How to Create and Complete a Manufacturing MIX Work Order
Learn how to properly create a work order, manually allocate raw materials by batch, record batch test results, and complete a final manufacturing mix.
By Ben Fotheringham
This guide explains how to create, progress, and complete a manufacturing works order. Completing this process ensures accurate tracking of raw material allocations, quality test results, and finished goods inventory.
This workflow applies to production staff, mixing operators, and manufacturing supervisors responsible for recording daily batch builds on the shop floor.
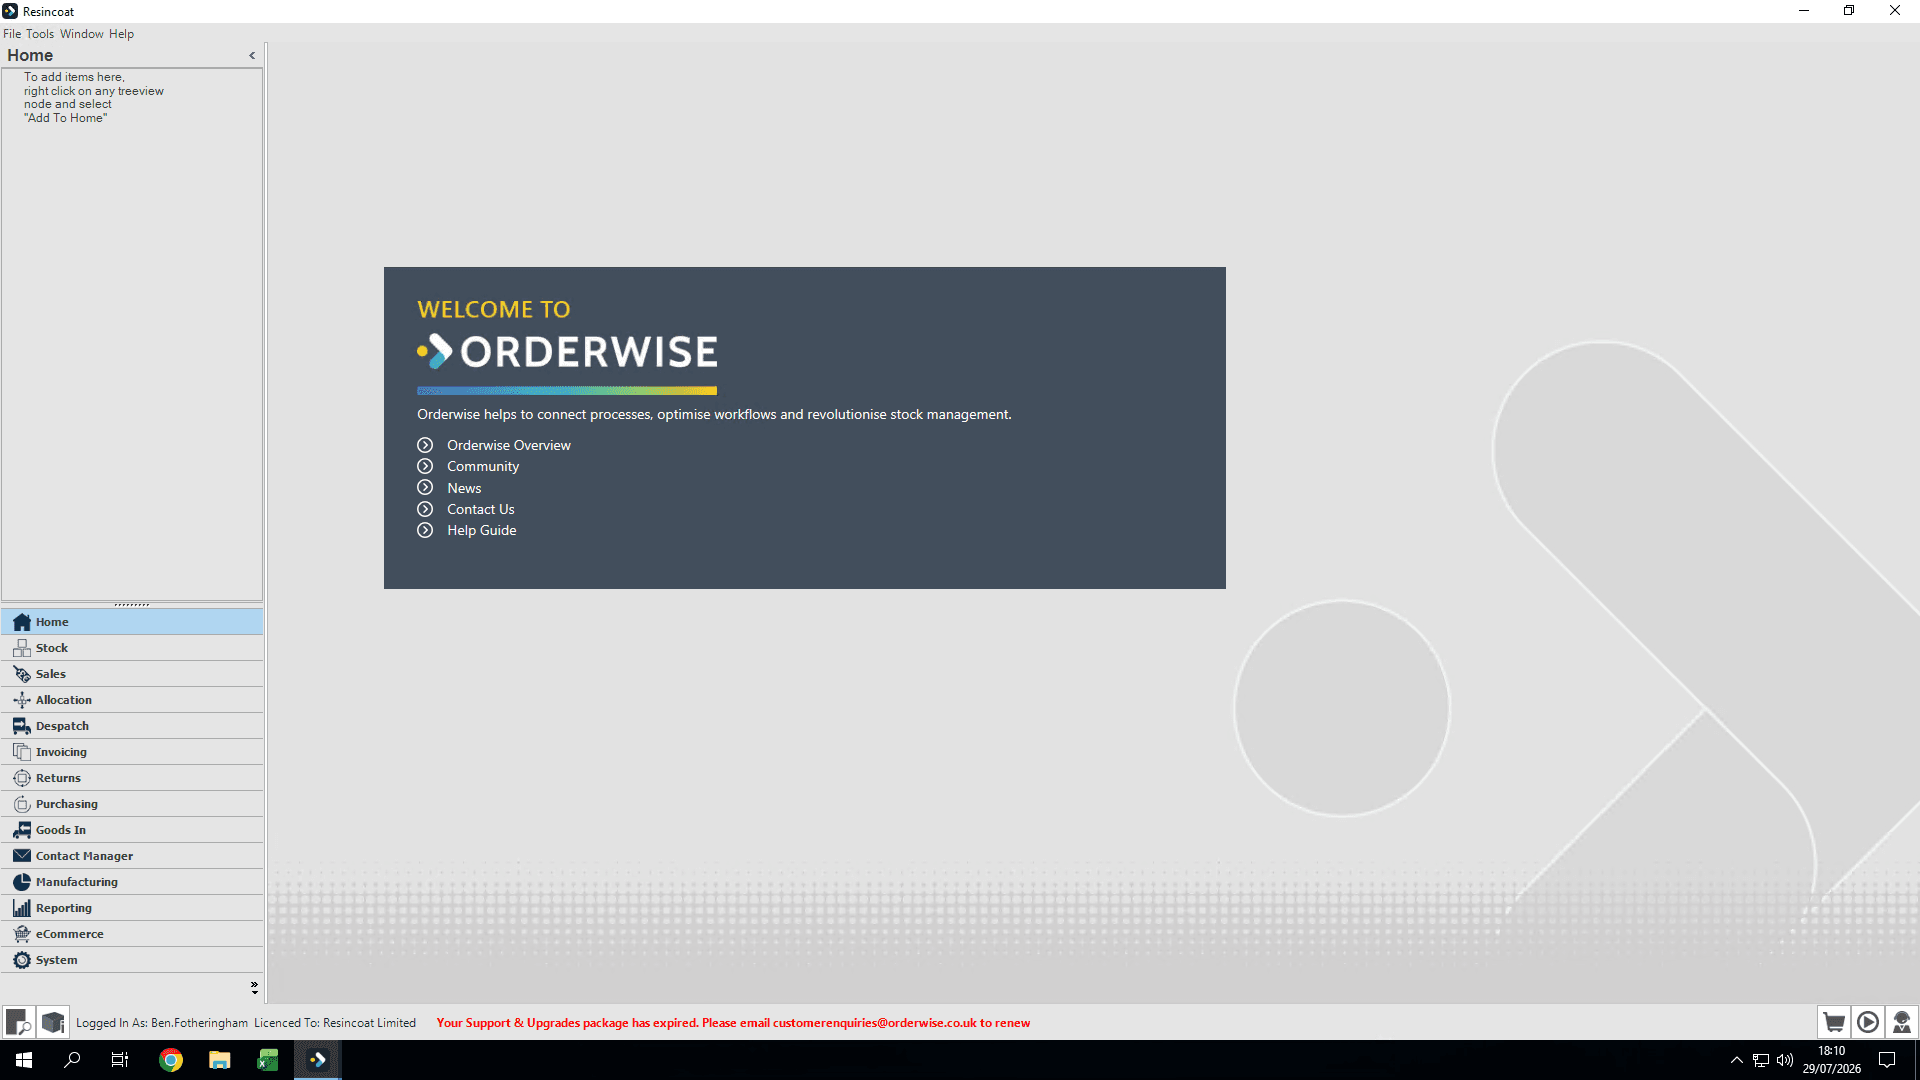
When beginning a batch, you can select from three different workflow paths:
Path
Description
When to Use
Work In Progress List
Opens an existing work order that is already scheduled.
When the order has already been generated by production planning.
To Manufacture Report
Creates work orders in bulk from a generated report.
When processing multiple planned orders at once (covered in a separate guide).
Manufactured Variants List
Manual search and creation of a specific product order.
When making one-off batches or manually starting a specific mix.
Create a Works Order
1
Click Manufacturing in the main navigation.
If continuing a previously started WO or looking to start a WO made with 'To Manufacture Report' jump to step 10
2
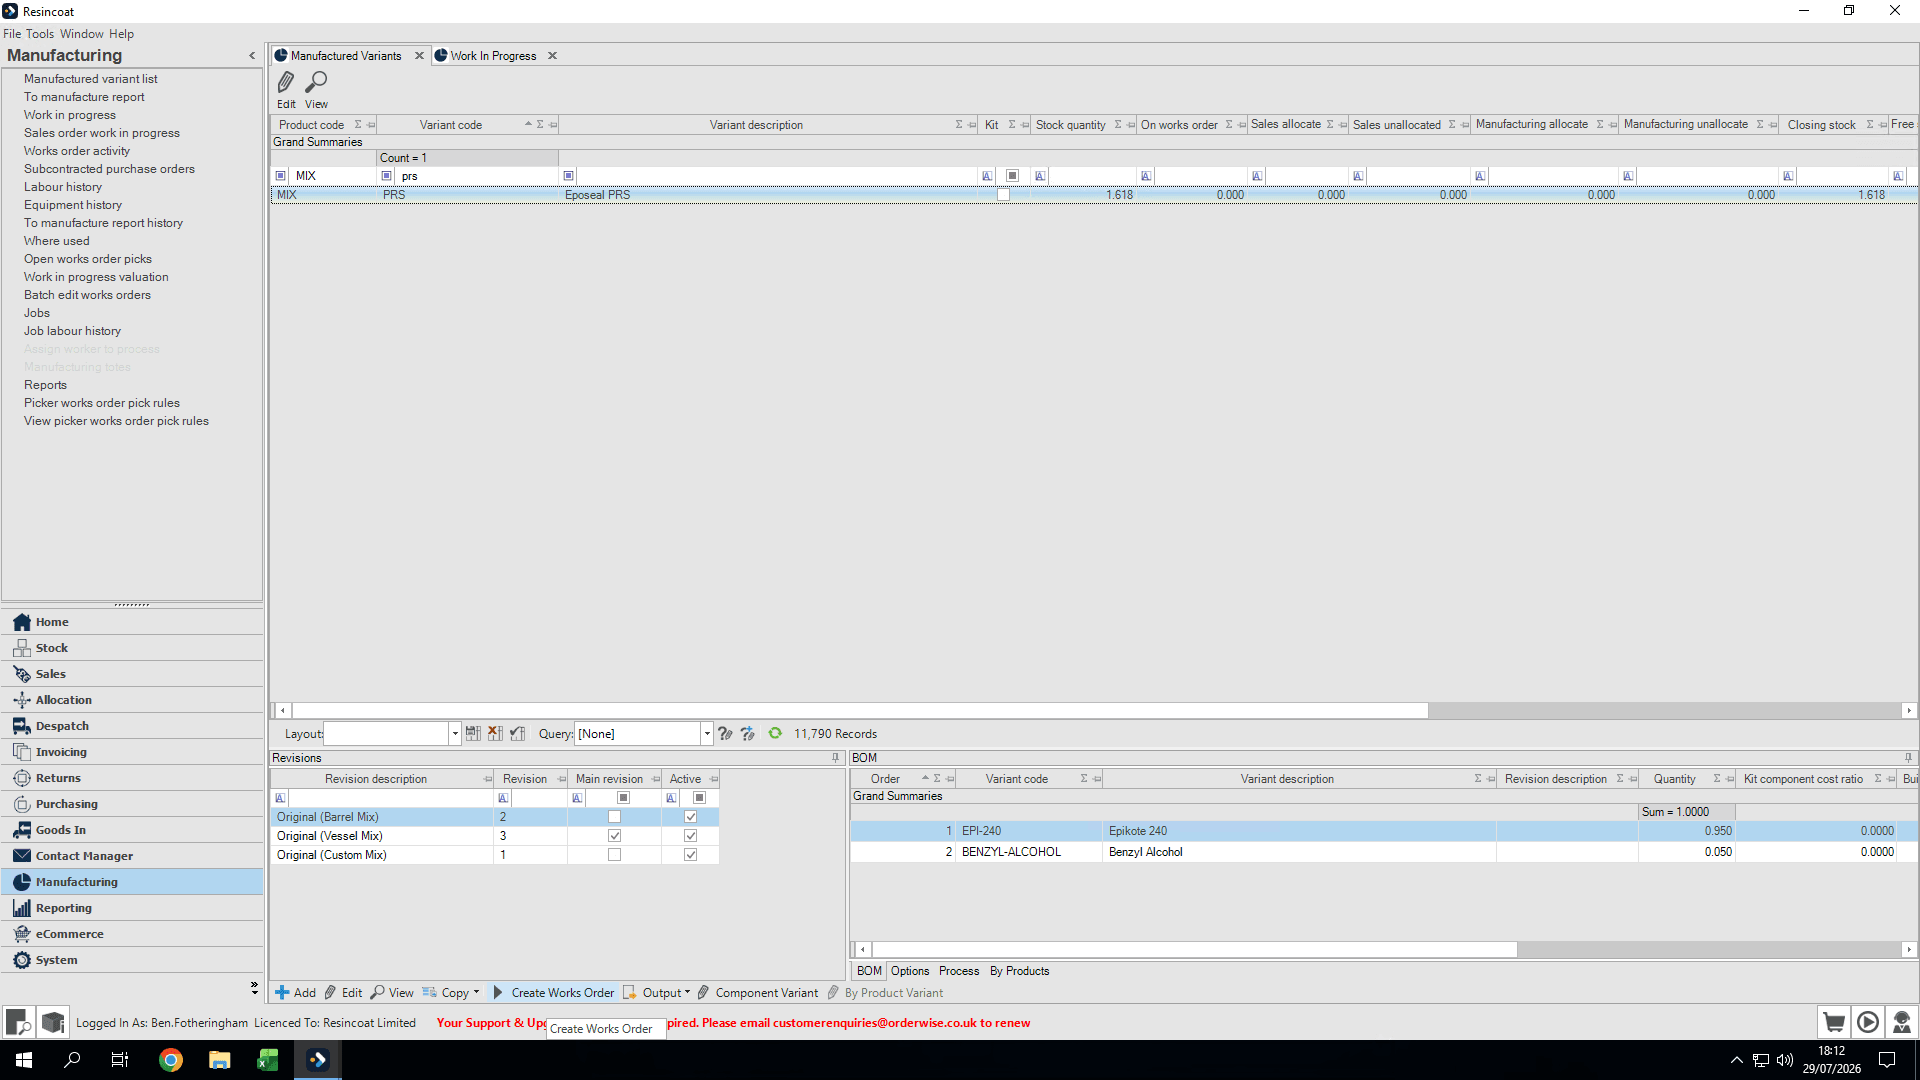
Click Manufactured Variants to search for the product you want to make.
3
Search for and select your product code (for example, "prs").
4
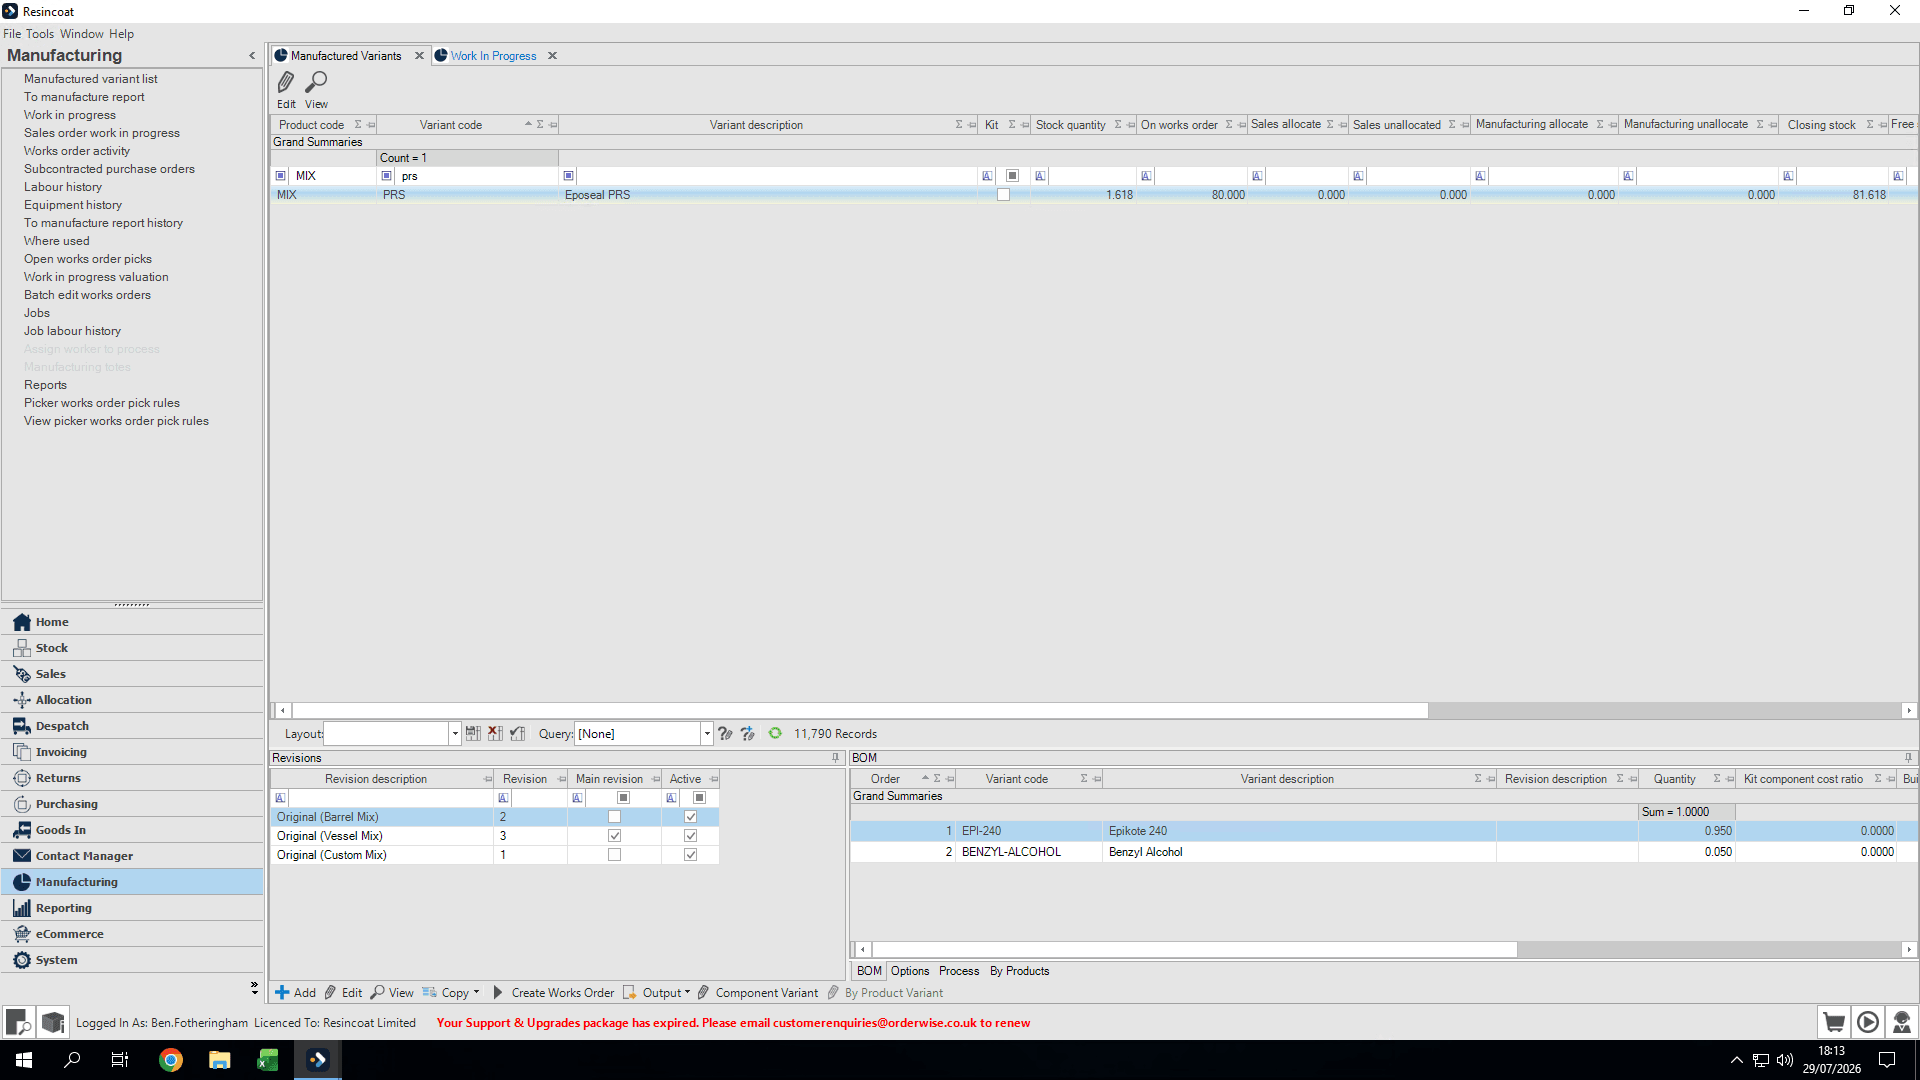
Click Create Works Order at the bottom of the screen.
Selecting different revisions (highlighted in blue above) will give different recommended quantities for production. Custom Mix allows you to enter any quantity you want.
5
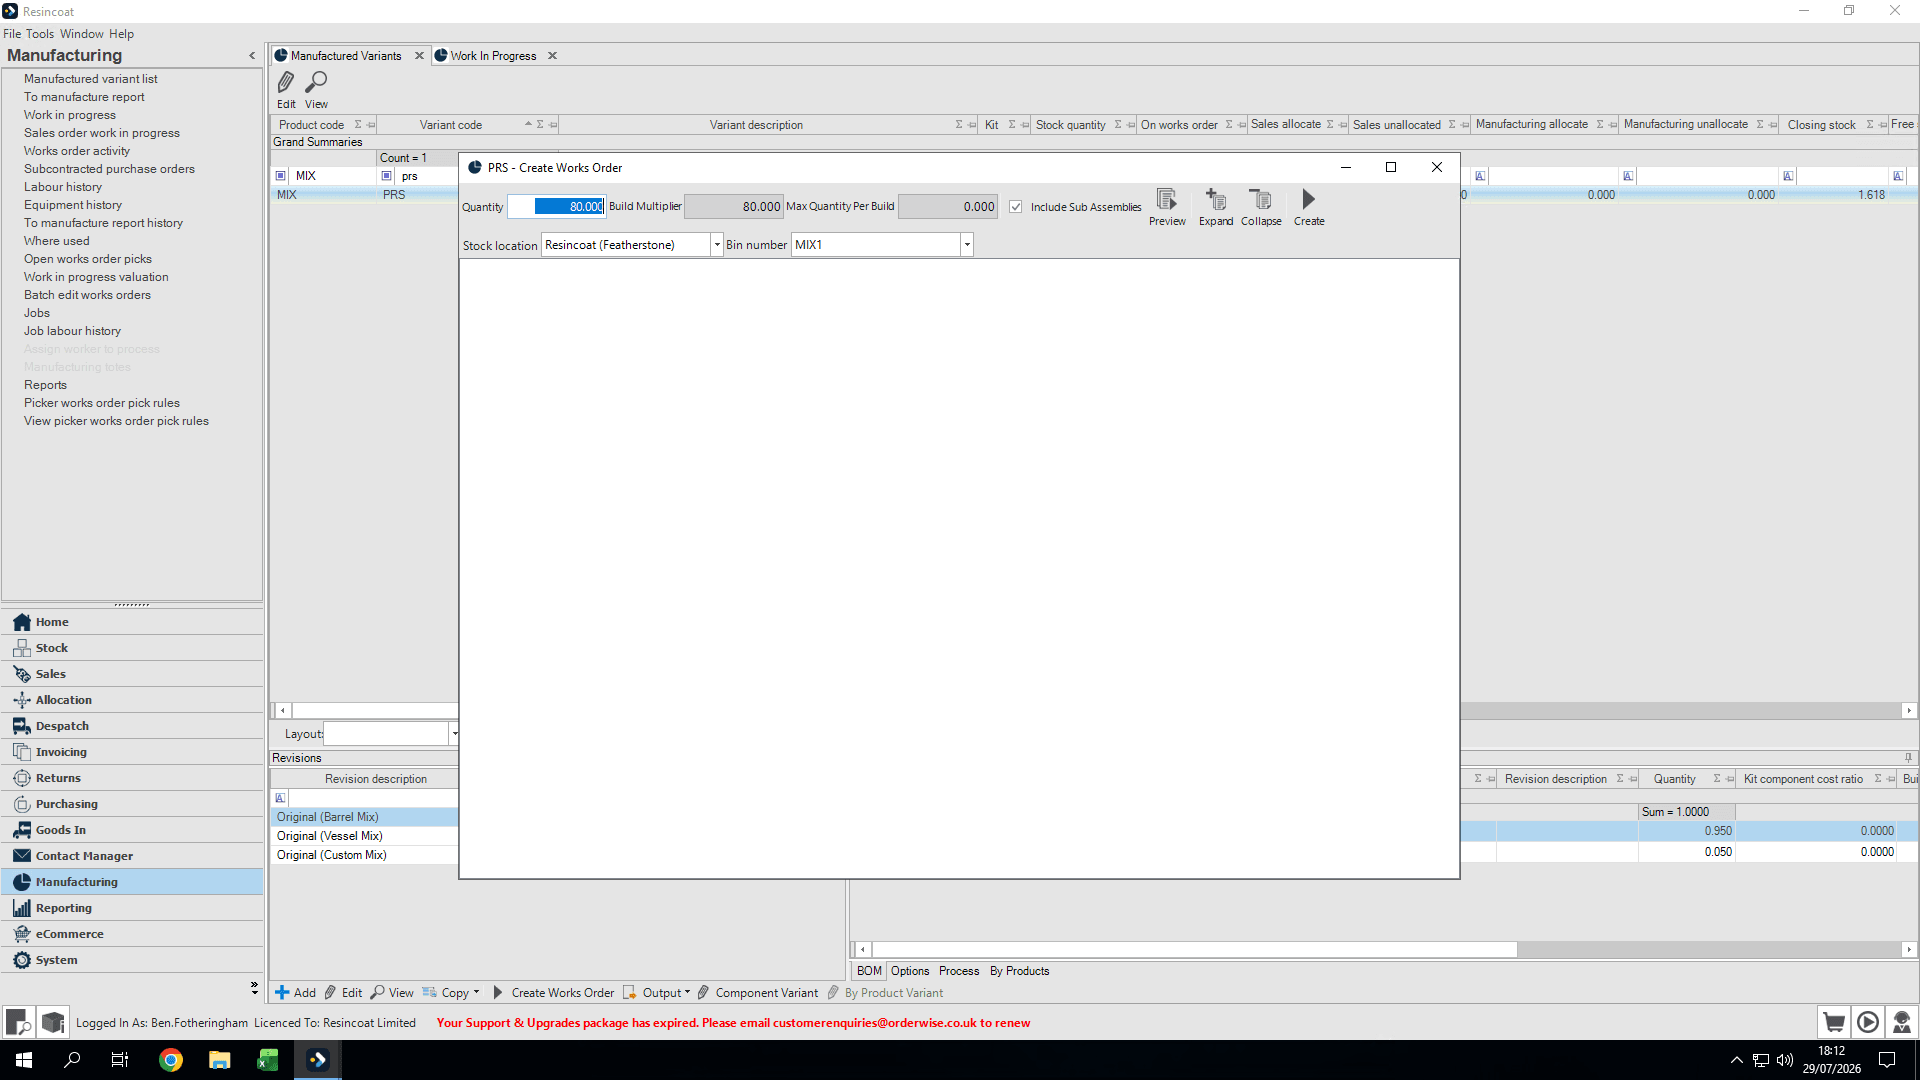
Enter your required manufacturing quantity.
6
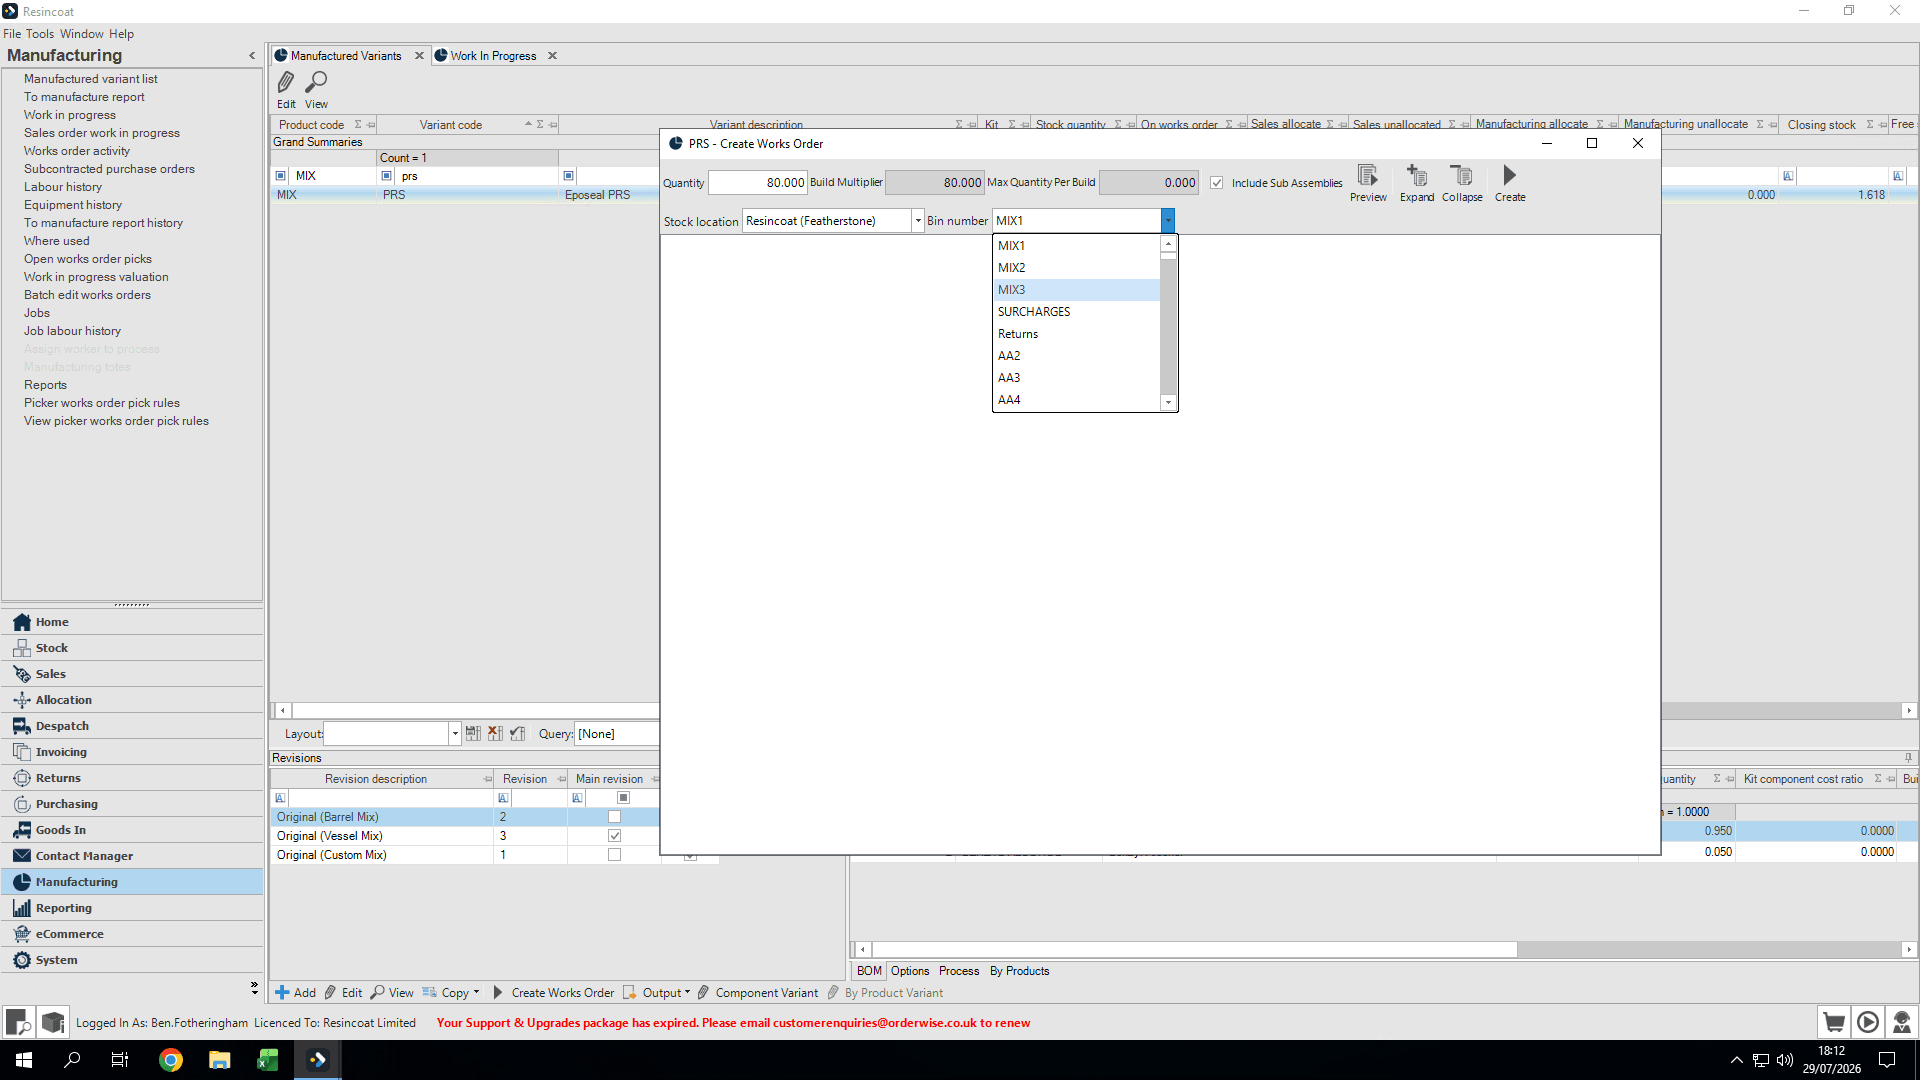
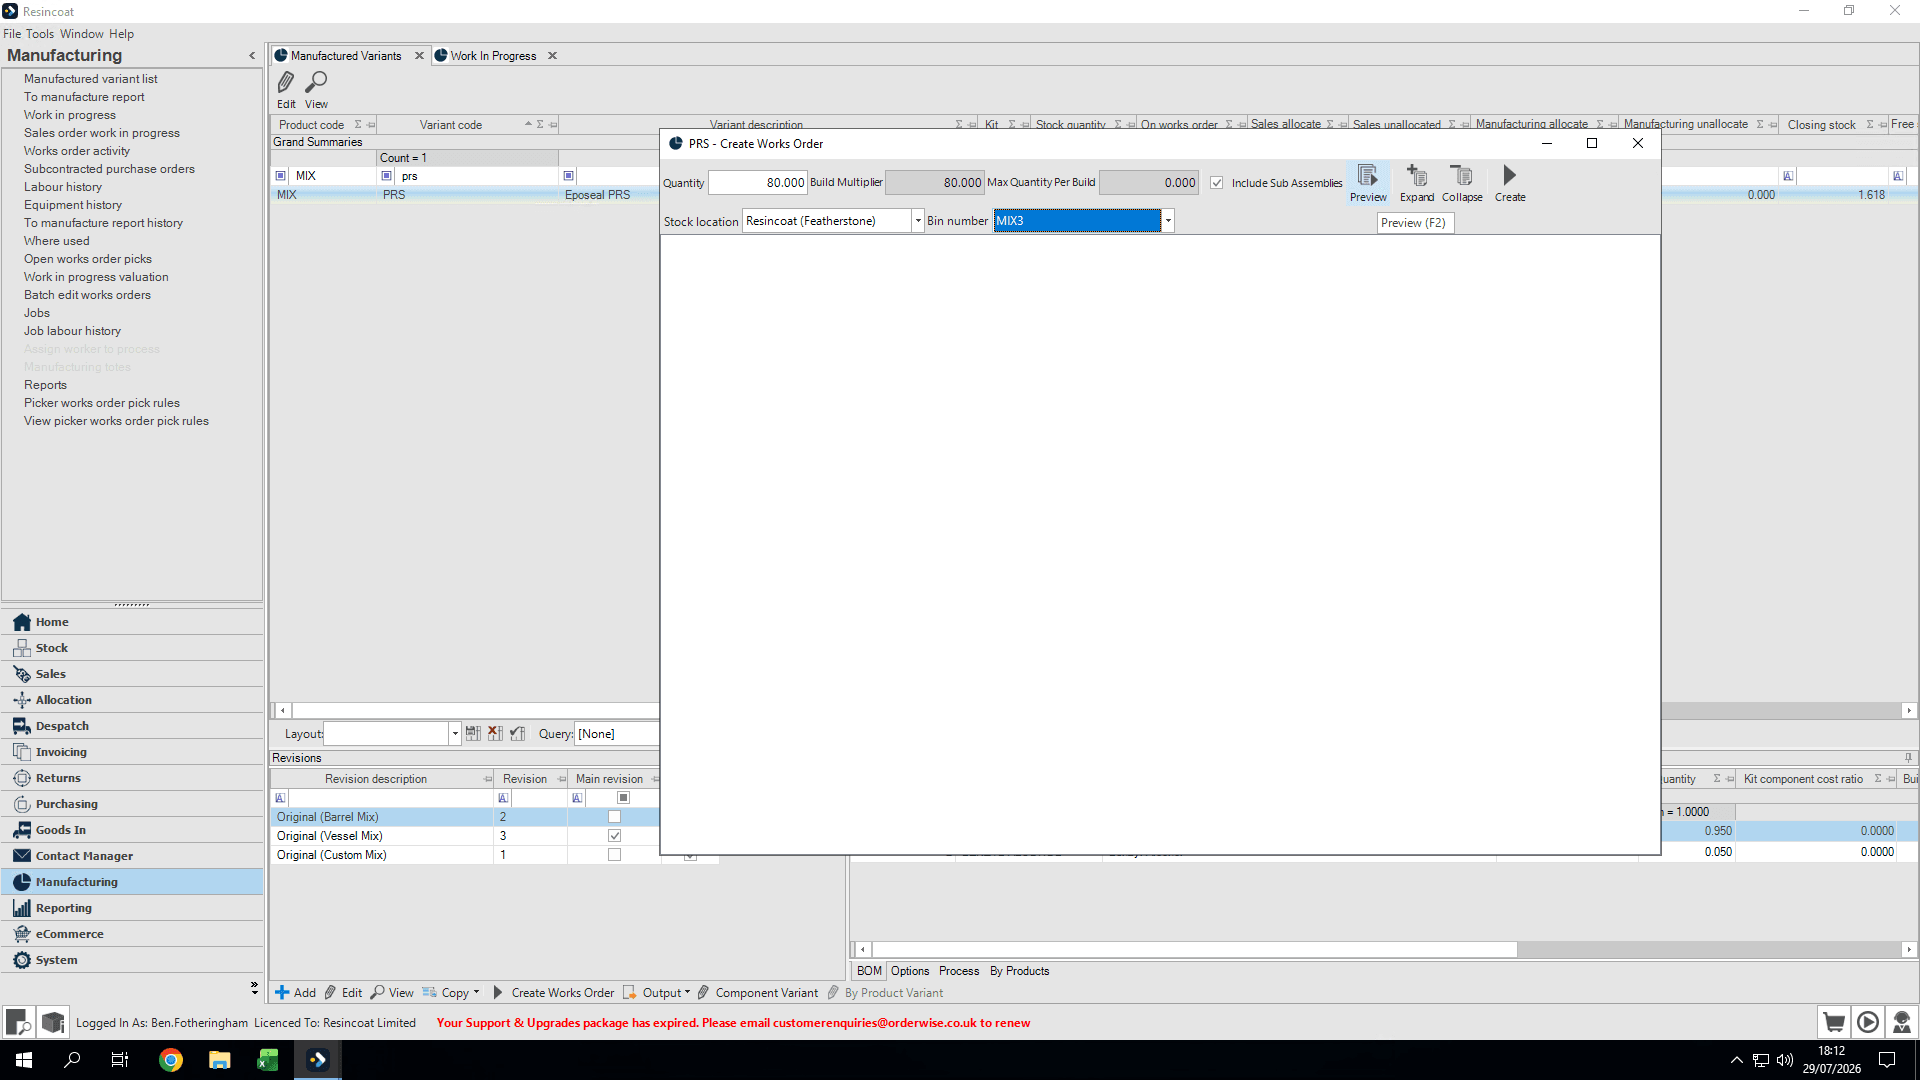
Select the designated mixer in the Bin number field.
7
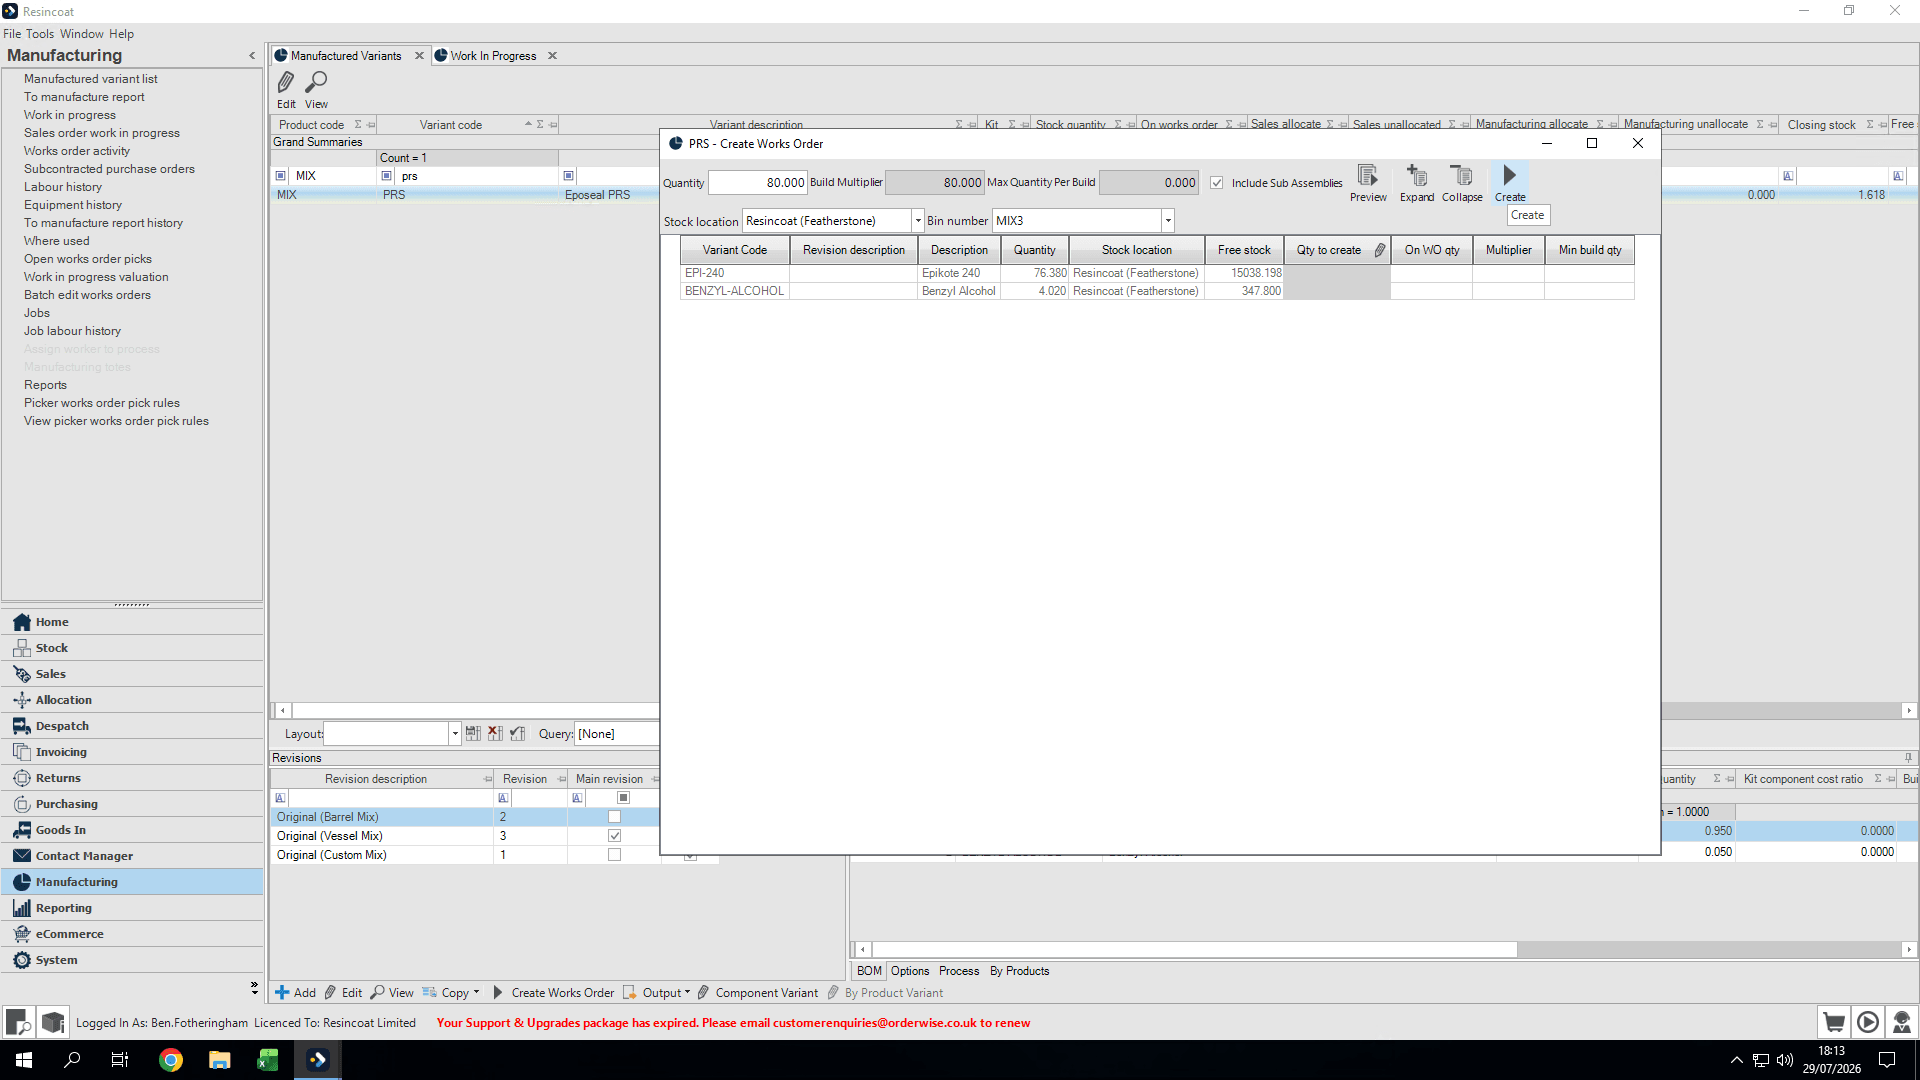
Click Preview to review the required raw materials versus available stock.
8
Click Create.
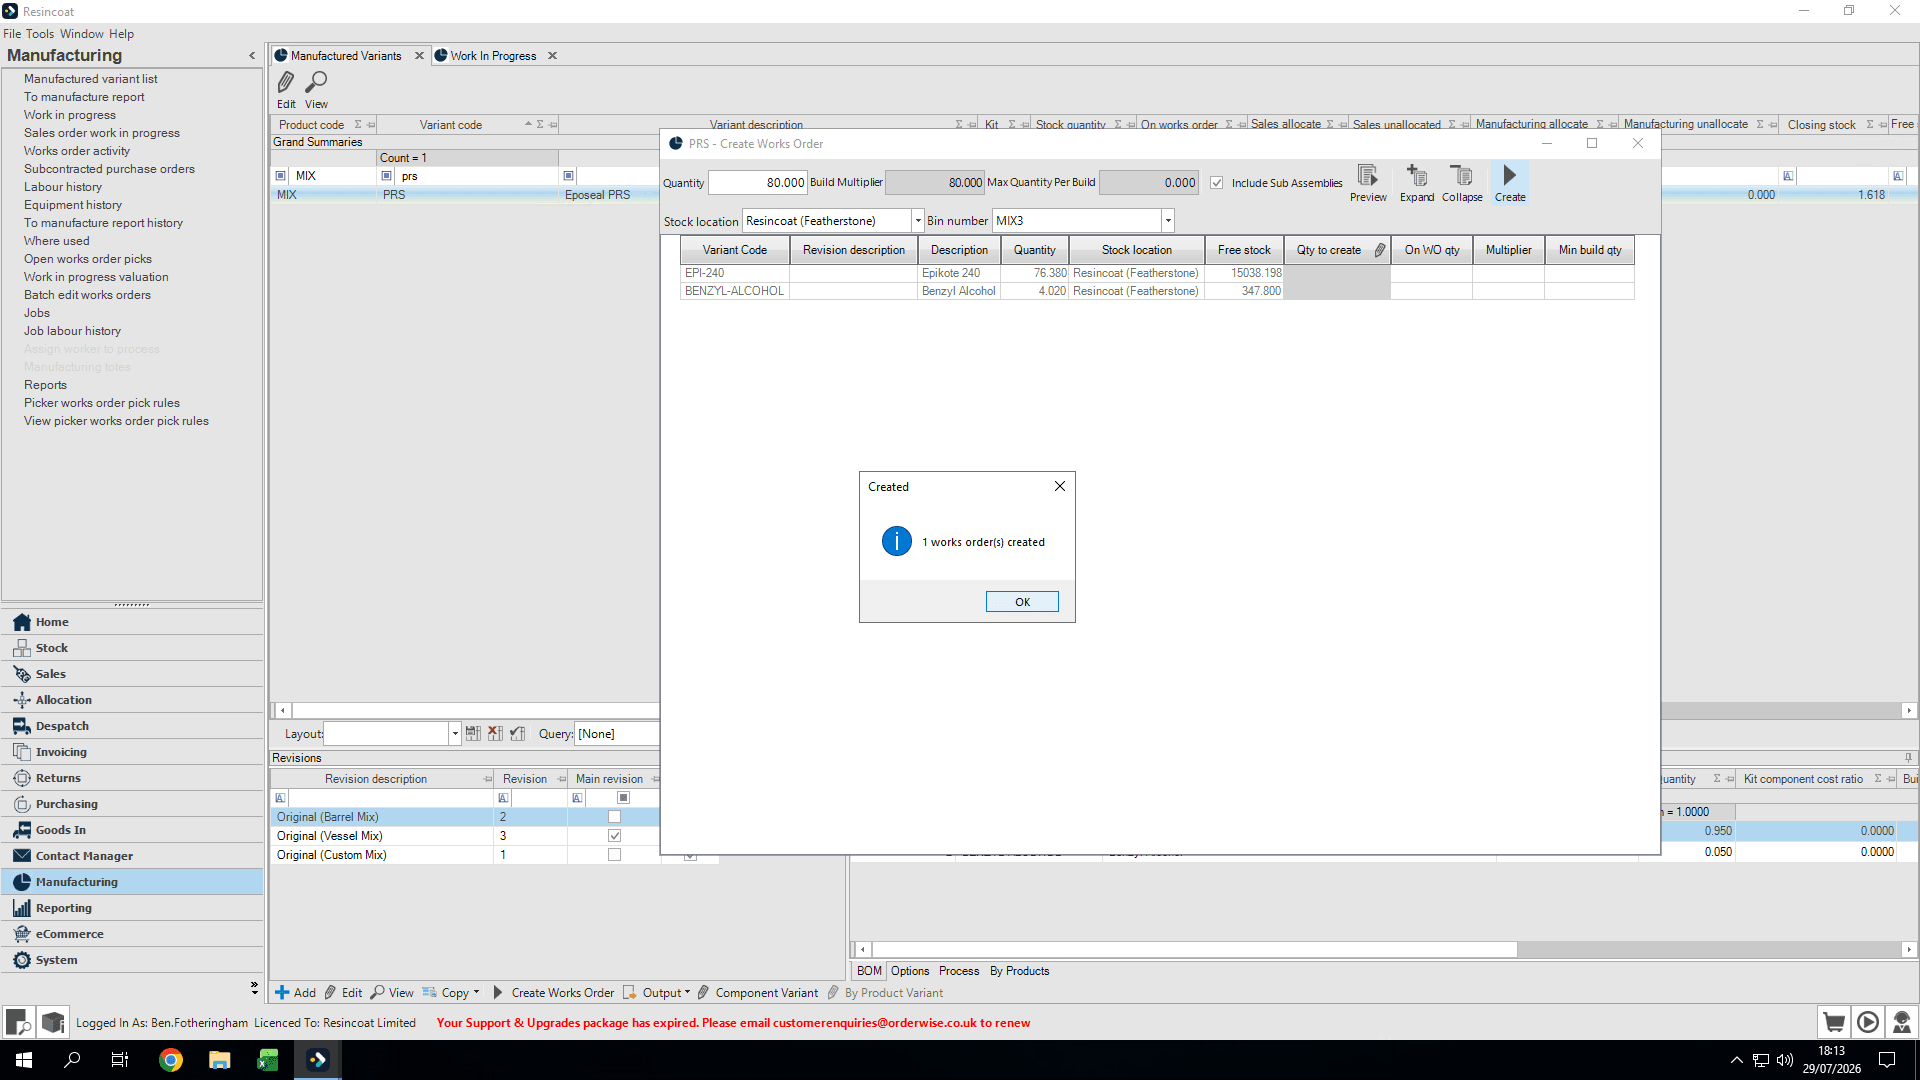
9
Click OK on the confirmation prompt.
Progress the Order and Allocate Components
10
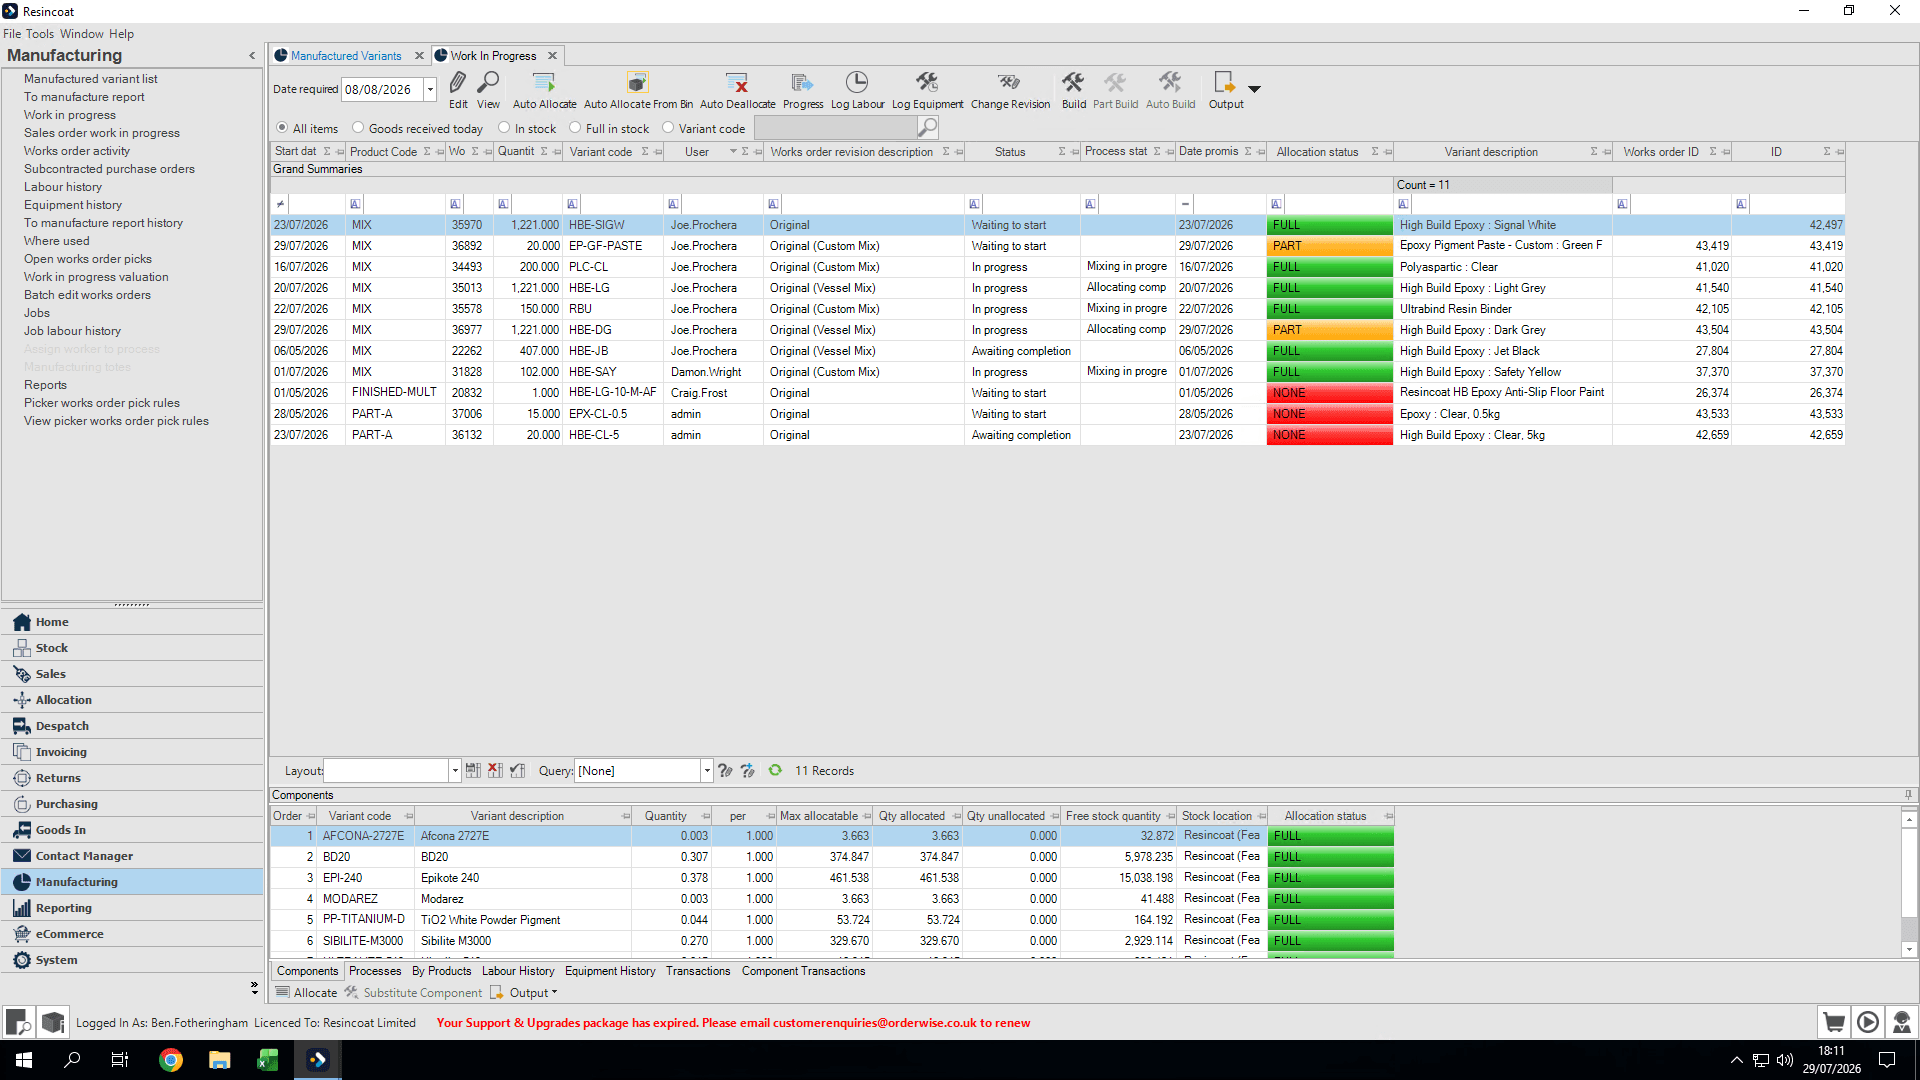
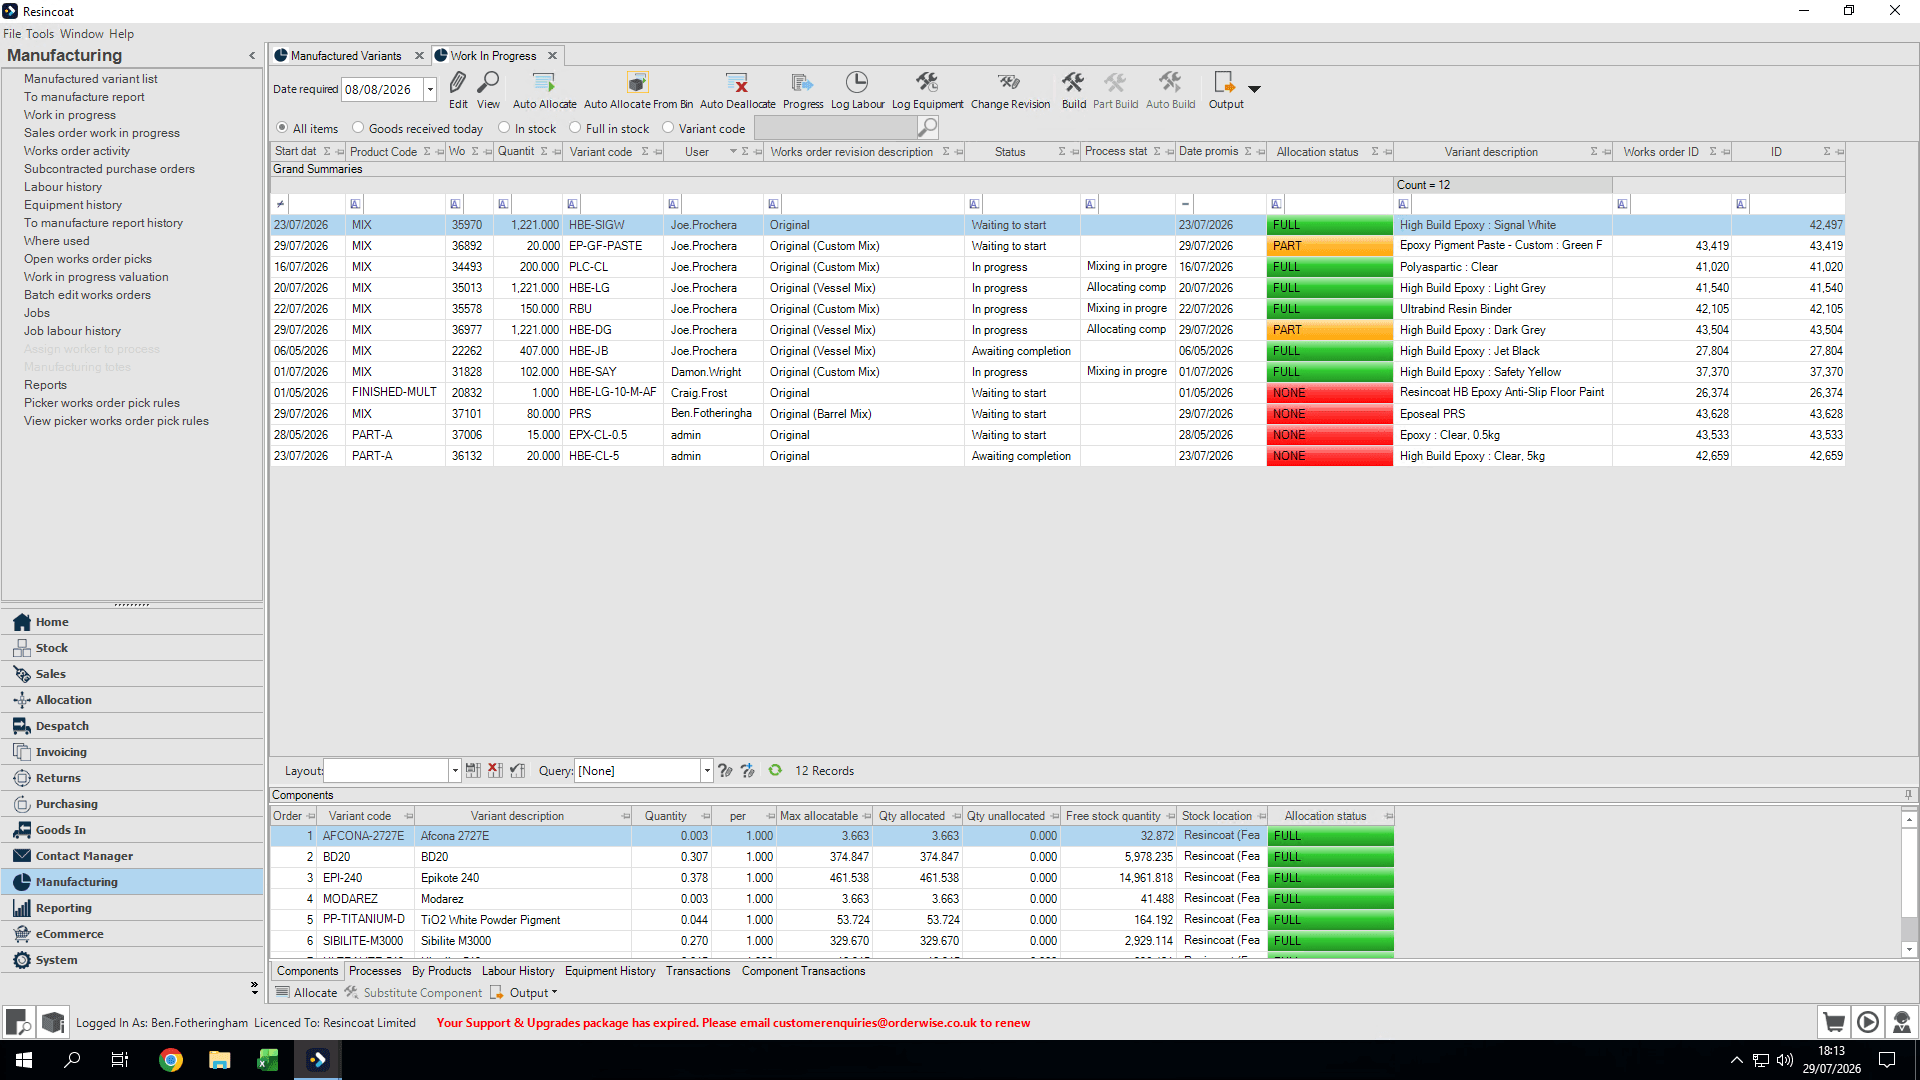
Navigate to the Work in progress tab.
11
Select your newly created works order.
12
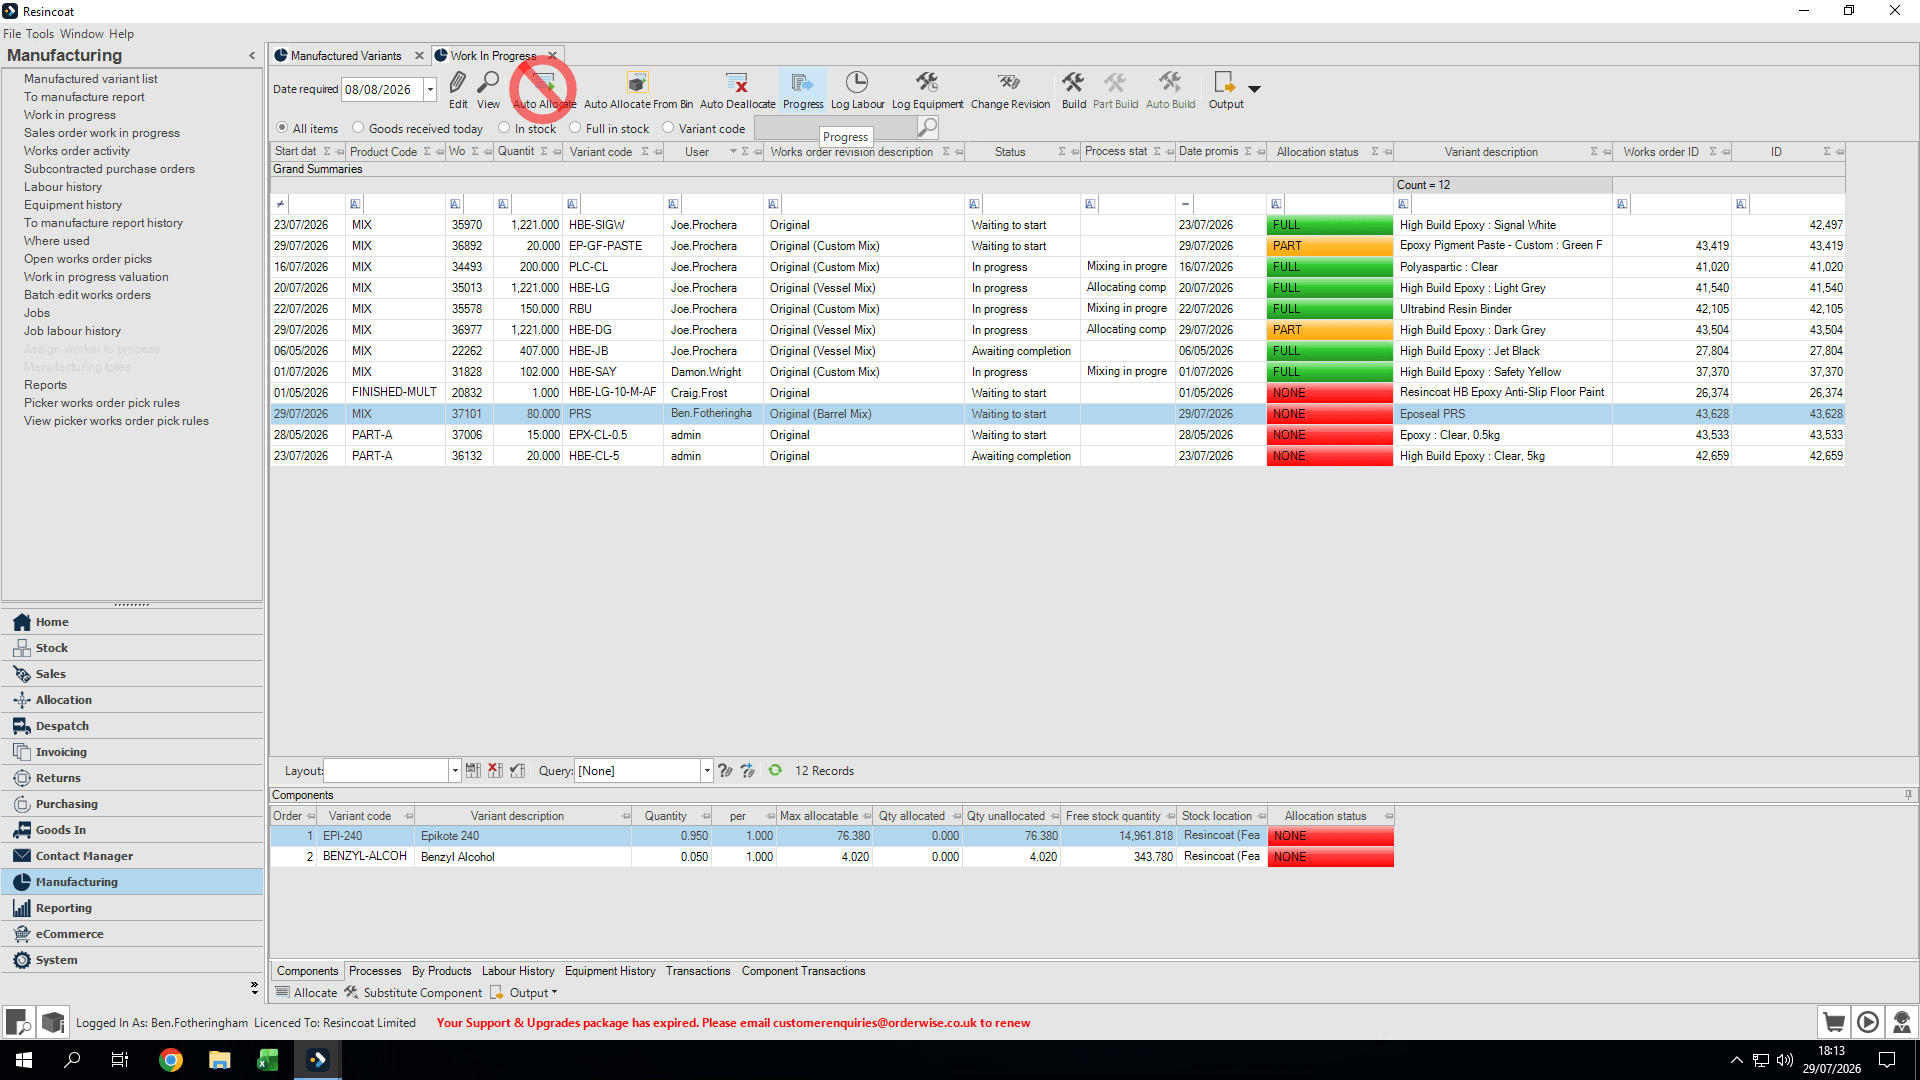
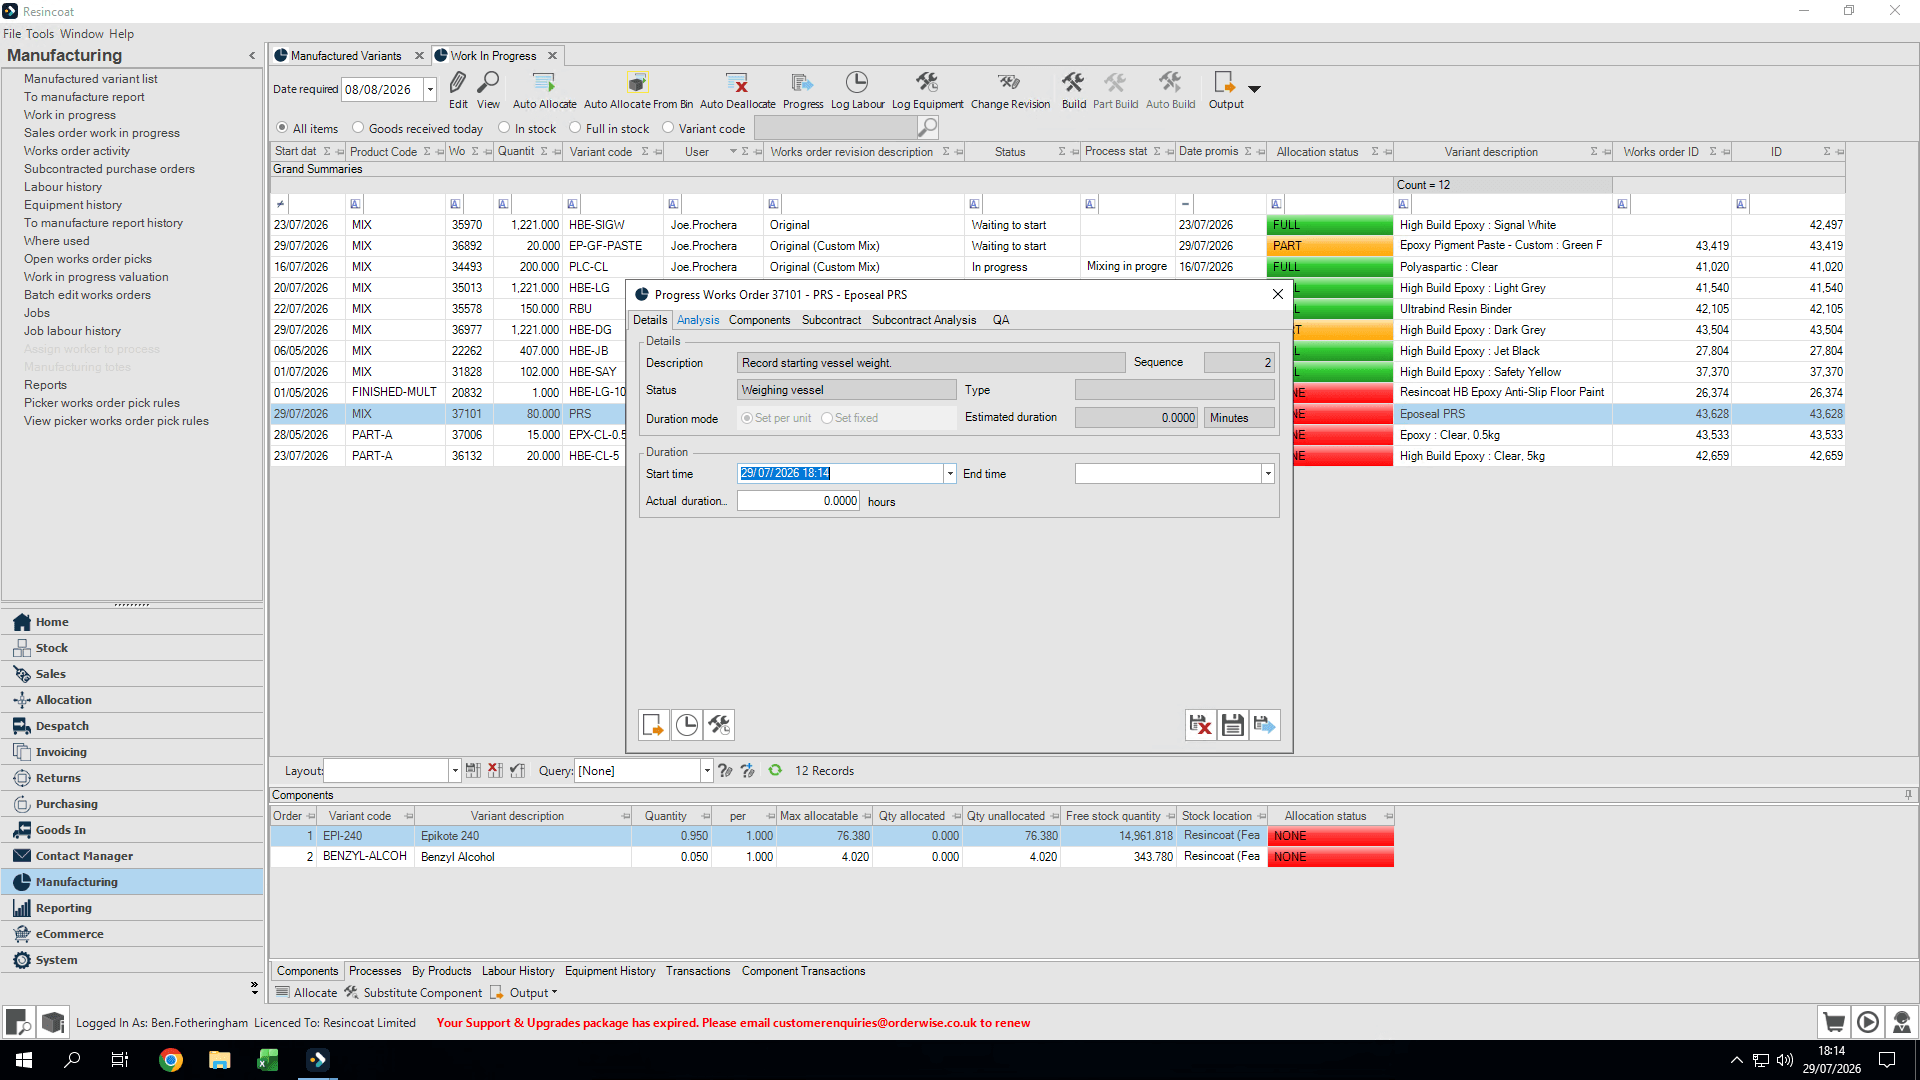
Click Progress to advance the order status.
Under no circumstances should you use the Auto Allocate button. It randomly assigns batch numbers that may not match the actual physical stock you are using.
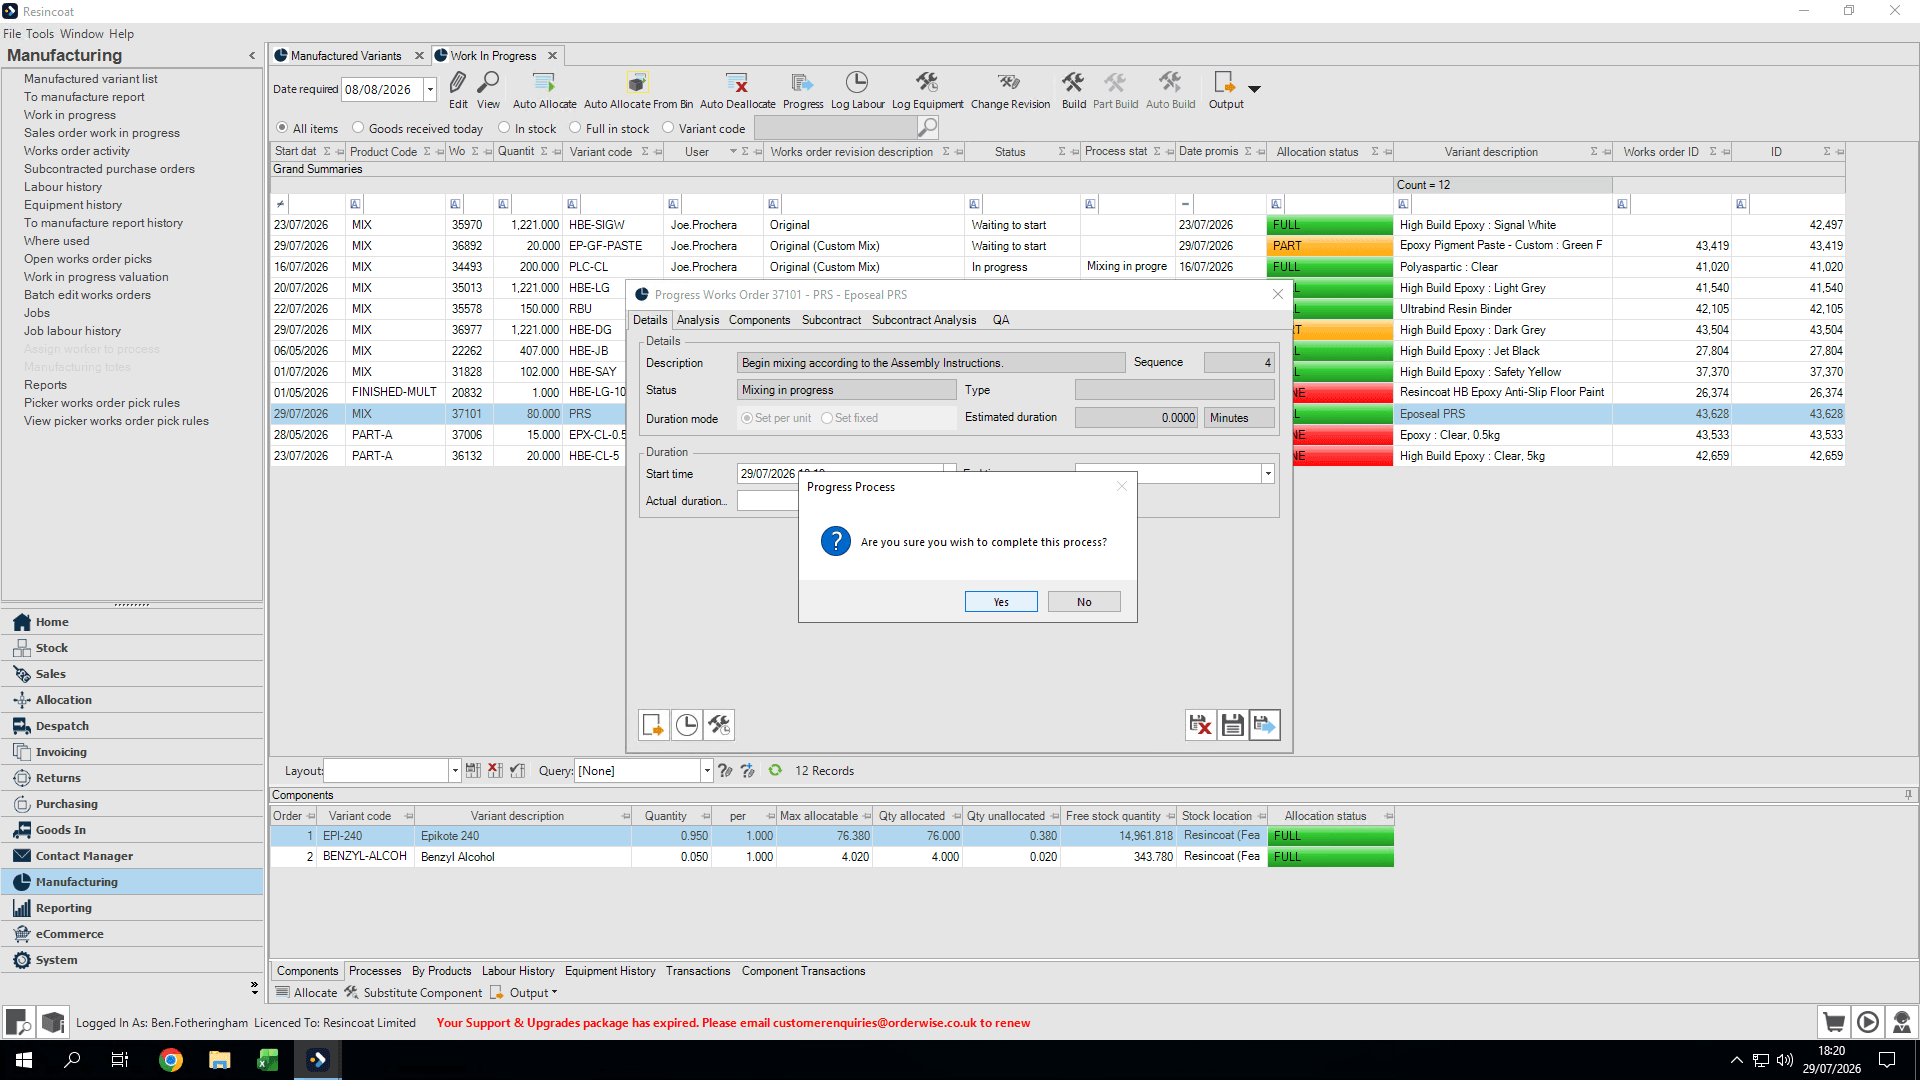
13
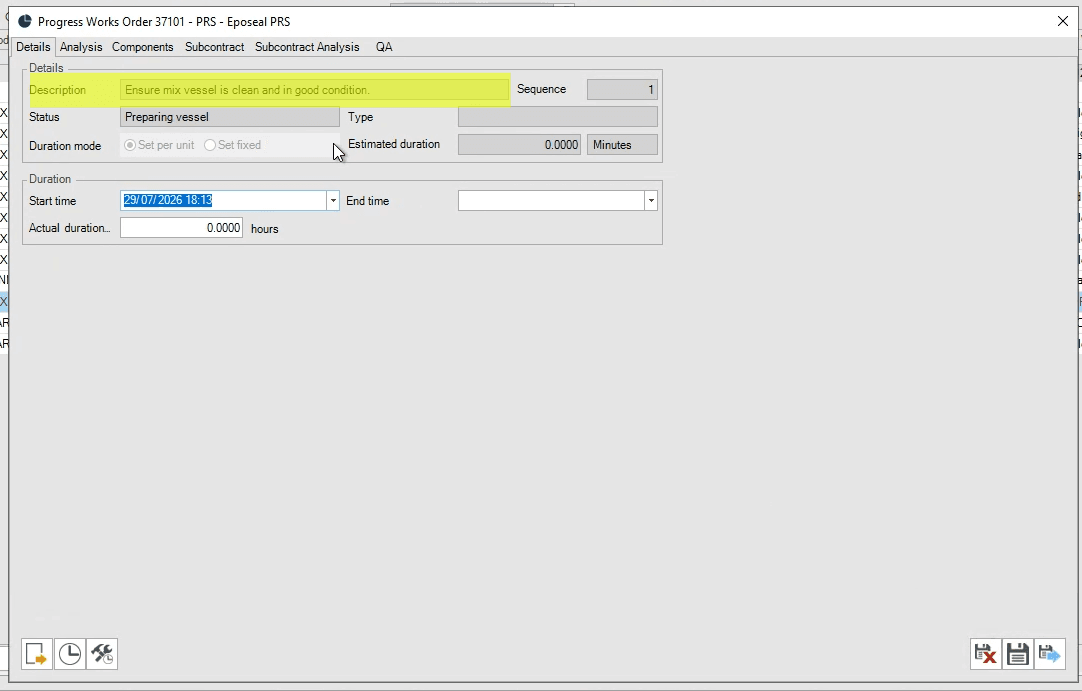
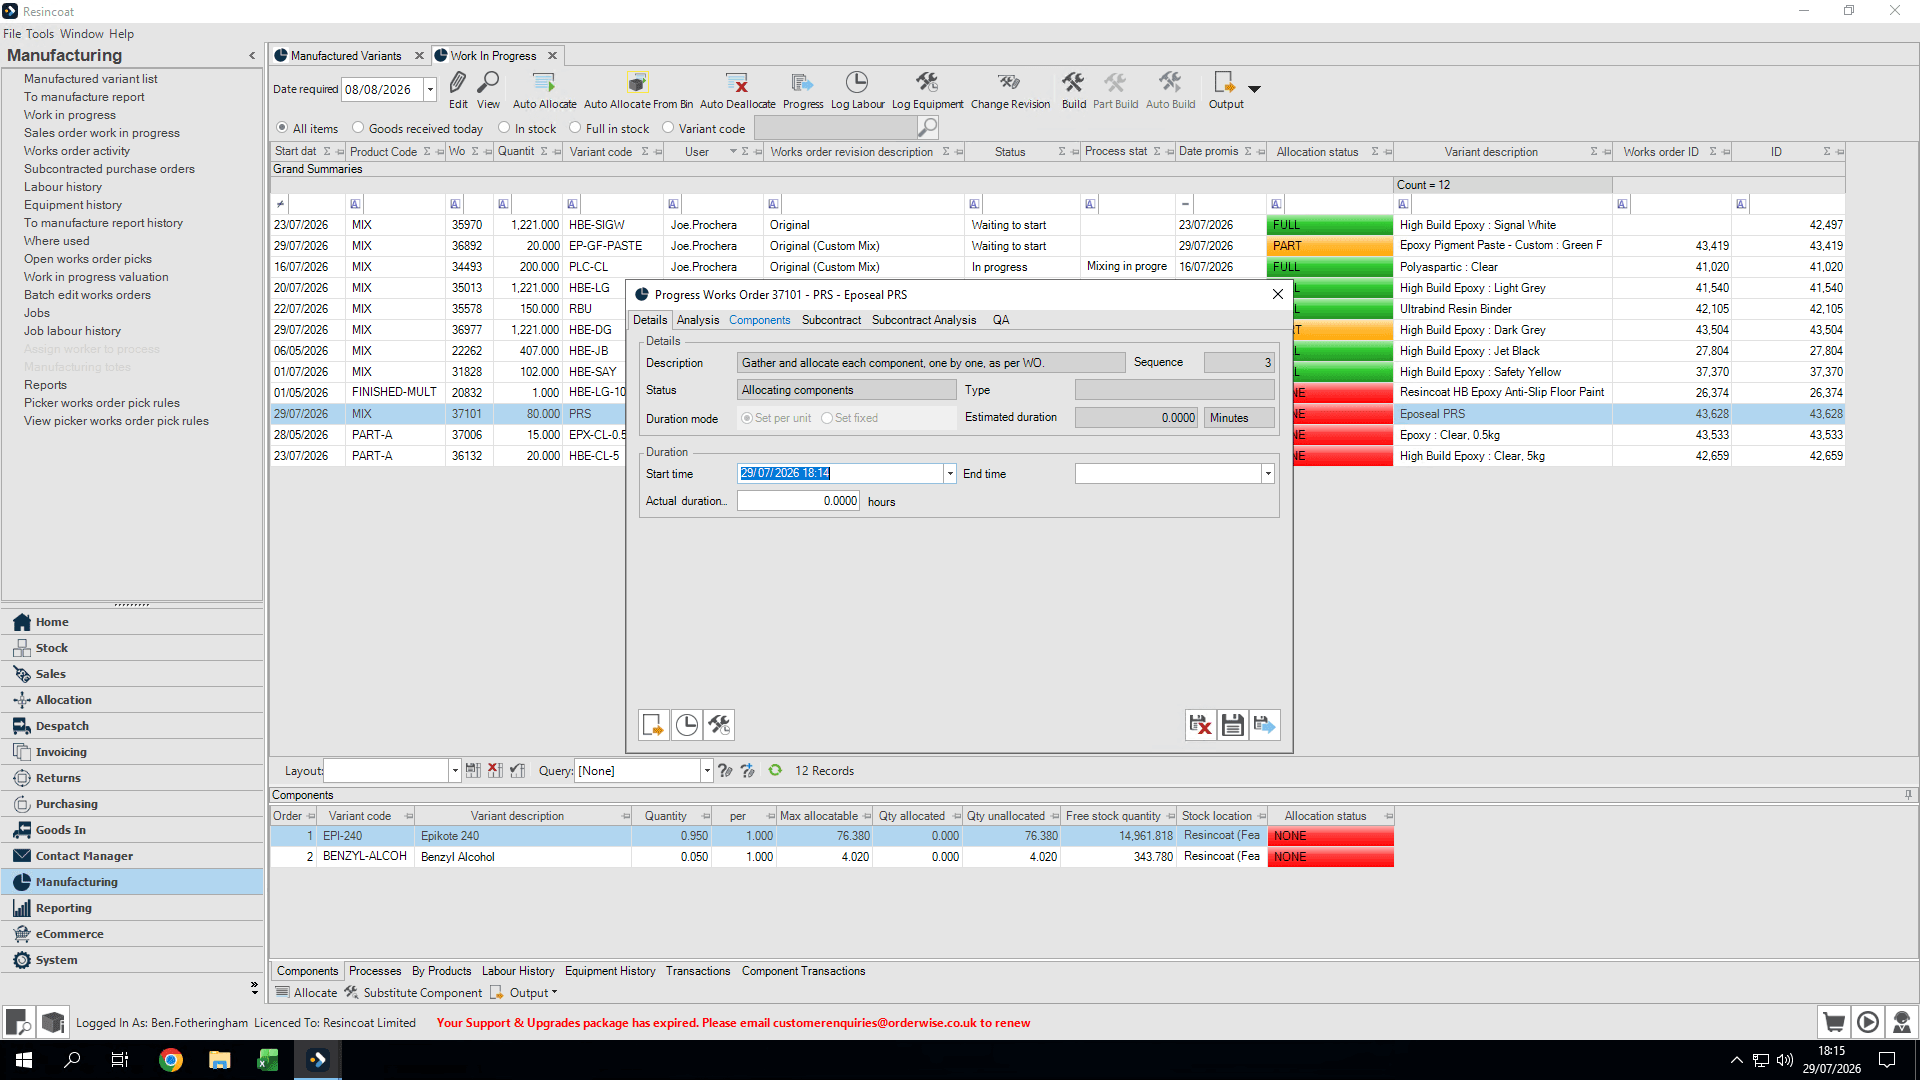
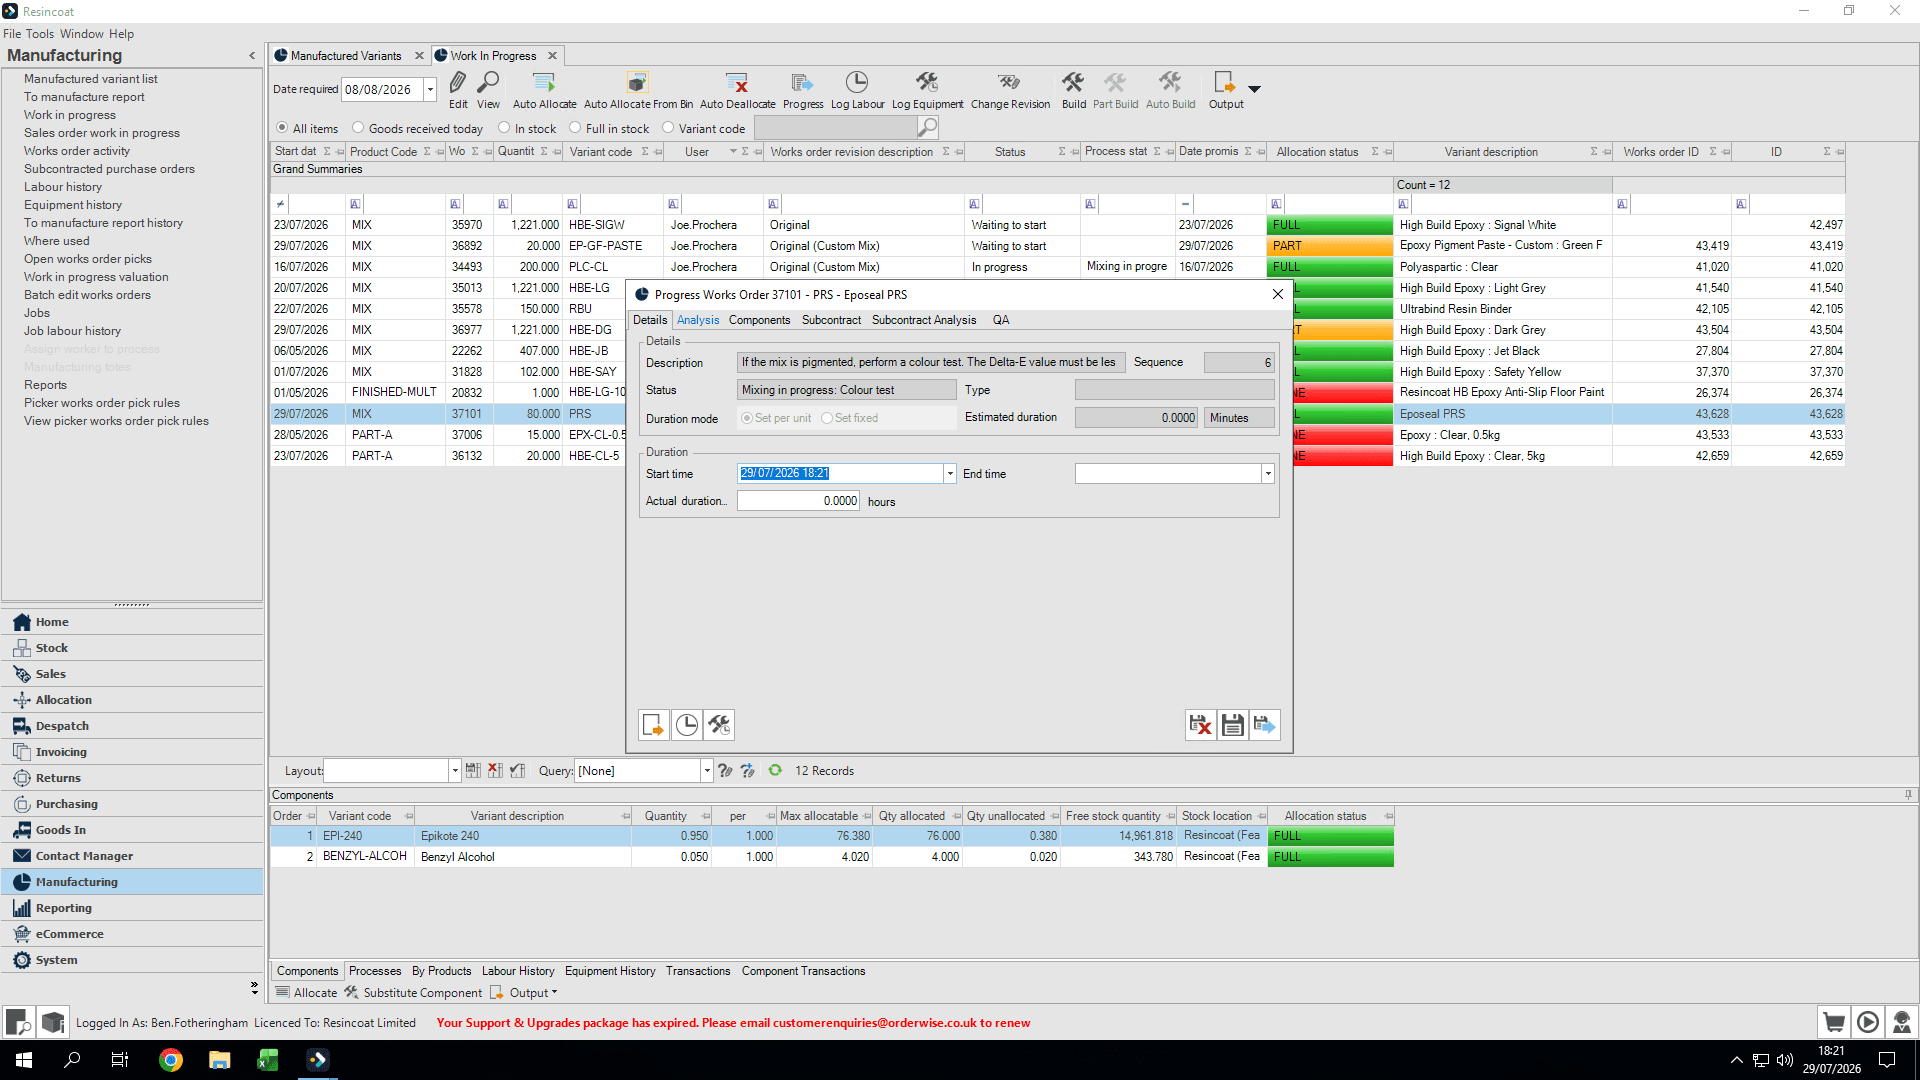
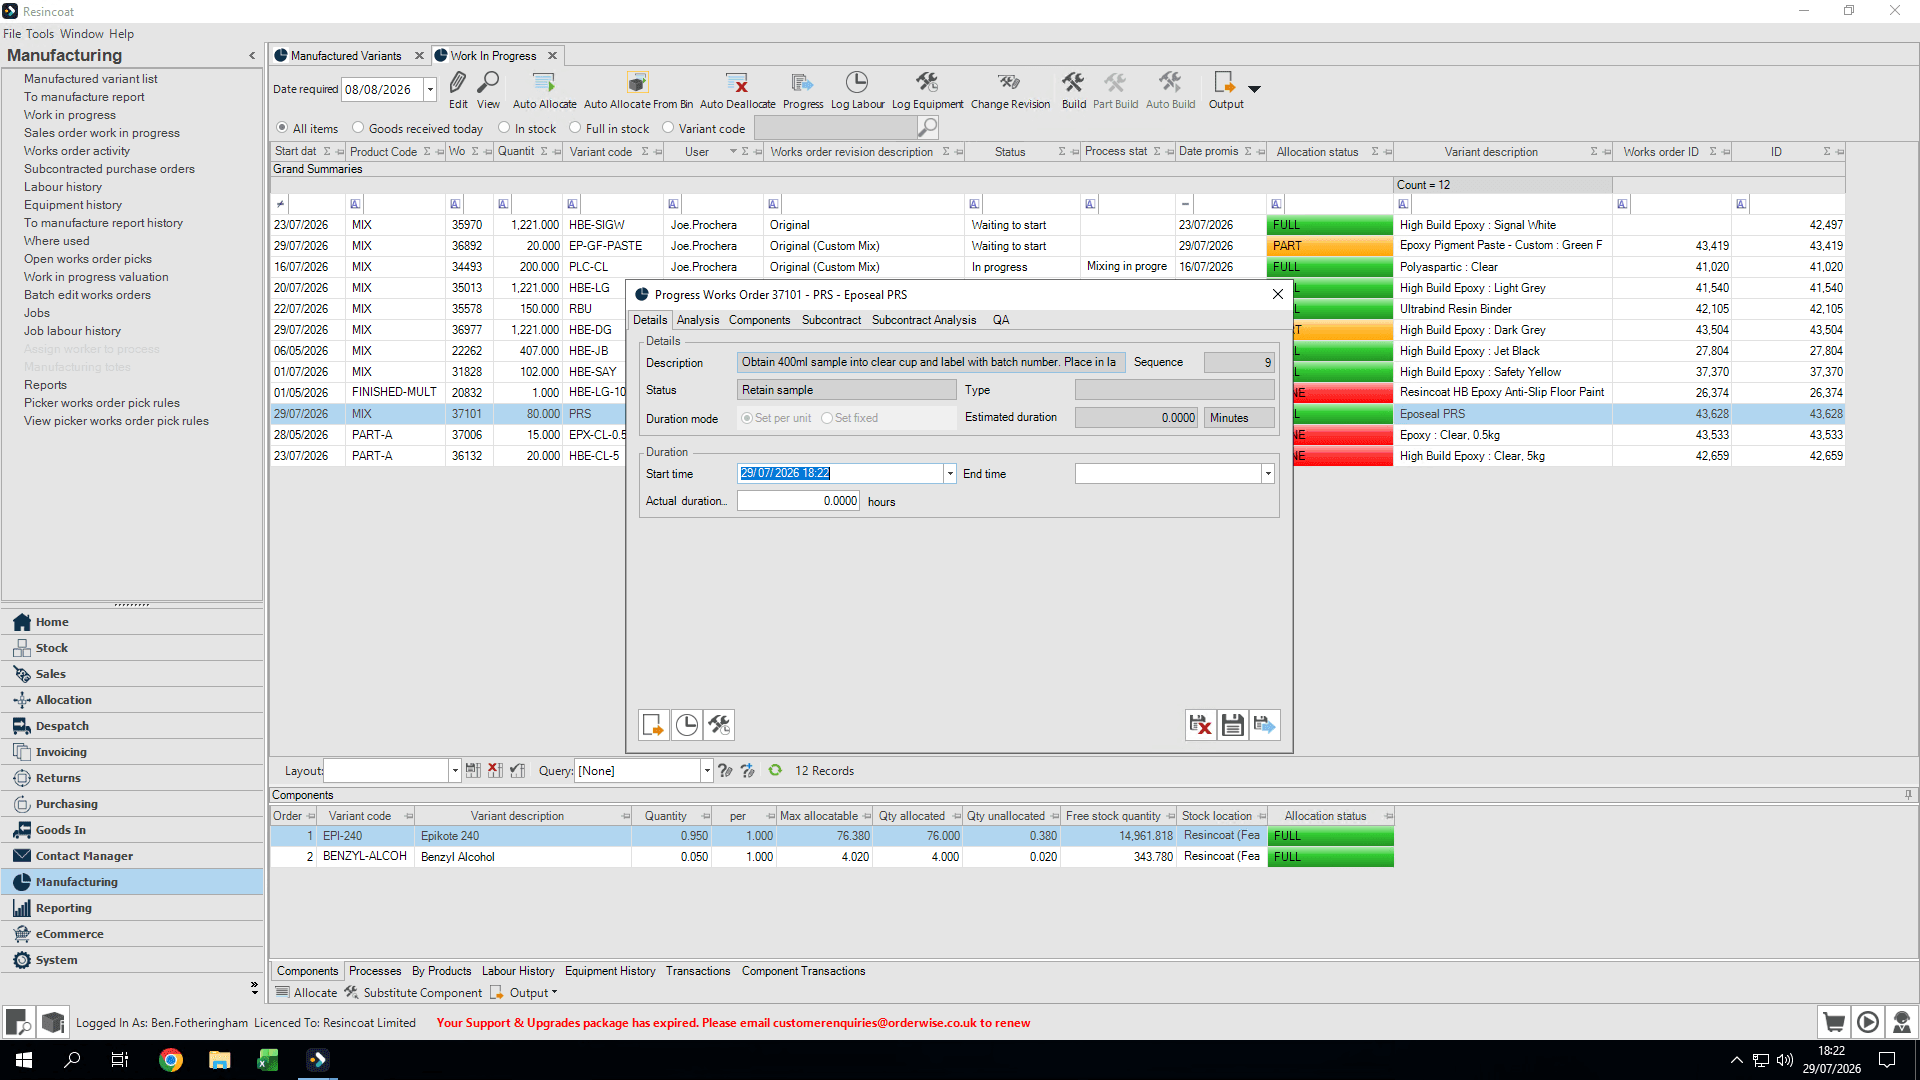
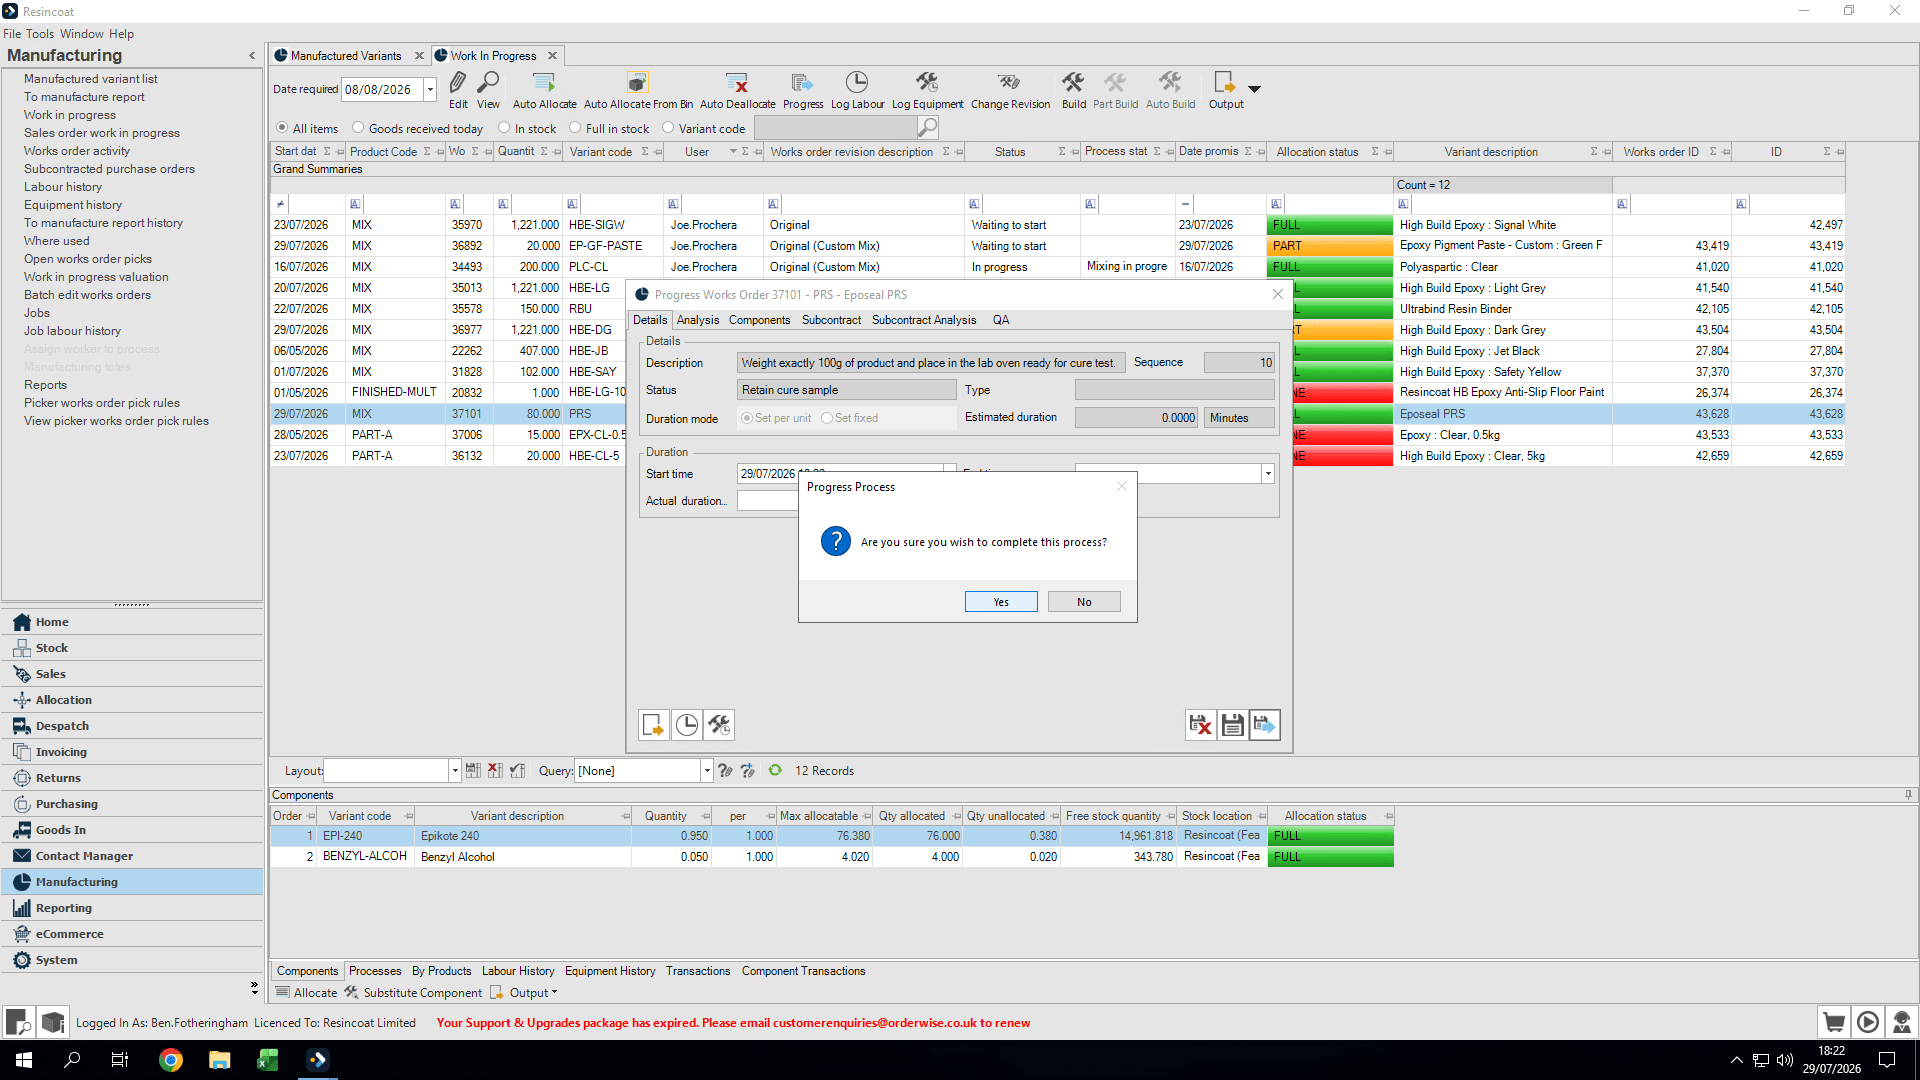
The description will tell you what to do at each step. Once the task has been completed click Save and Progress
14
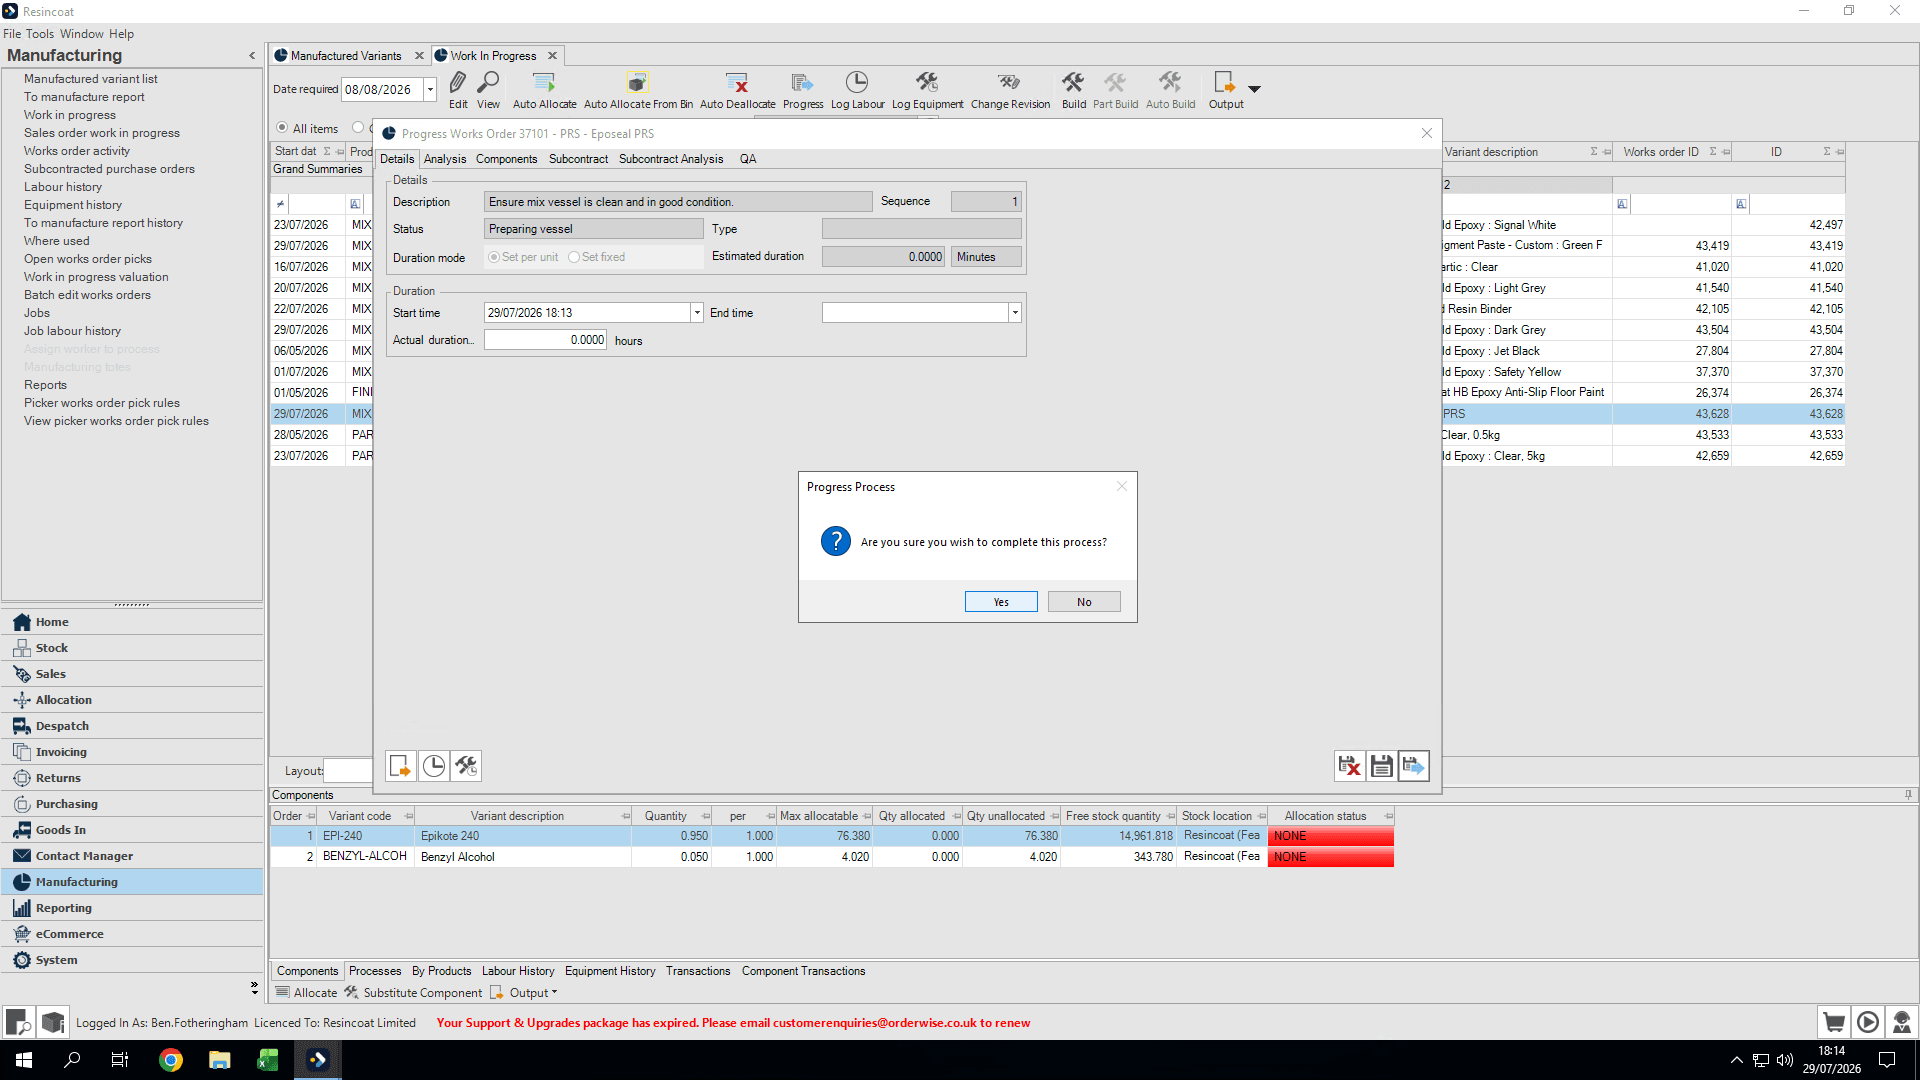
Click Yes to confirm.
15
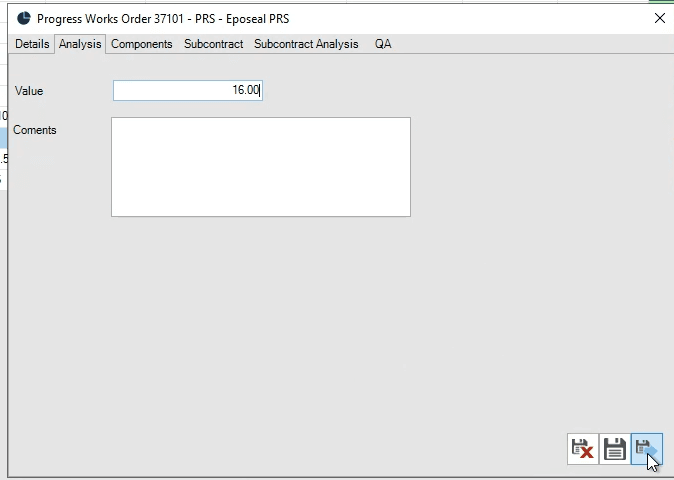
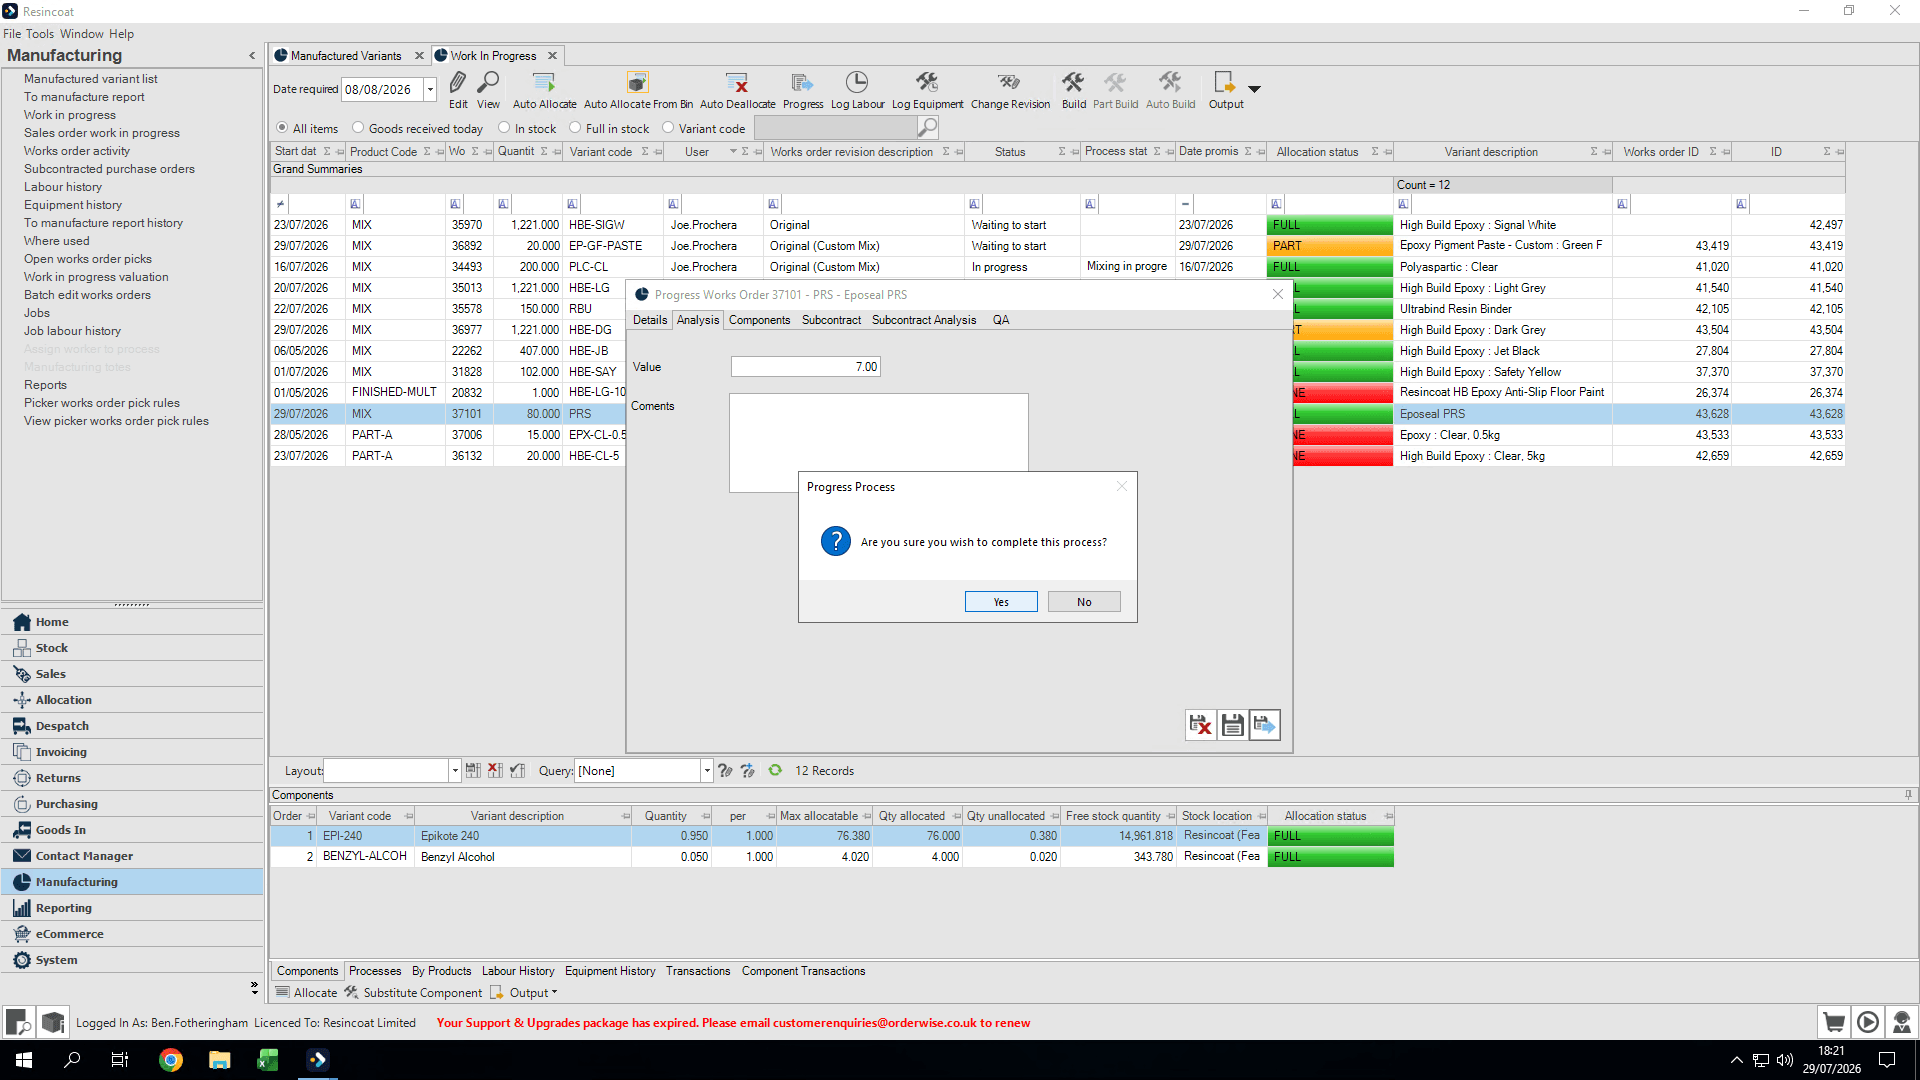
If the step requires you to record a figure, Click the Analysis tab to record the data.
16
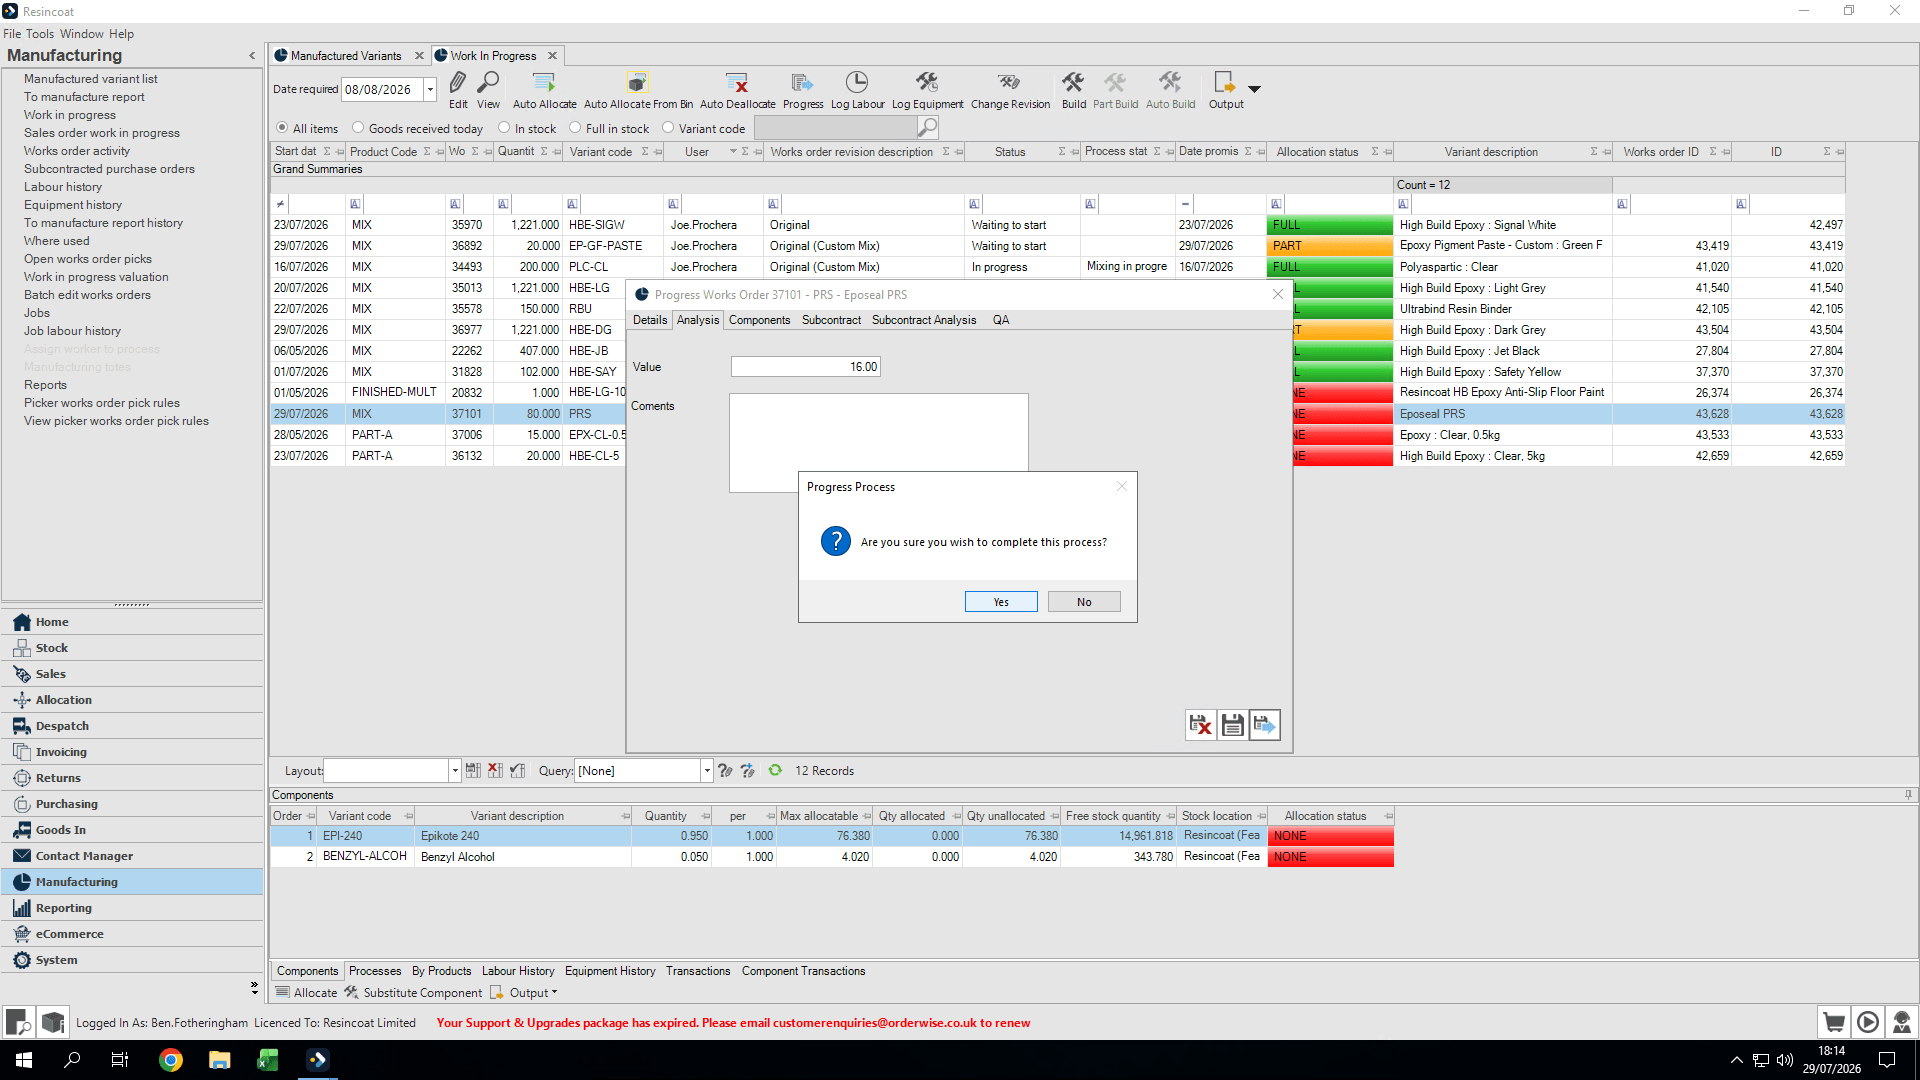
Type the starting vessel weight into the value field, then click Save and Progress
17
Click Yes to confirm the vessel weight.
Under no circumstances should you use the Auto Allocate button. It randomly assigns batch numbers that may not match the actual physical stock you are using.
18
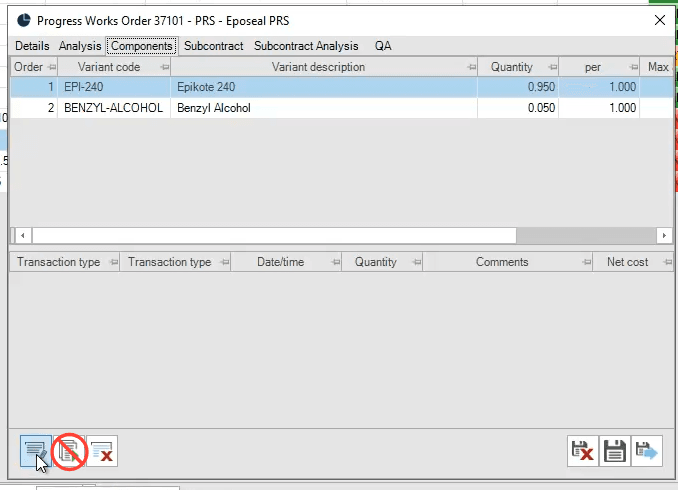
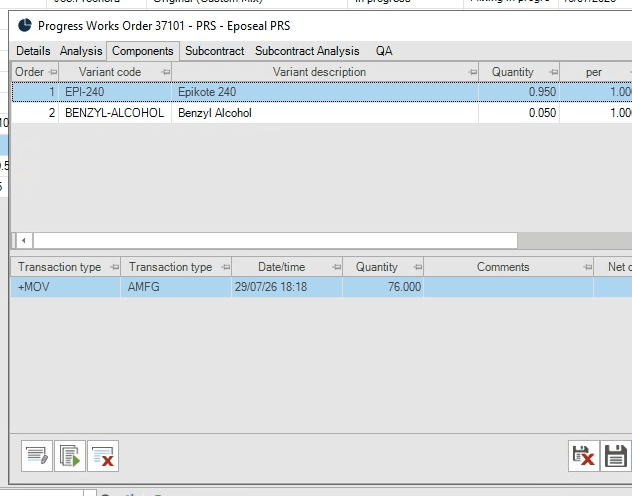
When we get to the stage to add ingredients, click the Components tab to view your required ingredients.
19
Assign your raw materials by clicking Edit Allocations, here
Under no circumstances should you use the Auto Allocate button. It randomly assigns batch numbers that may not match the actual physical stock you are using.
20
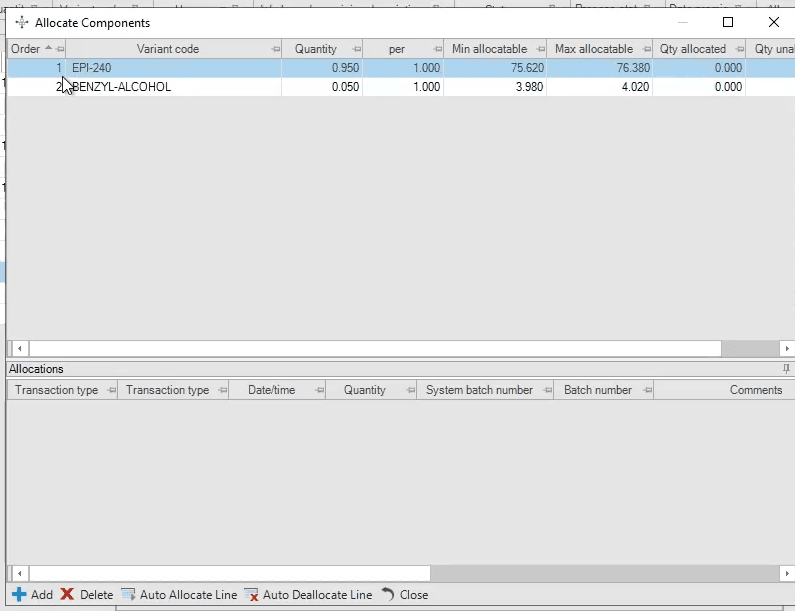
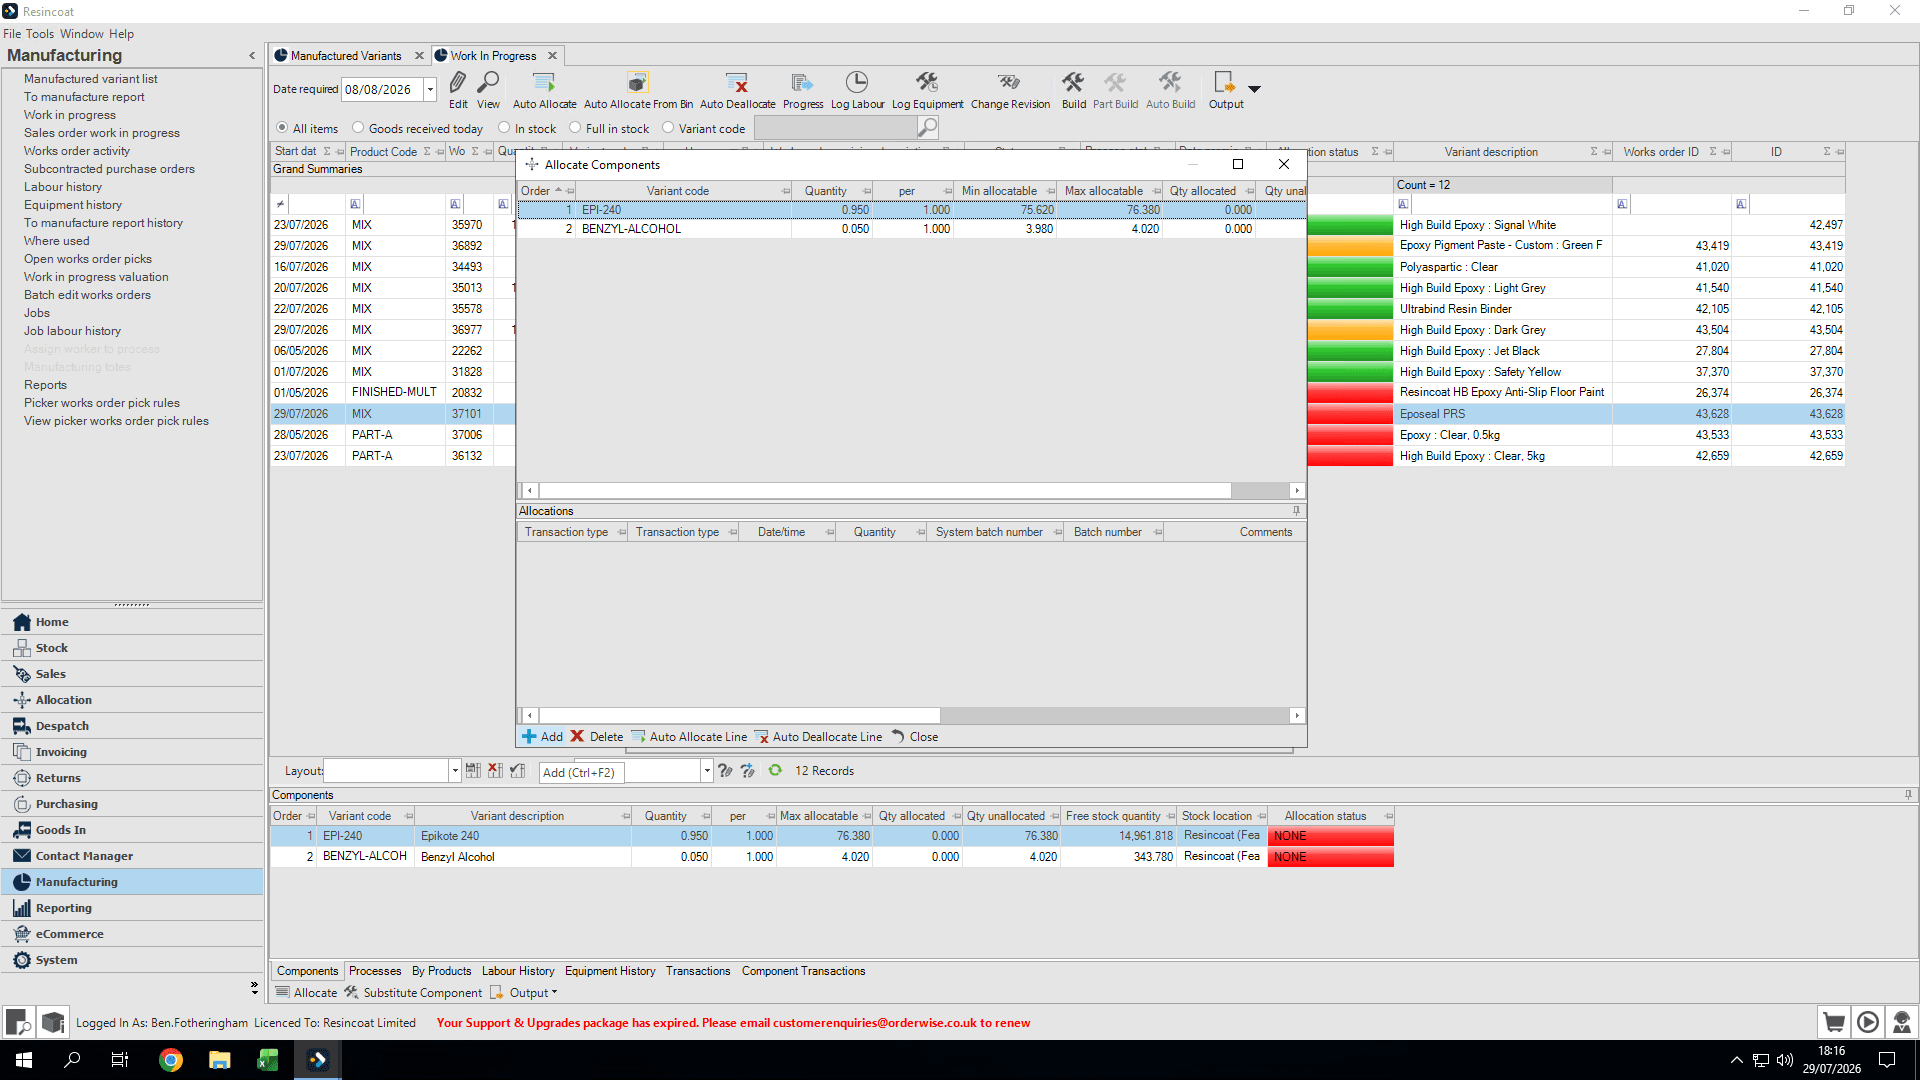
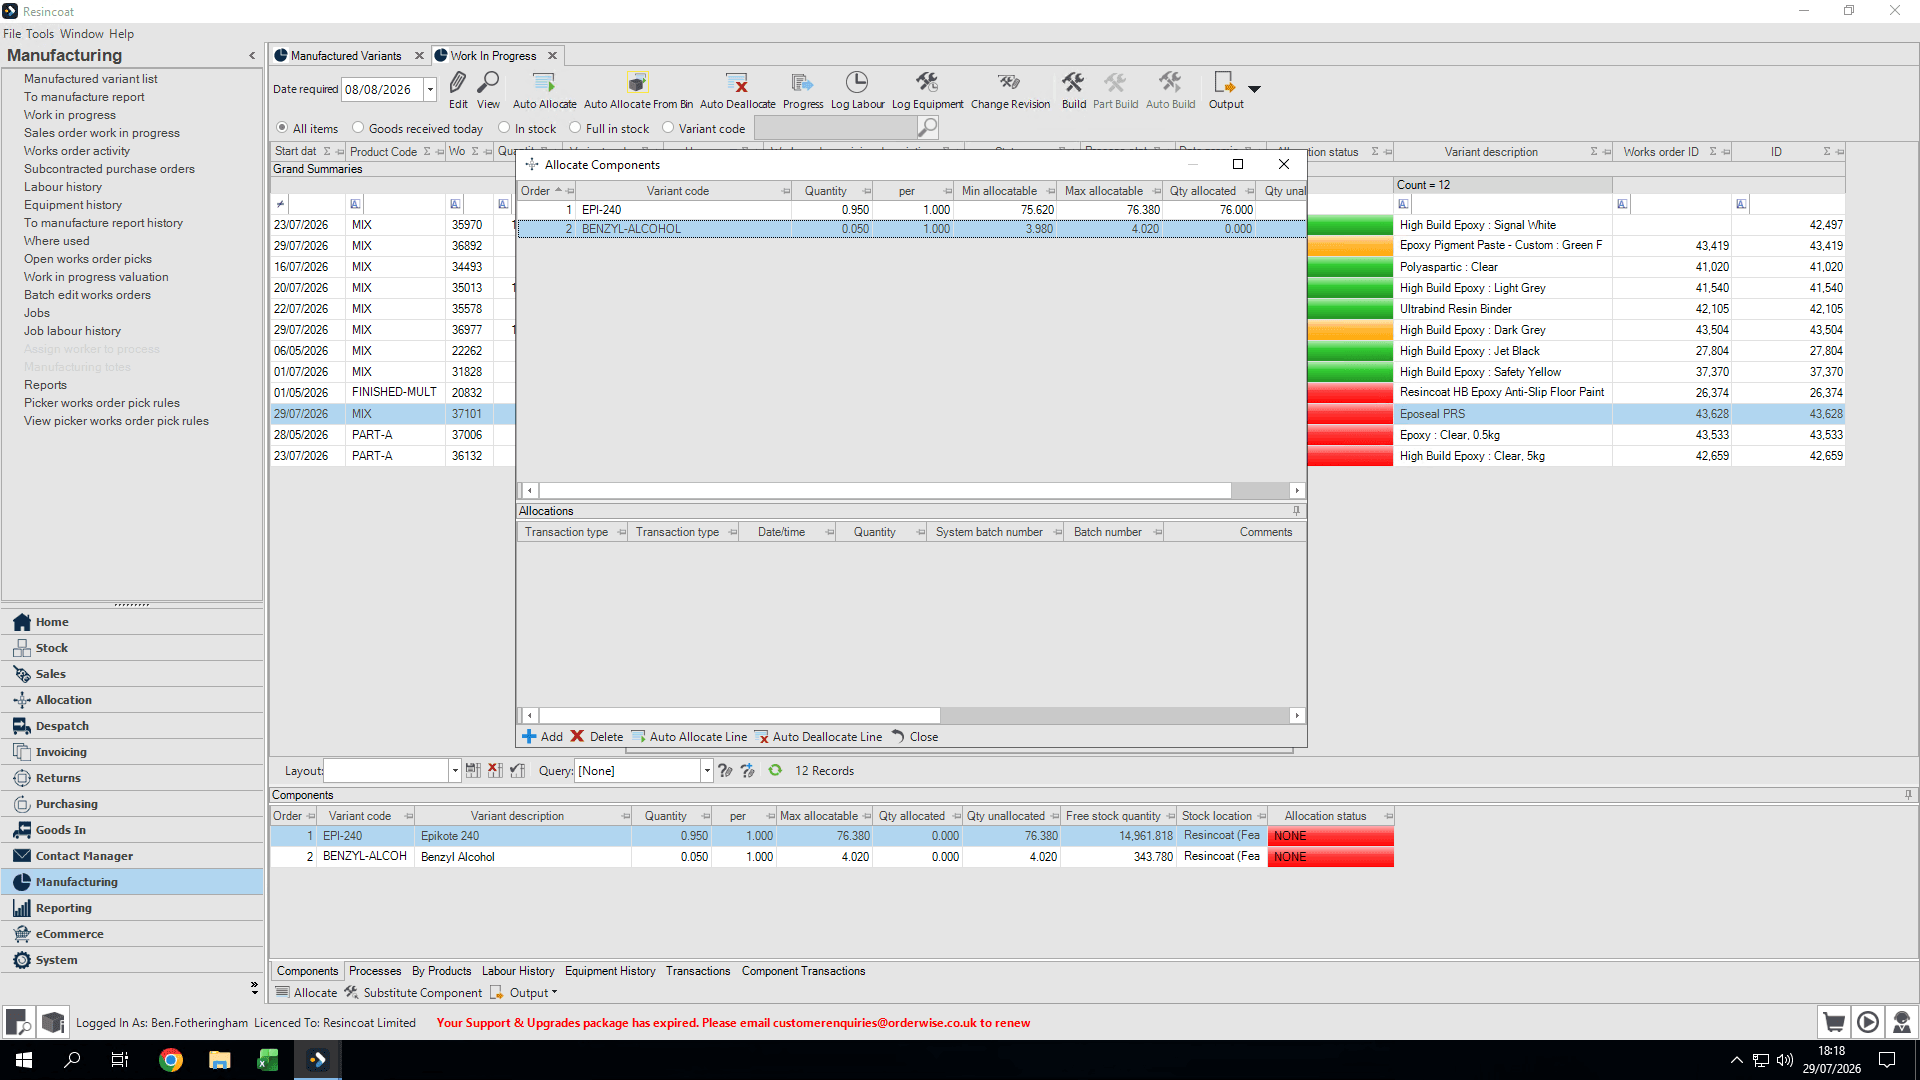
The order in which you should add the ingredients is listed in the Order column. Highlight the material you are about to add.
21
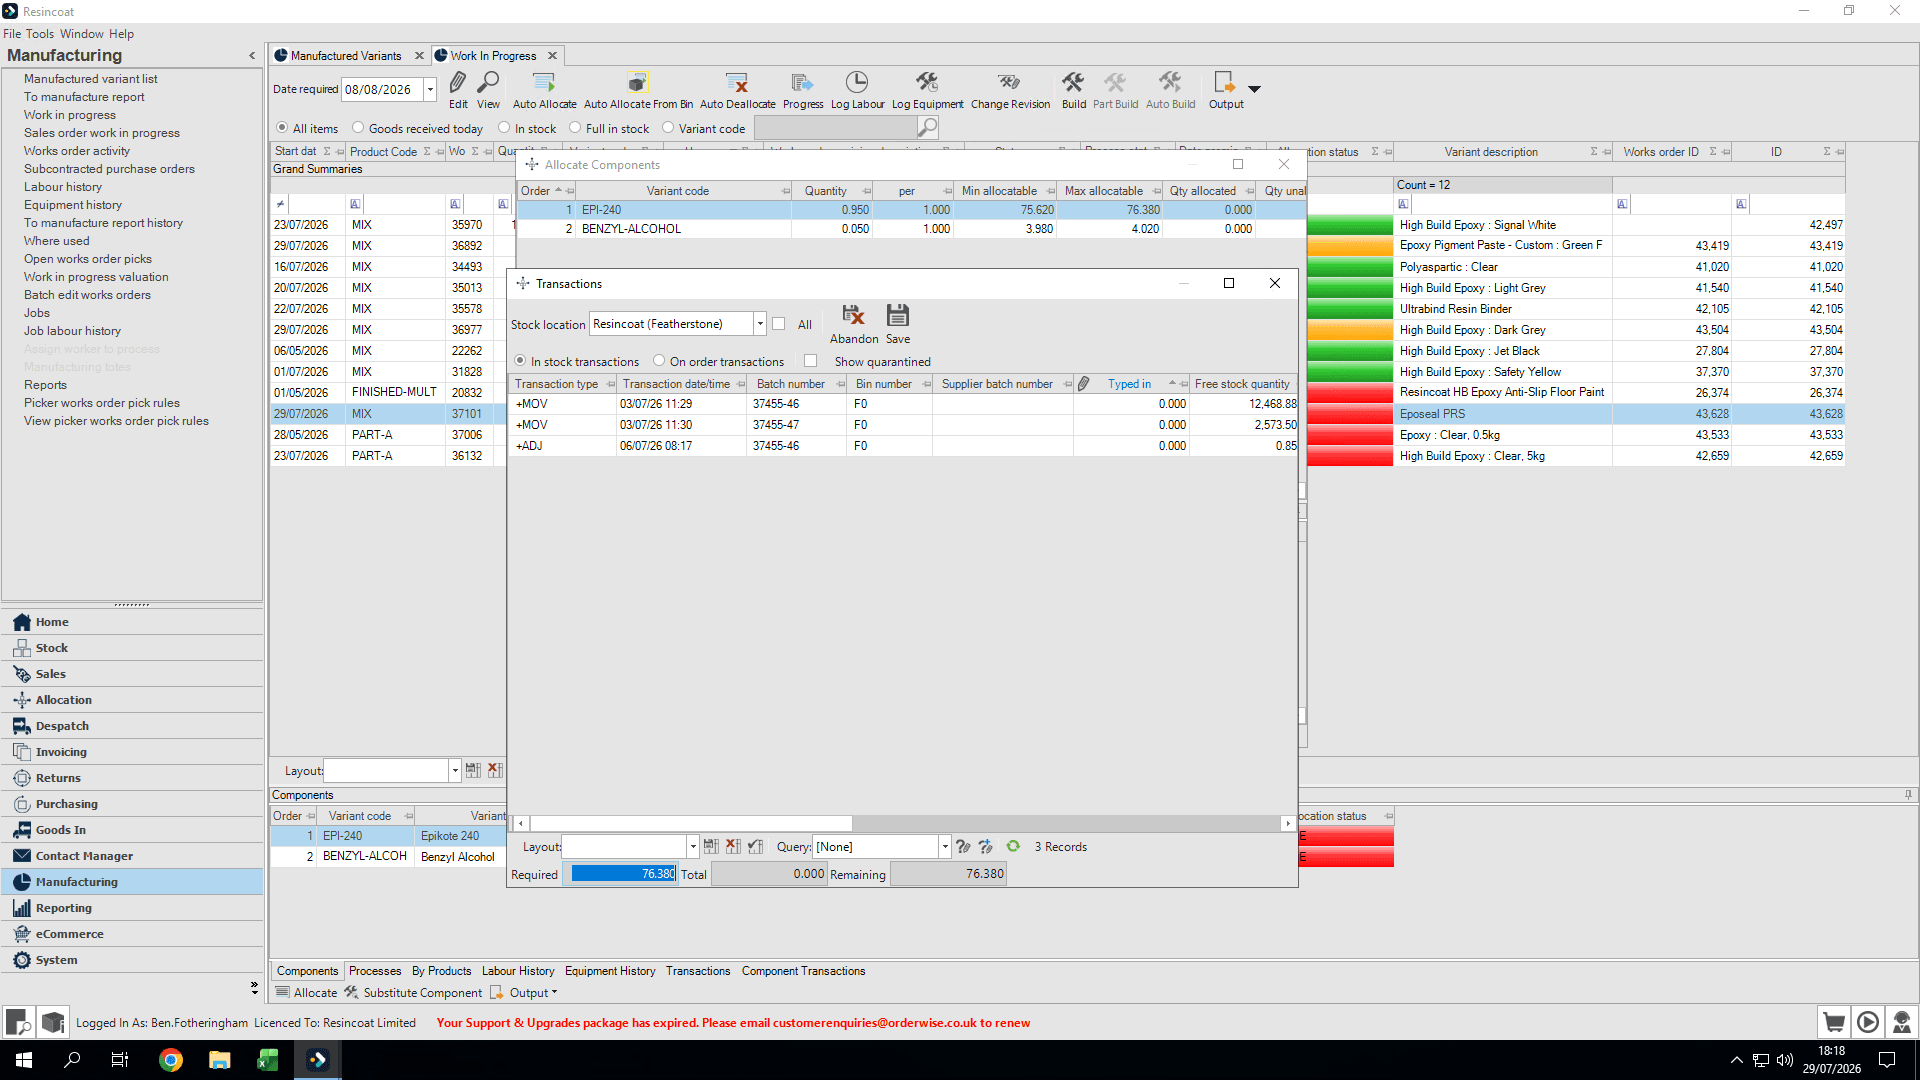
Click Add to manually select your stock and batch for the first component.
22
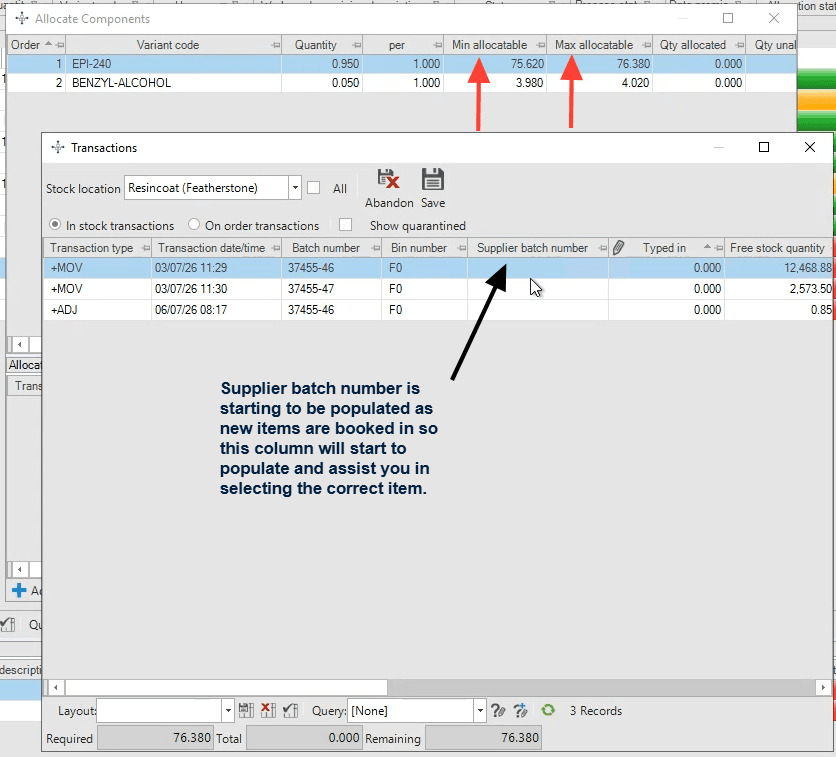
Highlight the row which contains the batch you are using. Type the quantity directly into the 'Typed in' field
You can see the Max and Min amount required on the previous window if you forget. This gives you some flexibility on adding certain raw materials in round numbers.
23
Click Save to lock in the allocation.
24
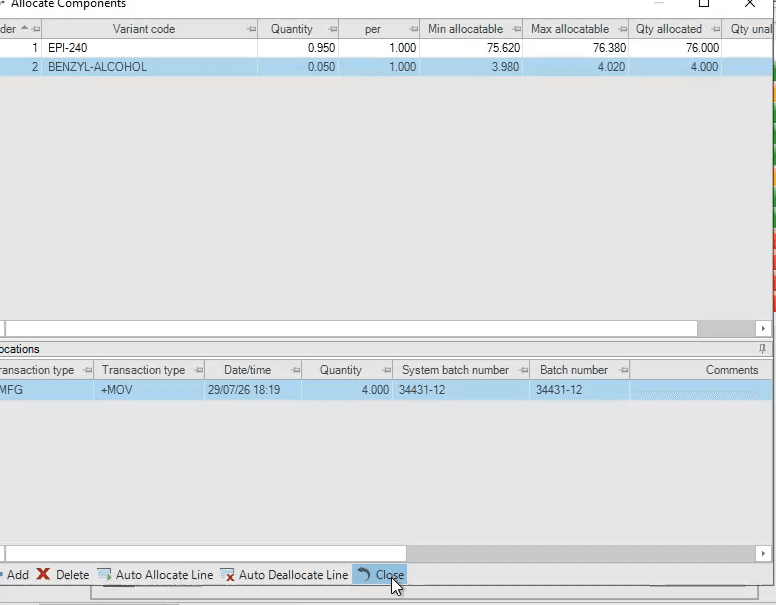
Repeat steps 20 - 23 for all remaining components in the prescribed sequence order.
Qty allocated column will highlight which materials have yet to be allocated.
25
Once all components have been allocated, close this screen.
26
Save
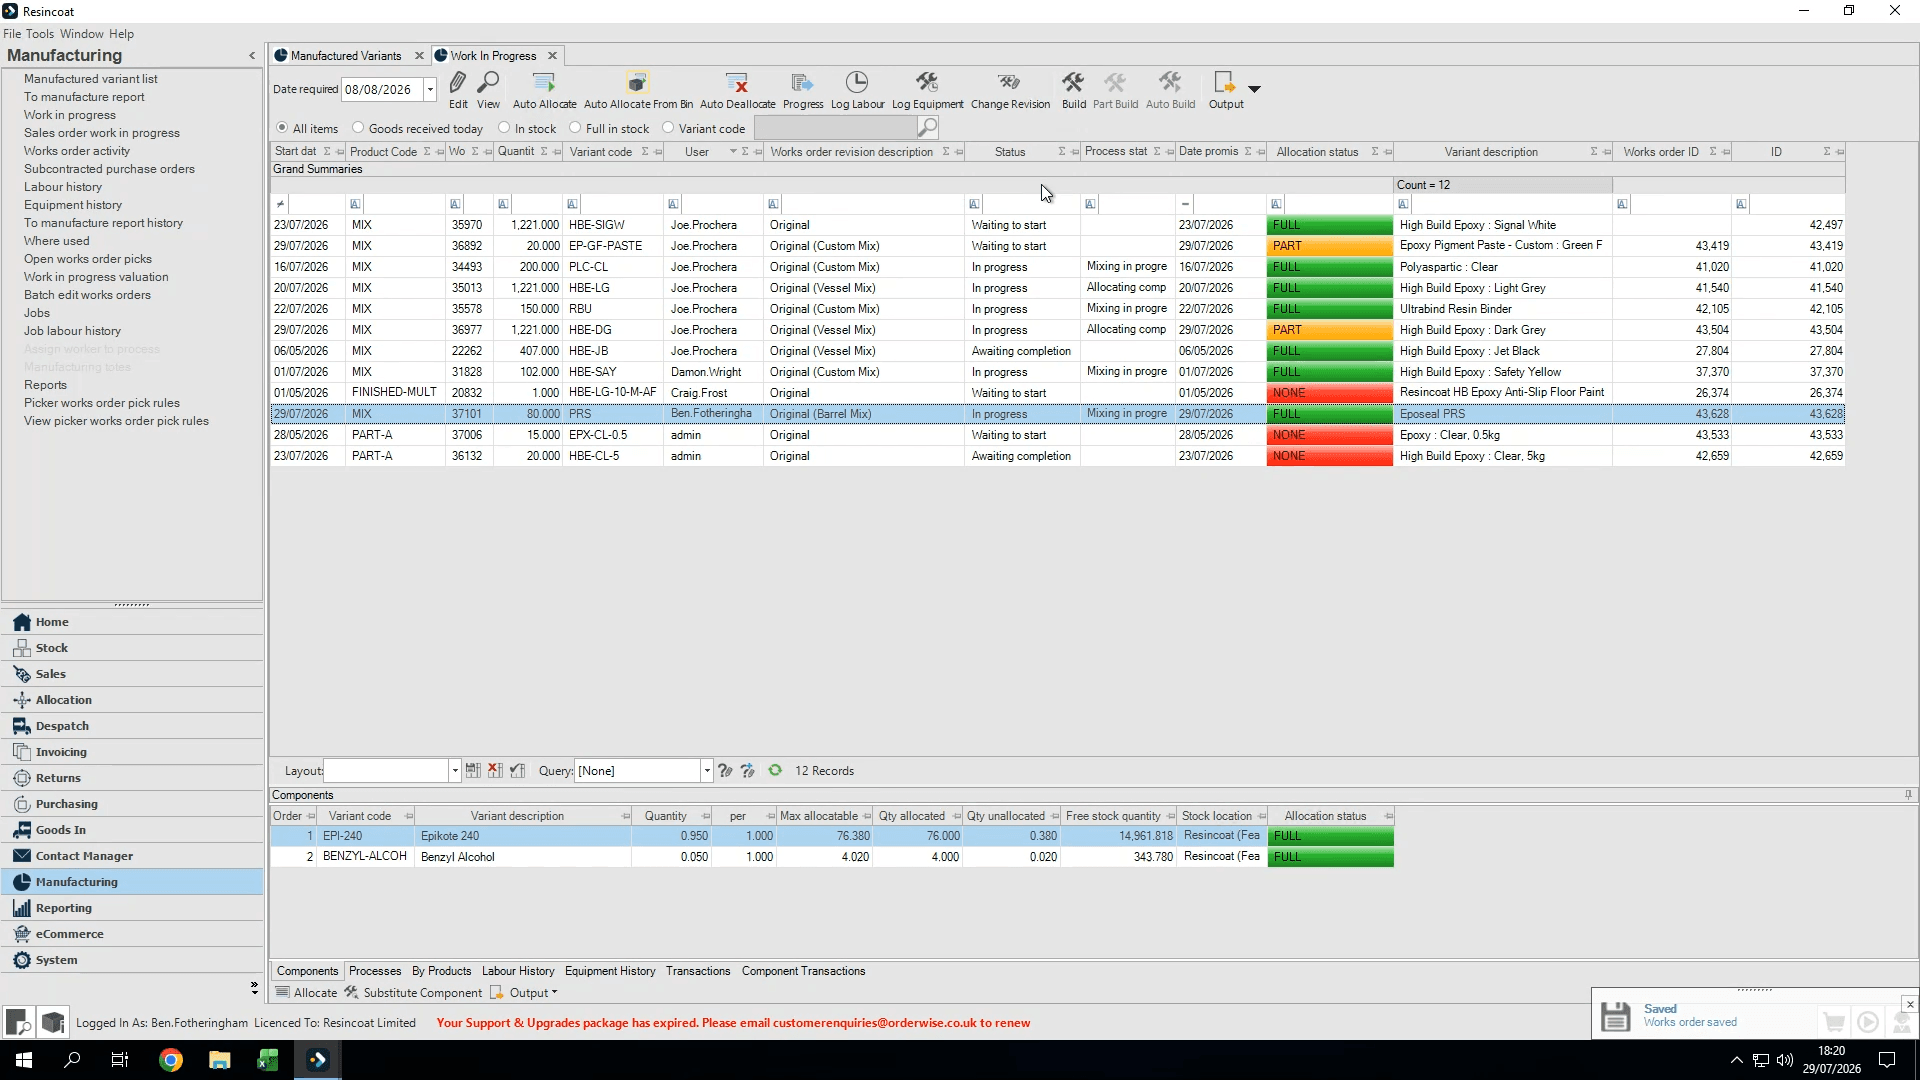
27
Click Yes to progress the works order once all components are accurately allocated.
Assembly, Testing, and Sign-off
28
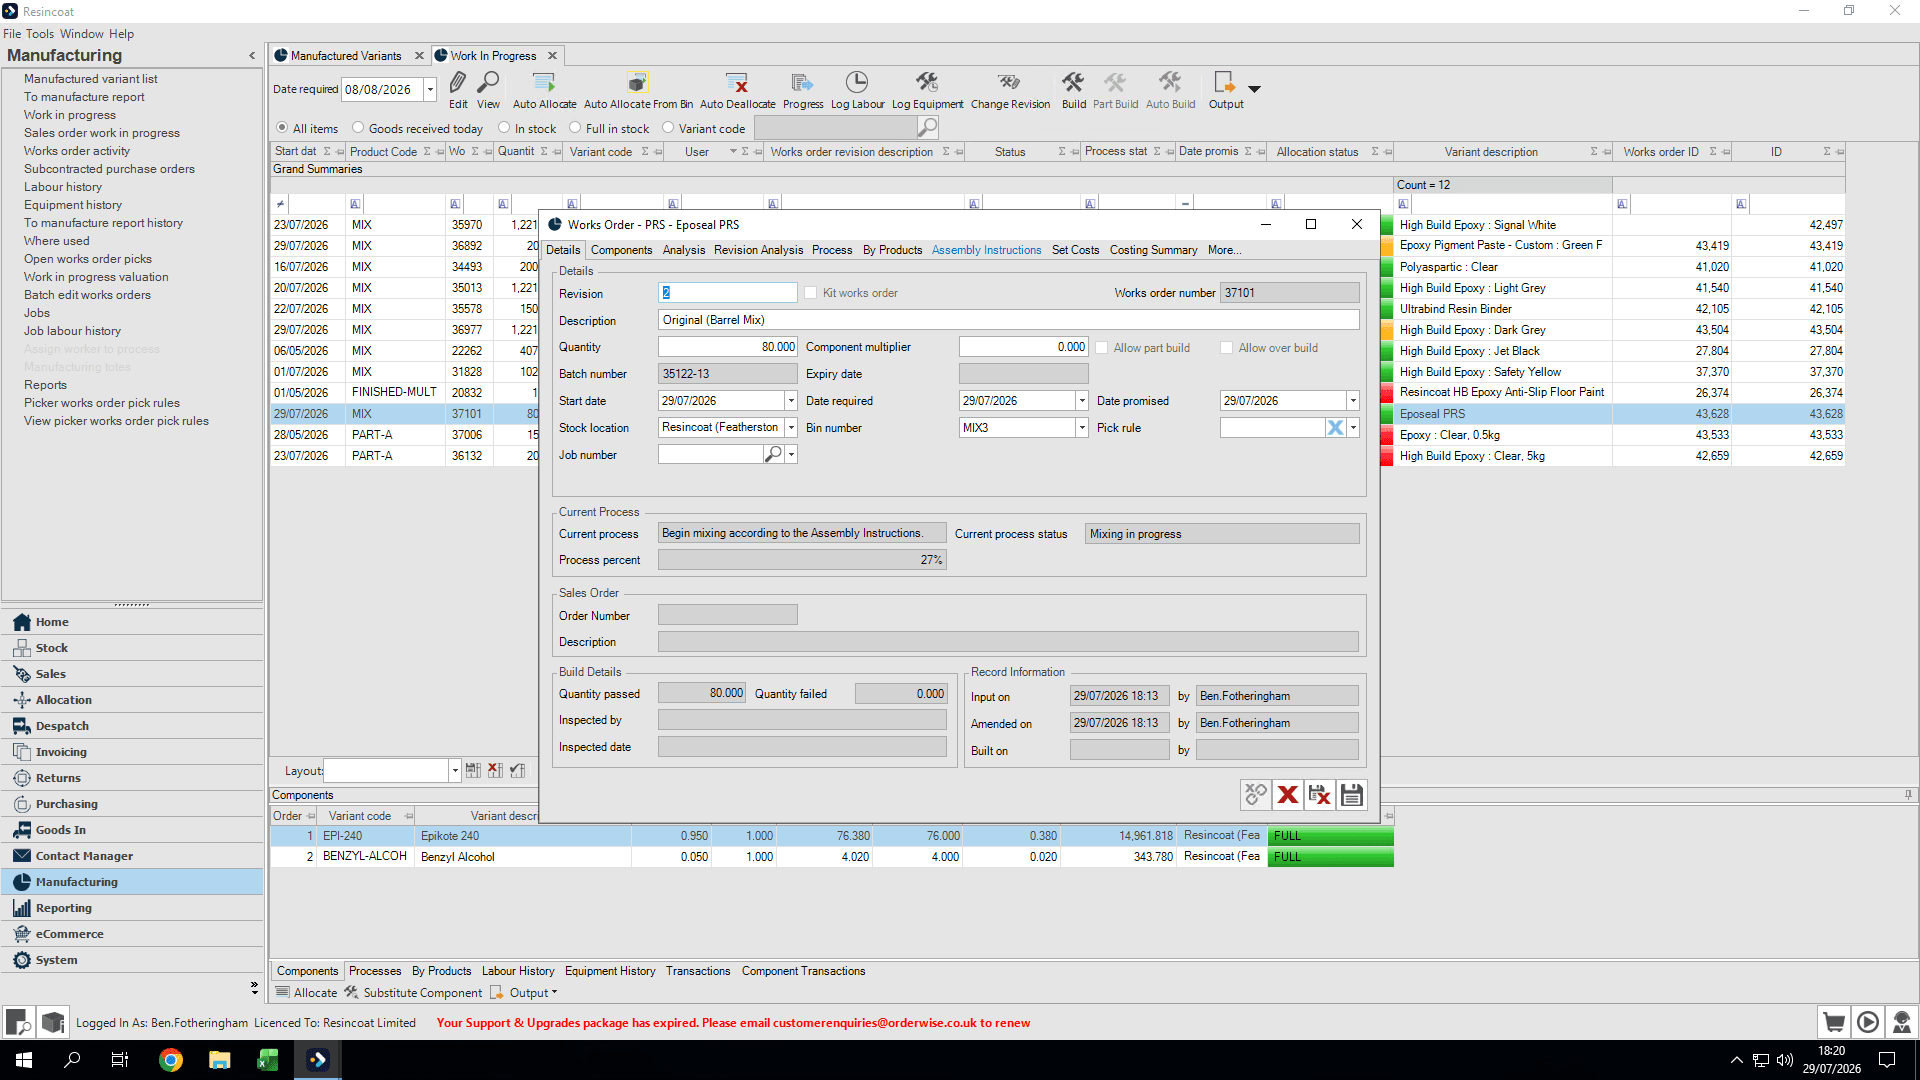
Double-click the Work Order and view the Assembly instructions for mixing directions.
29
Return to the Progress tab for the Work Order
30
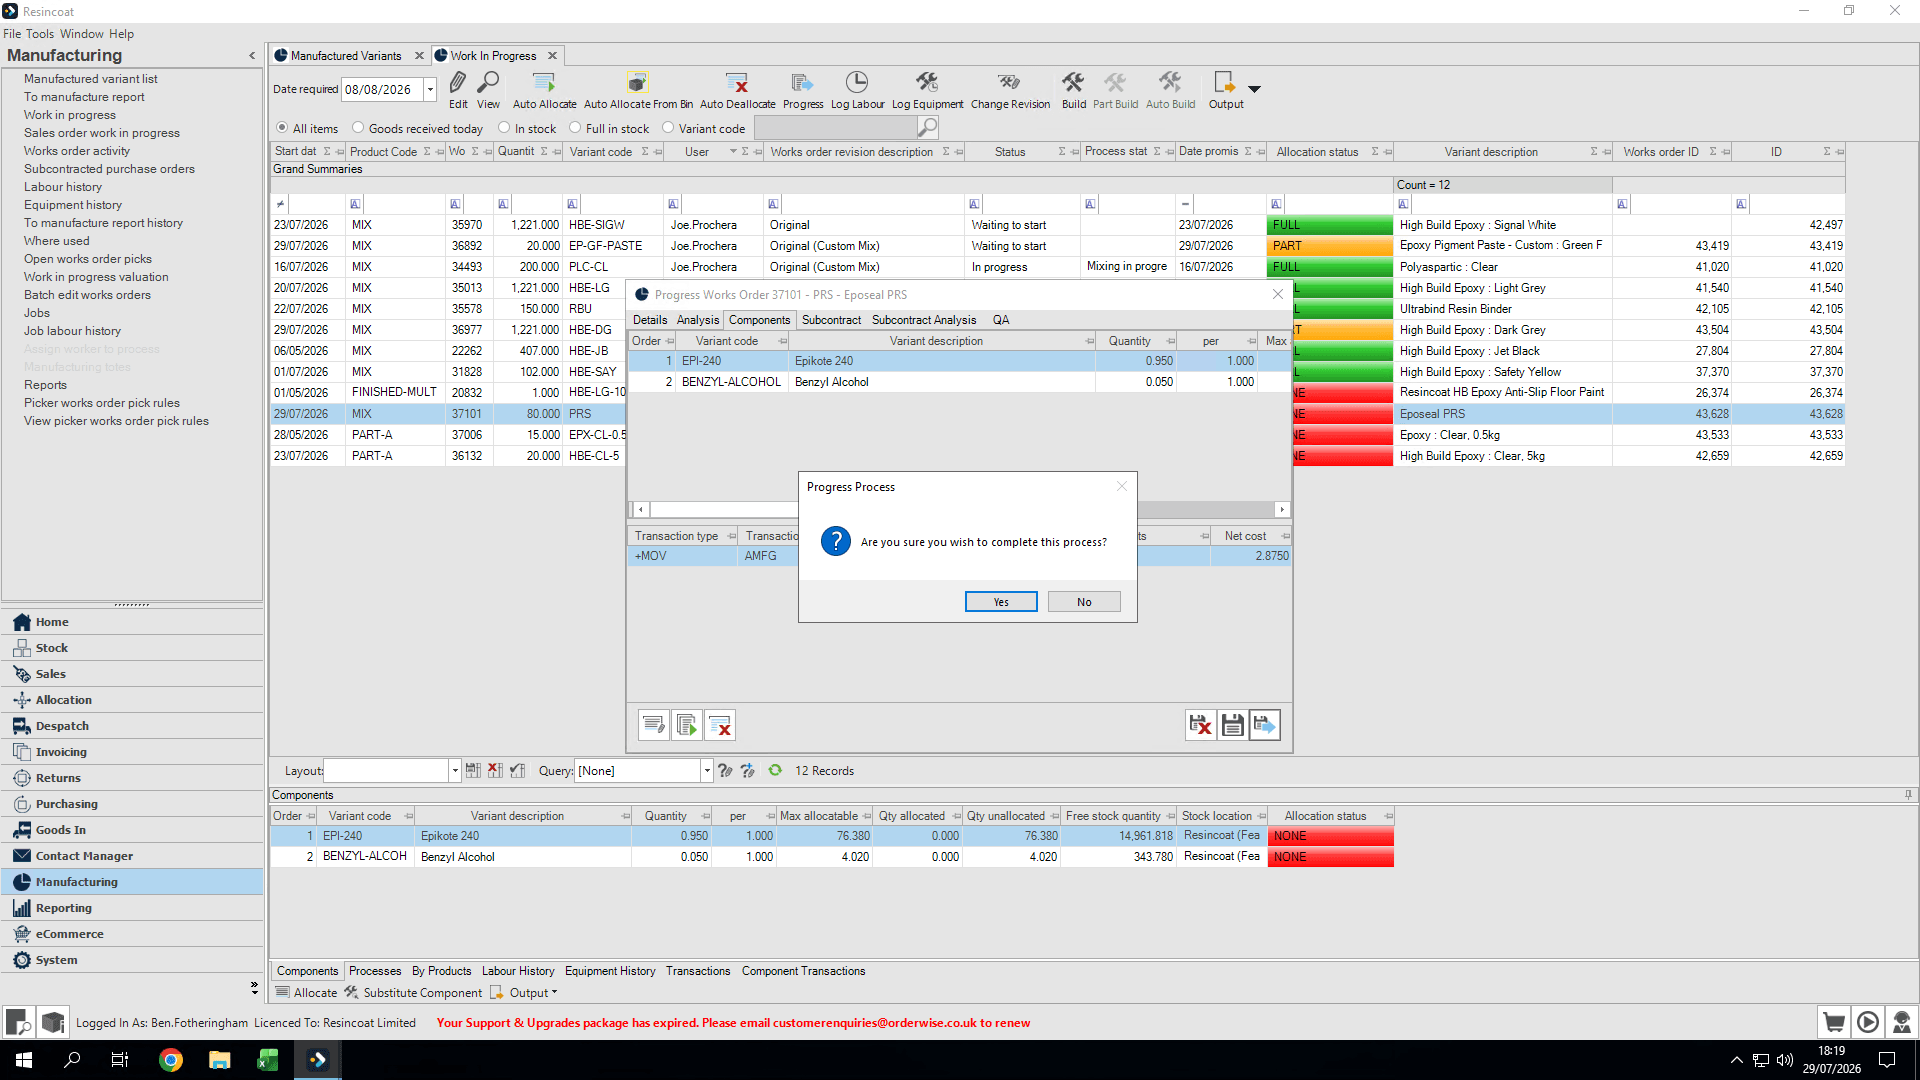
Save and Progress now that the mix is ready for mixing. Click Yes to confirm the mixing phase has completed according to the instructions.
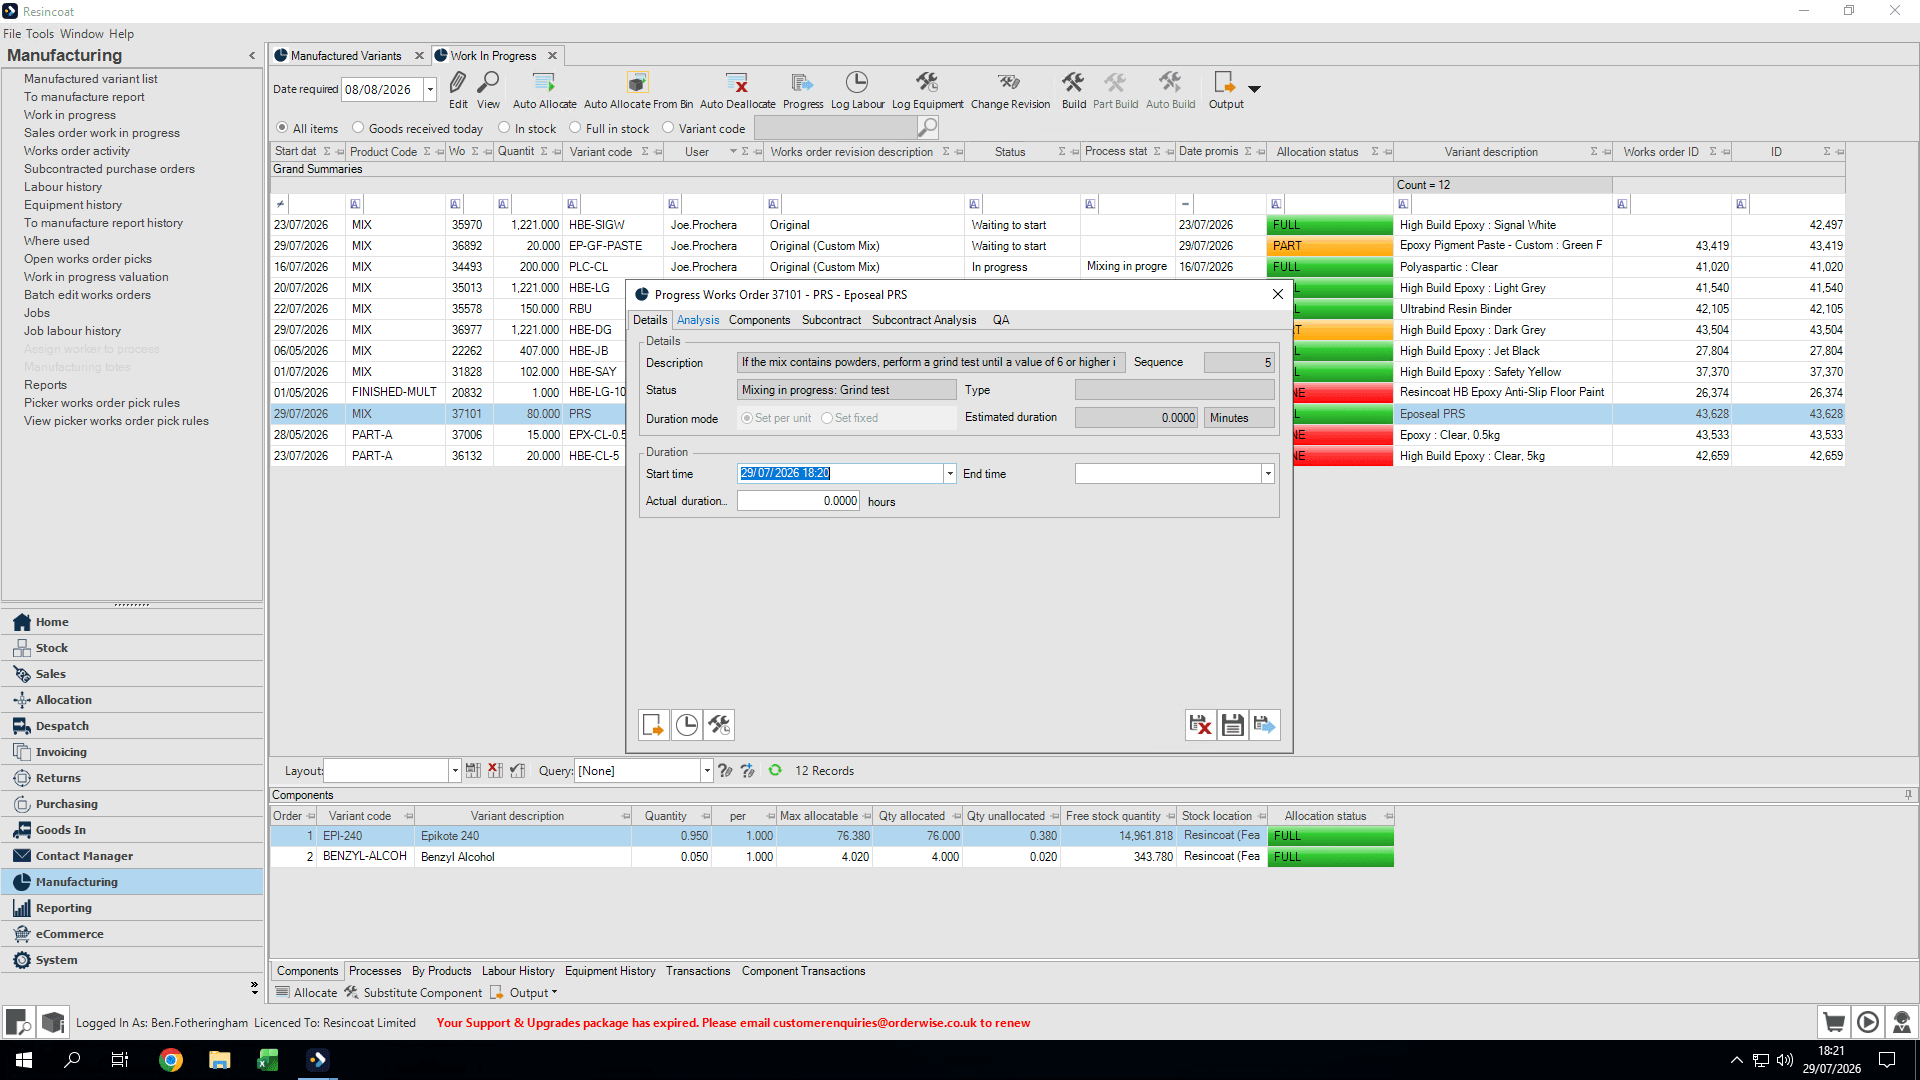
31
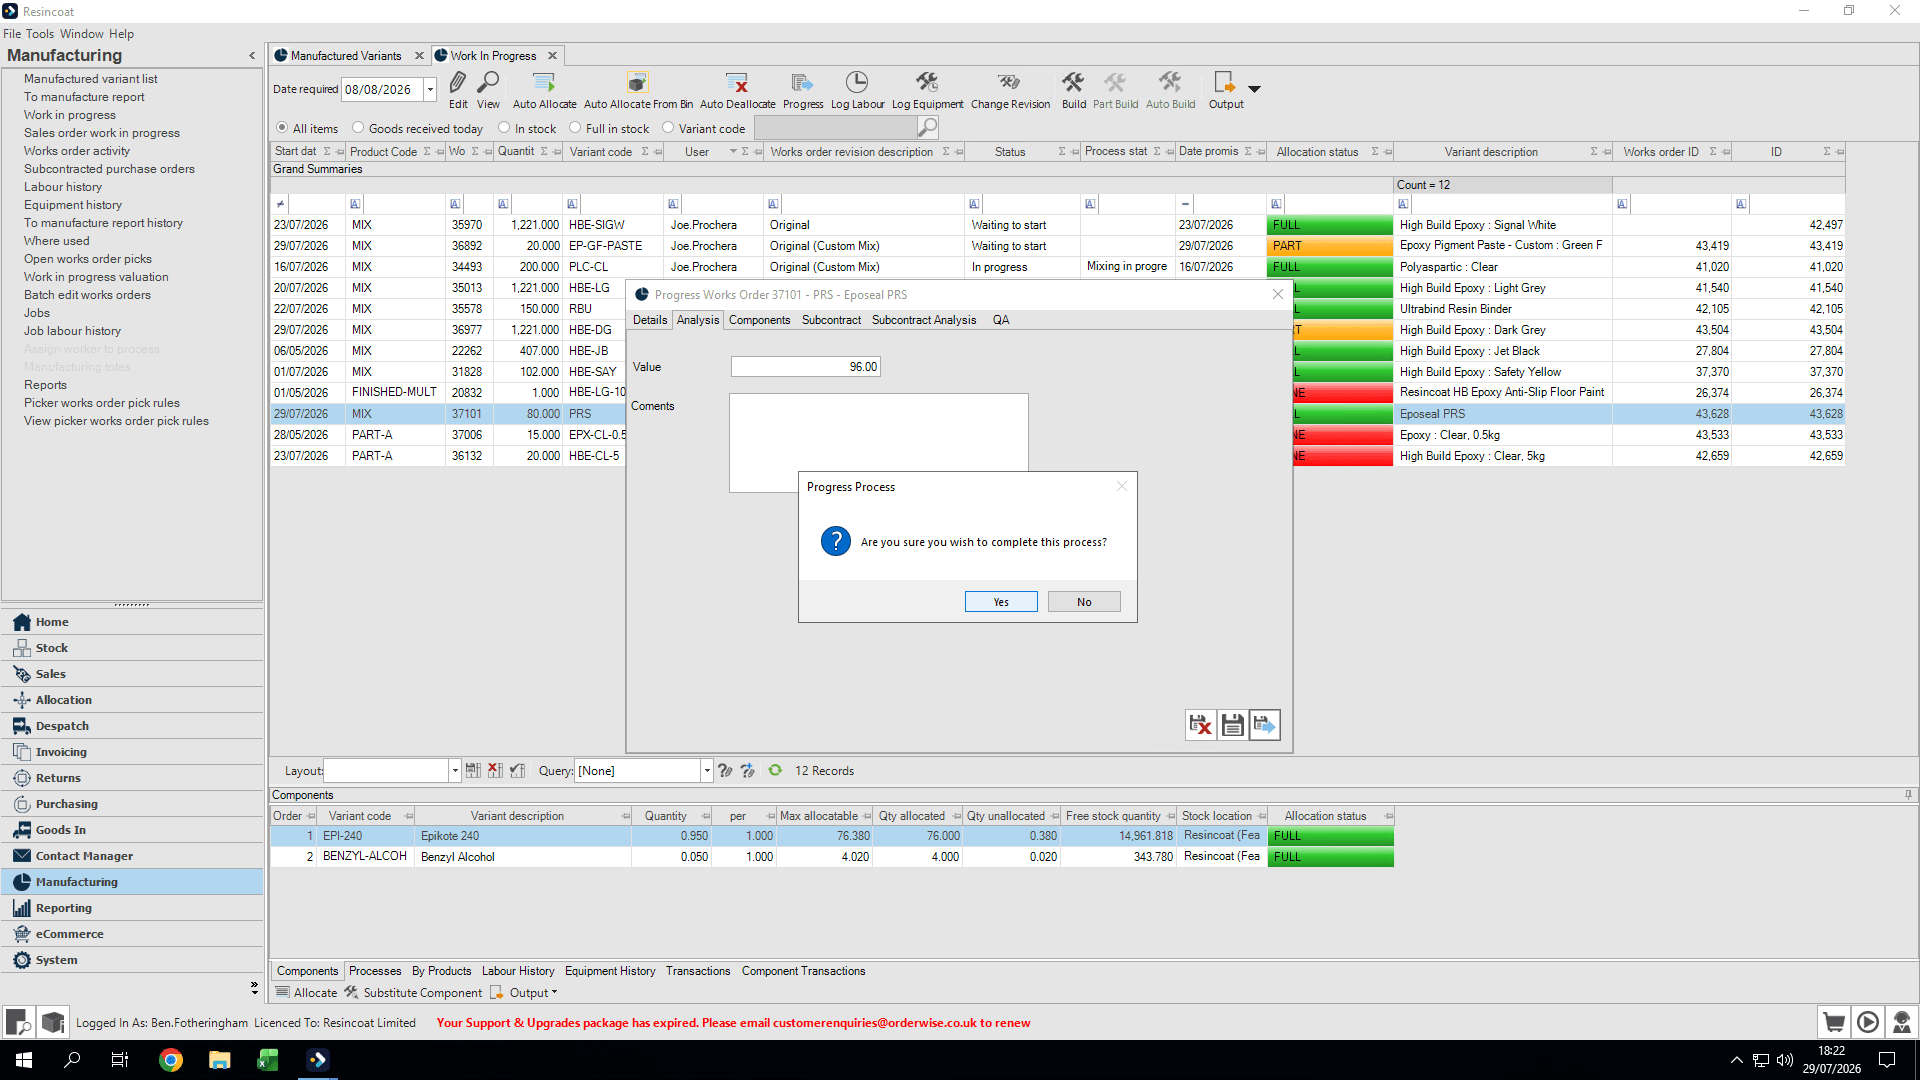
Click the Analysis tab to record your grind test results. (if applicable)
32
Enter the grind test score into the value box, click Save and Progress, Click Yes to confirm the grind test.
33
Repeat step 32 for any other values needing to be recorded
34
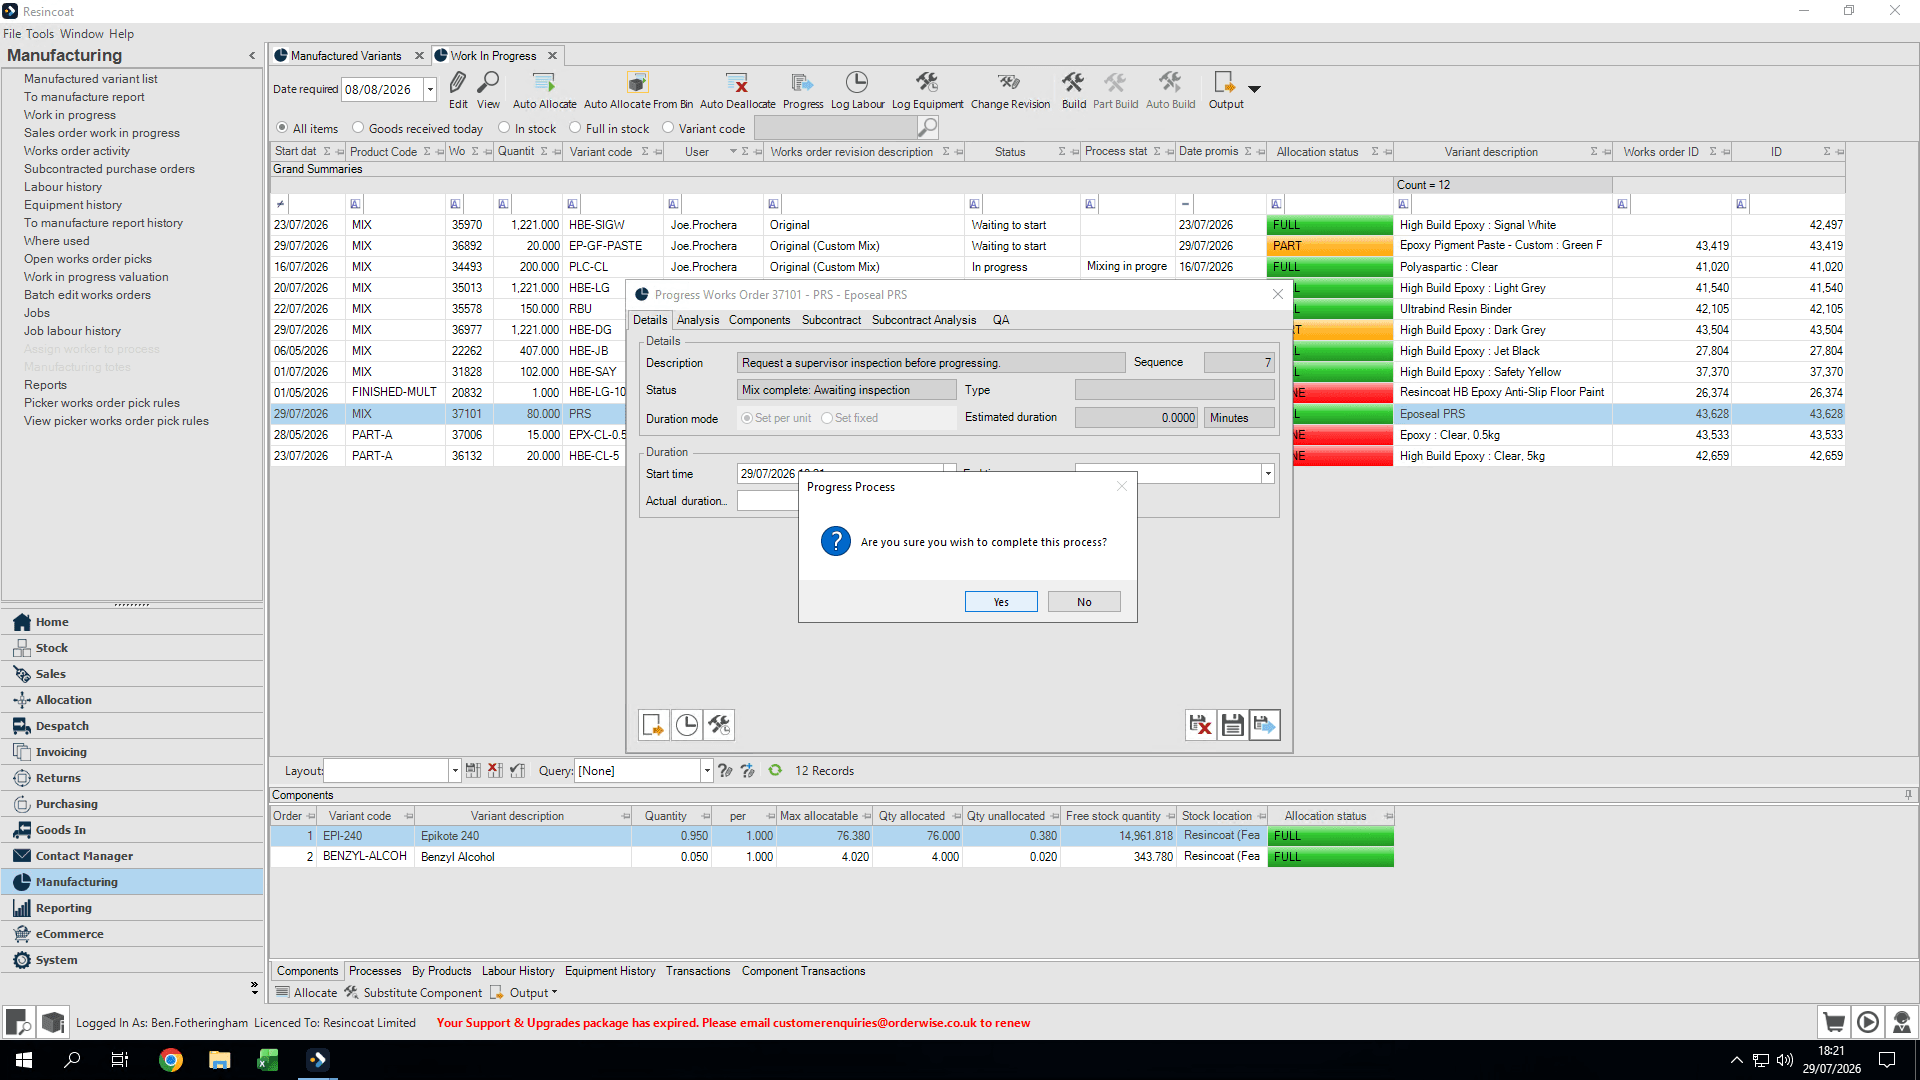
Ask a supervisor to review the mix, then click Yes to confirm their sign-off.
Finish Build and Stock Location
35
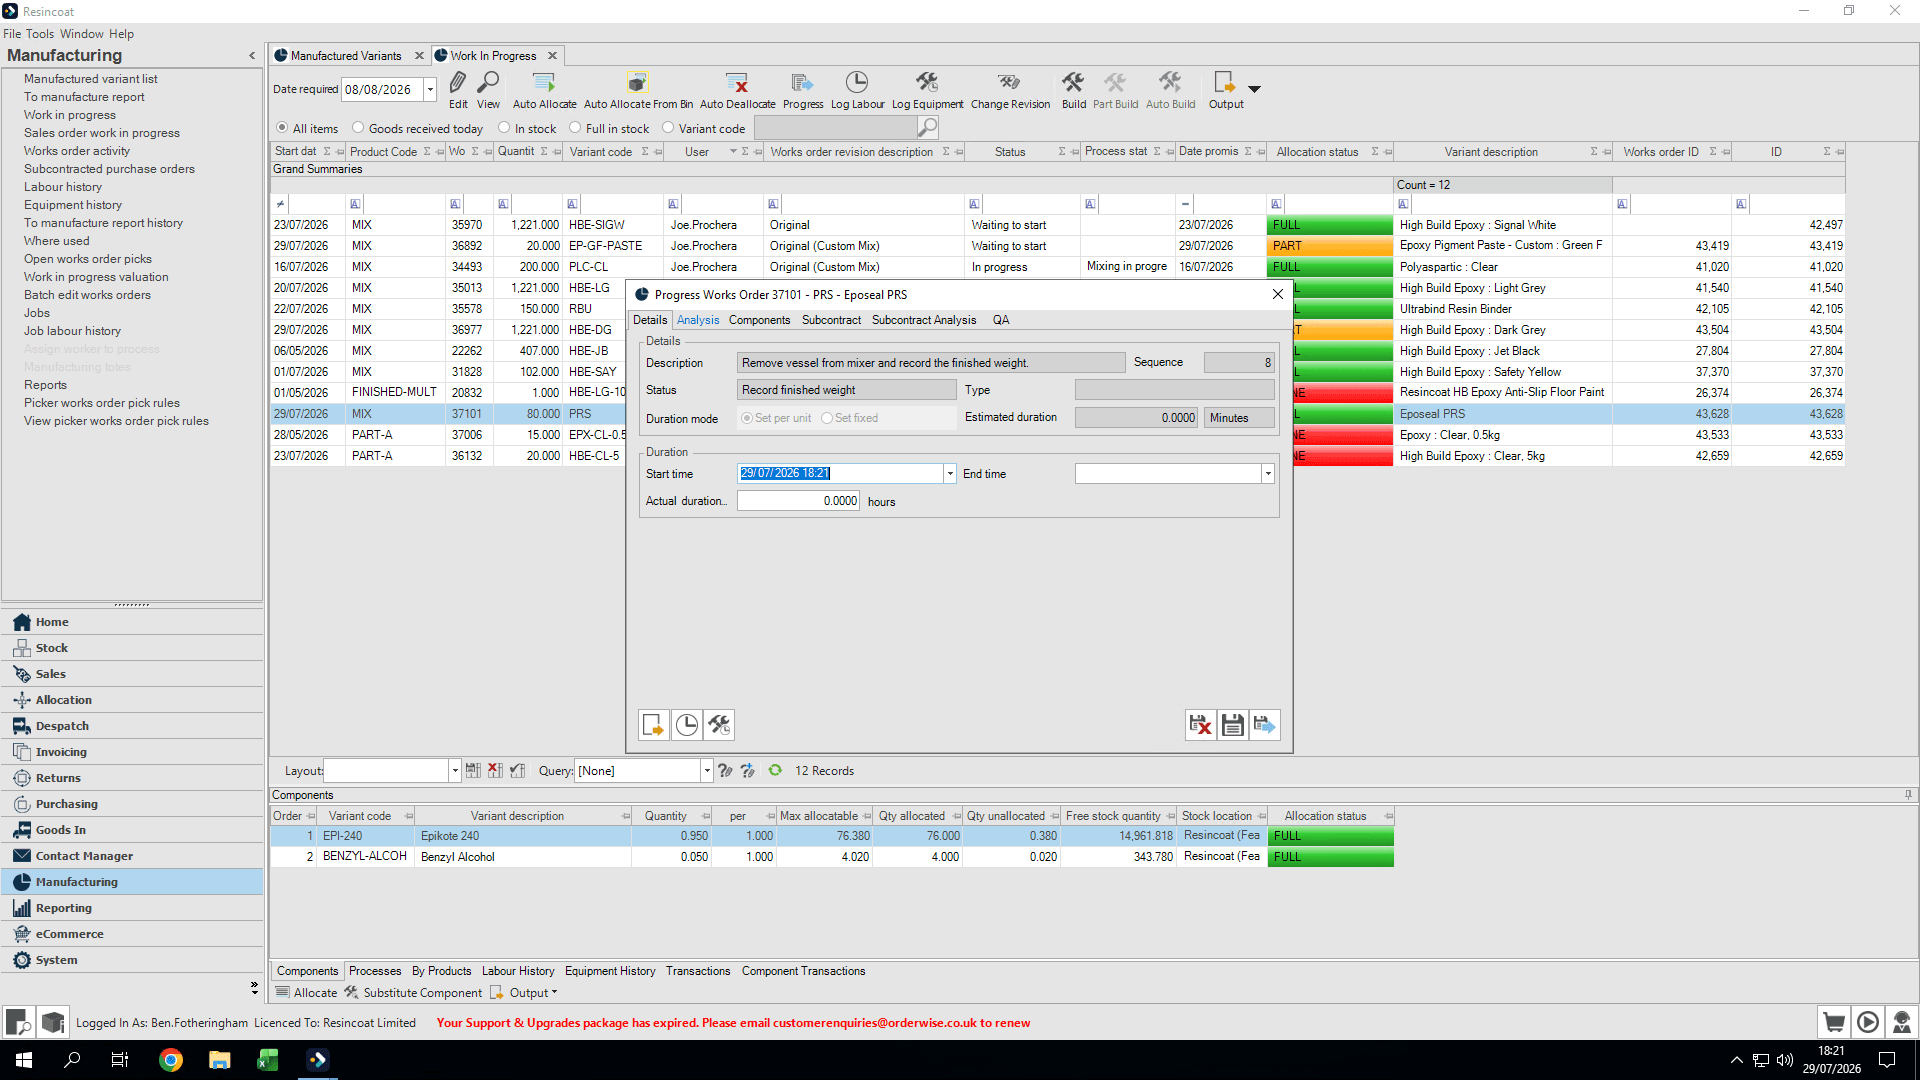
When instructed stop mixer and remove the vessel, ready for weighing and recording final figures.
36
Click the Analysis tab to record the total finished mix weight.
37
Enter the final weight into Value. Click Save and Progress. Click Yes to confirm the finish weight.
38
Take your lab and retained samples as instructed, then click Progress.
39
Click Yes to confirm that the sampling phase is complete.
40
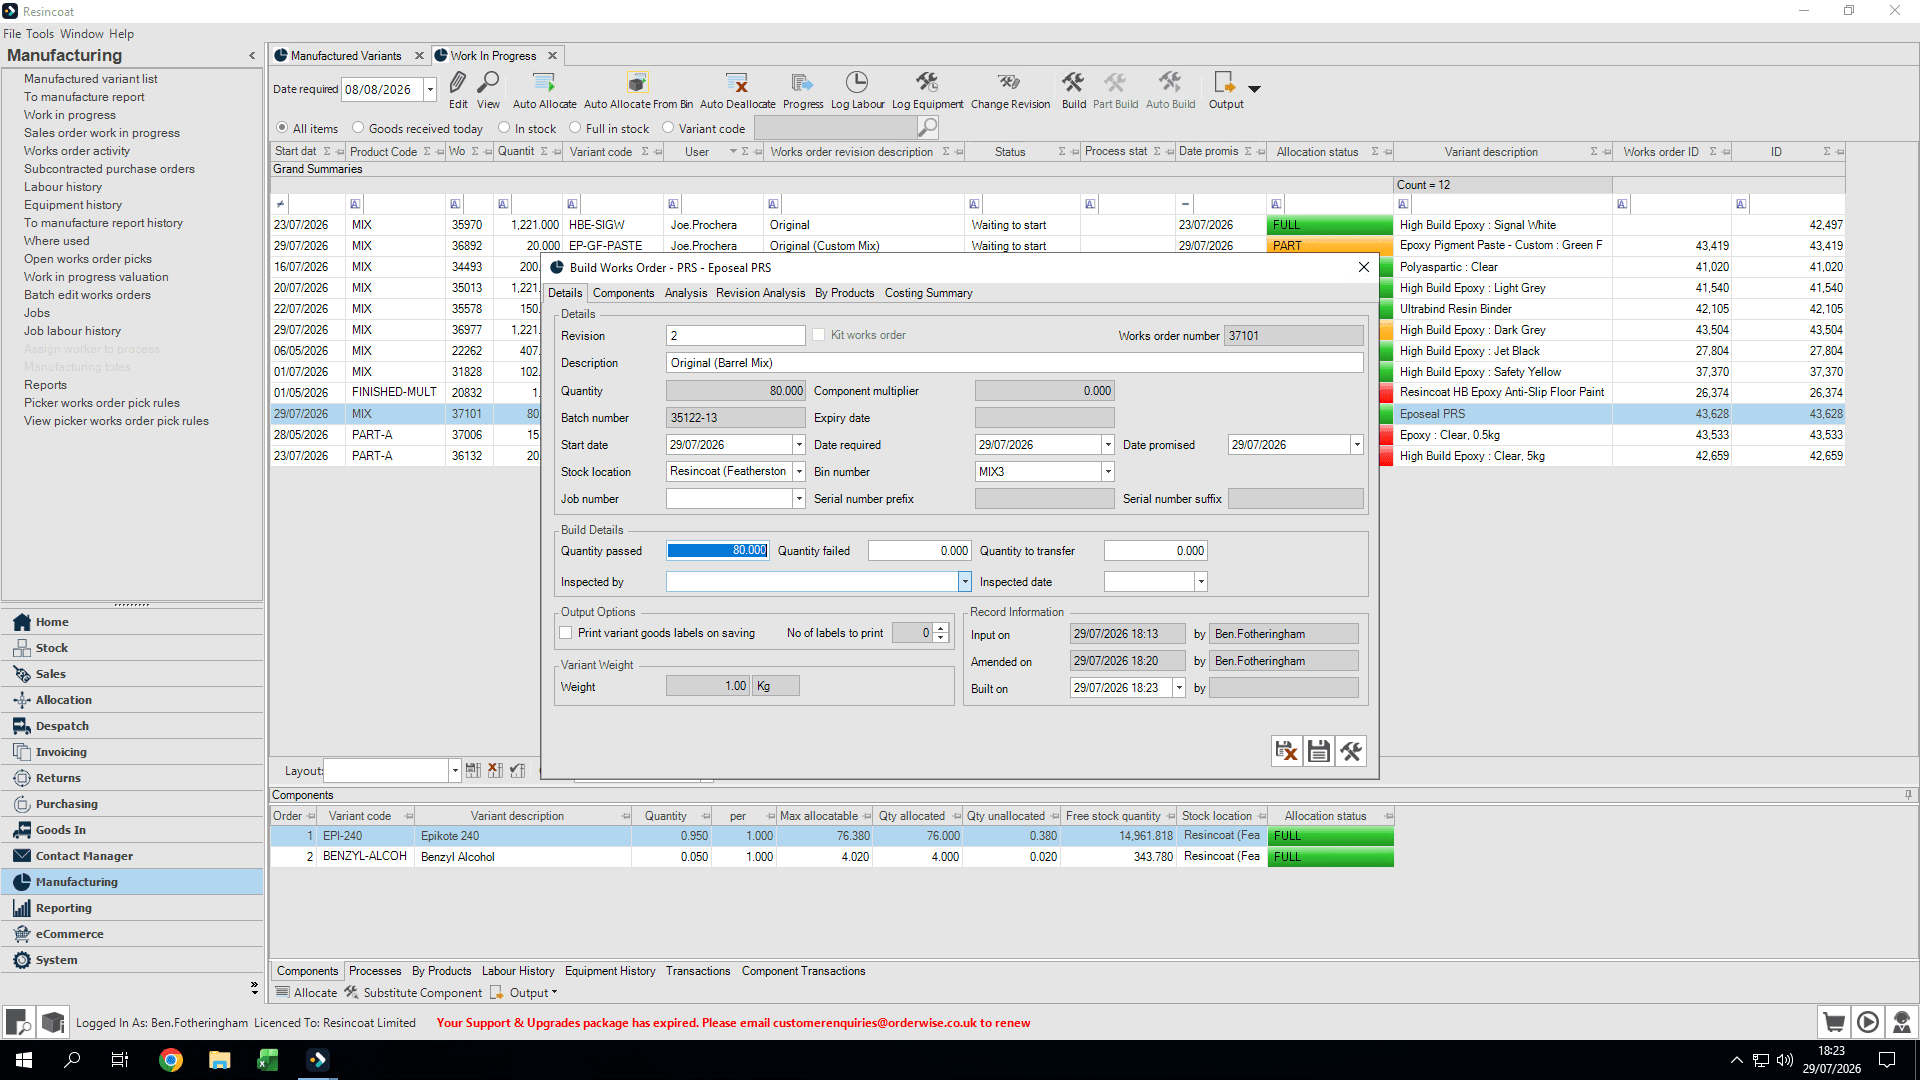
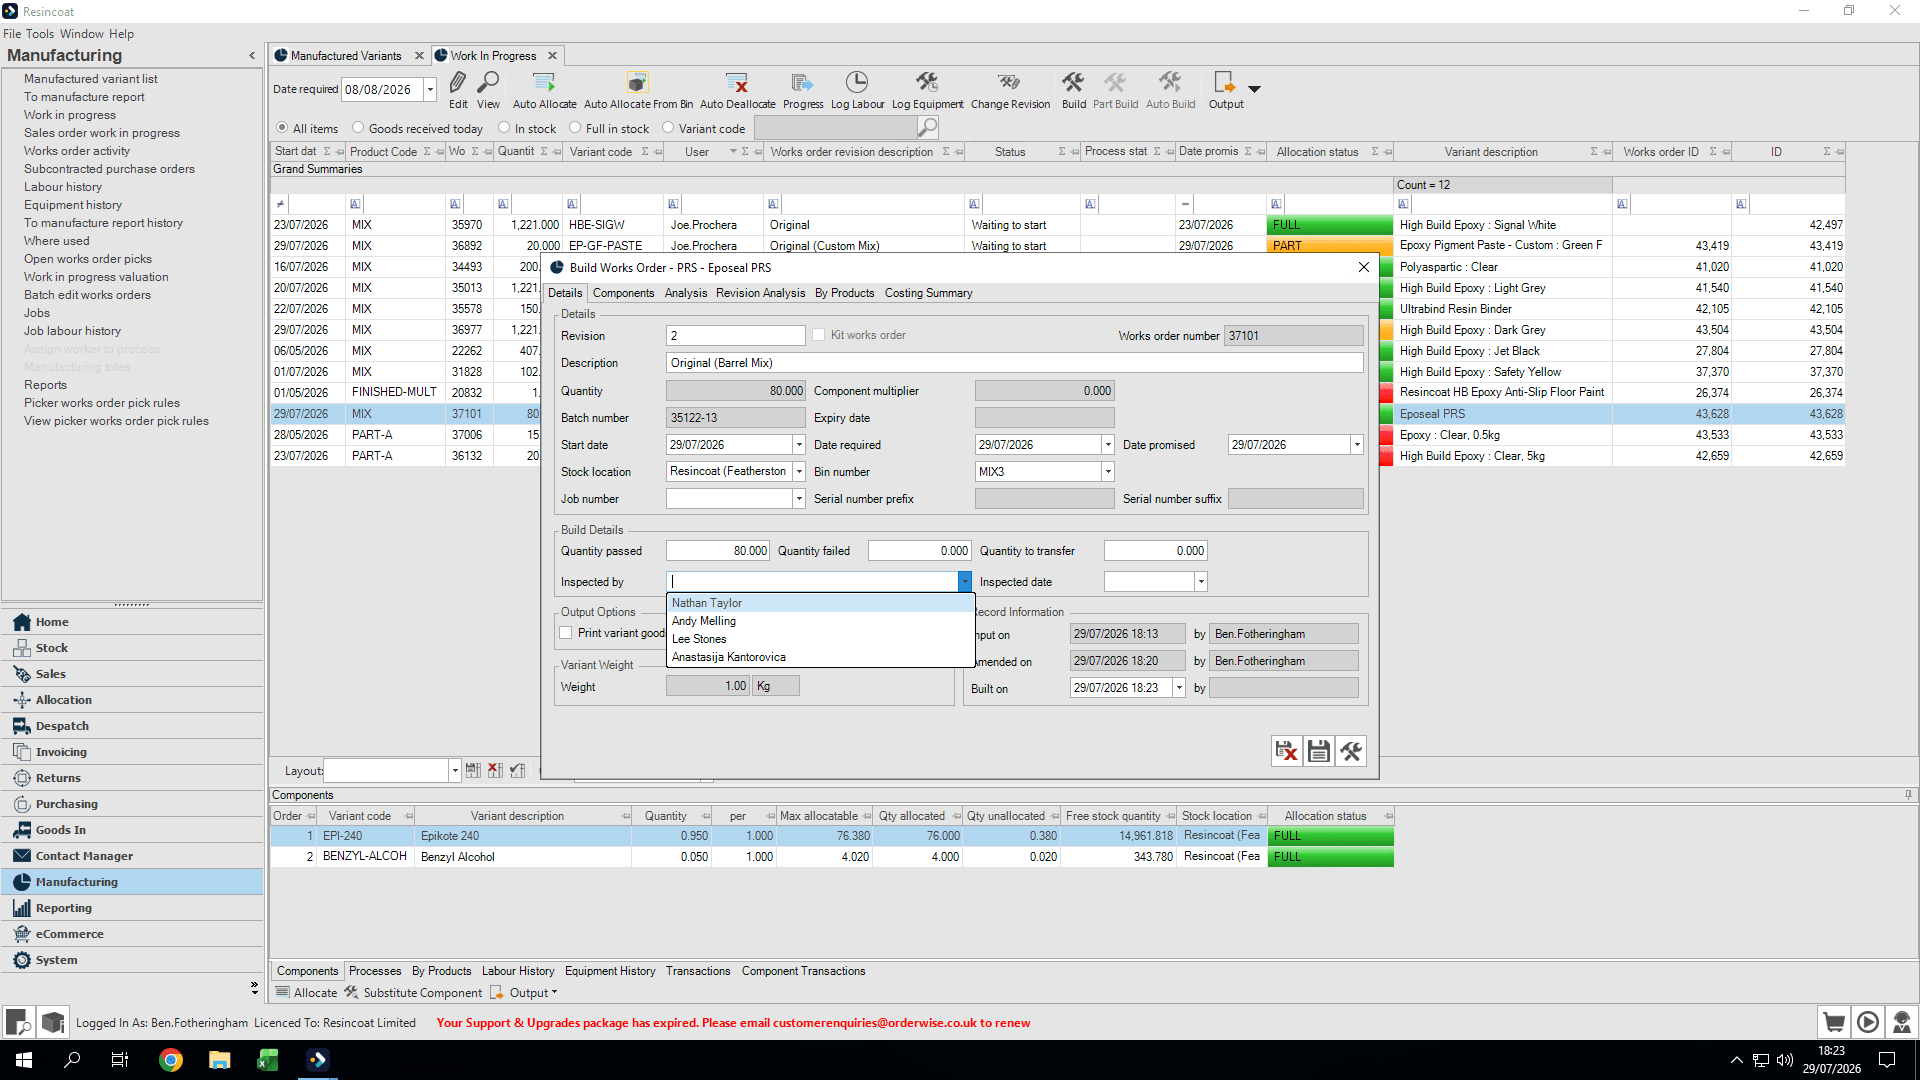
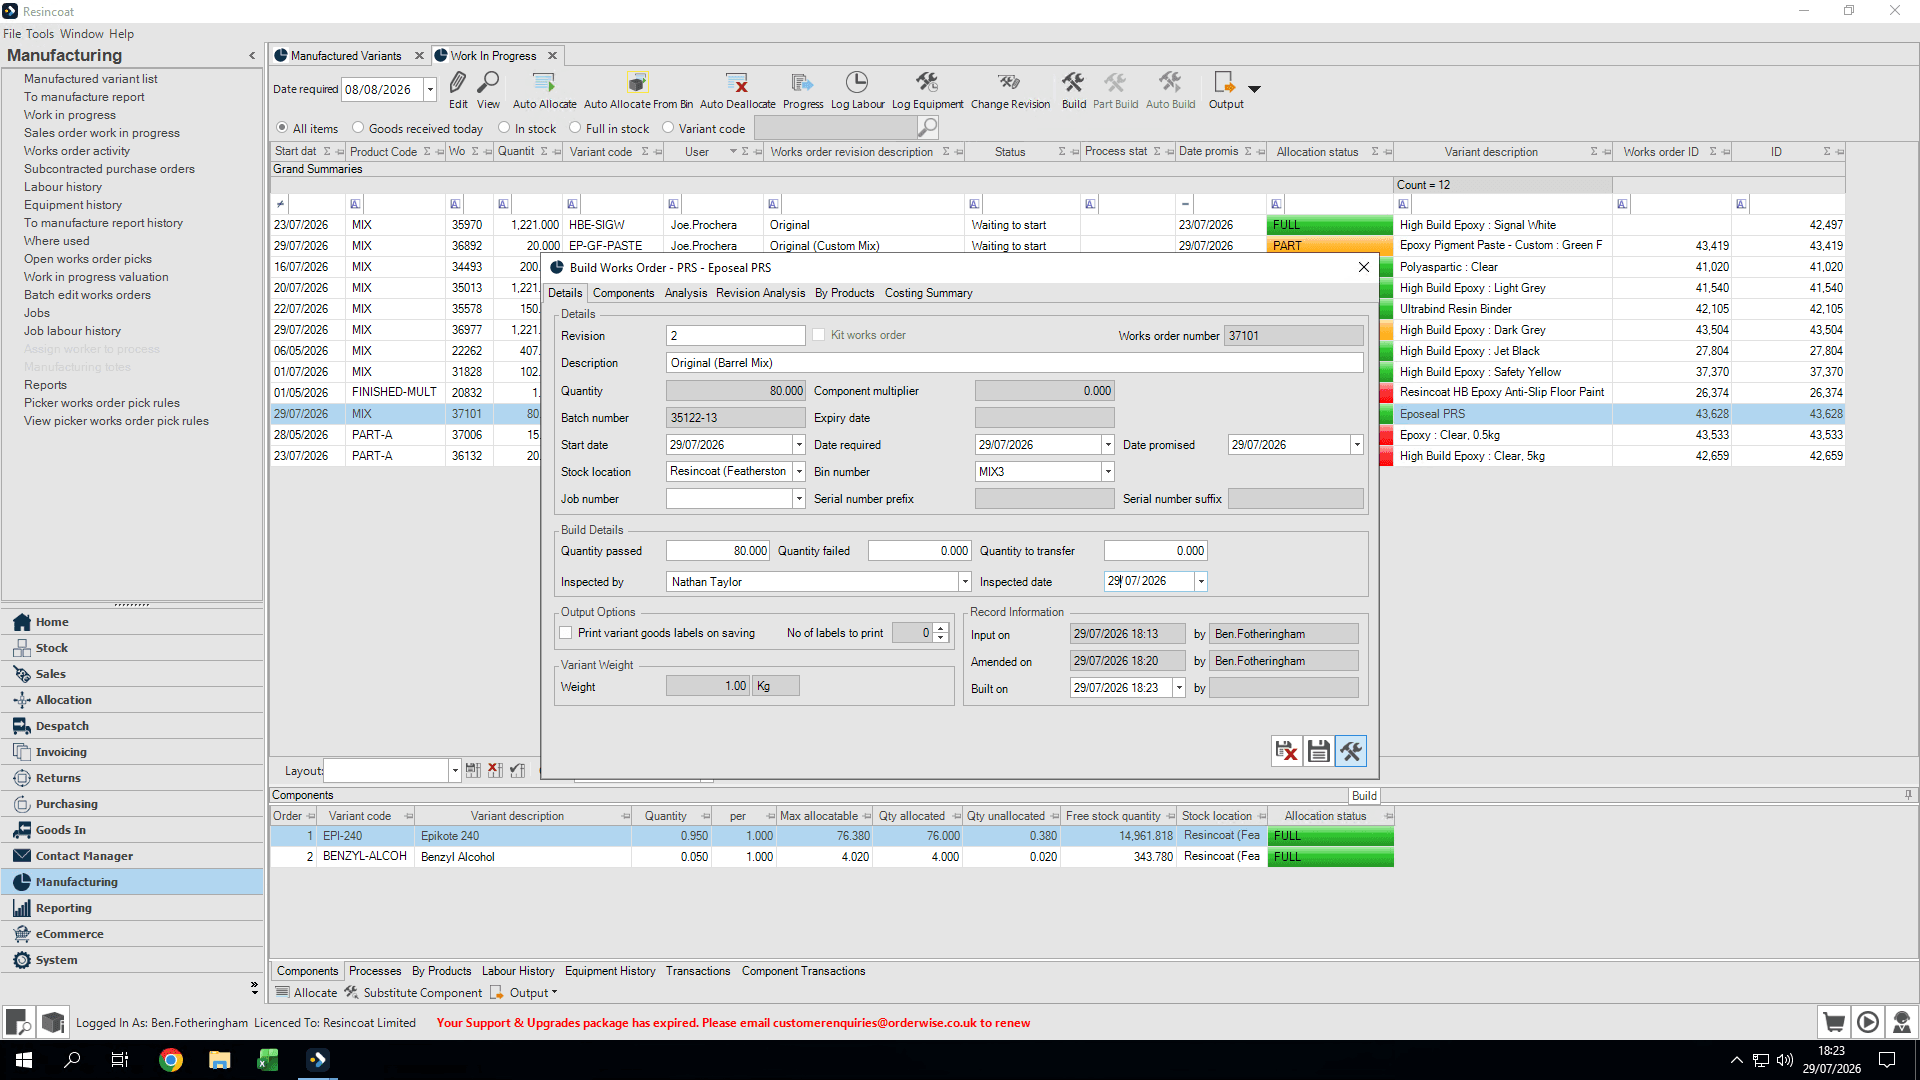
Once all steps are complete you will be taken to the Build screen. Check details are correct.
41
Select the inspector's name from the Inspected by drop-down menu.
42
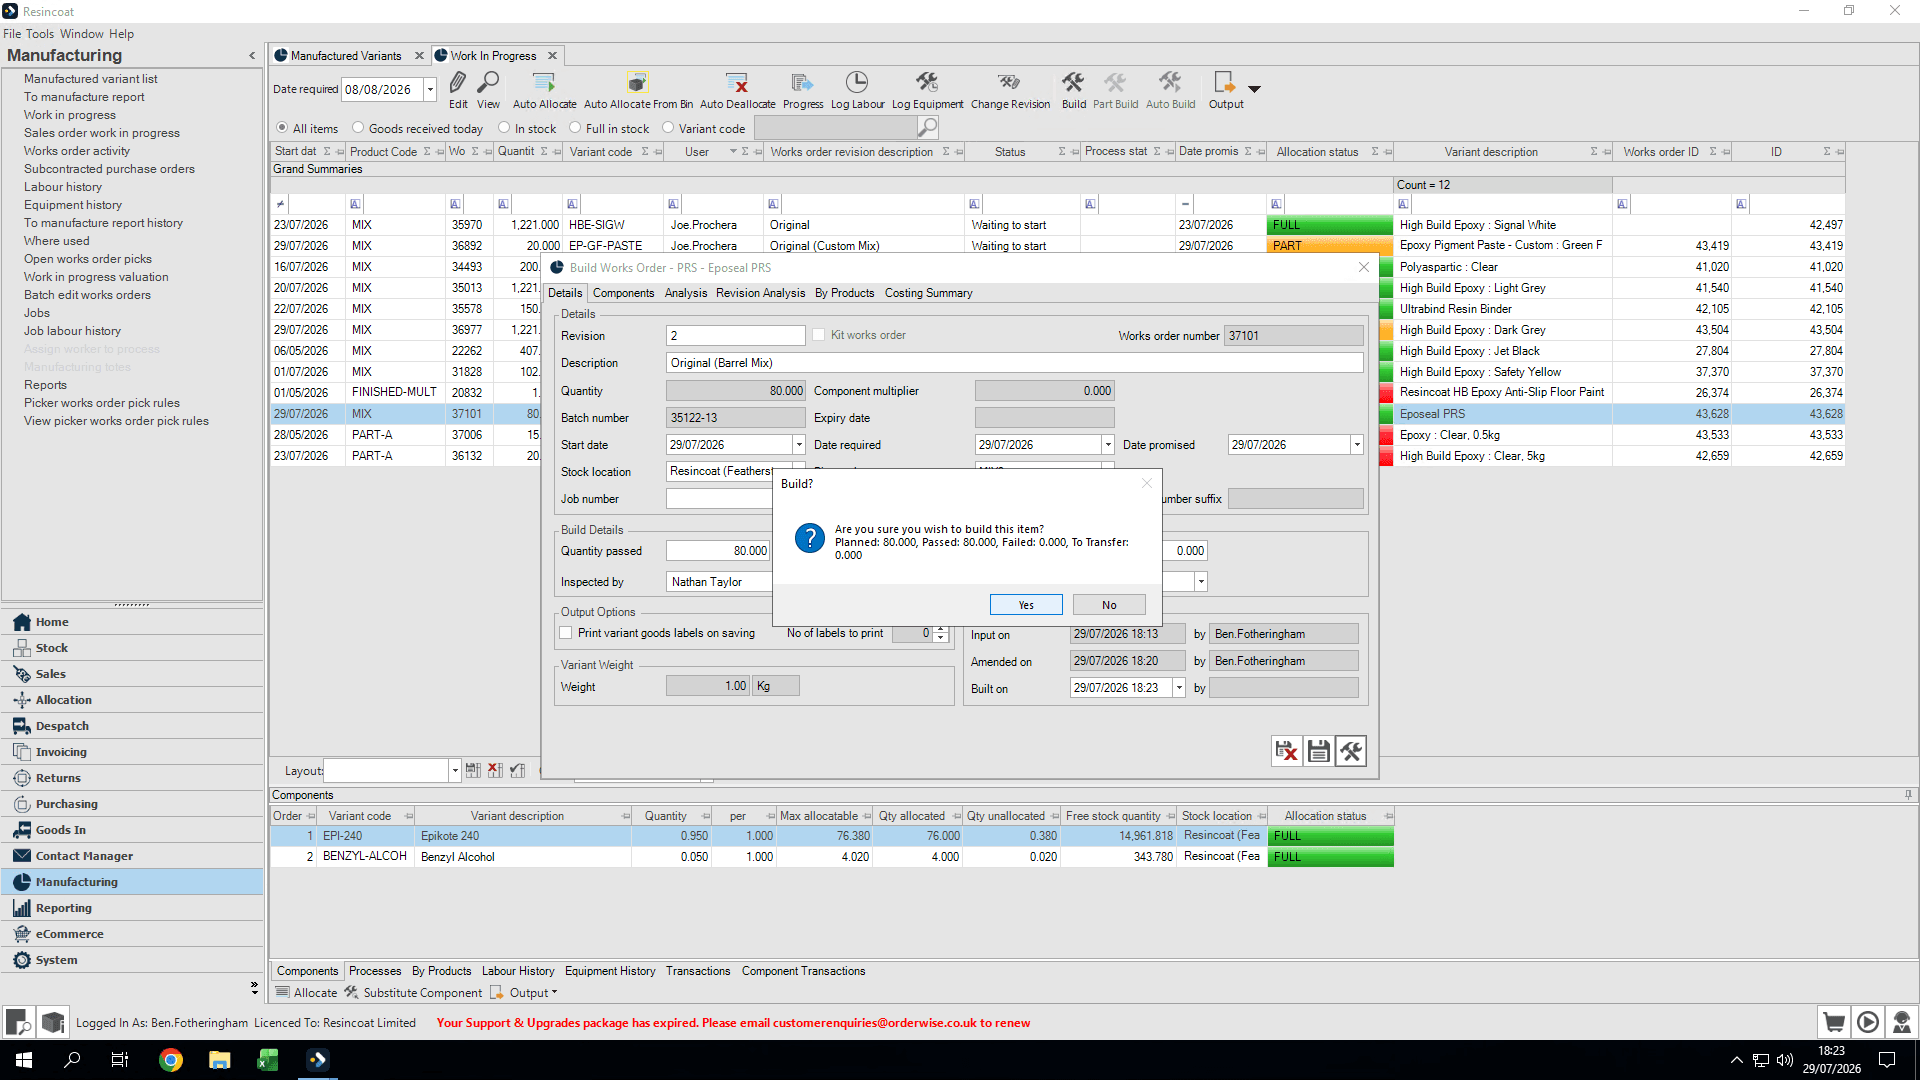
Click Build to finalize the order.
43
Click Yes to officially book the finished product into stock.
Q: Can I use the Auto Allocate button for components?
A: No. Never use the Auto Allocate button because it randomly assigns batch numbers that may not match the actual physical stock you are using. Always manually allocate the exact batch you use.
Q: Does the order in which I add components matter?
A: Yes. Components must be added in the numerical sequence shown on the works order. This is highly important for some mixes.
Q: What if I cannot weigh the exact required amount for a component?
A: The system provides minimum and maximum allocatable amounts to give you leeway. However, for specialized items like pigments or additives, this grace amount will be heavily restricted or unavailable.
Term
Definition
Works Order
A production document specifying what product to make, the required quantity, and necessary components.
IBC
Intermediate Bulk Container, a large reusable industrial container for storing and transporting liquids and powders.
Bin Number
The specific system location or mixing vessel assigned to hold inventory during a batch mix.
Supplier Batch Number
A unique tracking code provided by the external vendor of a raw material.
Grind Test
A quality control test used to check the fineness of a grind or the presence of coarse particles.