Icon

How to Create Event Scenario

Learn how to duplicate a reservation scenario, update notification templates, and schedule the new event at your venue using Munu Booking.

By Andrea Torland

This guide explains how easiest create an event scenario by duplicating an existing booking scenario.This guide is intended for booking administrators who handle booking configurations and venue scheduling.

Duplicating a Scenario
1
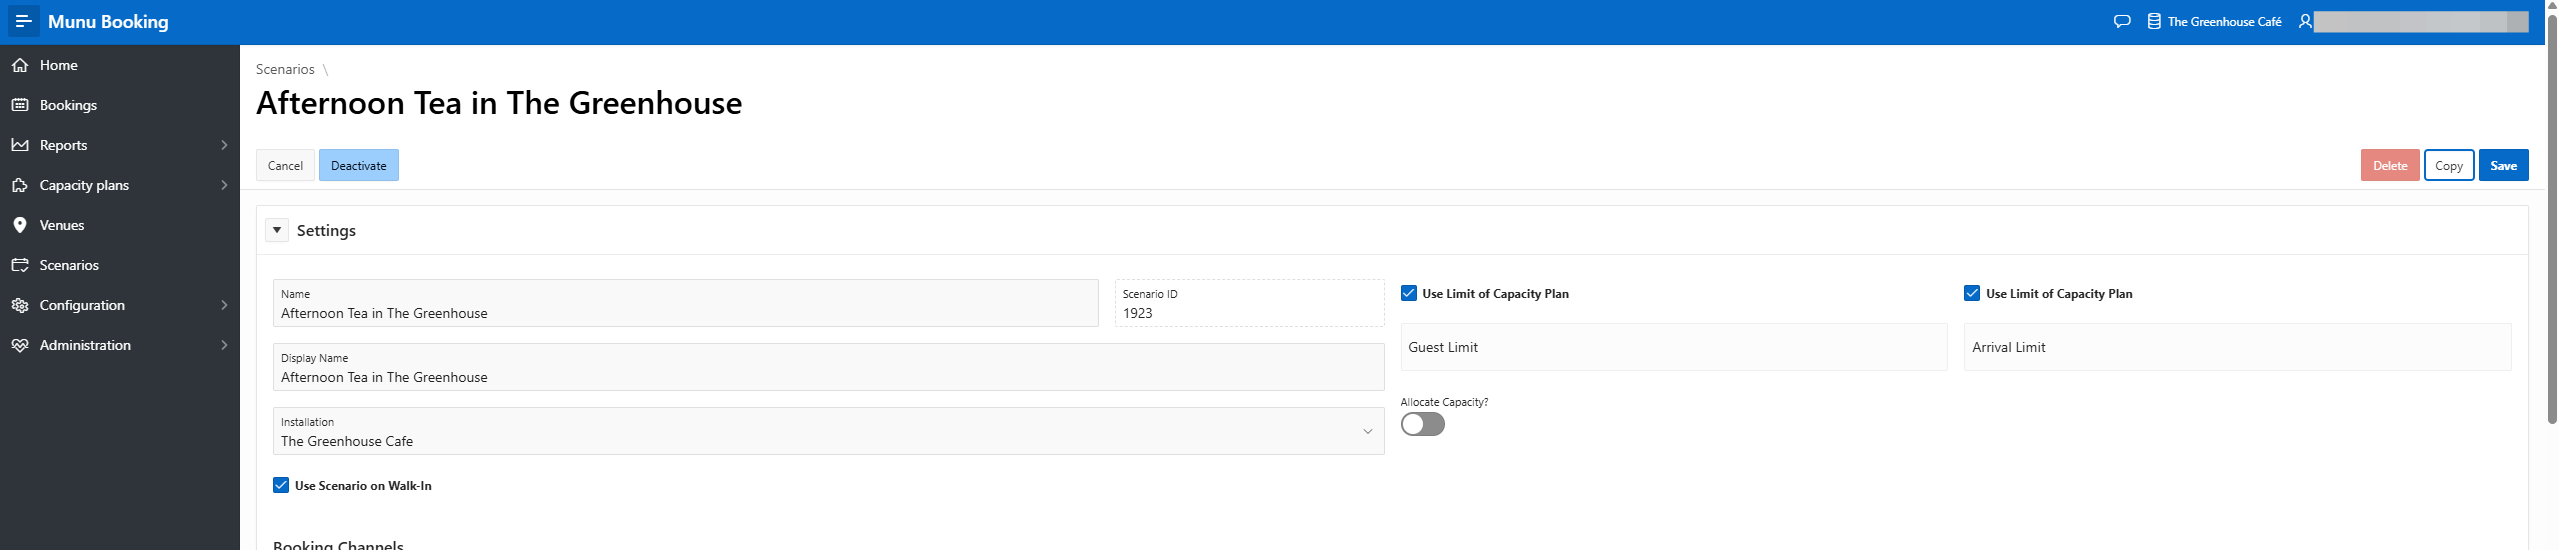
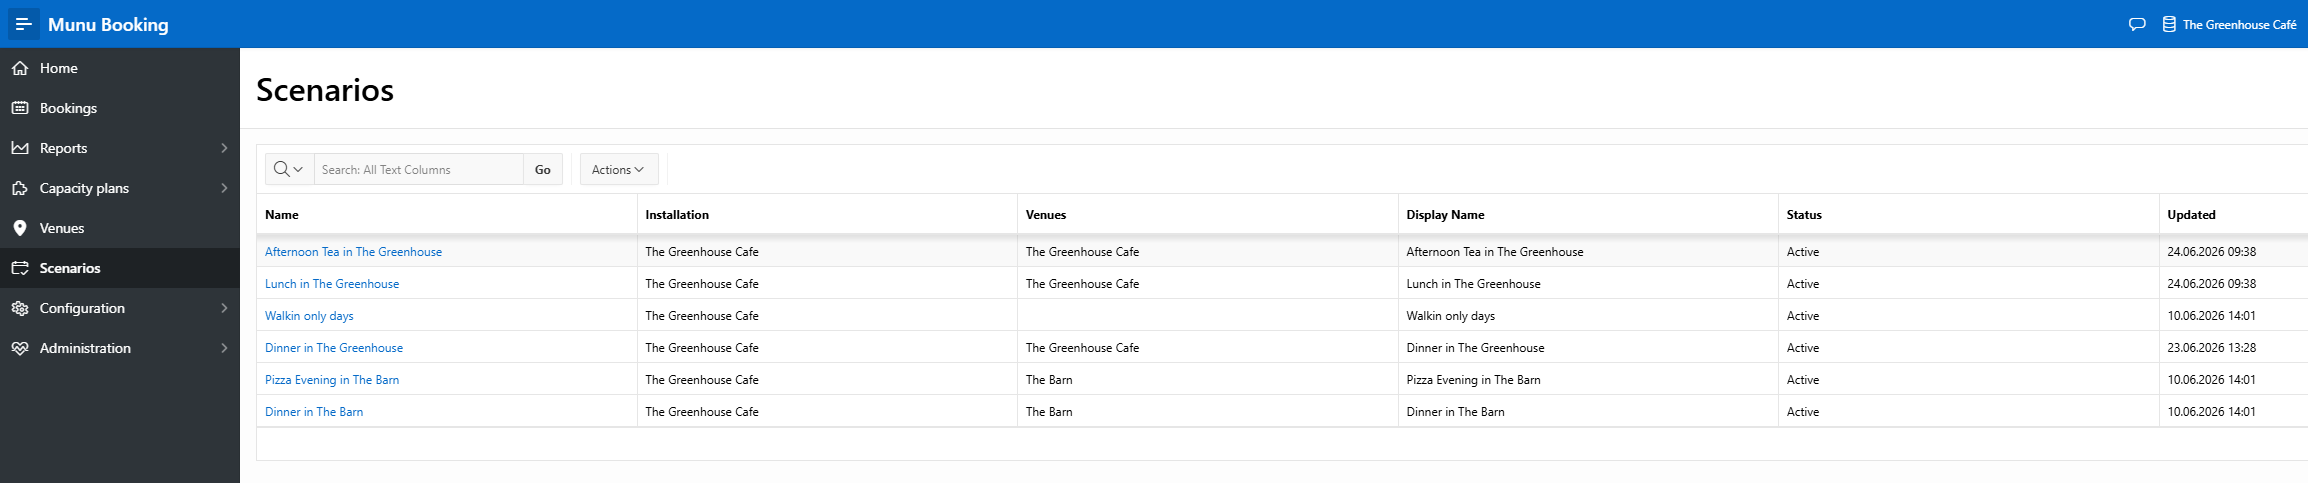
Click the existing scenario you want to use as a base.
Step #1: Click the existing scenario you want to use as a base.
2
Click Copy to duplicate the scenario settings.
Step #2: Click Copy to duplicate the scenario settings.
3
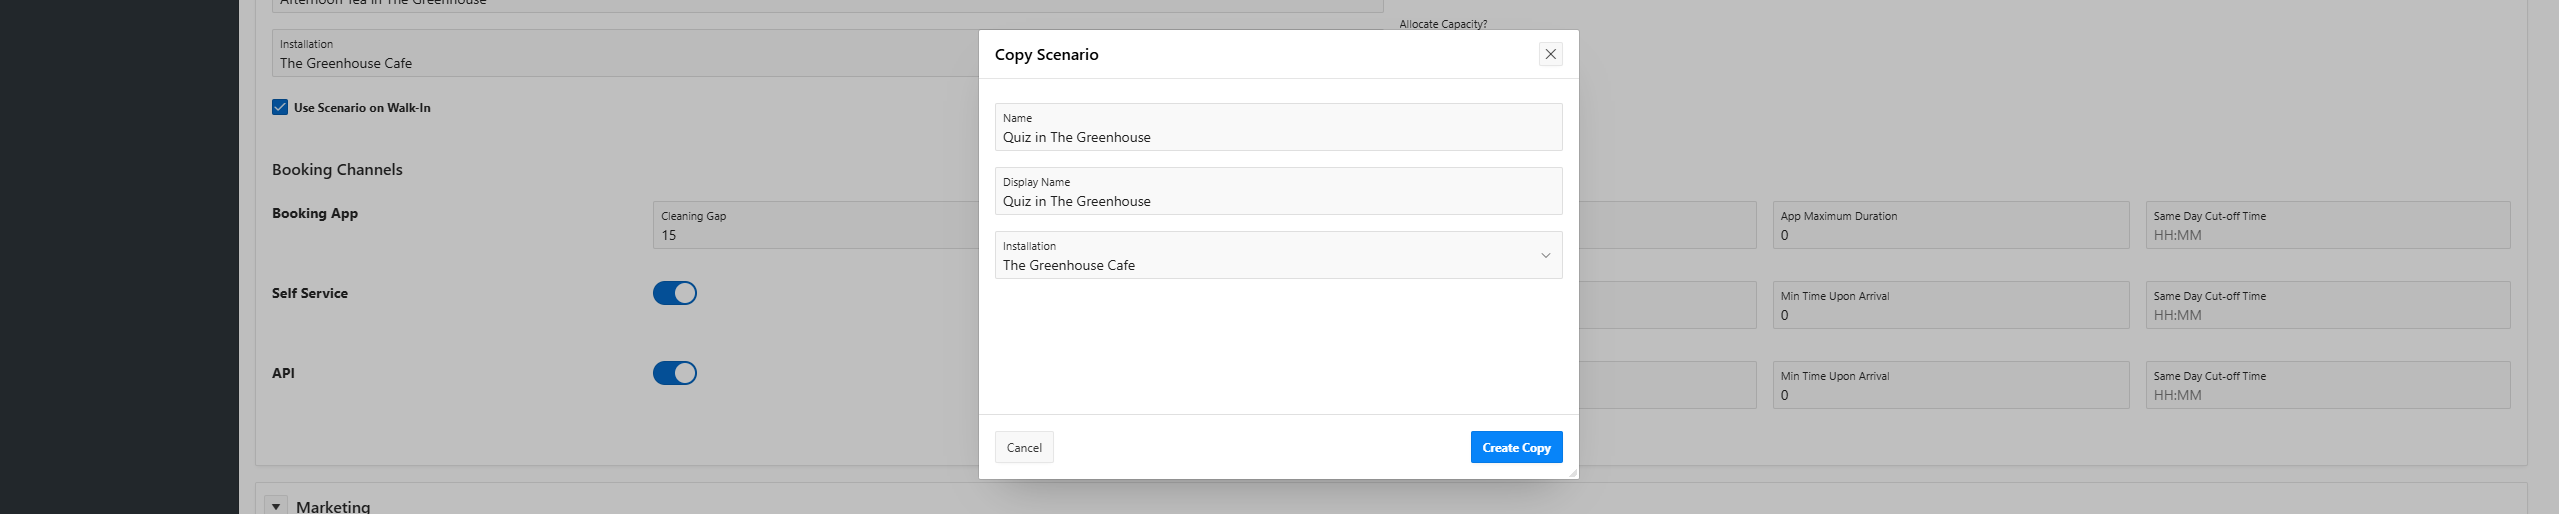
Enter the new name for your event in the modal and click Create Copy.
Step #3: Enter the new name for your event in the modal and click Create Copy.

Configuring Booking Details

4
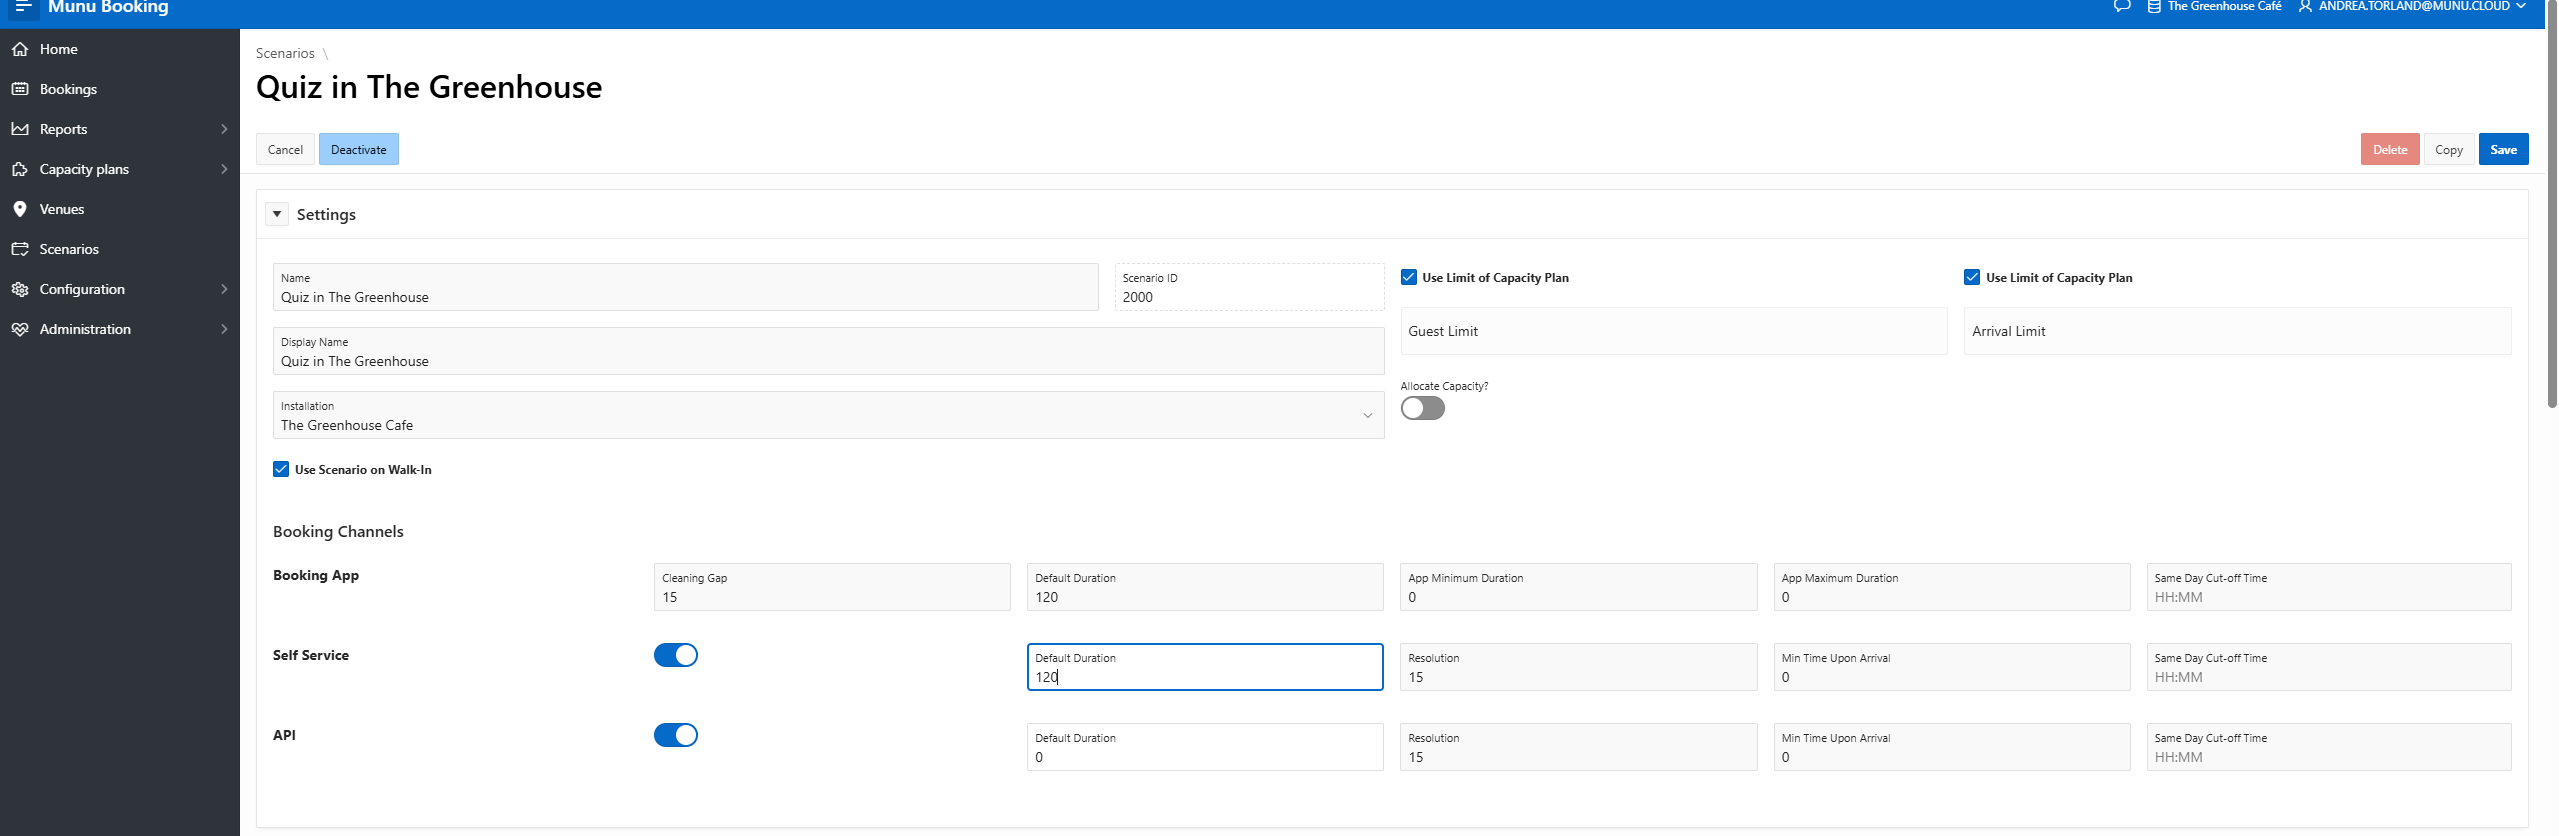
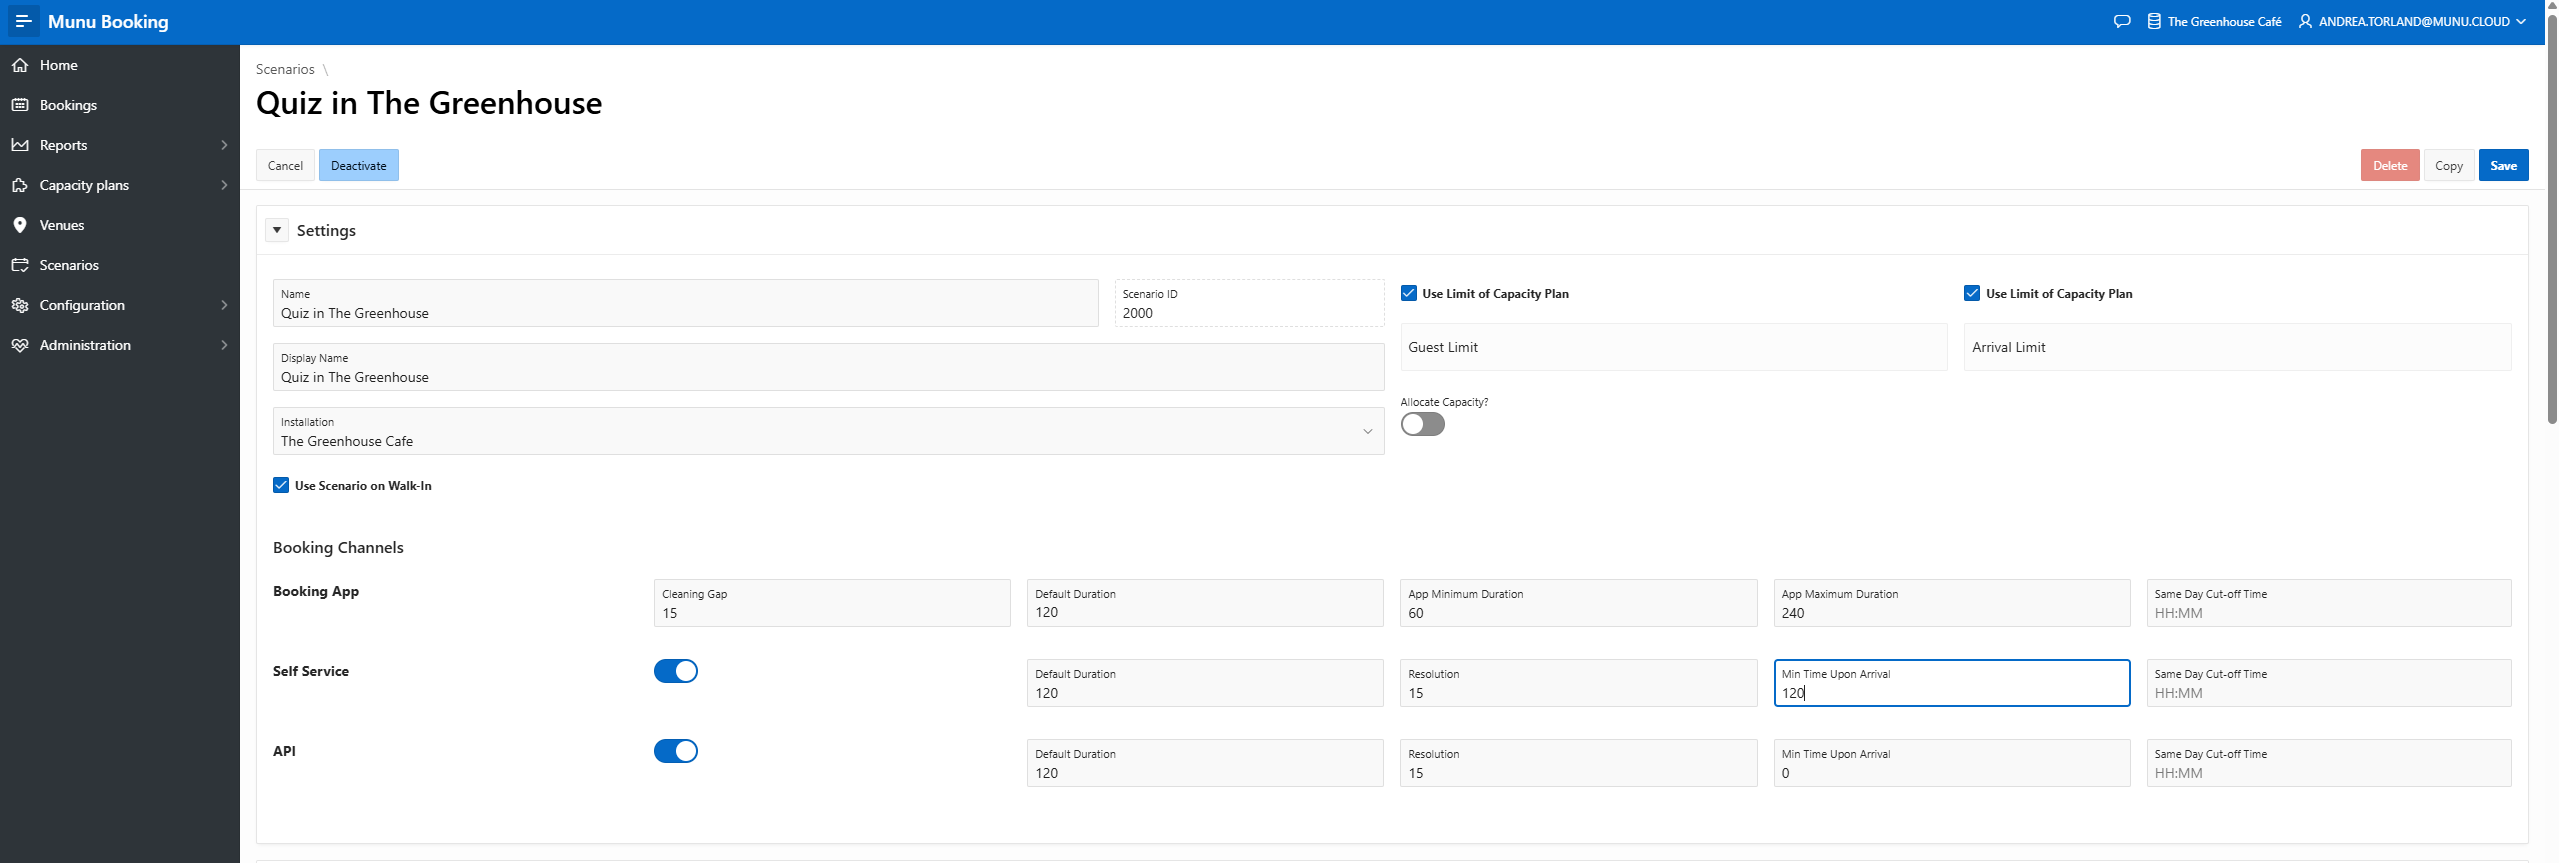
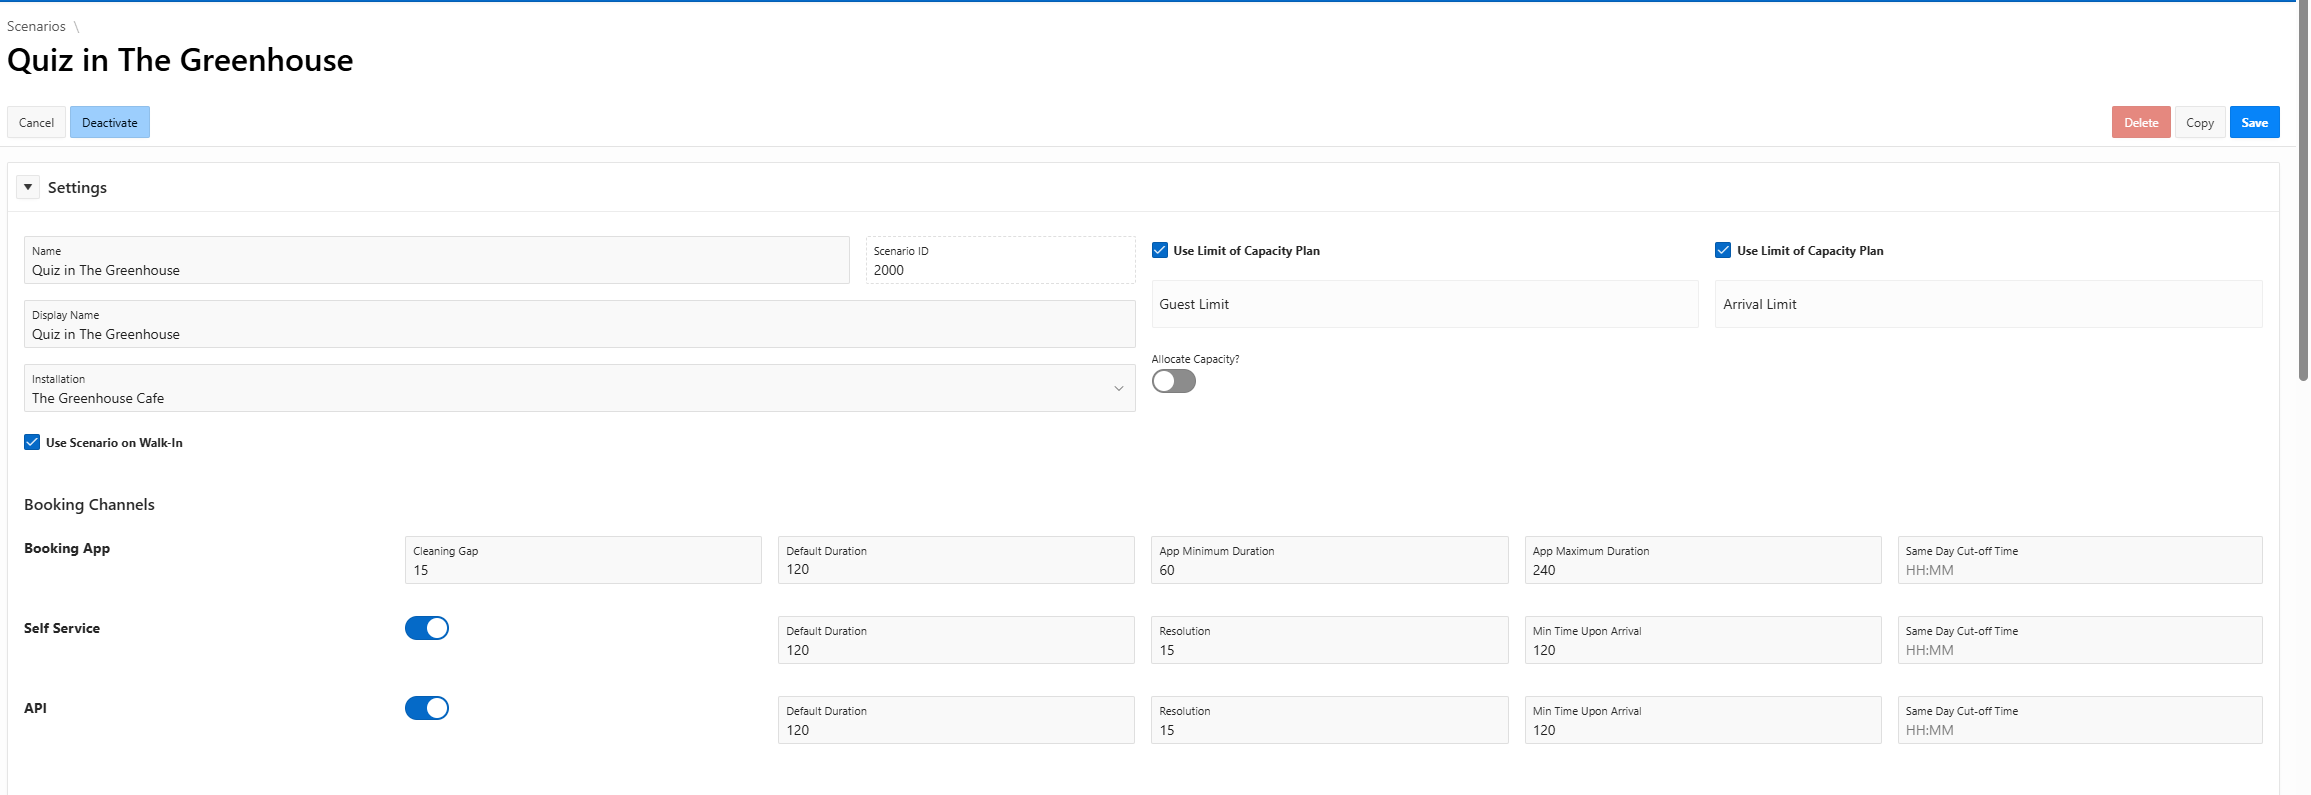
Adjust the Default Duration setting for your Self Service and AP channels.
Step #4: Adjust the Default Duration setting for your Self Service and AP channels.
5
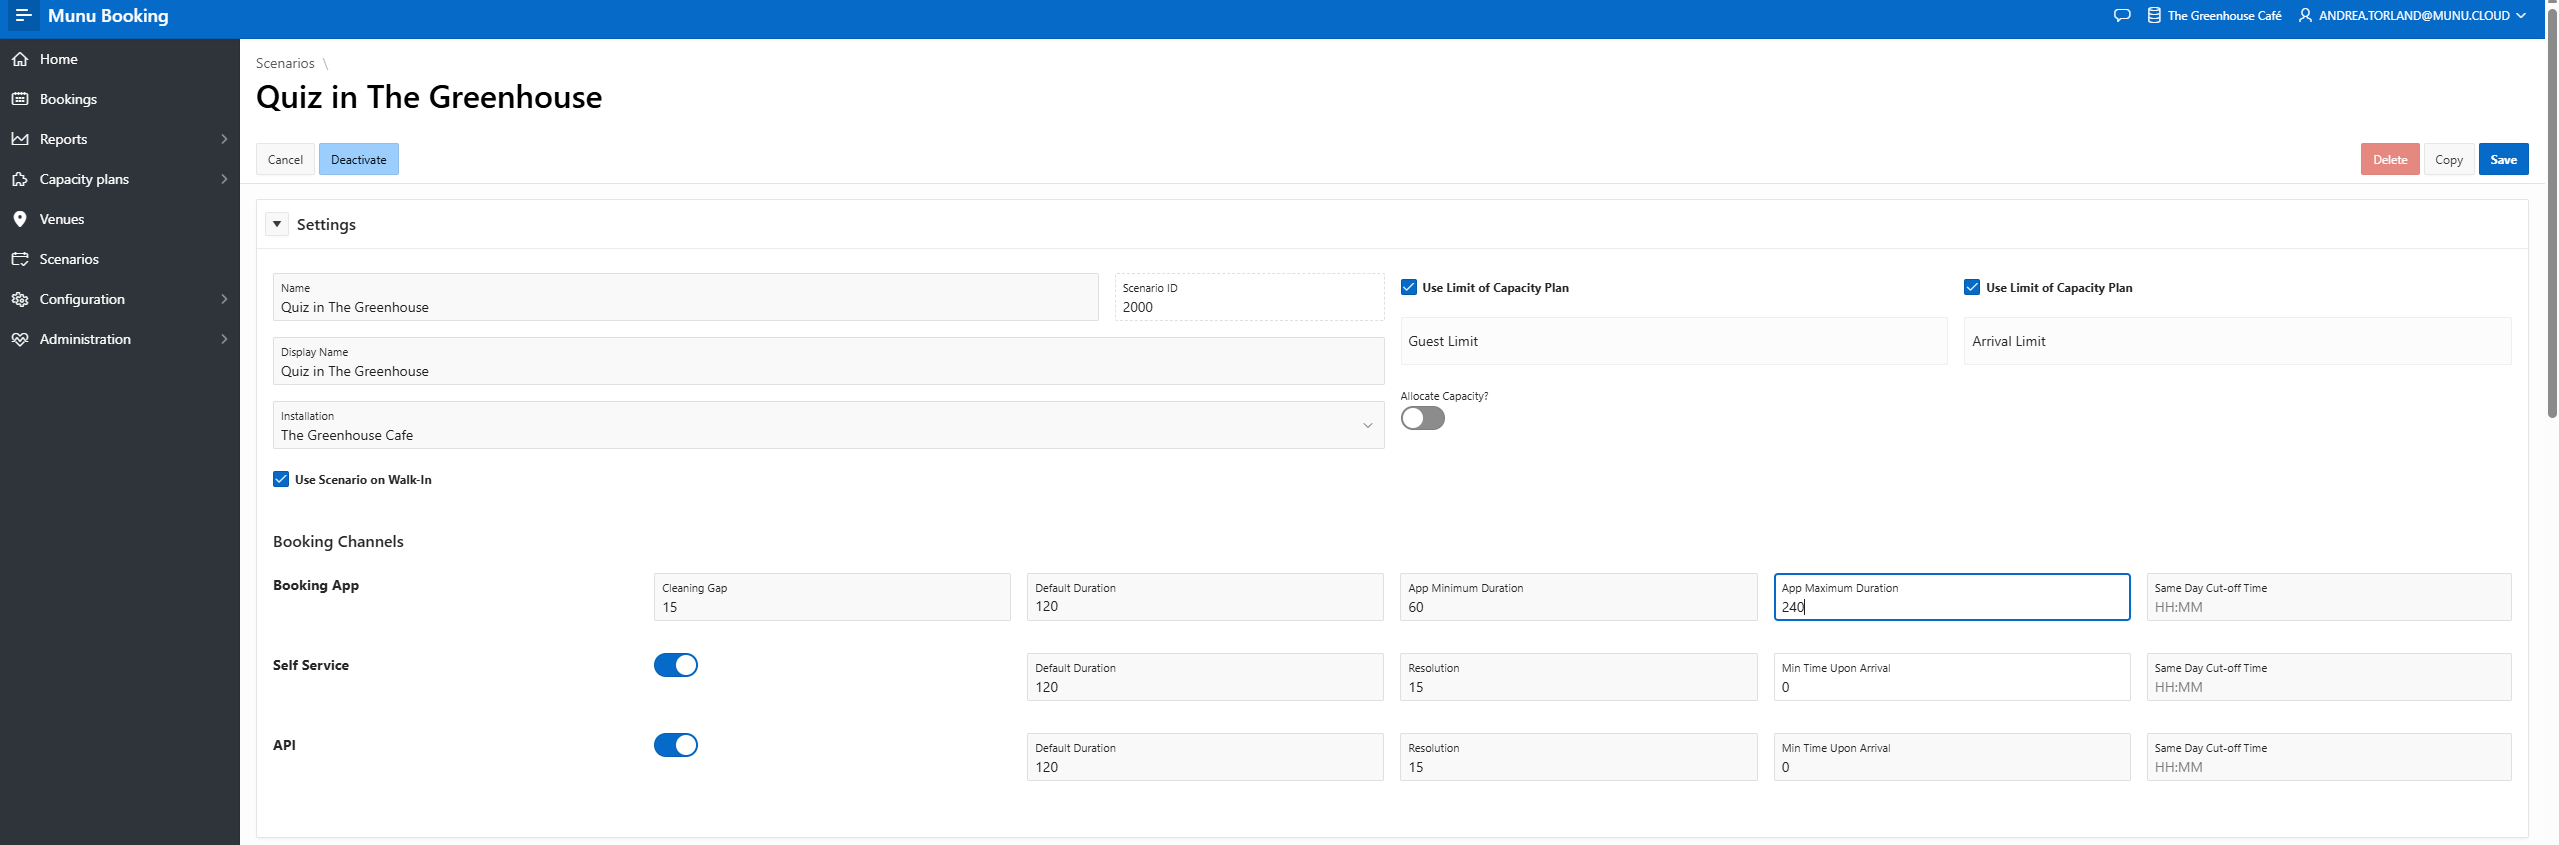
Update the App Maximum Duration and as needed.
Step #5: Update the App Maximum Duration and  as needed.
6
Set the Min Time Upon Arrival to restrict how close to the start time guests can book.
Step #6: Set the Min Time Upon Arrival to restrict how close to the start time guests can book.
7
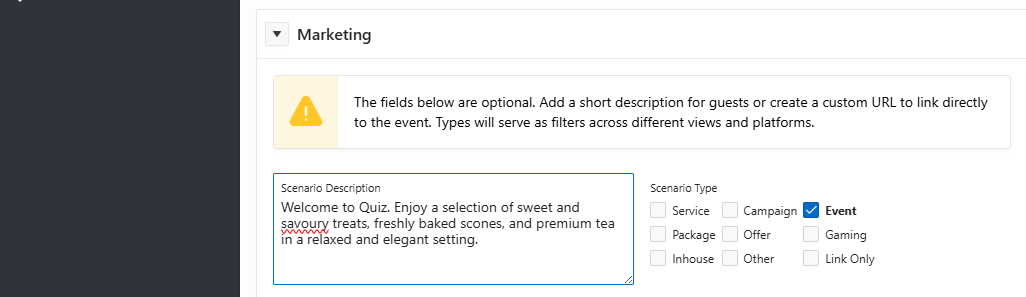
In the Marketing section, click Event to make the scenario Event only. Add a Short Description that will be shown on the Booking widget.
Step #7: In the Marketing section, click Event to make the scenario Event only. Add a Short Description that will be shown on the Booking widget.

Updating Notifications

8
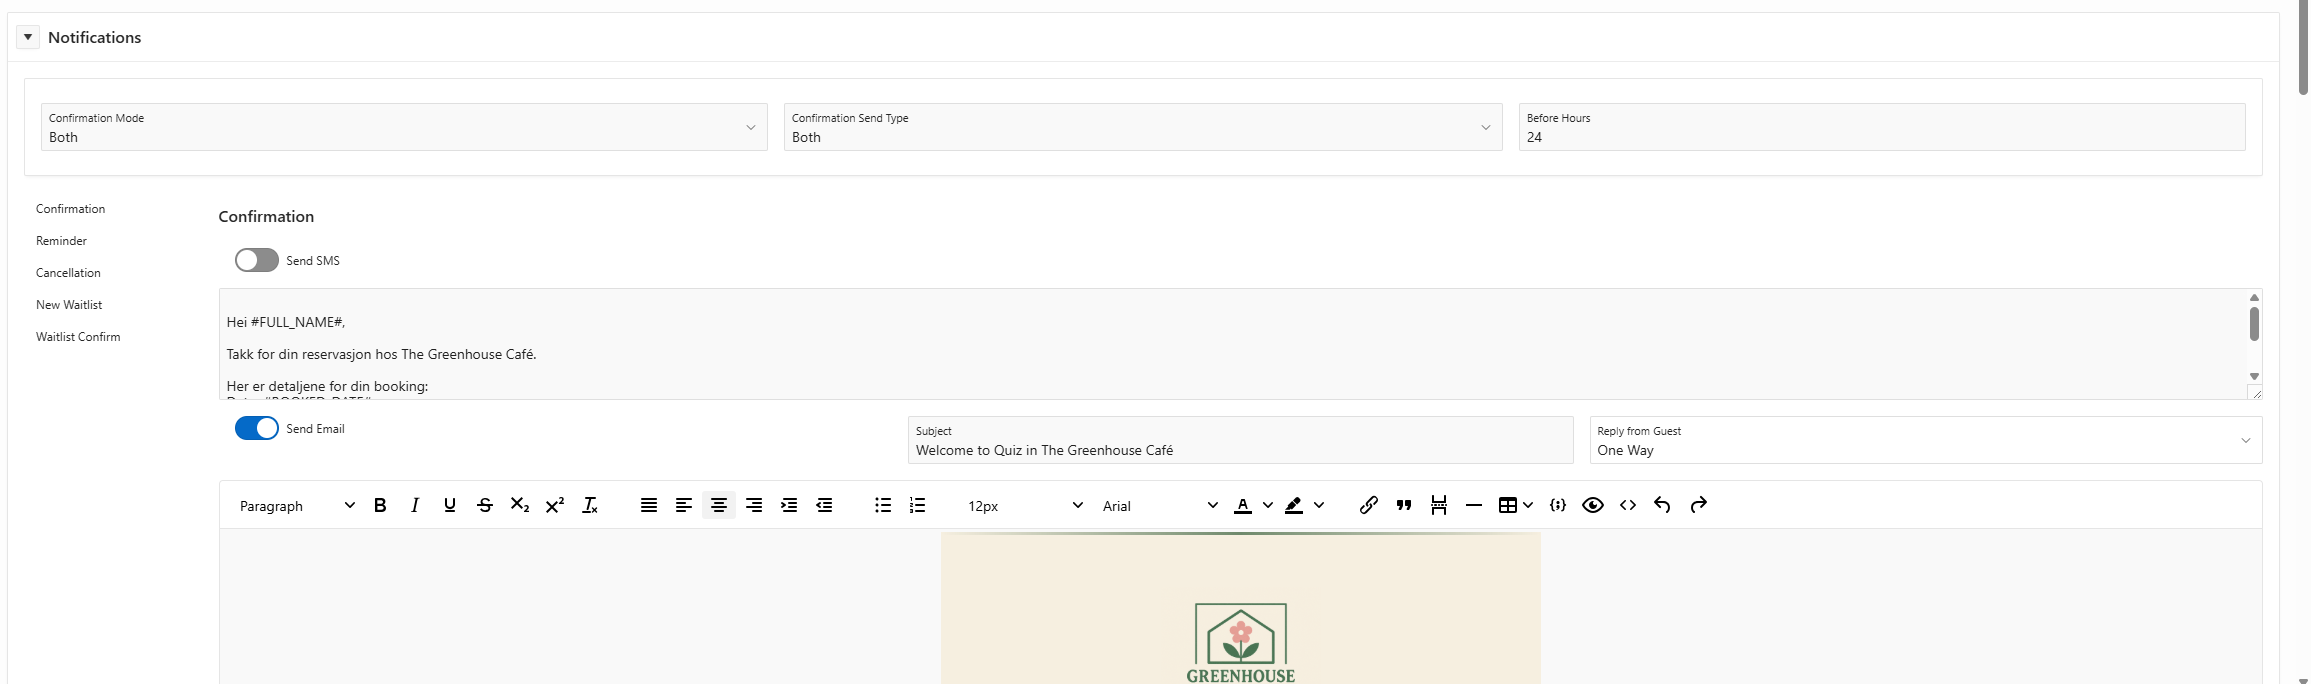
Navigate to the Notifications settings and open the Confirmation tab.
Step #8: Navigate to the Notifications settings and open the Confirmation tab.
9
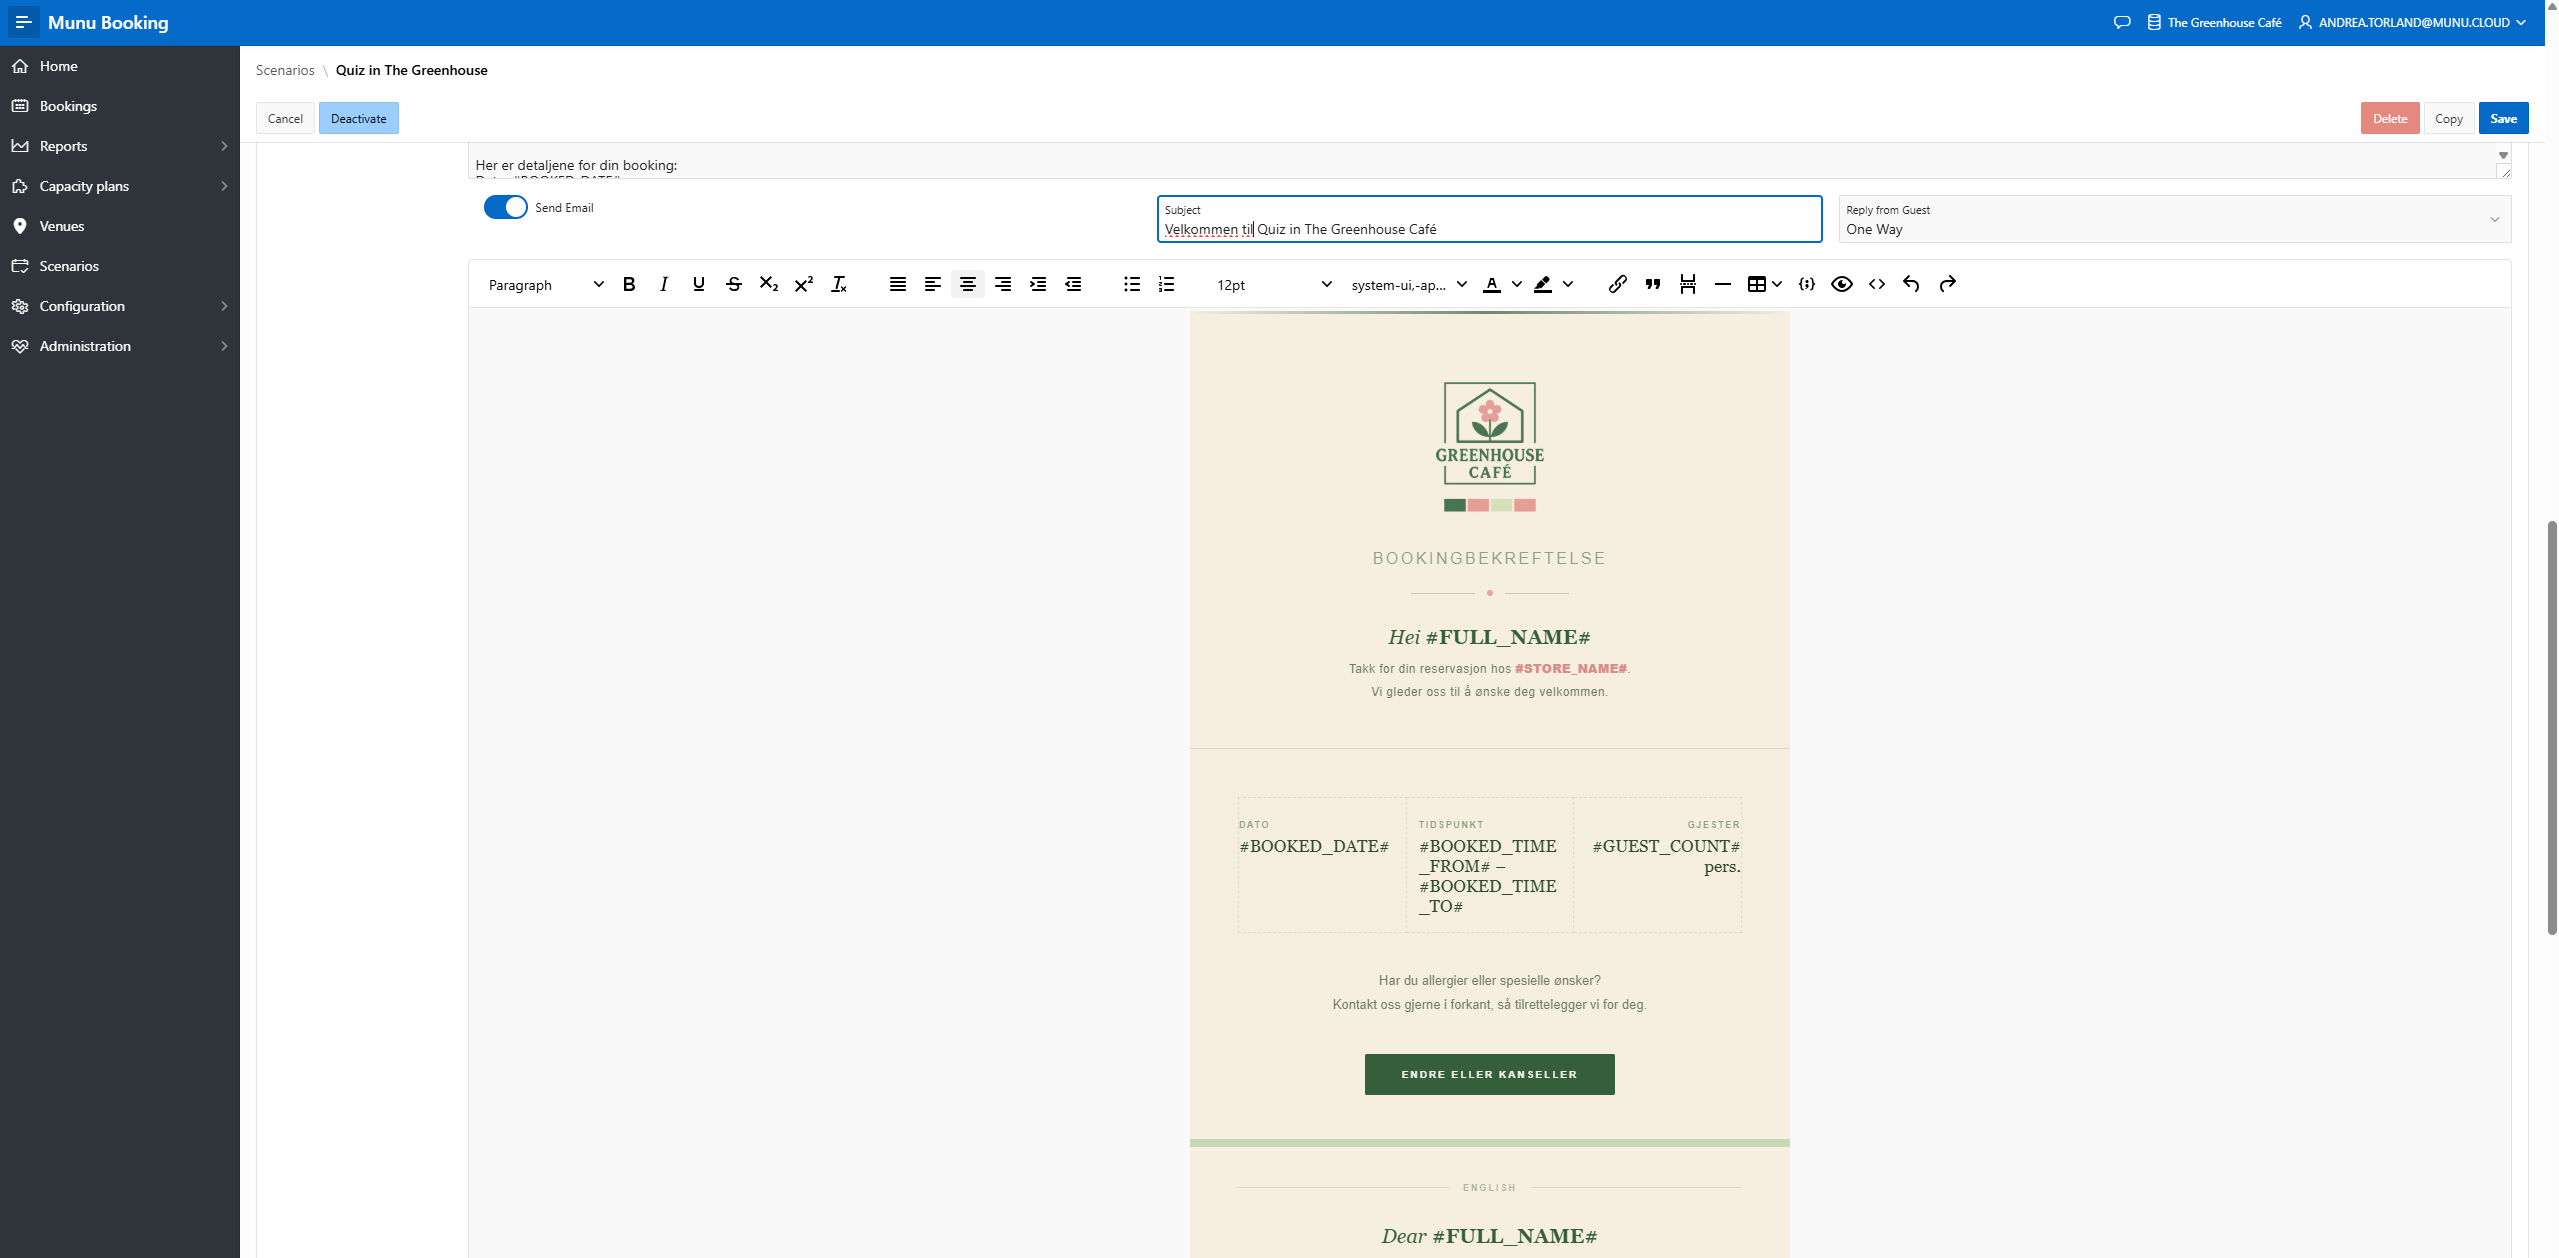
Update the email subject line to reflect the new event.
Step #9: Update the email subject line to reflect the new event.
10
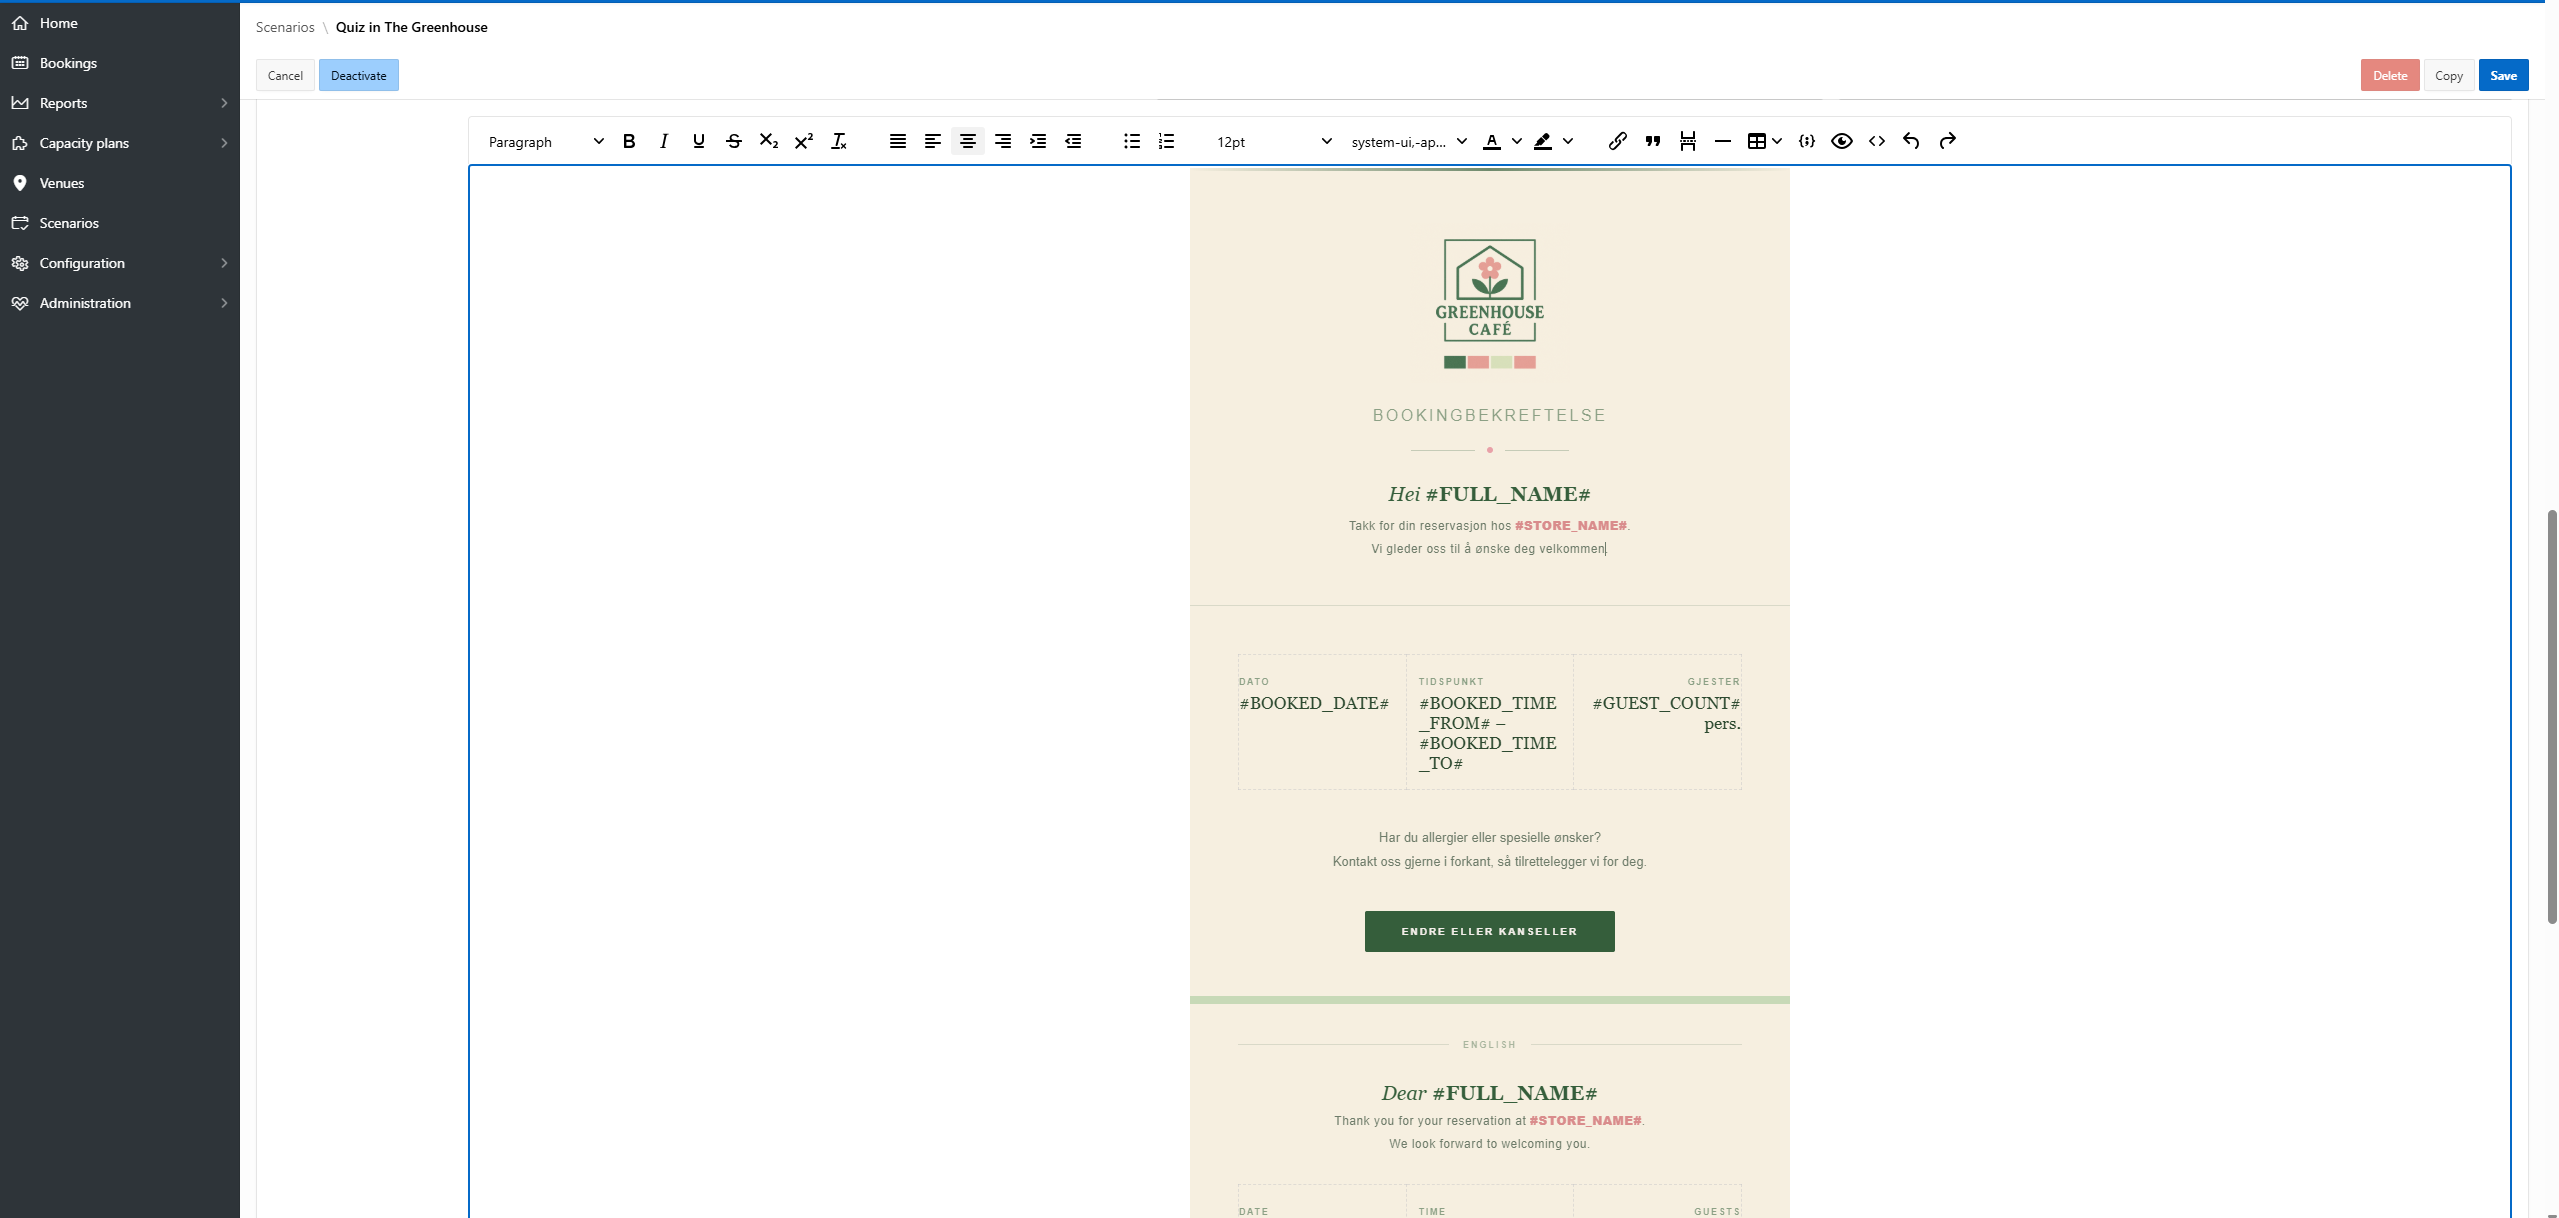
Modify the body text of the reservation template to match the new event.
Step #10: Modify the body text of the reservation template to match the new event.
11
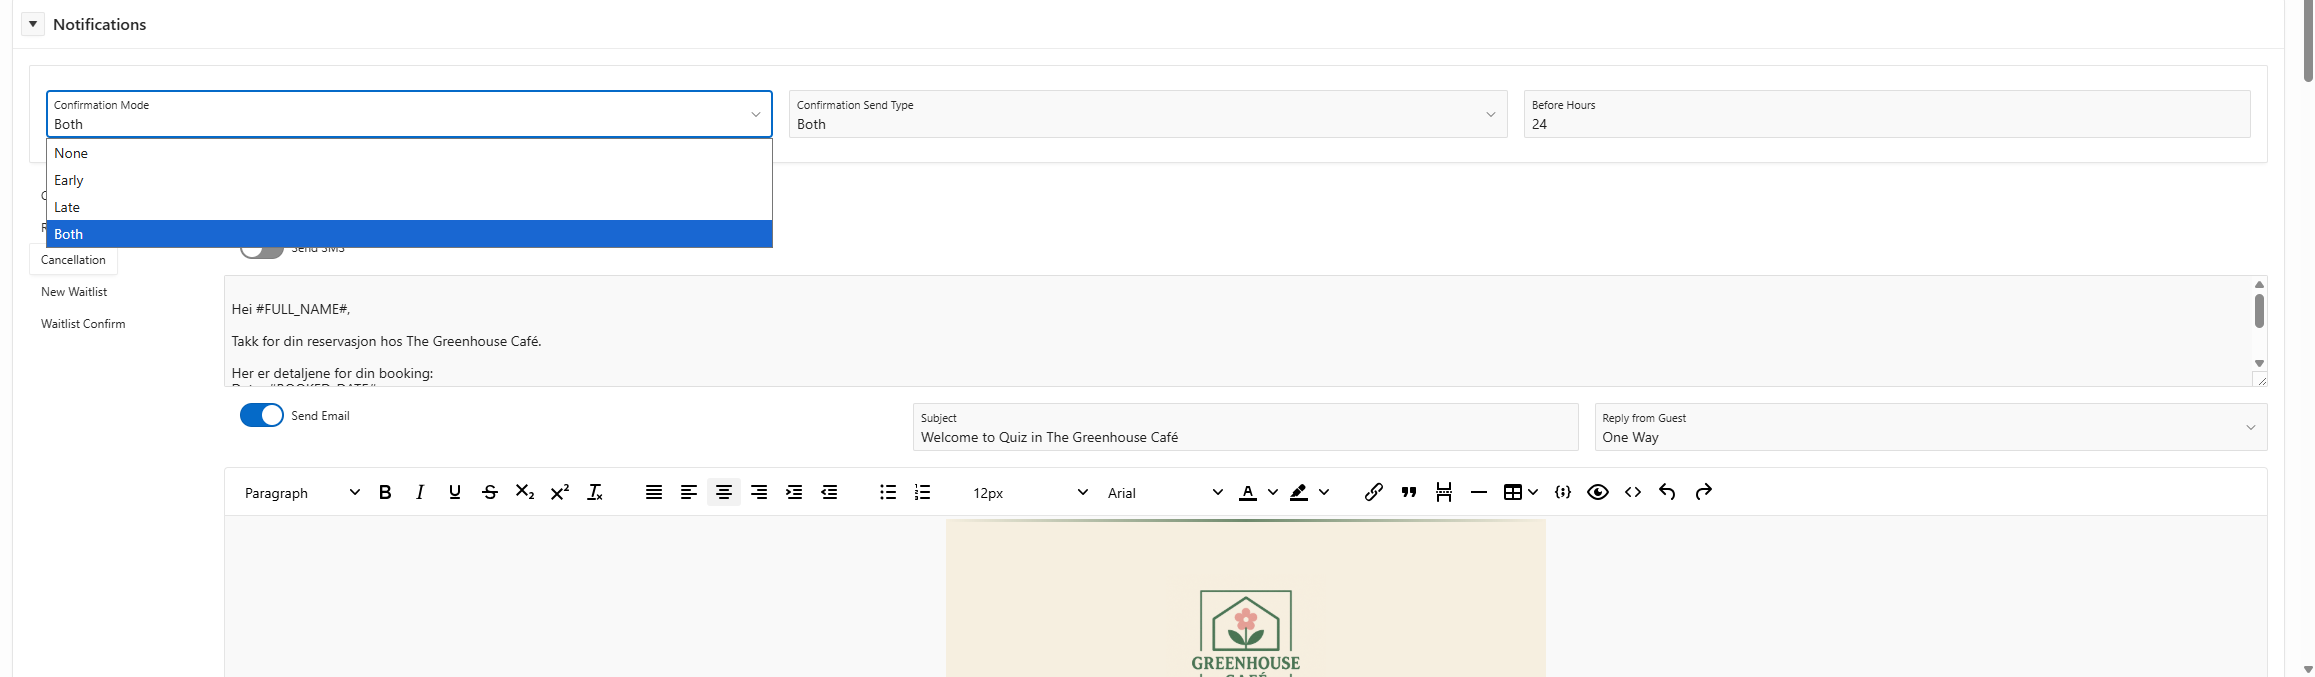
Choose the Confirmation Mode using the dropdown menu. Often used Both.
Step #11: Choose the Confirmation Mode using the dropdown menu. Often used Both.

12
Set the Reply from Guest dropdown to your preferred communication direction (e.g., One Way).
Step #12: Set the Reply from Guest dropdown to your preferred communication direction (e.g., One Way).
13
Click Save to apply all changes to your new scenario.
Step #13: Click Save to apply all changes to your new scenario.

Assigning the Scenario to a Venue
14
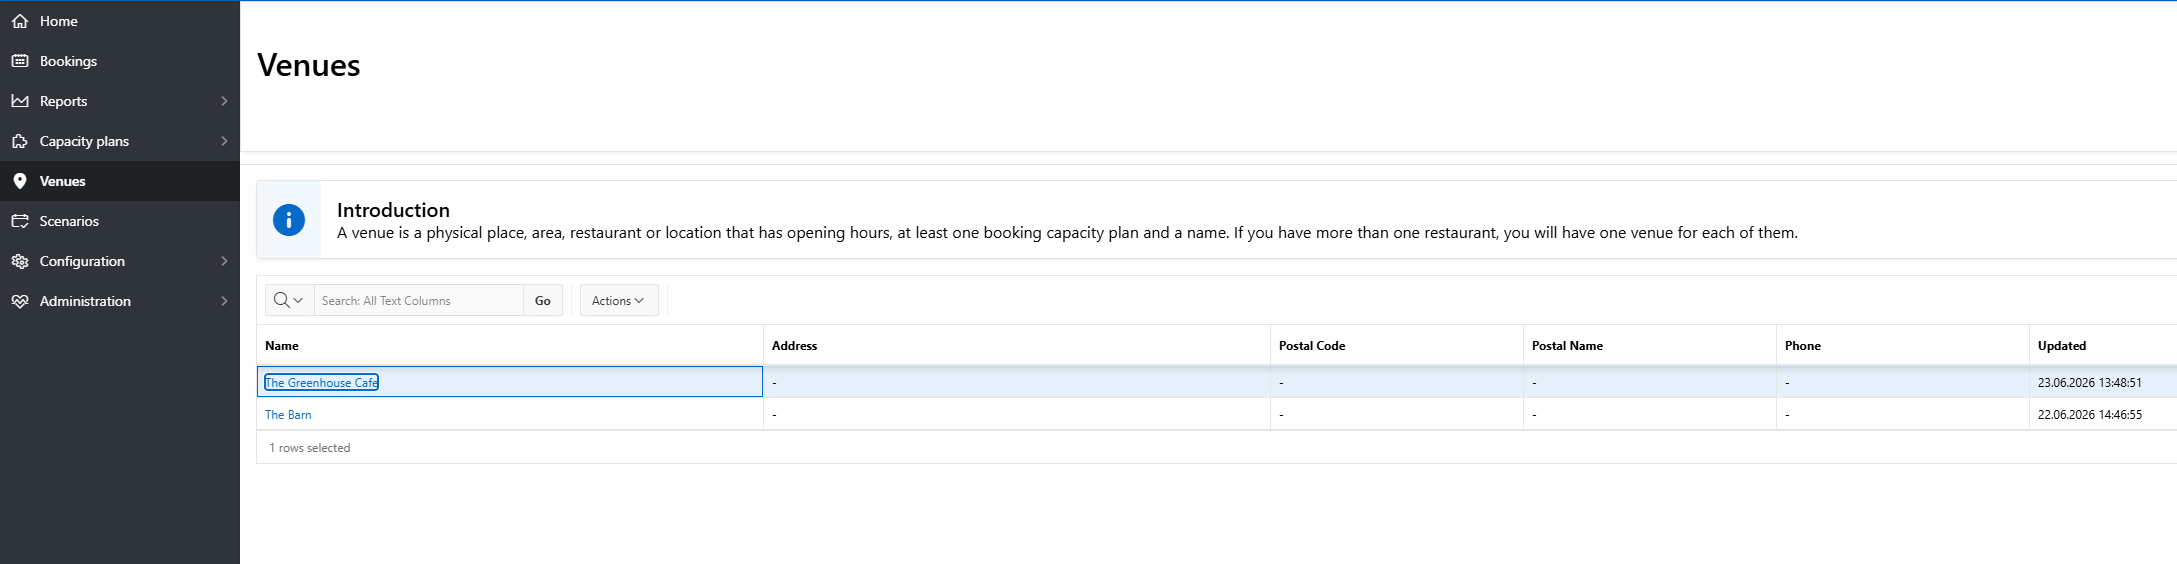
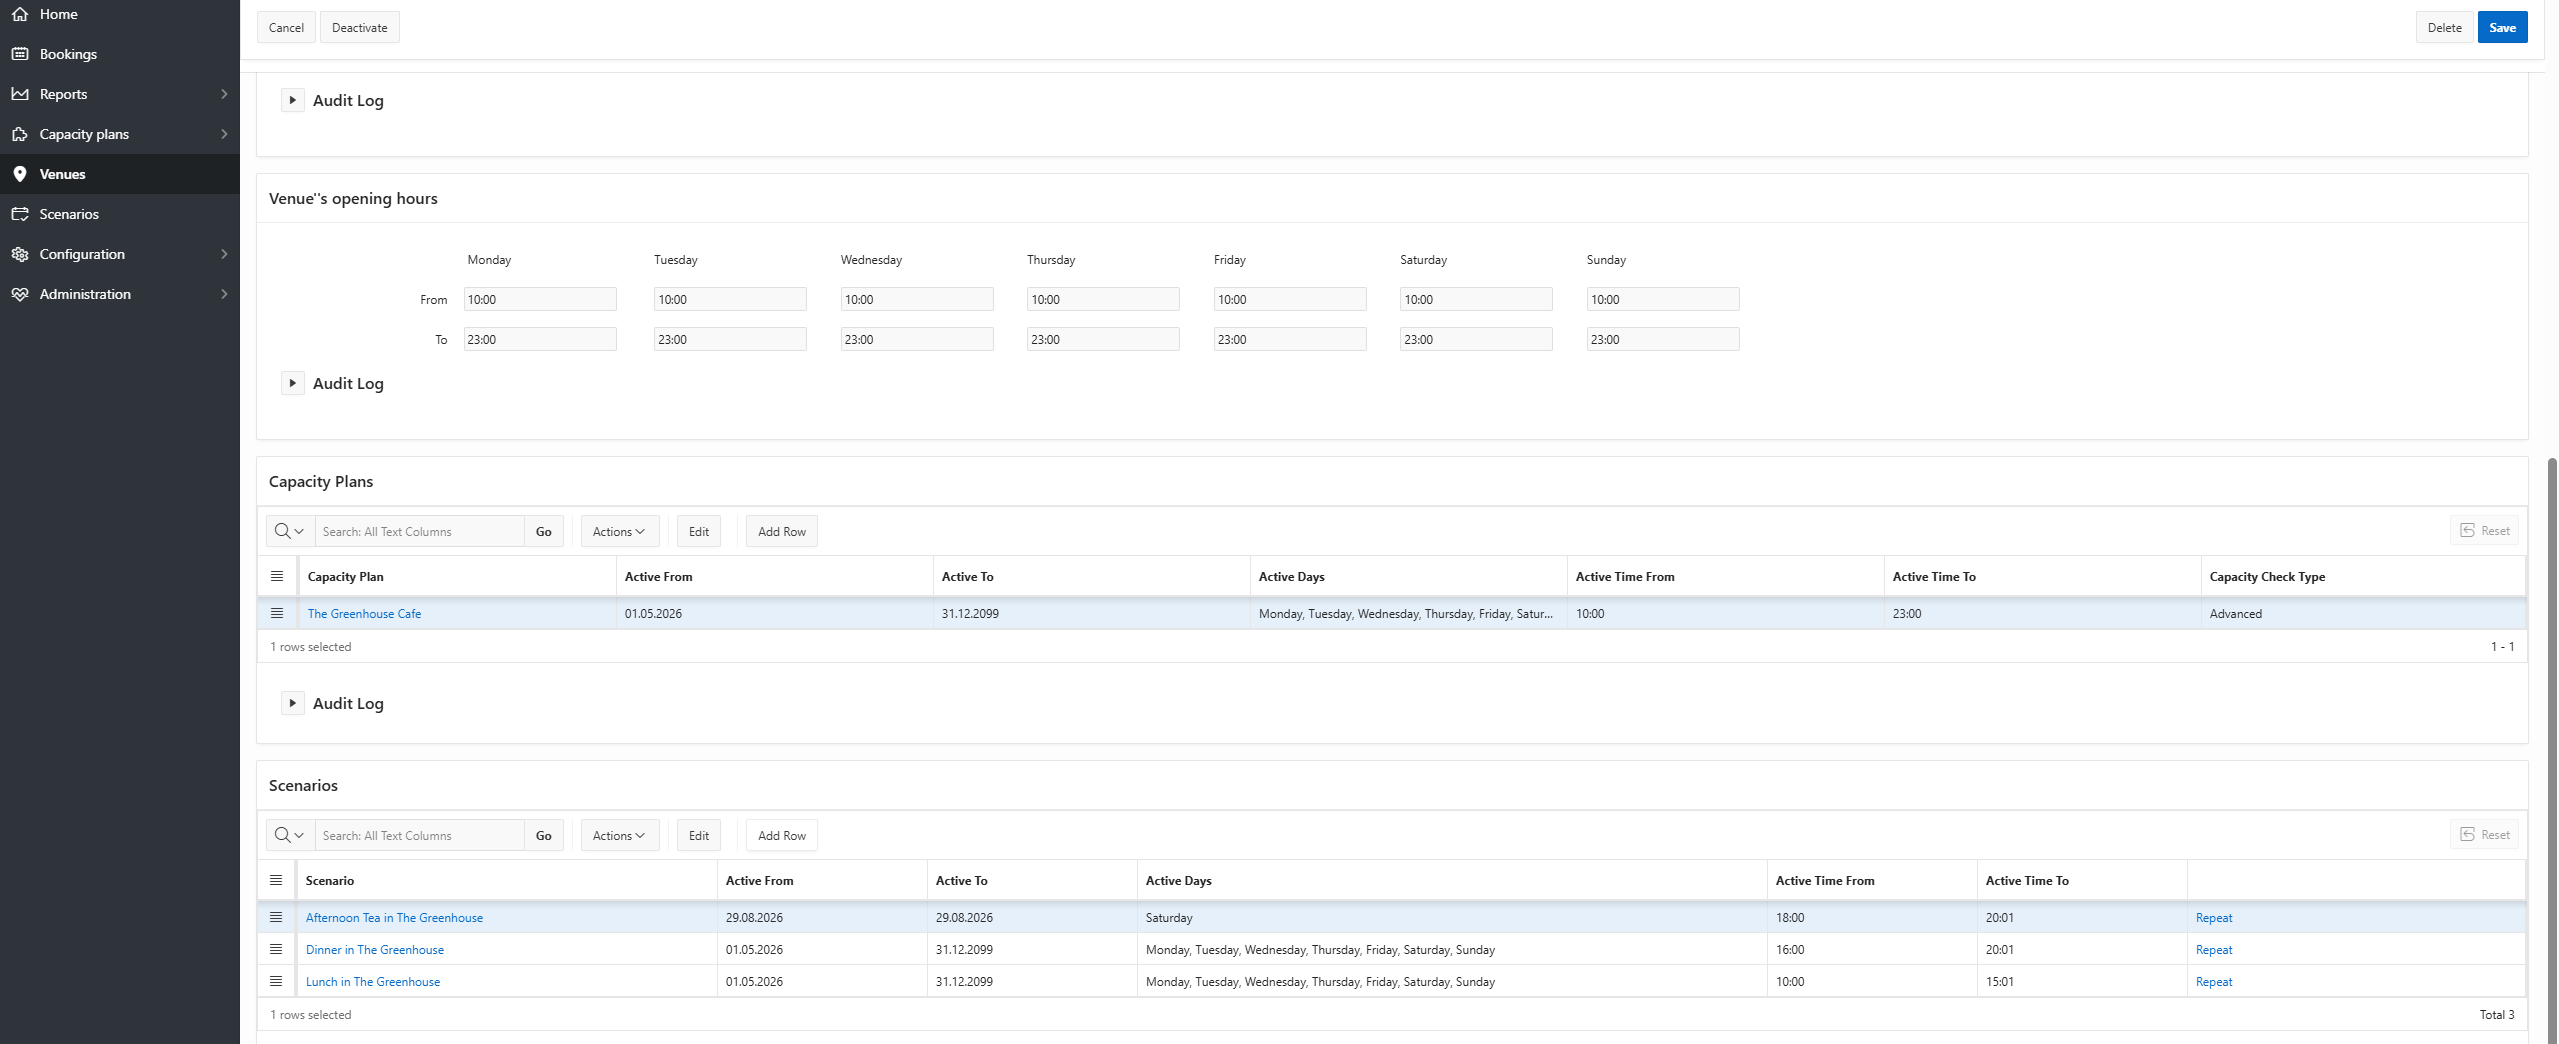
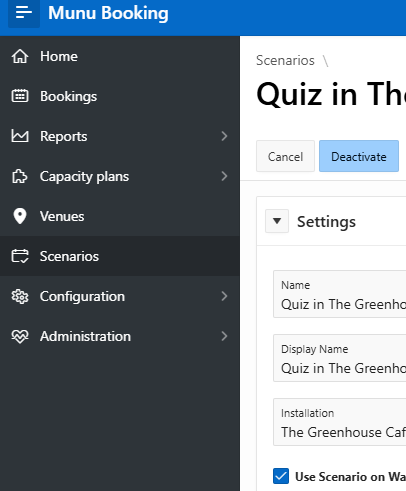
Navigate to the Venues page from the main menu.
Step #14: Navigate to the Venues page from the main menu.
15
Select the venue where this scenario will take place (e.g., The Greenhouse Cafe).
Step #15: Select the venue where this scenario will take place (e.g., The Greenhouse Cafe).
16
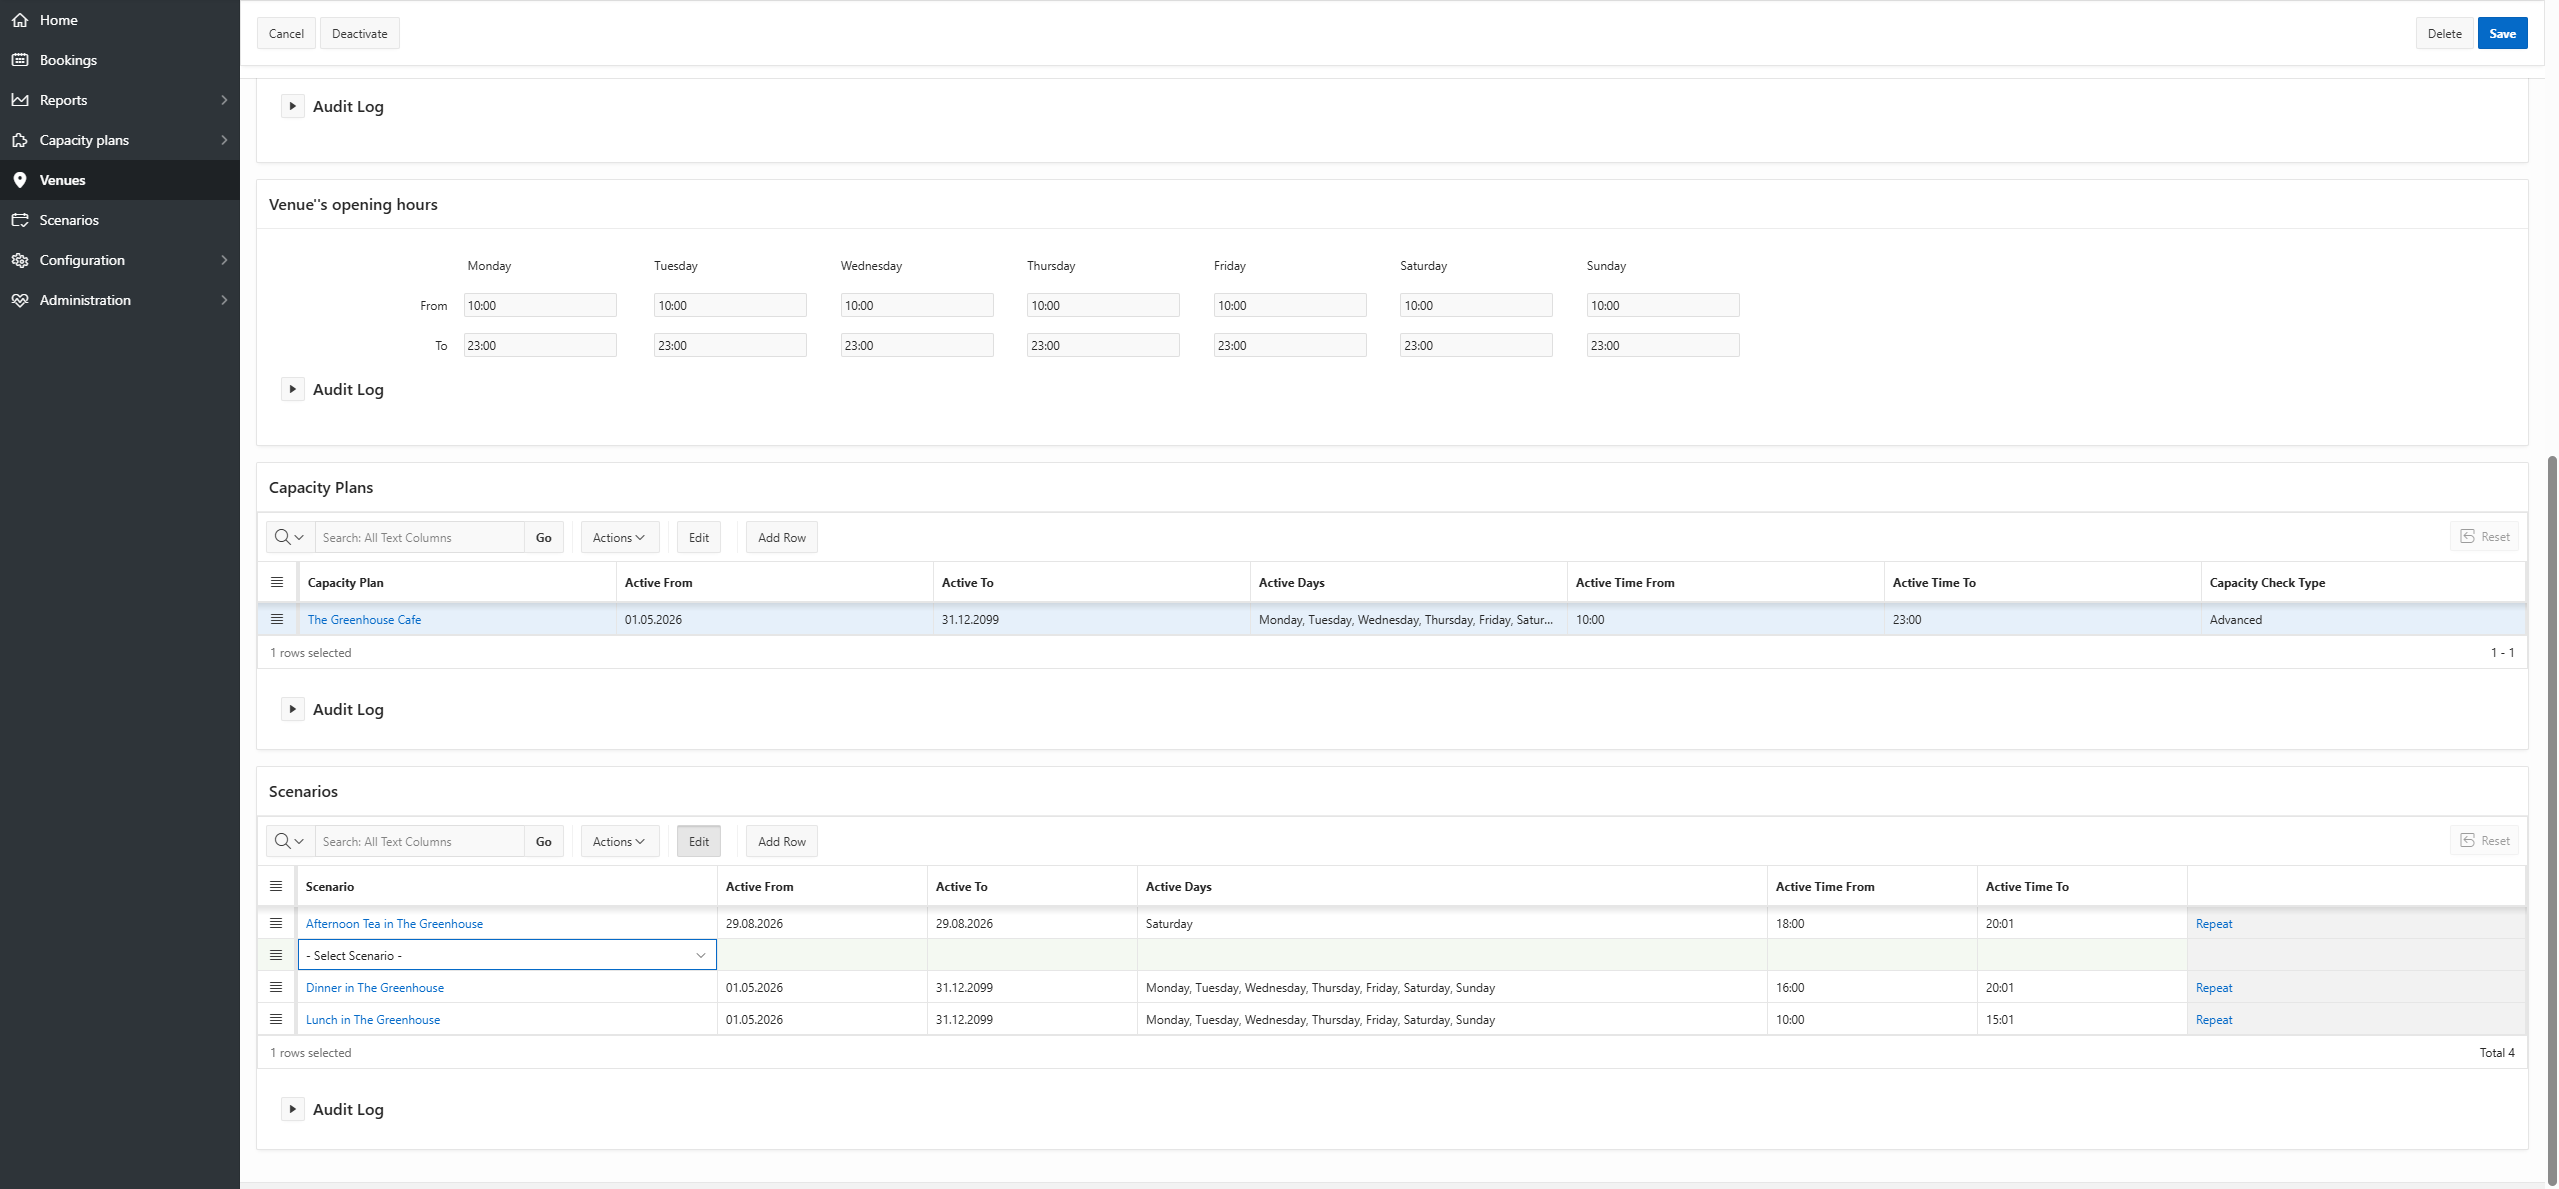
In the Scenarios section, click Add Row.
Step #16: In the Scenarios section, click Add Row.
17
Click the Select Scenario dropdown and choose your newly created scenario.
Step #17: Click the Select Scenario dropdown and choose your newly created scenario.
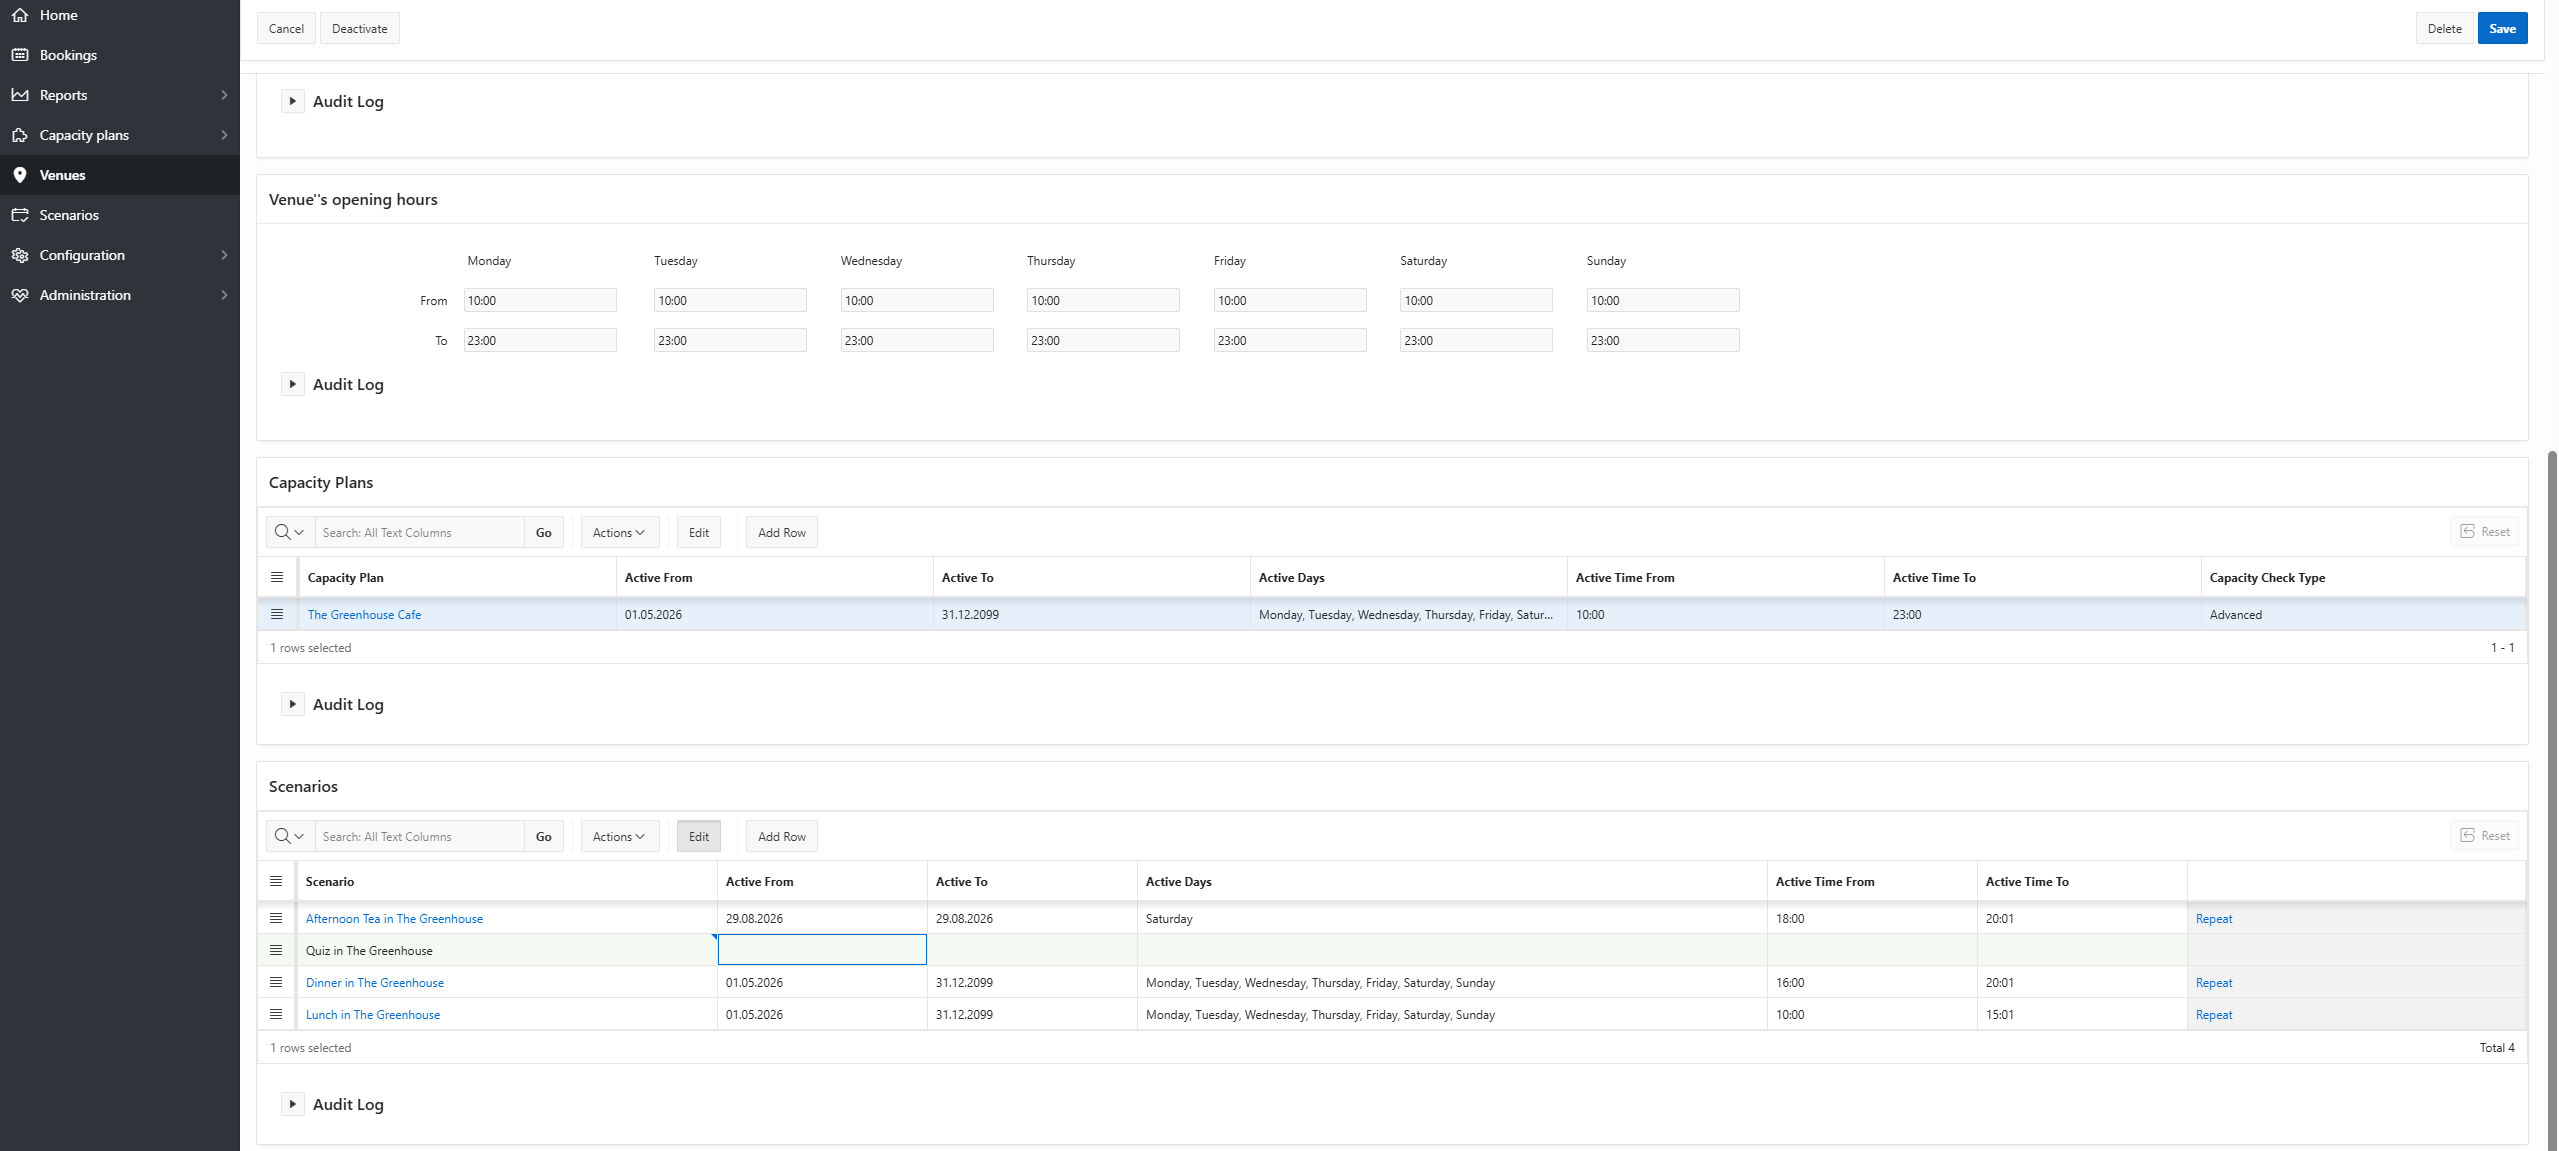
18
Click the Active From and Active To date field and use the calendar picker to set the starting date for the event.
Step #18: Click the Active From and Active To date field and use the calendar picker to set the starting date for the event.
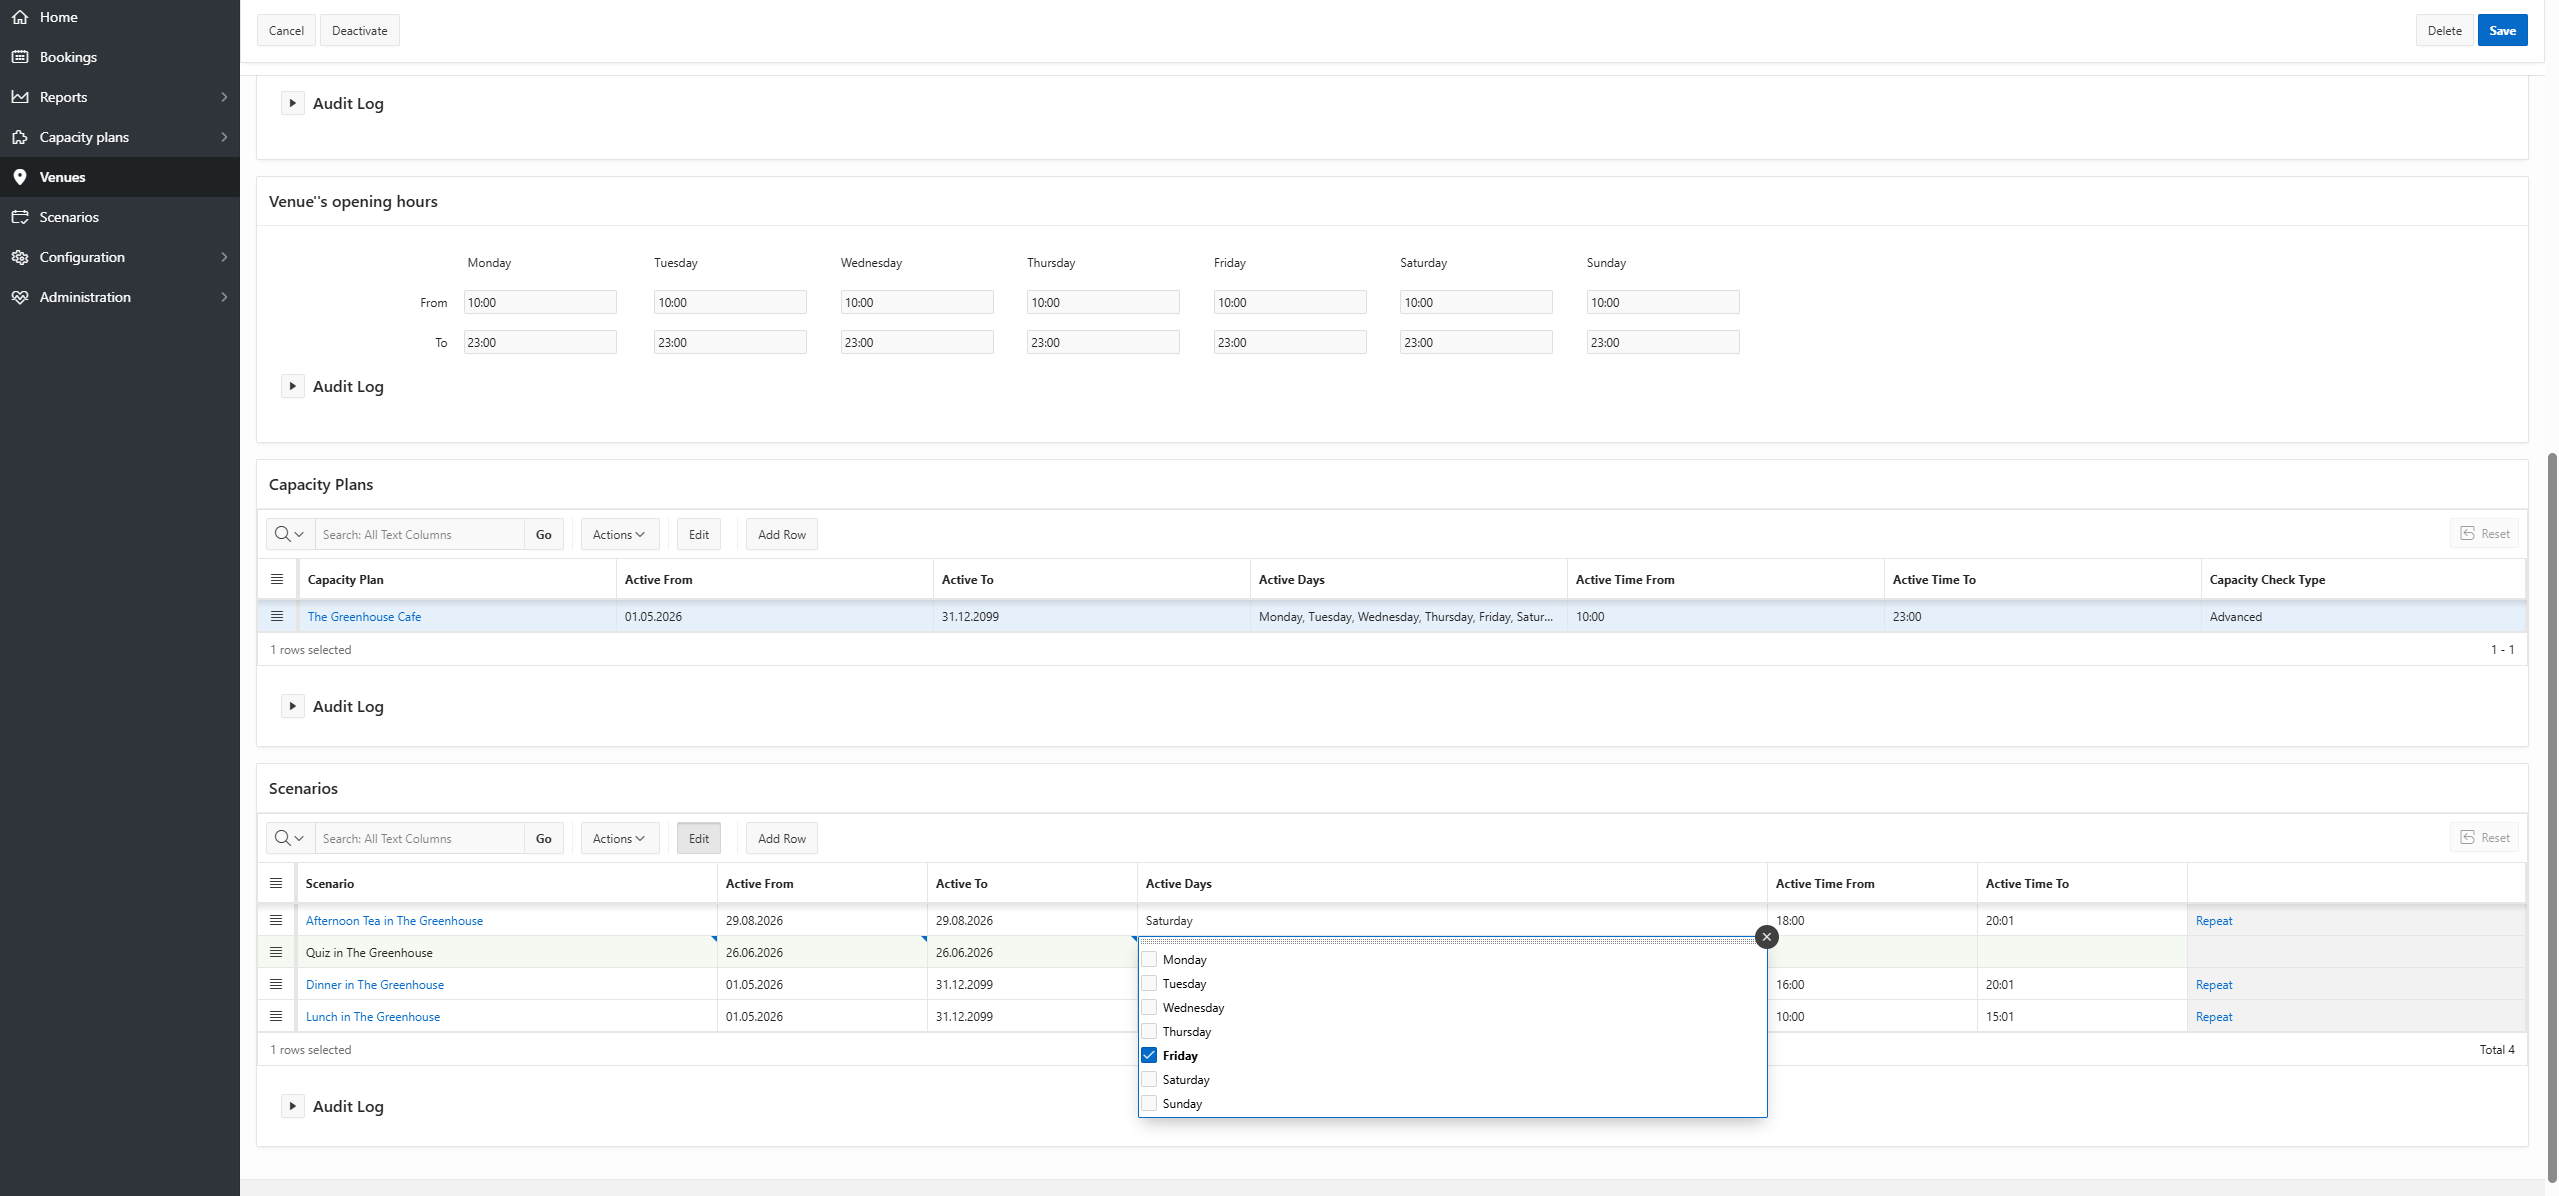
19
Open the days dropdown and select the specific days of the week this scenario is active.
Step #19: Open the days dropdown and select the specific days of the week this scenario is active.
20
Set the Active Time From and Active Time To to define the hours. If you want the last bookable time to be 20:00, you will have to set the time: 20:01 in the Active Time To field.
Step #20: Set the Active Time From and Active Time To to define the hours. If you want the last bookable time to be 20:00, you will have to set the time: 20:01 in the Active Time To field.

How the Event should be scheduled

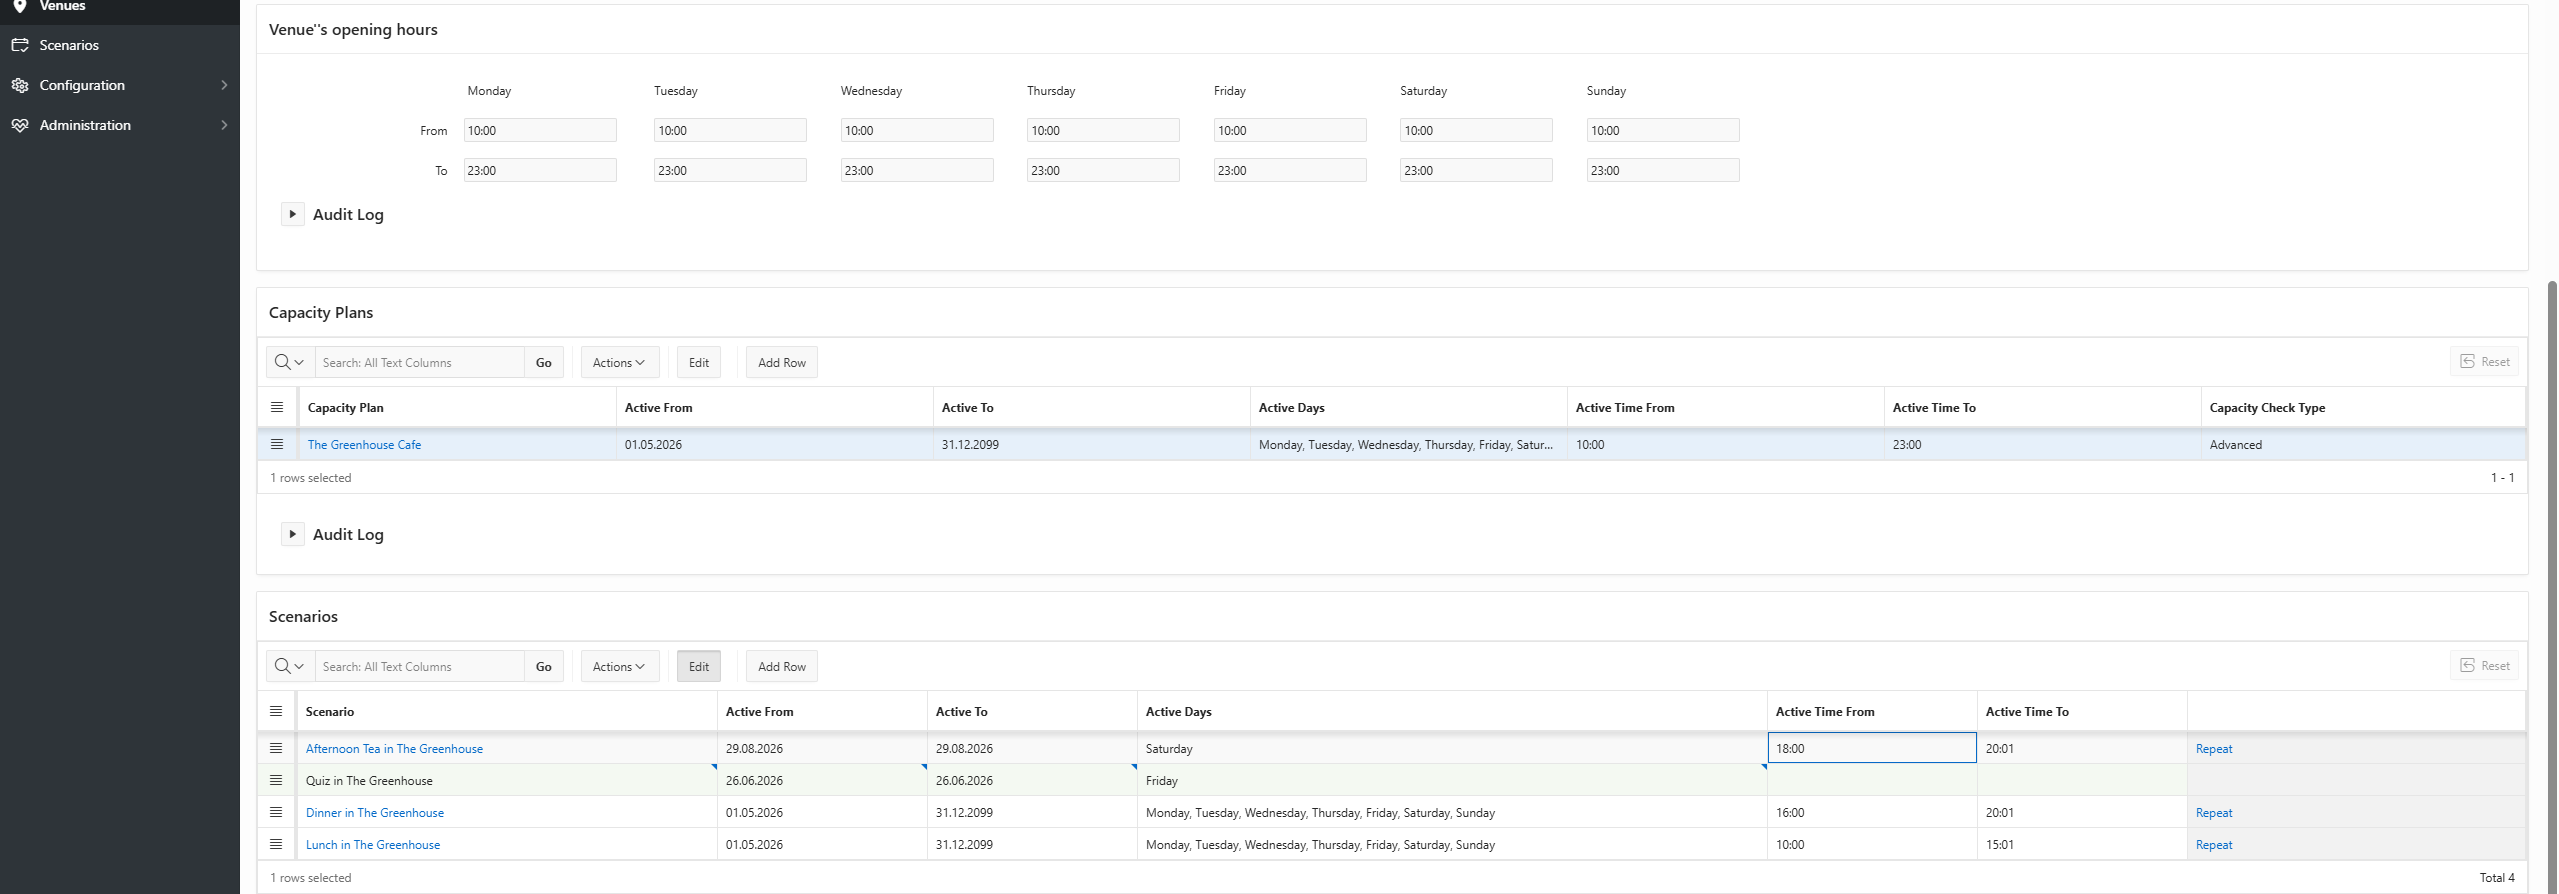
You can set up an event to be active at the same time as the regular service, or block bookings for the regular service, to only stay open for the event.
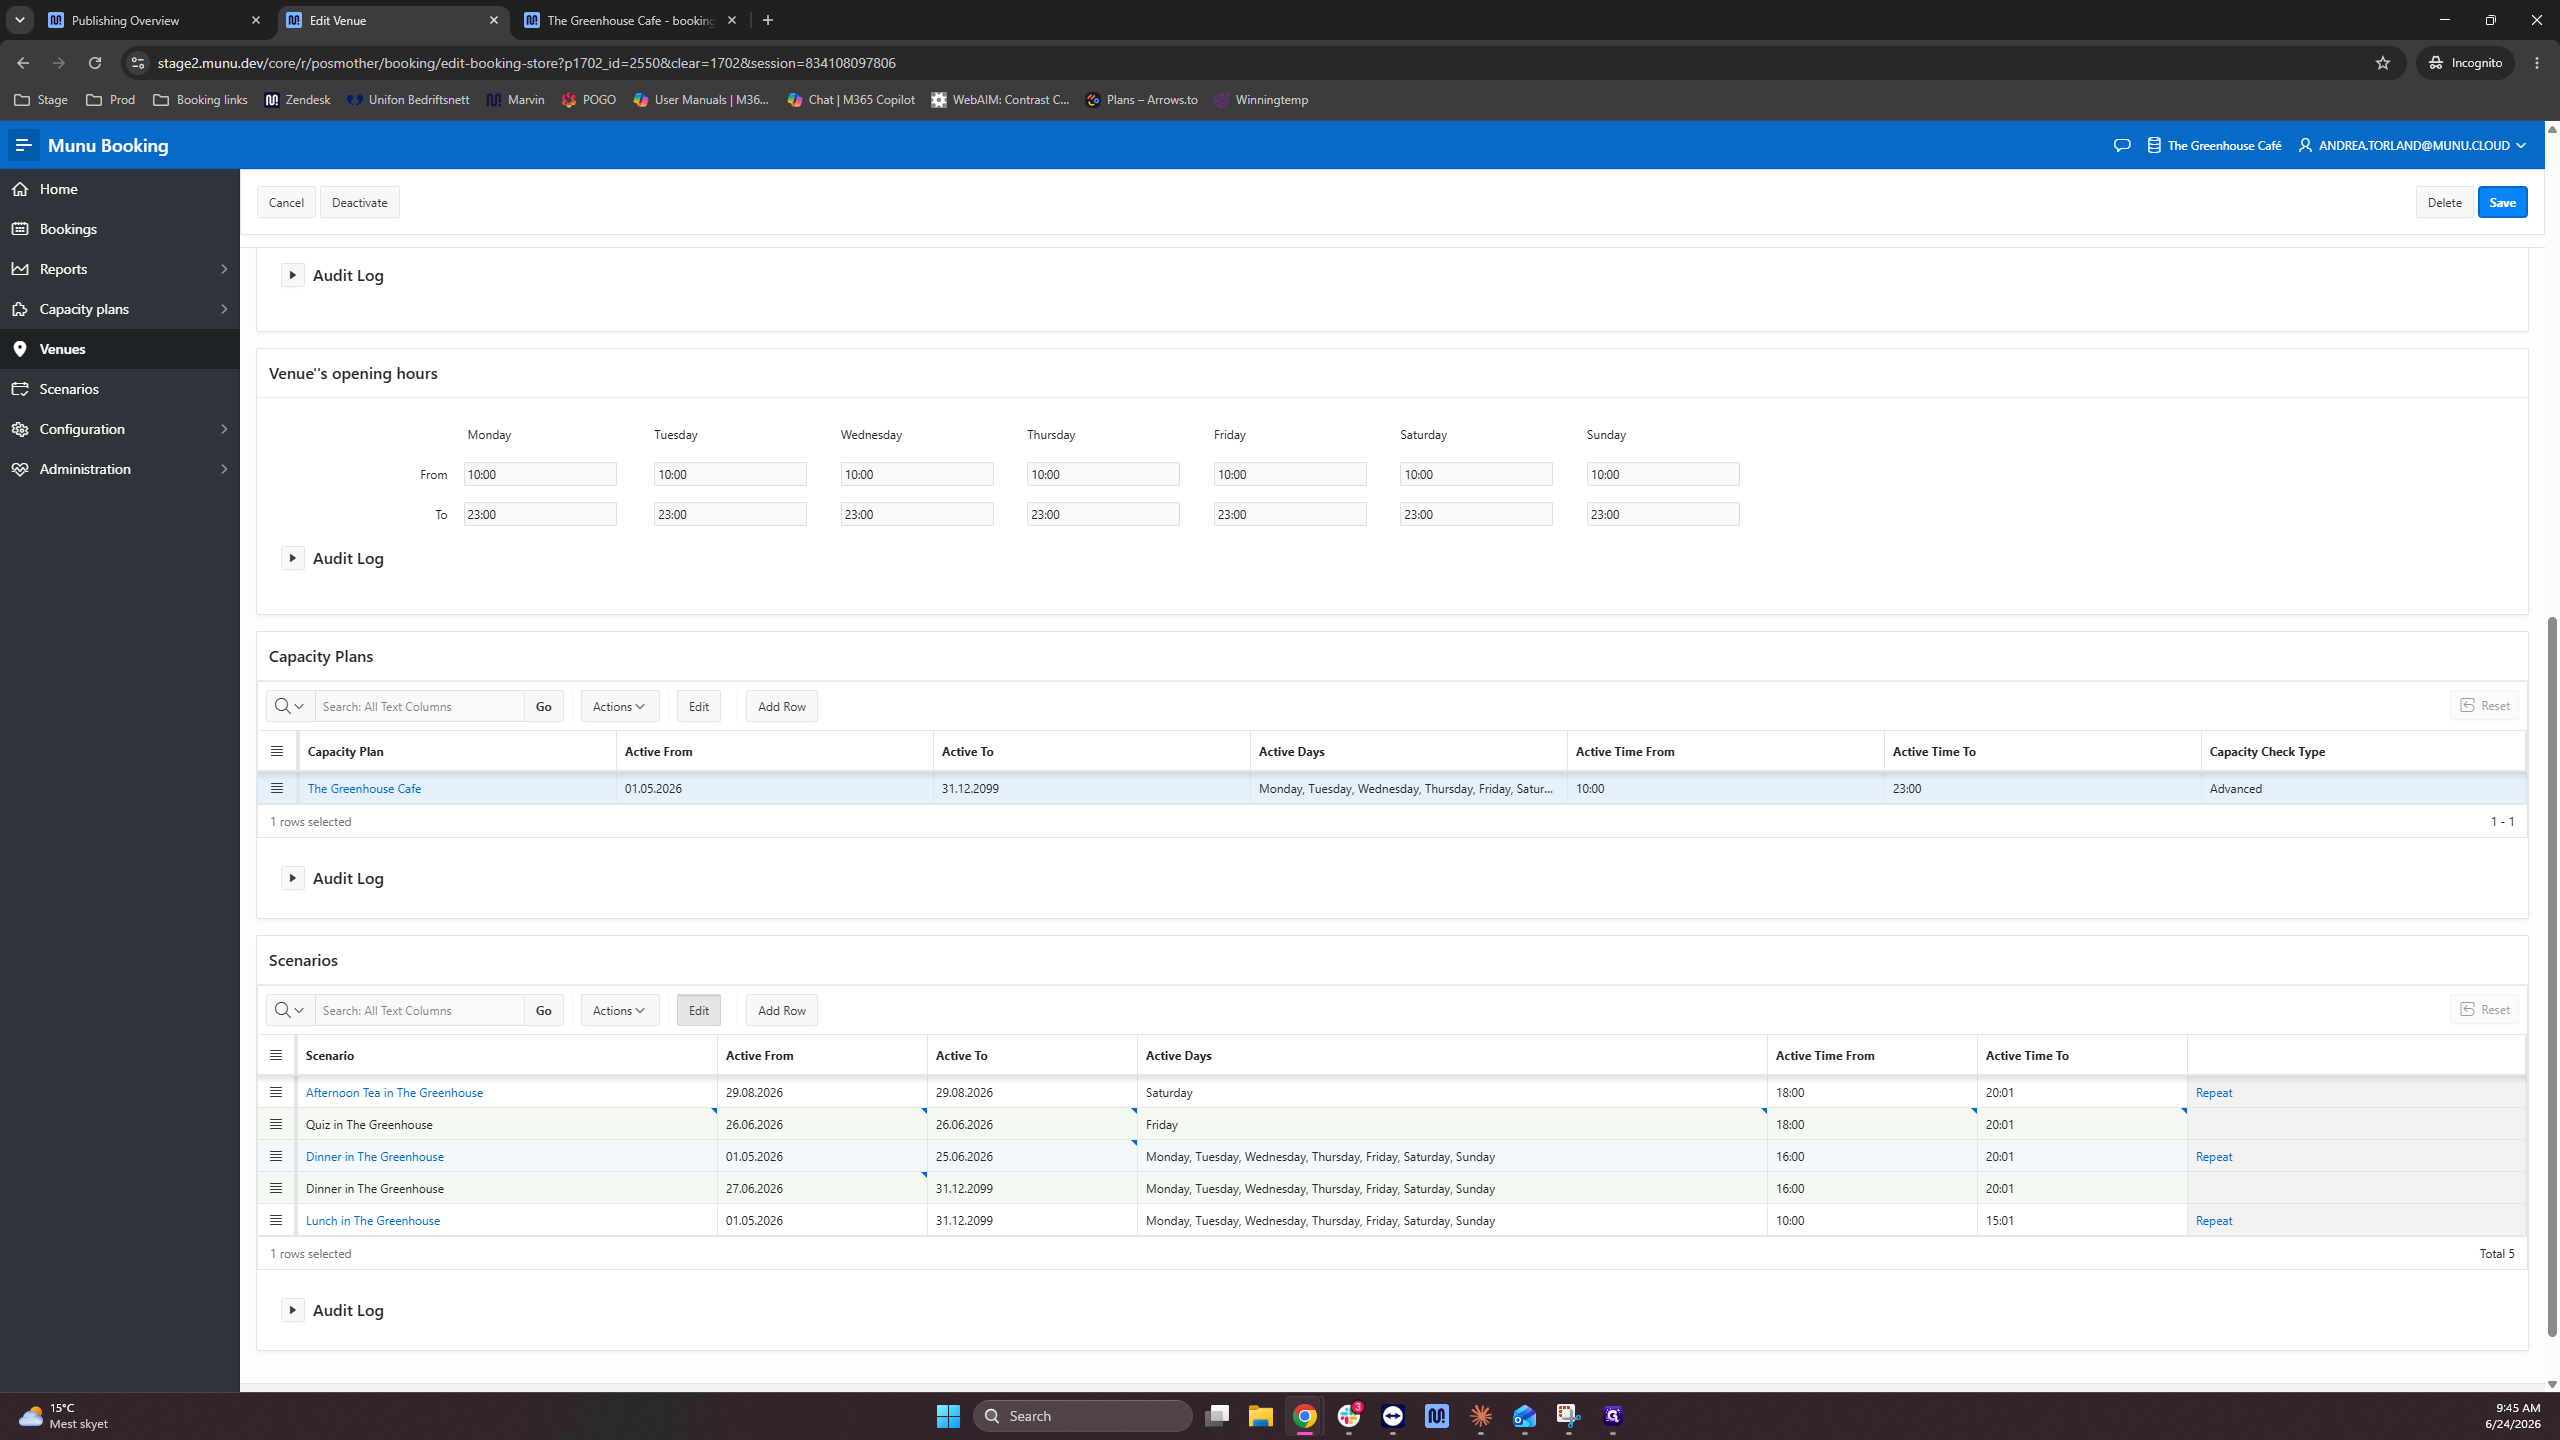
21
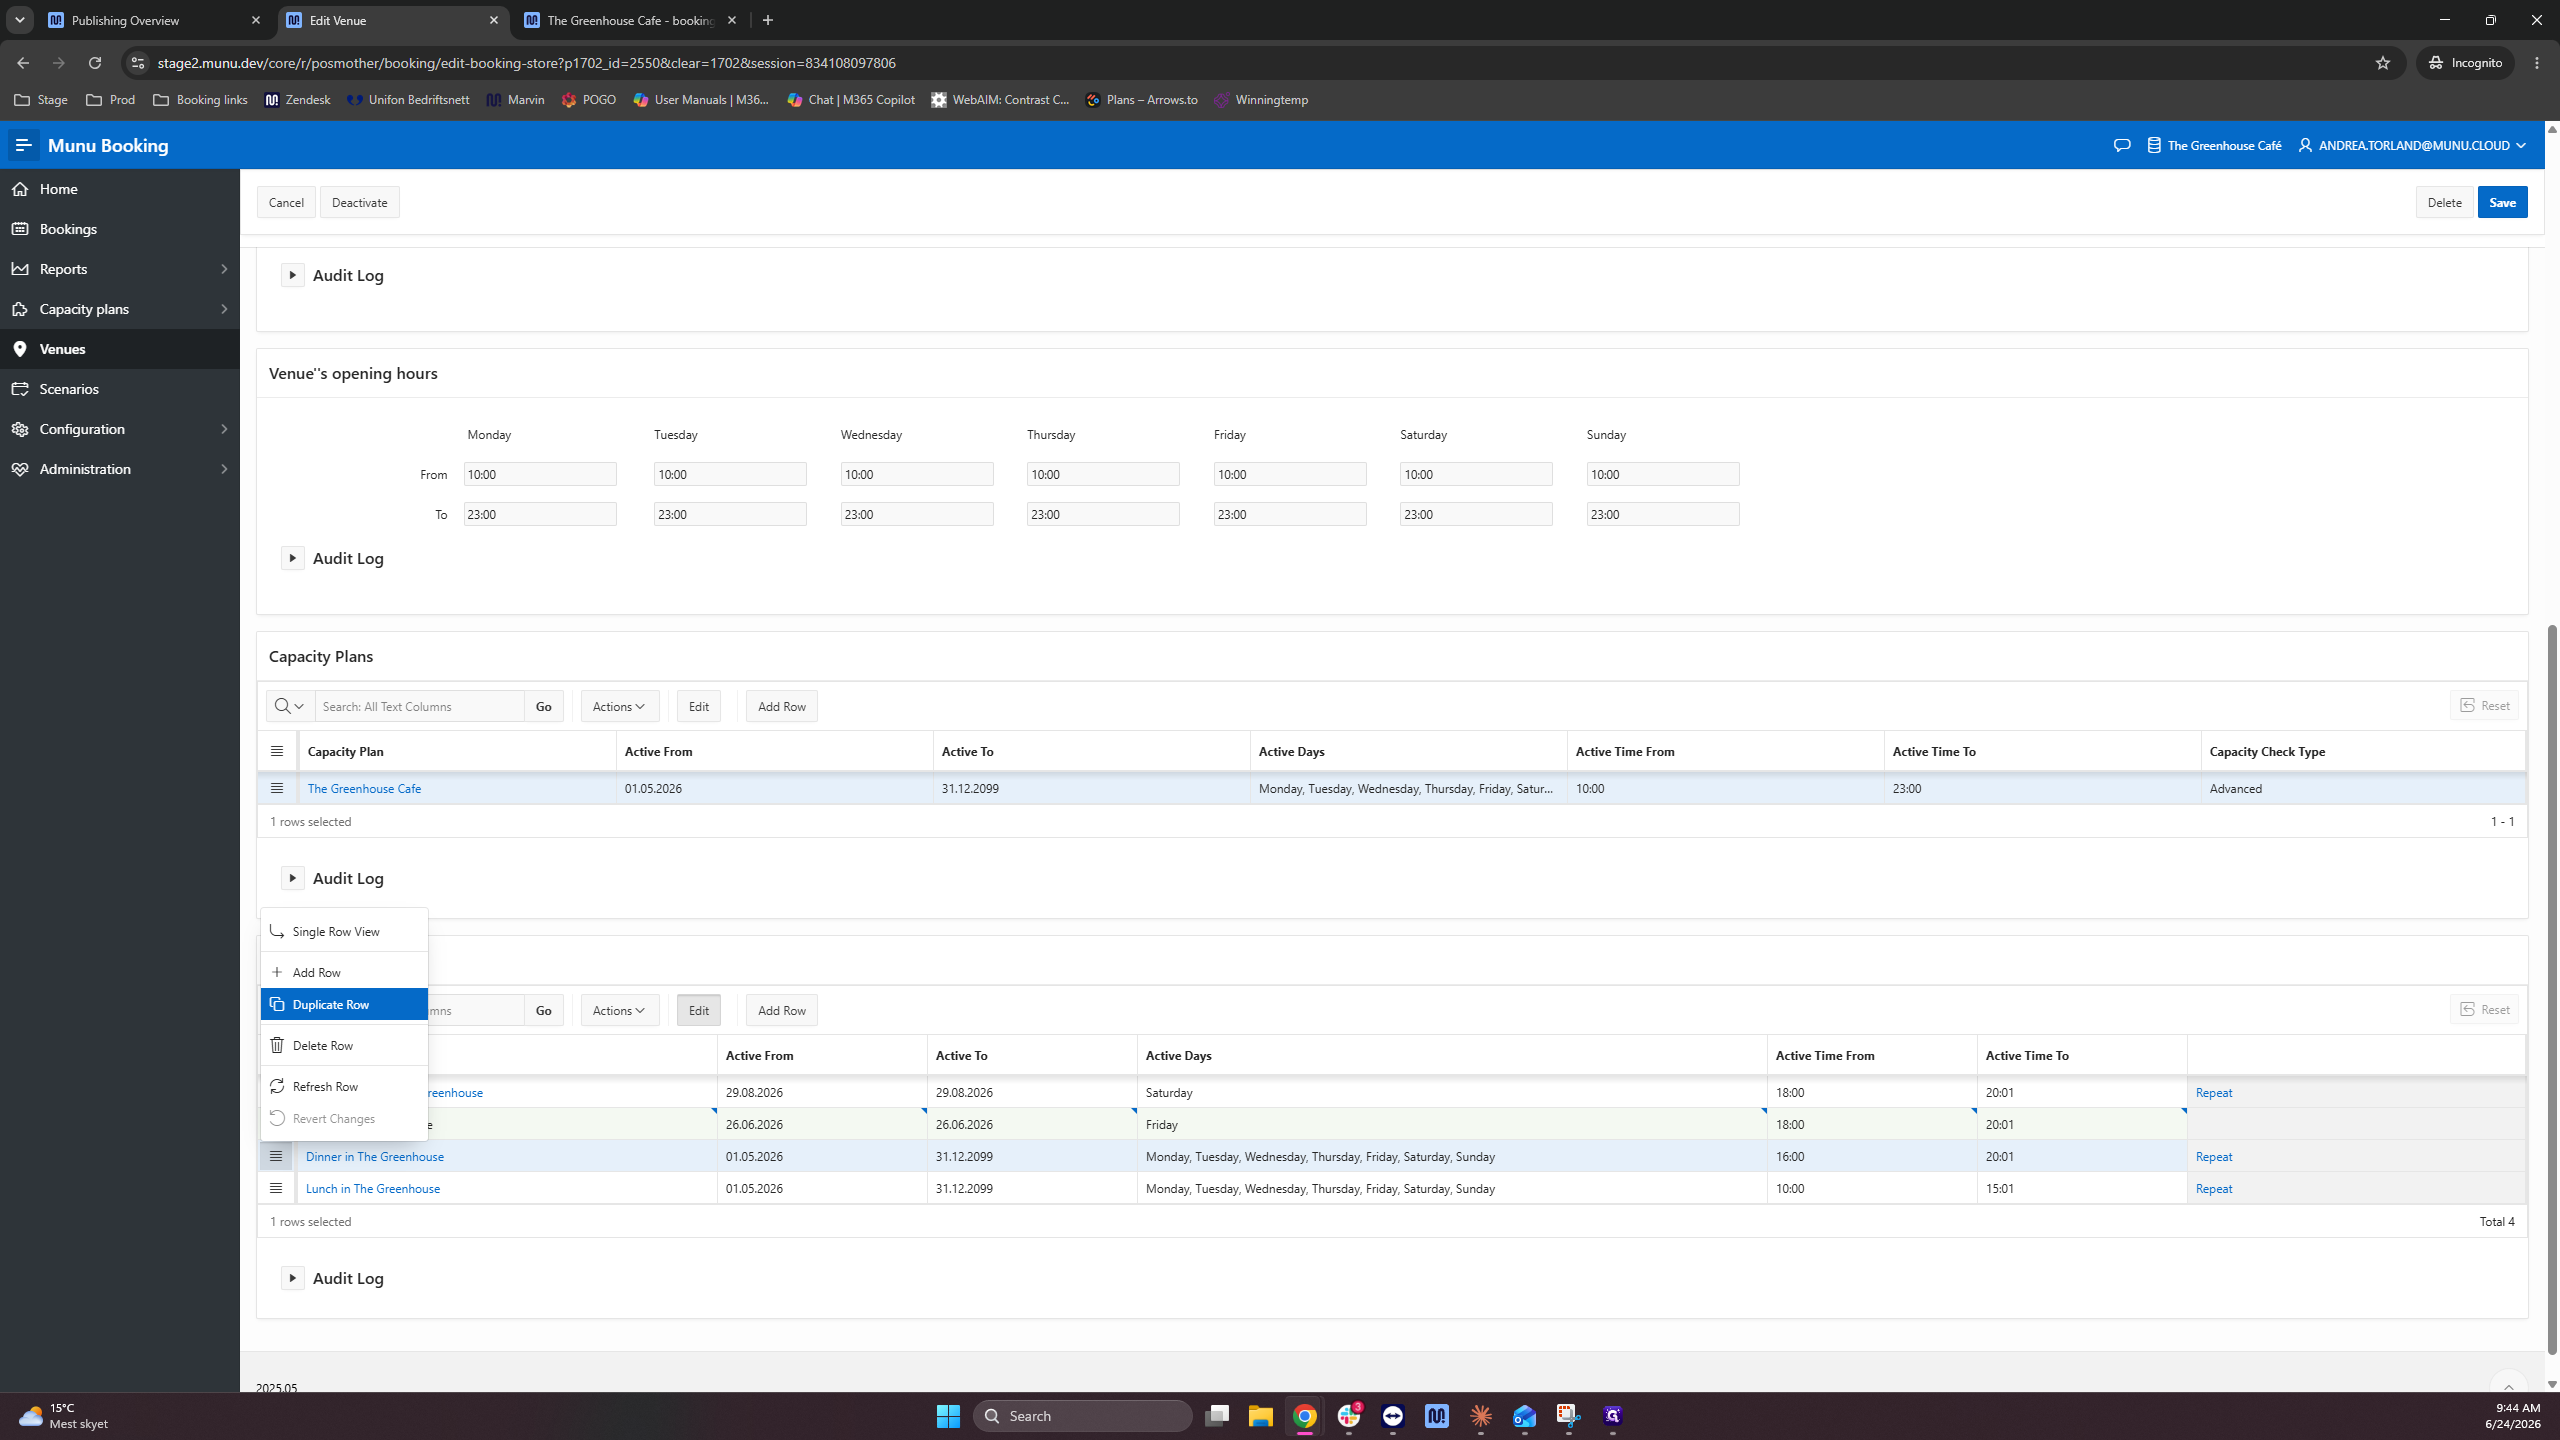
If needed, right-click an existing scenario row and select Duplicate Row to quickly add or adjust other scheduled events.
Step #21: If needed, right-click an existing scenario row and select Duplicate Row to quickly add or adjust other scheduled events.
22
Click Save to confirm your venue schedule updates.
Step #22: Click Save to confirm your venue schedule updates.

Q: Can I copy an existing scenario instead of creating one from scratch?

A: Yes, opening an existing scenario and clicking "Copy" allows you to duplicate all base settings and email templates, saving you configuration time.

Q: How do I make an event only available on specific days?

A: When adding the scenario to a venue's schedule, use the days-of-the-week dropdown in the Scenarios table to check only the applicable days.

Q: Do I need to manually rewrite the whole confirmation email for a copied scenario?

A: No. When duplicating a scenario, the previous email template carries over. You just need to update the specific details like the event name in the subject and body.

Term

Definition

Scenario

A configurable booking type or event (like Afternoon Tea or a Quiz) that defines available durations, rules, and notifications.

Widget Deep Link

A direct URL generated by the system that routes guests straight into the booking flow for a specific scenario.

Confirmation Mode

A setting that dictates when and how guests receive automated booking confirmations or reminders.