
How to Create Timesheets for Jobs in LMN: Step-by-Step Guide
Learn how to create timesheets for jobs in LMN, from estimate creation and scheduling to job assignment and timesheet submission. Follow this detailed step-by-step guide for accurate job costing and invoicing.
In this guide, we'll learn how to create timesheets for jobs in LMN. We'll cover the process from finding the estimate, creating and scheduling the job, tracking materials and equipment, to submitting the timesheet and finalizing job costing. This step-by-step approach helps ensure accurate records and proper invoicing for excavation and grading jobs.
Let's get started
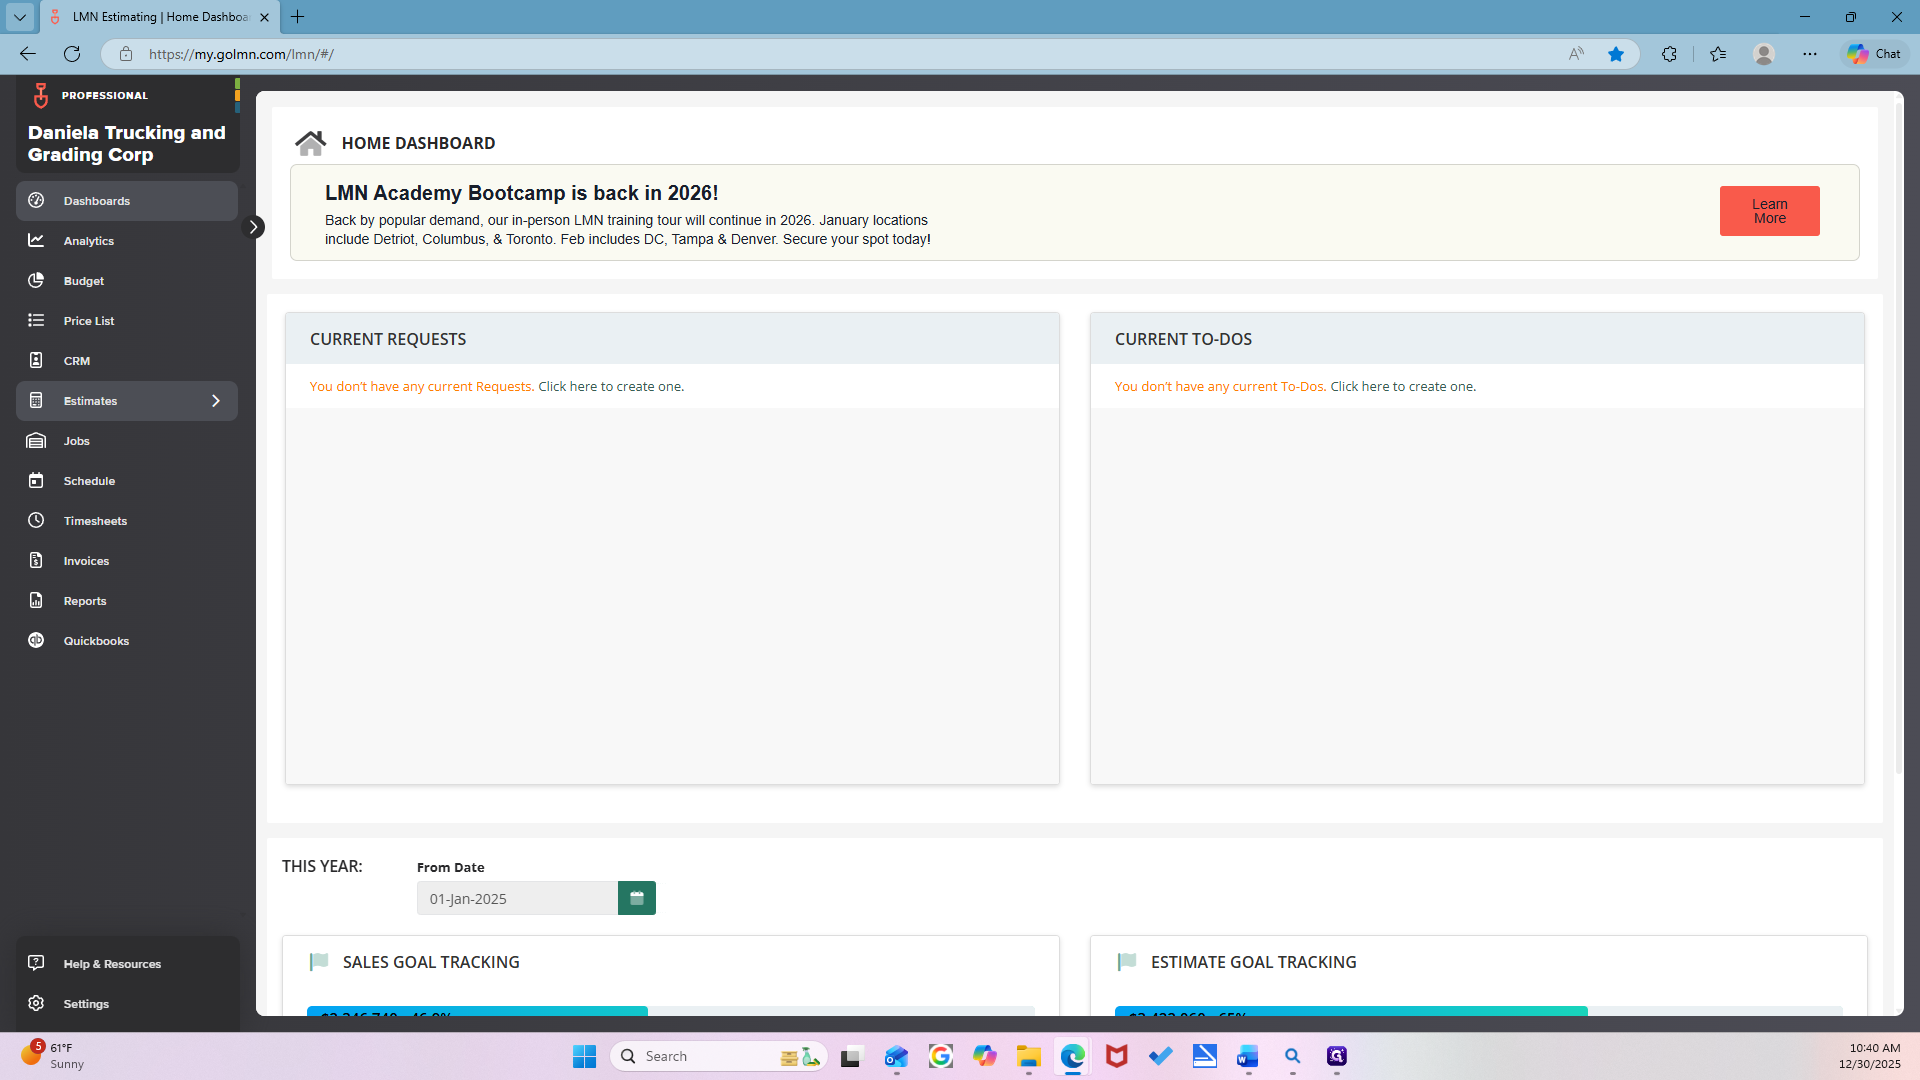
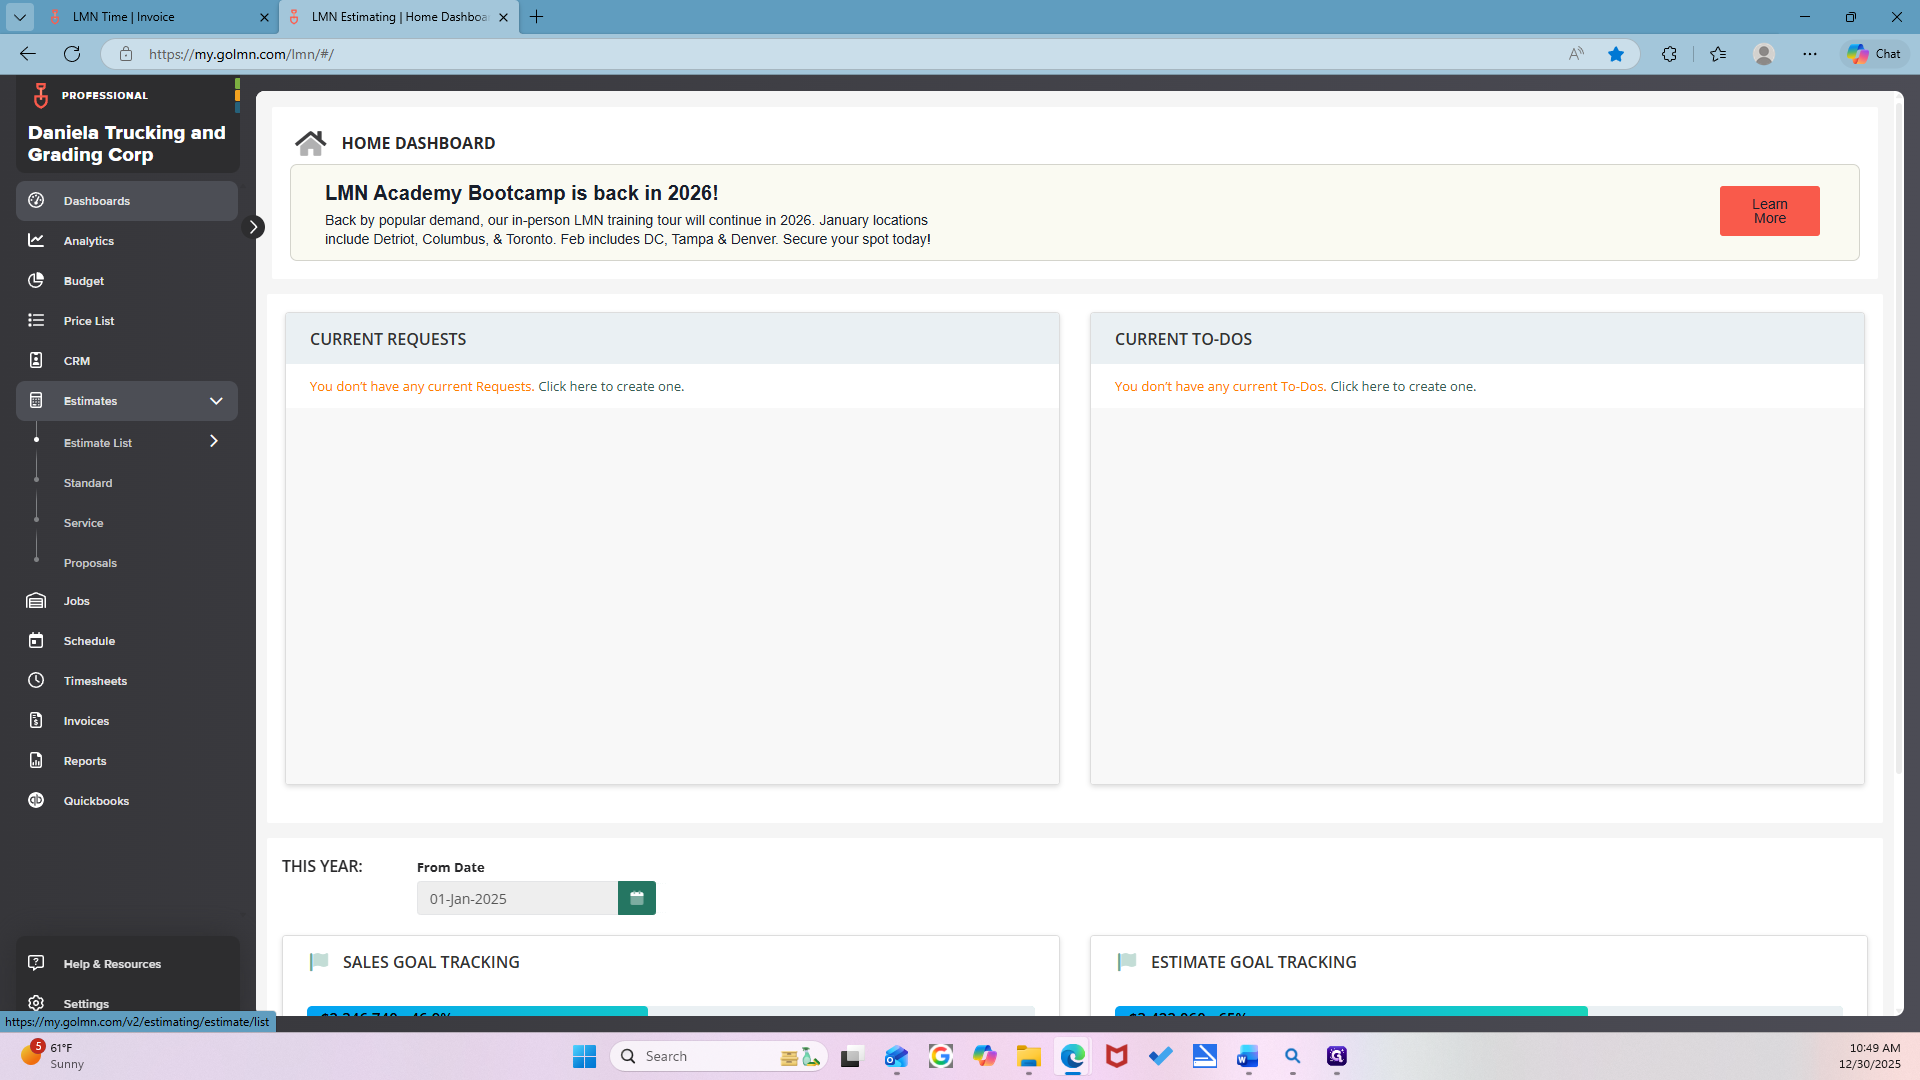
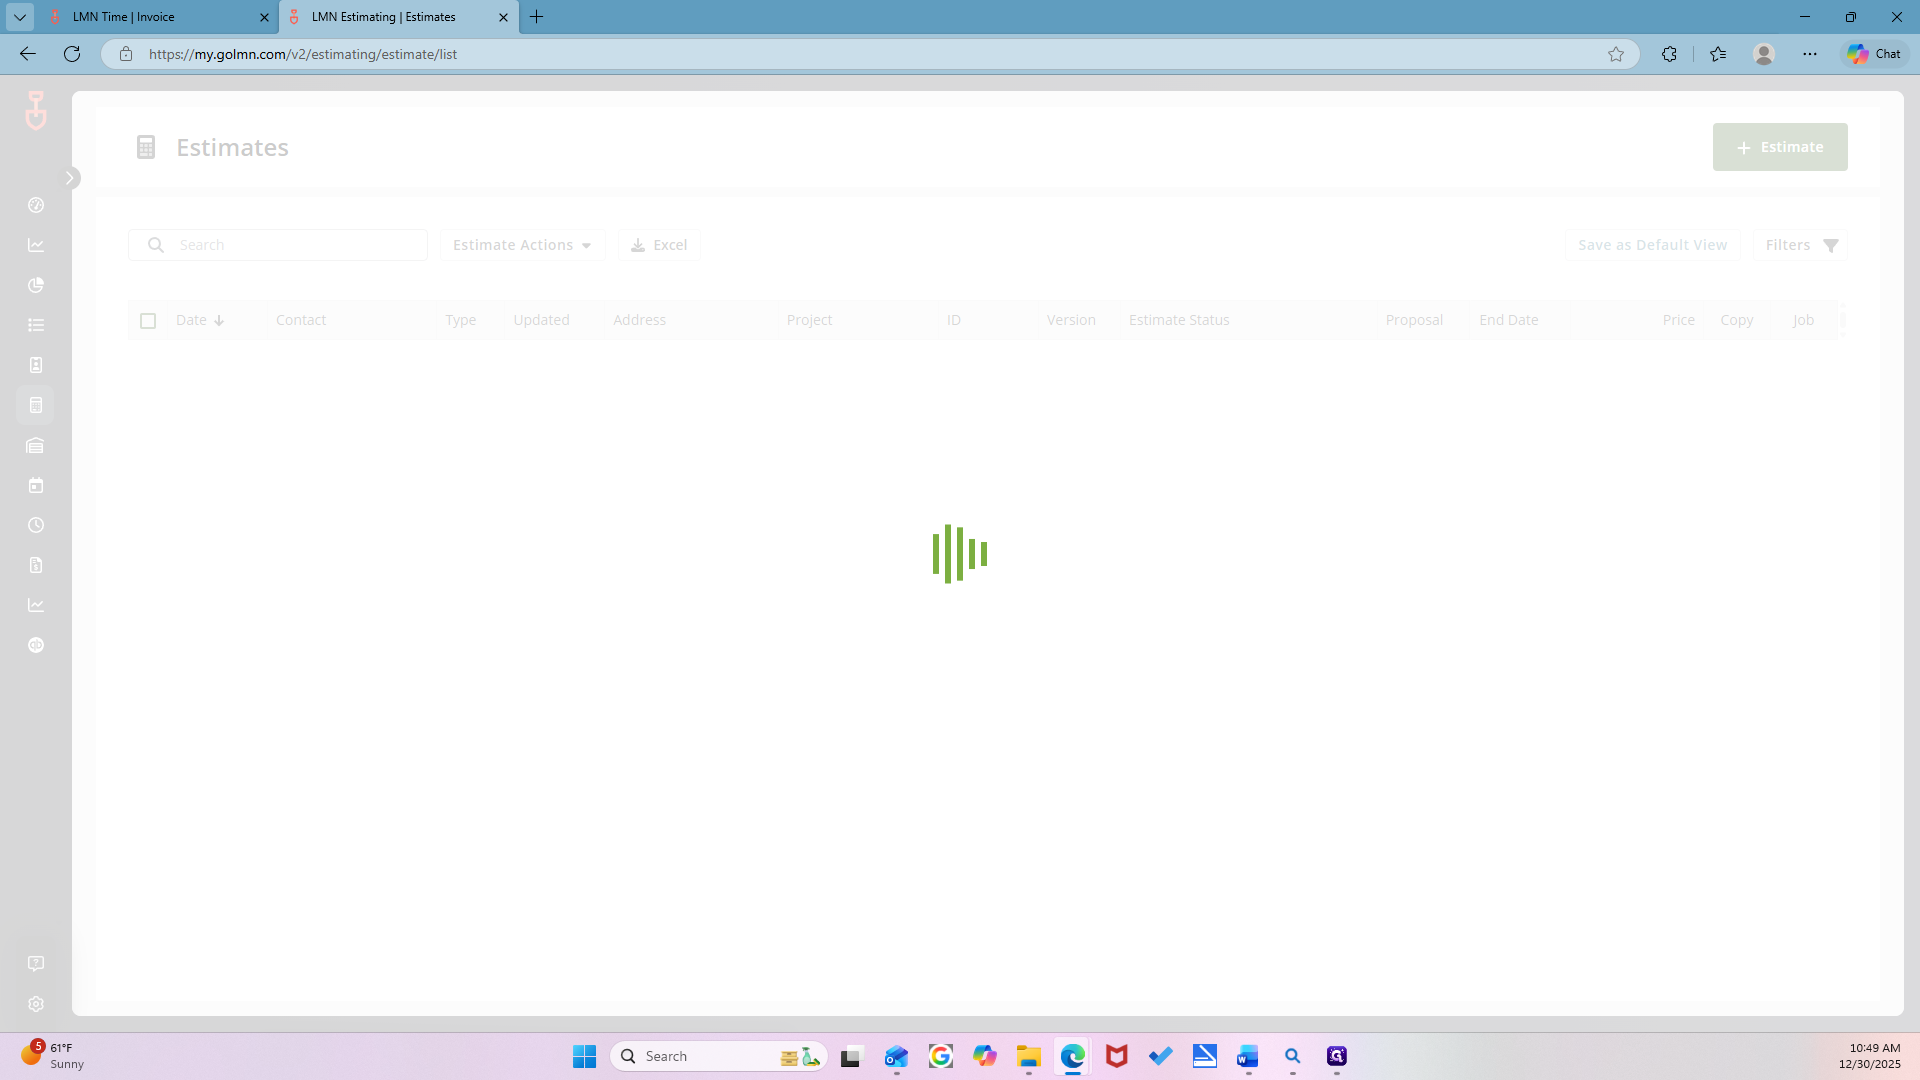
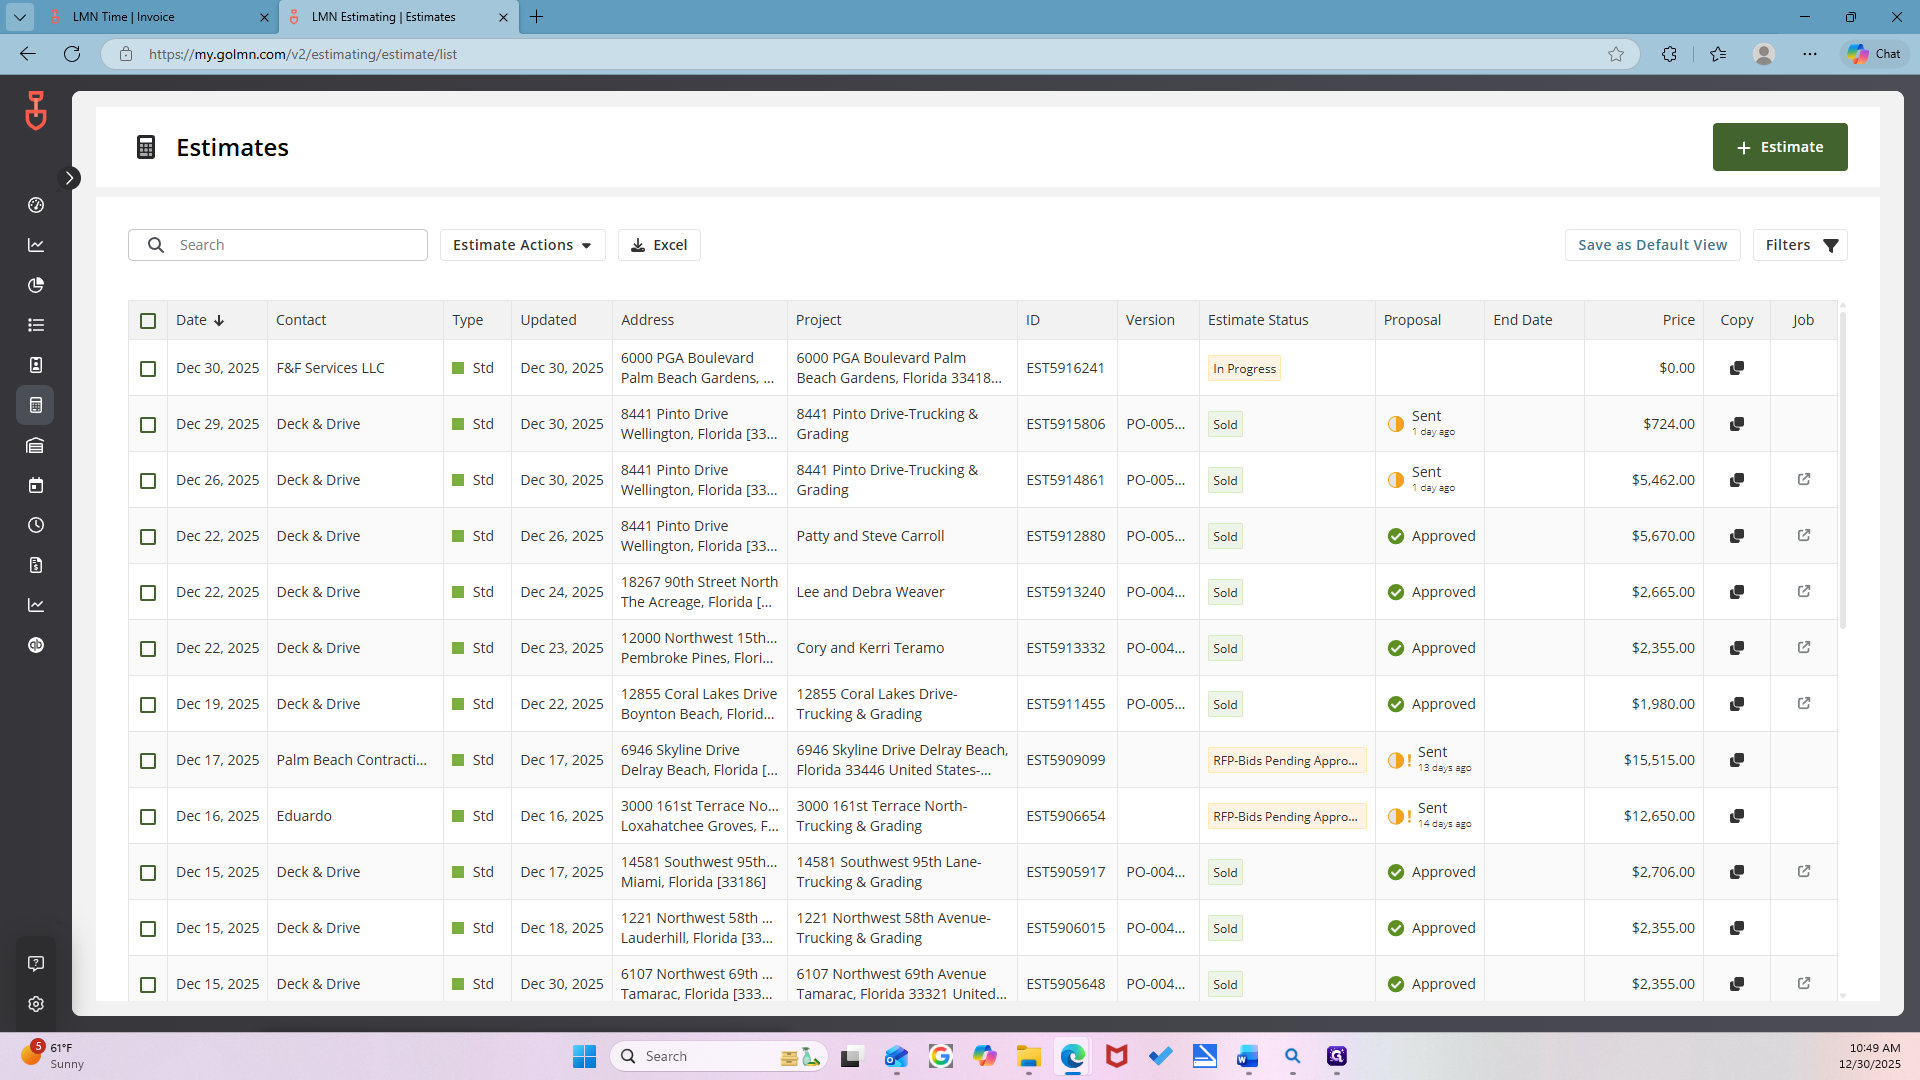
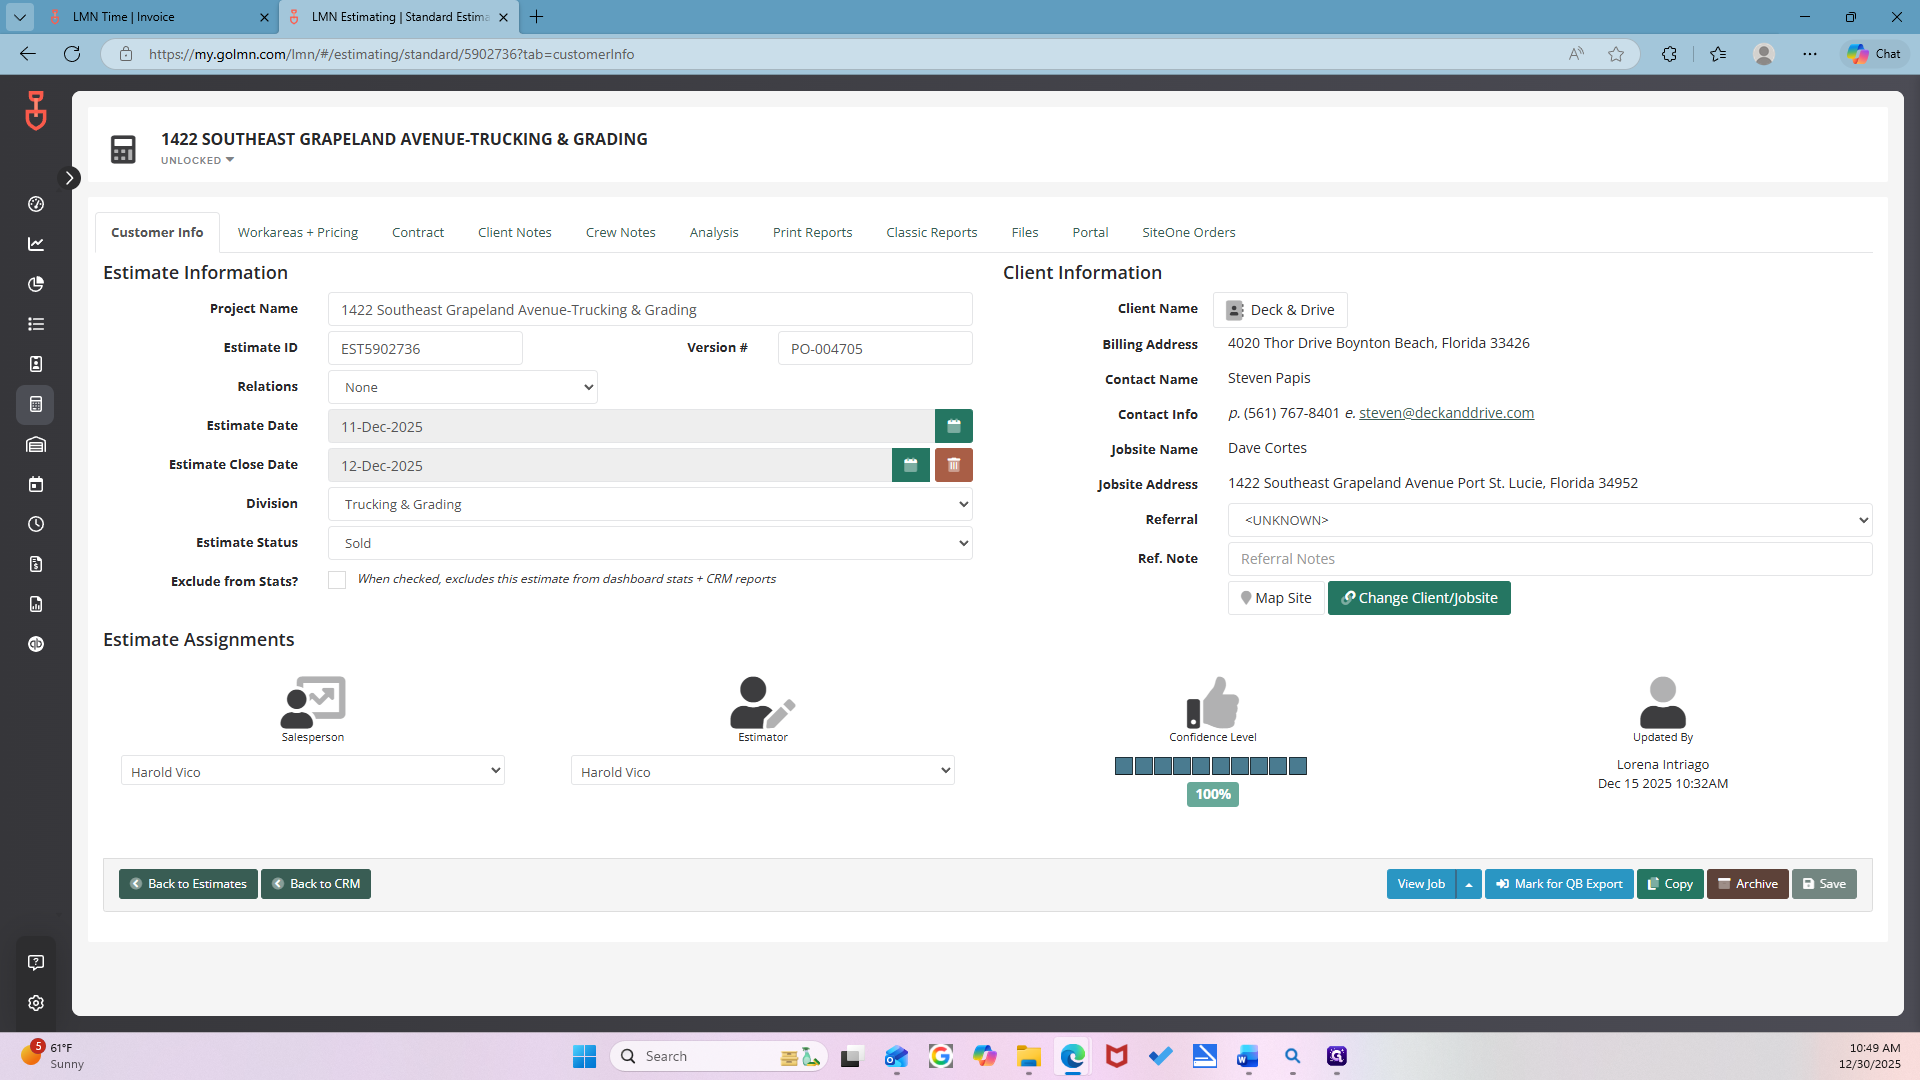
We will learn how to create timesheets for jobs in LMN. We will cover the process from creating the estimate, scheduling on the calendar, and job assignment, to submitting the timesheet. First, sign in to LMN. Then, locate the estimate. Go to the Estimate tab, then select Estimate List.

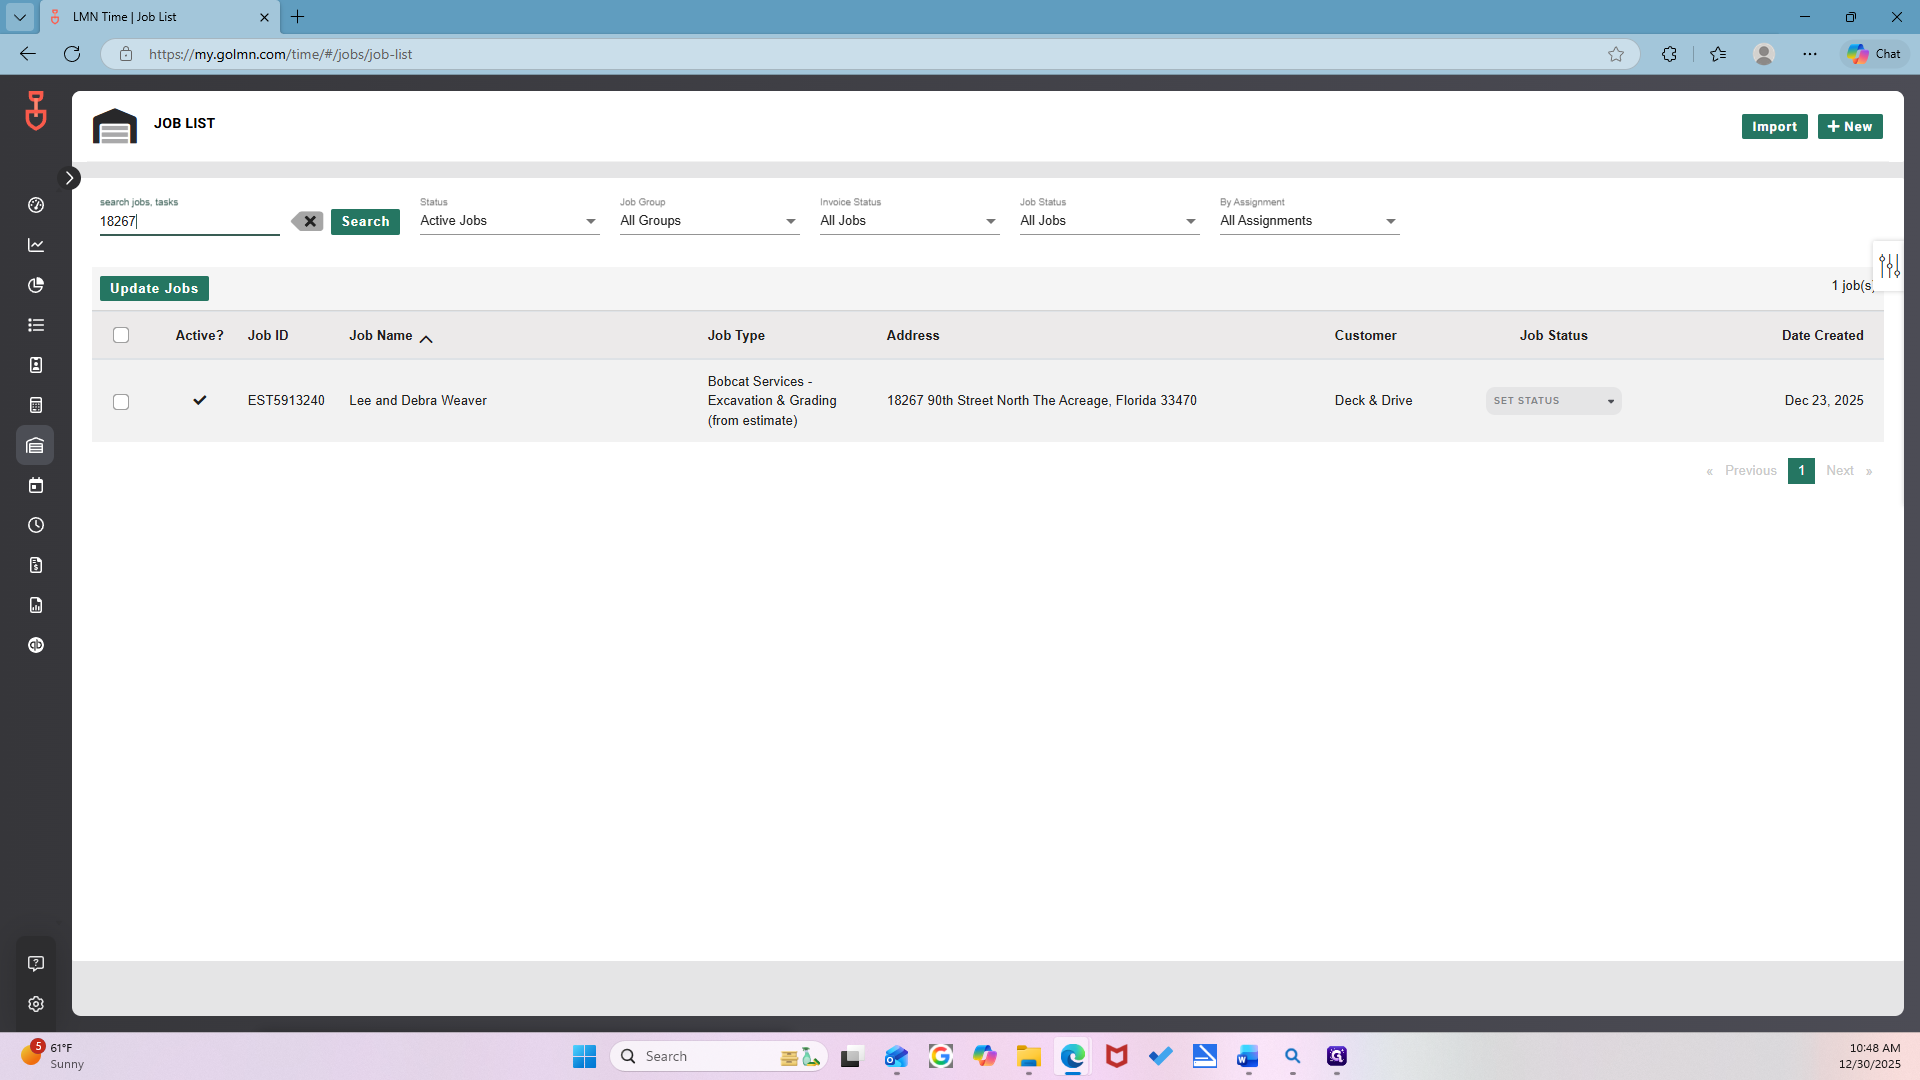
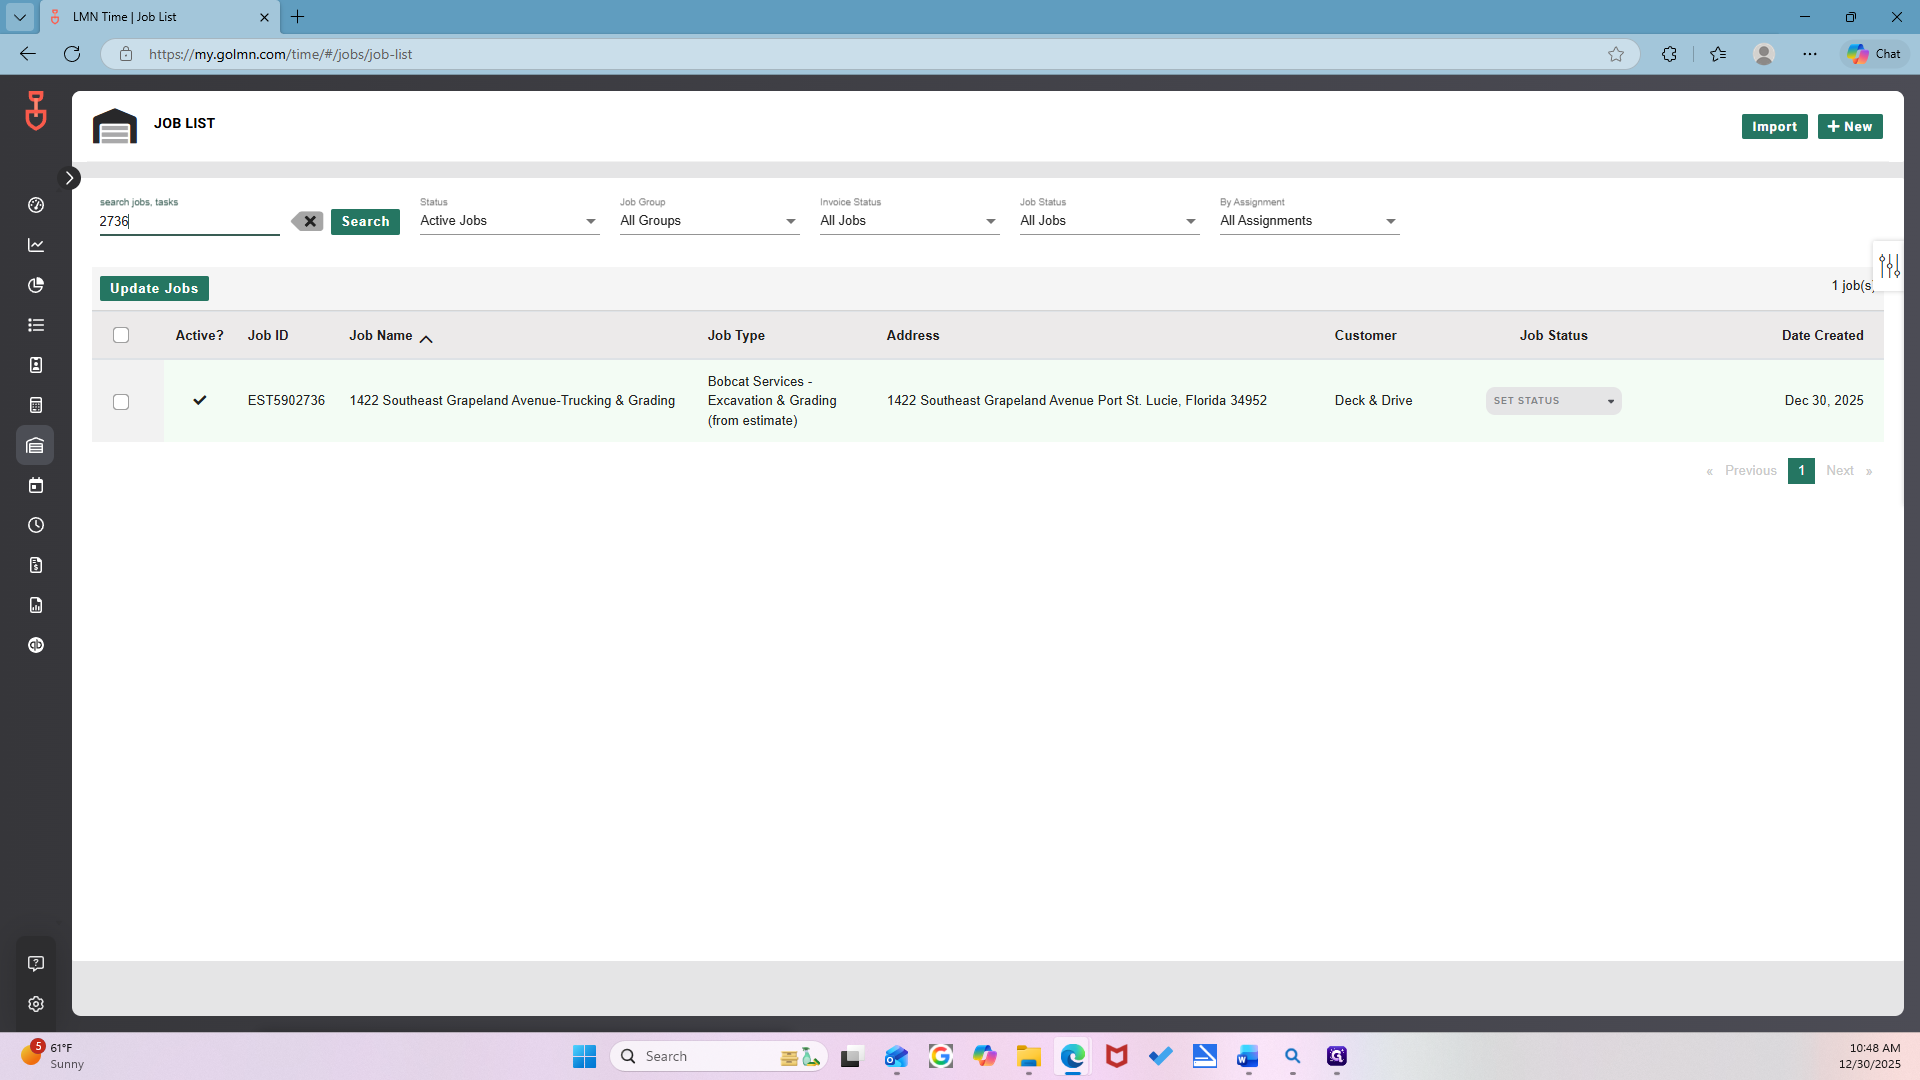
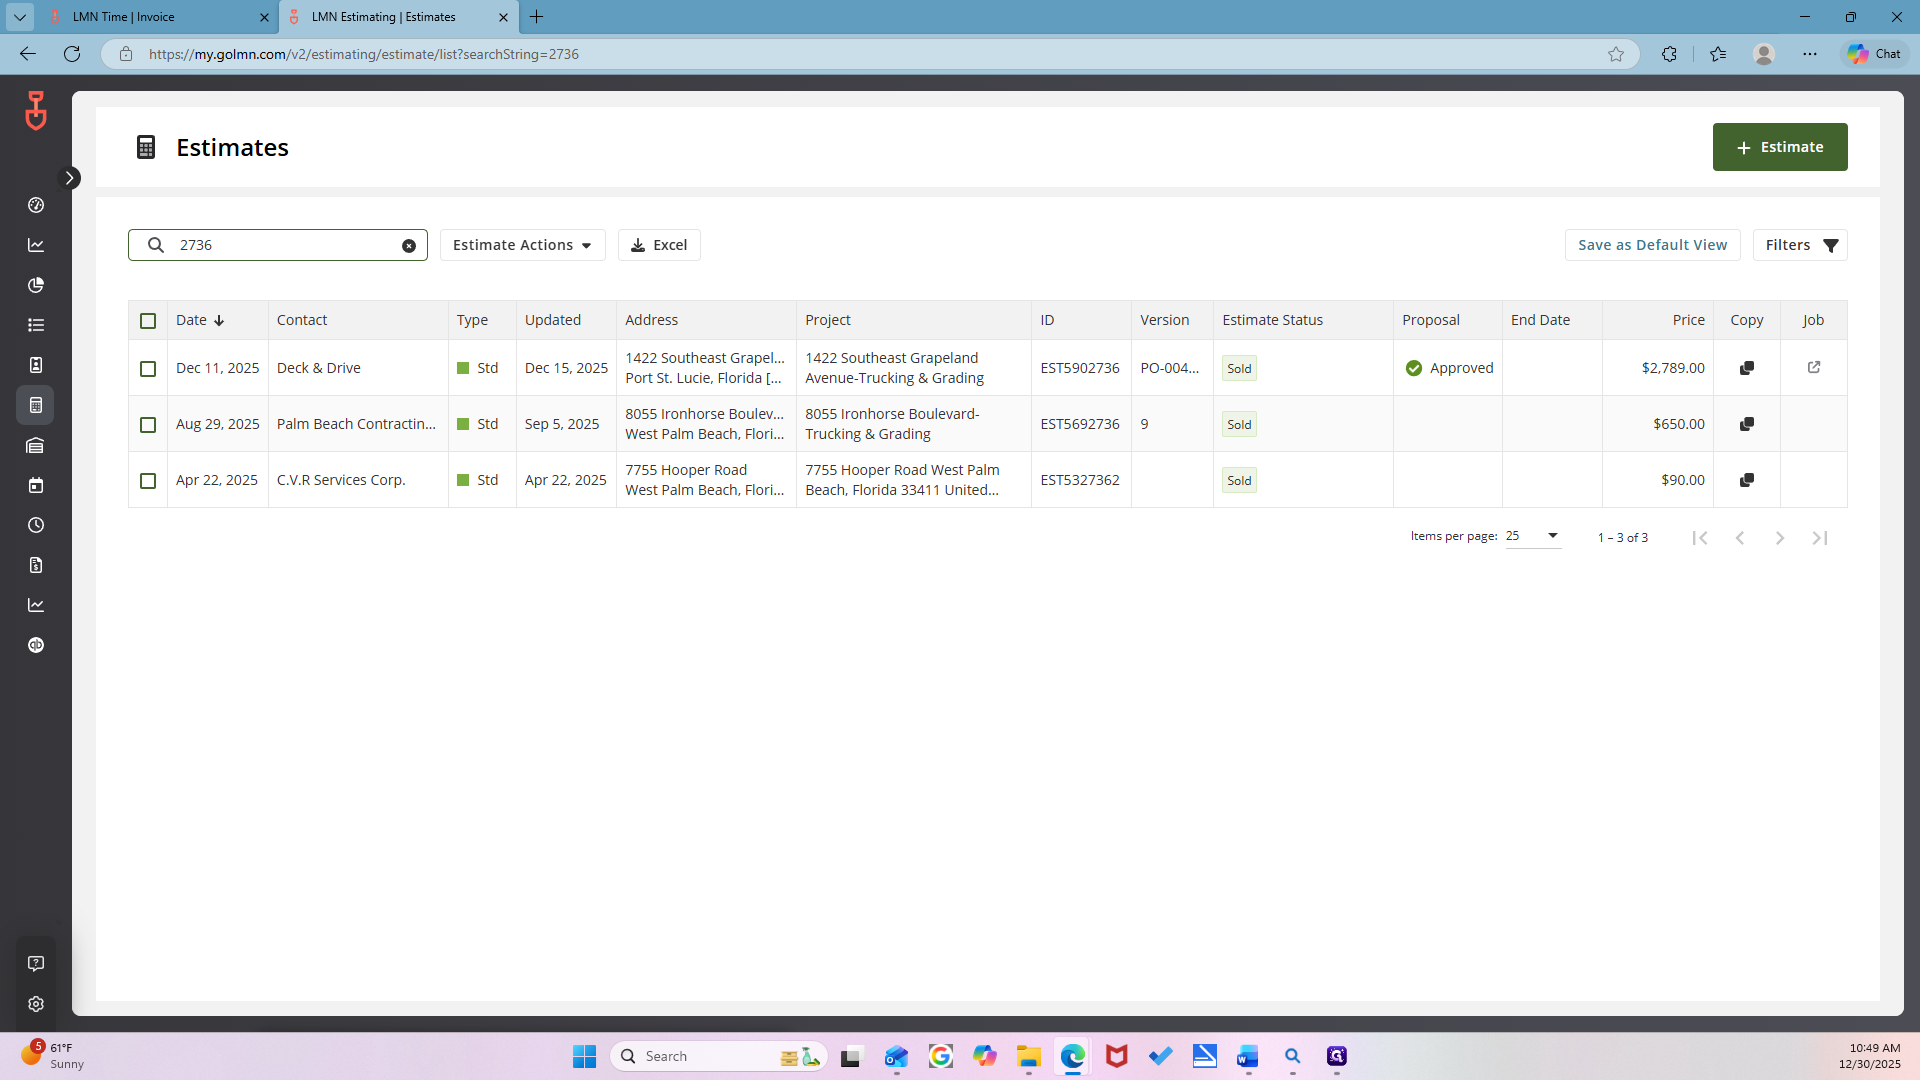
Look up either the estimate number or the job.
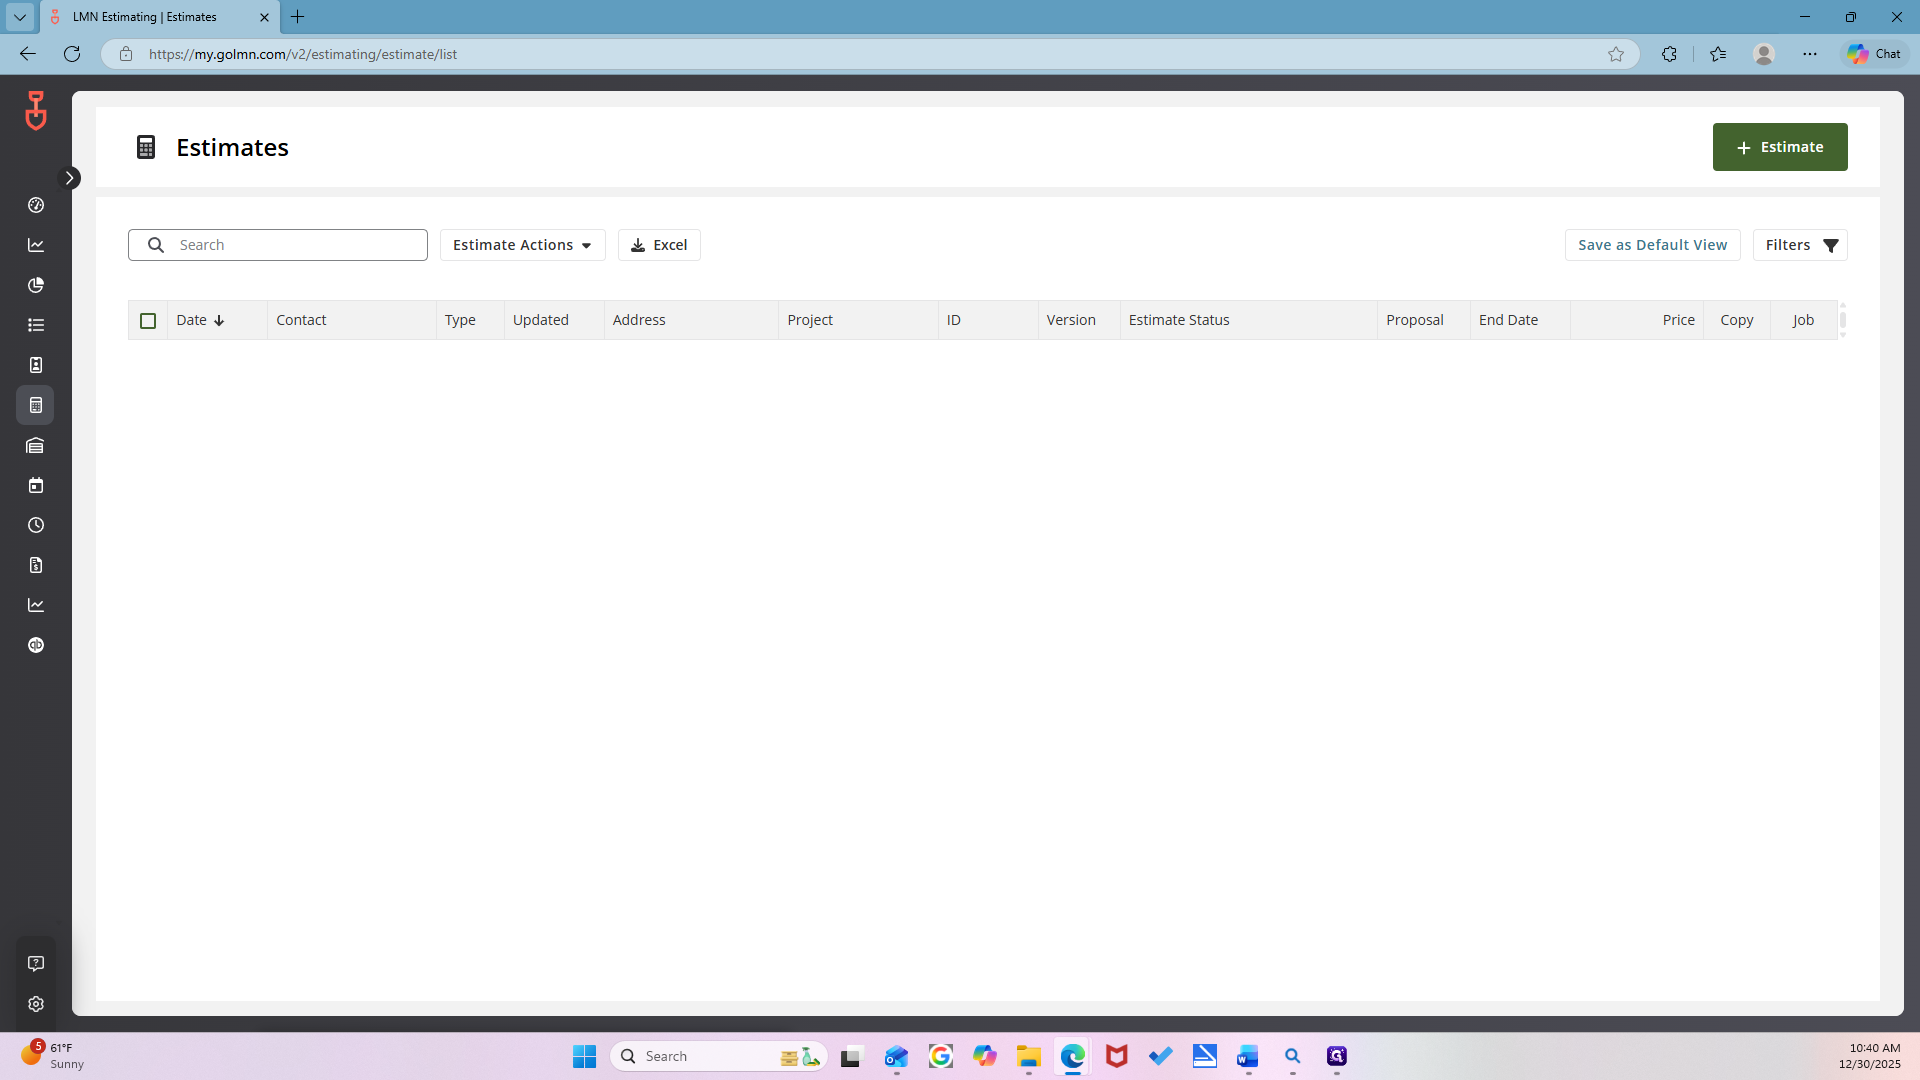
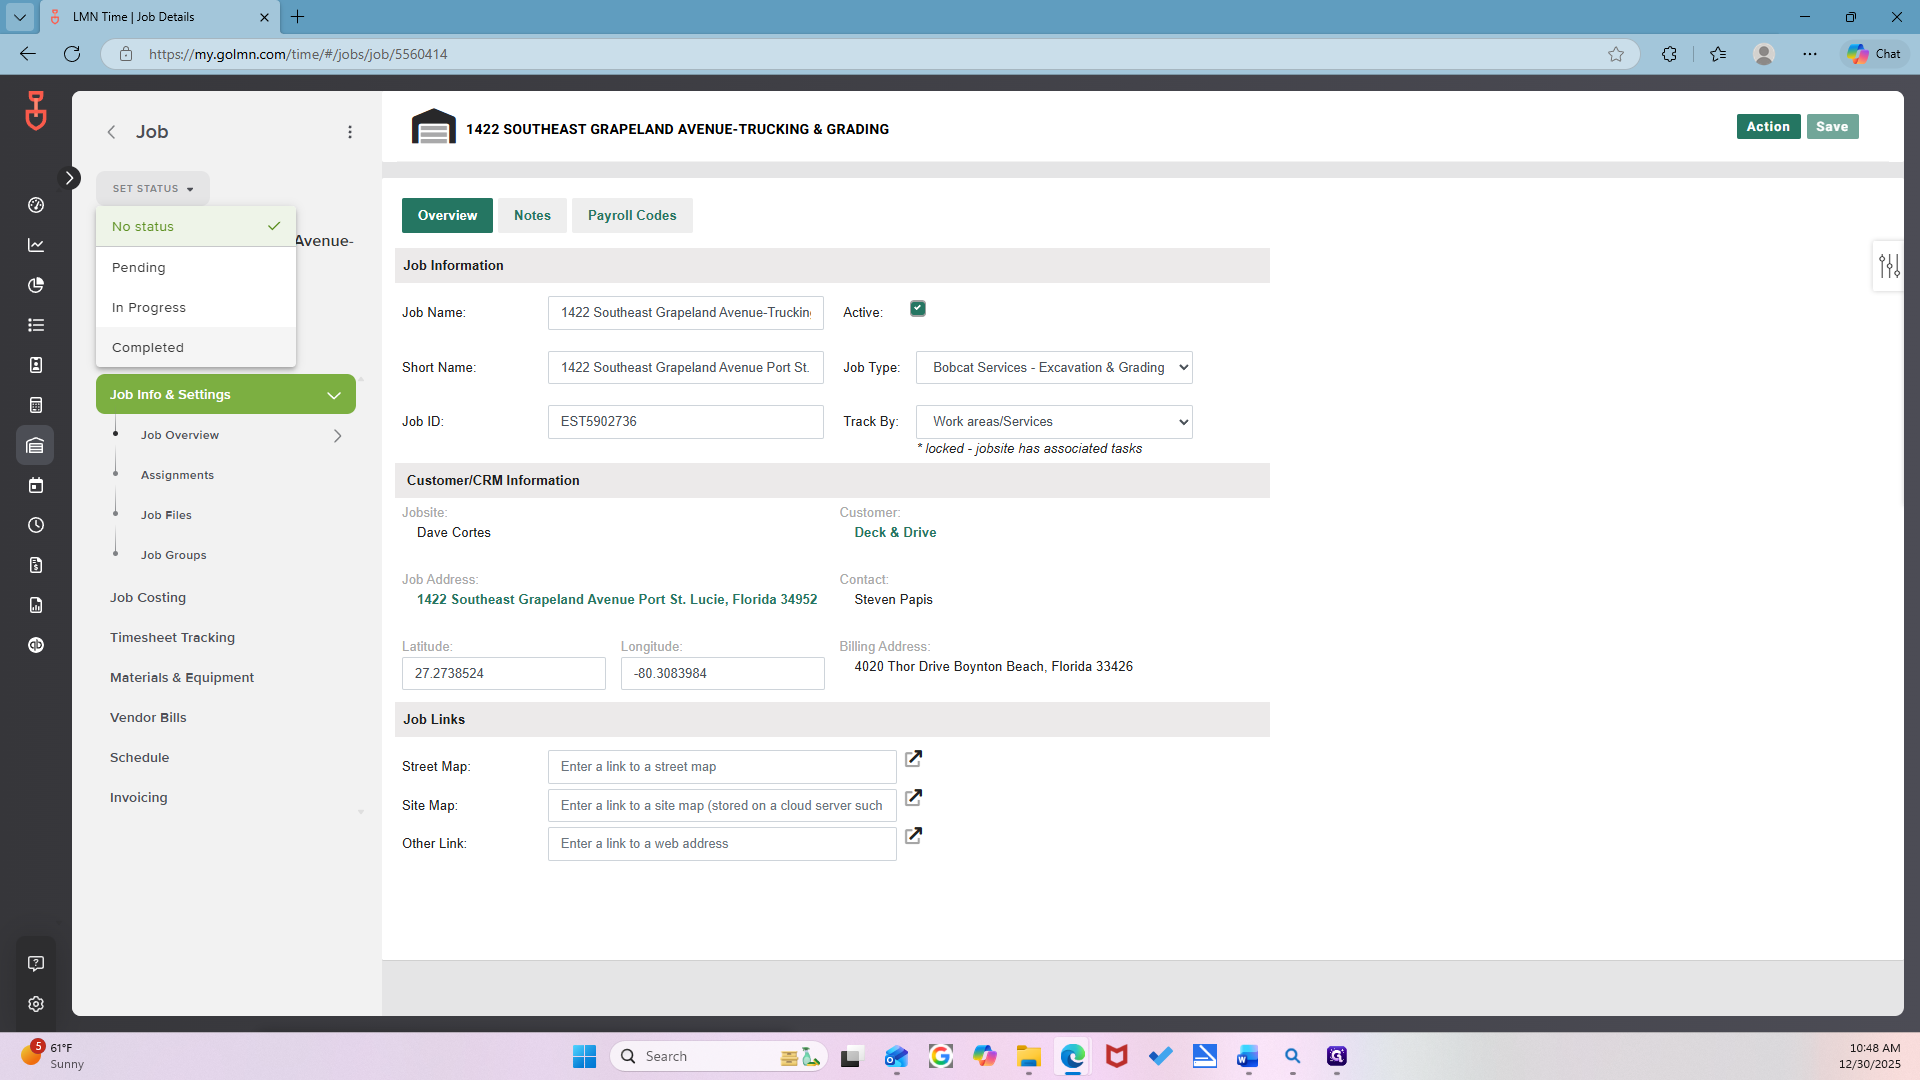
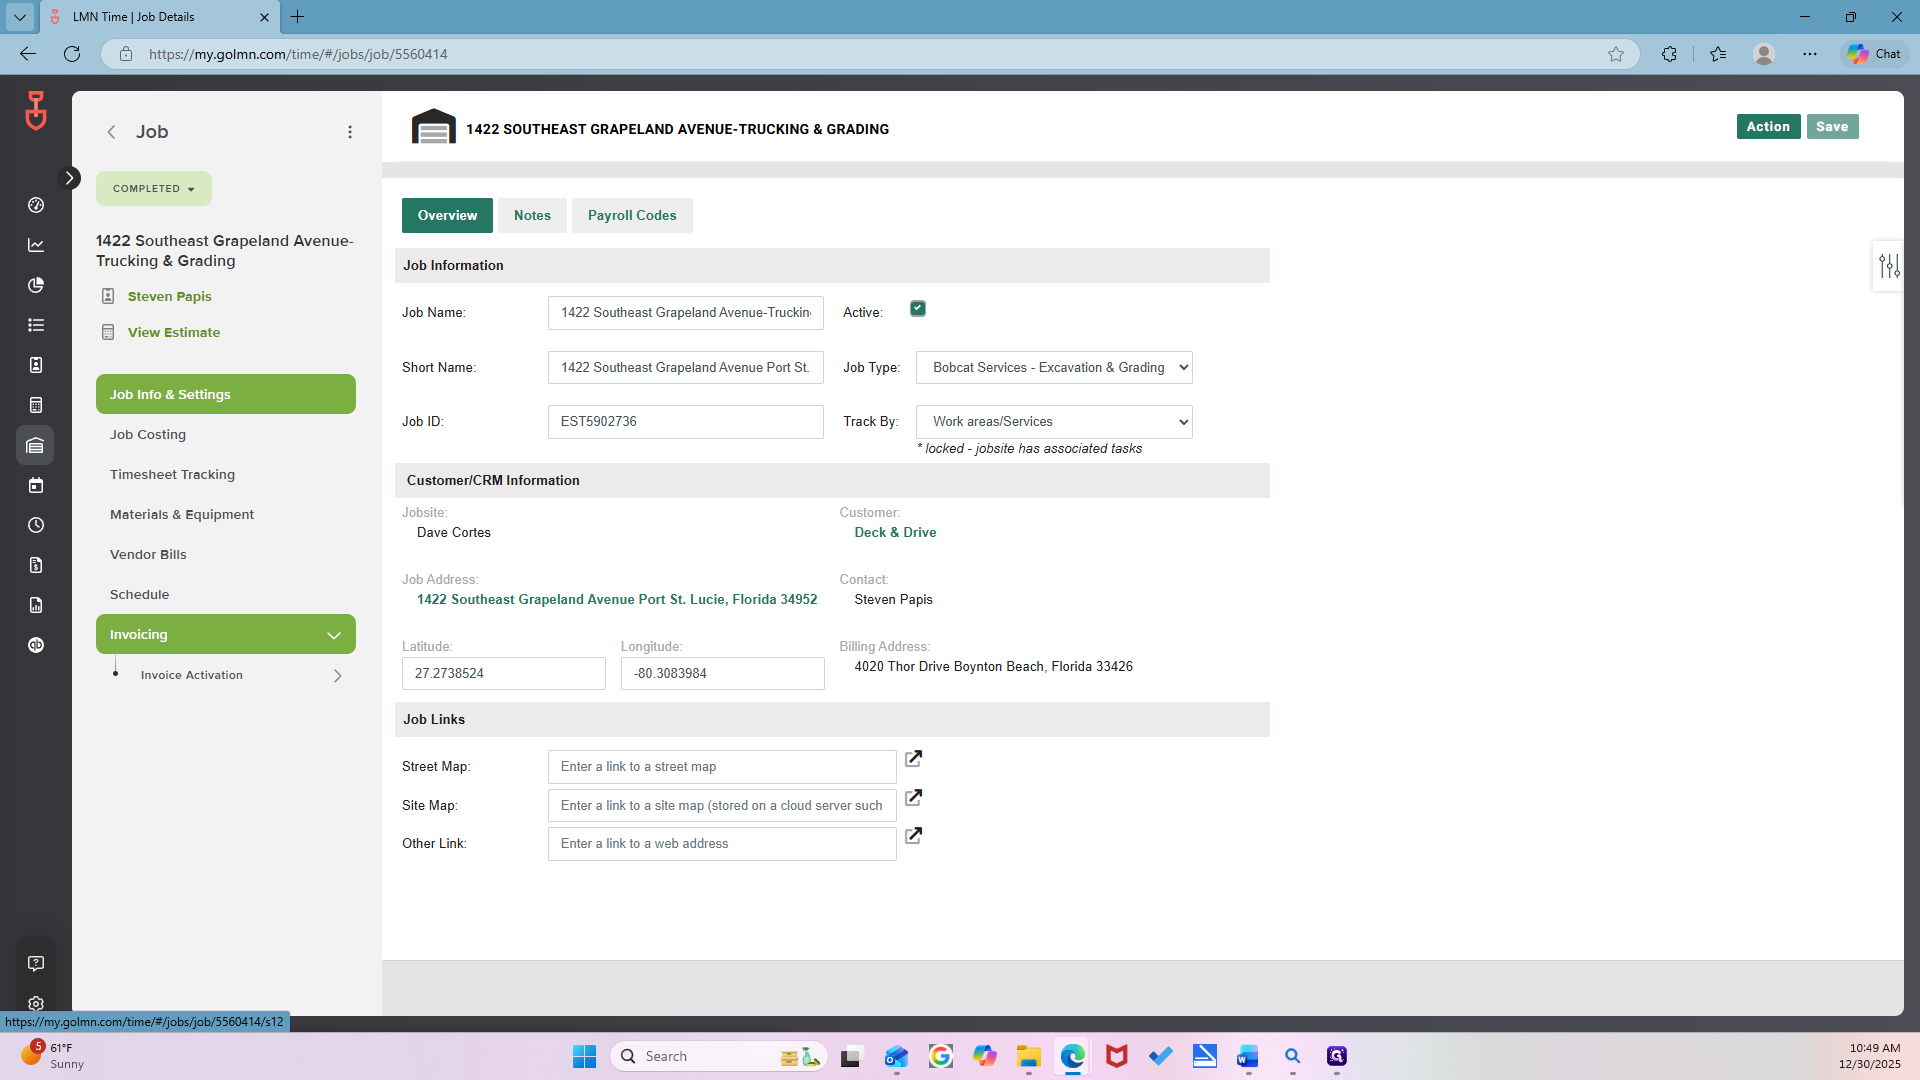
Once you find it, click on it. If a job has been created, click the "View Job" tab.

There is no job created, so we need to create one. Mm-hmm.
No, but how do I know that no job was created? It says to create a job. Oh, okay. If it says "View Job," this will... ...
will be the job. Okay.
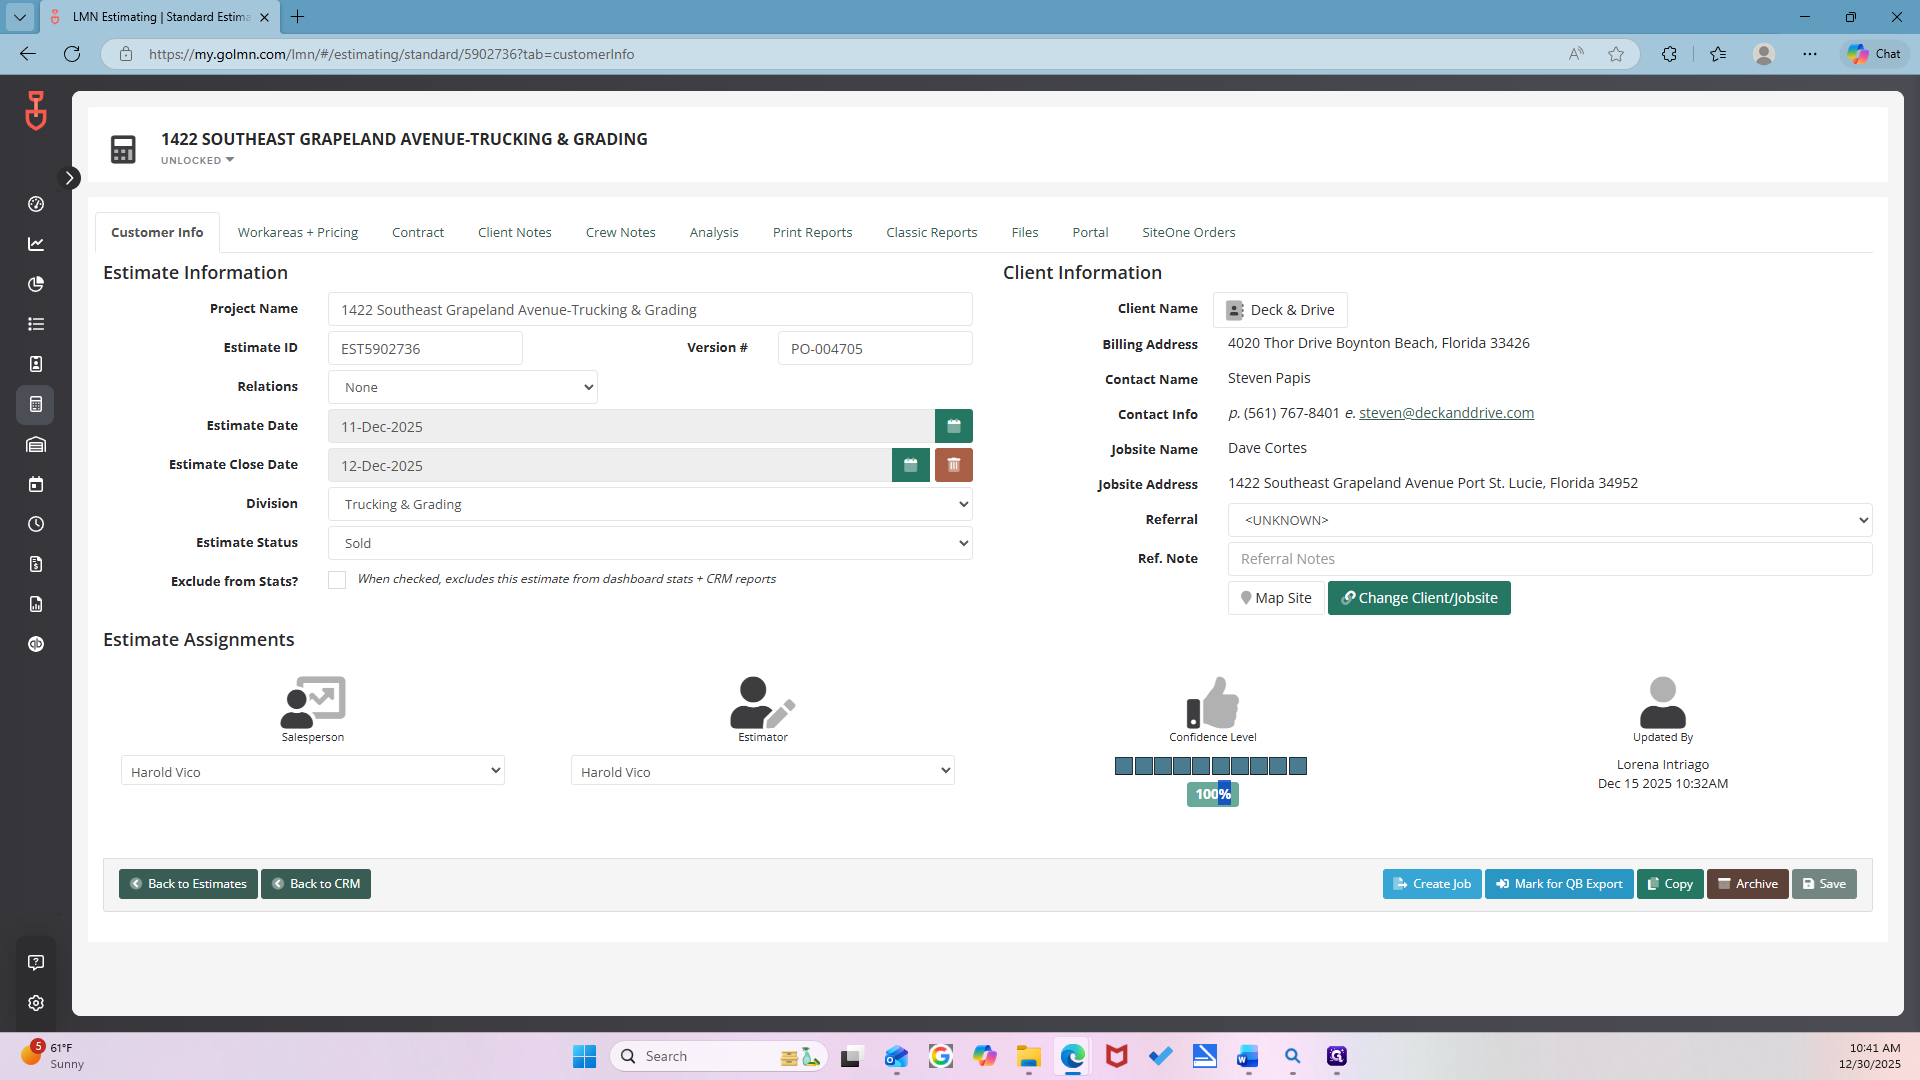
Type cr- create job. Mm-hmm. You will create a job for it. Ideally, a job should already be created in the schedule. Like this?
Yes. No, this is not in the schedule or created. We are creating it and adding it now. Okay. For job type, select the job box and choose Bobcat Services and Excavation and Grading. Remember, this is always for excavation jobs.
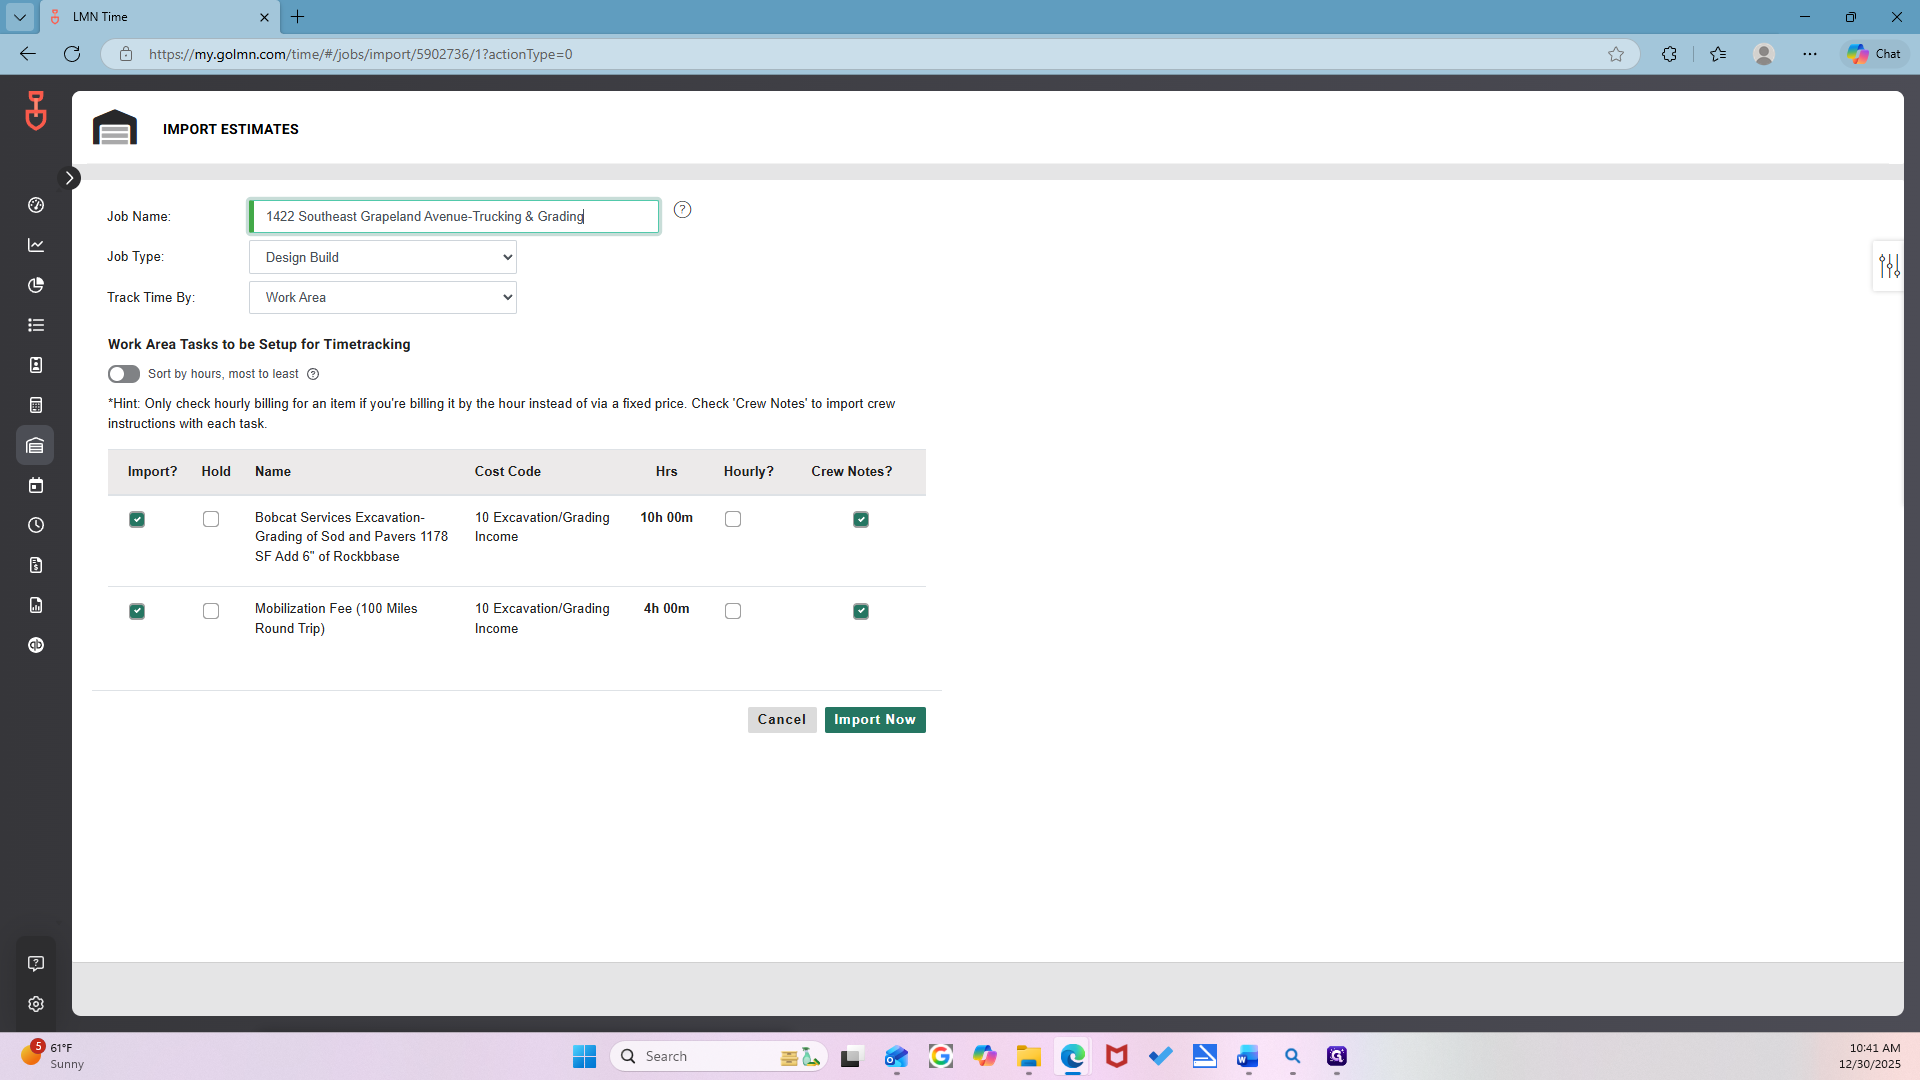
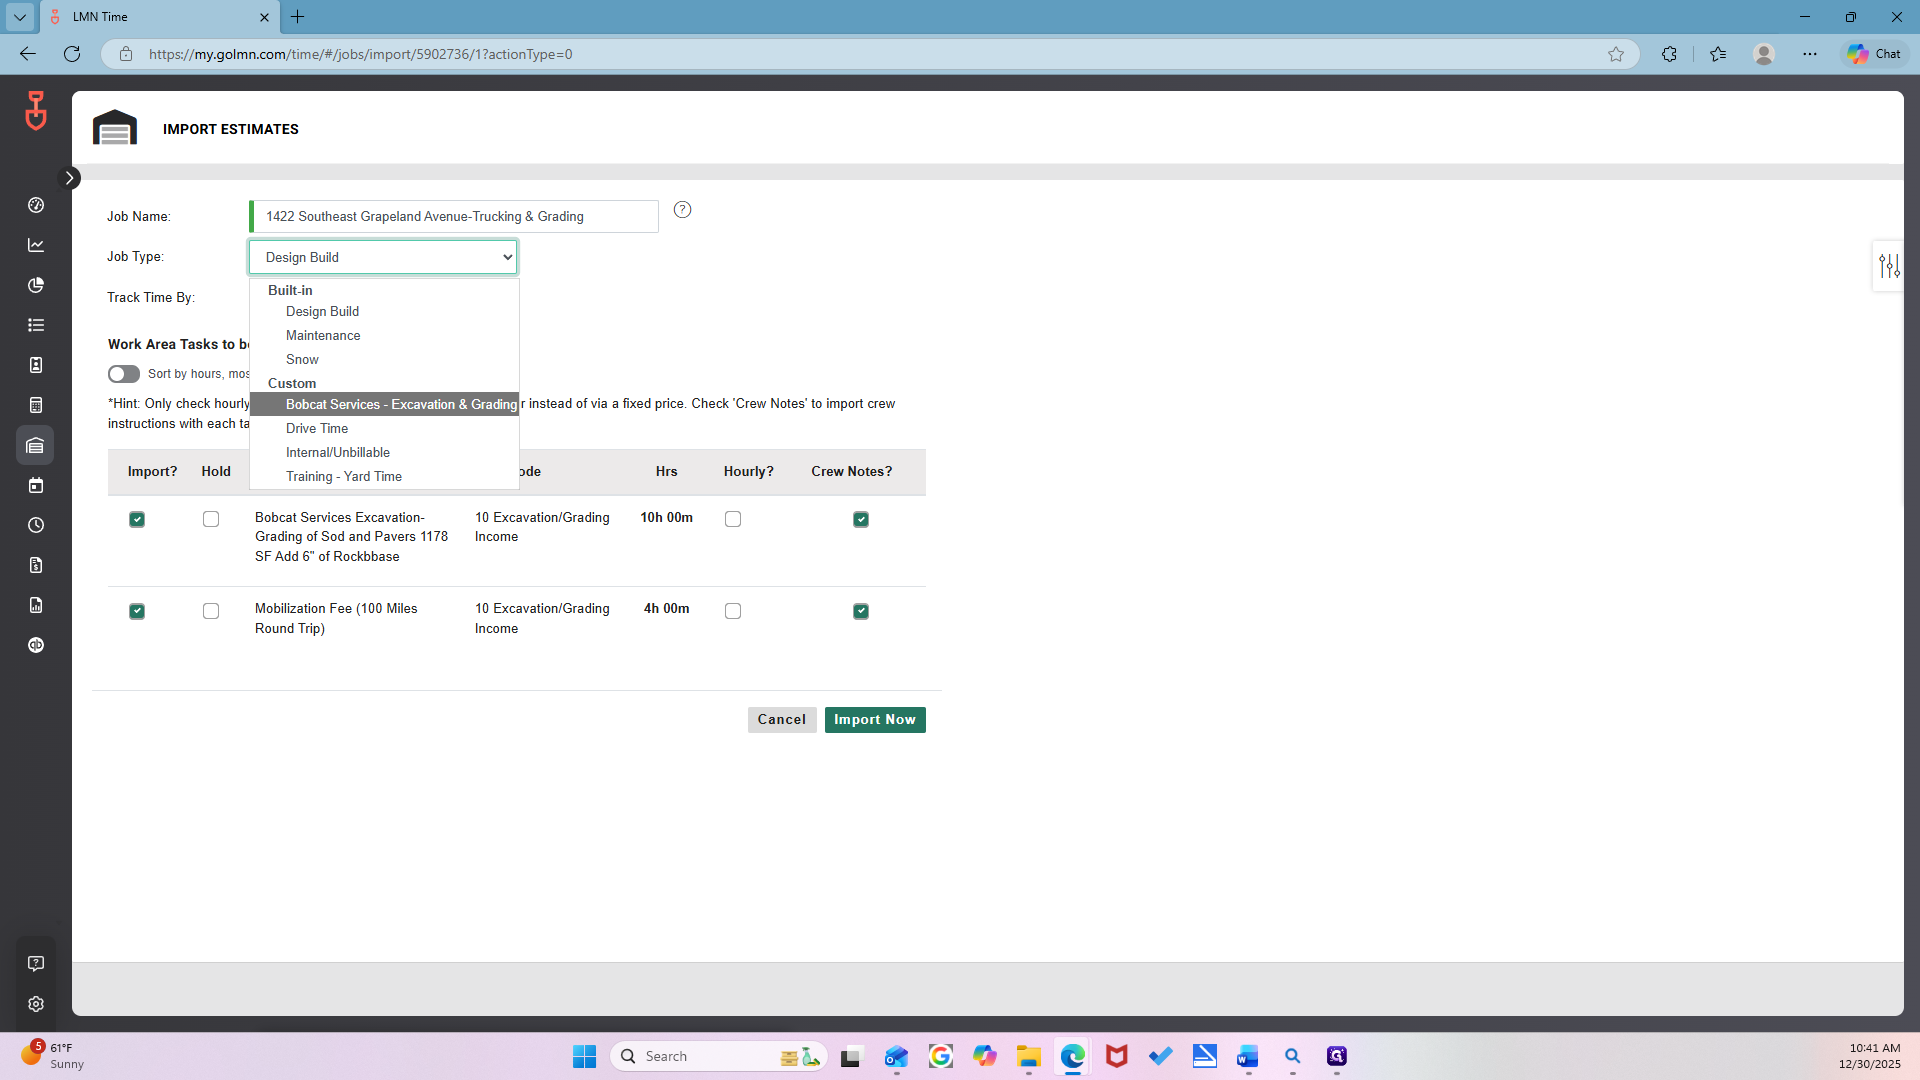
That's it. Leave everything else the same. Now, go ahead and import.
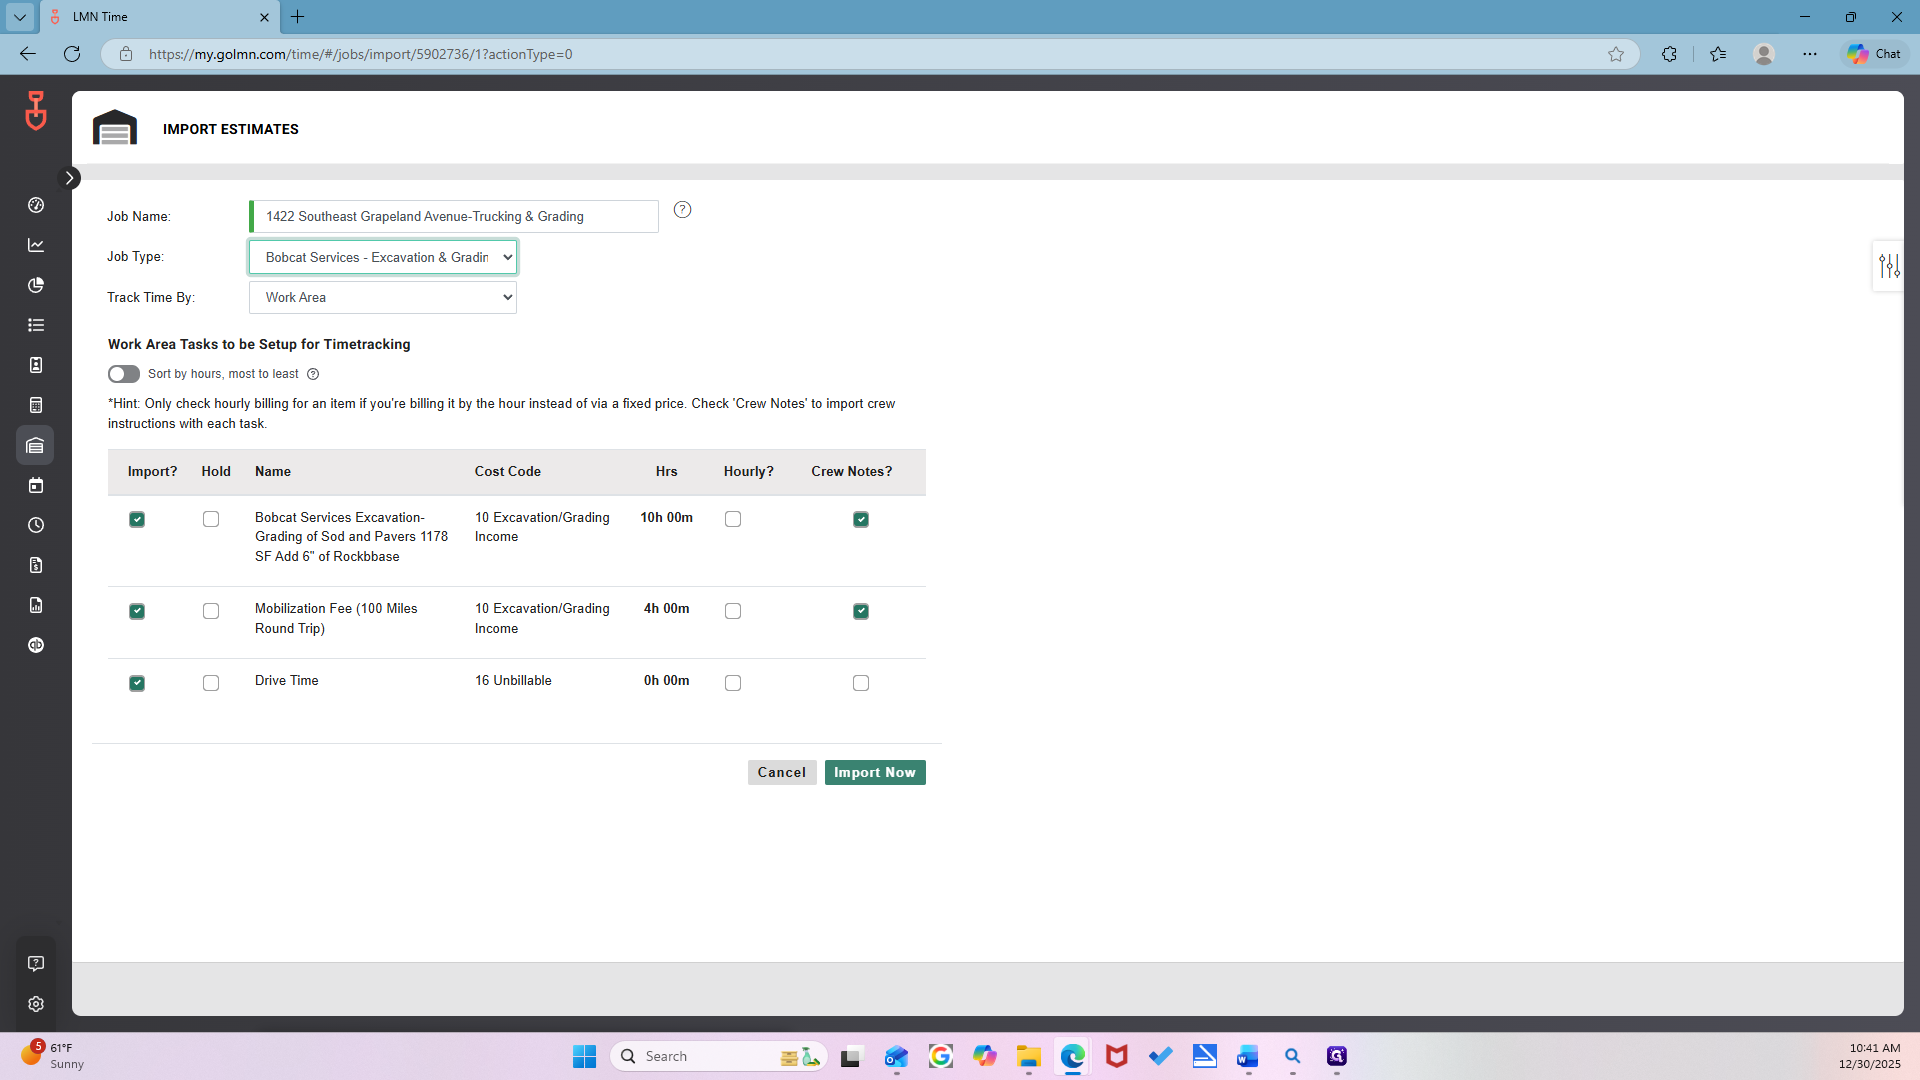
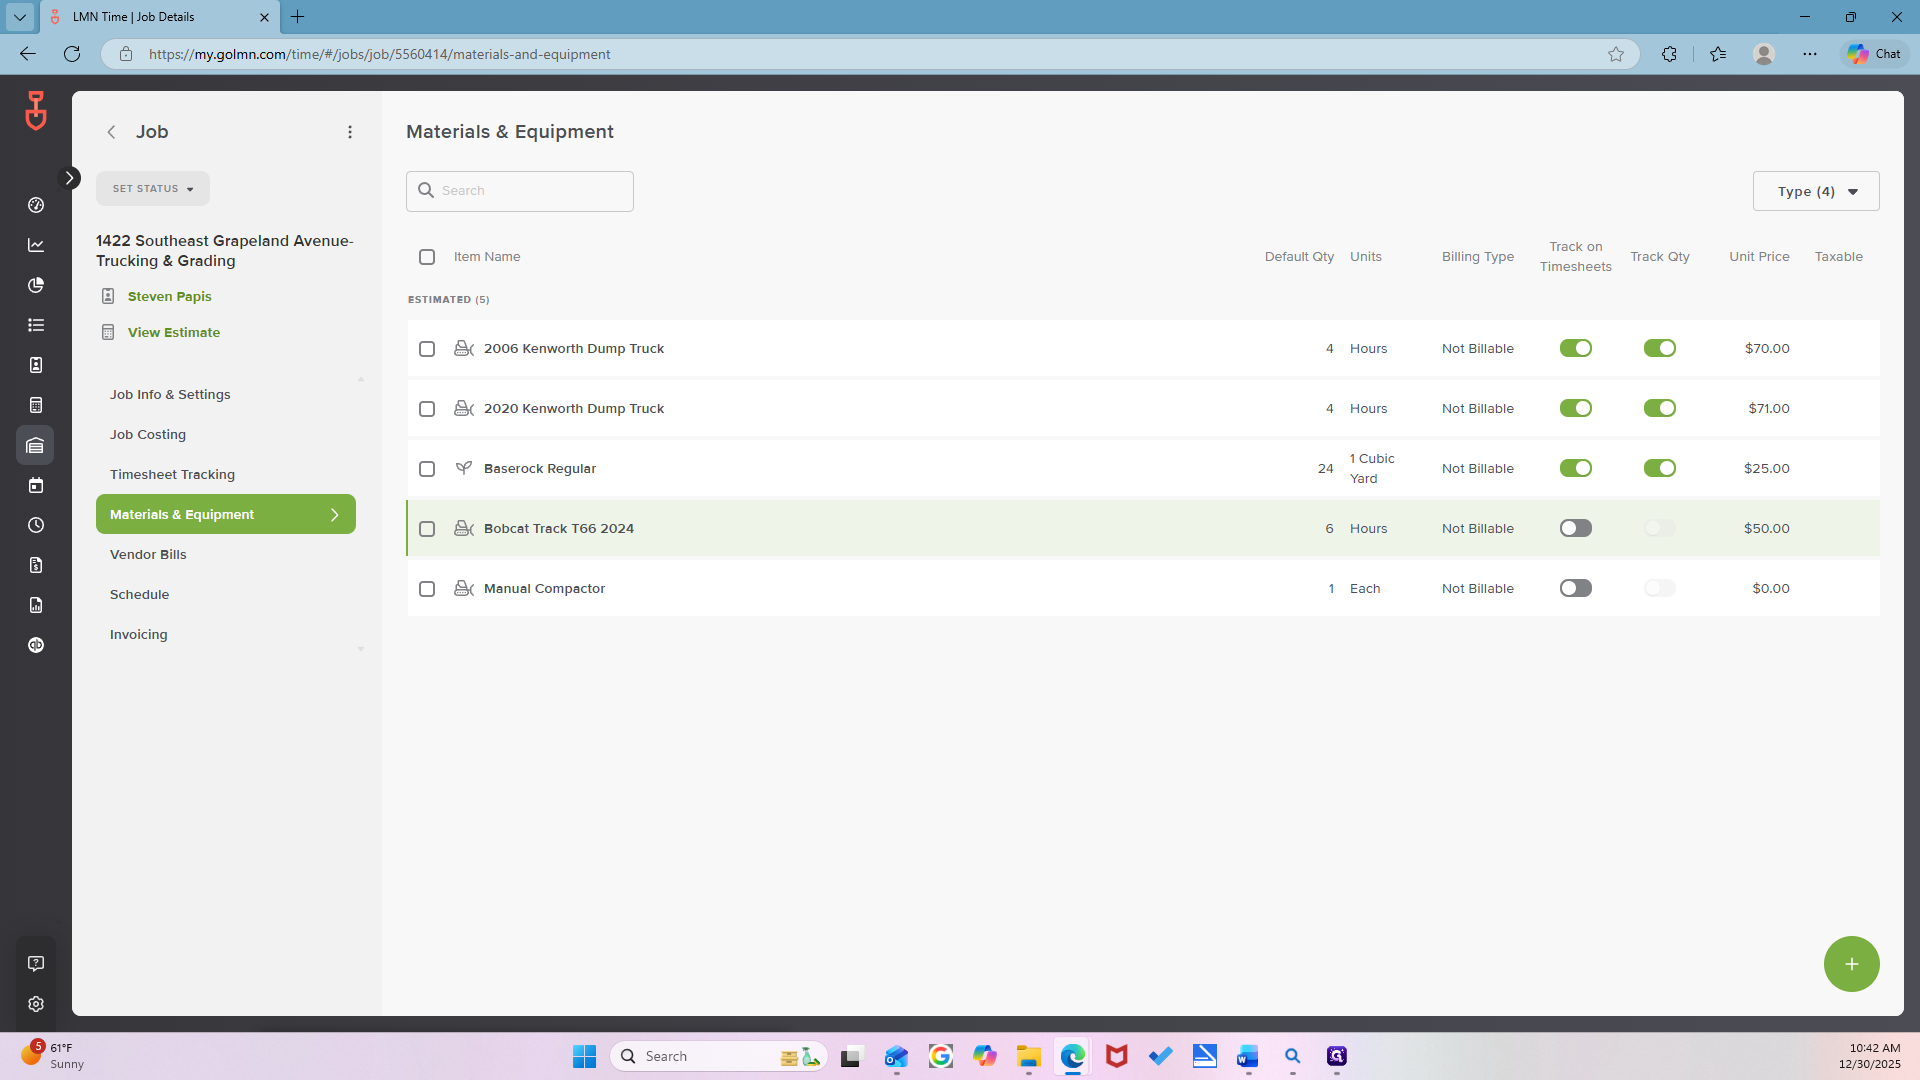
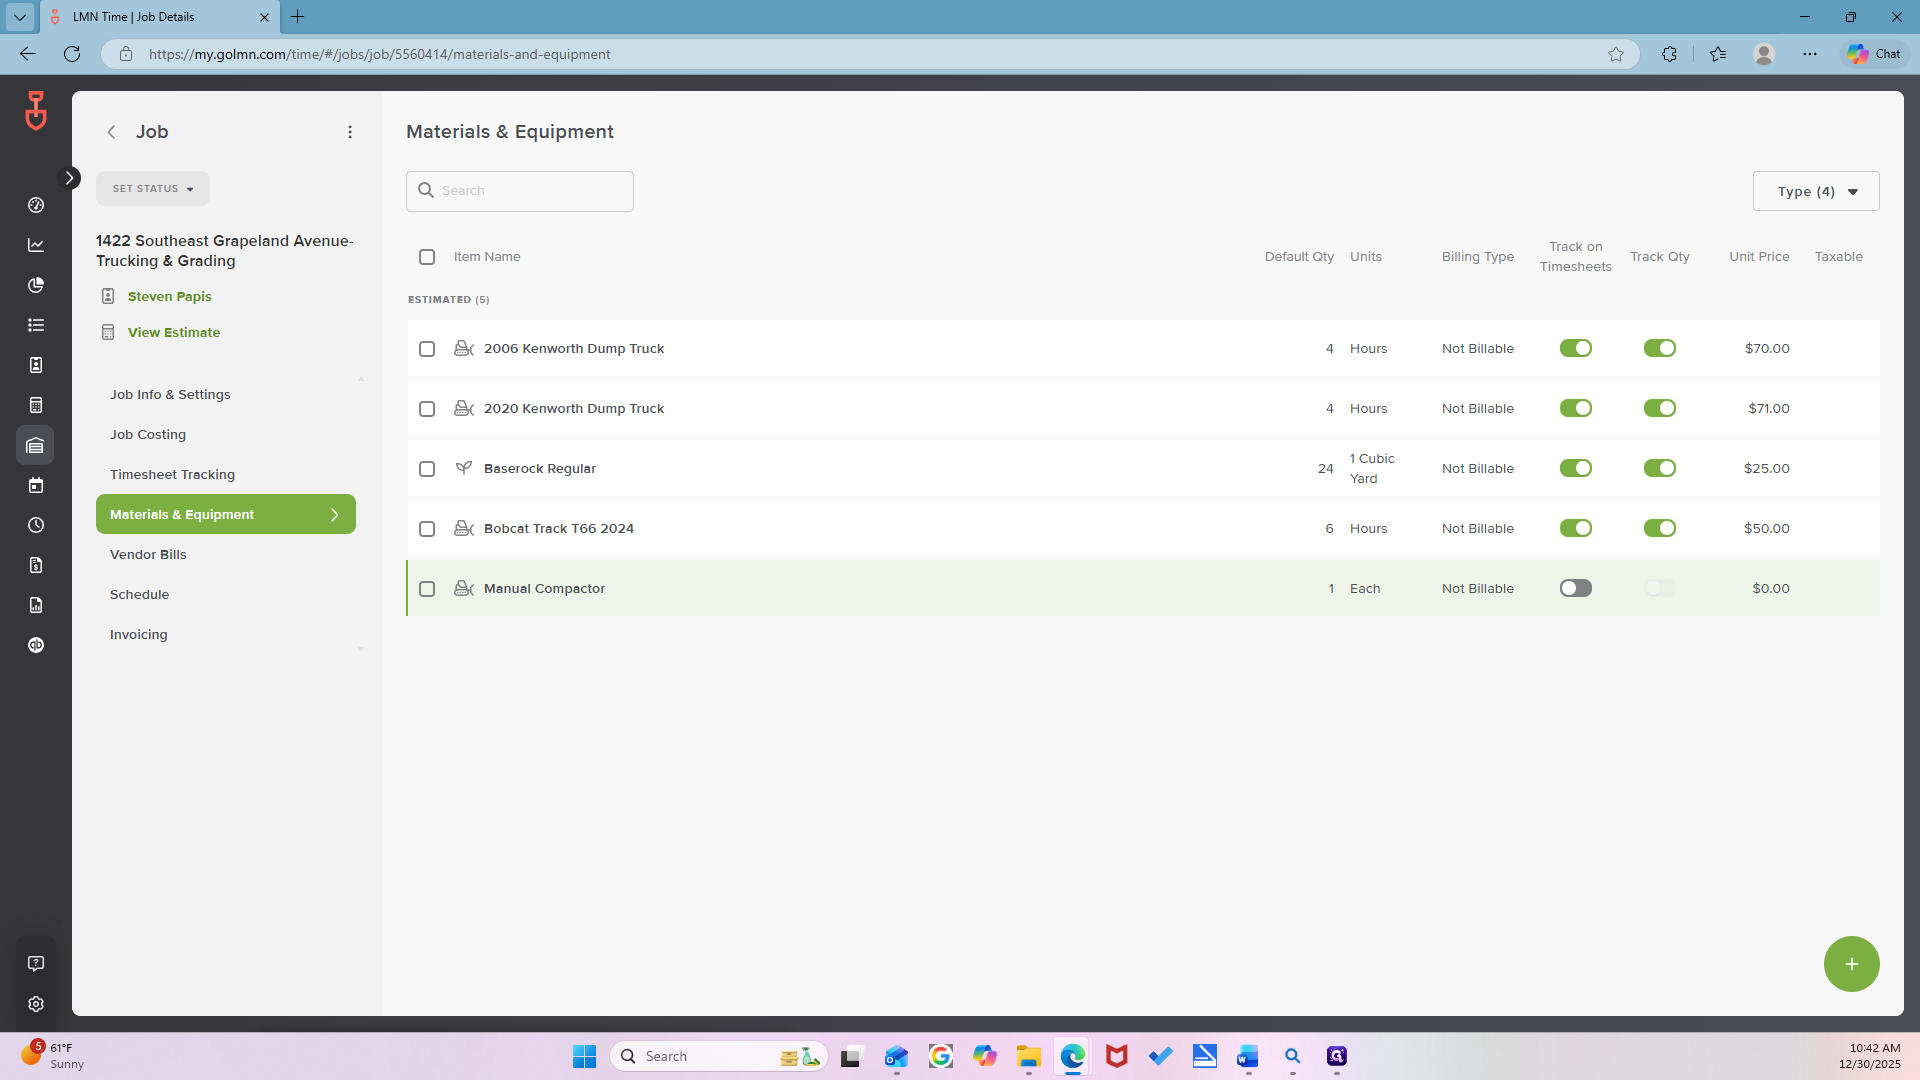
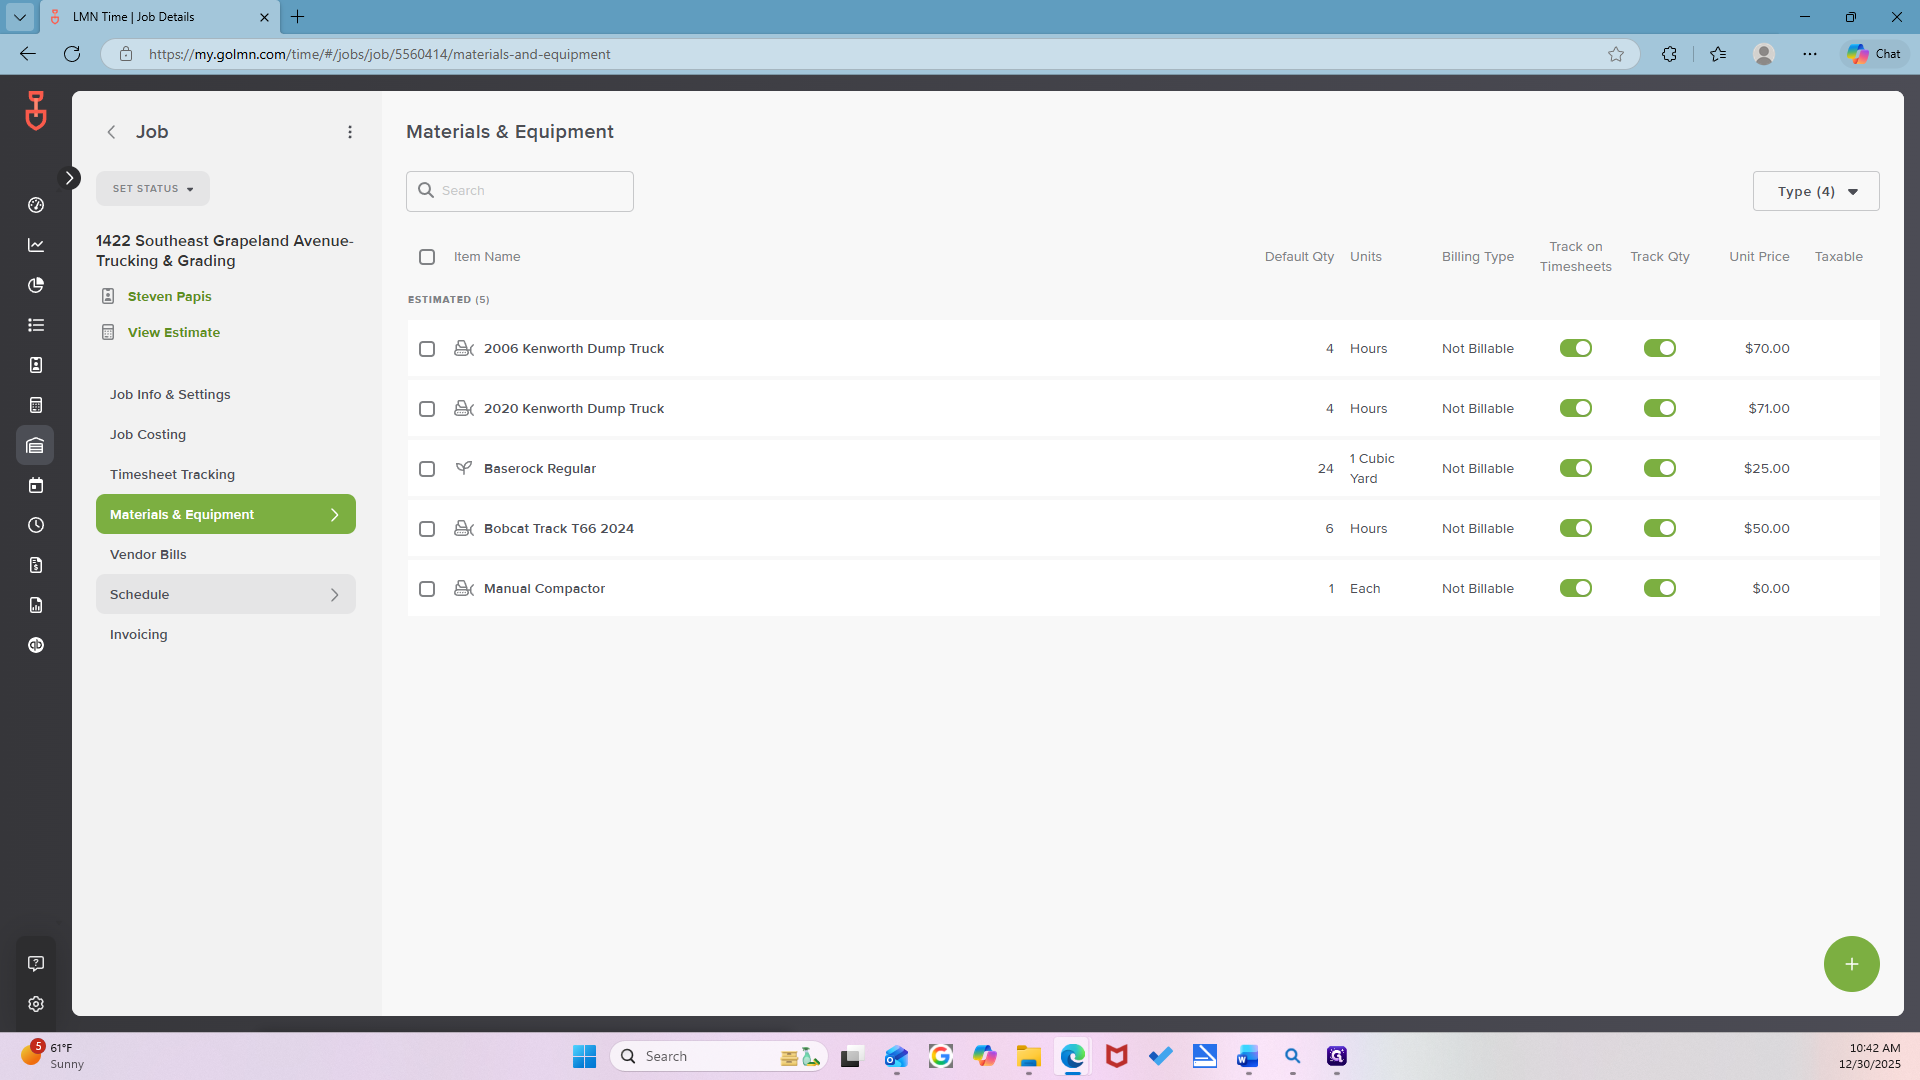
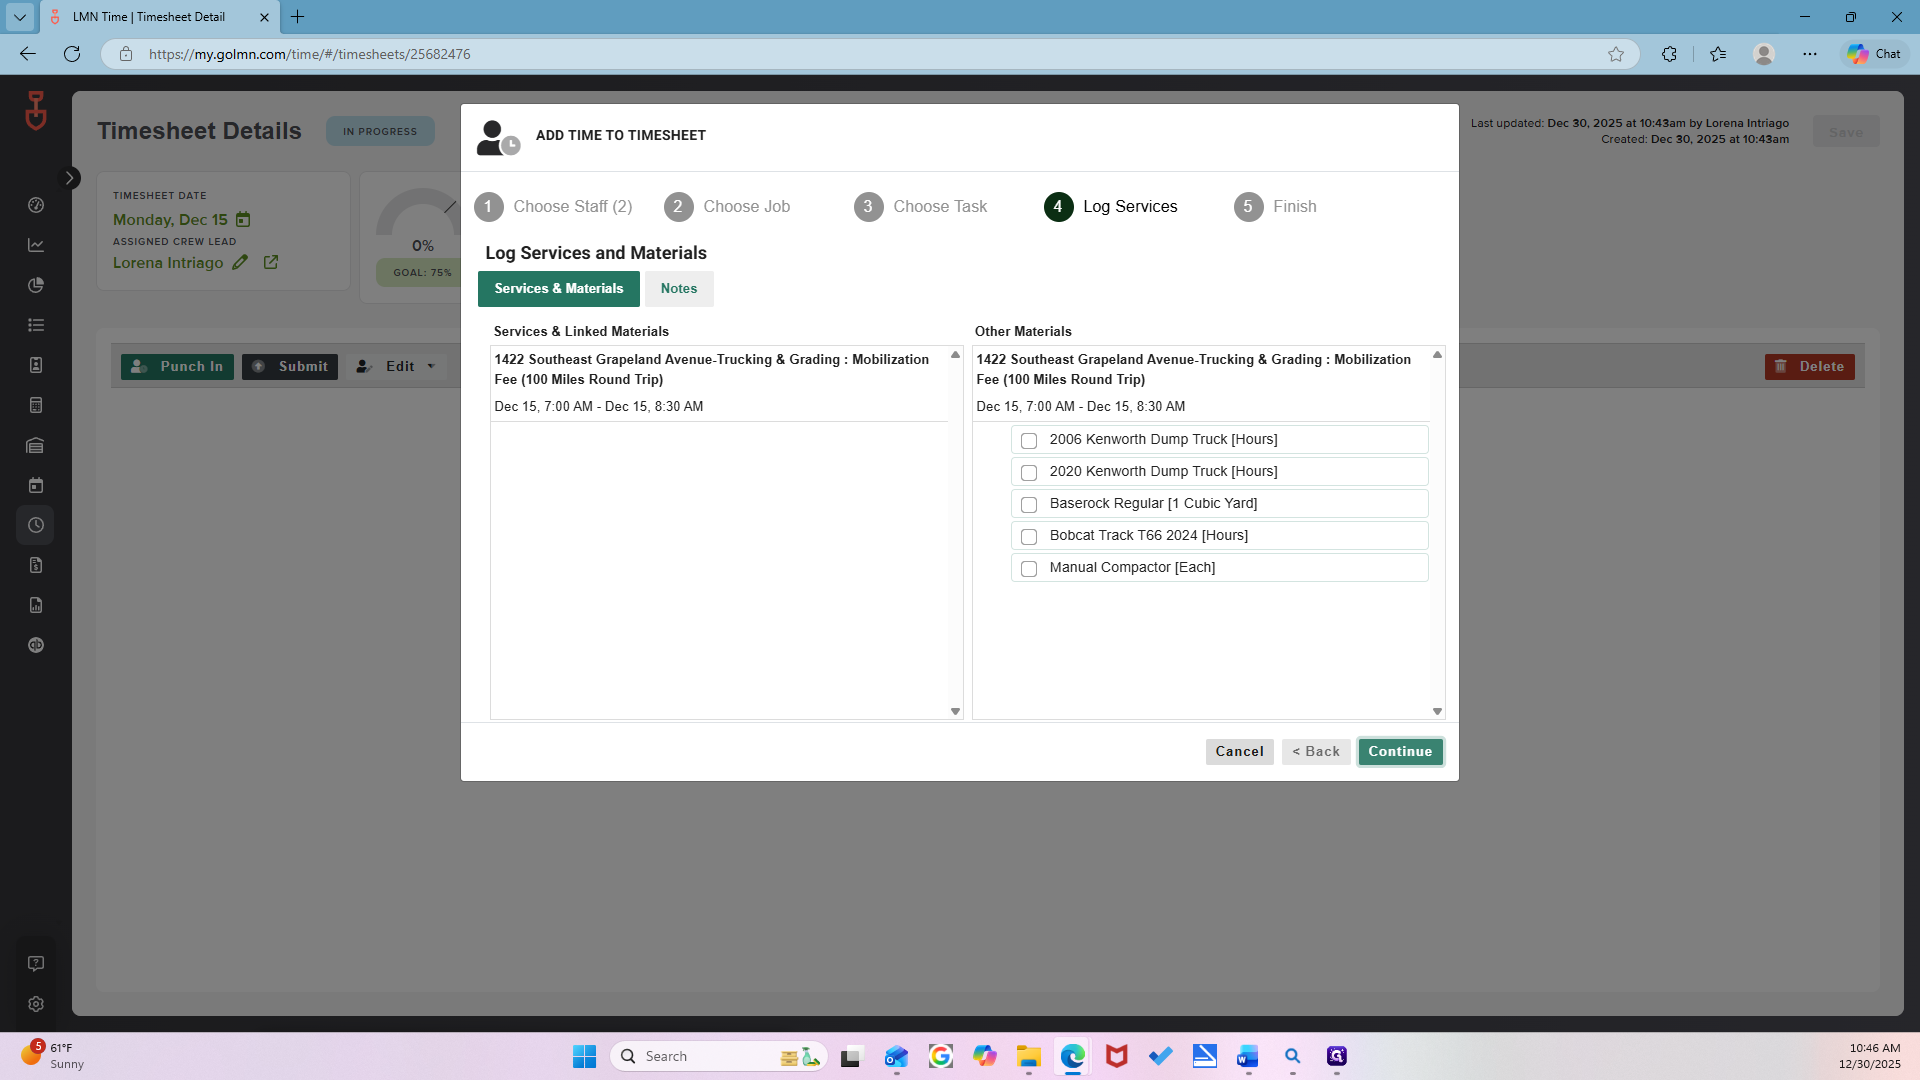
Perfect. Next, go to the Materials and Equipment tab on the left side. Mm-hmm.
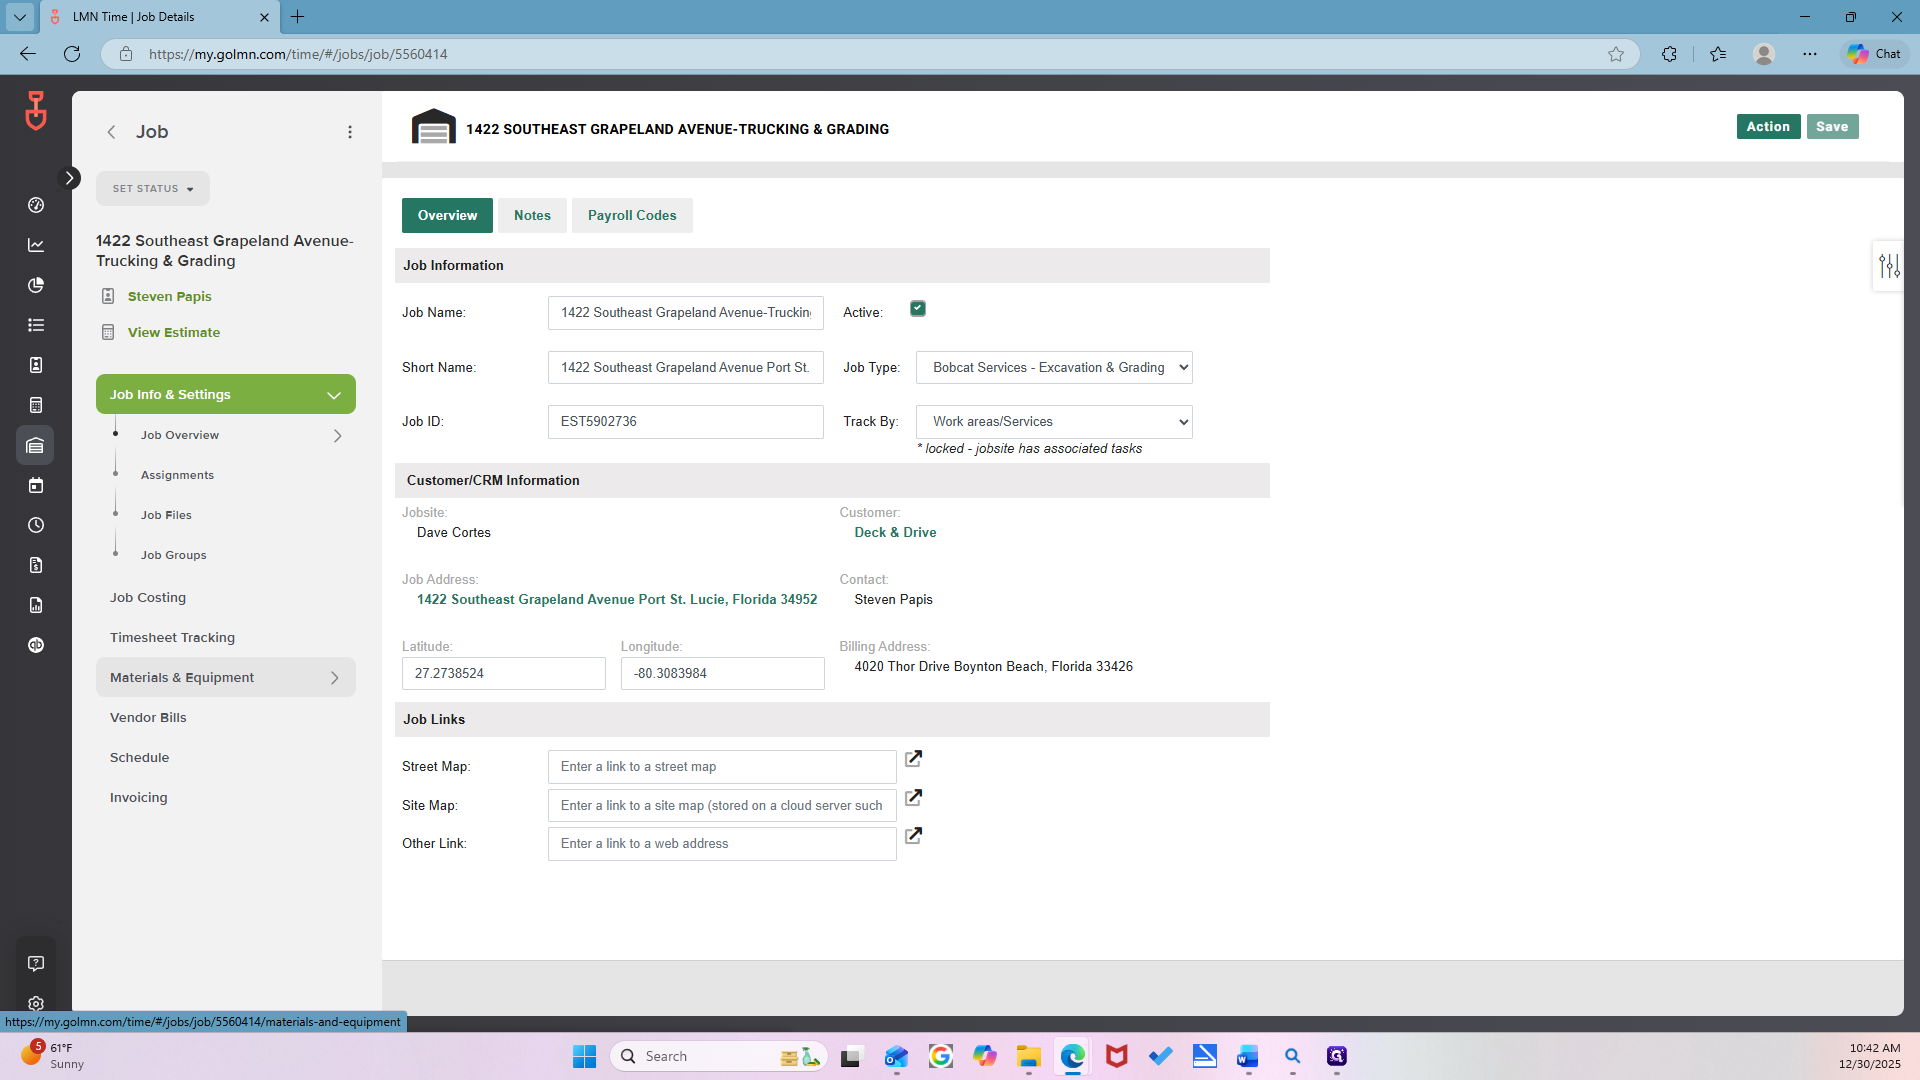
Make sure this is turned on every time. Do you see where it says "Track on timesheets"? Turn on the green light. Yes.
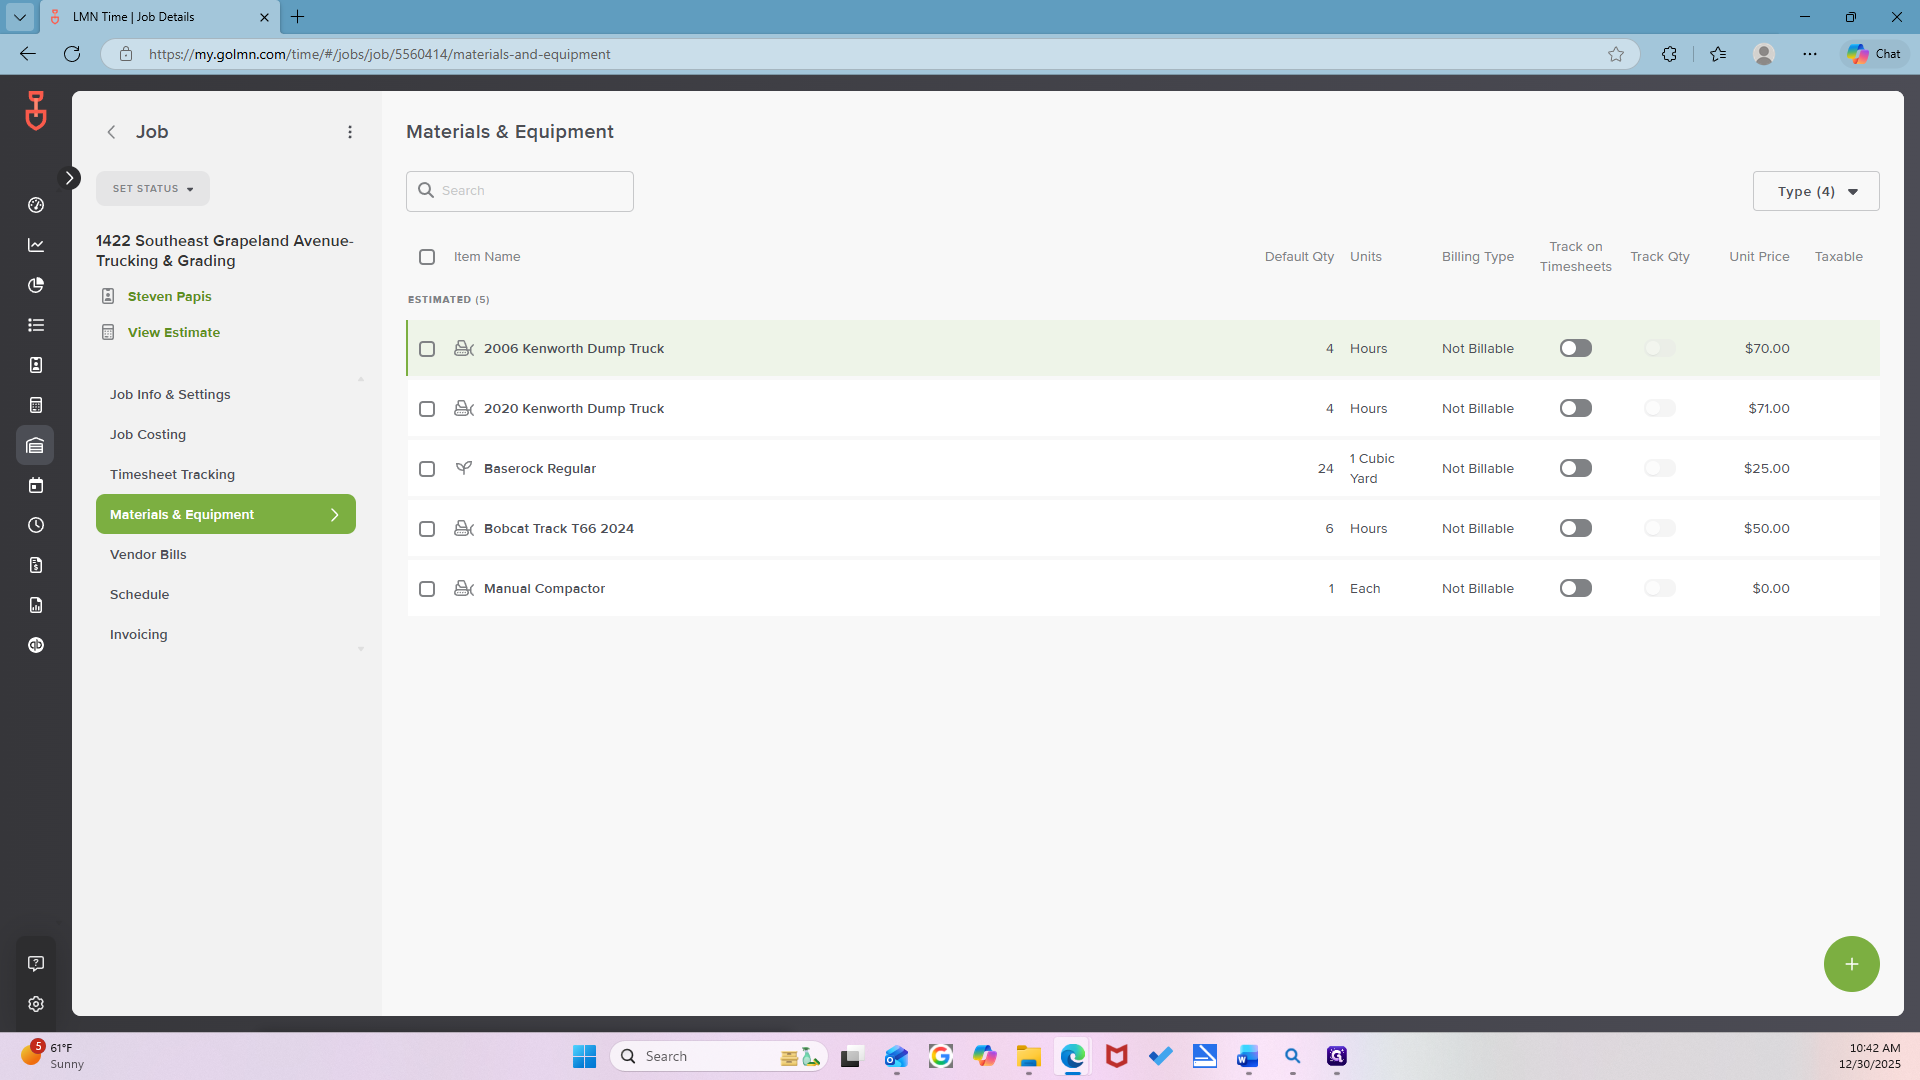
Make sure all of them are green.
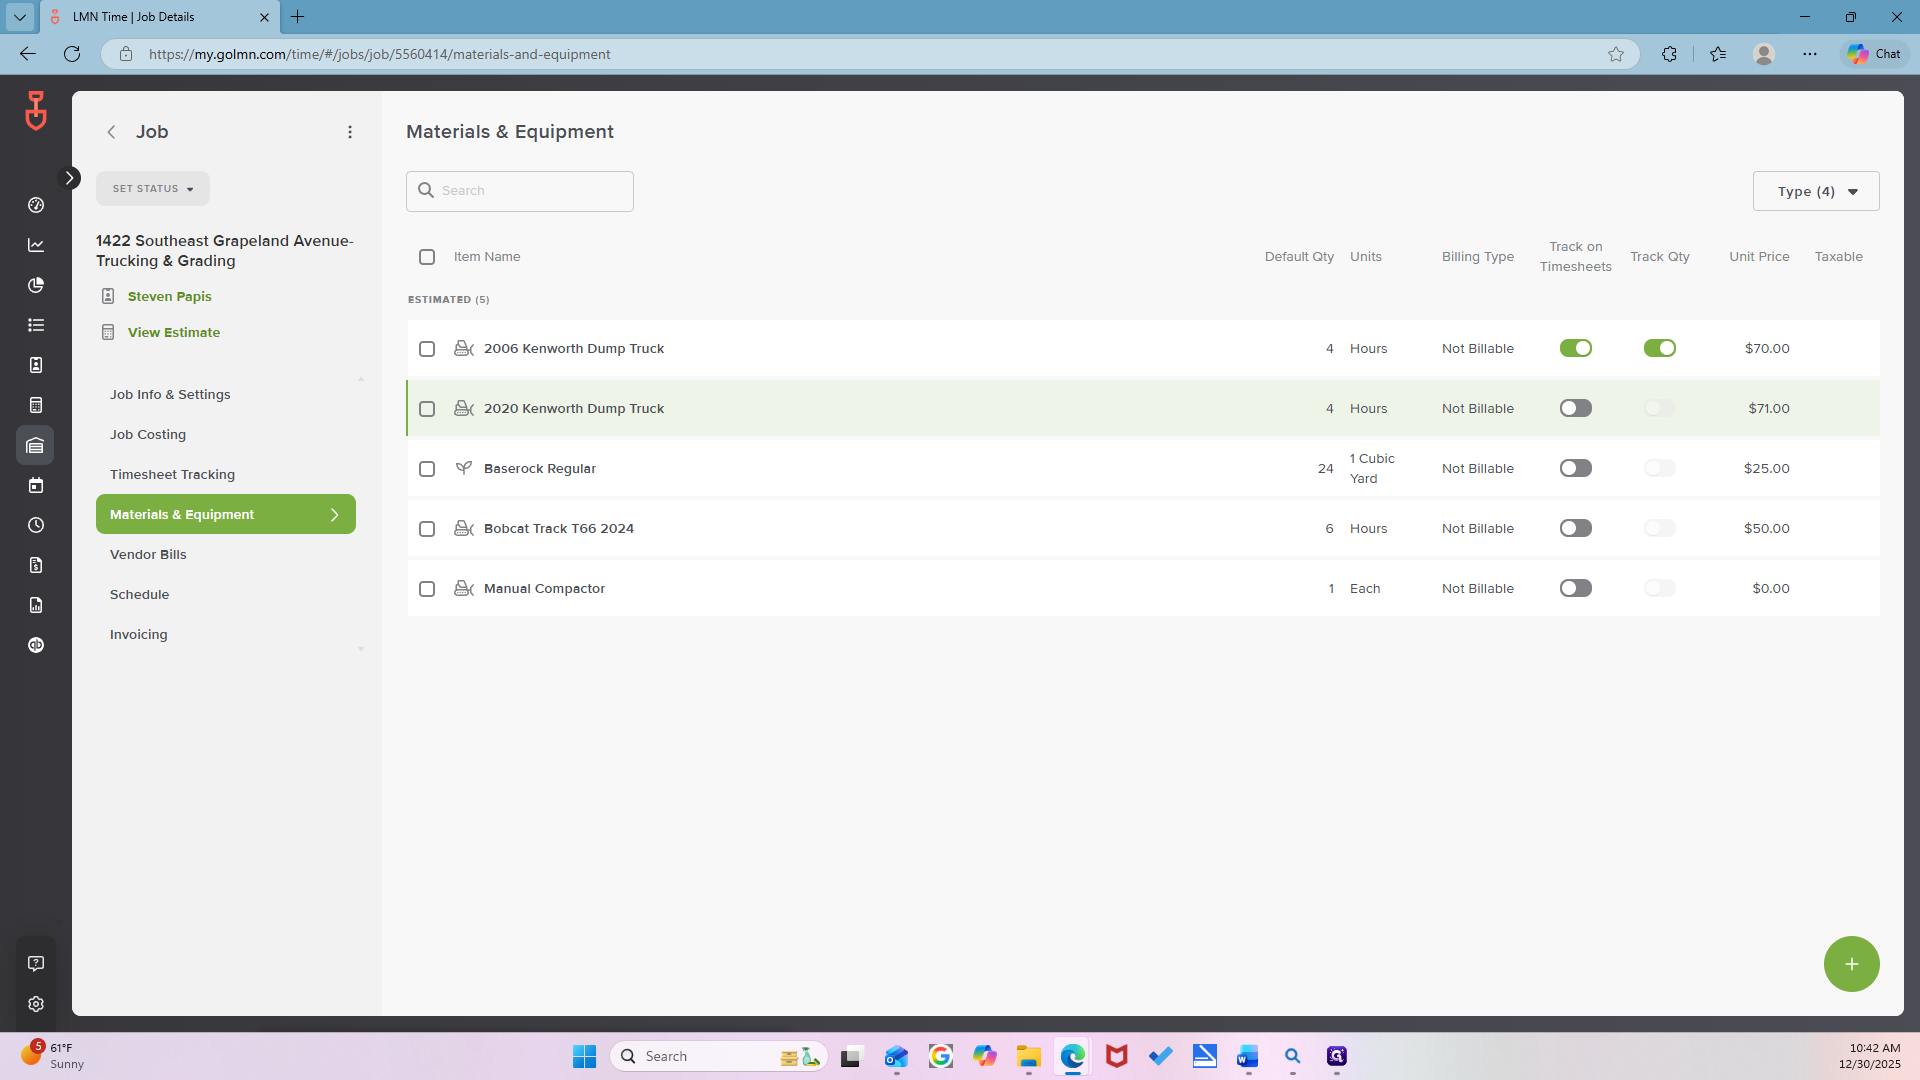
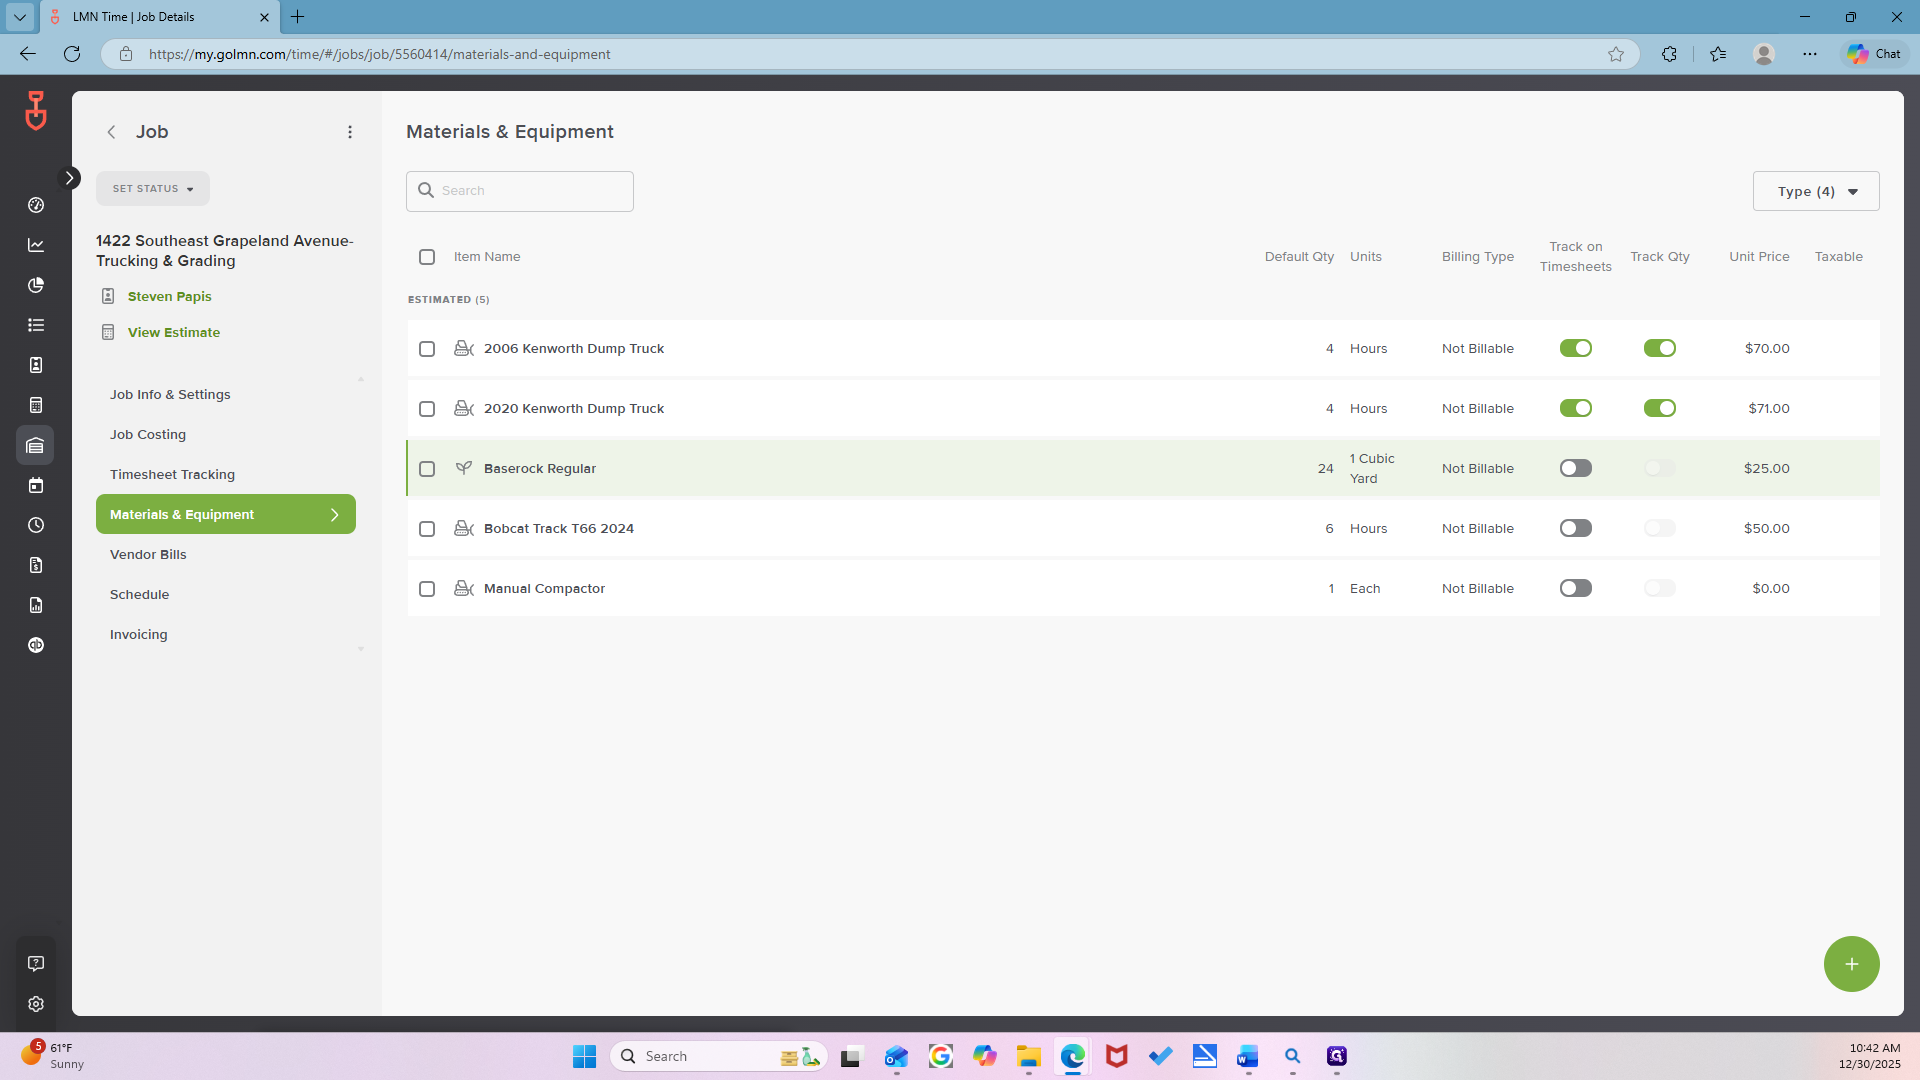
Perfect.
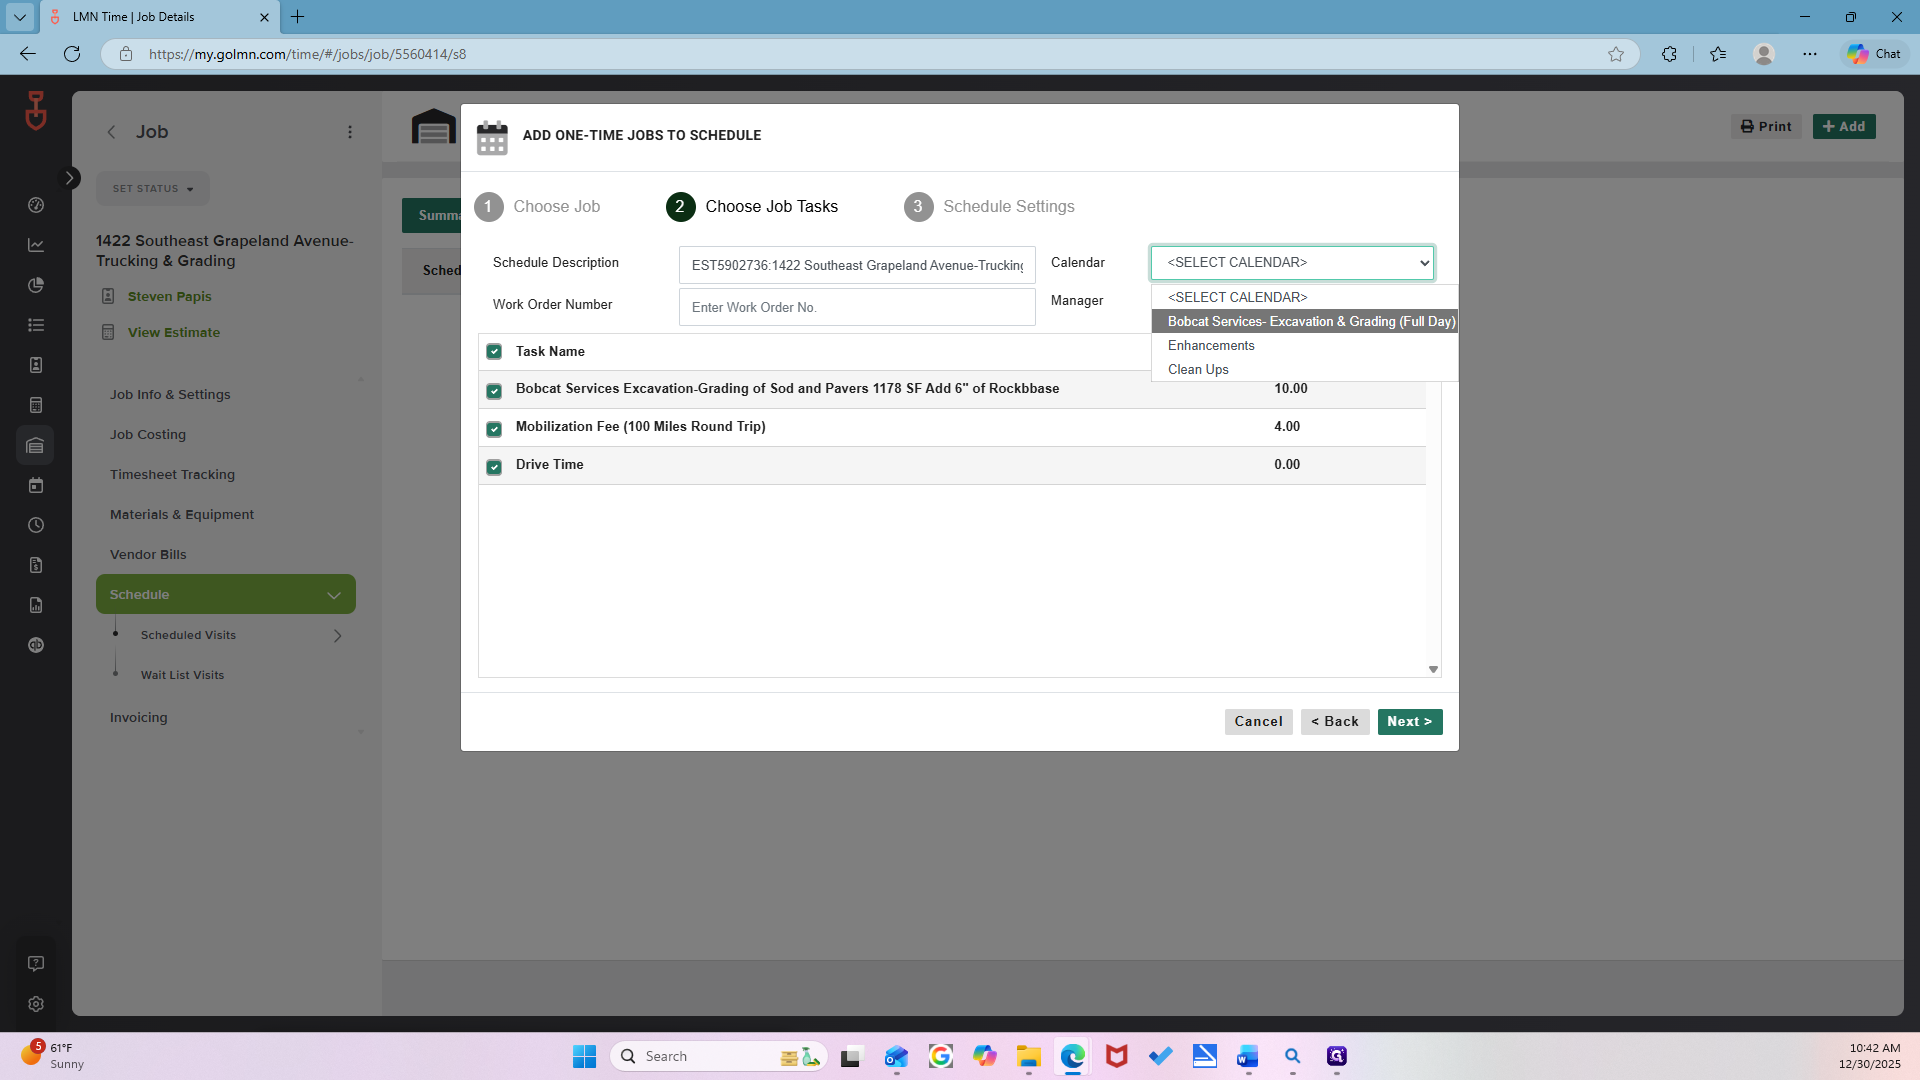
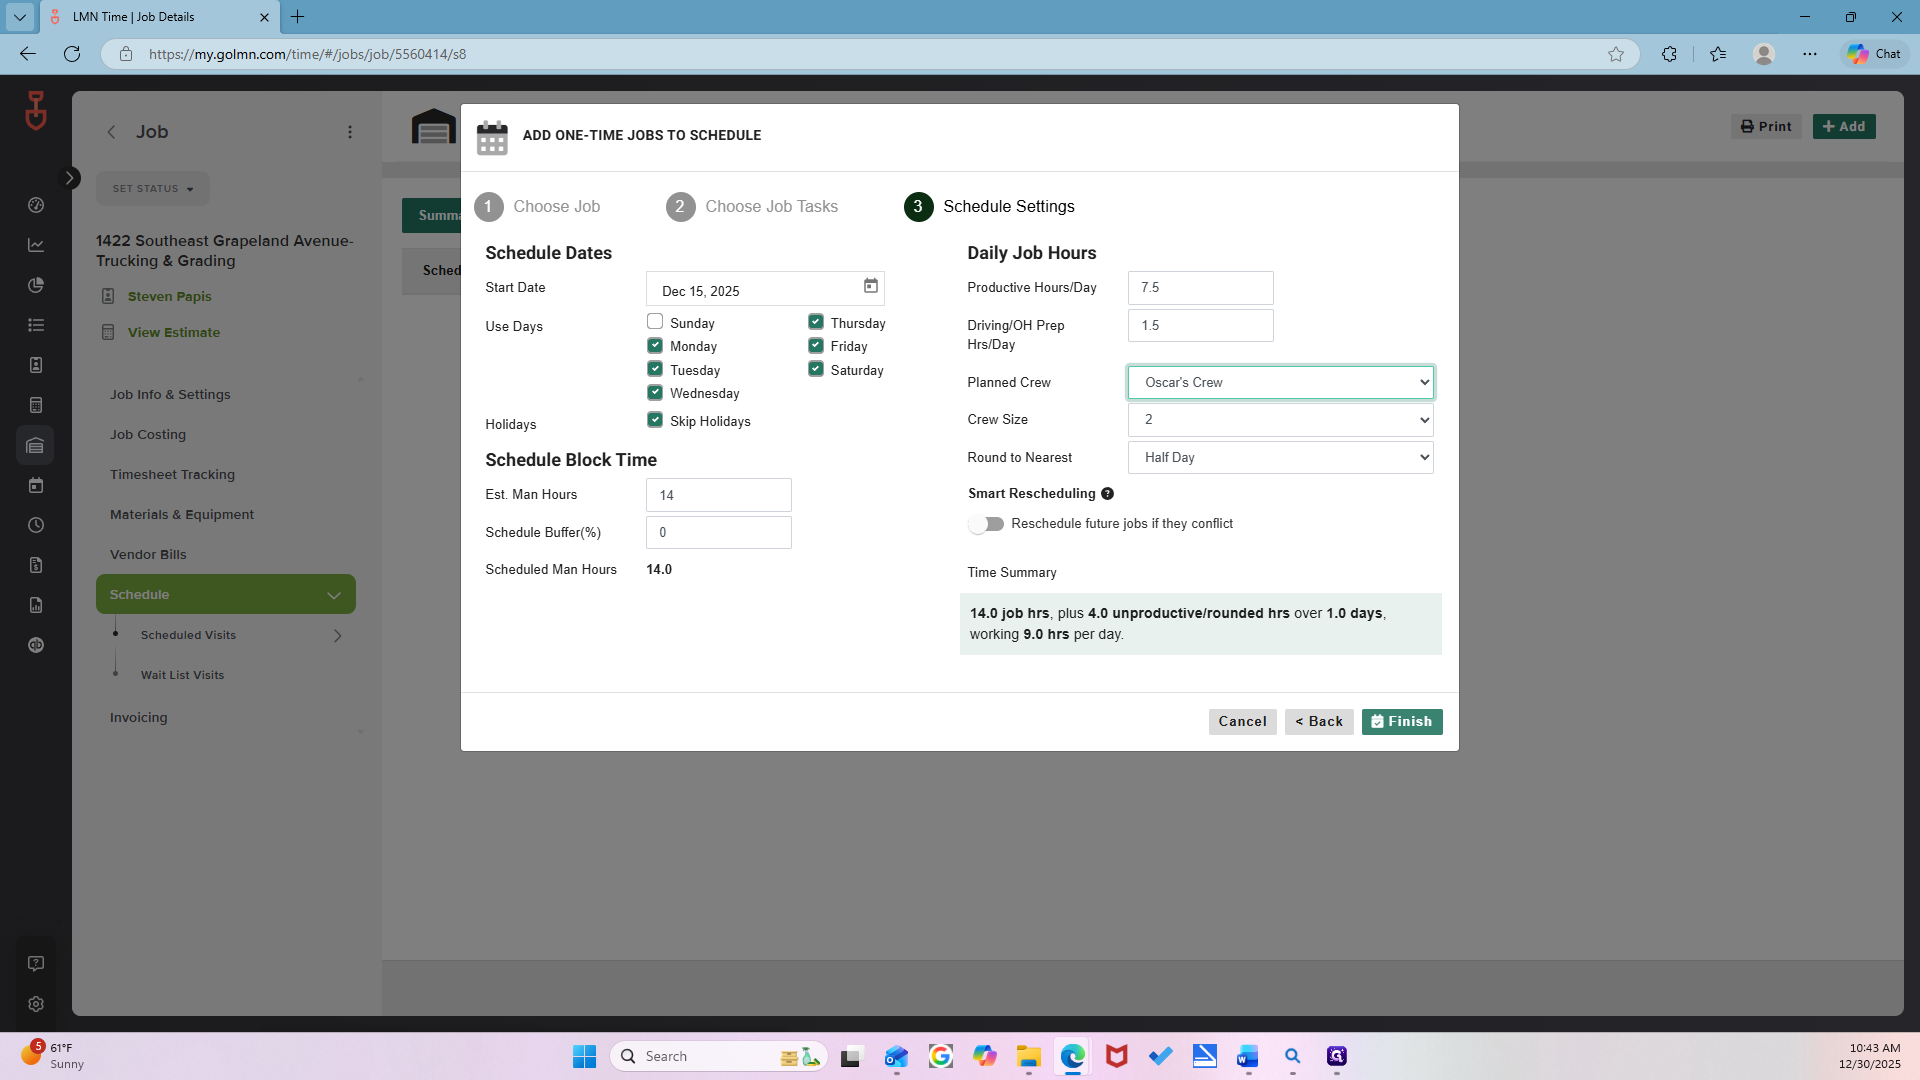
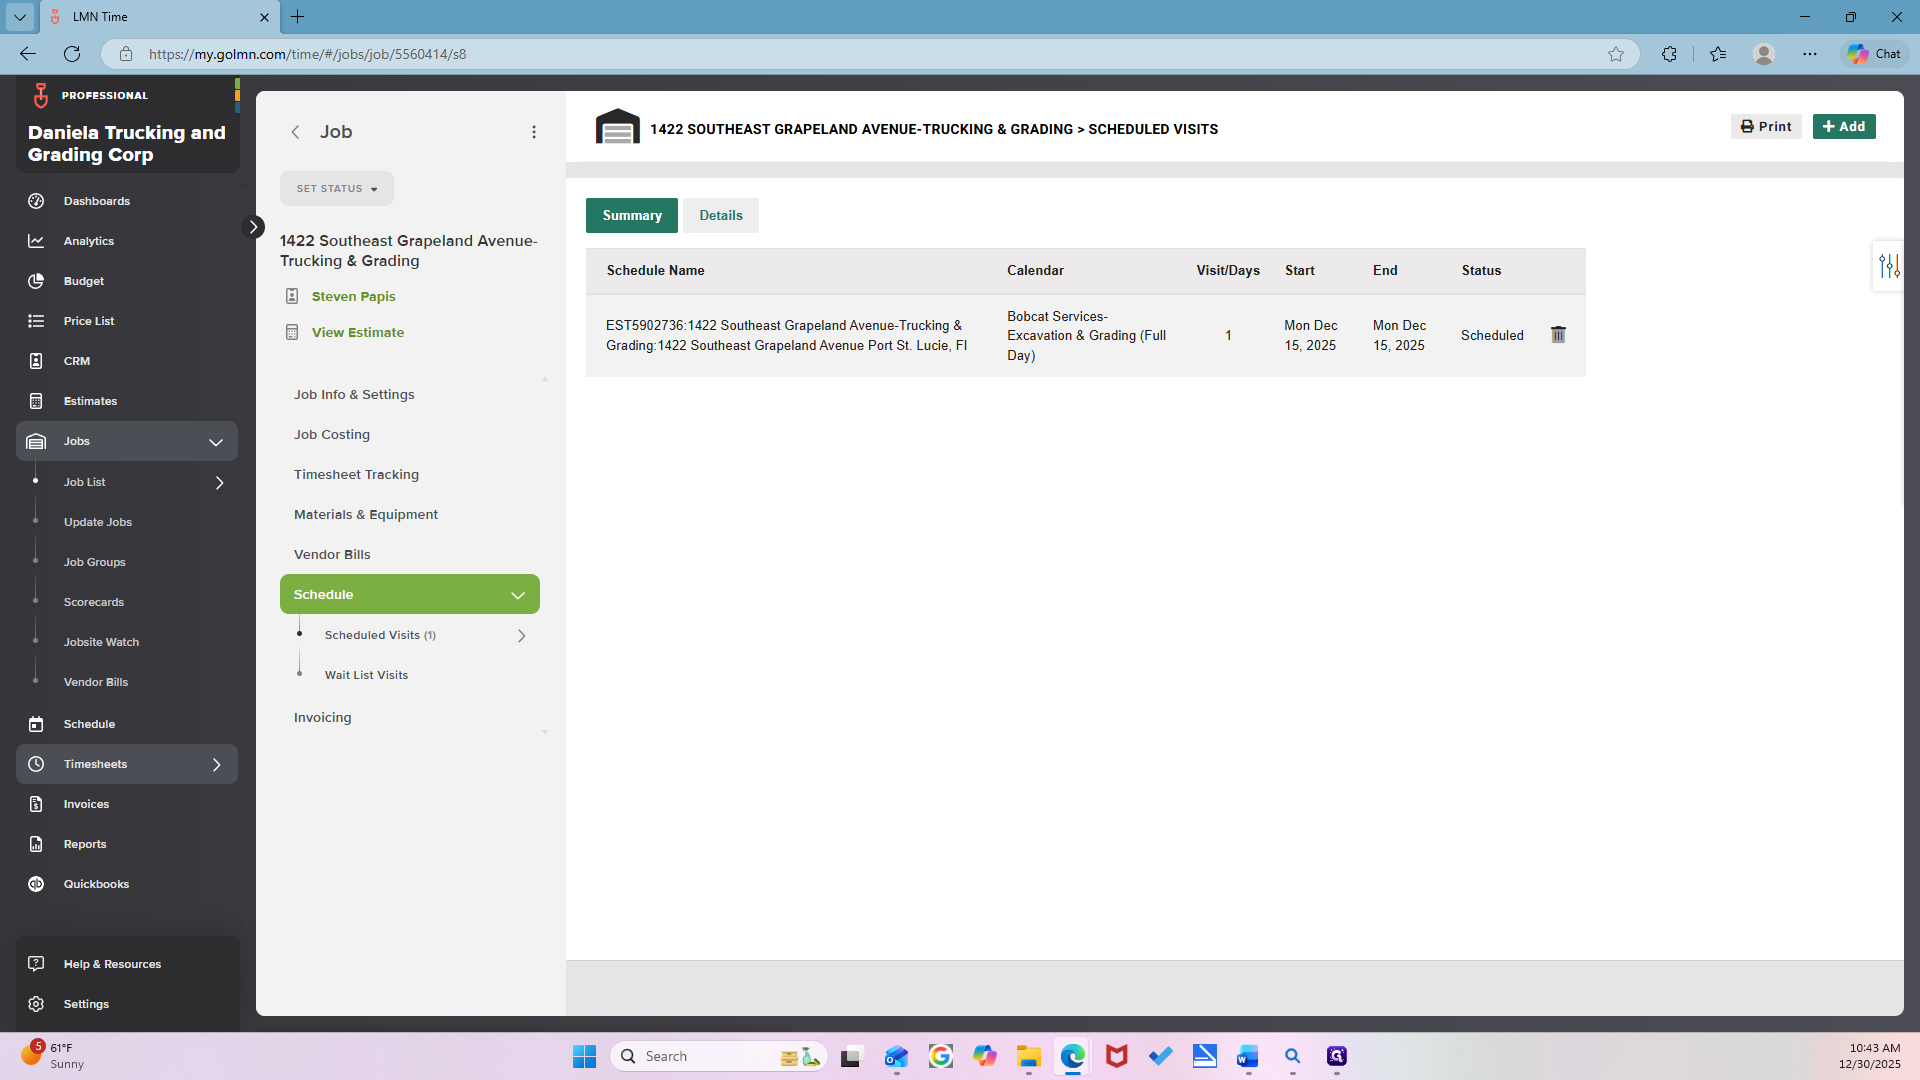
The next step is to place the schedule on the left-hand side. Scheduled visits.
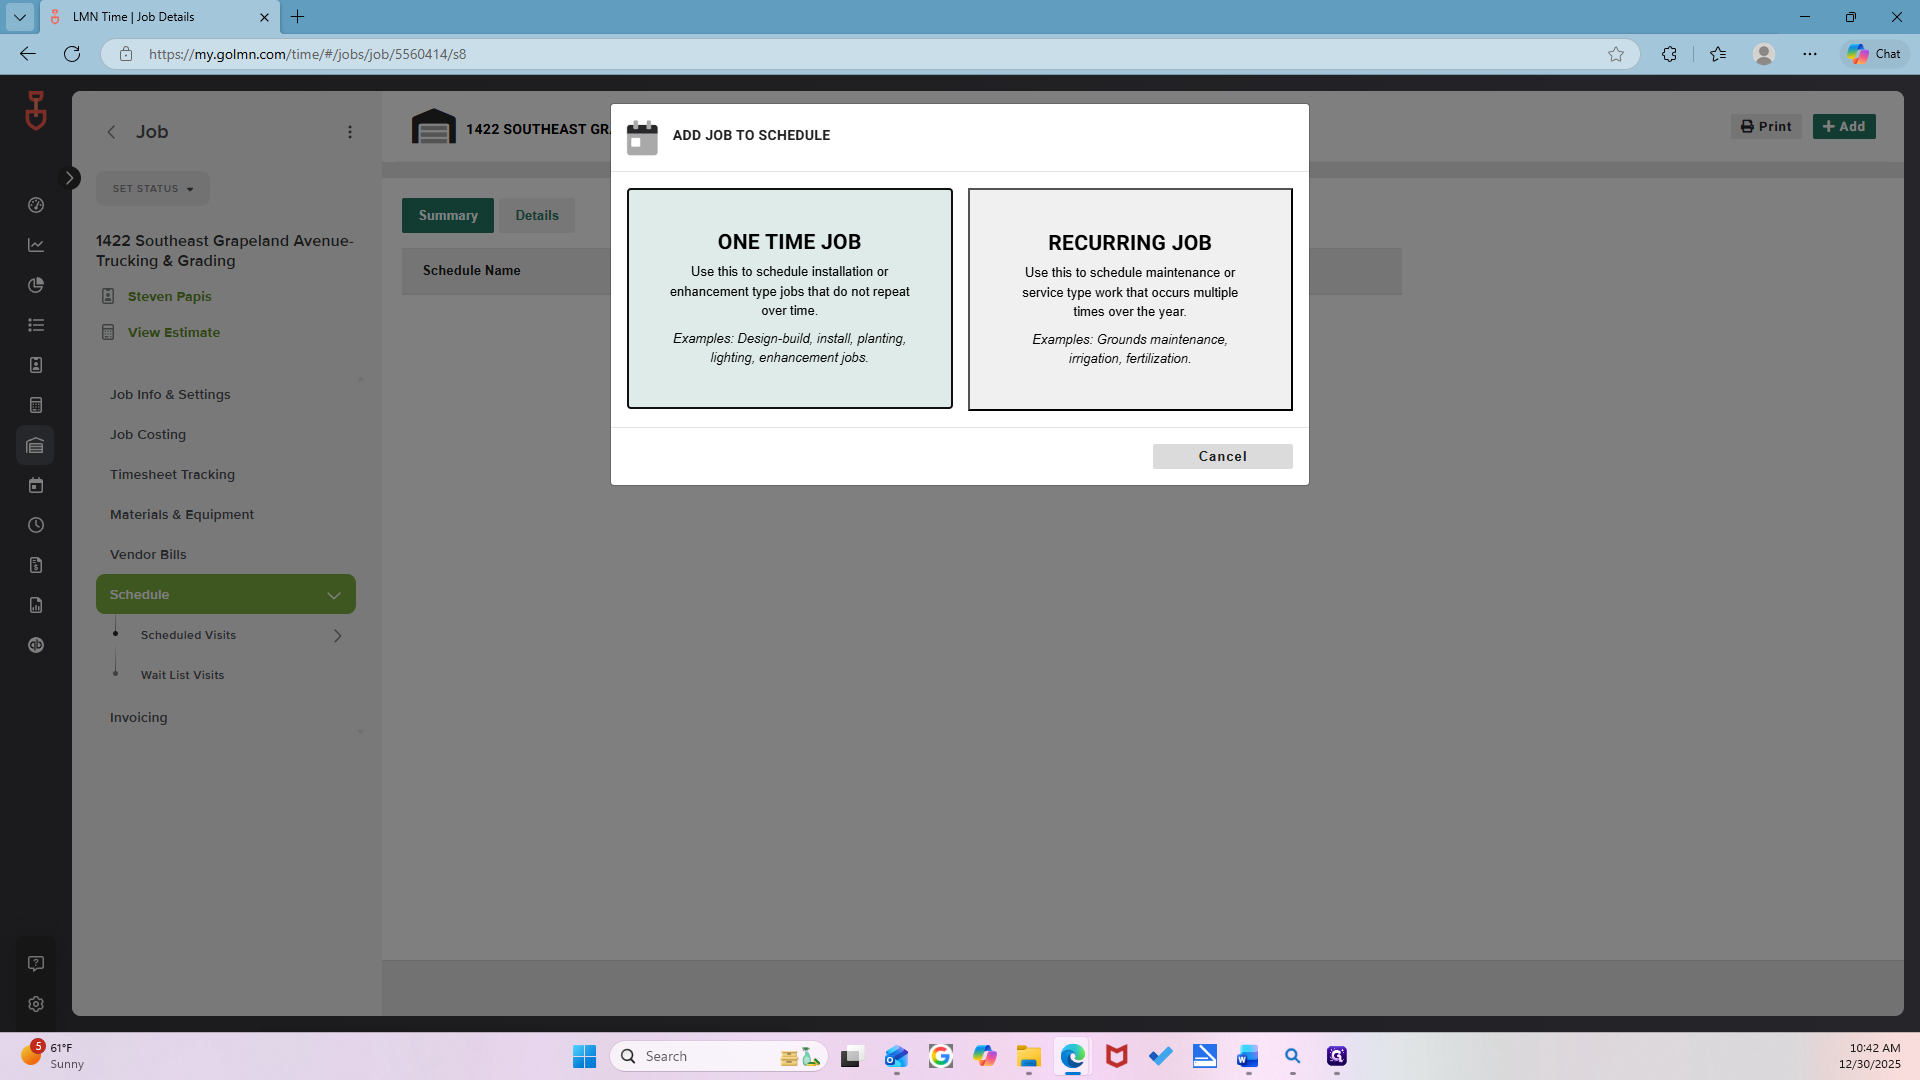
Click the Add button in the top right corner.
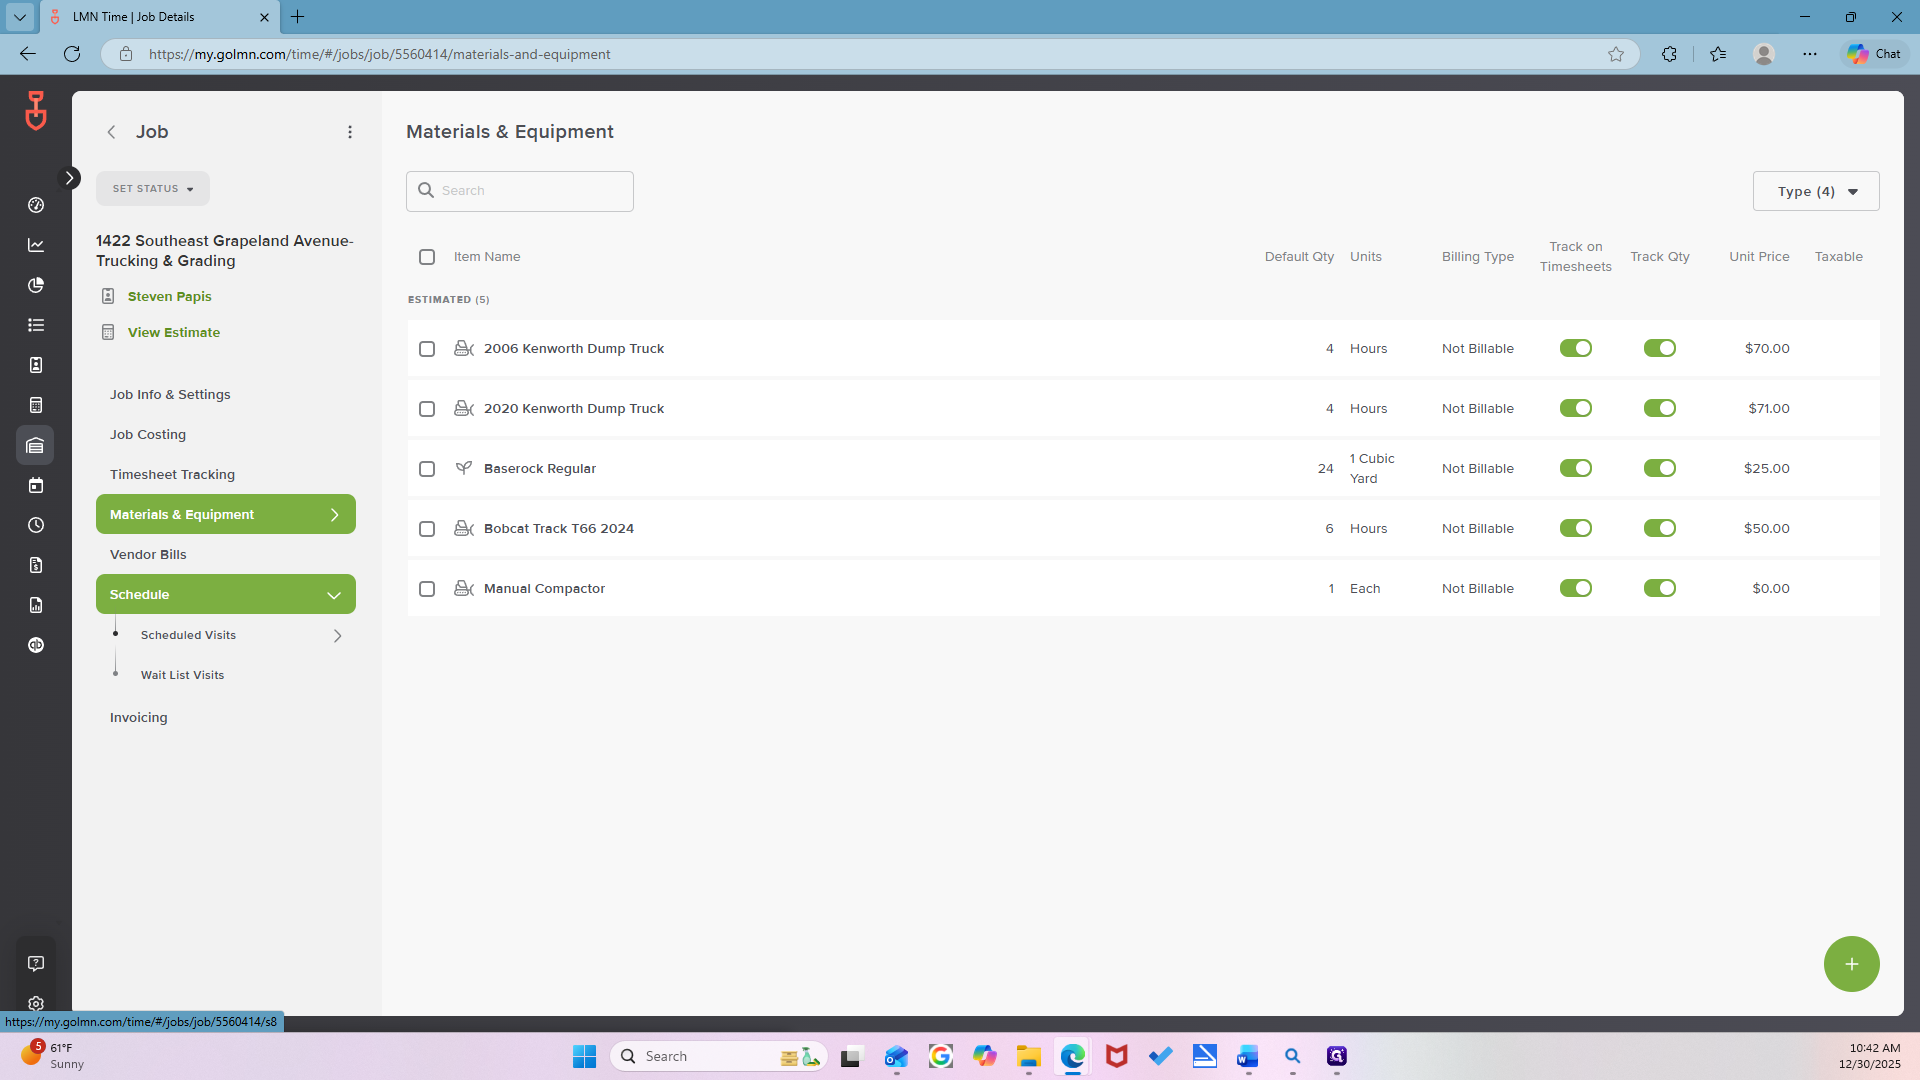

Always a one-time job.
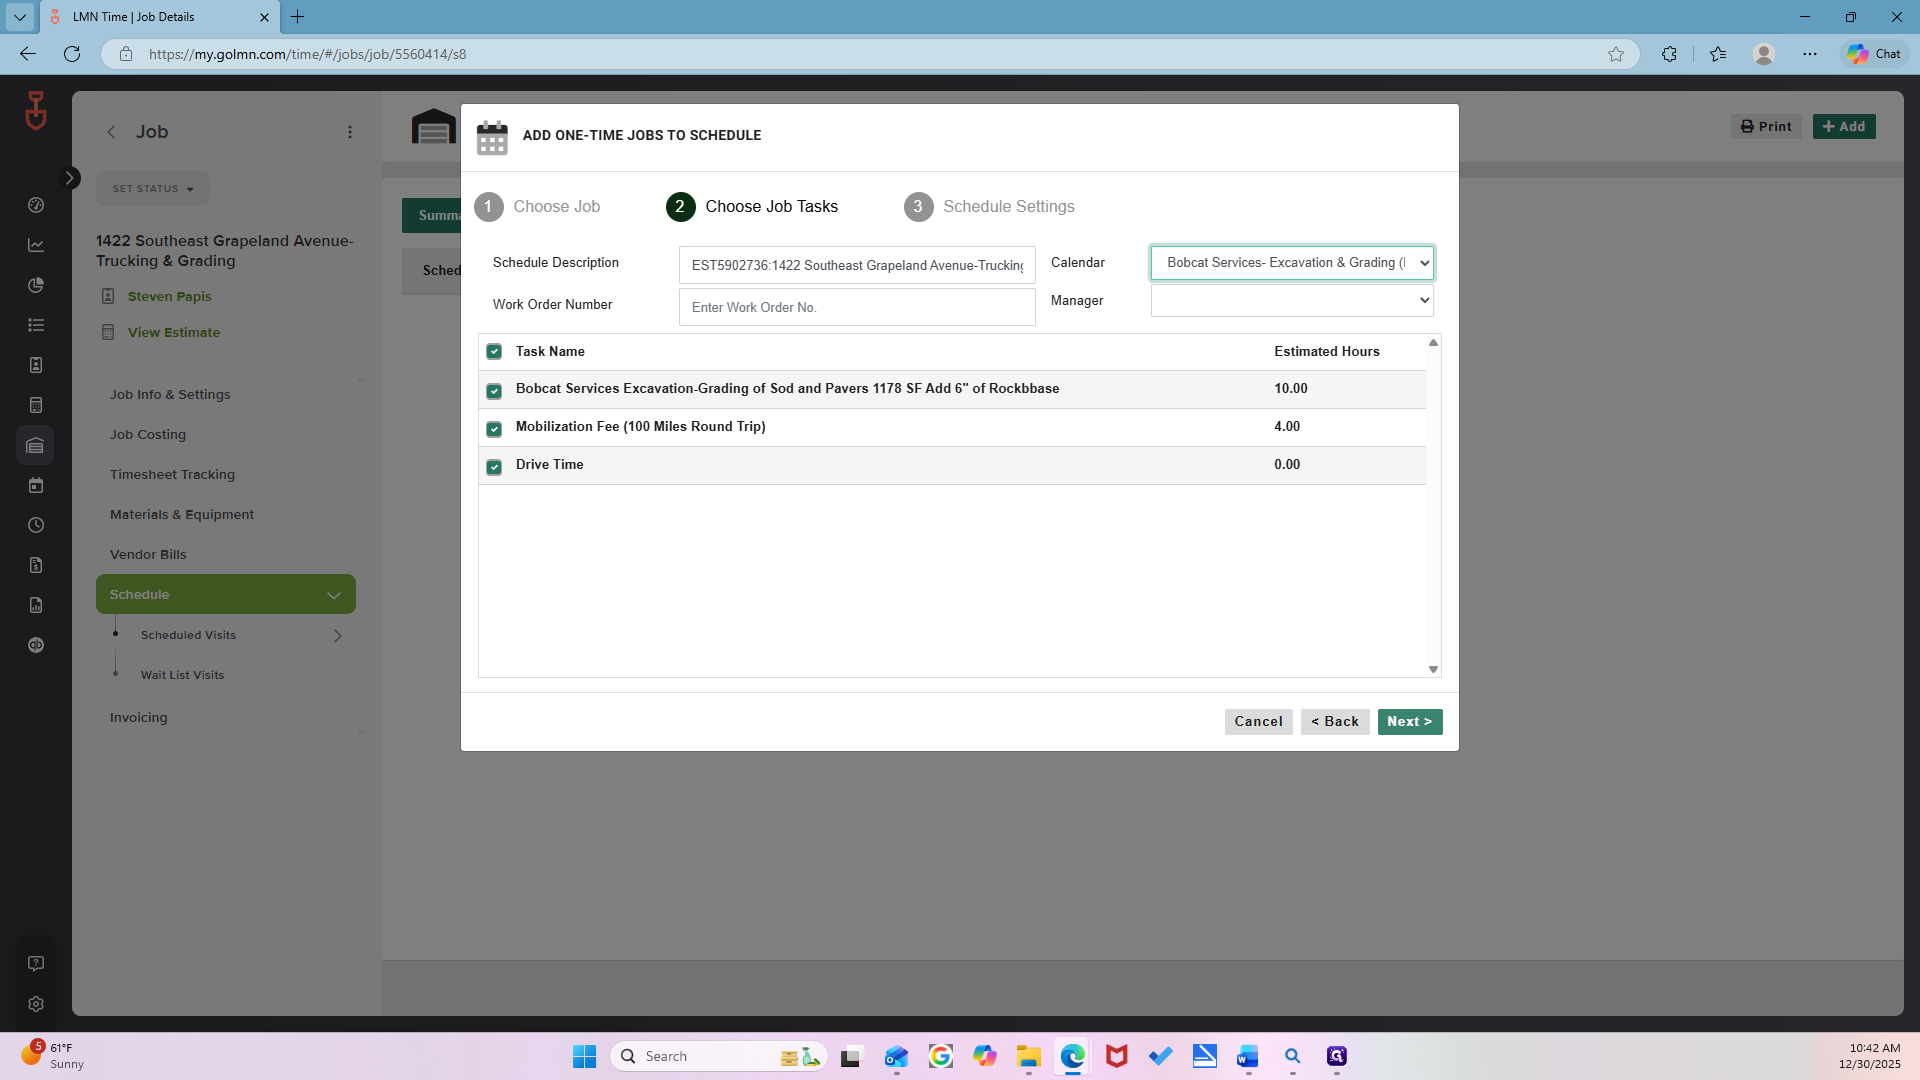
Make sure you select all the tasks, then choose Calendar and Bobcat Services. Click the Next button.

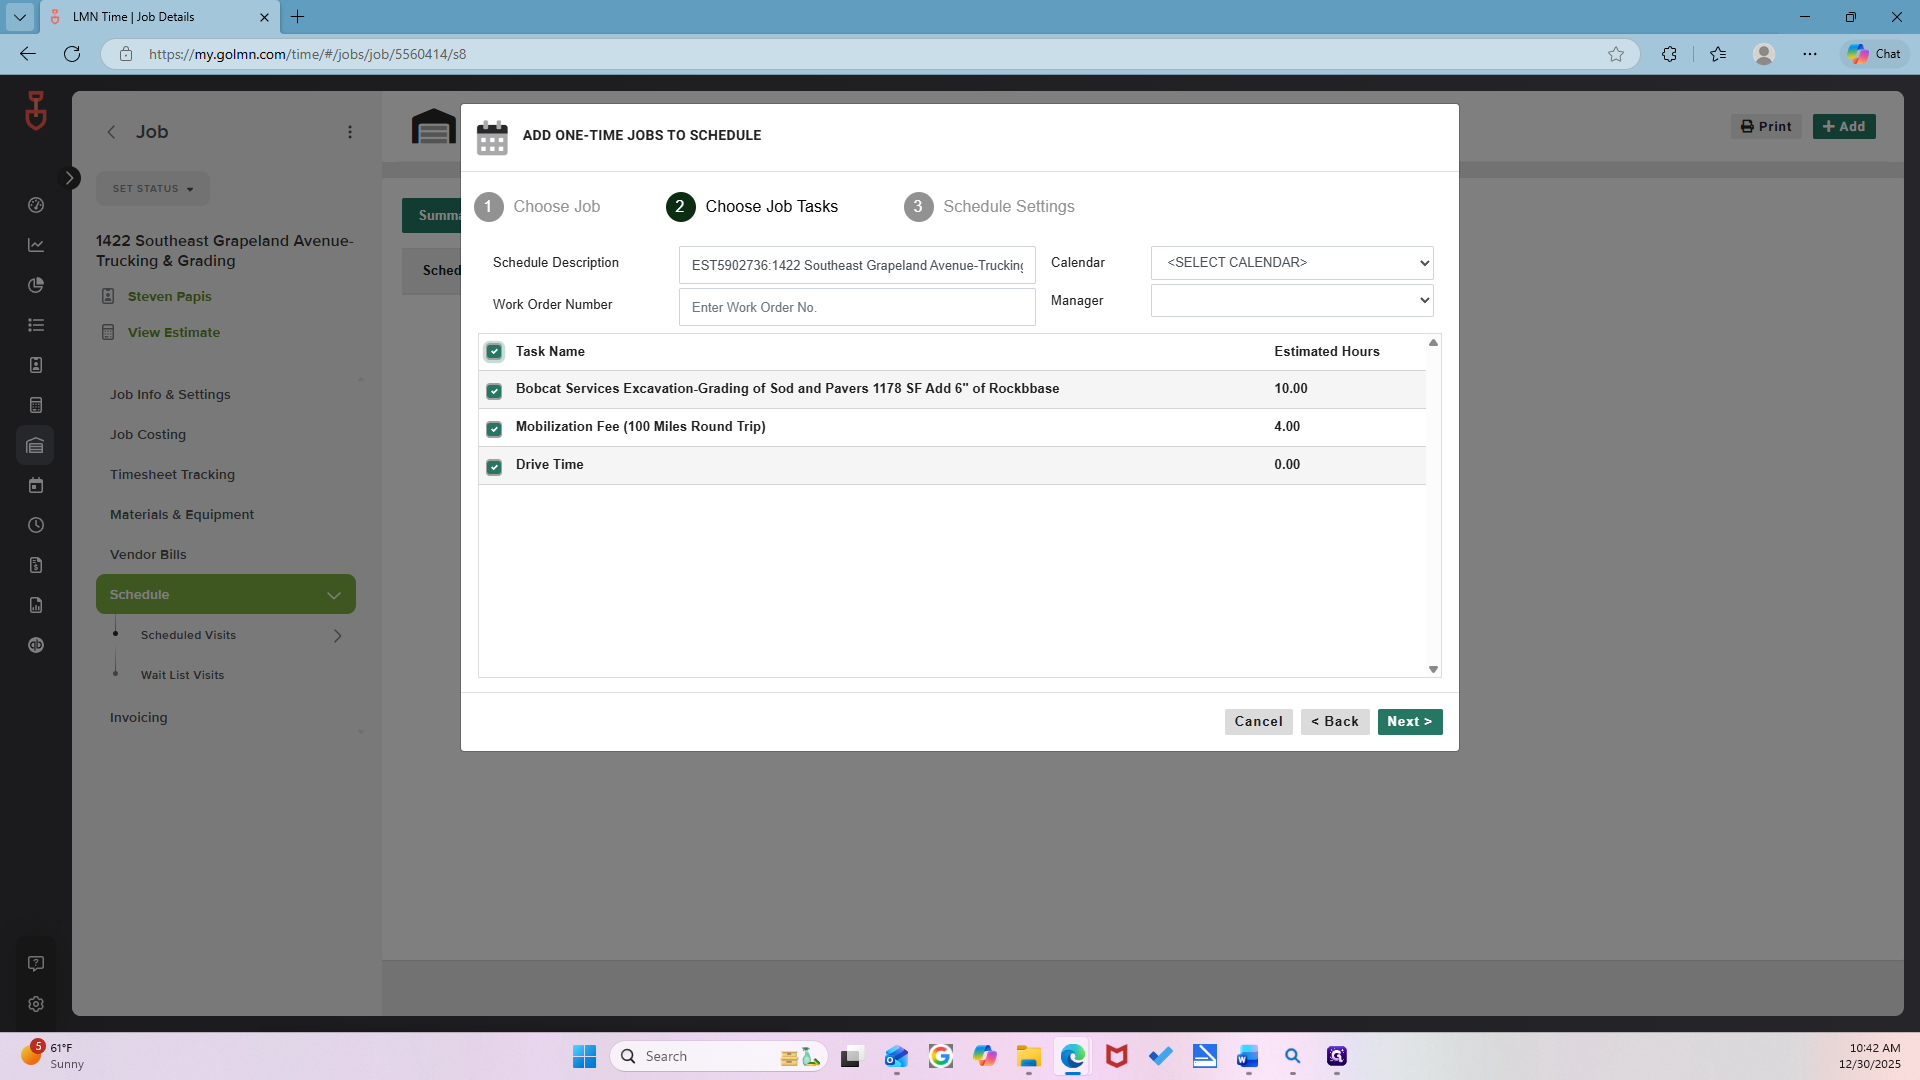
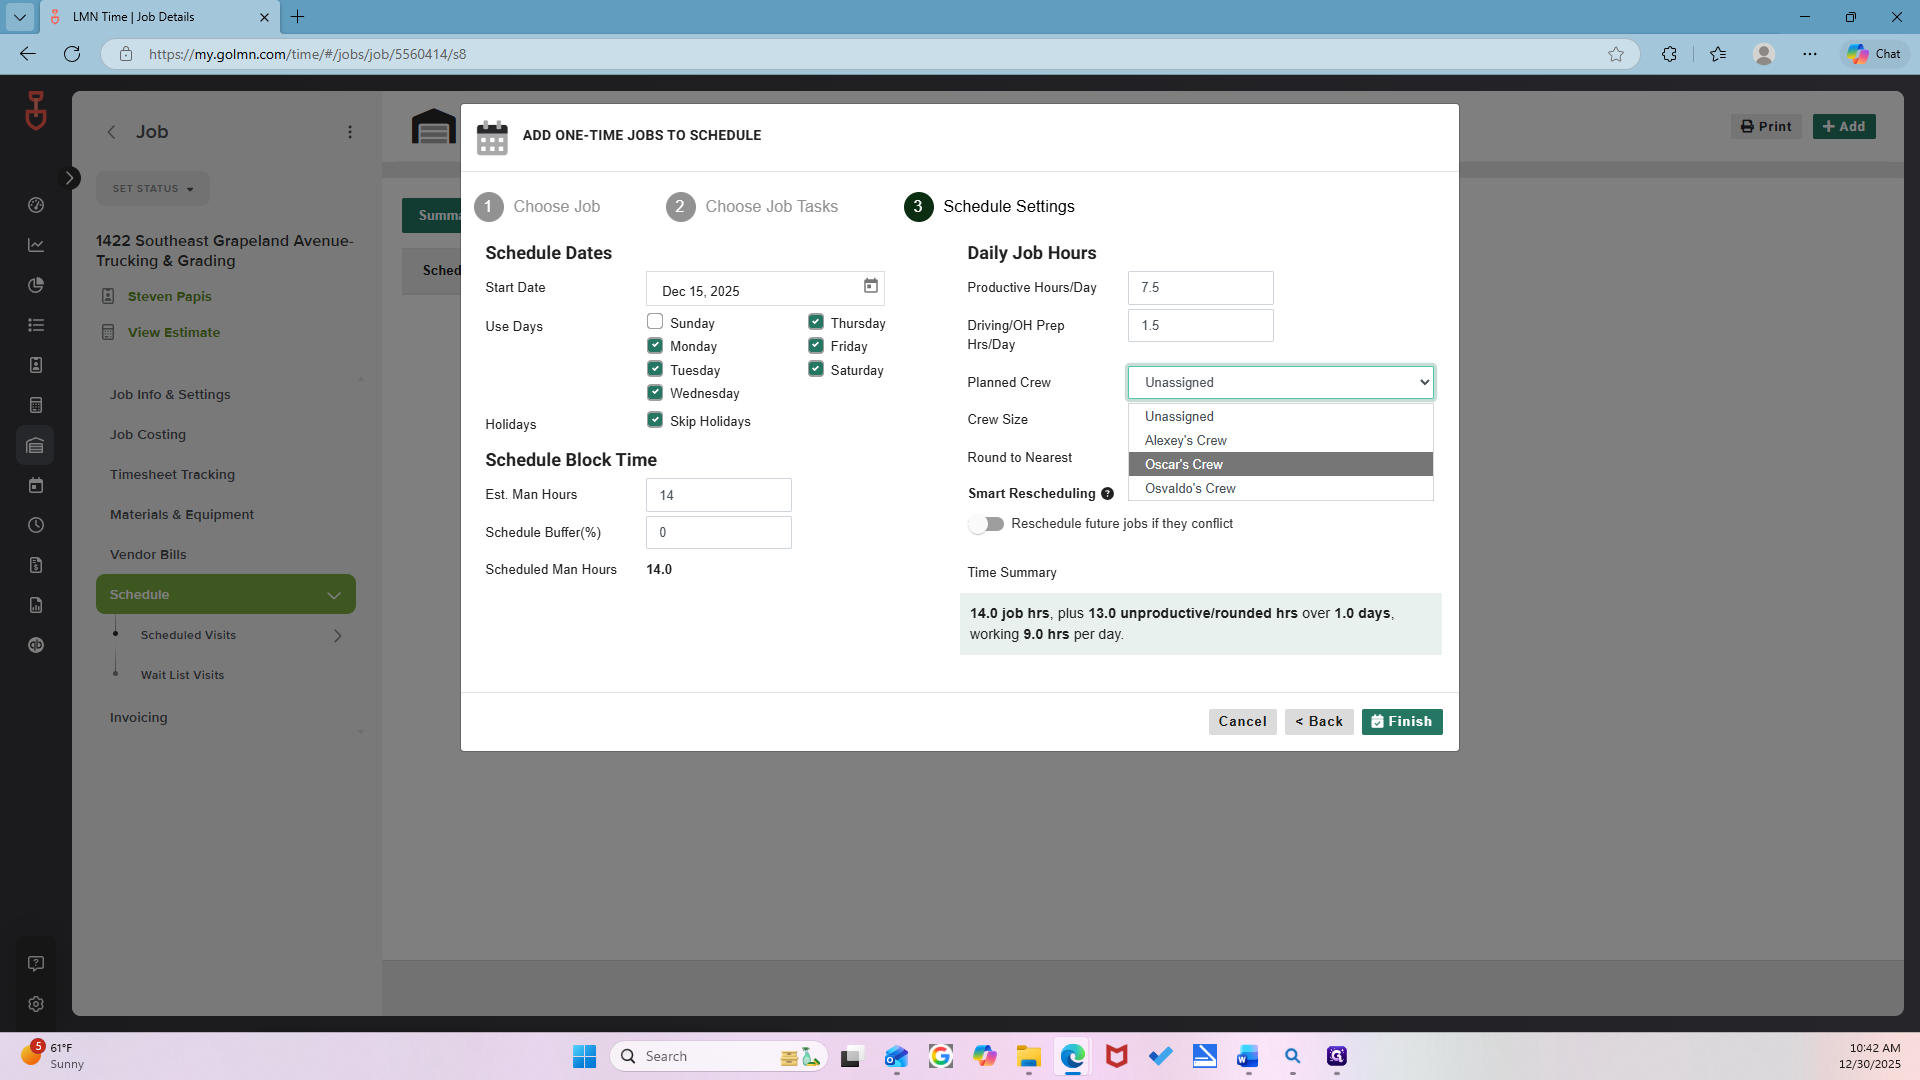
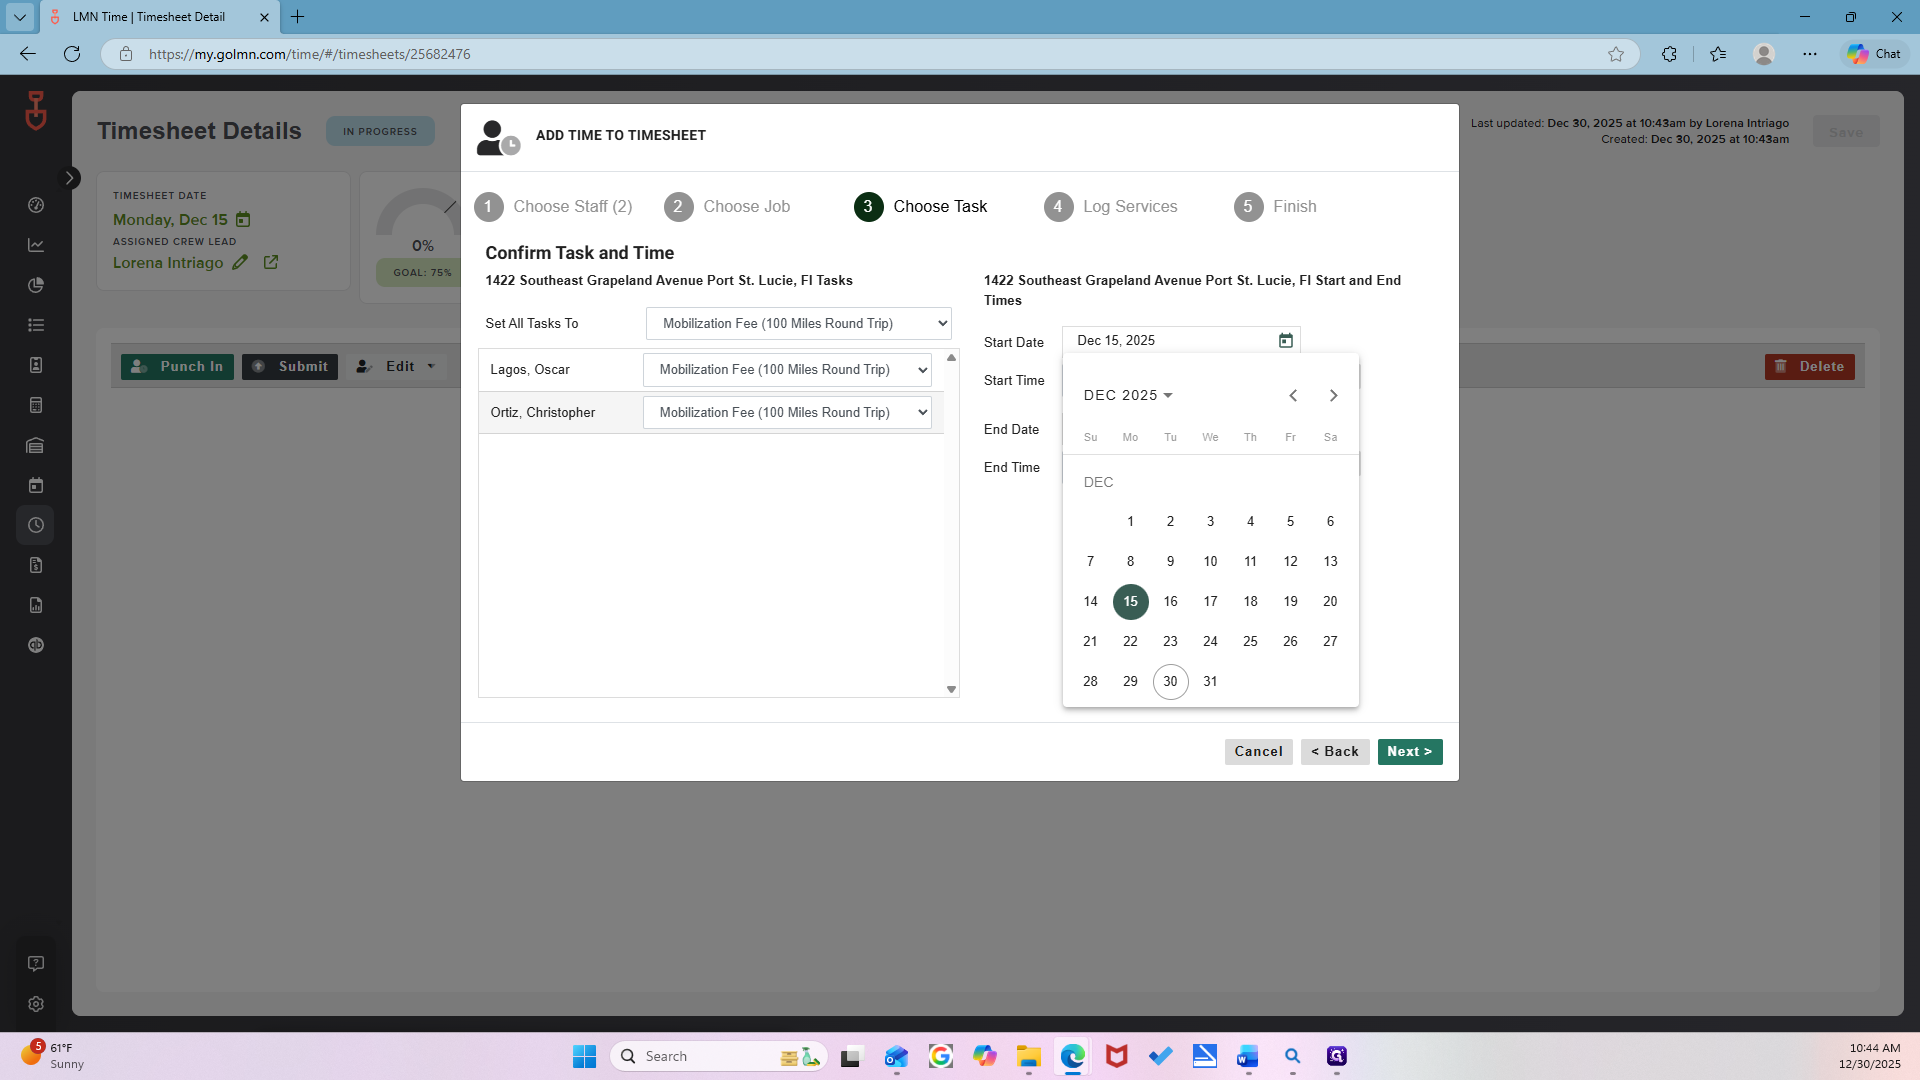
This job was completed on December 15th, so you should schedule it for December 15th.

Okay, since it was for Oscar, make sure to assign the planned crew to Oscar's team.
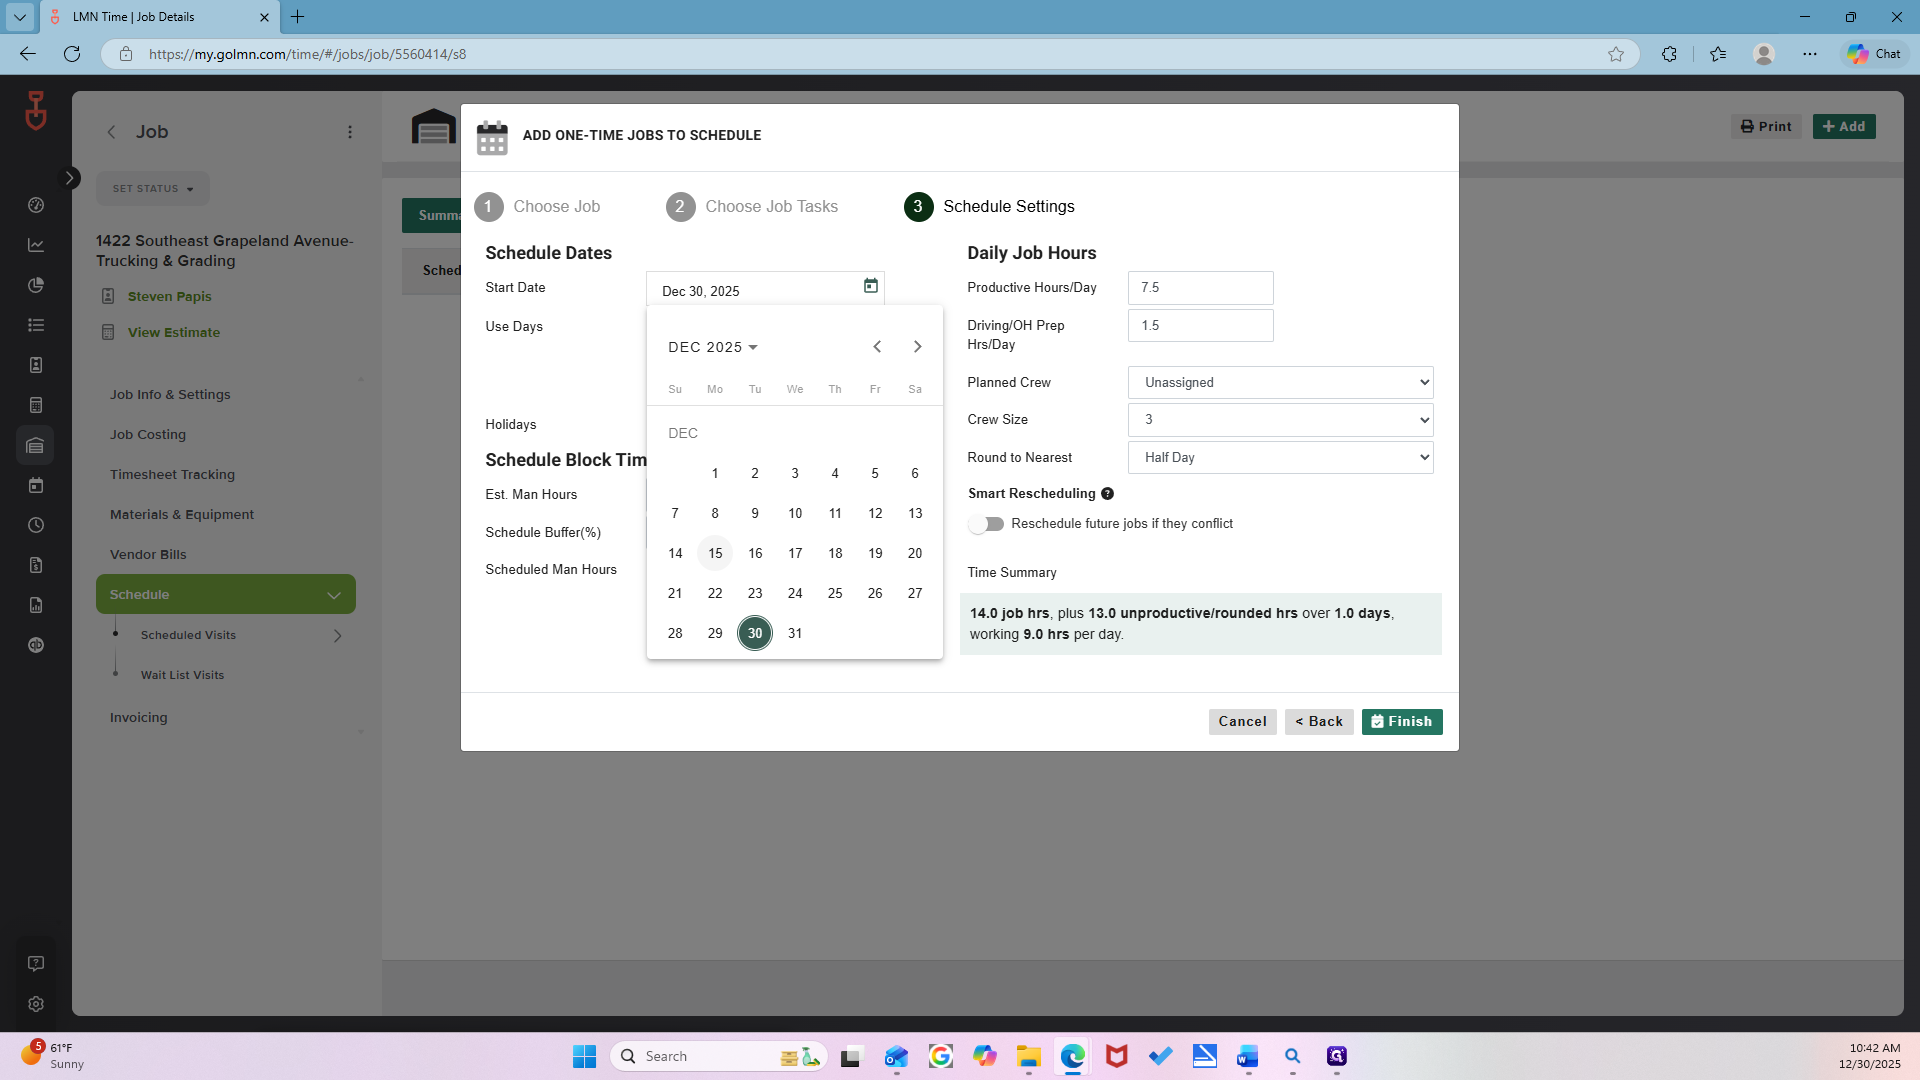

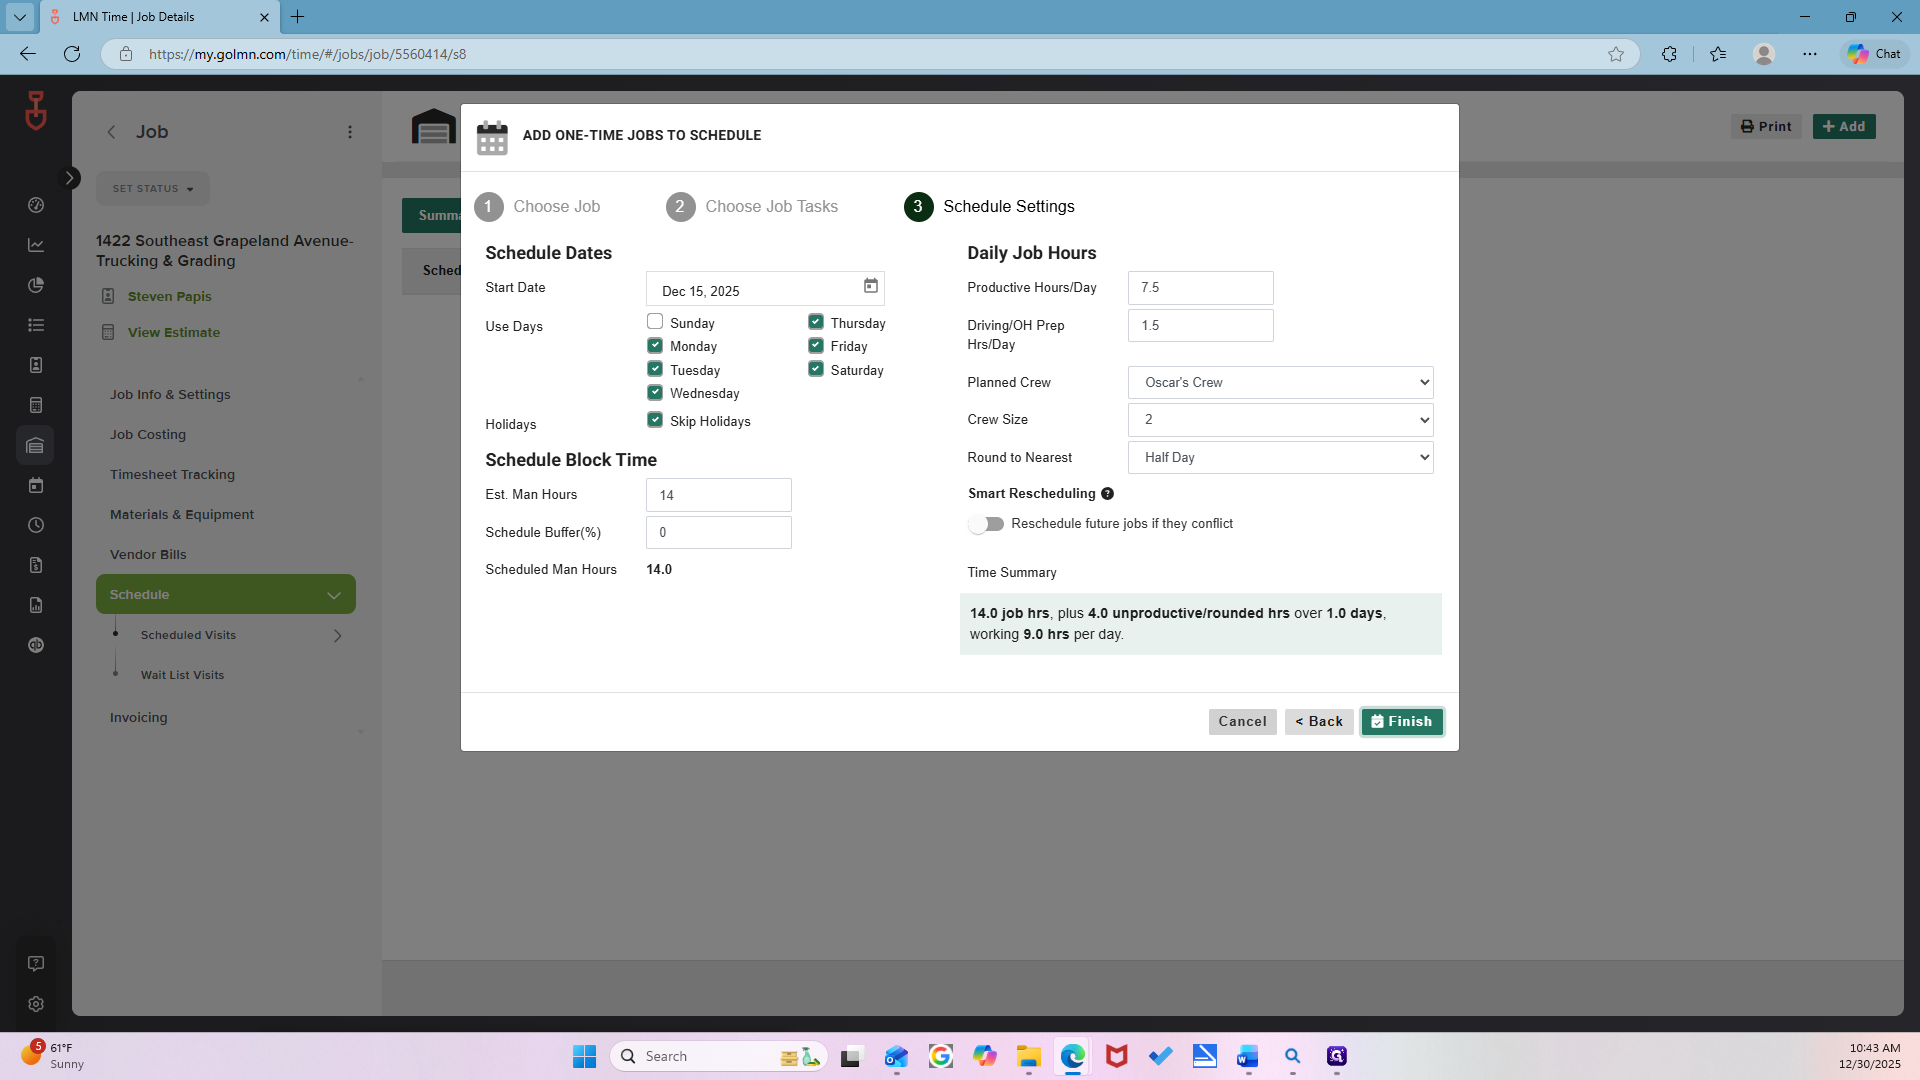
All right, now click Finish. Mm-hmm.
All right, it's already scheduled.
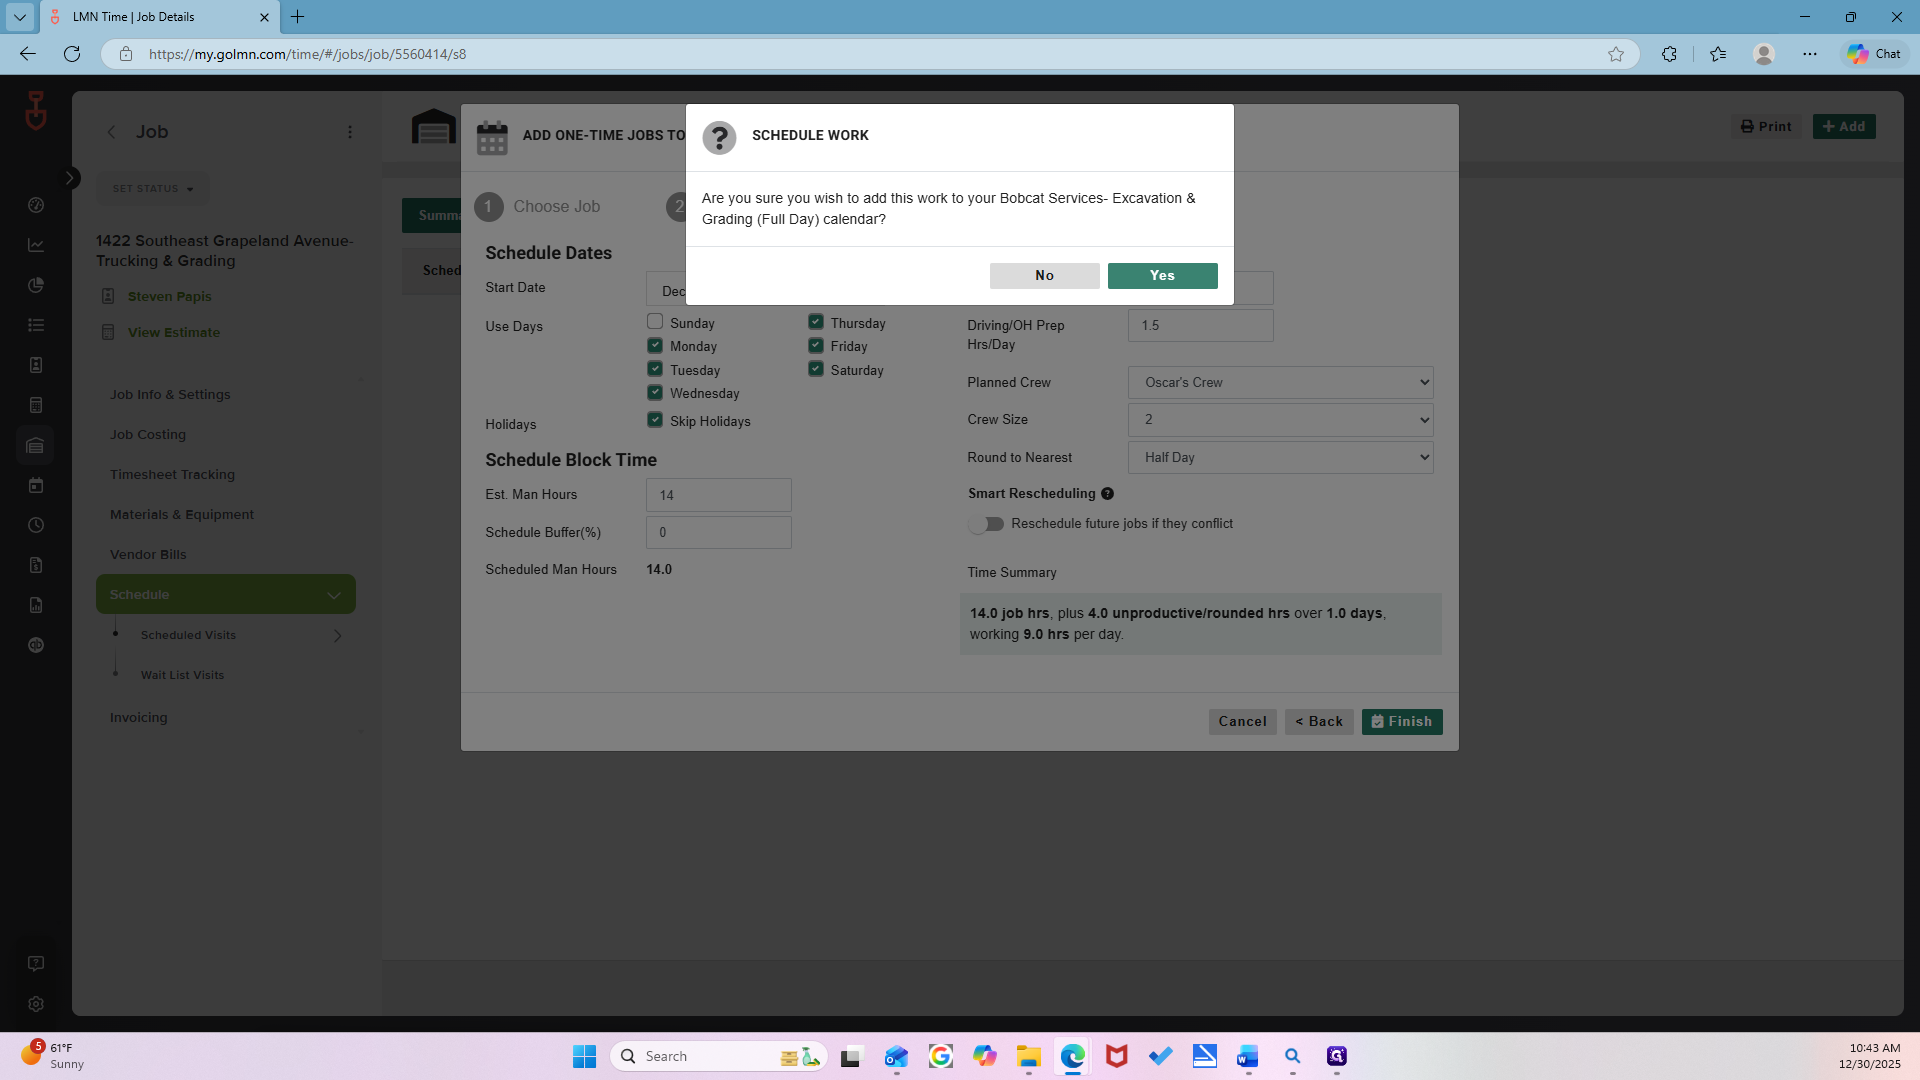
Sometimes this screen doesn't close. Just hit cancel; your item is already scheduled.
Okay, just refresh it so you can see it.
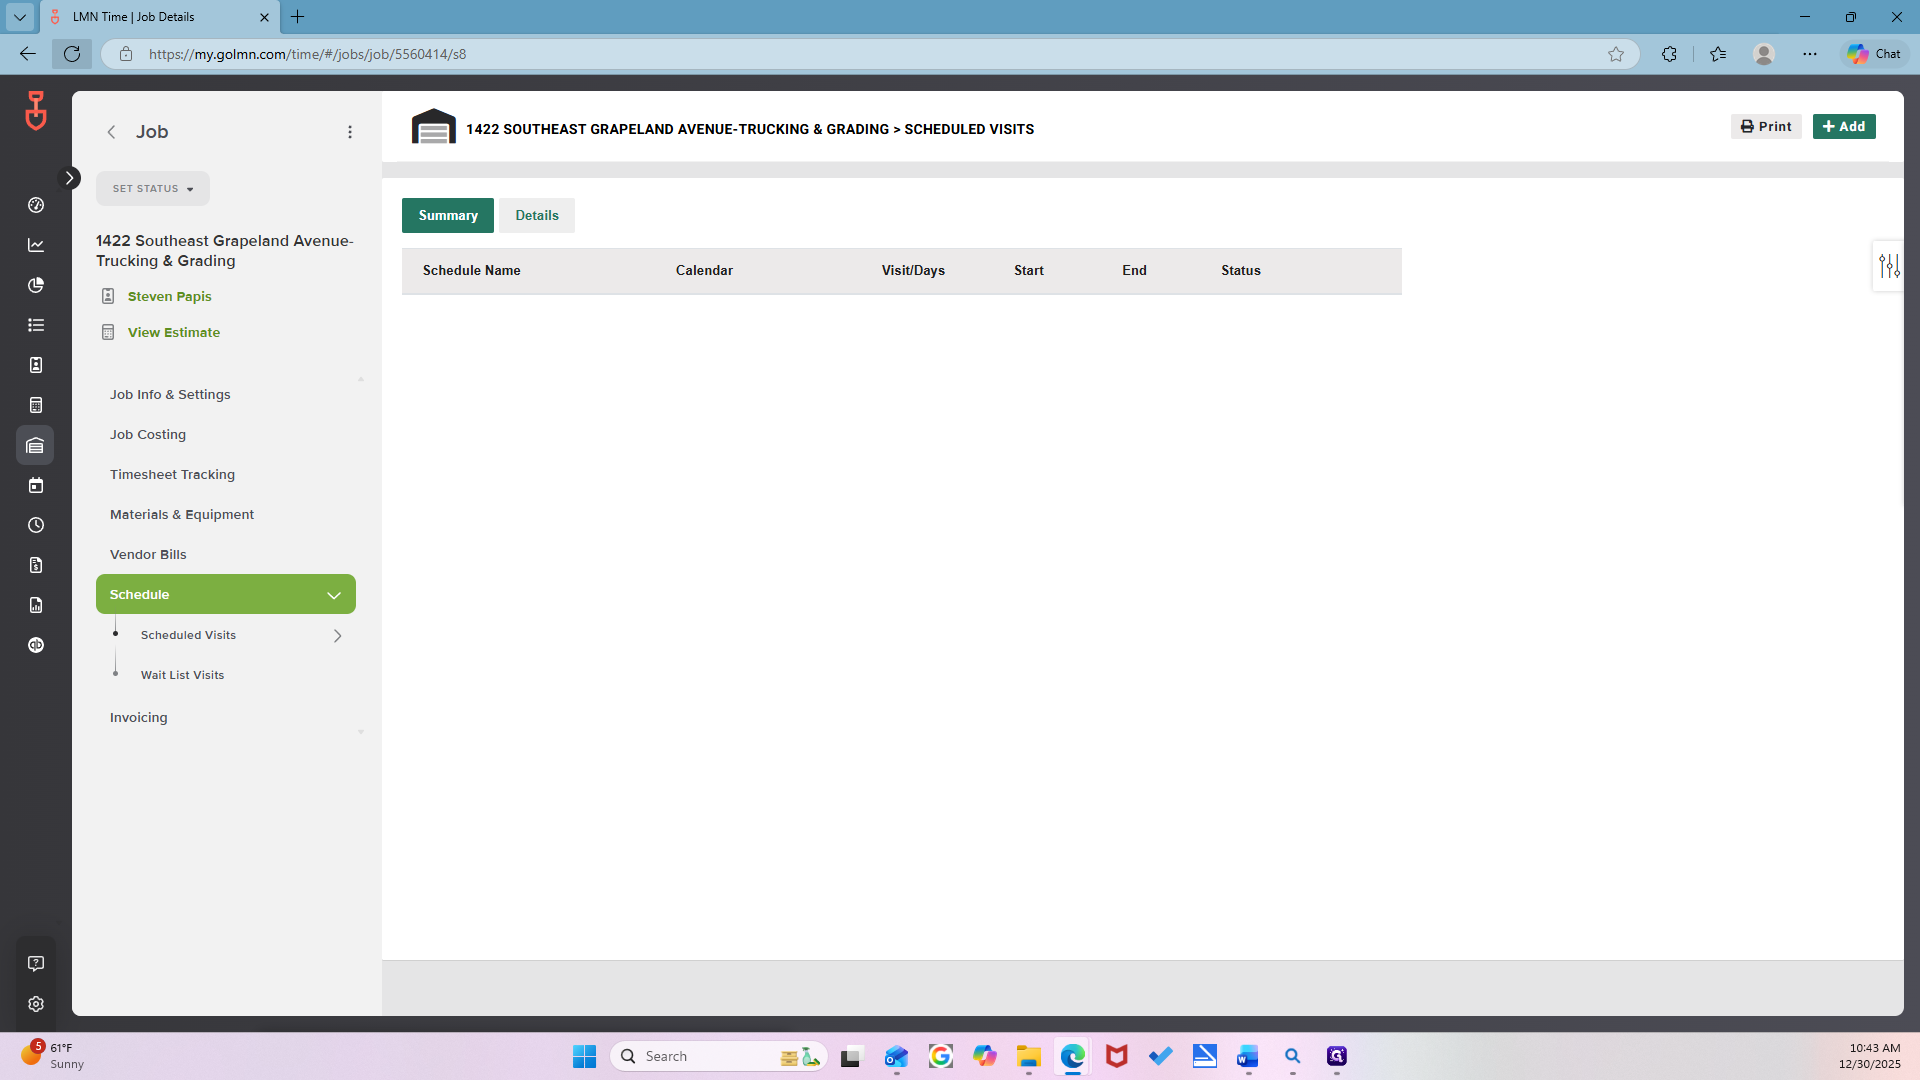
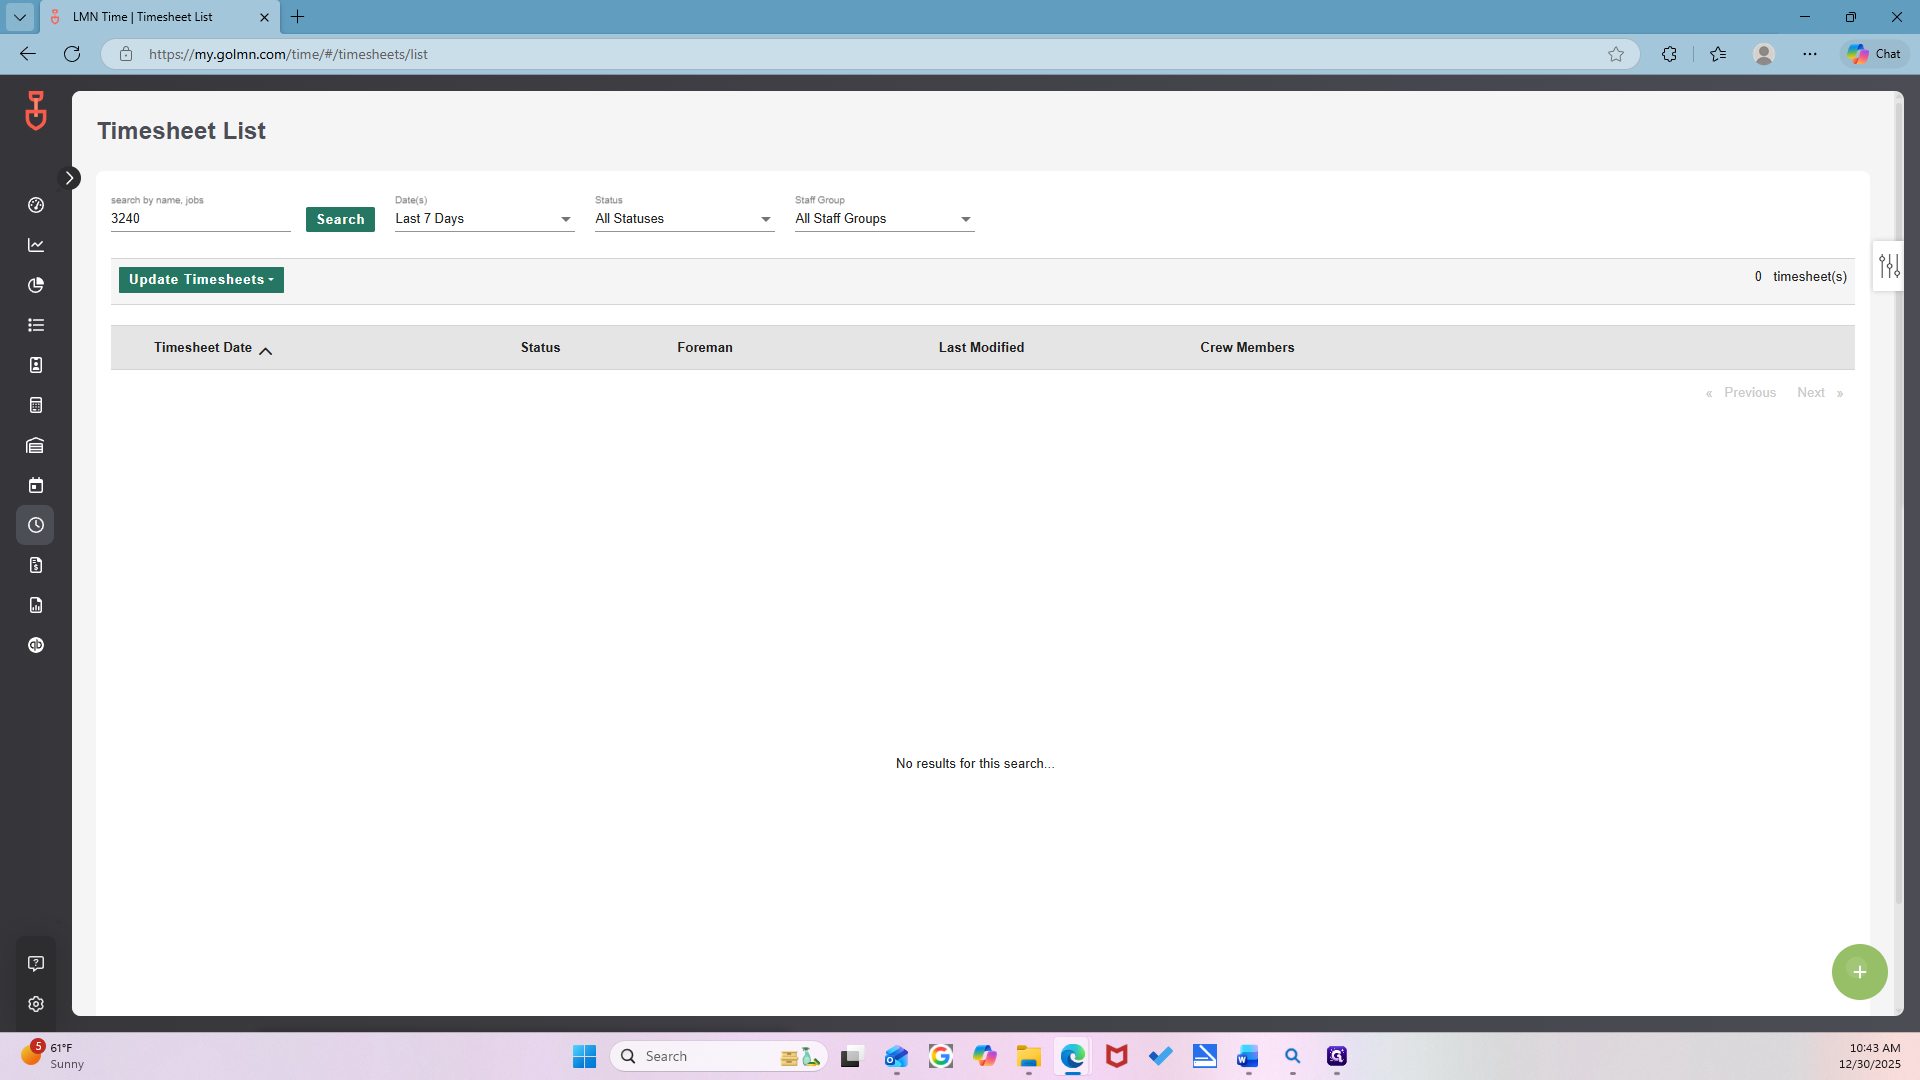
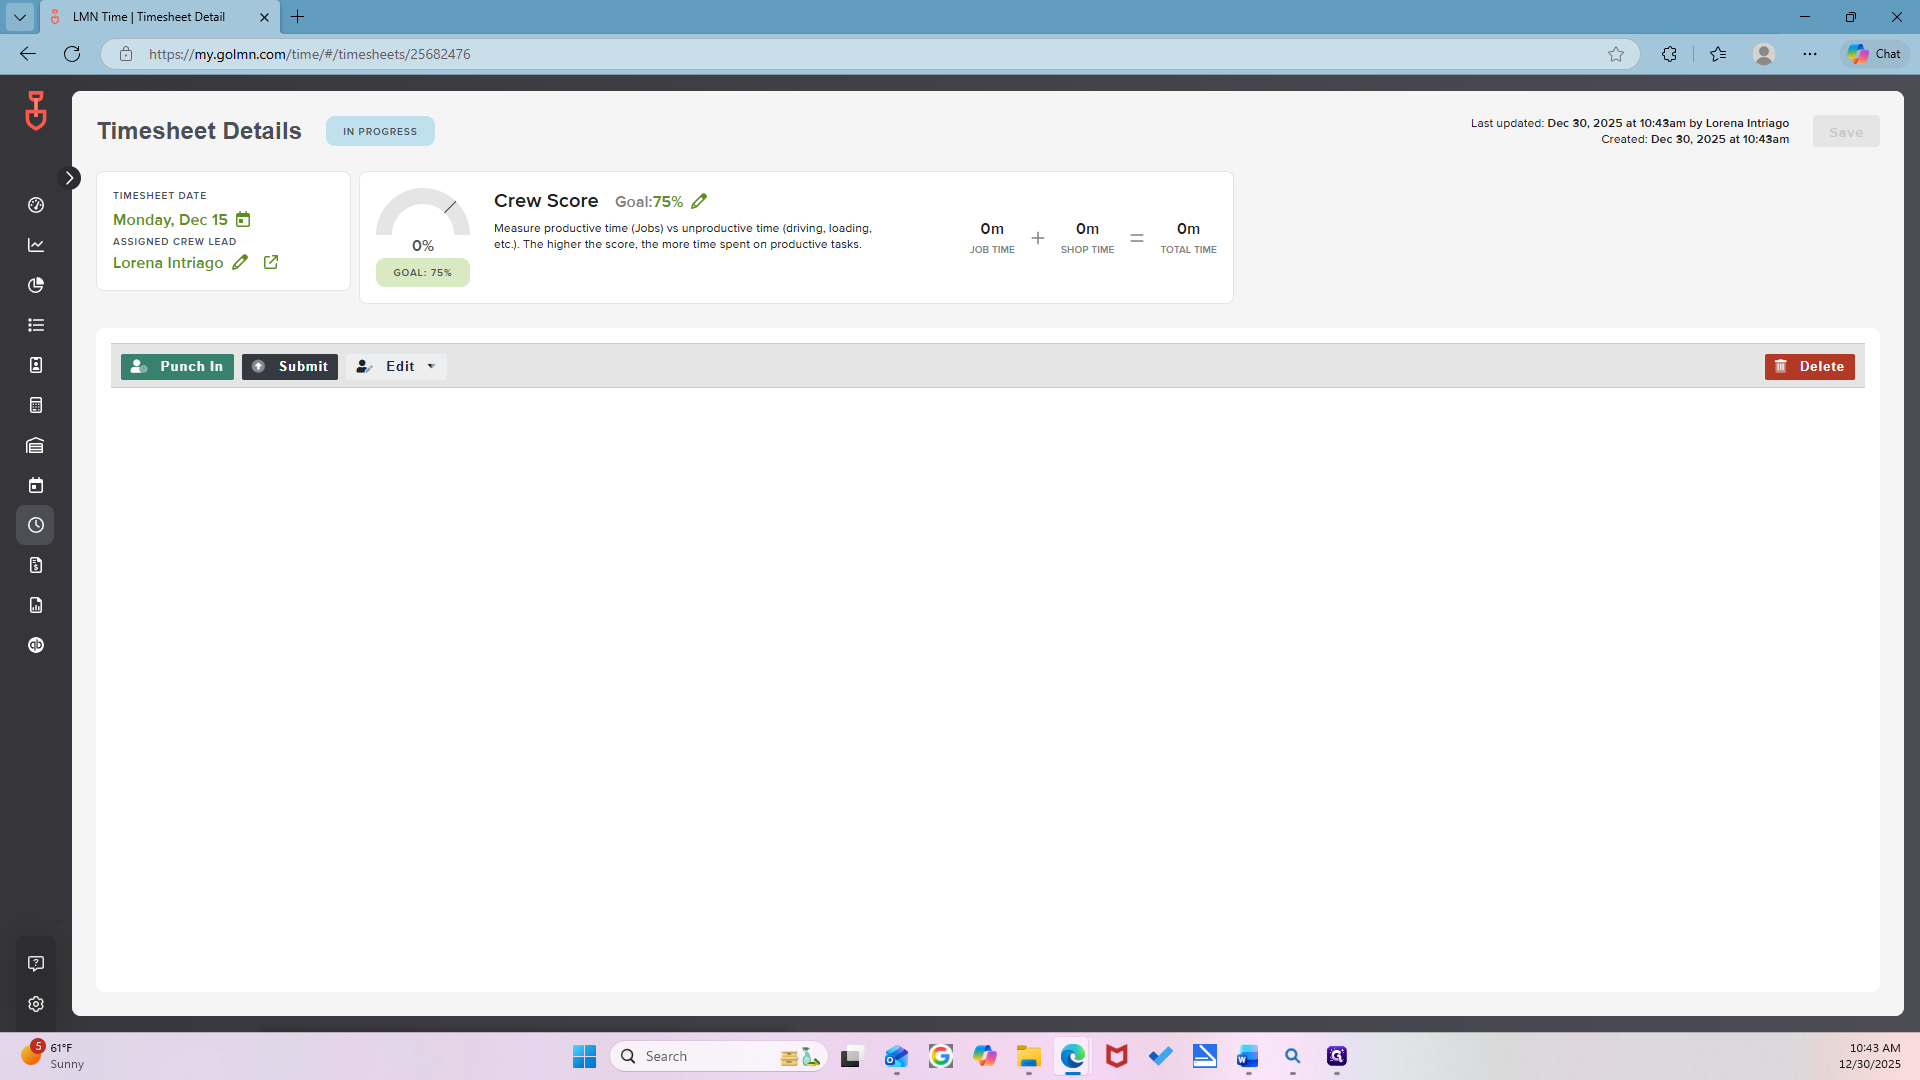
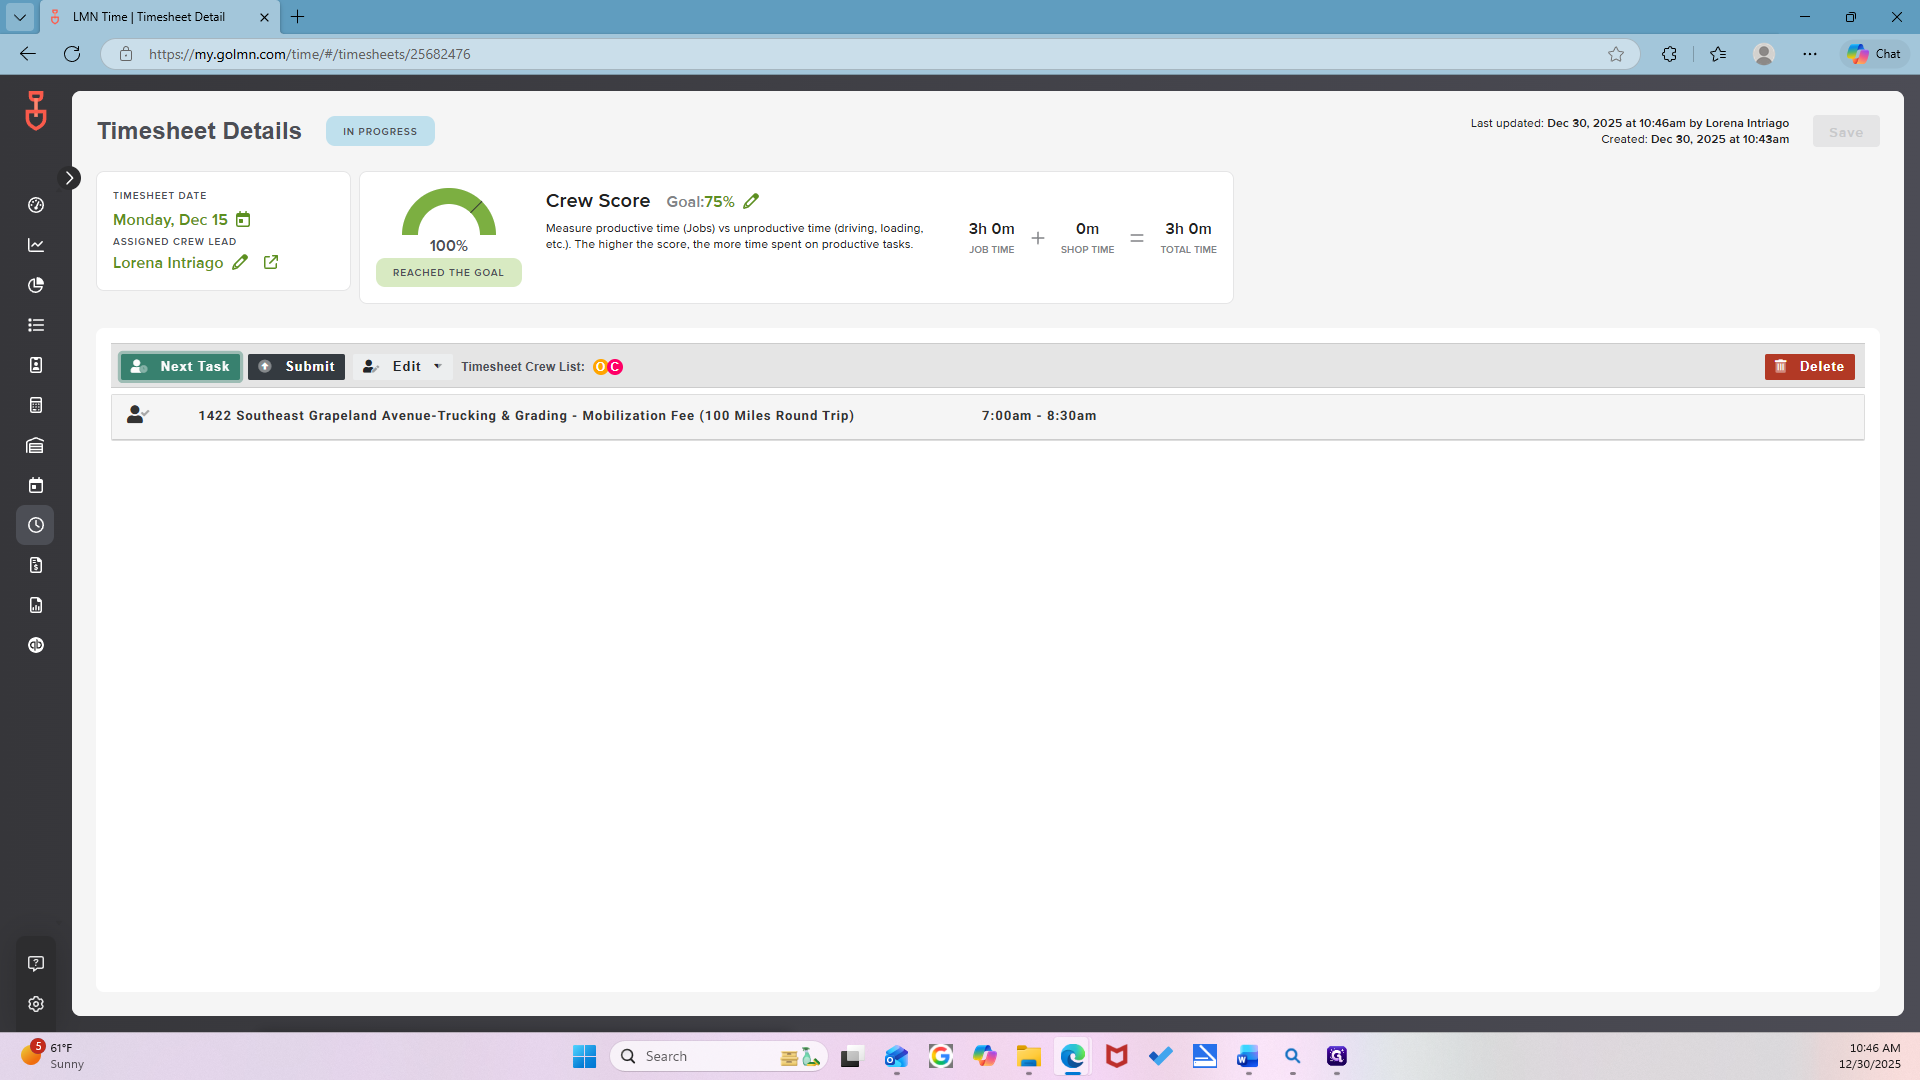
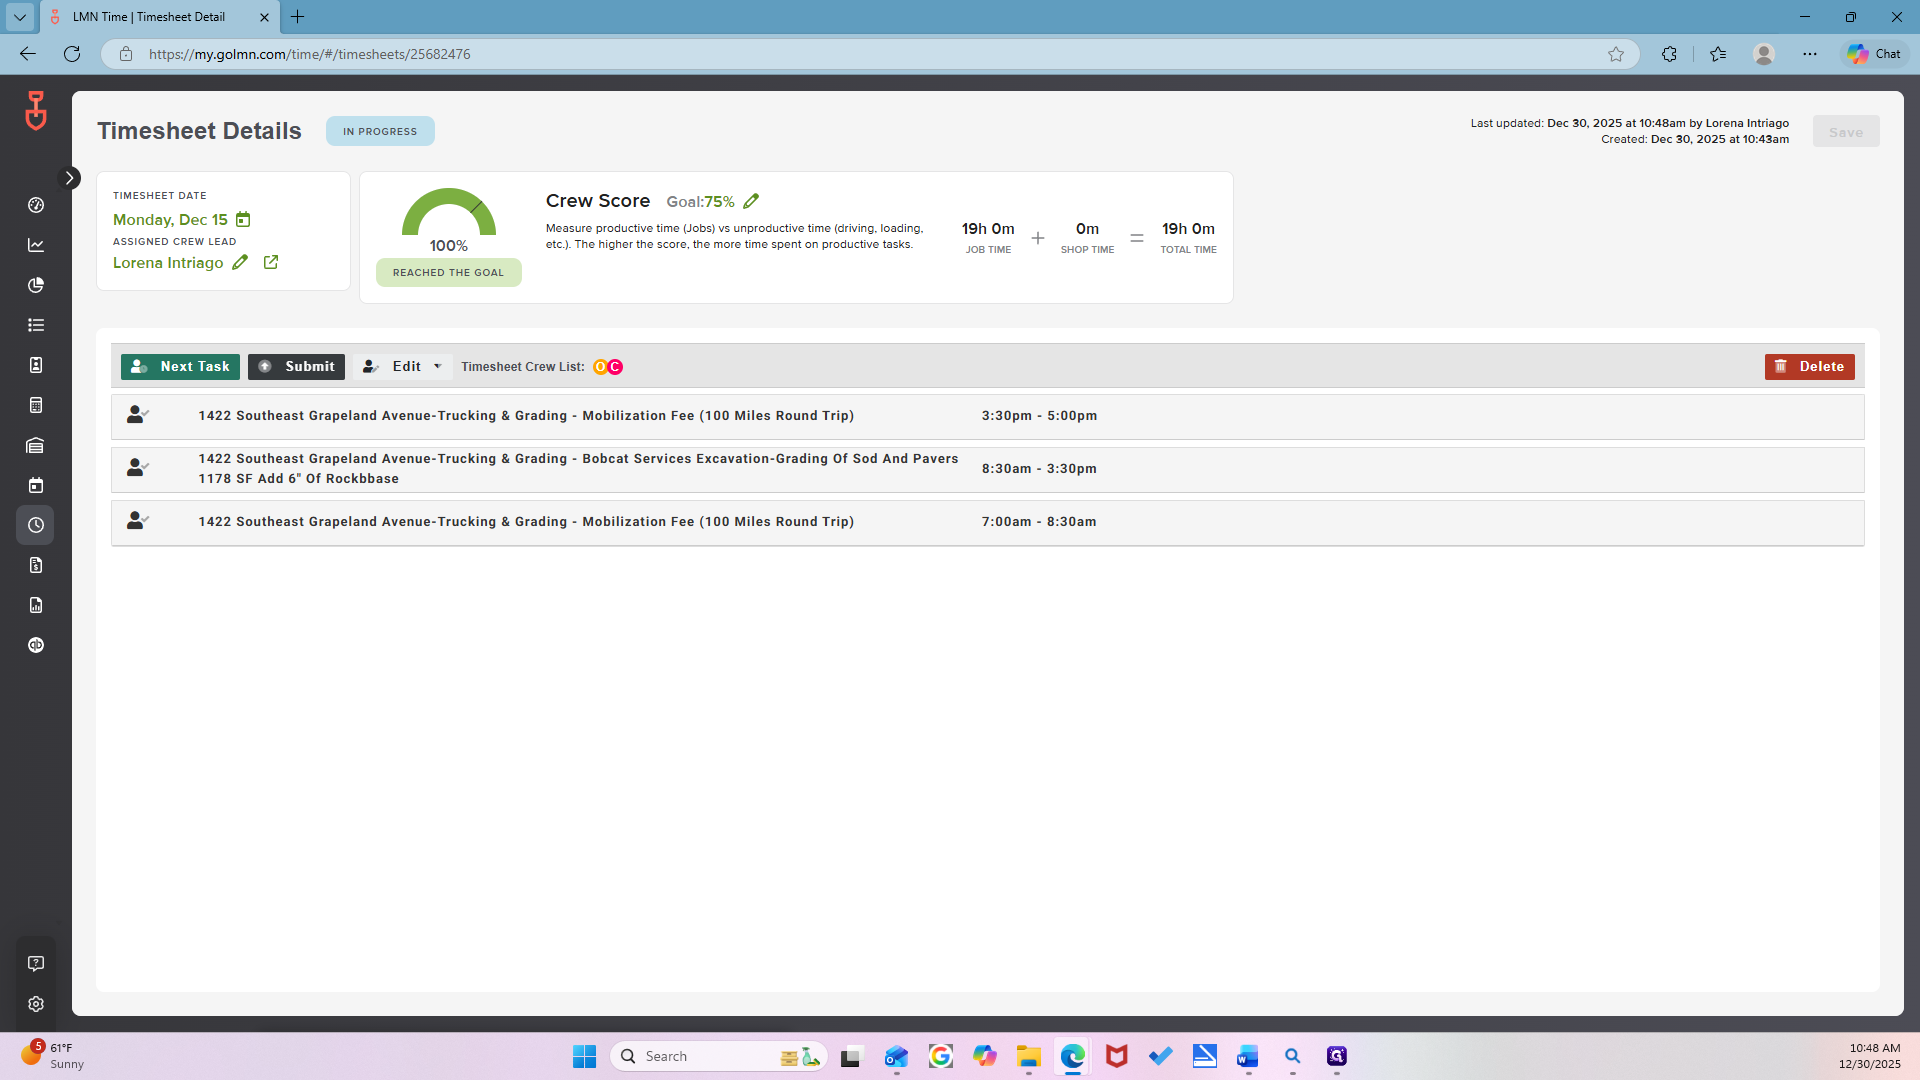
Okay. Now that it's scheduled, the materials are available. Next, go to the timesheet tab. So over, nope.
Down? Oh. Go to the timesheet list.

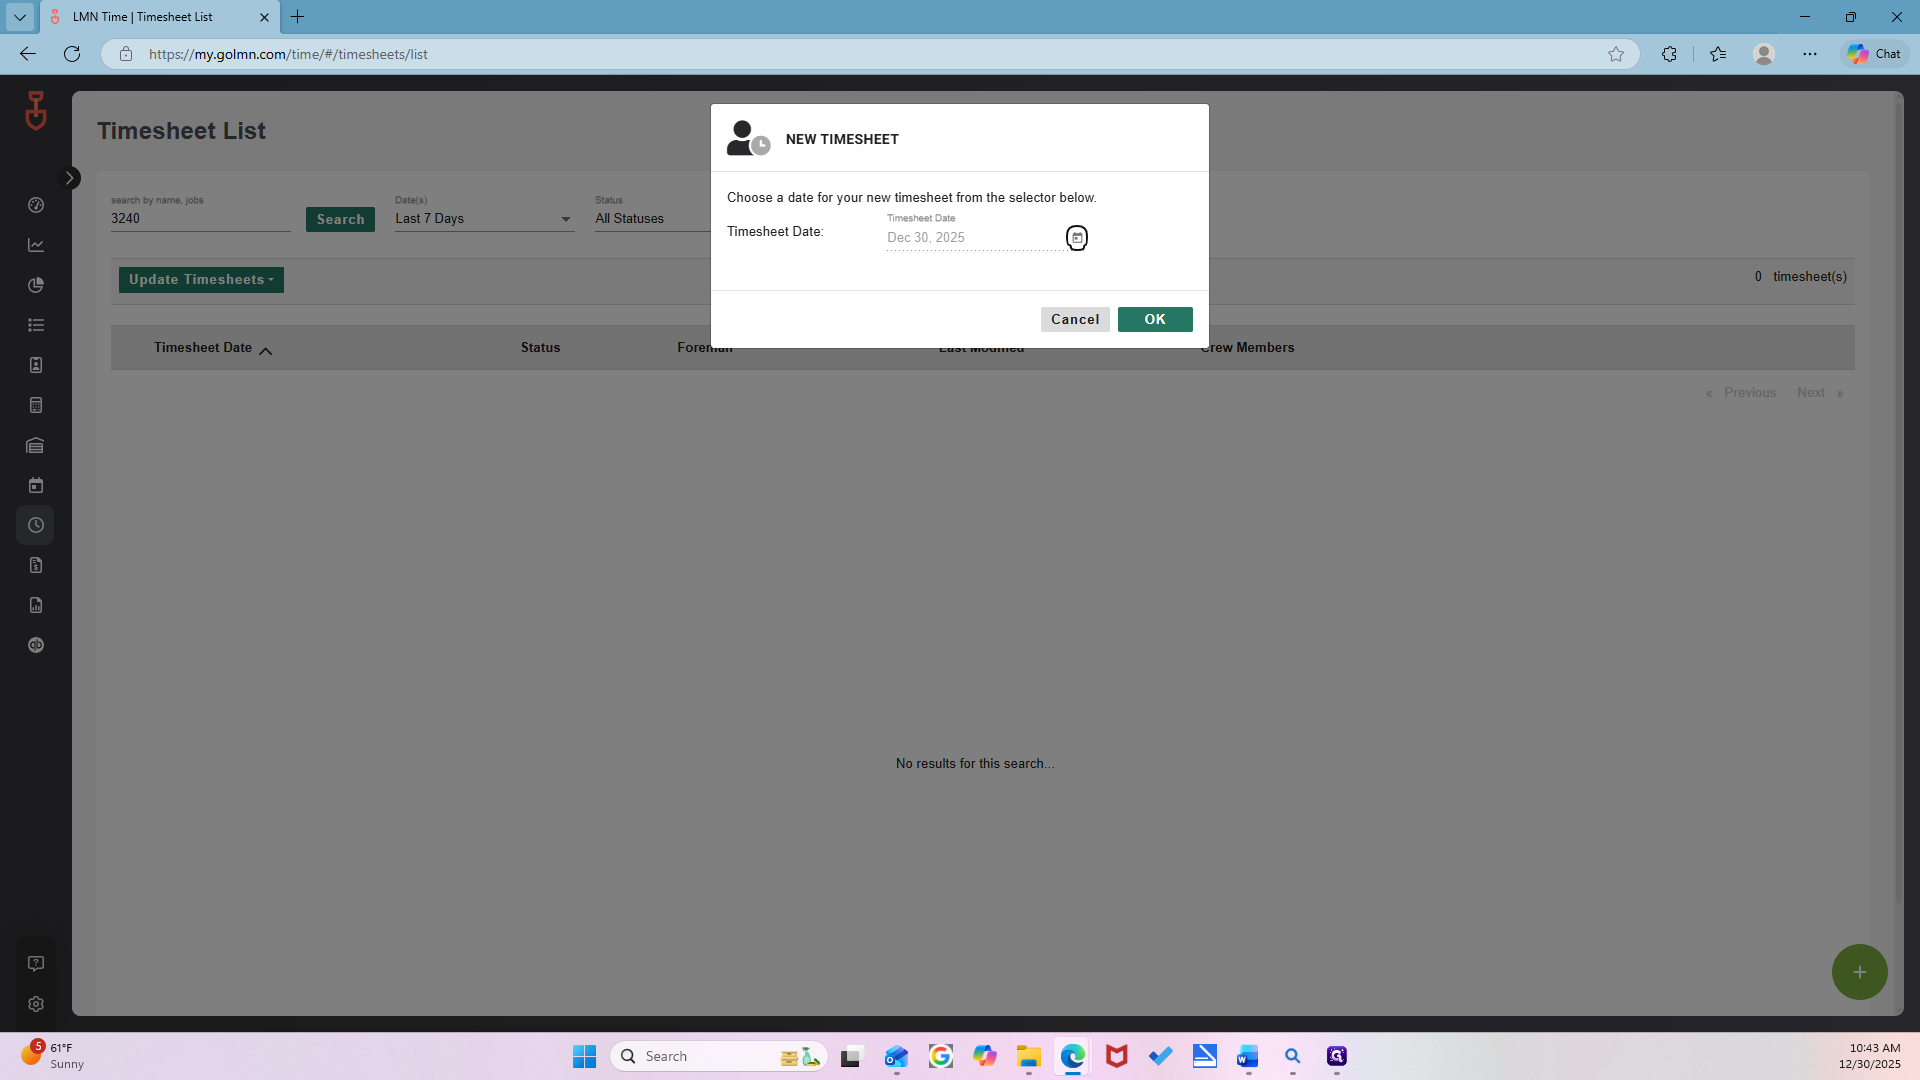
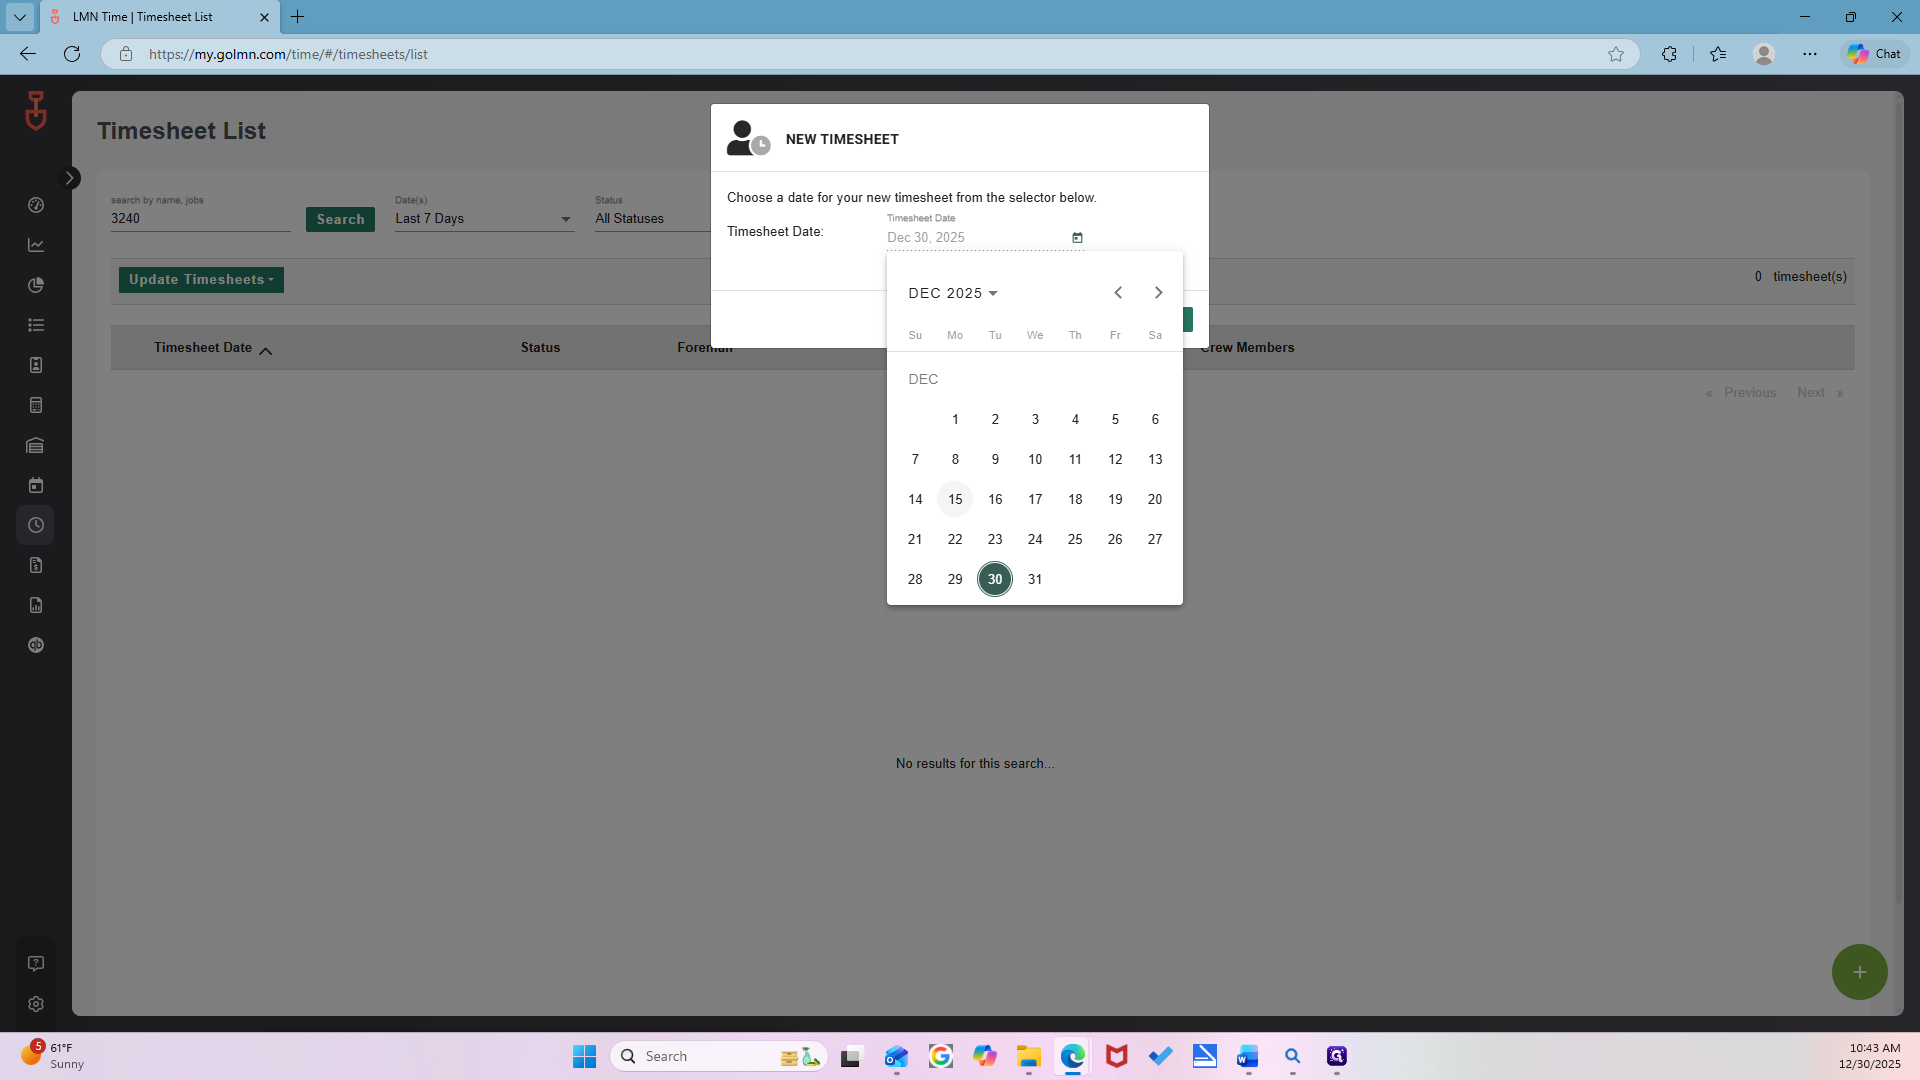
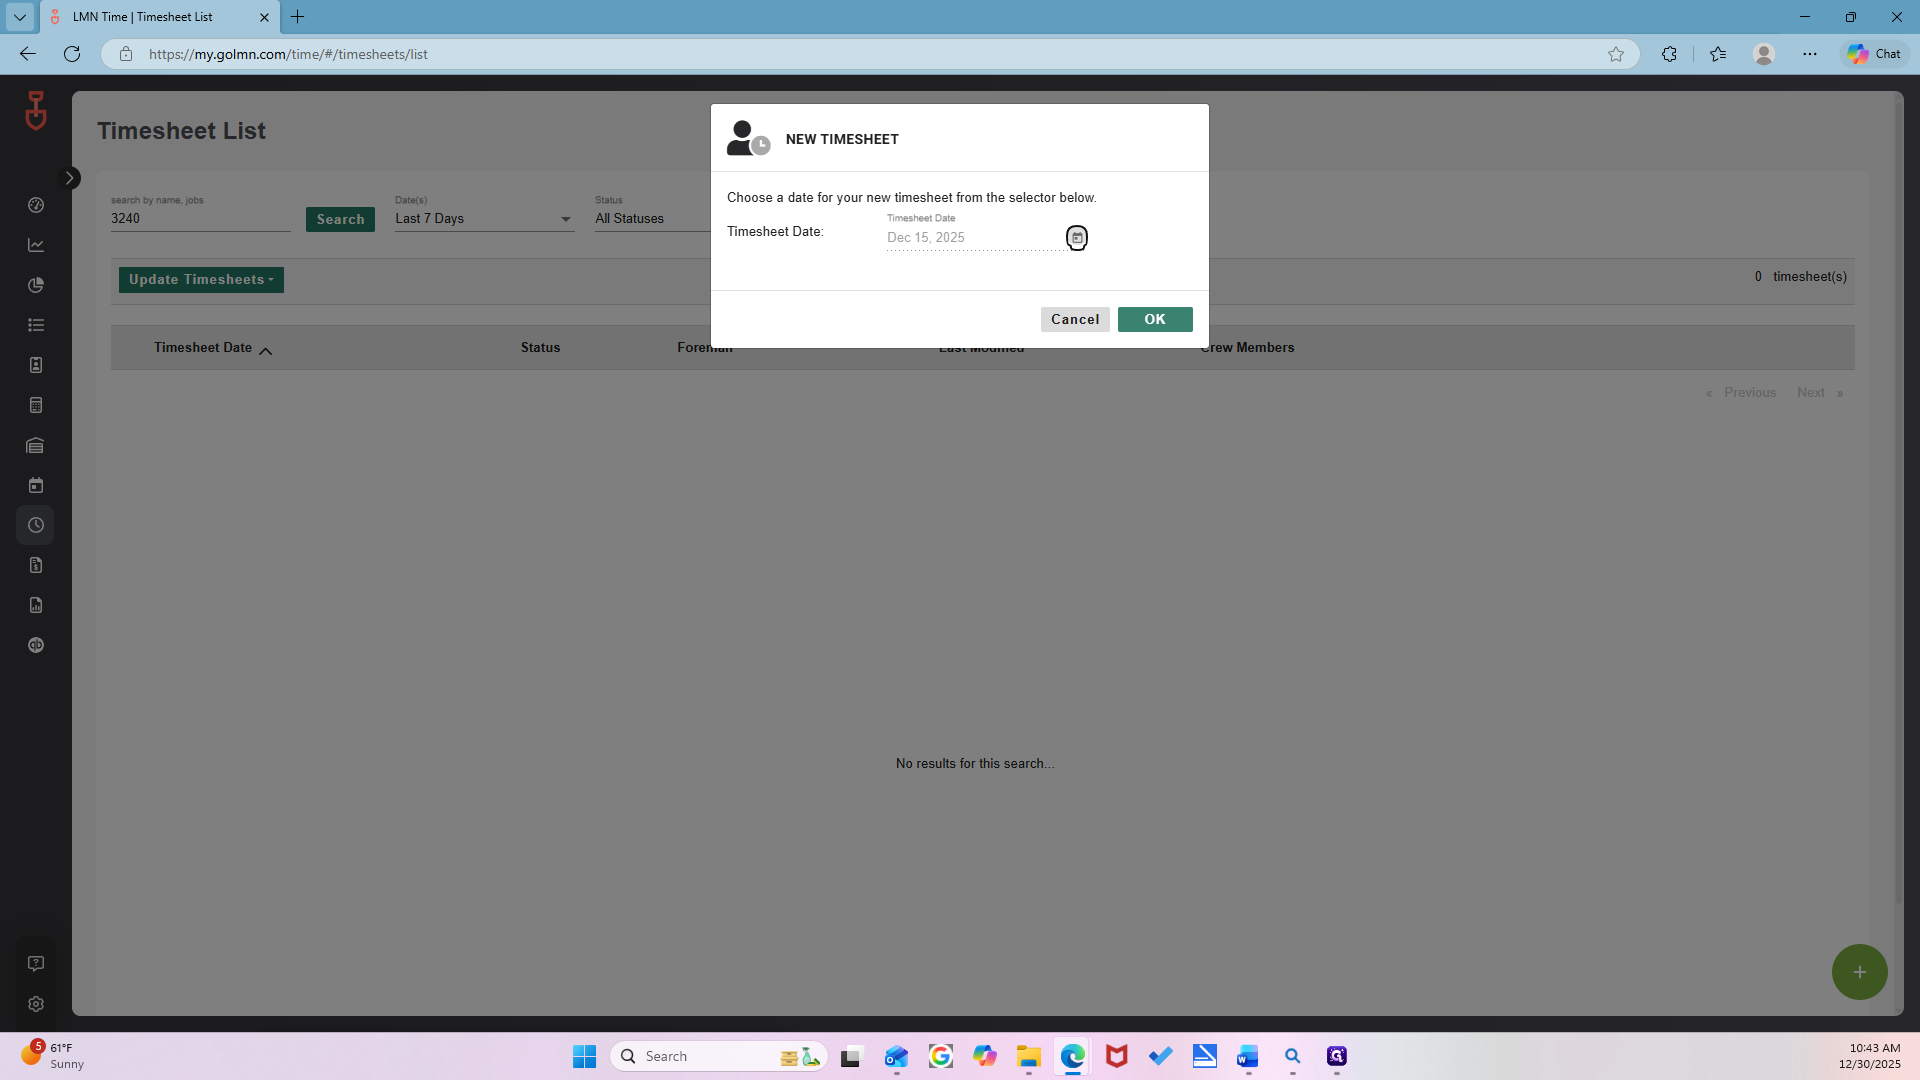
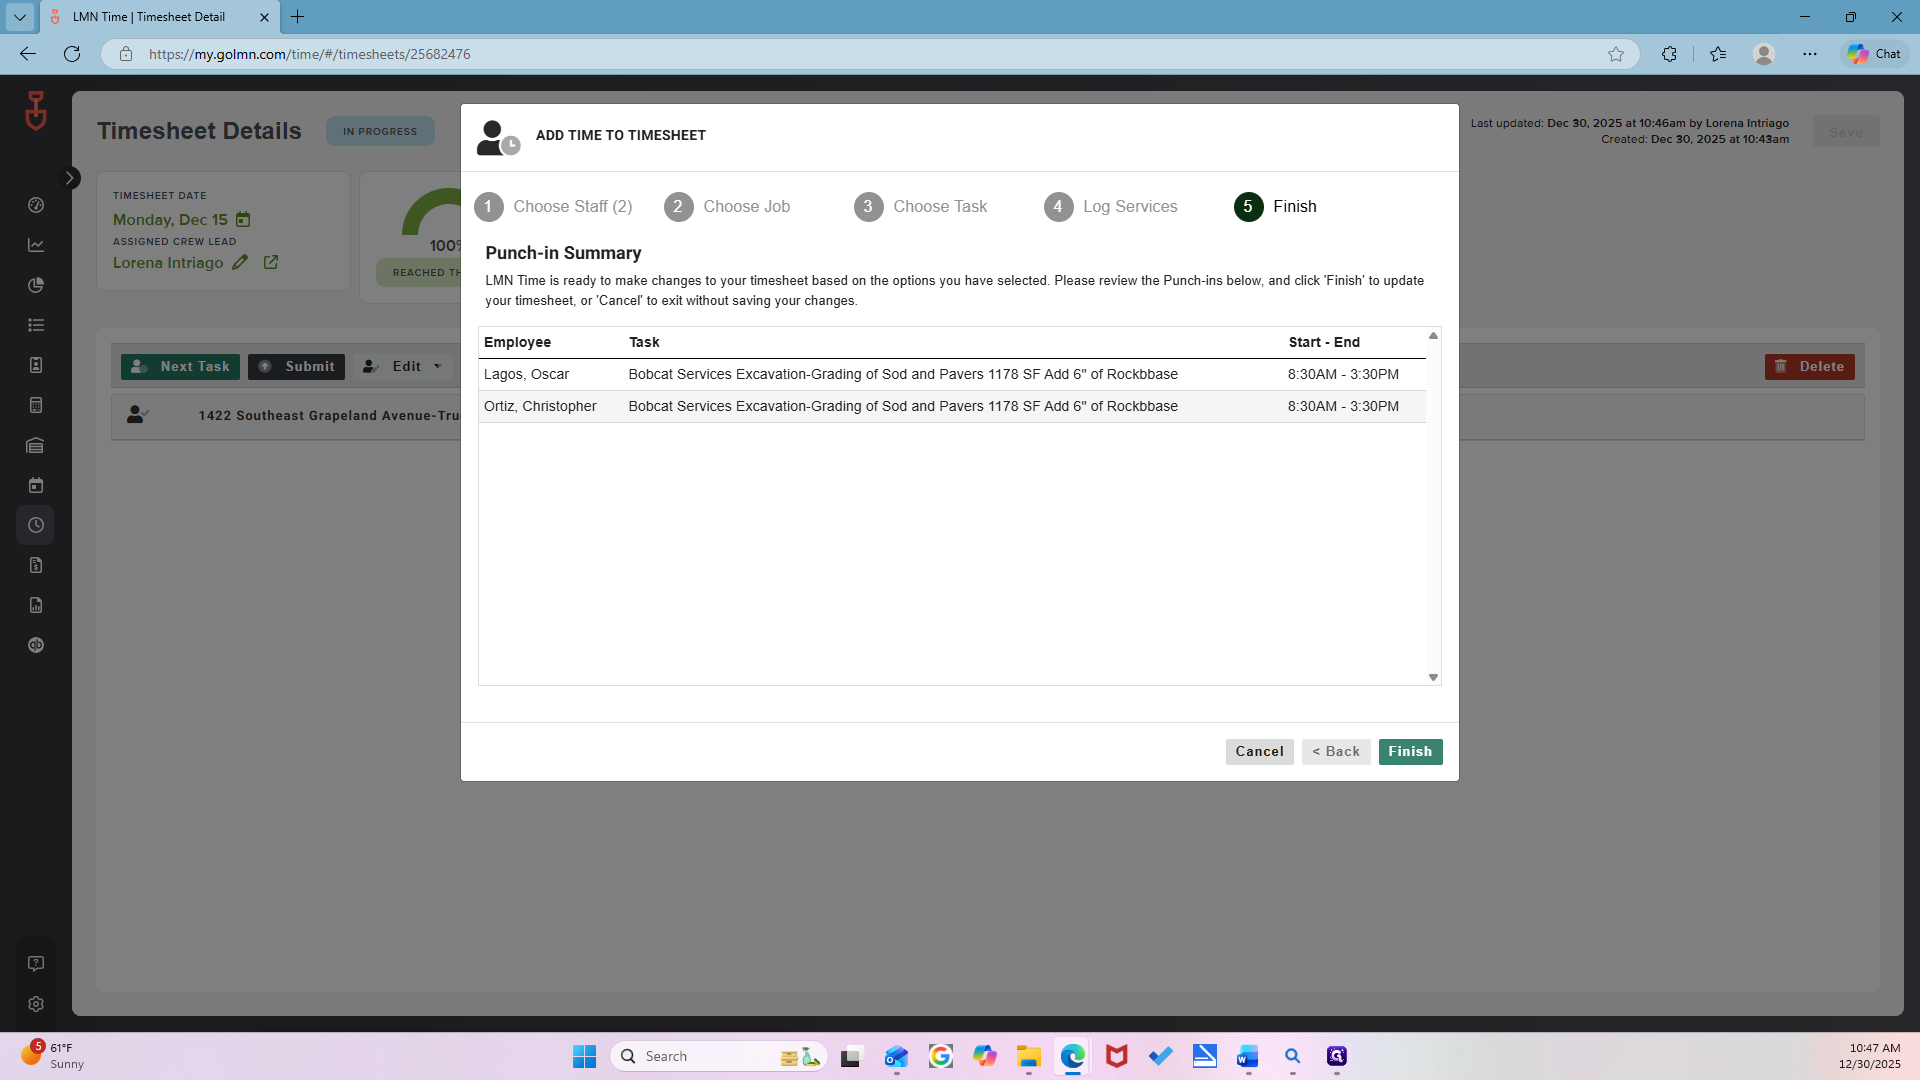
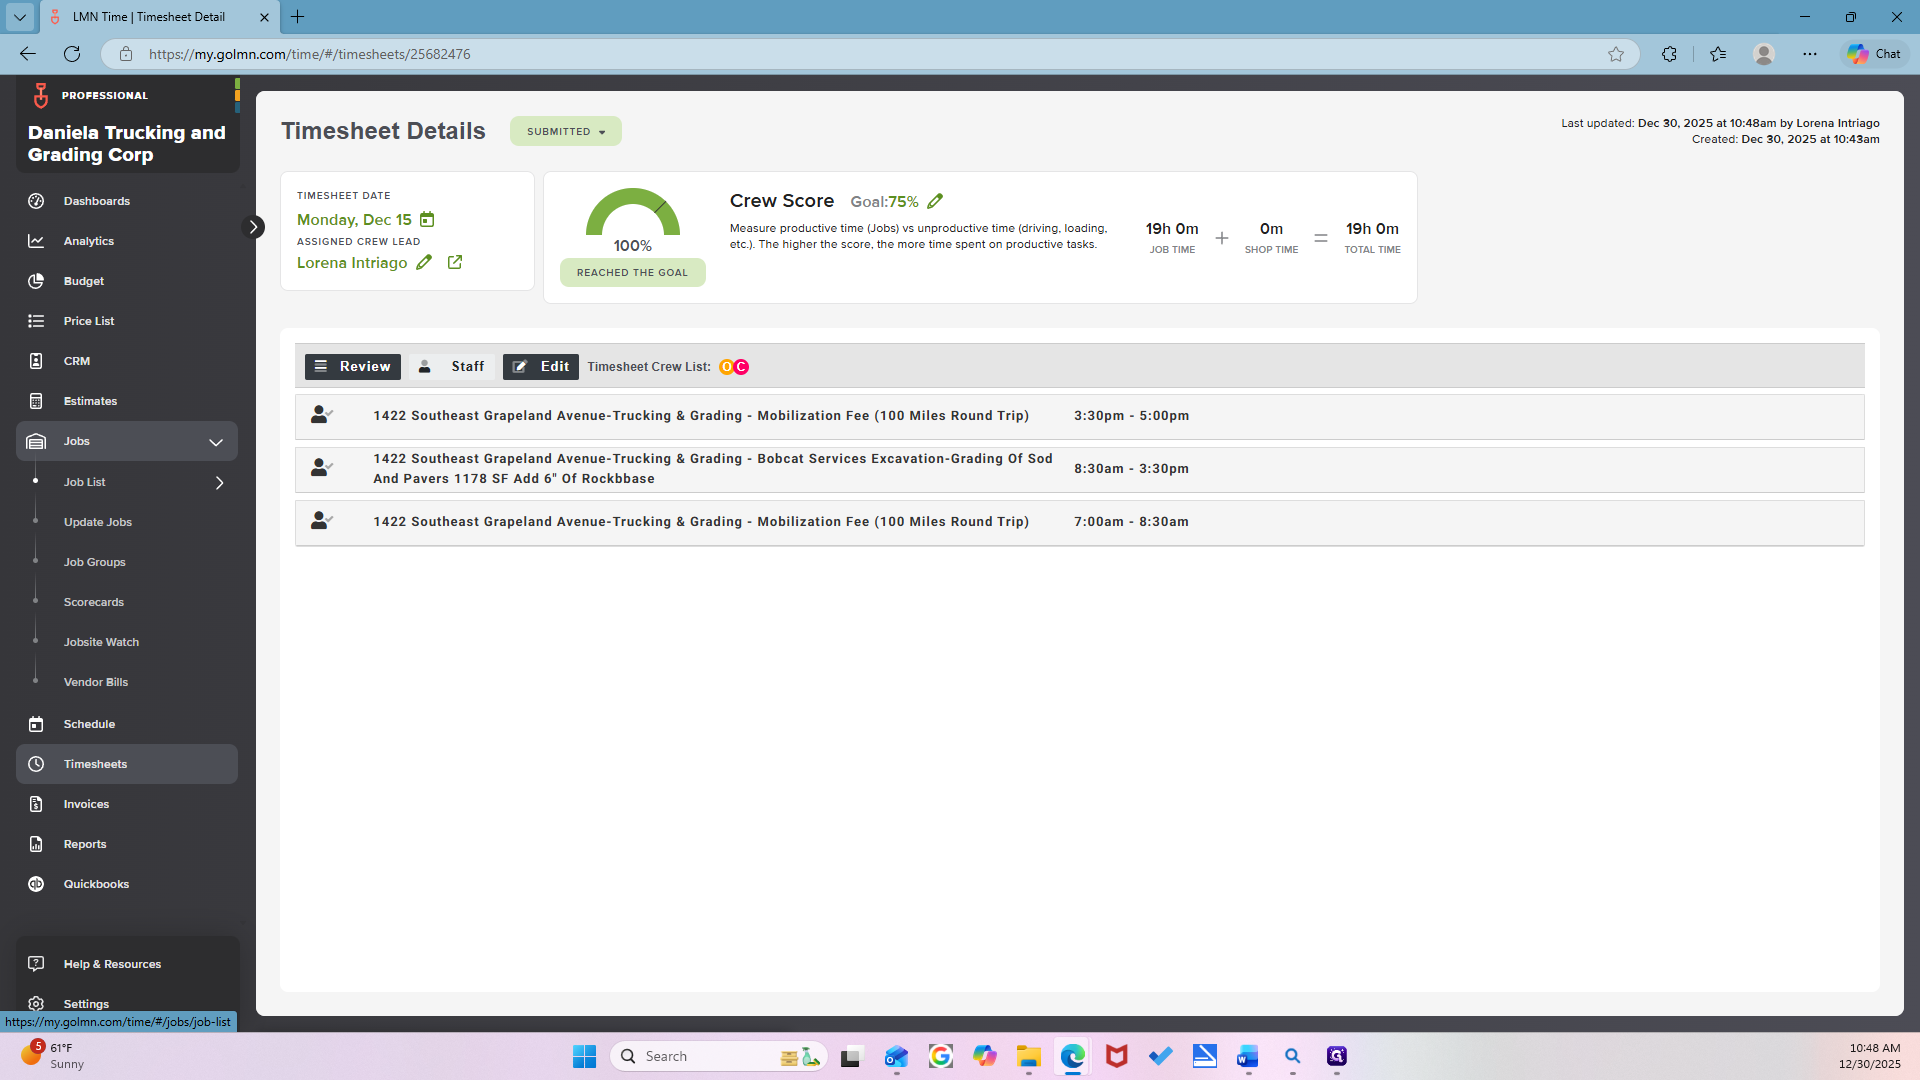
Do you see the plus sign now? This job was completed on the 15th. Make sure to select the correct completion date.
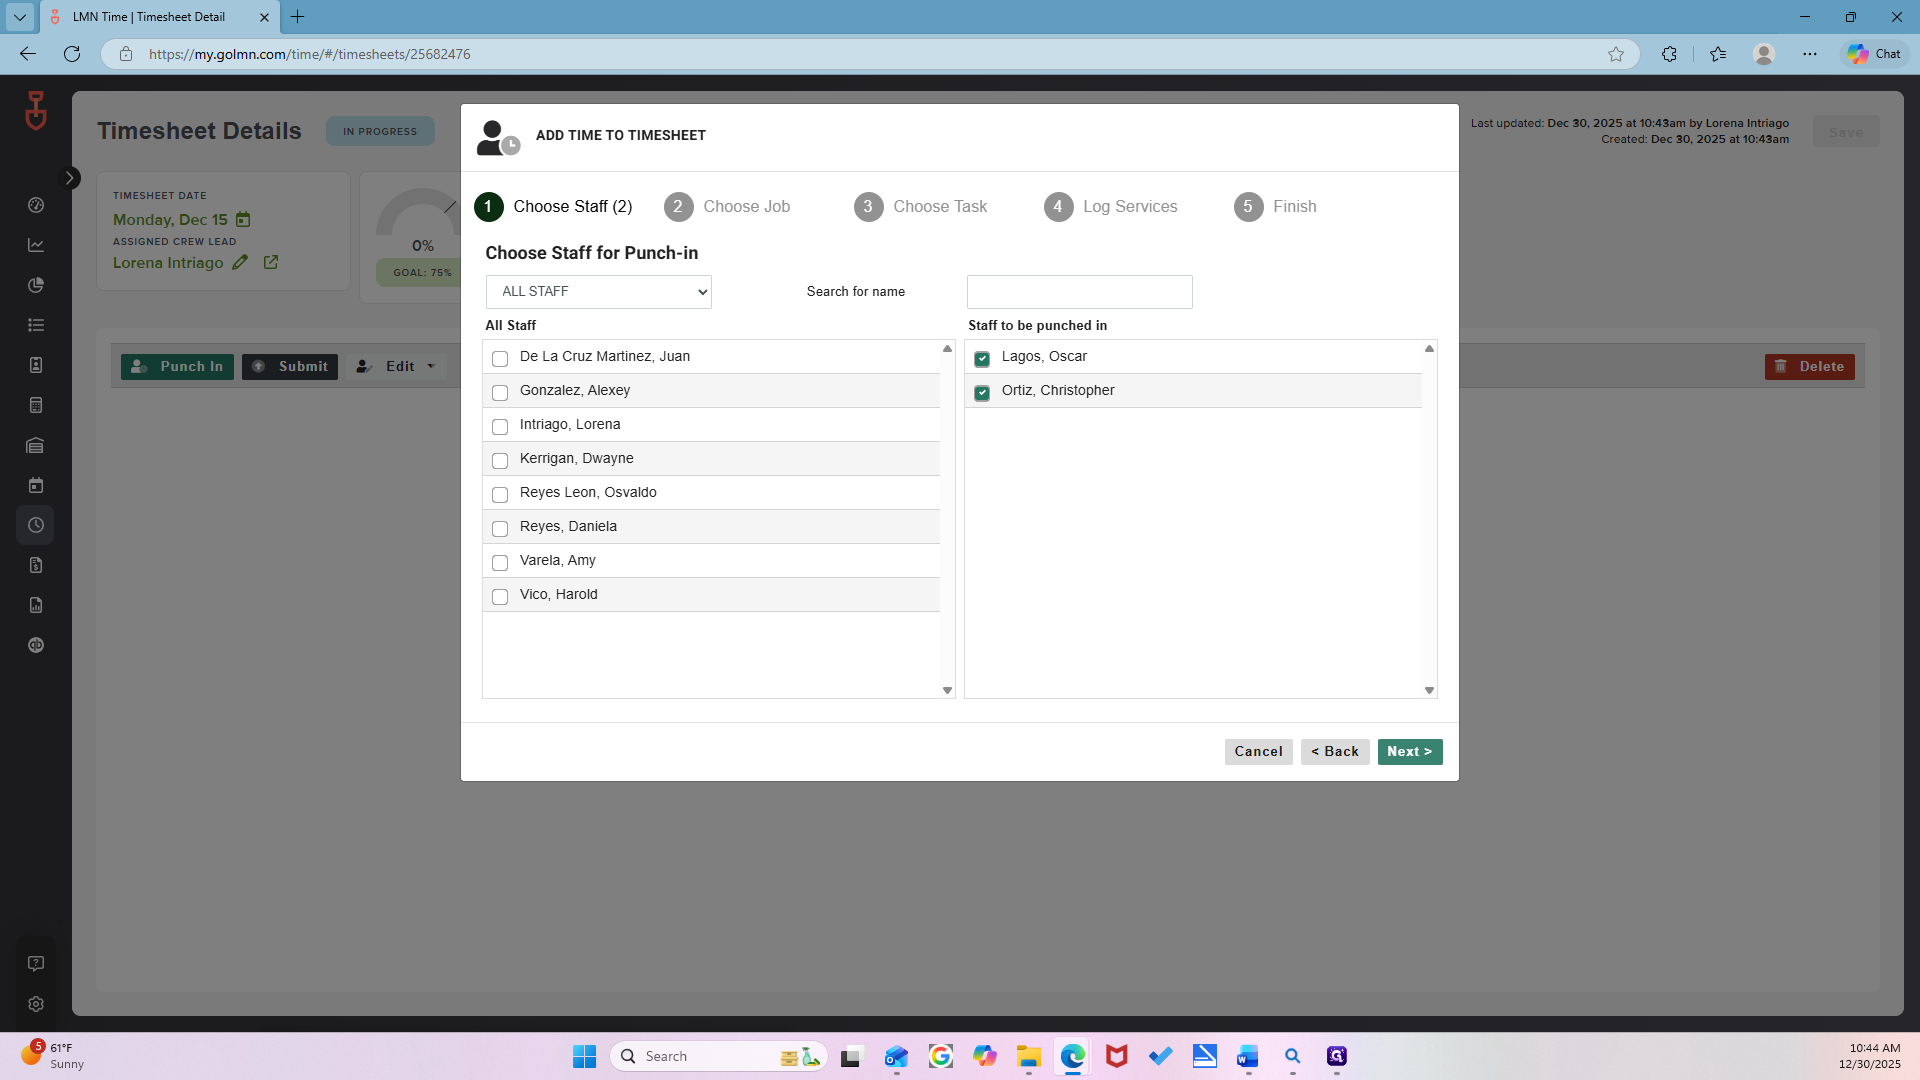
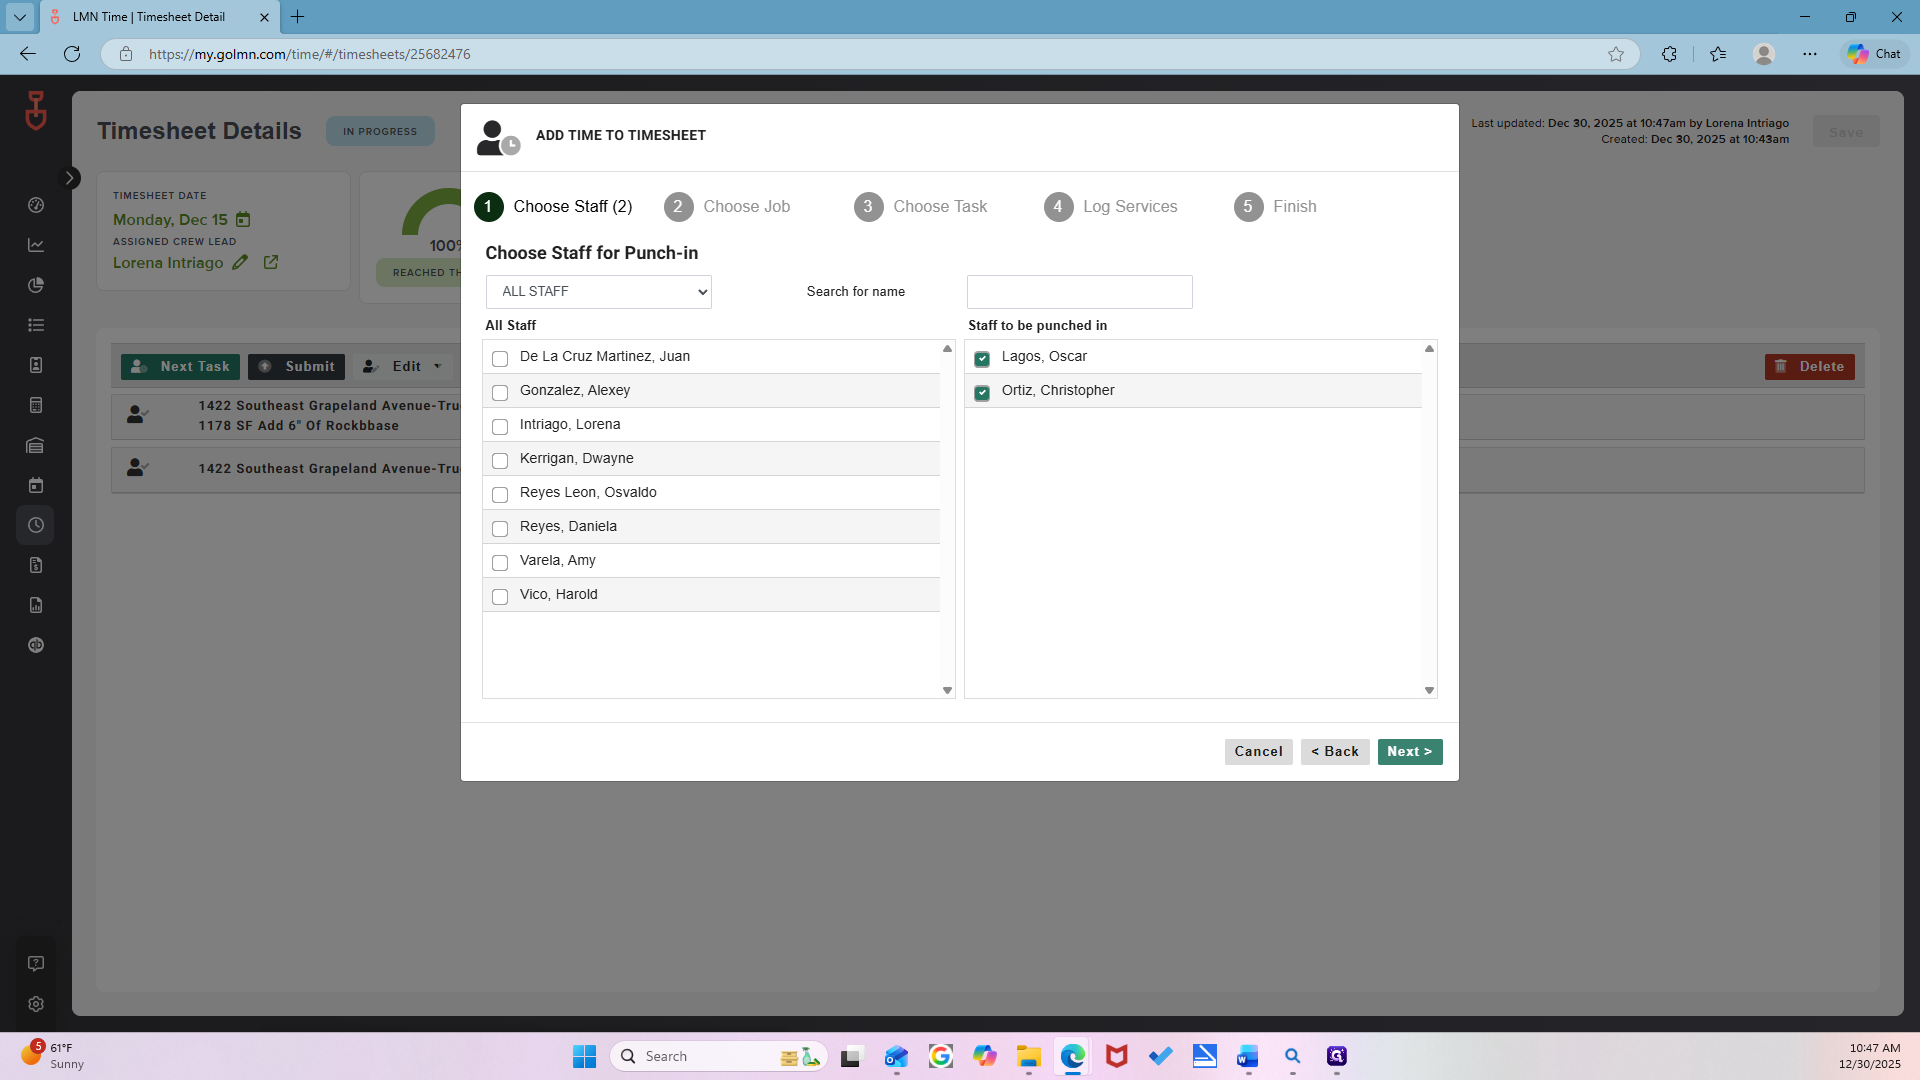
Now, press the punch-in button.
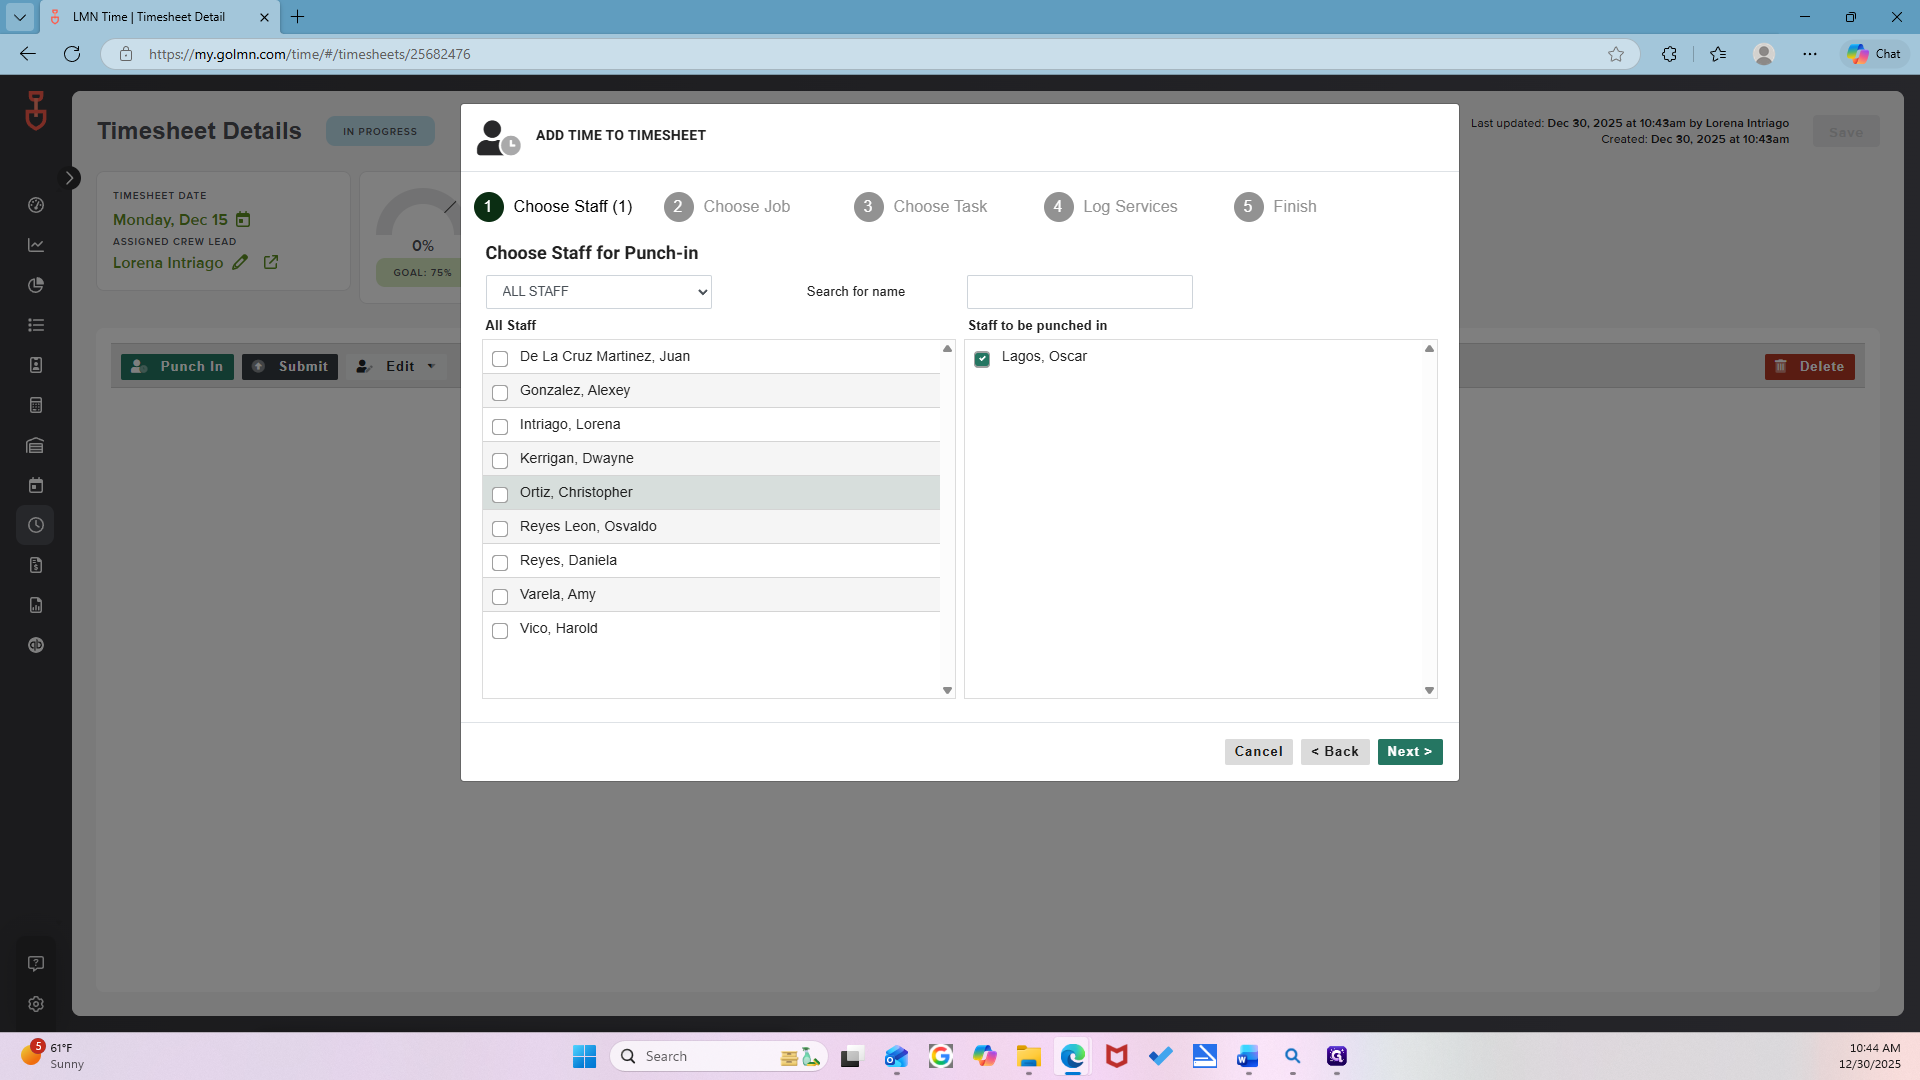
Here, we will select the crew that was present. Remember, it was Oscar.
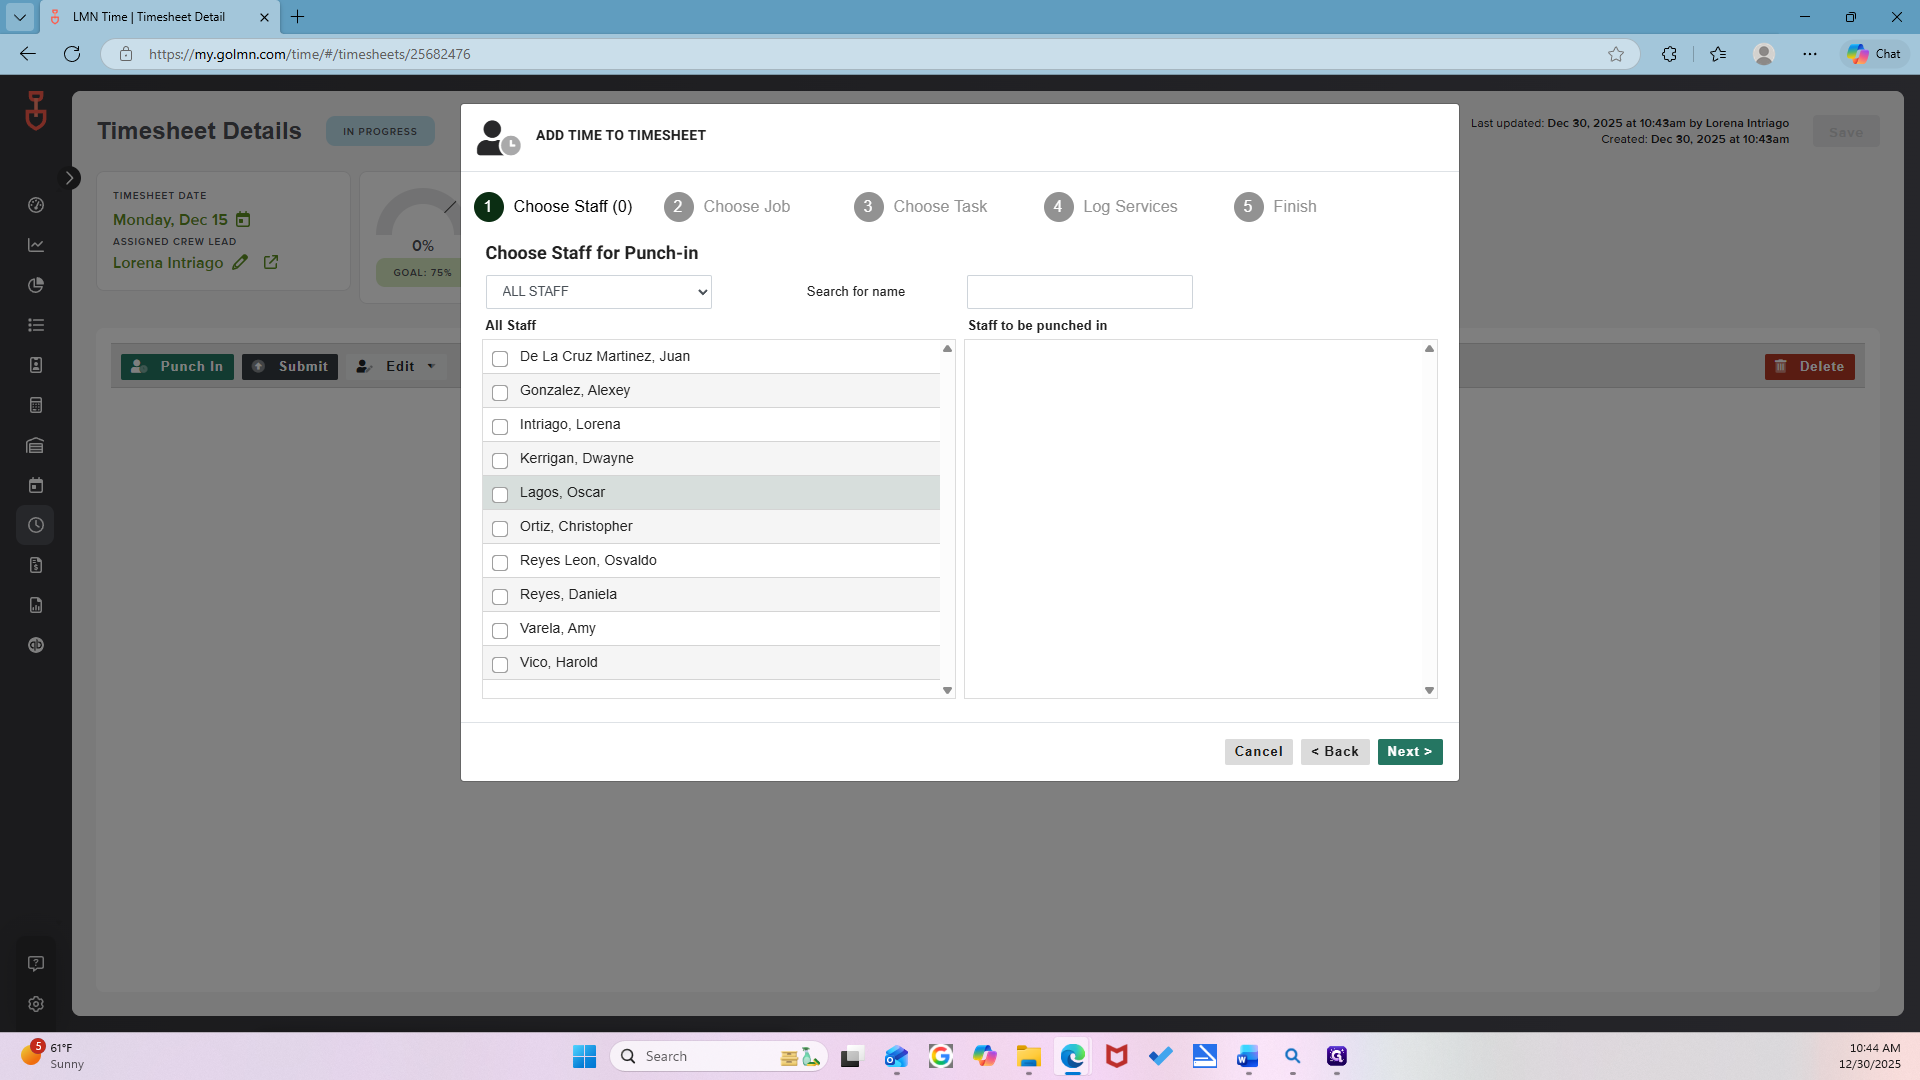
With Oscar, it was Chris. Mm-hmm. Now I'm going to move on to the next step.
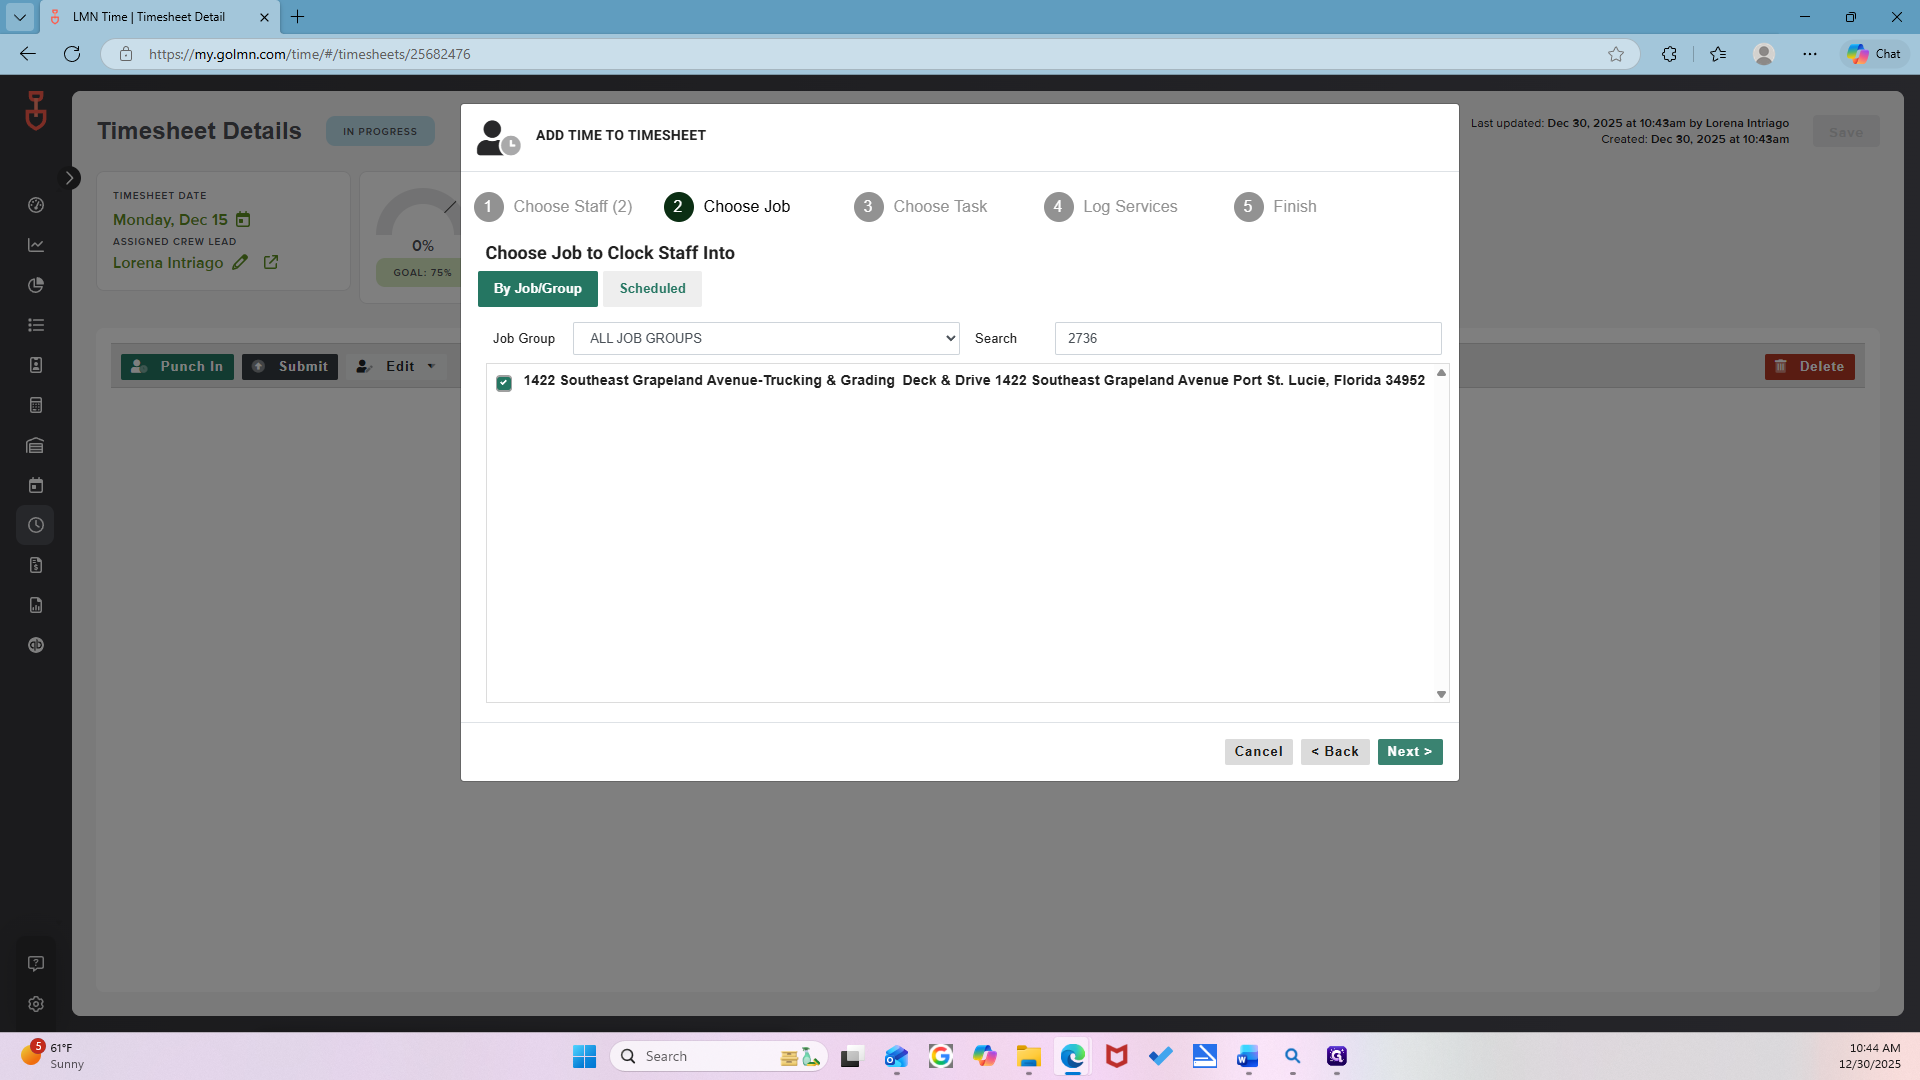
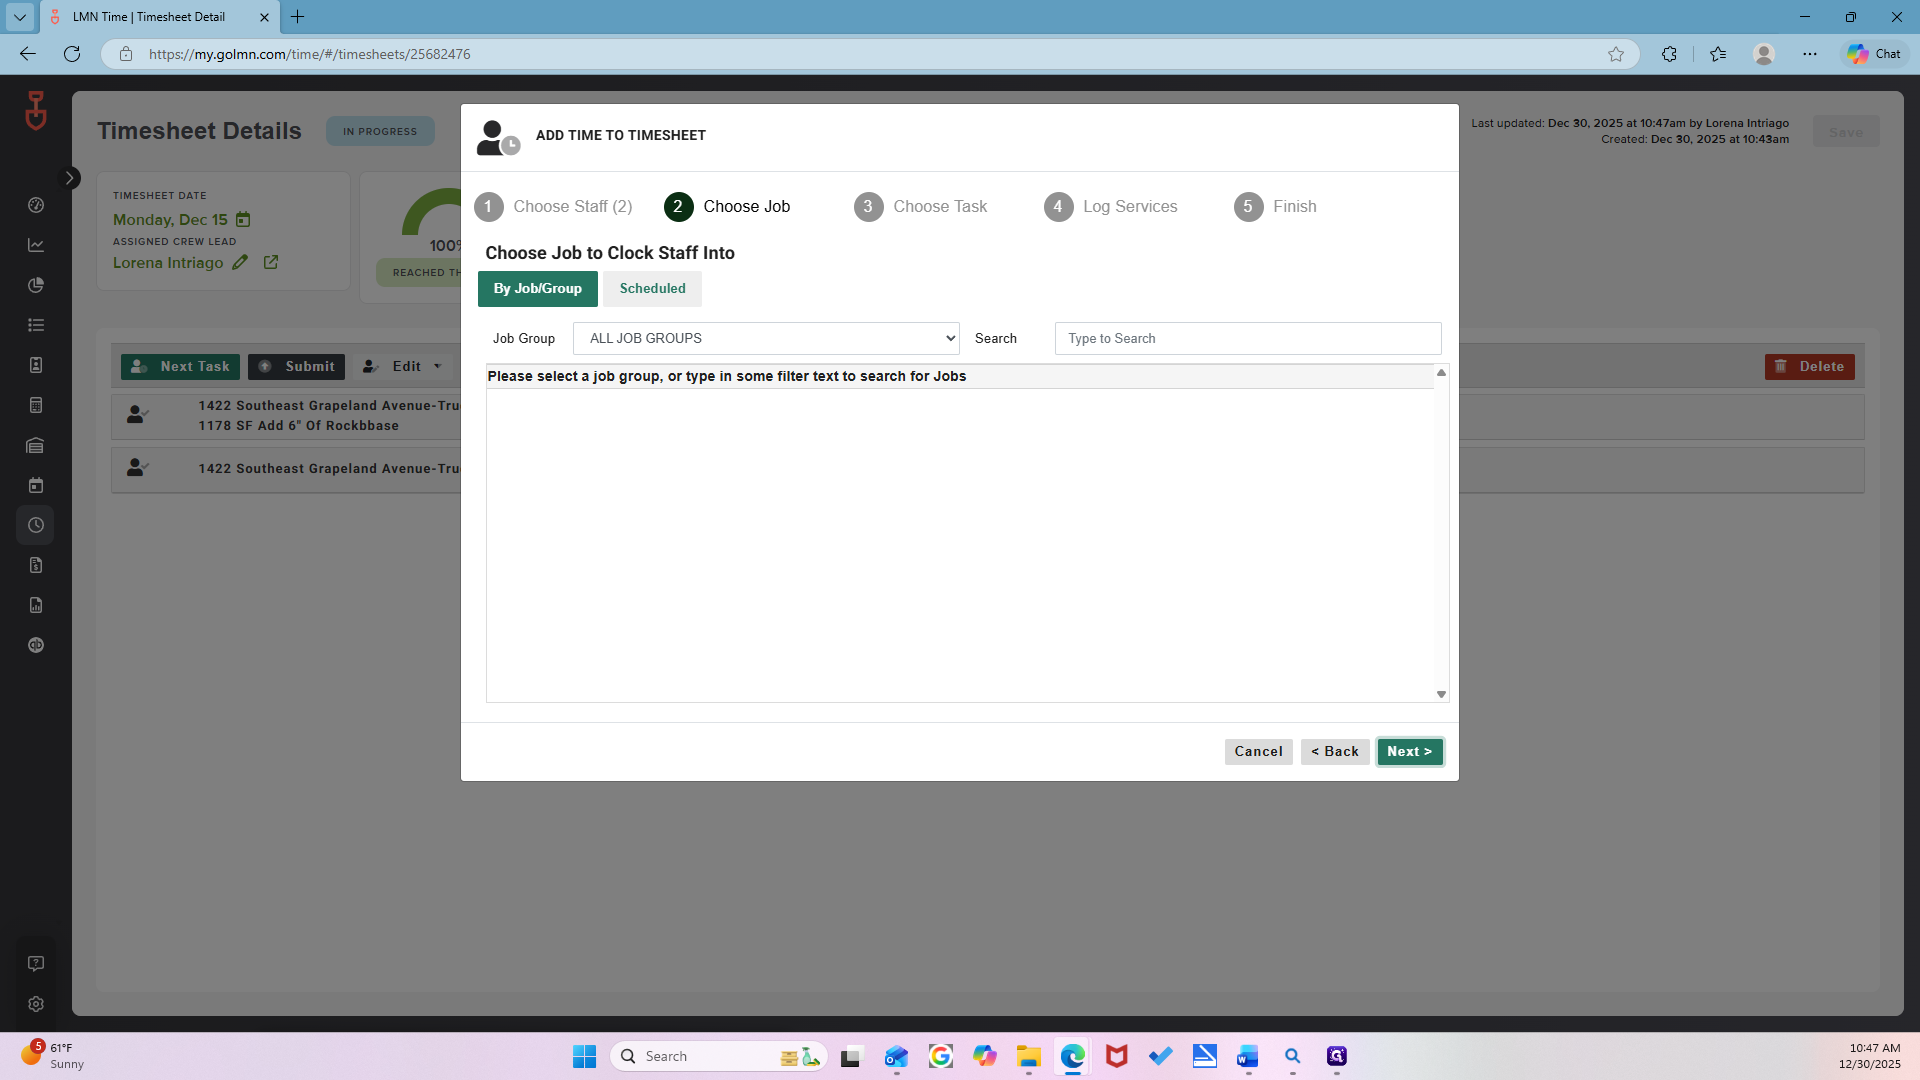
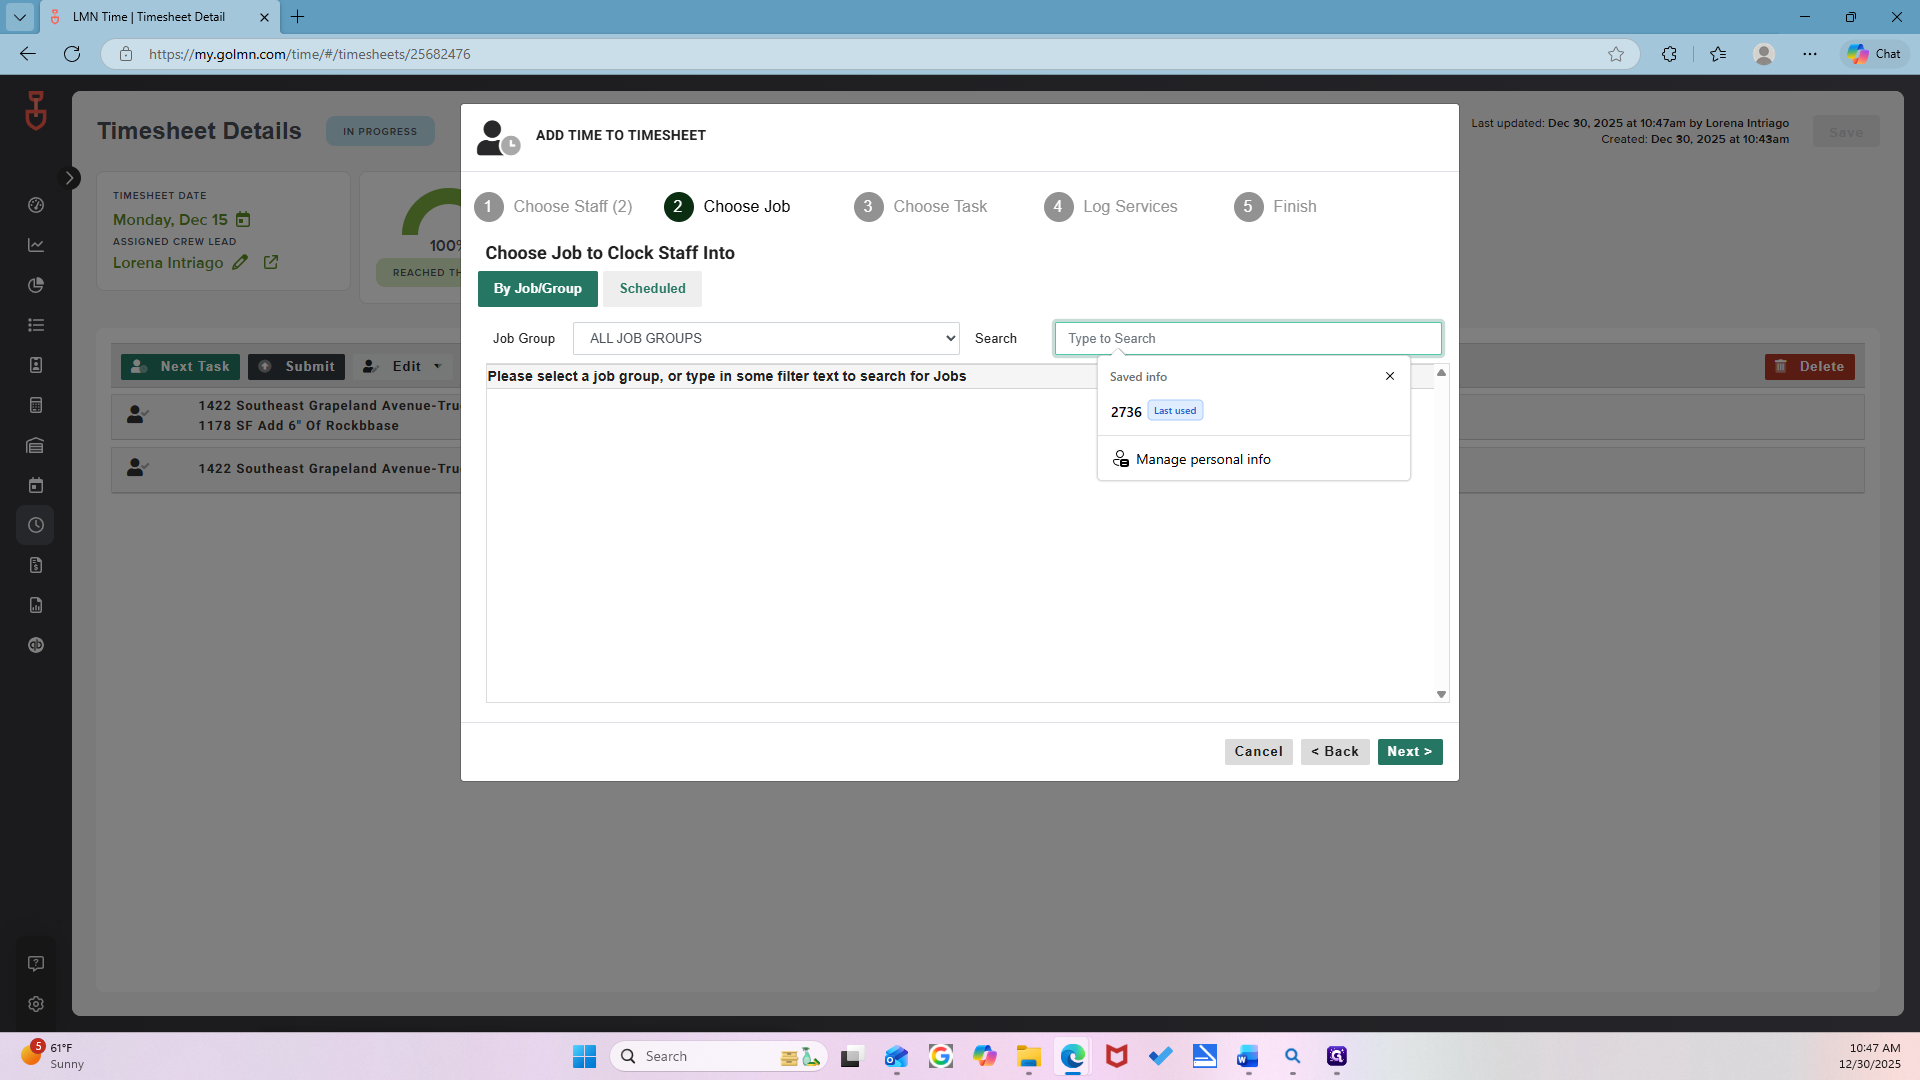
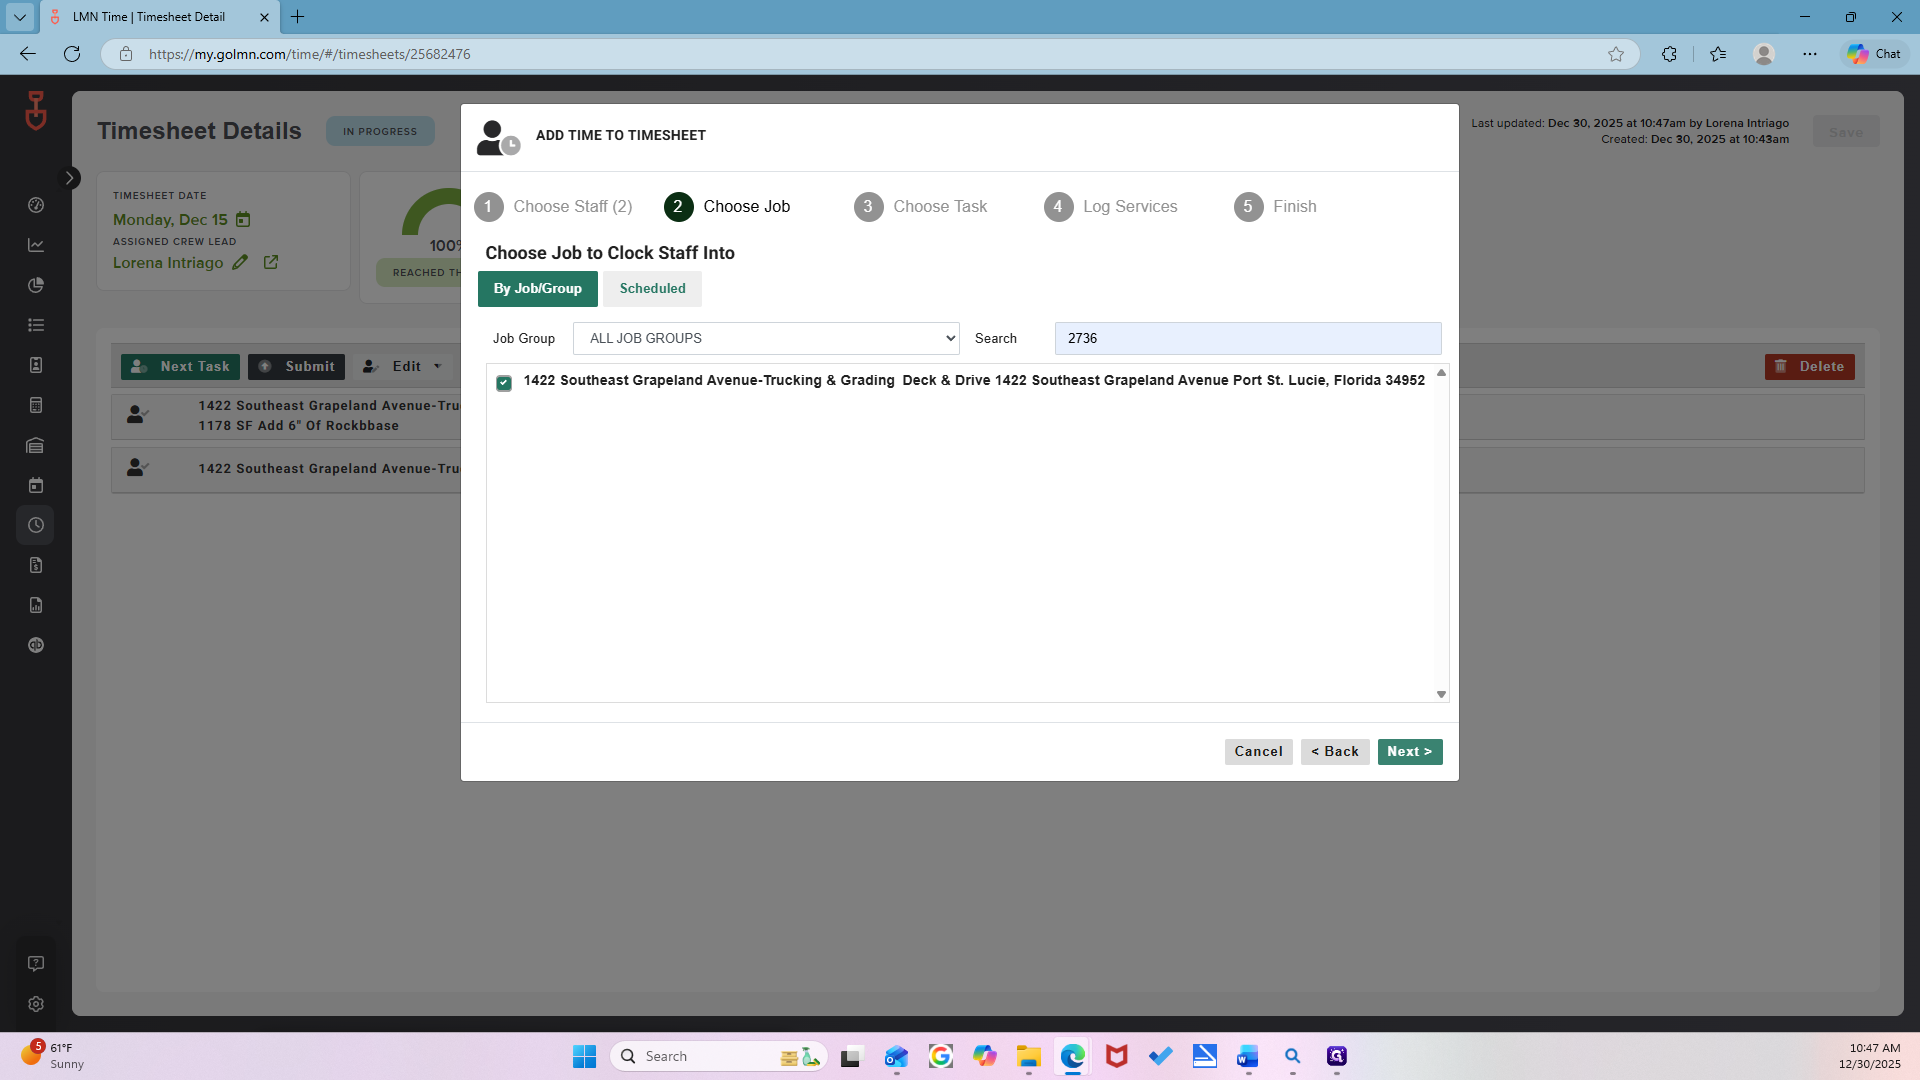
Now we'll search for the jobs. Use the estimate number again.
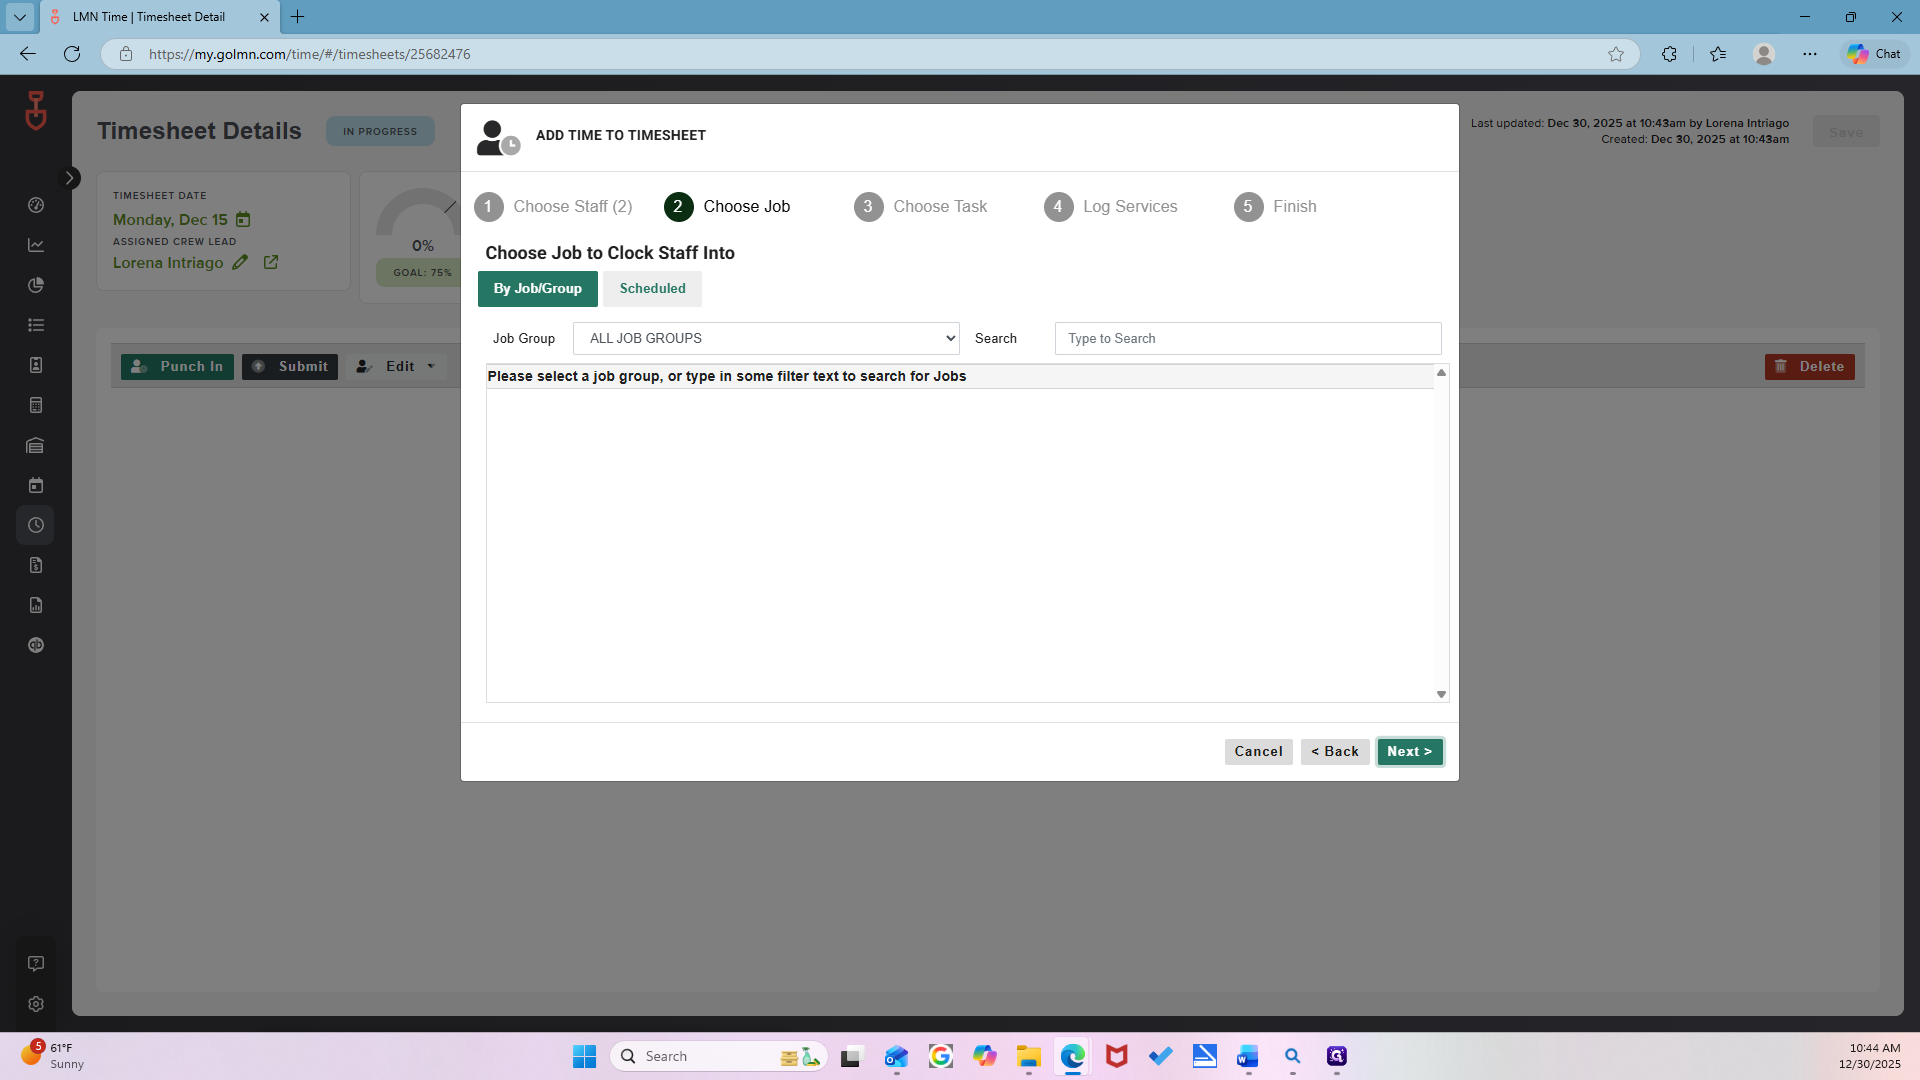
Select it, then click Next.

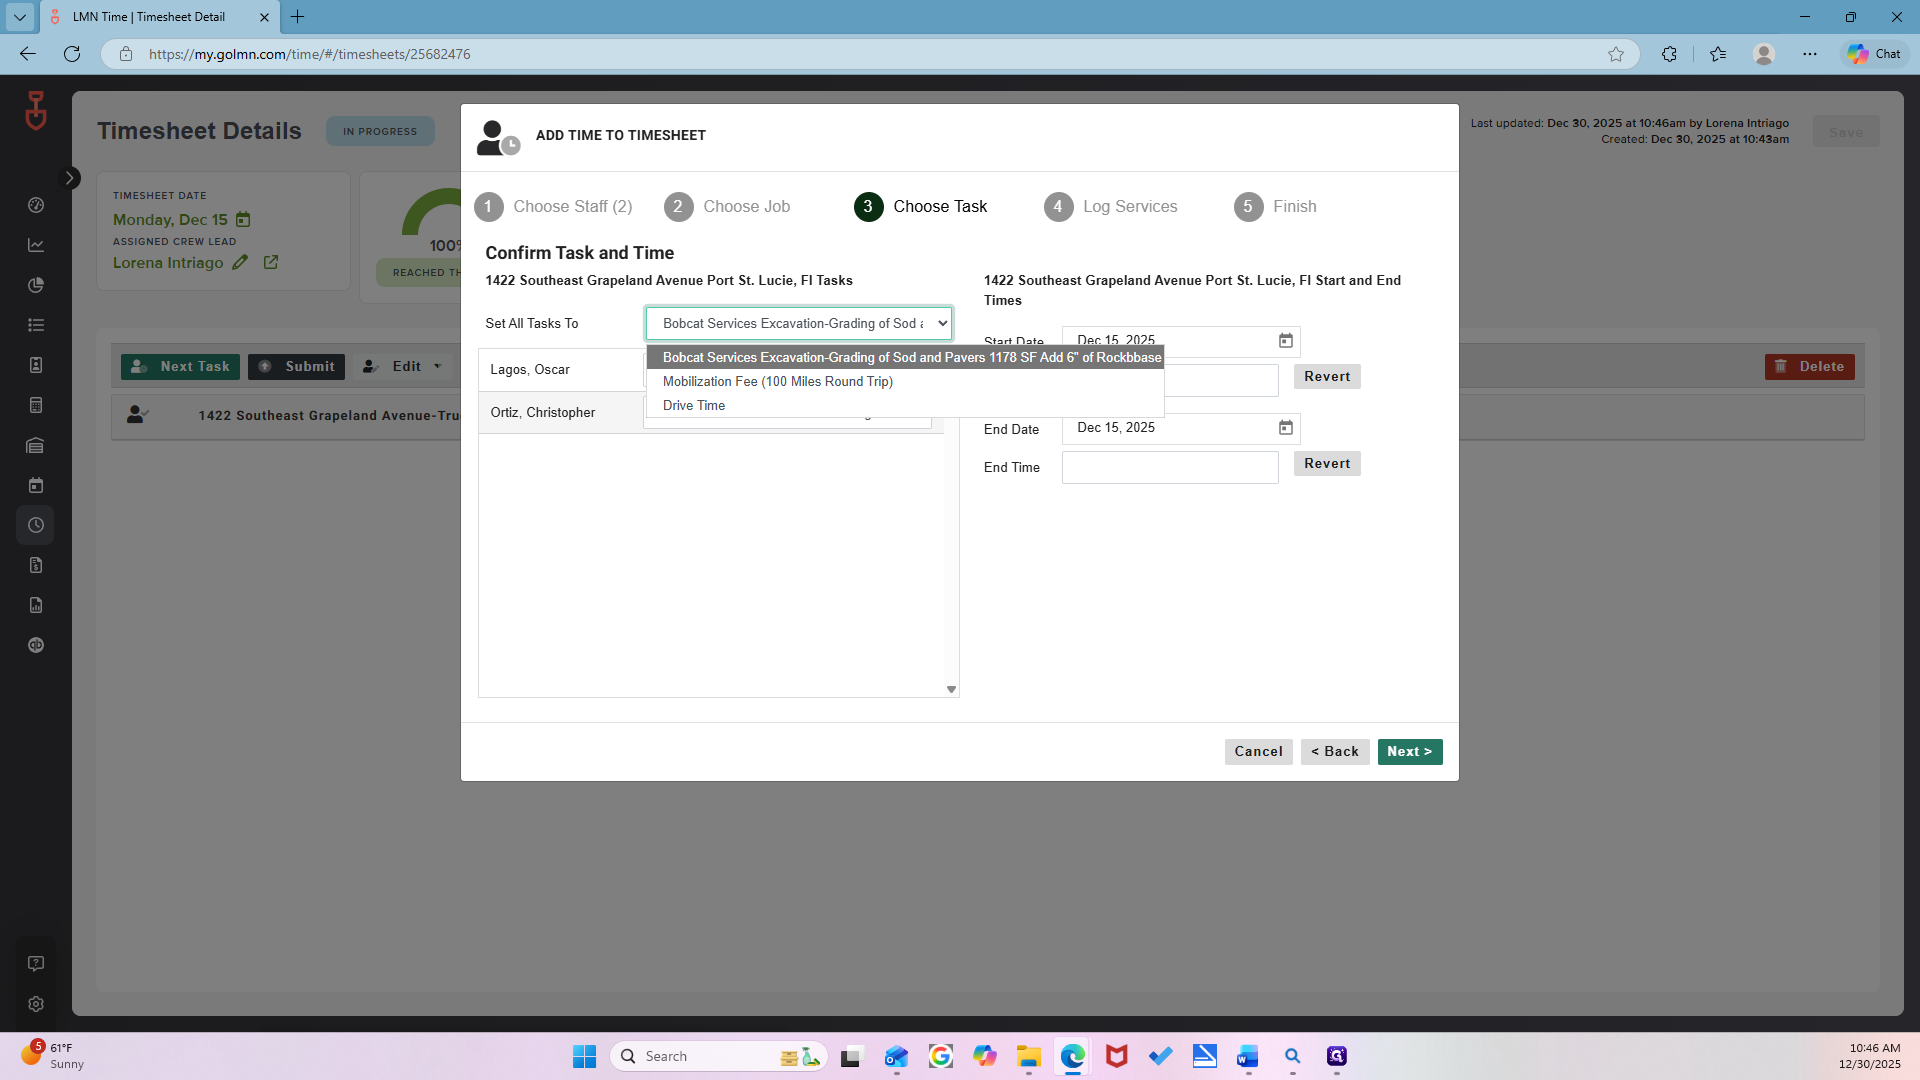
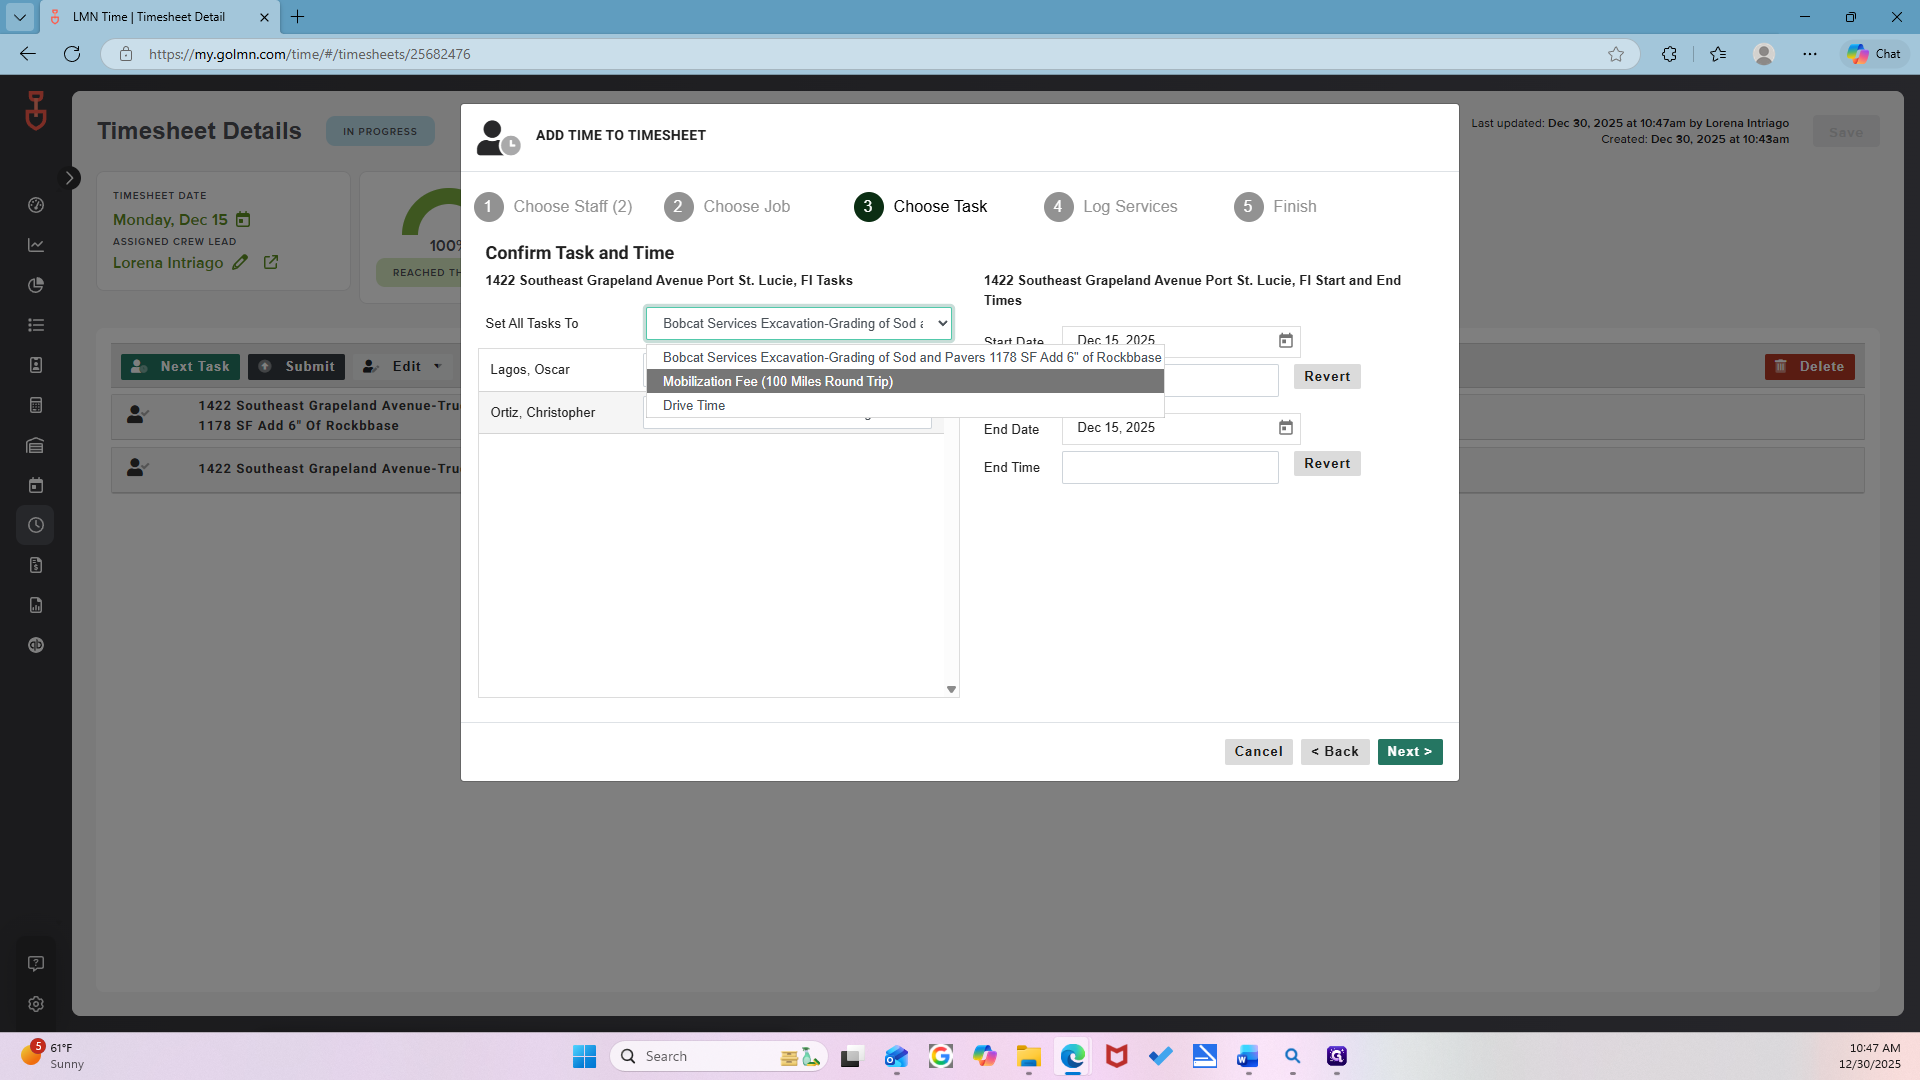
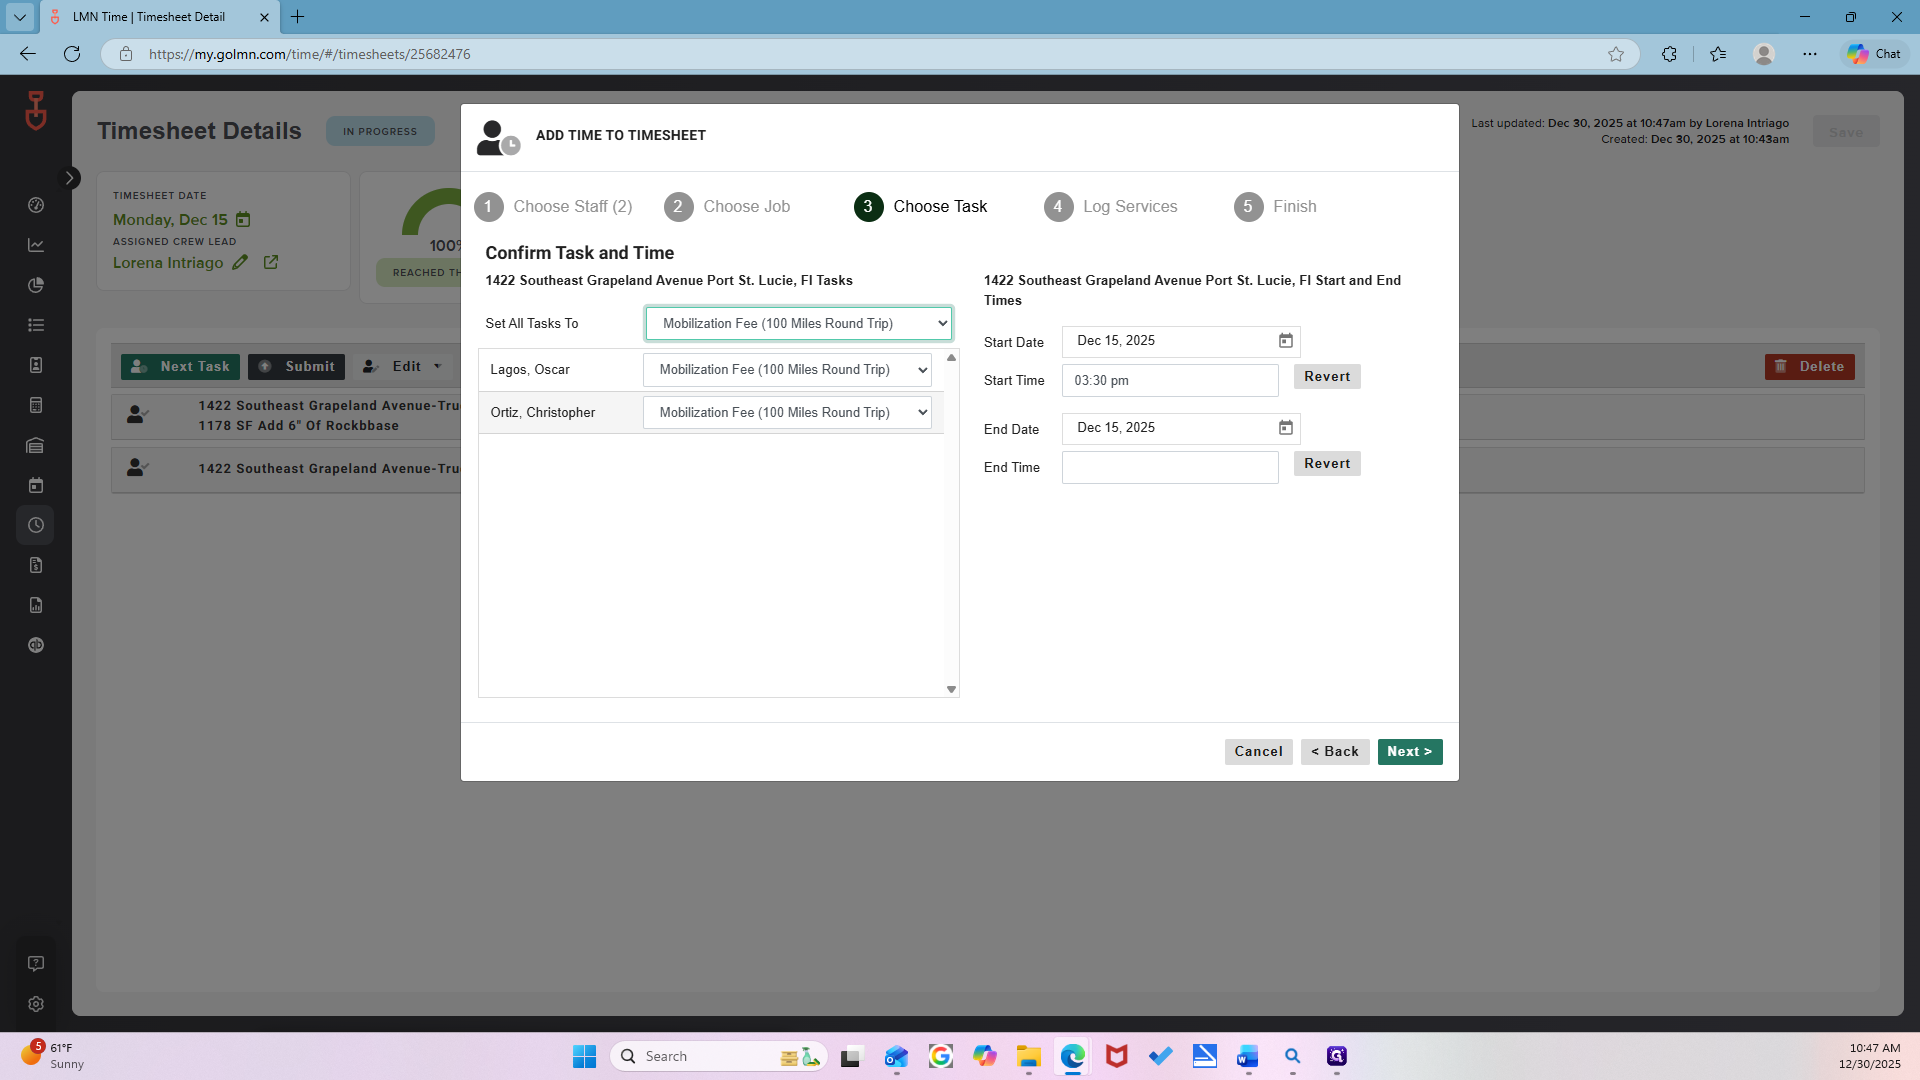
The first step is mobilization or drive time, which means they are driving. They always need to drive to the job first. Click "Mobilization Fee" where it says "Set all tasks to."

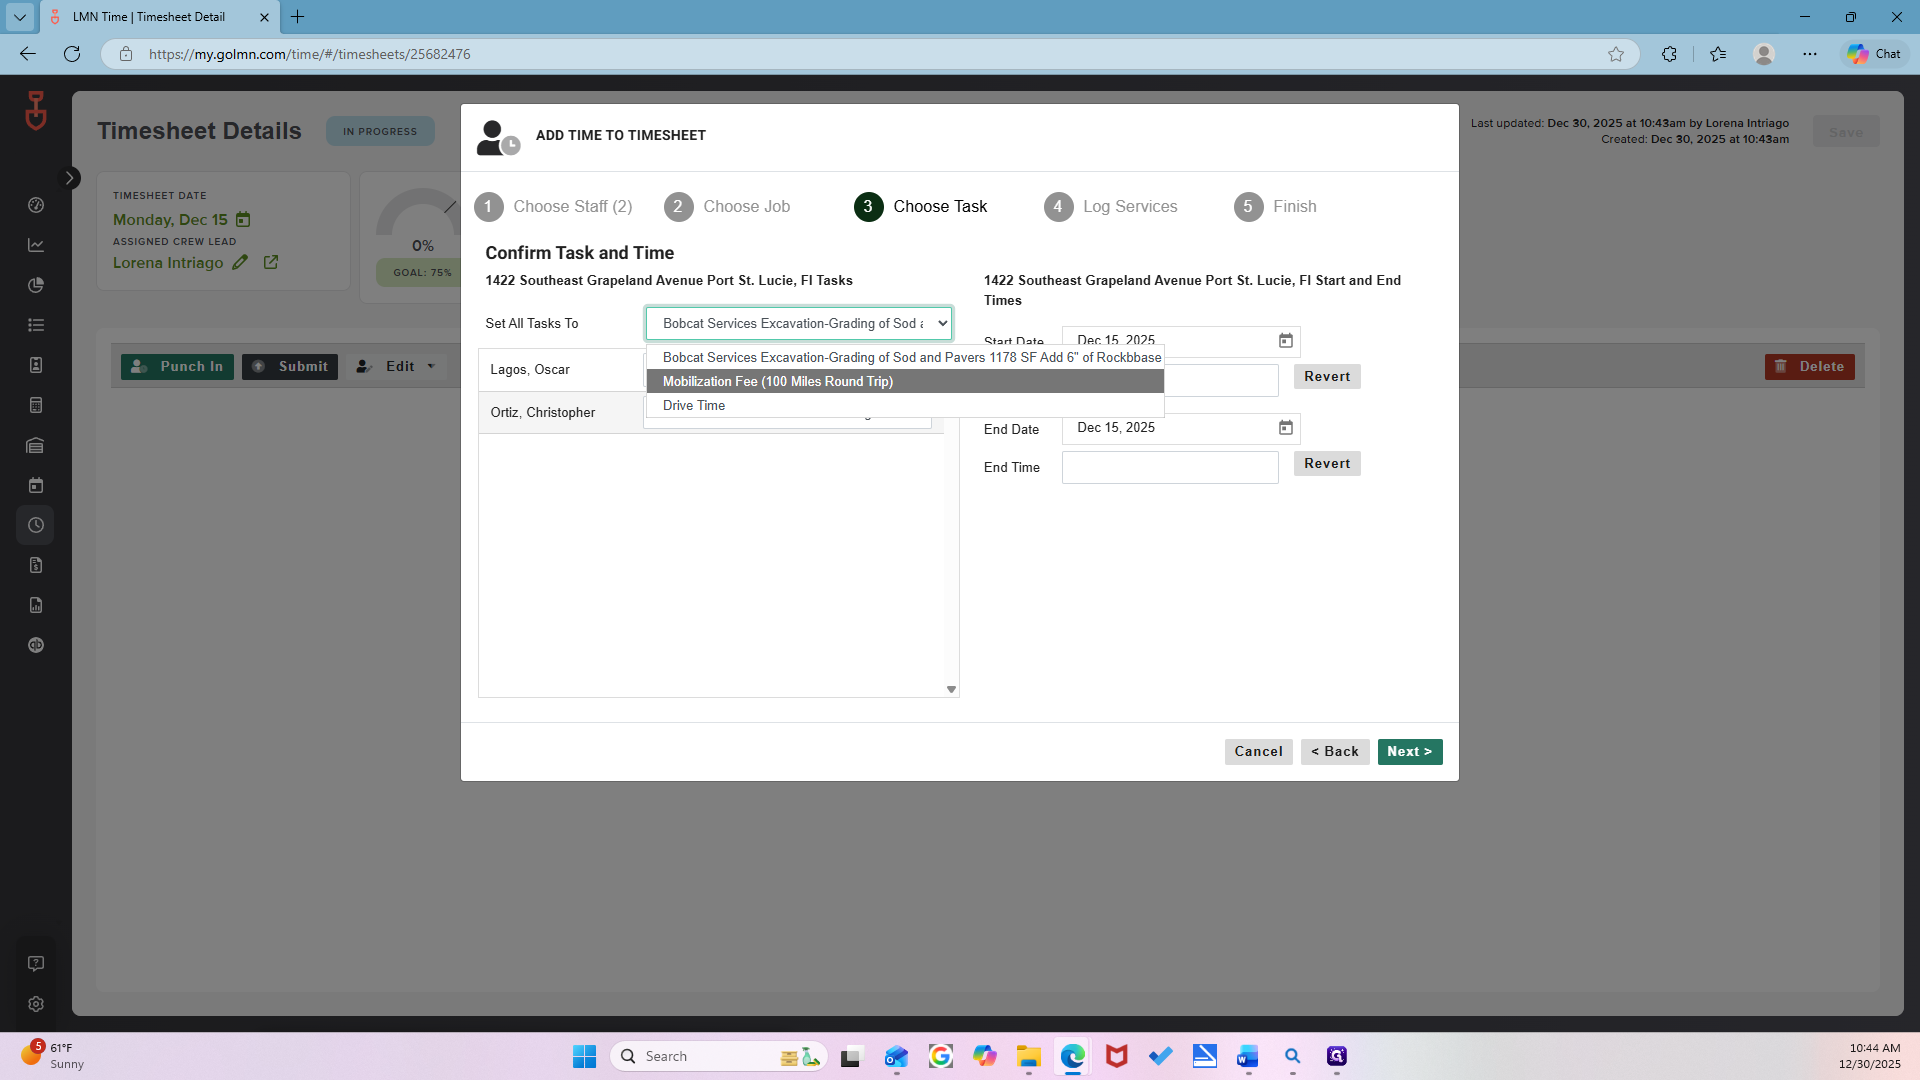
And then we're going to start. No, leave that. ""

No, the date is correct.


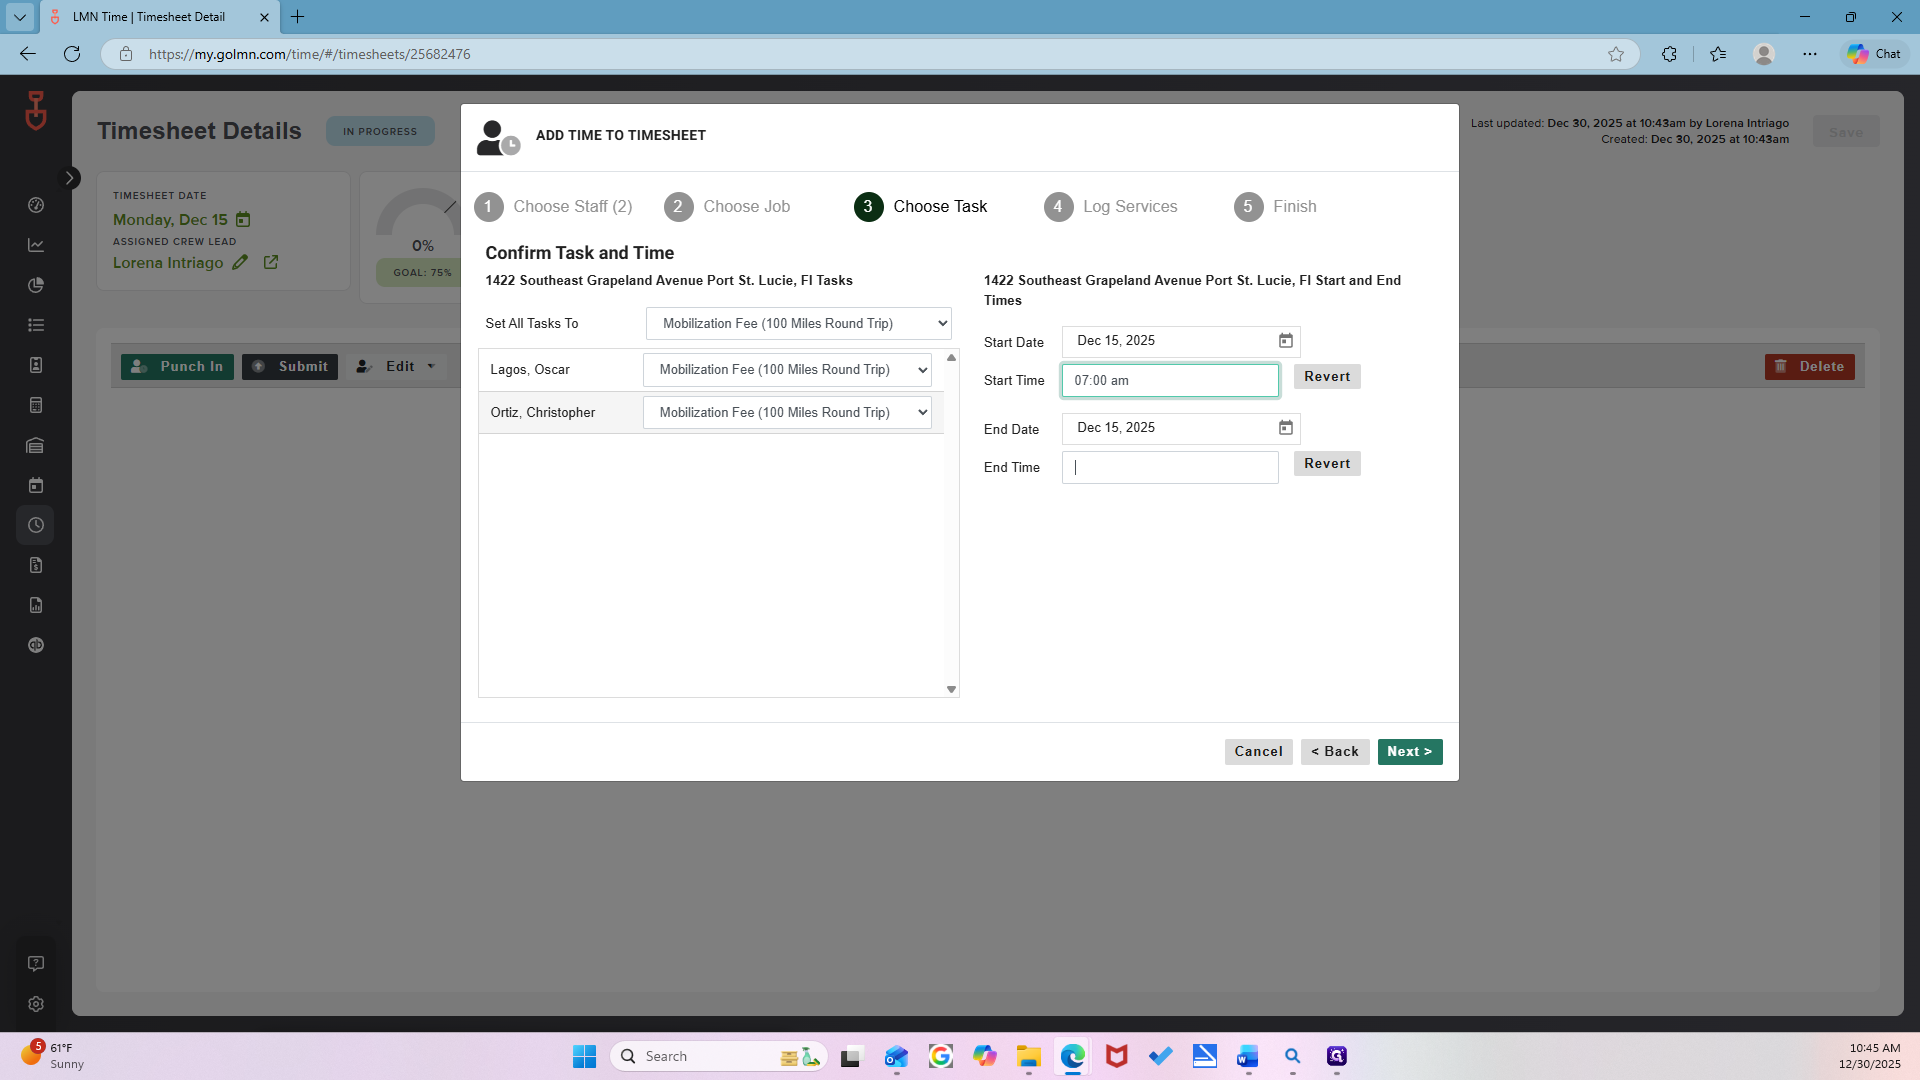
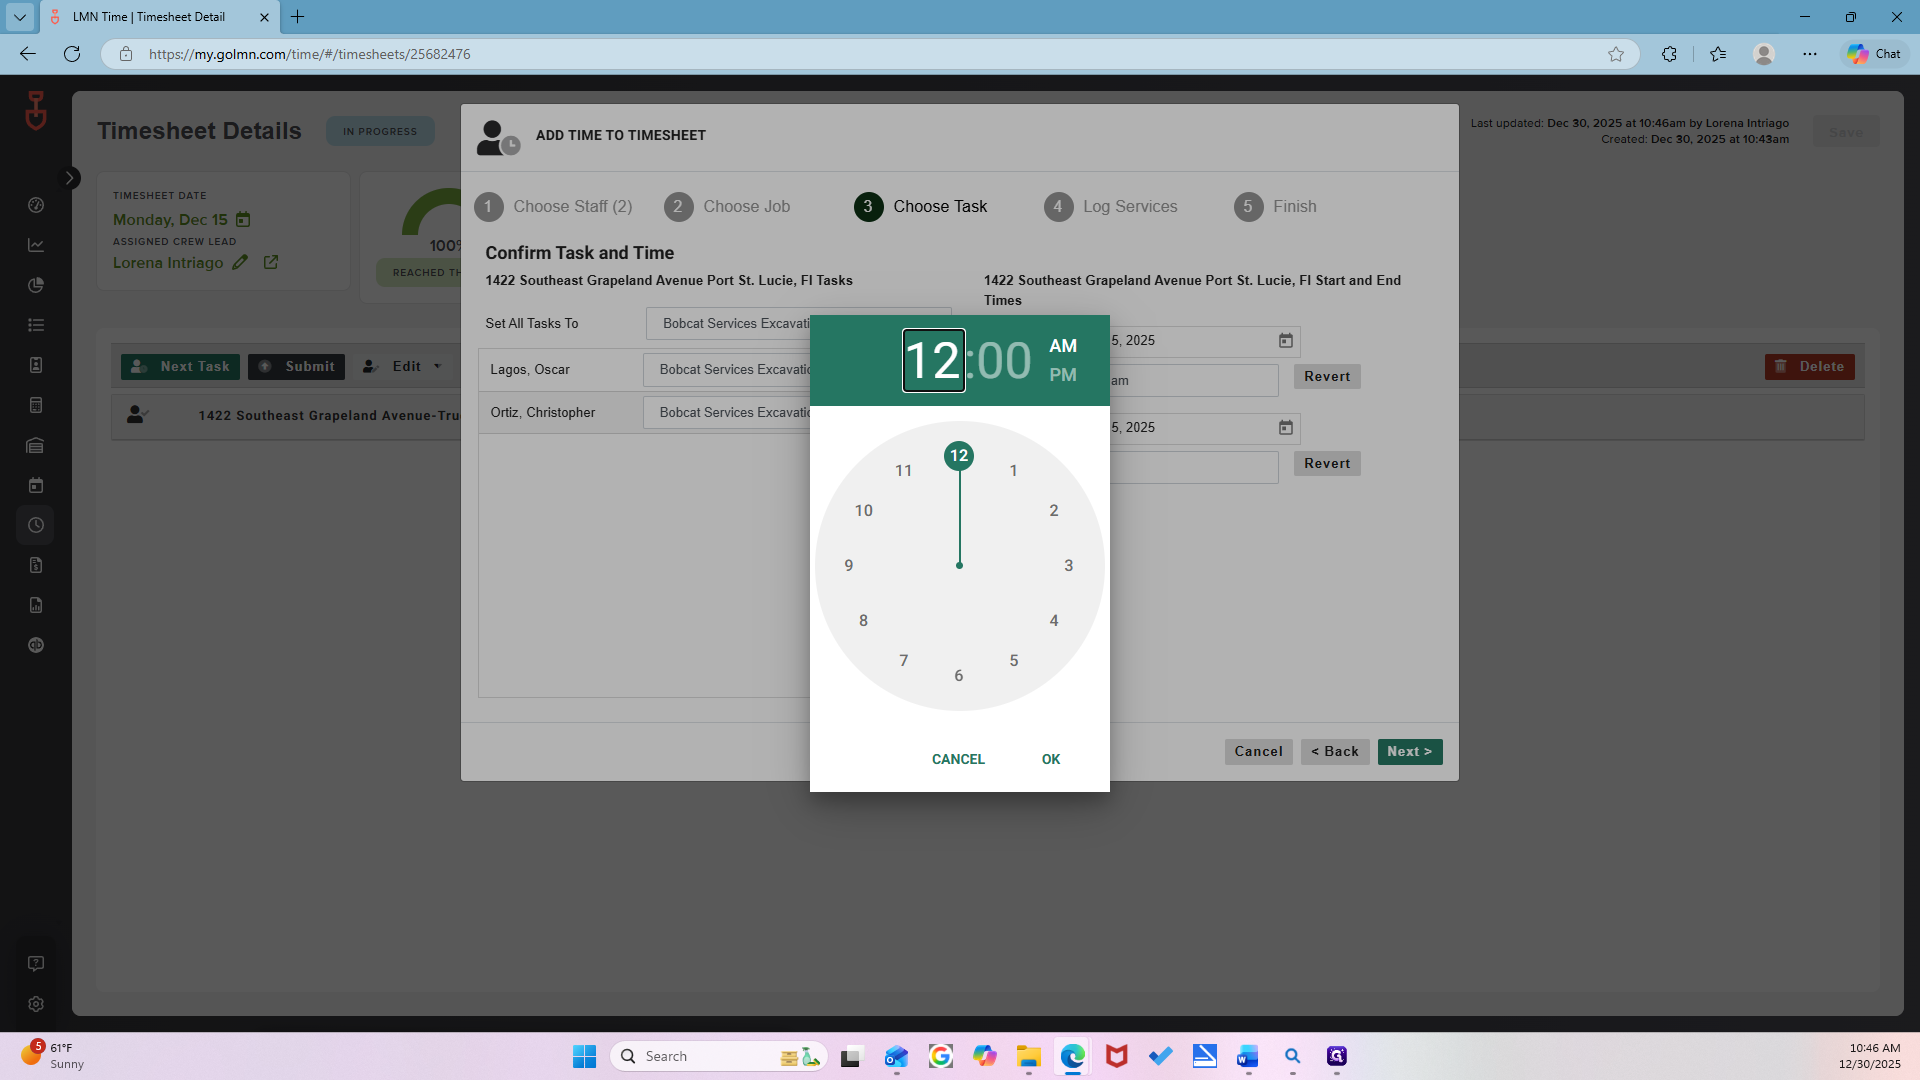
Start time.
Check the timesheet to see when they logged in that day.

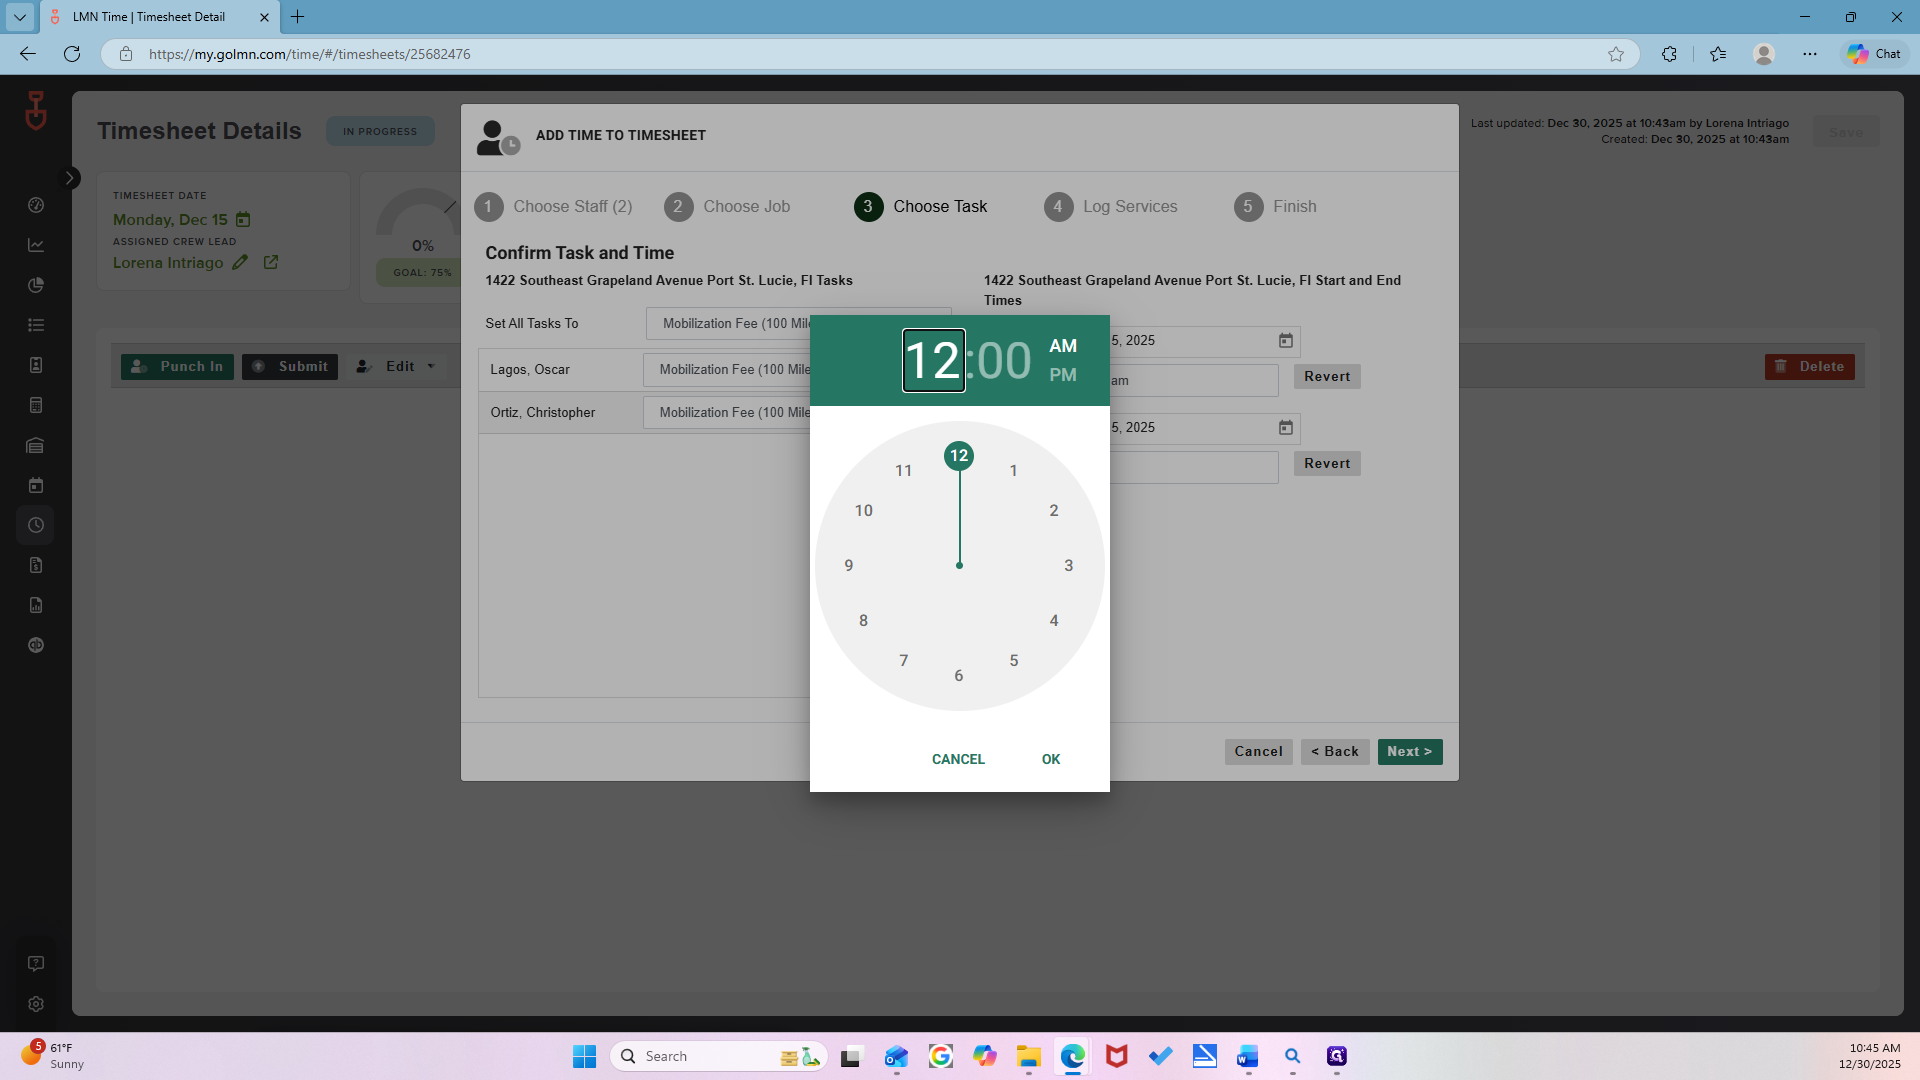
Enter 7:00, then click OK.

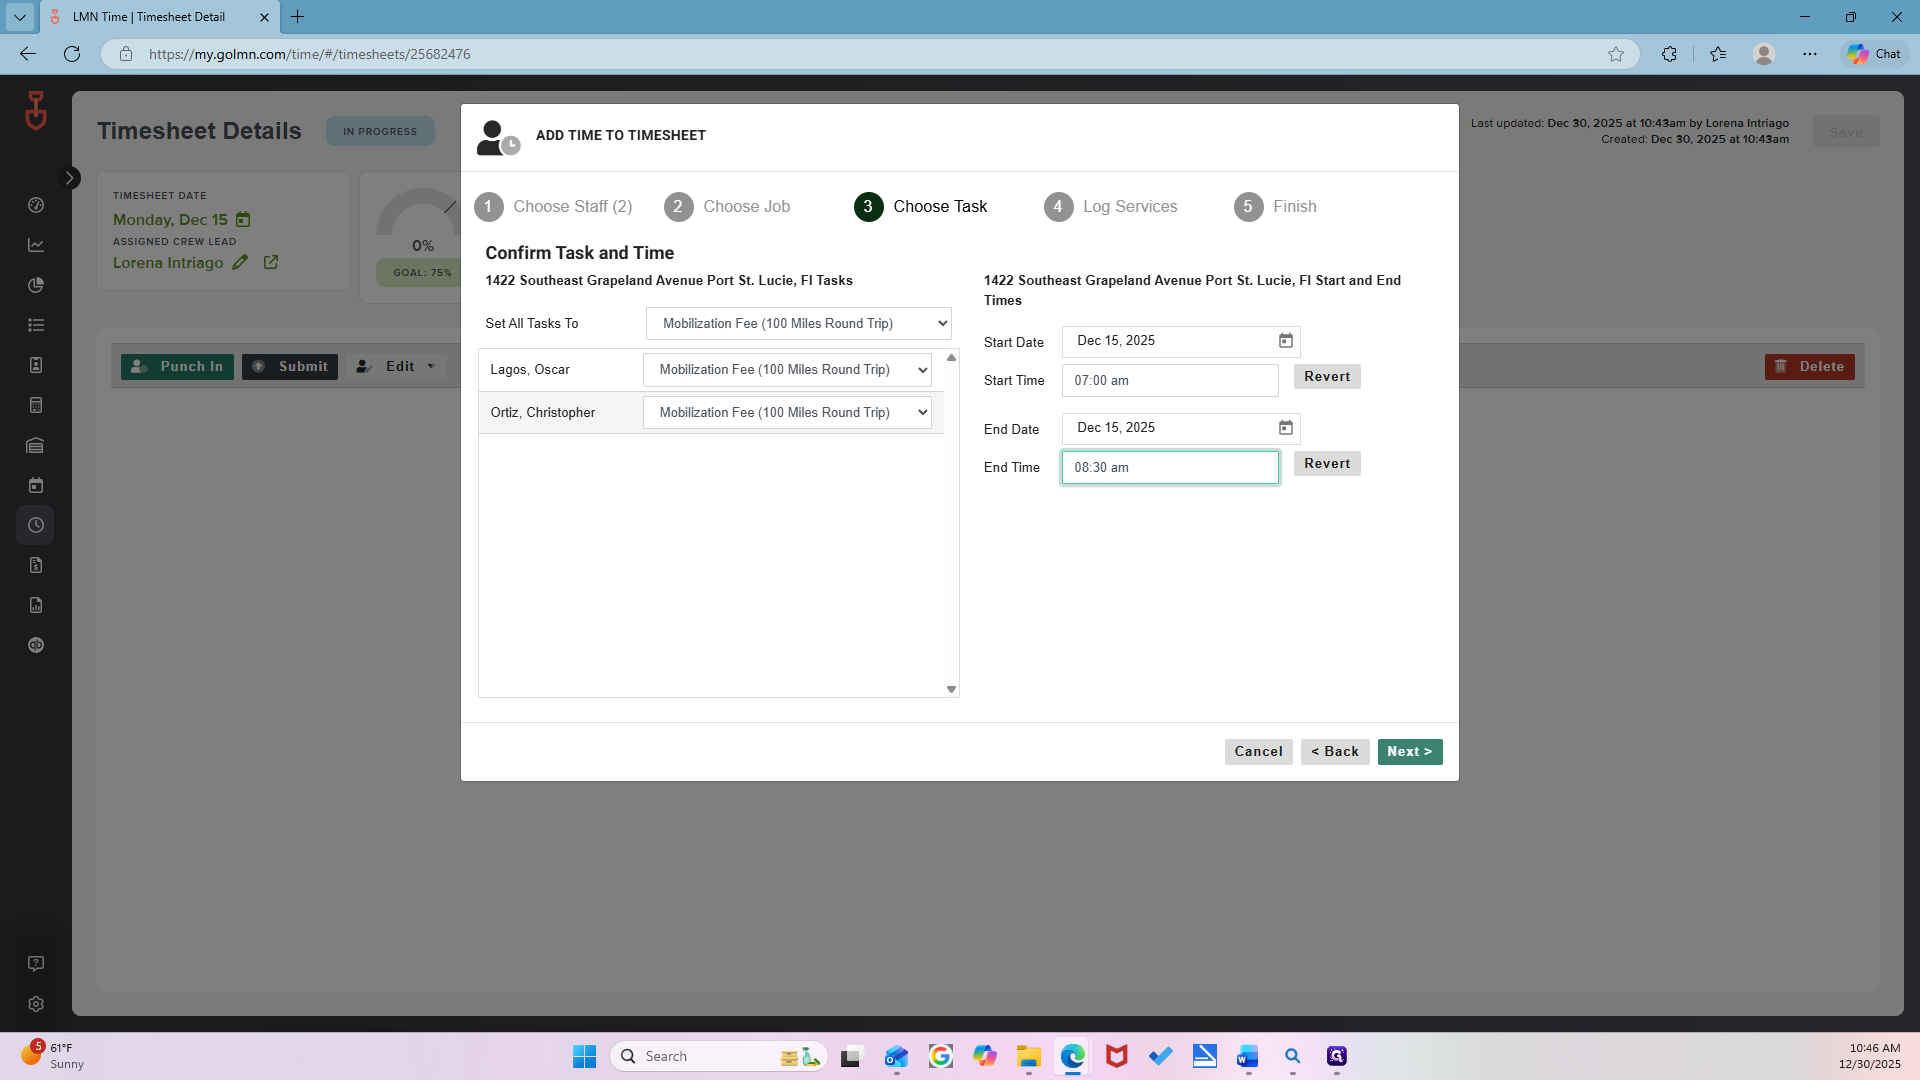
For clock-out time, this job is in Port Saint Lucie, so we allow a set amount of time for travel.

One hour? No. An hour and a half? I would say about an hour and a half. If they leave at 7:00 AM, do you think there will be traffic?
Yeah. Or do you think it will be fine? Traffic lights. It is an hour from here, so I would estimate an hour and a half. Give them an hour and a half.
If they left at 7:00 AM, I would say 8:30. You can just click on the 30.


Okay. Mm-hmm.

Now, click Next.
Click "Continue" since this is only the drive time.
""

Now, click Next Task.
The staff is already selected. Just click Next.

And now you just need to search one more time.

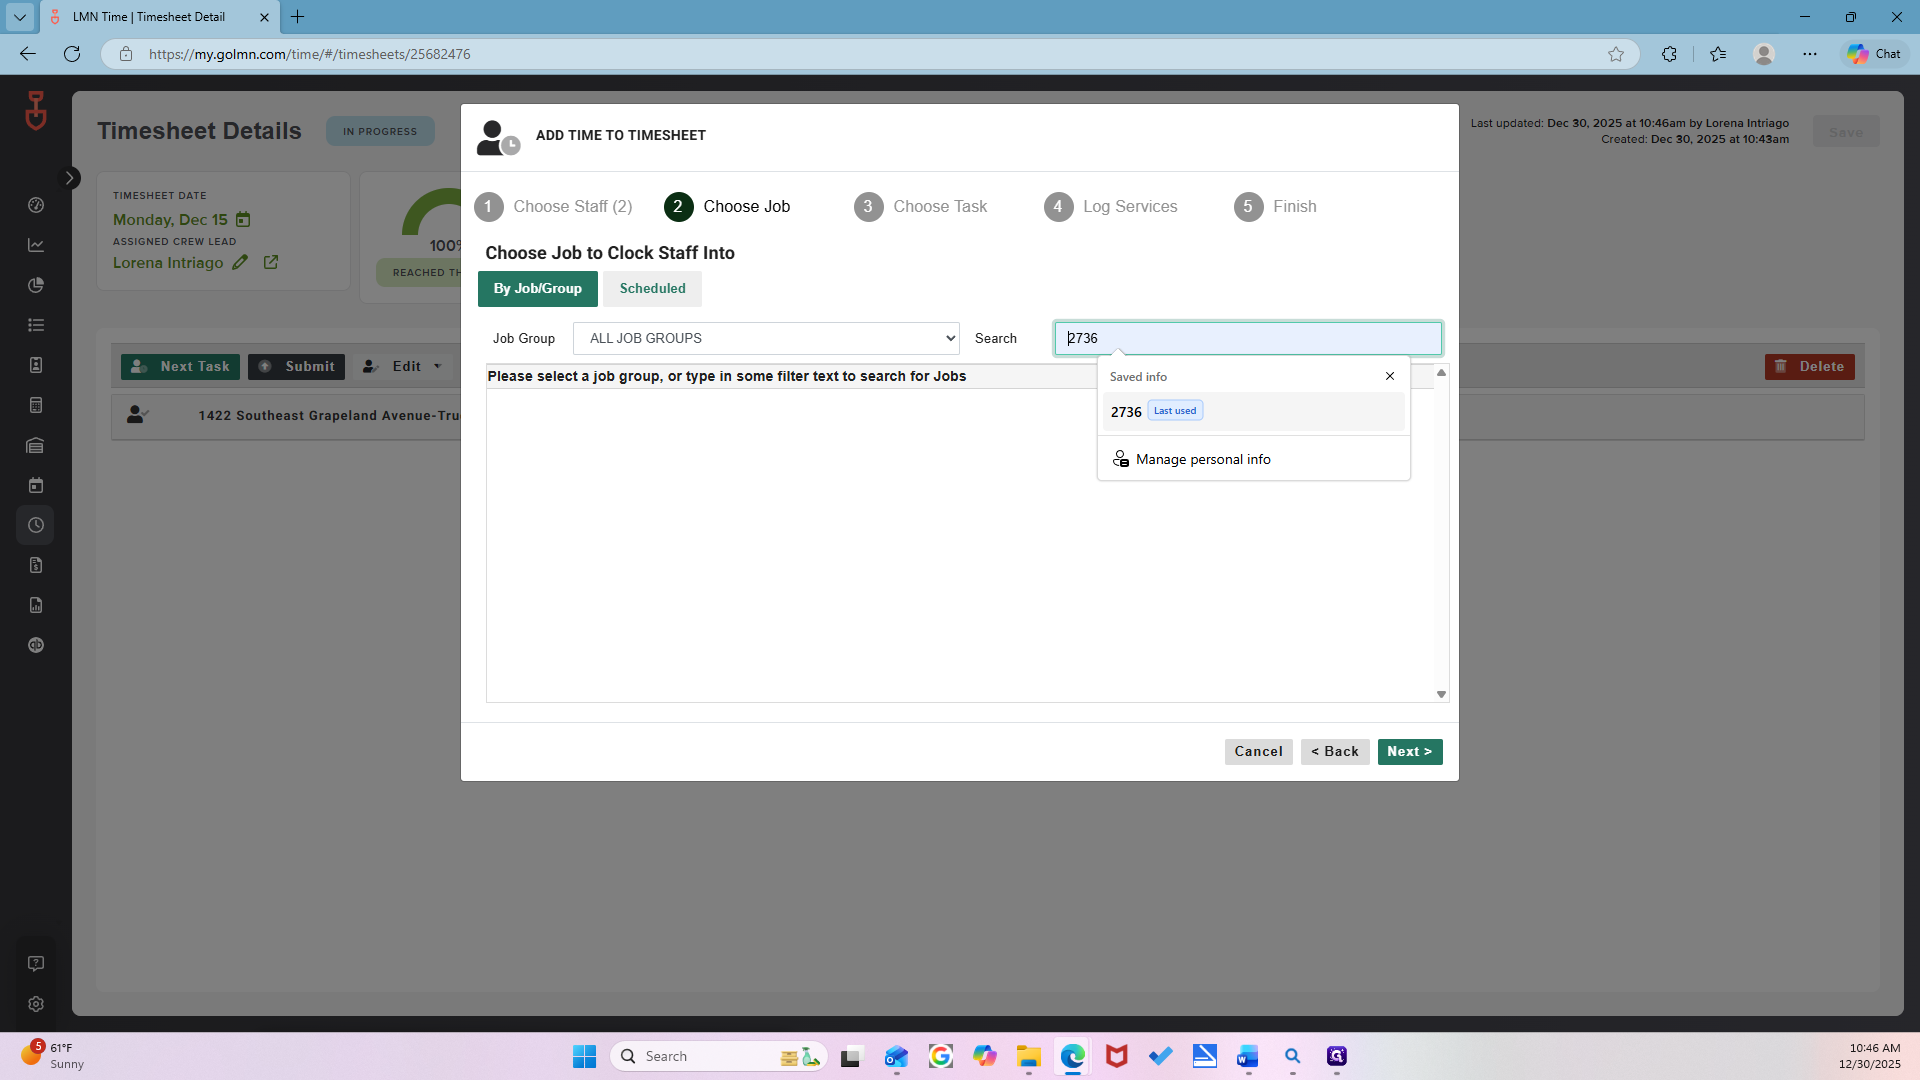
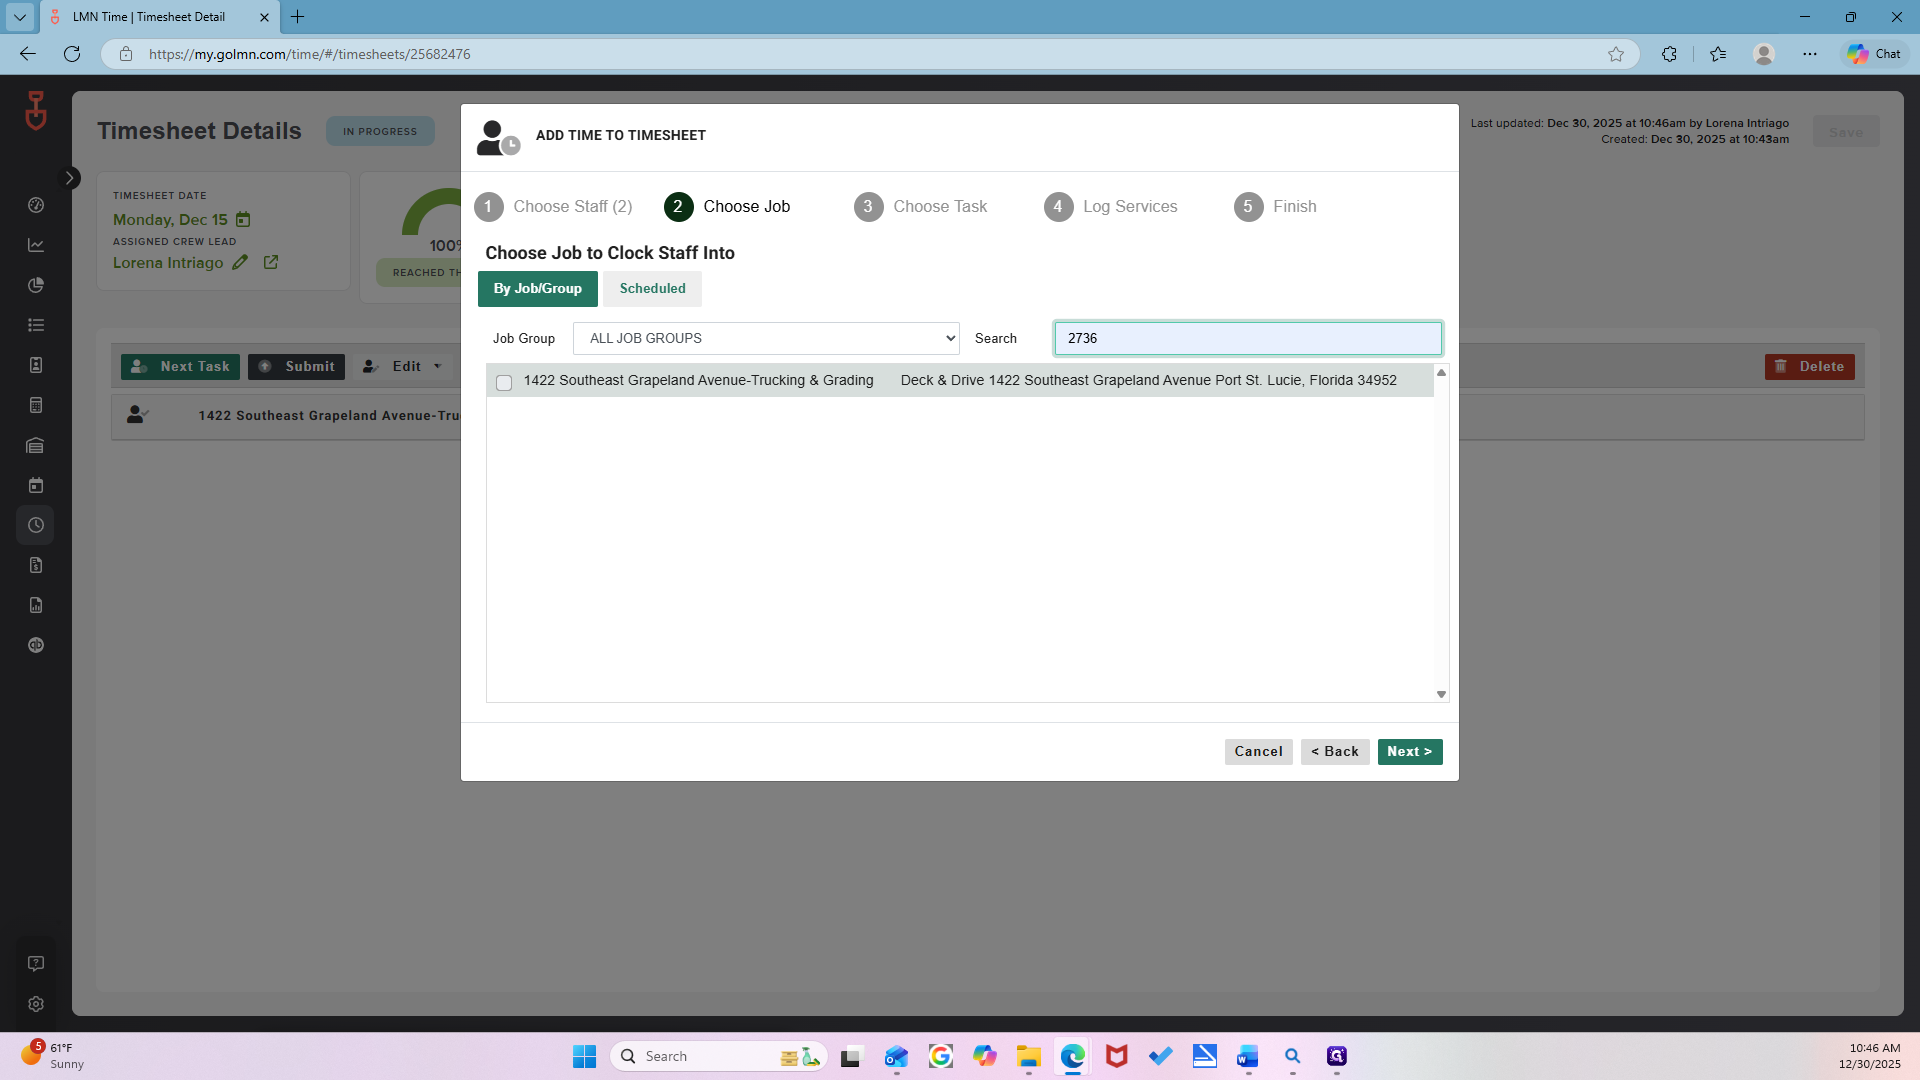
Select the job again.

Now you see how it selected the next task. Just in case, always click the top one. It's a top task. The main, top. This one? Yes, that one.

Okay. It's just the bobcat service and the drive fee. Okay. Just click the bobcat option. We'll leave it at that.
See how it continues from 8:30. You don't need to change that; it's just the end time. When did they finish that day? 5:00 PM. 5:00. Let's say 3:30.


Next. Here, select everything, as that is what was completed within the timeframe.


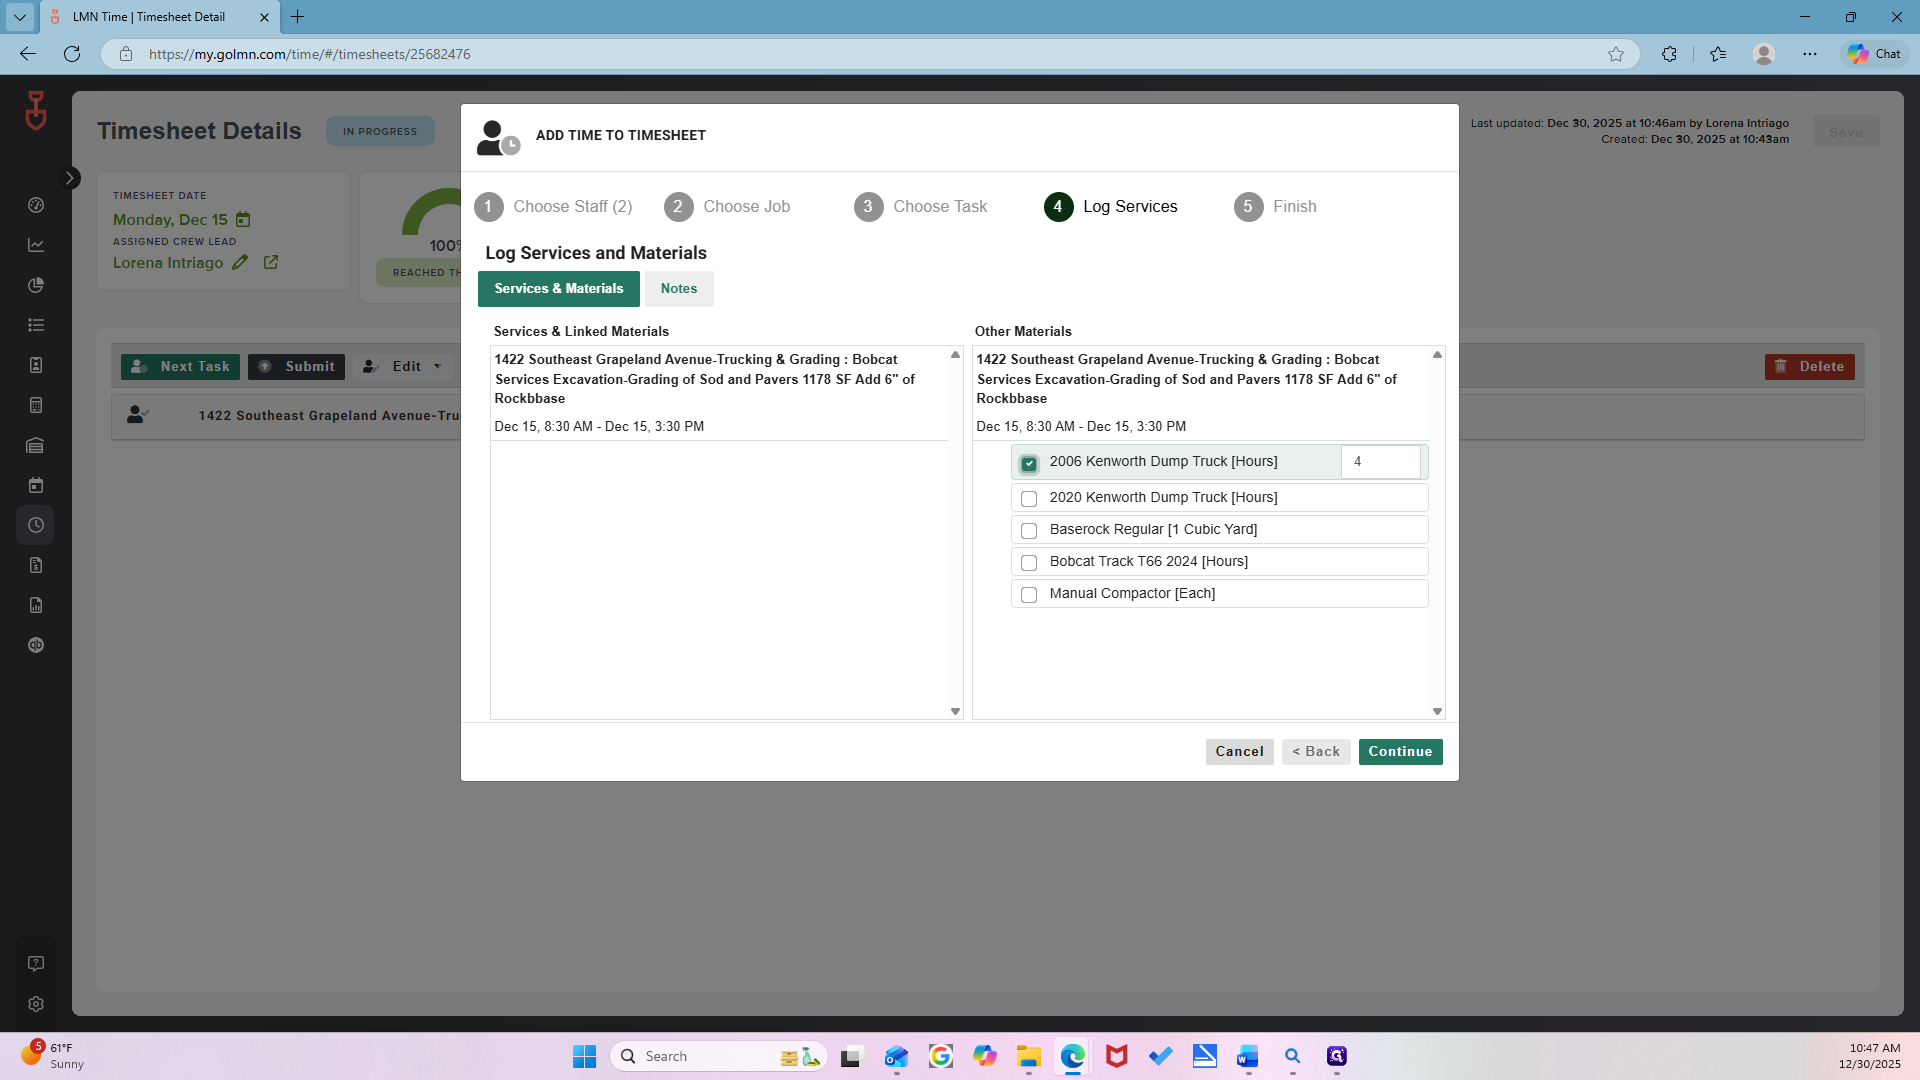


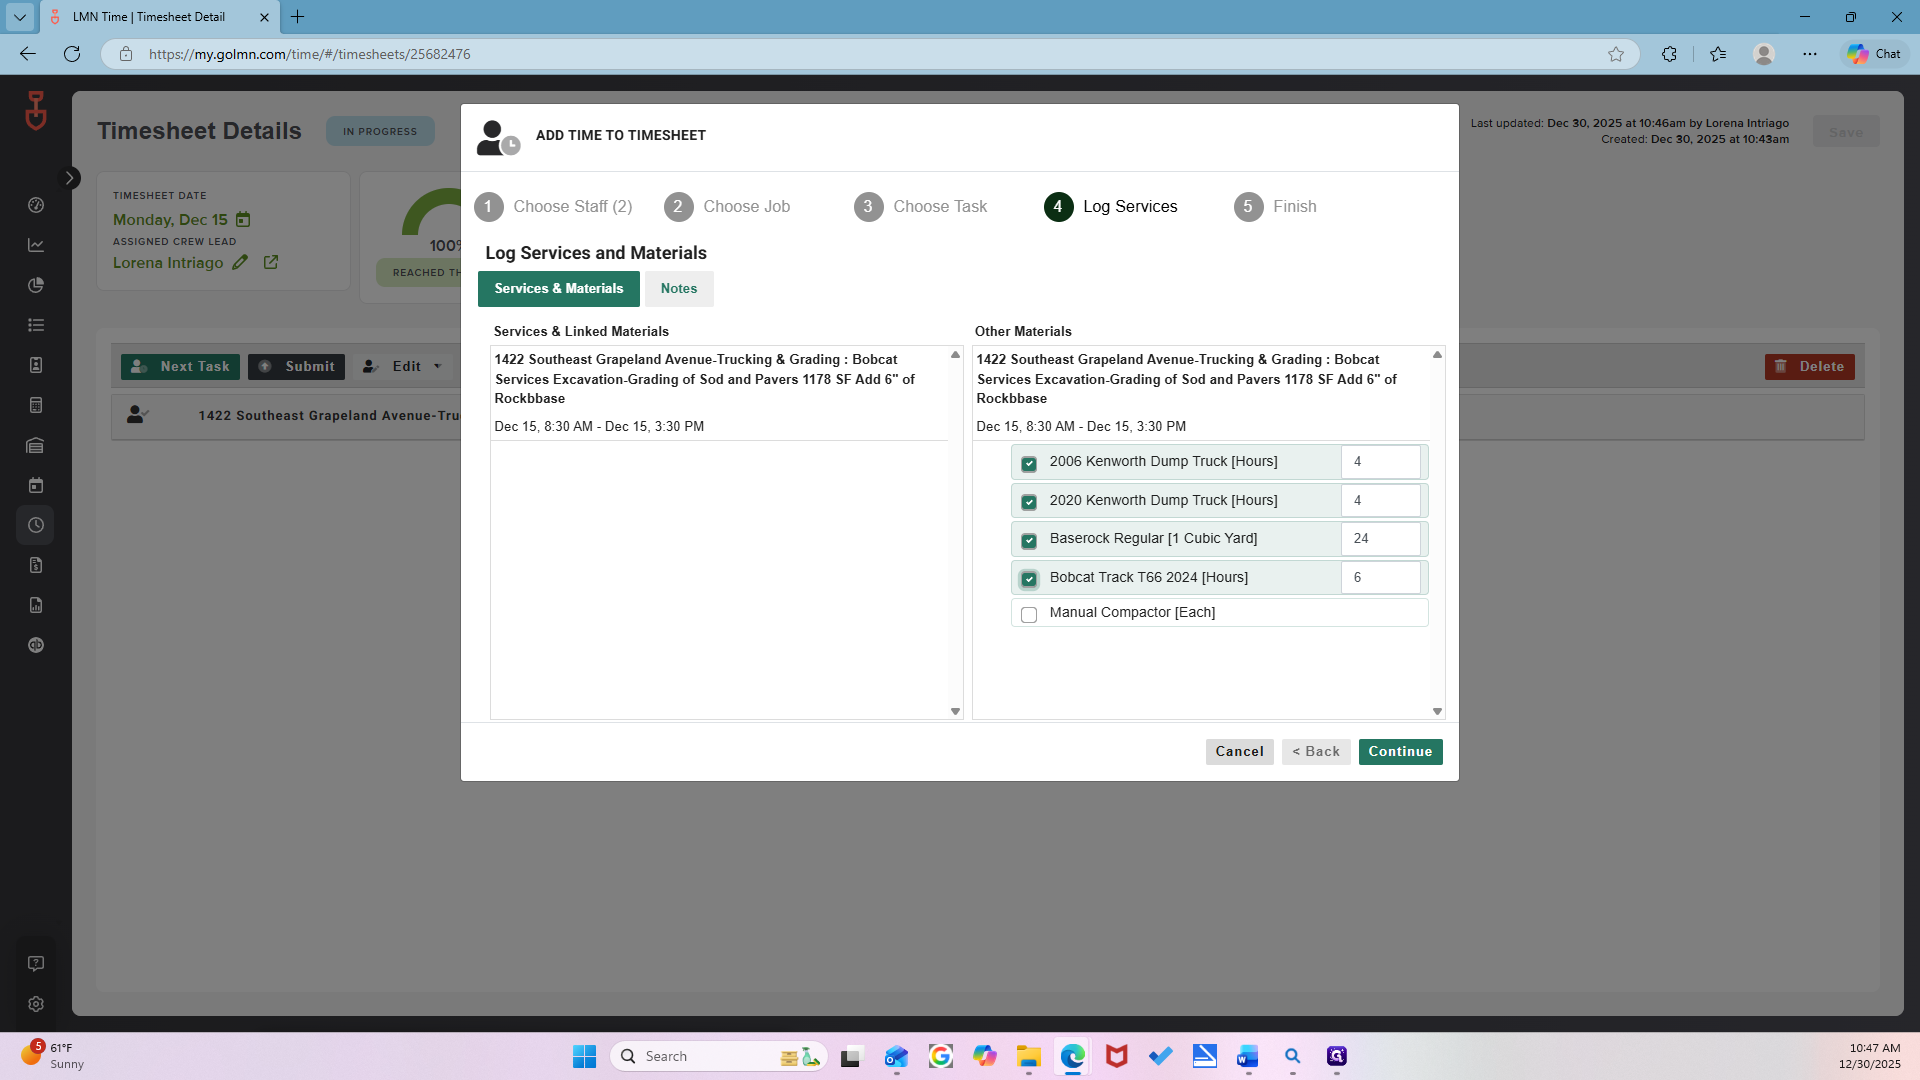
Continue.

Finish.
Next task again, because they have to drive back. Staff is already selected.

Click Next.
Search for the job again.


Select the job.

Now go back and switch that to Mobilization.

Hit 3:30 and leave it.

You should always enter the end time.

Set it to 5:00.


Next.

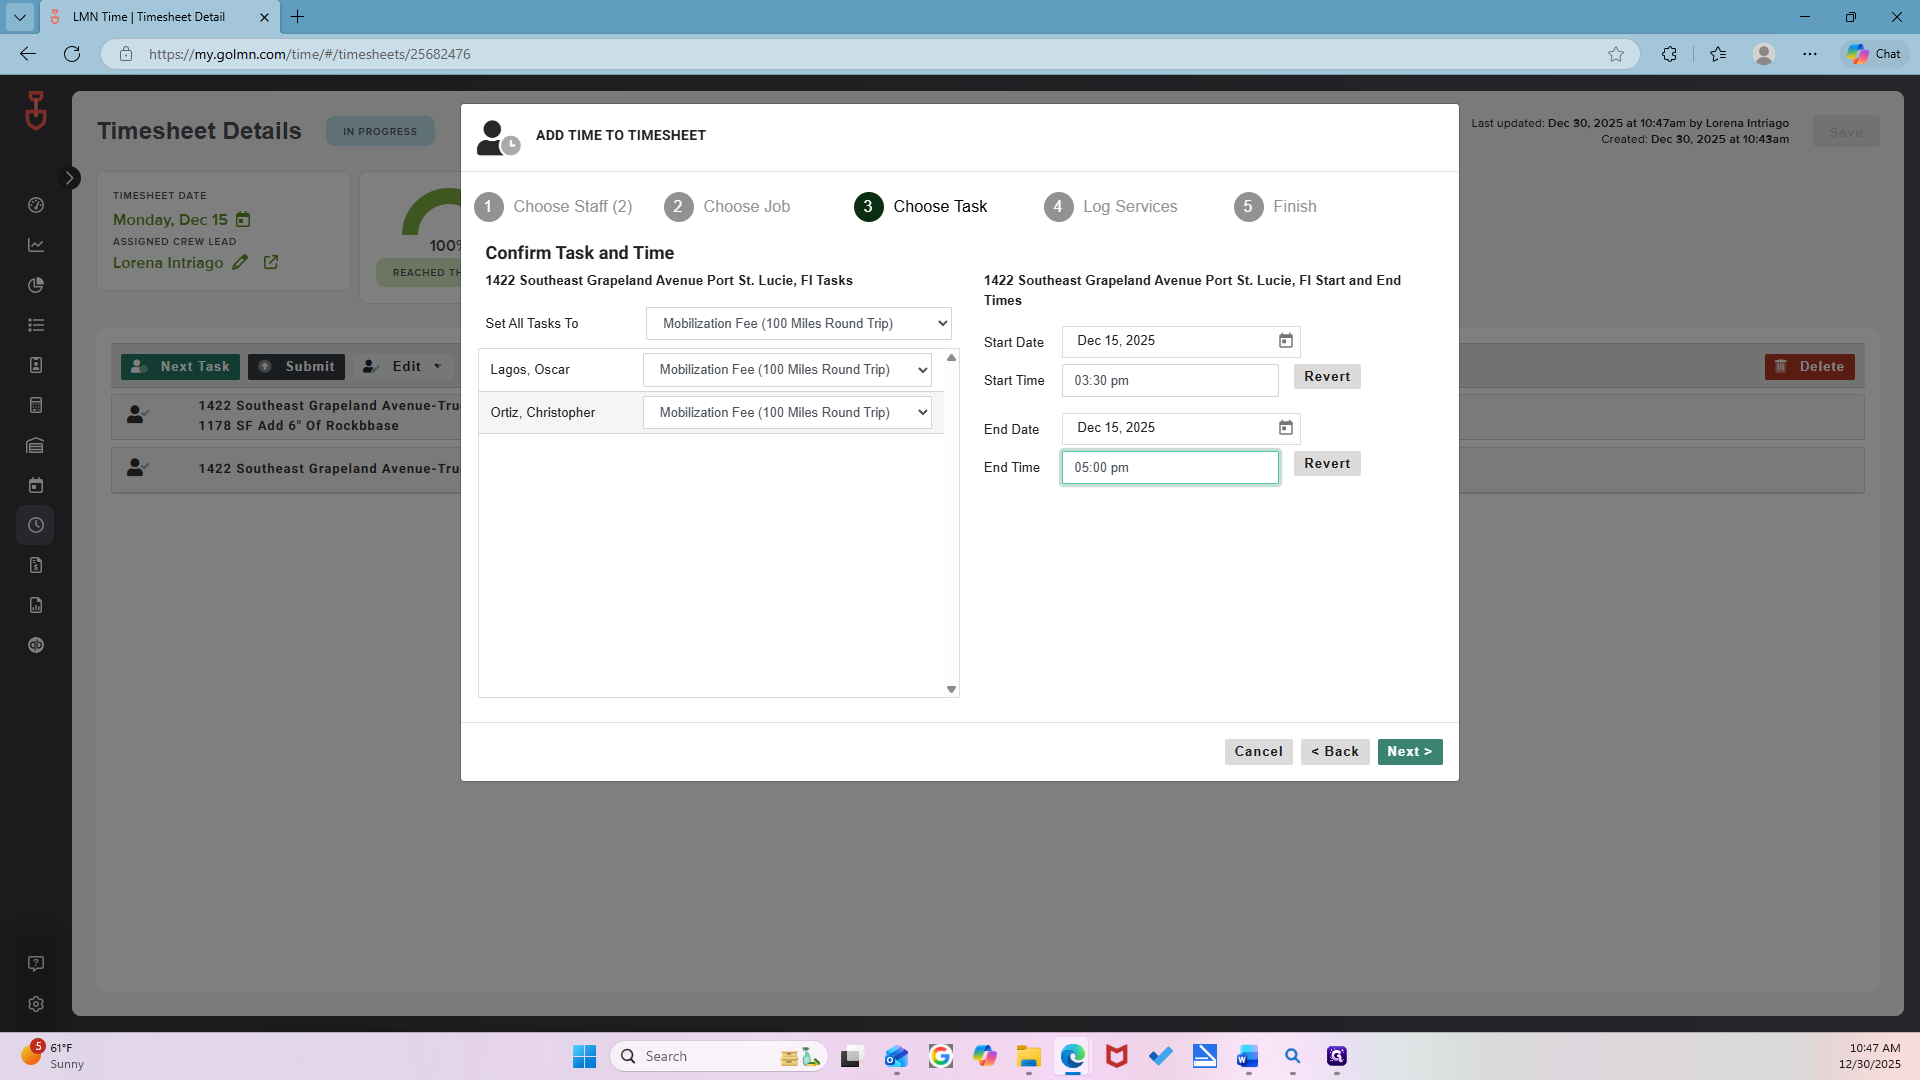
And Continue. No. Continue.


Perfect. We also need to make sure we add their lunch.

Click Edit.

Then add a duck lunch.

OK. Because it's always 30 minutes.

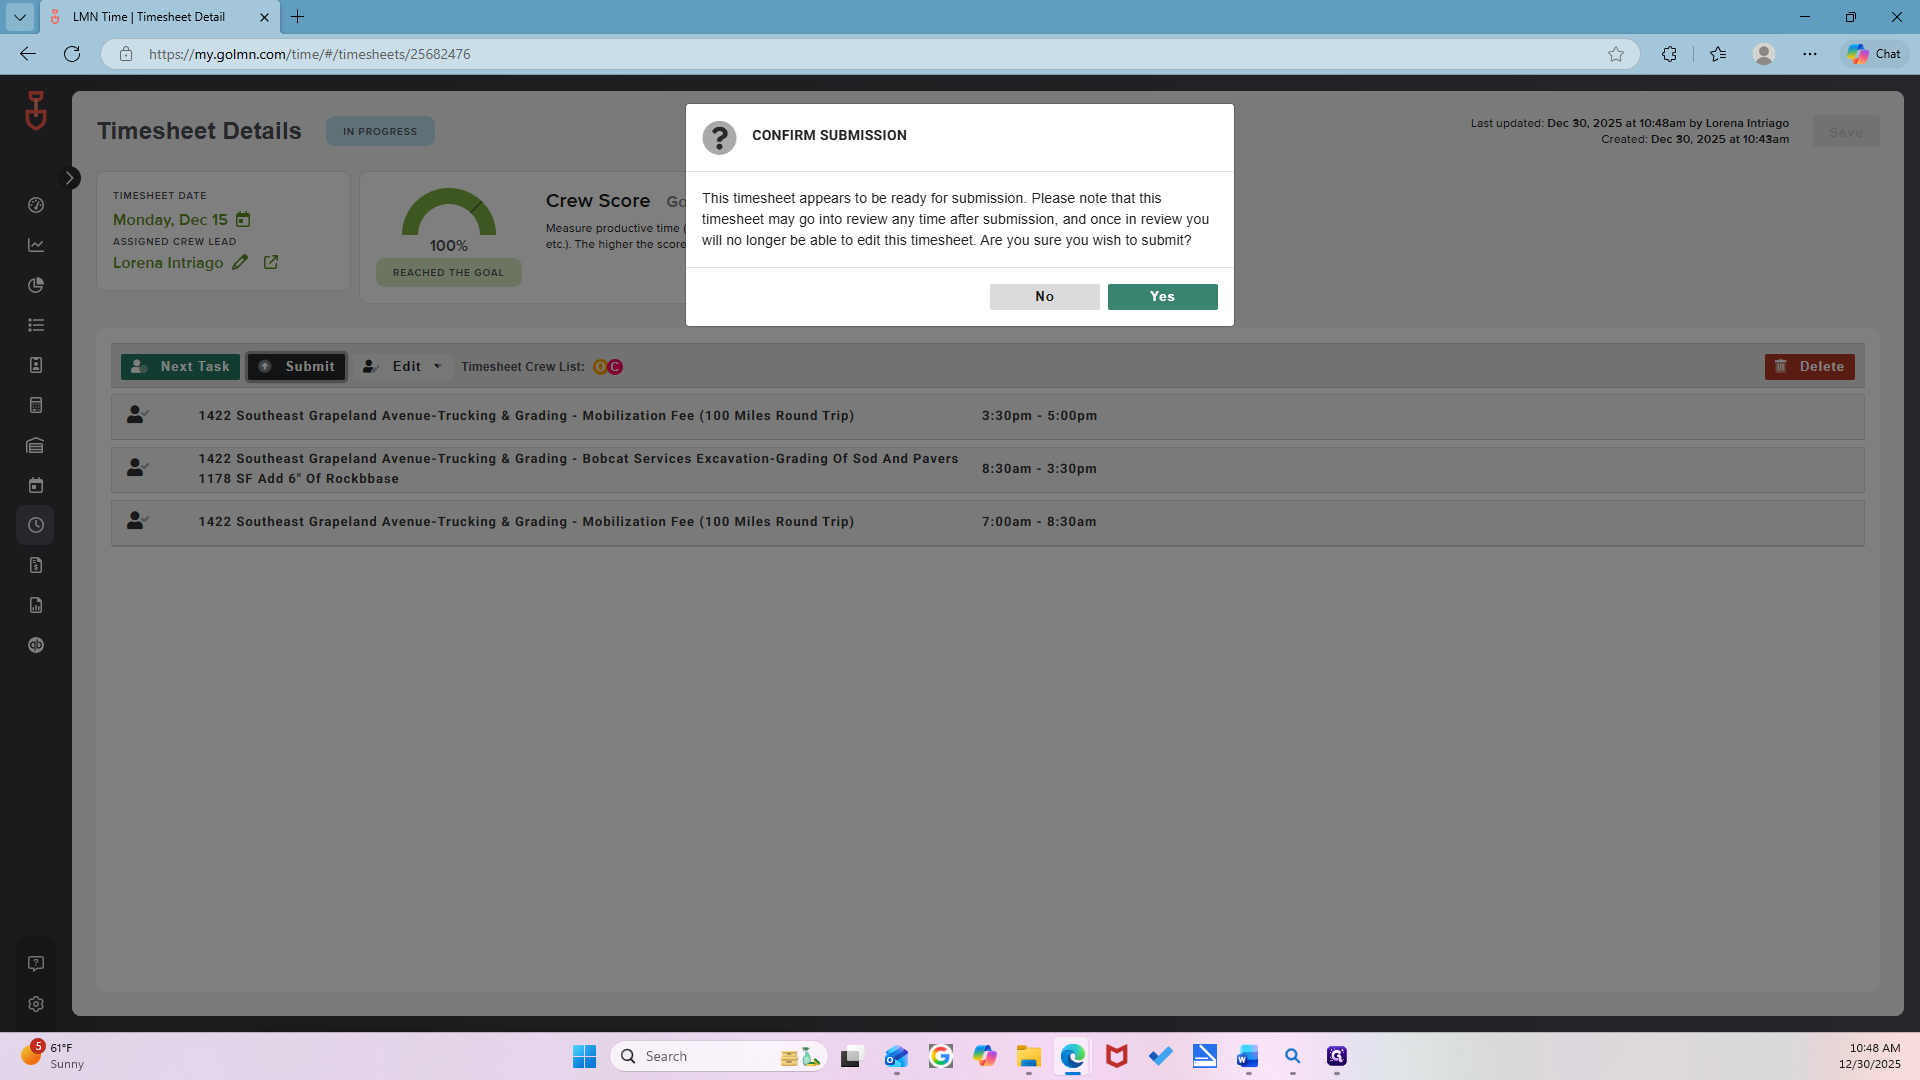
Now, the final step is to click the Submit button. Submit the timesheet.
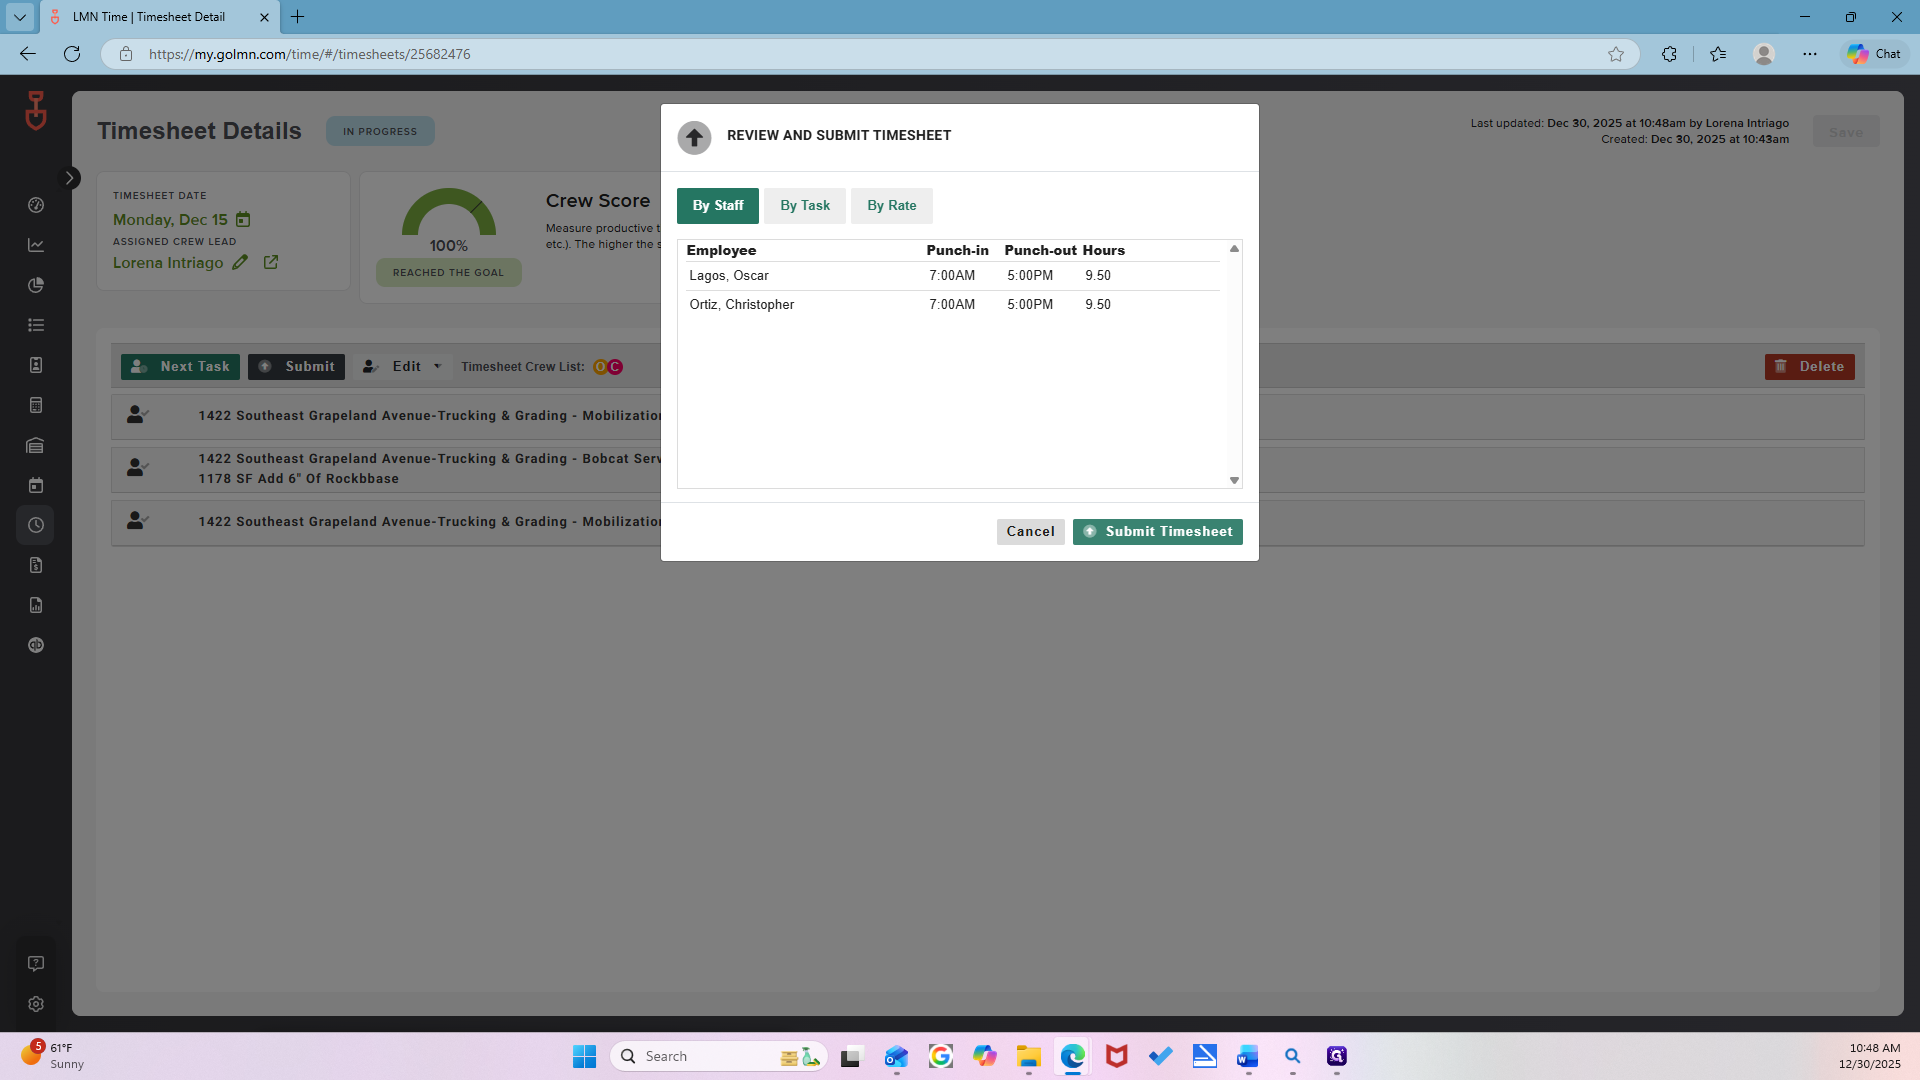
Yes.
Now, we will return to the Job tab. Go to the left-hand side. Jobs.
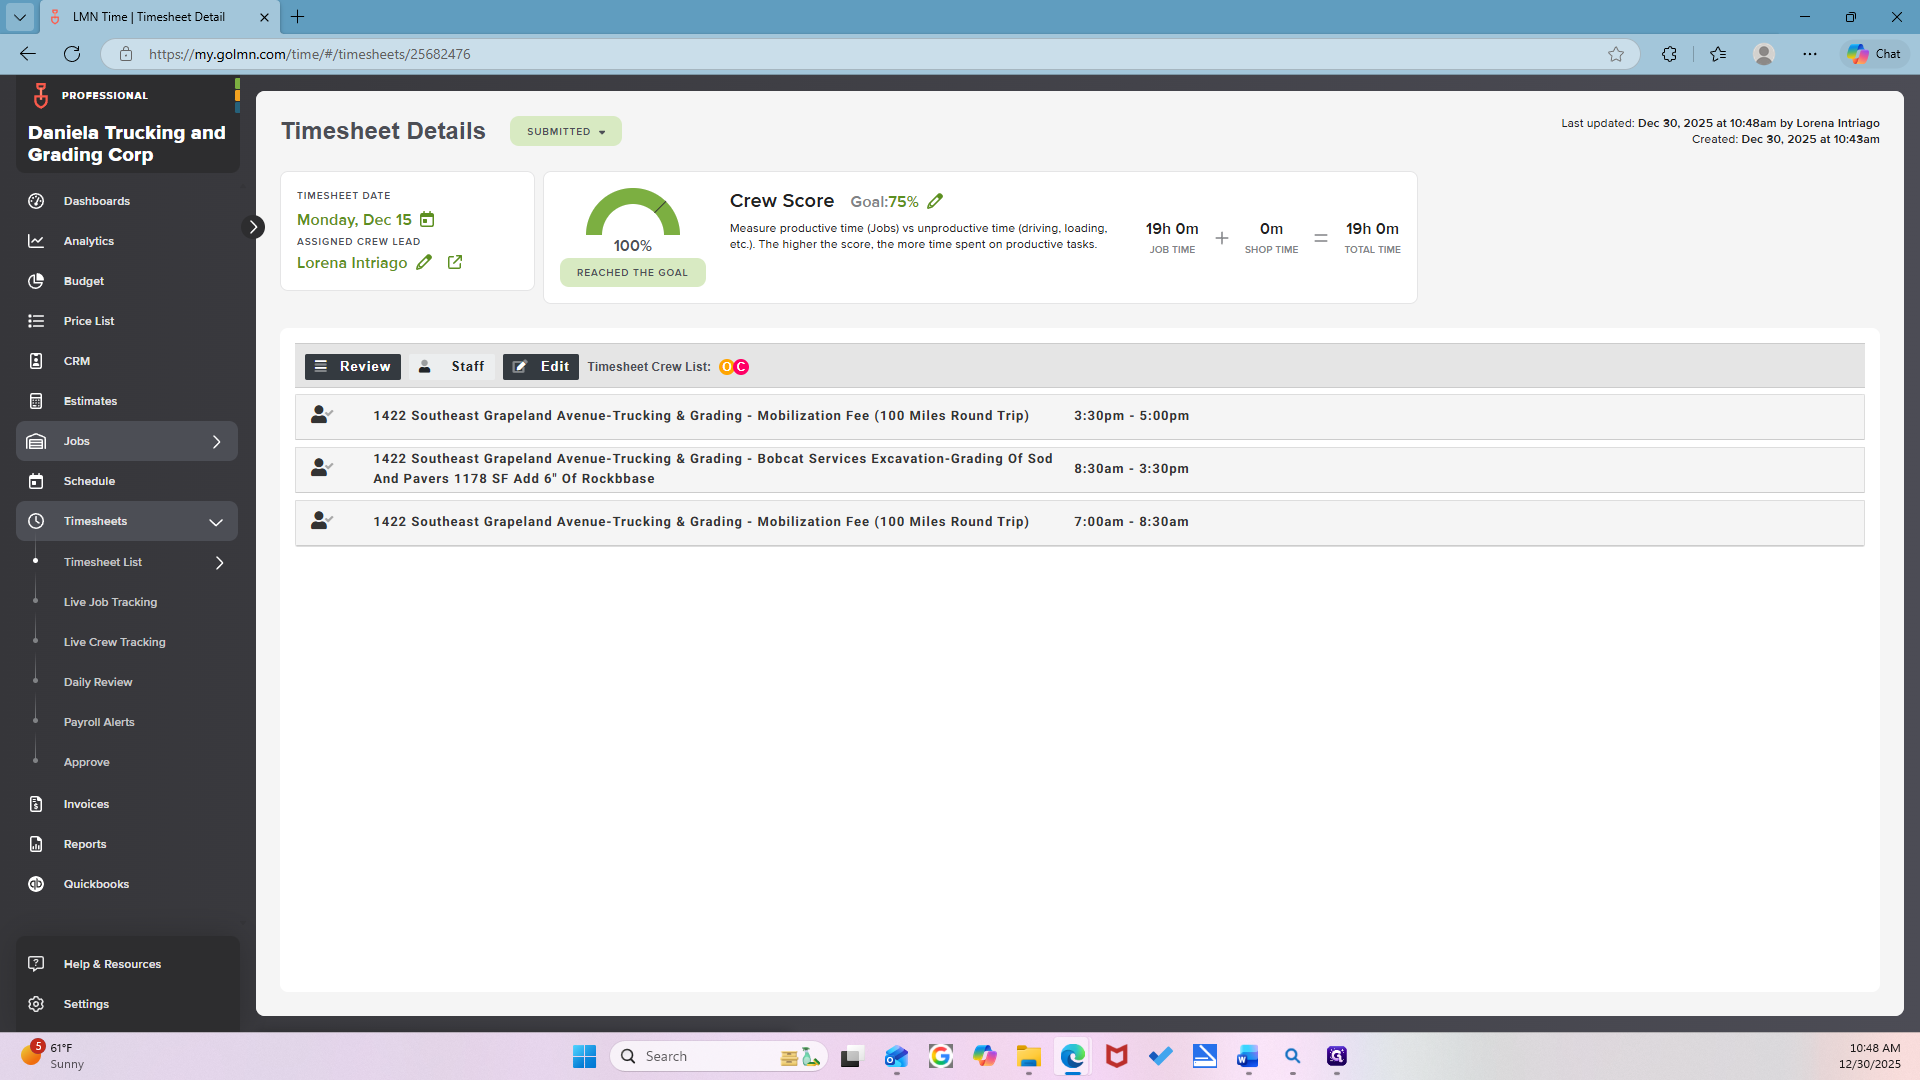
Job List.
Make sure to review the job and check the estimate number.

Mm-hmm. You? Yep.
Is that the item? Yeah.
Mm-hmm.
Set the status to "complete" since the job is finished.

Okay.
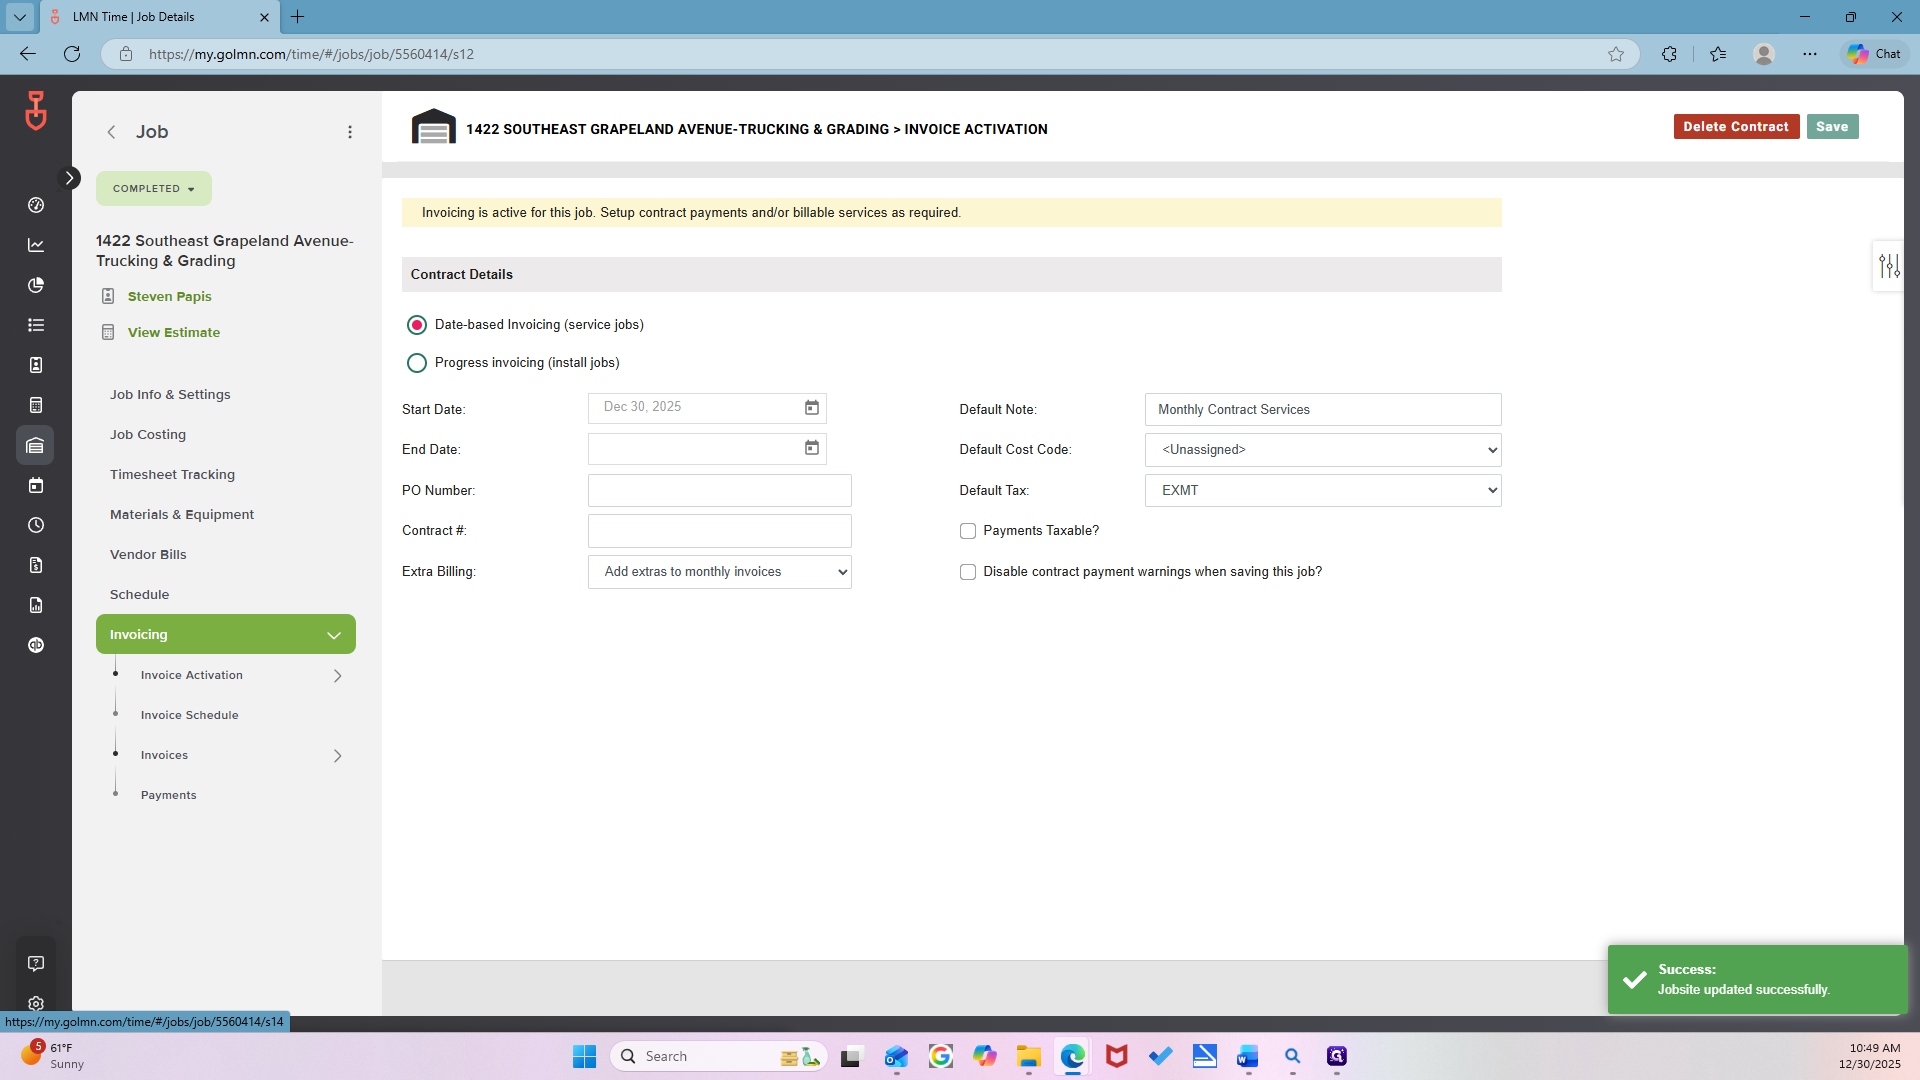
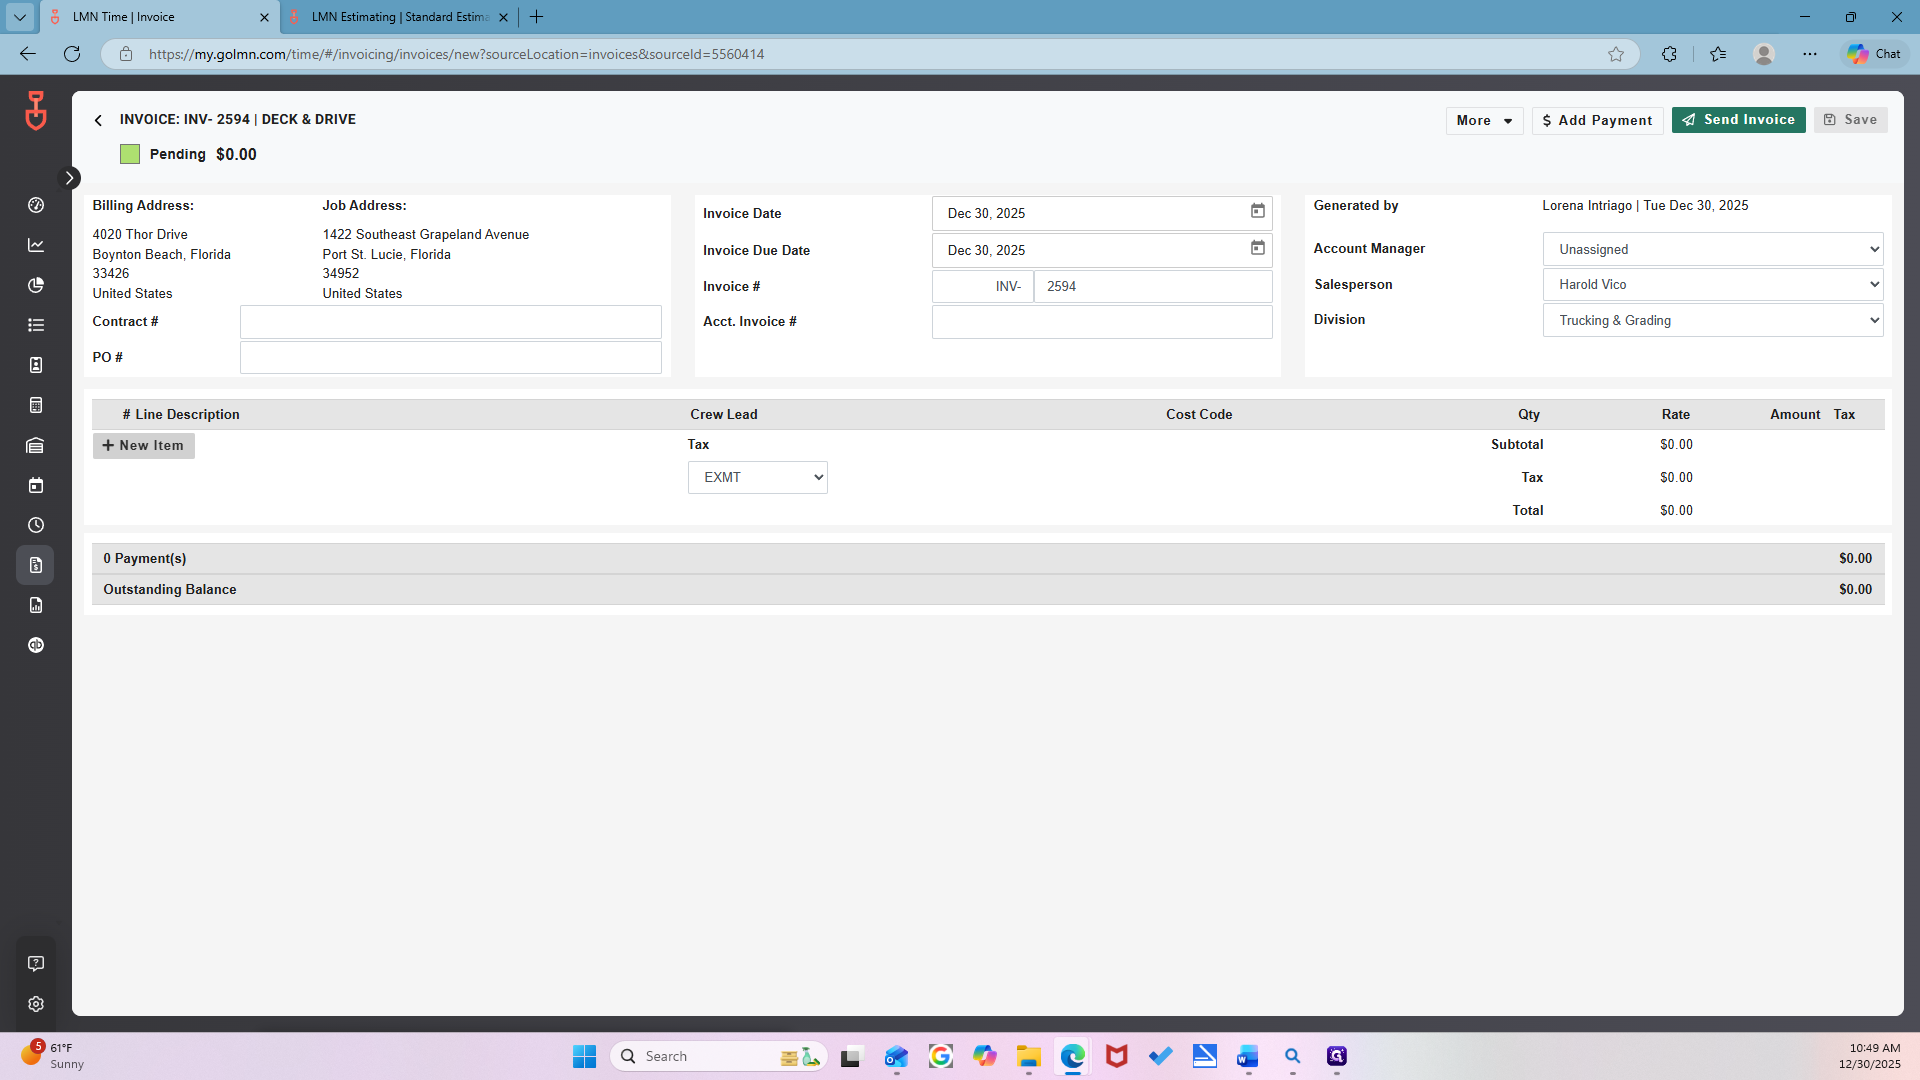
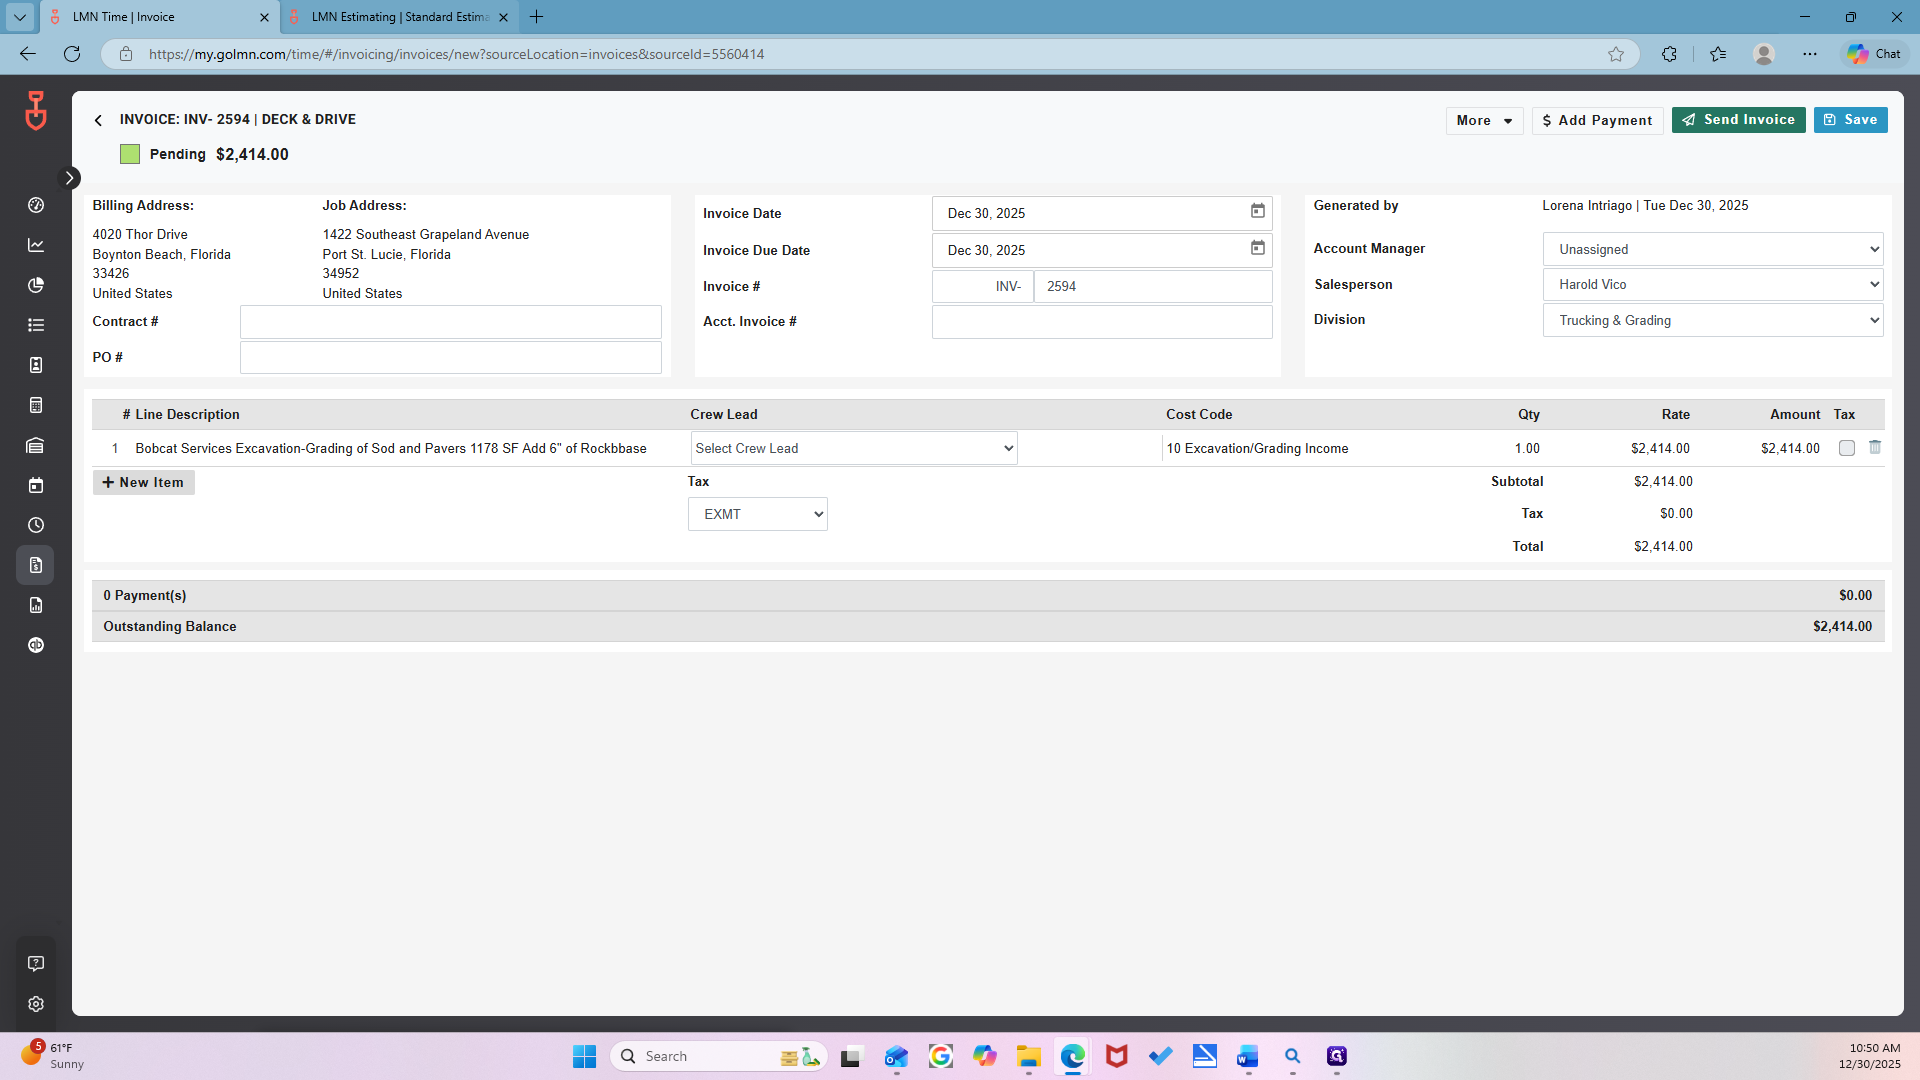
The next step to get the final job costing is to ensure the job has been invoiced. Invoice, invoice activation, and setup for invoicing.

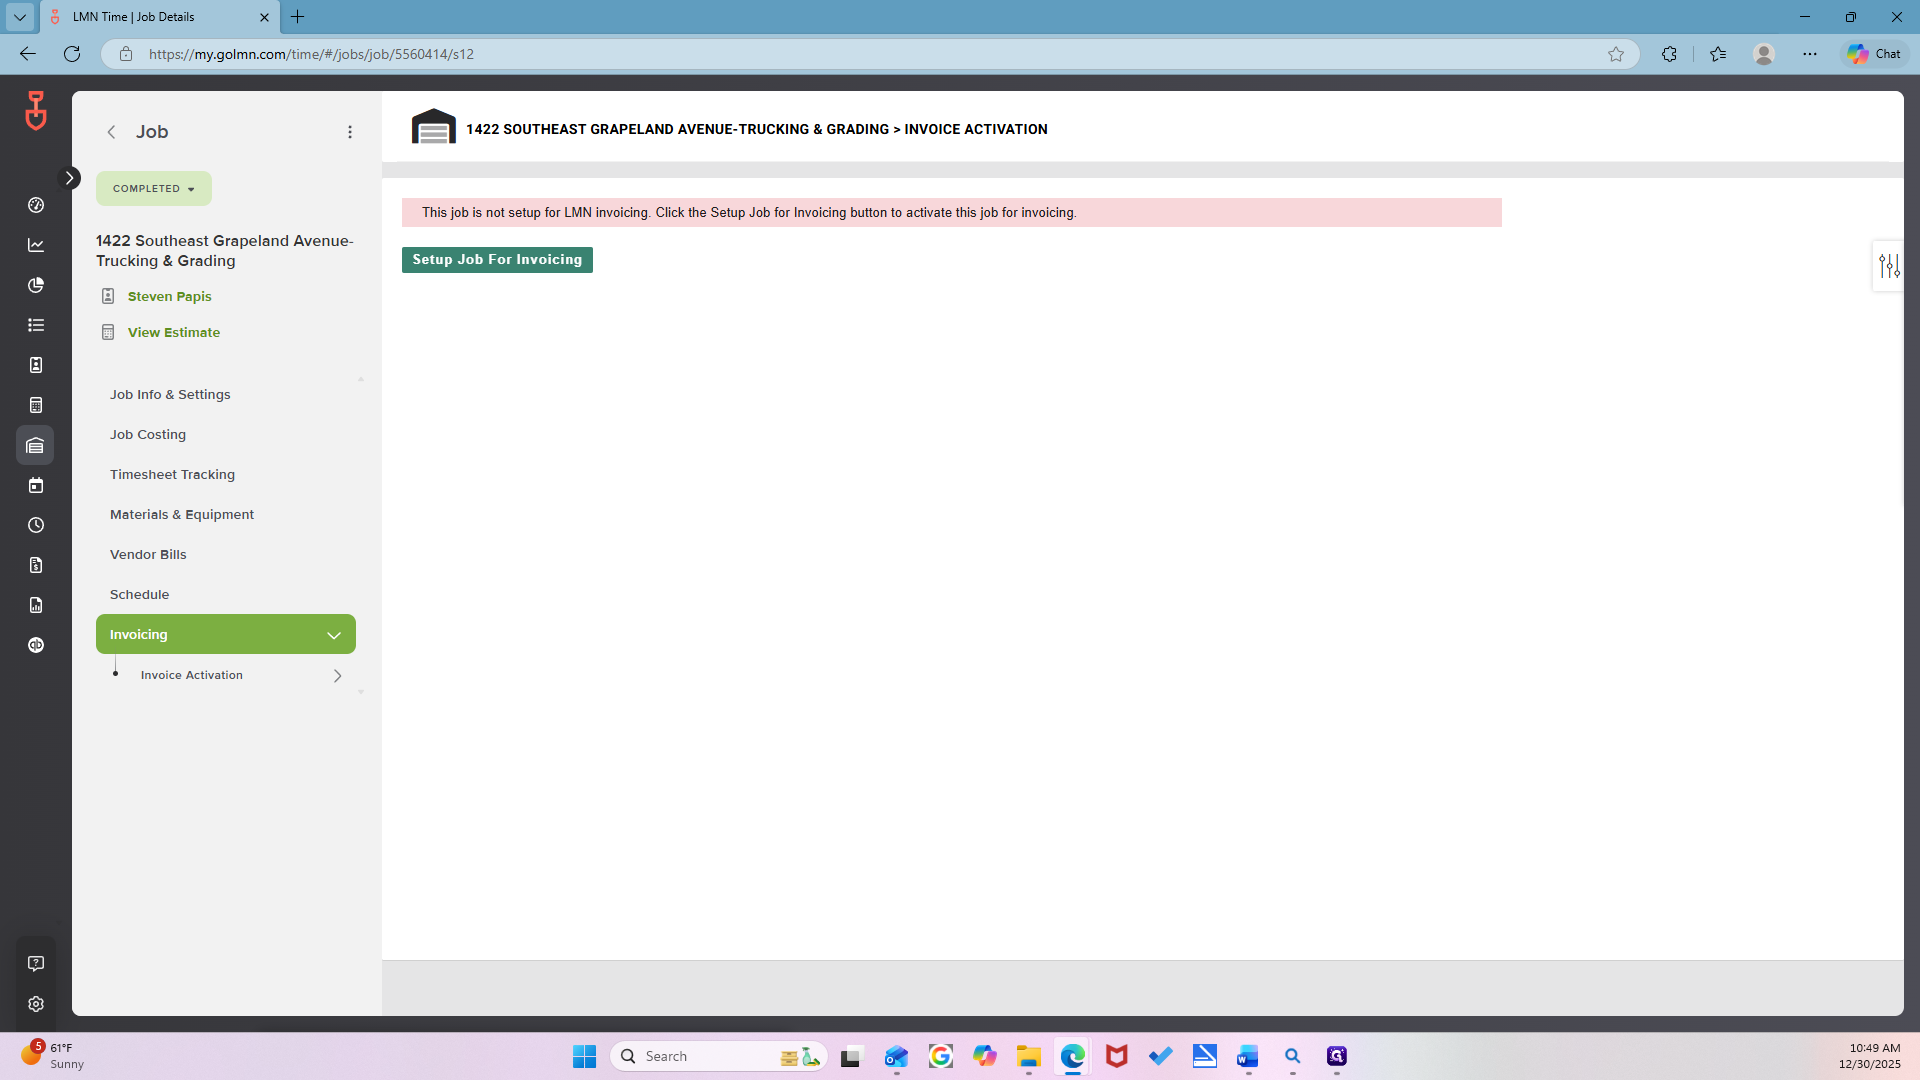
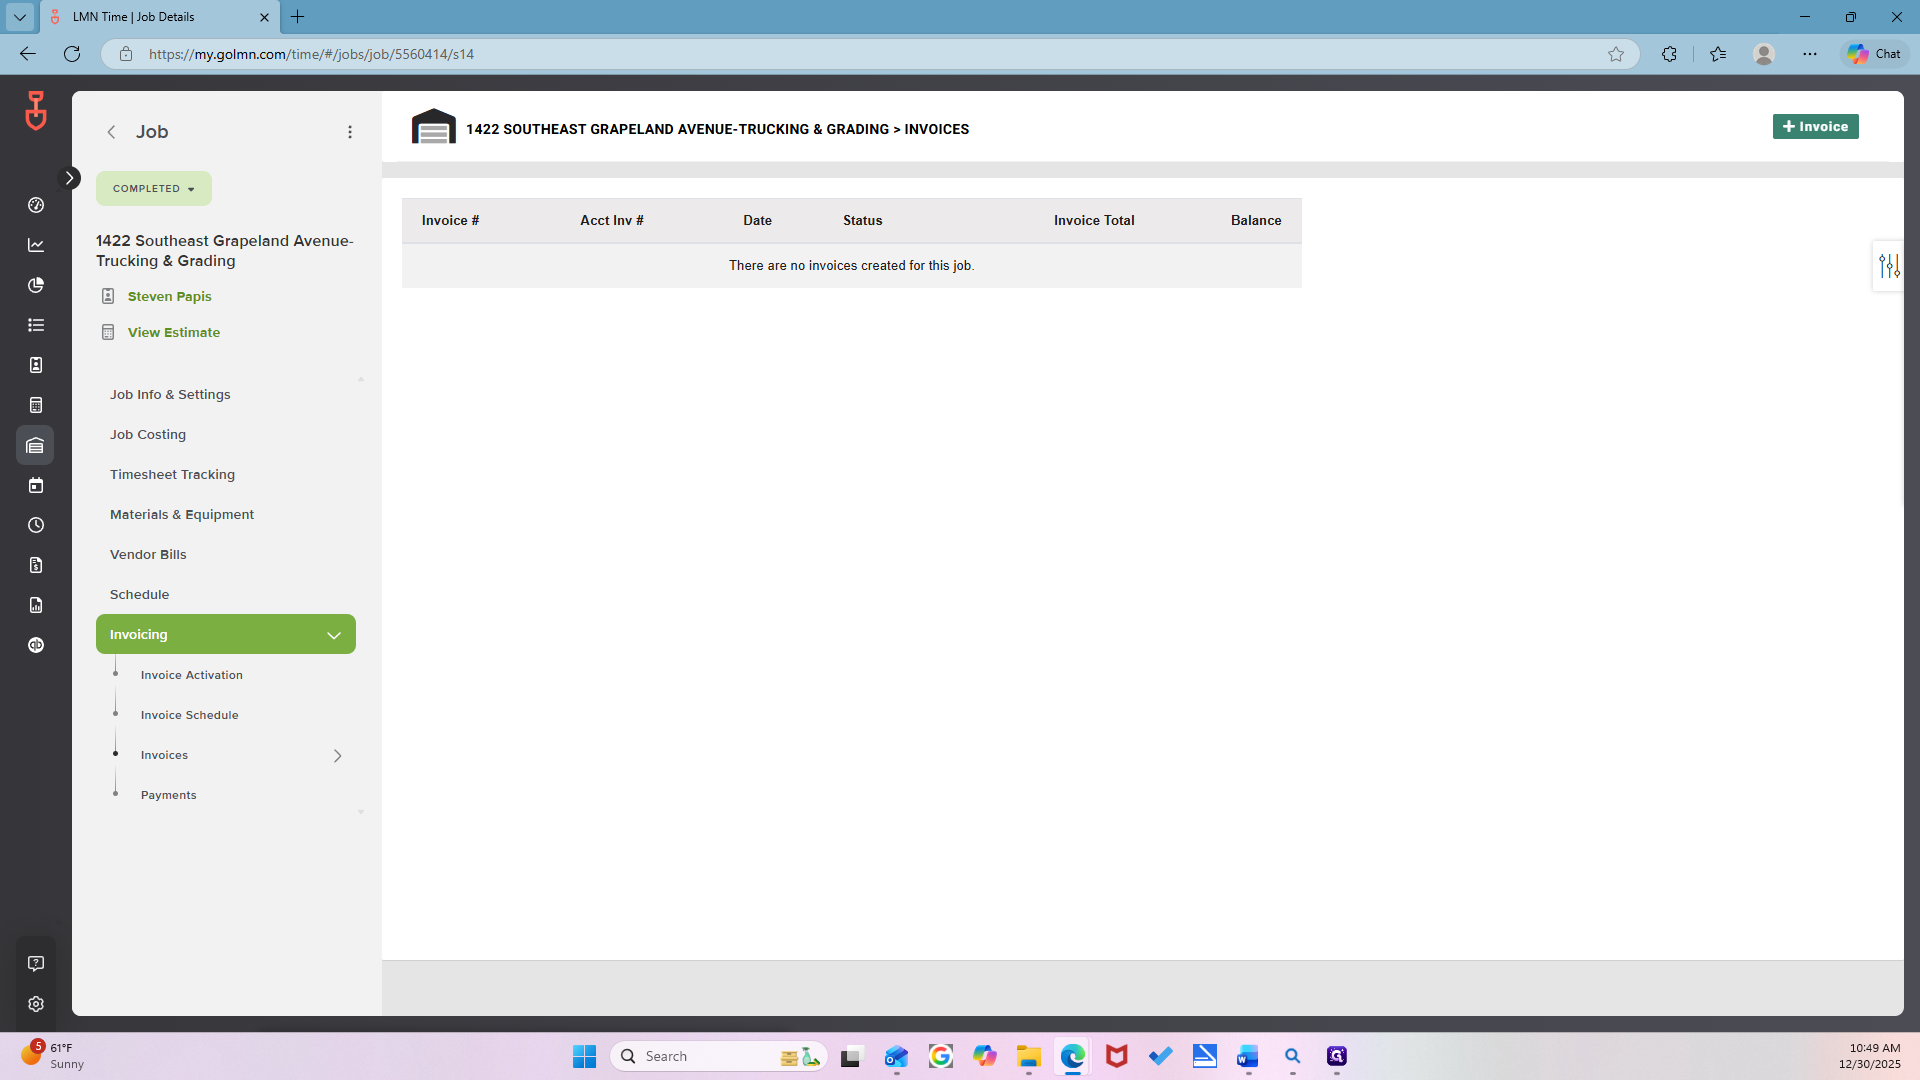
Go to Invoices. Create an invoice.
Remember, LMN does not transfer the information. Open another tab so you can copy and paste easily. Then, go to LMN again.
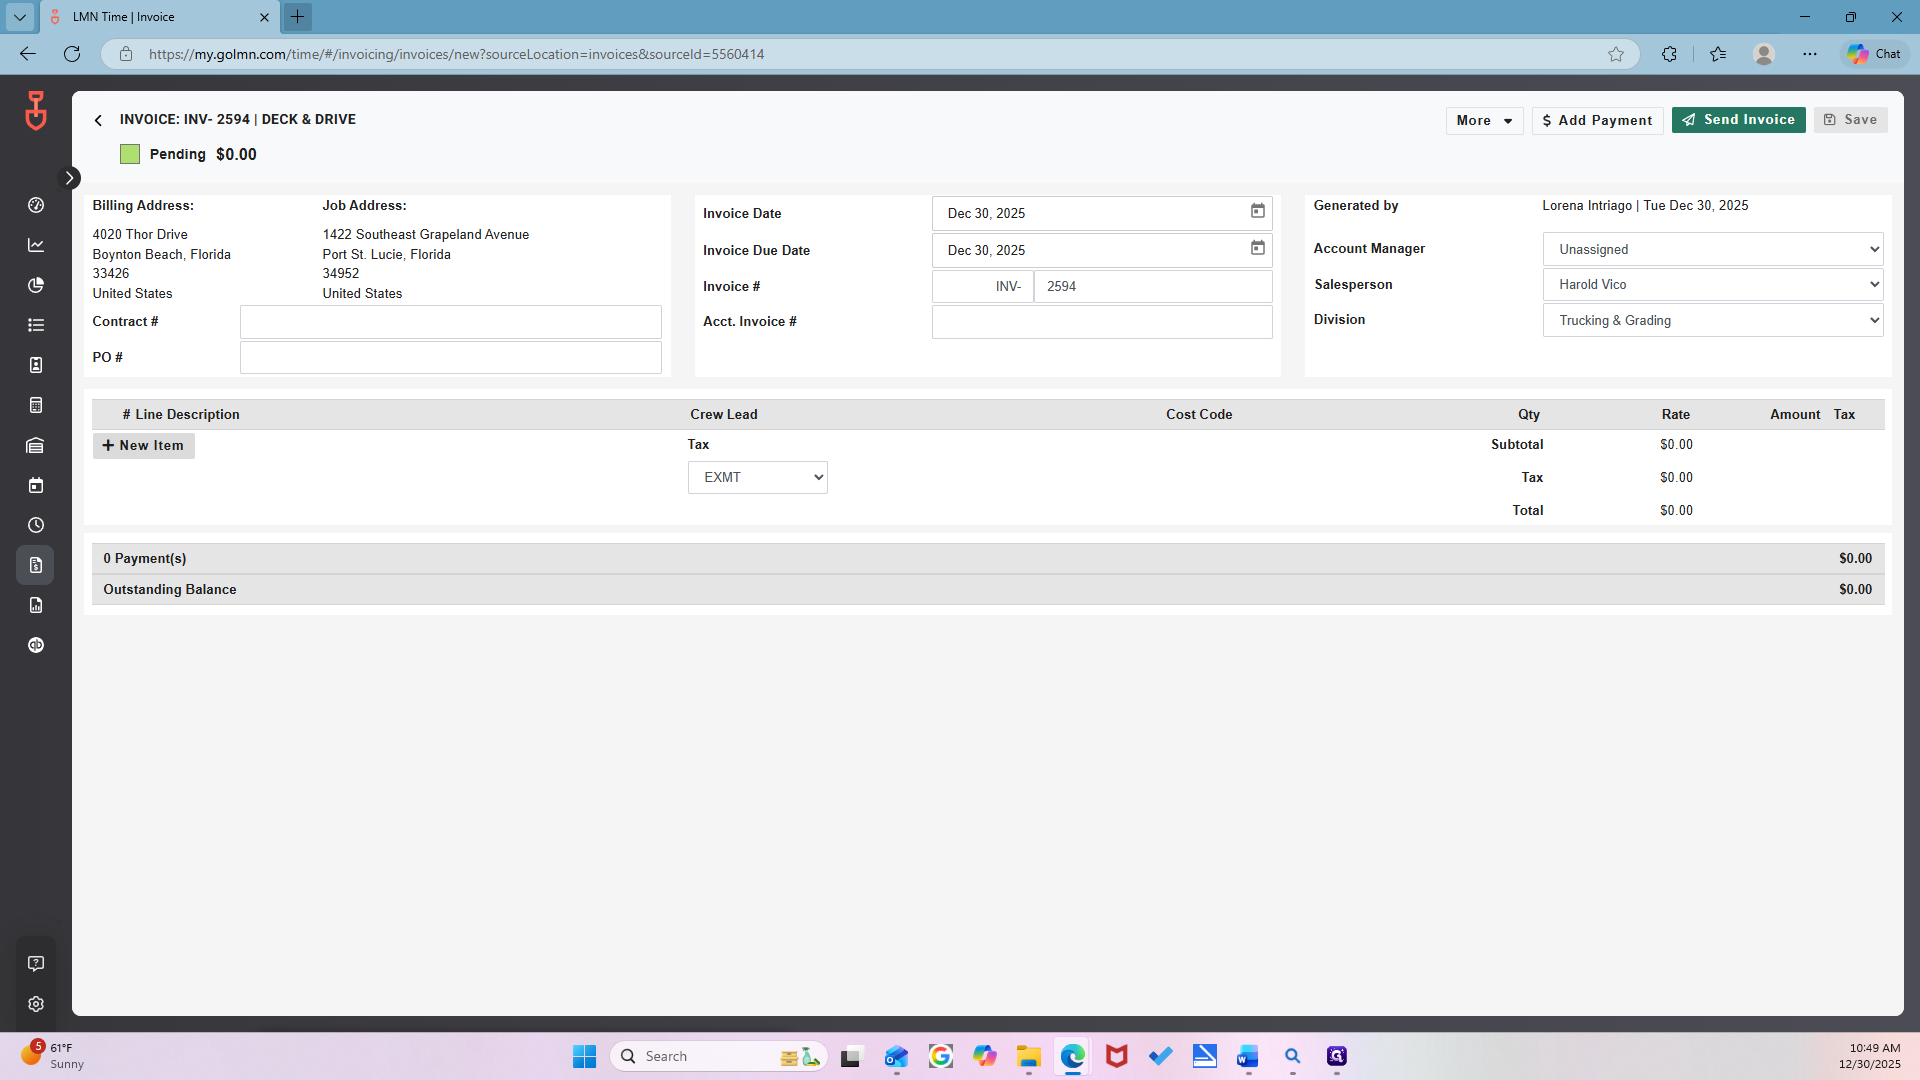
Look in the Estimate tab.
Estimate List.
Look up the estimate number.

Mm-hmm.
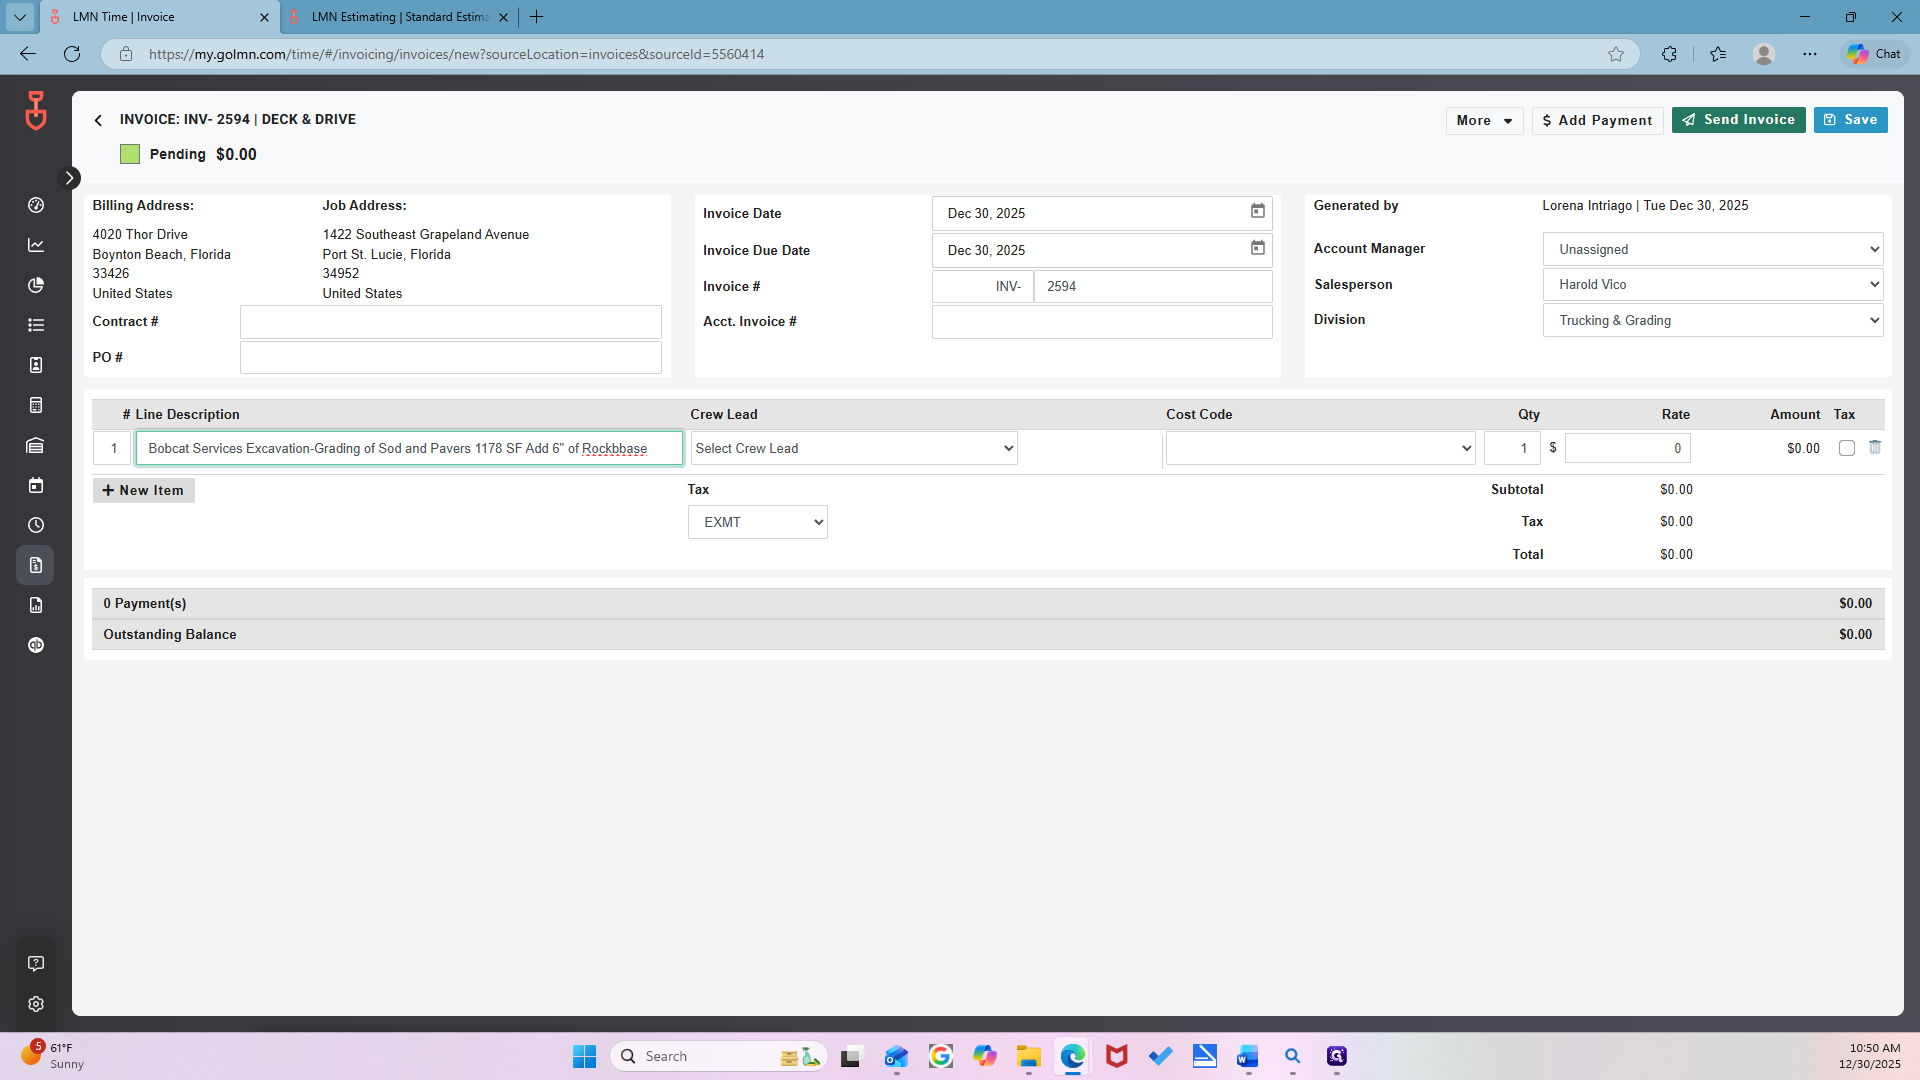
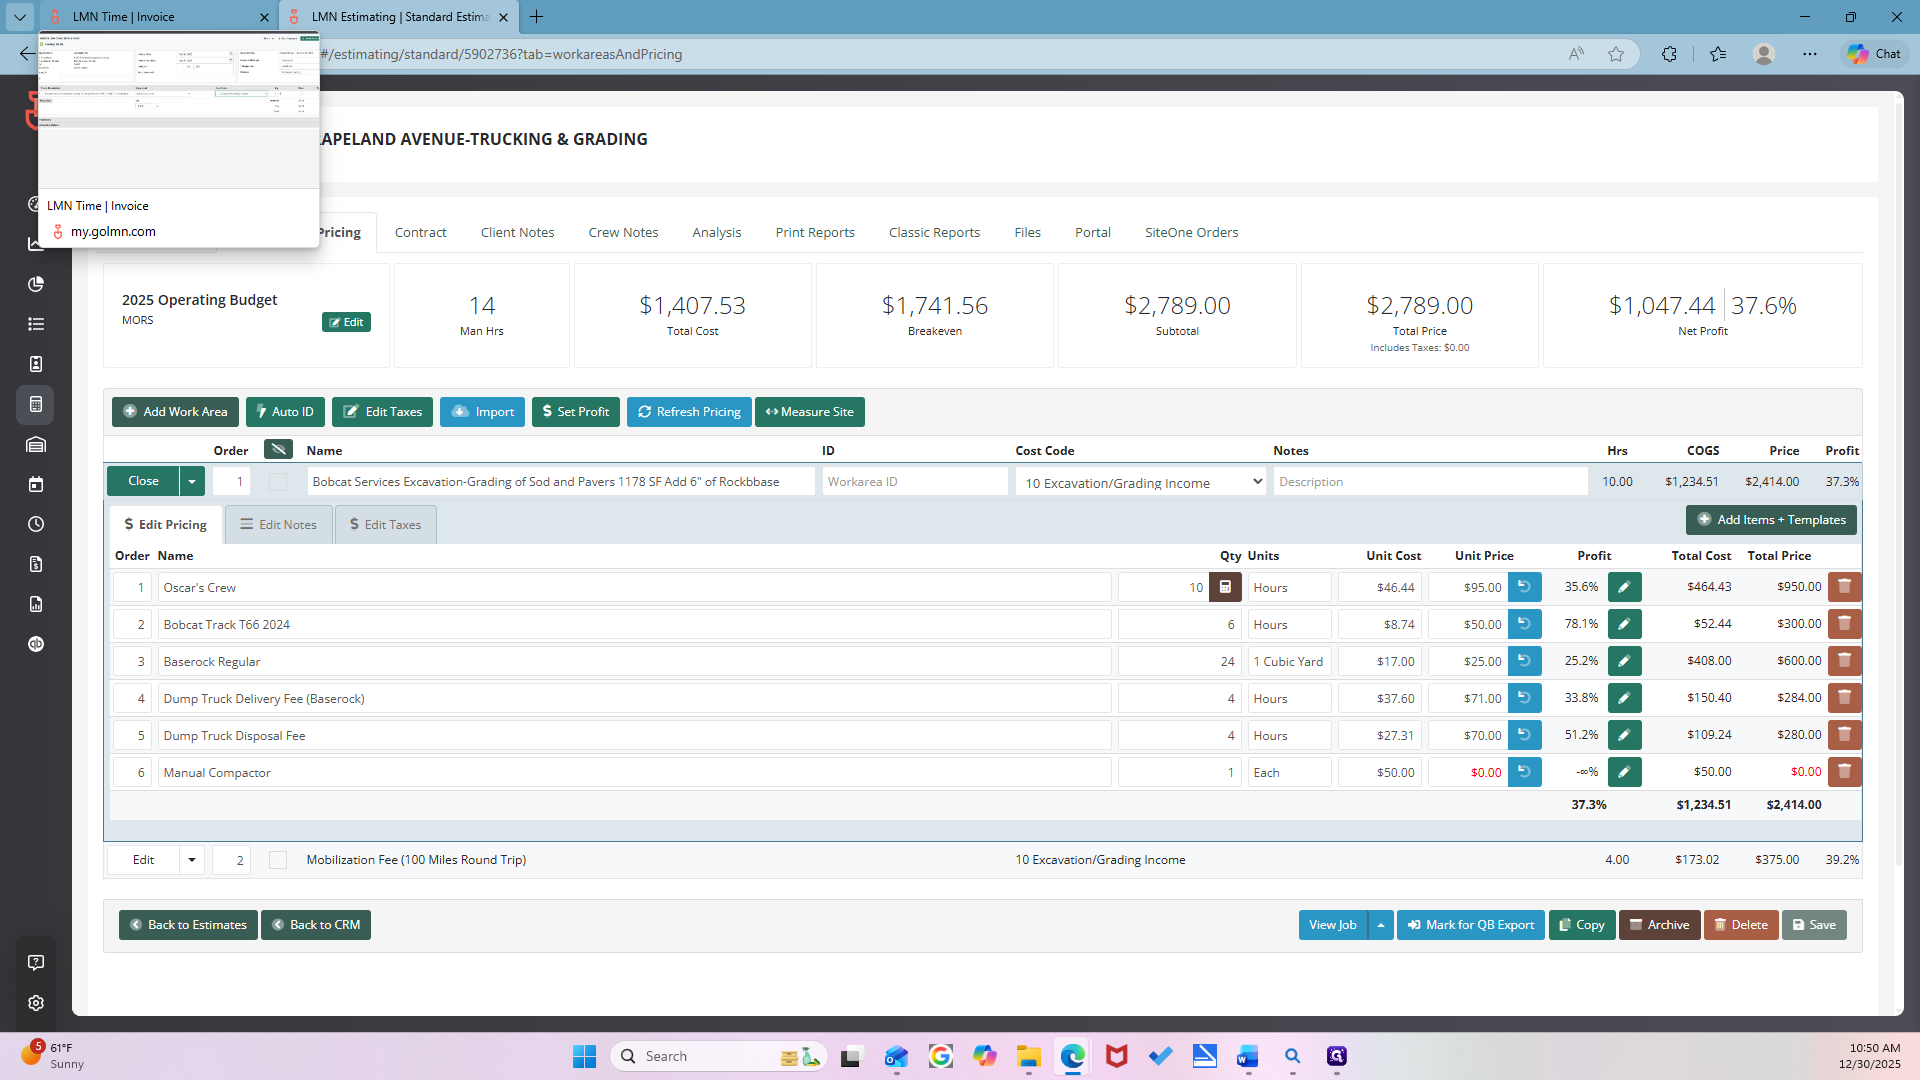
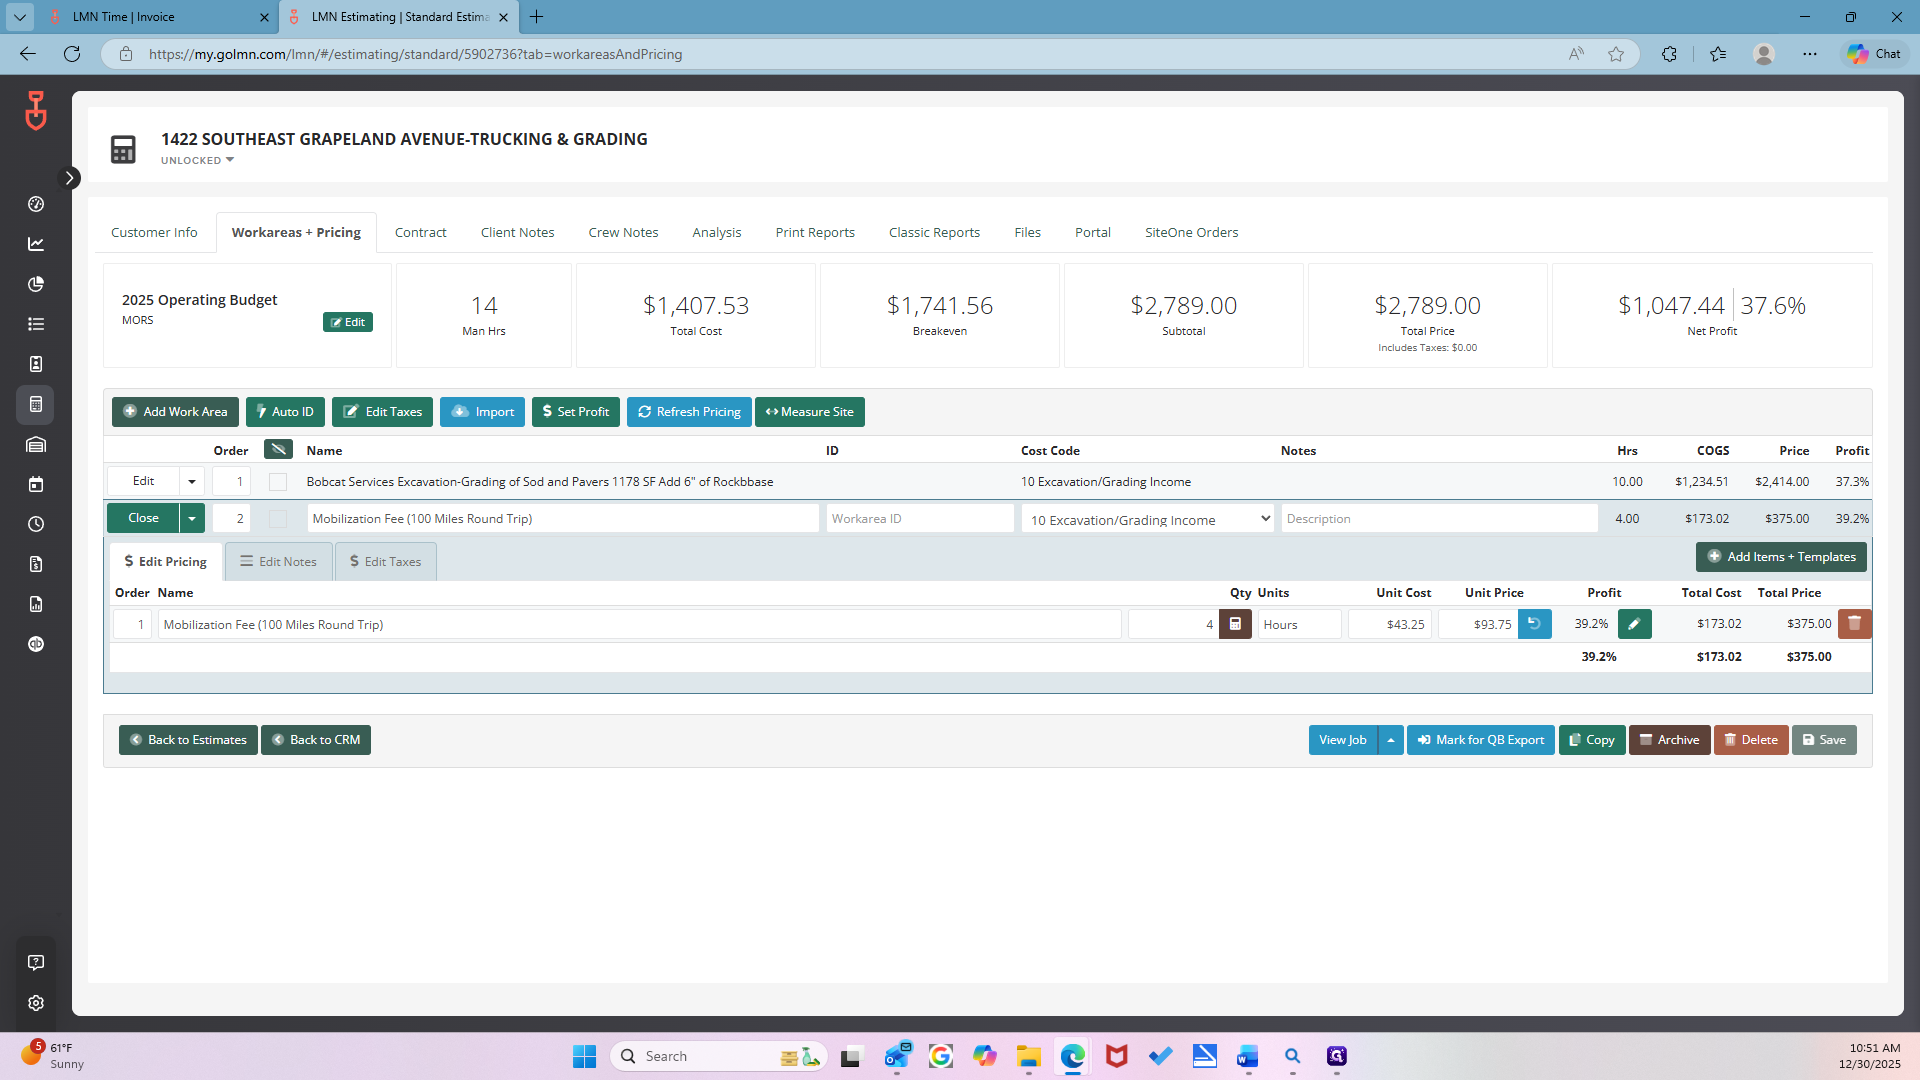
Go to Work Areas and Pricing.
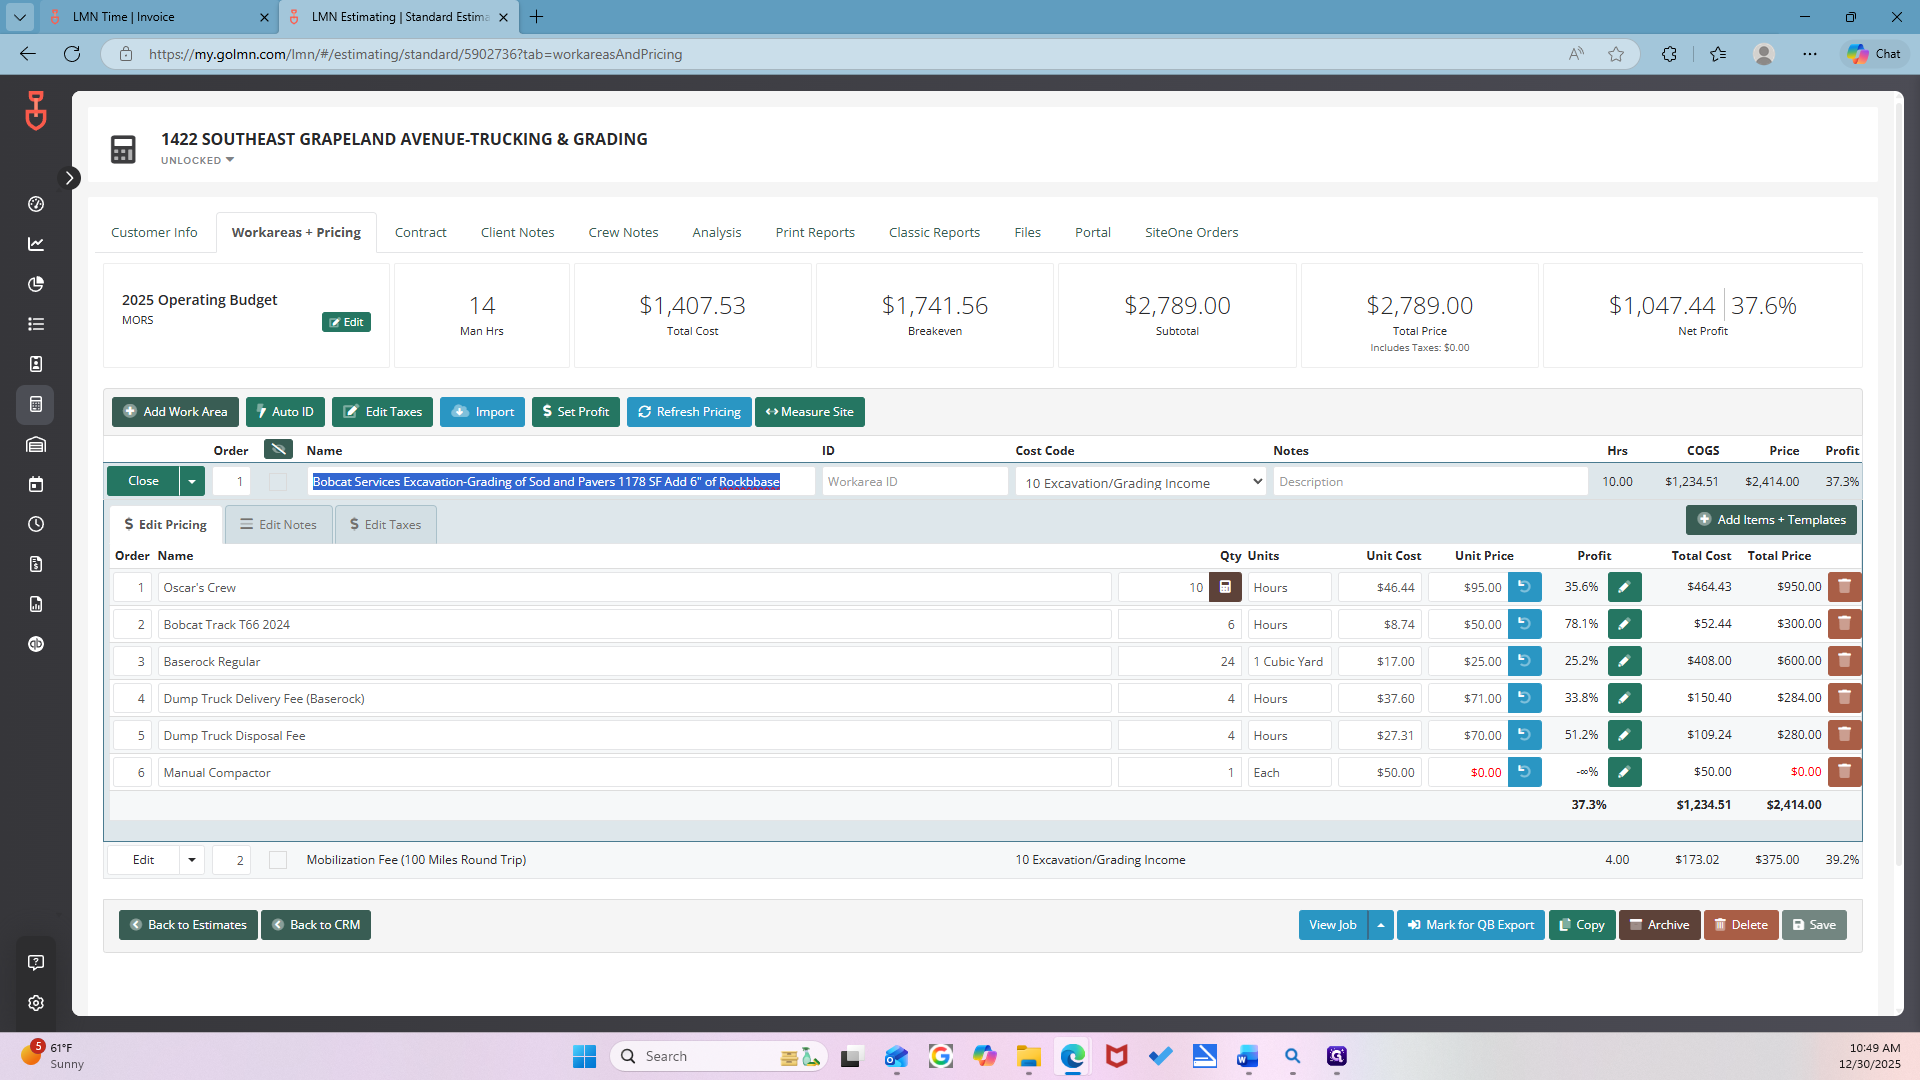
Okay. Now copy the first work area.
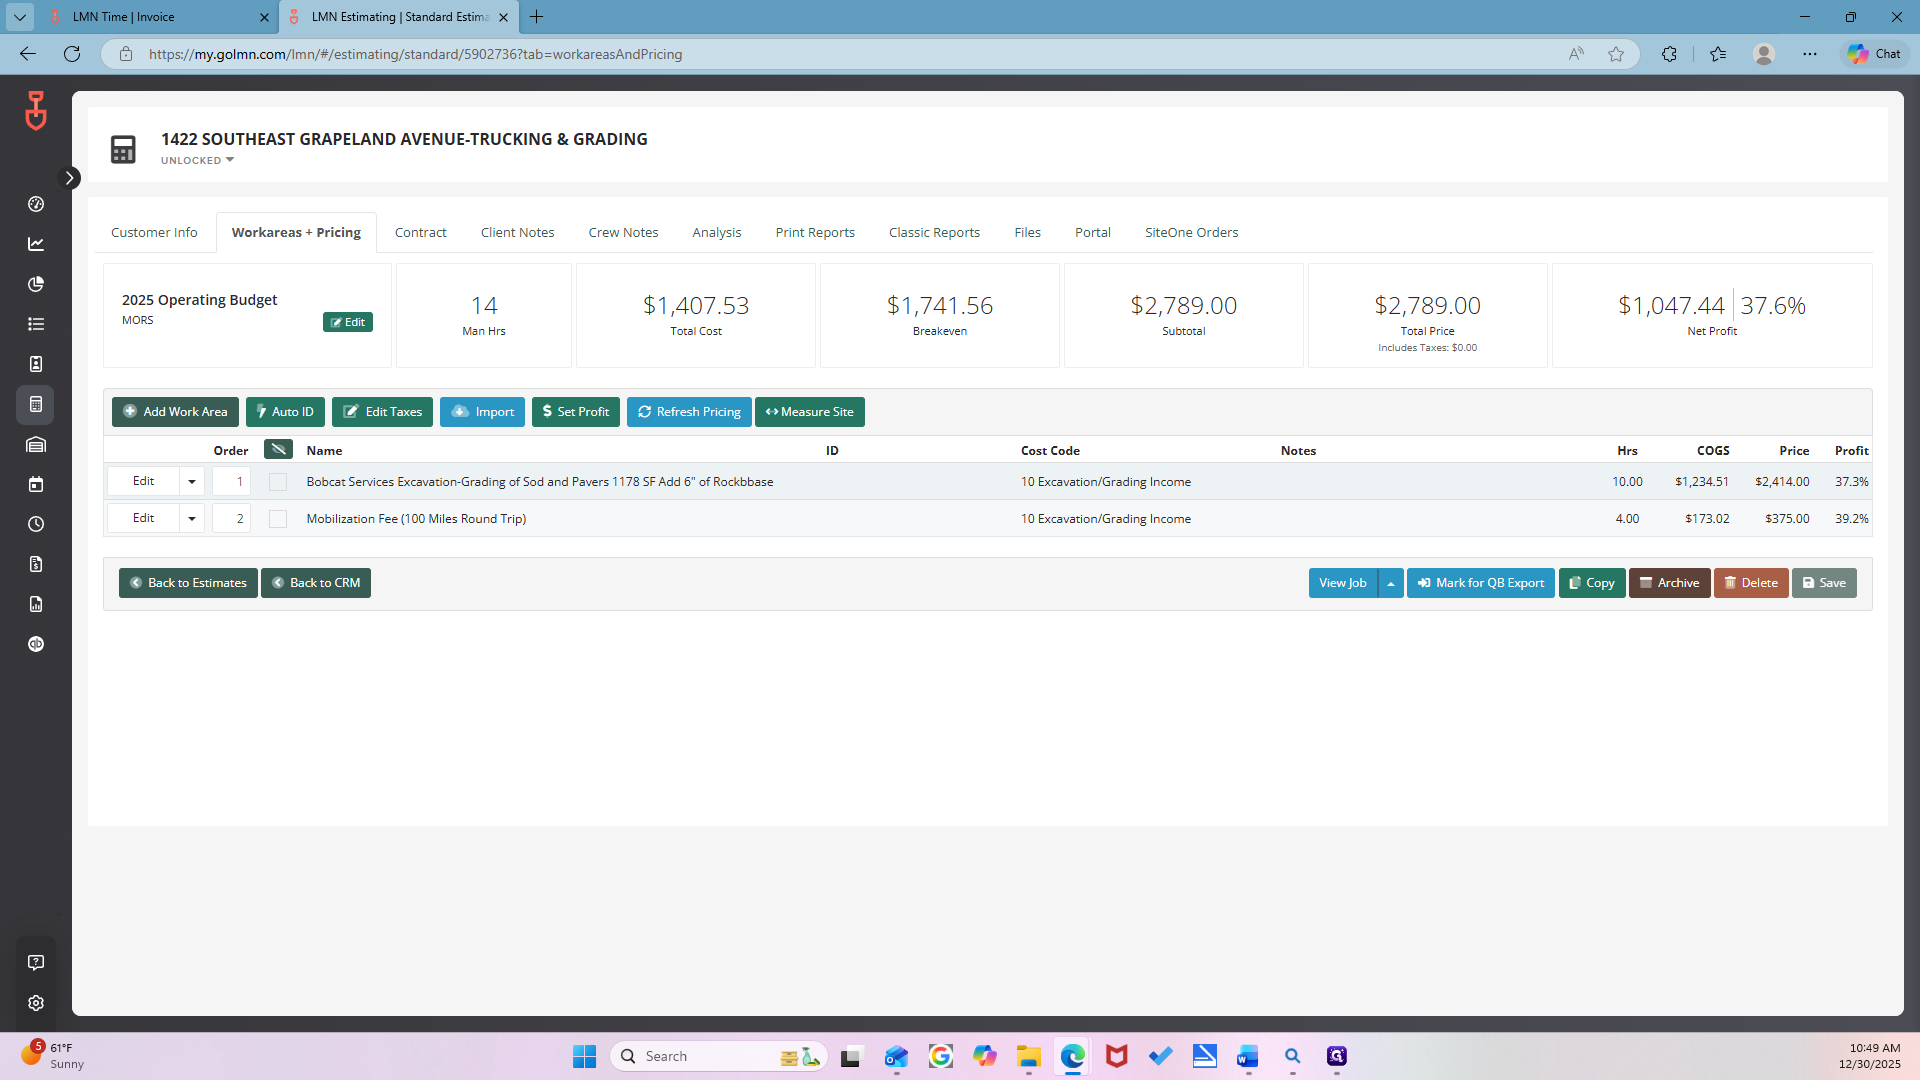
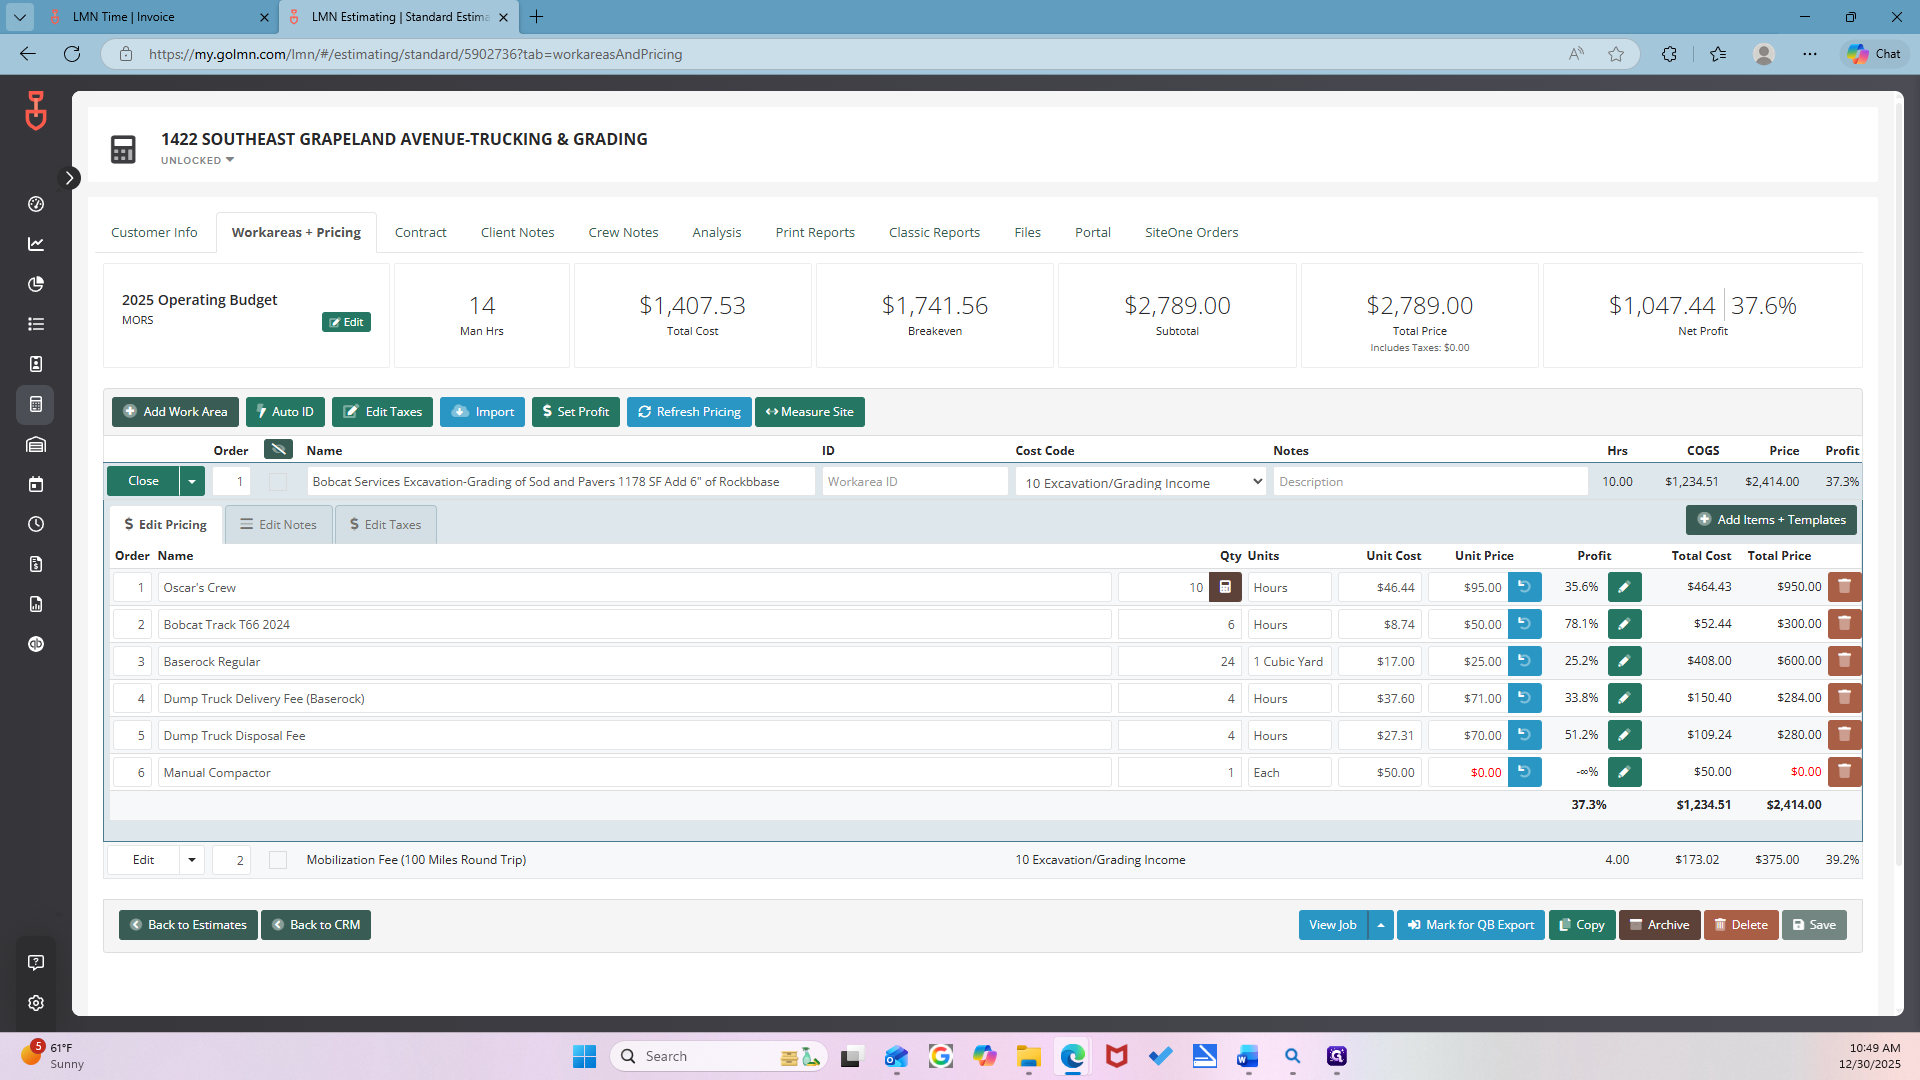
Also, check the amount.
You can paste it now.
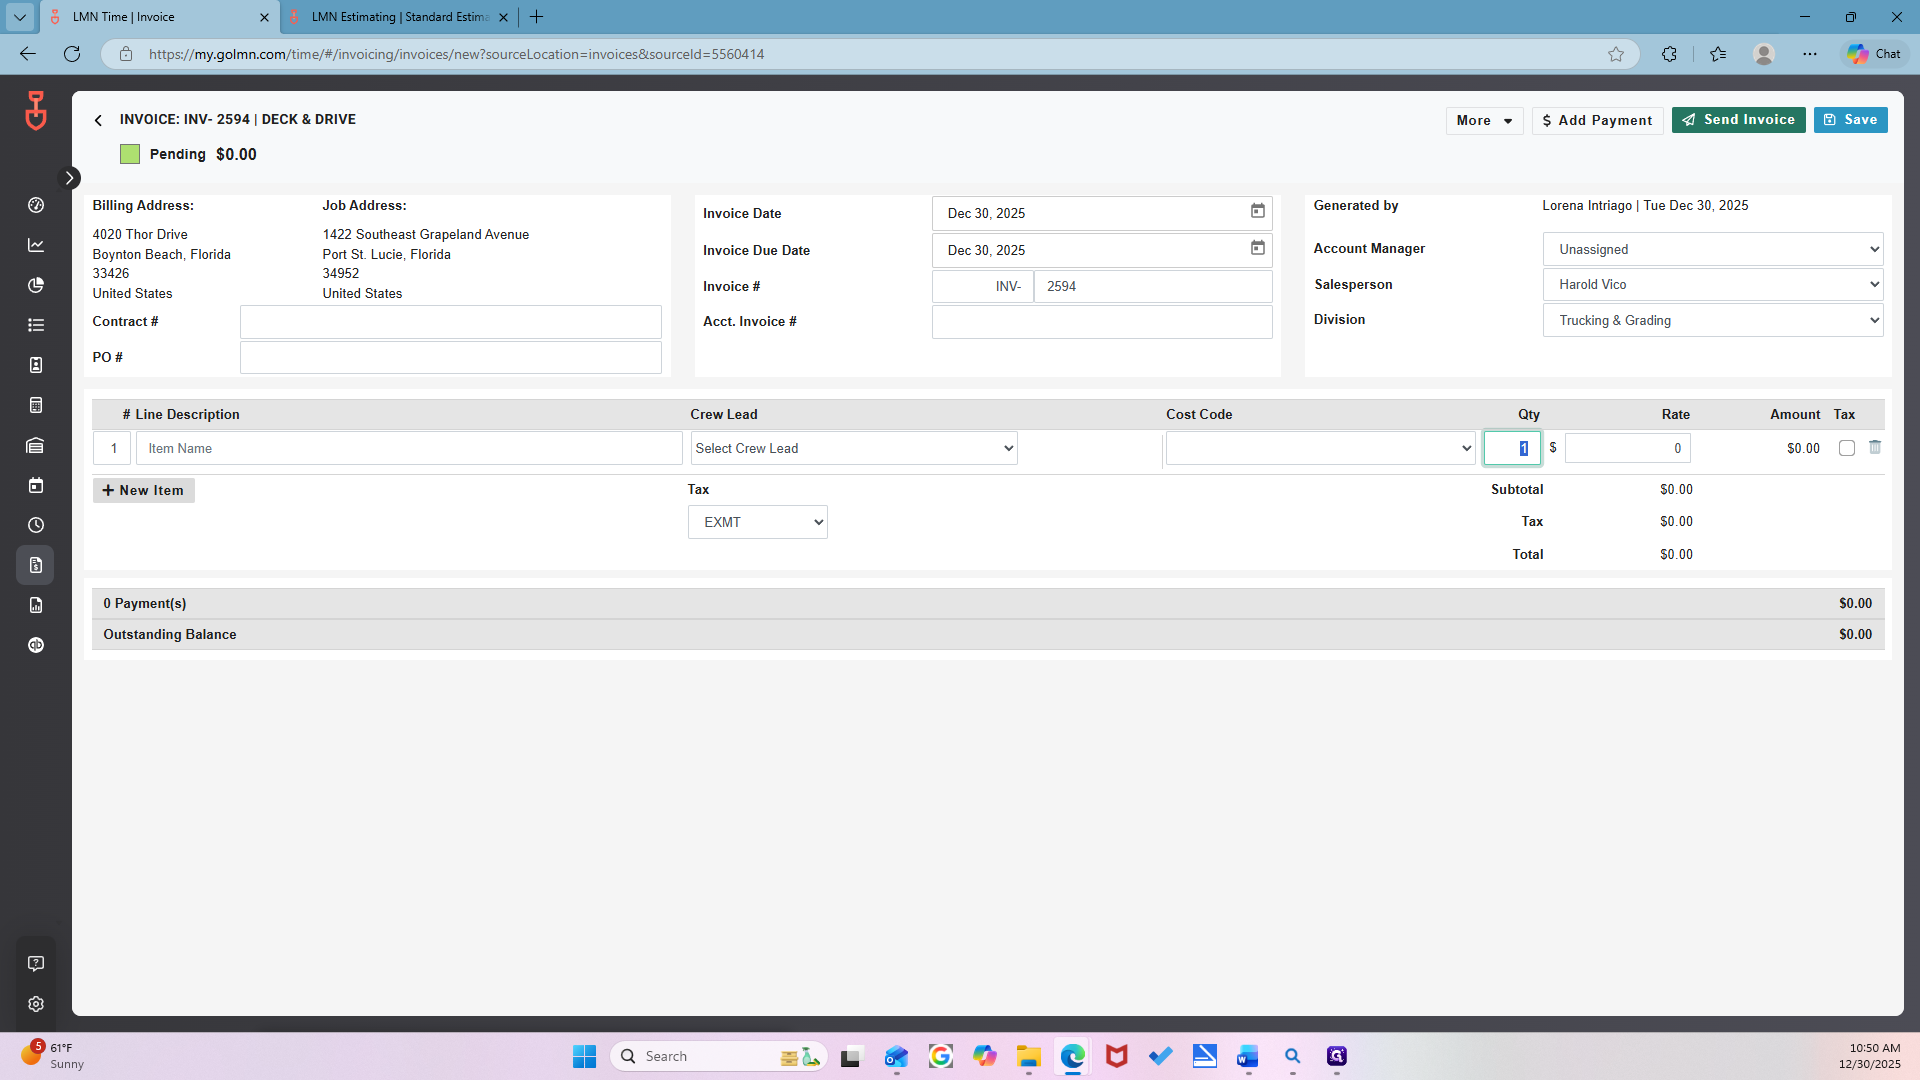
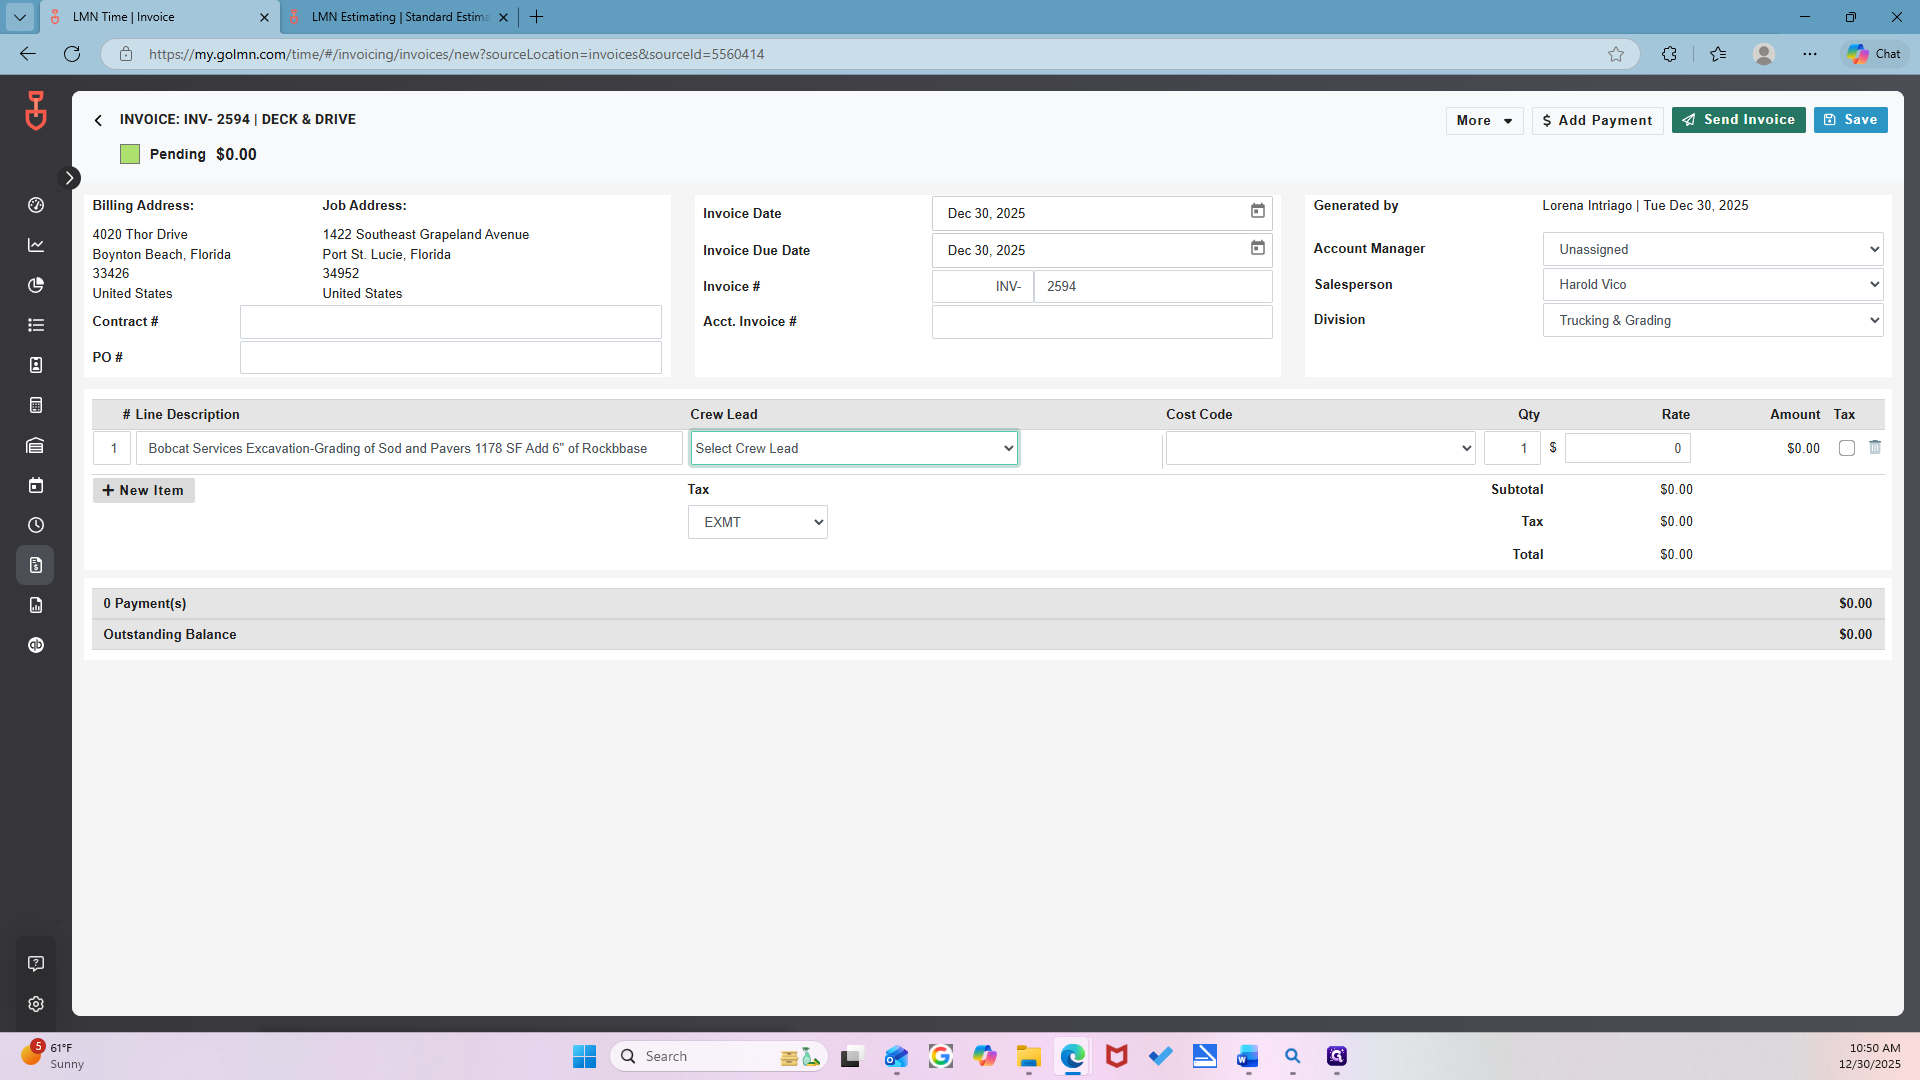
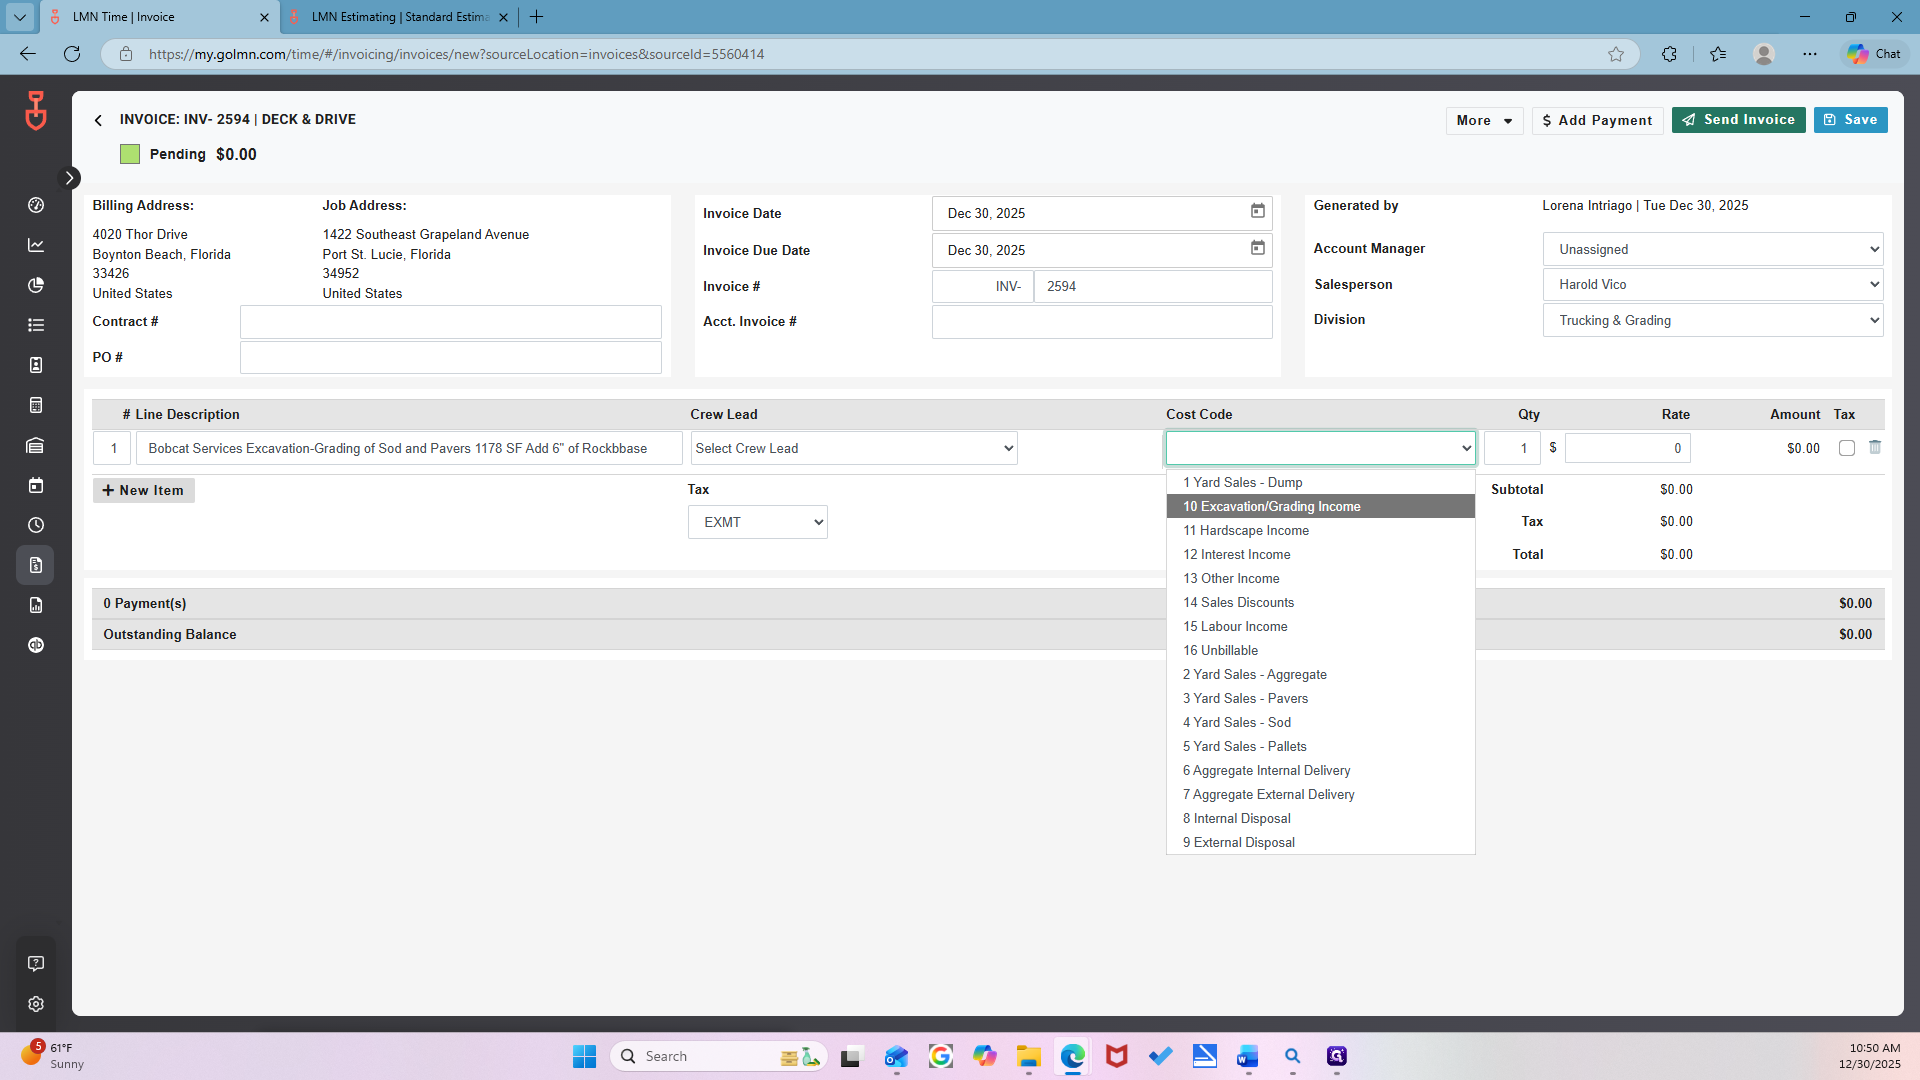
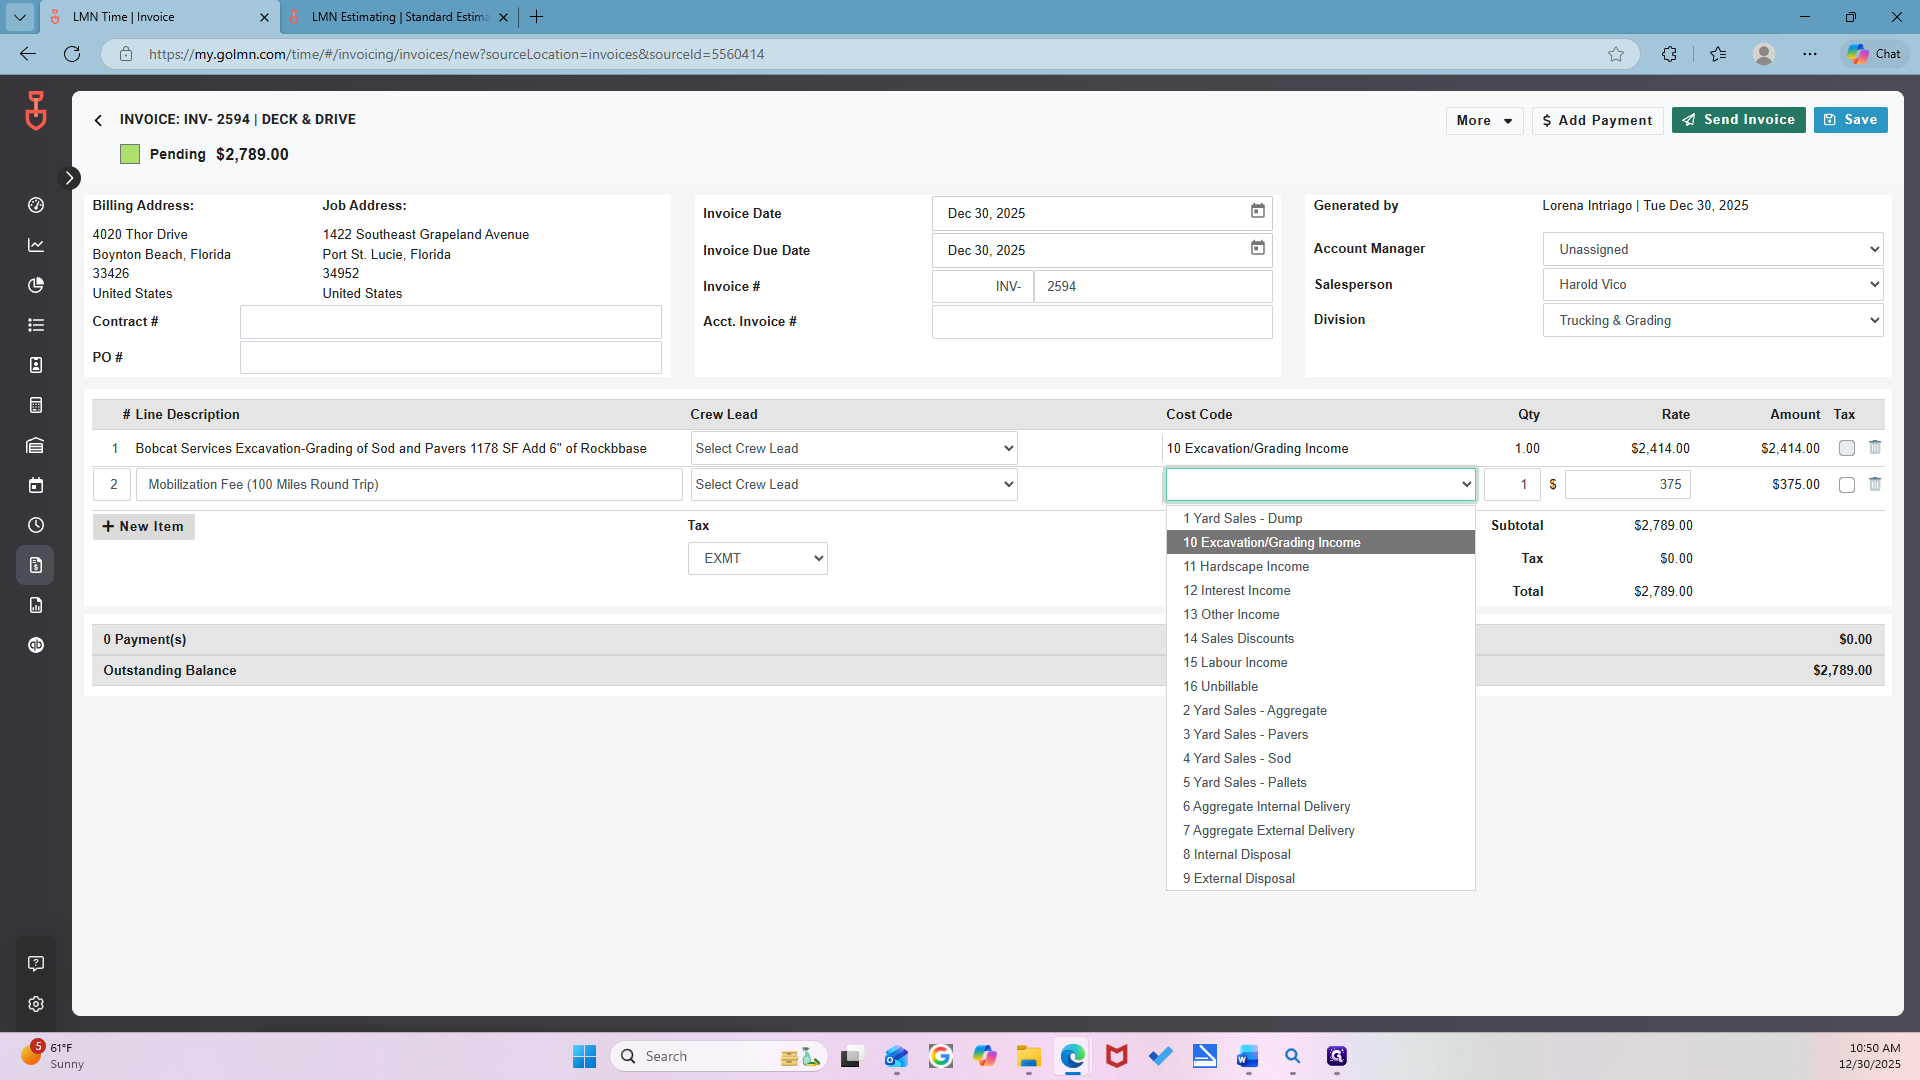
Make sure to select the cost code.
Uh, um, 10. Okay.
Now go back to check the cost of that item.
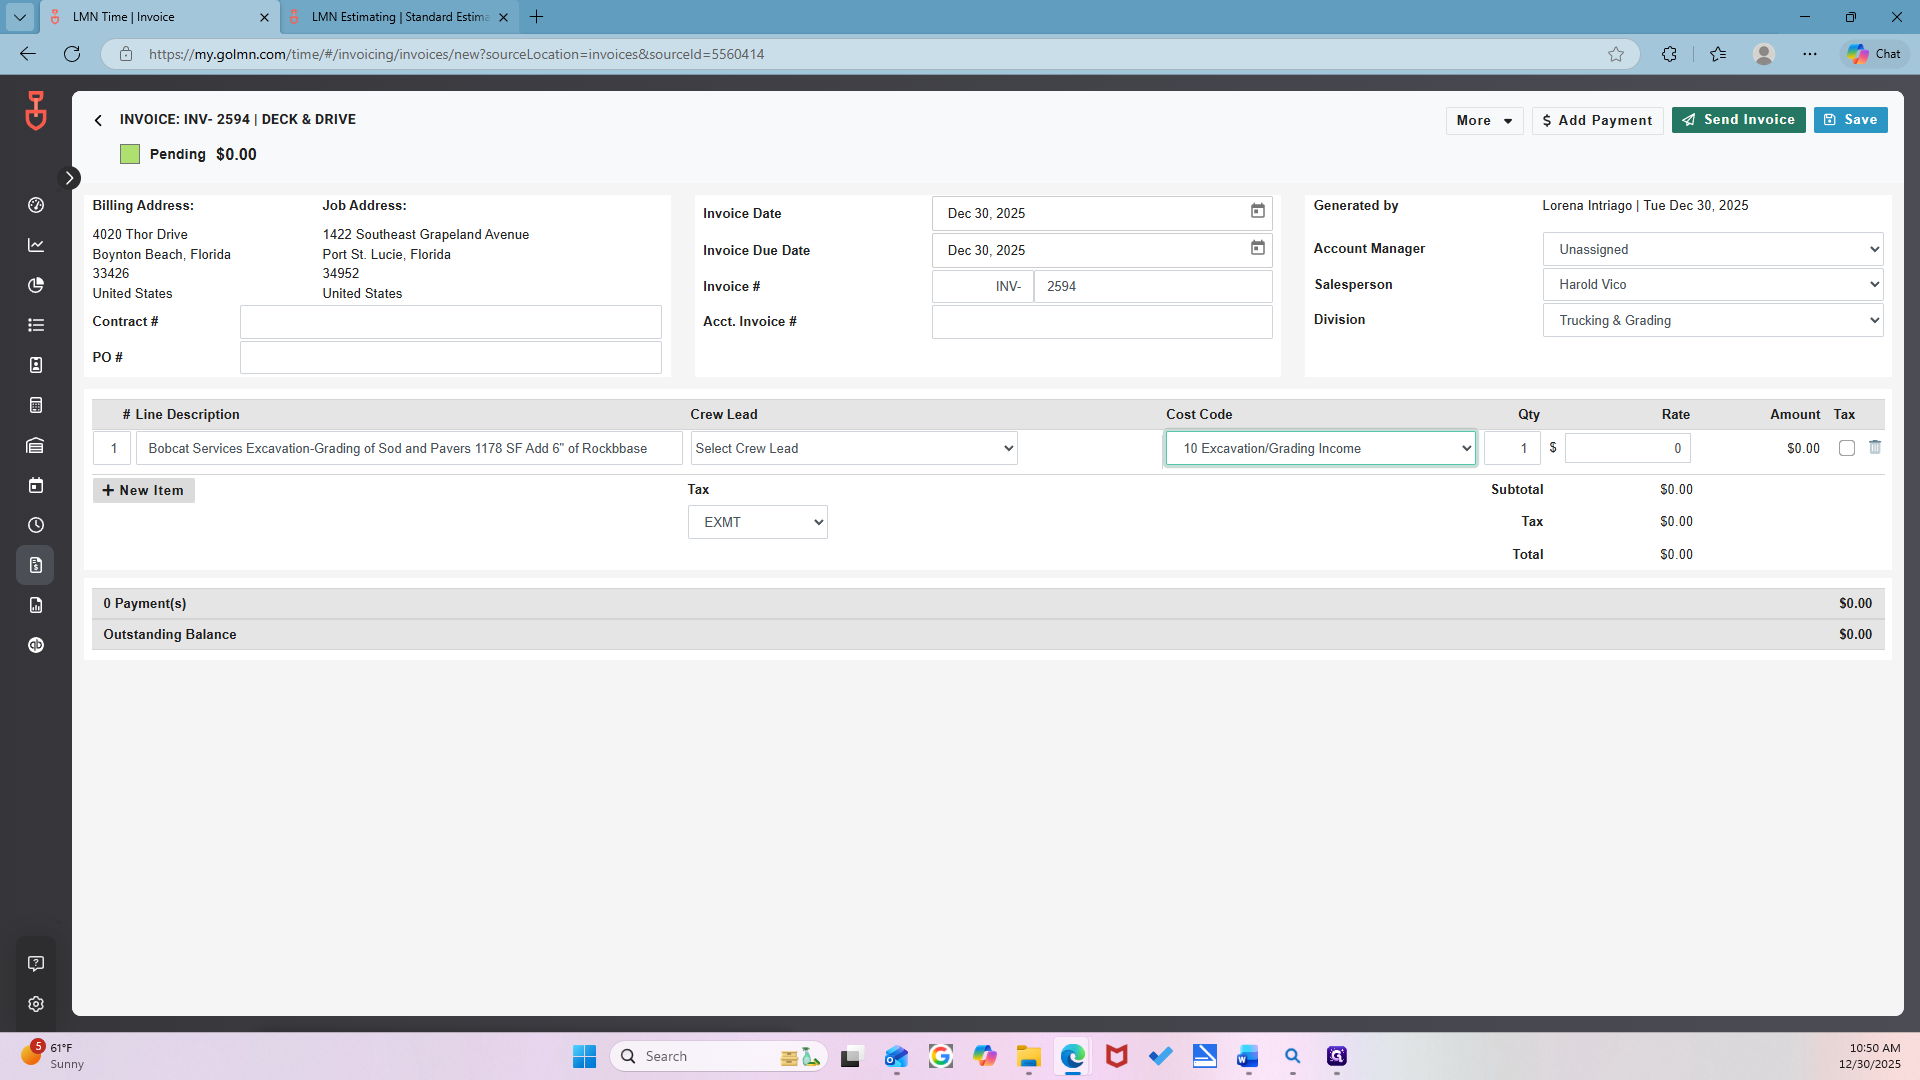
That one was 24.15. Mm-hmm.

Put it here.


Mm-hmm. Next, add the following item by copying it from the other mobilization.
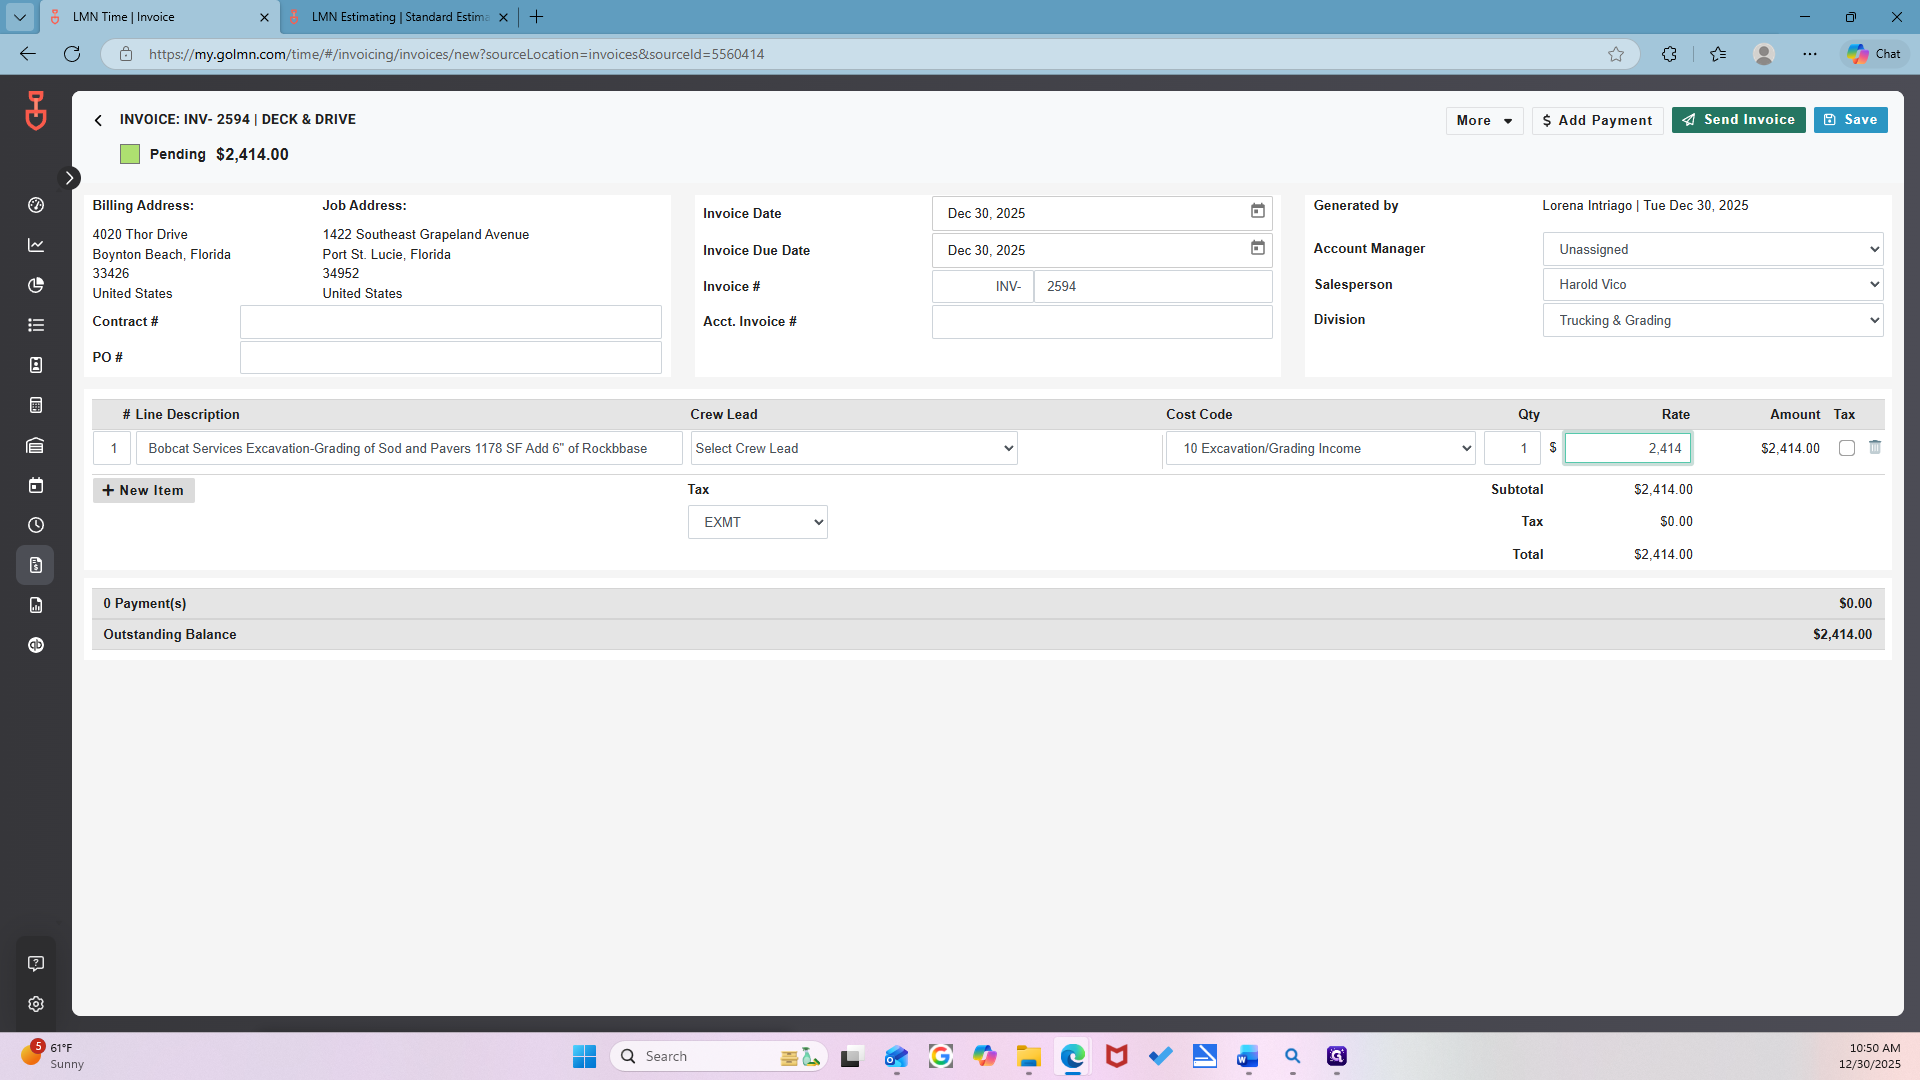


Look up the cost.
375. The total price. 375, yes. Always check the total price.
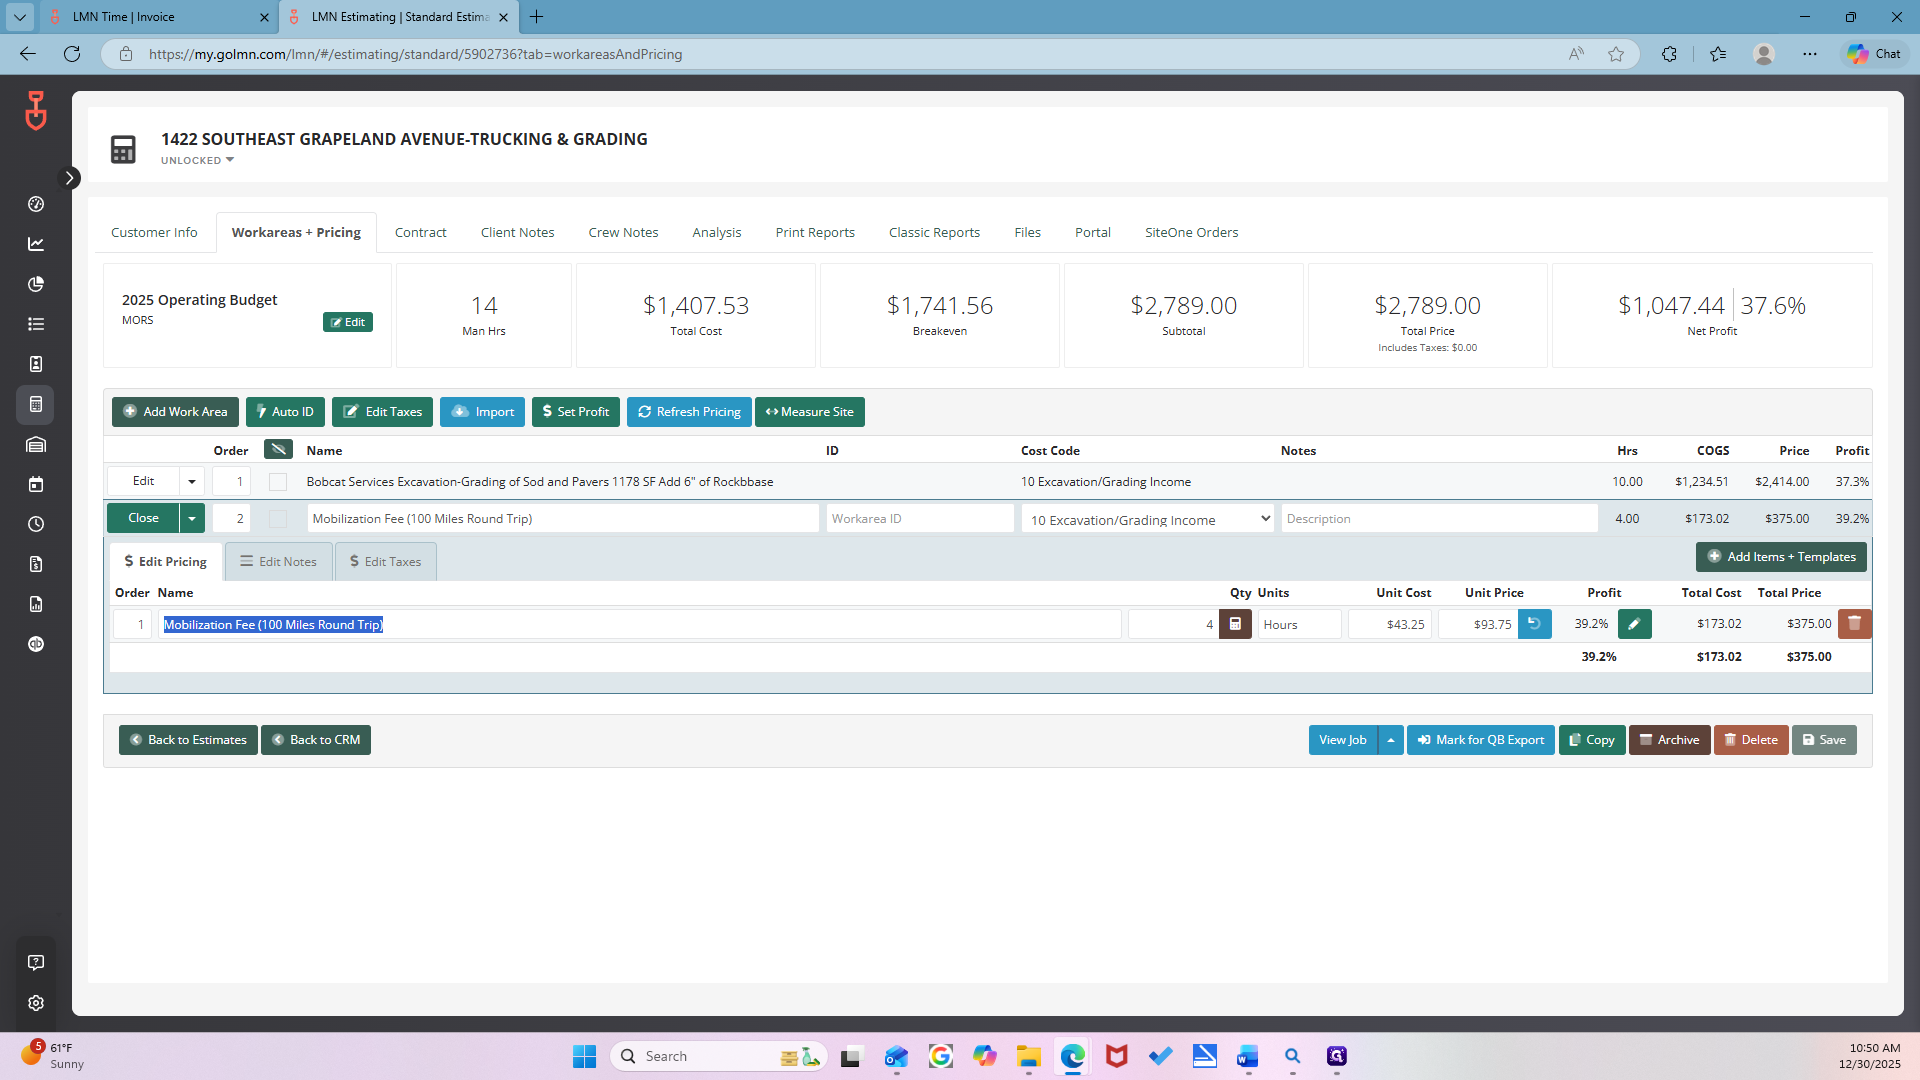
New item.

Always remember to include the cost code.
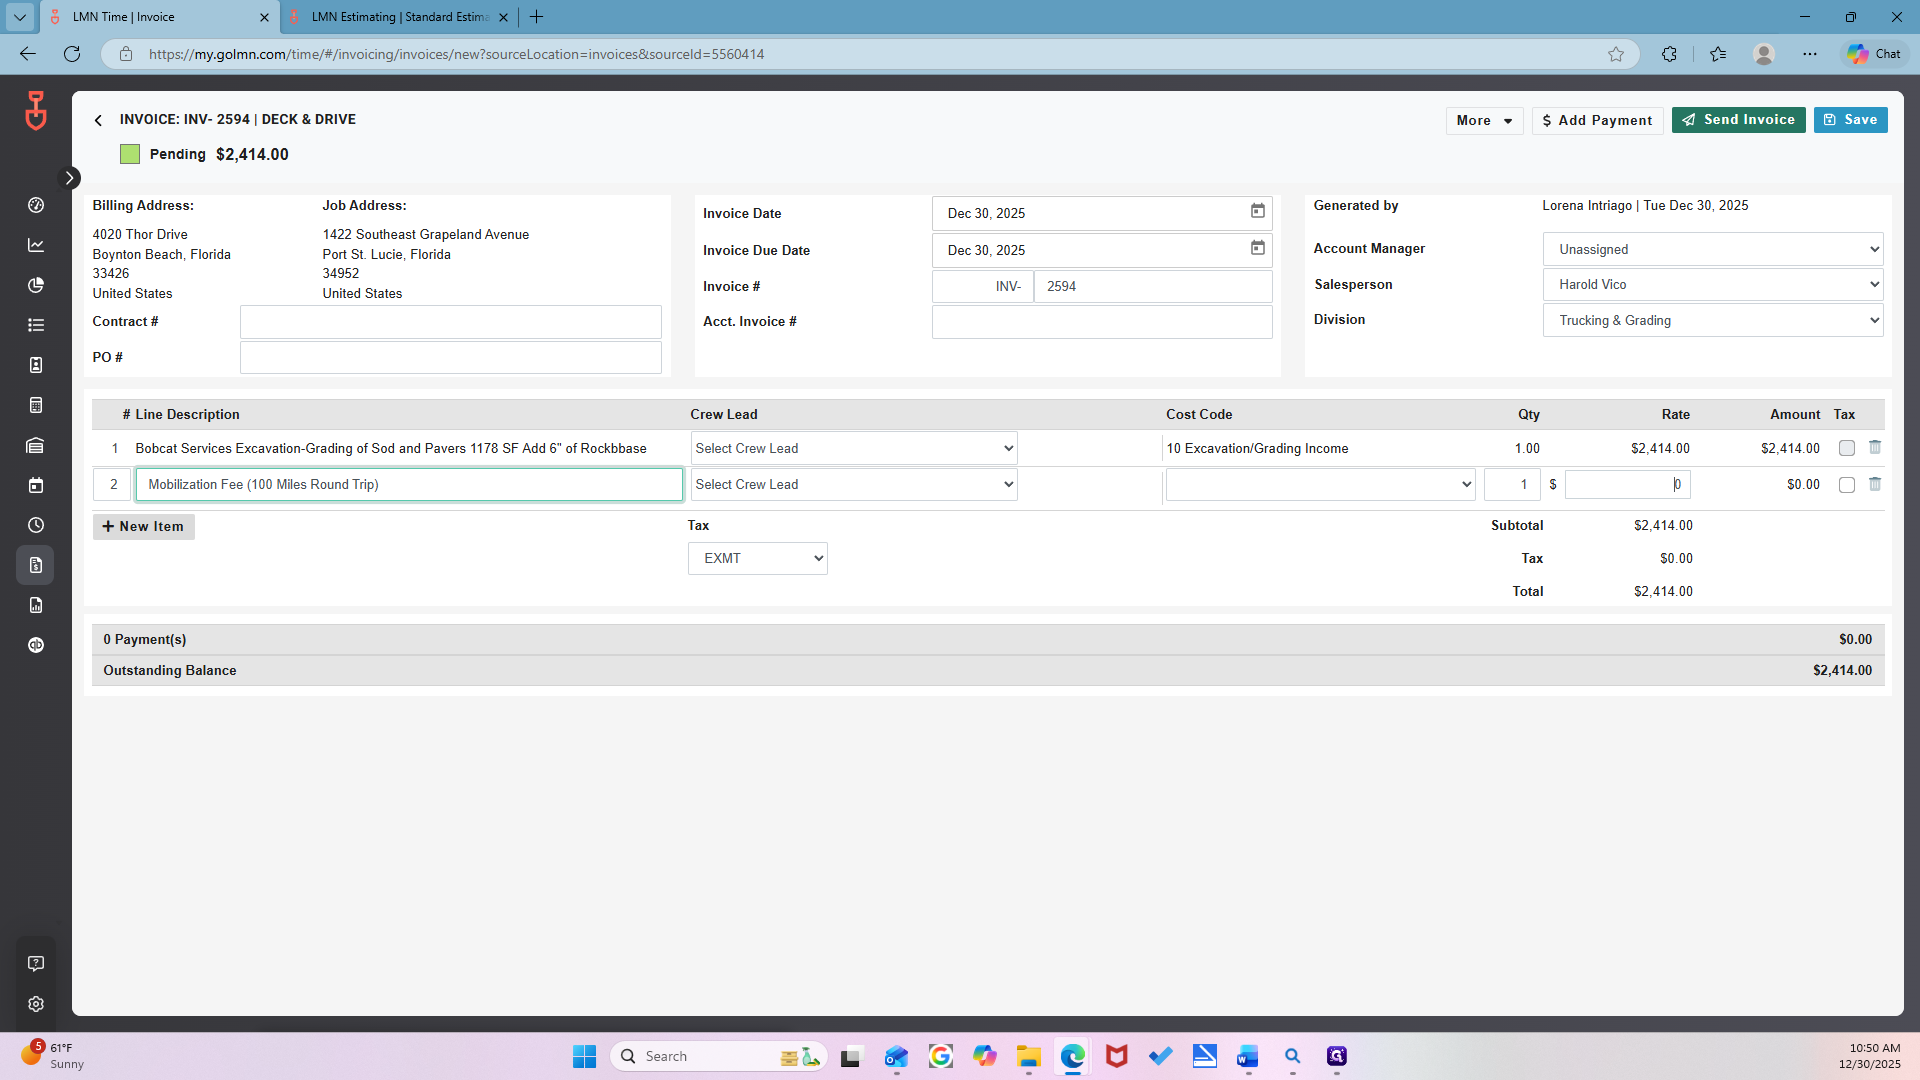
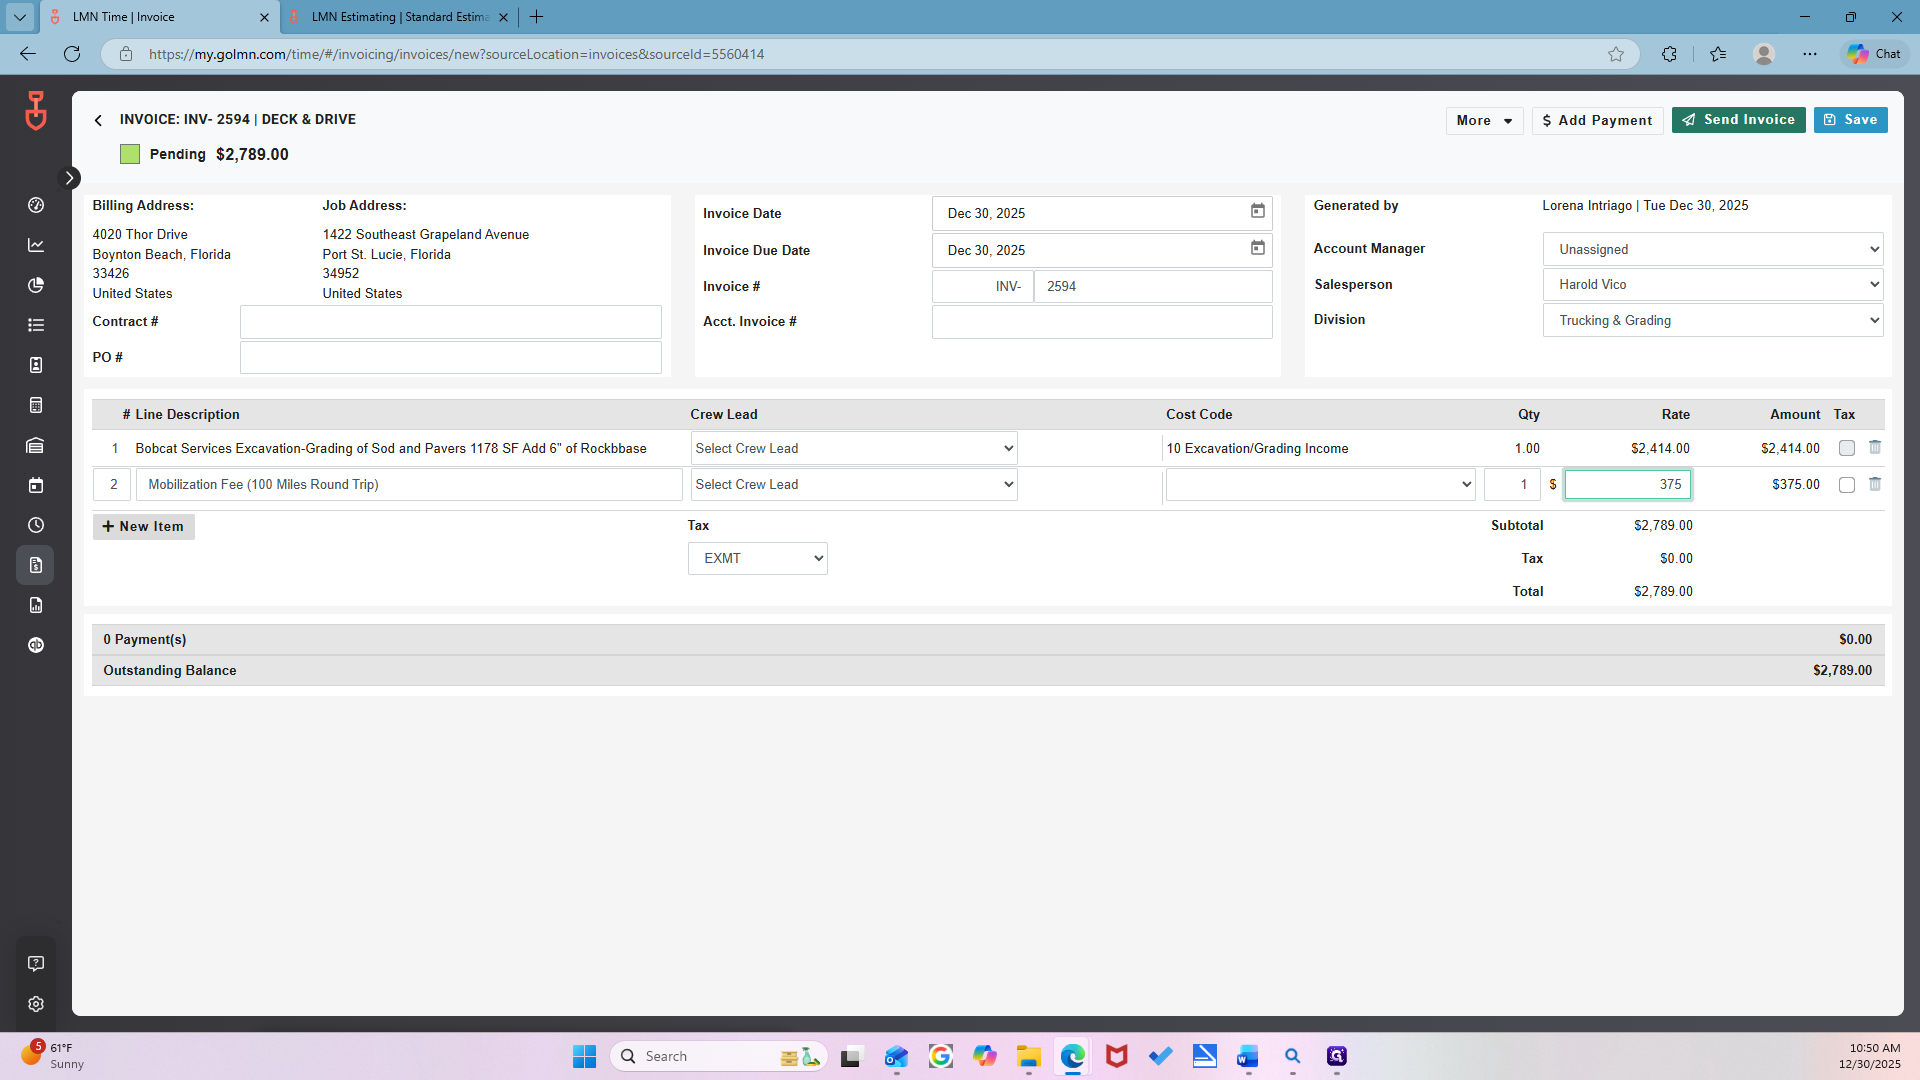
Uh-huh. Same one.
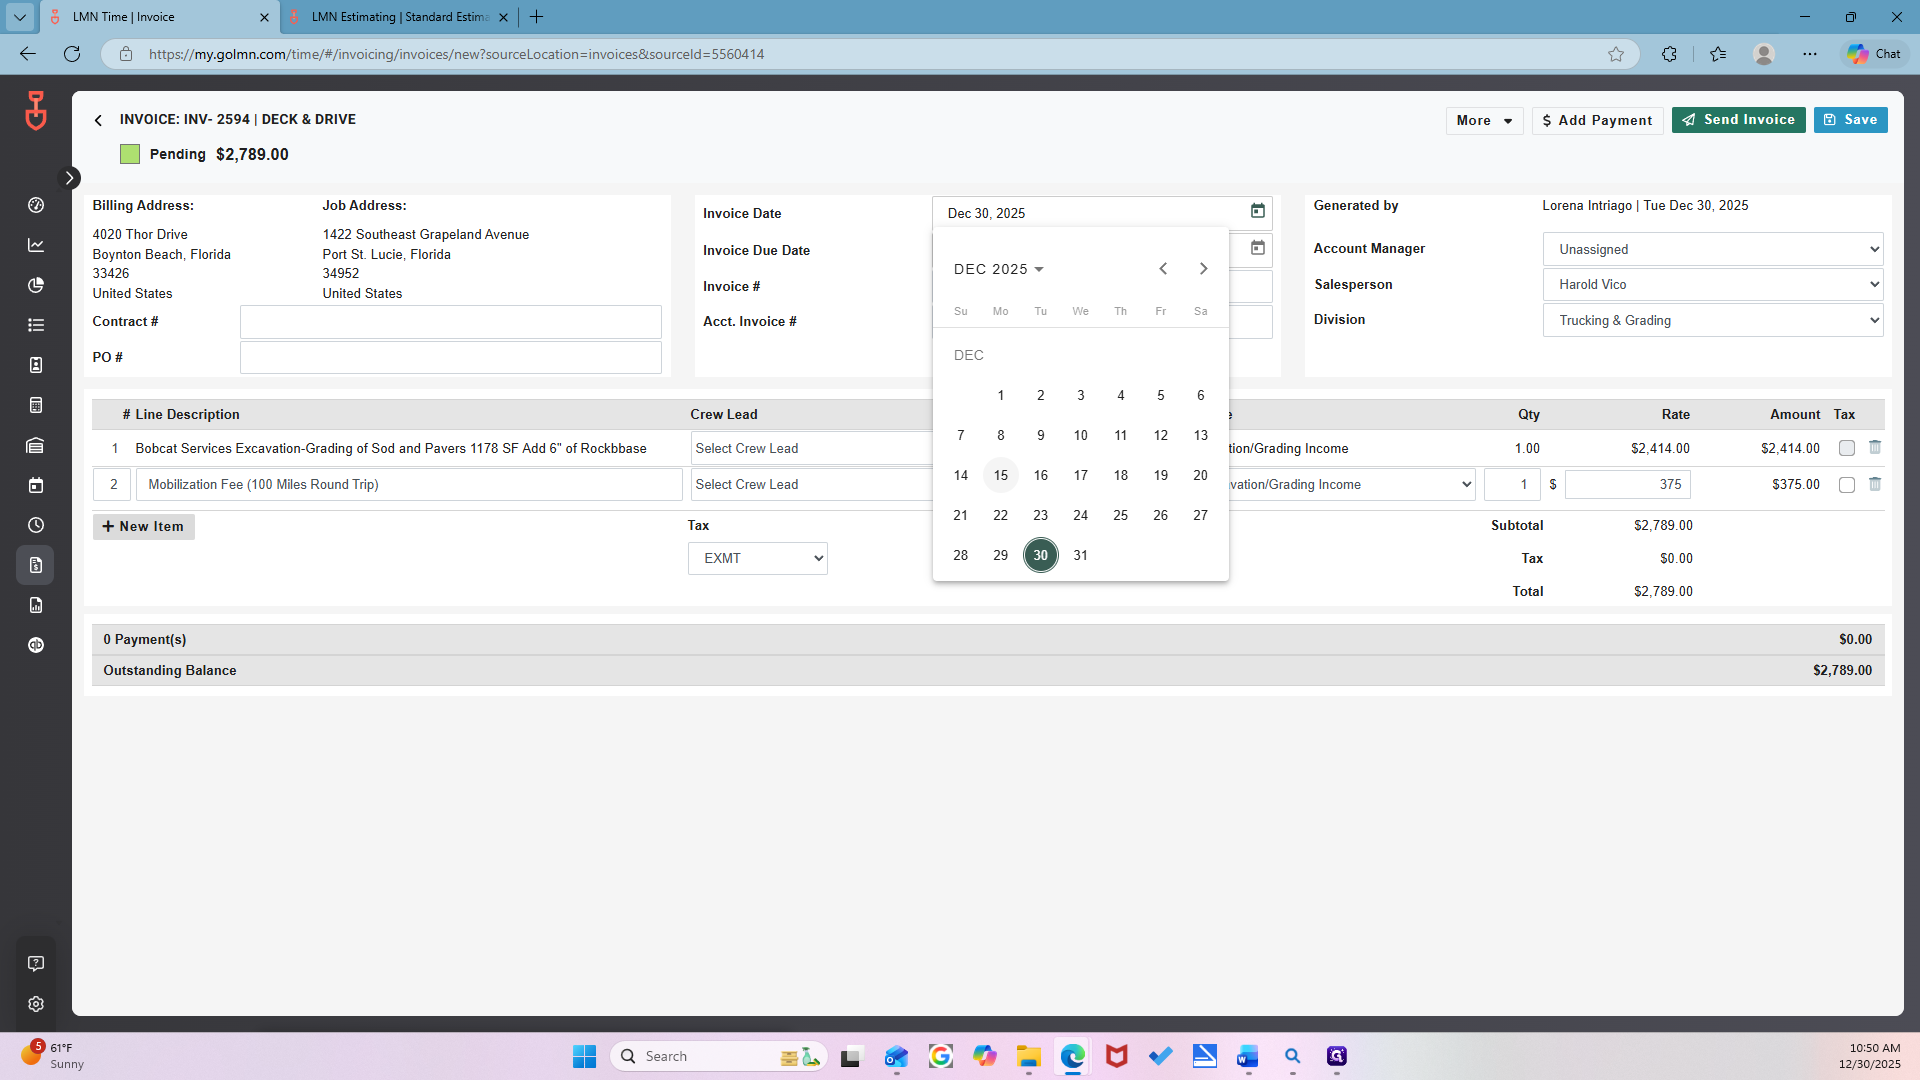
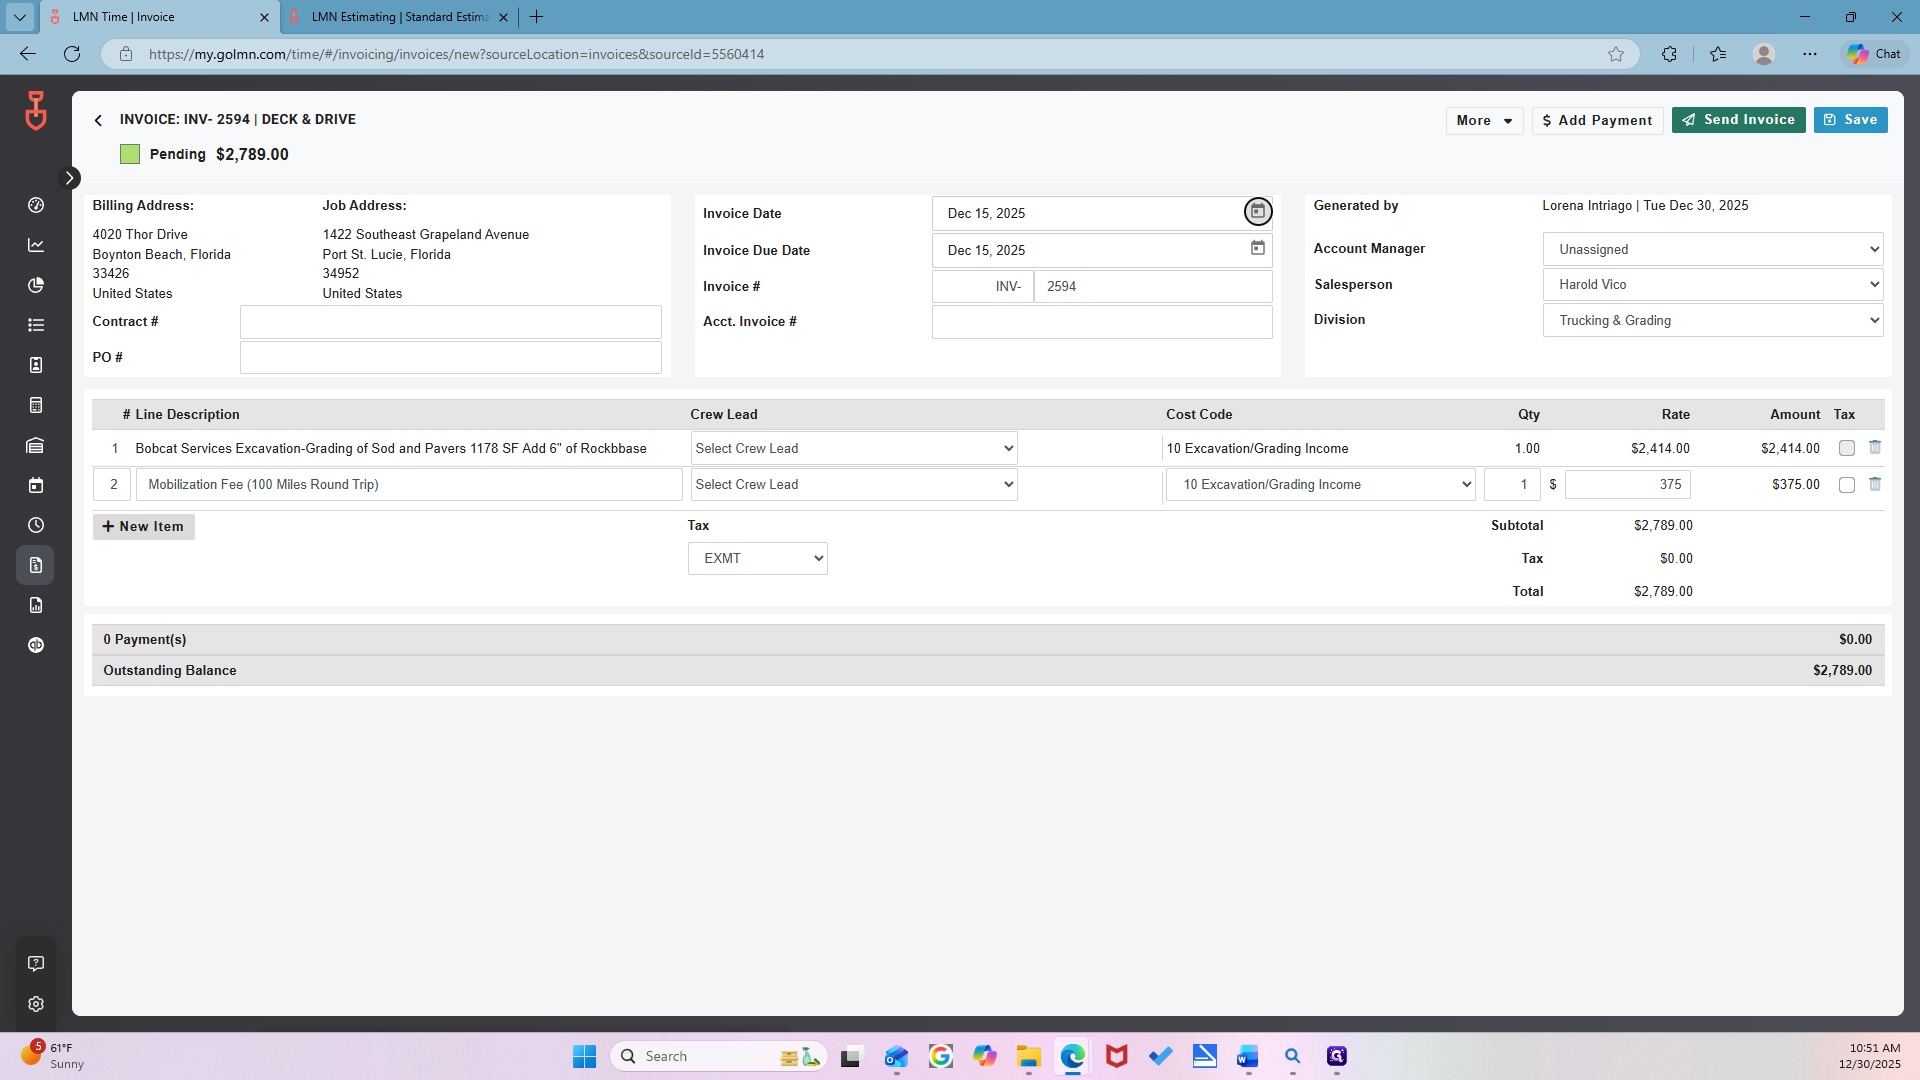
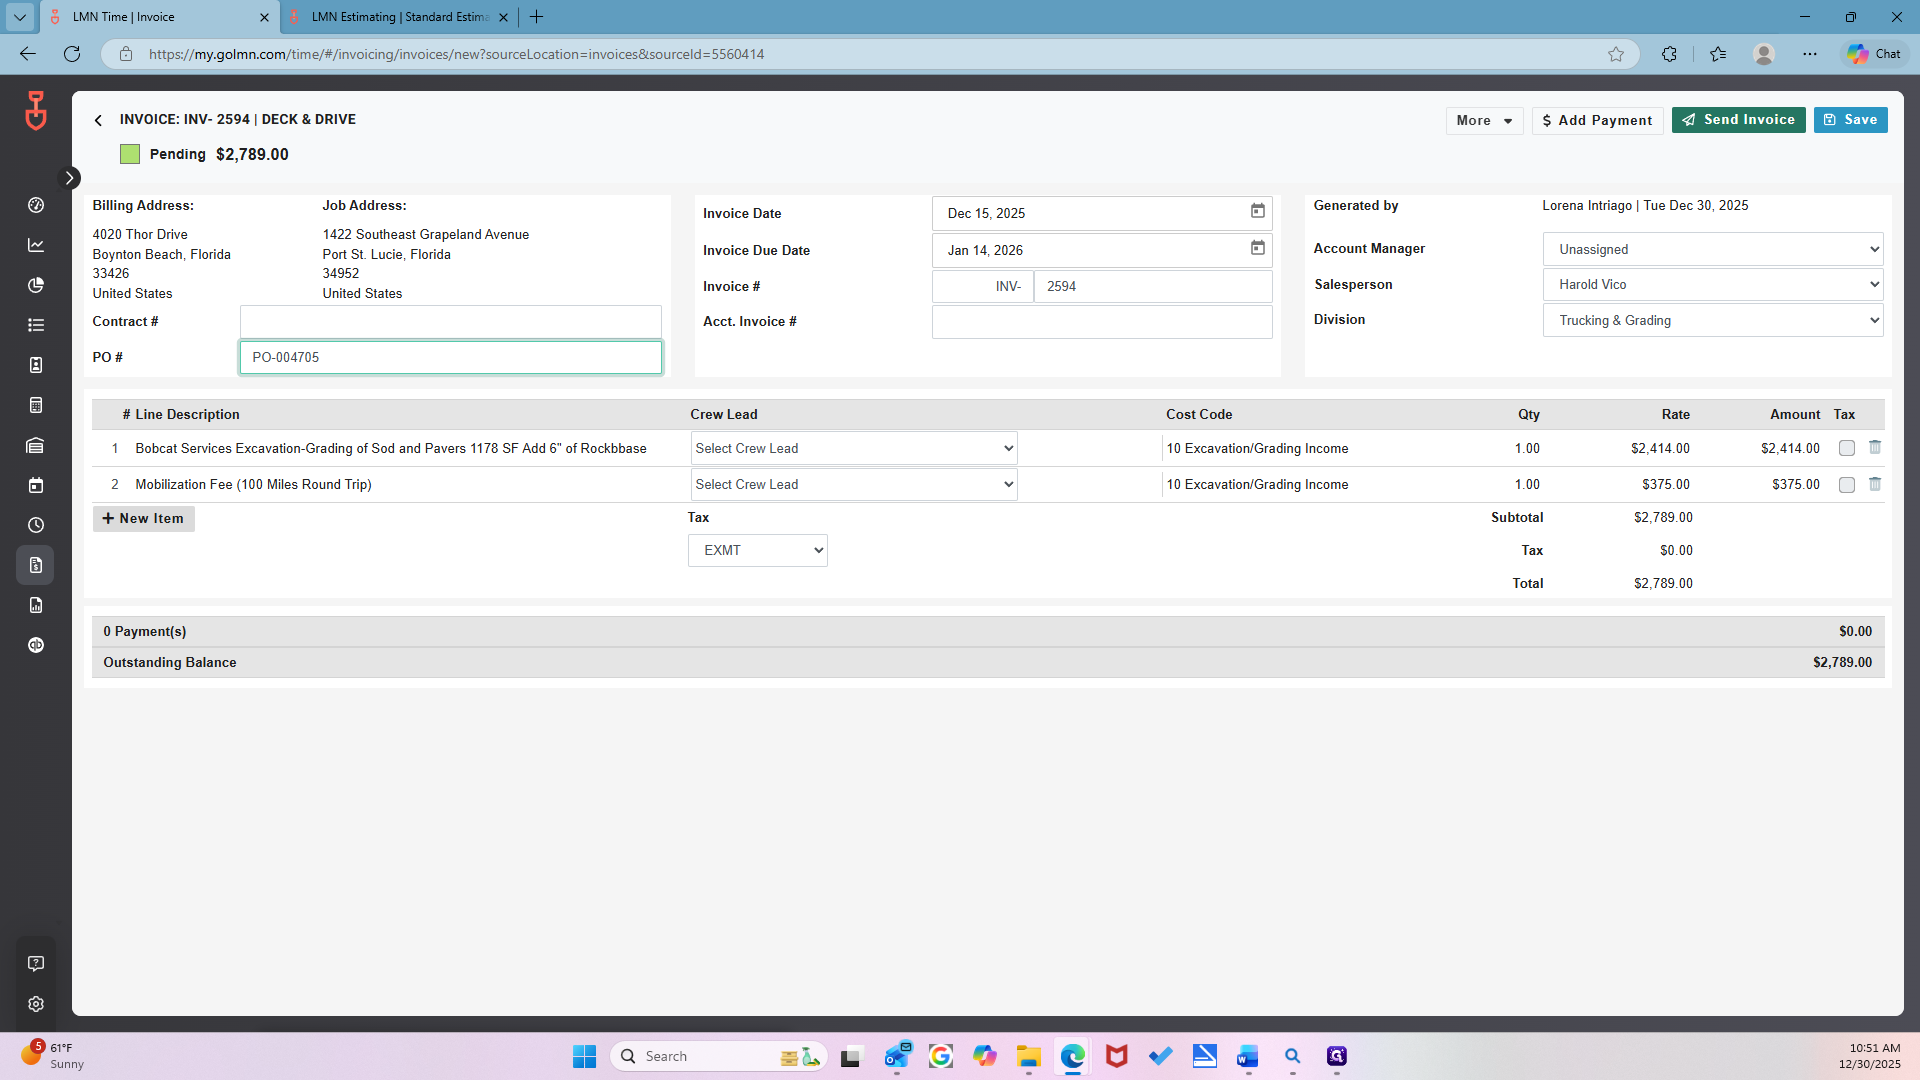
Then, fix the date.

15. This will be completed on the 15th.
The due date is extended by 30 days, making it January 14th.

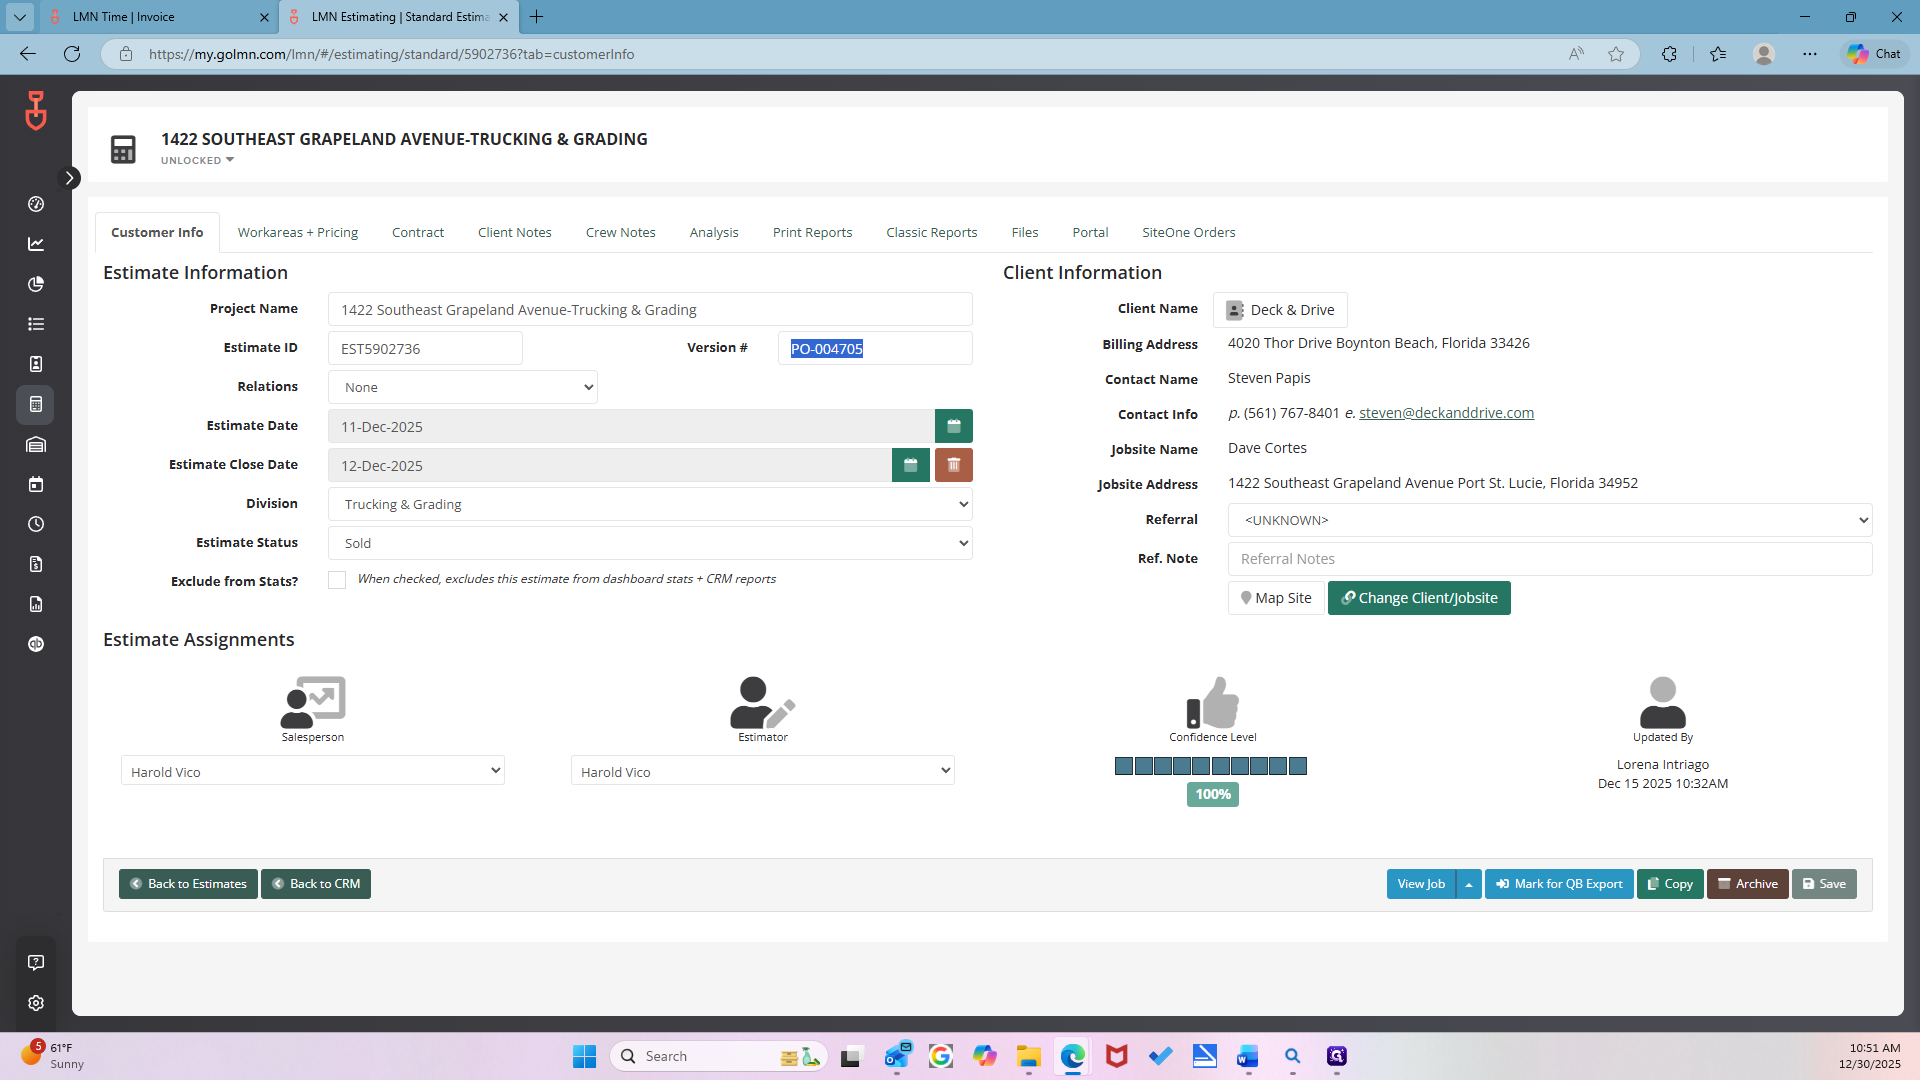
The last thing missing is a PO. Go back to the estimate one more time.

This one. Uh-huh.
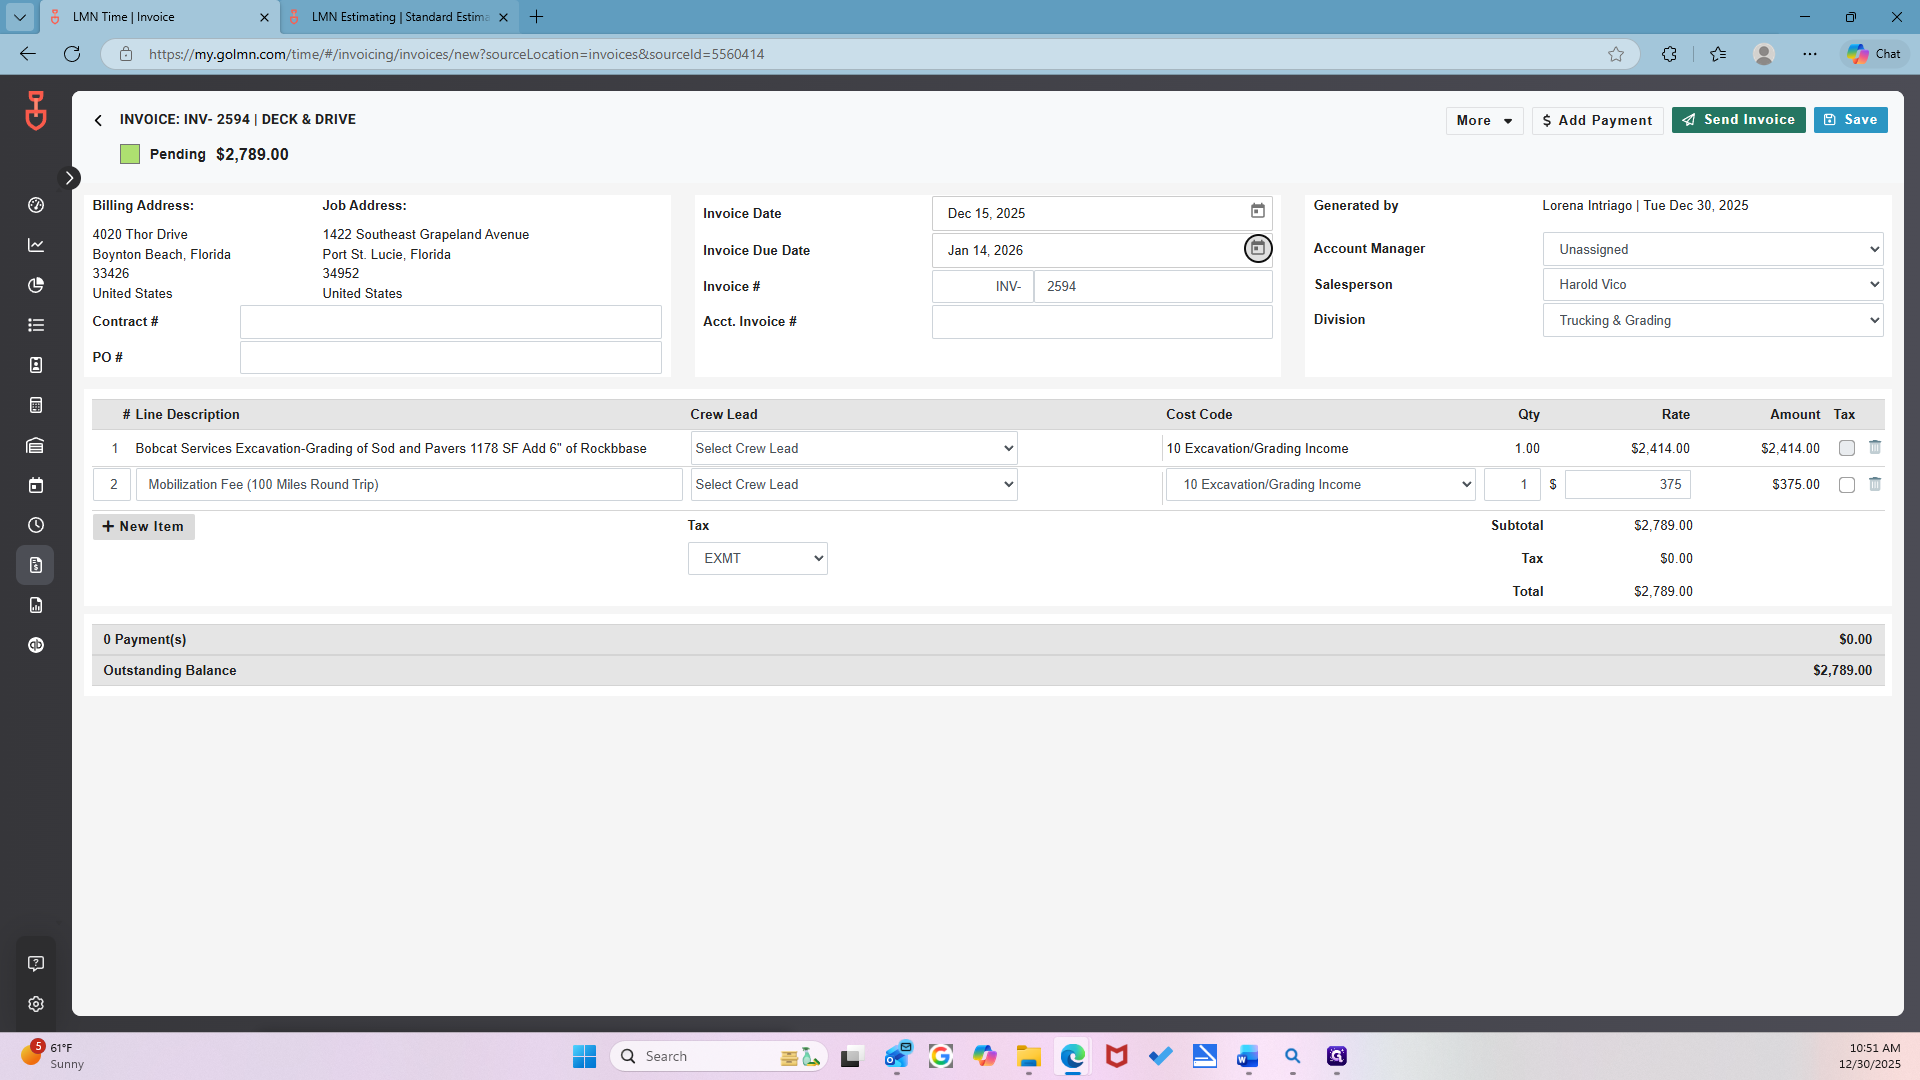
Customer Info. Version.

There you go. Copy the version number, which is the PO, and paste it into the PO.

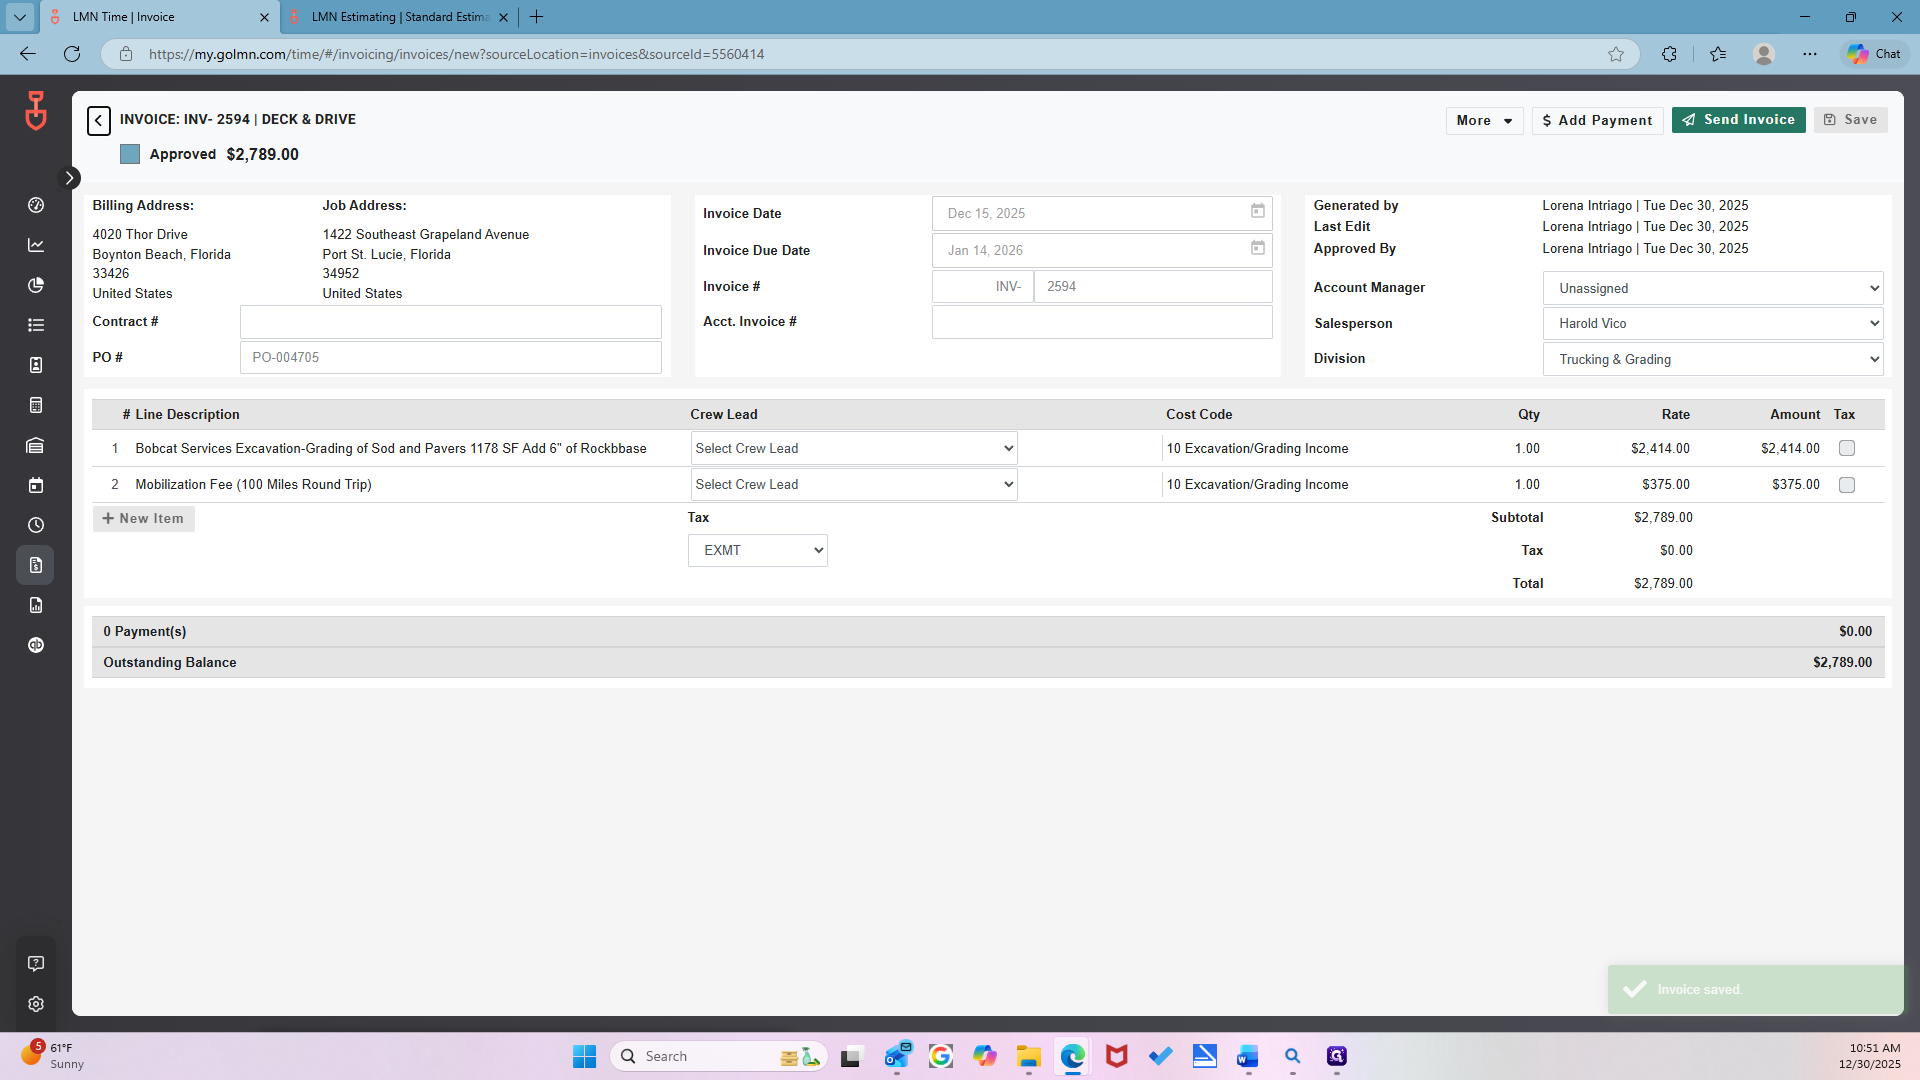
Click "More," then select "Tab," and set it to "Approved."
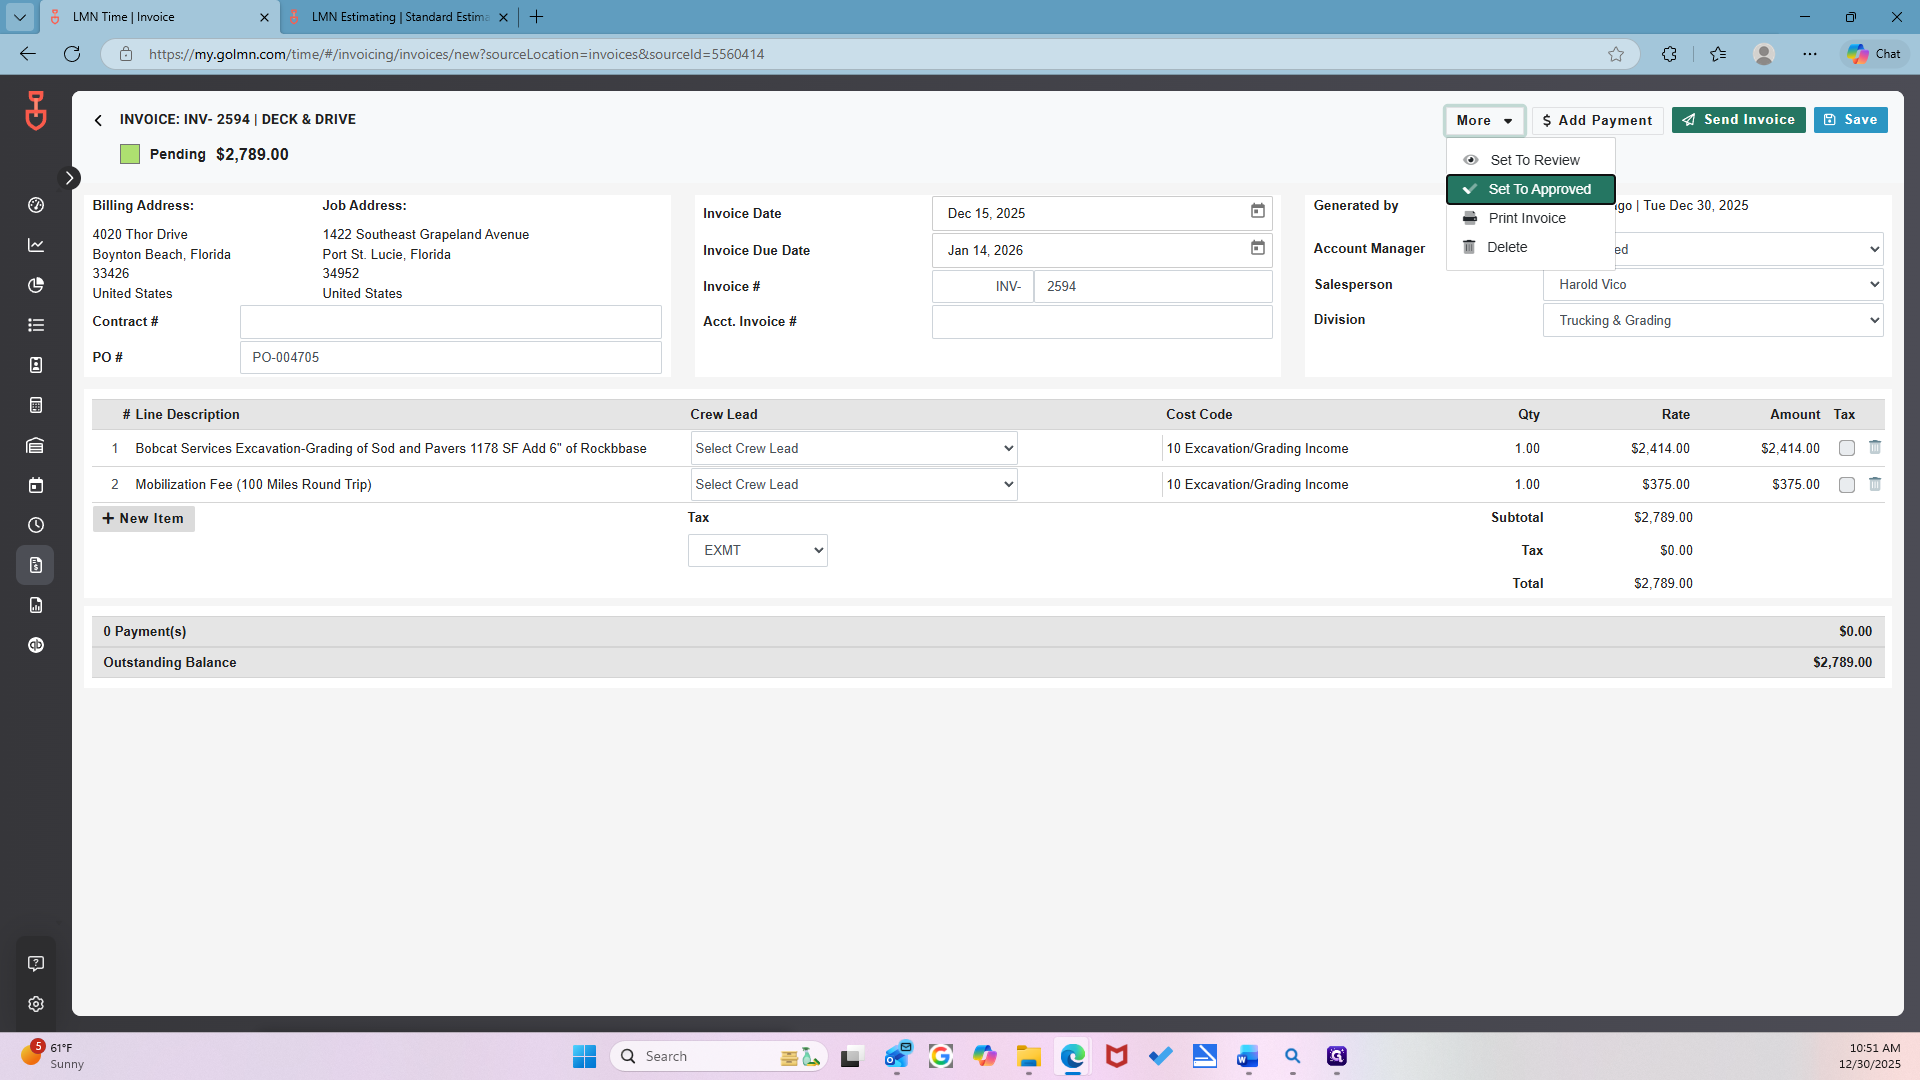
This has been approved. Now, go back to the small arrow. Yes.
Everything has been set up completely. The last step is to go to Job Costing so you can view it. The end goal here is job costing. Overview.
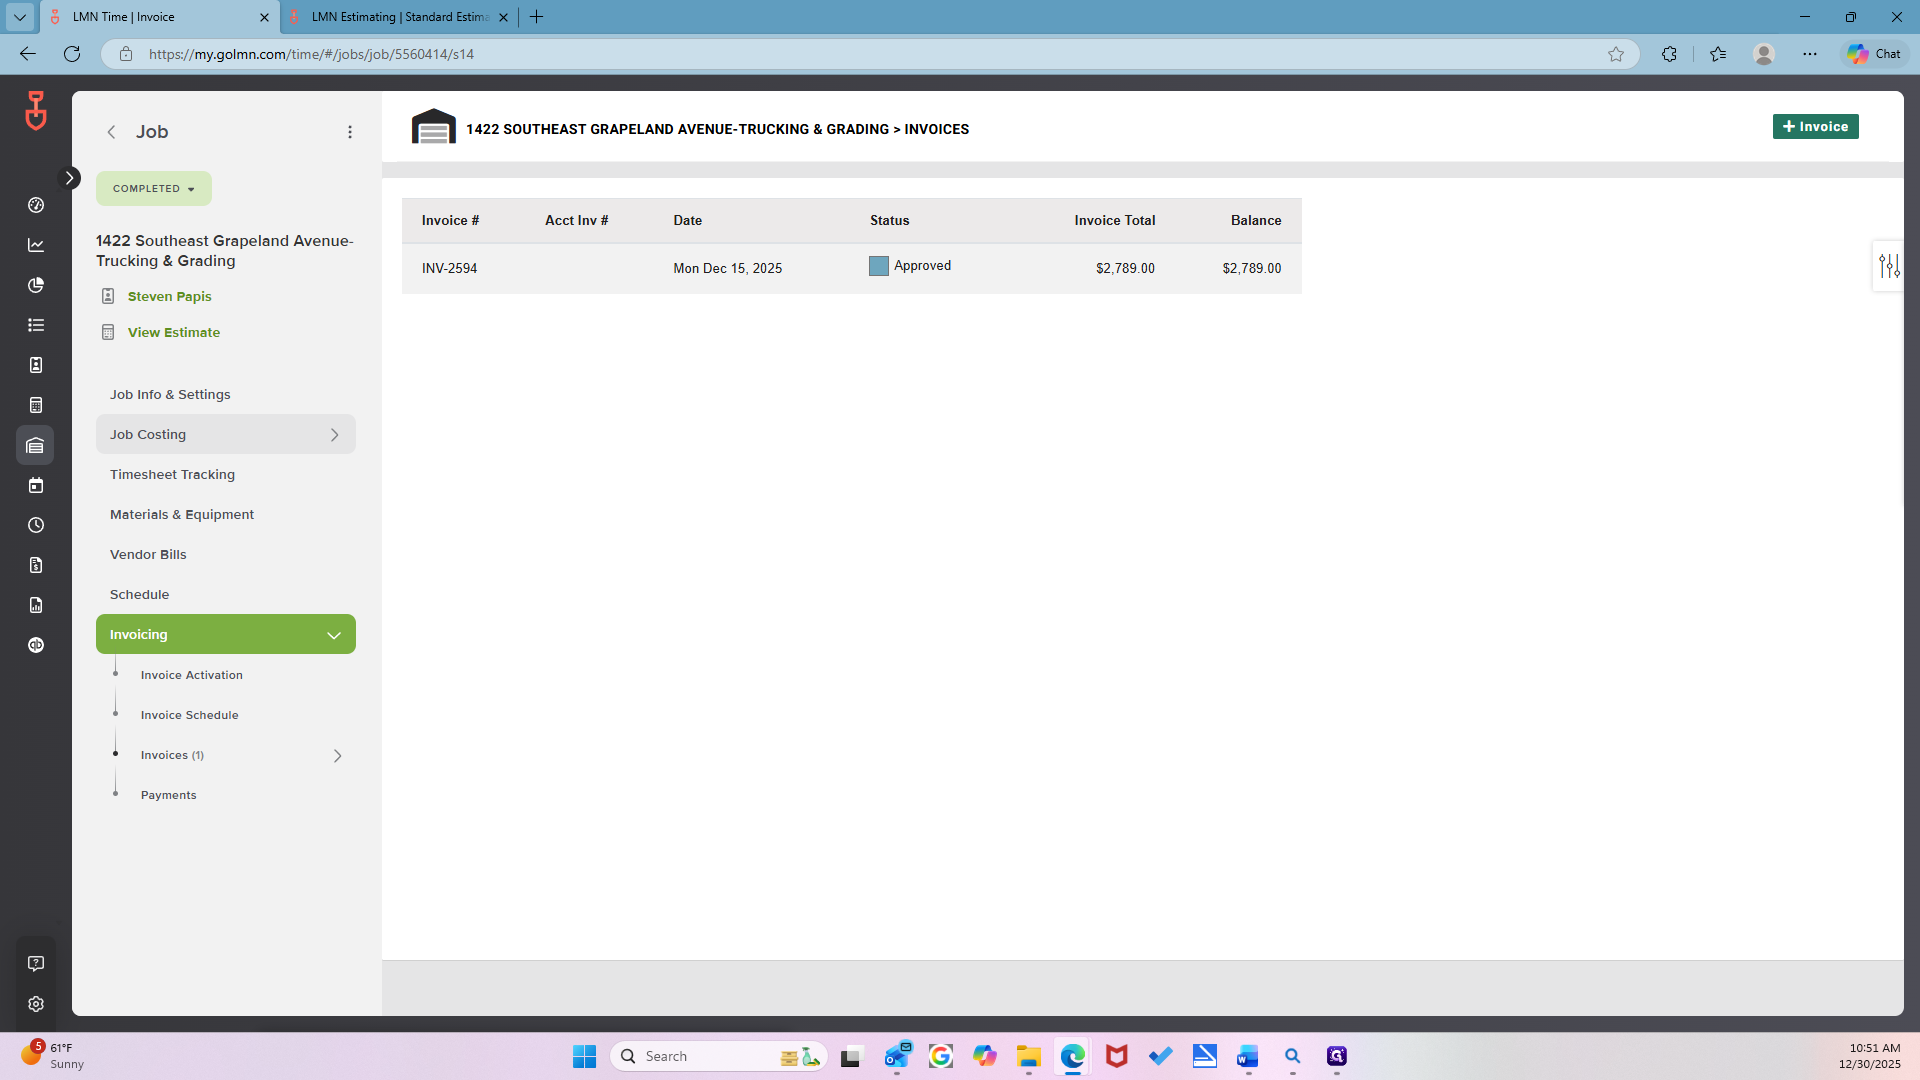
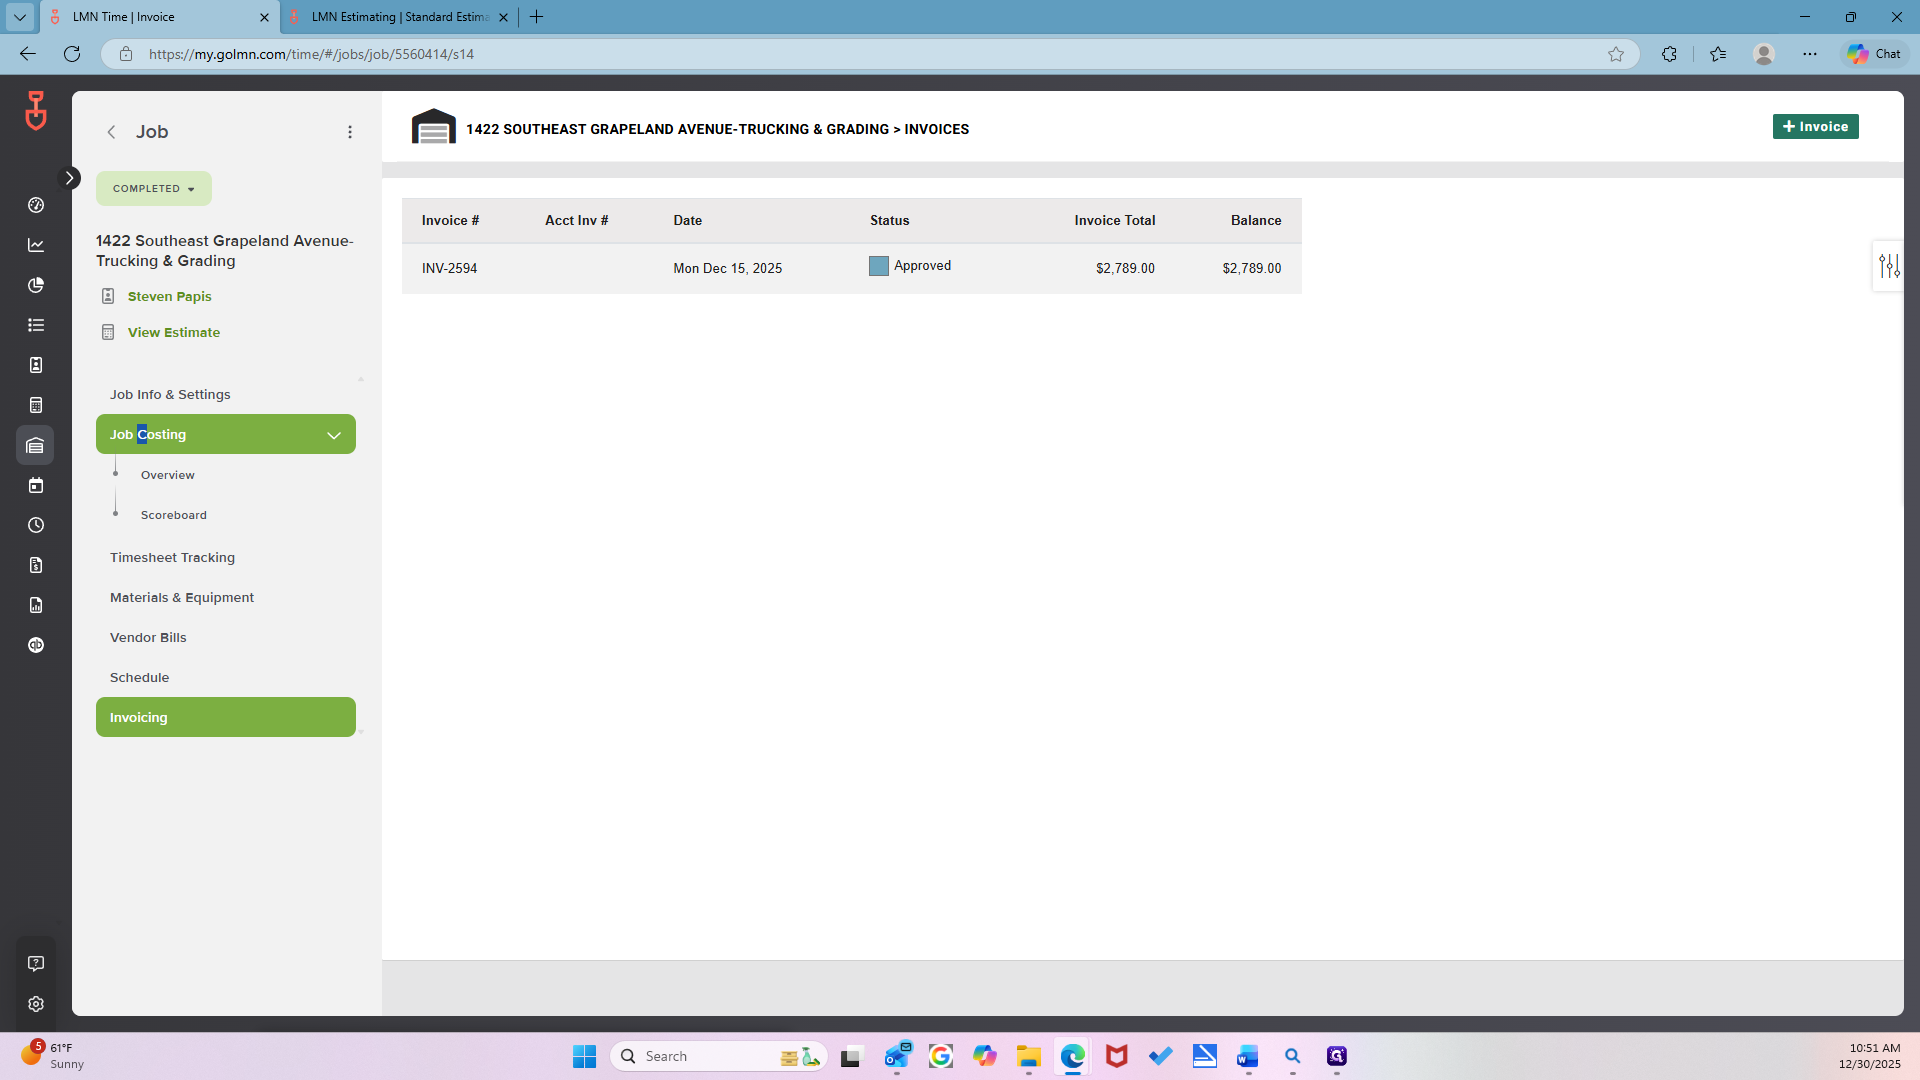

Now you can see that everything appears. There is job costing, profit, cost, and revenue. That was the end goal, and we were able to get everything to display.