How to Customize Your FlowPoint Dashboard with Quick Links
Learn how to personalize your FlowPoint dashboard by adding and managing quick links for easier access to your most-used tools and workflows. Step-by-step instructions included.
In this guide, we'll learn how to customize your dashboard in Flowpoint to make it easier to access the tools and workflows you use most often.
Customizing your quick links helps you avoid clutter and ensures you have direct access to the pages that matter most to you. You will learn how to add, label, and remove quick links so your dashboard fits your needs.
Let's get started
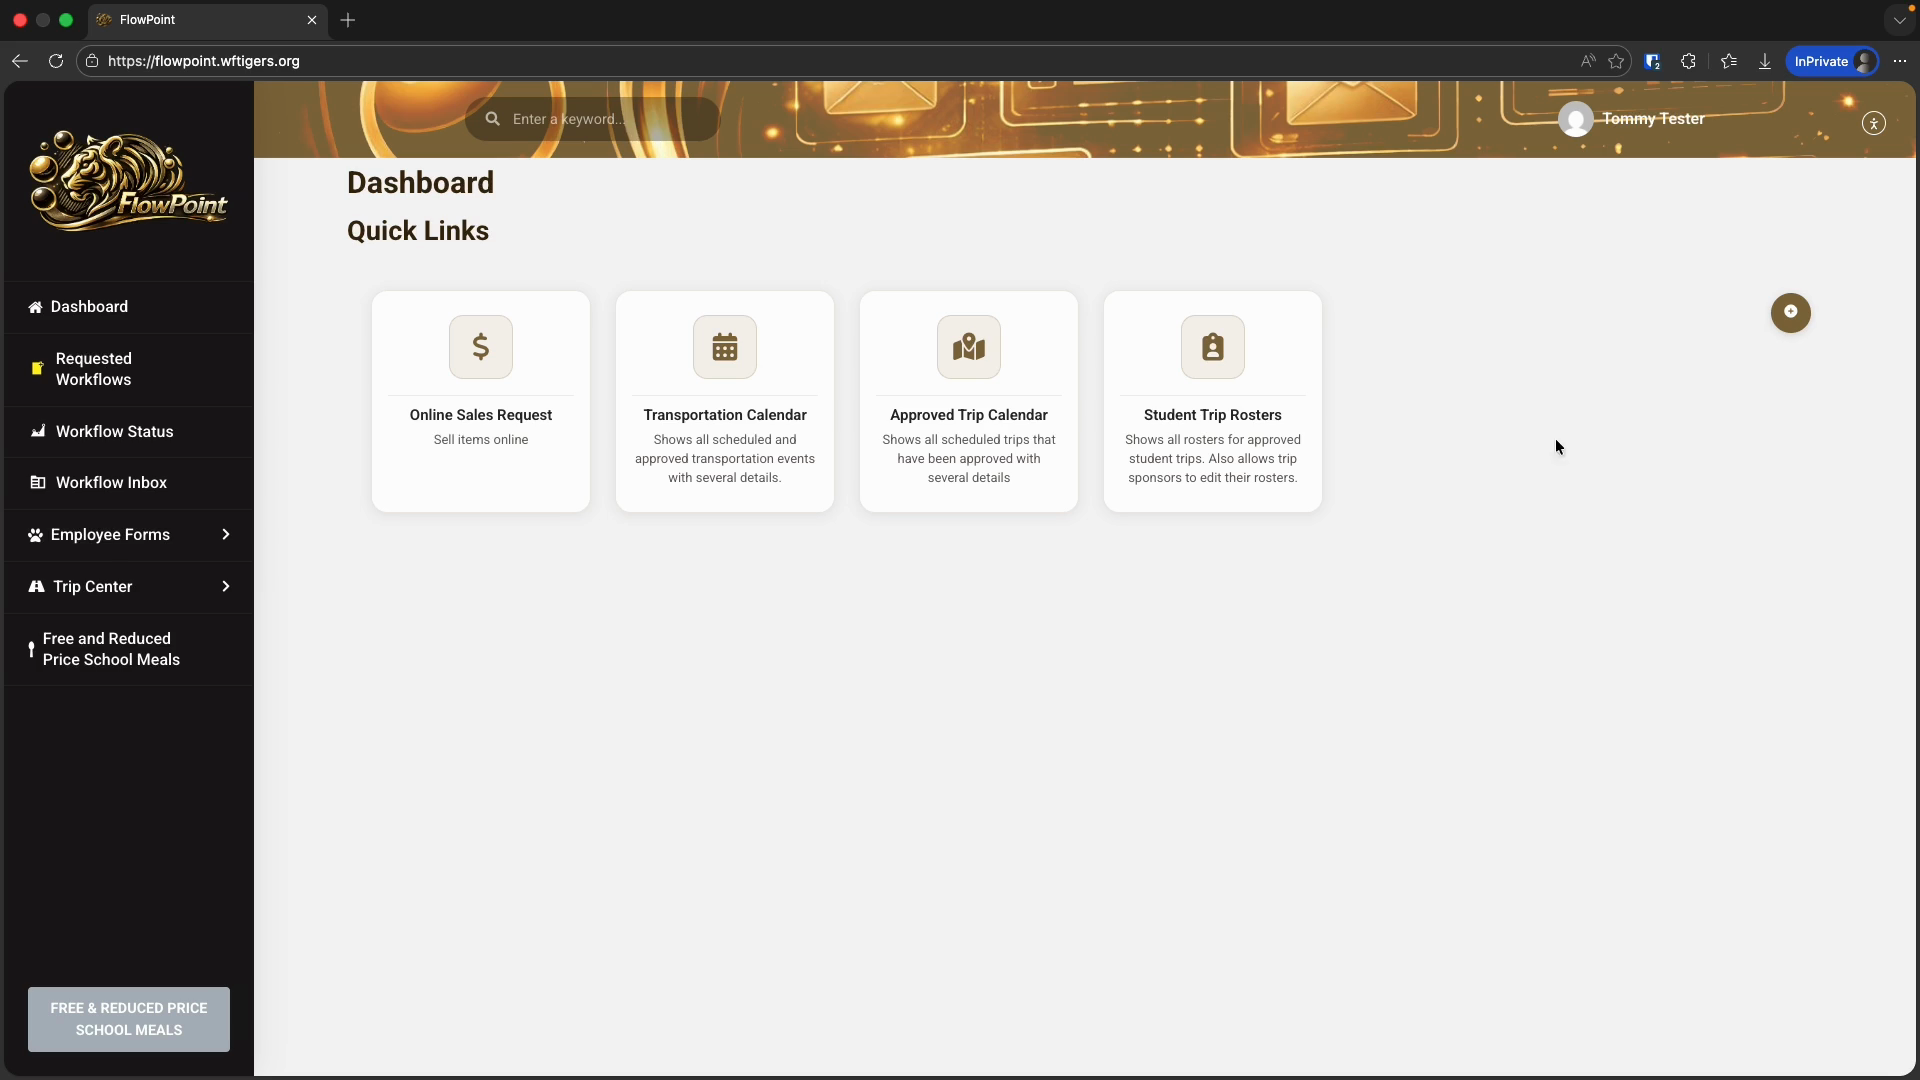
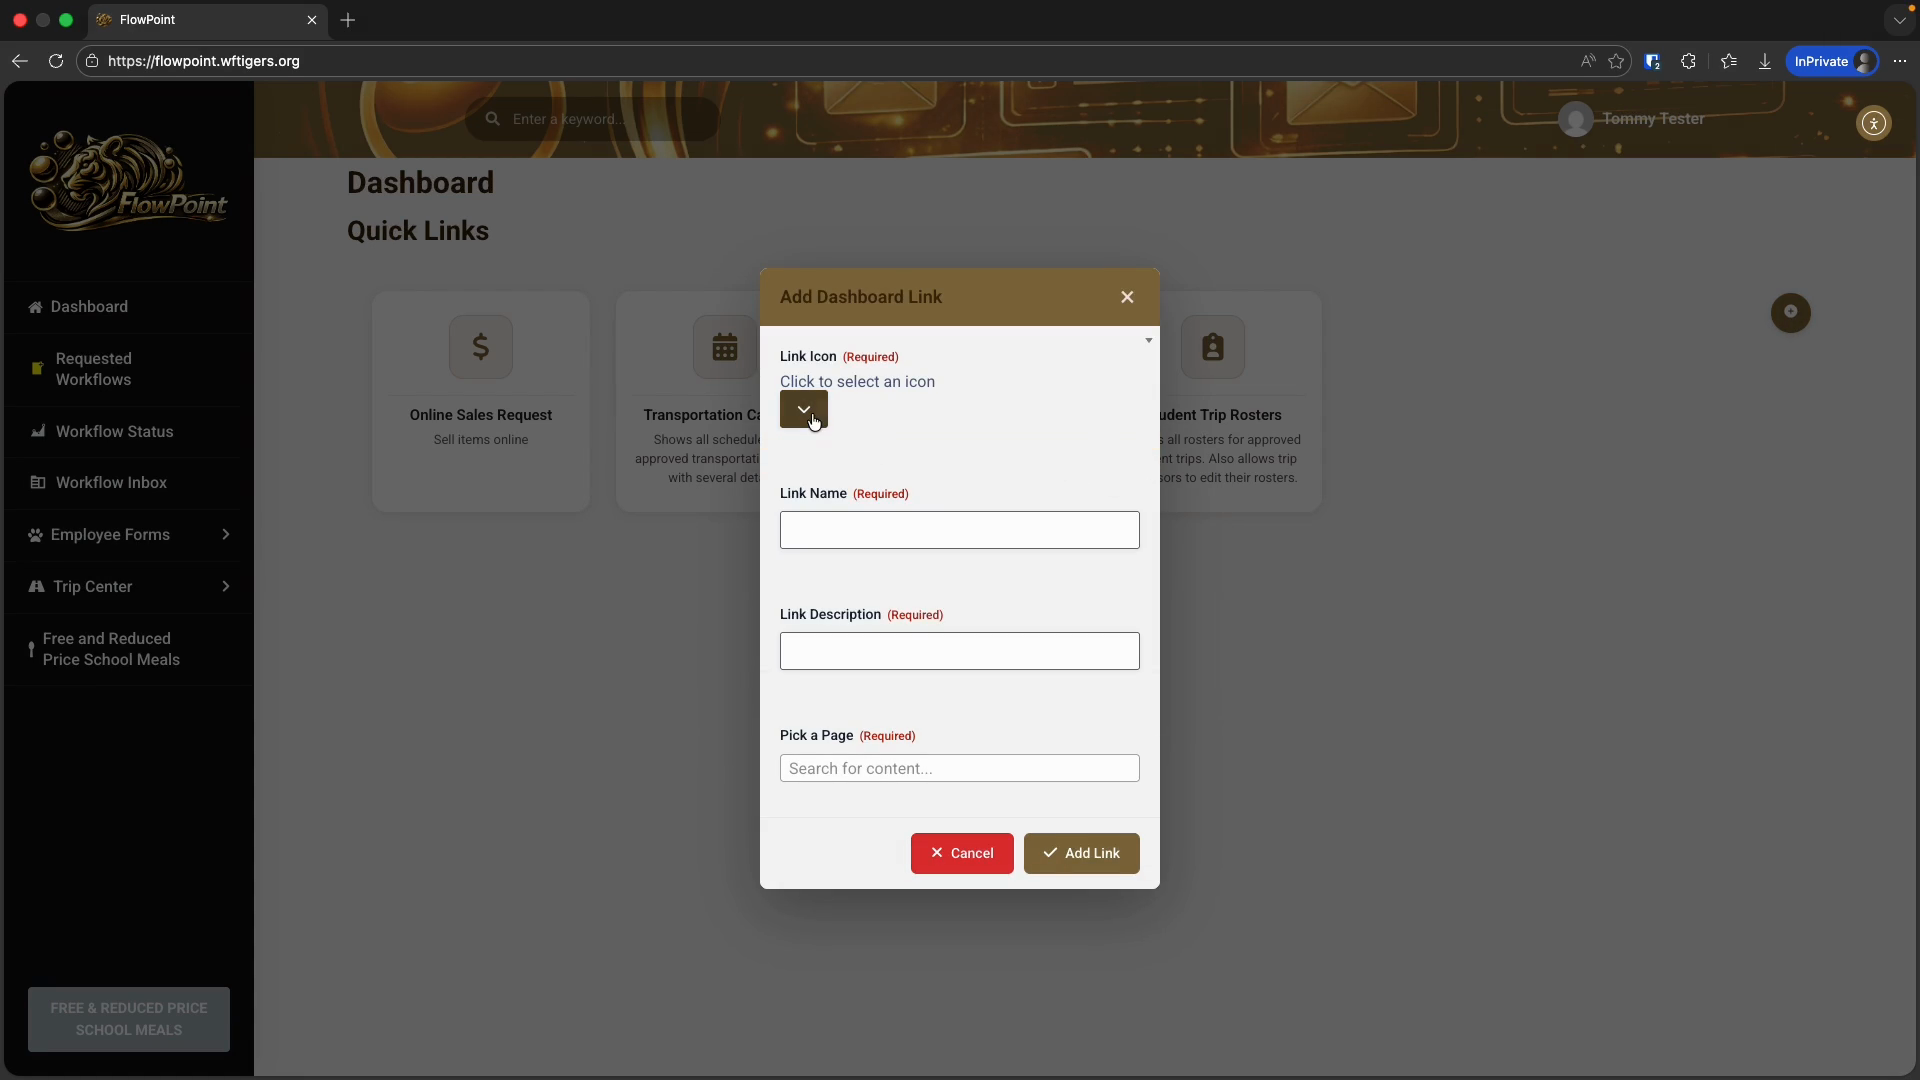
By default, you will see a set of quick links that we believe will be useful for you and all staff members. You cannot remove items we have added to your quick links list. However, you can add new items to it. To add a new quick link, click the plus sign icon.
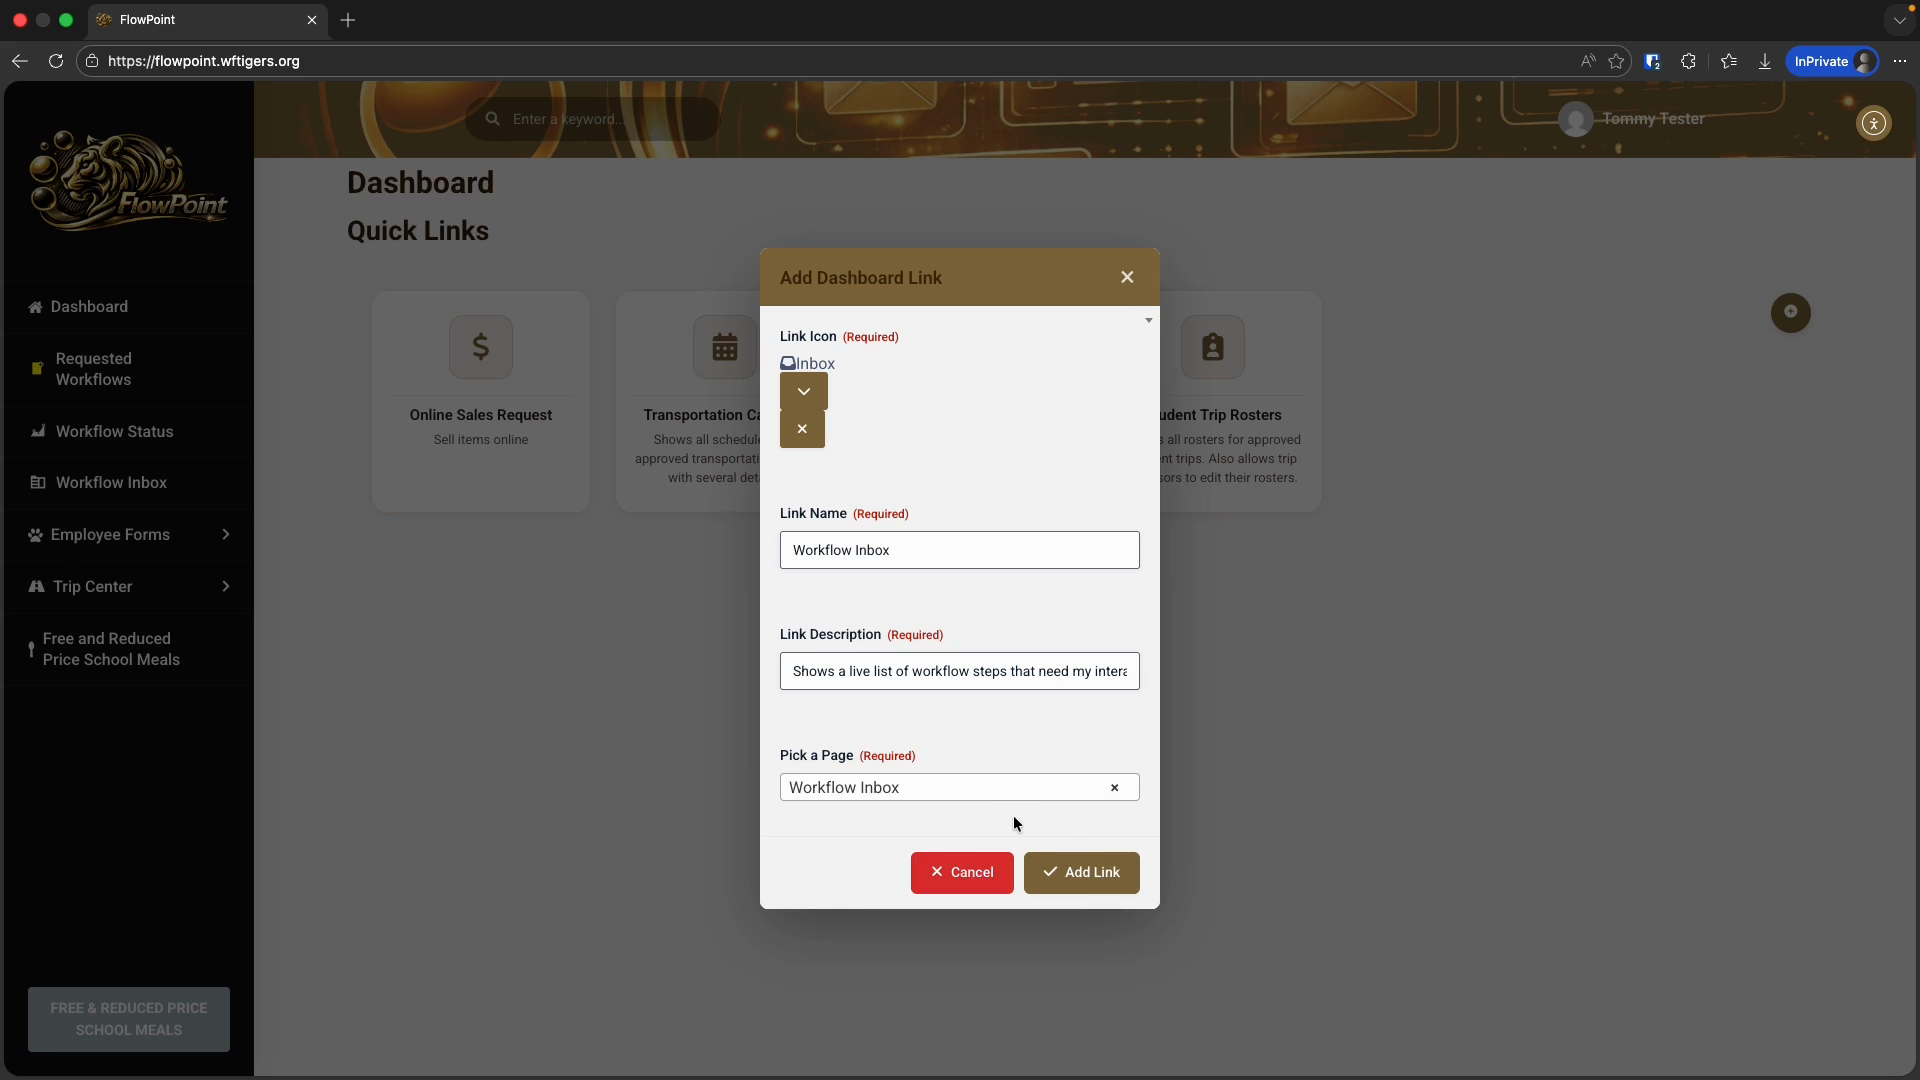
This will open a box that asks you a few questions. Let's go through each option.
There are many options available. The default page displays popular icon choices. You can use the tabs to select different icon types, but I will use the search box.
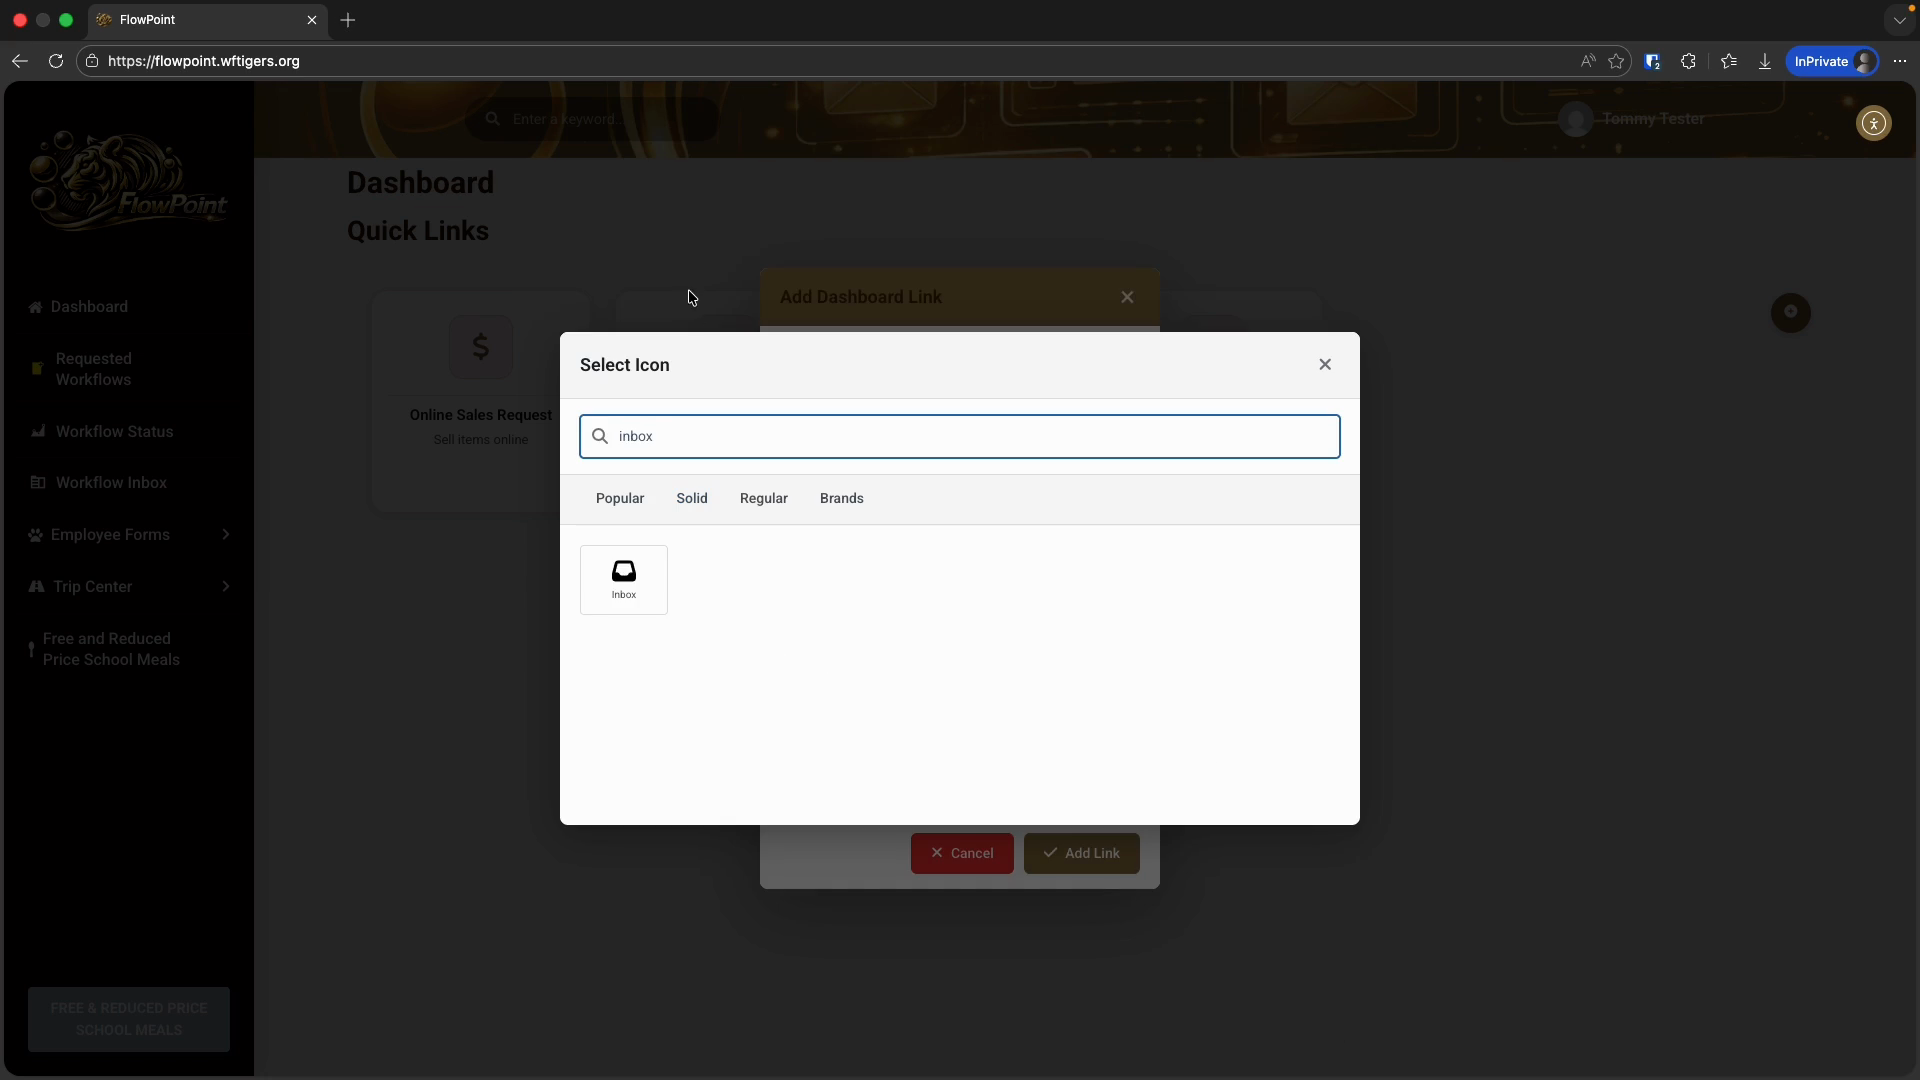

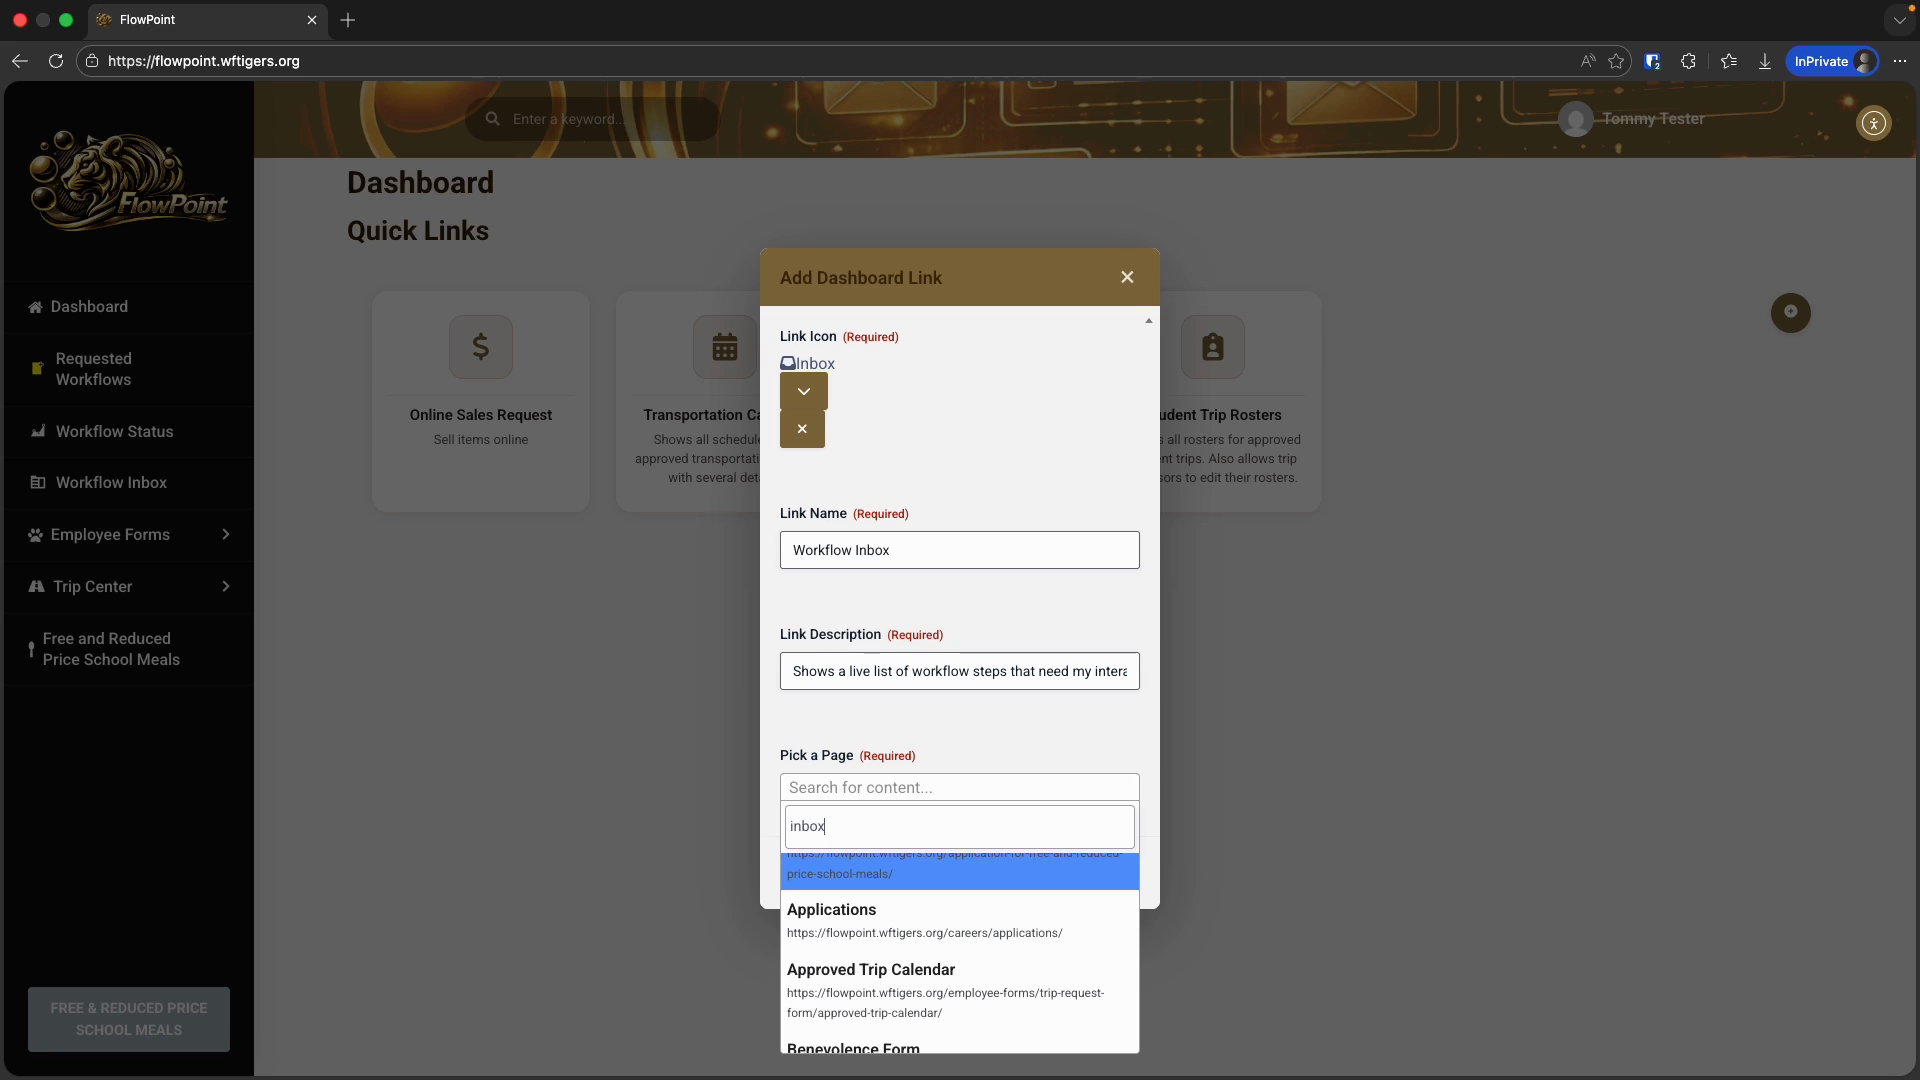
I can scroll through, or start typing the page name. The page list will filter. I can then select the page I need. I want the Inbox page, so I'll type "Inbox" and select Workflow Inbox.
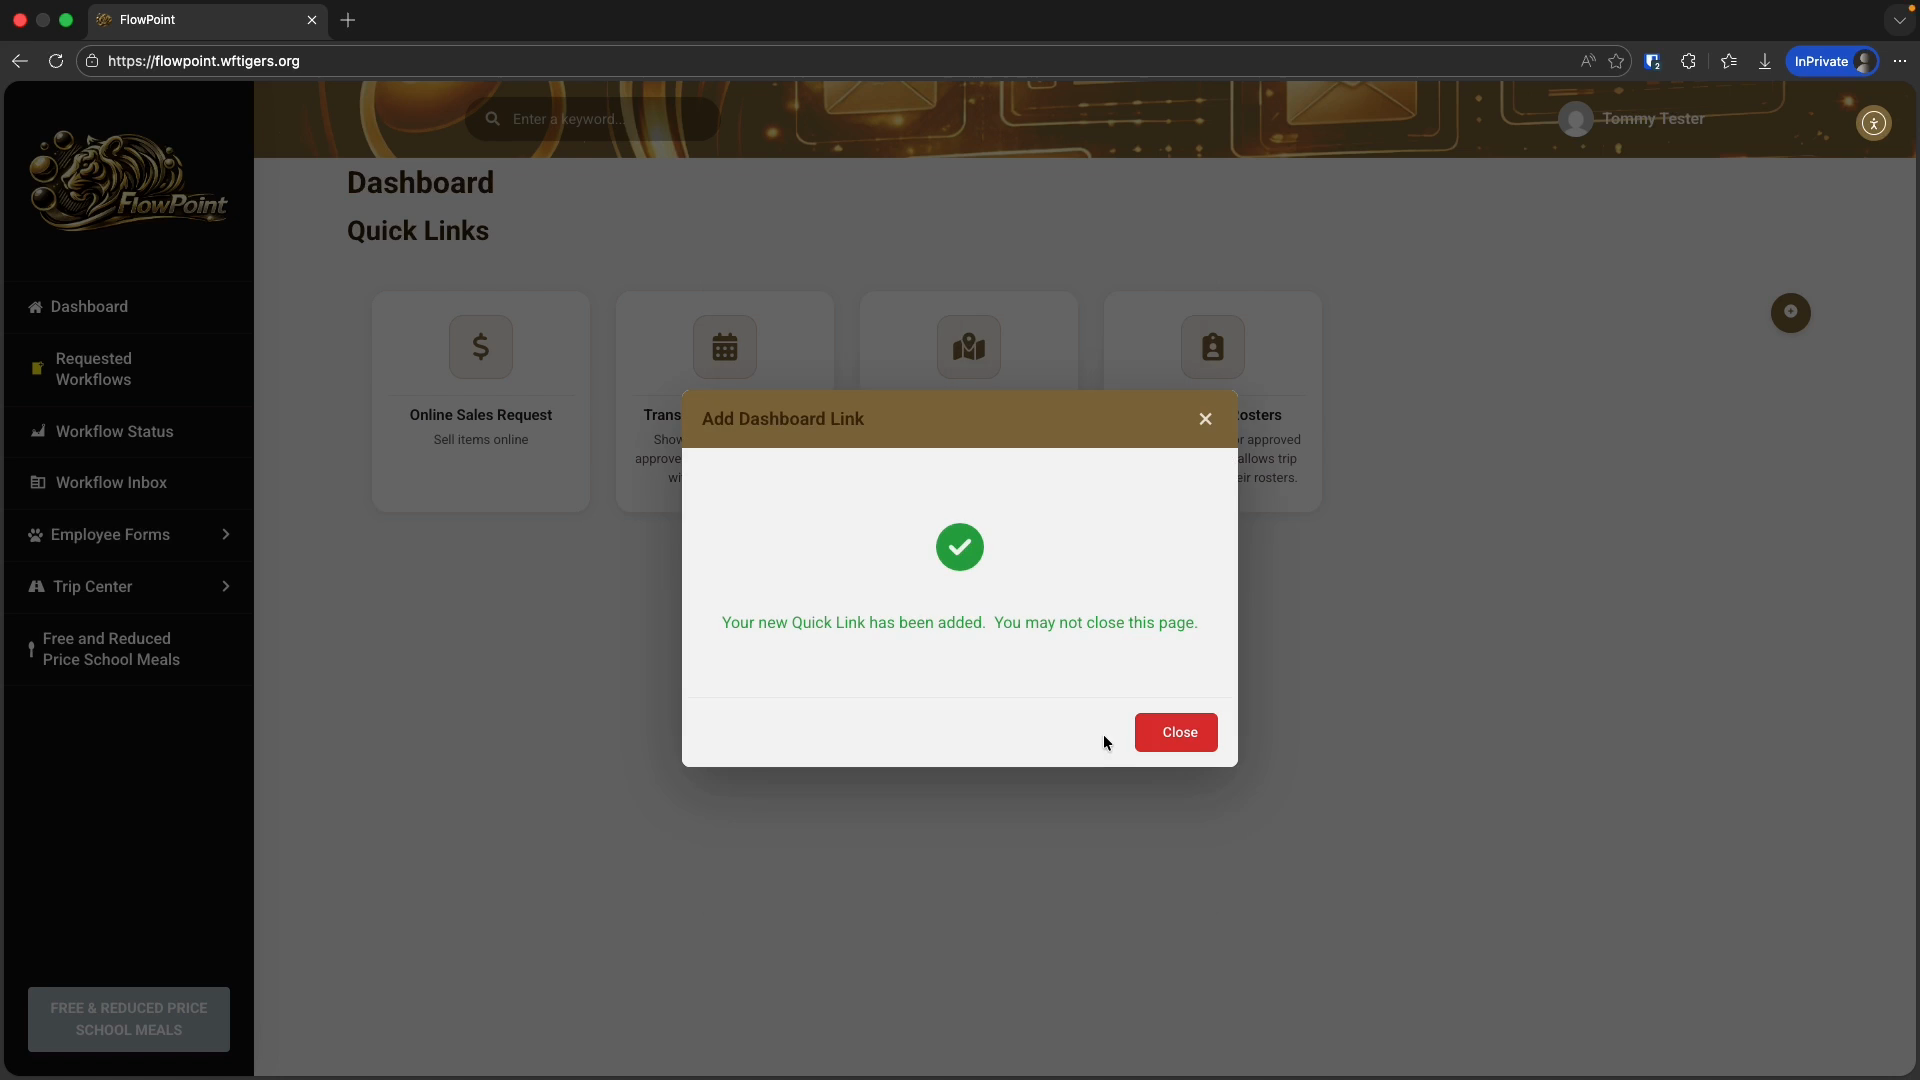
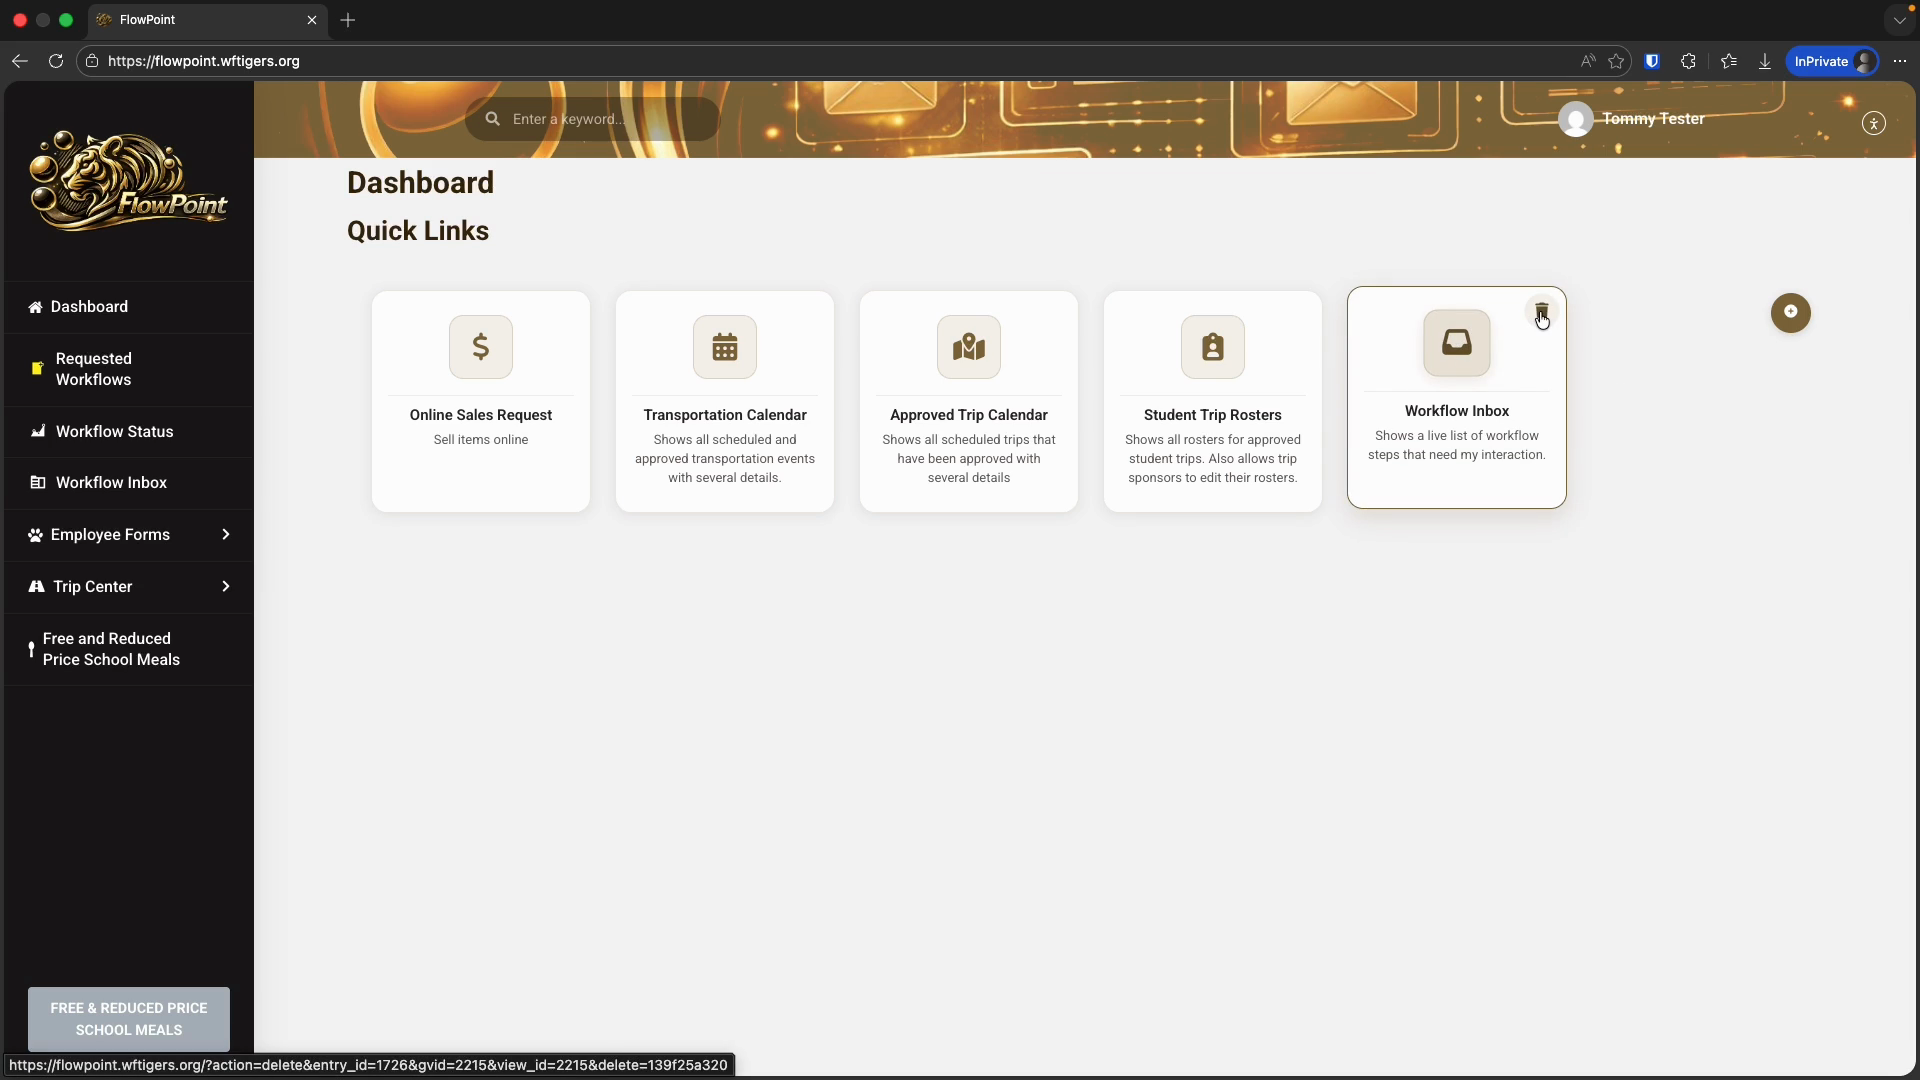
Your page will refresh automatically, and your new quick link will be ready to use. After adding your link, a small trashcan icon will appear at the top right corner of your new quick link.
Clicking the icon will display a browser pop-up asking for confirmation.
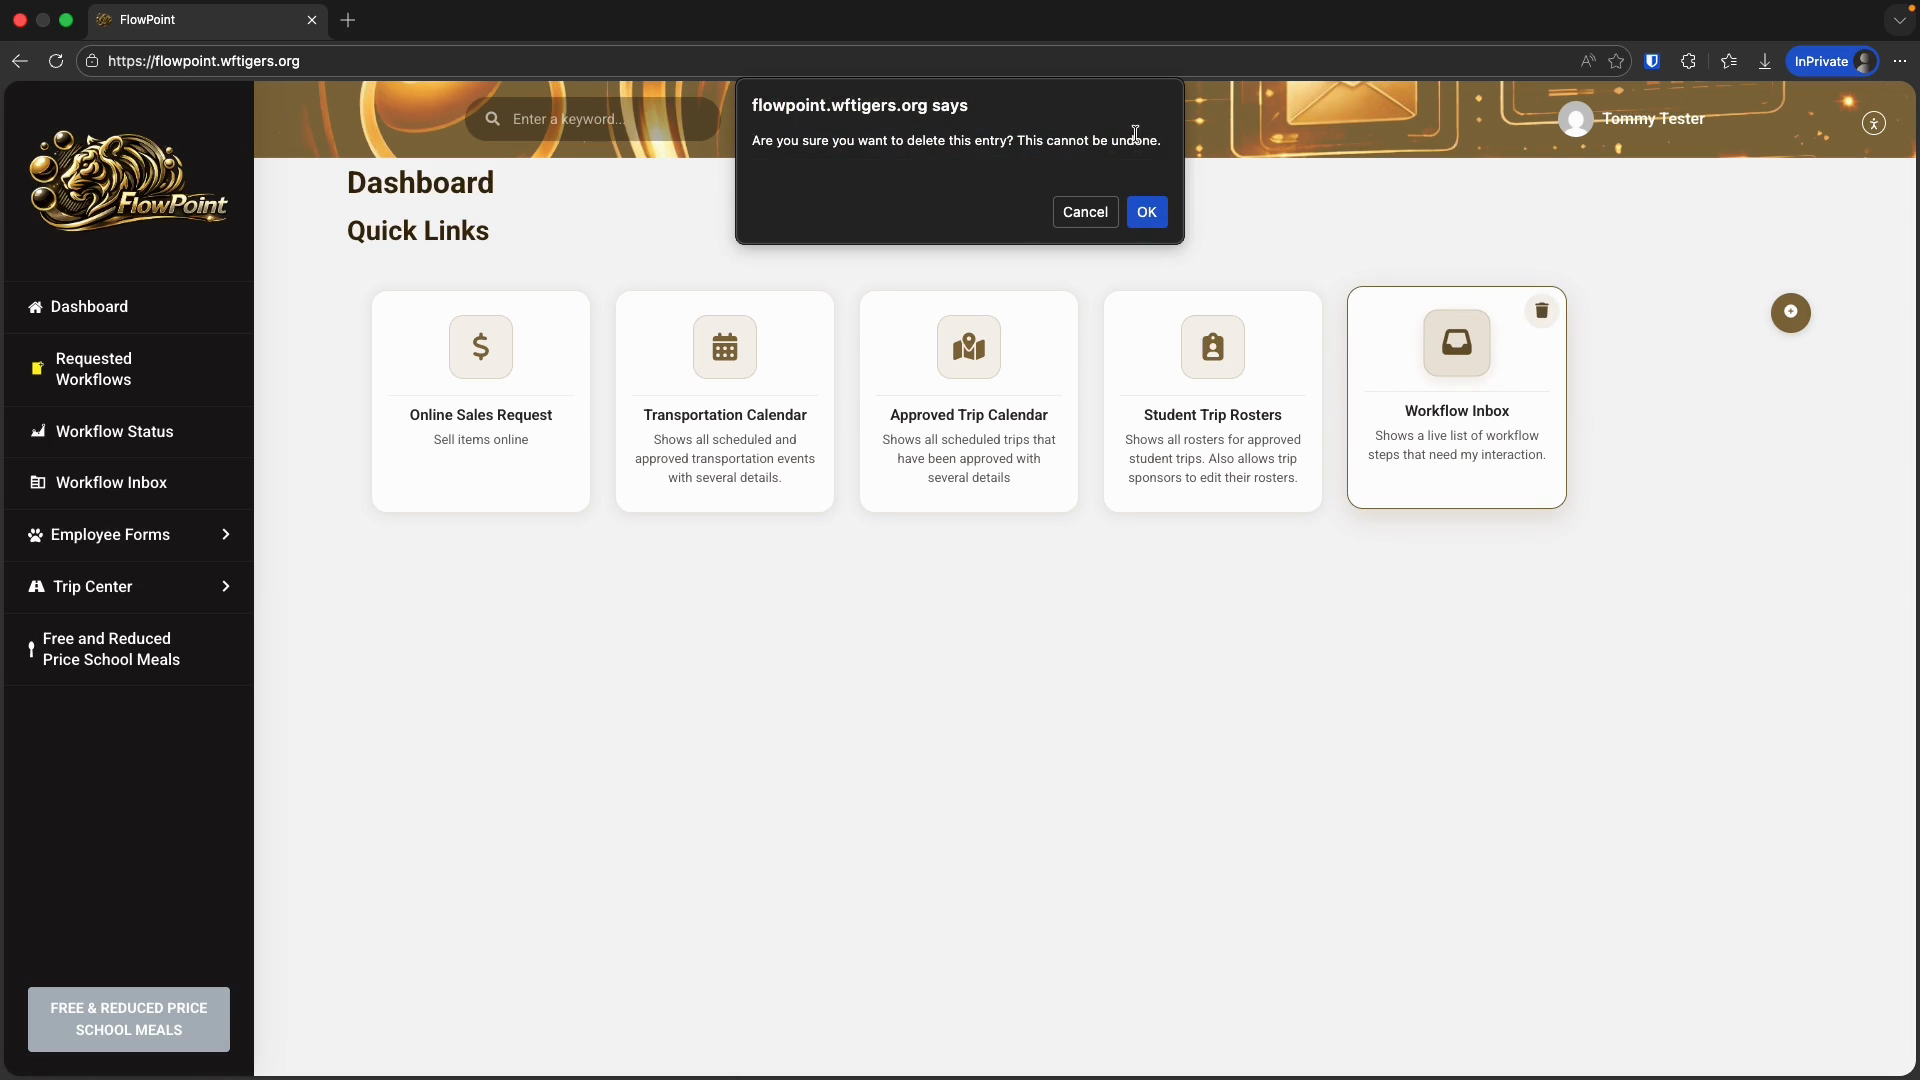
If you confirm, your page will reload. Your custom link will be removed. That's it. With this tool, you can set up your dashboard with your most frequently used links.