How to Edit and Configure Donation Forms for Hayward Promise Neighborhood
Learn how to edit and configure donation forms, update donation levels, and manage designations for the Hayward Promise Neighborhood fundraising campaign.
In this guide, we'll learn how to update and configure a donation form for a new fundraising campaign. The process involves editing donation levels, modifying form content, and ensuring the correct elements are displayed. We'll adjust donation amounts, update content to reflect the new campaign, and configure the form's layout to enhance user experience. This guide will help you ensure that the donation form is accurate and ready for publication, supporting the Hayward Promise Neighborhood initiative.
Let's get started
Edit the form you just copied. Double-check the internal form name and the public name listed. Add a description if necessary. Scroll down and click "Next."
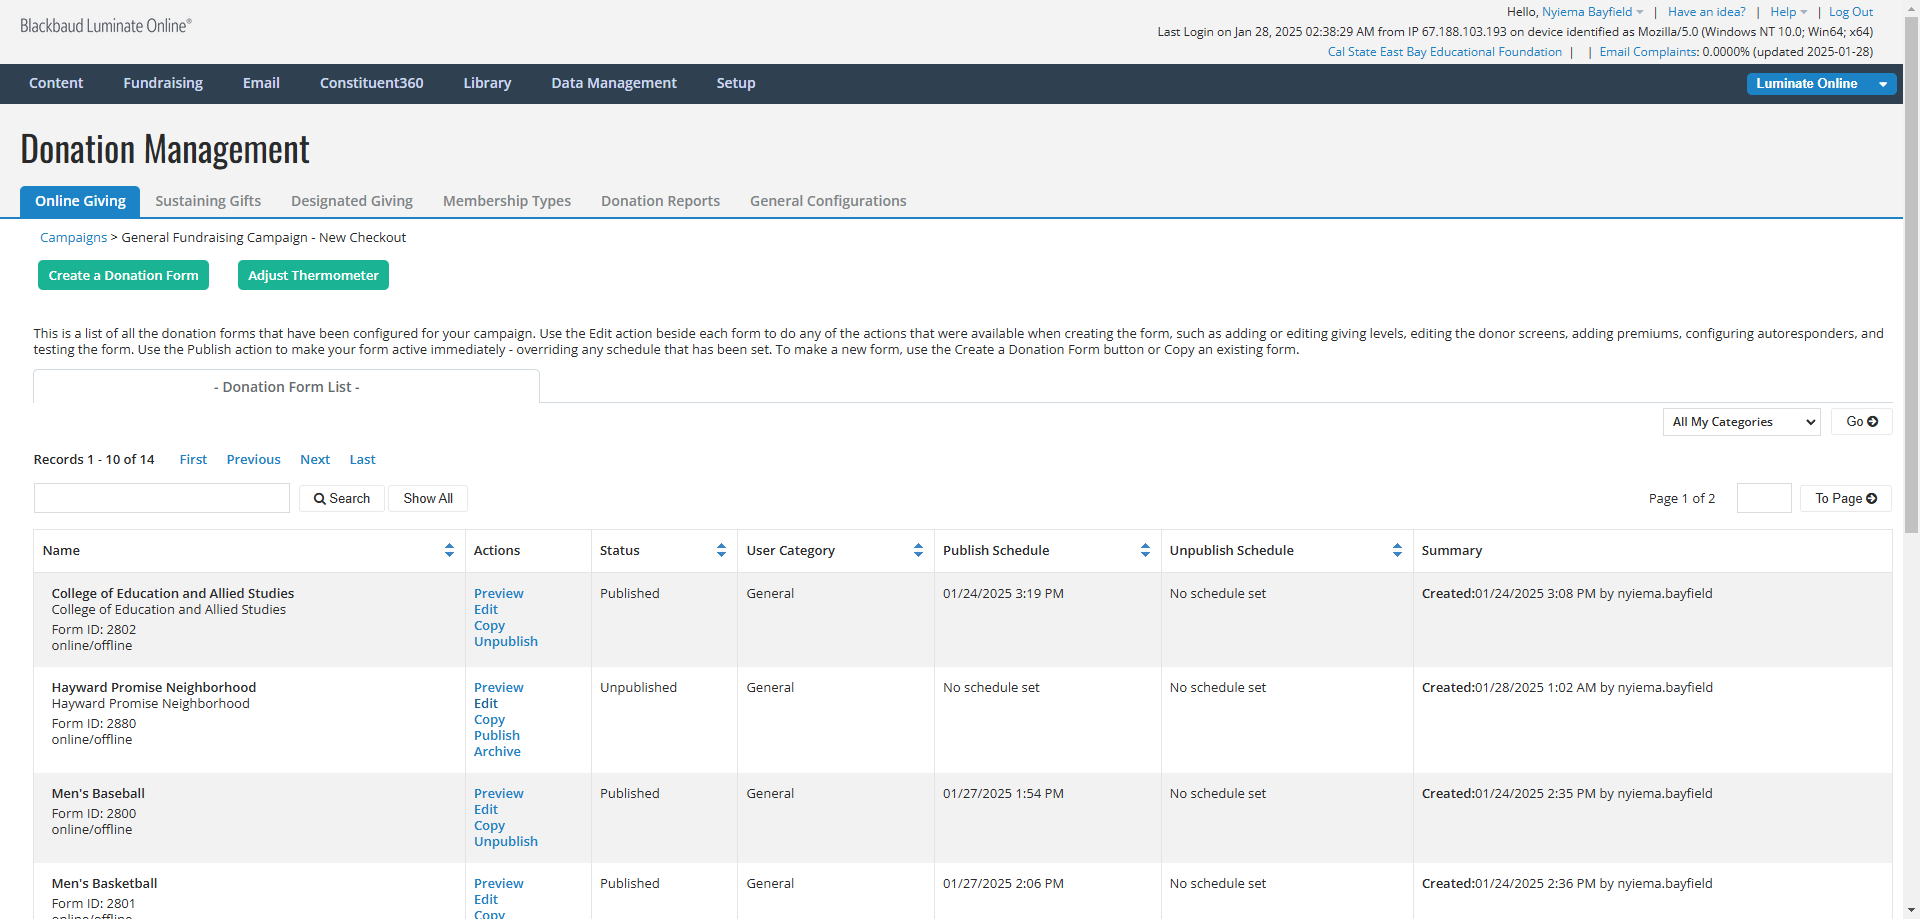
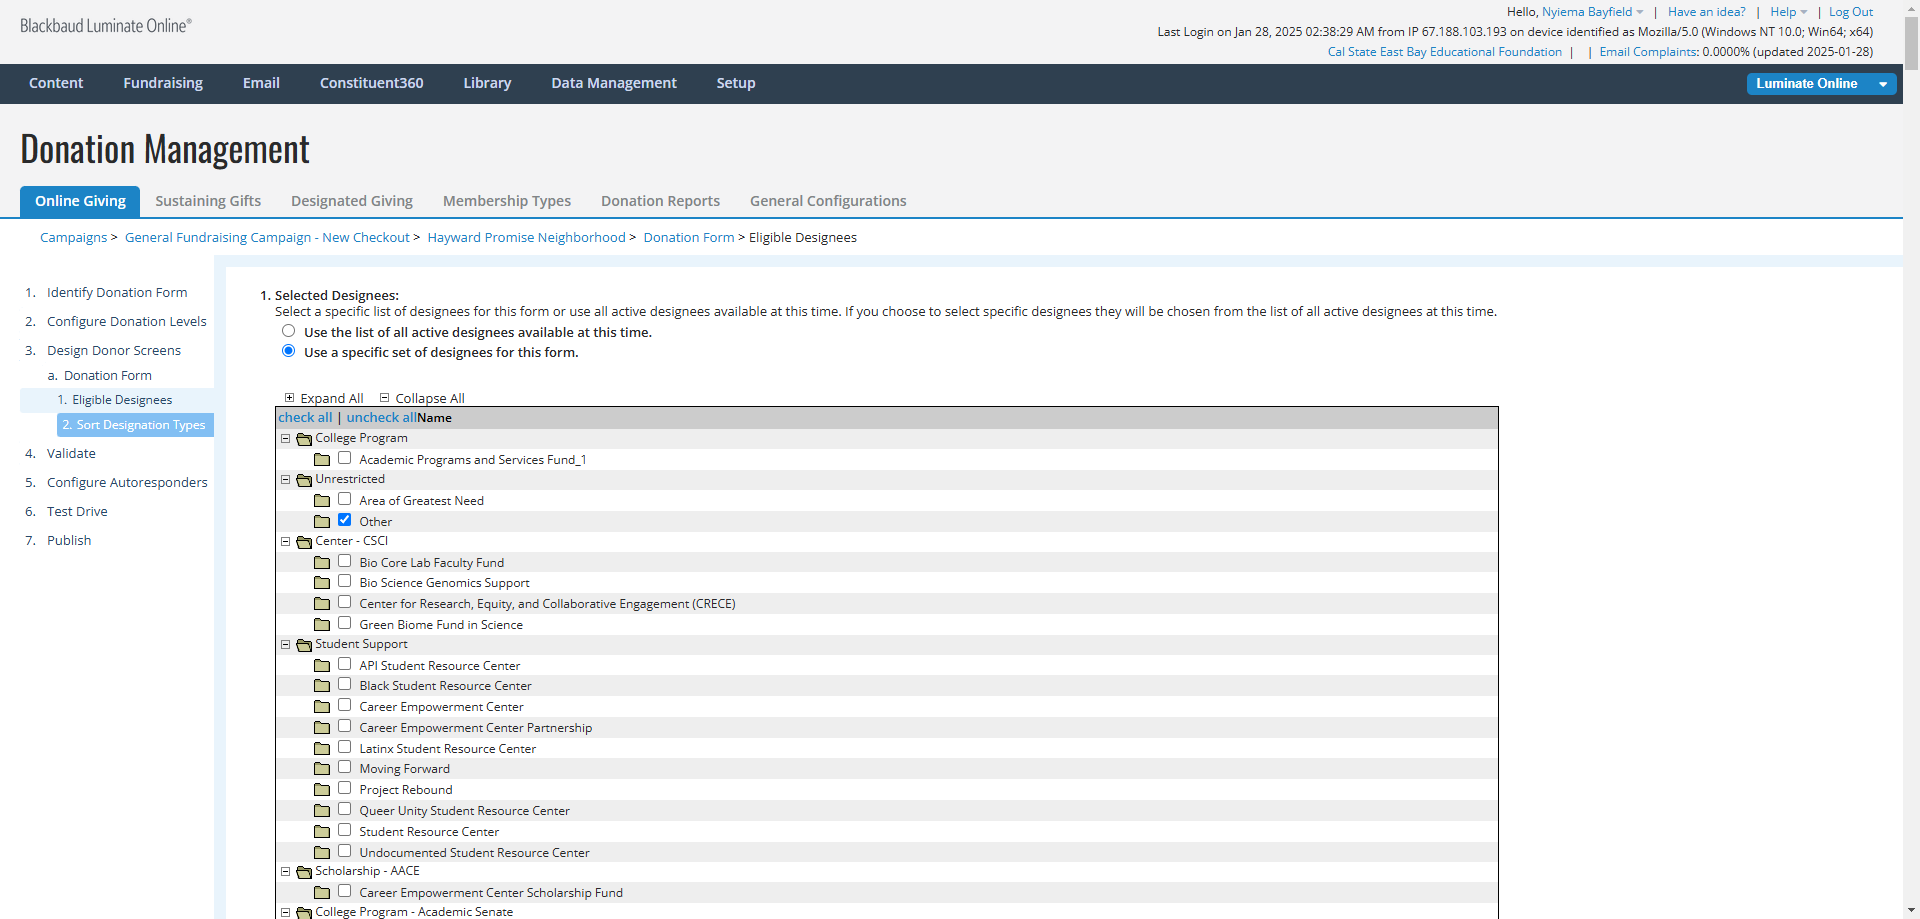
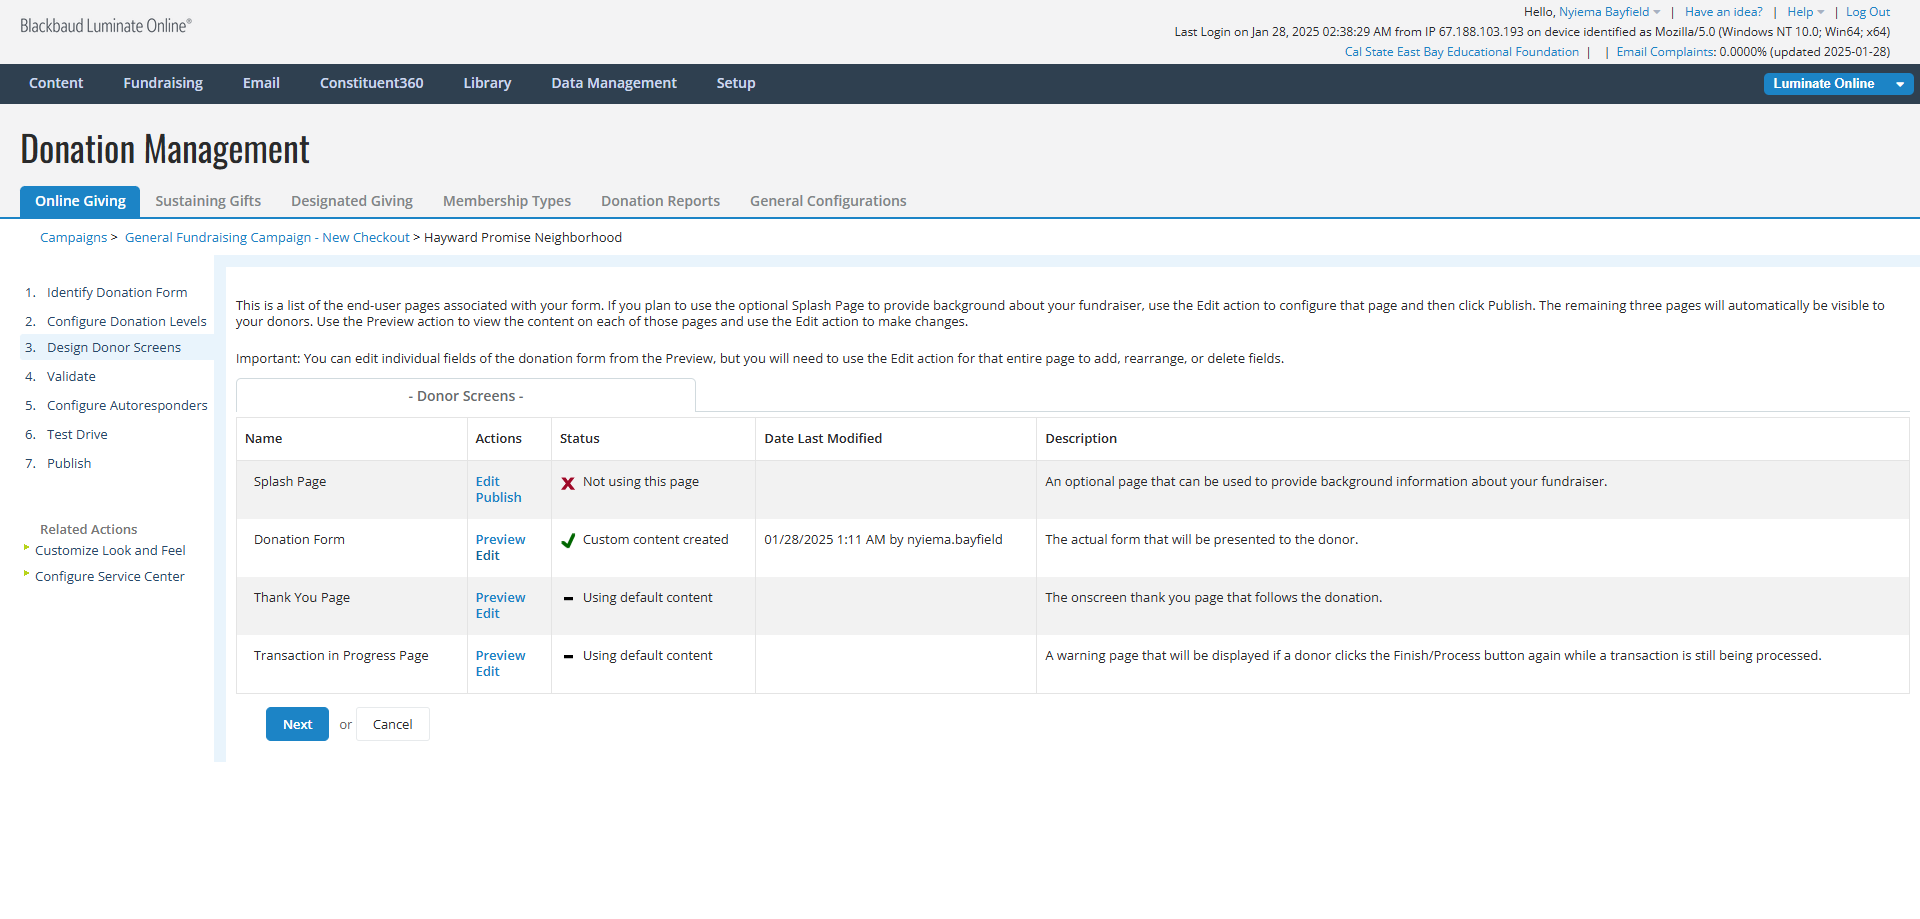
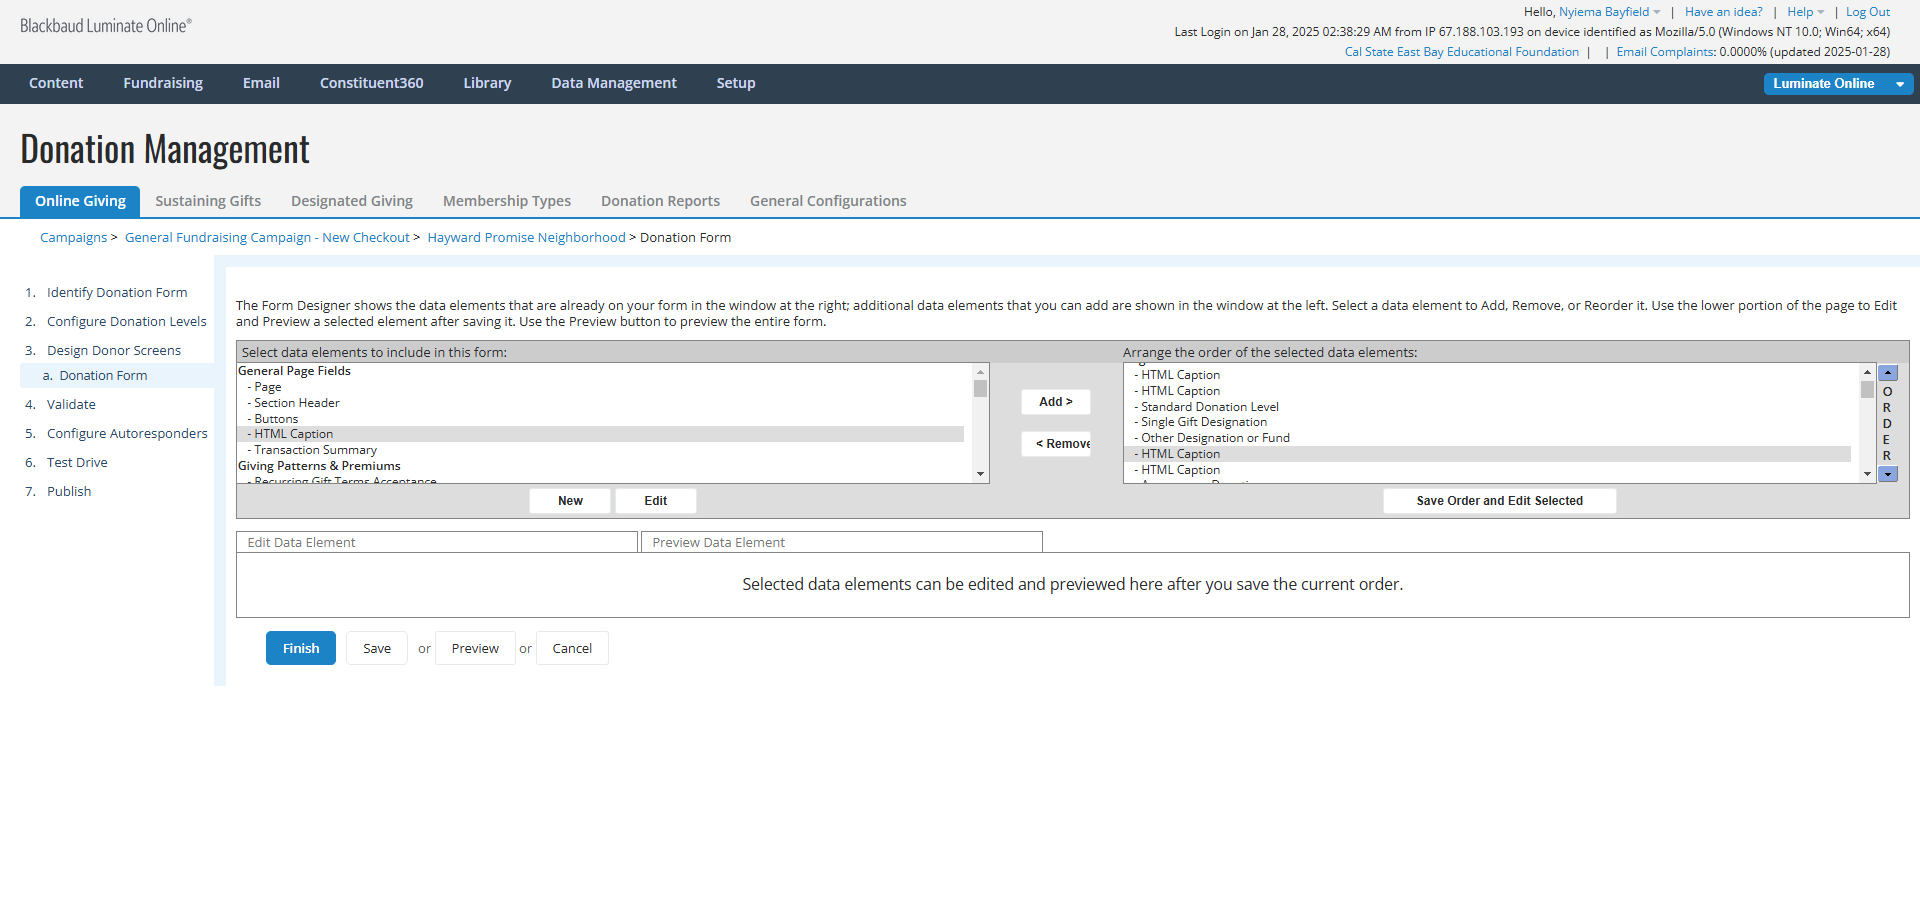
Click on Fundraising->Donation Management. Find the "General Fundraising Campaign - new checkout" Campaign and in the Actions Column, click on "Manage".

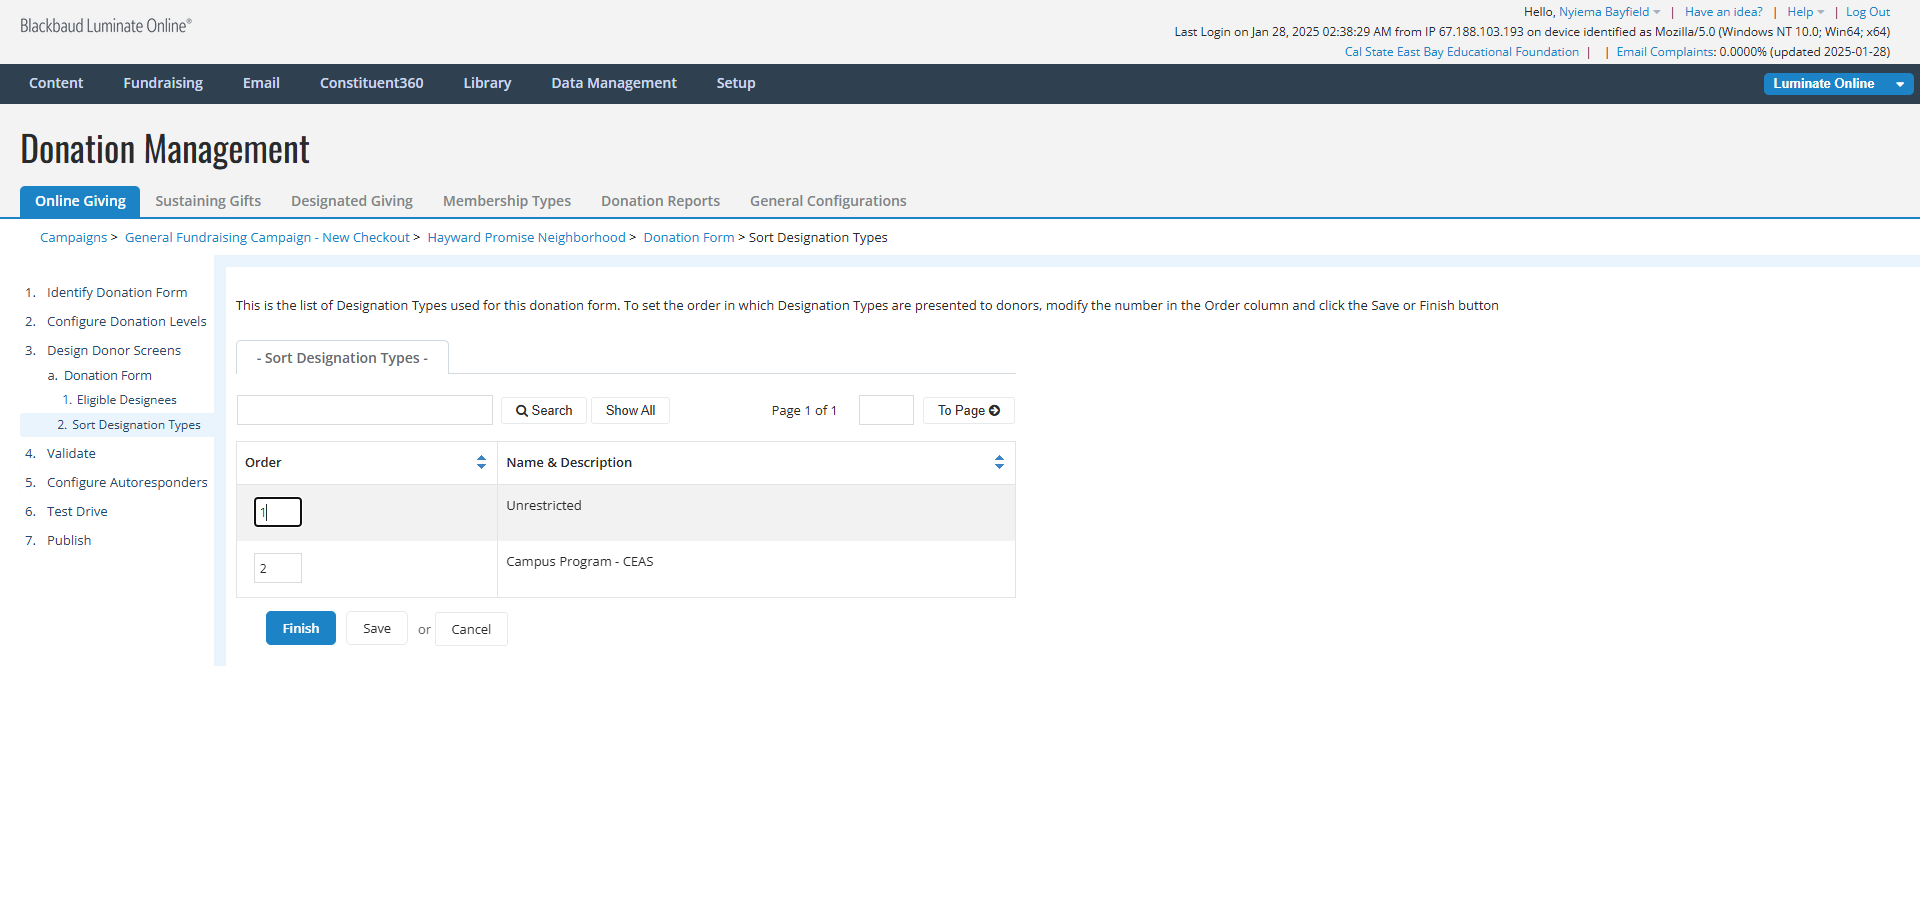
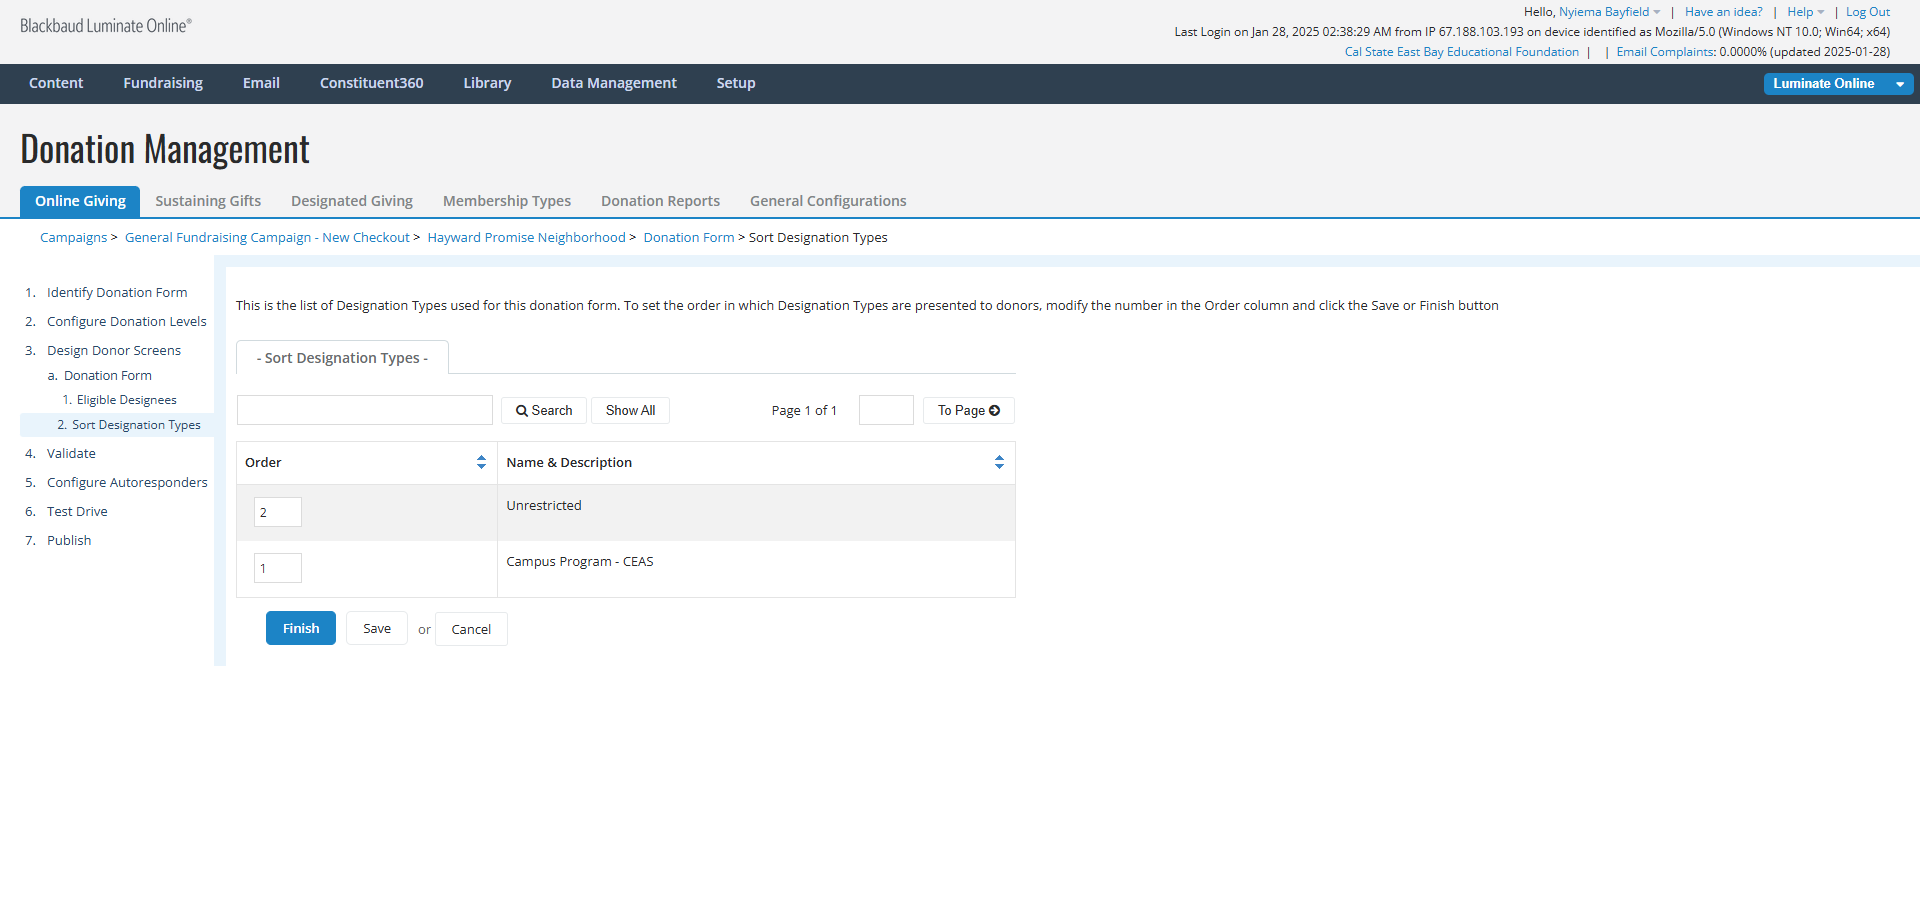
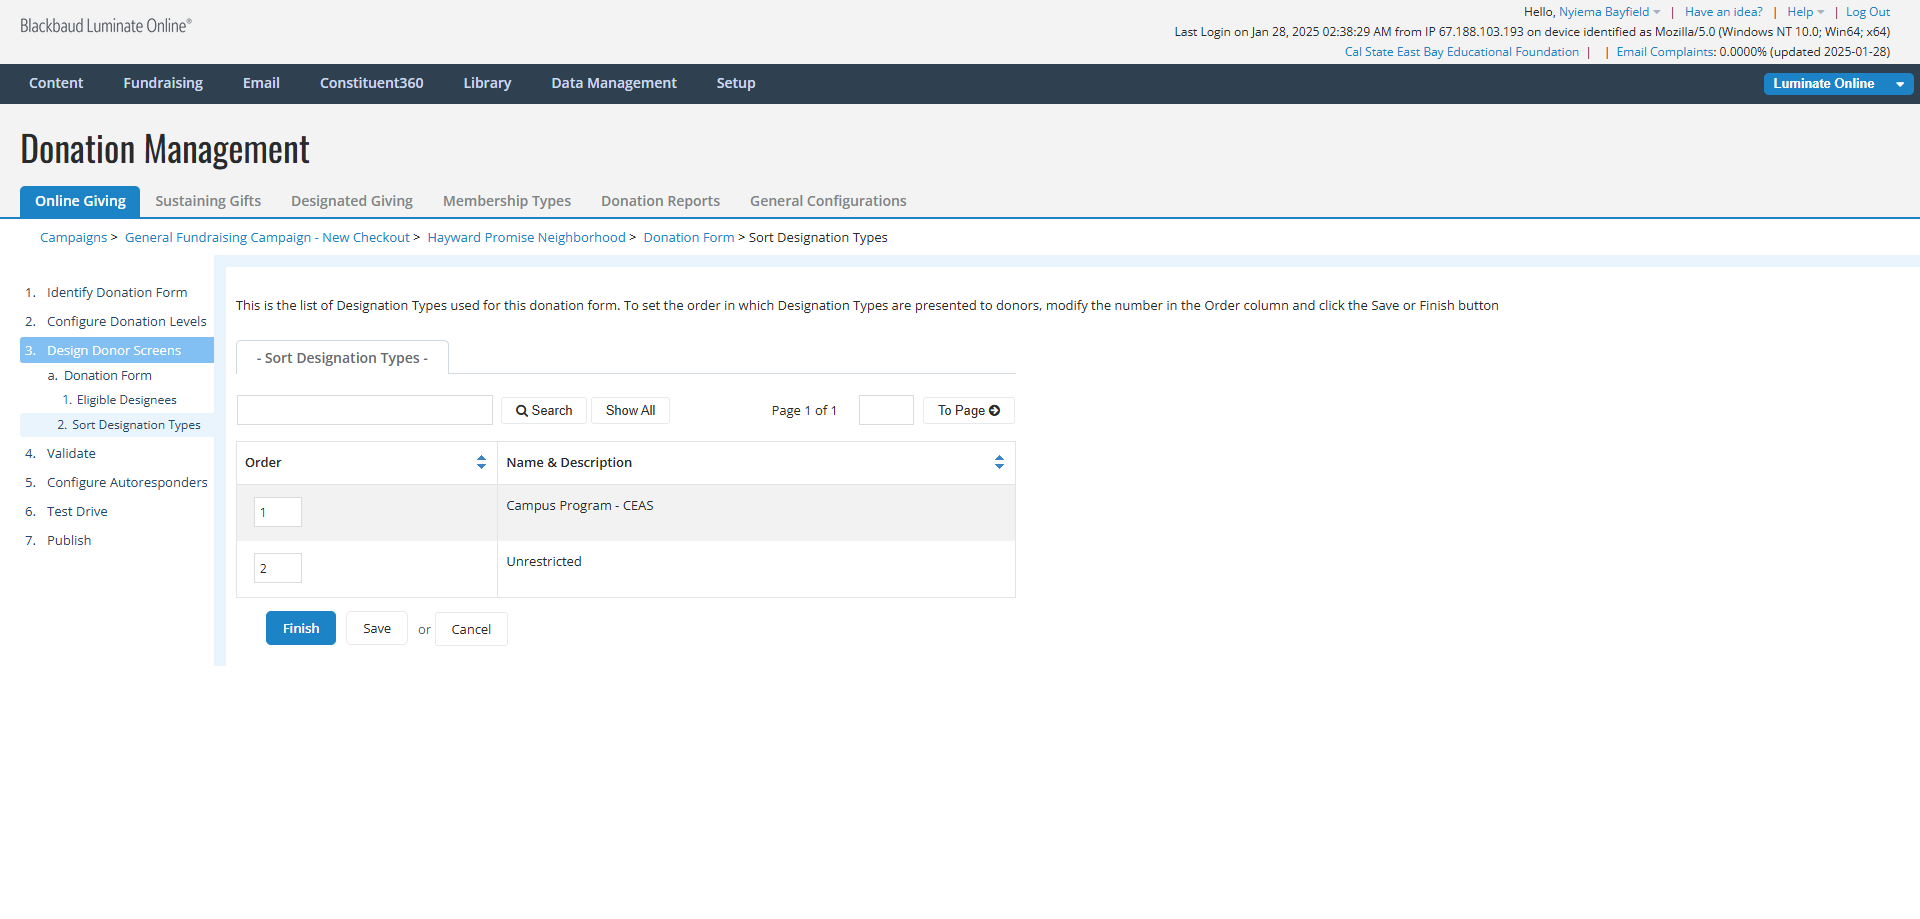
Specify the order that designees are listed in.

Add Matching Gift Component
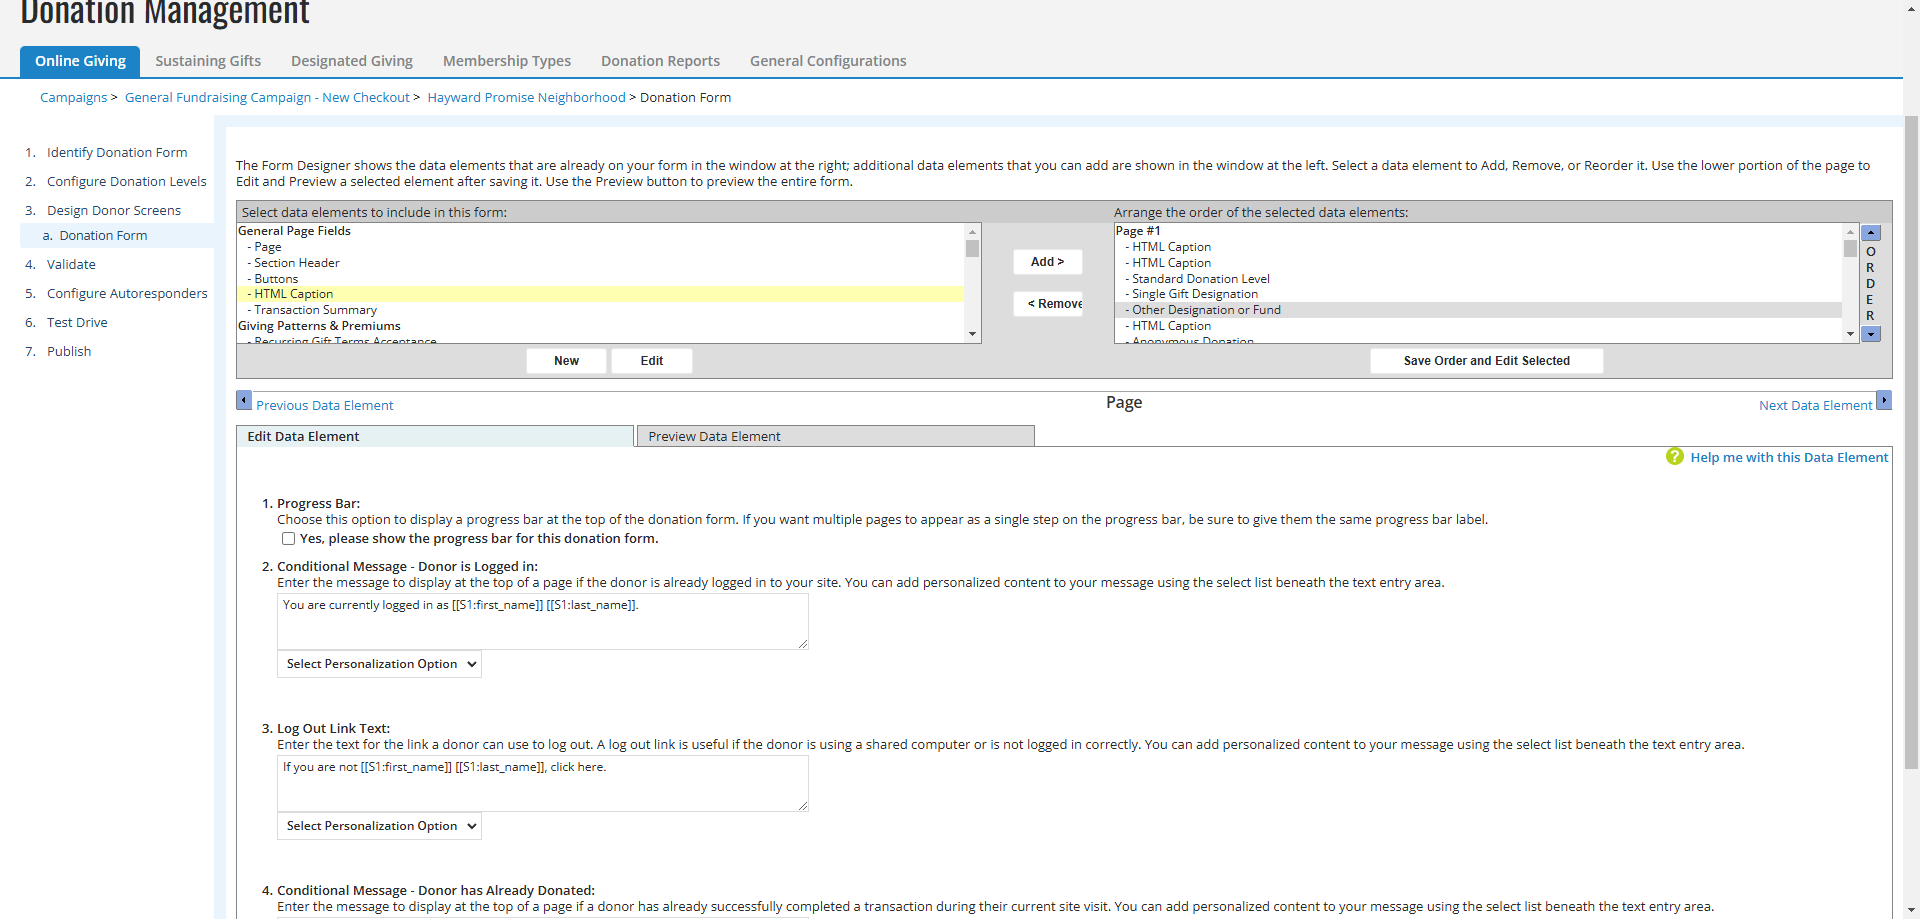
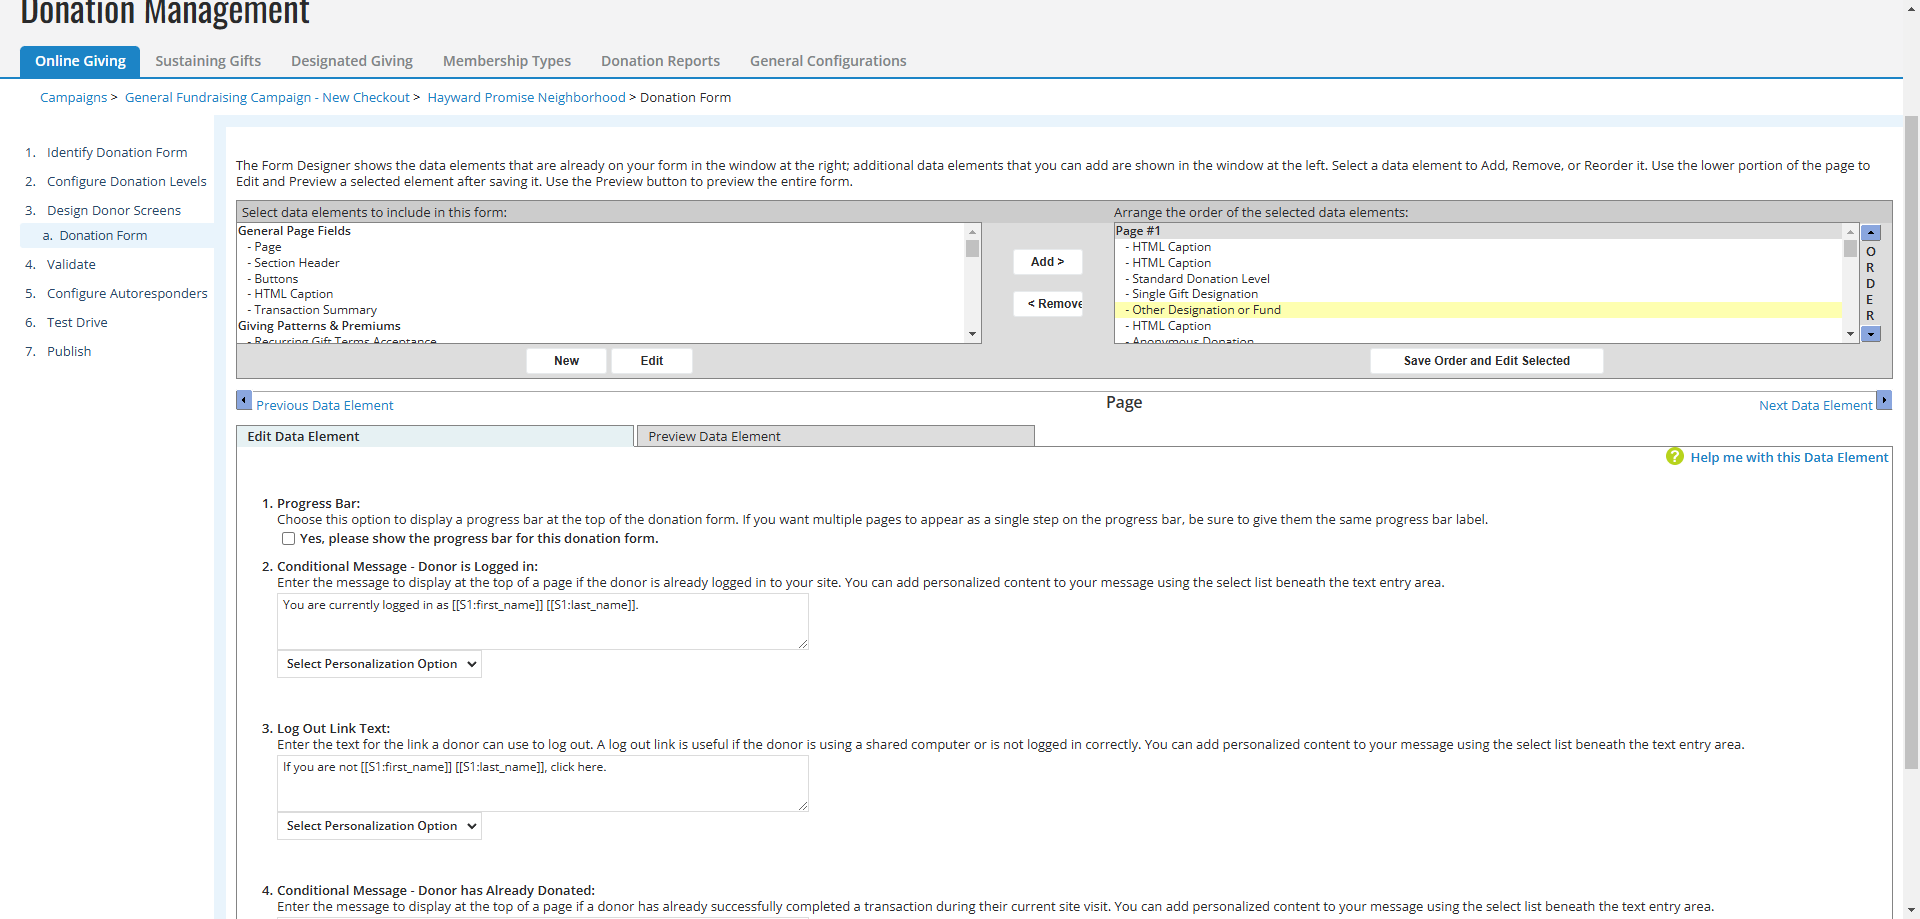
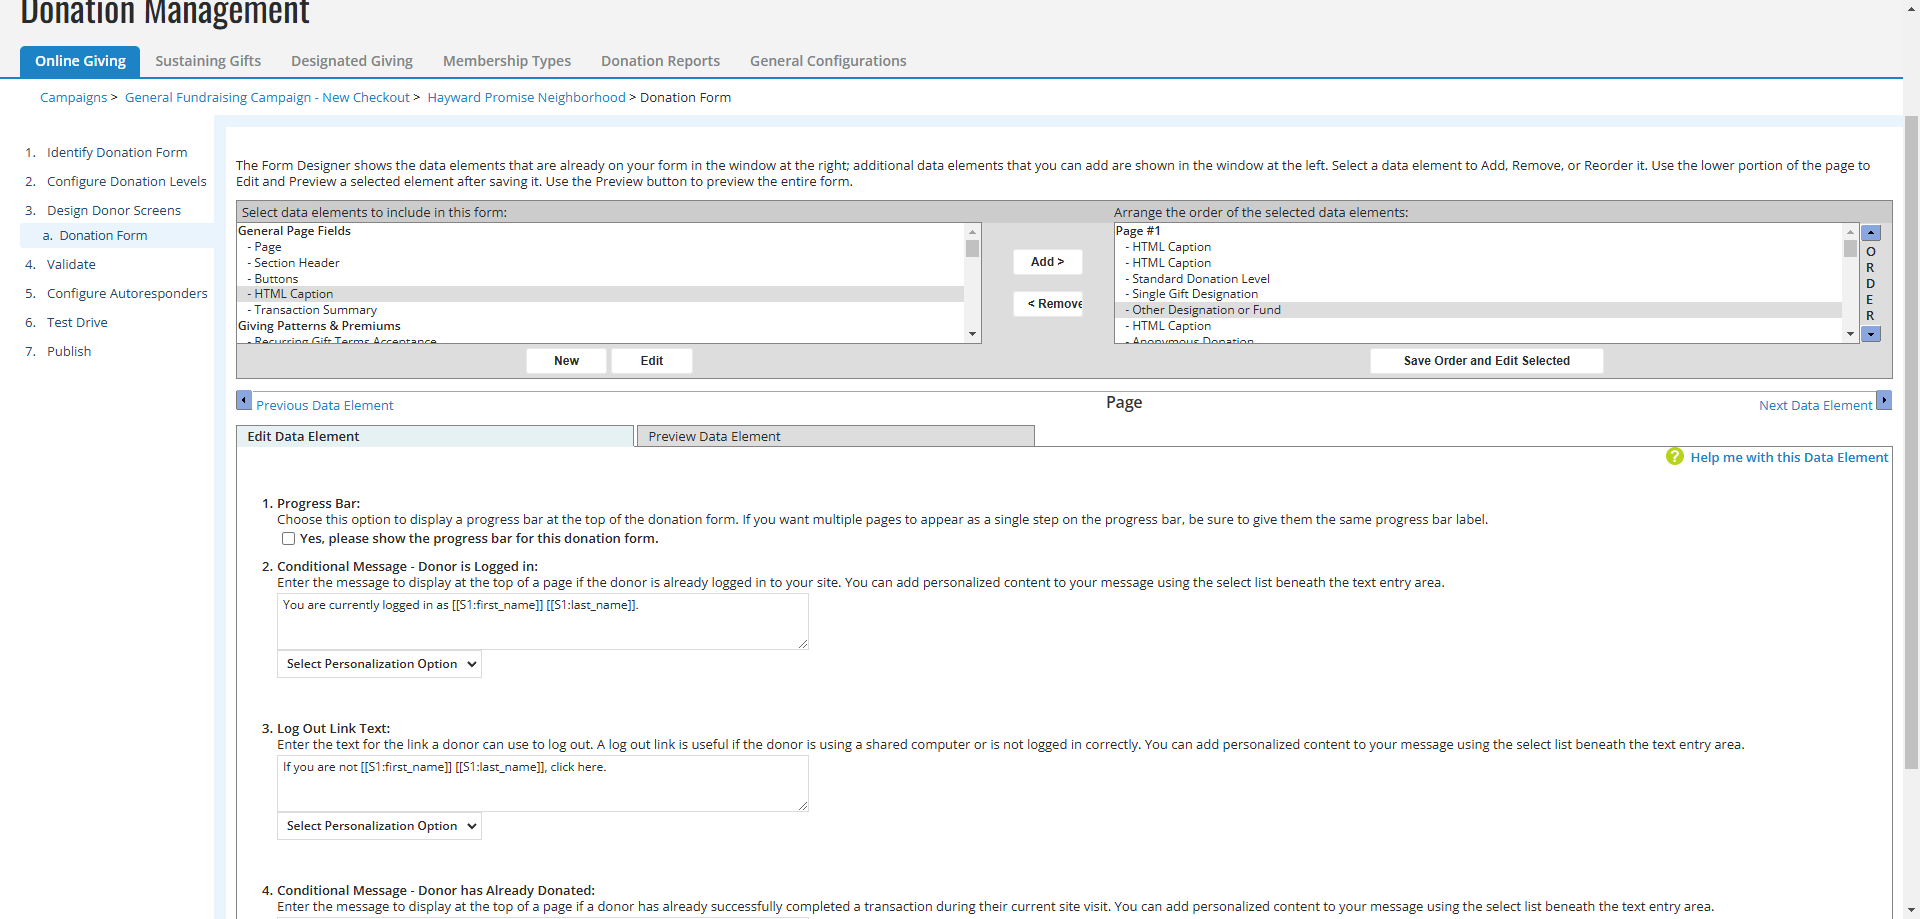
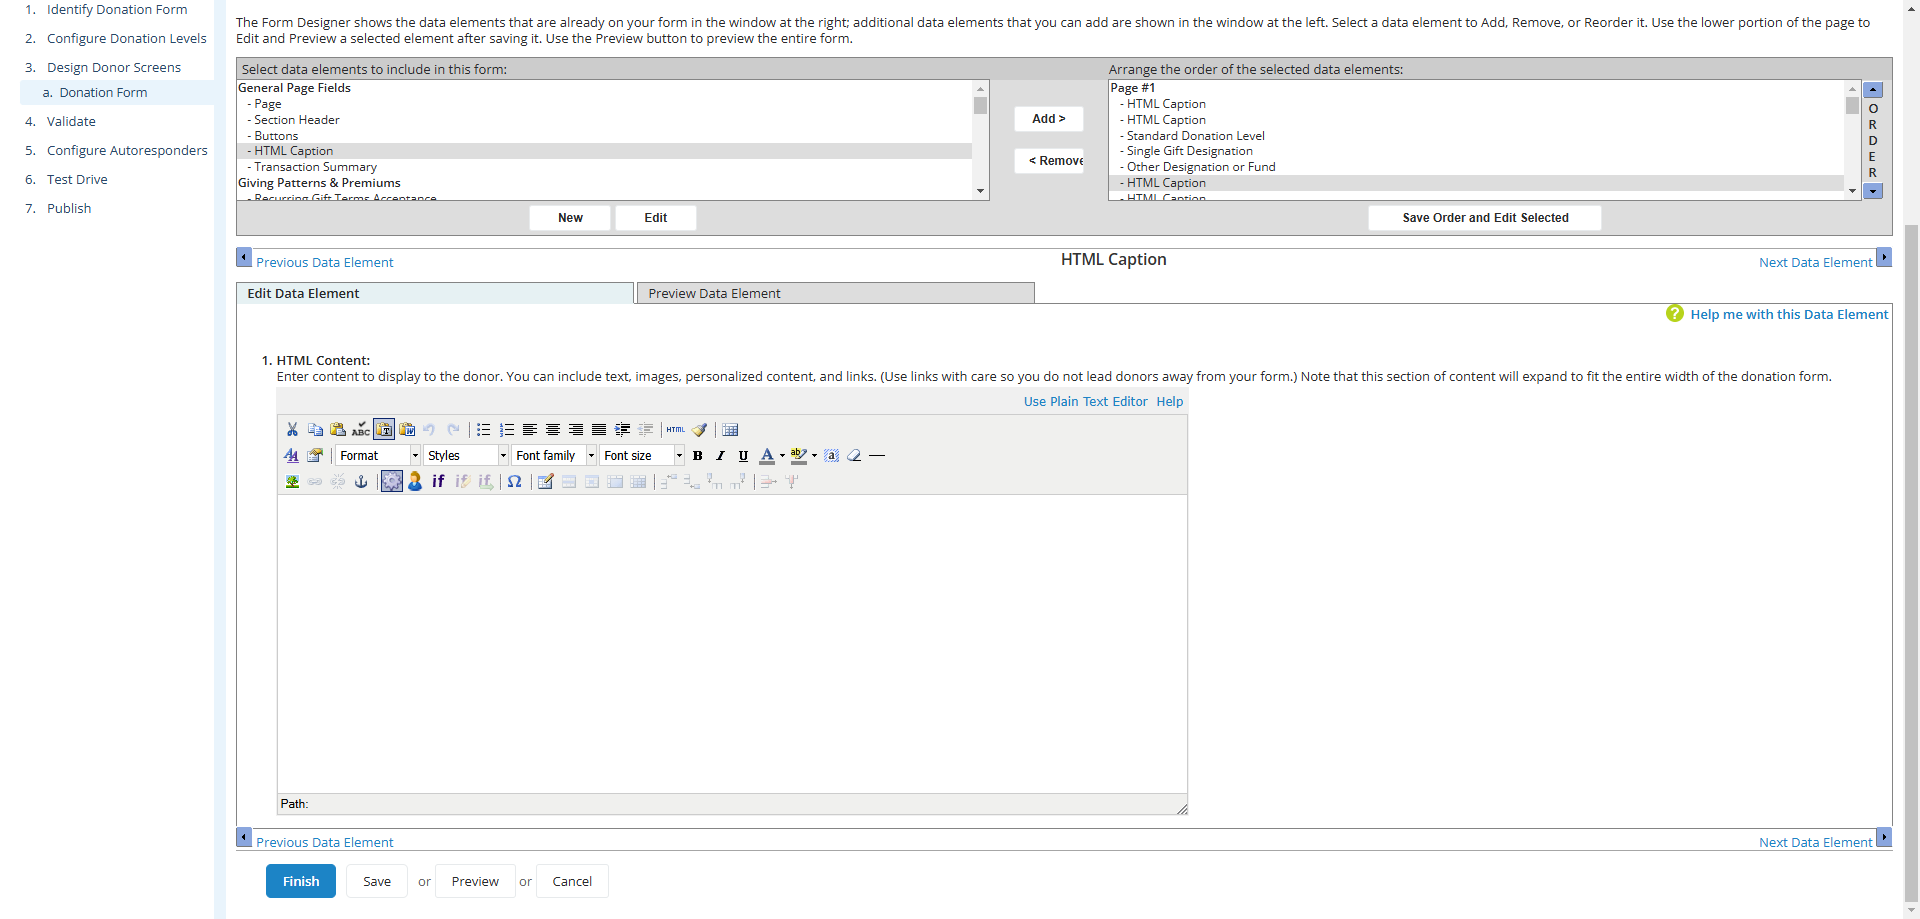
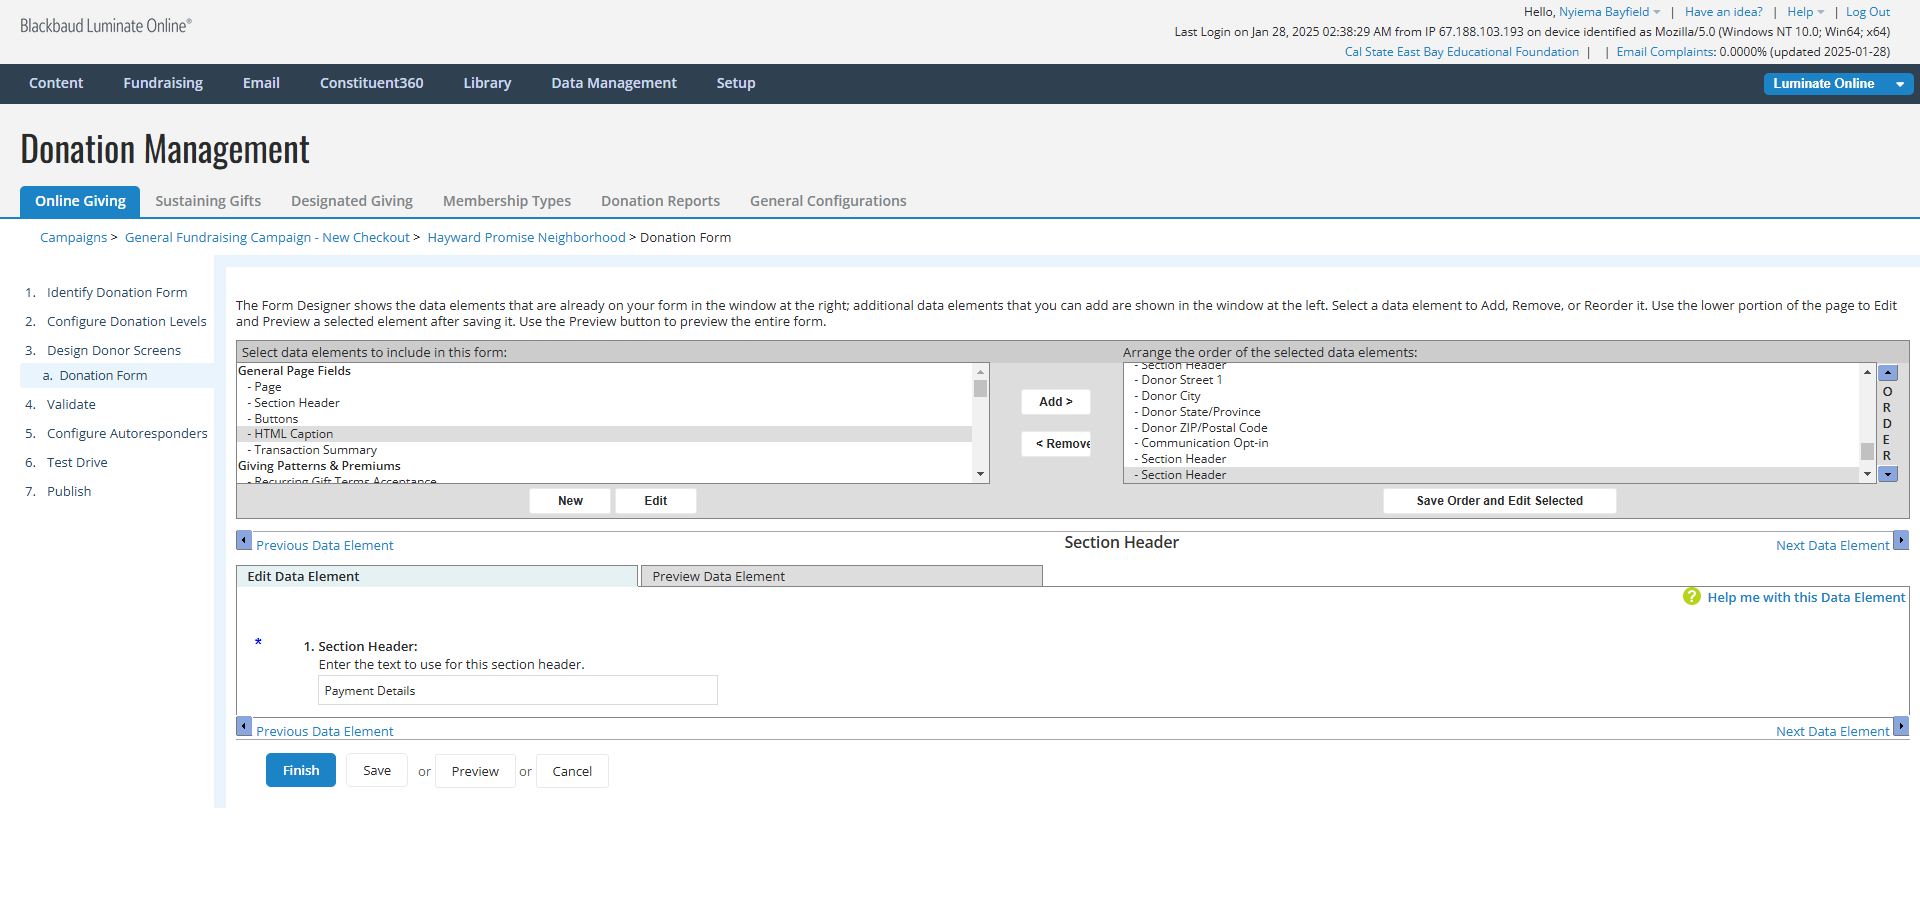
In the top right panel, there should now be two HTML Caption elements displayed below "Other Designation or Fund". Click on the top one, then hit "Save Order" and "Edit Selected."

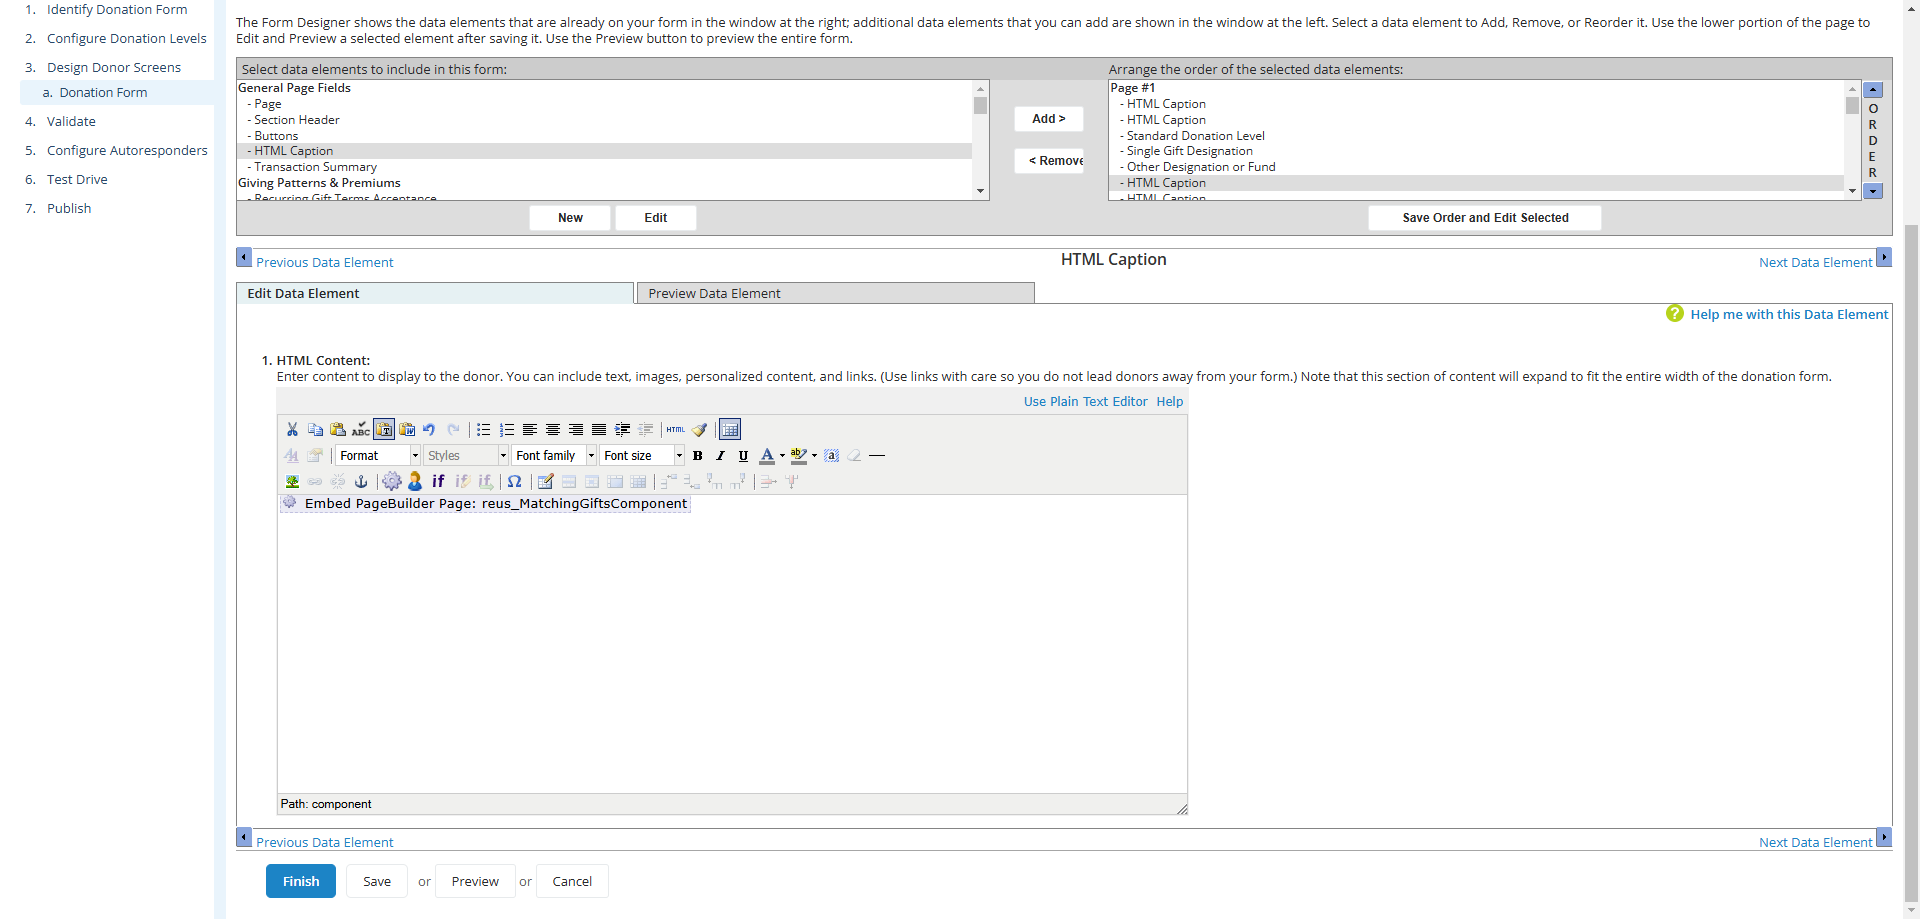
From the pop-up window, click on "Content" and then click on "Reusable Page." Find the component titled "reus_MatchingGiftsComponent," and click on it. In the Configure Component screen, you'll be able to see a preview of the component. Click the "Insert" button.
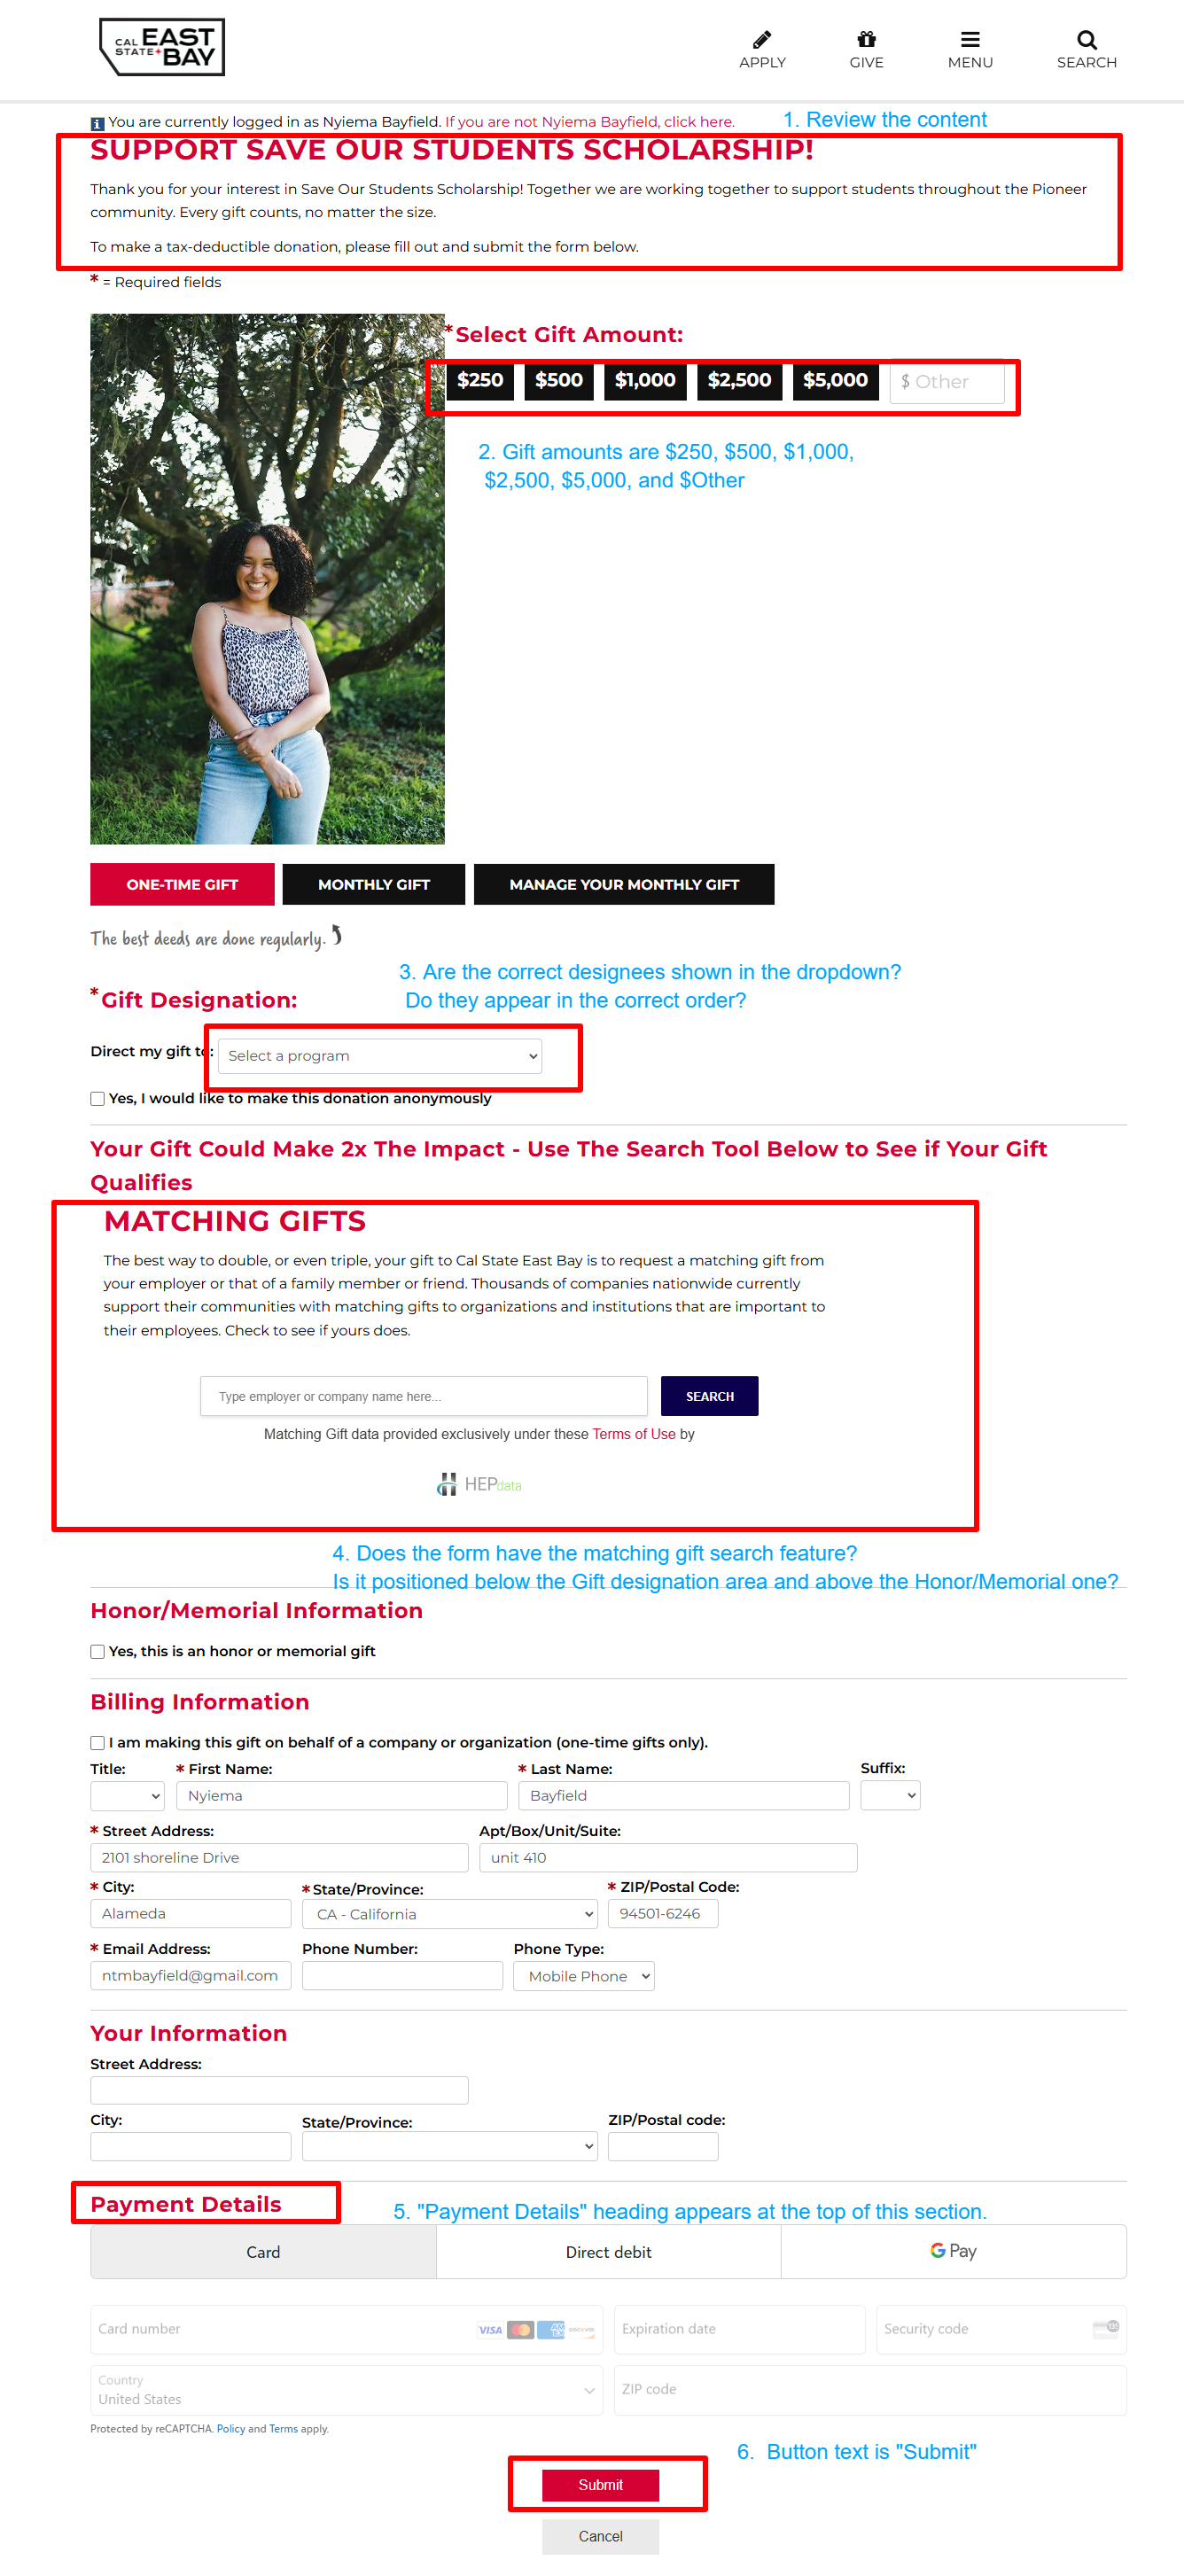
Preview the Donation Form.

Review the preview version of the Donation Form.
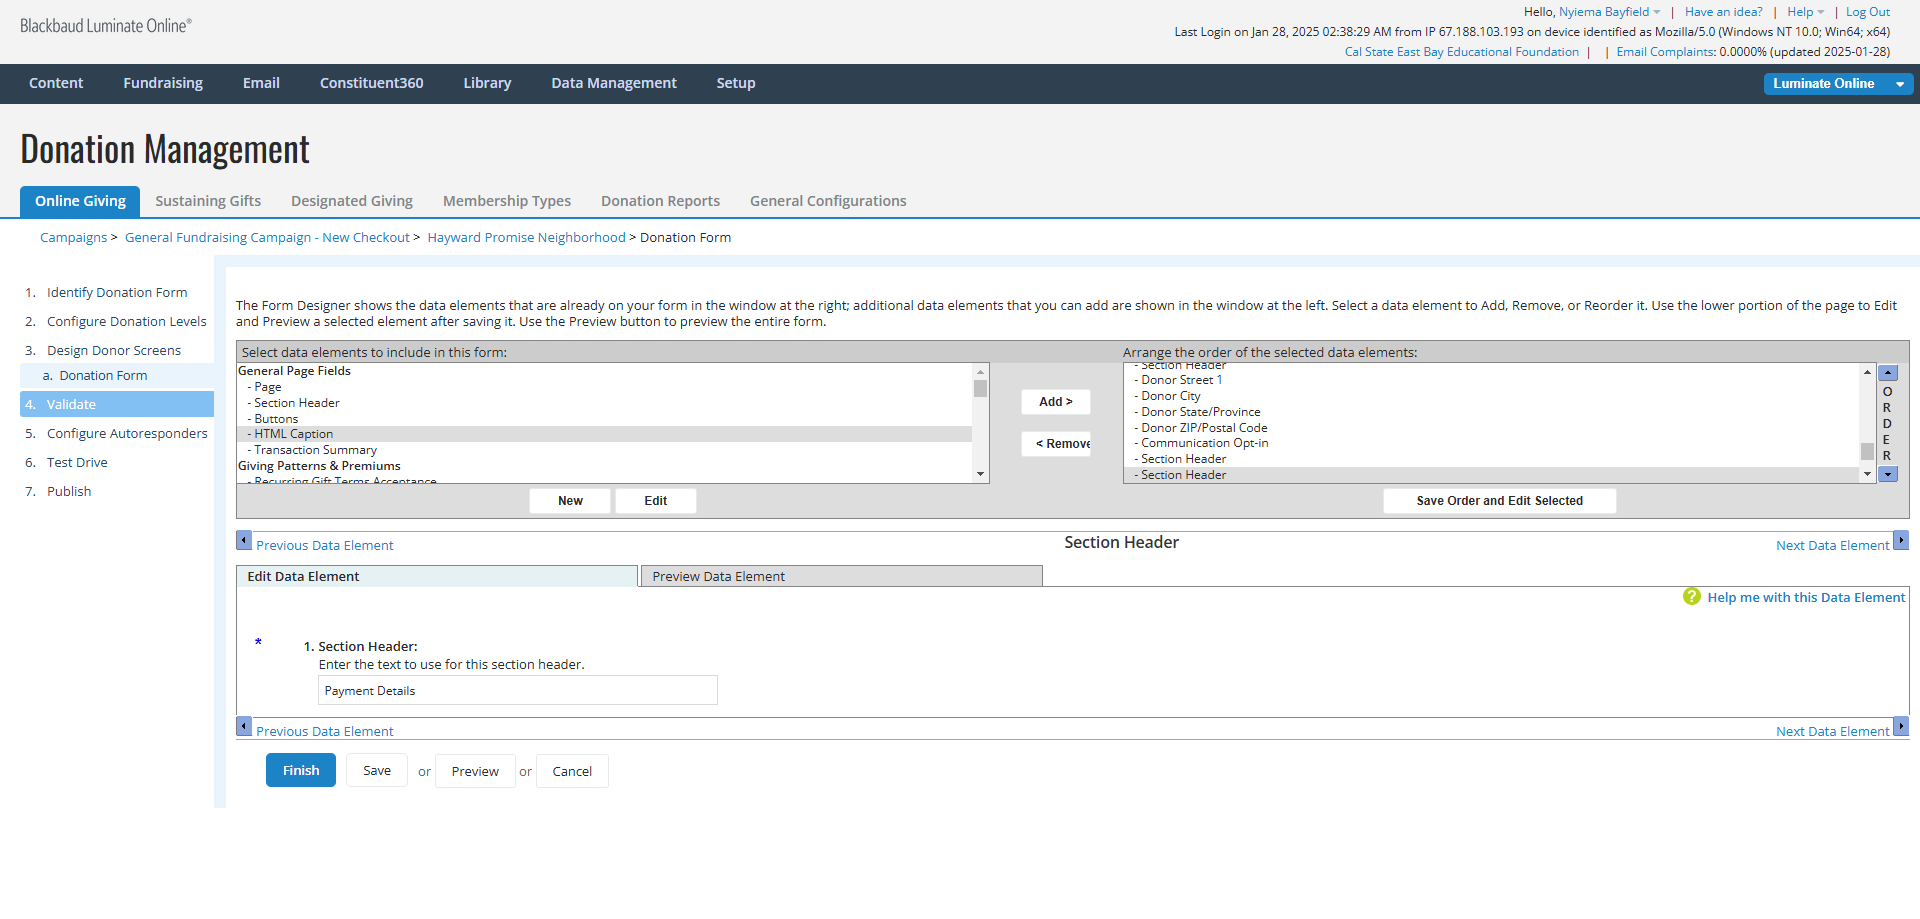
Validate the donation form.
This will check for any errors in the form that might prevent processing.
![Step #20: Under 1. Form Validation, Click on the [Validate] button.](https://di8mn0rali2ic.cloudfront.net/uploads/cf94947f-731c-4a3f-801f-5fbb5b11c4a0/45c0ba78-4d6e-4c68-b9f1-1ba95f8b839c.png)
To fix the errors identified during Form Validation, you will need to return to editing the donation form.
Click on 3. Design Donors Screens, then click on the Action "Edit" next to Donation Form. Try to resolve the errors that were identified with the form one at a time.
To check if an error has been resolved:
Click the [Save] button and then click 4. Validate.
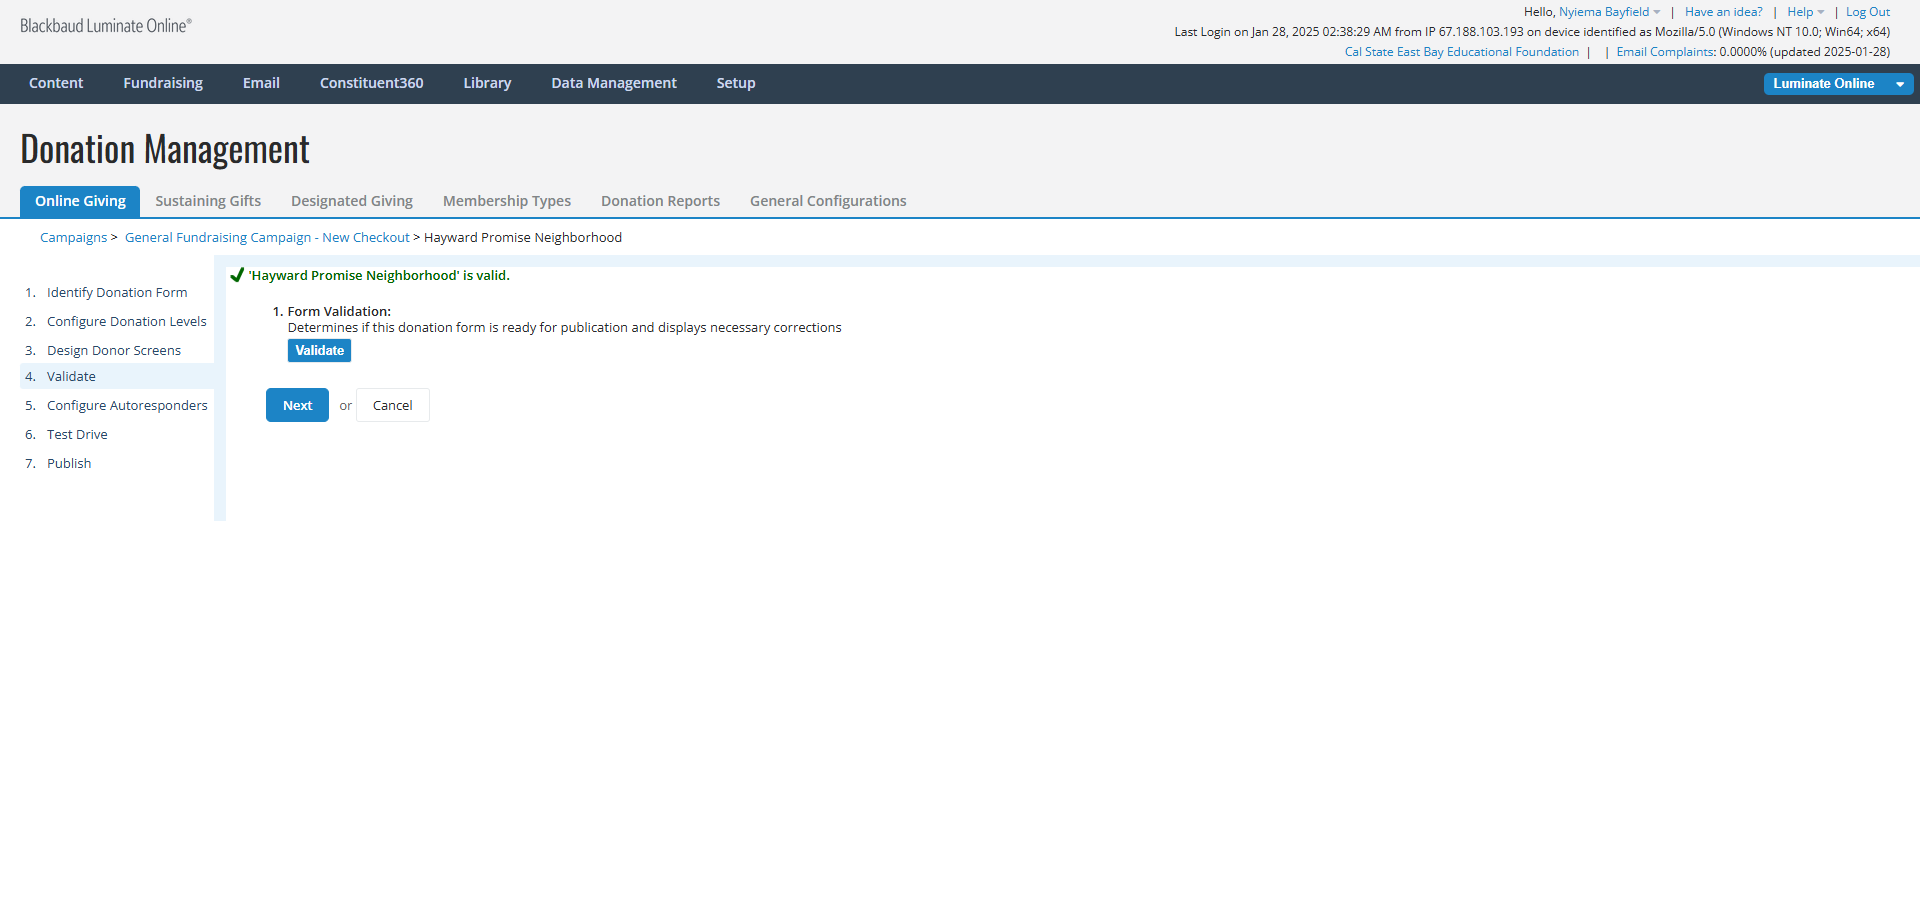
Next, Click the [Validate] button.
If that error is no longer listed, you fixed it. Good job!
Now, move onto the next error message on the list and repeat this process (1. Return to editing the form, 2. Try to fix the error, 3. Save the form, and 4. Validate the form) until all of the errors have been resolved.
OR
If the form is valid and no errors were identified, then continue to the step below.
"✔ FORM_NAME is valid."
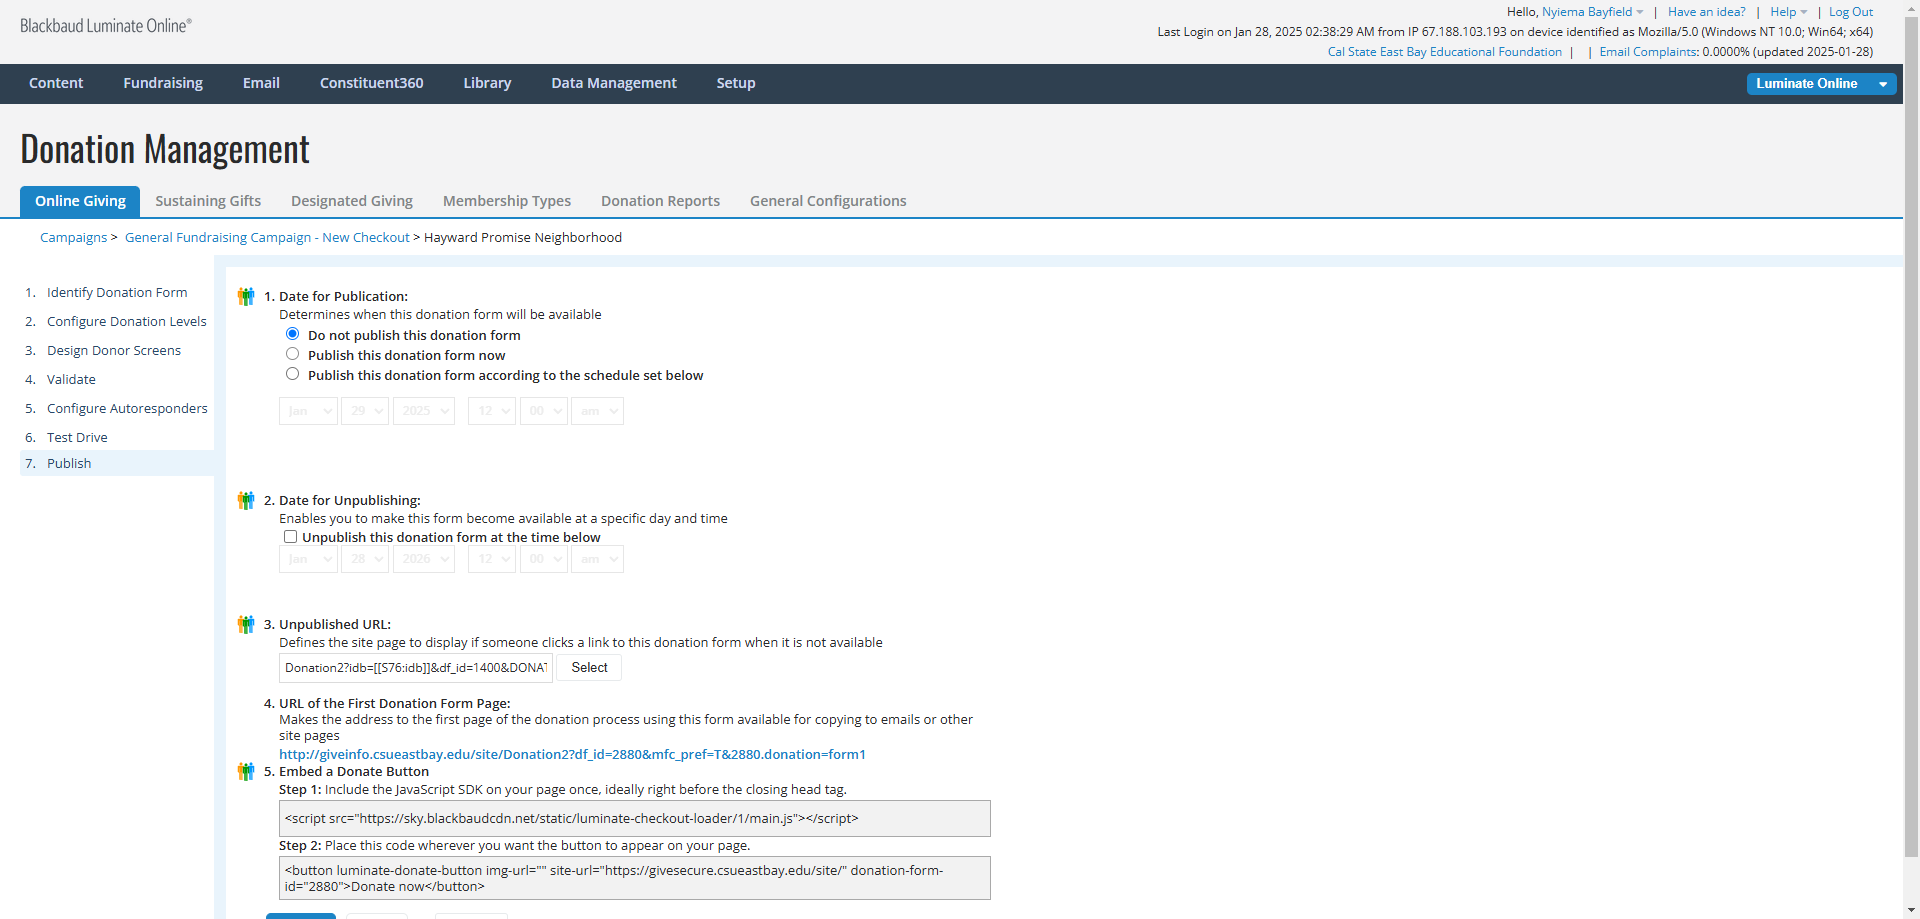
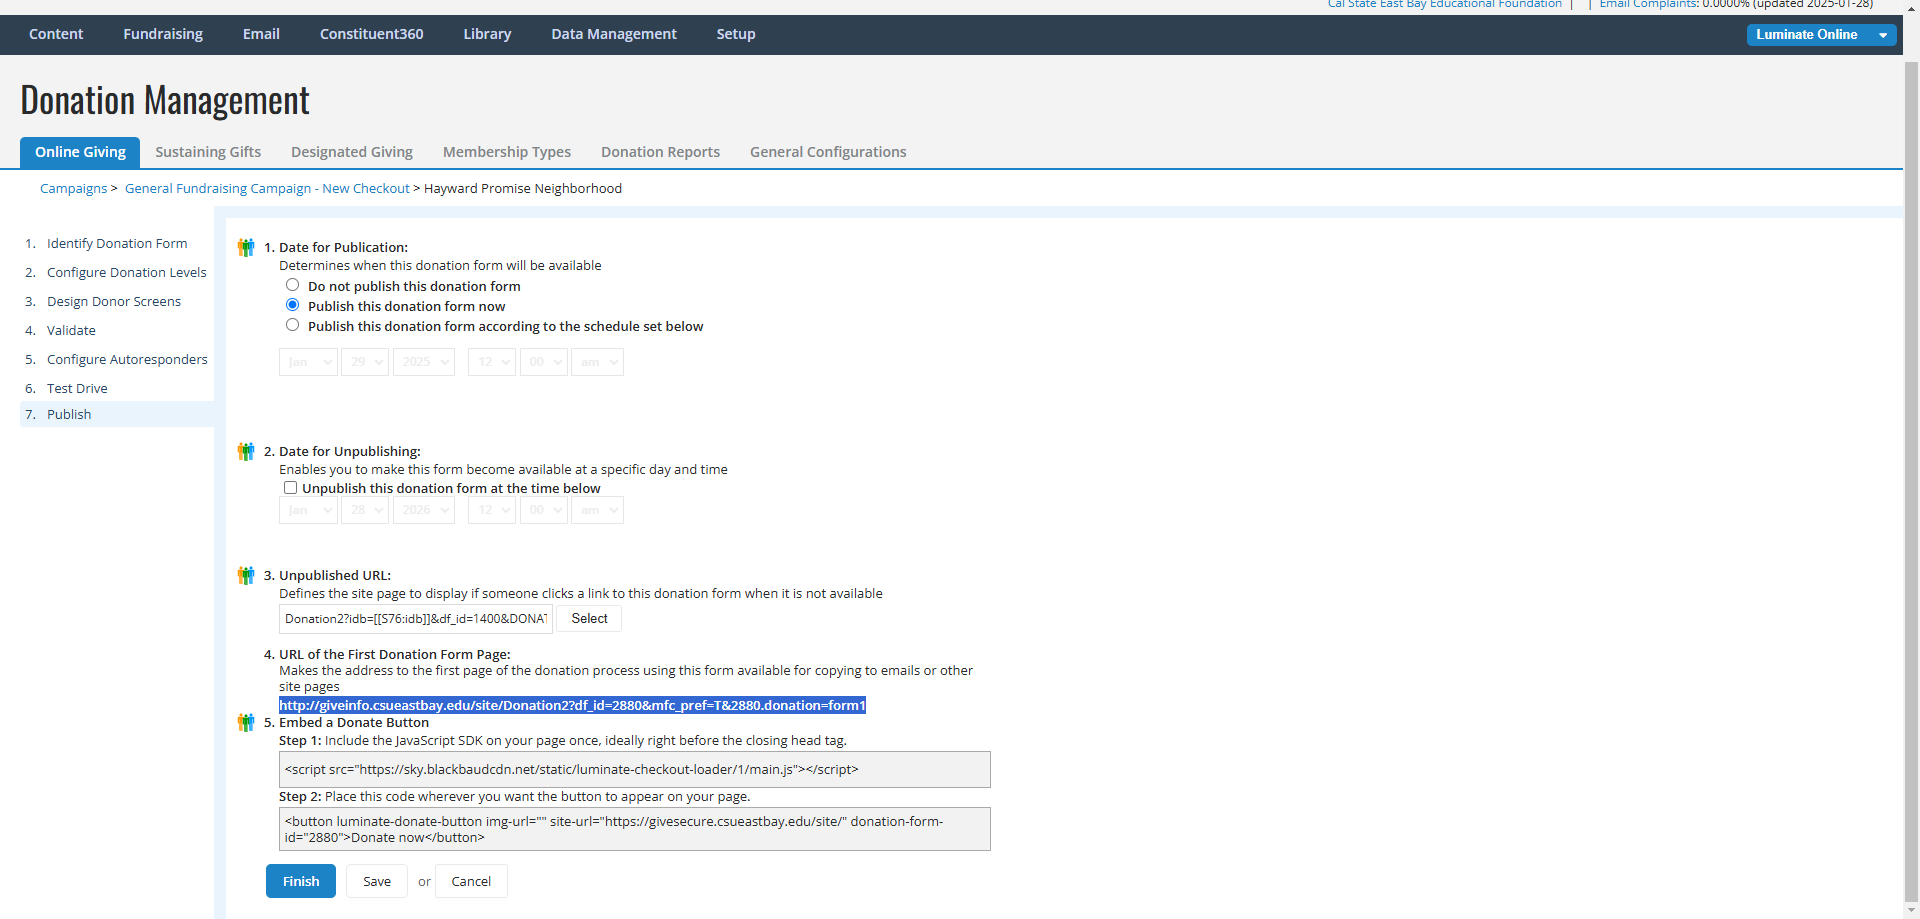
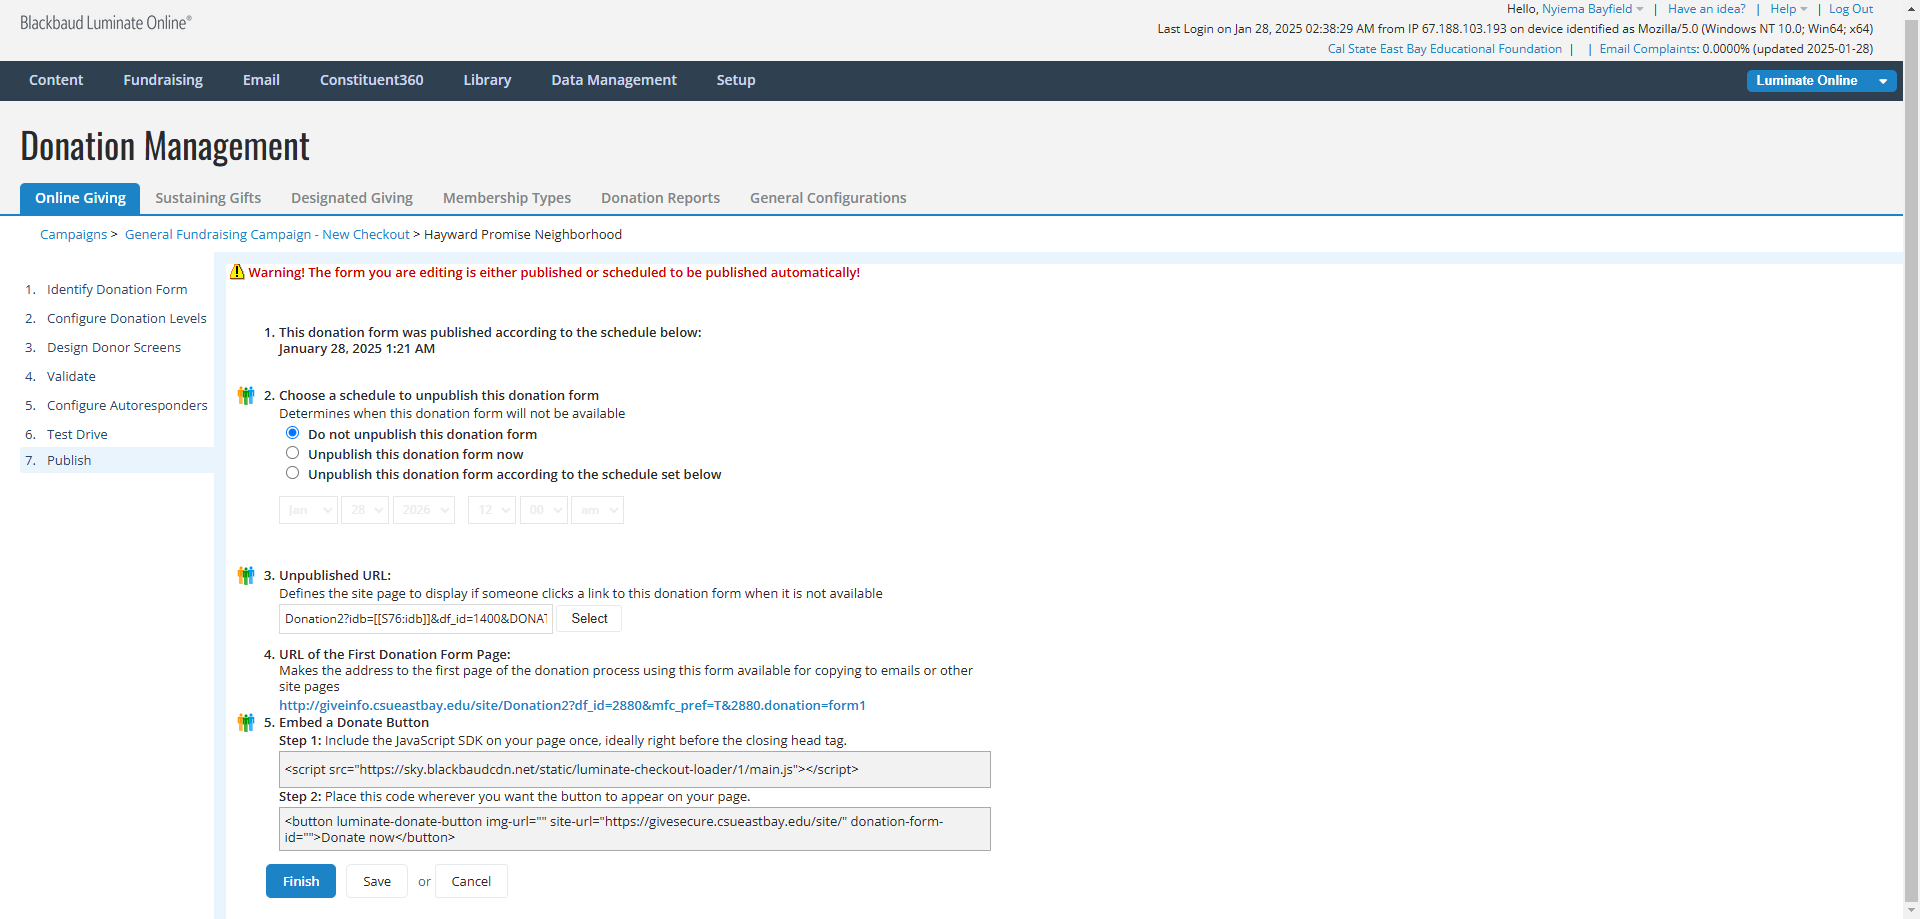
Click on 7. Publish.
Publish the Donation Form.