
How to Edit and Schedule Broadcast Emails from the Dashboard
Learn how to efficiently edit and schedule your broadcast emails directly from the dashboard. Follow these simple steps to make quick changes and manage your email campaigns effectively.
In this guide, we'll learn how to make quick changes to scheduled emails using the ConvertKit dashboard. This process includes editing the subject line, body text, and scheduling details of your email broadcasts. Understanding how to efficiently manage and update your email campaigns ensures that your communications are always accurate and timely.
Let's get started
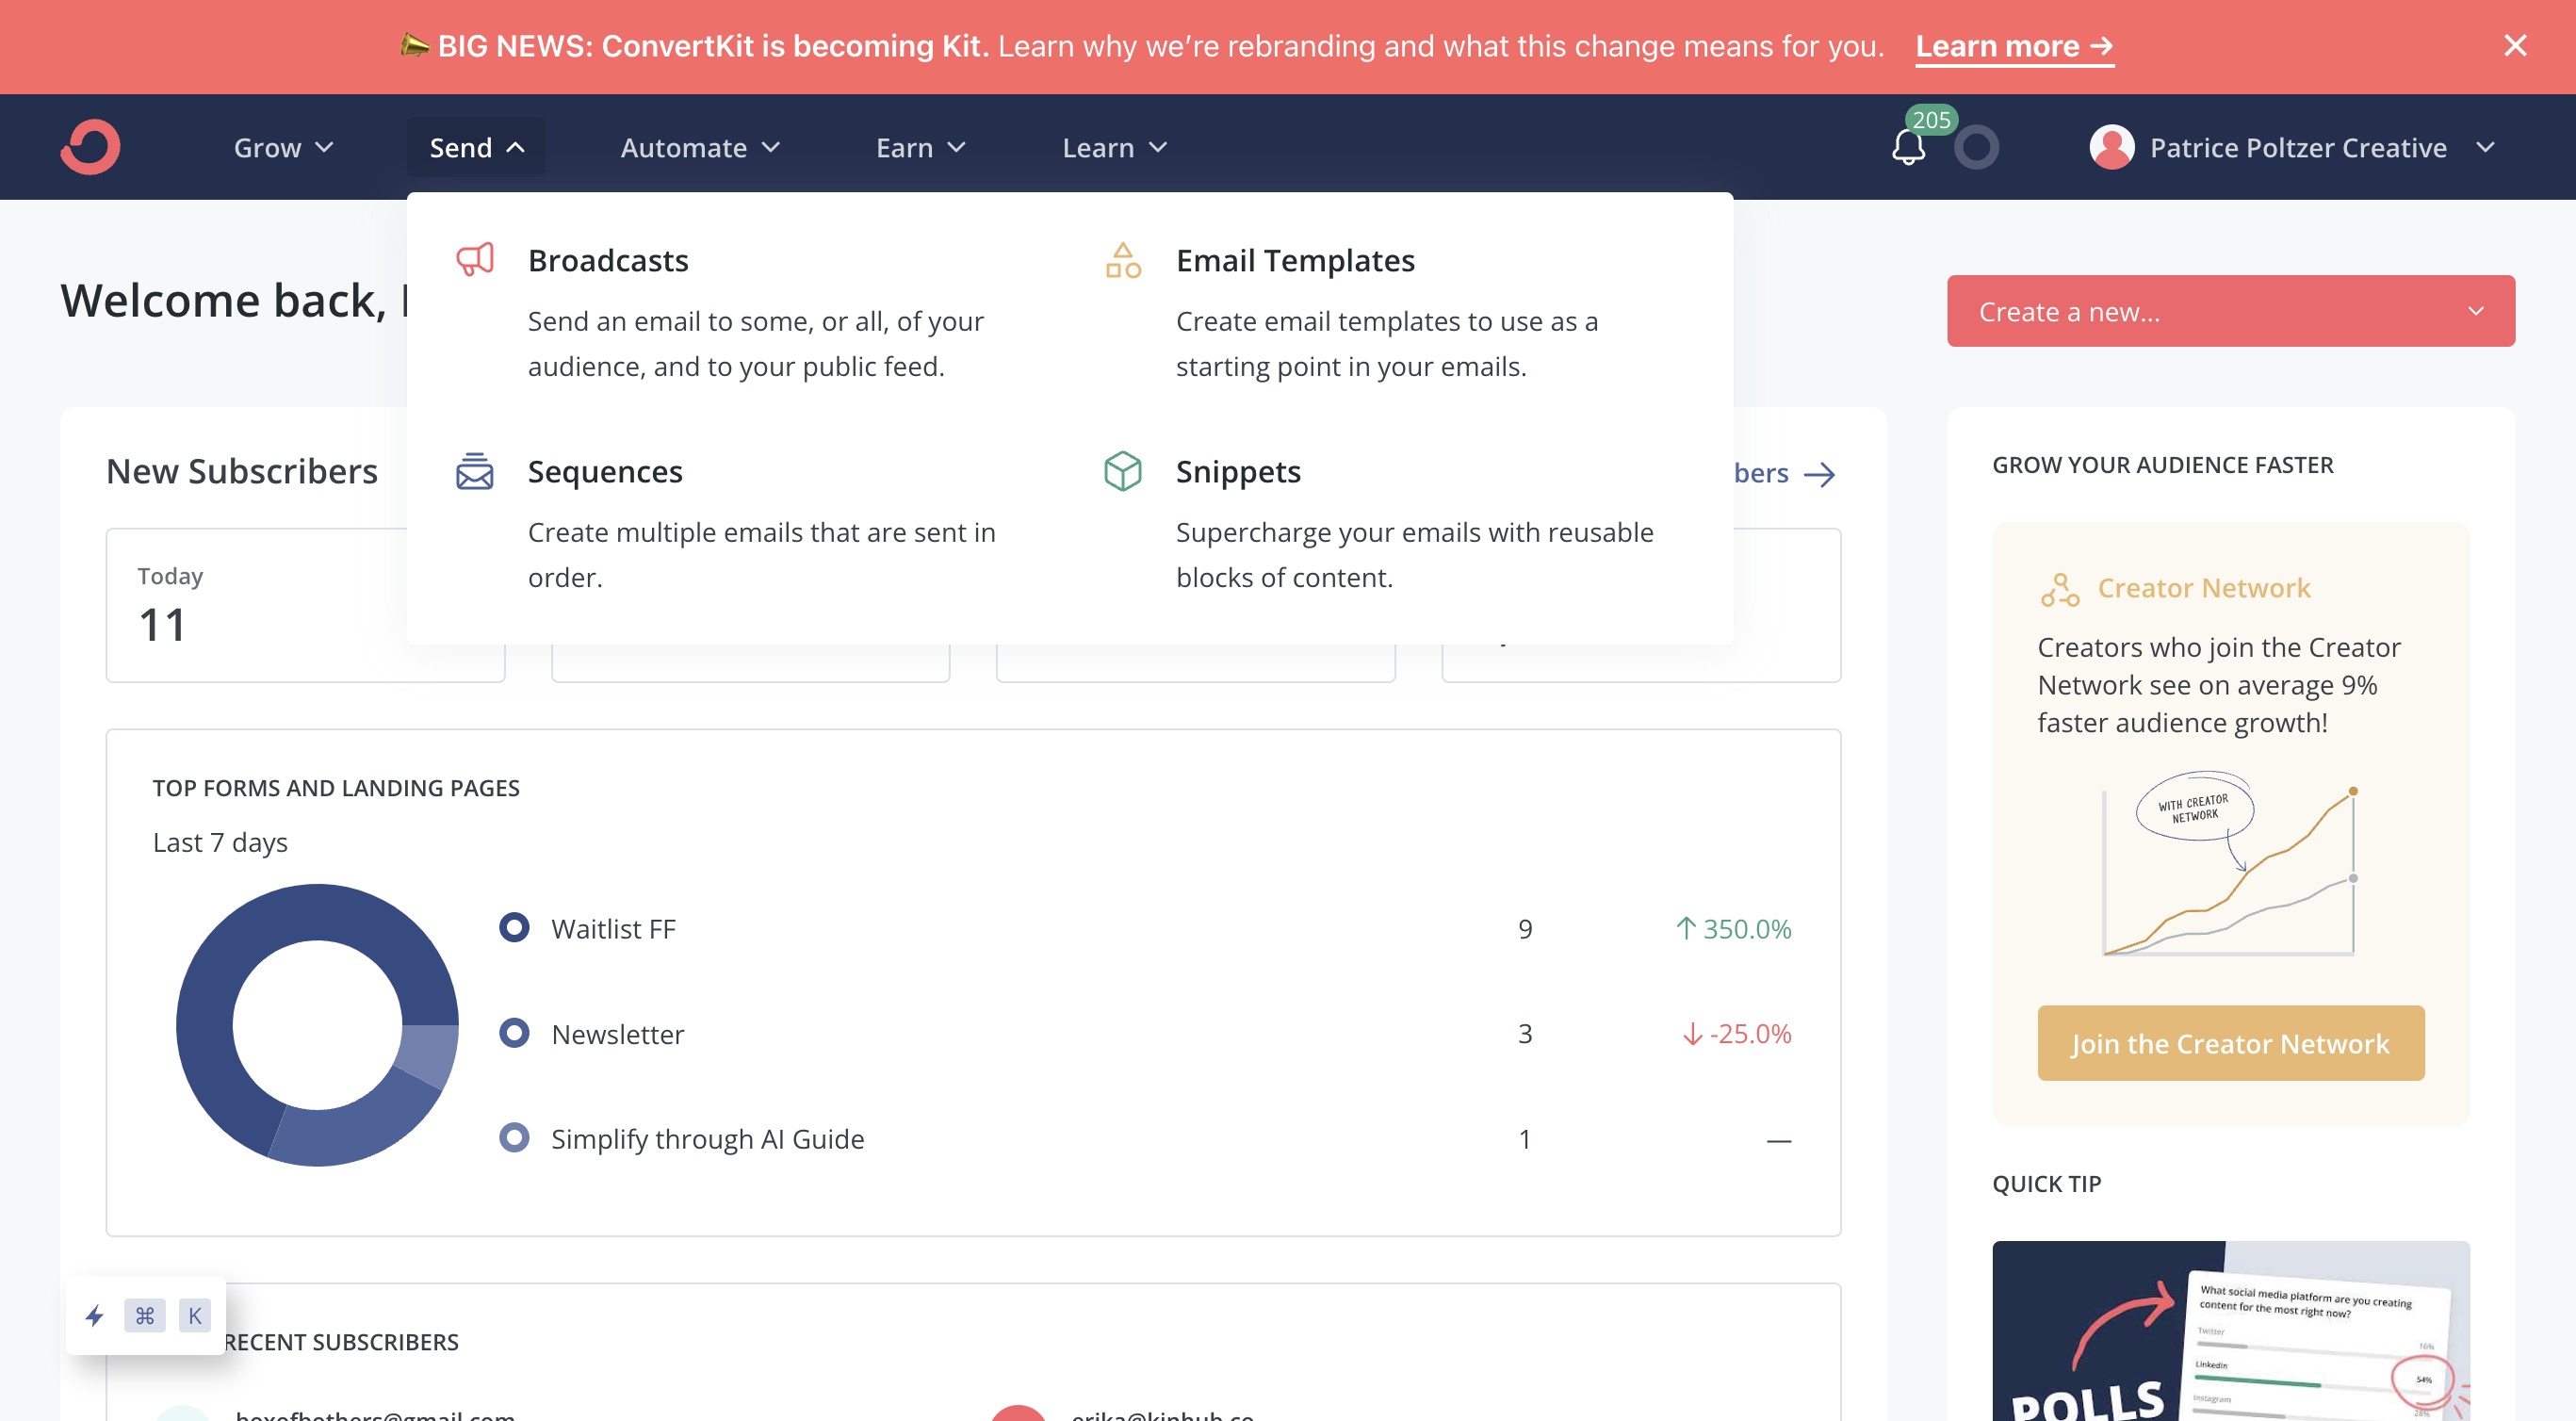
When you are on the dashboard, click on "Send." Next, click "Broadcasts." Here, you will find an overview of all the broadcasts.

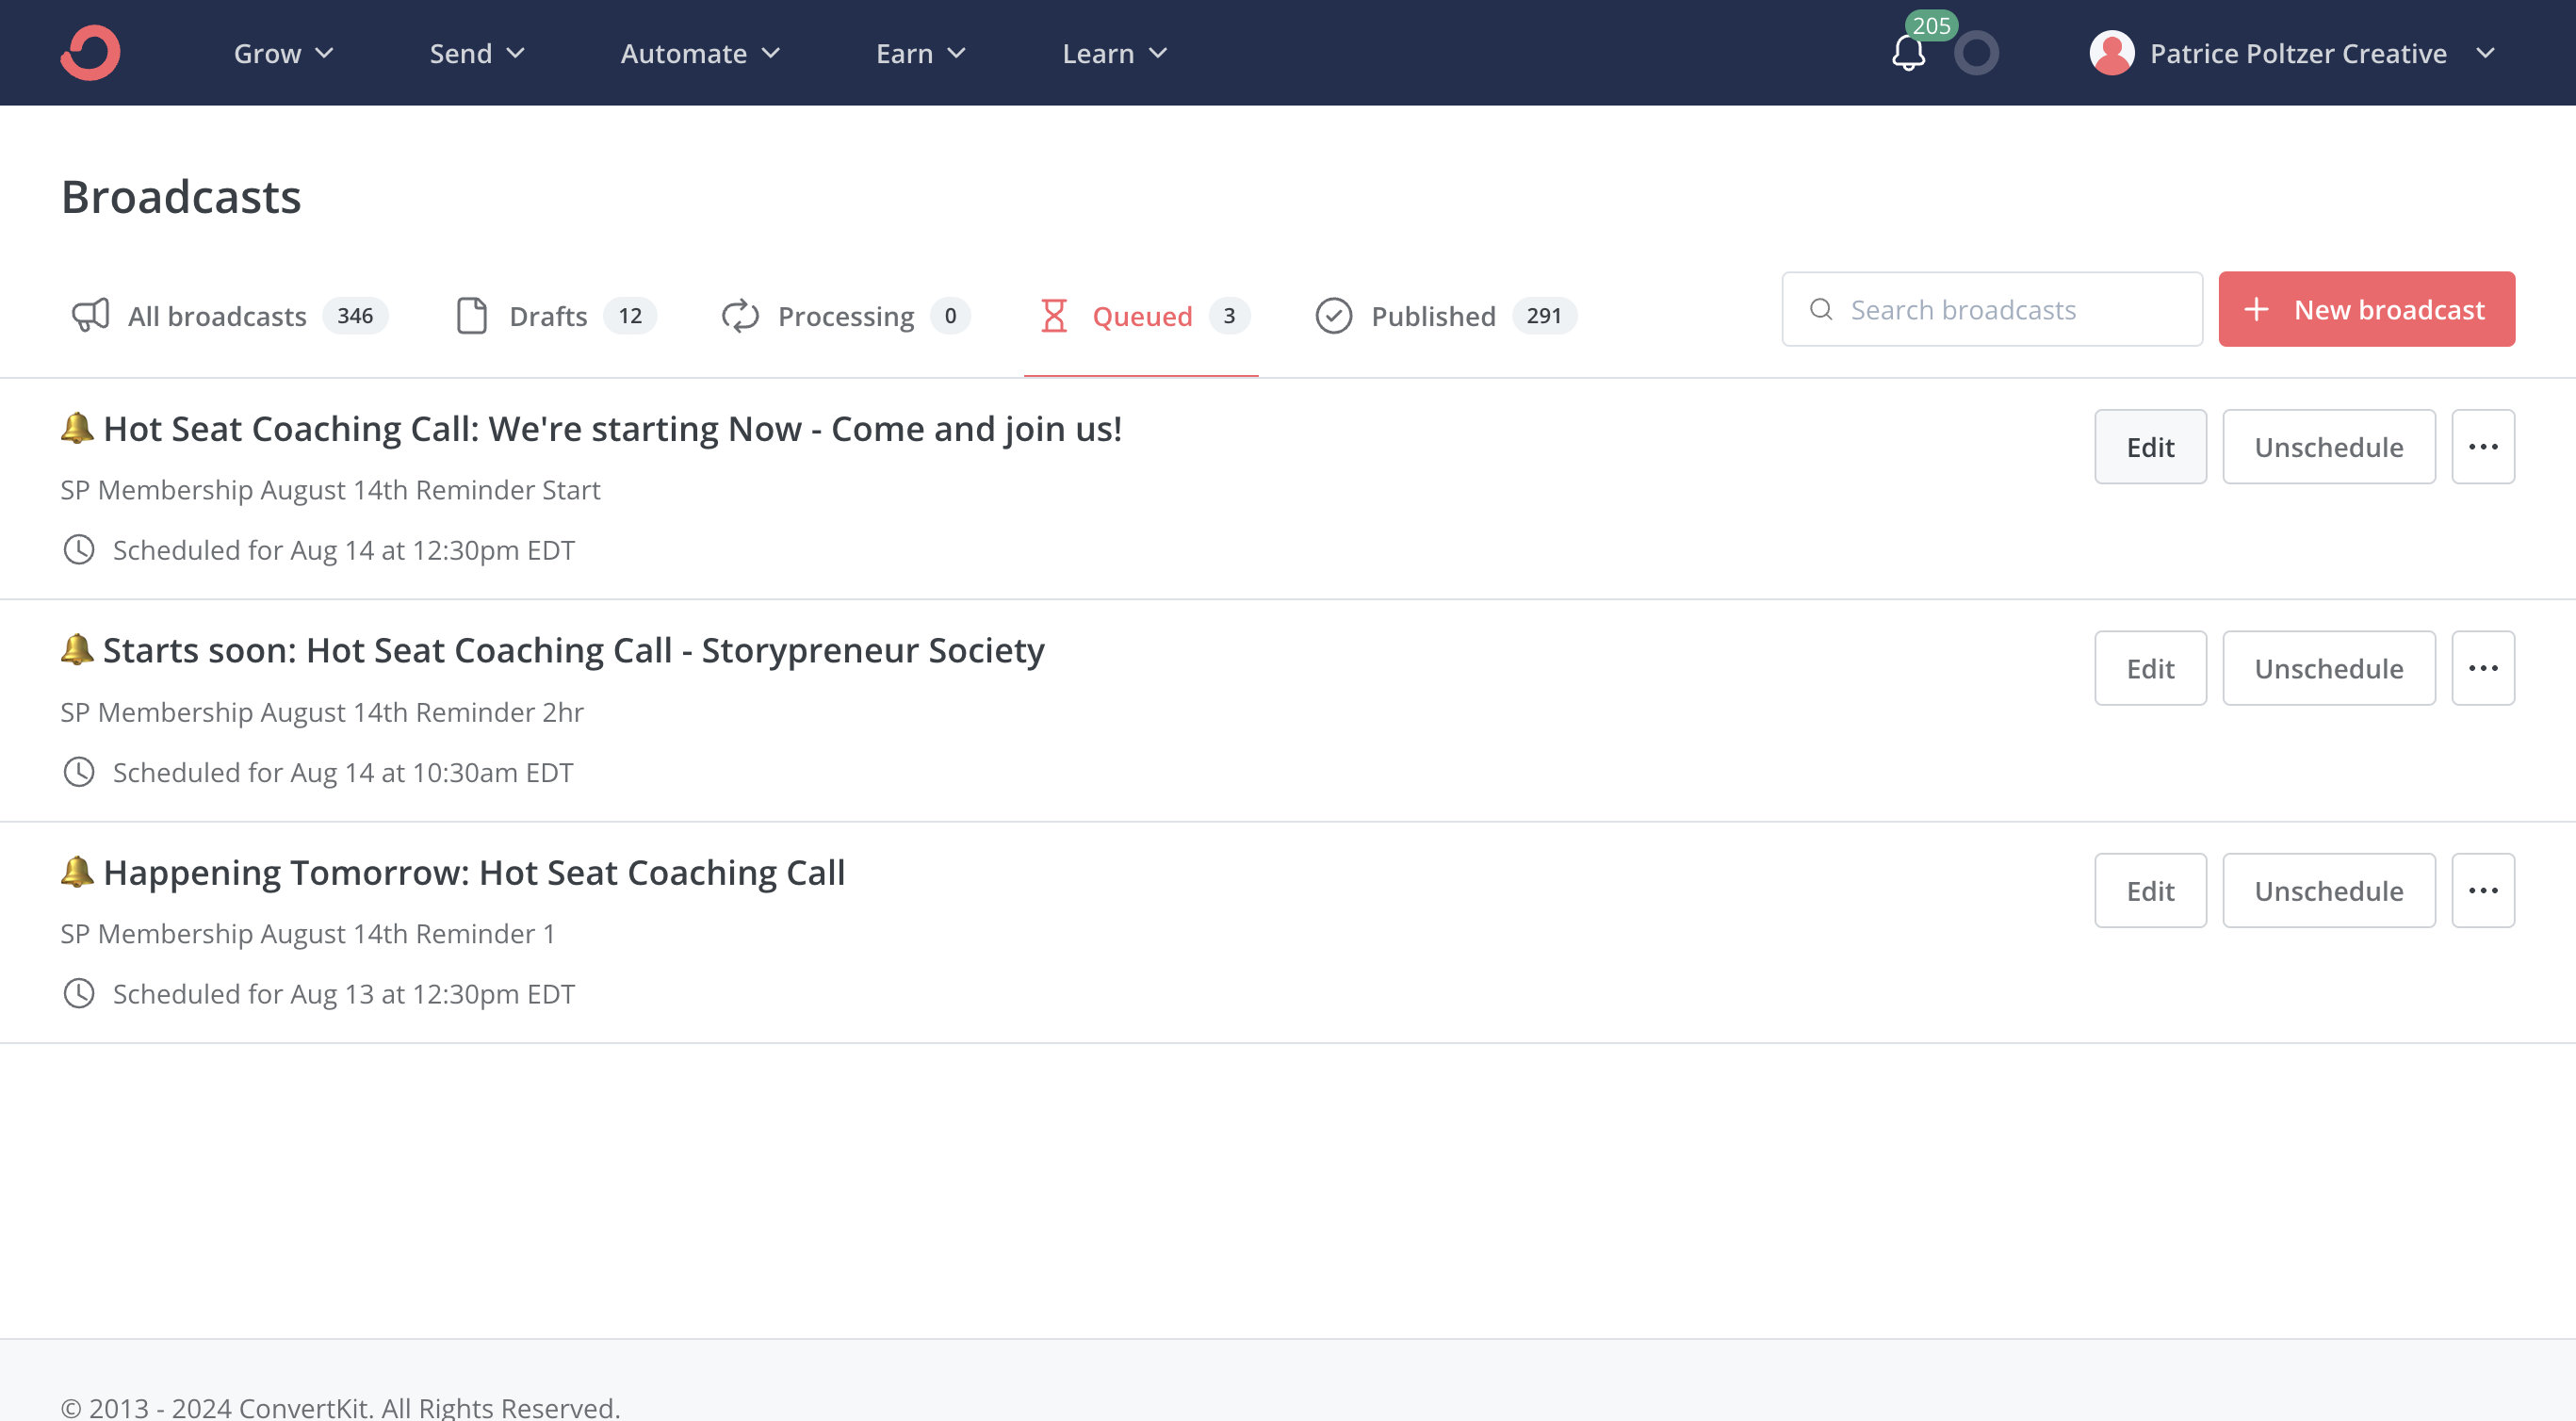
Here you can find all the drafts. Here you can find all the scheduled emails.

If you want to make a quick change to a scheduled email, click on "Queued." Then, either click on the email or click "Edit."
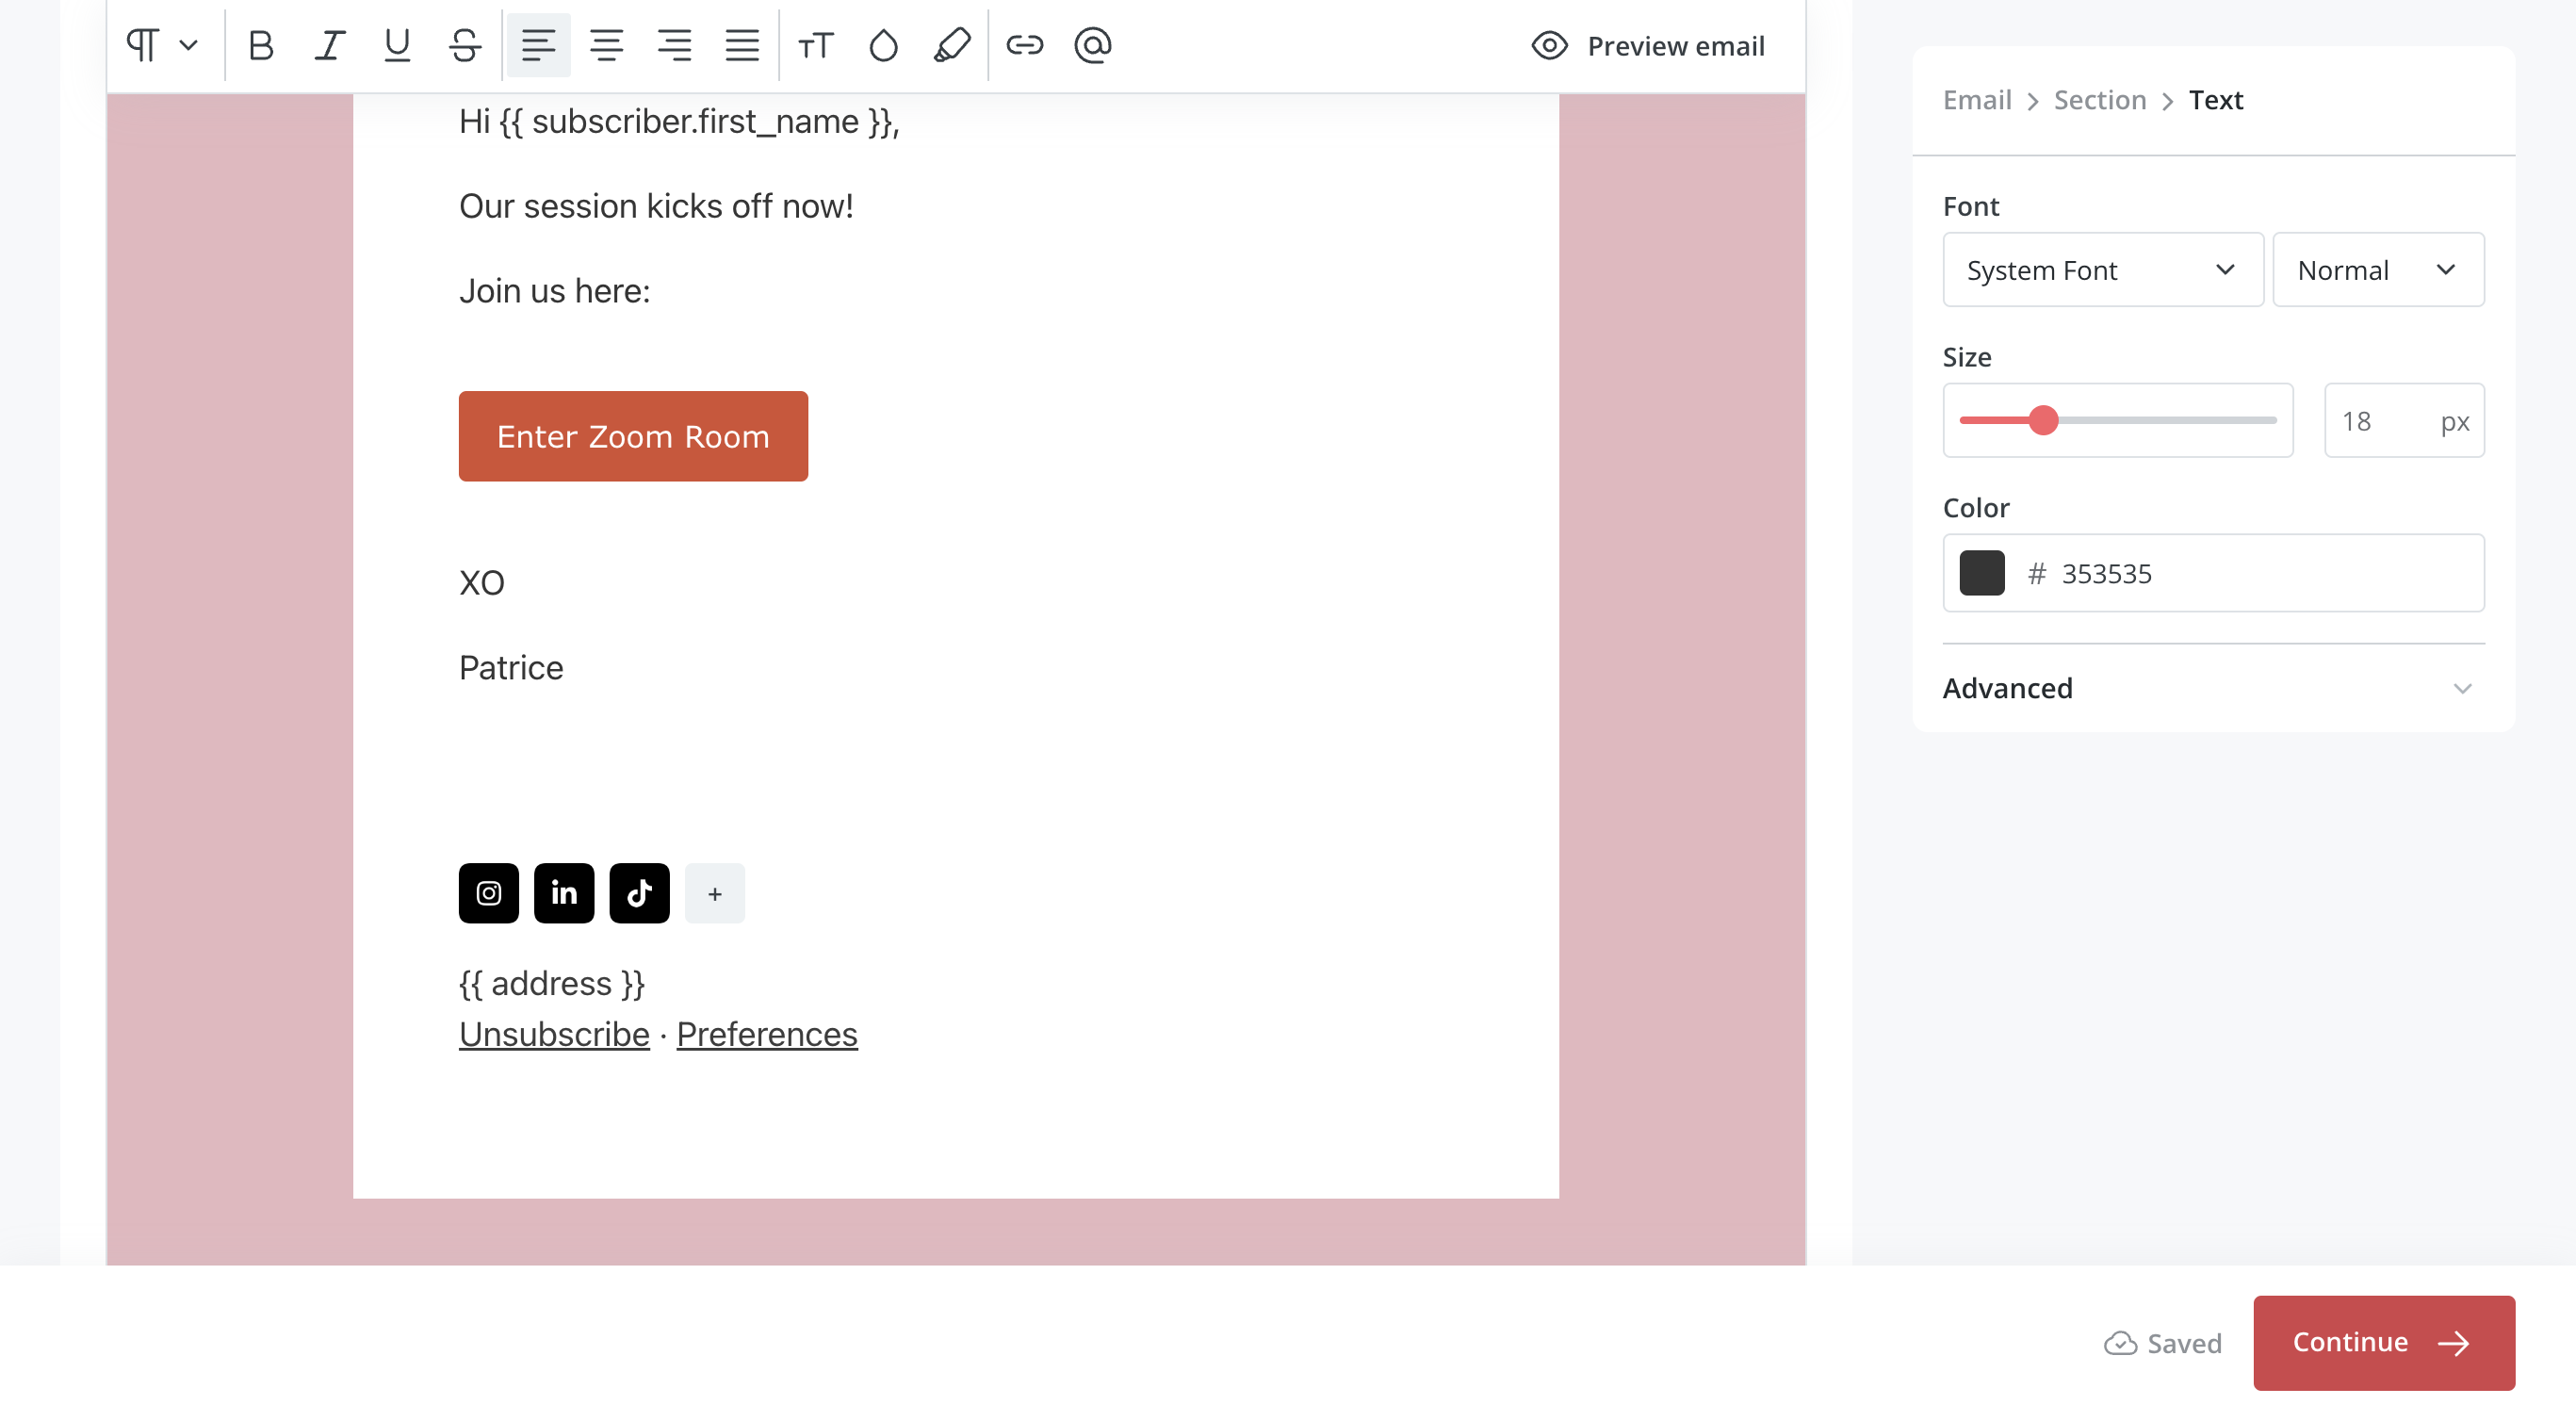
In the subject line, you can change the header. You can also change the body text here.
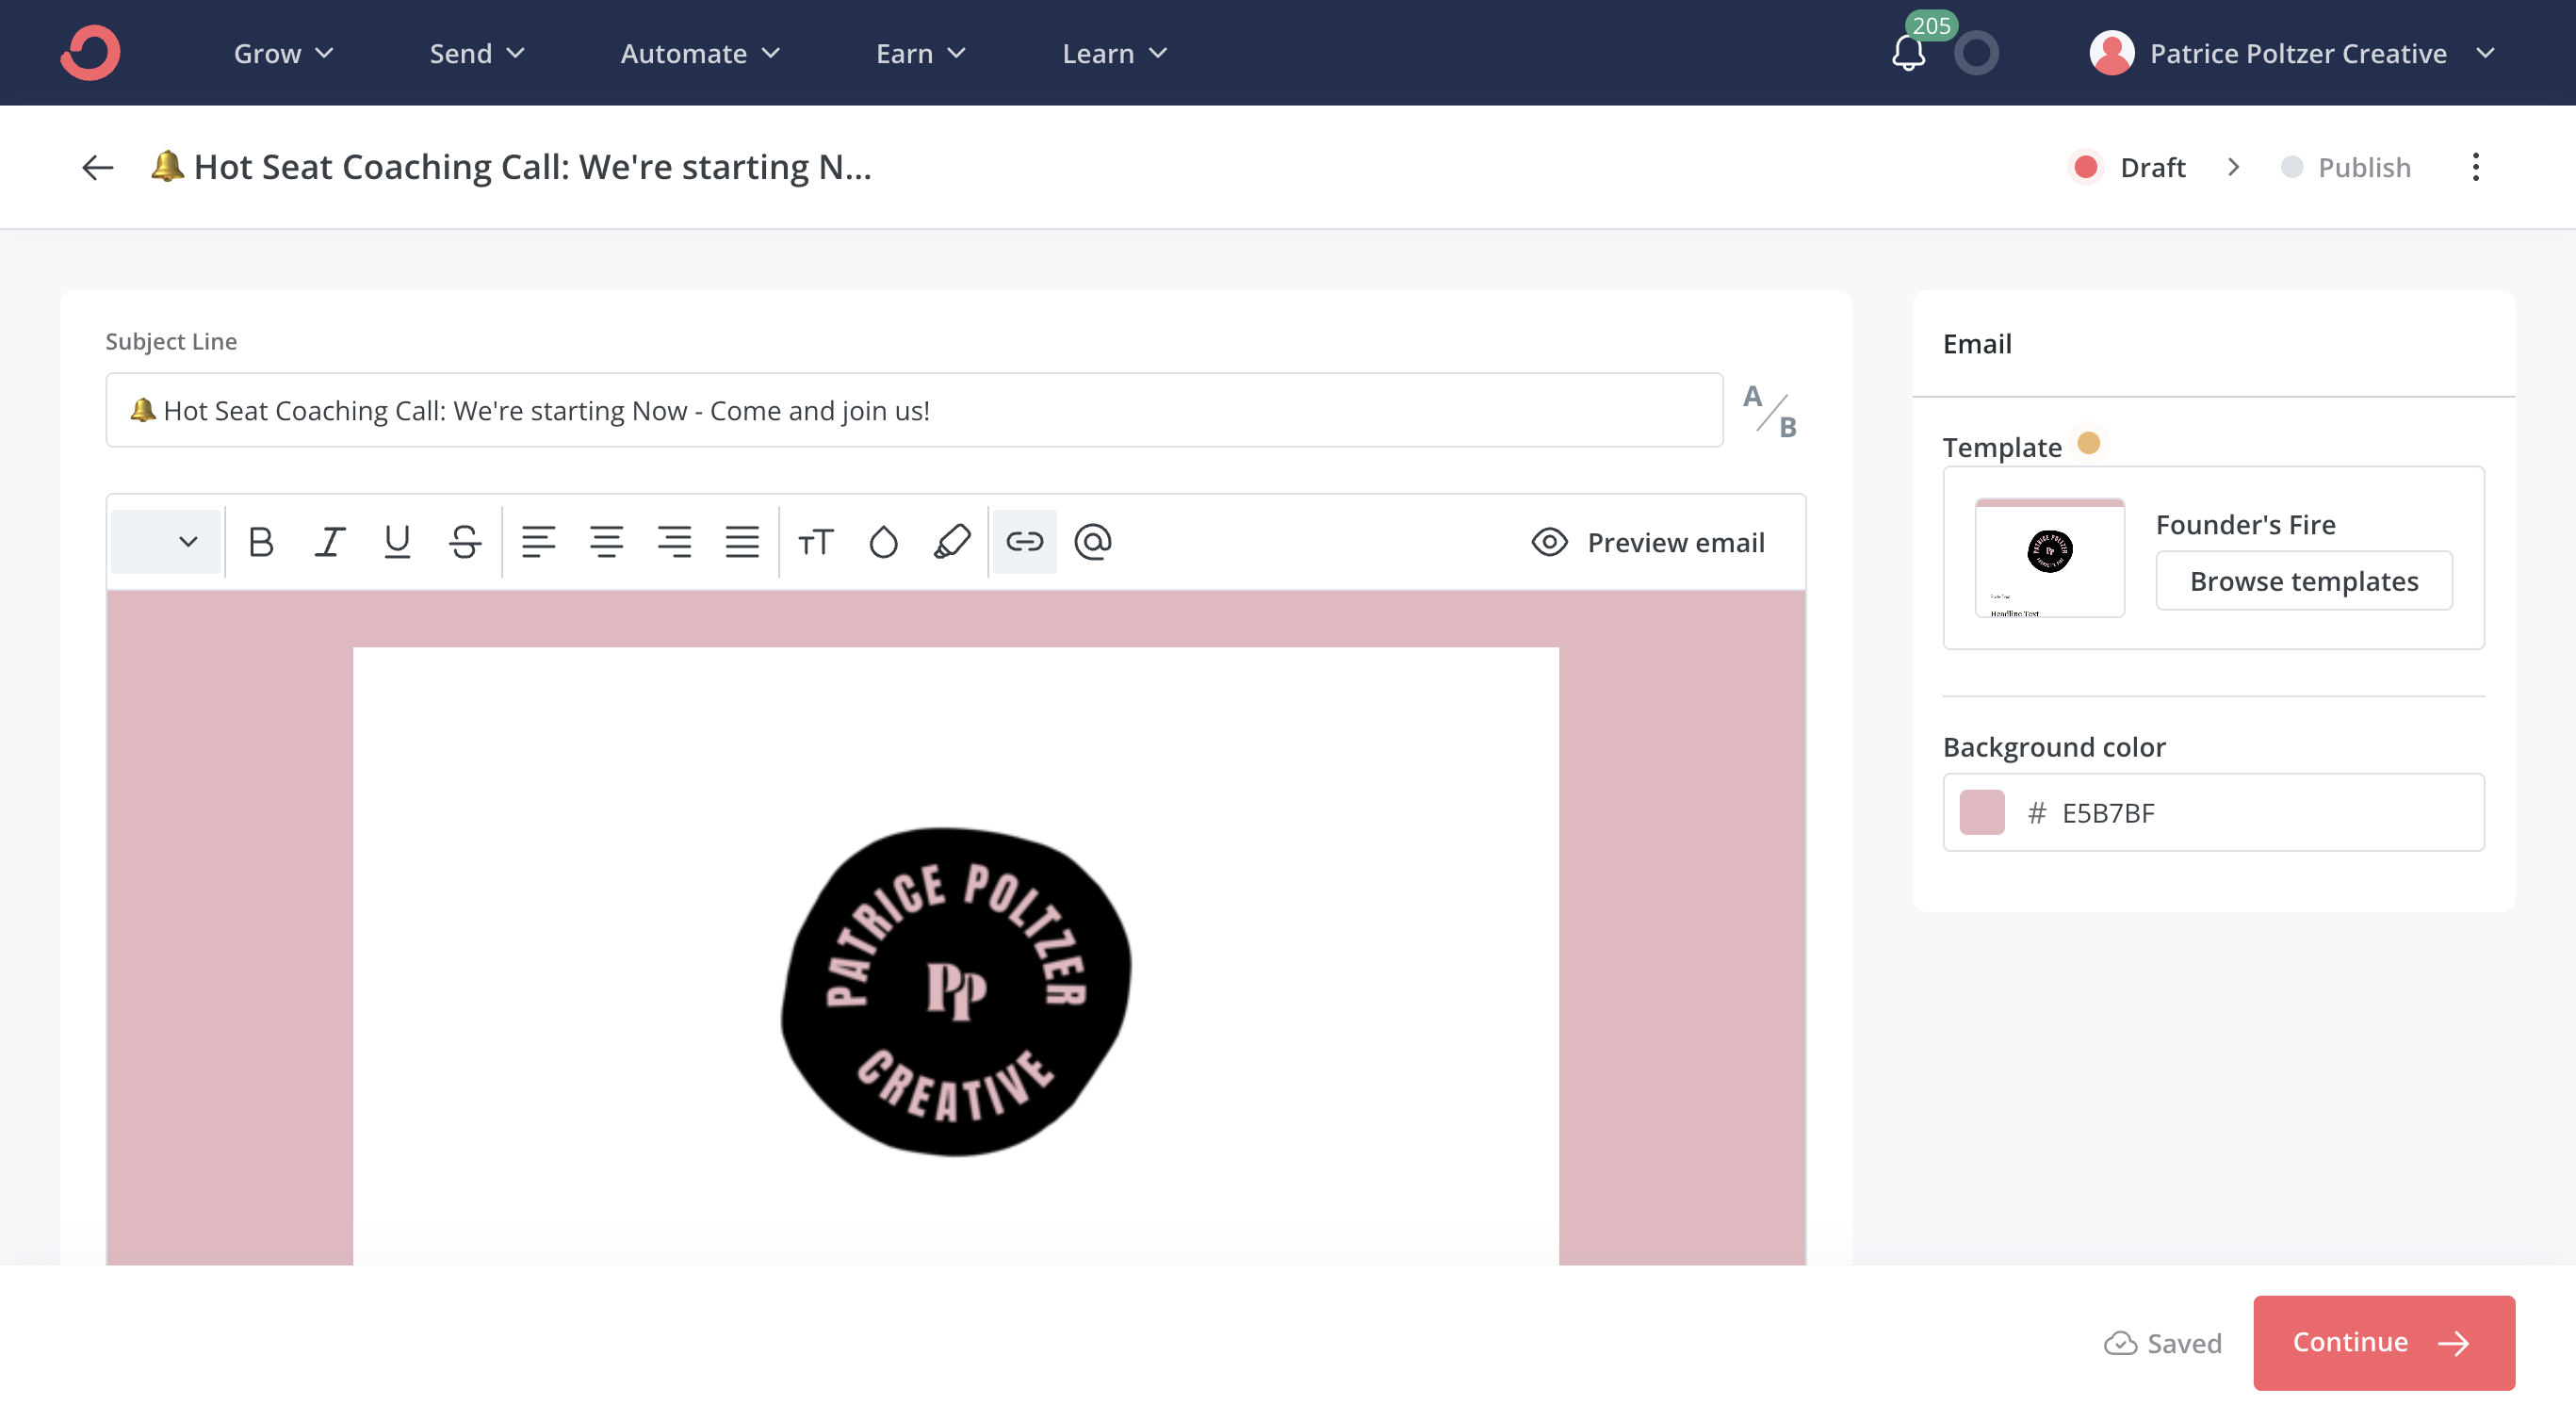
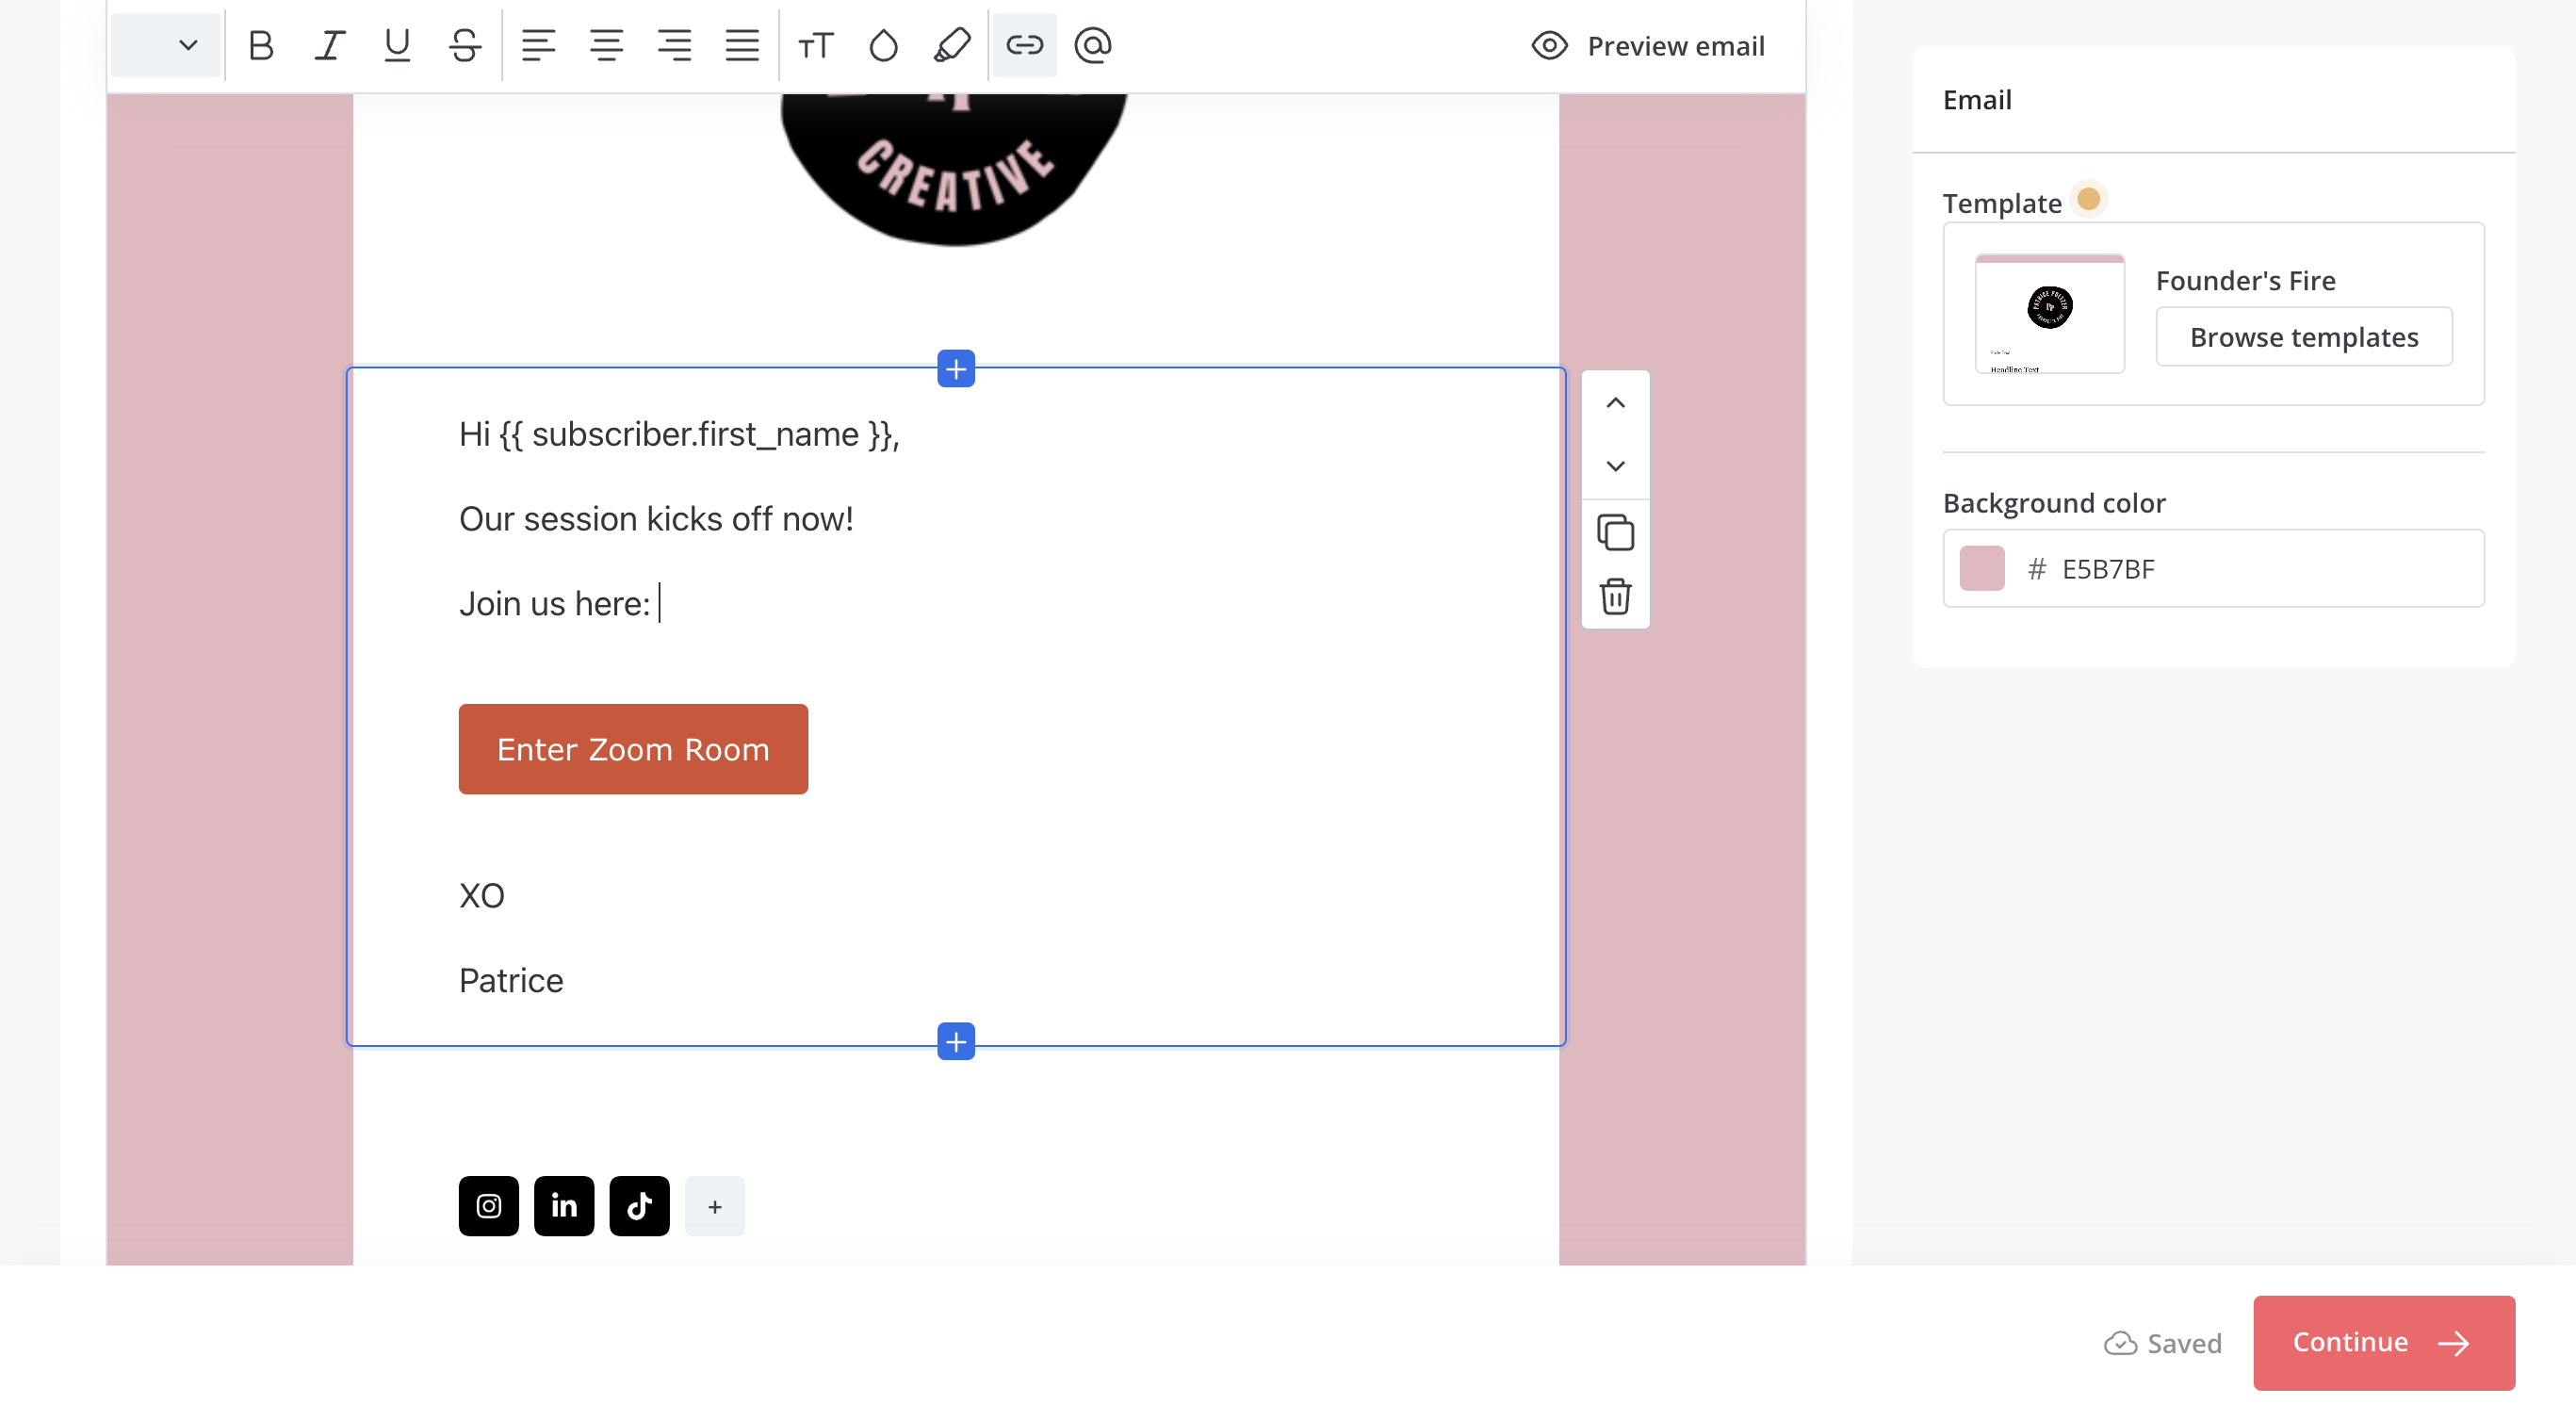
When you make changes, click Continue at the bottom right.
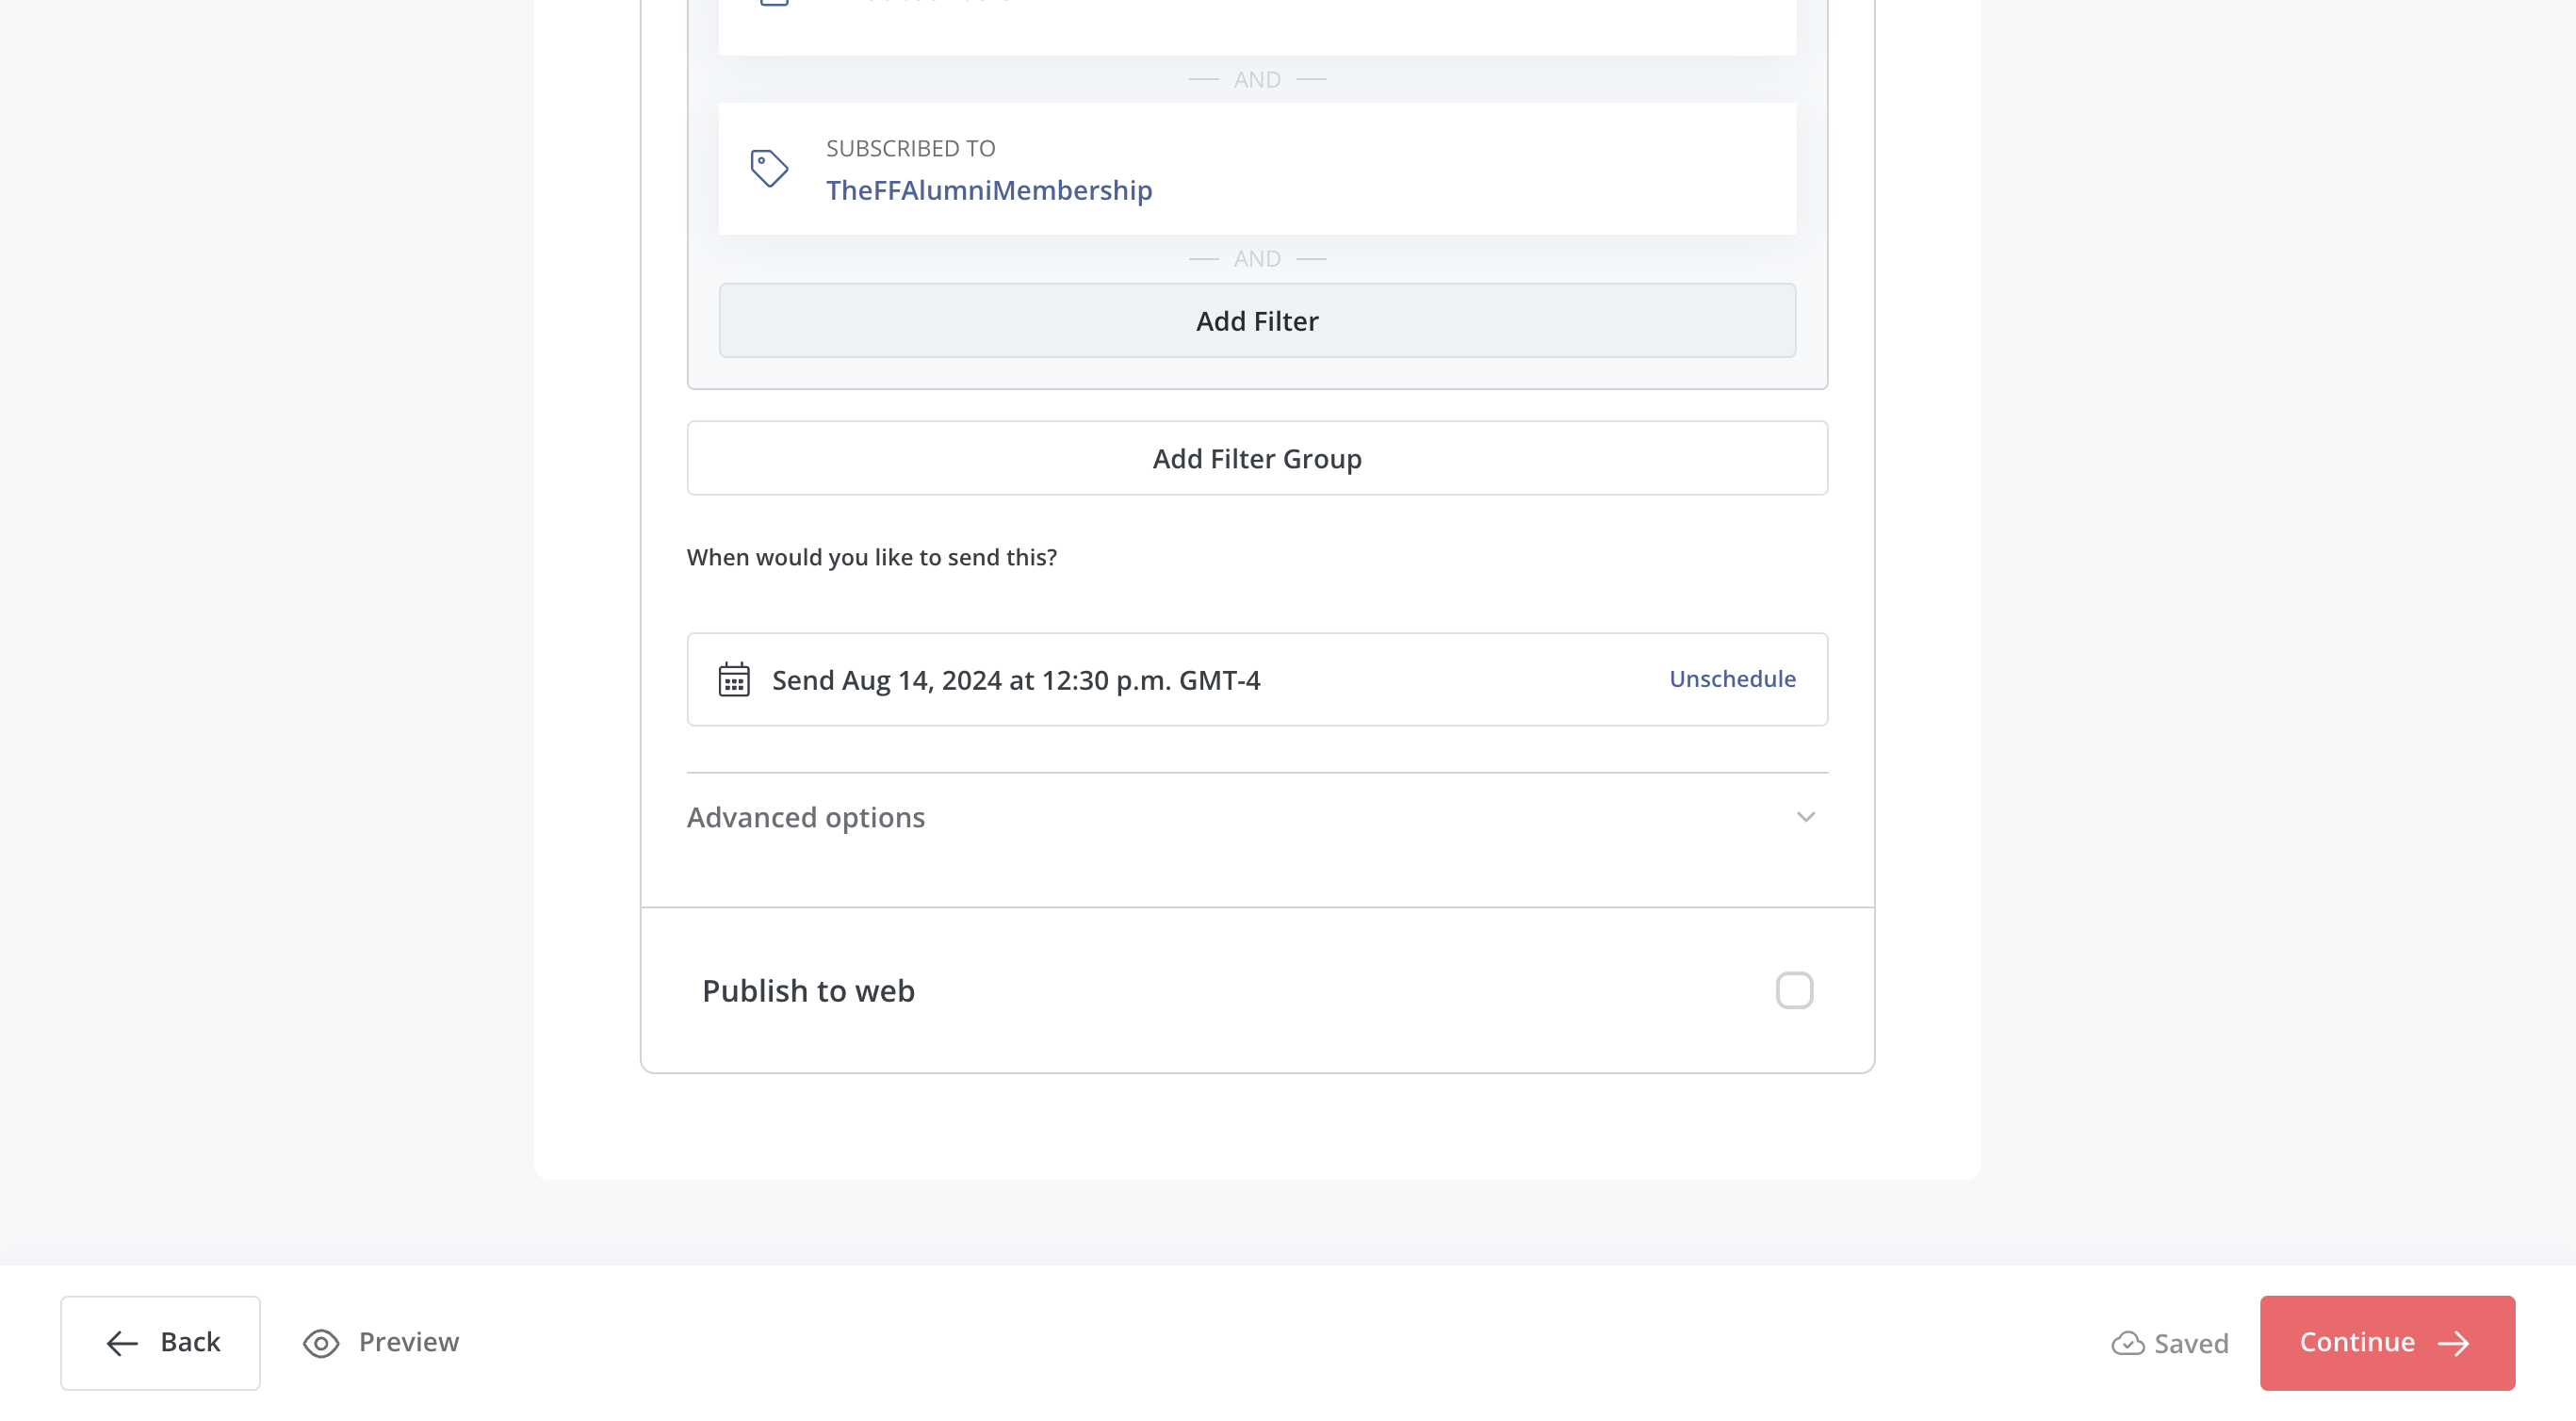
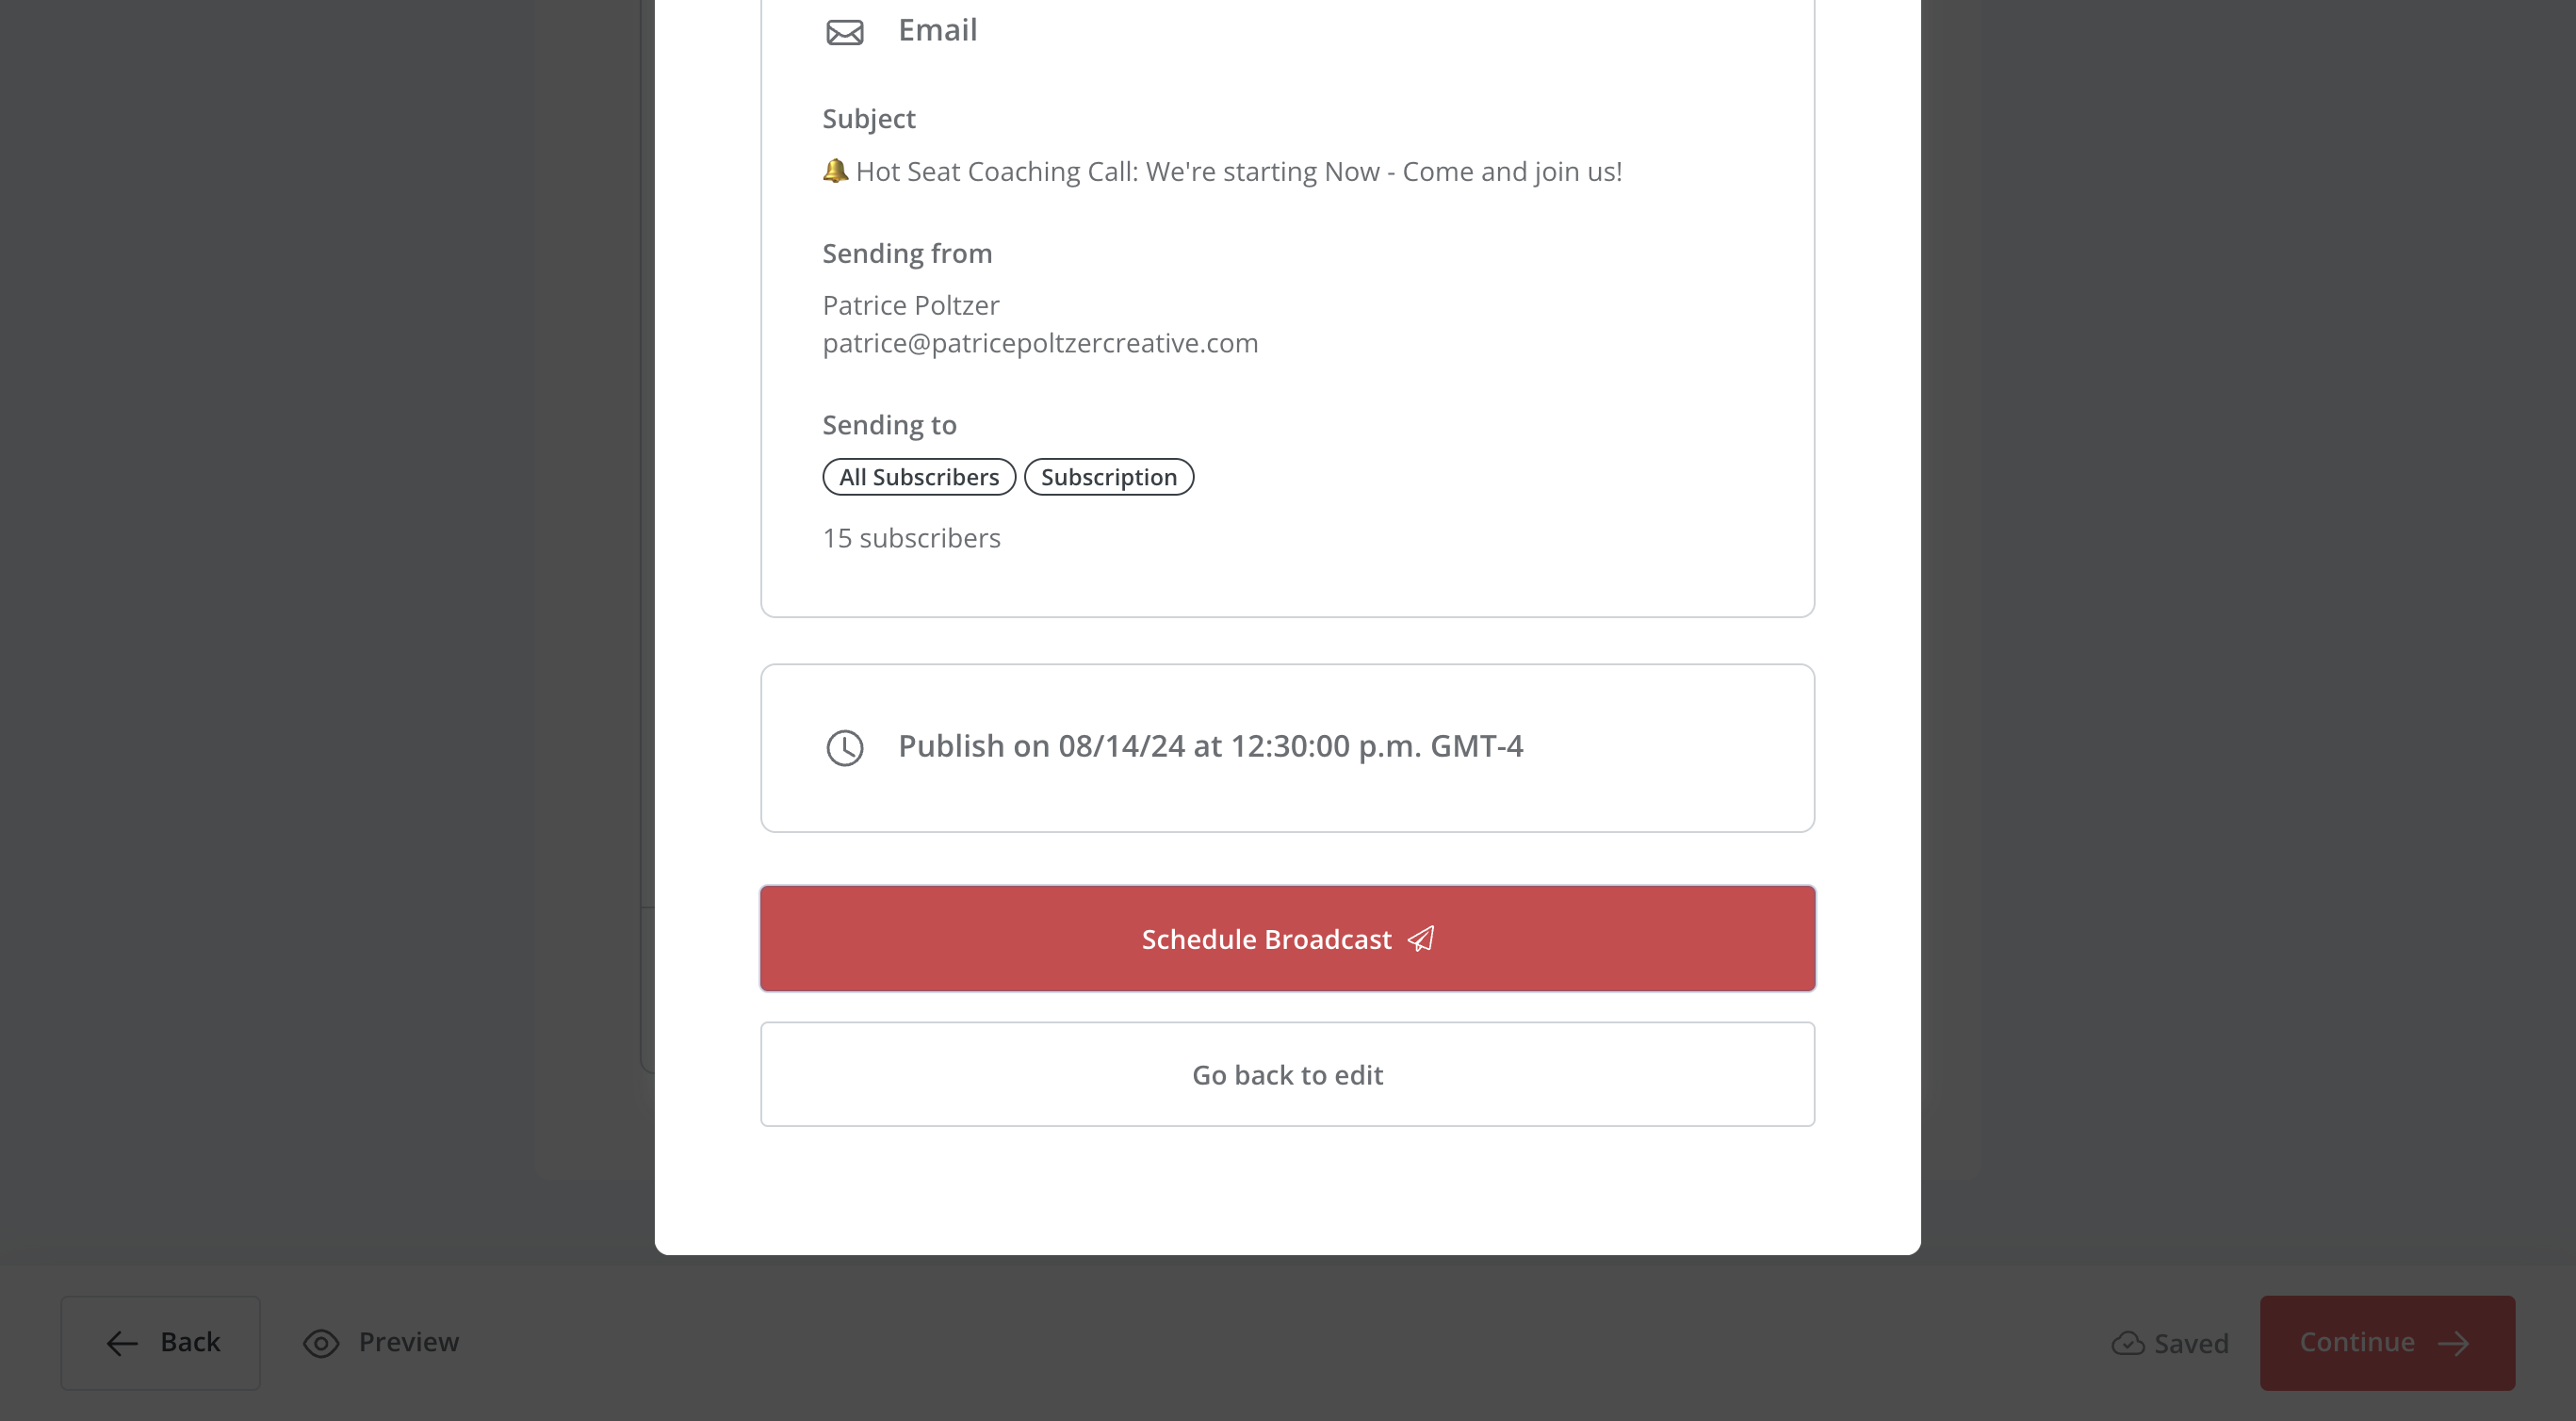
In this section, you can see who will receive the email and which tag has been assigned. You can also change the scheduling. Sometimes, this is removed when you make changes, and you have to schedule it again. You can choose a date here. Click Advanced Options if you want to change the preview text.
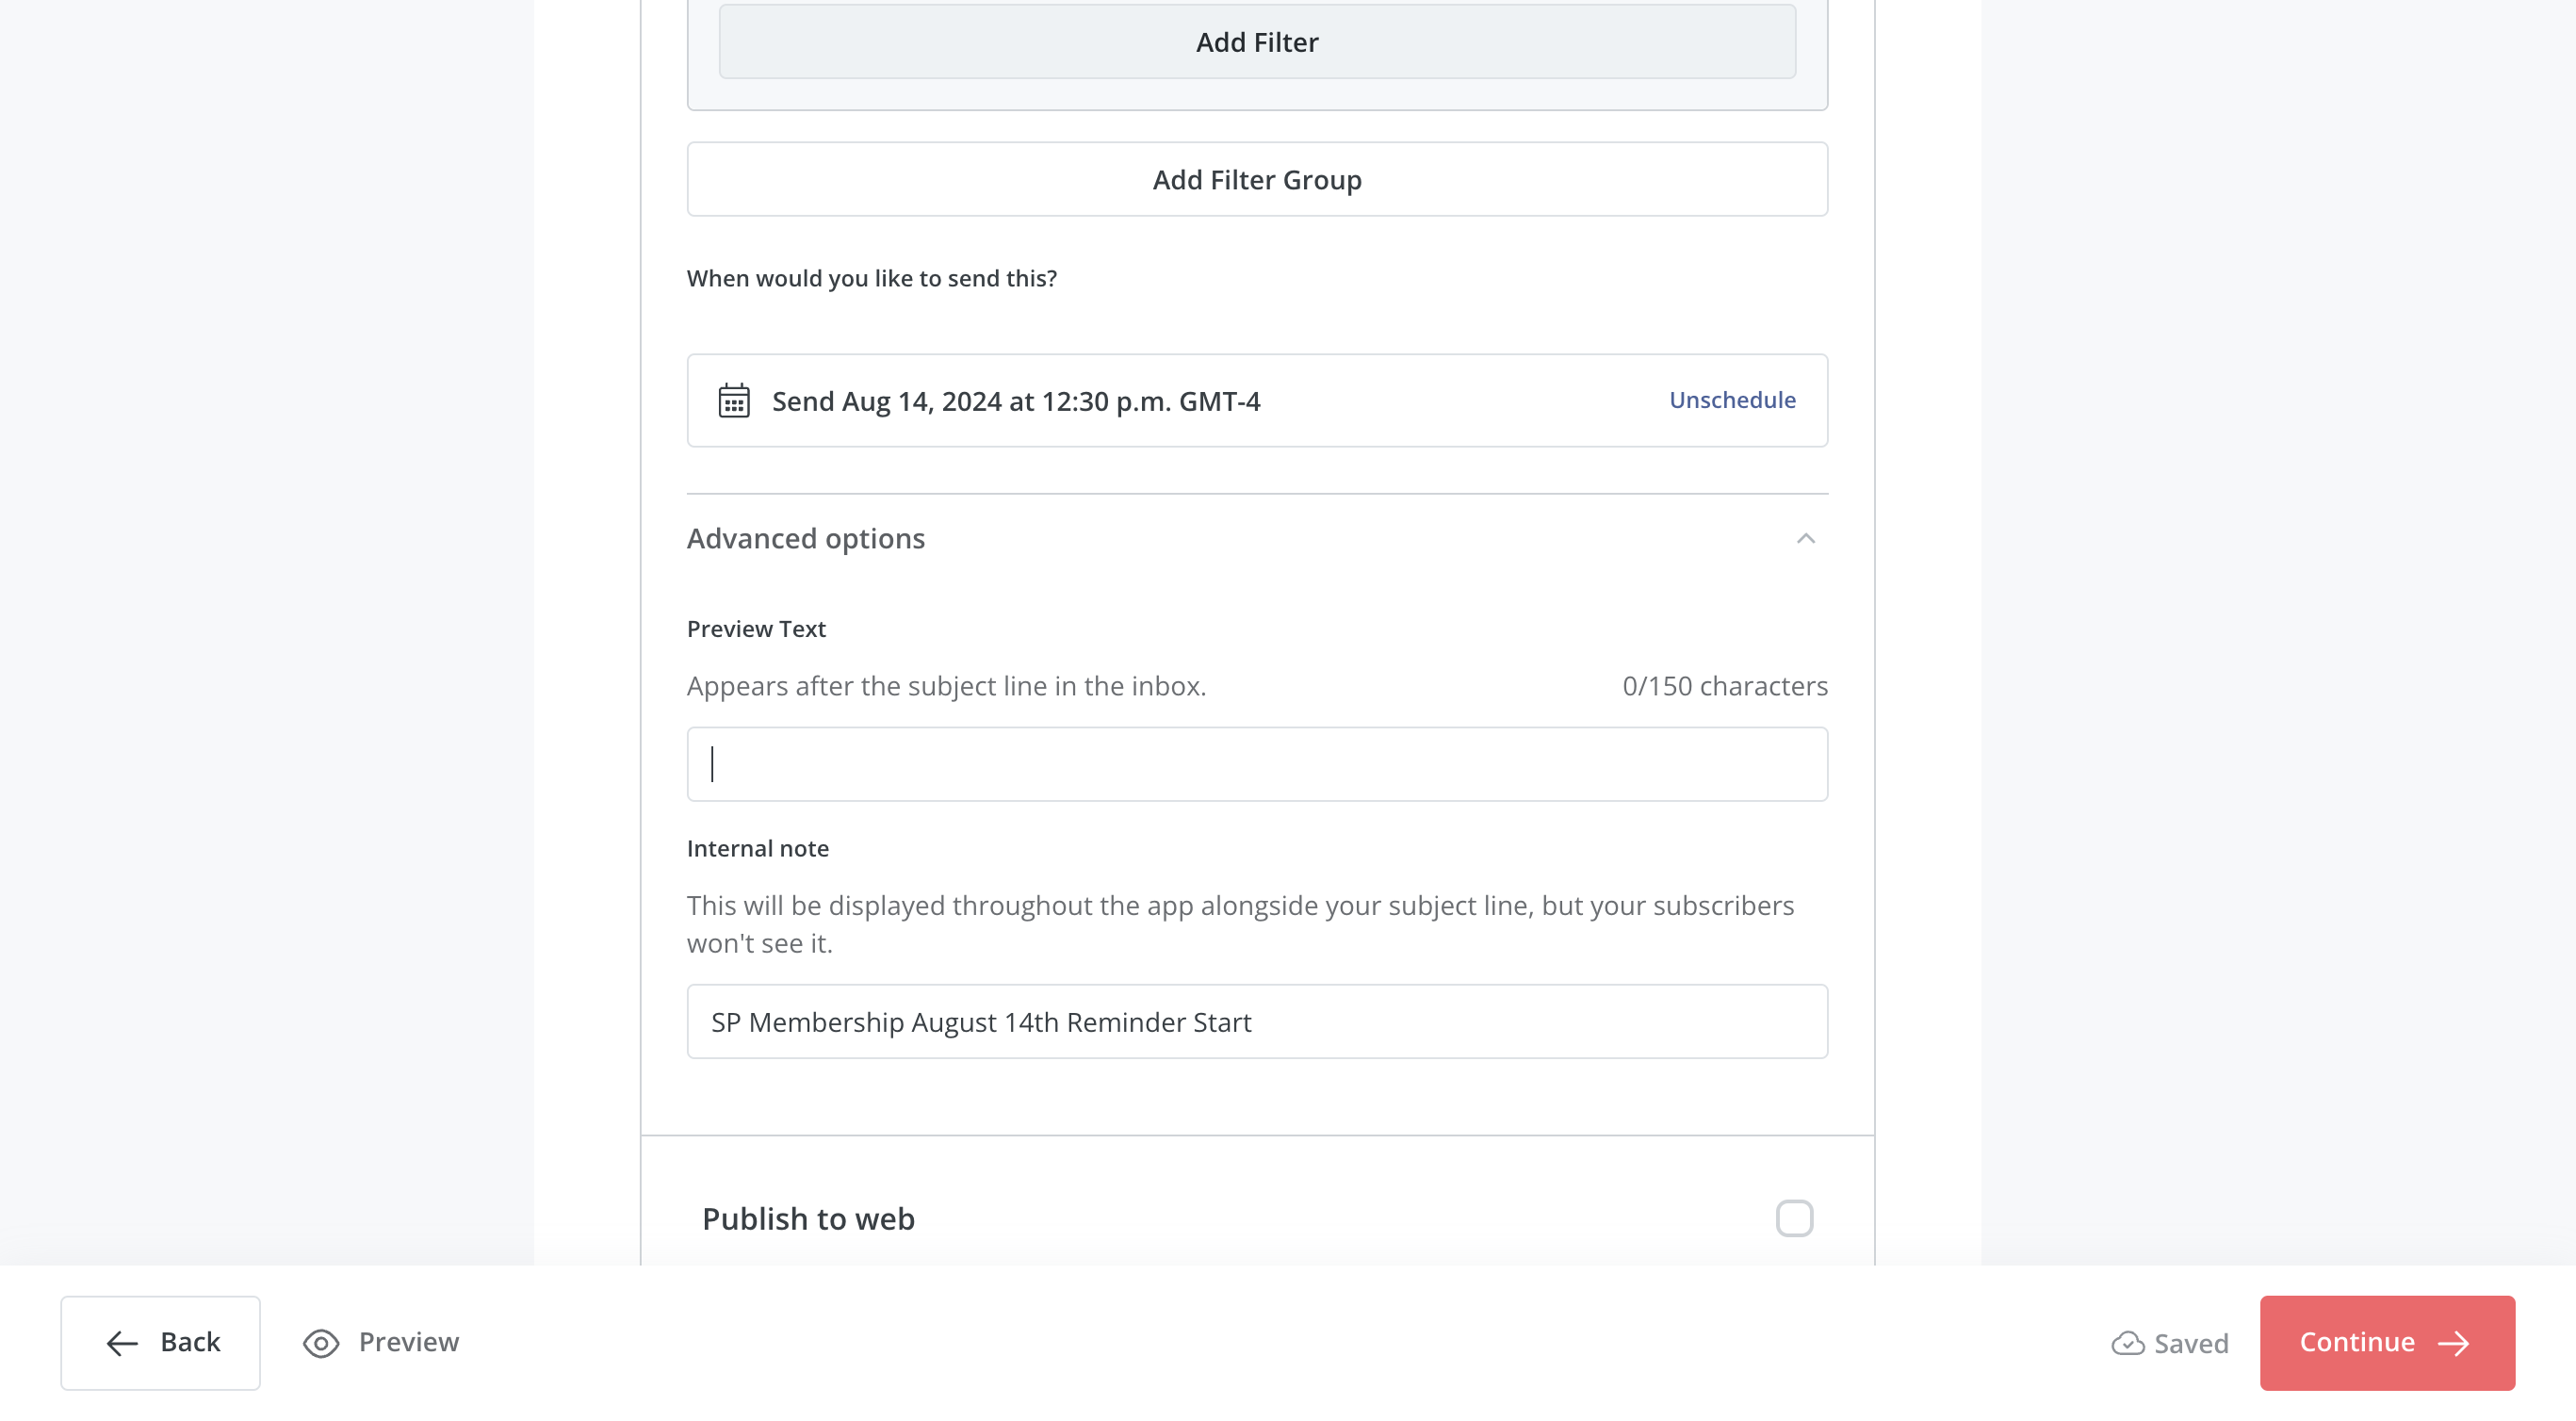
In this case, we don't have one. When you're done, click Continue.
Then, you can make final changes and click Schedule.
That's it.