How to Enable Class and Location for a Client
Learn how to enable Class and Location tracking for a client.
By Aasma Technology Solutions
This guide explains how to enable the Class and Location options for a client. Enabling these settings allows transactions associated with the client to support class and location tracking, helping improve financial reporting and transaction categorization.
1
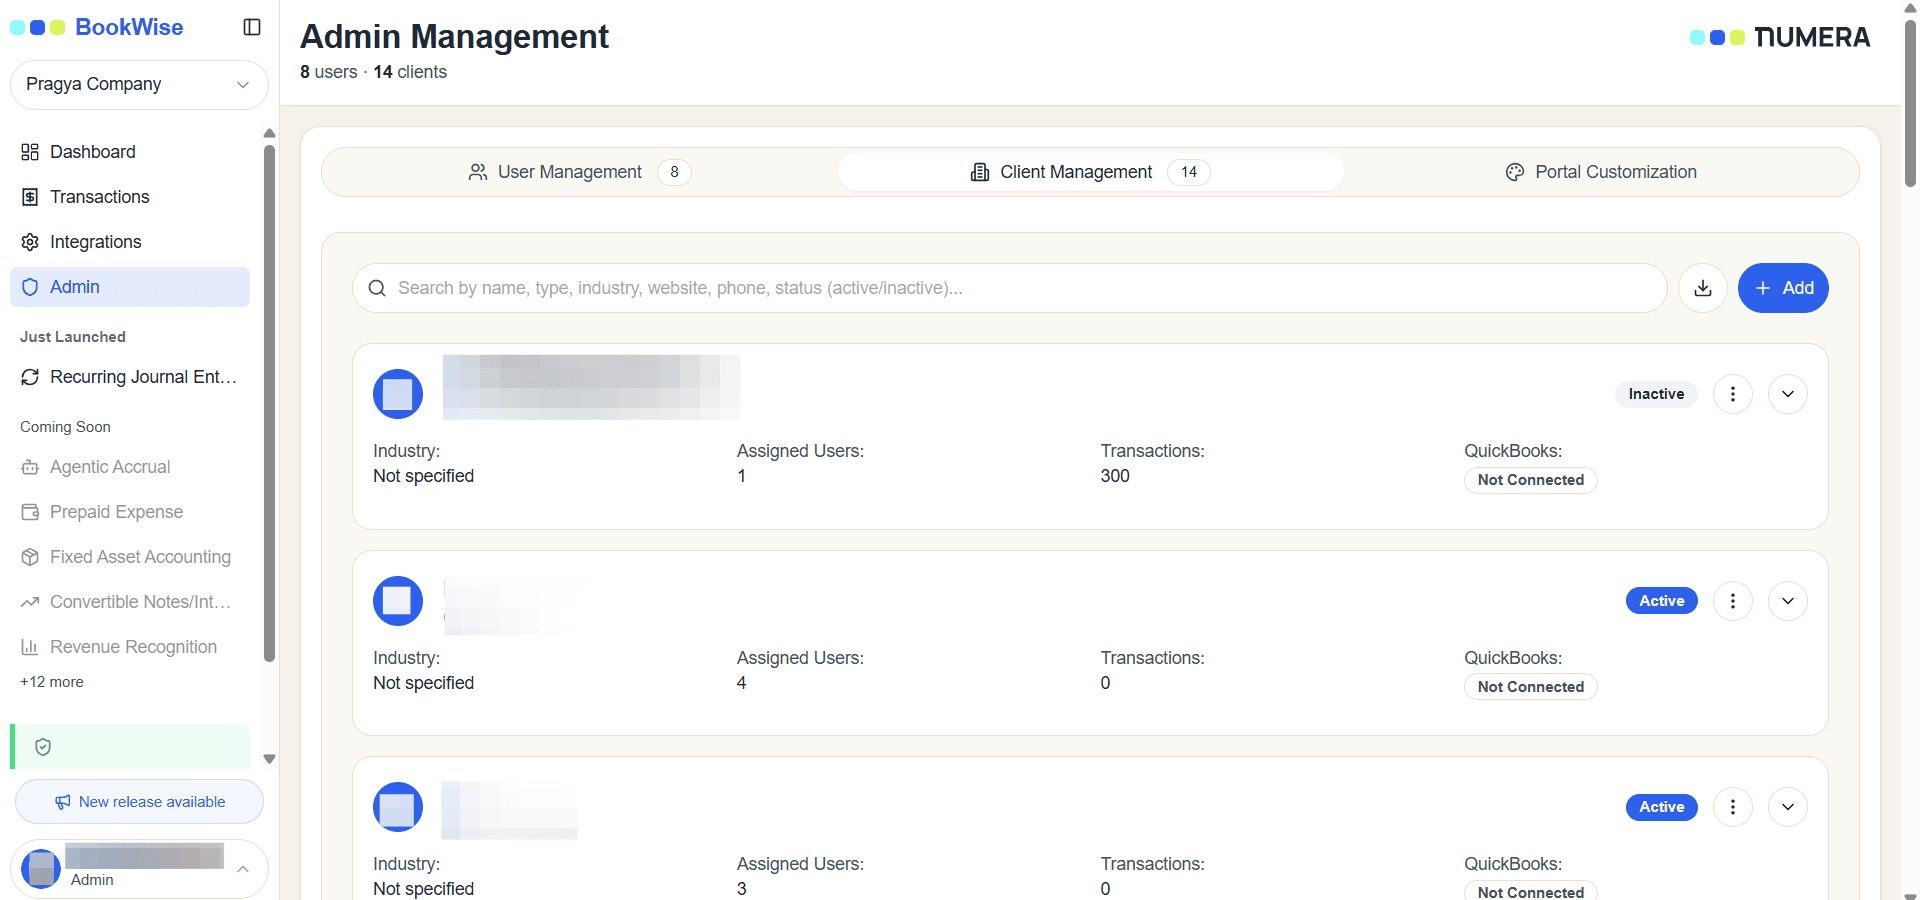
Go to the Clients section from the sidebar to view the list of available clients. Locate the client you want to update and open its details.
2
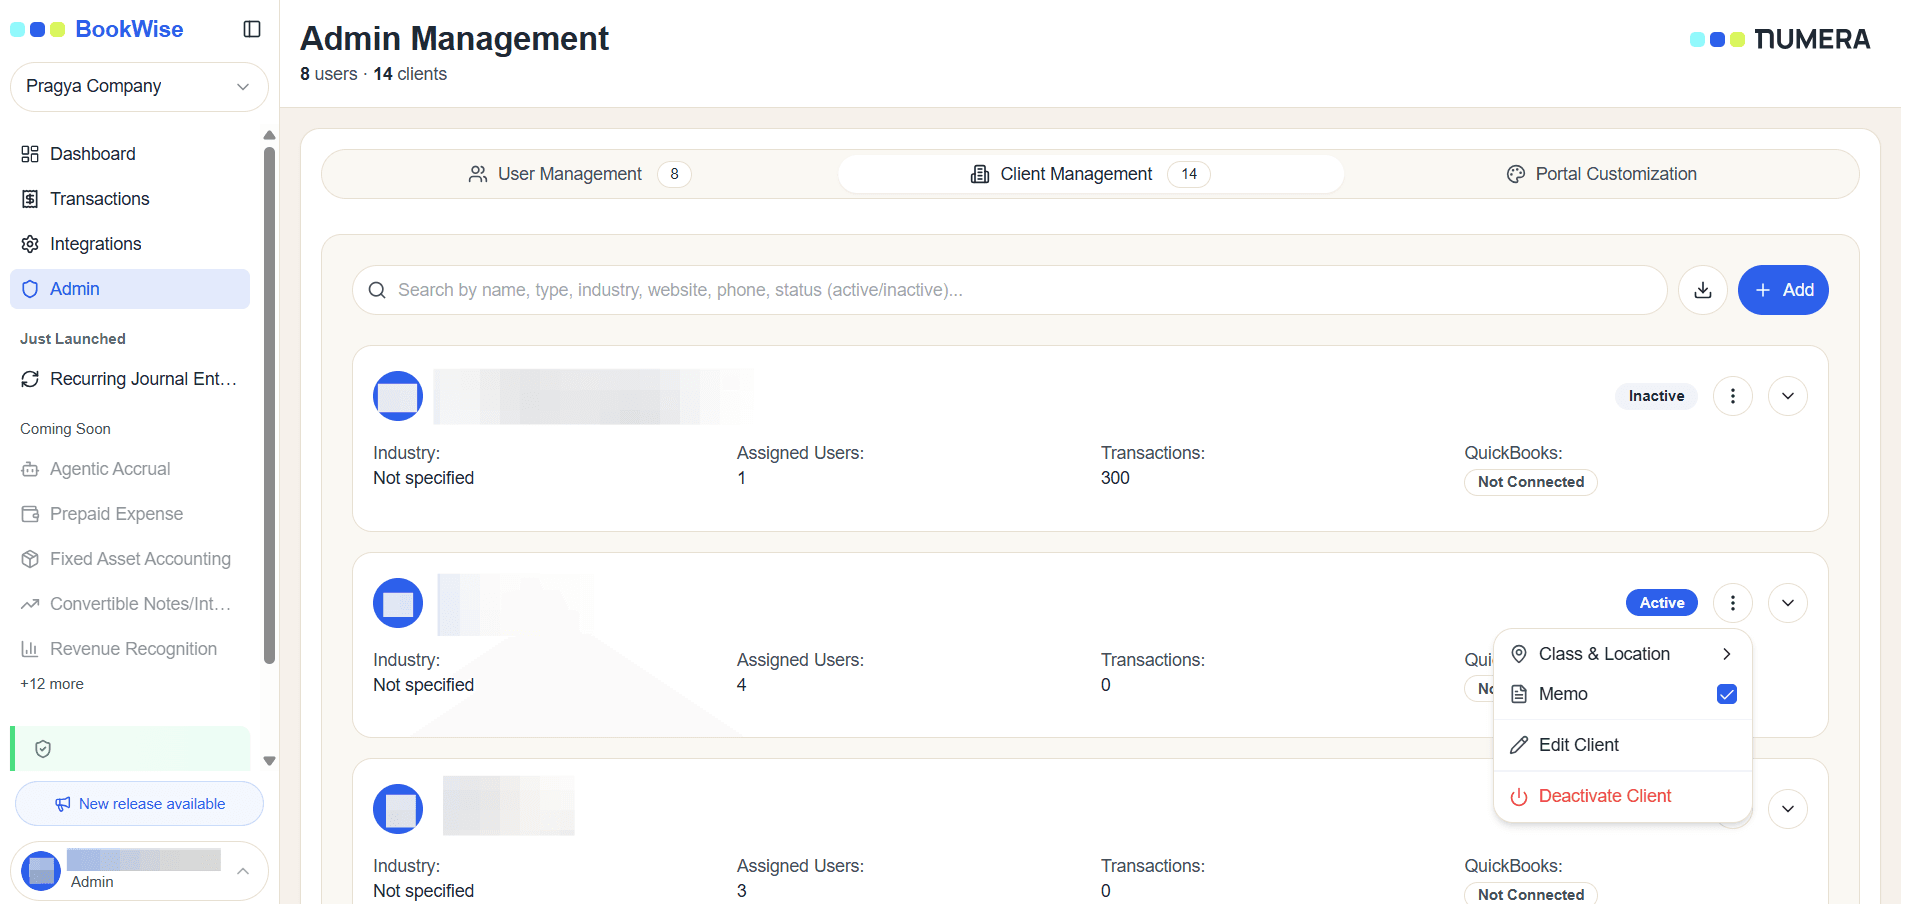
Click the 3 dot button to modify the client's settings.
3
Select Class & Location from the expanded submenu, and select the option based on your requirement
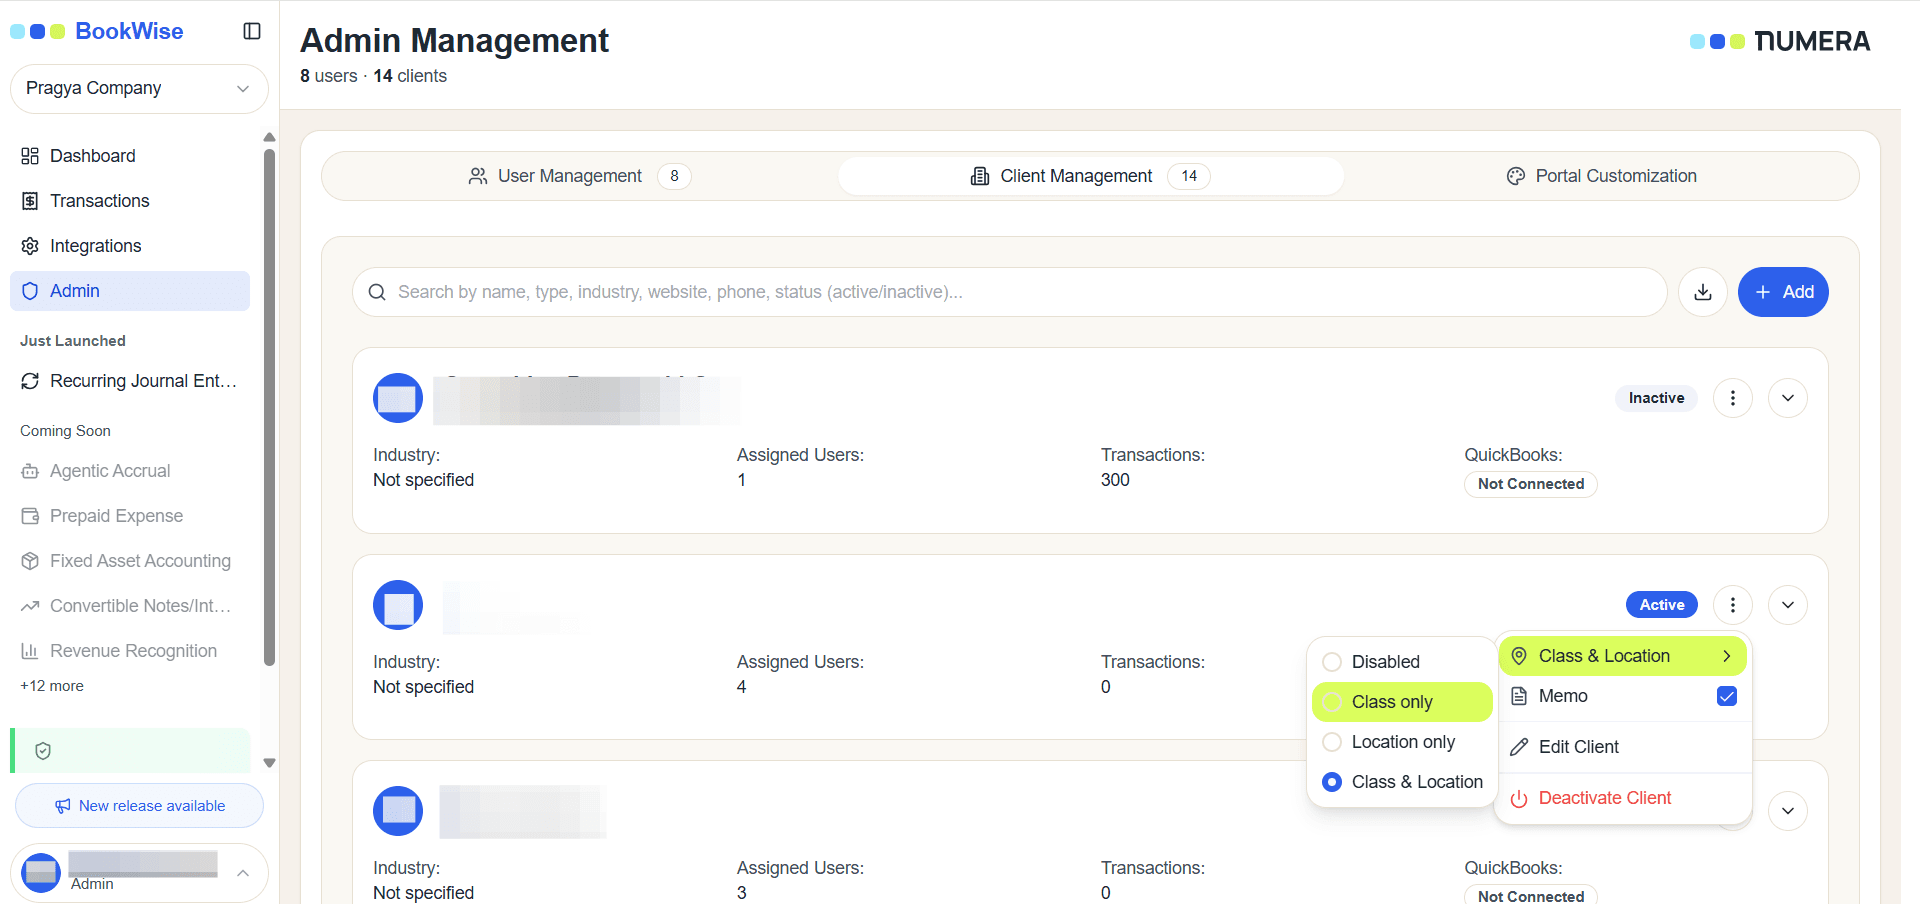
Open the client's details to confirm that the Class and Location settings have been enabled successfully.
Enabling Class and Location helps ensure transactions are categorized accurately, making financial reporting and reconciliation more efficient.