Icon

How to Enter a New Sales Order: Step-by-Step Guide

Learn how to enter a new sales order, including customer details, product entry, scheduling, and special order handling. Follow these best practices to ensure accurate order processing.

By Samantha Roche

In this guide, we'll learn how to enter a new sales order, including adding customer details, selecting products, and setting the correct schedule dates for in-stock and special order items. We will also cover how to avoid common mistakes, such as not using the "Pick From Existing" option, and how to add custom notes when needed.

This process helps ensure that orders are accurate and production schedules are set correctly.

Let's get started

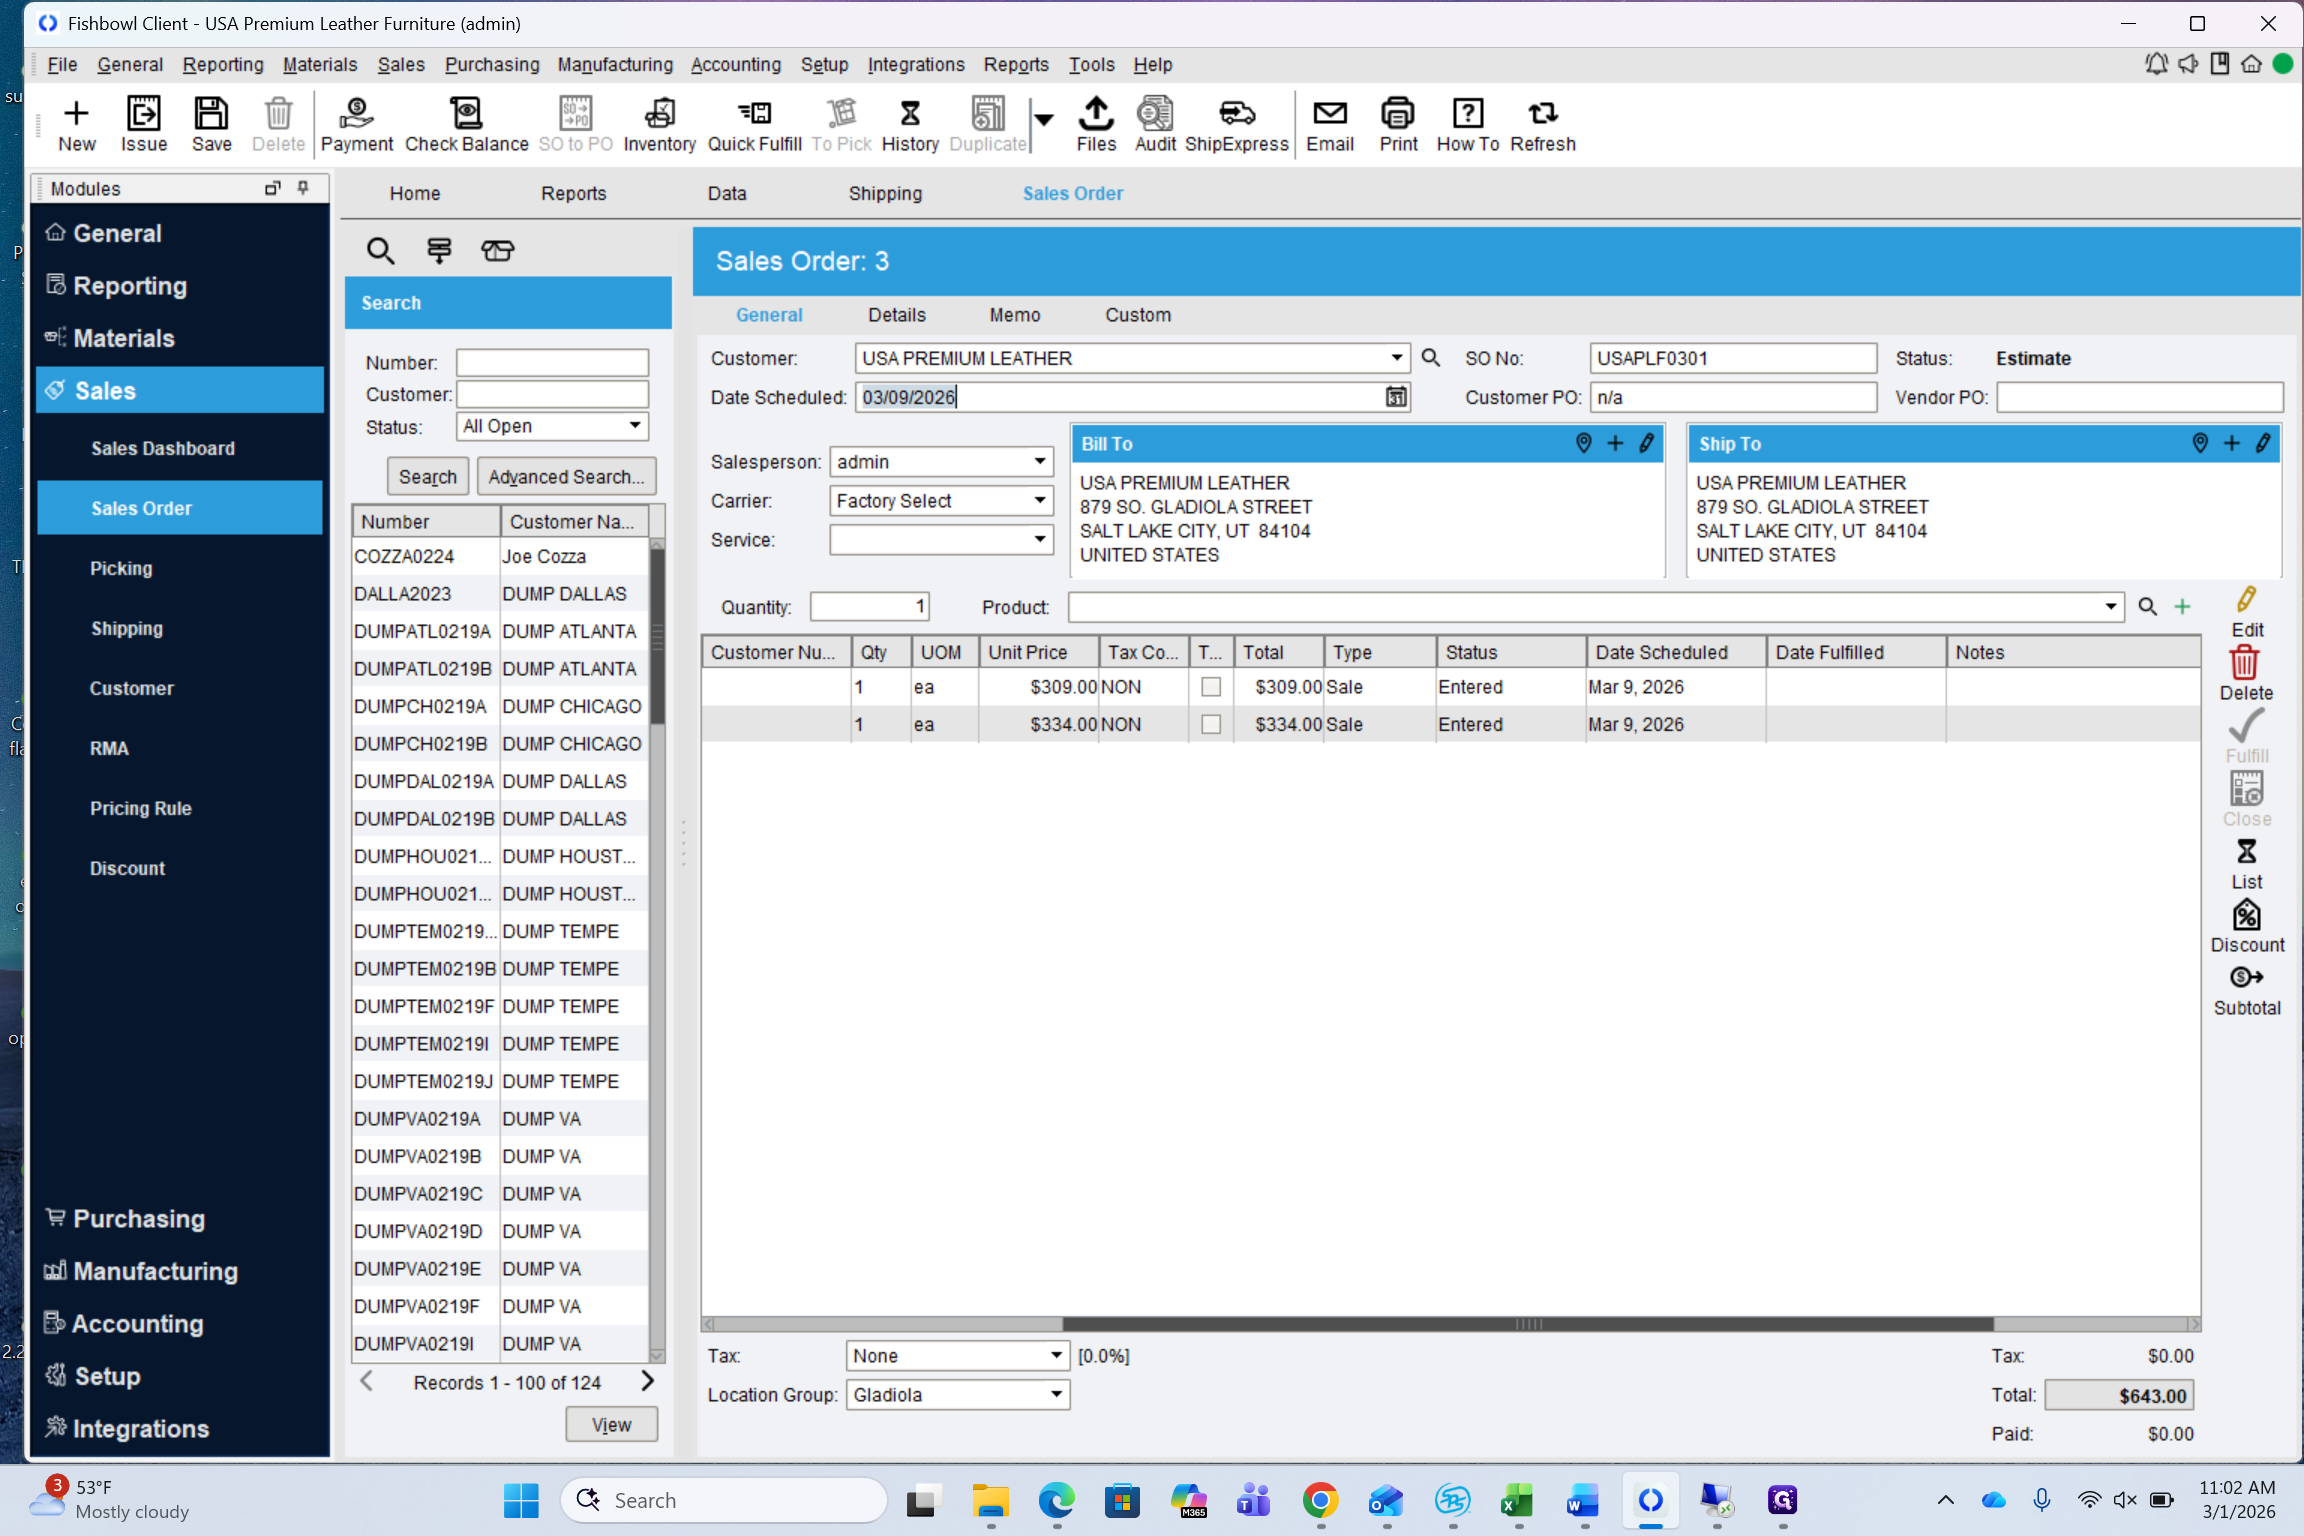
To enter a new order, press New.

1
Click on "+"
Step #1: Click on "+"

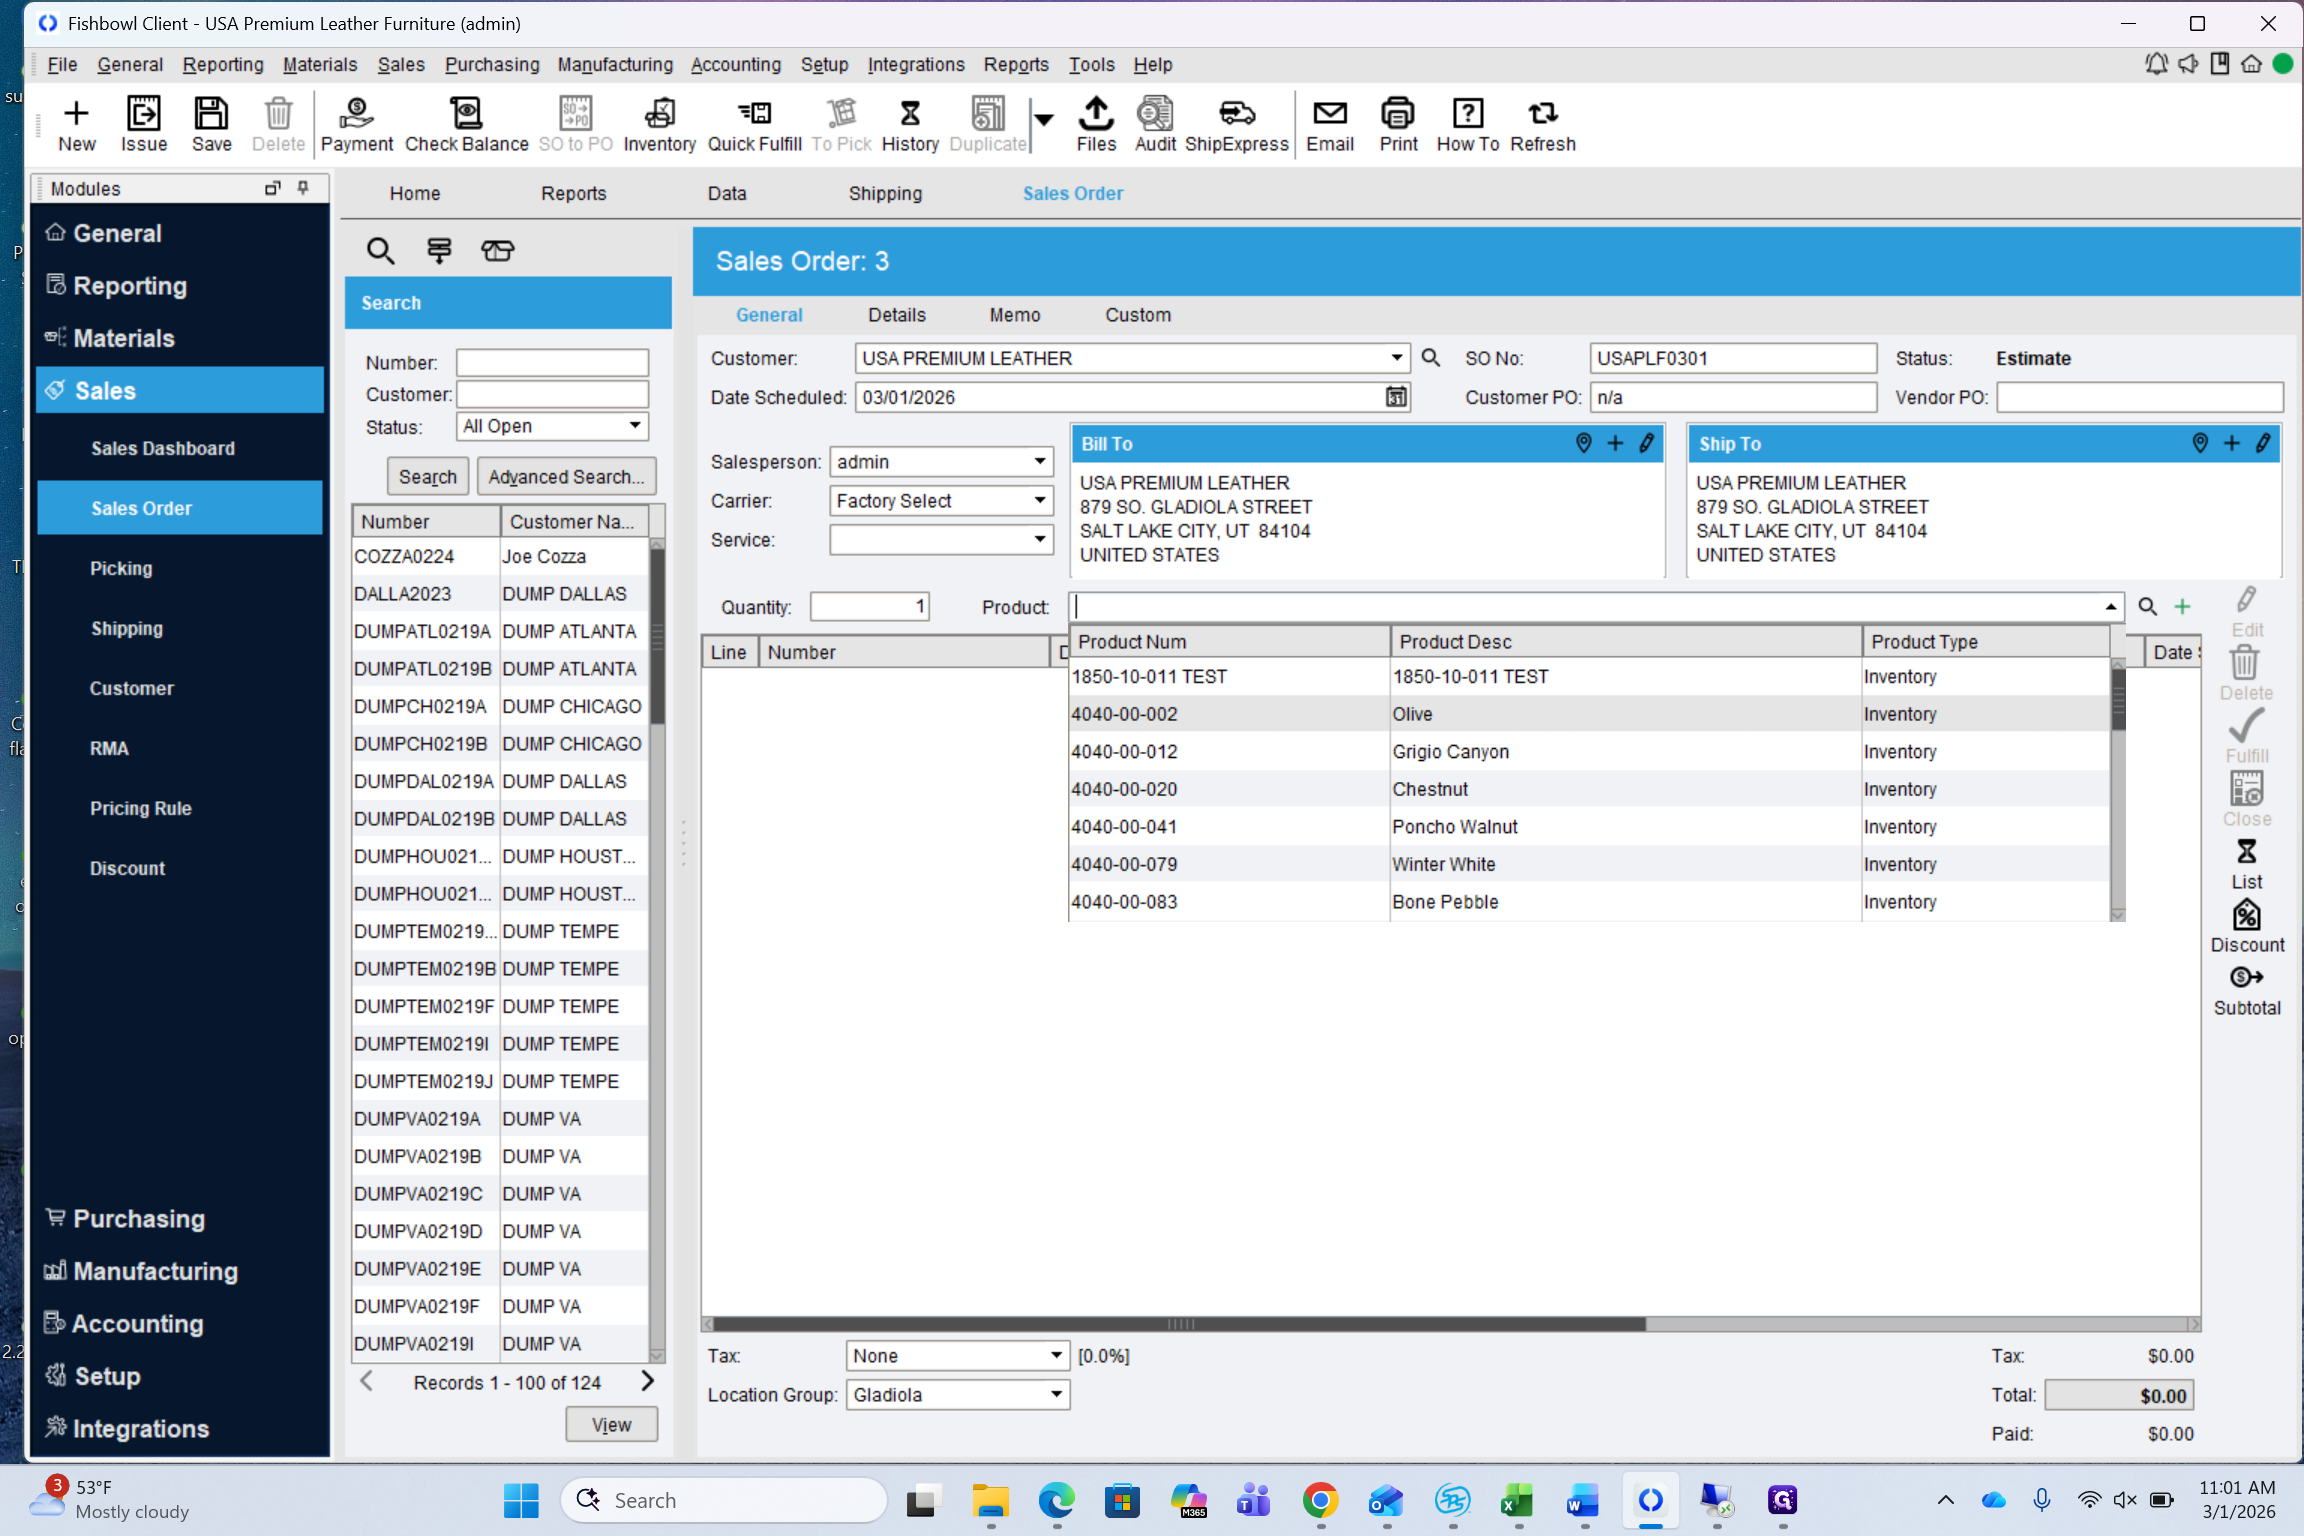
Enter the customer name.

2
Choose the Customer
Step #2: Choose the Customer

3
Enter the SO Number, the SO number represents the customer name and today's date.
Step #3: Enter the SO Number, the SO number represents the customer name and today's date.

4
Enter the Customer PO
Step #4: Enter the Customer PO

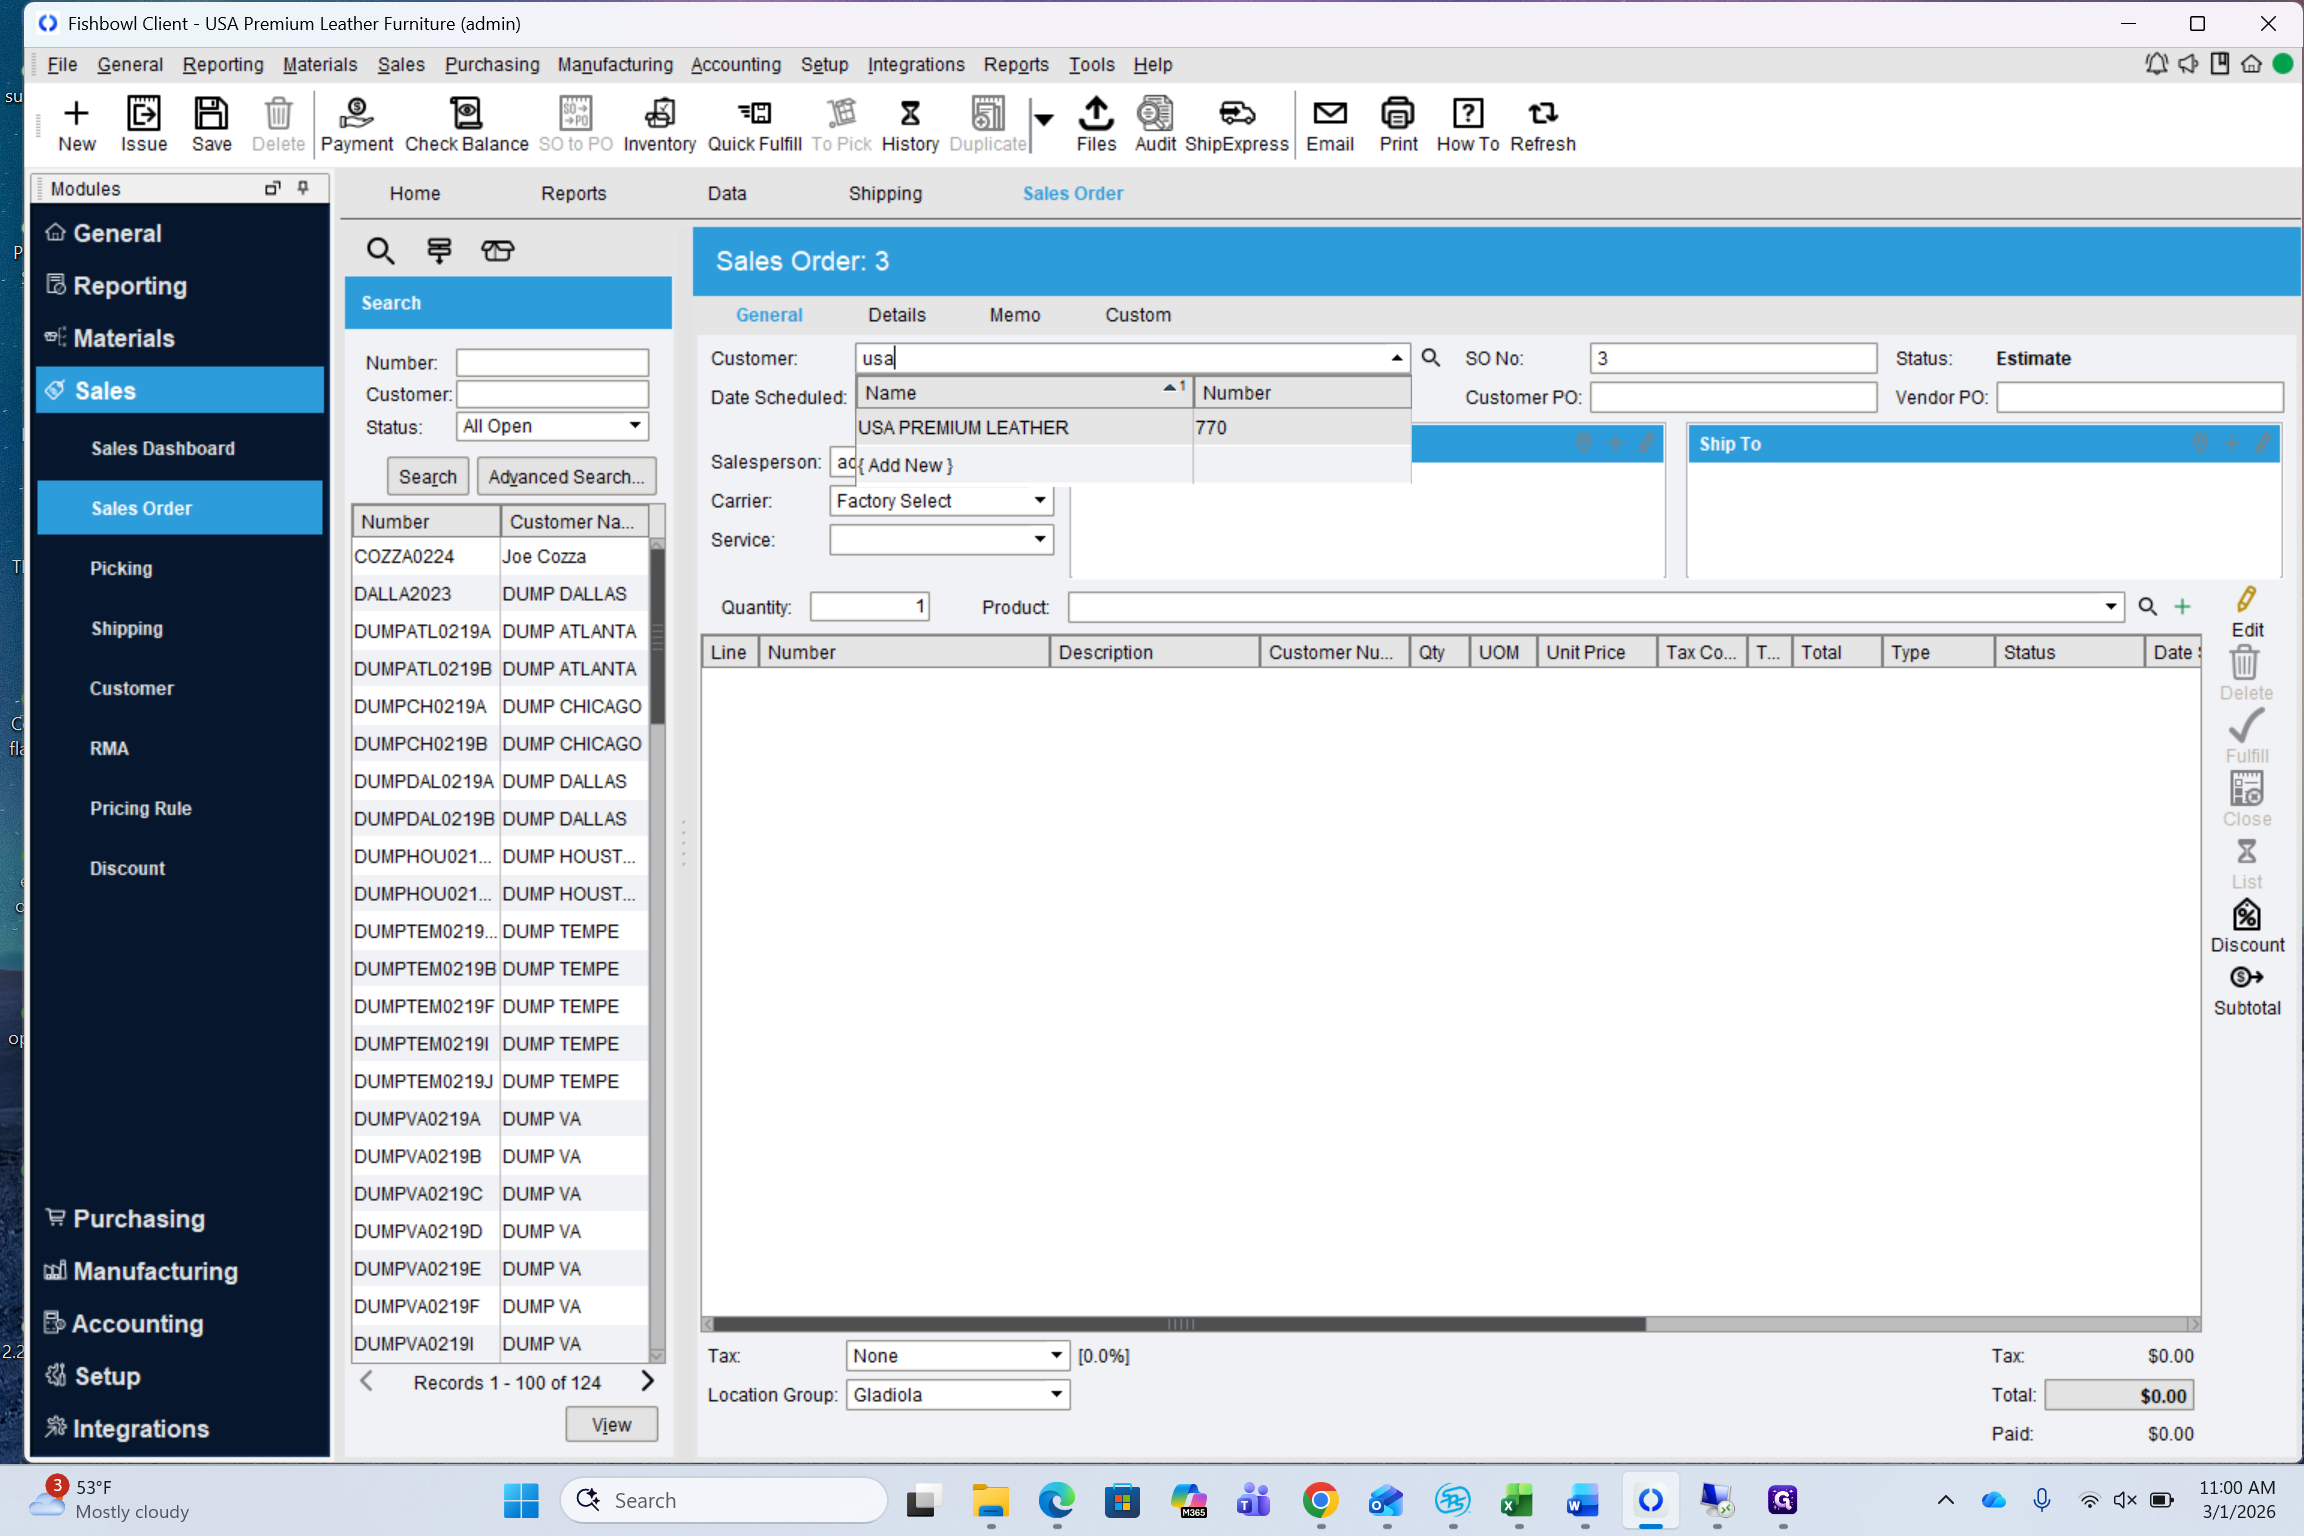
The salesperson should default to the company's assigned salesperson. The carrier should also default to Factory Select.

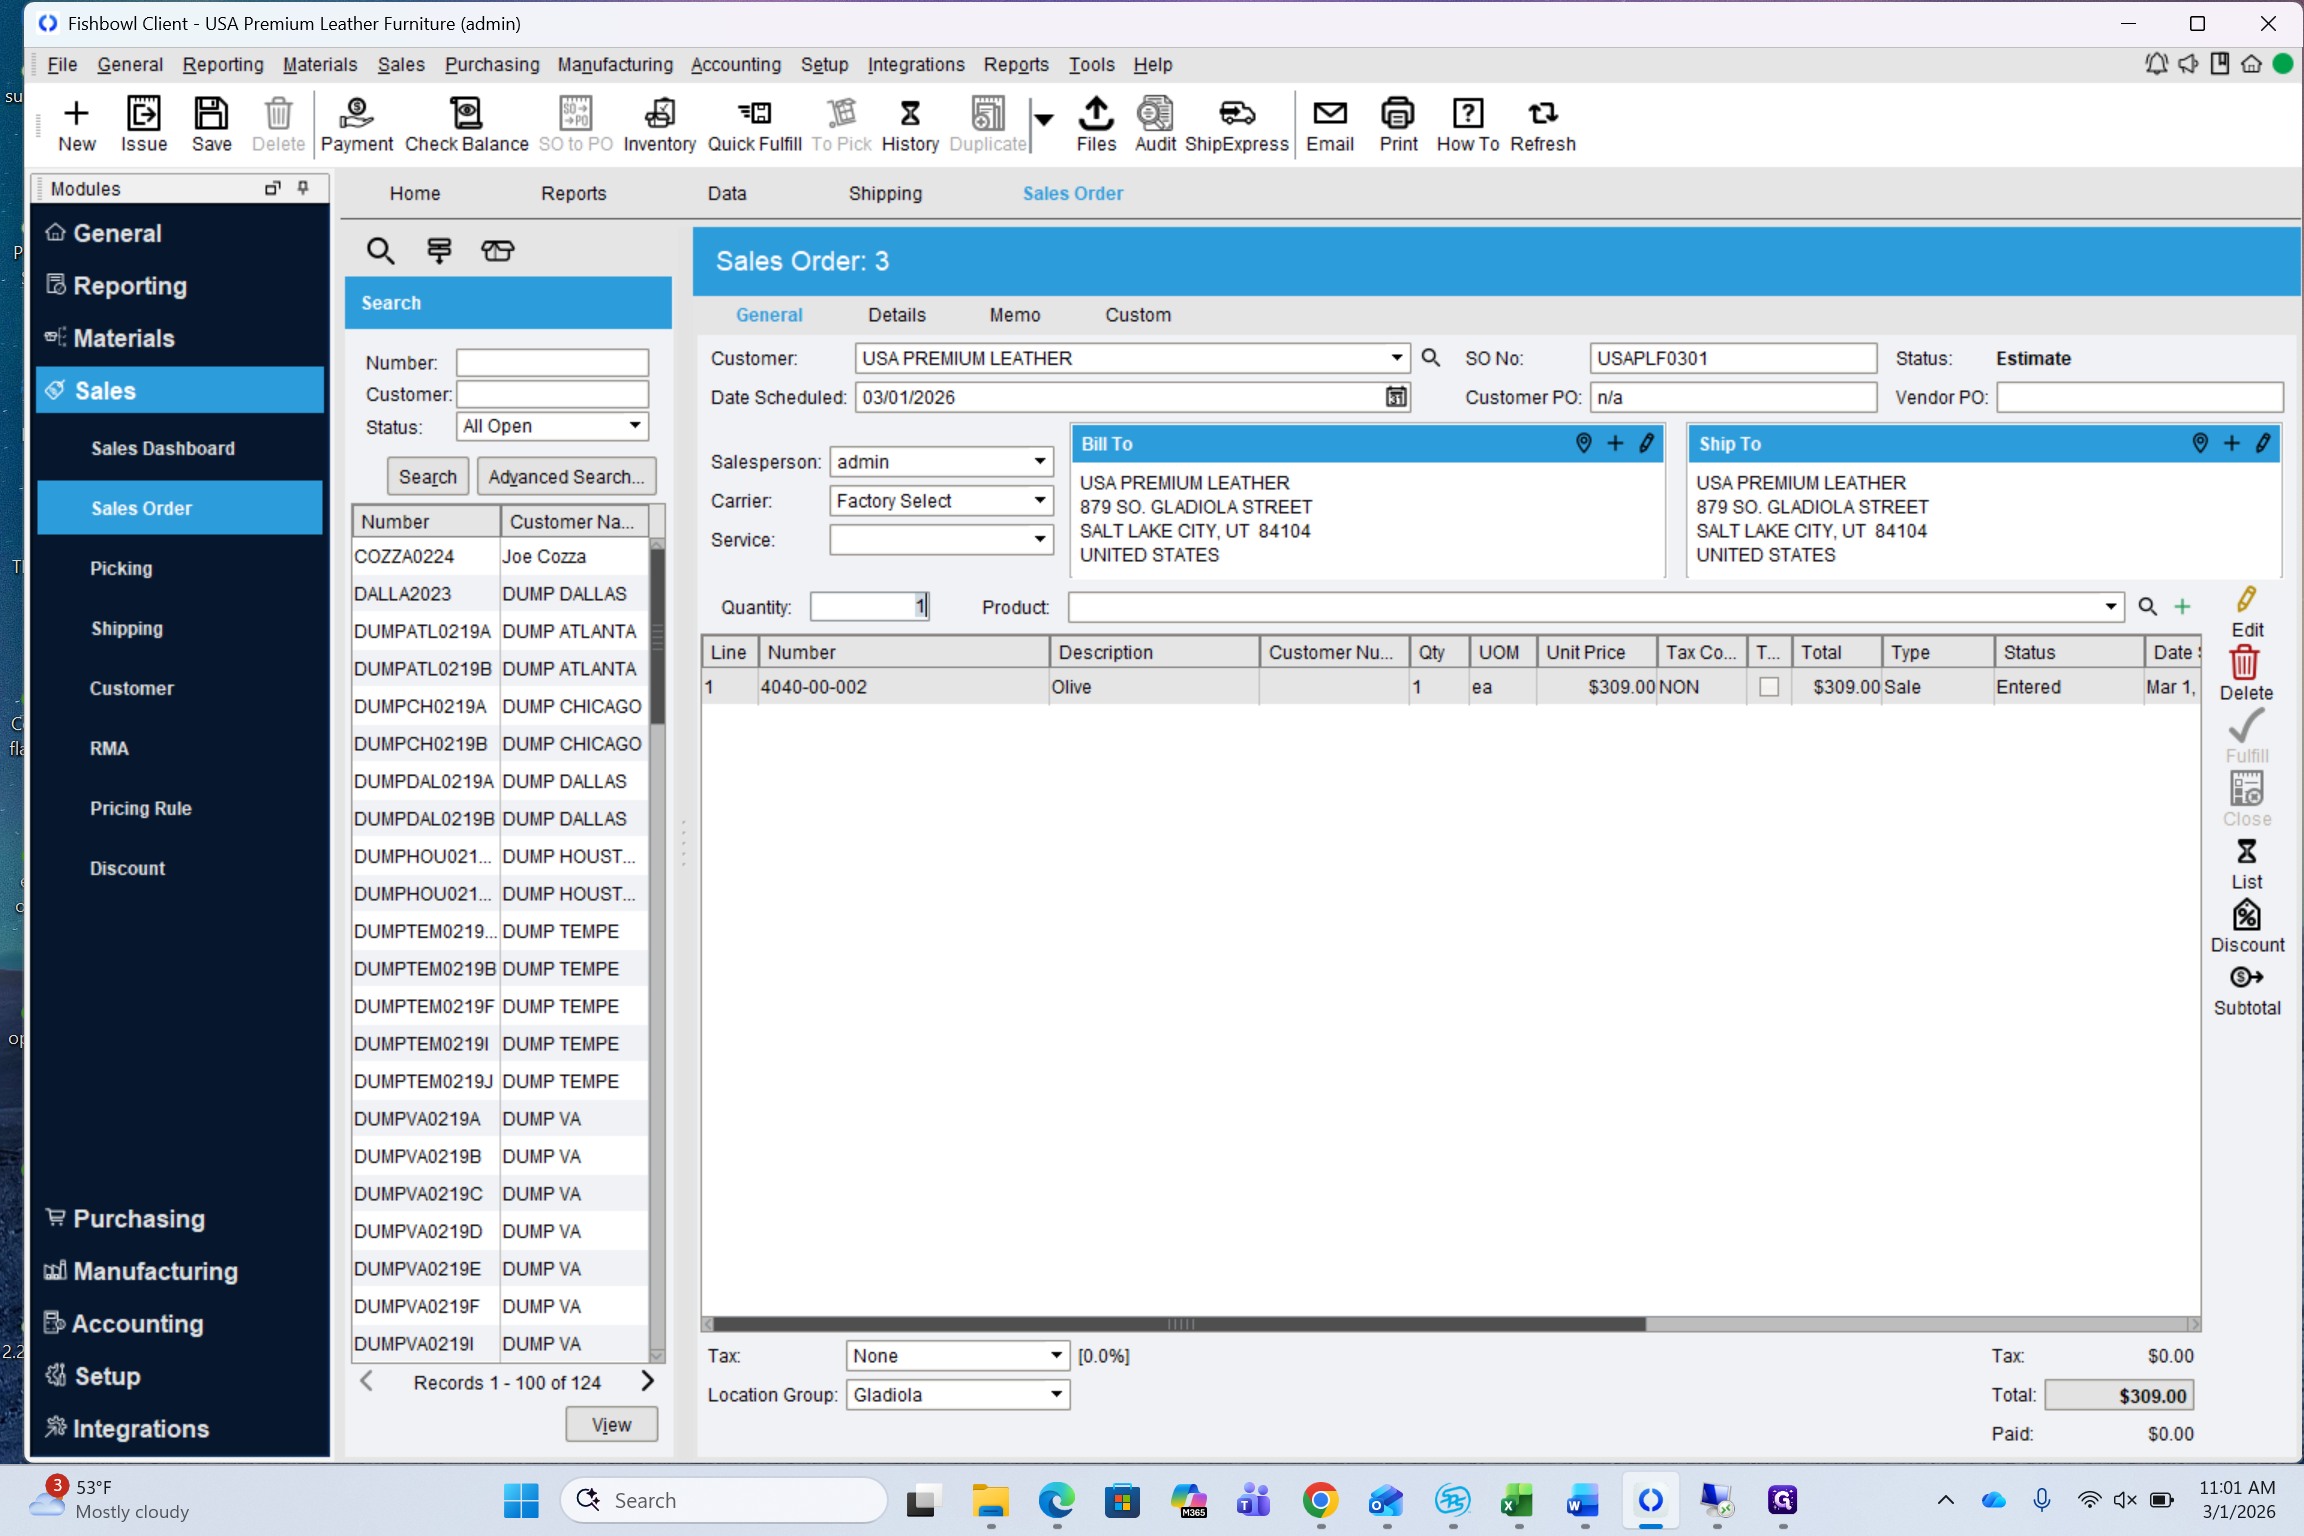
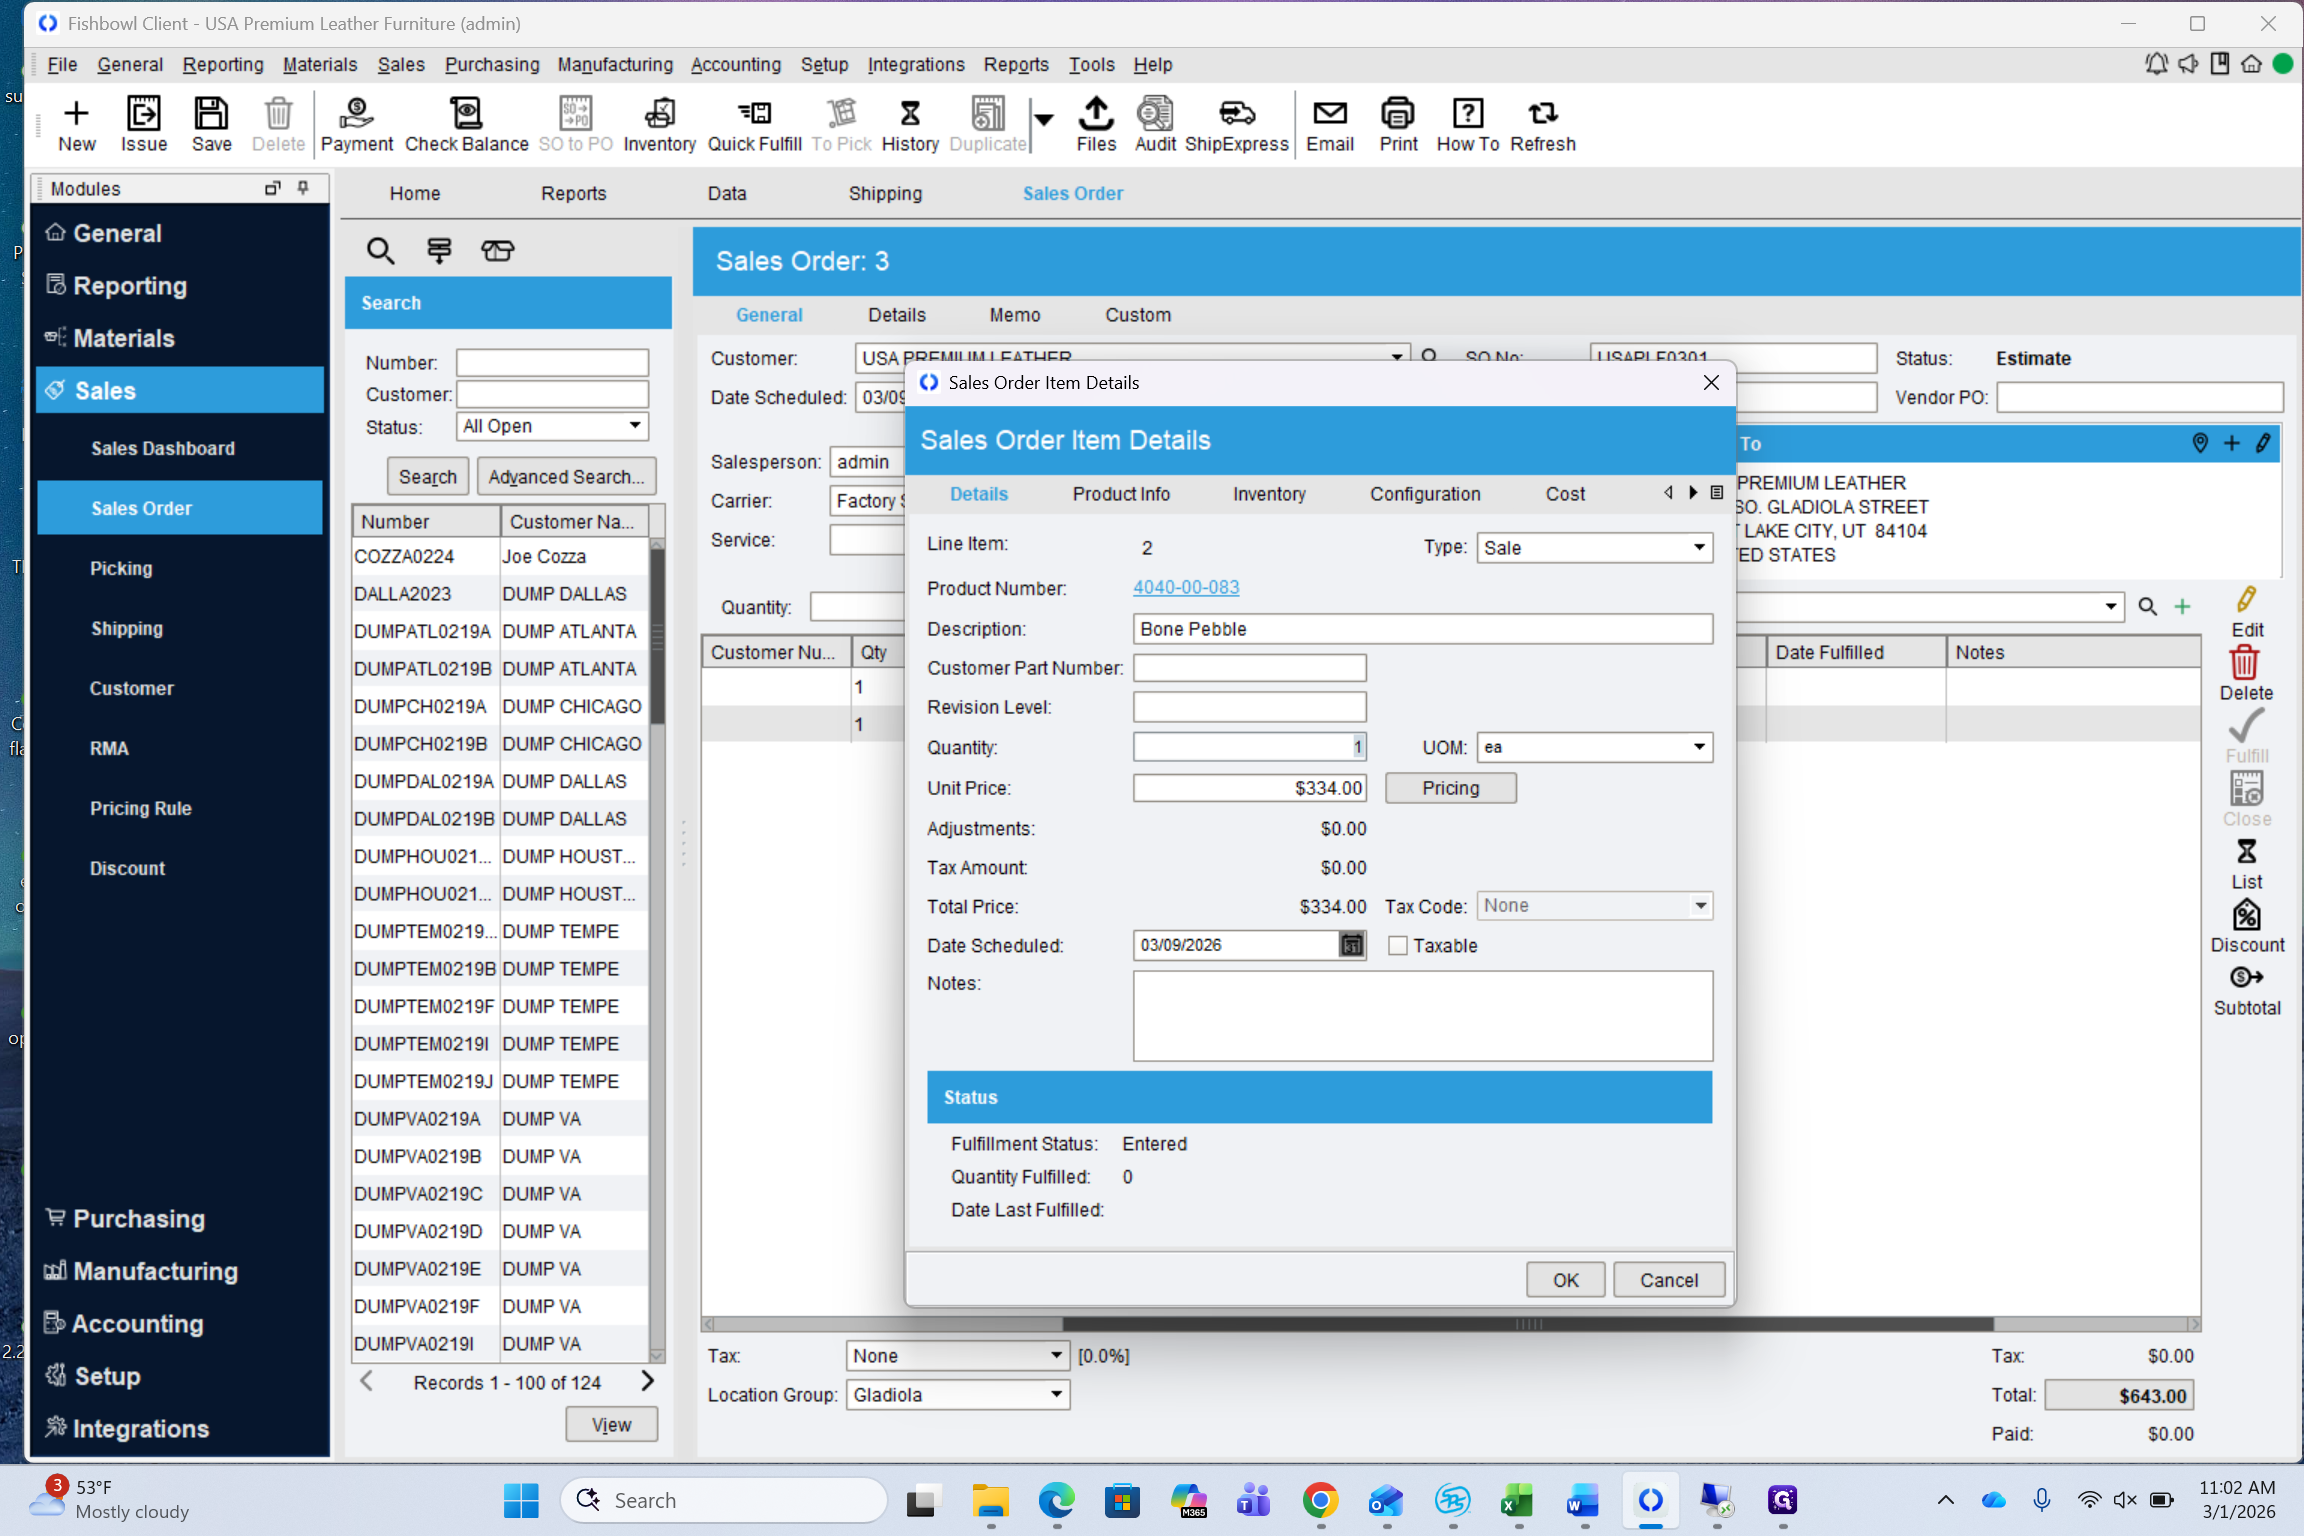
Check that the Bill To and Ship To information is accurate. Then, enter your product.

5
Click here
Step #5: Click here
6
Choose the Product
Step #6: Choose the Product

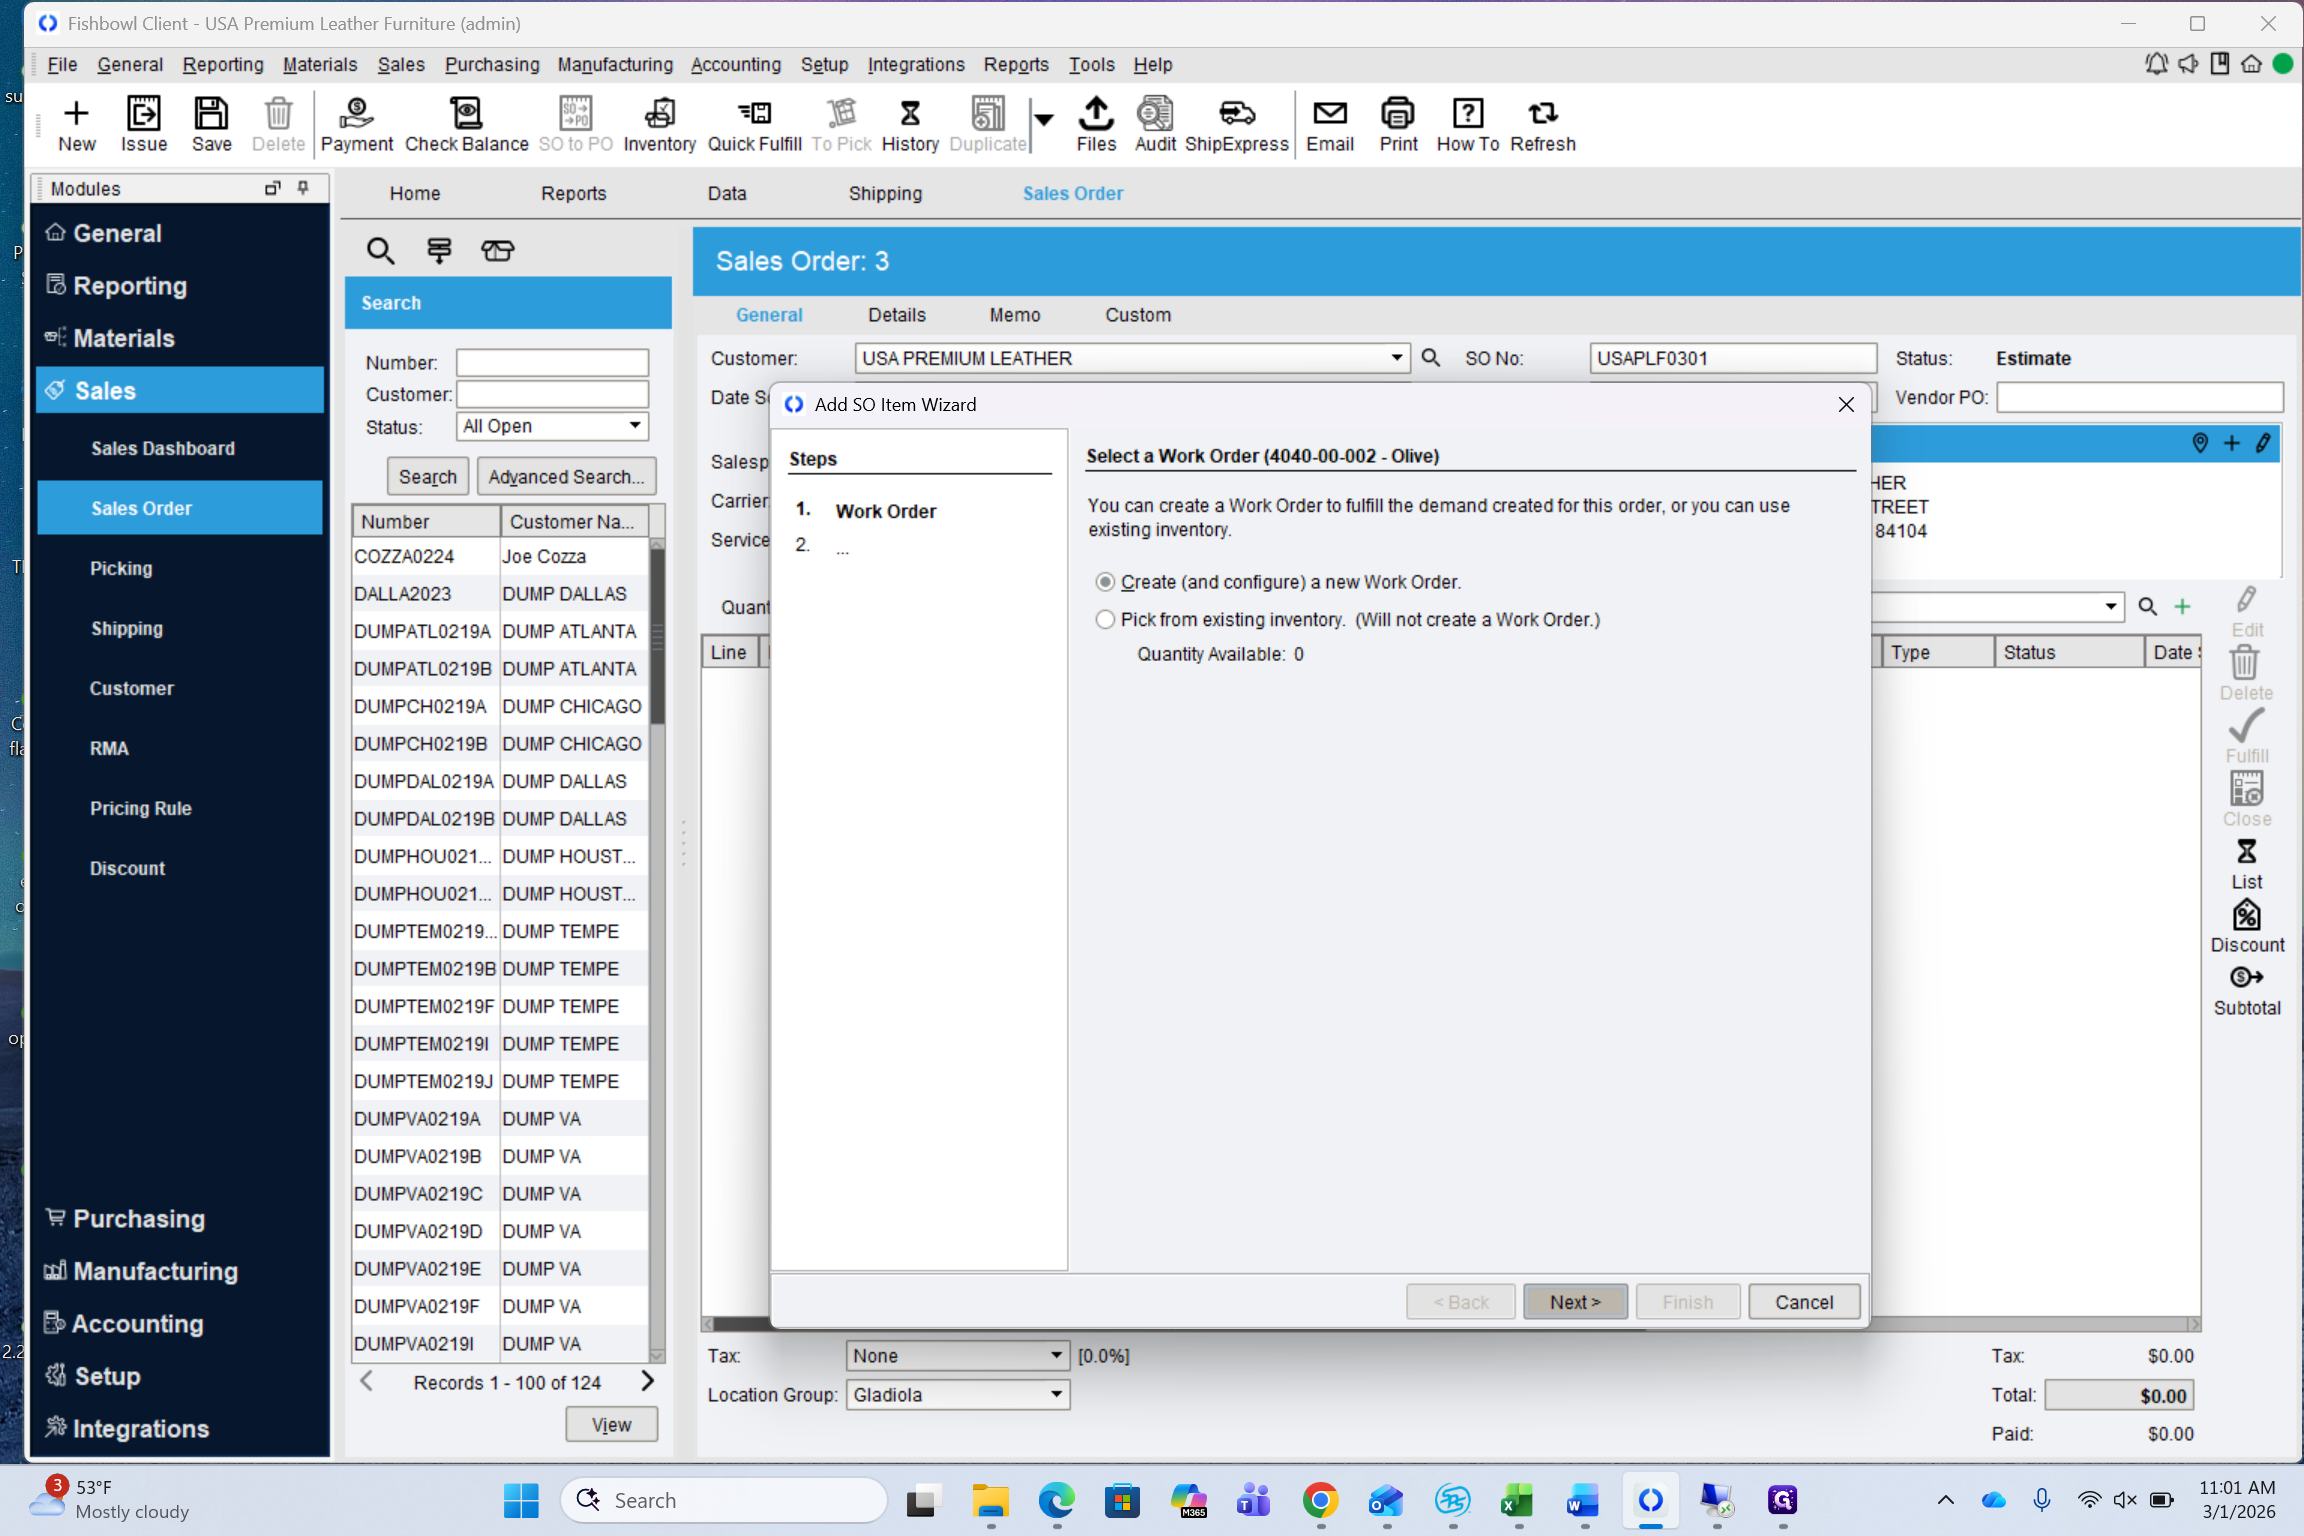
Click Next. Never click "Pick From Existing." This is very important, as a manufacturing order will not be created if you do.

7
Click on "Next >"
Step #7: Click on "Next >"
8
Click on "Finish"
Step #8: Click on "Finish"

And we'll choose another one.

9
Choose your next product
Step #9: Choose your next product

Let's proceed with a special order.

10
Click here
Step #10: Click here

11
Choose the Date Scheduled. This should represent when the order will go into production. Note, if there are in stock items, it should be for the following week. If there are special order items, it should be two weeks out. If there is a mix of both, use the following week for the overall sales order.
Step #11: Choose the Date Scheduled. This should represent when the order will go into production. Note, if there are in stock items, it should be for the following week. If there are special order items, it should be two weeks out. If there is a mix of both, use the following week for the overall sales order.

12
Once you set the overall date scheduled, you can change individual line items. For example, if this order is a mix of in stock and special order, adjust the special order lines to be two weeks out. Double click on the date.
Step #12: Once you set the overall date scheduled, you can change individual line items. For example, if this order is a mix of in stock and special order, adjust the special order lines to be two weeks out. Double click on the date.

13
Select the correct date from the calendar
Step #13: Select the correct date from the calendar
14
Click on "OK"
Step #14: Click on "OK"

If there are any custom notes to add, such as designating the JoSales Customer Name, specifying that this is part of truck one, or noting that it will ship via Brooks, include that information here.

15
Click on "Custom"
Step #15: Click on "Custom"
16
Click here
Step #16: Click here
17
Type your note

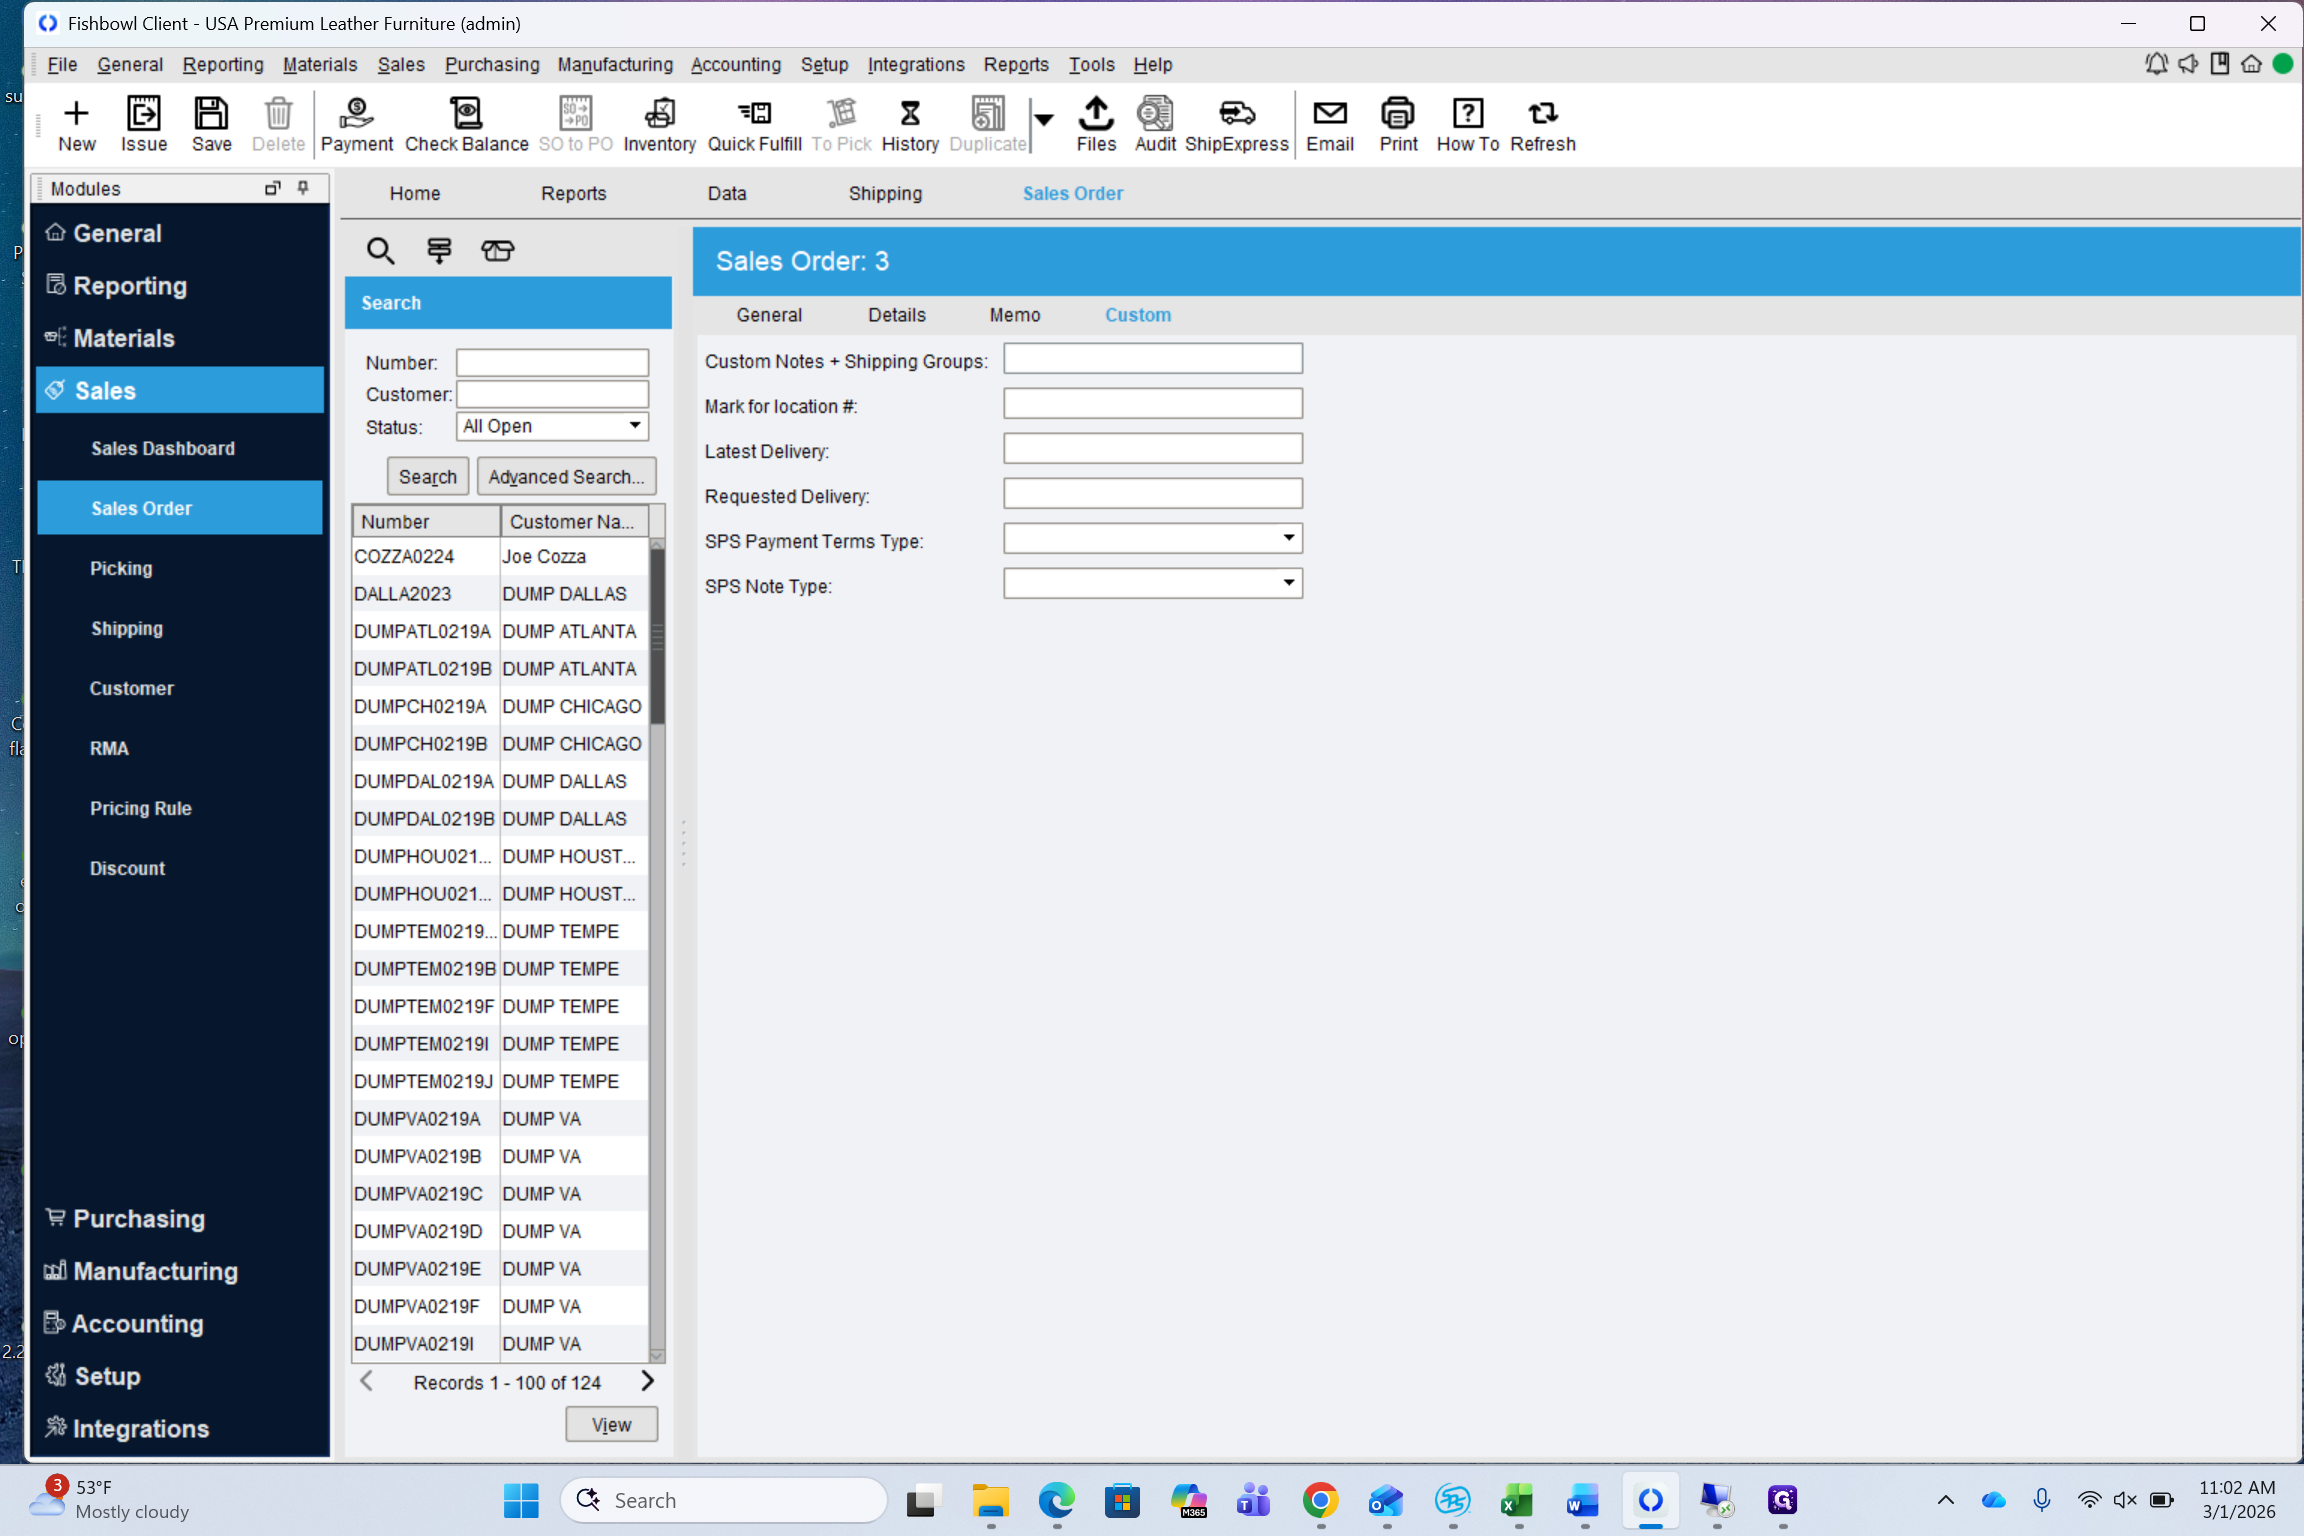
This can be added at any point during the process, even after the sales order is issued.

Once everything is entered, press Issue.

The sales order will then be locked. We should not adjust any dates after the fact. We will only adjust dates on the manufacturing order, which will be a completely different process.