How to Import and Manage Payroll Registers in ADP Payroll Dashboard
Step-by-step guide on importing payroll registers, managing commissions, and downloading payroll reports in the ADP Payroll dashboard. Learn how to handle common issues and ensure accurate payroll processing.
In this guide, we'll learn how to import, review, and adjust payroll check registers using the ADP Payroll dashboard. This process includes uploading a saved file, making necessary changes for commissions, and verifying the payroll register for accuracy. The goal is to ensure payroll data is correct before finalizing and downloading the register.
Let's get started
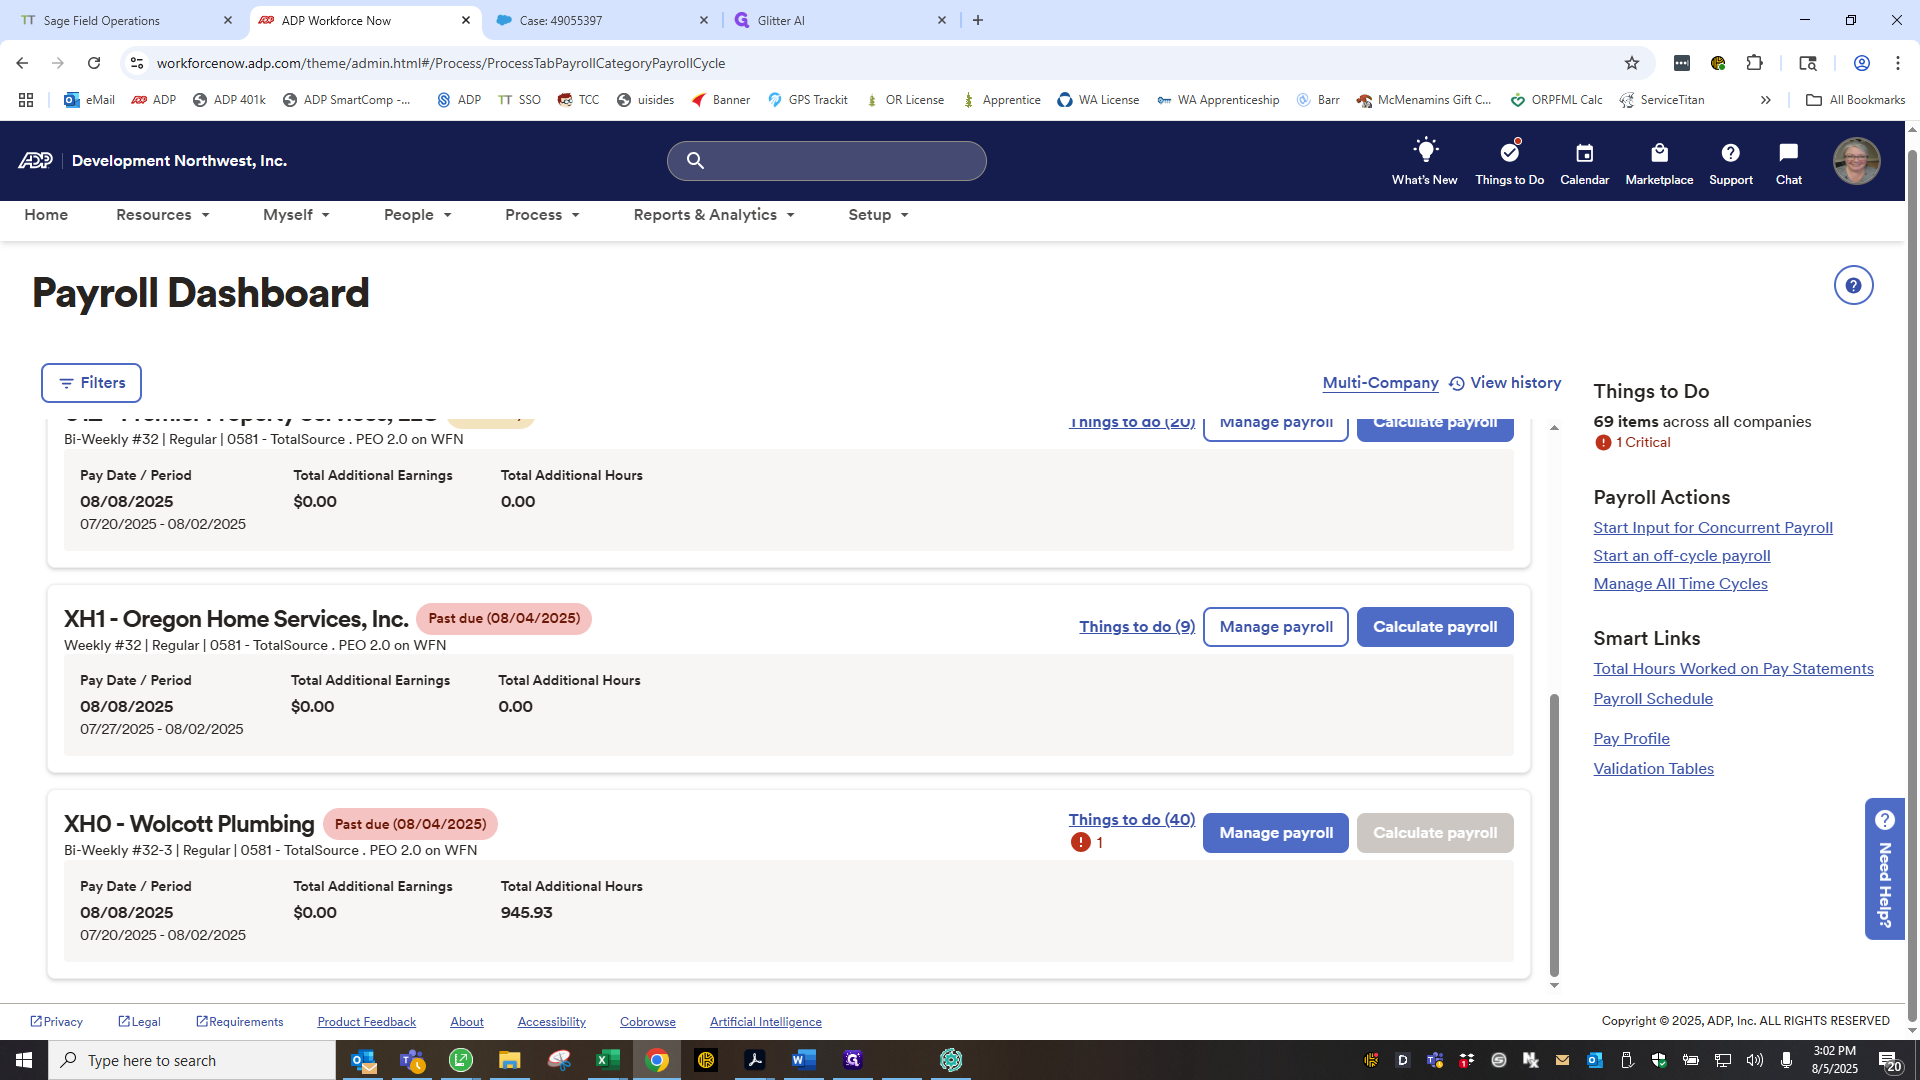
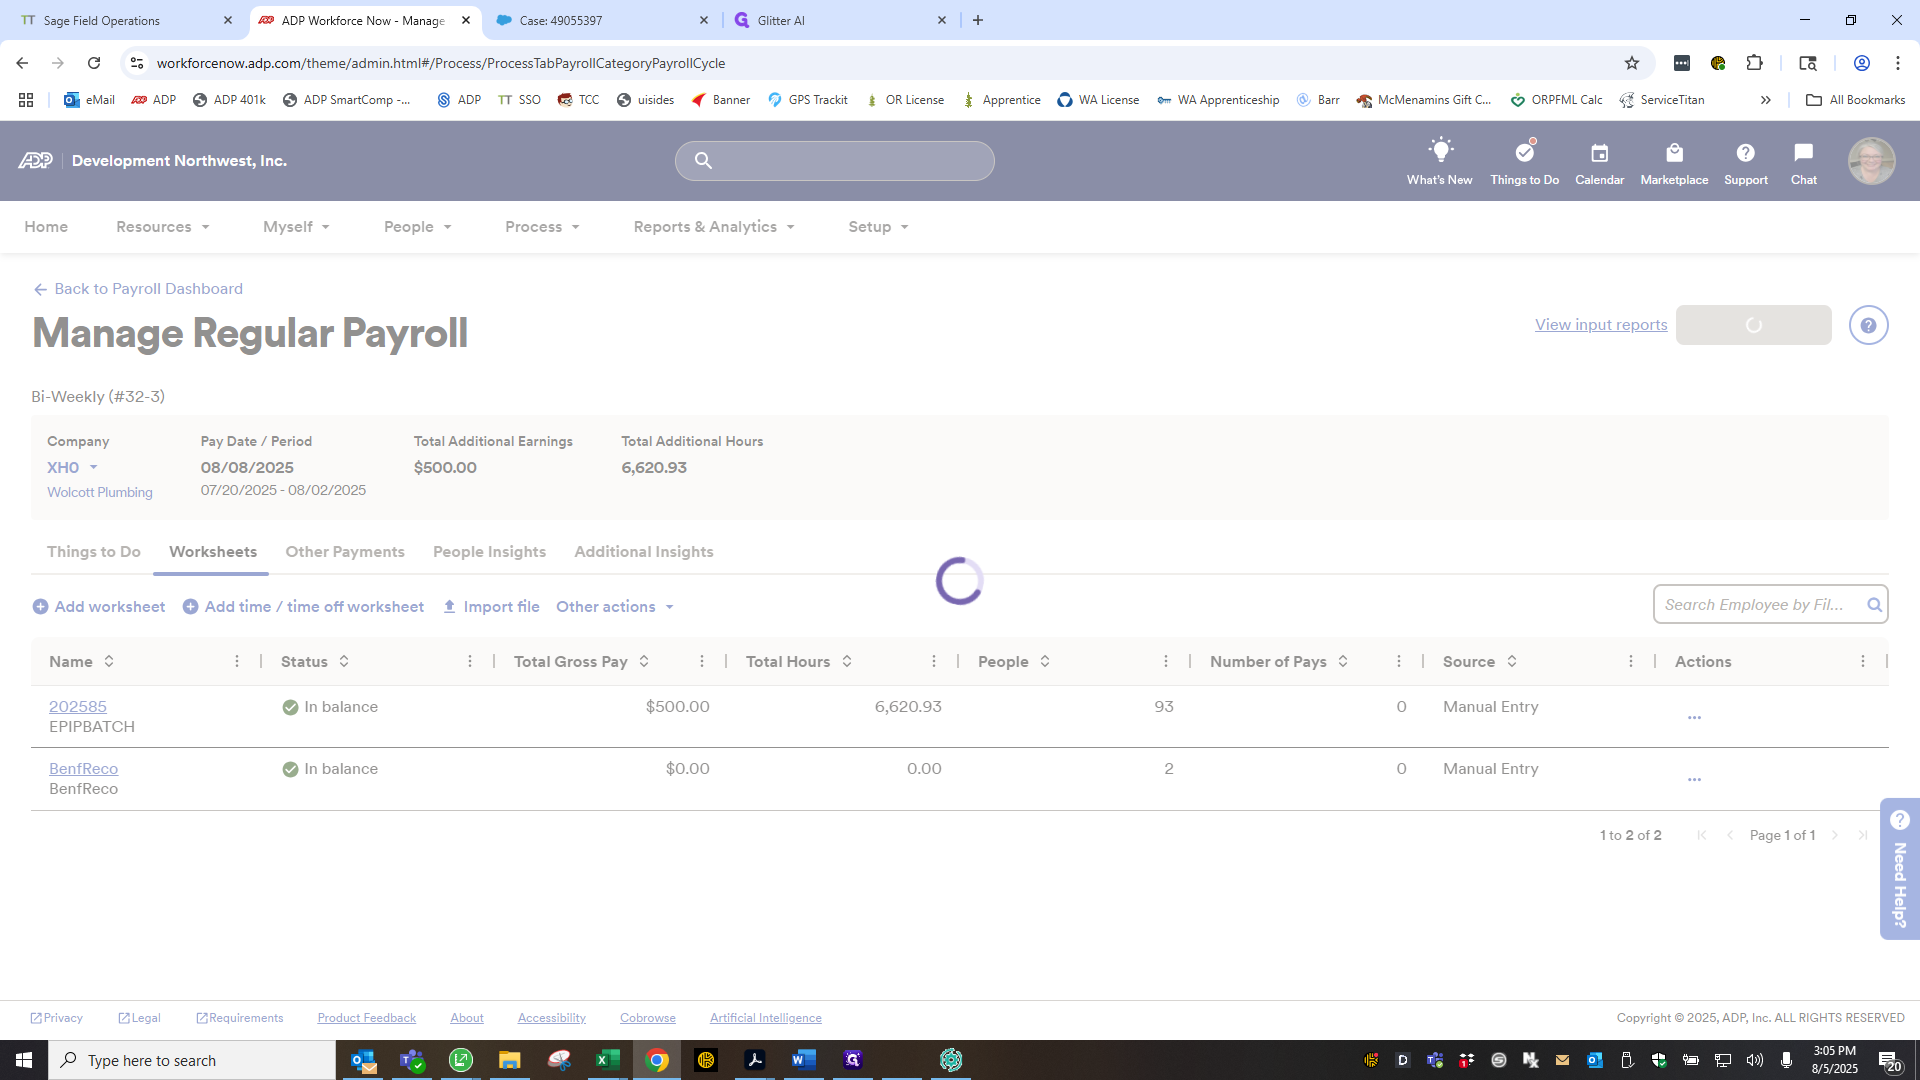
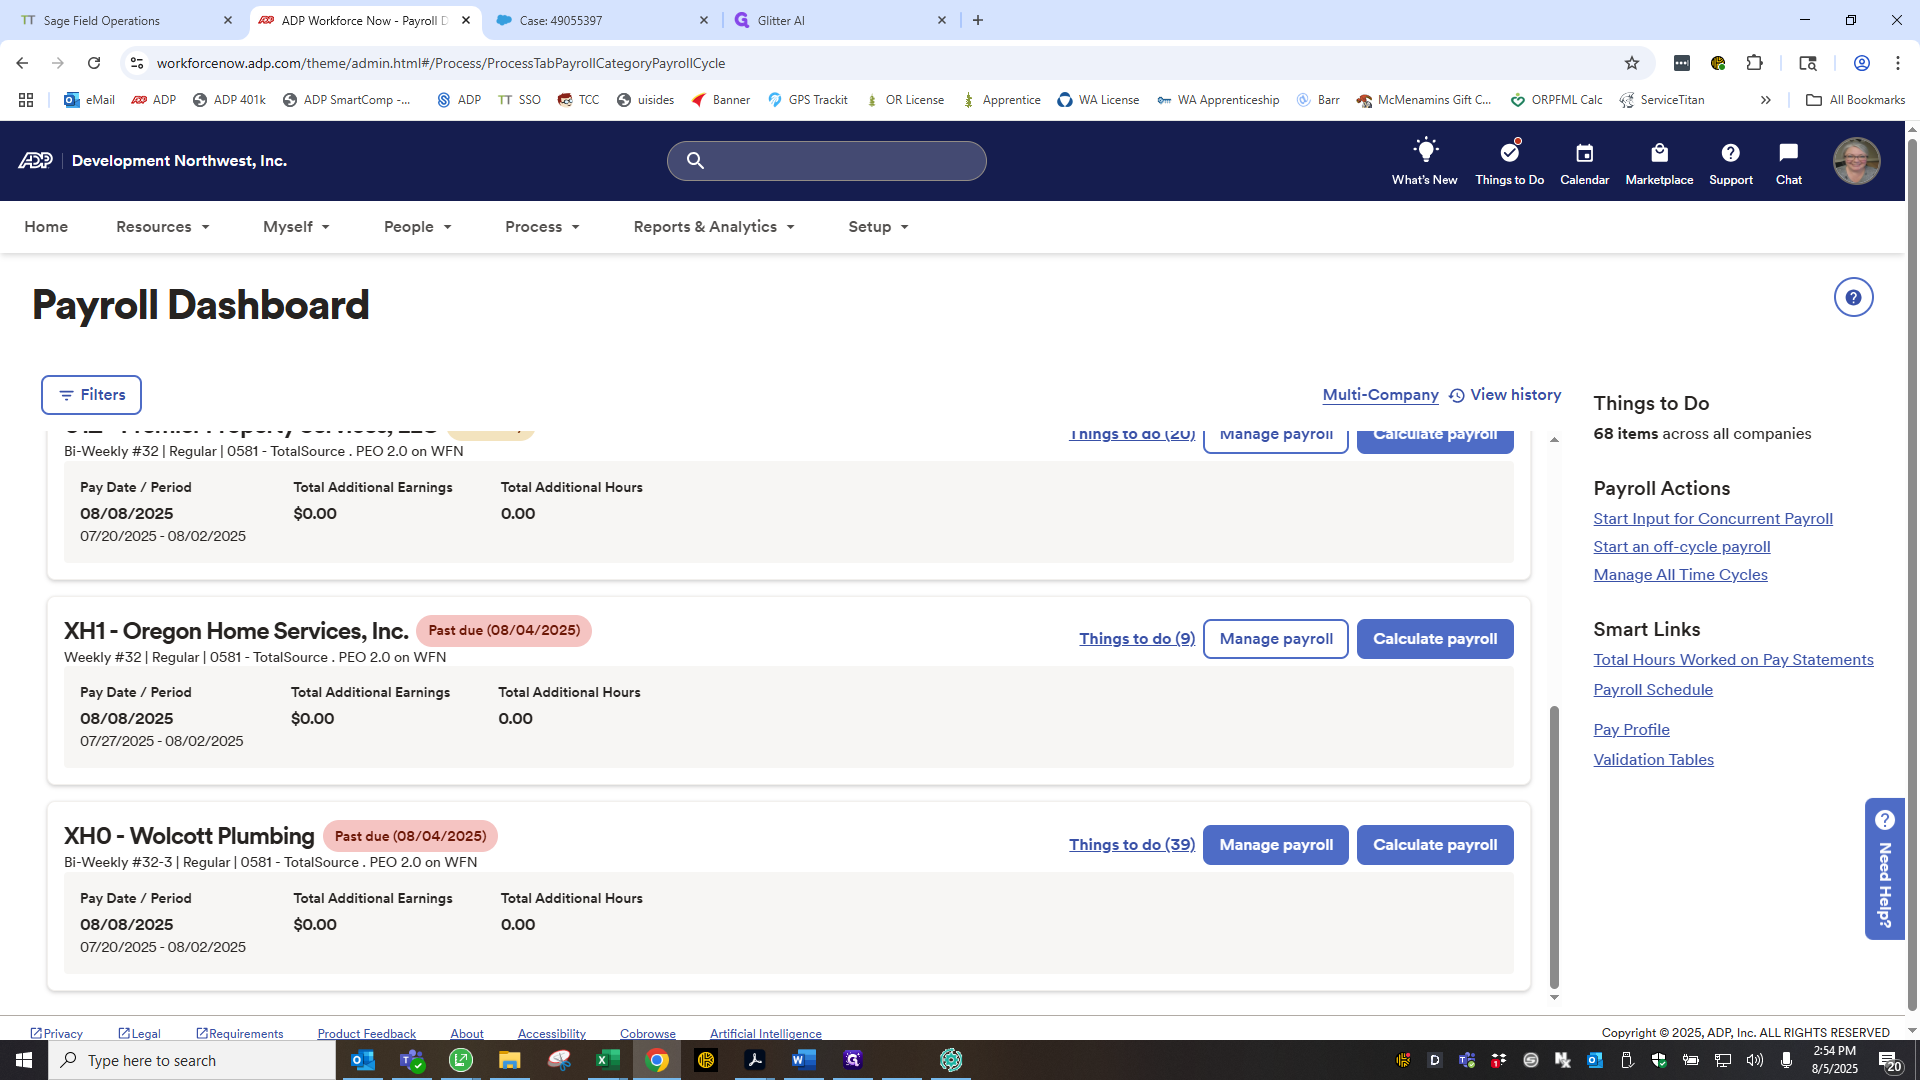
Okay. Continuing from the ADP Payroll dashboard. Several registers will be listed here. Find the one labeled HX0 with the pay date you need. Click Manage Payroll.
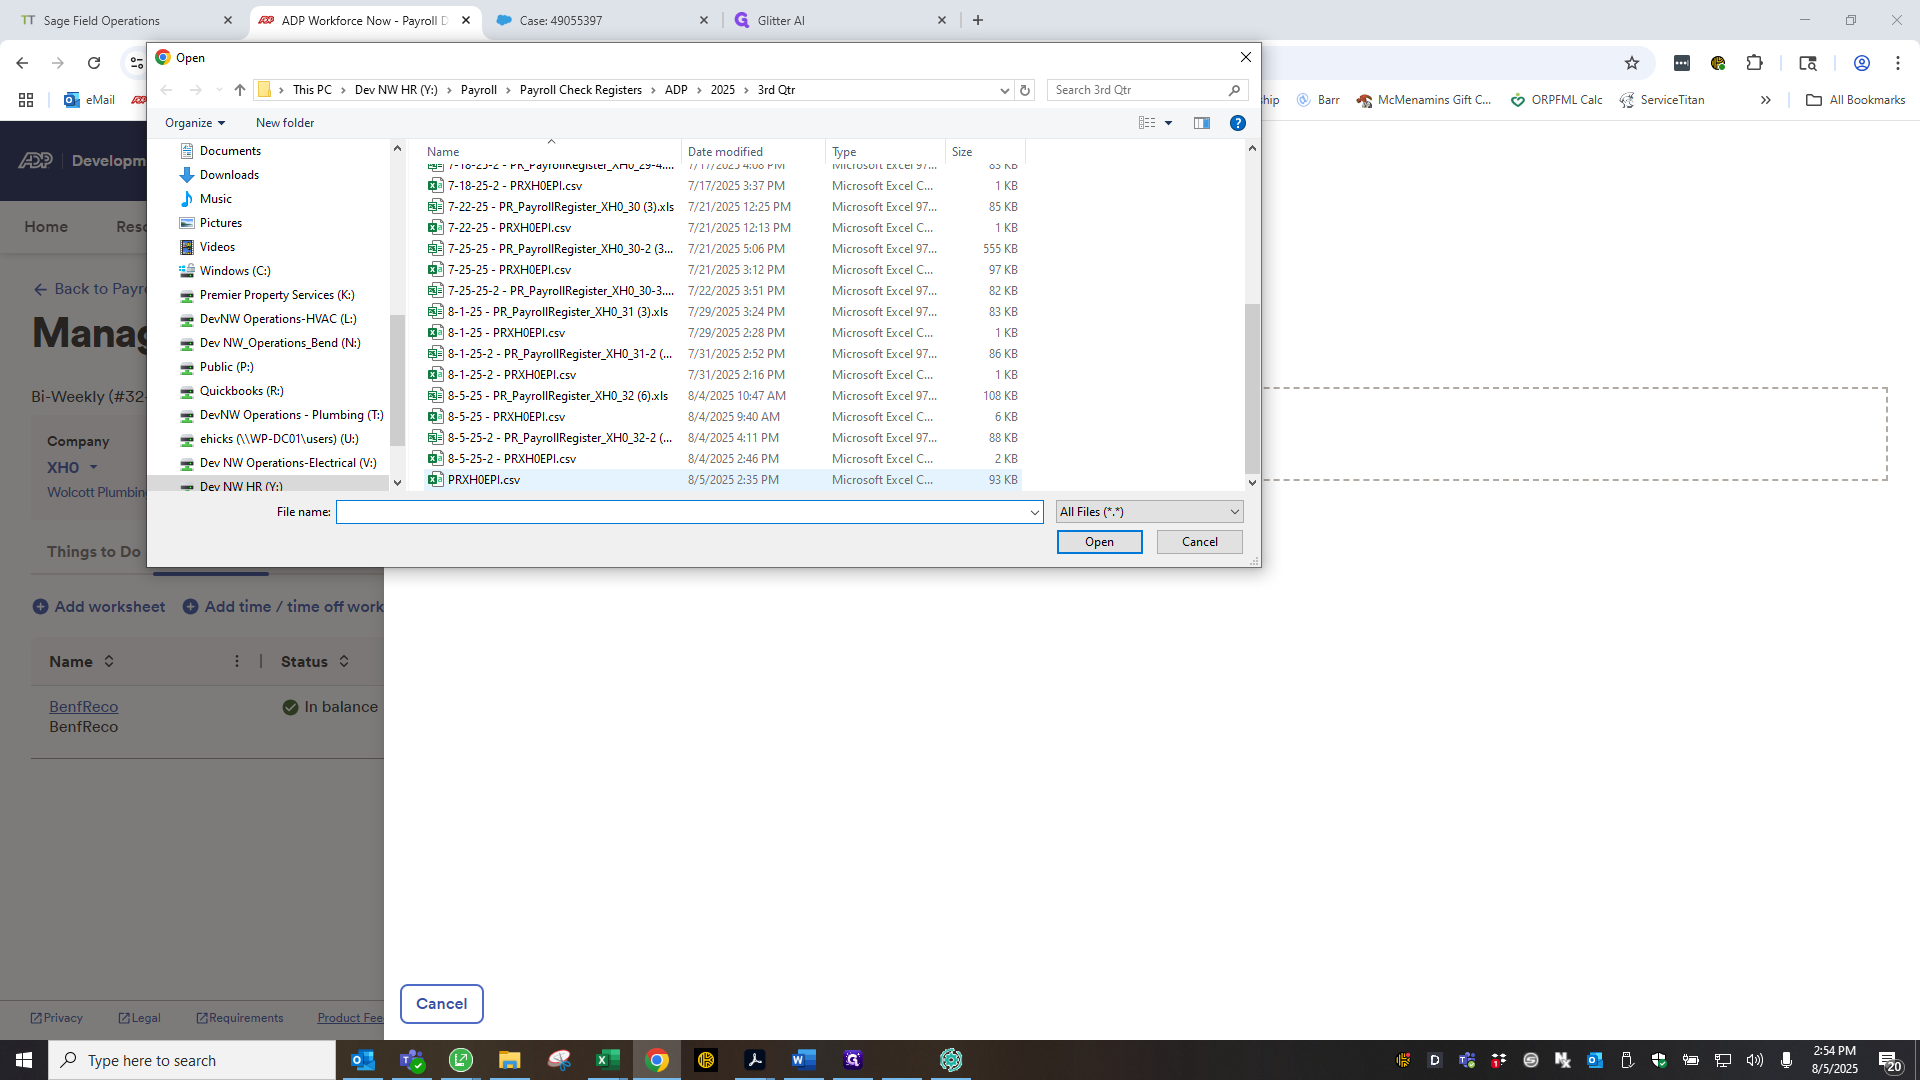
Click Import File.
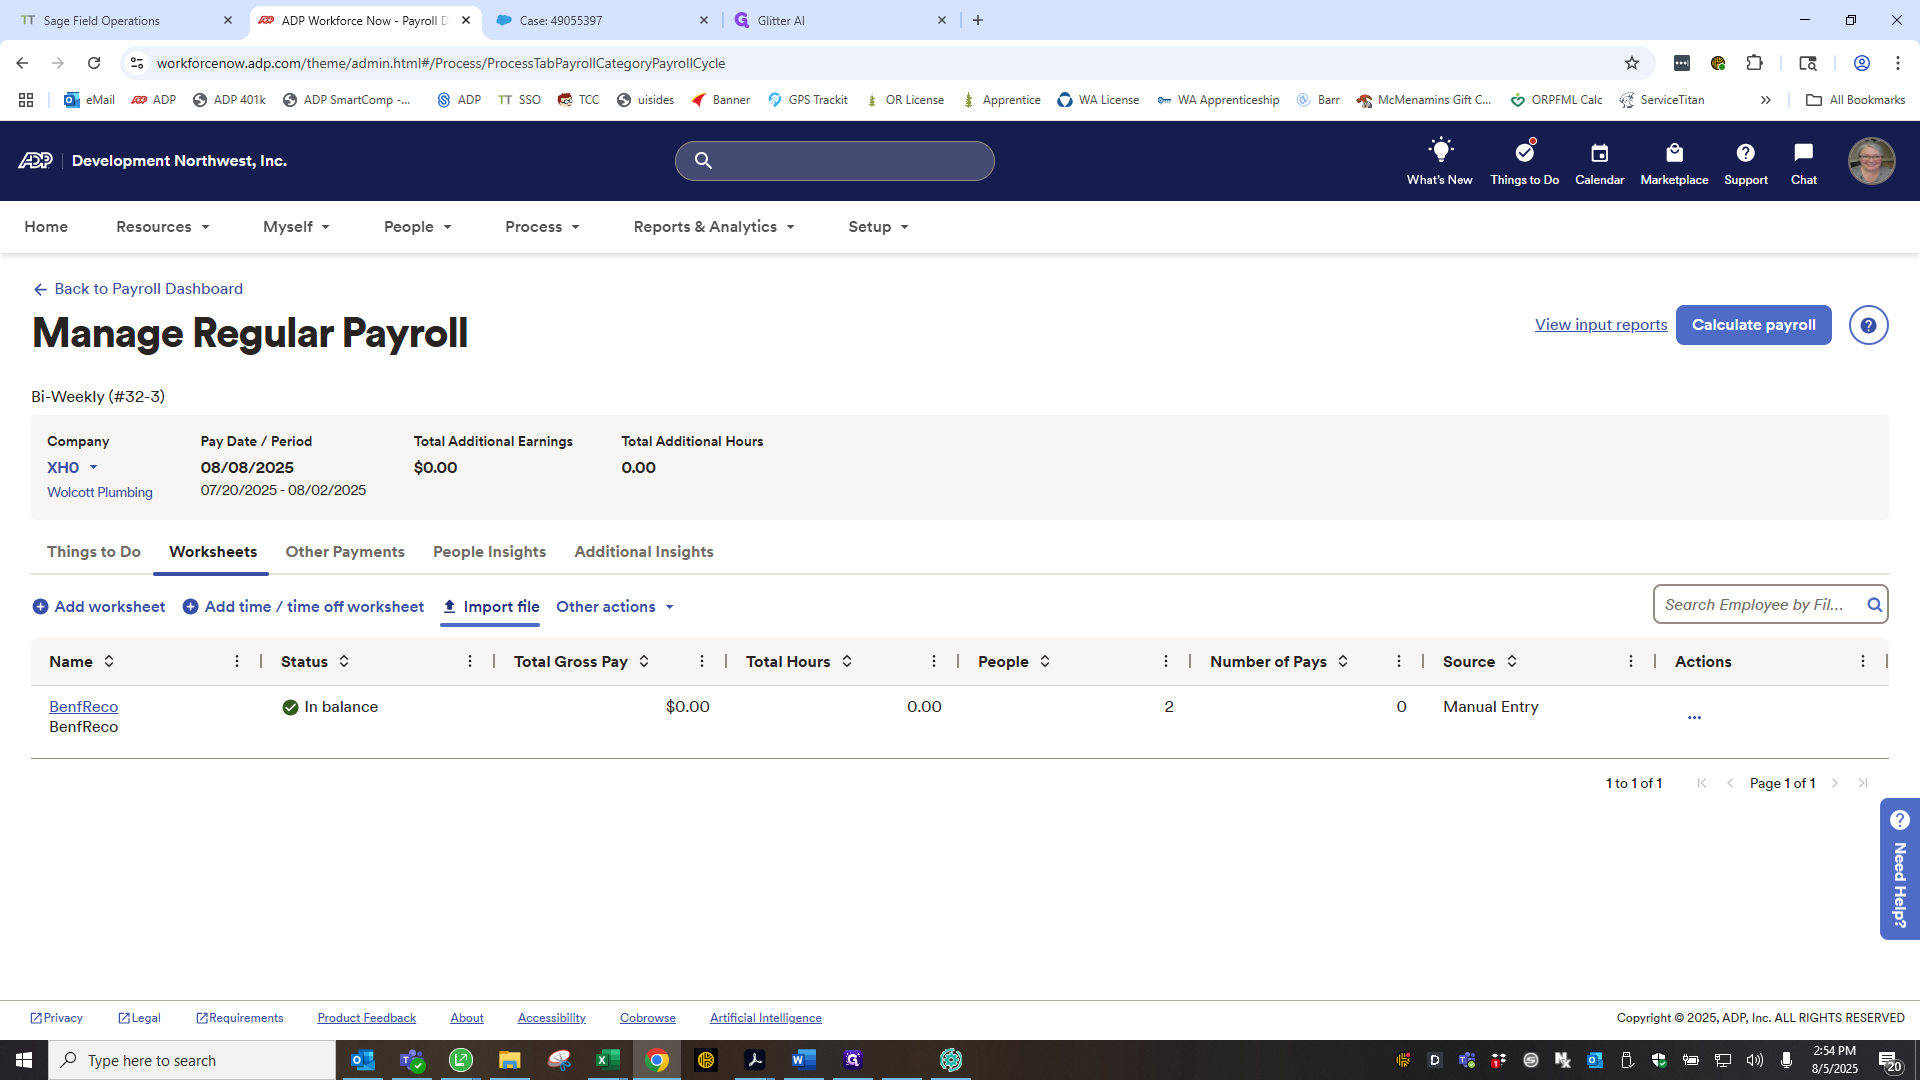
We will add the file we just saved to the payroll check registers.
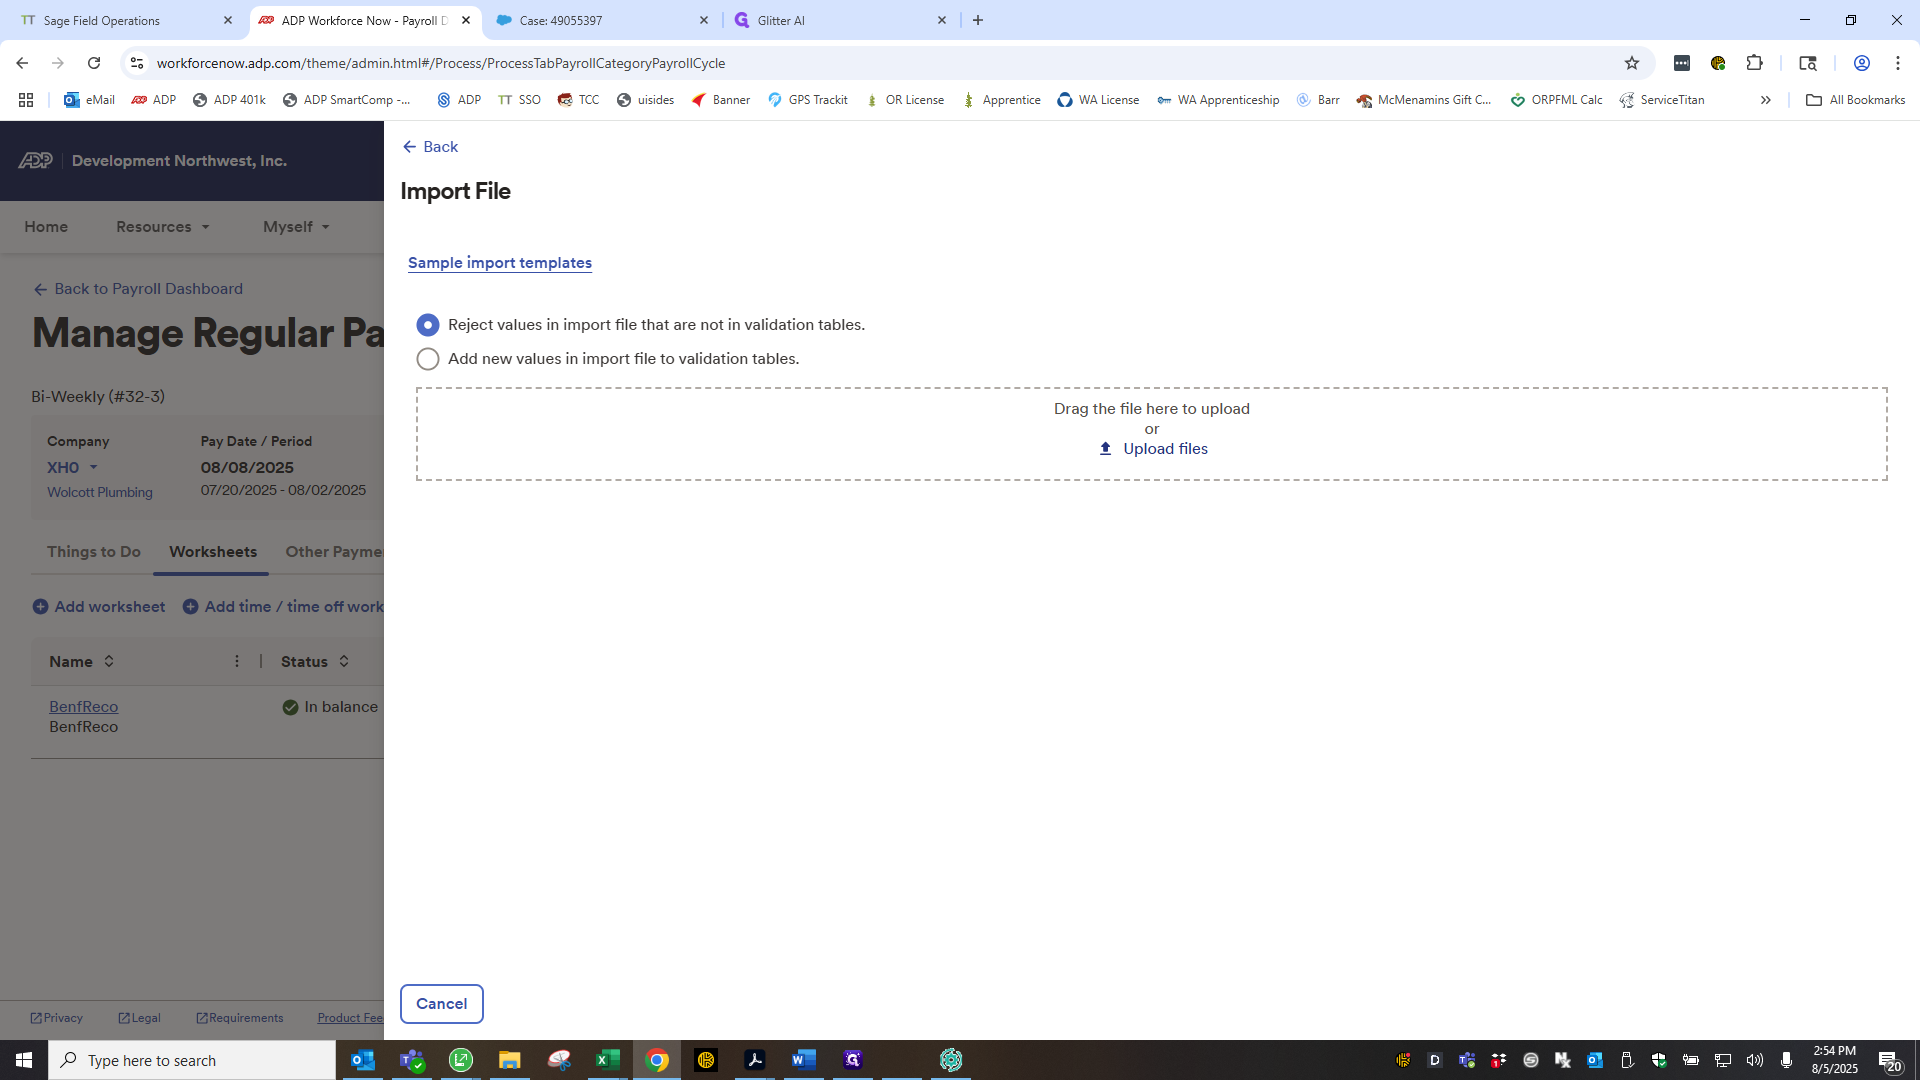
Click Open below.

Now, it isn't a magical import. It may take some time. Sometimes, you can close it as it says, but other times it may not work.
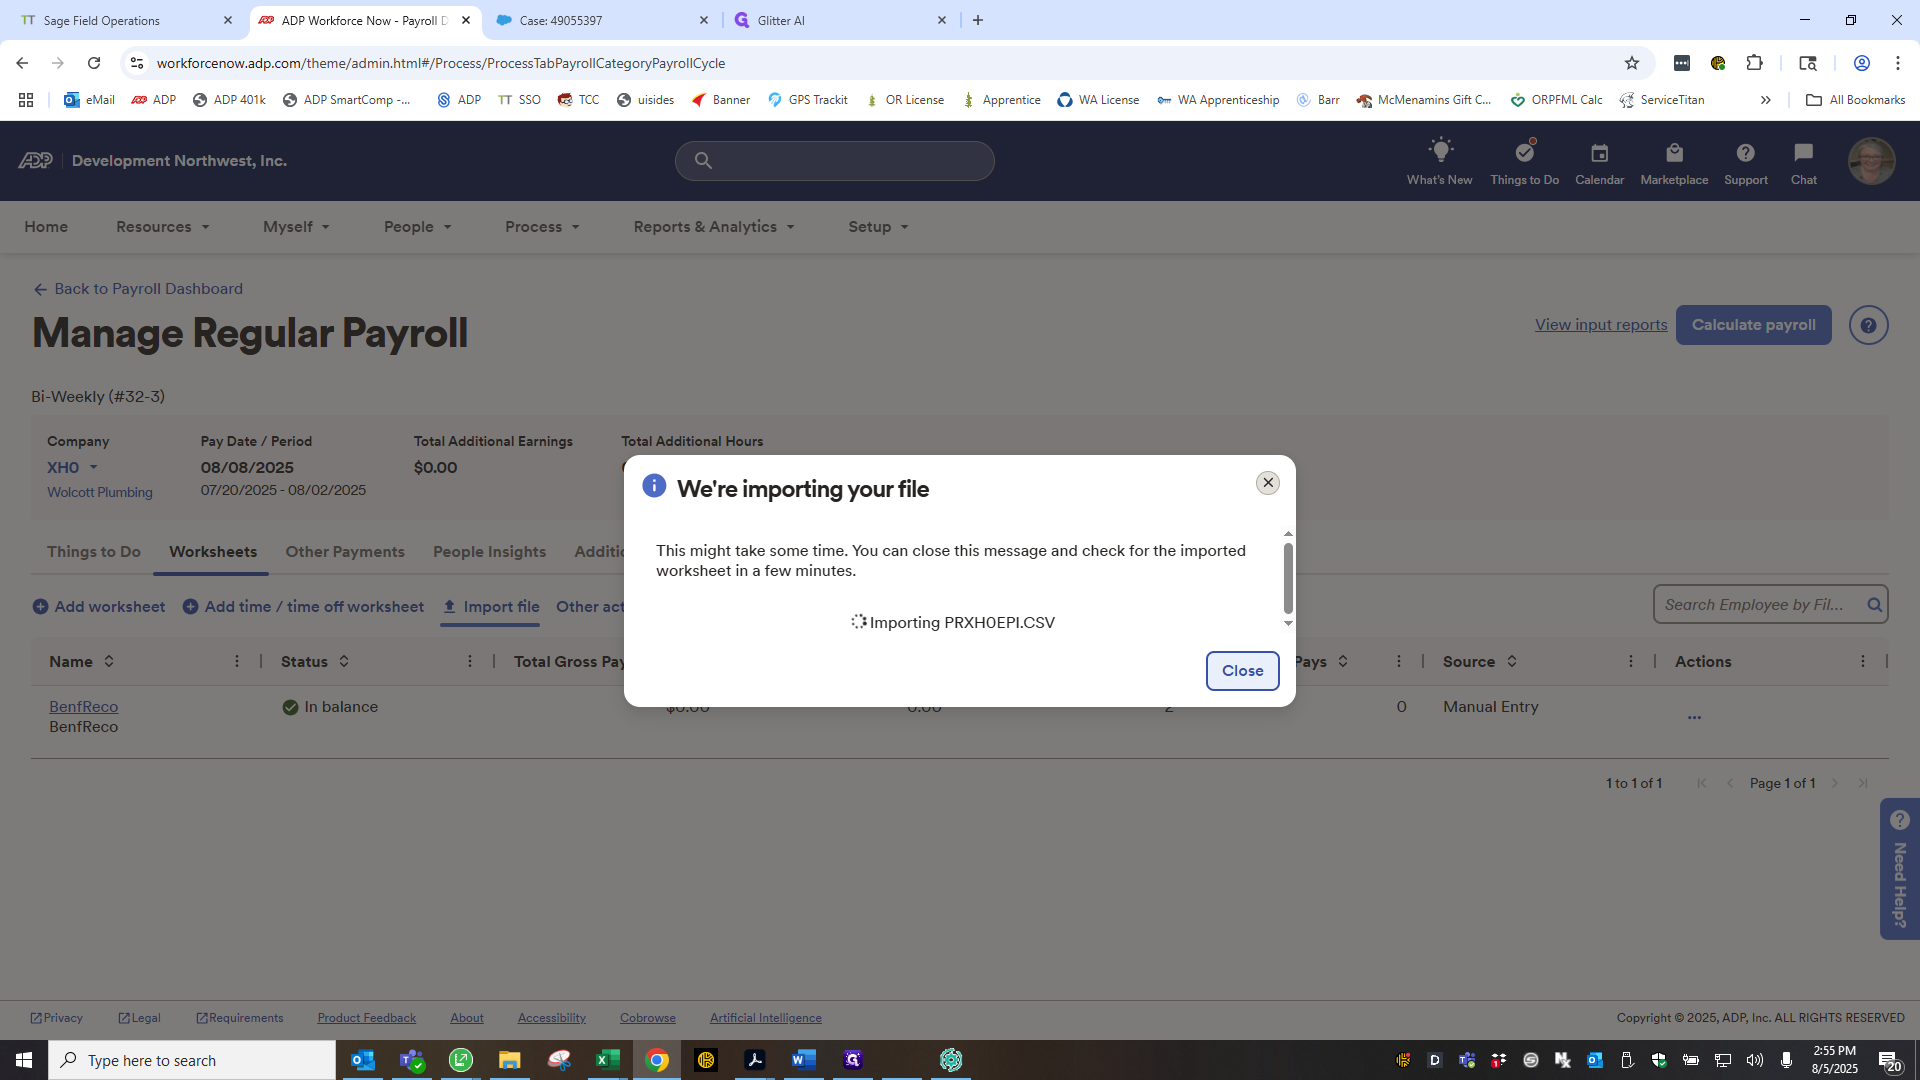

If you refresh, you'll return to the payroll dashboard. Wait a few minutes, then go back. I'll show you how to do that shortly.

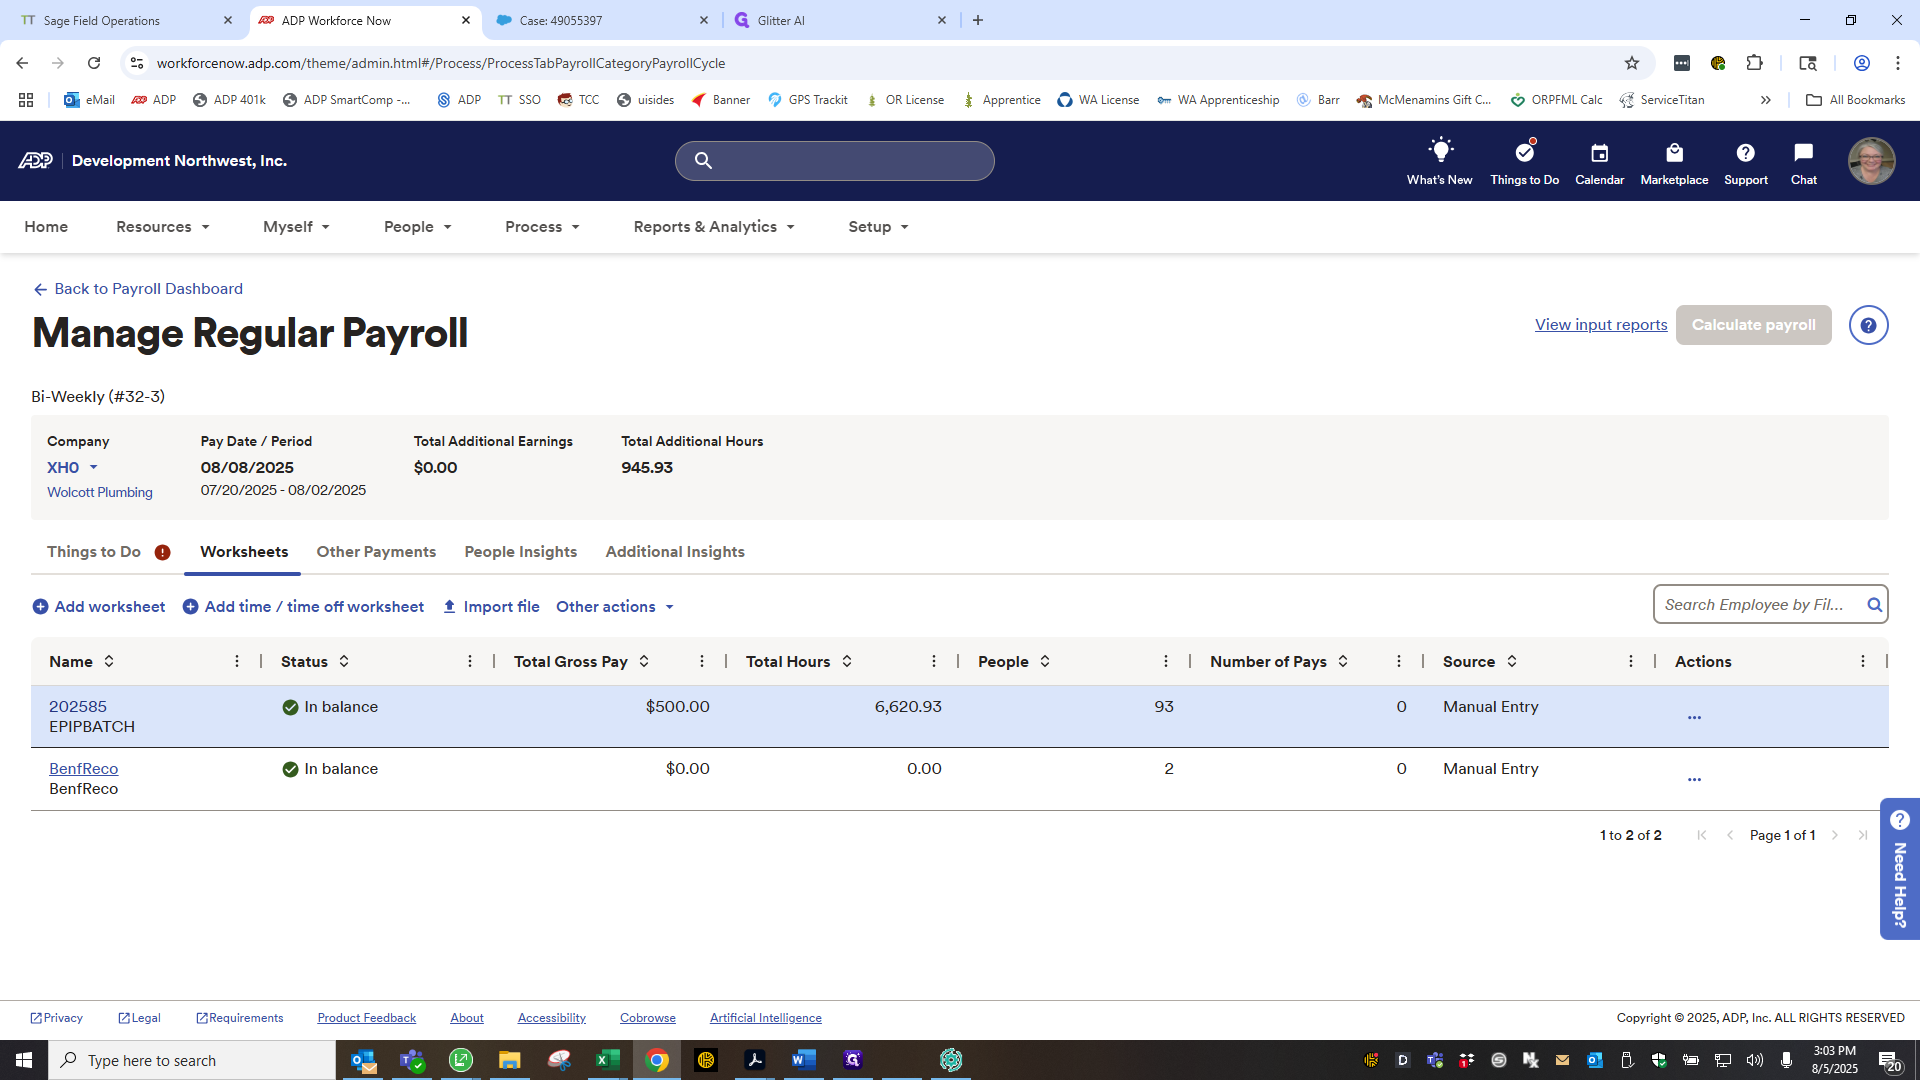
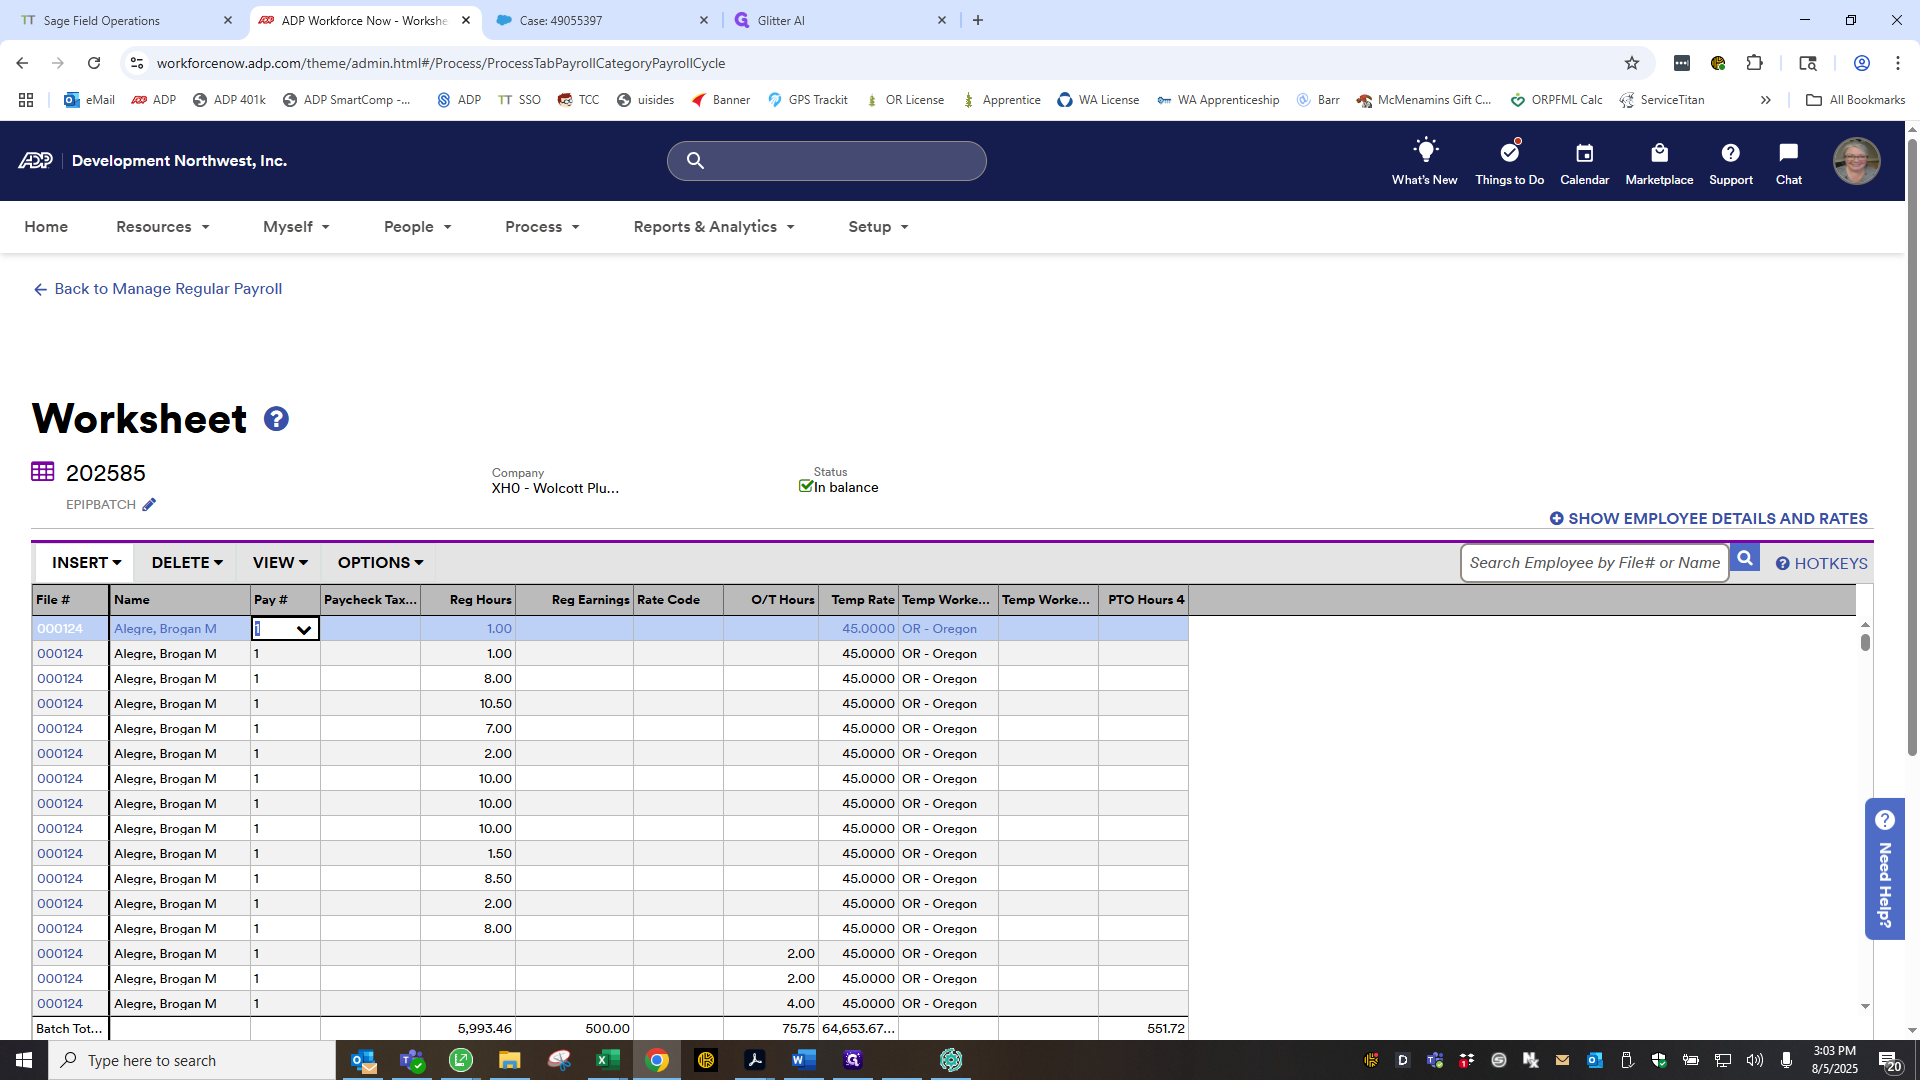
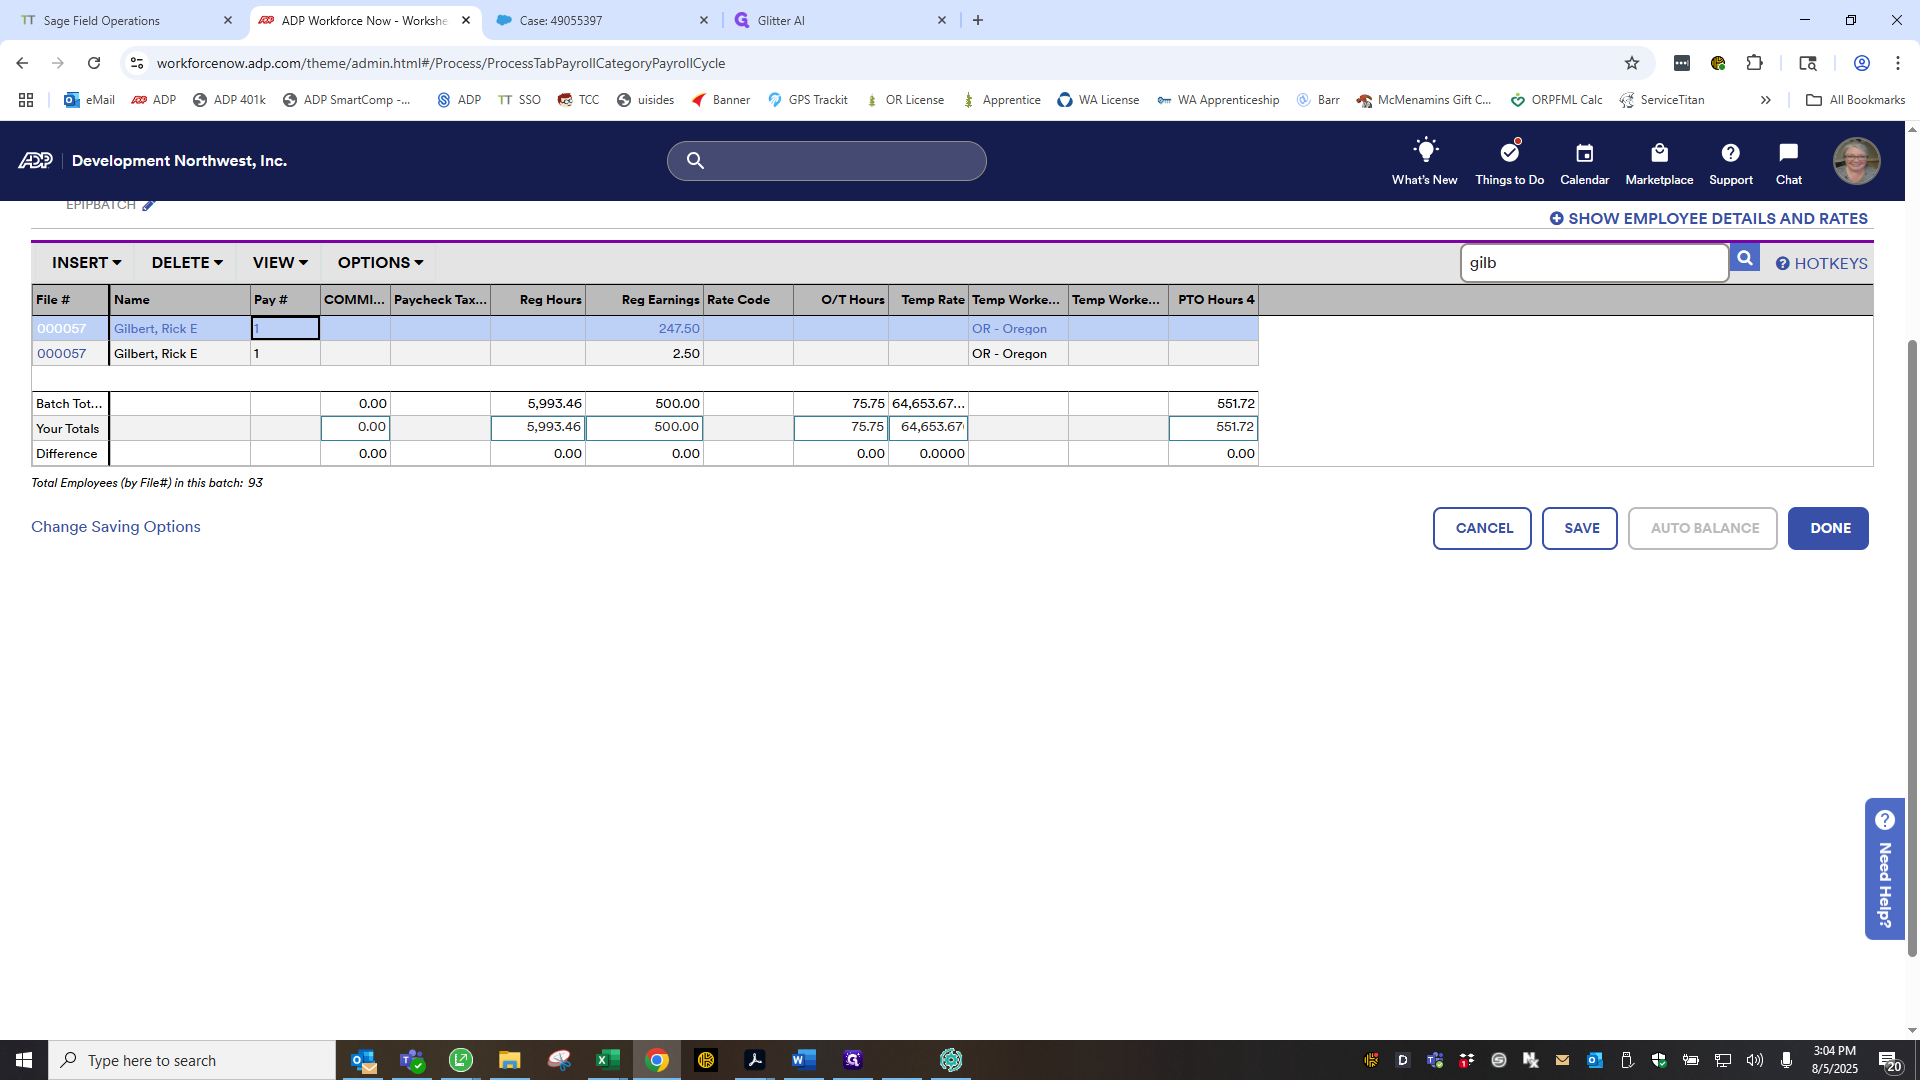
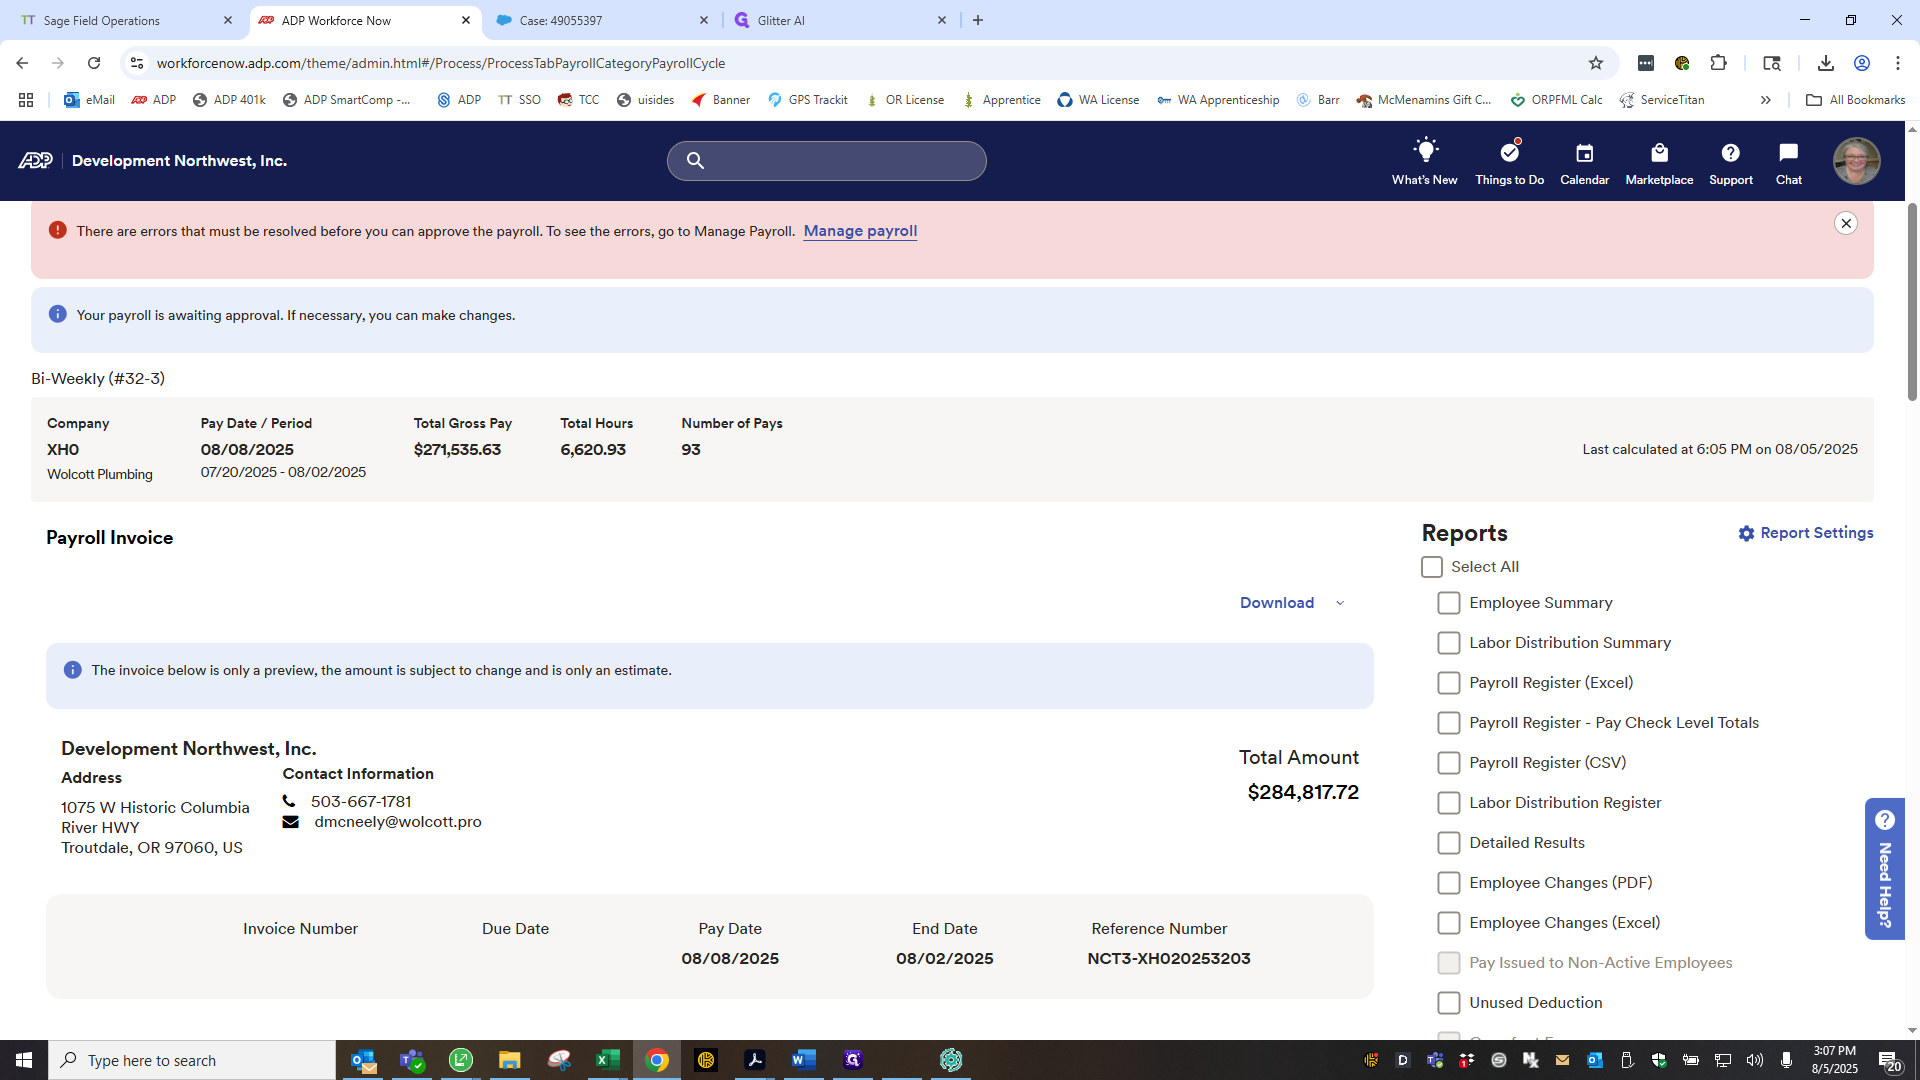
Okay. Let's check if everything imported correctly. It has. I forgot to mention this earlier when I was creating or discussing how to export the file to check the number. But it was 93.
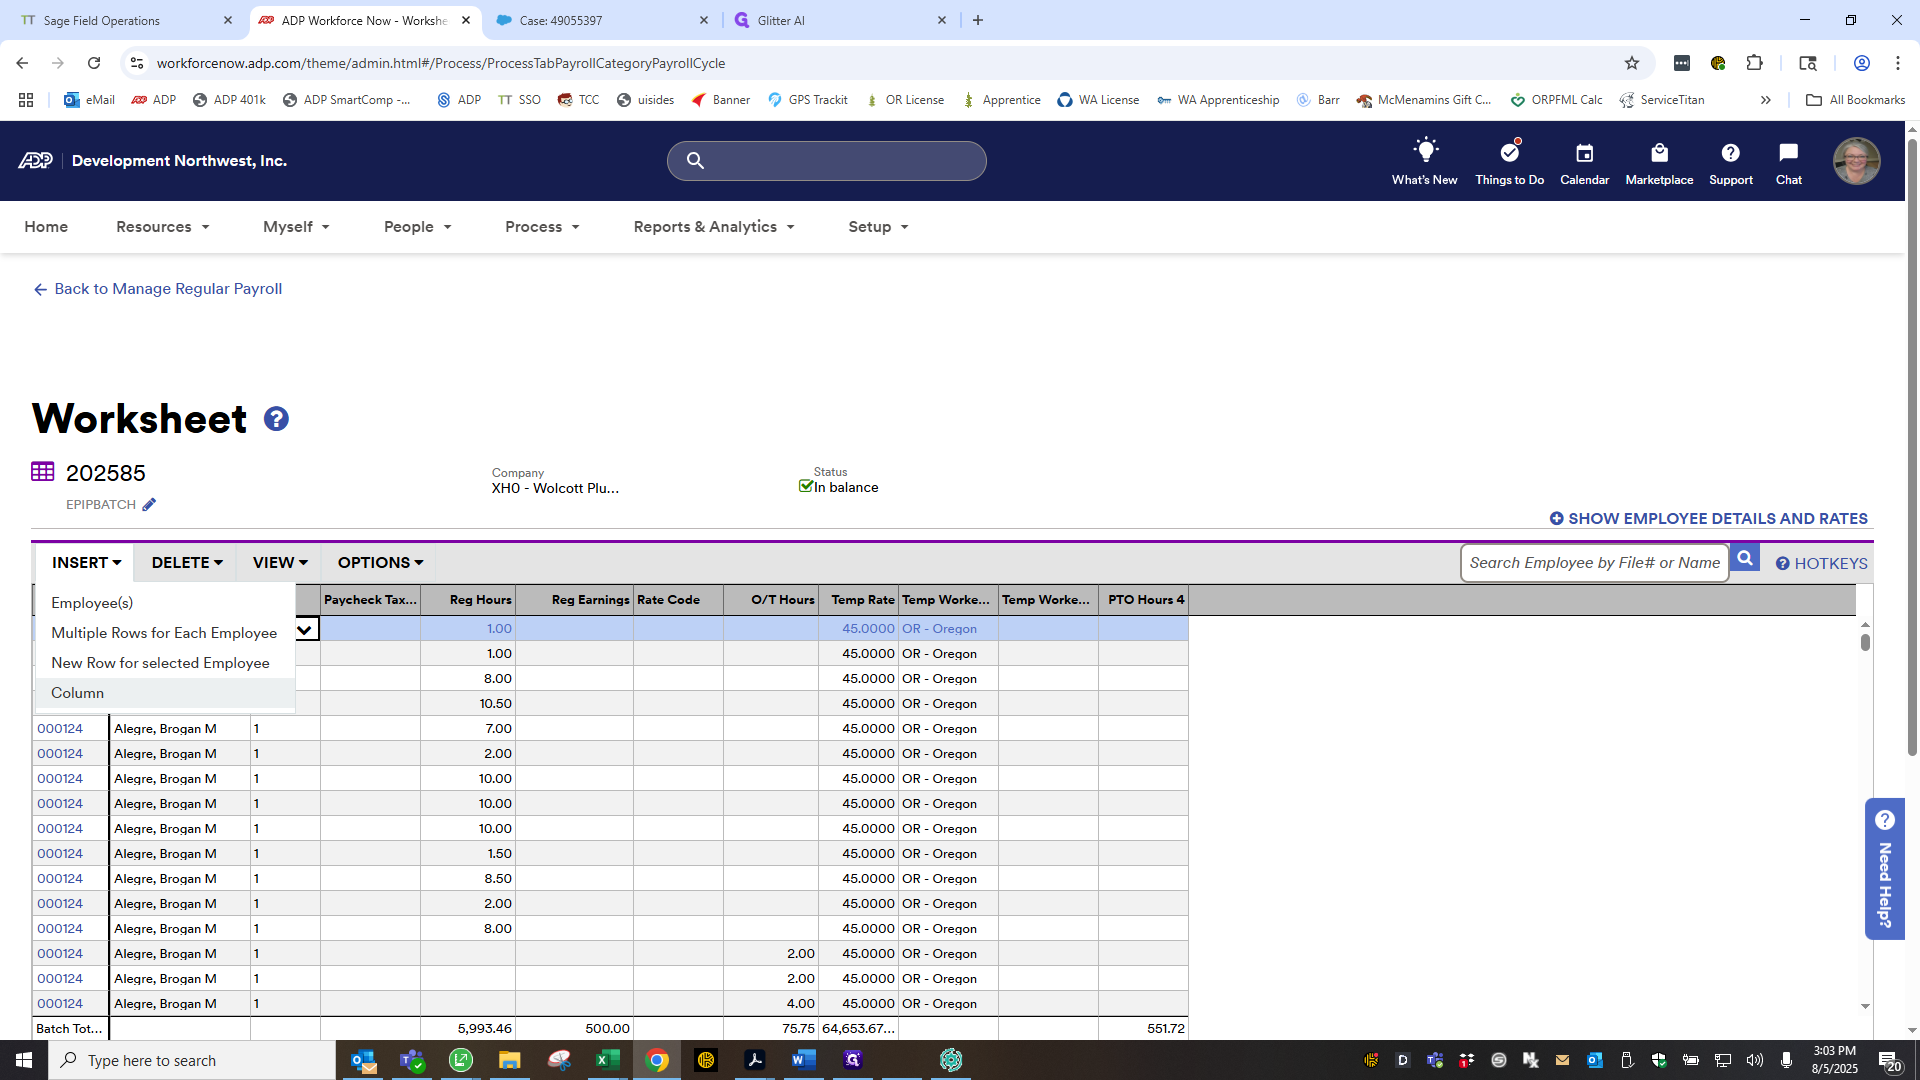
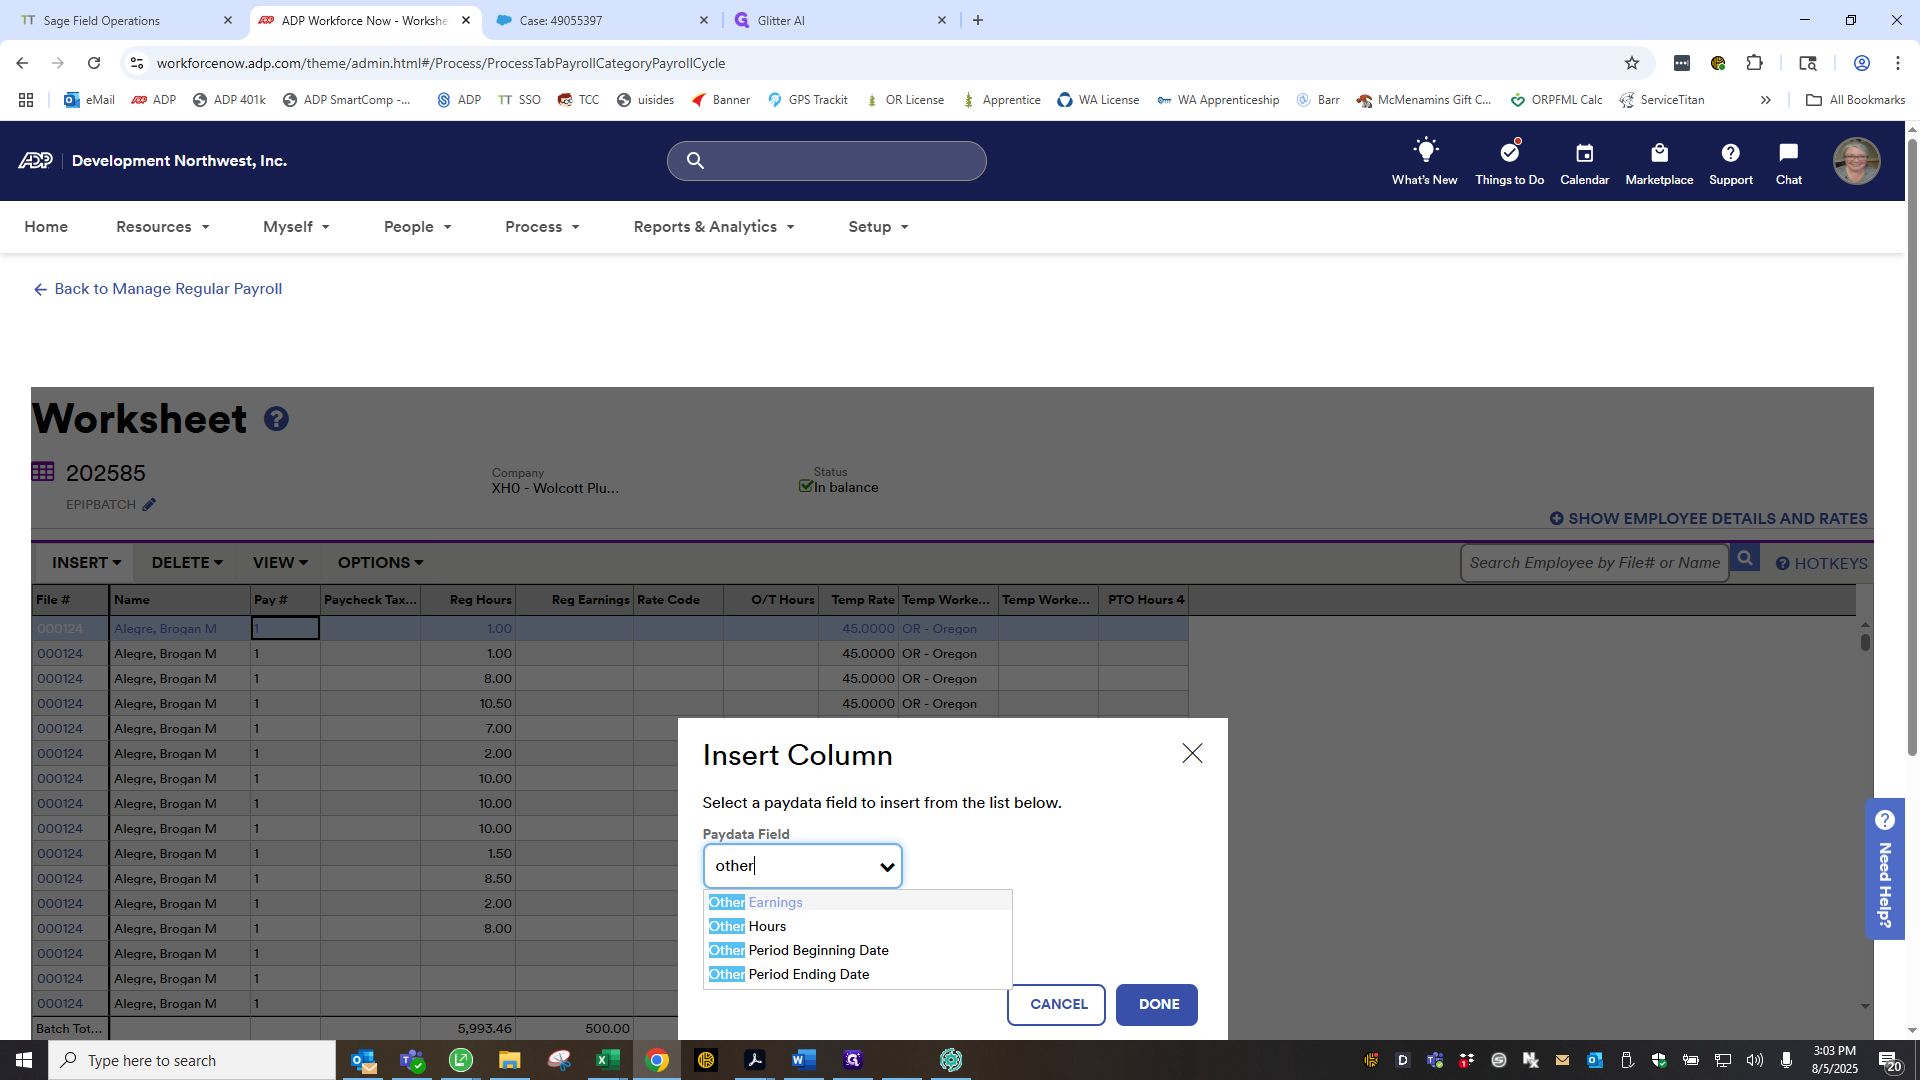
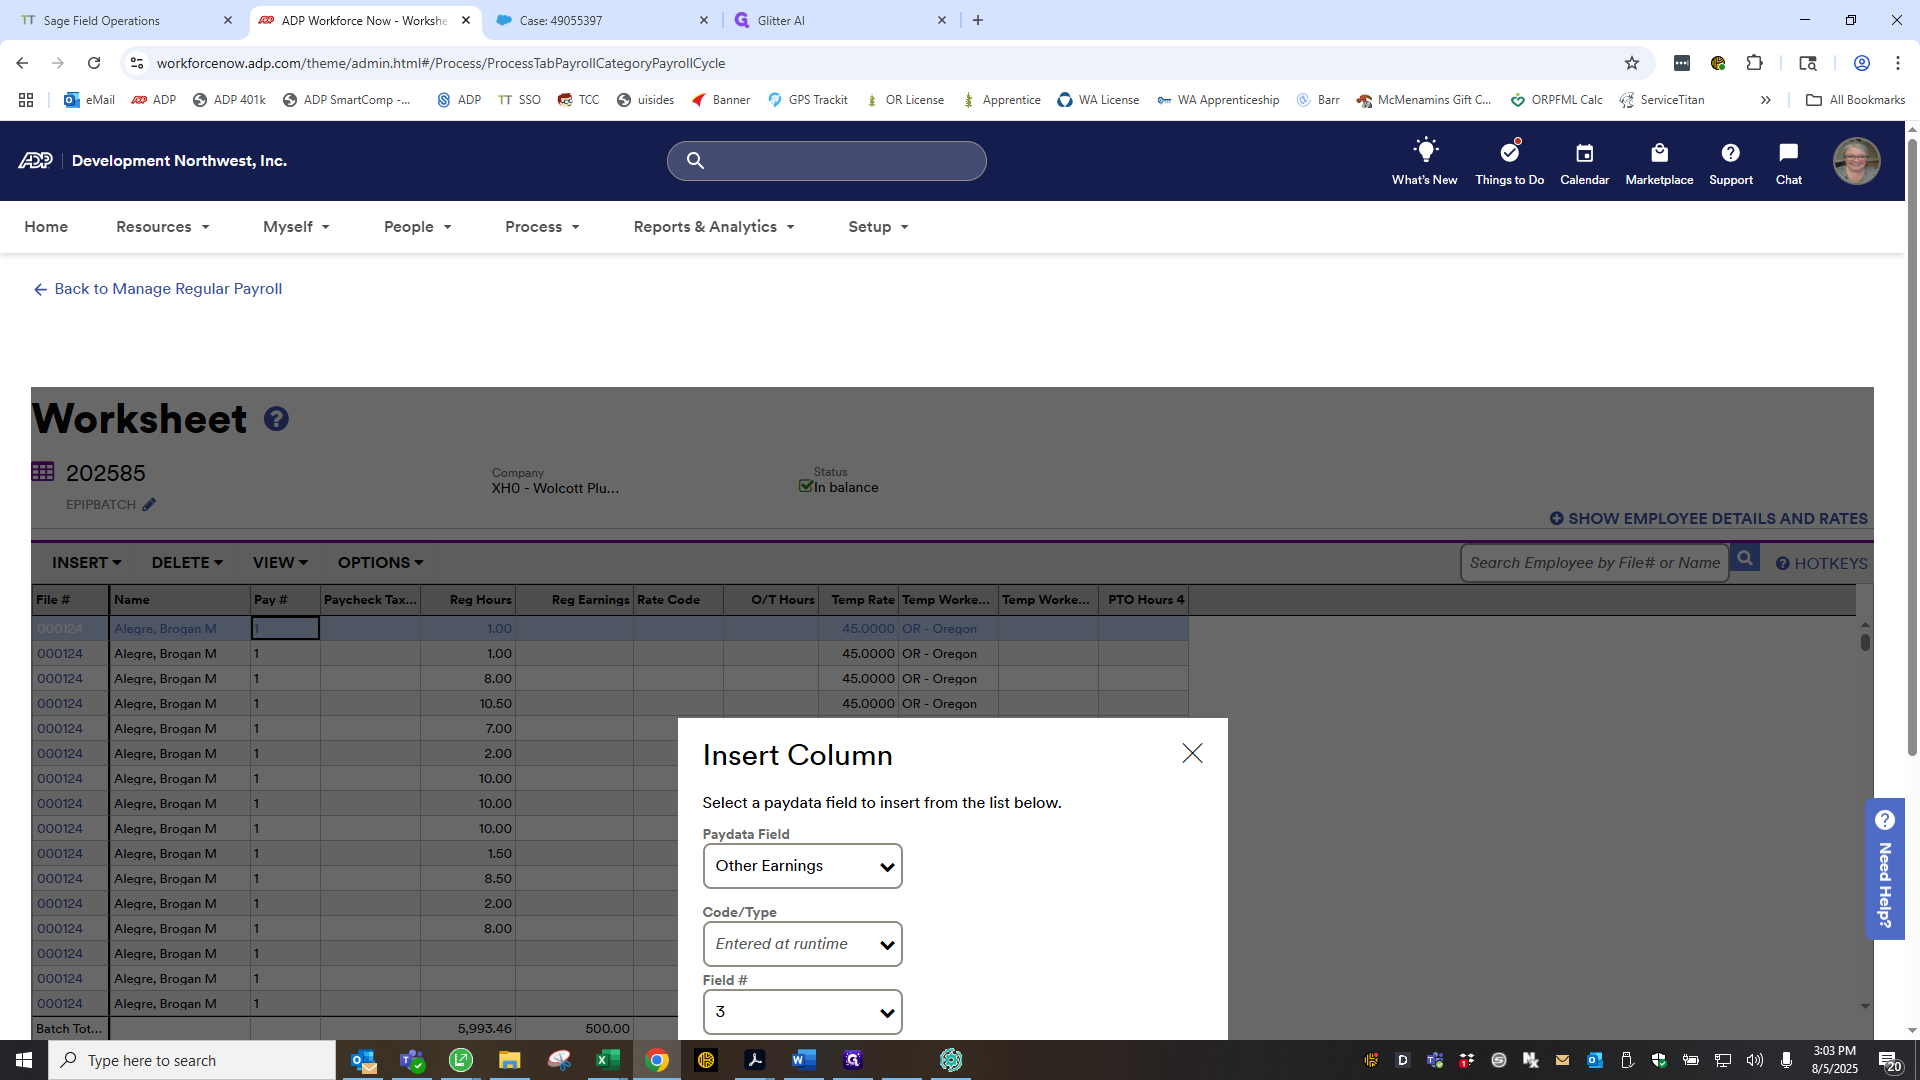
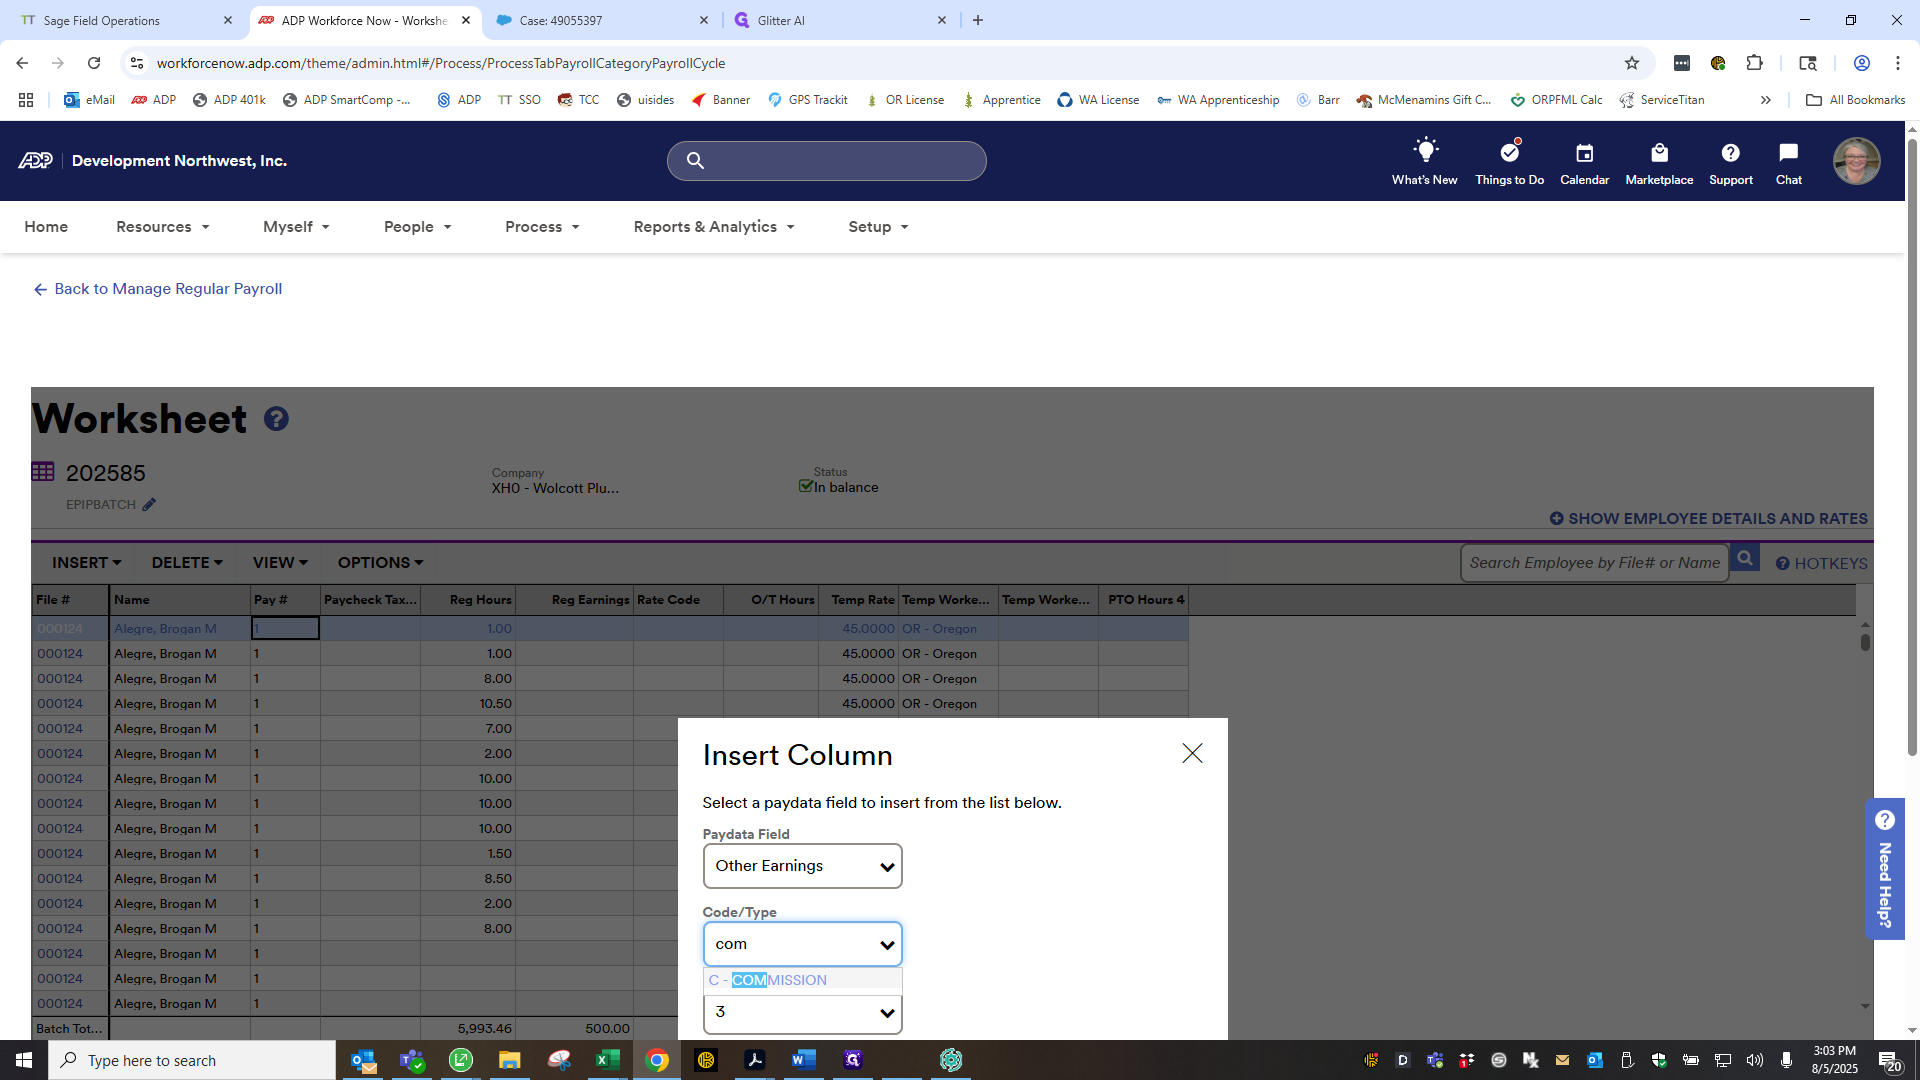
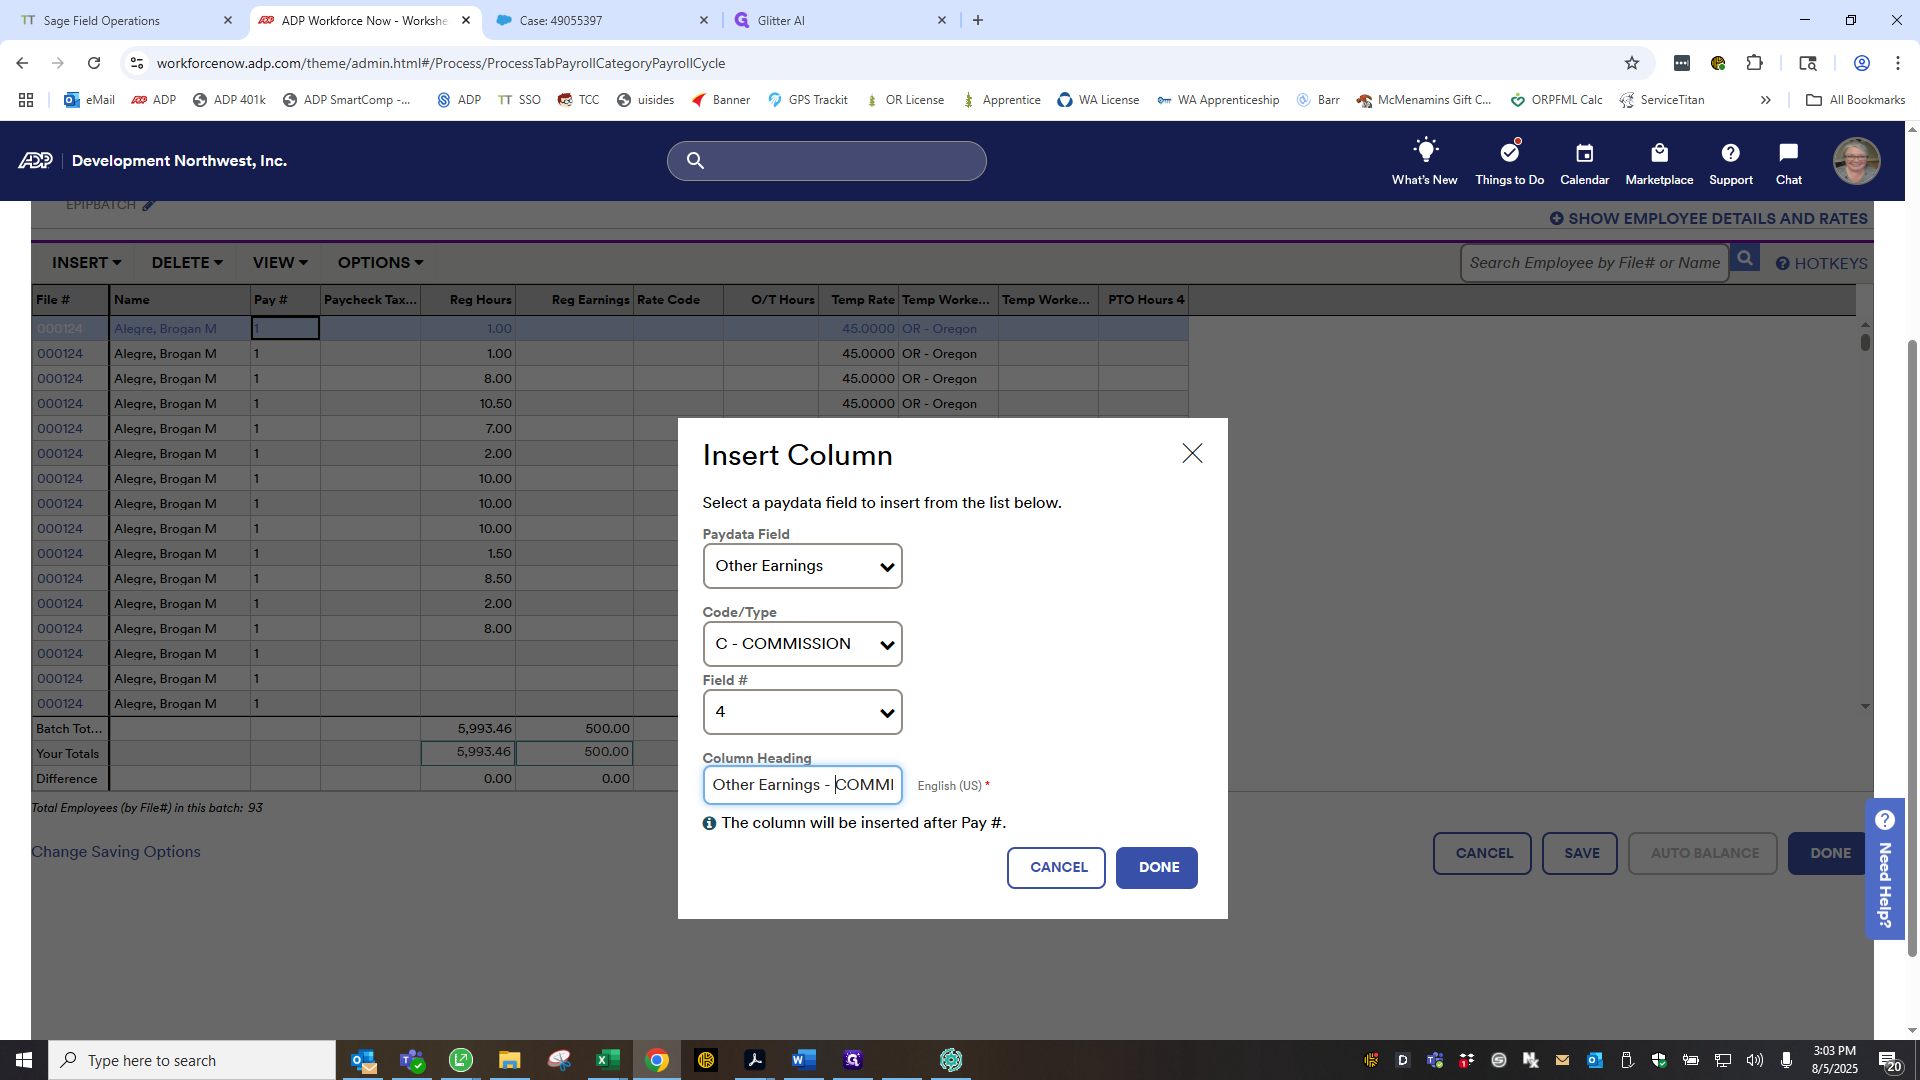
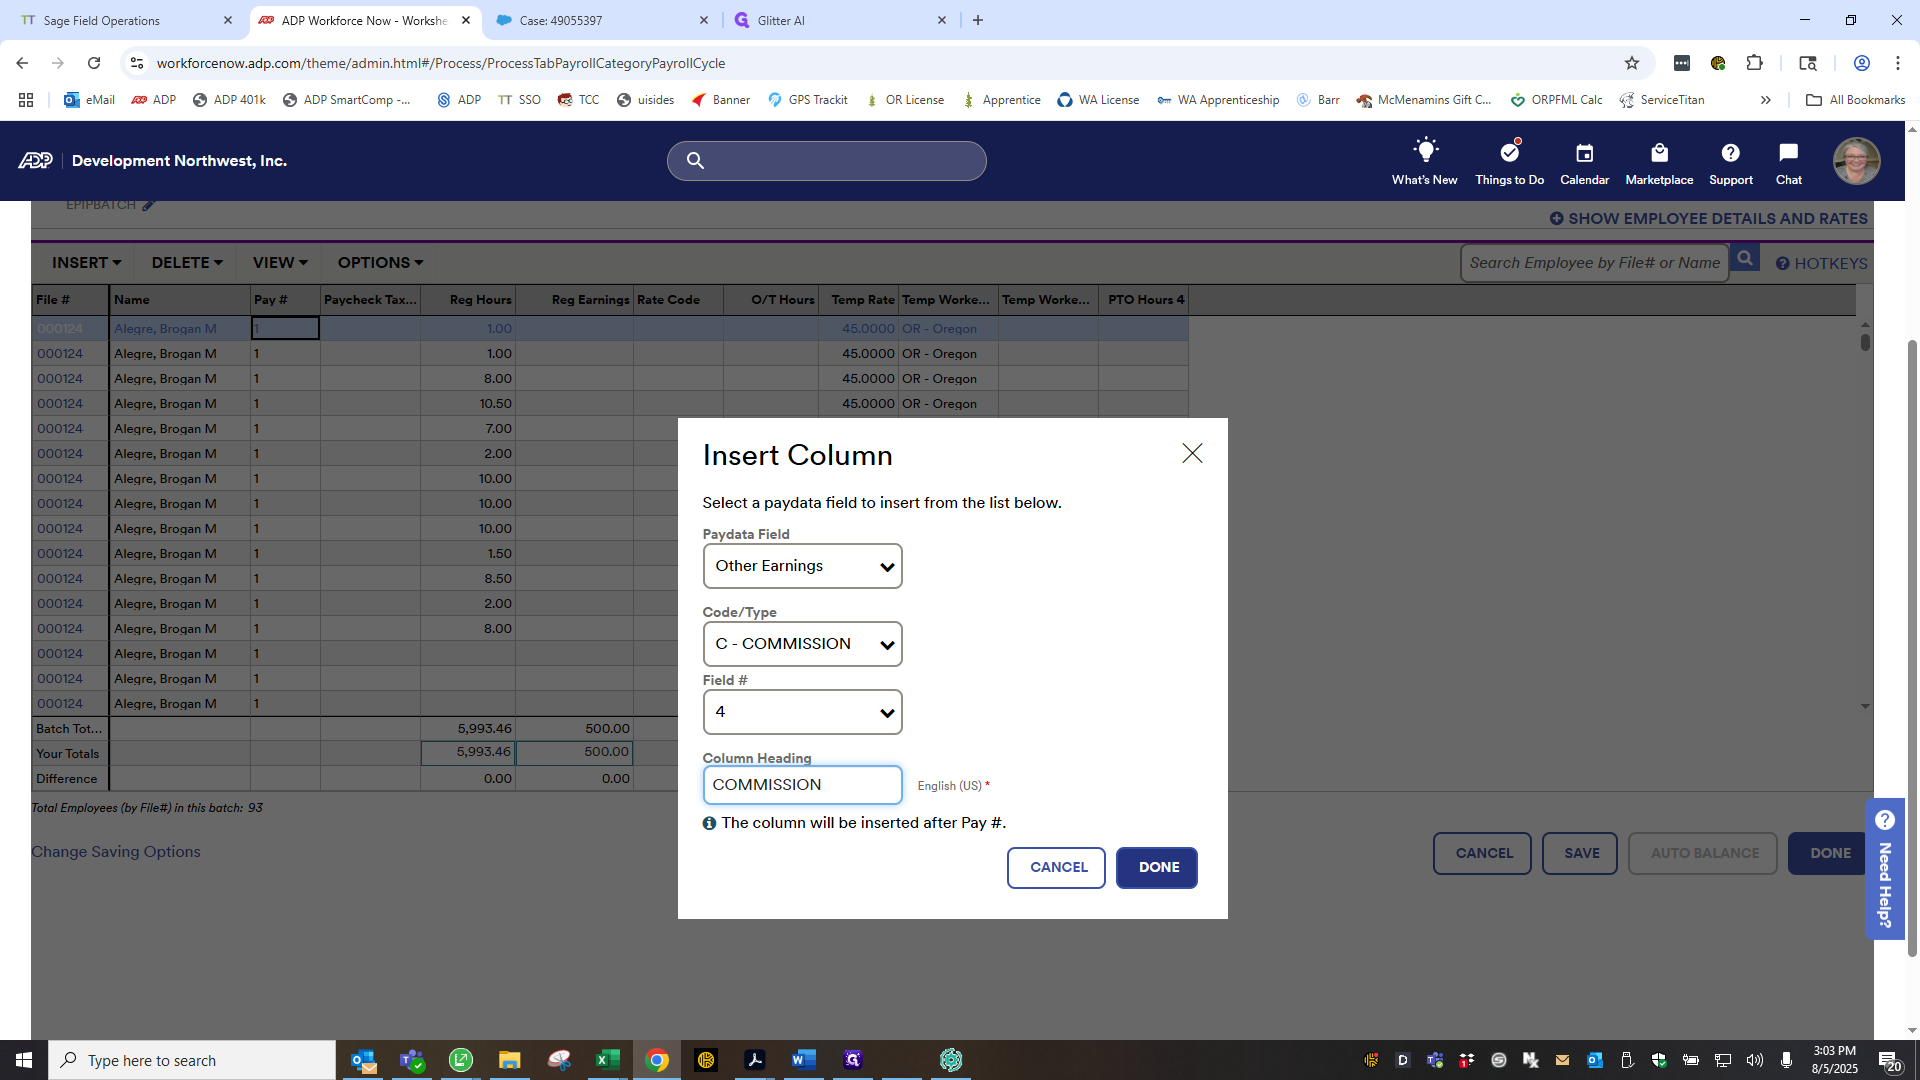
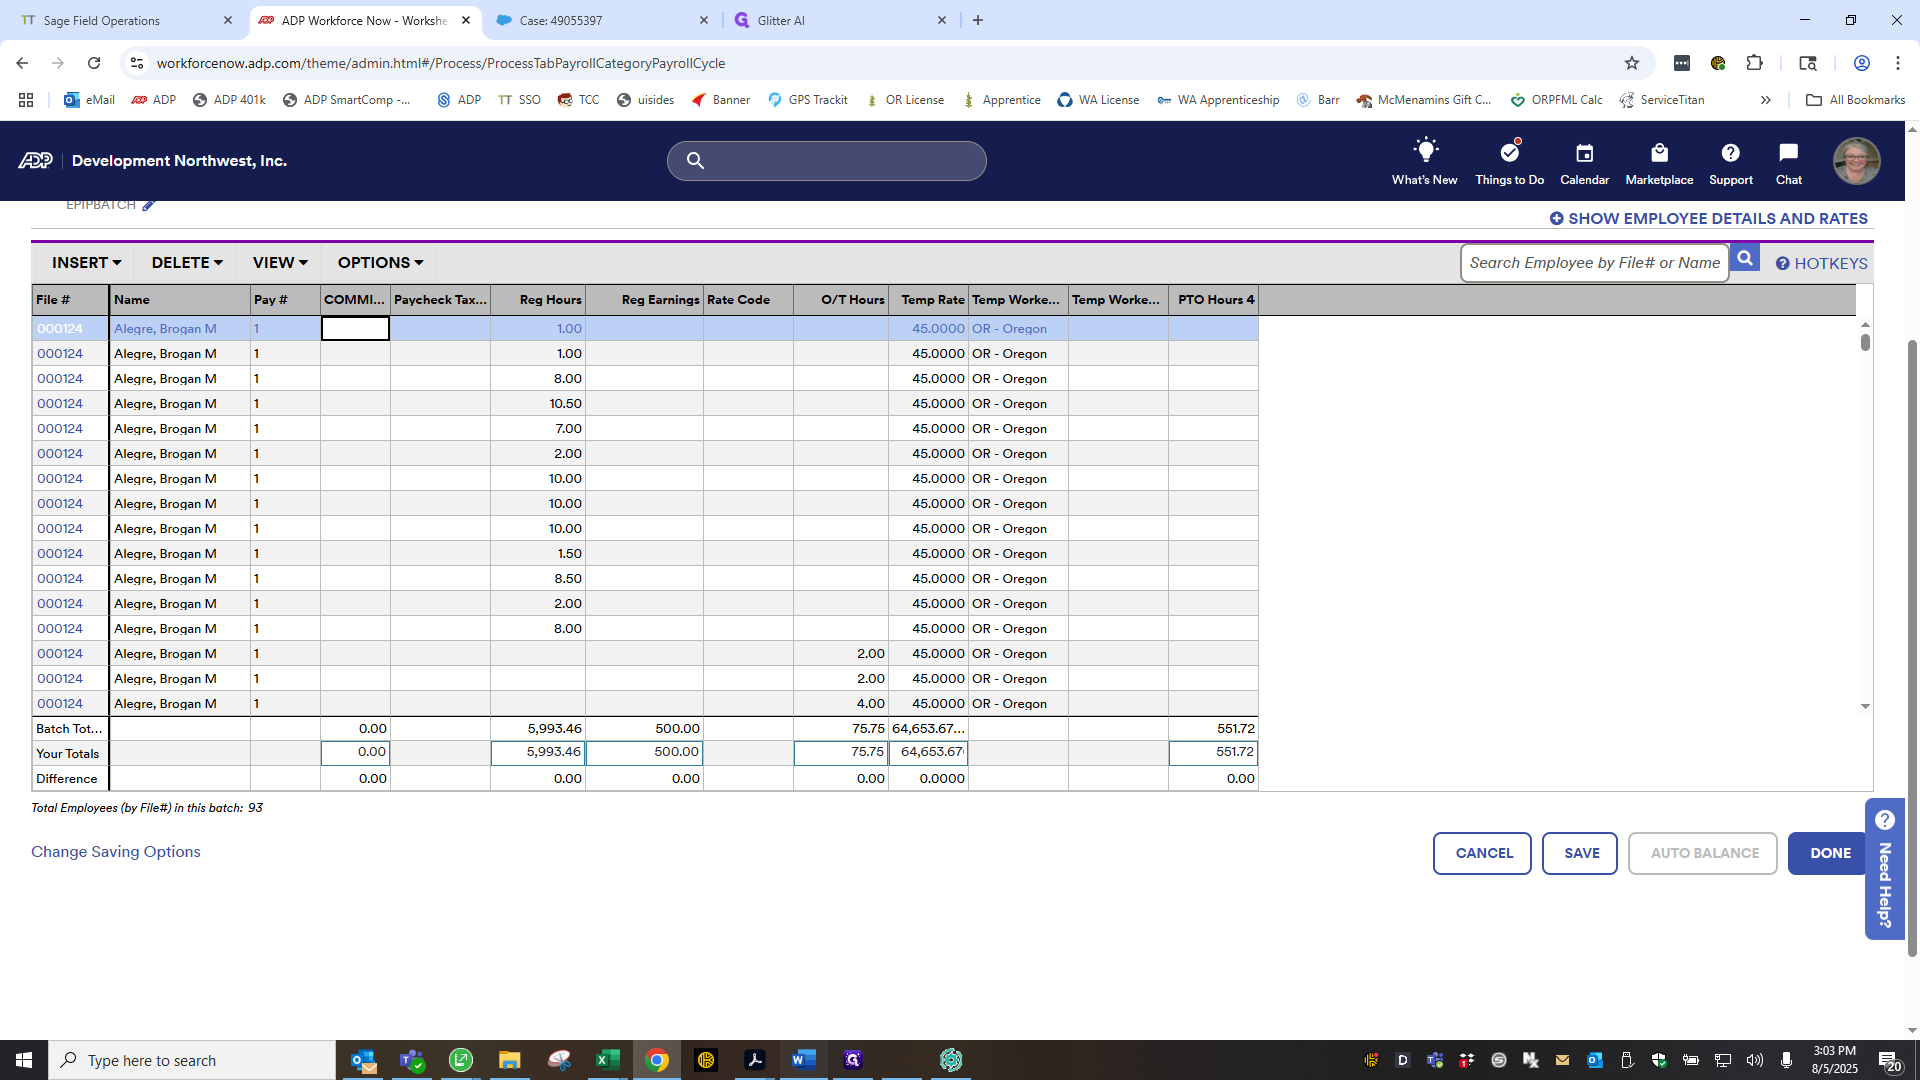
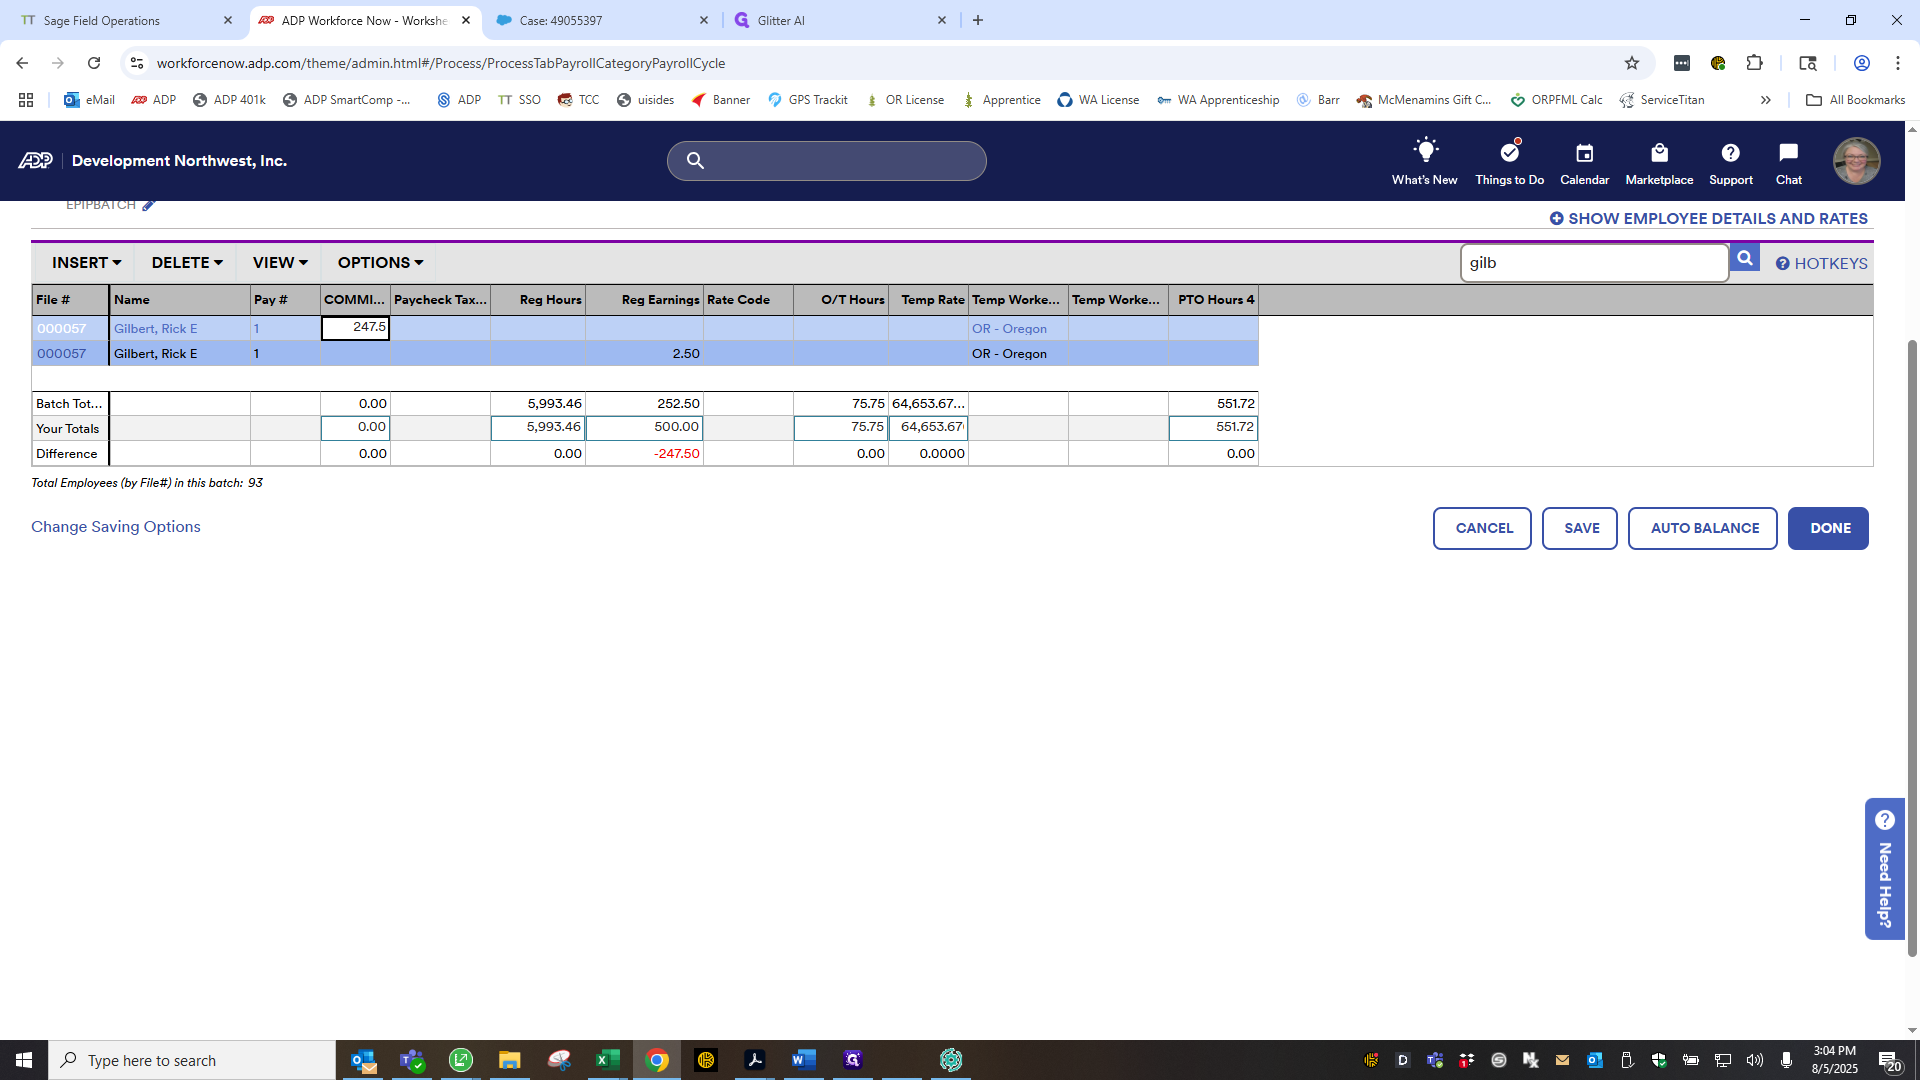
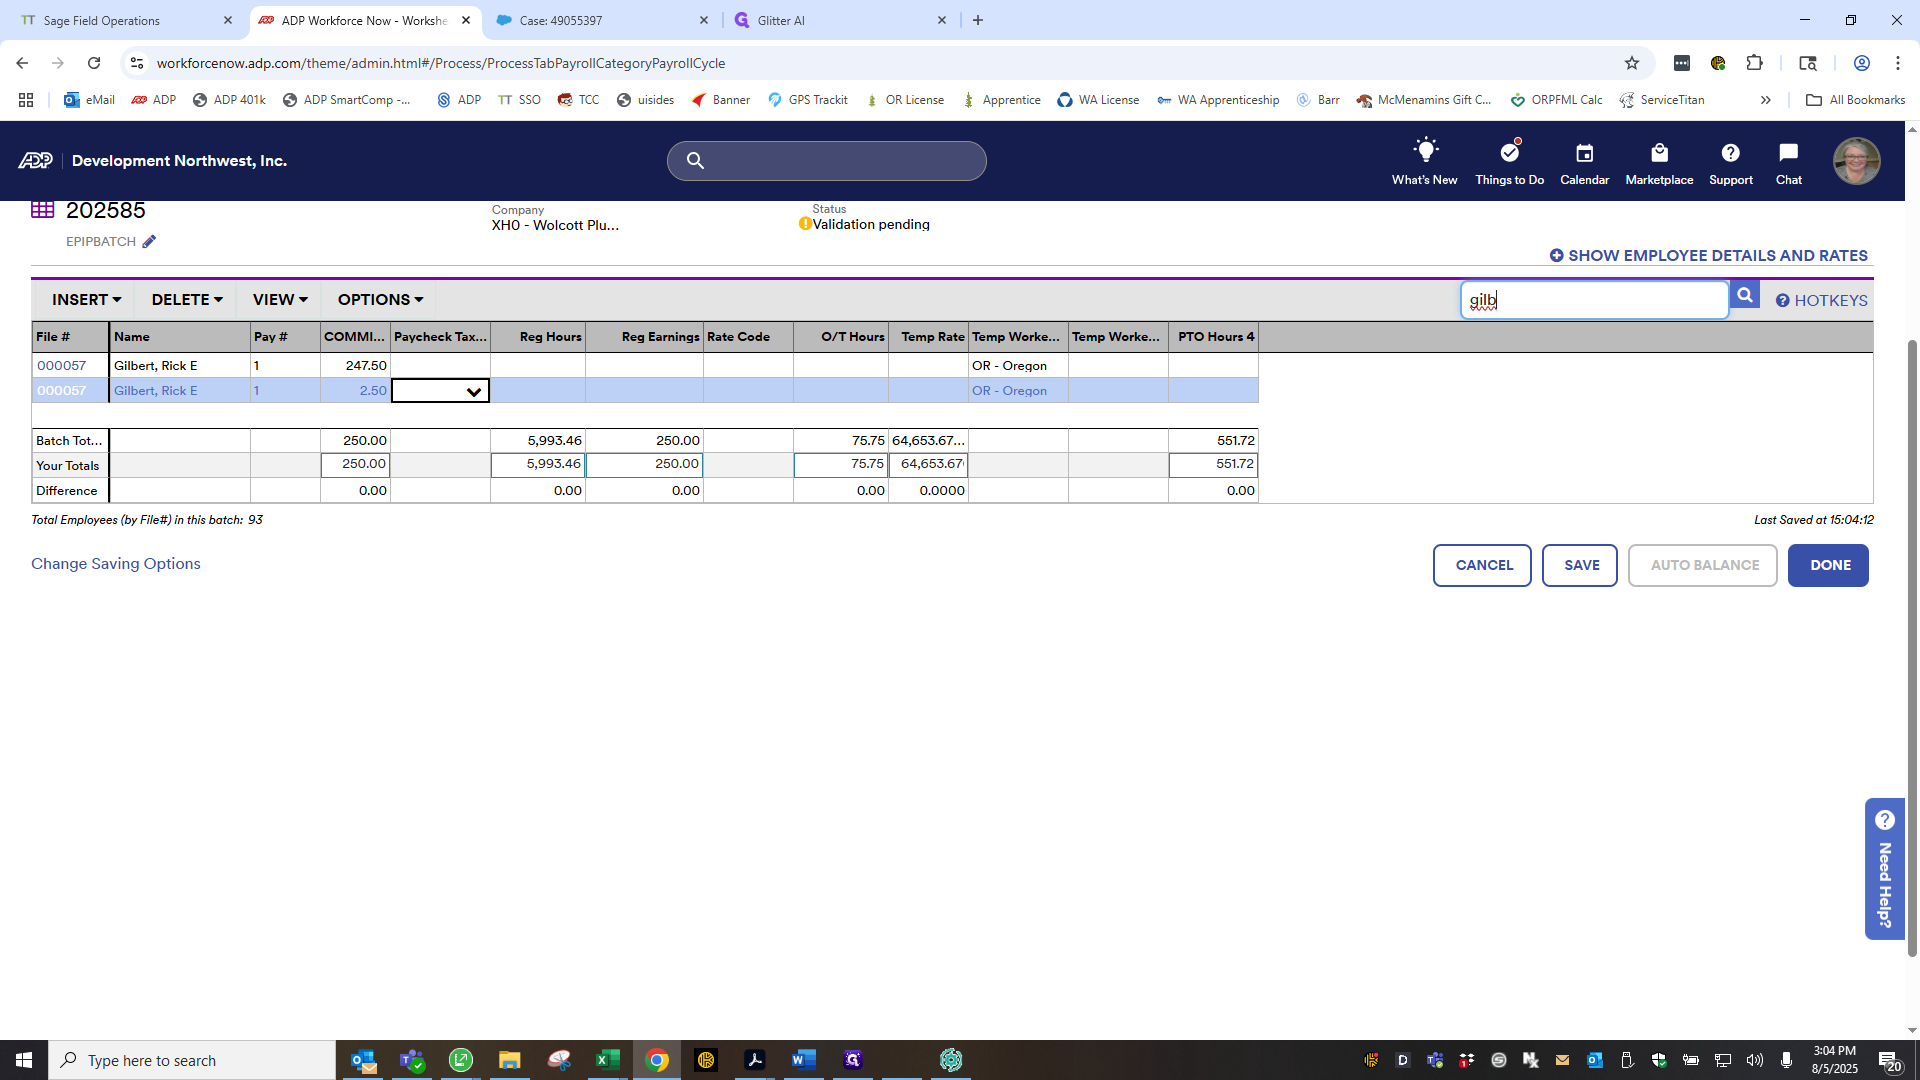
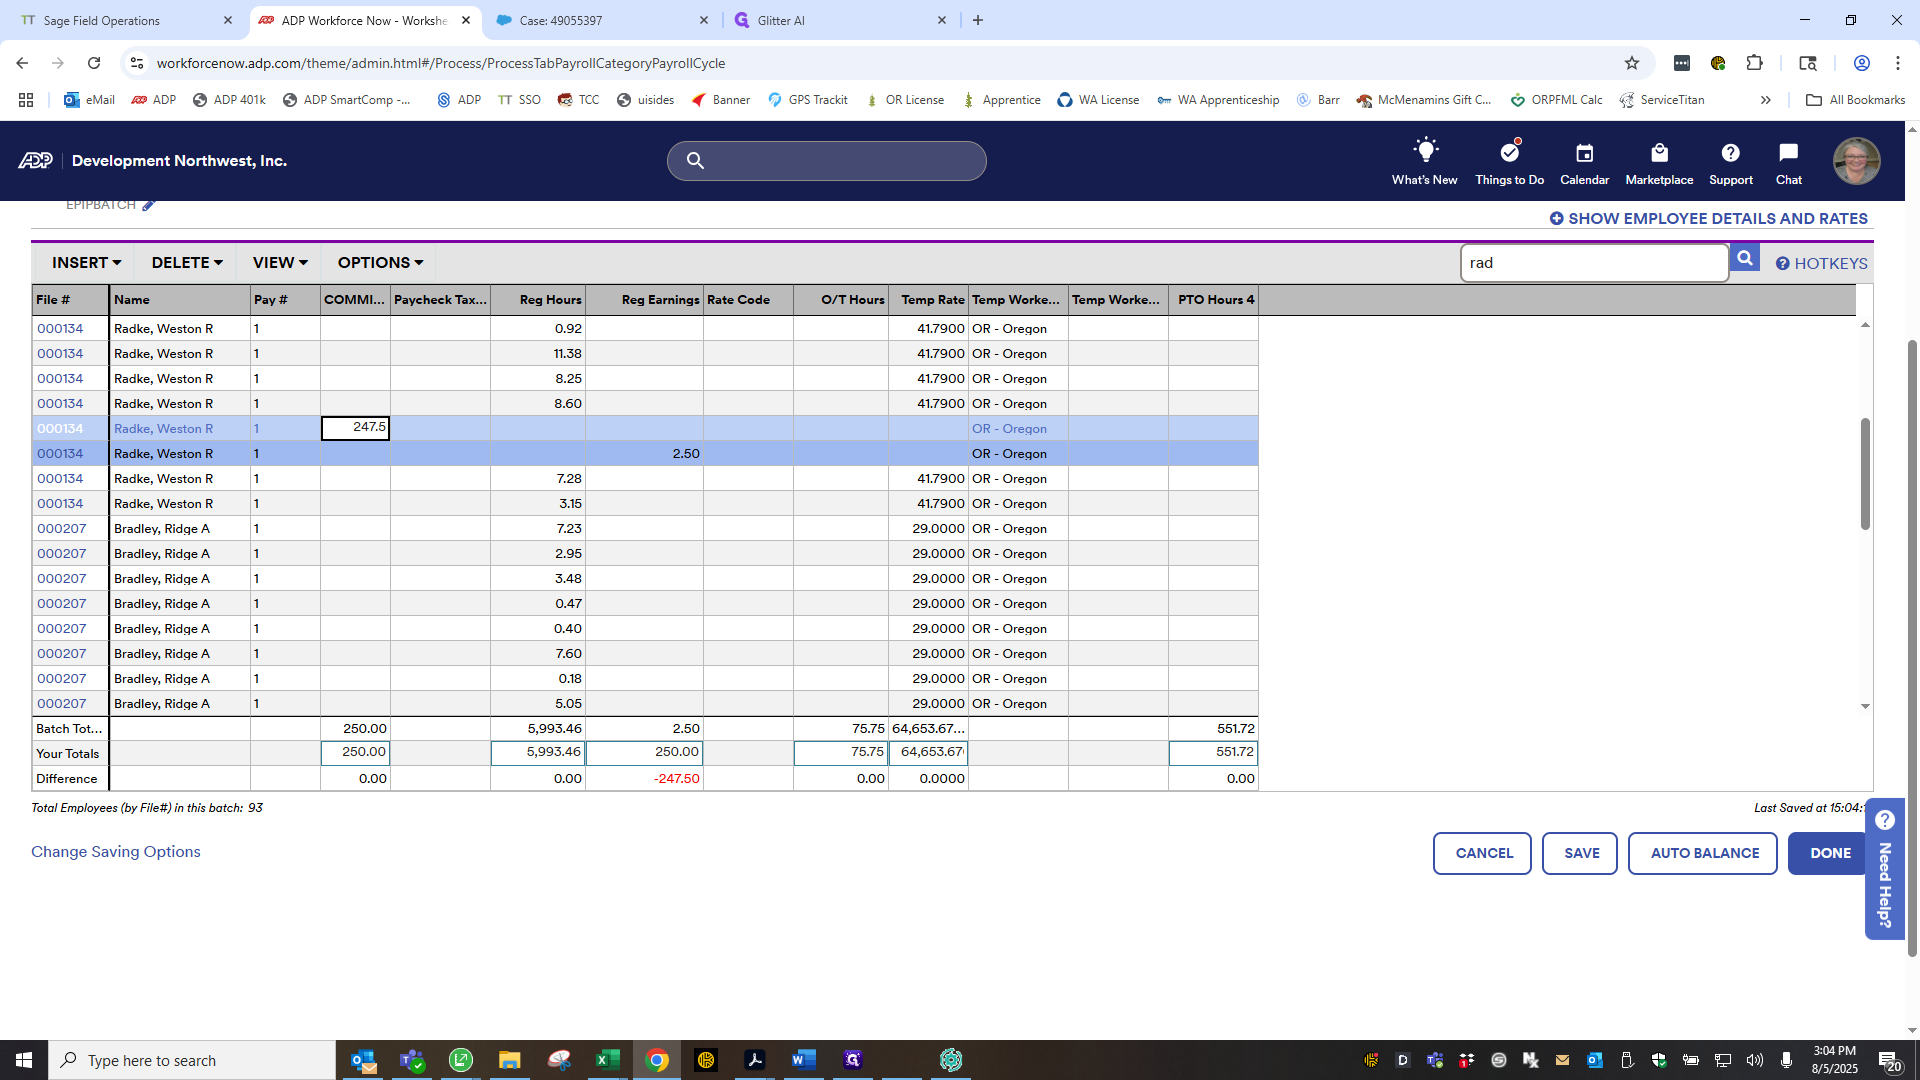
You need to open that because we have to make some changes. First, for the people who receive the $250 commission, we need to add a column for other earnings. Code is commission. I always delete this part because it appears on their pay stub. Click Done.
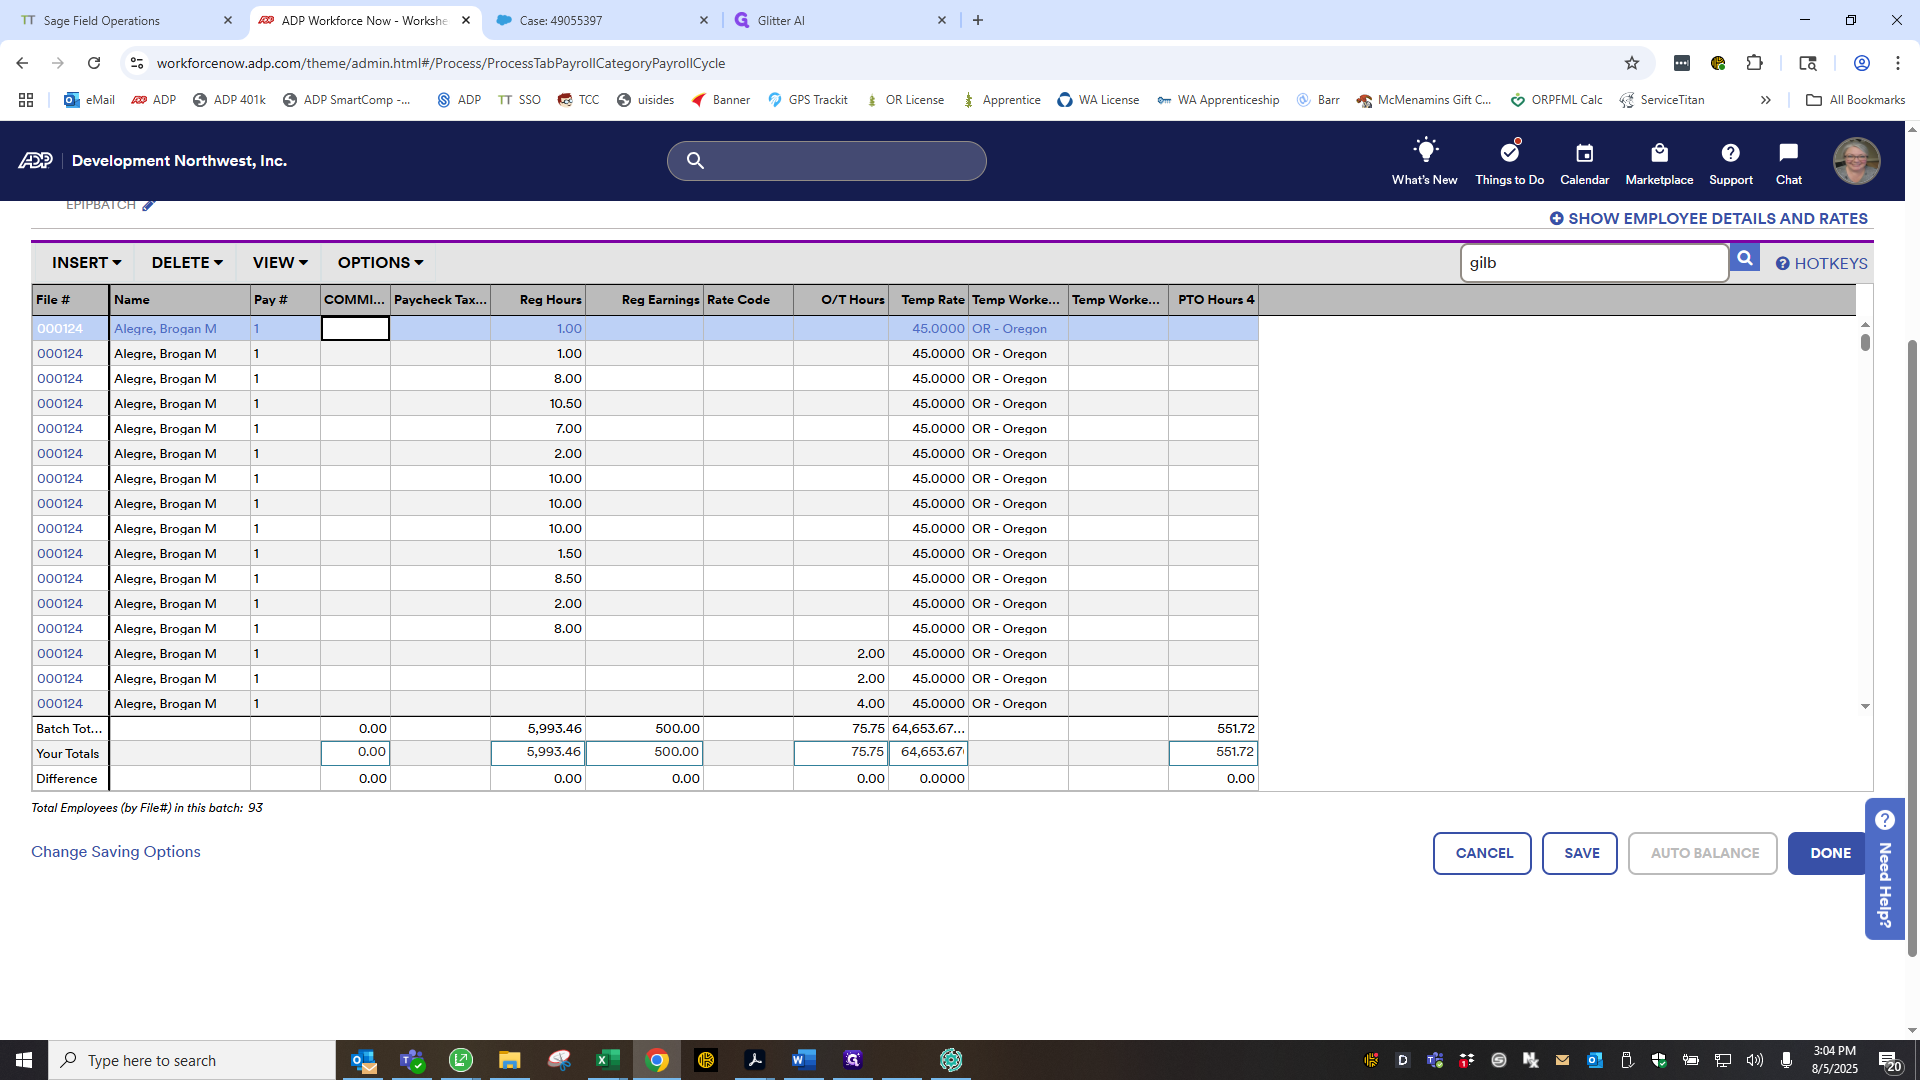
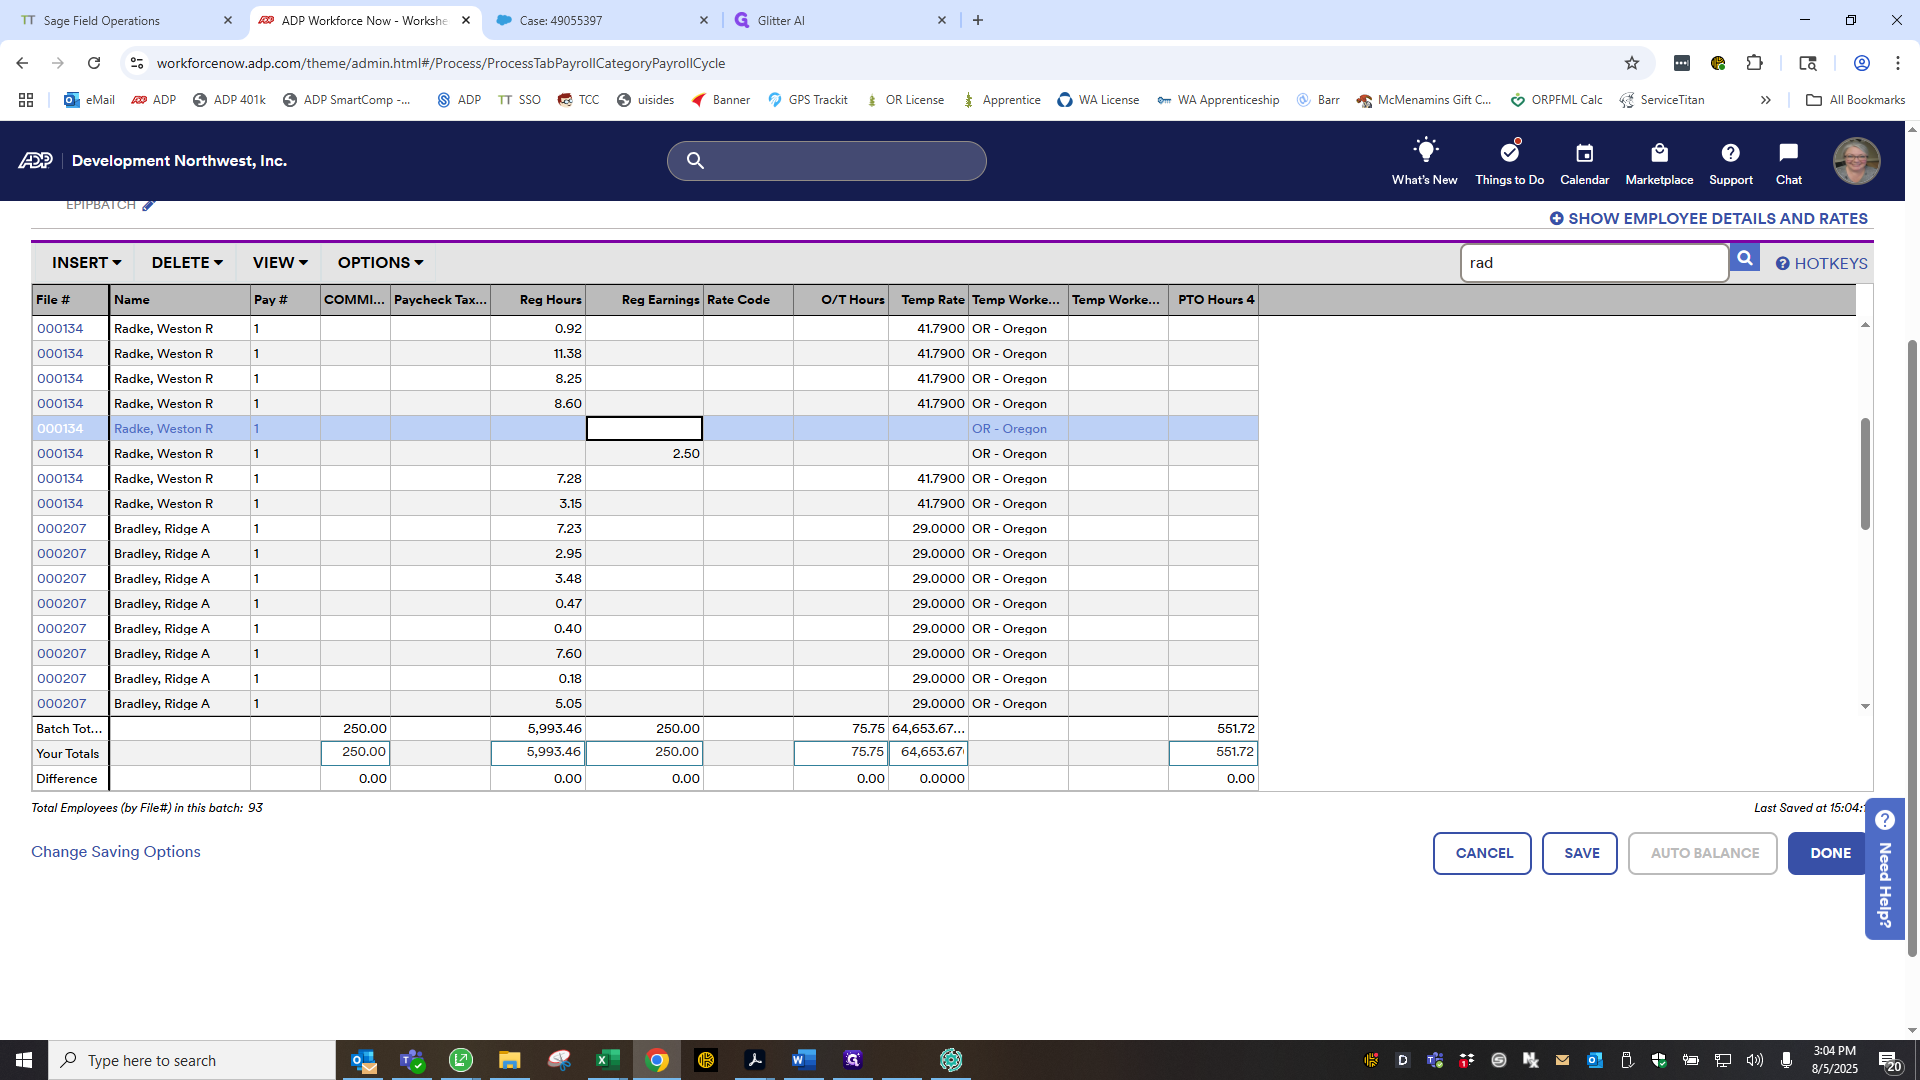
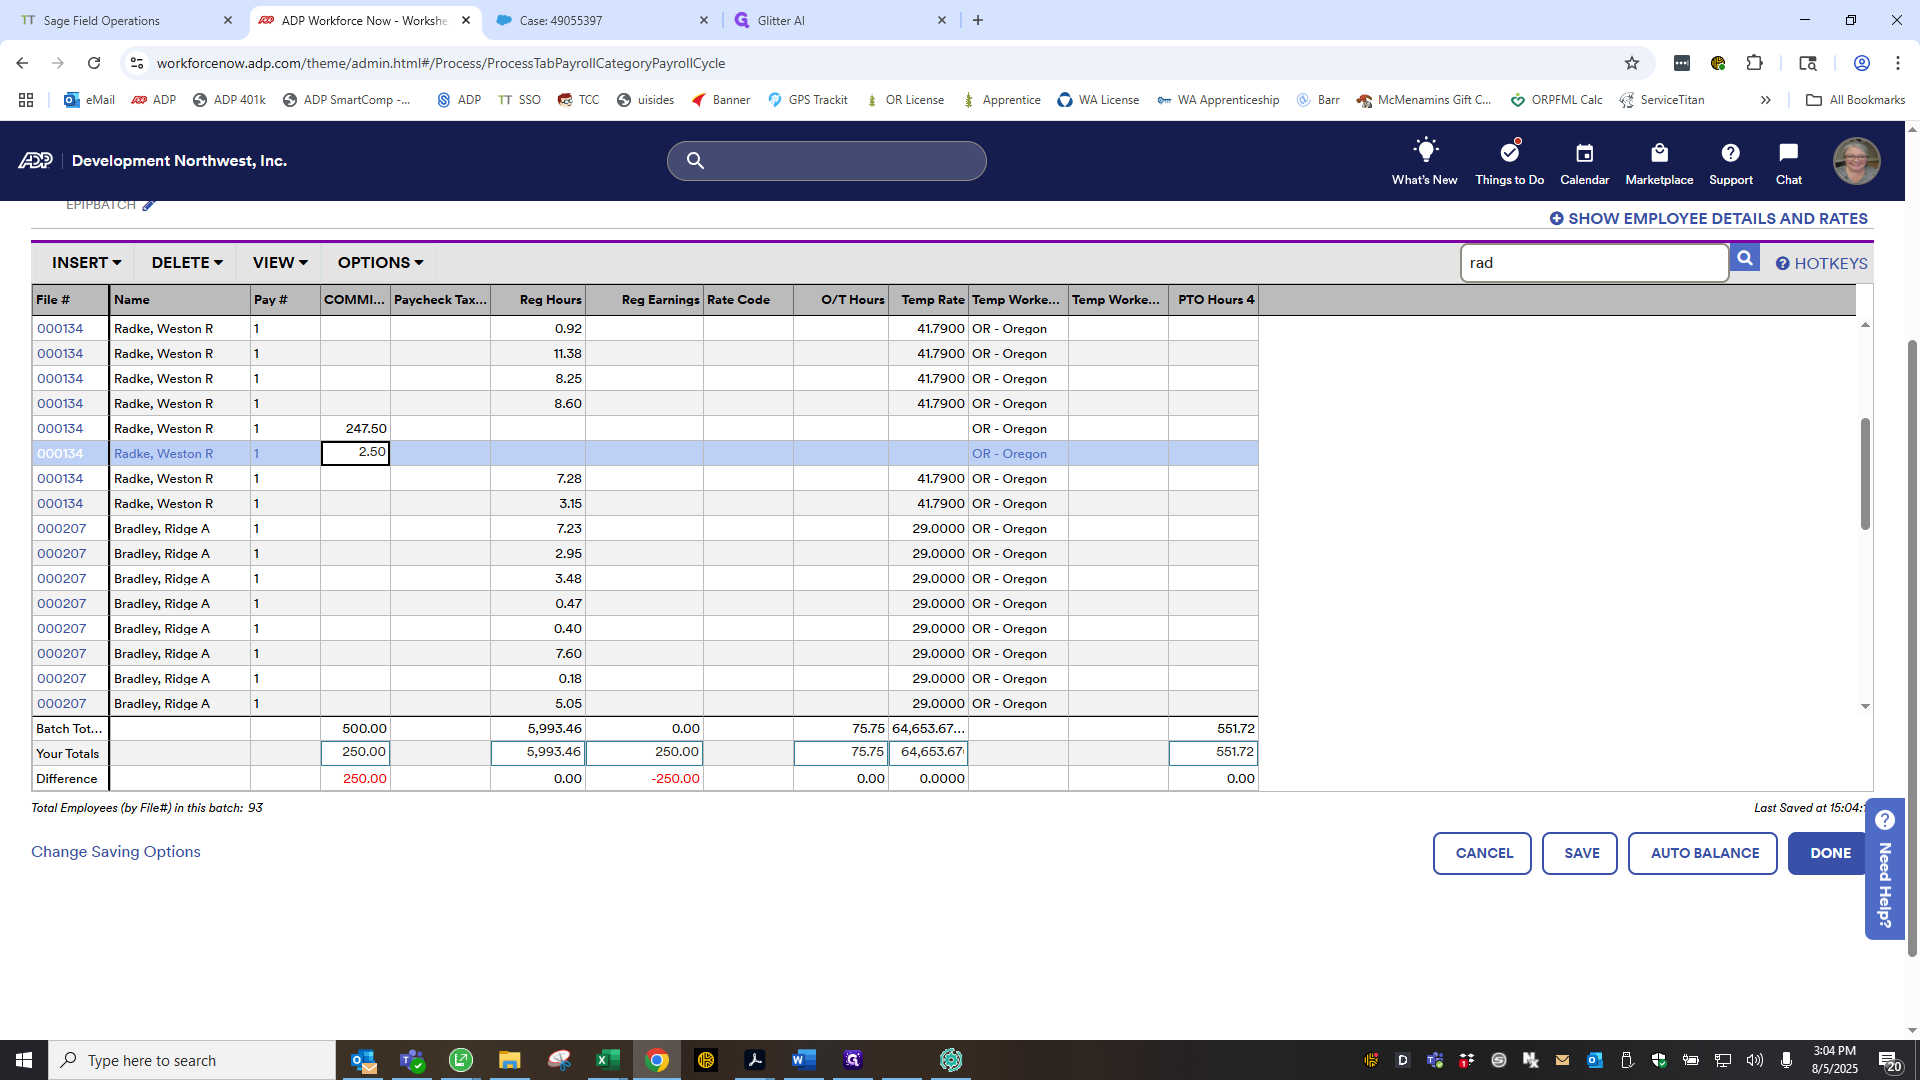
I check my notes and see it was Rick Gilbert and Weston Radke. Return to ADP, enter the last name, and move the entry from regular earnings to the commission column. Autobalance. Radke. Scroll until it appears.
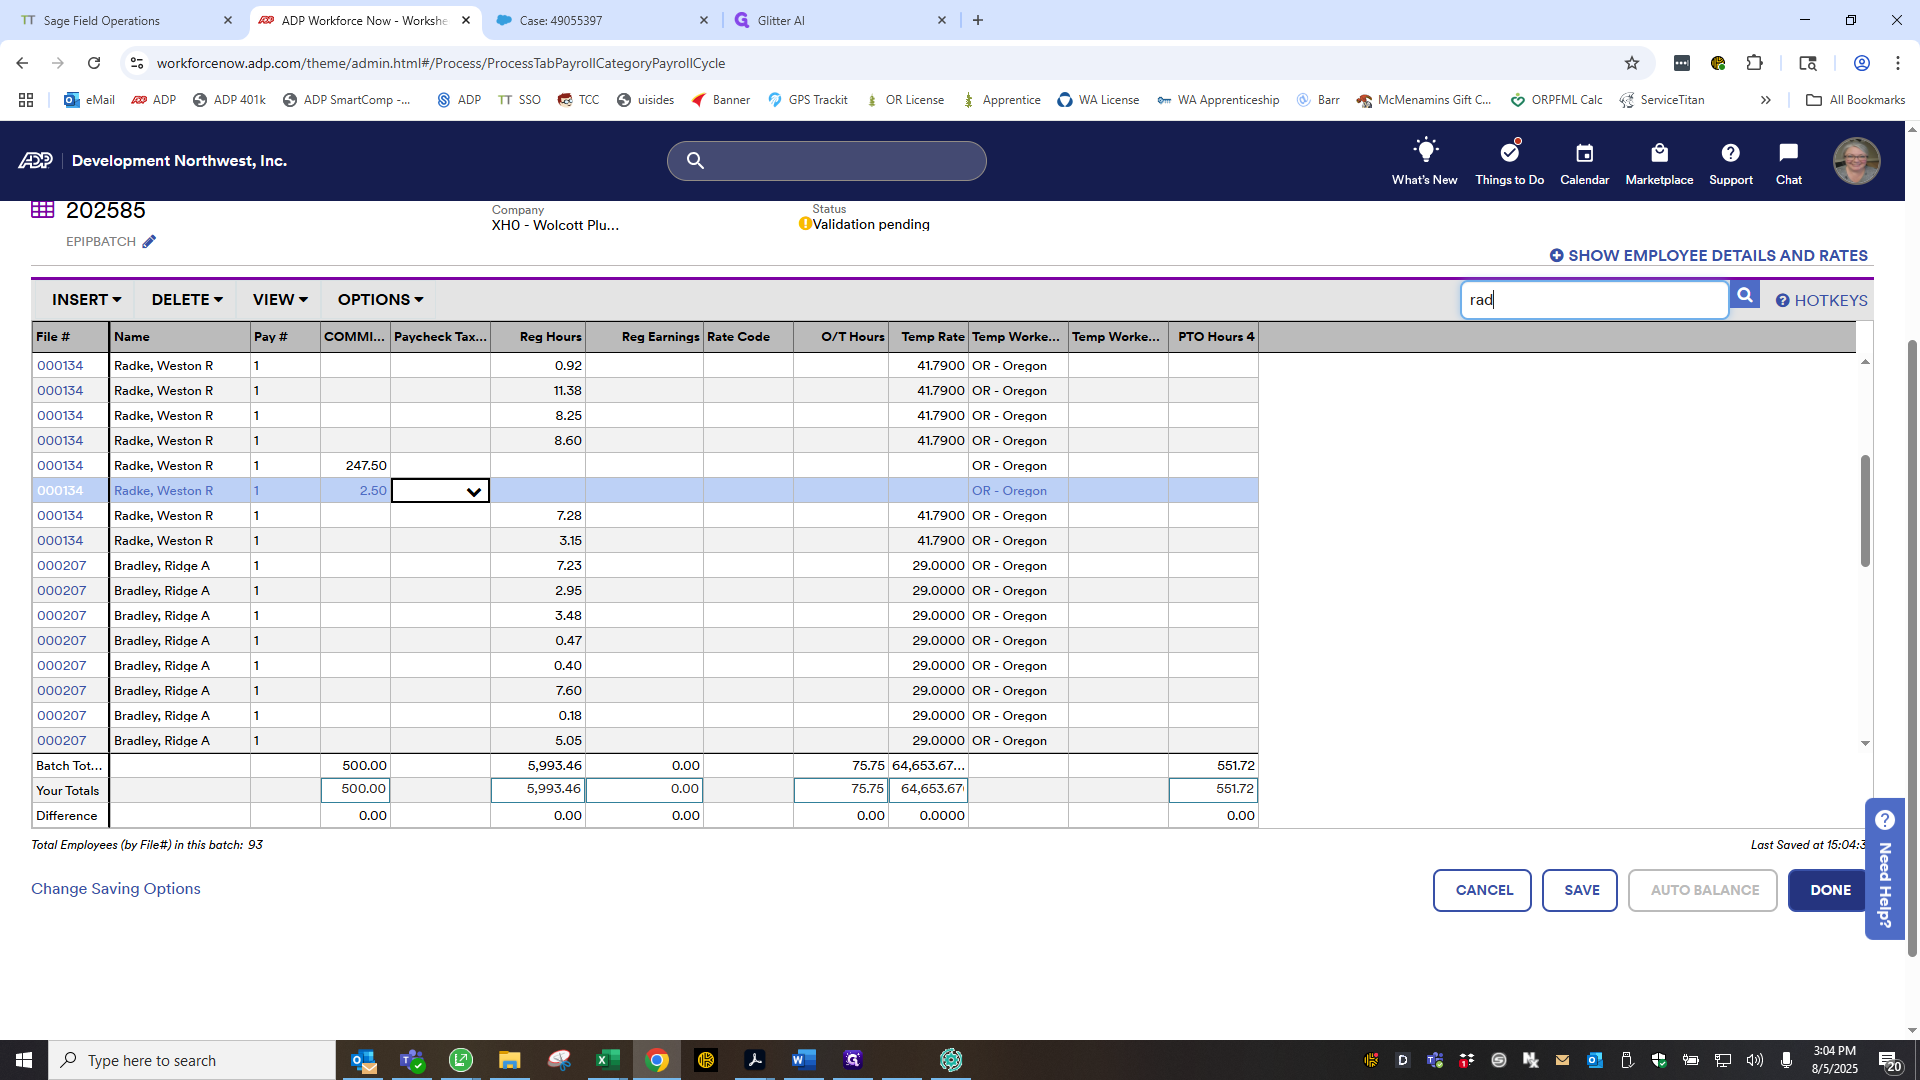
Past it. There we go. Autobalance it, then click Done. Calculate. I will discuss this.
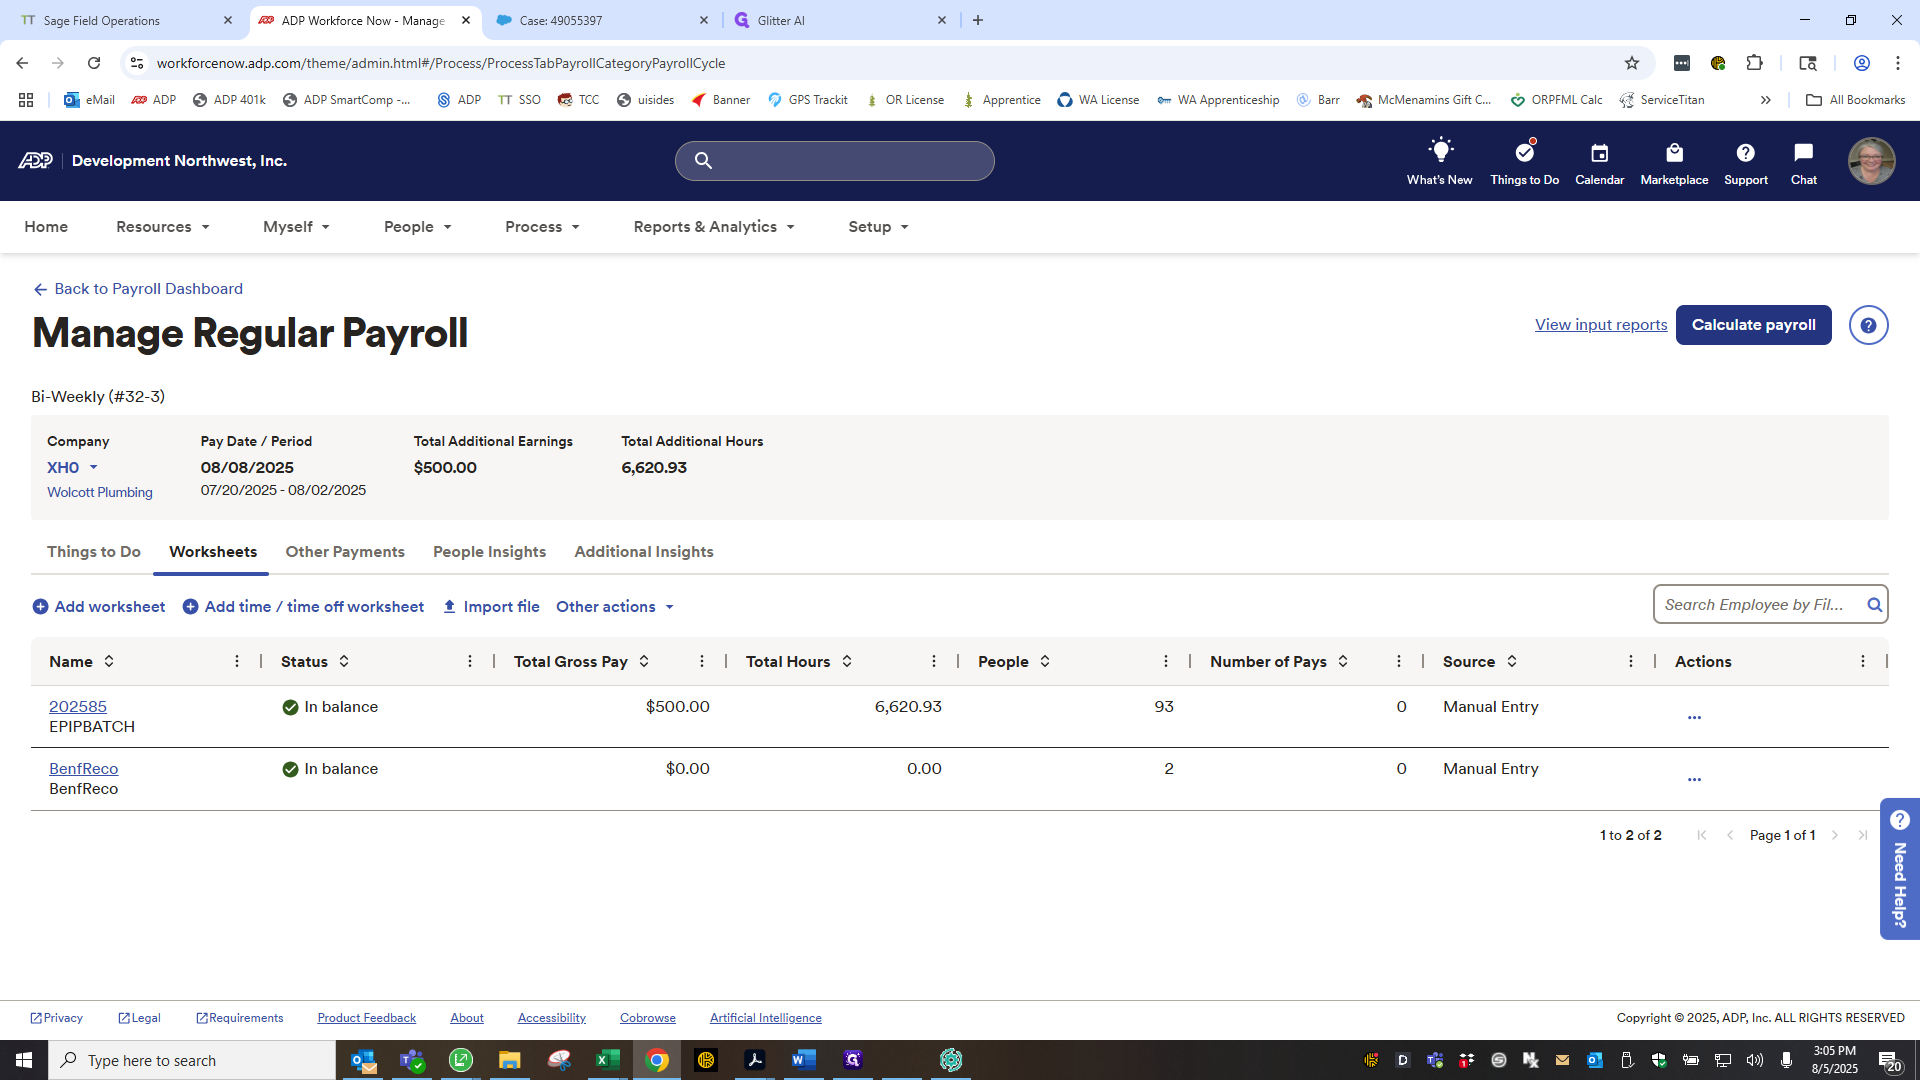
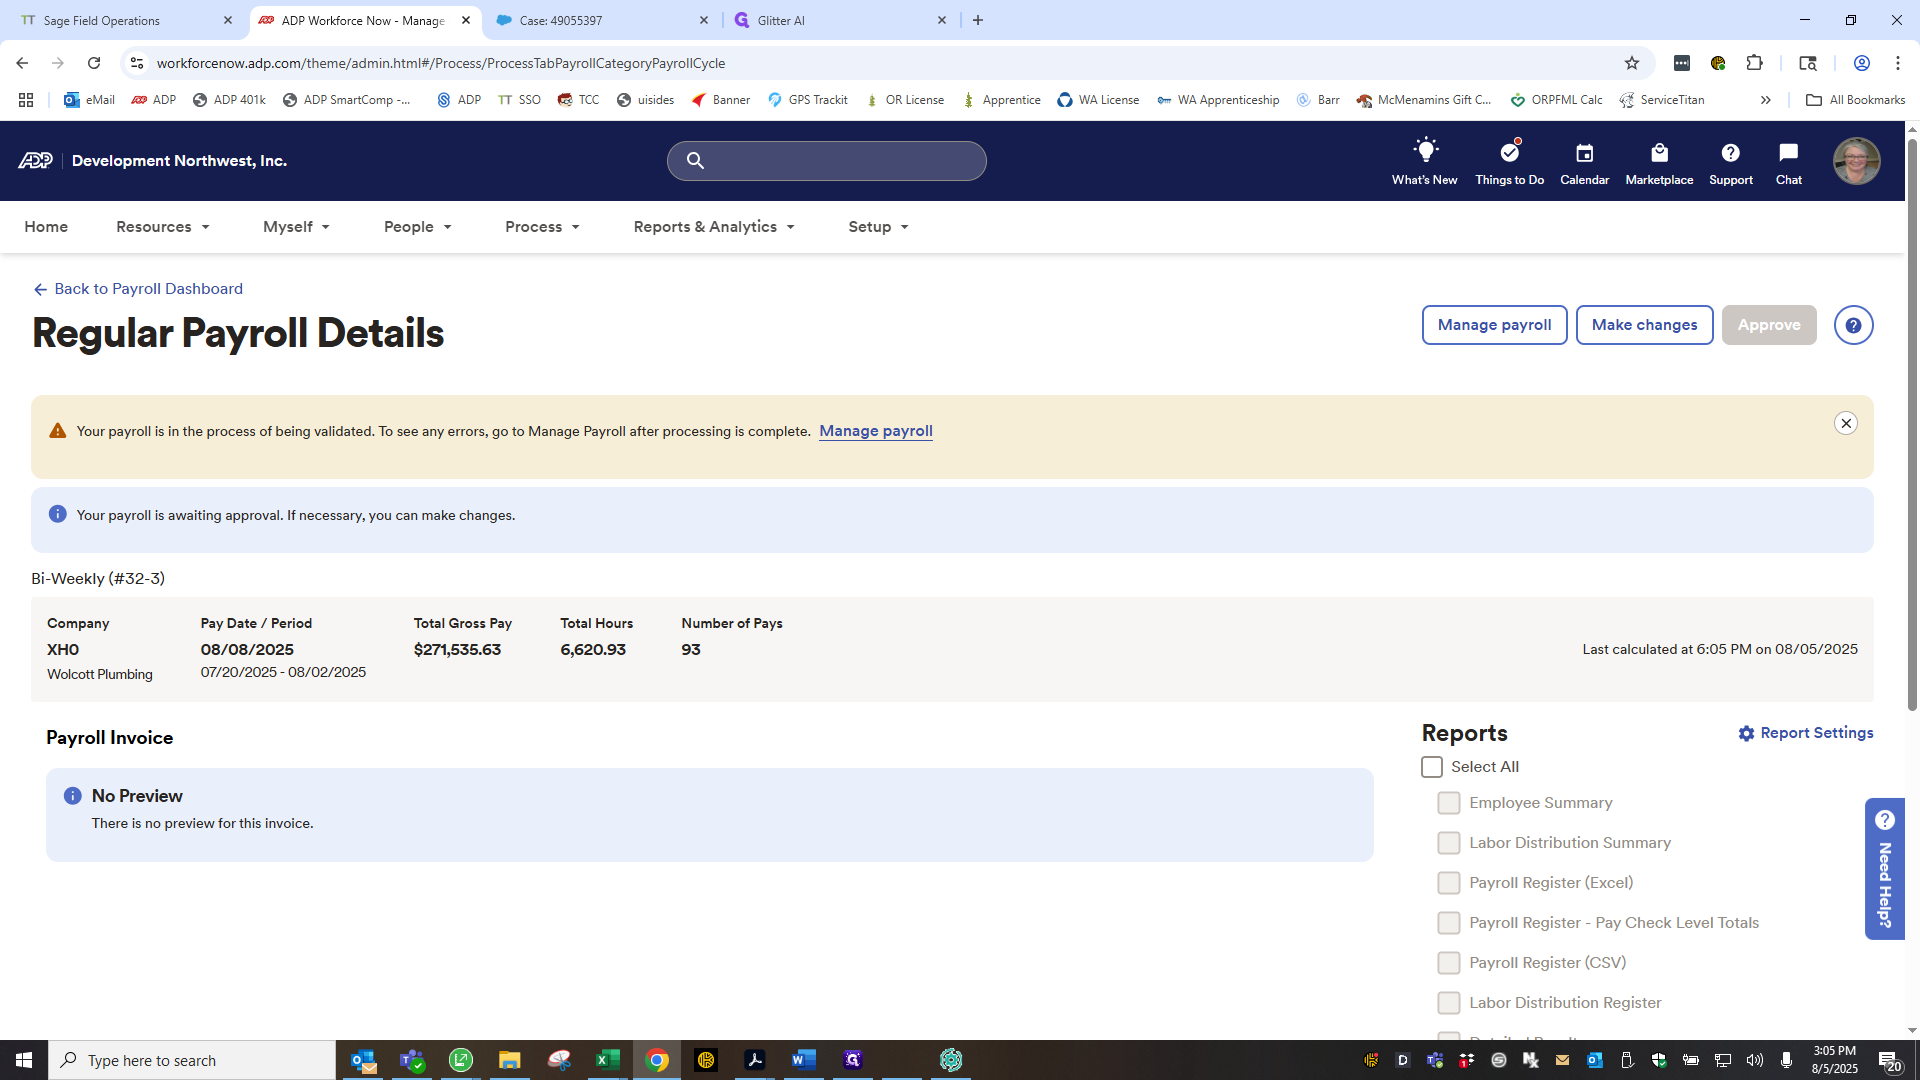
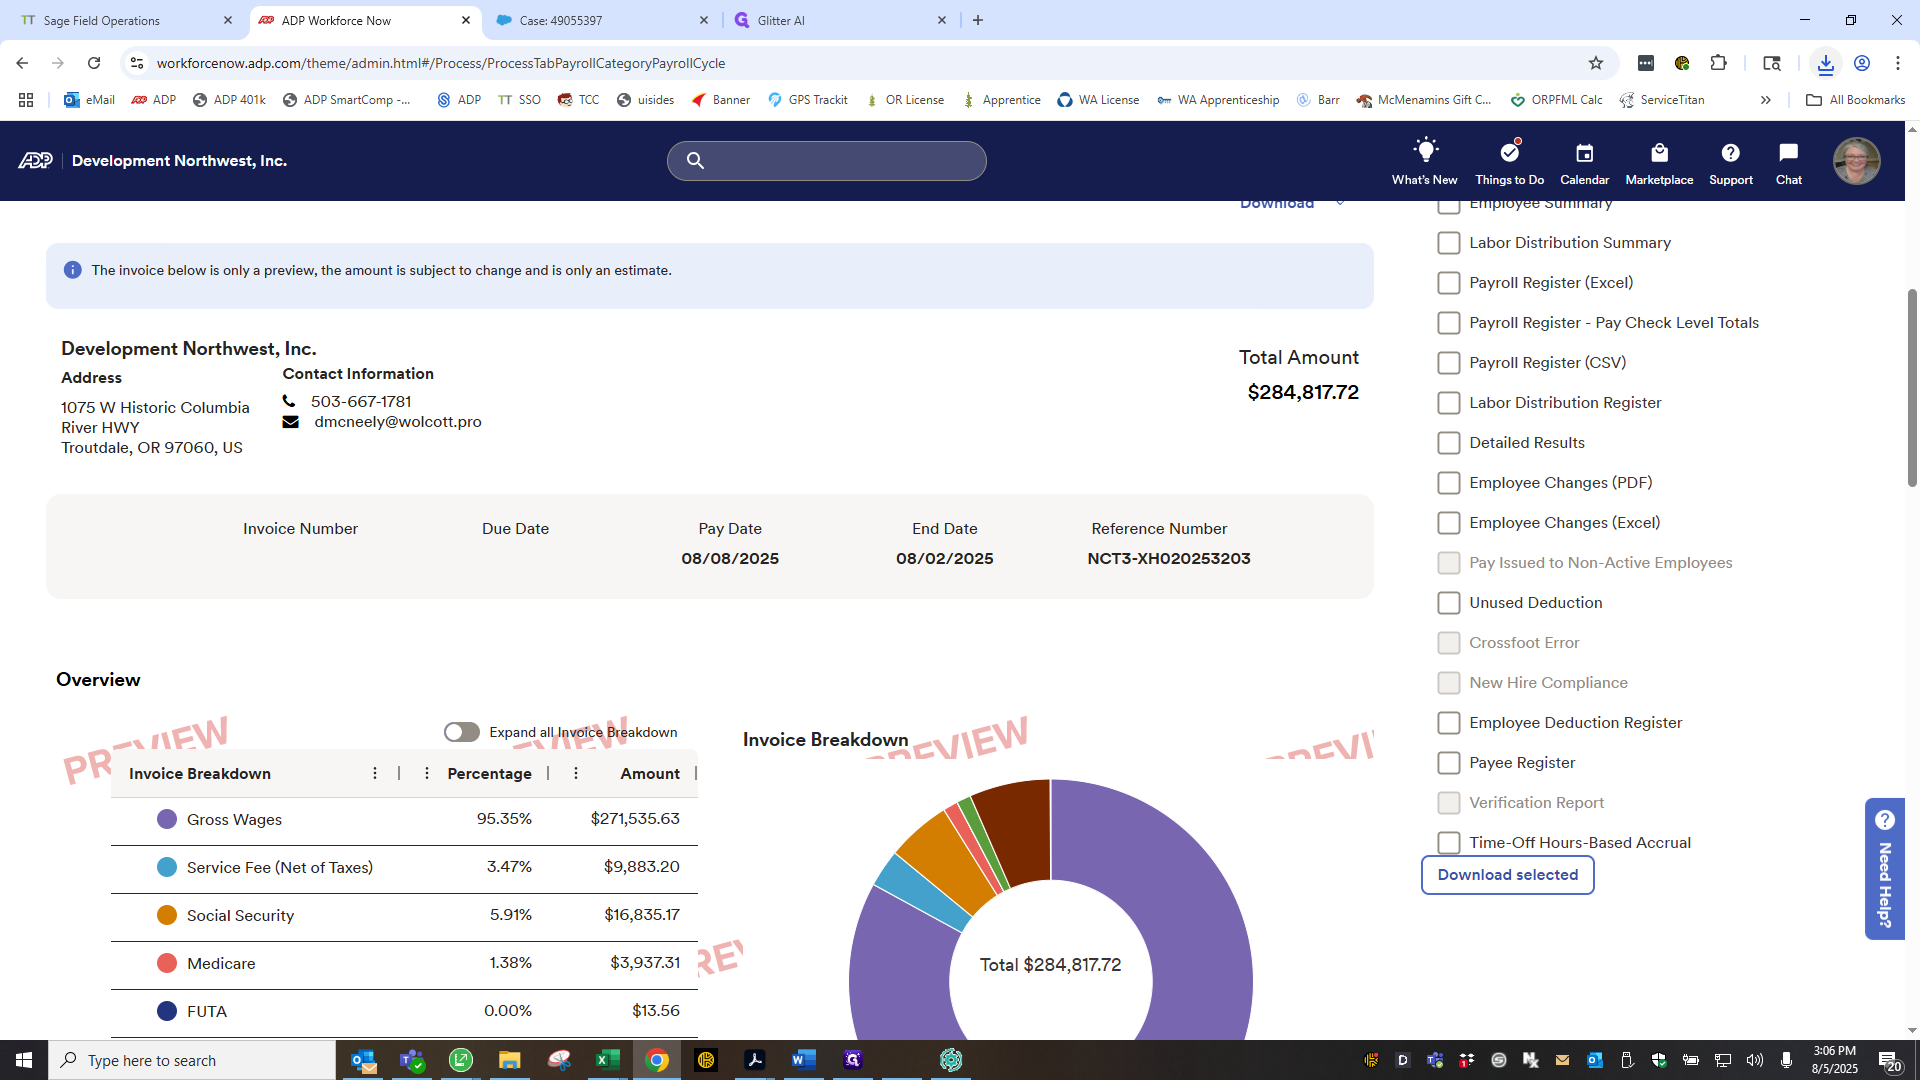
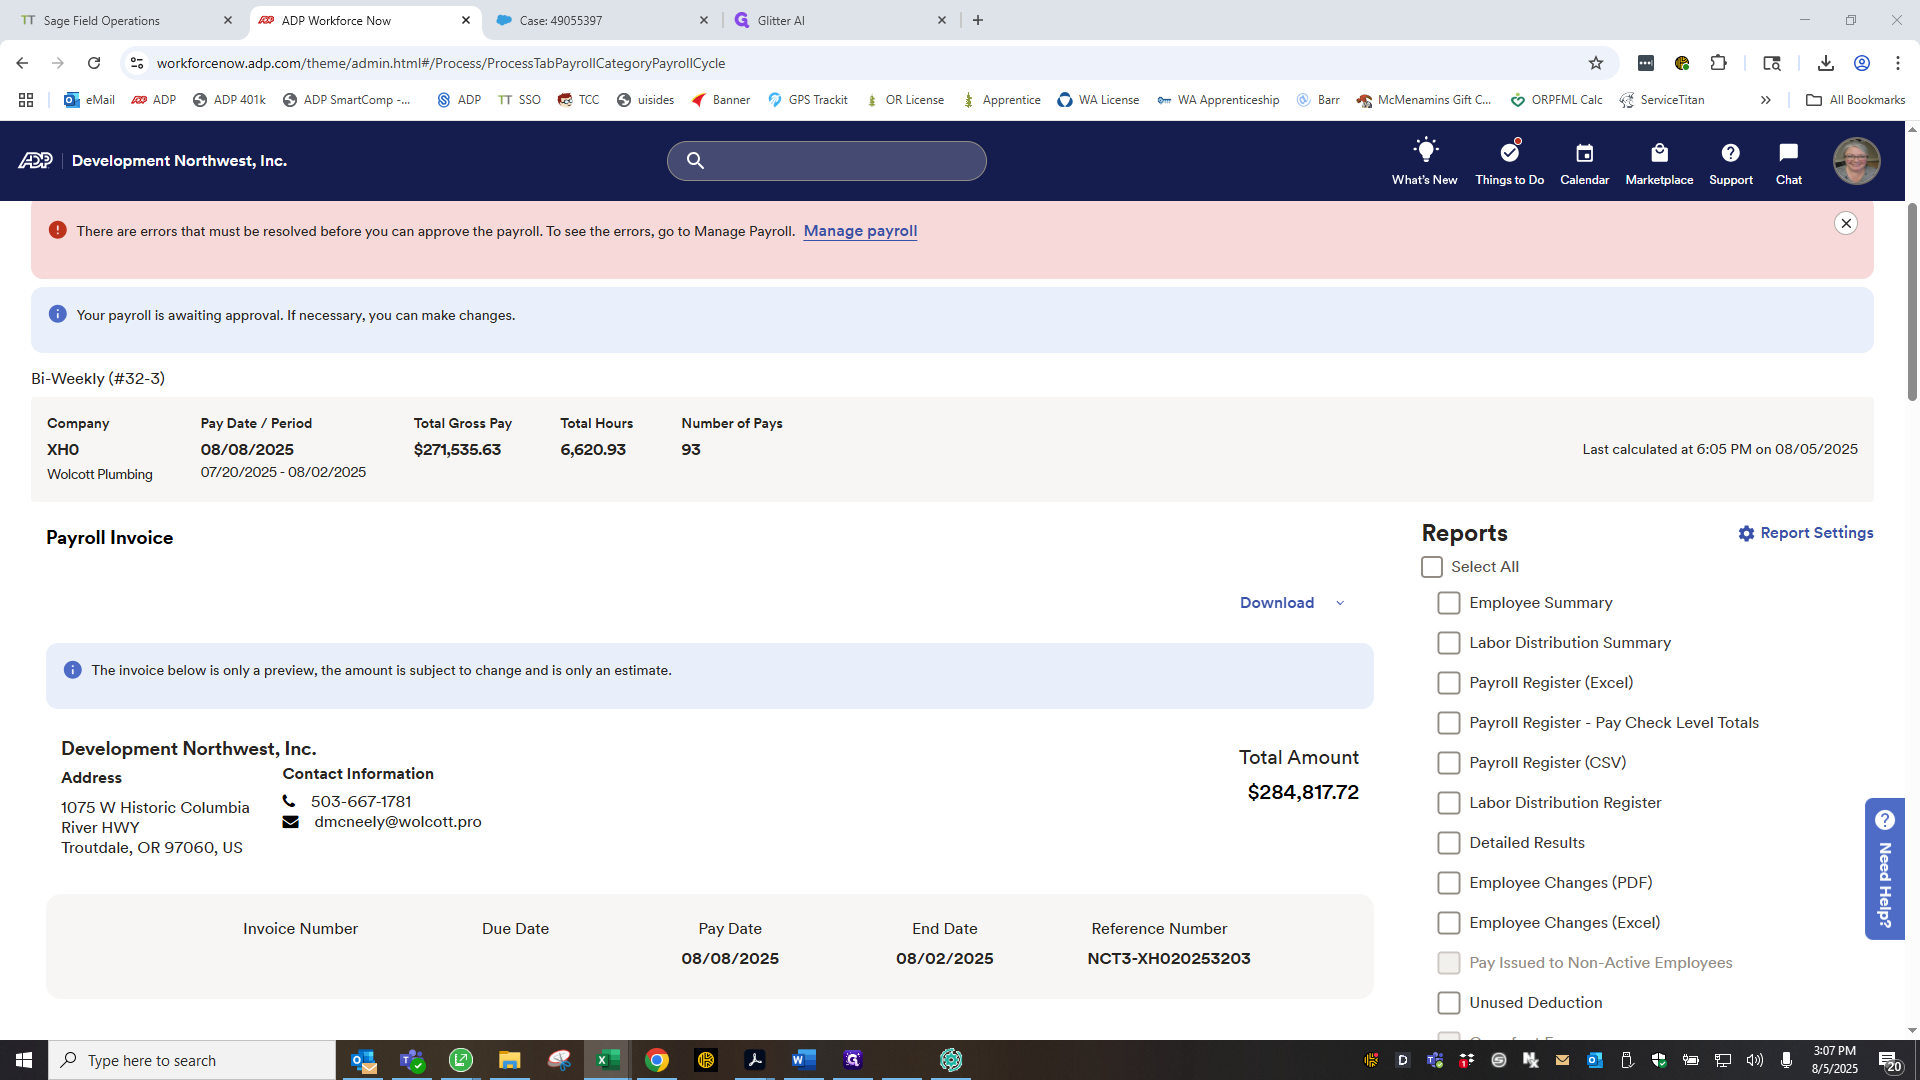
This is another file we use to add a worksheet for benefit recoupment for anyone who has been on leave. Not very typical, so I didn't address that. We can discuss that in more detail if it comes up in the future. Calculate payroll. A new screen will appear. Select the option to download the payroll register.
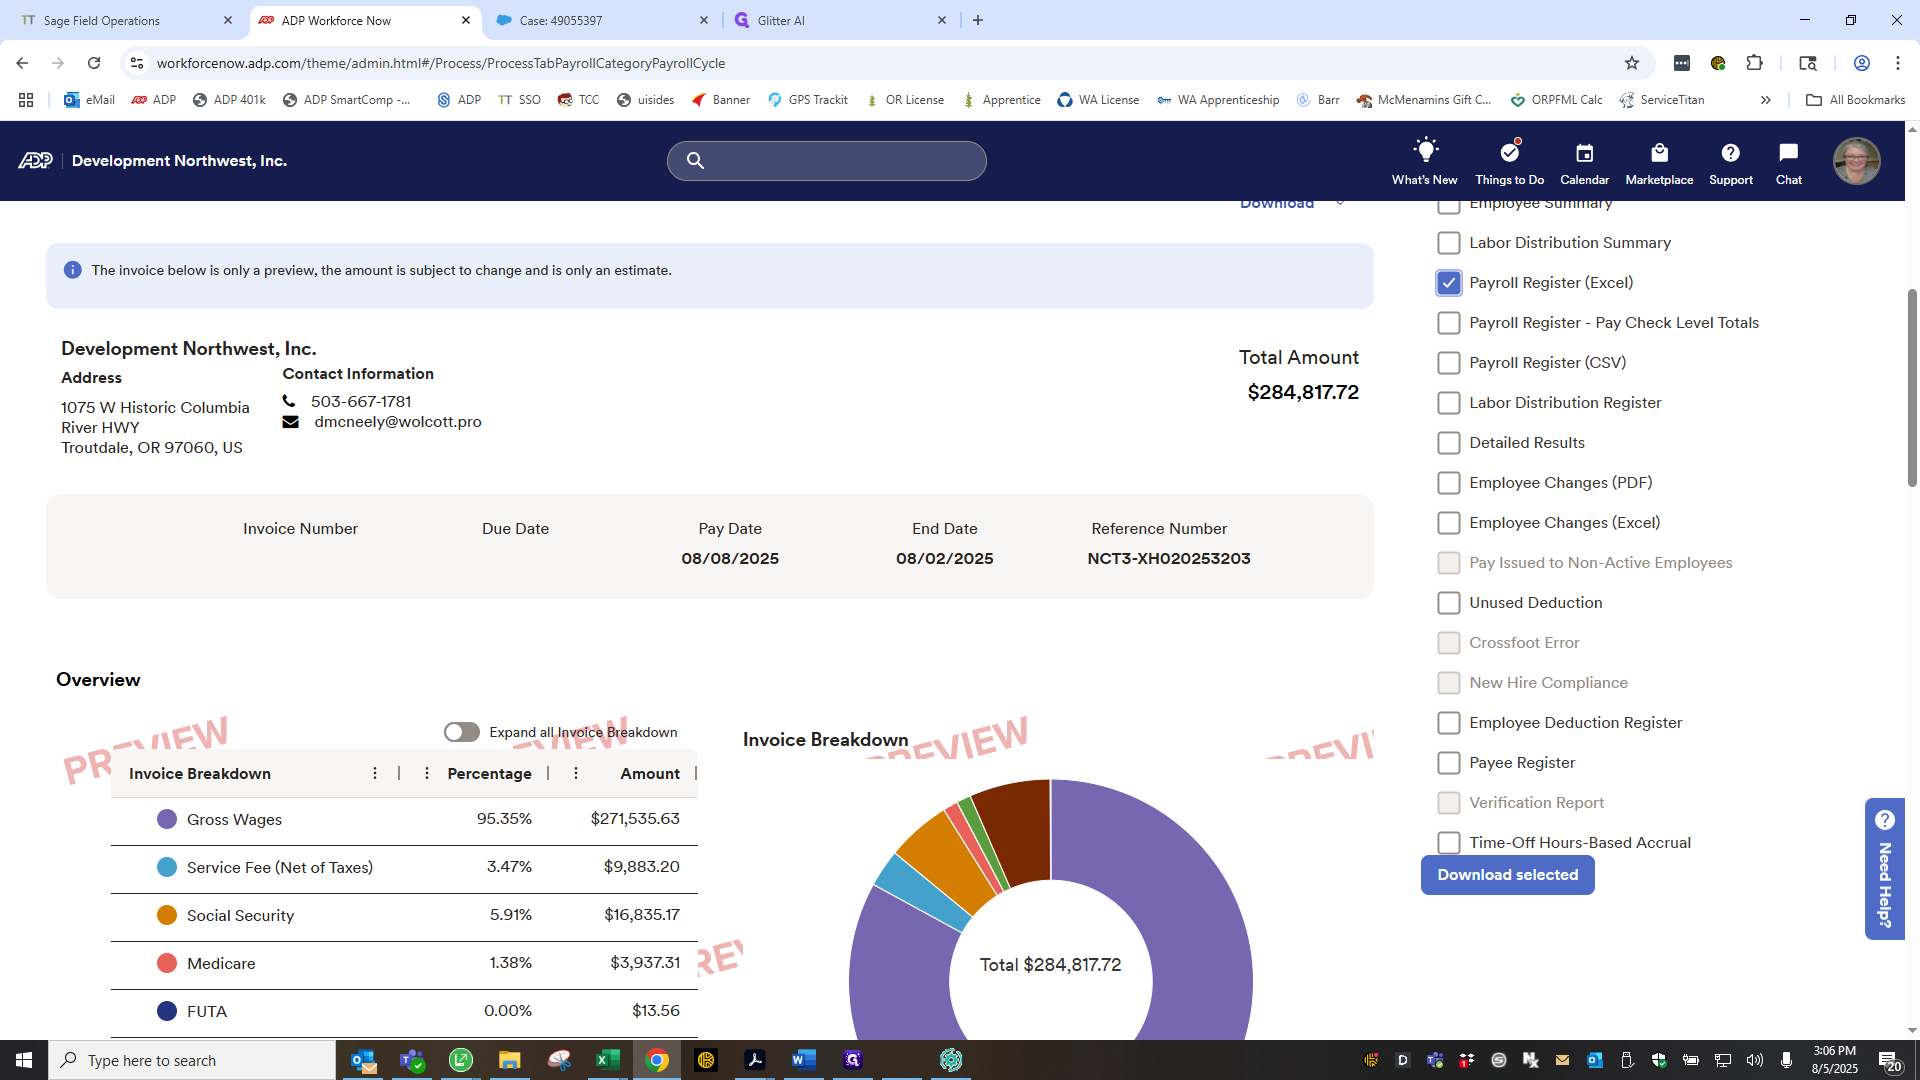
Once the payroll register downloads, I review it. This screen appears. Take a moment to think. We want to choose a time when it isn't blocked out. We will select the payroll register. It usually doesn't take this long.
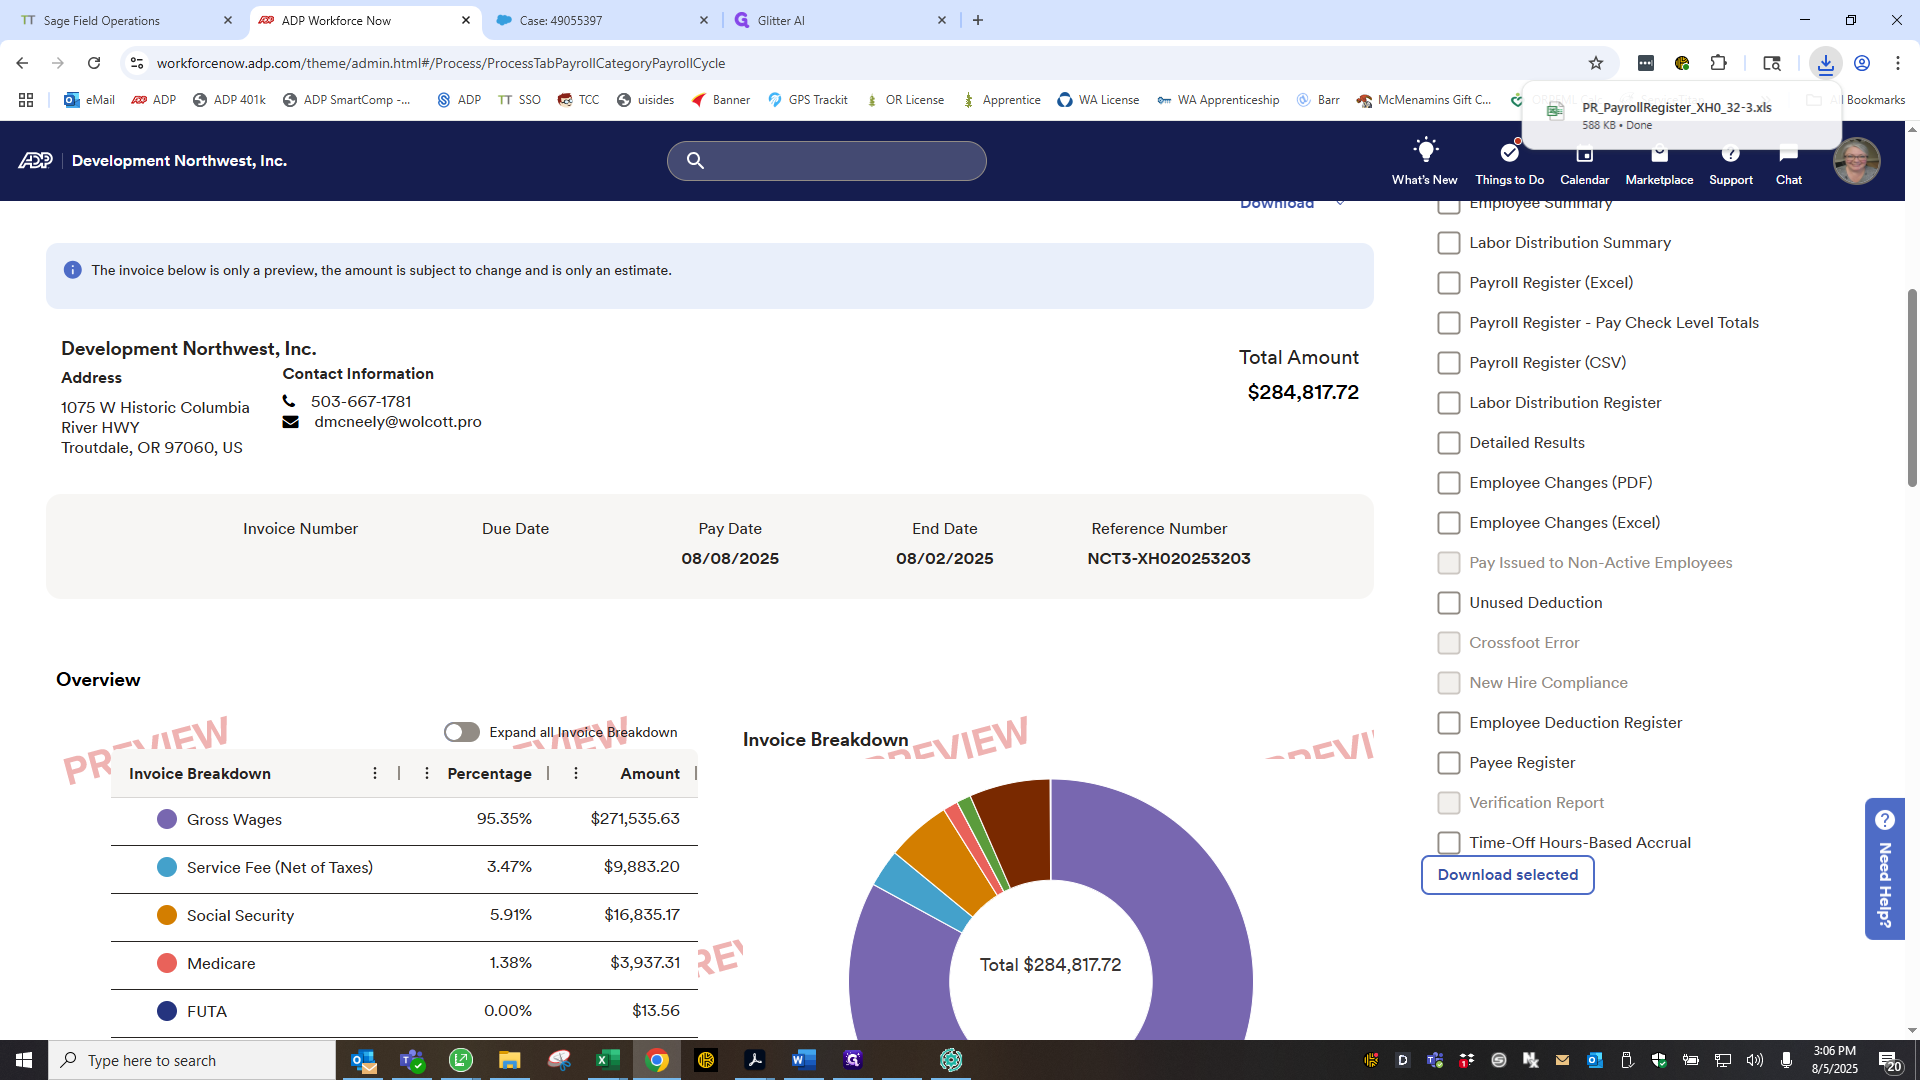
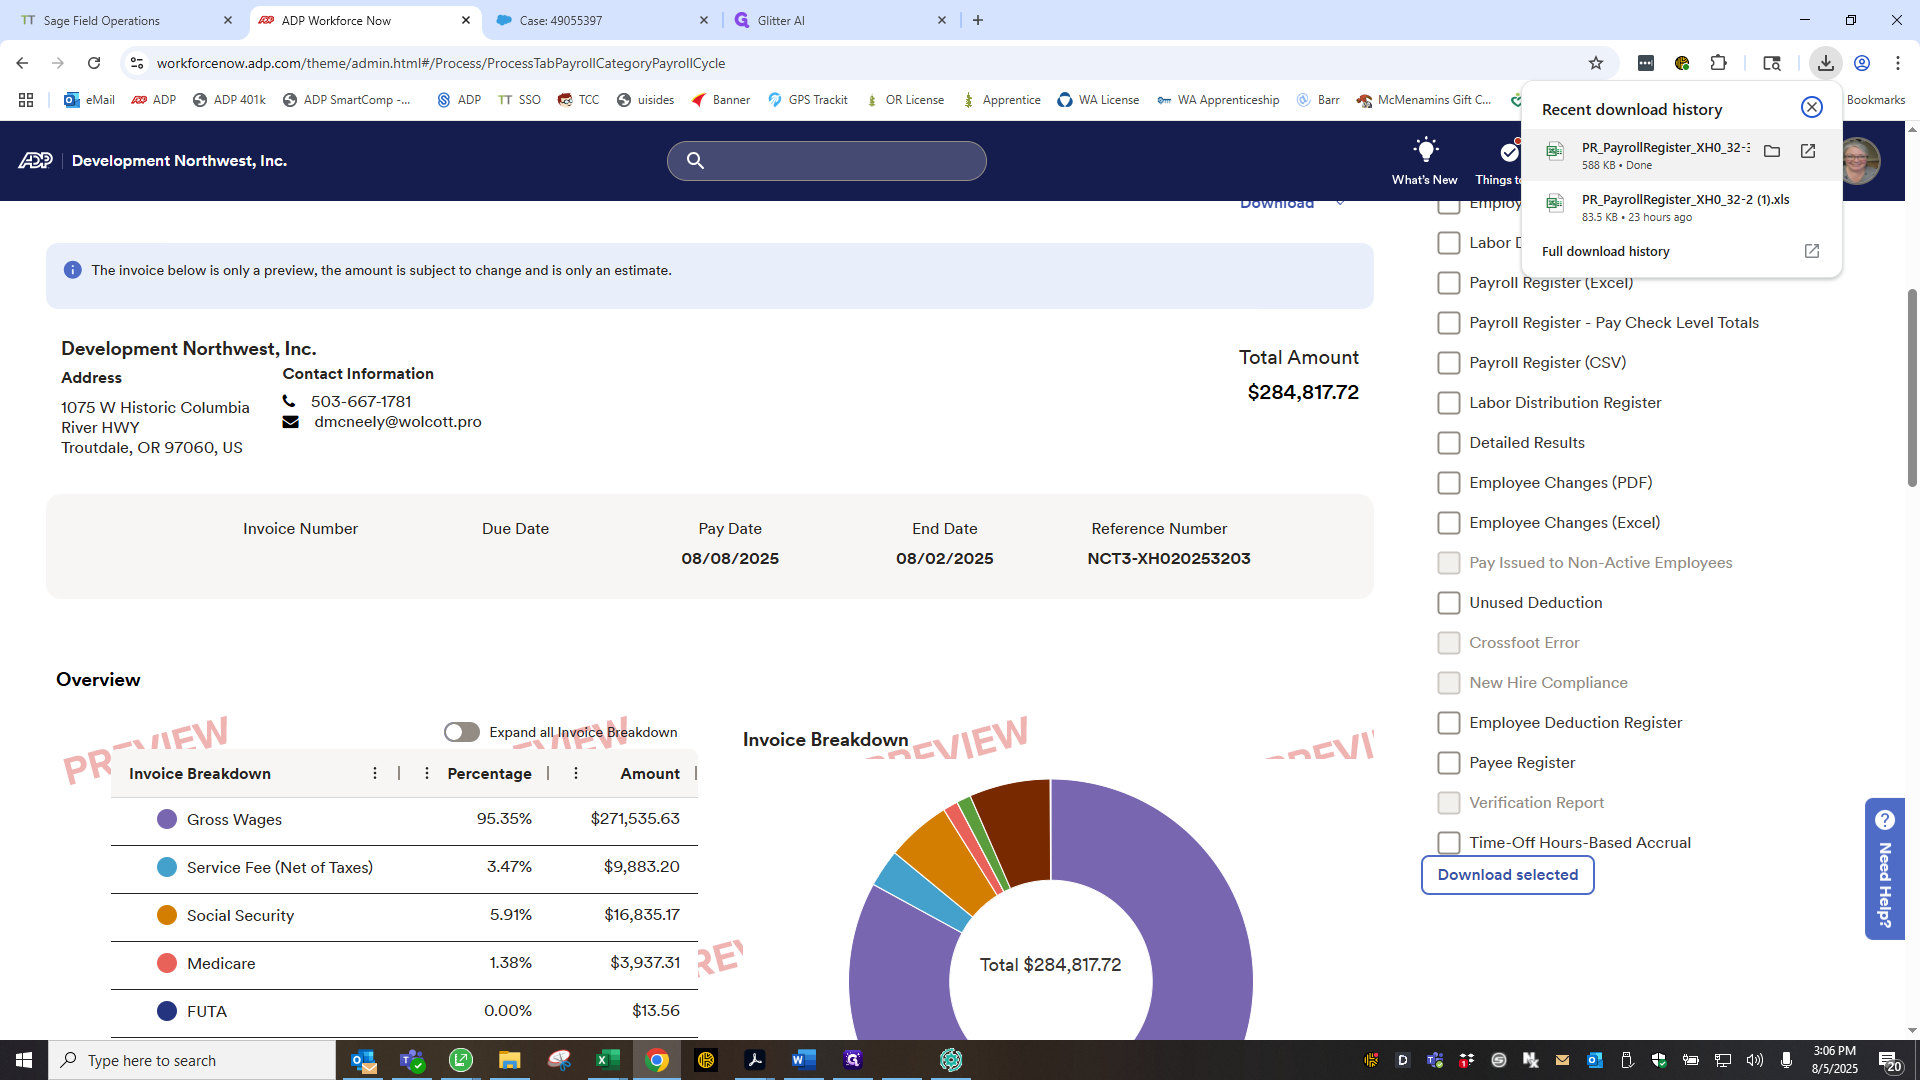
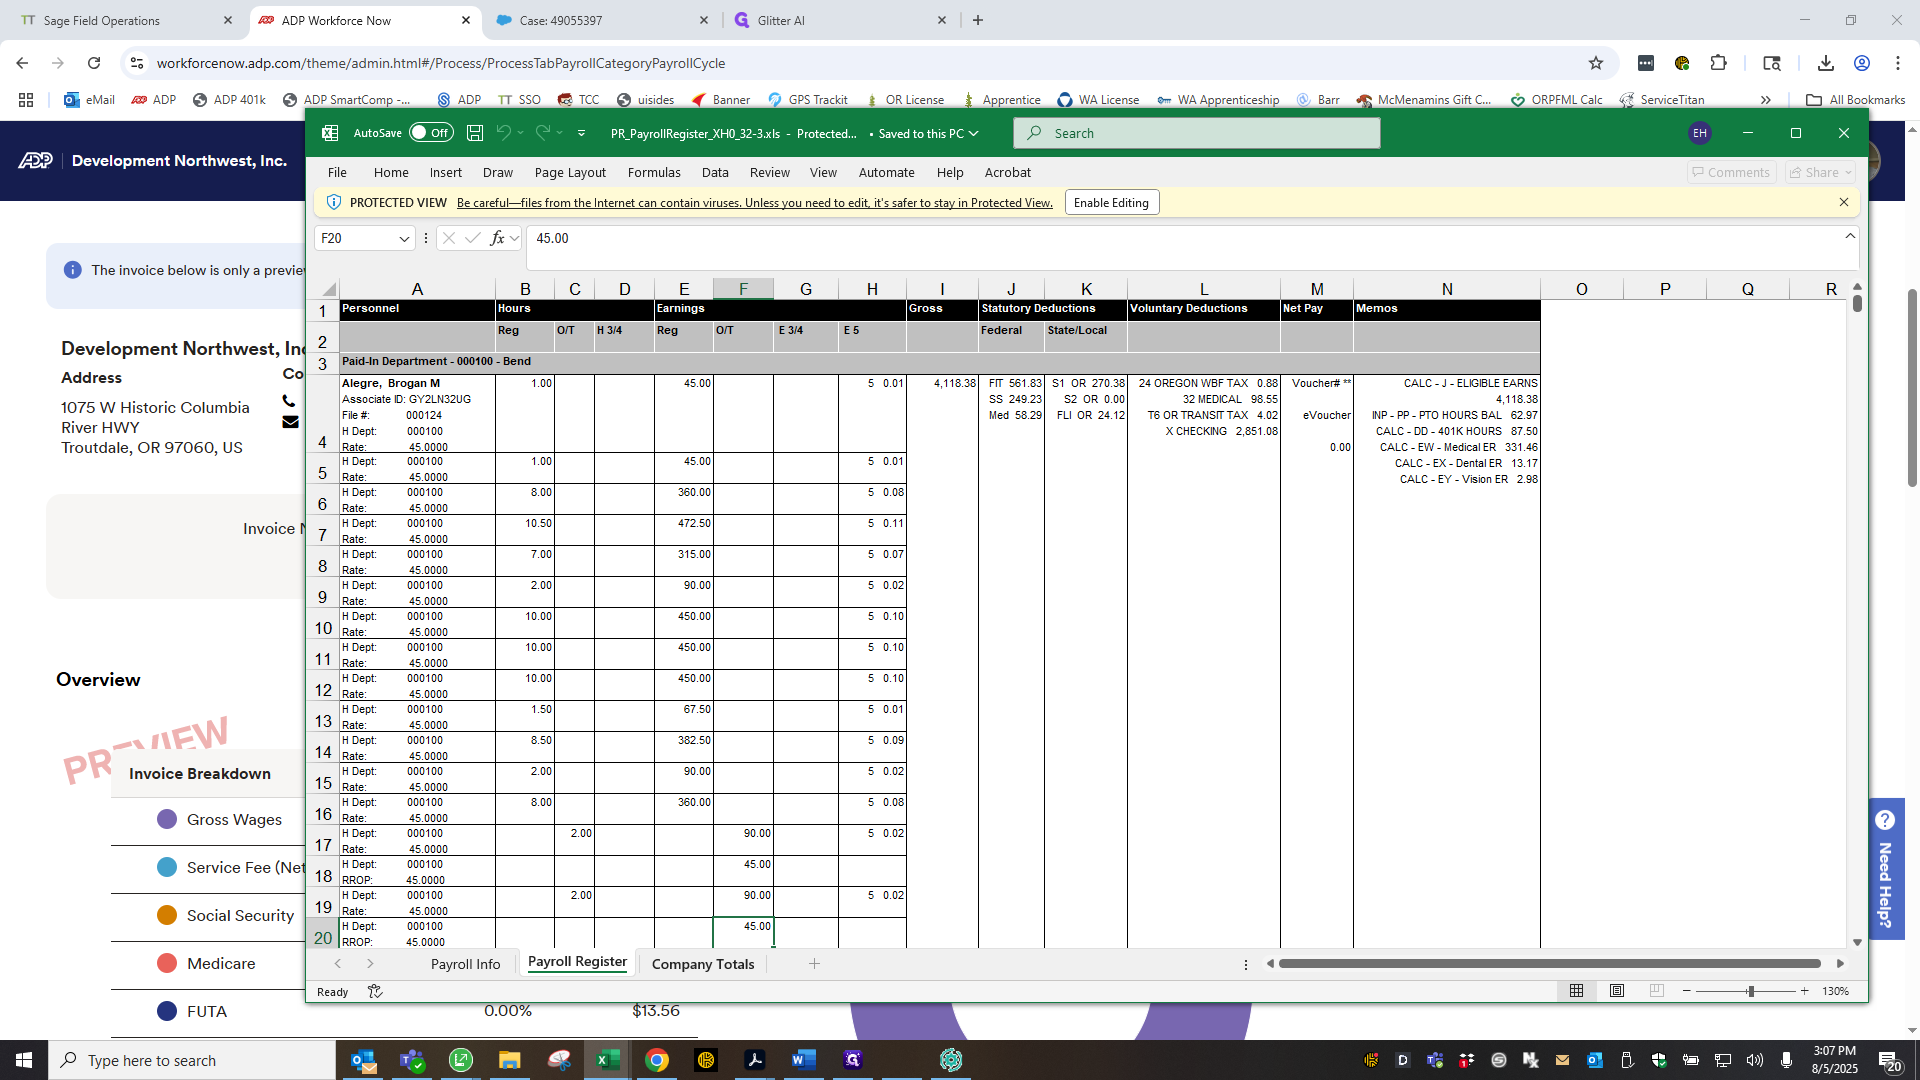
It’s ready. Click the checkbox, scroll down, and select "Download Selected." It will appear in your downloads. Click it to open your register. Okay, the register opens. Go to the company totals page. I'm used to this, but I scan through to check for anything unusual, like errors or excessive spending.
Okay. The screen also displays the total amount due to us. I will continue in another video to discuss managing payroll errors.