Icon

How to Input Student Records: A Step-by-Step Guide

Learn how to accurately input student records with this comprehensive step-by-step guide. Ensure your records are correct by following these detailed instructions.

By Teacher Zubaan

In this guide, we'll learn how to input student records accurately. We'll start by entering the last day of the month and use a record sheet to find necessary details like customer numbers, lesson hours, and class dates. We'll input this data into Grist and verify it using Google Calendar. This process ensures that all records are up-to-date and correct.

Let's get started

These are instructions on how to input student records. First, start by entering the last day of the month, which is September 30th.

1
Click on "2024-09-30"
Step #1: Click on "2024-09-30"

Open the class record sheet of the student. You will find the names and the customer number at the top.

2
Step #2:

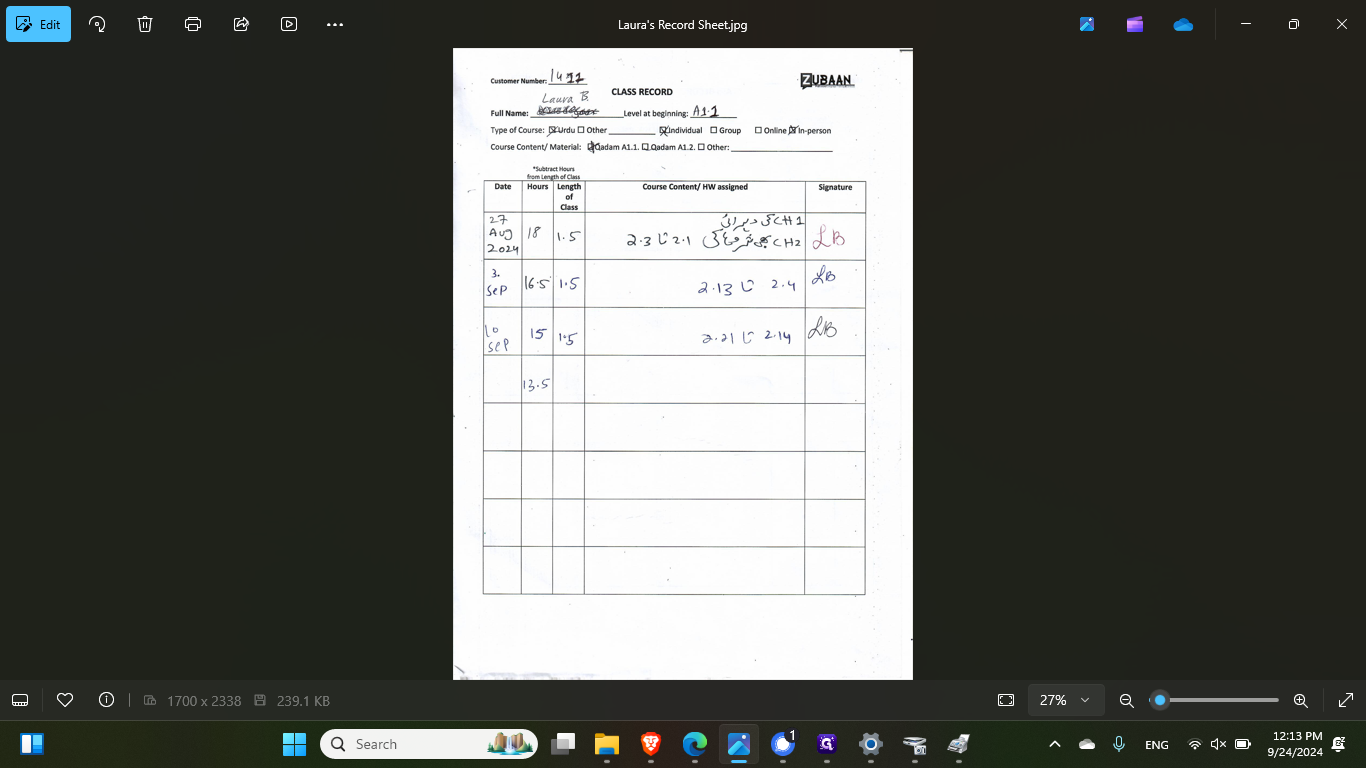
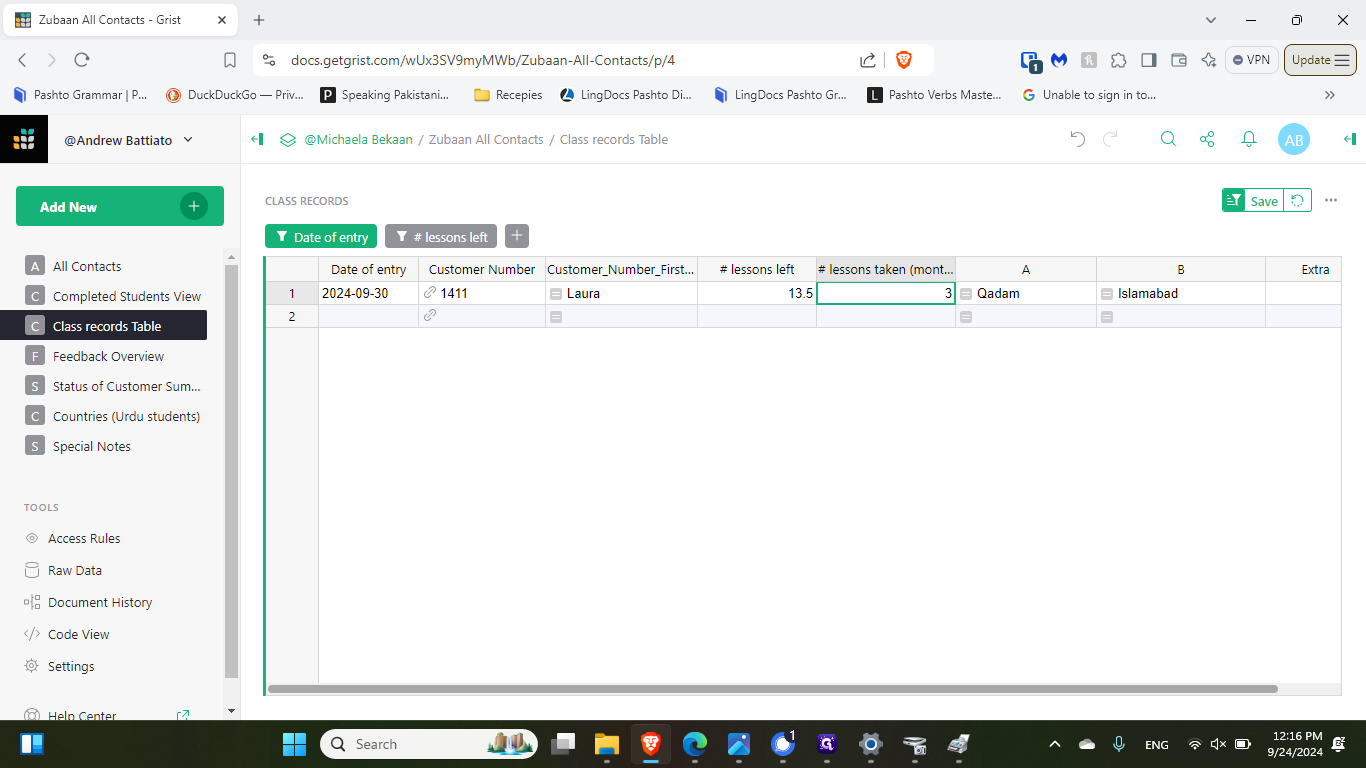
You'll also see columns for the date, hours, and length of the class. I'll input 1411 into Grist, and it fills out the rest.

3
Click on "Customer Number"
Step #3: Click on "Customer Number"
4
Type "1411 + Enter"

It shows blanks for lessons left, and lessons taken. I'm going to go back to the record sheet to find out how many lessons the student has left. To do this, check the number of hours I have left that have been paid for.

5
Look at the number in the empty spot beneath the last class. Here, it's 13.5. Input that number into the lessons left.
Step #5: Look at the number in the empty spot beneath the last class. Here, it's 13.5. Input that number into the lessons left.

6
Click here and in put the lessons left of 13.5
Step #6: Click here and in put the lessons left of 13.5

Now I need to the amount of hours taken in September.

7
On September 3rd and September 10th, each class was 1.5 hours. That's a total of three hours of class.
Step #7: On September 3rd and September 10th, each class was 1.5 hours. That's a total of three hours of class.
8
Click here and insert the numbers taken this month of September: 3
Step #8: Click here and insert the numbers taken this month of September: 3

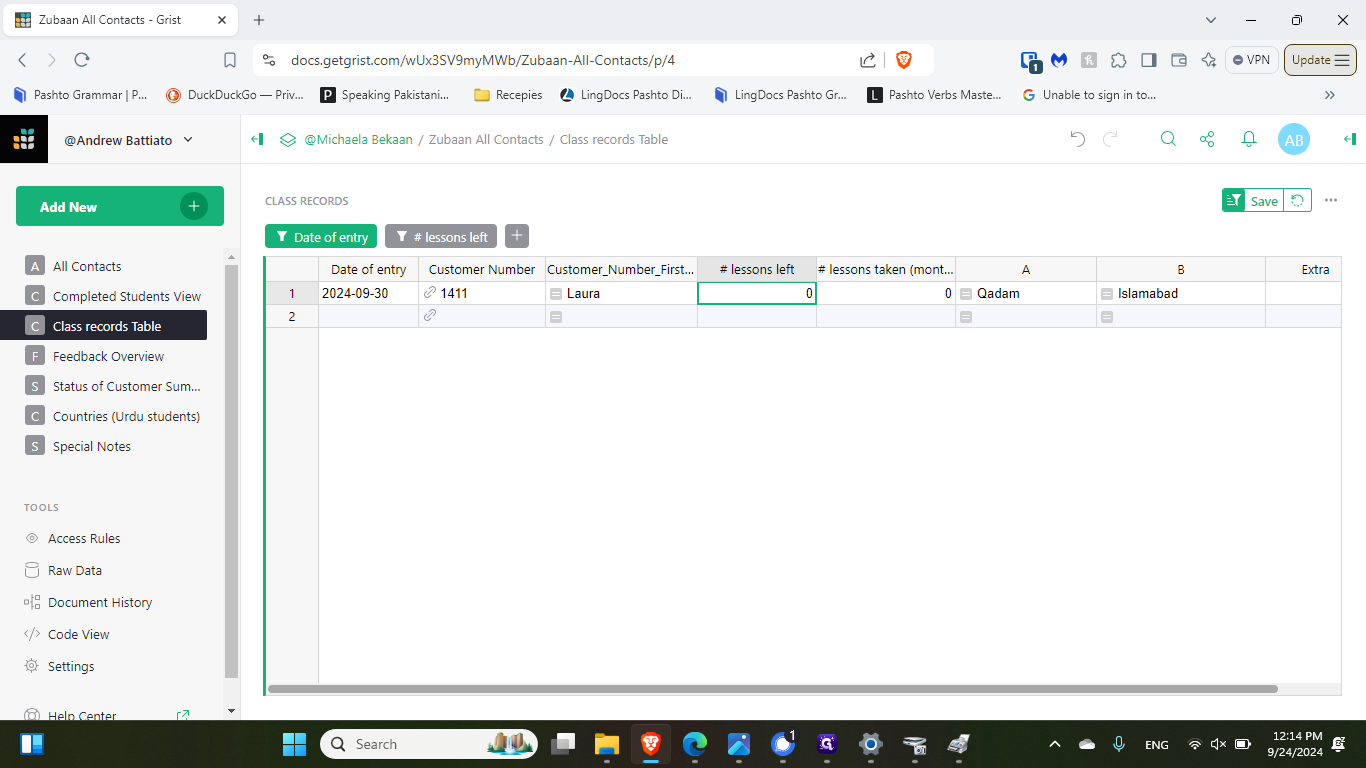
Now, I'll check to ensure the class record is correct by going into Google Calendar.

If you know the teacher, you can highlight that teacher, or you can highlight all the teachers.

9
Since I know the teacher was Sania, I will look at Sania's.. Click on off the other highlighted teachers
Step #9: Since I know the teacher was Sania, I will look at Sania's.. Click on off the other highlighted teachers
10
Now I can verify that the date and time of each of Laura's class on the schedule.
Step #10: Now I can verify that the date and time of each of Laura's class on the schedule.
11
Here I check the next week's class, in this case the class on September 10th.
Step #11: Here I check the next week's class, in this case the class on September 10th.
12
I'll also ensure there are no classes in between.
Step #12: I'll also ensure there are no classes in between.
13
Then, I will check to make sure on the calendar
Step #13: Then, I will check to make sure on the calendar

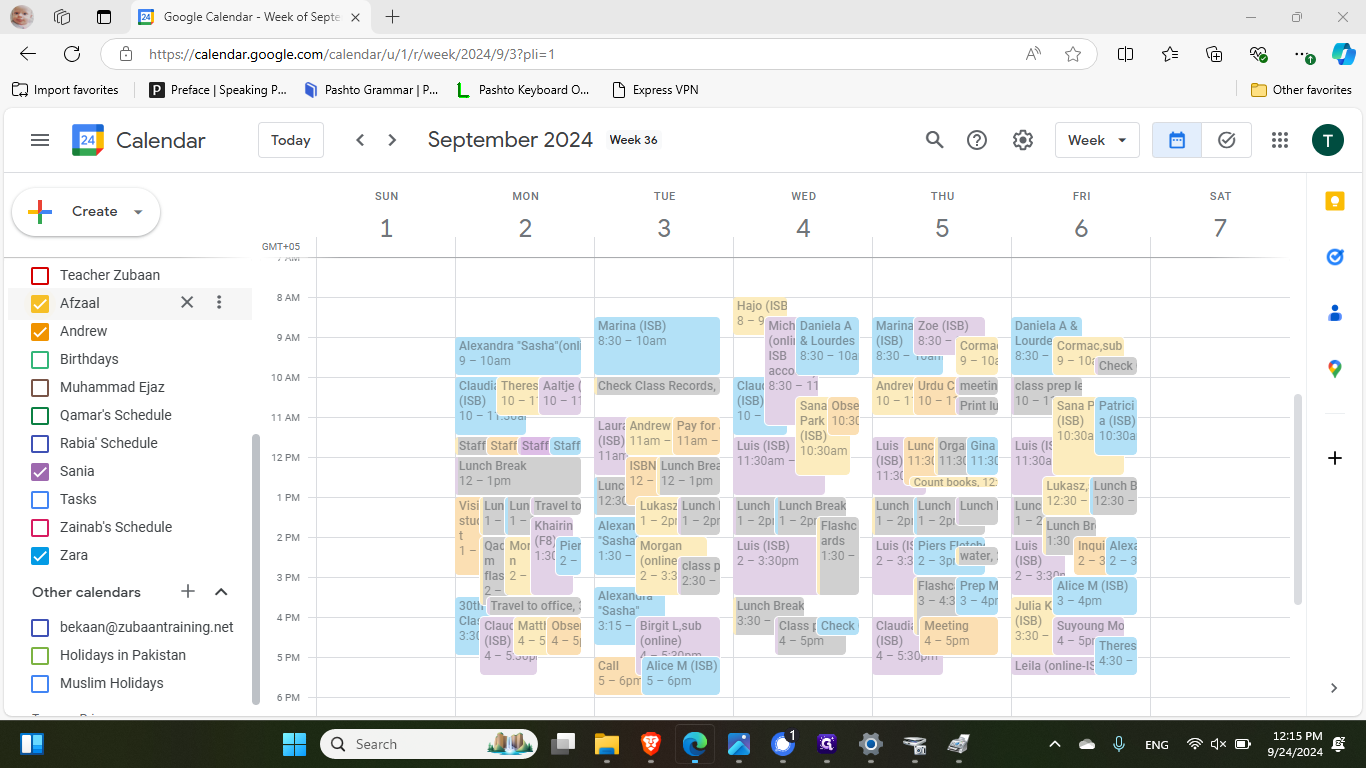
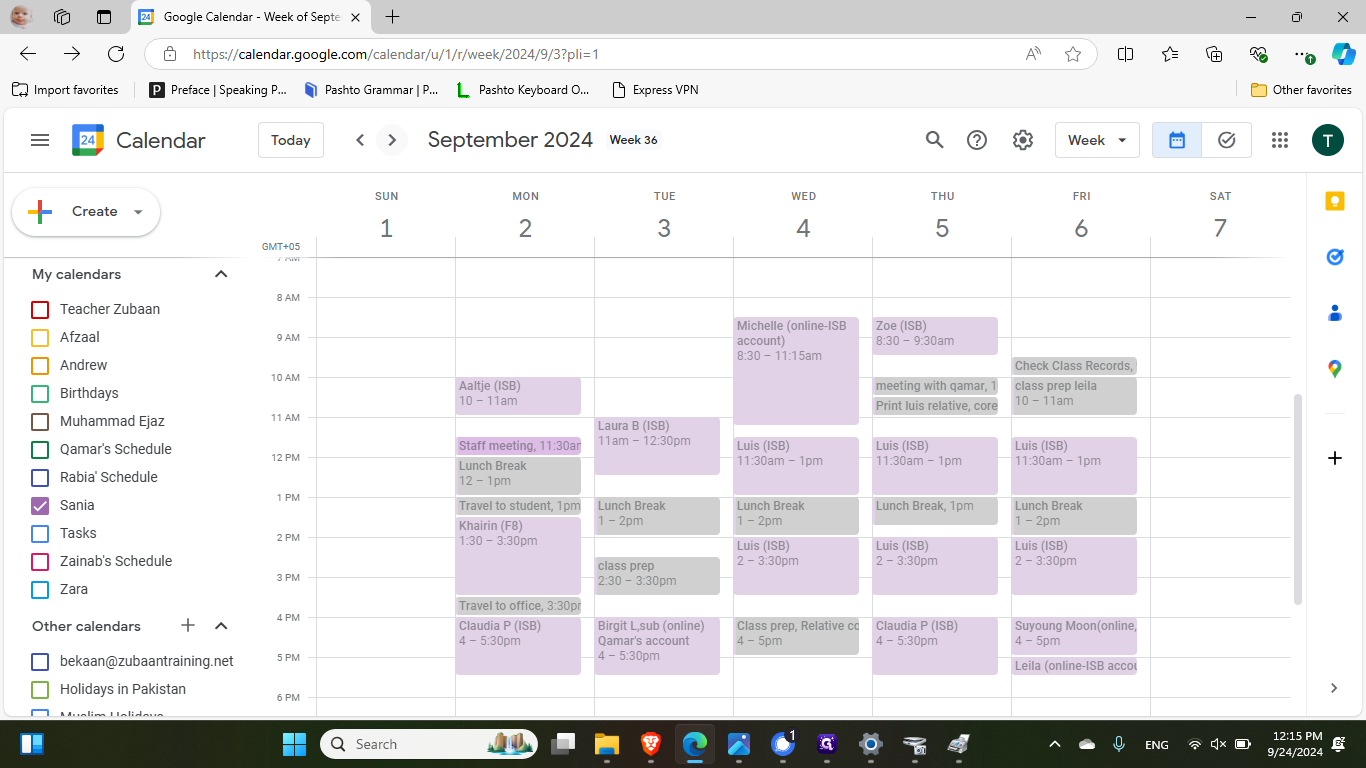
You might expect the next Tuesday to be a class, but when checking the calendar, you see it is a holiday.

14
Nobody had class, so I checked other dates to ensure I wasn't missing anything.
Step #14: Nobody had class, so I checked other dates to ensure I wasn't missing anything.

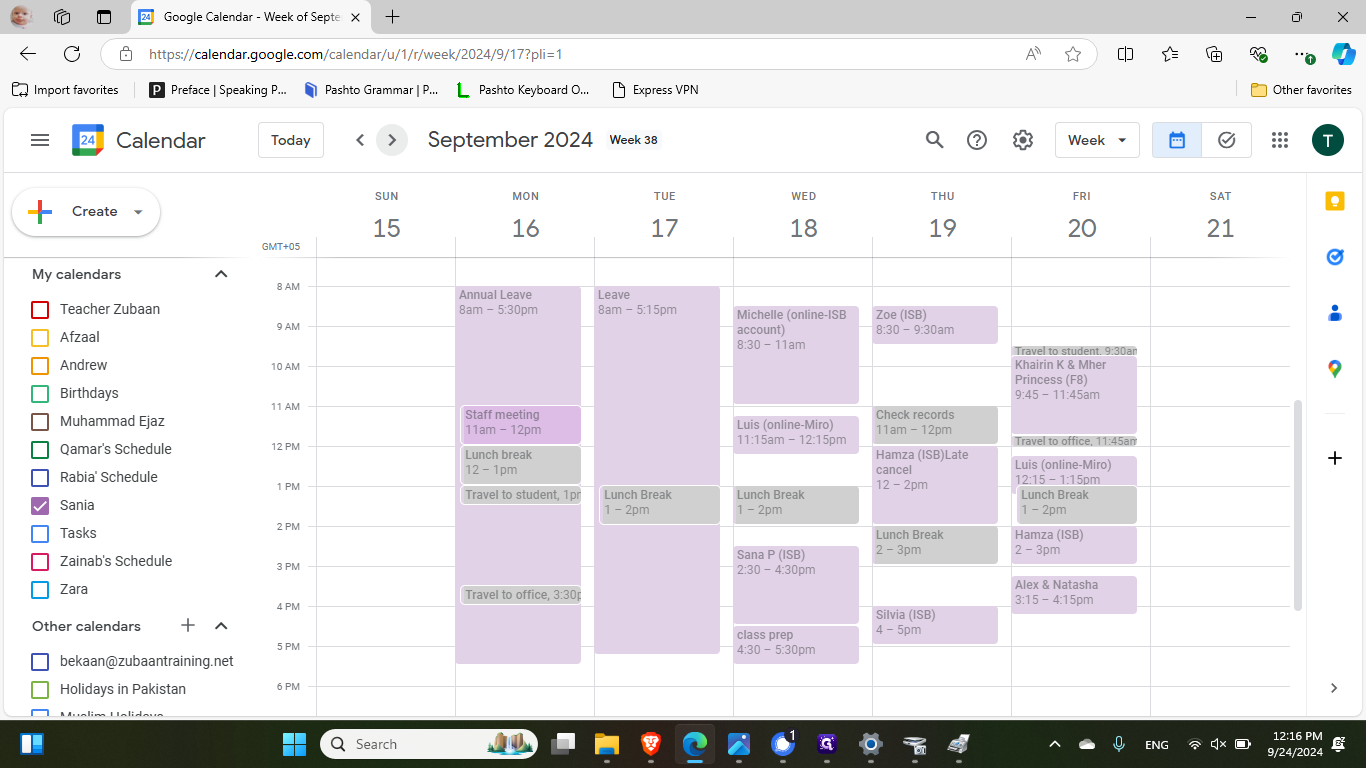
It looks like the class record is correct.

15
Click here
Step #15: Click here
16
I can now start the next one.
Step #16: I can now start the next one.
17
Start by entering the date, September 30th, and then proceed to the next number.
Step #17: Start by entering the date, September 30th, and then proceed to the next number.

How to Input Student Records: A Step-by-Step Guide