How to Integrate Xero with Your Rental Website on Reservety

Learn how to seamlessly connect your Xero account to your rental website dashboard to automate accounting, invoices, and payments.

By Reservety

Connect your Xero account to your rental website to automate invoice and payment syncing. This ensures seamless accounting and rental management without manual data entry.

This guide is for rental business owners, administrators, and accounting teams looking to set up their initial Xero integration directly from their rental dashboard.

Create a Xero Developer App
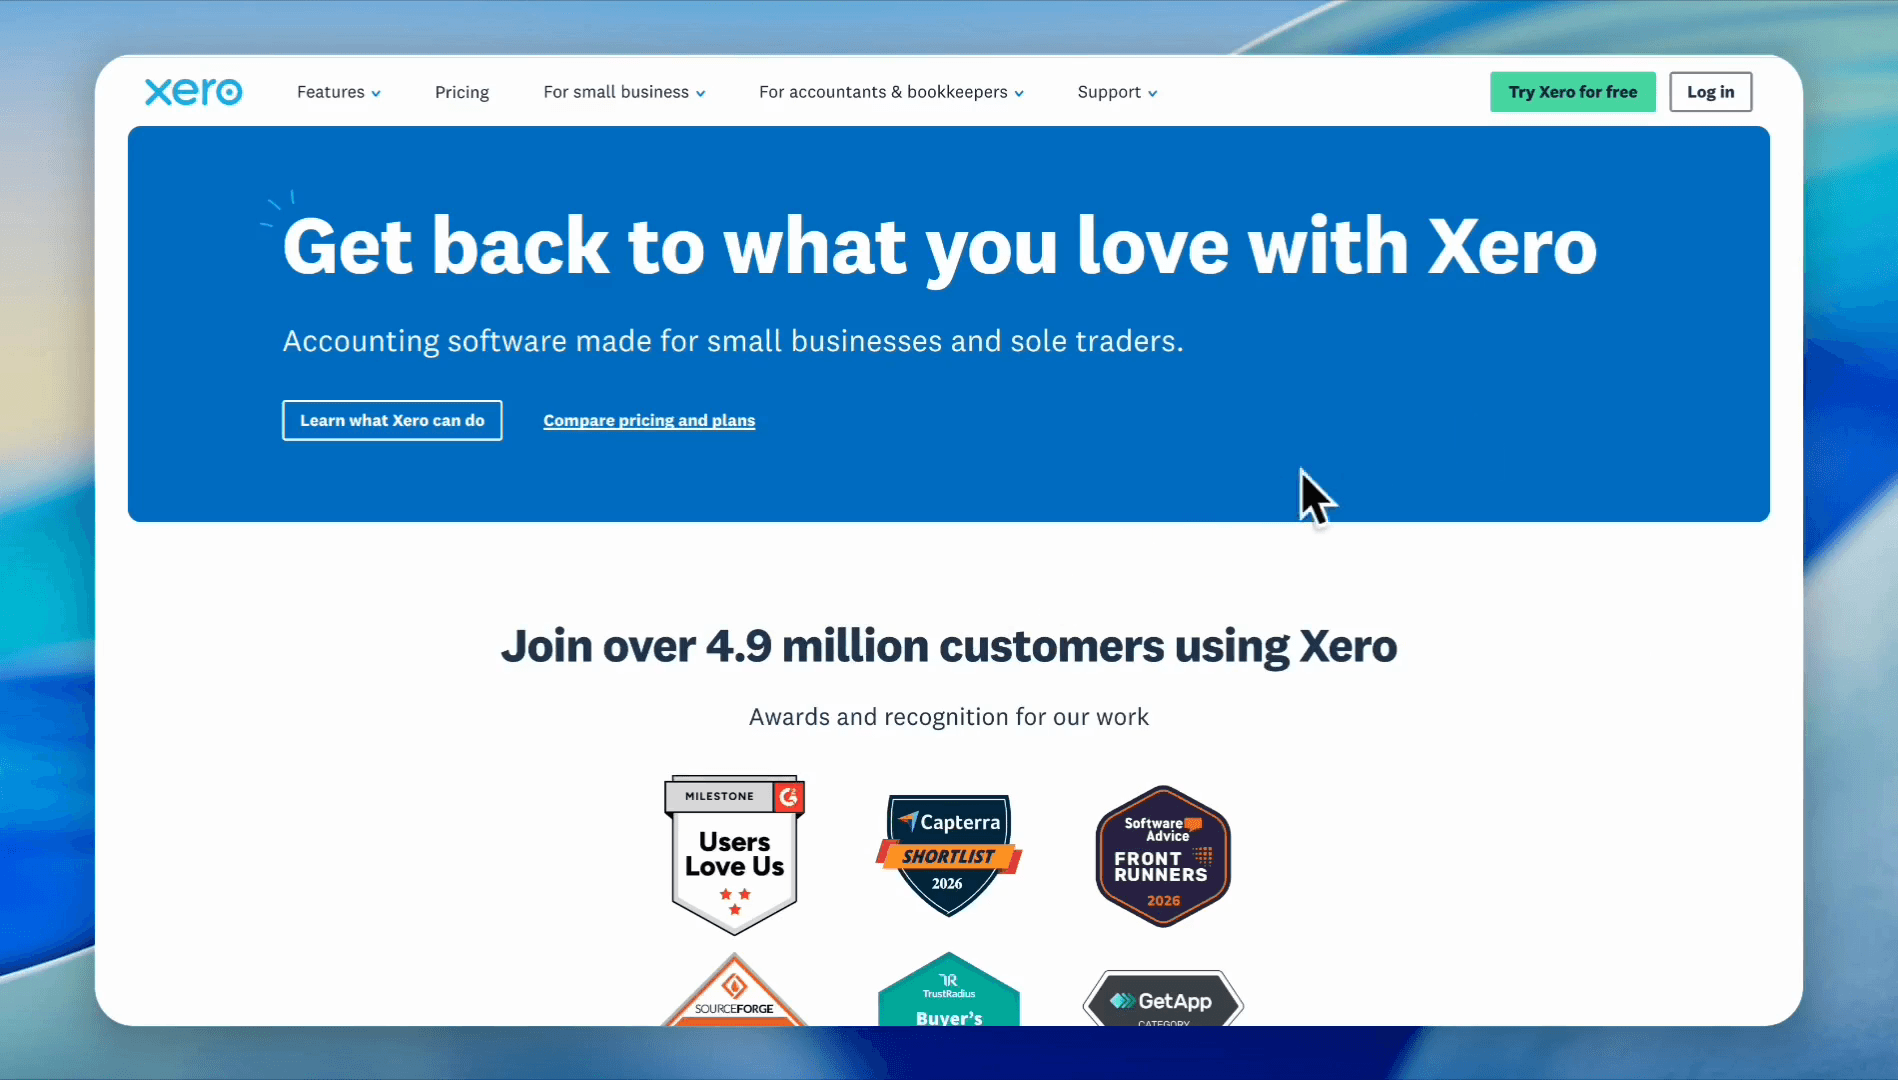
1
Click Log in on the Xero website to access your main account.
Step #1: Click Log in on the Xero website to access your main account.
2
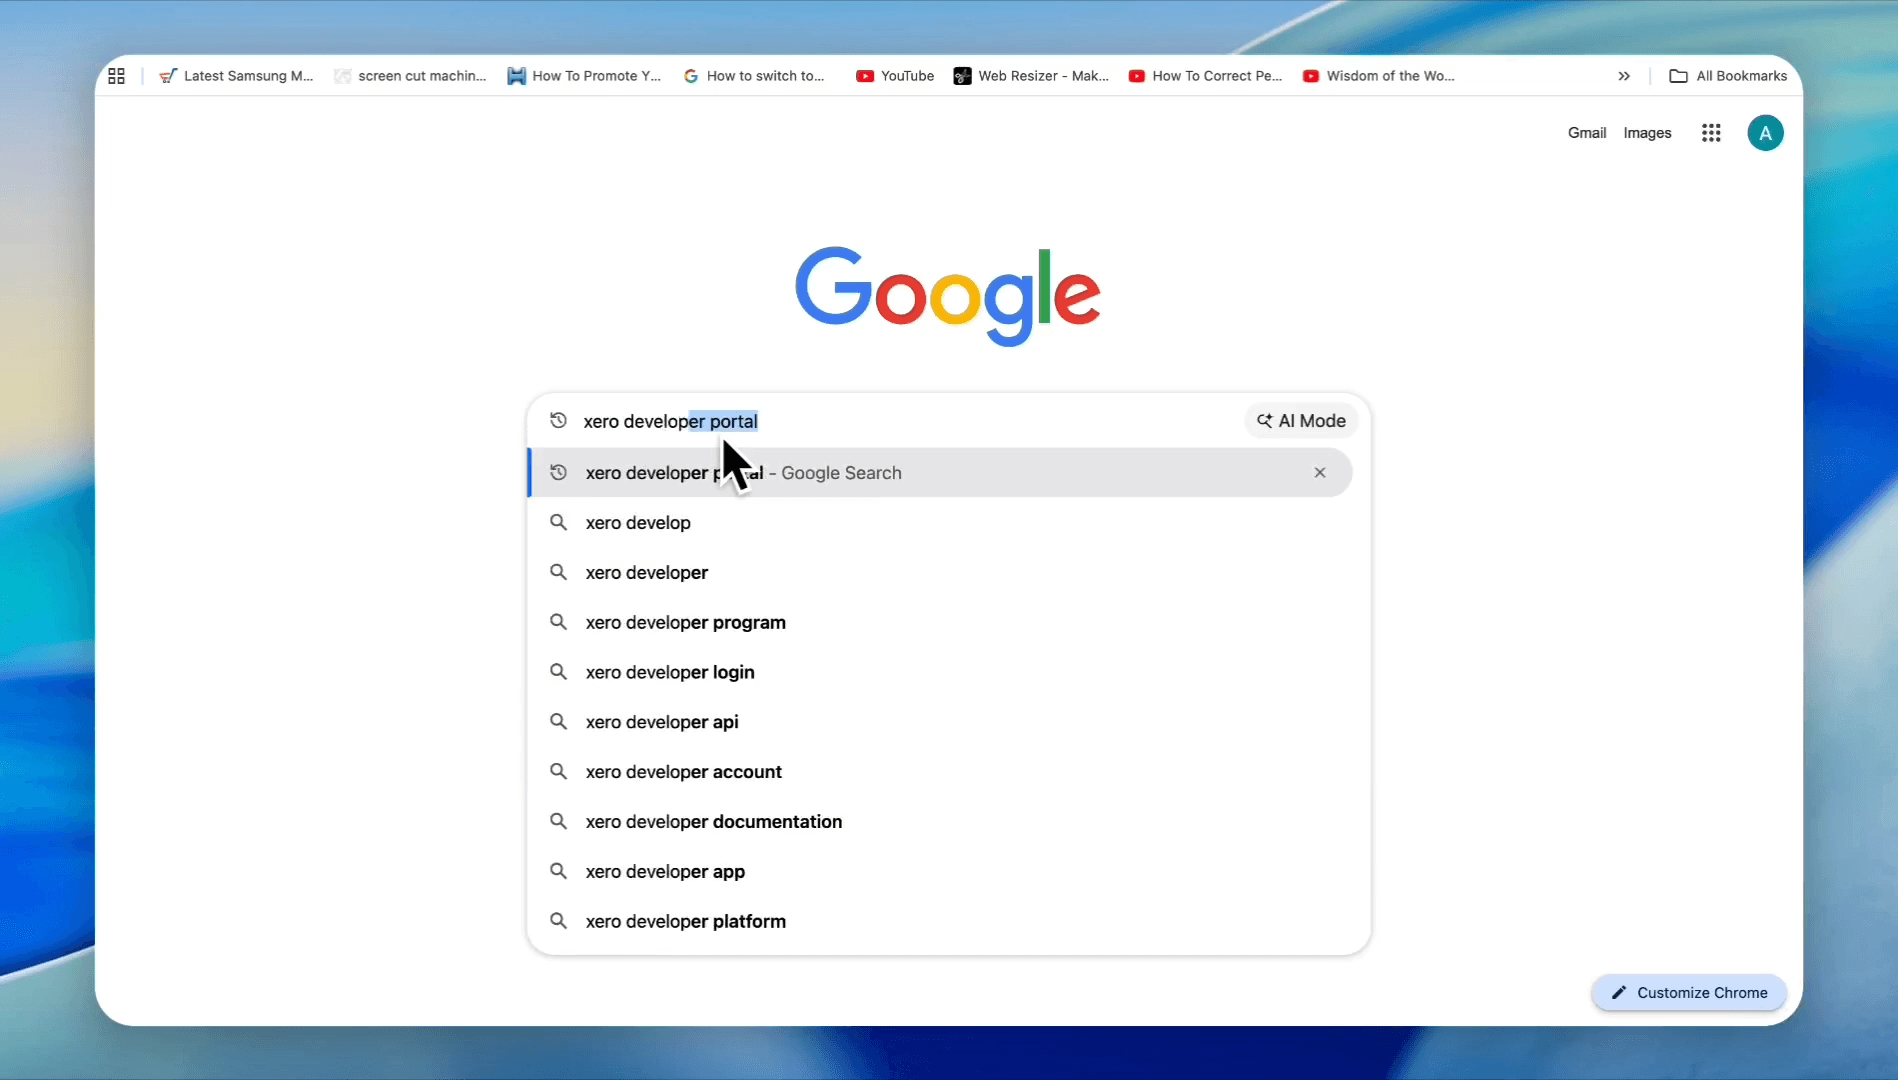
Open a new tab and search for "Xero developer portal". Click Xero Developer Platform from the search results and log in.
Step #2: Open a new tab and search for "Xero developer portal". Click Xero Developer Platform from the search results and log in.
3
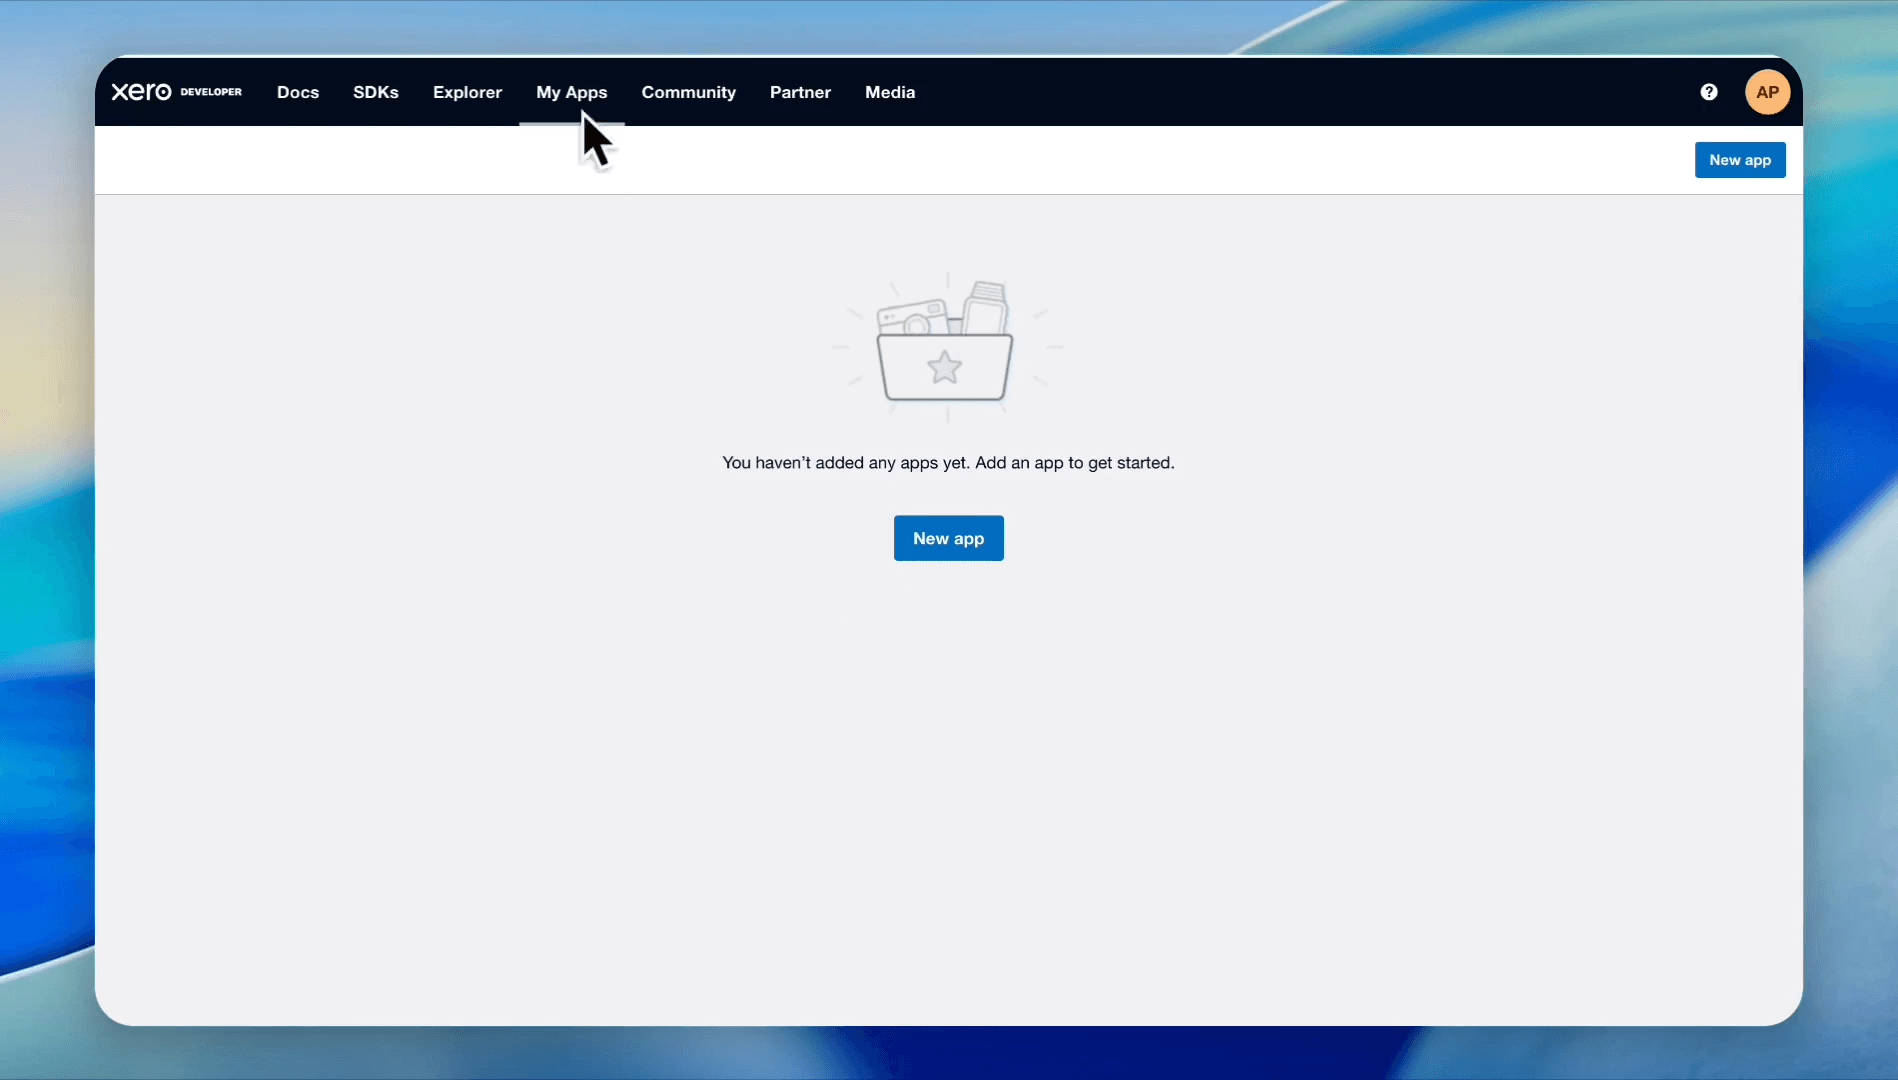
Navigate to My Apps and click New app.
Step #3: Navigate to My Apps and click New app.
4
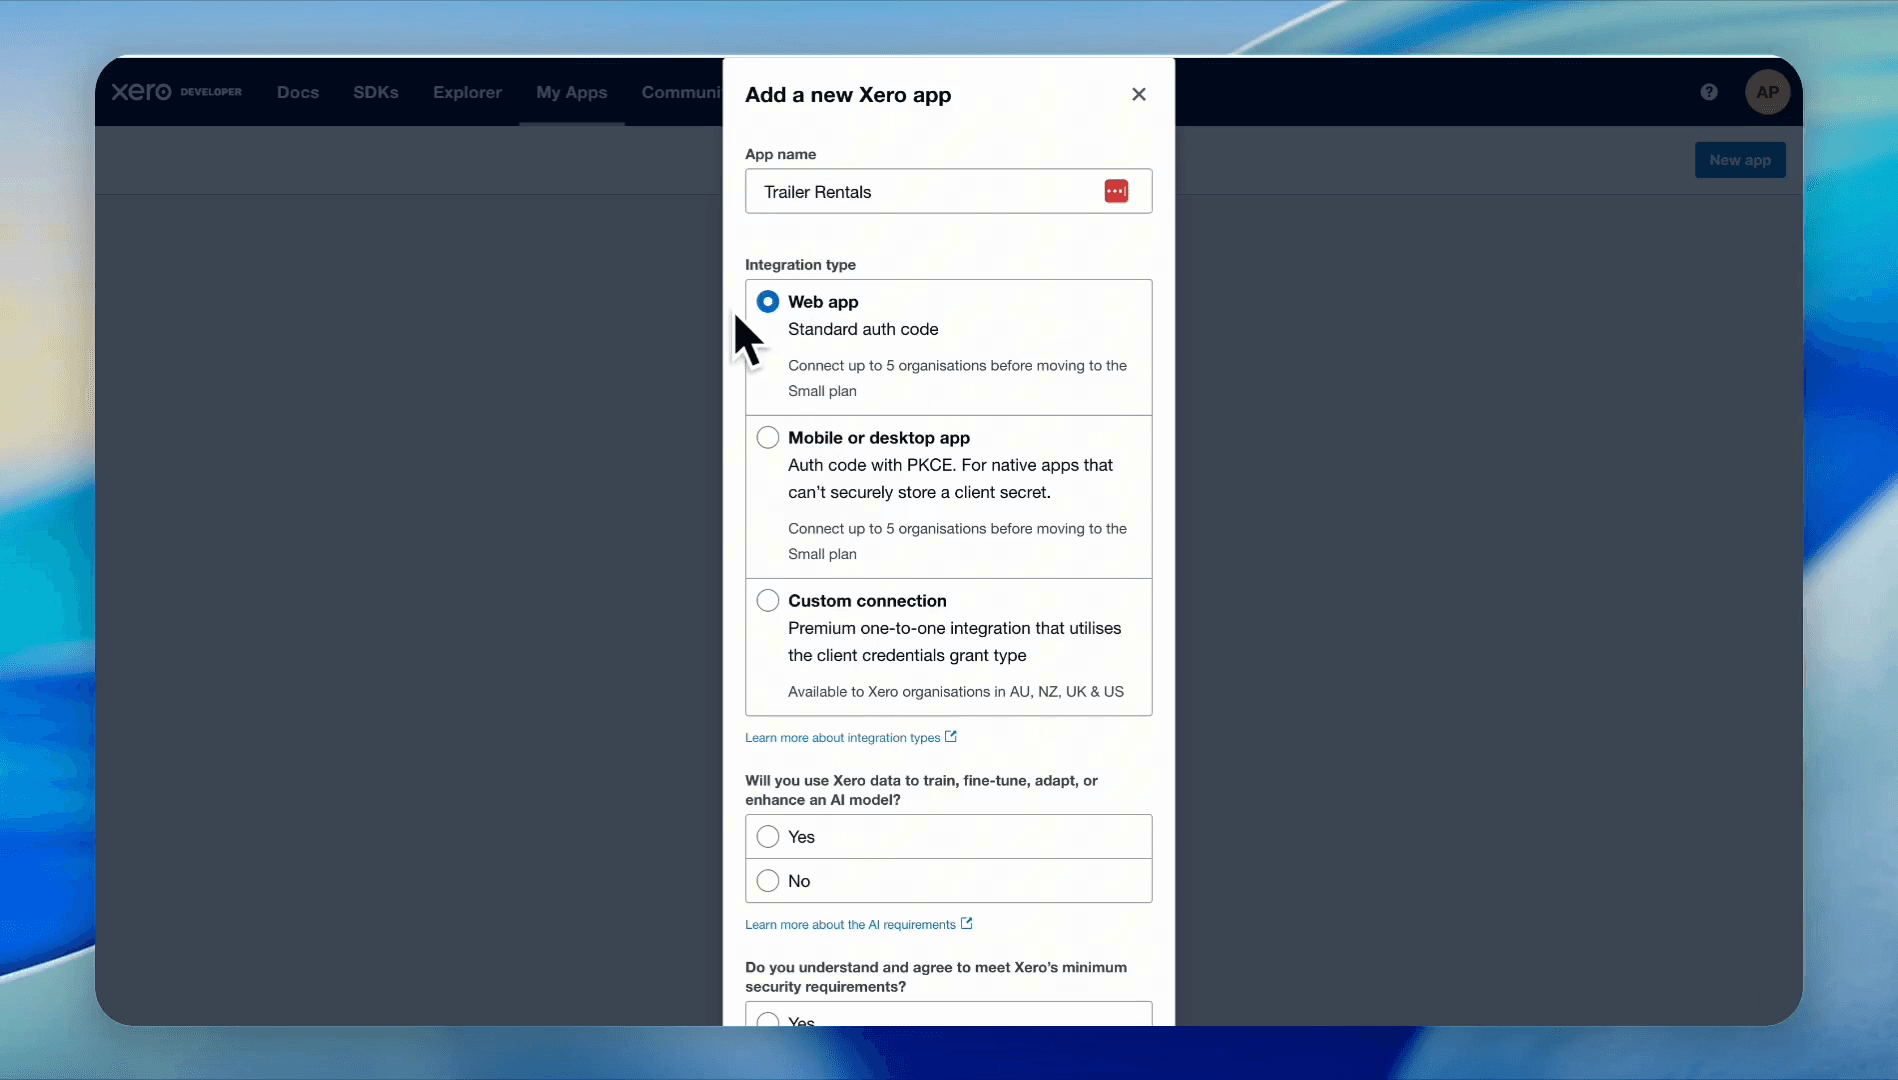
Type the name of your business in the App name field (for example, "Trailer Rentals"). Select the Web app integration type.
Step #4: Type the name of your business in the App name field (for example, "Trailer Rentals"). Select the Web app integration type.
5
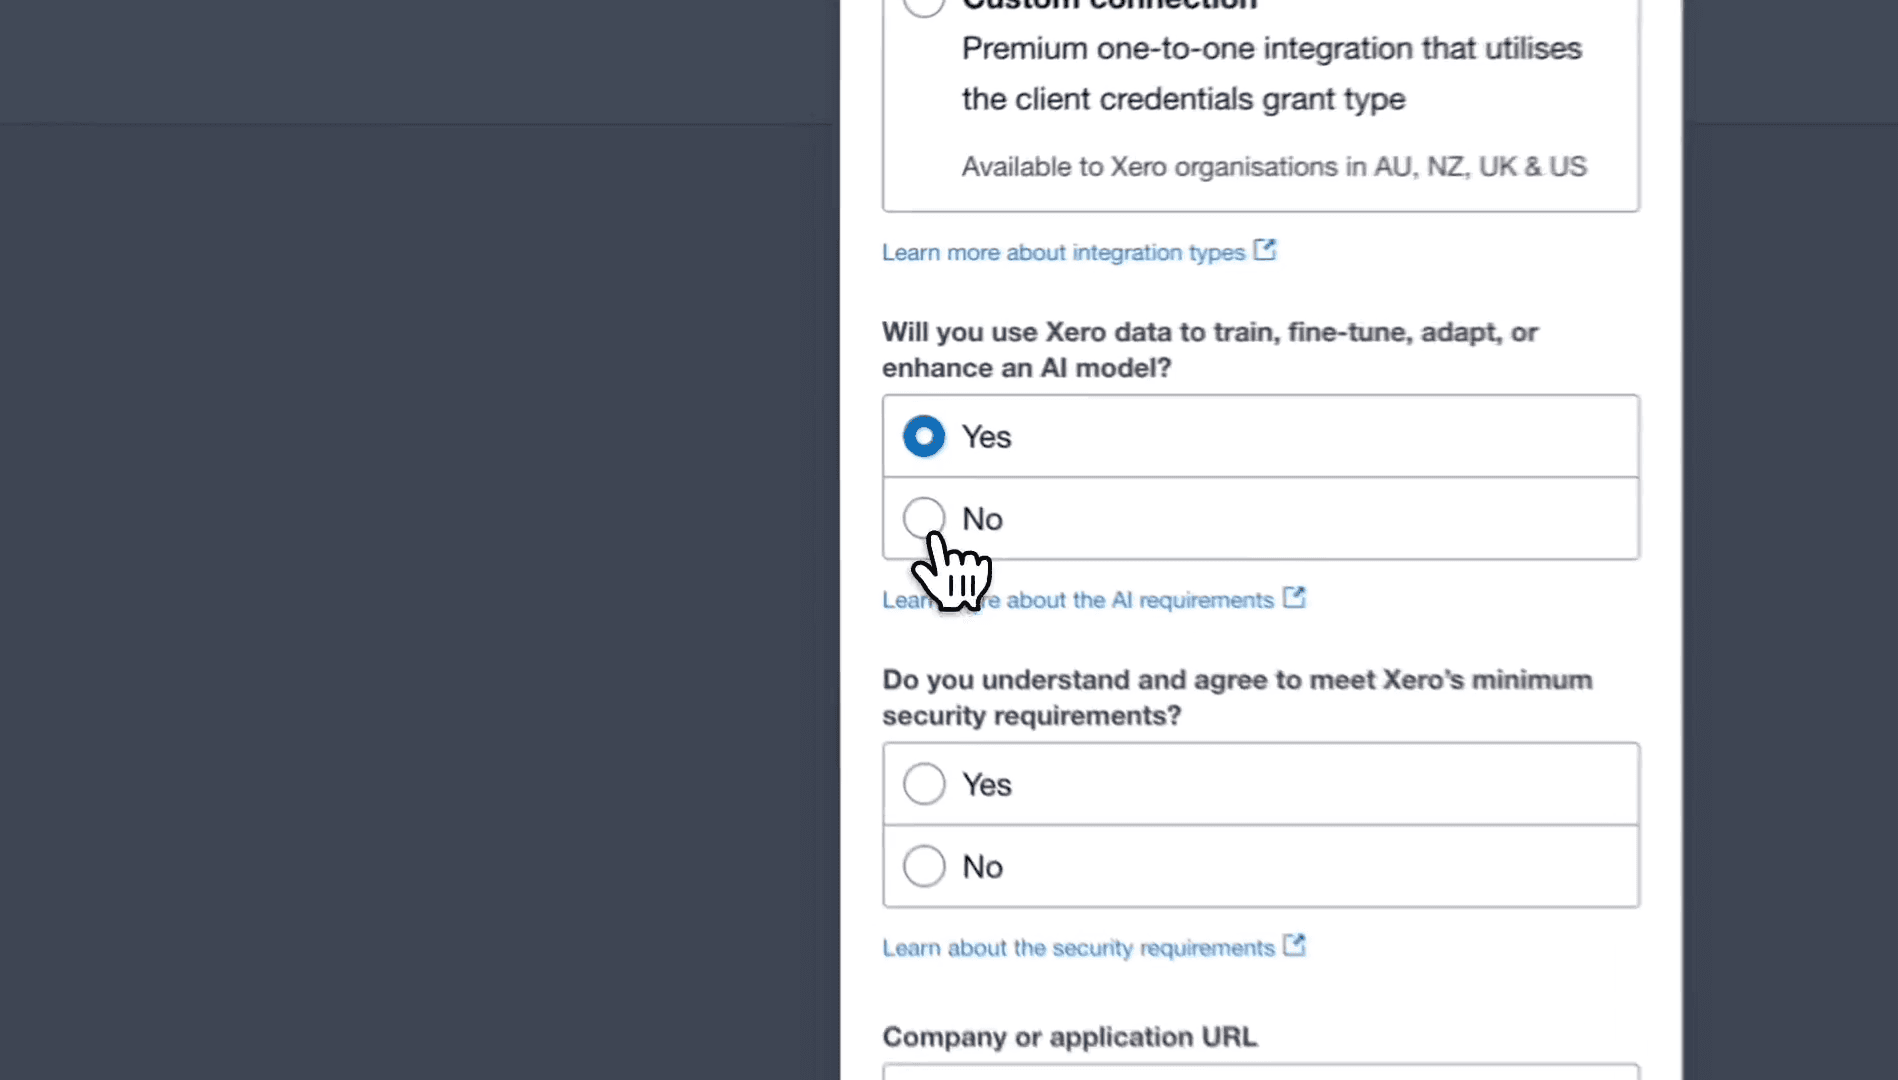
Select No for the question regarding AI model training.
Step #5: Select No for the question regarding AI model training.
6
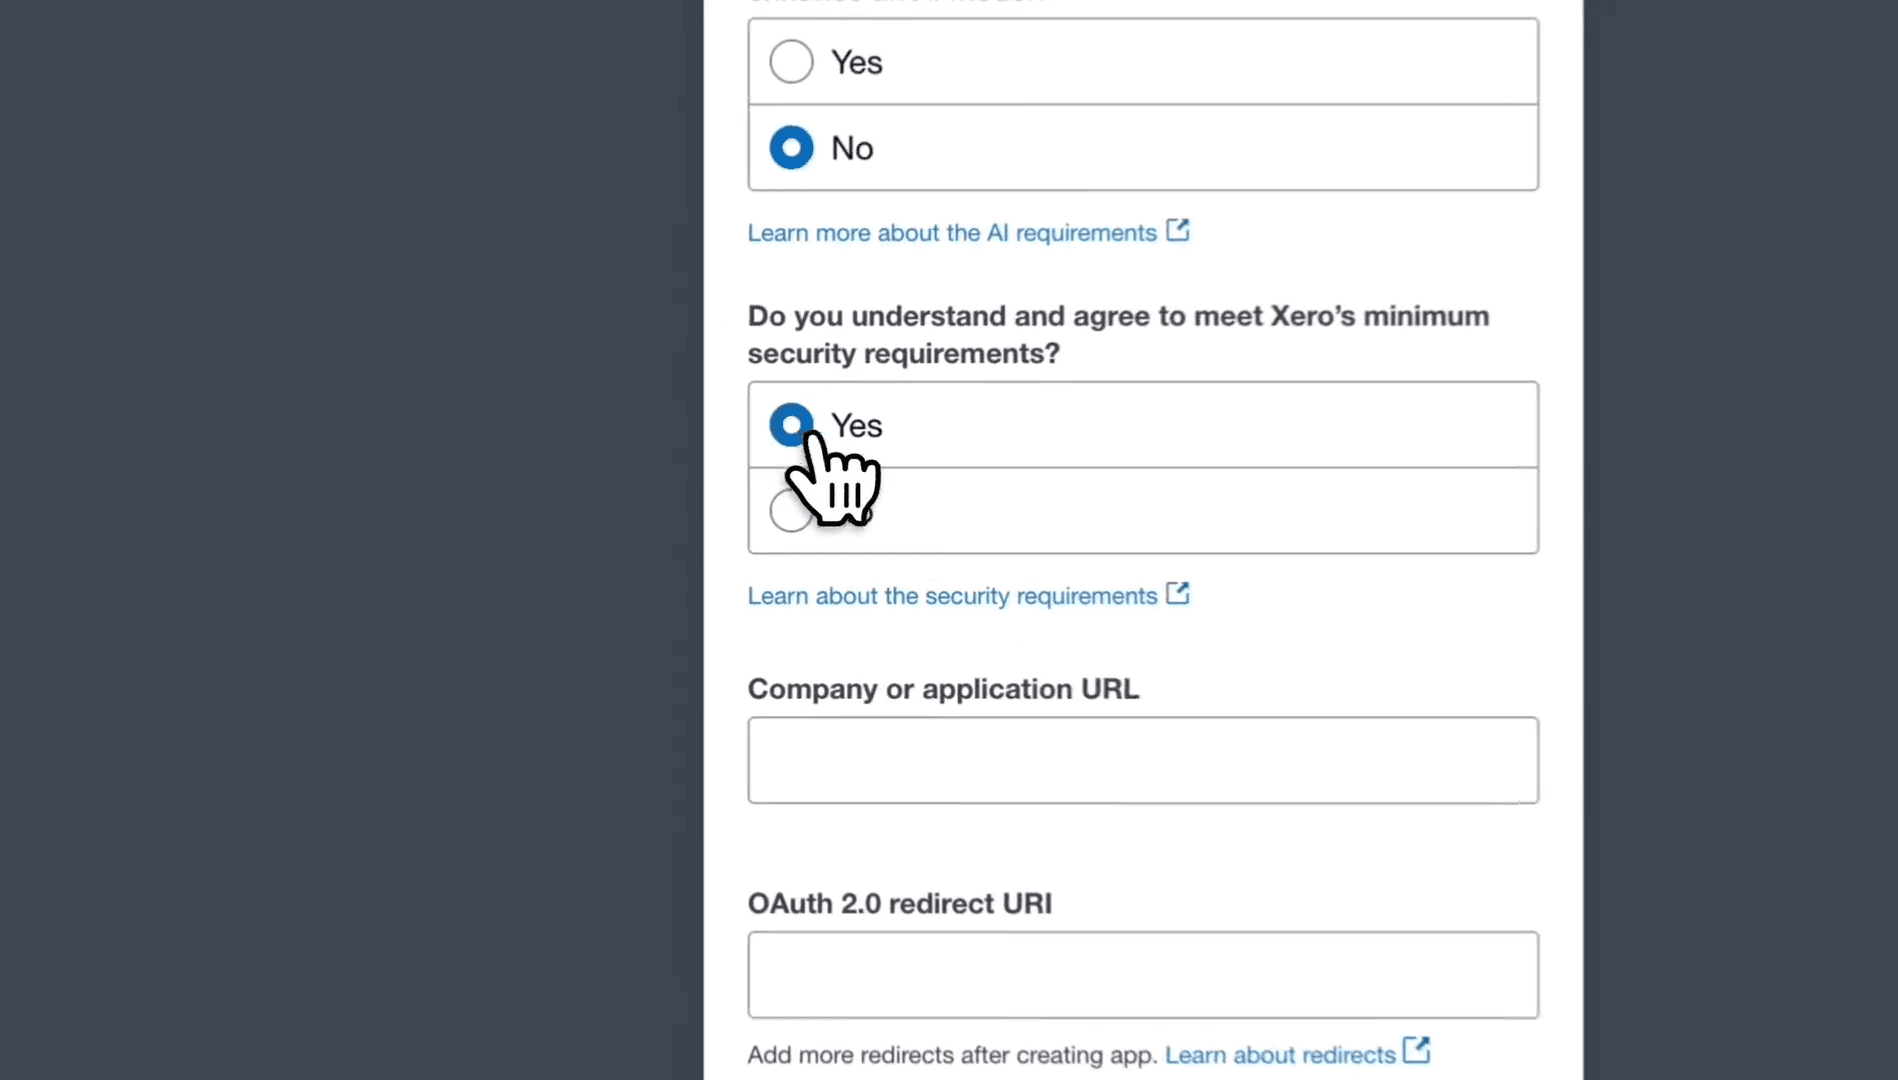
Select Yes to agree to Xero's minimum security requirements.
Step #6: Select Yes to agree to Xero's minimum security requirements.
7
Enter your web address in the Company or application URL field.

Configure the Redirect URI

8
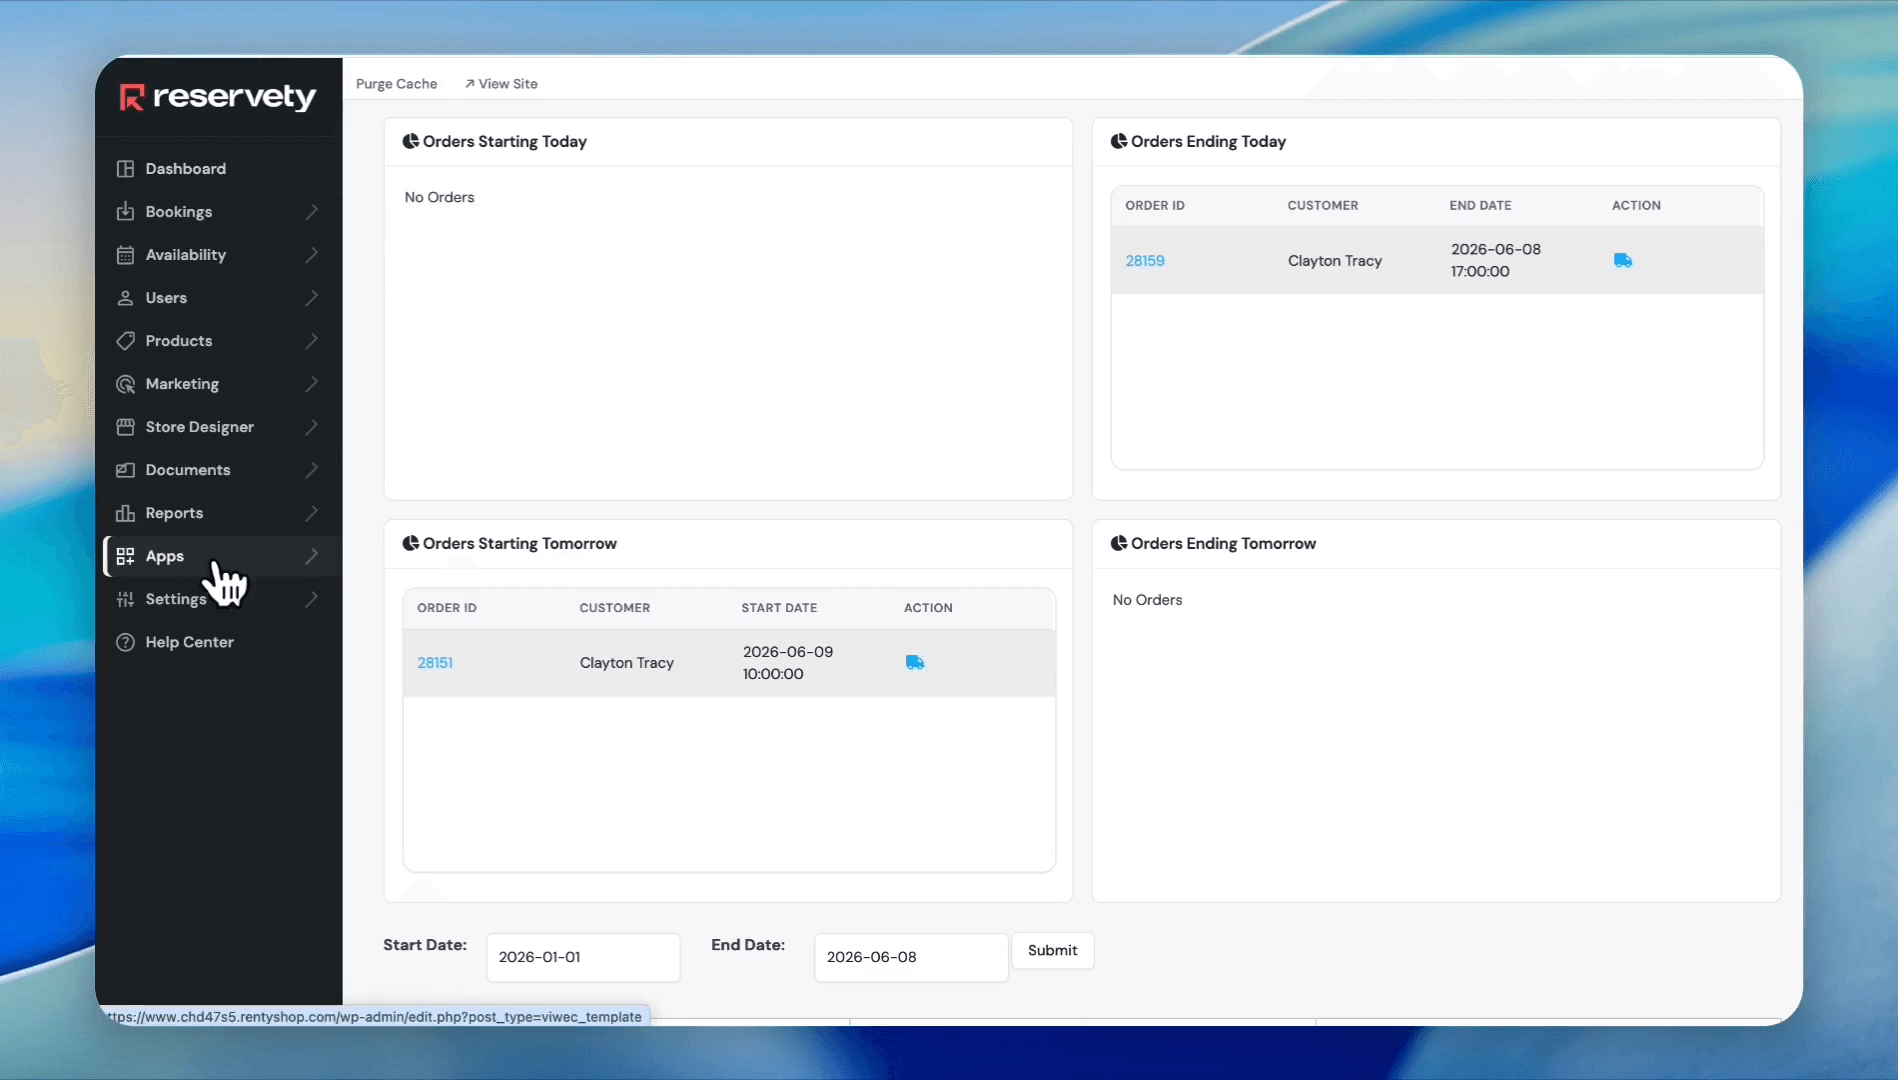
Navigate to your rental dashboard and click Apps on the left sidebar.
Step #8: Navigate to your rental dashboard and click Apps on the left sidebar.
9
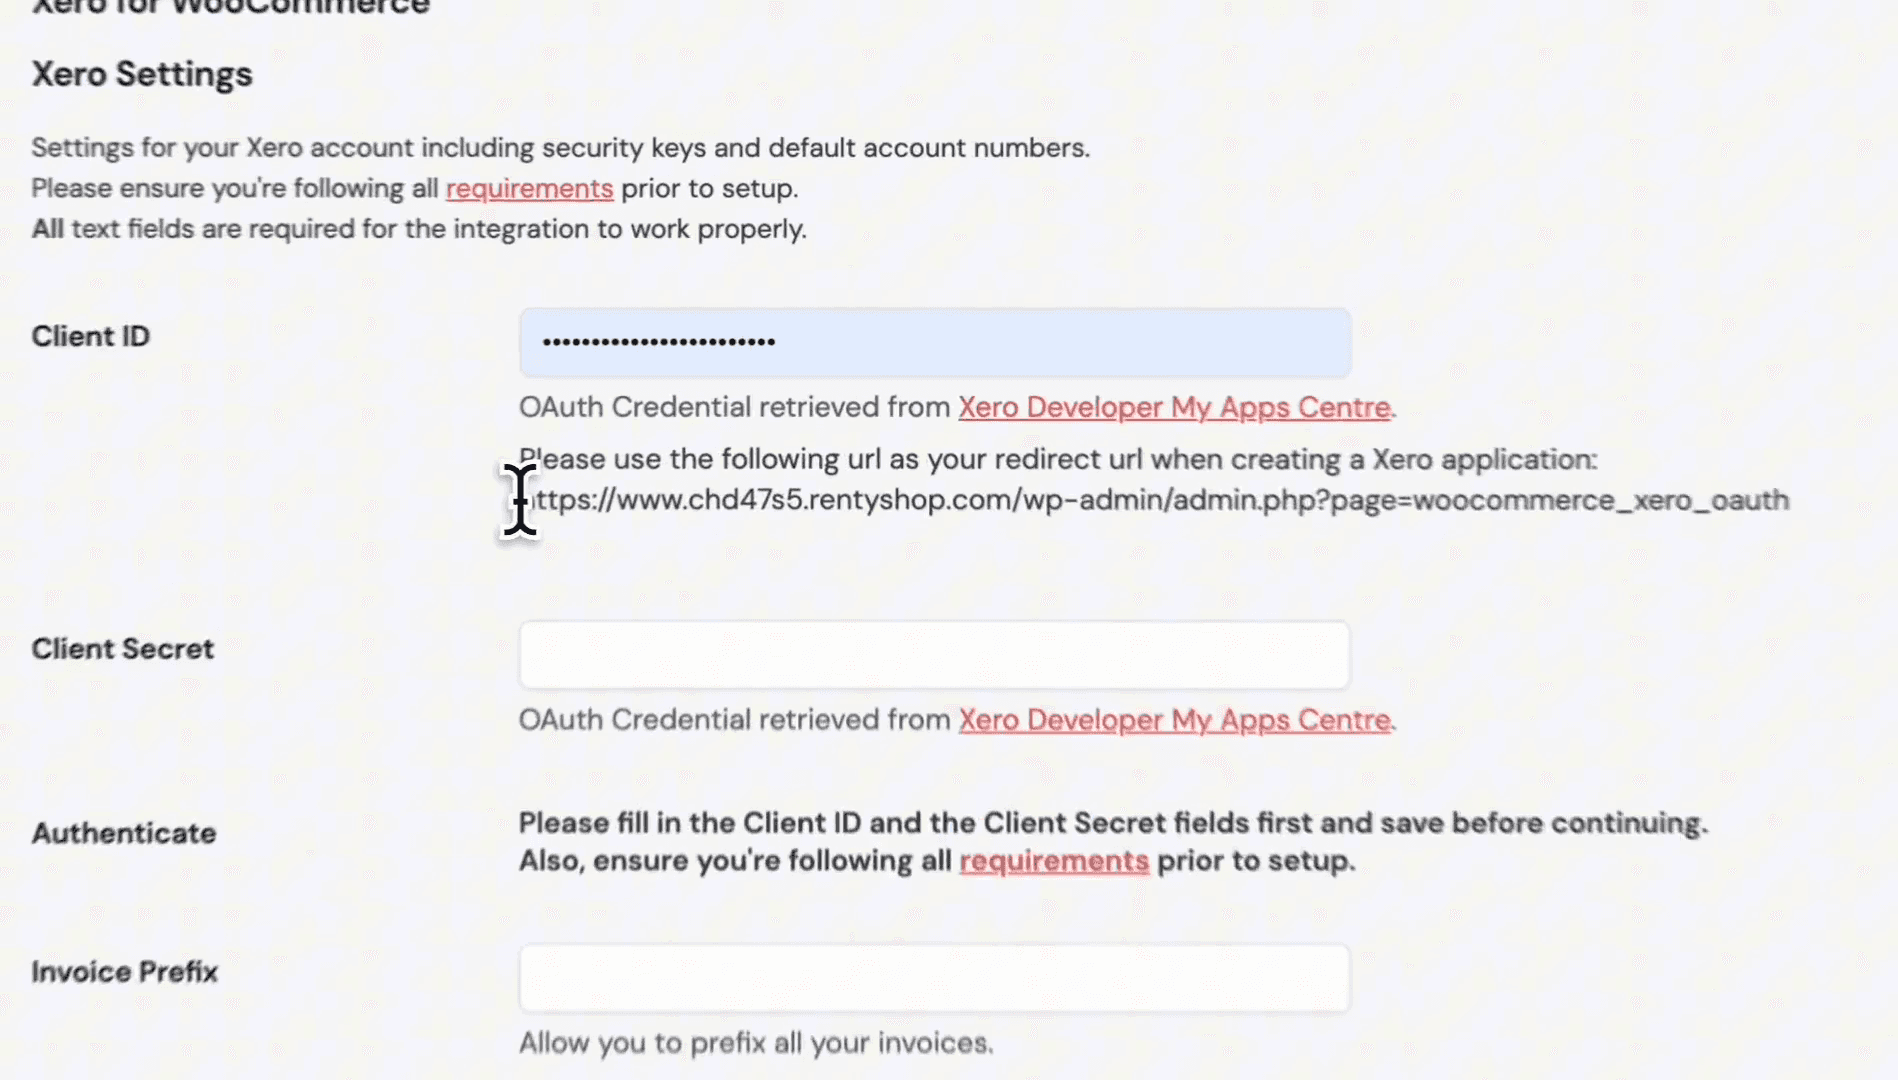
Select the Xero app to open its settings, locate the Client ID section, and copy the provided redirect URL.
Step #9: Select the Xero app to open its settings, locate the Client ID section, and copy the provided redirect URL.
10
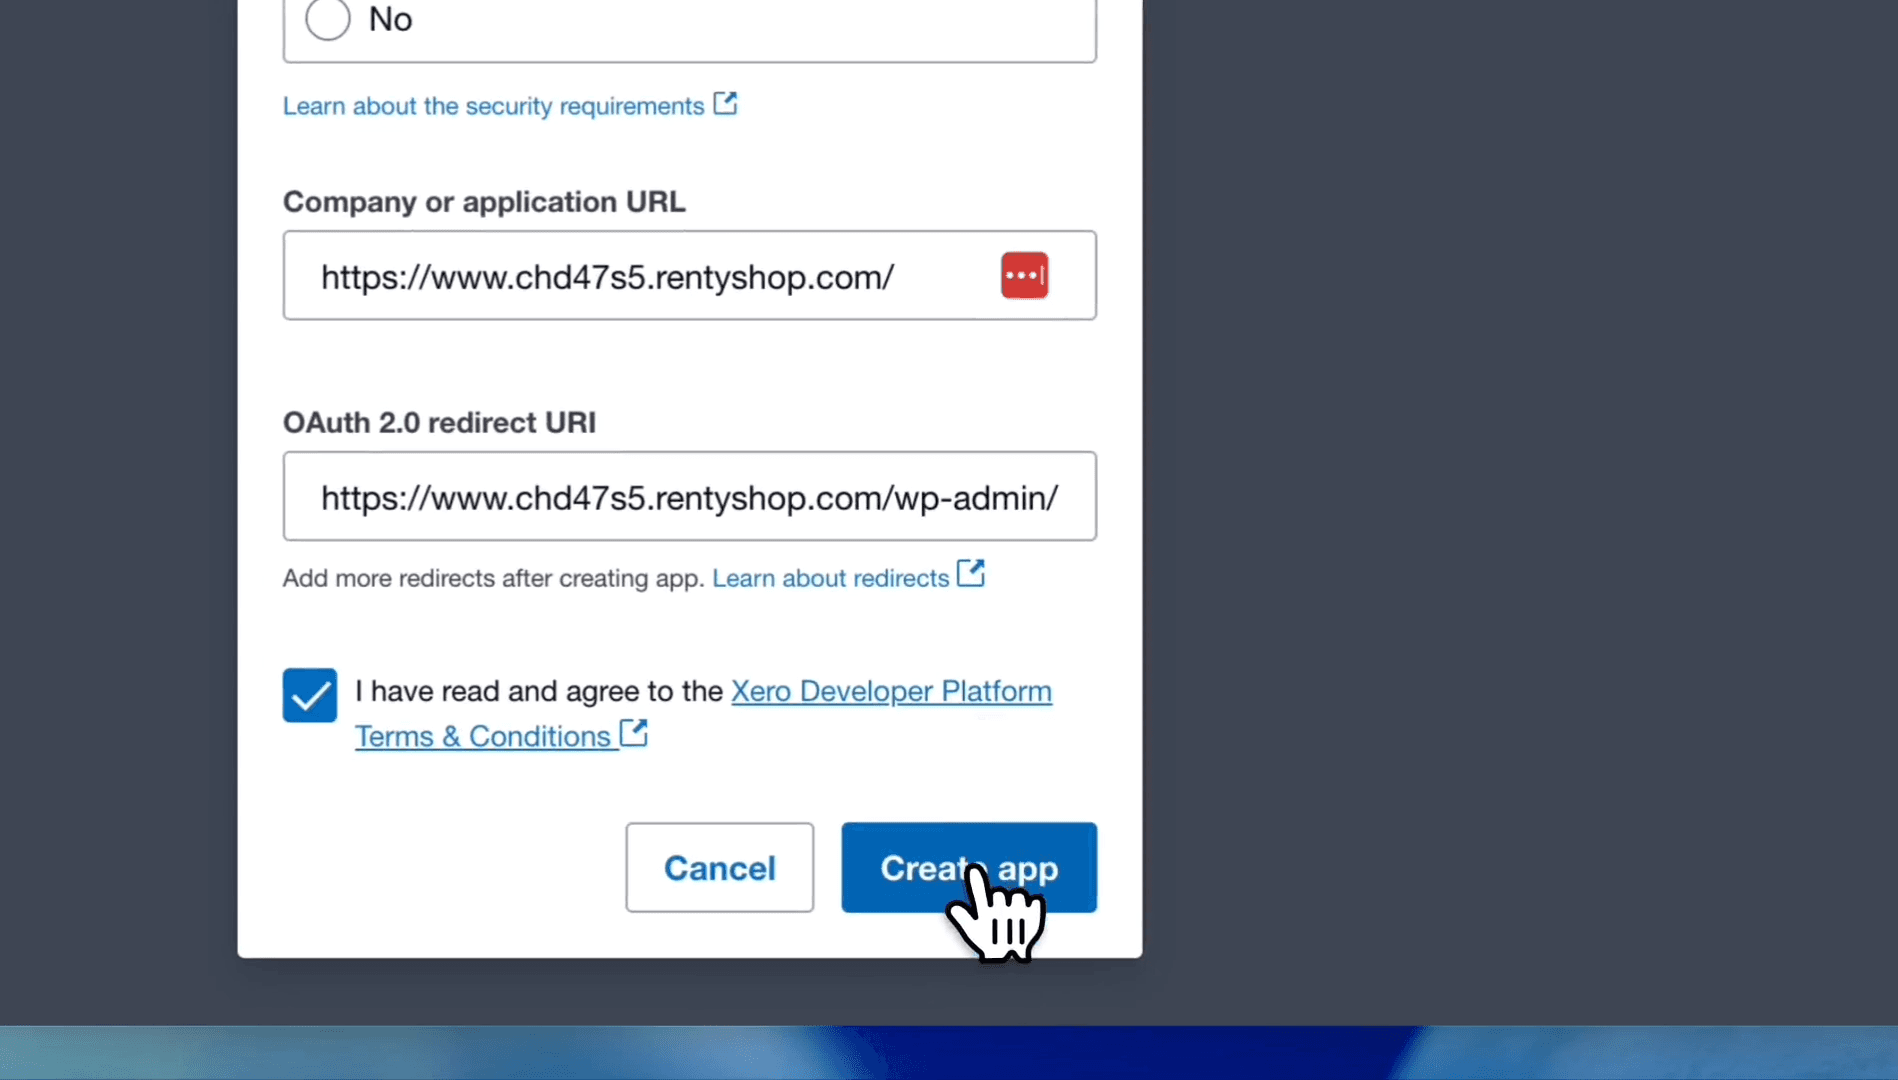
Return to the Xero developer portal and paste the link into the OAuth 2.0 redirect URI field.
11
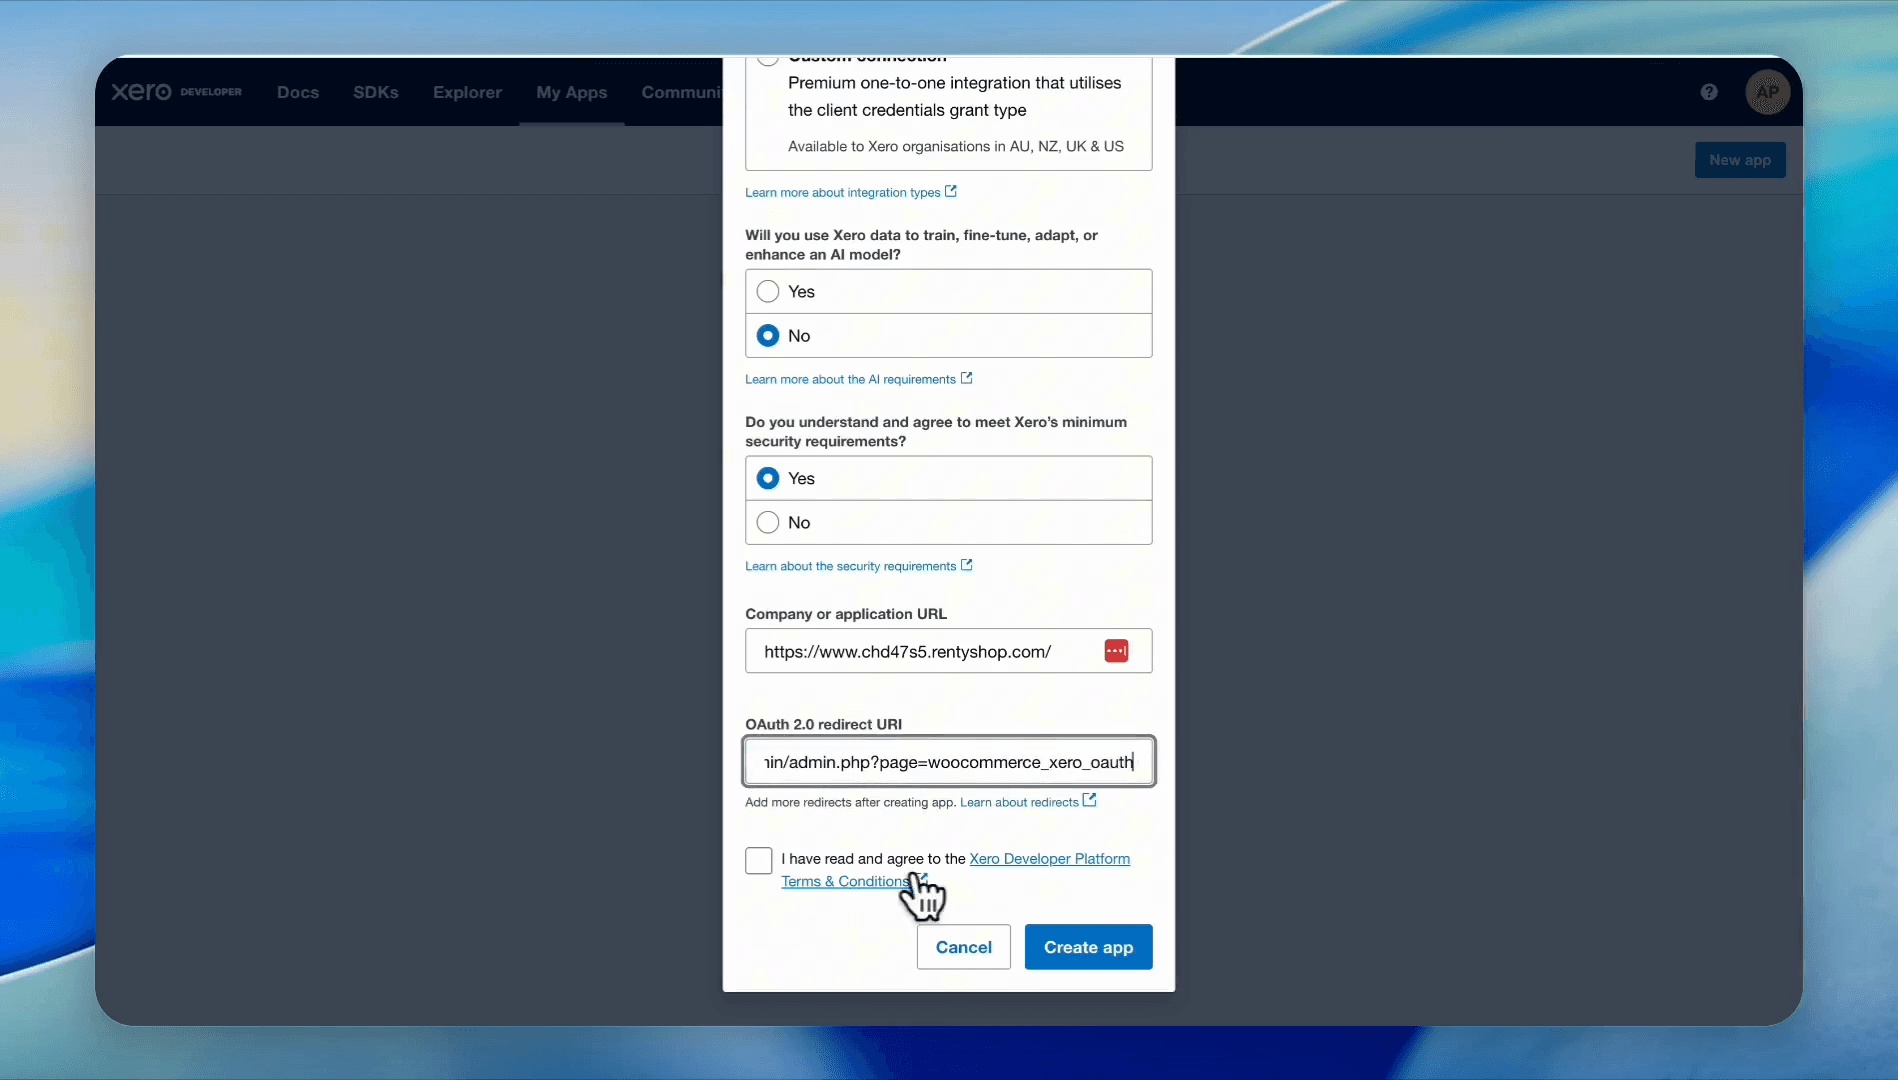
Check the box to agree to the platform terms and conditions.
Step #11: Check the box to agree to the platform terms and conditions.
12
Click Create App.
Step #12: Click Create App.

Generate and Apply Credentials

13
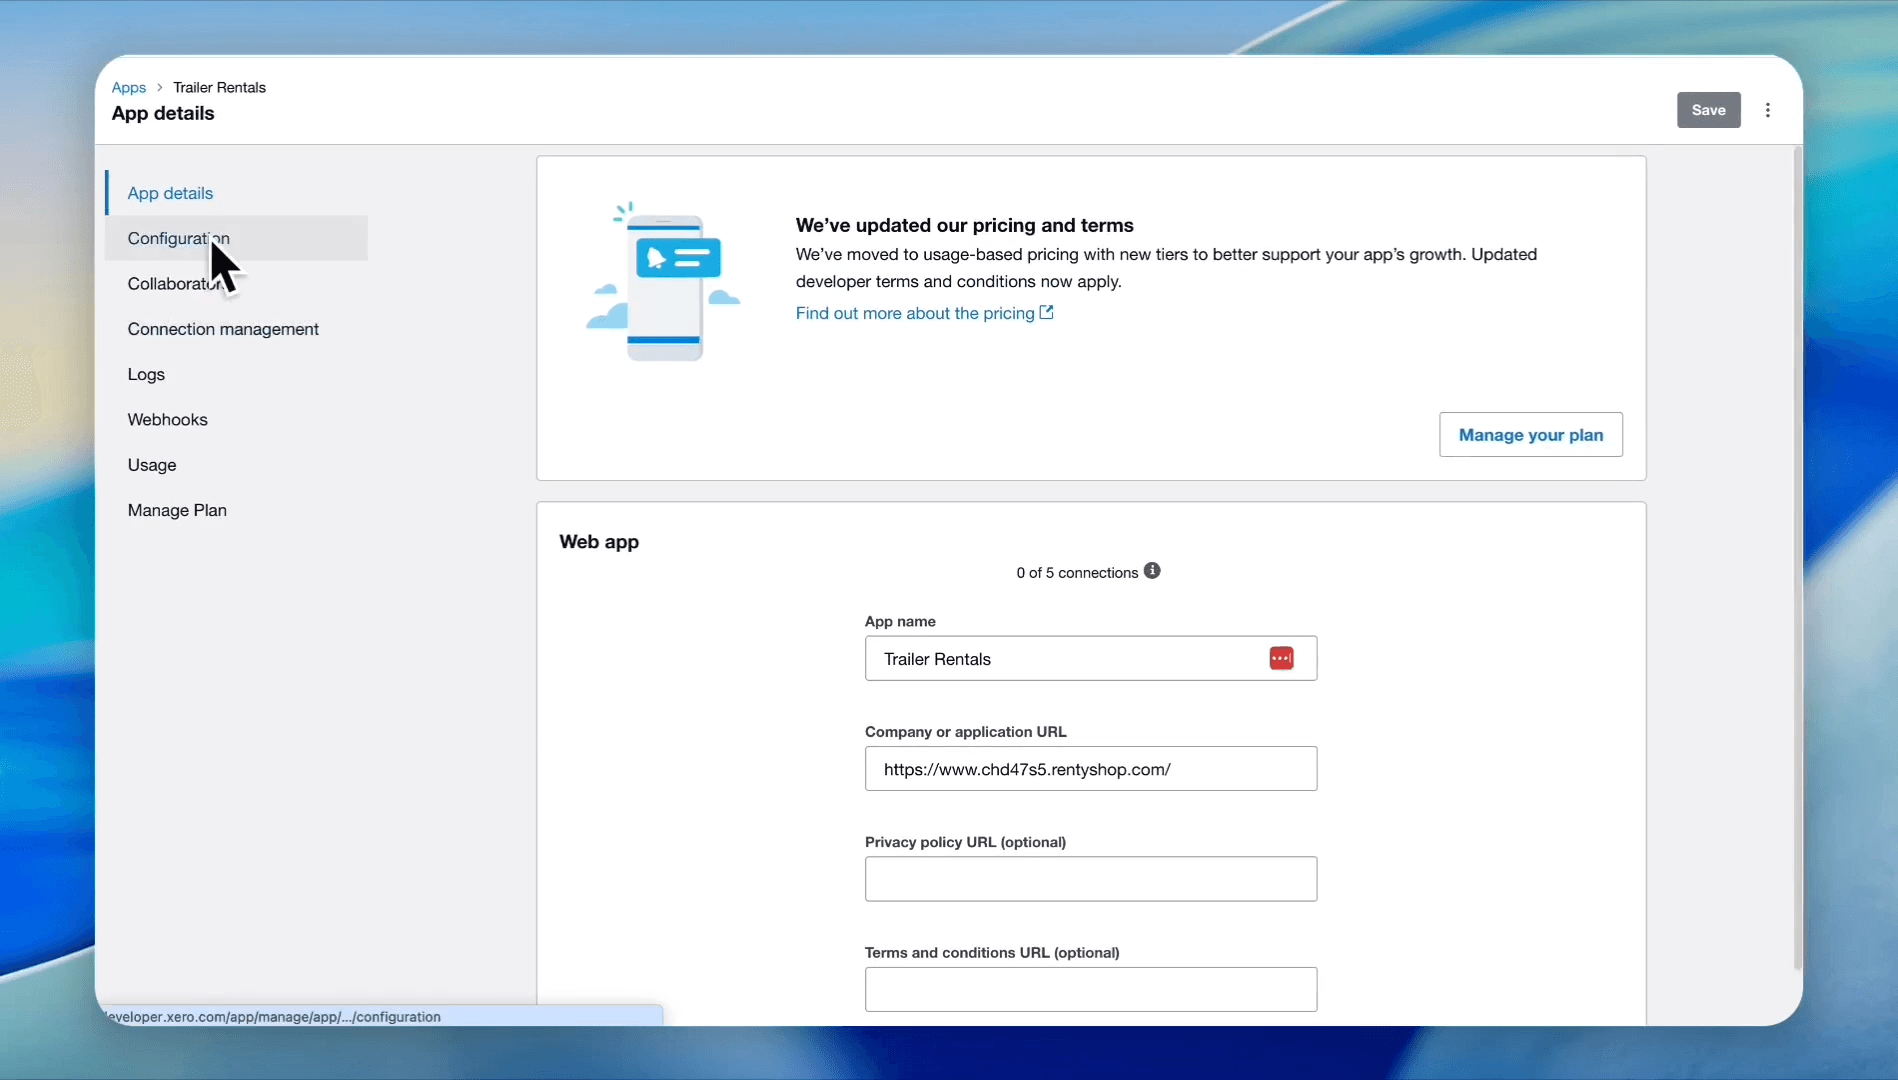
In the Xero Developer portal's left menu, click Configuration.
Step #13: In the Xero Developer portal's left menu, click Configuration.
14
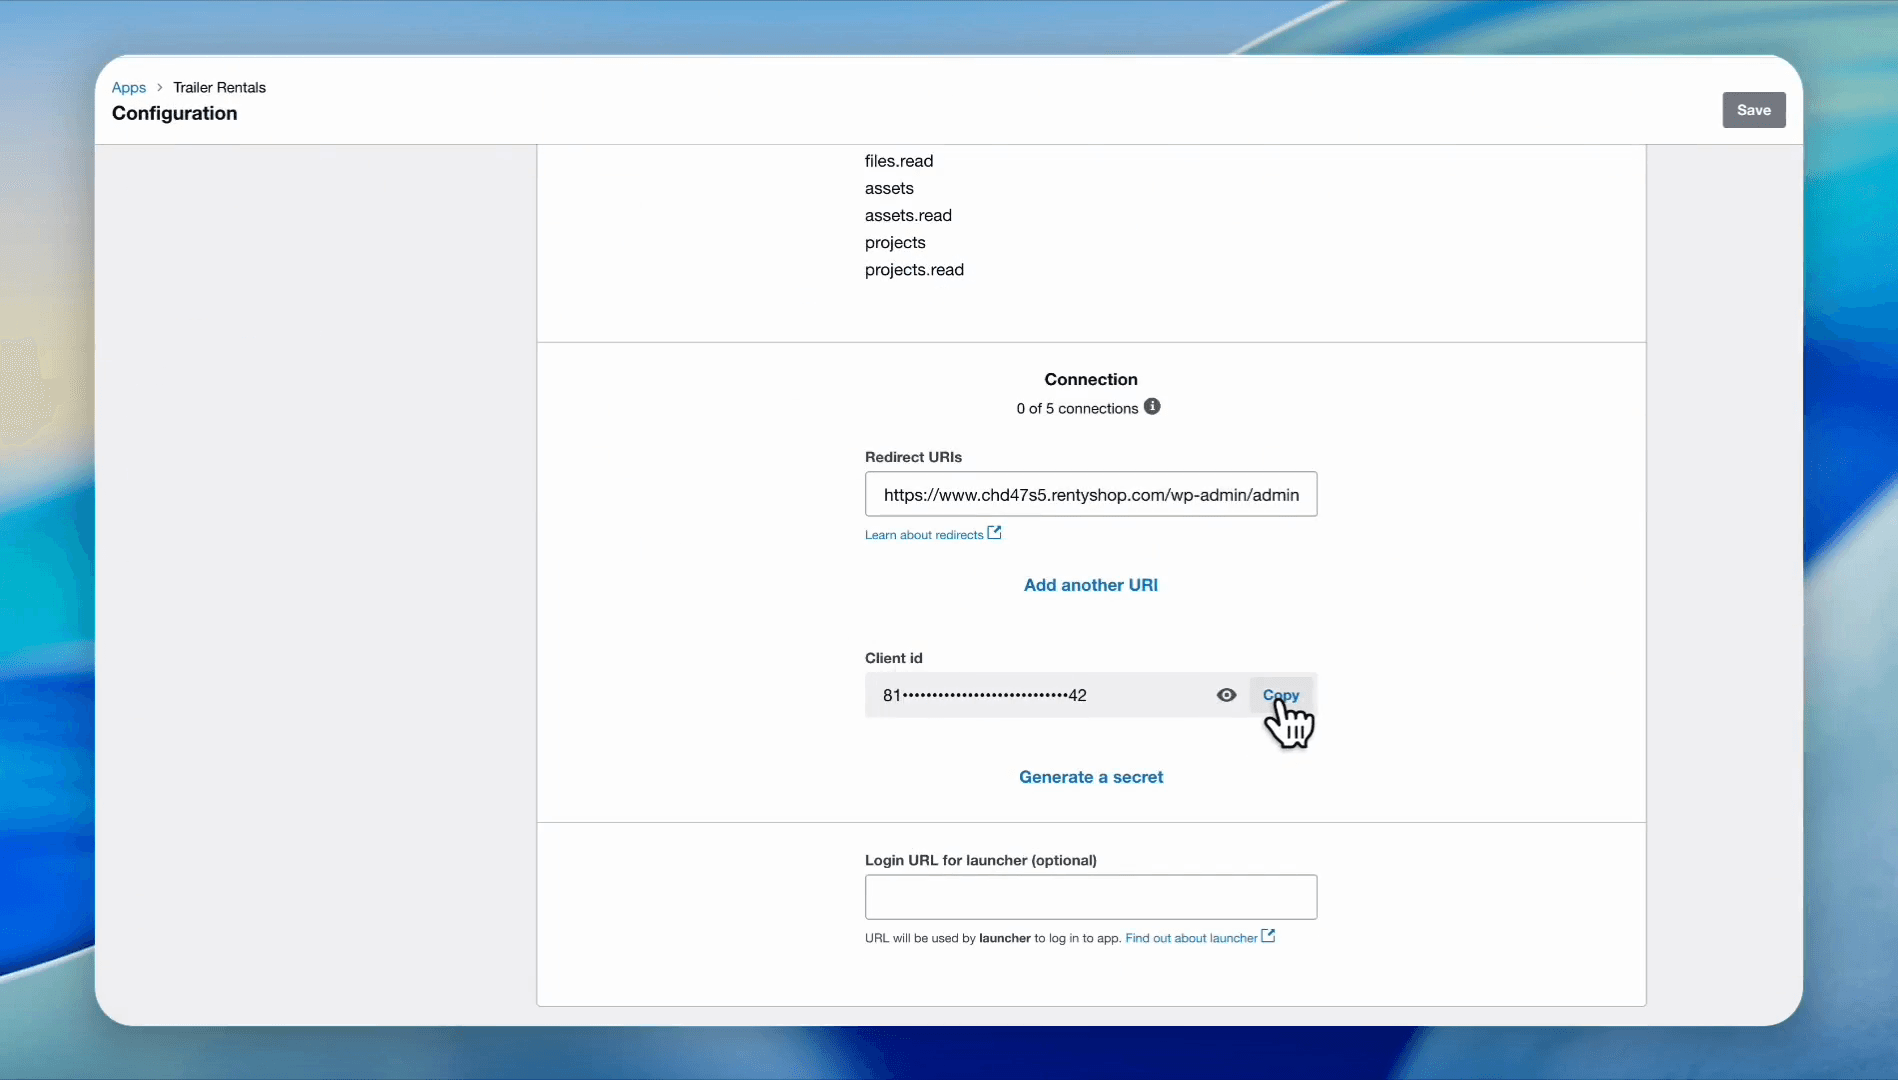
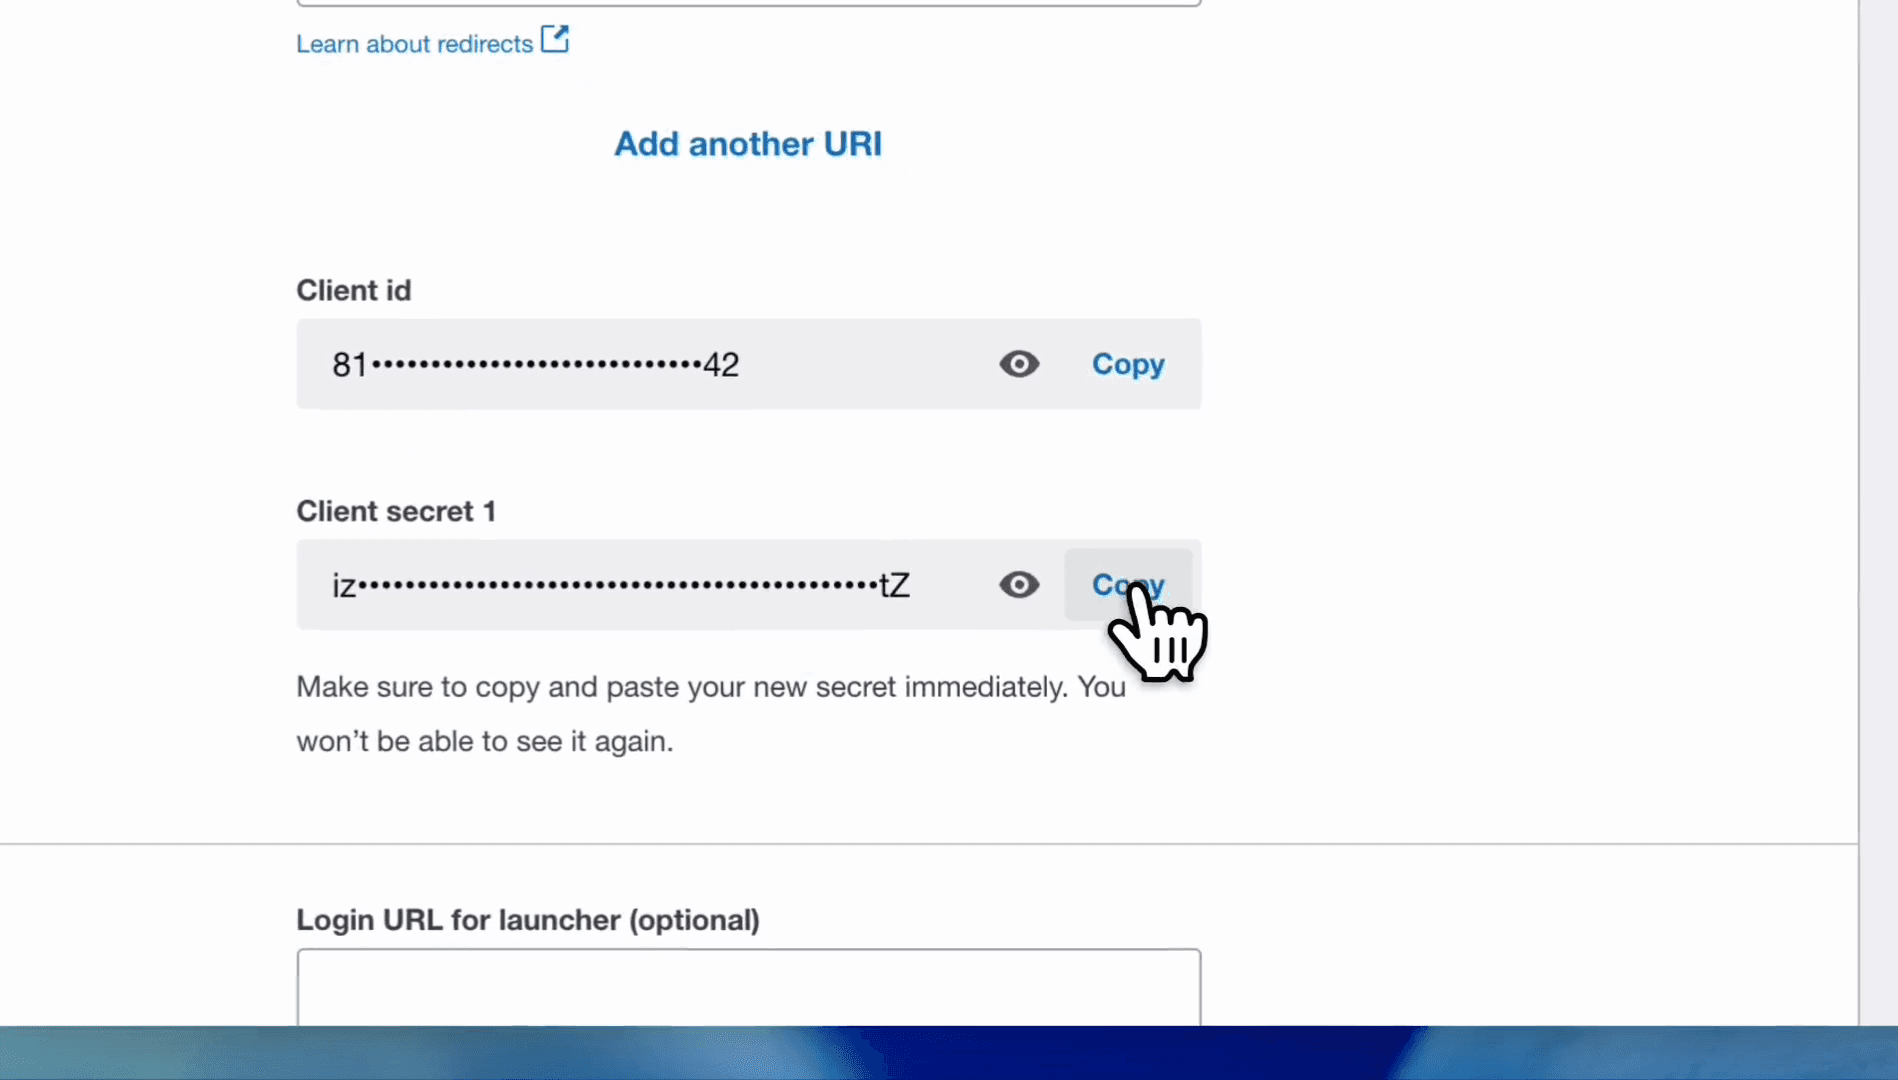
Click Copy next to your generated Client ID.
Step #14: Click Copy next to your generated Client ID.
15
Return to your rental dashboard and paste the copied code into the Client ID field.
16
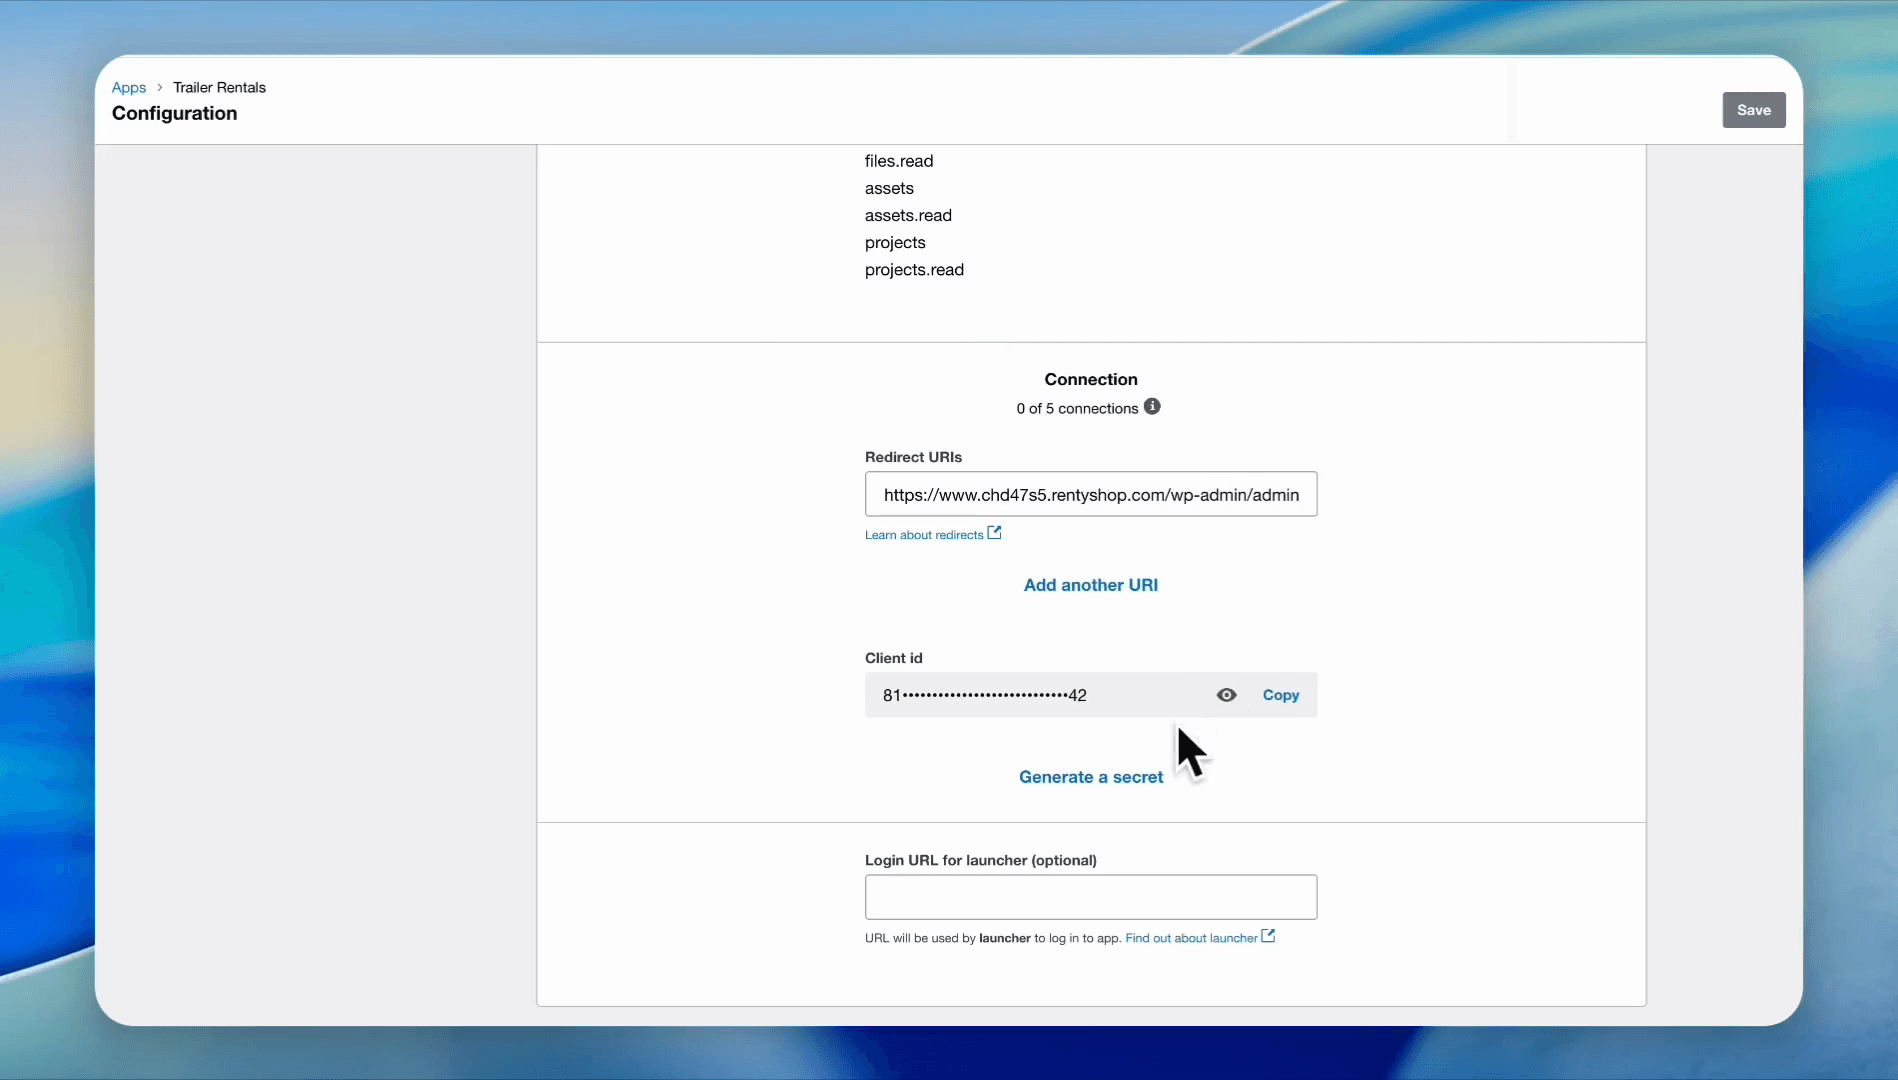
Go back to the Xero portal and click Generate secret.
Step #16: Go back to the Xero portal and click Generate secret.
17
Click Copy to copy the newly generated secret string.
Step #17: Click Copy to copy the newly generated secret string.
18
In your rental dashboard, paste the string into the Client Secret field.

Configure Sync Settings and Account Codes
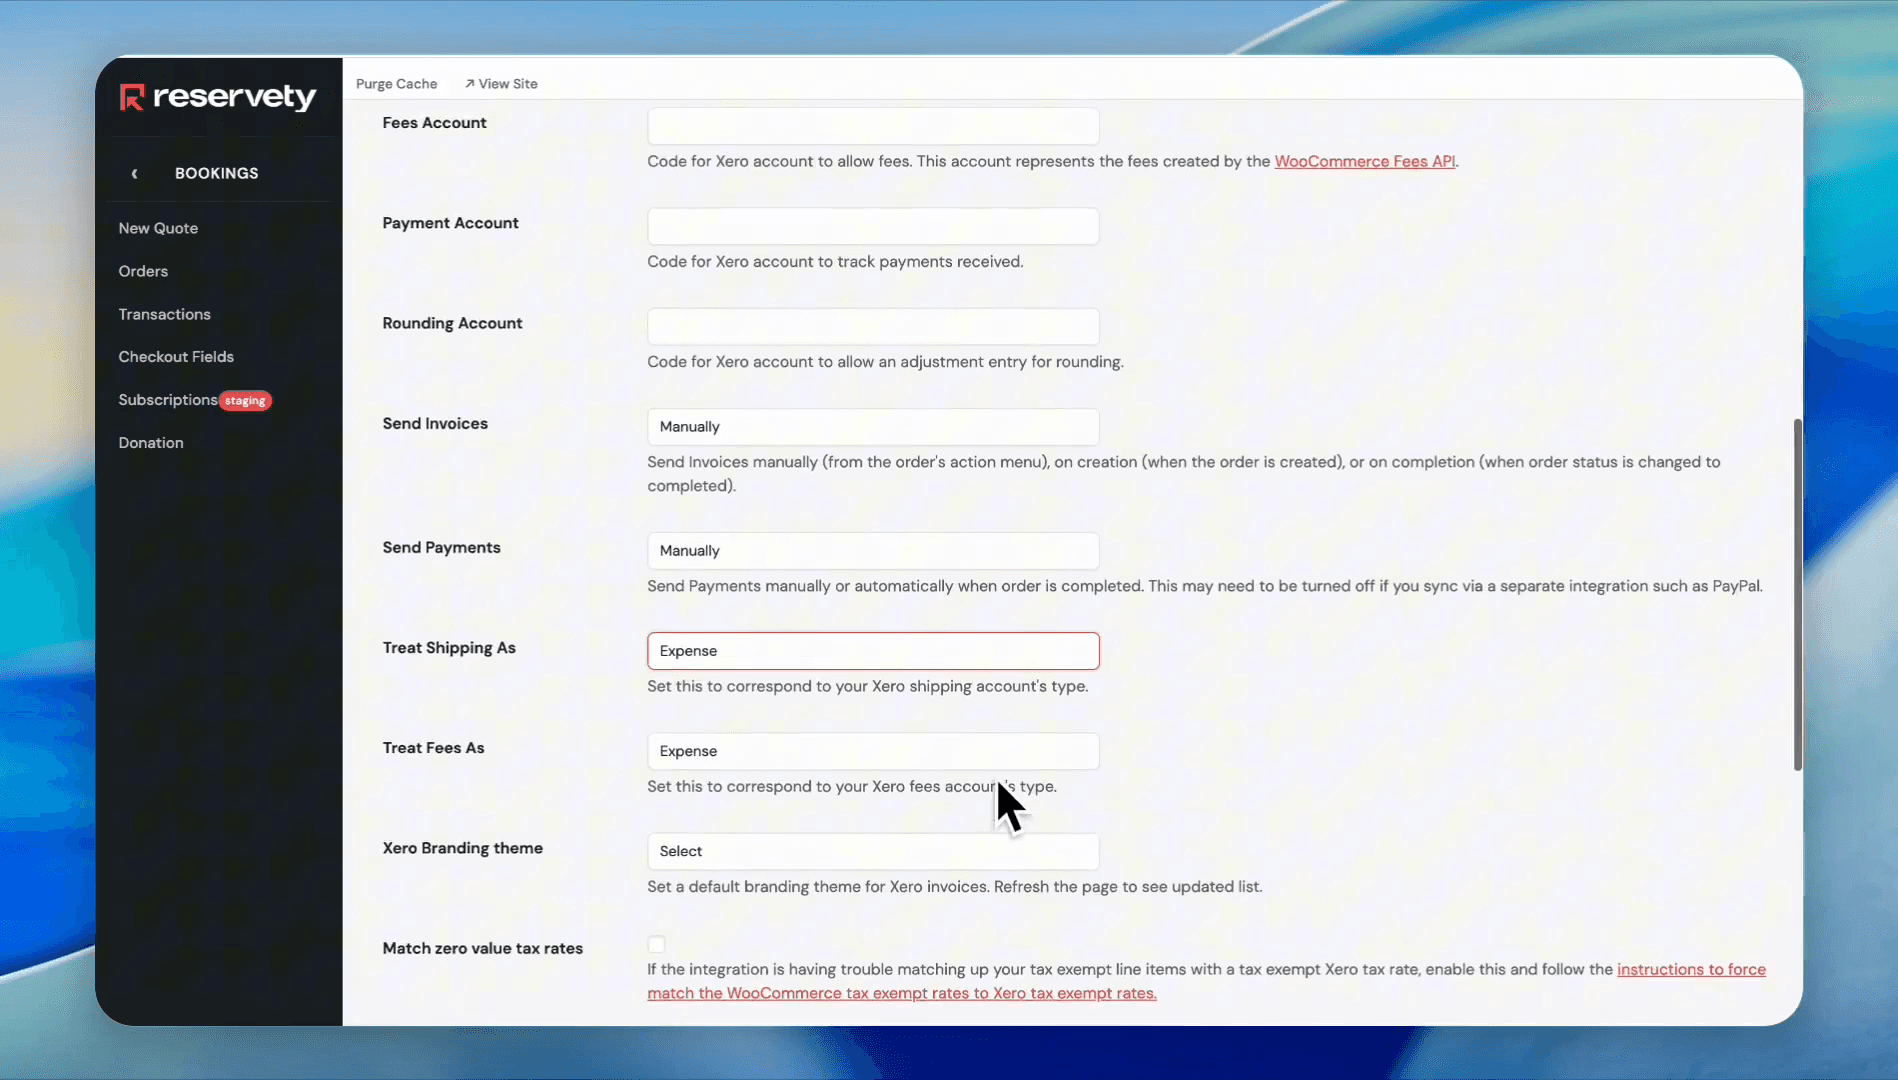
19
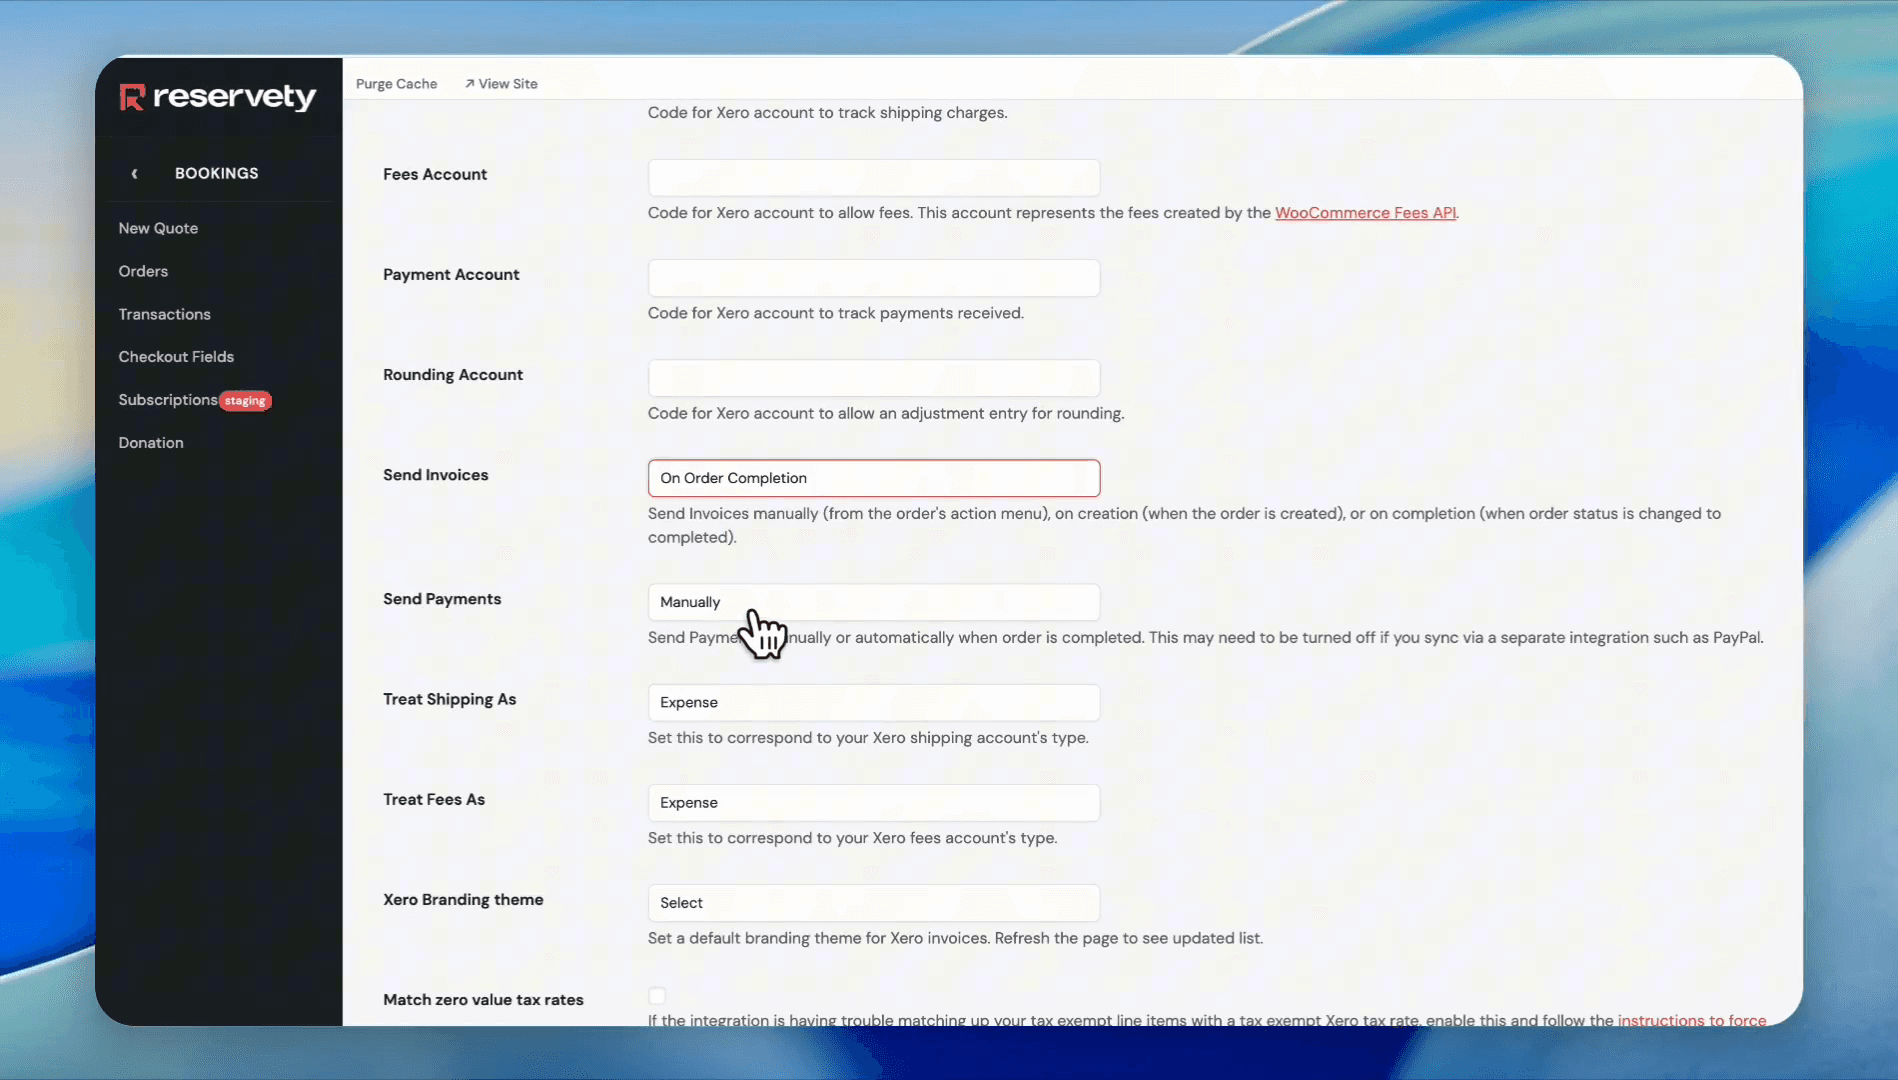
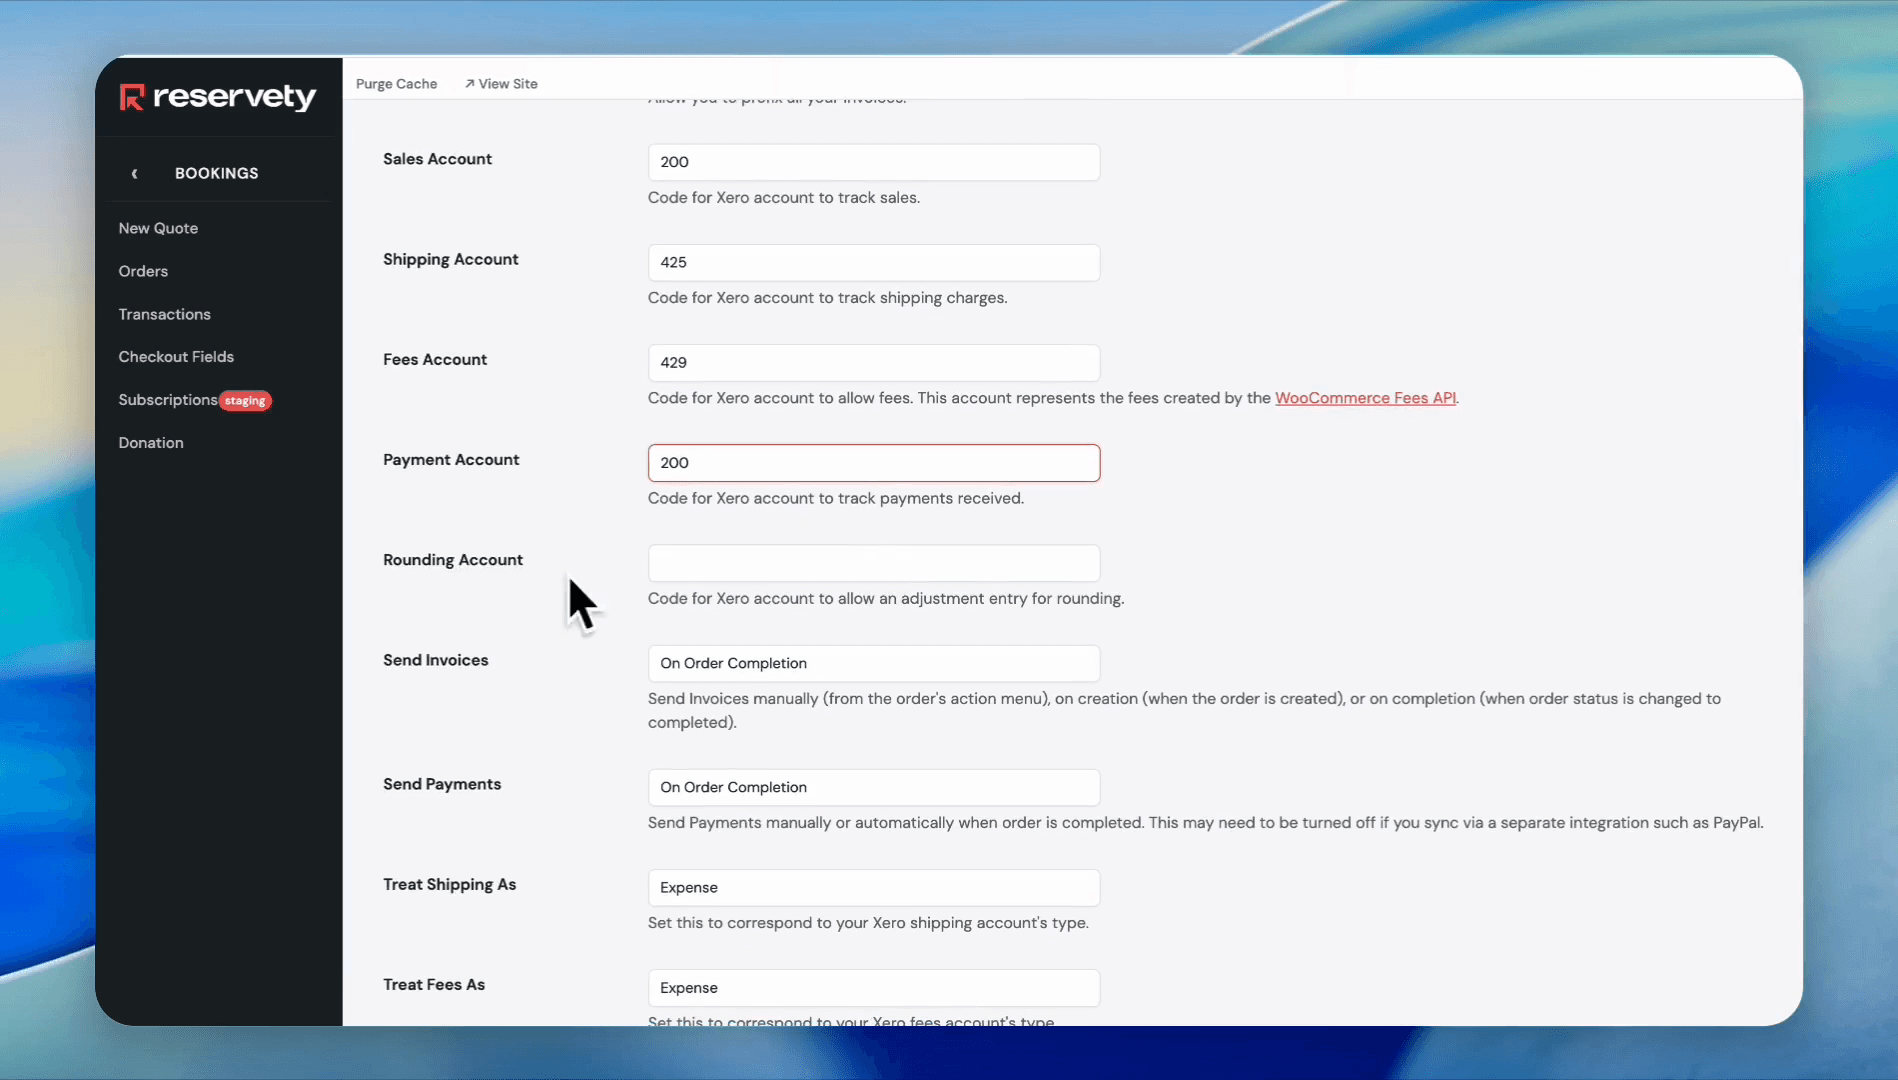
Scroll down and change the Send Invoices setting from "Manually" to "On Order Completion".
Step #19: Scroll down and change the Send Invoices setting from "Manually" to "On Order Completion".
20
Change the Send Payments setting from "Manually" to "On Order Completion".
Step #20: Change the Send Payments setting from "Manually" to "On Order Completion".
21
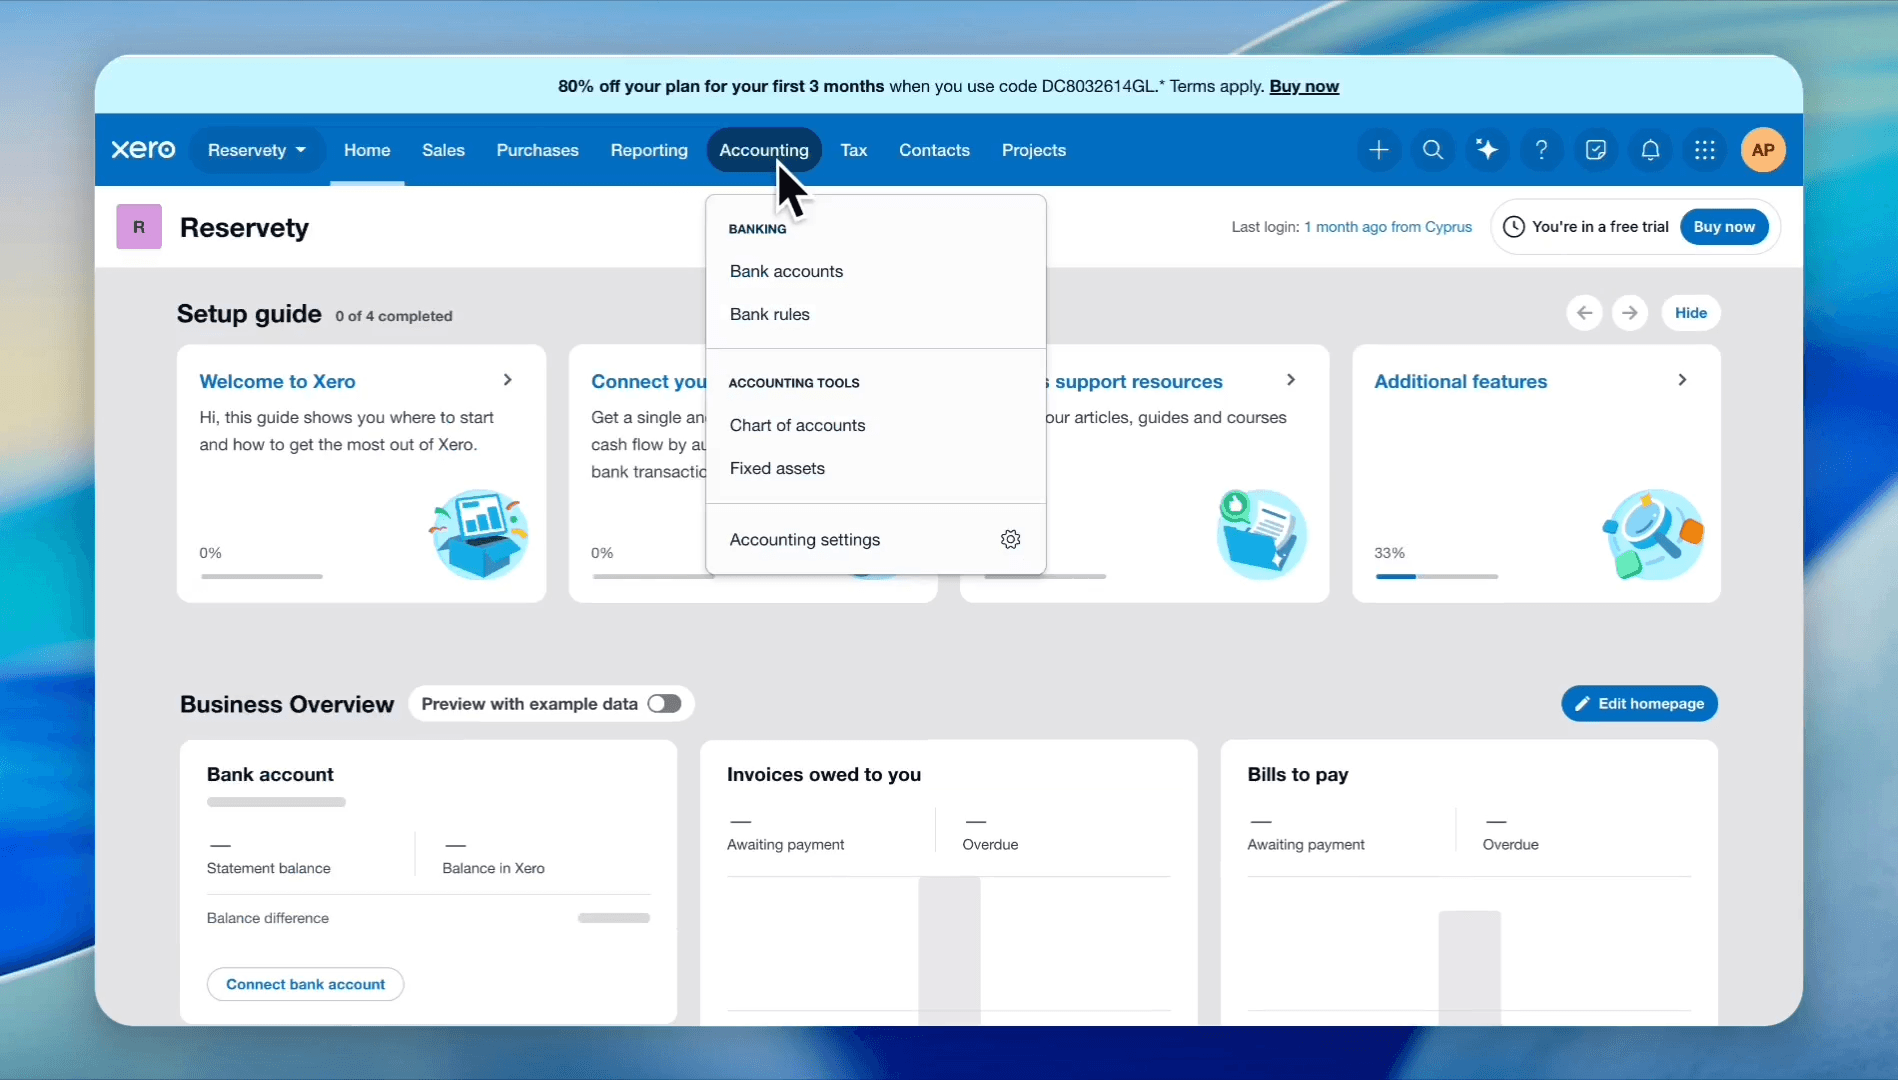
In your main Xero account dashboard, click Accounting.
Step #21: In your main Xero account dashboard, click Accounting.
22
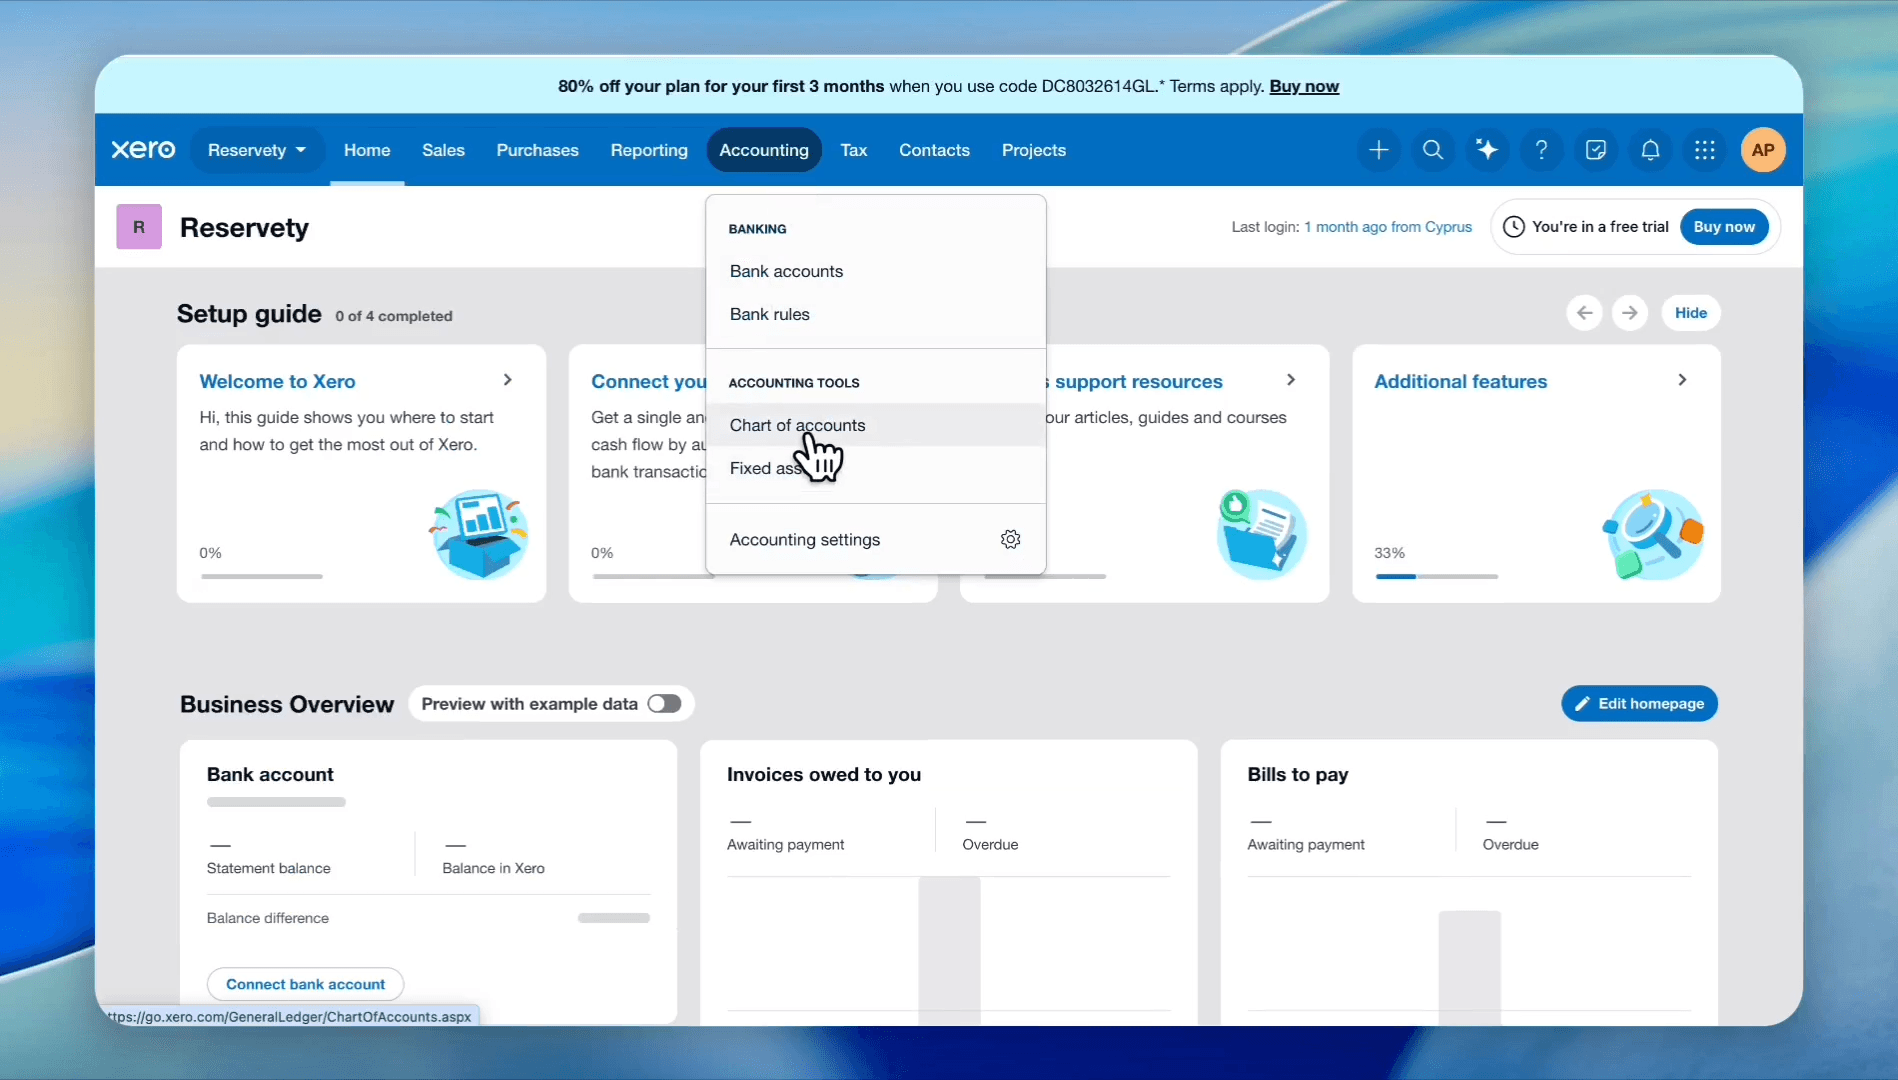
Click Chart of accounts to find the specific codes you will map into your rental dashboard.
Step #22: Click Chart of accounts to find the specific codes you will map into your rental dashboard.

Review your Chart of Accounts and determine which codes correspond to the required fields. Below is an example mapping of common Xero codes:

Account Field

Example Xero Code

Description

Sales Account

200

Primary revenue account for rental income.

Shipping Account

420 or 425

Income accounts designated for shipping or freight.

Fees Account

429

General expenses associated with running the business.

Payment Account

200

The account where initial payments are captured.

23
Click Save to apply your account code configurations.
Step #23: Click Save to apply your account code configurations.

Authenticate the Integration

24
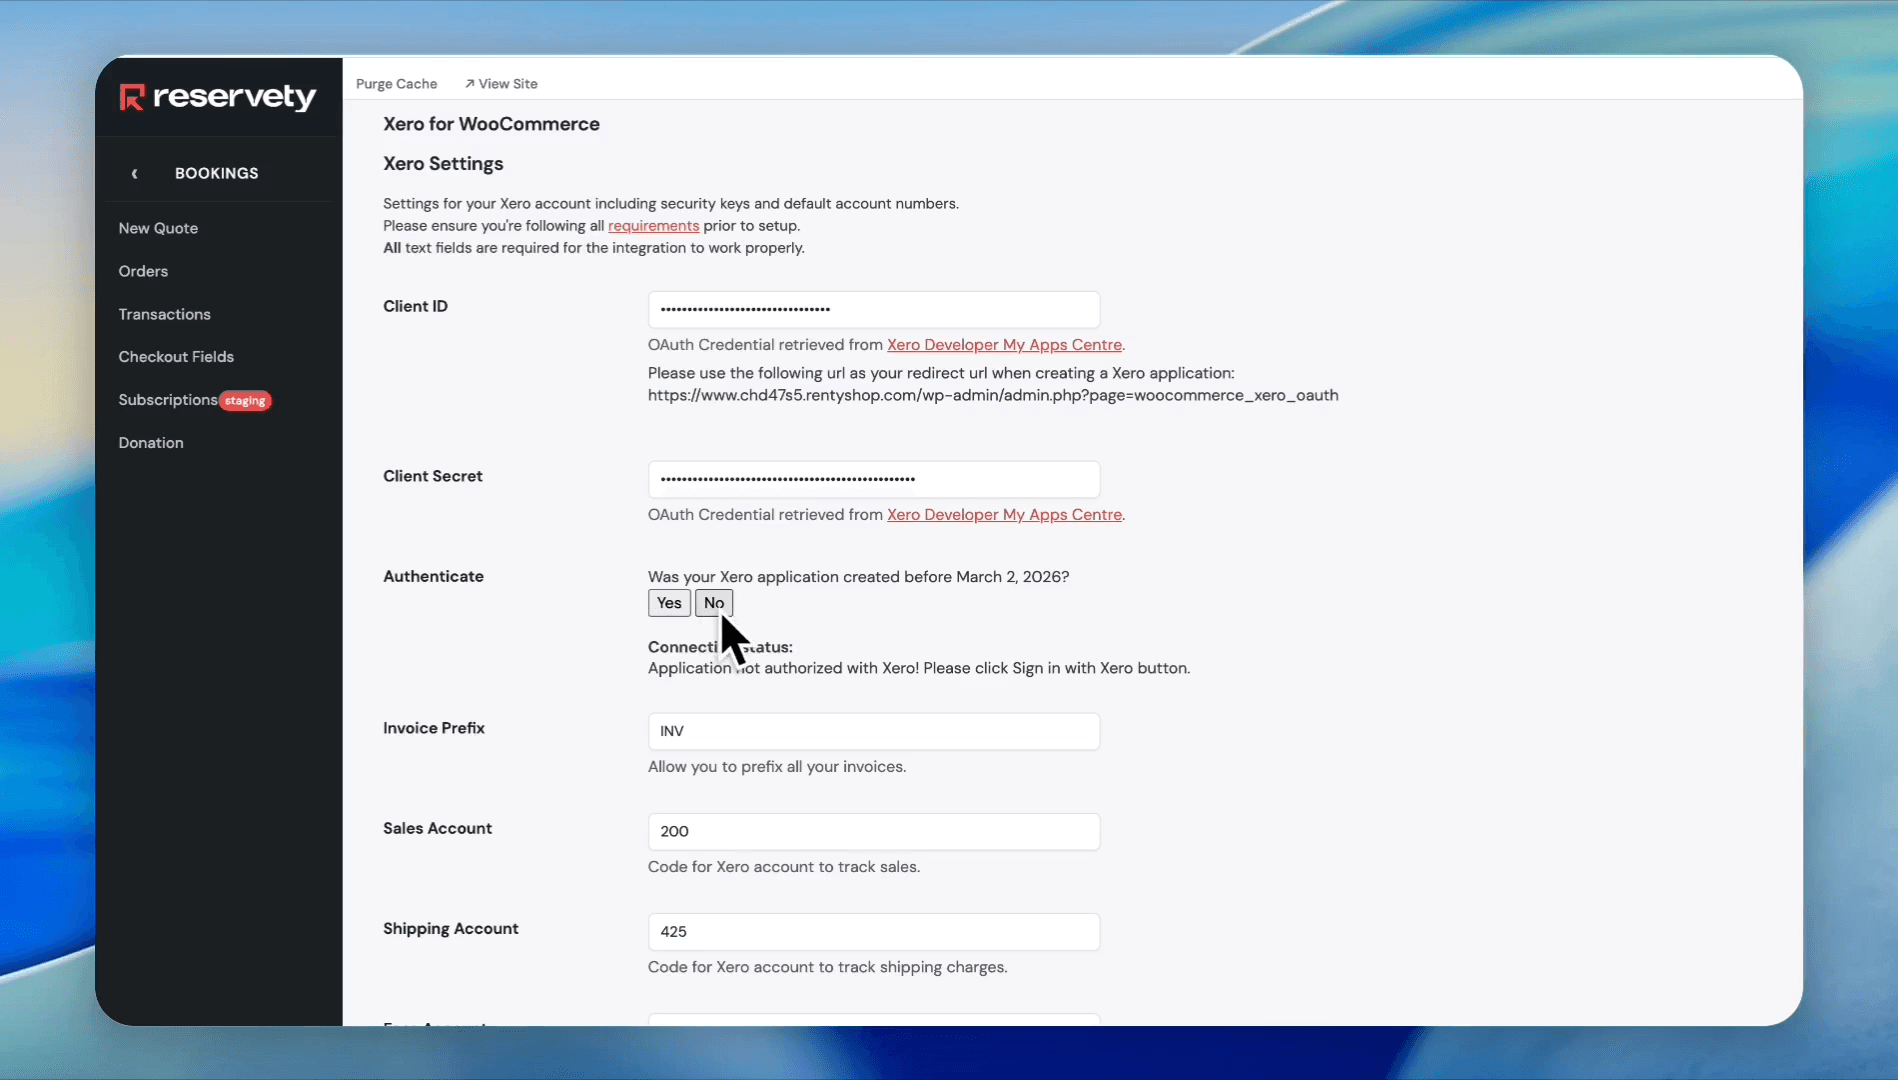
Under the Authenticate section, select No for the question regarding app creation date (if your app was created after March 2, 2026).
Step #24: Under the Authenticate section, select No for the question regarding app creation date (if your app was created after March 2, 2026).
25
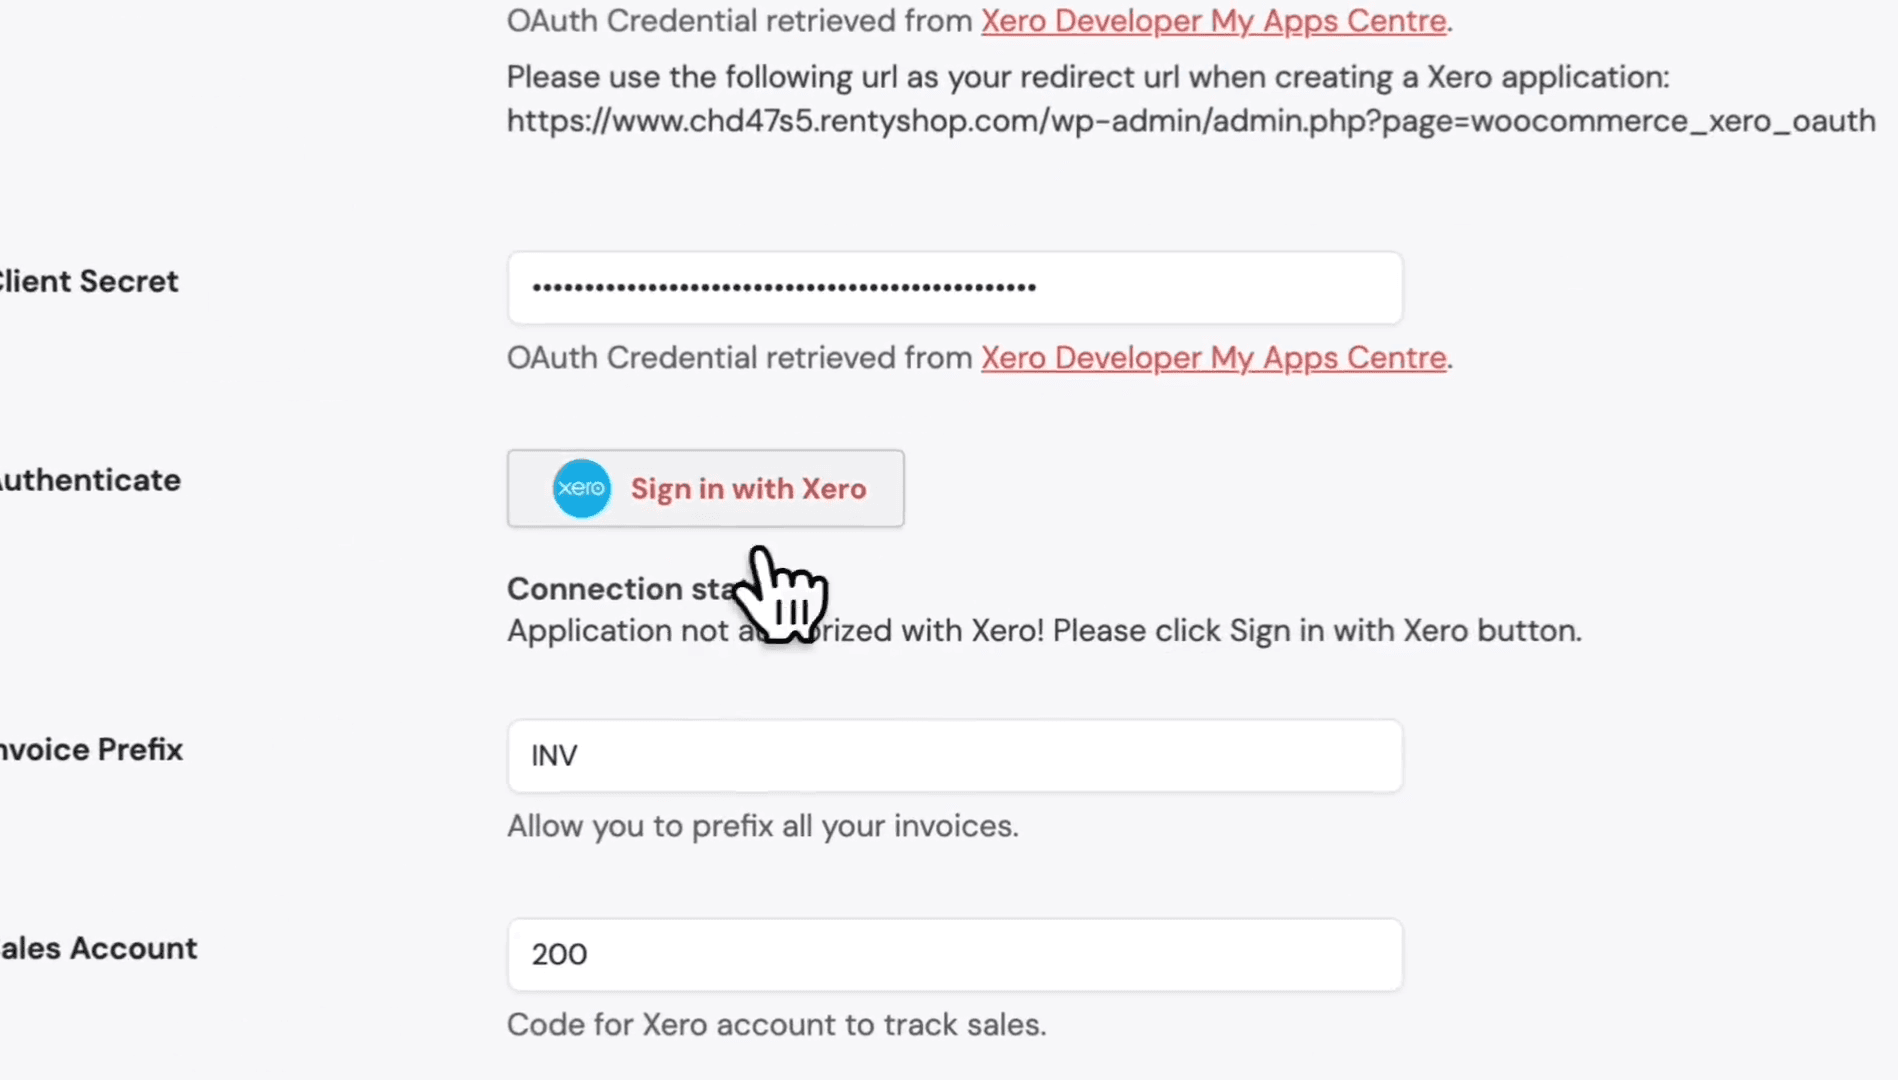
Click Sign in with Xero to initiate the connection.
Step #25: Click Sign in with Xero to initiate the connection.
26
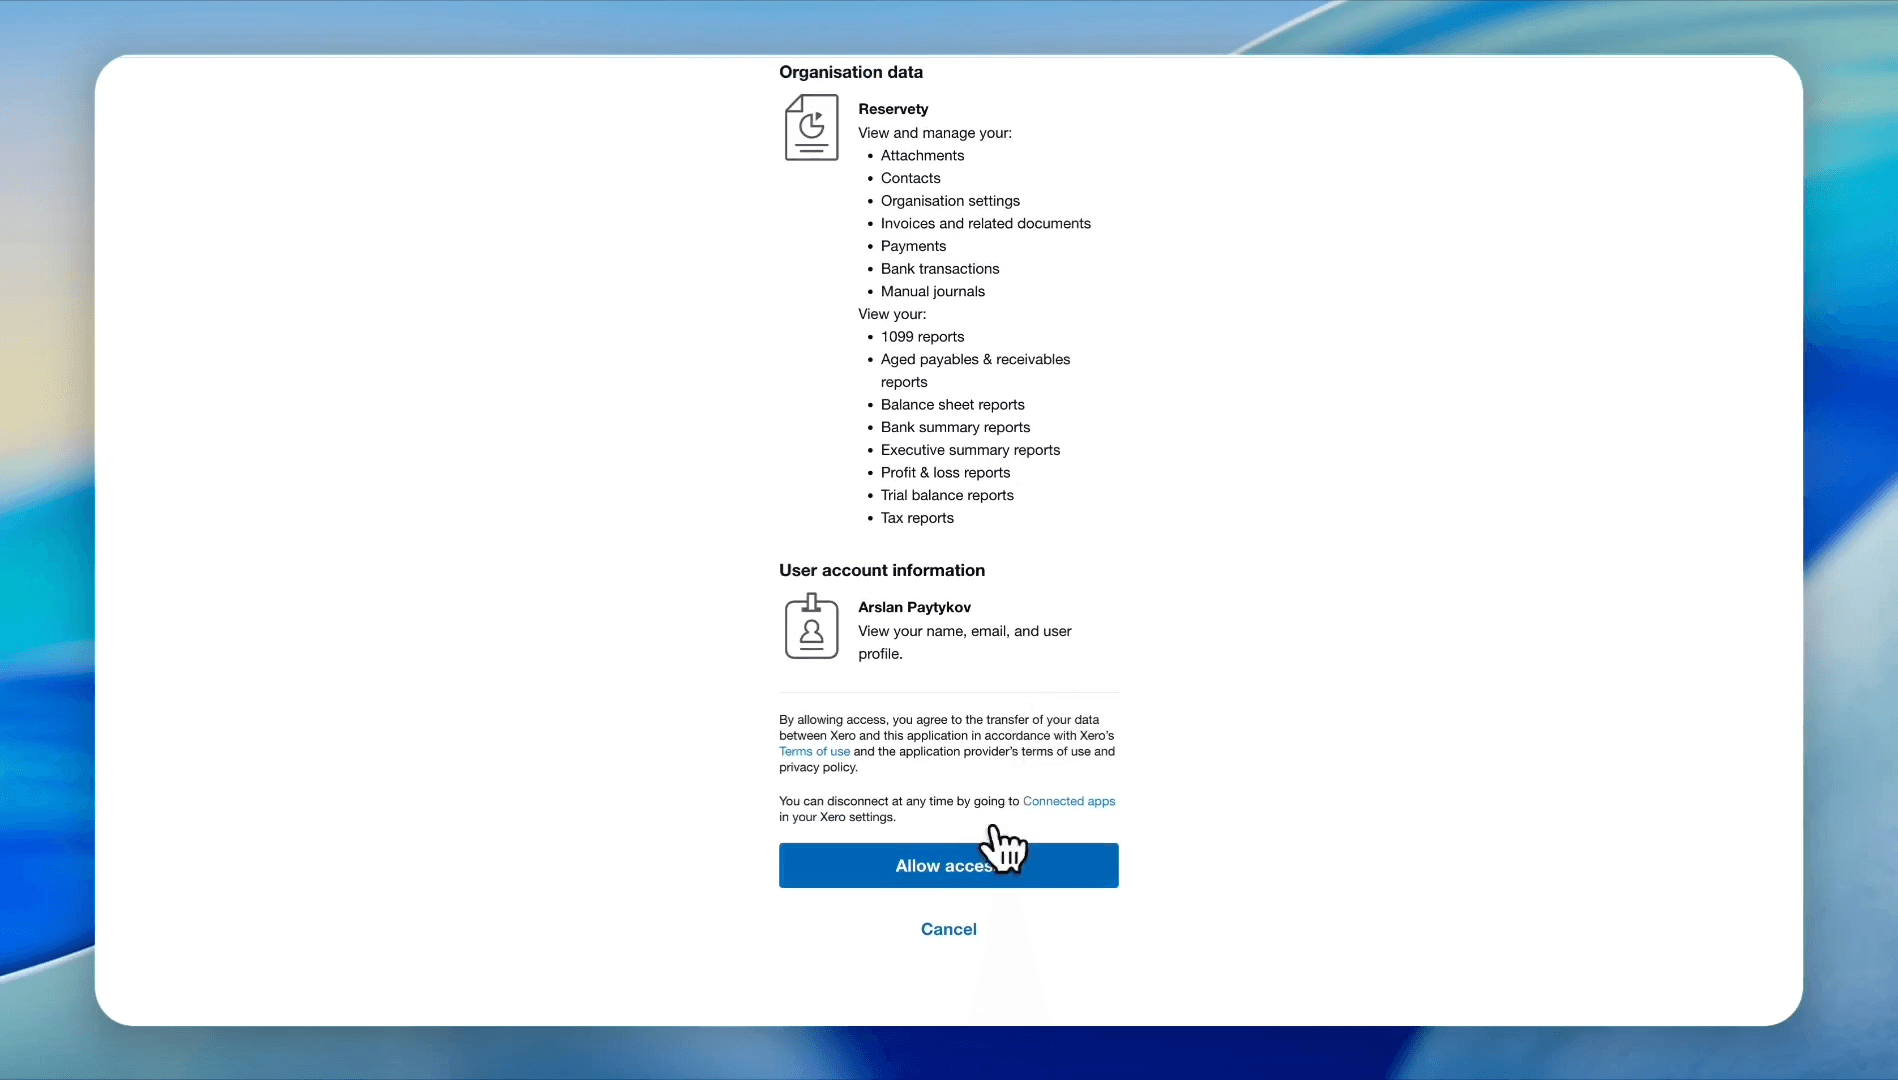
Scroll down and click Allow access to authorize the integration.
Step #26: Scroll down and click Allow access to authorize the integration.

Q: Are the Privacy Policy and Terms and Conditions URLs required when setting up the Xero app?

A: No, those fields are optional and can be skipped during the initial application creation process.

Q: How do I know which account codes to enter in the rental dashboard?

A: The specific account codes for Sales, Shipping, Fees, and Payments vary based on your business model. You should find them in your Xero Chart of Accounts and consult your accountant before entering them.

Q: How do I handle the authentication question regarding the app creation date?

A: If your Xero application was created after March 2, 2026, simply select "No" to proceed with standard authentication.

Term

Definition

OAuth 2.0 redirect URI

An endpoint URL where Xero sends the user after they successfully authorize an application.

Client ID

A unique public identifier assigned to your application when it is registered with Xero.

Client Secret

A private security code known only to your application and Xero, used to authenticate the identity of the connection.

Chart of Accounts

A complete listing of every account in an accounting system, categorized by assets, liabilities, equity, revenue, and expenses.