How to Issue a Bench Warrant and Process Bonds in Court Hearings
Learn step-by-step how to issue a bench warrant directly from a court hearing, update bond amounts, generate warrant forms, and process surety bonds and bond estreicher letters efficiently.
In this guide, we'll learn how to issue a bench warrant directly from a court hearing and manage related bond procedures. This includes selecting the correct hearing event, issuing the warrant, updating bond amounts, and generating the necessary forms for surety bonds and bond forfeiture. The steps will help ensure that all required documents are completed and submitted for judicial review and recordkeeping.
Let's get started
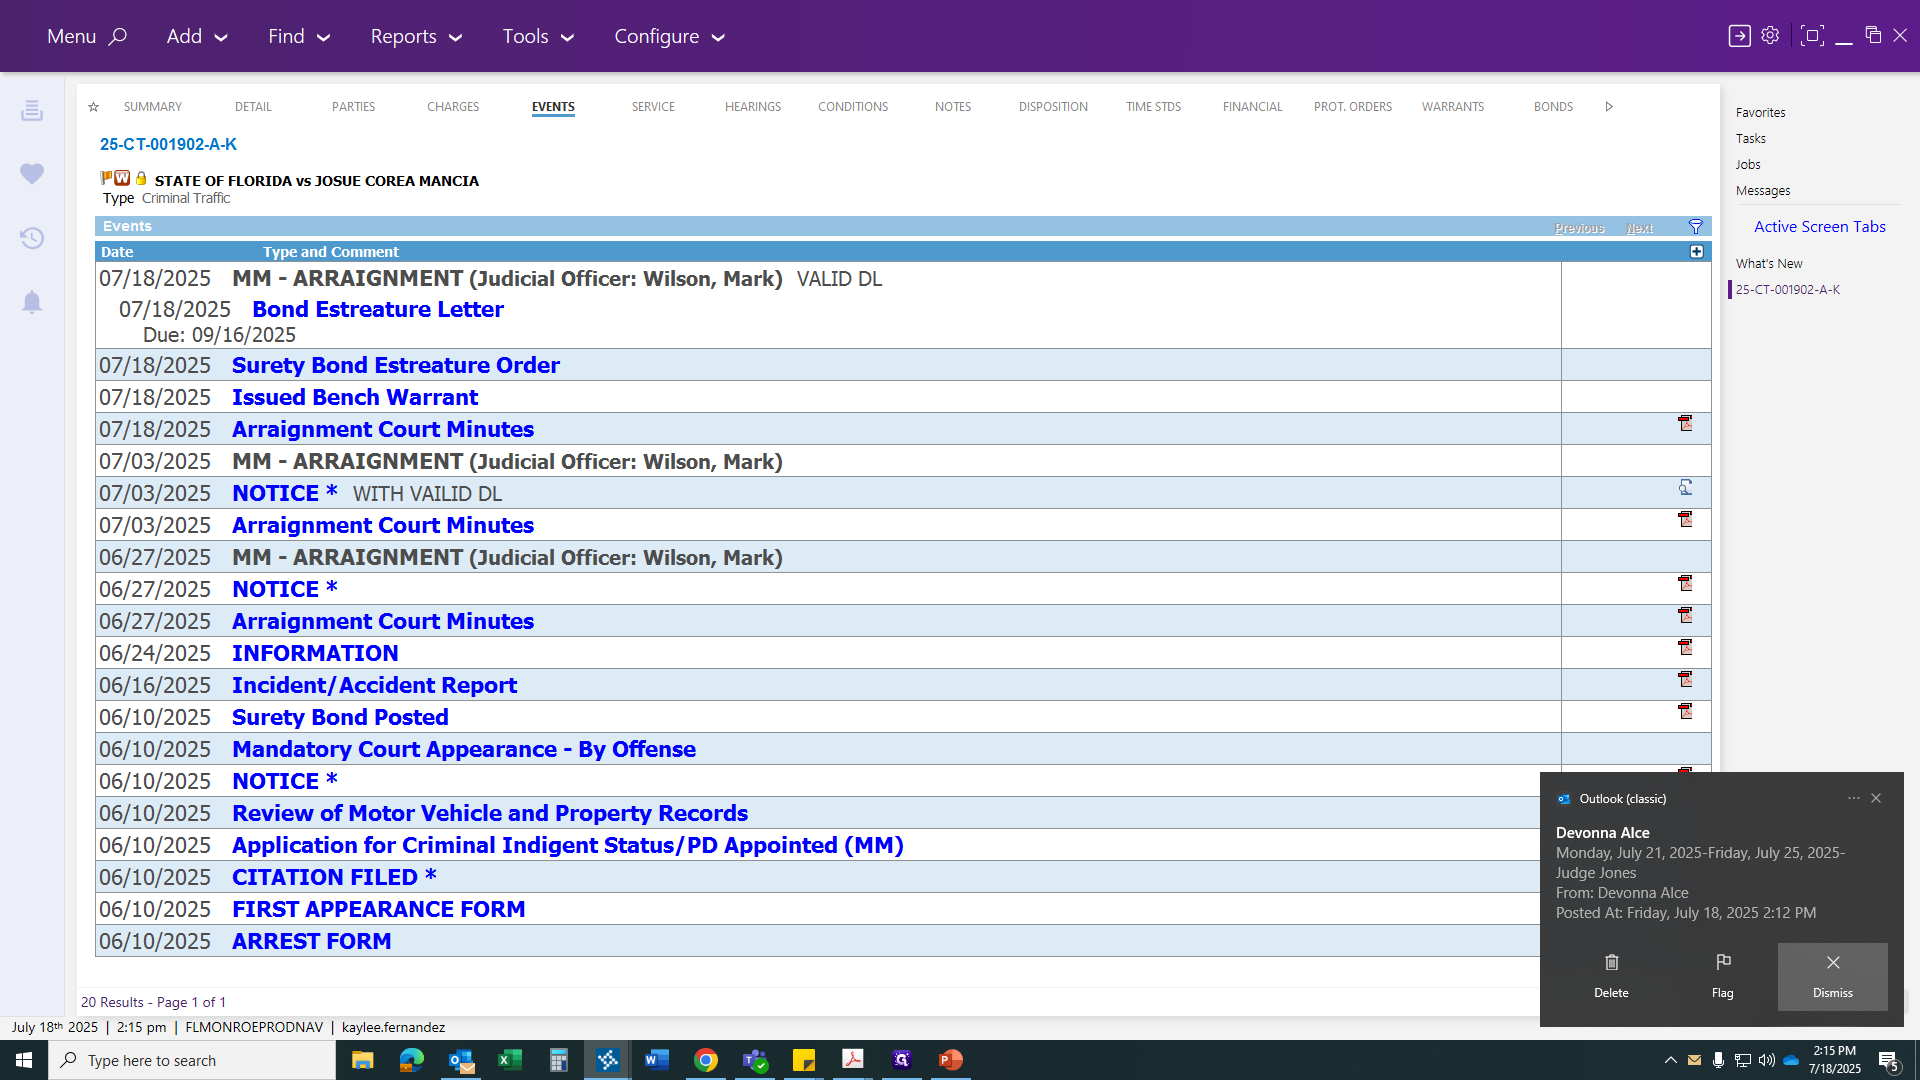
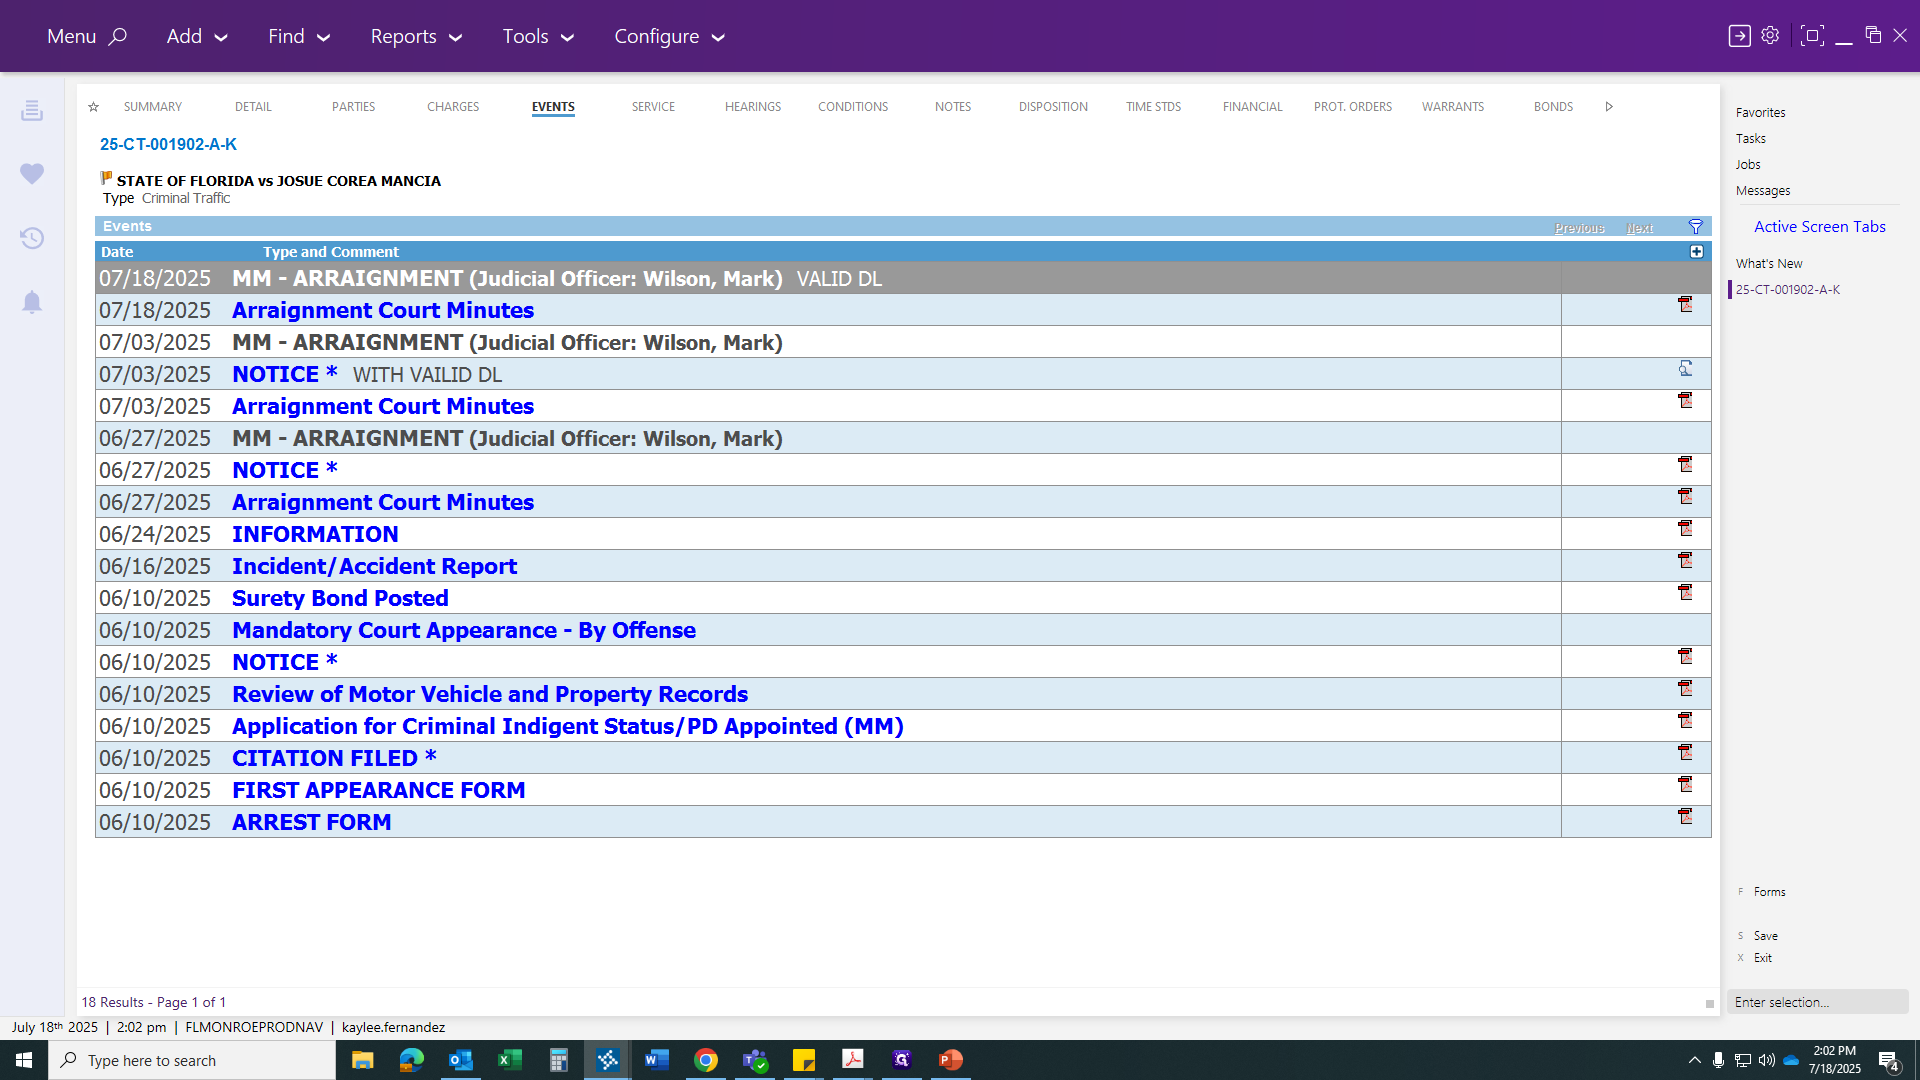
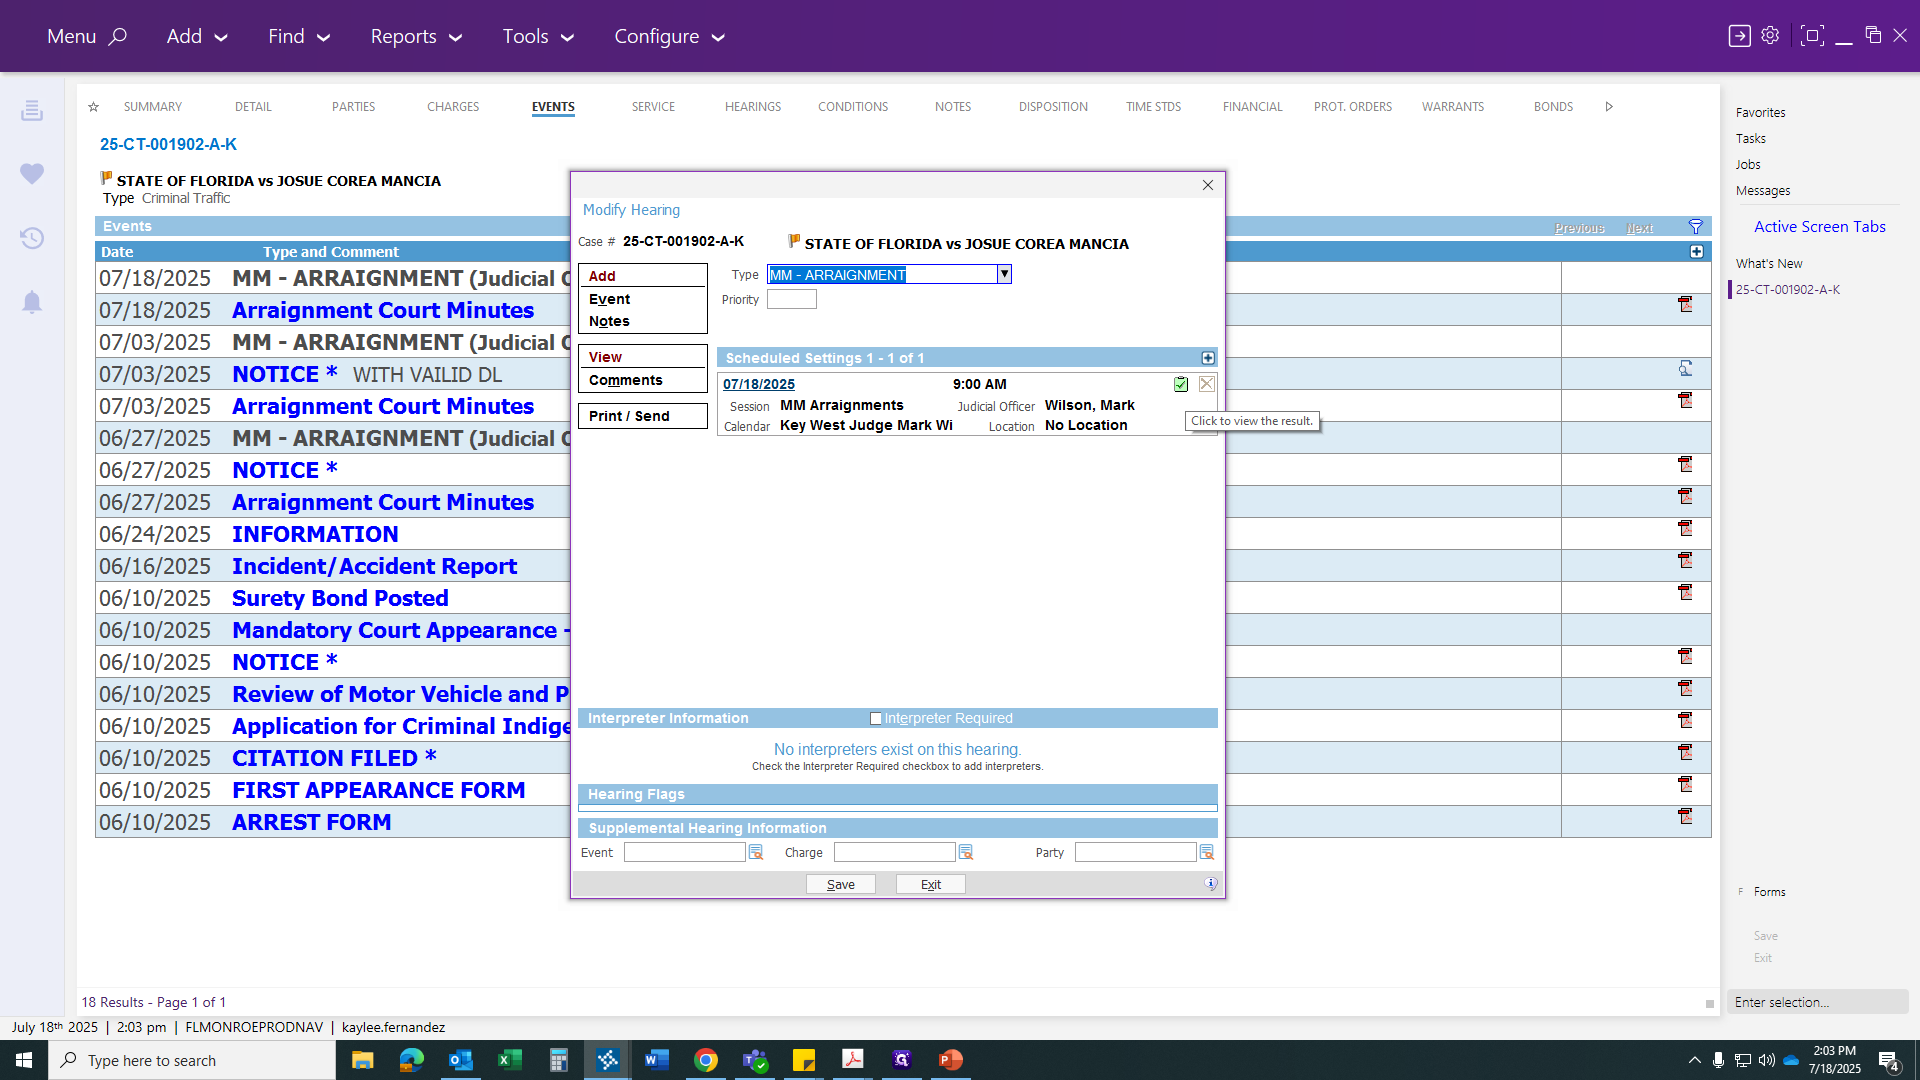
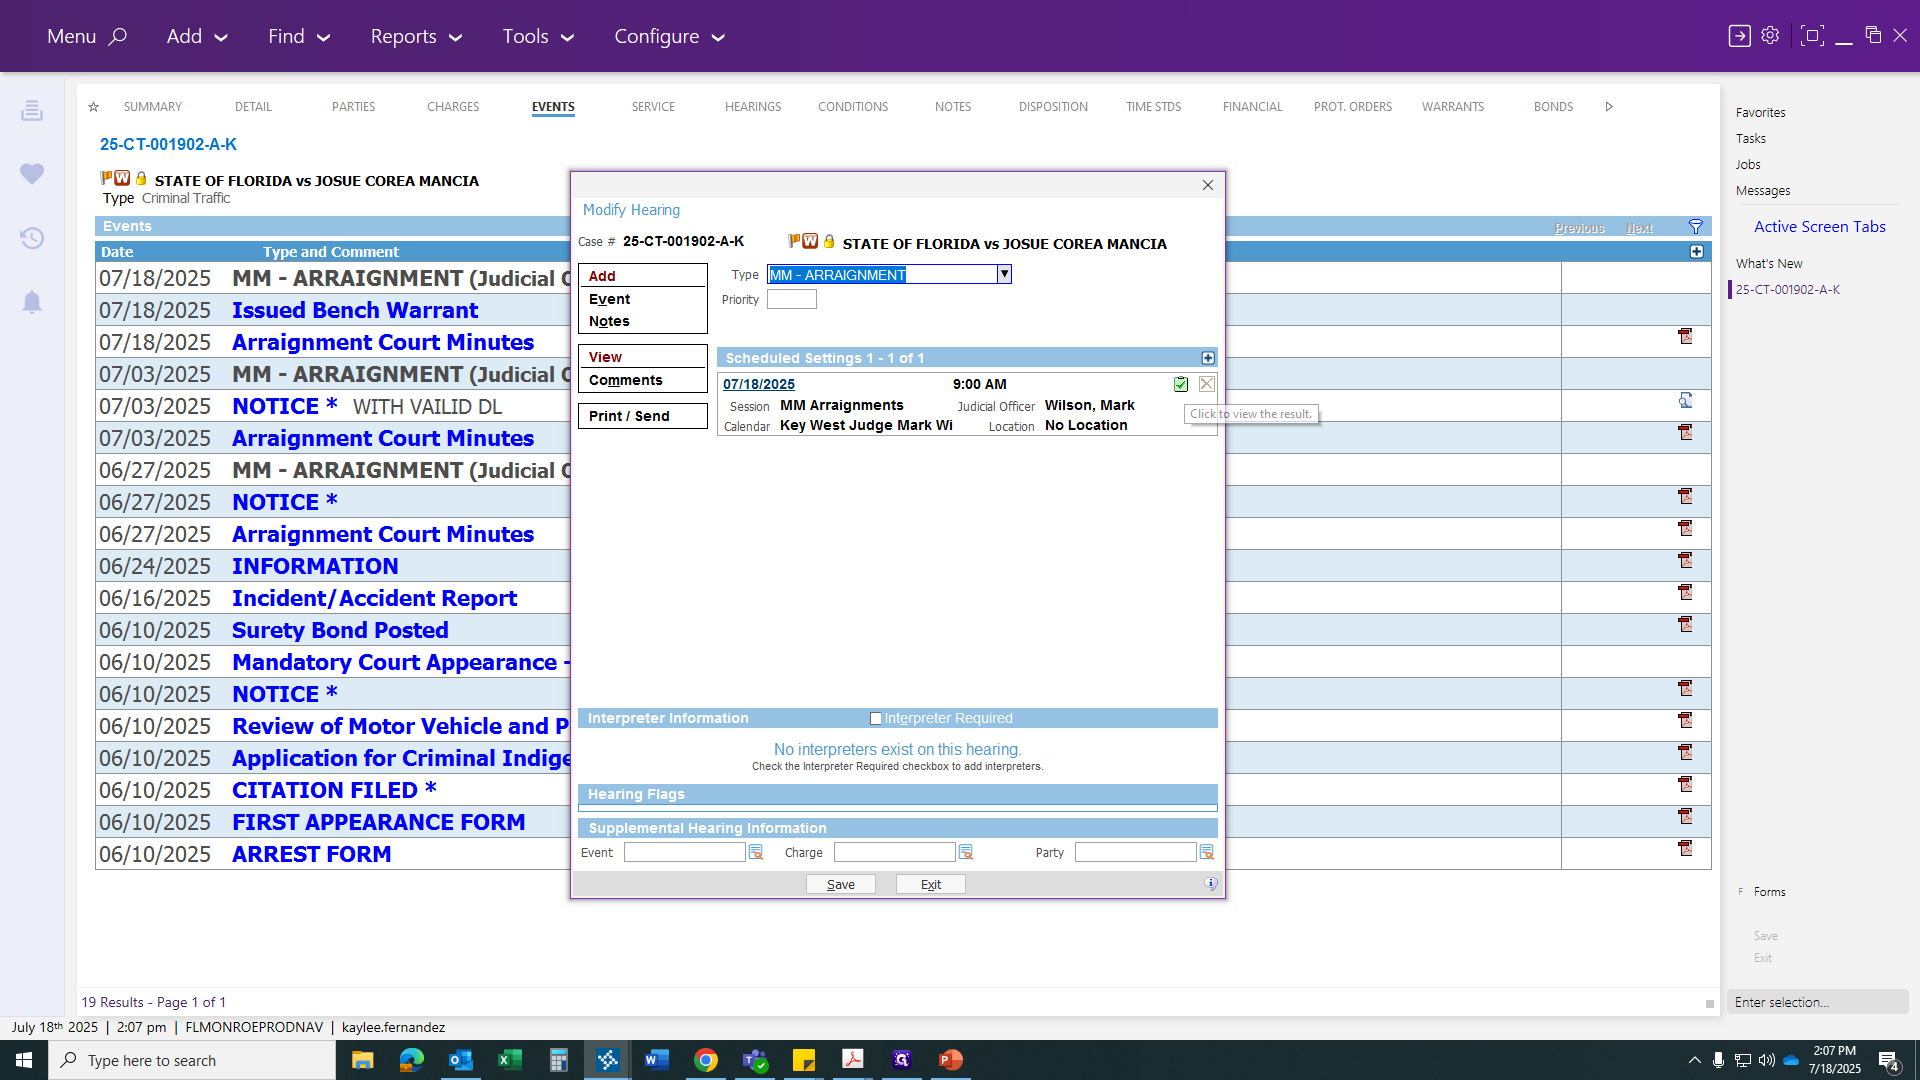
Hello, everyone. In this video, we will learn how to issue a bench warrant directly from a court hearing. Let's get started. Make sure you are on the Events section, then click on the Hearing. Click on the Hearing to open the Modification Hearing type. Then, go to Scheduled Hearing and select the check mark.
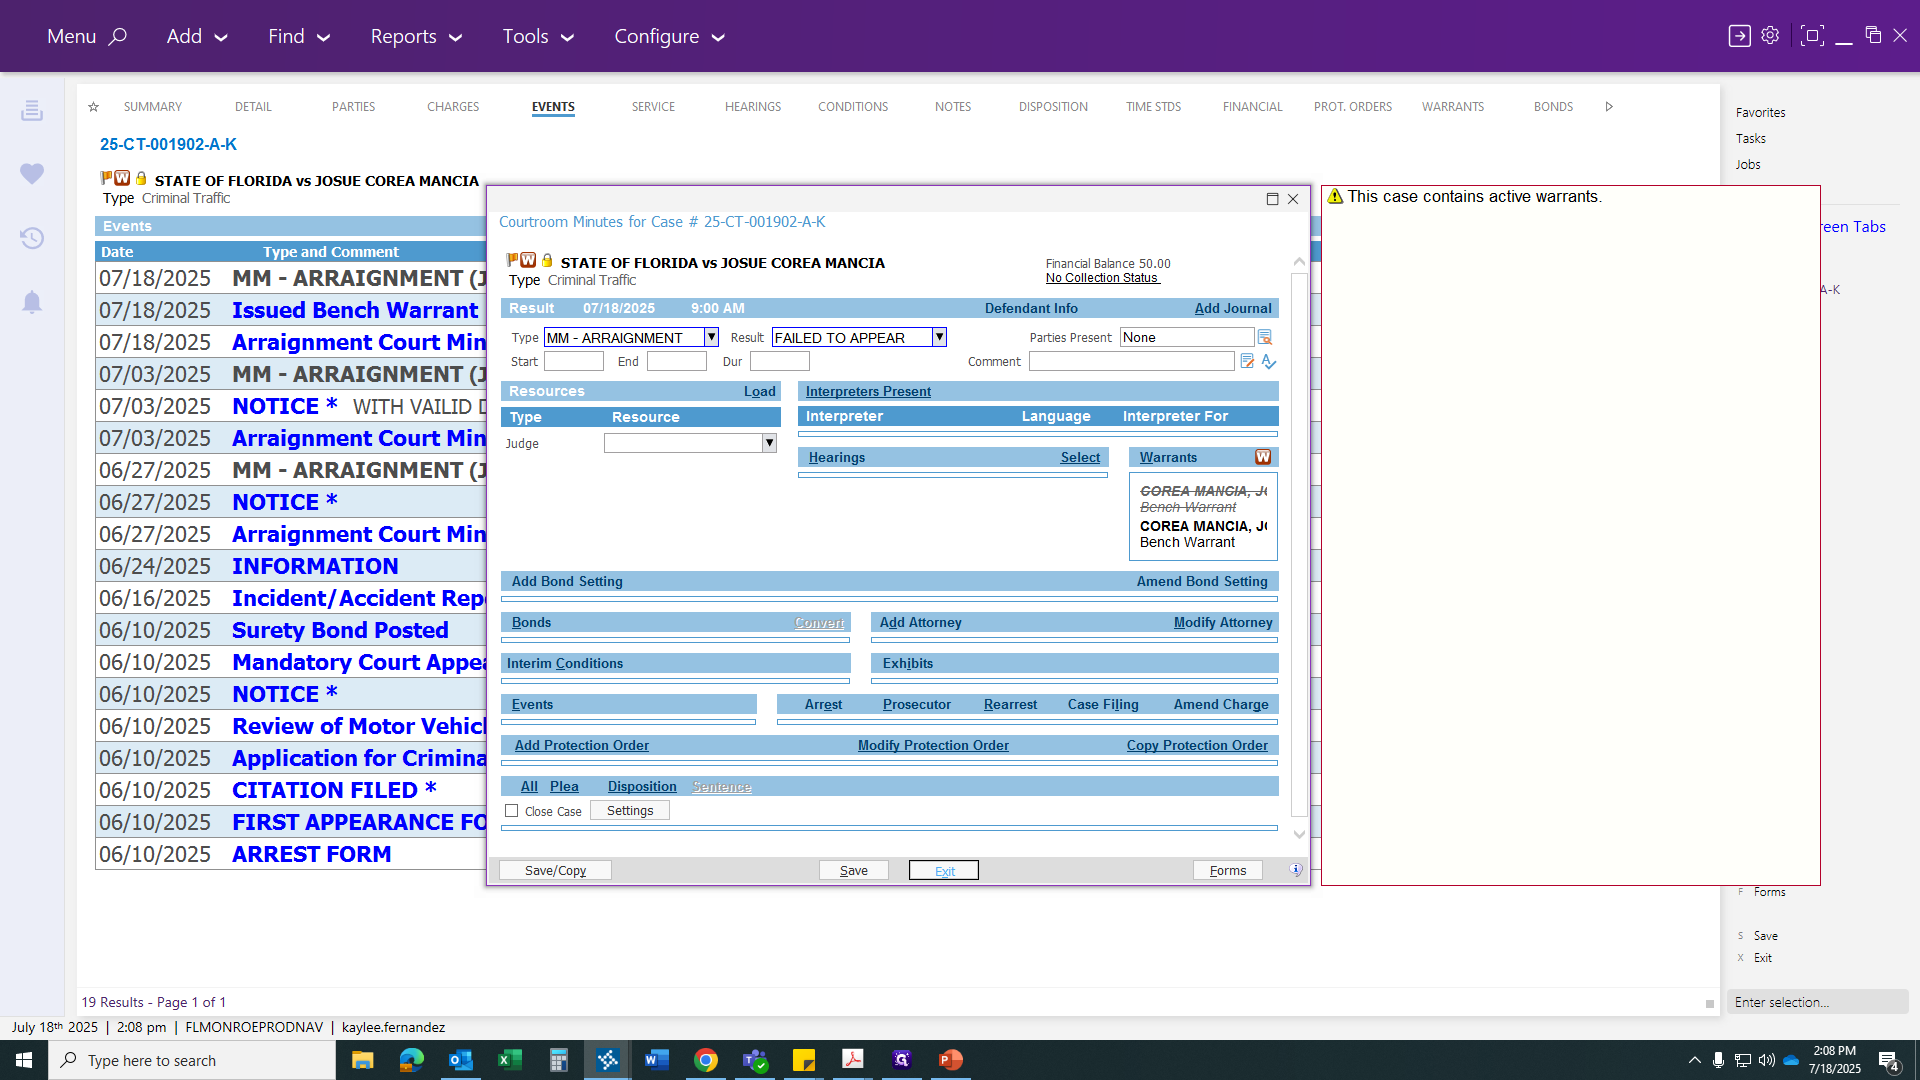
After clicking the check mark, you will see the result. Select "Failure to Appear."
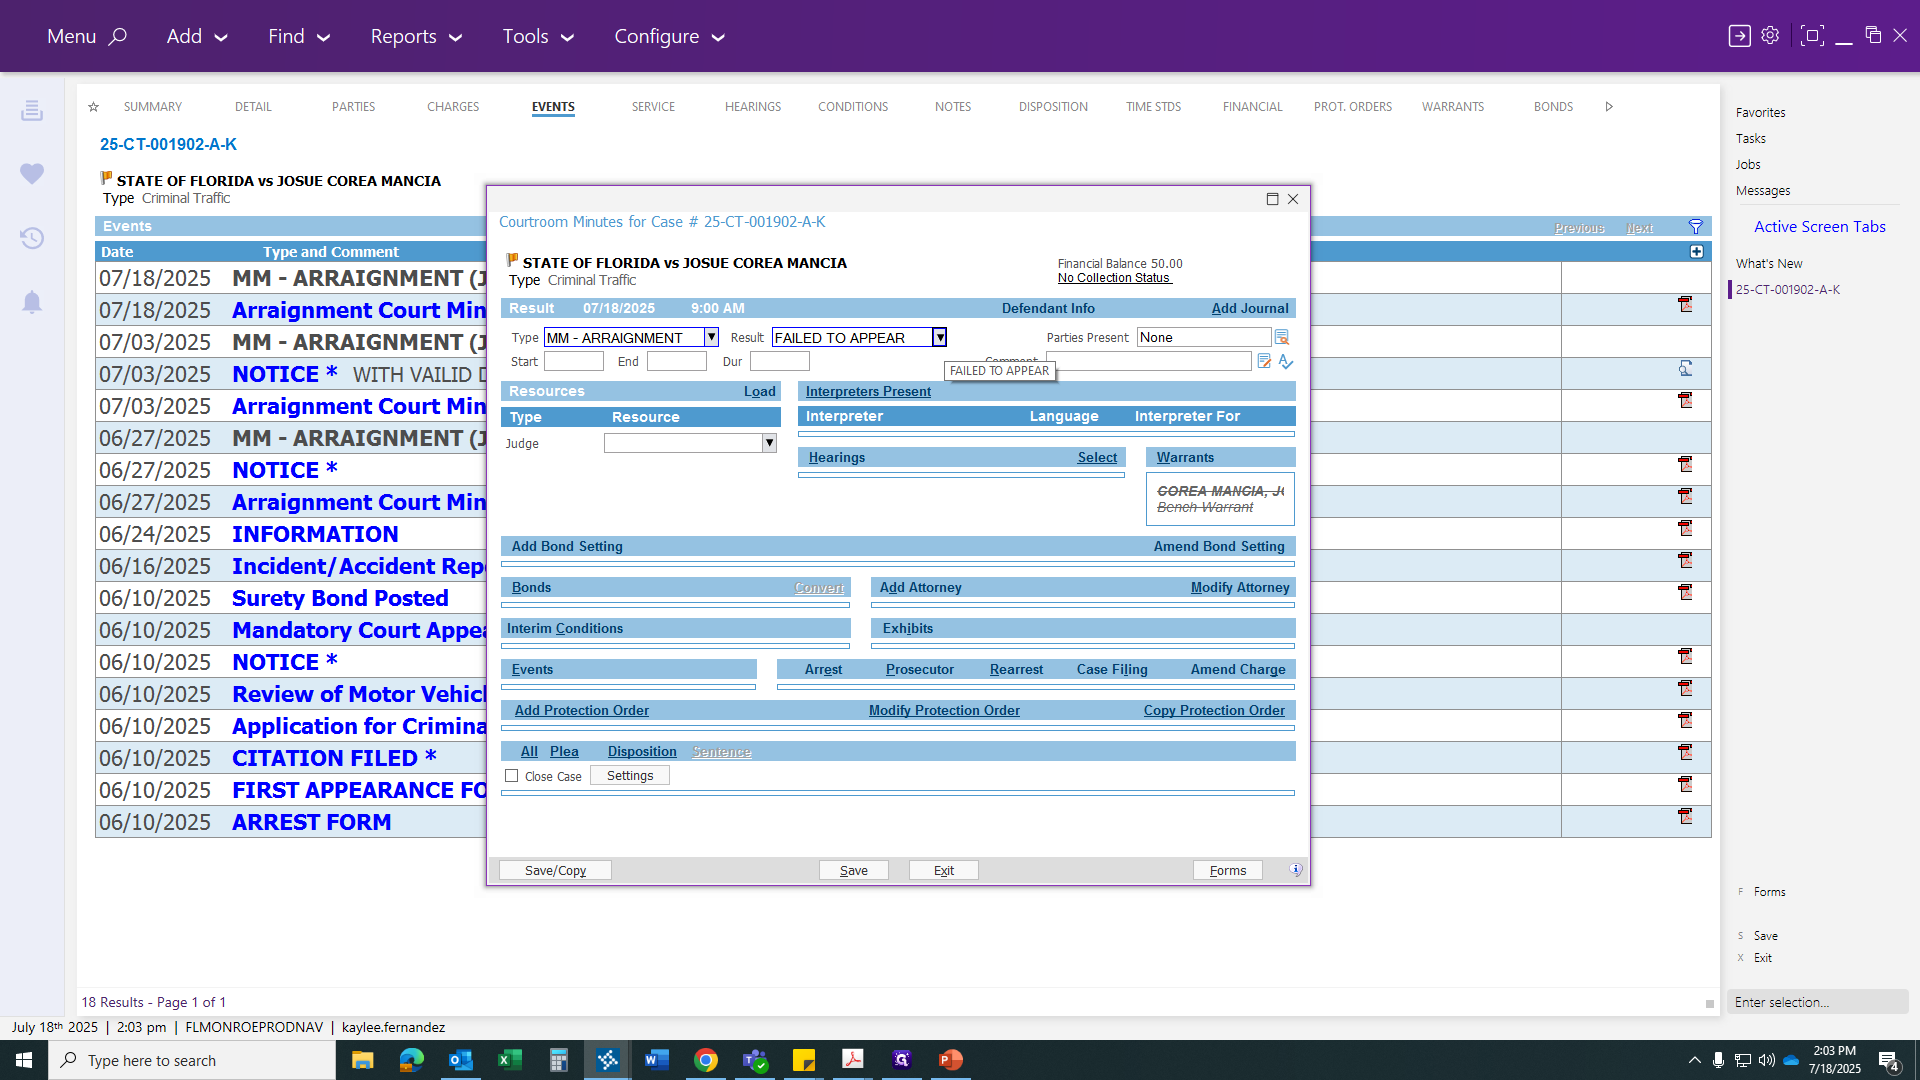
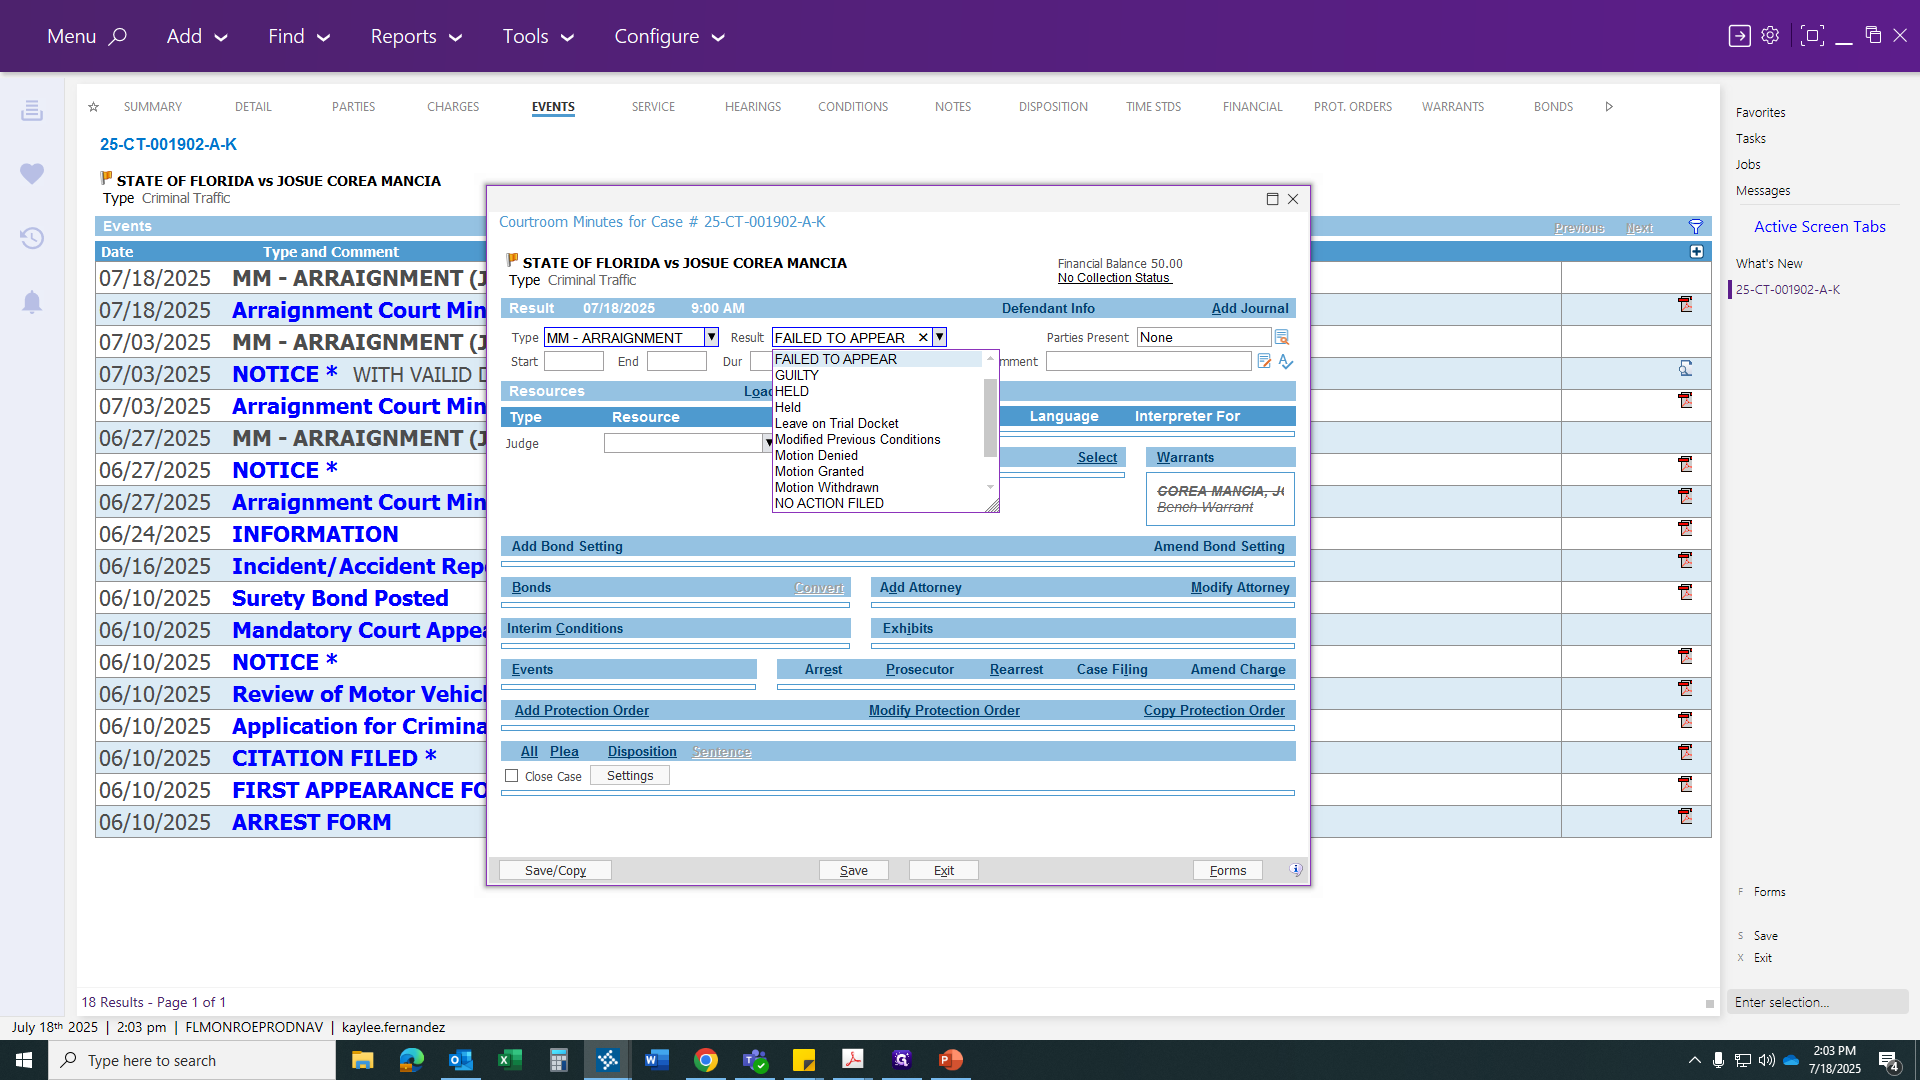
I already did that beforehand. Then issue the warrant. You will not have this here. I issued it before this video to get everything set up. We'll assume that is blank, and click on Warrants to issue our warrant.

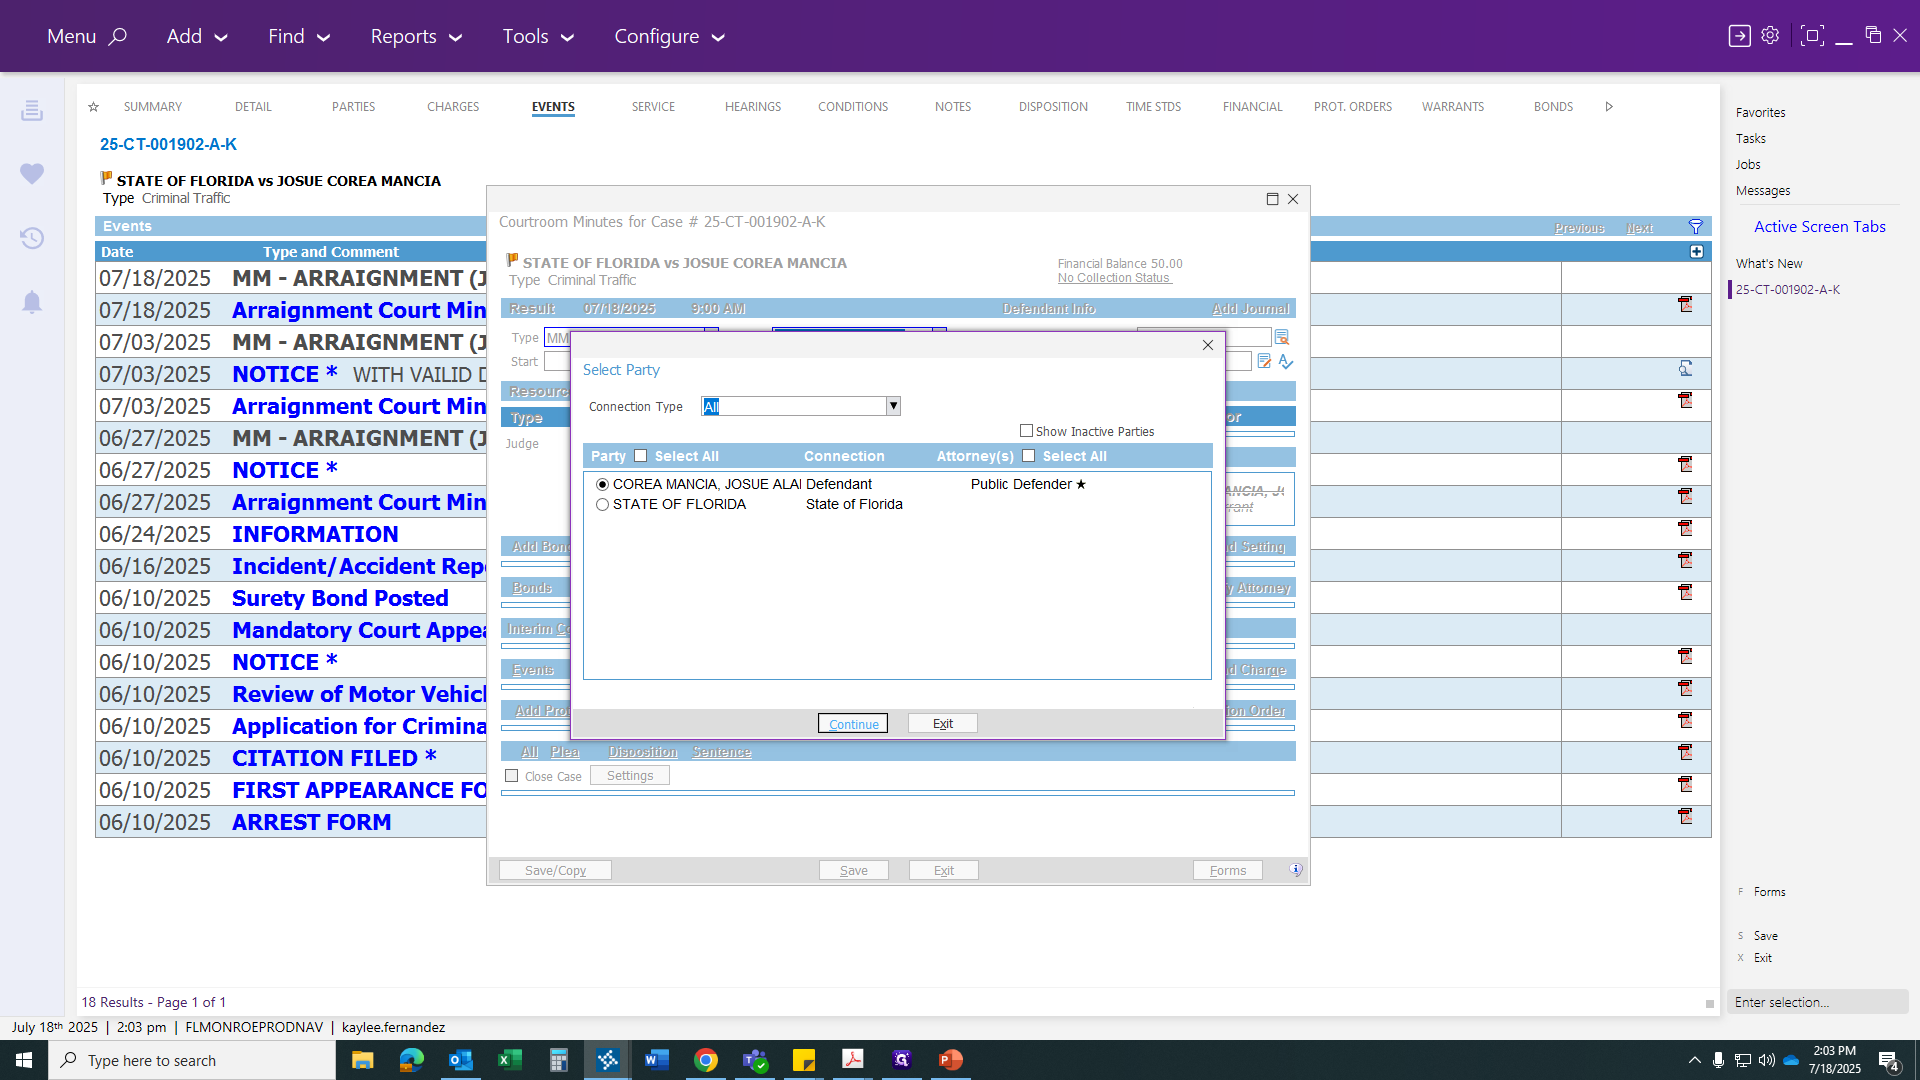
Once you have selected the party, click on the Defendant. It should appear automatically for you. Then, click Continue.
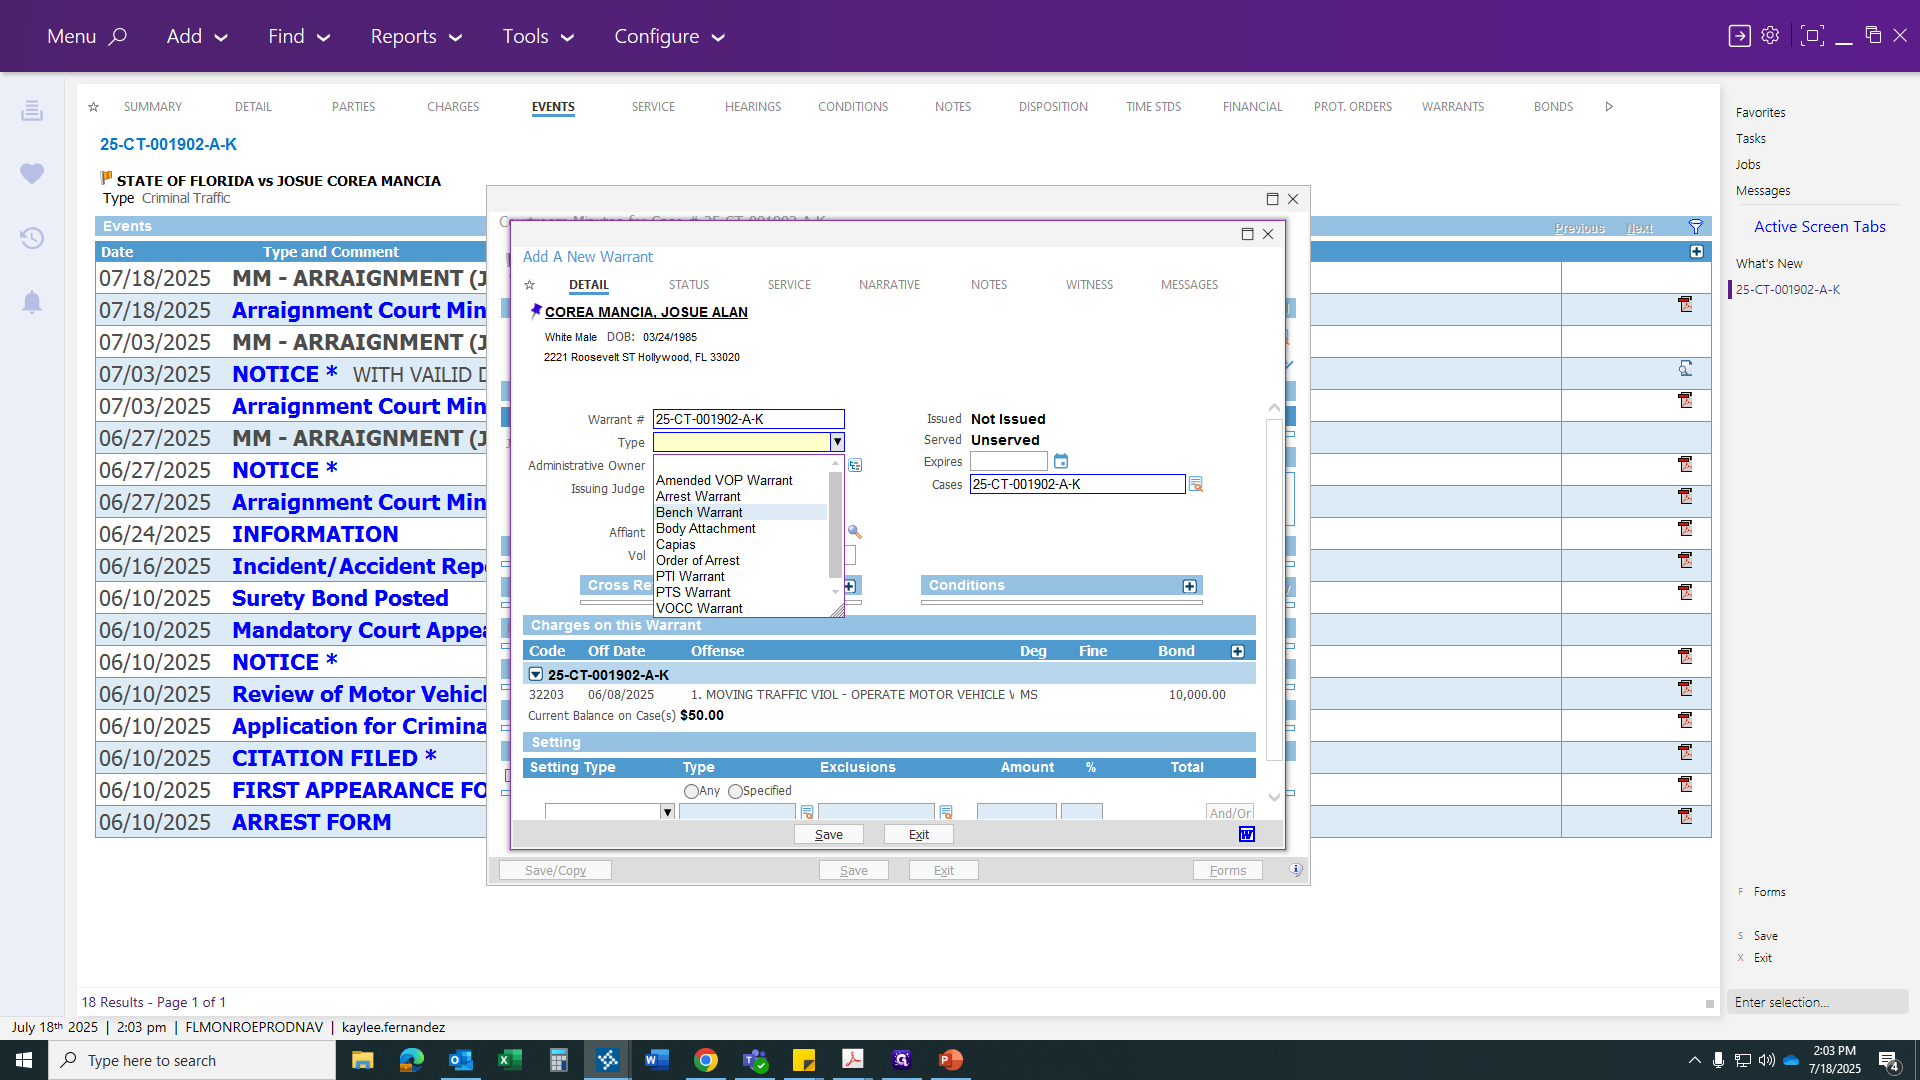
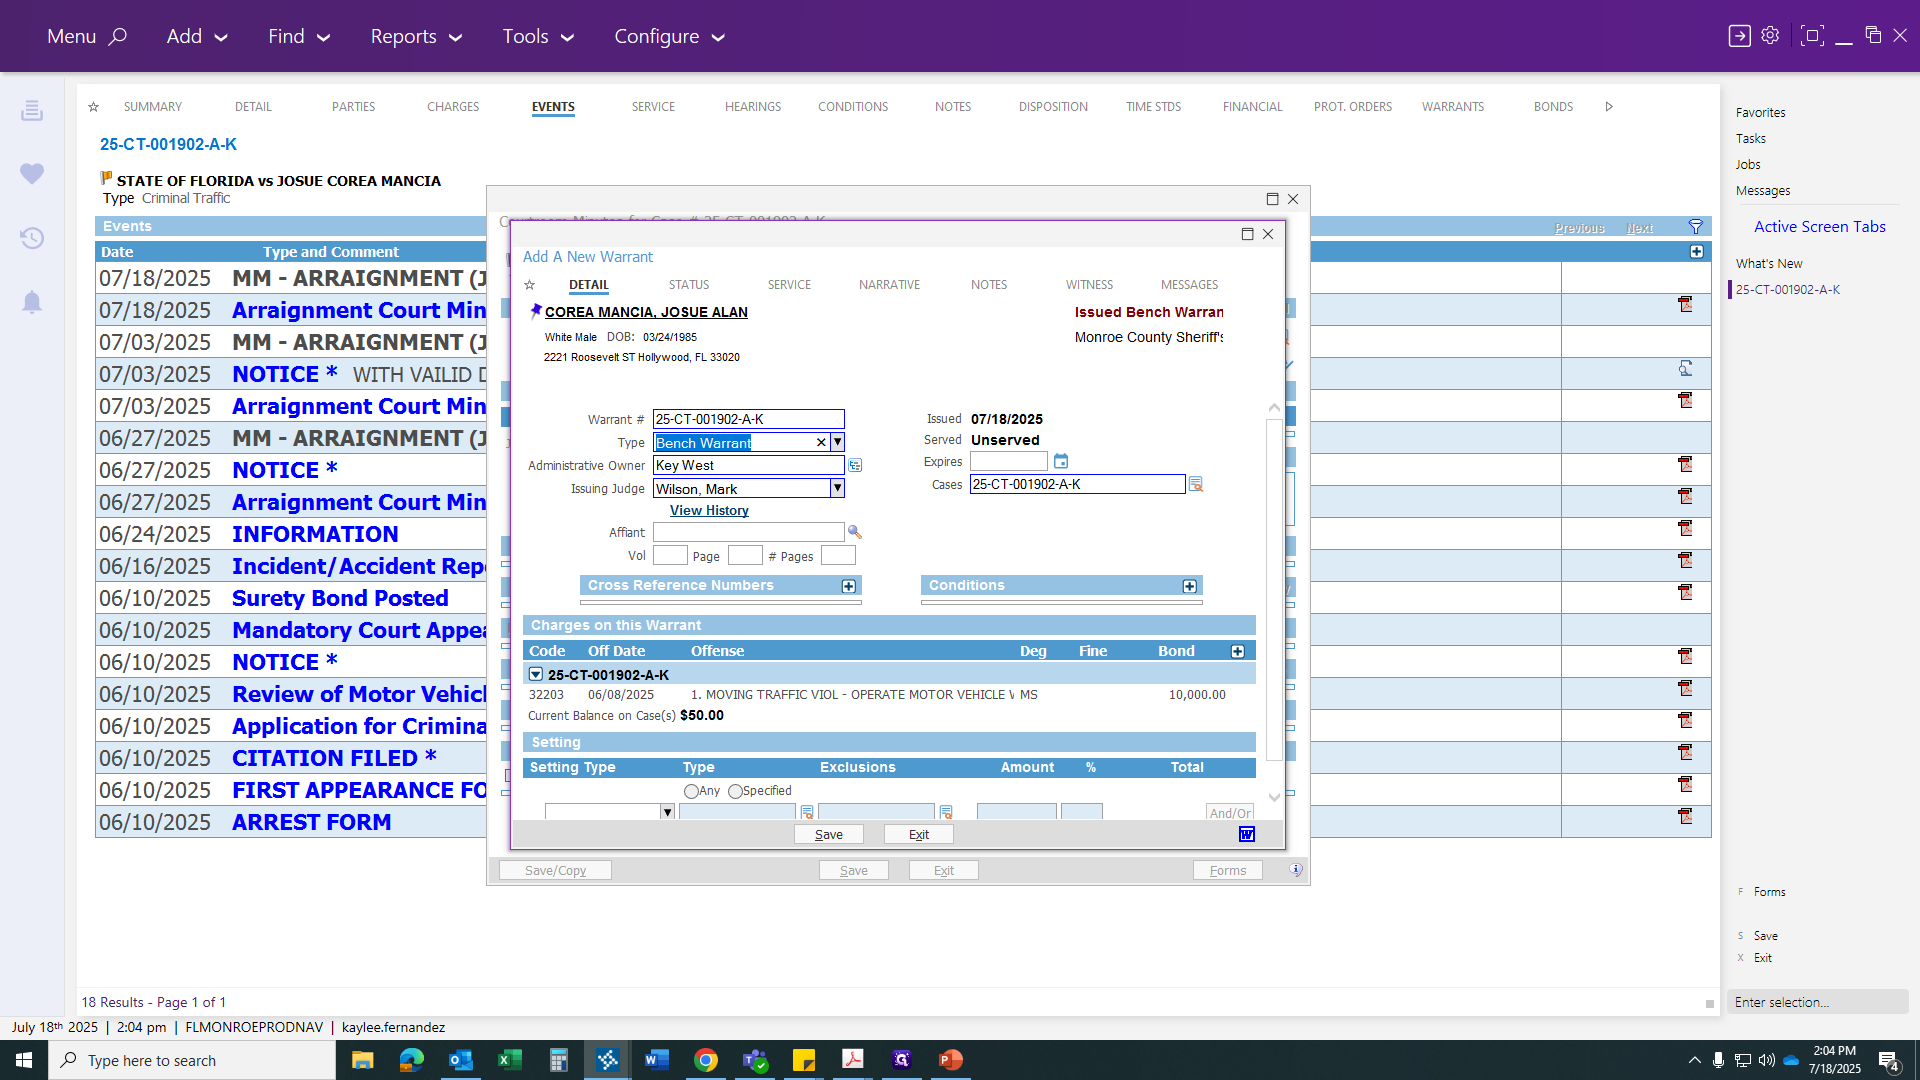
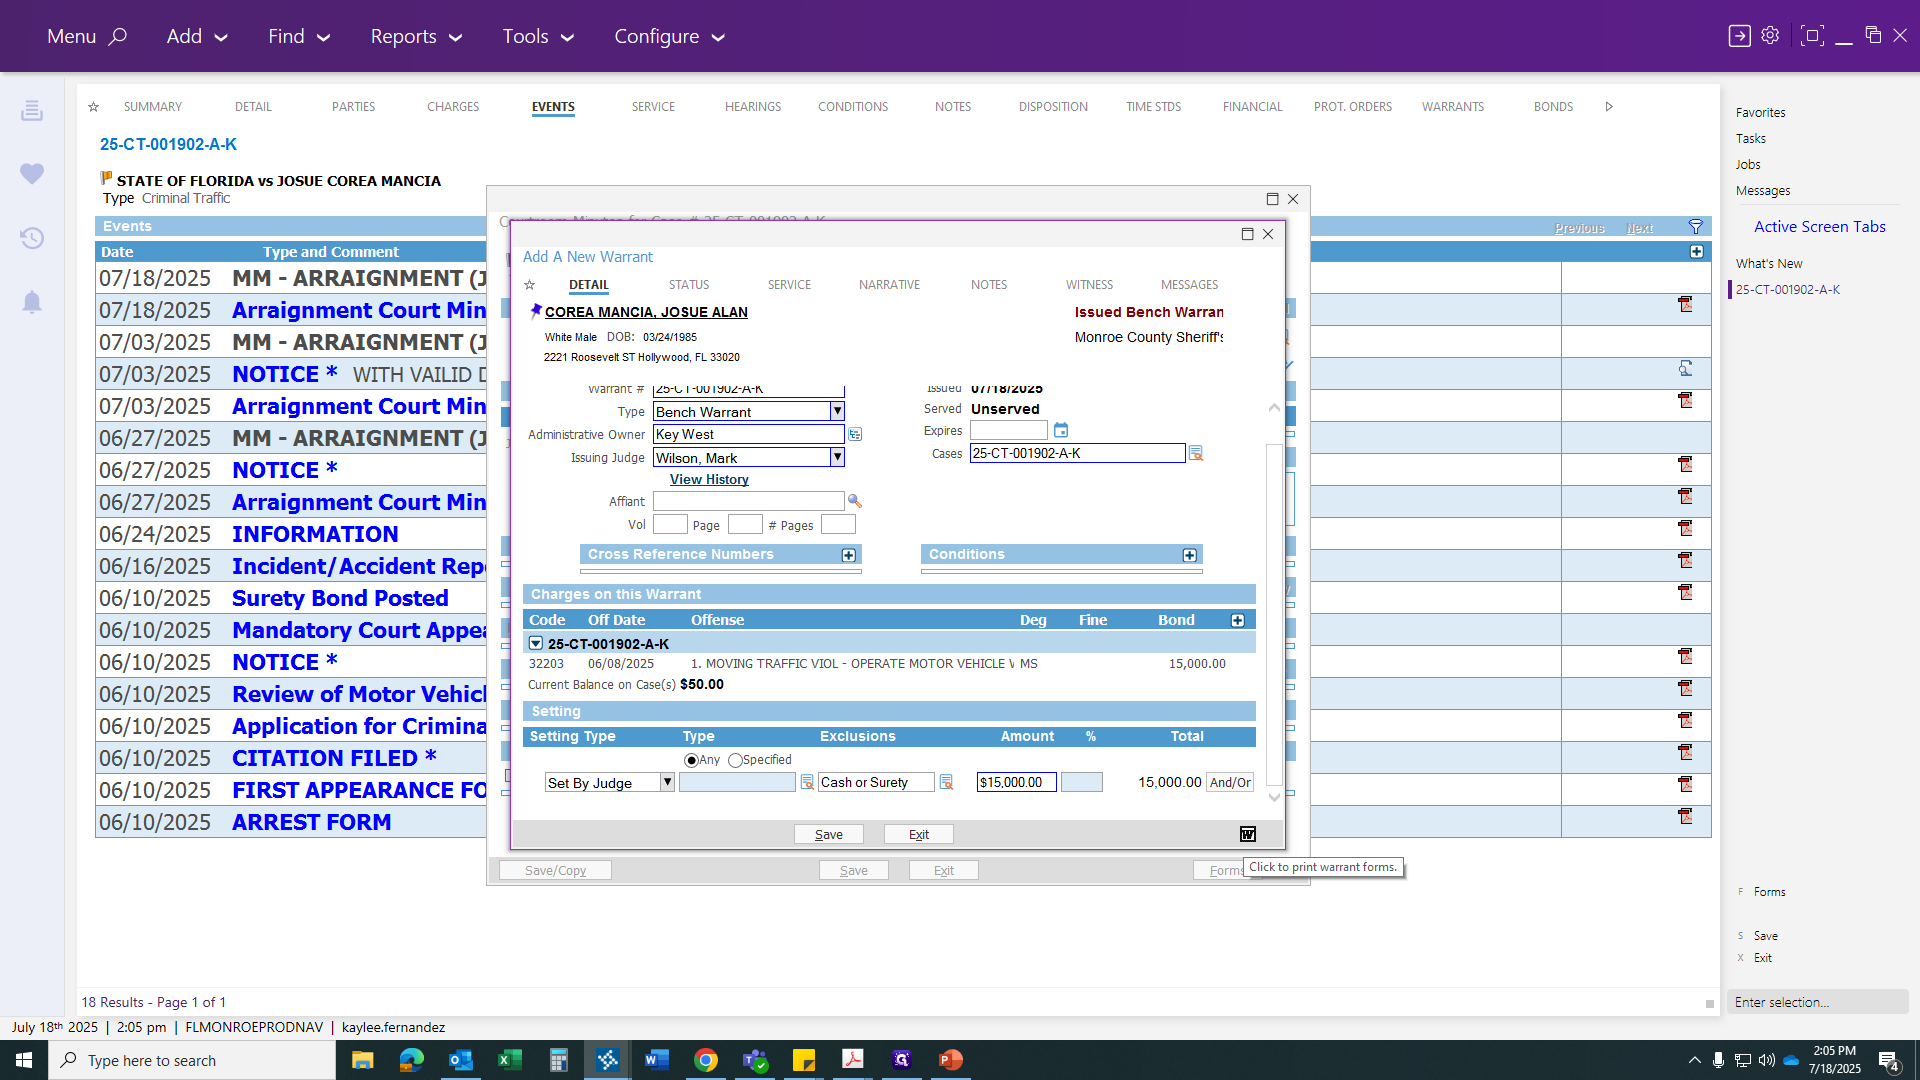
This is where our team will issue the warrant. We will need to get a bench warrant because I failed to appear at an arraignment. Make sure the hearing date and the issuing judge's name are correct.

You can change the judge at this point if someone else is covering. For now, we will keep Judge Wilson, as he presided over this case.

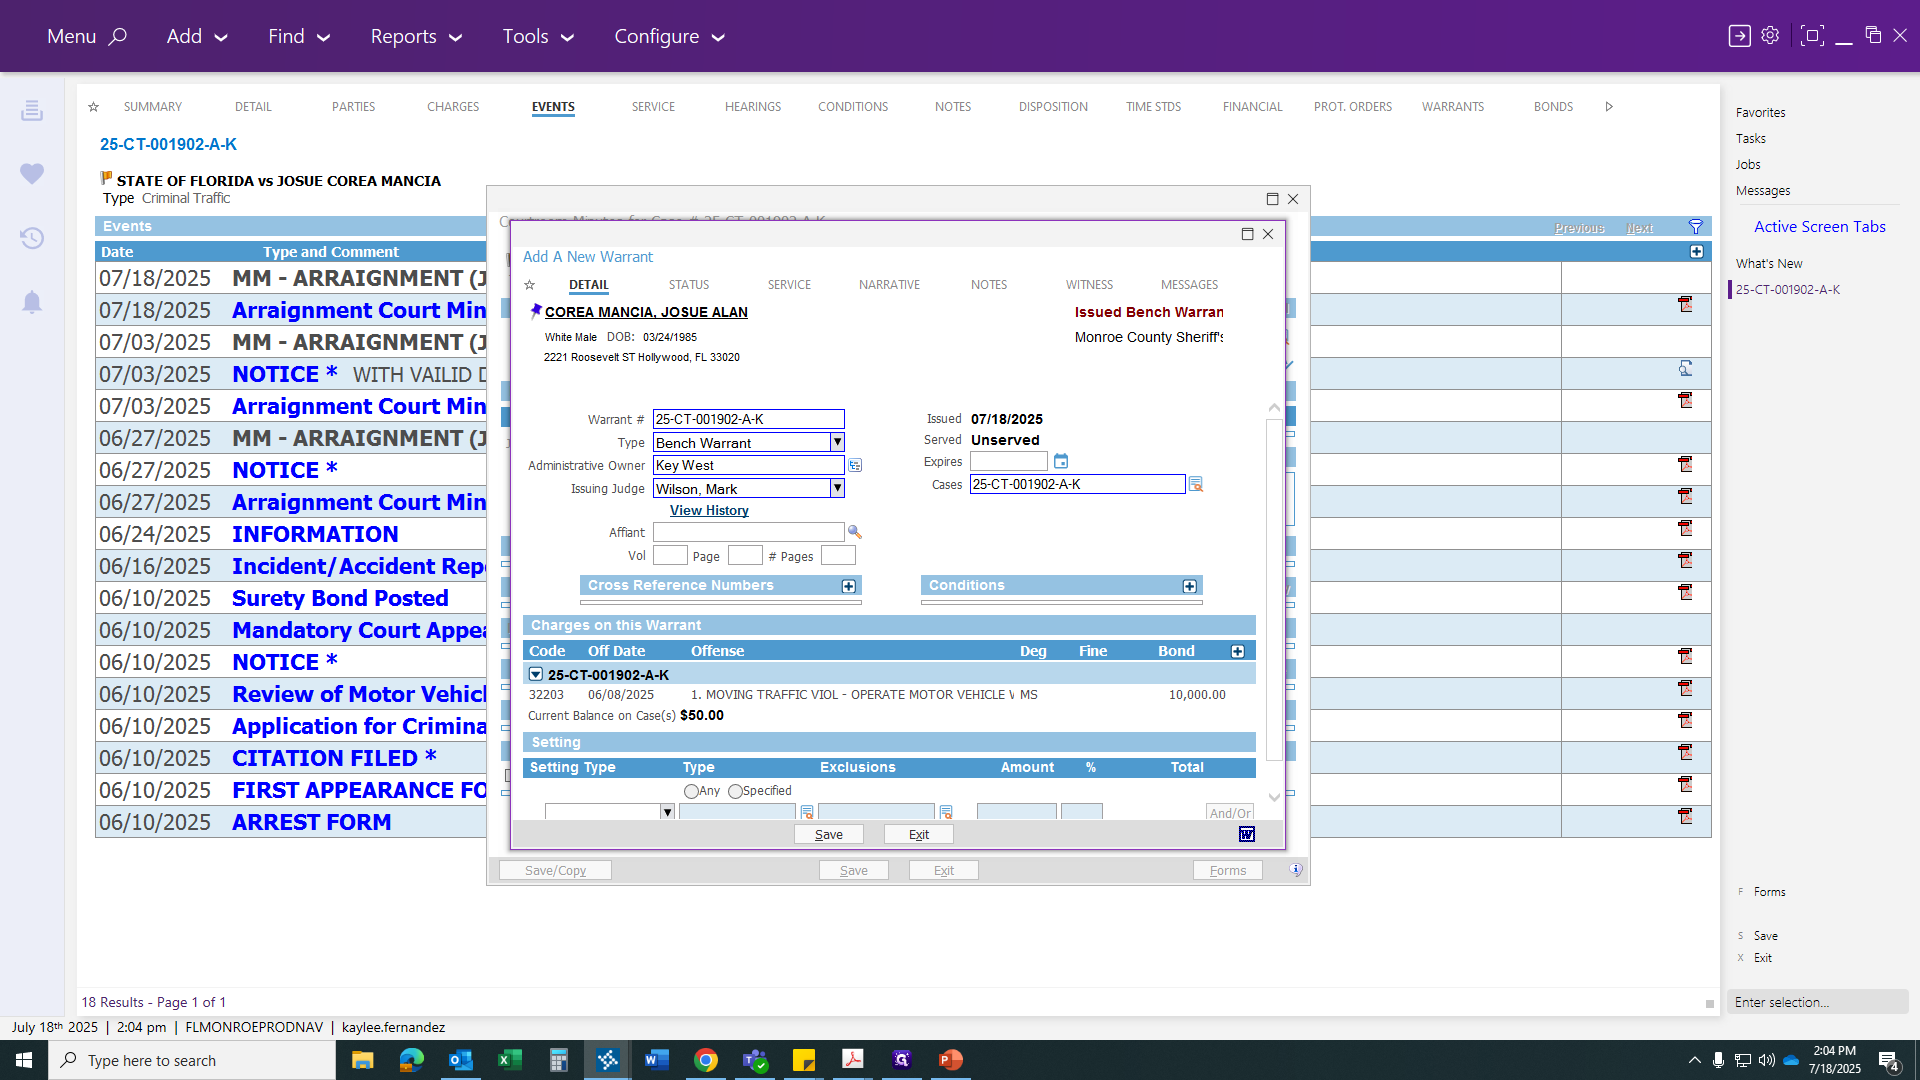
If you look below, you'll see a $10,000 bond set by the first appearance judge when the defendant was arrested.
We will now update the bond, as there is a new bond amount to enter.
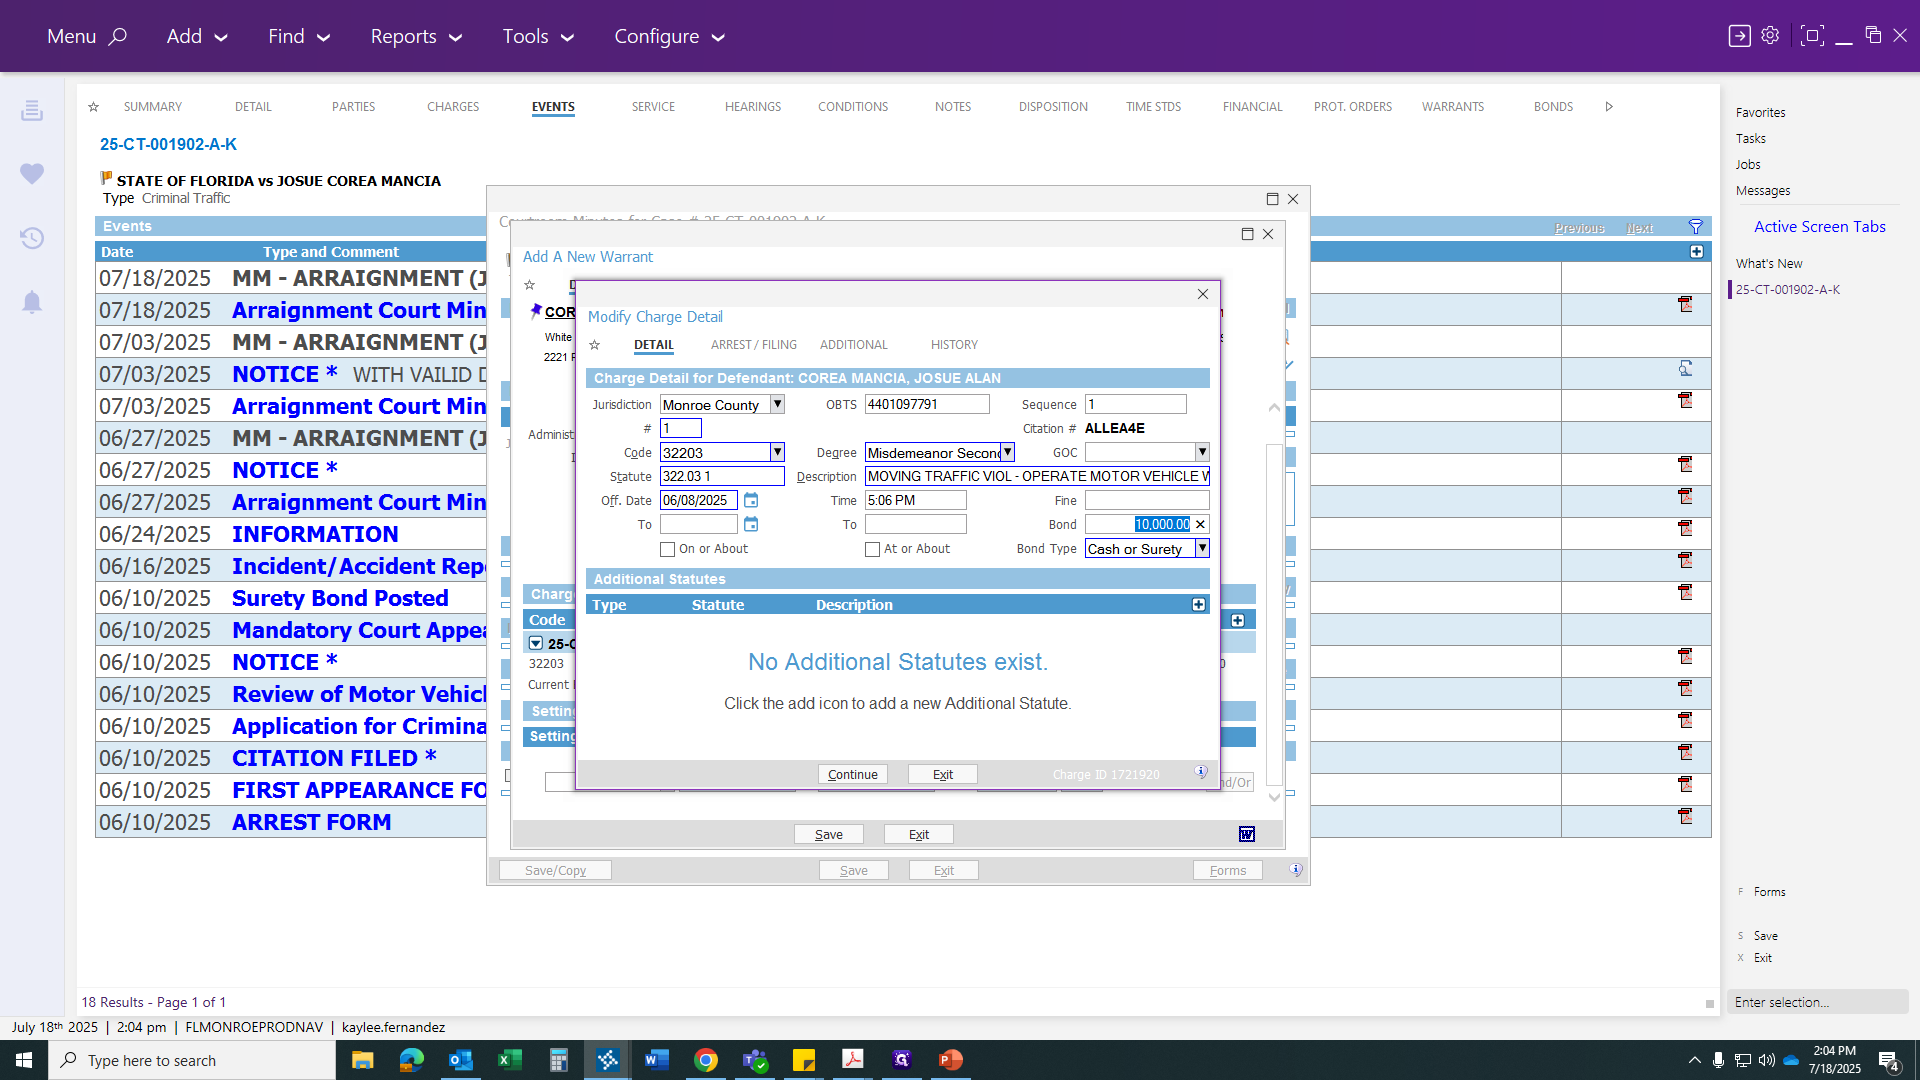
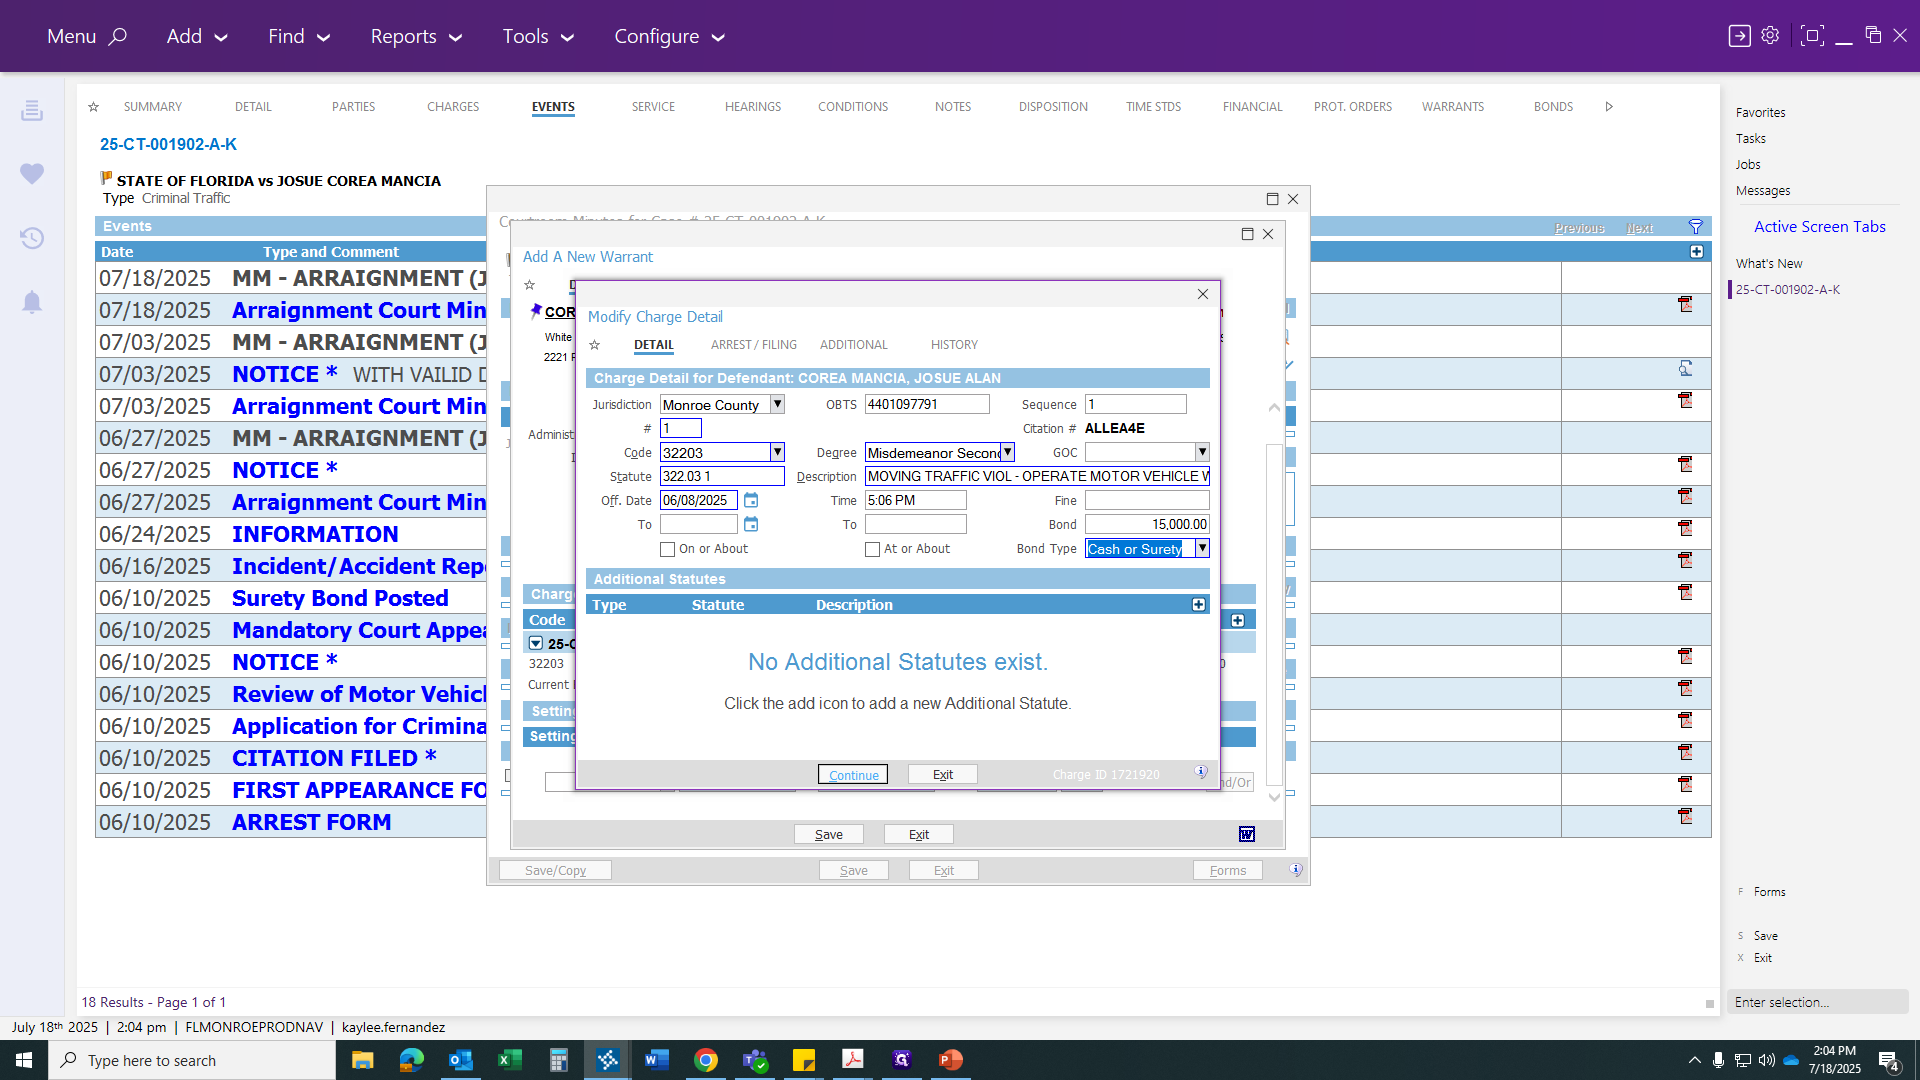
In this case, the judge ordered a $15,000 cash or surety bond.
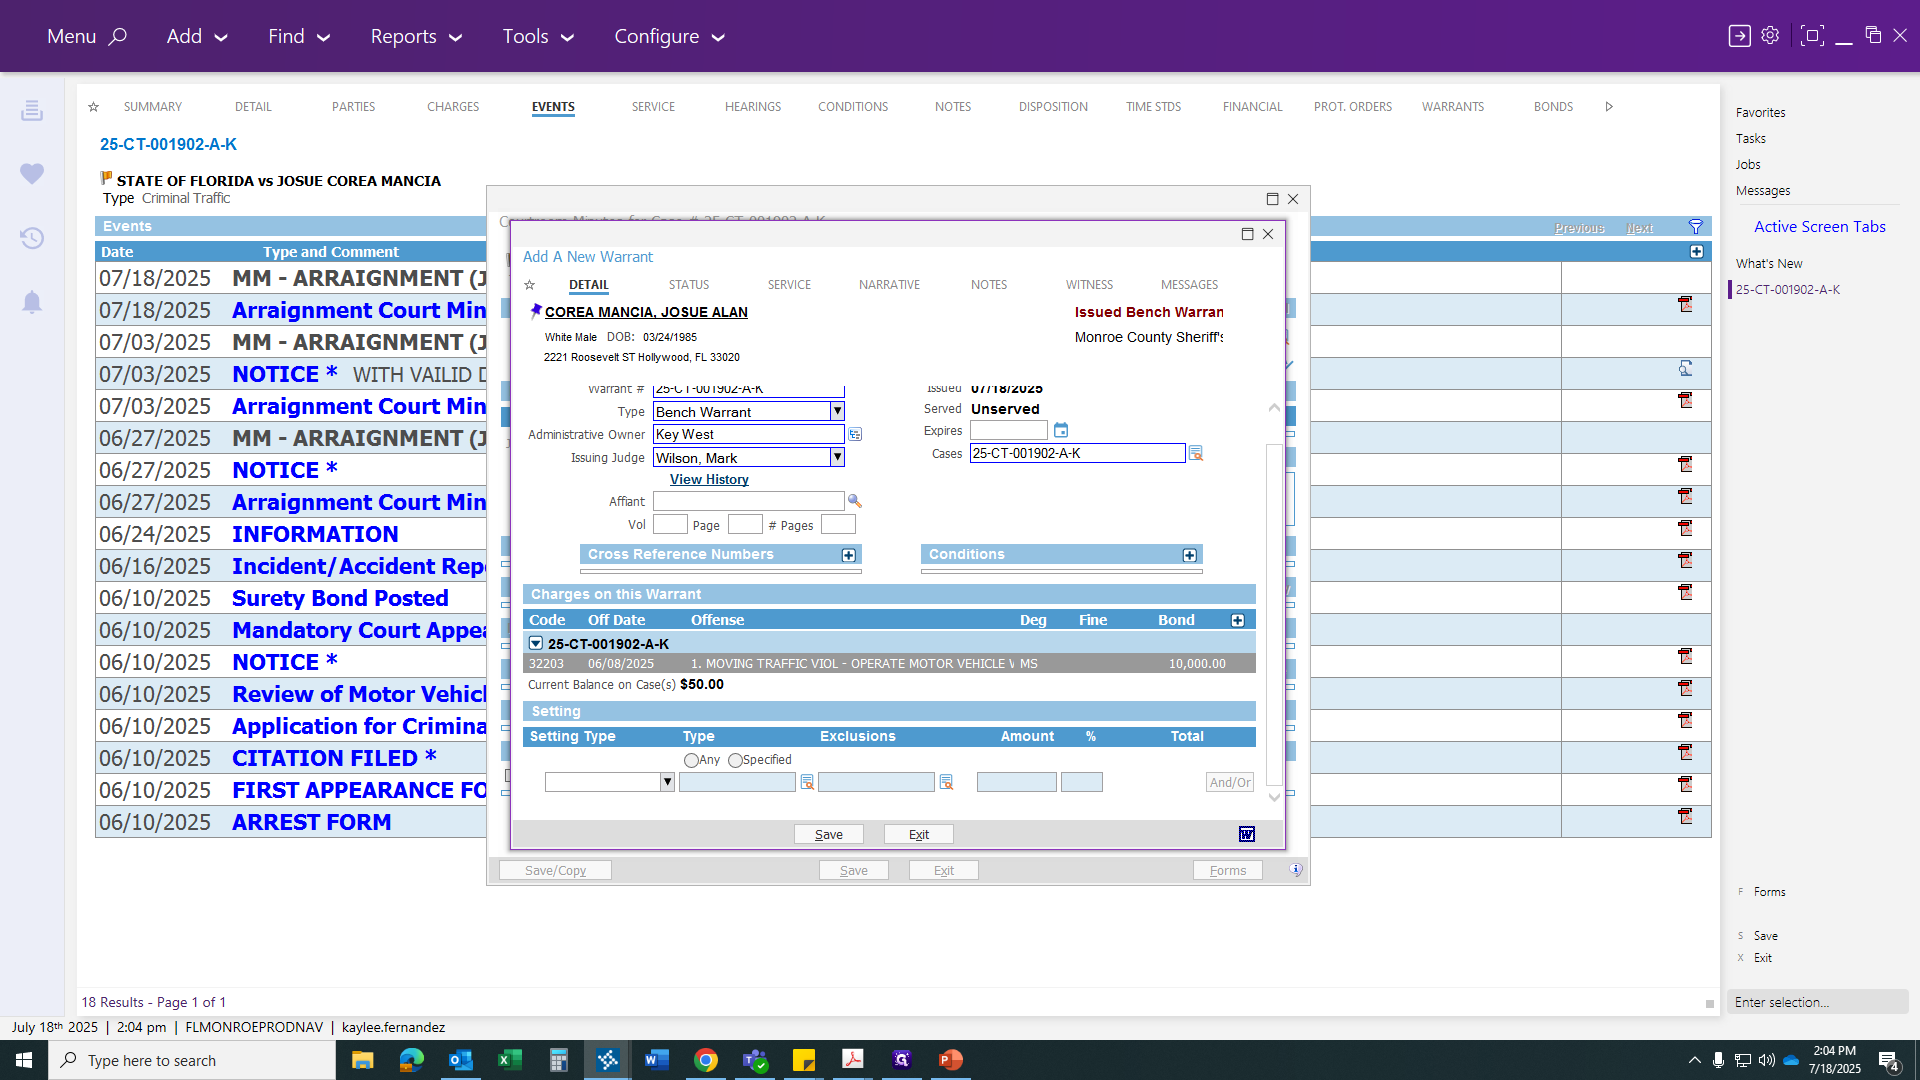
Once you have corrected the bond amount, go to the Setting Type. You will see two options.

We are going to choose the option "Set by Judge." If the judge says no bond is allowed, select "Hold Without Bond." Since we have a bond, select "Set by Judge."

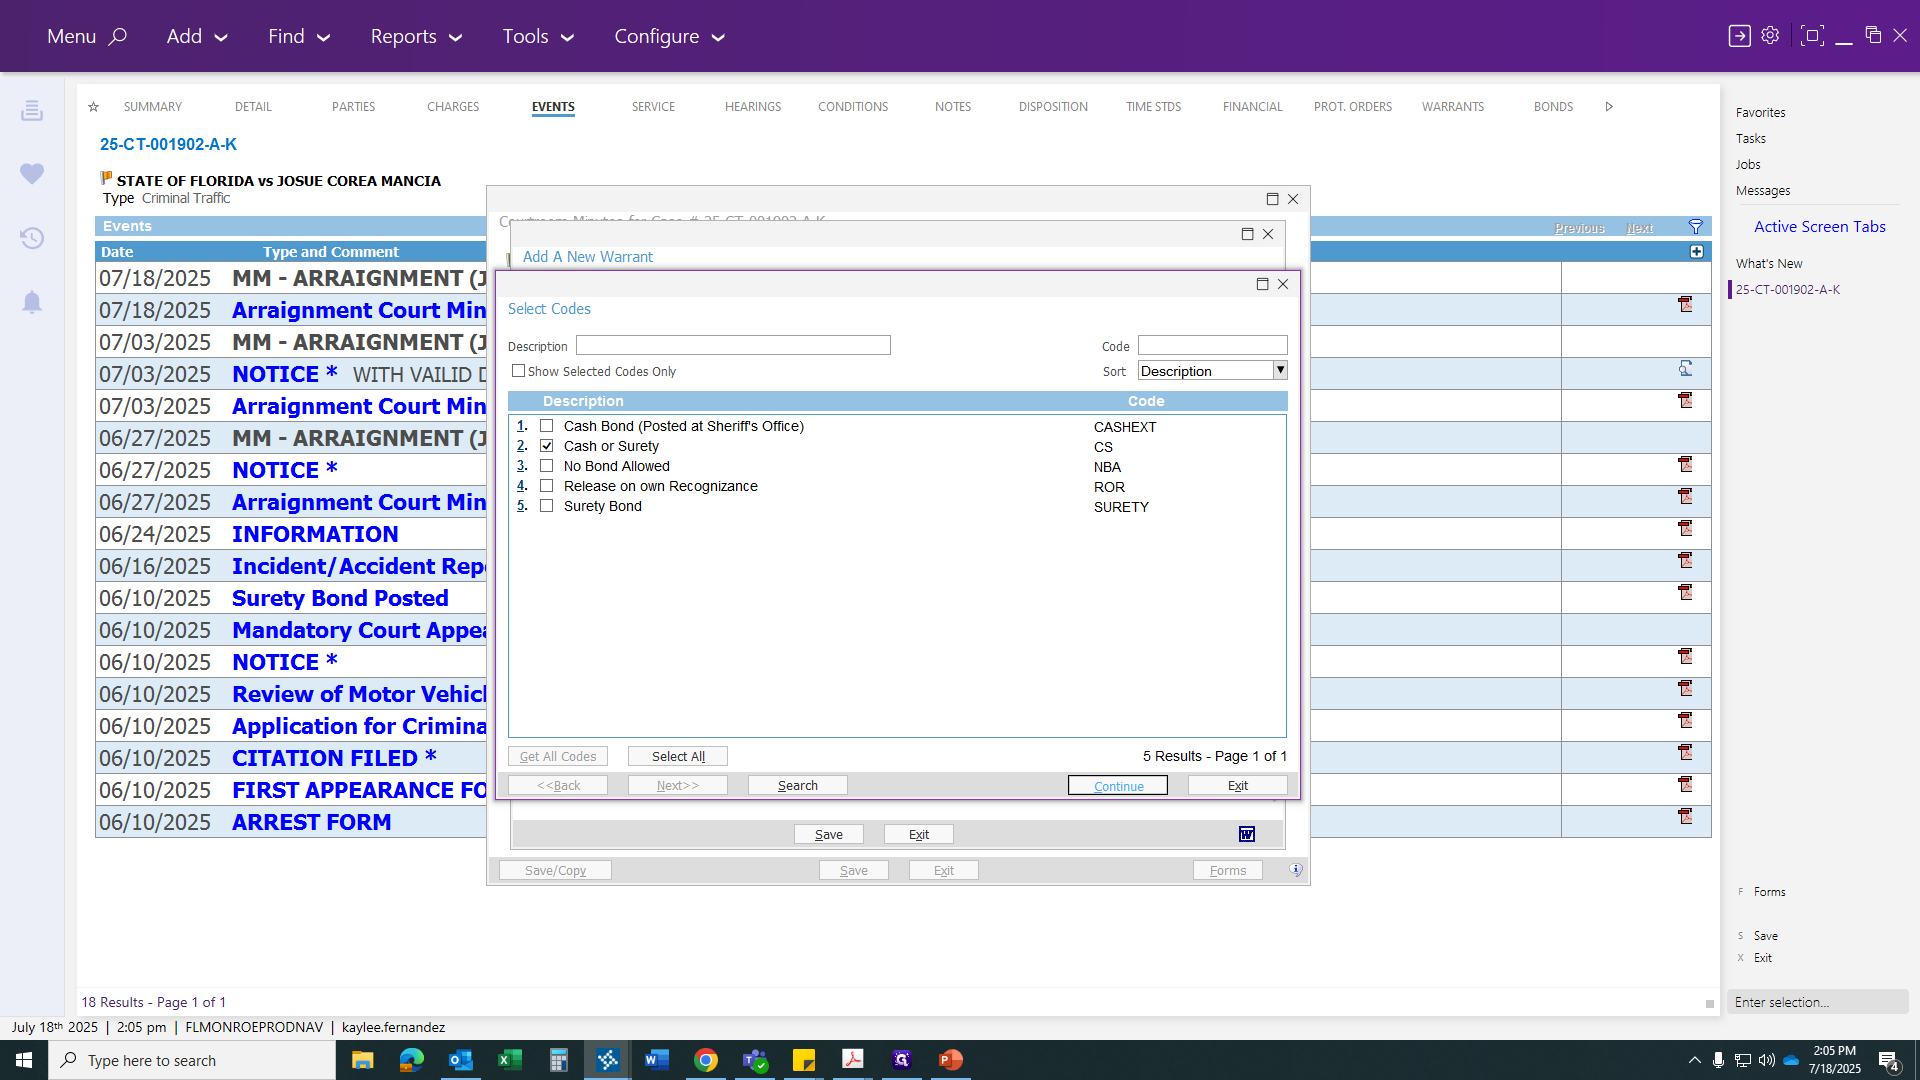
After clicking Set by Judge, you'll see the other boxes are still grayed out. Click any open space to generate the bond below. Then, select Cash or Surety Bond and click Continue.


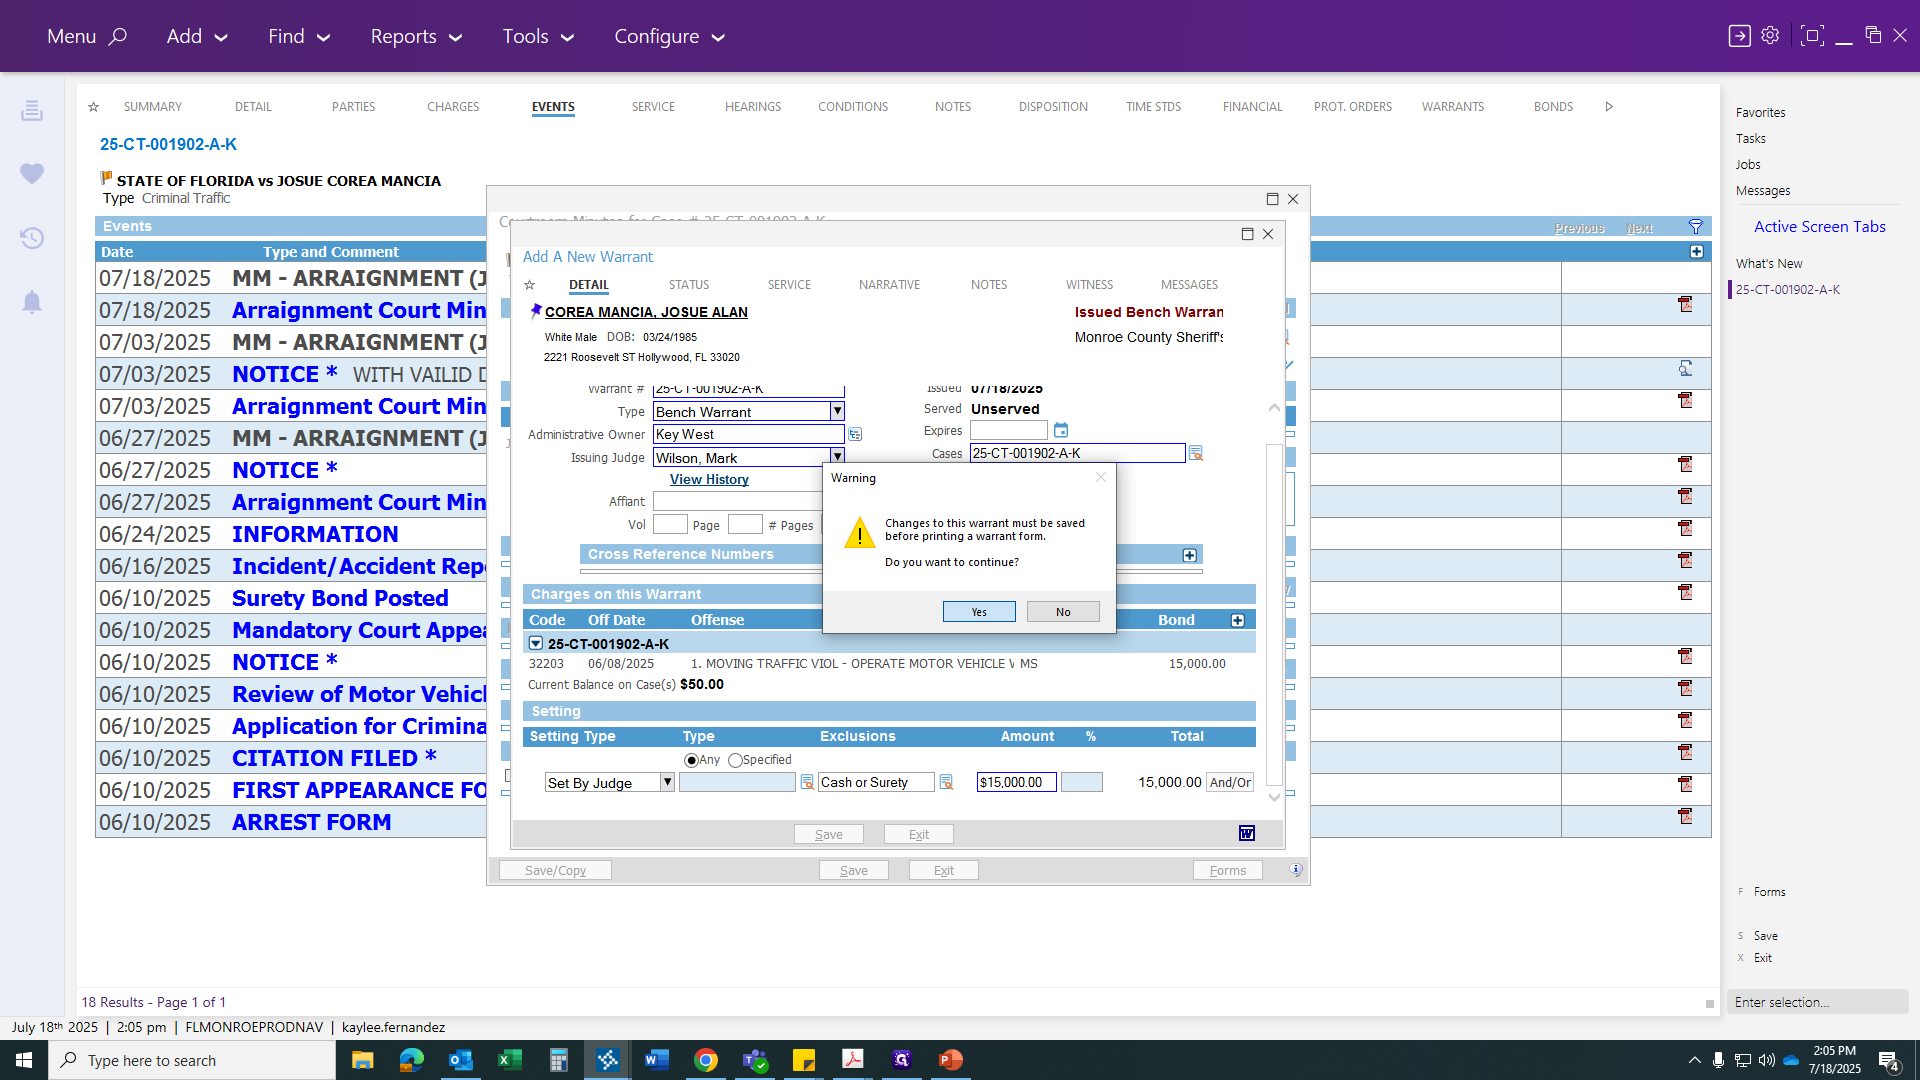
Once you are here, go to your Print Warrants forms.
Yes, the warrant will be saved in the background, and the form will be printed. Yes, continue, and it will generate your warrant information. Then, you can print your document.
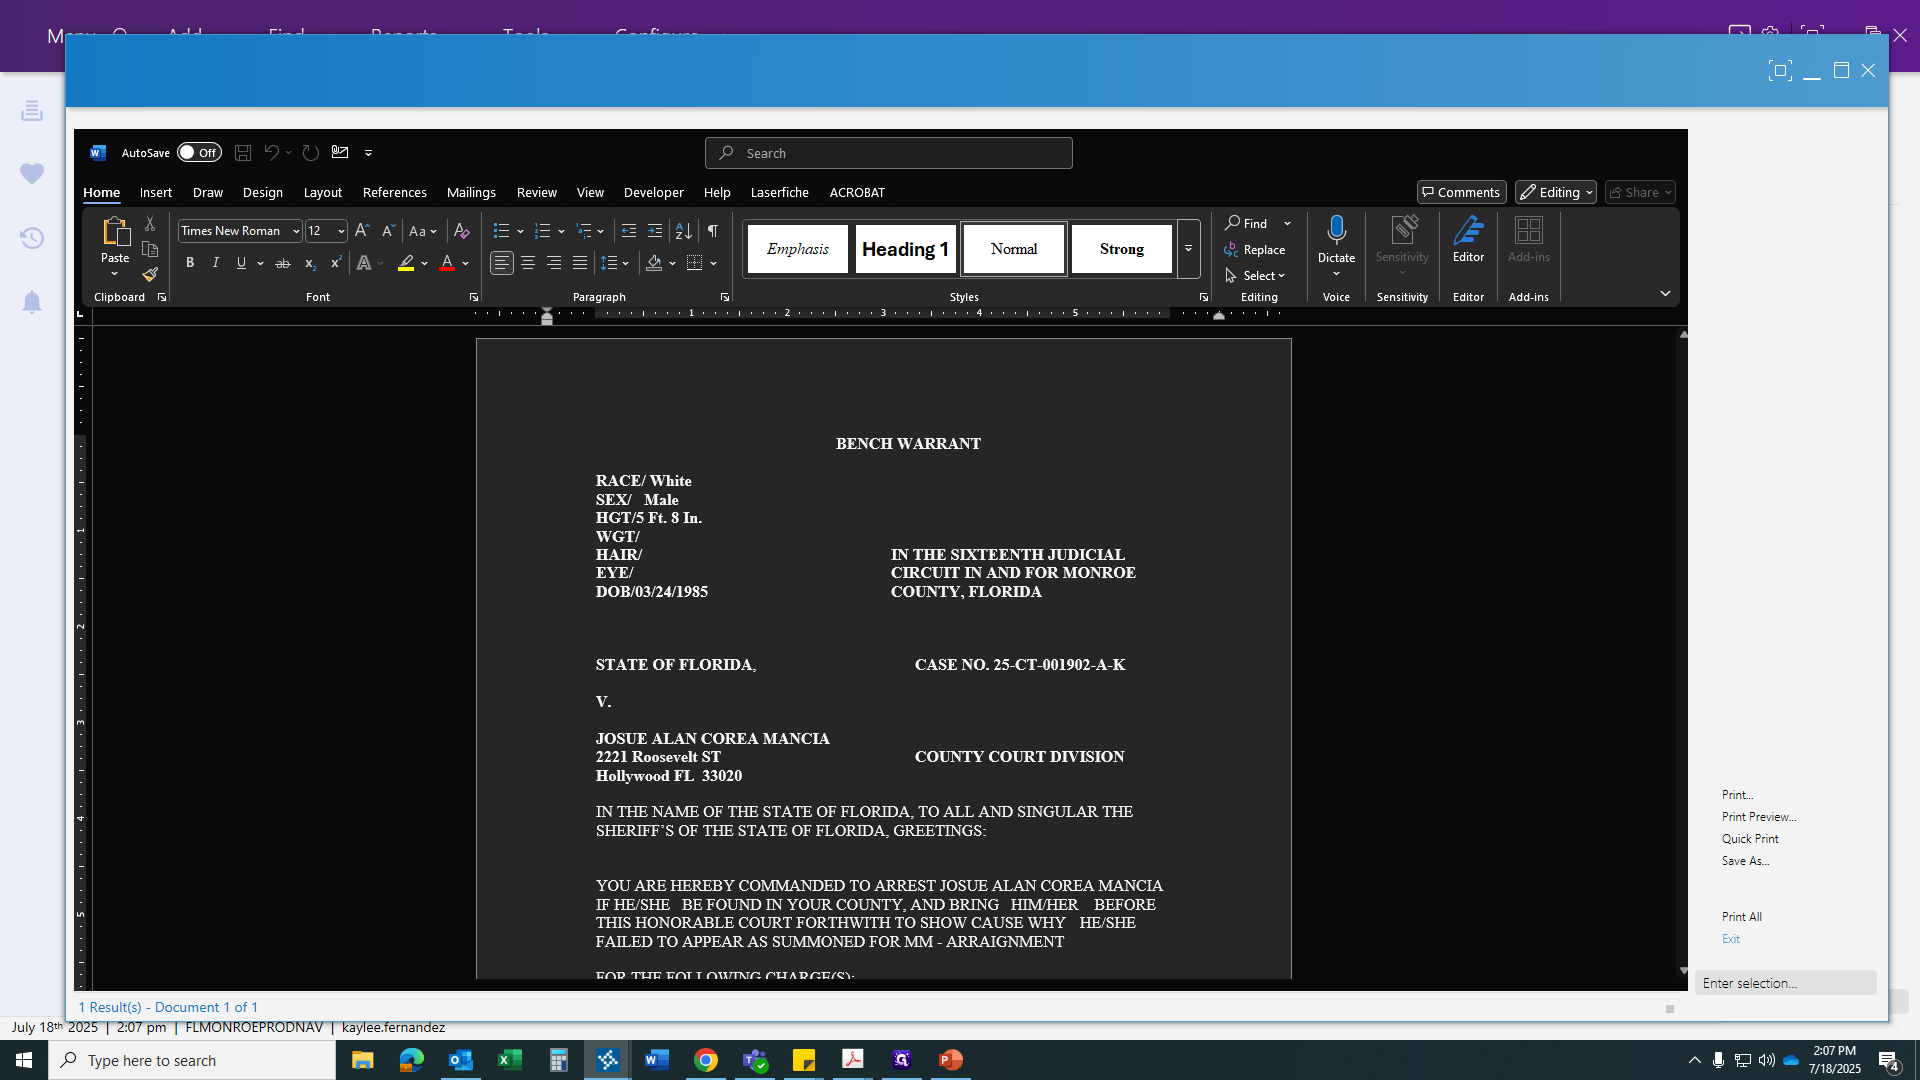
There will be several bench warrants and a capias. The first one is for a felony, as you can see, Circuit. We have county and circuit options for a bond revocation warrant, but for now, we will use a misdemeanor bench warrant.
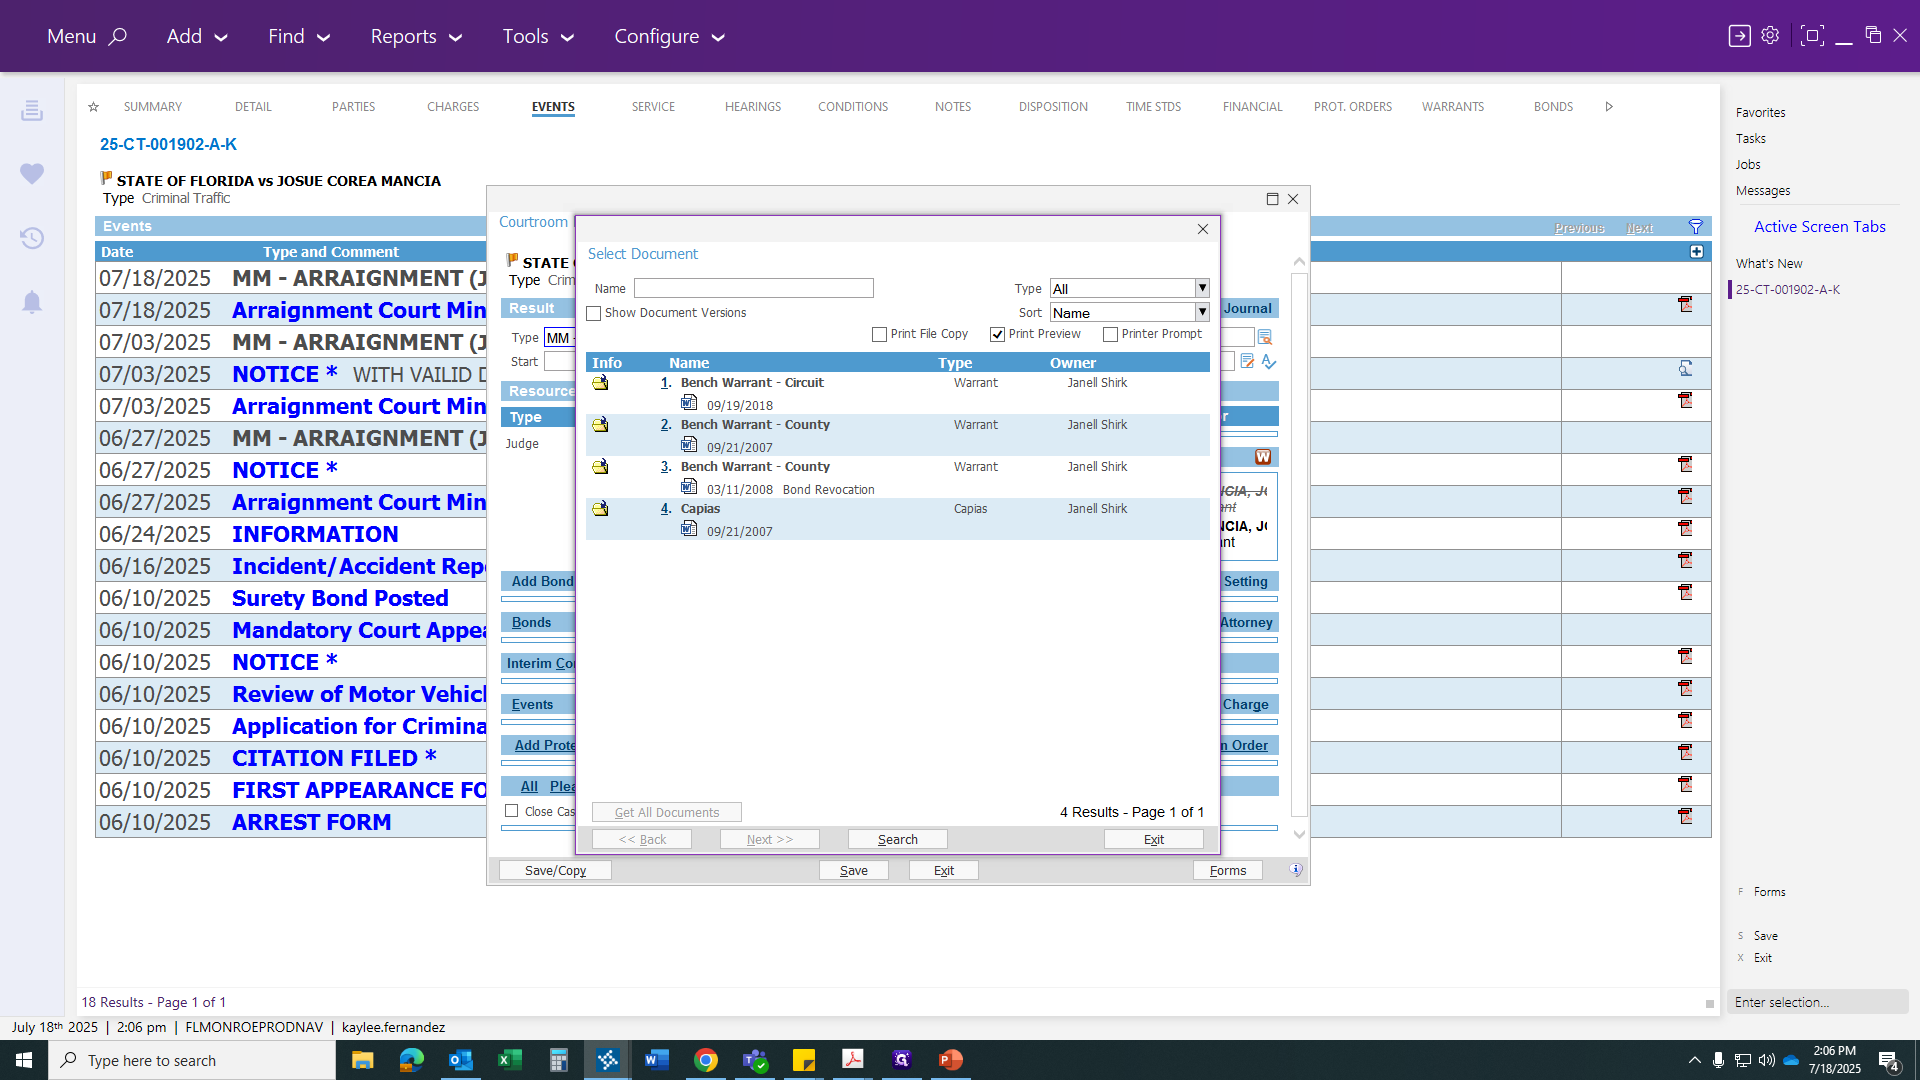
Once you click the icon, it will generate your bench warrant form. This is where you can edit your case if needed. If you have multiple charges and the judge issues only one, the other charge will appear below. You can erase that. If you have multiple charges, Odyssey will carry over the full amount. You will then need to break it down by each charge according to the judge's bond decision. If you have nothing else to correct or save, click the email button at the top to send this to the judge for a signature.
Once that is finished, click Exit. Then...
You should not have this script.
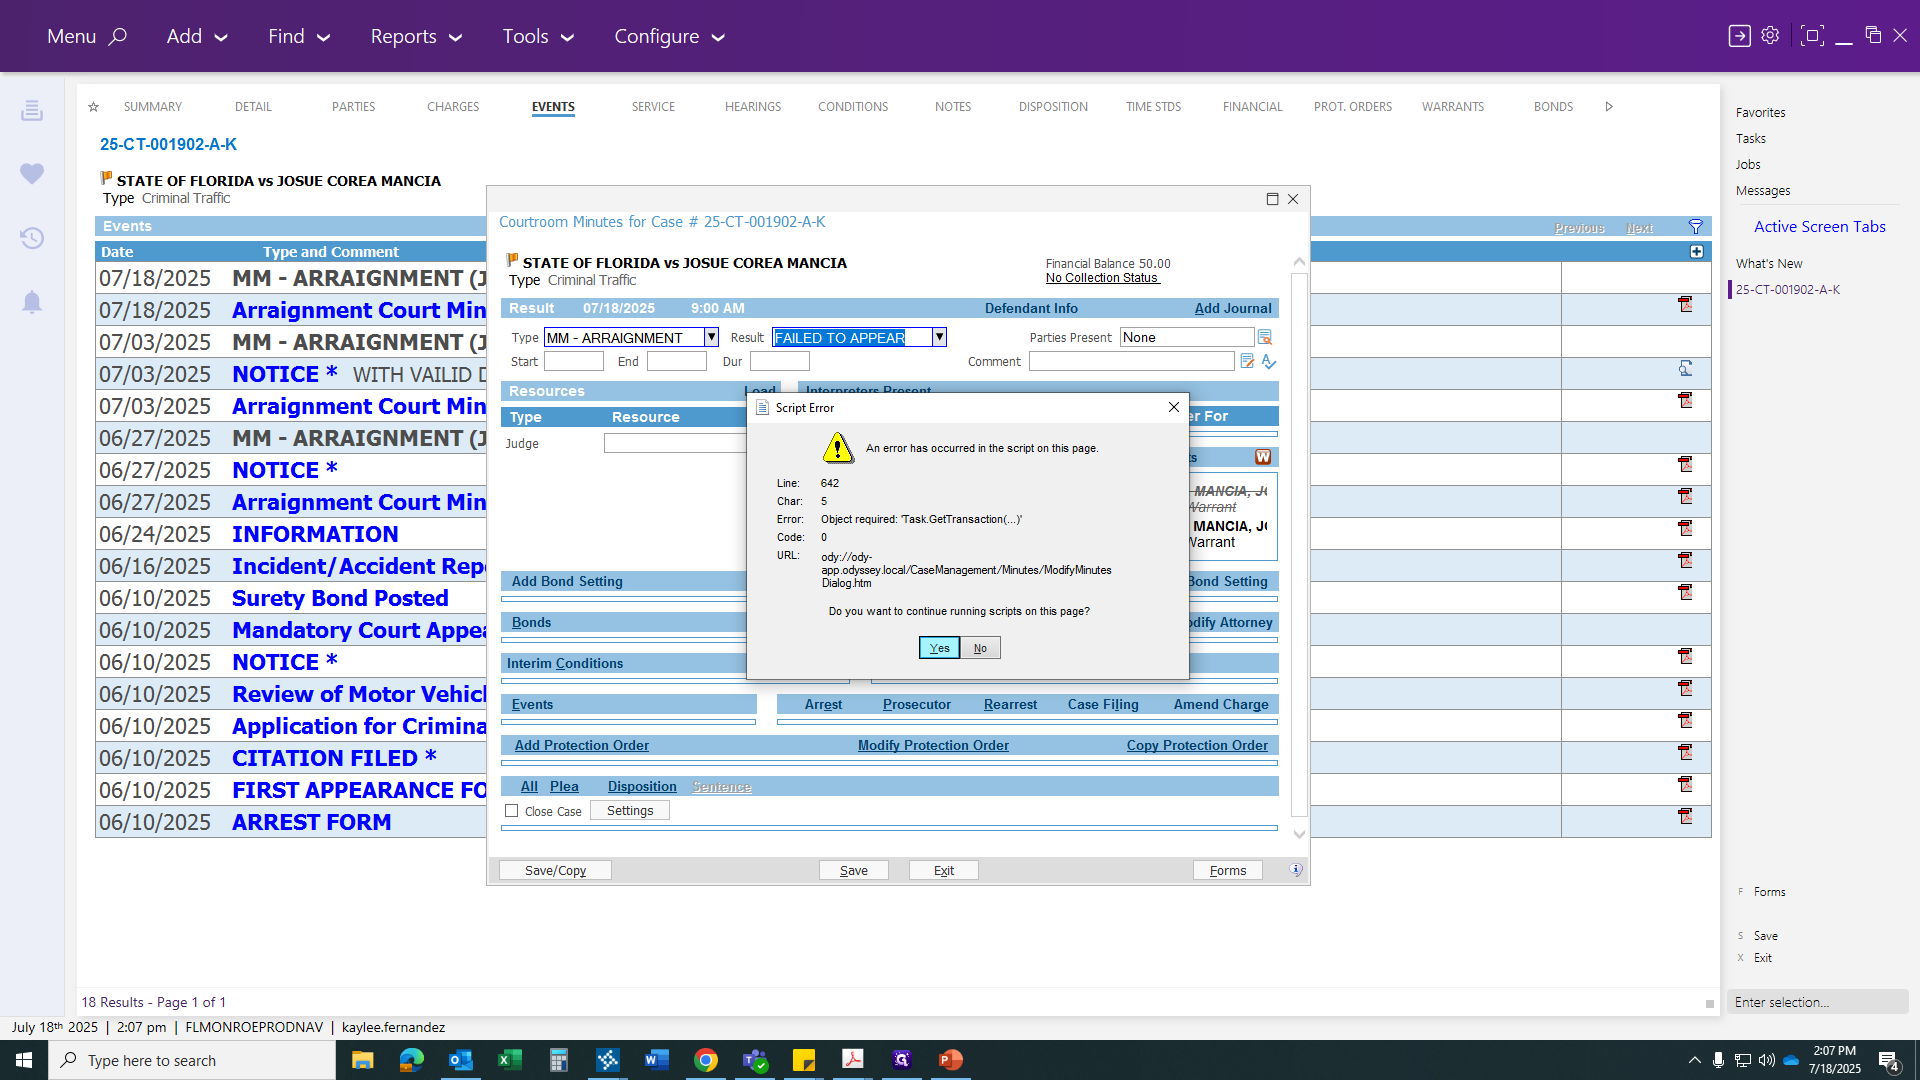

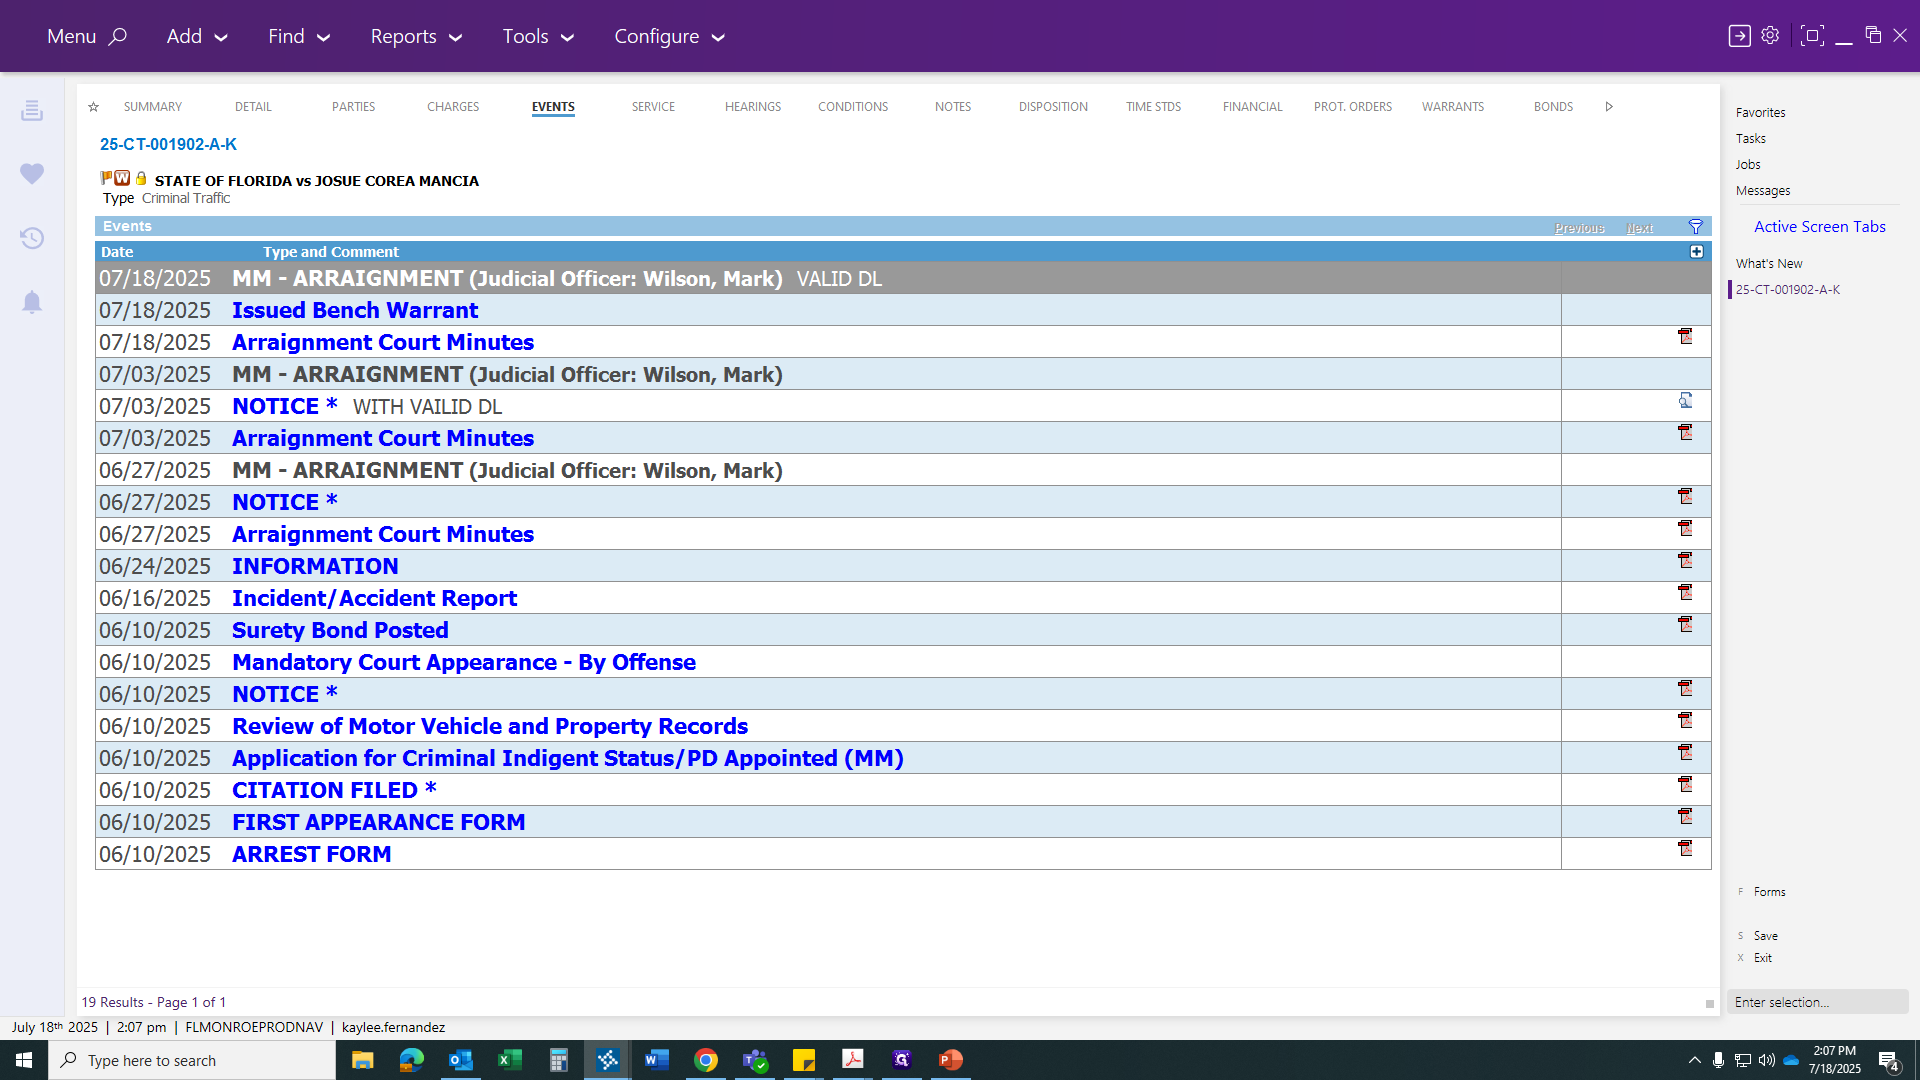
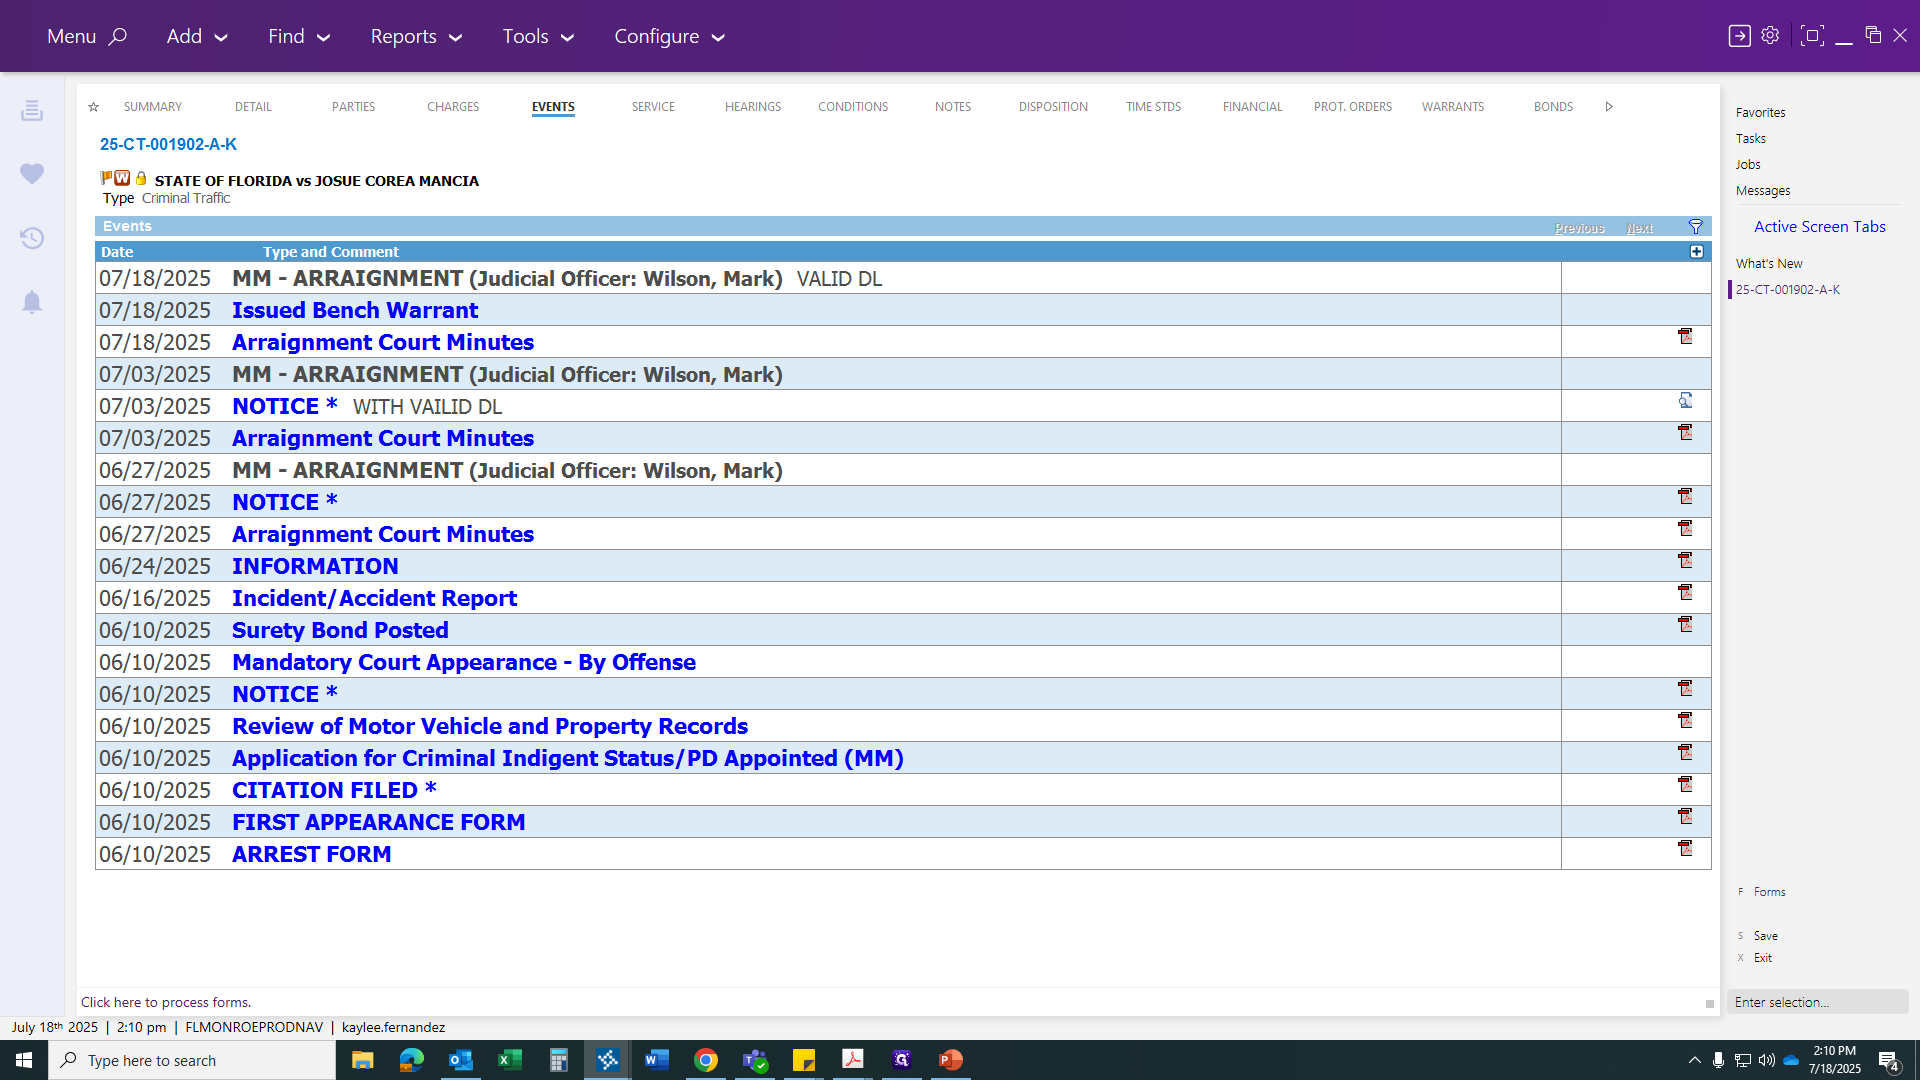
After you click Save, the system will automatically generate the "issued bench warrant" event. When the signed warrant returns via the portal, you can simply attach all the necessary information.
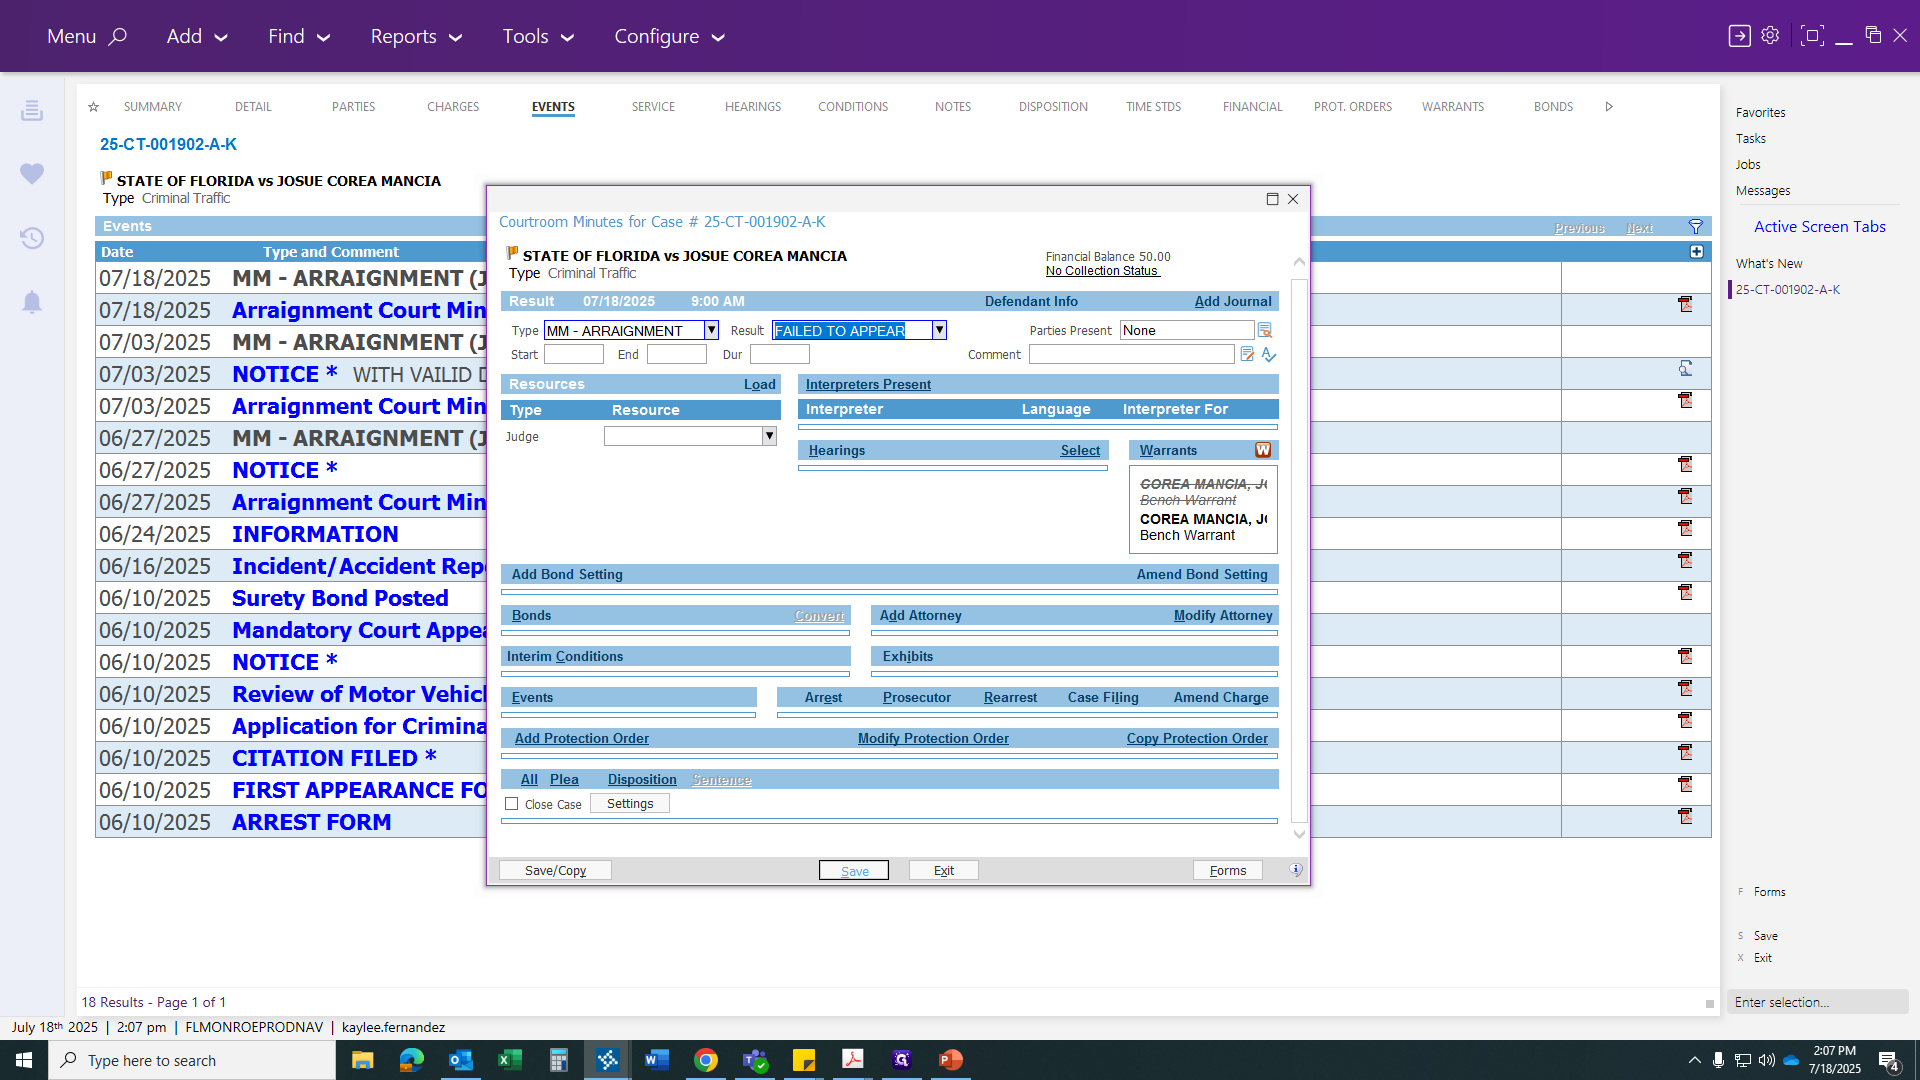
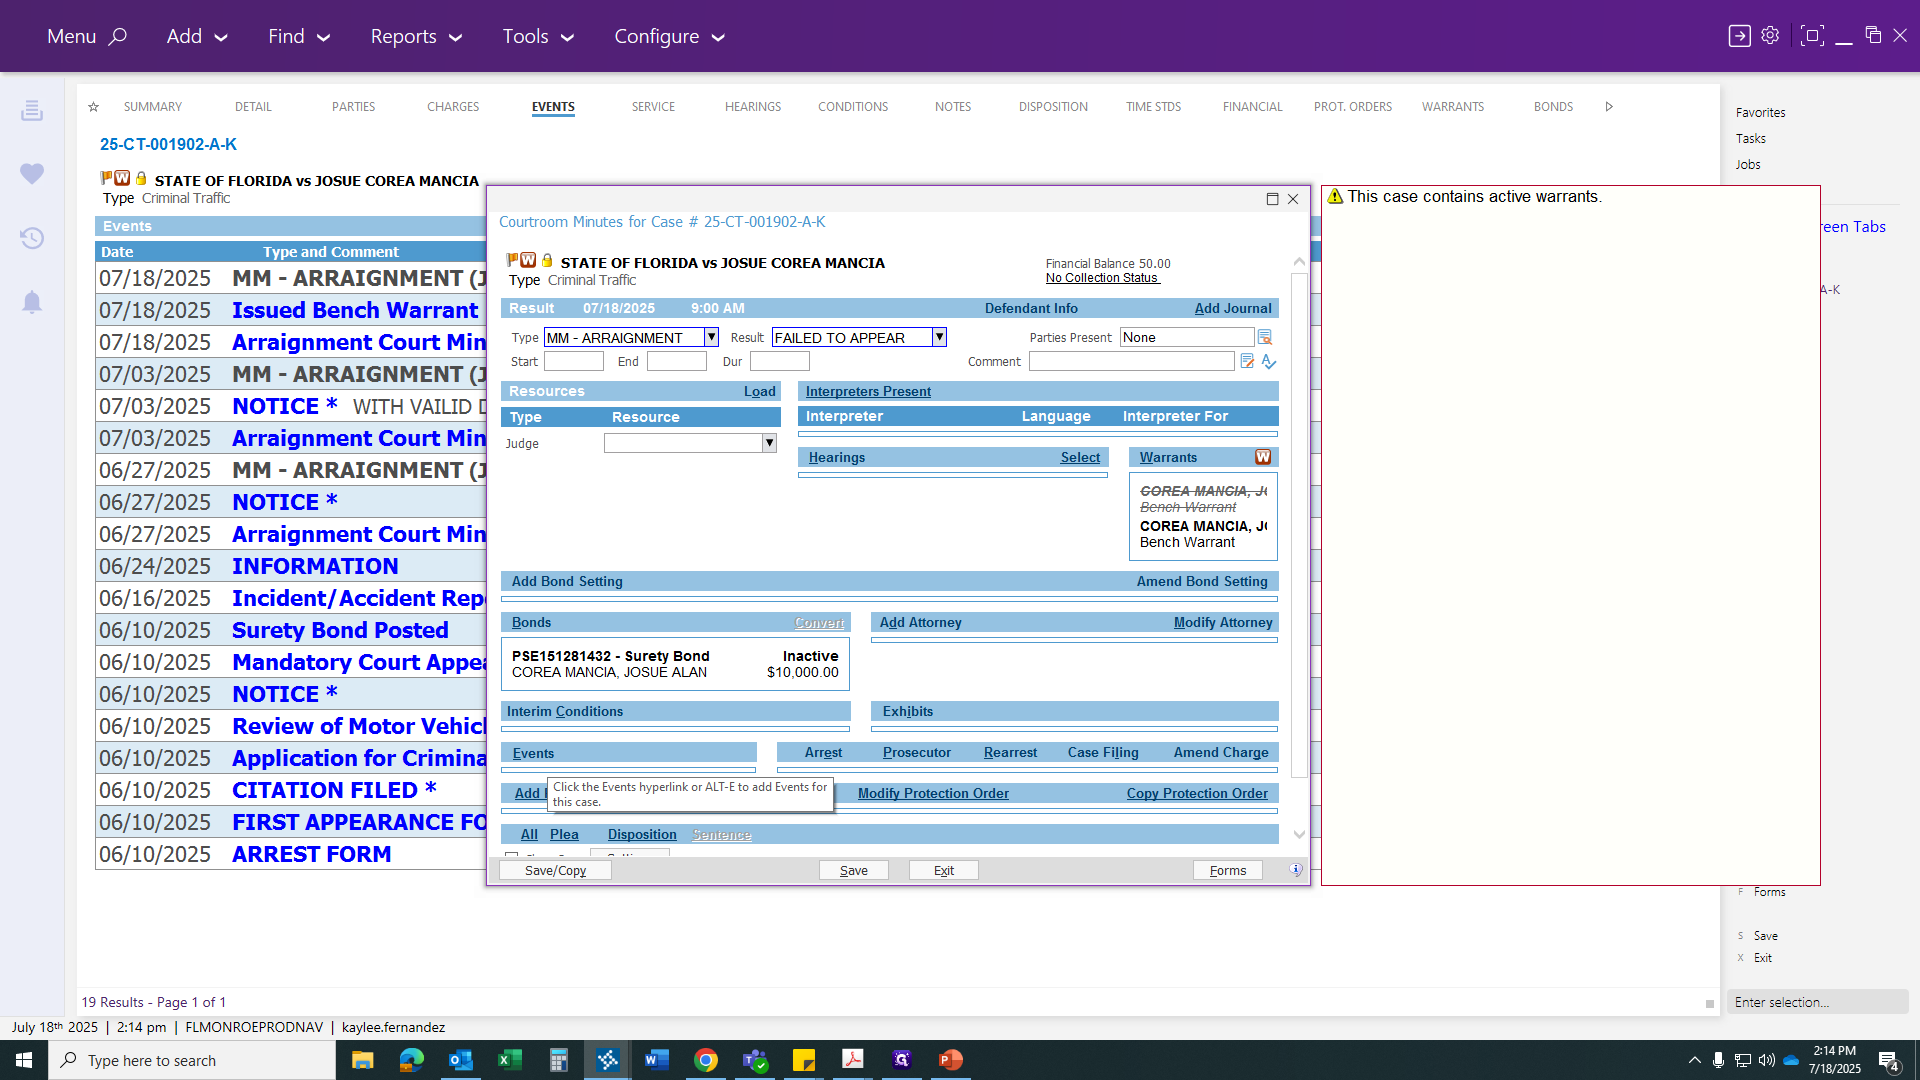
Now, go back to the Court Minutes tab. Next, we will issue... You will see a disclaimer stating that this case has an active warrant. That is fine. Now, we will proceed to process your bonds.
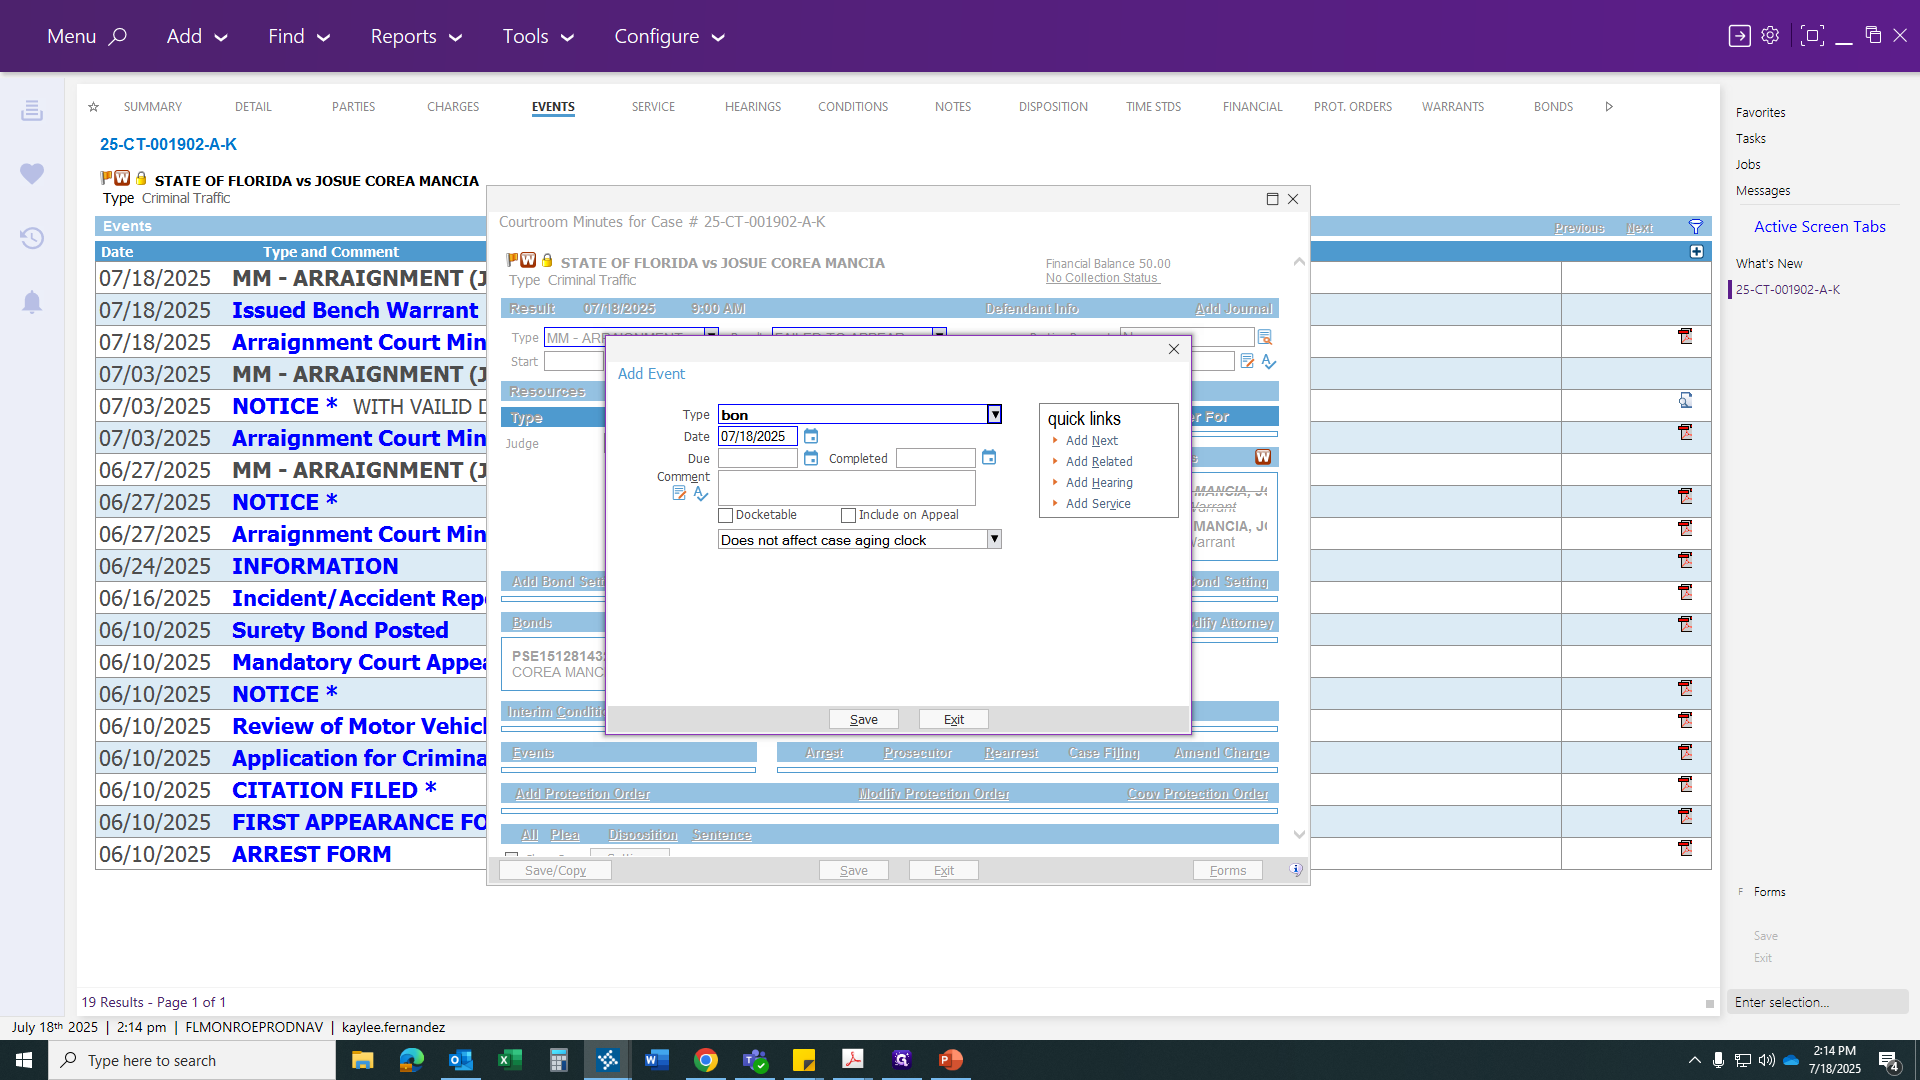
Before generating the certificate and bond letter, ensure the bonds are currently active. After creating the forms, deactivate the bonds. So we are going to... Exit here and go directly to our forms.

Type "surety" to bring up three forms: one for circuit, one for misdemeanor, and a surety bond letter for both.

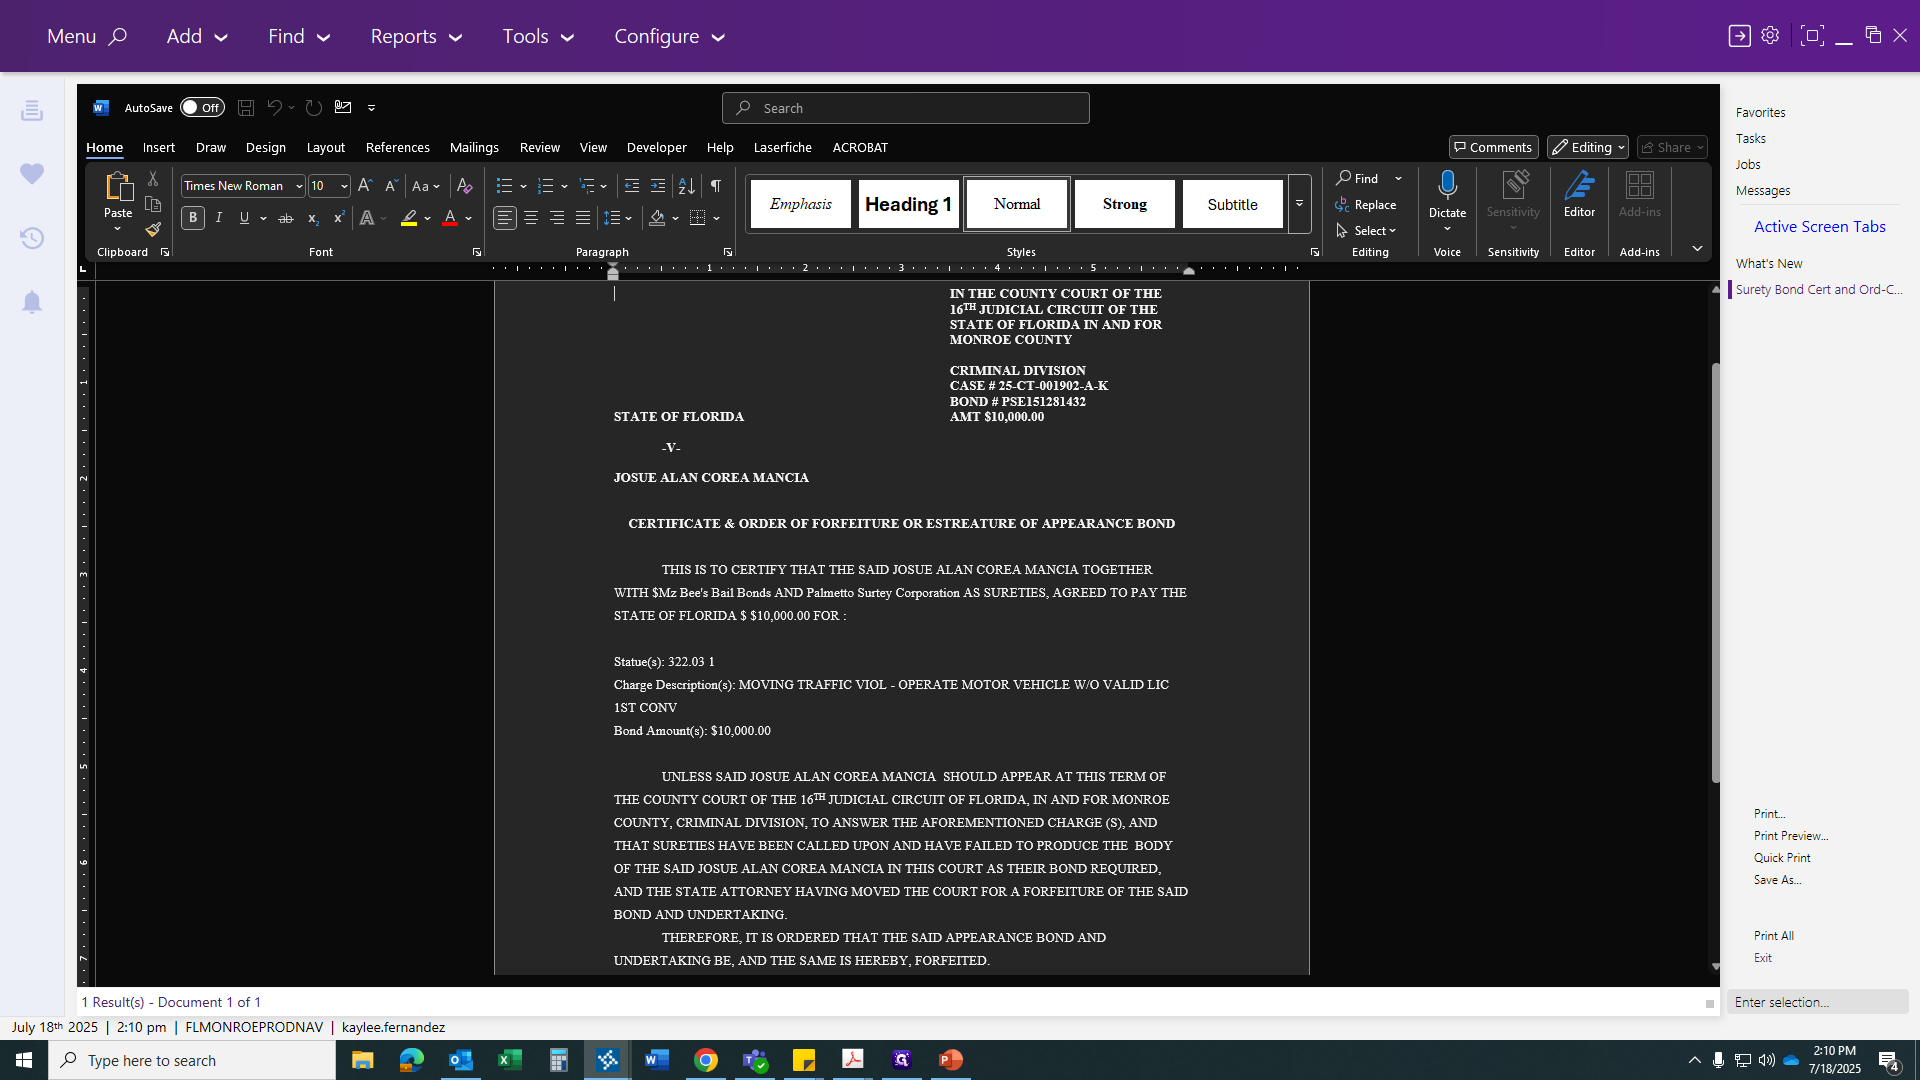
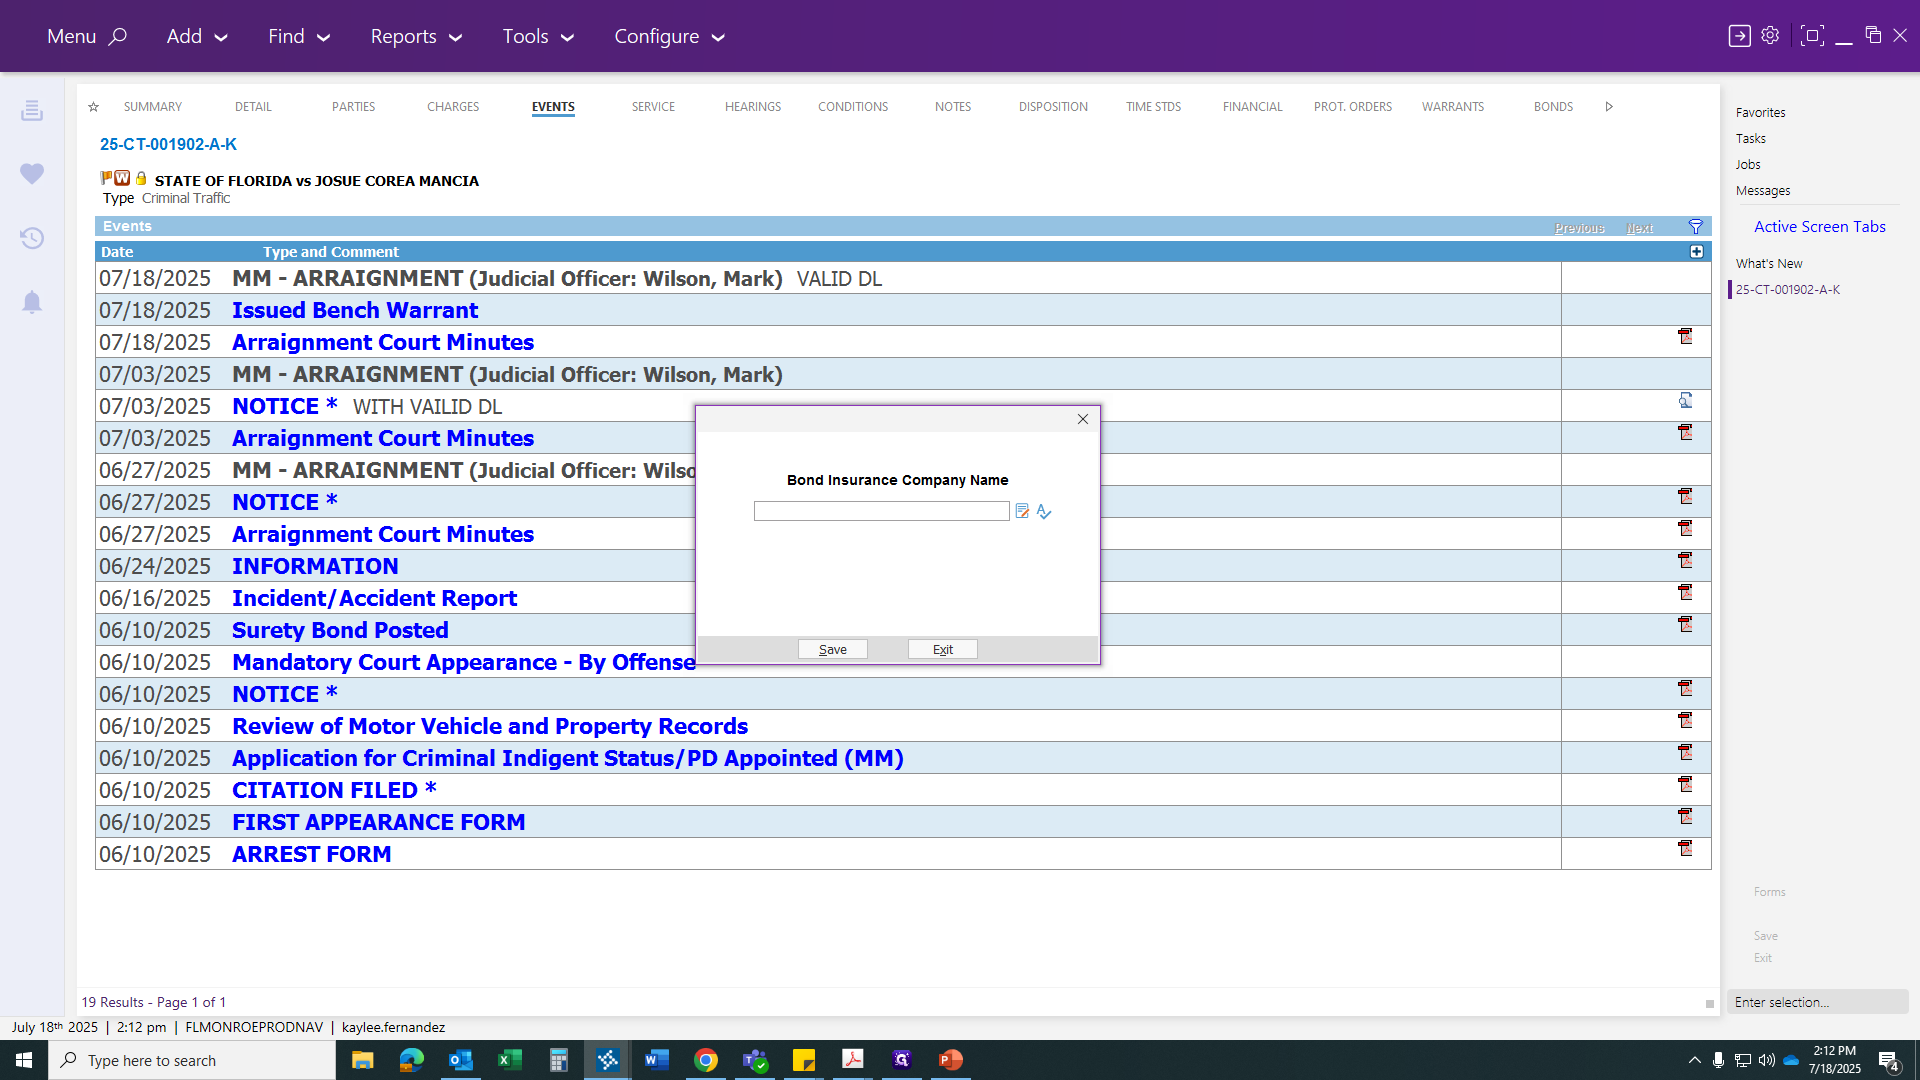
So first, we'll start with our... Surety bond certificate. It will ask you for your bond company name. You can find the bond insurance company name on the first page of your bond. Enter their information as required.

After entering the insurance company name, click Save. This will generate your certificate and the order to forfeit the bond, which can also be emailed to the judge's office for a signature. Once you have compiled this, you should not need to make any changes at this stage unless you have multiple bonds.

If there is only one count, you can erase it and apply it only to the specific charge being forfeited. Click on that, then return to the Forms tab. Type "Surety" to get your bond estreature letter.

This one will have several boxes appear for you to fill in. Make sure you enter all the correct information. I entered the company name. I’ll click Save. Next, it will ask for the address. I’m entering the information exactly as it appears on the bond paperwork. Give me a moment to type this out.
Next, enter all the information for the bond insurance company.
Again, it will include everything listed on the bond—the bonds...

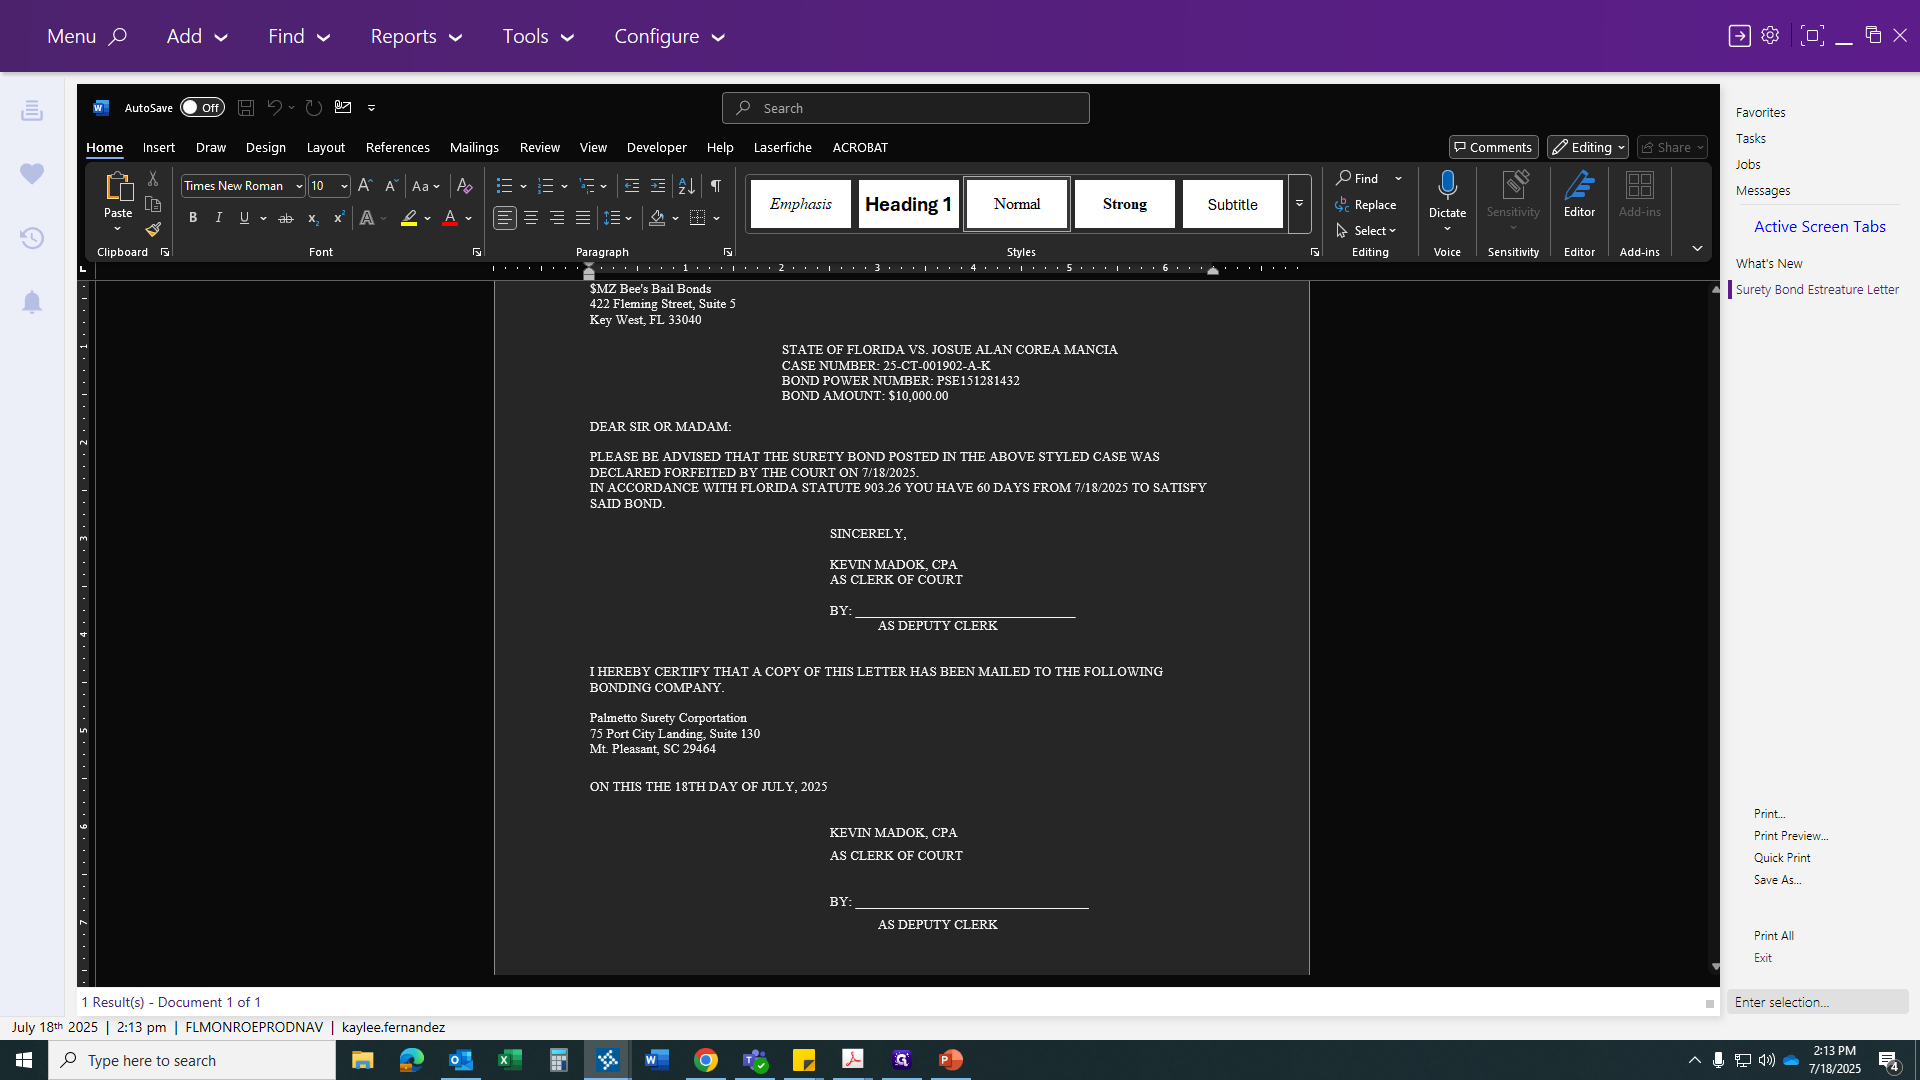
Enter the corporation's name and address. Once you've provided this information, your bond letter will be generated. You can then print, sign, and stamp it.

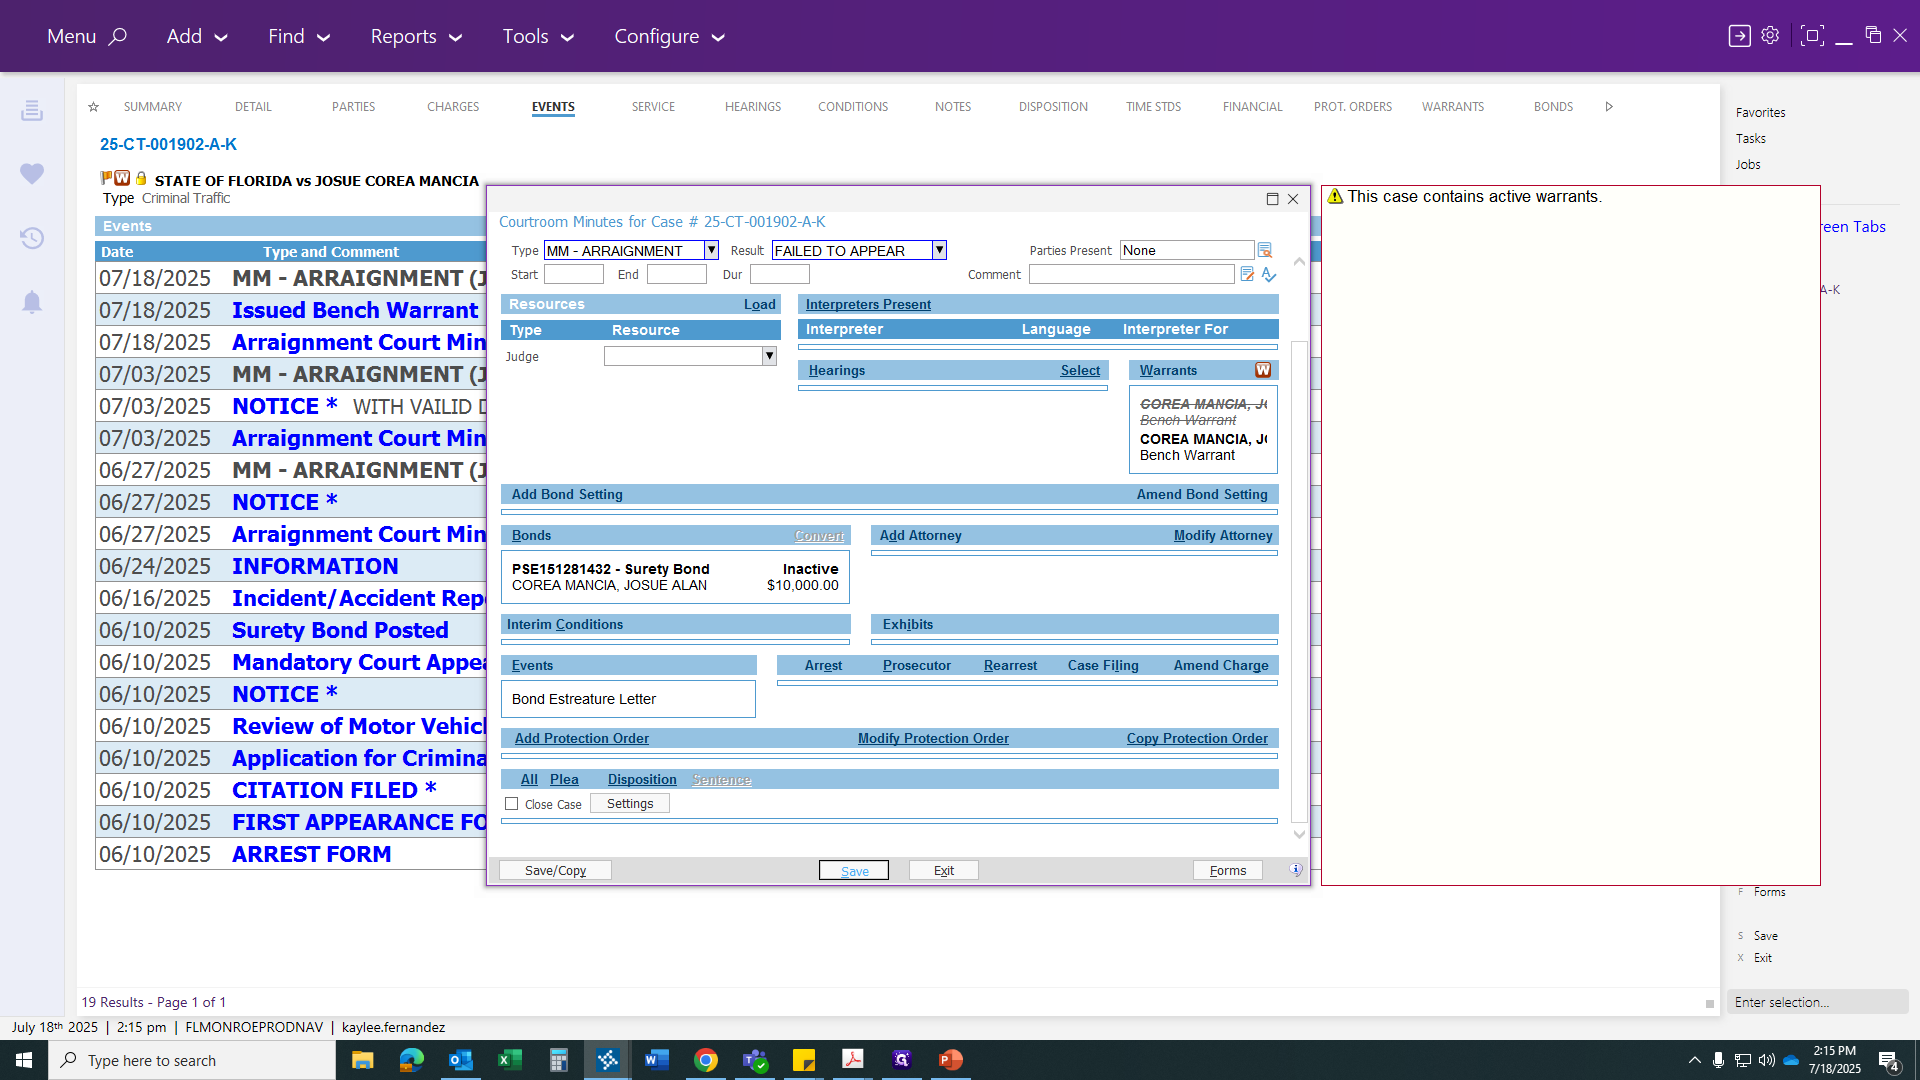
CORRECTION * The original document will remain in the file. A certified copy will be sent to the bondsman and the insurance company. Once you have completed that, return to your arraignment hearing. Update the court minutes to show that your bond can now be estreated, once you have your paperwork.

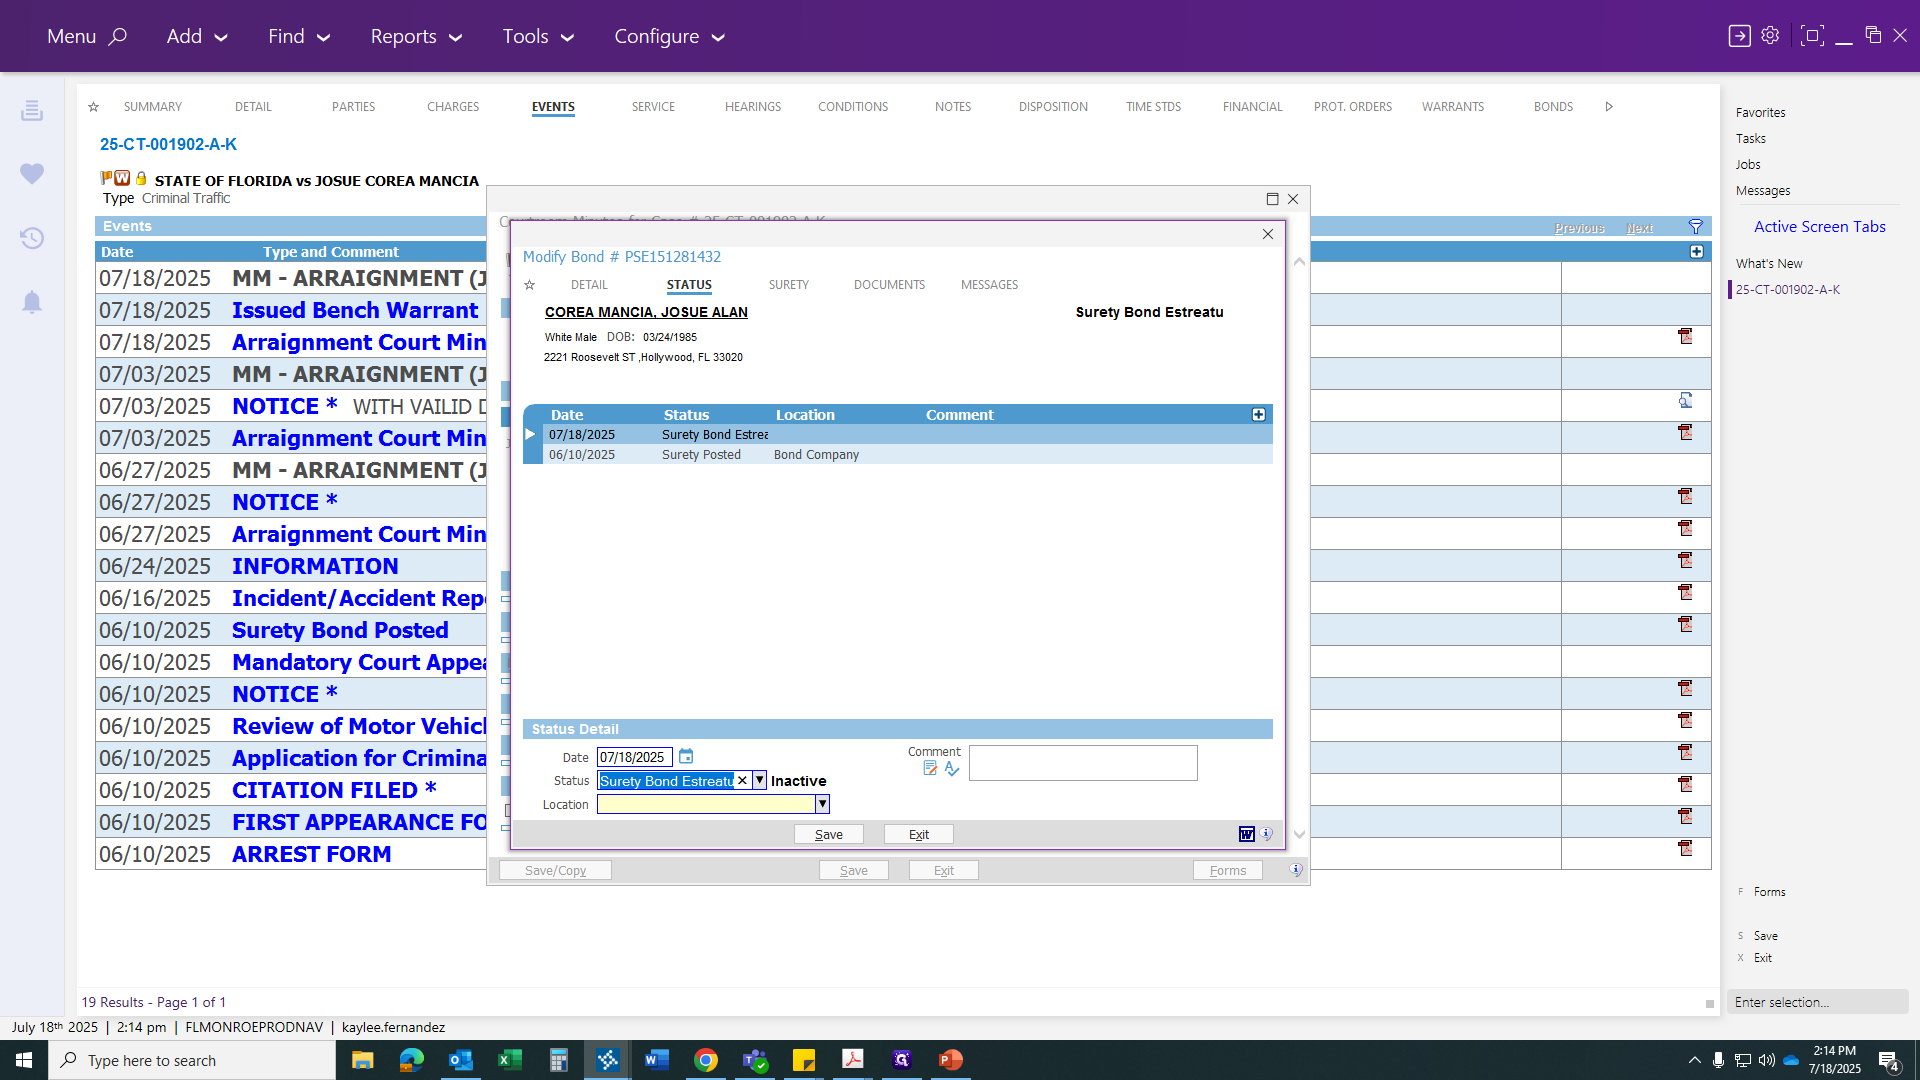
What... Once the bond becomes inactive, you must handle everything manually. This saves everything in time.

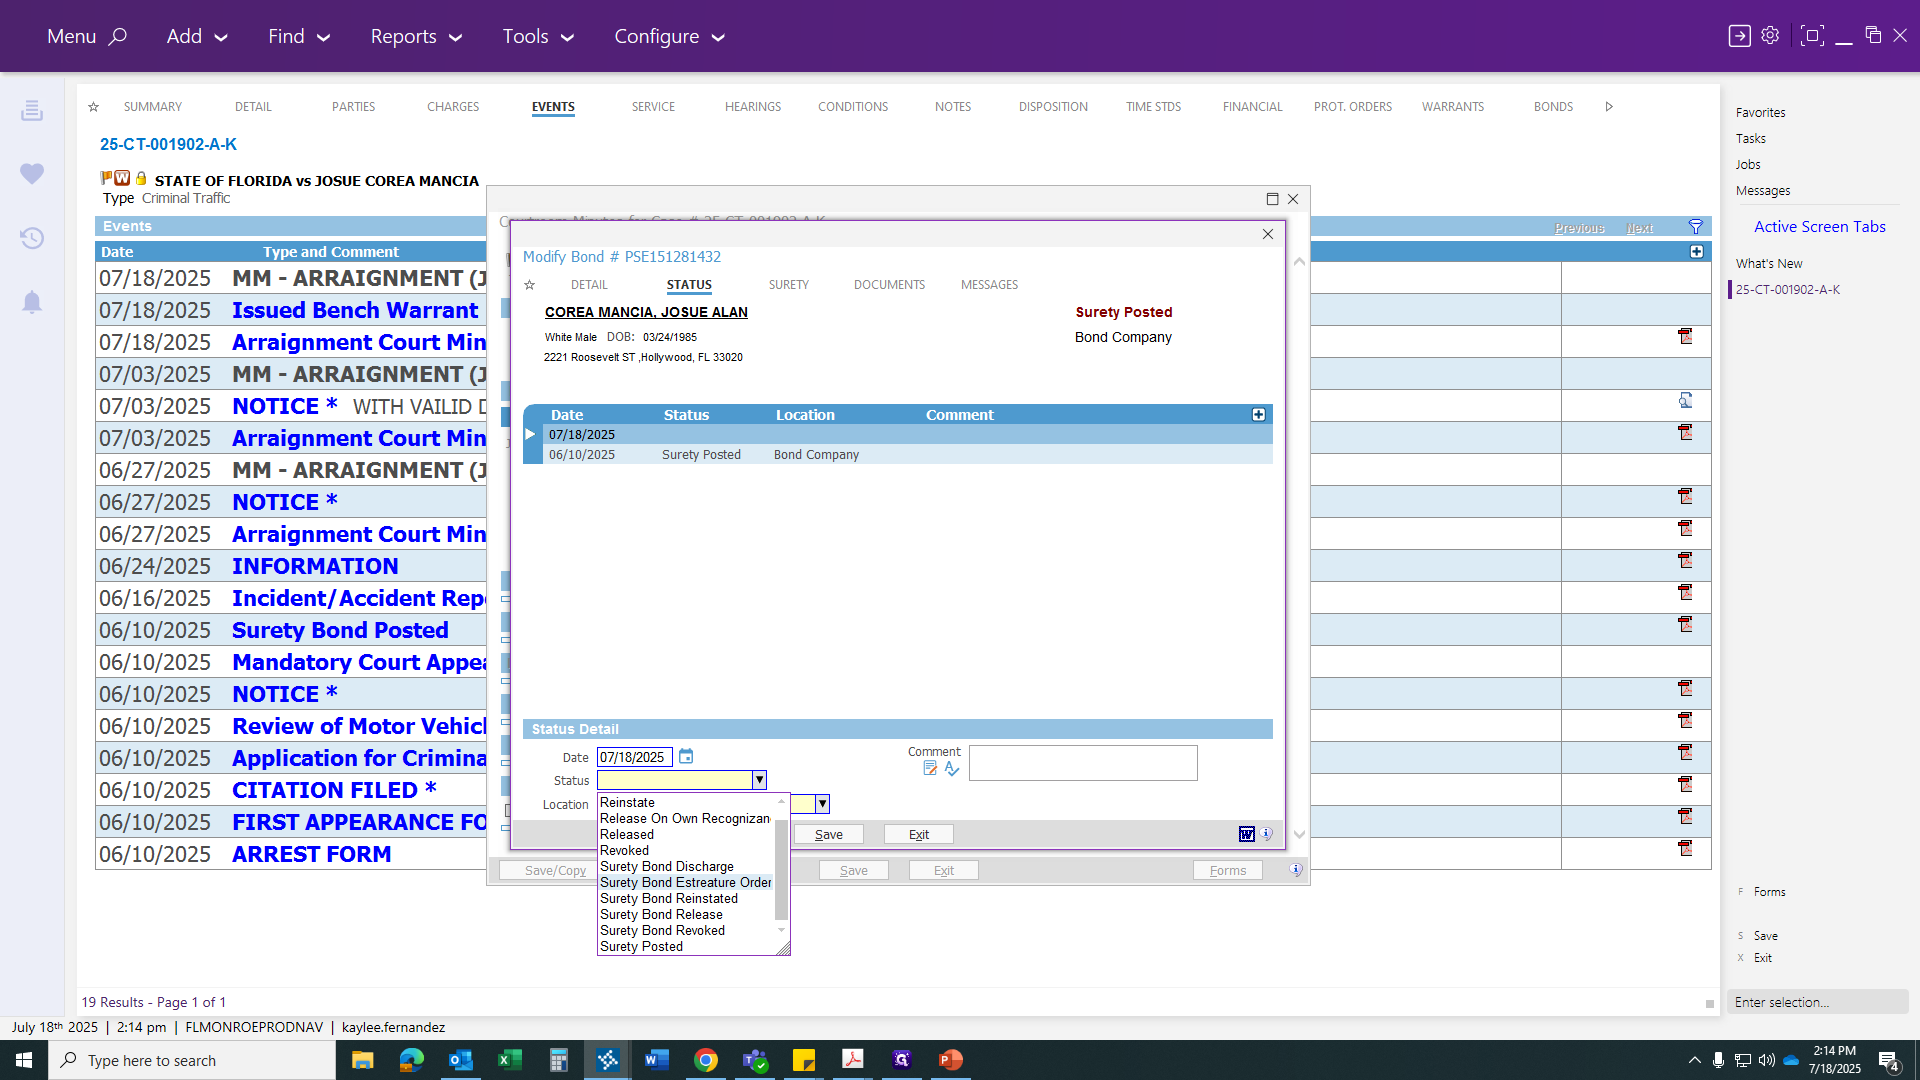
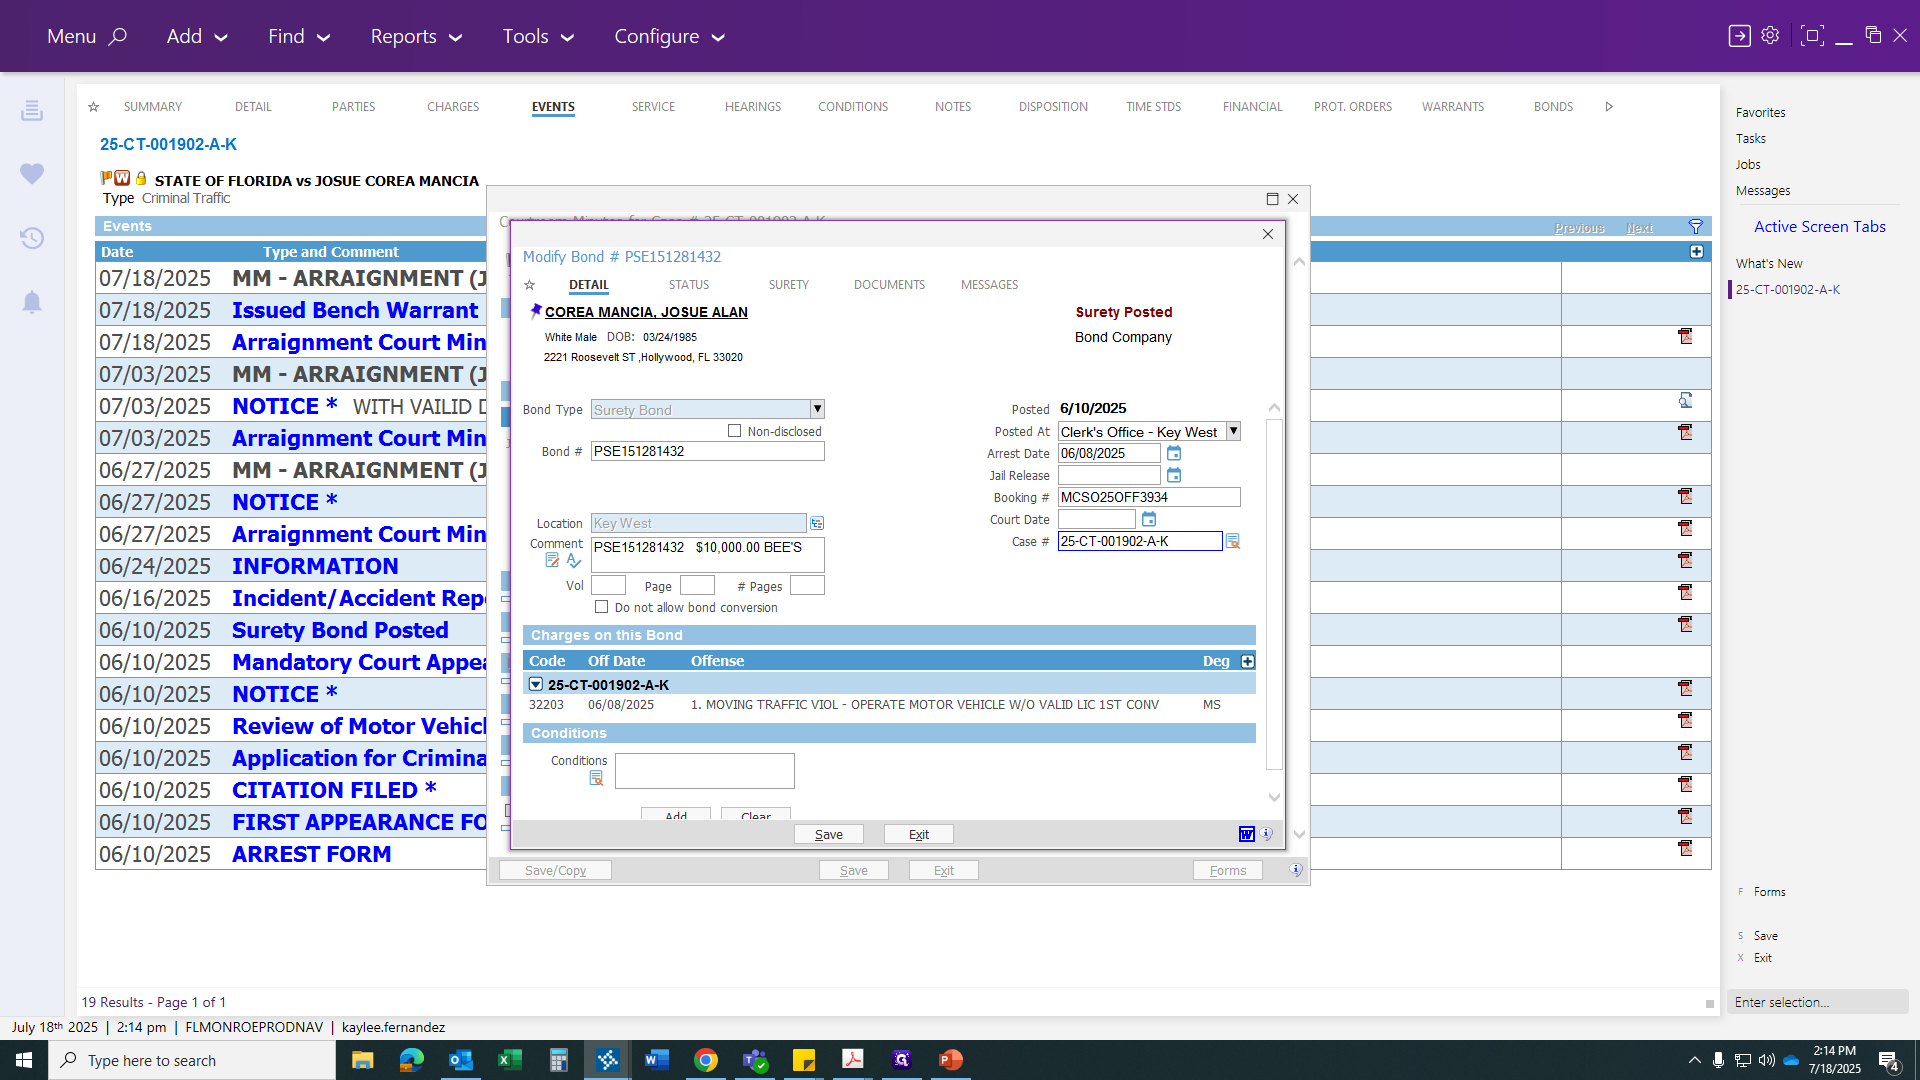
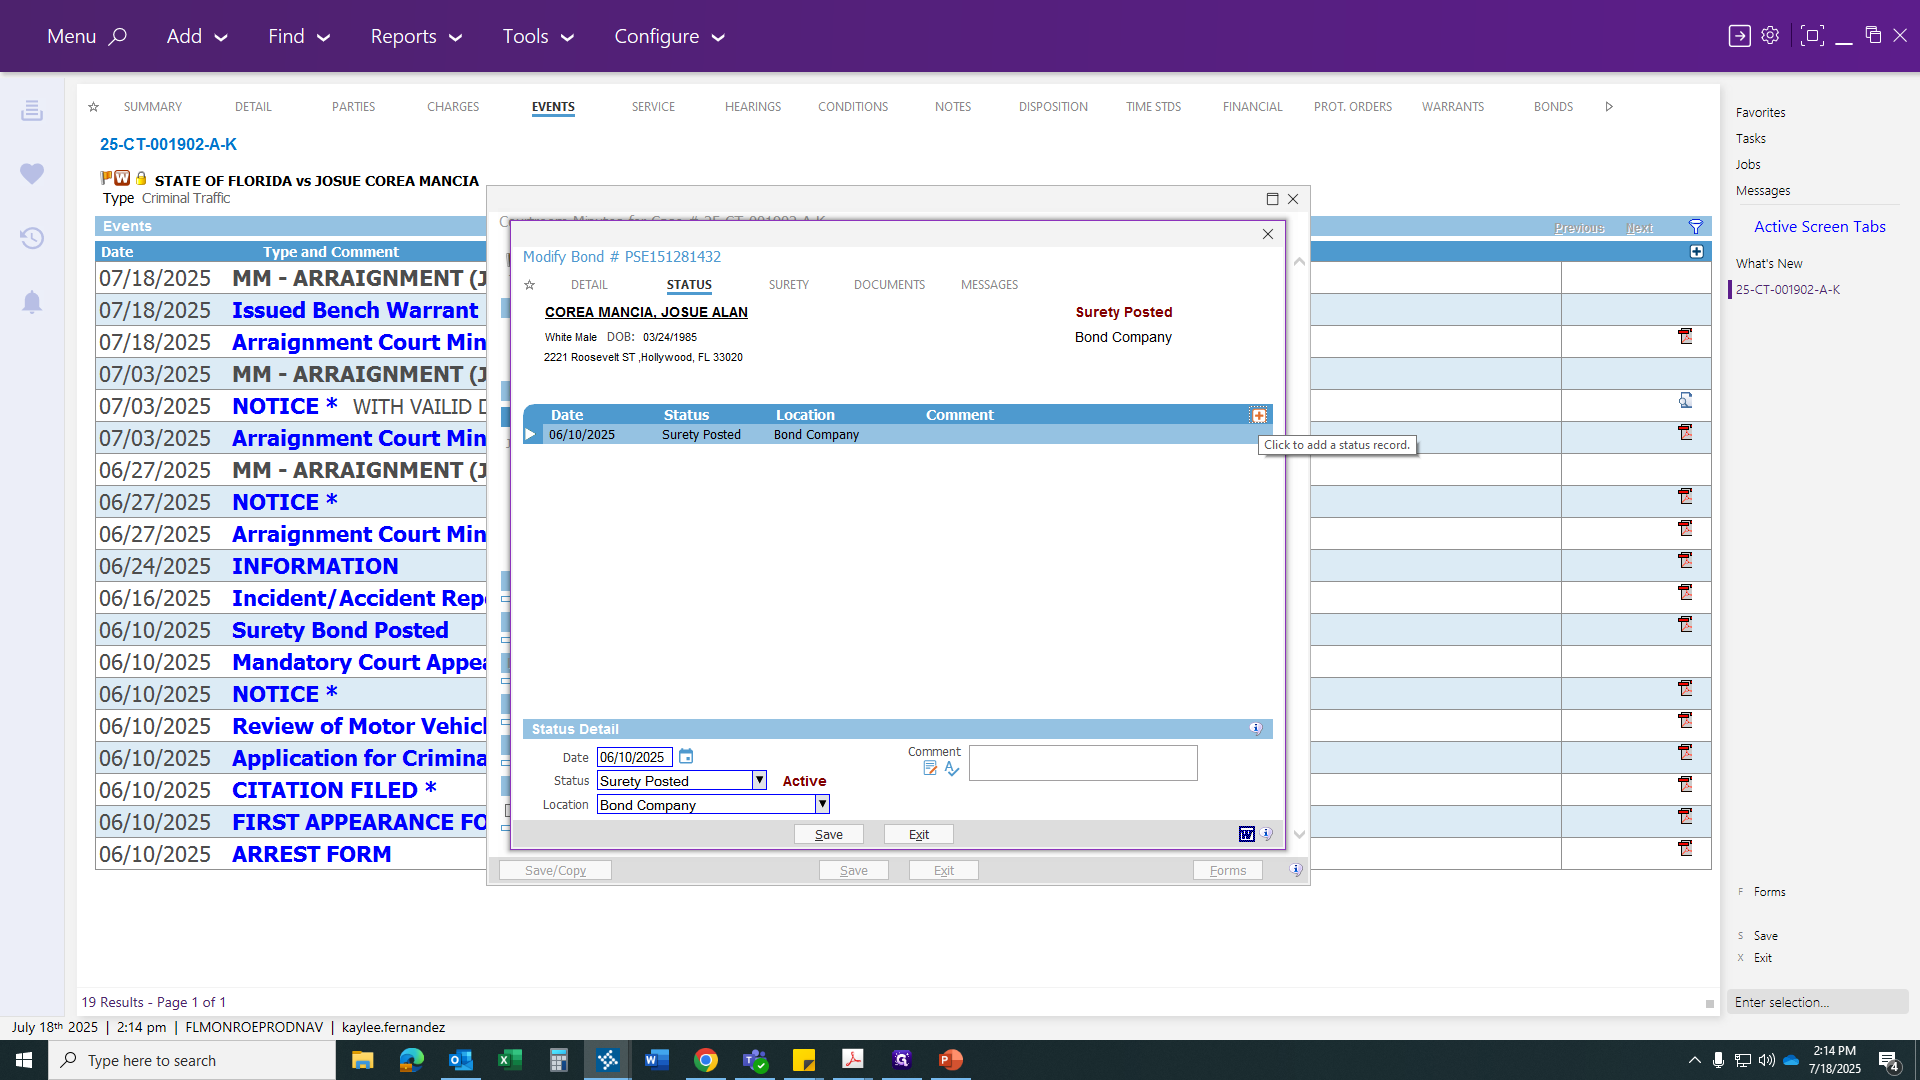
After clicking on your bond, leave all settings unchanged. Go to Status and enter the judge's issue date.

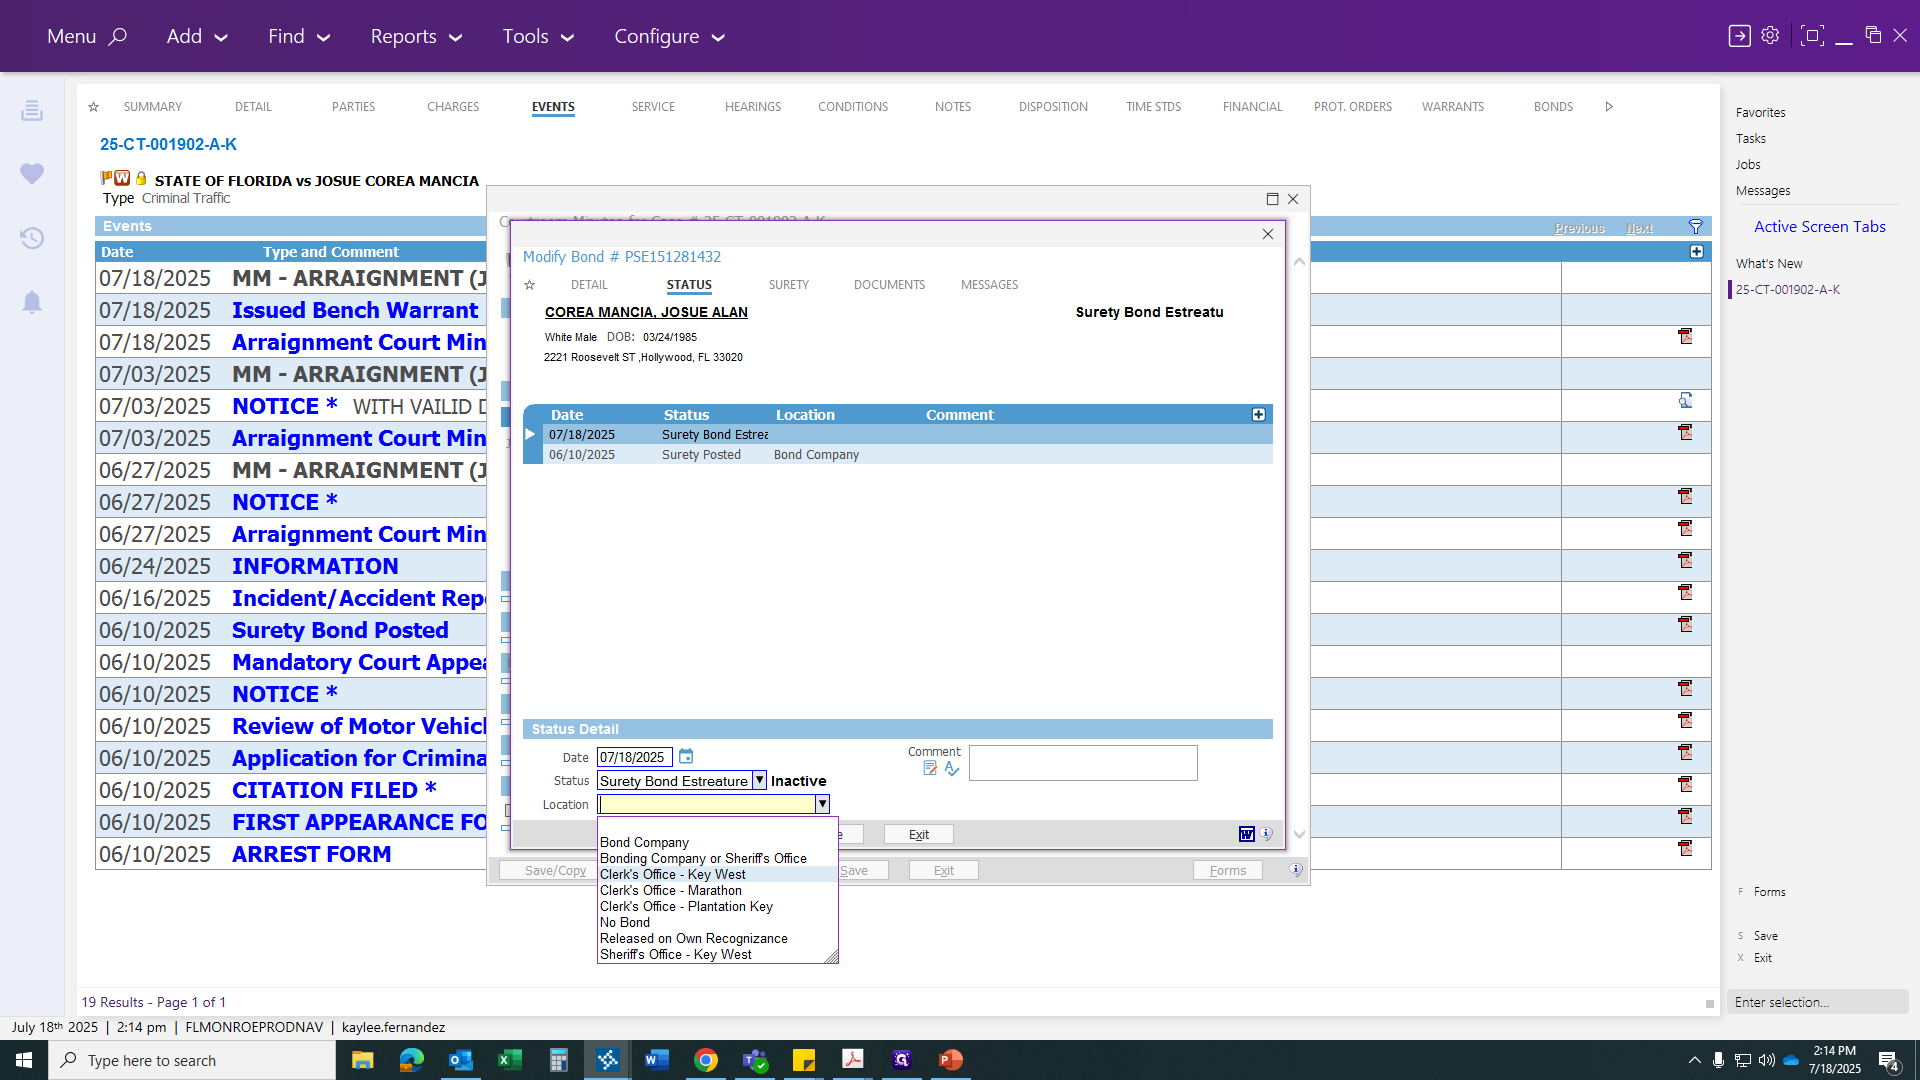
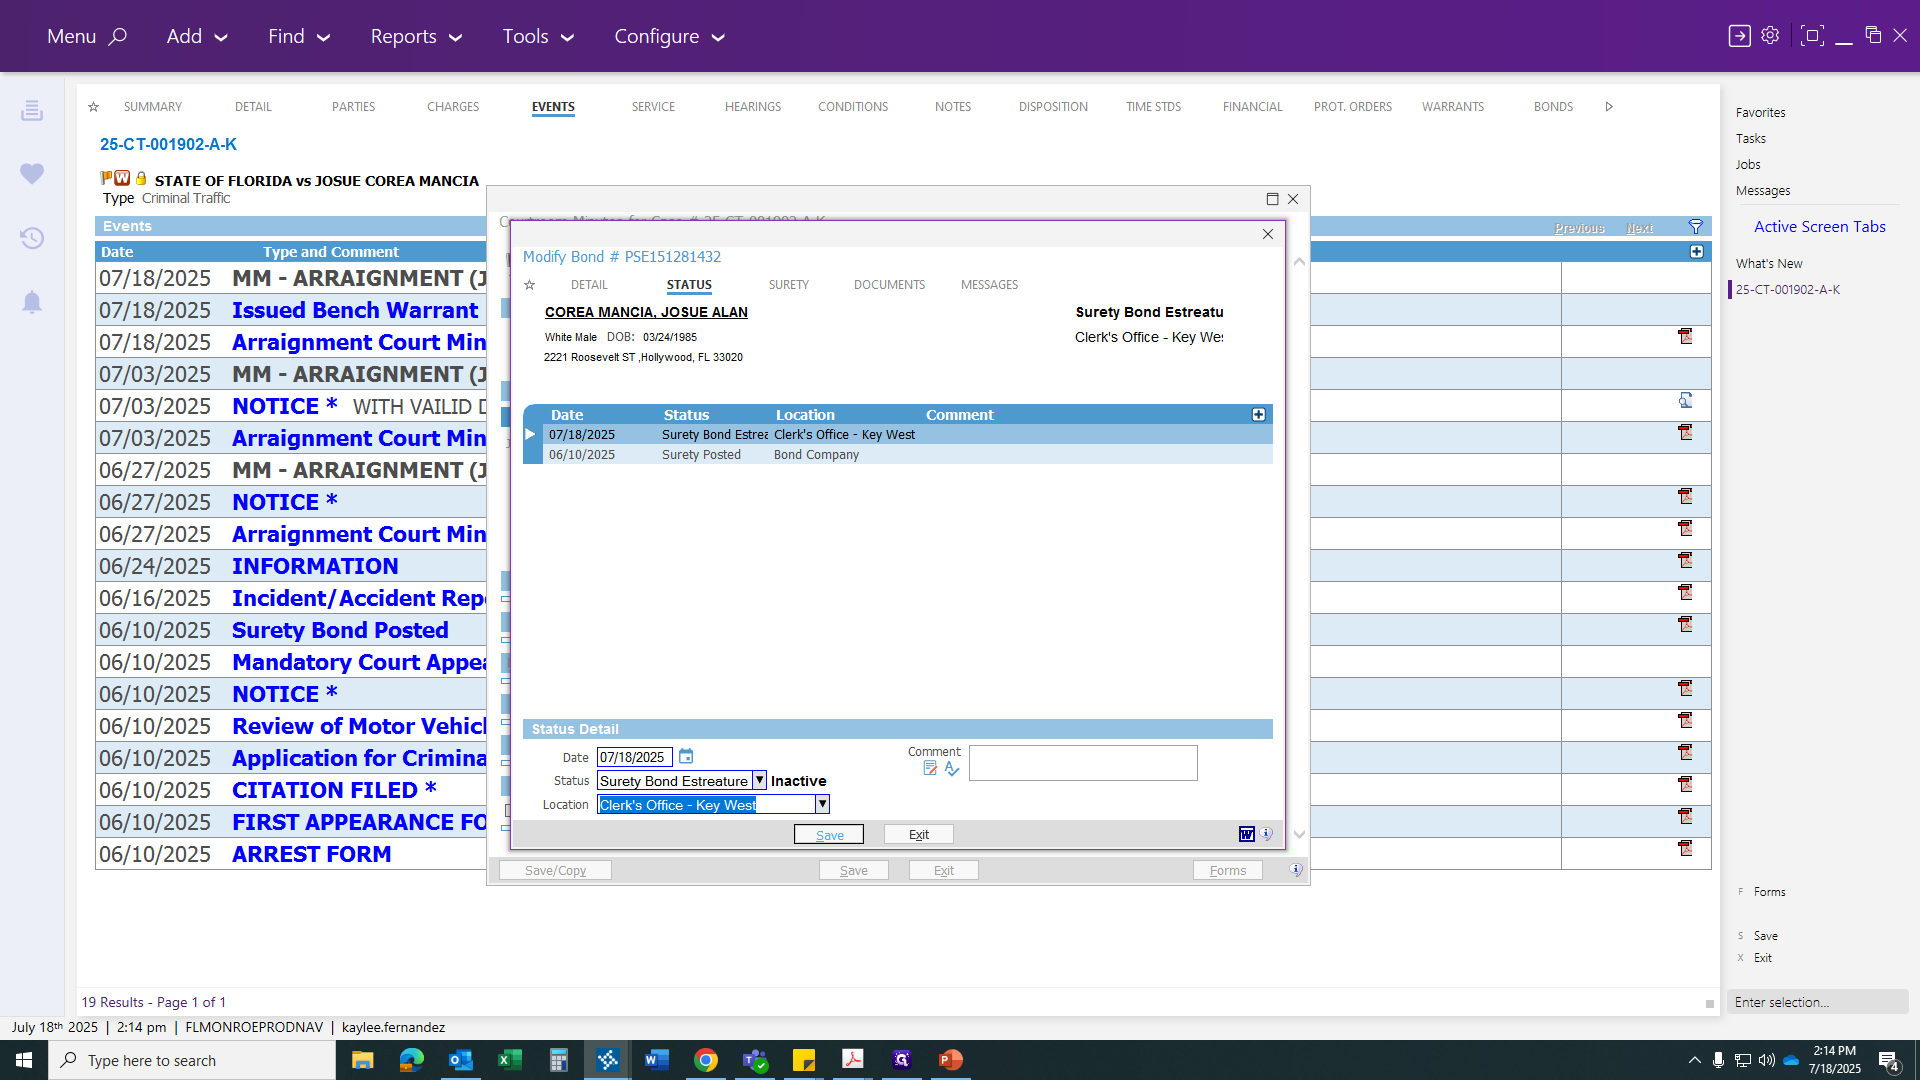
Go to Status and locate the Surety Bond Estreature Letter. Now it will make the bond inactive and send it to the Key West Clerk's Office.

Once you click Save, the post will be scheduled automatically. Certificate is being ordered.

The last thing you will post is your bond letter, giving the bondsman 60 days to either pay the bond or have the defendant rearrested, so they can recover their bond money.

If not, legal action will be taken against the bond company.


Once you are done, click Save. This will generate all your information. After the judge signs, submit your paperwork to the appropriate offices. Make sure the bond estreasure order is scanned, clocked in, and sent to records for recording.


Hope this helps with the process and procedure for issuing a bond, a bench warrant, and bond estreaure.