How to Manage and Create Email Templates on Reservety
How to Manage and Create Email Templates on Reservety
Learn how to manage, build, and customize an automated email email template in Reservety using placeholders, drag-and-drop formatting, and styling controls.
By Reservety
This guide explains how to design and publish a custom email template in Reservety.
By configuring automated emails, you can easily notify customers about anything without doing manual follow-ups.
This guide is intended for store owners, administrators, and customer support team members. You'll typically perform these steps during initial platform setup or when refining your automated communication strategy.
Access Email Templates
Reservety provides out-of-the-box automated messaging for actions like failed bookings, account creations, and successful payments. You can either edit these default templates or create brand new ones for distinct needs.
1
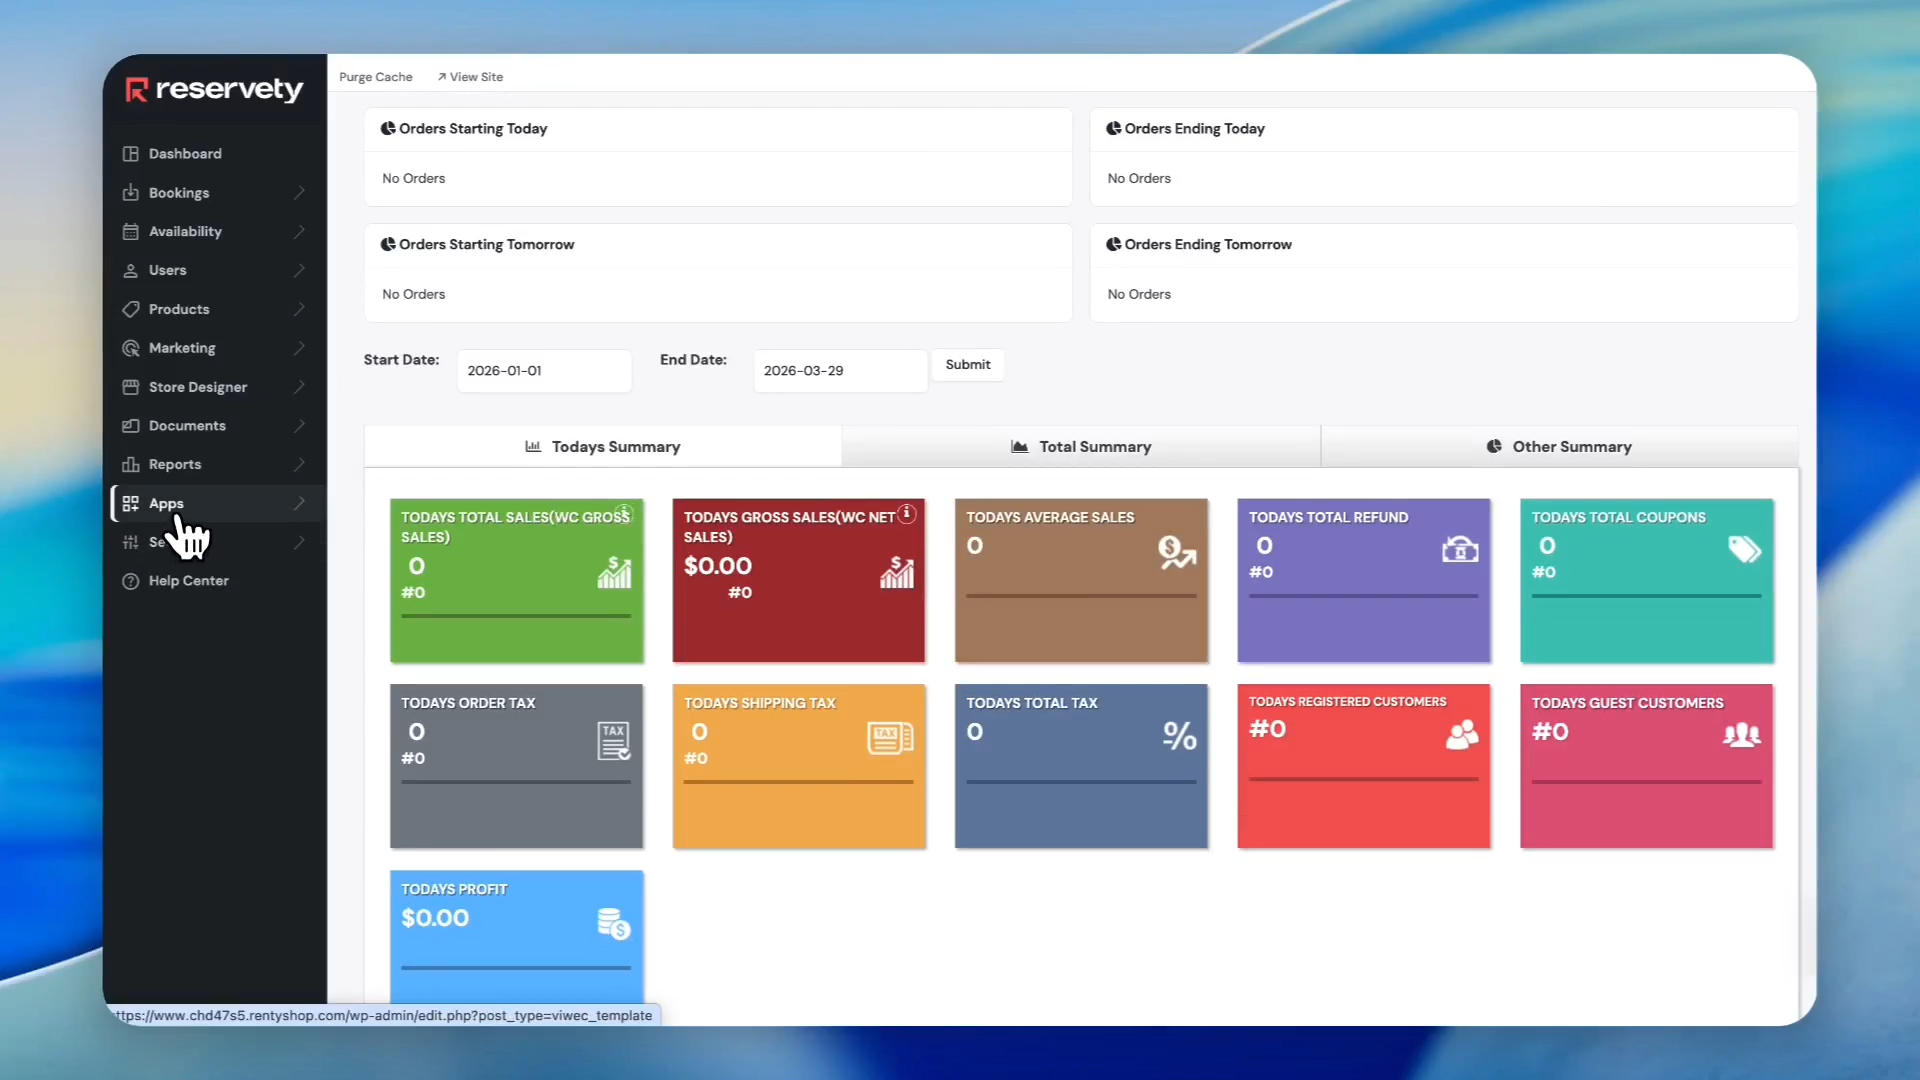
Click Apps in the left-hand navigation sidebar.
2
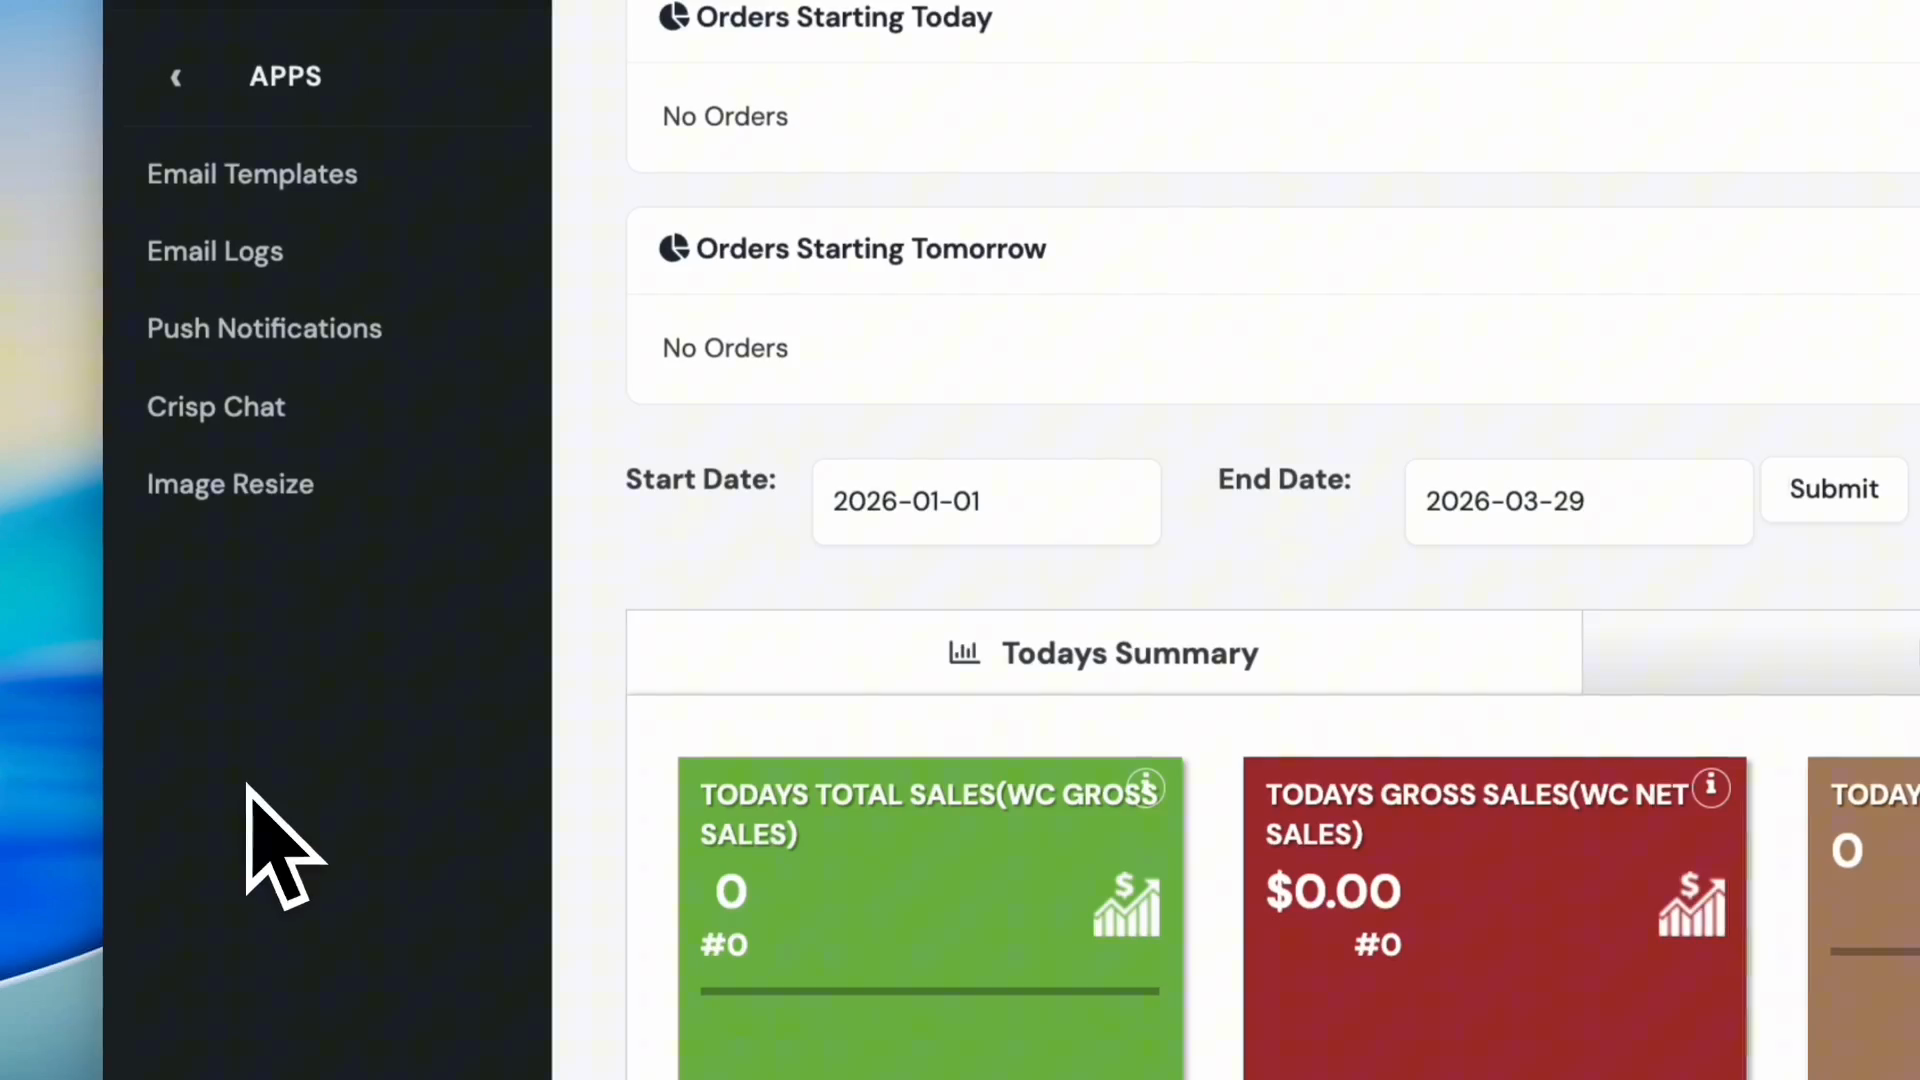
Click Email Templates.
3
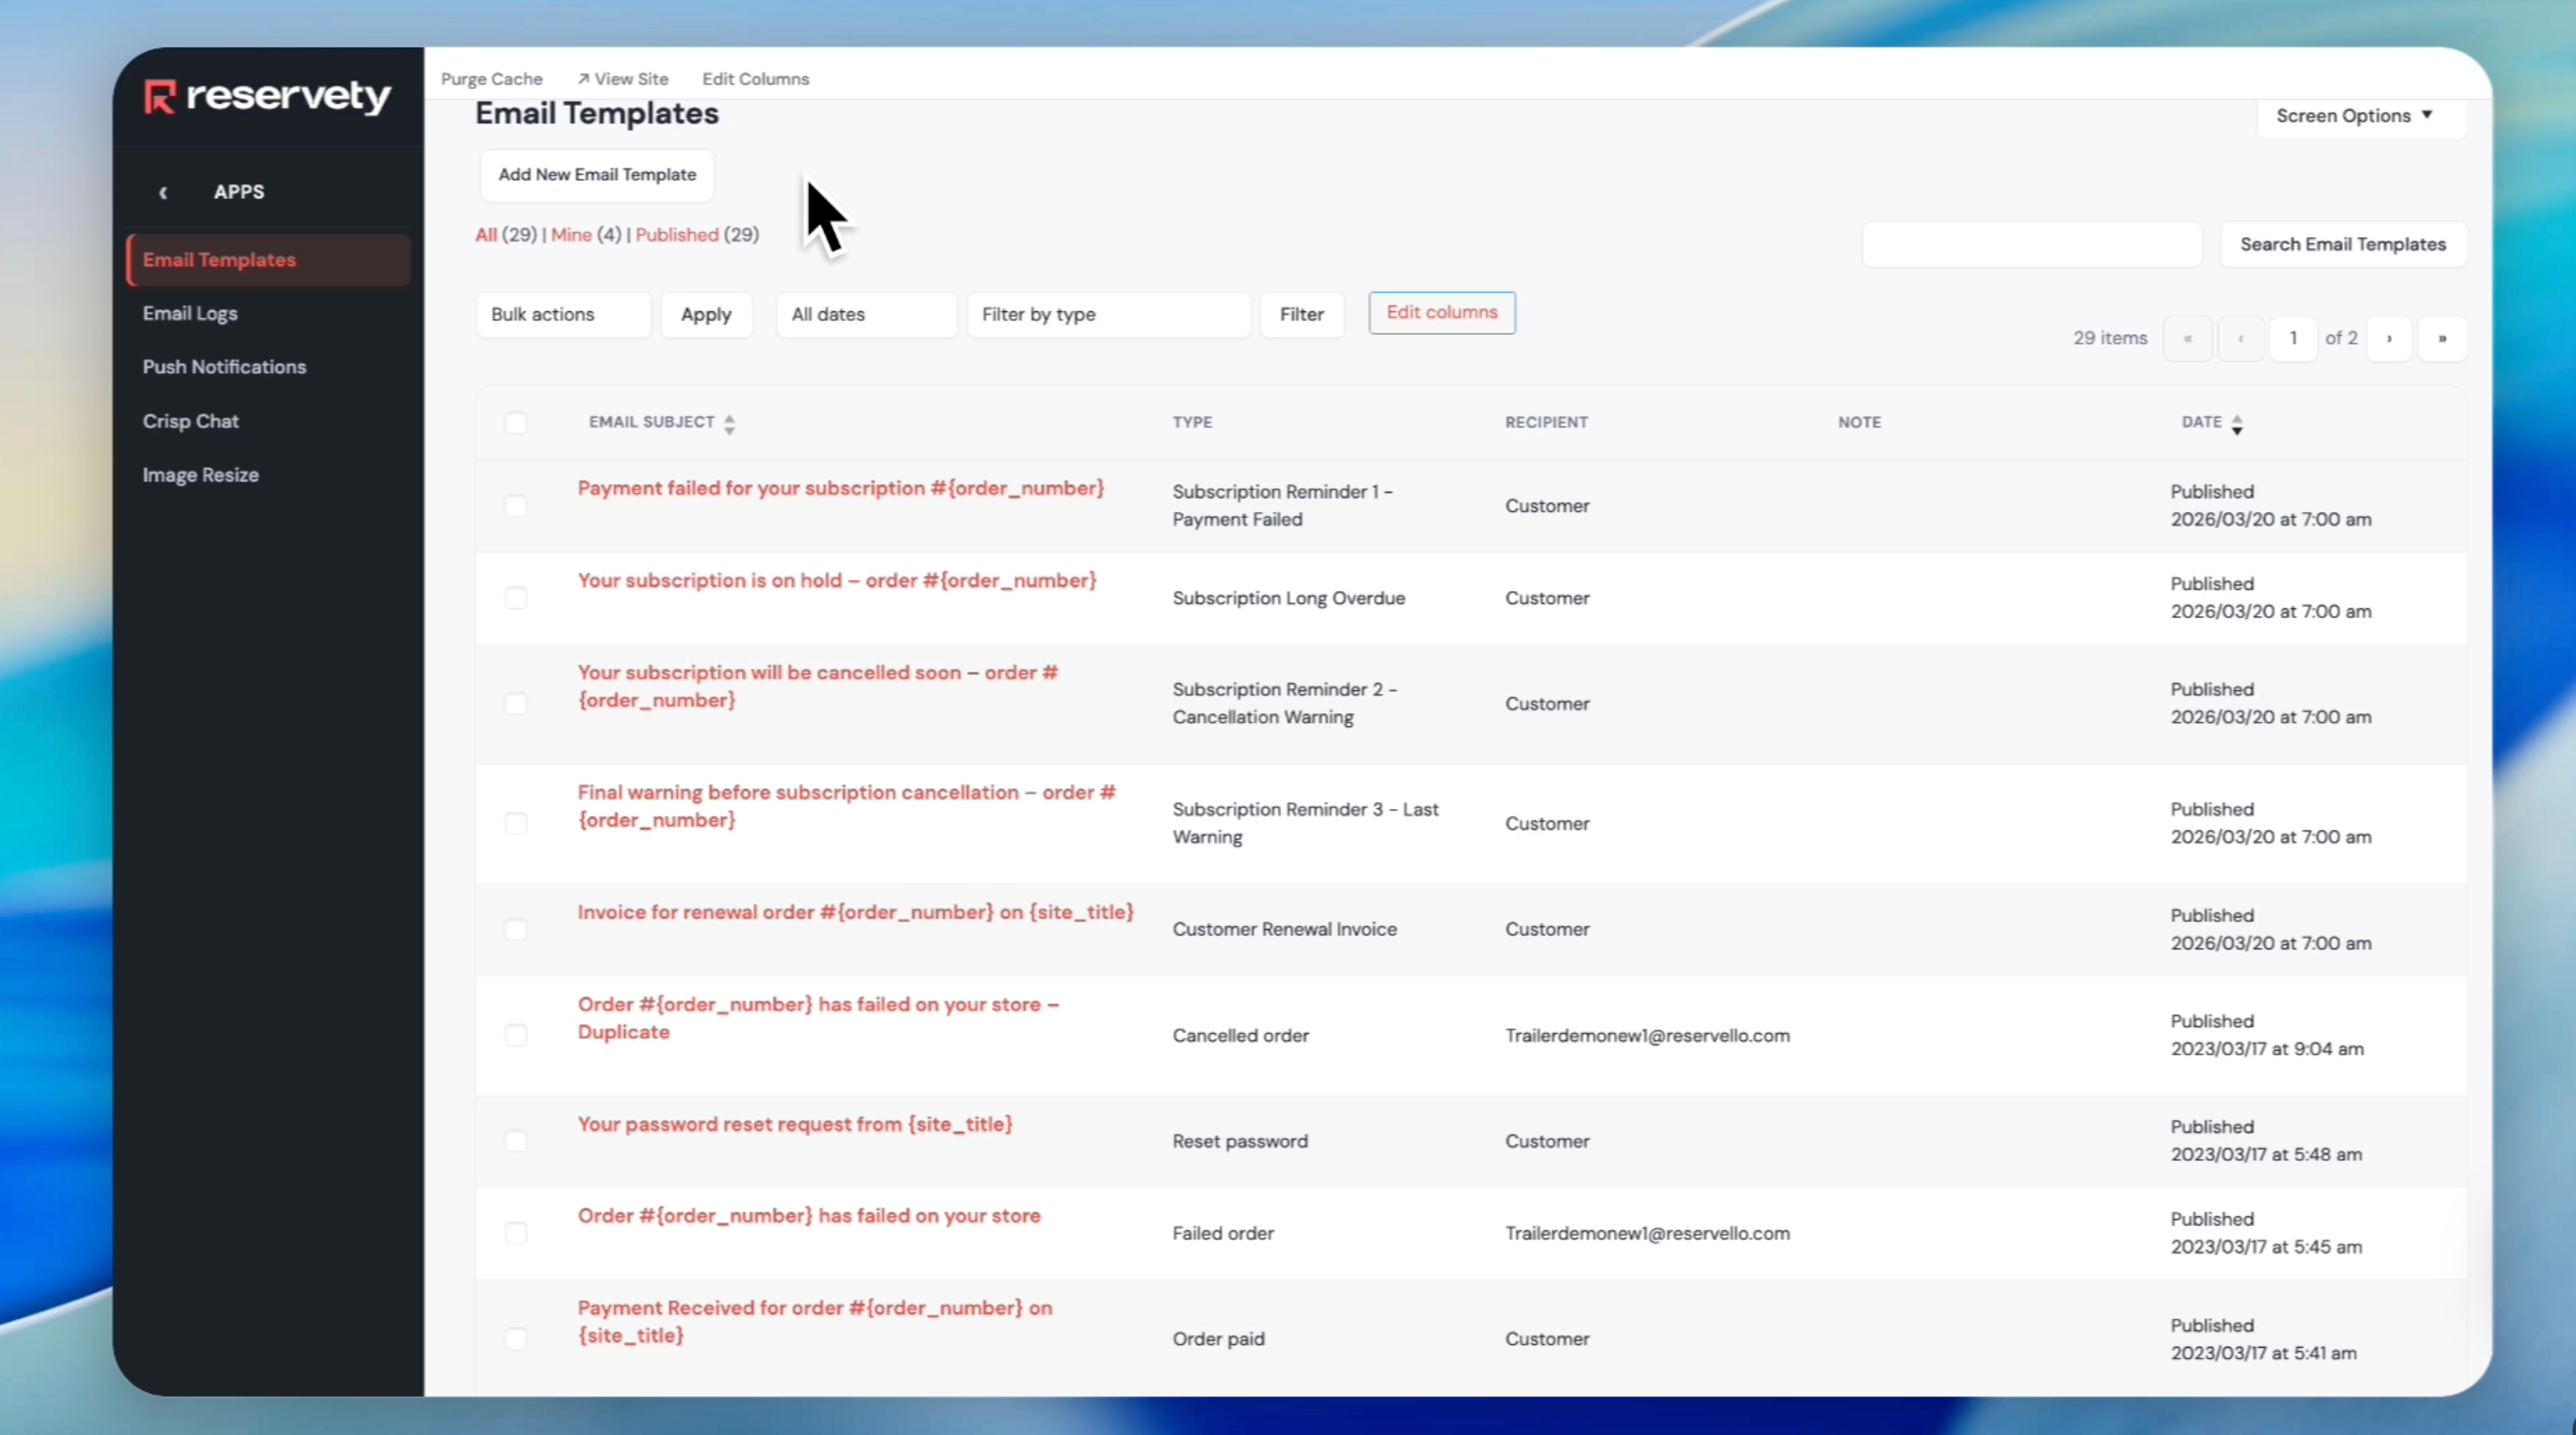
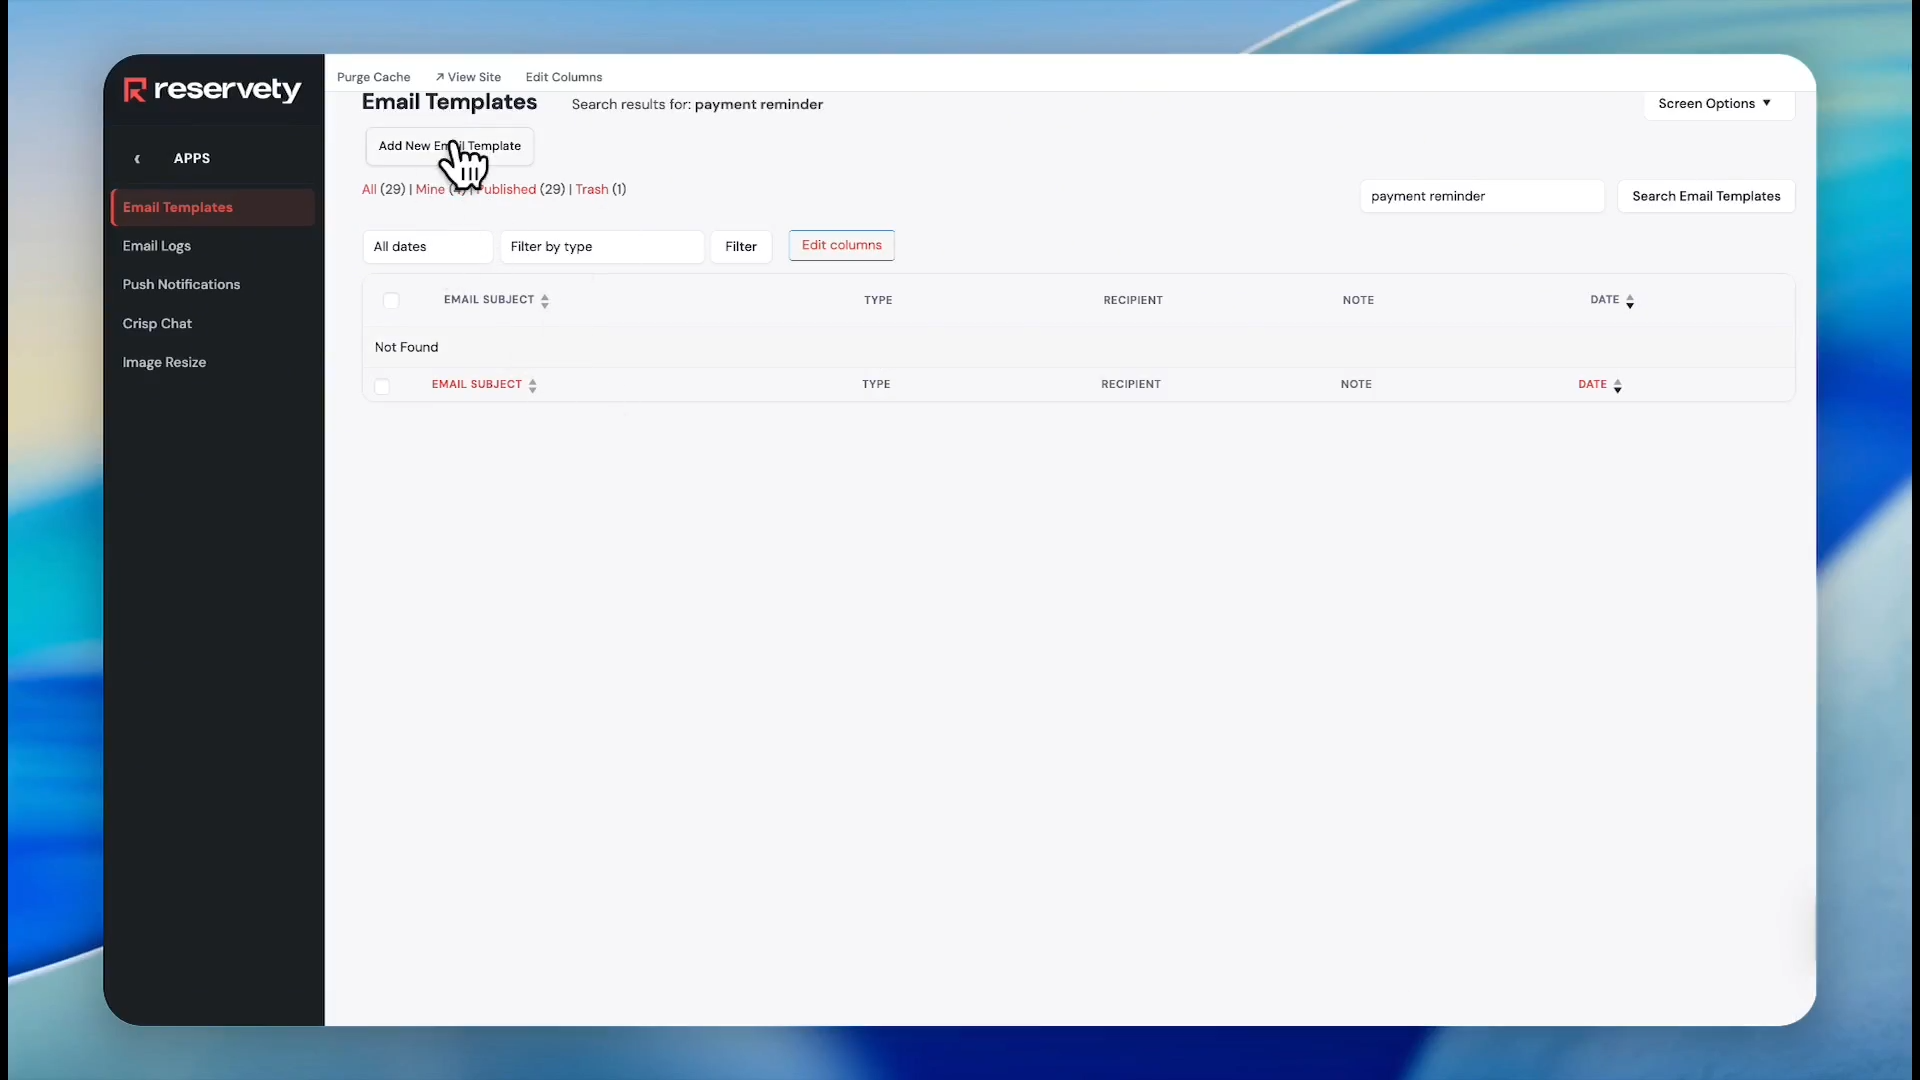
On the email templates page, you will see the existing templates. You can customize them easily by clicking on edit button under each listing.
4
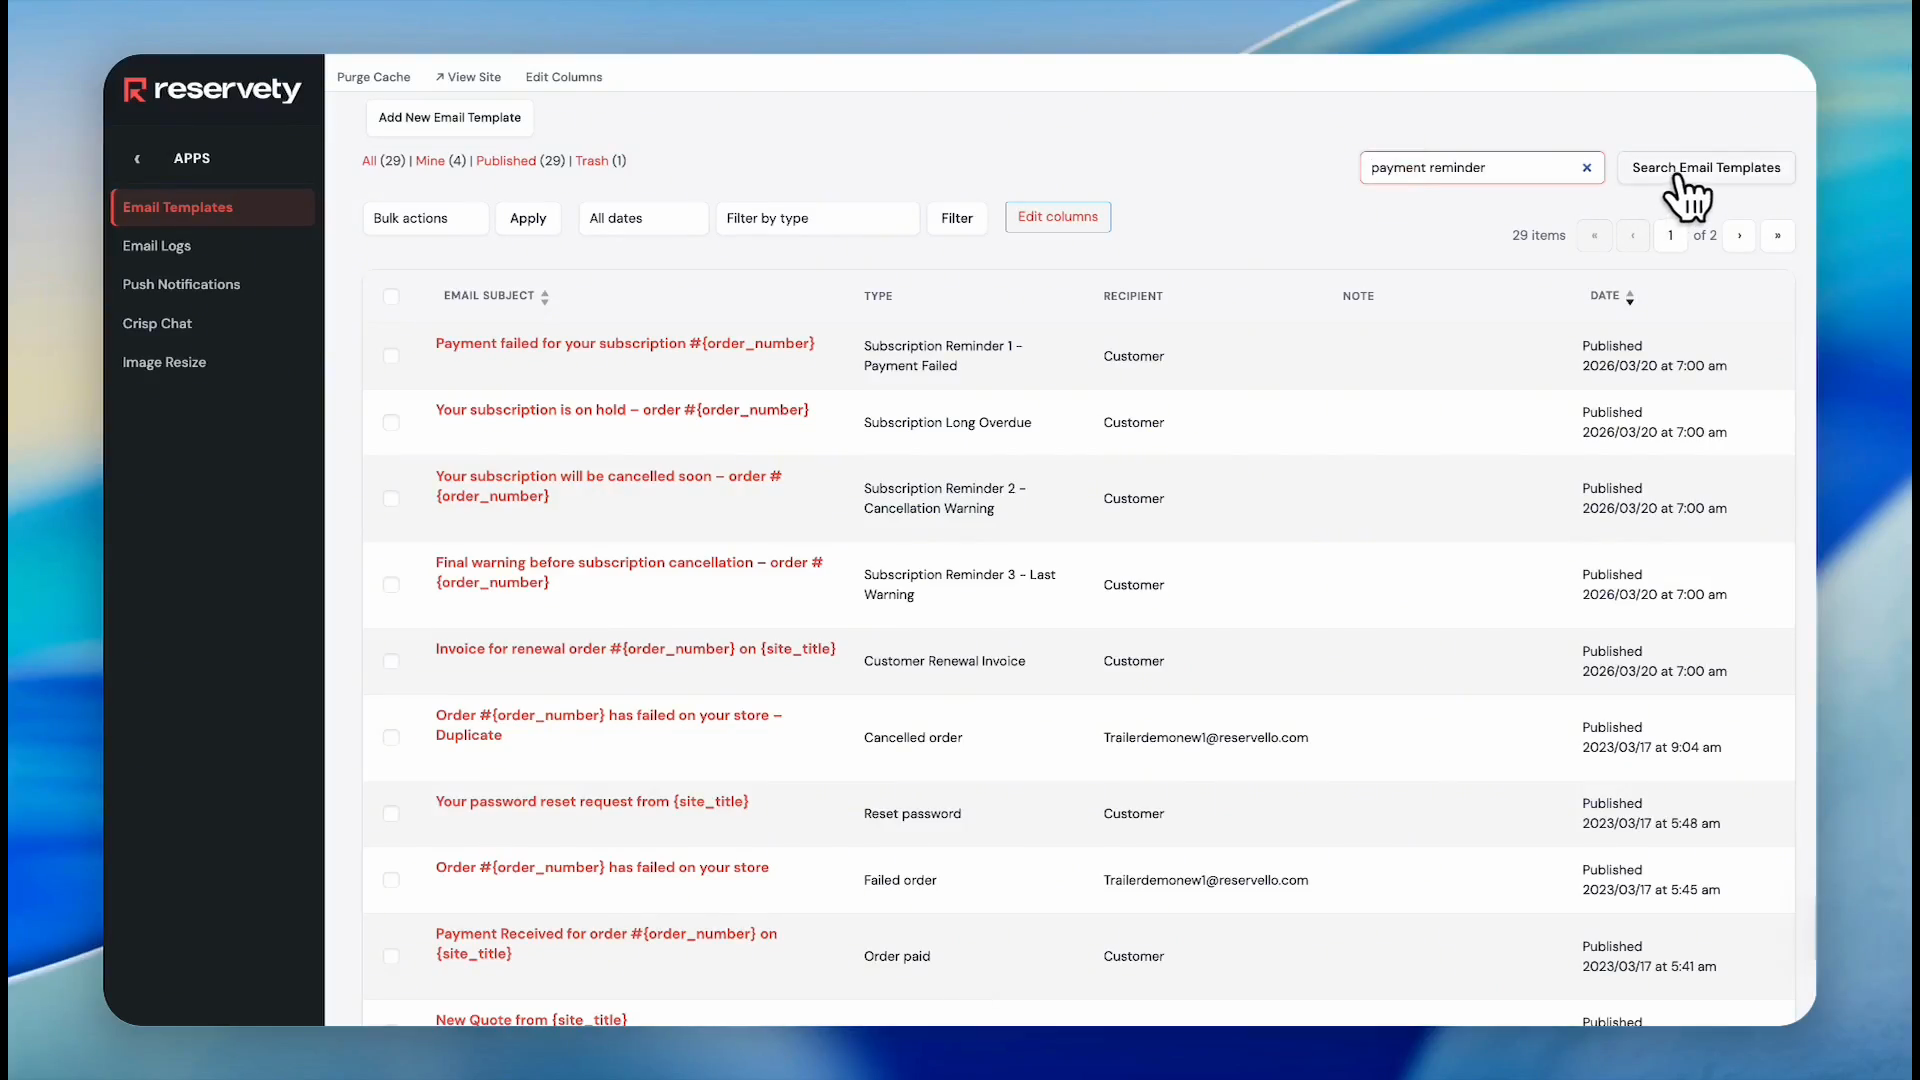
Let's say we need a email template for Payment Reminders. Type "Payment reminder" into the search bar to check if a default template already exists.
5
Click Search Email Templates.
6
If a template does not exist, click Add New Email Template to begin building one from scratch.
Configure the Template Settings
7
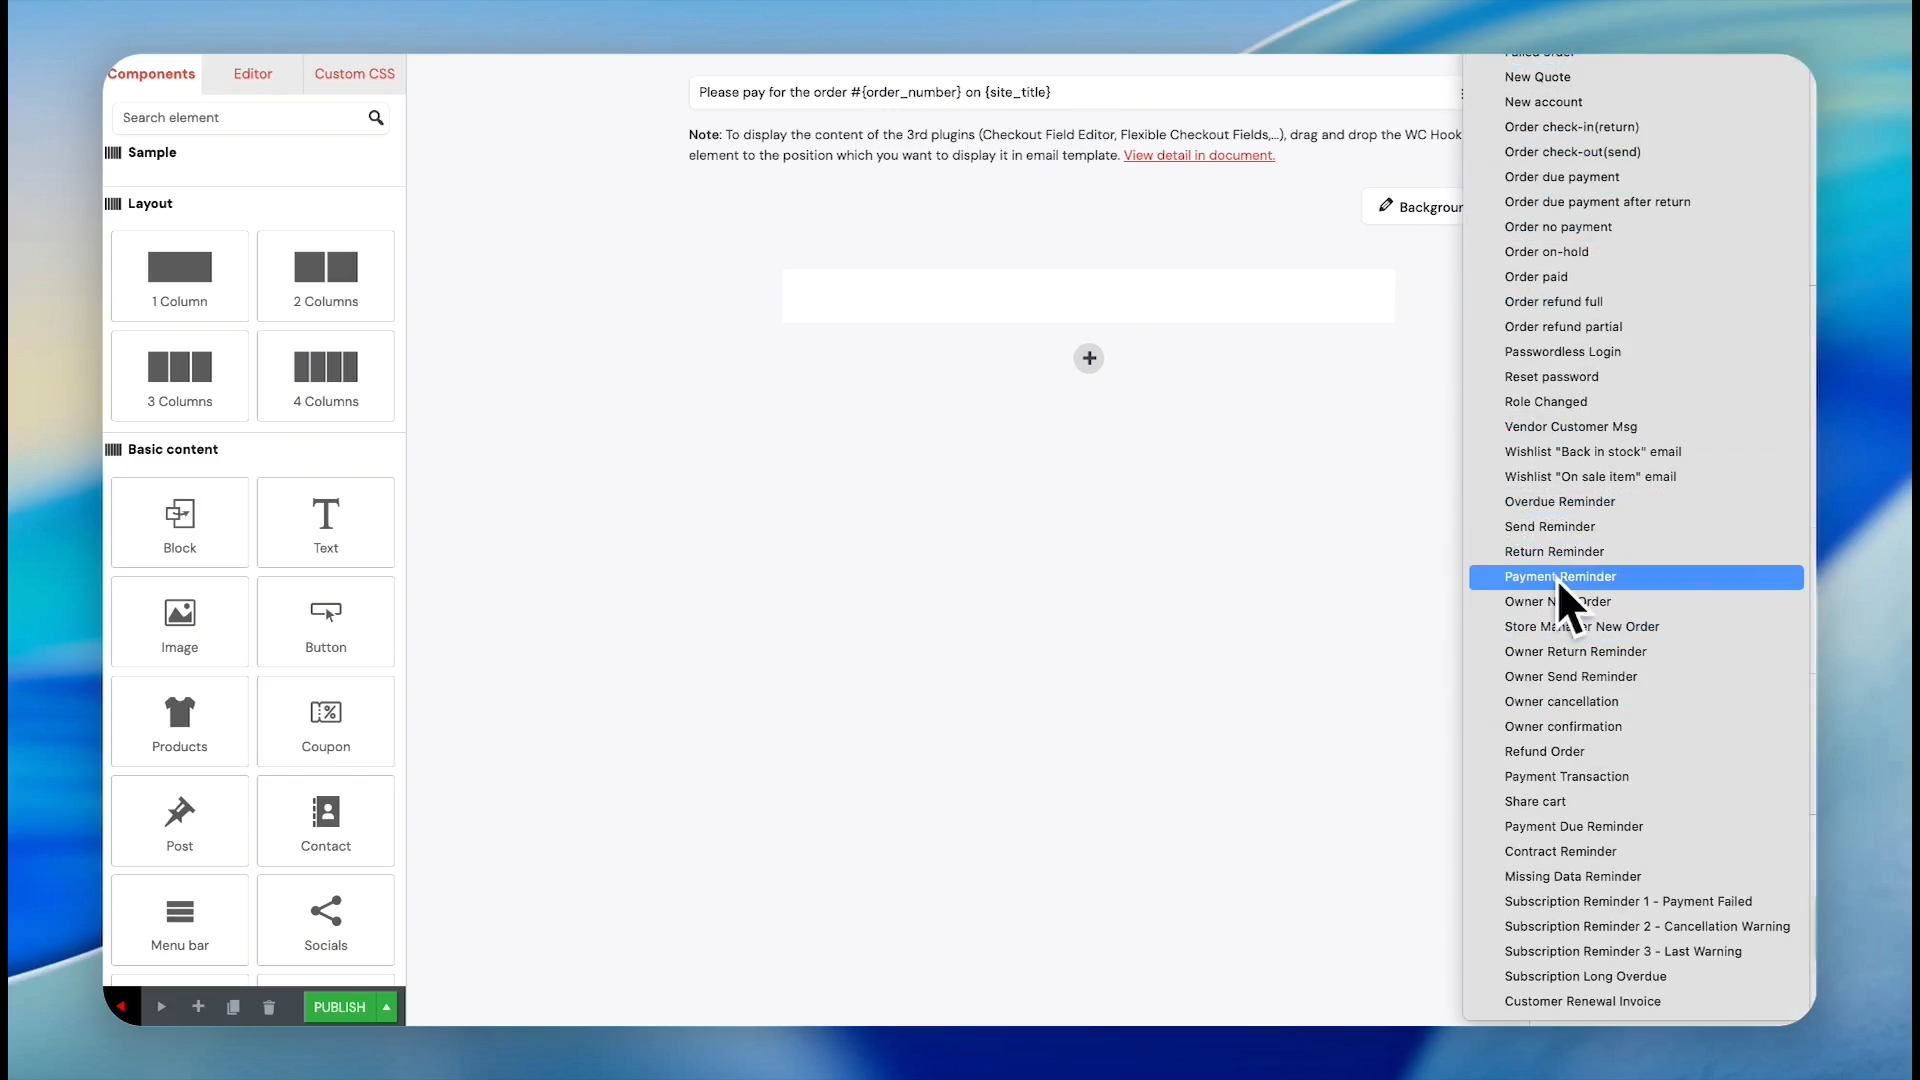
Type your email subject in the provided field (e.g., "Please pay for the order number").
You can use placeholders like {site_title} and {order_number} directly in the subject line. The system automatically populates these tags with real-time data from the customer's profile.
8
Select Payment Reminder from the Default template dropdown menu in the right-hand sidebar.
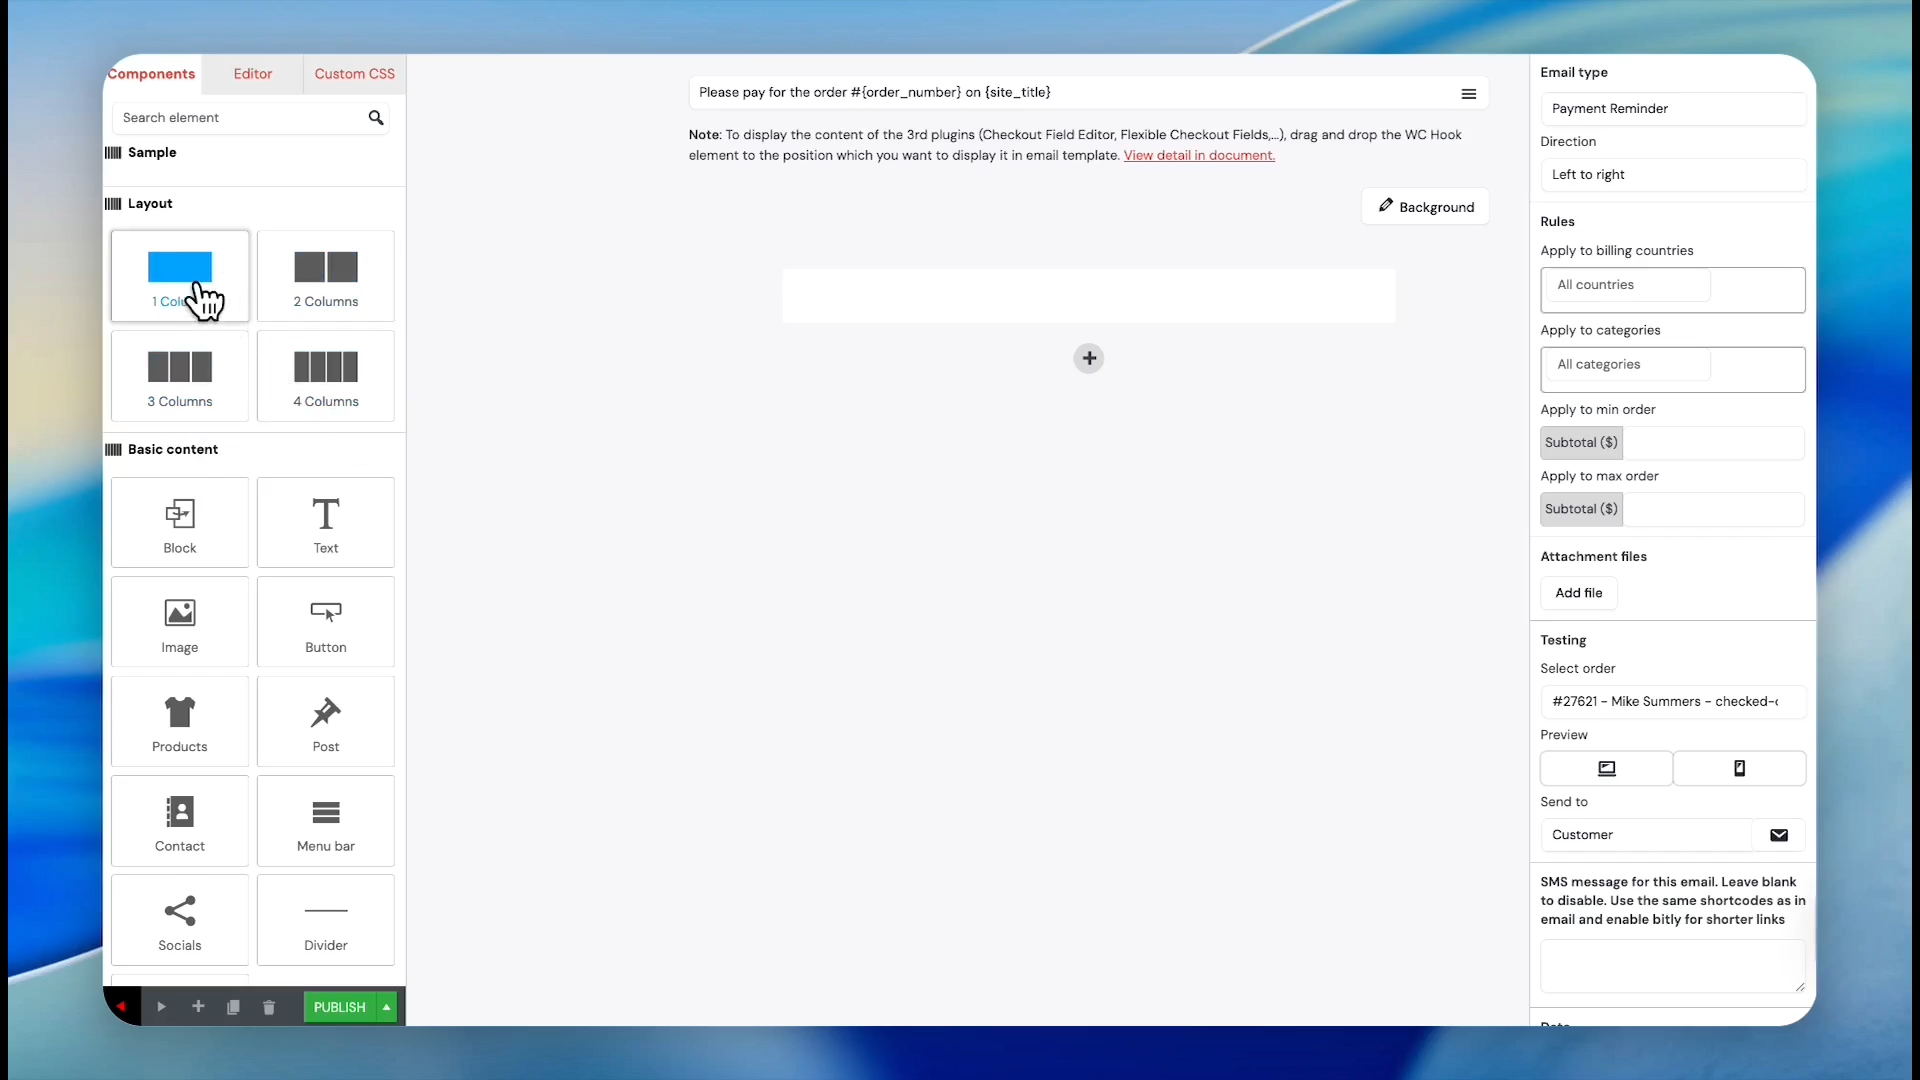
After designating the email type, you can assign rules to automatically trigger this reminder for specific countries or product categories if desired.
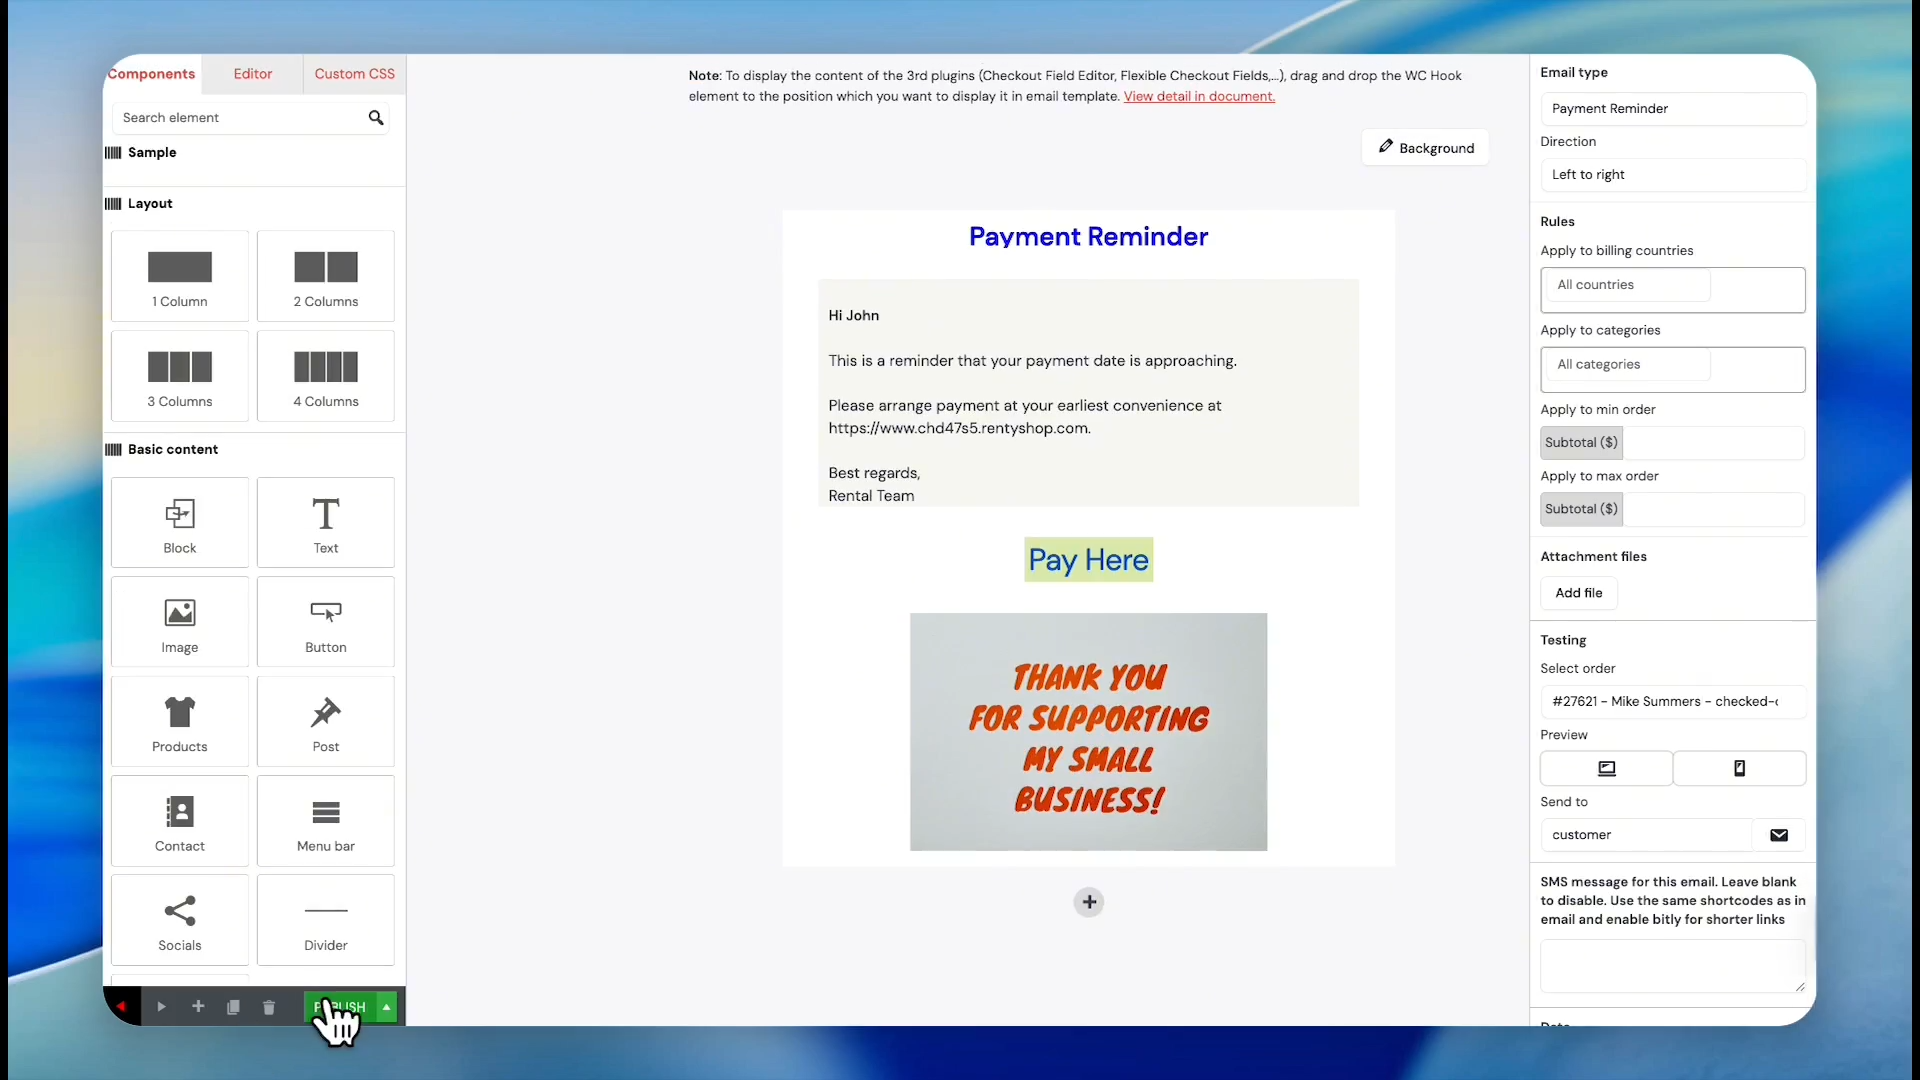
Design the Email Layout and Text
Now you can build the visual structure of your email using drag-and-drop components.
9
Drag and drop the 1 Column layout block from the left sidebar onto the central canvas.
10
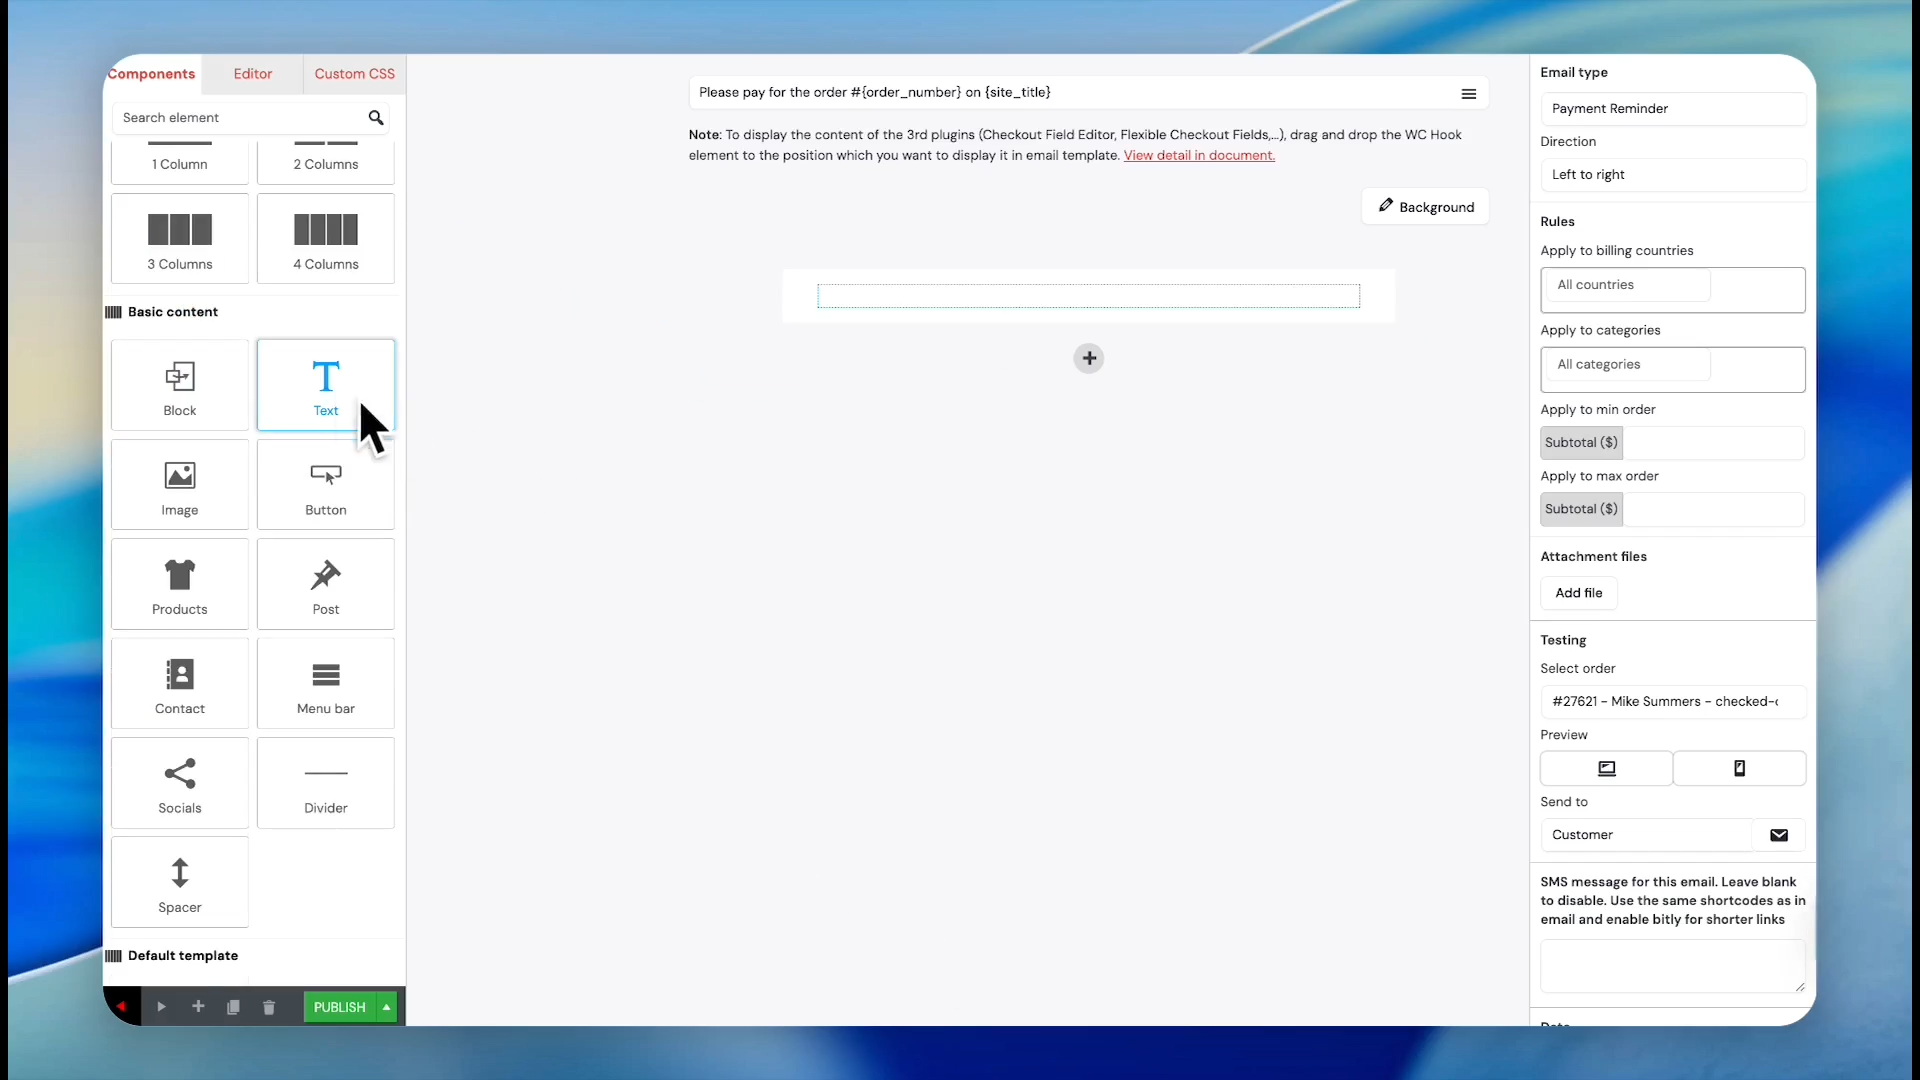
Drag and drop the Text component into the layout box.
11
Type "Payment Reminder" into the text editor.
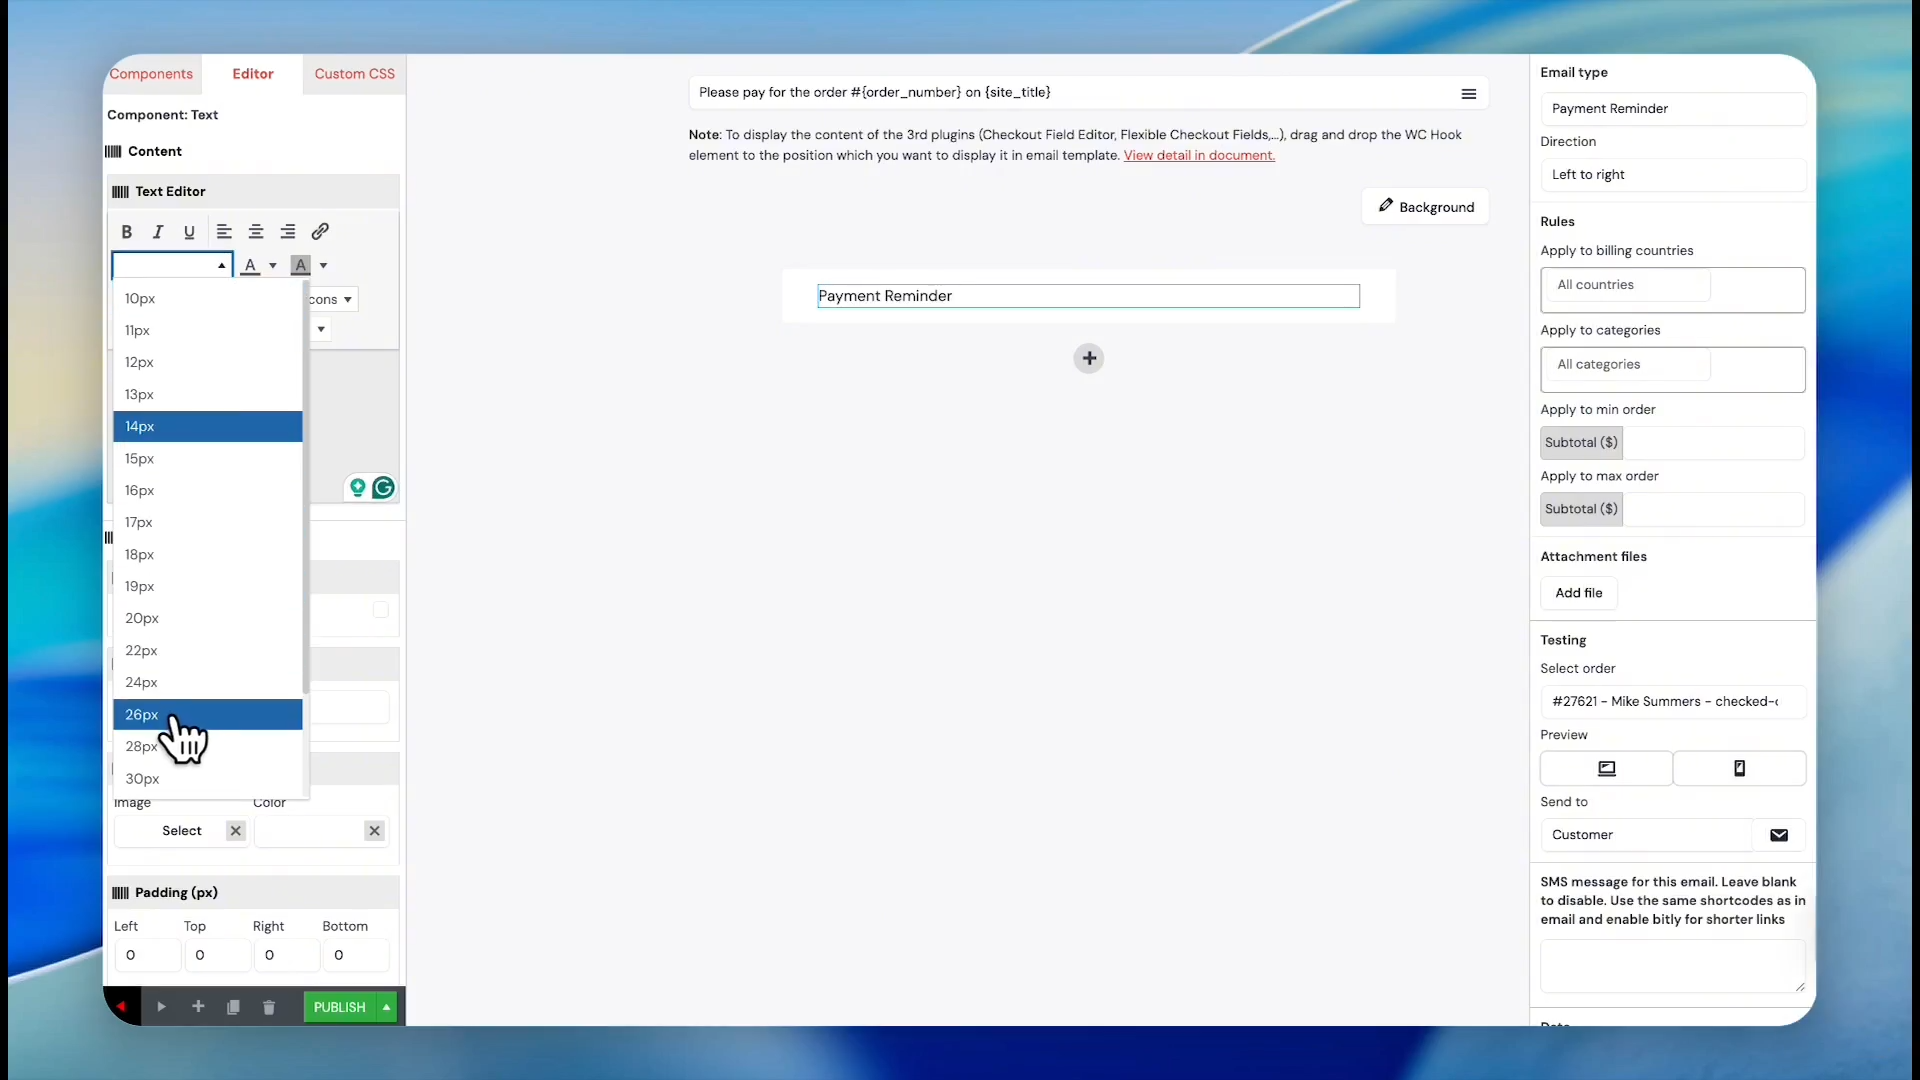
12
Highlight the text and select 26px from the font size dropdown menu.
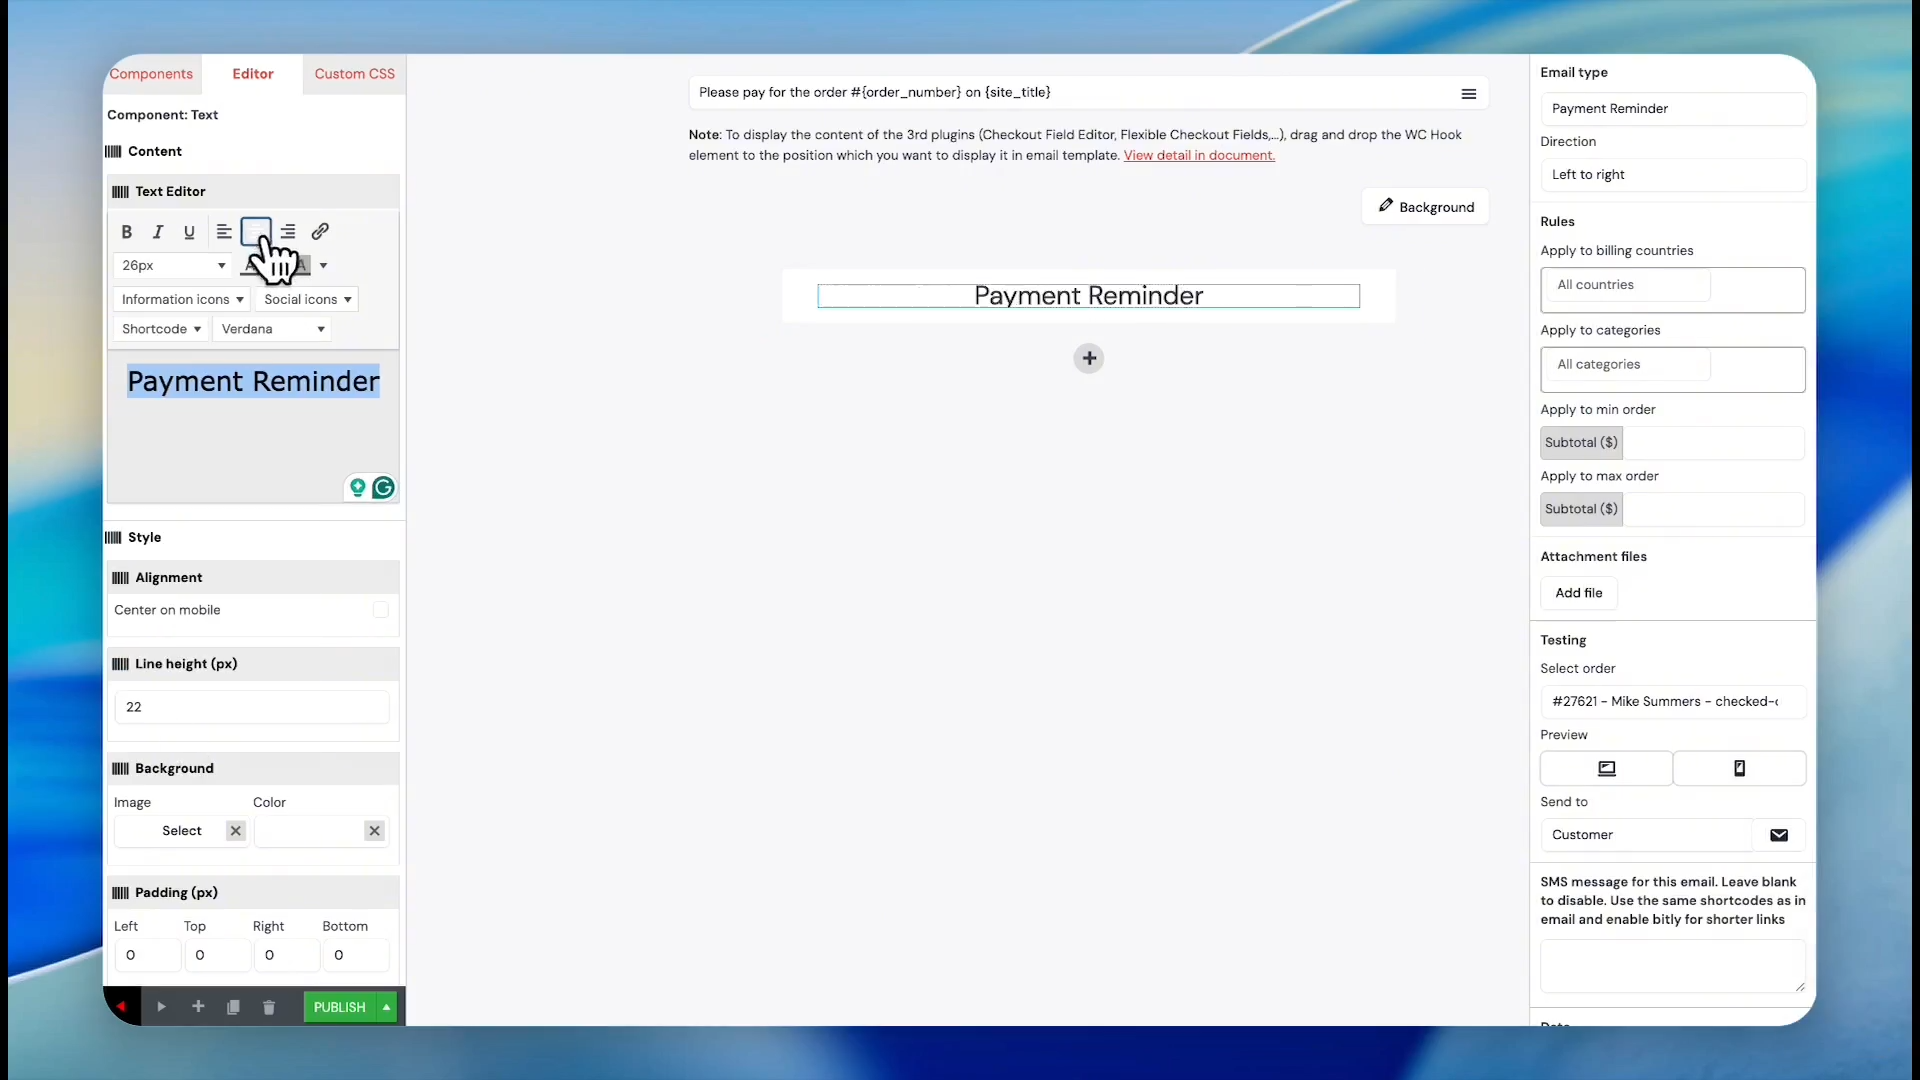
13
Click the Align center button to center the header.
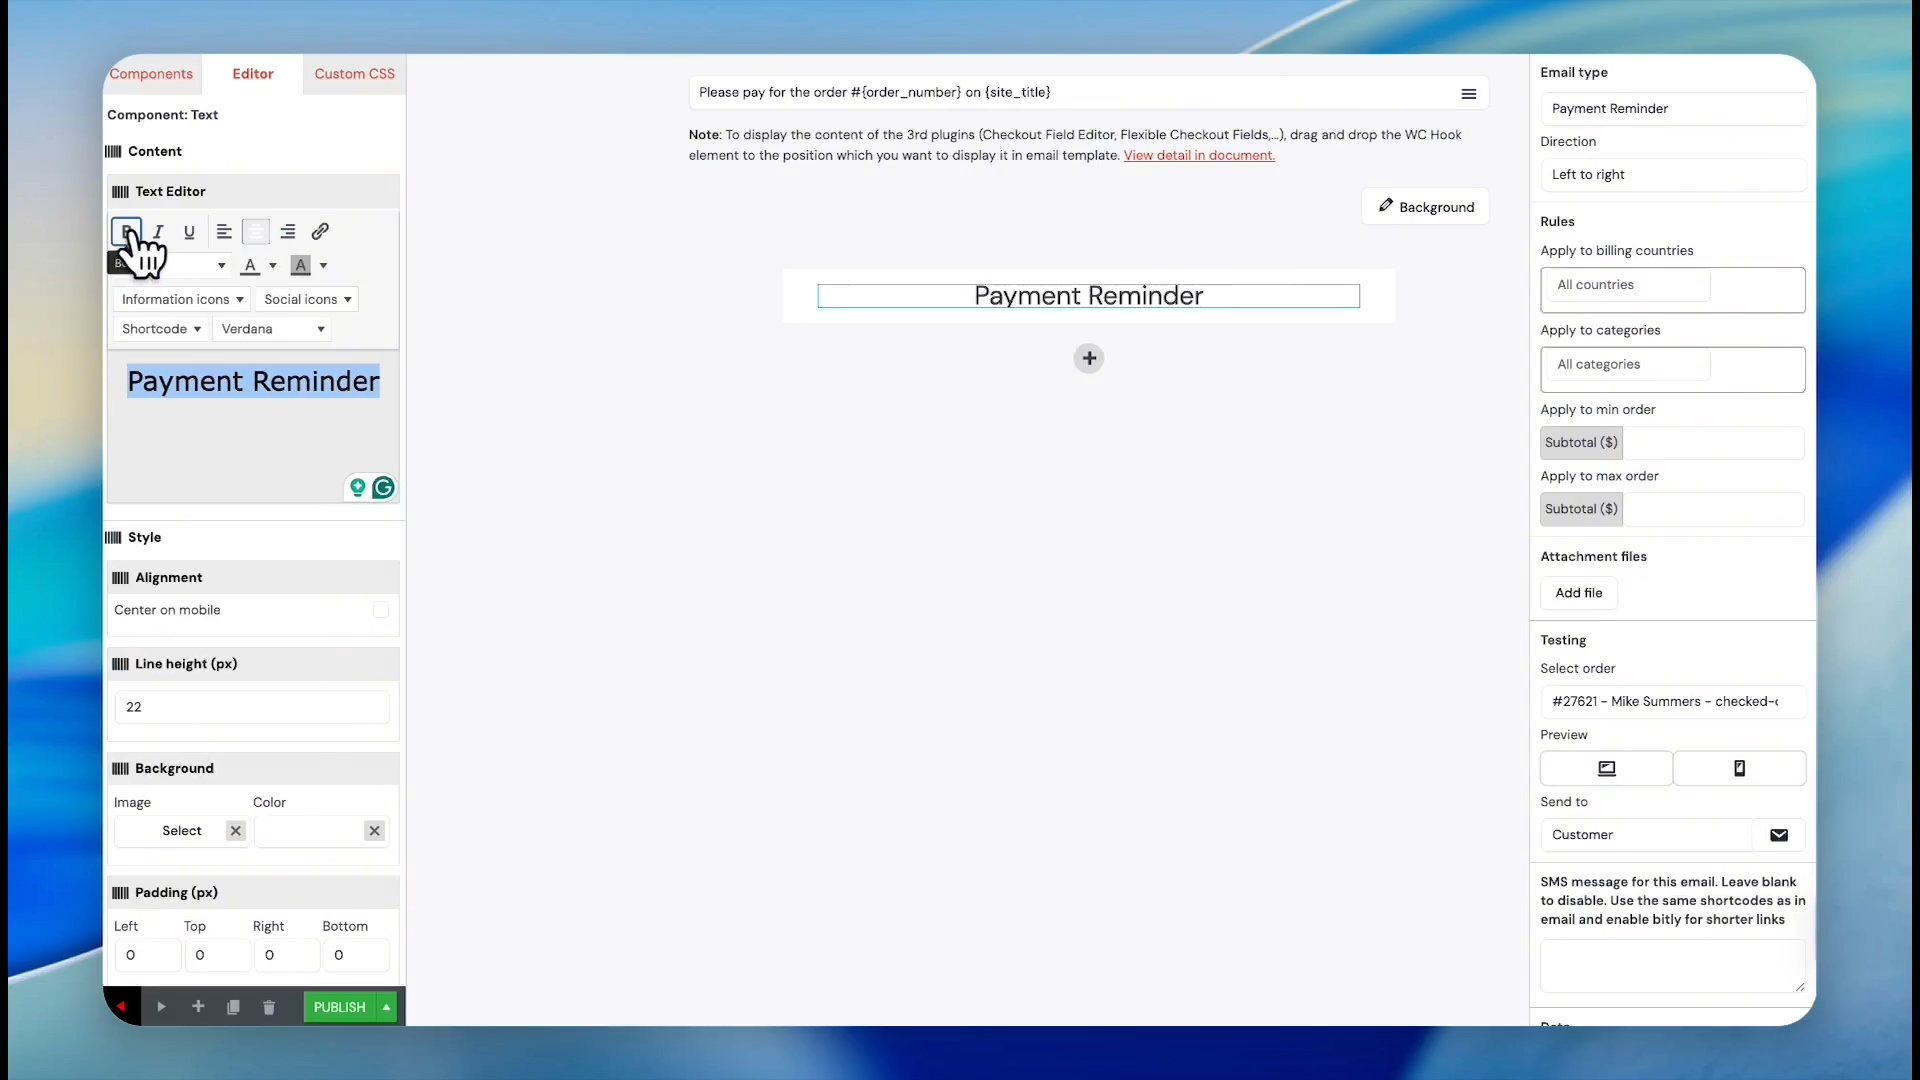
14
Click the B icon to make the text bold.
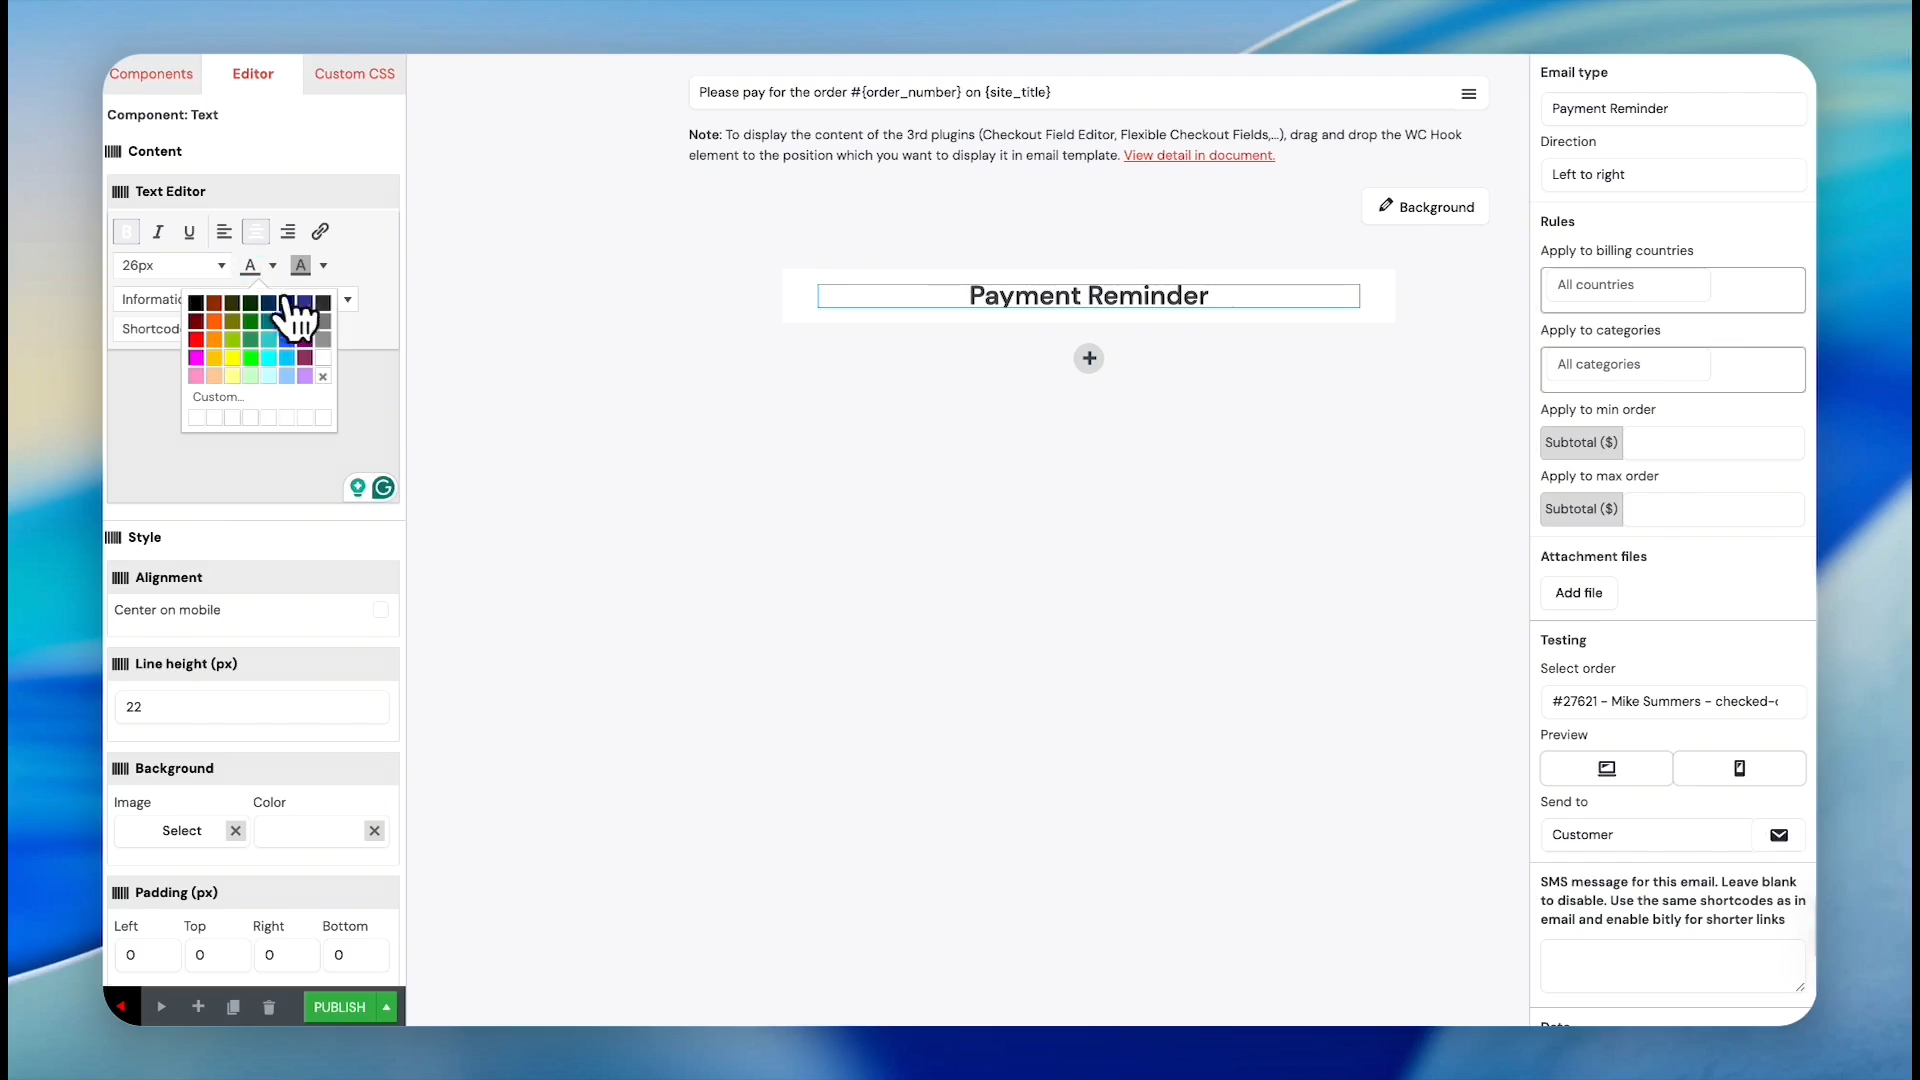
15
Click the text color icon and select the color blue.
16
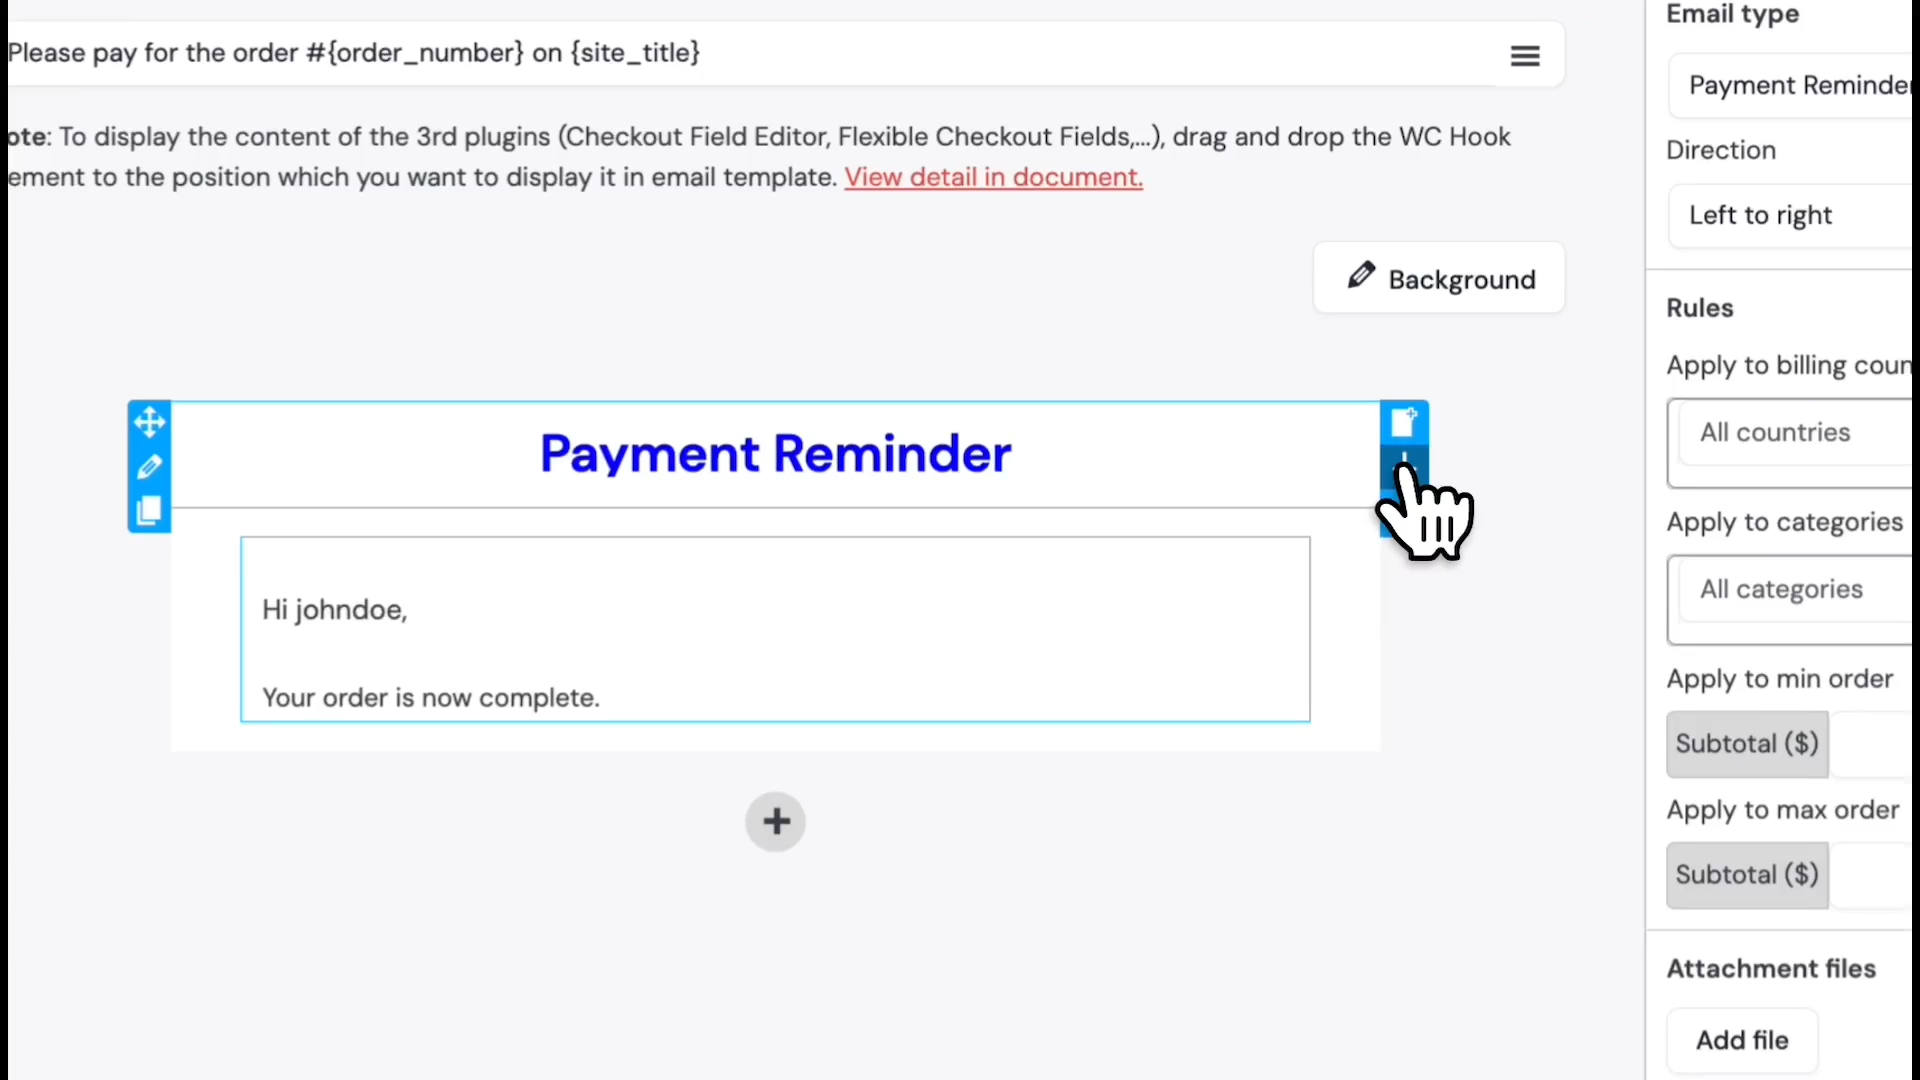
Click the duplicate icon on the text block to add a new text section for a customized greeting.
17
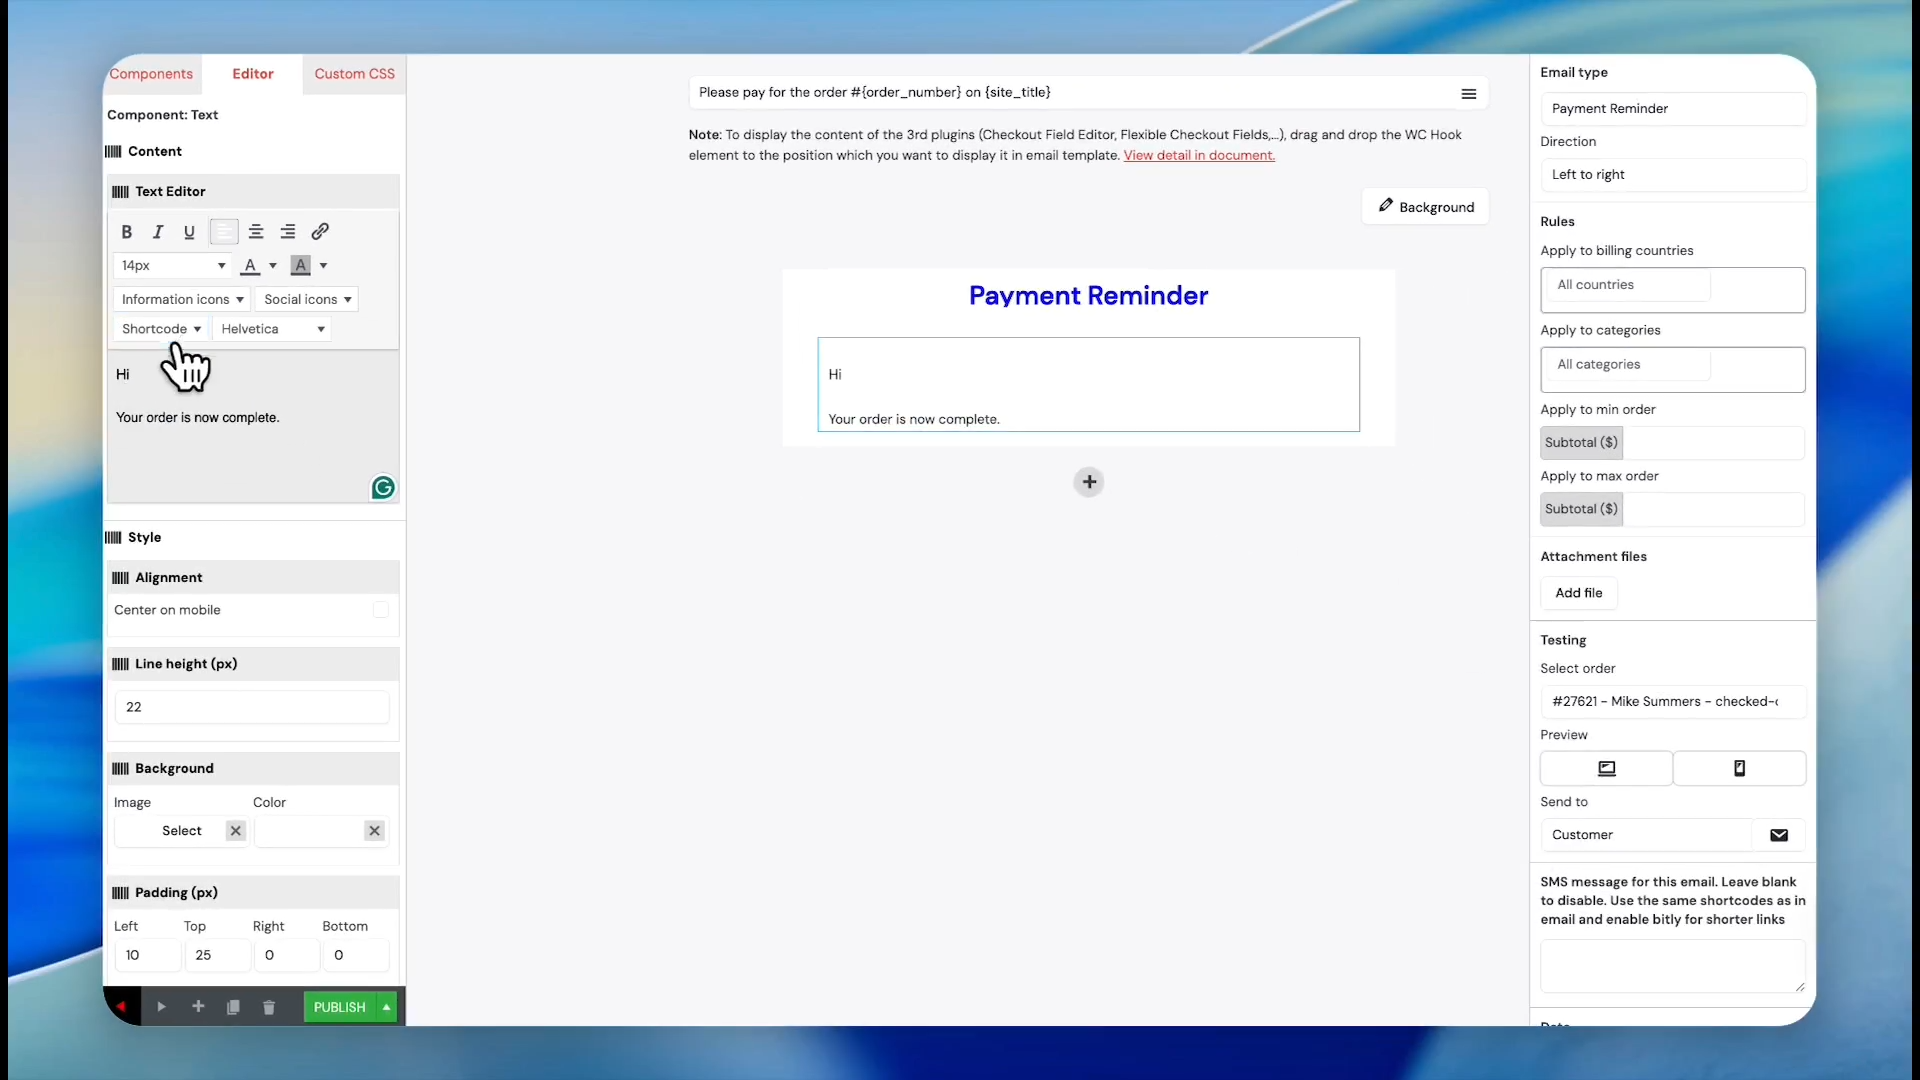
Delete the generic login placeholder, click on the shortcode menu, and select {first_name} to personalize the salutation.
18
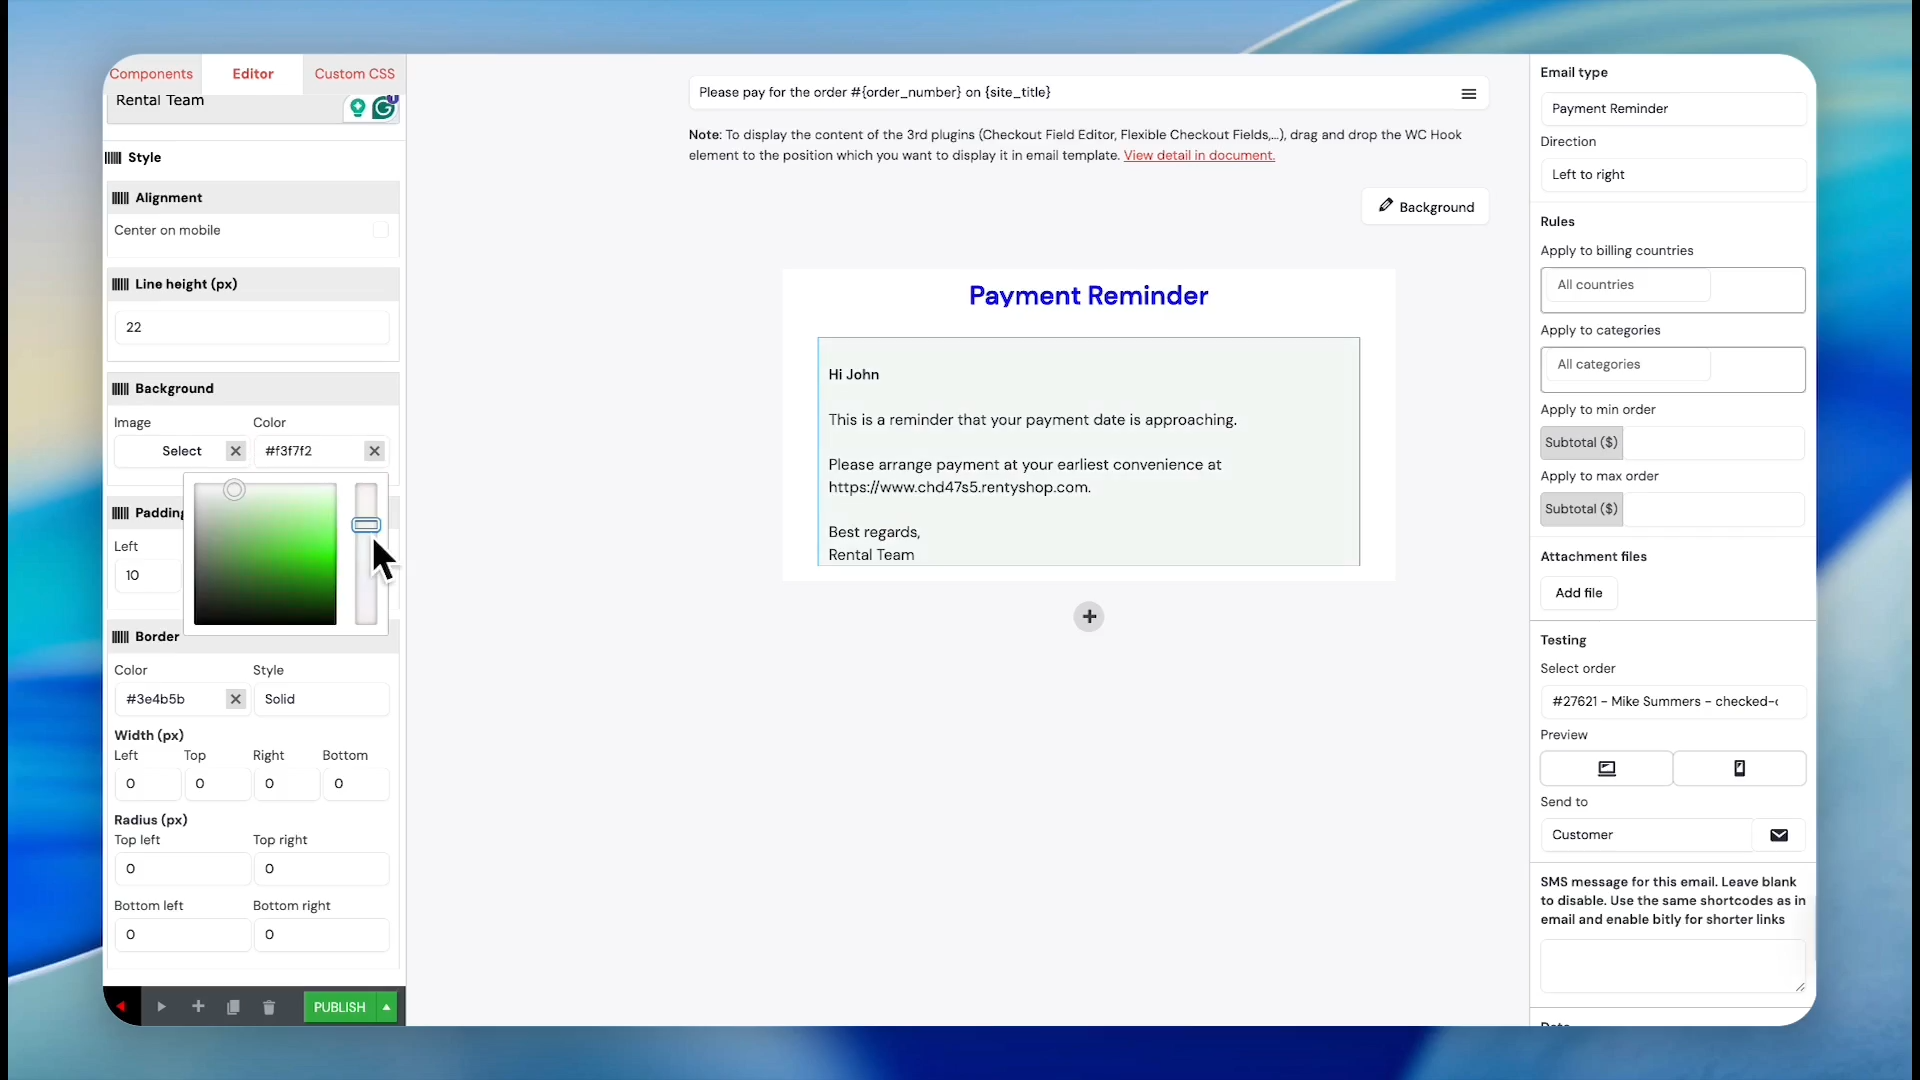
Highlight the default remainder text and replace it with your own custom payment reminder message.
19
Click the Select button under Background Color and drag the slider to set a background color for the text container.
Add the Payment Button
20
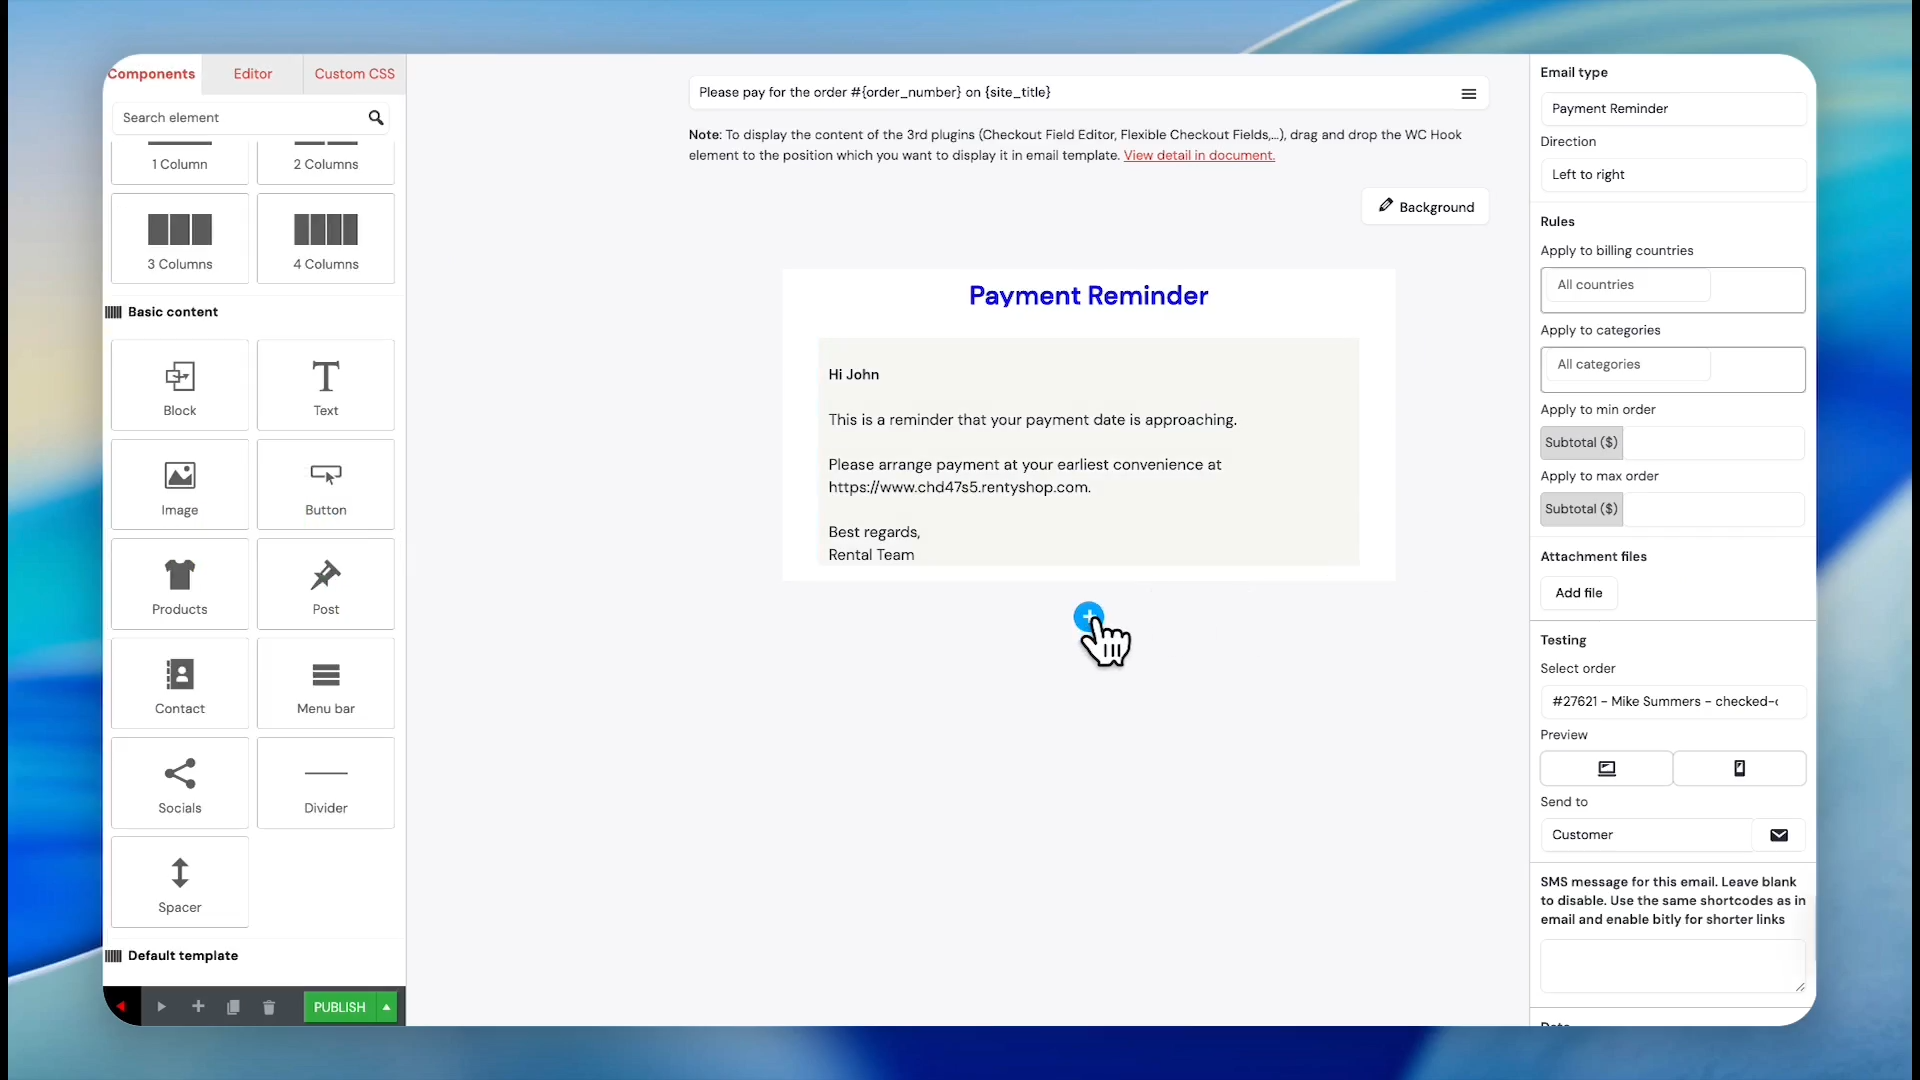
Click the Plus icon located at the center-bottom of the canvas to create a new section, and select the single column layout.
21
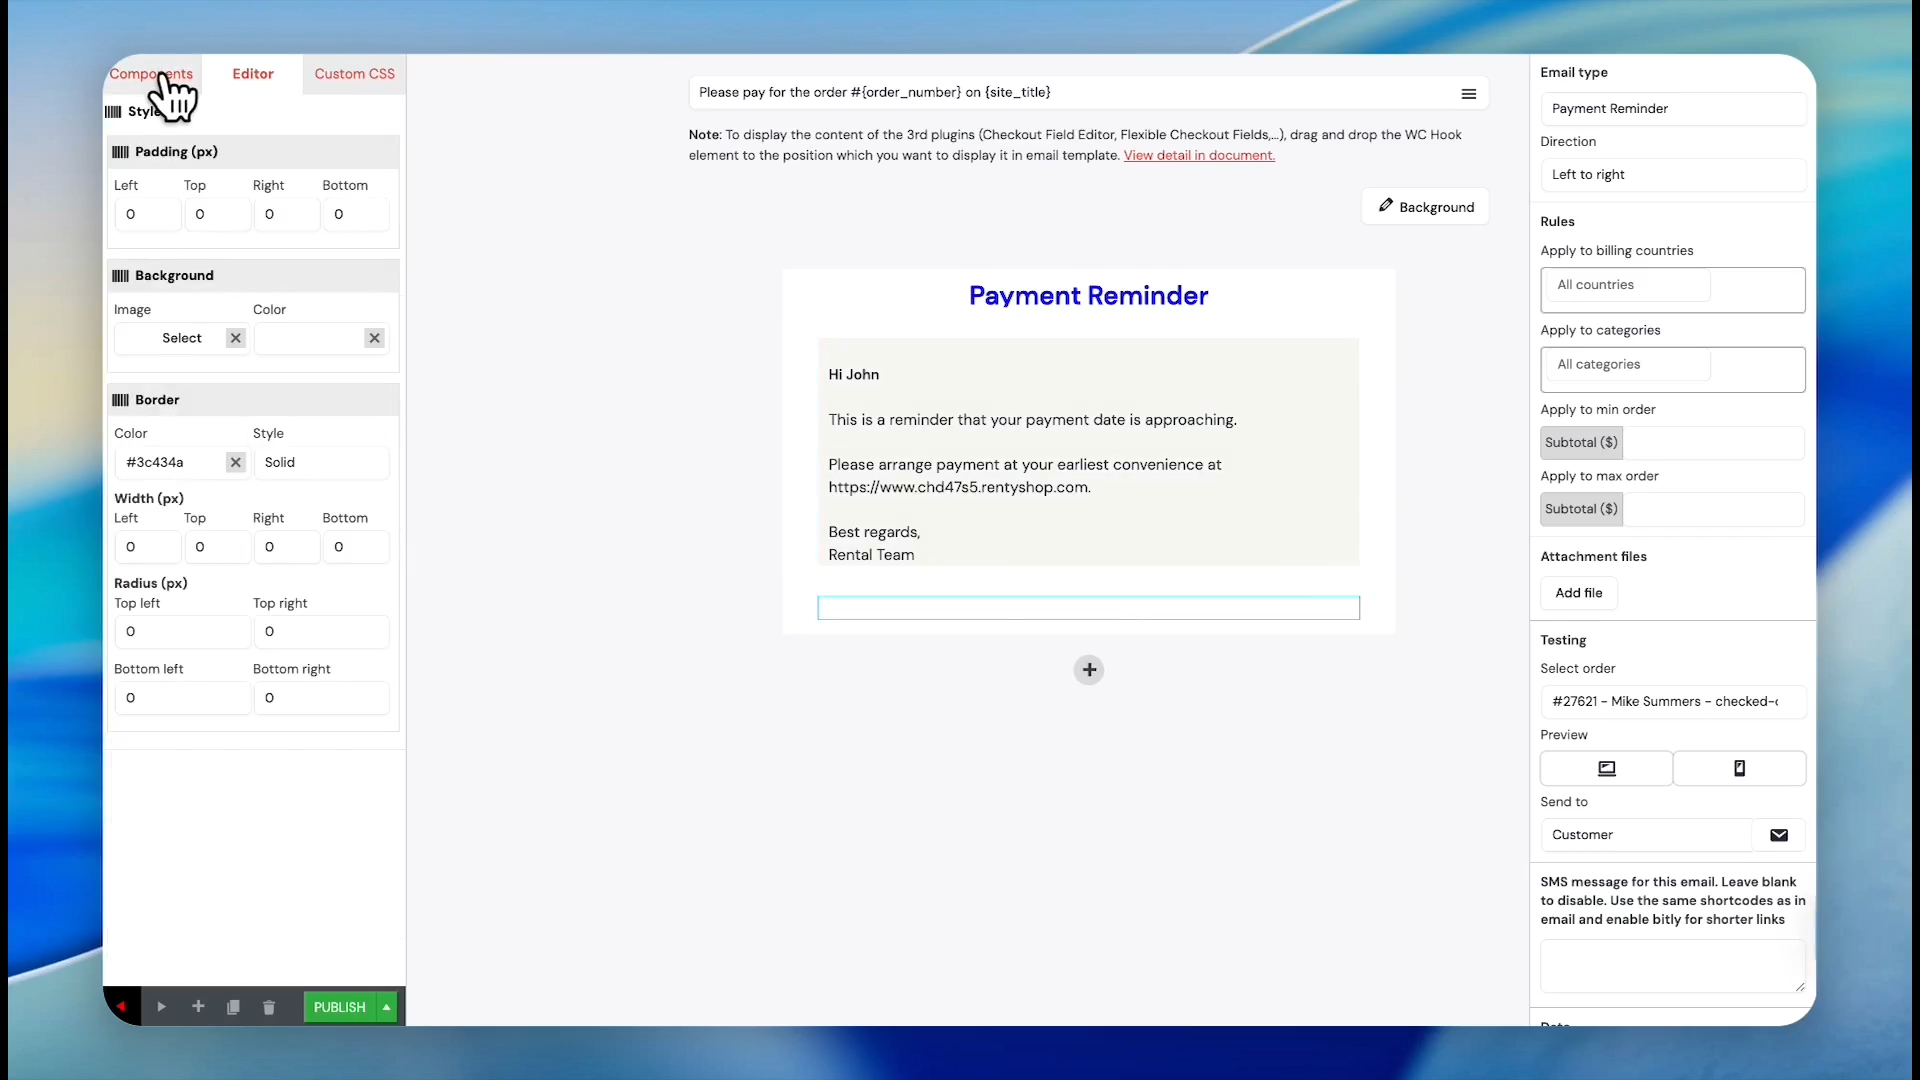
Click the Components tab in the sidebar.
22
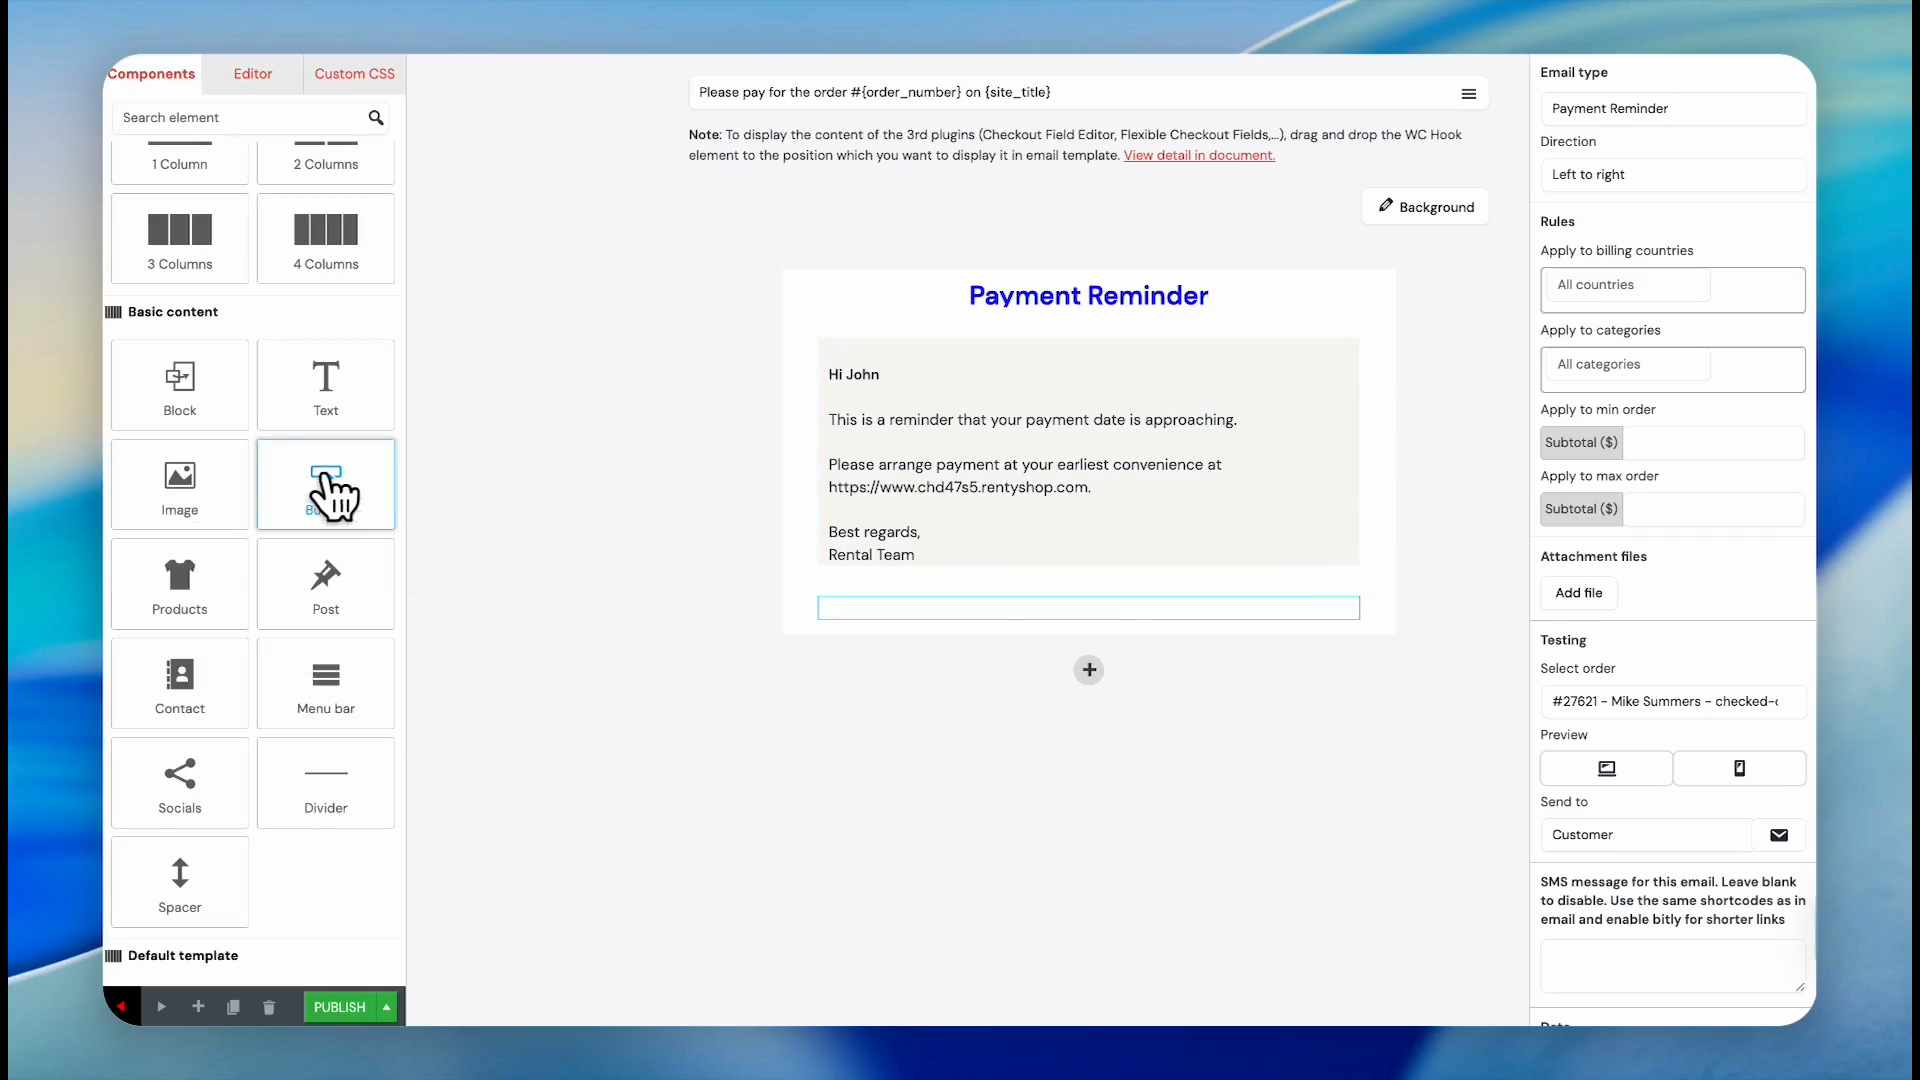
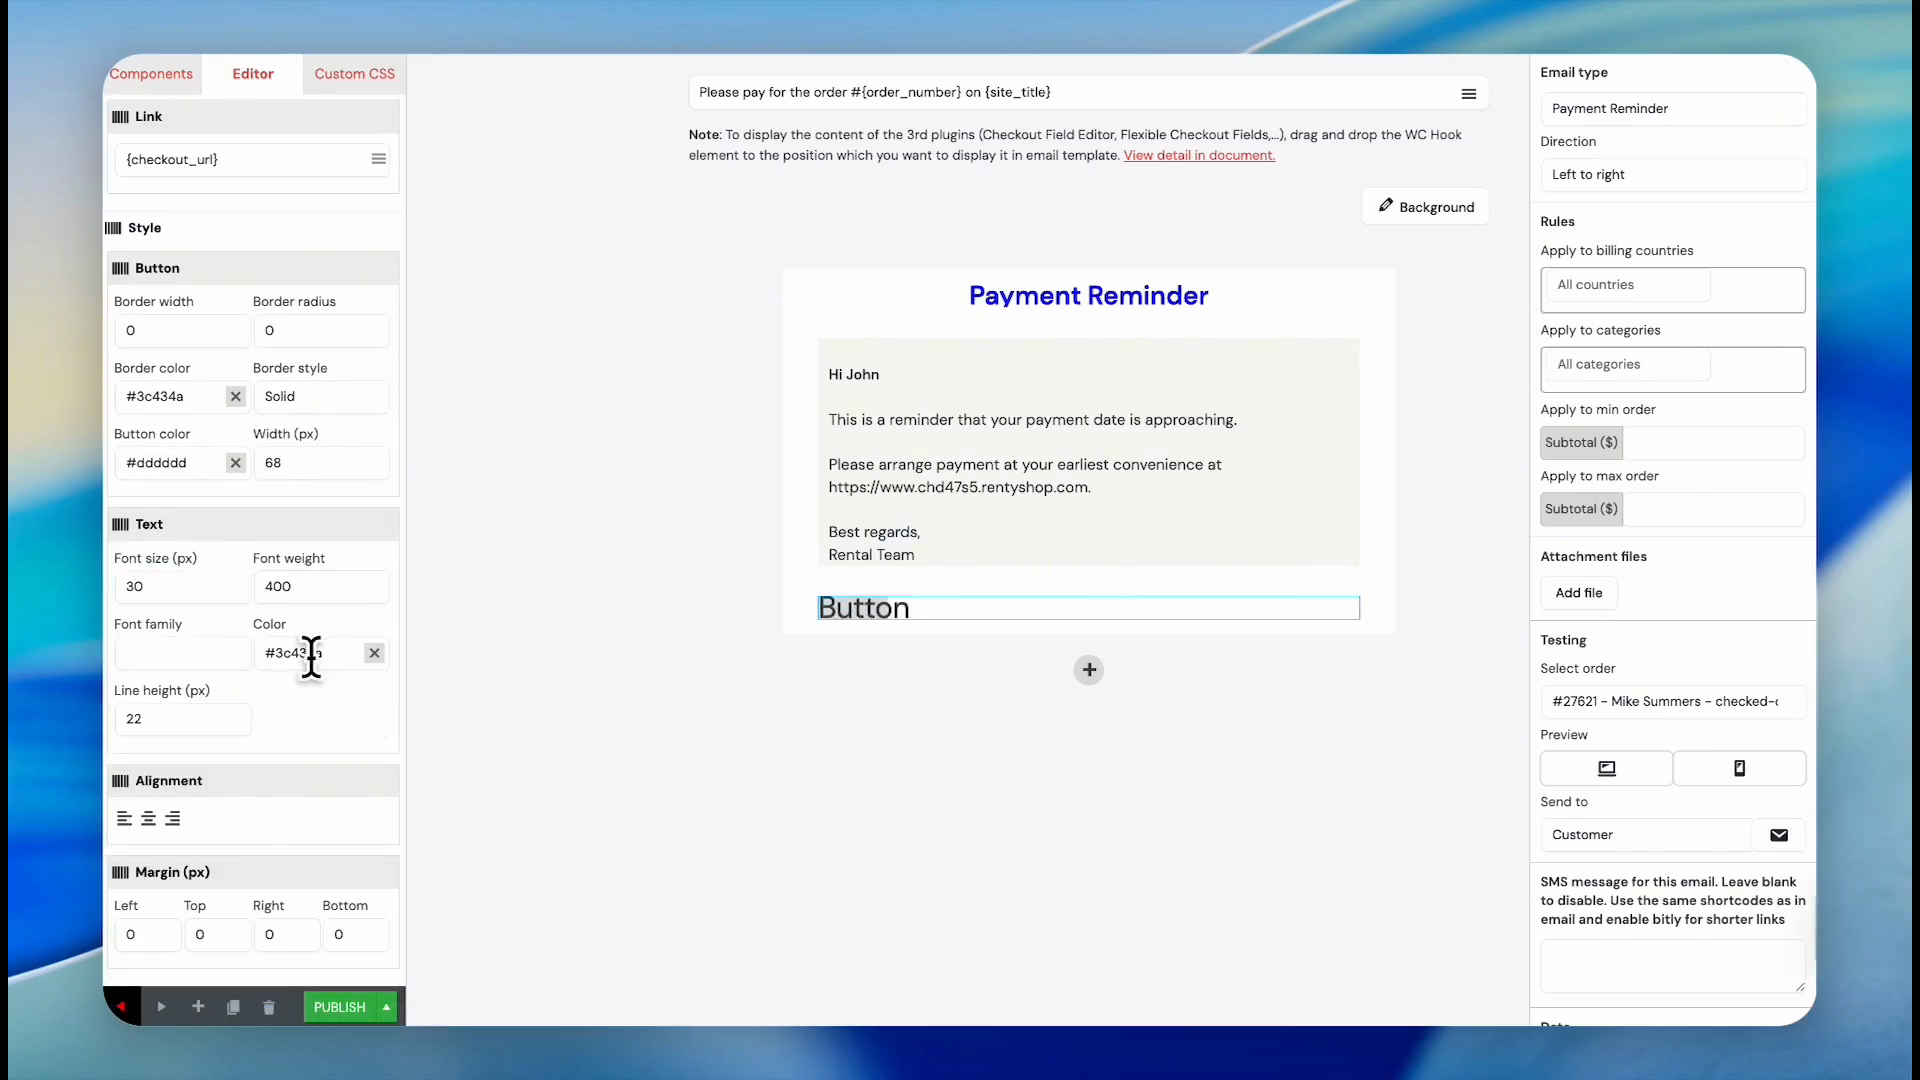
Drag the Button component into the newly created column.
23
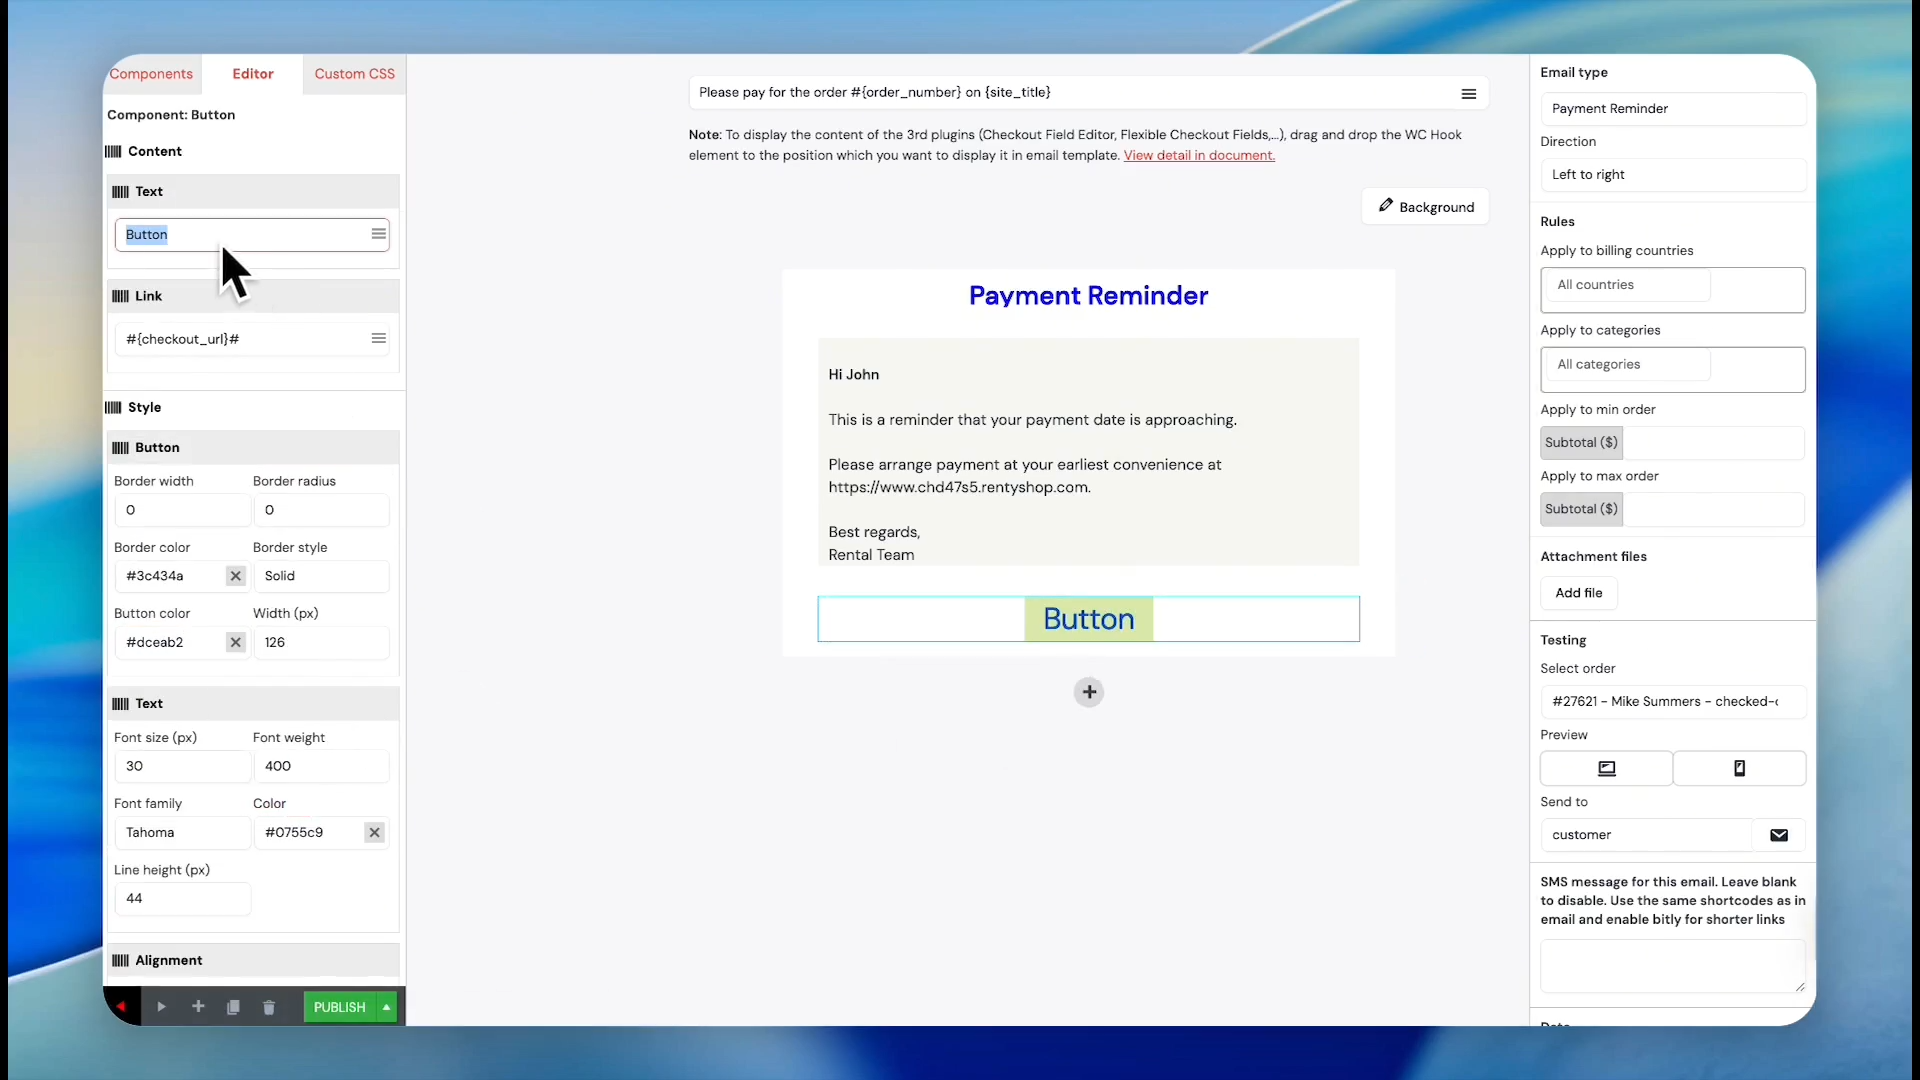
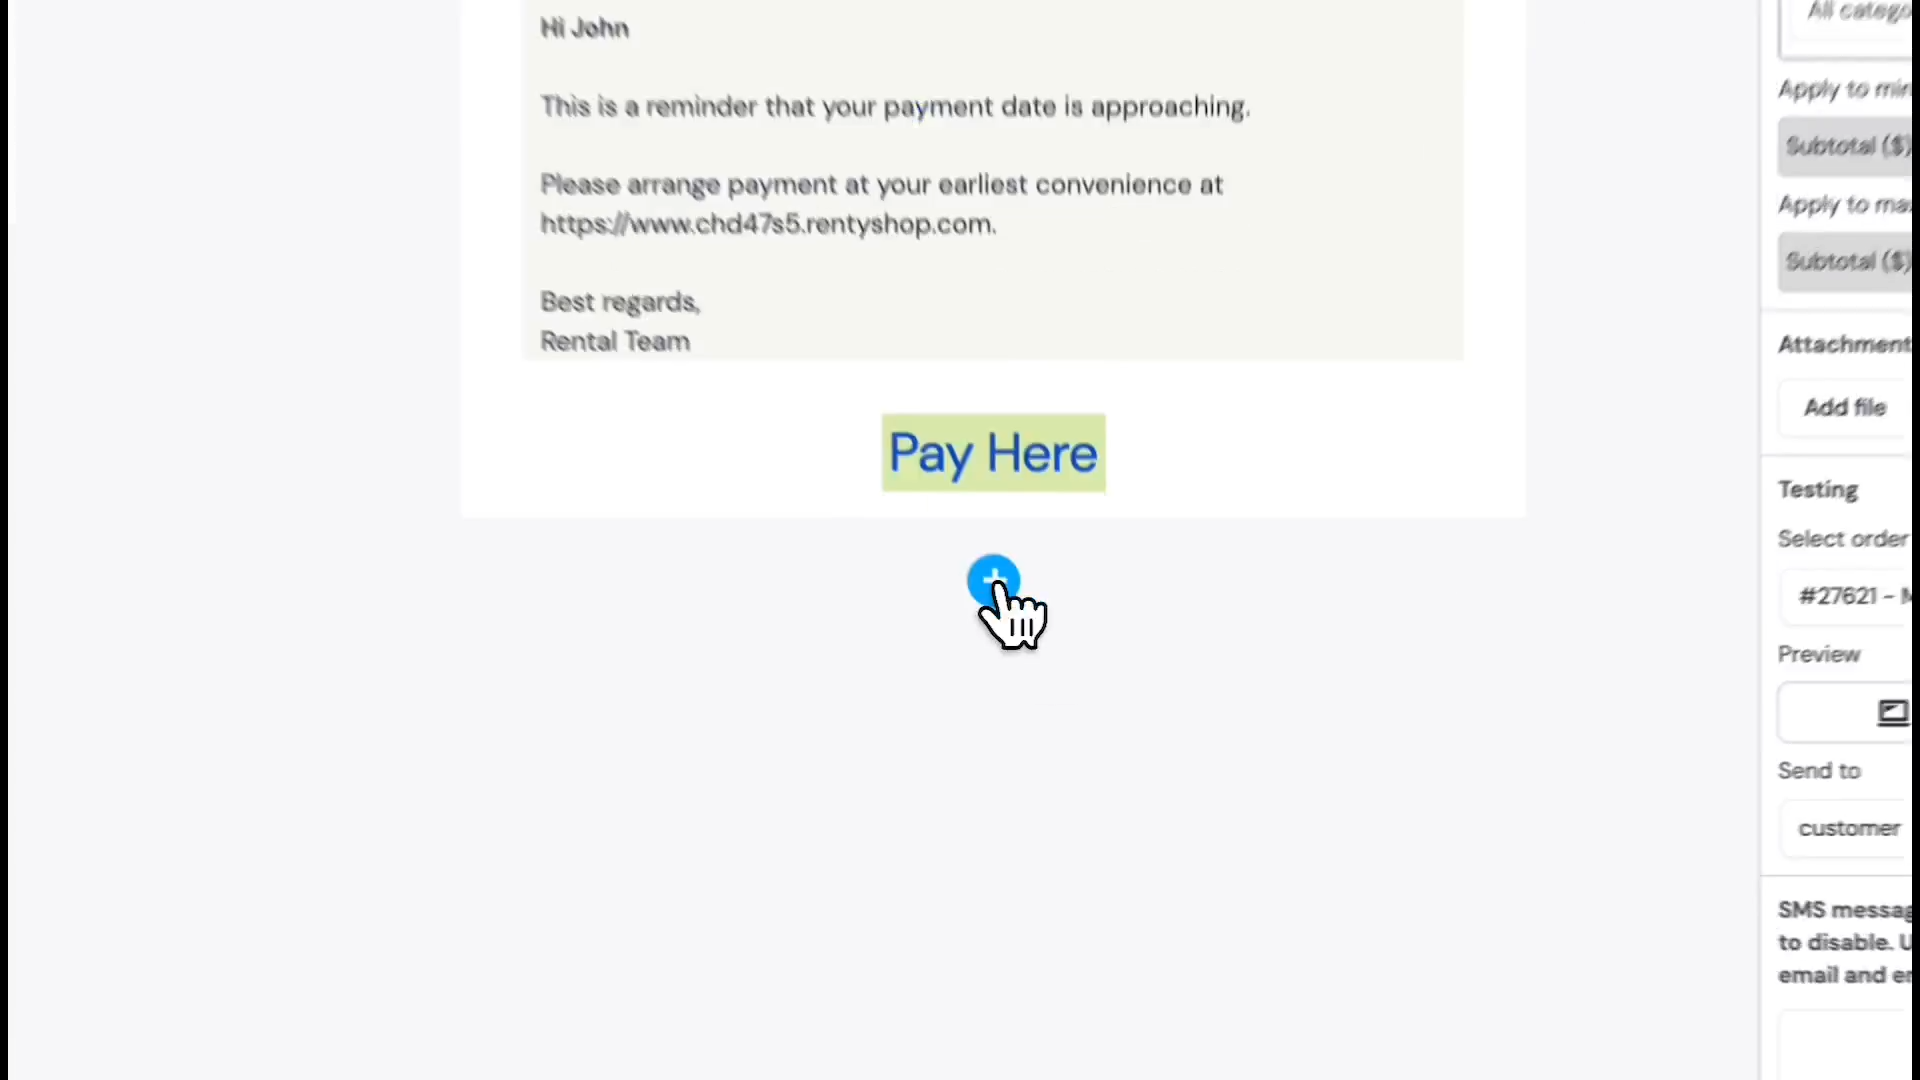
Double-click the button text and change it to "Pay Here".
24
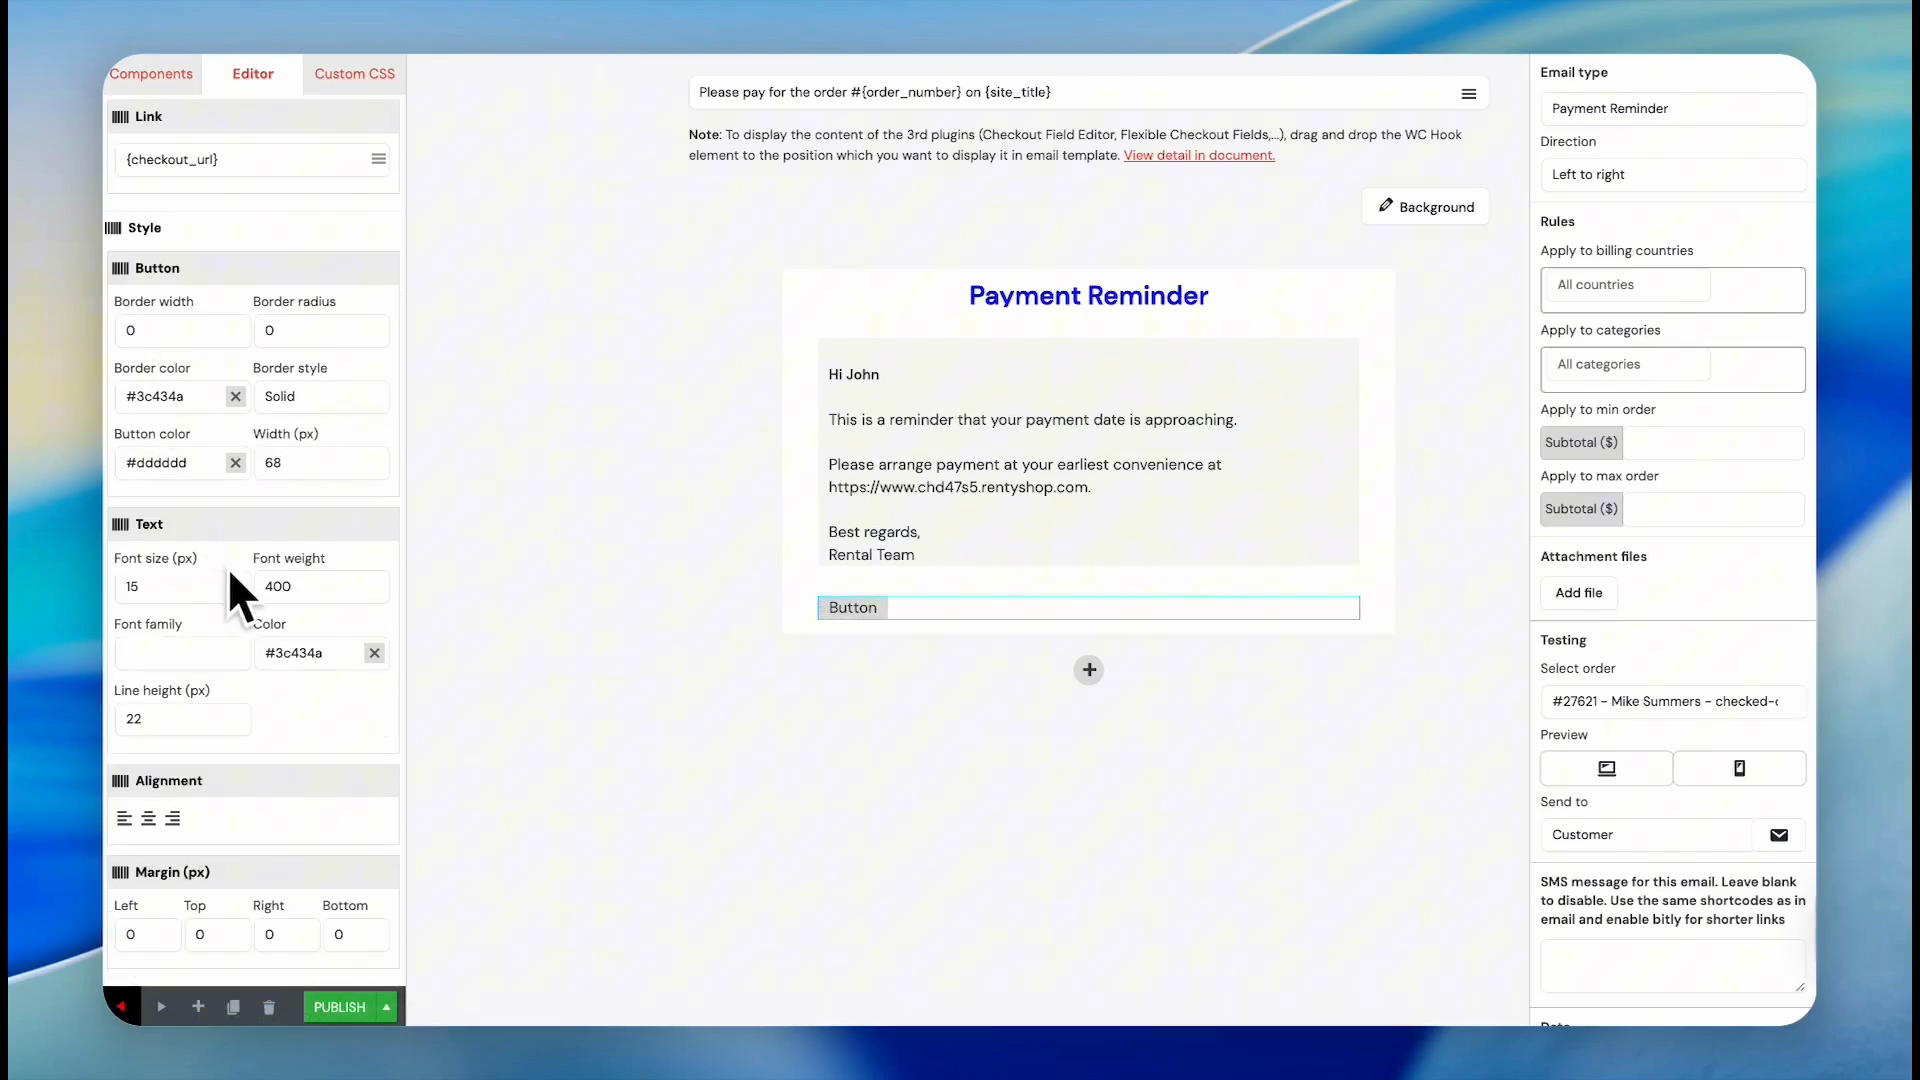
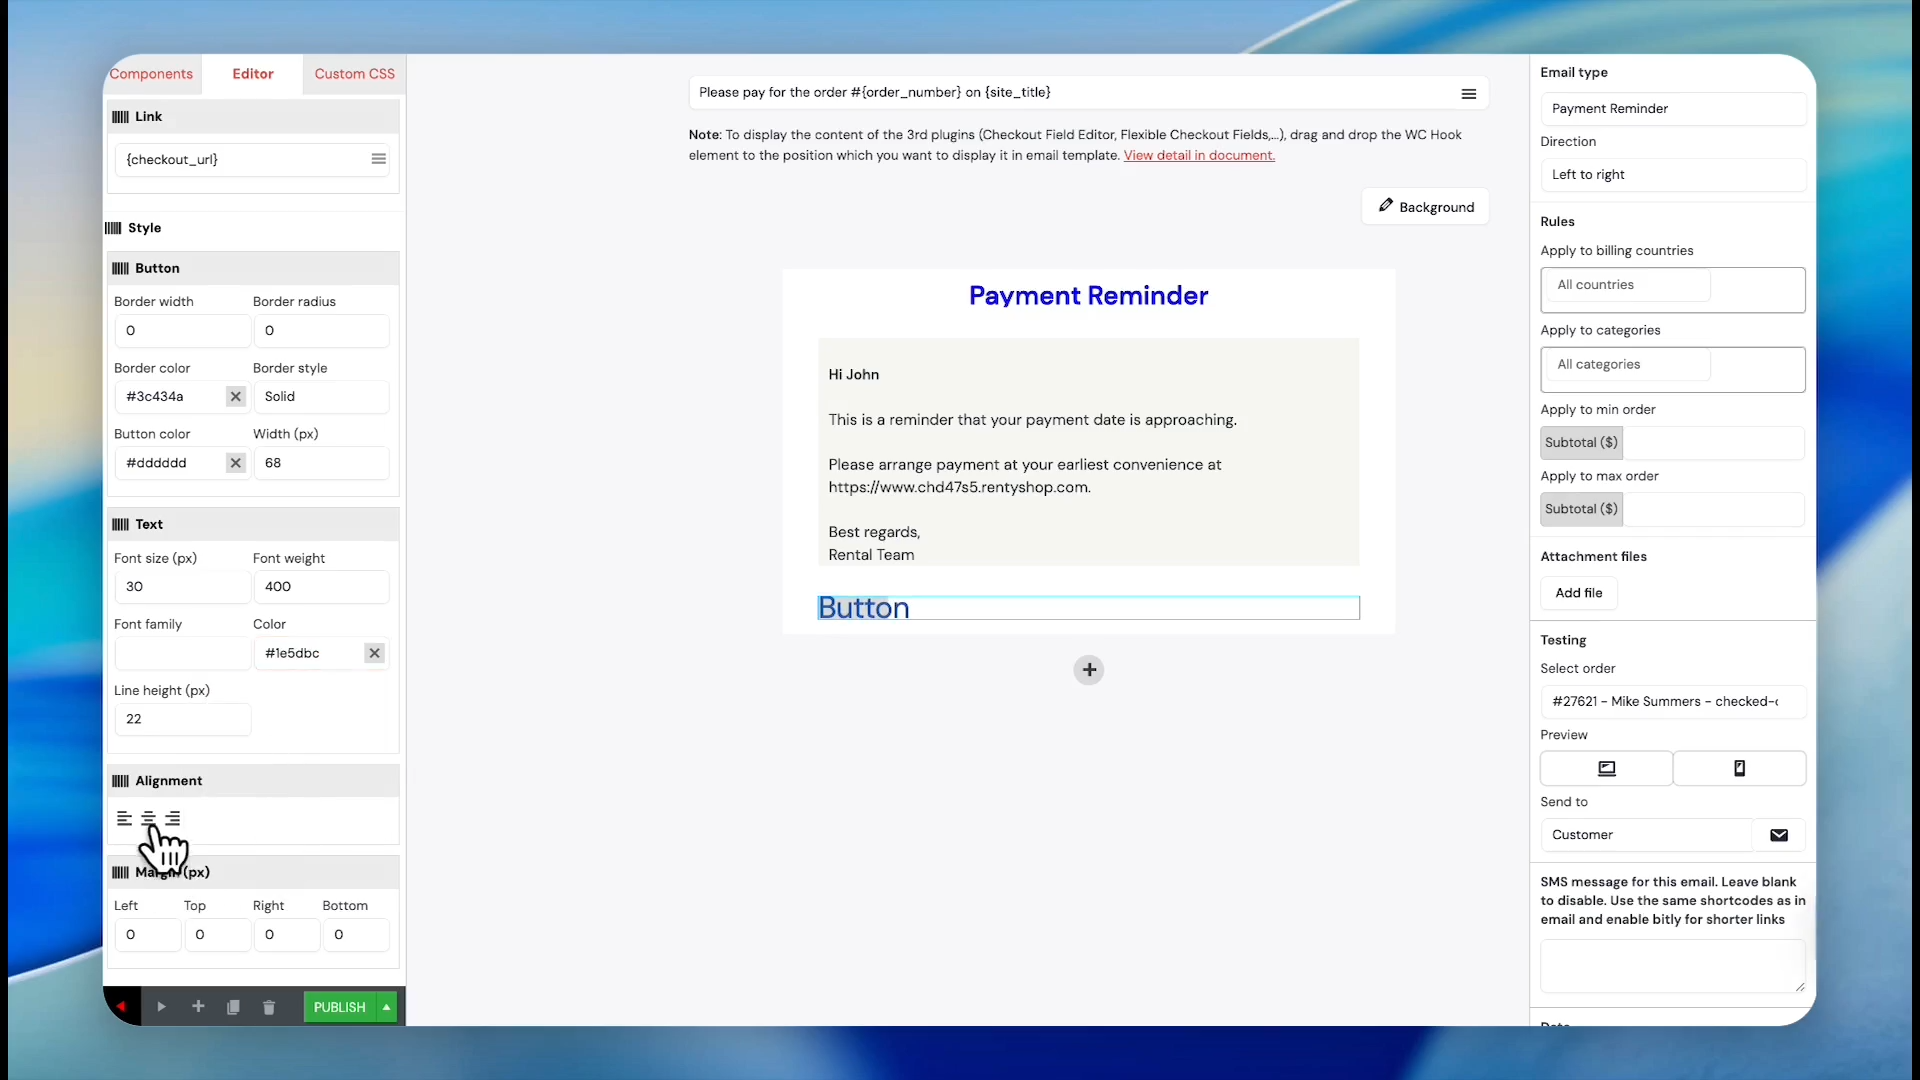
With the button selected, adjust the font size to 15px in the text settings panel.
25
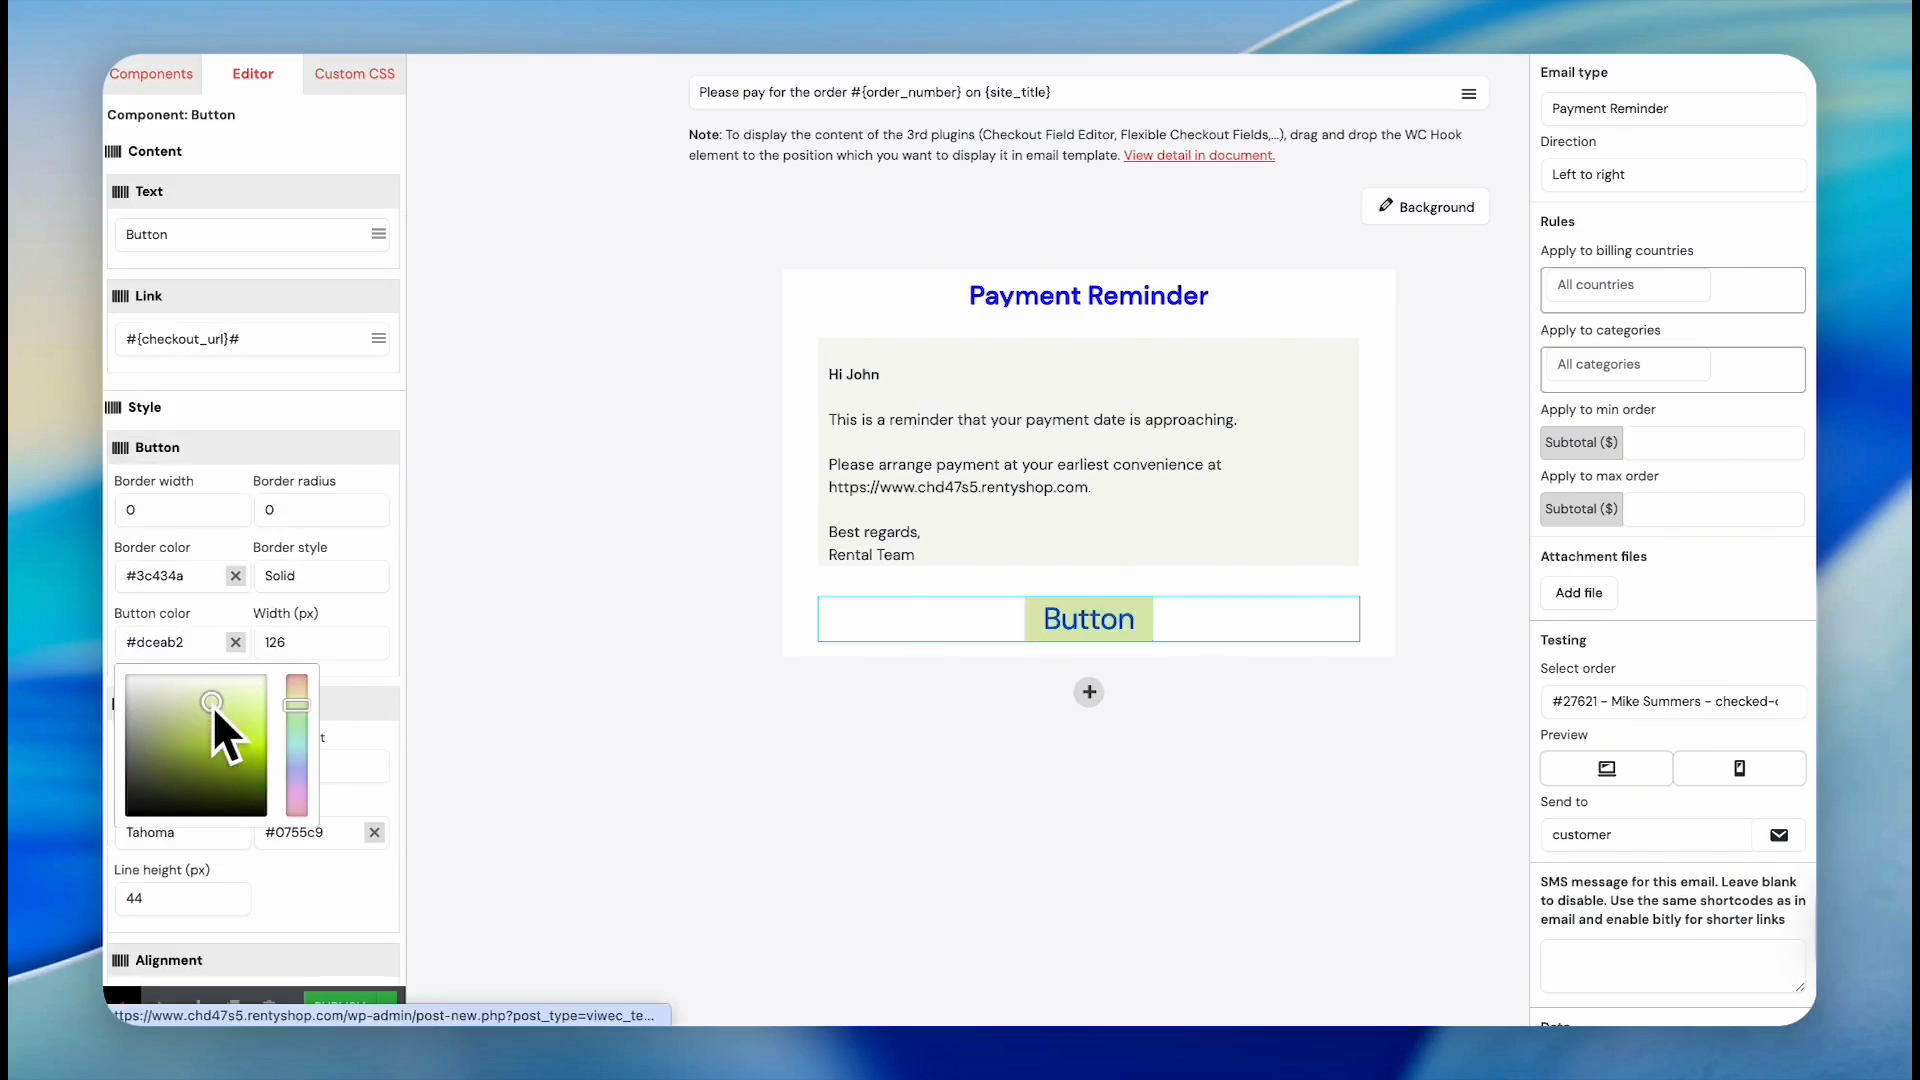
Click the text color box and select a new font color (e.g., green).
26
Click the center align button to visually center the button within its block.
27
Click the button background color box and select a new color for the button.
Add Imagery and Finalize
28
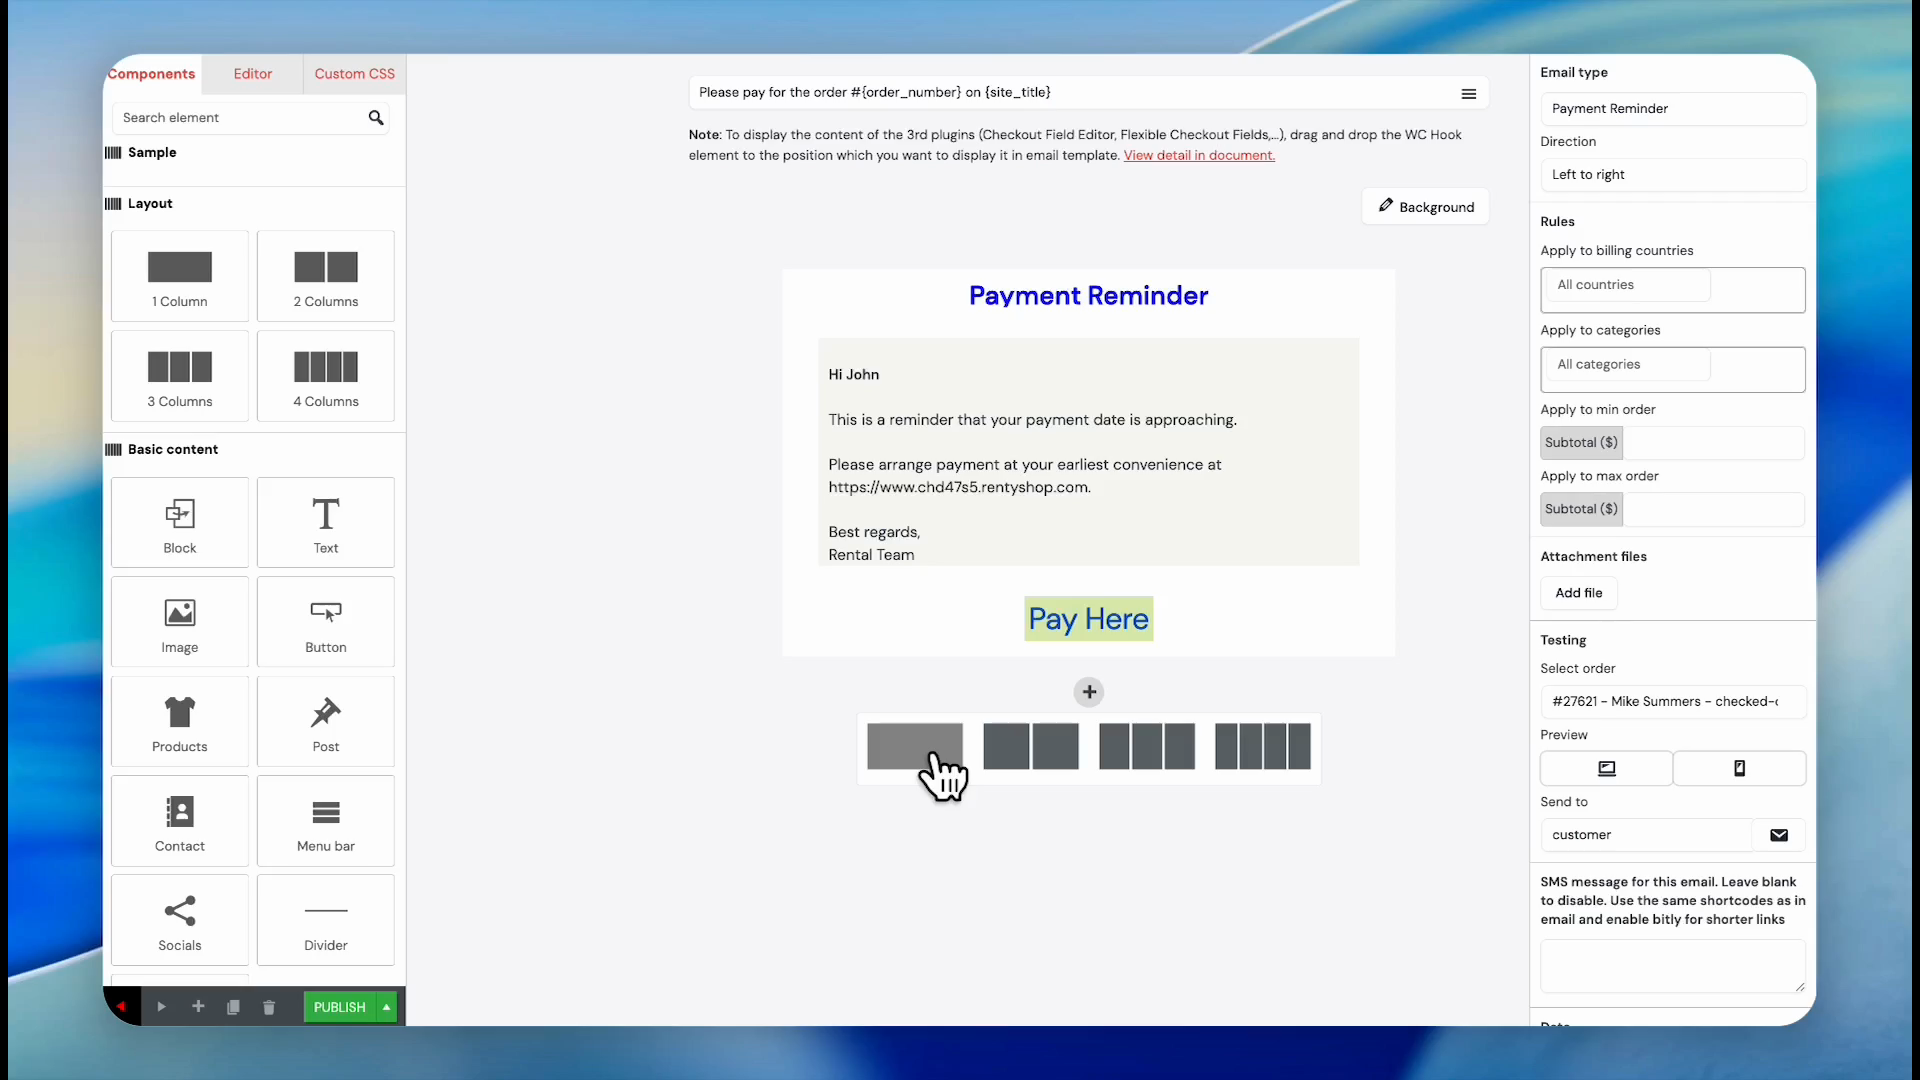
Click the + icon below the payment button and select another single column layout for an image.
29
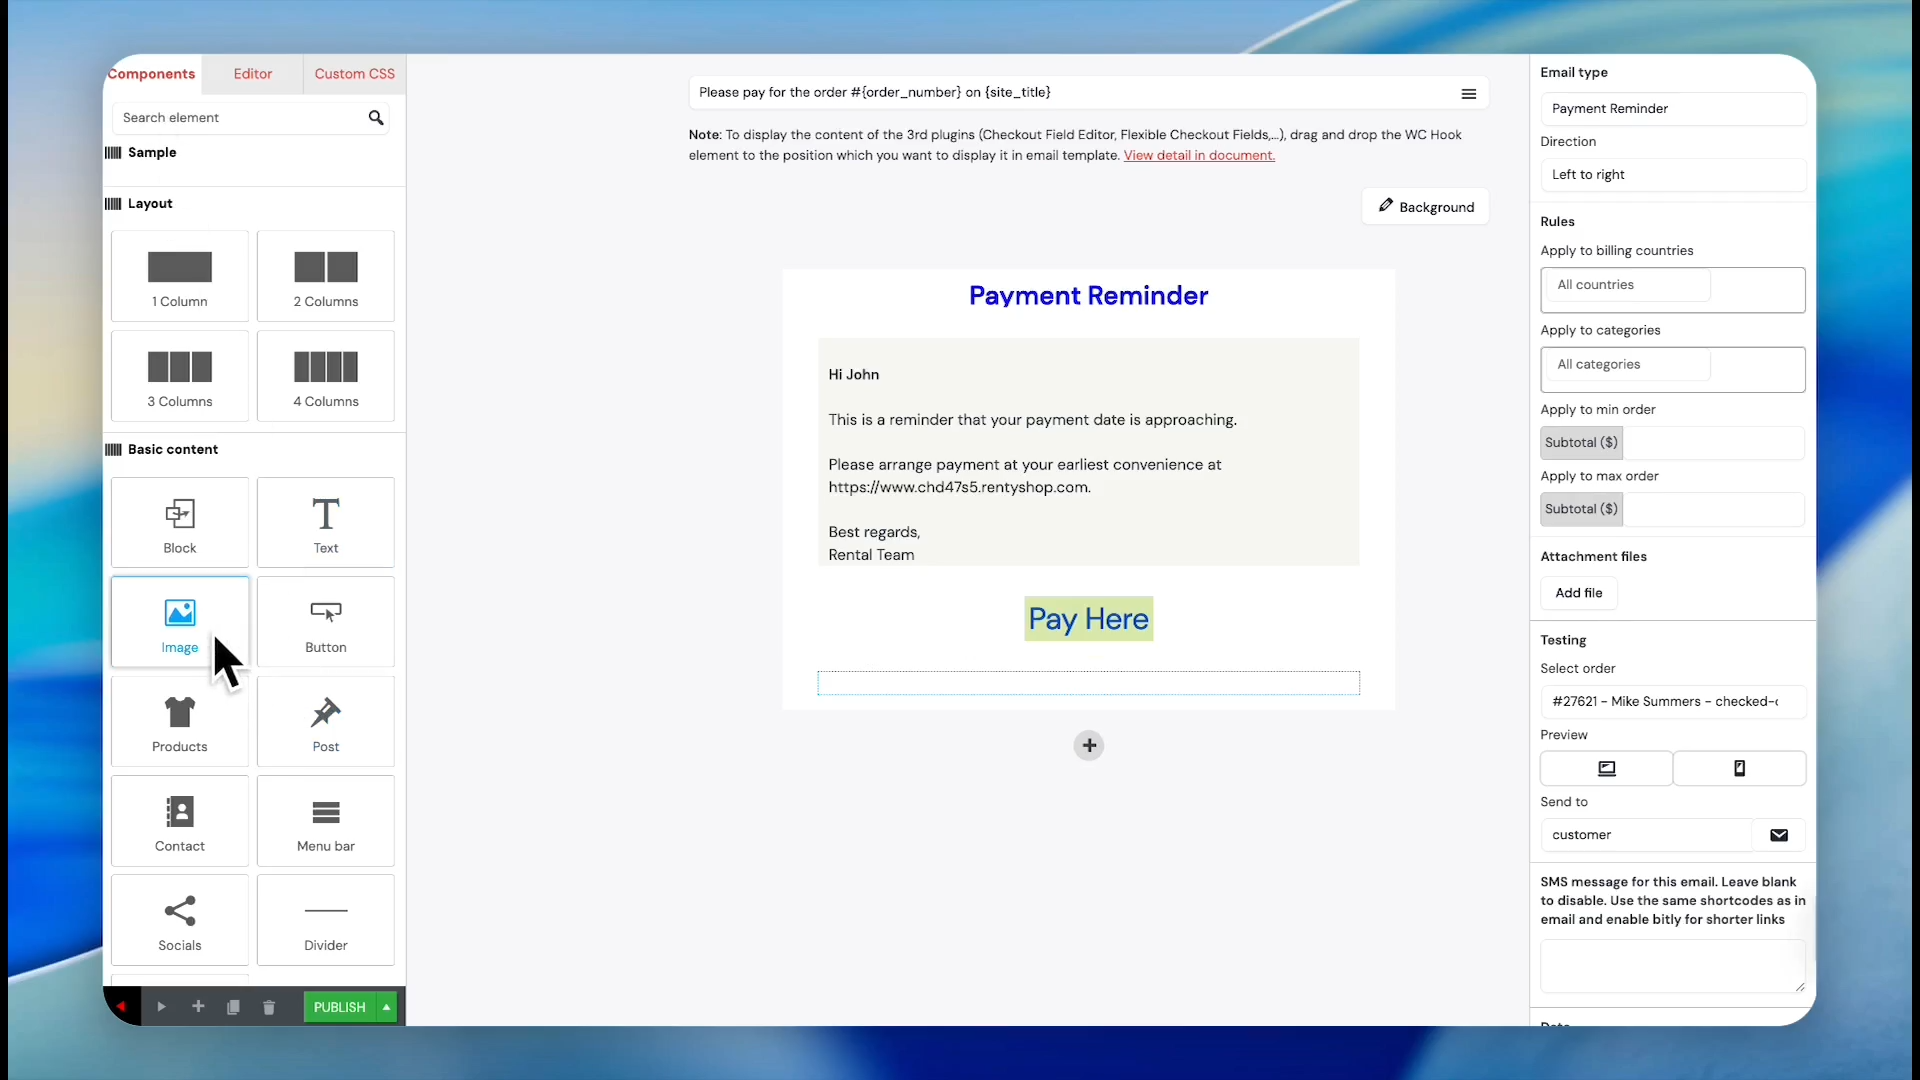
Click Components to reopen the component widget menu.
30
Drag the Image component into the final column.
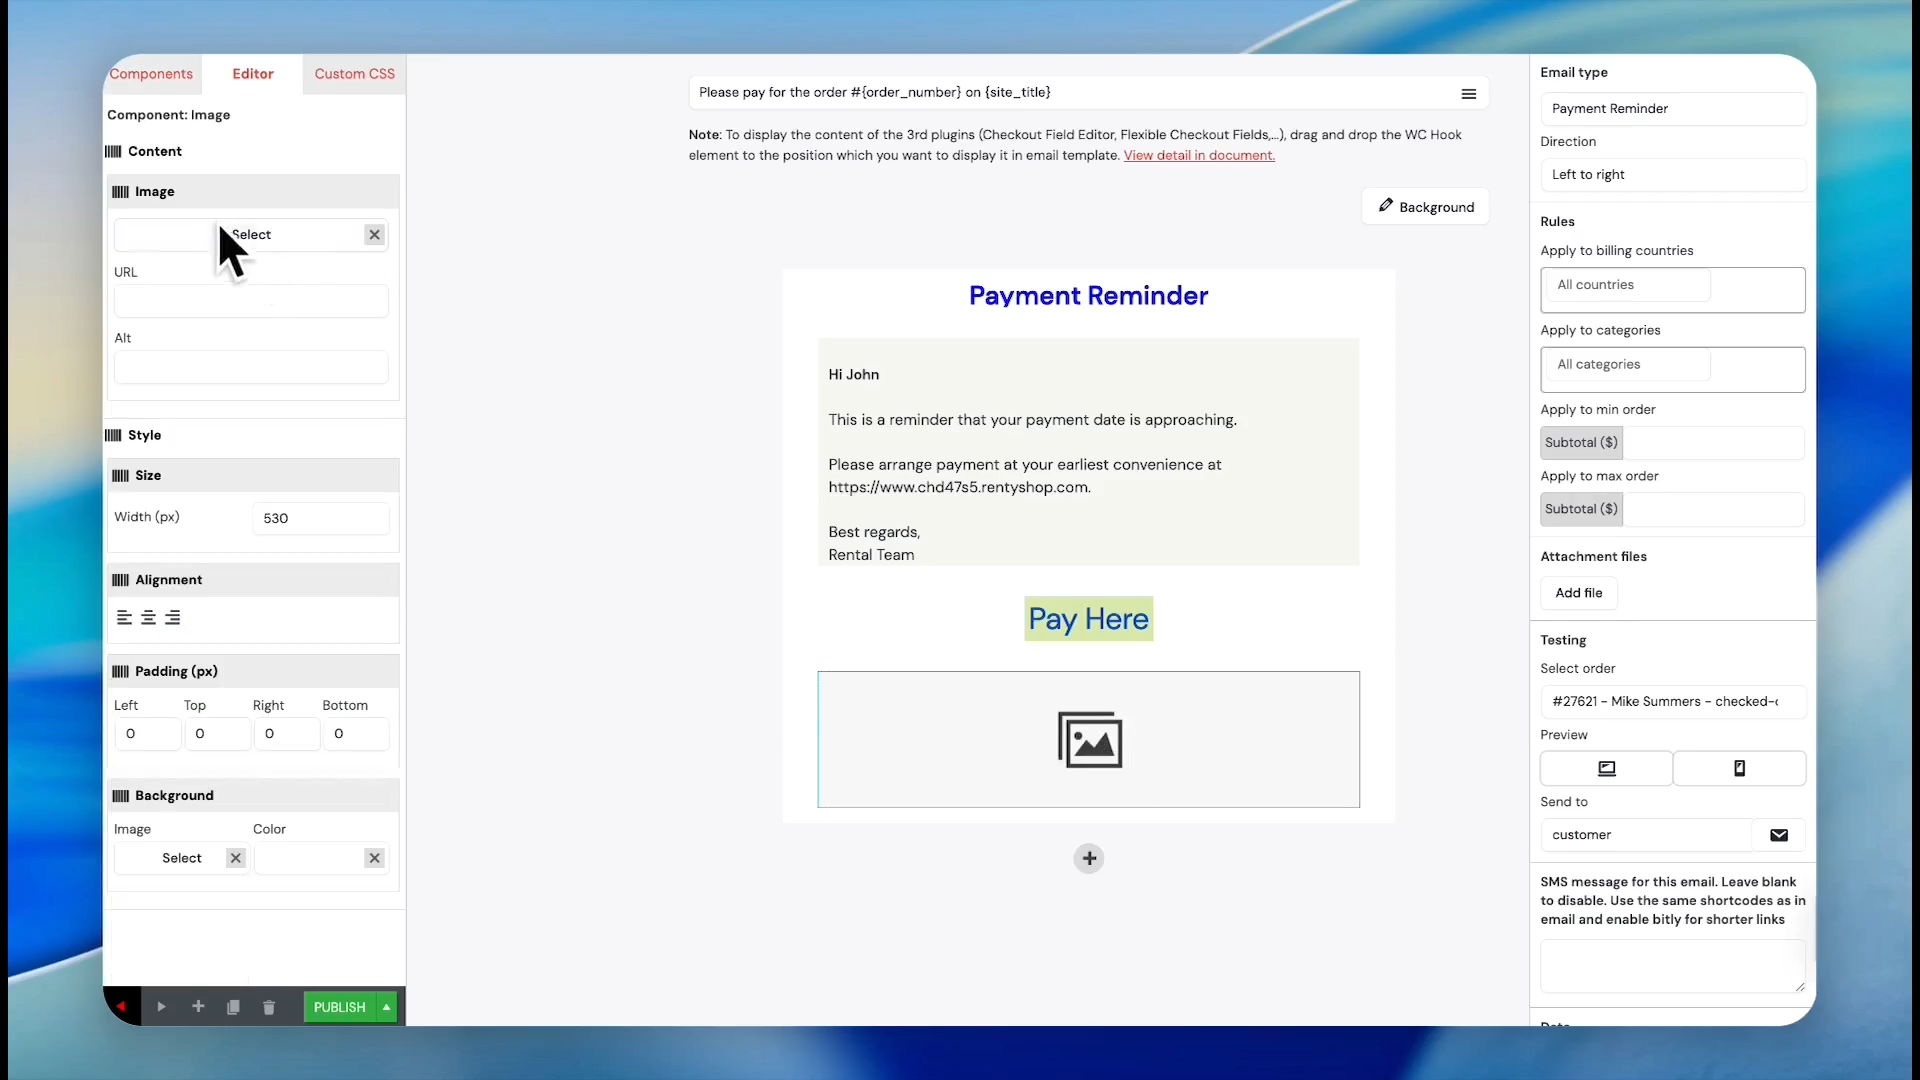
31
Click the image placeholder, click Select, choose an image from your media library, and click Select again to confirm.
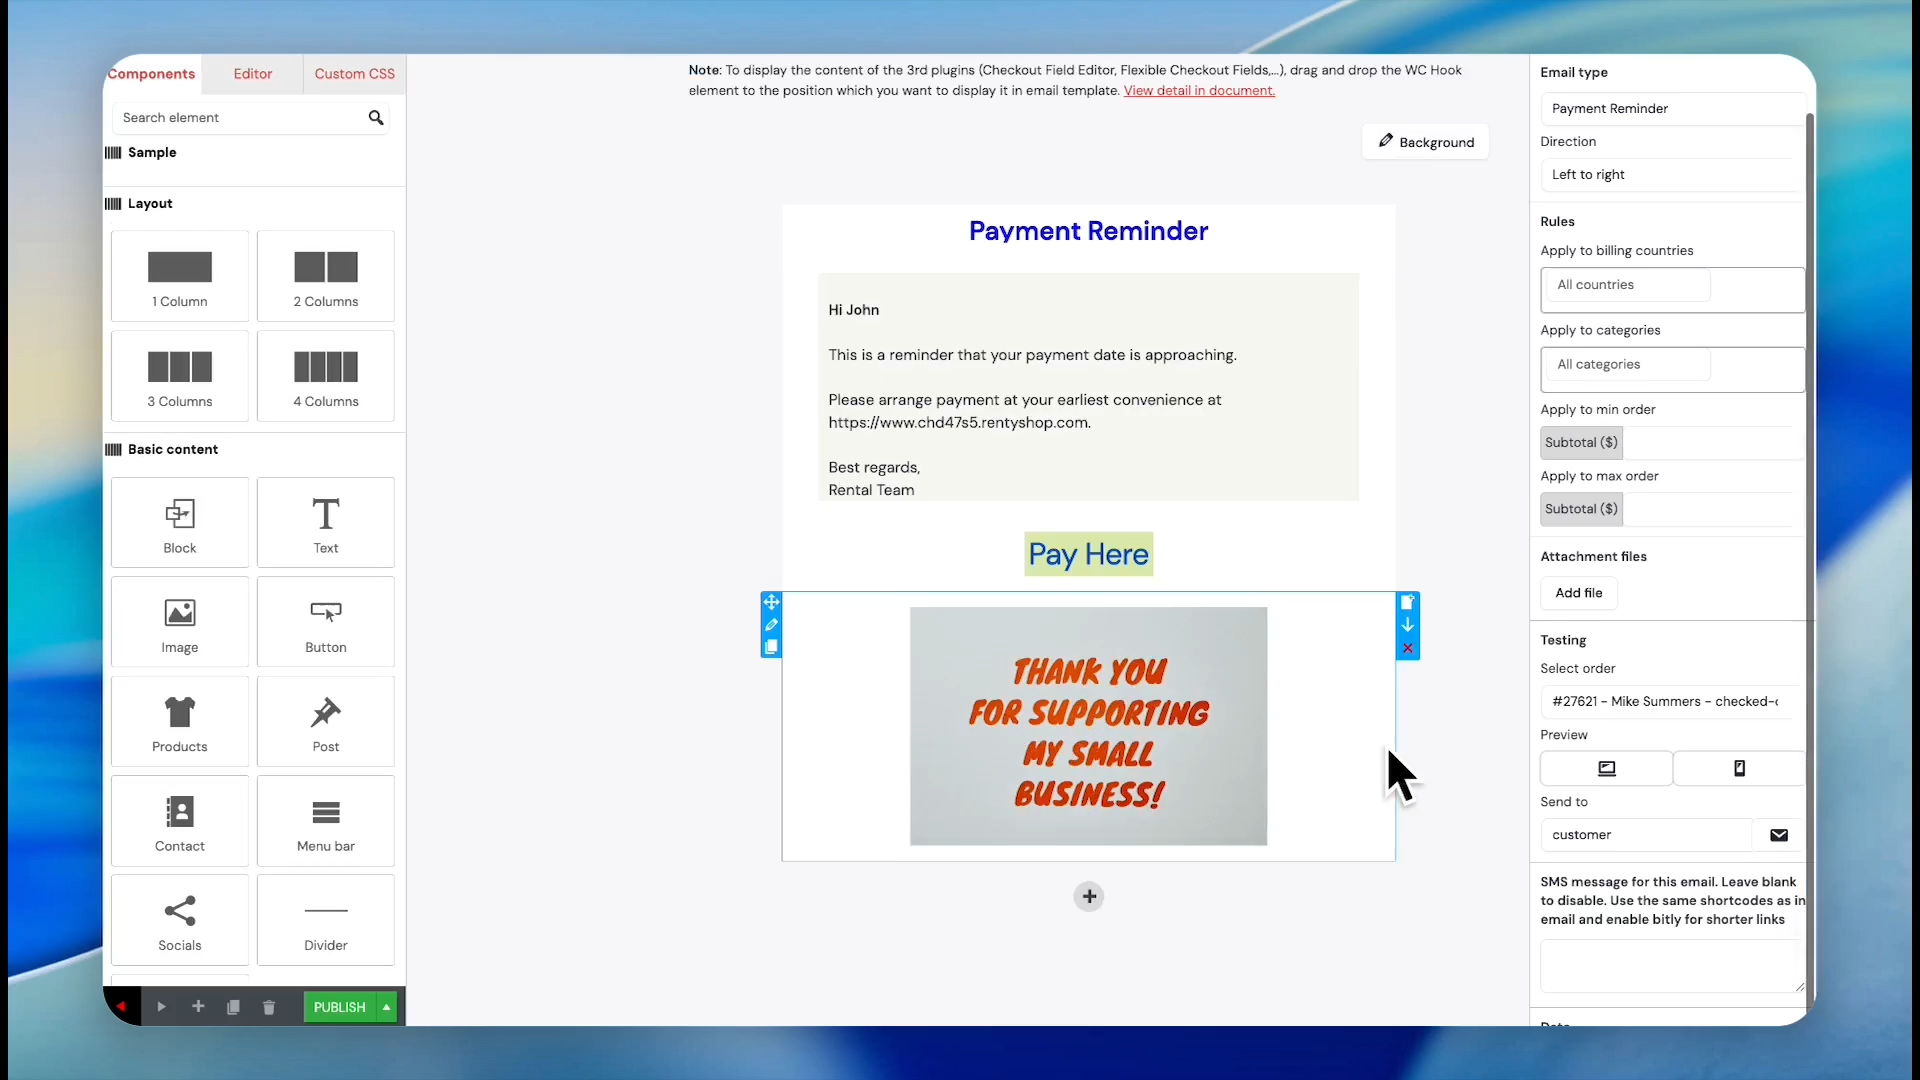
32
Click the Center alignment option to align the image properly.
33
Click Publish to save and activate your payment reminder template.
Your new payment reminder email template will now appear in your master list and trigger automatically according to the rules you configured.
Q: Can I edit the default email templates included in the platform?
A: Yes. While important operational templates are pre-built to handle automated messaging natively, you are not limited to them. You can click "Edit" on any existing template directly from the Email Templates page to make modifications.
Q: Will placeholders automatically populate customer data?
A: Yes. By using placeholders (also called shortcodes) like {first_name}, {site_title}, or {order_number}, the system automatically replaces them with the corresponding real-world data generated by the customer's profile and particular order.
Q: Can I restrict an automated template so it doesn't trigger for everyone?
A: Yes. When configuring the template settings, you can establish rules that limit the template so it only applies to specific countries or specific product categories.
Term
Definition
Placeholder / Shortcode
A dynamic piece of text, usually wrapped in brackets (like {first_name}), that automatically swaps in actual customer or system data before sending.
Component
A drag-and-drop structural or visual element (such as an image, text box, or button) used to construct templates in a visual email builder.