Icon

How to: Manage Customer Interactions

Learn how to filter logs, update follow-ups, and log new customer communications using the Interactions portal.

By Josh

Introduction

This process is designed for sales representatives, account managers, and sales leadership for maintaining clarity on customer activity.. It should be used during daily account review sessions or immediately after communicating with a client to ensure all records remain up-to-date.

This portal is used for logging and monitoring customer interactions and follow ups to ensure no important actions are missed for any customer. Unlike the Tasks section, it allows you to view all interactions assigned to other members of your team in case of customer ownership transference. Monitor by customer, category, due date, rep, assignee, and edit Interaction notes directly from this screen to eliminate context switching.
1
Step #1:

Viewing and Filtering Interactions

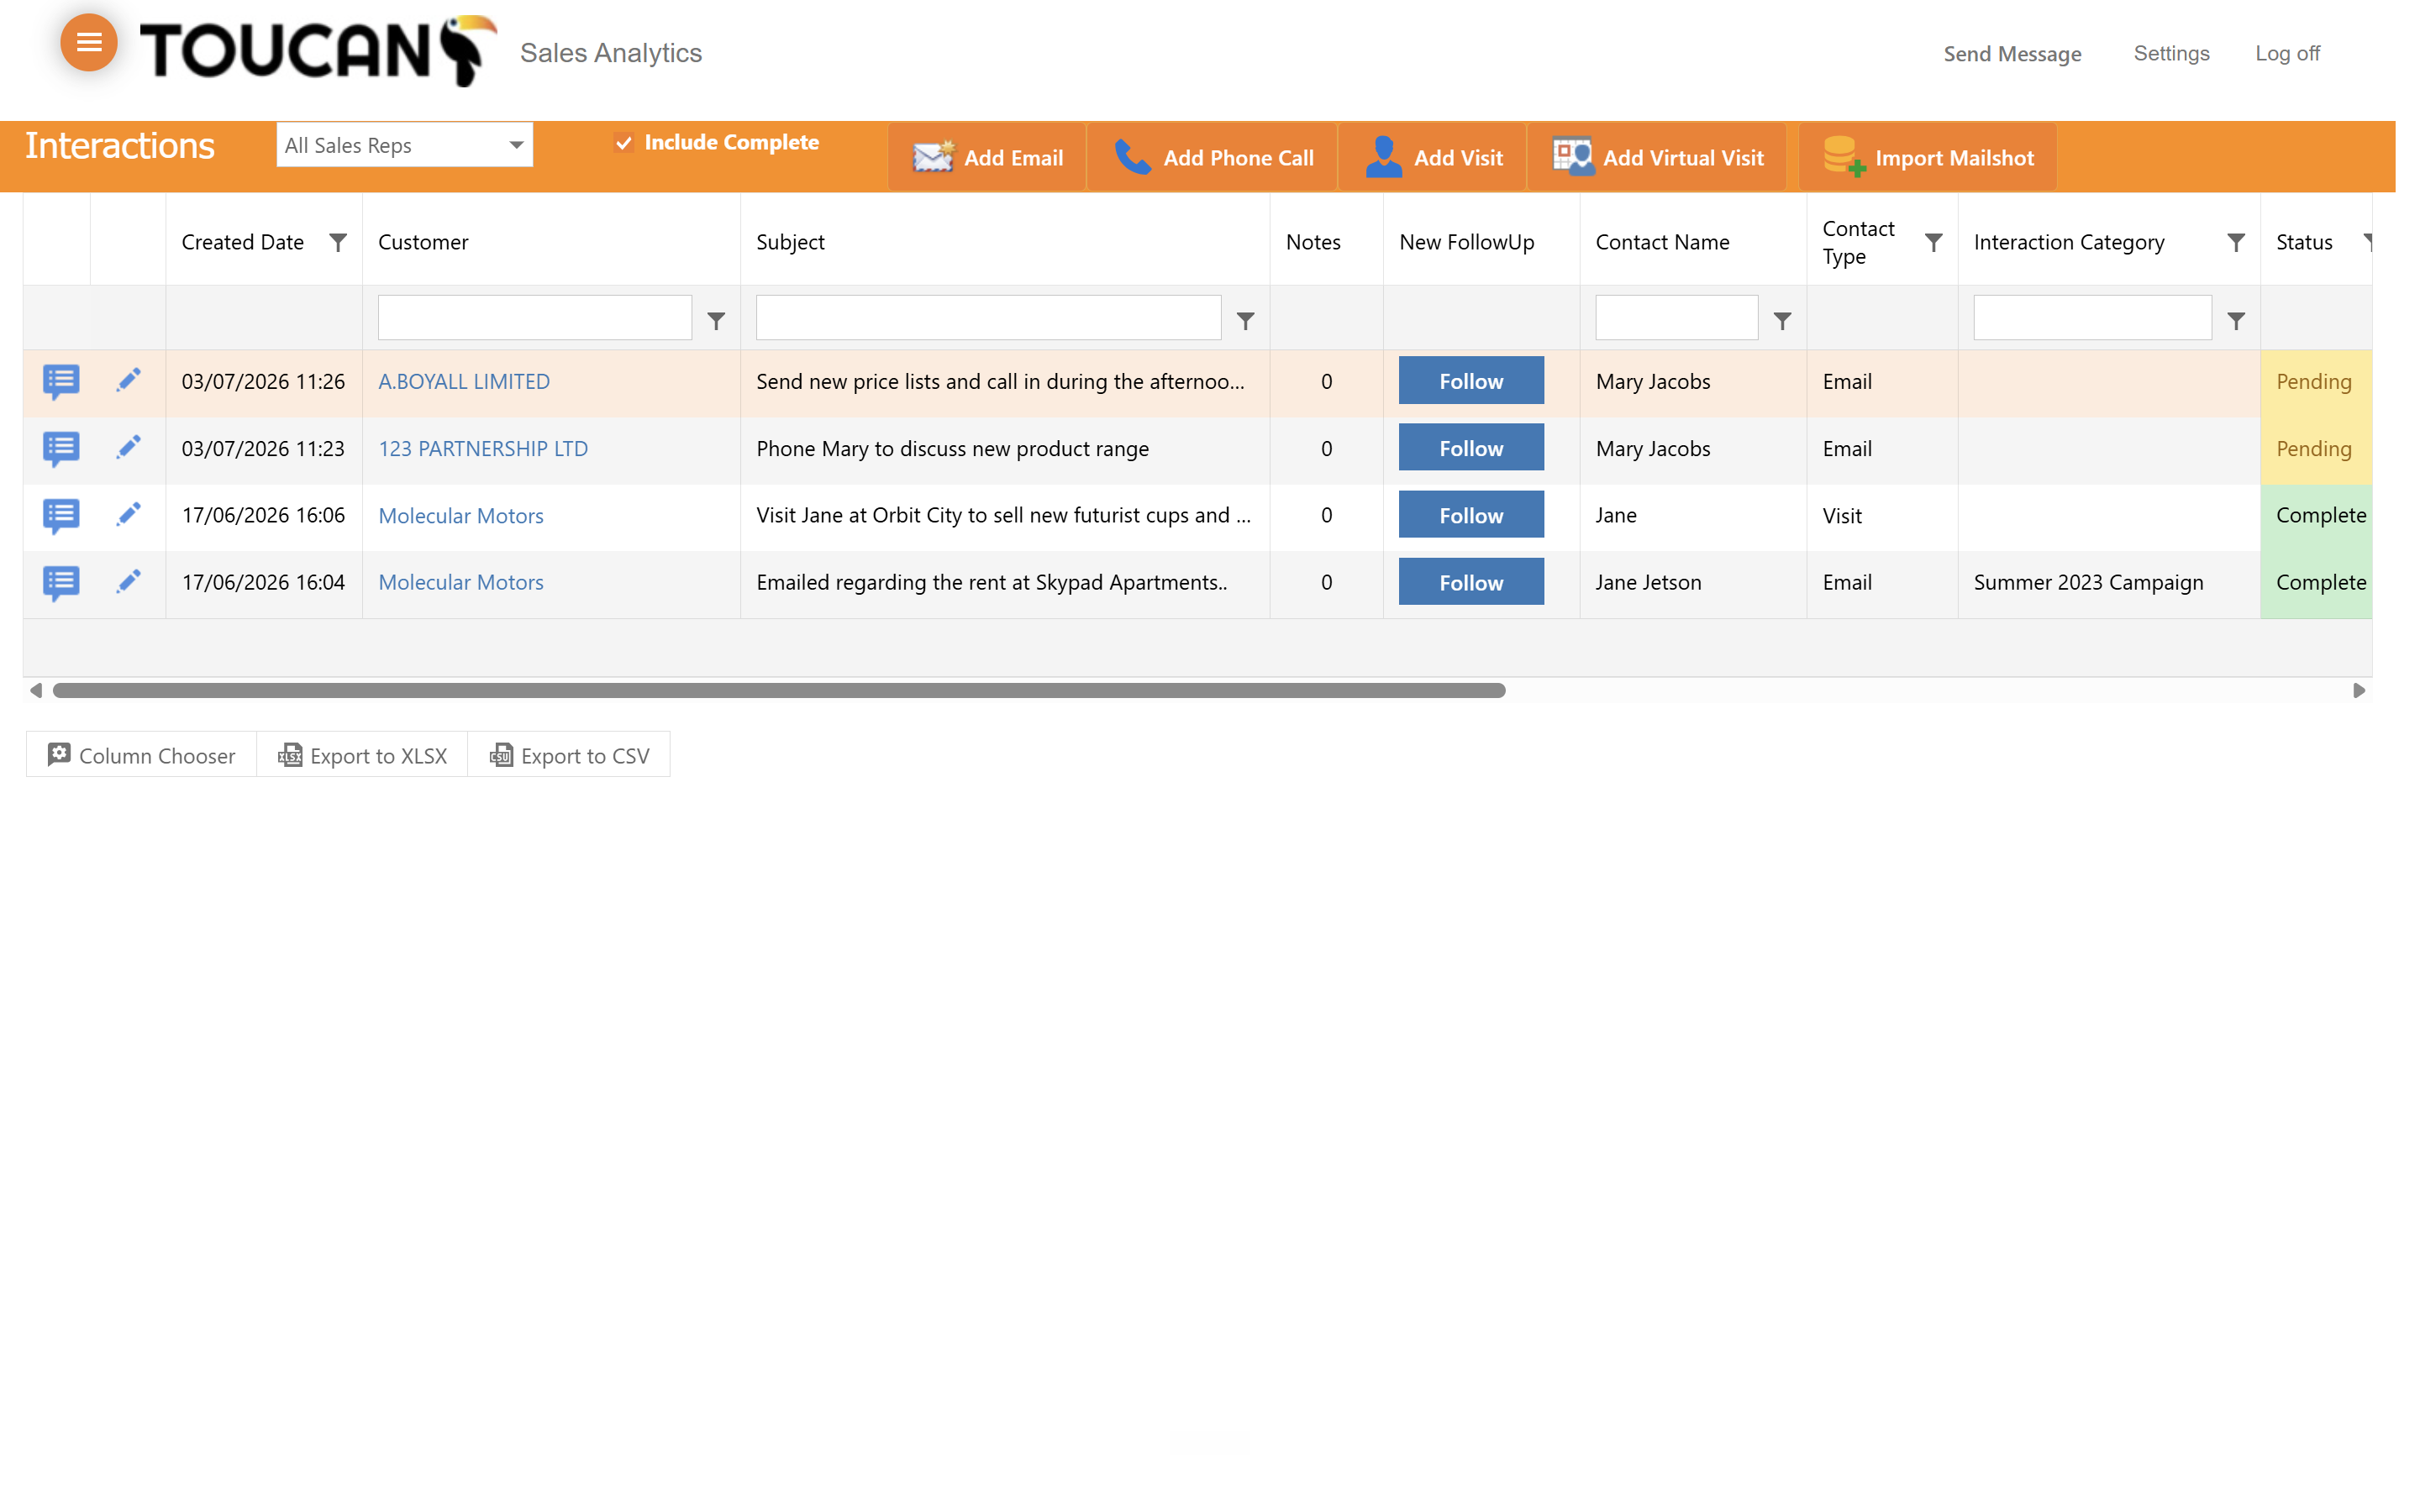
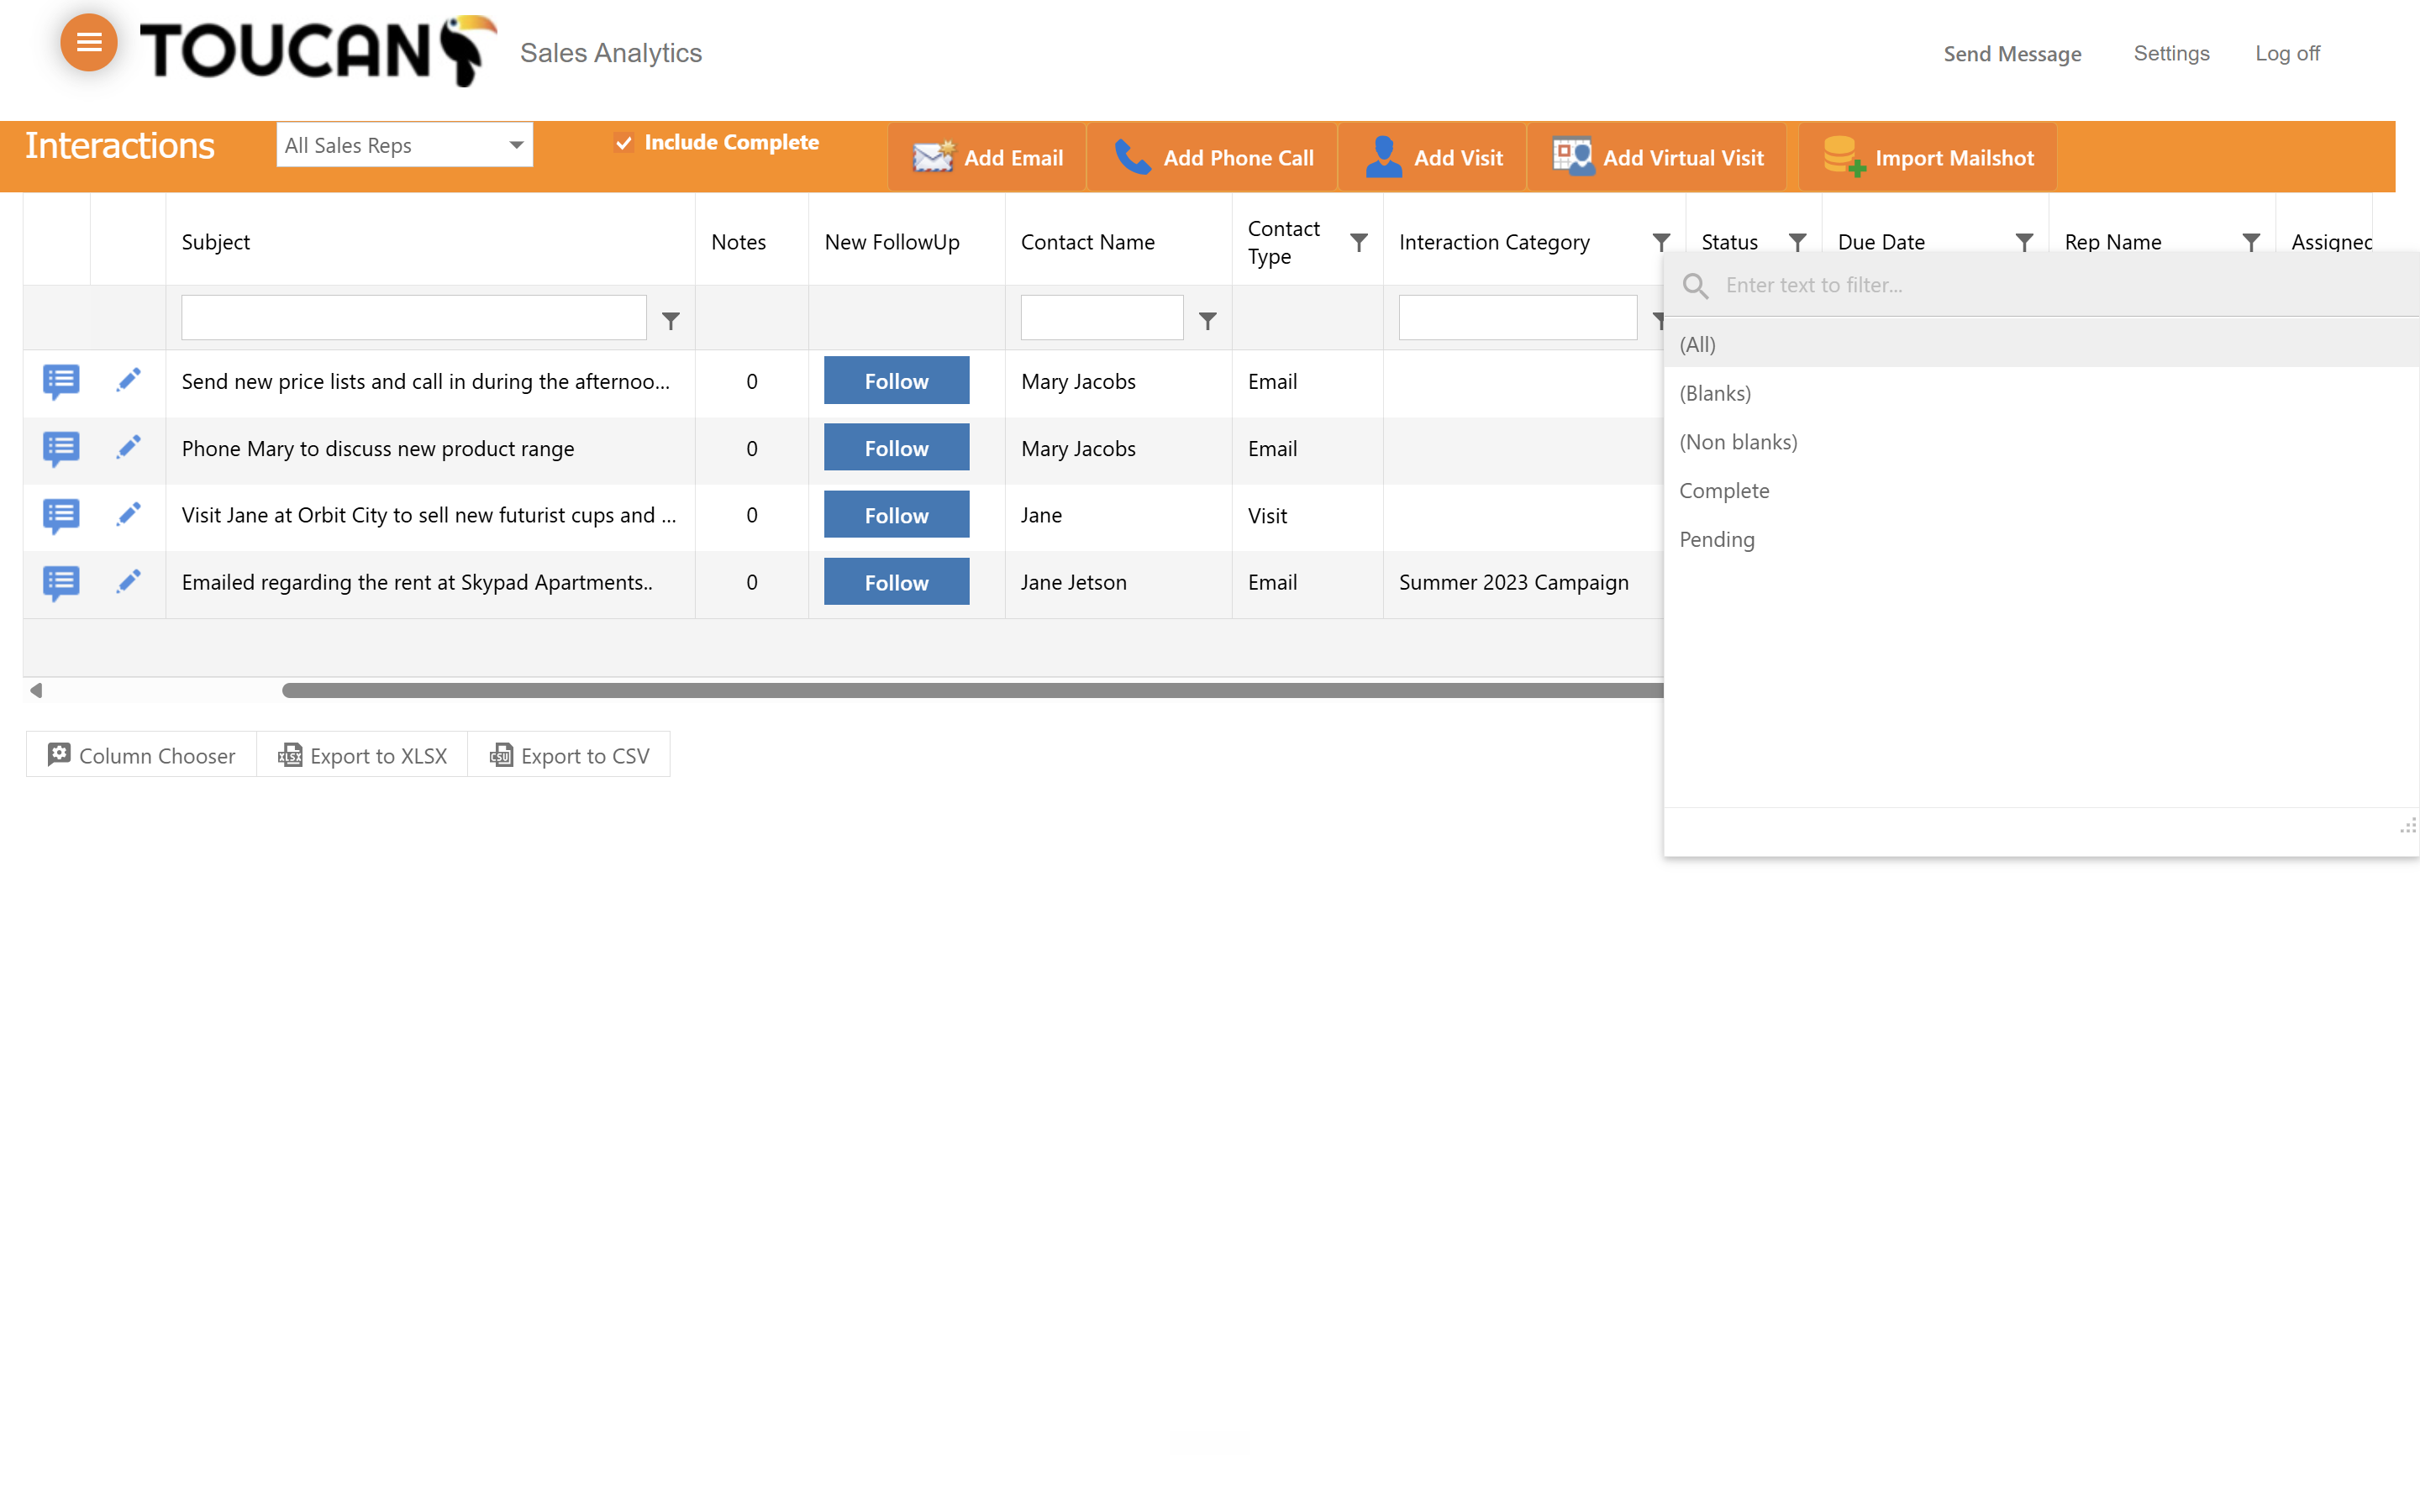
When navigating the Interactions dashboard, you can filter records to focus on specific tasks using the filter icon in the column headings.
2
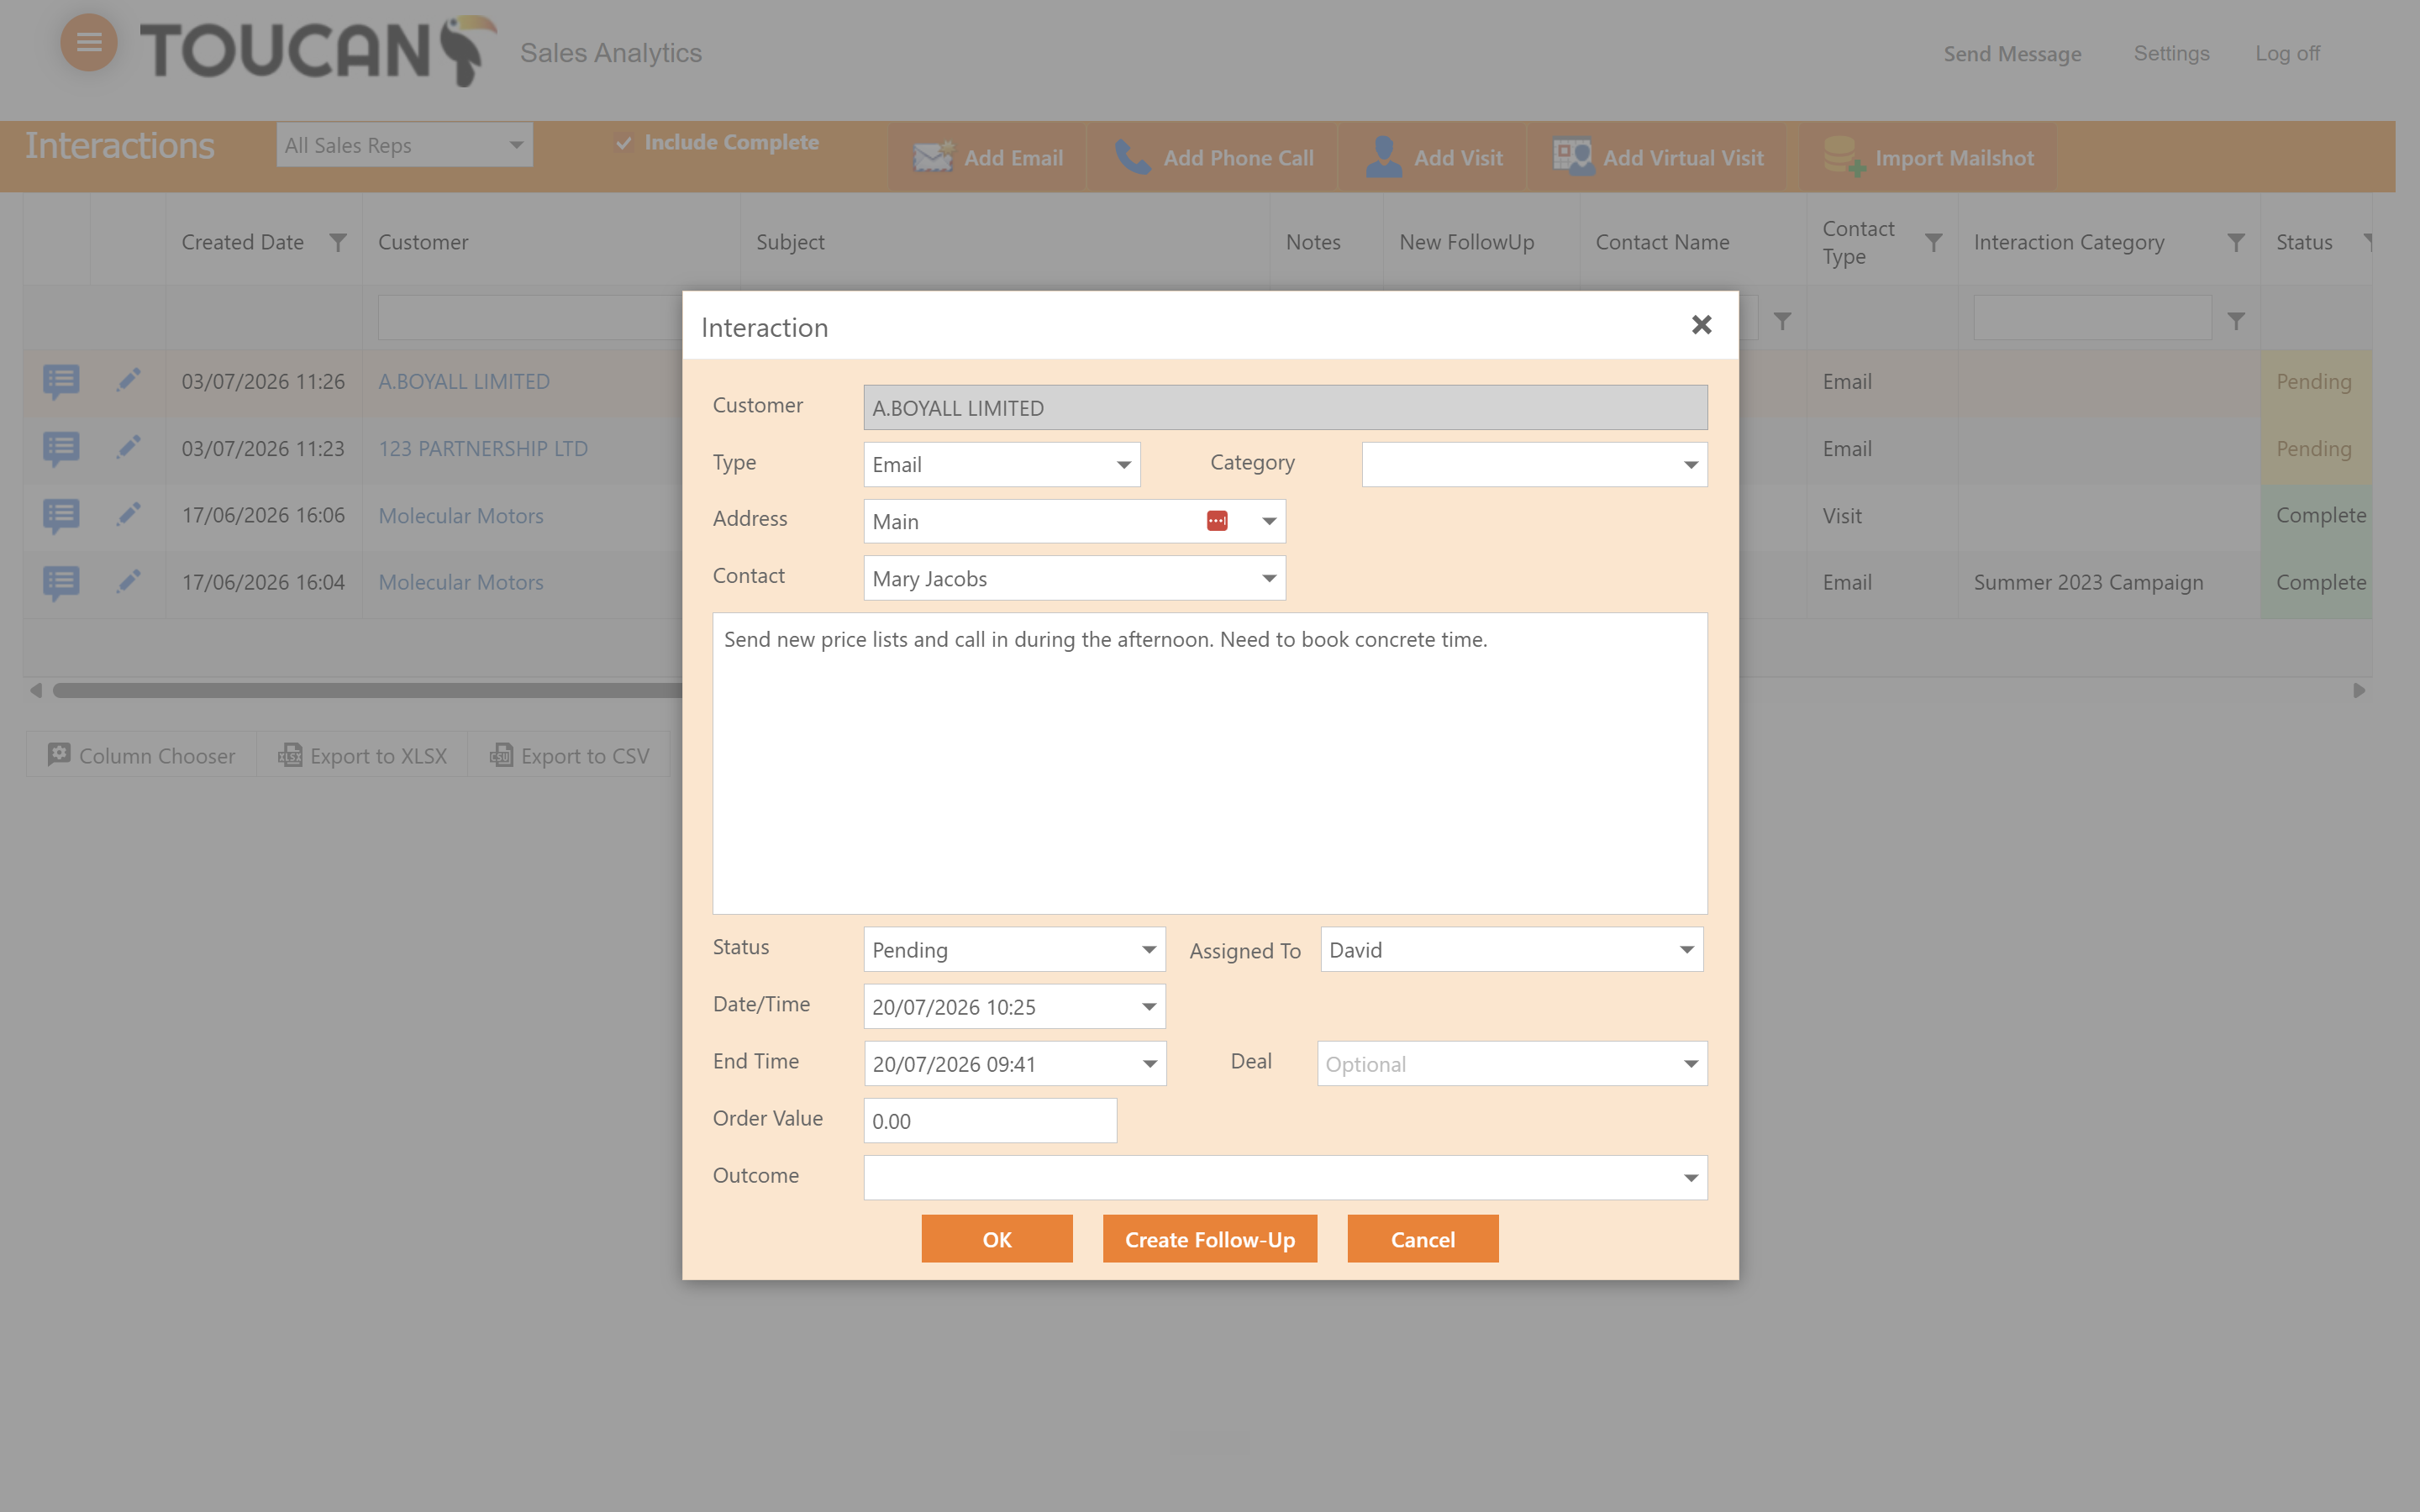
Click a specific interaction record to open the detailed modal window. From here you can amend the current interaction if more detail is provided, changes due dates or assignees, or add a new outcome. Interactions can also be set to Complete and new Follow Ups can be created.
Step #2: Click a specific interaction record to open the detailed modal window. From here you can amend the current interaction if more detail is provided, changes due dates or assignees, or add a new outcome. Interactions can also be set to Complete and new Follow Ups can be created.
3
Click the filter icon in the Status column header to display options such as Complete or Pending.
Step #3: Click the filter icon in the Status column header to display options such as Complete or Pending.

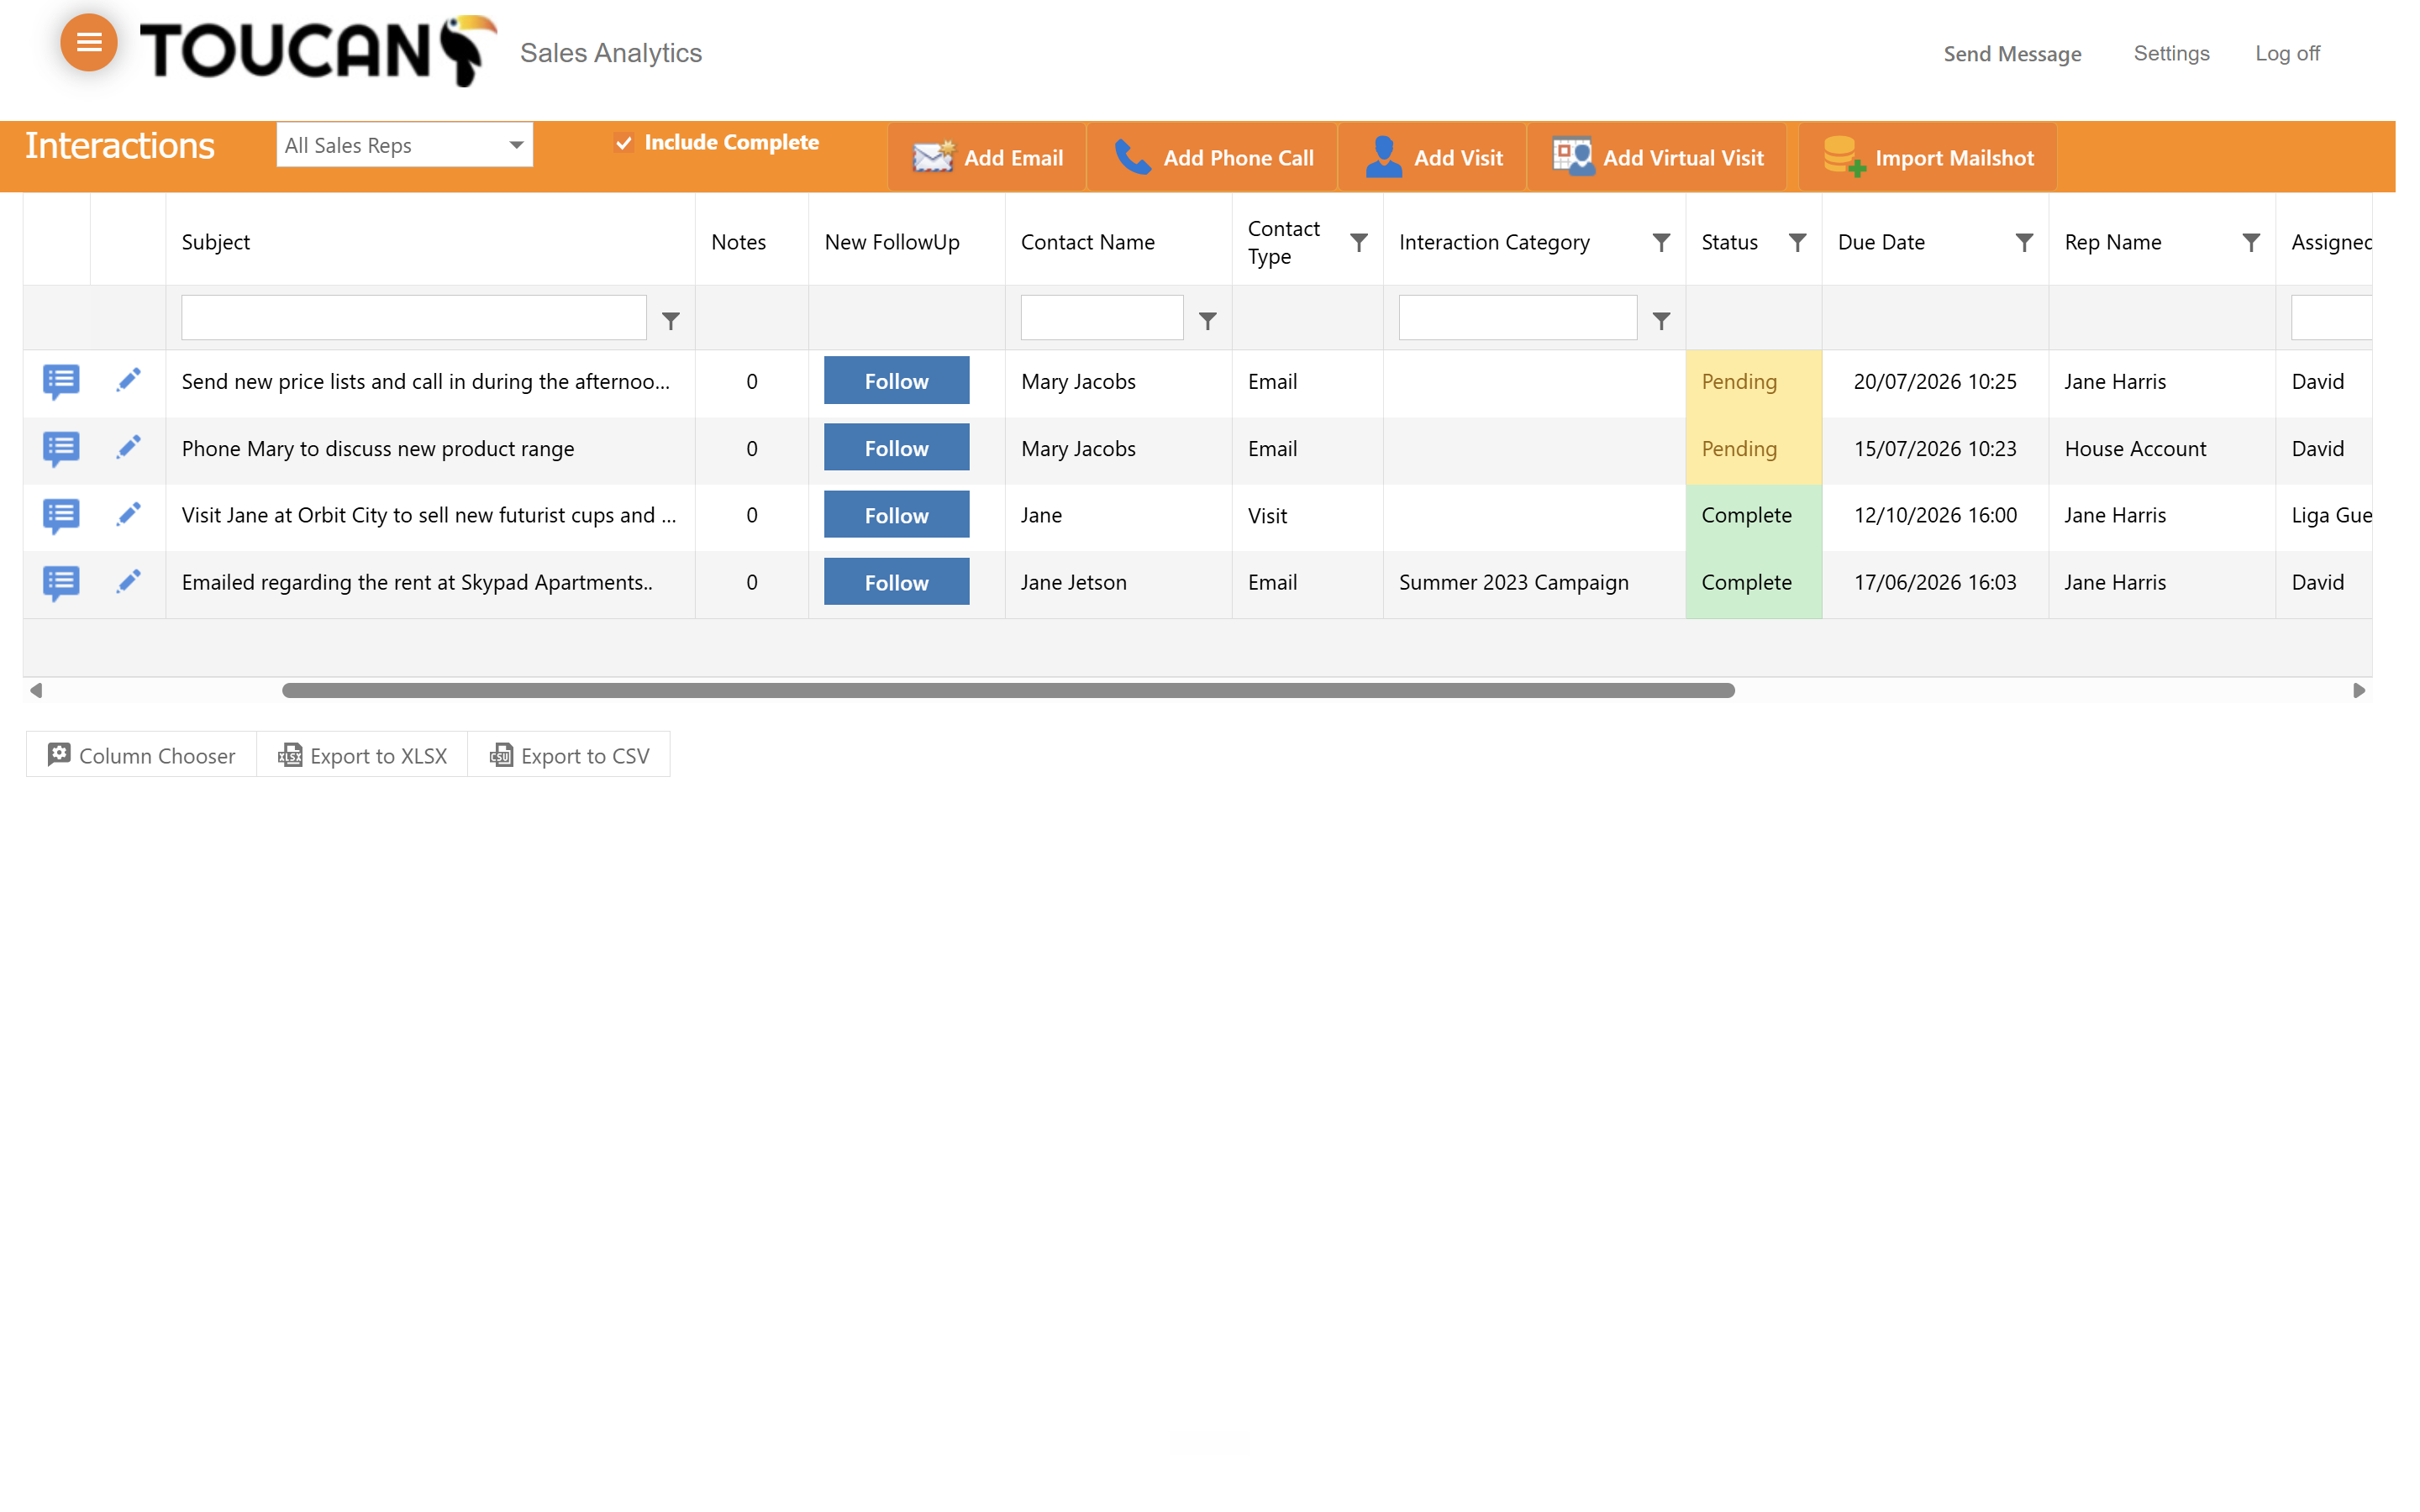
To view tasks per individual rep or find all interactions assigned to you, filter on the Rep Name column.

1
Click the appropriate filter button to configure returned results.
Step #4: Click the appropriate filter button to configure returned results.

Viewing a Customer

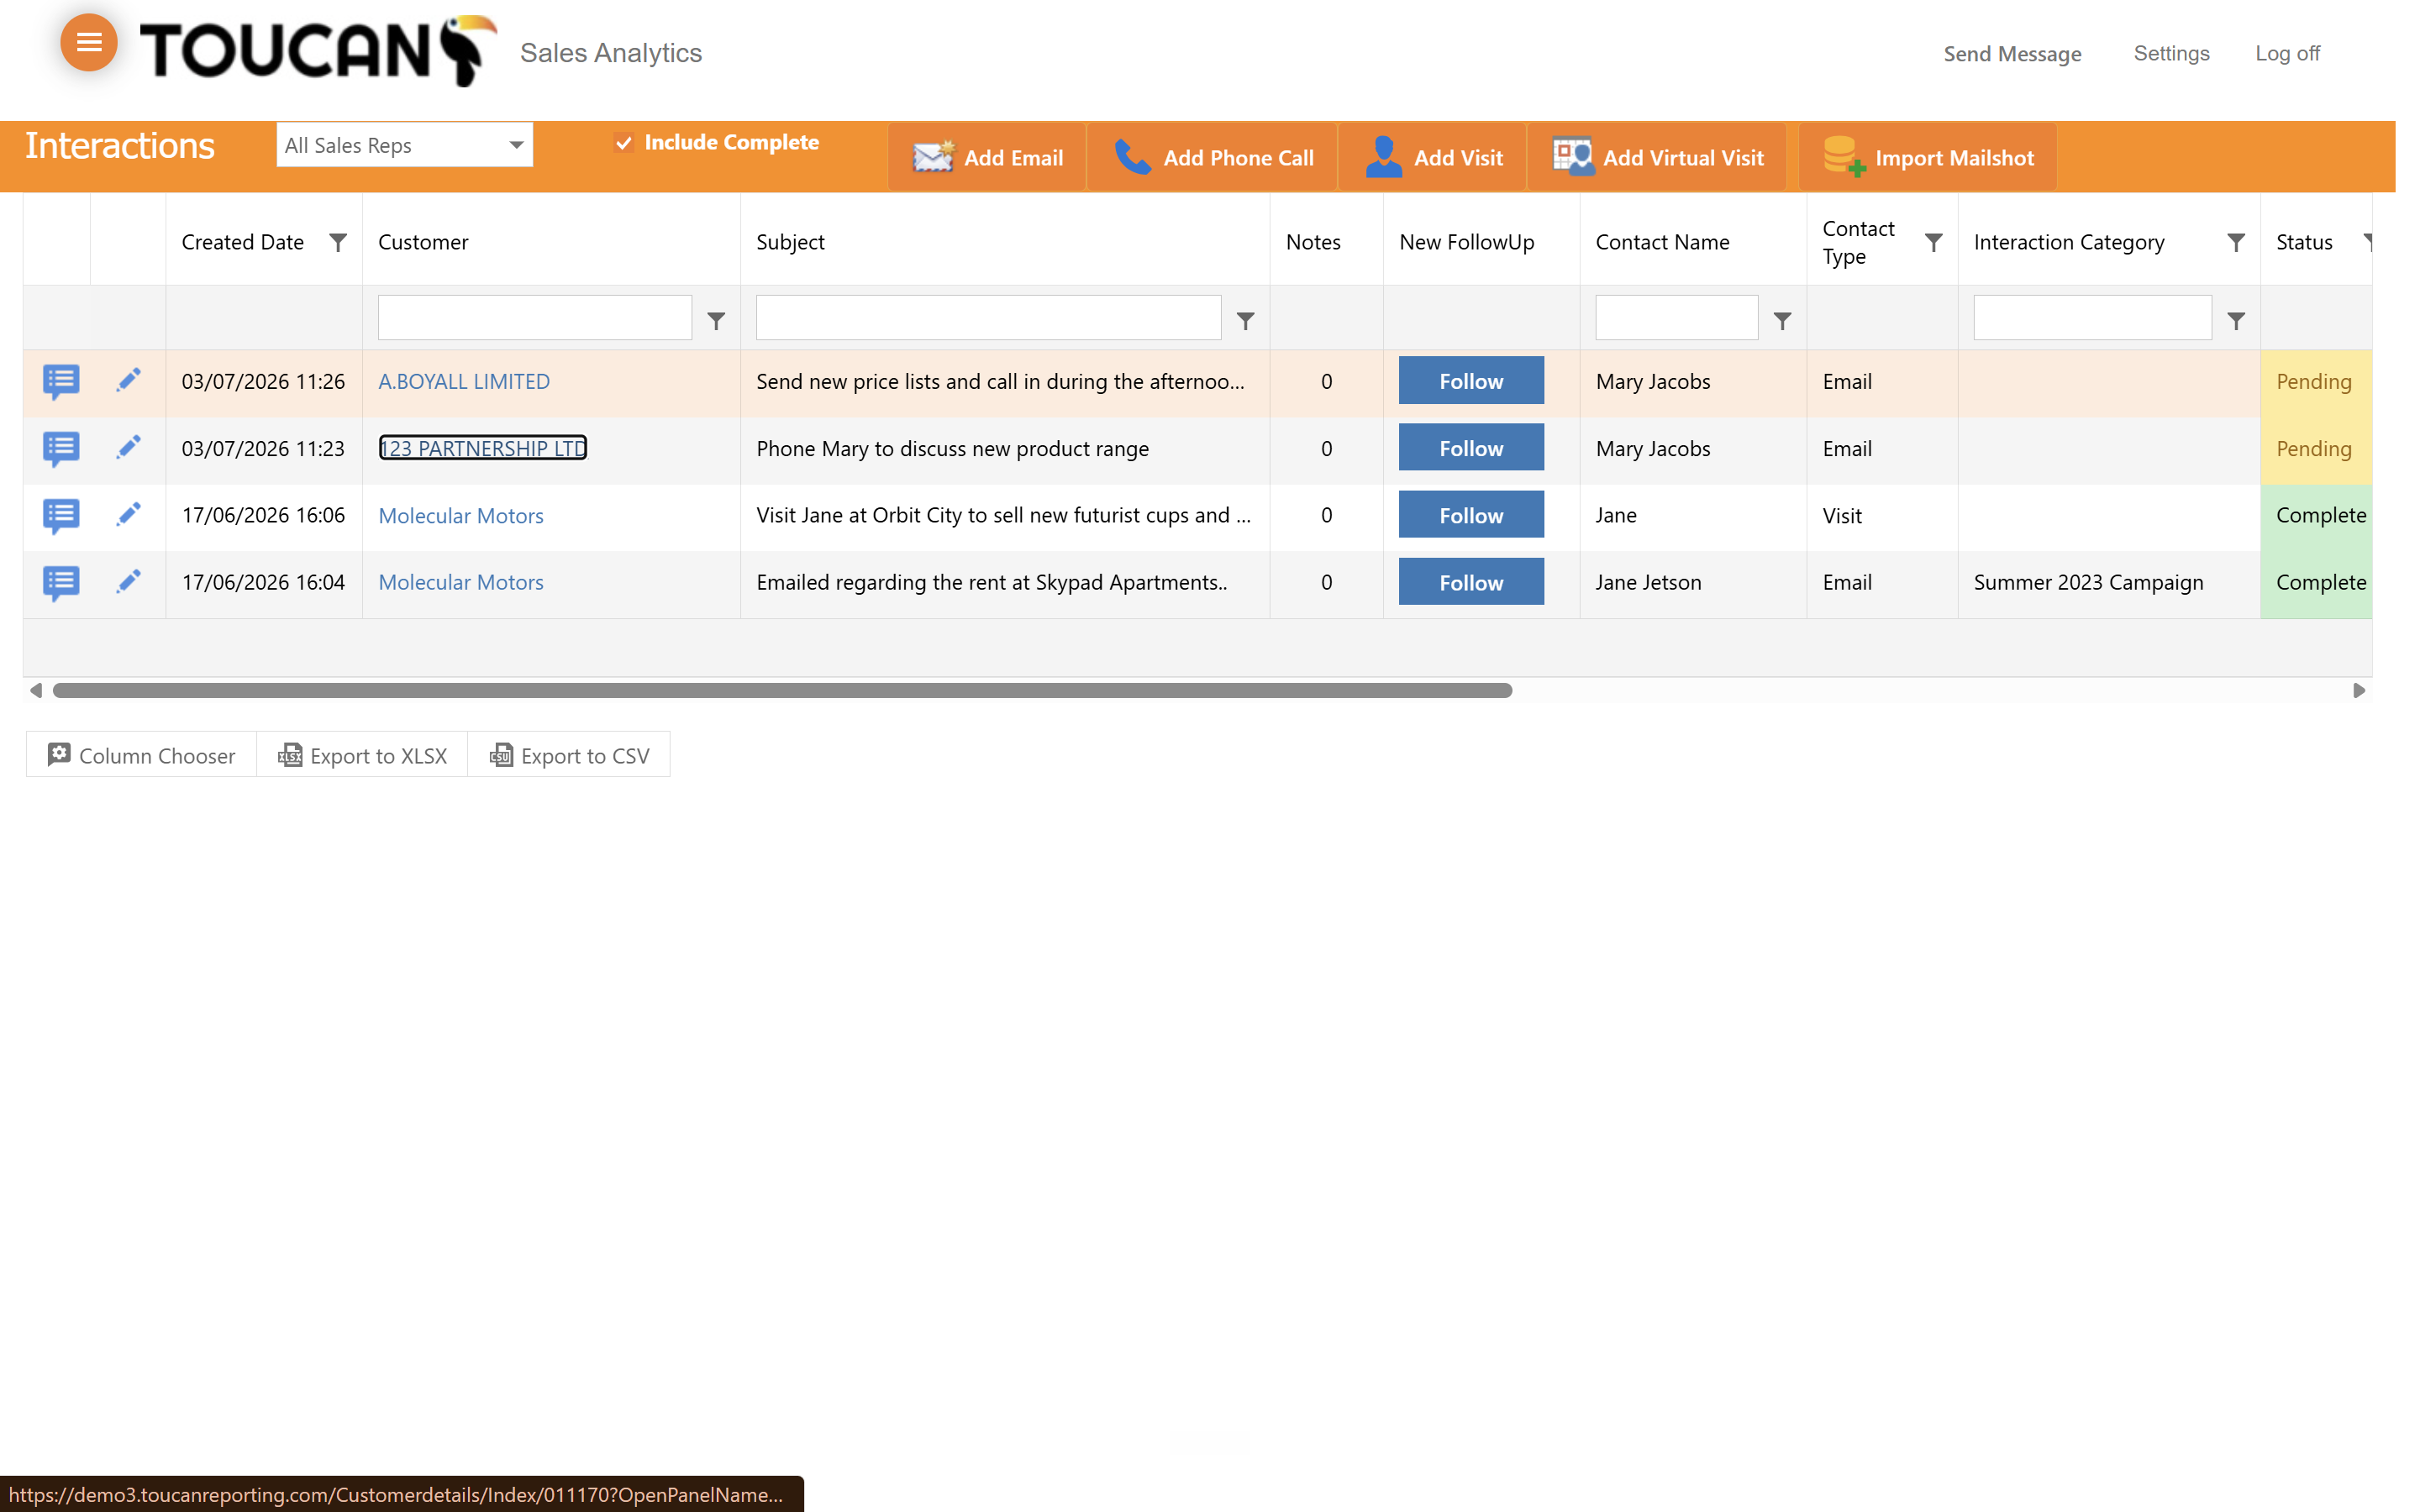
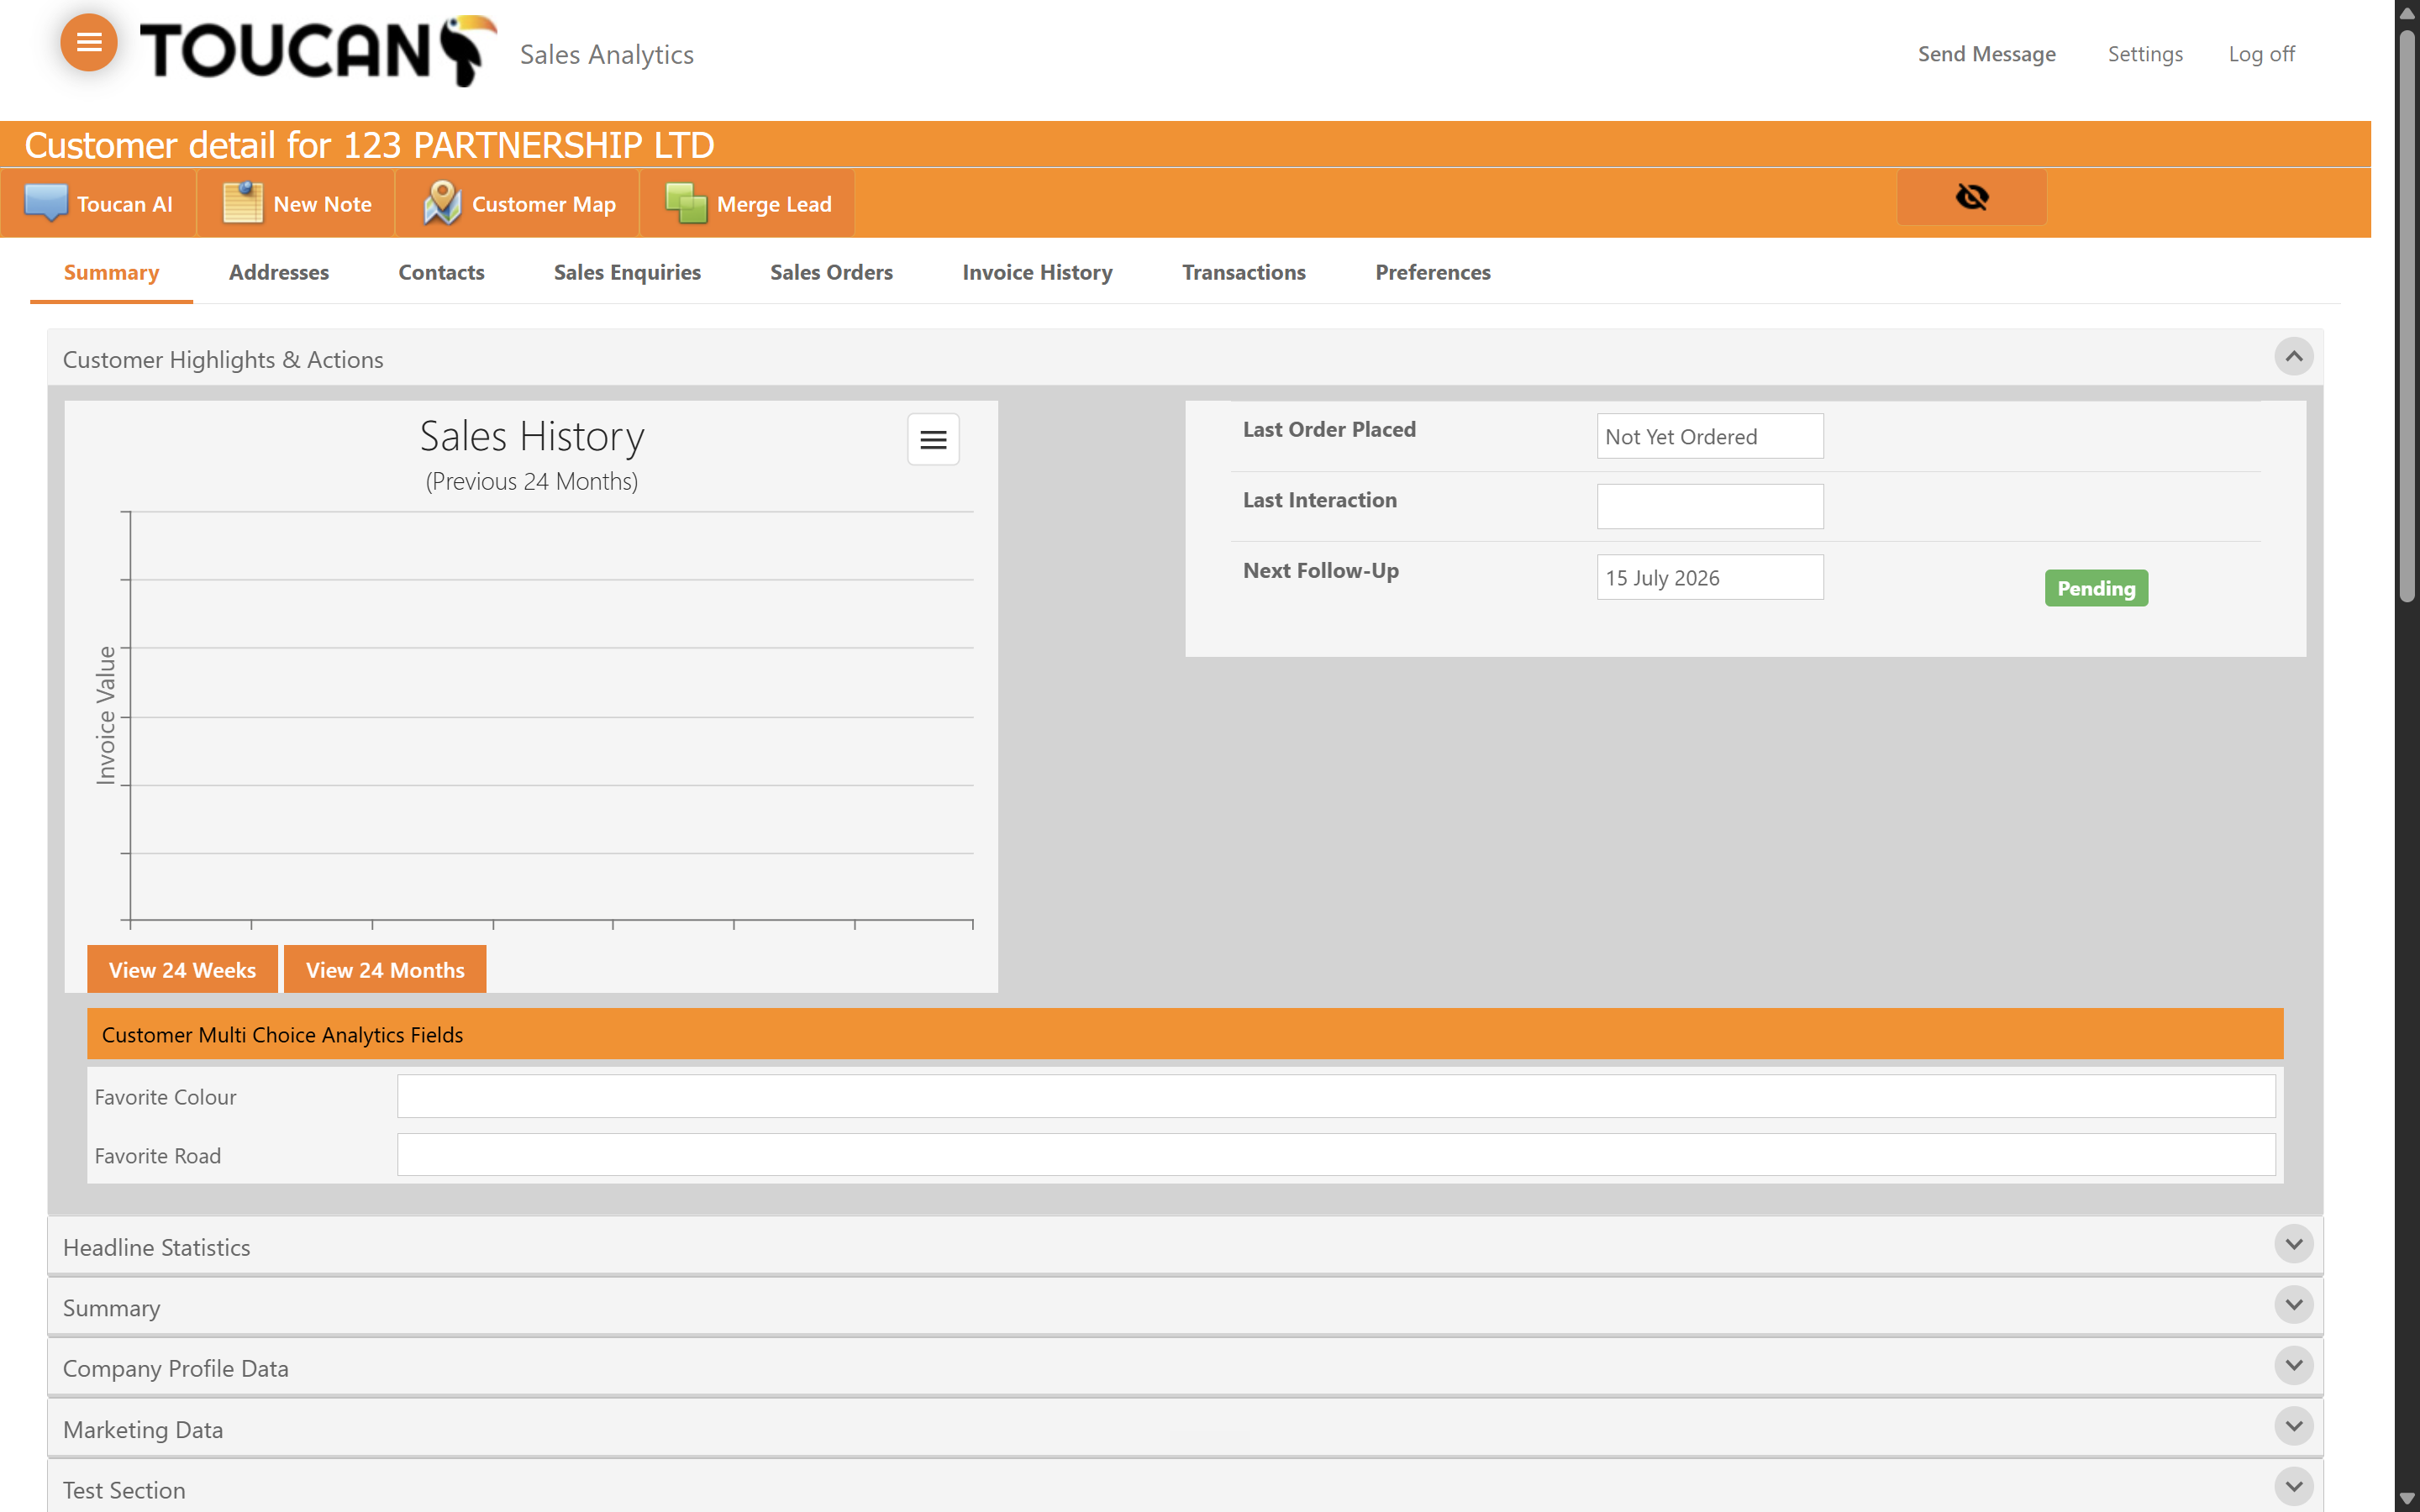
If you need more context on the customer or need to review any of their current sales or stock data, click on their Customer Name field to open their profile page.
5
Click the customer's name in the table to open their detailed account profile and sales history.
Step #5: Click the customer's name in the table to open their detailed account profile and sales history.
6
From their main account page you will find all relevant details and context needed to complete the interaction if required. The same interaction listed on the Interactions page will also be listed under the Interactions container on thei
Step #6: From their main account page you will find all relevant details and context needed to complete the interaction if required. The same interaction listed on the Interactions page will also be listed under the Interactions container on thei

Managing Follow-Ups

Keep track of ongoing customer communications by updating notes and progressing follow-ups.
7
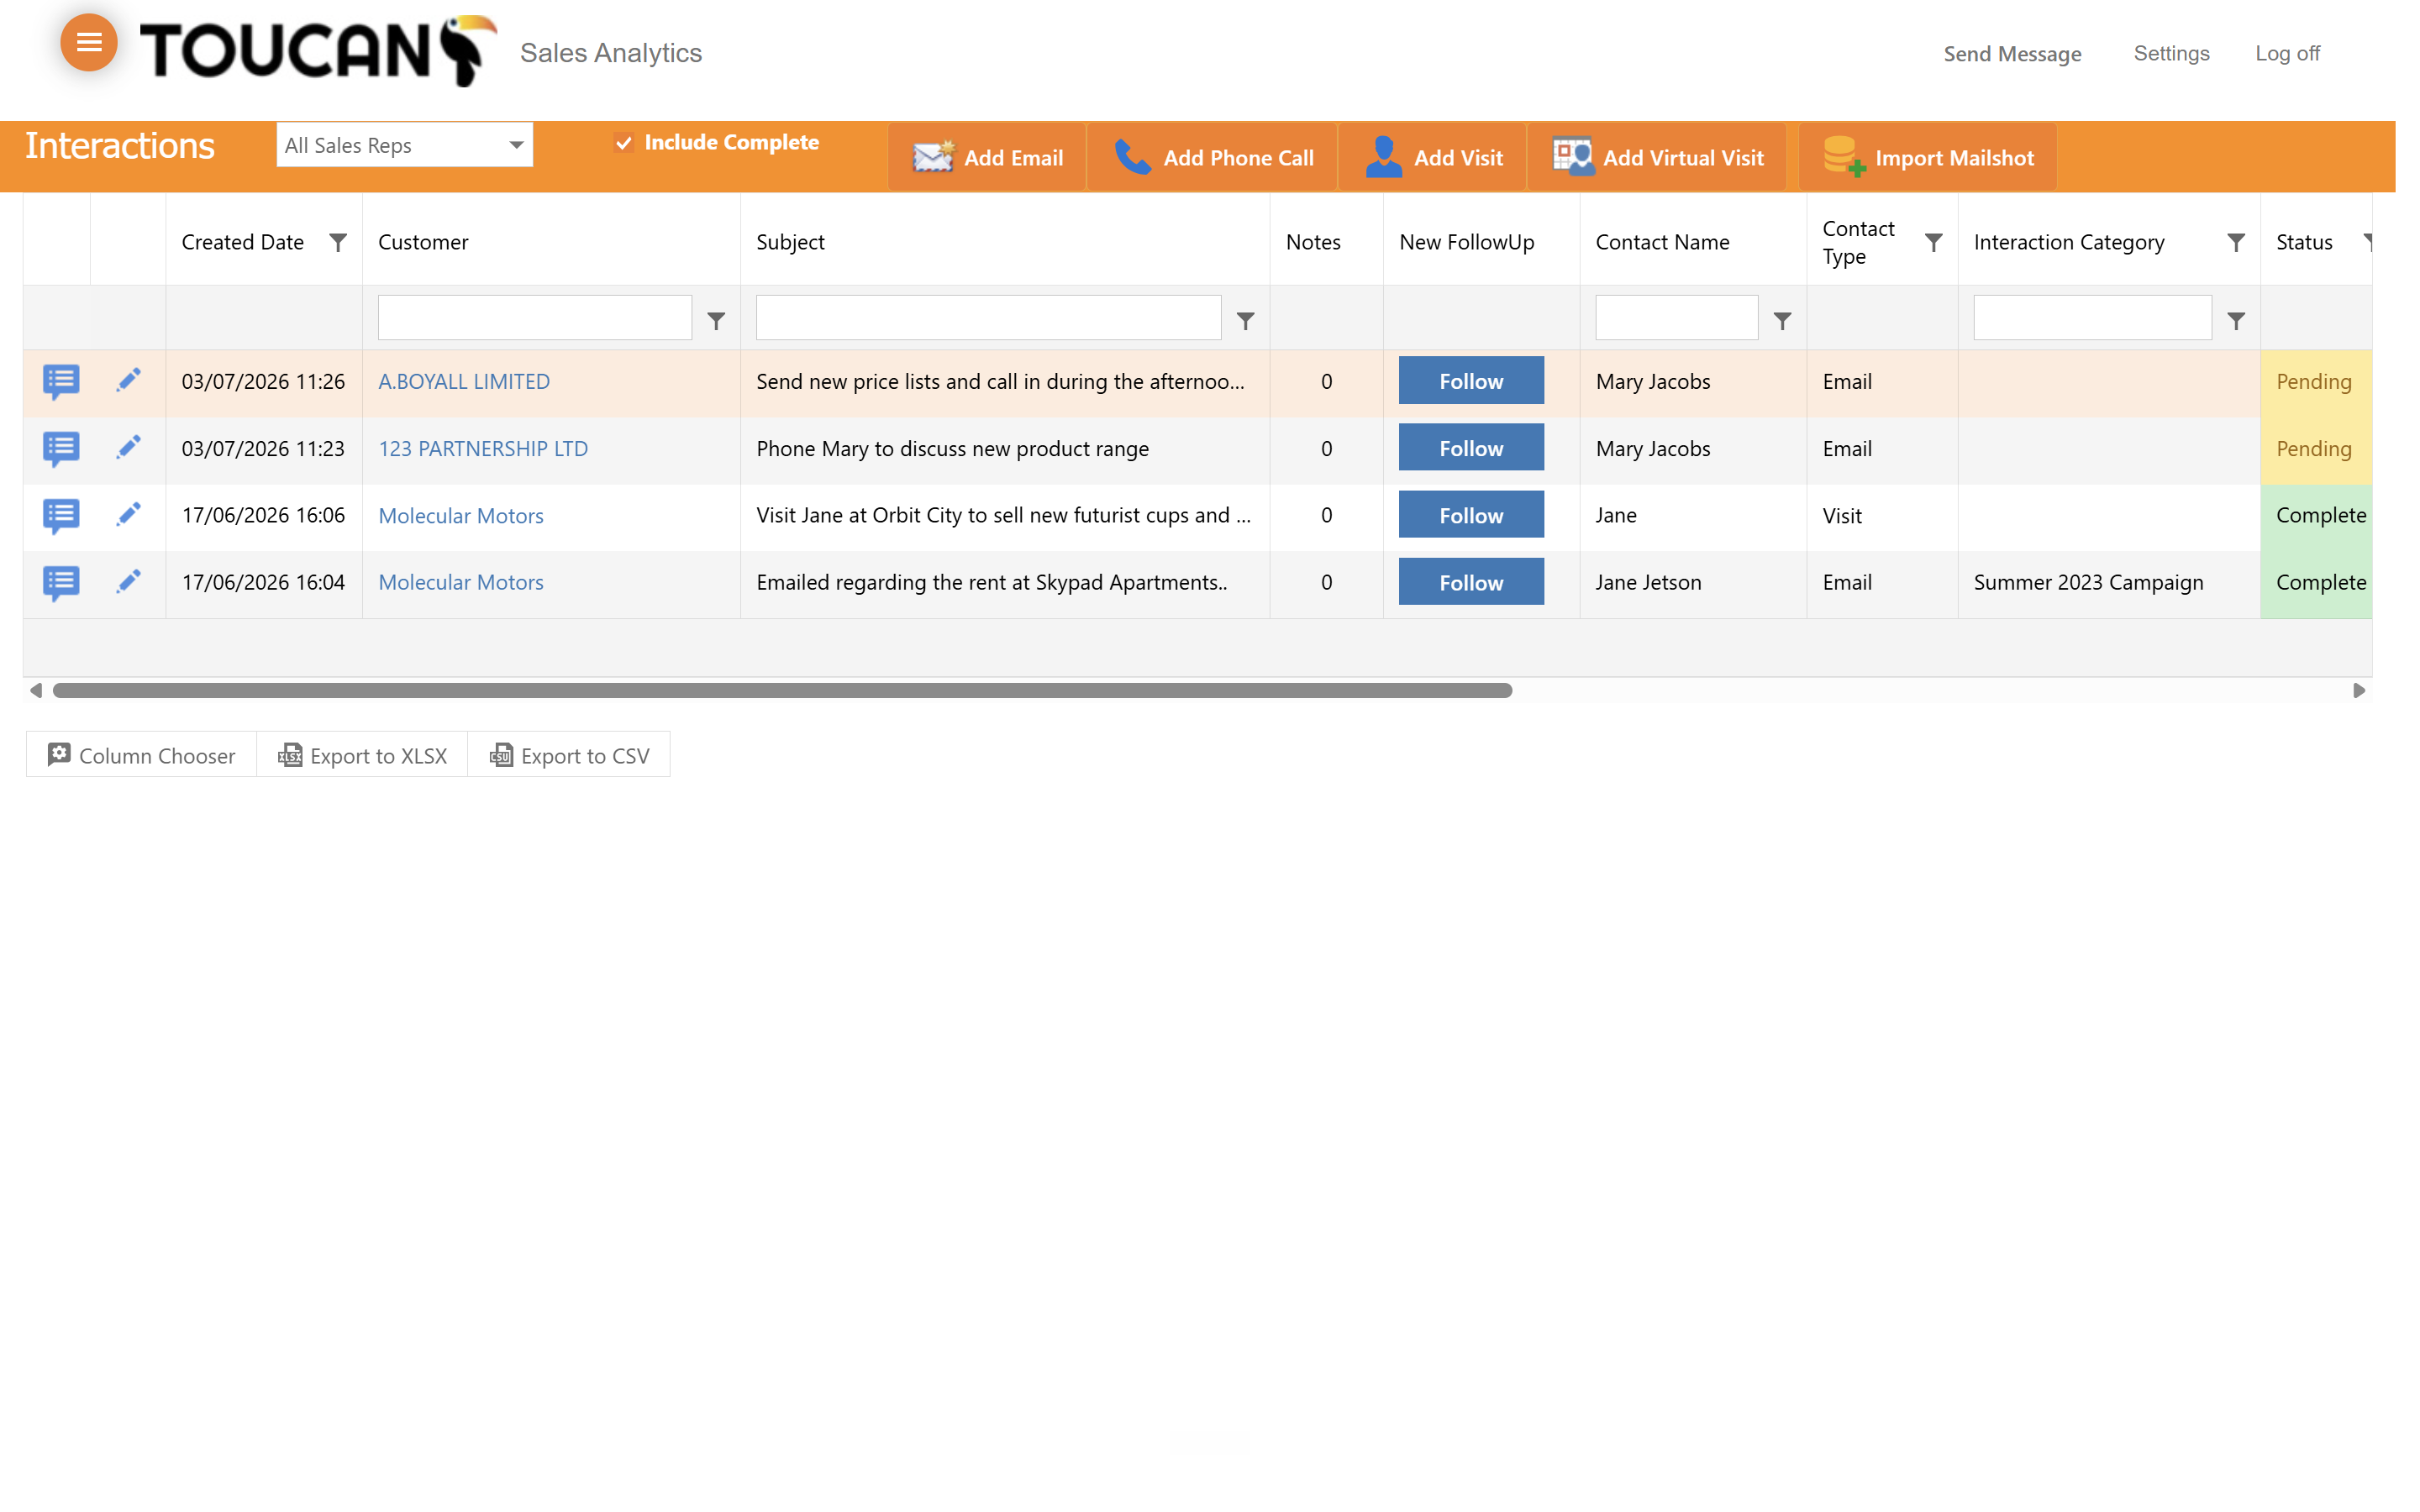
Click Follow in the New FollowUp column to enter the Interaction window as described in step 1 to create a new Follow Up Interaction which will be added to the list.
Step #7: Click Follow in the New FollowUp column to enter the Interaction window as described in step 1 to create a new Follow Up Interaction which will be added to the list.

Customising and Exporting Data

You can adjust which columns appear in your grid and export your records for external reporting.
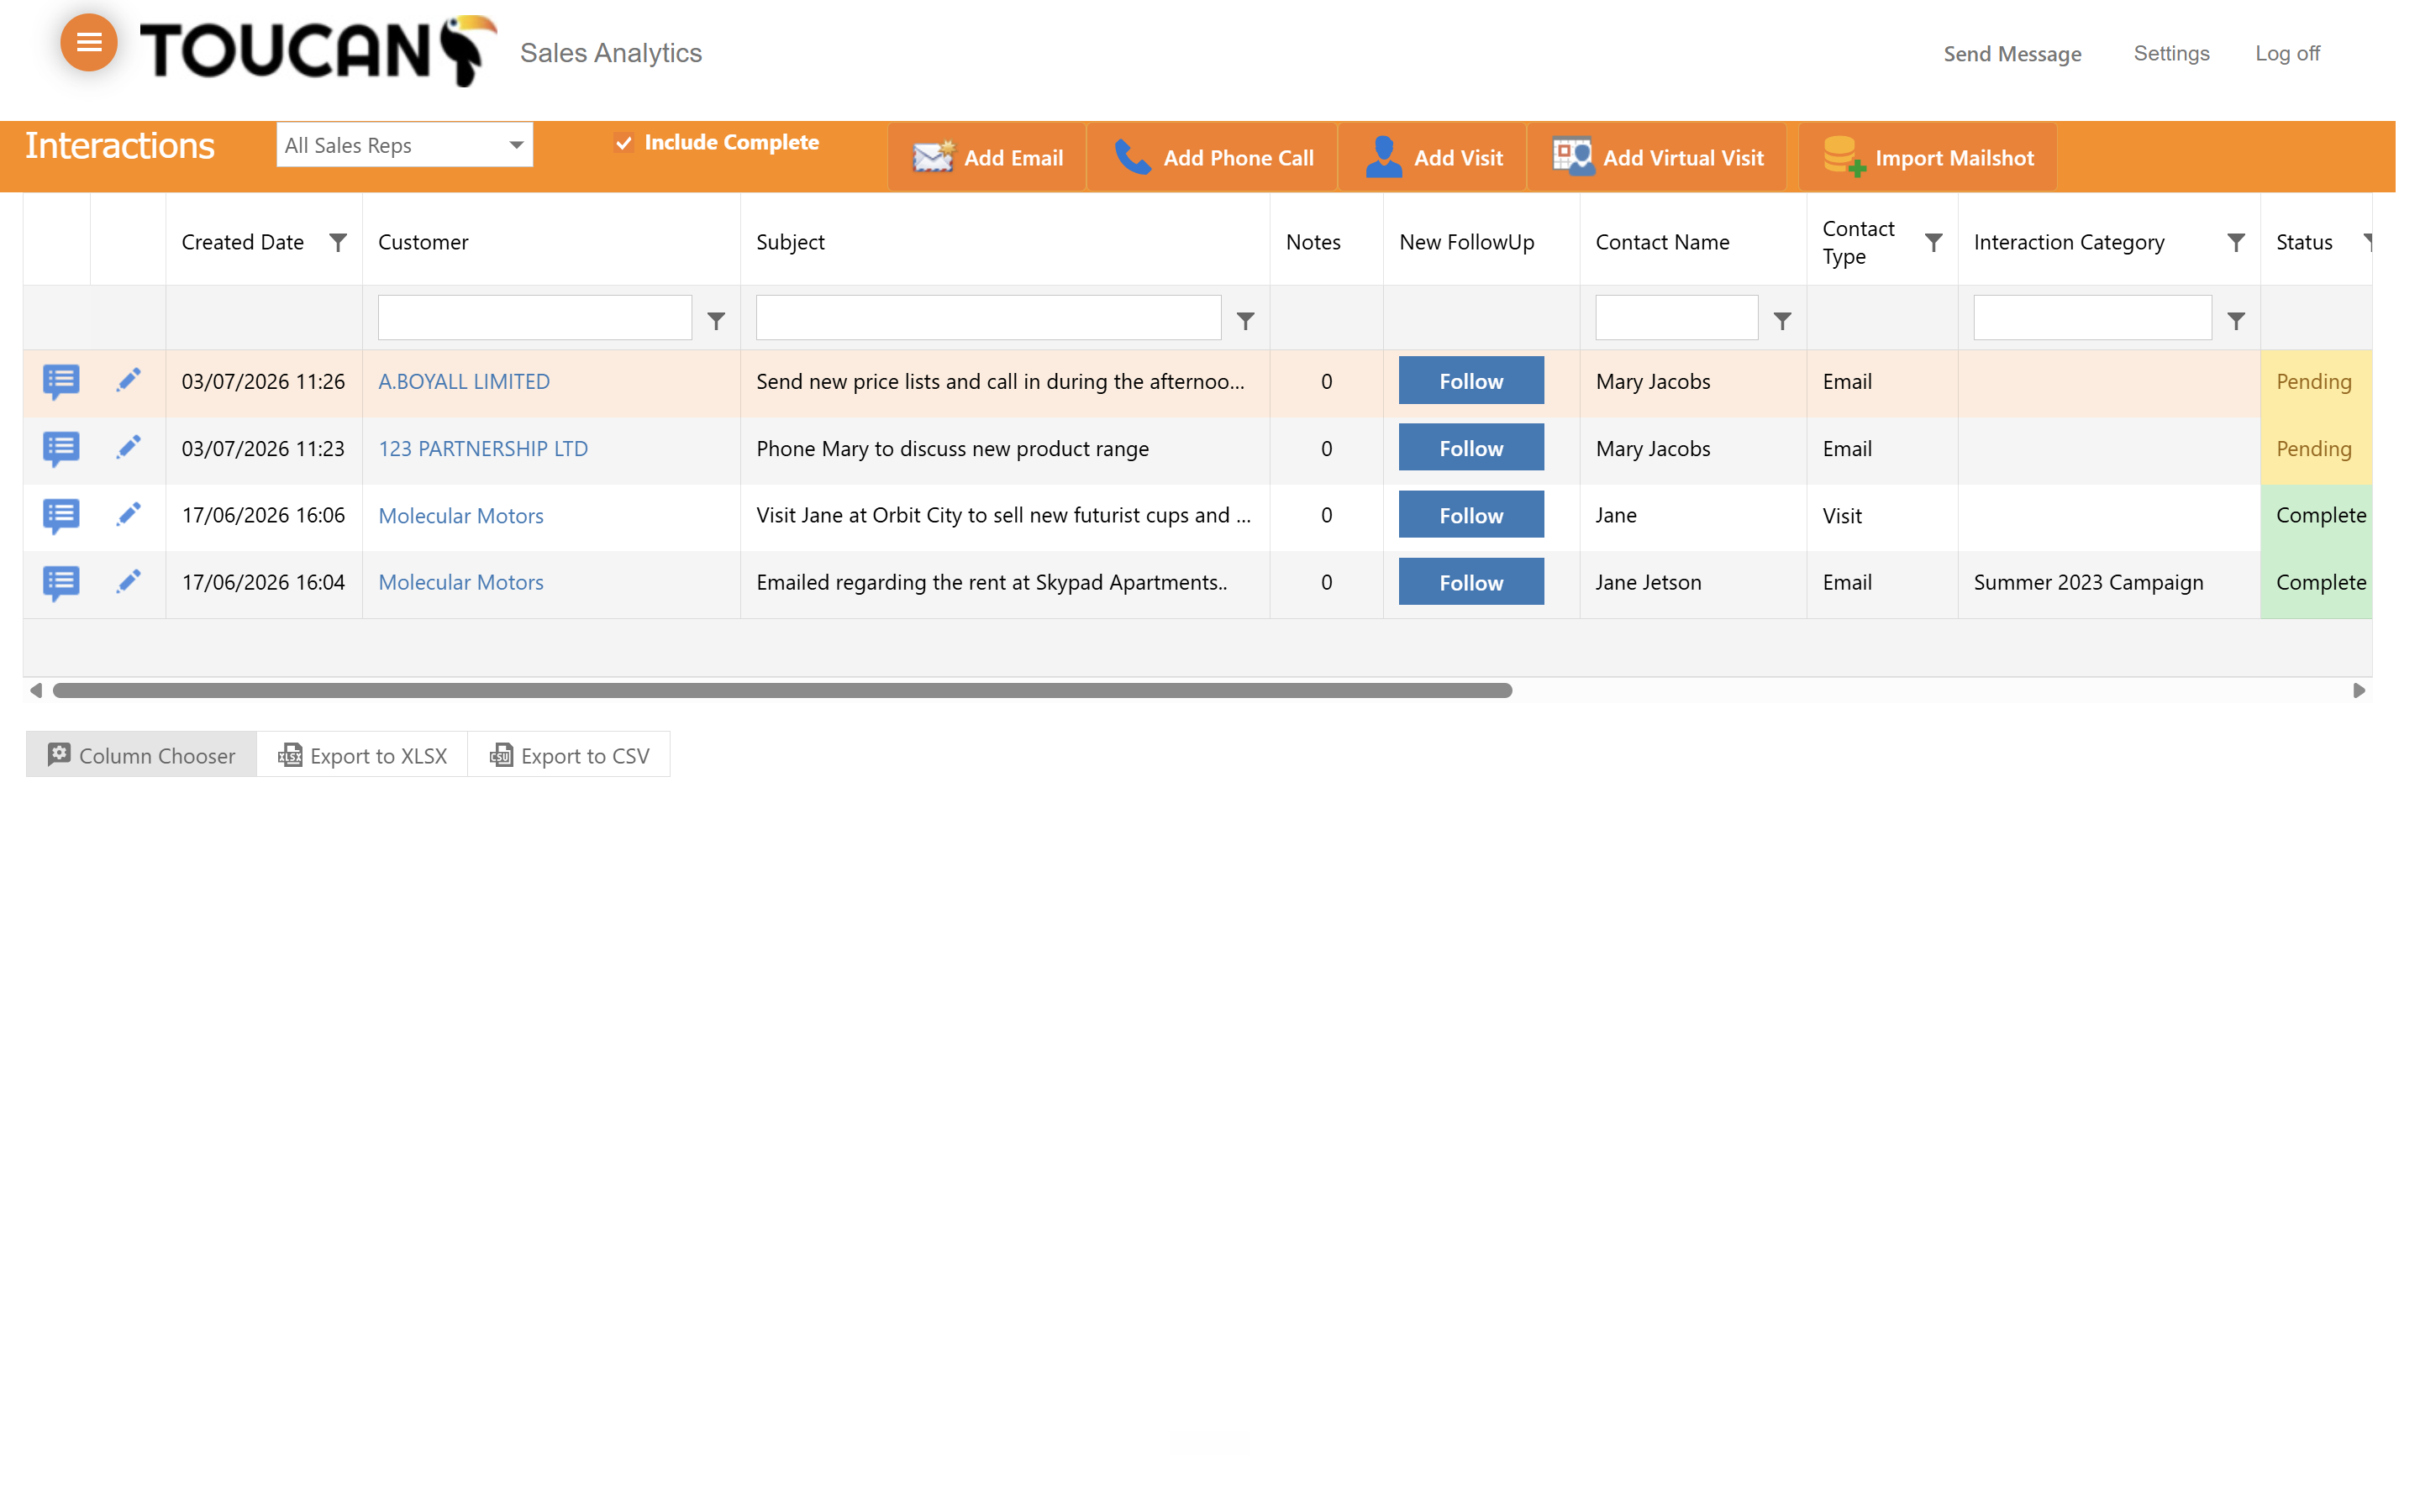
8
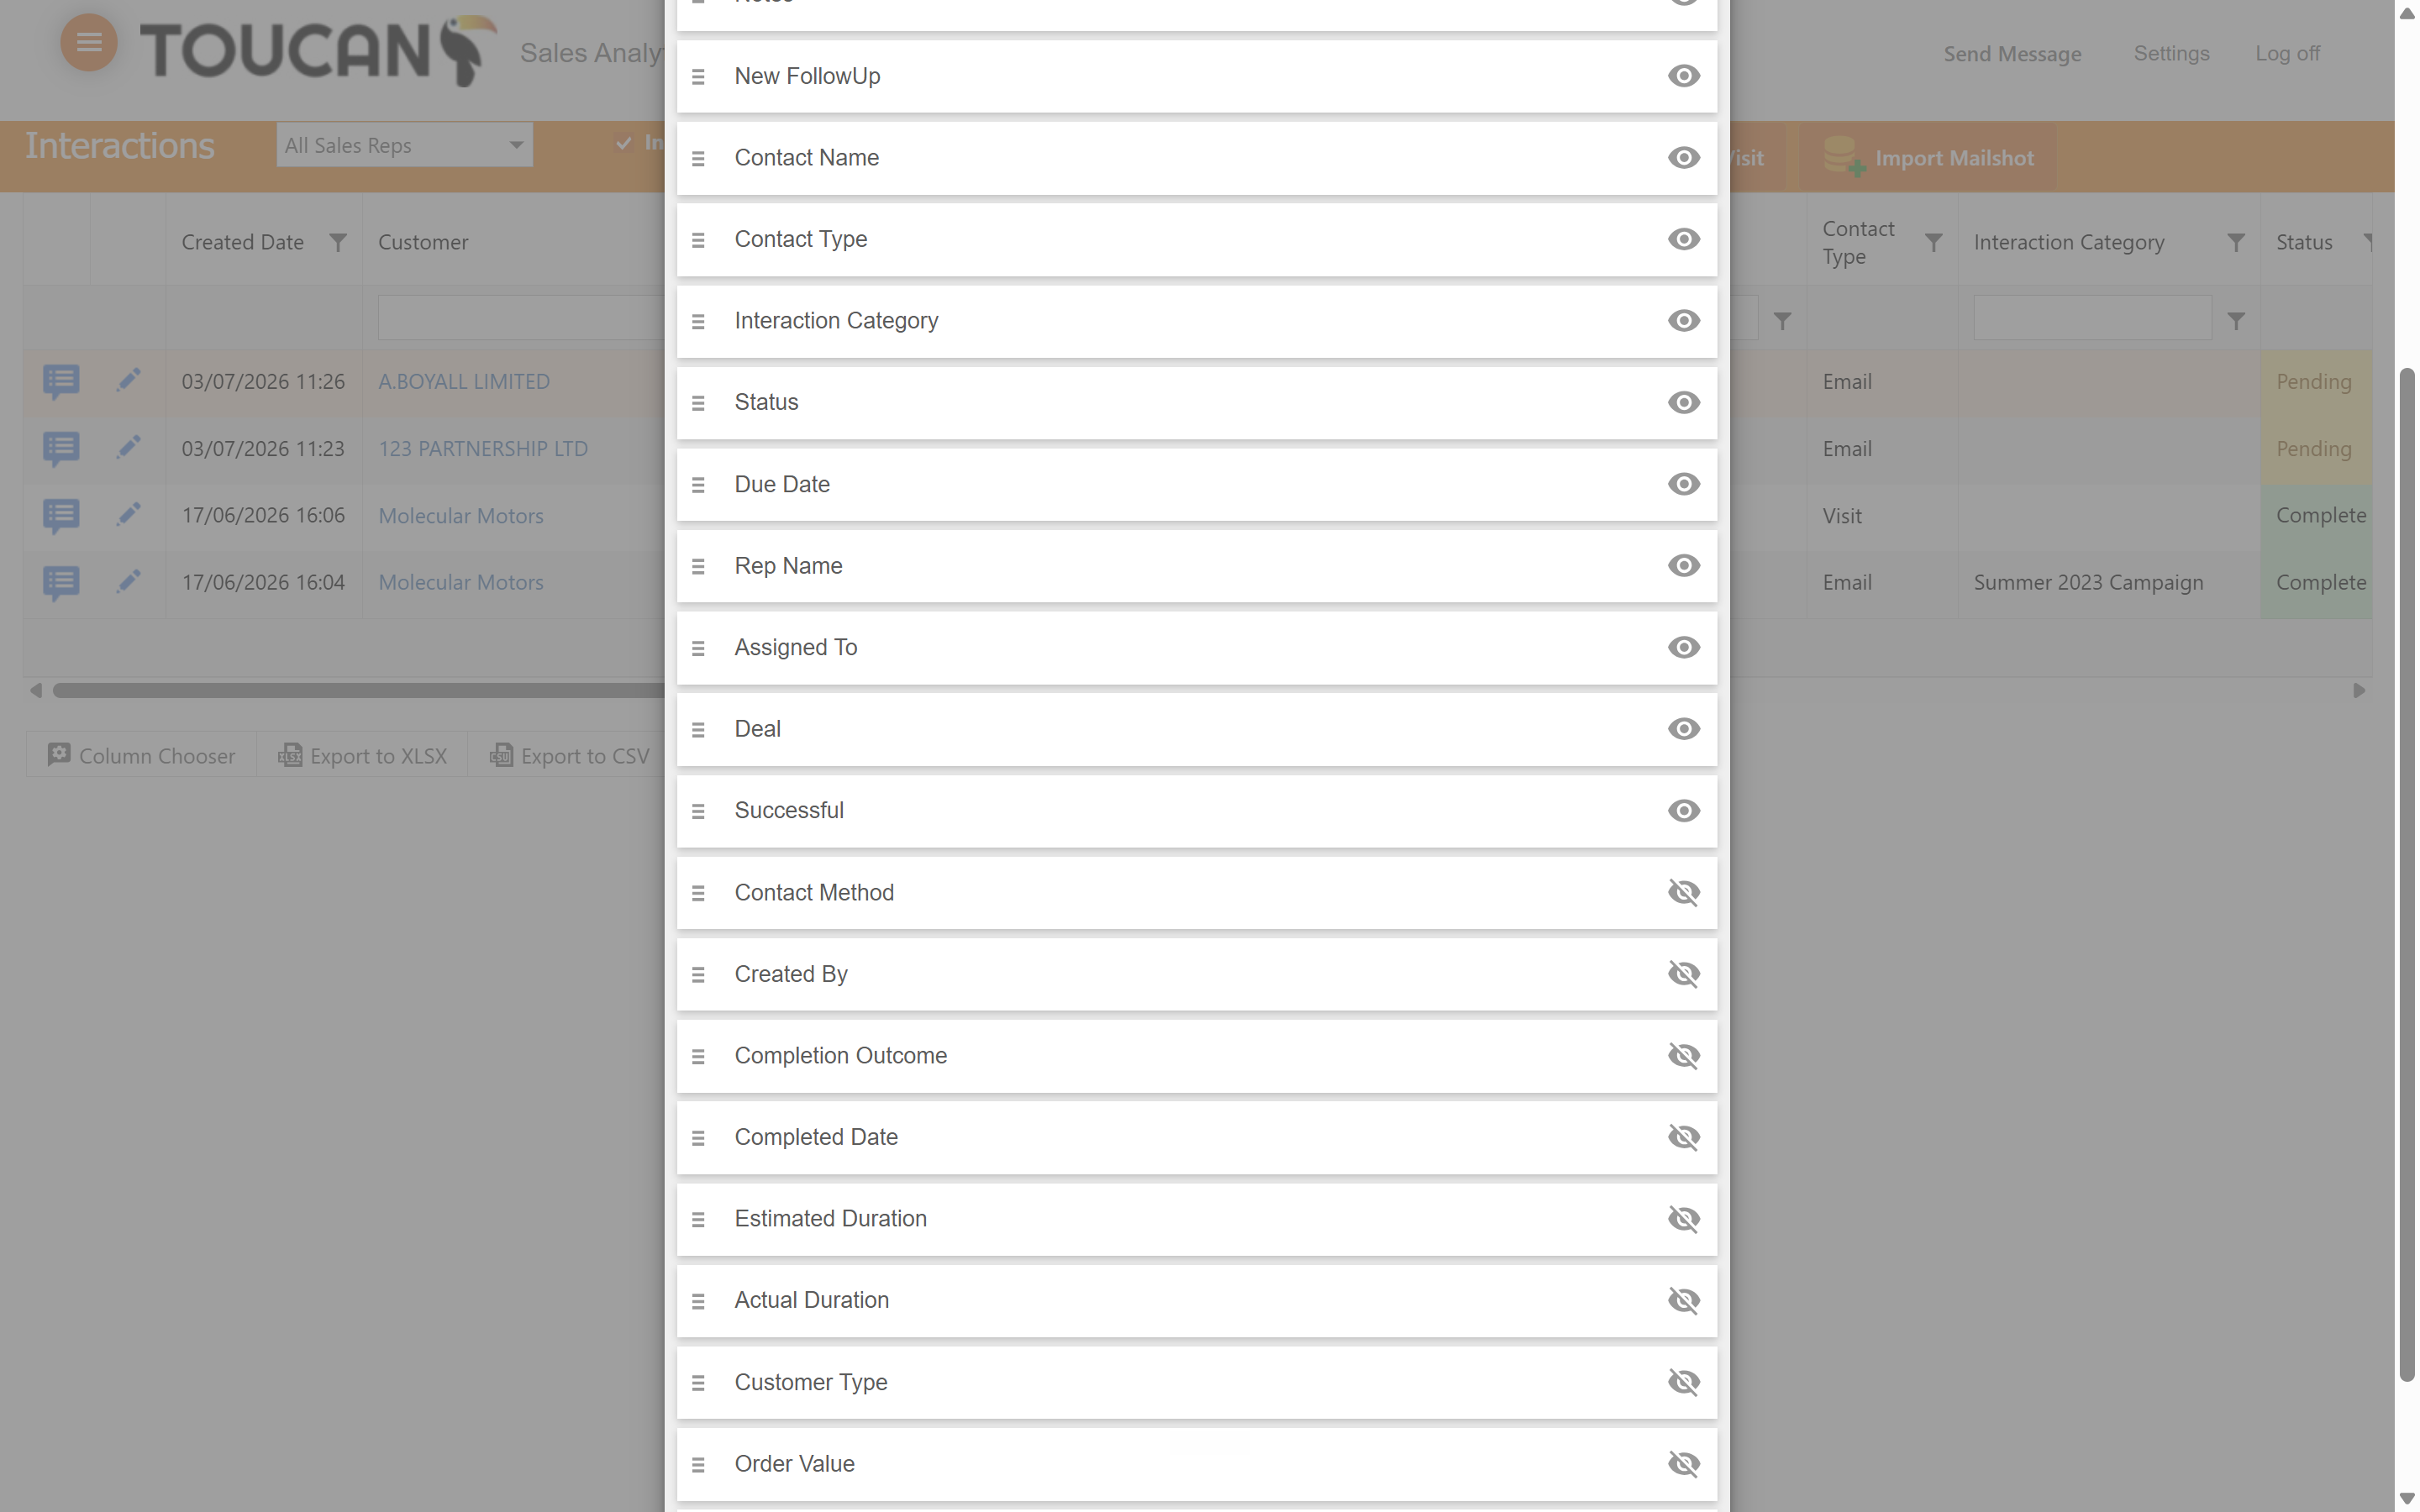
Click Column Chooser to open the visibility settings.
Step #8: Click Column Chooser to open the visibility settings.
9
Click the eye icons next to any field name to show or hide that column in the main view.
Step #9: Click the eye icons next to any field name to show or hide that column in the main view.
10
Click Export to CSV at the bottom-left of the screen to download the current table layout.
Step #10: Click Export to CSV at the bottom-left of the screen to download the current table layout.

Term

Definition

Mailshot

A promotional or informative bulk email campaign sent to a large list of contacts.

Column Chooser

A tool that lets users toggle the visibility of specific data fields in a table layout.

Modal Window

A pop-up dialog box that requires user interaction before returning to the main dashboard.

Adding New Interactions

You can manually log various types of communications using the action buttons located at the top of the dashboard.

Interaction Type

Description

Add Email

Logs a new email communication with the customer.

Add Phone Call

Records the details of a telephone call.

Add Visit

Logs an in-person meeting or site visit.

Add Virtual Visit

Tracks a video conference or virtual meeting.

Import Mailshot

Imports bulk email campaign interaction data.