How To: Navigate the Customers Portal
Learn how to filter, sort, and customise customer data tables, as well as export reports and edit individual customer metrics.
By Josh
This guide explains how to navigate, filter, and find customers based on certain metrics and group them together. By following these steps you will be able to refine data views and edit specific account metrics.
This guide is intended for sales directors, sales managers and account managers.
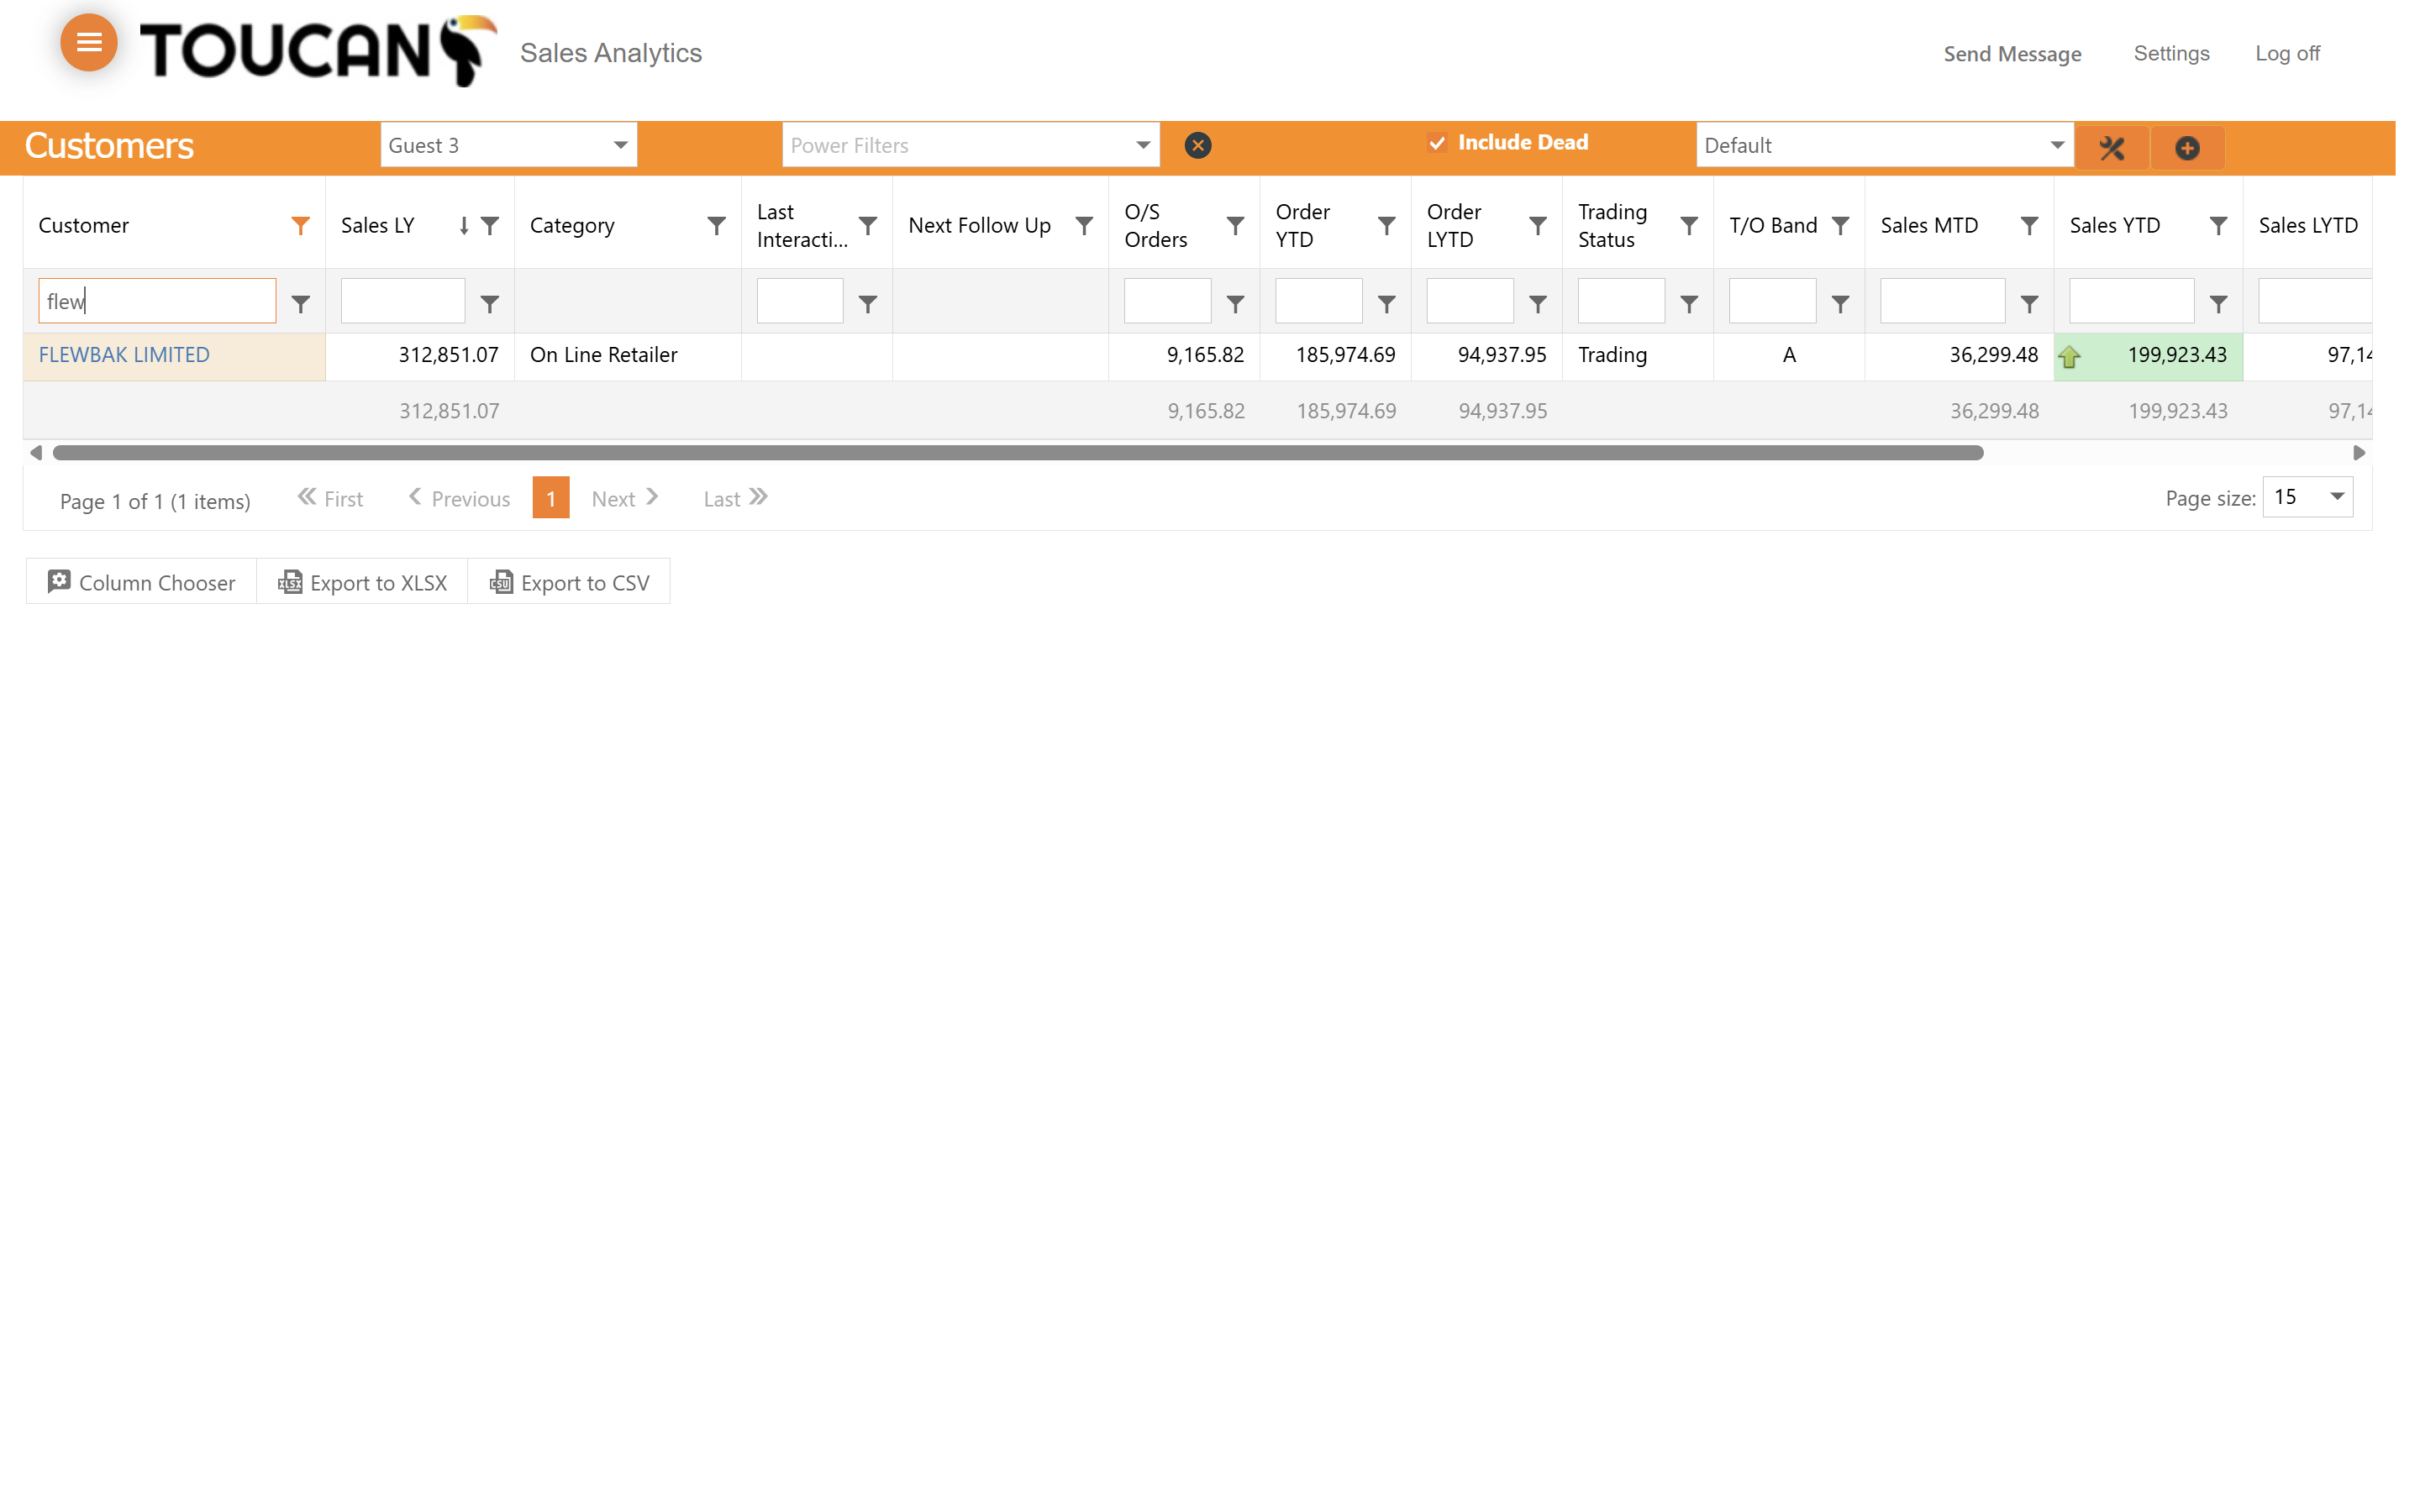
Filter and Search Customer Data
1
Type a customer name or keyword into the text search input field in the Customer column to filter the list by specific customer if you know the name.
2
The list will update as you type.
3
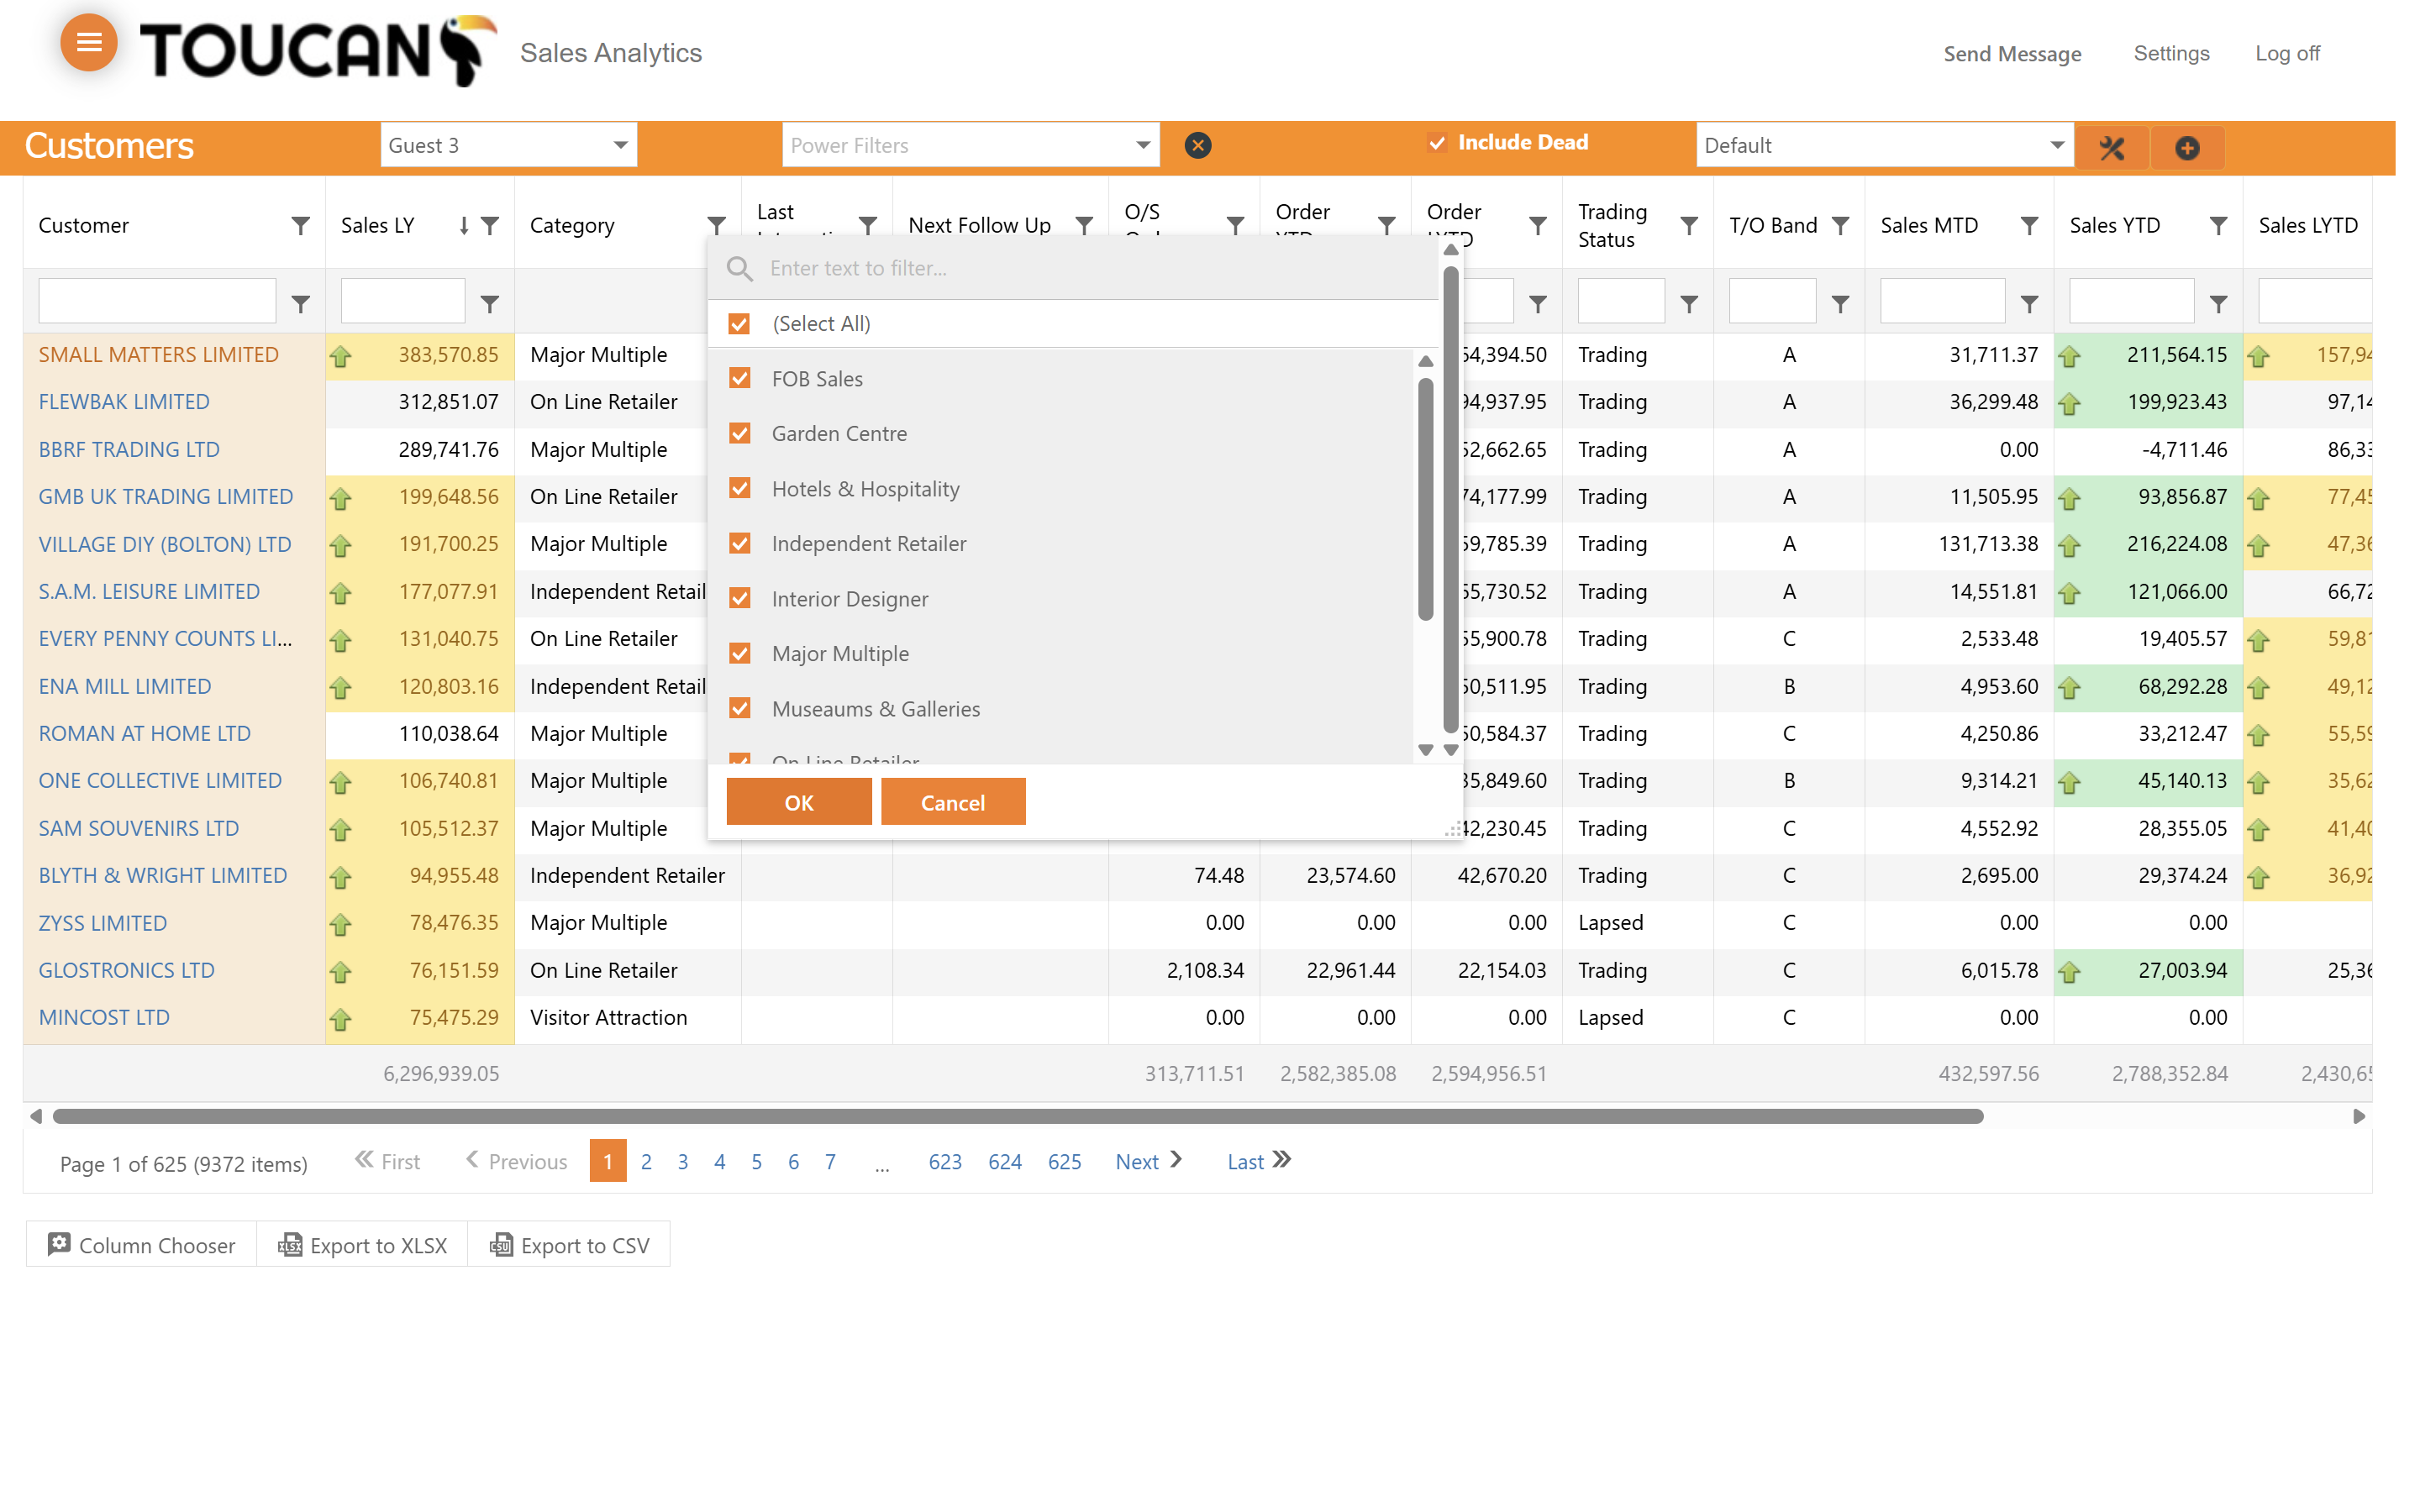
Hover over the Category column header and click the filter icon to reveal the category dropdown menu.

4
Use the checkboxes in the filter dropdown to select specific business categories.
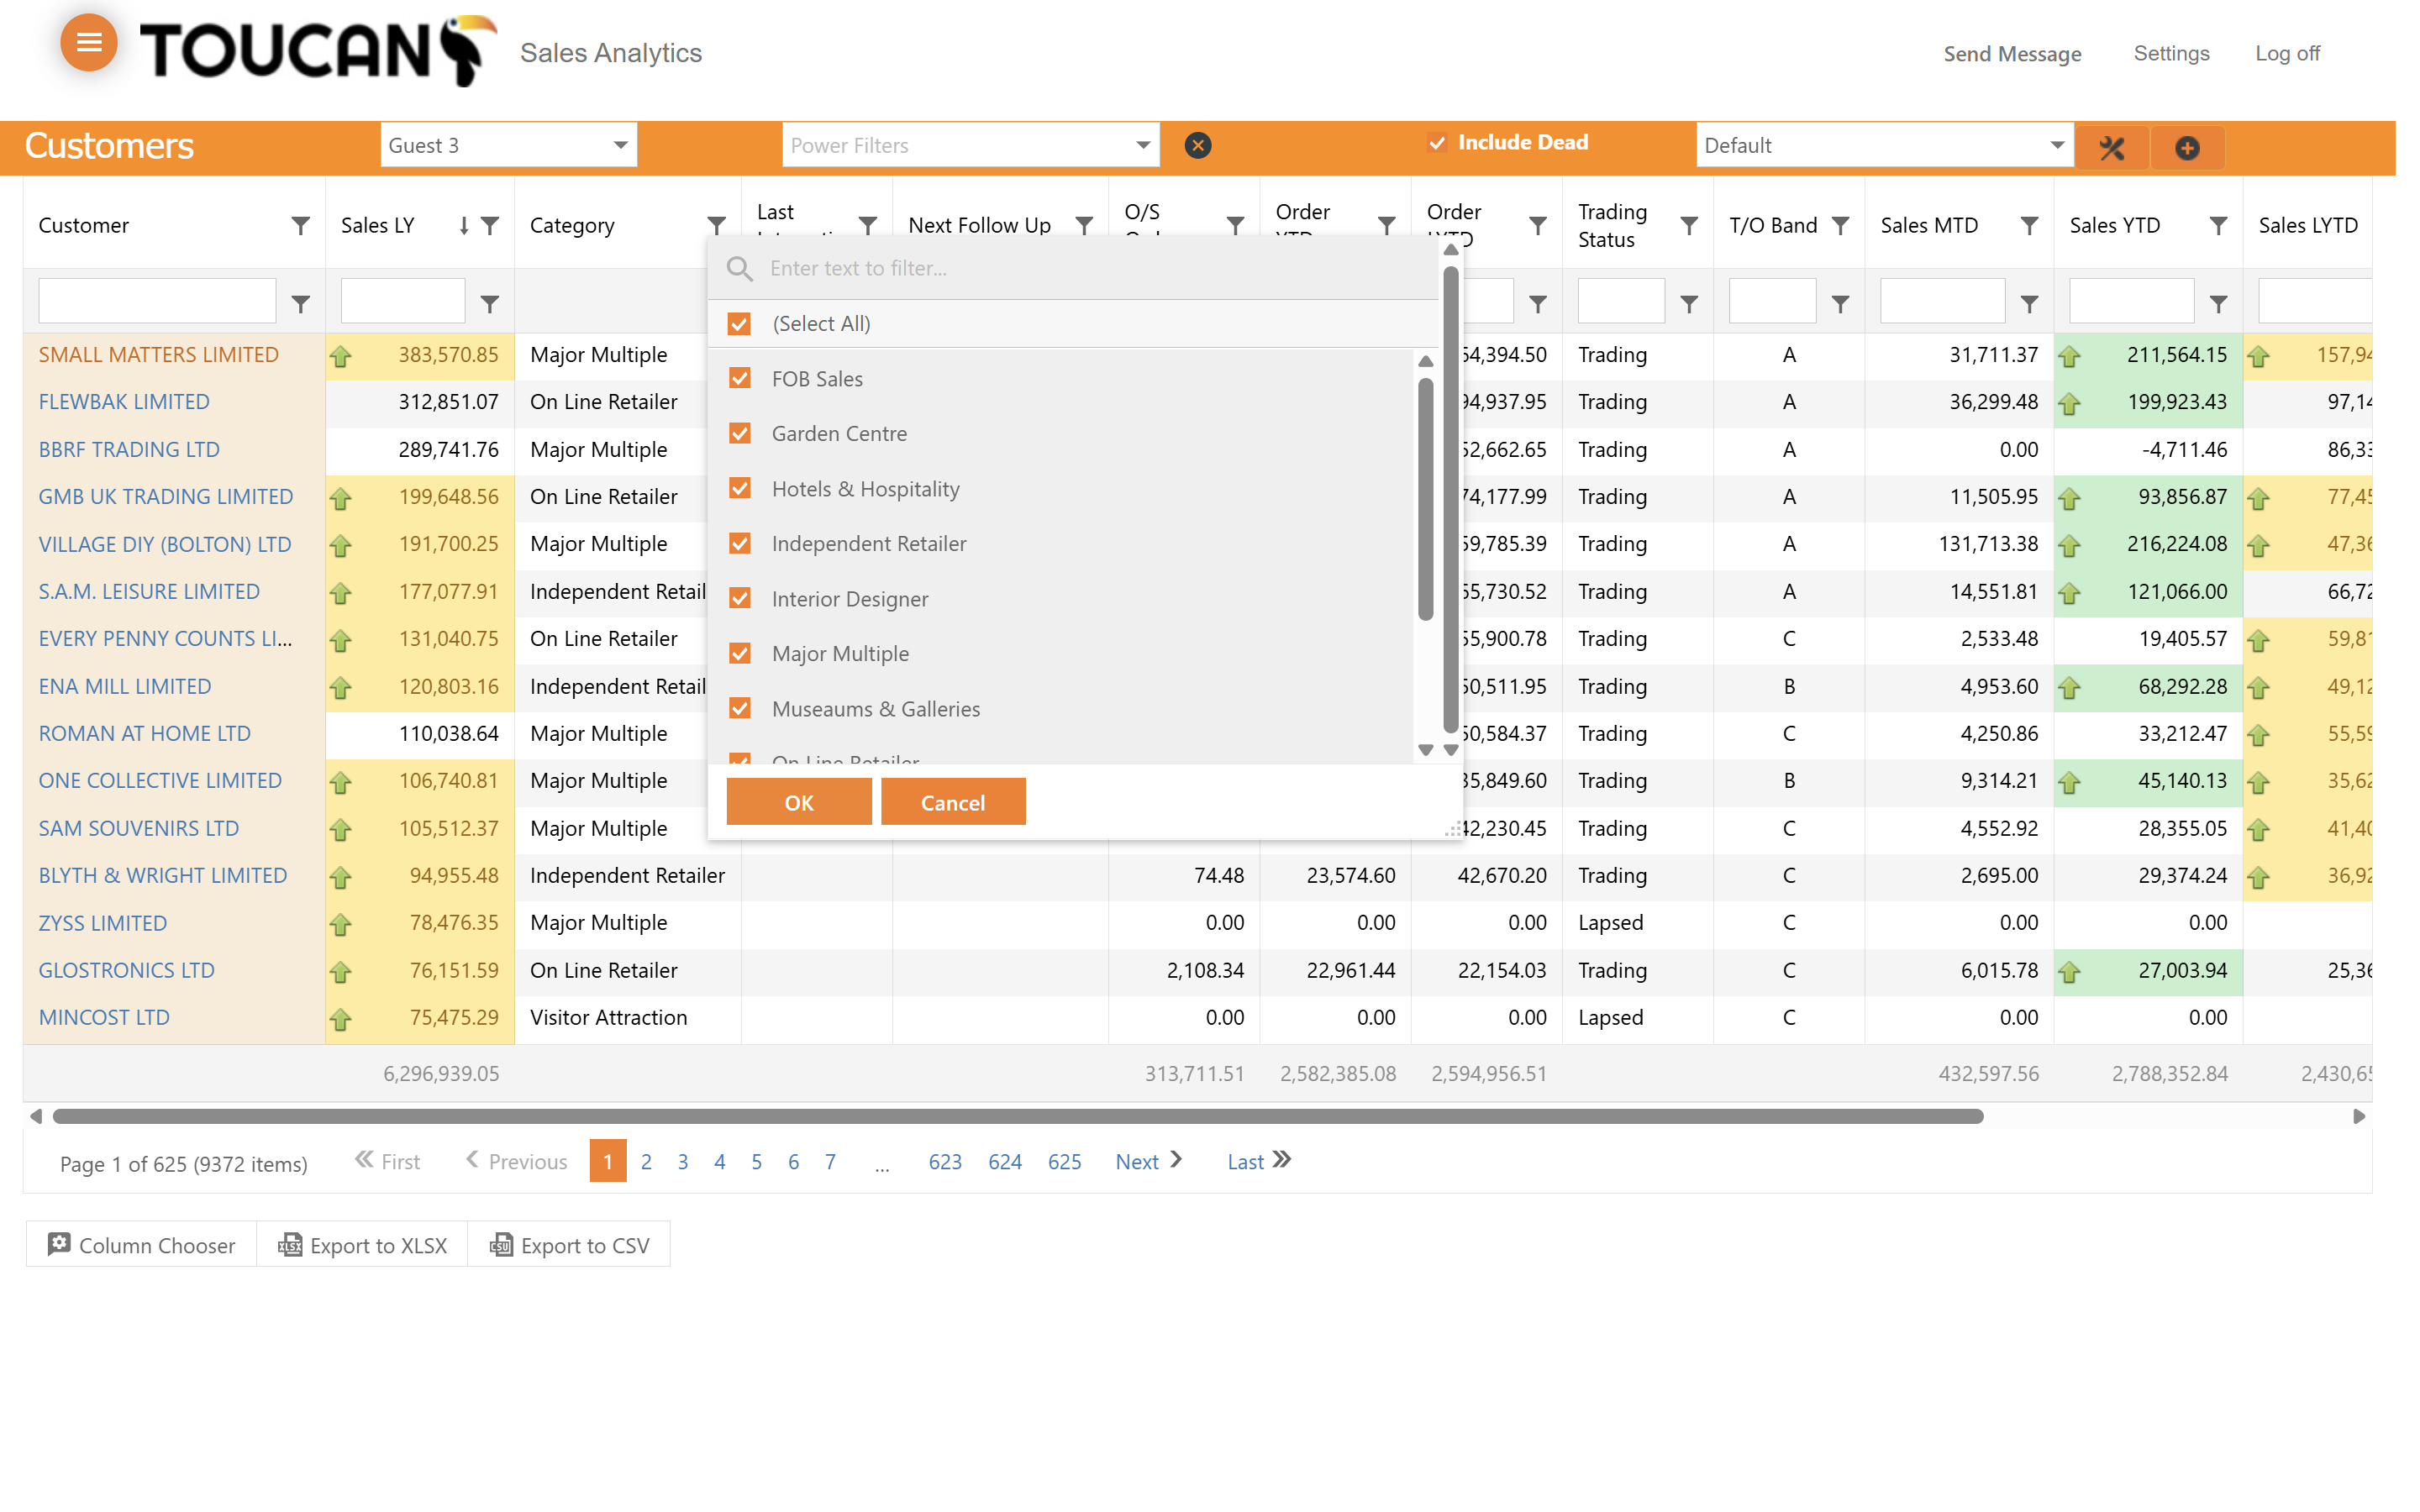
5
Click the respective buttons to select or deselect all categories to refine your table data quickly.
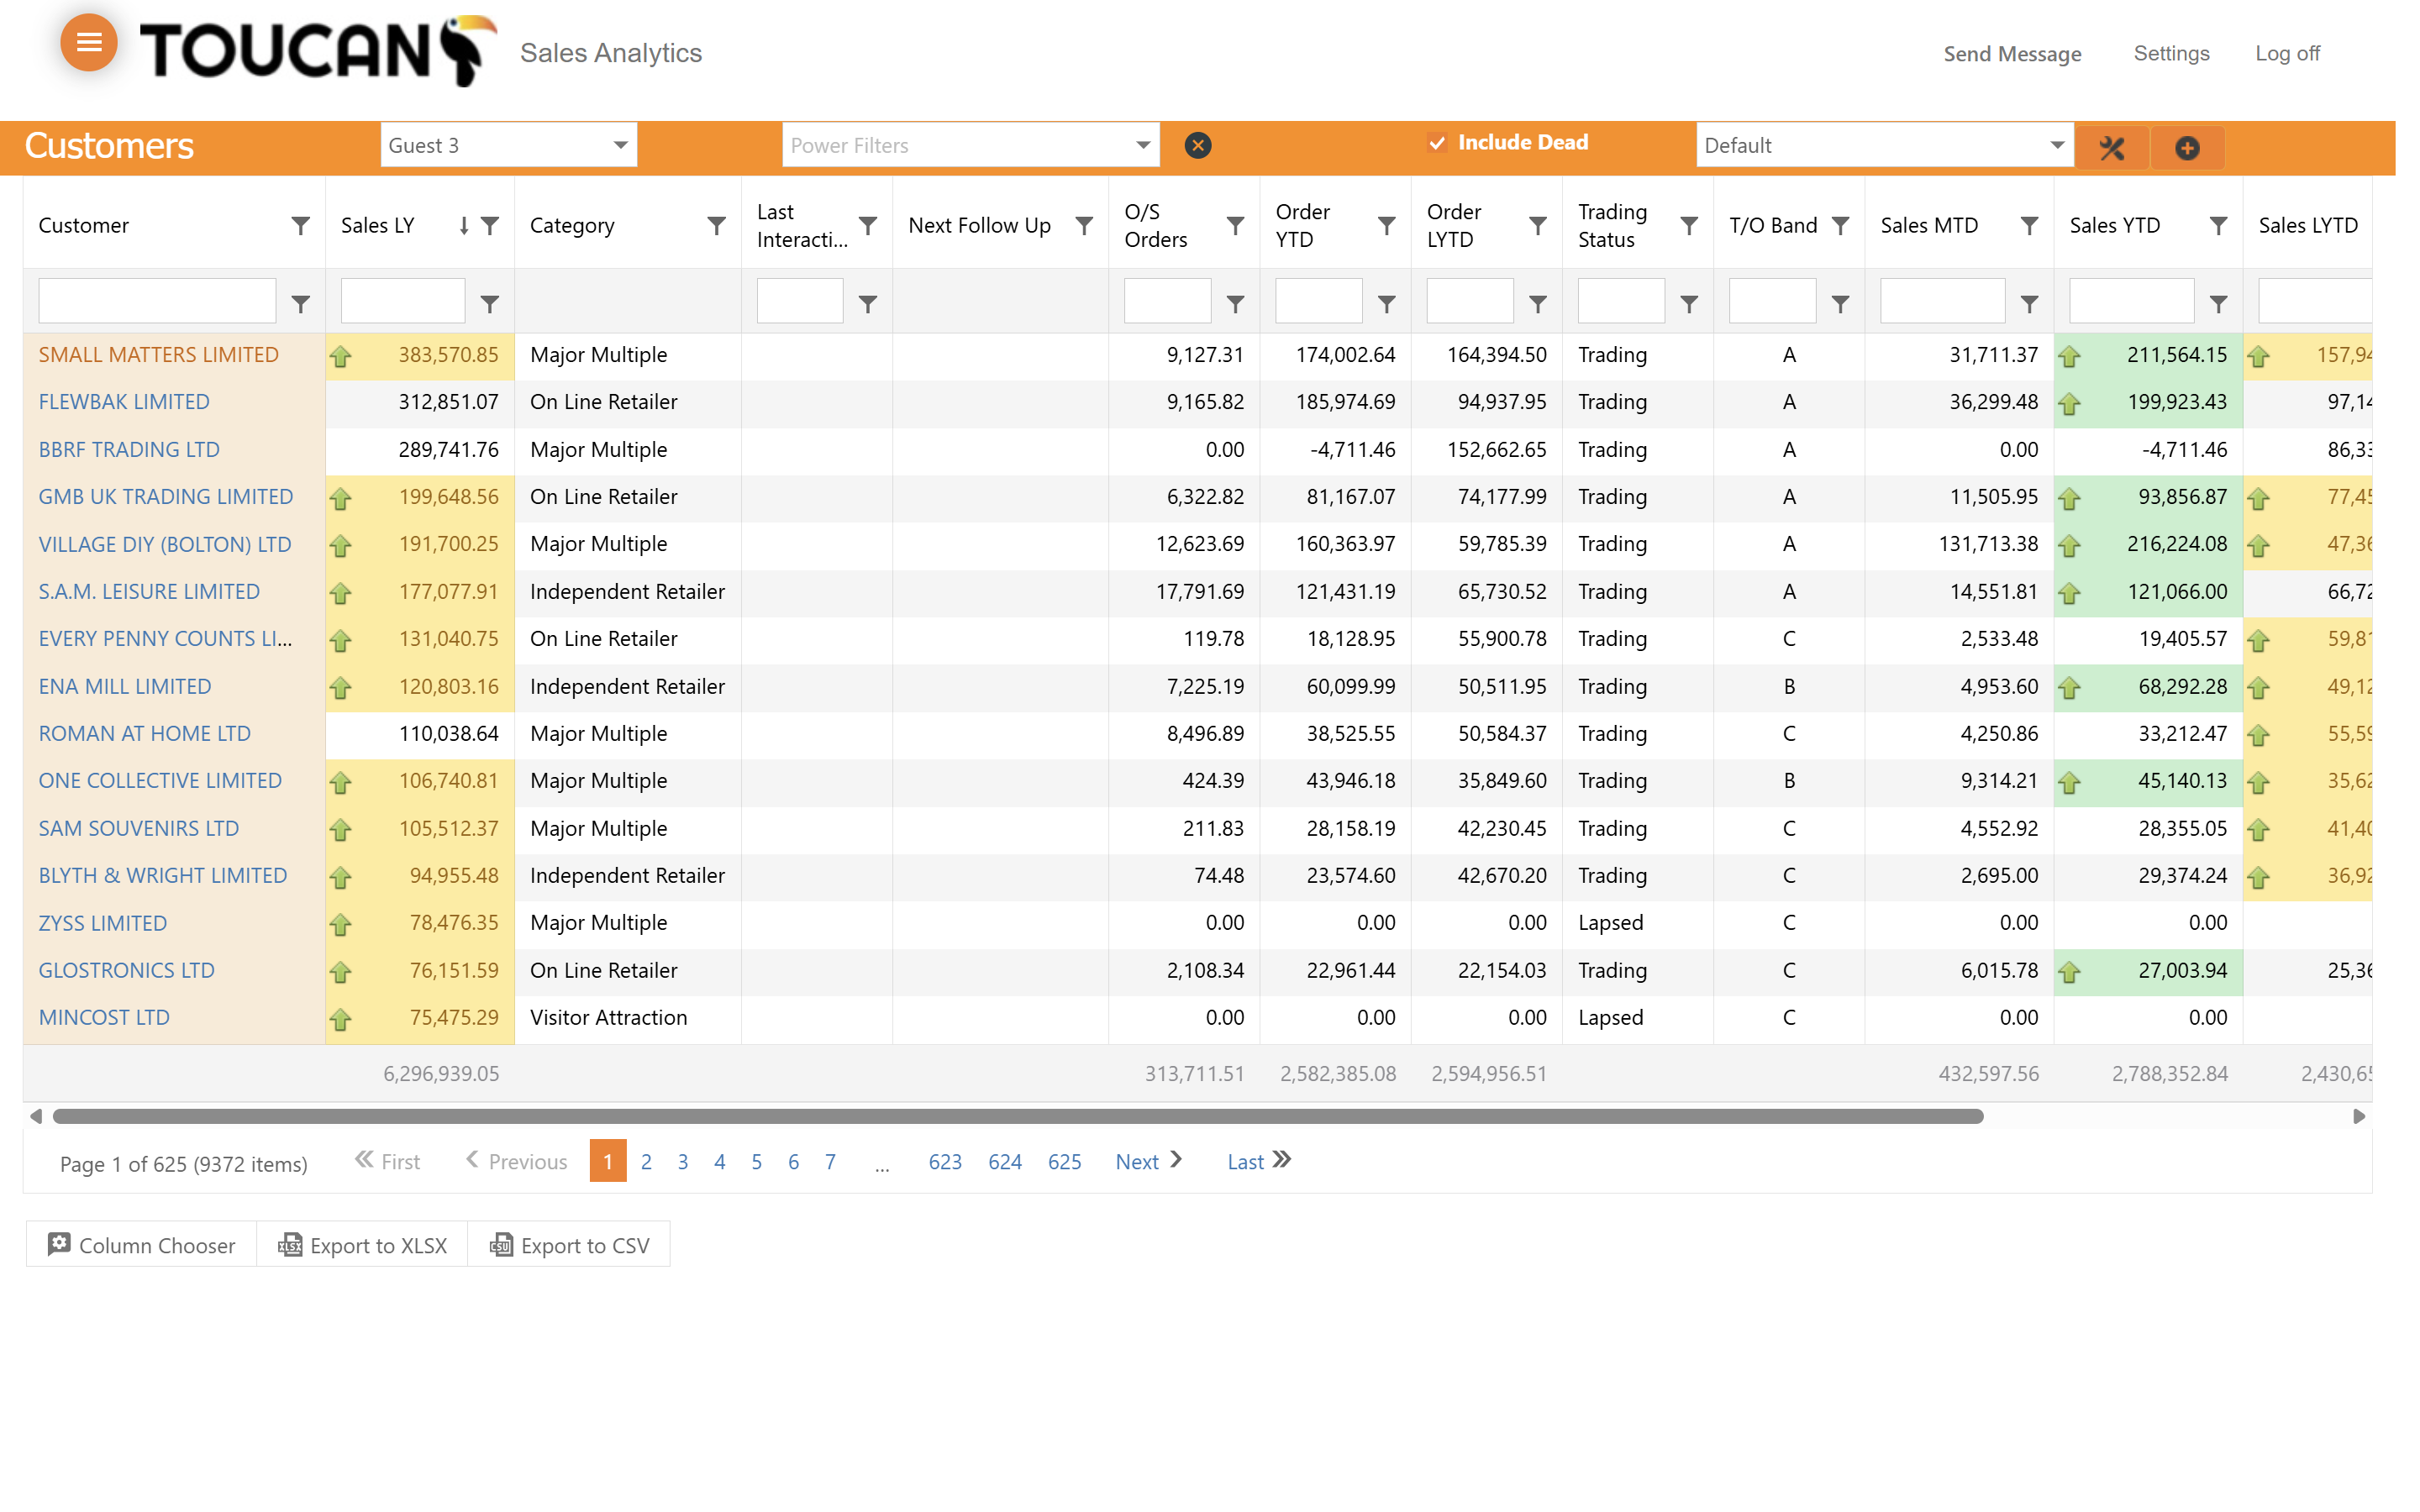
Sort and Customize the Table View
6
Click a column header, such as Sales LY, to sort the table data by that specific financial metric.

7
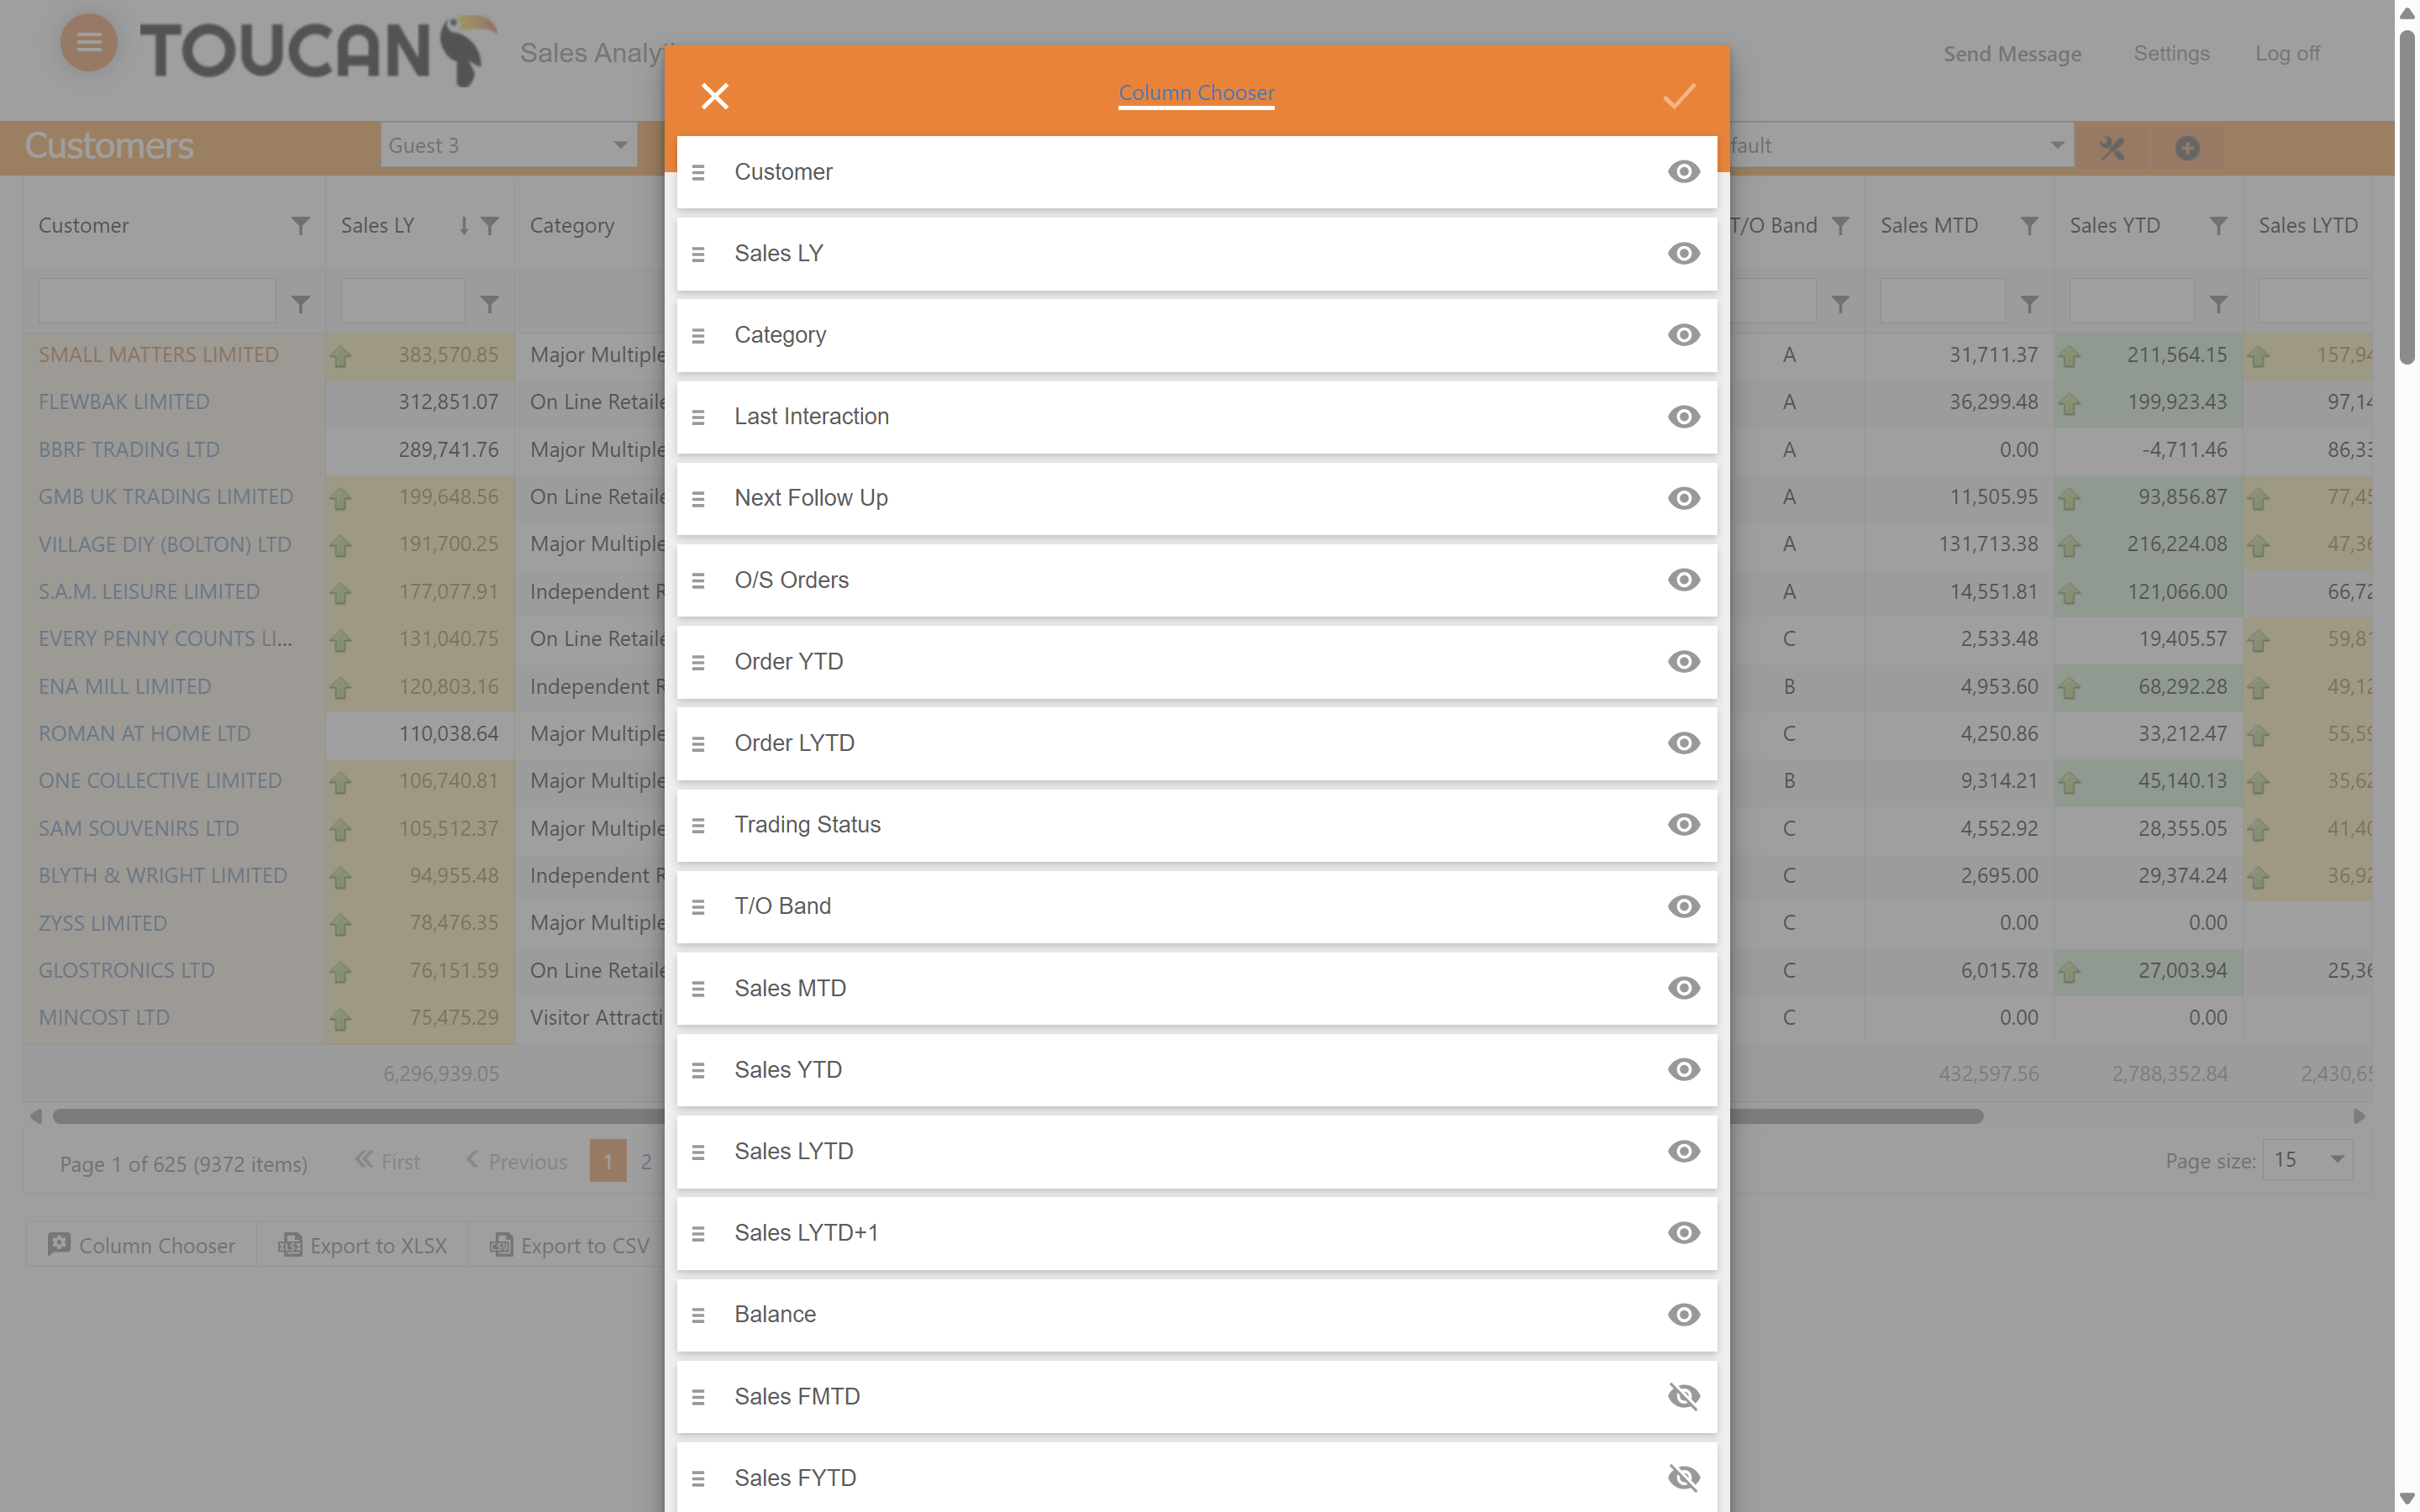
Click the Column Chooser button located beneath the table to open the column configuration modal to ensure you only see the metrics you need.
8
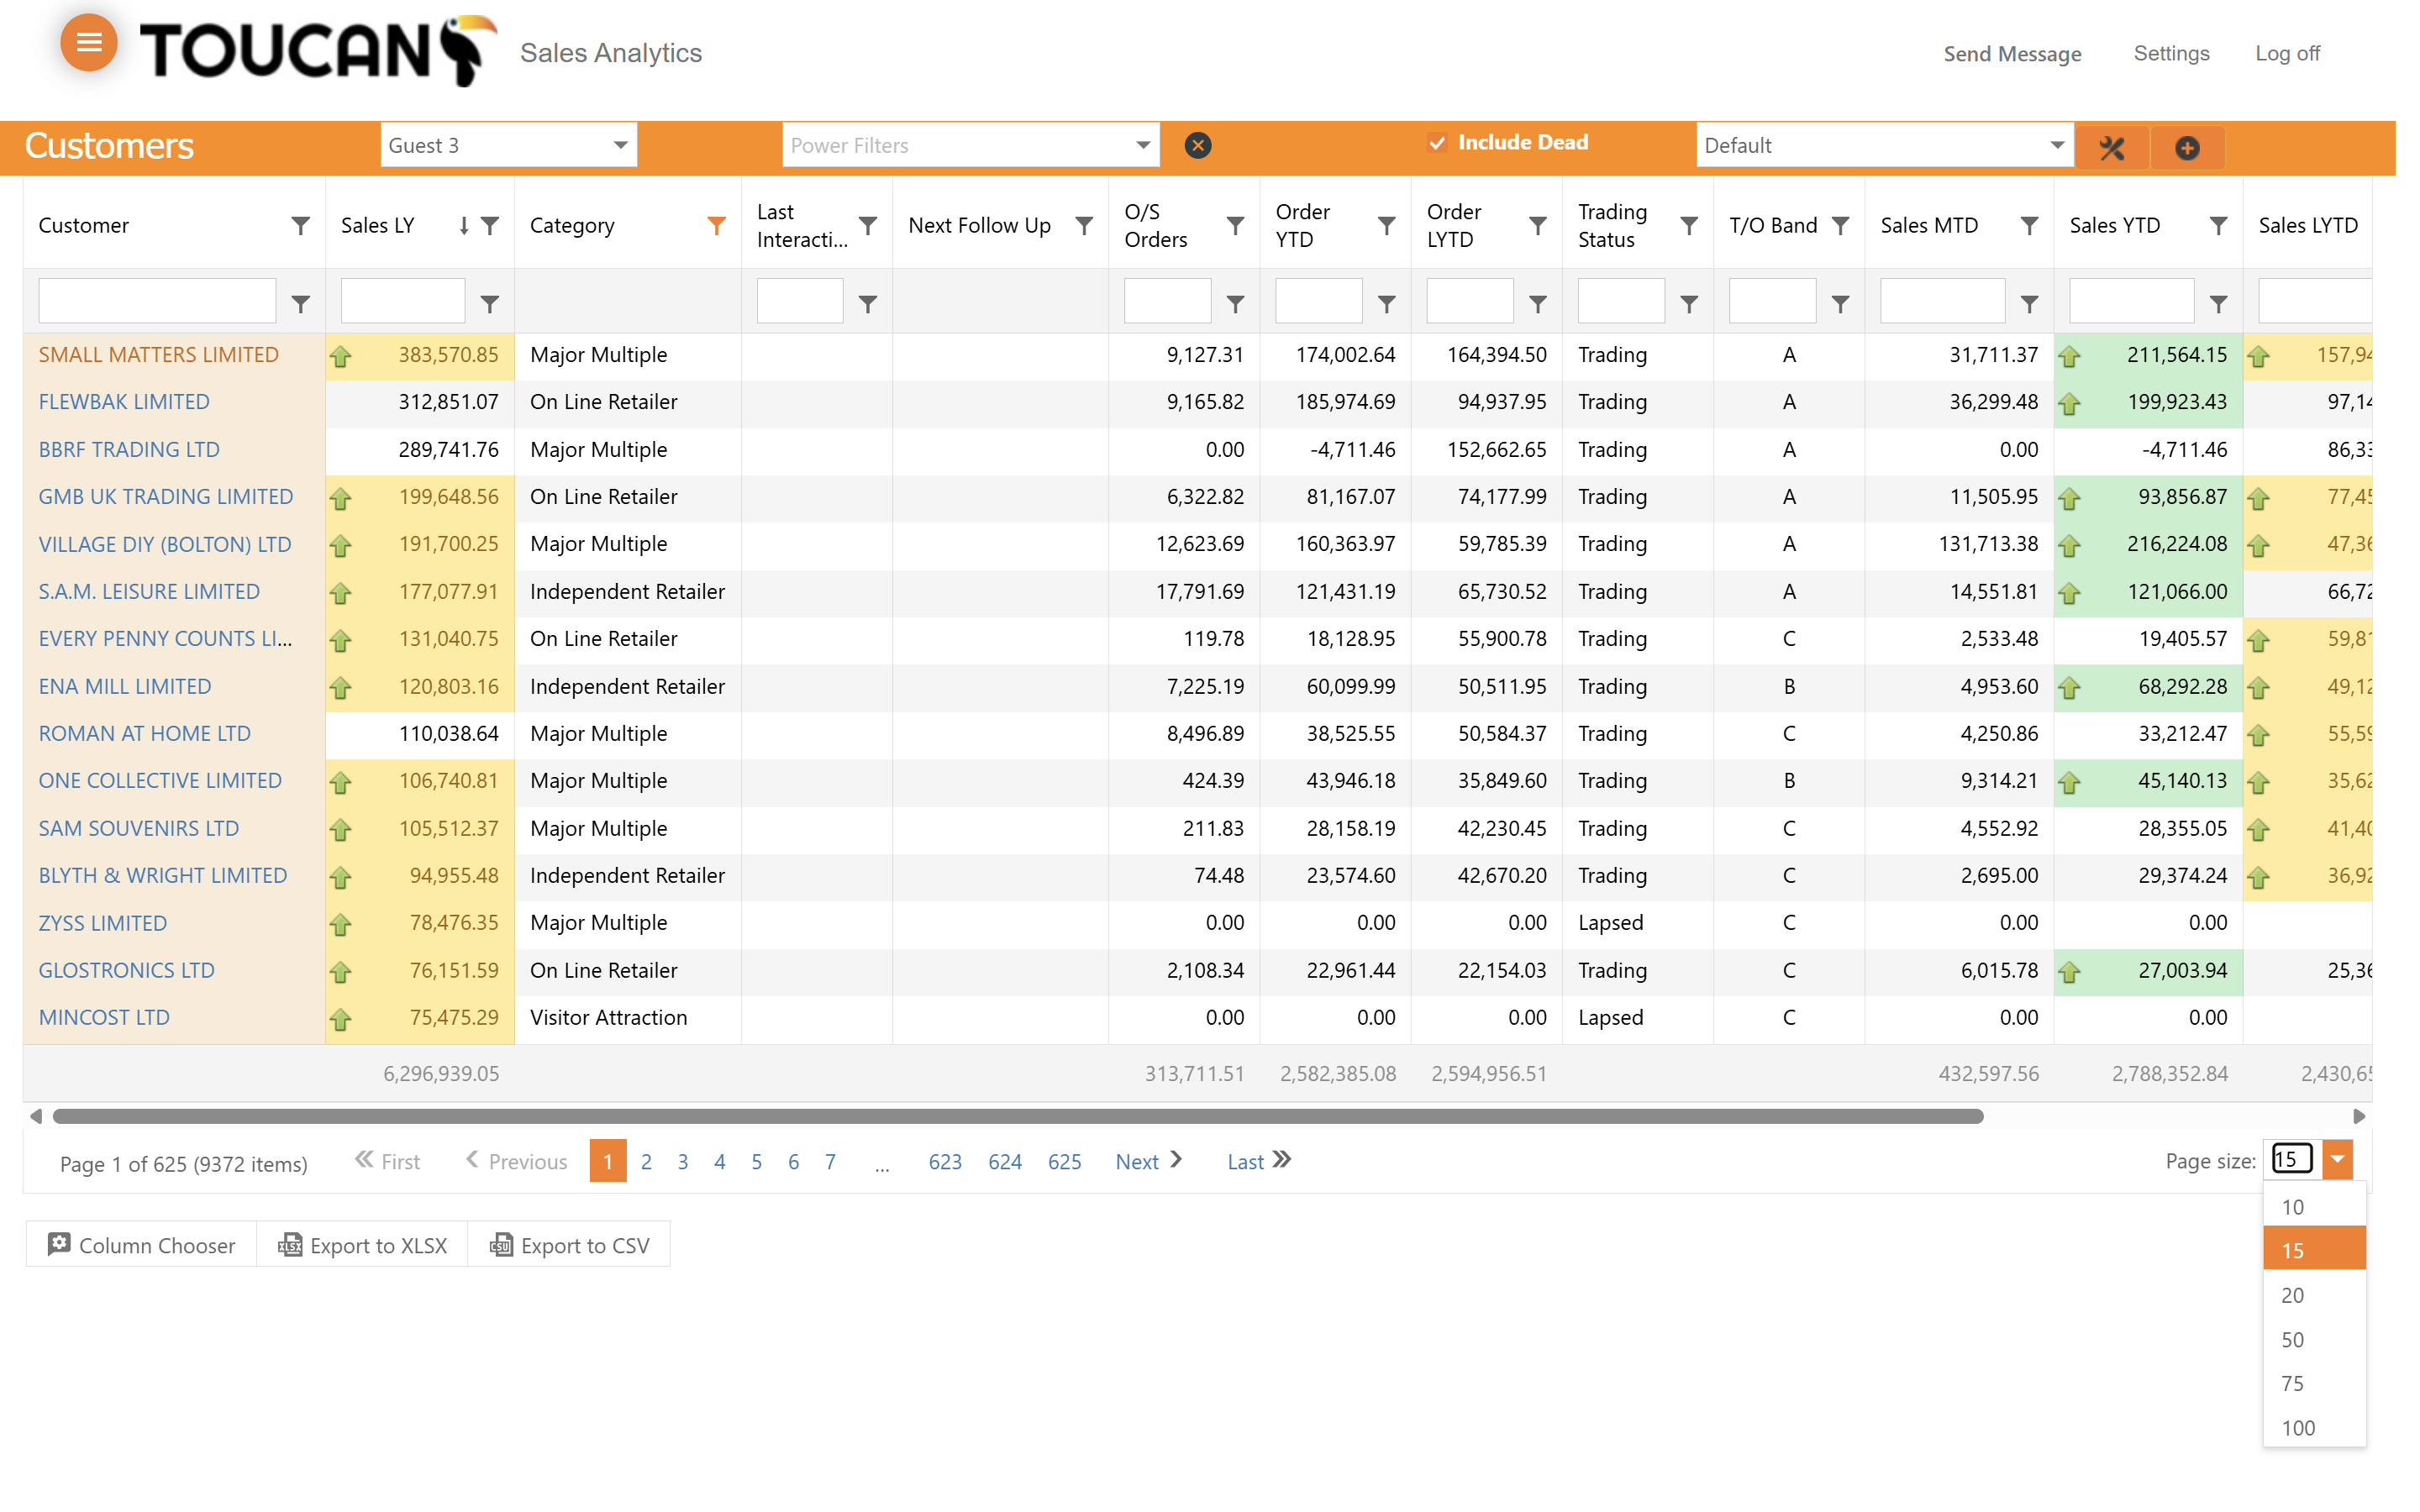
To view more records per page, select how many are visible with the Page Size dropdown at the base of the table.
Export Data
9
Click the Export to XLSX button located in the toolbar to download the customized table data.

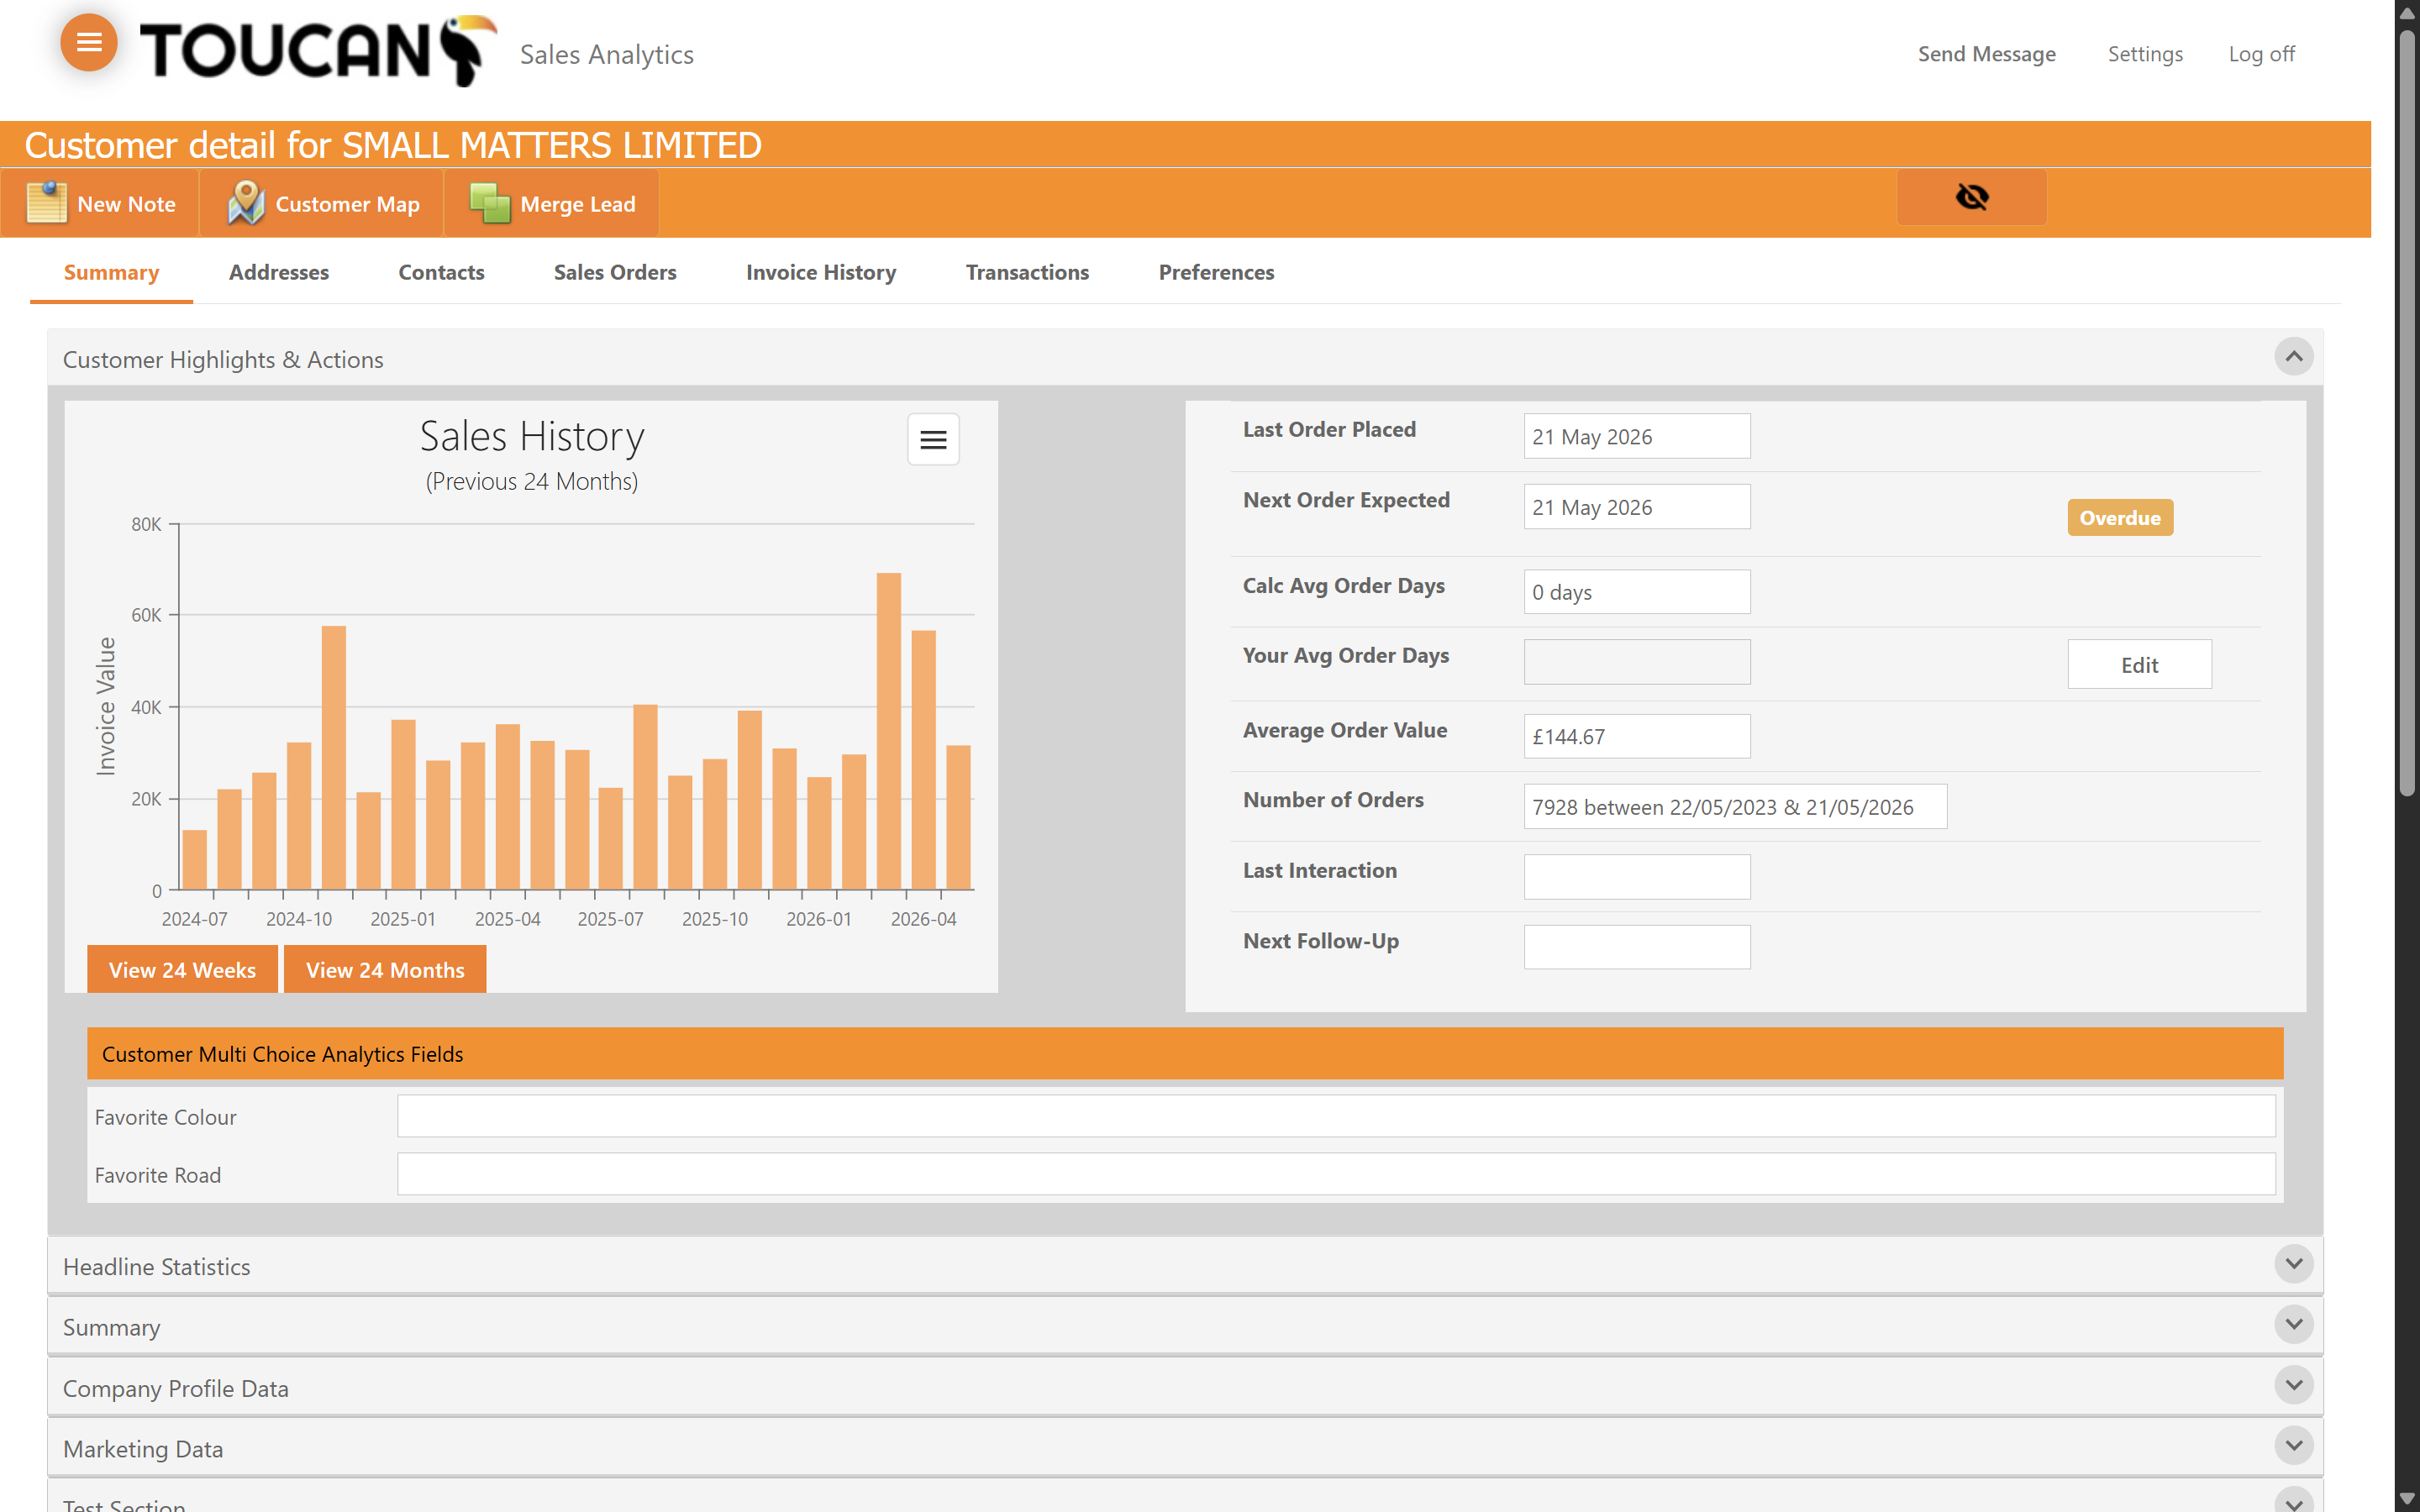
Edit Individual Customer Metrics
10
Click on a specific customer row to open their detailed customer highlights and actions page.

11
Inside the Customer record you can begin to edit, add, and view every important detail about the customer. If you are preparing for a visit you can view the most recent Interactions and Notes, and view their sales orders and invoice history. This page will be explained further in a separate guide.