Icon

How to Set Up Circle Events

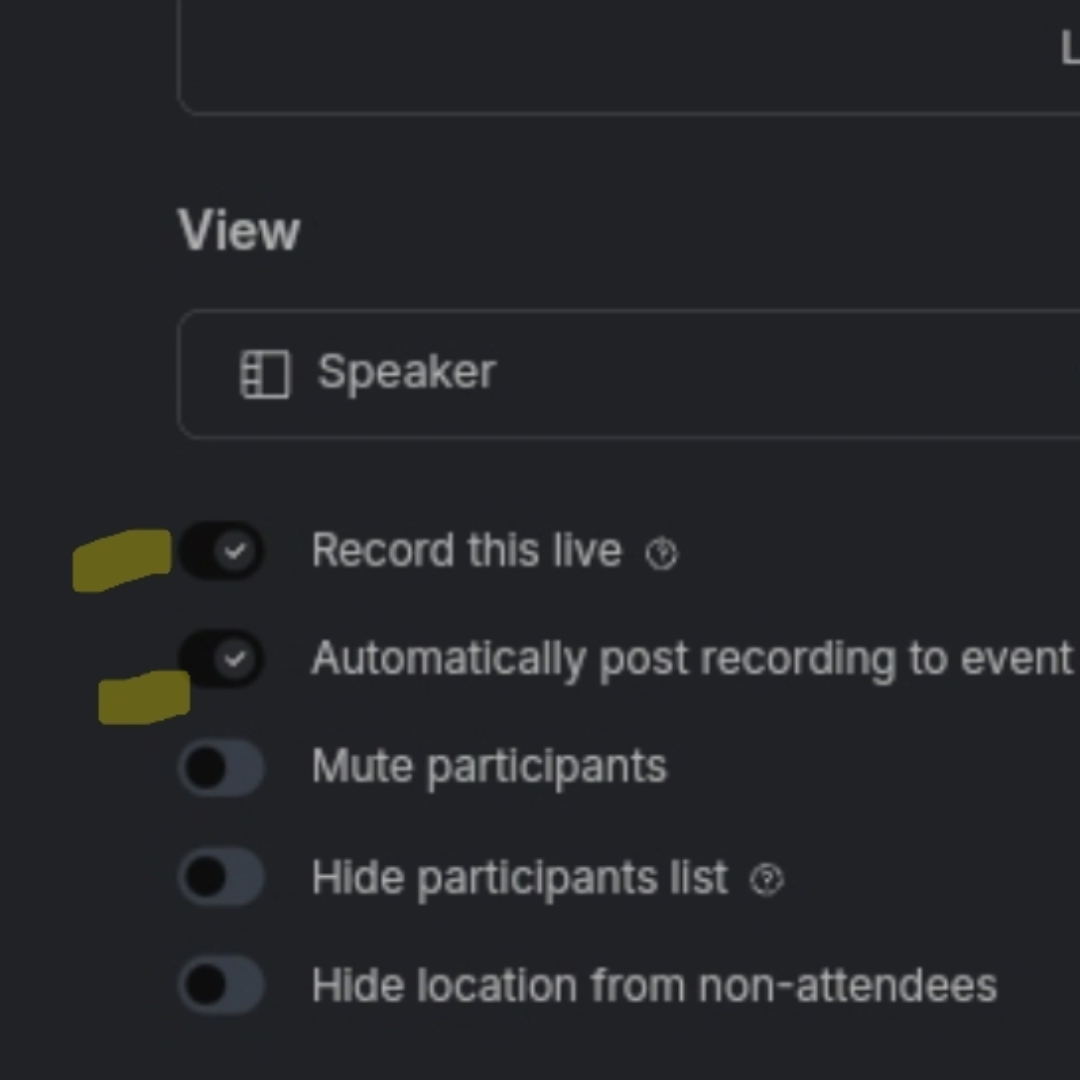
Learn how to effectively set up your Circle events, set it to auto-record, and ensuring anyone can access the lonk

By HealthyGamerGG Team

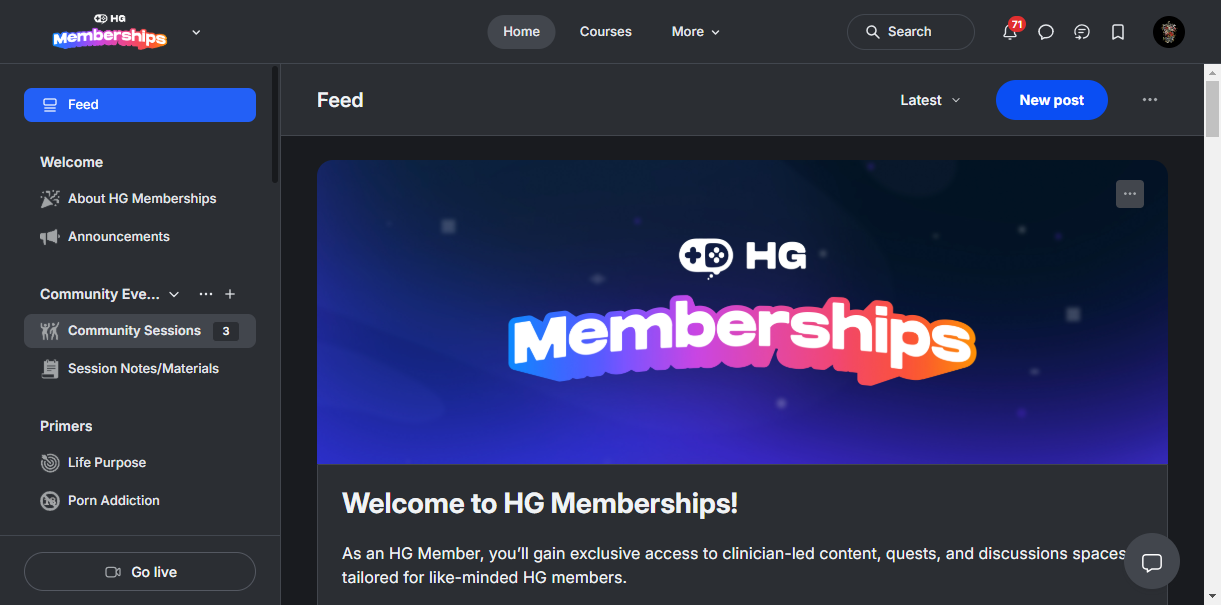
This guide is meant as a checklist to help you create and manage your community events using the Circle platform. With the easy recording, the general learning-based bent of those who tend to use the platform, and the ability to post session notes + materials and send follow-up emails to those who RSVPed, Circle should be the platform you use going forward for any free event based around teaching something with clear learning goals (as opposed to a community discussion or a more flexible Q+A).

*This does not currently apply to communities that need the moderation features of Discord.

Let's get started.

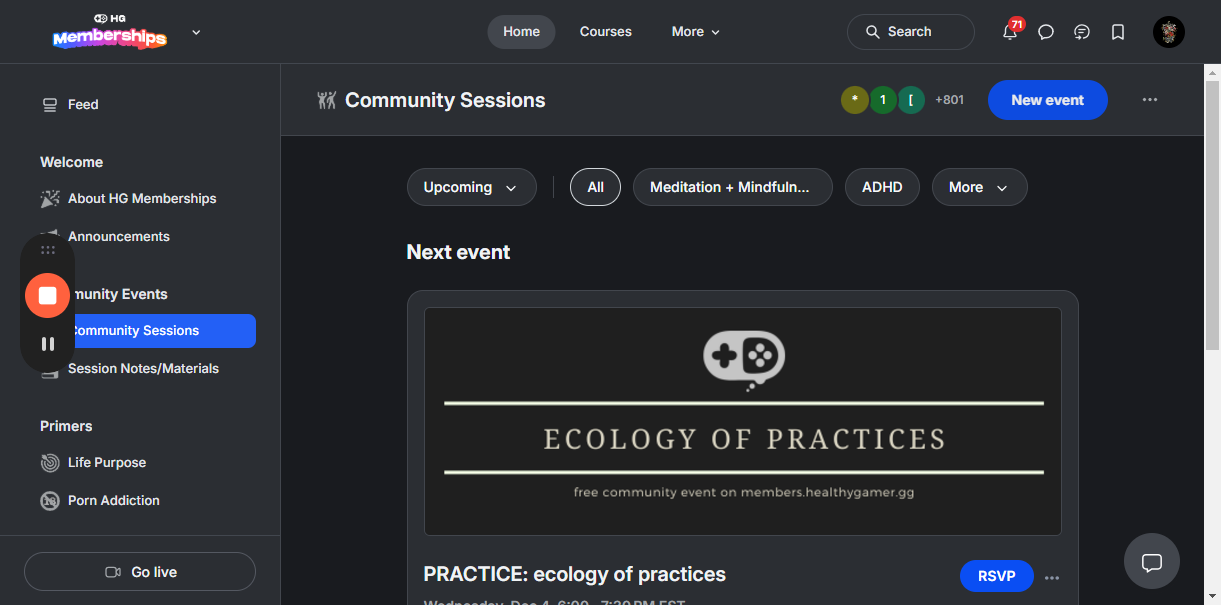
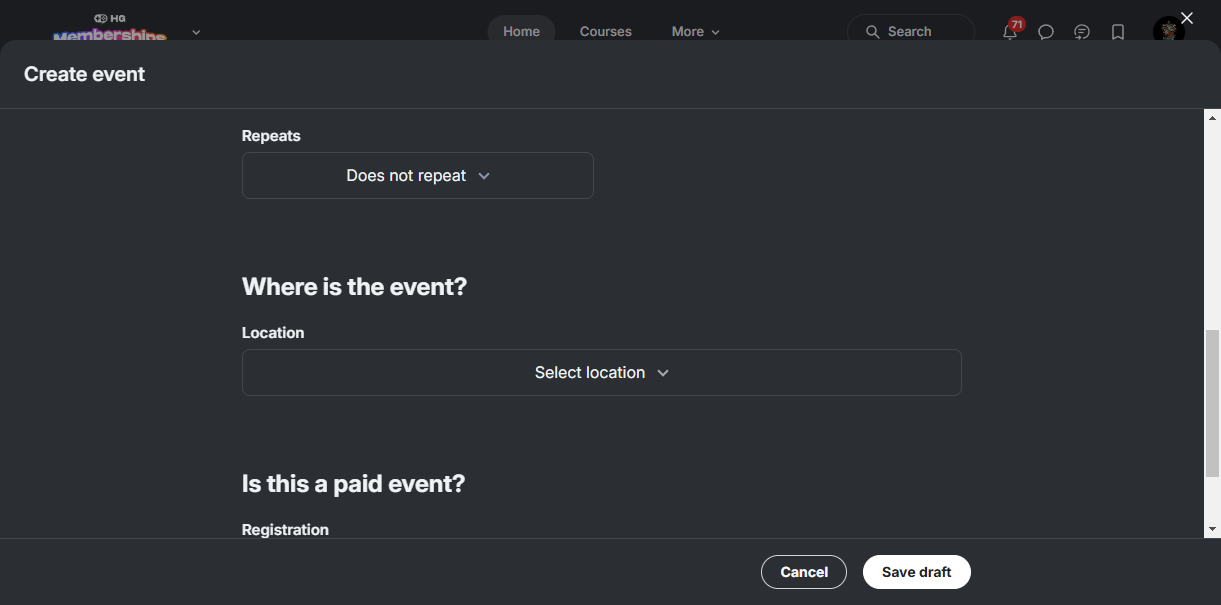
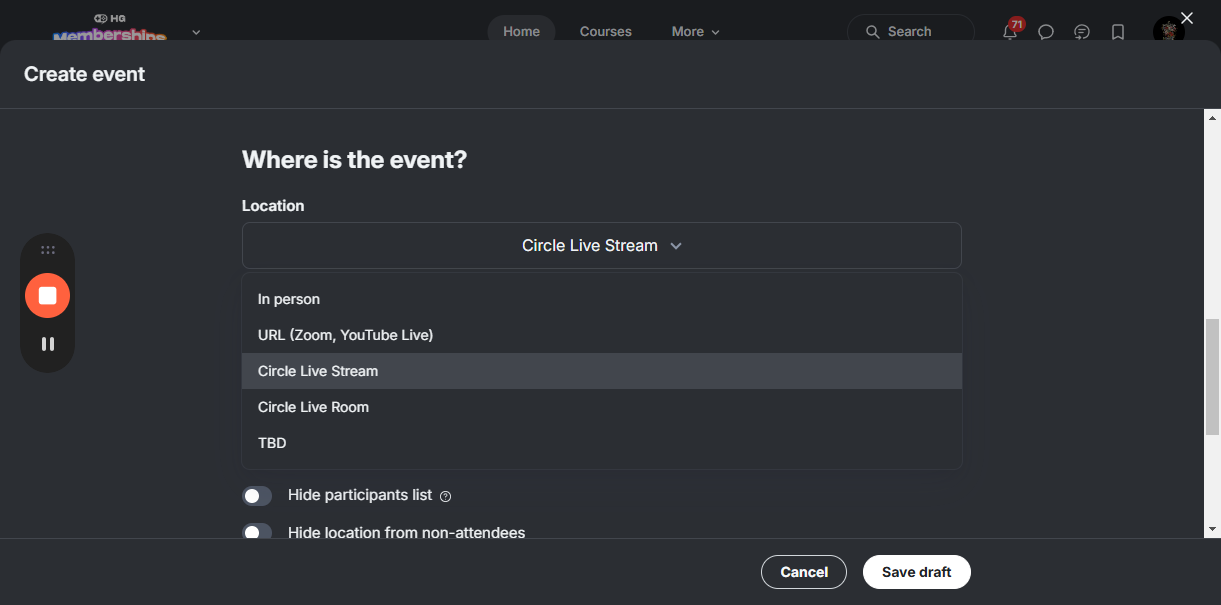
In Circle, go to the Community Events section, which is where free events live. Click on Community Sessions, wait for it to load, and then select New Events.

1
Go to Feed | HG Memberships and click on "Community Sessions"
Step #1: Go to Feed | HG Memberships and click on "Community Sessions"
2
Click on "New event"
Step #2: Click on "New event"

3
Title your event.
4
Click here to choose "topics," which is a tagging system similar to reddit flair. If there's a topic you want added that you don't see, just let me know.
Step #4: Click here to choose "topics," which is a tagging system similar to reddit flair. If there's a topic you want added that you don't see, just let me know.

5
Create the time and date.
Step #5: Create the time and date.
6
Click on "Select location ✓"
Step #6: Click on "Select location ✓"
7
Click on "Circle Live Stream." (If you choose Room, that makes everybody's audio and video public.)
Step #7: Click on "Circle Live Stream." (If you choose Room, that makes everybody's audio and video public.)

8
Under "Basic Info," set the following. To ensure recording, make sure to select "Record This Live" when making the event so that it's ready to go when you start it. Even if scheduled way in the future, turn it on now!!!!
Step #8: Under "Basic Info," set the following.  To ensure recording, make sure to select "Record This Live" when making the event so that it's ready to go when you start it. Even if scheduled way in the future, turn it on now!!!!

9
Click on "Save draft," and after you do, a URL will be created for your event based on the title you put in on that screen. It will then take you to advanced settings.
Step #9: Click on "Save draft," and after you do, a URL will be created for your event based on the title you put in on that screen. It will then take you to advanced settings.

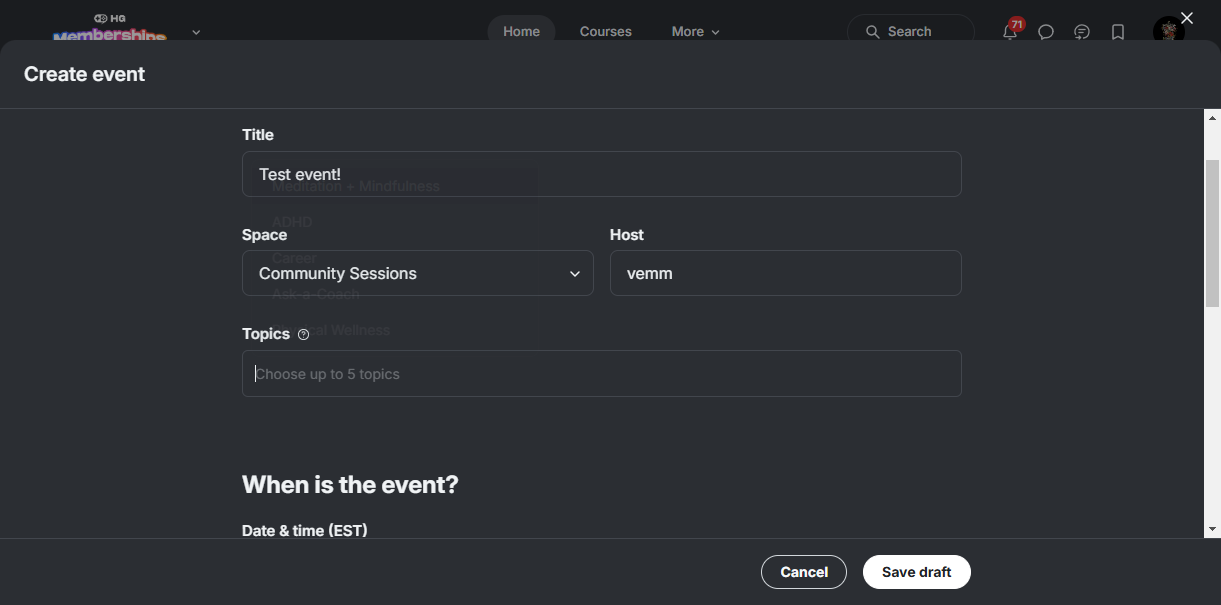
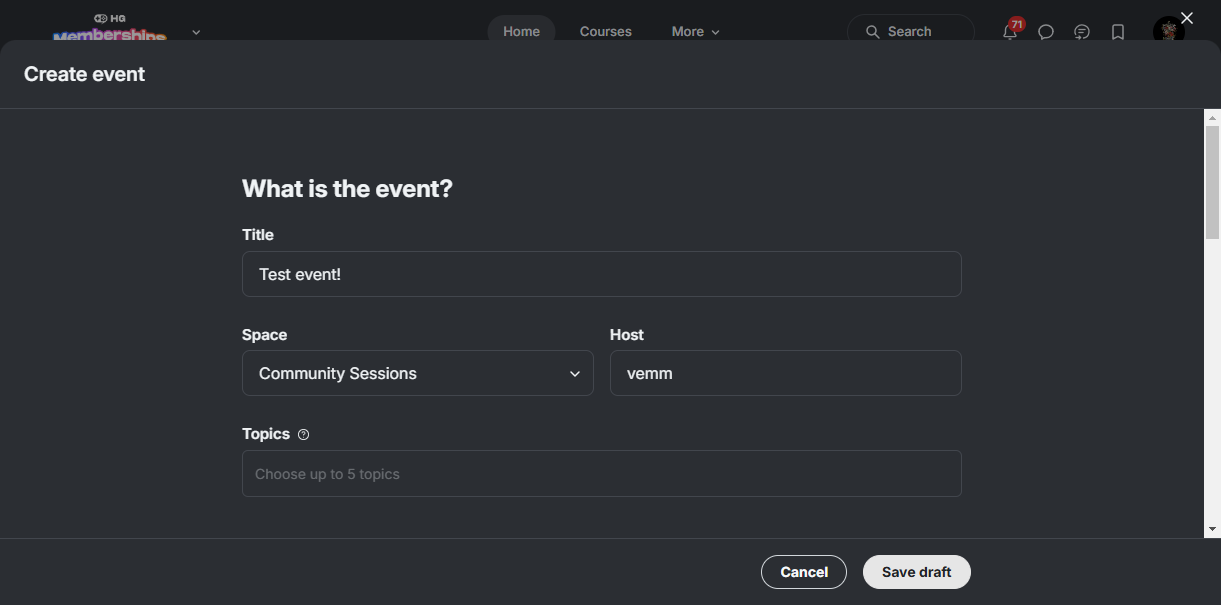
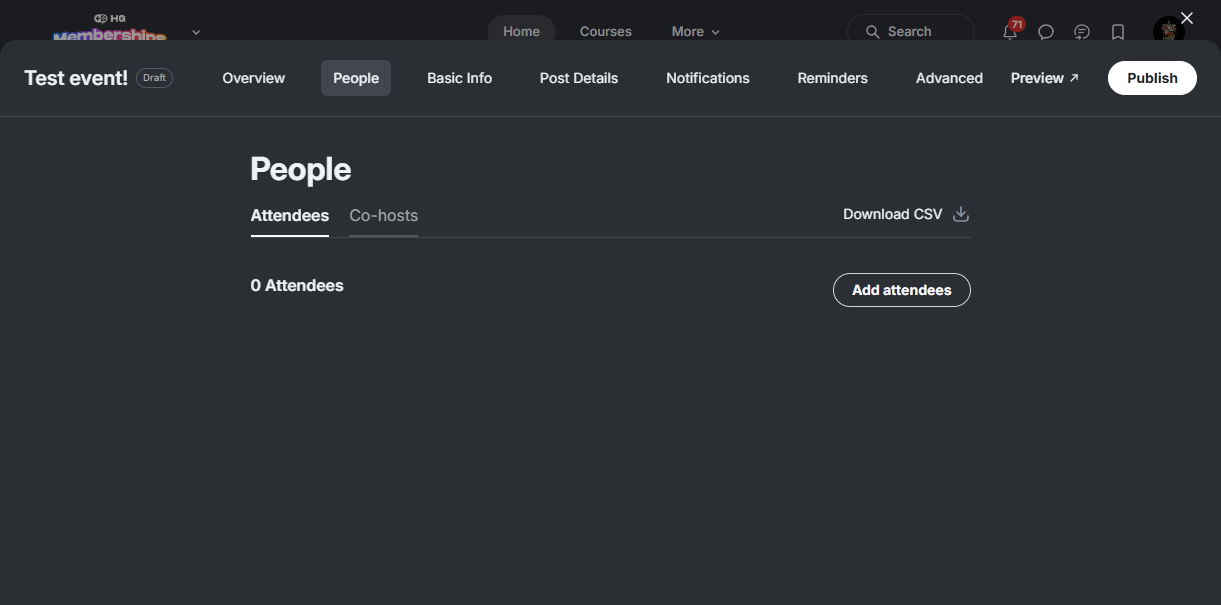
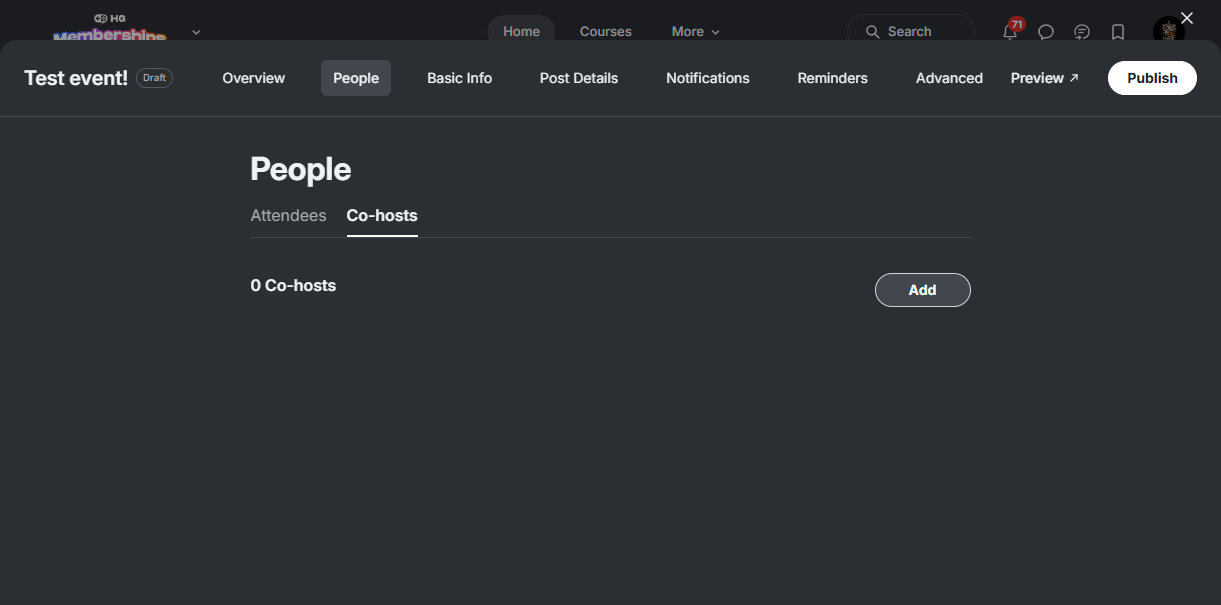
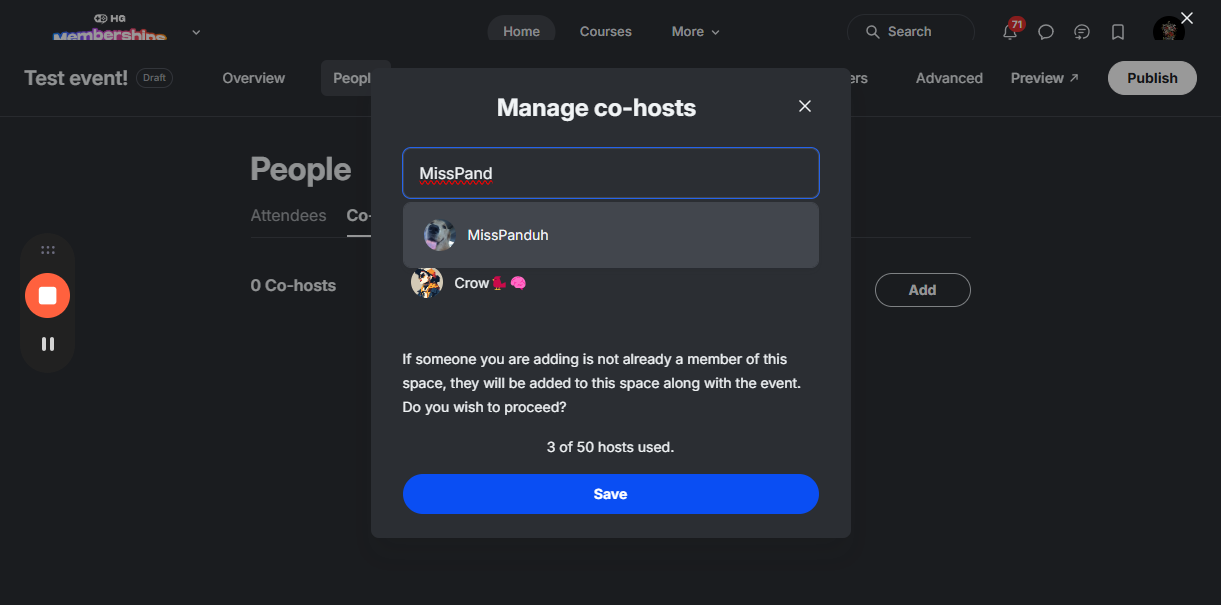
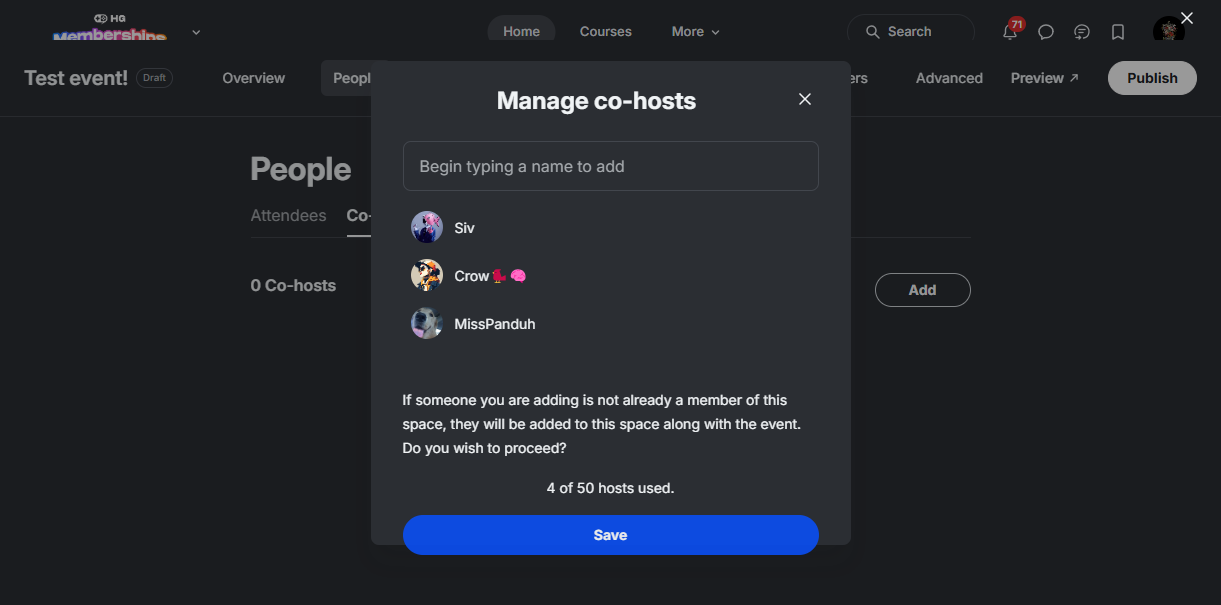
You'll then want to go to People and add co-host abilities for our three circle moderators: Siv, Crow, and MissPanduh. This makes it possible for them to get the needed permissions, if you're not watching the chat.

(If you don't do this, you will end up needing to manually give people mod powers after you see them in chat by clicking the [...] by their names. It needs to be done for every individual event.

If you need a moderator, none of those three are around, and you see a different Discord mod in your chat, you can click the [...] to make that person a mod for a single event.)

10
Click on "People"
Step #10: Click on "People"
11
Click on "Co - hosts"
Step #11: Click on "Co - hosts"
12
Click on "Add"
Step #12: Click on "Add"
13
Type names in
Step #13: Type names in

14
Click on "Save"
Step #14: Click on "Save"

15
Click on "Post Details"
Step #15: Click on "Post Details"

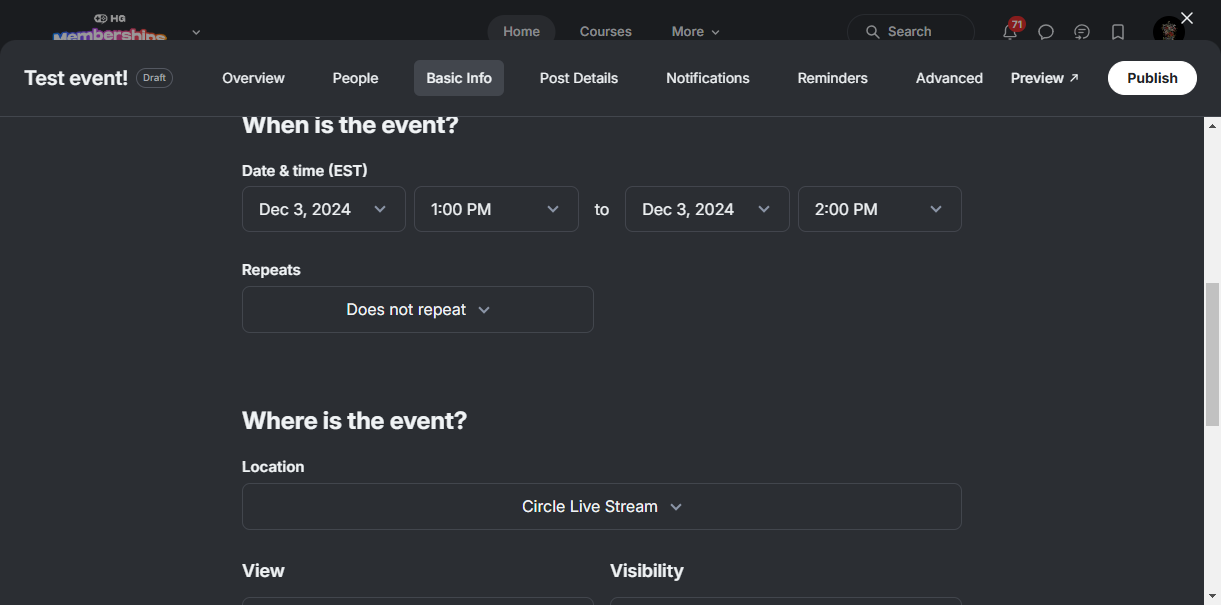
Here's where you can upload an image and add a short event description. Be sure to write a description, as that will appear with the event in the Circle feed. If you don't have a cover image for your Circle events yet, let me know and I will get one for you.

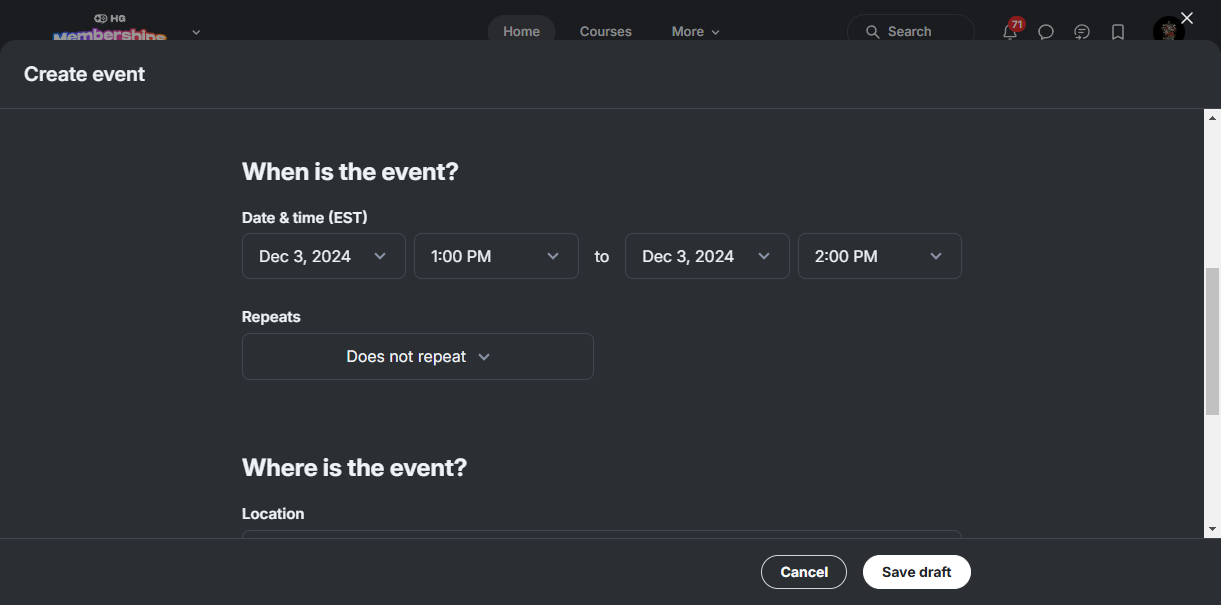
Congrats, you made an event!

After your event

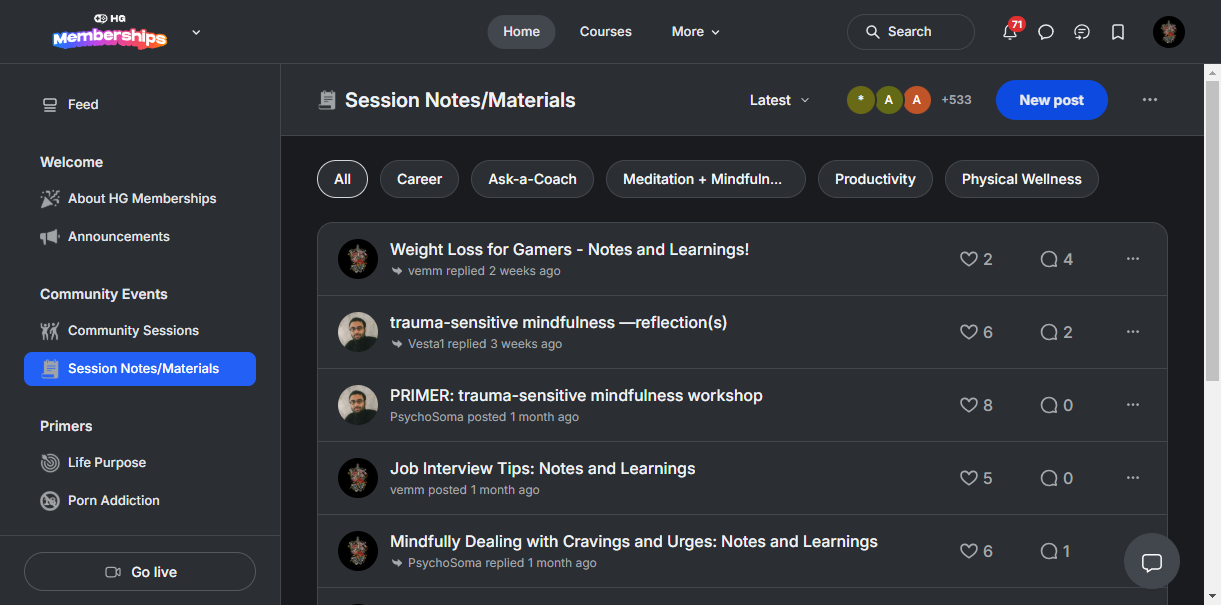
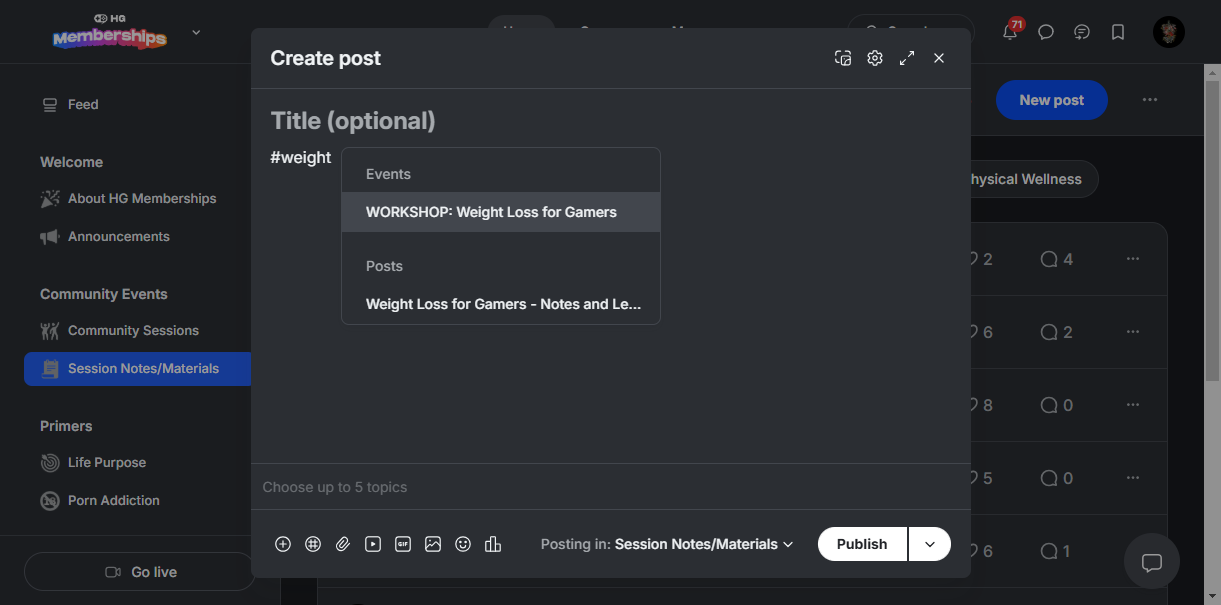
After the event, you'll go to Session Notes and Materials, where you can post slides, reflection questions, notes, links, or whatever else you'd like. If nothing else, please make a "notes and learnings" post just so viewers can add any notes they took during your event.

16
Click on "Session Notes / Materials"
Step #16: Click on "Session Notes / Materials"

17
Click on "New post"
Step #17: Click on "New post"
18
When posting something like this, use a hashtag and start typing in the title of your event. This allows you to link a past event, enabling people to see the recording
Step #18: When posting something like this, use a hashtag and start typing in the title of your event. This allows you to link a past event, enabling people to see the recording

19
You are welcome to click on the current ones to borrow the language from for your own notes posts. Just be sure to change what event it links to!
Step #19: You are welcome to click on the current ones to borrow the language from for your own notes posts. Just be sure to change what event it links to!

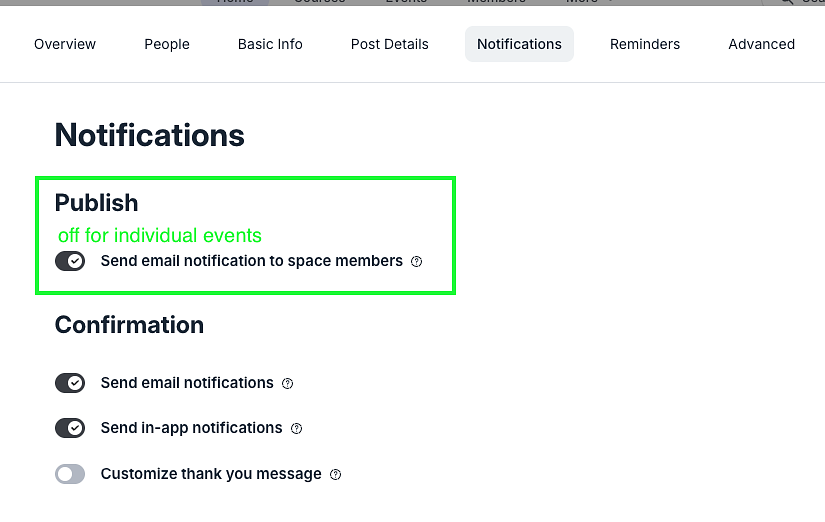
Finally, I can schedule follow-up emails to go out the day after your event, which sends a "Hey, if you missed it, here's how you can access it" message to all RSVPs and will invite those who attended live to share their notes + reflections from the event on its notes post. That said, if you don't ask me to do this, I might miss it — please be sure to let me know if you'd like follow-up emails scheduled!

Don't hesitate to reach out if you get stuck on anything. Can't wait to see all the fab new workshops y'all do on Circle soon!