Dokkio suggests categories for all your Google Drive documents by using AI to first describe all of them -- including images, screenshots and webpages. If your team's folder structure has ever struck you as confusing, this could be a great secondary way to navigate these files.
By Kristi Lim
1-minute summary: Here are 3 main tips for using Dokkio.
1) Use case: Selecting the right use case at onboarding is not life or death, but it could save time -- within your workspace, Dokkio will suggest sections specific to your use case. (e.g. "Tech Company" gets sections like "Feature", "Product", "Project"; "Non-Profit" gets "Board Member", "Campaign").
2) Custom sections/categories: When you're creating your own sections and categories, Dokkio will base everything off of the name you give your categories: try to aim directly at self-descriptive and sufficiently distinct keywords.
3) Advanced settings: If the files Dokkio pulls up for your category are not what you expect, click on edit, and add "synonyms" (other ways to identify the right item) and "blacklist names" (items to include) based on what Dokkio got right and wrong in its first pass.
Quick terminology:
A section contains categories, and categories contain files.
E.g. Section: Projects; Categories: March Launch, April Launch; Files: Budget.docx, Invoice_March.pdf
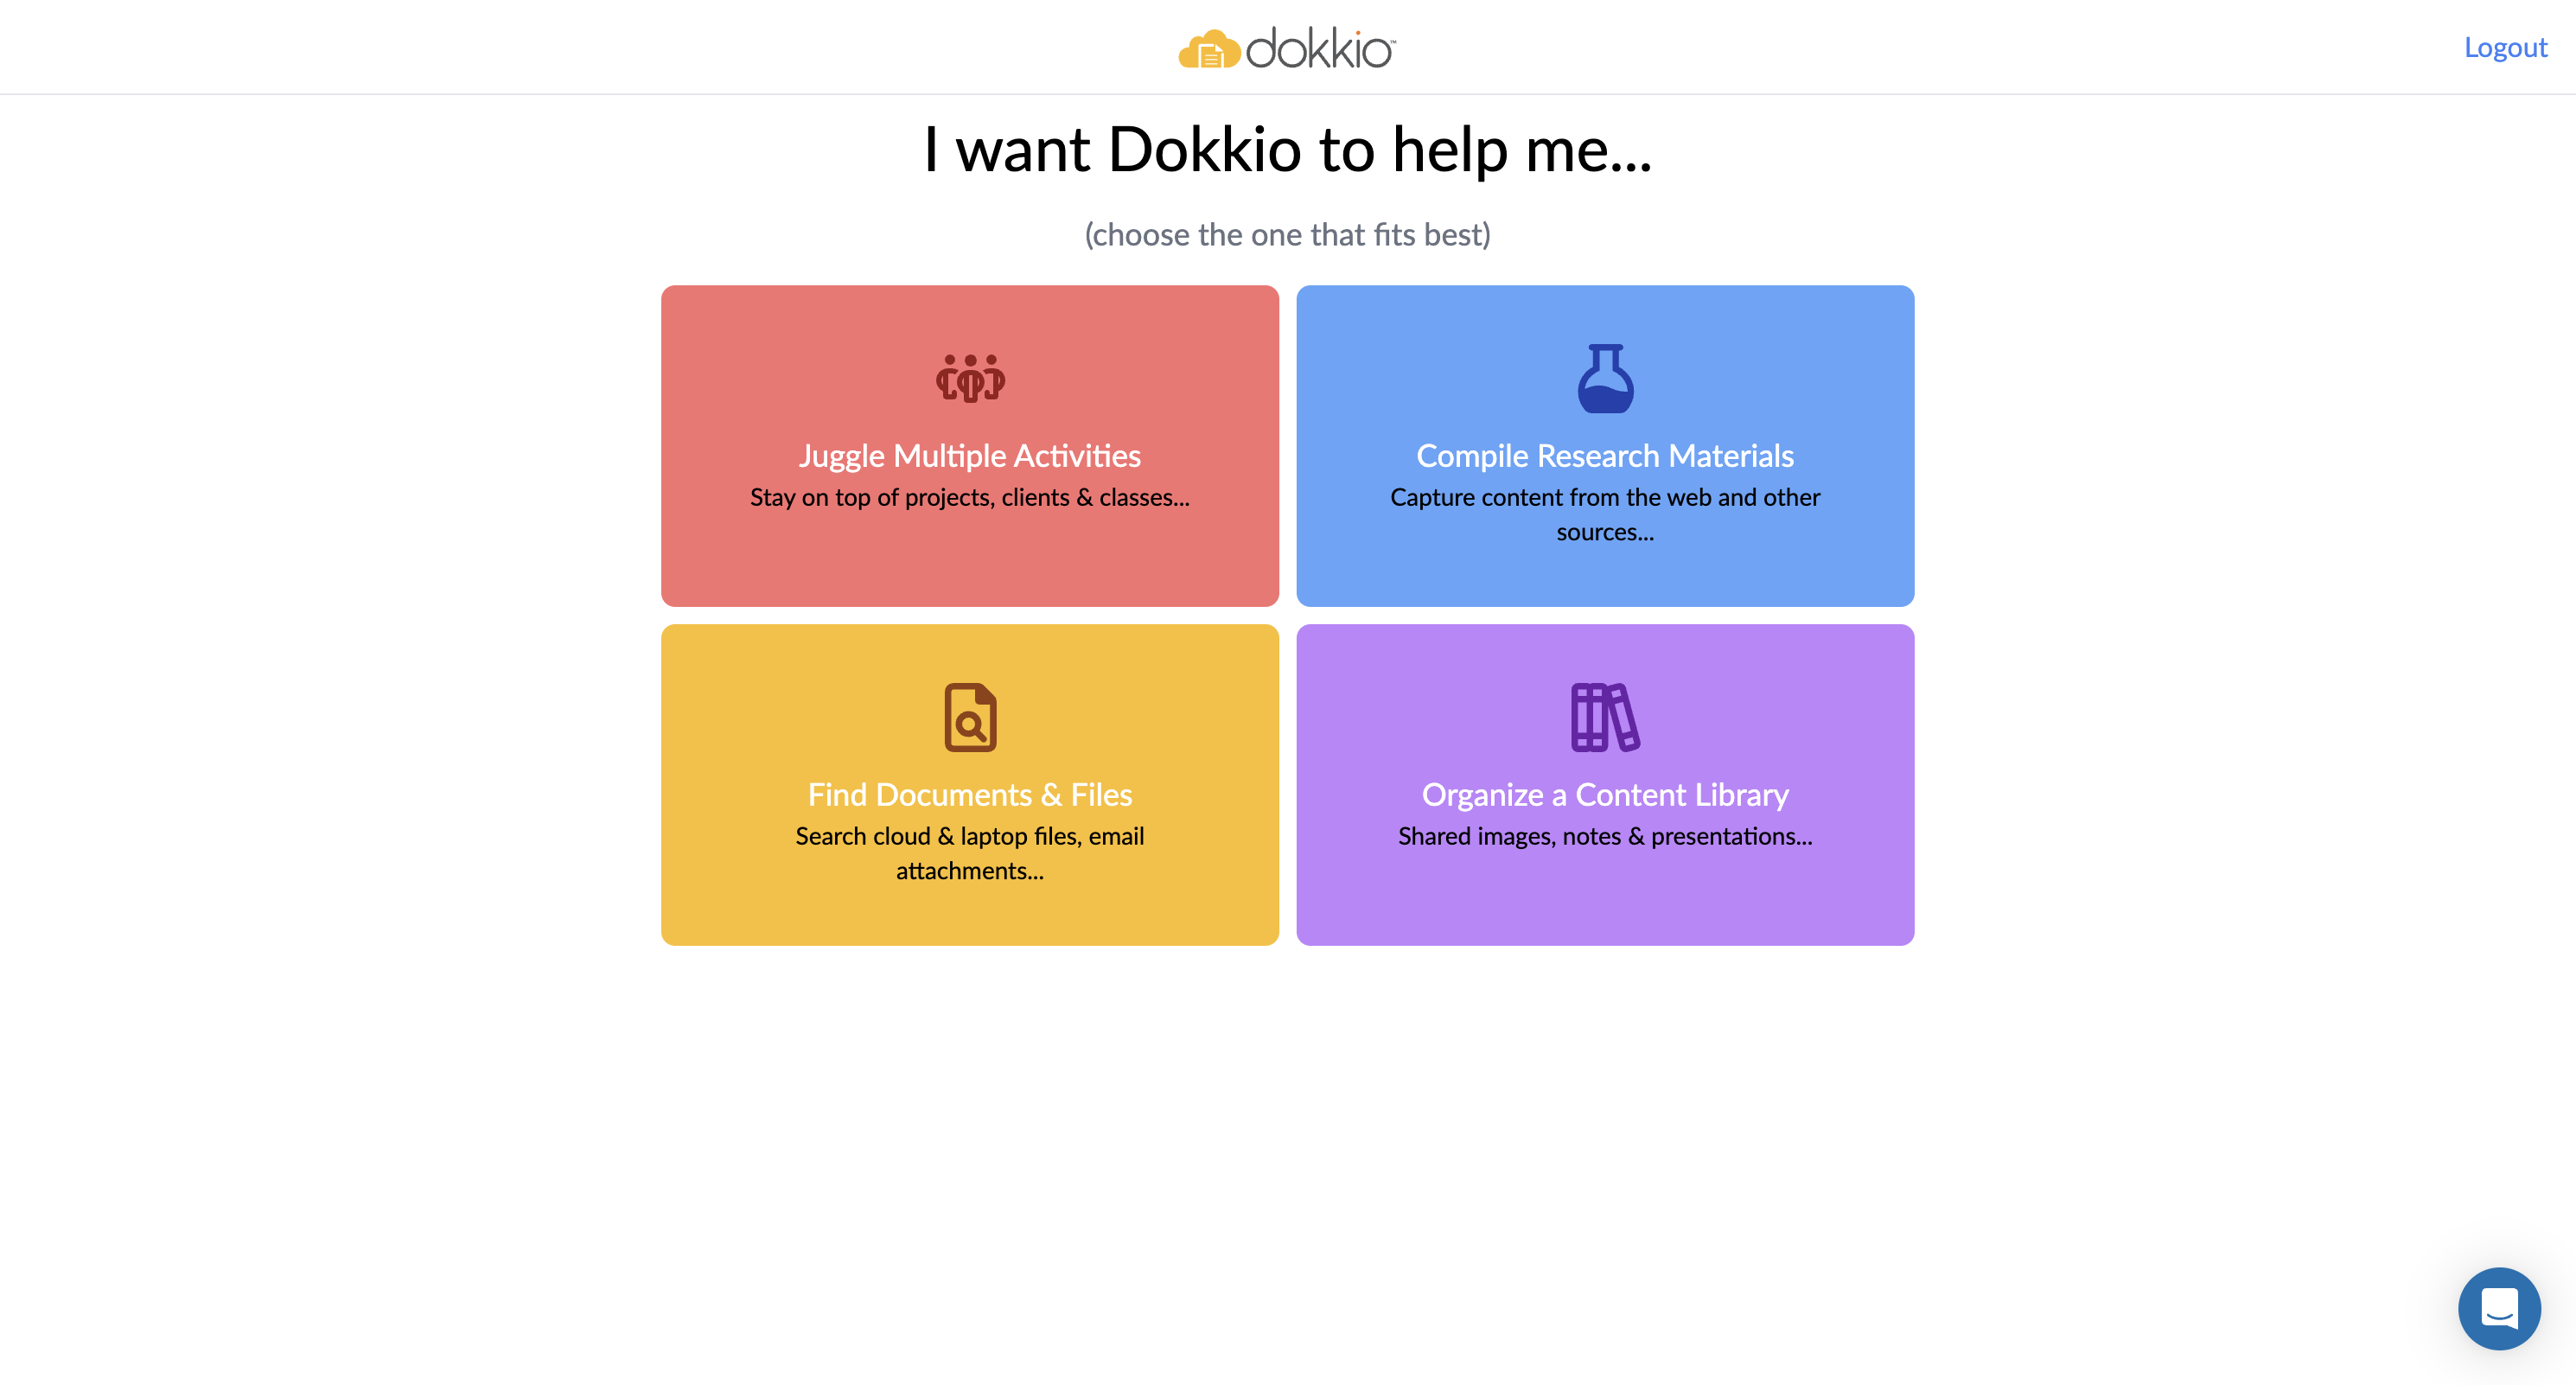
15-minute walkthrough: Here is how to get Dokkio set up in 30 steps.
From this point, you can choose any use case that makes sense.
4
Let's select "Non - Profit" for now.
5
Click on "Organize a Content Library"
6
Here, select the integrations you would like to add. Free plans can add up to 3 content sources.
7
Dokkio lets you connect Google Drive accounts that are different from the email you signed up with, which can be useful if you want to connect multiple Drives.
8
Slack is also an integration within Dokkio; given that your organization uses it, it could be worth adding.
9
Click on "Finish Adding"
10
Here, you can select how you would like Dokkio to group your files -- you'll notice its suggested categories are relevant to Non-Profits (e.g. by Board Member).
11
Here, type in names of projects, or any other way that makes them easy to identify. You can add more later, as well as retroactively edit those you add now.
12
Once you're done, click on "Continue"
Dokkio also has a natural language chat section. Personally, I haven't had great success with this -- possibly because my files are not the most generalizable (and the natural language chat sections of most AI tools tend to work best with whatever is well-represented in their training data). This likely reaps the best results with a general note.
13
My general note: "Can you help me group assets from the same project together? I cover different AI tools, so if possible, try to group it by category of AI tool."
14
Click on "Continue"
15
Feel free to download the Sidebar: this gives you the ability to add the webpages you browse as data sources automatically. (You can turn off the automatic function, and only add the webpages you screenshot or clip).
16
Once Dokkio is done processing your files, you should see: 1) The Categories they've automatically generated, based on your existing files 2) Your files organized by your designated categories (in our case: April Launch, March Launch, Spotify).
17
Whether for categories within sections, or files within categories, Dokkio will 1) Auto-assign anything it feels confident enough about 2) "Suggest", for you to review, anything it is less confident about. ("Confidence" is based on similarity scores). You can find these indicated as a yellow dot, everywhere that it is relevant.
18
You can select and accept anything that is relevant.
19
20
To create your own custom section, click on "New Section".
21
Click here
22
Click here
23
You have two options: 1) To select one of their use case-specific sections, or...
24
2) To create your own custom section, select this option, and type in a sufficiently descriptive name. I will type in, "AI Tool Types".
25
Next, type in sufficiently unique and descriptive names. You can edit these more in Advanced Features later, this can be your first-pass test.
26
After you've submitted them, you should see your new Section appear with the other Sections in the left sidebar.
27
When you click on your section, you'll see that your categories have already been populated. The yellow dot means that Dokkio would like to suggest more file types. You can click and review as we did above.
28
If Dokkio included or excluded files en-masse, you can make your category more fine-grained by returning to Section view, hovering over to reveal the blue "Actions" button, and then clicking on "Edit".
29
The first useful thing to do is make your tag name more specific, if applicable. The second useful thing: Reduce or increase the "confidence" rating to include, or exclude more files respectively. The third useful thing is to play with: 1) File types, 2) Synonyms, 3) Blacklist names.
30
Synonyms are other key words that Dokkio should consider as part of the same category (you can write in what didn't get included the first time). Blacklist Names are anything that got included, when you didn't want them to. (I typed in image file extensions because too many "Images" got pulled up. In this case, I can also just uncheck the "Image" file type in the section above.