How to Pay Constellation Bills in QuickBooks
Learn the step-by-step process to pay your Constellation bills using QuickBooks, ensuring accurate transactions and account balance management.
In this guide, we'll learn how to manage and pay your Constellation bills using QuickBooks. The process involves navigating to the New Transactions section, selecting the appropriate bills, and ensuring the correct amount is paid. We'll also cover how to handle the payment summary and adjust the check number to reflect an electronic funds transfer (EFT). This will help ensure your account balance is updated accurately.
Let's get started
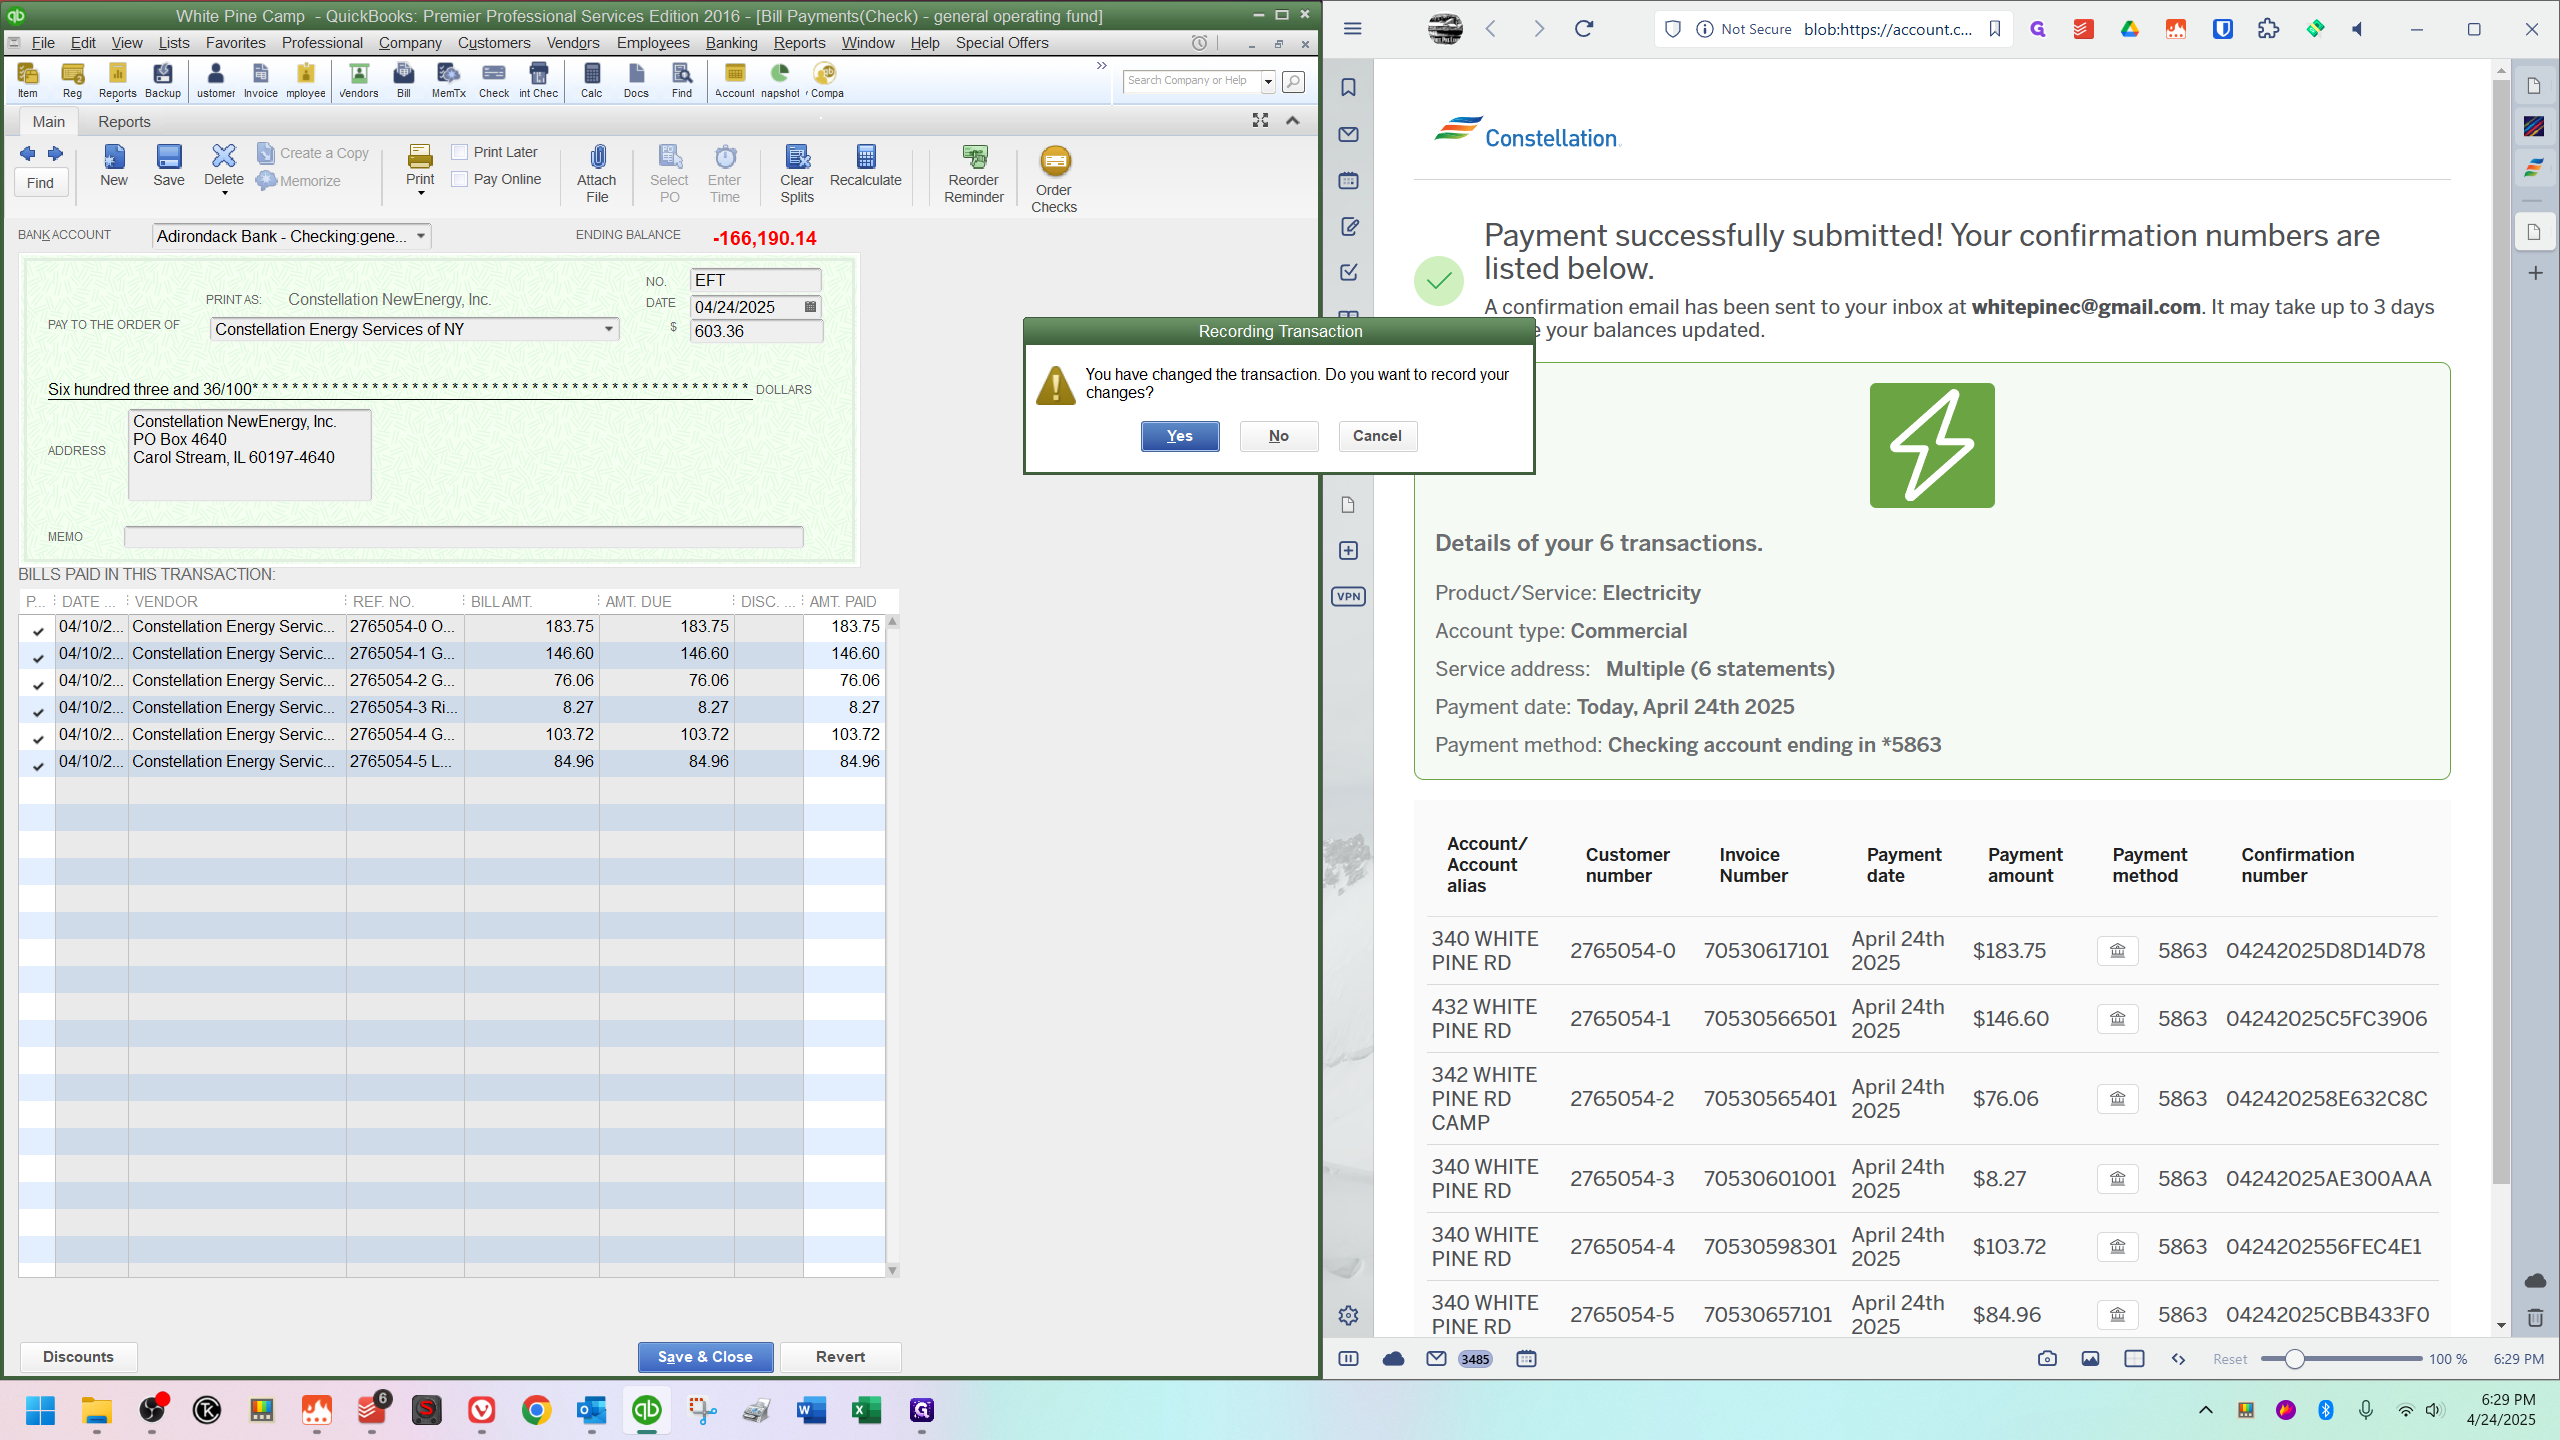
Now that you've paid your Constellation bill, go back into QuickBooks. You should still see the balance there. Go to New Transactions and select Pay Bills.
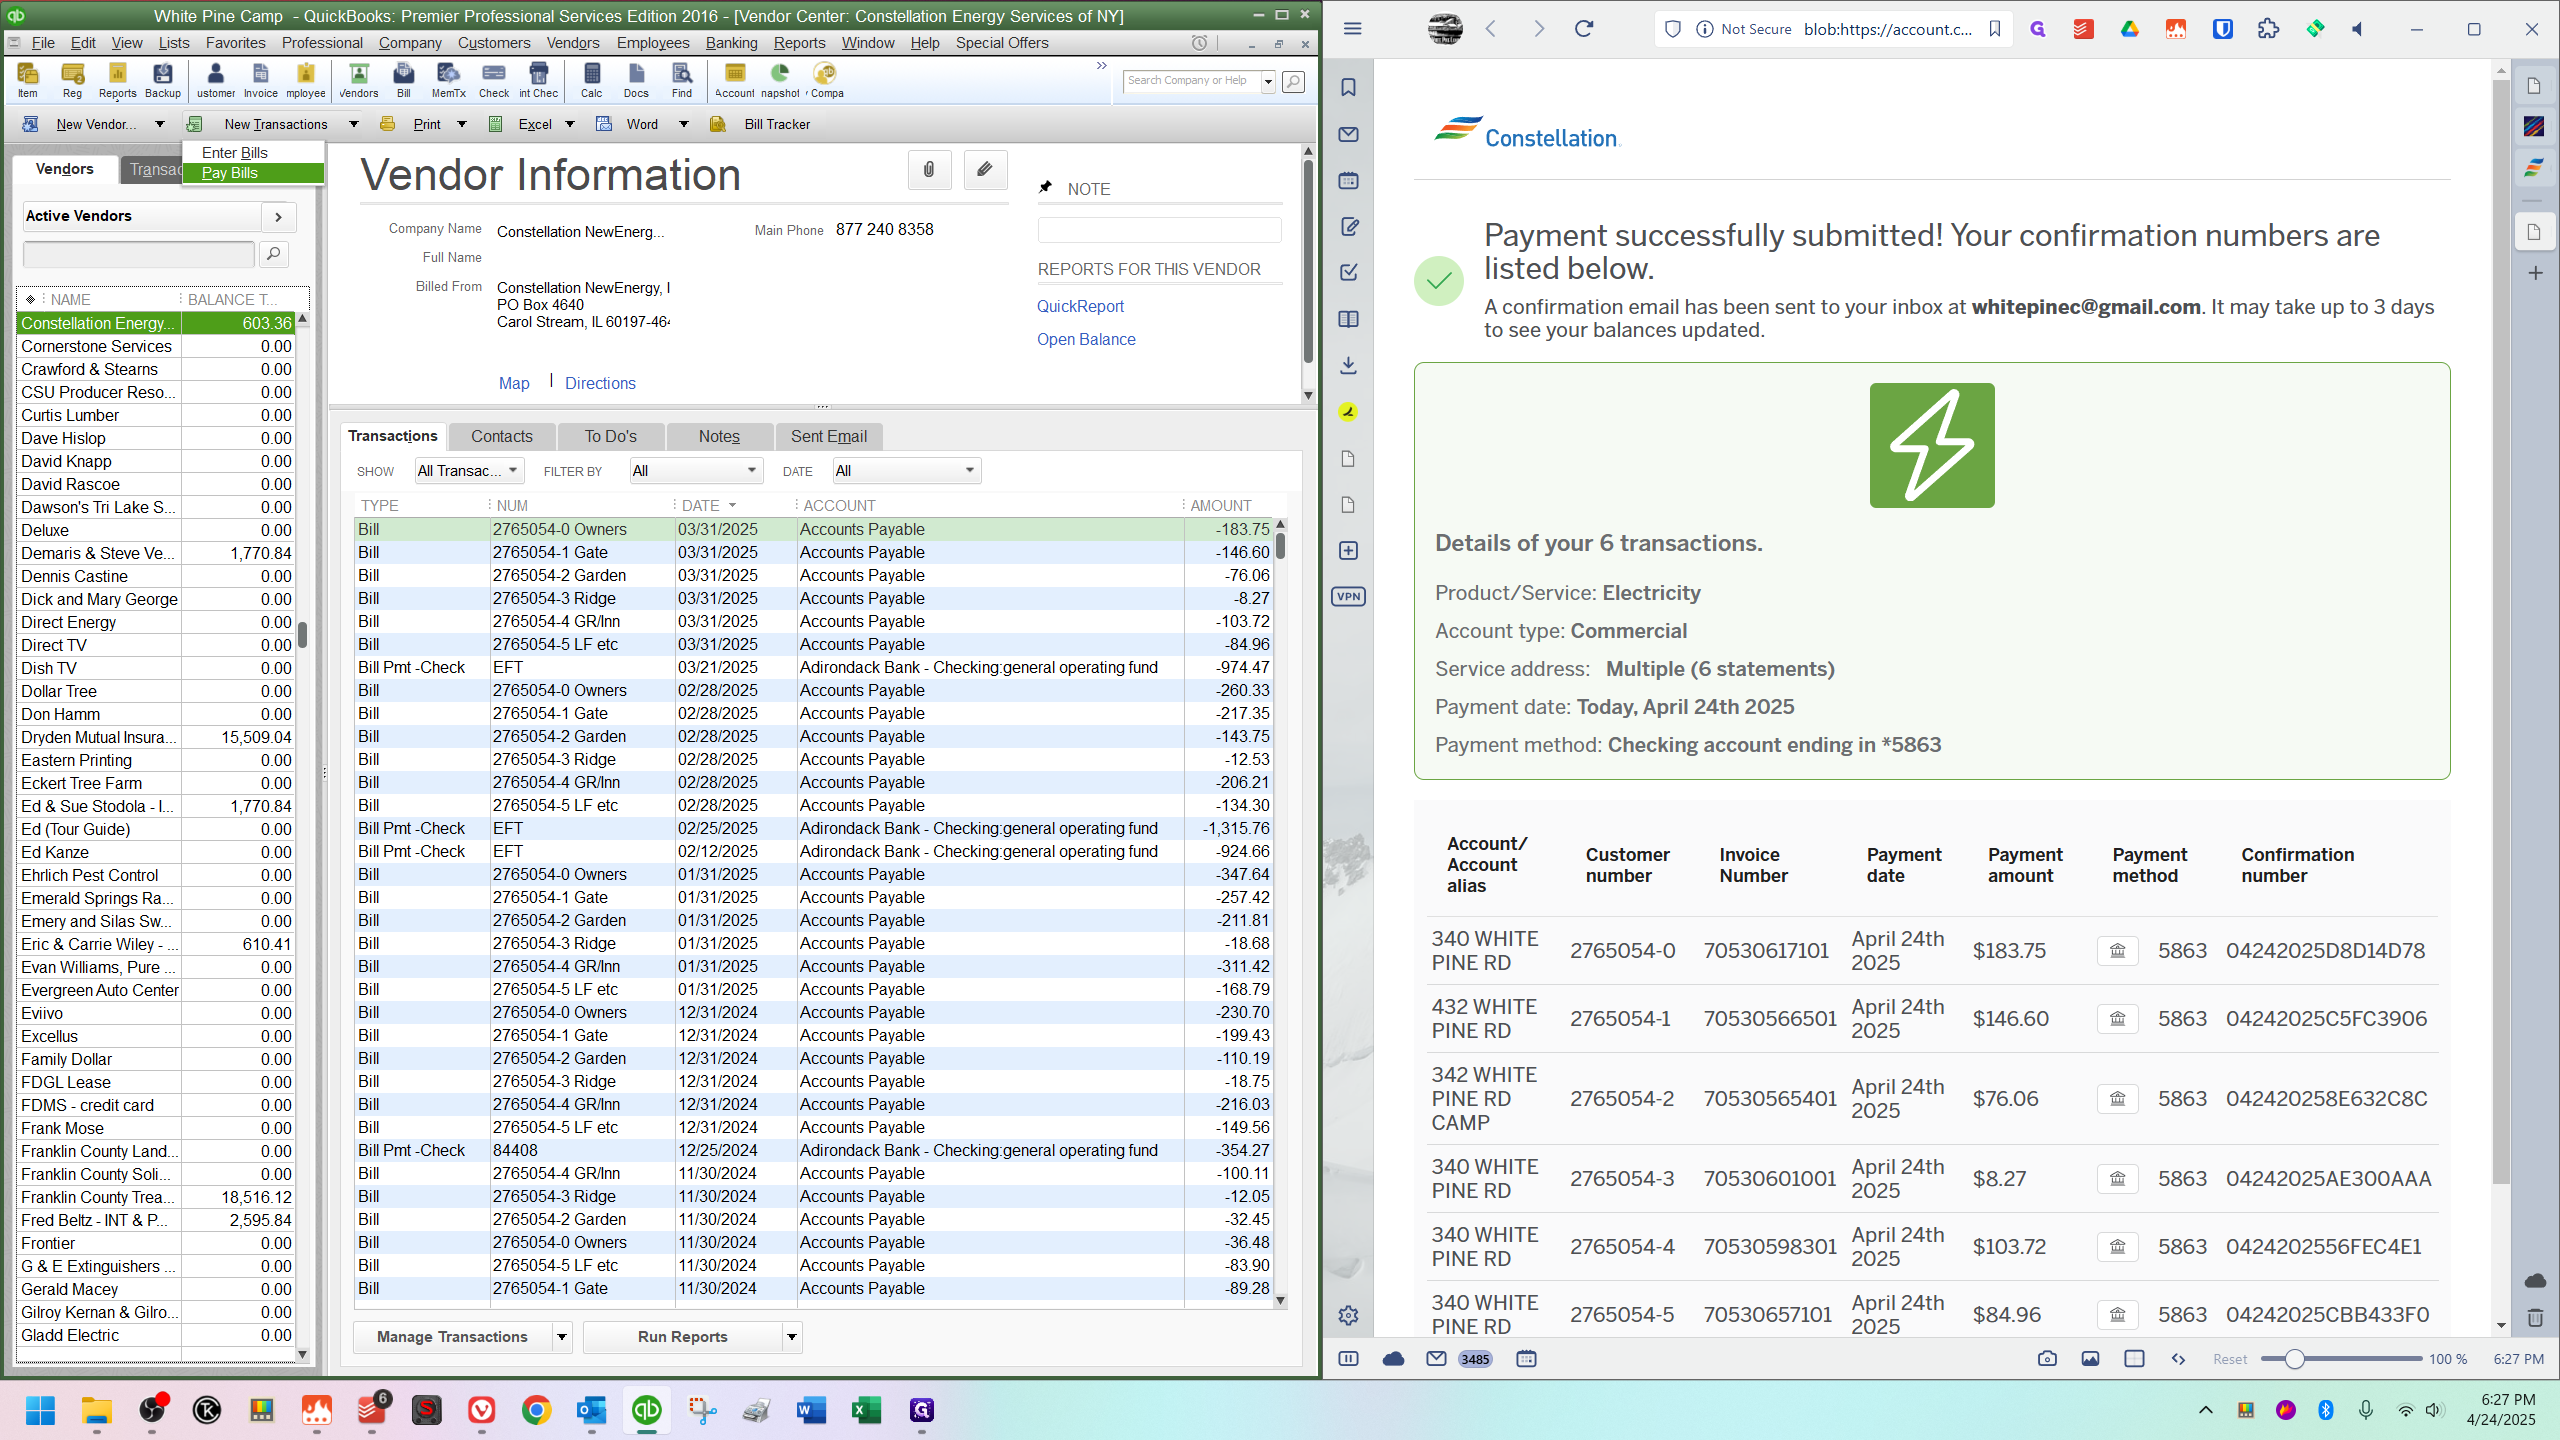
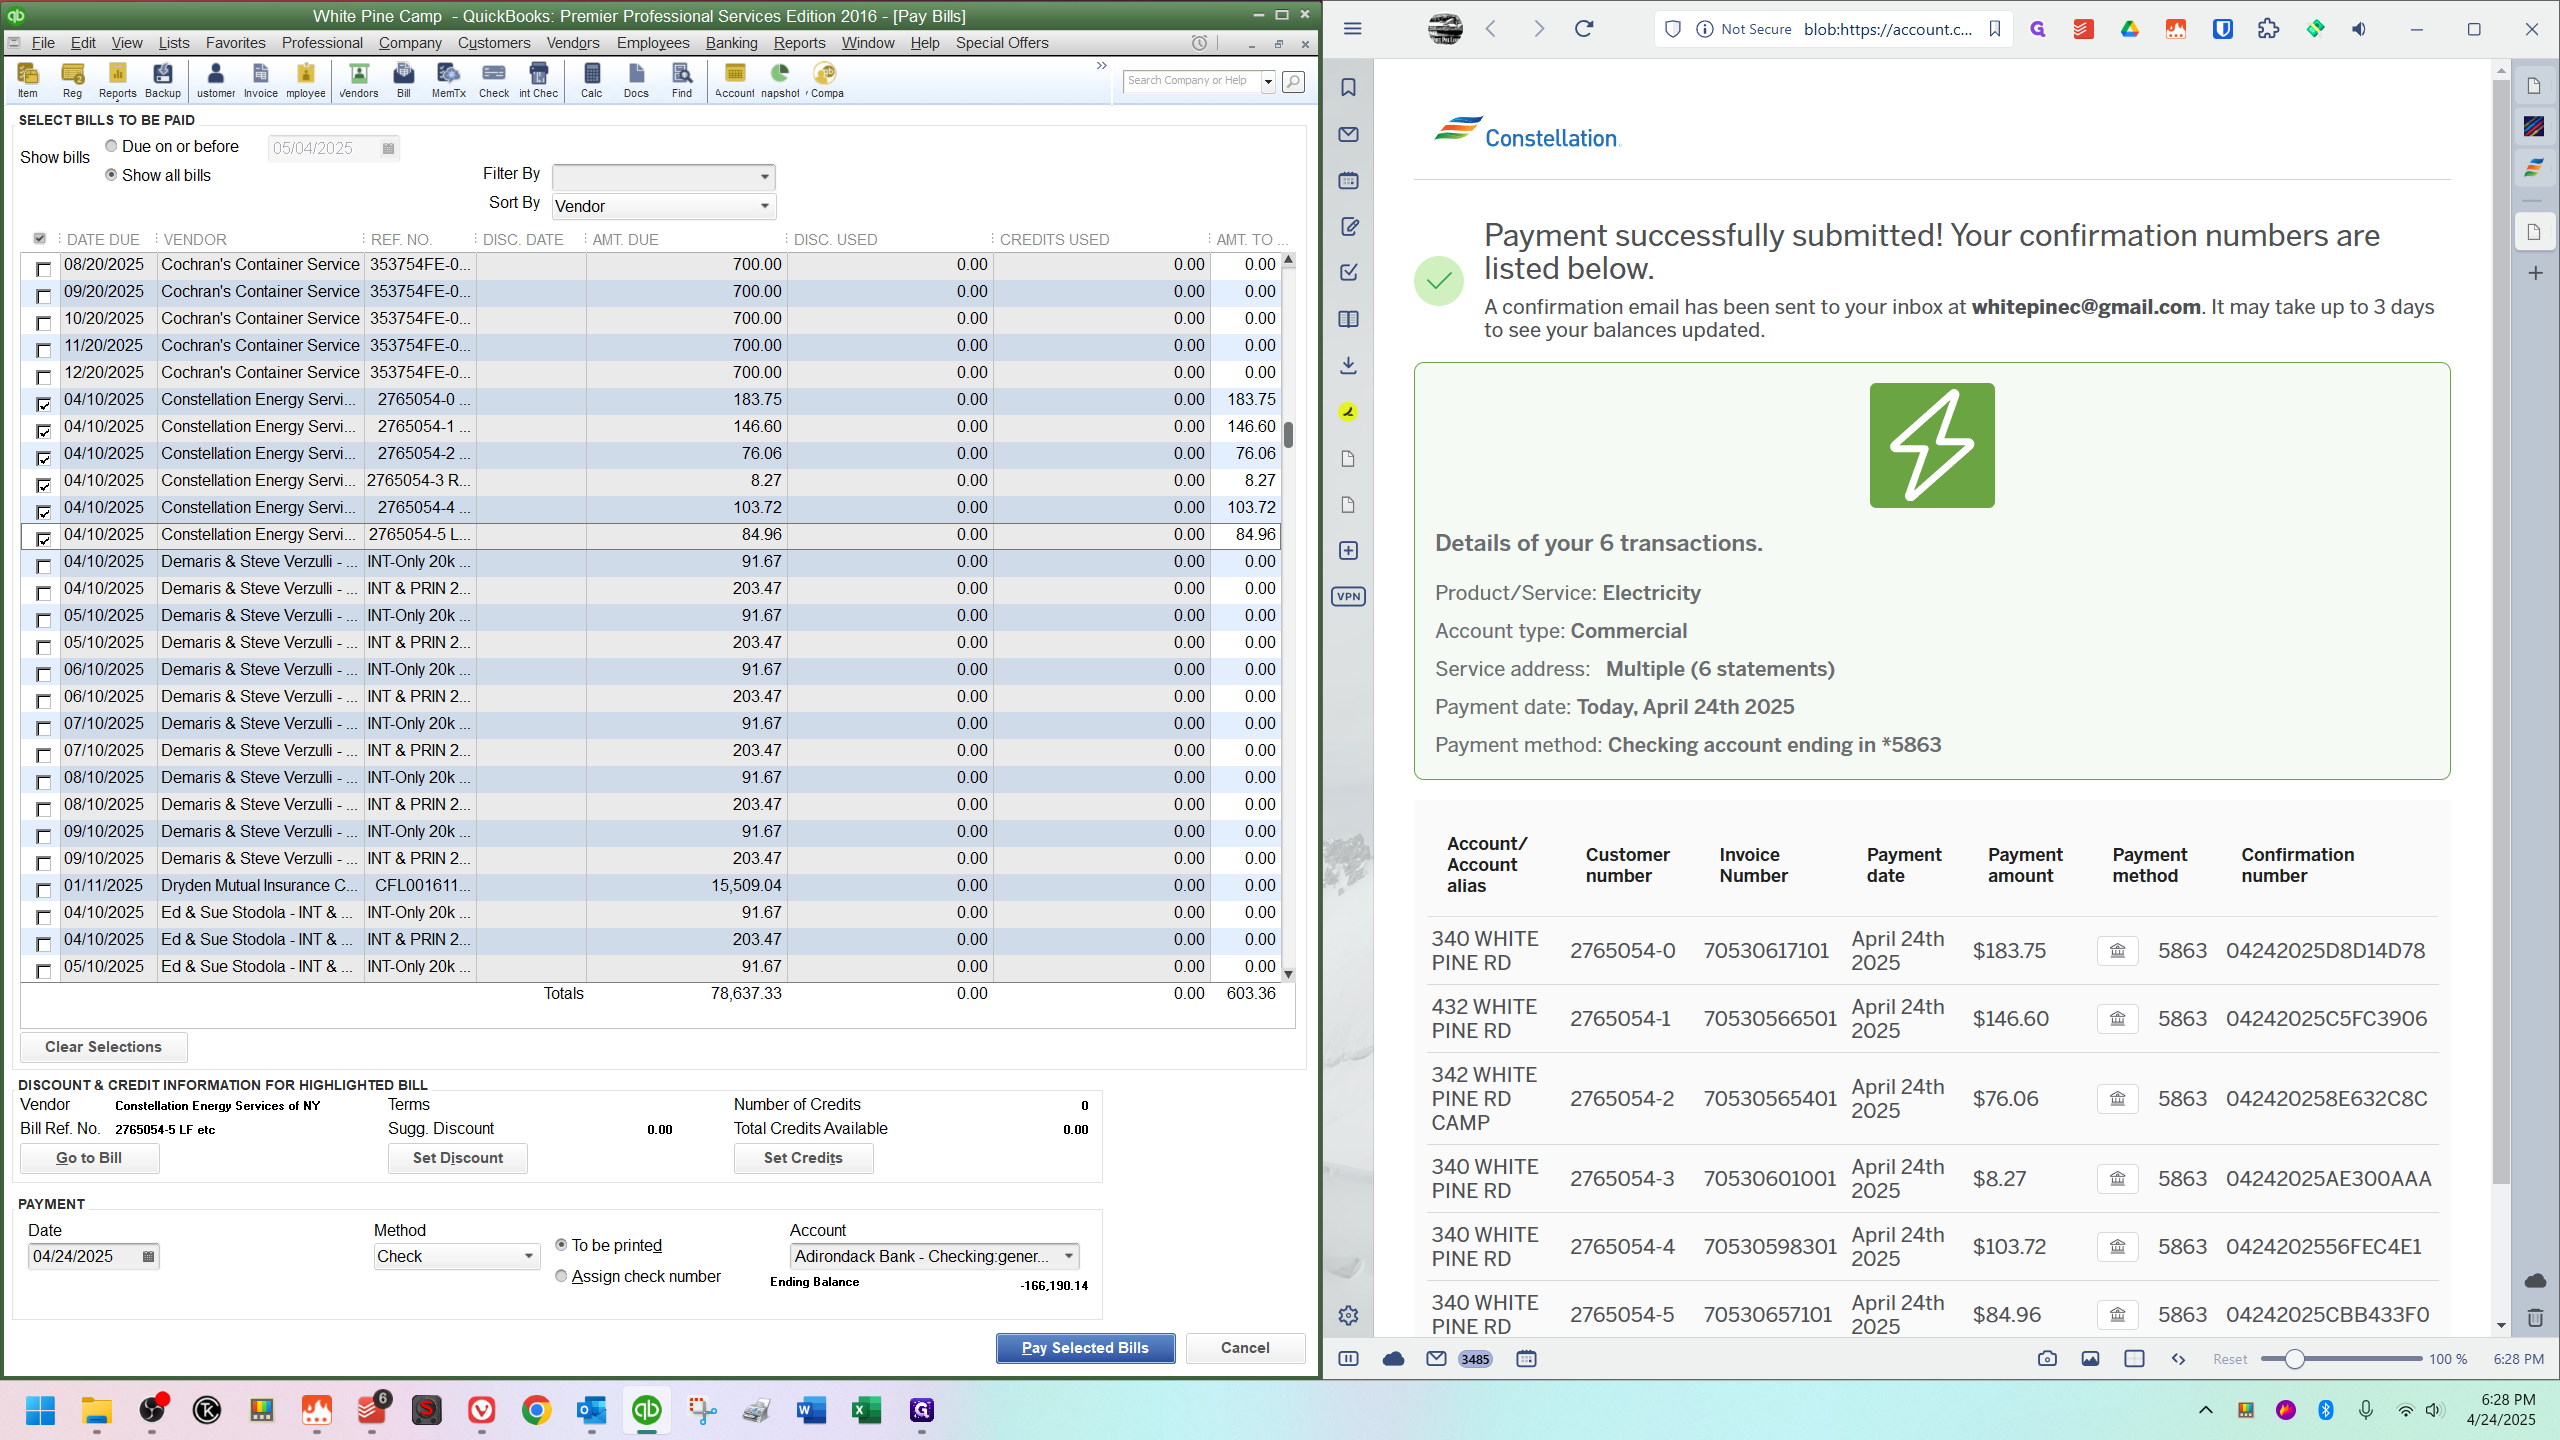
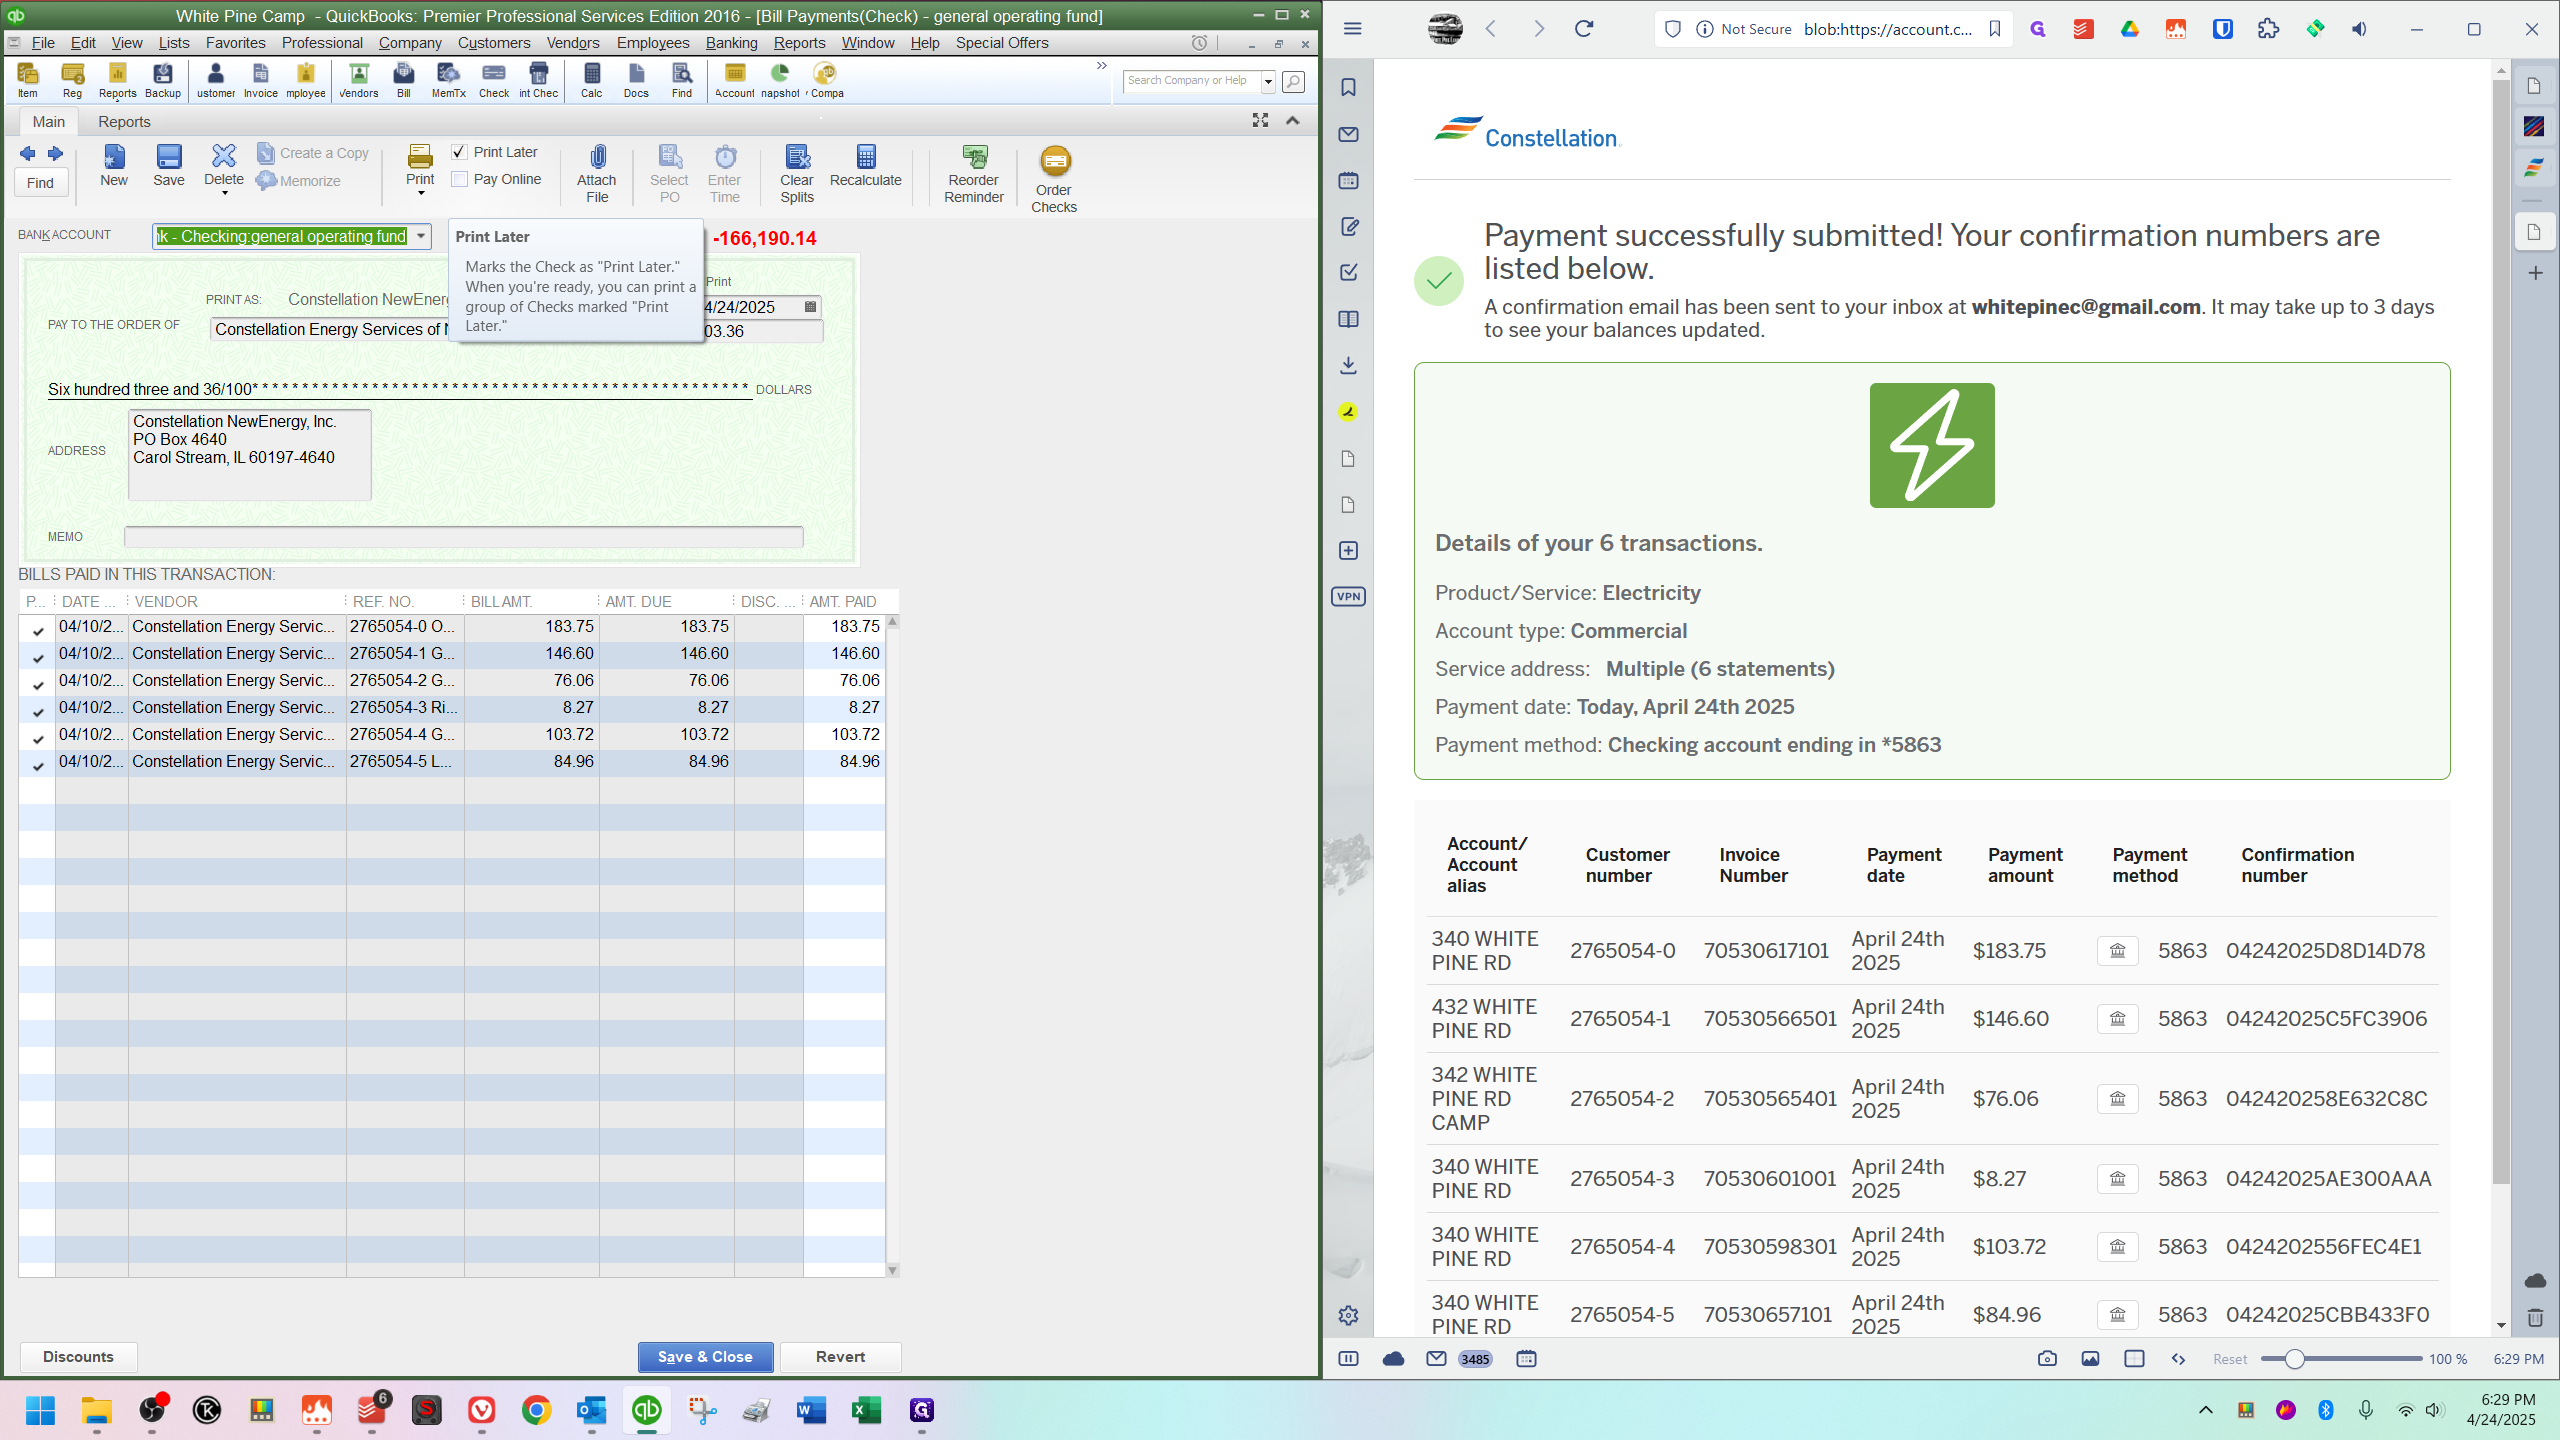
Scroll down and find the Constellation bills. Click the checkbox to the left of each one. There are six in total.
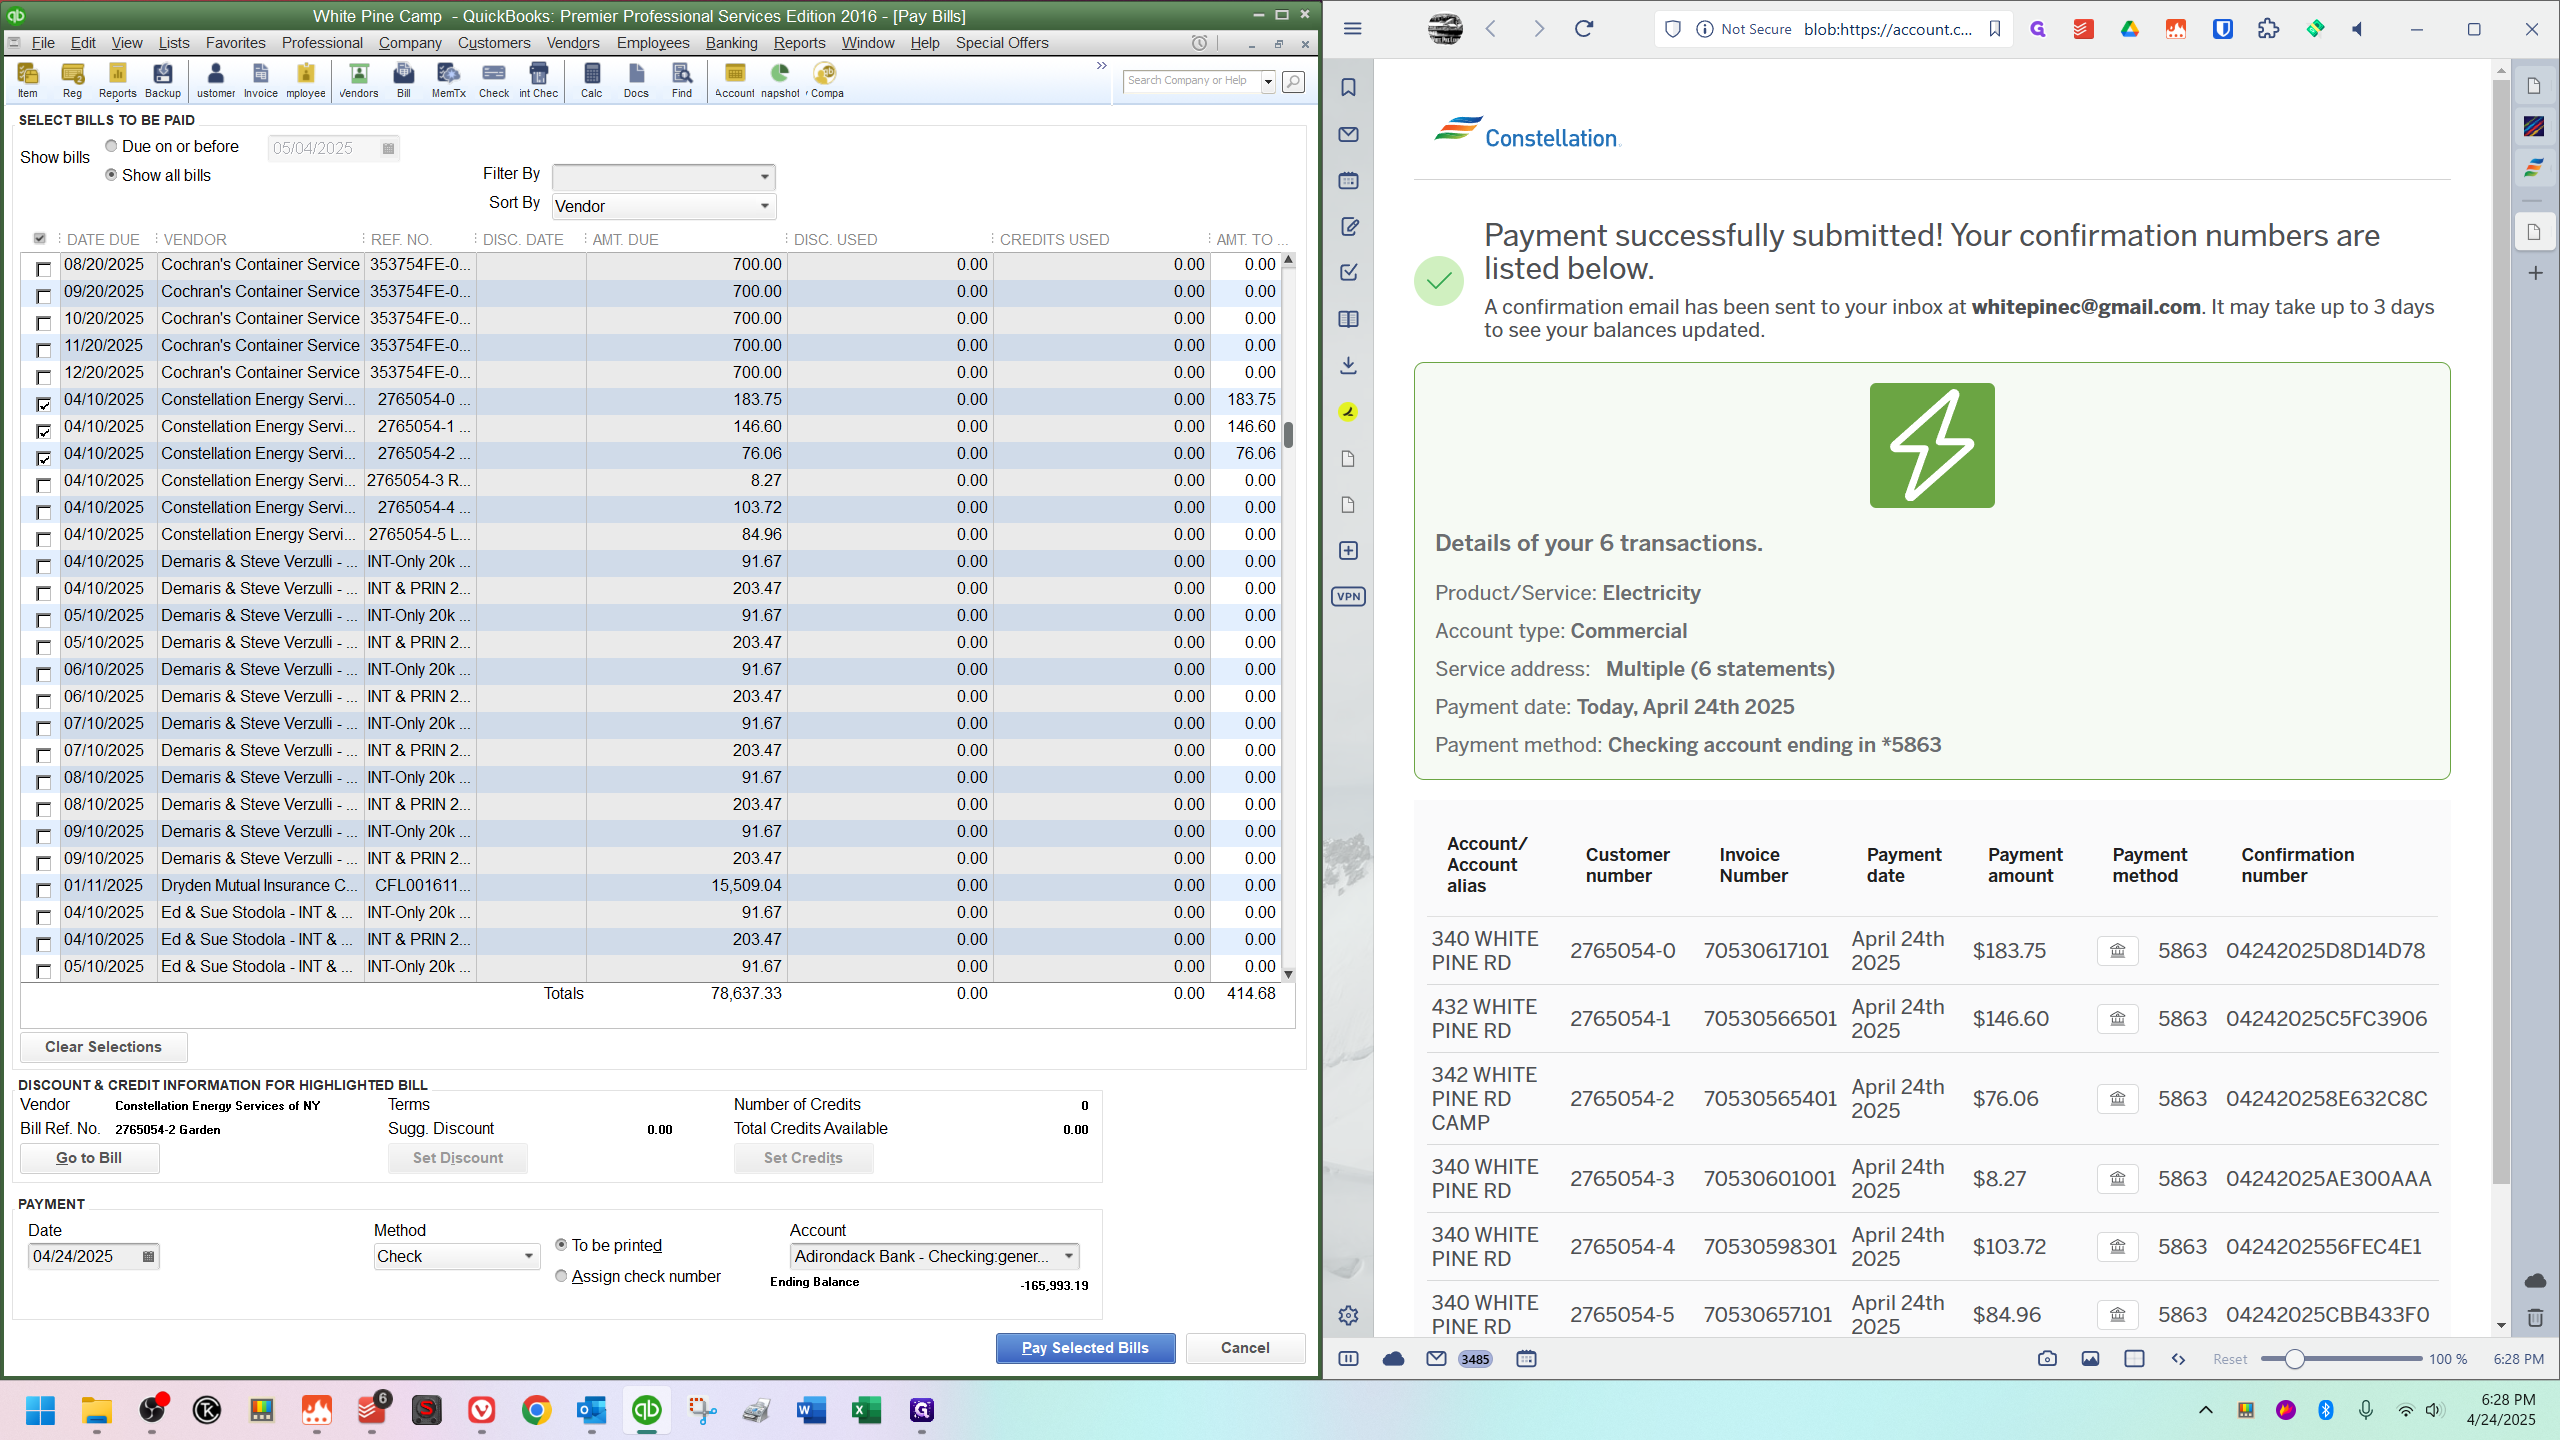
After doing that, look at the bottom right of the chart to see the amount of money.


Ensure the amount matches what you owe the vendor. If it doesn't, you might have clicked something extra or misclicked. Double-check your selections. Then, ignore everything else at the bottom and click "Pay Selected Bills."
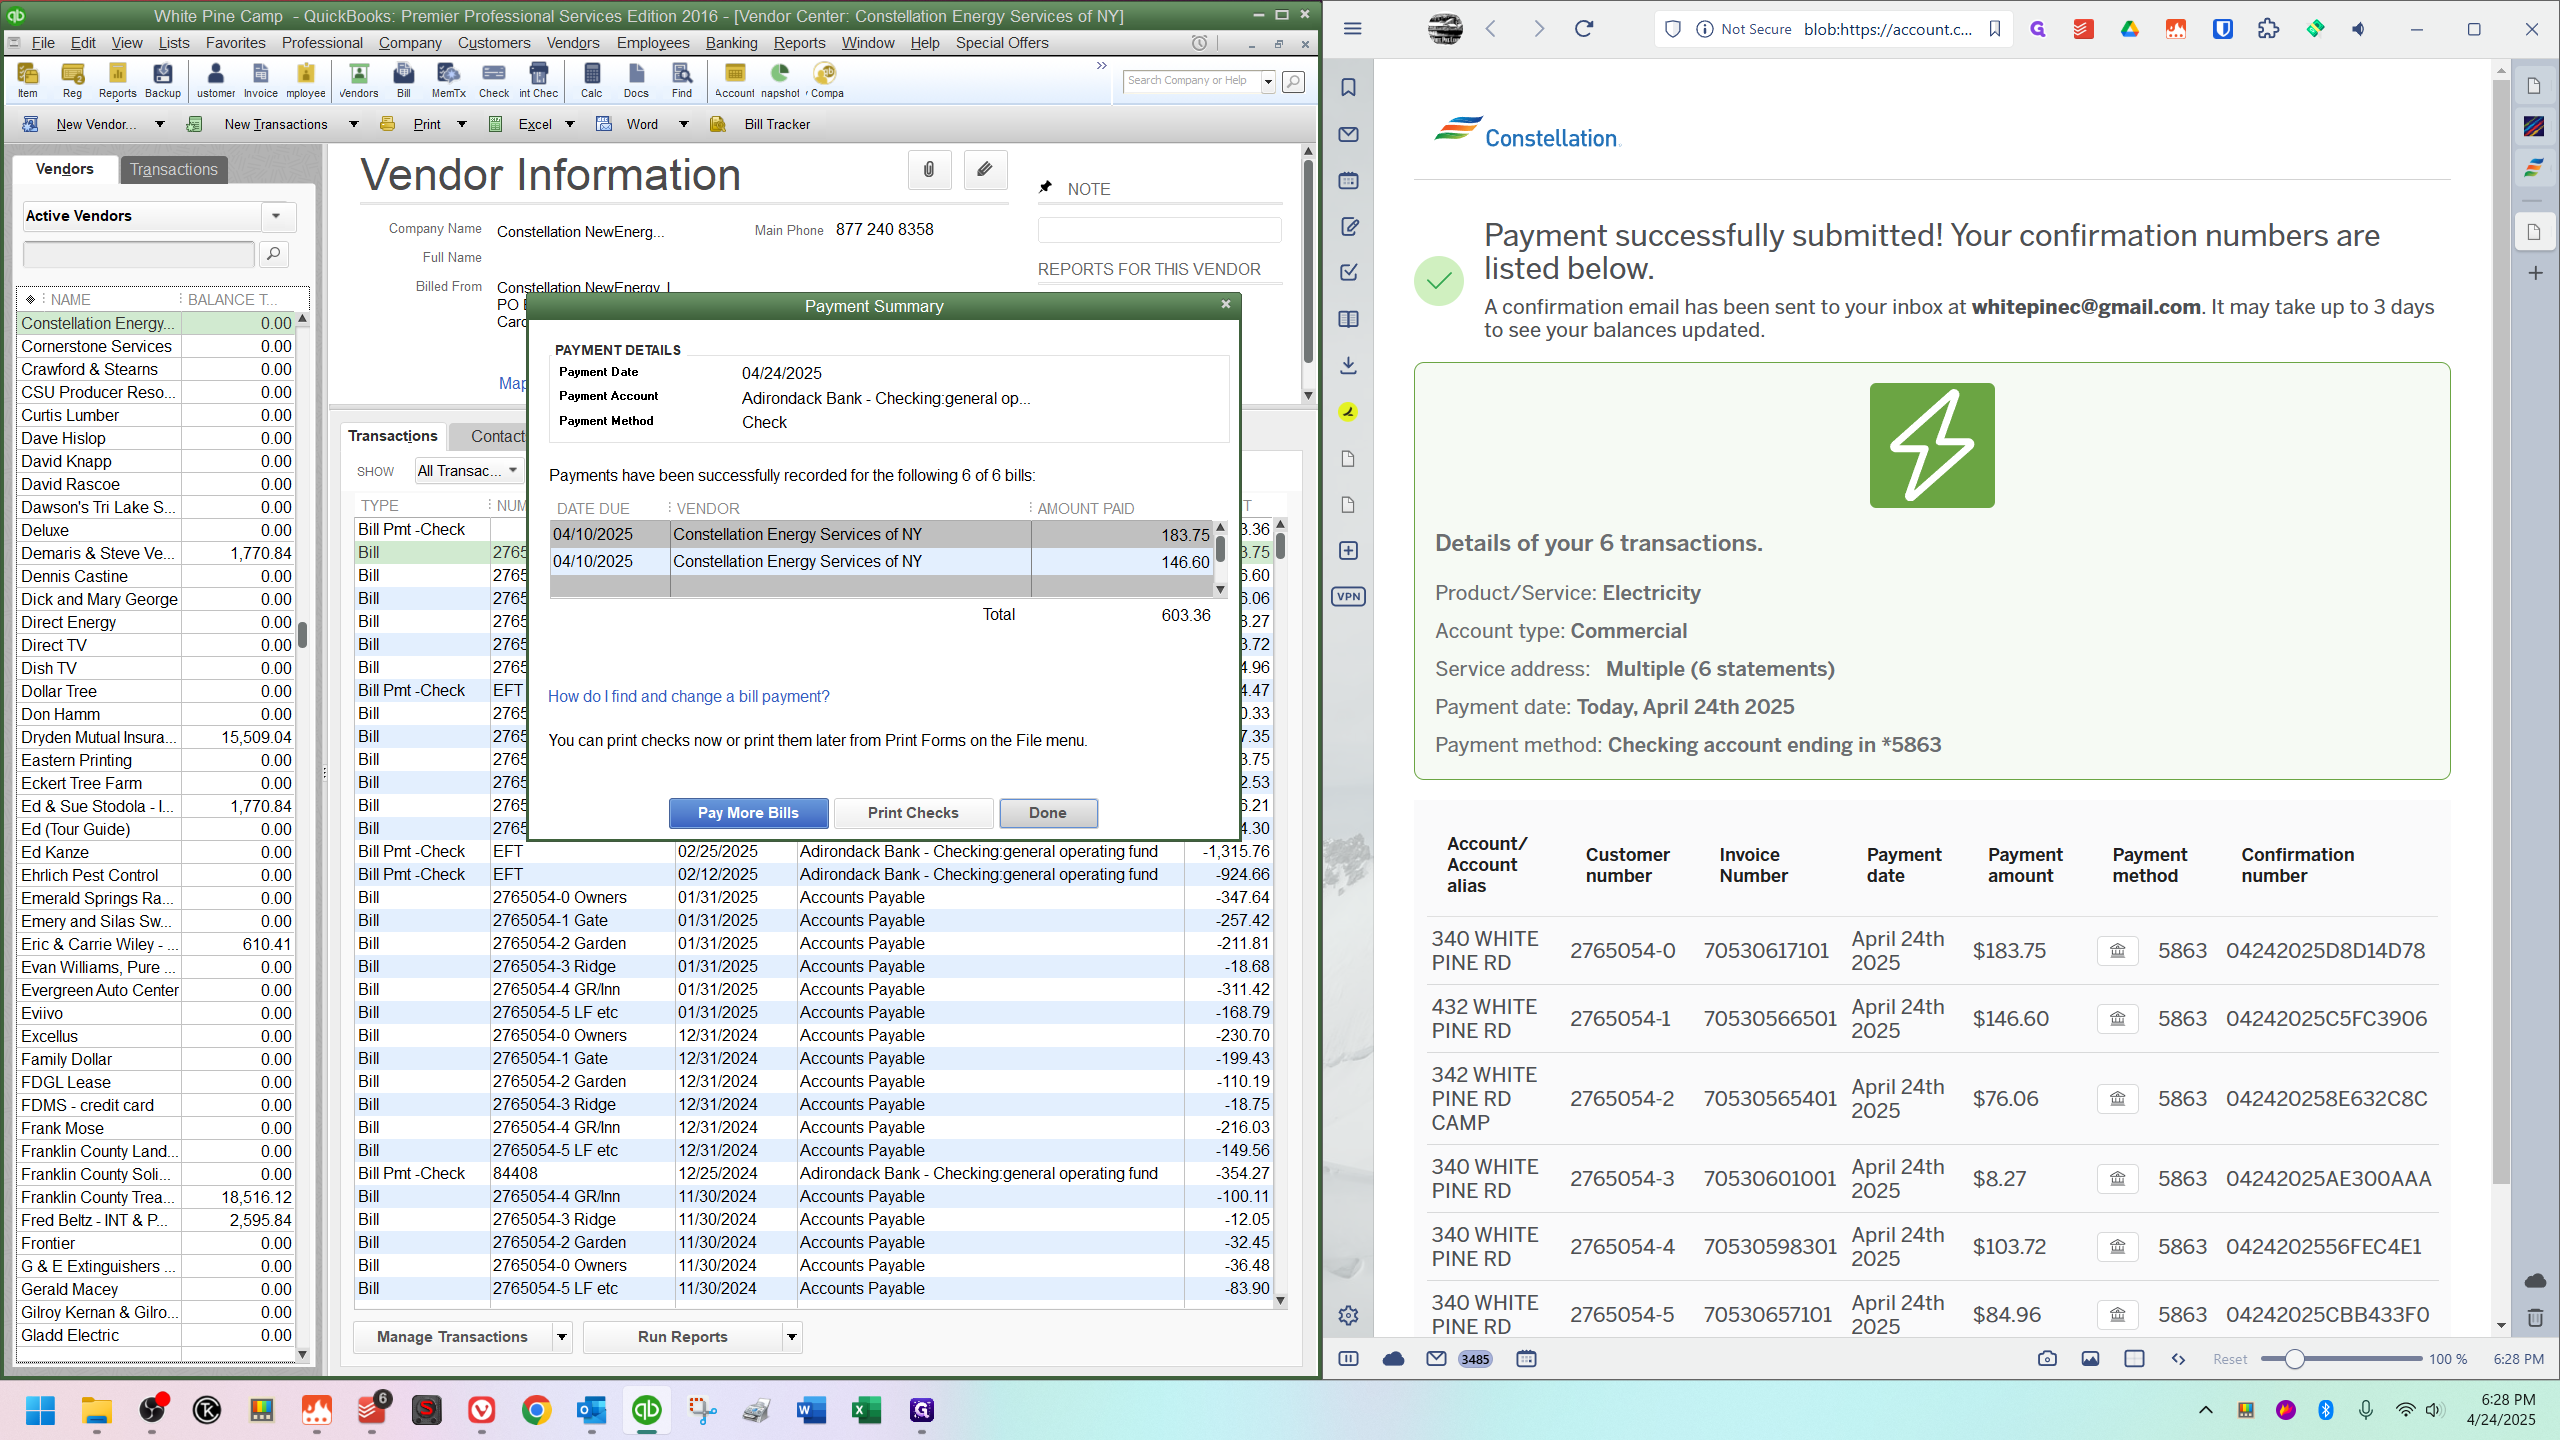
You will see a Payment Summary pop-up. Click Done.
I avoid filling things out there because it would cause everything to default in a certain way, which I don't want. So, I leave it and then bring up this check here.

Click "Print" or check/uncheck the "Print Later" box. Remove the default check number, type "EFT," then save and close.

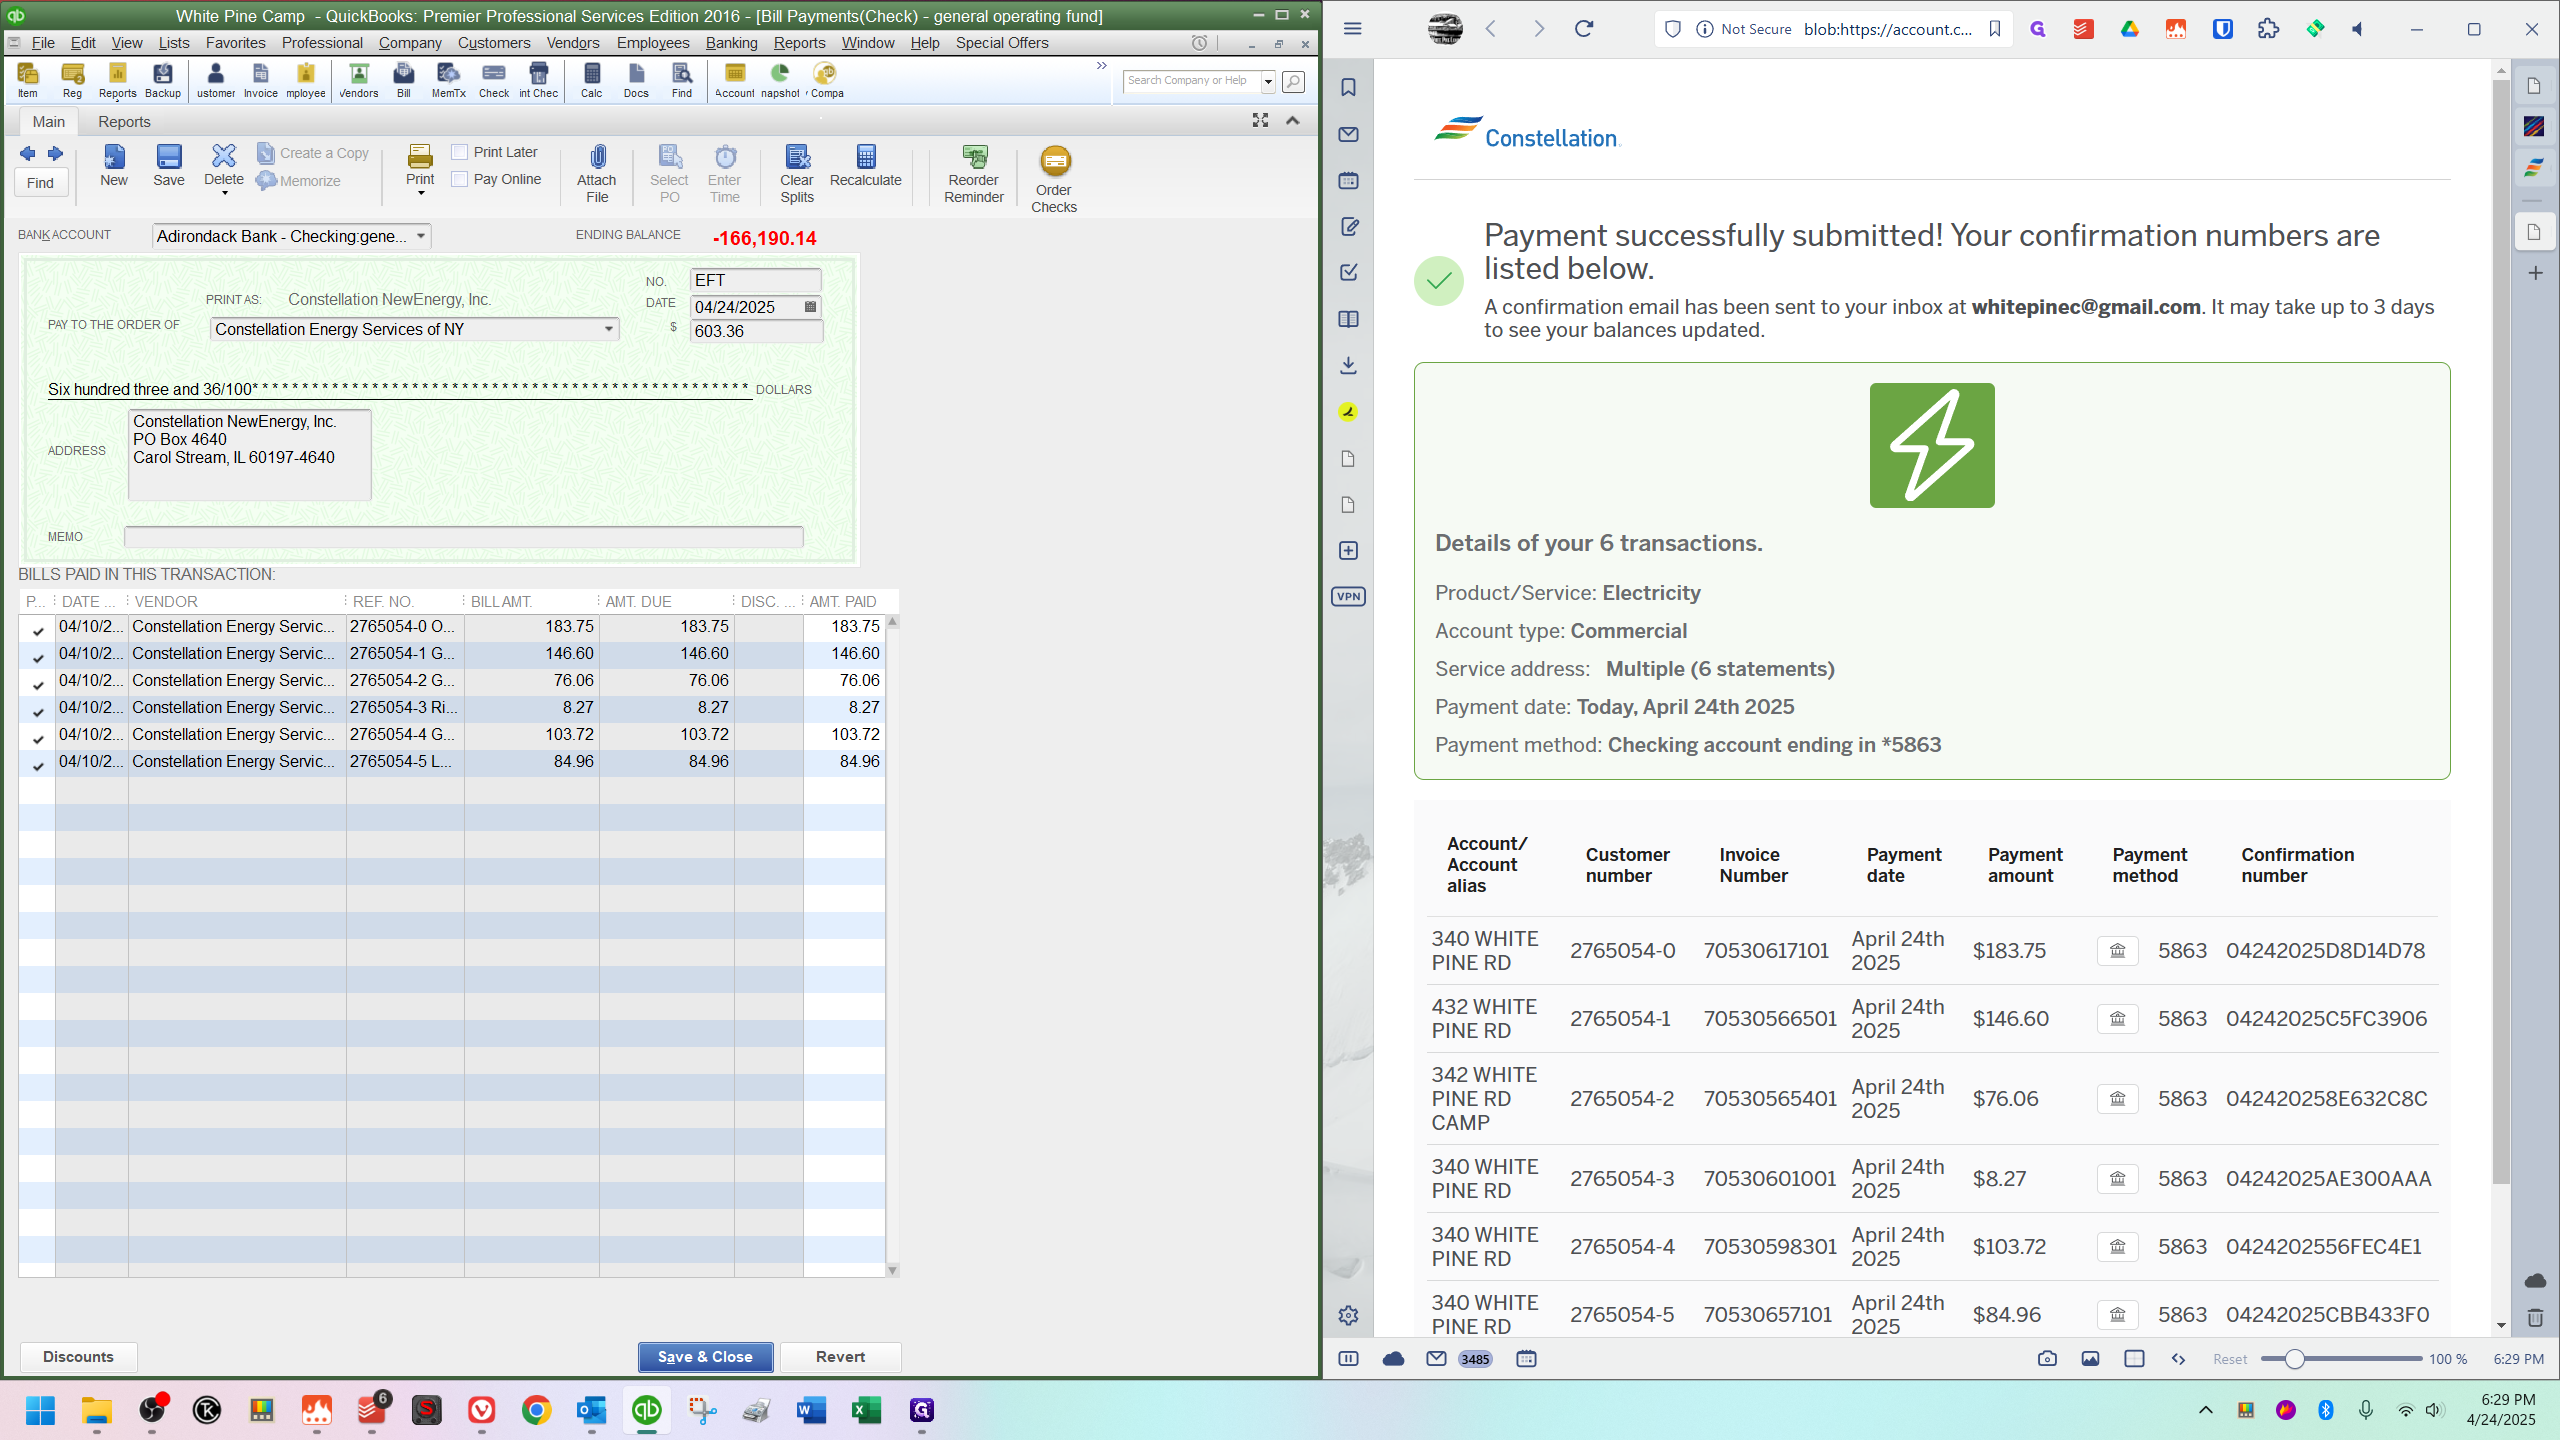
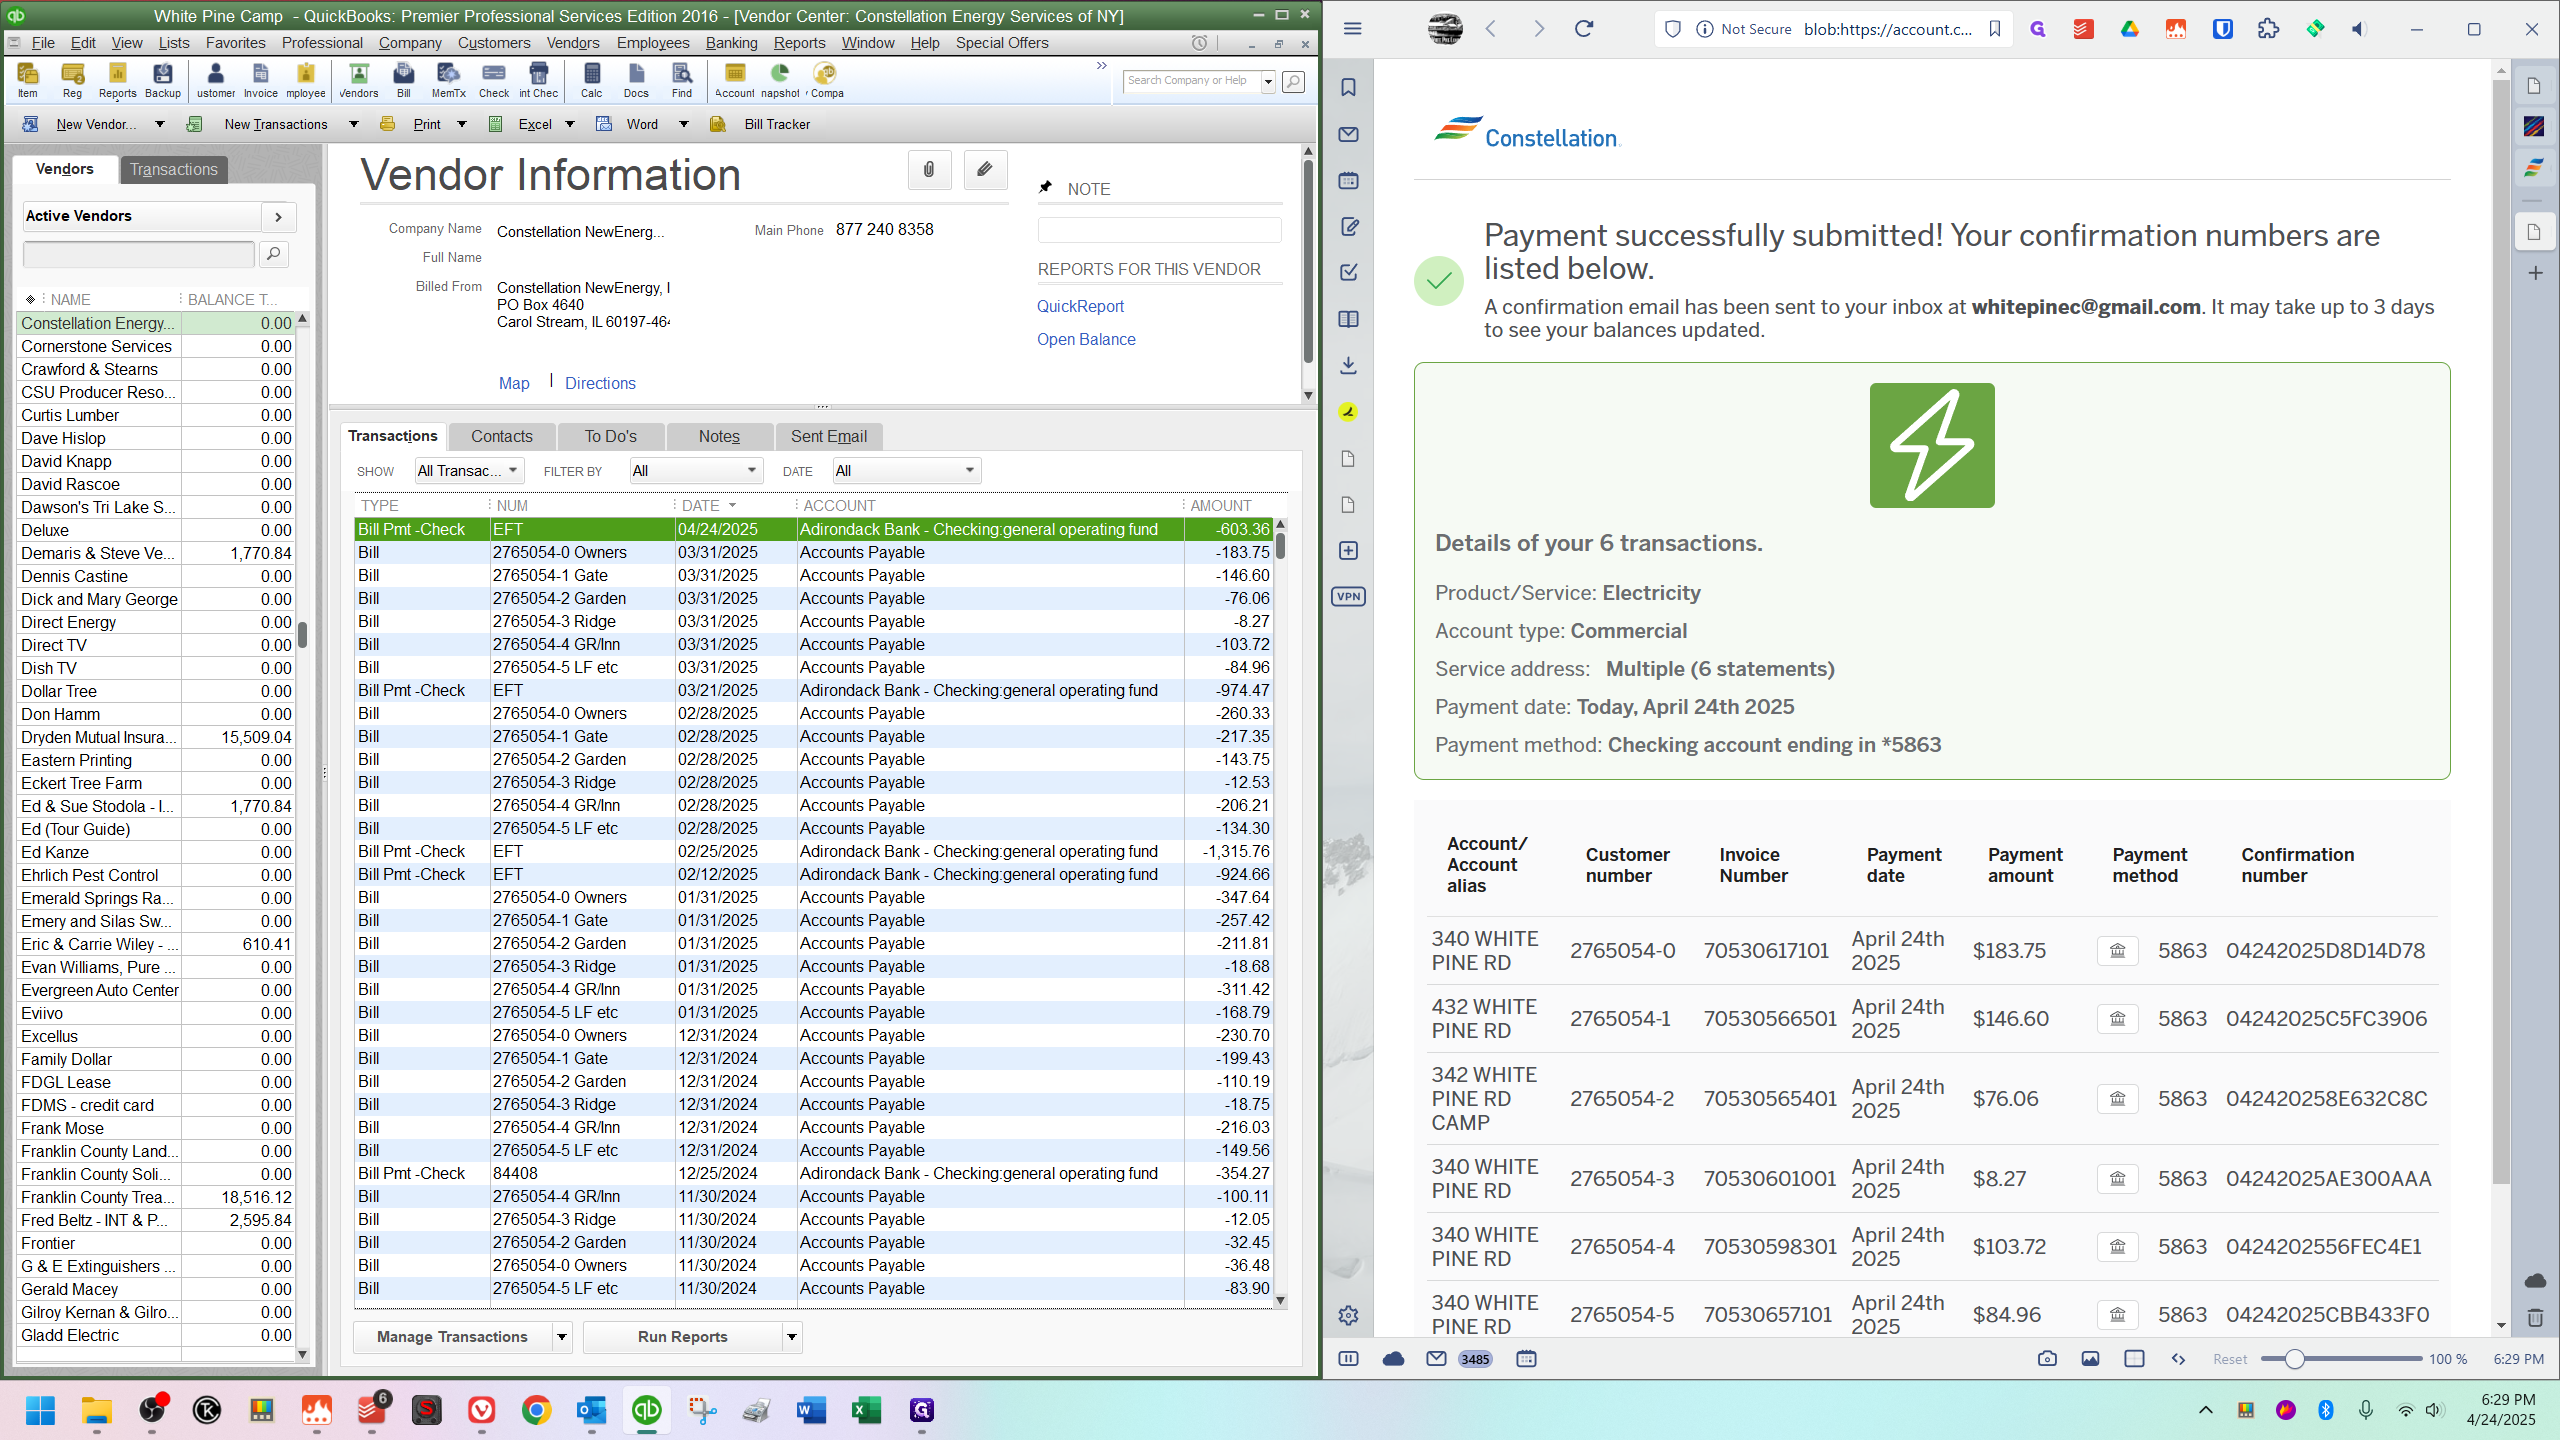
Their account balance should now be zero, and the check number for that payment should indicate EFT.