Icon

How to Perform a Mass Change in Windchill

Learn how to execute a mass change in PTC Windchill PLM, including creating an ECR and ECN, revising objects, and updating multiple BOMs simultaneously.

By Evinia Ryckoort

This guide walks you through the process of performing a mass change in Windchill. It covers creating a Change Request, adding affected objects, generating an ERP Change Notice, updating the bill of materials for multiple objects simultaneously using the Perform Mass Change function, and finalizing the change tasks.

This guide is intended for engineering change administrators, technical change managers, or PLM administrators responsible for executing structural and process updates to multiple parts or BOMs simultaneously within PTC Windchill.

Create a New Change Request
1
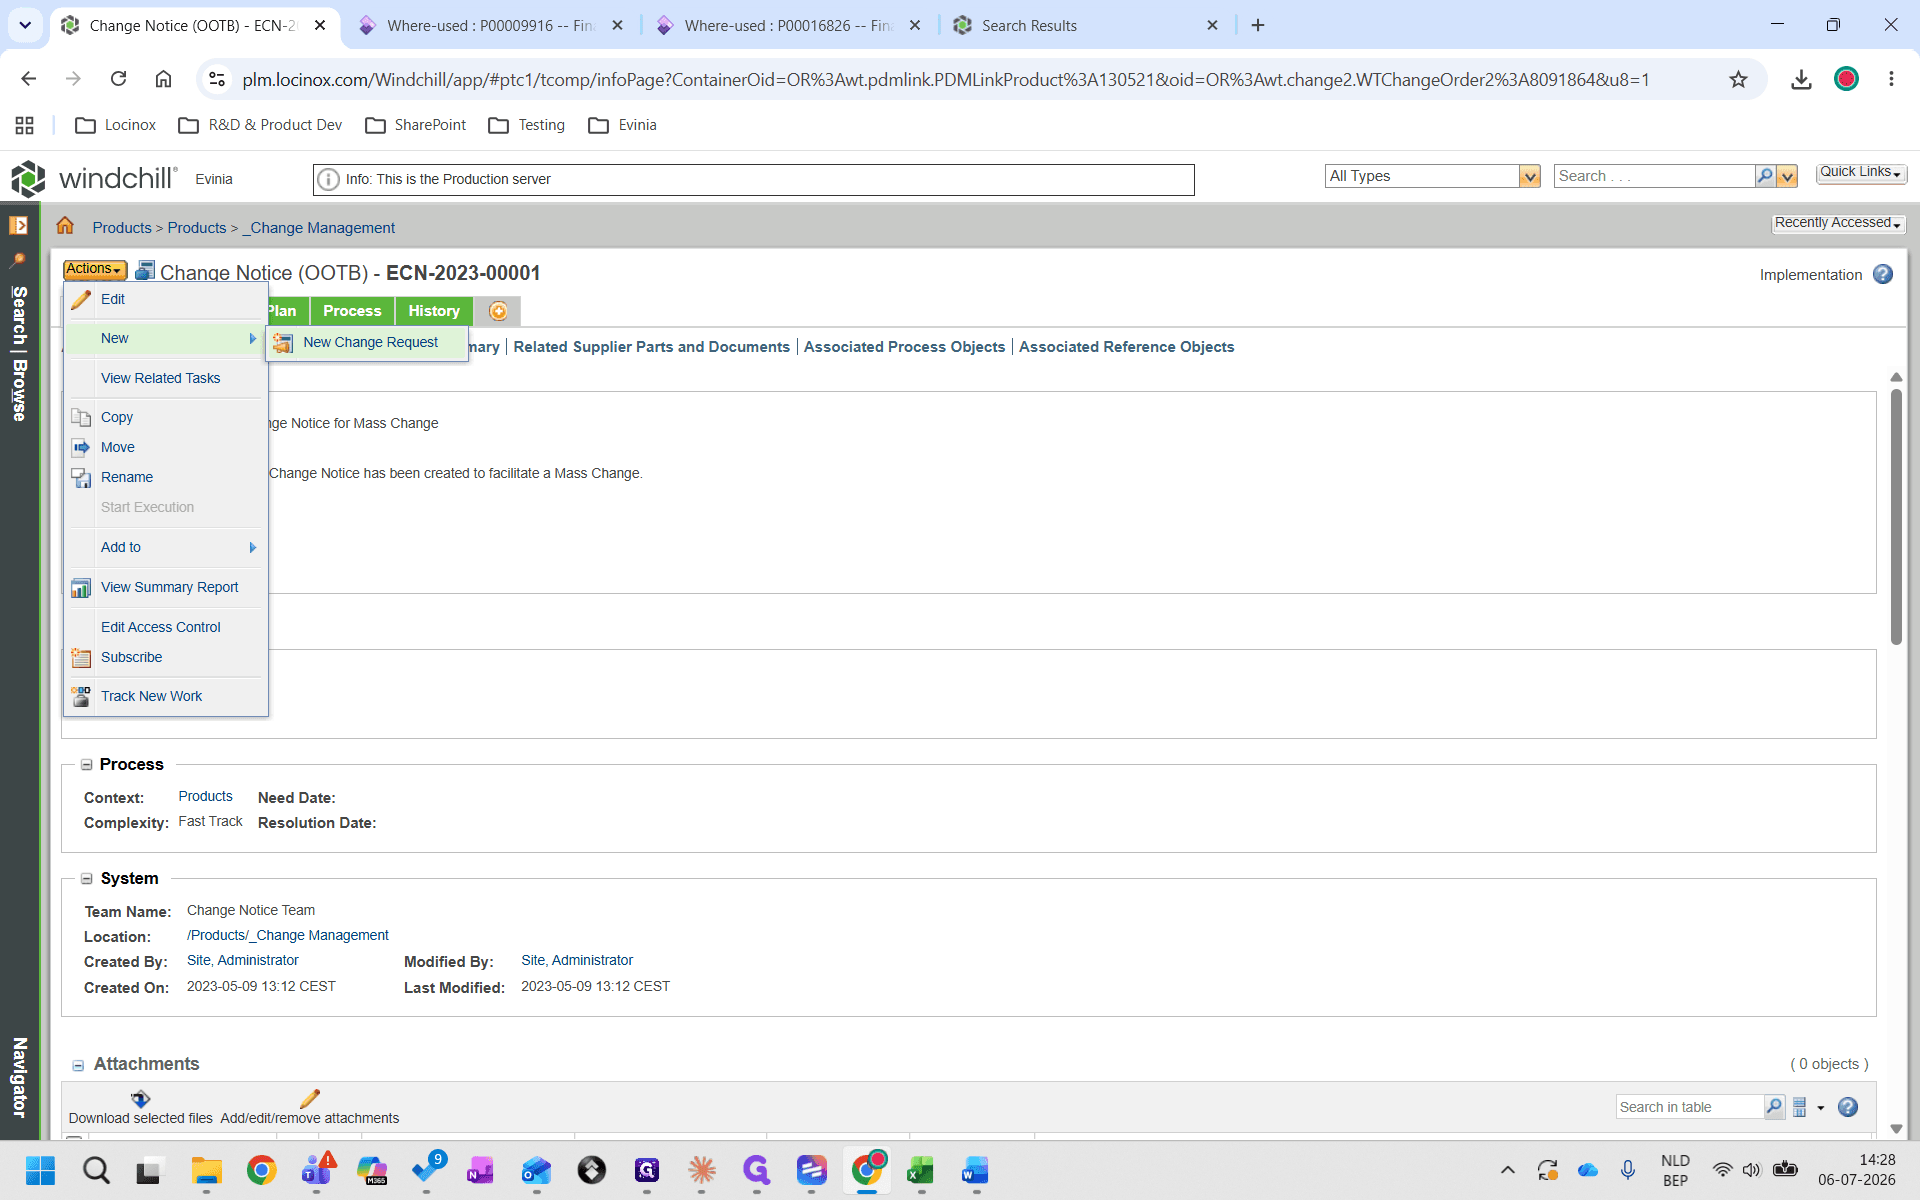
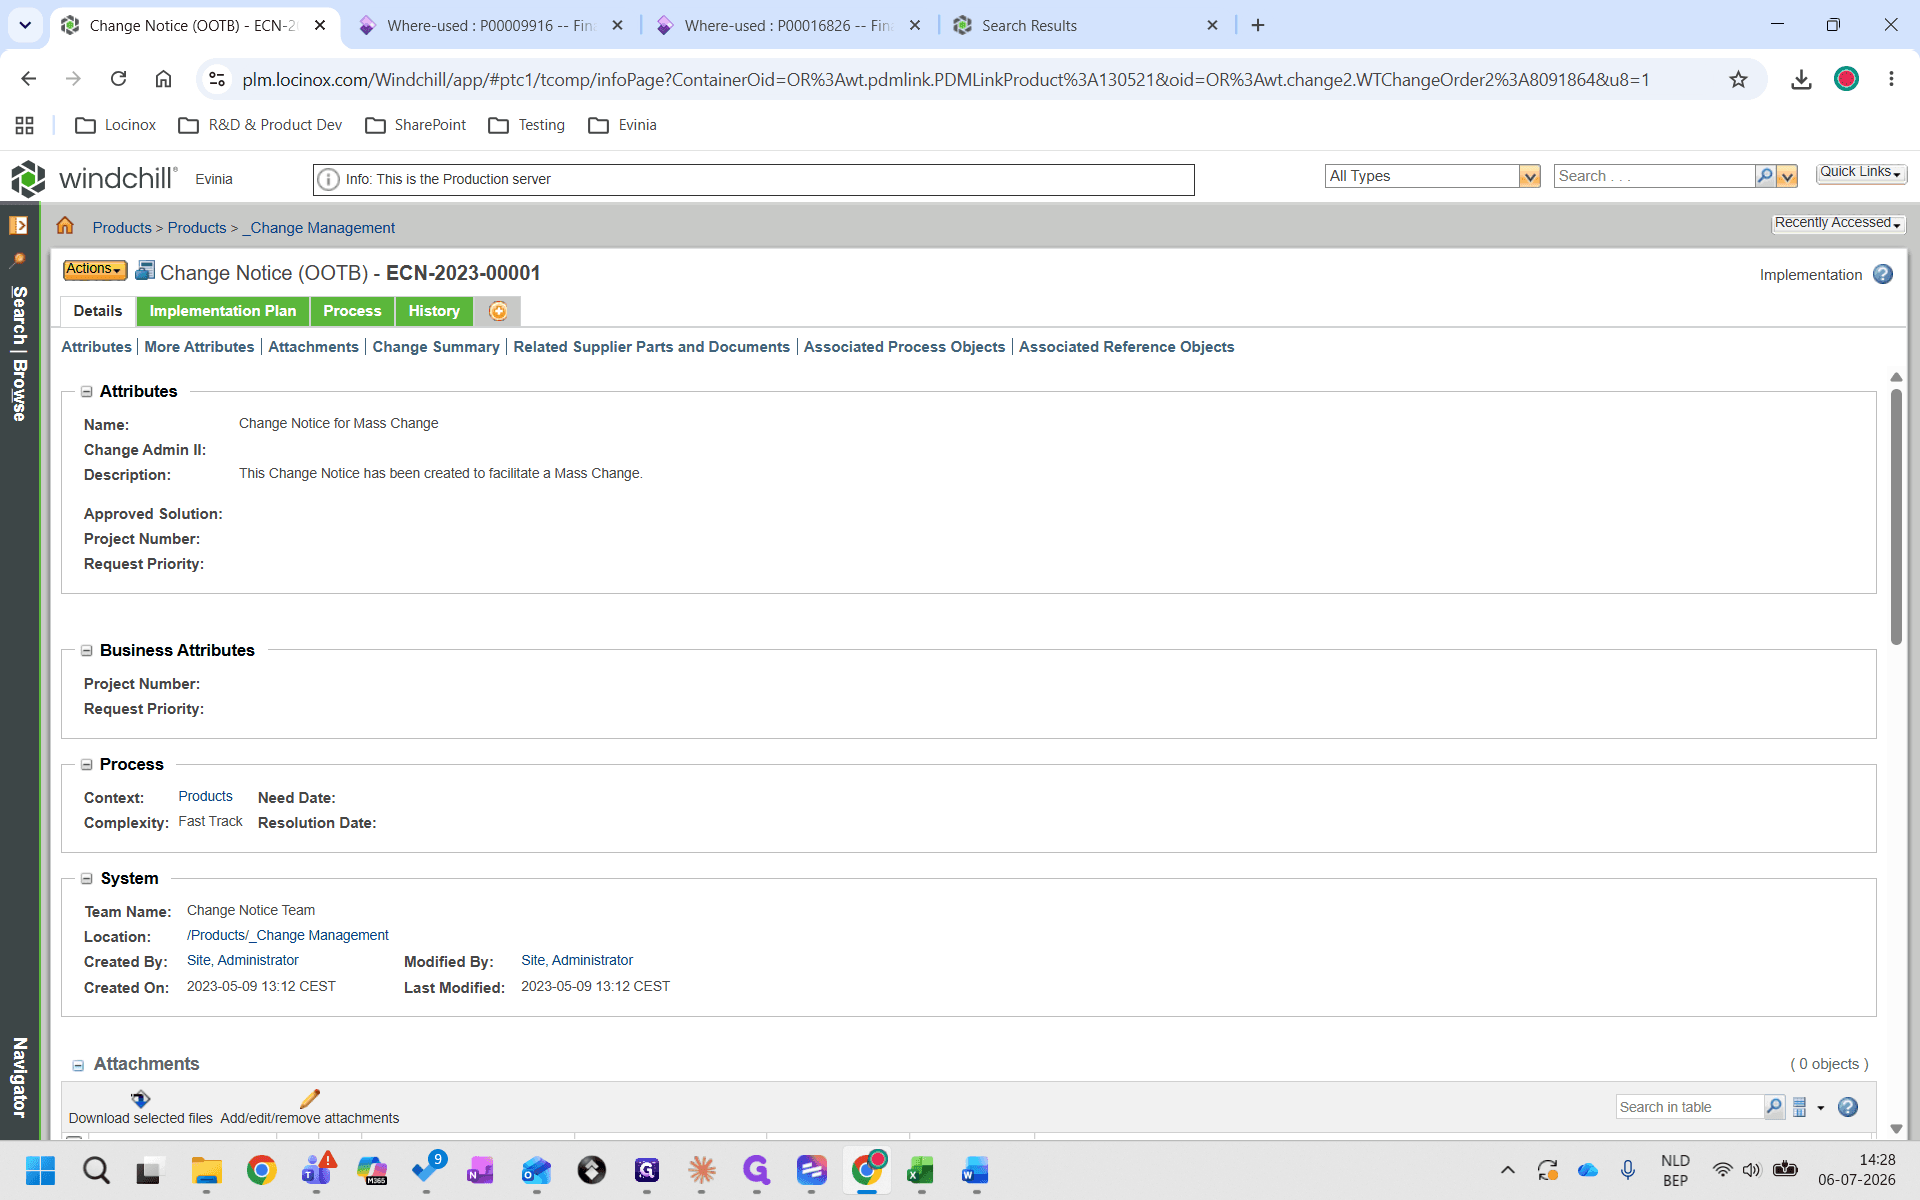
Open the Actions menu from your existing context.
Step #1: Open the Actions menu from your existing context.
2
Select New Change Request.
Step #2: Select New Change Request.

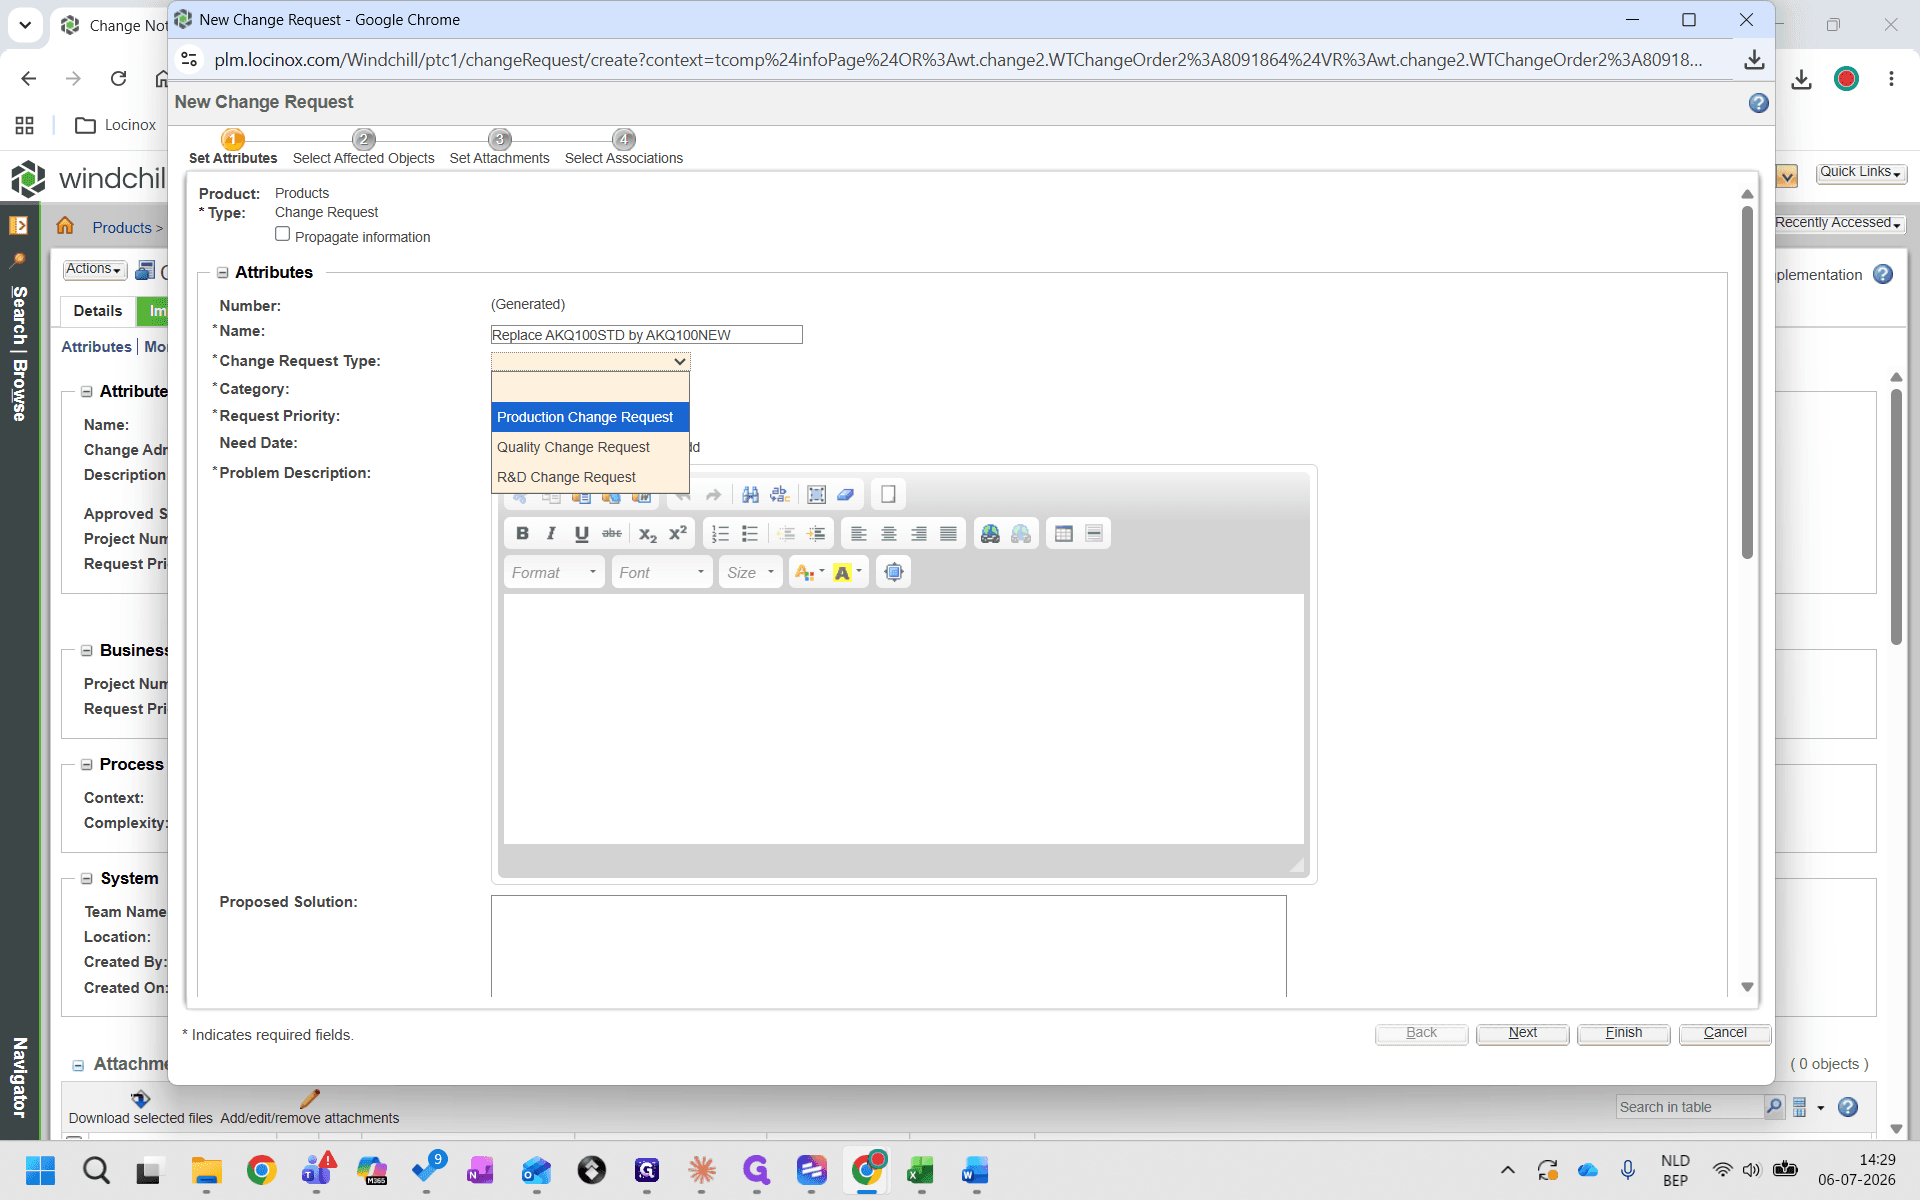
Request Type

Description

Production Change Request

Used for changes affecting active manufacturing and assembly processes.

Quality Change Request

Used to address defects, non-conformances, or compliance issues.

R&D Change Request

Used for design modifications during the engineering and development phases.

3
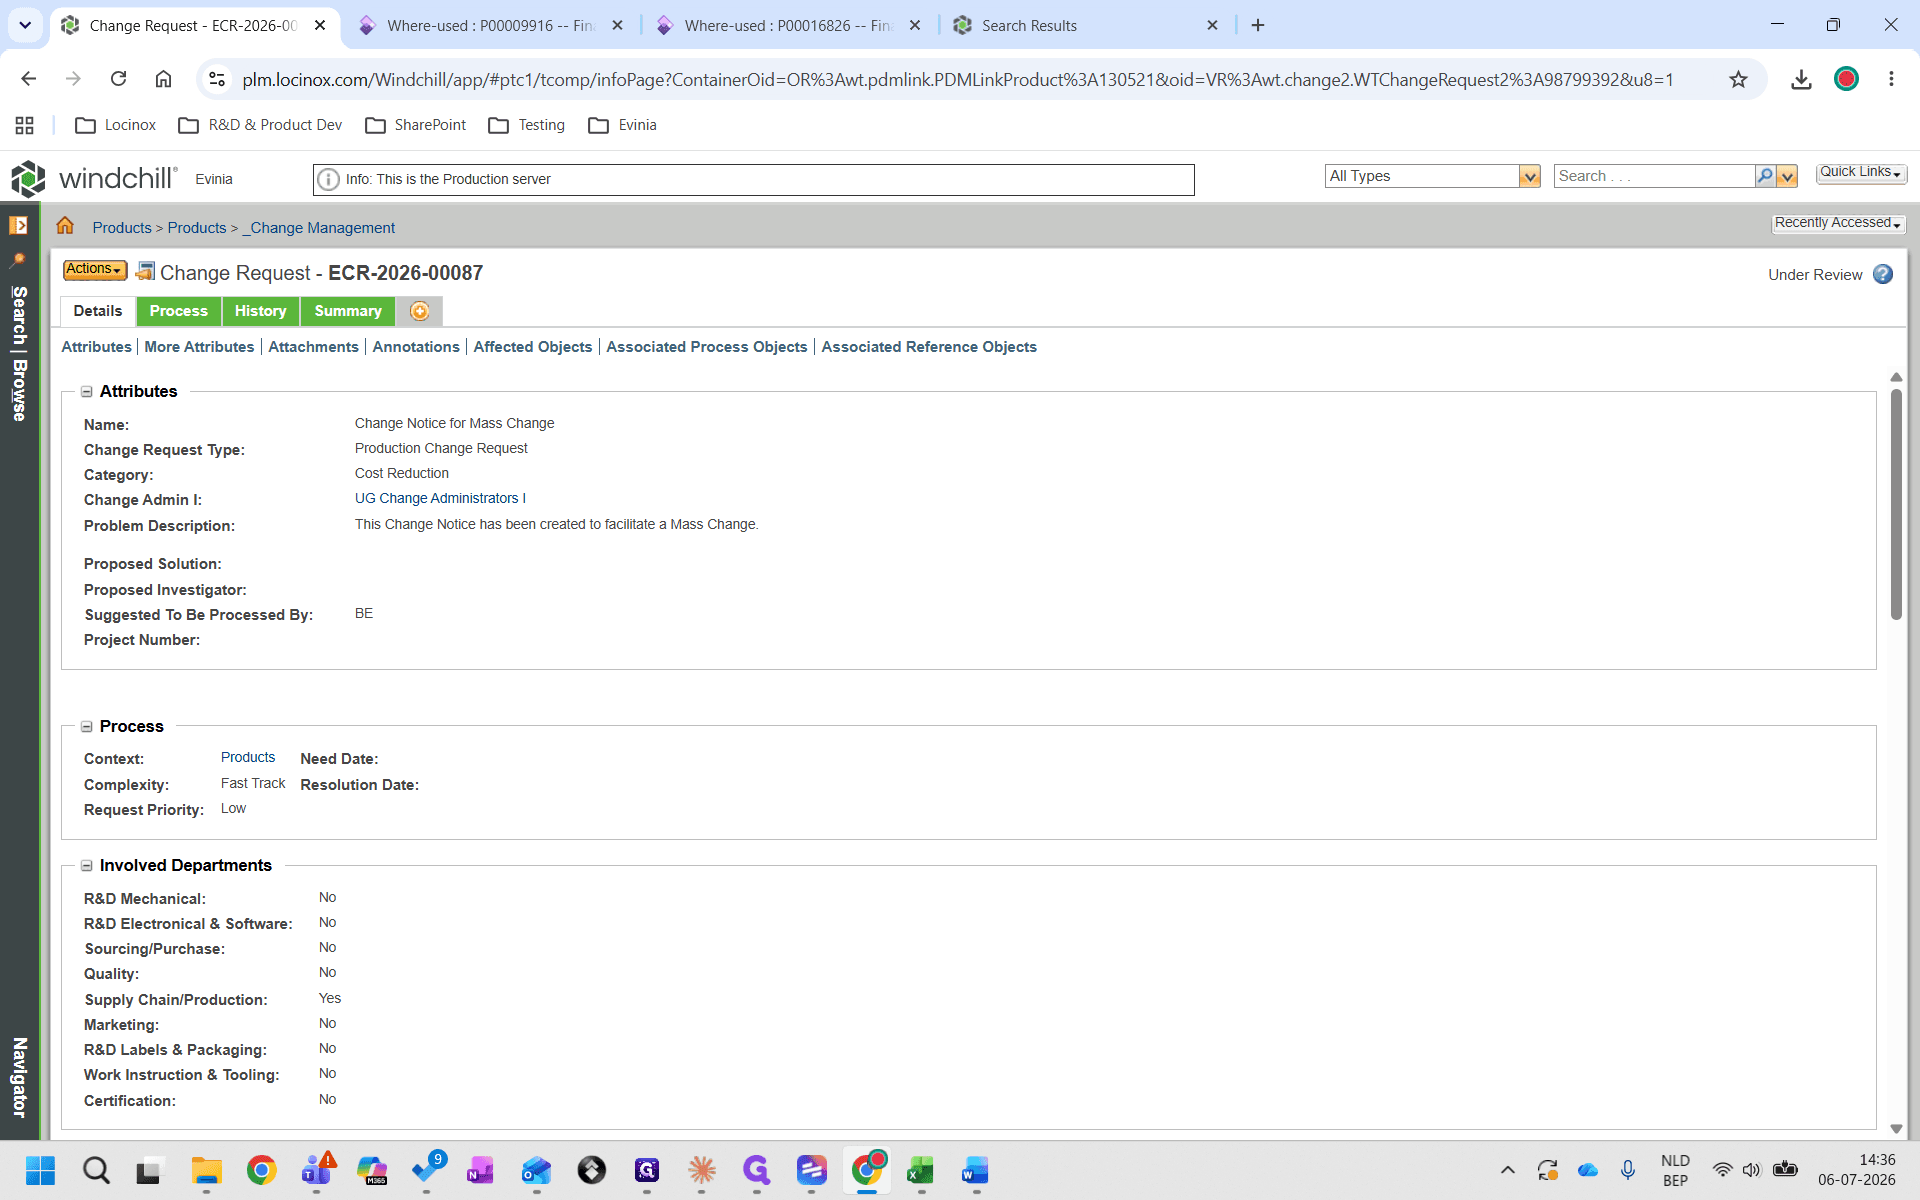
Set the change request type from the options above (e.g., Production Change Request).
Step #3: Set the change request type from the options above (e.g., Production Change Request).
4
Enter a brief description for your mass change in the Proposed Solution field.
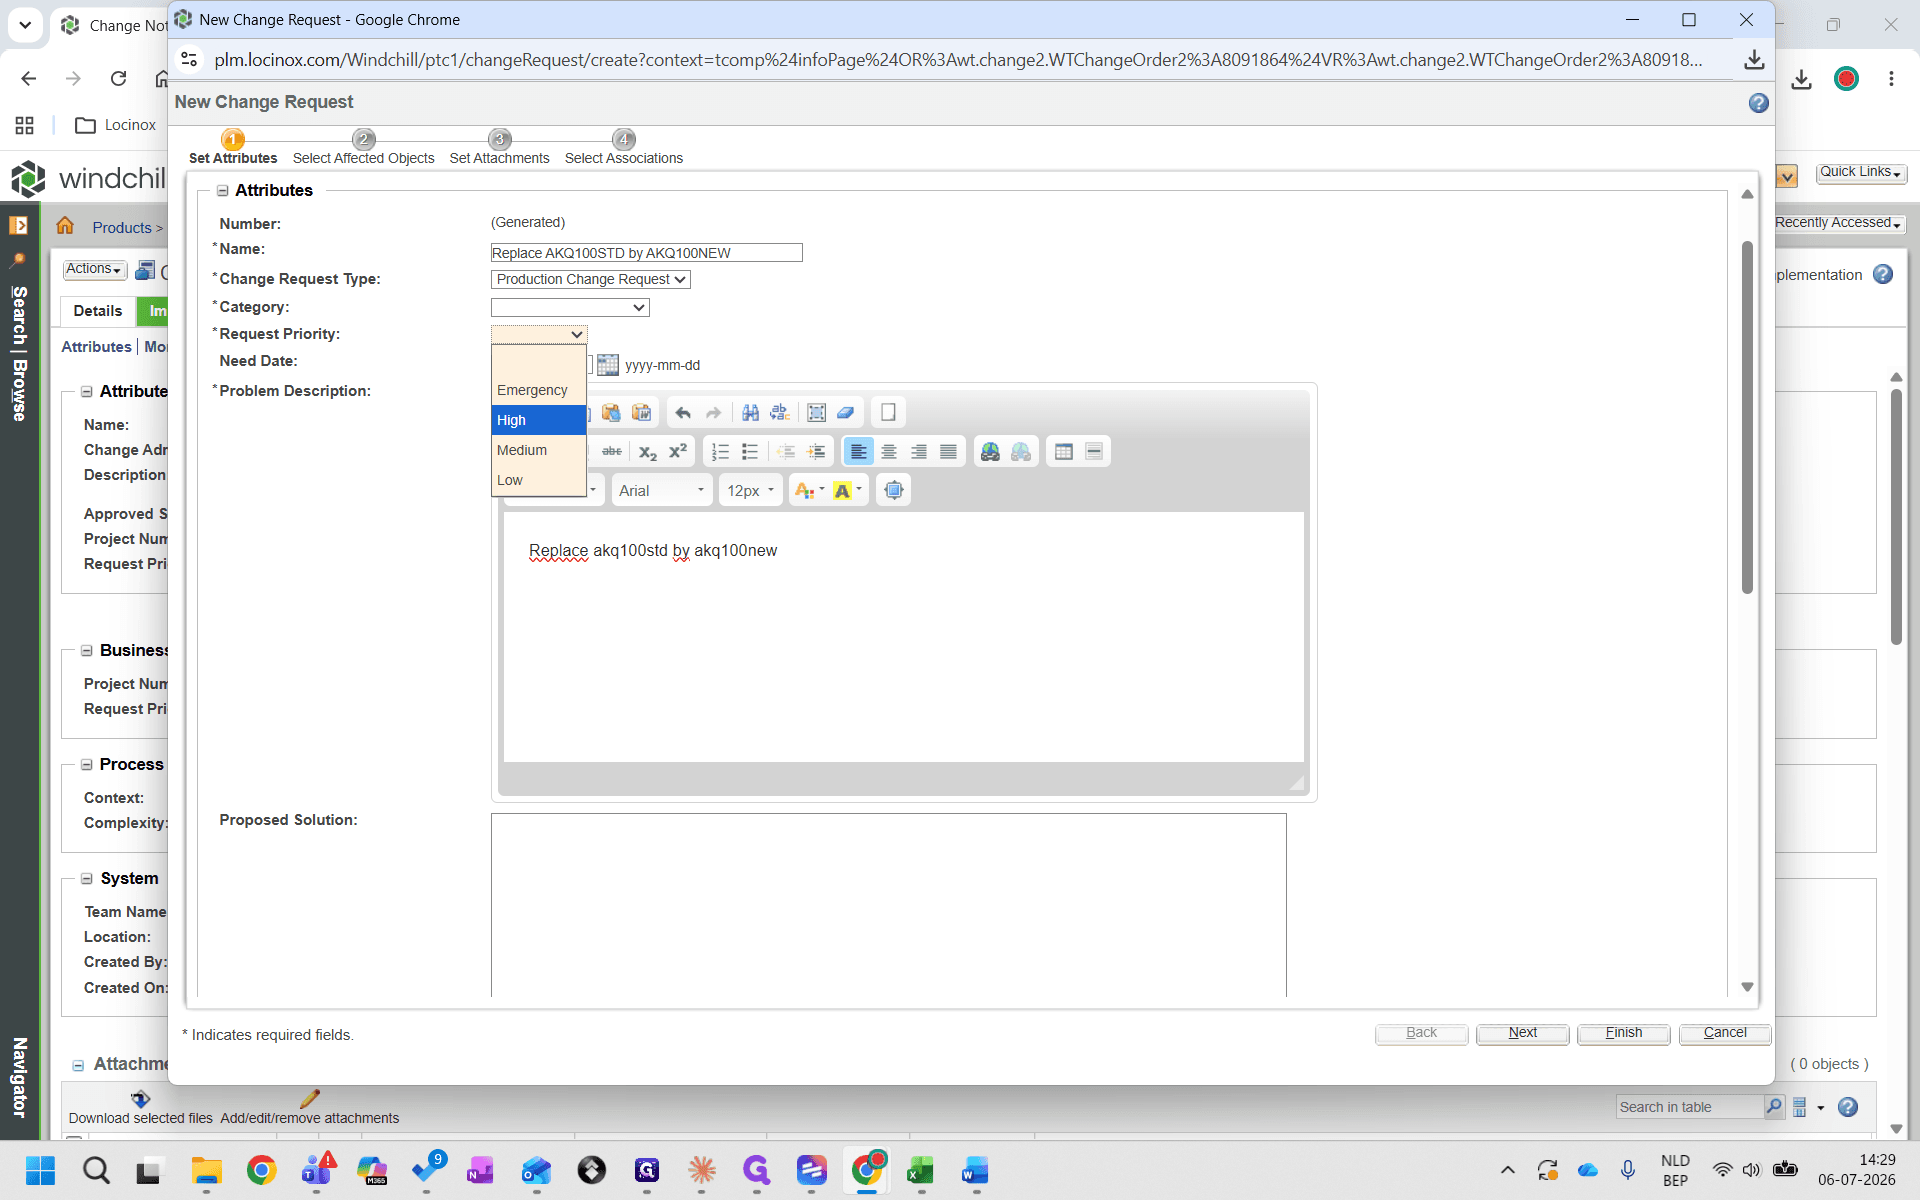
5
Set the Request Priority to High.
Step #5: Set the Request Priority to High.
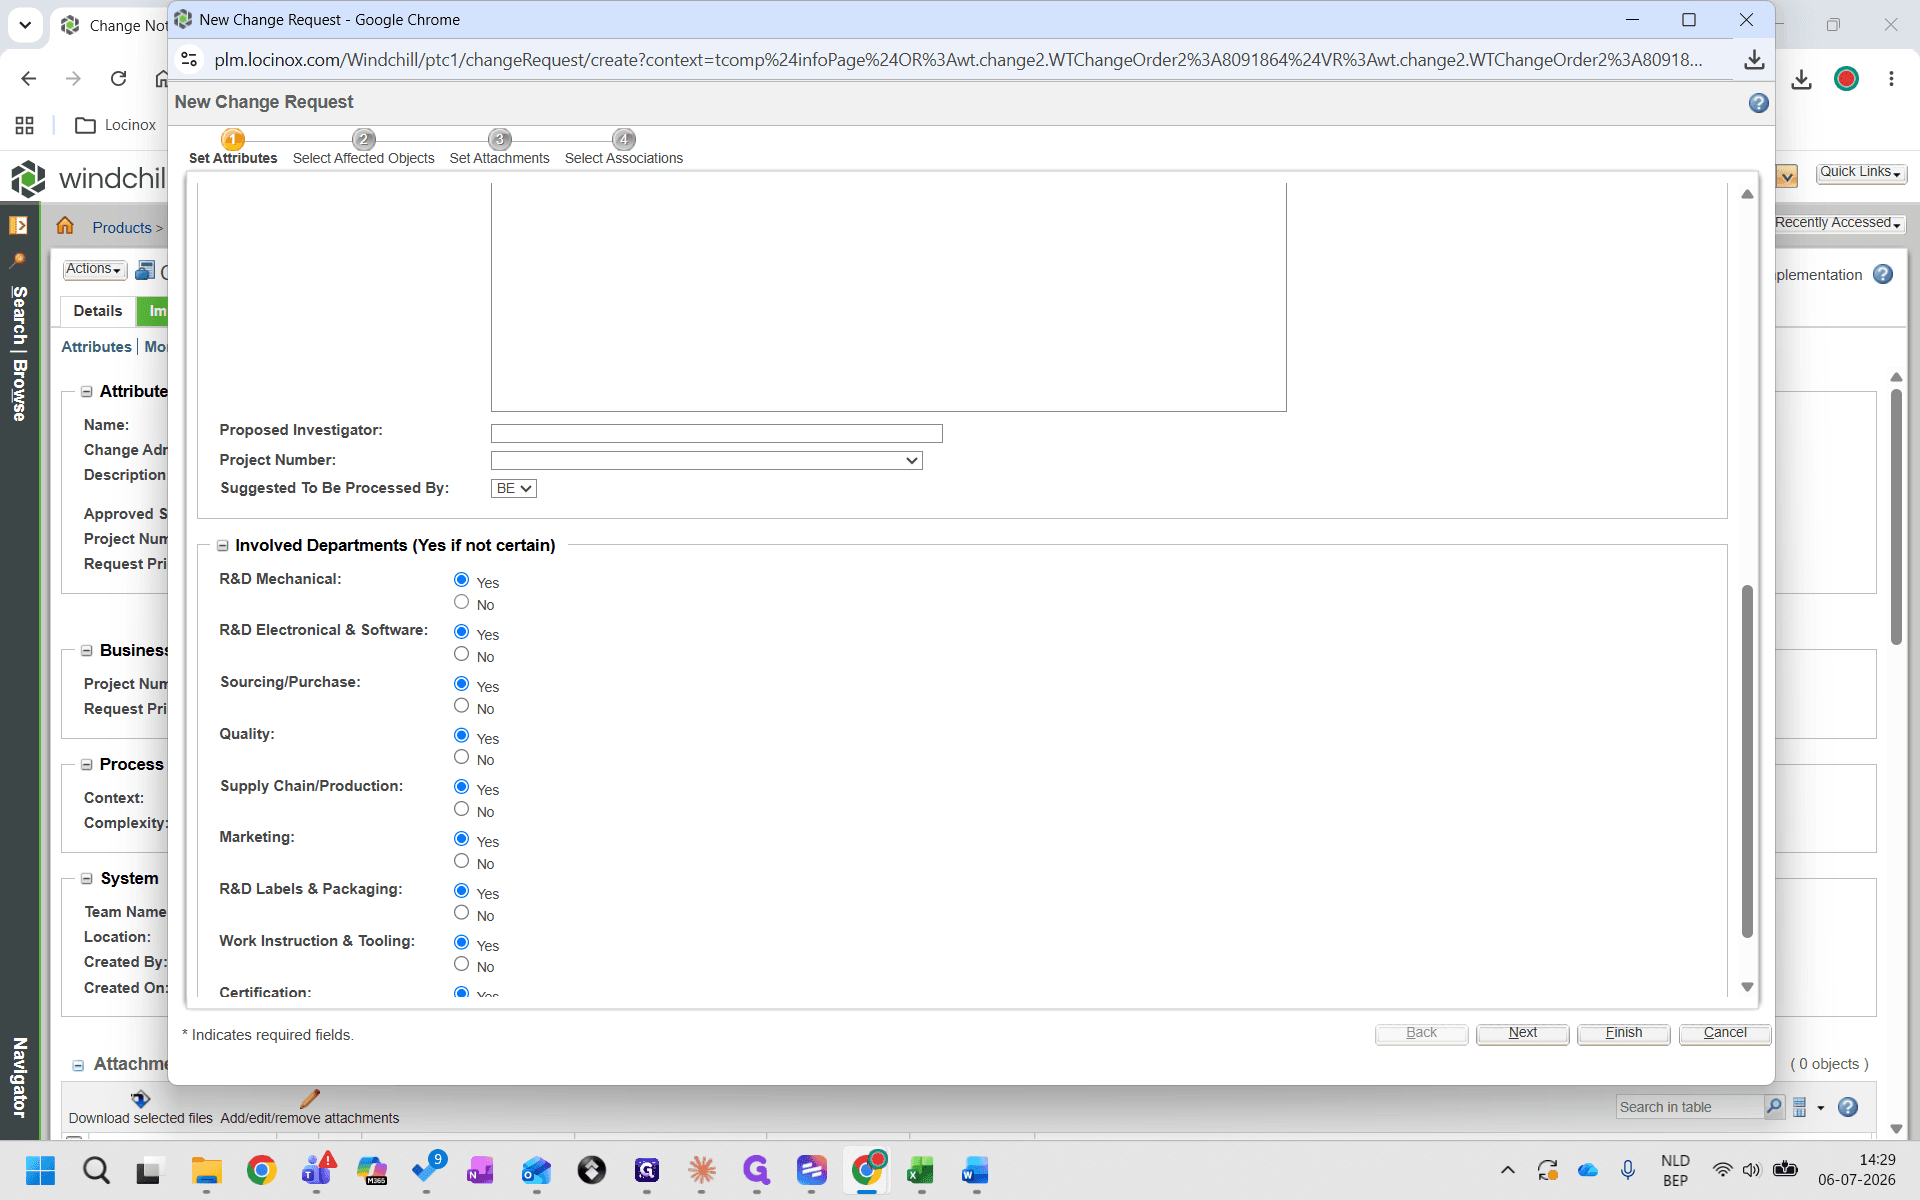
6
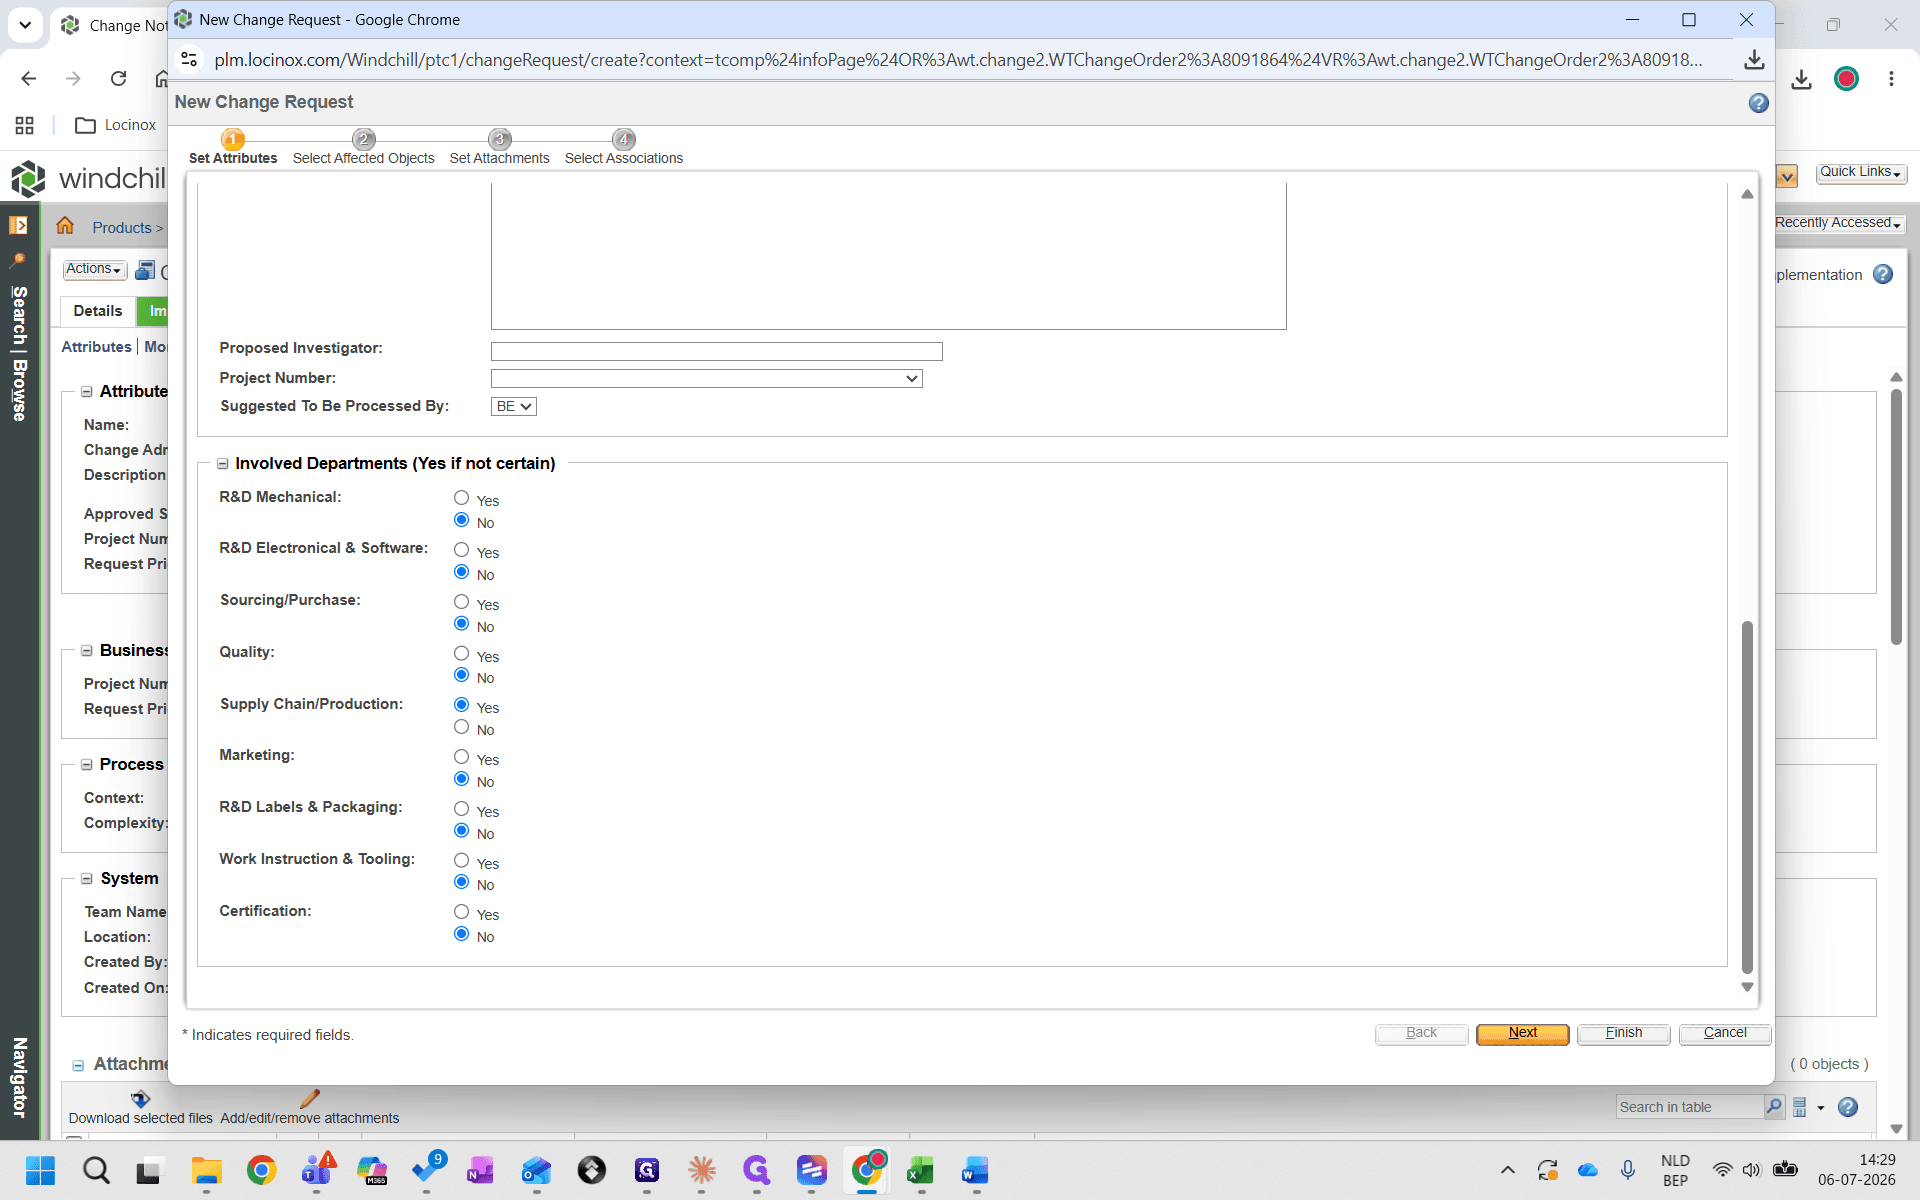
Scroll down to the Involved Departments section and indicate which departments are involved by selecting Yes or No for each.
Step #6: Scroll down to the Involved Departments section and indicate which departments are involved by selecting Yes or No for each.
7
Click Next.
Step #7: Click Next.

Add Affected Objects

8
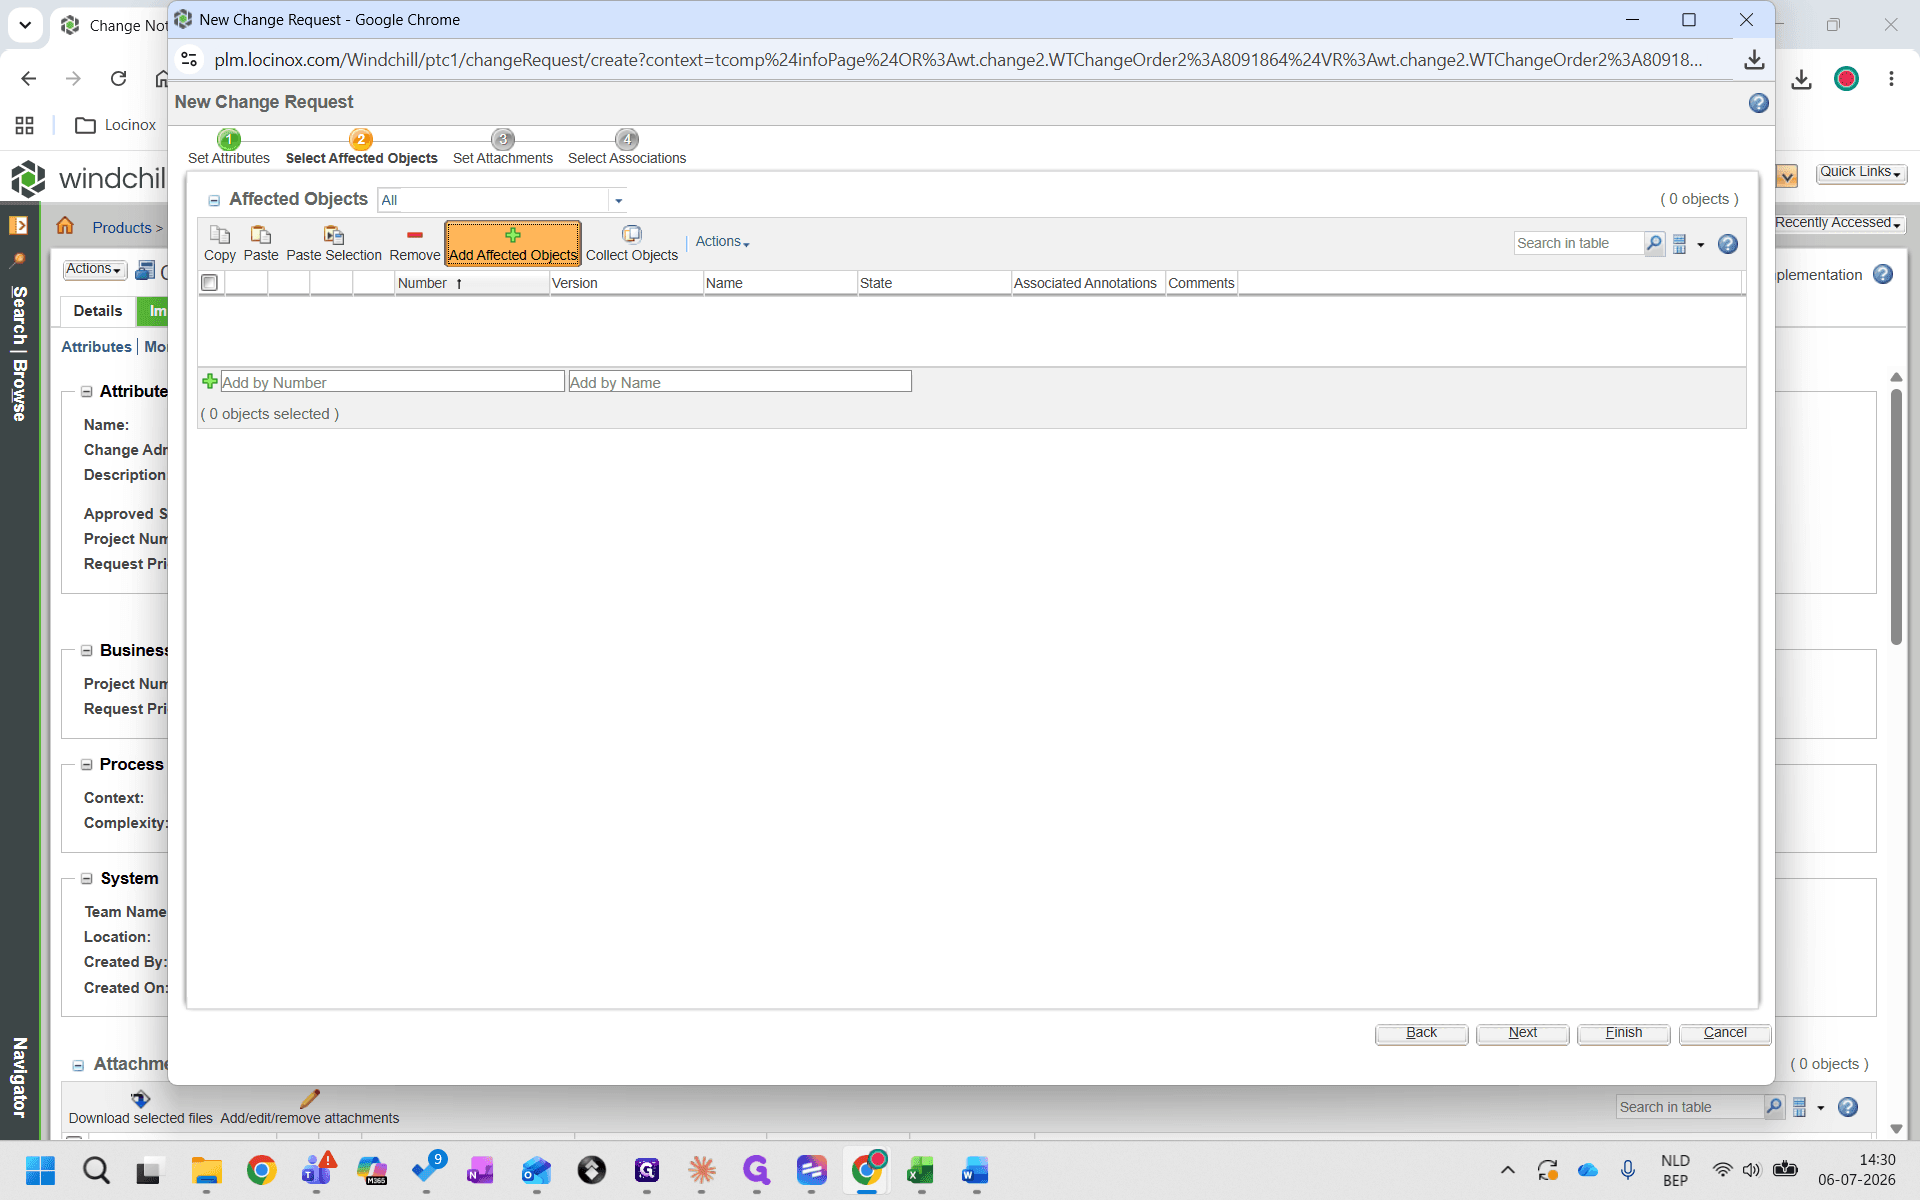
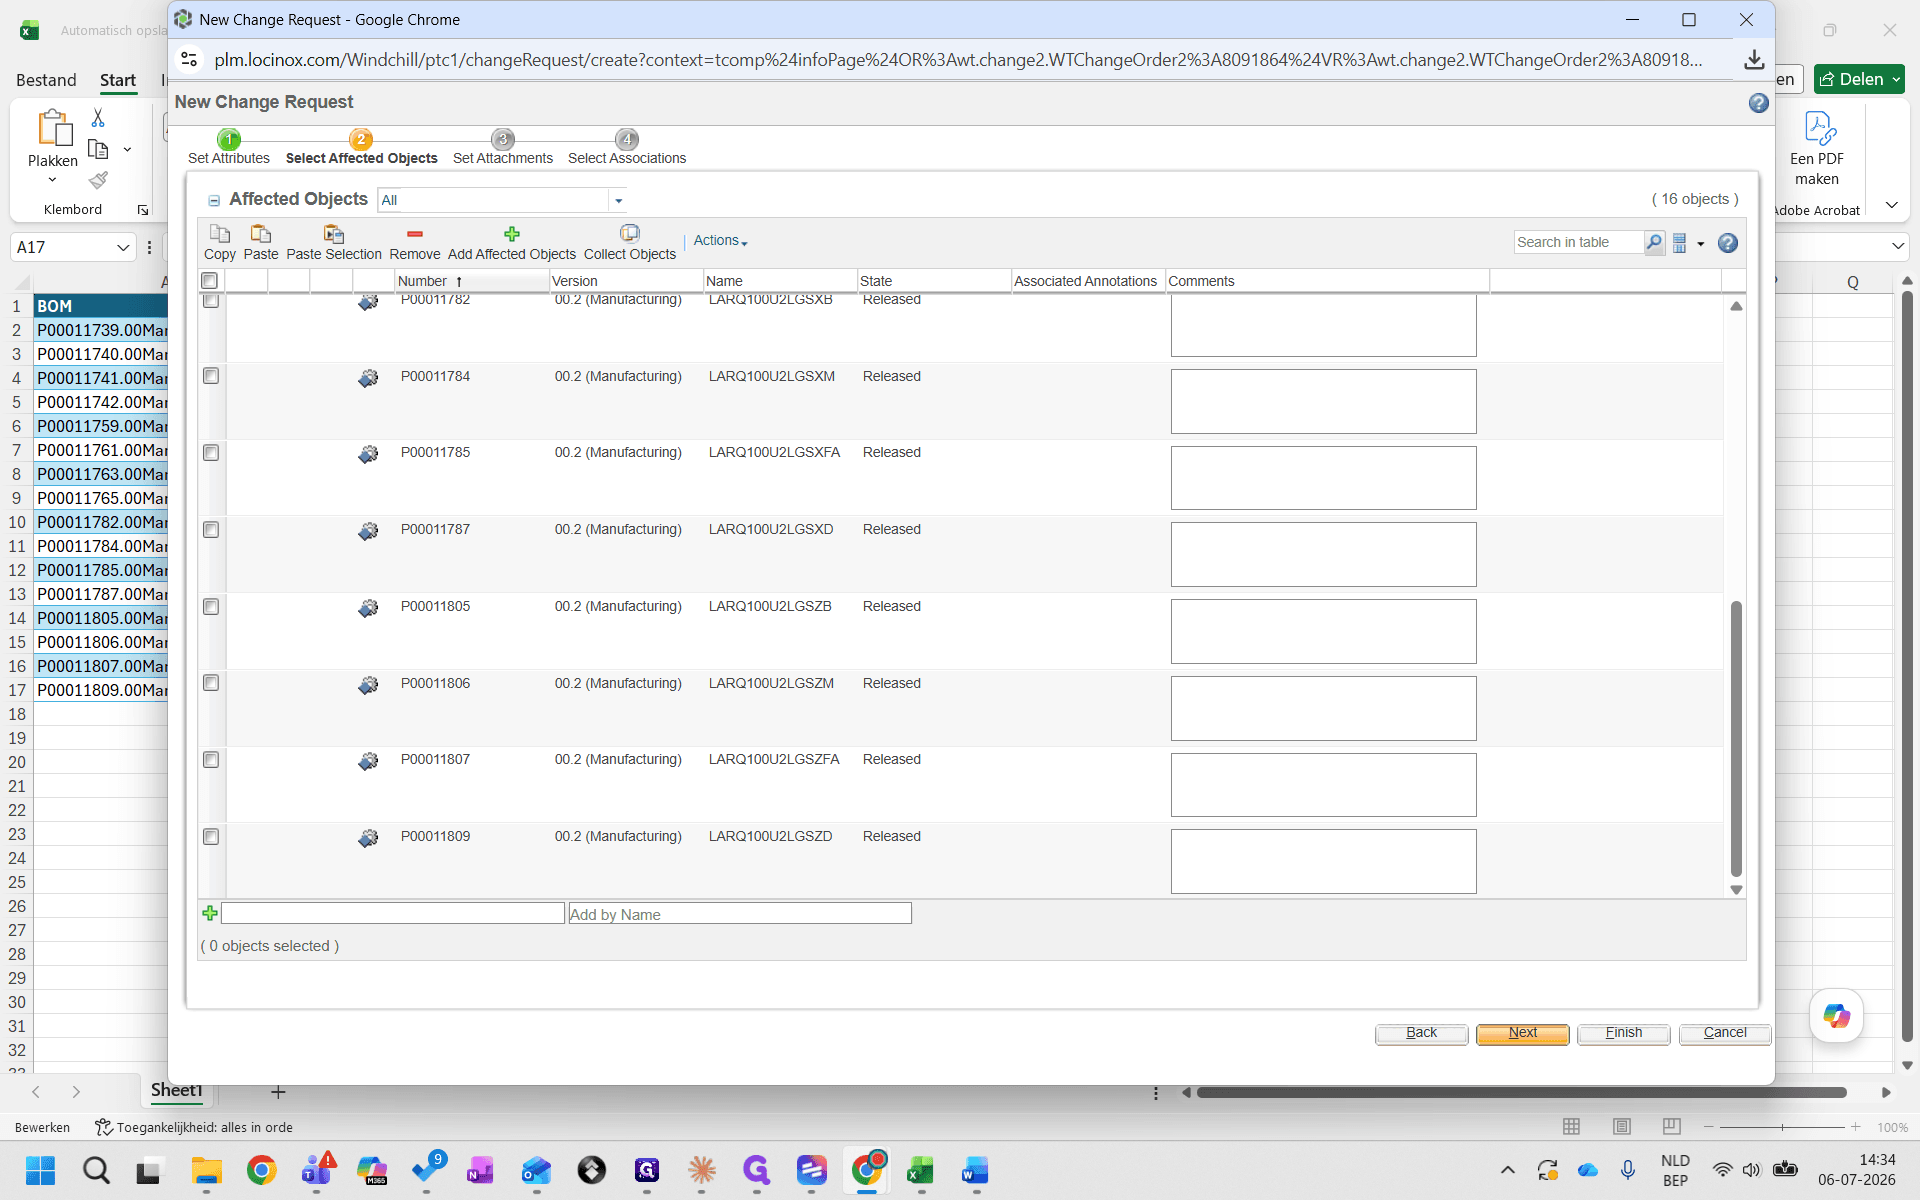
In the Affected Objects section, click Add Affected Objects.
Step #8: In the Affected Objects section, click Add Affected Objects.
9
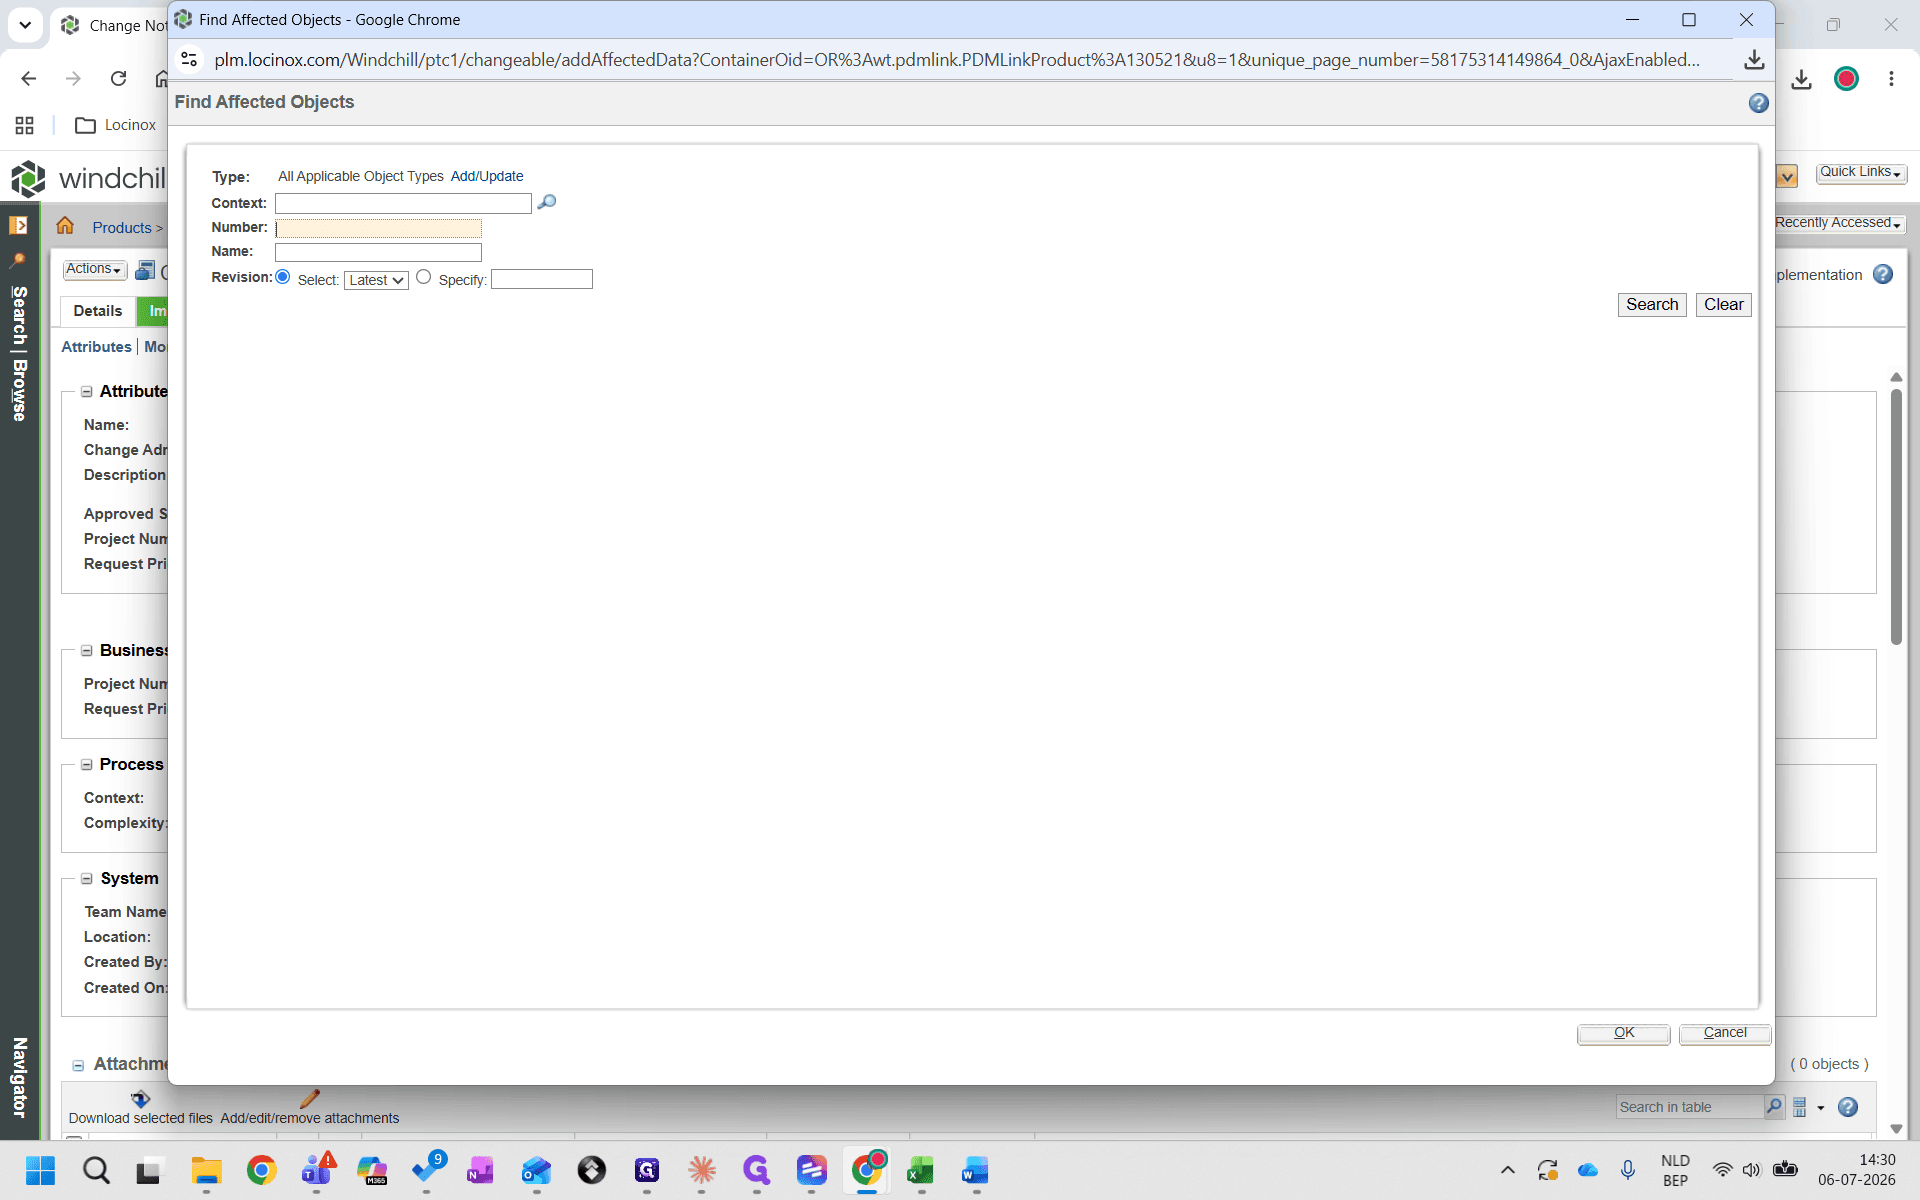
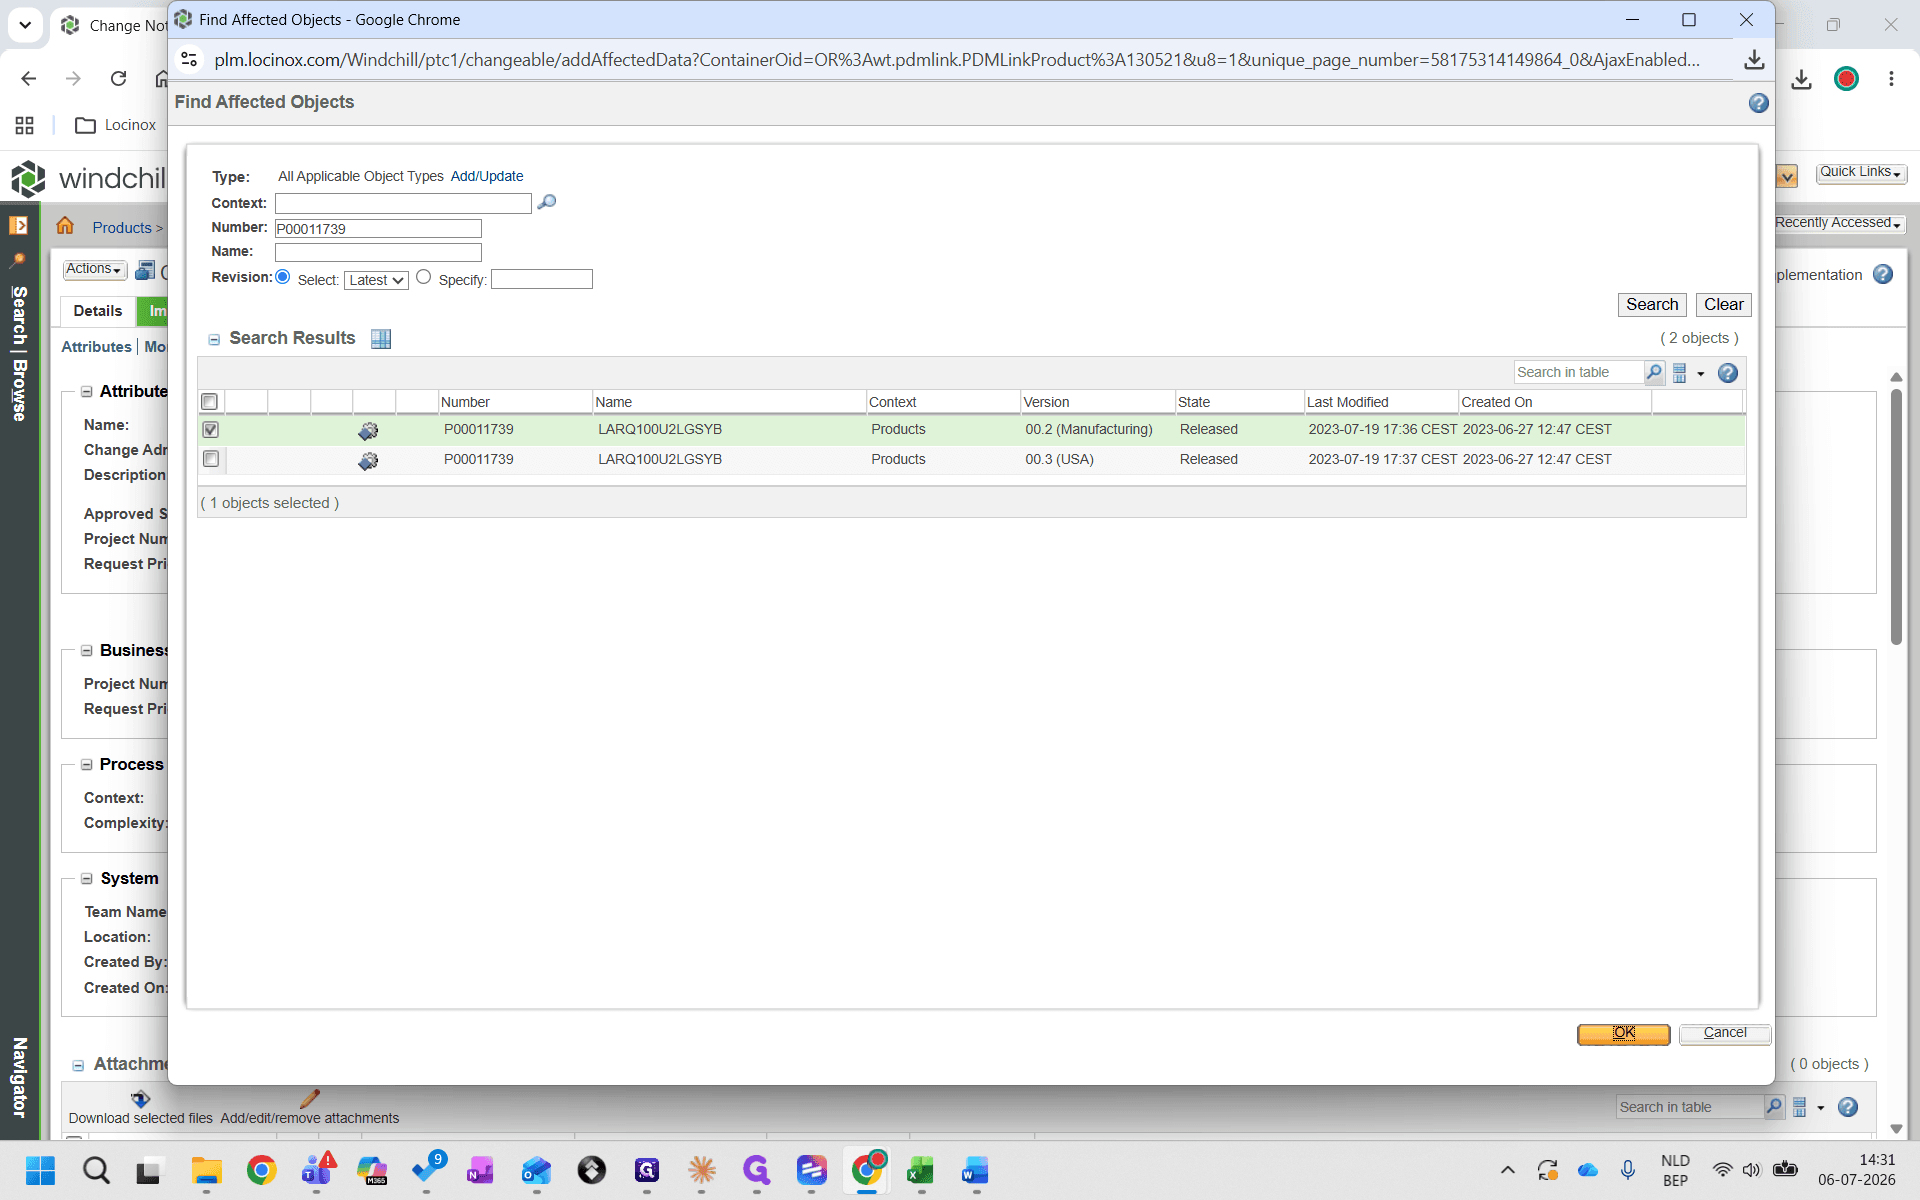
Type or paste the part numbers you want to include in the change request.
Step #9: Type or paste the part numbers you want to include in the change request.
10
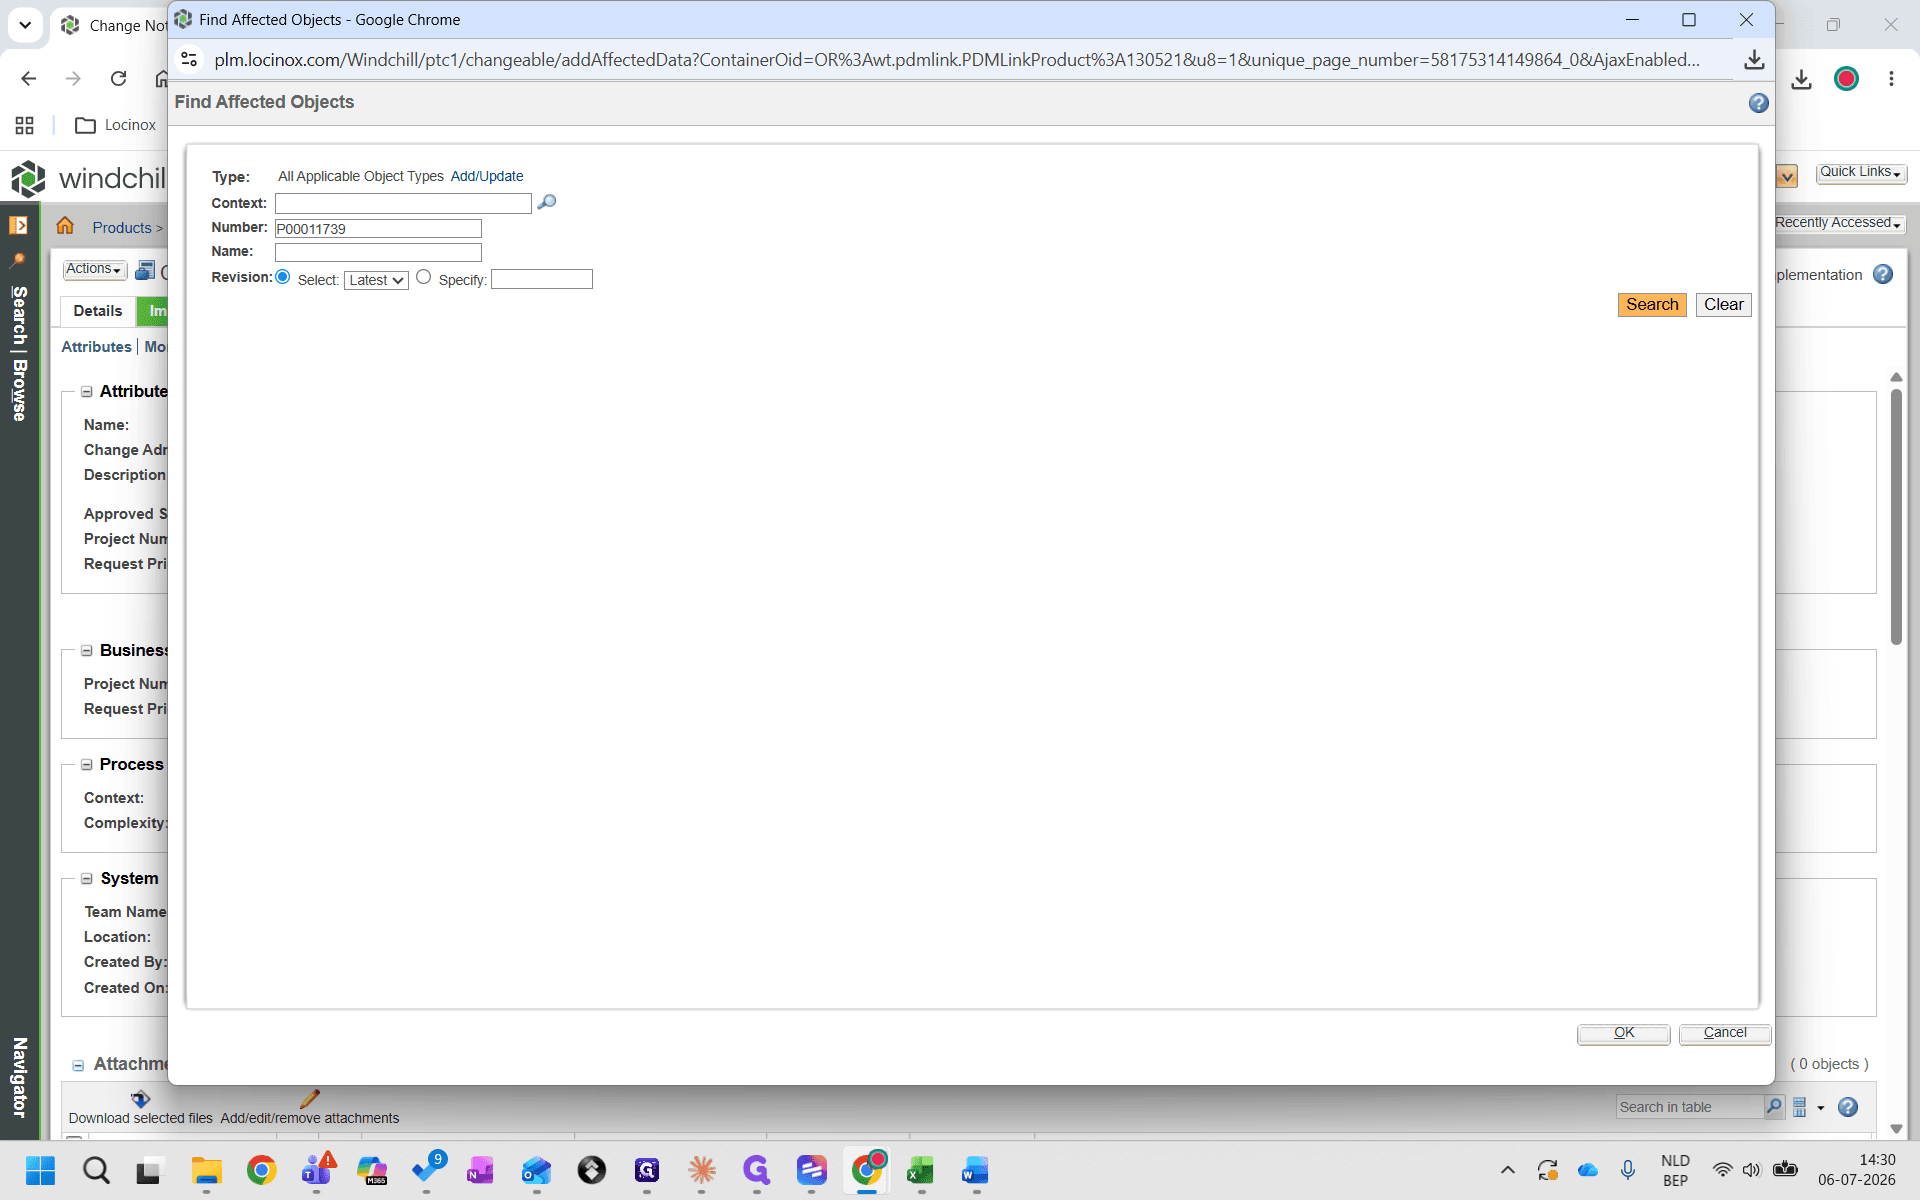
Click Search to locate the items.
Step #10: Click Search to locate the items.
11
Select the appropriate versions of the objects from the results and click OK.
Step #11: Select the appropriate versions of the objects from the results and click OK.
12
Click Next through the remaining steps.
Step #12: Click Next through the remaining steps.
13
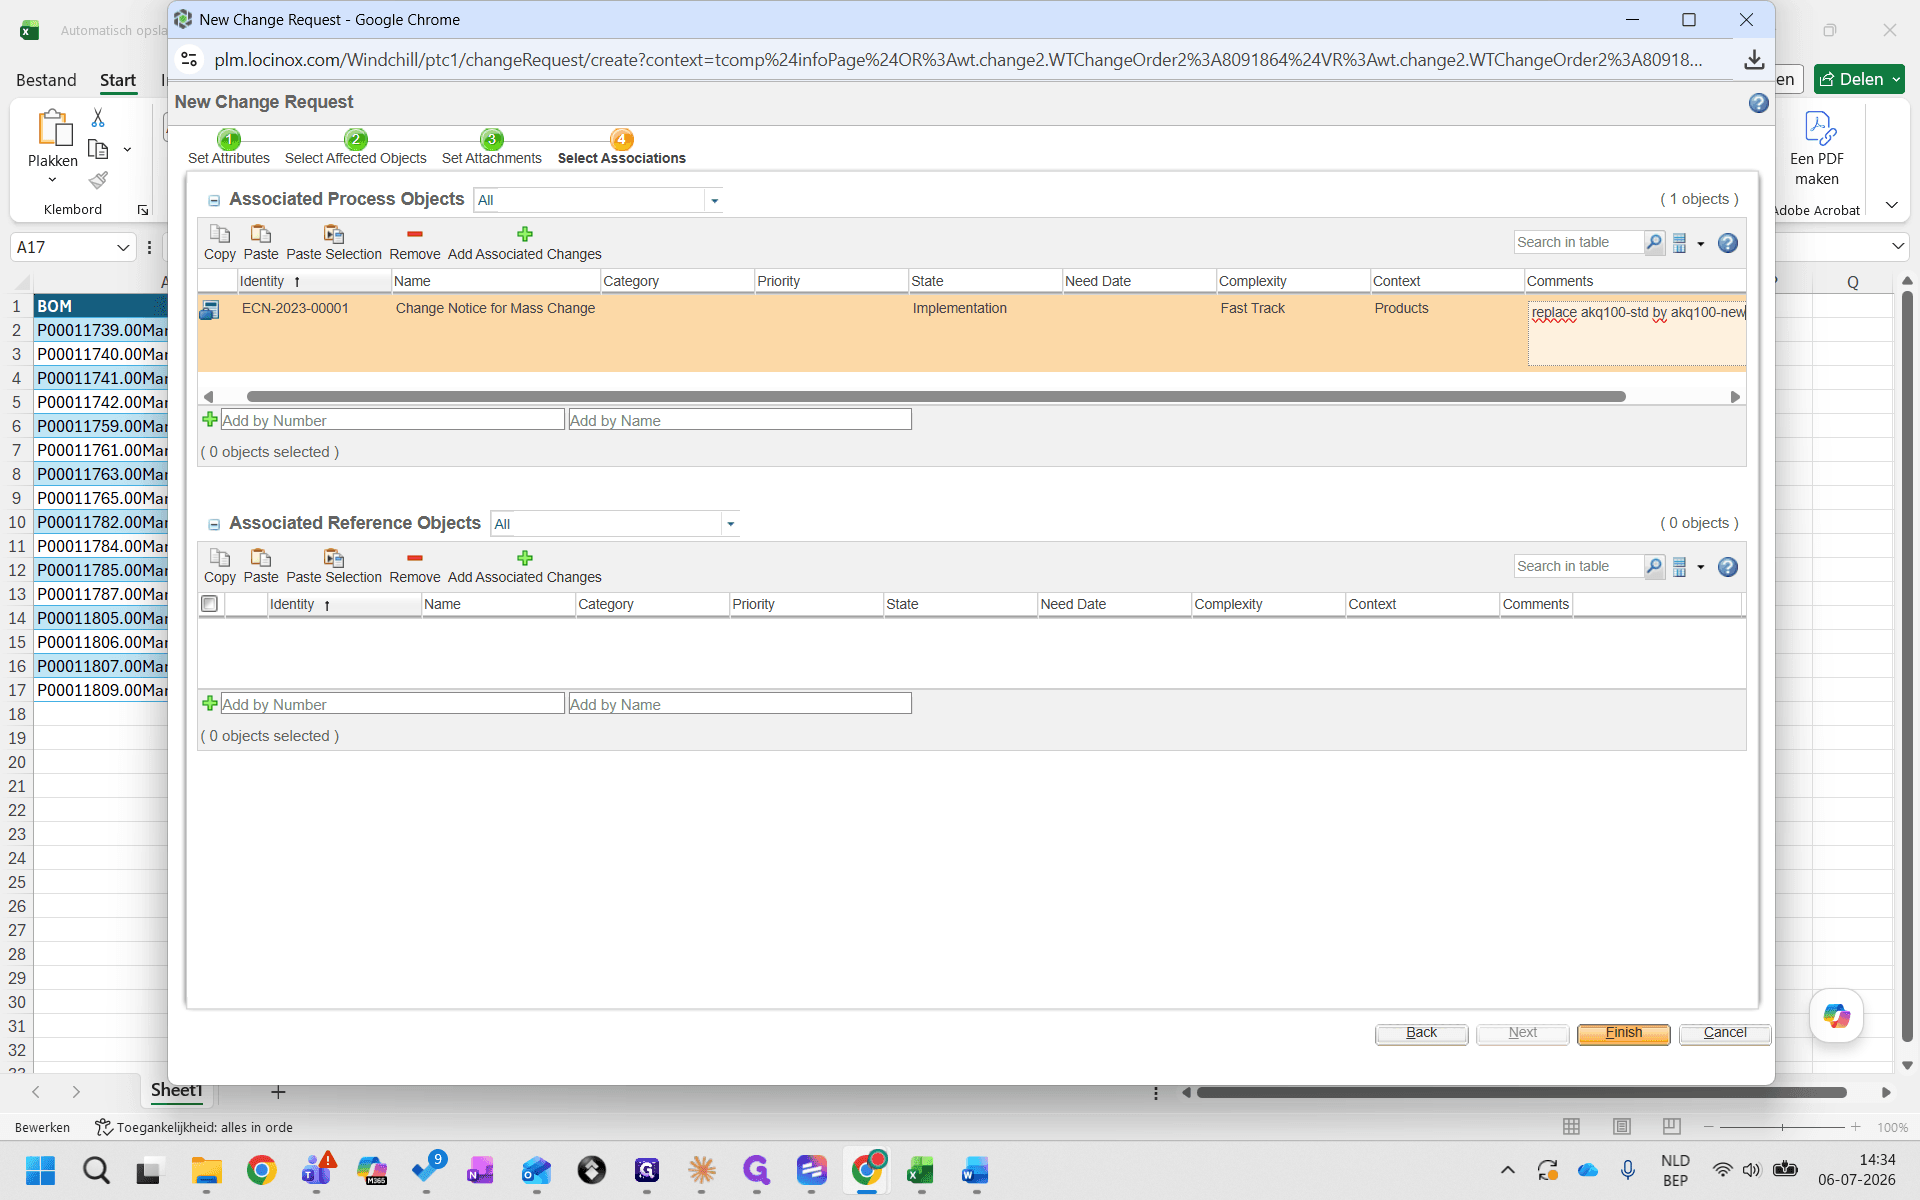
Click Finish.
Step #13: Click Finish.
14
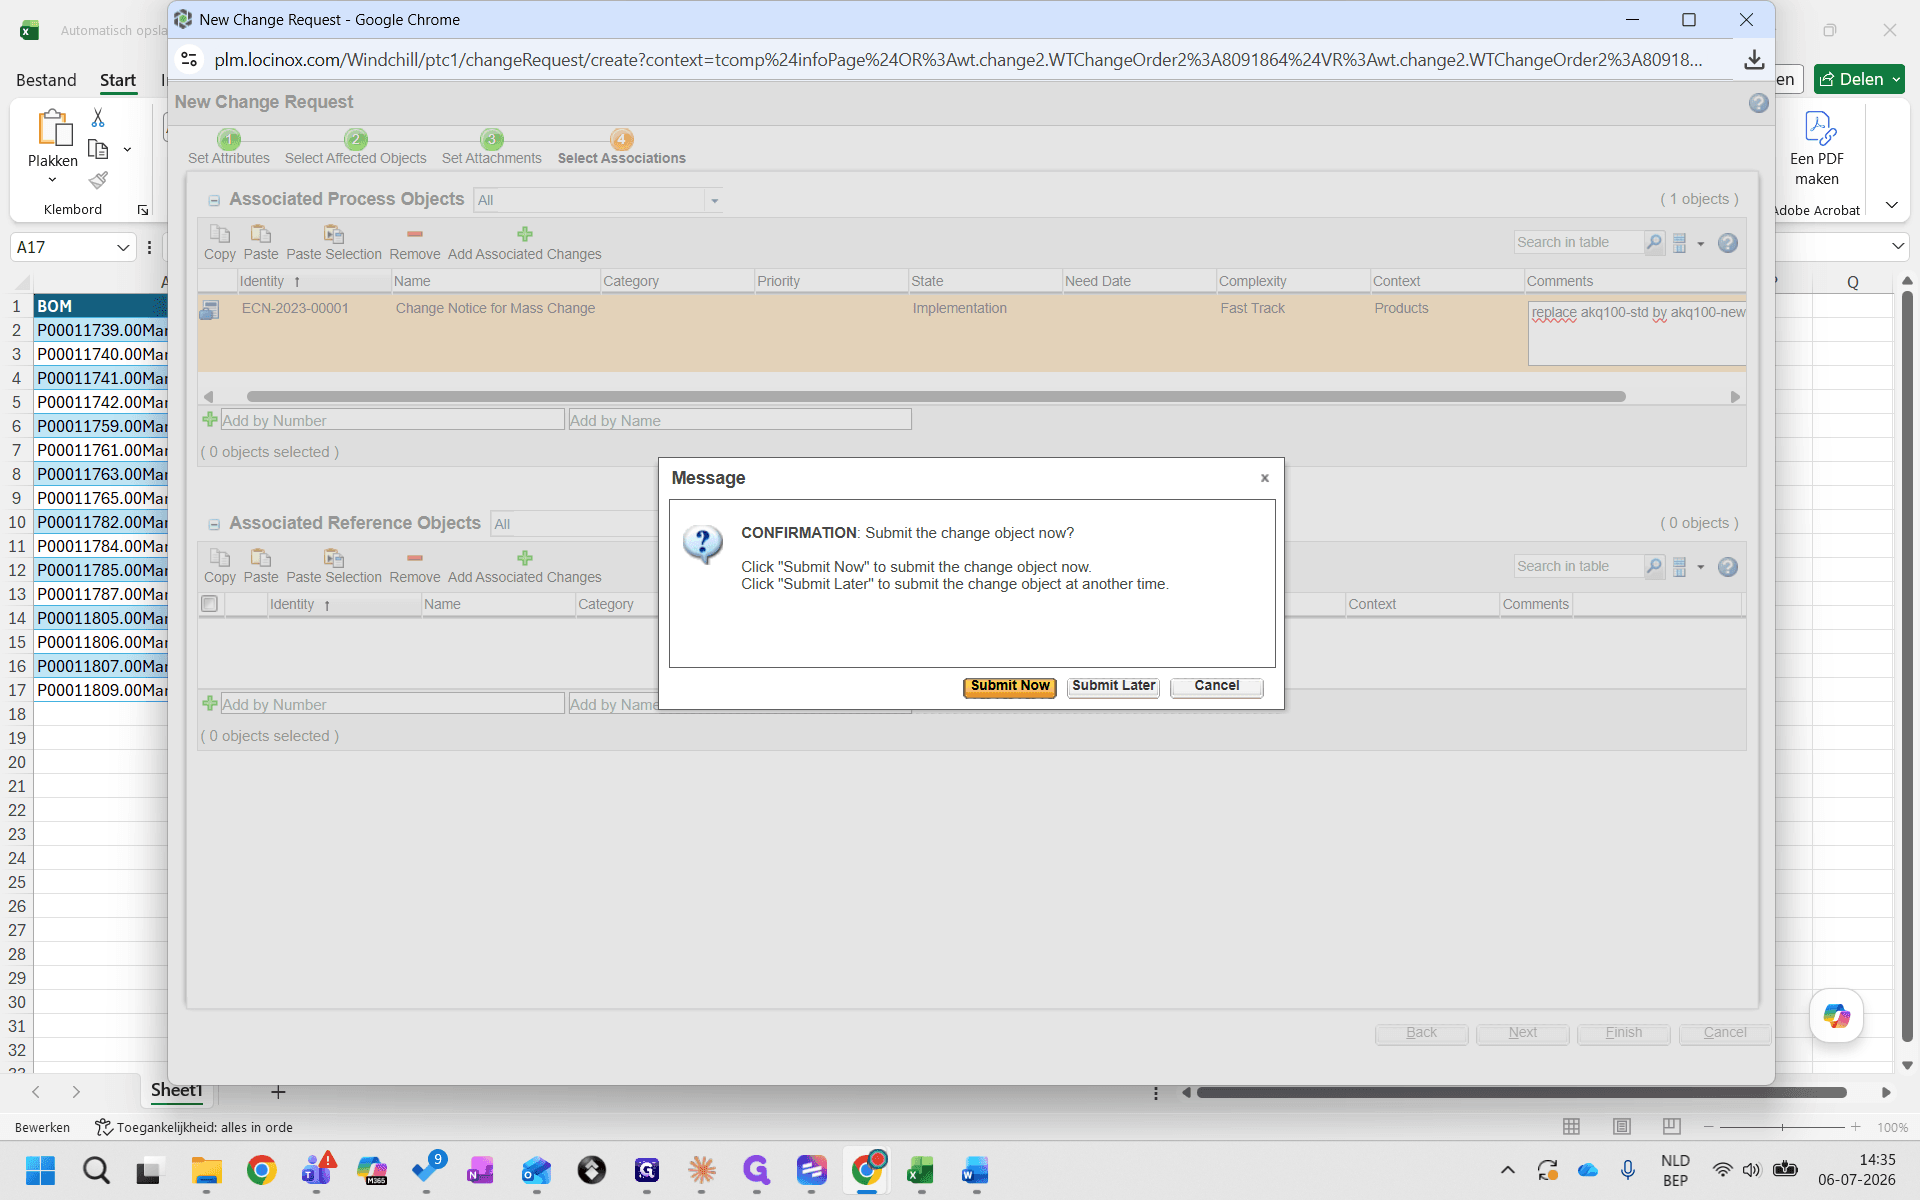
Click Submit Now when prompted.
Step #14: Click Submit Now when prompted.

Create the ERP Change Notice
15
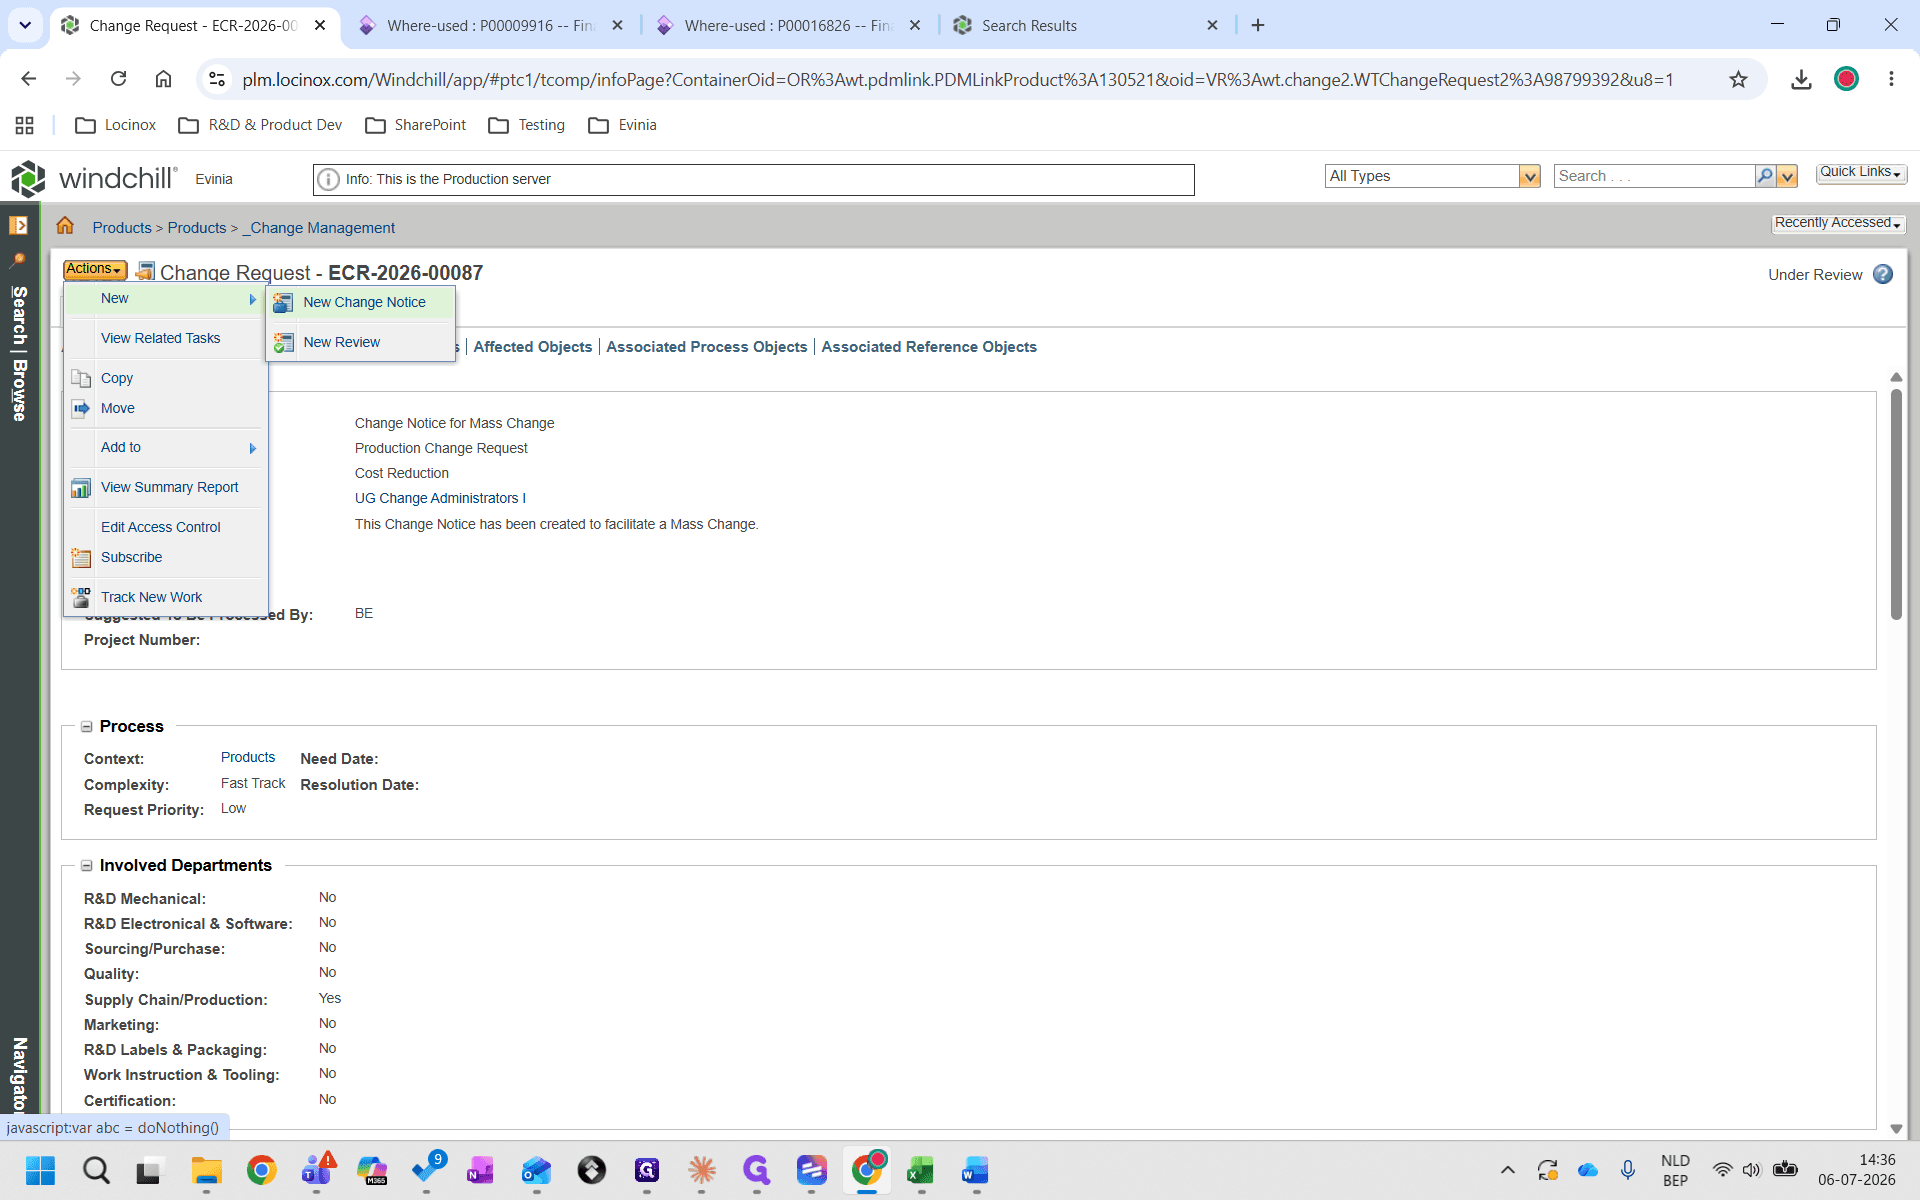
On your newly created Change Request page, open the Actions menu.
Step #15: On your newly created Change Request page, open the Actions menu.
16
Select New Change Notice.
Step #16: Select New Change Notice.
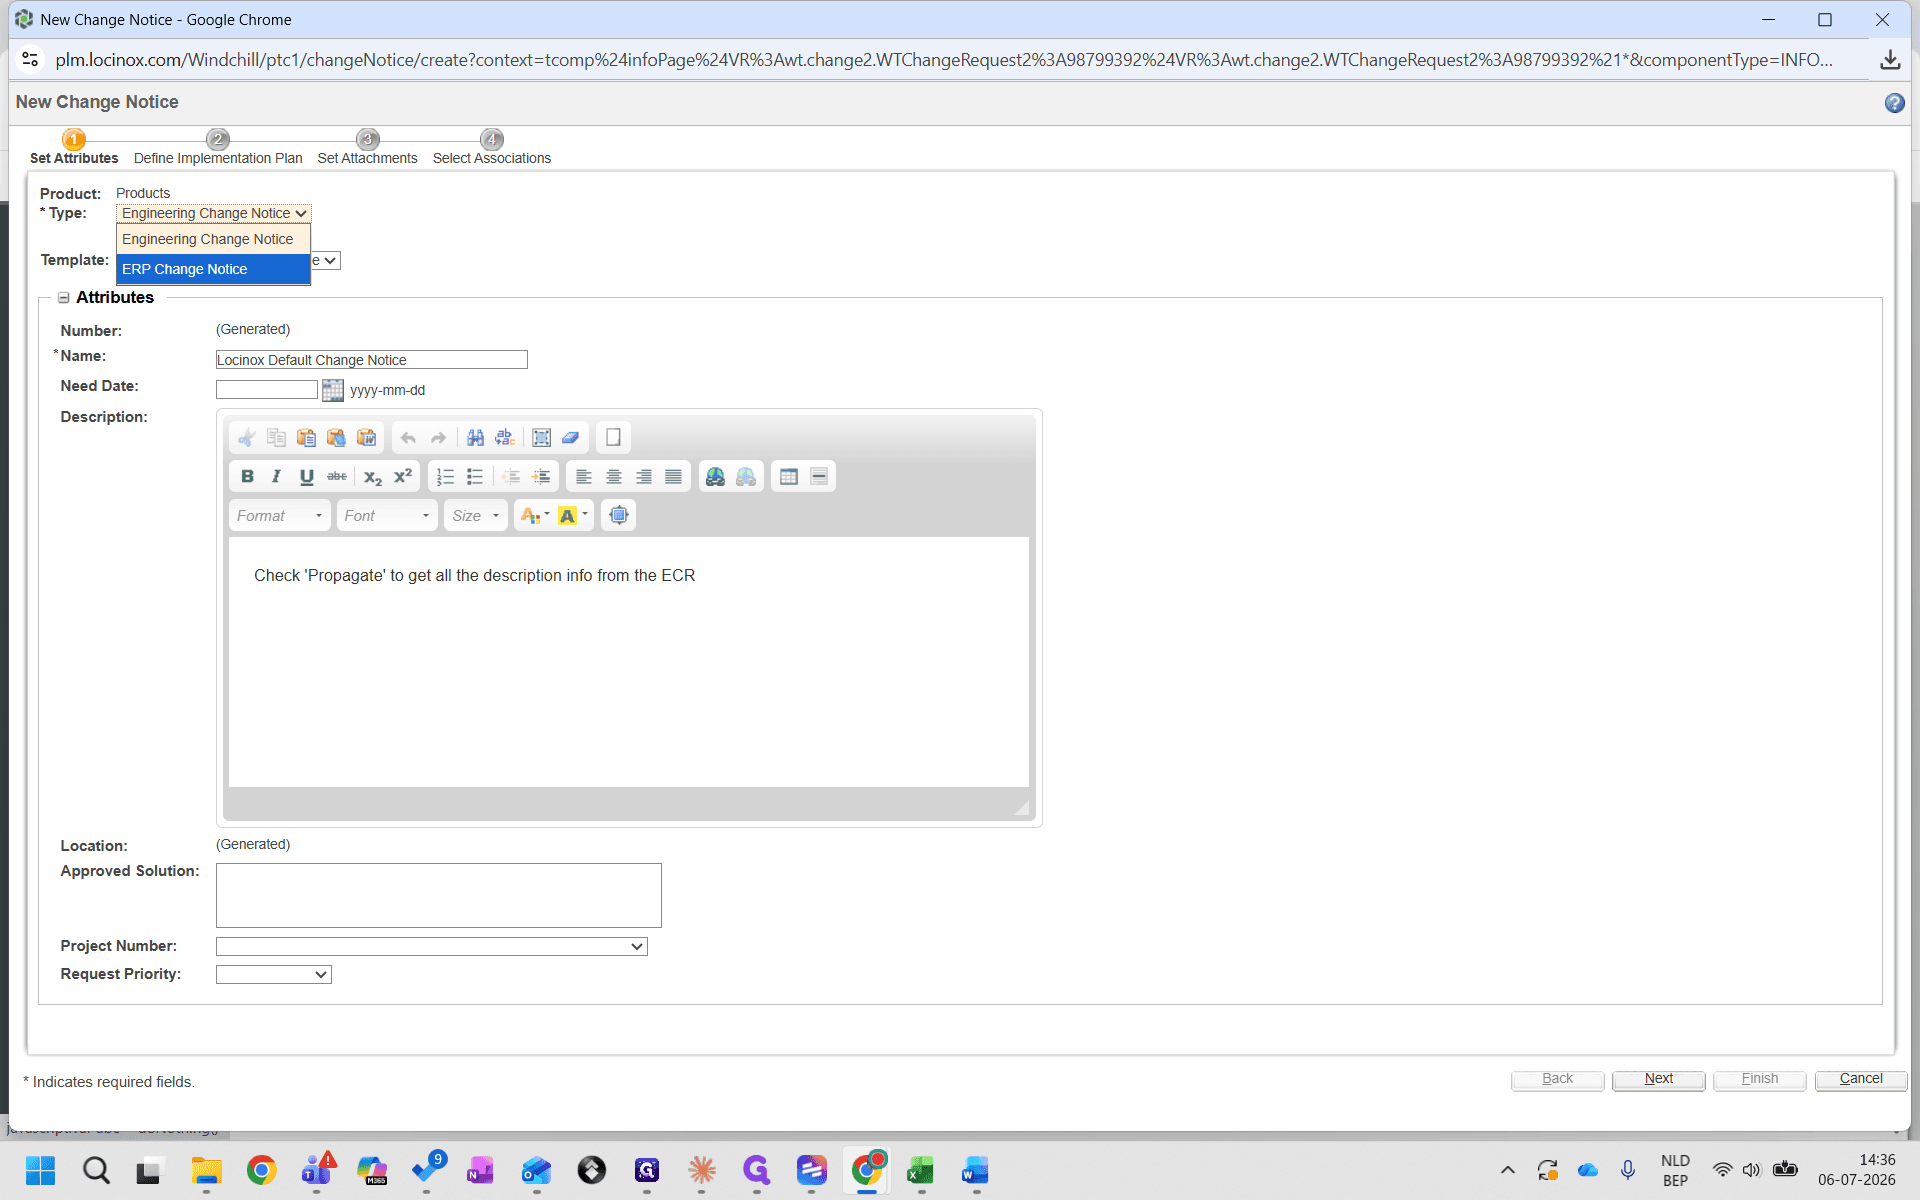
17
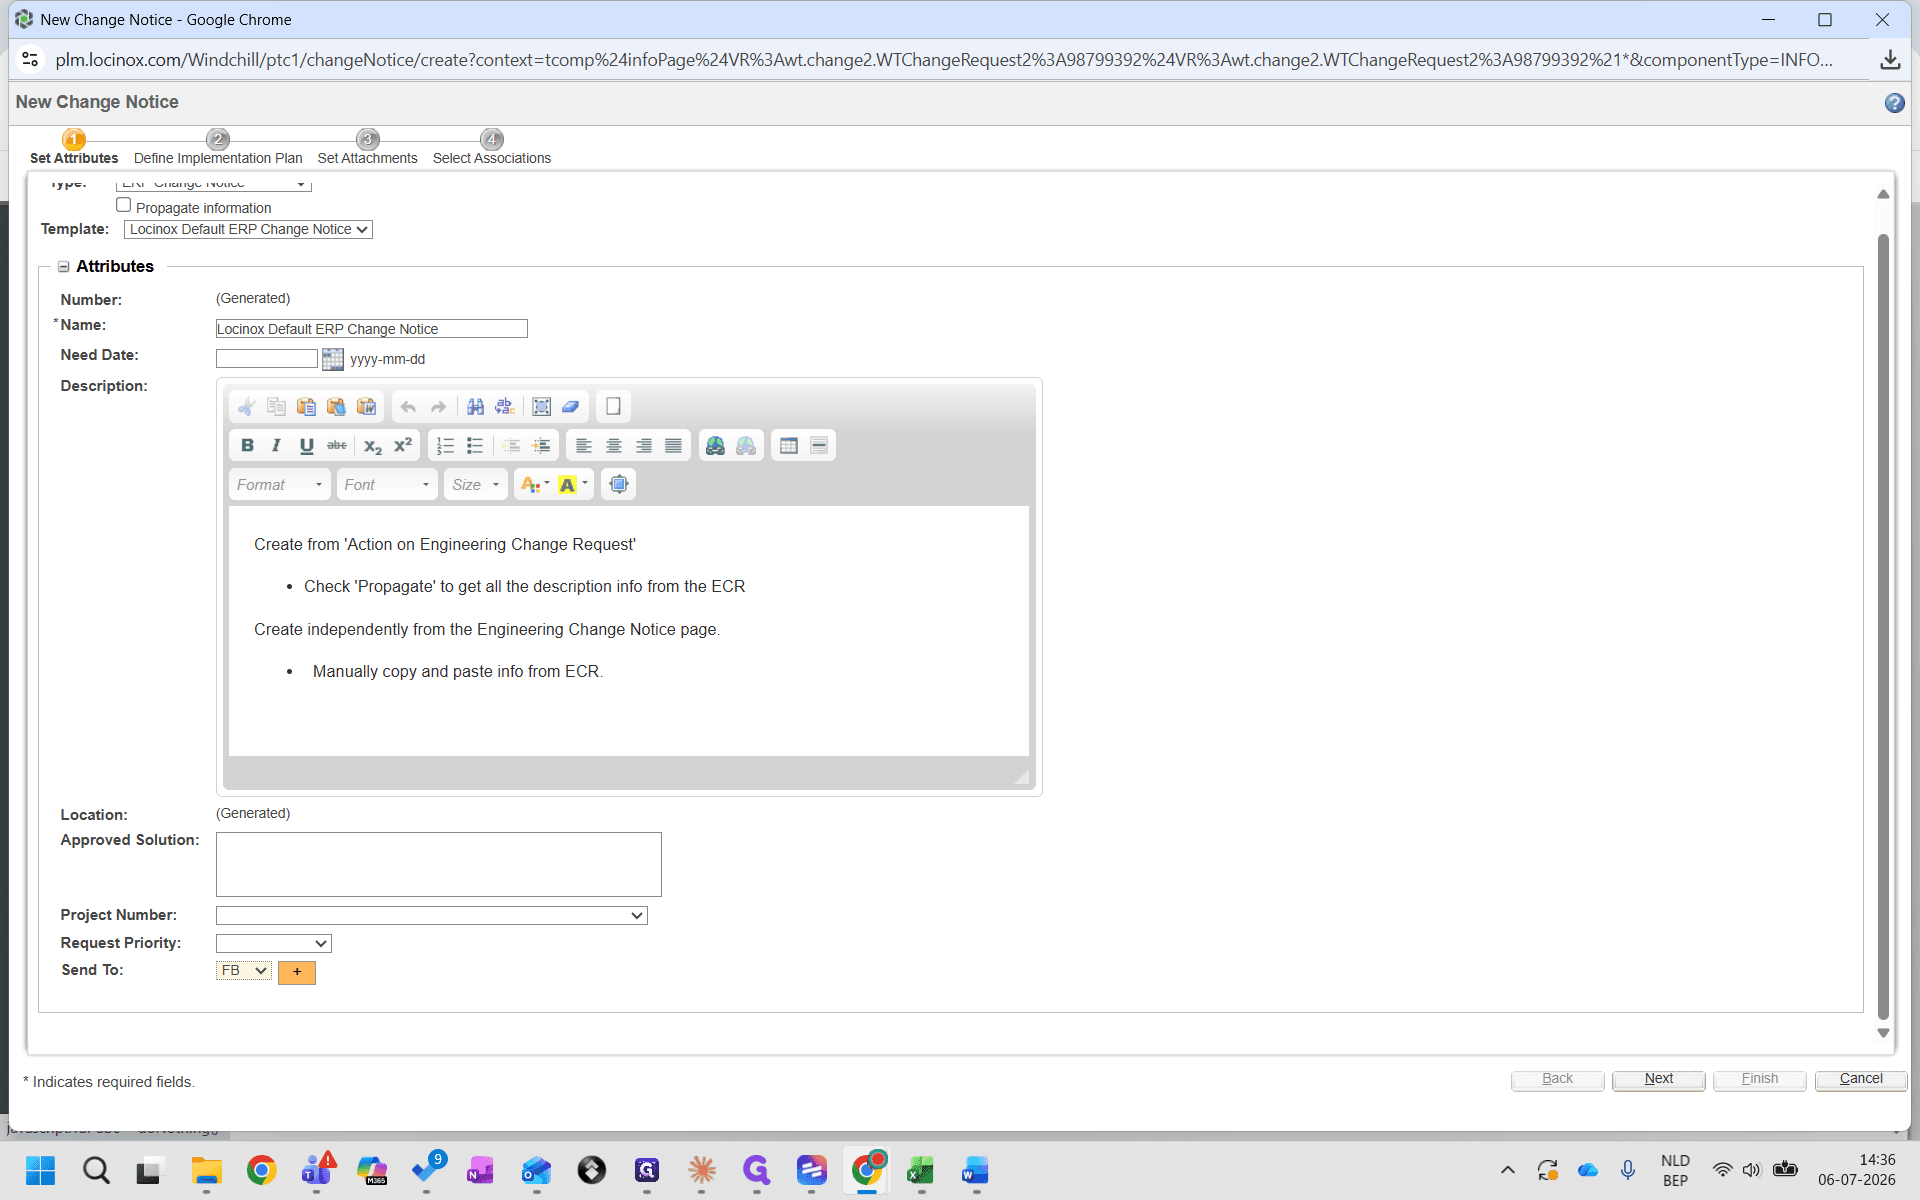
Change the notice type to ERP Change Notice.
Step #17: Change the notice type to ERP Change Notice.
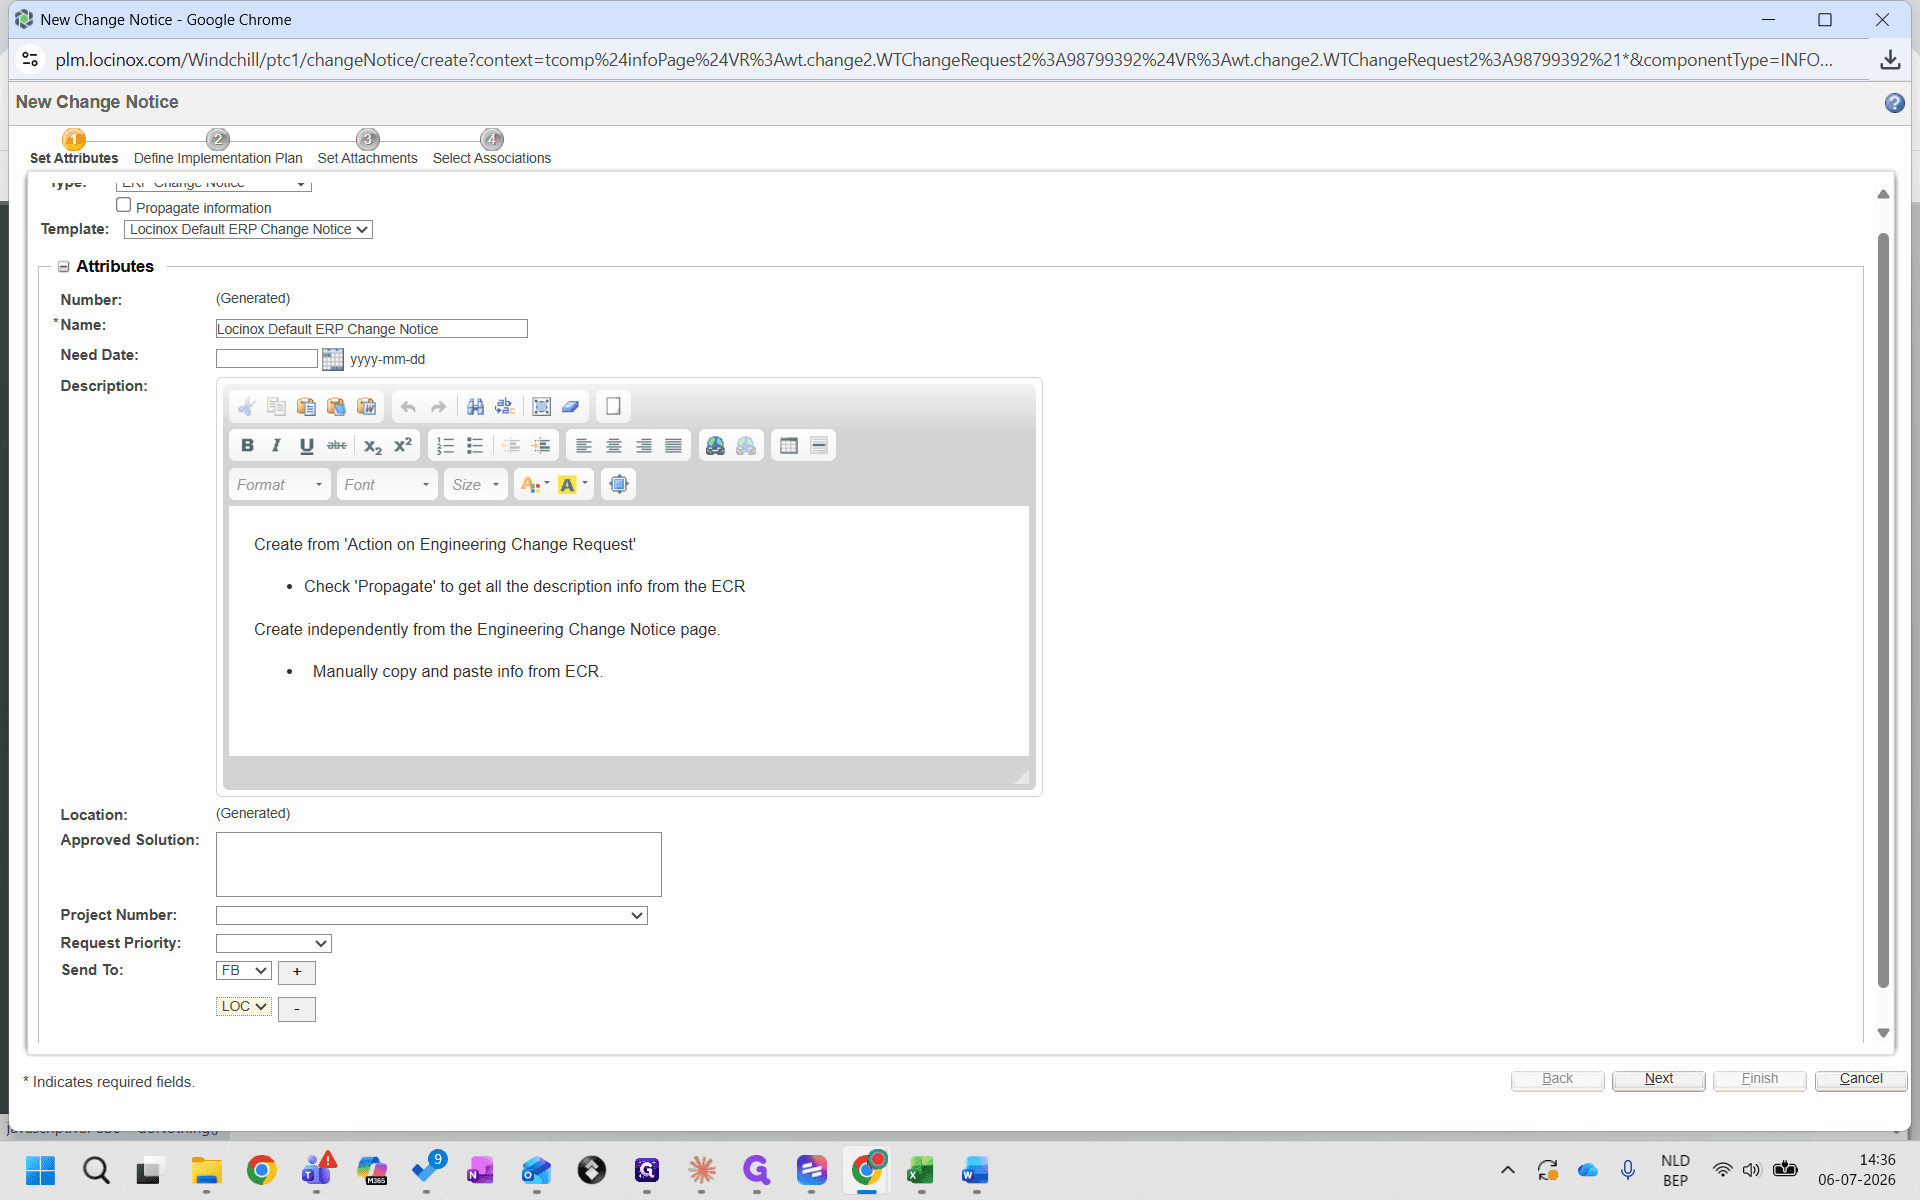
18
Fill in the required metadata, including the Send To field.
Step #18: Fill in the required metadata, including the Send To field.
19
Proceed to the Define Implementation Plan step to configure your change tasks.
Step #19: Proceed to the Define Implementation Plan step to configure your change tasks.
20
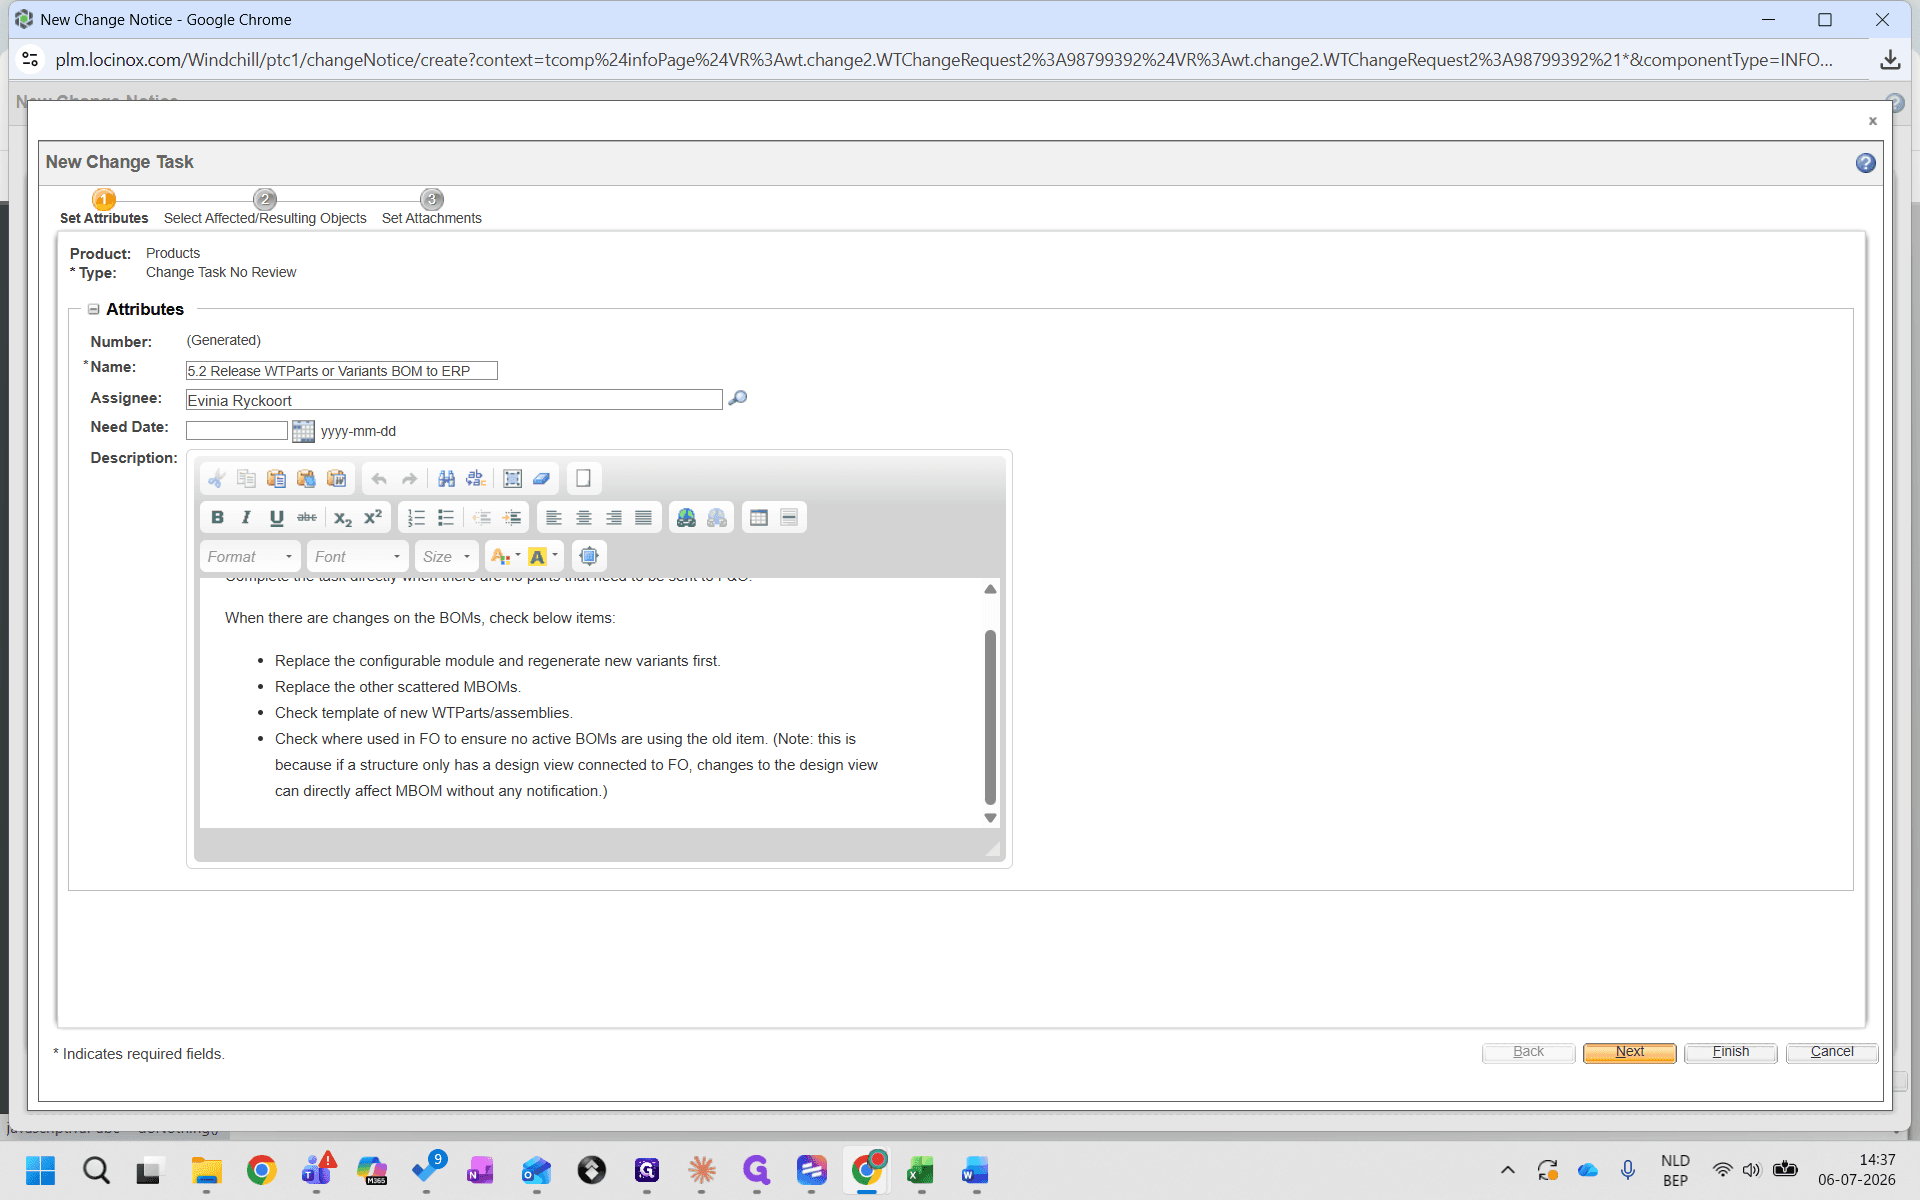
Assign the task to the appropriate team member.
21
Click Next.
Step #21: Click Next.

Revise Objects and Set Release Target
22
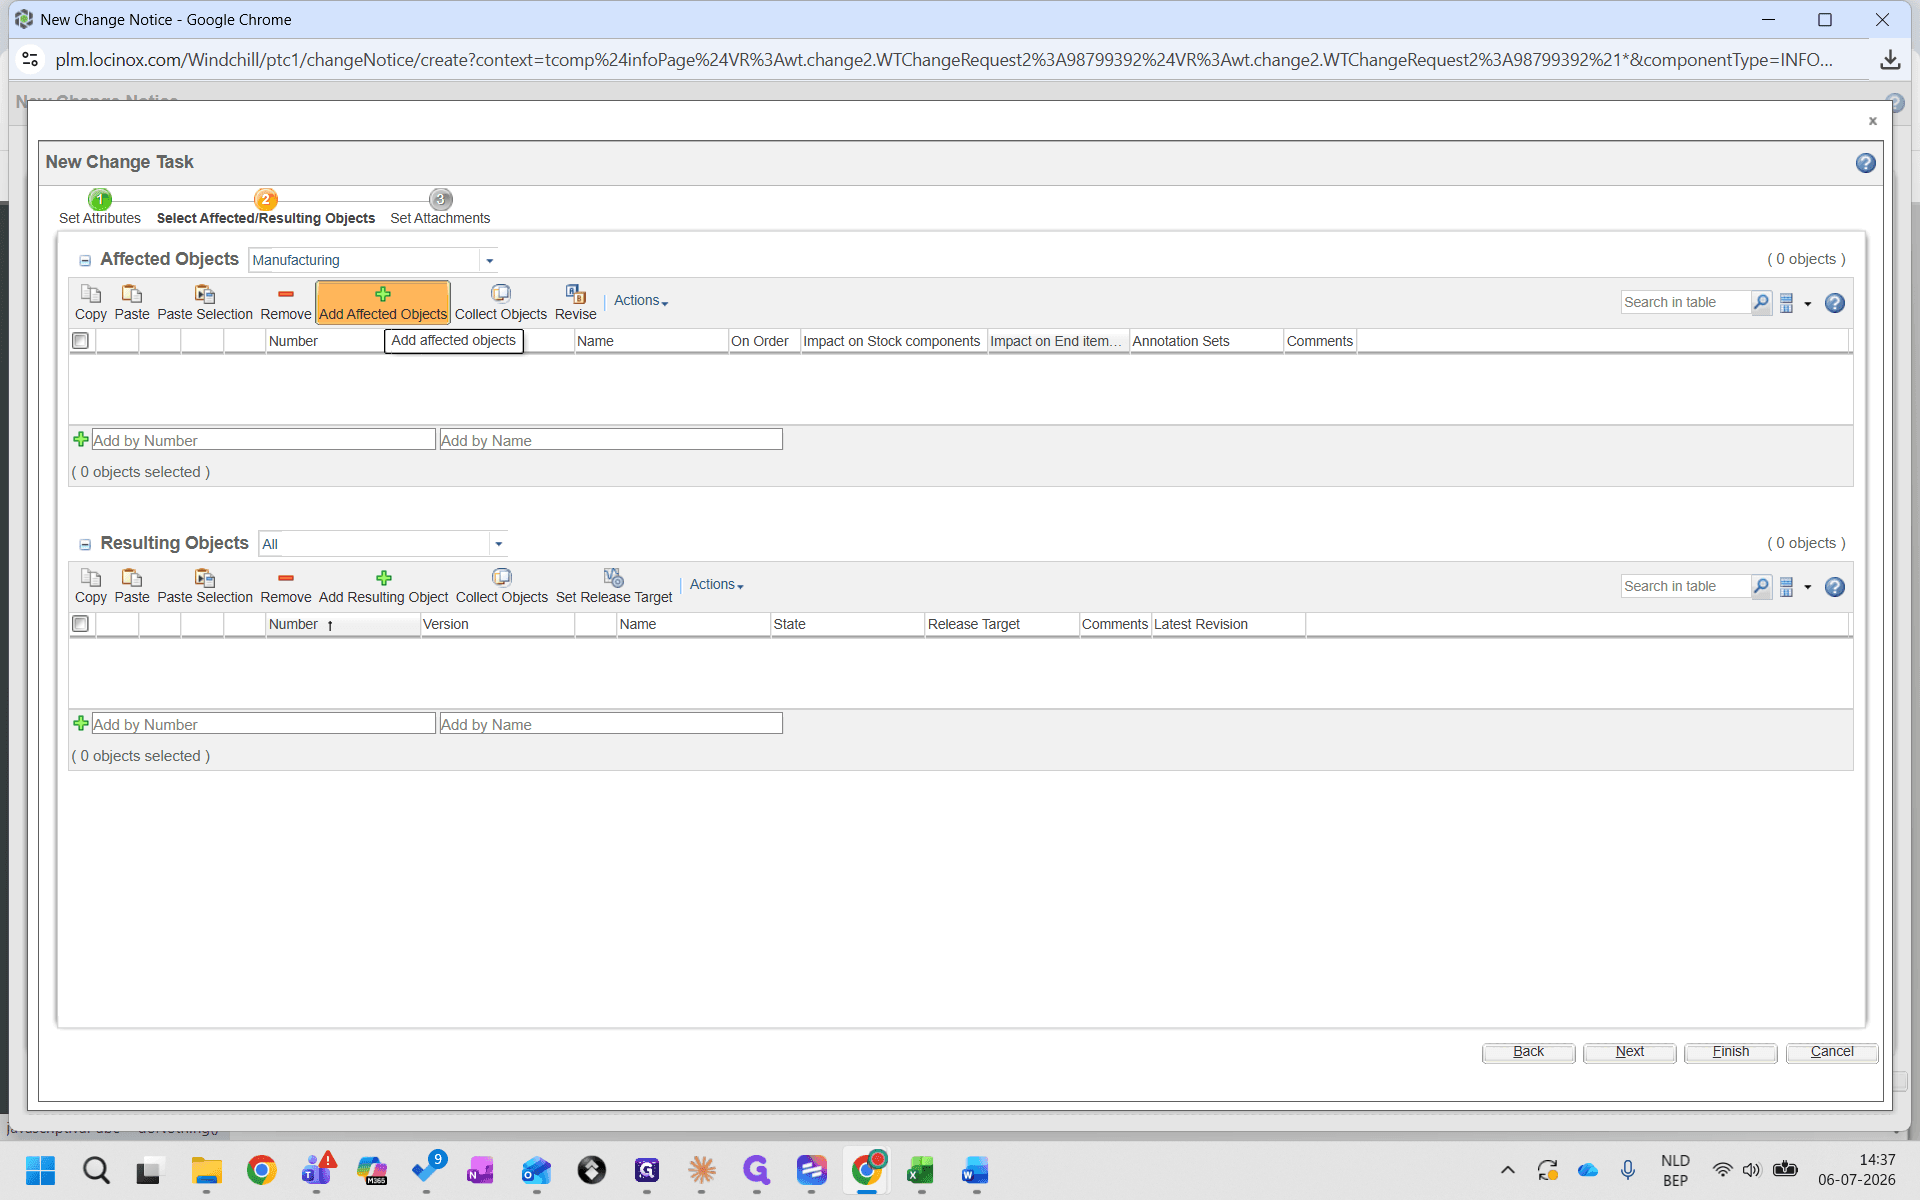
Under the Affected Objects section of your change task, click the Add Affected Objects (plus) icon.
Step #22: Under the Affected Objects section of your change task, click the Add Affected Objects (plus) icon.
23
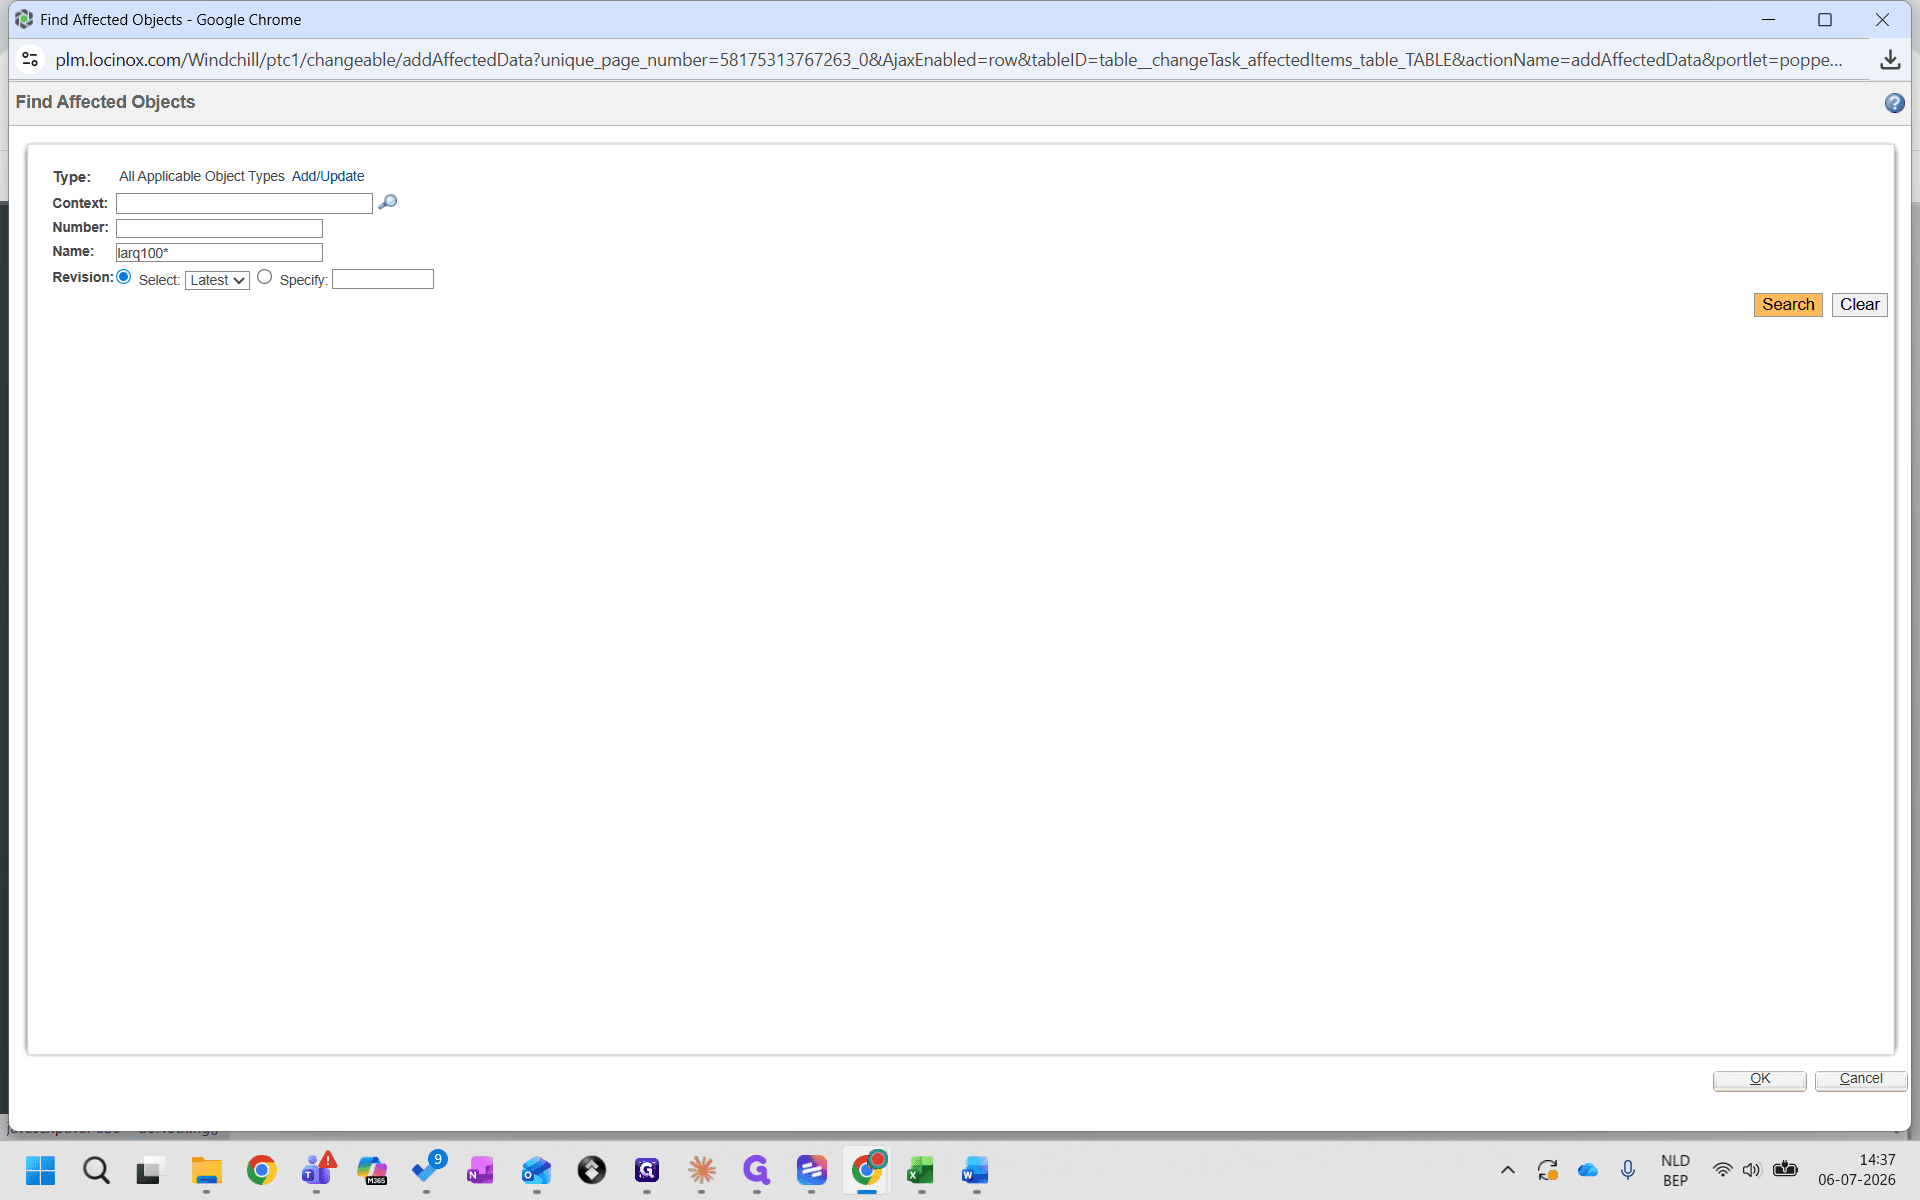
Search for the affected parts, using wildcards if necessary.
24
Click Search.
Step #24: Click Search.
25
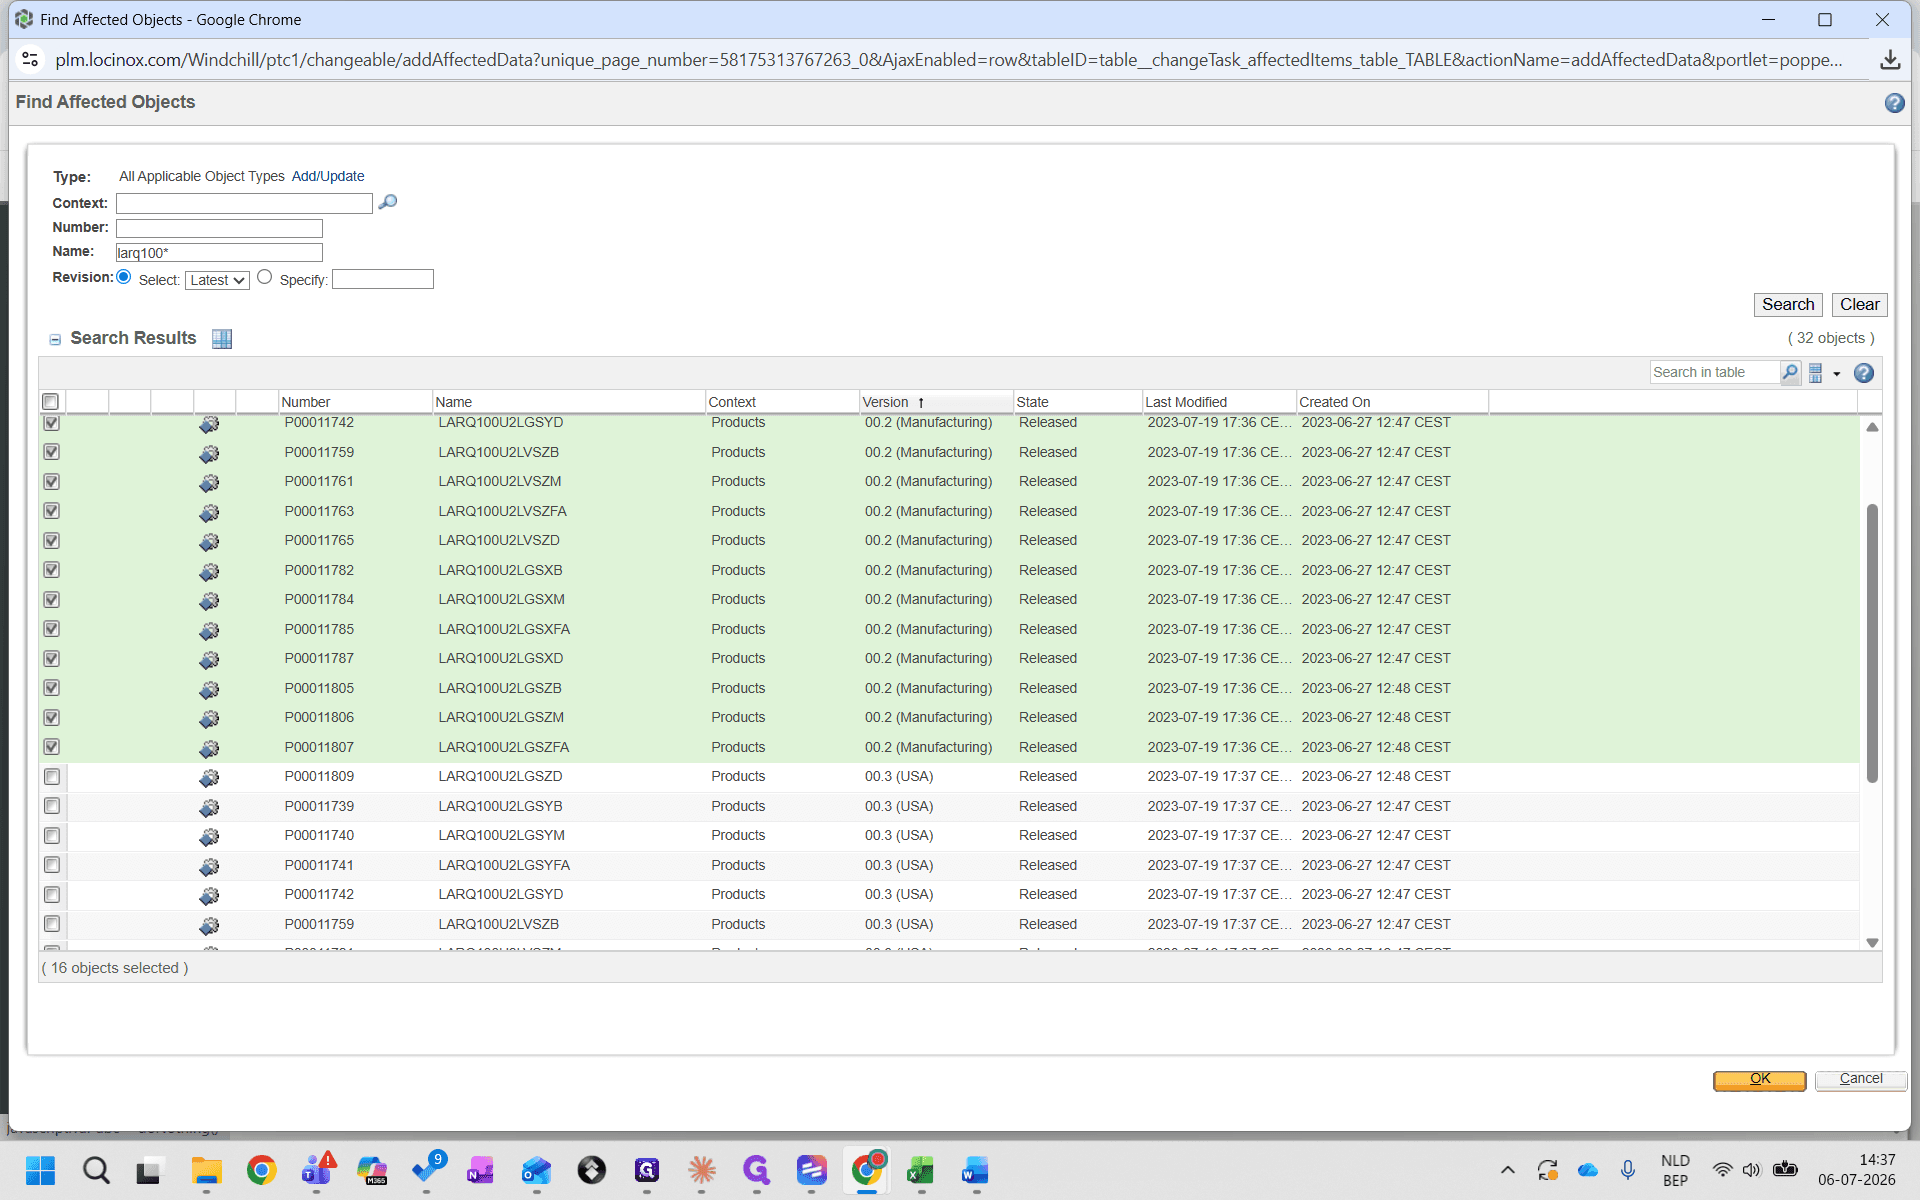
Check the boxes for the objects you want to update and click OK.
Step #25: Check the boxes for the objects you want to update and click OK.
26
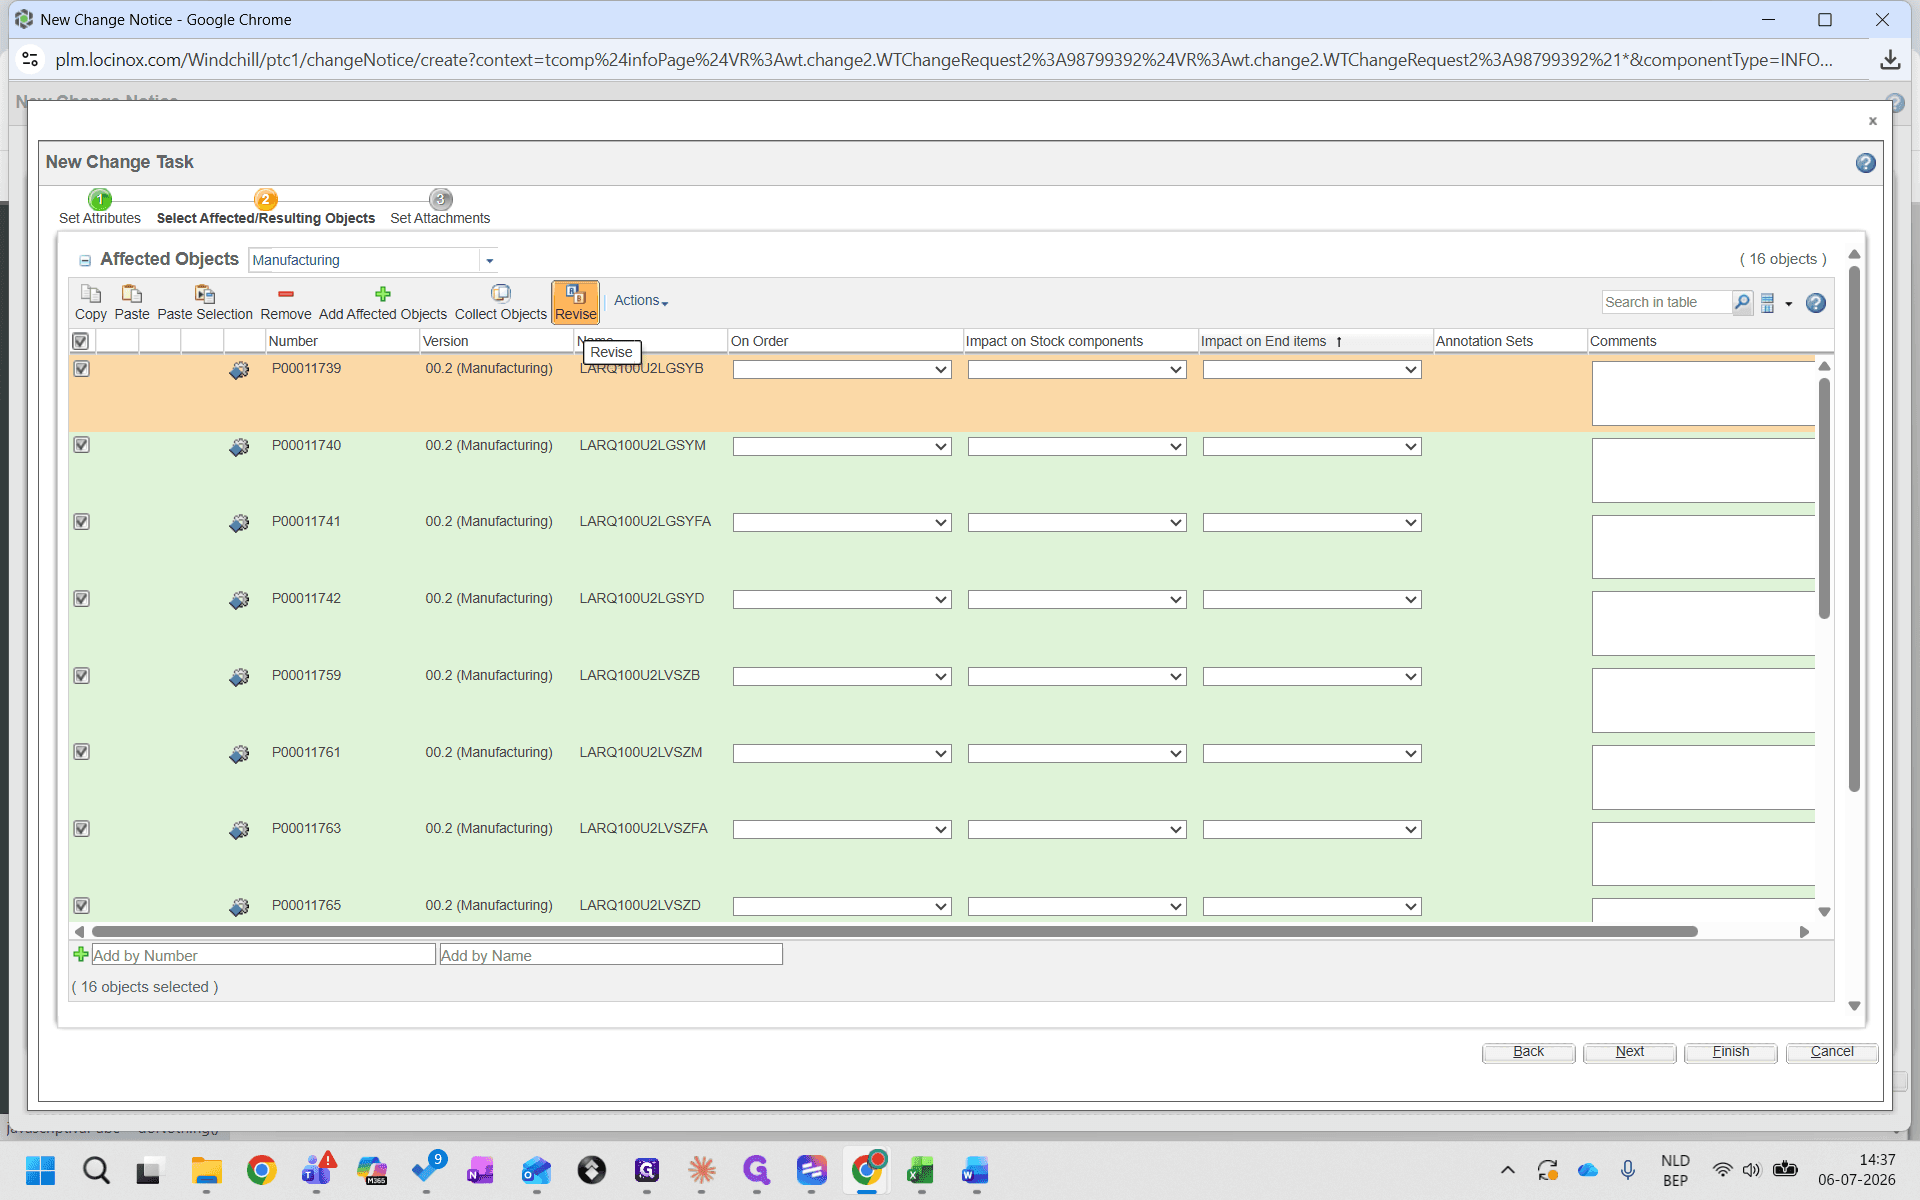
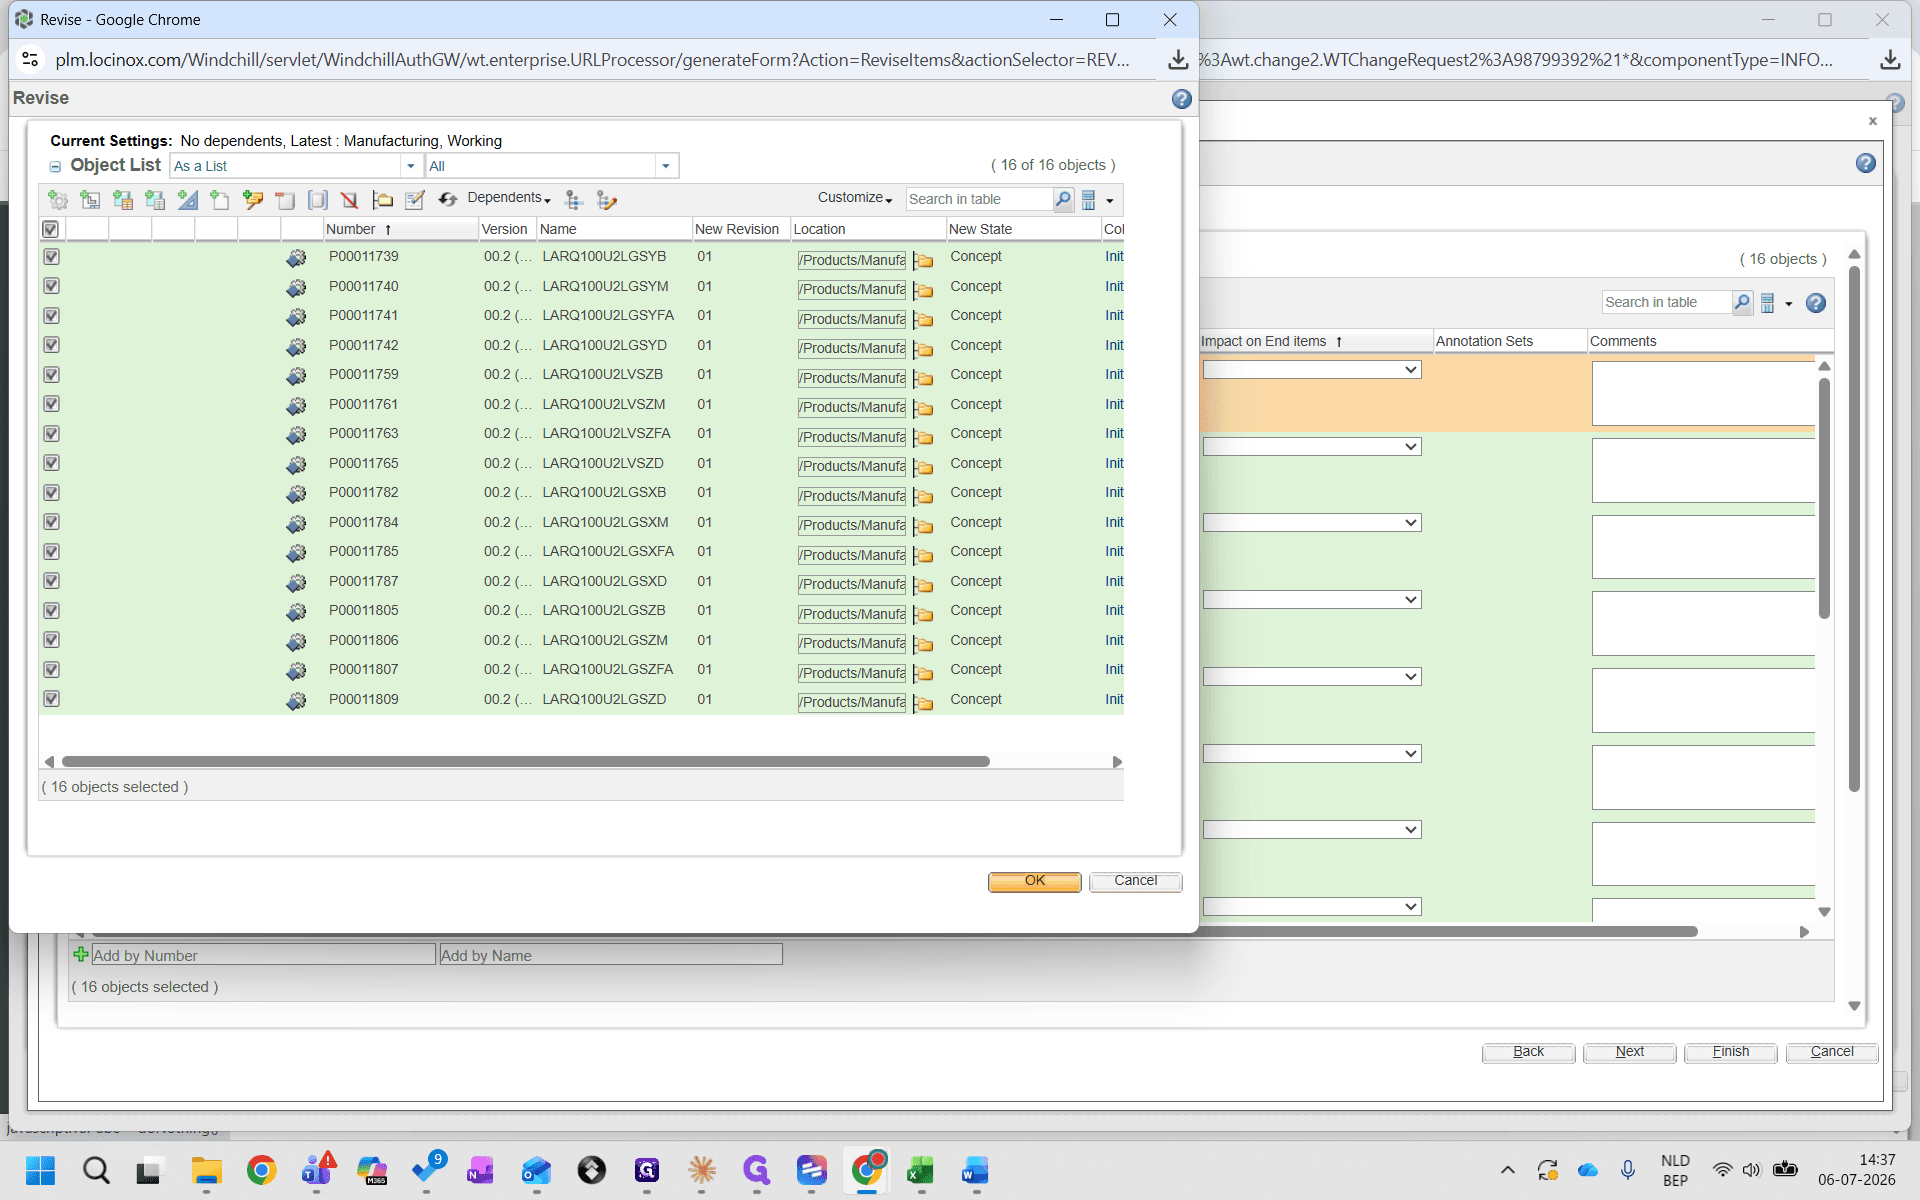
Select the objects in your task list and click the Revise button to bump their revisions.
Step #26: Select the objects in your task list and click the Revise button to bump their revisions.
27
Review the revision settings and click OK.
Step #27: Review the revision settings and click OK.

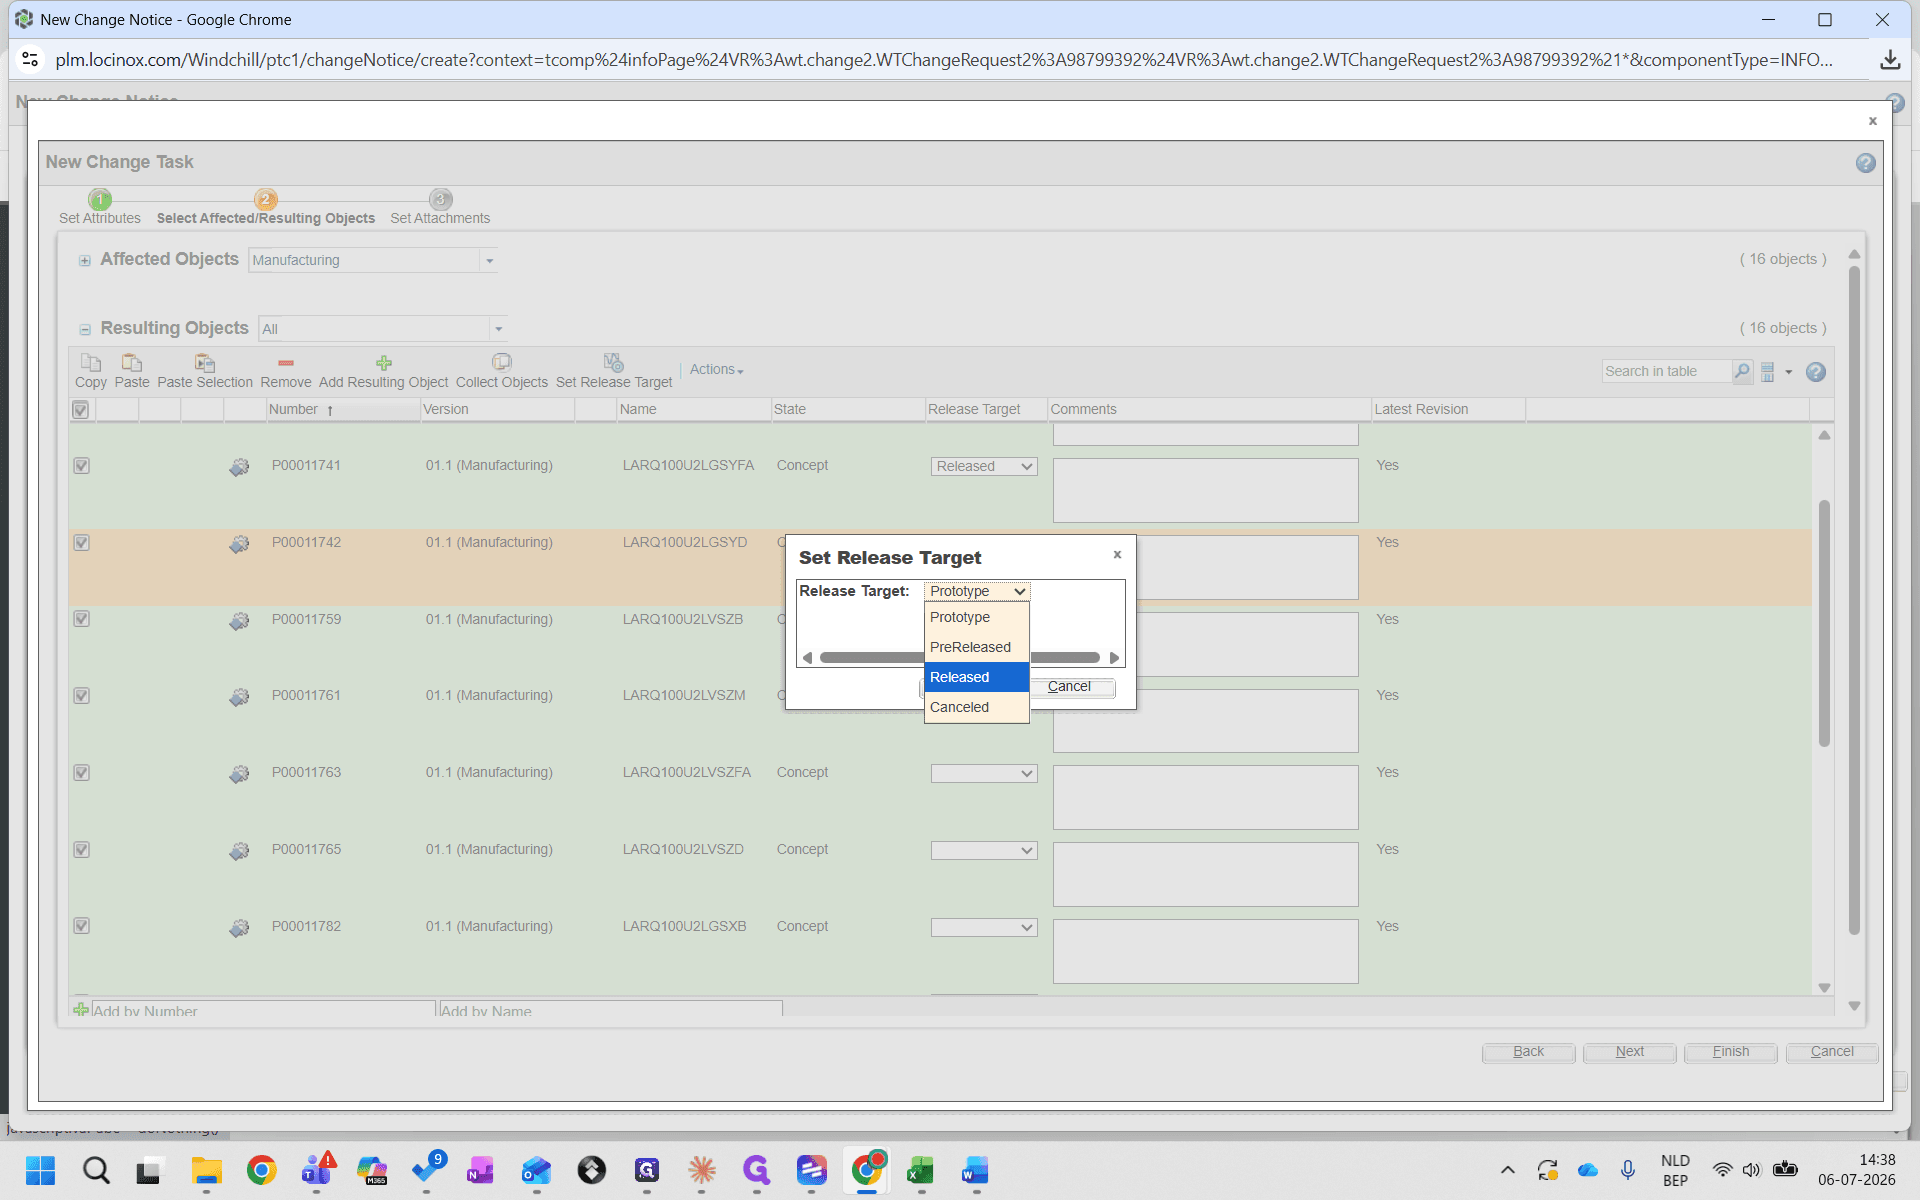
Target State

Description

Prototype

Used for early-stage development and physical testing before official production.

PreReleased

Indicates the object is near finalization but still pending ultimate manufacturing approval.

Released

The final state indicating the object is fully approved for production and distribution.

Canceled

Aborts the item's lifecycle, removing it from active use or consideration.

28
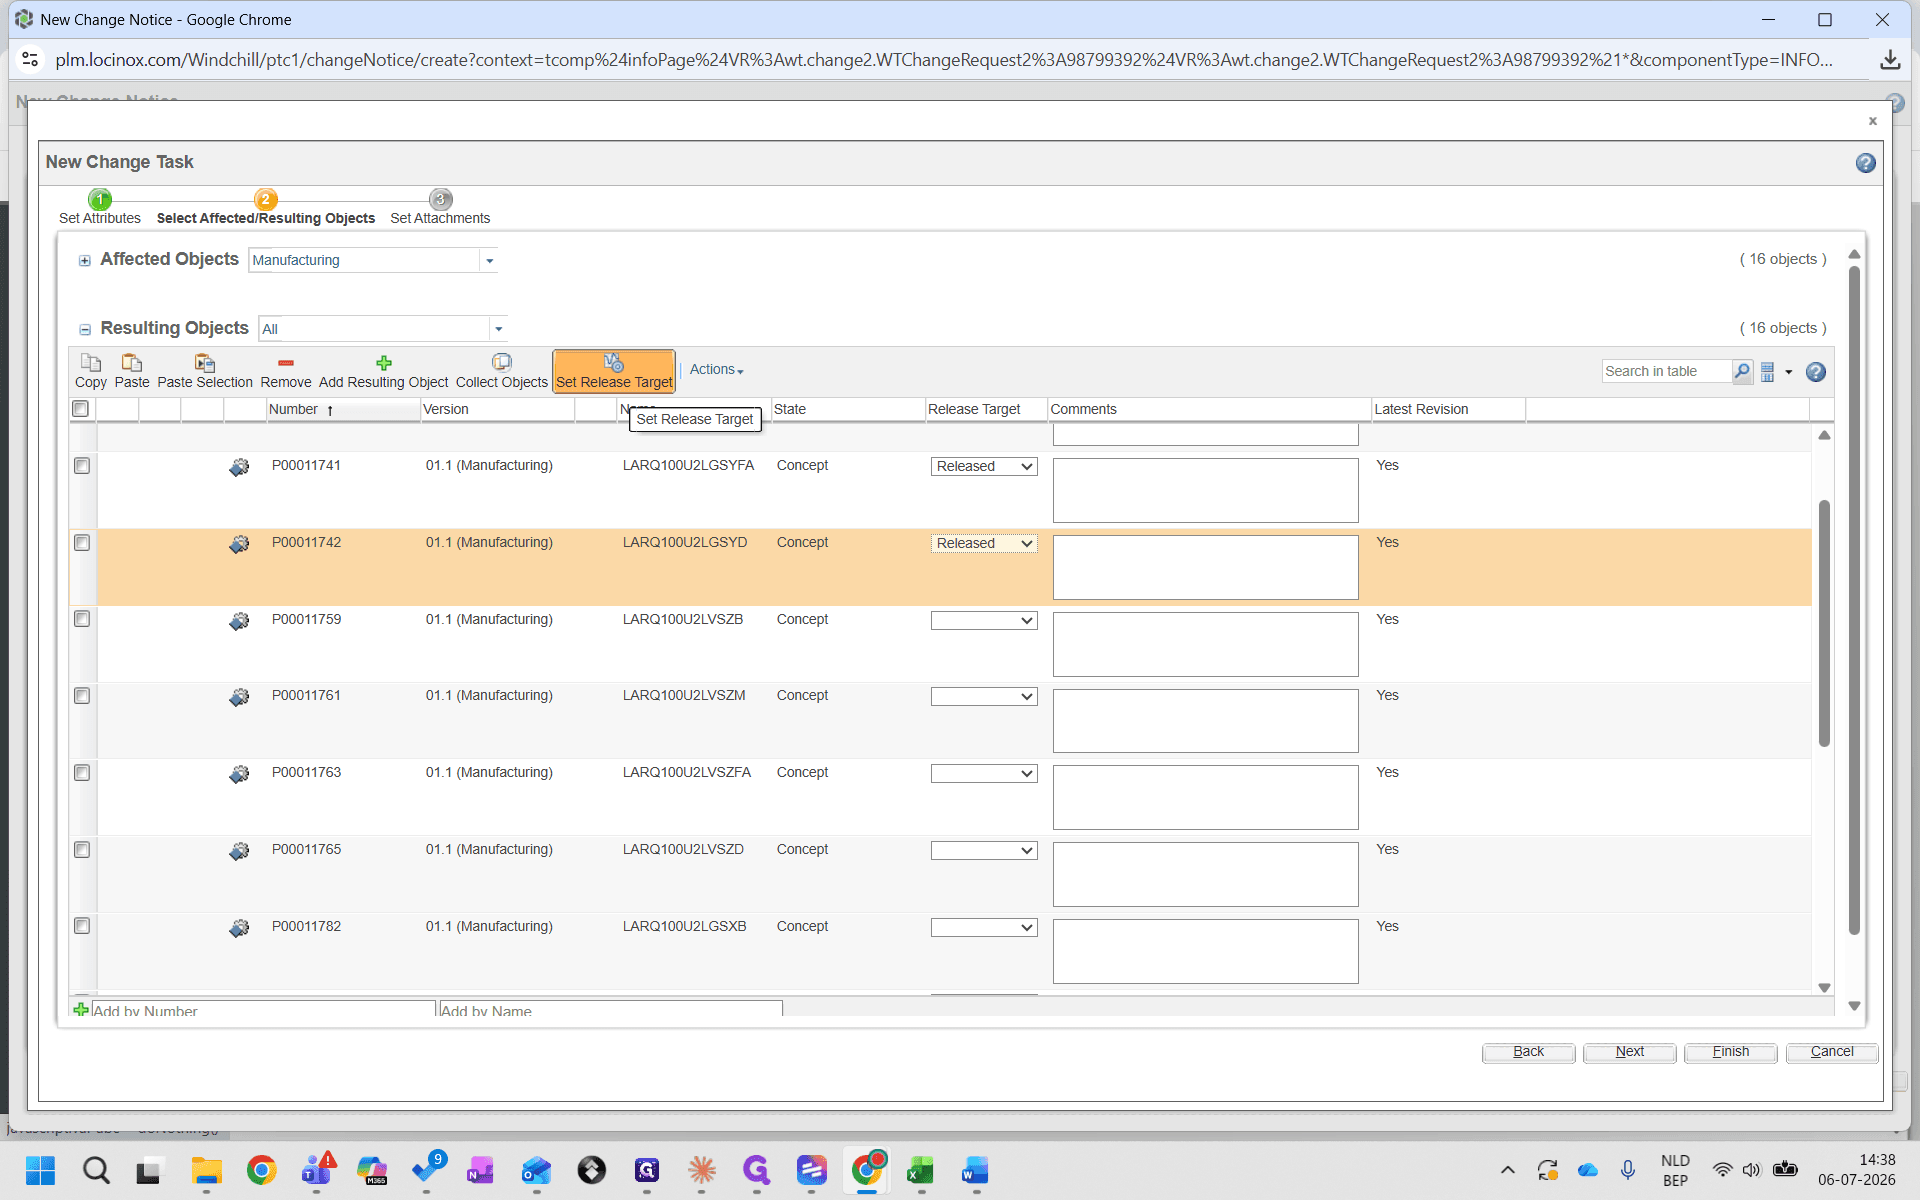
With the resulting objects selected, click Set Release Target.
Step #28: With the resulting objects selected, click Set Release Target.
29
Change the target state from the dropdown menu based on the options above.
Step #29: Change the target state from the dropdown menu based on the options above.
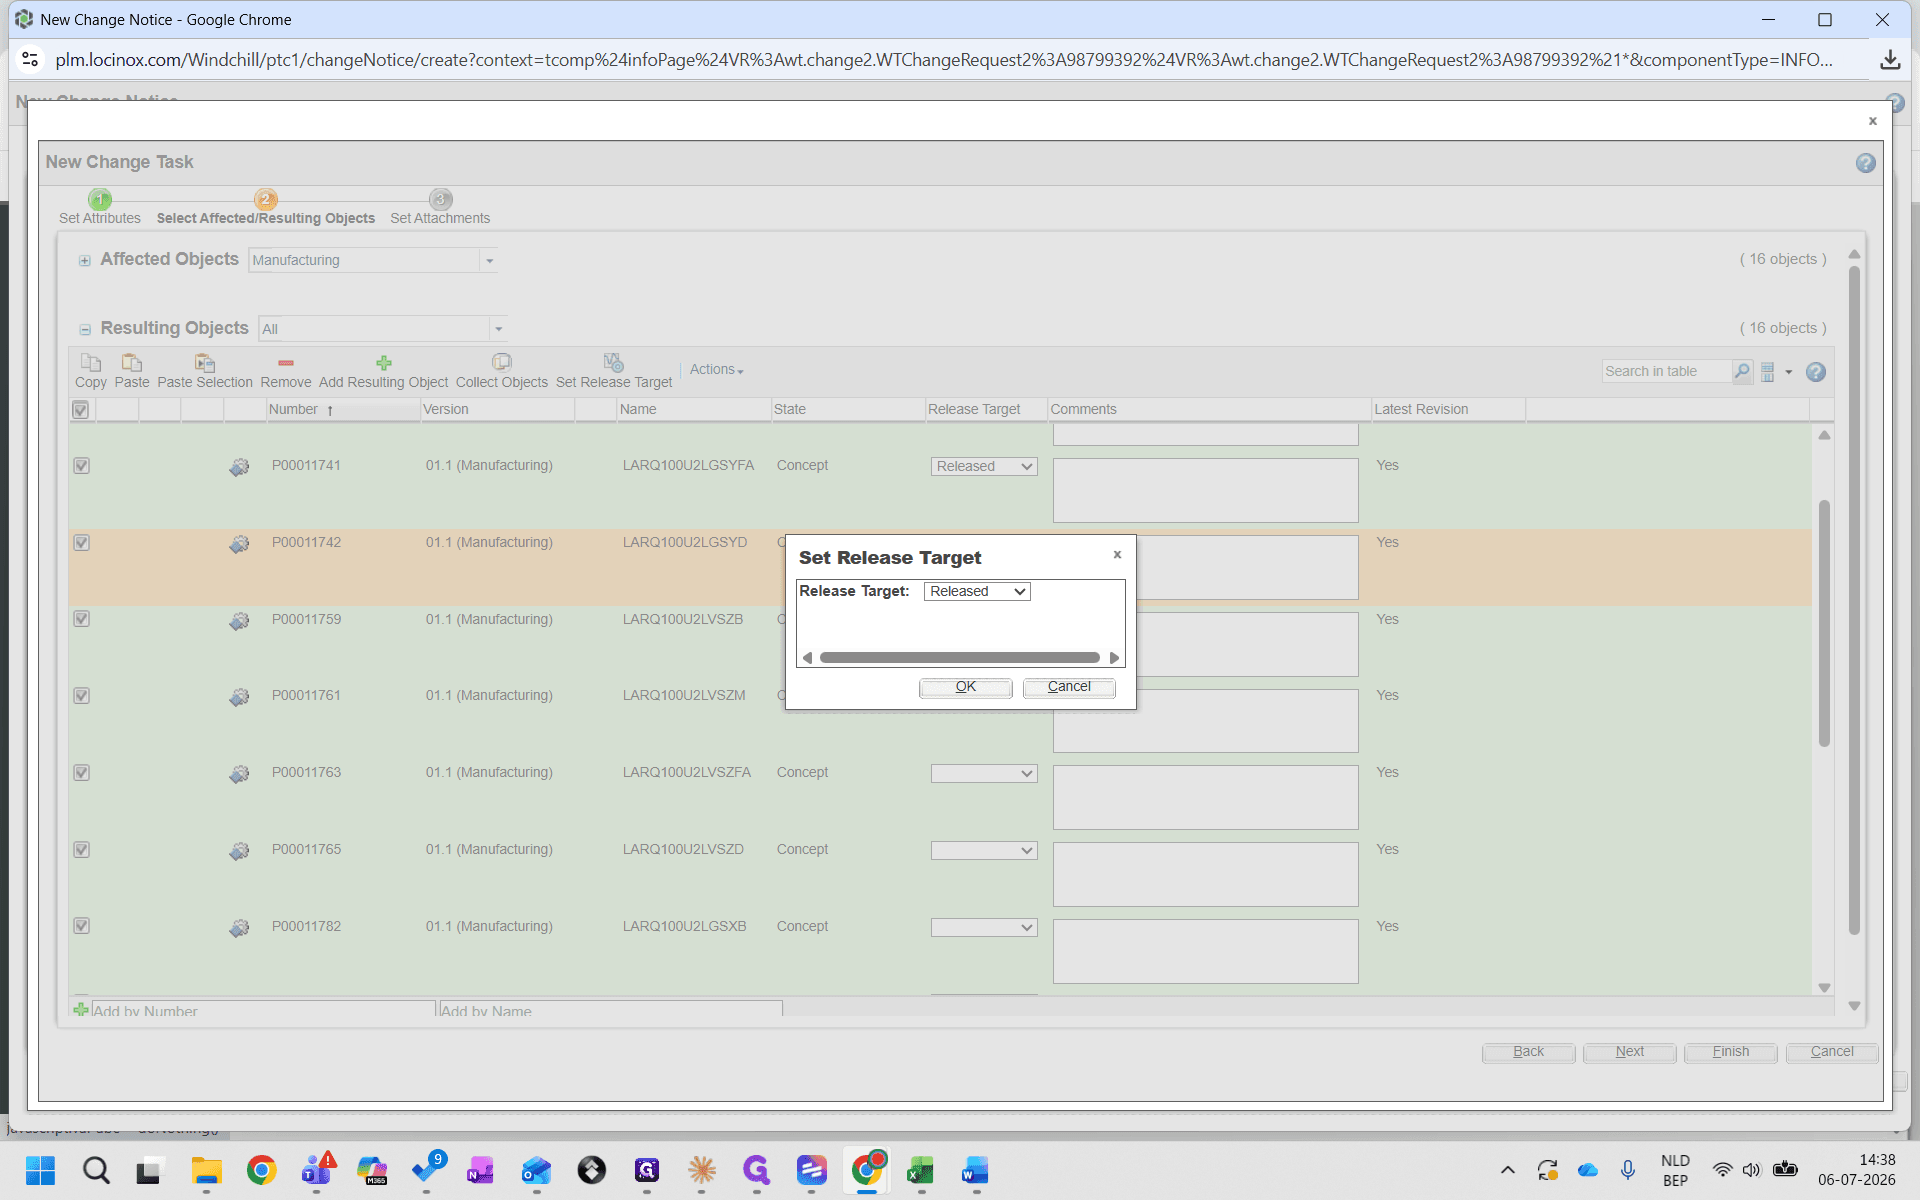
30
Click OK.
Step #30: Click OK.

Perform the Mass Change

31
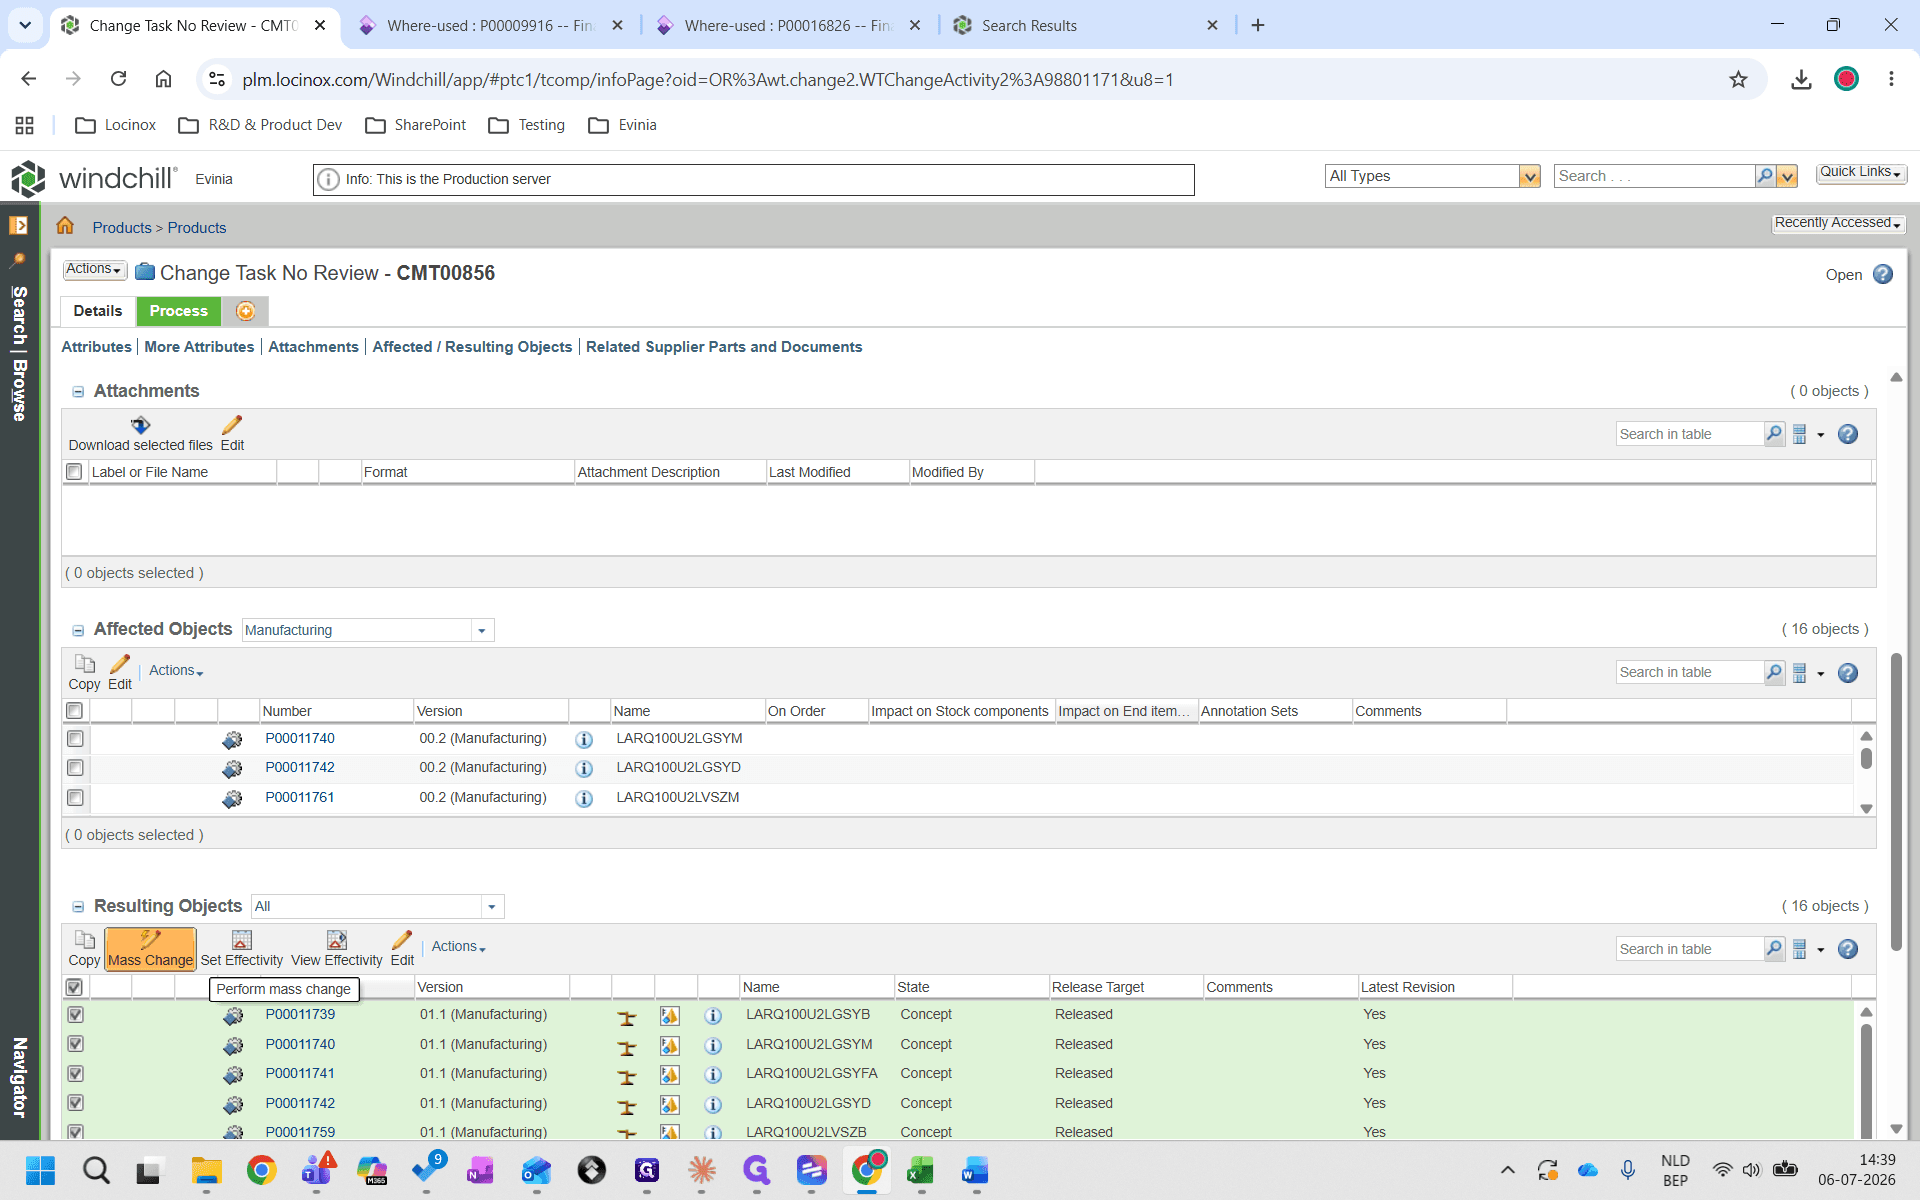
From the Resulting Objects toolbar, click the Perform mass change icon.
Step #31: From the Resulting Objects toolbar, click the Perform mass change icon.
32
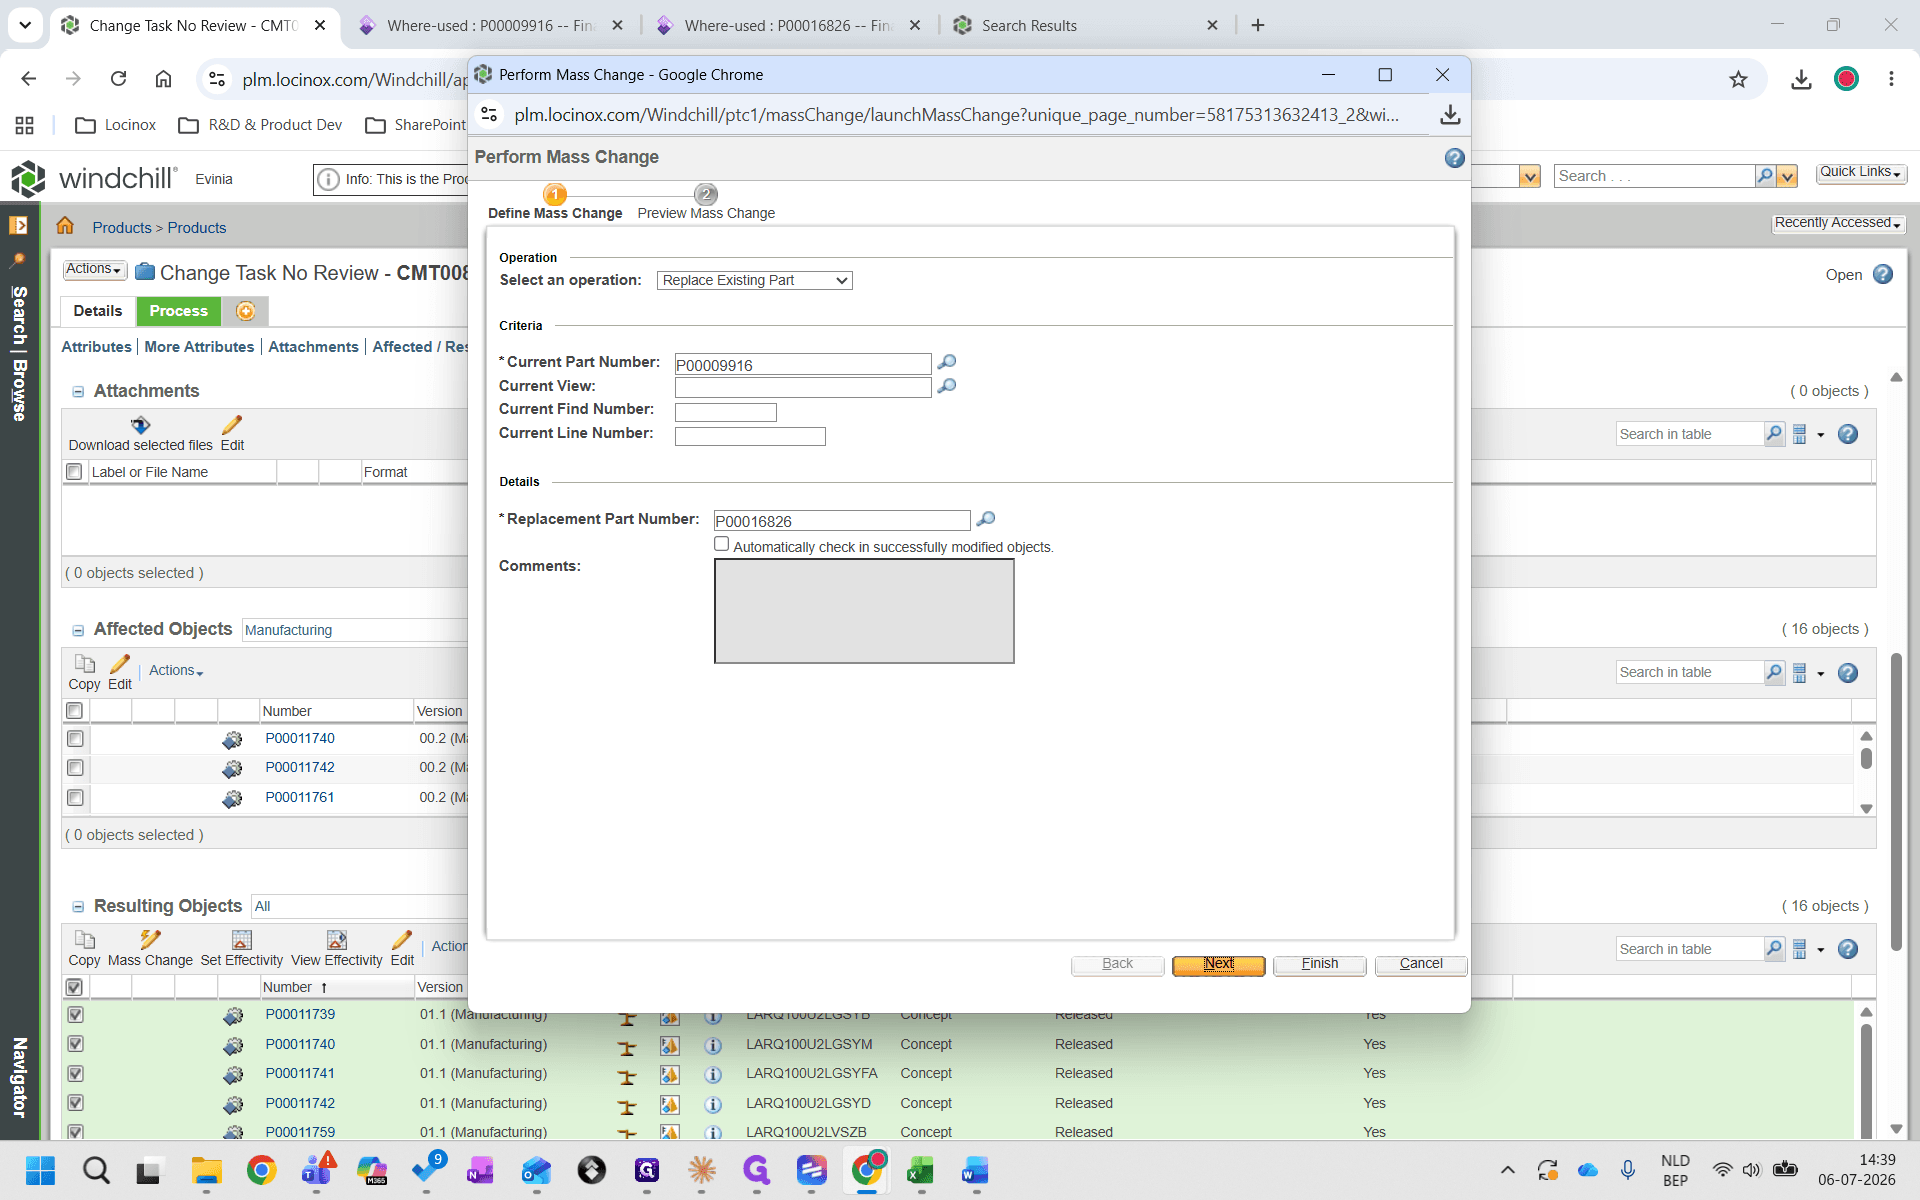
In the Current Part Number field, enter the part number you want to replace.
33
In the Replacement Part Number field, enter the new part number.
34
Click Next.
Step #34: Click Next.
35
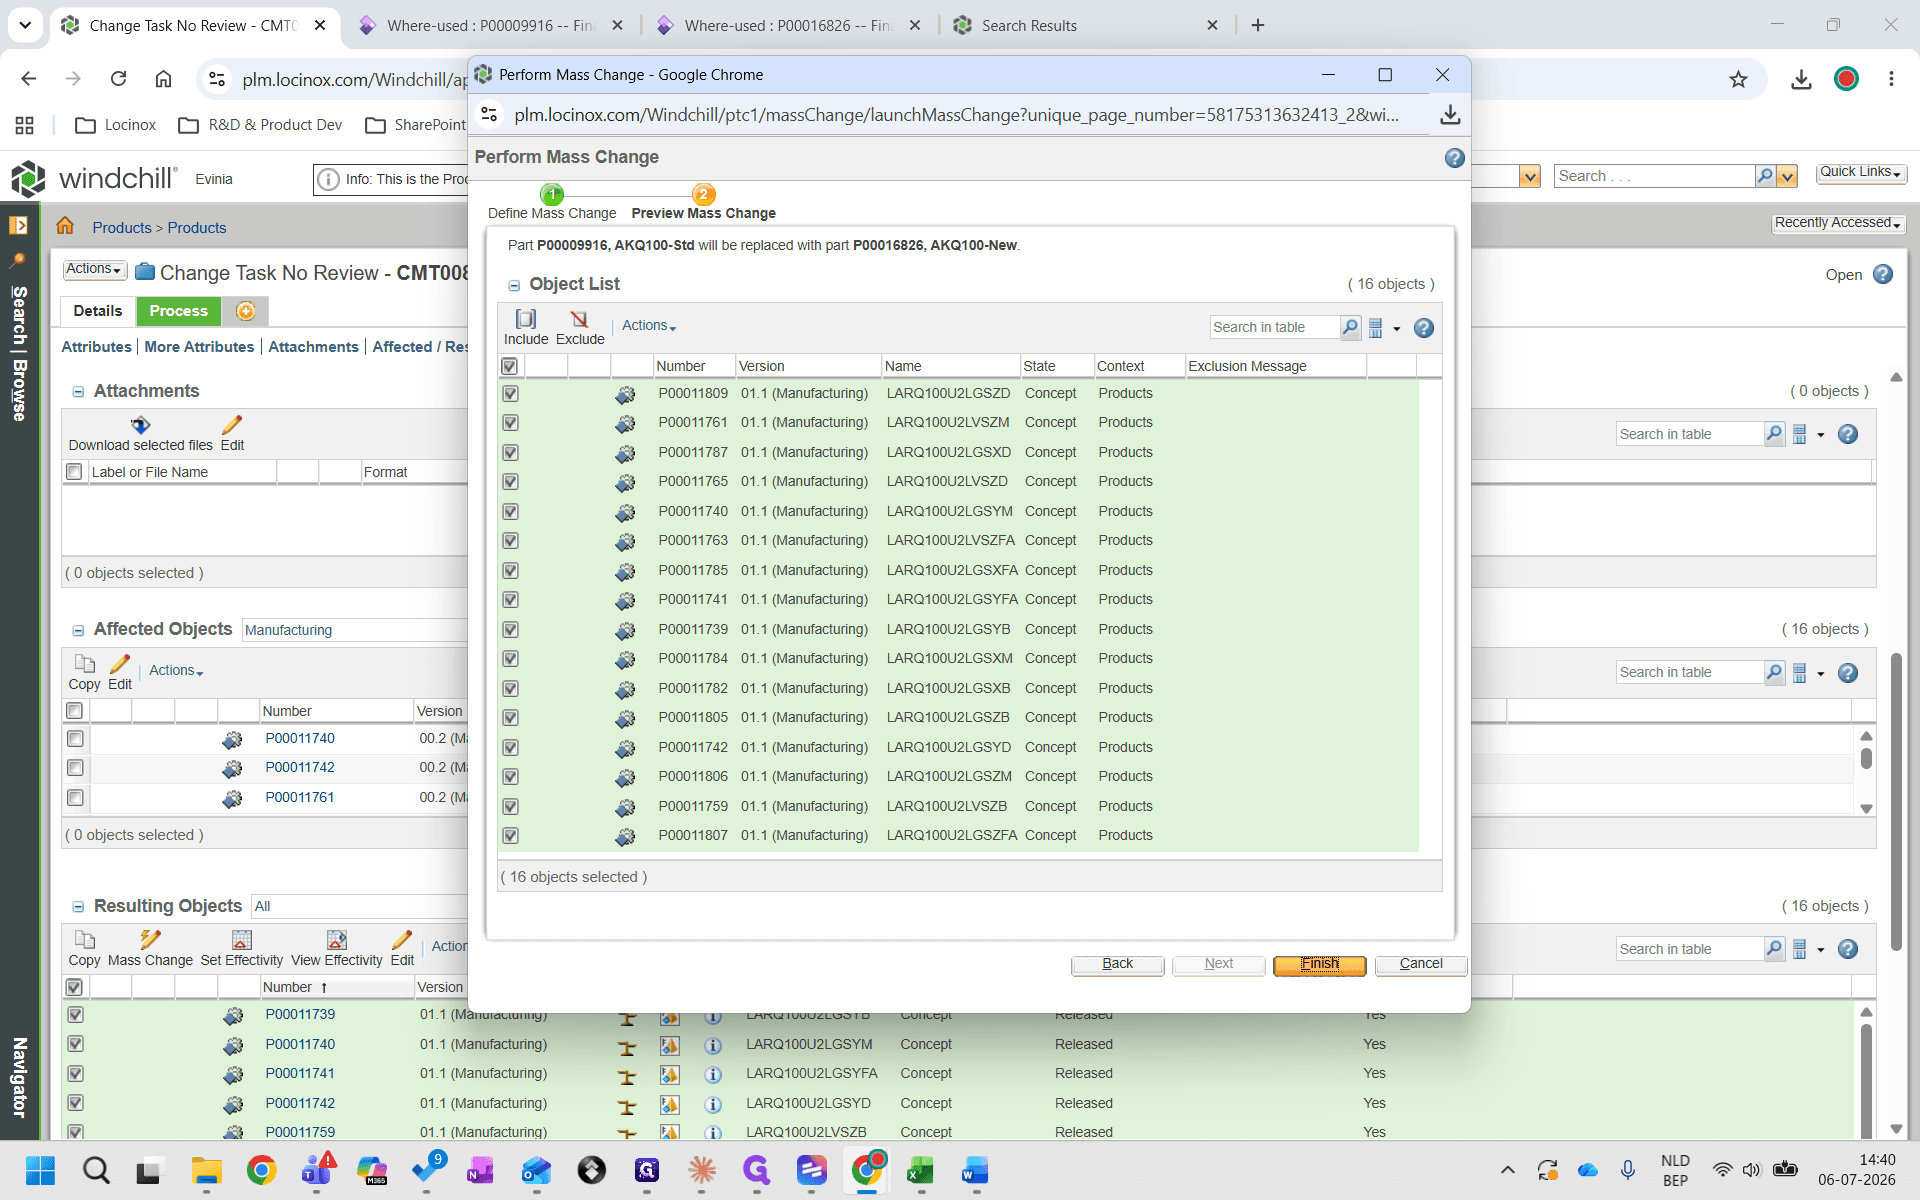
Review the preview of the updated parts, and click Finish.
Step #35: Review the preview of the updated parts, and click Finish.

Check In the Changes

36
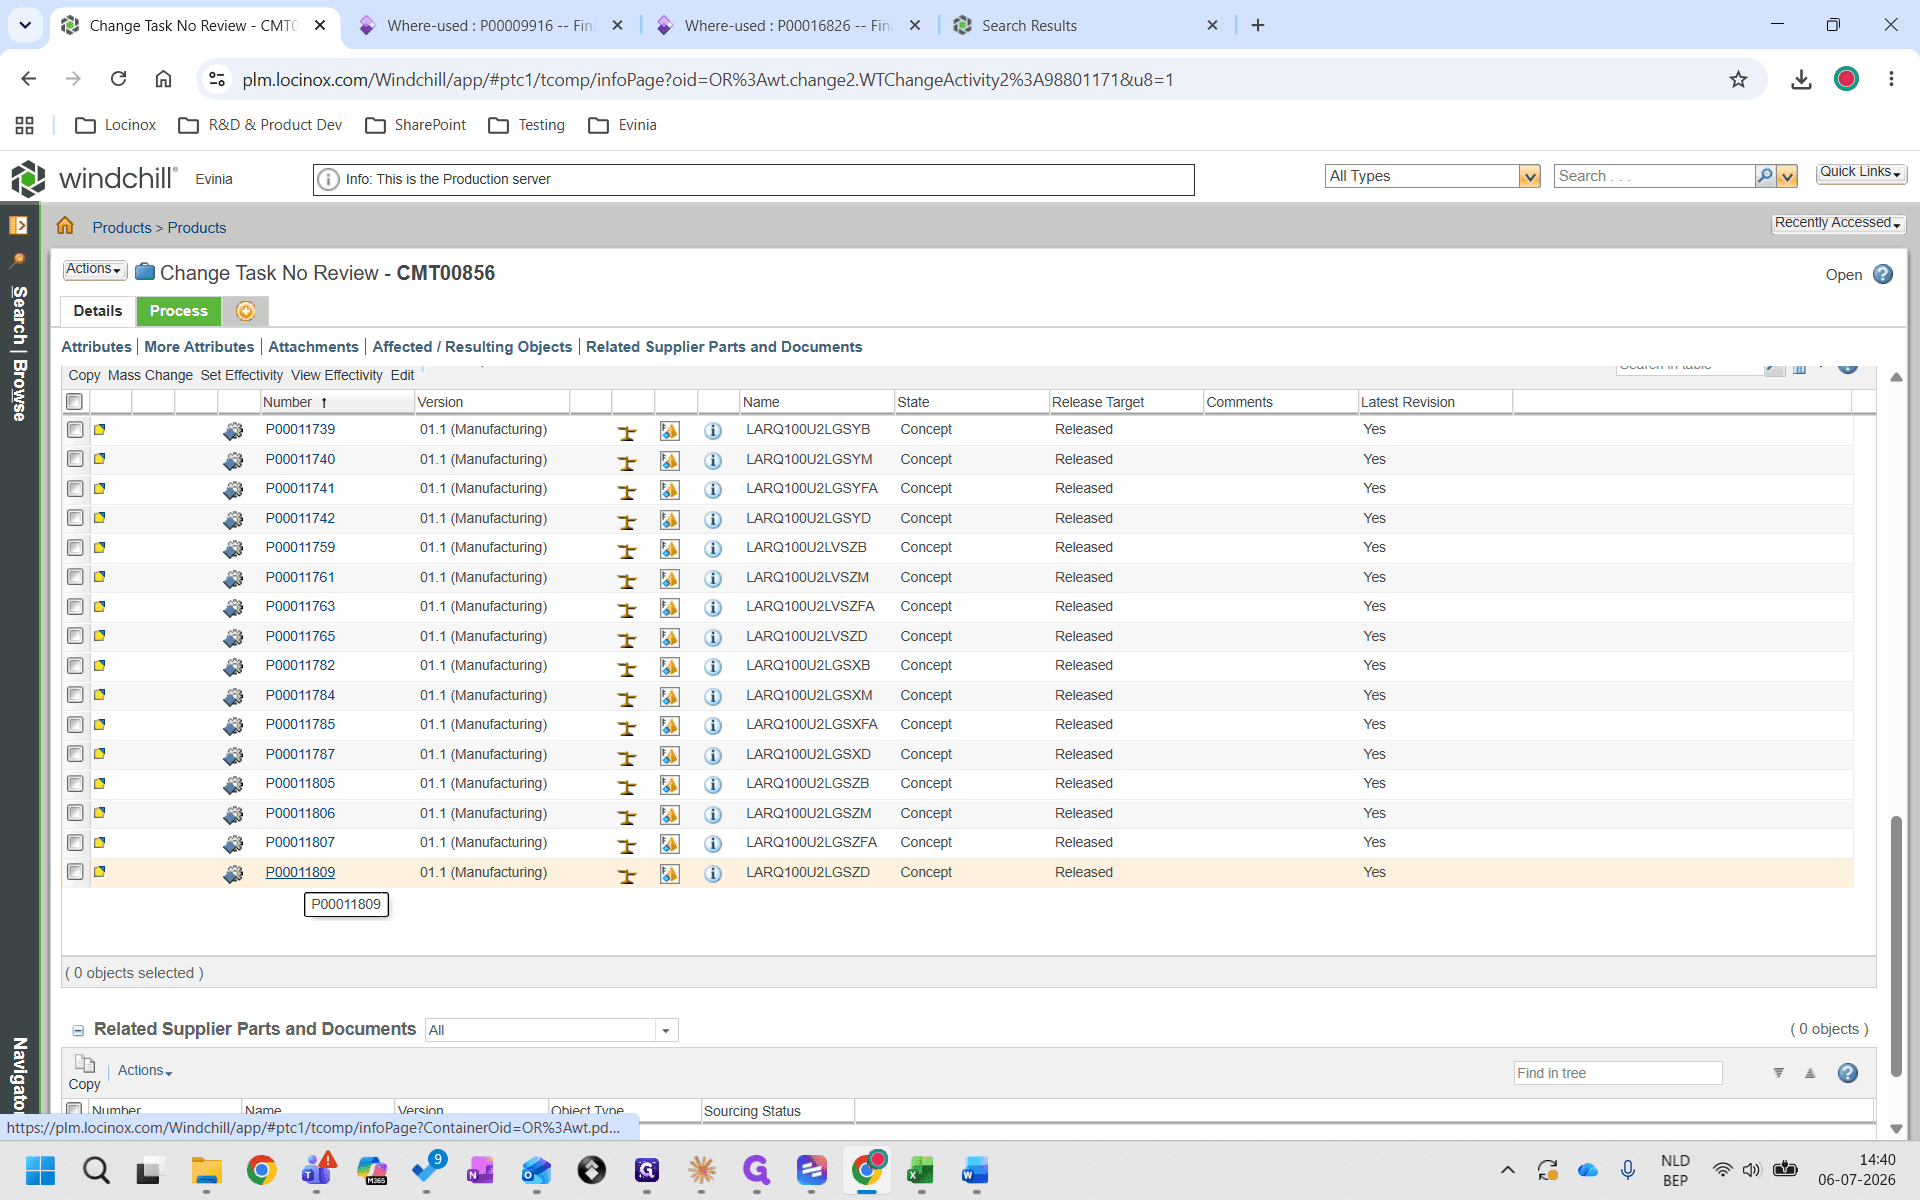
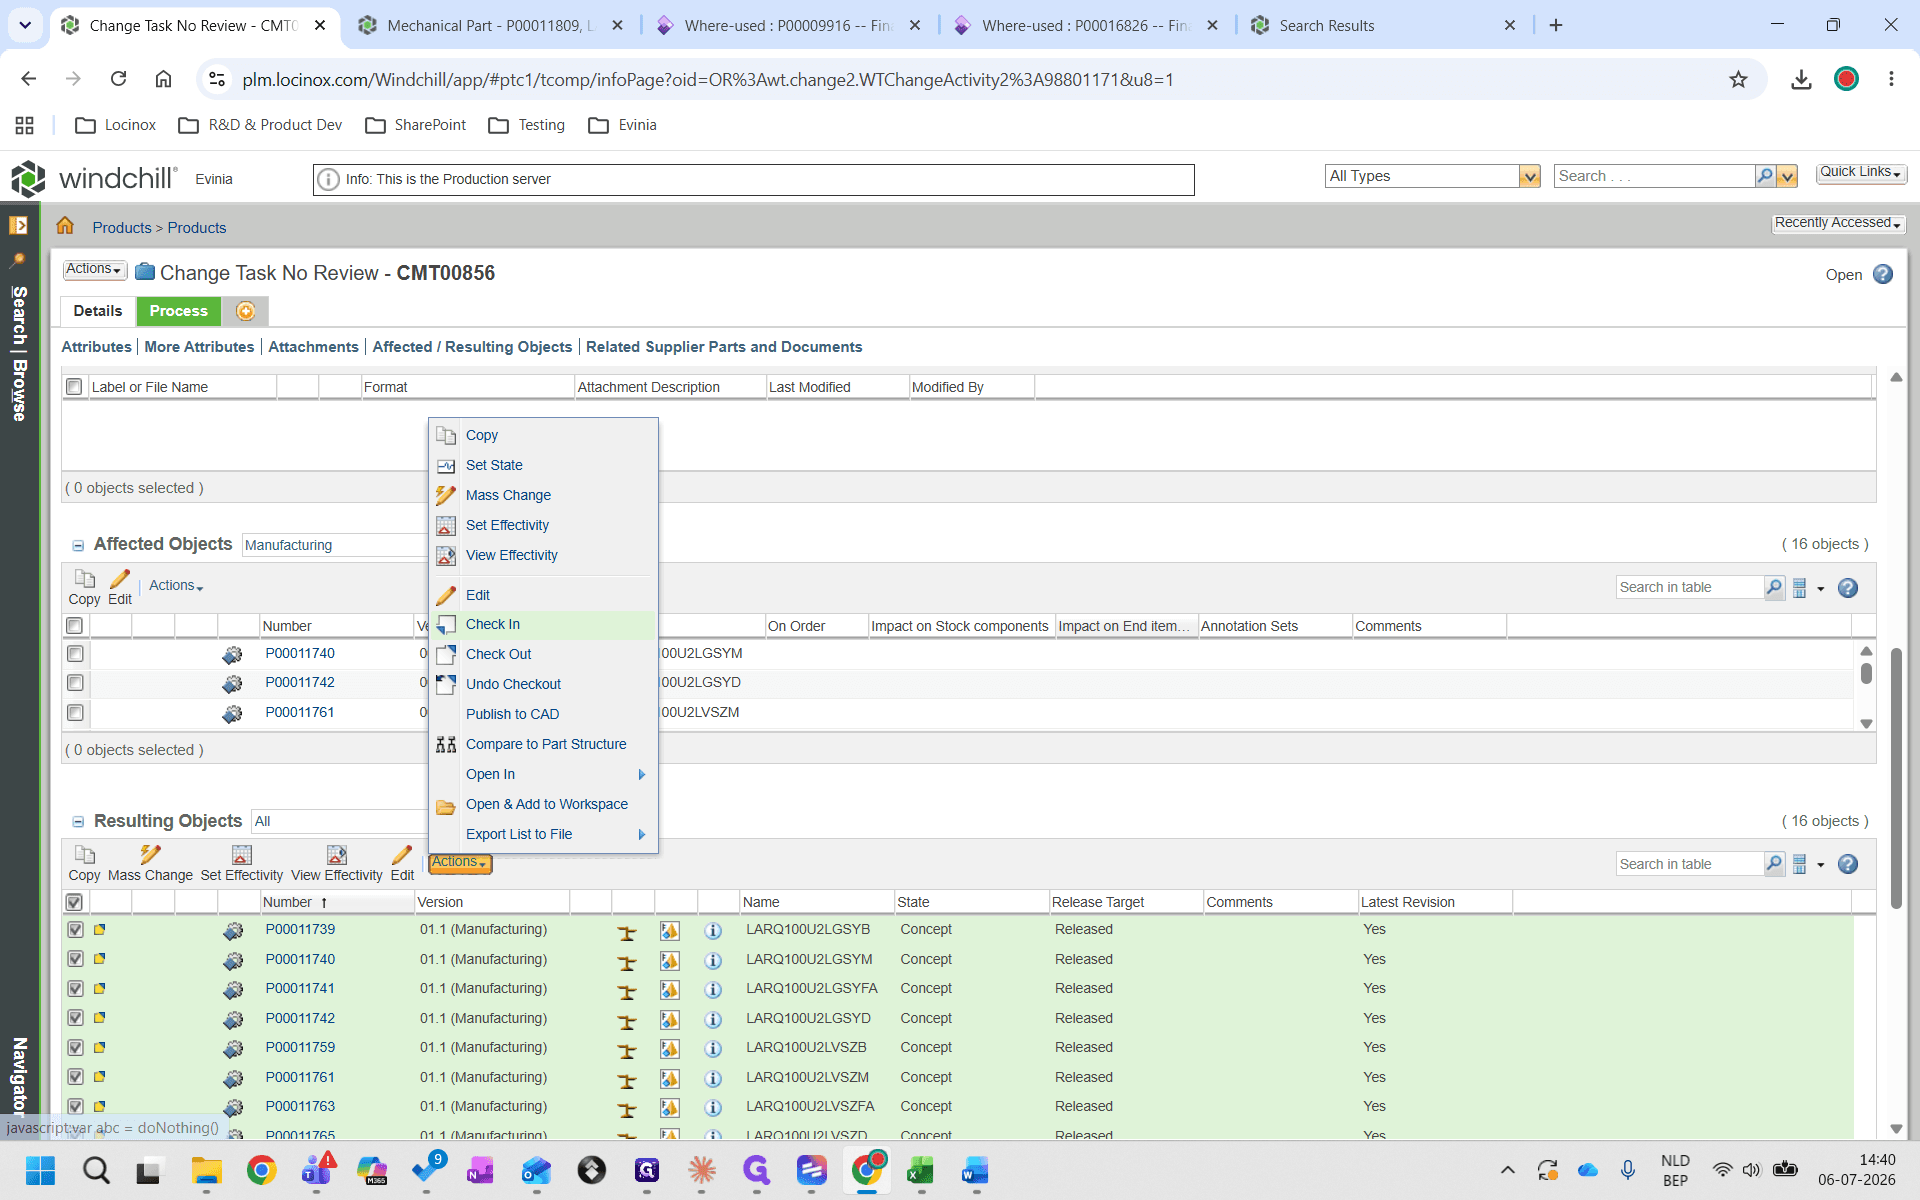
Right-click one of the affected objects in the list.
Step #36: Right-click one of the affected objects in the list.
37
Select Check In from the context menu.
Step #37: Select Check In from the context menu.
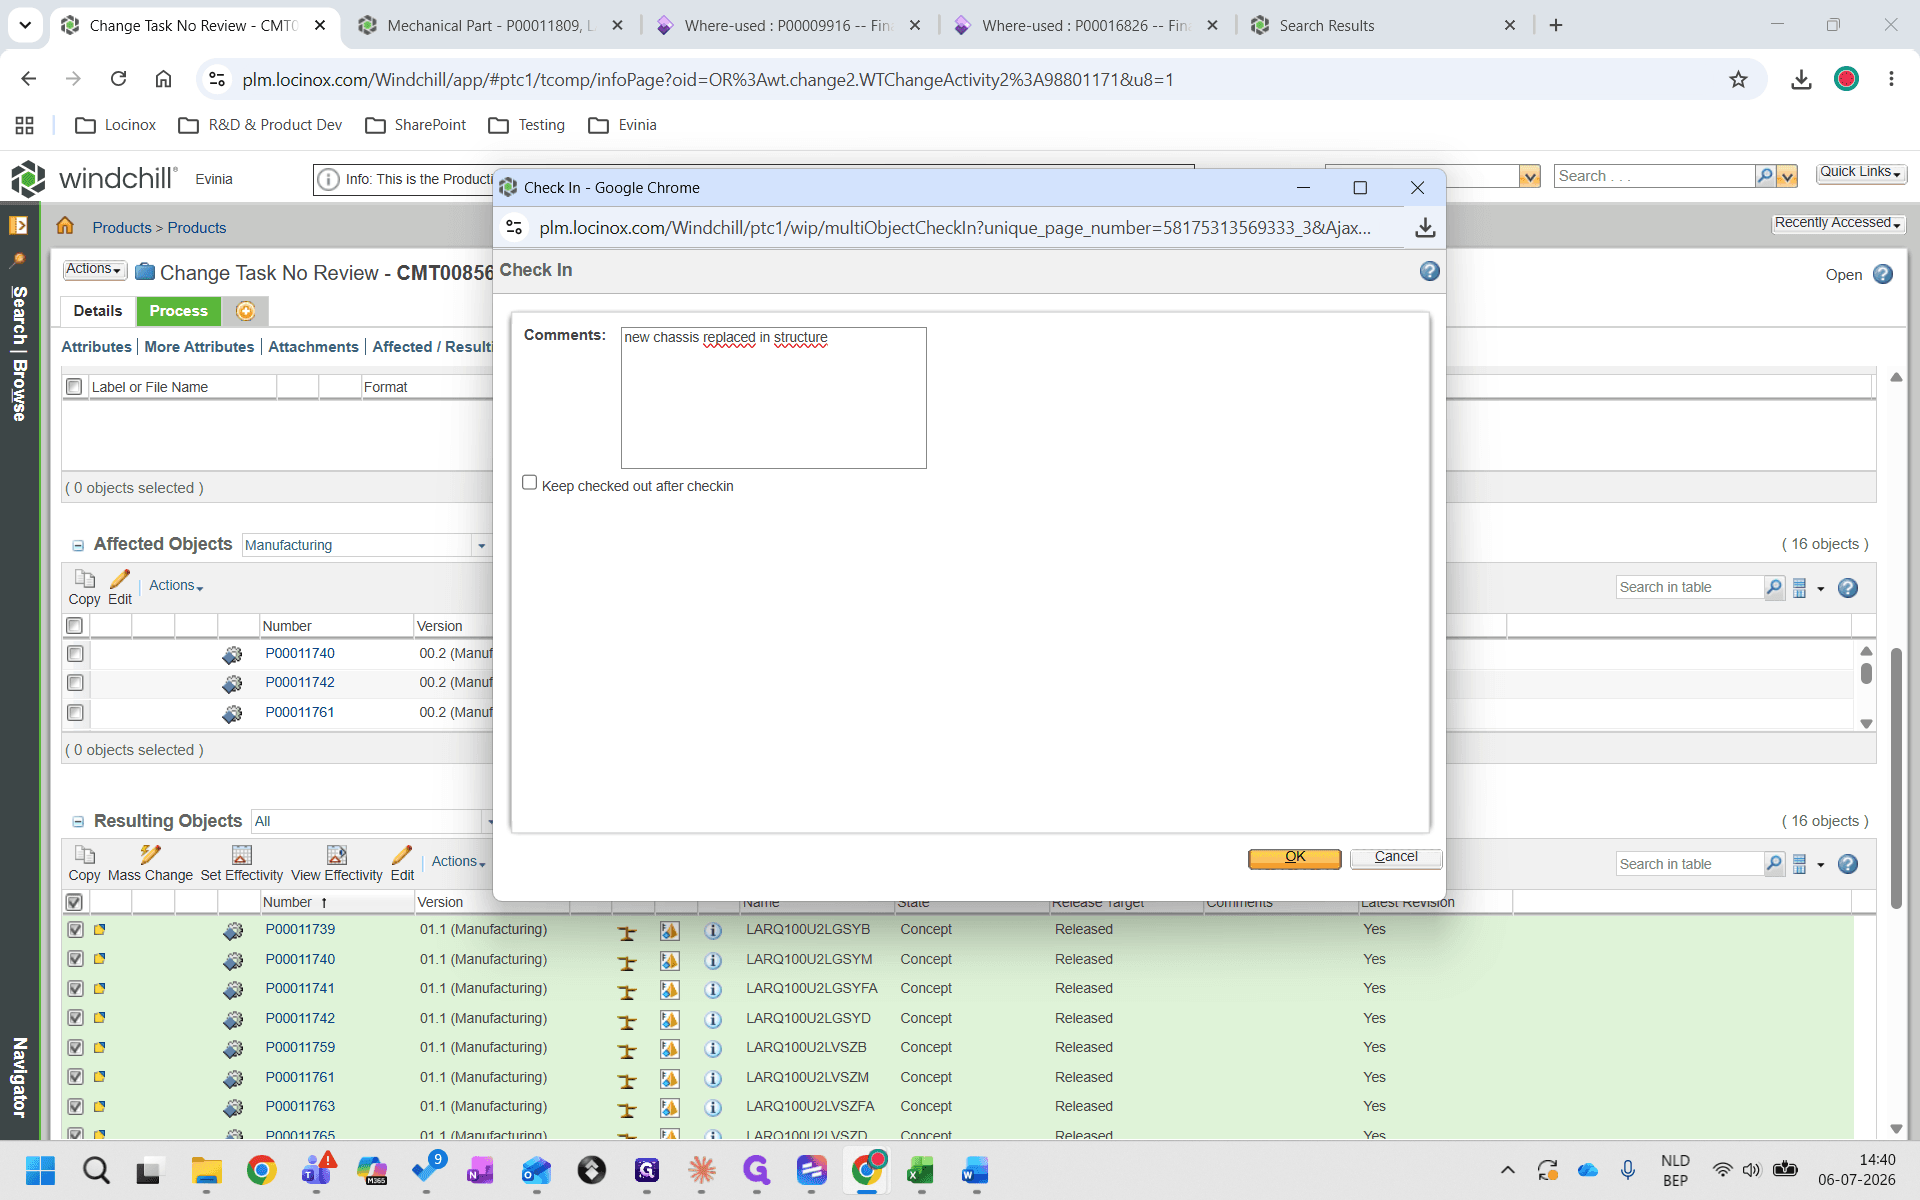
38
Enter a relevant comment explaining your updates (e.g., "new chassis replaced in structure").
39
Click OK.
Step #39: Click OK.

Complete the Workflow Task

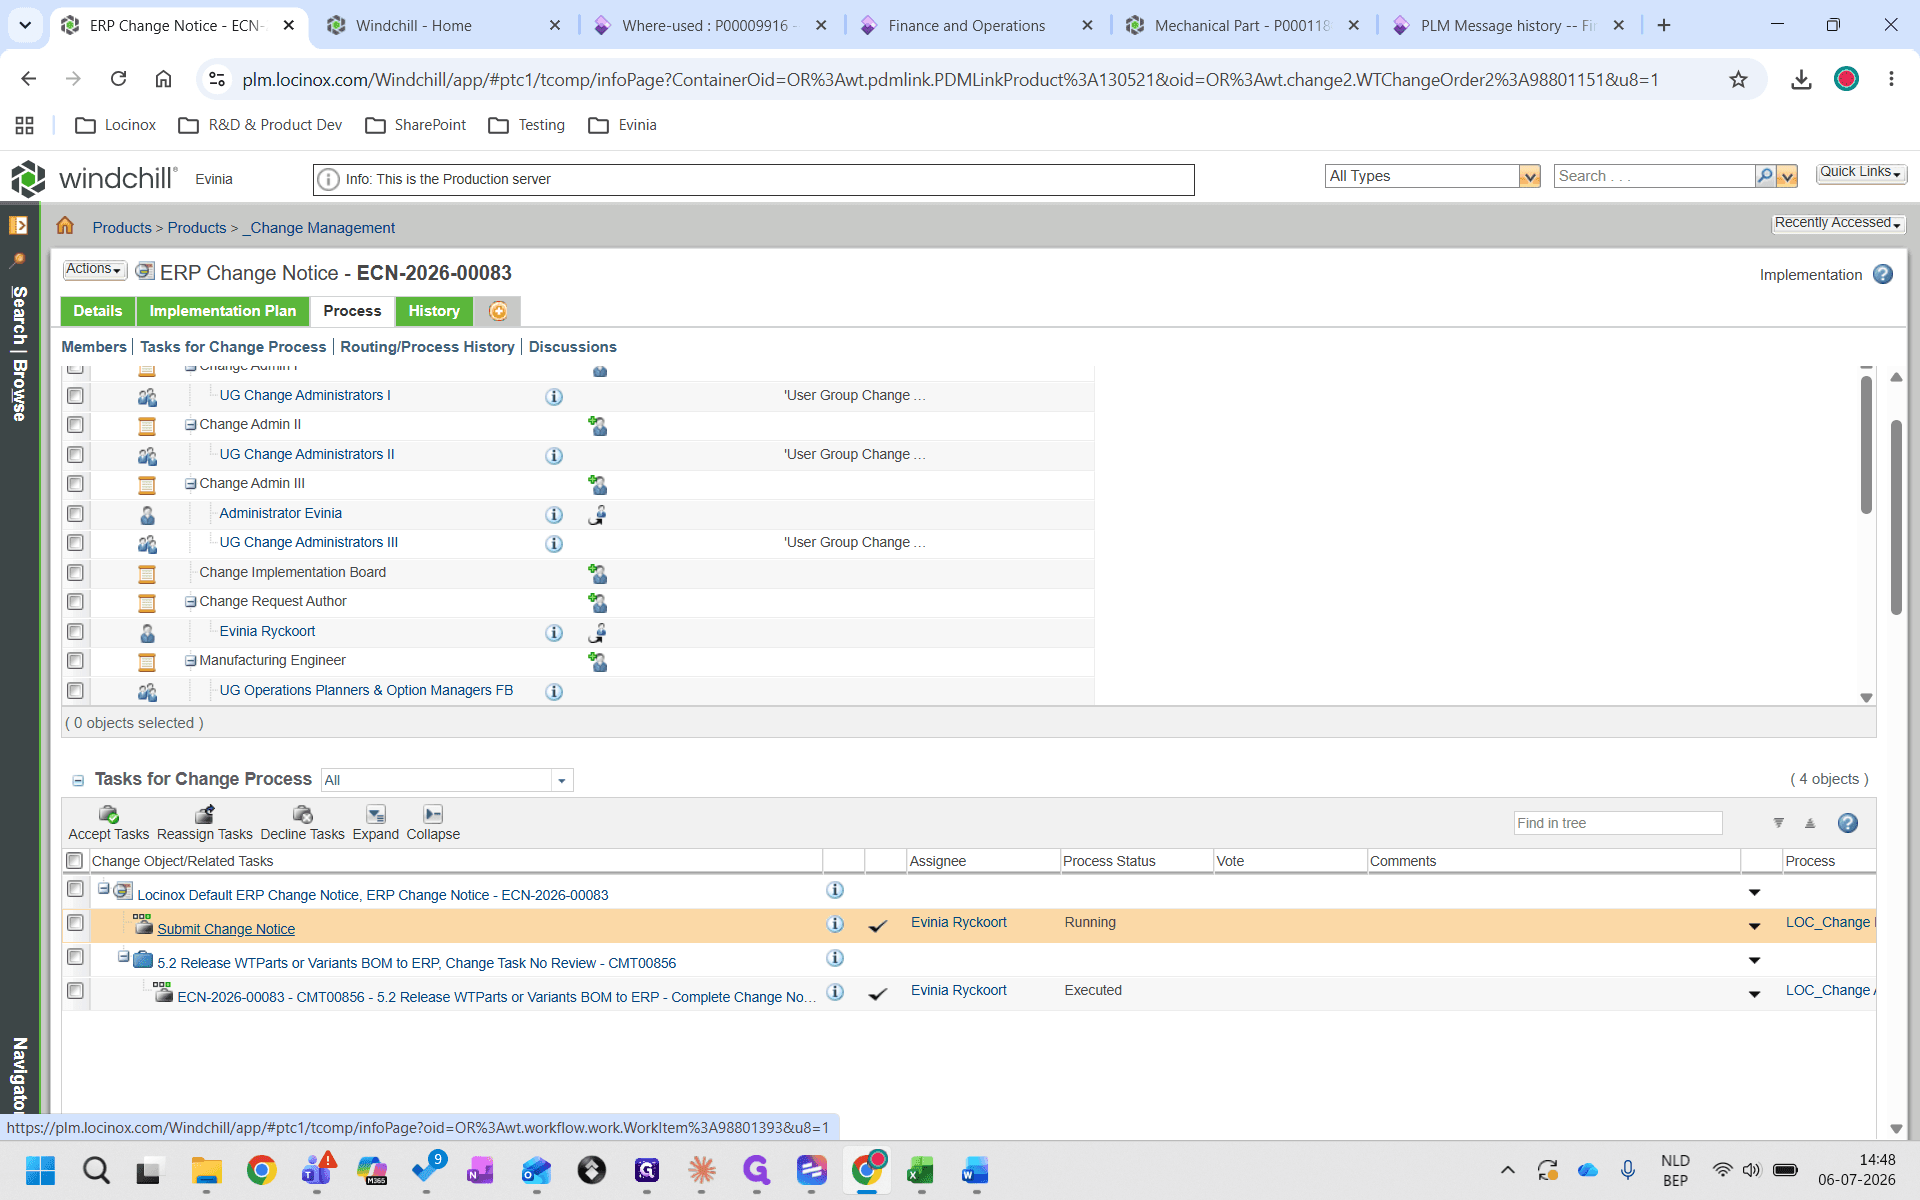
40
Navigate to your user's task list and open the Submit Change Notice task for your ECN.
Step #40: Navigate to your user's task list and open the Submit Change Notice task for your ECN.
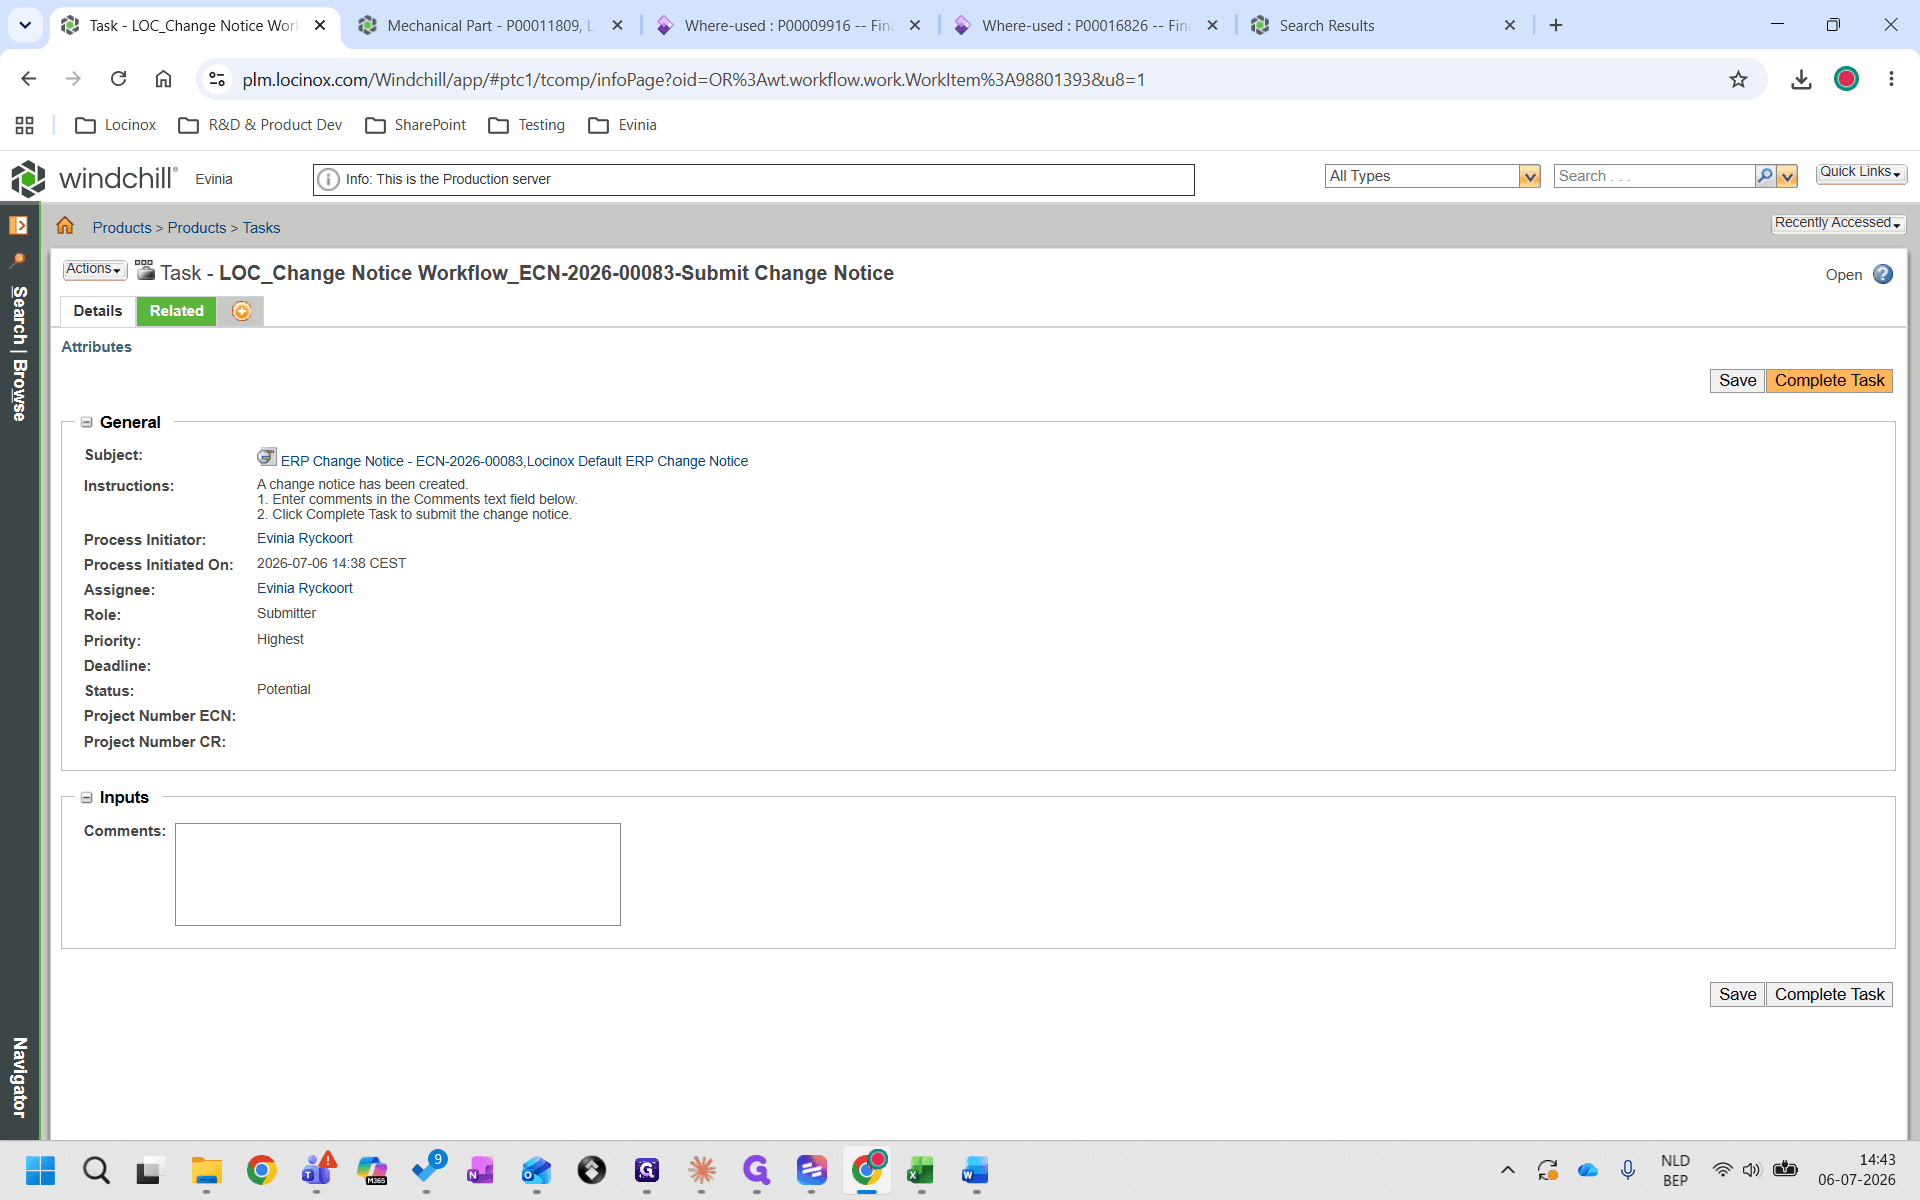
41
Click Complete Task to finalize the workflow and dispatch the changes.
Step #41: Click Complete Task to finalize the workflow and dispatch the changes.

Q: What is a Mass Change in Windchill?

A: A Mass Change is an operation that allows you to replace, insert, or remove a specific part or document across multiple Bills of Materials (BOMs) or structures simultaneously, rather than updating each one individually.

Q: Why are my items not updating when I try to set the release target?

A: You must first select the checkboxes for the specific objects in the Resulting Objects table before clicking Set Release Target. If no items are selected, Windchill will throw a "No object selected to process" warning.

Q: Do I need to create a Change Request before an ERP Change Notice?

A: It depends on your organization's workflow, but typically, a Change Request is created first to document the problem and proposed solution. The ERP Change Notice is then generated from the request to carry out the actual structural modifications.

Q: How do I assign a release target to my revised parts?

A: Select the revised items in the Resulting Objects table, click the Set Release Target icon in the toolbar, select your desired state (e.g., Released or PreReleased) from the dropdown, and click OK.

Term

Definition

Windchill PLM

A Product Lifecycle Management software by PTC used to manage product data, BOMs, and engineering processes.

Change Notice (ECN)

A formal document in PLM authorizing and recording the execution of a change to a product or system.

Change Request (ECR)

A documented request to modify a product, process, or system, usually preceding a Change Notice.

Mass Change

An automated action to find and replace, add, or remove a component across multiple assemblies in a single operation.

Resulting Objects

The parts or documents produced or modified as the output of a change task.

Affected Objects

The existing, released versions of parts or documents that are targeted for modification during a change process.

Release Target

The lifecycle state that an object will automatically transition to once the change notice is approved and closed.