How to Pick a Pallet Order Using the PC: Step-by-Step Guide
Learn how to efficiently pick a pallet order using the PC, from accessing the dispatch module to assigning orders, tracking batch numbers, and preparing shipments for delivery. Follow this detailed warehouse picking process for accurate and streamlined operations.
In this guide, we'll learn how to pick a pallet order using a PC in a warehouse environment. We'll cover how to use the dispatch module to find orders, assign them, and follow detailed picking notes. You'll also see how to handle stock differences, update batch numbers, and complete the shipping process.
Let's get started
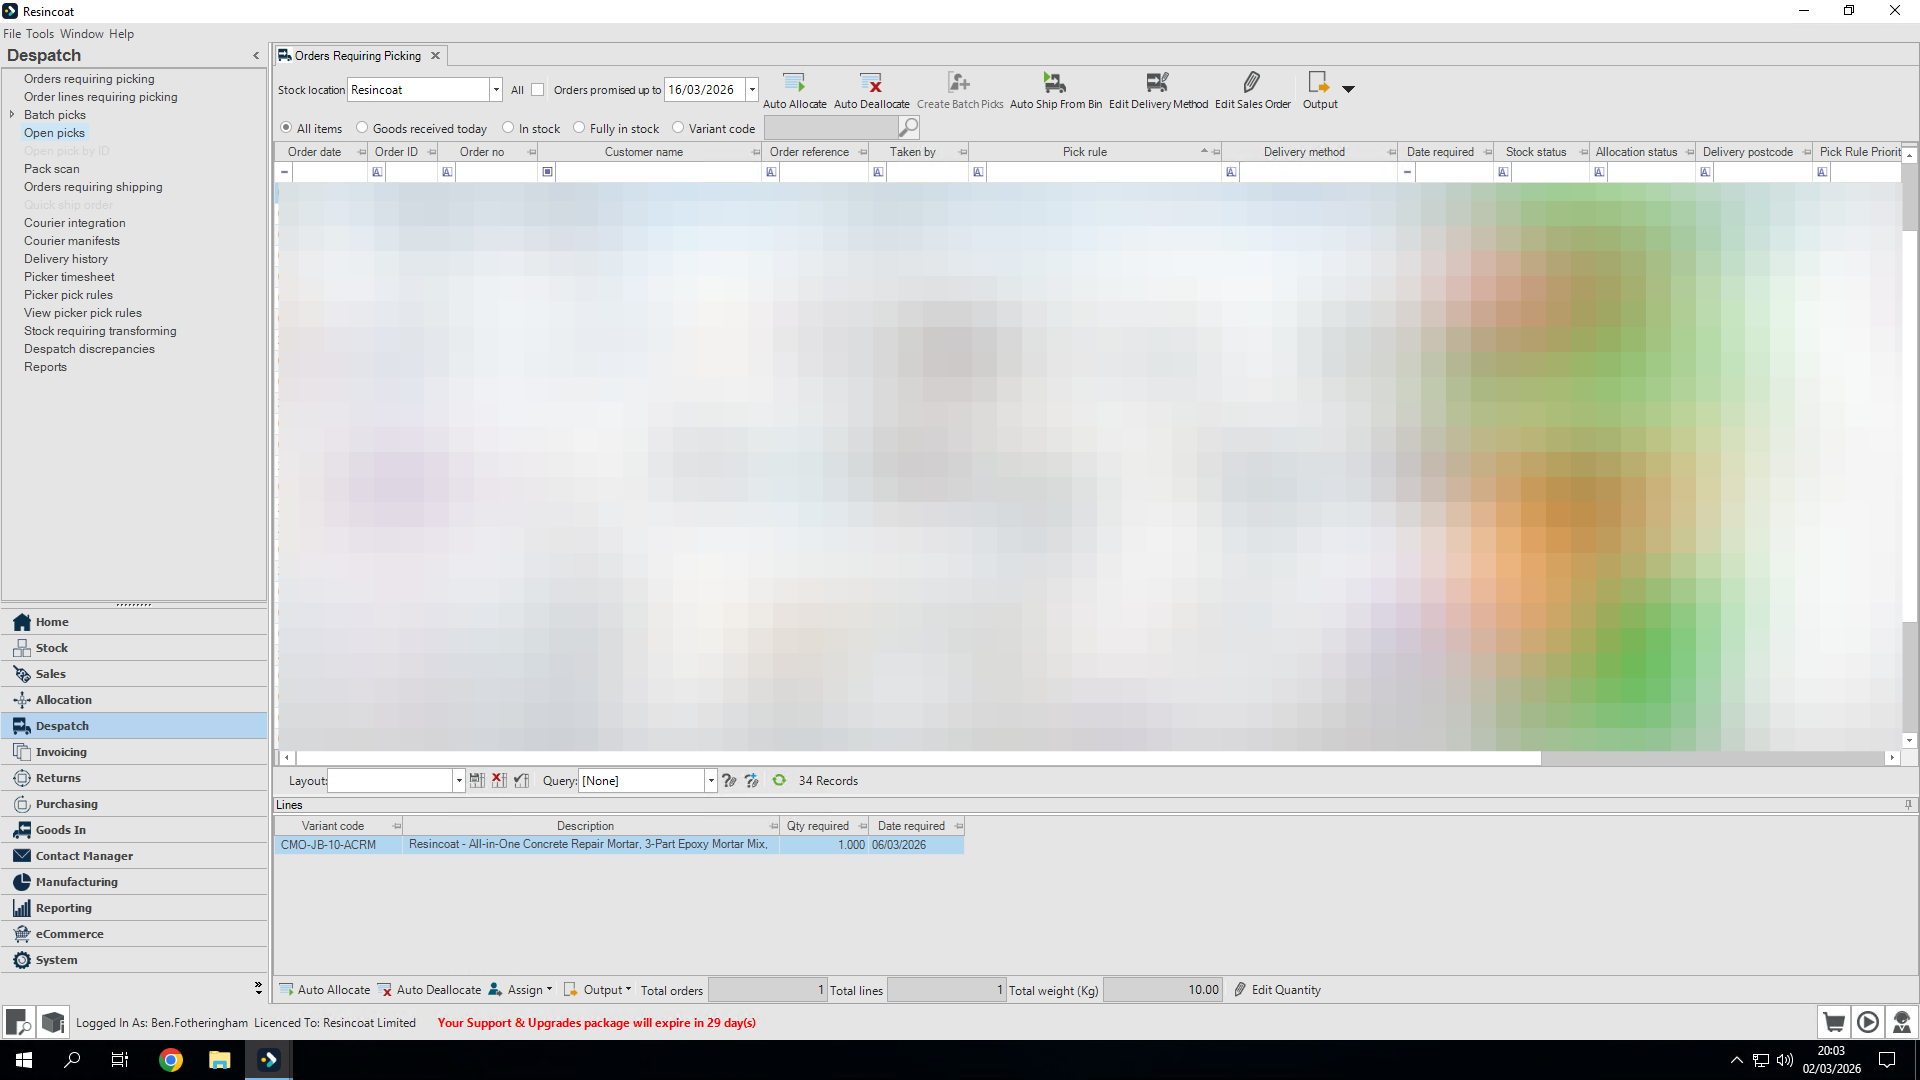
Okay. Let's look at how to pick a pallet order using the PC. First, go to the dispatch module.
You can see orders that require picking loads up automatically. Let's find the pallet we need to pick. We have our pallets ready for the next day.
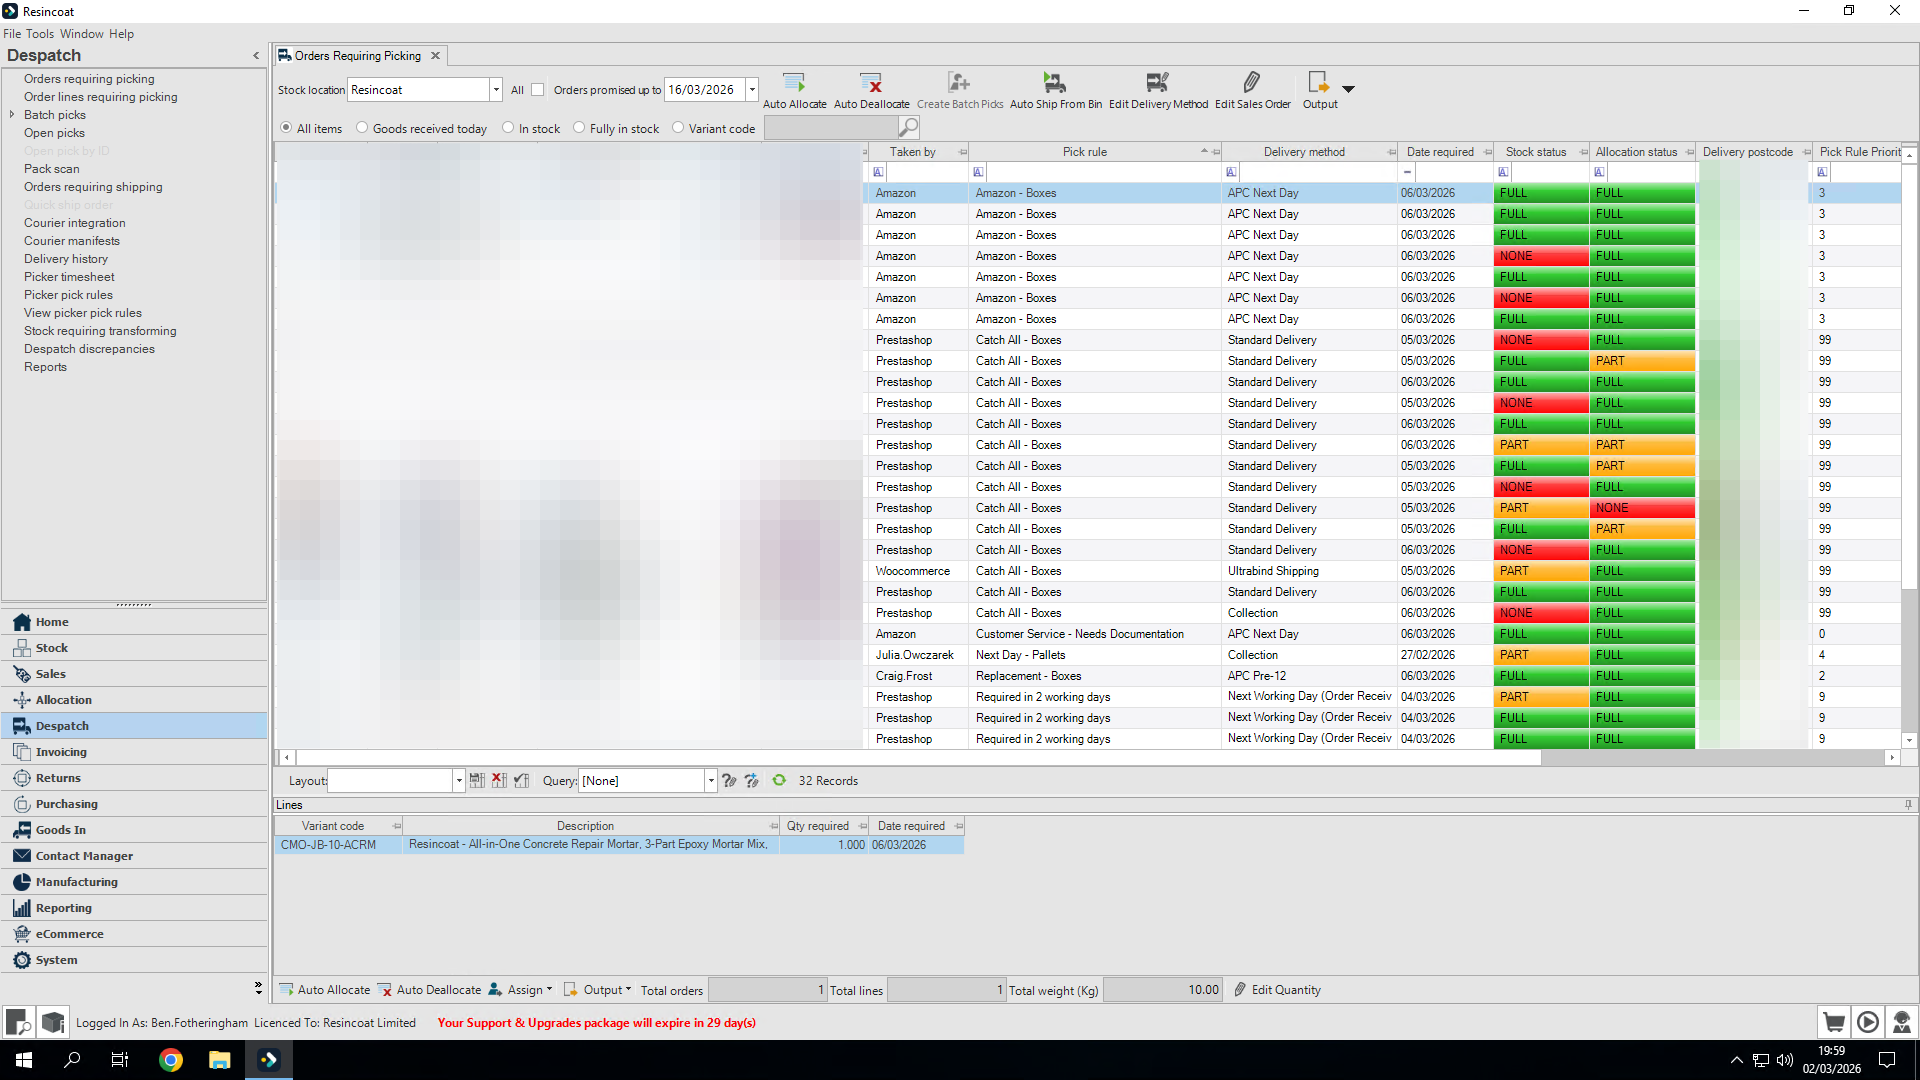
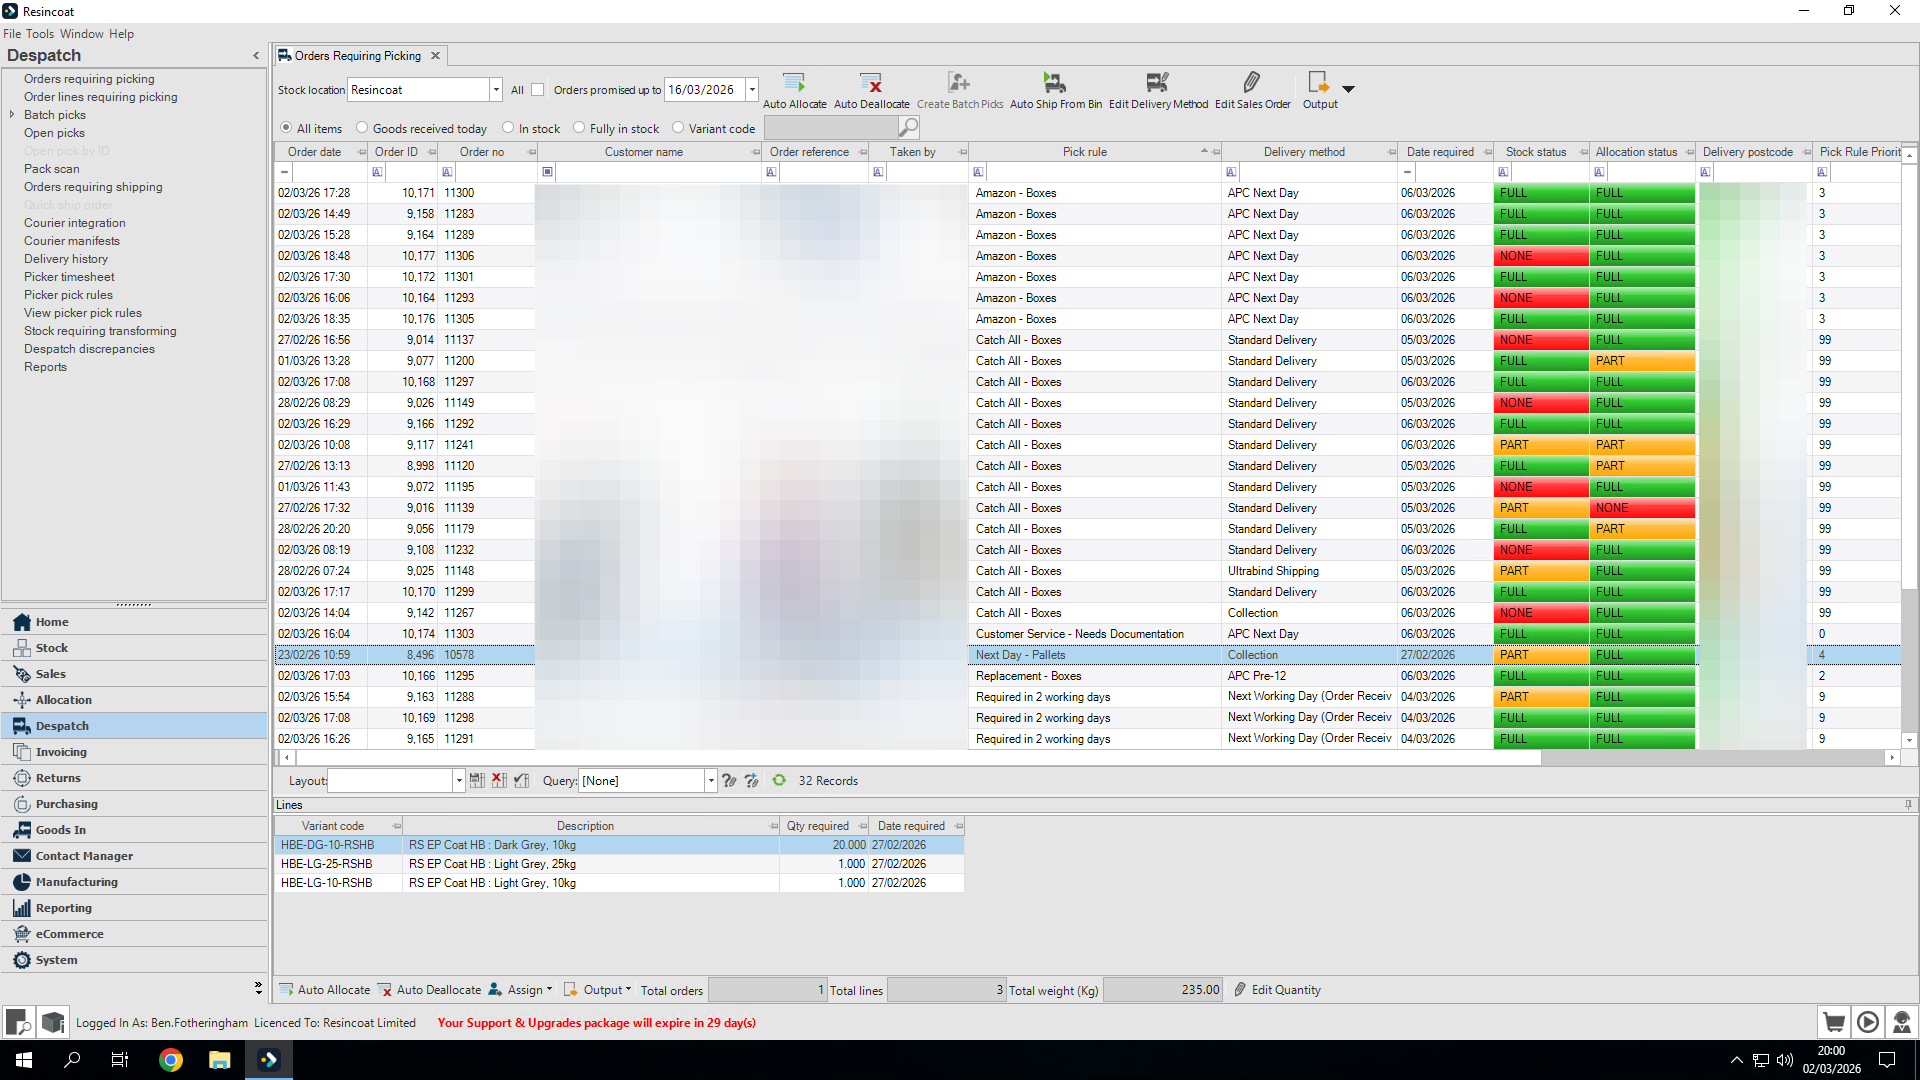
Let's look at one we can choose.
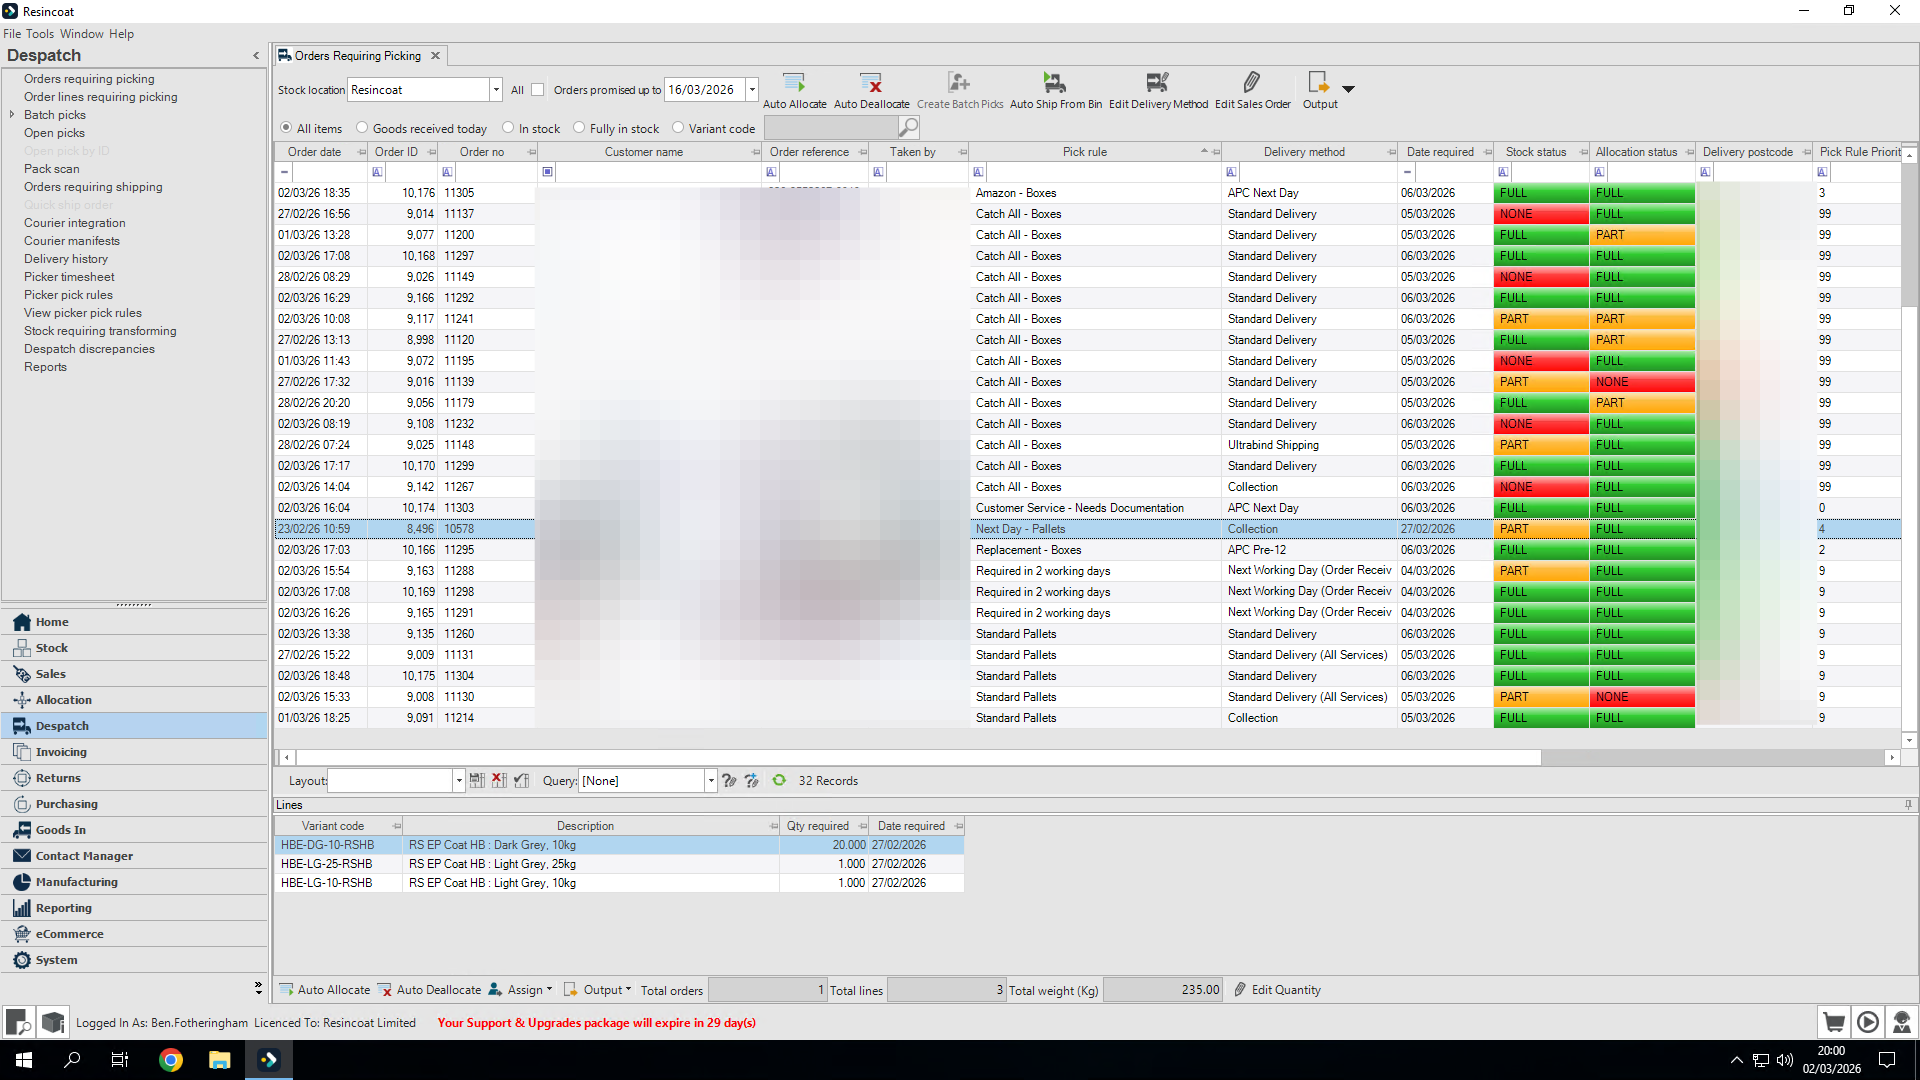
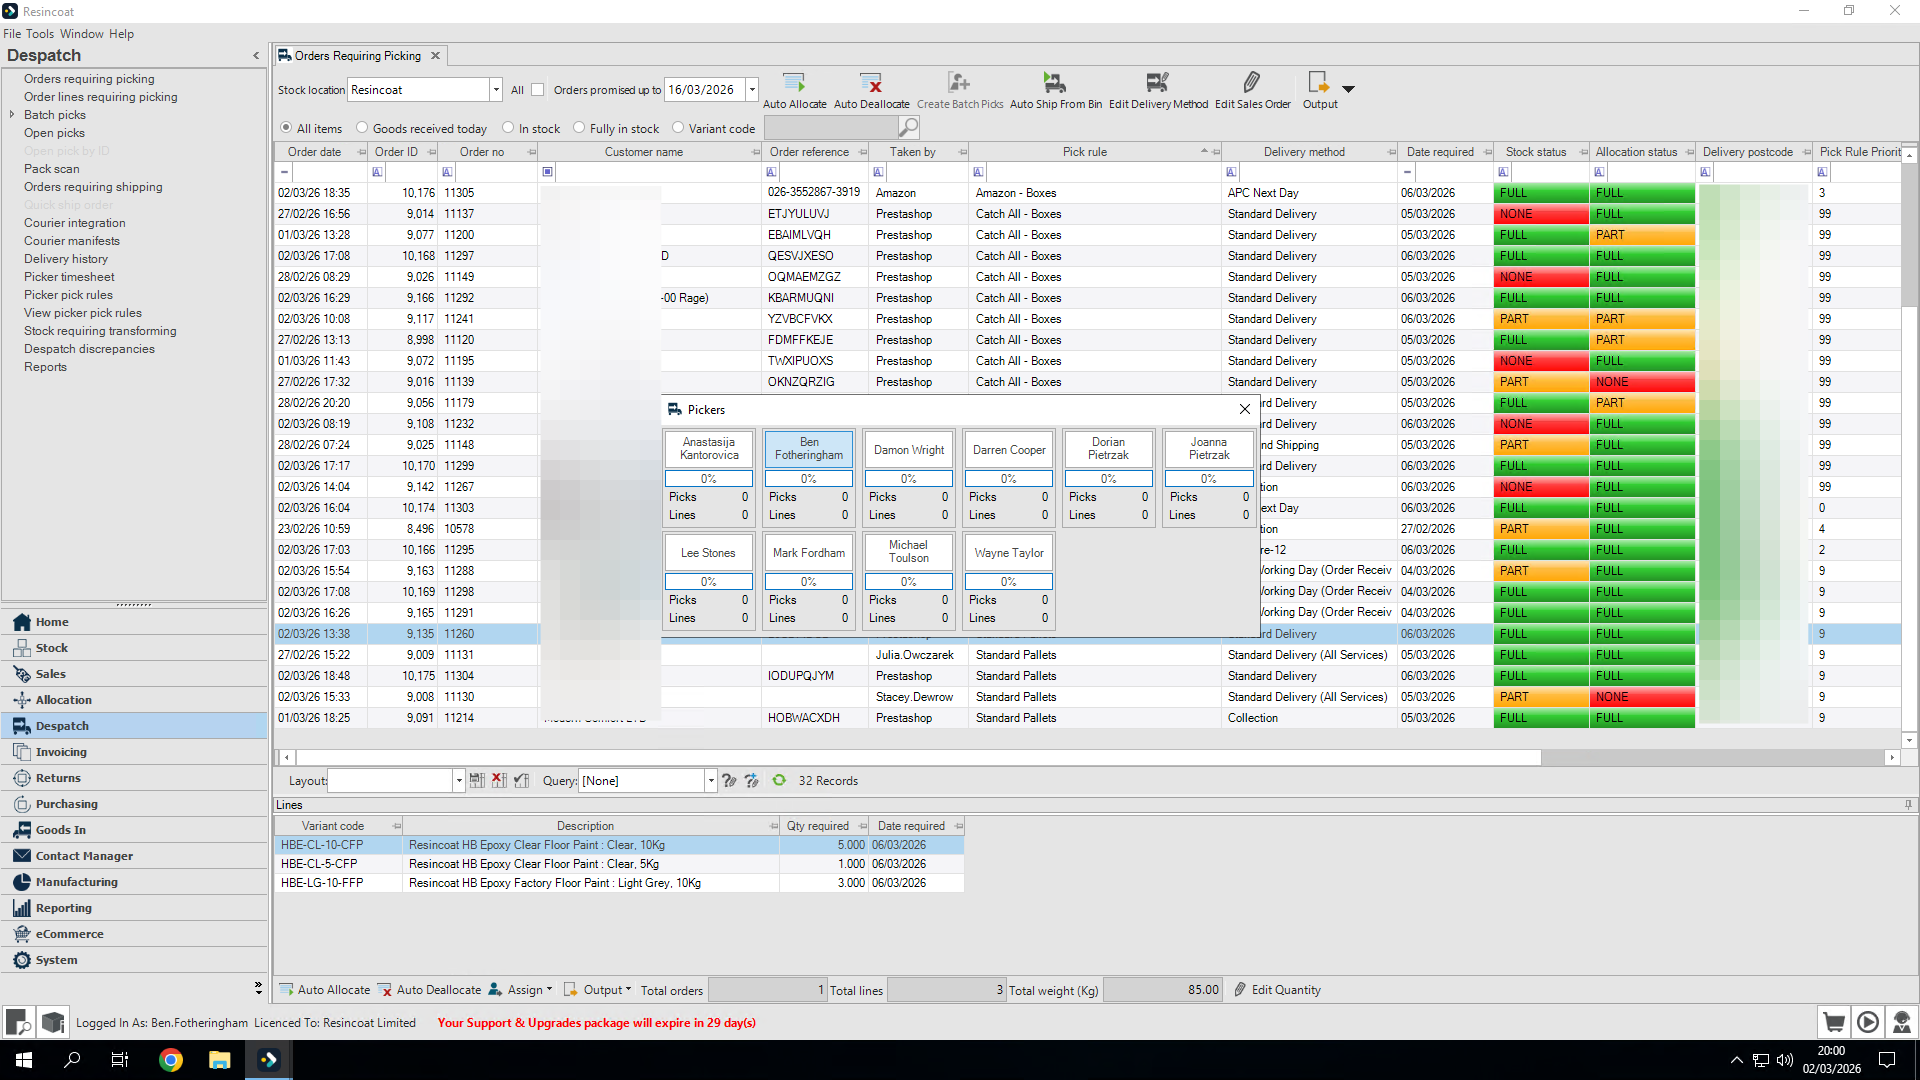
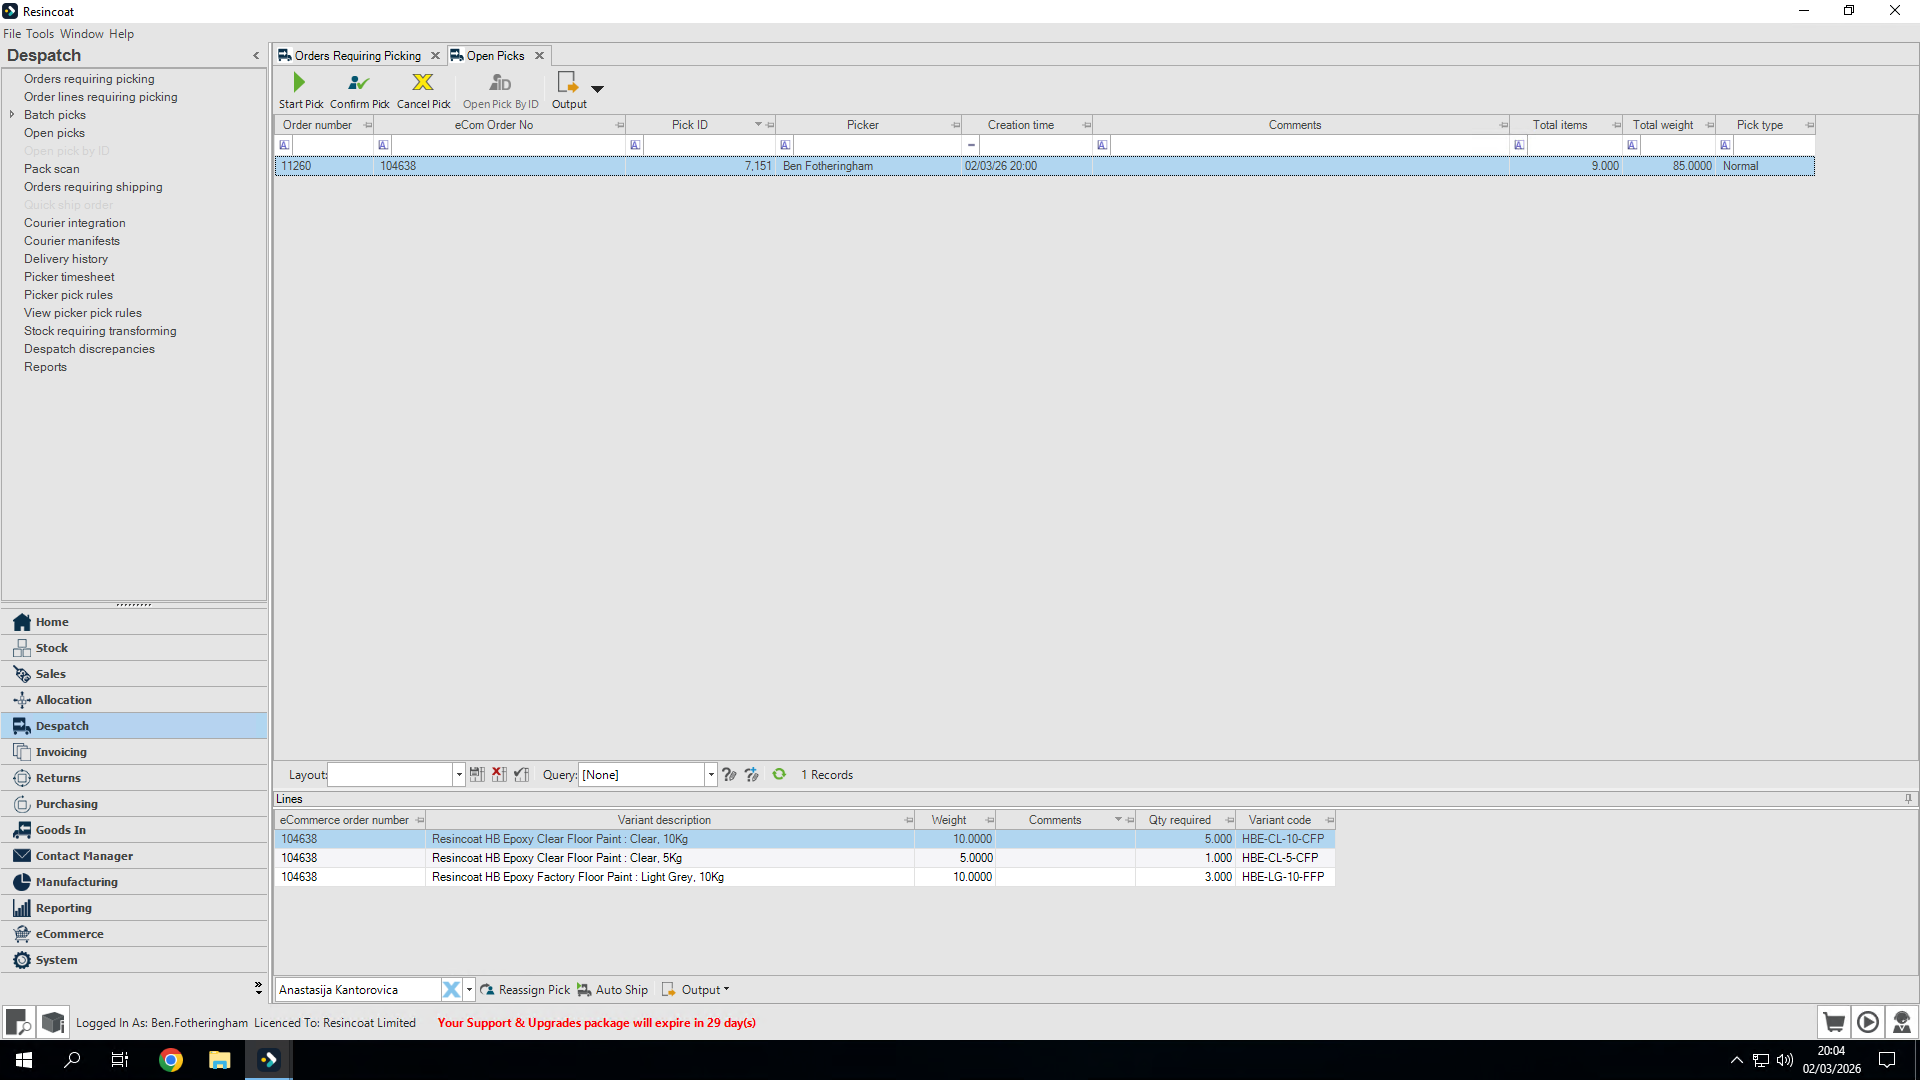
Assign the pick to yourself.
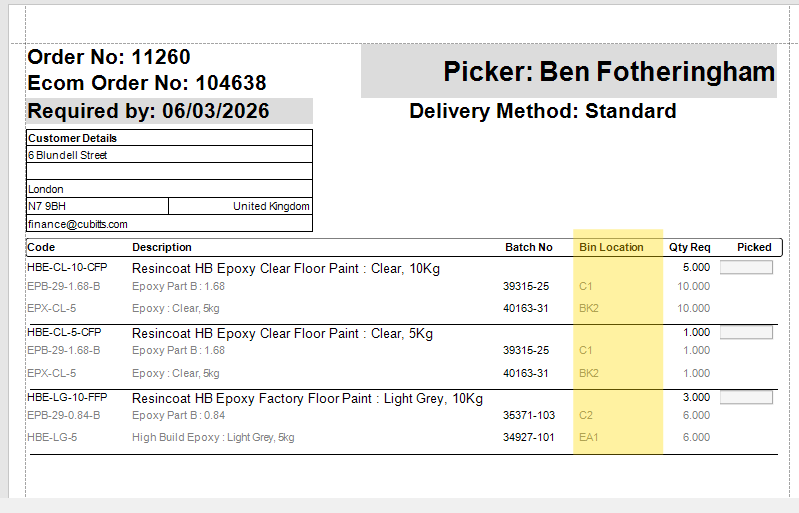
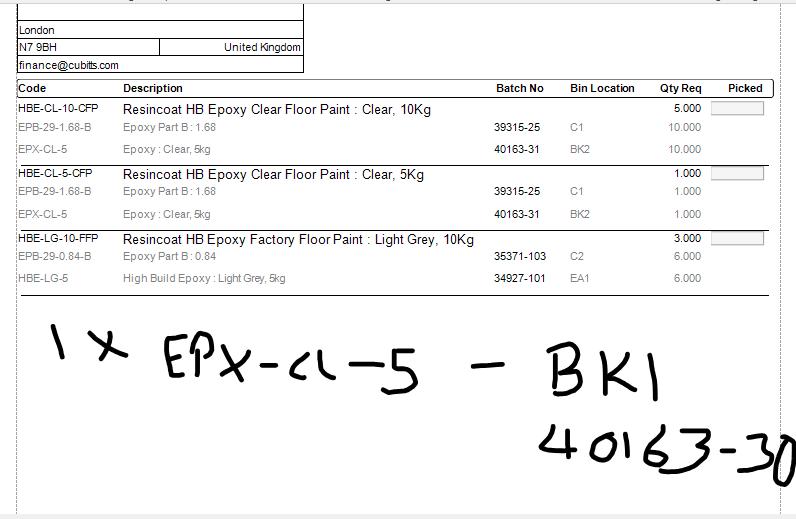
At this stage, we receive our detail picking notes here, which will most likely be printed at the picking benches in the warehouse. This will tell us exactly what we need to choose.
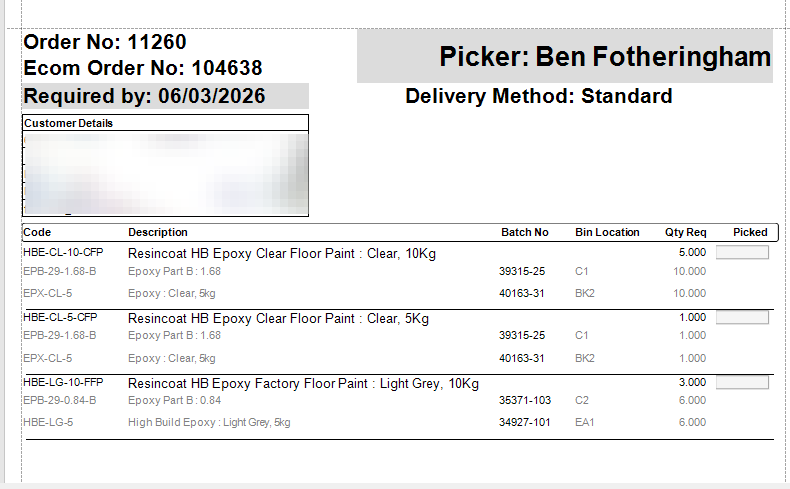
This picking note tells us where to pick from. If we cant pick from that Bin Number for some reason, keep a note of the Bin you did pick from and how many units from that bin.
Now, I will go around, pick everything, label each item, and line them up on my bench to double-check my picking note.
Let's tell Orderwise what we actually picked
I can find my order here. As you can see, it is assigned to me as the picker.
It's easy to find your own pick that you're doing.
Select the items where components came from a different bin number or have a different location.
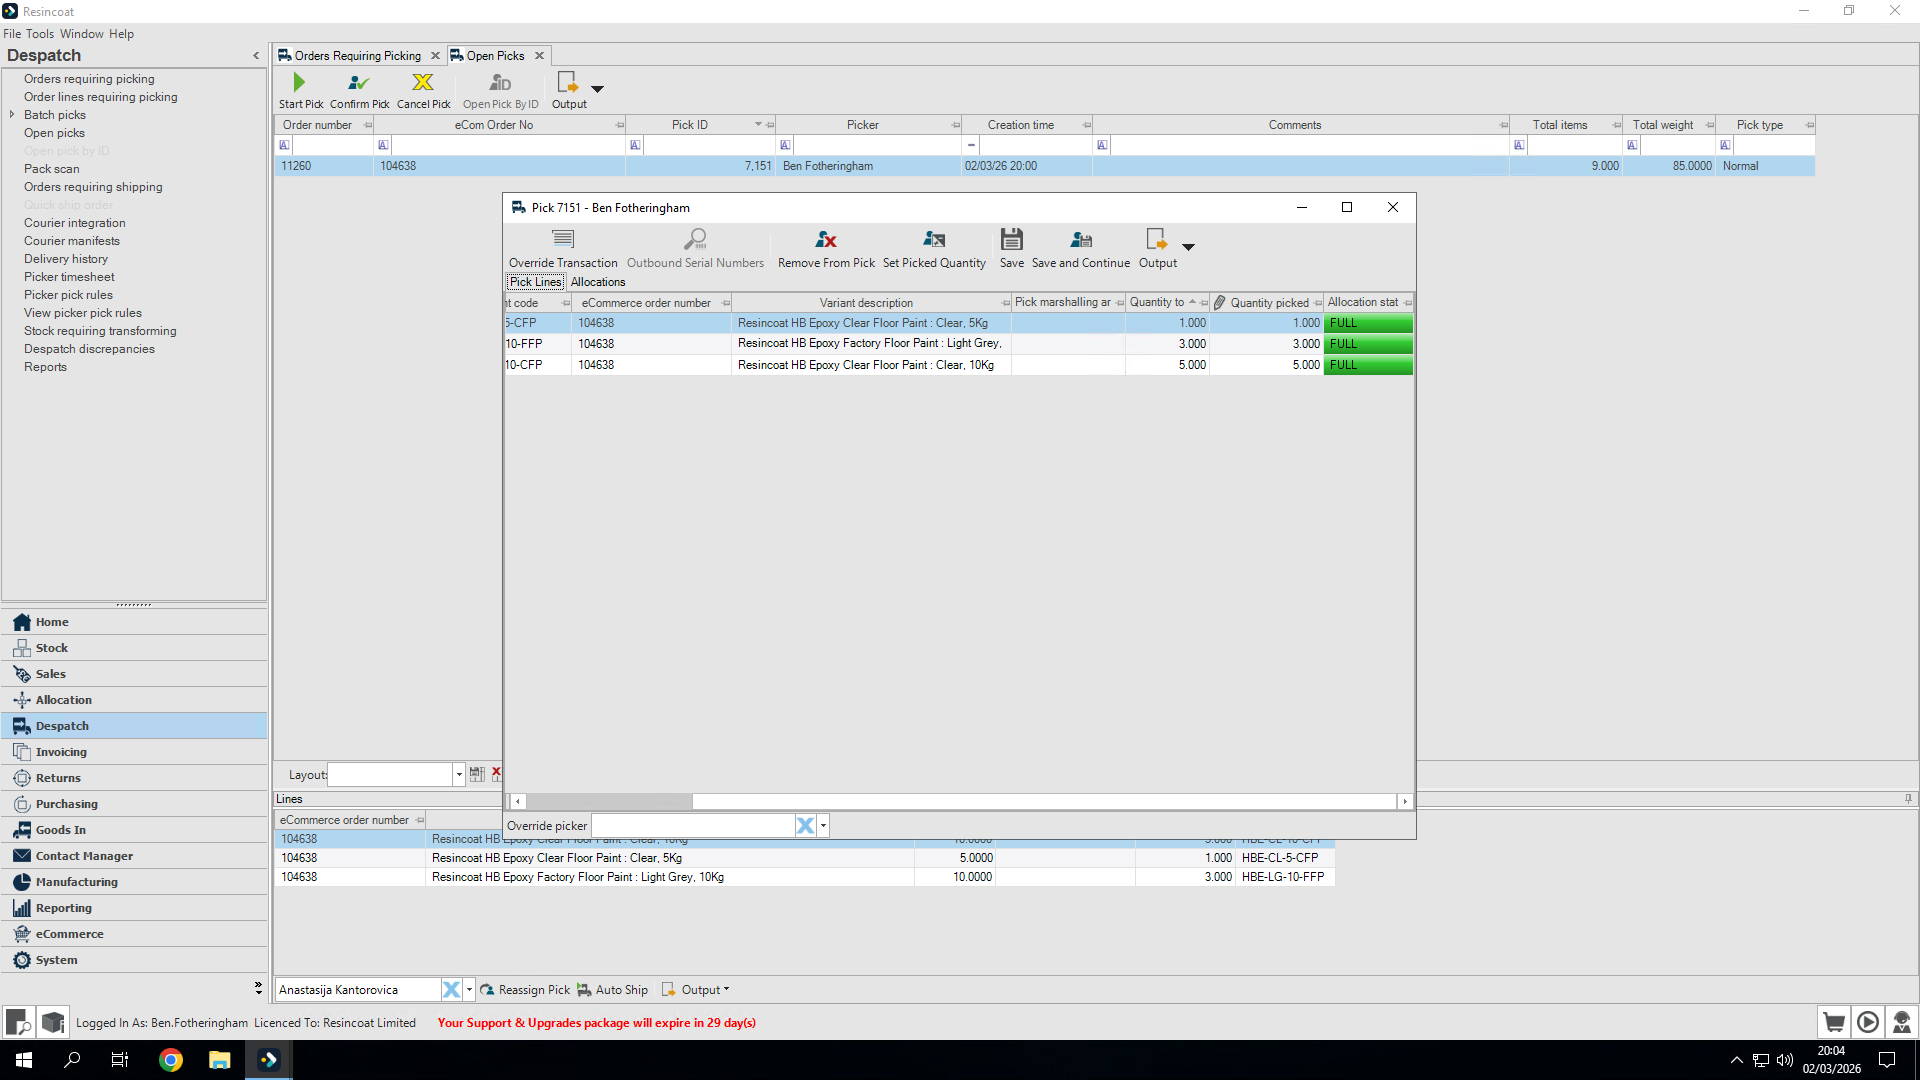
Highlight the product and override the transaction
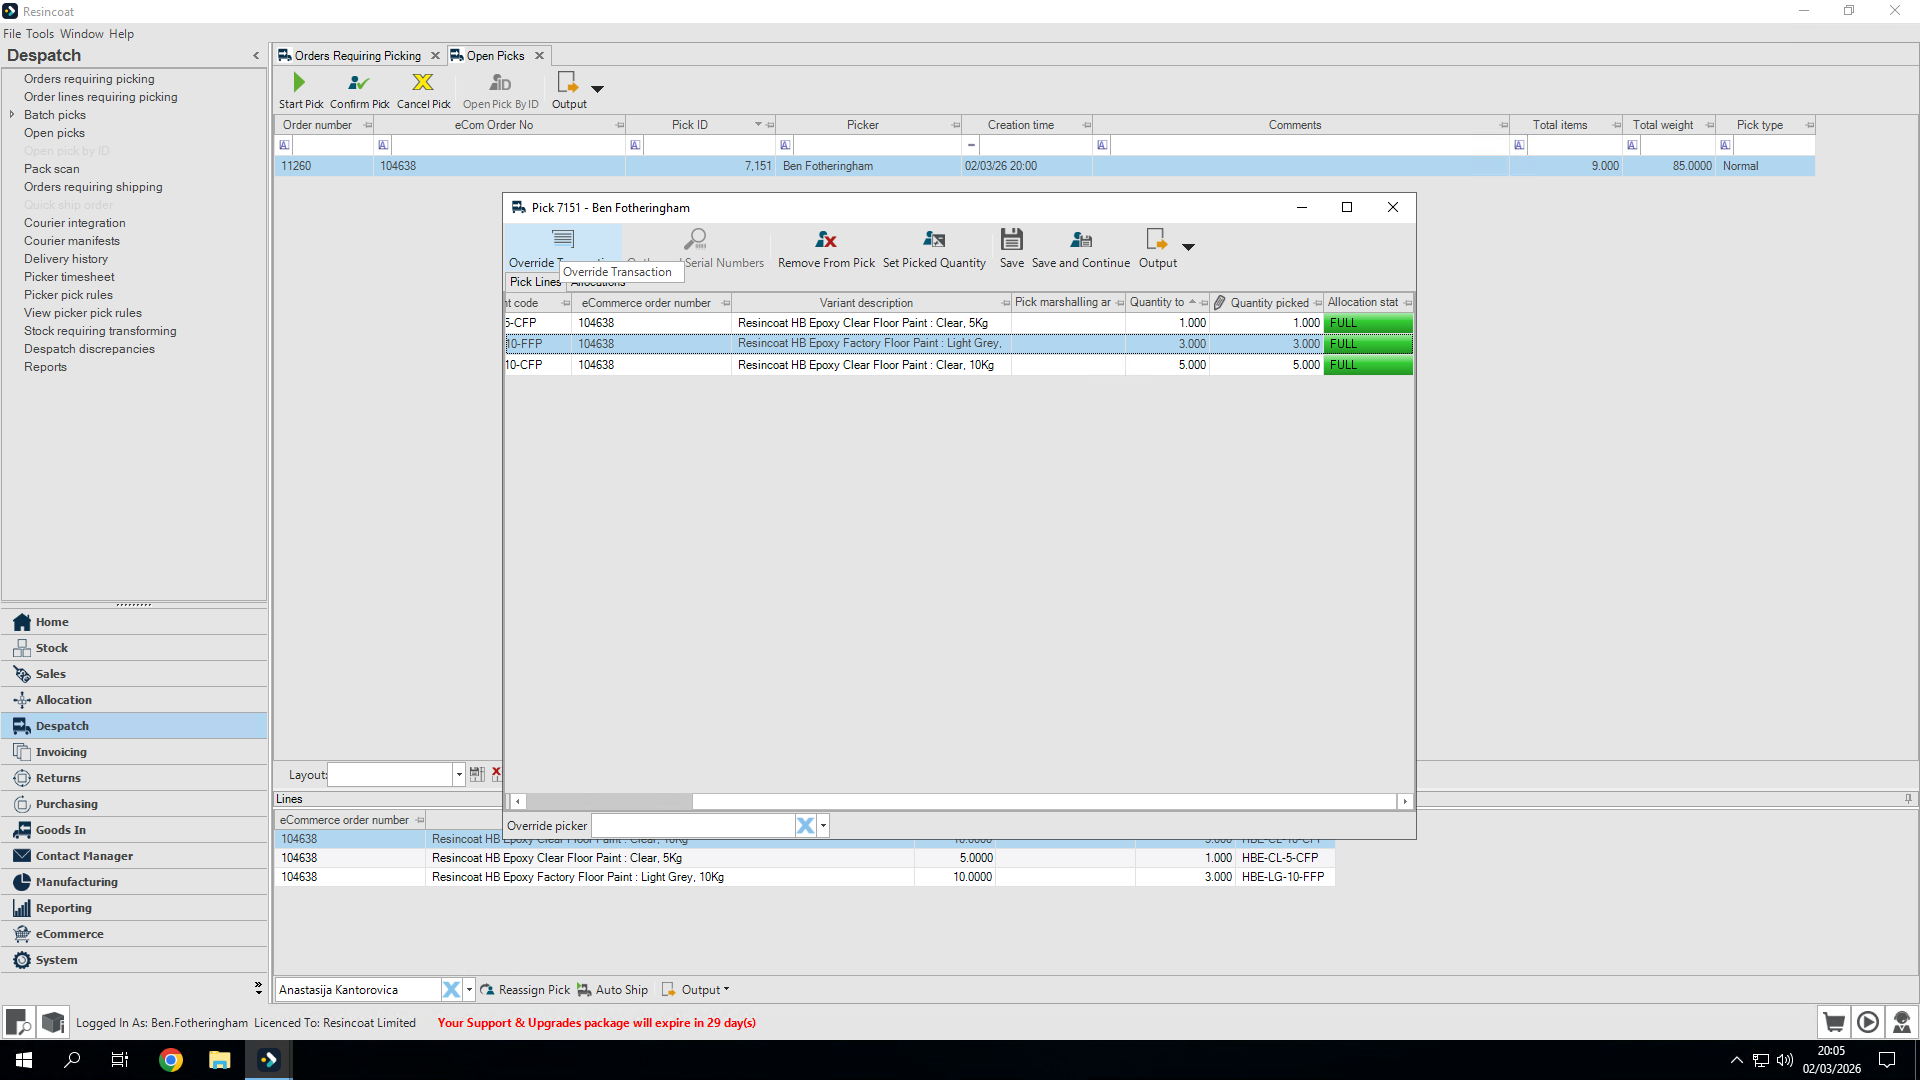
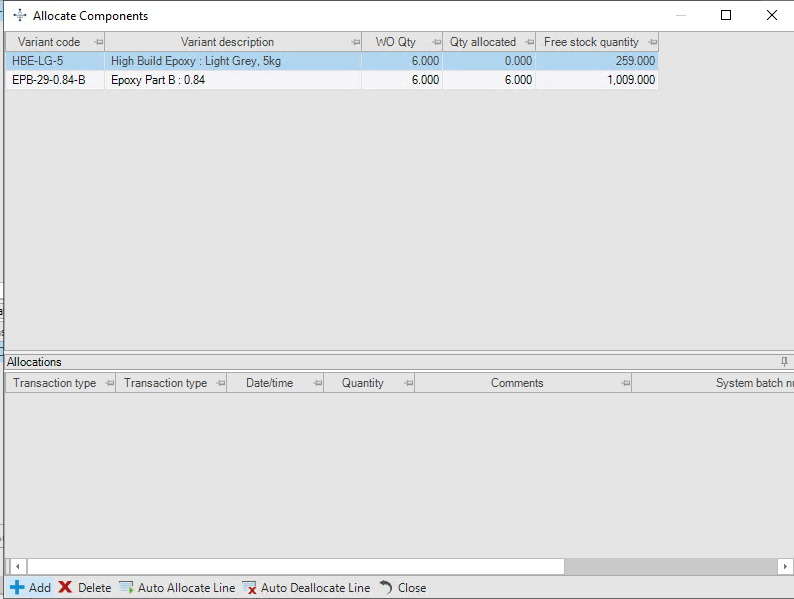
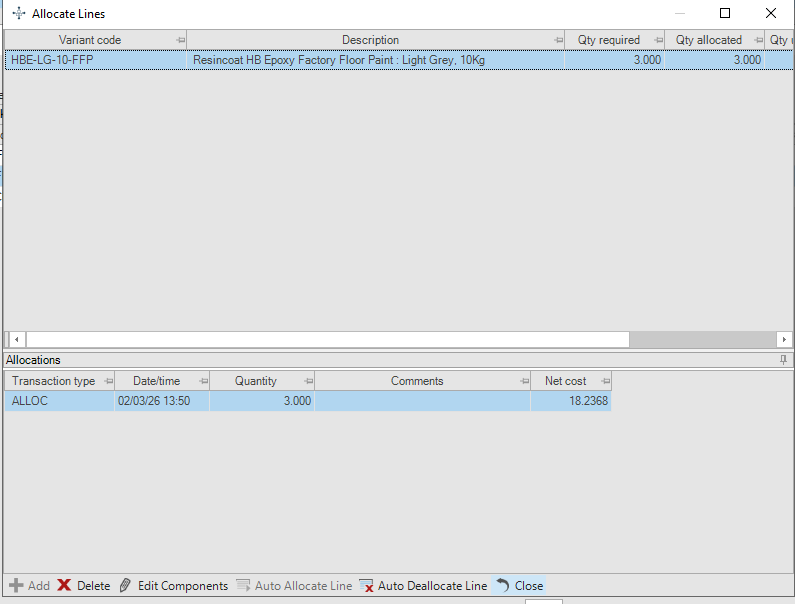
This opens the allocate lines screen
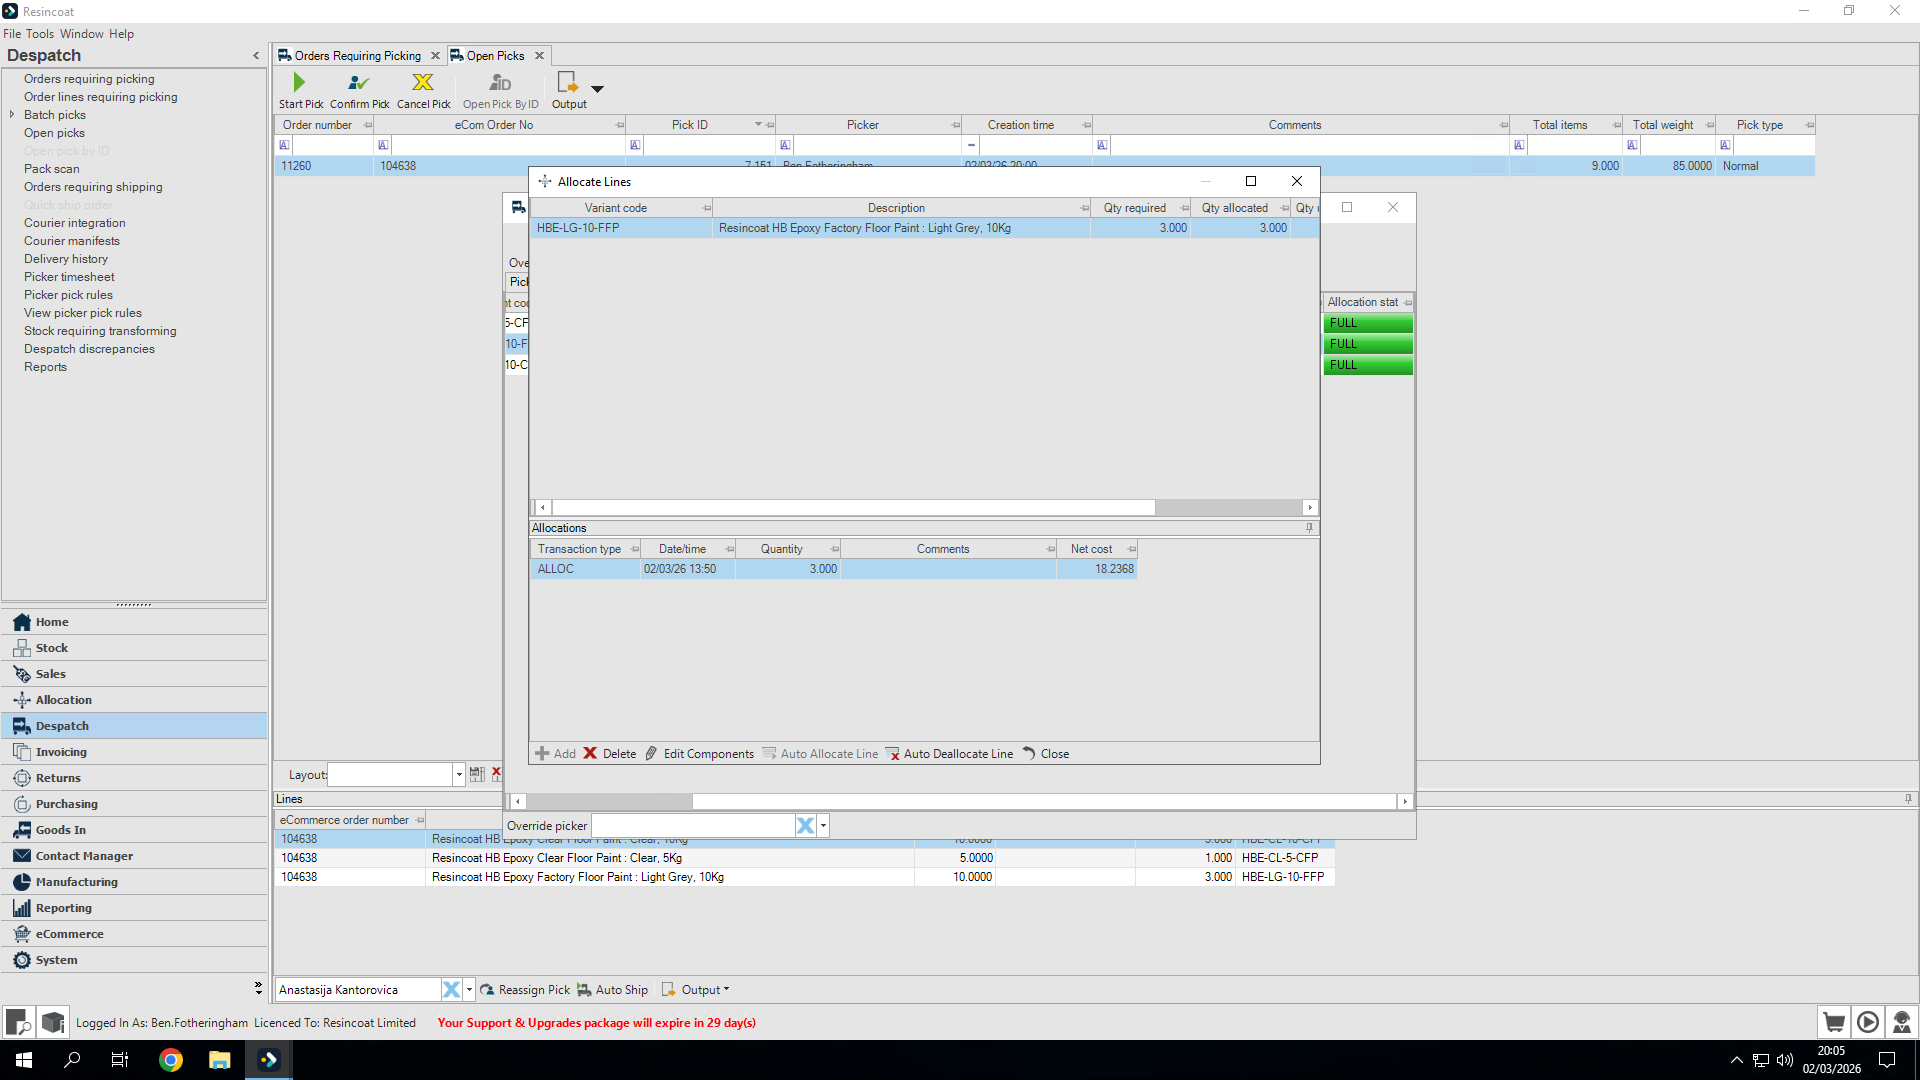
First, I select the component I want to change at the top.
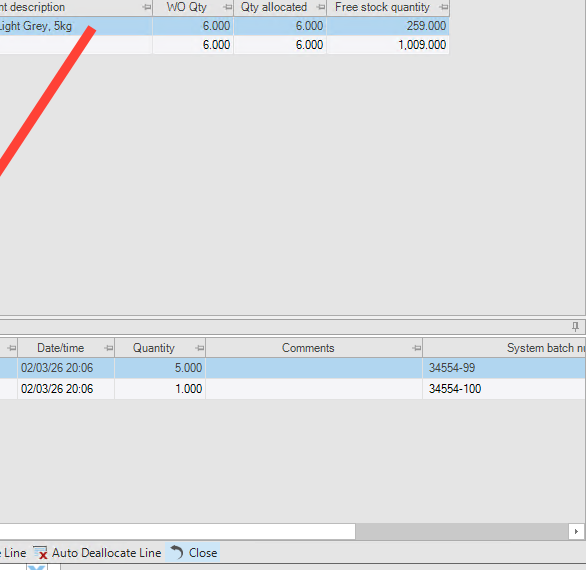
It thinks I have picked 6x 34554-99 HBE-LG-5's. This is not correct. Let's delete this line.
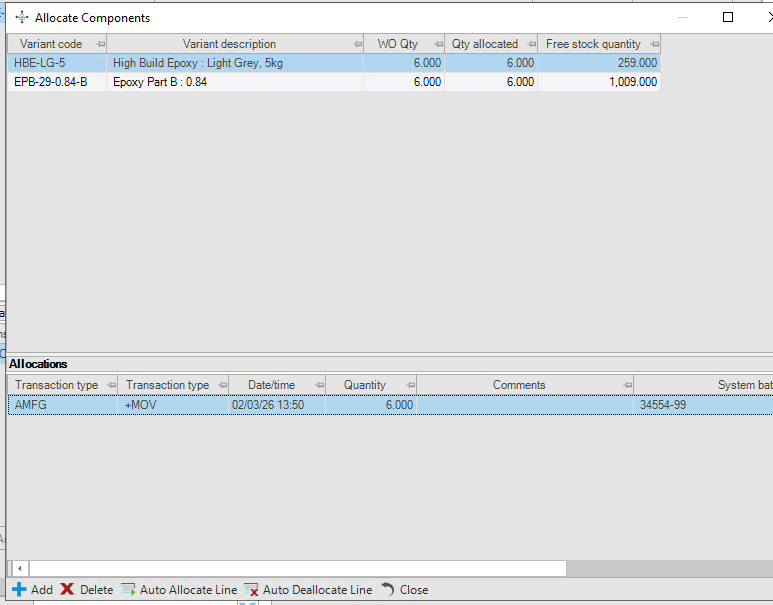
I am now going to add what I have picked
Use this new form to enter how many units and from which Batch and Bin you have actually used.
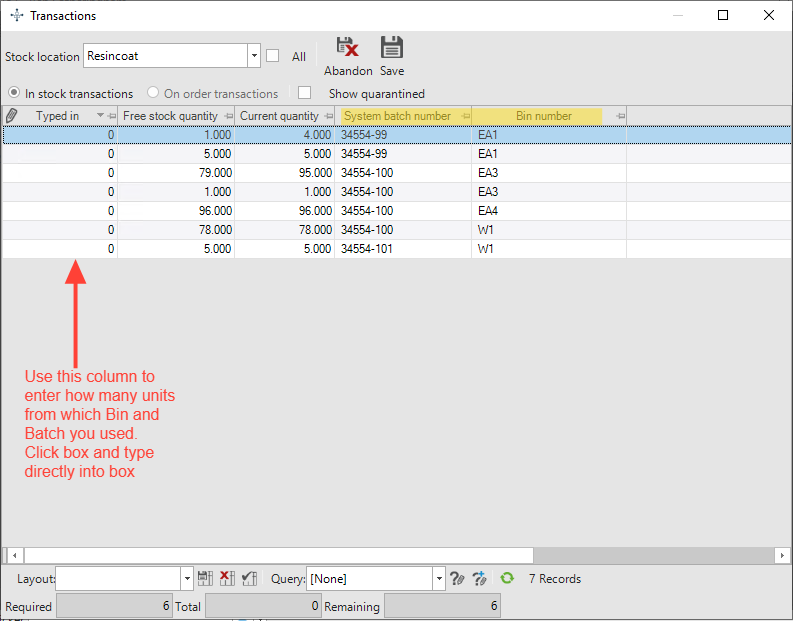
Below we have set to use 1x 34554-99 from Bin EA1 and 5x 34554-100 from EA3
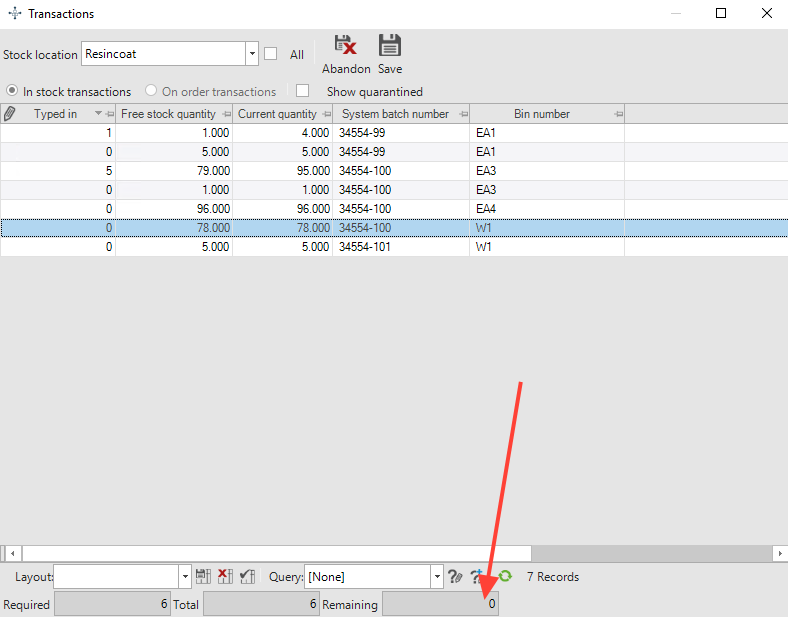
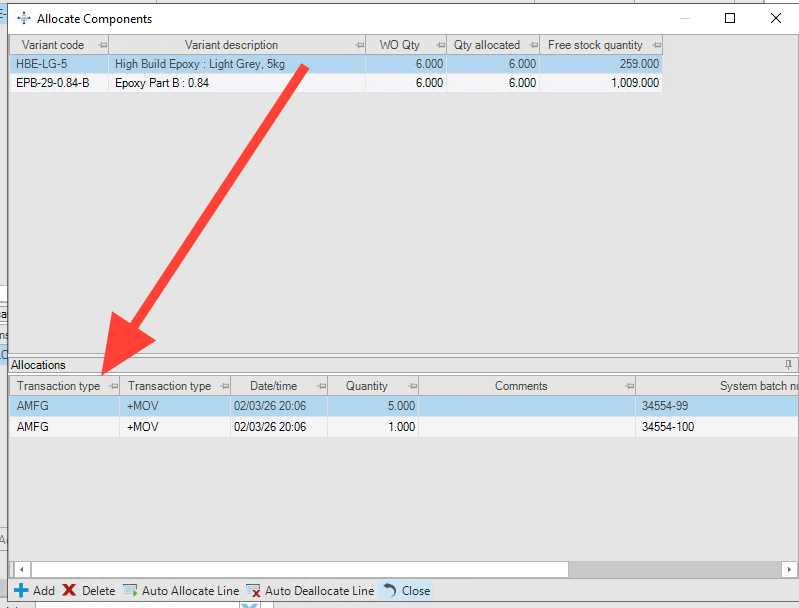
I will save it when I am happy. Now you can see that it has broken it down into two separate sections. I can close this.
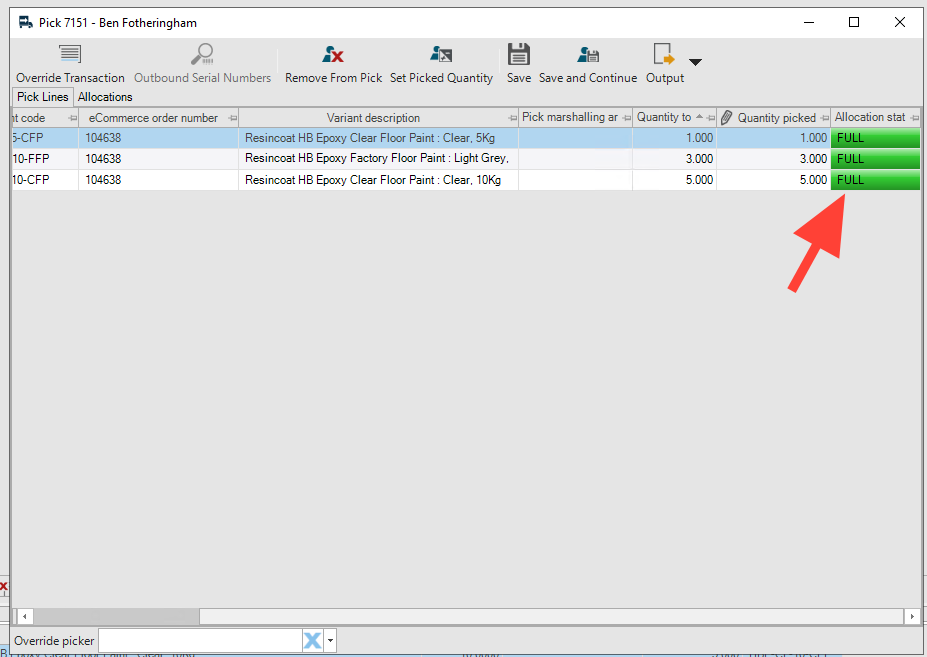
and this screen
when happy, check to ensure the order is fully allocated
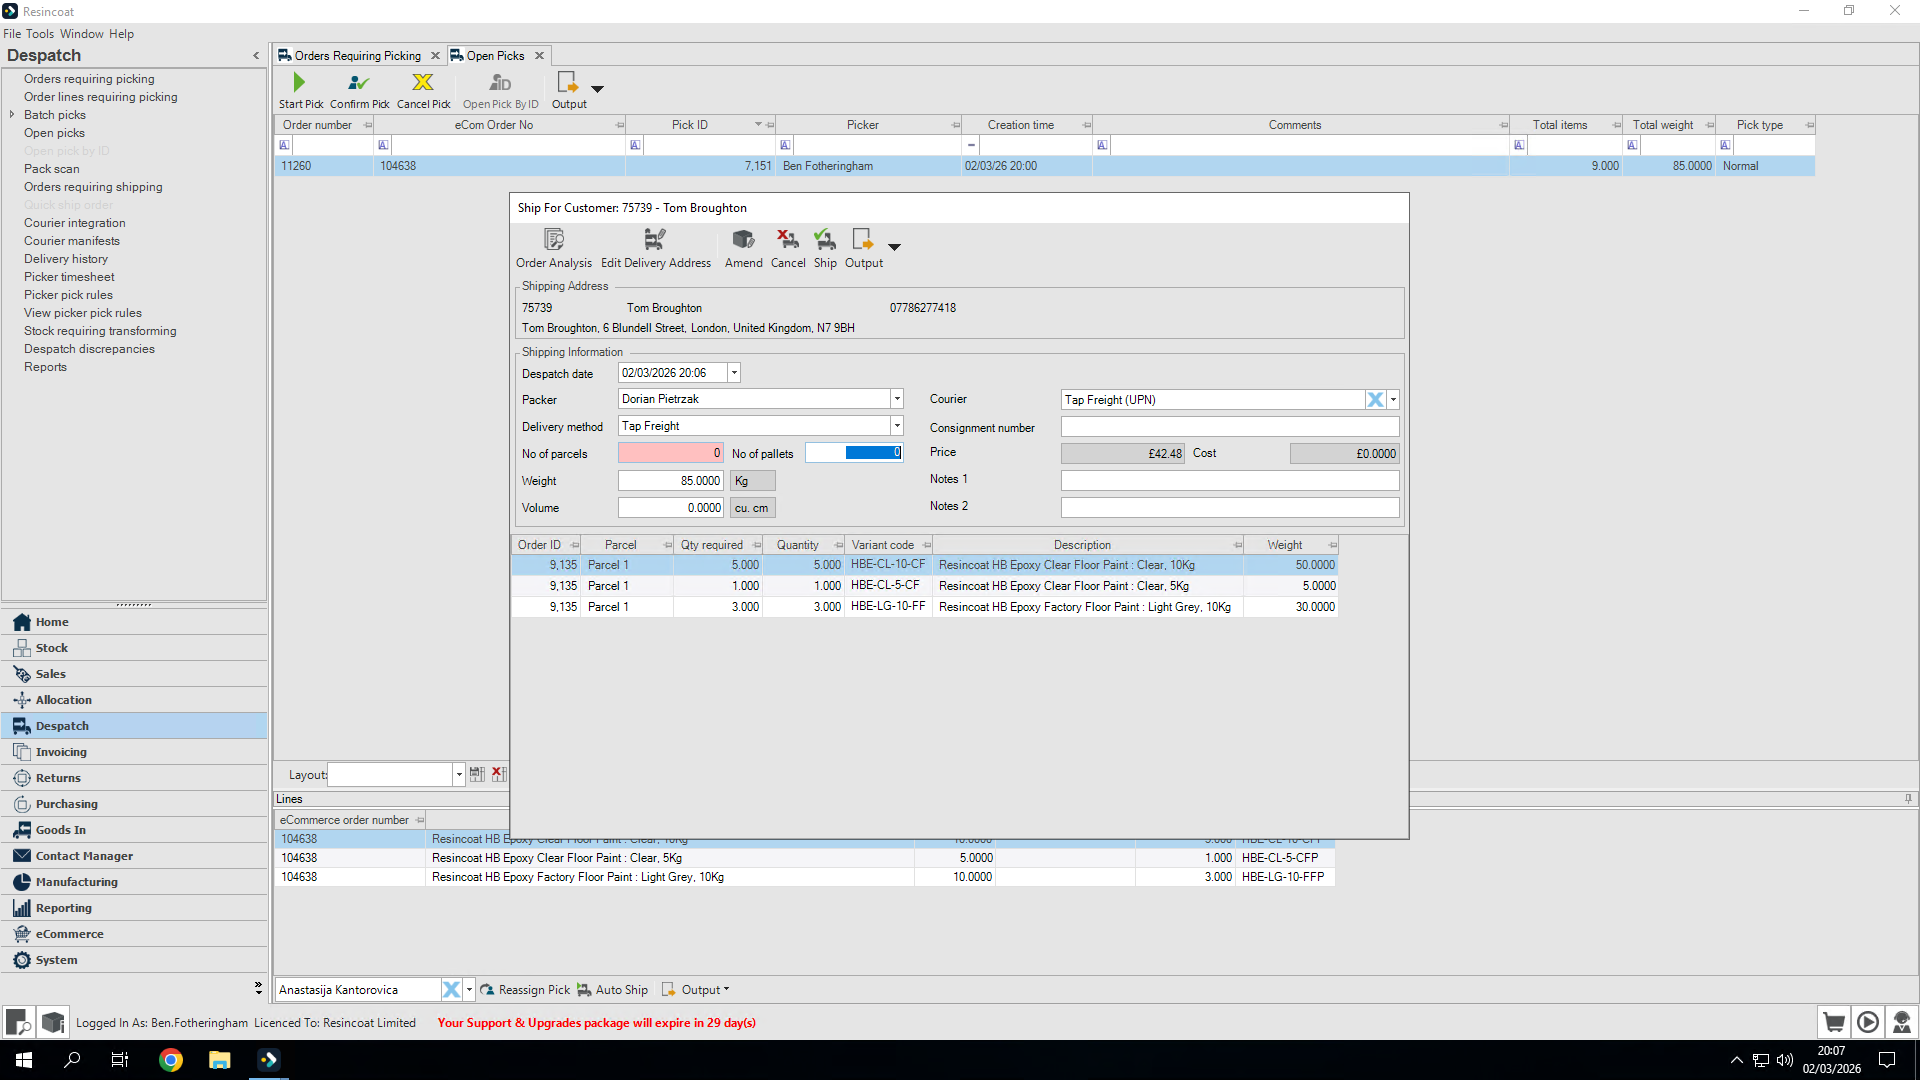
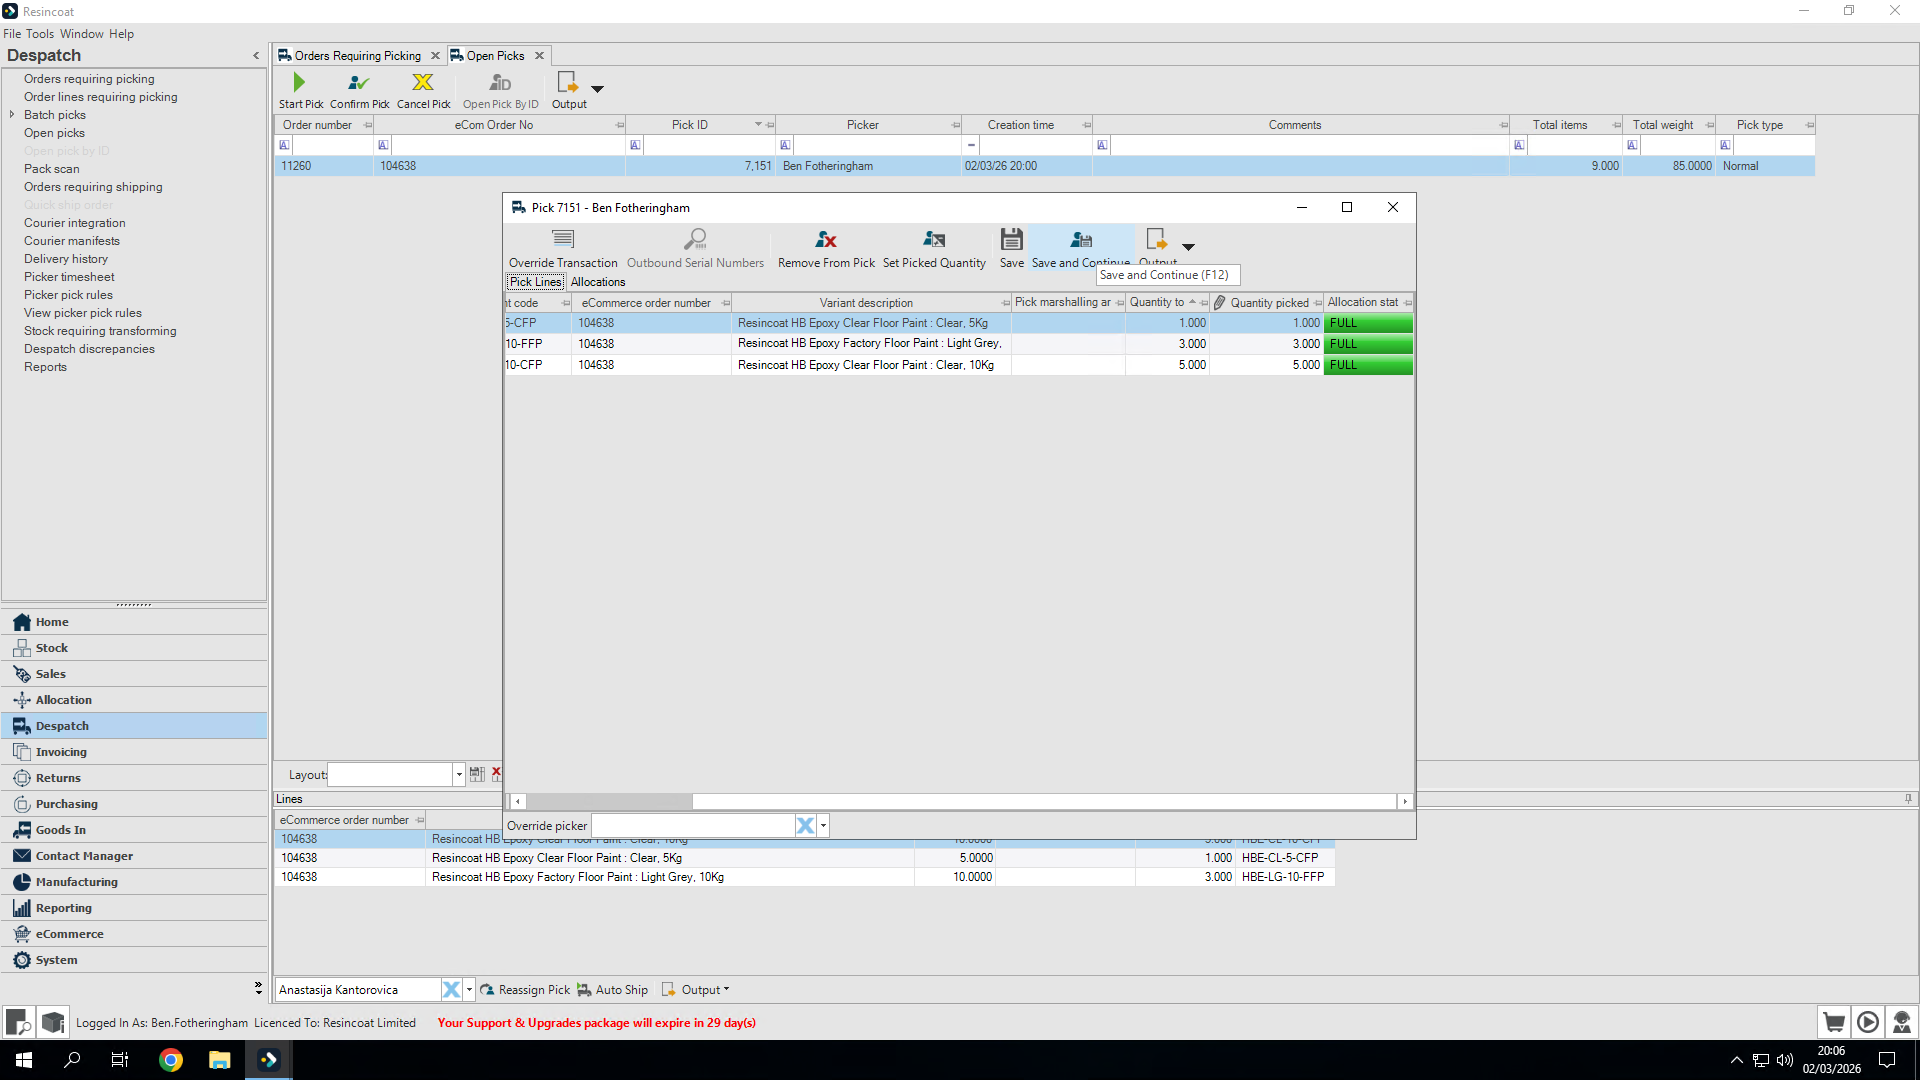
Now, Save & Continue. This takes me to the final screen, which is shipping.
For pallet shippers, most of this should already be filled in. Select who packed it (may be different to who picked it if working with an assistant). The delivery method will already be set to Tap Freight, as will the courier.

We've got our expected weight. This is the weight of the items on the order, not including the pallets. You may need to change this to take into account pallet weight.
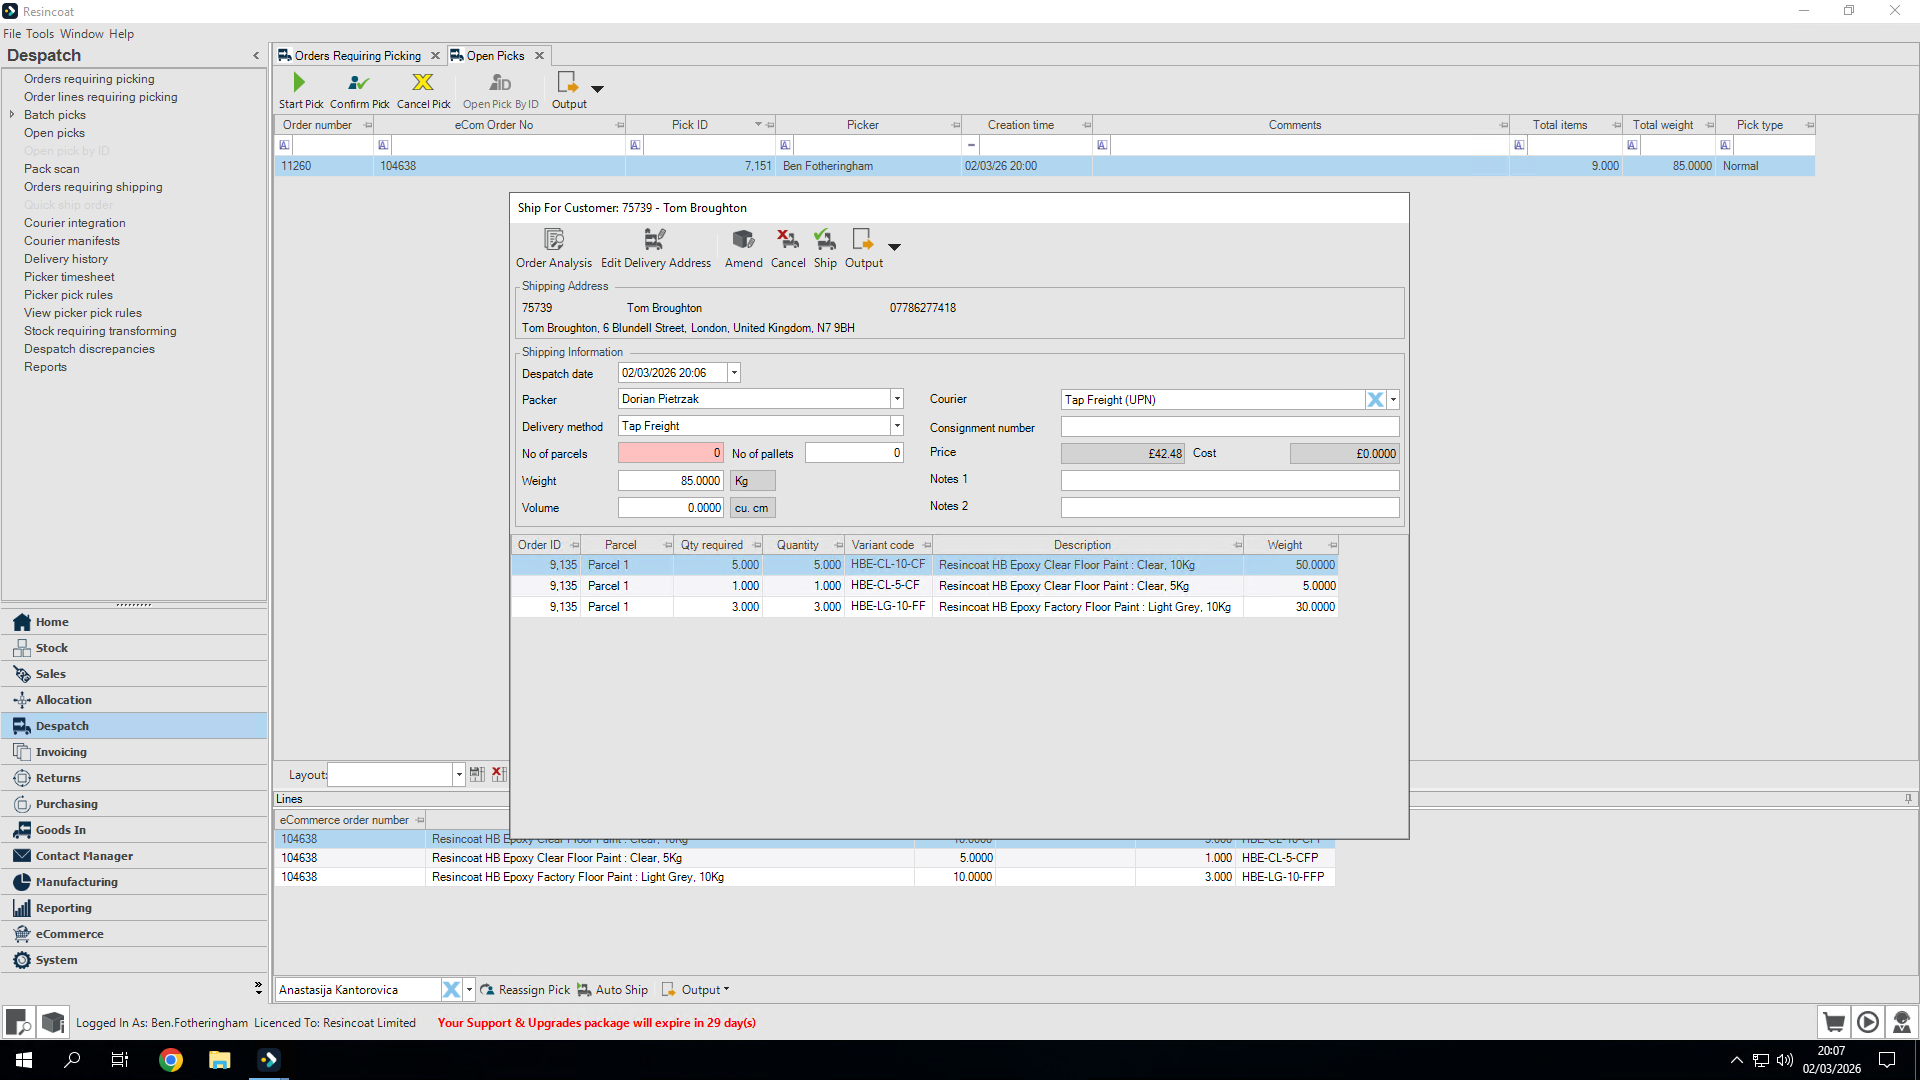
Once I’m satisfied that everything is complete, I just need to click Ship. That will send it to customer service so the team can book with Top Freight.