
How to Pick Wholesale Orders in ShipHero - ENGLISH
Learn how to navigate the ShipHero iPad app to accurately pick, scan, and stage wholesale orders for fulfillment.
This guide explains how to pick wholesale orders using the ShipHero iPad app, ensuring accurate item retrieval and proper staging for packing.
Warehouse pickers and fulfillment staff use this process to locate, scan, and stage wholesale shipments efficiently.
Accessing Wholesale Orders

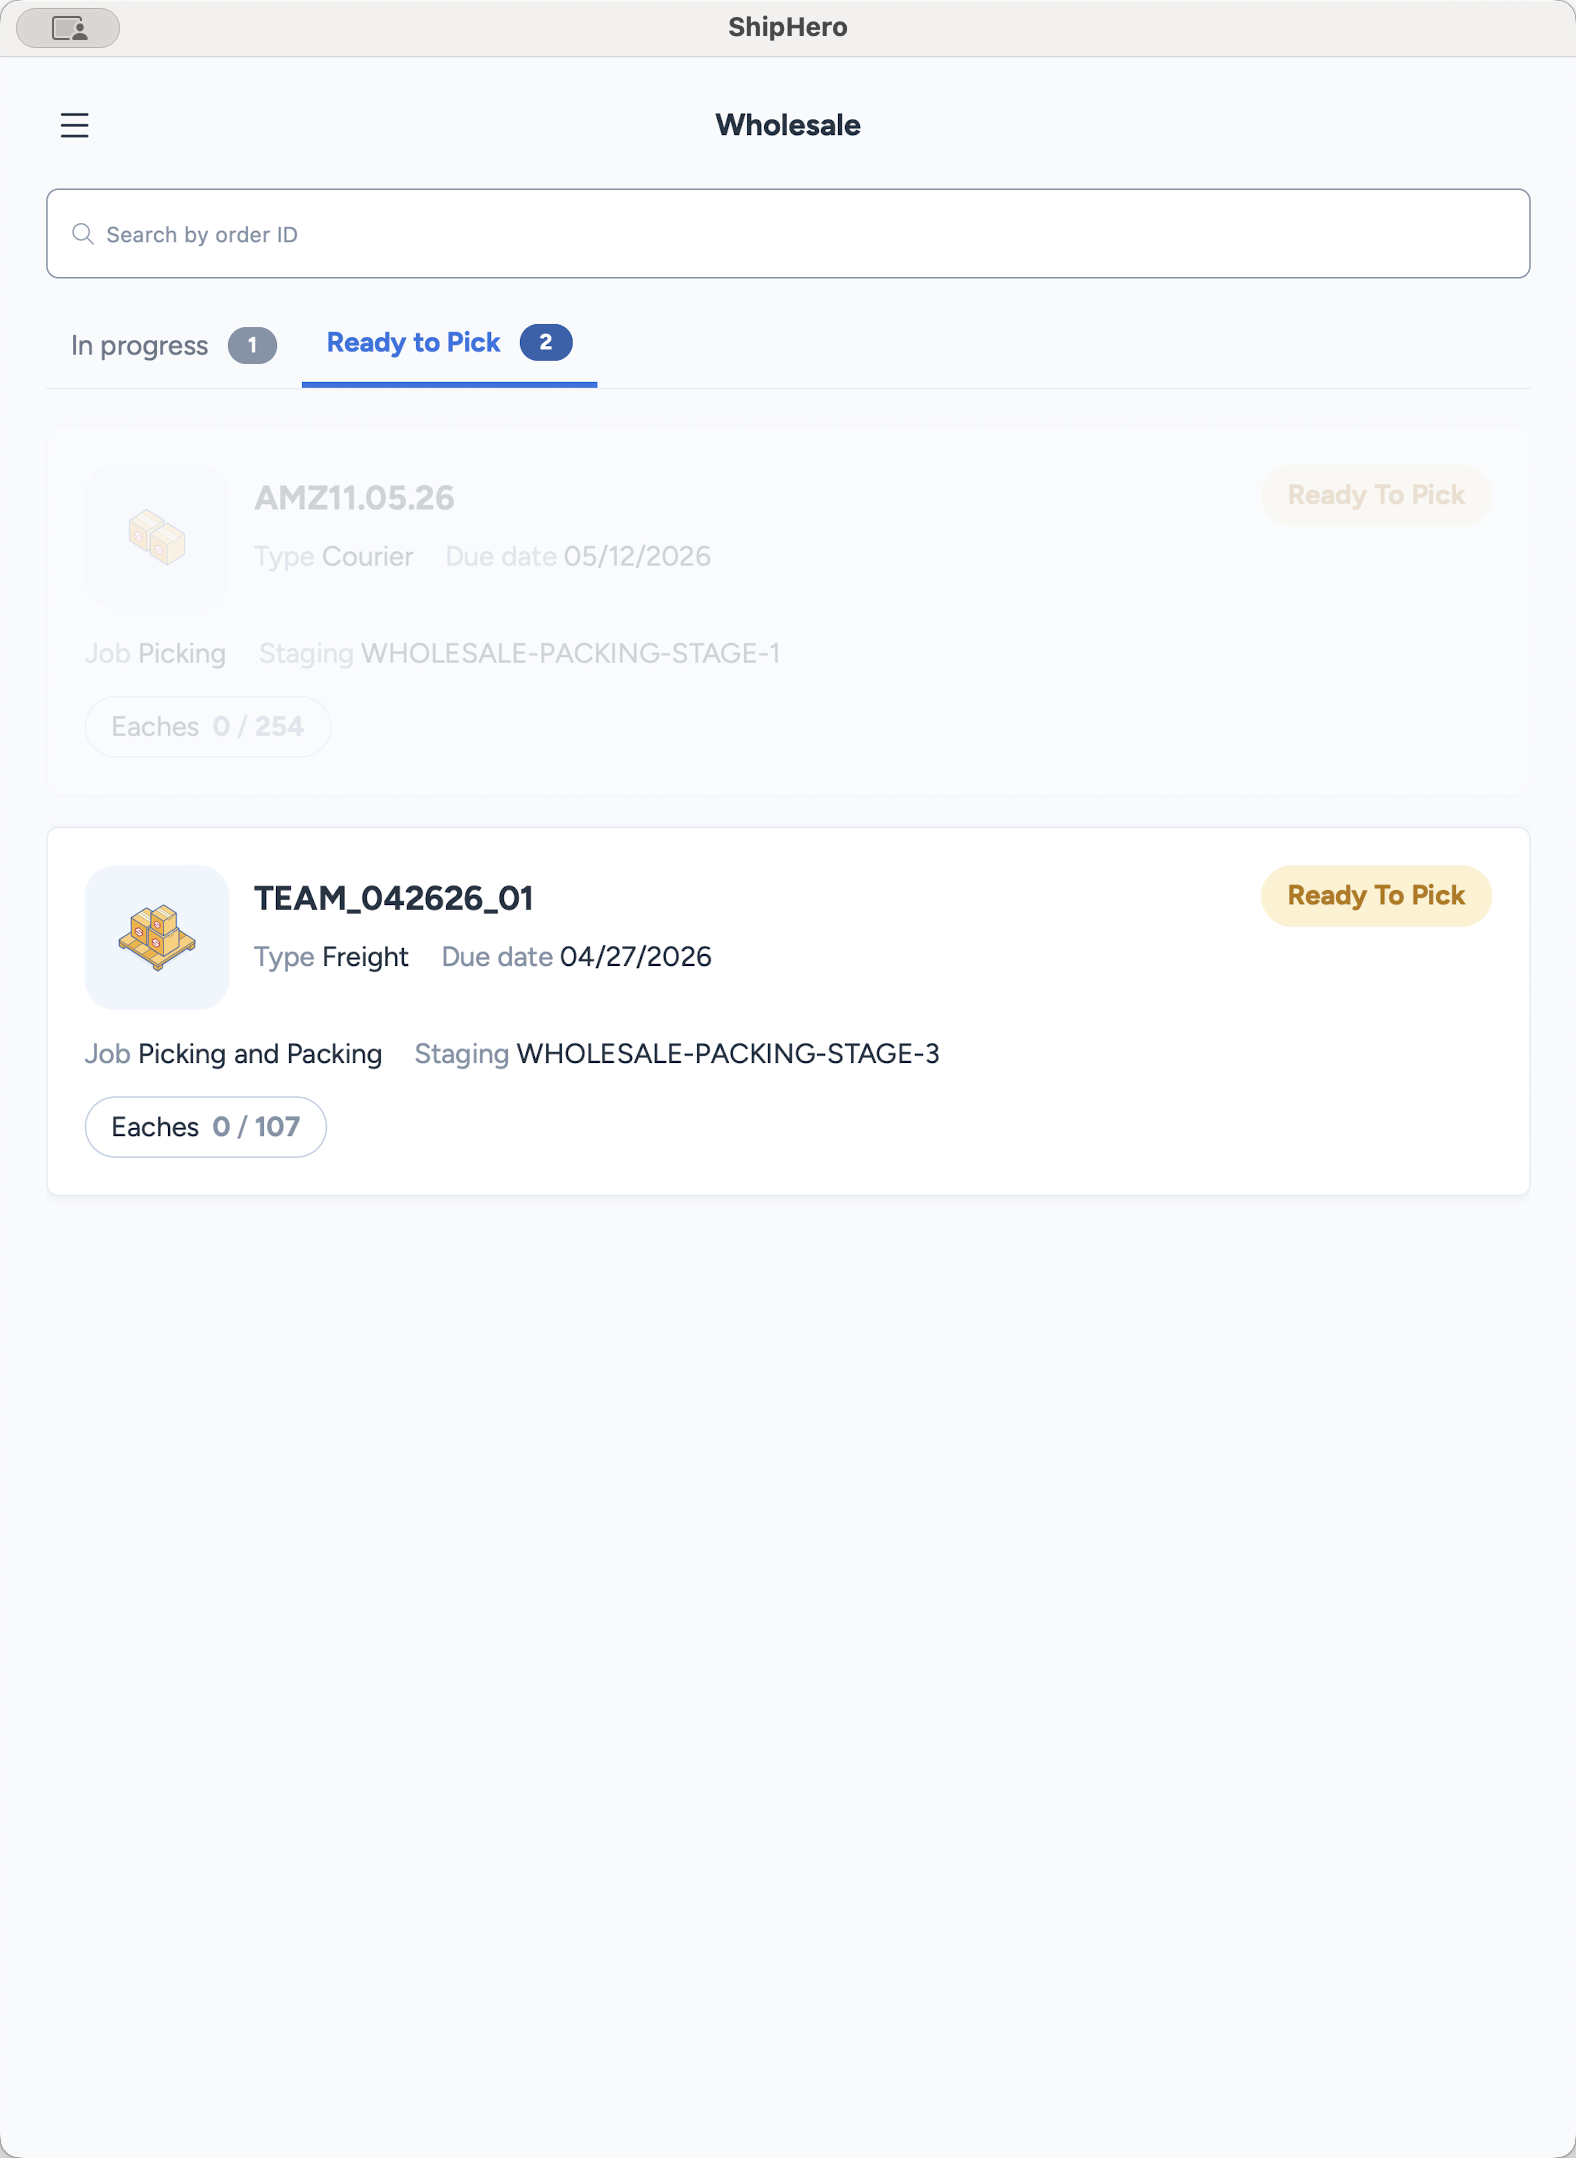
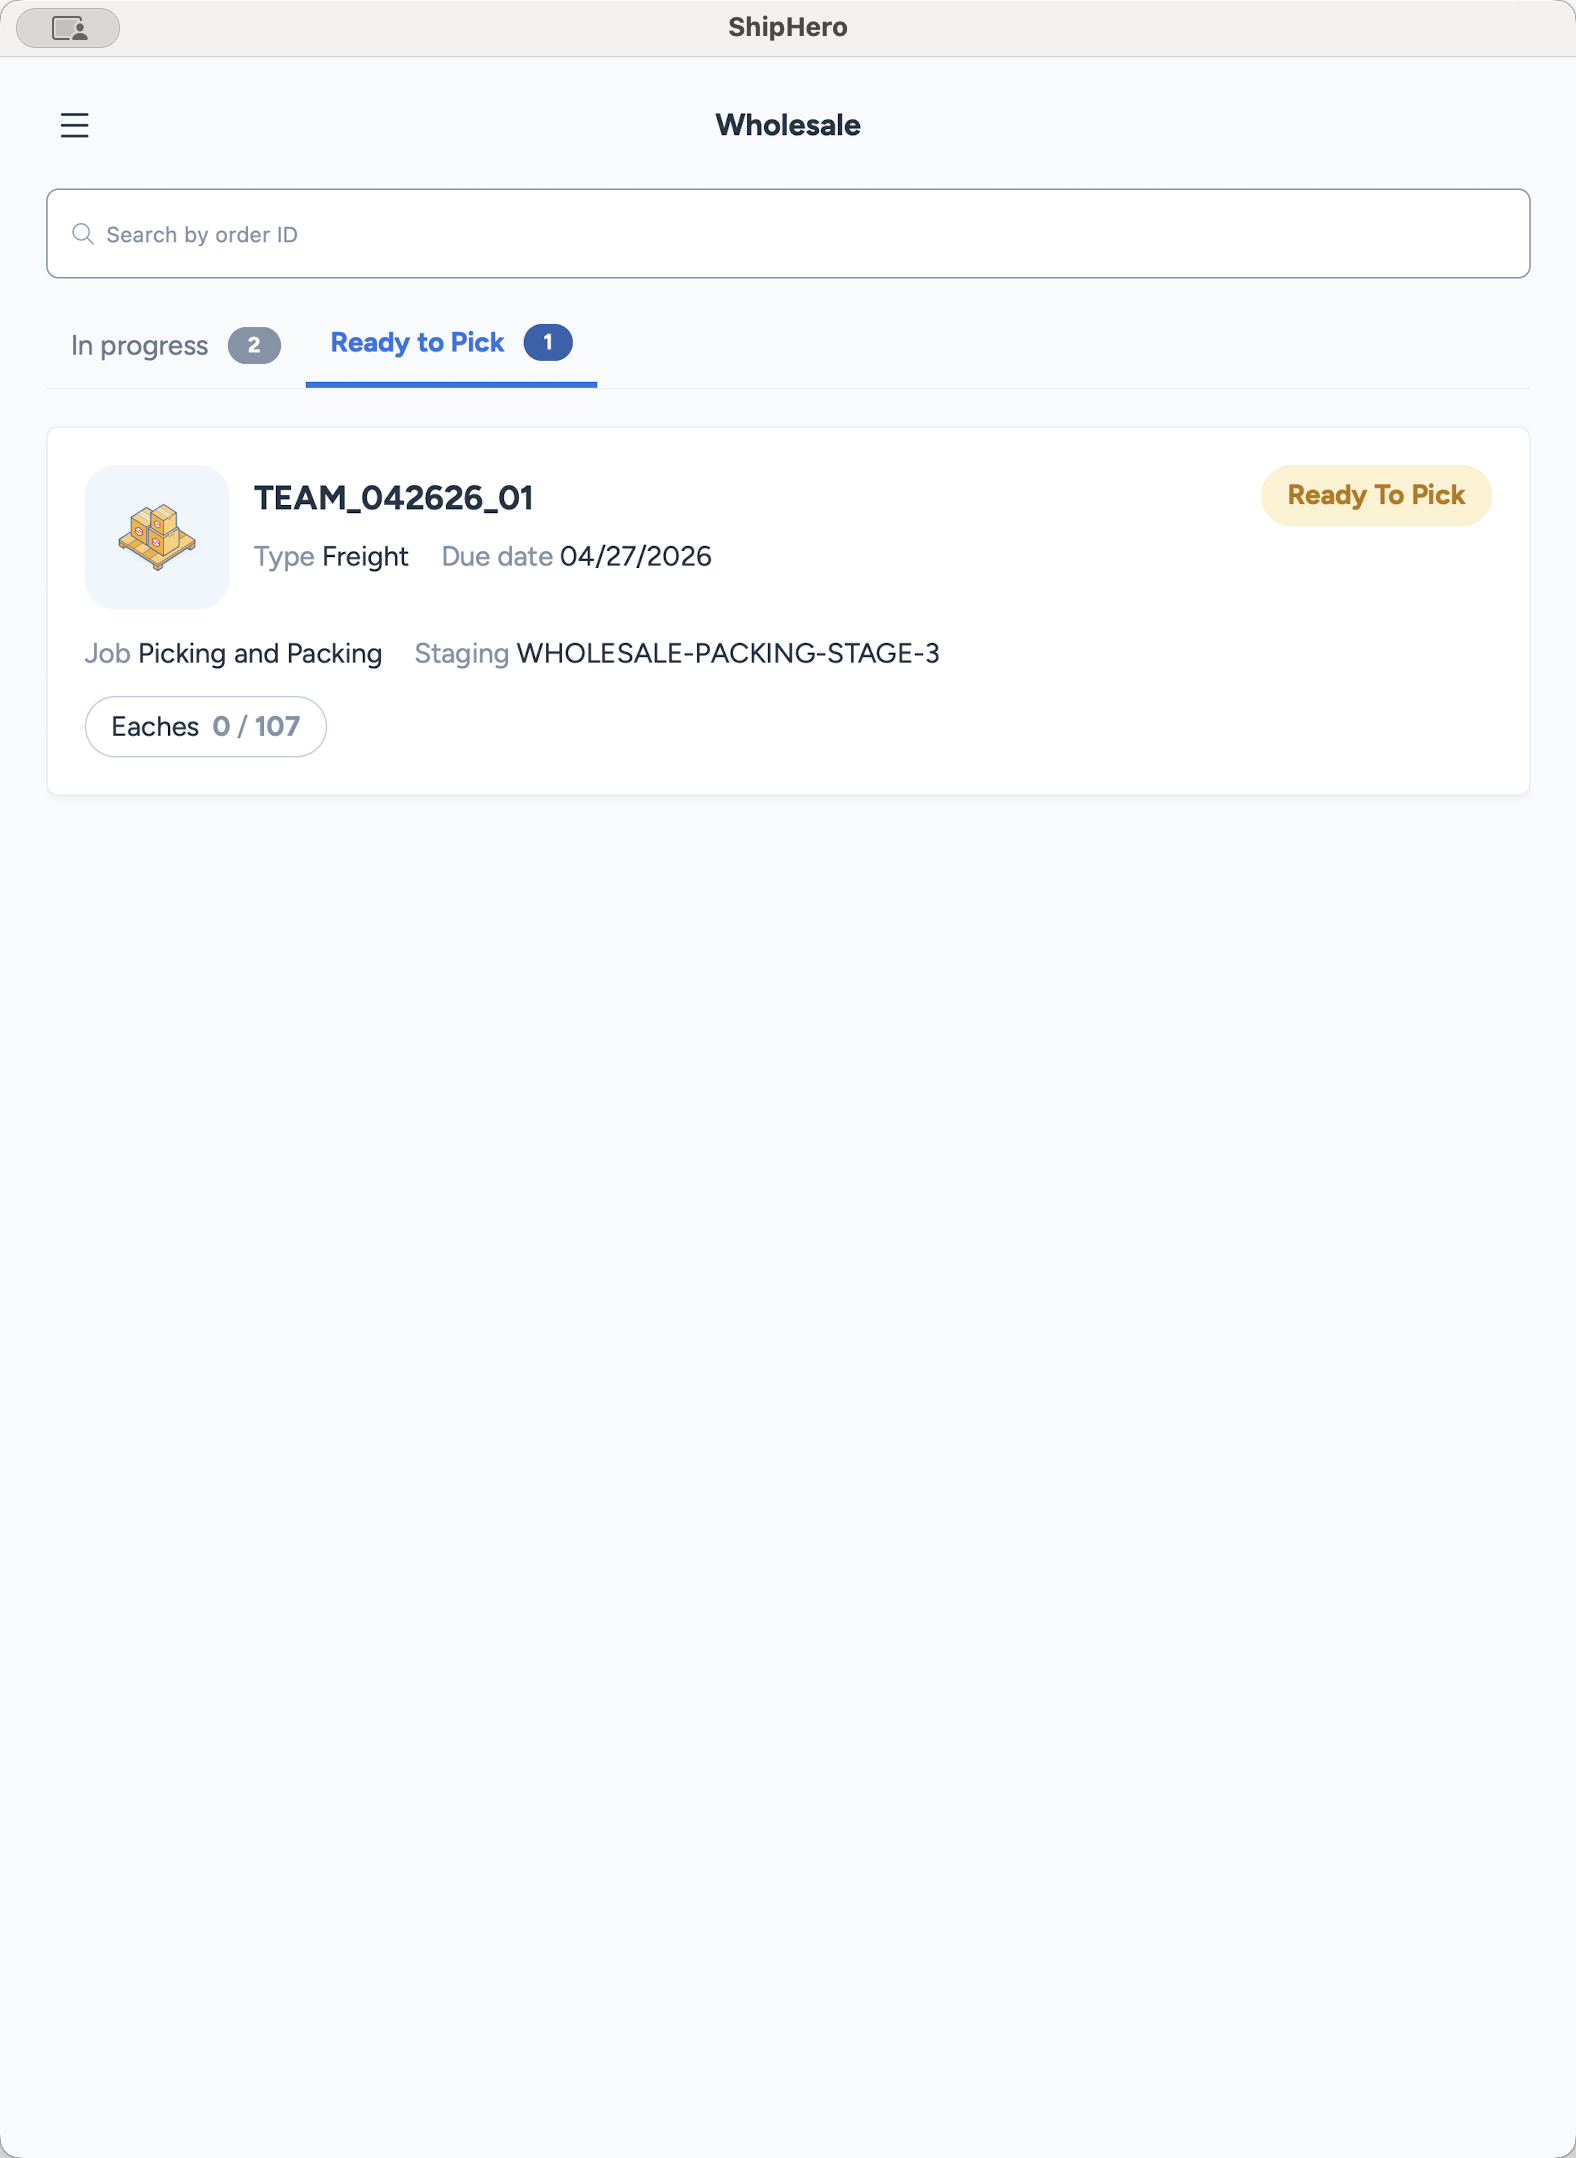
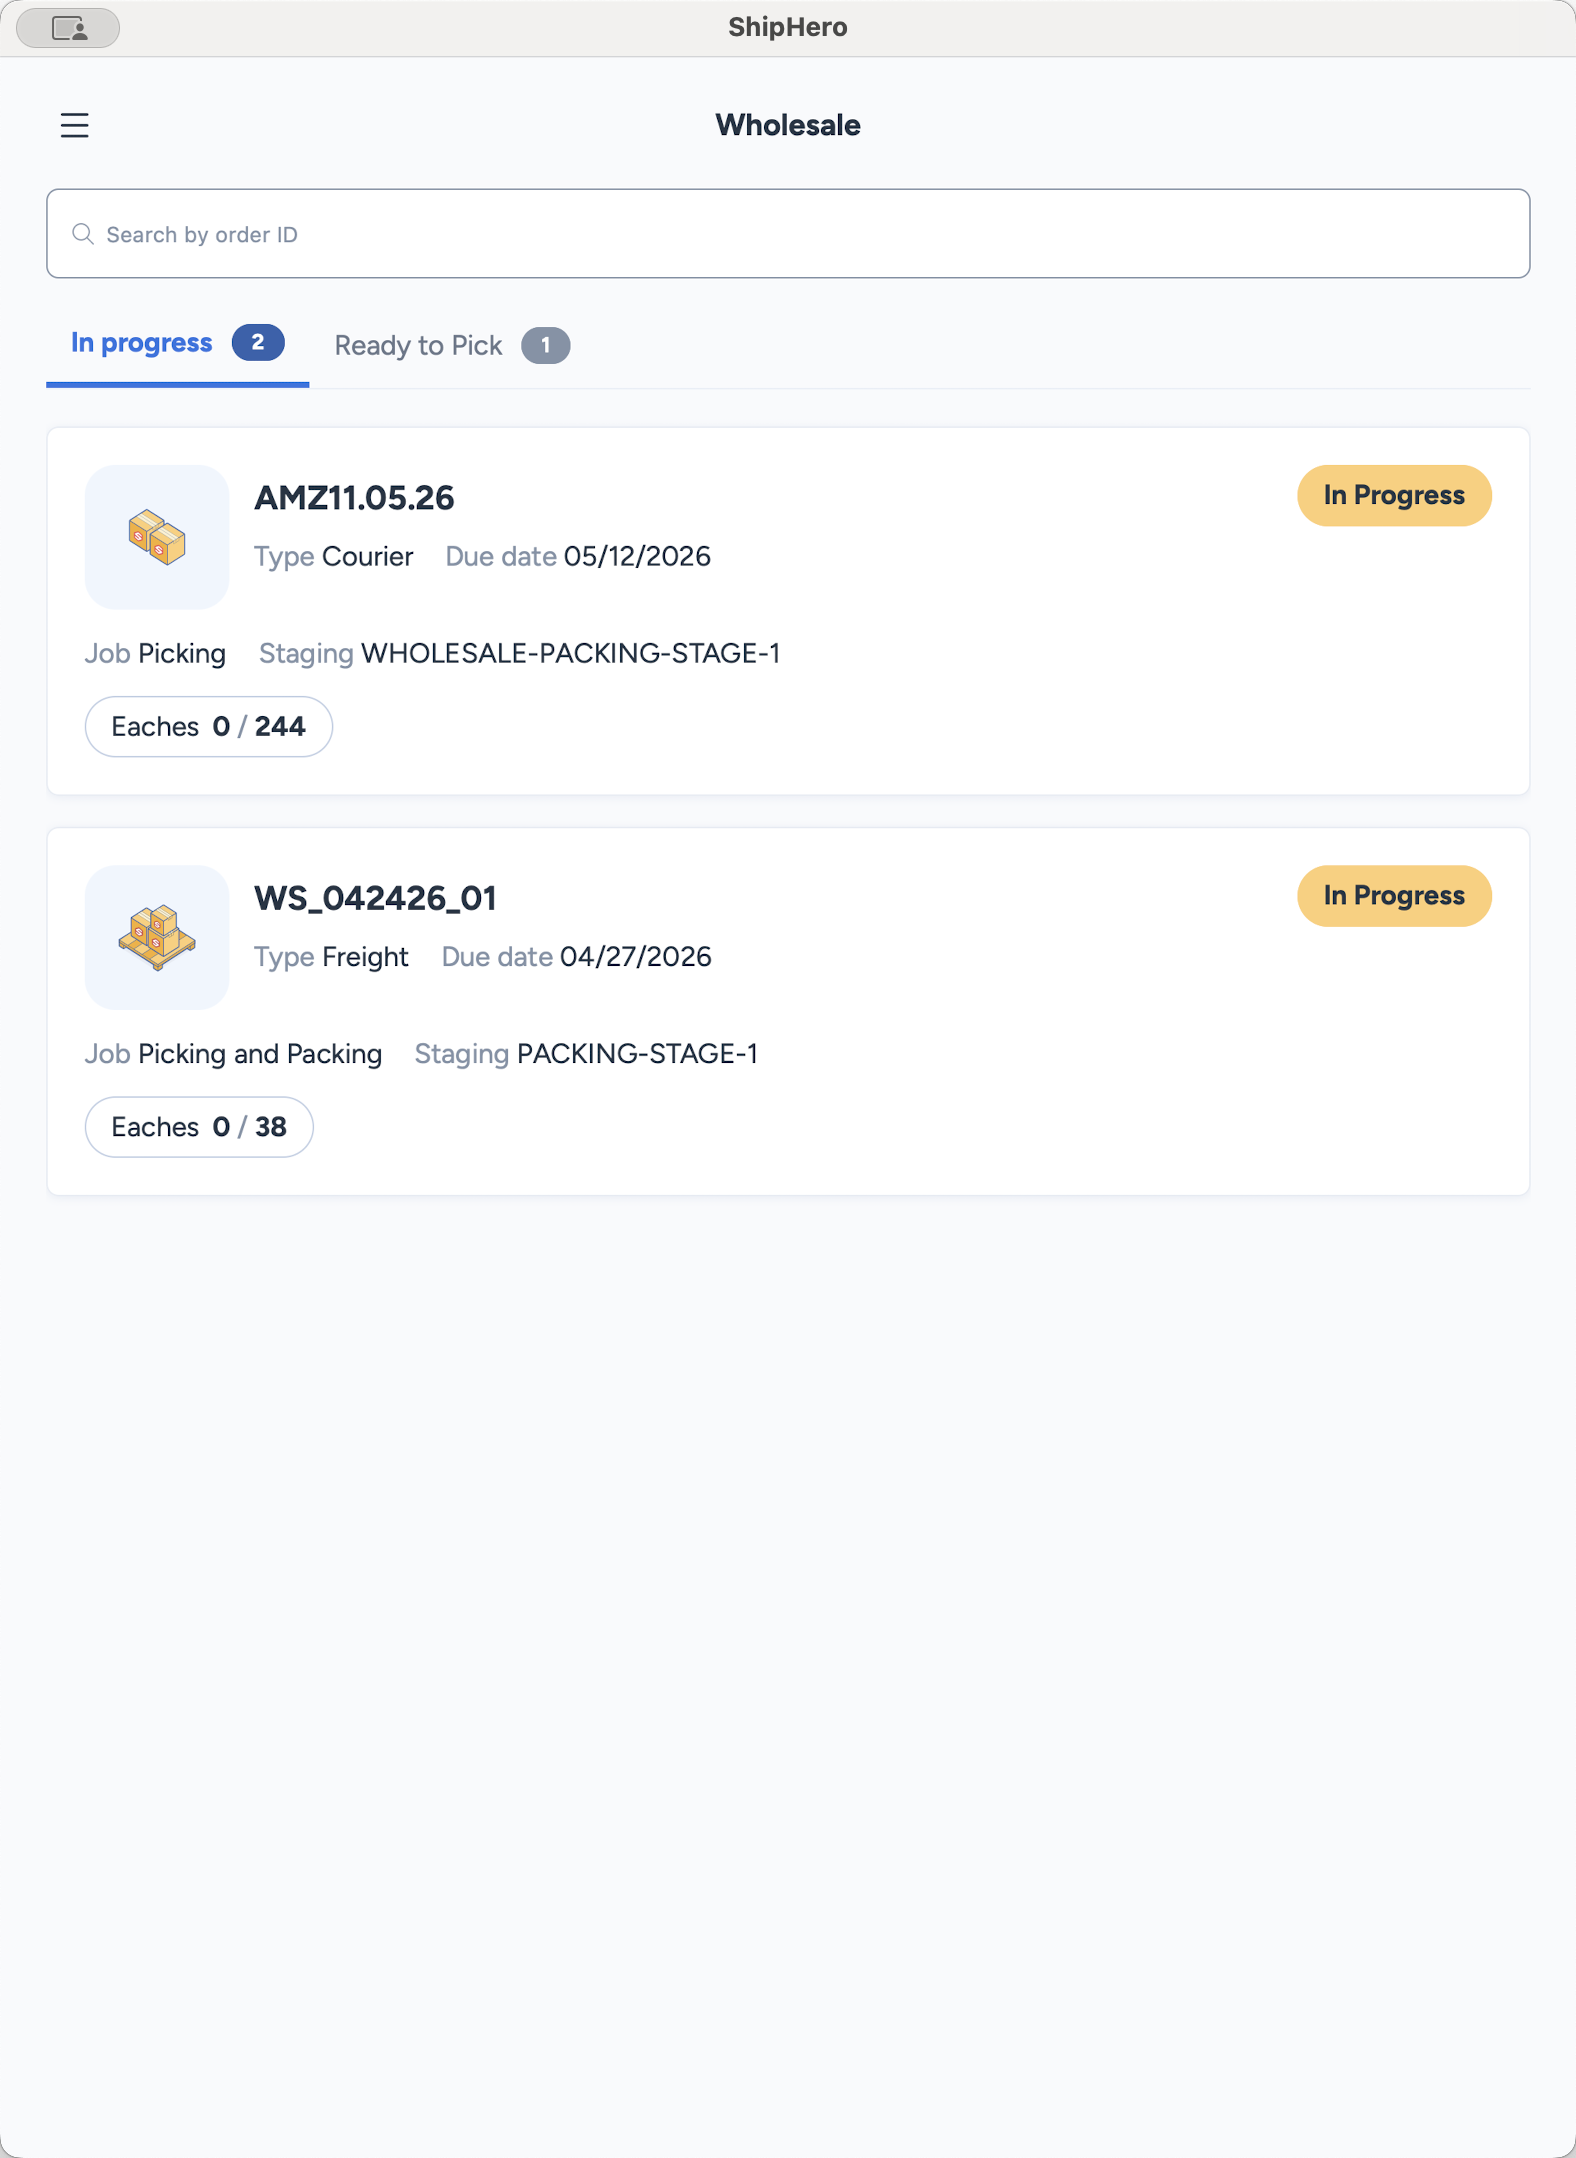
When the Wholesale page loads, you will see orders split between two tabs:
In Progress: Orders currently being worked on by a team member.
Ready to Pick: New orders waiting to be fulfilled.
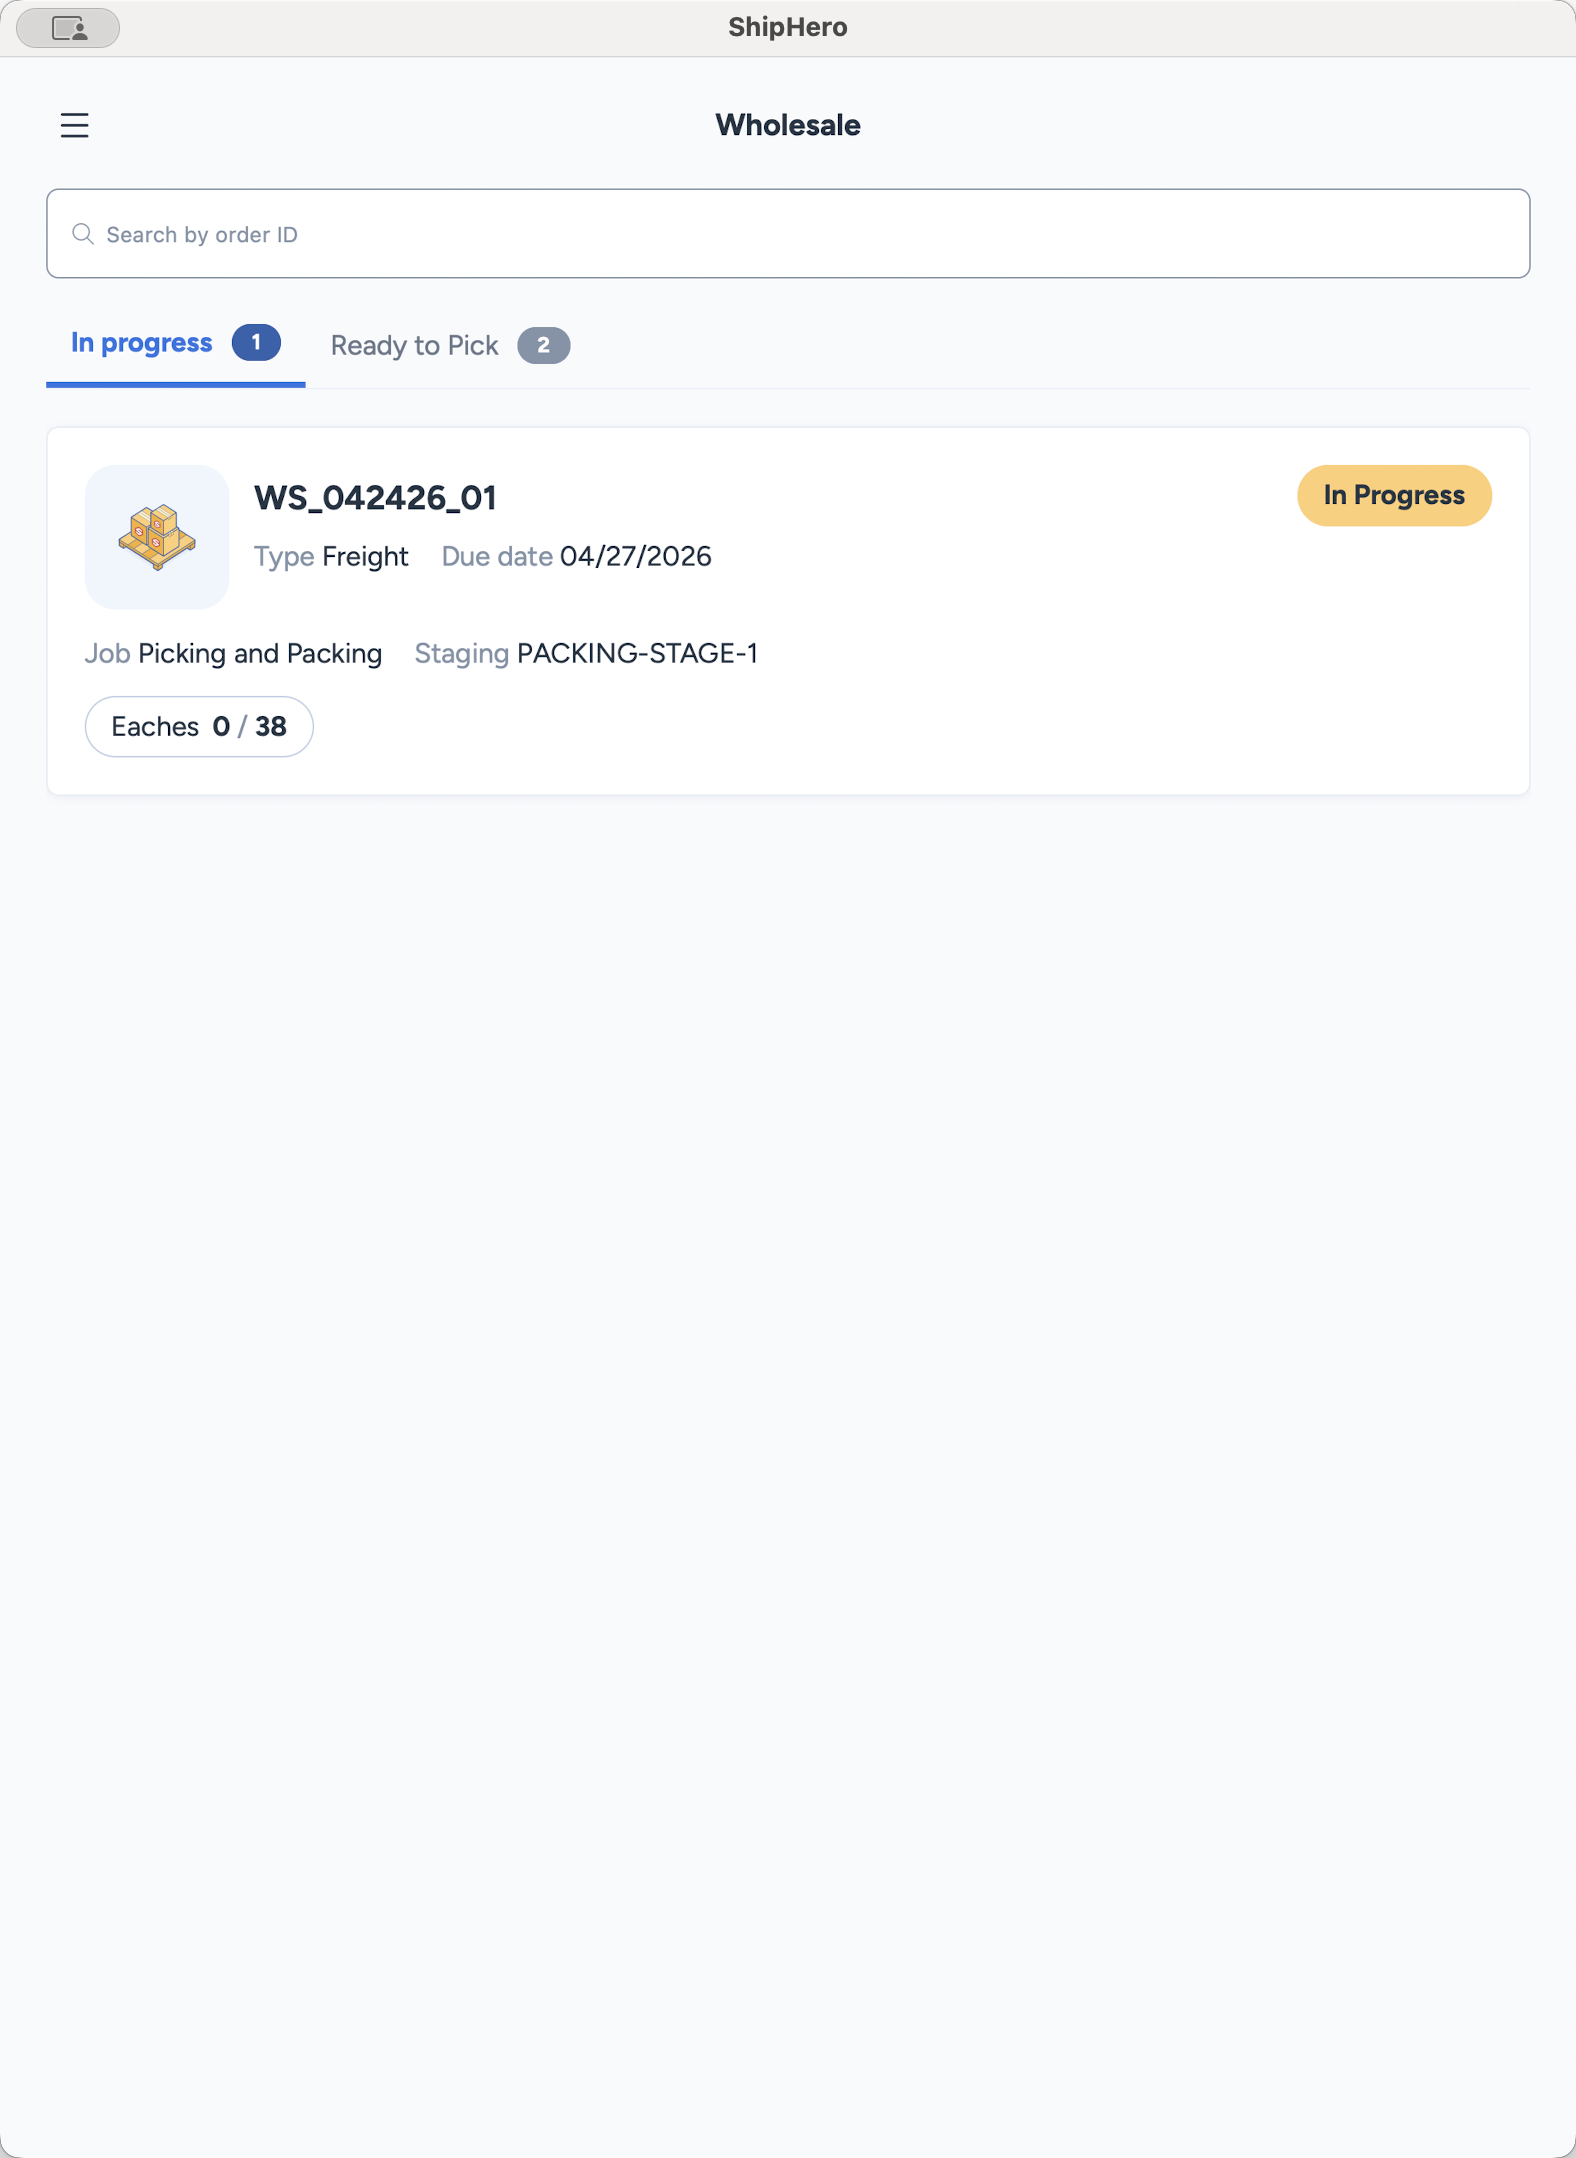
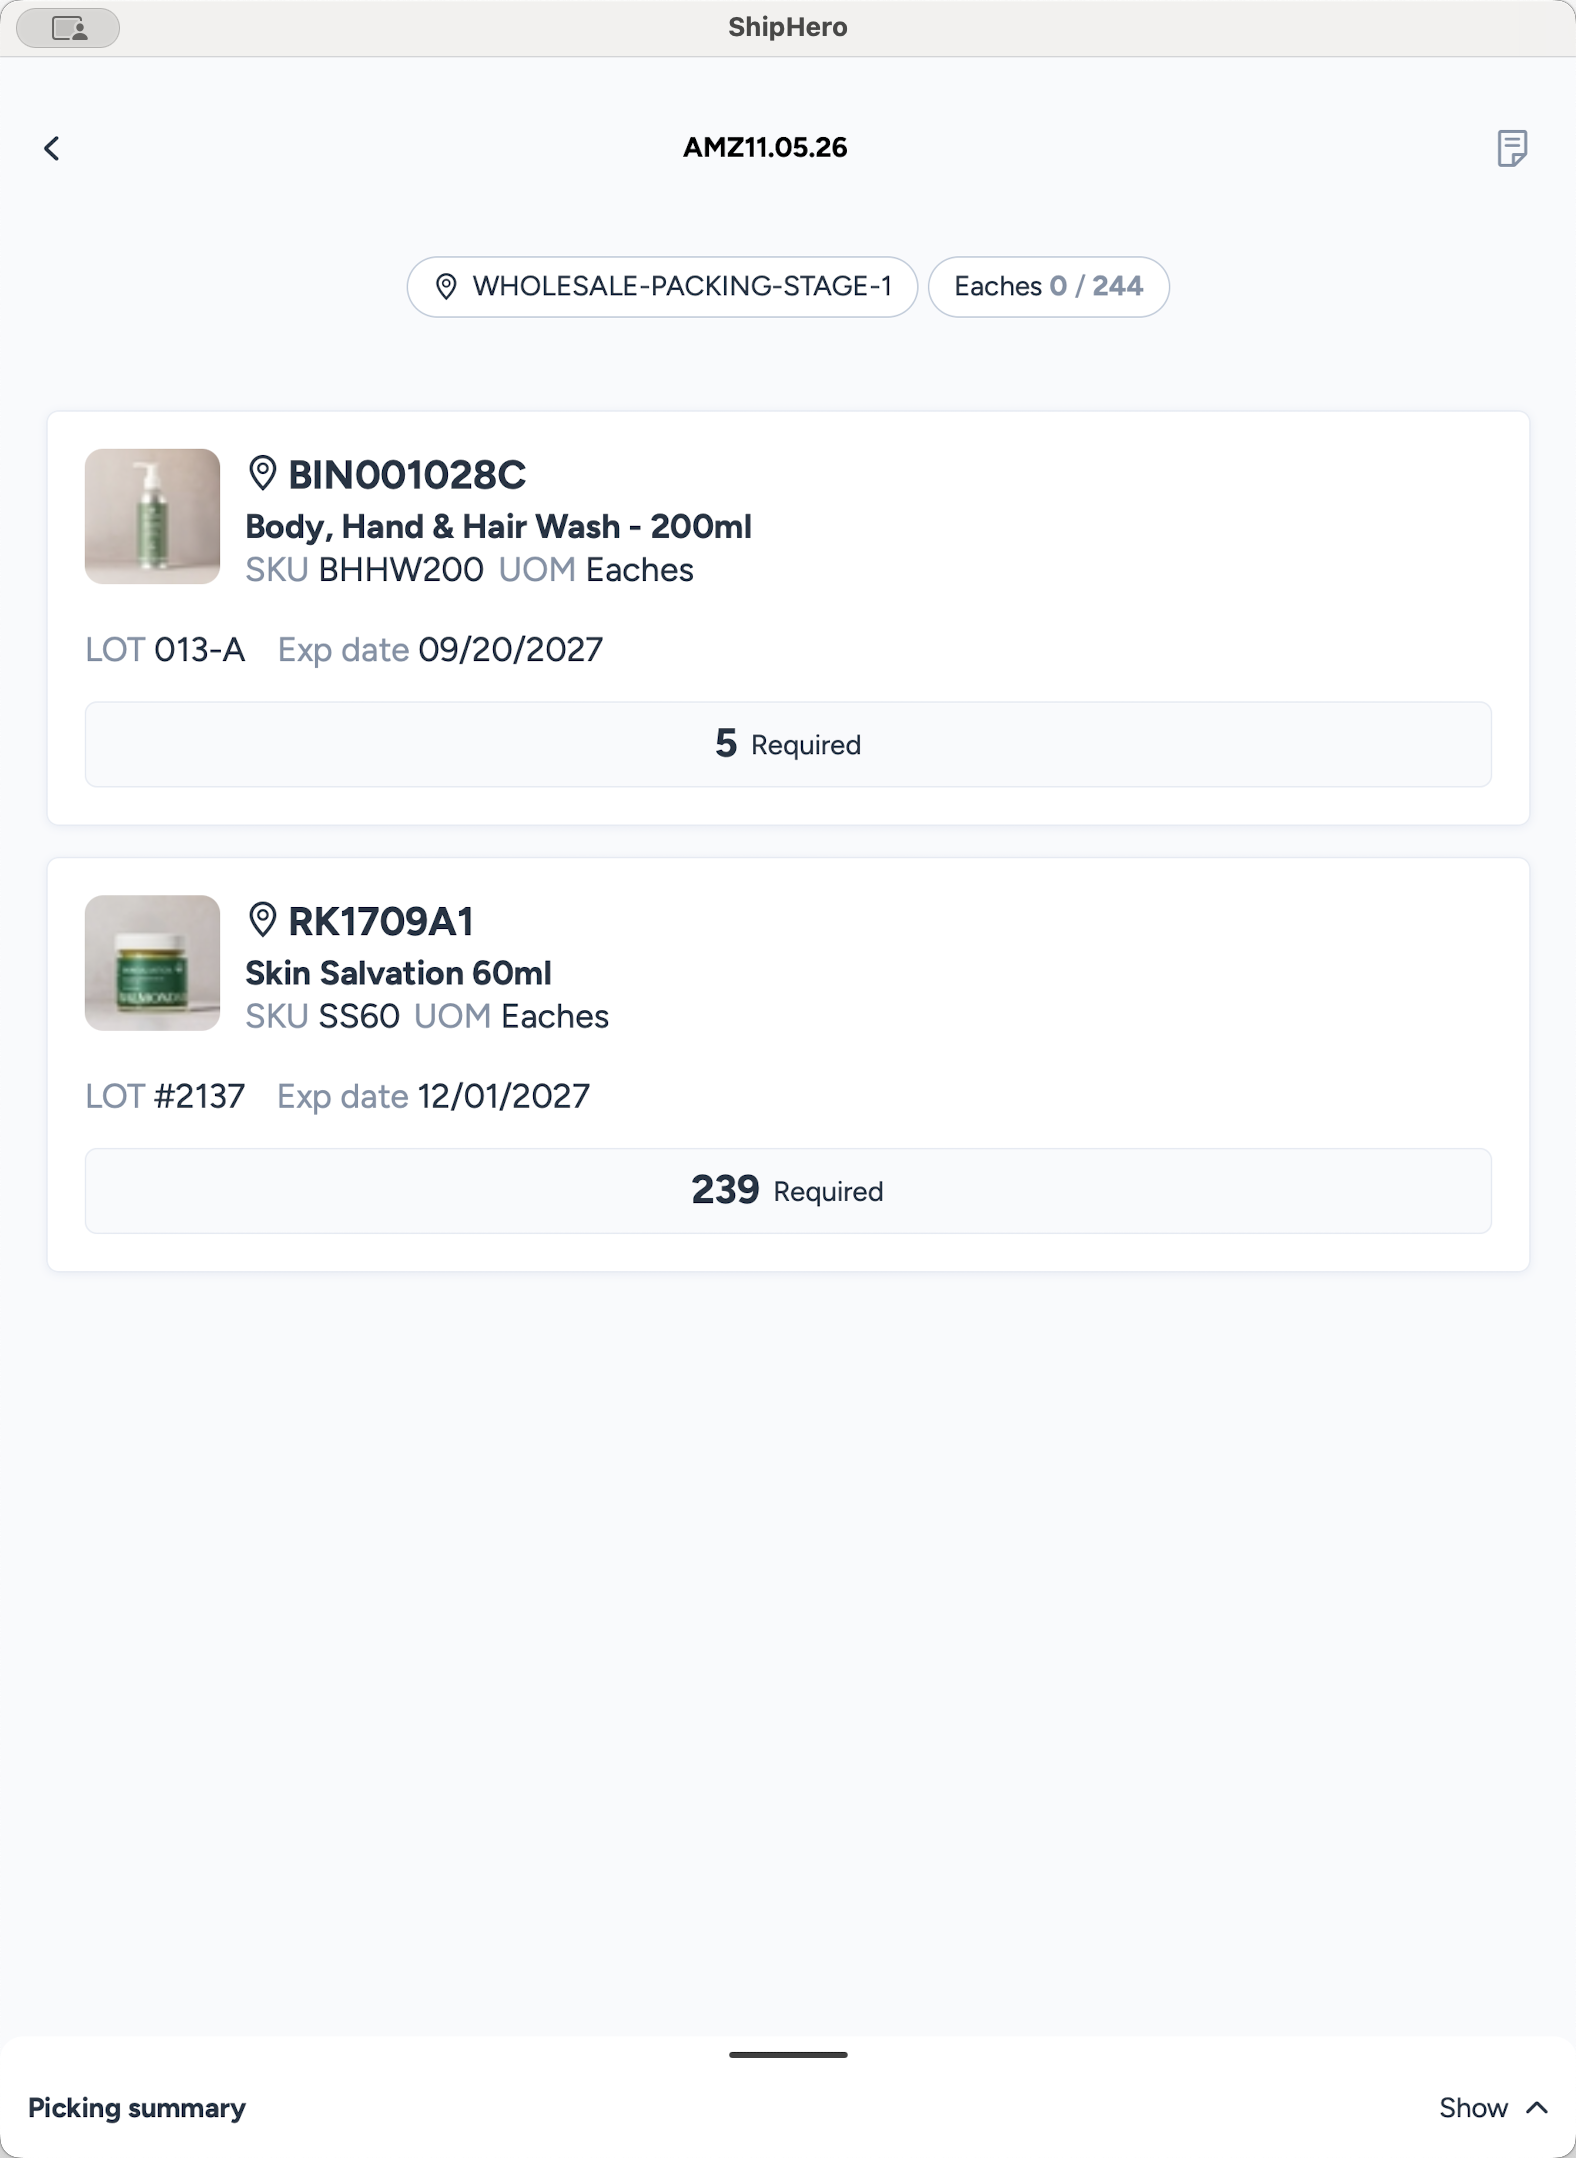
Wholesale order cards provide critical upfront details before you start picking:
Information | Description |
|---|---|
Type | "Freight" (truck pickup) or "Courier" (UPS/FedEx/DHL). |
Due Date | The target finish date for picking and packing the order. |
Job | "Picking" means pick on the iPad, then pack at a computer. "Picking and Packing" means both happen simultaneously on the iPad. |
Staging Location | The physical location where the order should be placed and packed once picking is complete. |
Eaches | The total number of individual units that need to be picked. |
Starting a Pick
Picking Items
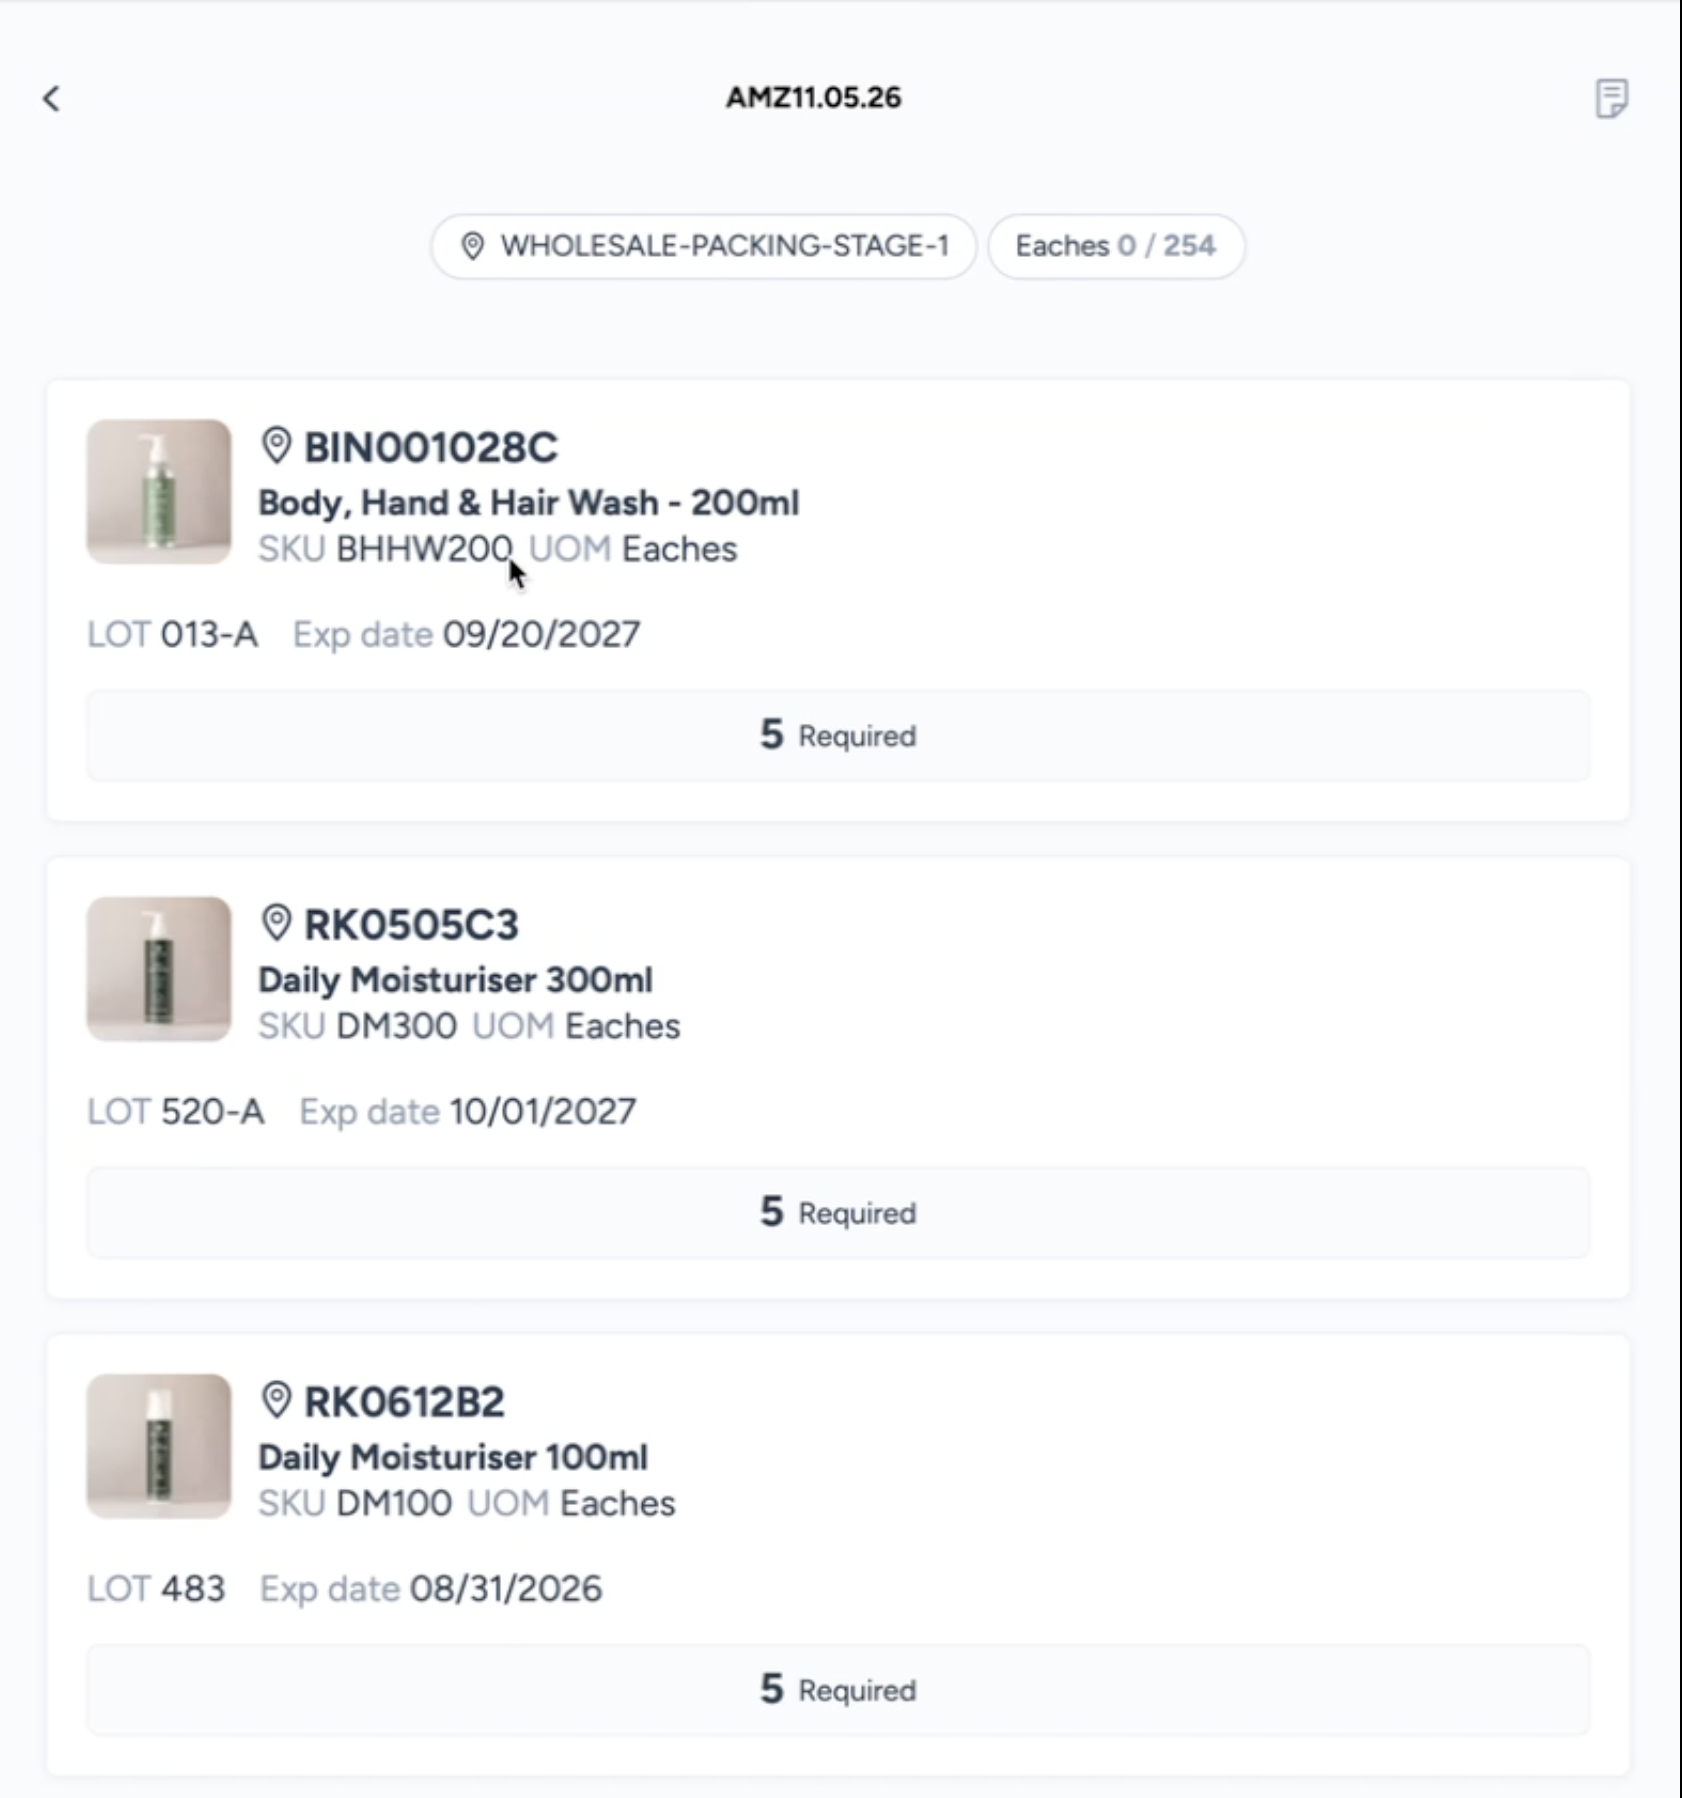
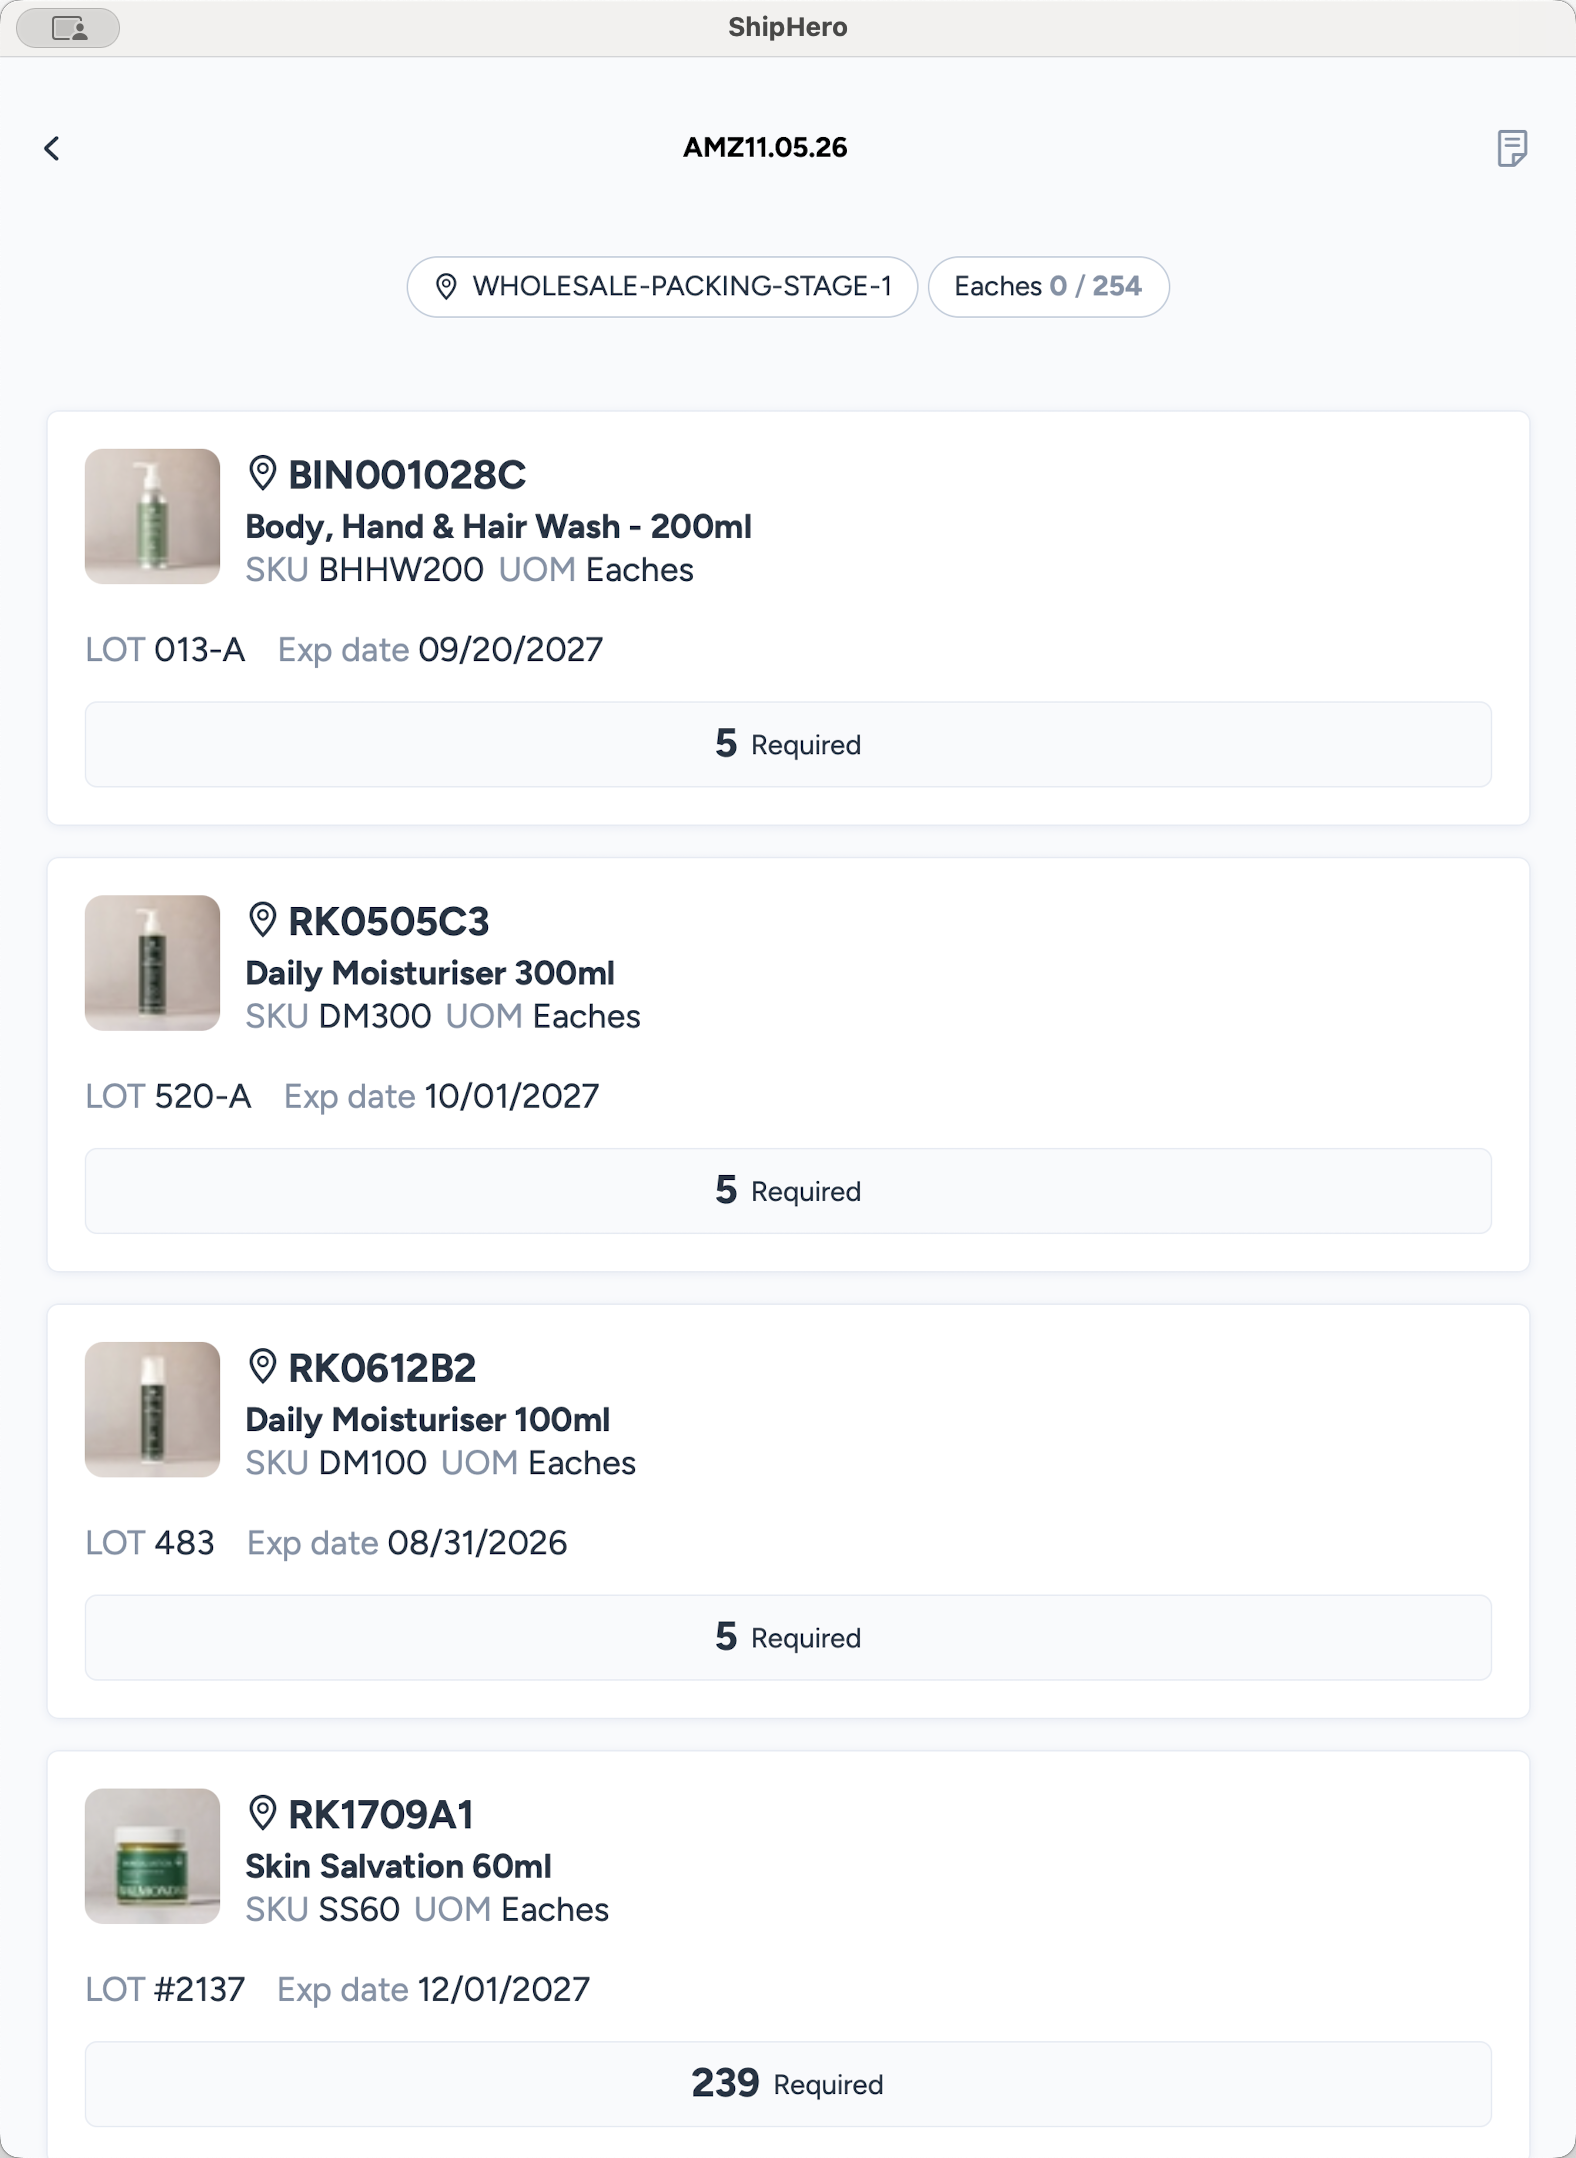
The picking screen directs you to a specific location (e.g., RK0505C3) and lists the item details, SKU, lot tracking, and the required quantity.
Walk to the specified location shown at the top of each product
Scan the physical location barcode.
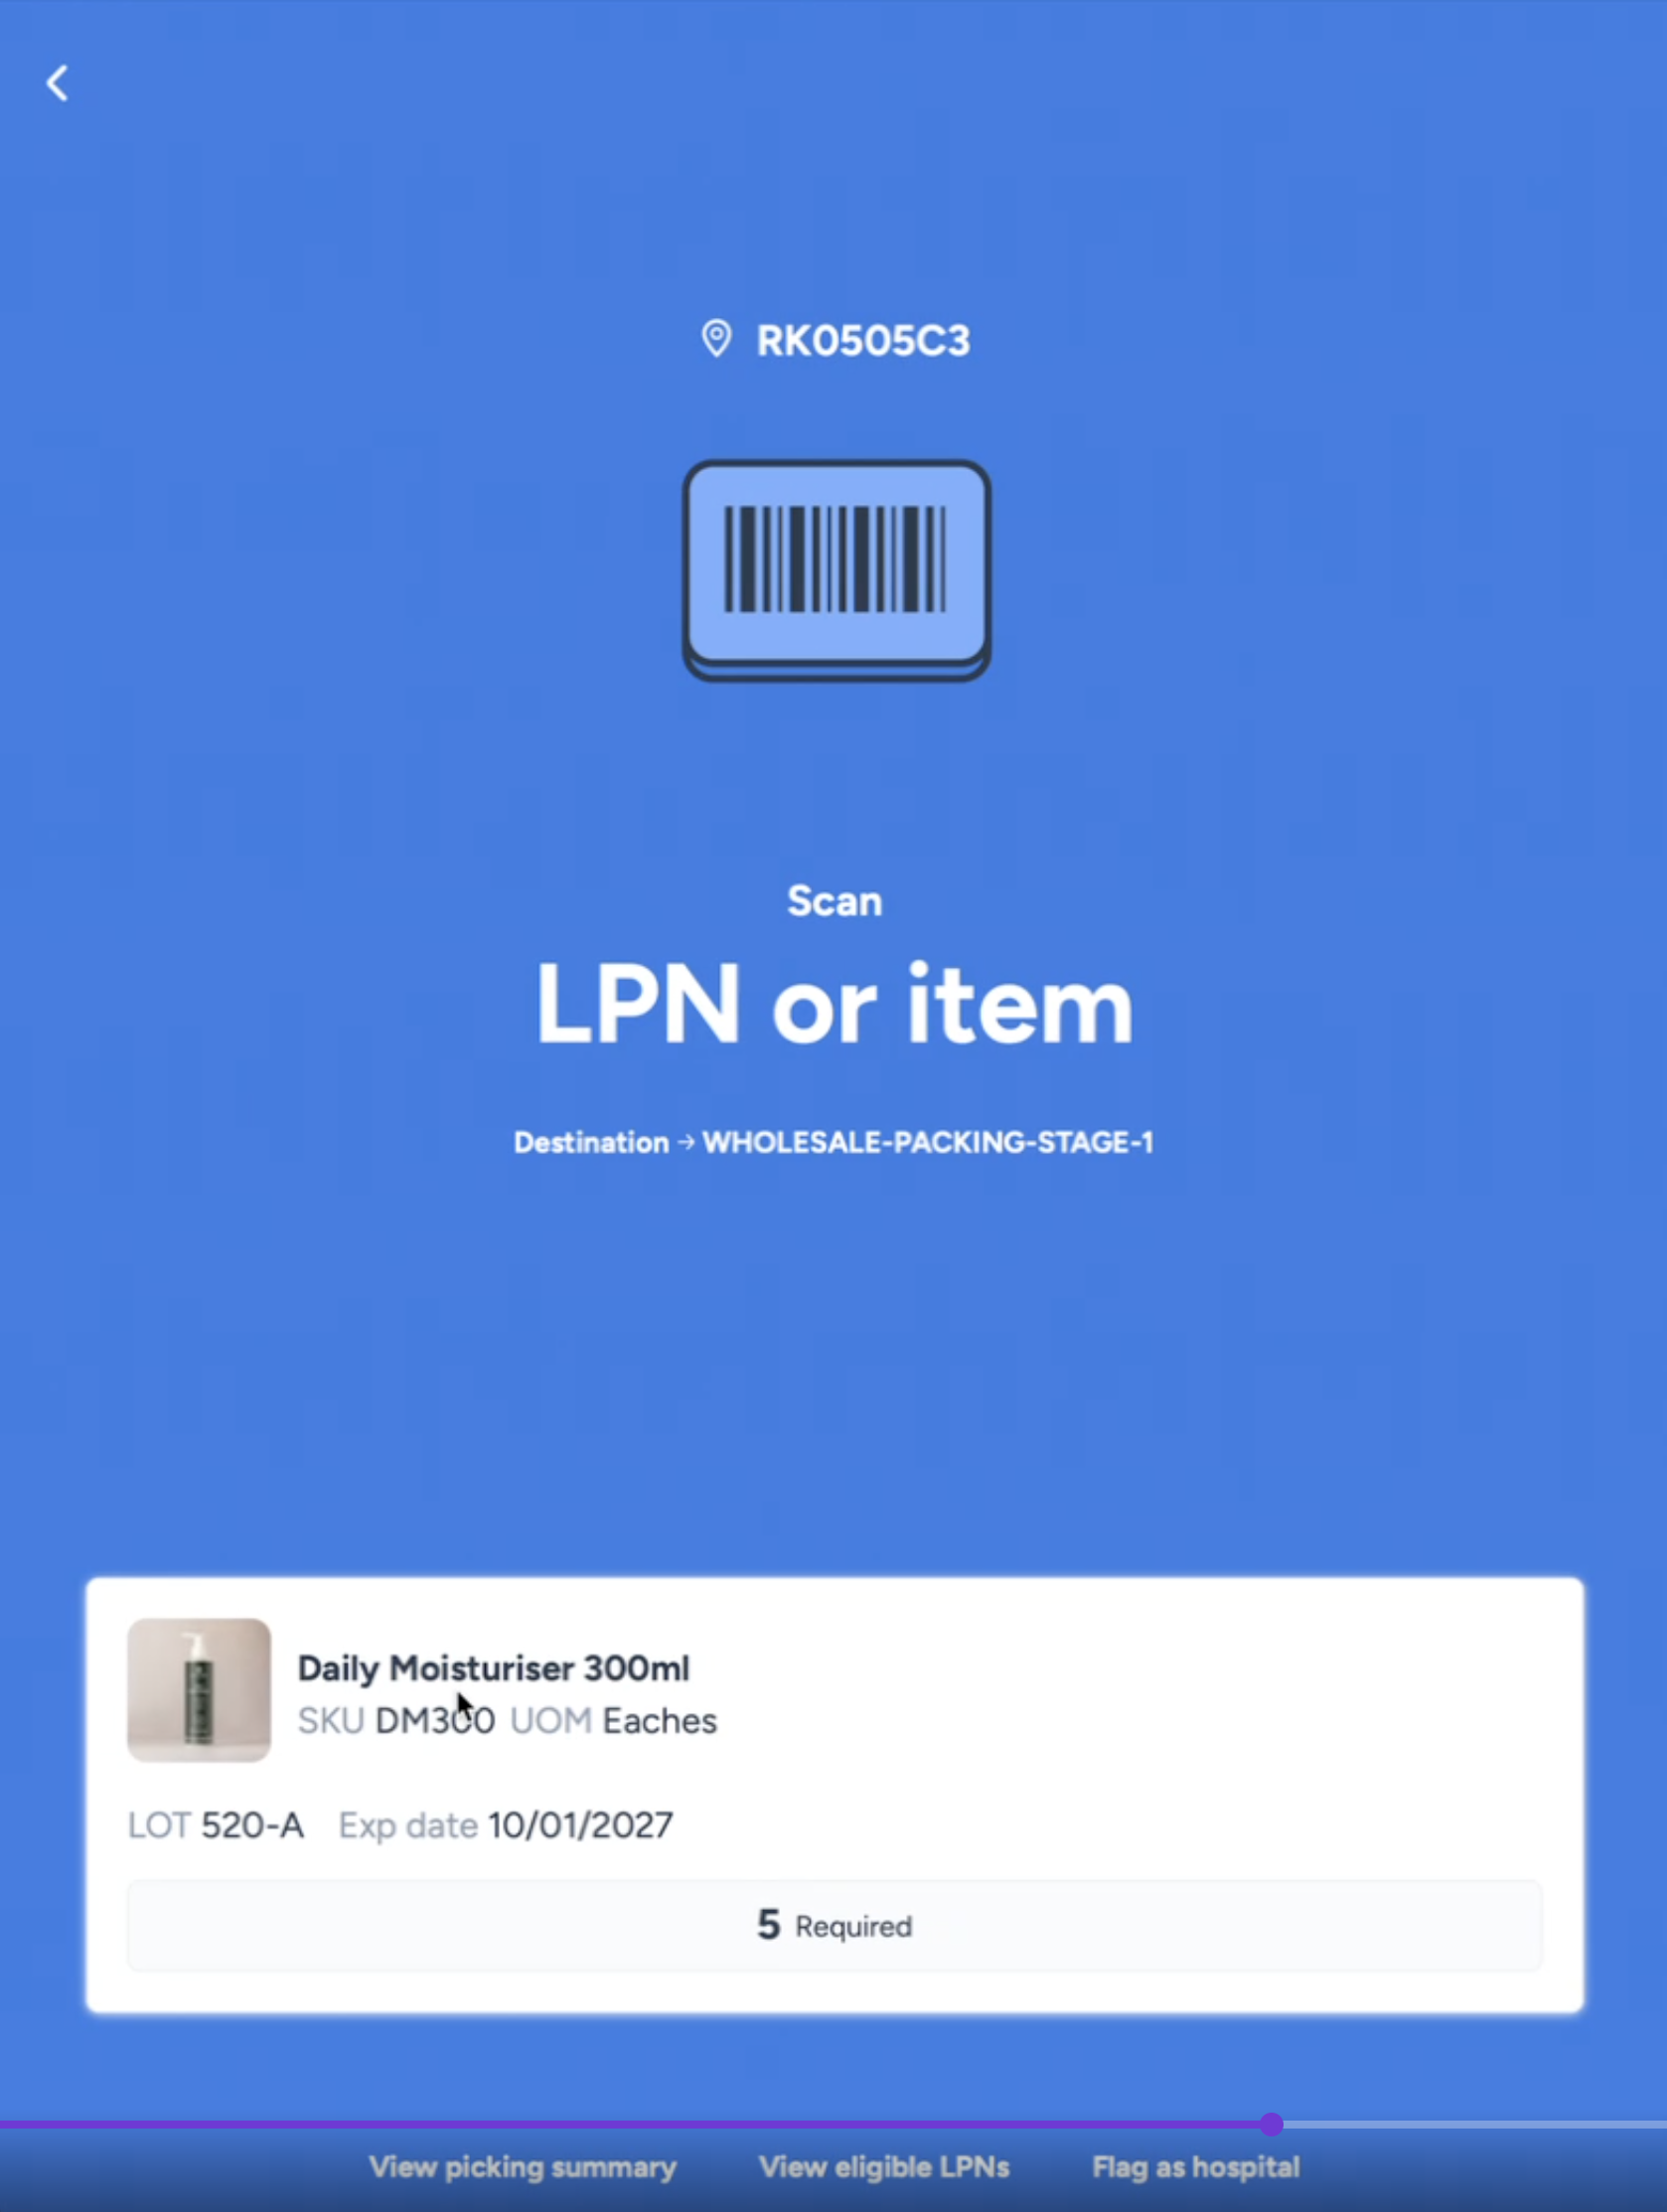
Remove an item from the bin and scan its barcode. The screen will turn green to confirm the correct item. If you scan the wrong item, the screen will turn red.
The screen will then move the product scanning screen (blue screen) showing you the product and how many units have been scanned out of the total required.
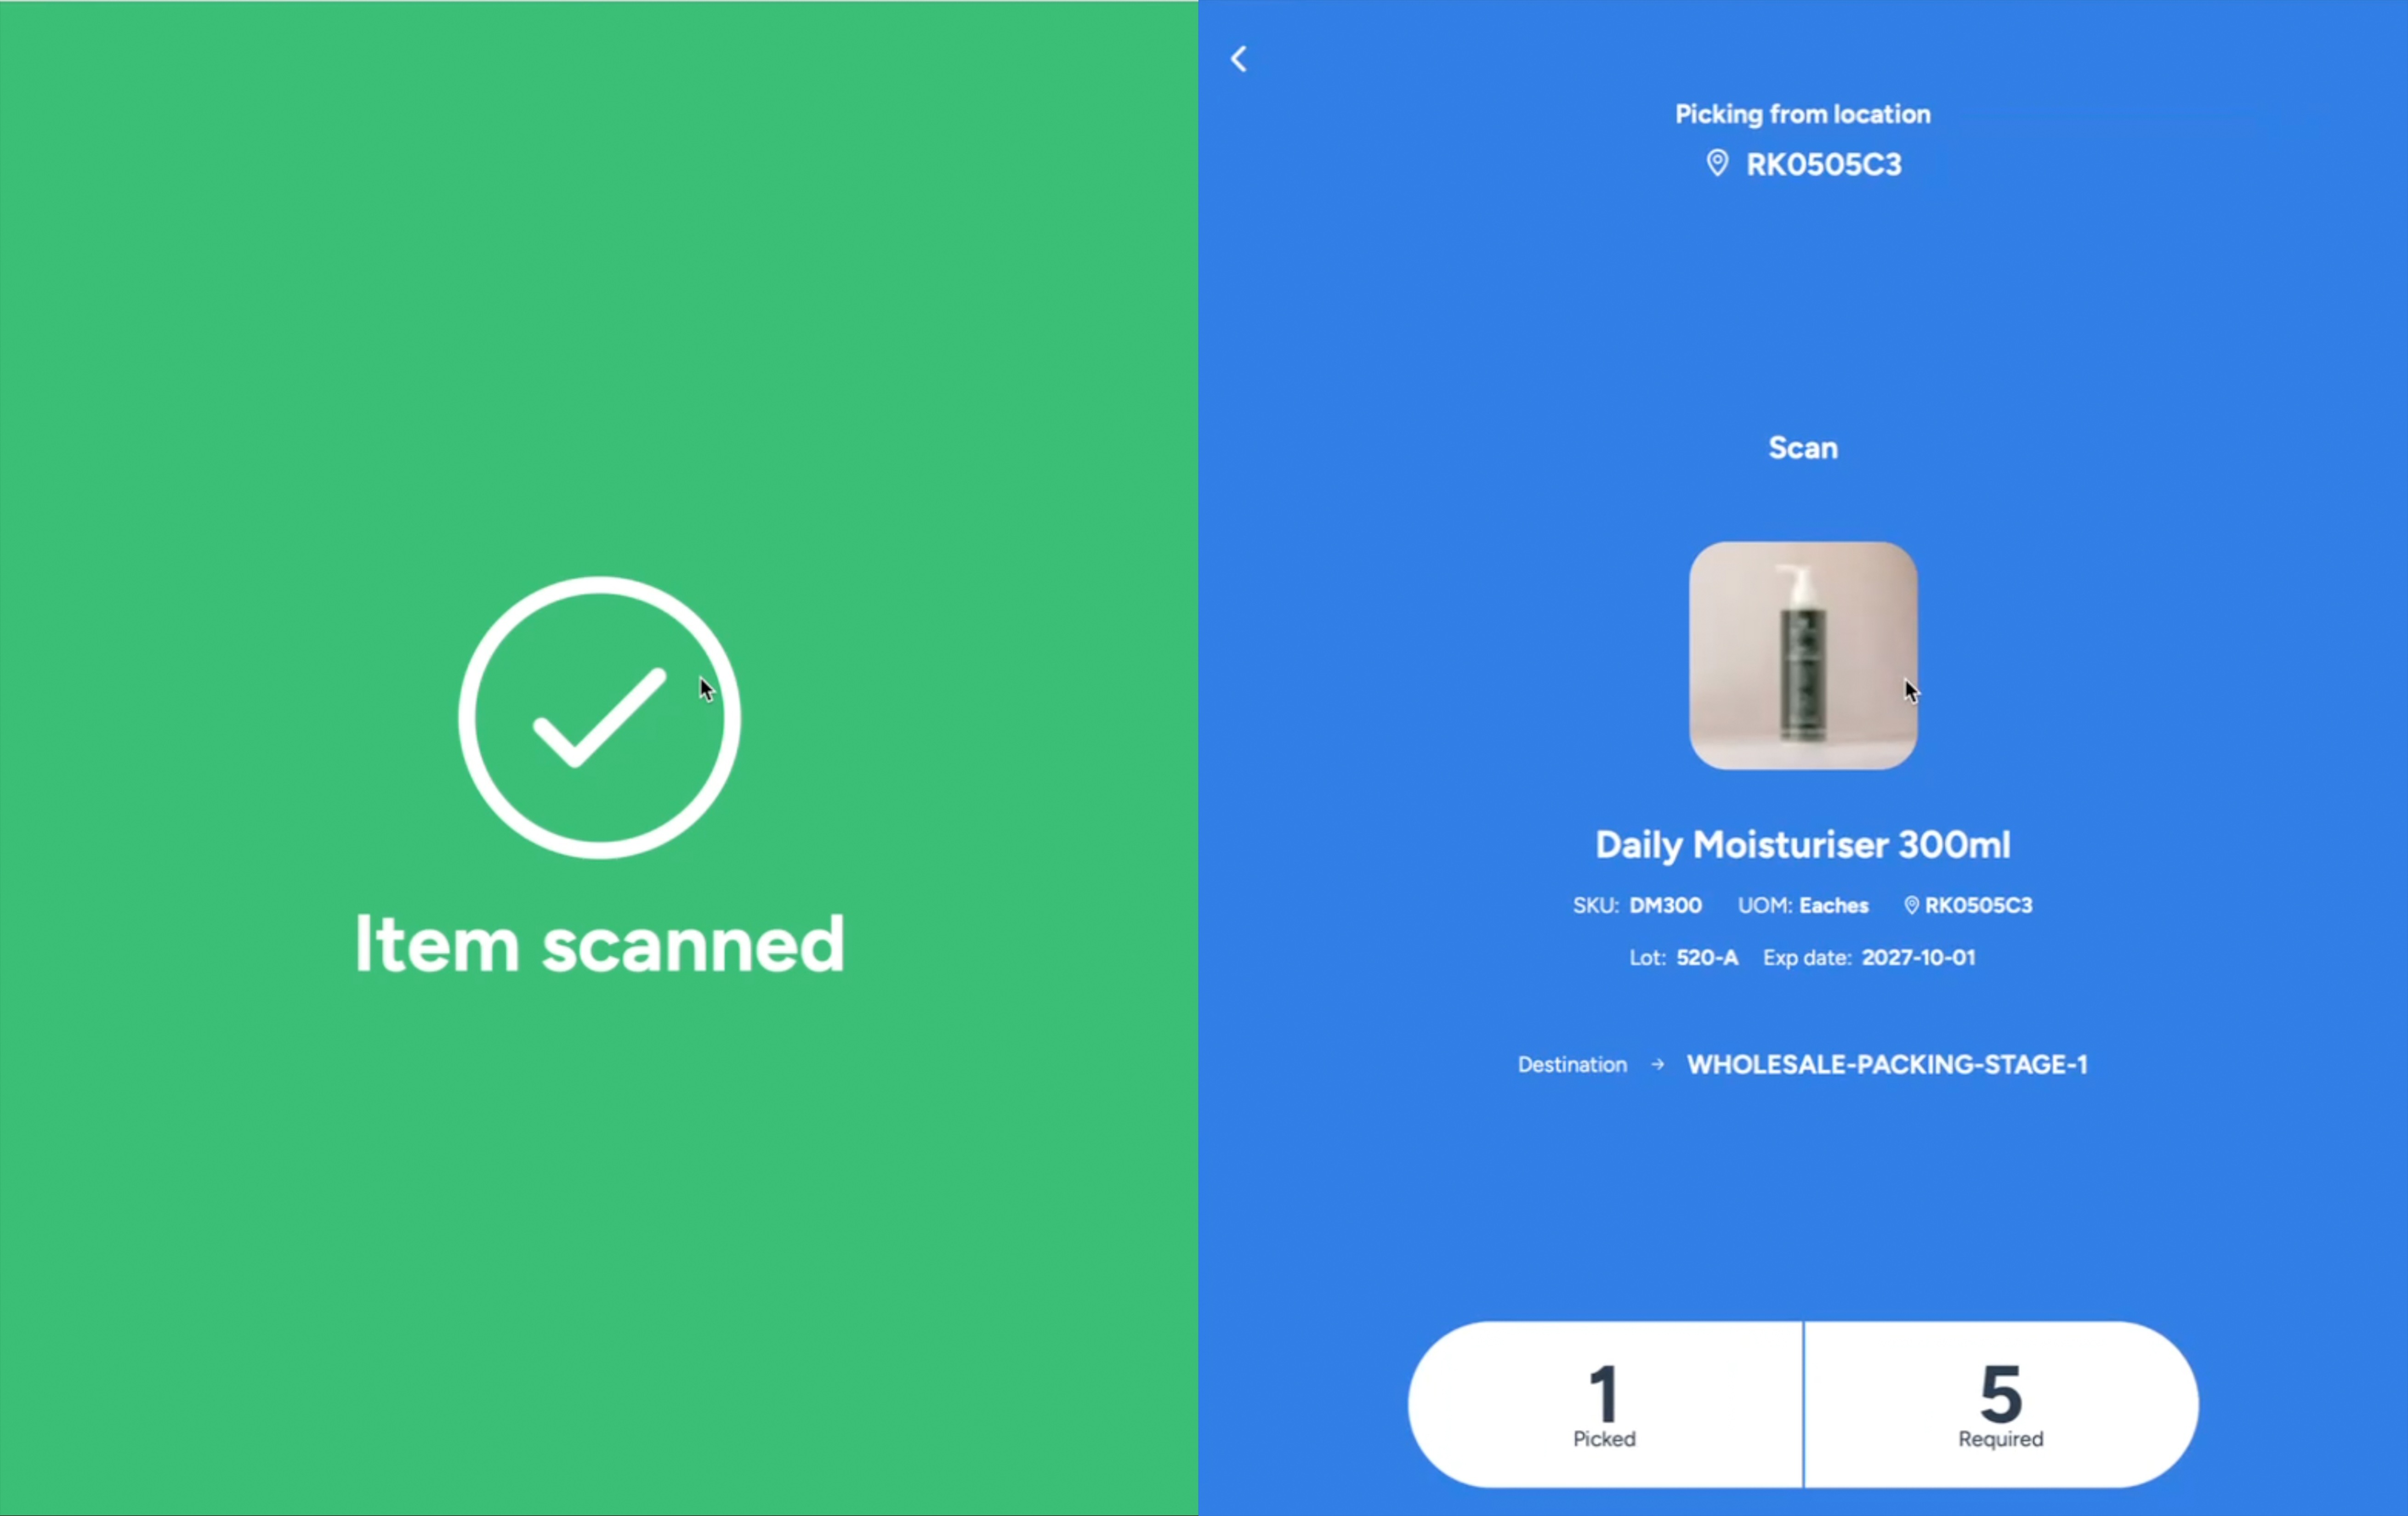
Continue scanning each required unit until you meet the required quantity. In the example above, we have to pick 5 units. Once you have scanned the 5th unit, the screen will close and take you back to the picking screen to pick the next product location.
During the picking process, you have access to additional options at the bottom of the screen:
Option | When to use |
|---|---|
Pick all required | Never use this. It completely bypasses the item scanning requirement. |
Flag as hospital | Use when the location is short on inventory or there is a picking problem. Inform your manager after flagging. |
Move picked to staging | Use to transfer already picked items to the staging location if handling large batches. |
Once you finish picking all items for the order, place them in a bin or on a cart and wheel them to the assigned staging location (e.g., Wholesale Packing Stage 1).
Pausing and Resuming an Order
You can exit a wholesale order at any time without losing your progress.

FAQ
Q: What should I do if an item scans as incorrect?
A: The screen will turn red. Stop and verify the SKU, lot number, and bin location to ensure you are picking the exact correct item.
Q: What happens if I don't understand the Packer's Note?
A: Do not guess. Reach out to your manager for clarification before proceeding with the pick.
Q: Can multiple people pick the same order
A: Yes, multiple pickers can pick the same order. This is helpful if the order is large. Each picker will pick on their own iPad. The App will not allow two pickers to pick from the same location at a time, so the locations to pick from shown are the ones the other person has not worked on. When finished all pickers should bring the picked items to the designated staging location.
Glossary
Term | Definition |
|---|---|
Each | A single unit of measure for an item, as opposed to a full master case. |
LPN | License Plate Number; a trackable barcode assigned to a specific item or container in the warehouse. |
Courier | Small parcel shipping services (like UPS, FedEx, or DHL) used for non-freight orders. |