
How to Place a Hot Part Order with Showplace Cabinetry
Learn the step-by-step process of placing a rush order with ShowPlace Cabinetry, including selecting order types, entering job details, and choosing shipping methods.
In this guide, we'll learn how to place a rush order, also known as a hot part order, with Showplace Cabinetry. Understanding the process for these urgent orders is crucial for ensuring timely delivery of essential parts. We'll start by logging into the Showplace Pro website, navigate through the order options, and select the appropriate order type. This tutorial will cover each step, from entering job details to selecting shipping preferences, ensuring a smooth and efficient ordering experience.
Let's get started
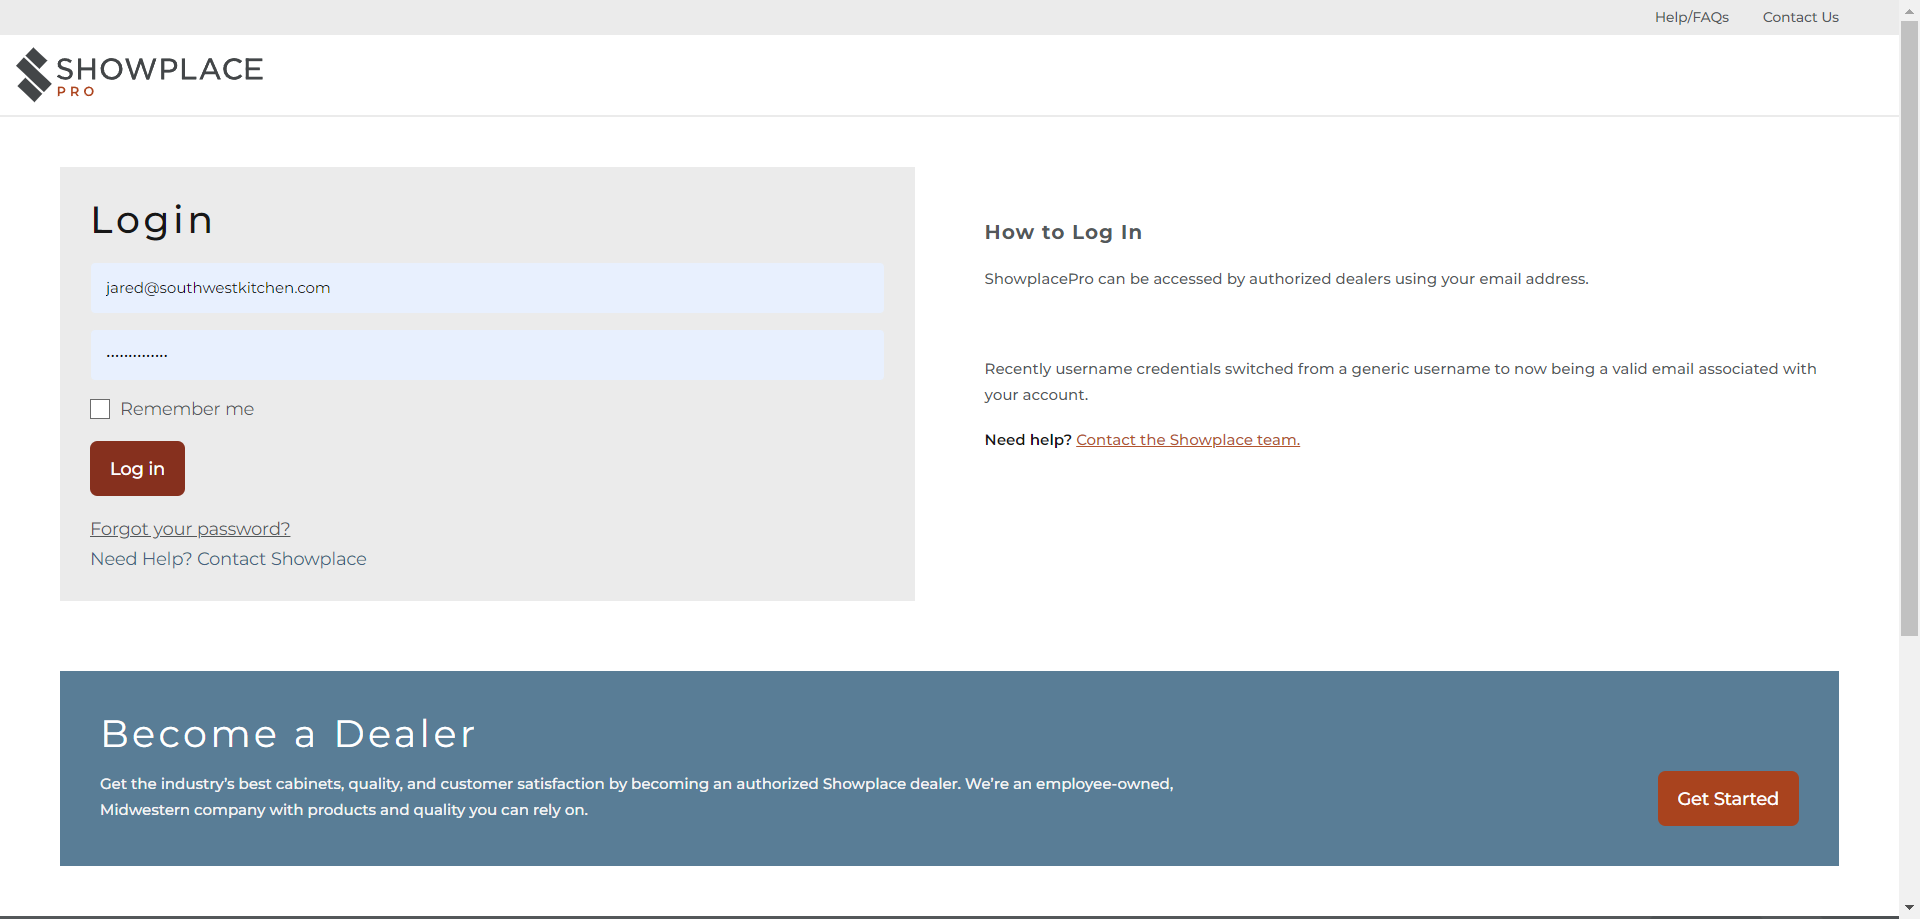
Each cabinet manufacturer has different procedures for placing orders, including various types of orders. In this tutorial, we will learn how to work with Showplace Cabinetry and place a hot part or rush order. First, go to the Showplace website, Showplace Pro Biz, and log in. Enter your credentials, typically your email and password, and click "Log In."
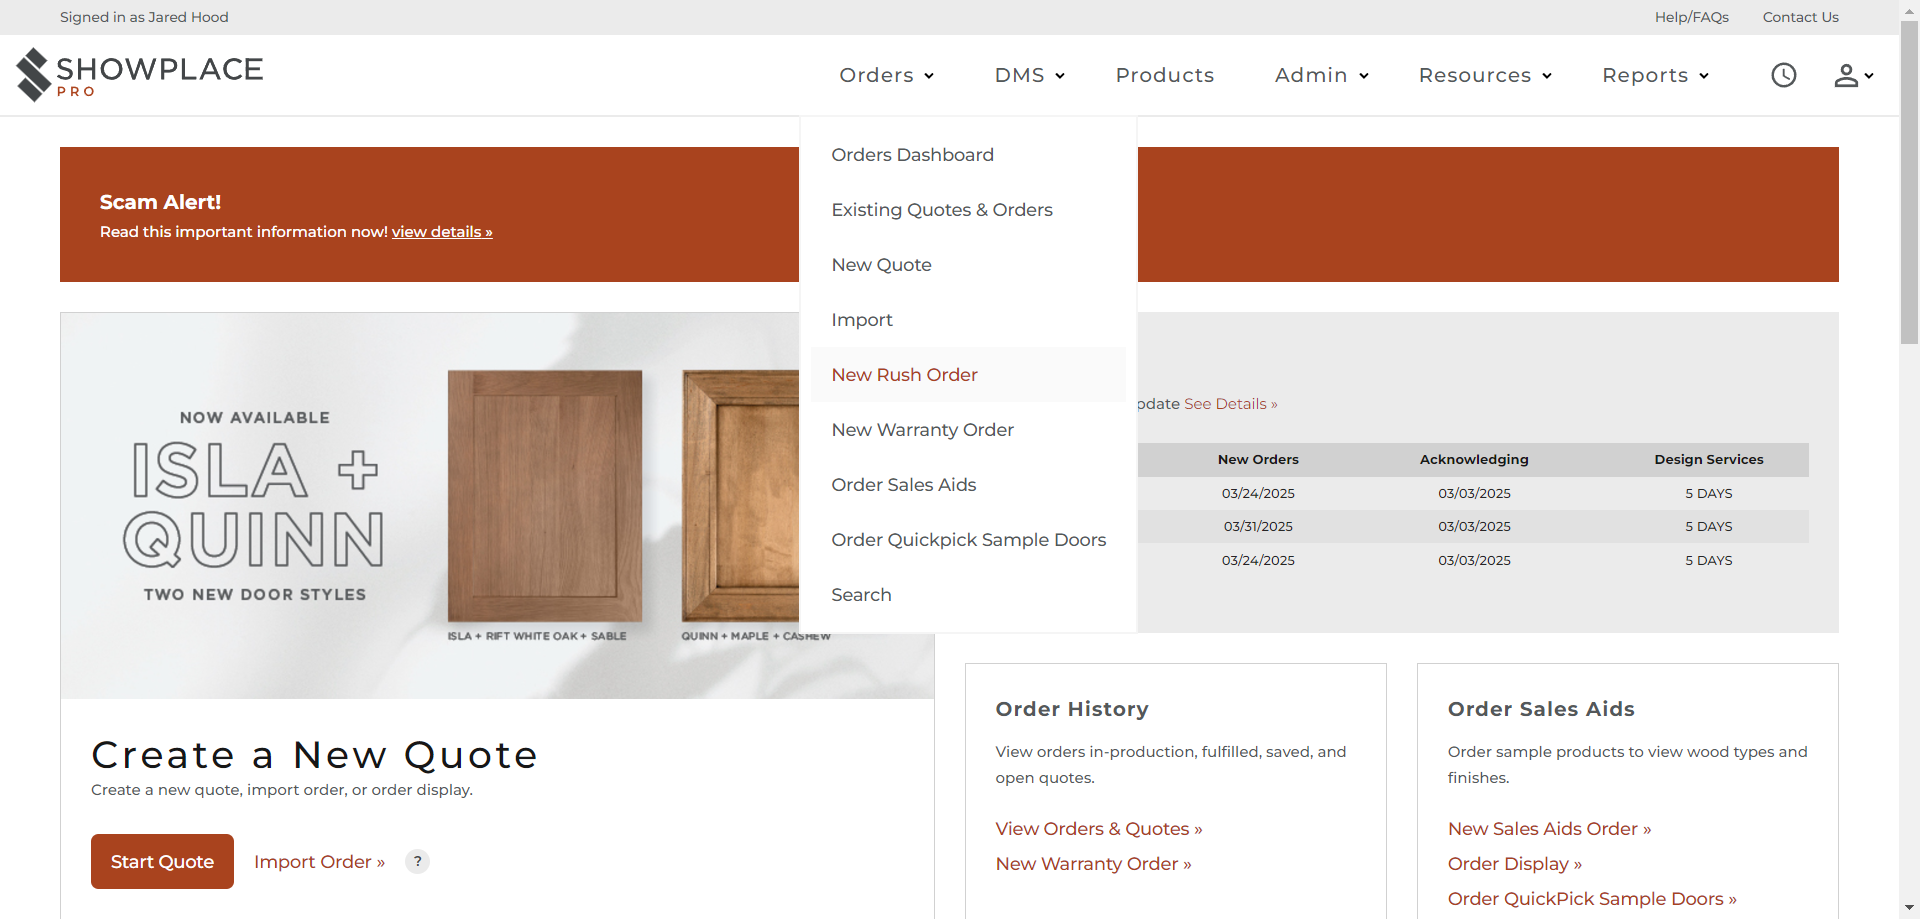
Once on their website, go to the top ribbon and select "Orders." A dropdown will appear with different order types. Scroll down to "Rush Order." Click on "New Rush Order."
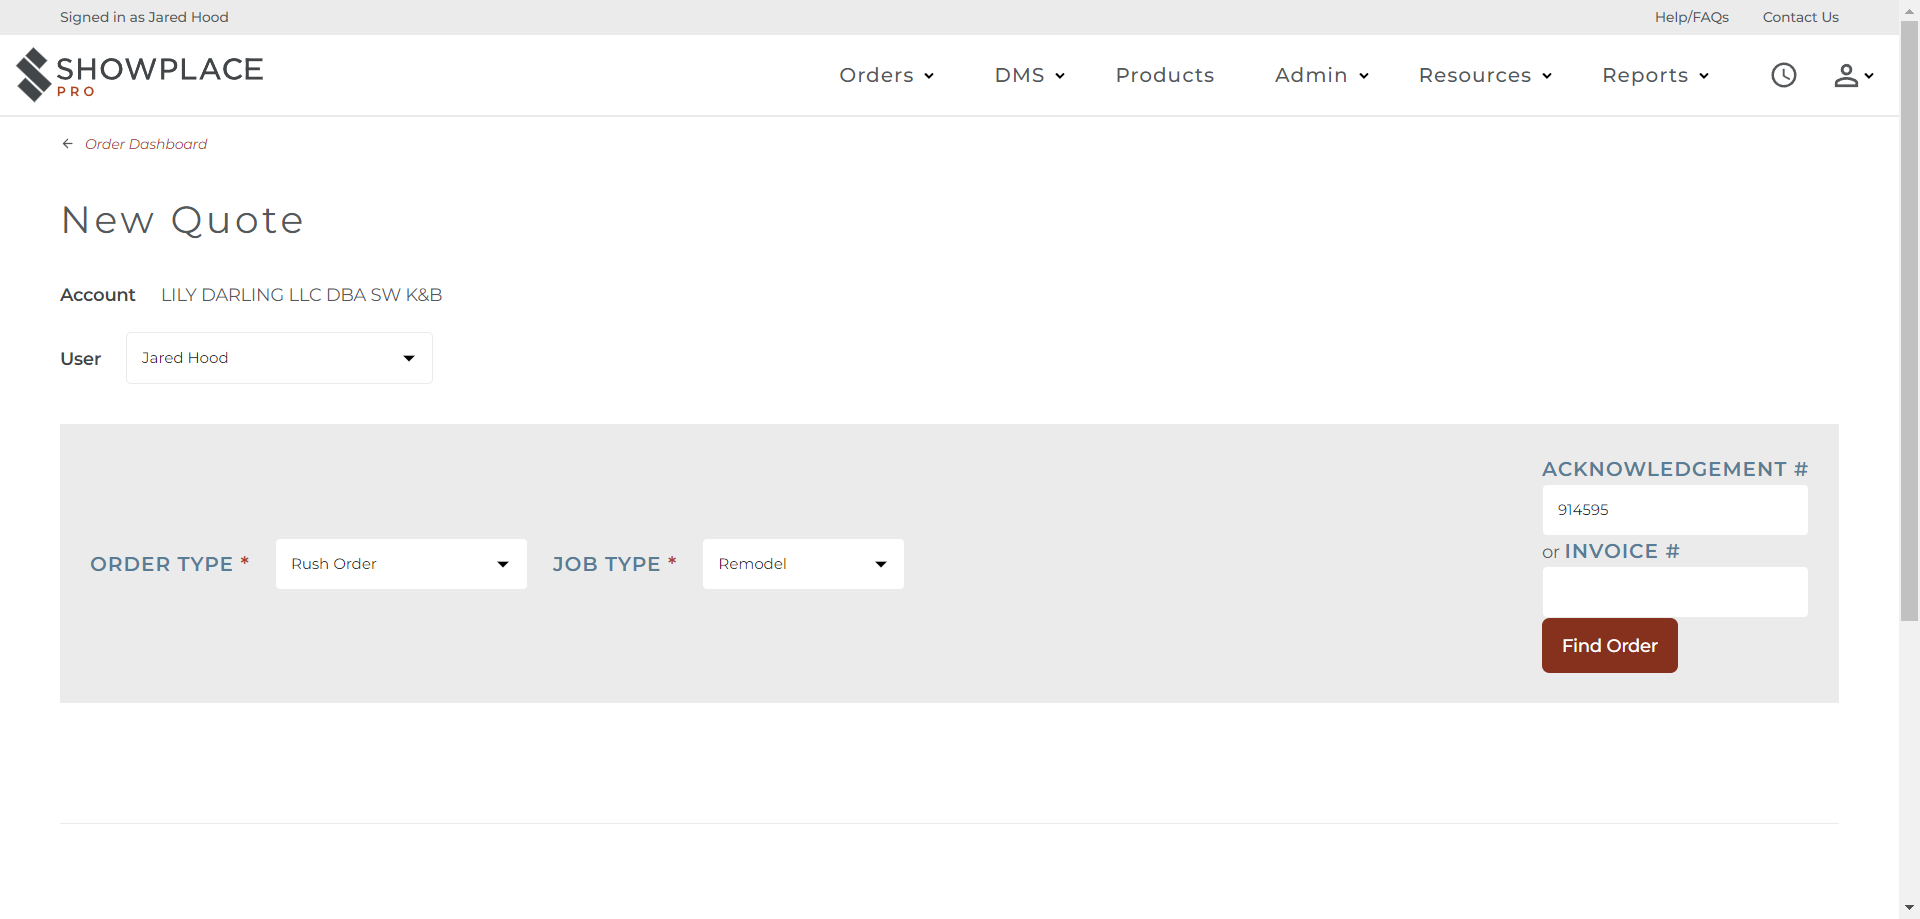
Once in the new quote screen, you'll see the order type is already set to rush order. If you want a different type, click on order type and select from the drop-down menu.
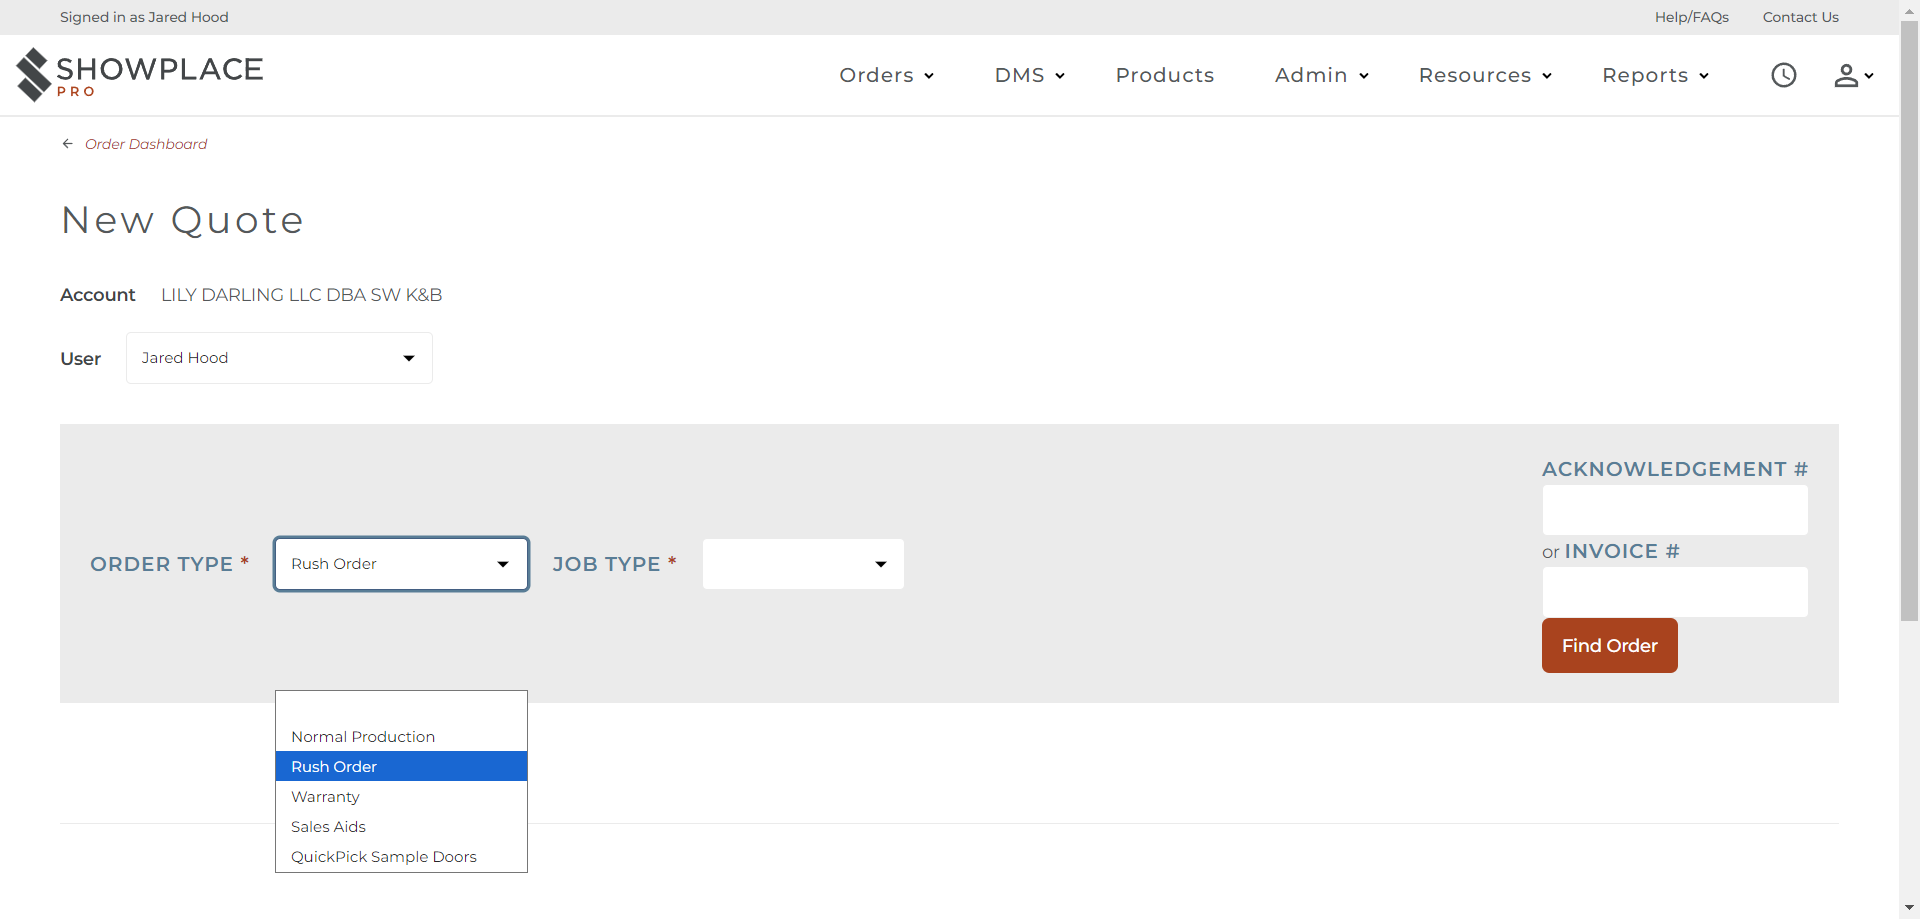
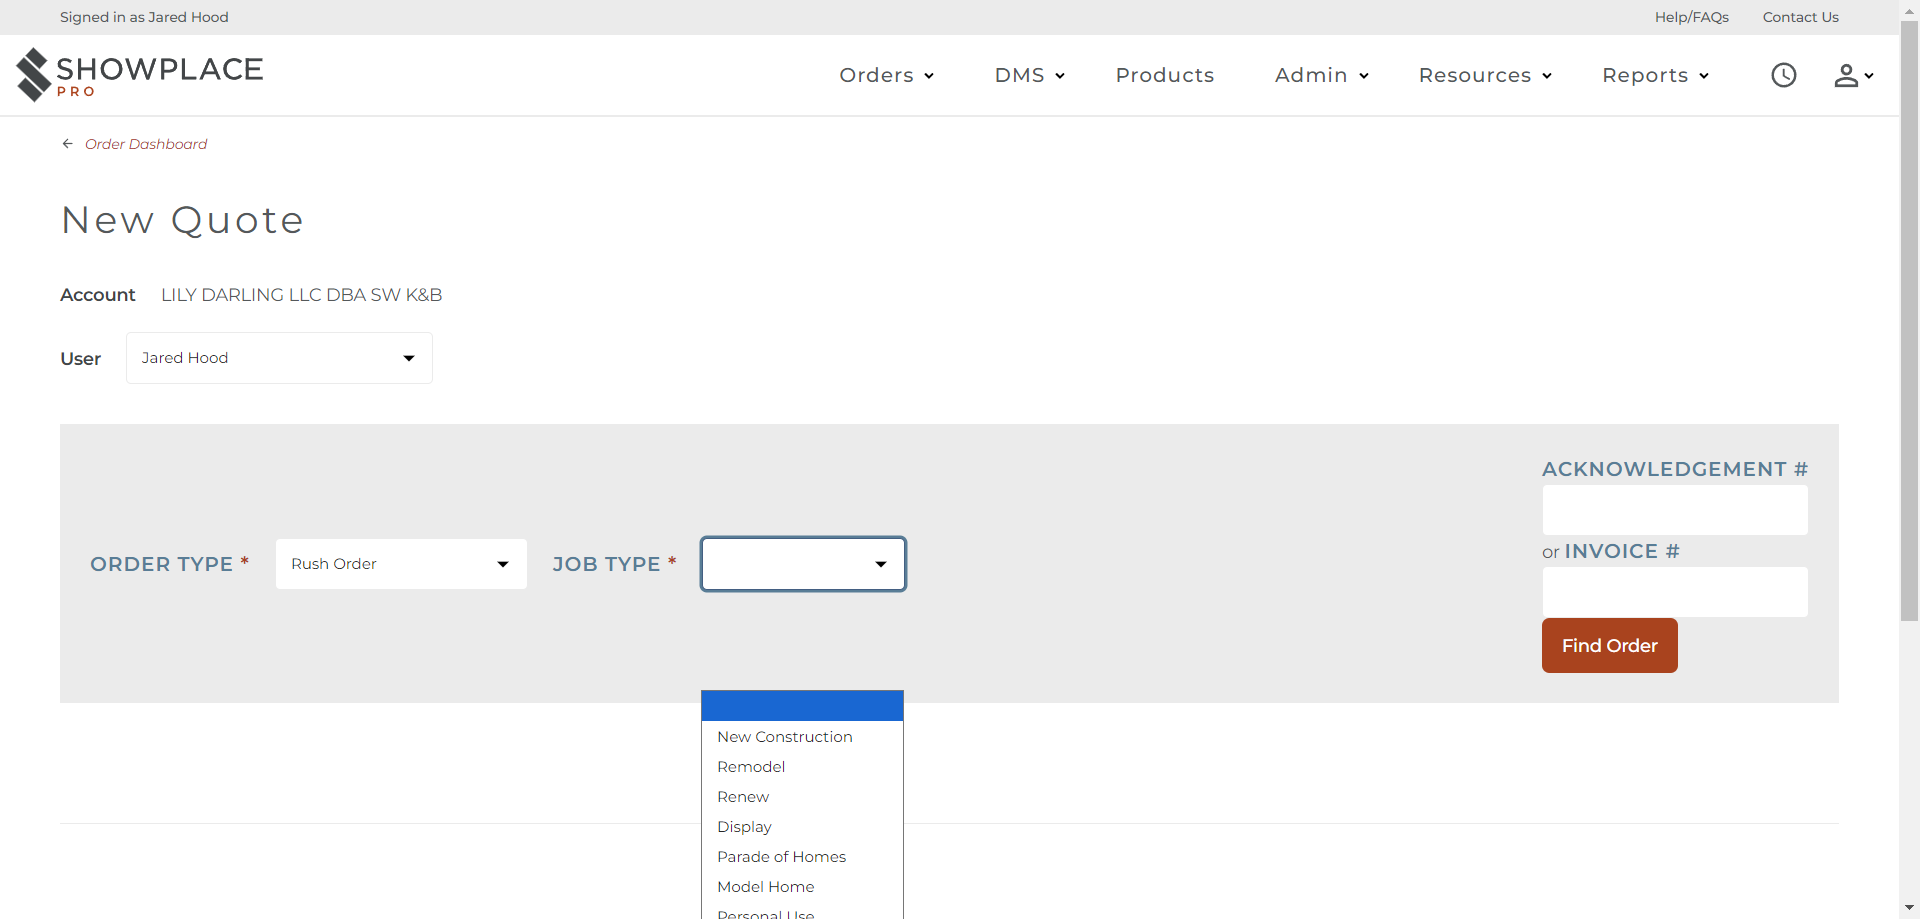
Next, we will select the job type, which refers to the kind of installation. It could be new construction, a remodel, a renew (also known as a reface), or another type of job. In this example, we are ordering for a remodel project. So, we will click on "remodel."
Hot part orders are similar to warranty orders because we need to reference the project's original order. For this project, I'll type in the original order number, then select "find order." The system will then retrieve the information for that original order.
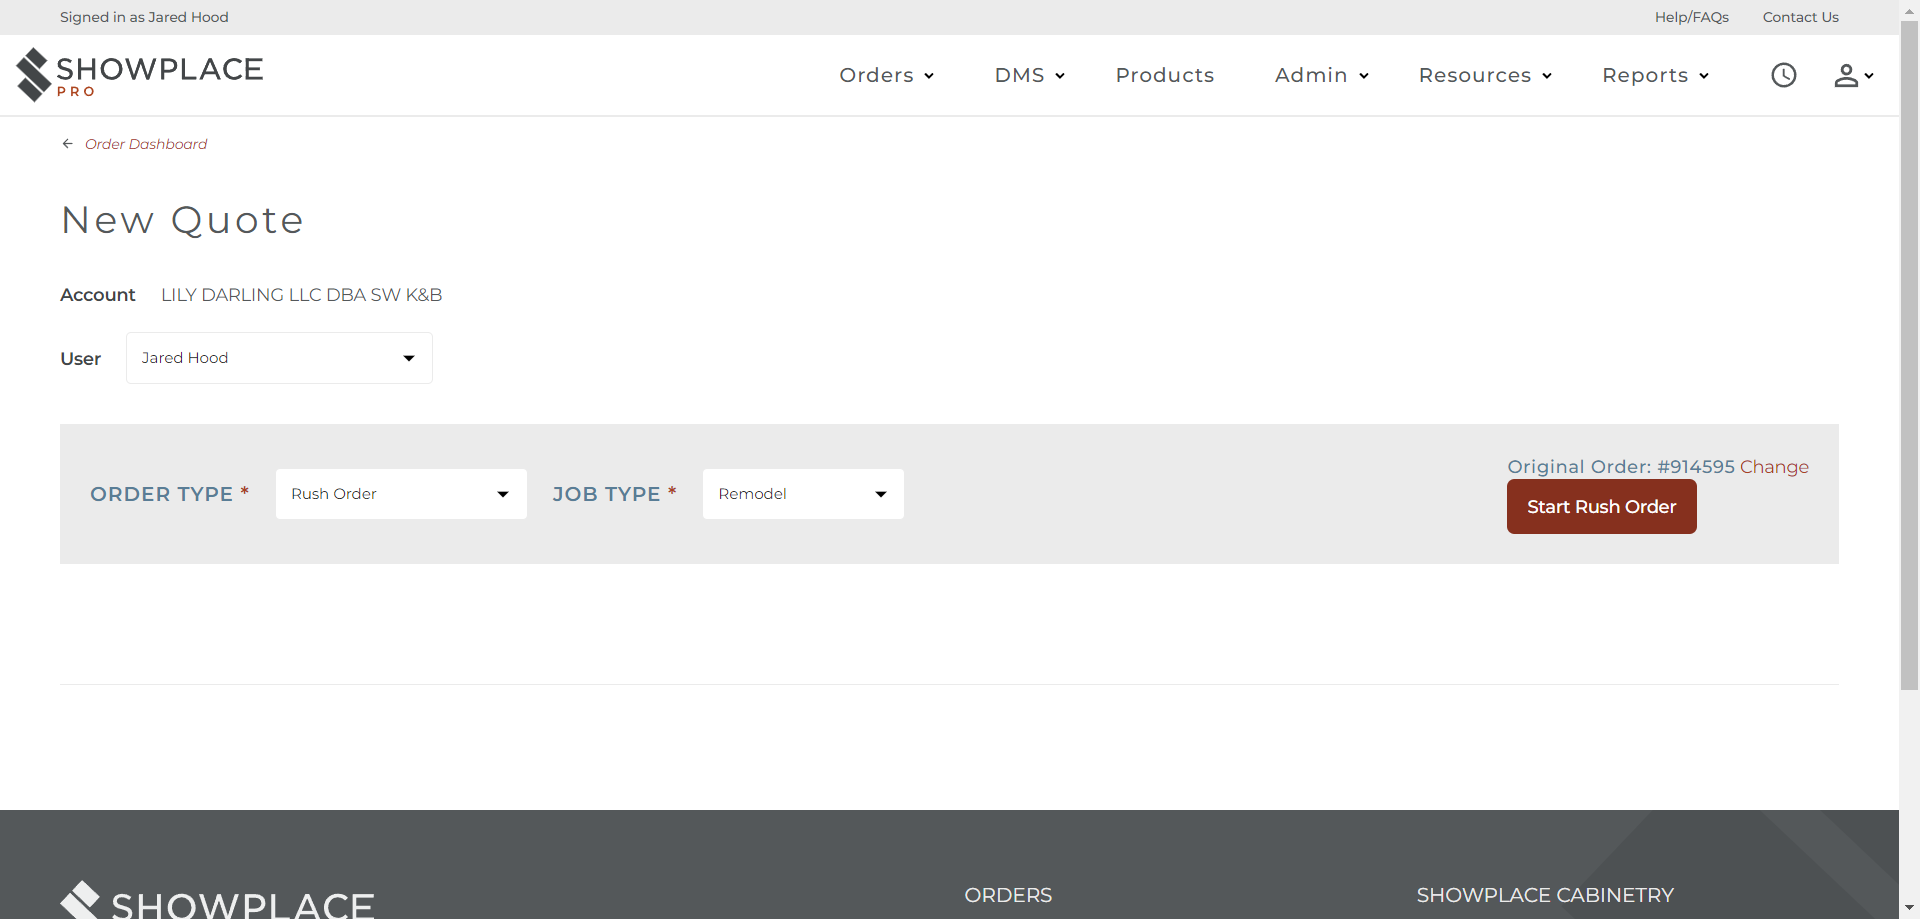
Once it has found the order, verify that the order number is correct. If it's not, click "change" and retype the number. Since this order number is correct, we'll click on "start rush order."
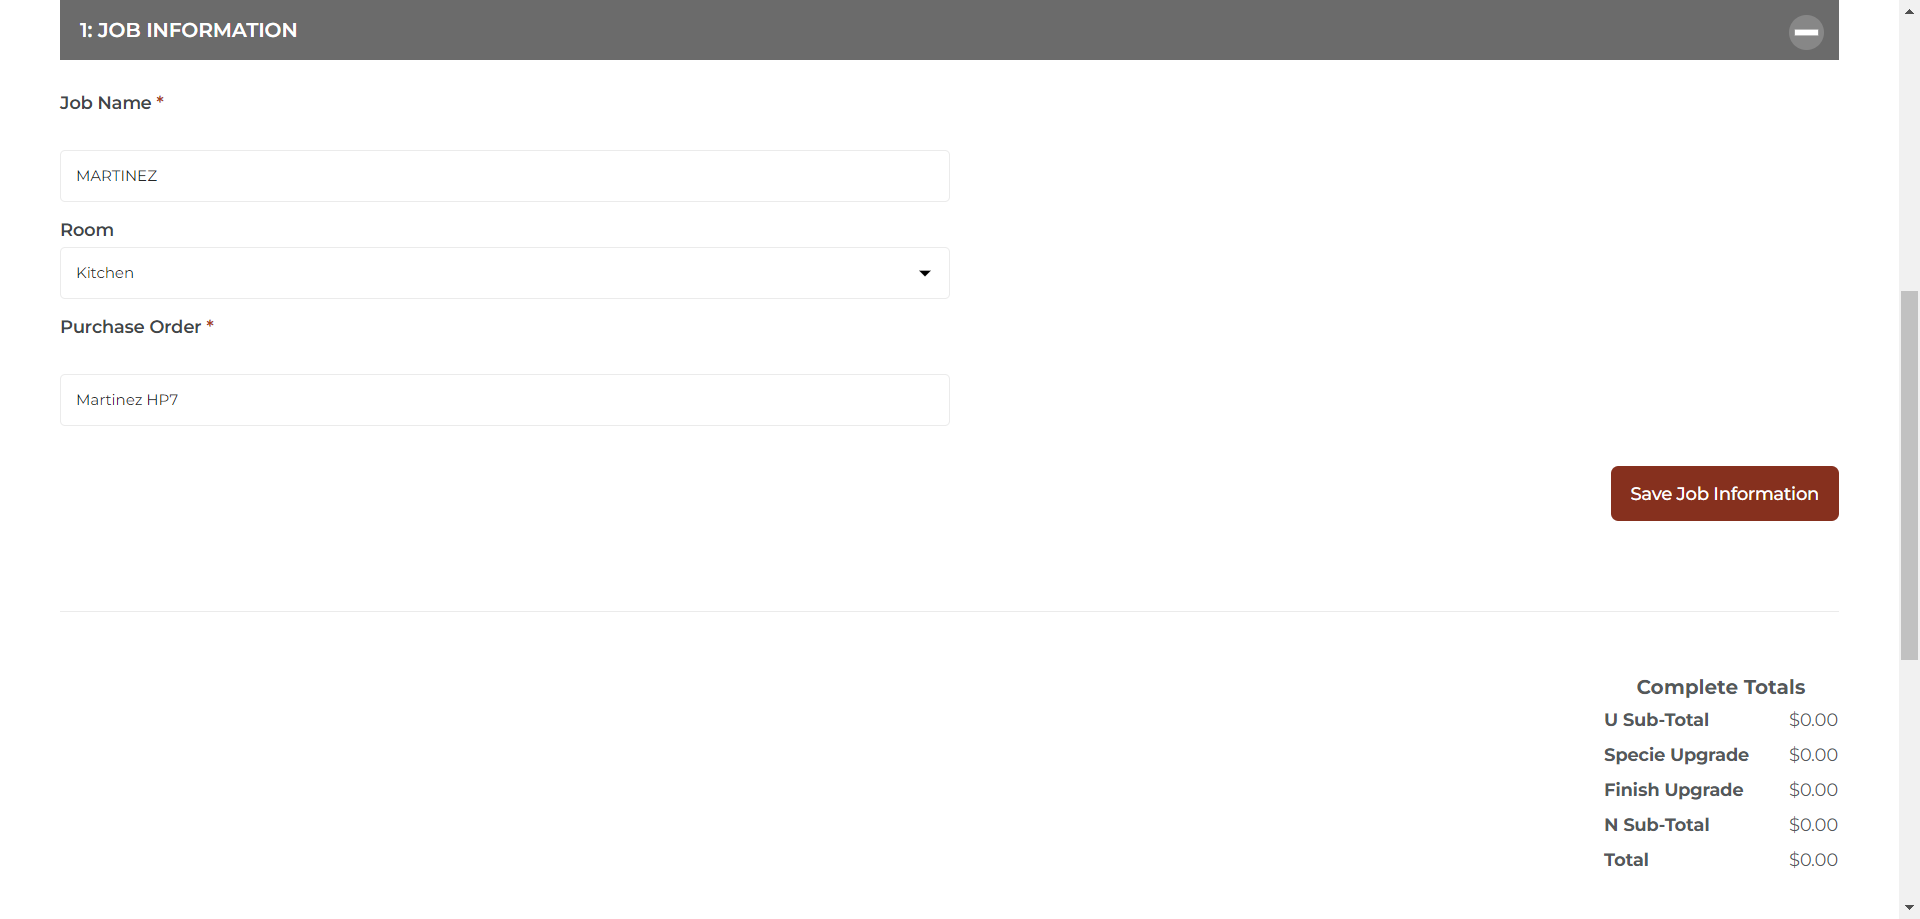
We are then taken to the job information screen, where we need to enter the job details. Here, we will input the project name (which is our client's last name), the type of room this order is for, and the PO we want to use.
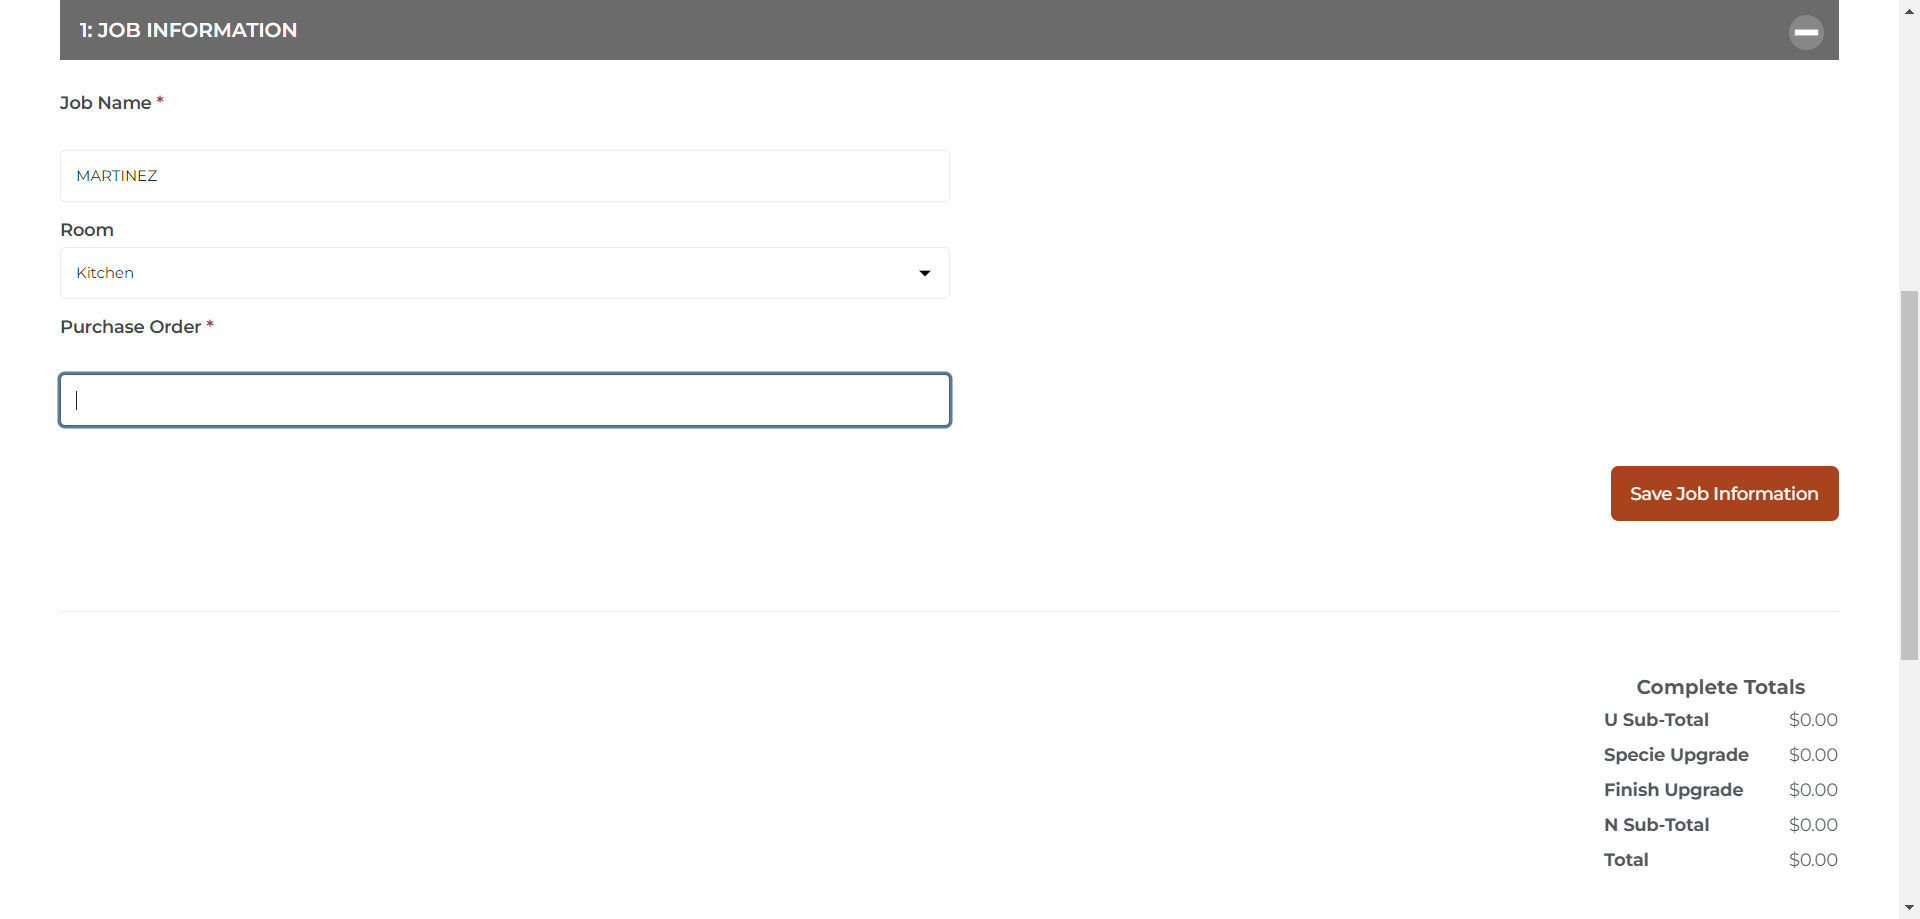
After entering the information, save the job details.
Next, go to the shipping information and look to the right side. There, you will see a drop-down arrow for our shipping address.
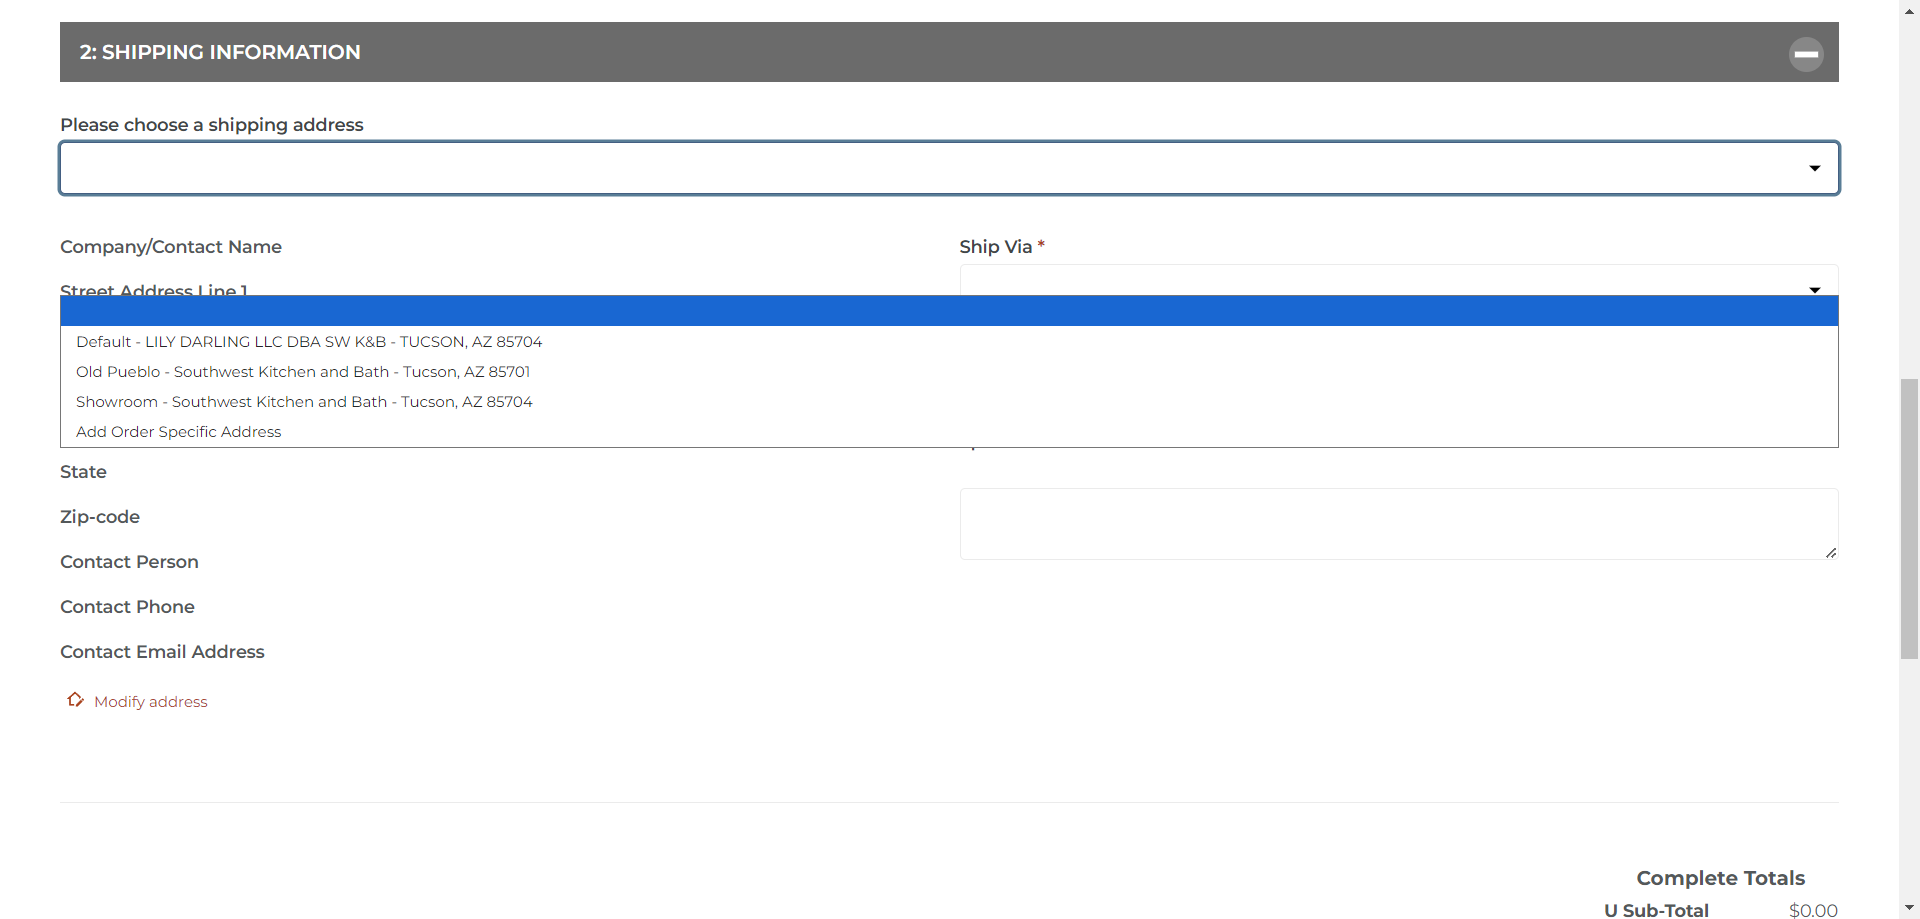
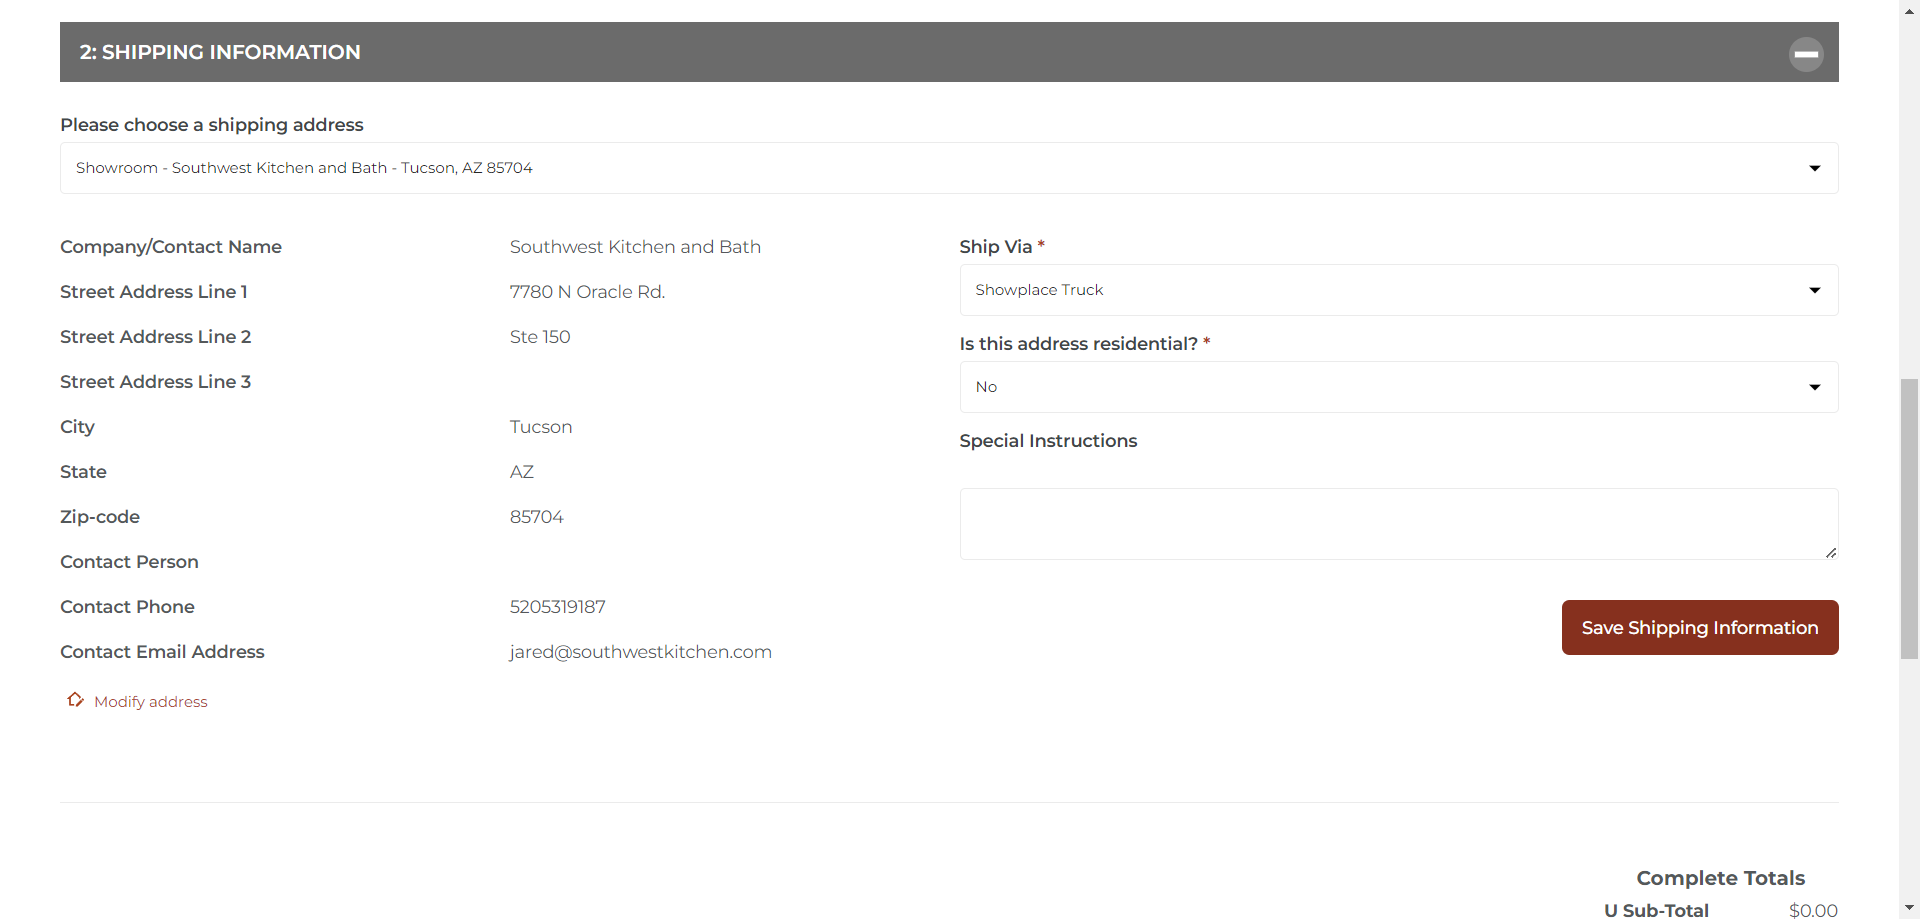
For large orders or those with cabinet boxes, we will ship to our storage and delivery service, Old Pueblo. However, in this example, we are ordering just one item, so it can be shipped directly to our showroom. Typically most hot part orders will ship directly to our showroom. Click on "showroom," and our address will appear on the left. Ensure this is the correct shipping address. Then, go to the right, click the drop-down menu under "ship via," and select your preferred shipping method.

We can send it by FedEx, either overnight or regular ground service. Alternatively, we can have one of their trucks deliver directly to our showroom. If you're dealing with a long item, like crown molding, furniture molding, or a toe kick, I recommend choosing the truck option. Carriers like FedEx or UPS may cut down the size to fit their requirements. It's better to ship via truck for long plank items, so choose the showplace truck for this type of order.
Inform them that this is not a residence (we rarely ship directly to a client's home).
If there are special instructions for the order, such as delivery preferences or location, enter them in the special instructions area. In this example, there are no instructions, so we can now click "Save Shipping Information."
It has all been saved.
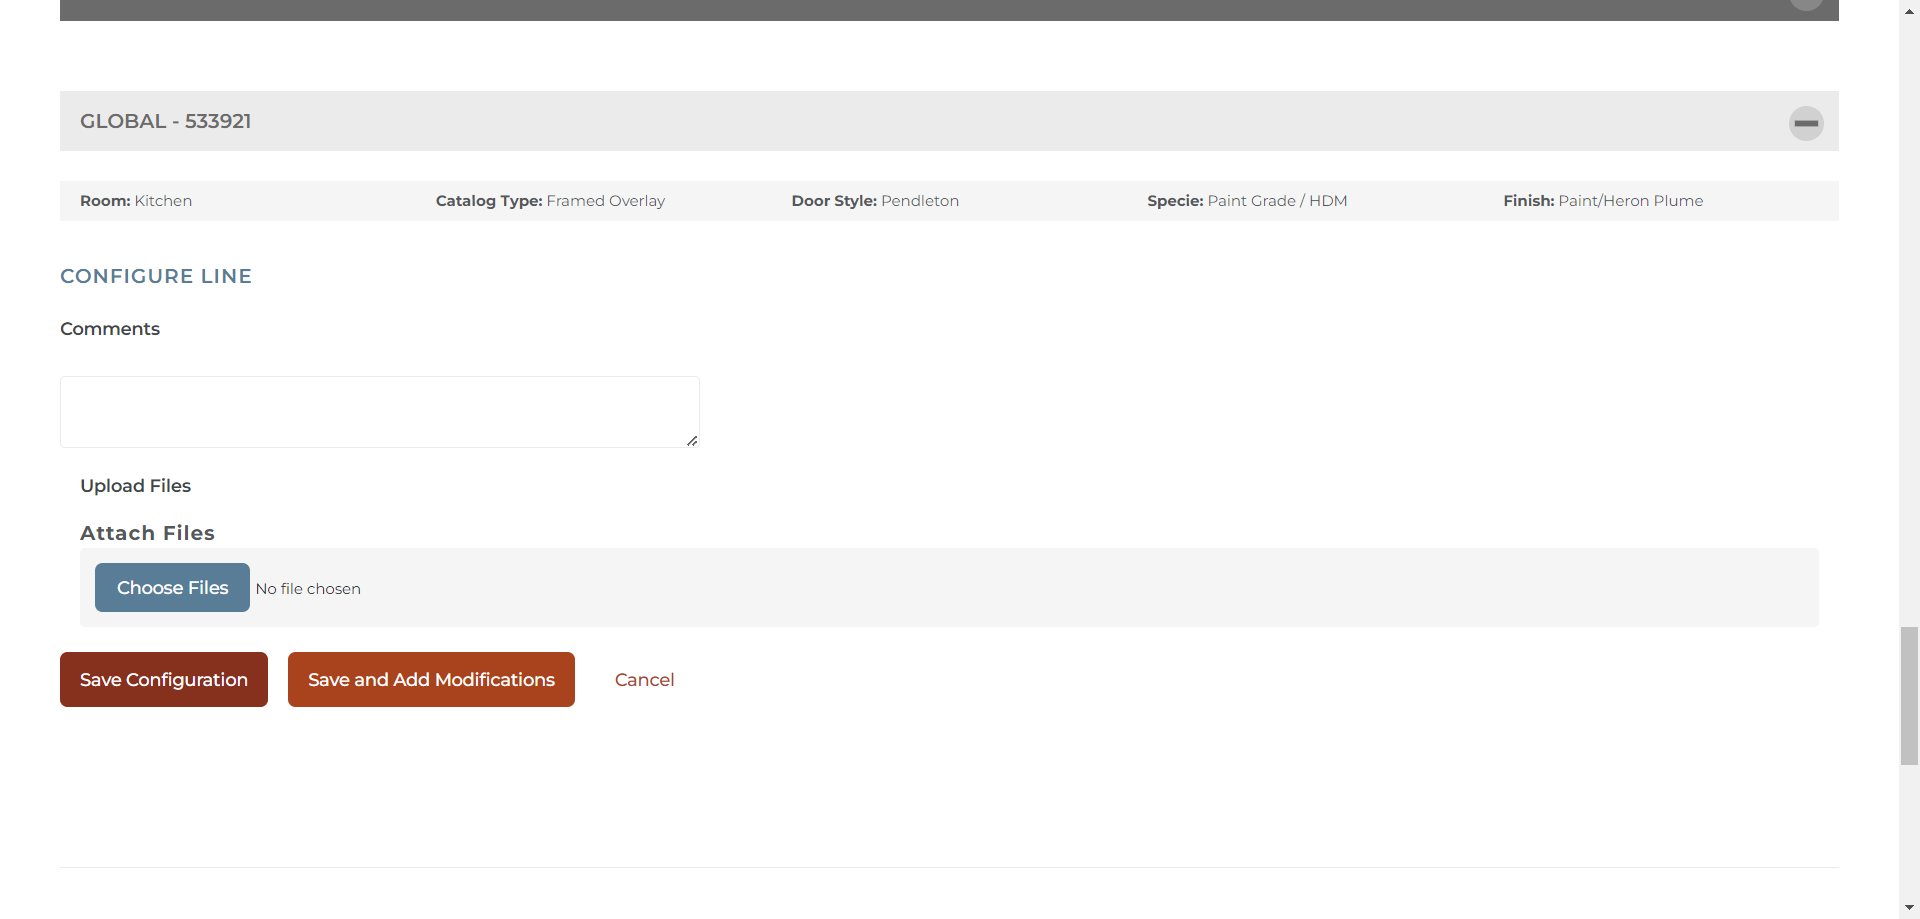
Now we can move to the next field, known as the global job details or globals for short. This information includes all the details about the type of cabinetry, such as the door style, drawer header style, color, and finish. This information is auto-populated based on the acknowledgement number we entered at the beginning. Review the original acknowledgement, which can be found in your client folder or in Basecamp, and ensure it matches the information here. Its very important to verify the cabinetry type, door style, header style, species, color, and finish.
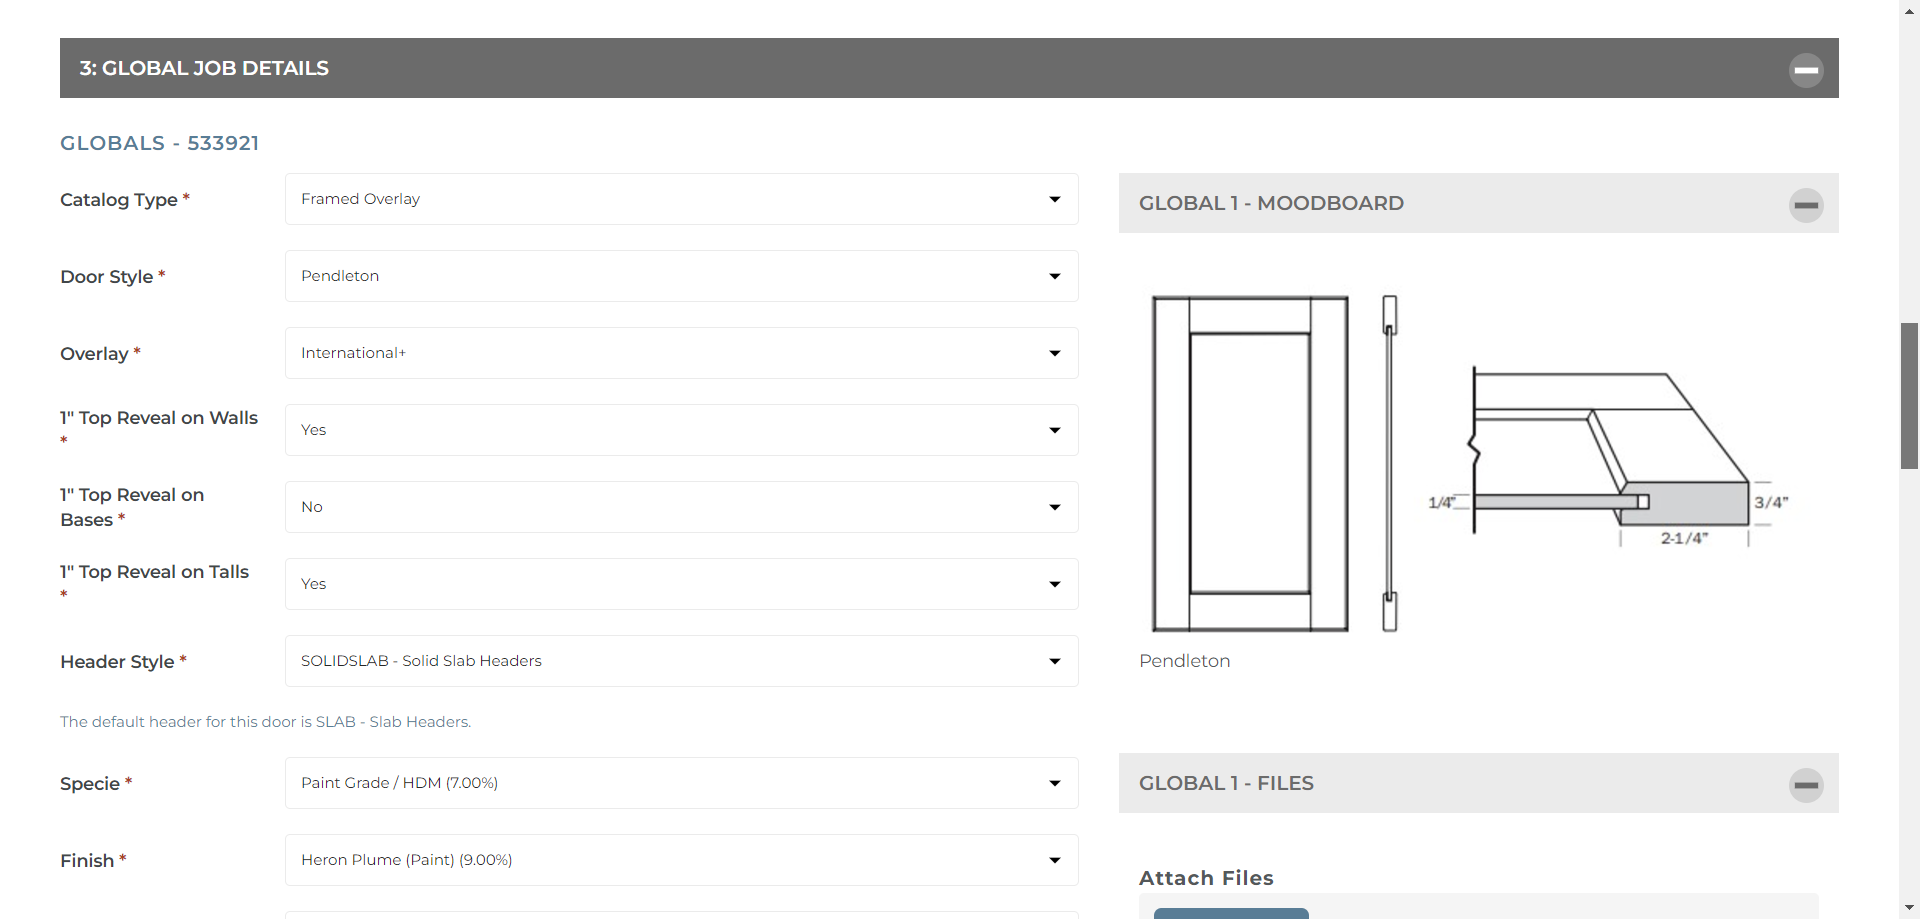
Once you've verified that all the information is correct, go to the bottom right and click "Save and Continue." This will lock in the globals configuration.
Once you have done that, you can start building the order. Today, we need to order some cove molding, specifically furniture base cove molding that will be used as crown for this project.
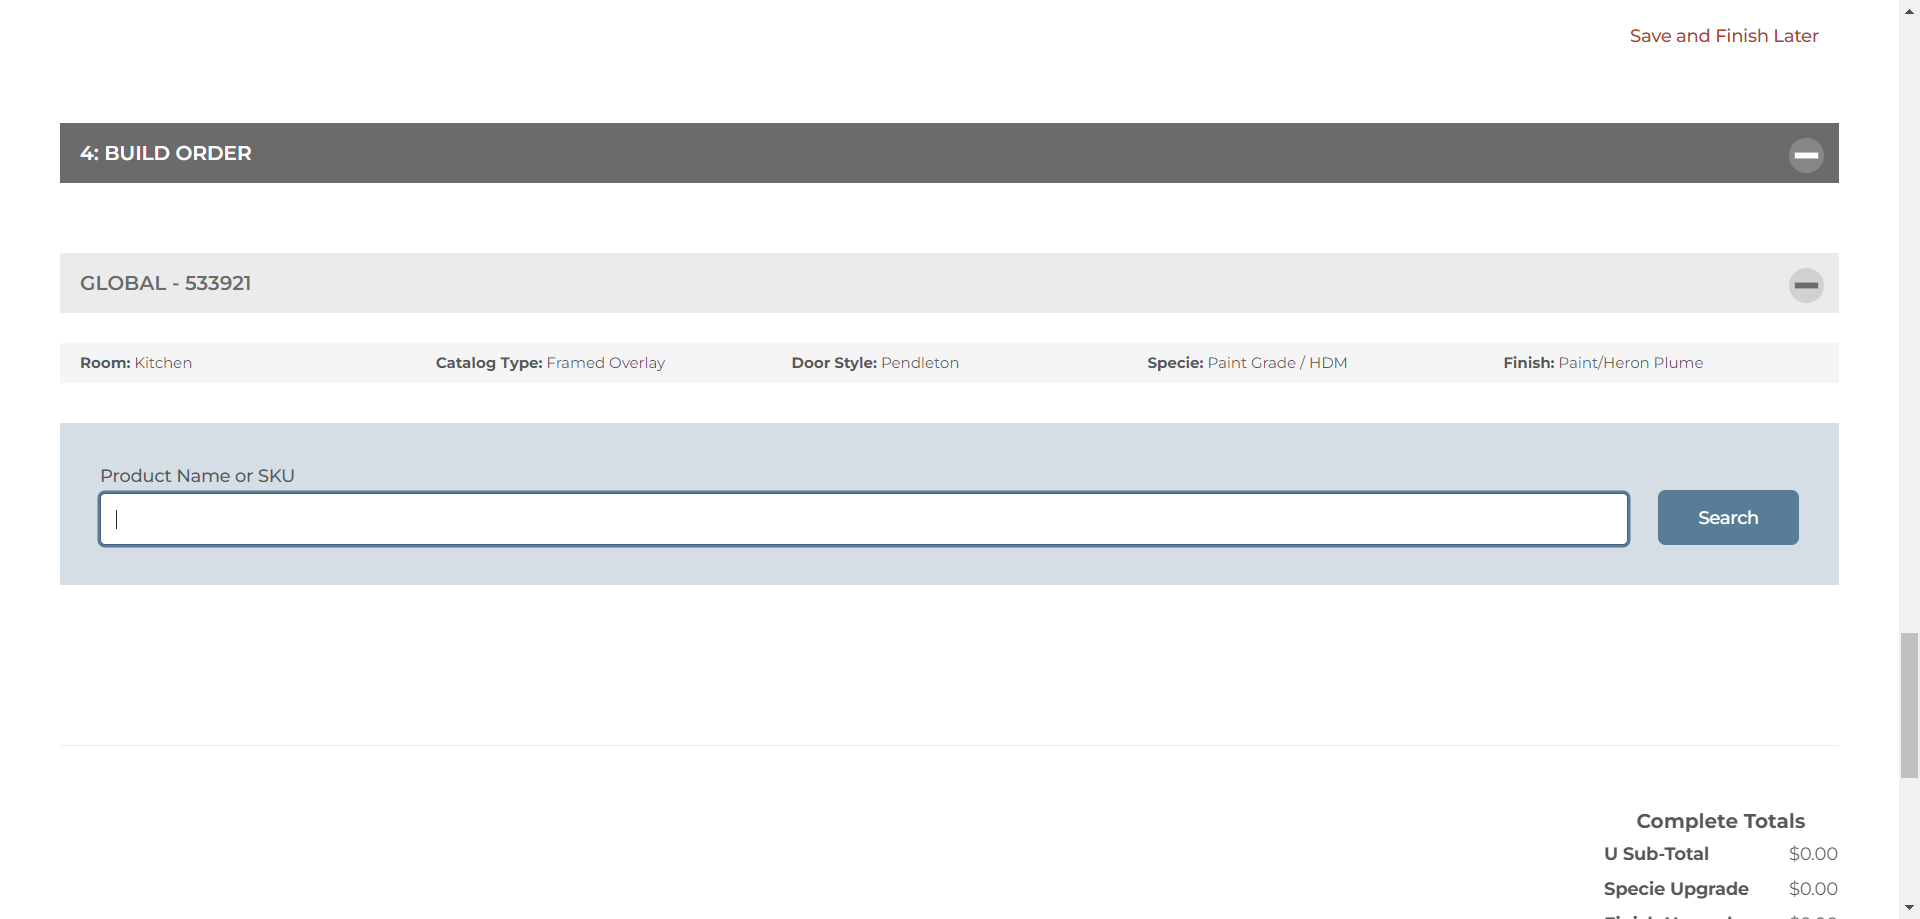
Simply type the exact nomenclature, the SKU, or a keyword. For example, if you type "cove" and hit search, it should display several options for different types of cove molding.
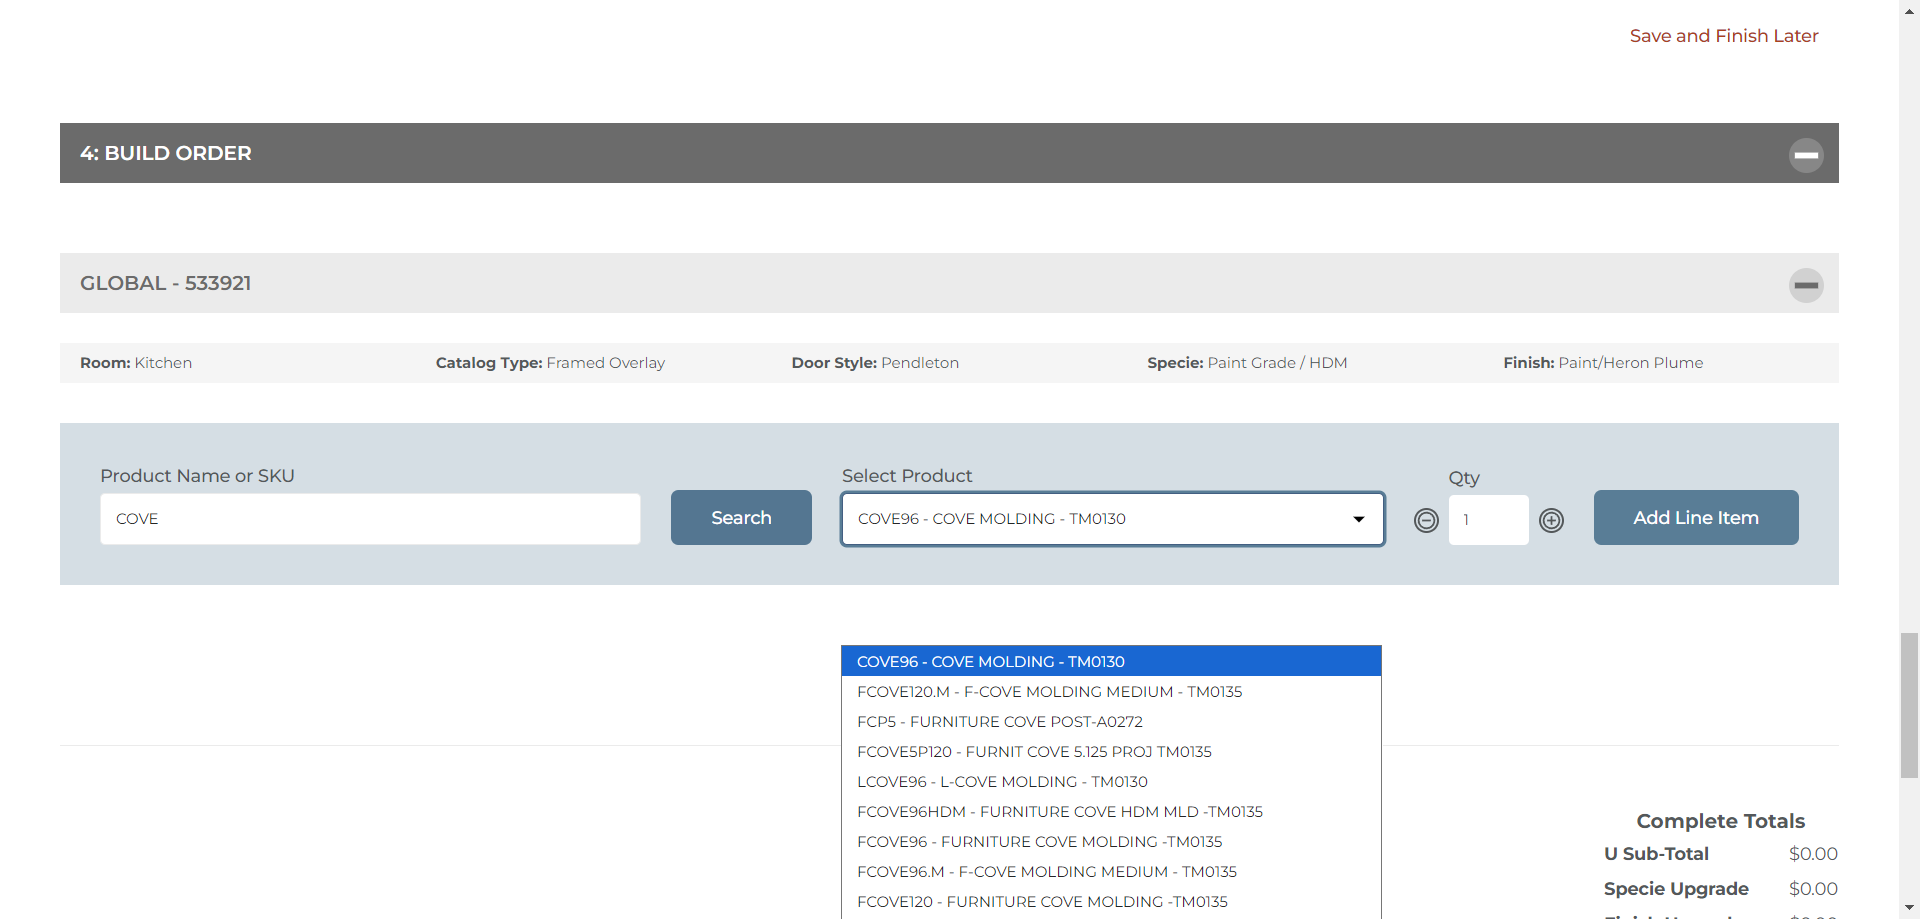
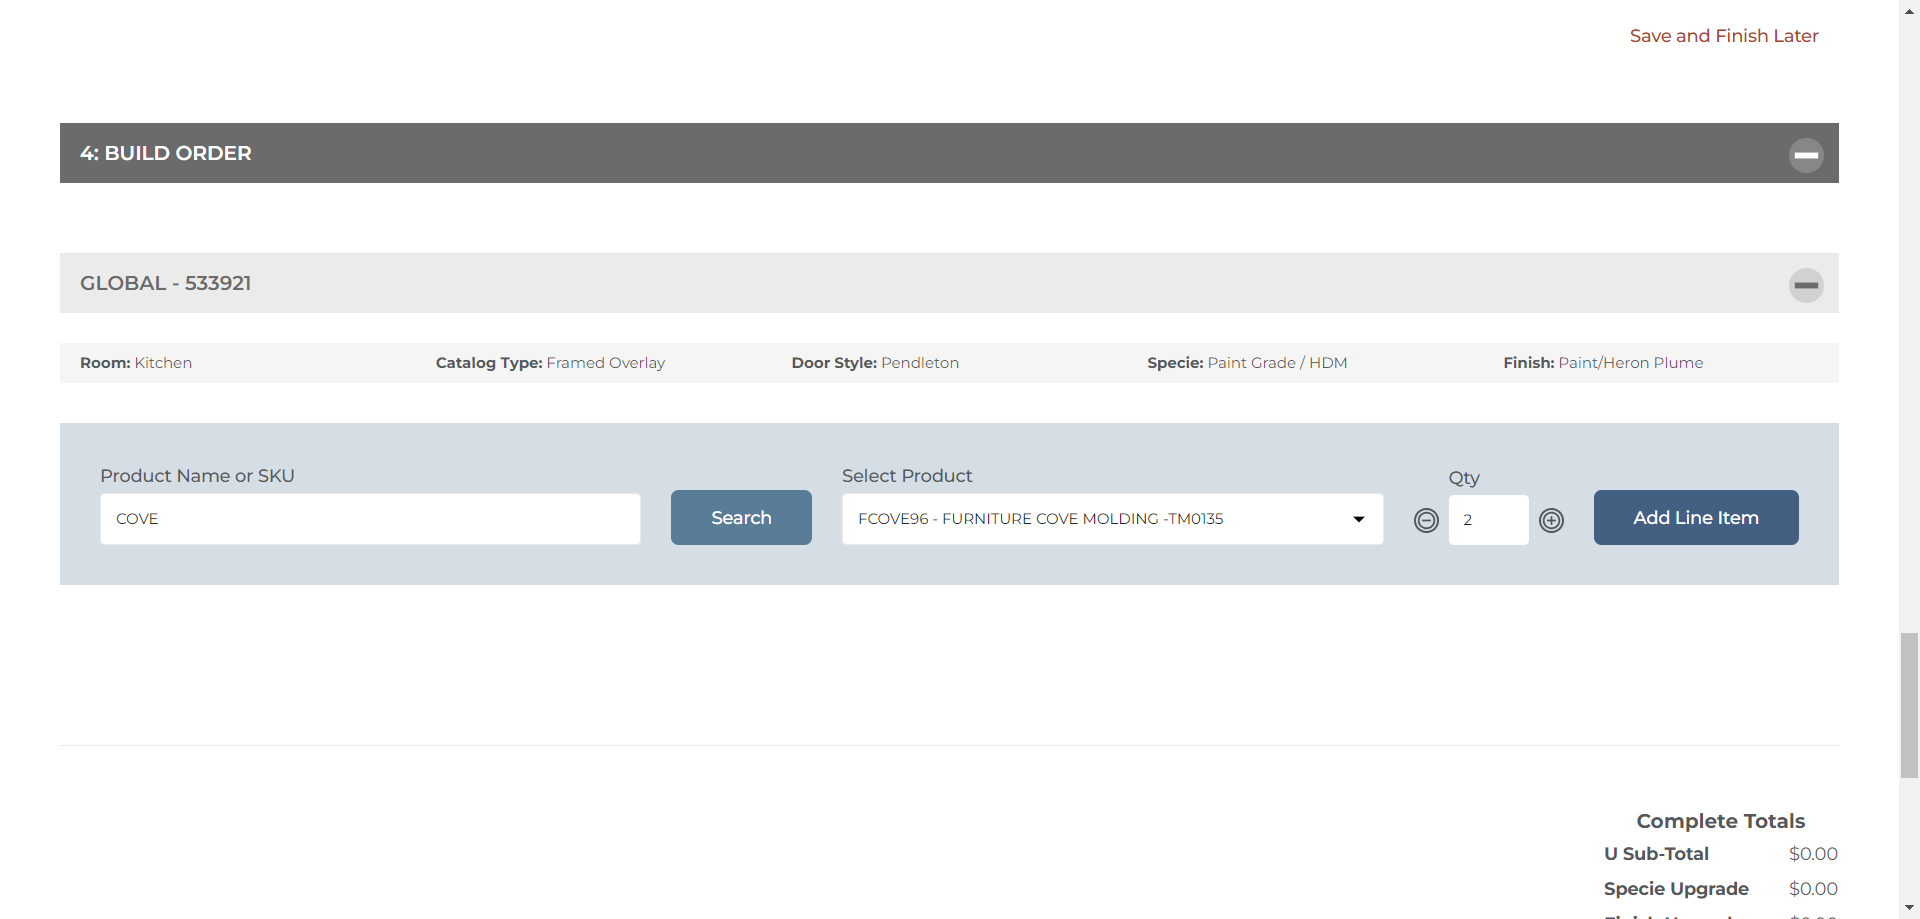
For this example, I want a furniture base cove molding, so I'm going to search here. Find the product we need within the dropdown and click on it. We've now selected our product.
Now we need to select the quantity. I'm going to order two sticks of this cove molding. Click on two, then click the "Add Line Item" button.
If we were ordering a door, header, panel, or other size-specific type of product it would ask for dimensions for that item. However, this item has a simple dimension of 96 inches long so we don't need to provide additional information. However, if you want to add a detail or comment, you can do so in the comments field.
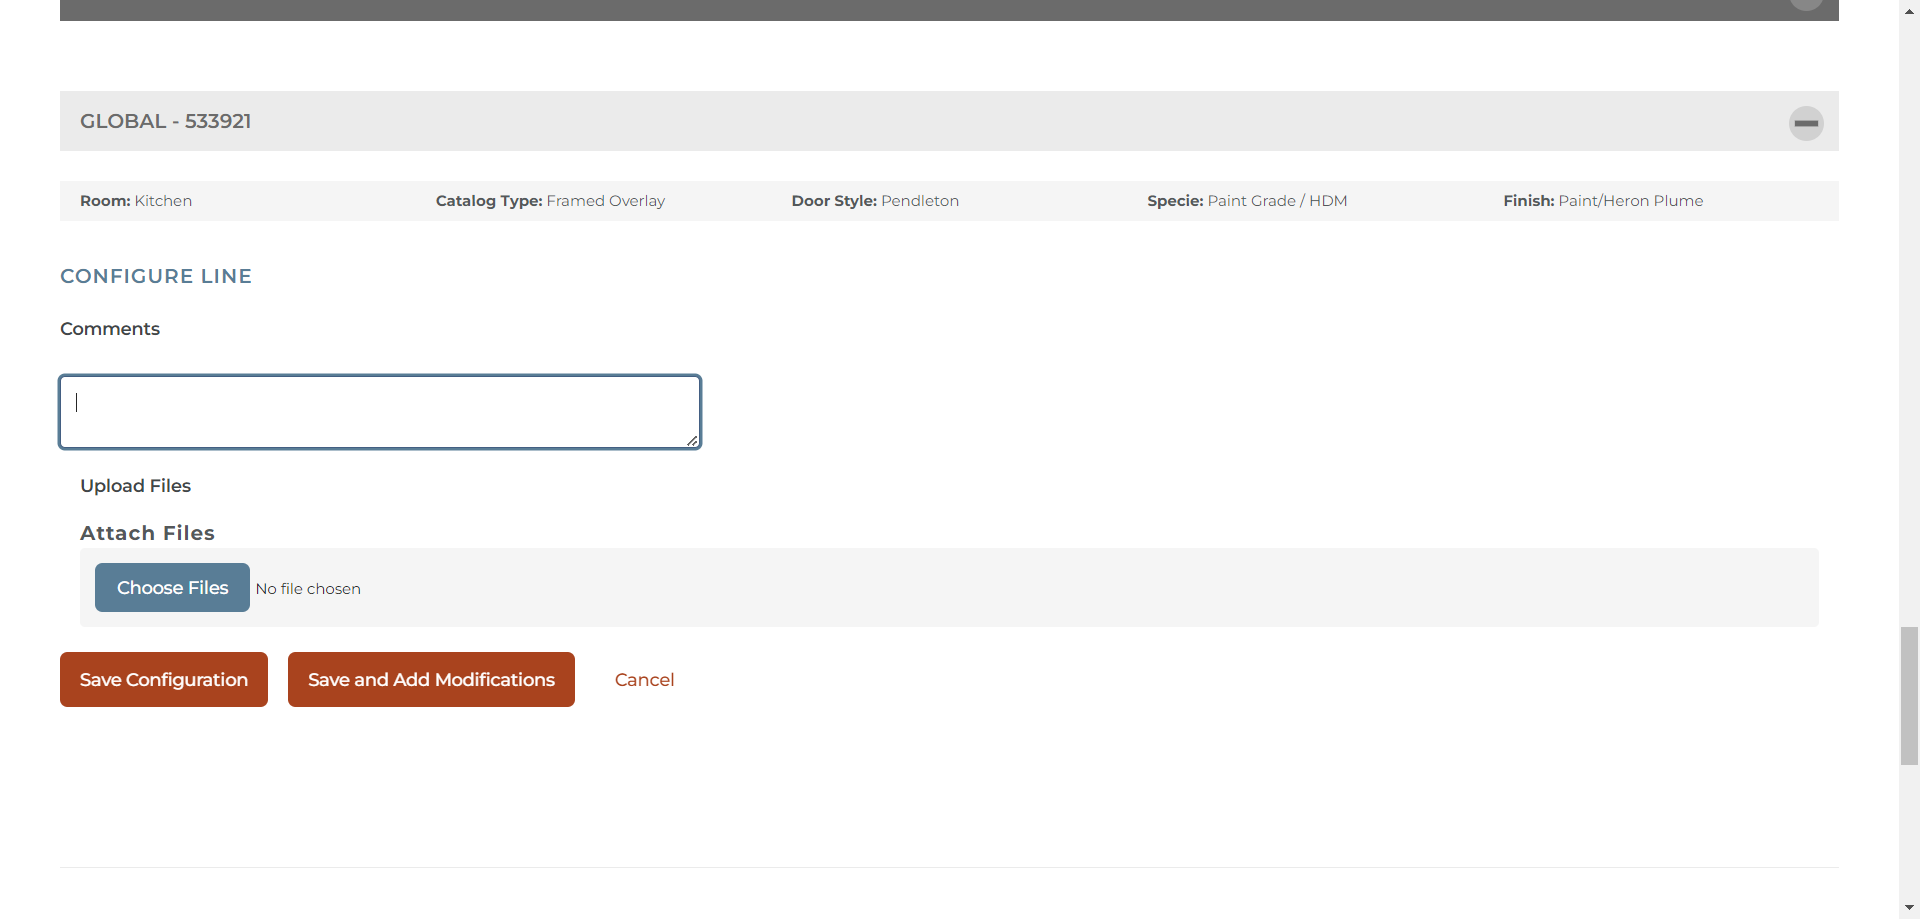
For our purposes, we will simply save the configuration.
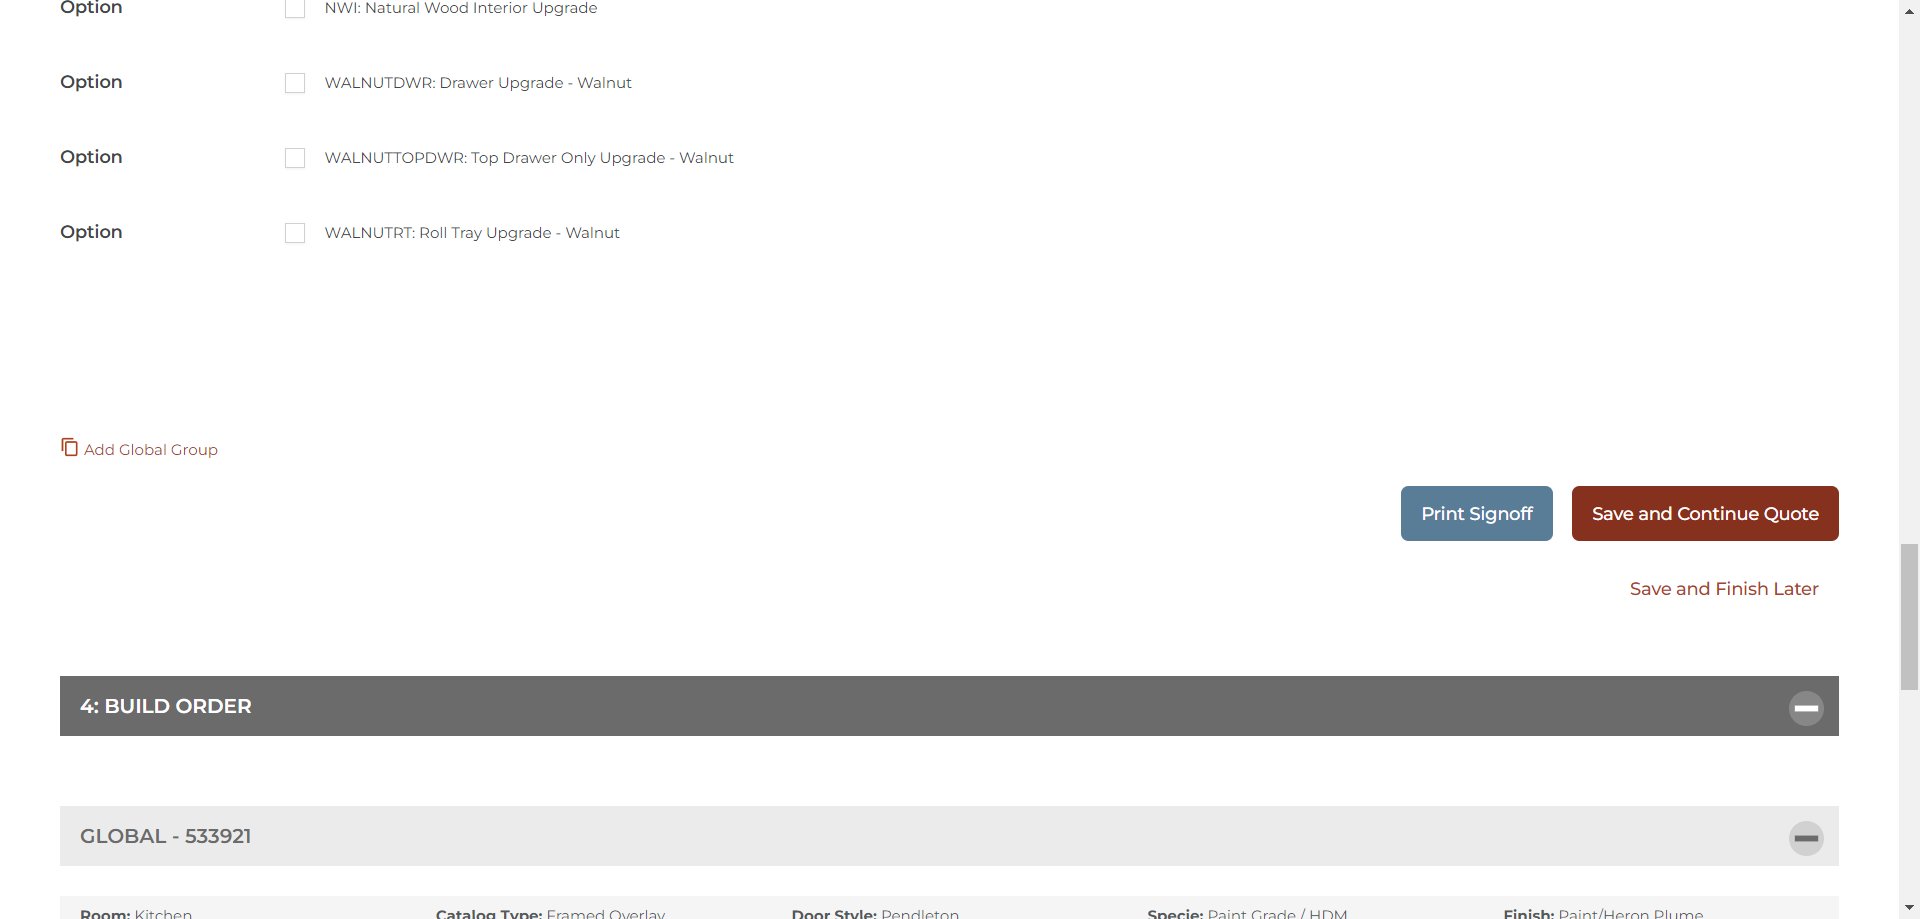
We see that it has added the item we want to the order. This completes our order. Now, scroll down to where it says "Submit Order."
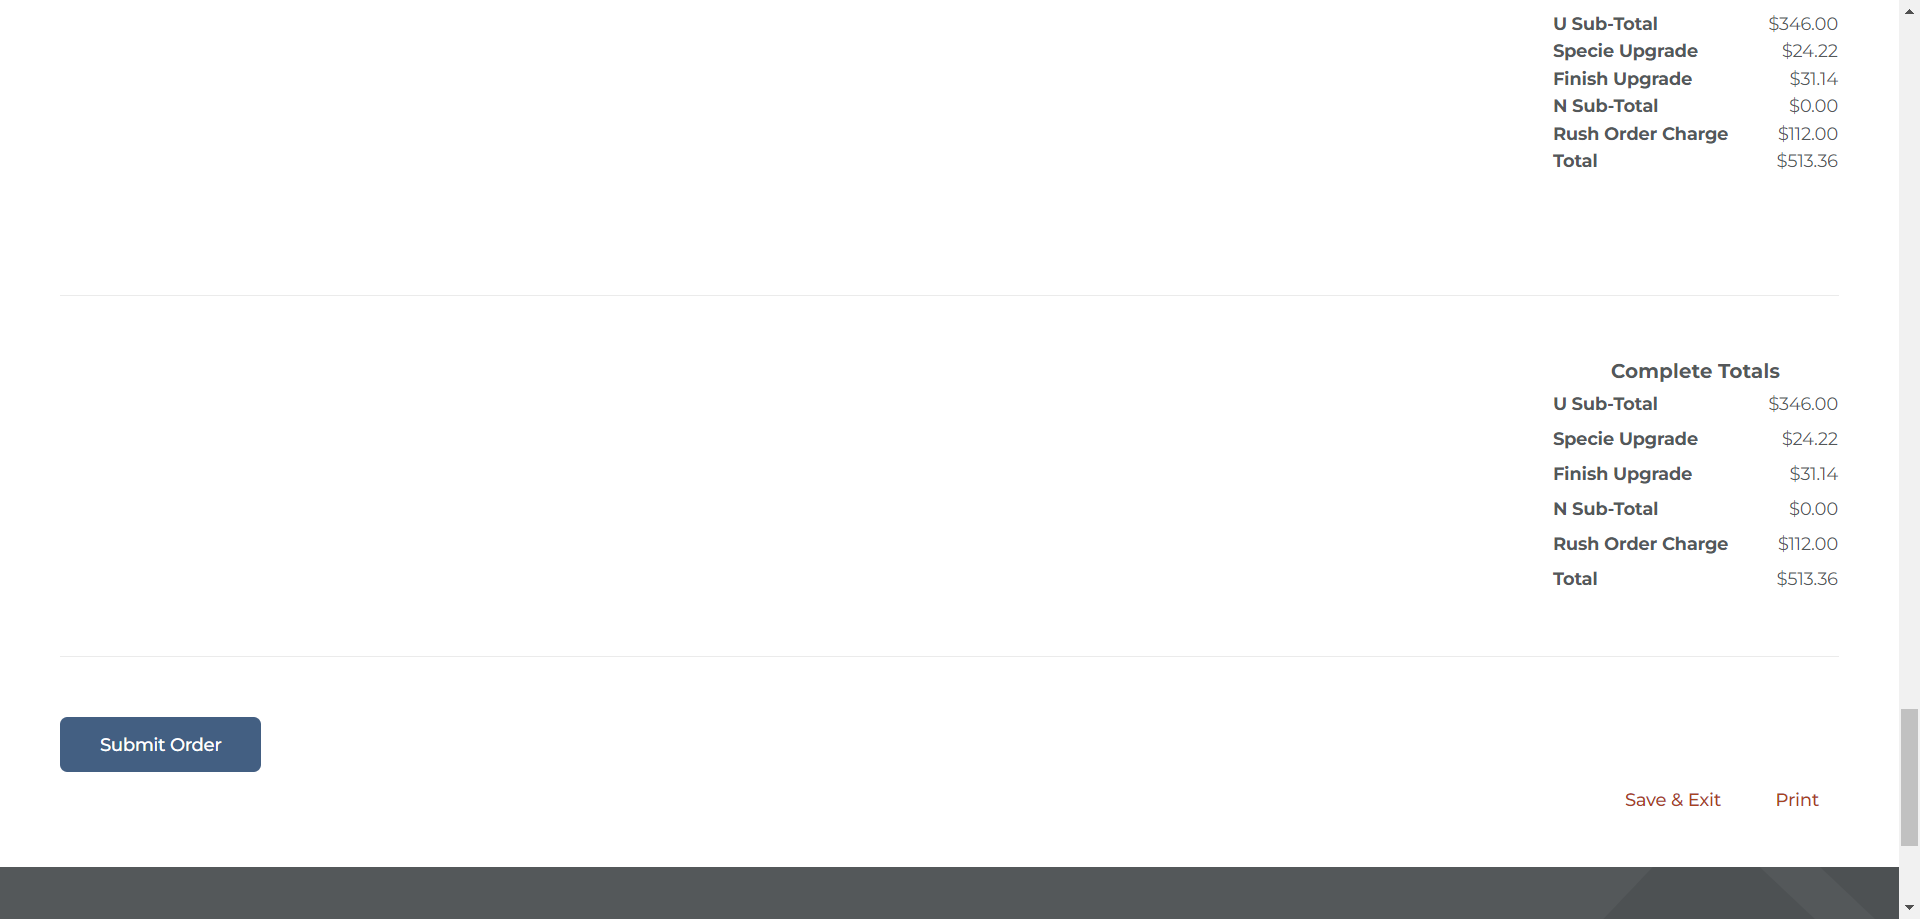
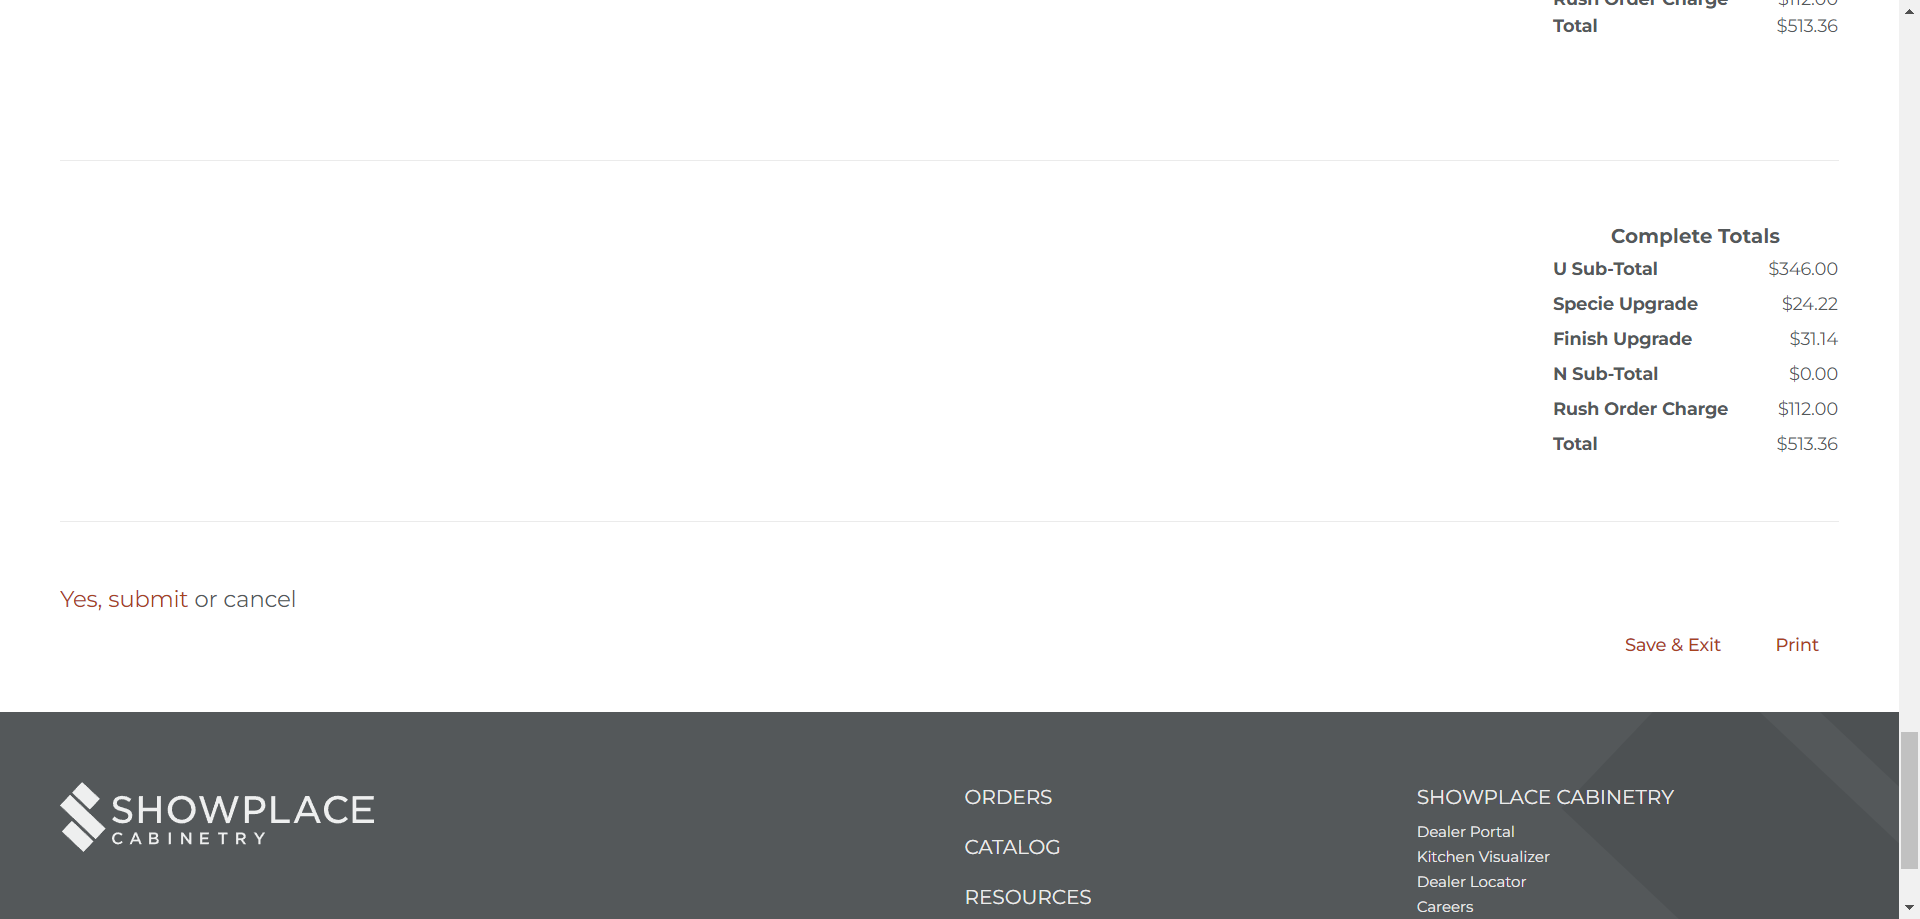
It will ask you to either submit or cancel. This is your last chance to verify all the information. I always scroll through and double check that all the information is accurate. Then, click "Yes, submit."
After doing that, you'll be directed back to your order dashboard on the Showplace Cabinetry site.
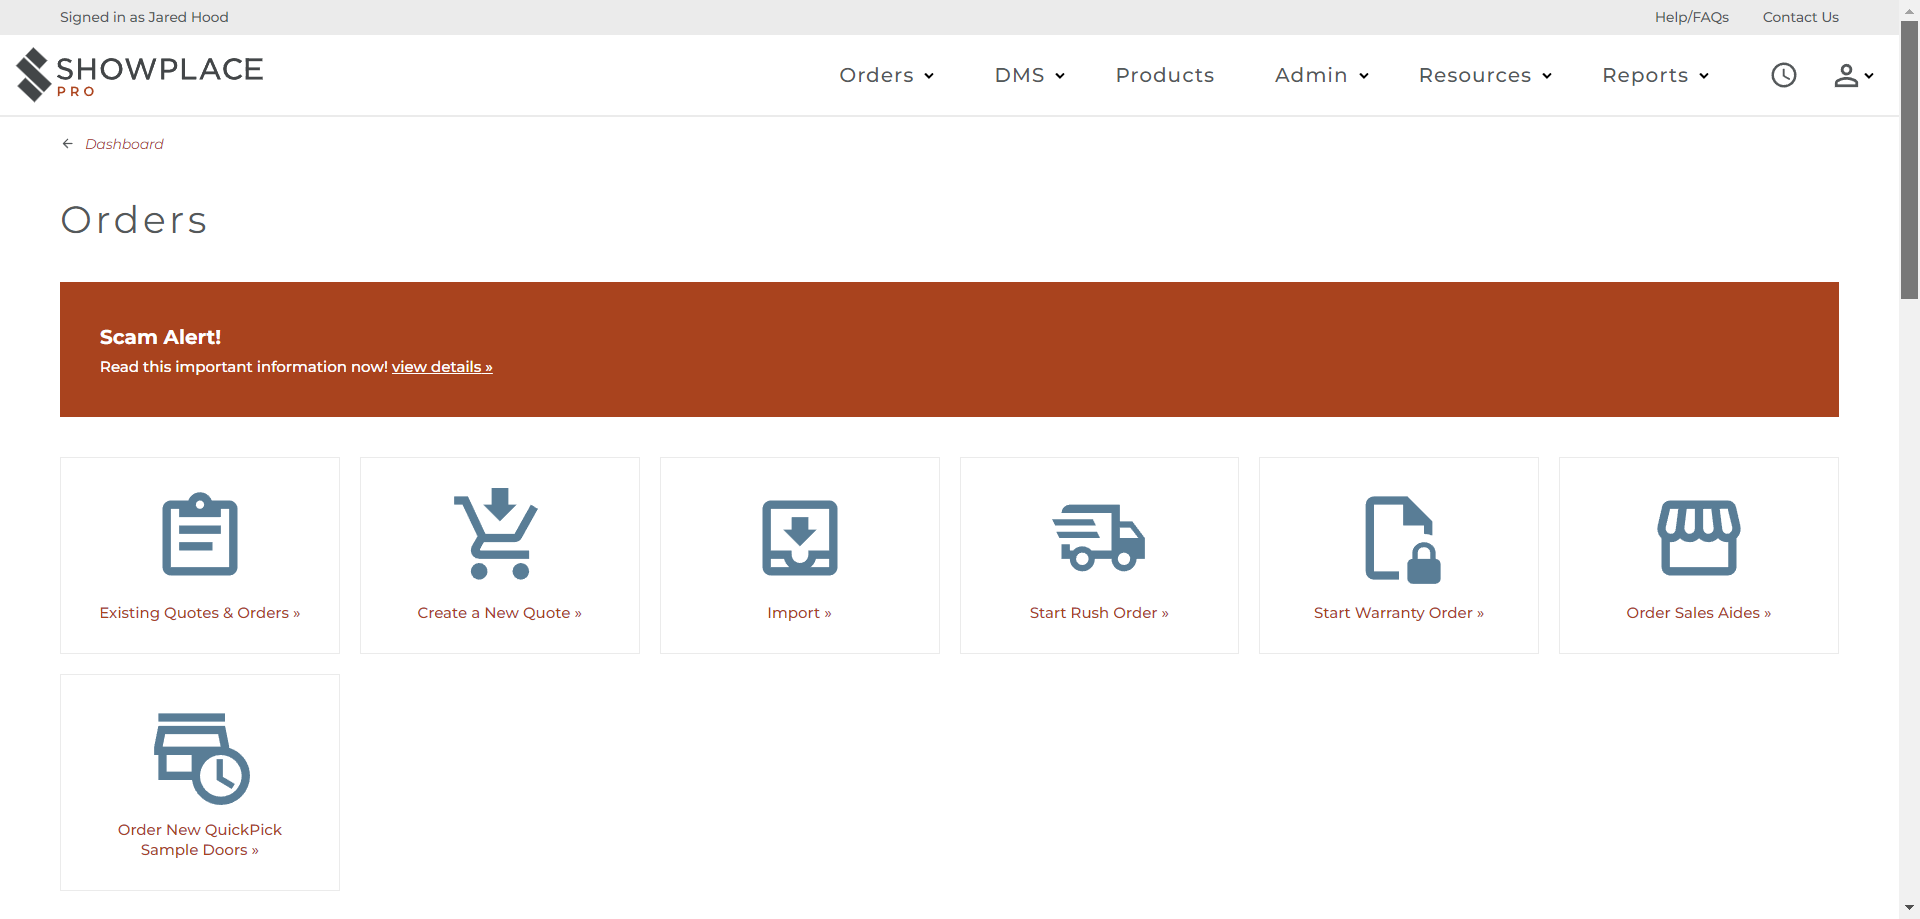
You will see the order we placed is here, confirming it was submitted. Once received and processed, we will get an acknowledgment number. They will email us a formal acknowledgment with the order details and provide the estimated delivery date. That's all there is to it. We are now done.