
How to Post Transactions to QuickBooks: Step-by-Step Guide
Learn how to post transactions to QuickBooks with this easy step-by-step guide. Discover how to review, select categories, and post expenses efficiently.
By Aasma Technology Solutions
In this guide, we'll learn how to post transactions to QuickBooks. You will see how to review a transaction, select the right customer or vendor, choose a category, and post the transaction to Quickbooks.
This process helps keep your financial records organized and up to date.
Let's get started
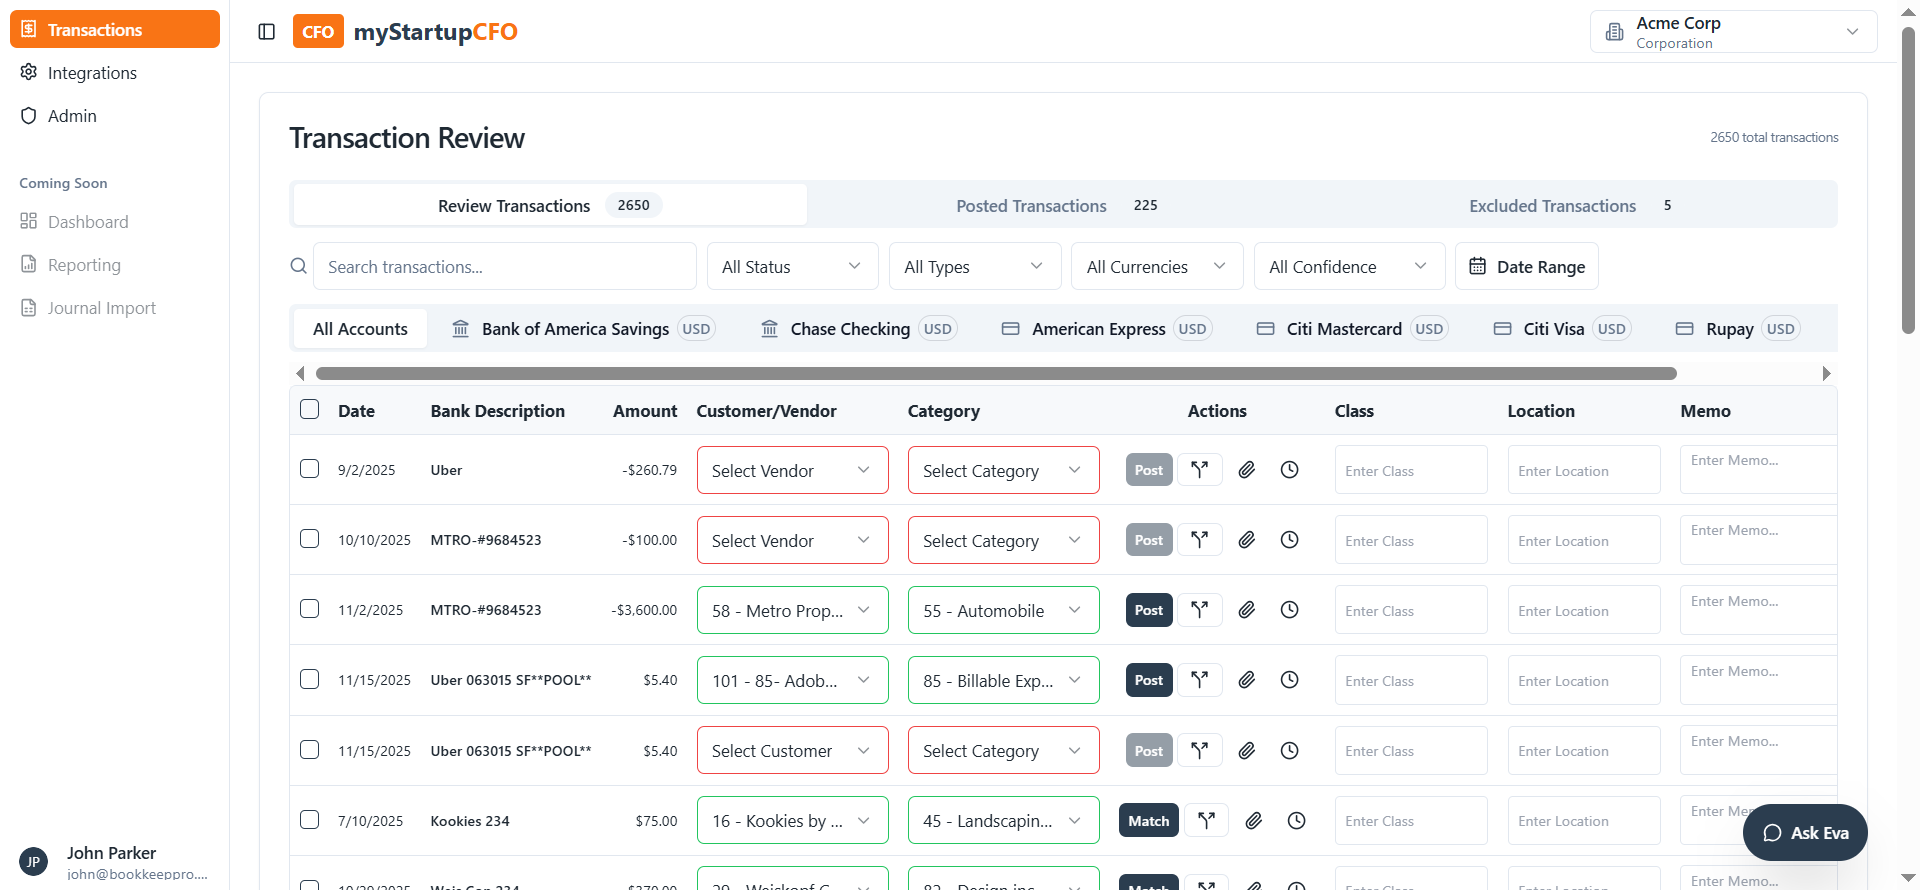
In this guide, we will learn how to post transactions to QuickBooks. On the Review Transactions tab, you can view the transaction details before posting.
2
Click on "Review Transactions"
3
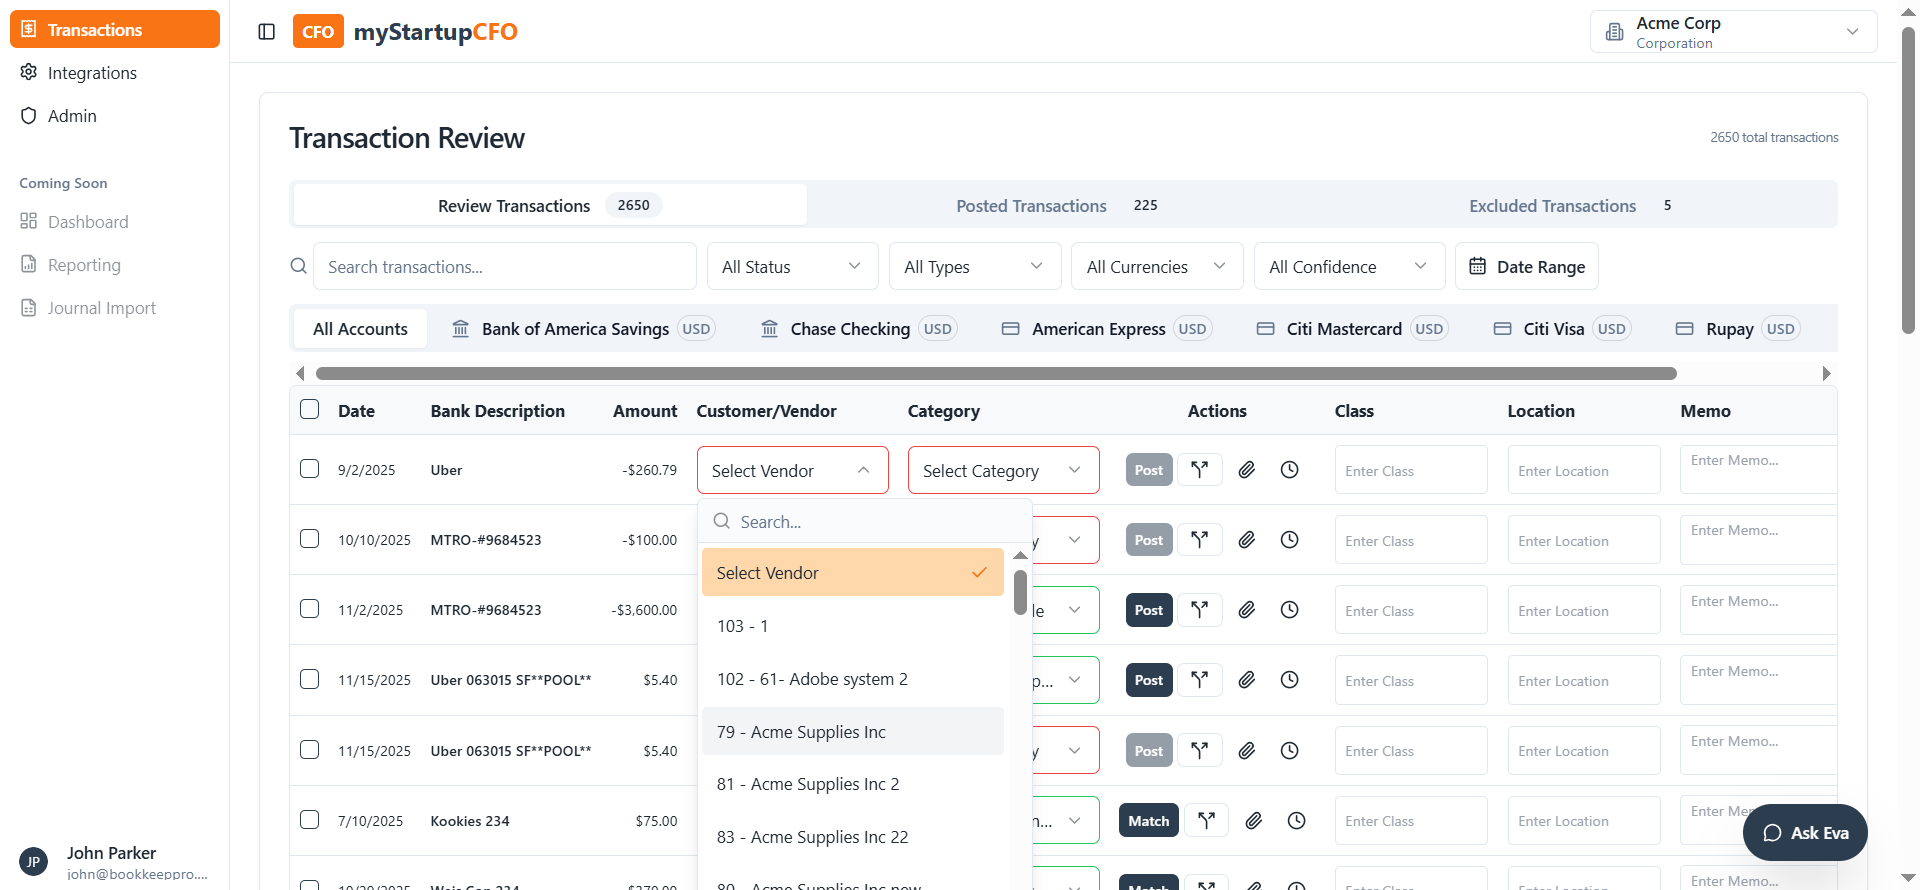
When you click Select Customer or Select Vendor, a dropdown list of all available customers or vendors will appear.

4
Select the customer or vendor from the dropdown list.
5
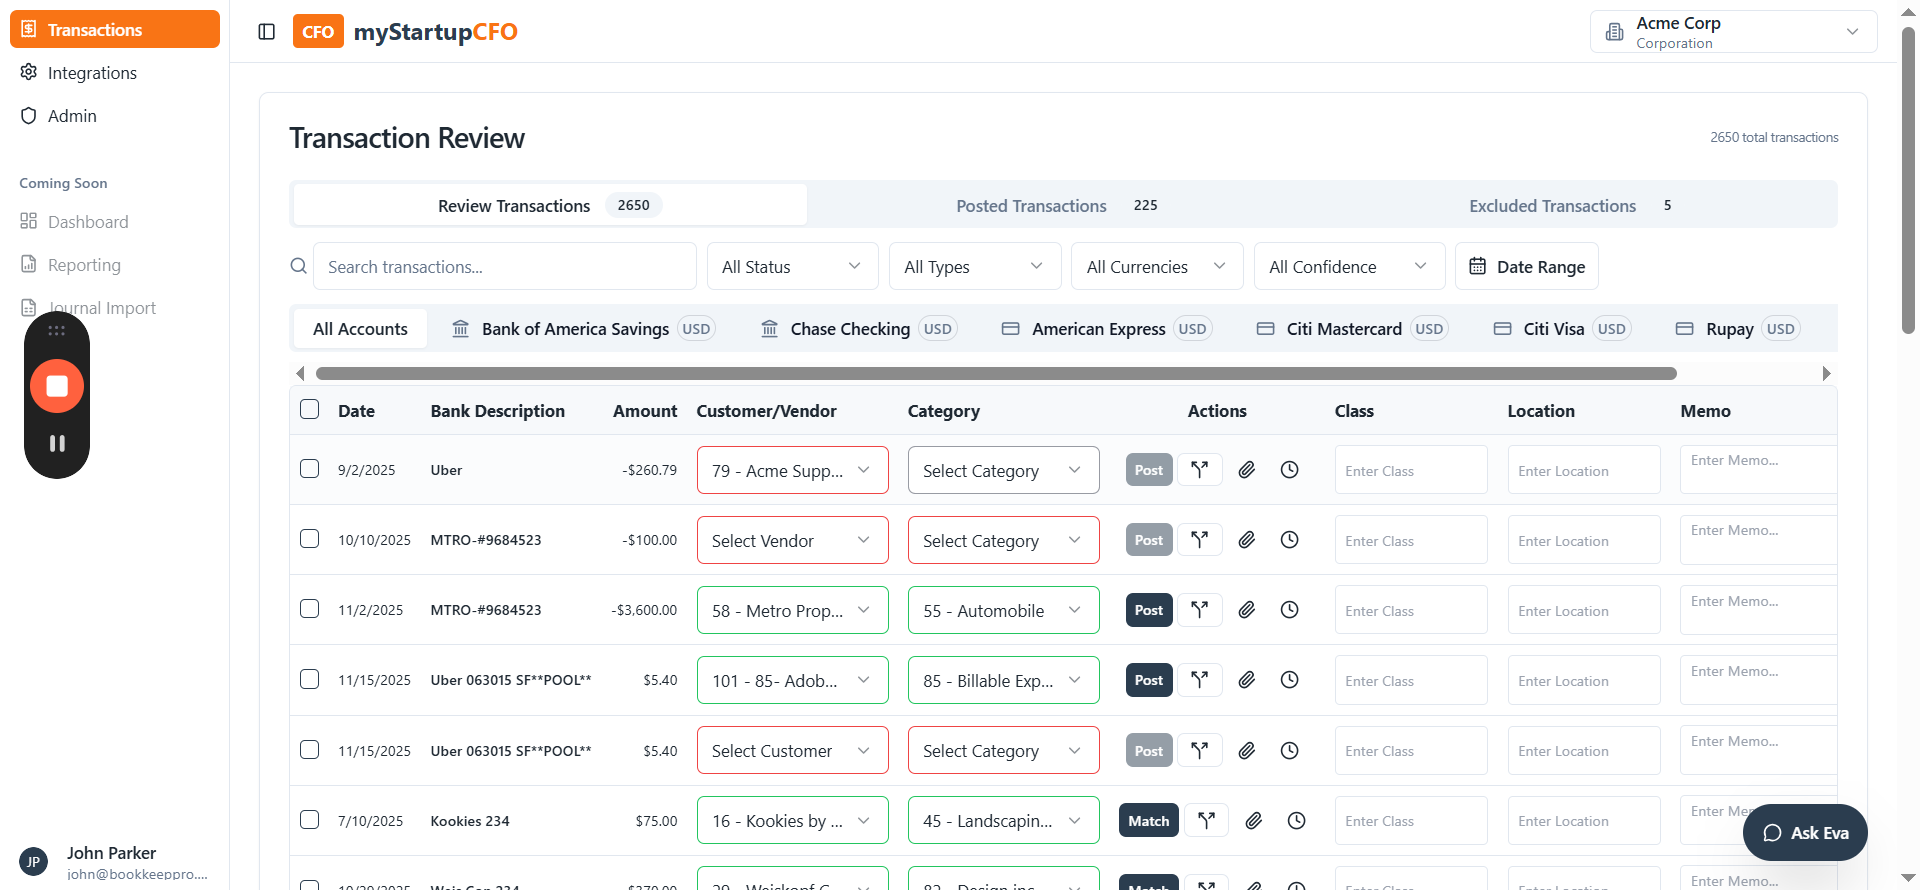
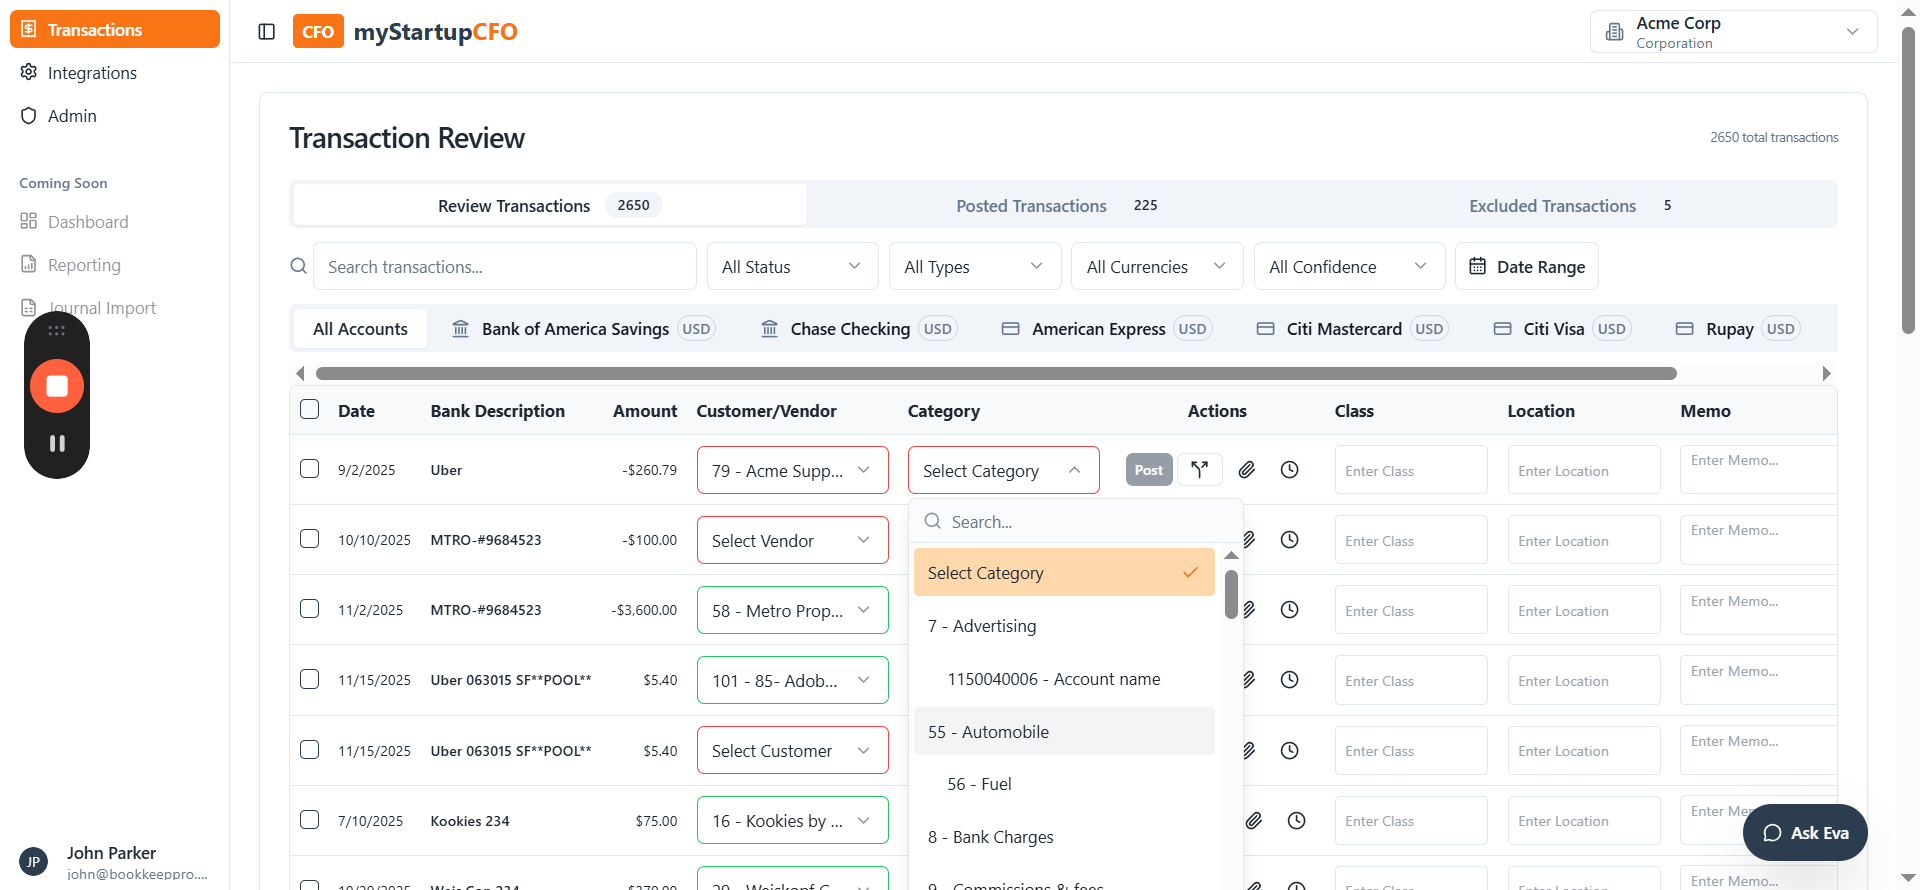
When you click Select Category, a dropdown with all category options will open.
6
Select the appropriate category for the transaction from the category dropdown.
The transaction is now categorized and ready to be posted. Categorized transactions are highlighted in green.
7
Click Post to post the transaction to QuickBooks

Posted transactions are listed in the Posted Transactions tab, confirming that the transaction has been successfully Posted to QuickBooks.