
SOP: Payroll Step 1
Learn how to prepare payroll, review and approve time off requests, and manage time cards in ADP. This step-by-step guide covers payroll dashboard navigation, handling time card errors, and best practices for efficient payroll processing.
In this guide, we'll learn how to prepare payroll using ADP, including reviewing and approving time cards, handling pending time off requests, and starting new payroll cycles for different companies.
We'll also cover how to validate time off worksheets and ensure all necessary approvals are in place before processing payroll.
These steps help ensure payroll is accurate and ready for submission.
Let's get started
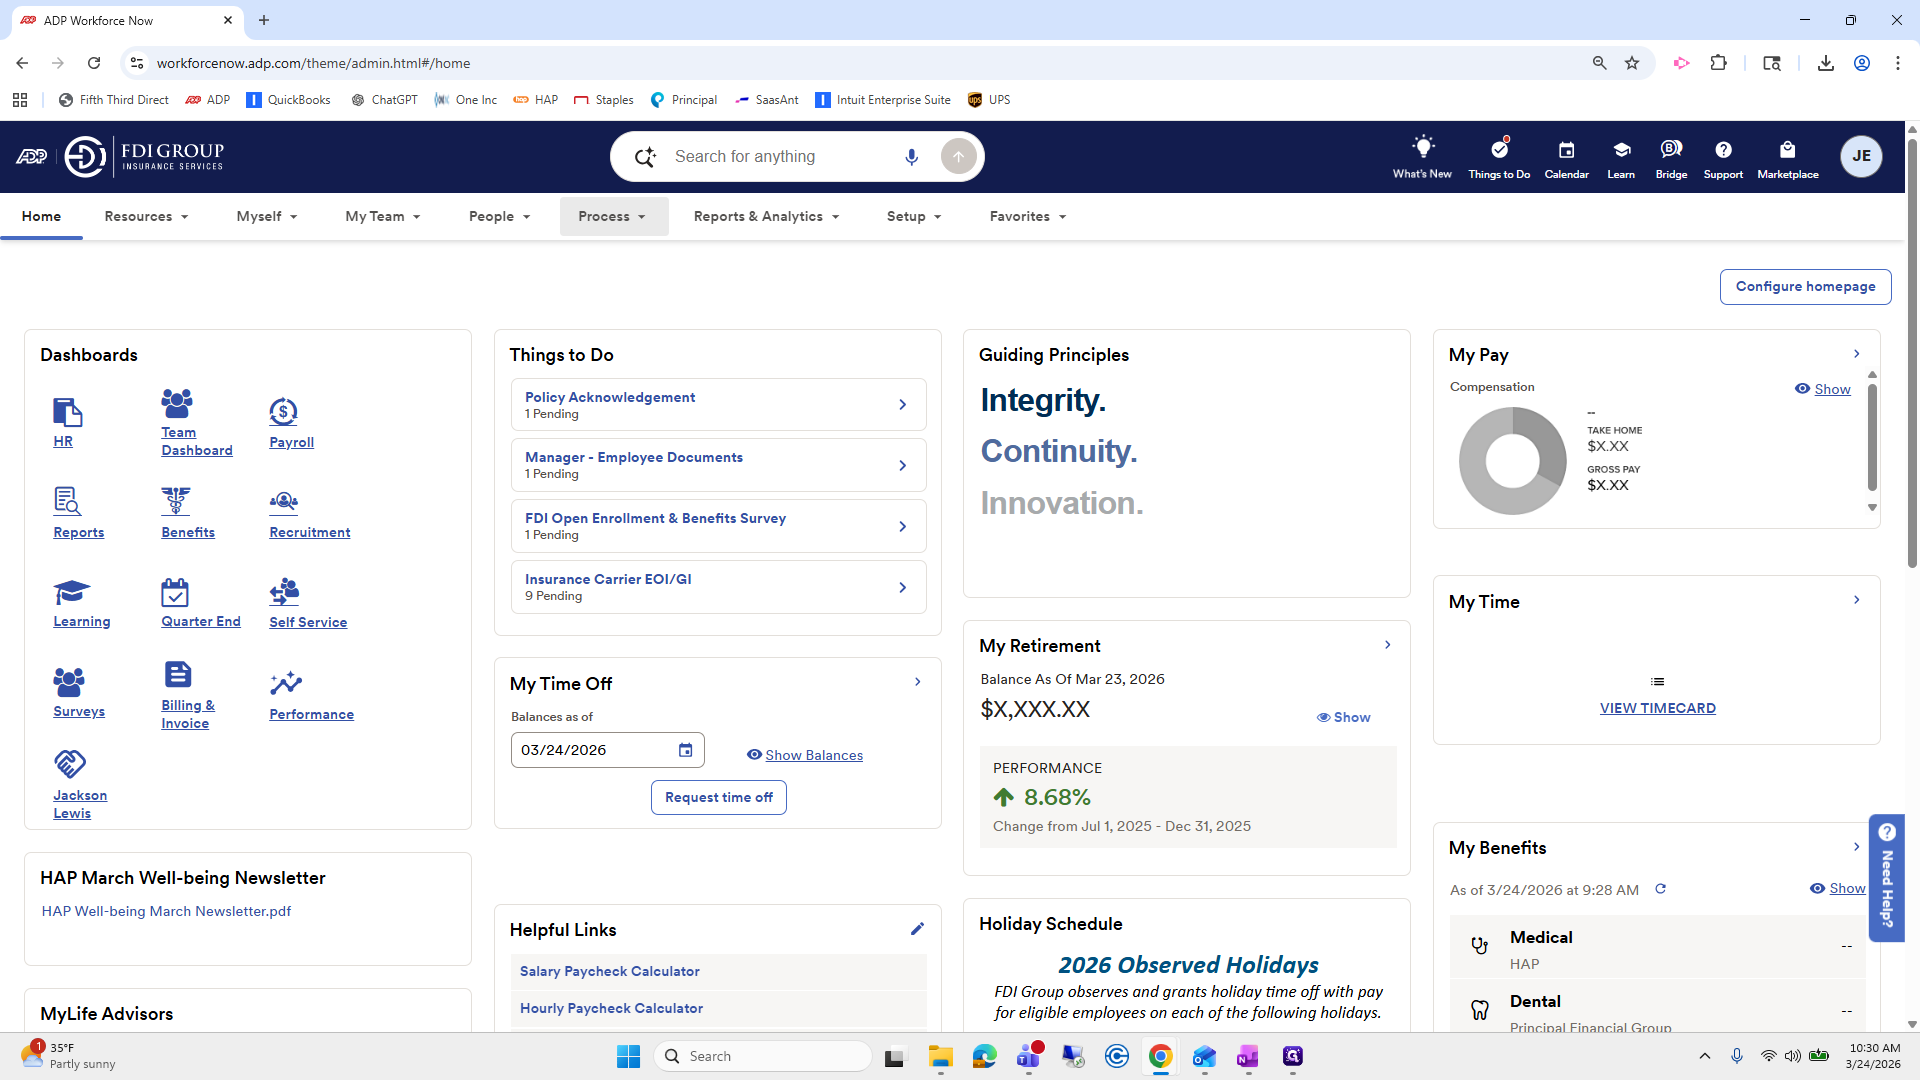
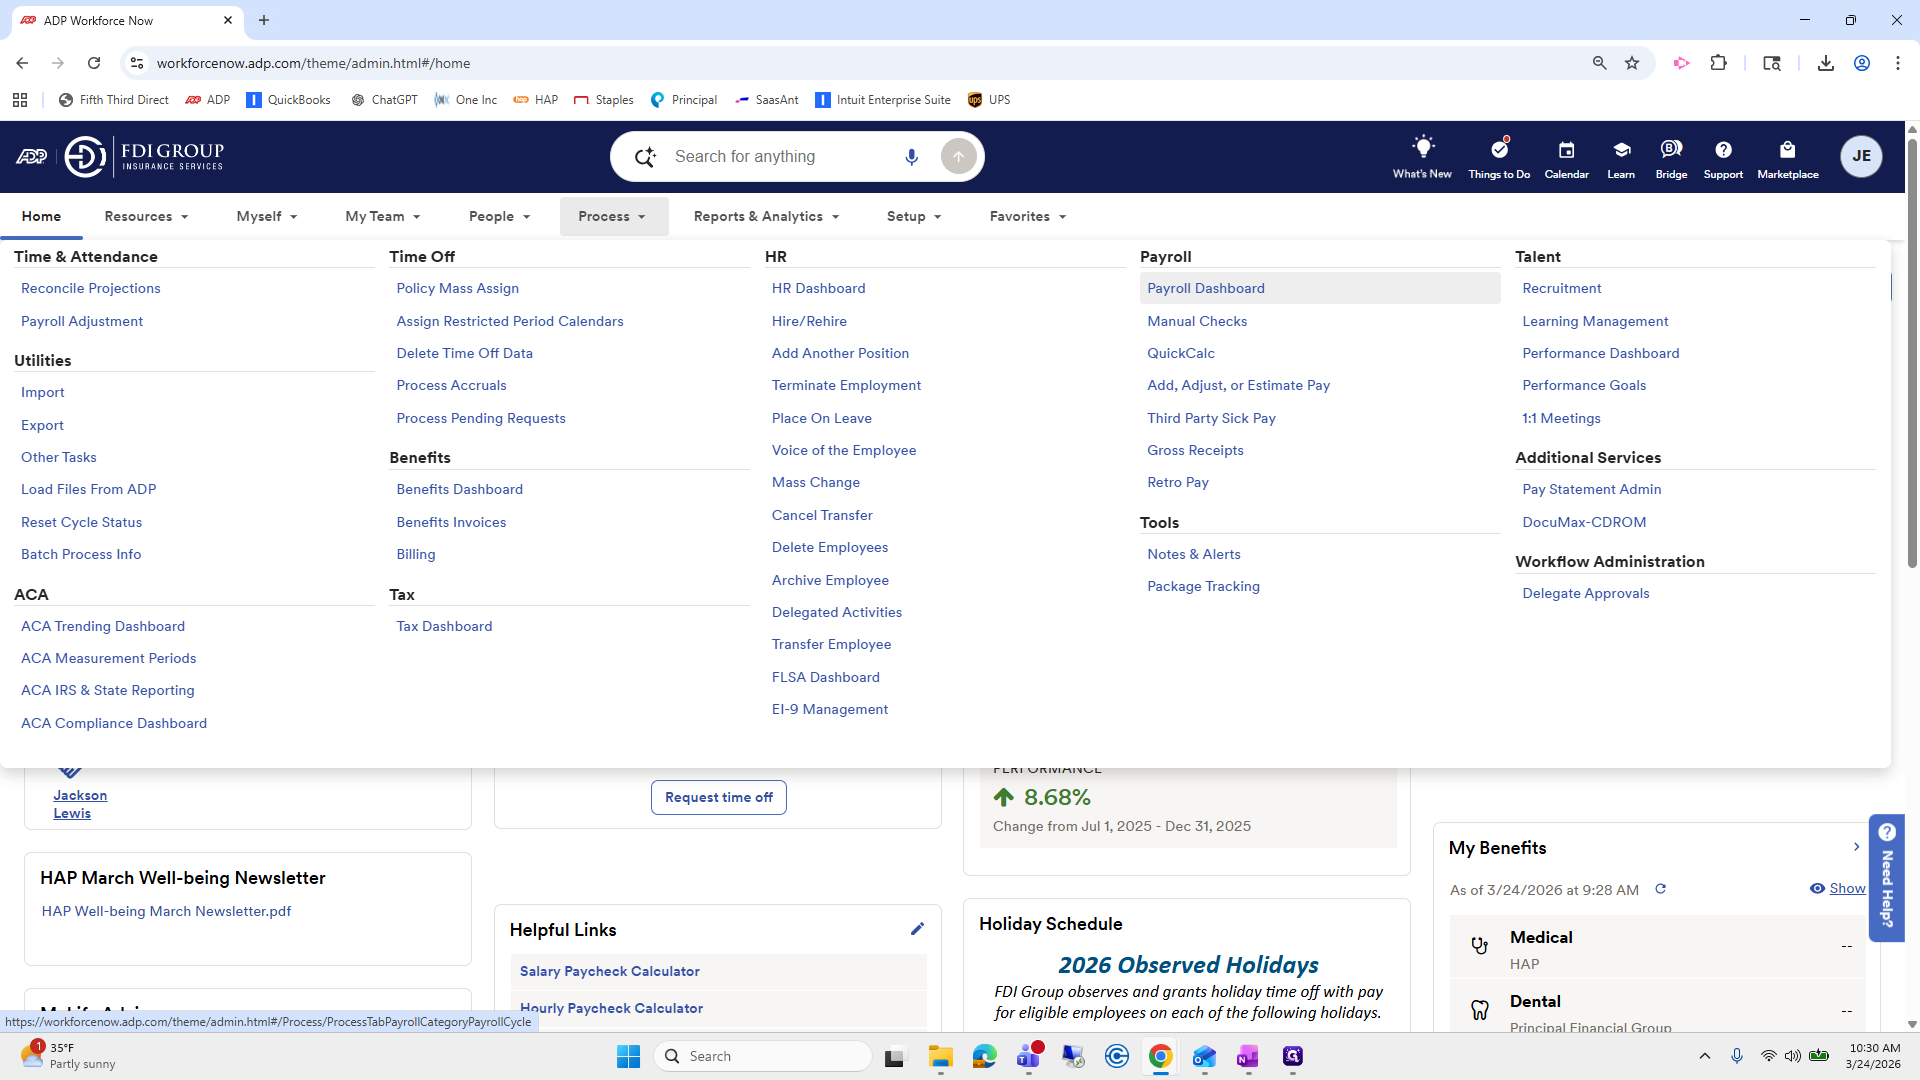
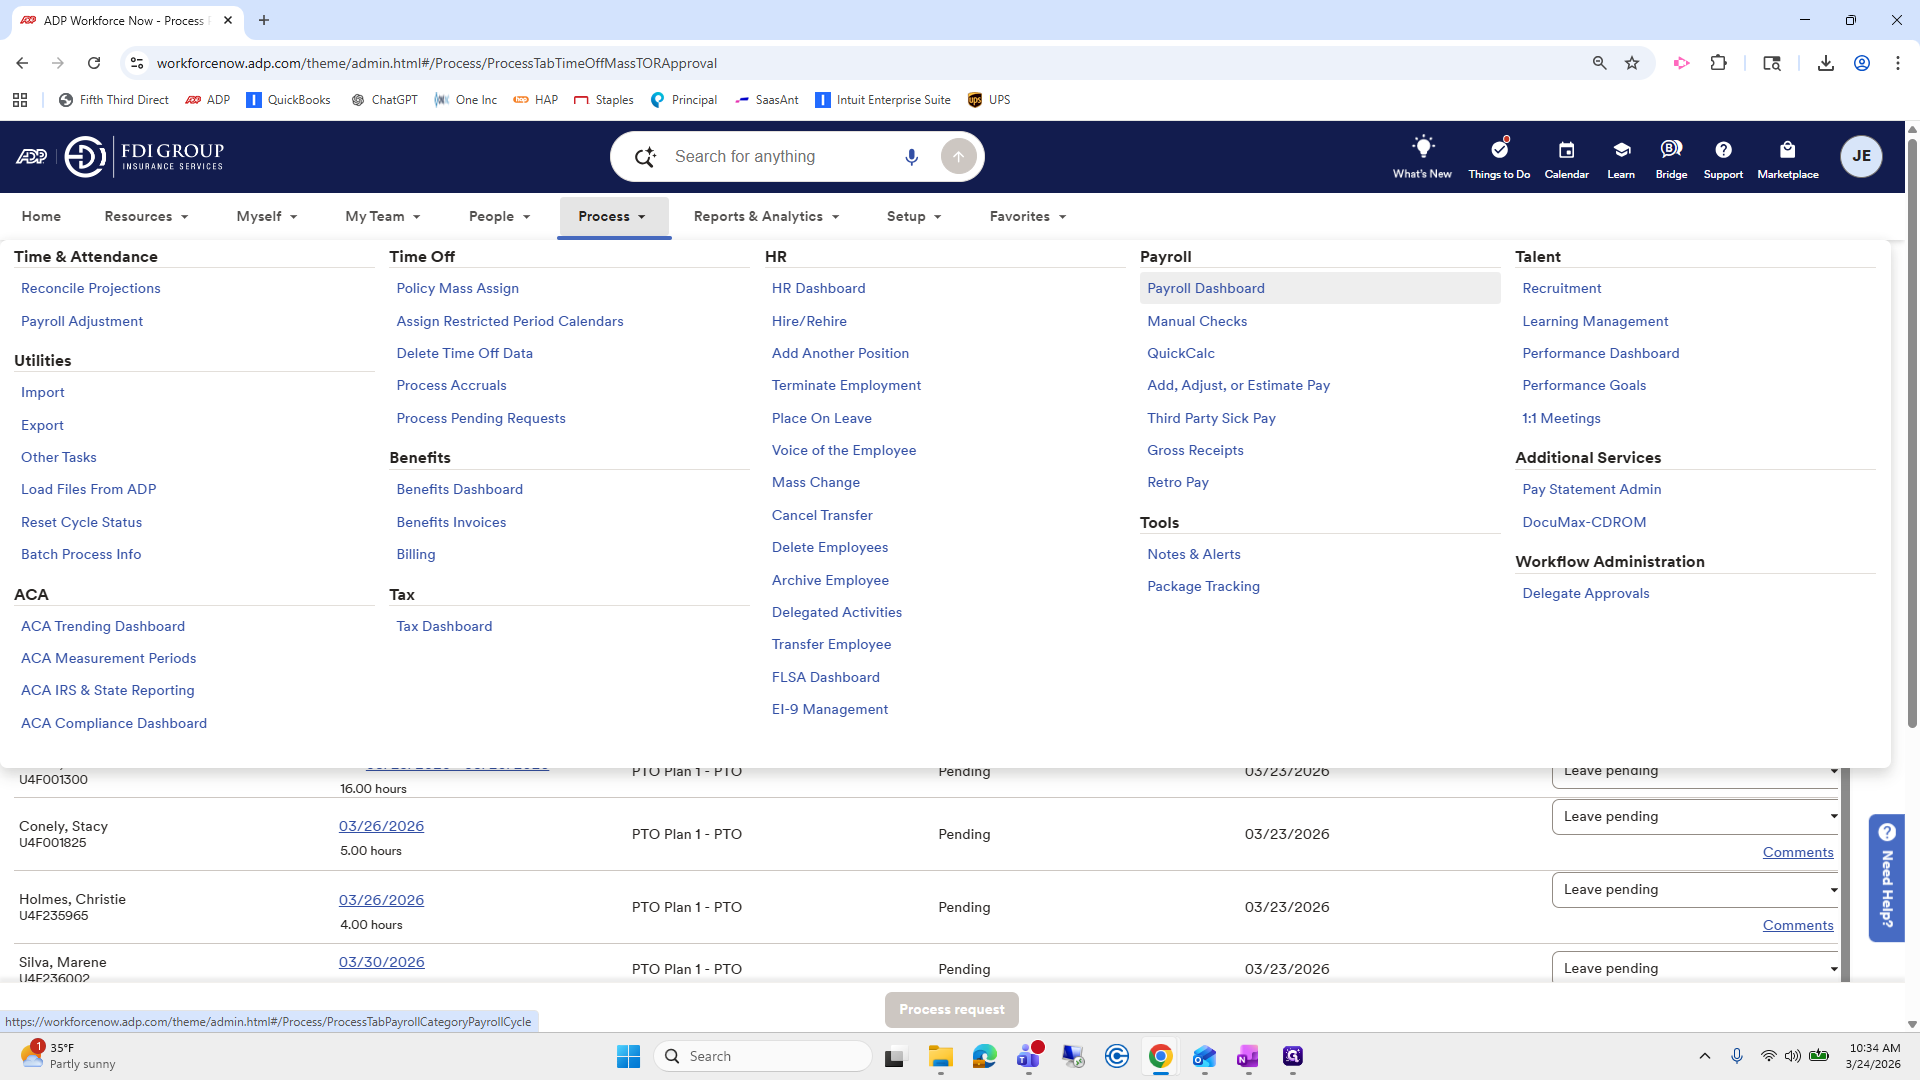
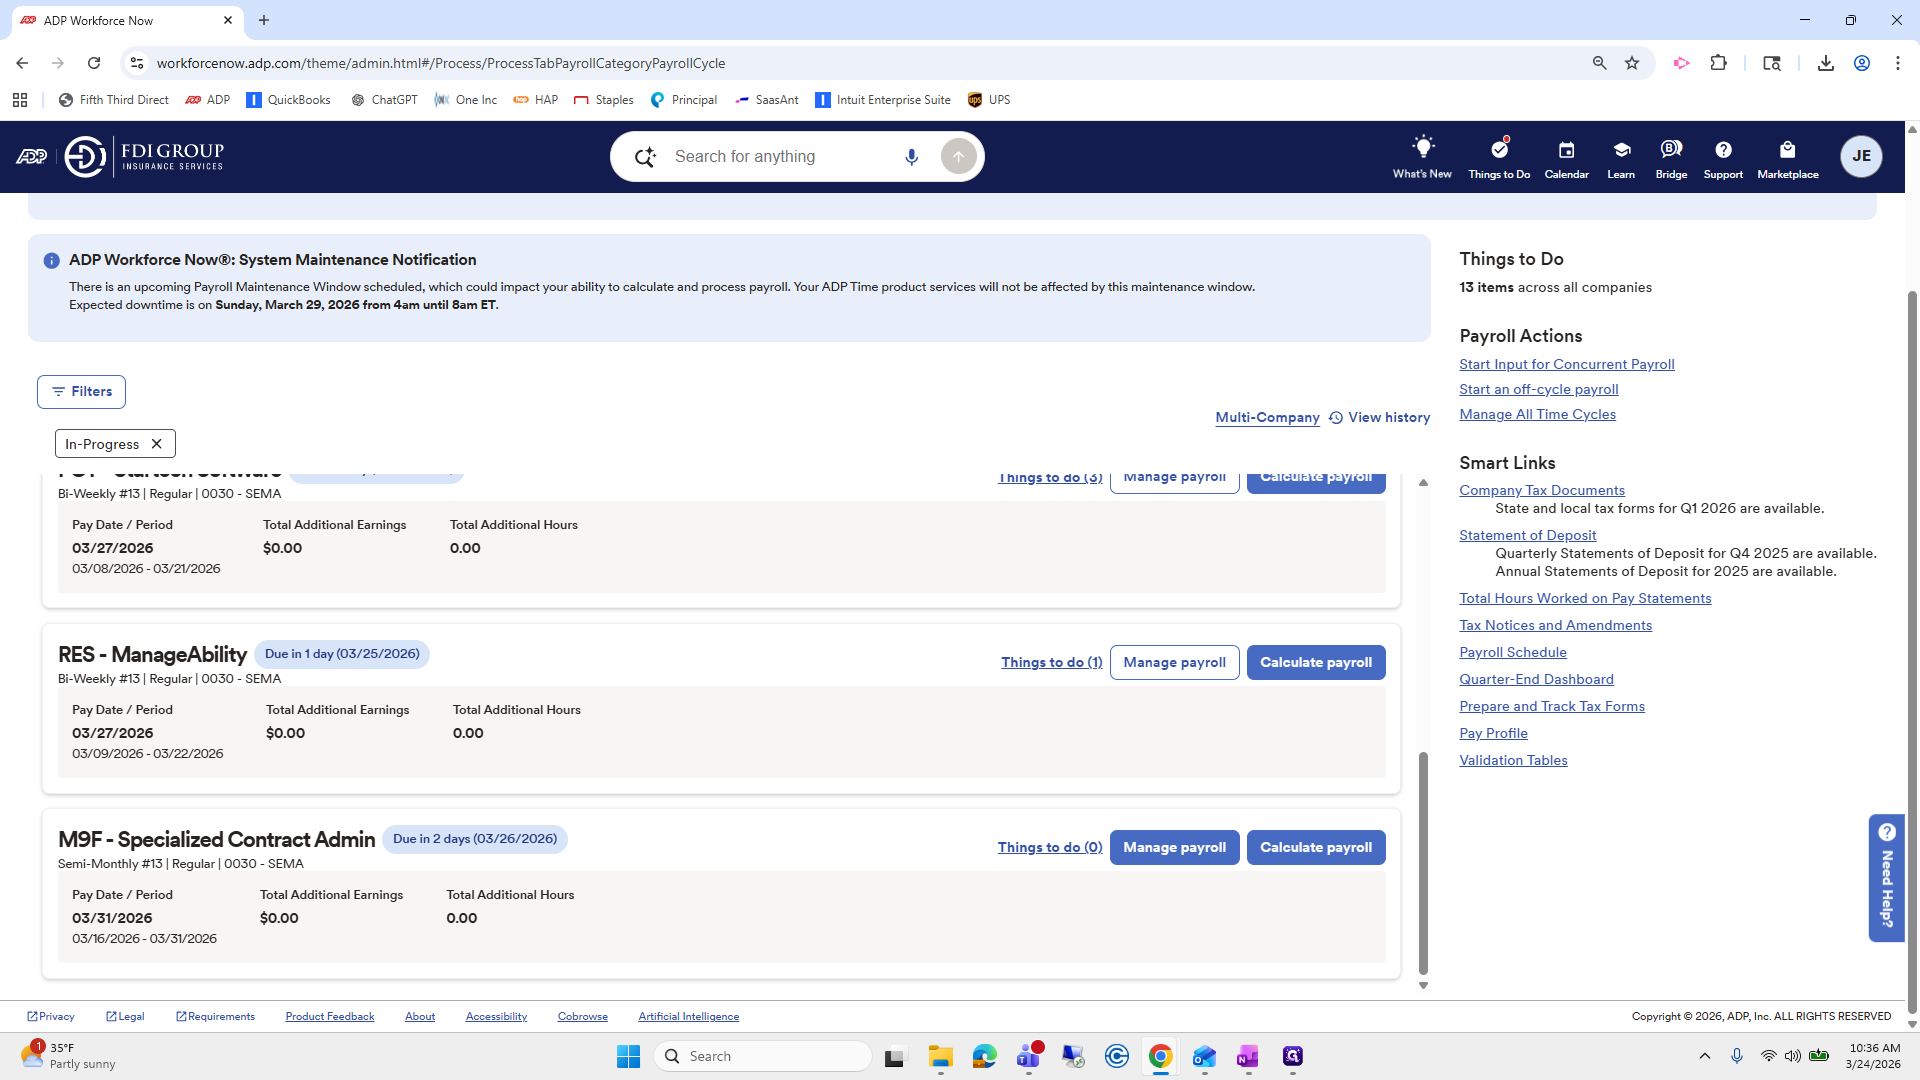
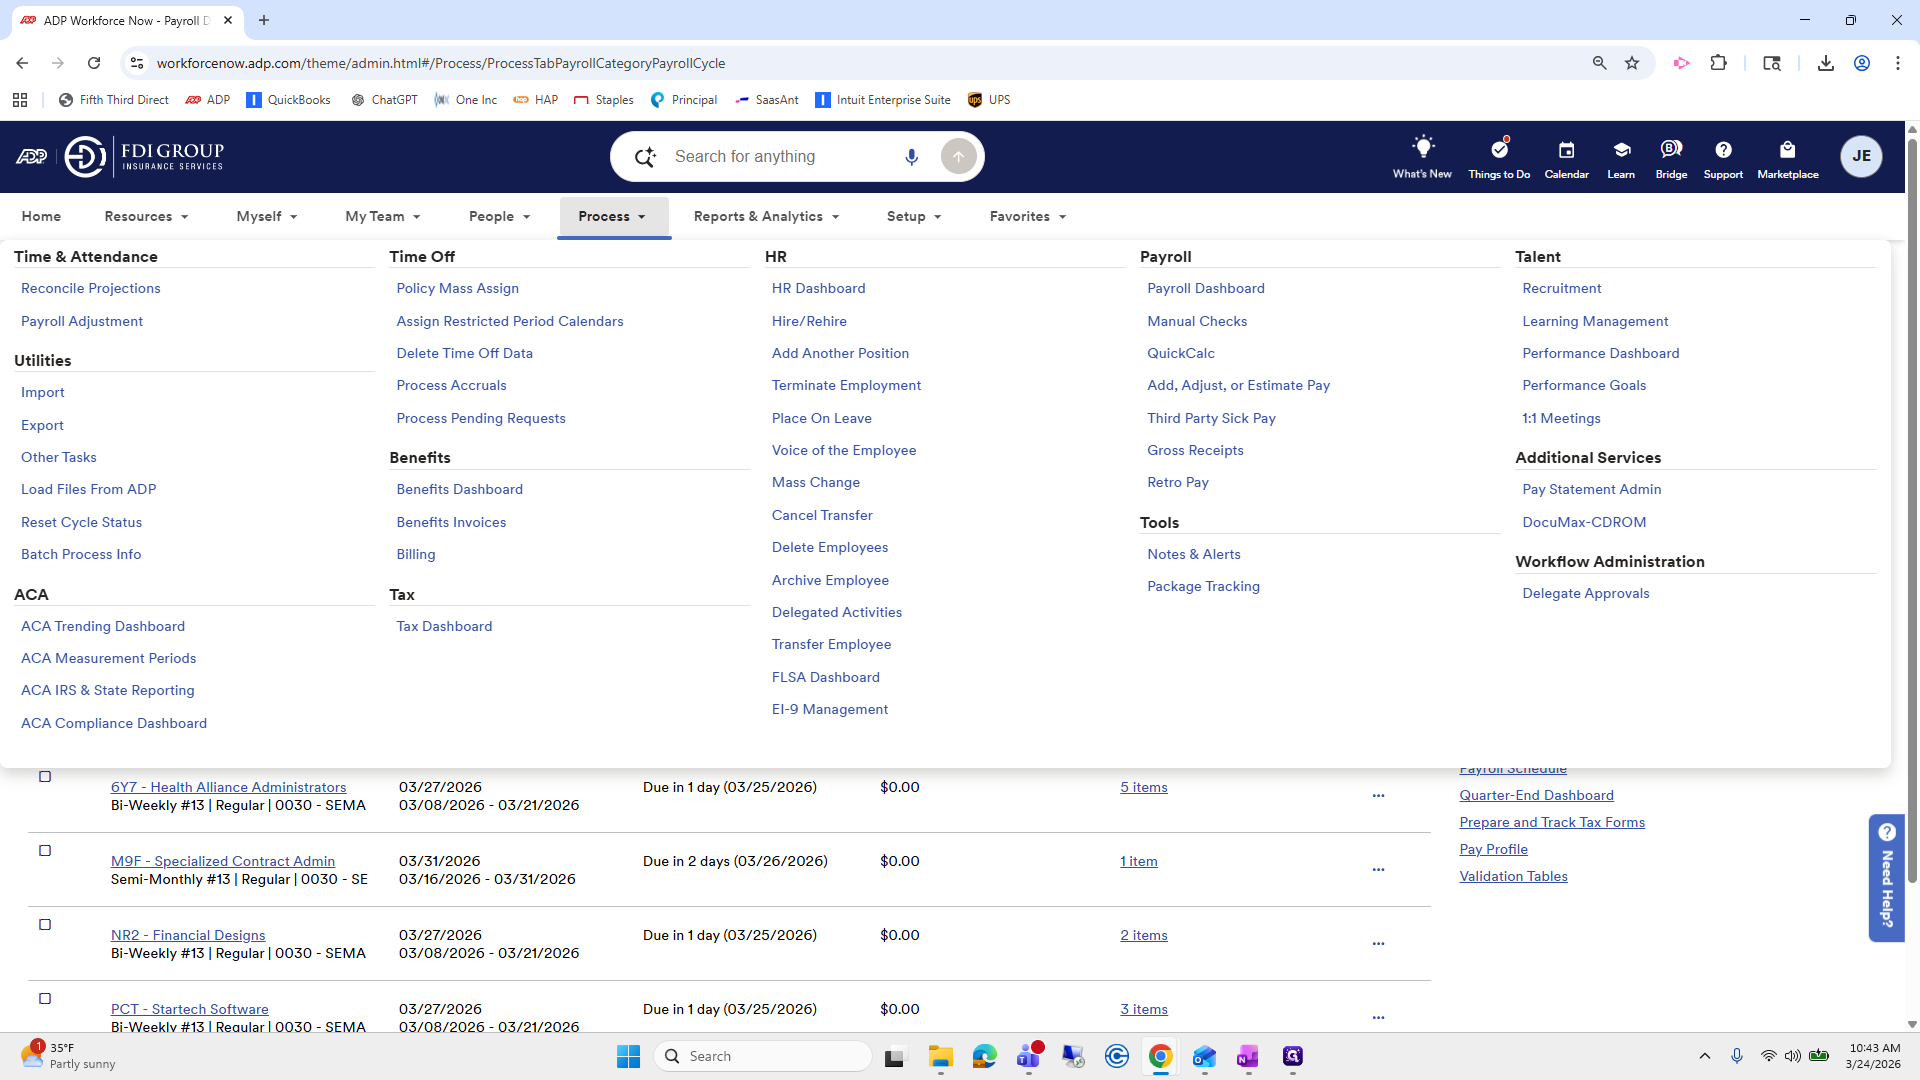
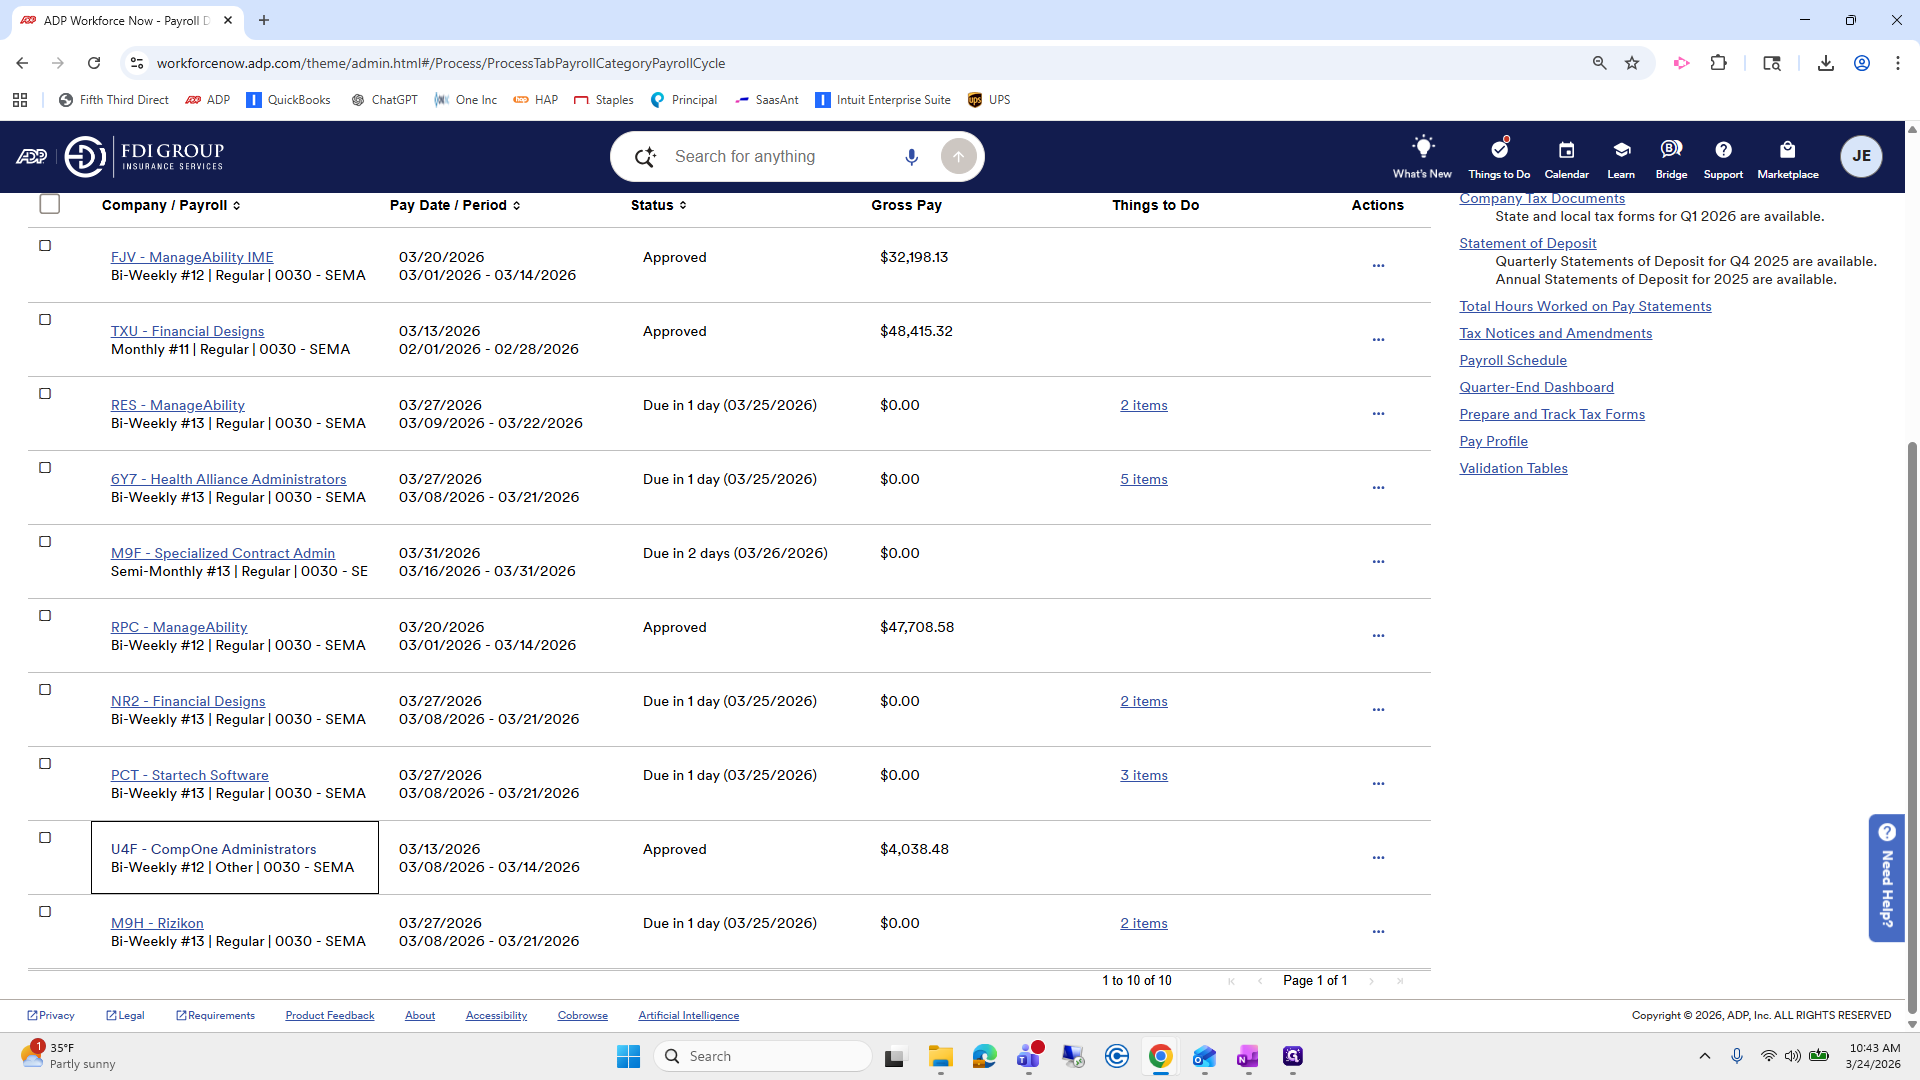
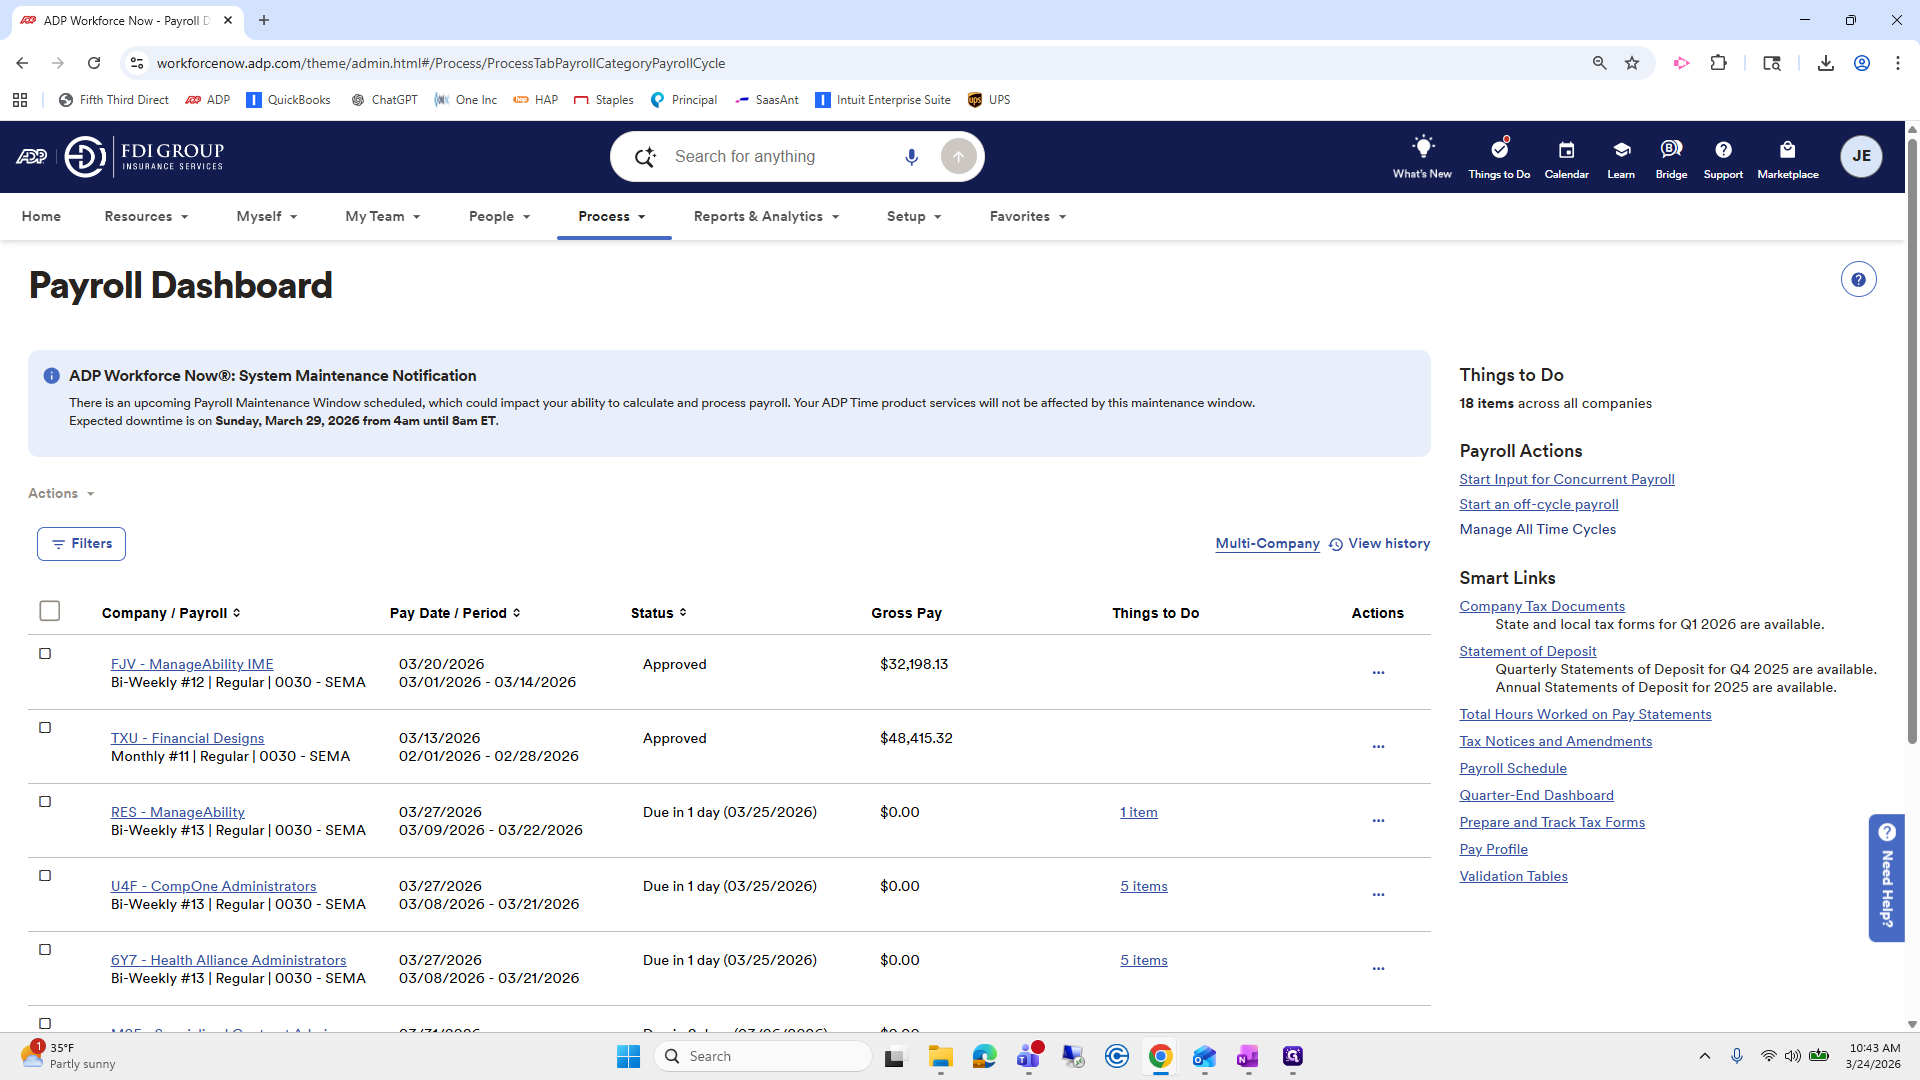
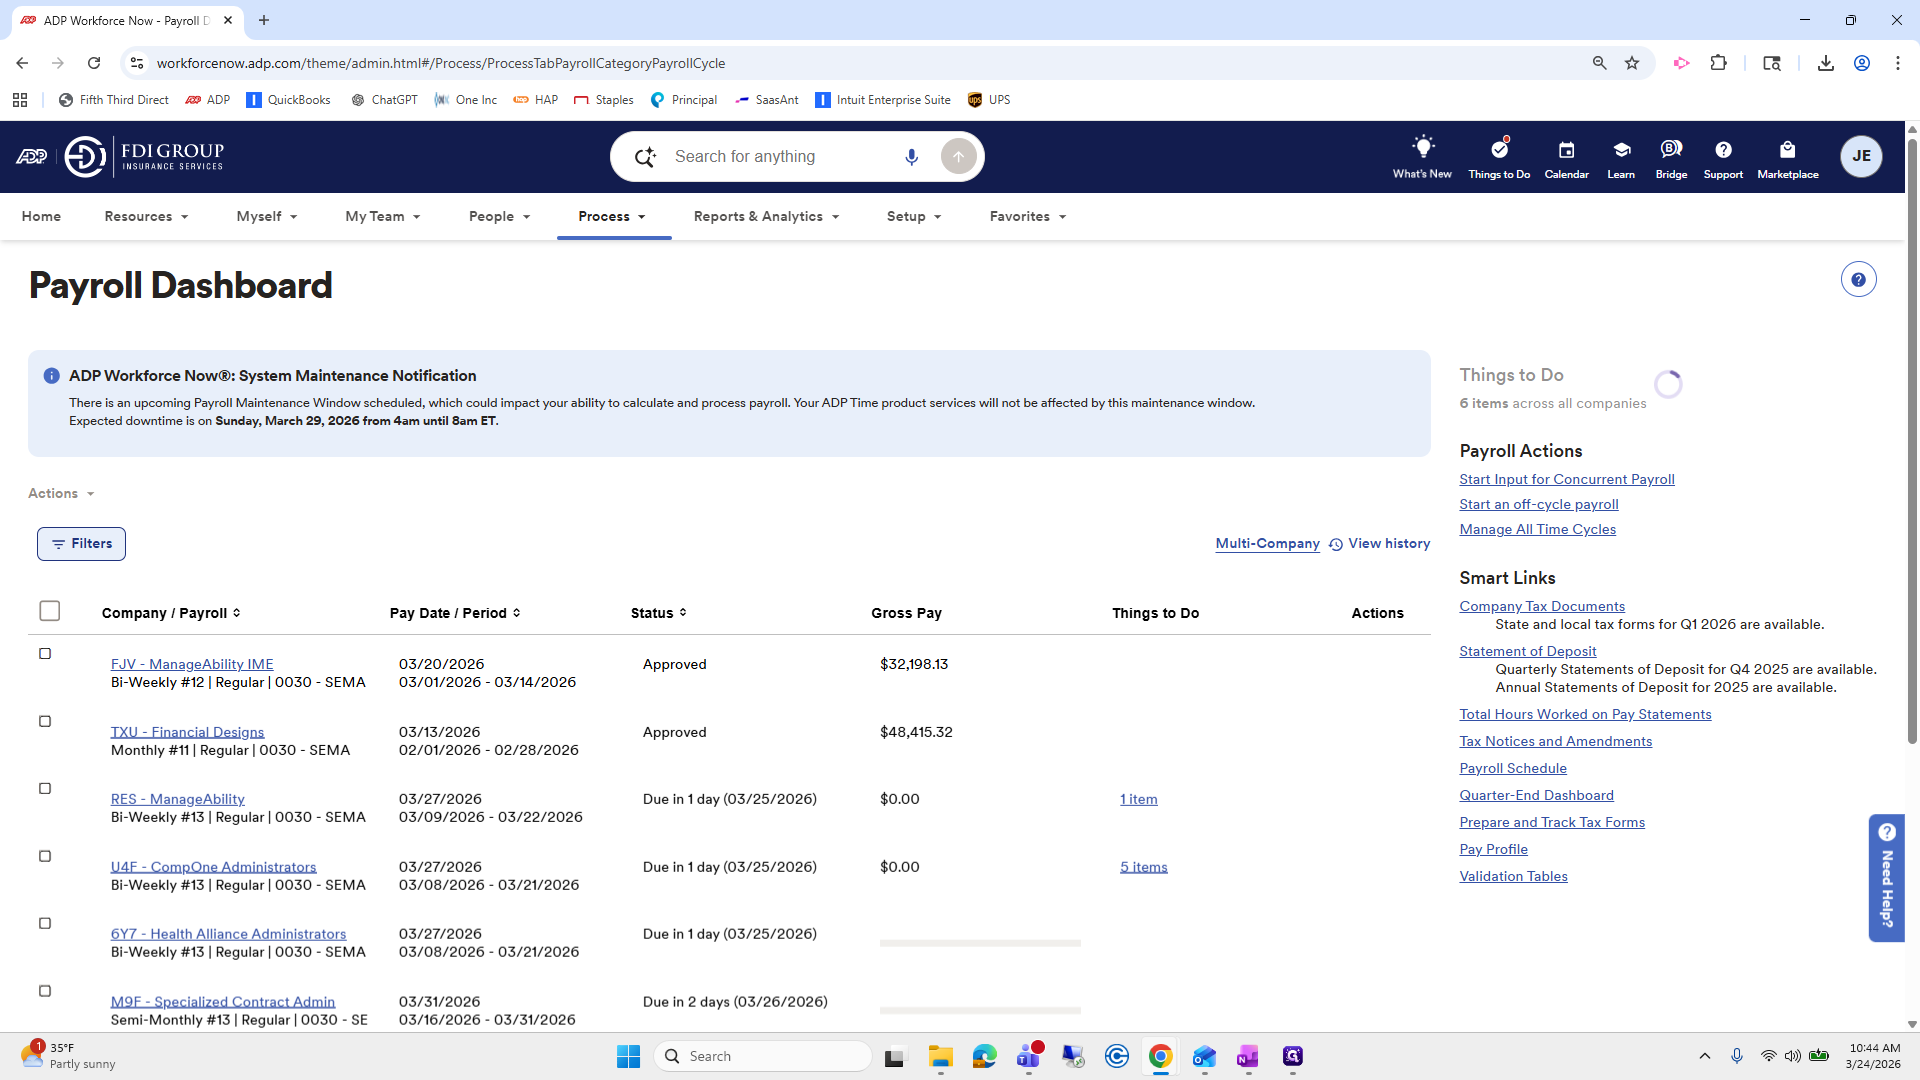
In this video, we will cover how to prepare payroll and review any time off that has not yet been approved by management. We will also briefly look at time cards. When you first log in to ADP, go to Process, then Payroll Dashboard.
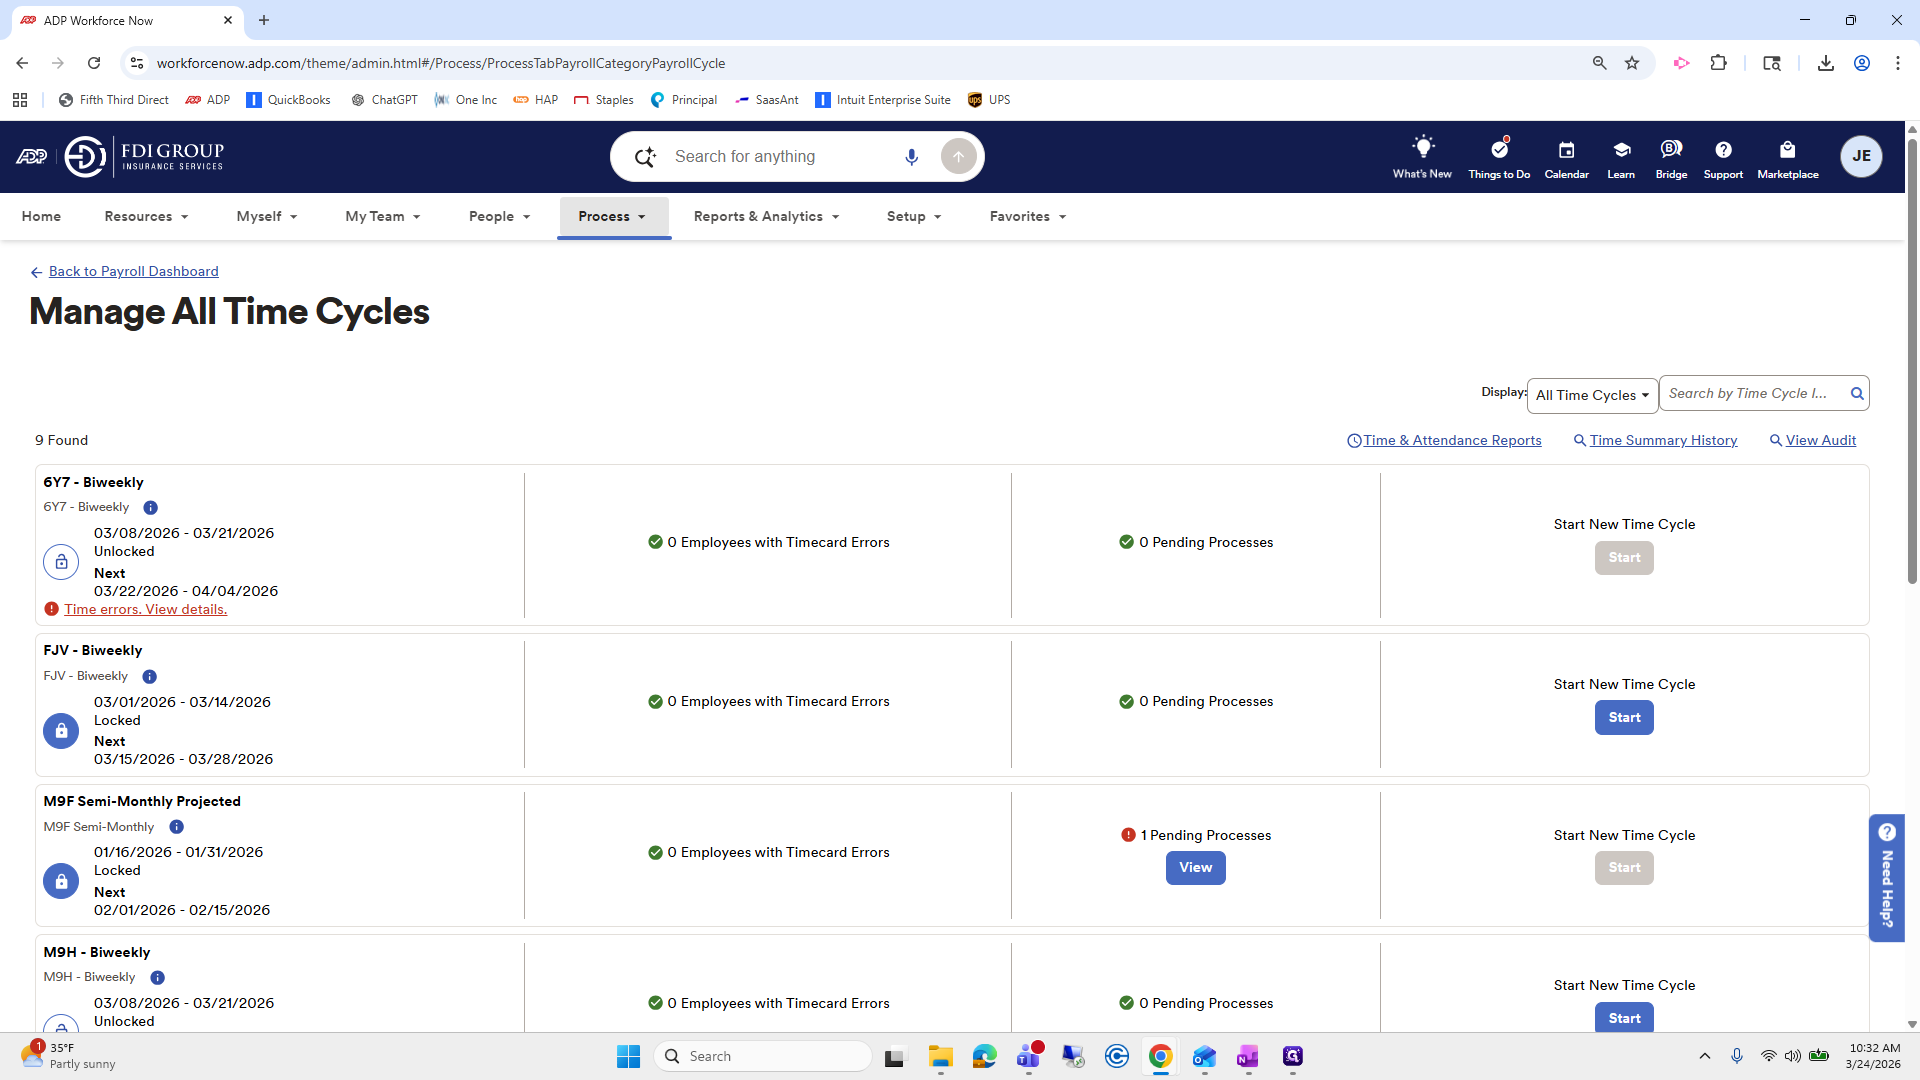
From here, I prefer to review all time cycles first.

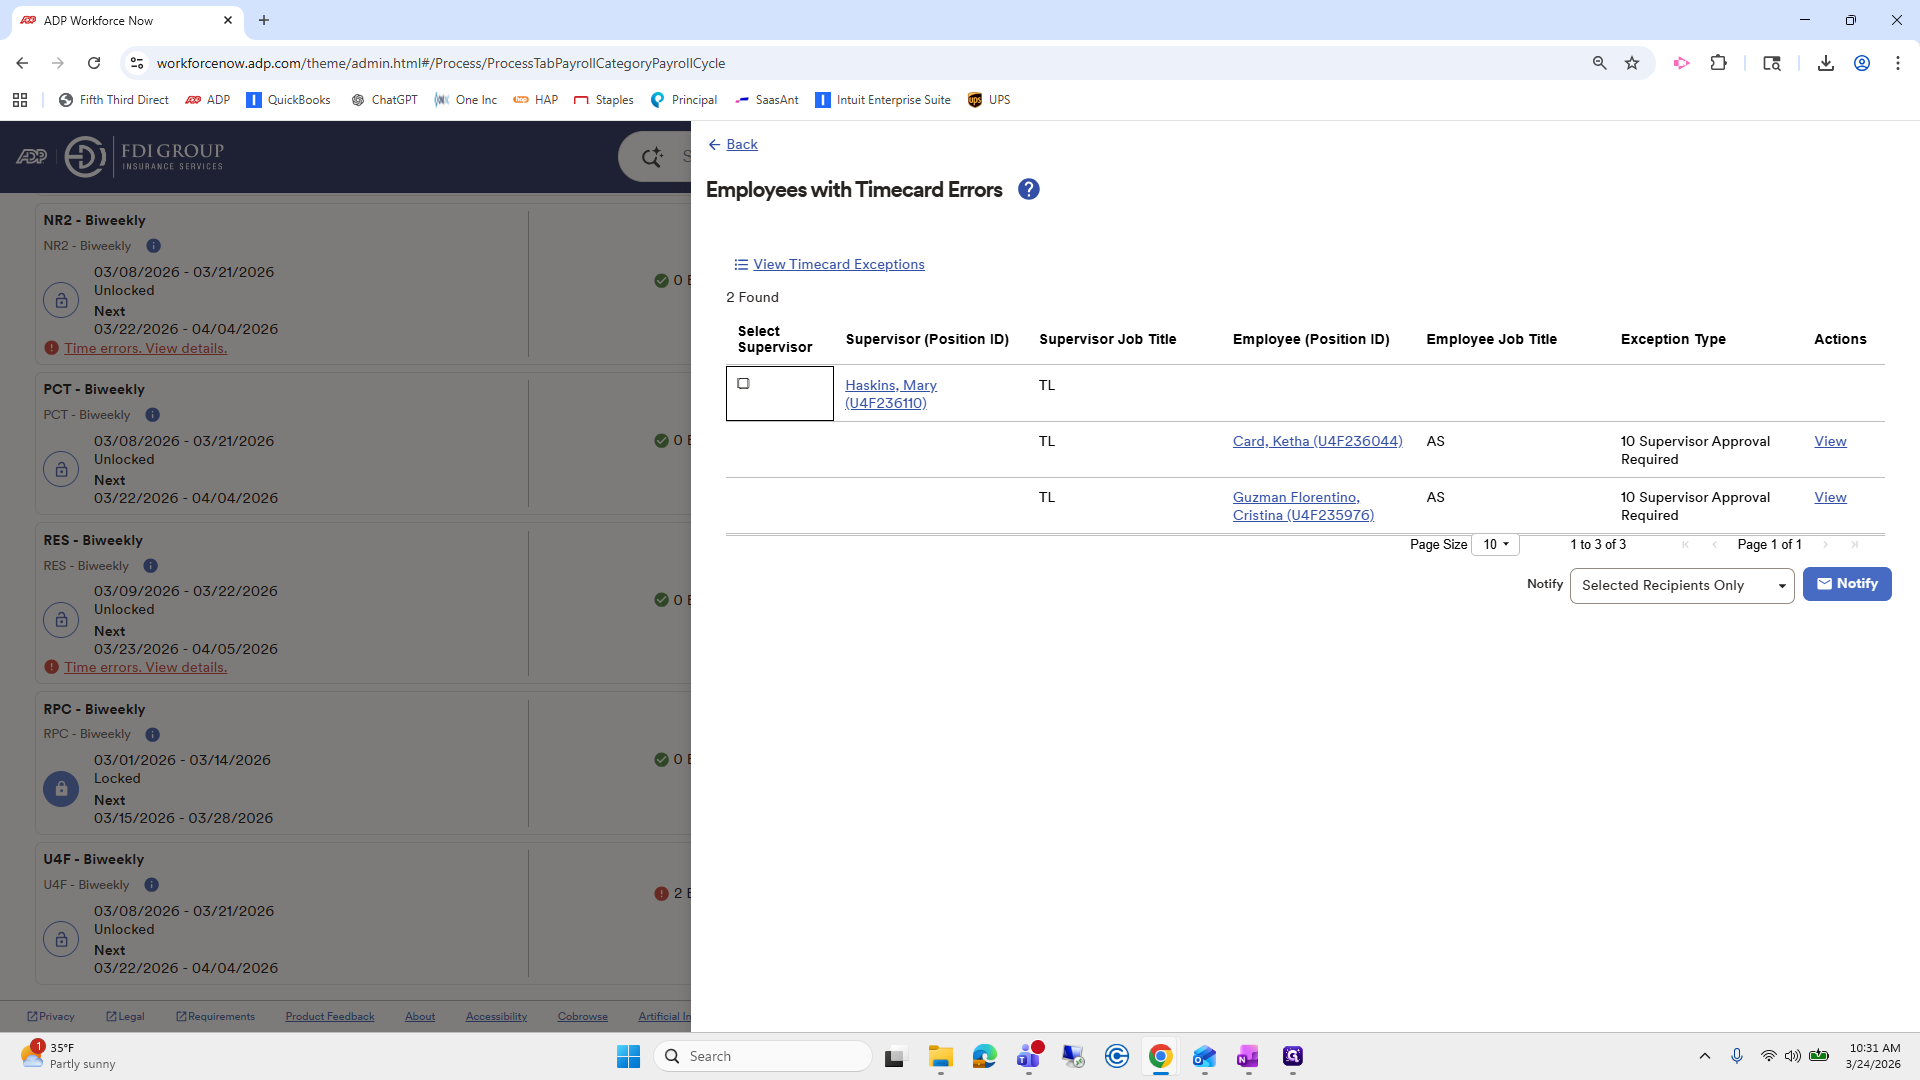
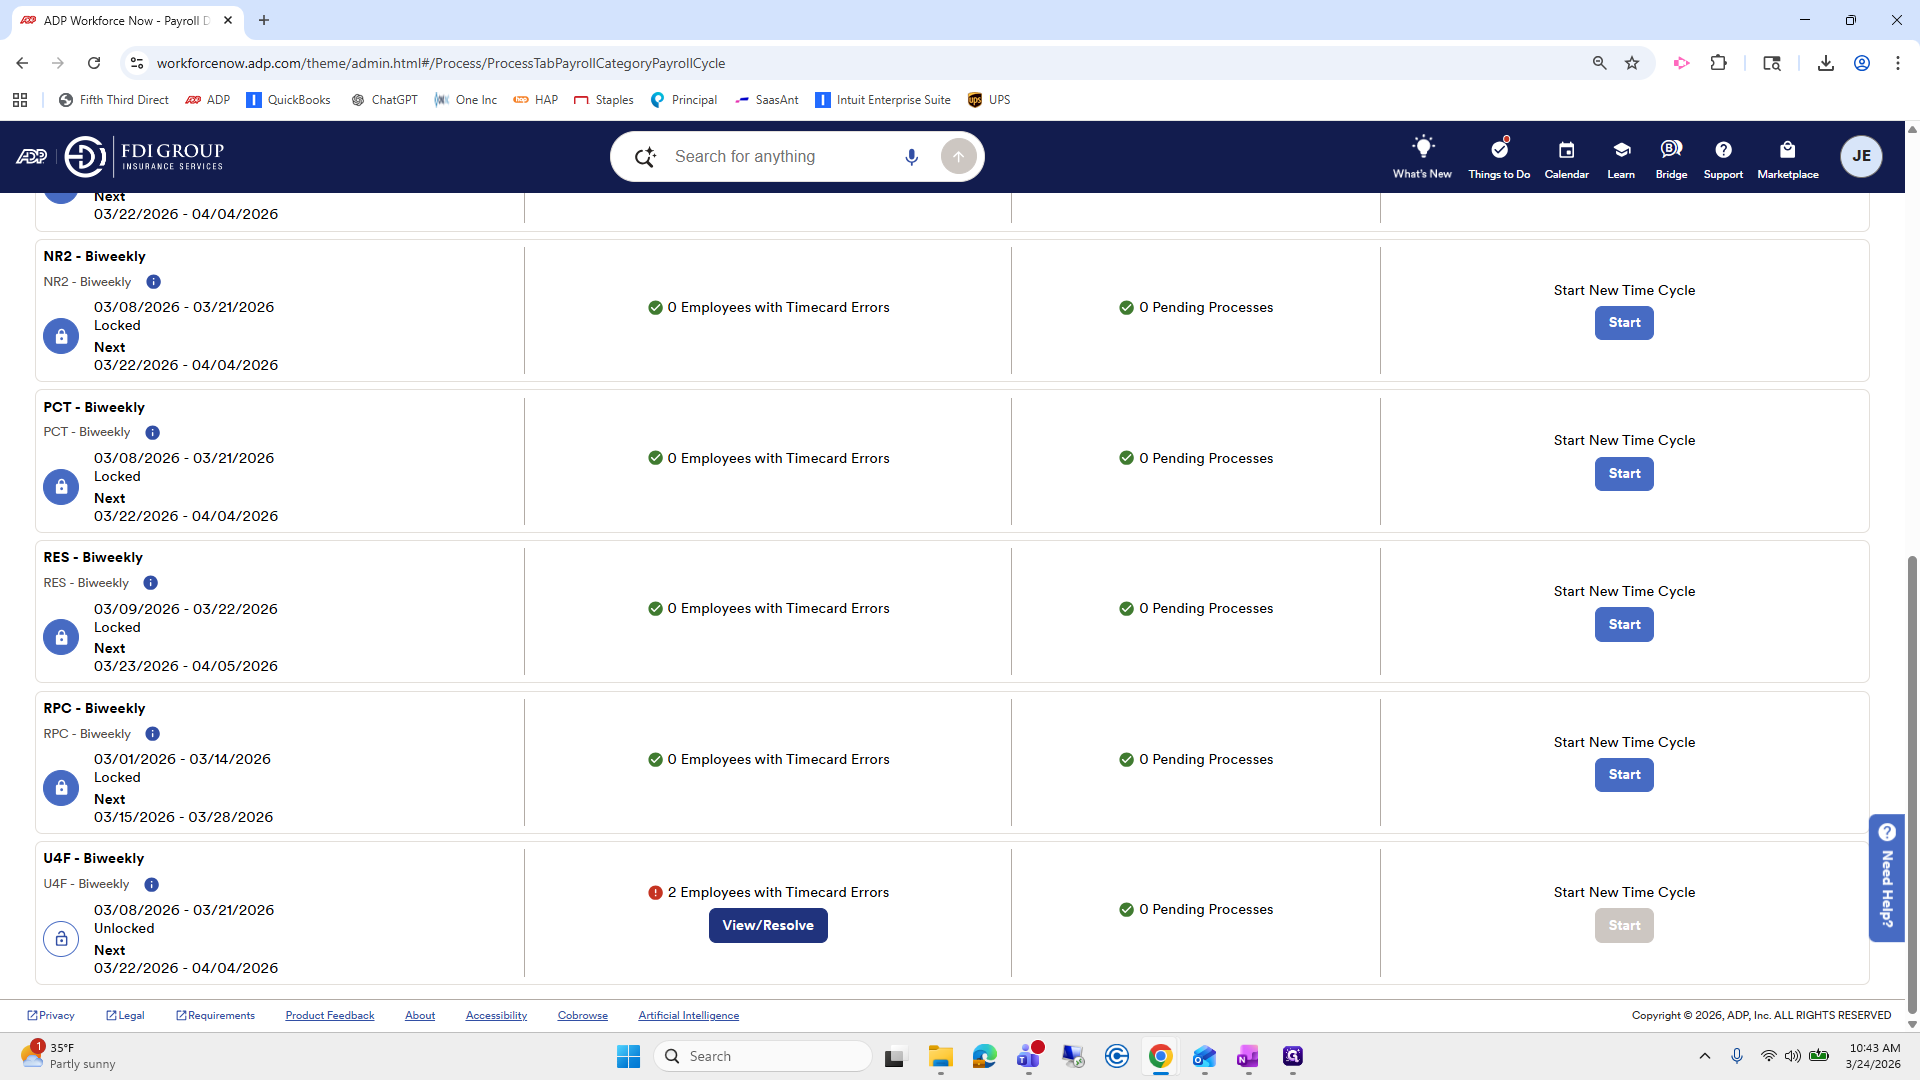
This is the section where we need to ensure there are no time card errors. For example, Comp One has a few time card errors. This means some employees have not had their time cards approved yet.
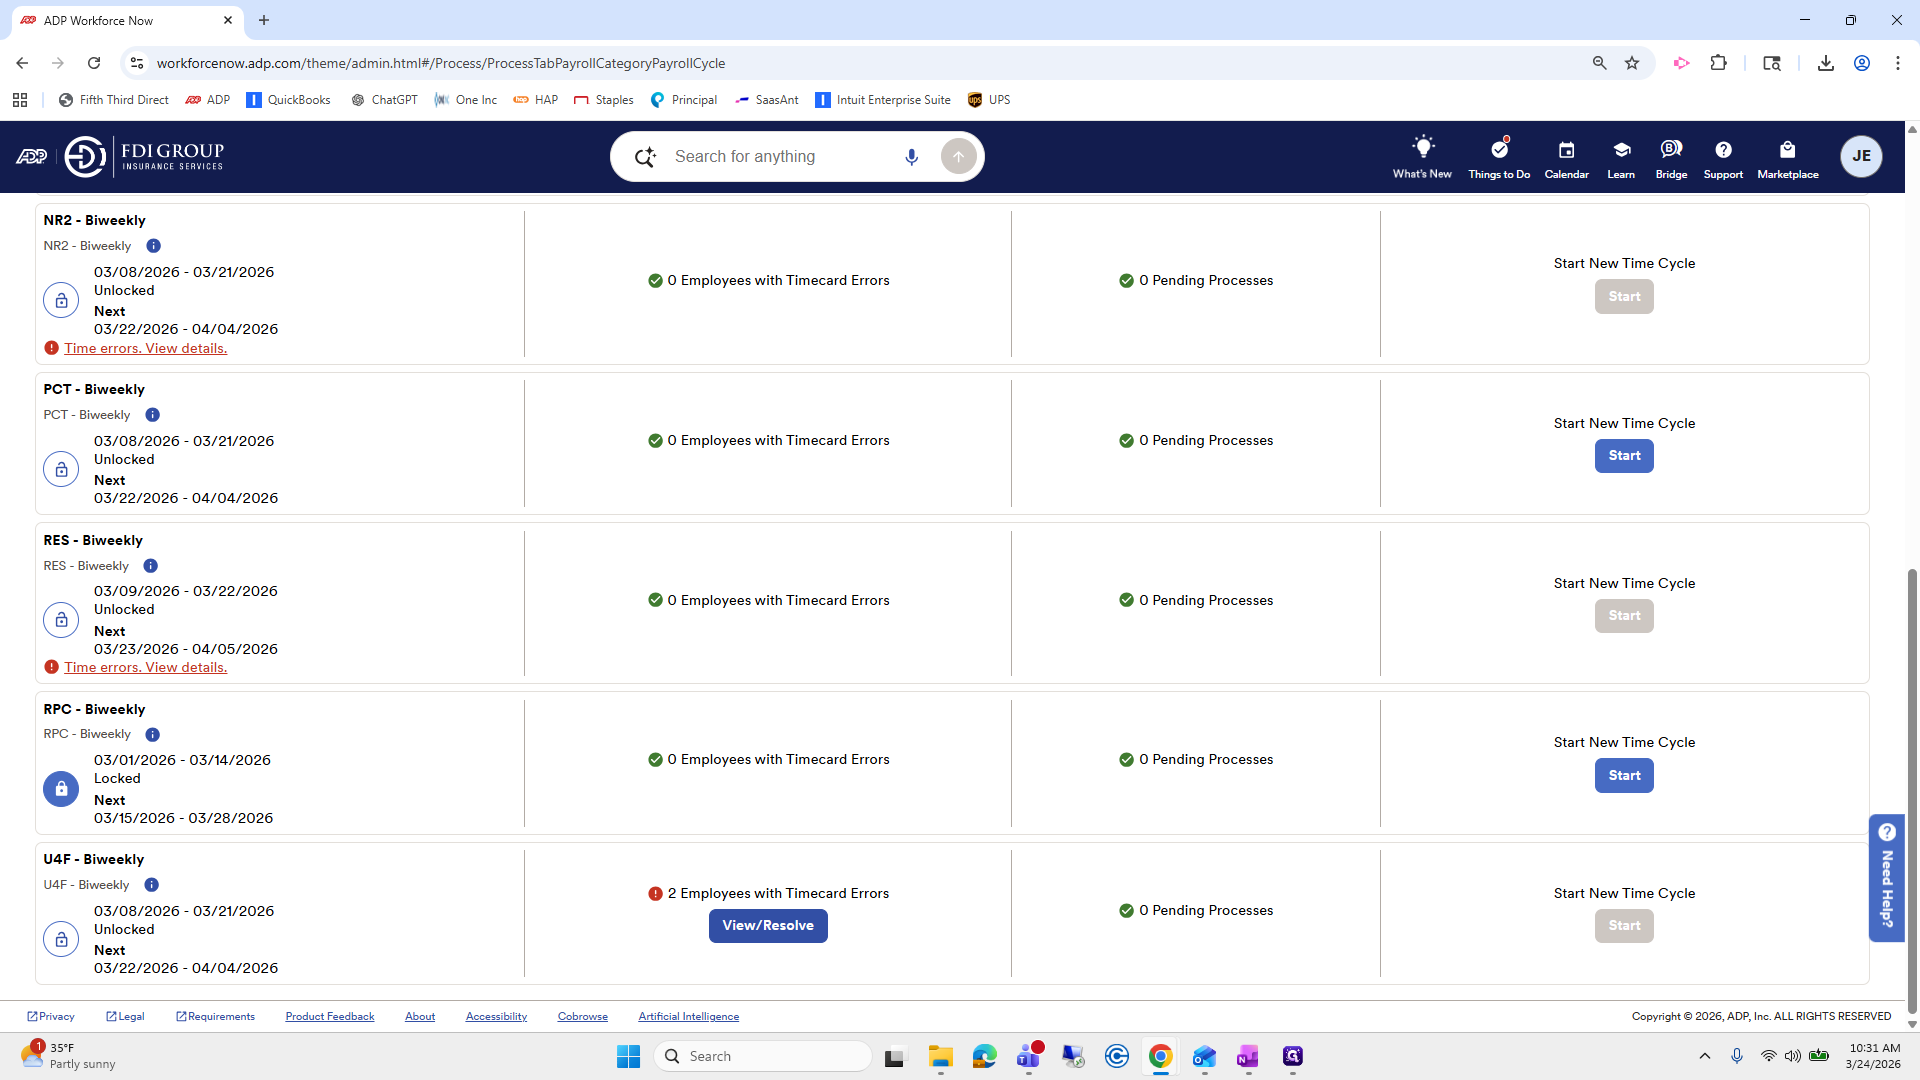
To move the process along, I first select the supervisor. This notifies them that I am sending a reminder to review their time cards.
I already sent them one yesterday and another earlier today. If I don't see anything, I usually send a friendly follow-up email and screenshot this to the supervisor. If I don't hear anything, I'll approve them myself so I can move forward with payroll. We'll return to that later.
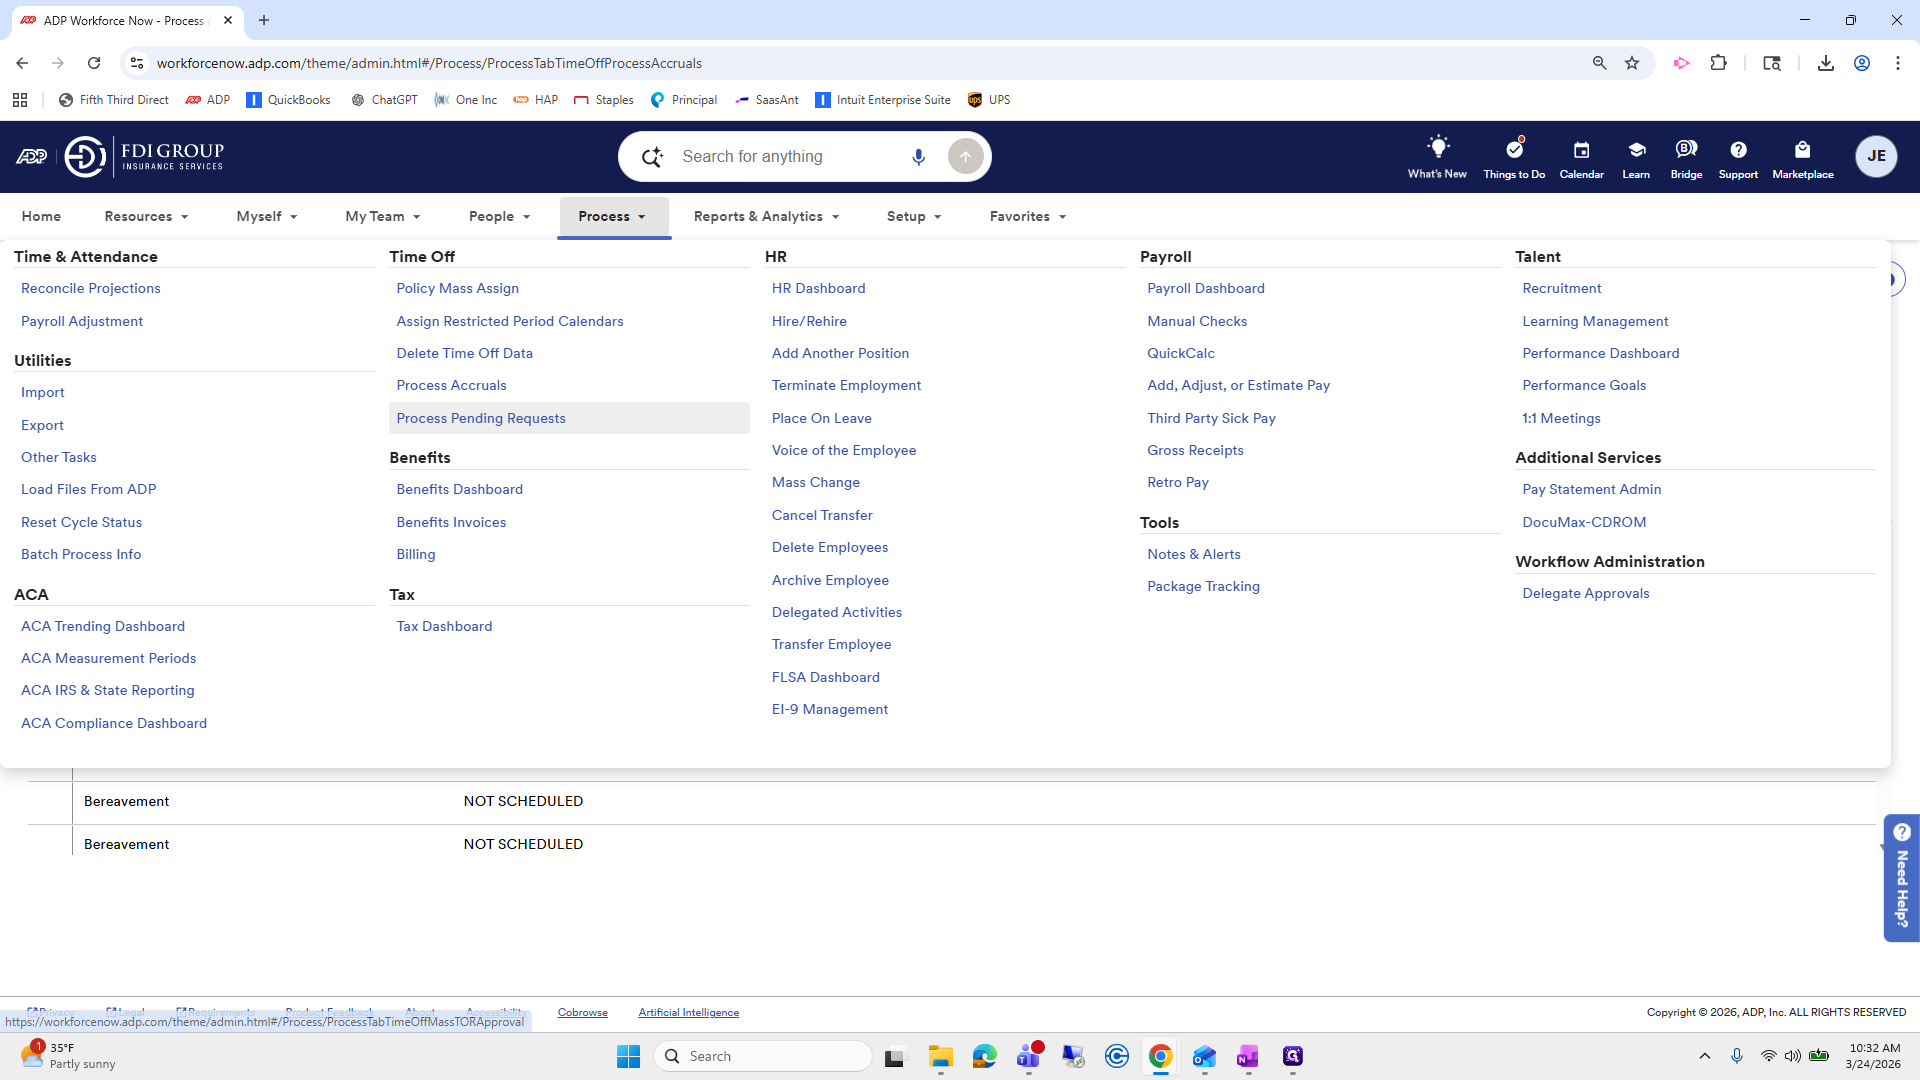
Everything else looks good because these are all in green. Here, I will go to Process.
Under Time Off, go to Process Accruals.
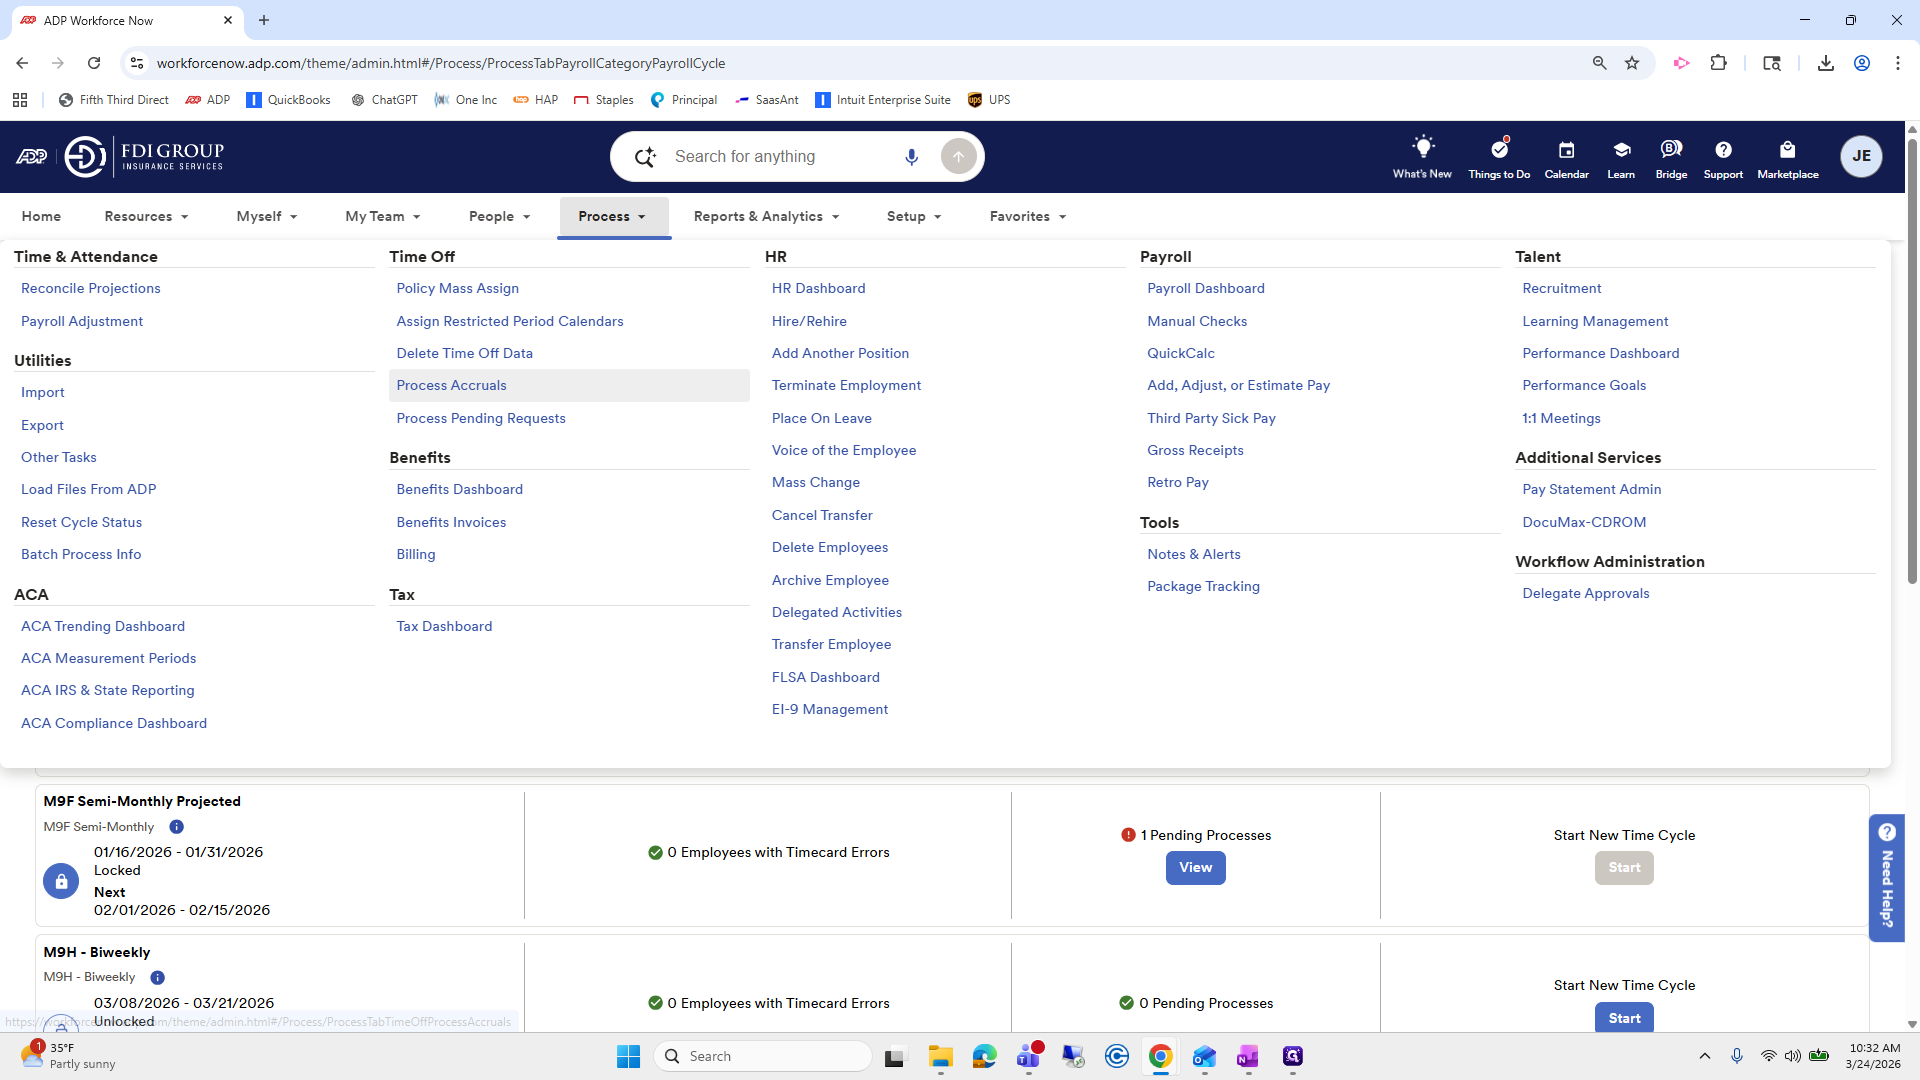
Process Pending Request.
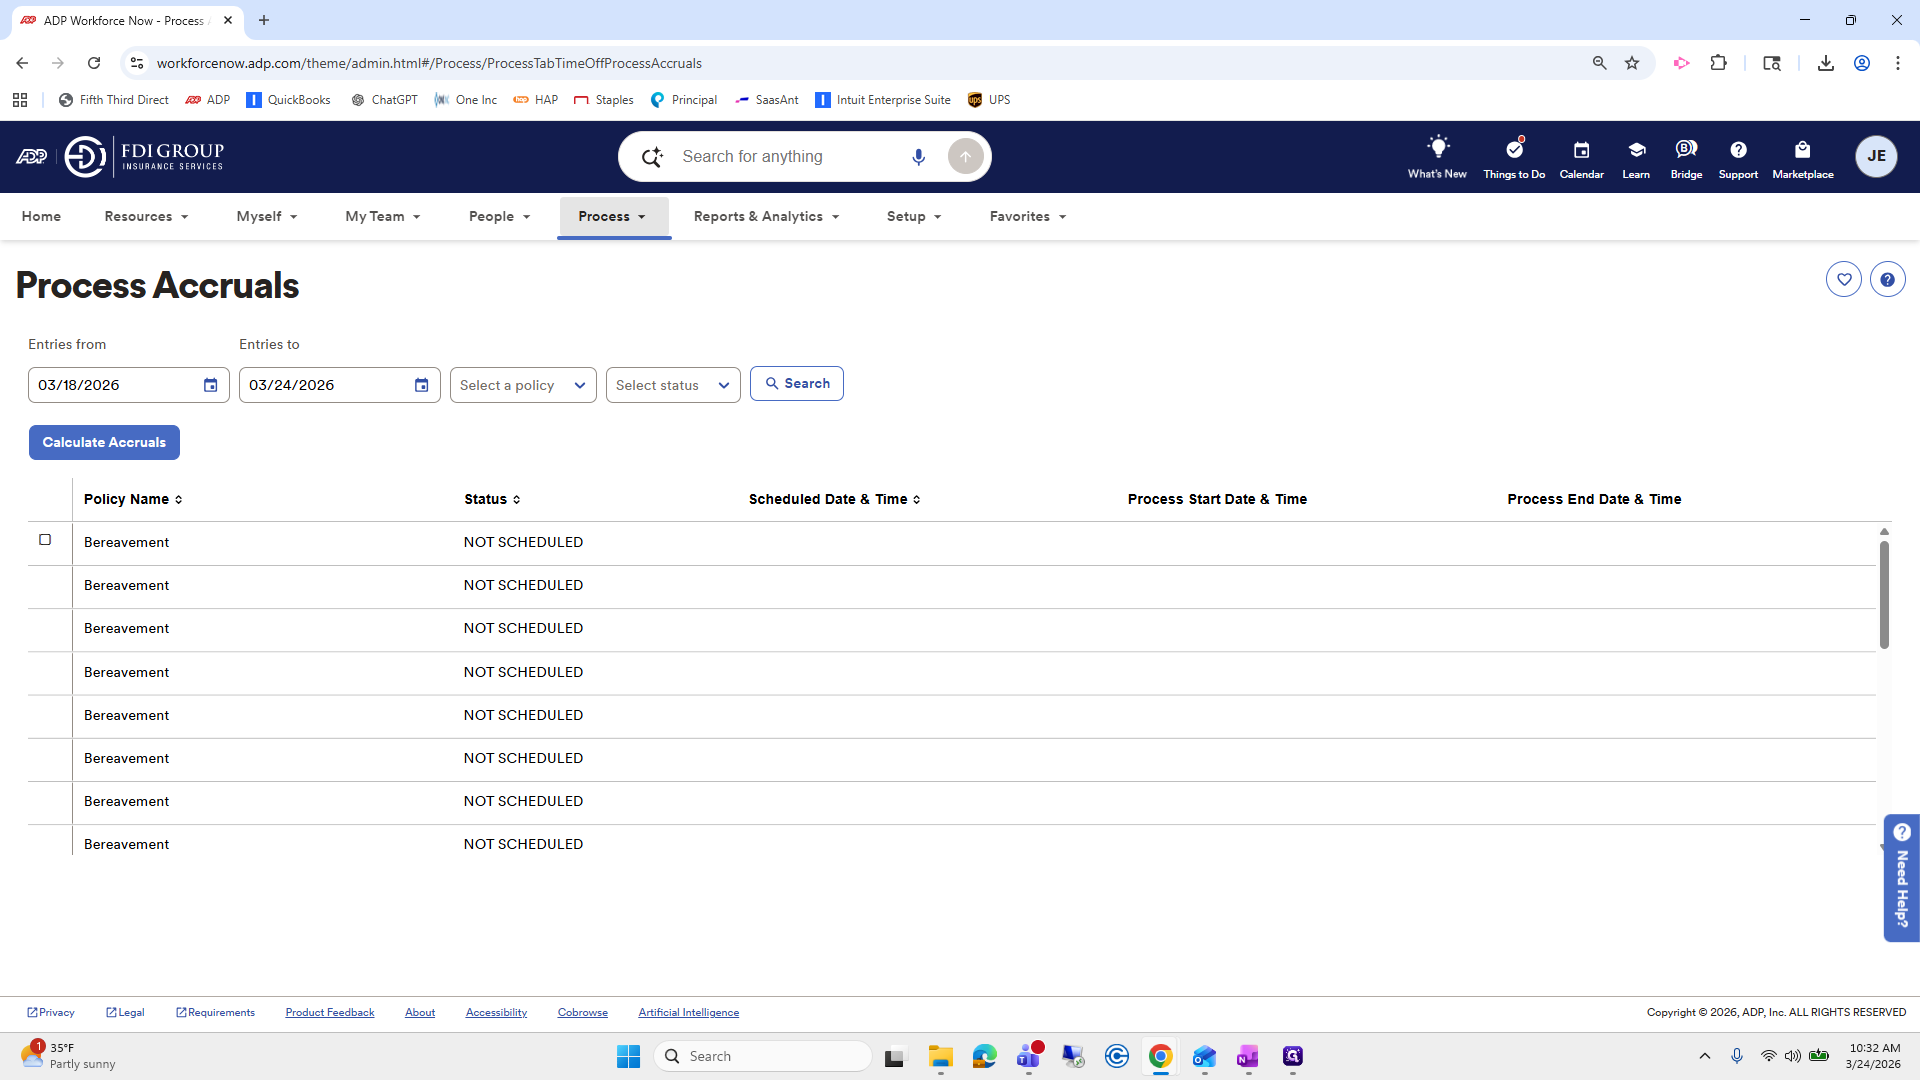
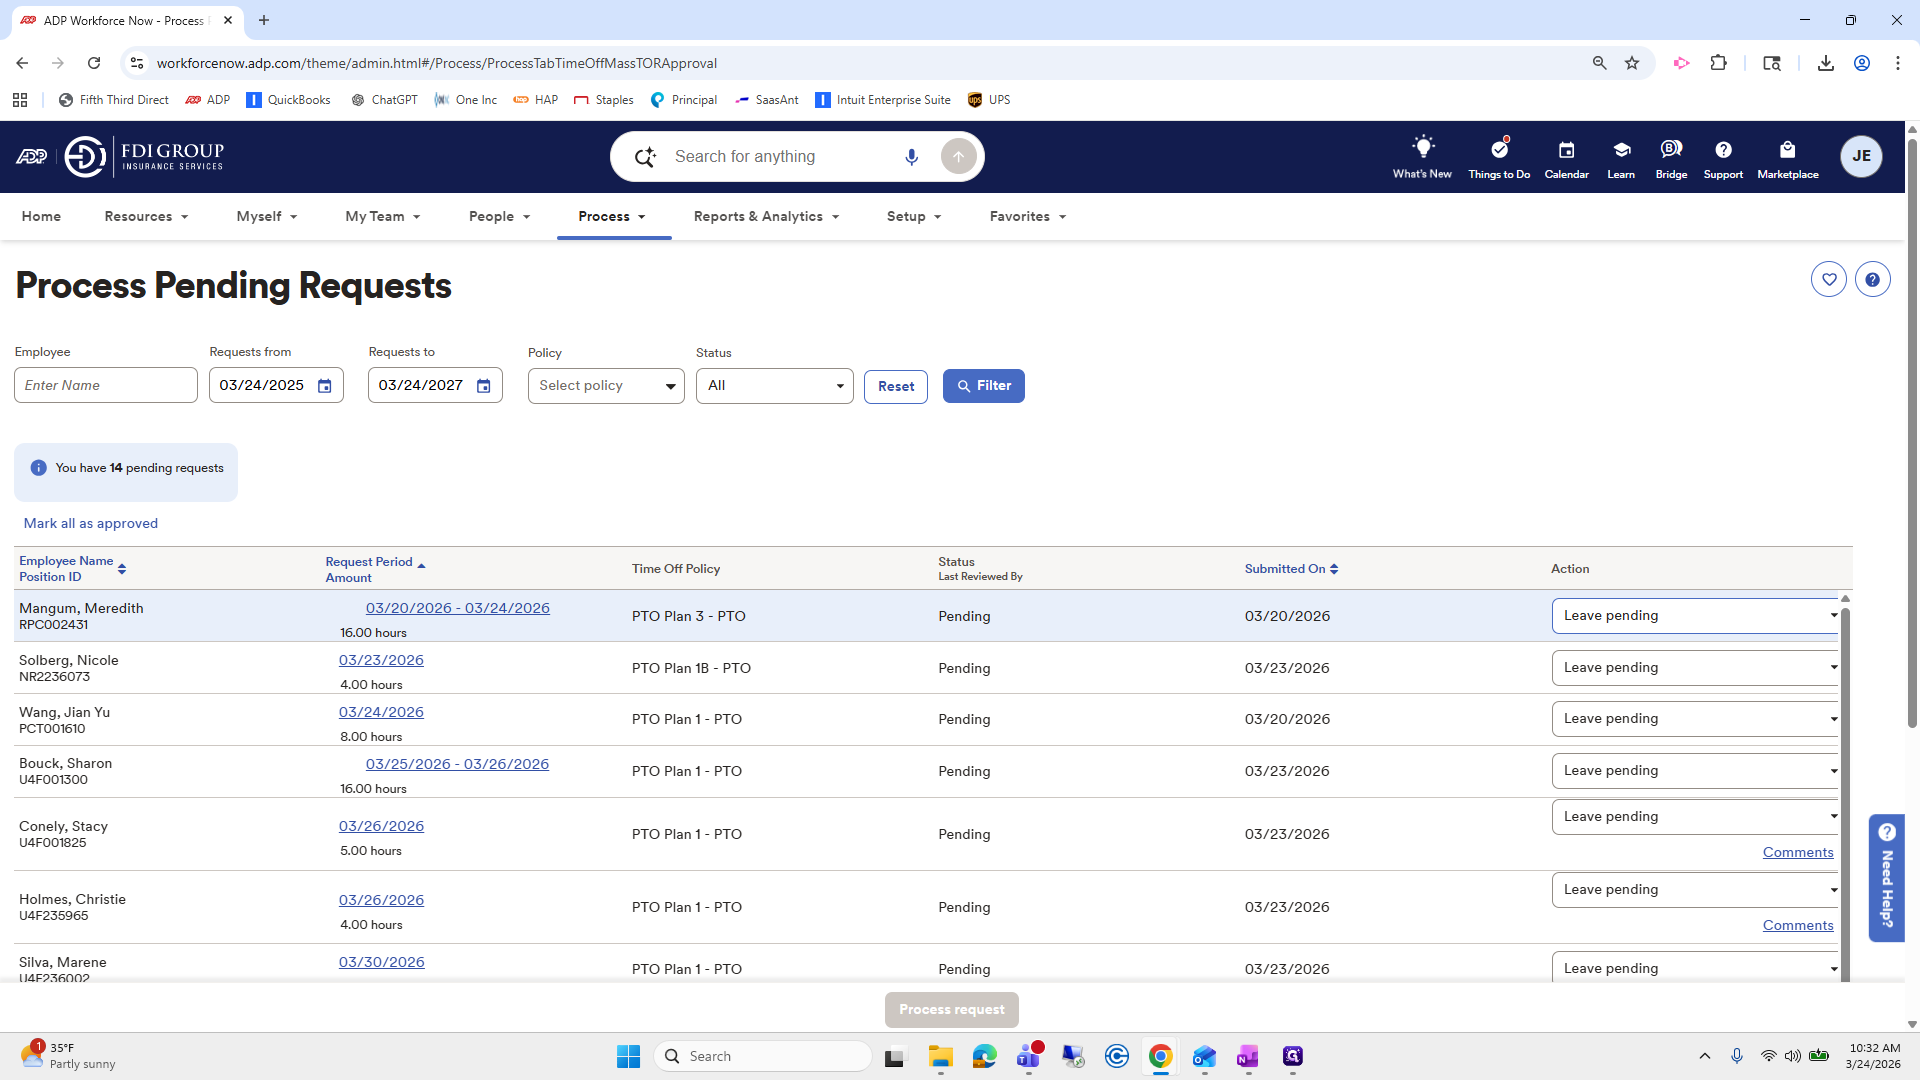
I like to filter the request period to the most recent dates. The last payroll dates were the 21st and 22nd.


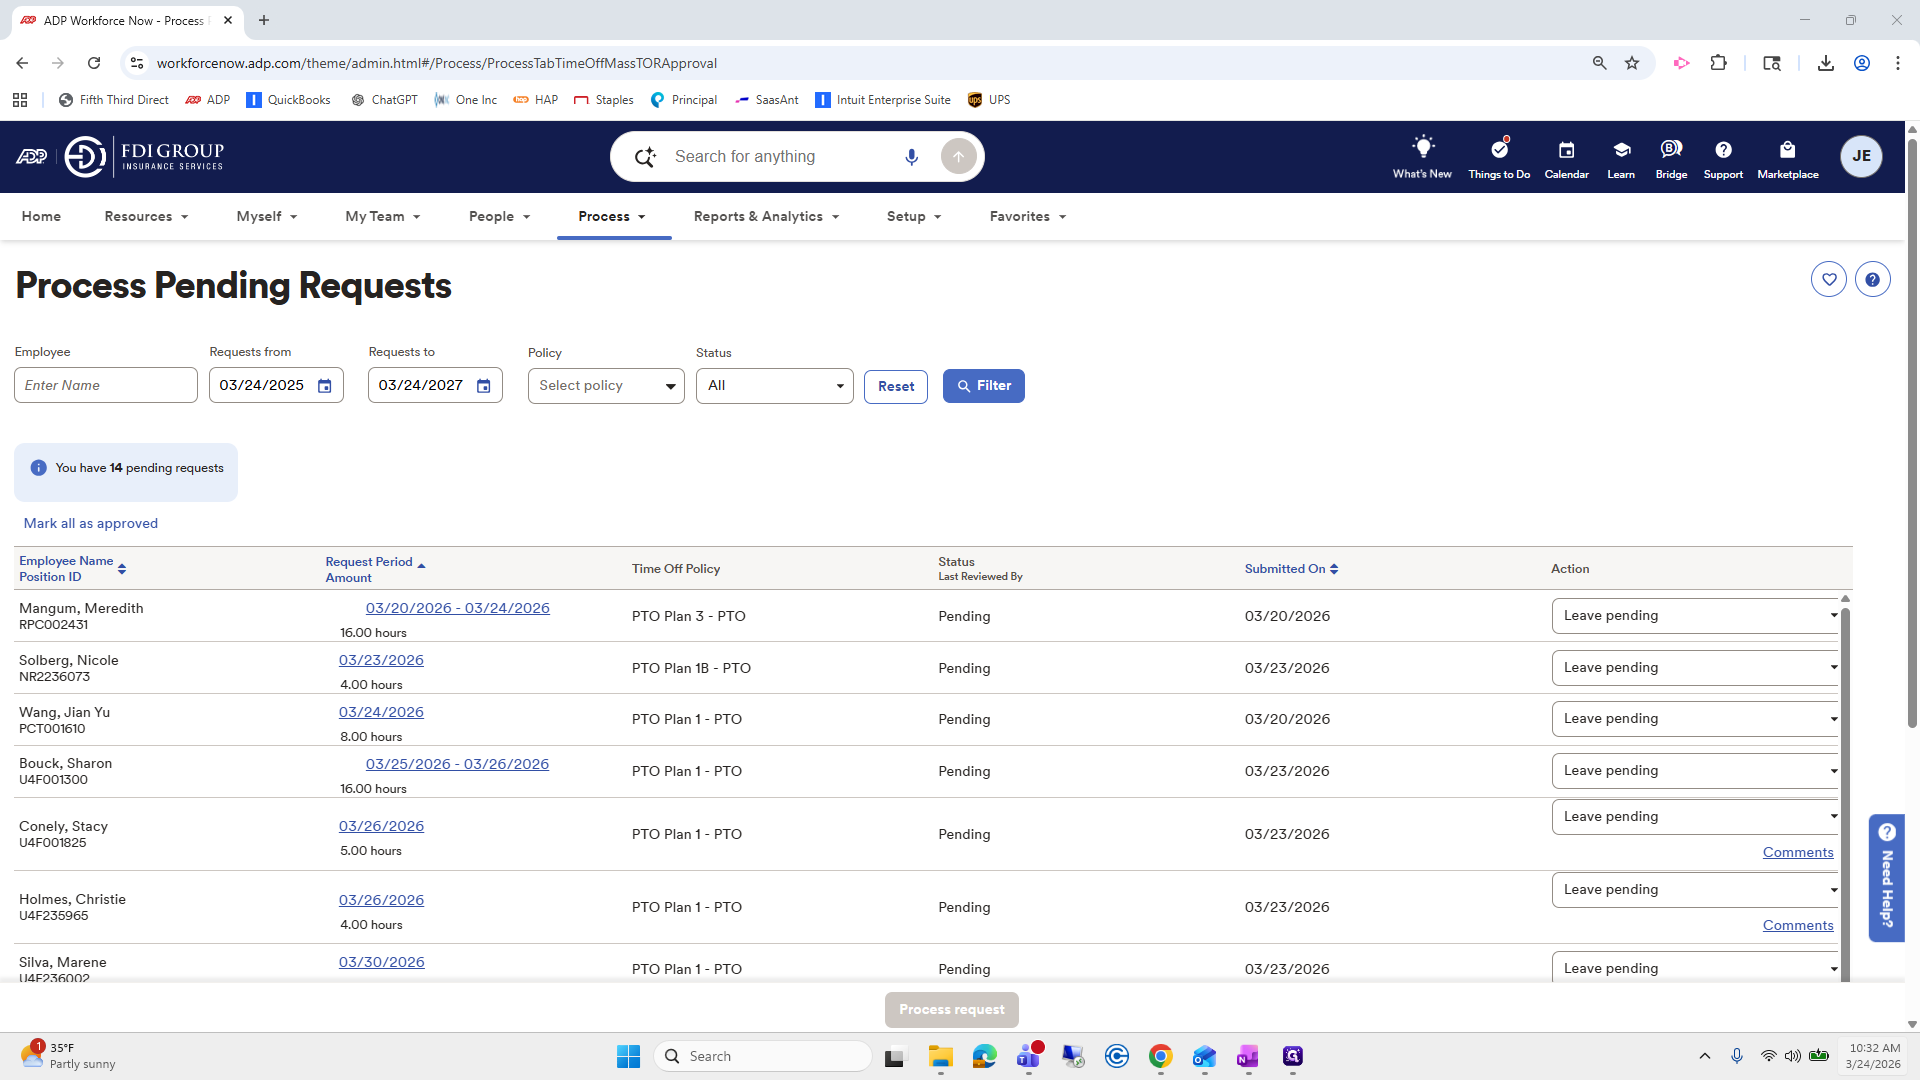
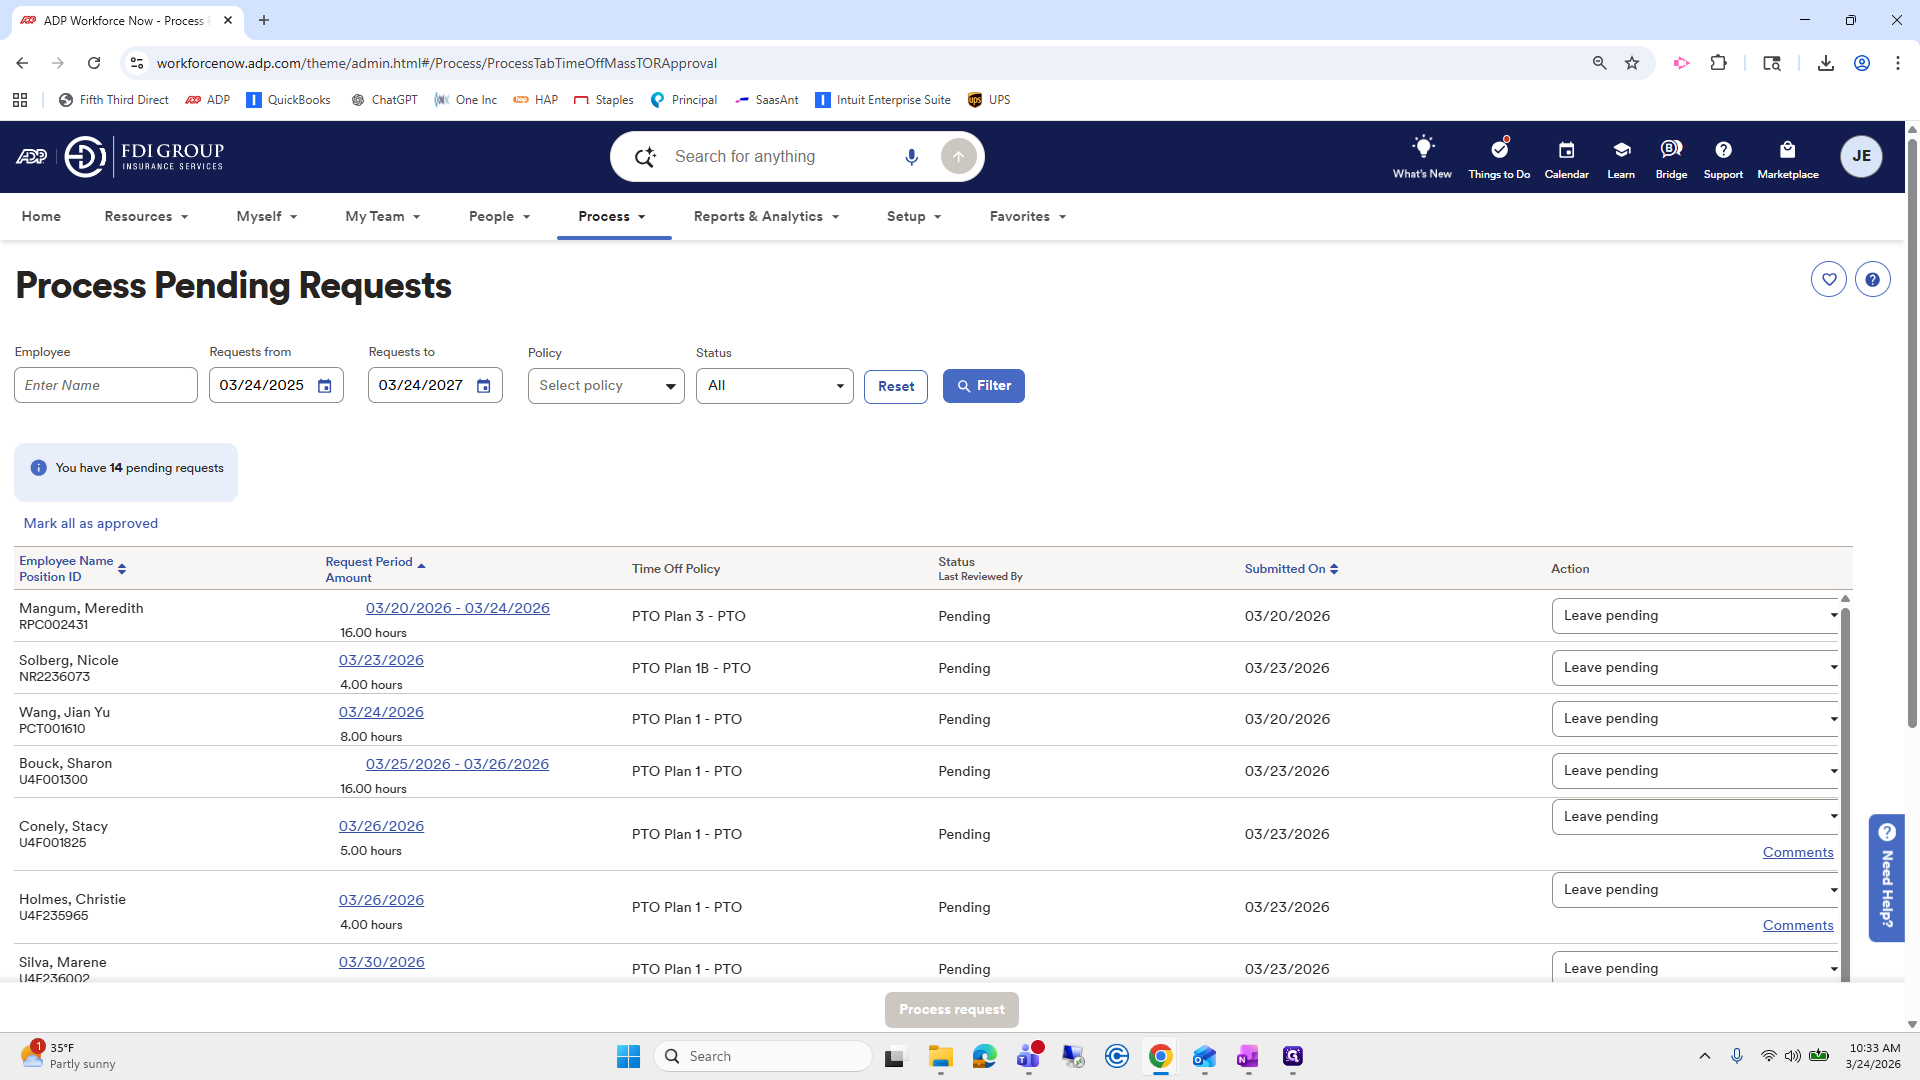
There are no pending PTO approvals for this payroll.
We are good. If they were pending, go to Action and select Mark to Approve. Alternatively, you can contact the employee's supervisor.
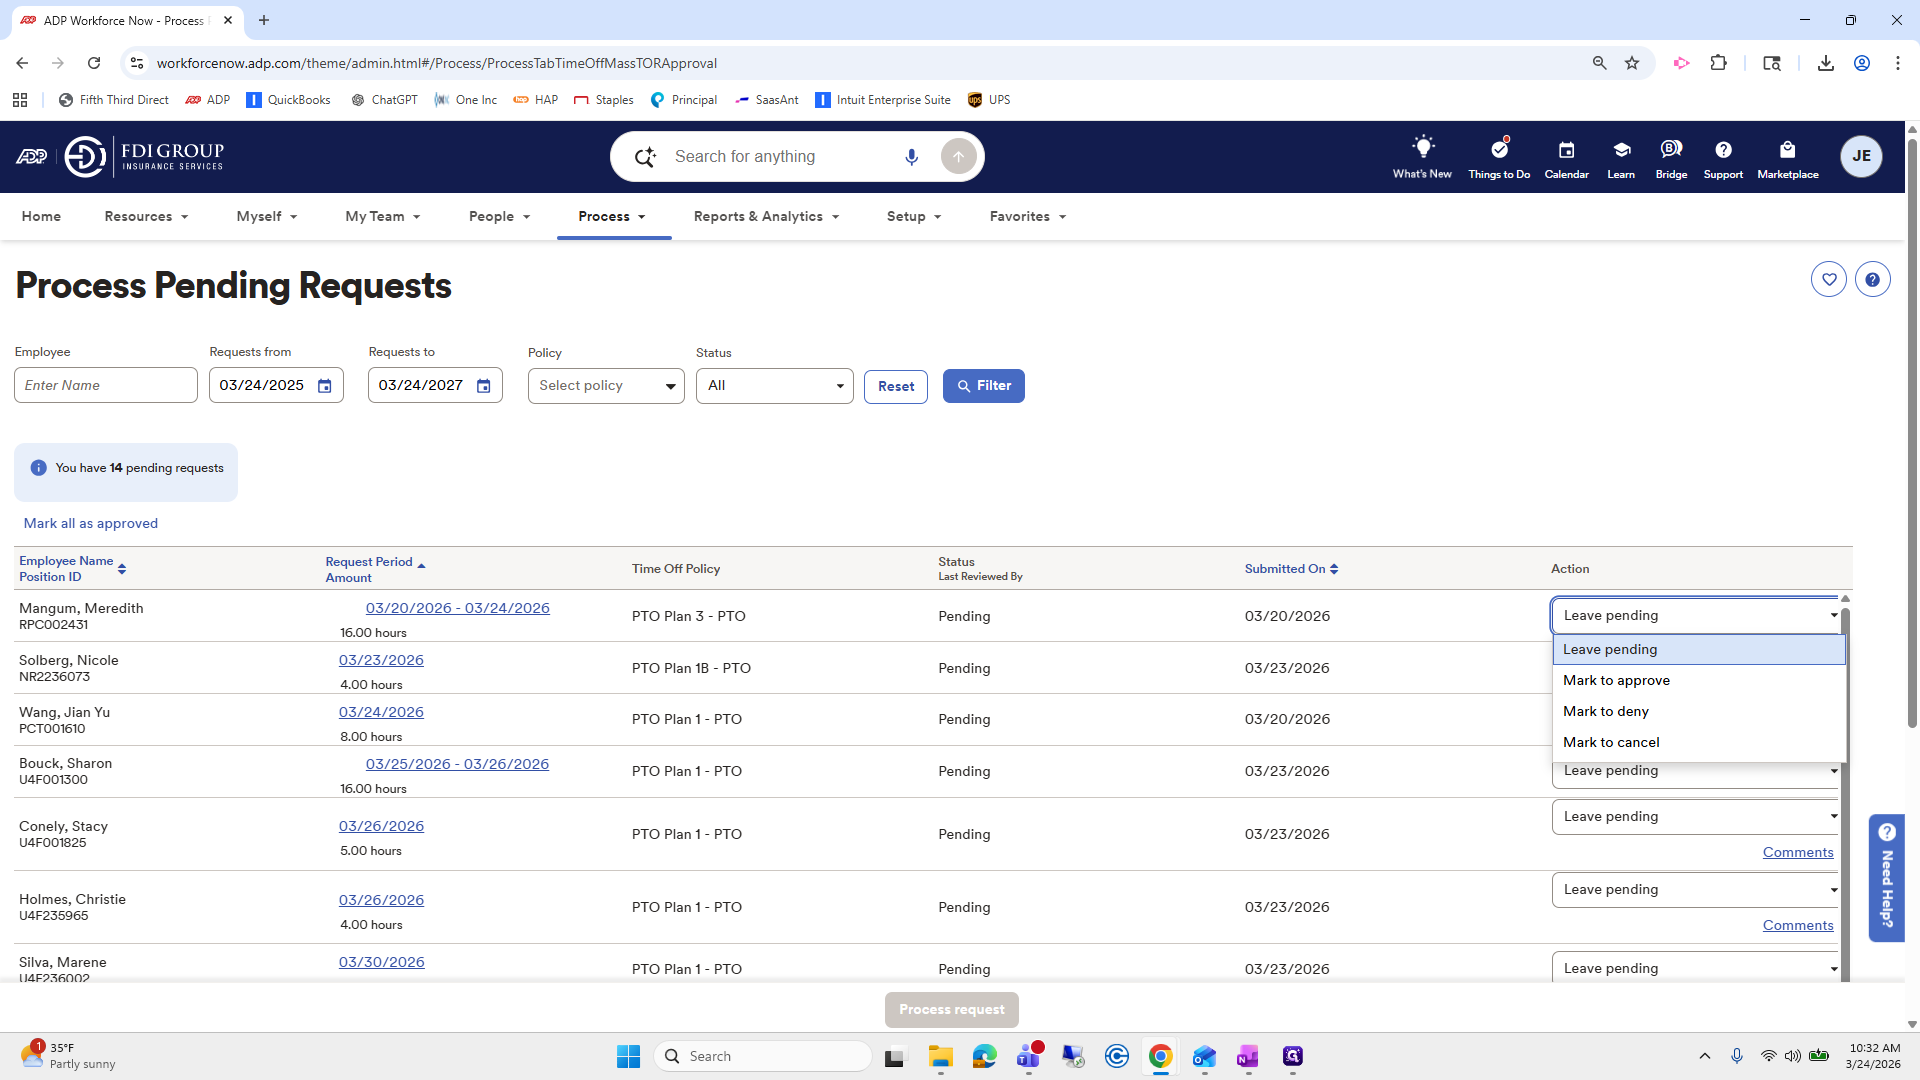
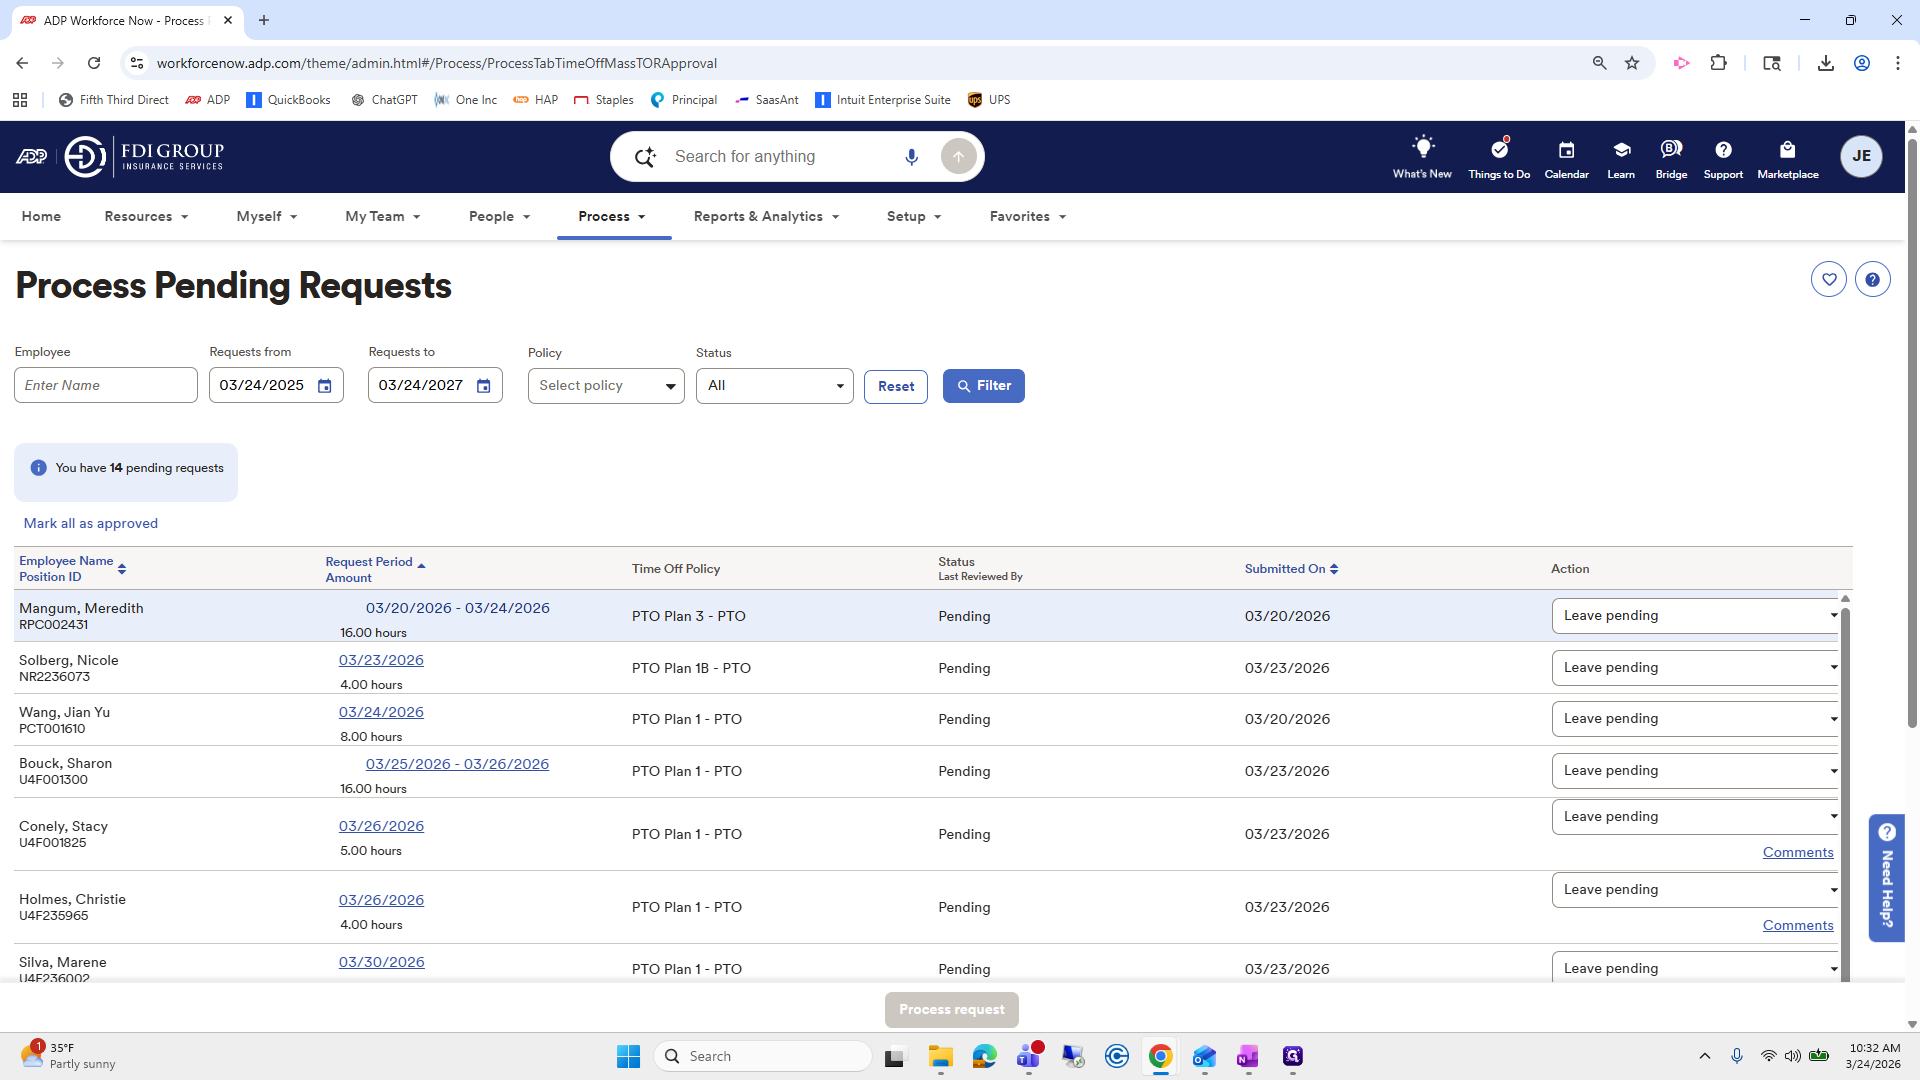
You can contact the employee's supervisor or manager for approval. You can click on it and approve it yourself, but this is probably not the best option.
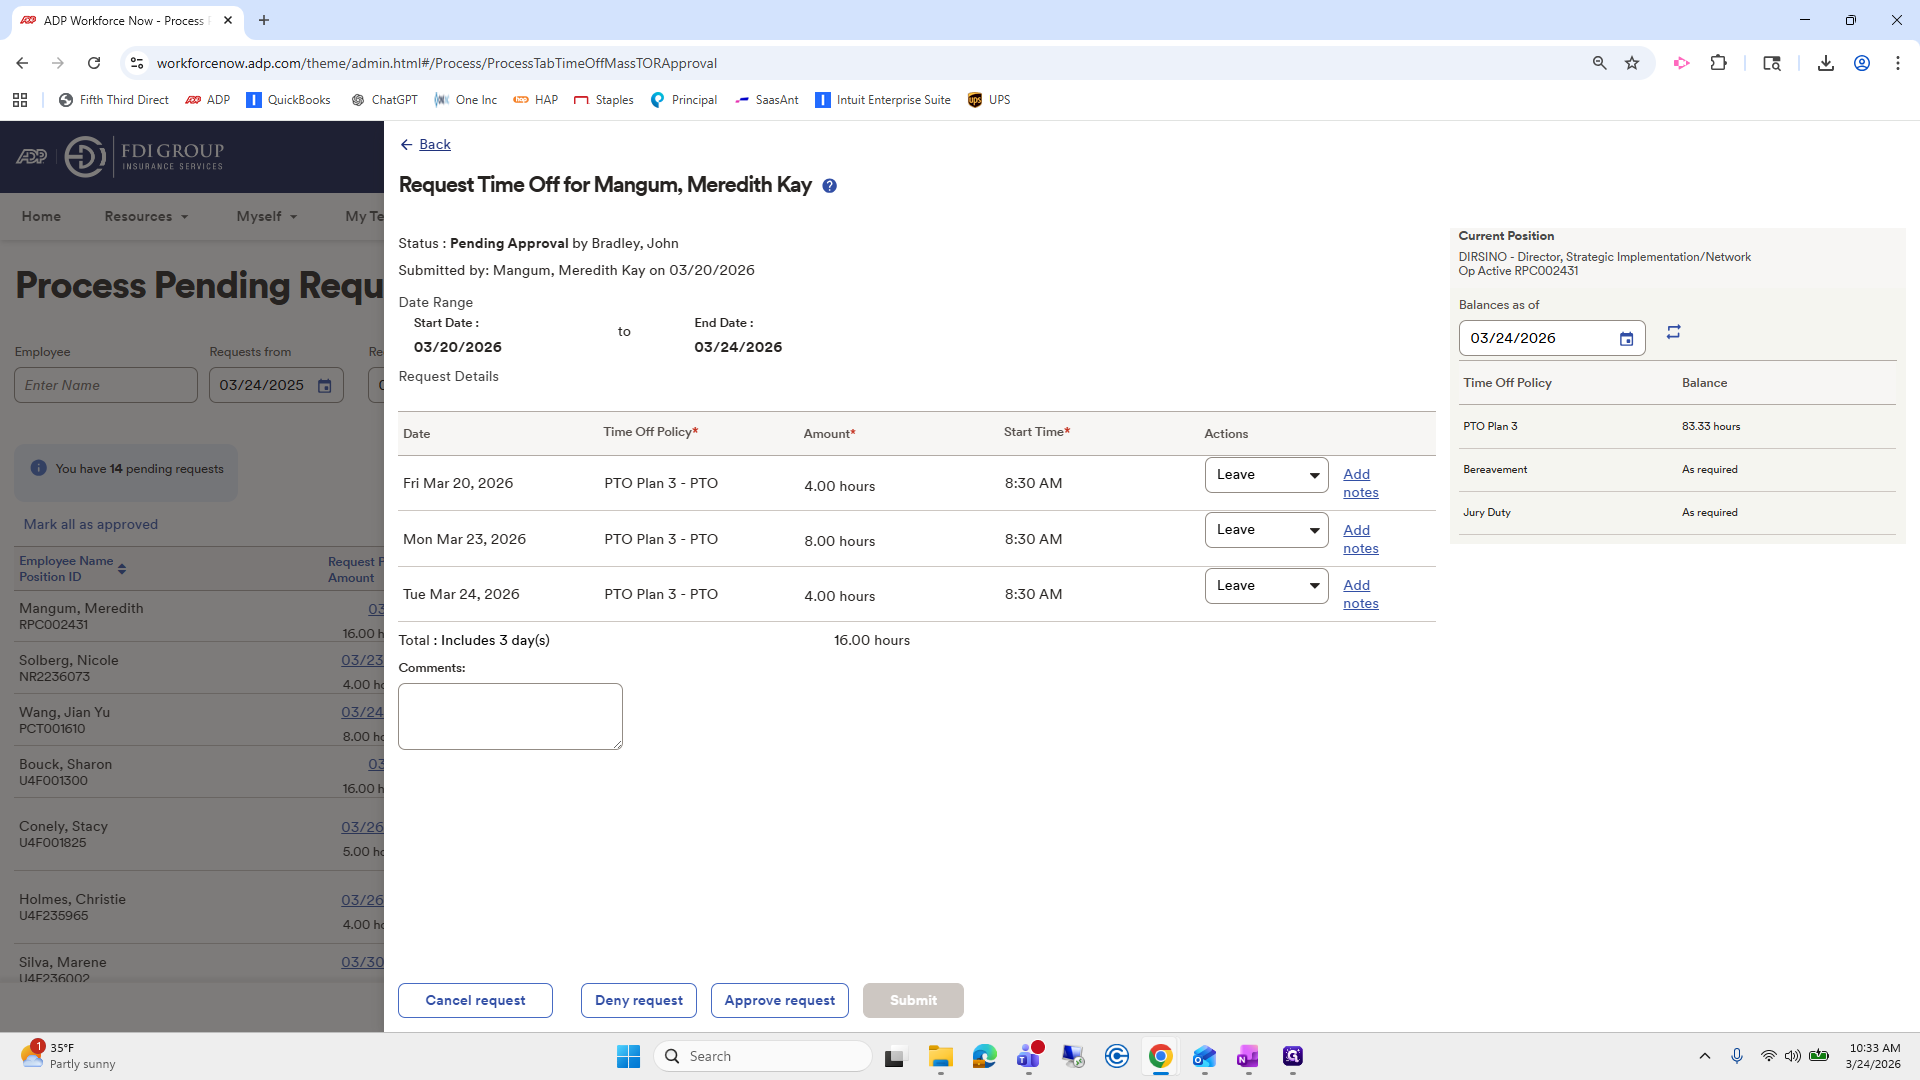
If you're in a pinch and need to keep going...

Okay.
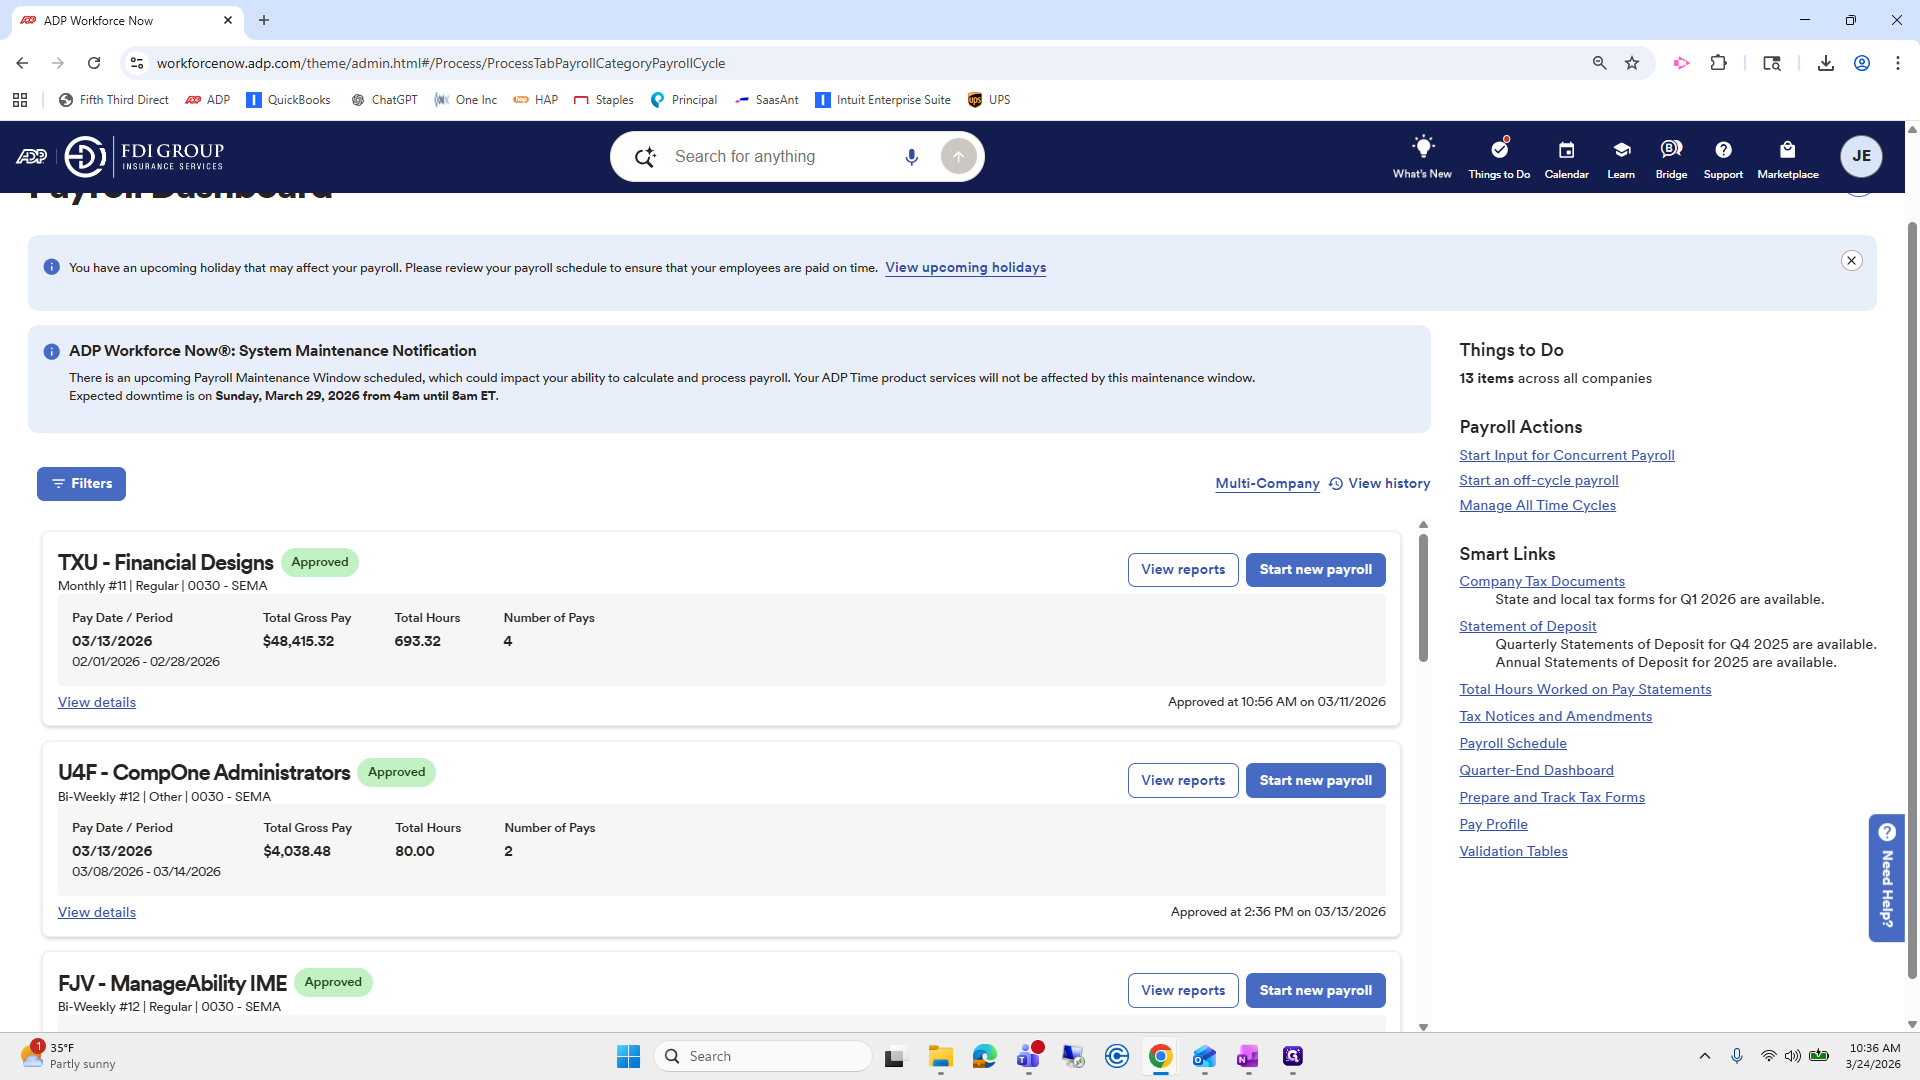
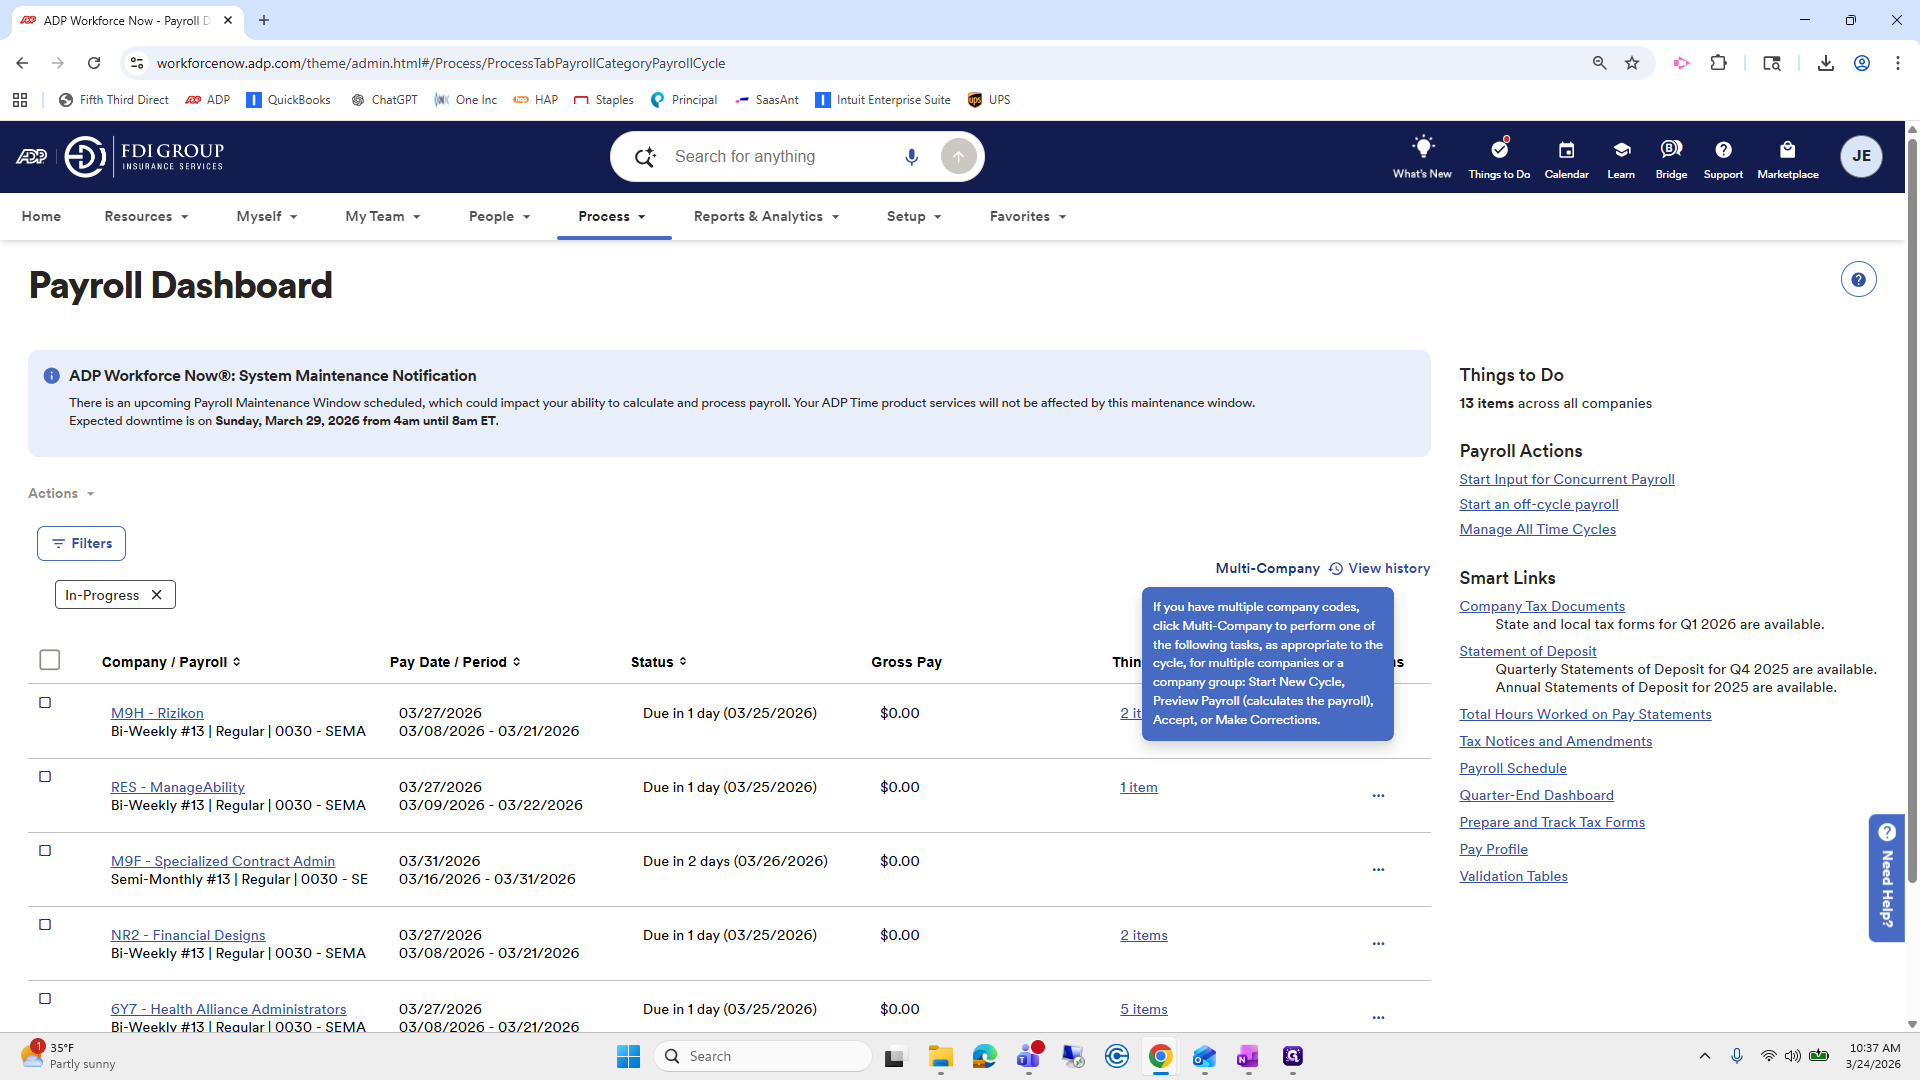
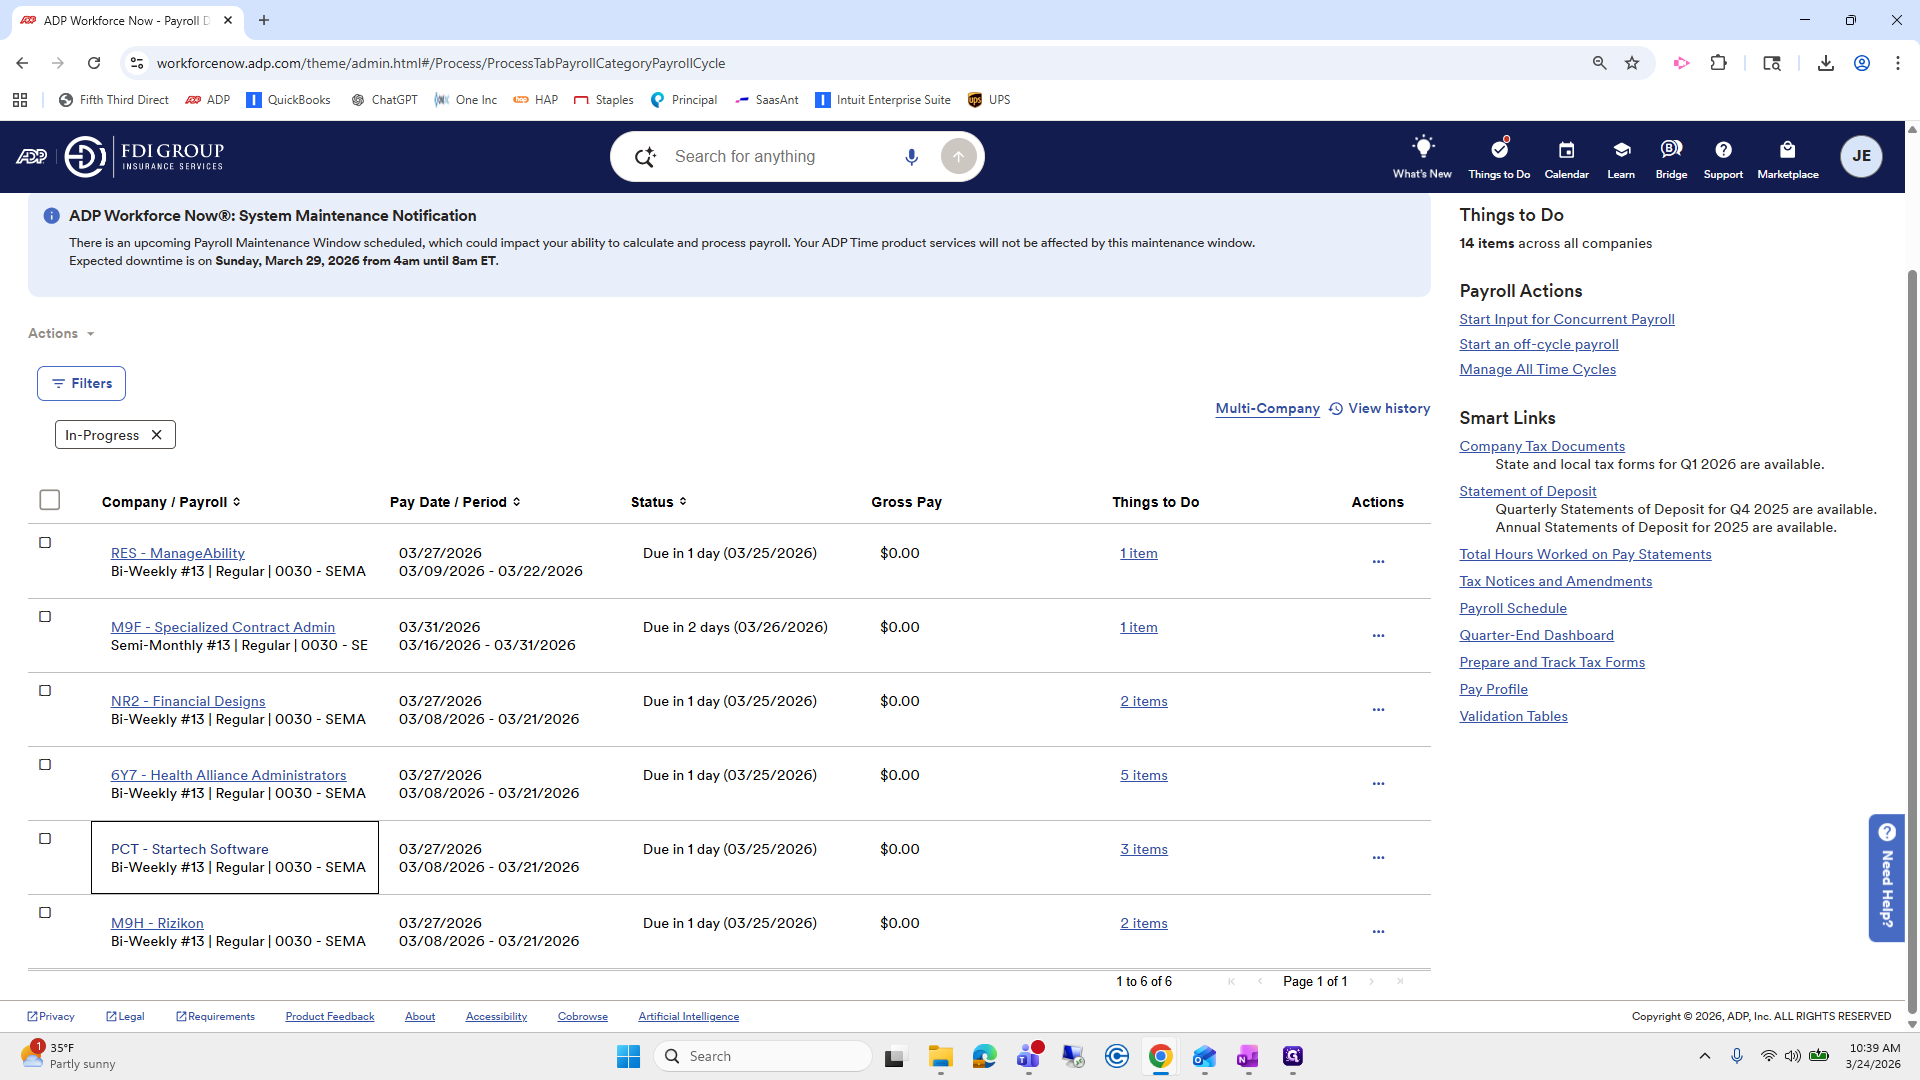
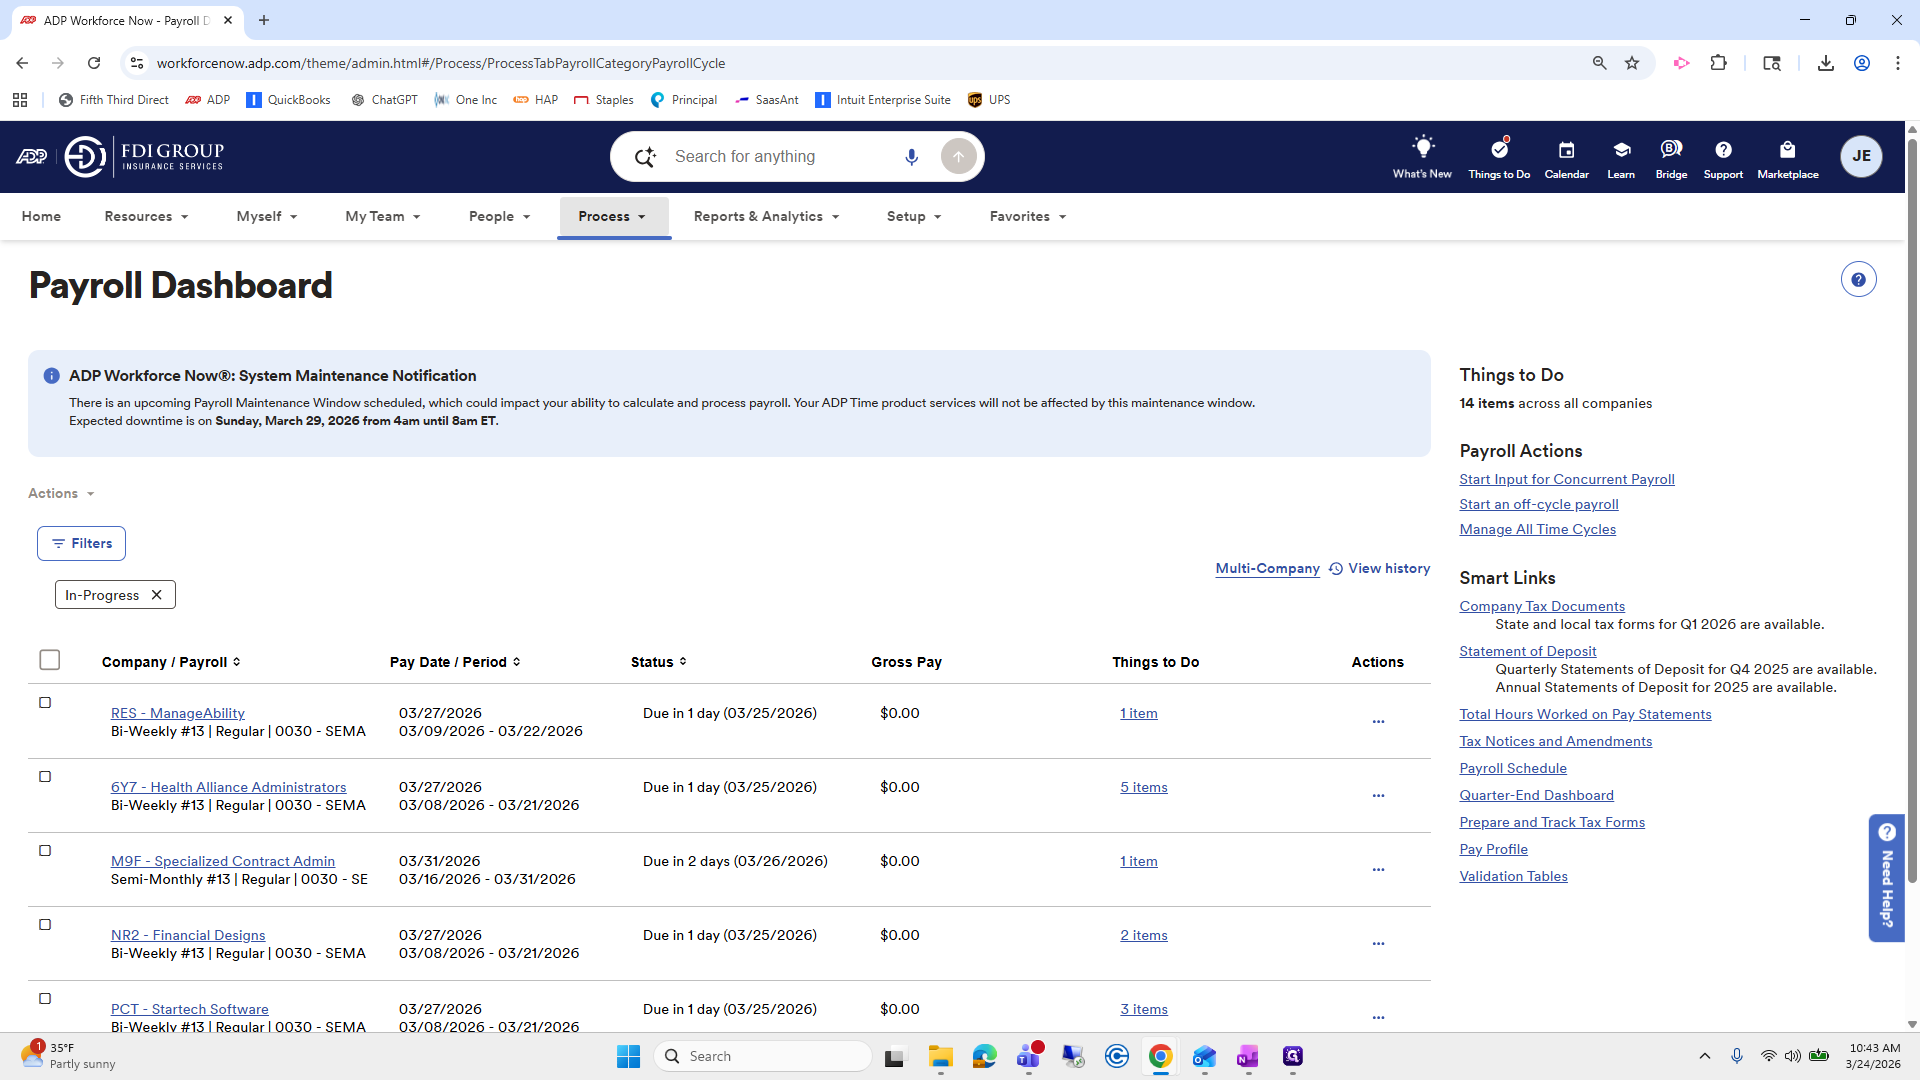
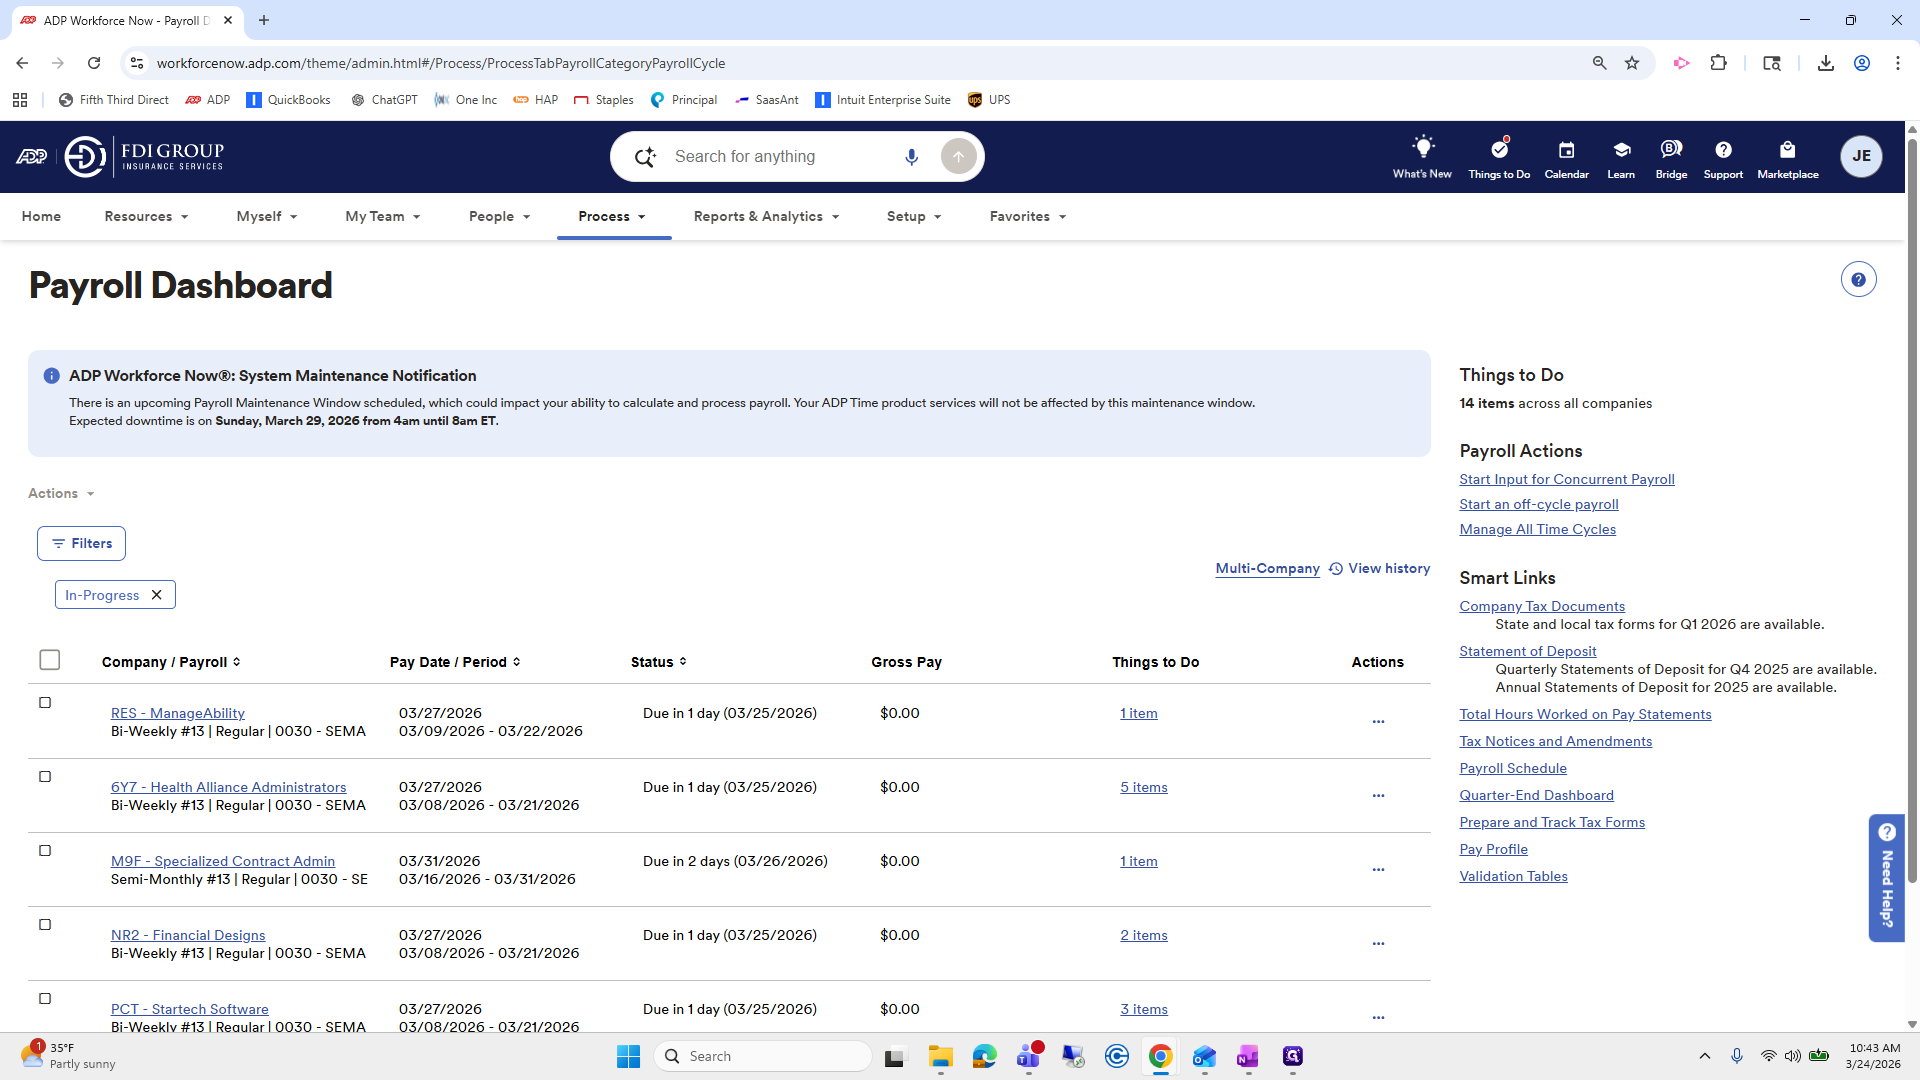
That is the first step to ensure everything looks good. This week’s focus is on payroll. Sometimes I start the process on Monday or Tuesday, but I usually don’t submit it until Wednesday. Most of the time, there are a few changes that need to be made before final submission. You can do this from top to bottom all on Wednesday, and you do not have to work on it Monday or Tuesday if you prefer. From here, go to Process, then select Payroll Dashboard.

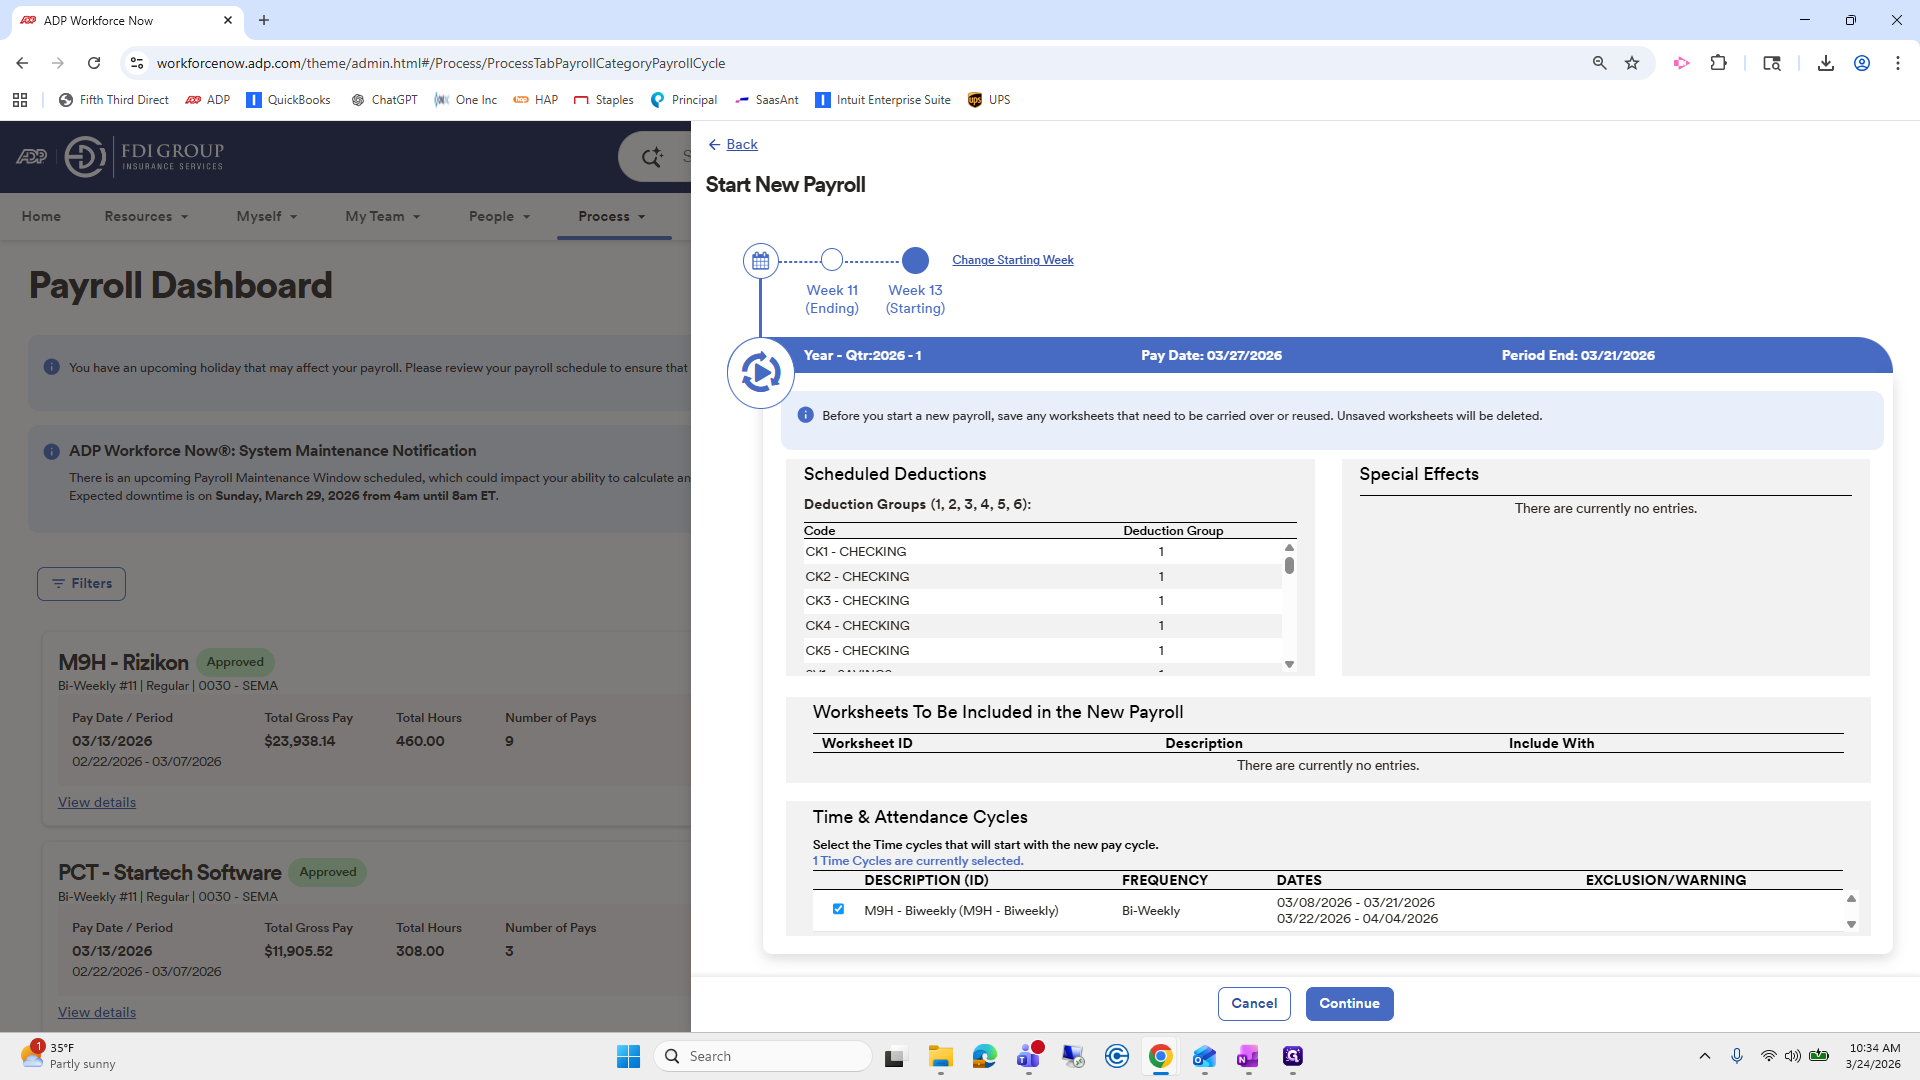
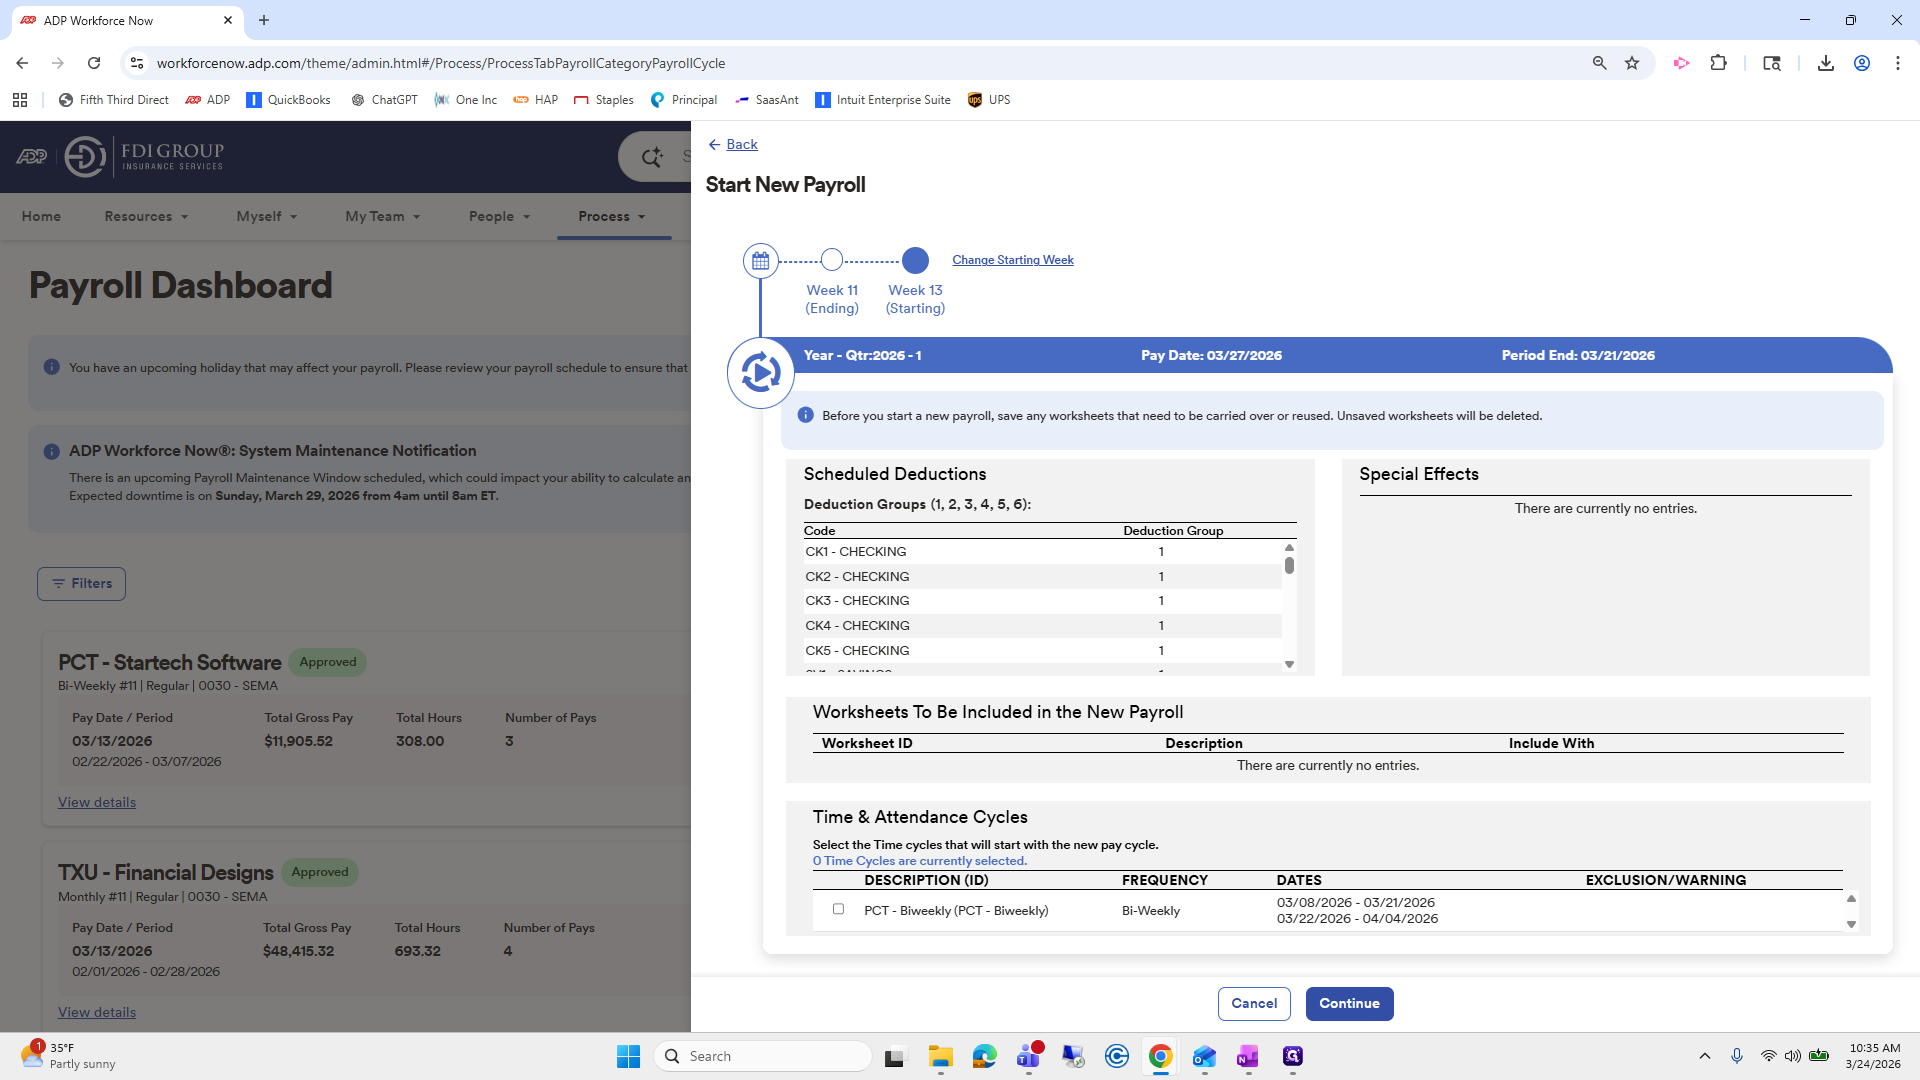
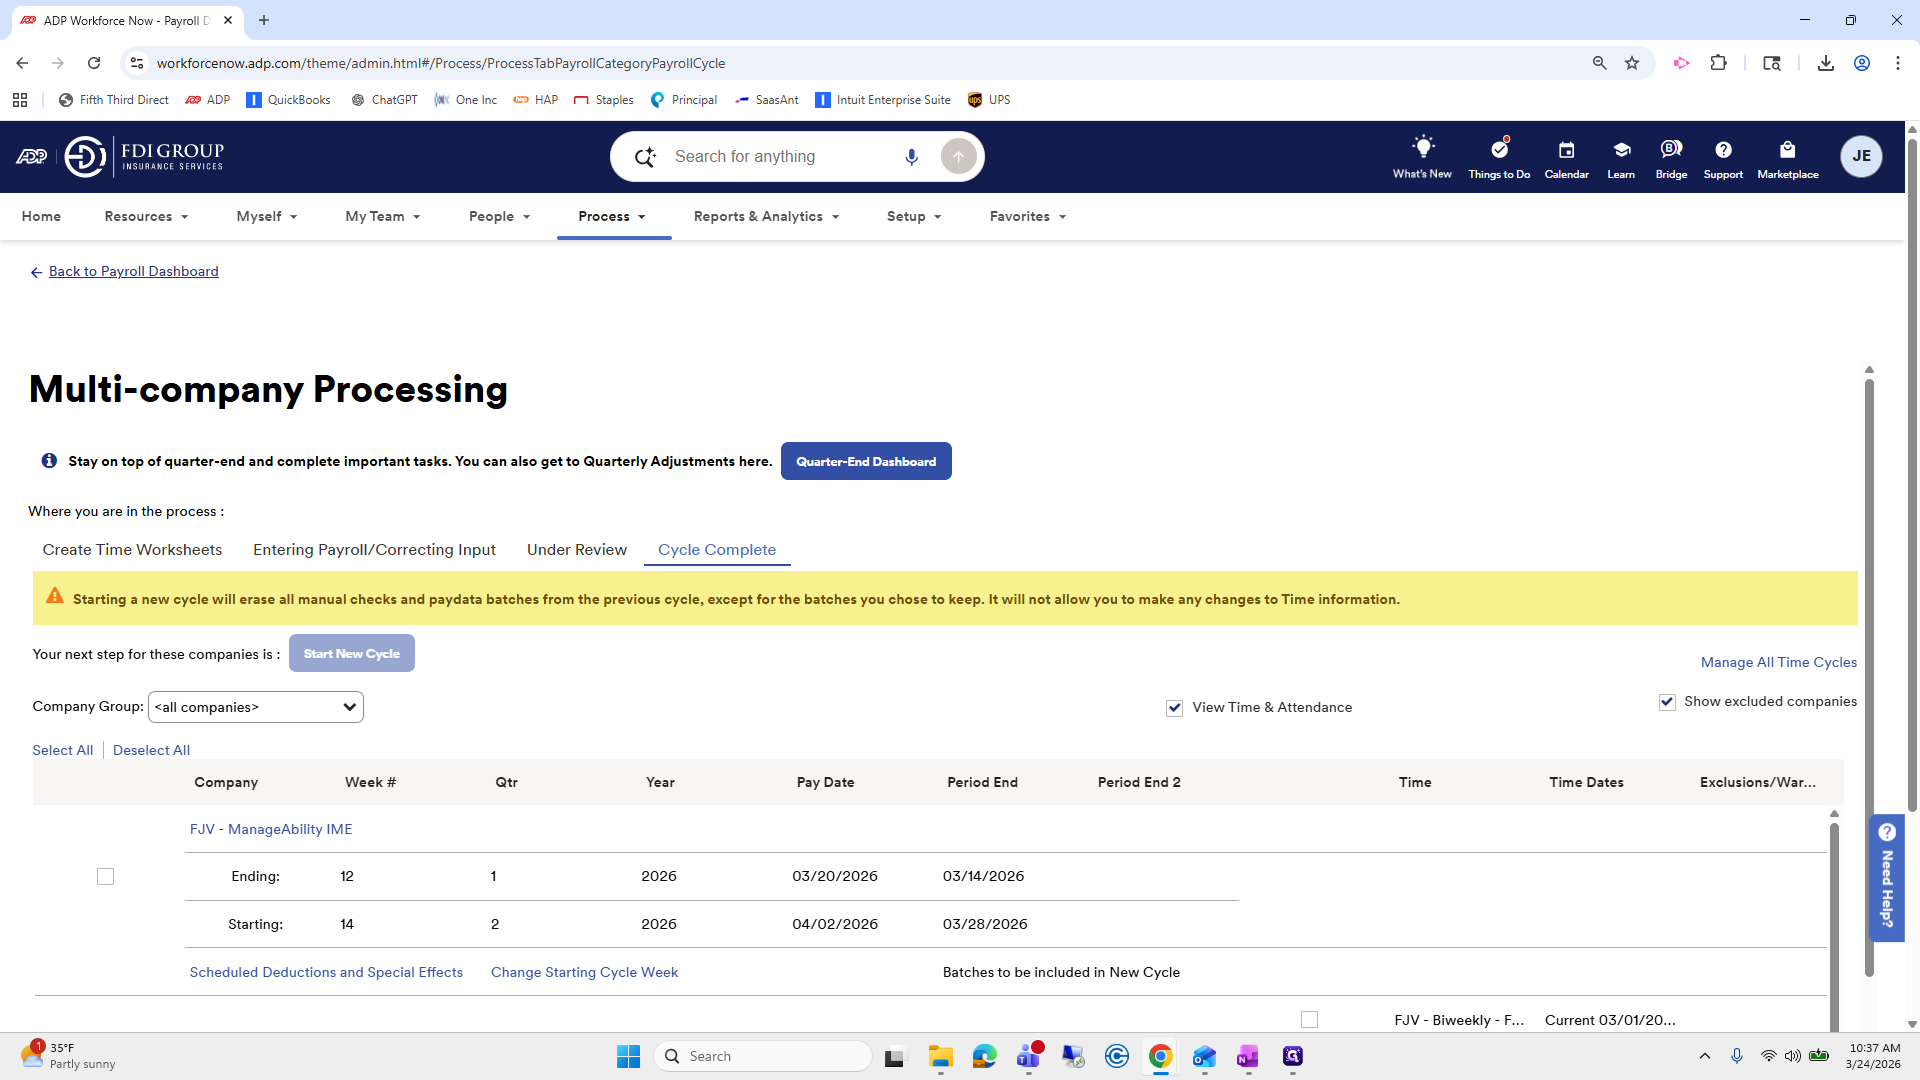
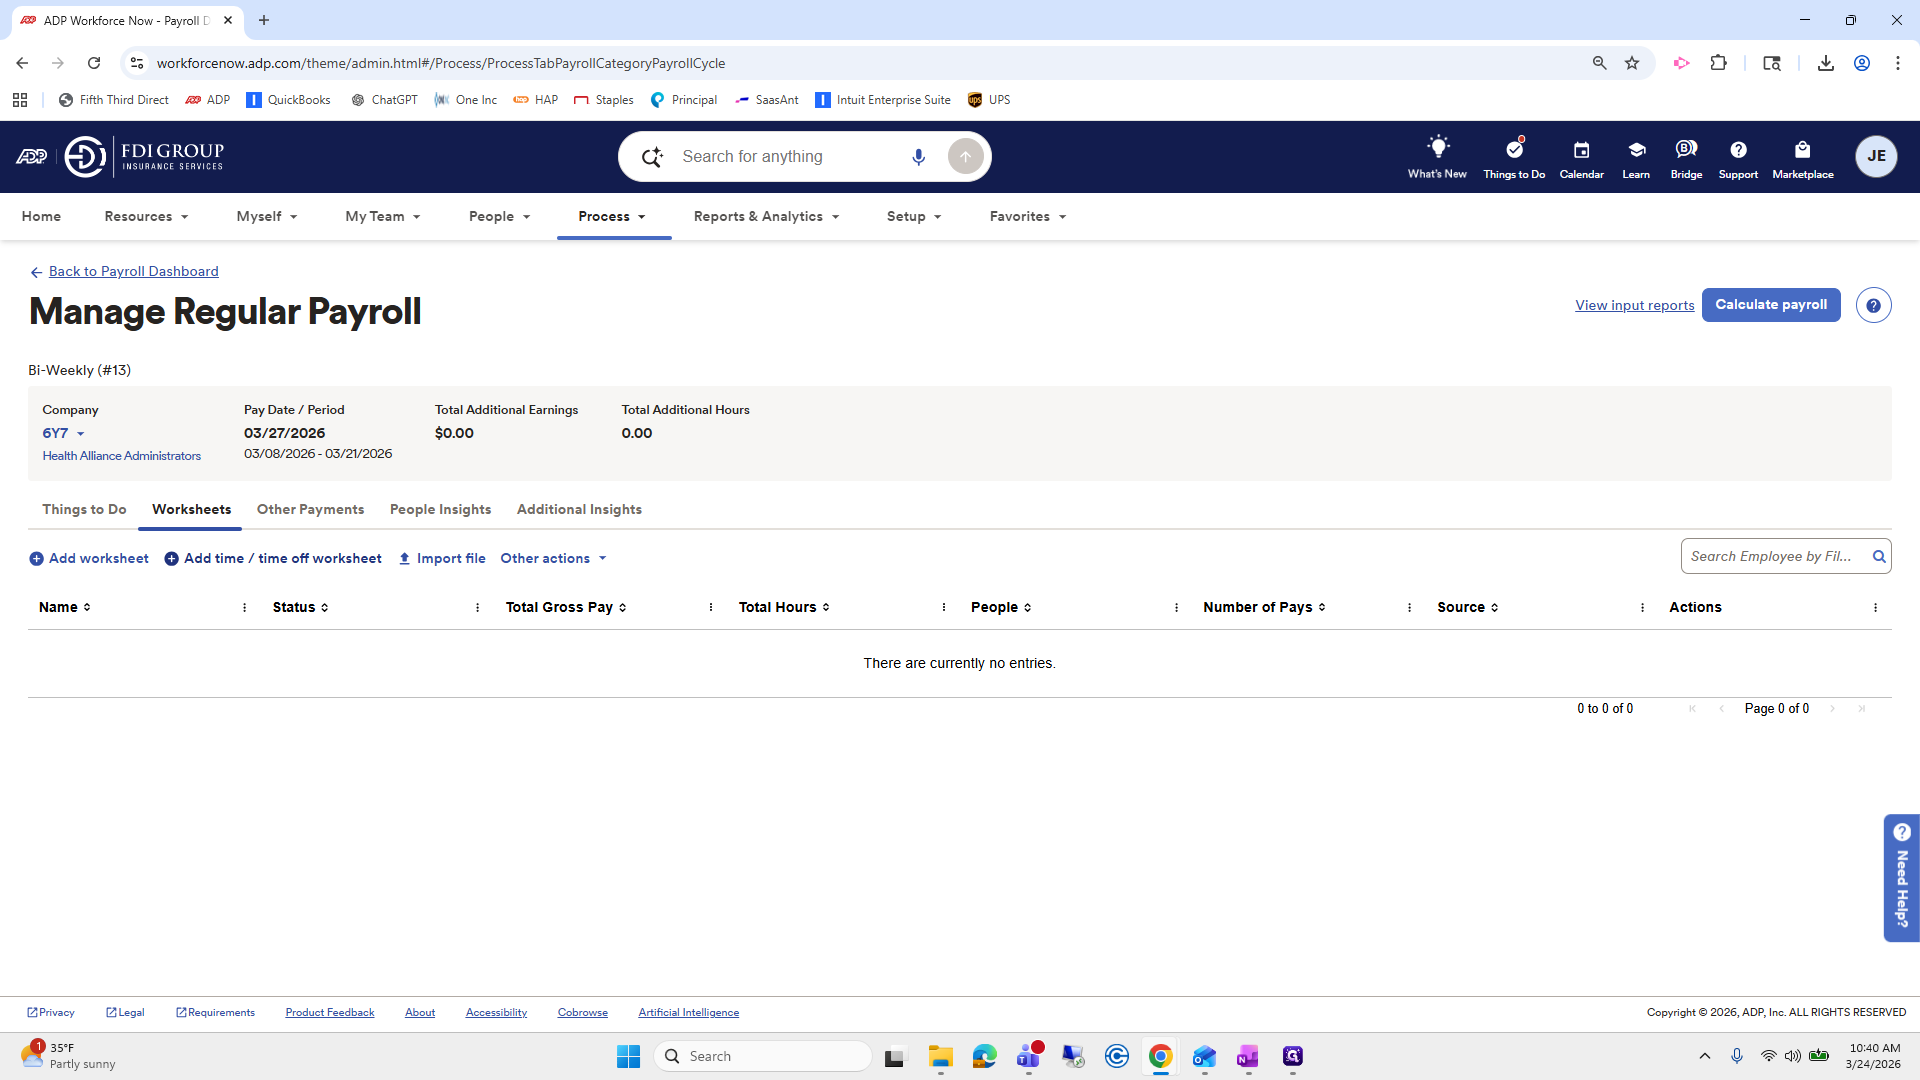
One of the payrolls ready to process is Risikon. You will see that it already says "Approved" from the last pay date. We need to start a new payroll.

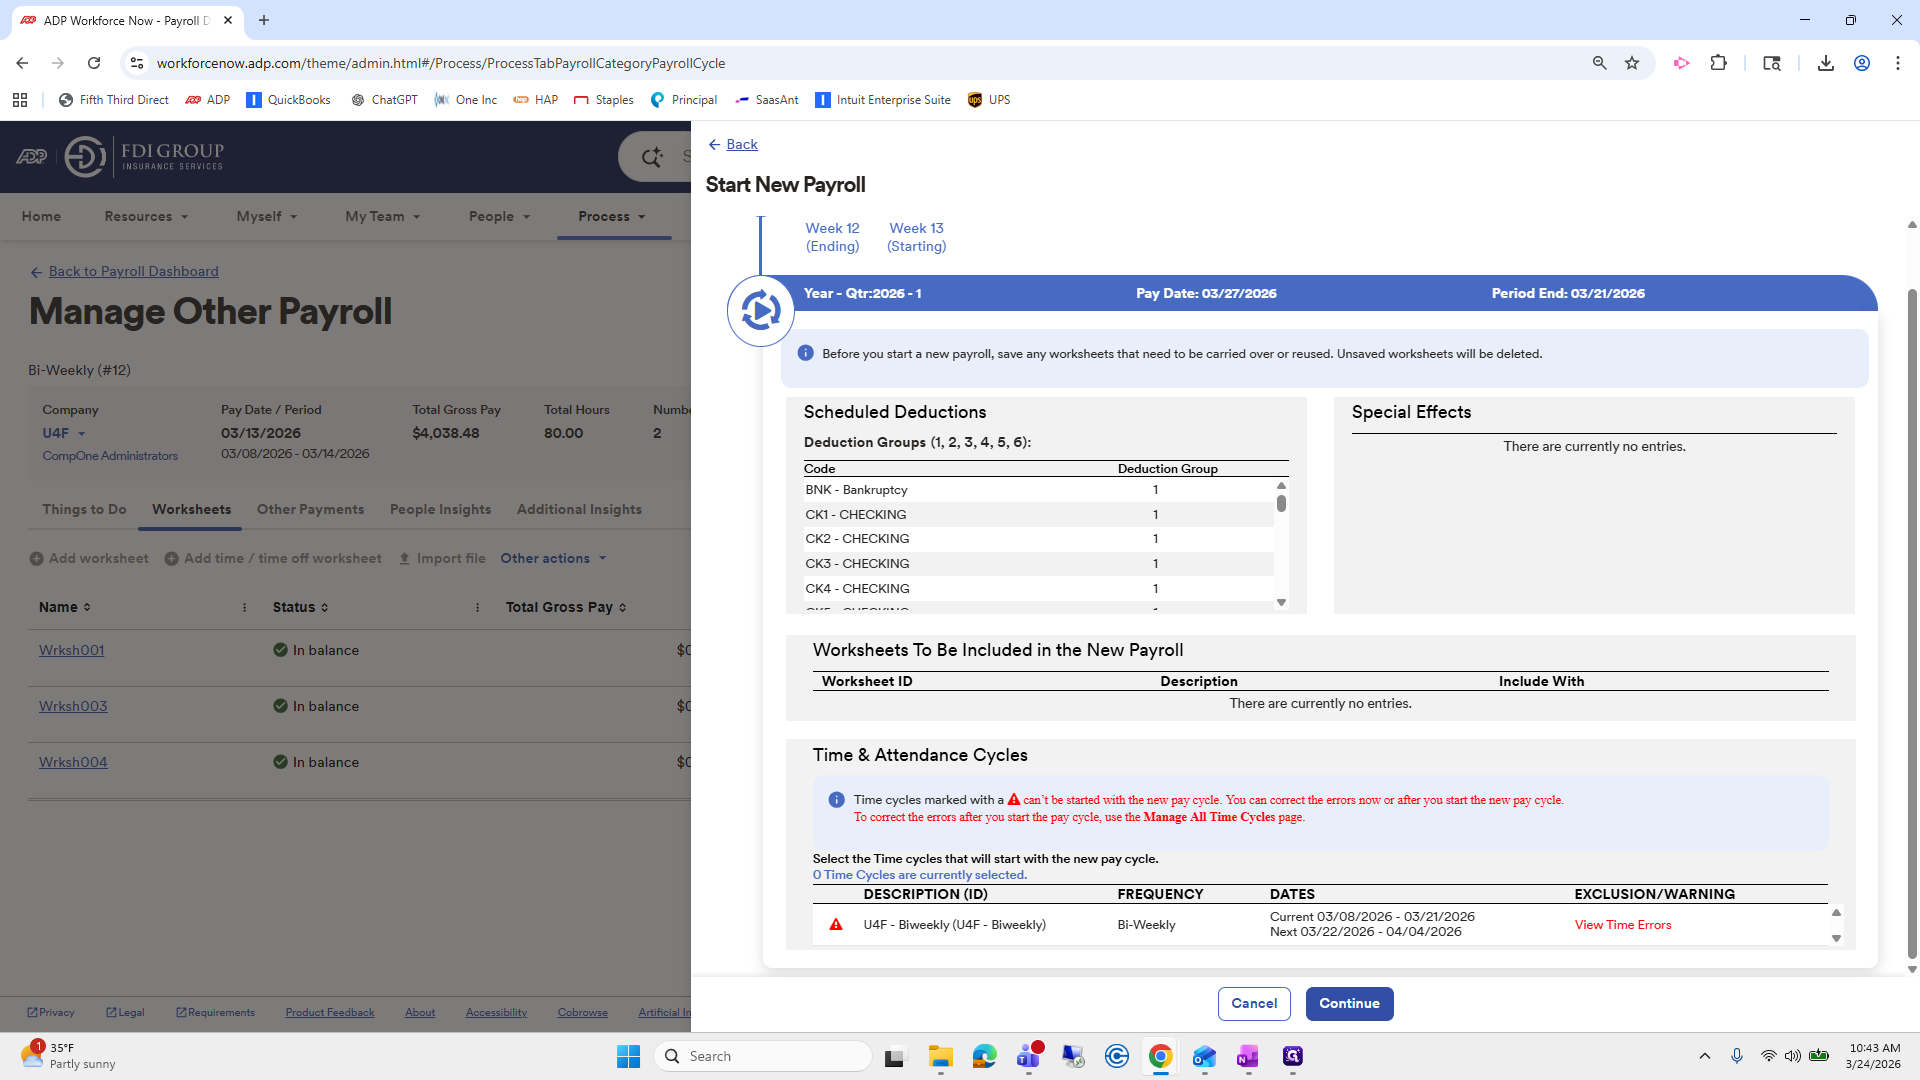
It's going to appear like this. Under Time and Attendance Cycles, this will be either blue or red. I always uncheck this. If you check it and press Continue, it will roll over to the next pay cycle automatically. We want to do this manually ourselves.
We will uncheck this option and click Continue.
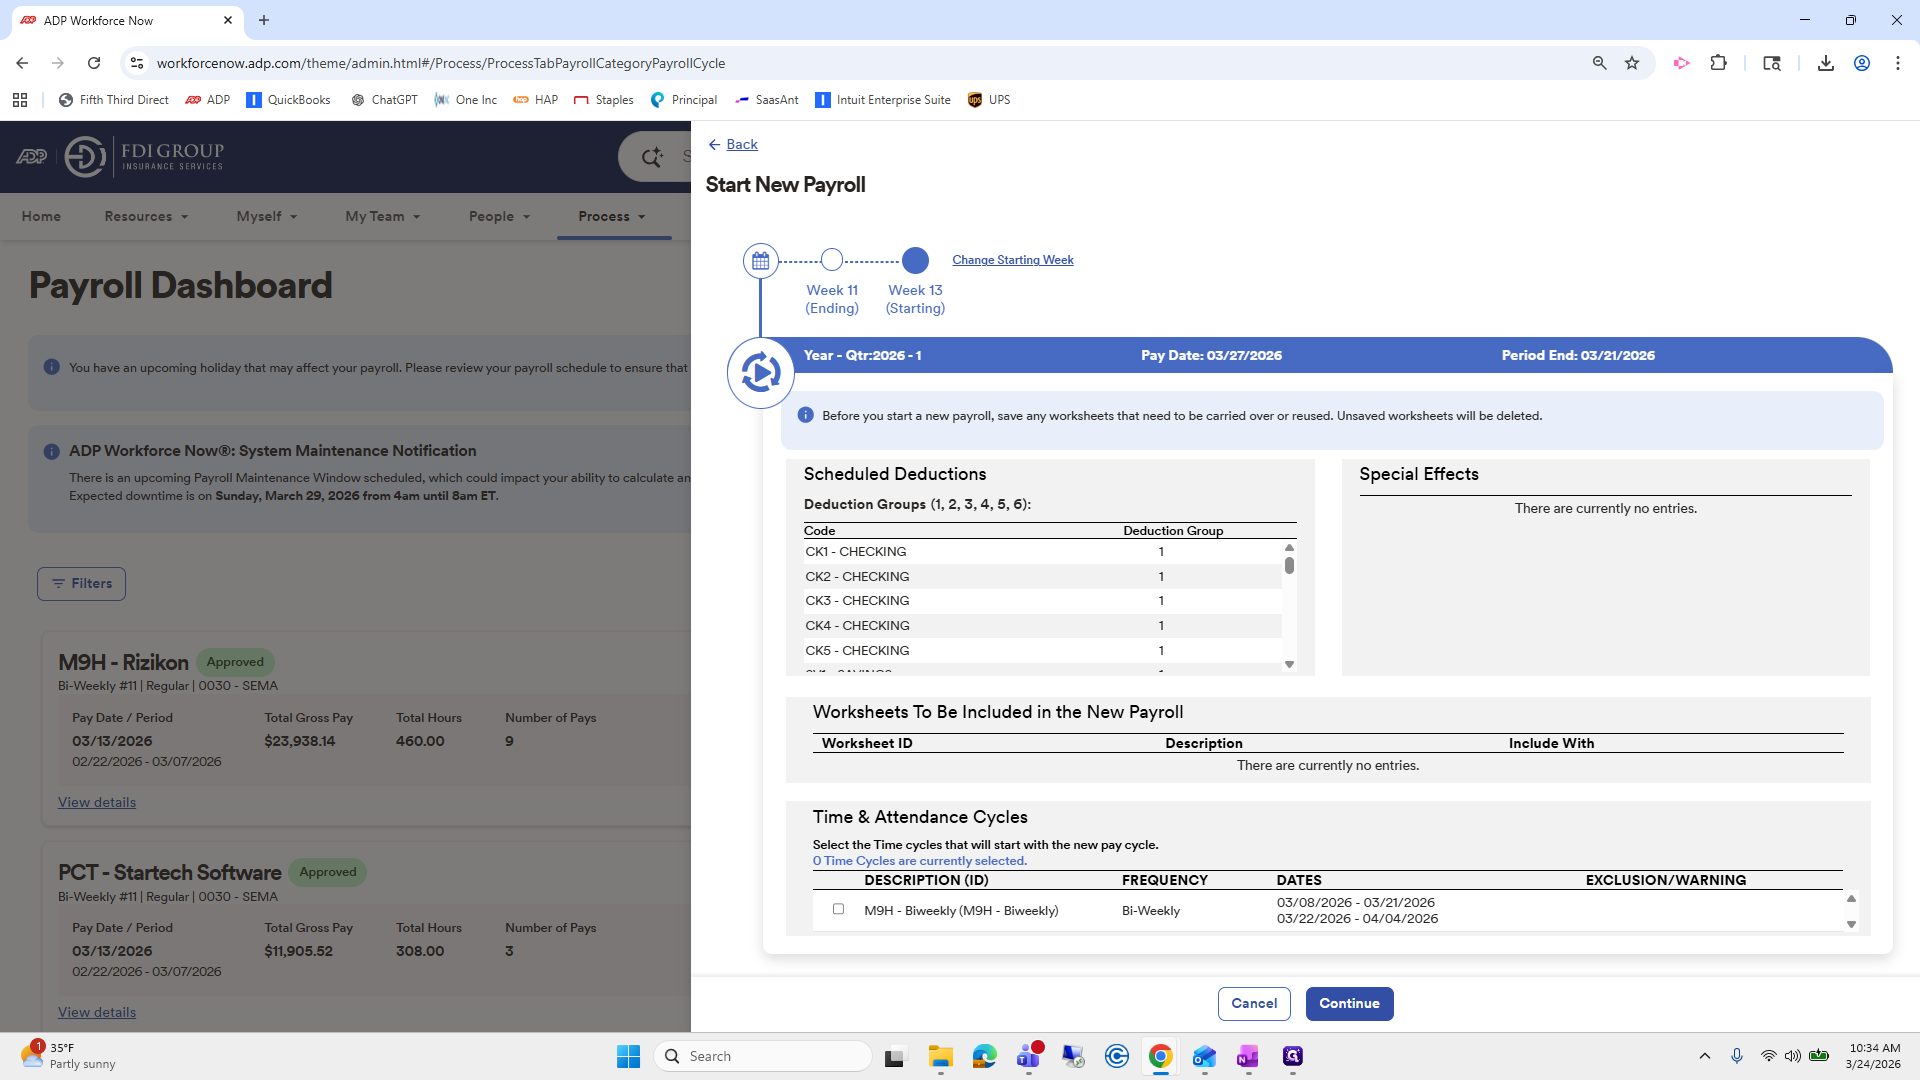
Then it started the new payroll. So I usually... You can process them one by one if you prefer. I usually start the payrolls and get them going, so we can handle each one individually. Another one coming up is Star Tech. I'm going to select Start New Payroll.
I will uncheck this.

Remember, it is very important to uncheck it. If you do not, when we pull the time cycle reports, it will include the following week. We do not want that, because then we have to contact ADP. It will take four to five days before they get back to you, and it will be annoying. Next, we'll skip Comp One for now since it's not ready. However, we could still start it and begin working.
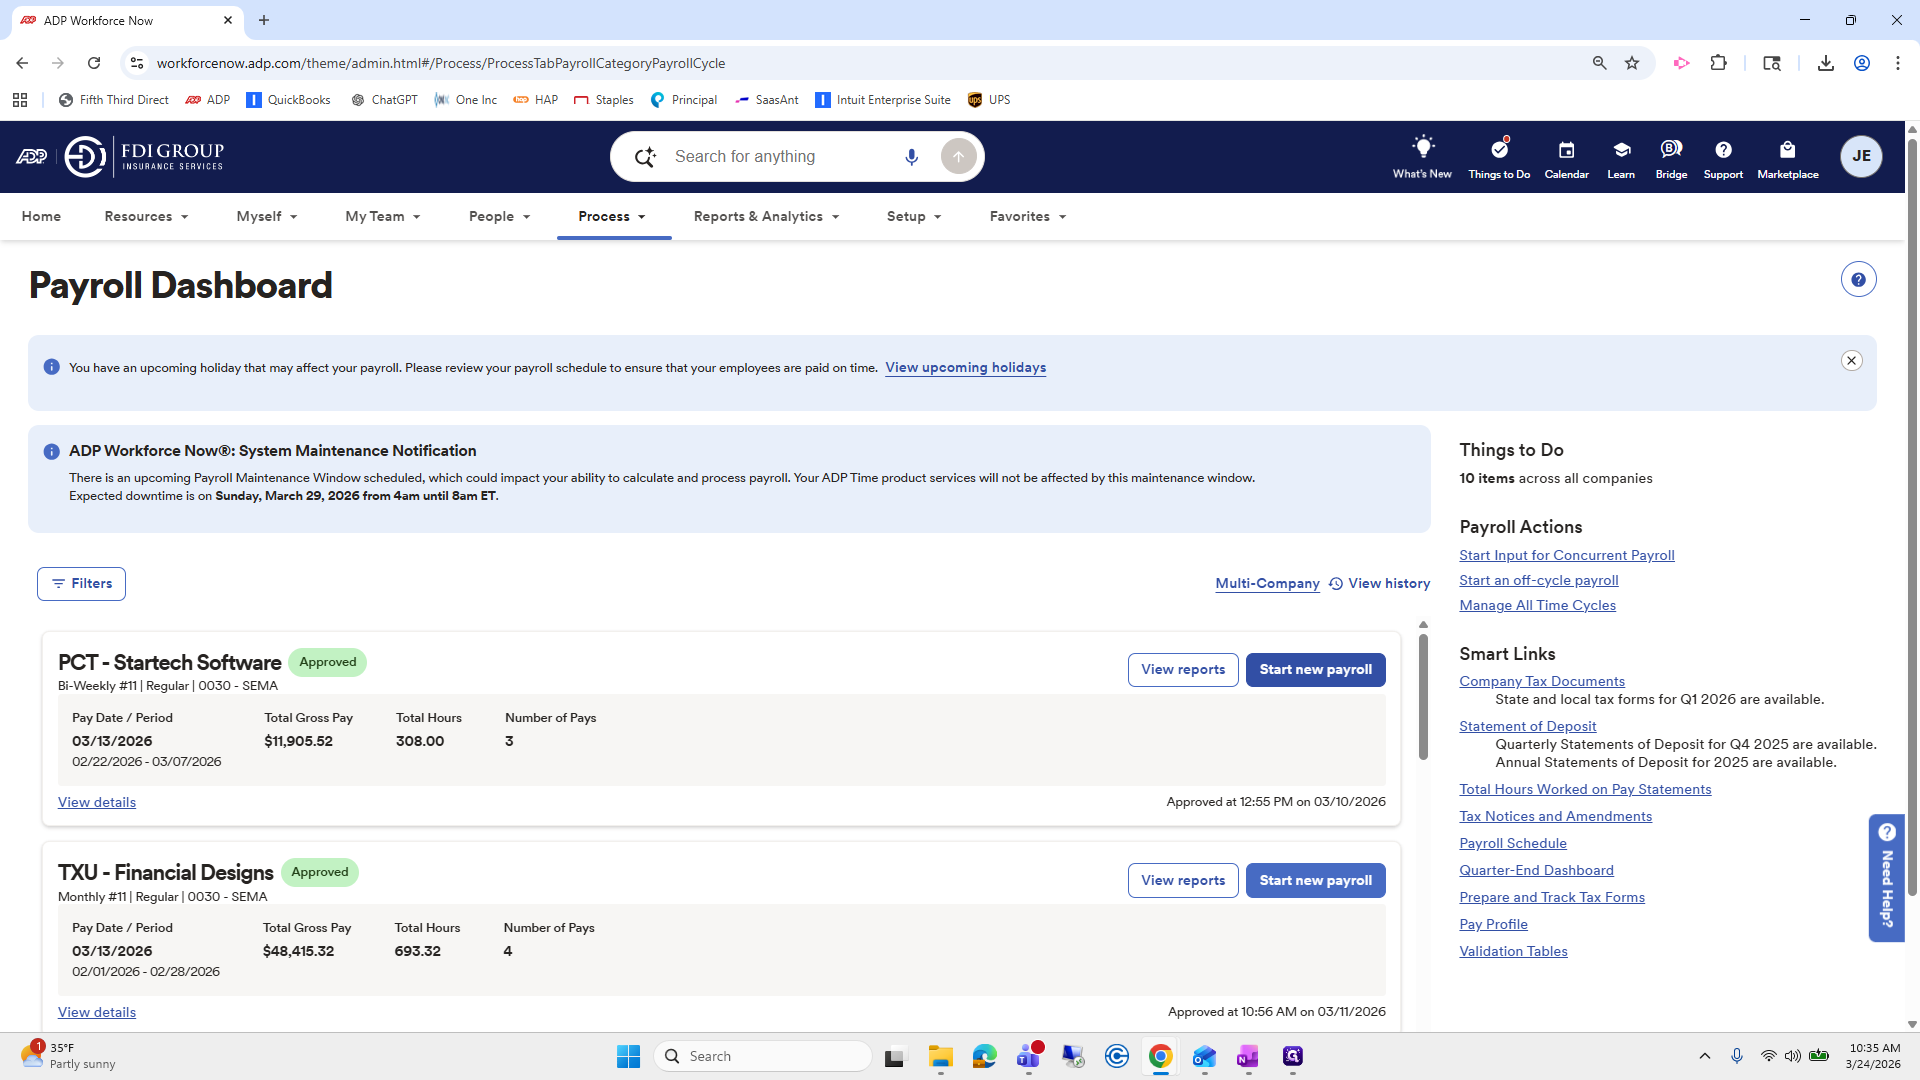
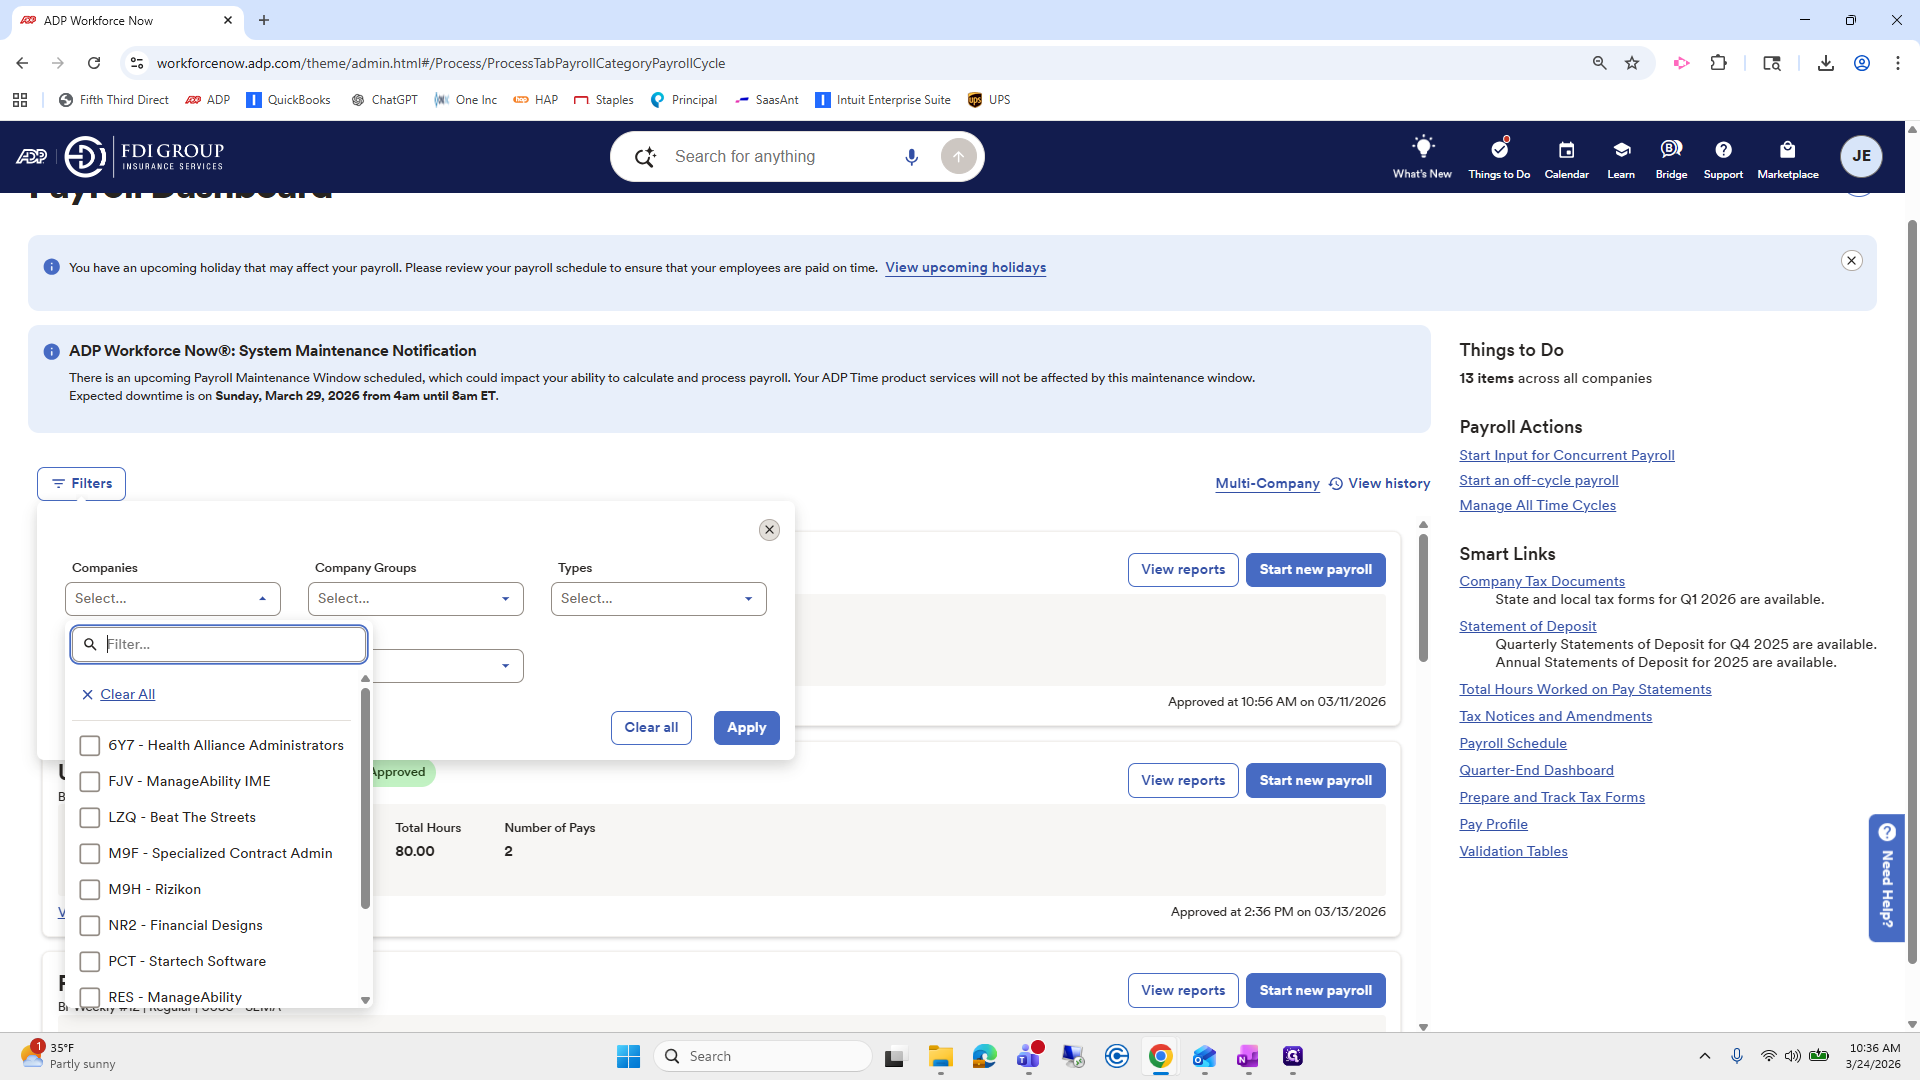
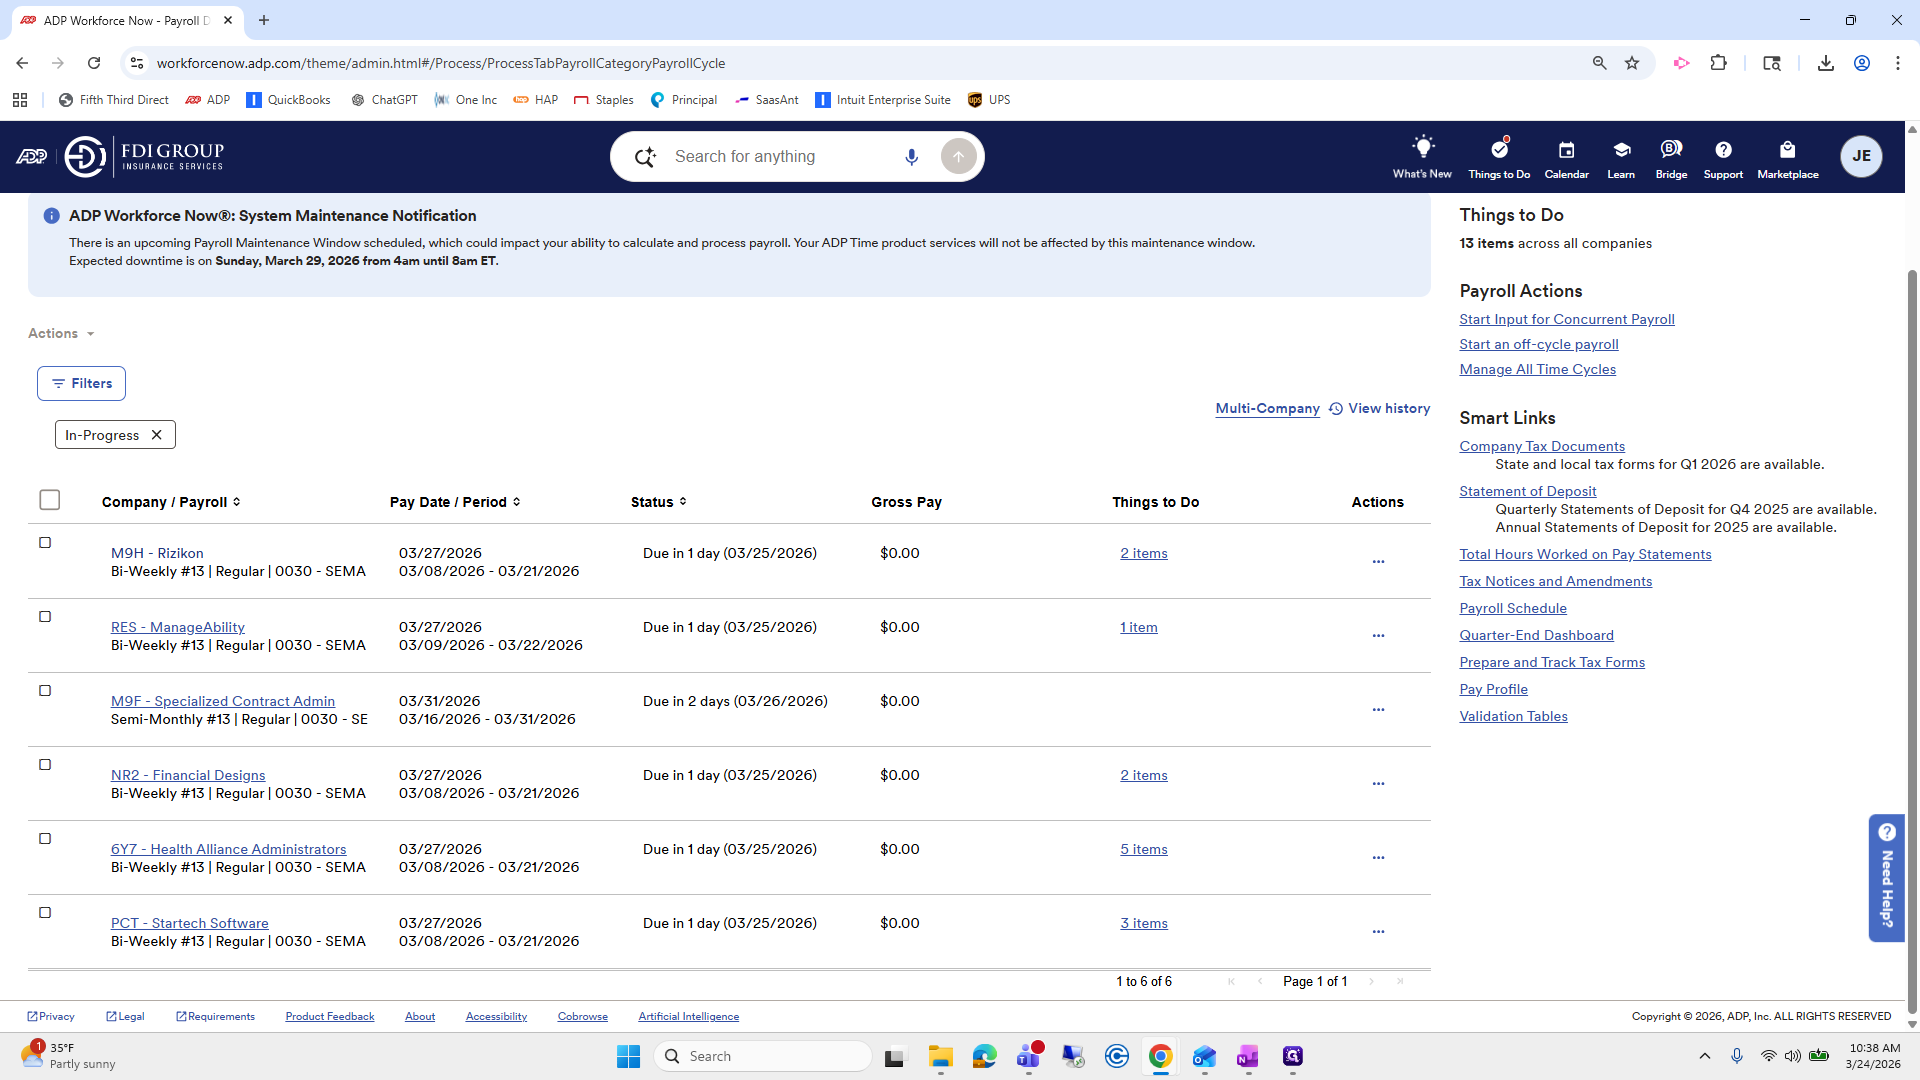
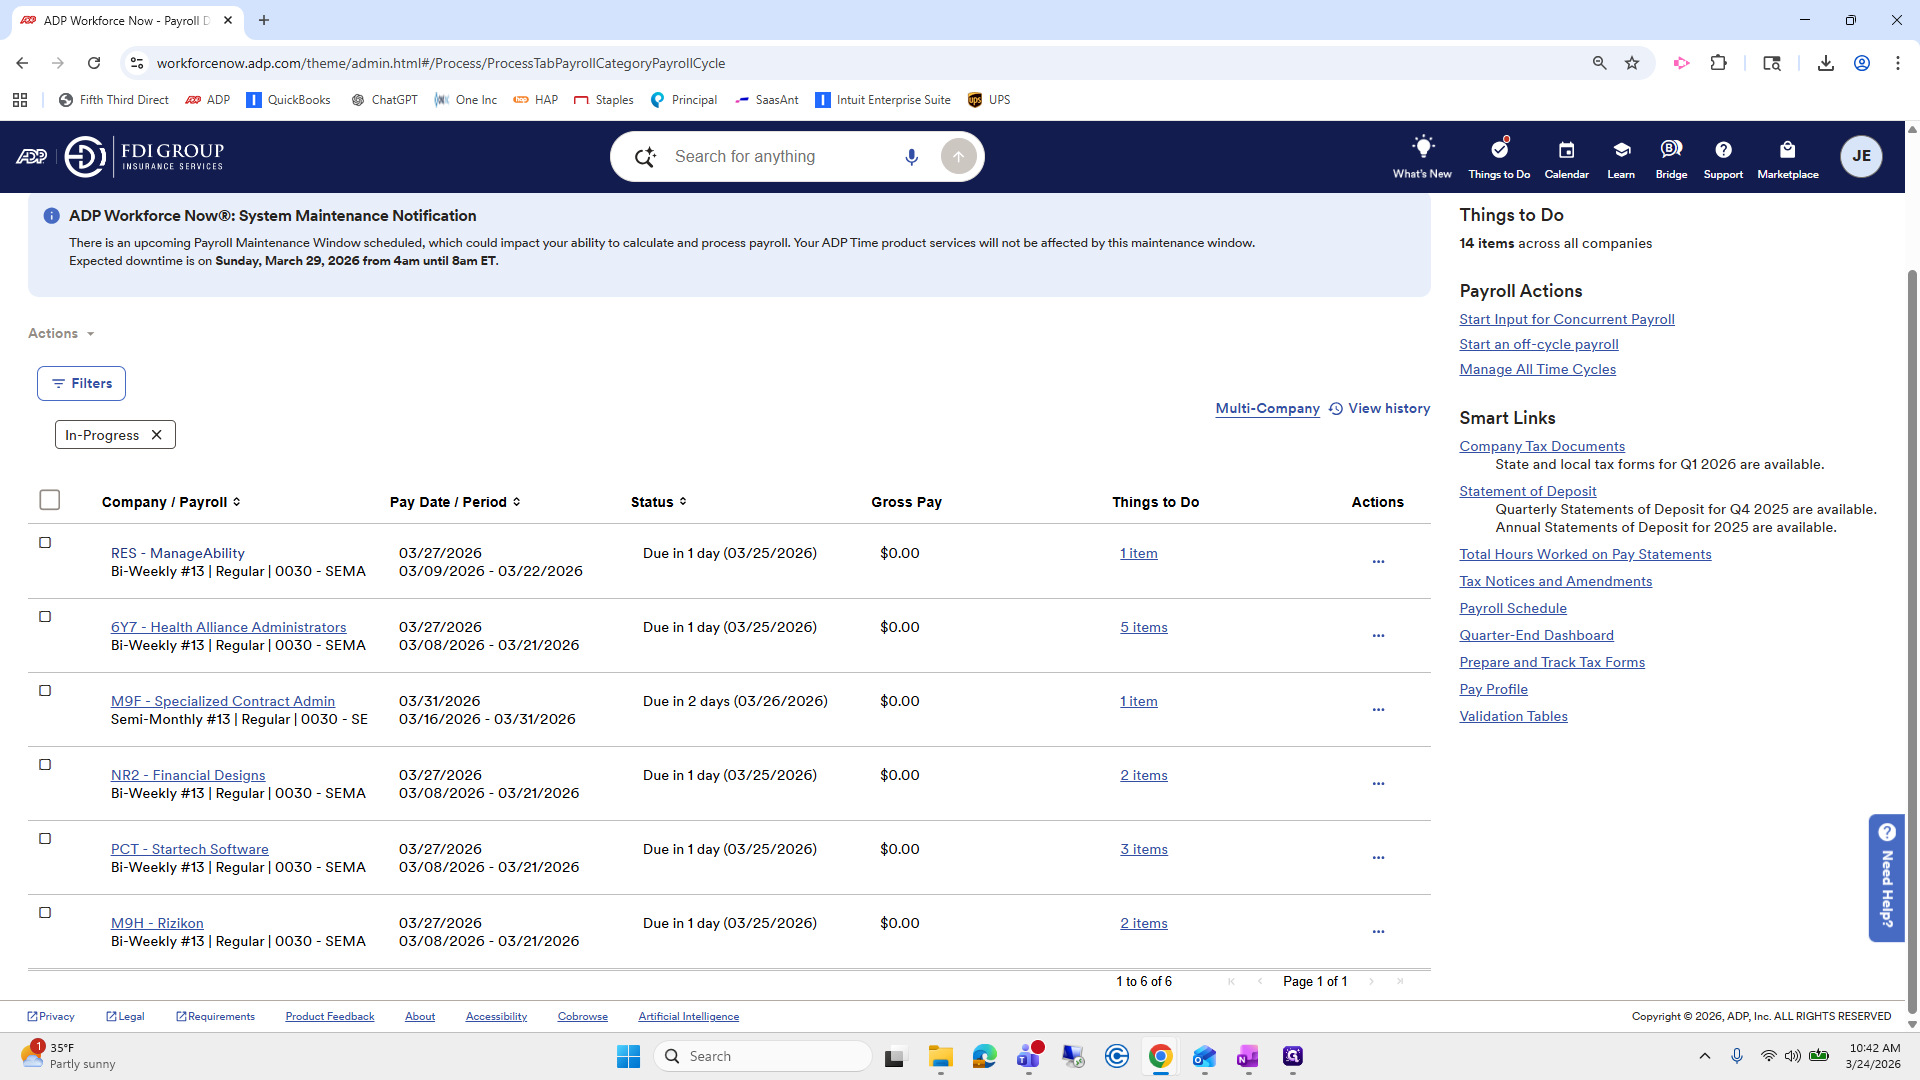
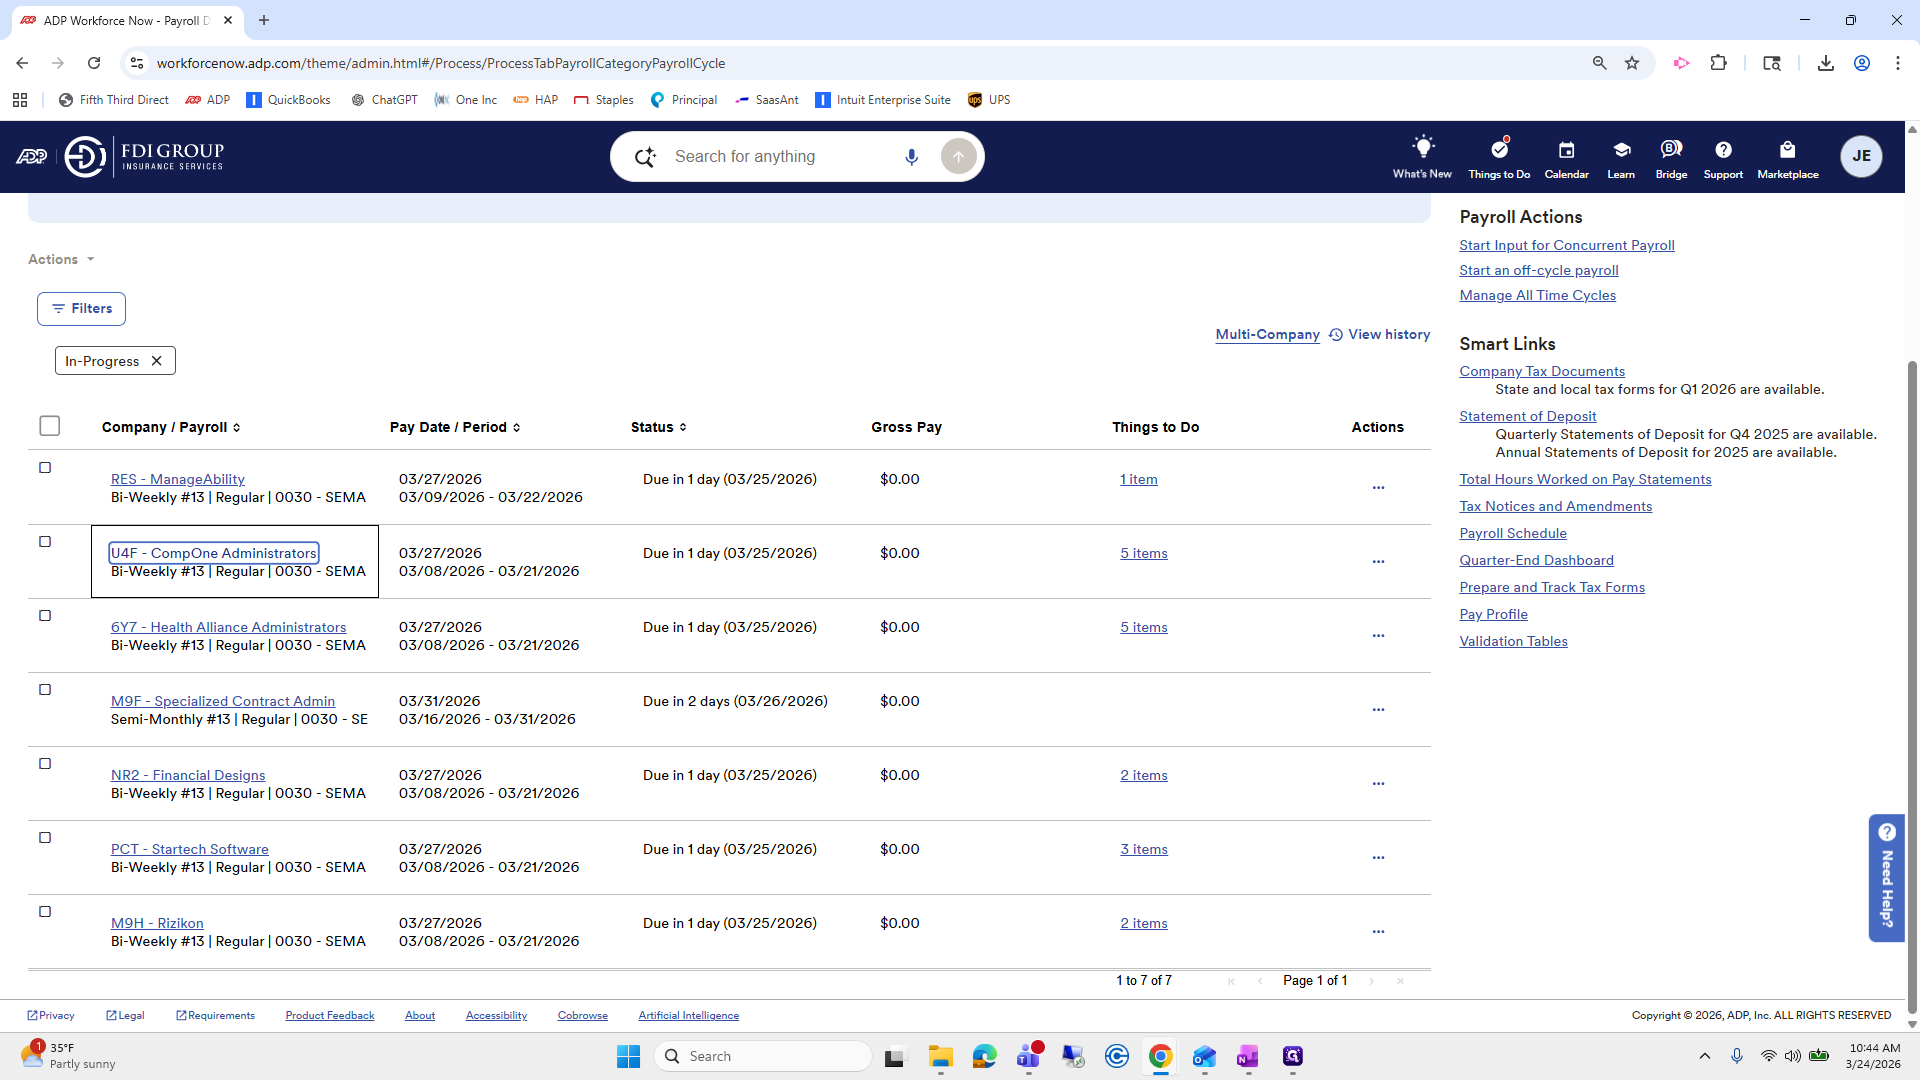
I'll skip it for now. IME is next week. RPC Manageability is next week. I have already started Health Alliance, Financial Designs, SCA, and Manageability Case Managers. All of these are ready for the next step.
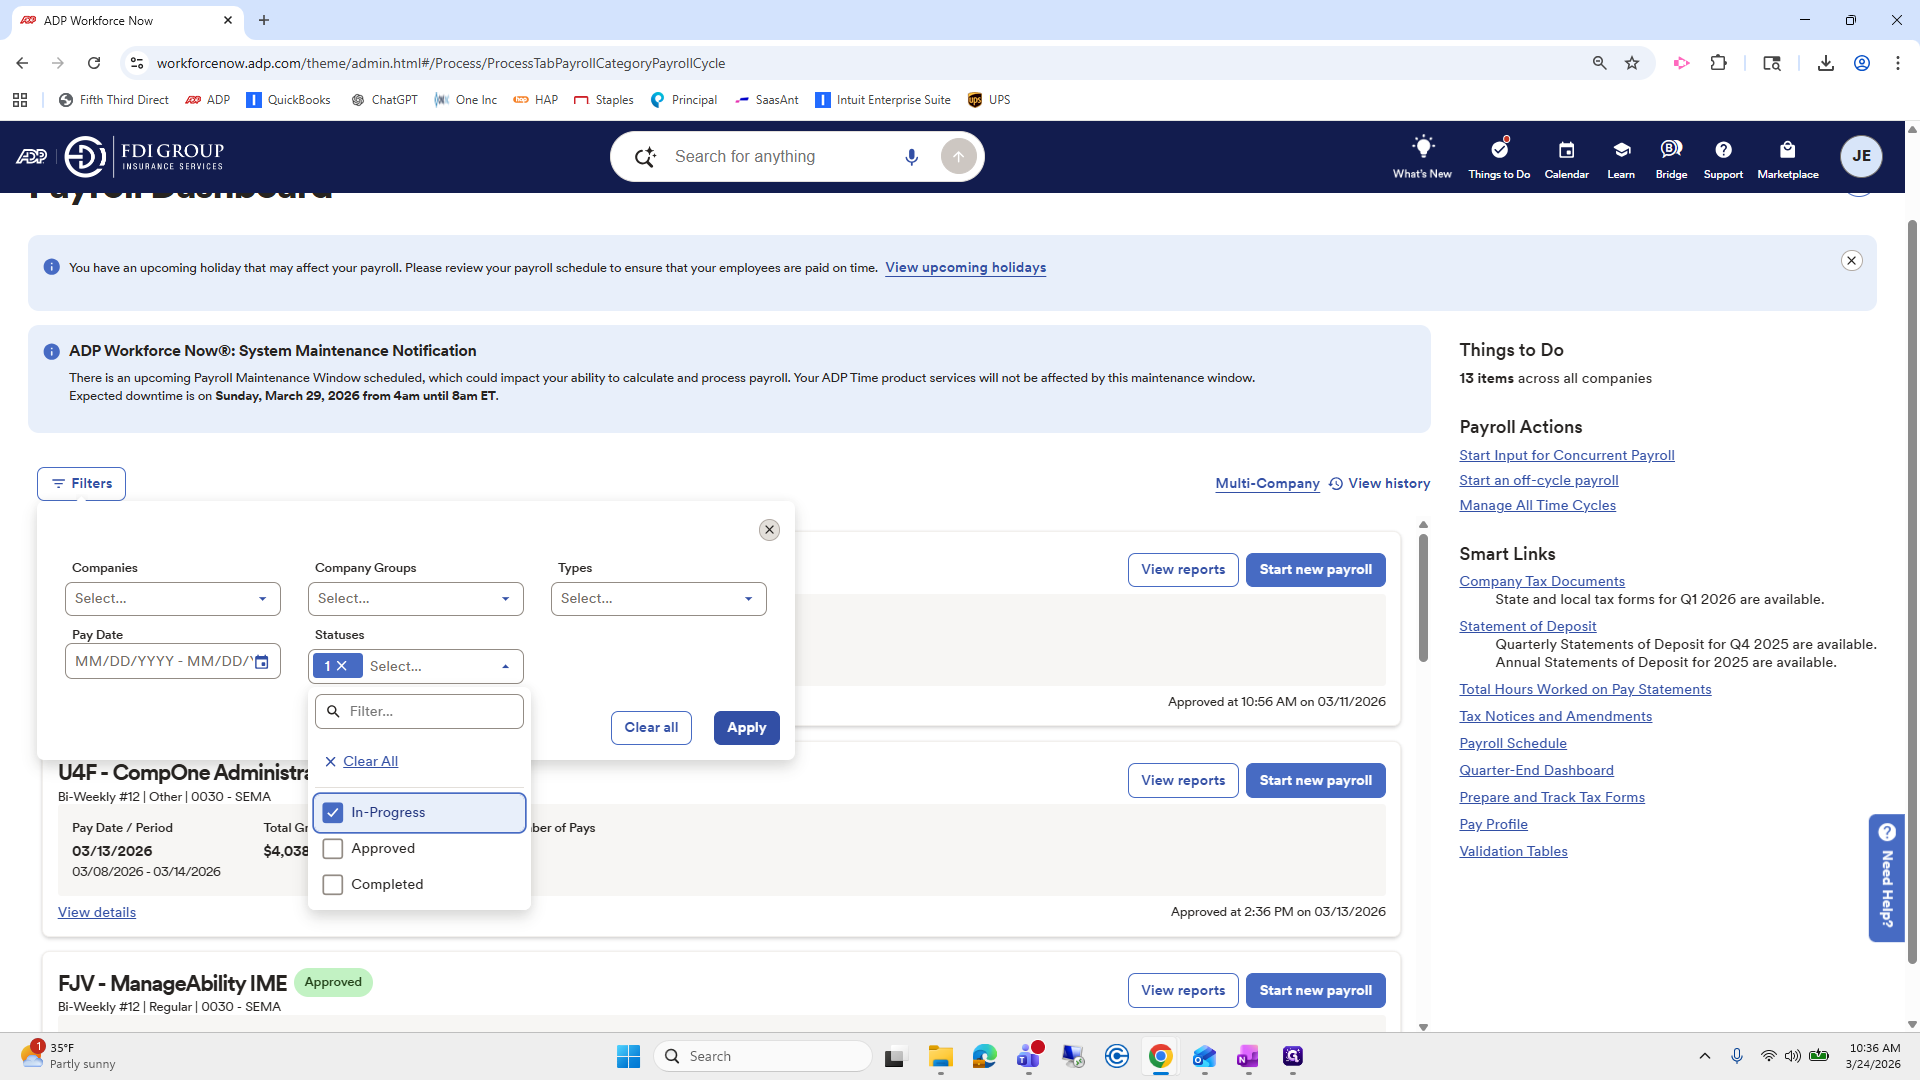
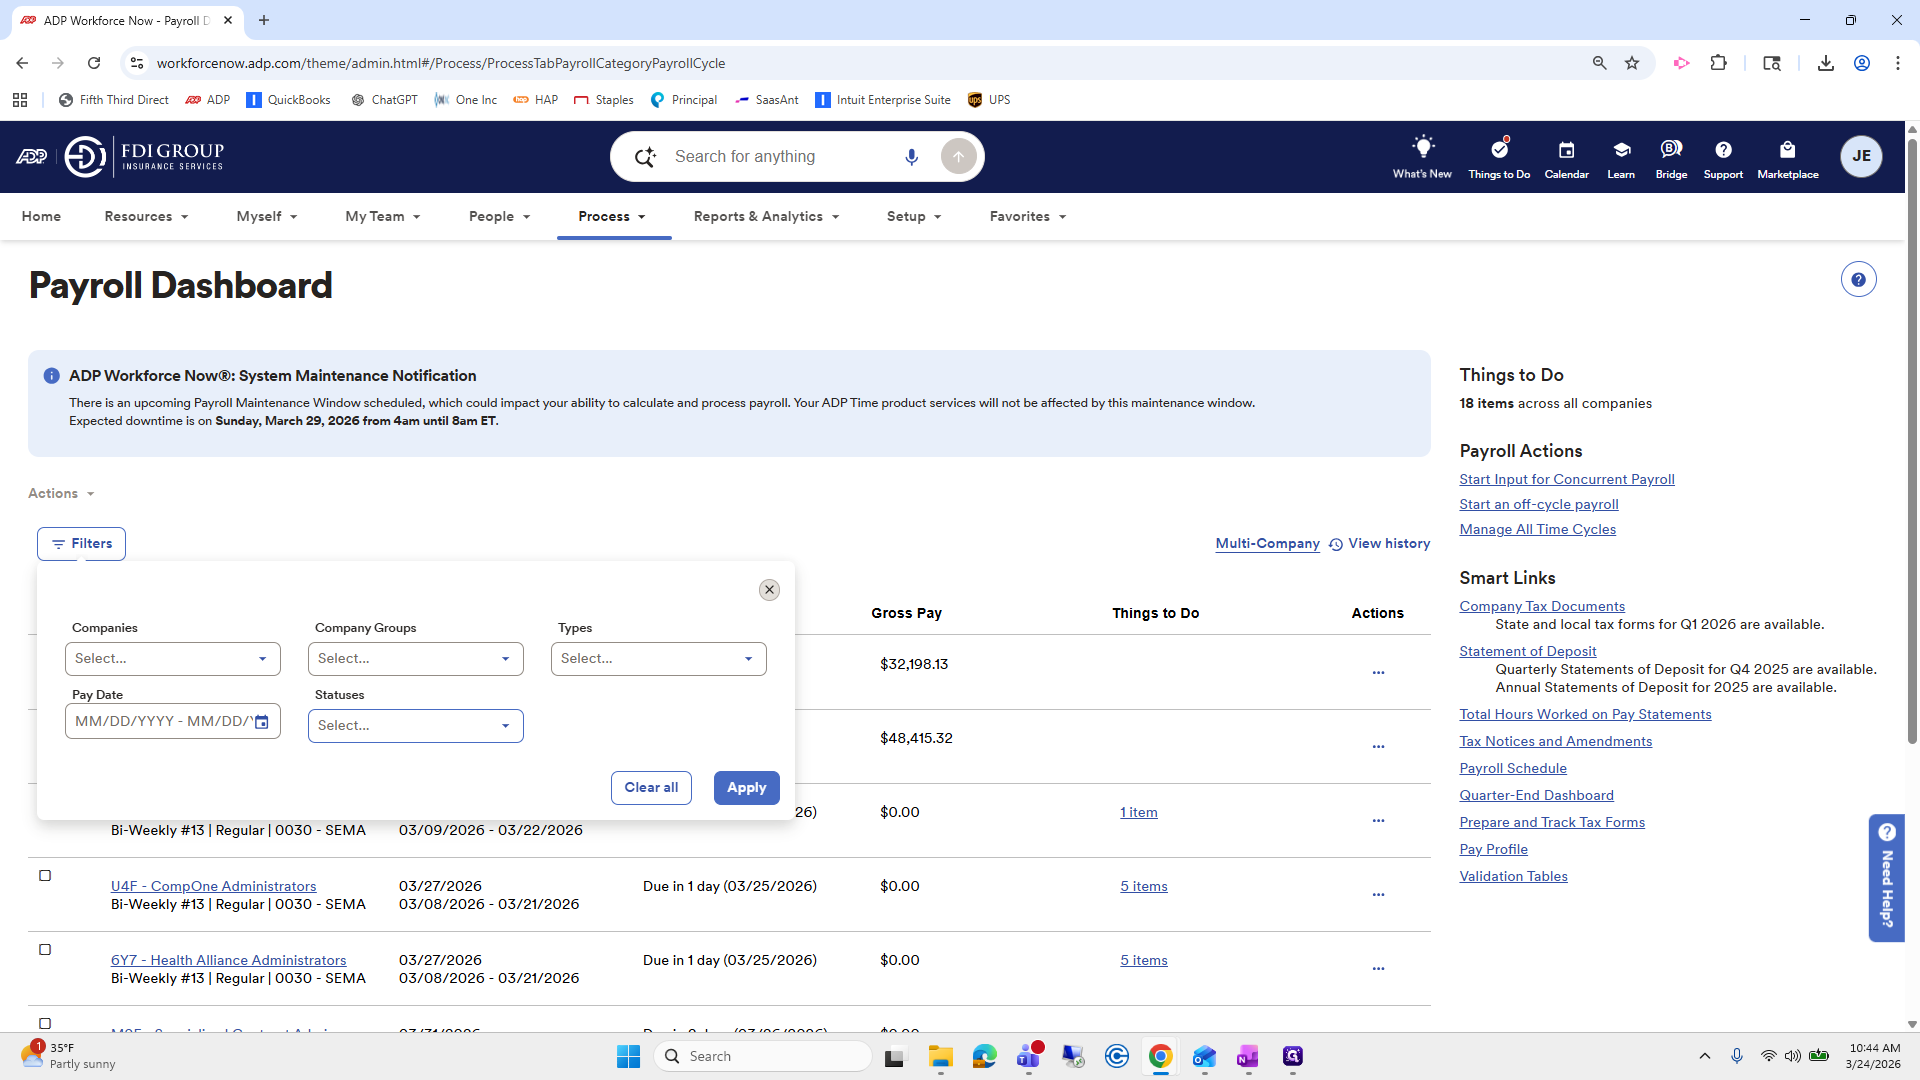
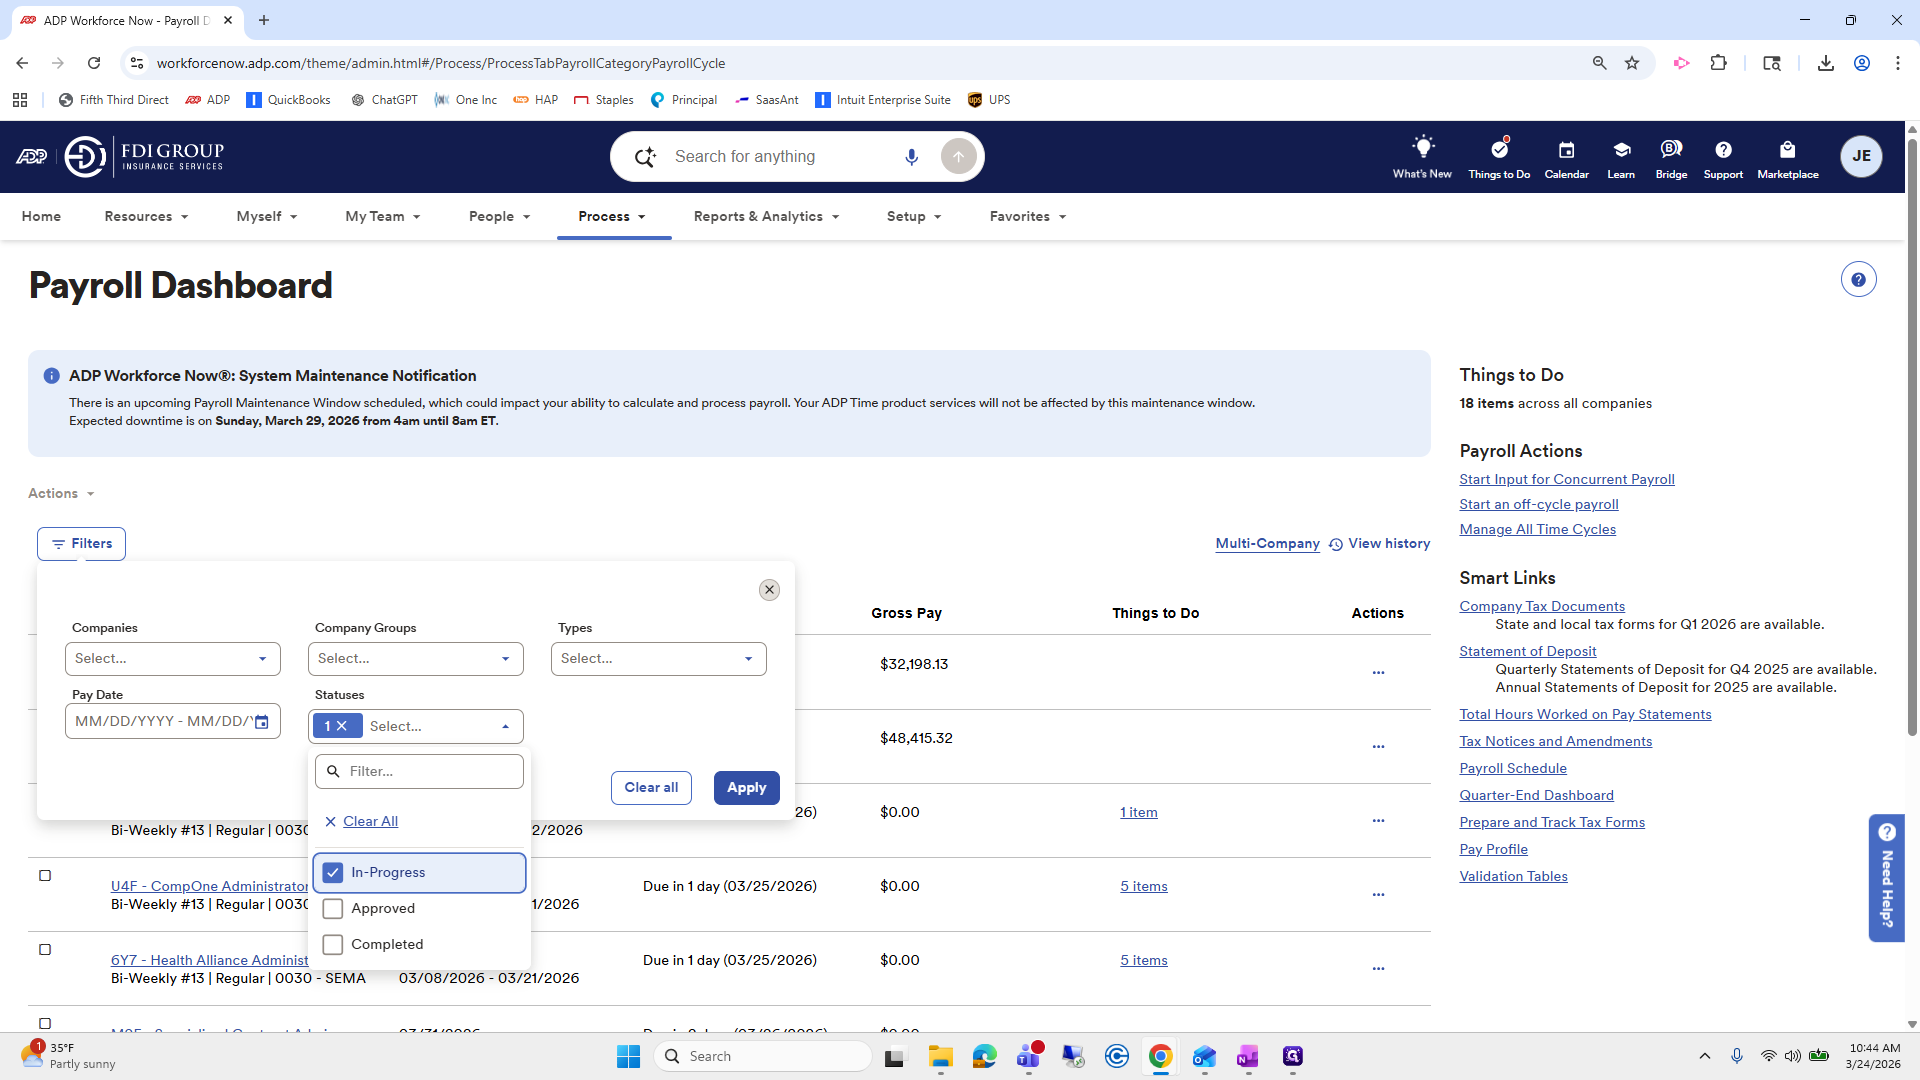
I like to filter statuses to "in progress" and "apply" so I only see the ones I need to work on, instead of all the others.


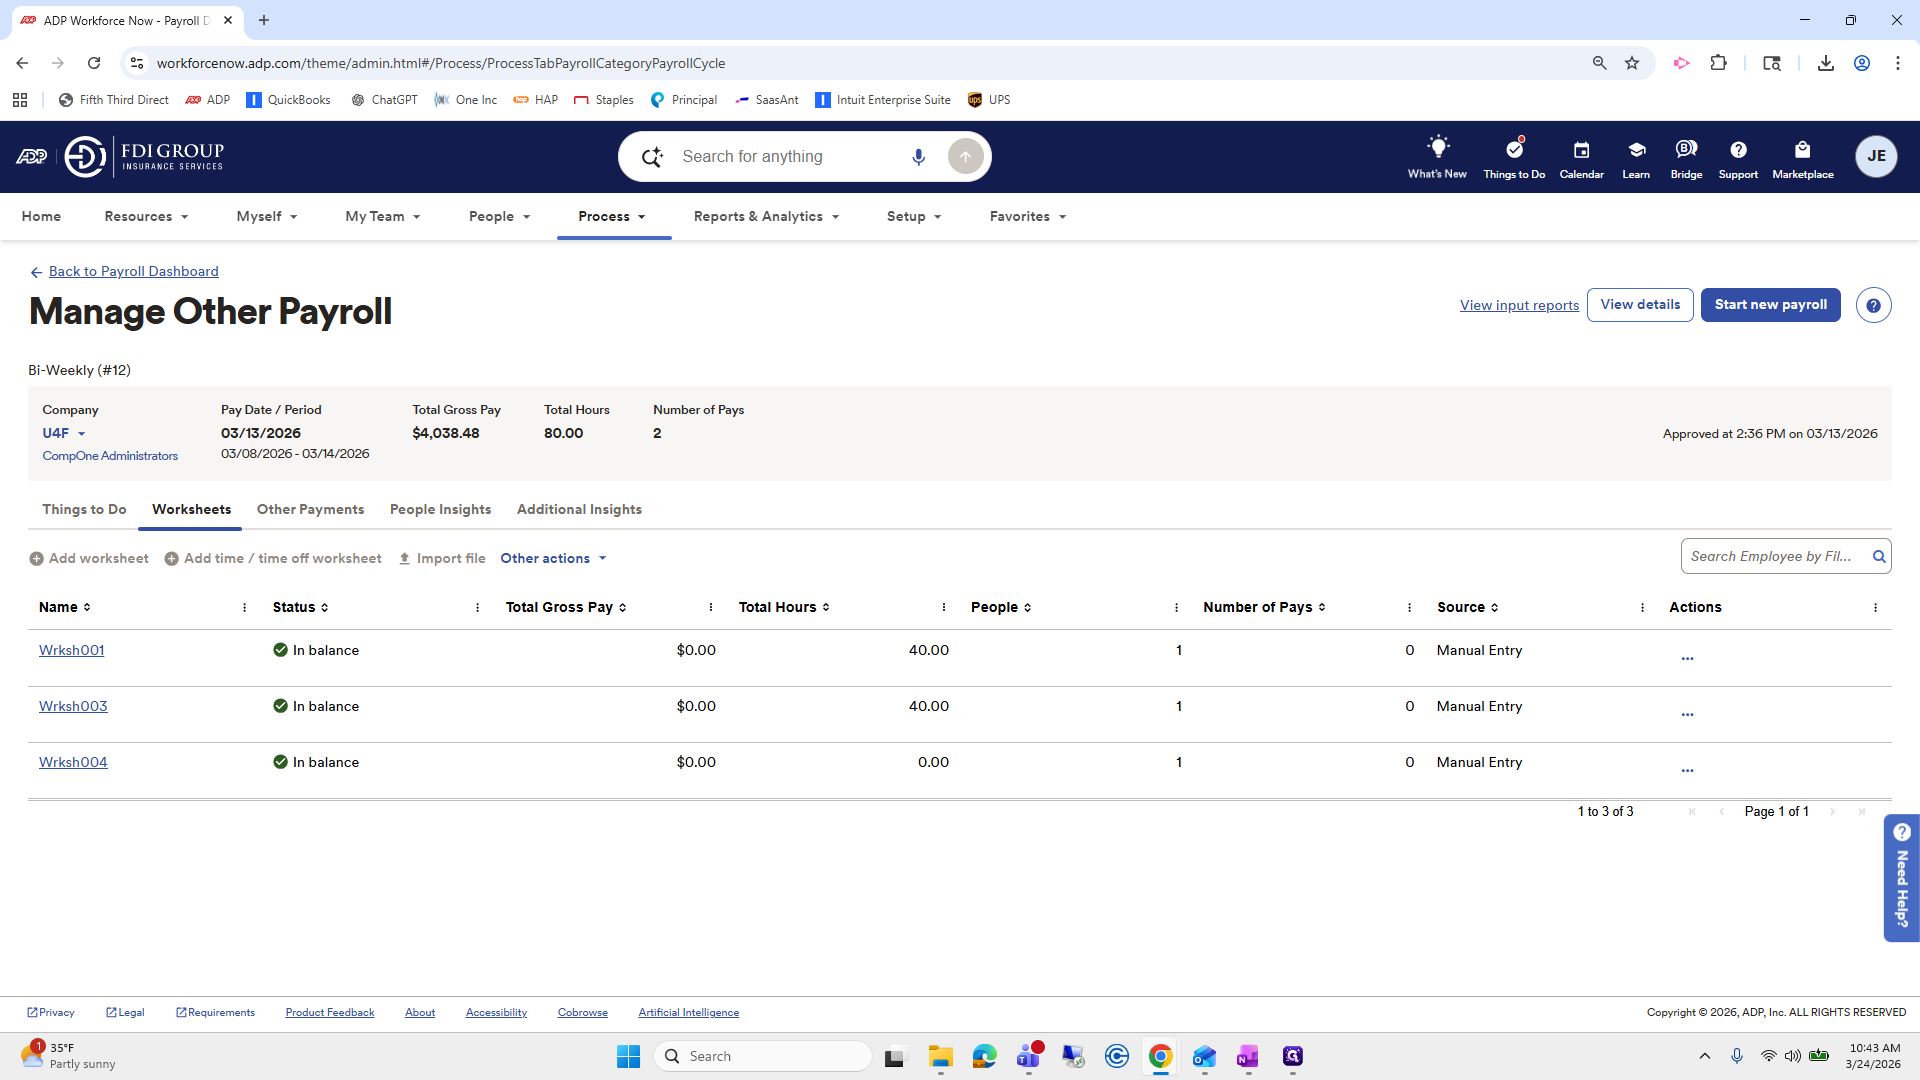
Now, I will start with the easy ones first. SCA, I'm going to select Manage Payroll. First, I'll go to Add Time, then Time Off Worksheet.

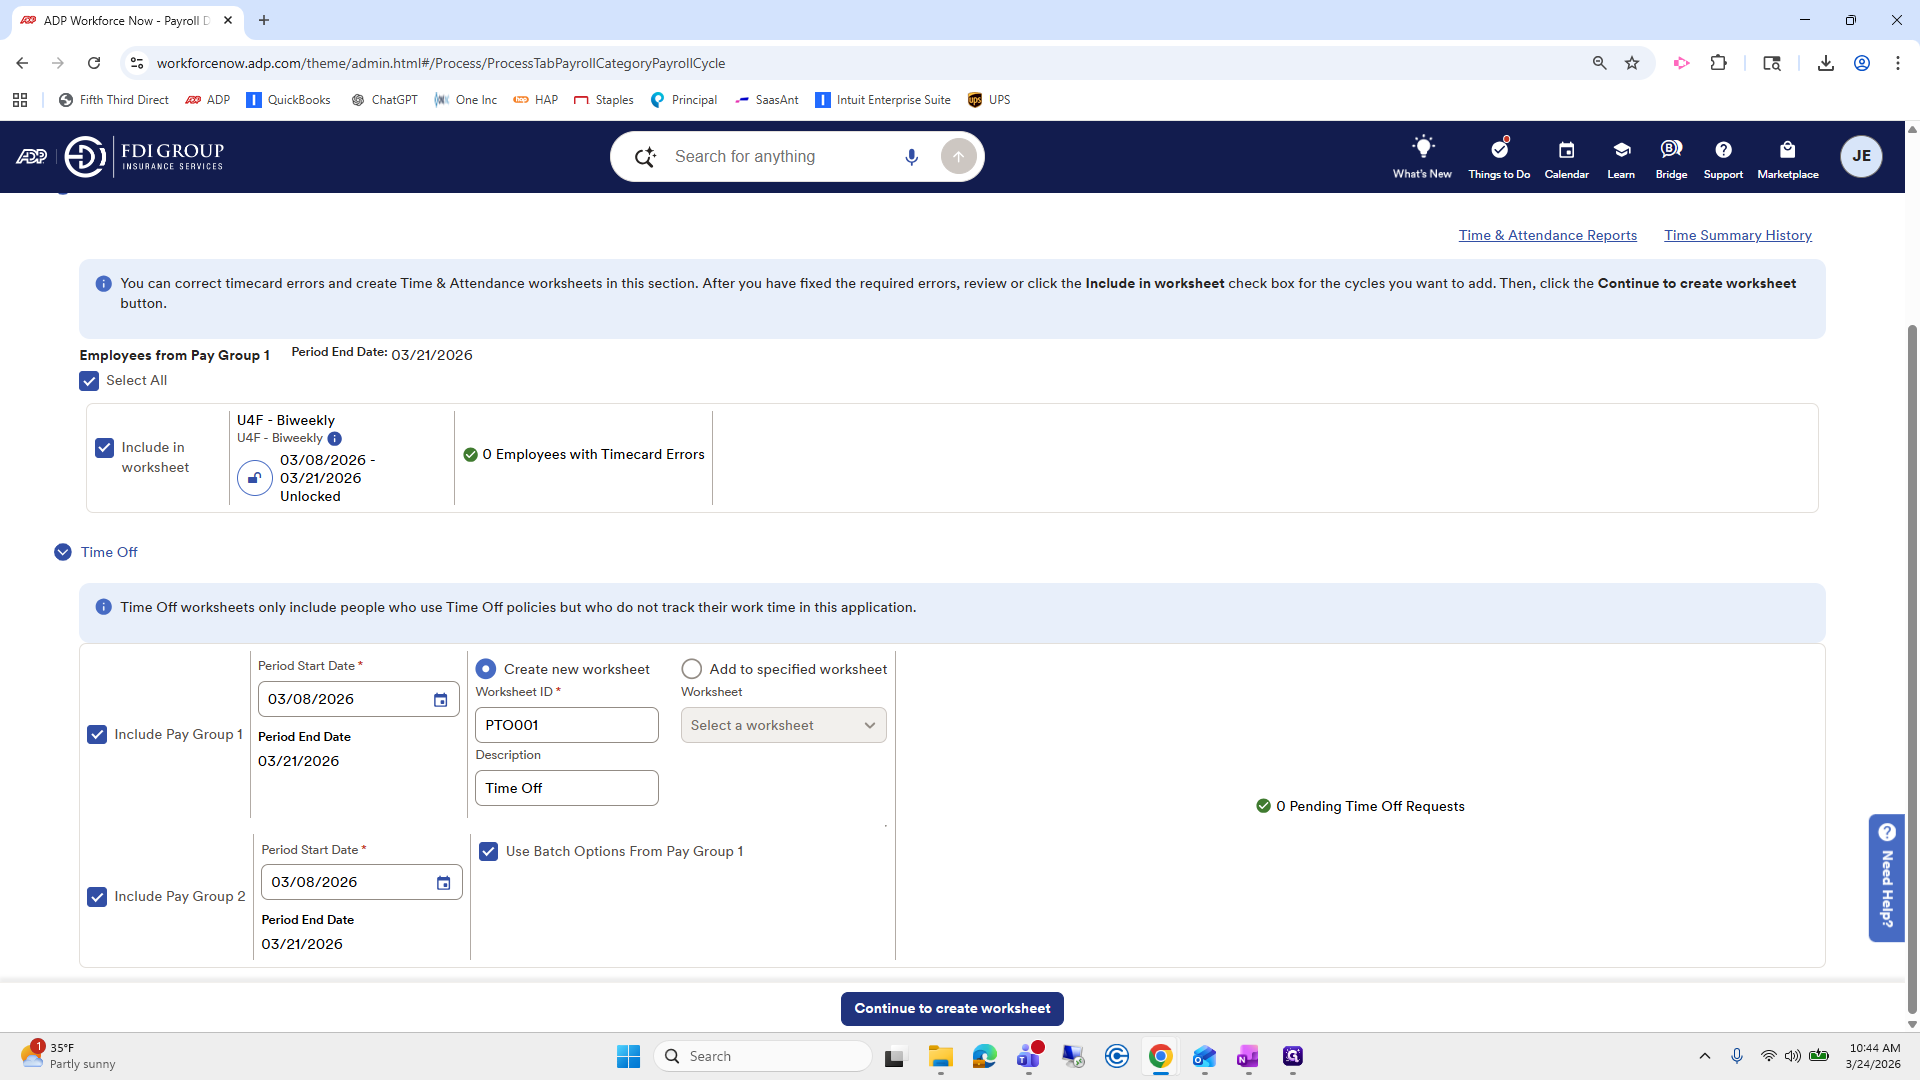
This is probably a bad example because I always have to contact ADP to push this section over. Since it is semi-monthly, something is messed up with it. You can ignore this section for now. Make sure everything here is checked. Period start date 3/16 to 3/31. That looks good. Continue creating the worksheet.

Start, then review worksheets.
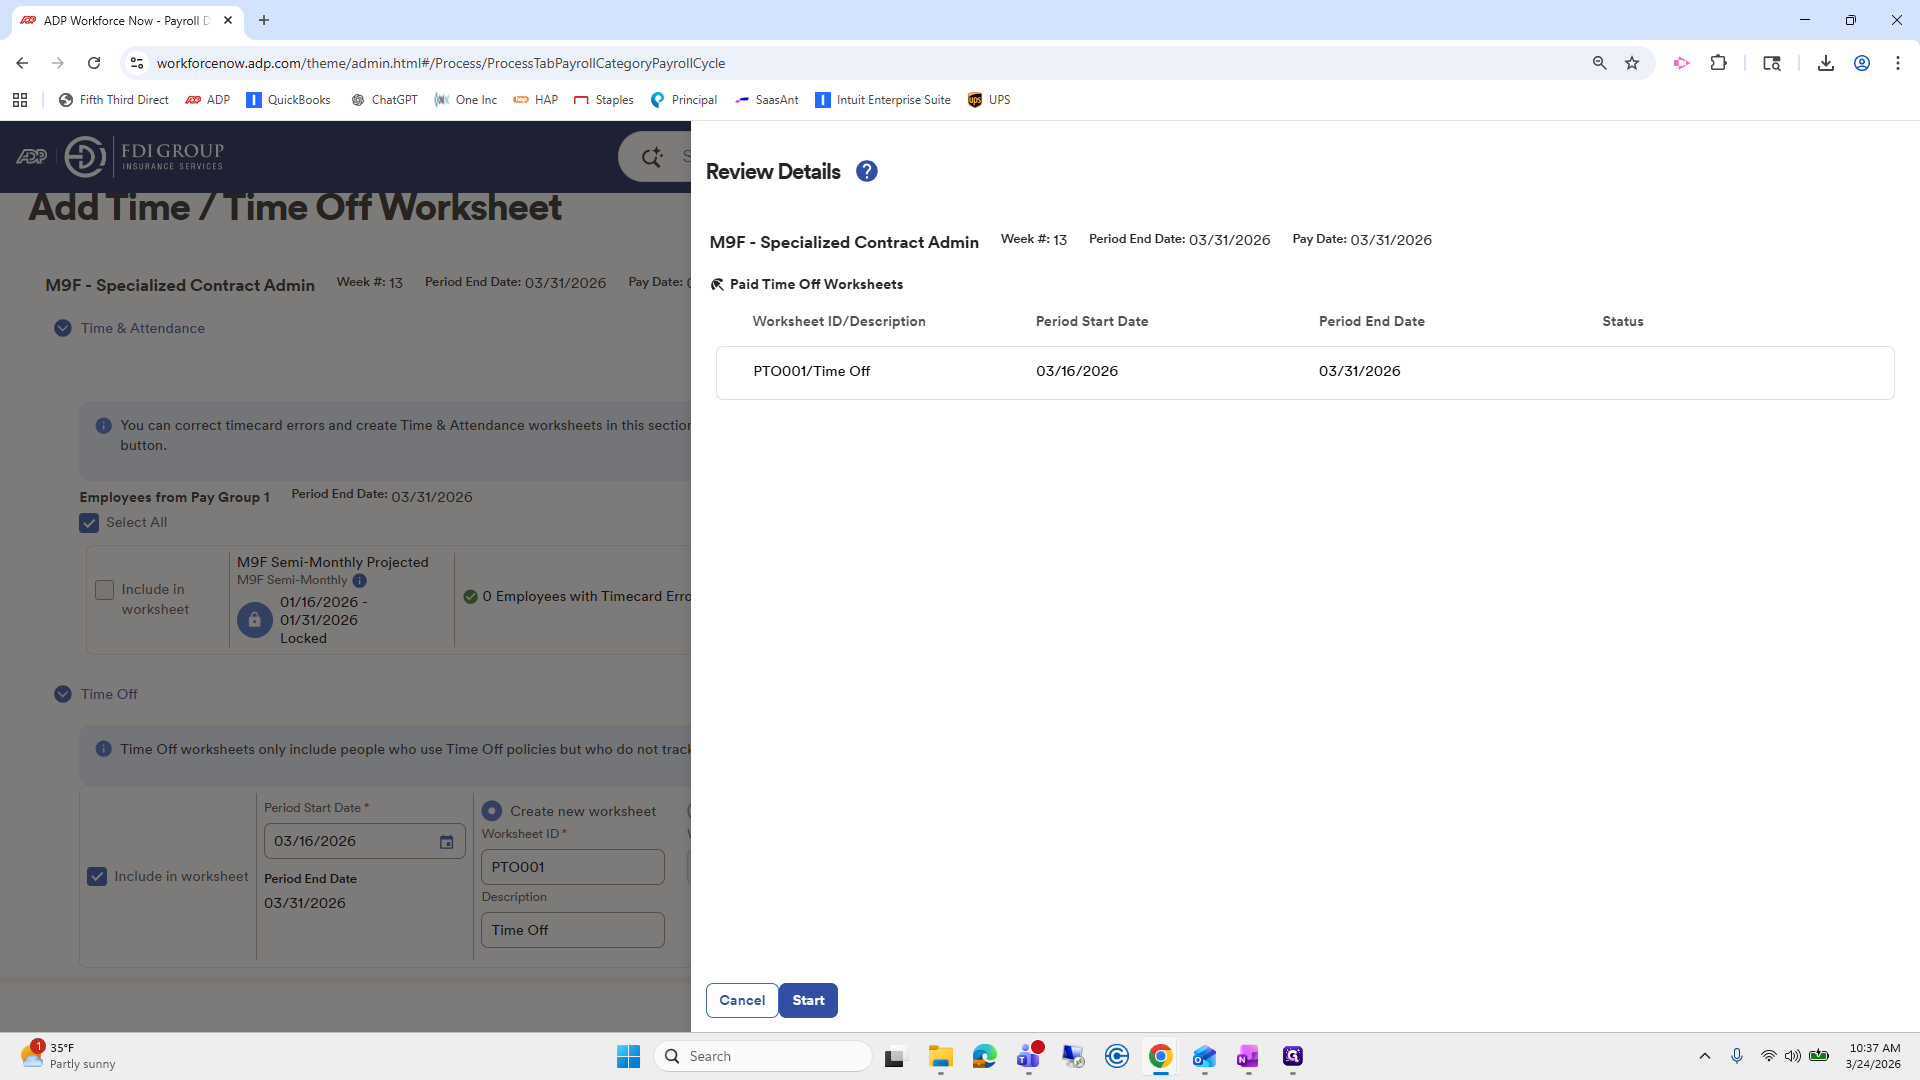
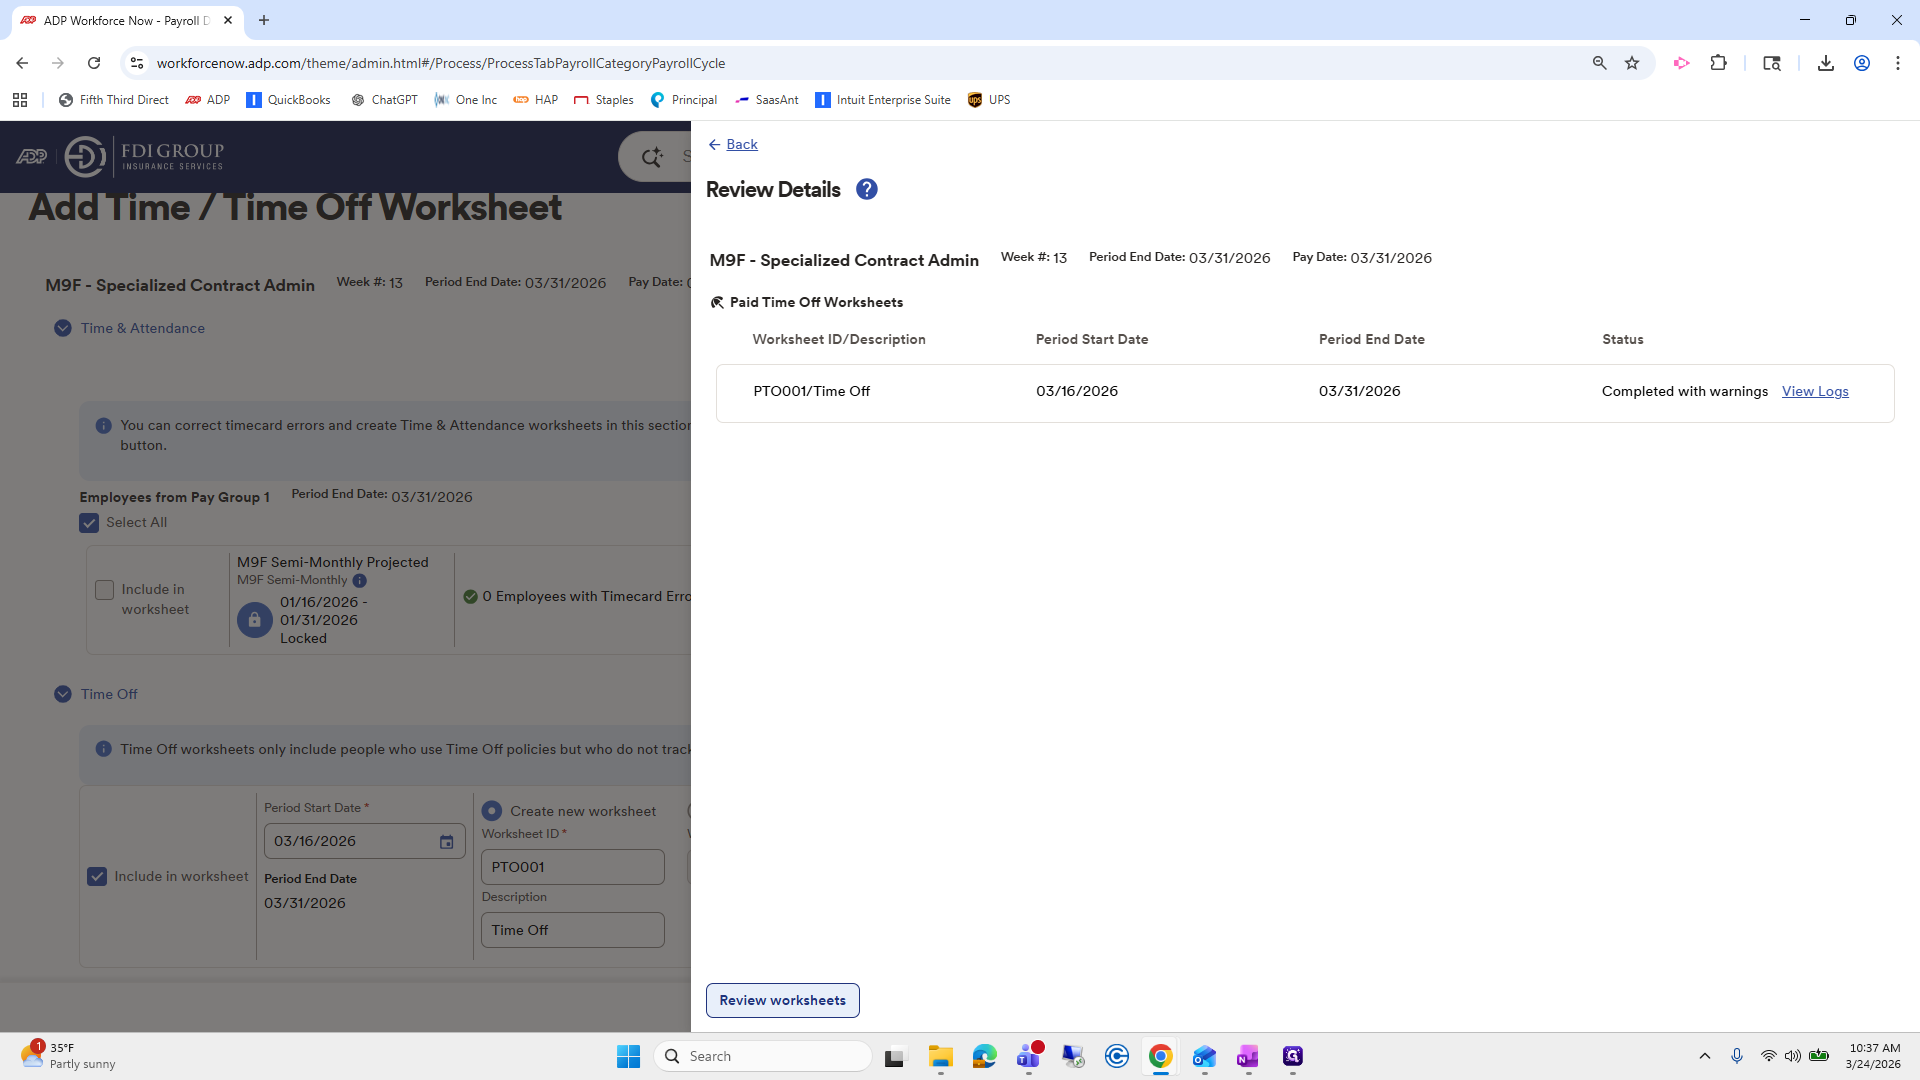
Next, click on the worksheet that was processed for you.

This one just shows the PTO. Everyone on SCA is salaried, so there are no hours you need to review. Click Done.

I like to create all the worksheets for each of the payrolls first, keeping everything in sync. You can process one payroll at a time. If you see this unusual view, switch to multi-company view.

Oh, just kidding.
Go back. I already did that. We have this view now. Not a big deal. Next, I will open and work on Risikon.
Always double-check the pay period and the pay date. The pay date is the 27th, which is this coming Friday.

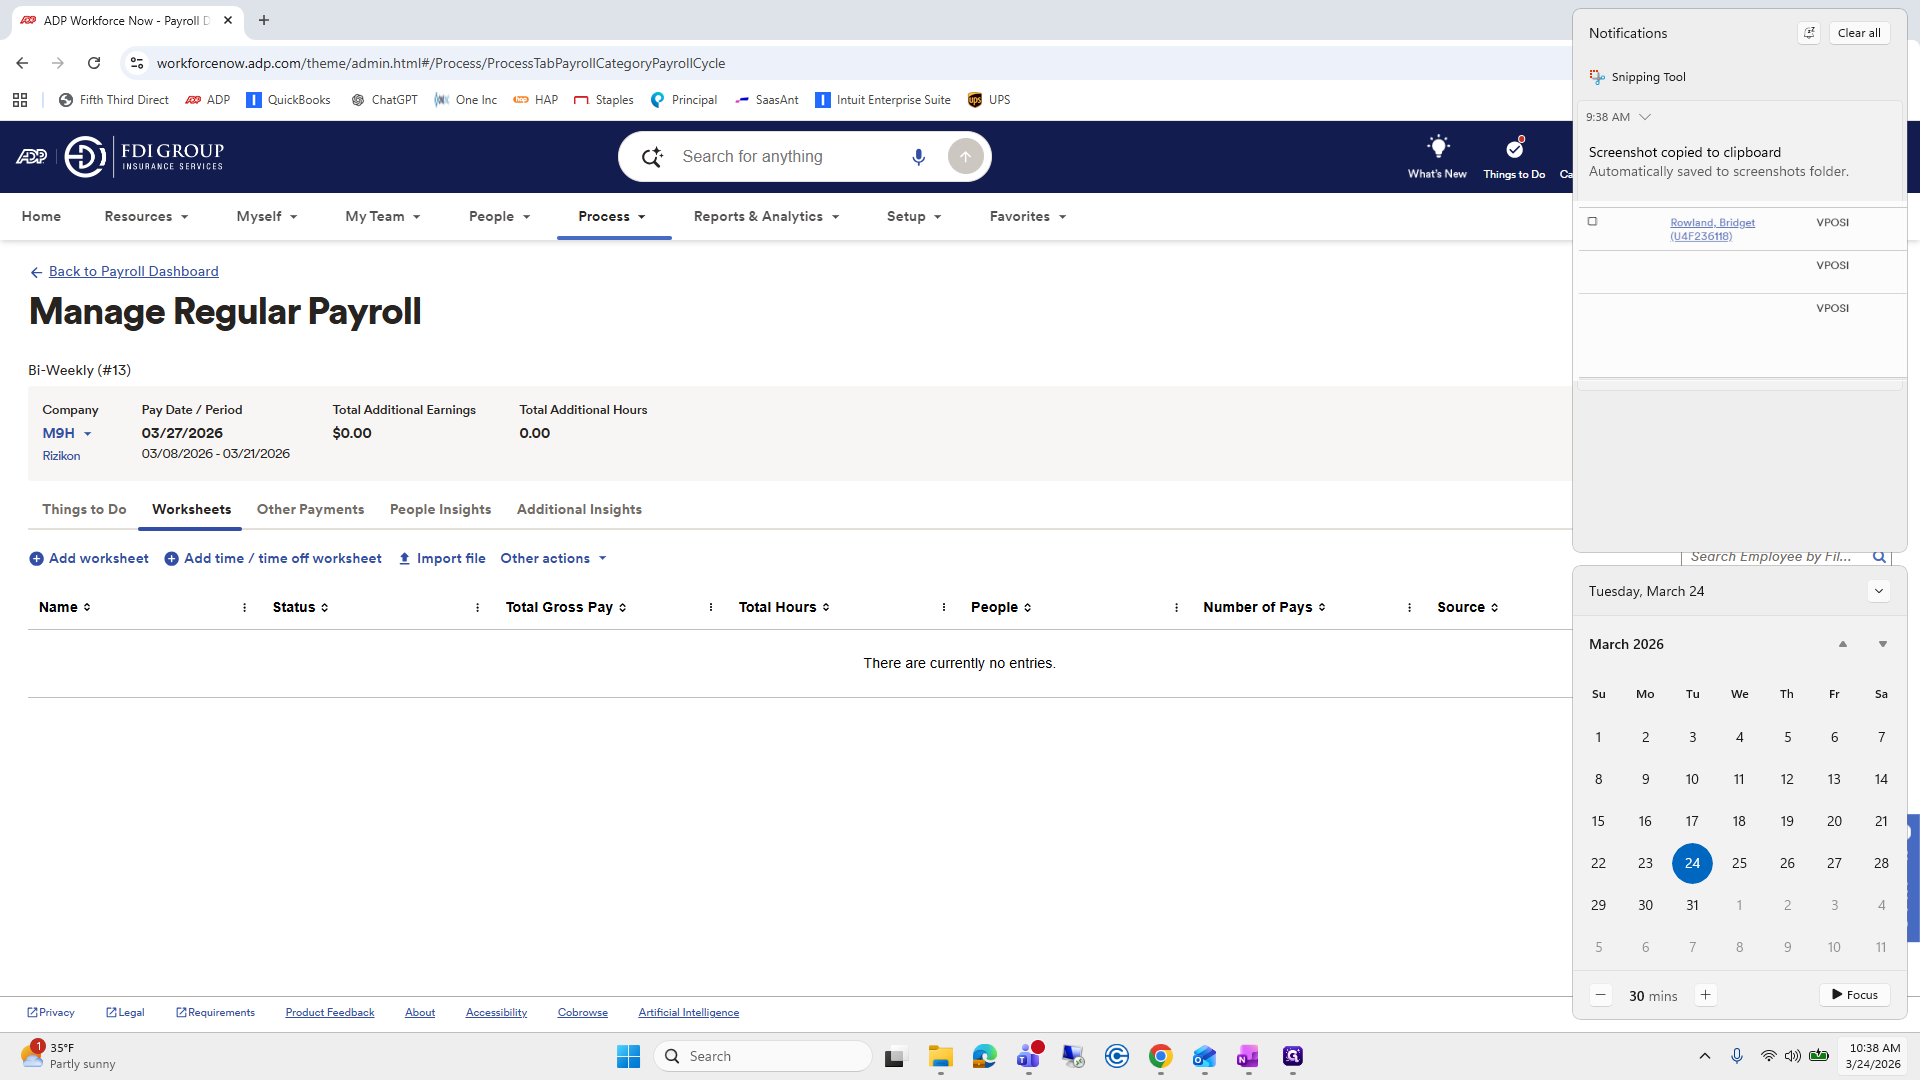
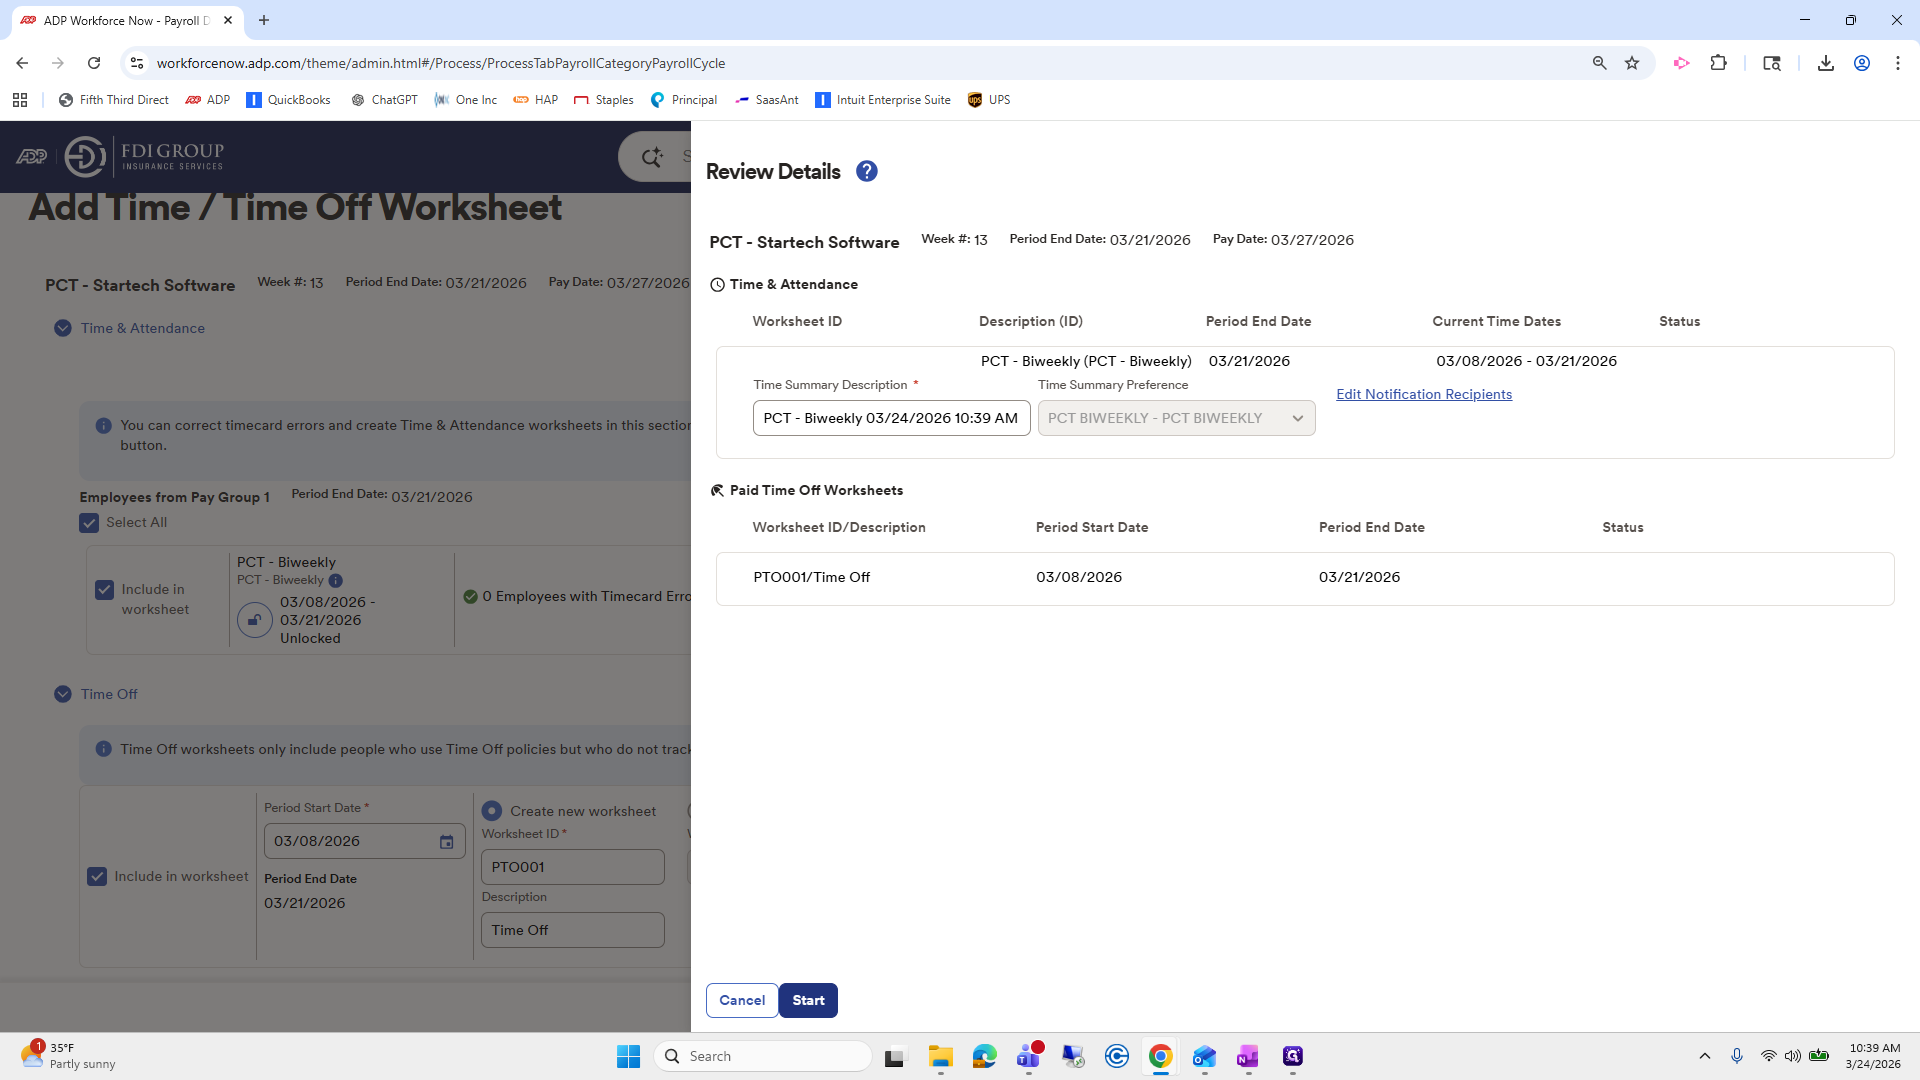
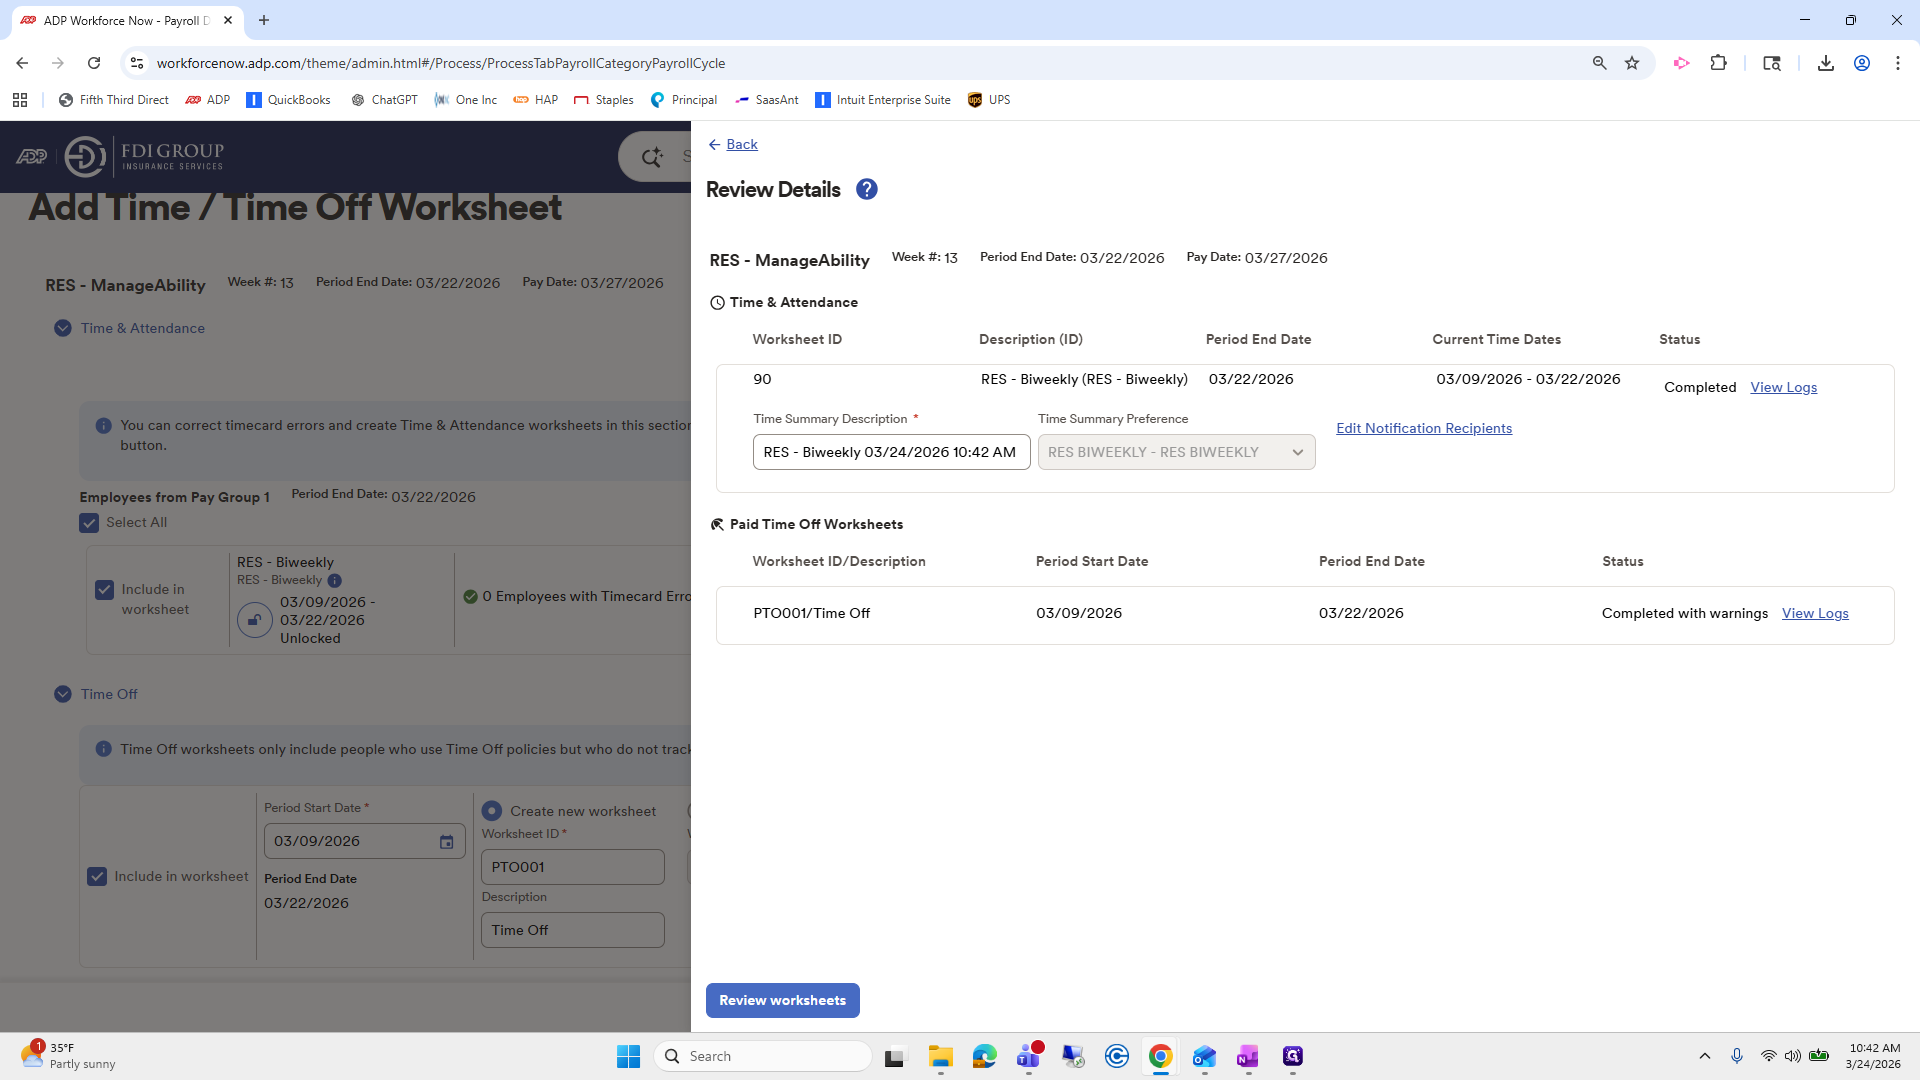
We add the Time Off Worksheet.

You will see that it has the correct payroll cycle. Make sure this is checked. Continue creating the worksheet.

Click Start.
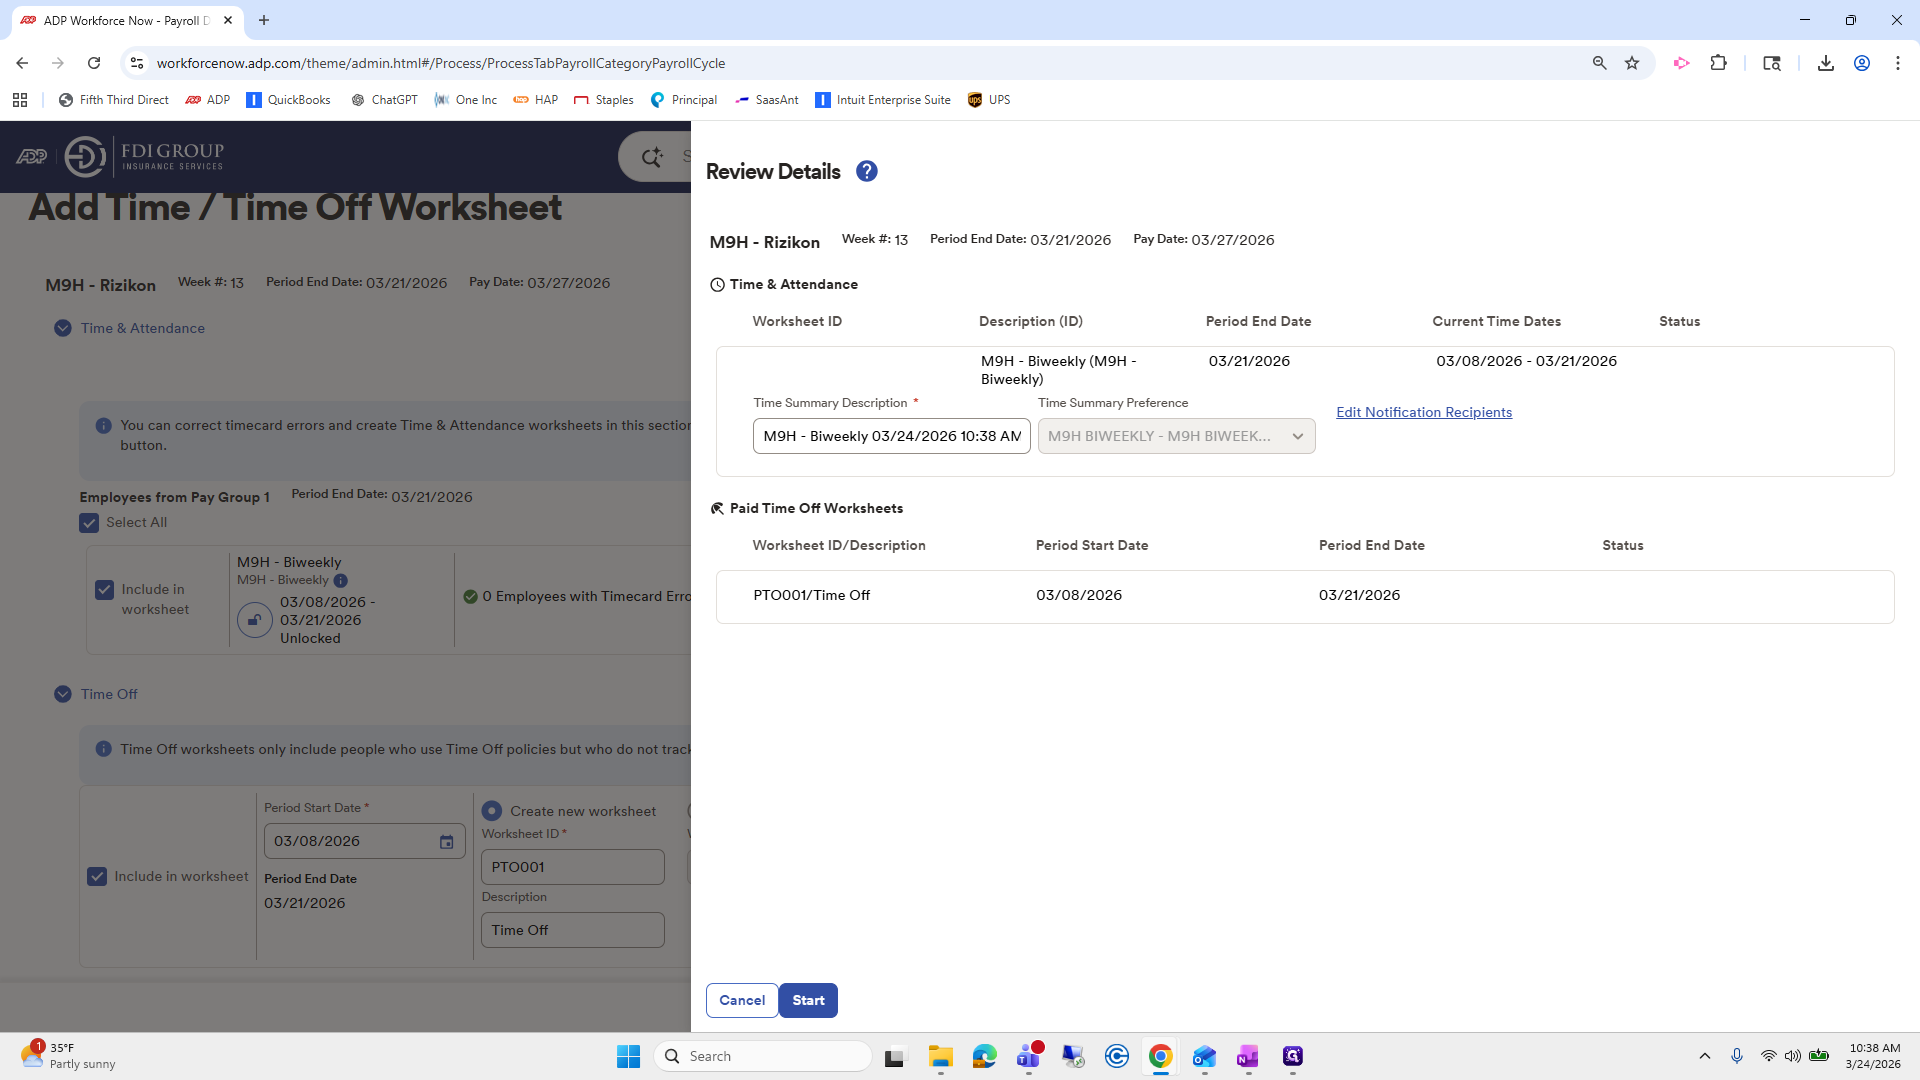
View worksheets.

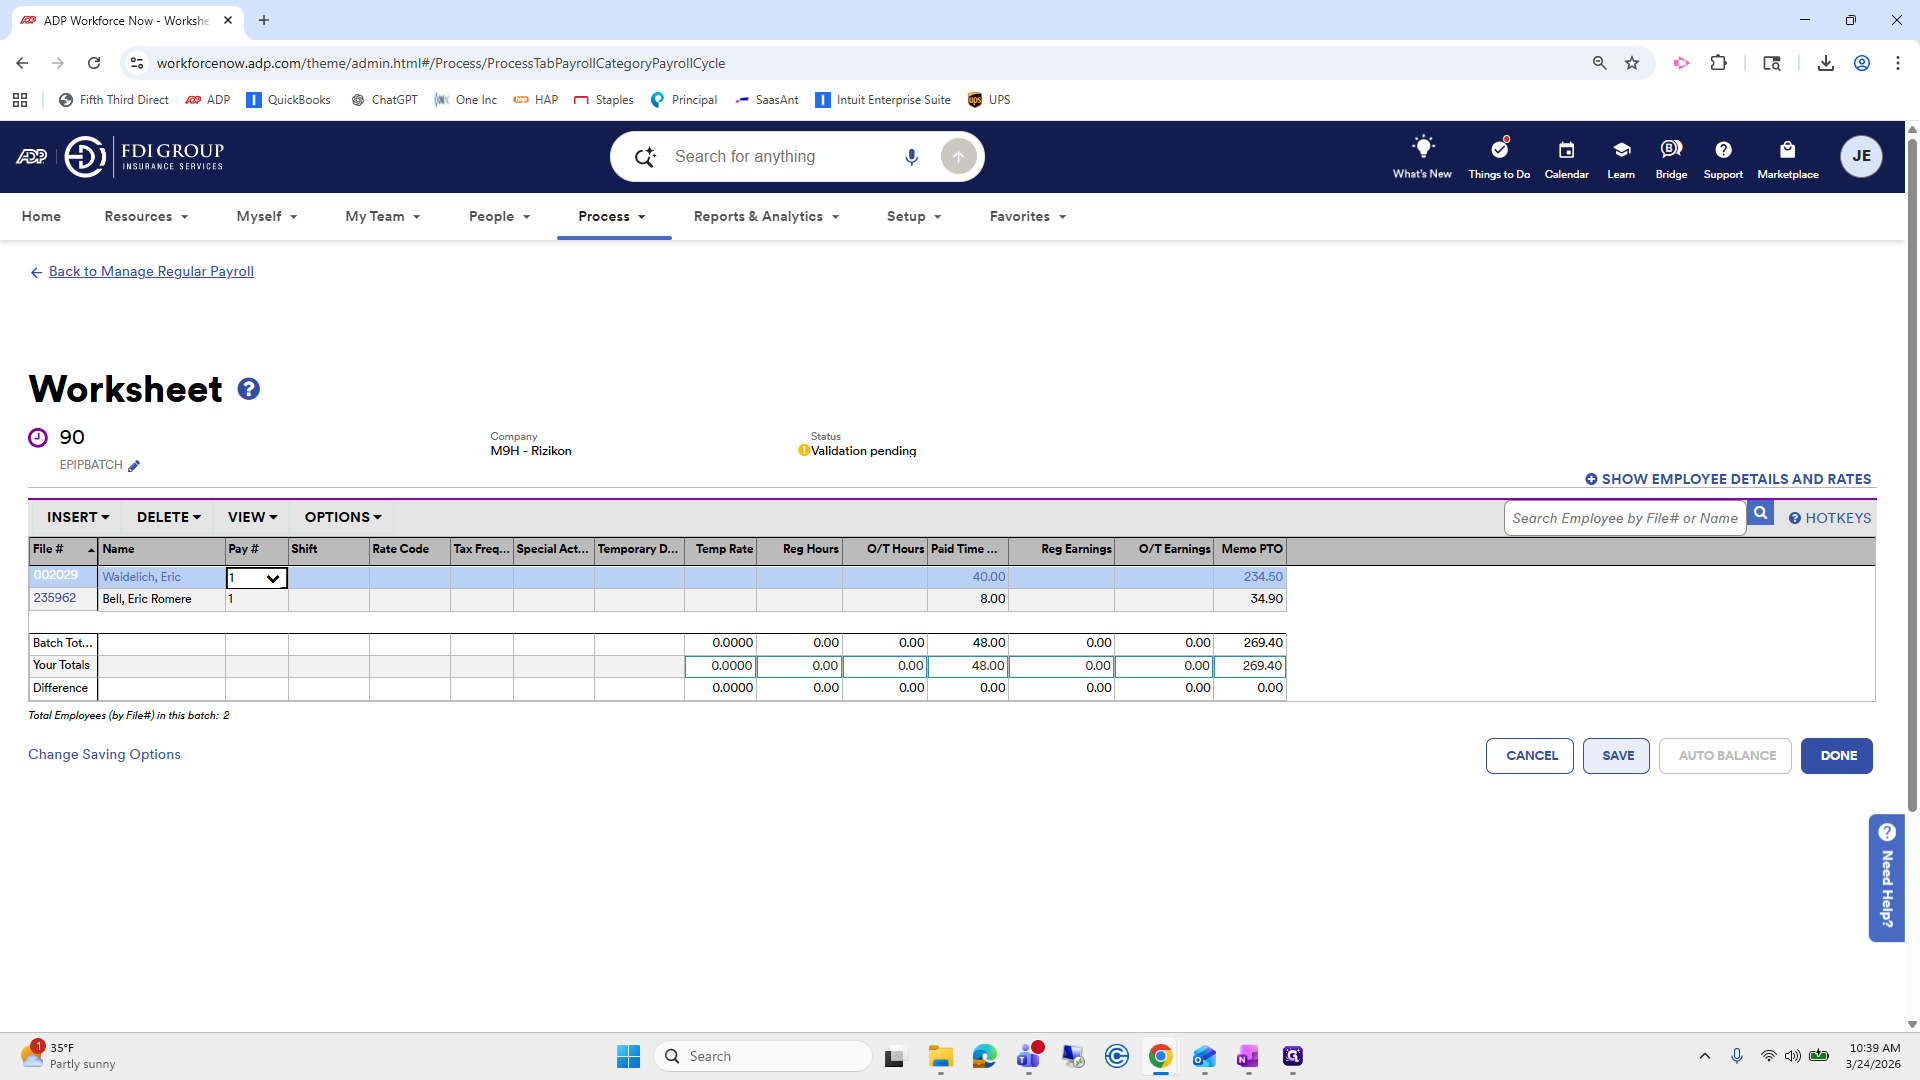
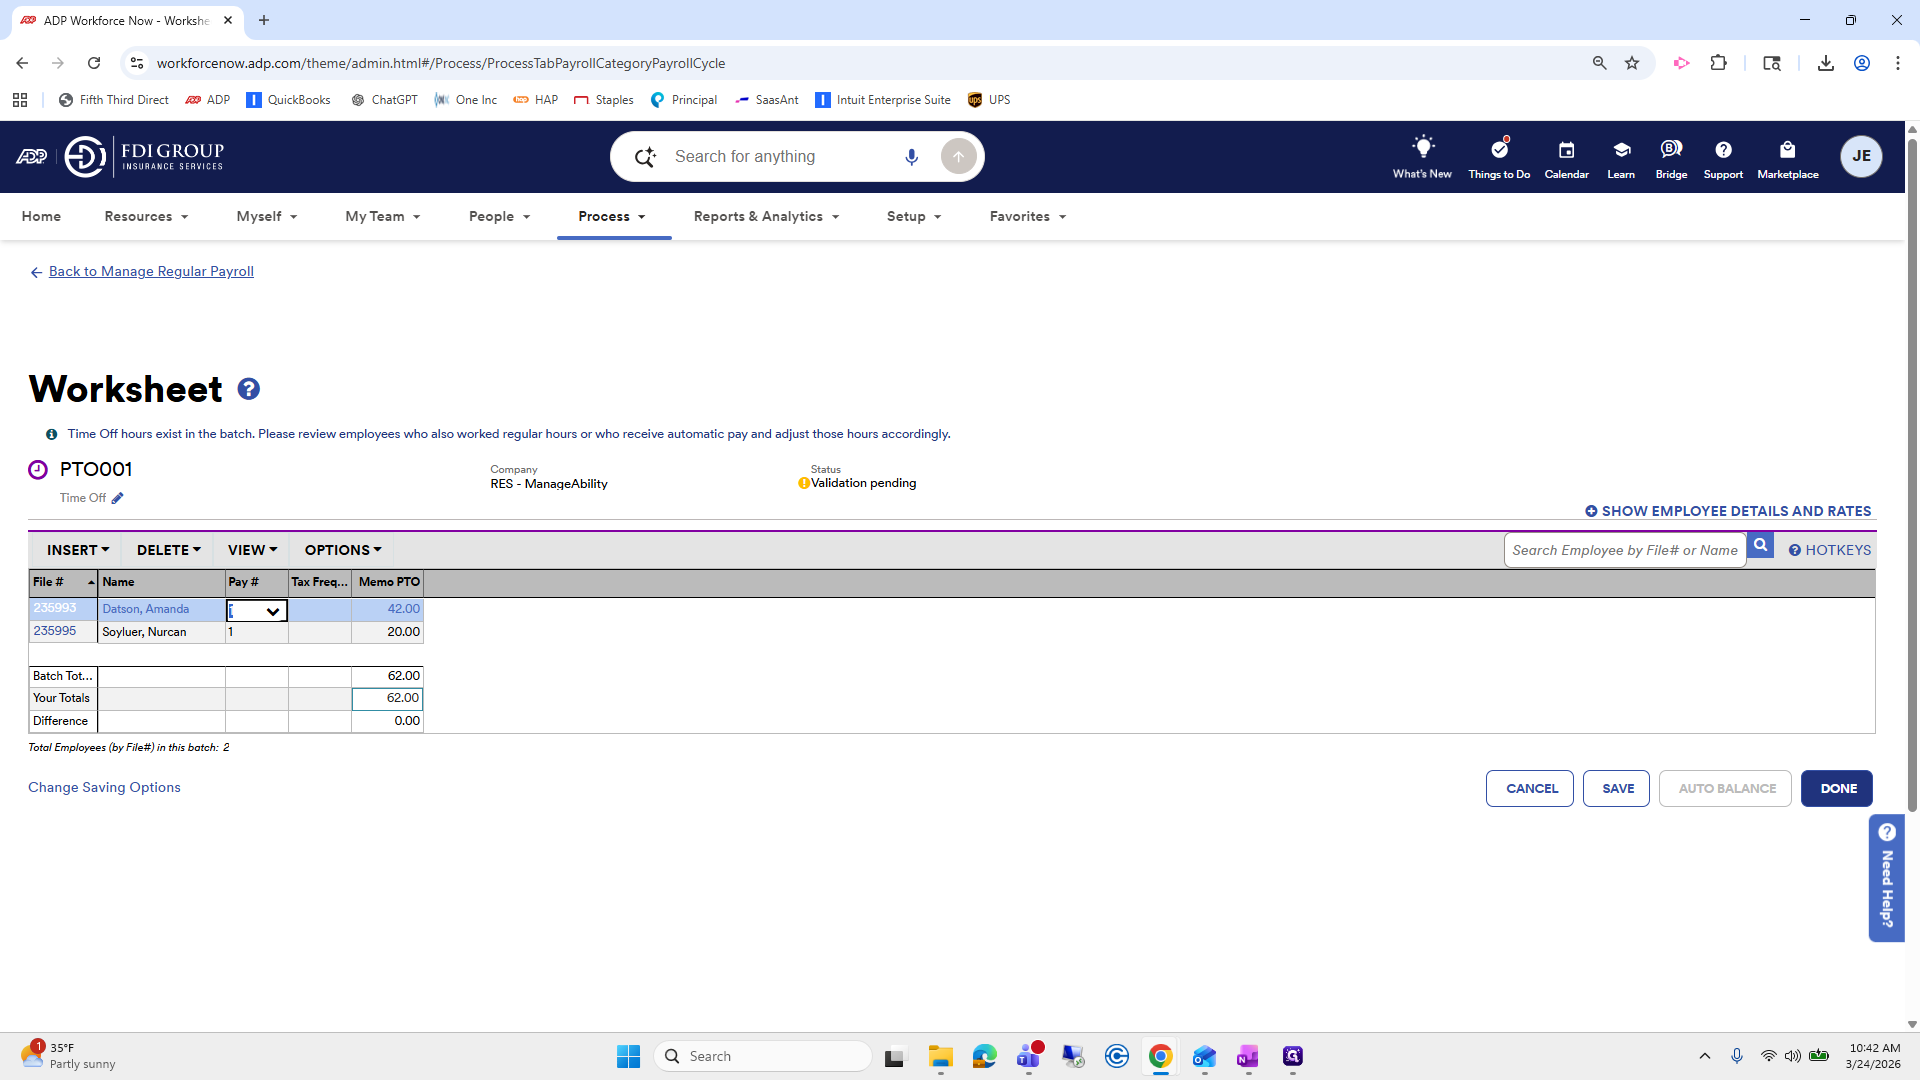
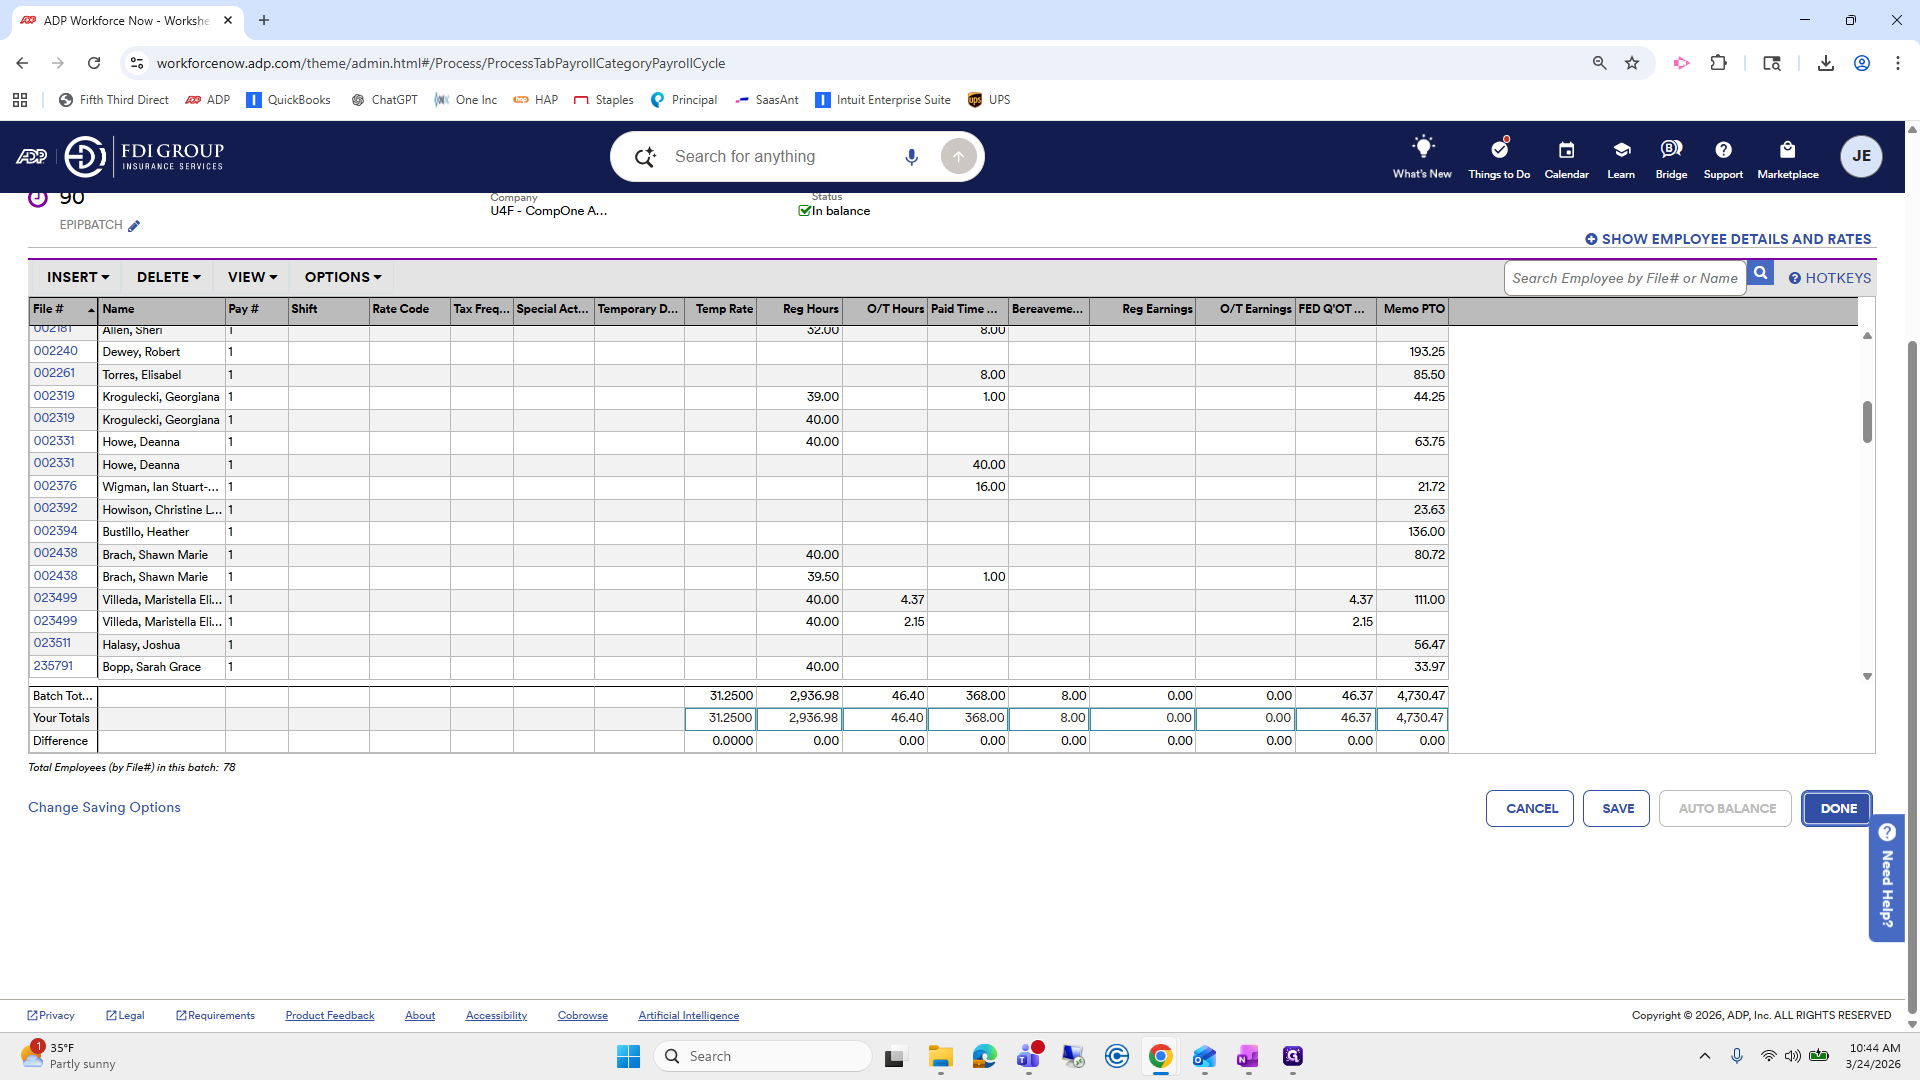
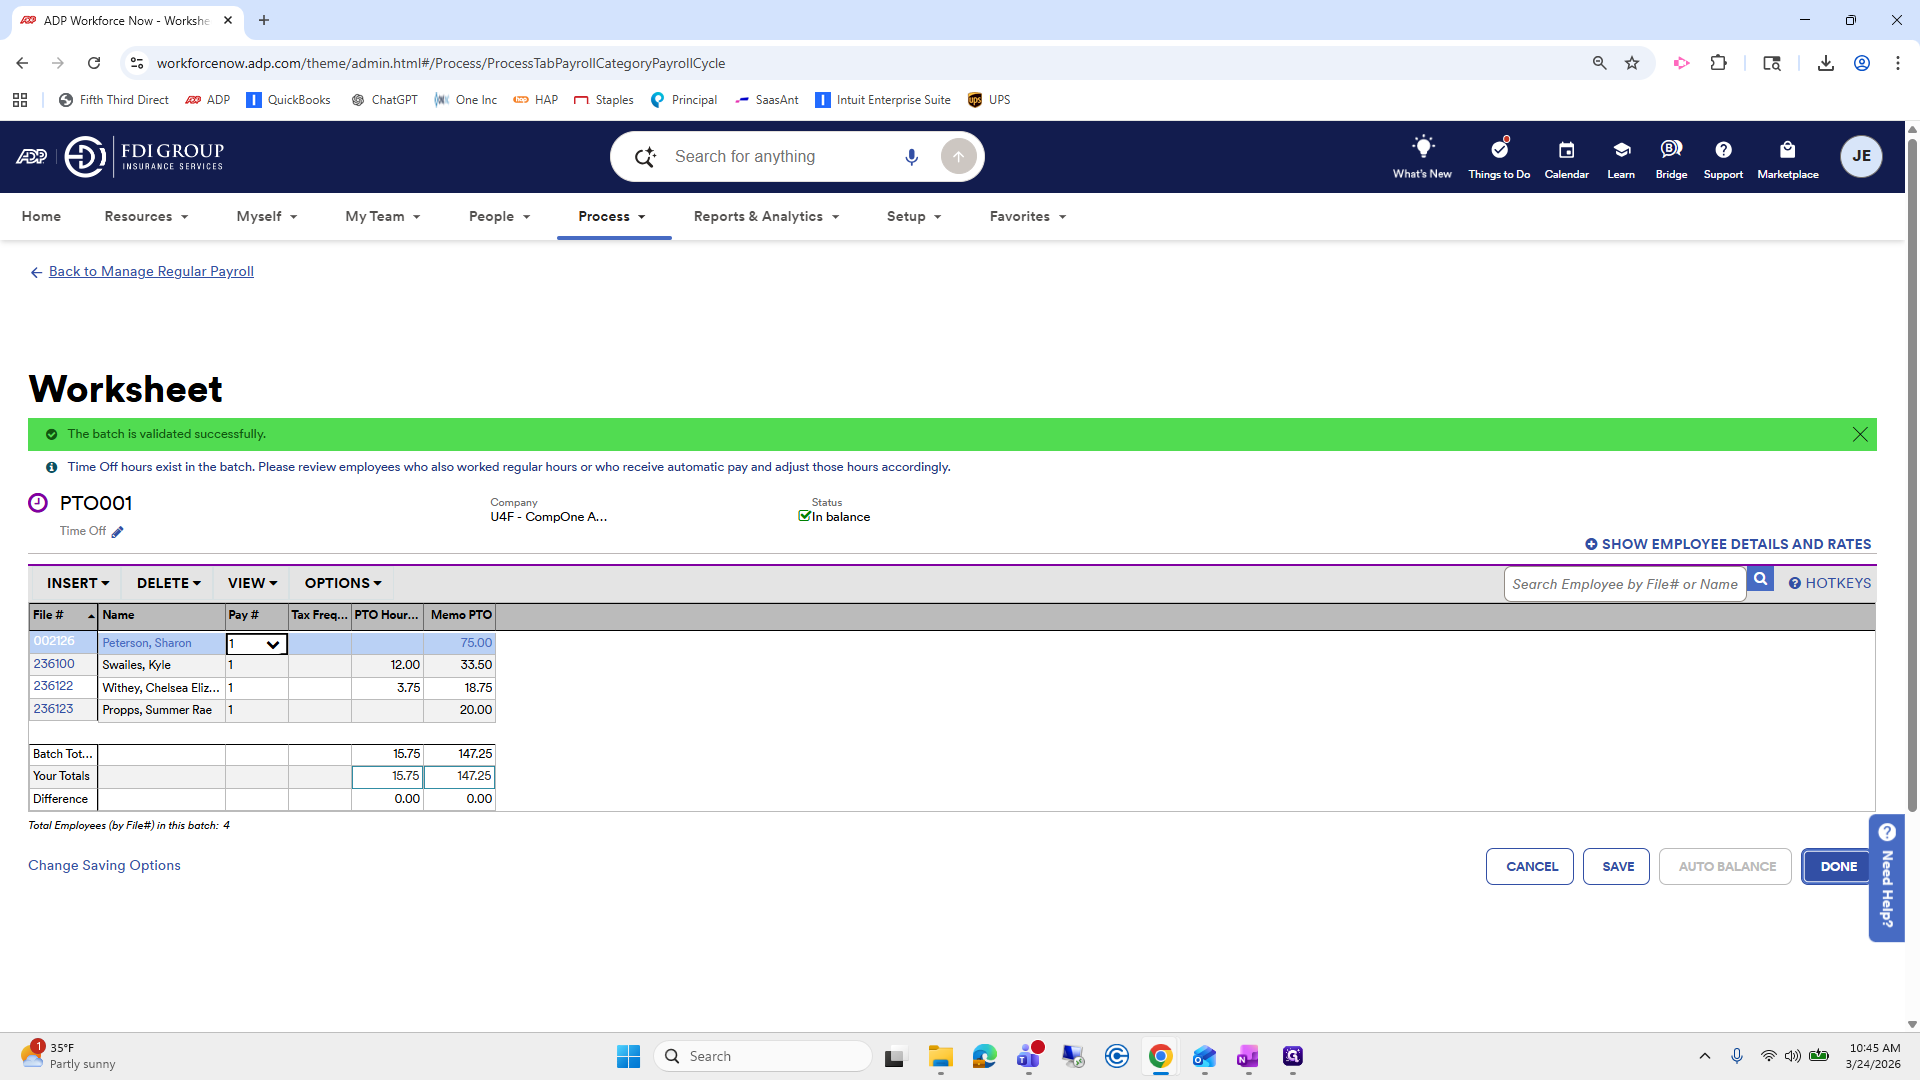
This one was pulled in two batches. One belongs to us, and one is PTO.

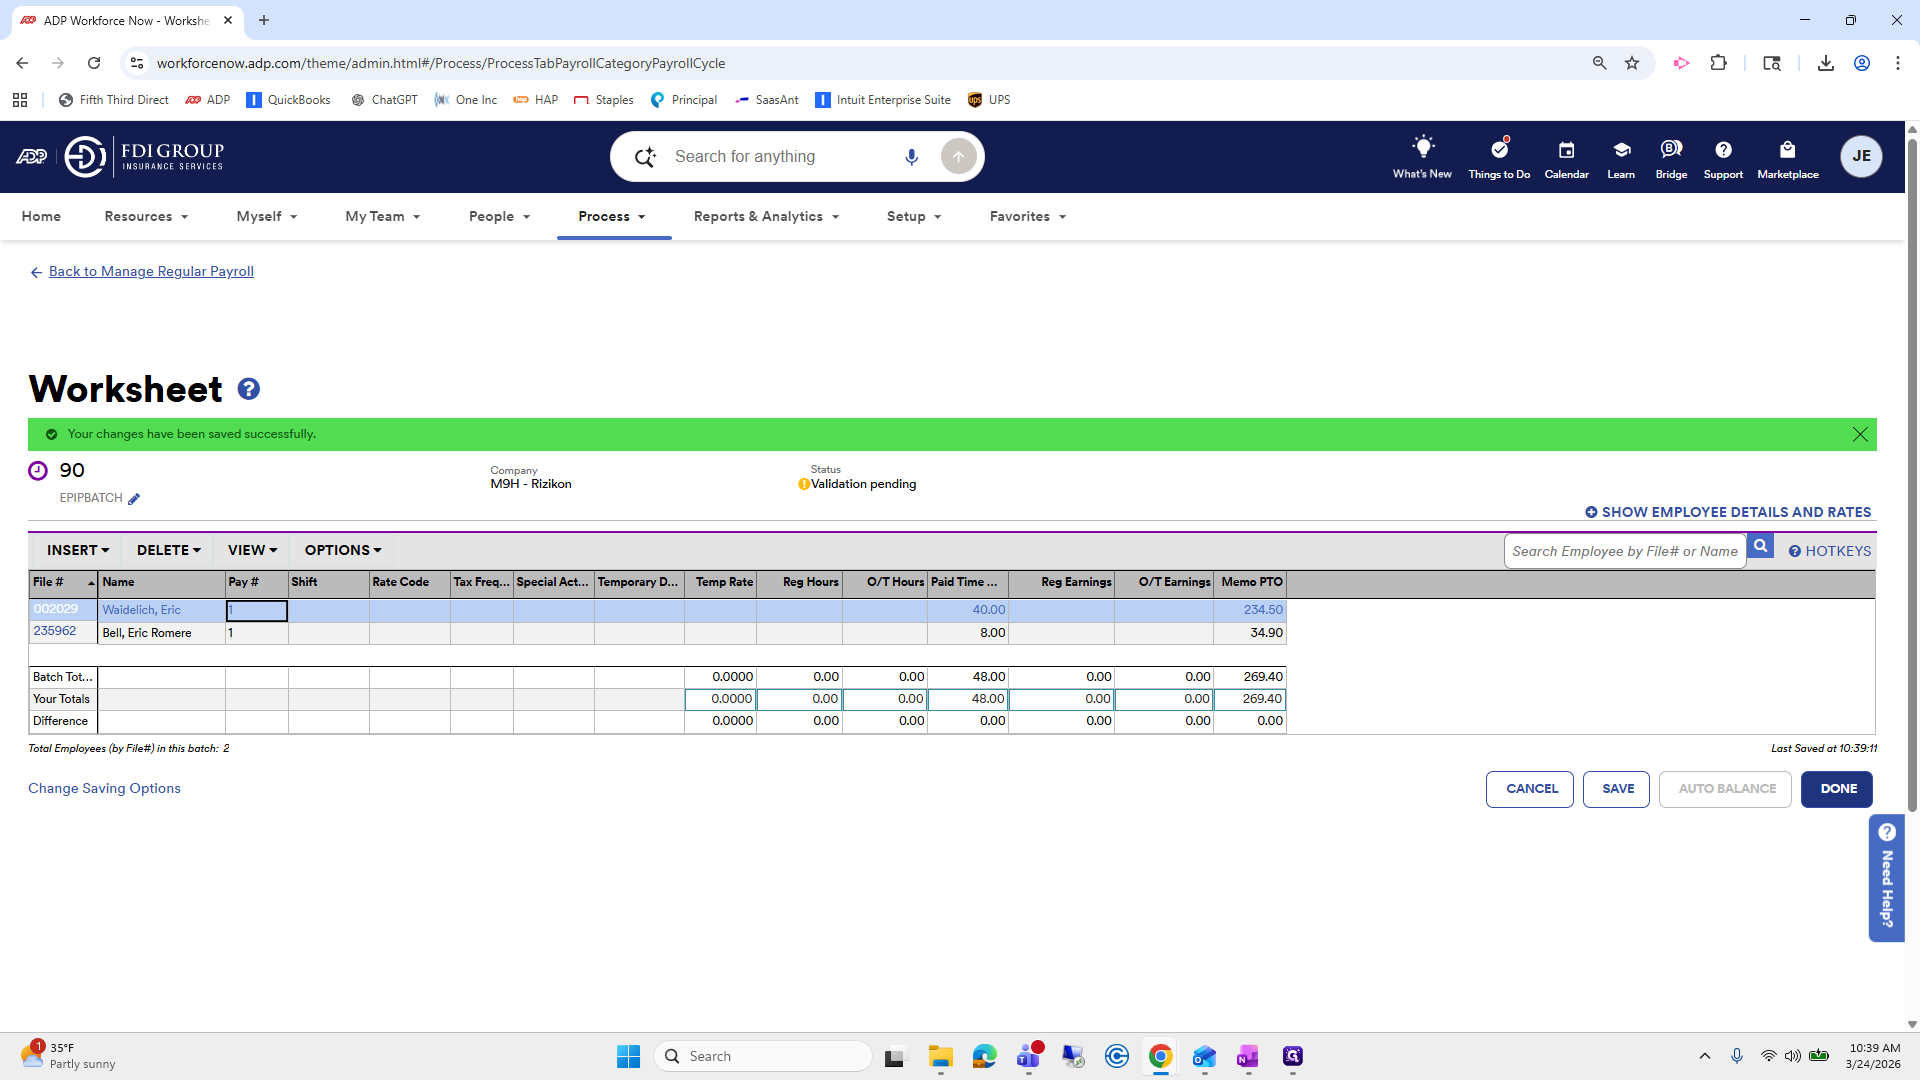
This looks good. Click Save, then Done.

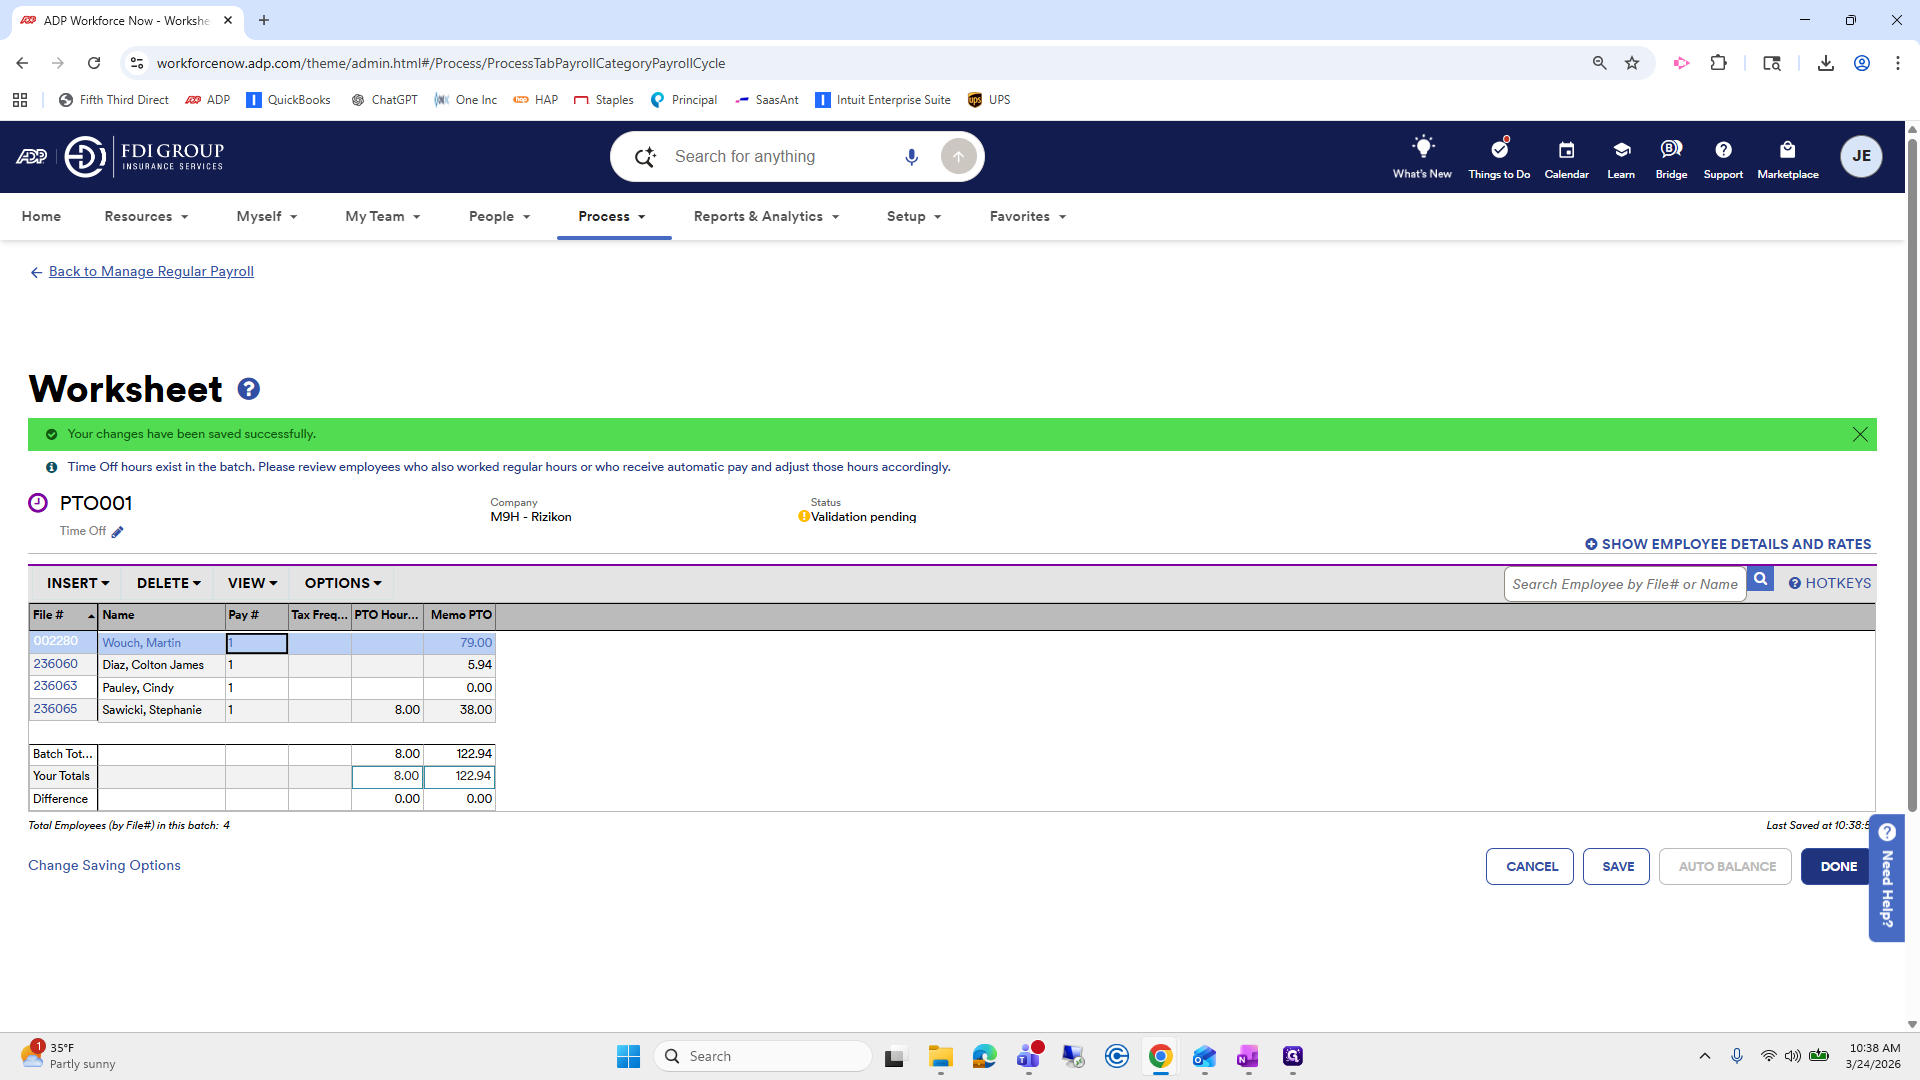
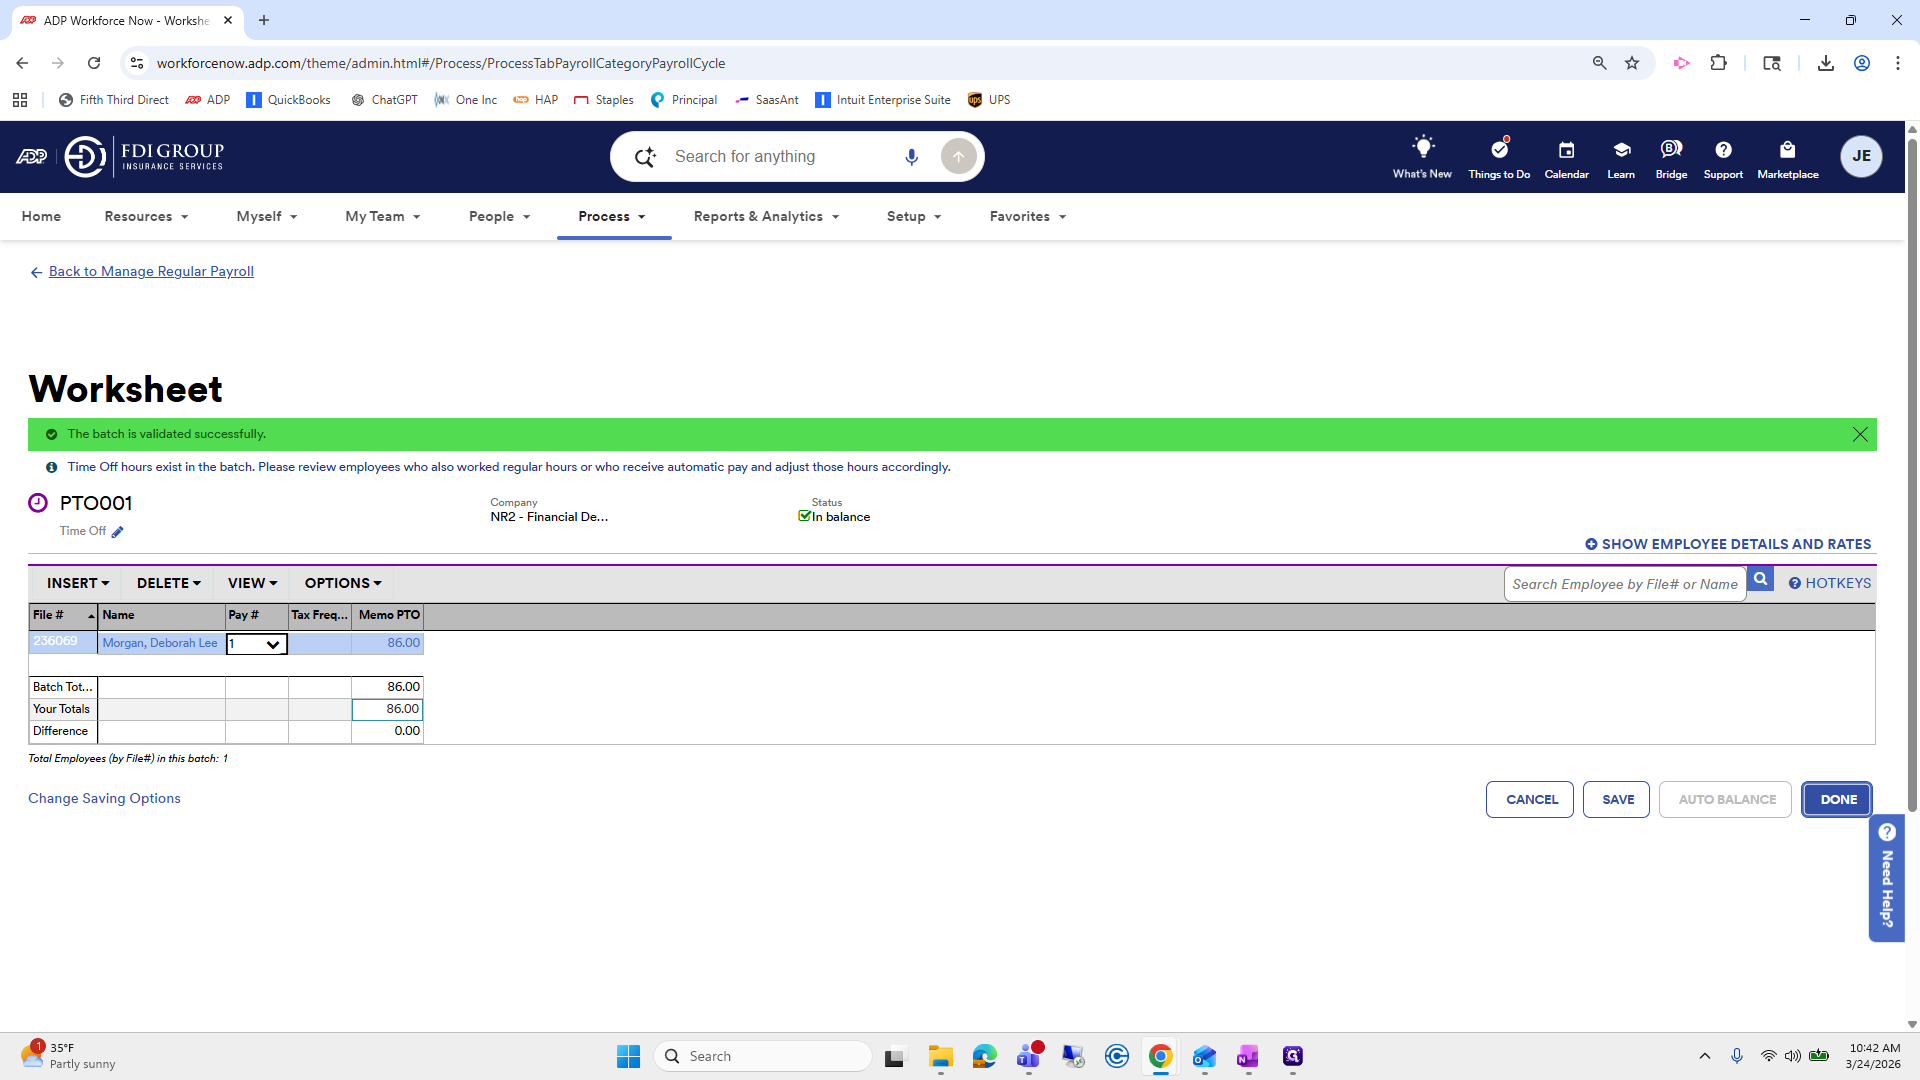
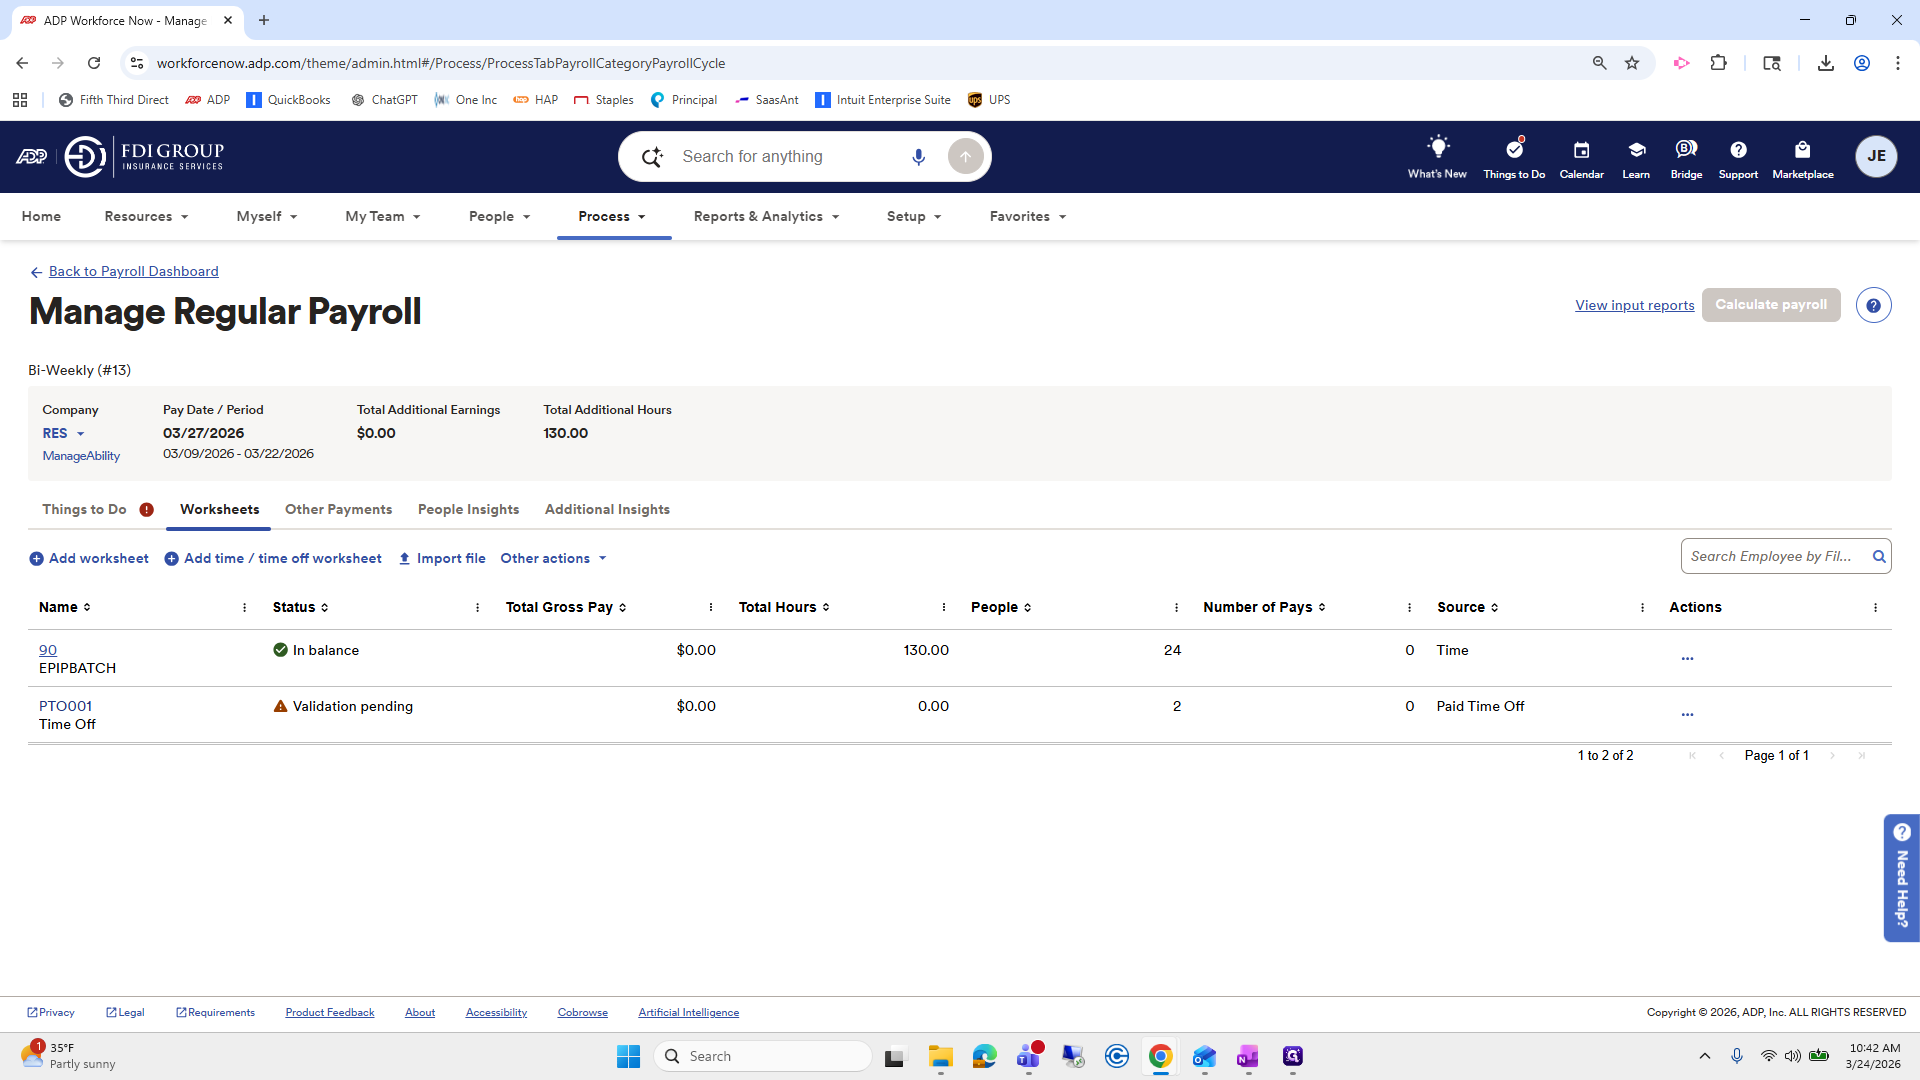
This validates it. I will click on this one.

This one looks good. They only had paid time off.
Save and done.
For Risikon, if there are additional hours, three to four employees will submit their pay hours to Misty Jefferson. She will then forward them. I usually send an email to Misty asking if there are any hours, but lately there haven't been. If you haven't received anything, you can either contact her or move forward.


We will go back to the Payroll Dashboard. We did SCA and Risikon. Next, we'll cover Star Tech.
Add a Time Off Worksheet.

Everything looks good. Continue.

""
Review worksheets.

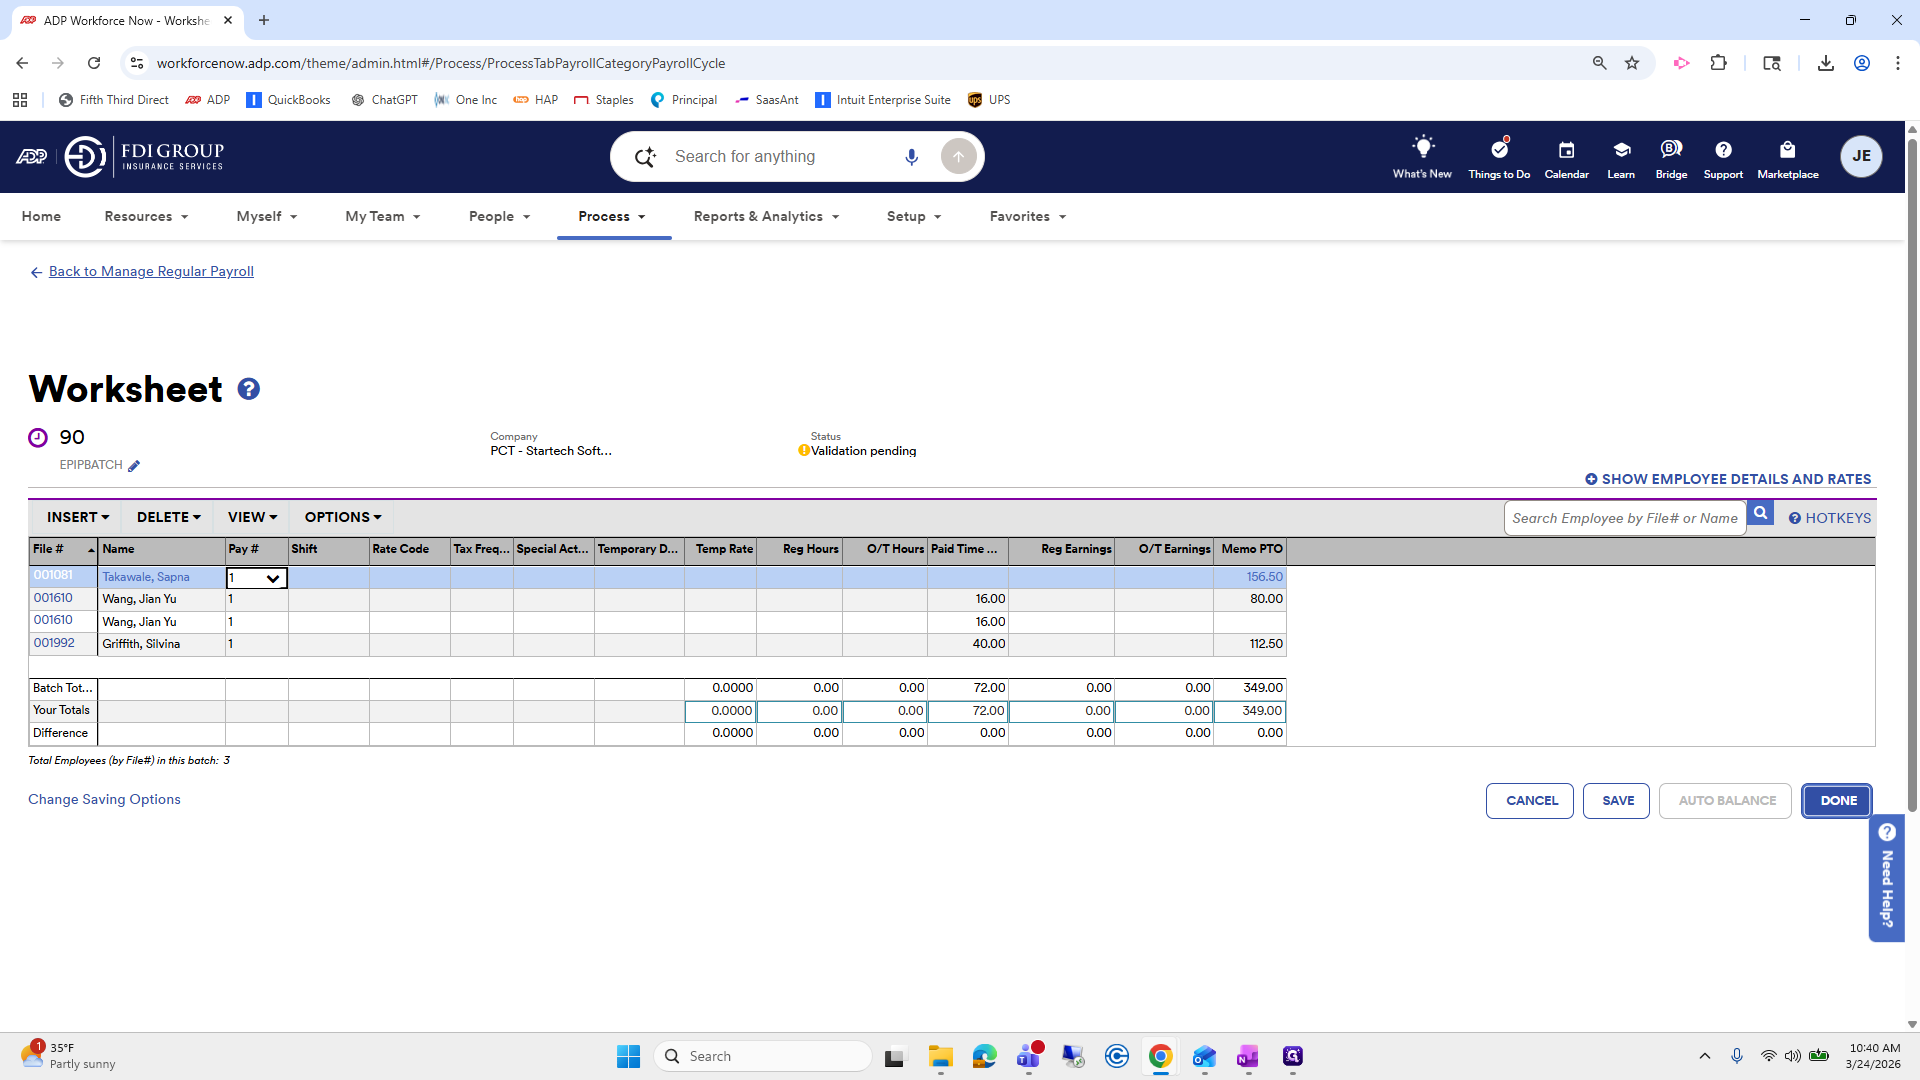
Star Tech employs only salaried staff, so only their paid time off will be shown.

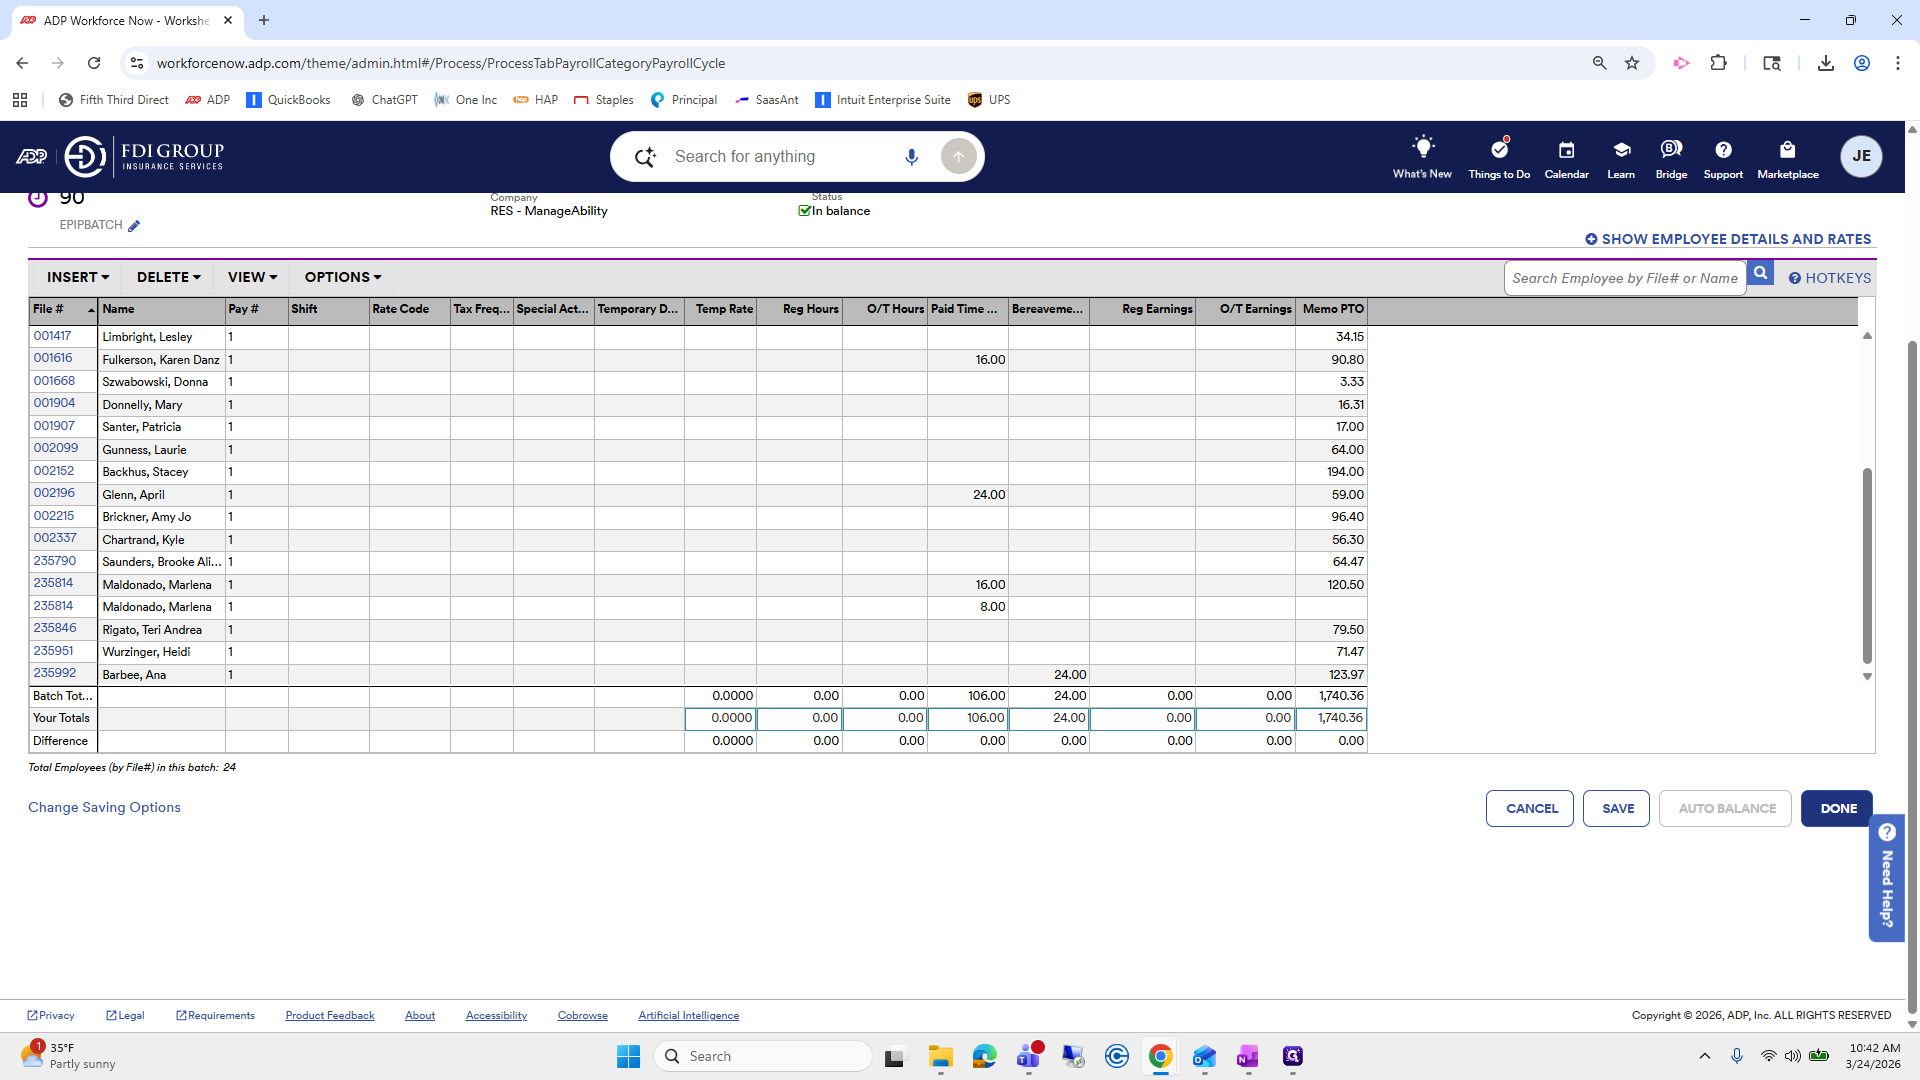
They are taking paid time off. These are the hours they recorded during that two-week period. The memo PTO is simply their balance.

That one looks good.

Now we have Health Alliance.

Add time off.
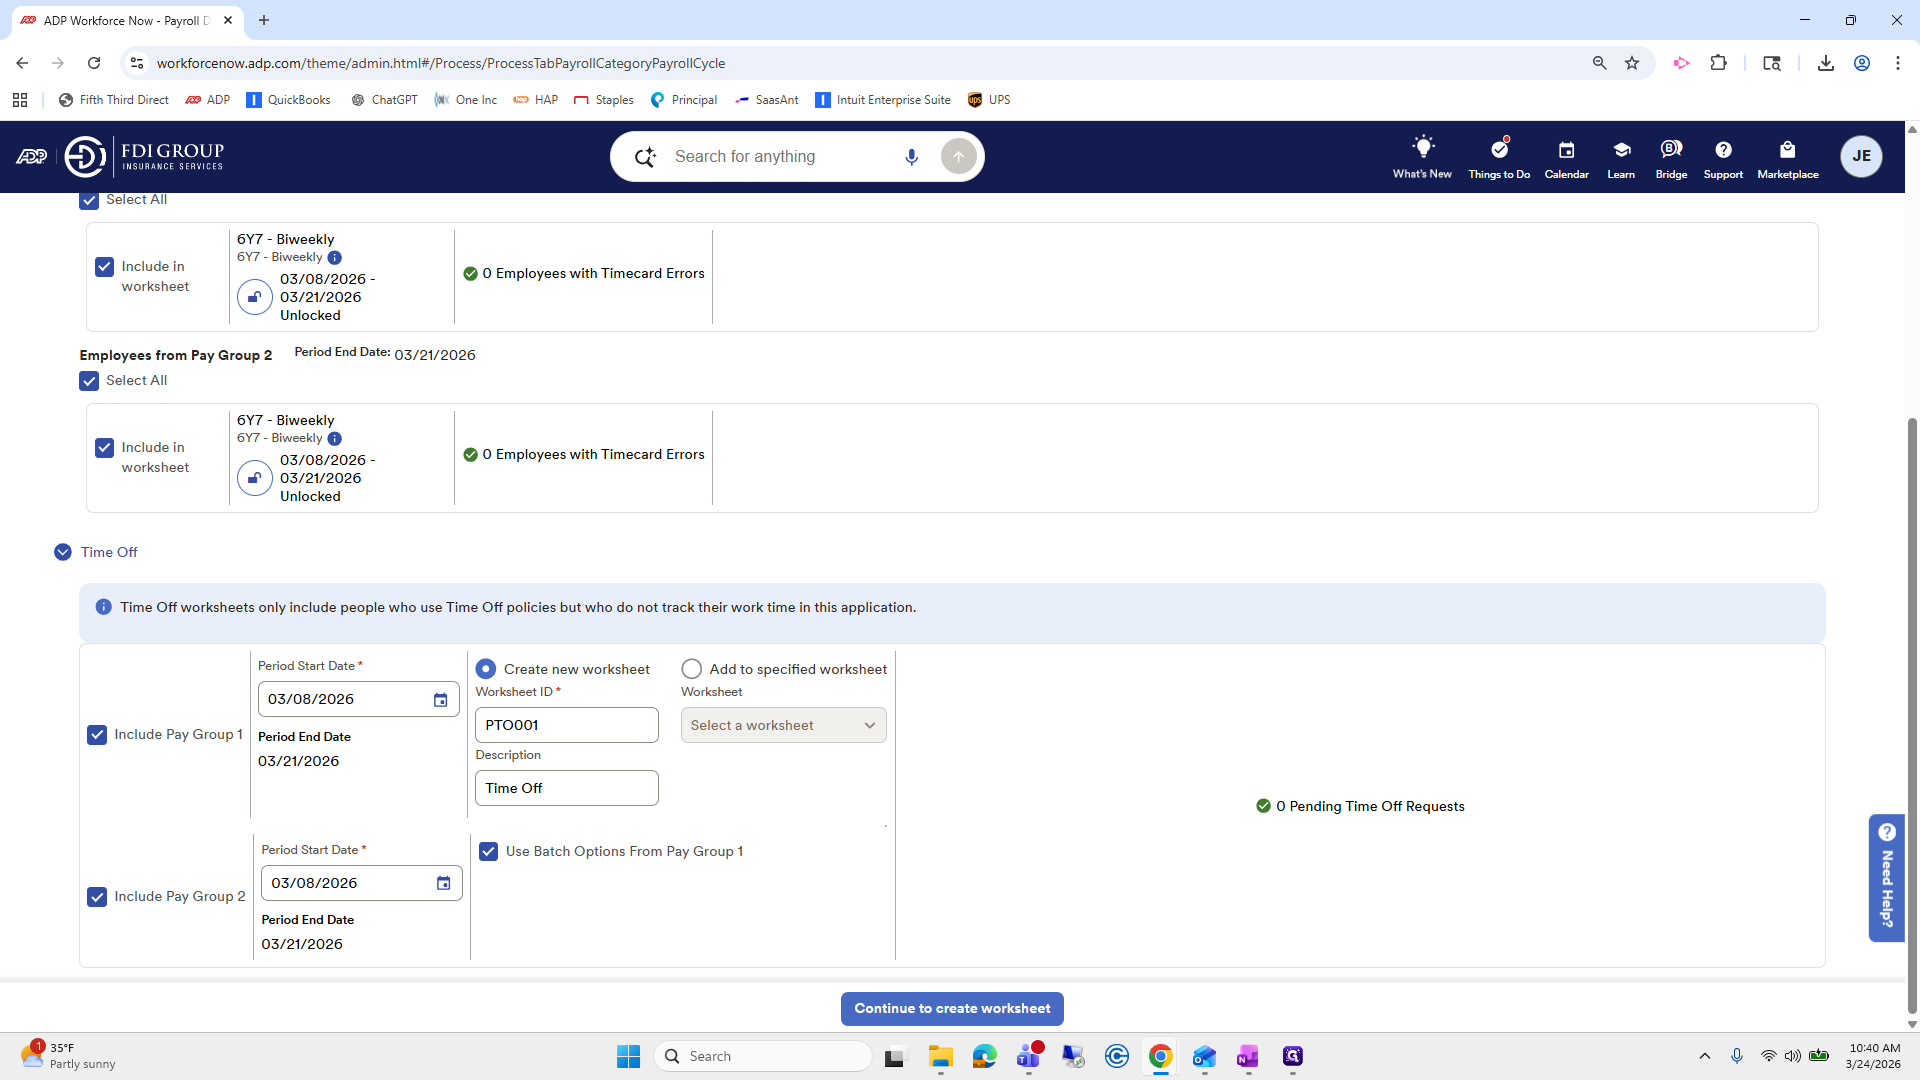
This looks good. Scroll down and you will see the "Include Pay Group" option, which is not checked. We want to check that.

"" I just lost my computer. Maybe it didn't happen for you, but everything went black for a minute.
Then go to Continue, select Create Worksheet, and click Start.

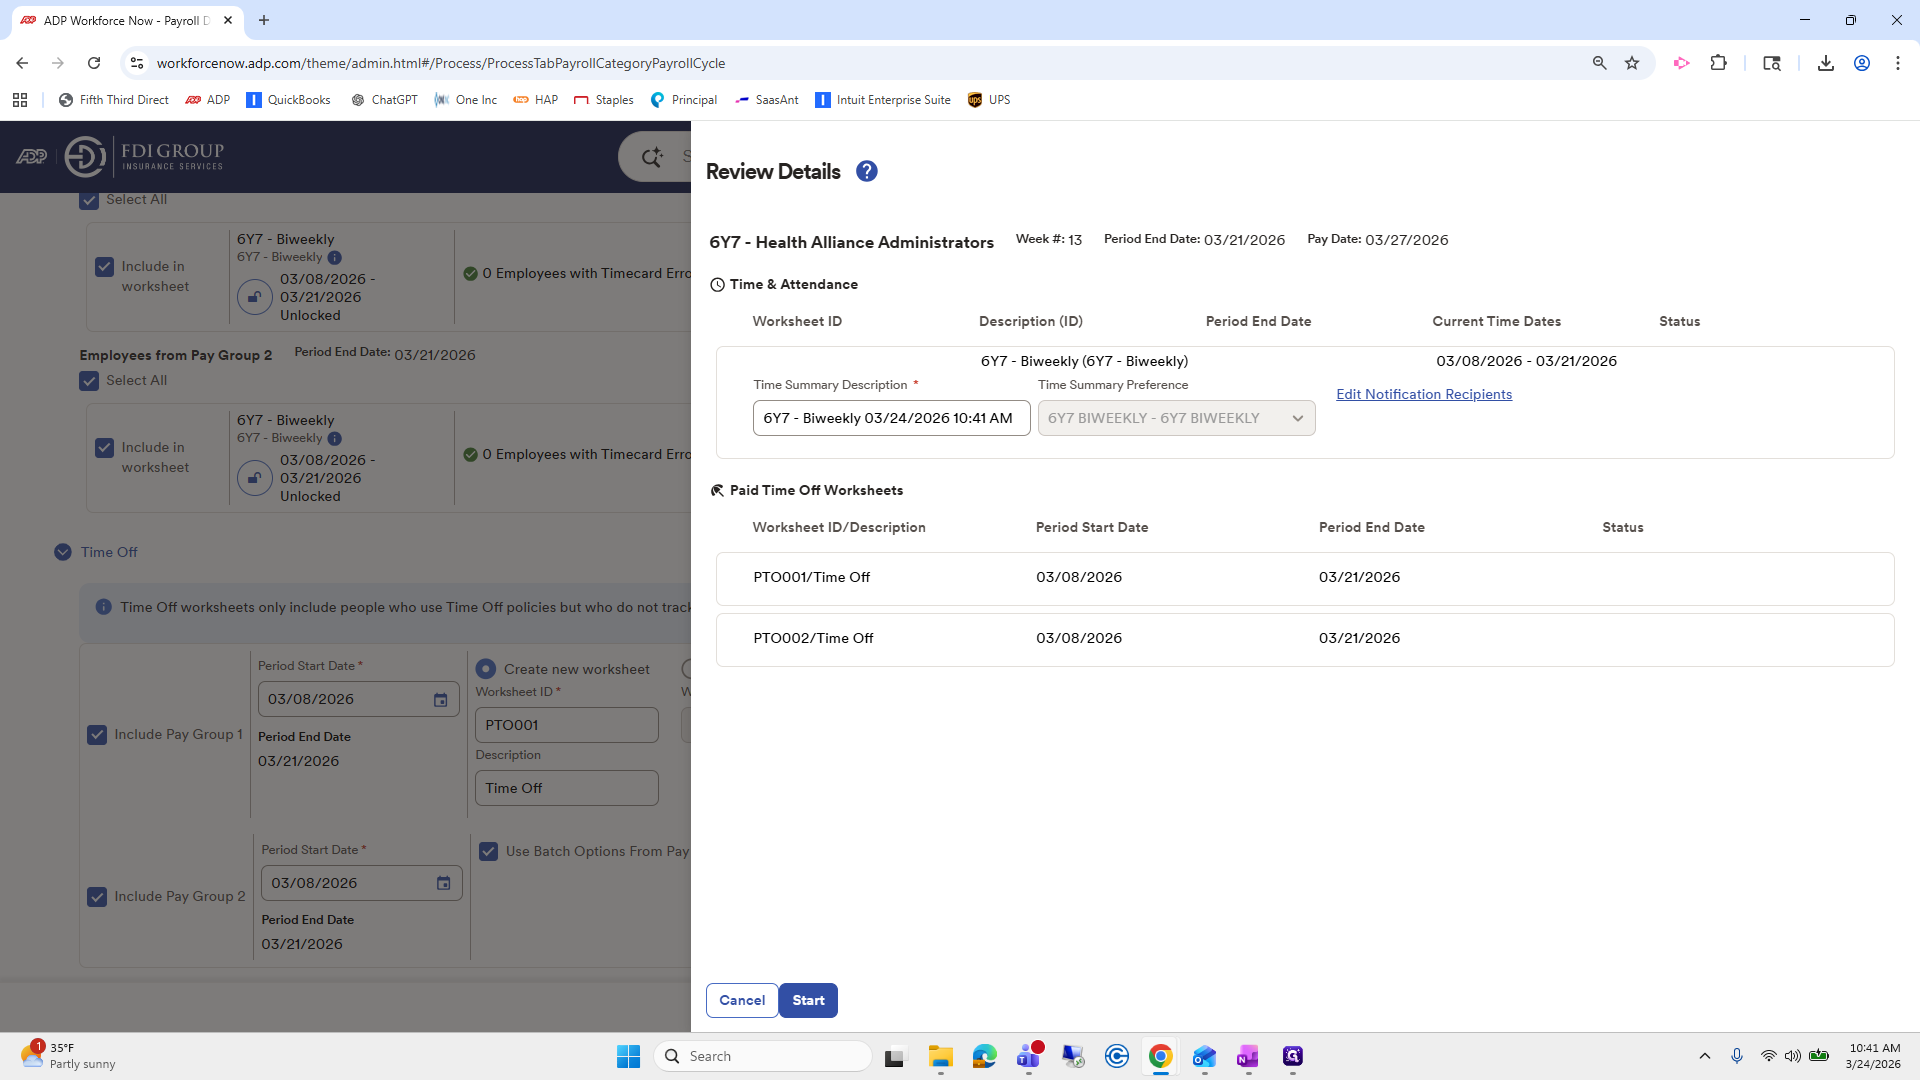
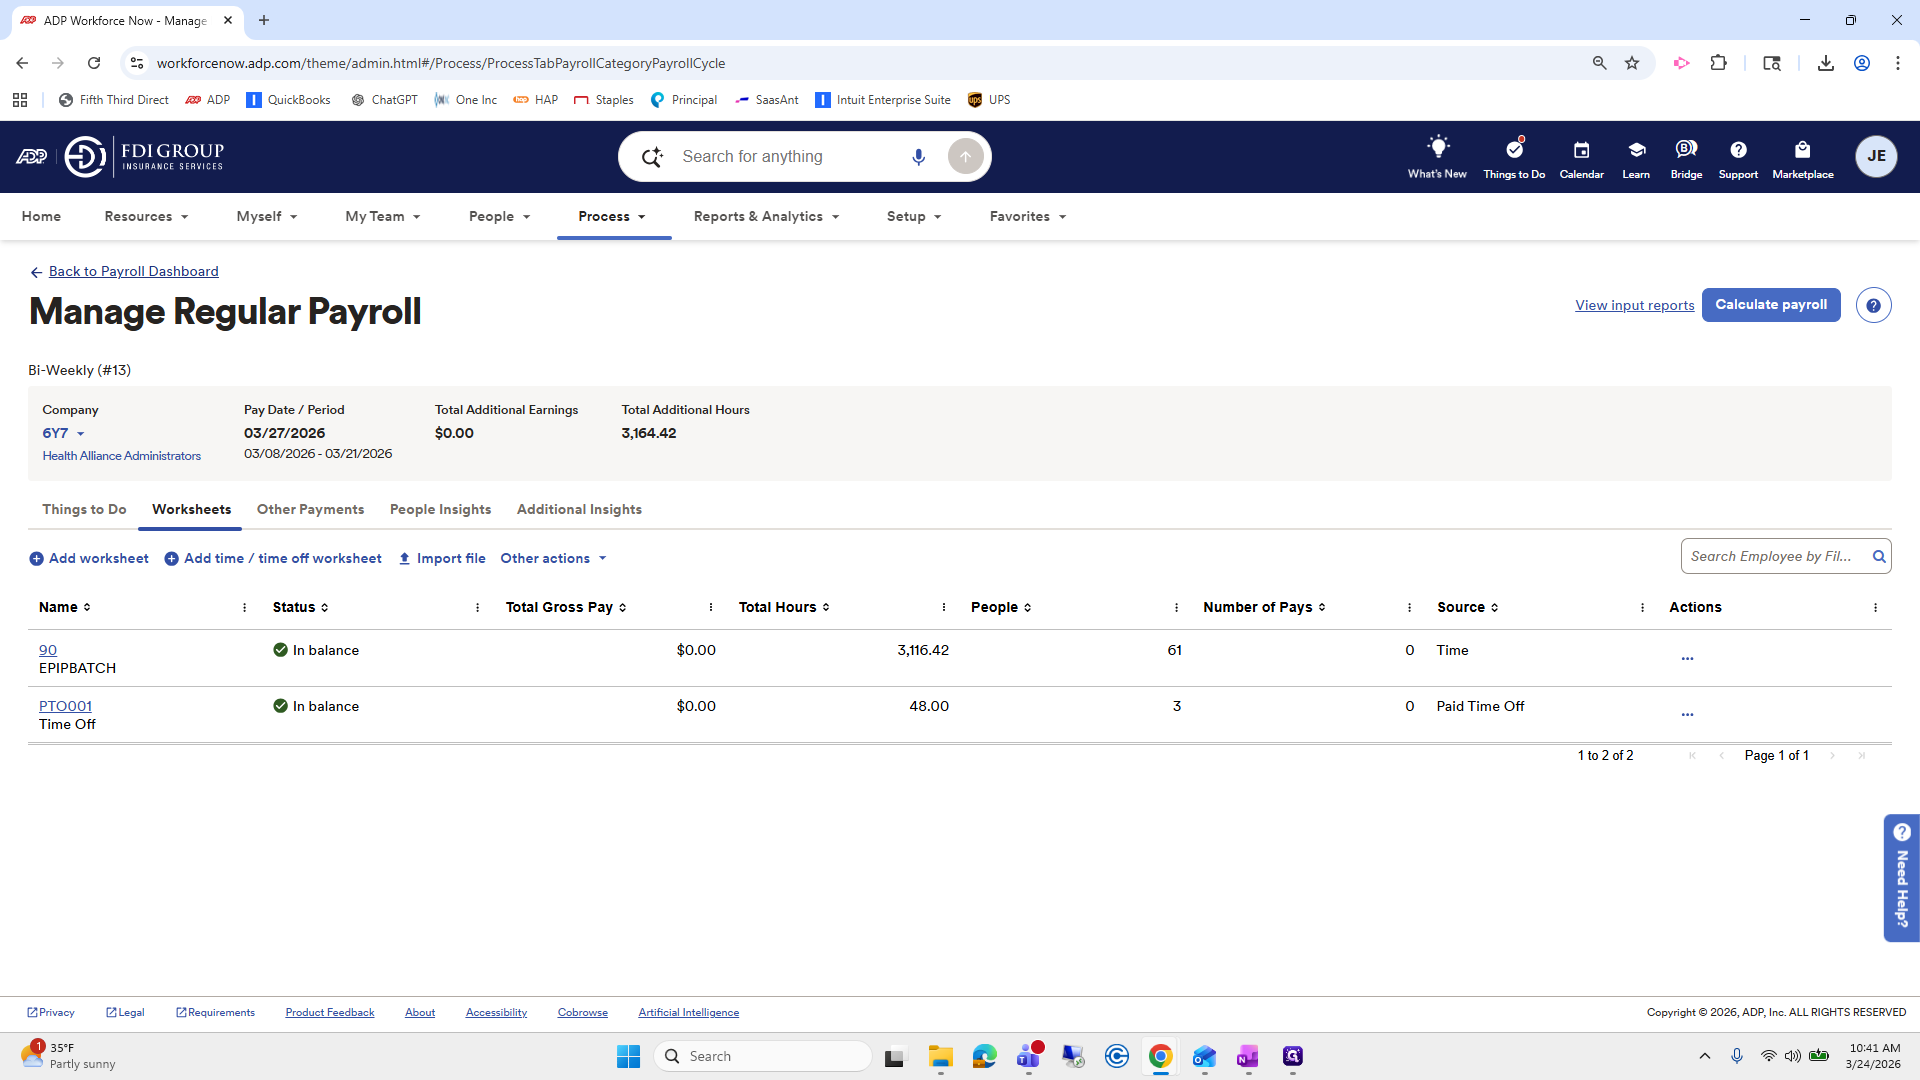
Review worksheets.

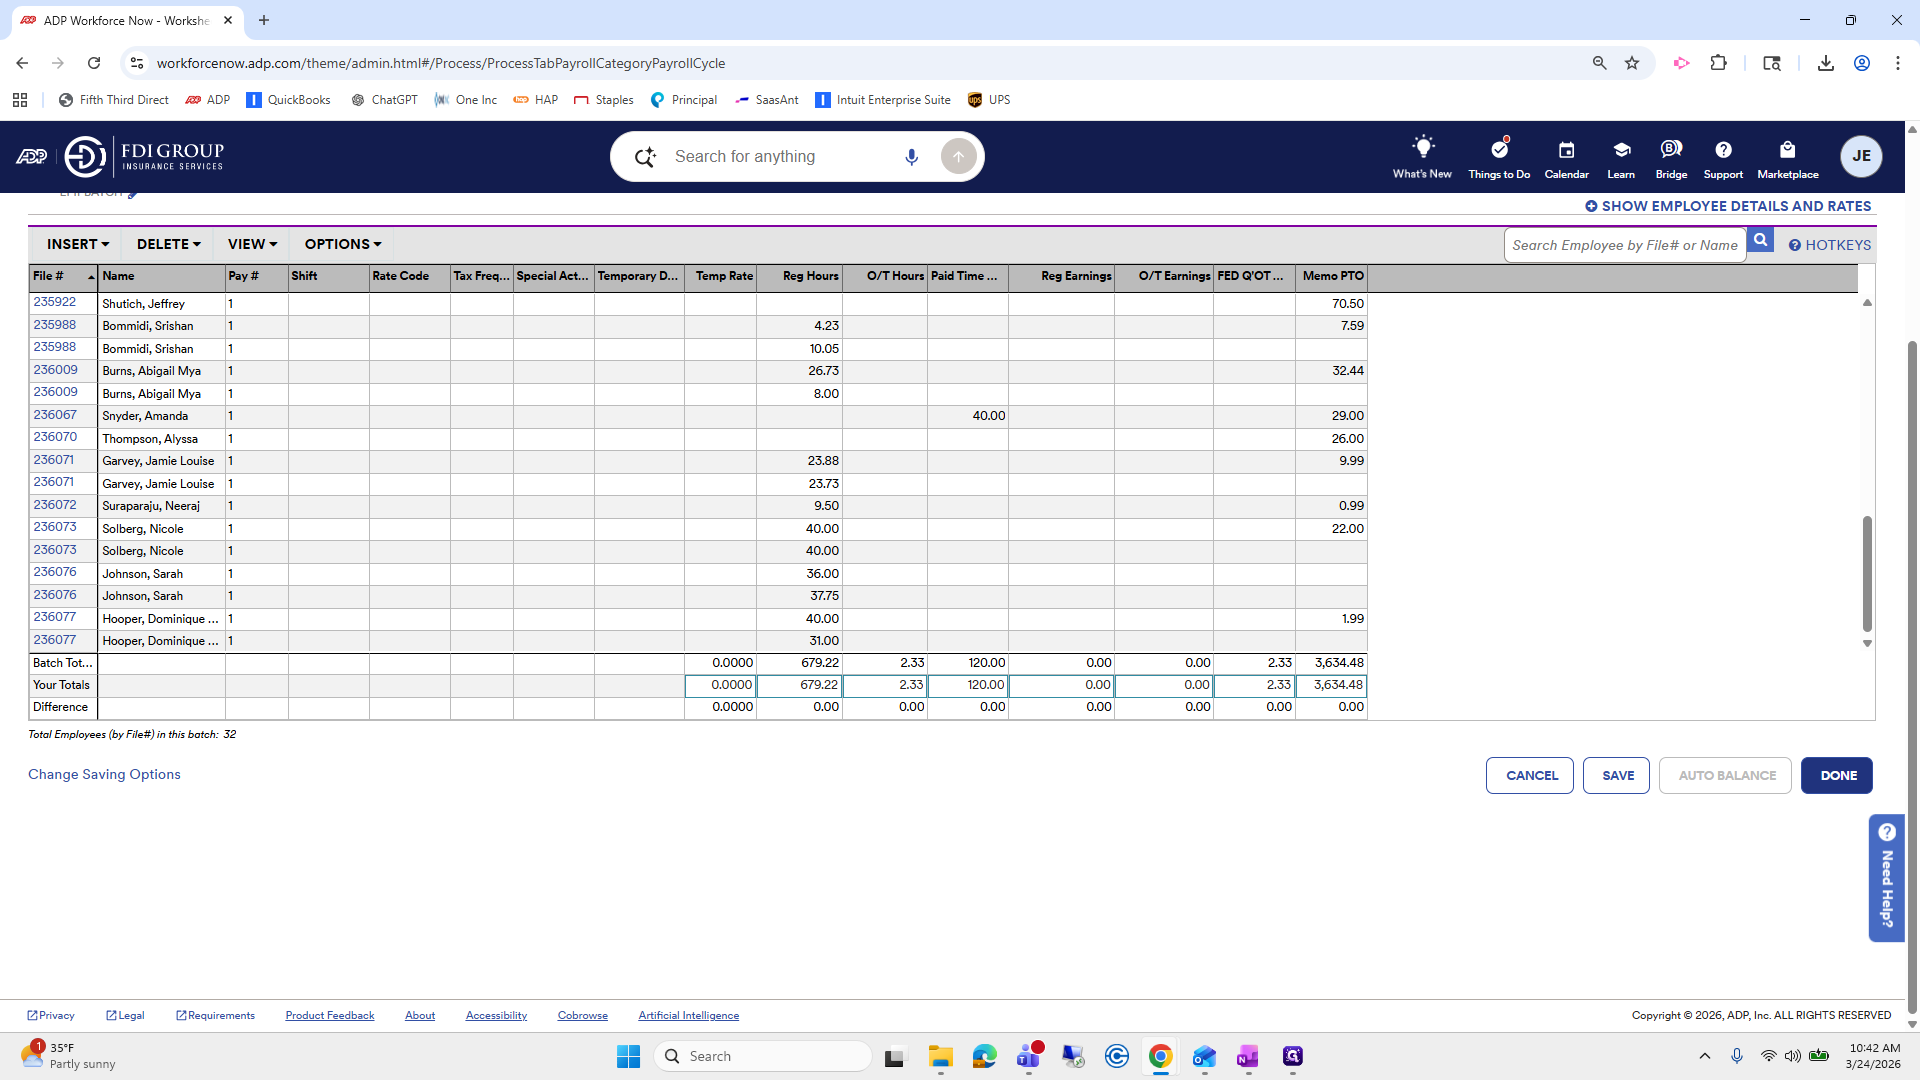
We will go into the hours.

This one shows hours, including regular hours and PTO taken. Press Done.

Go to PTO.

You shouldn't need to review these, as they have already been reviewed by their managers.

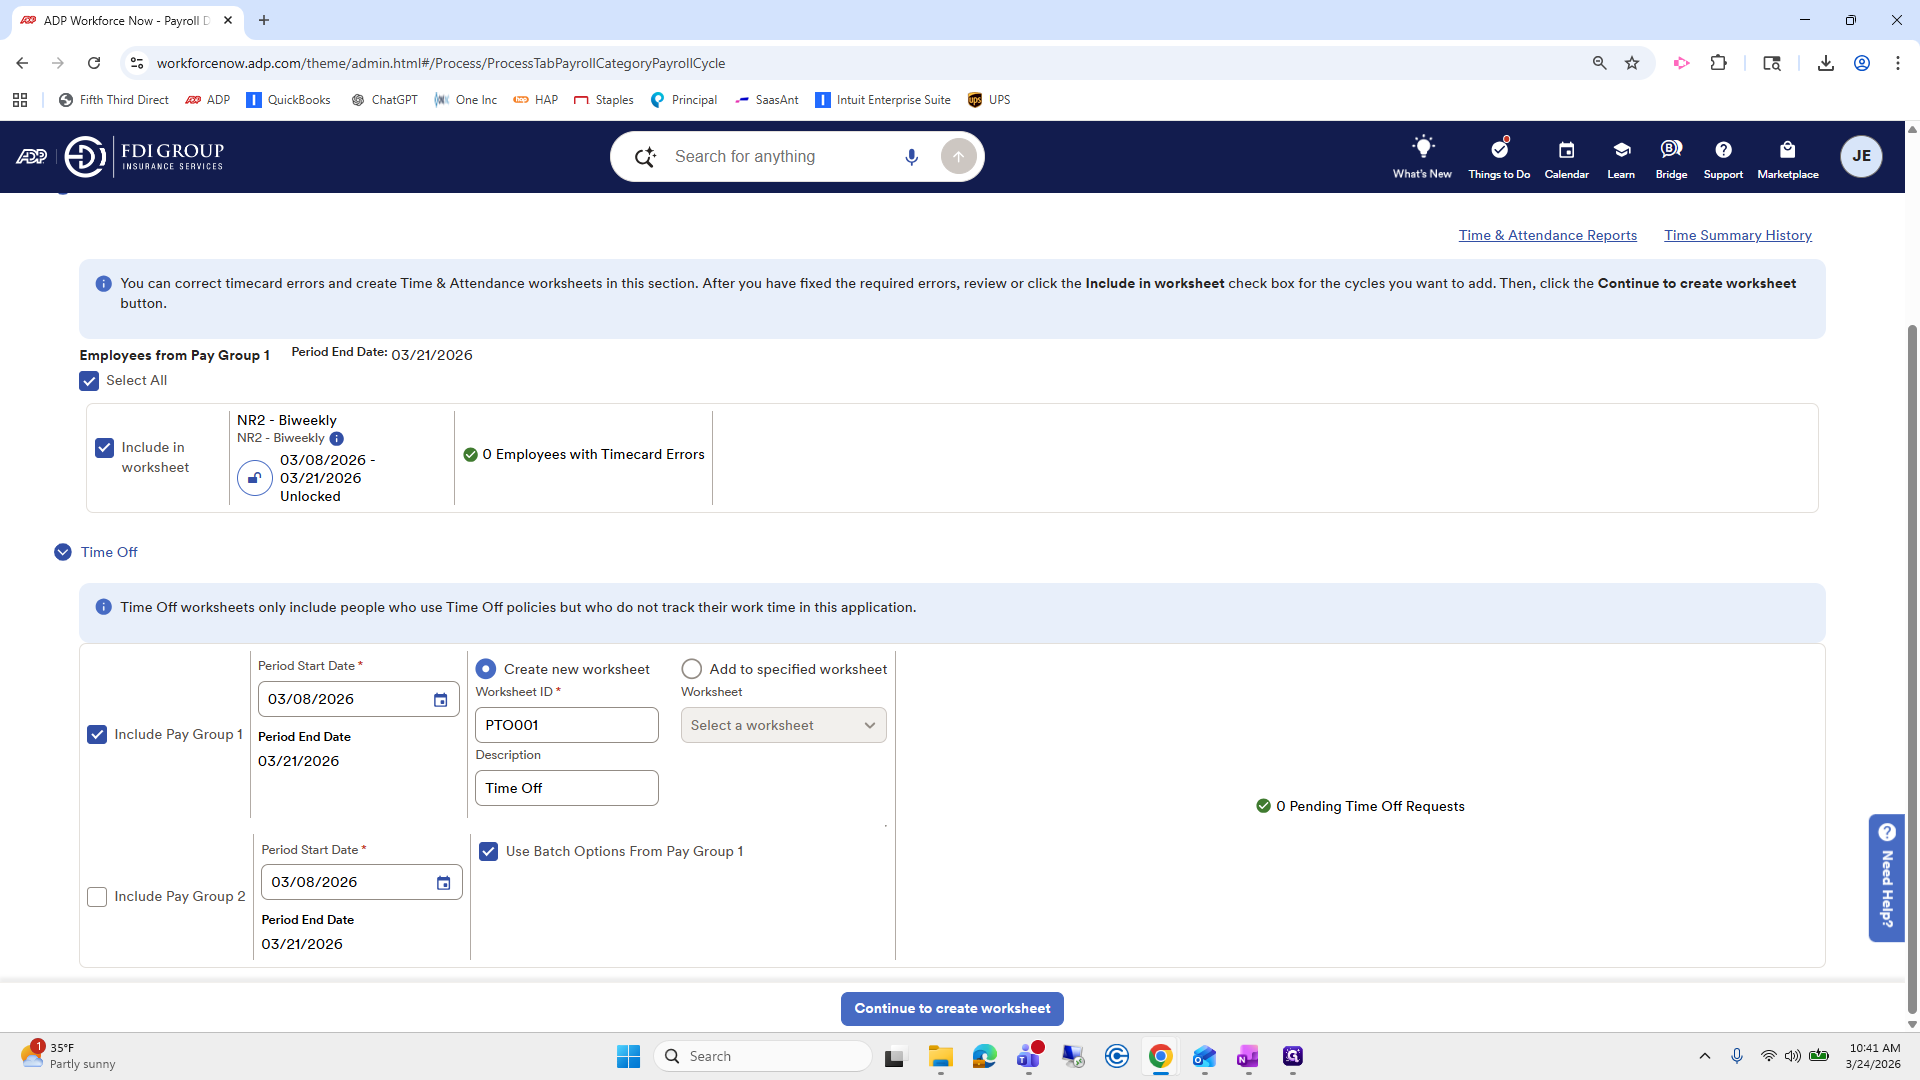
Payroll Dashboard. Next, we have Financial Designs.

Add Time and Time Off Worksheet.

This one is missing the Pay Group, so click it.
""

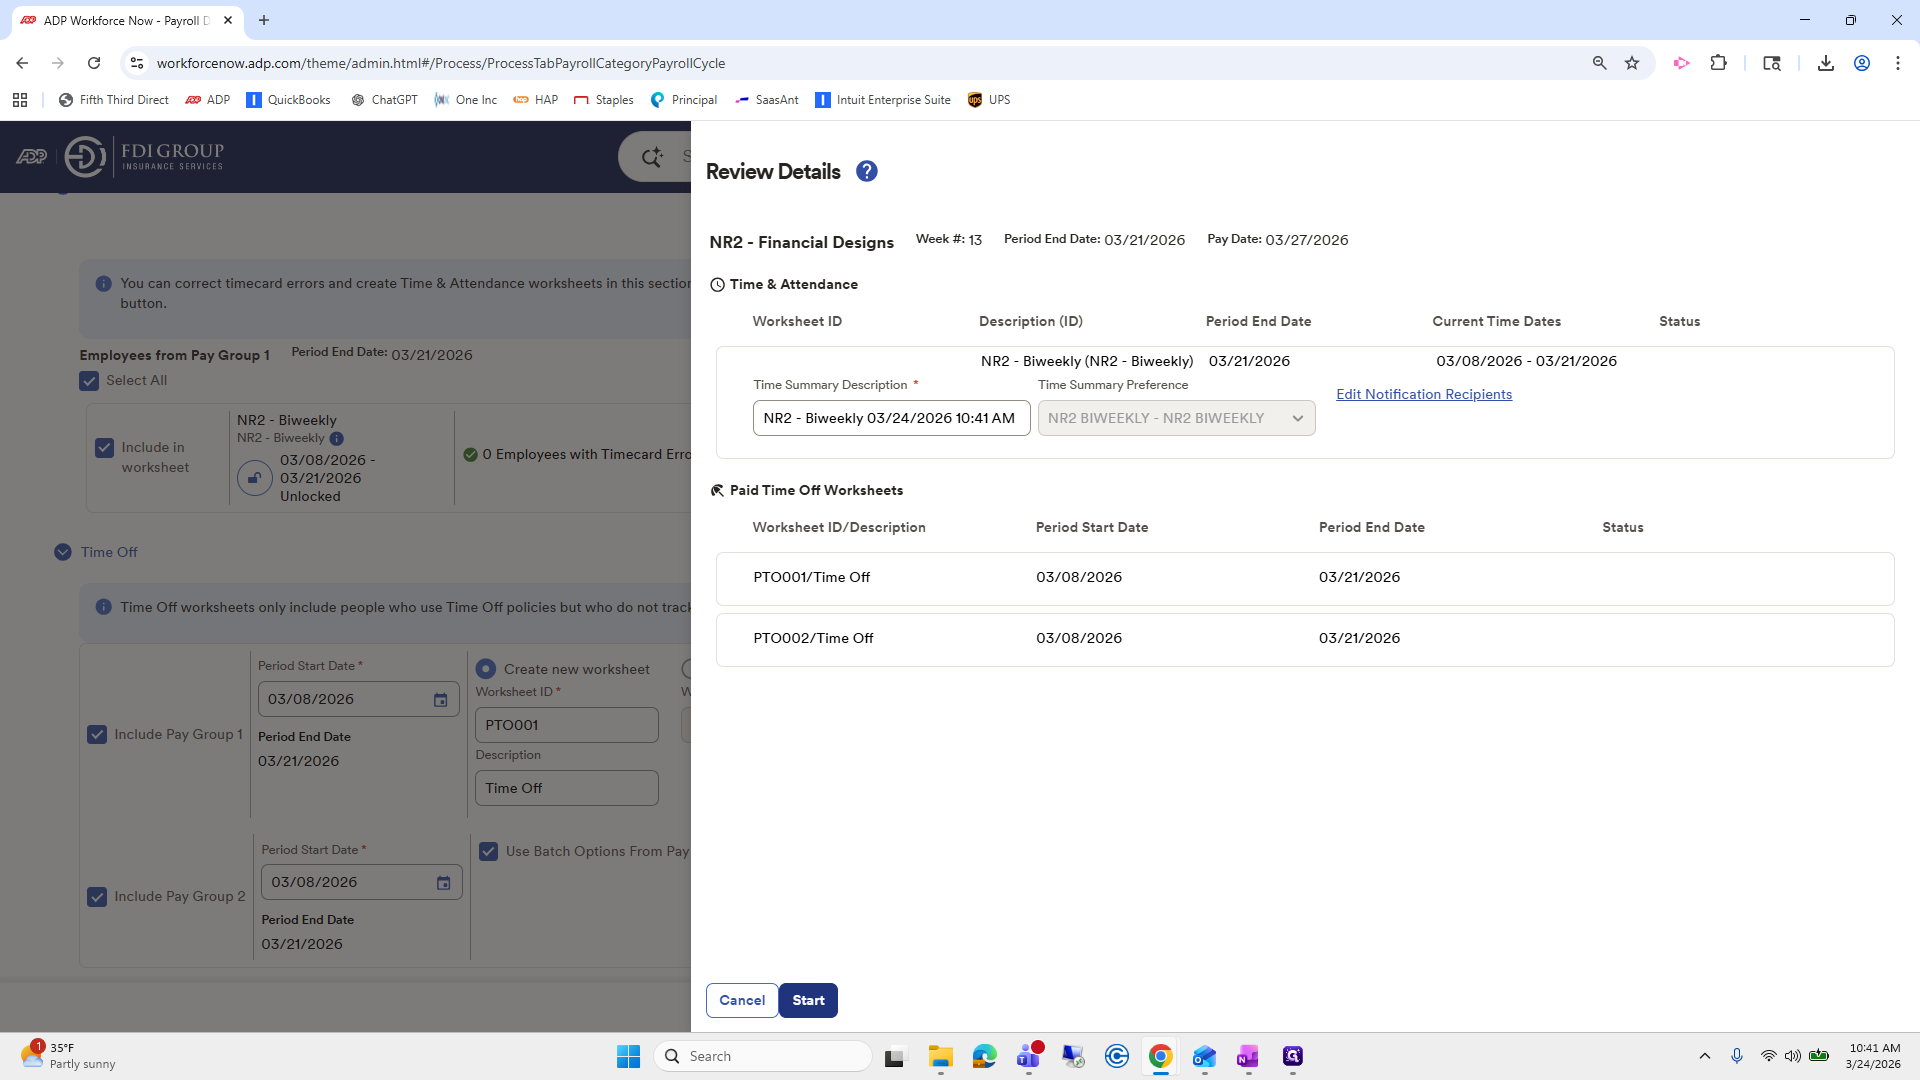
Review the worksheets and examine them.
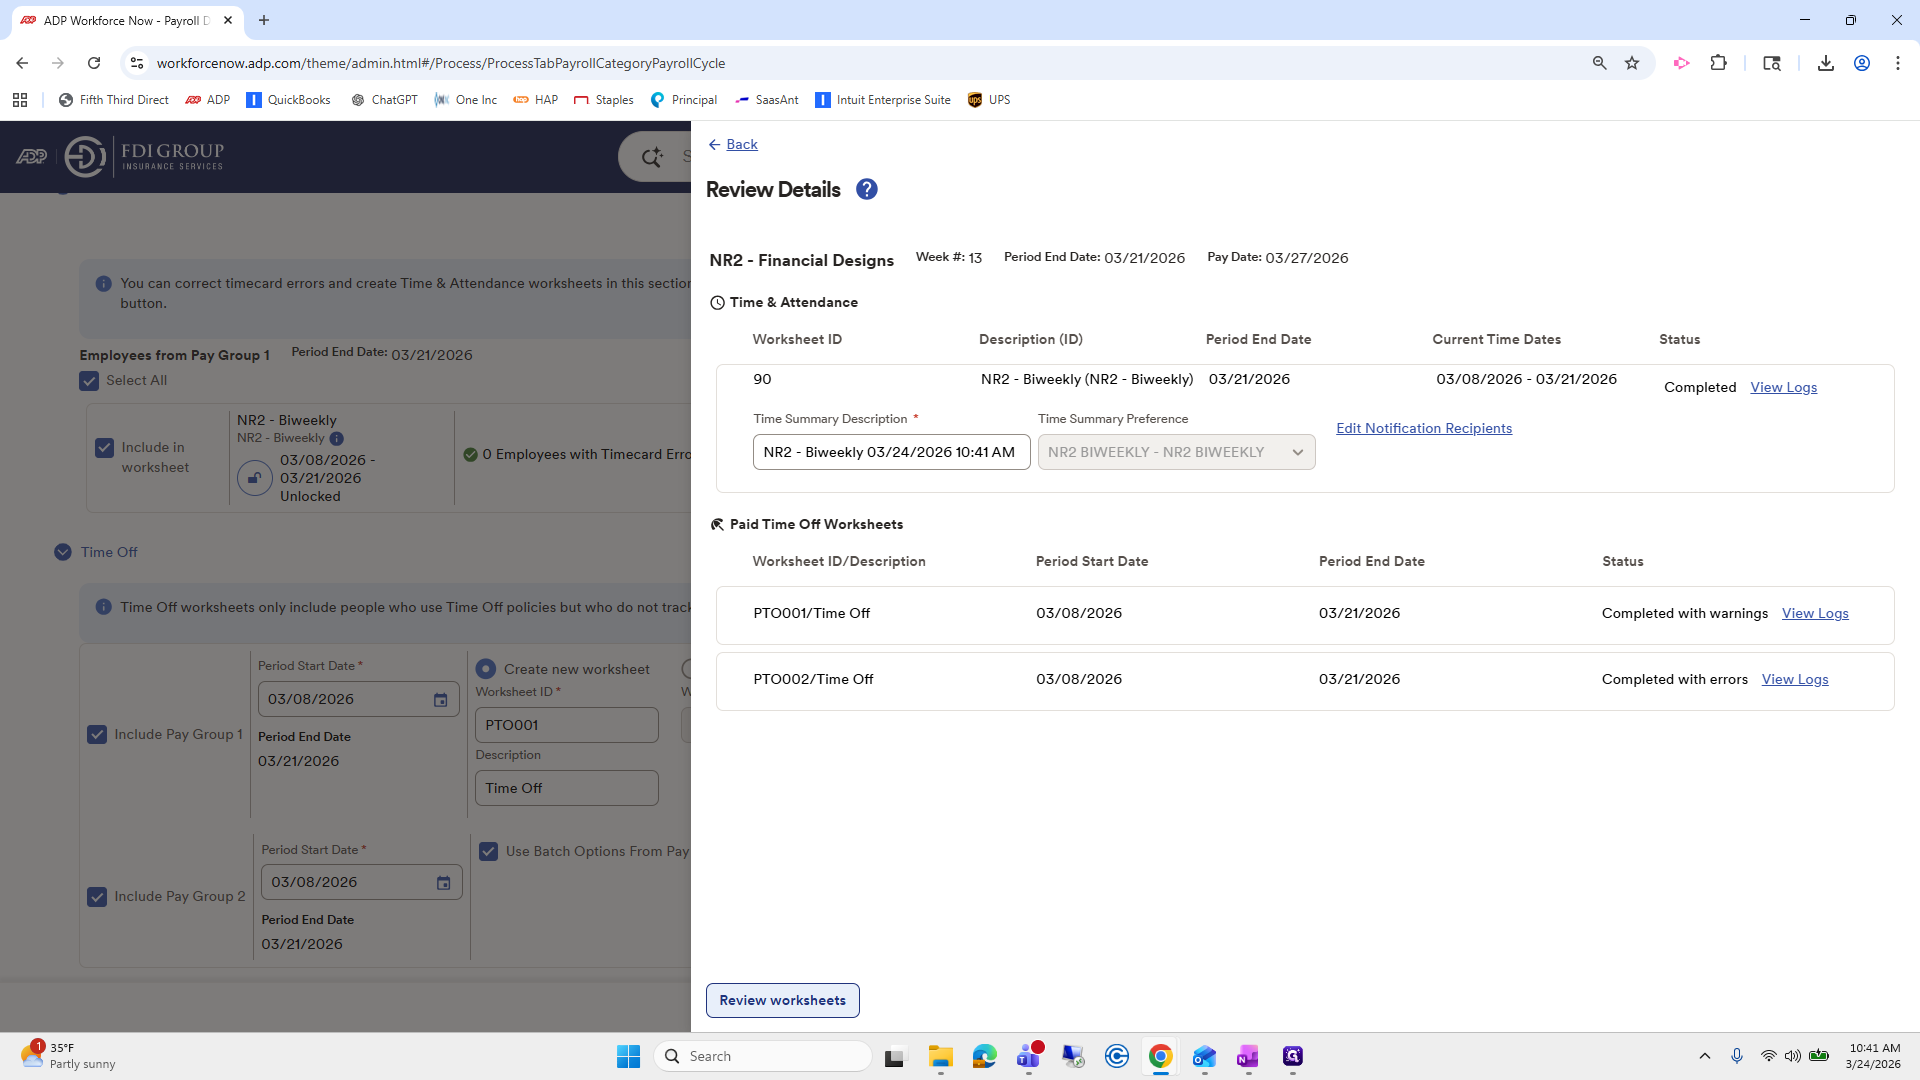

Click Done.
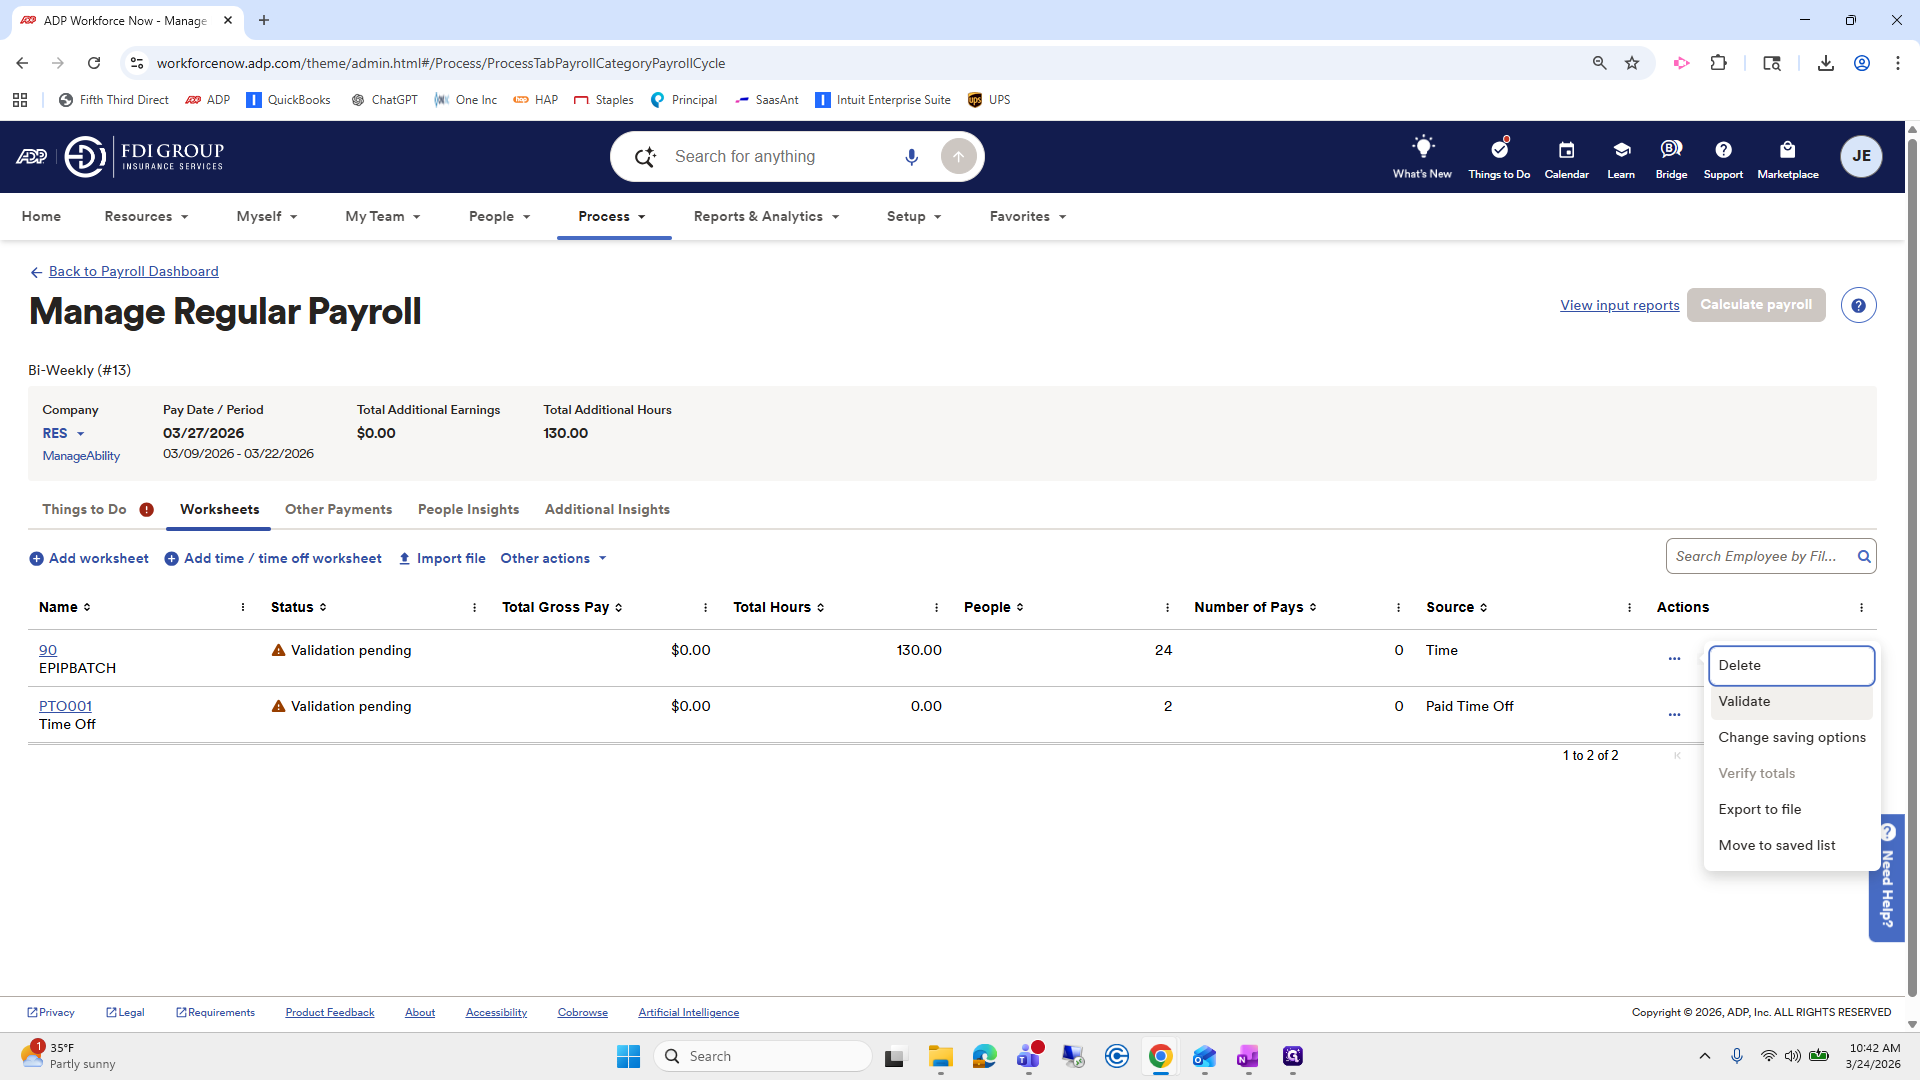
Another way is to click the three dots and select Validate, instead of clicking into that.


It will open it as well. Click Done.
We have one left.

Andreli Health Alliance, Star Tech. So we did all of the... Manageability.
Add Time and Time Off Worksheet.

Click Next.

Start. View worksheets.

We'll use the second method this time, in case you prefer this approach.

Scroll down. Done.
PTO completed.
Our only remaining task is Comp One. I will go to Process while we are in the Payroll Dashboard.

I will deselect In Progress and locate Comp One.
Shoop.
We will start a new payroll.
This one has a warning sign, and that's okay. Just press Continue, then press Yes.
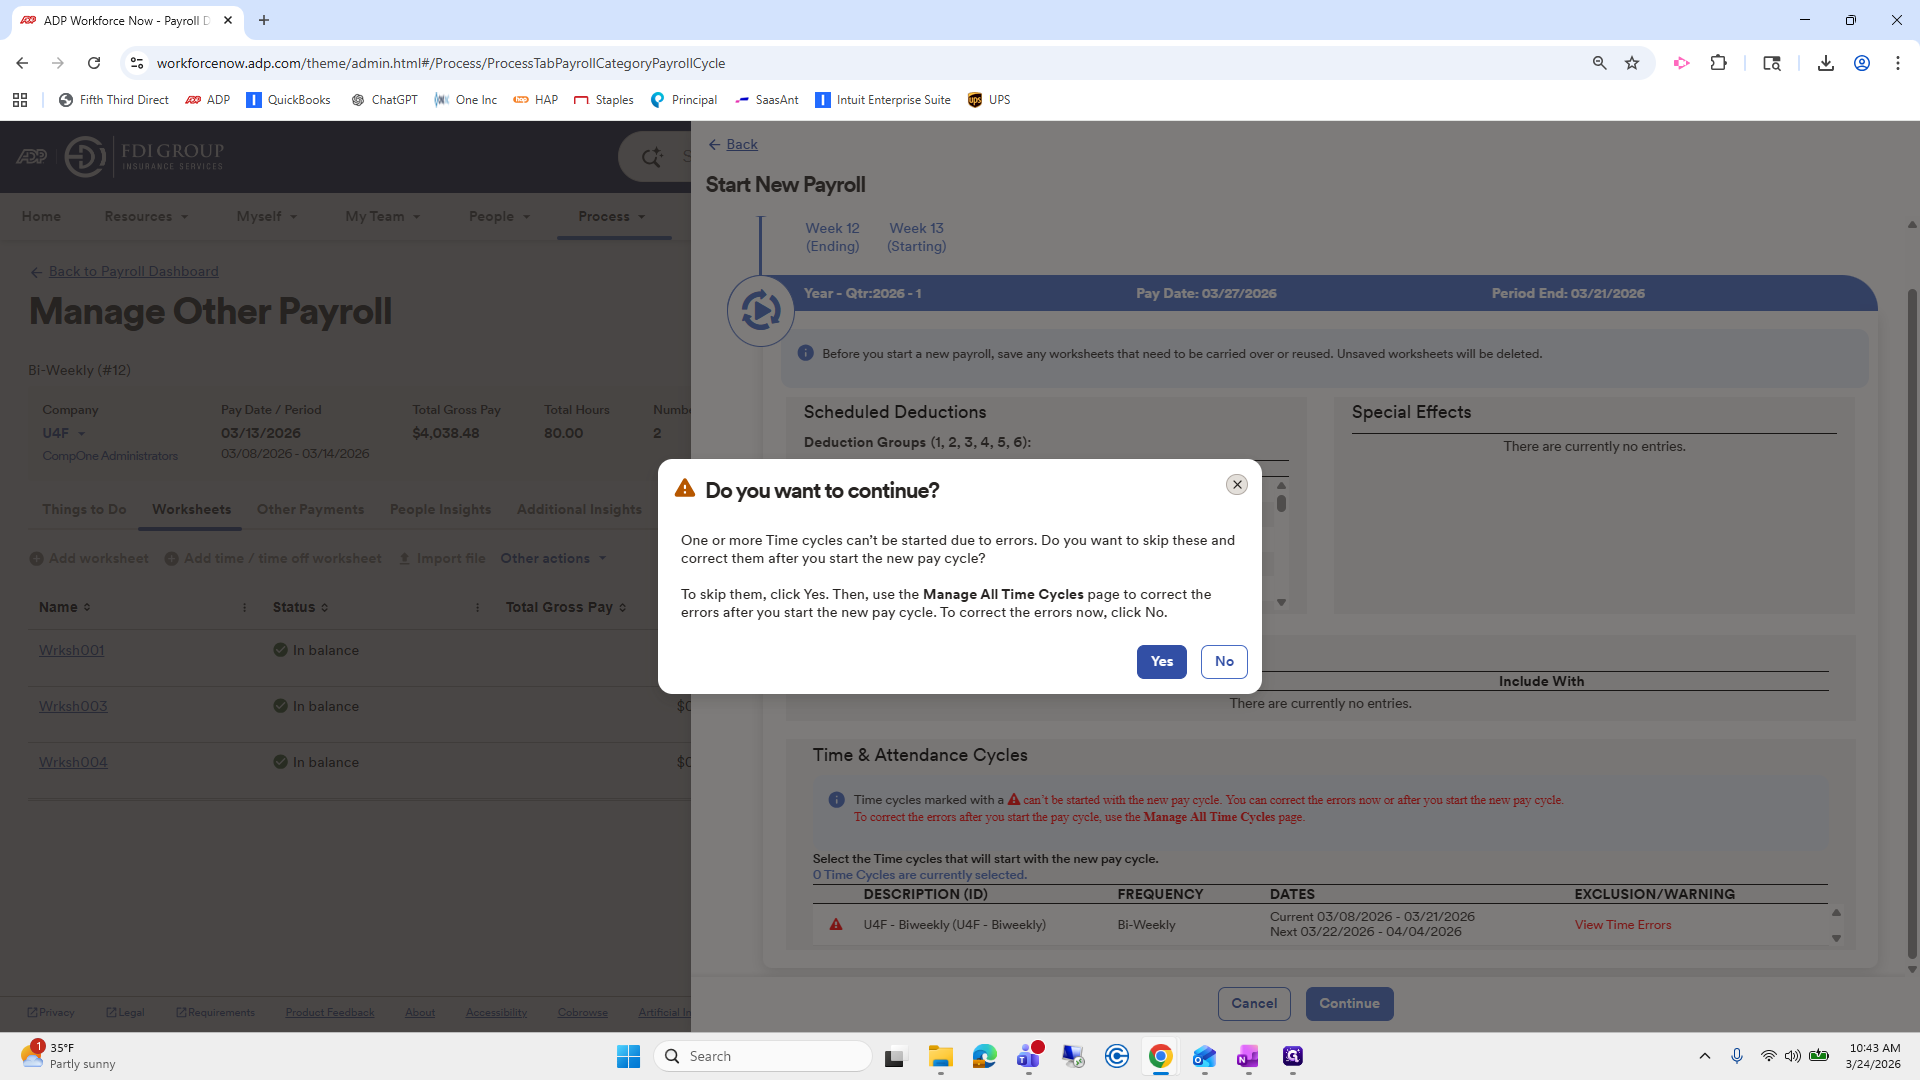
That started the payroll, but we still need to return to Manage All Time Cycles.
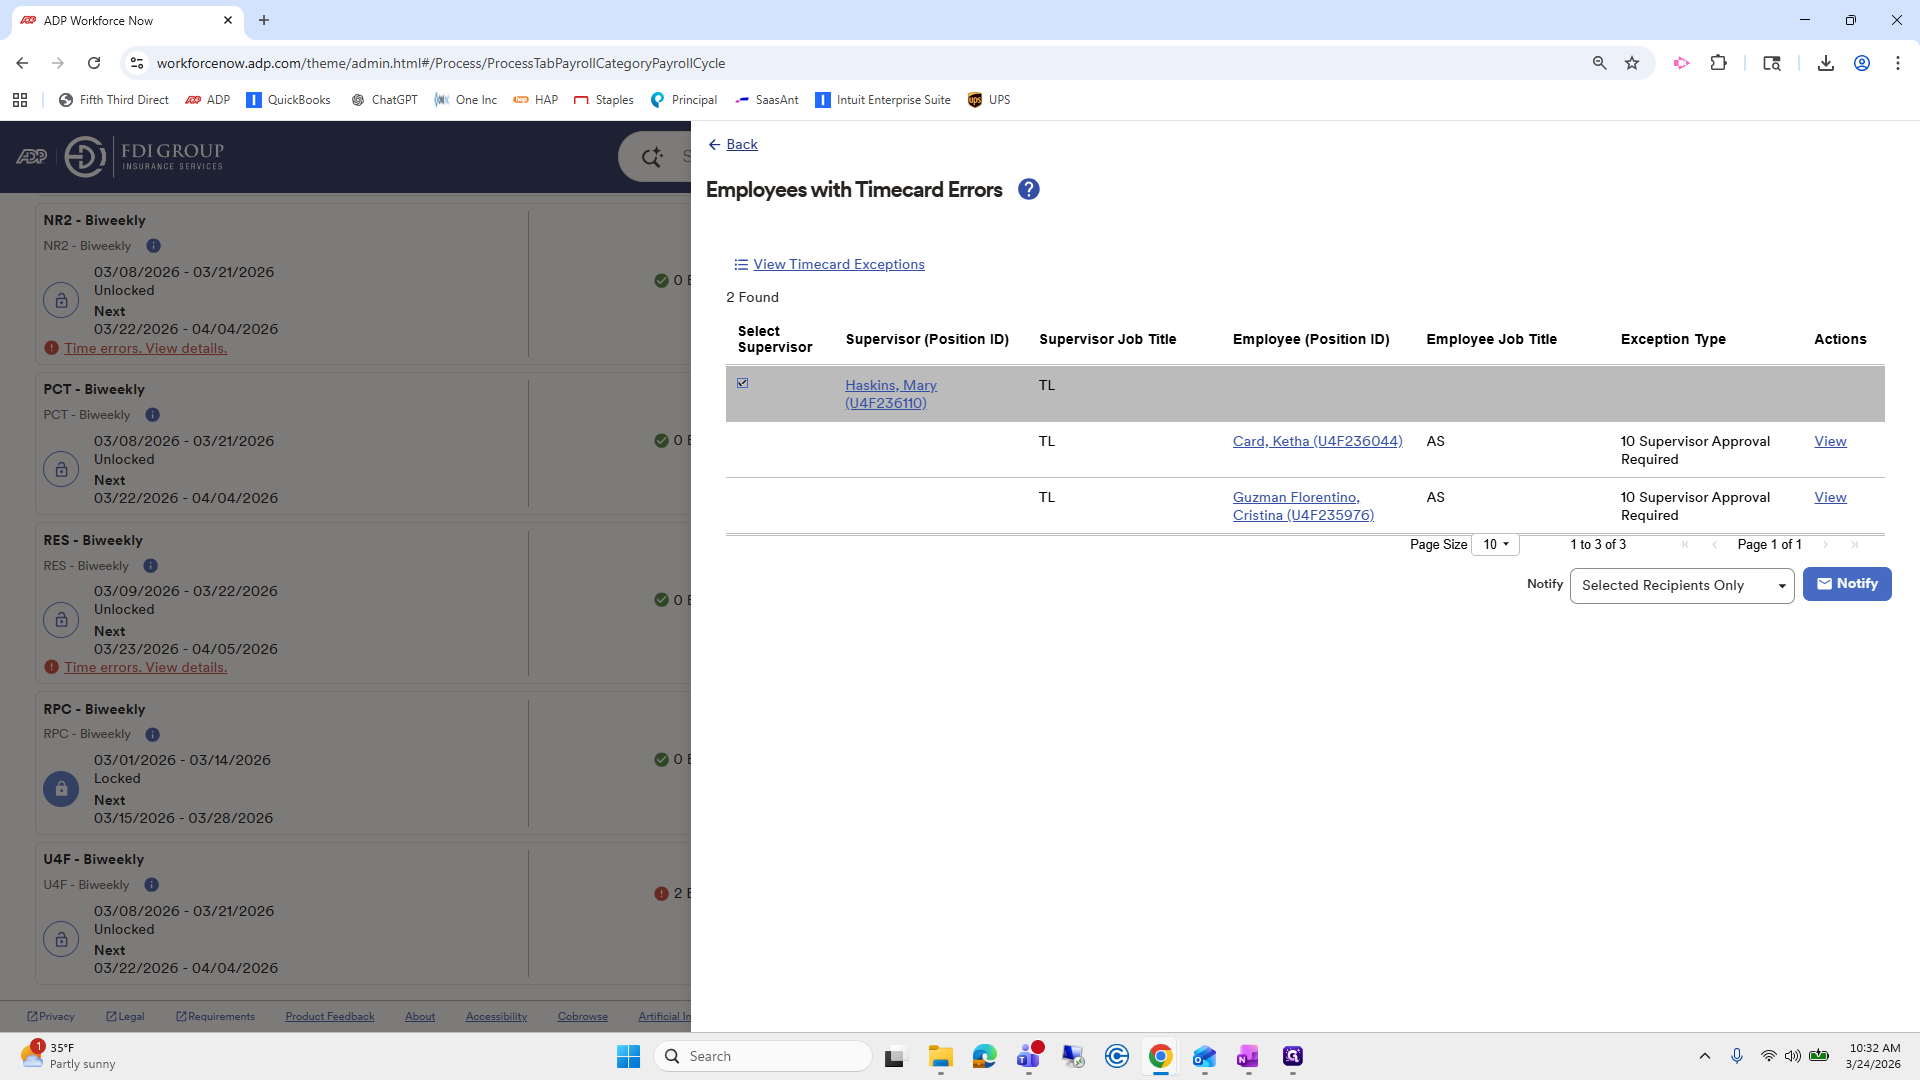
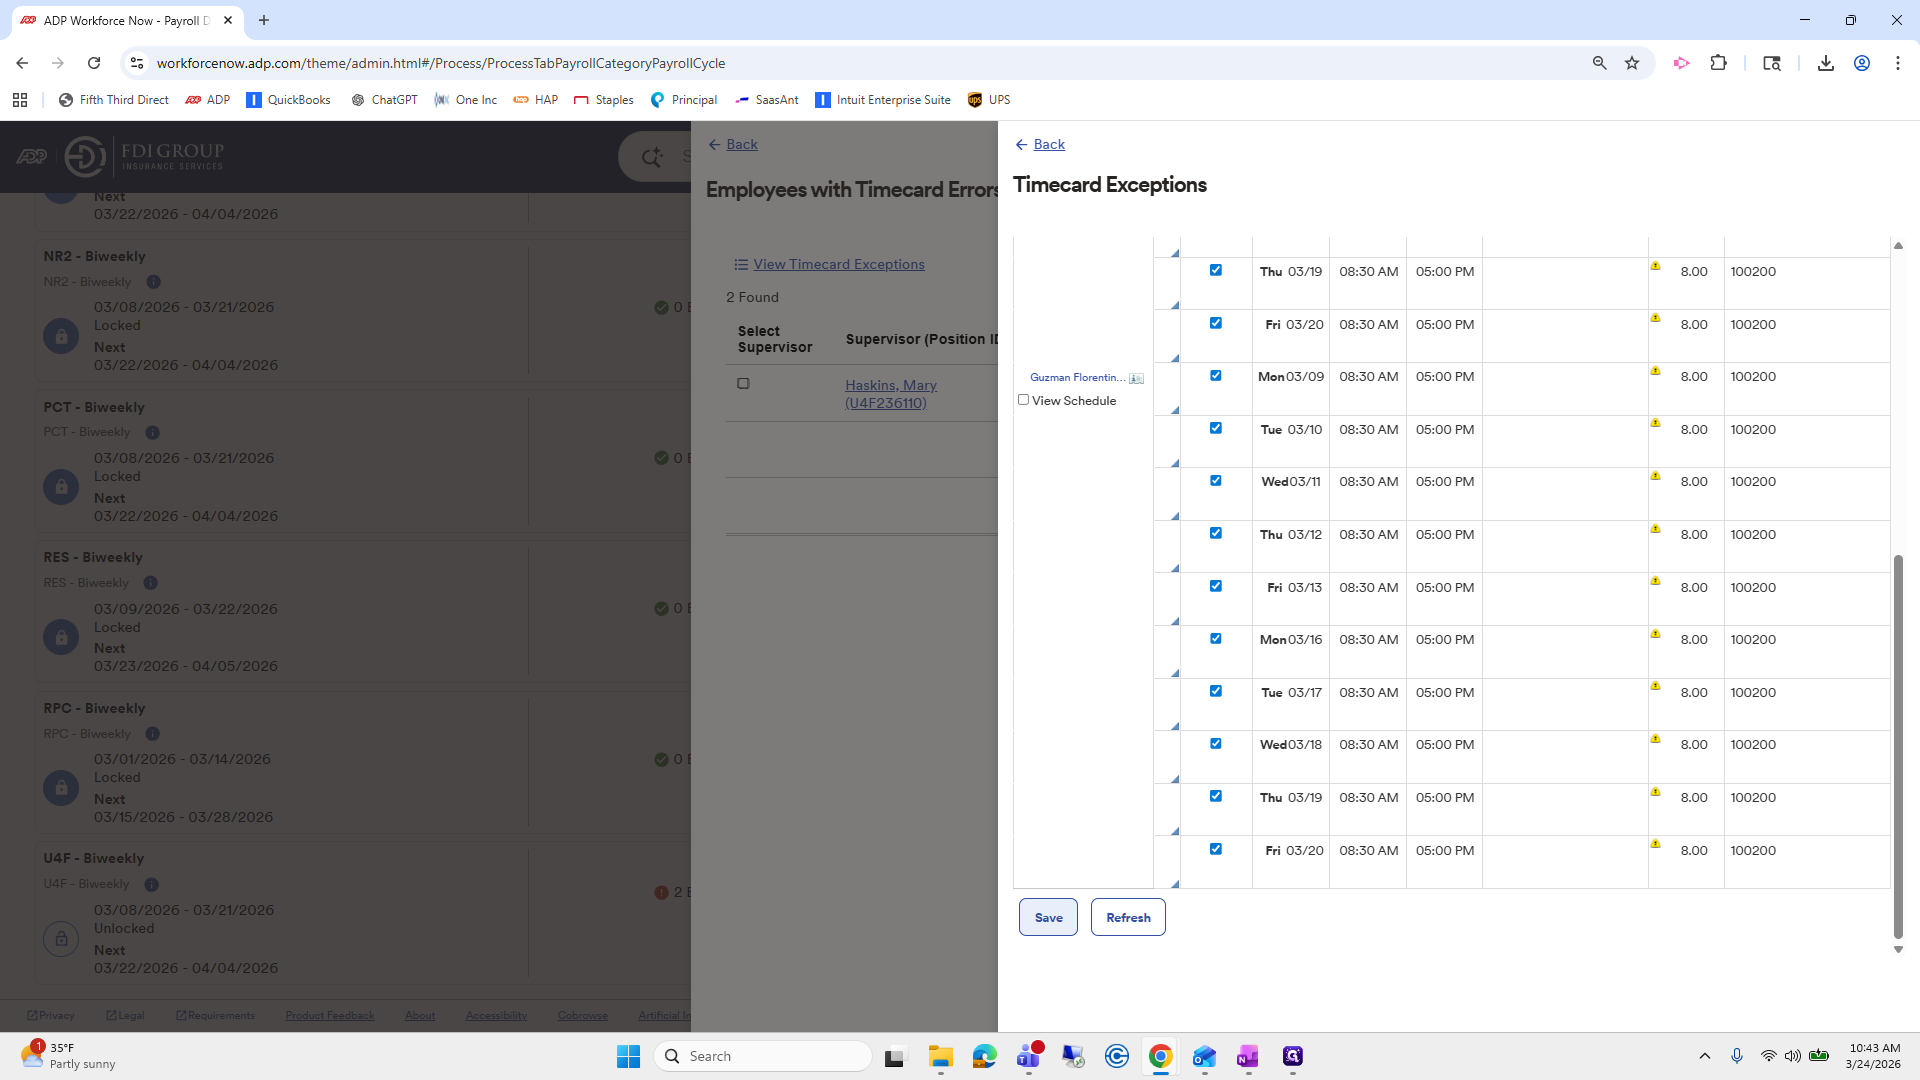
You can see that these two employees are still not done. Since I have multiple memos going out, I will click View Time Card Exceptions.
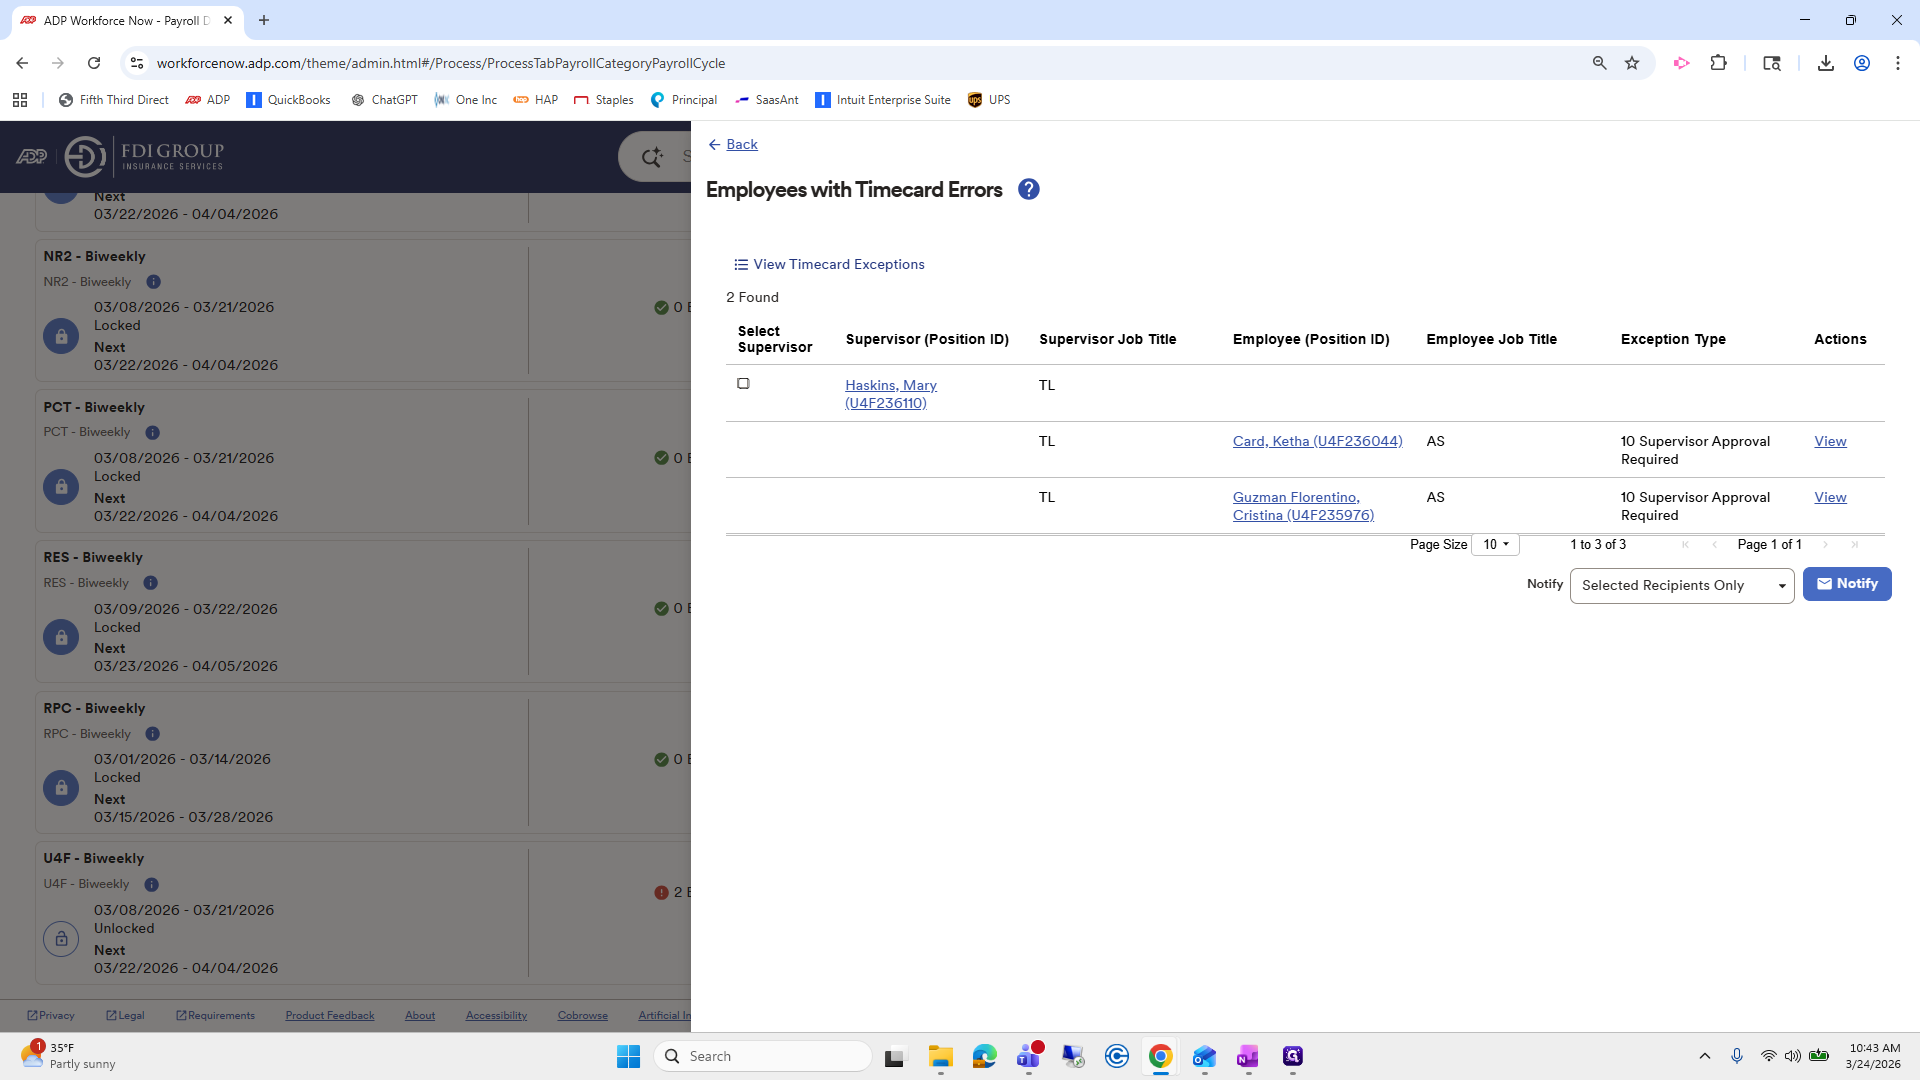
I will quickly check to ensure everything looks correct before I click Approve at the top.
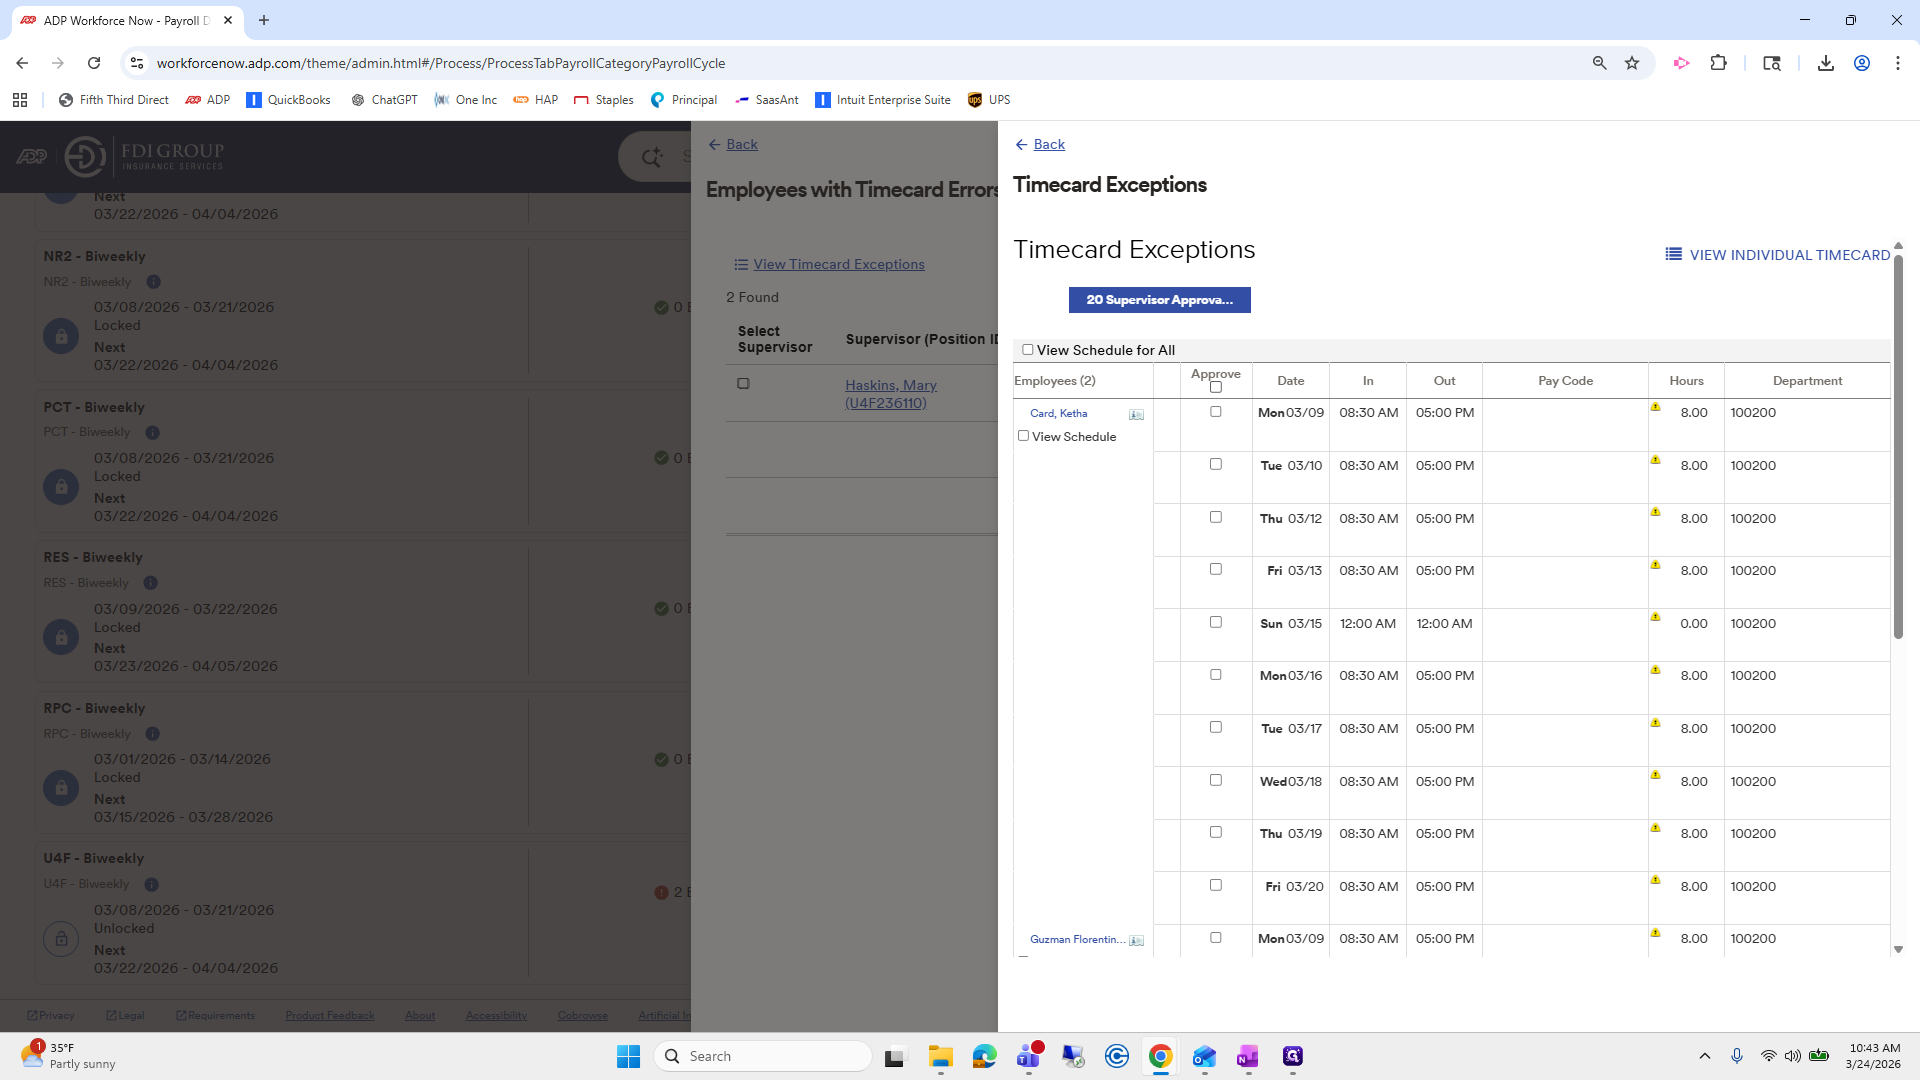
It approves in bulk.
I save it, go back, and you can see it turns green.
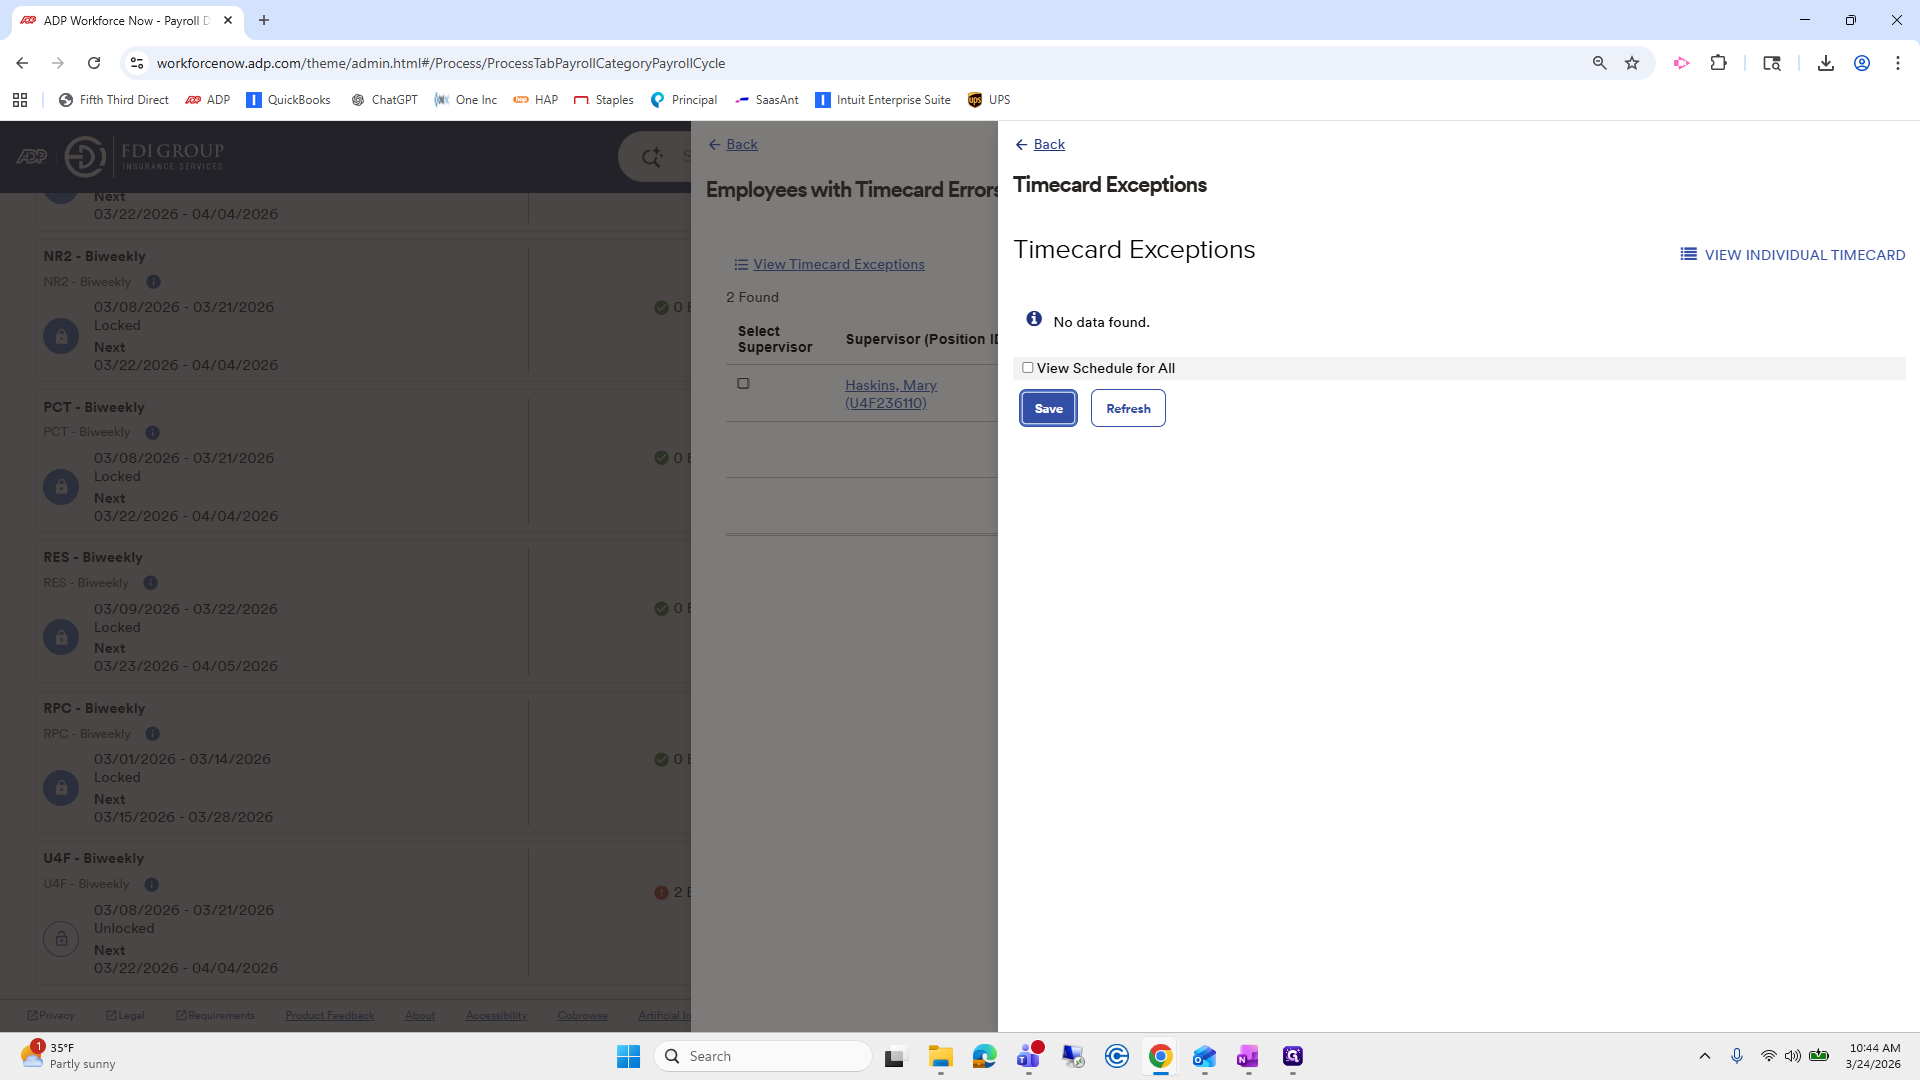

Then you can return to the Payroll Dashboard.

I like to go back to Filter, select Statuses In Progress, click Apply, and then open Comp One.

This is the final step.

Add Time and Time Off to the worksheet, then review everything. Make sure this box is checked. If there is a second box, continue to Create Worksheet and start.


Click Review Worksheets.
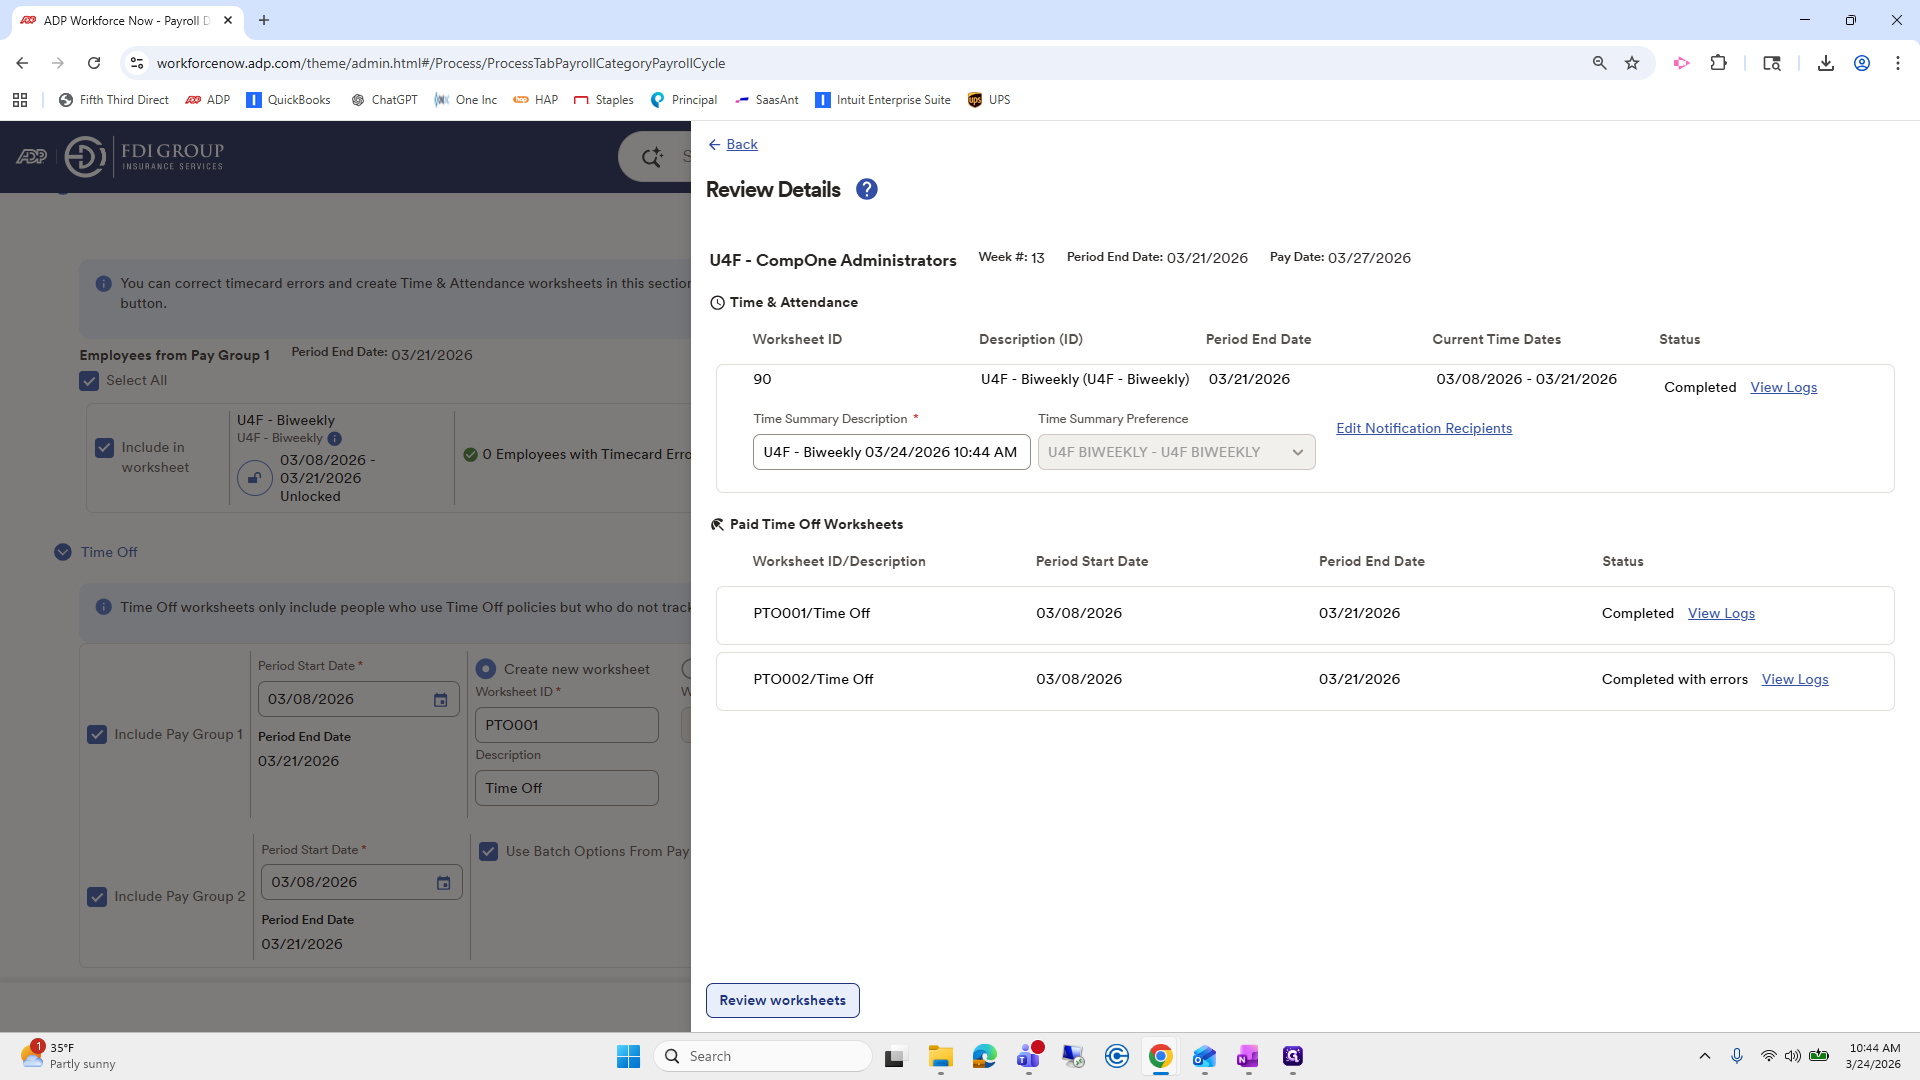
We will validate these again.


Scroll down. Done.
This concludes step one of the prep work needed to start payroll: approving time cards and adding employees' time off worksheets.


In the next video, we will cover how to add additional pay, hours, benefits, and introduce the master work paper.