Icon

How to Process a Customer PO in Salesforce: Step-by-Step Guide

Learn the exact steps to follow when you receive a customer PO in Precursive, including budget checks(Steps 1-6), document uploads(Steps7-9), and notifying your finance manager(Steps 10-14) for seamless project management.

By Ziv Profesorsky

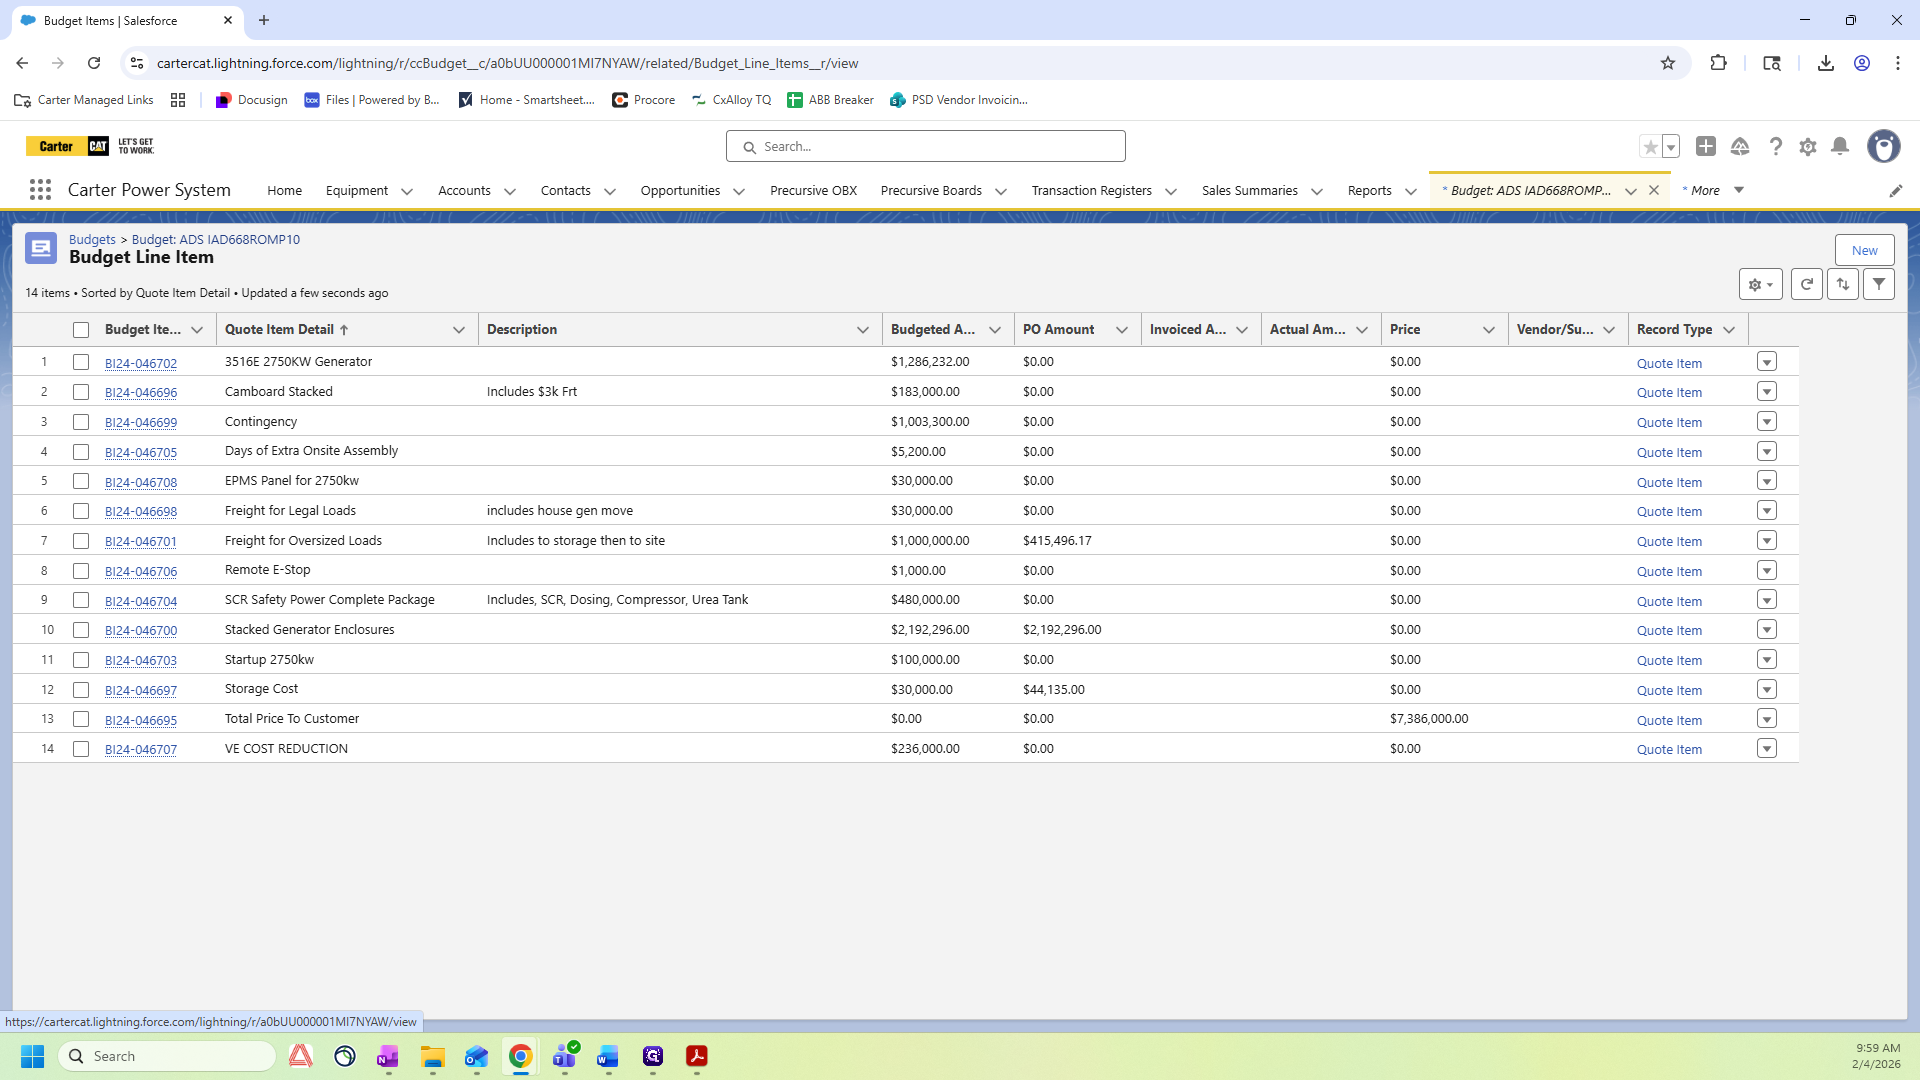
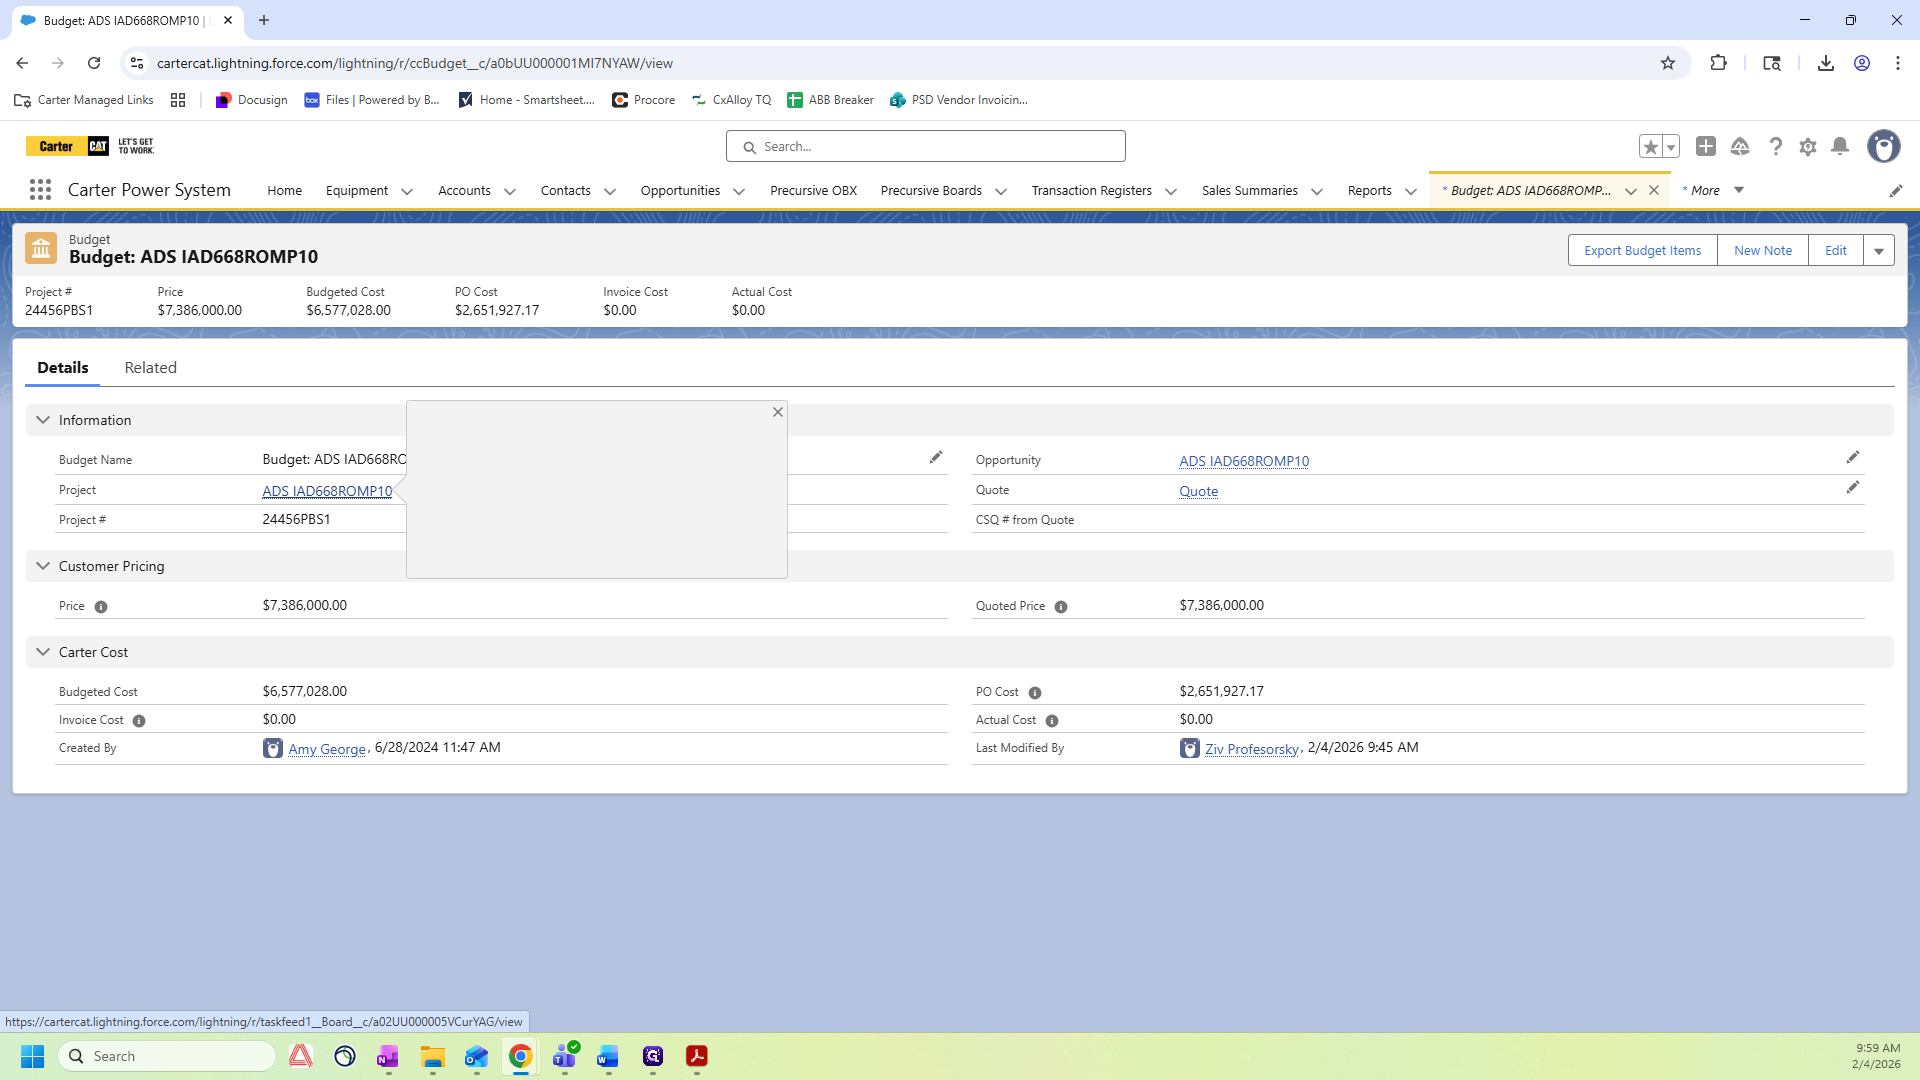
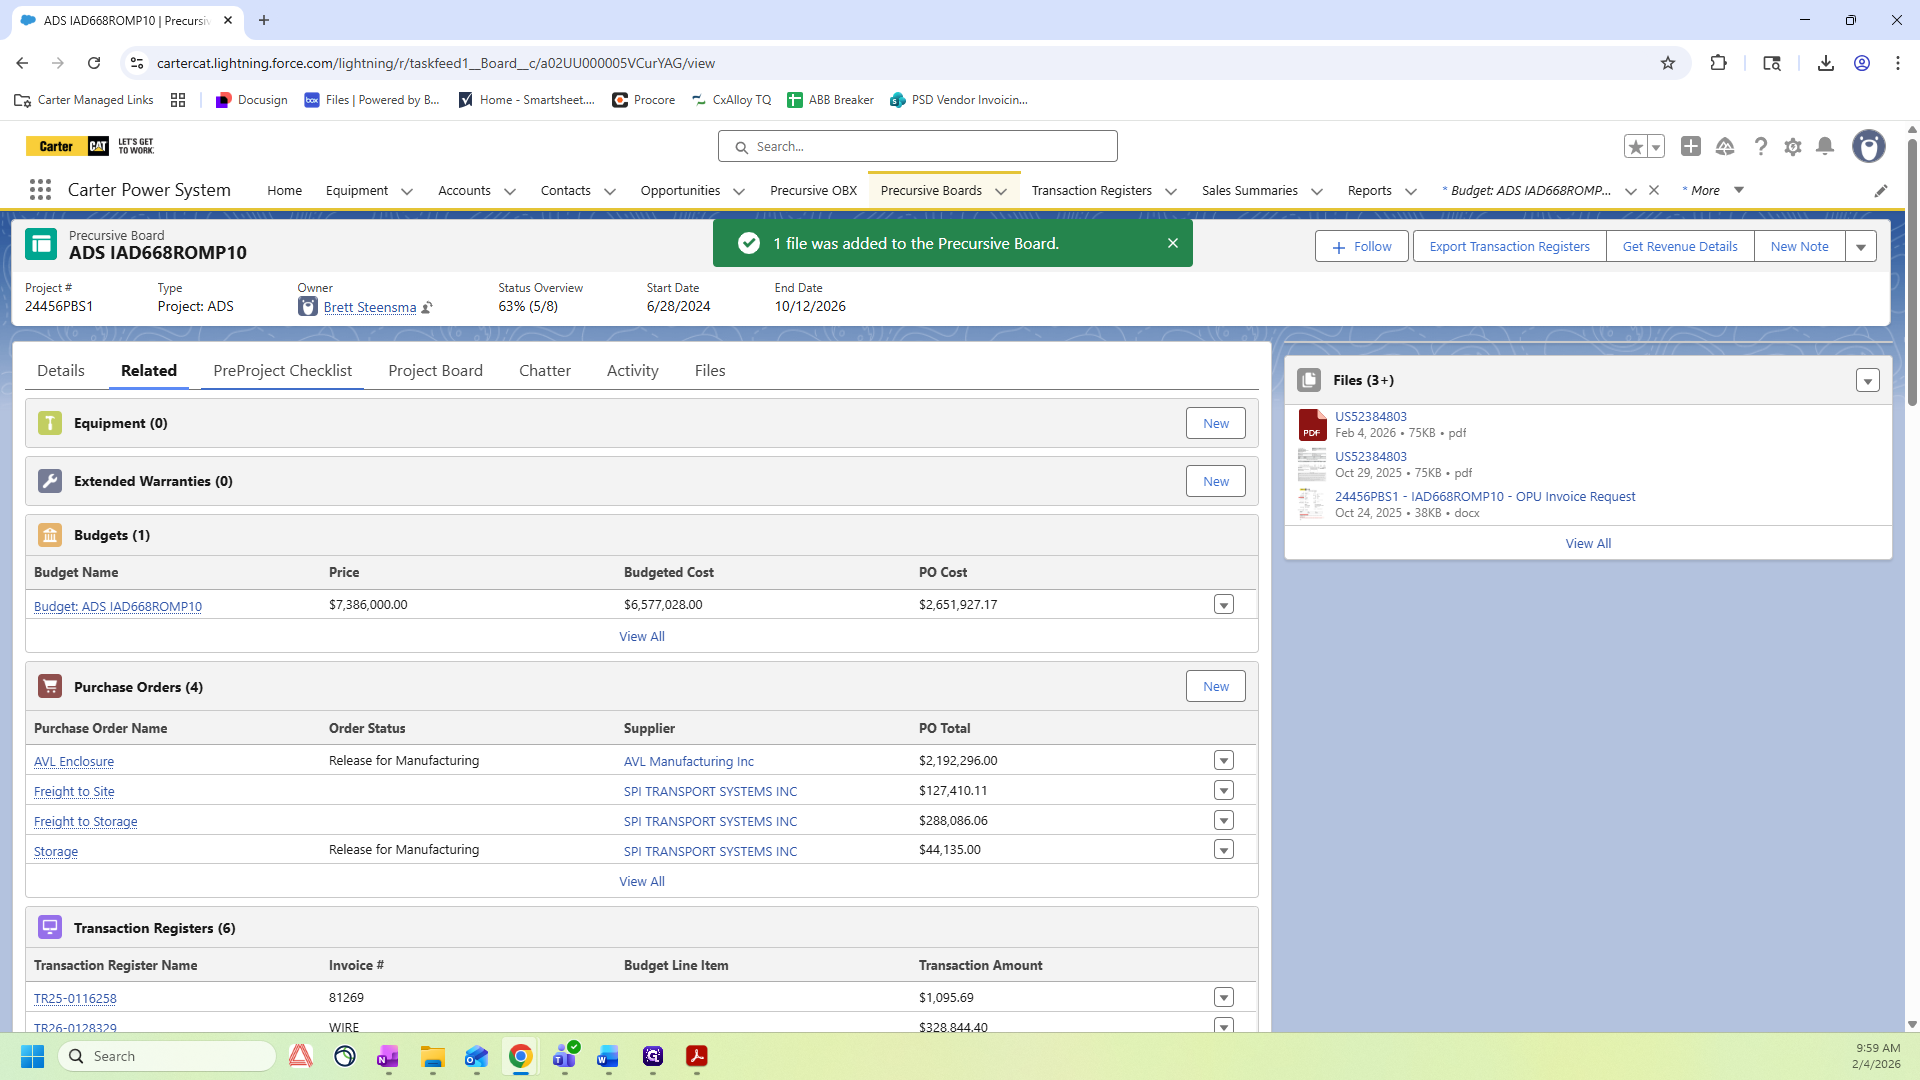
In this guide, we'll learn how to process a customer purchase order using your Precursive Board. We'll cover how to verify the total price, upload the PO document, update the project checklist, and notify the finance manager for review.

These steps help ensure that your project records are accurate and that your team is informed.

Let's get started

1
Click on the Budget for your project
Step #1: Click on the Budget for your project
2
Click on "Related"
Step #2: Click on "Related"
3
Click View All Budget Line Items
Step #3: Click View All Budget Line Items
4
Look for "Total Price To Customer" and verify the Price column
Step #4: Look for "Total Price To Customer" and verify the Price column
5
Go to your Customer PO
Step #5: Go to your Customer PO
6
Verify that the Total for the PO matches the Total Price to Customer
Step #6: Verify that the Total for the PO matches the Total Price to Customer

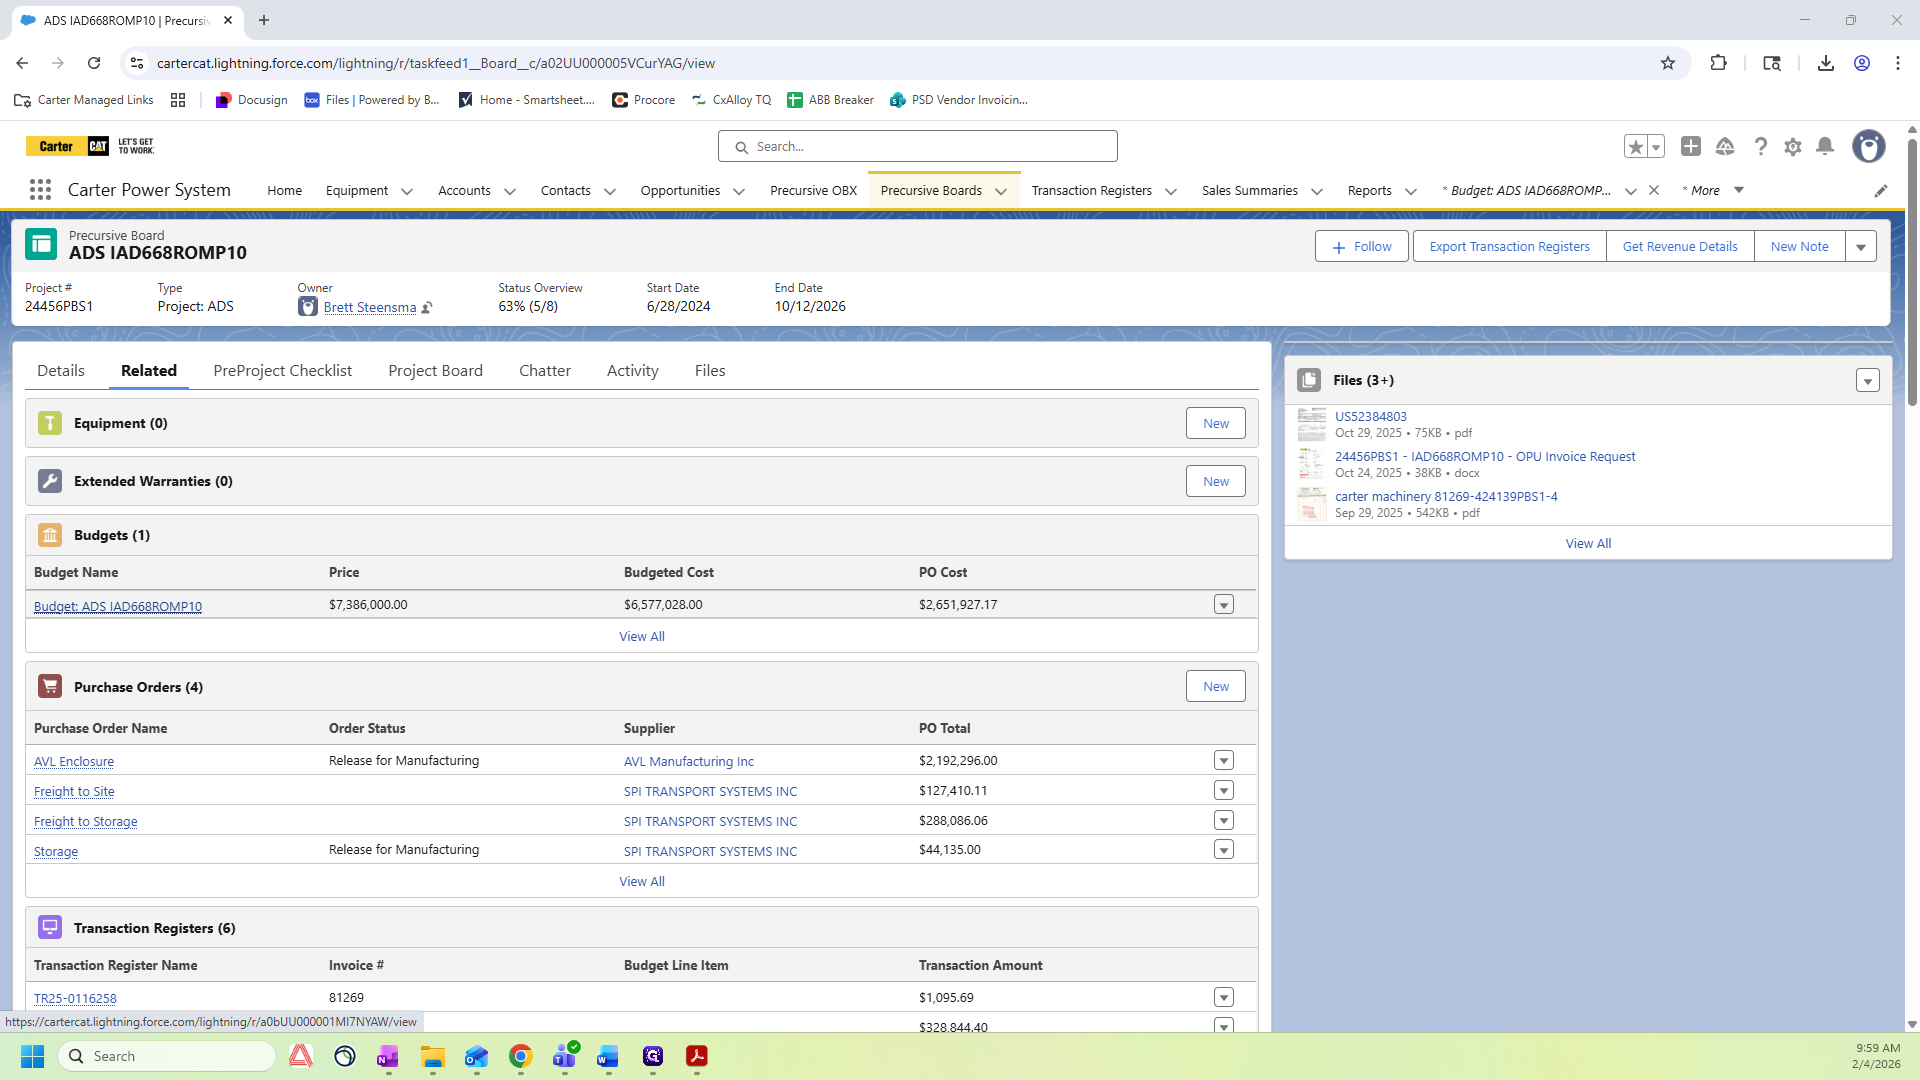
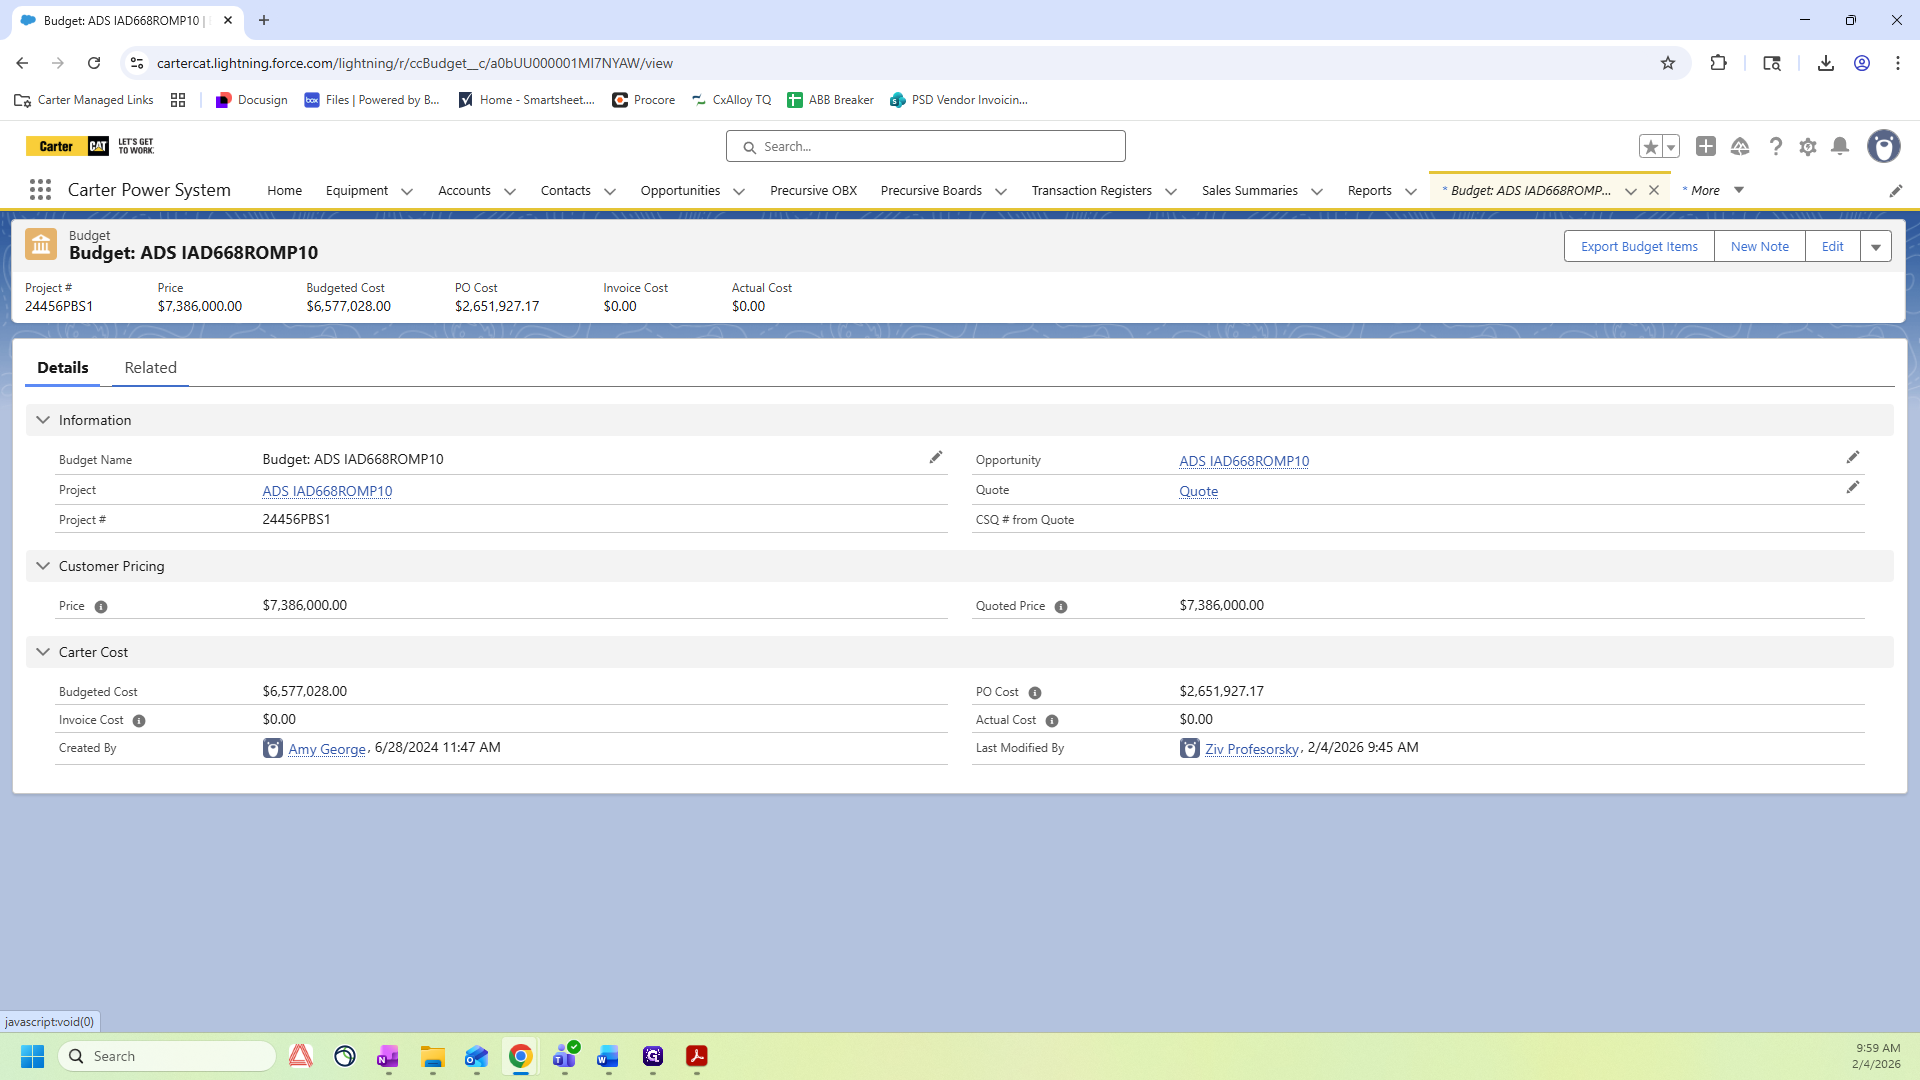
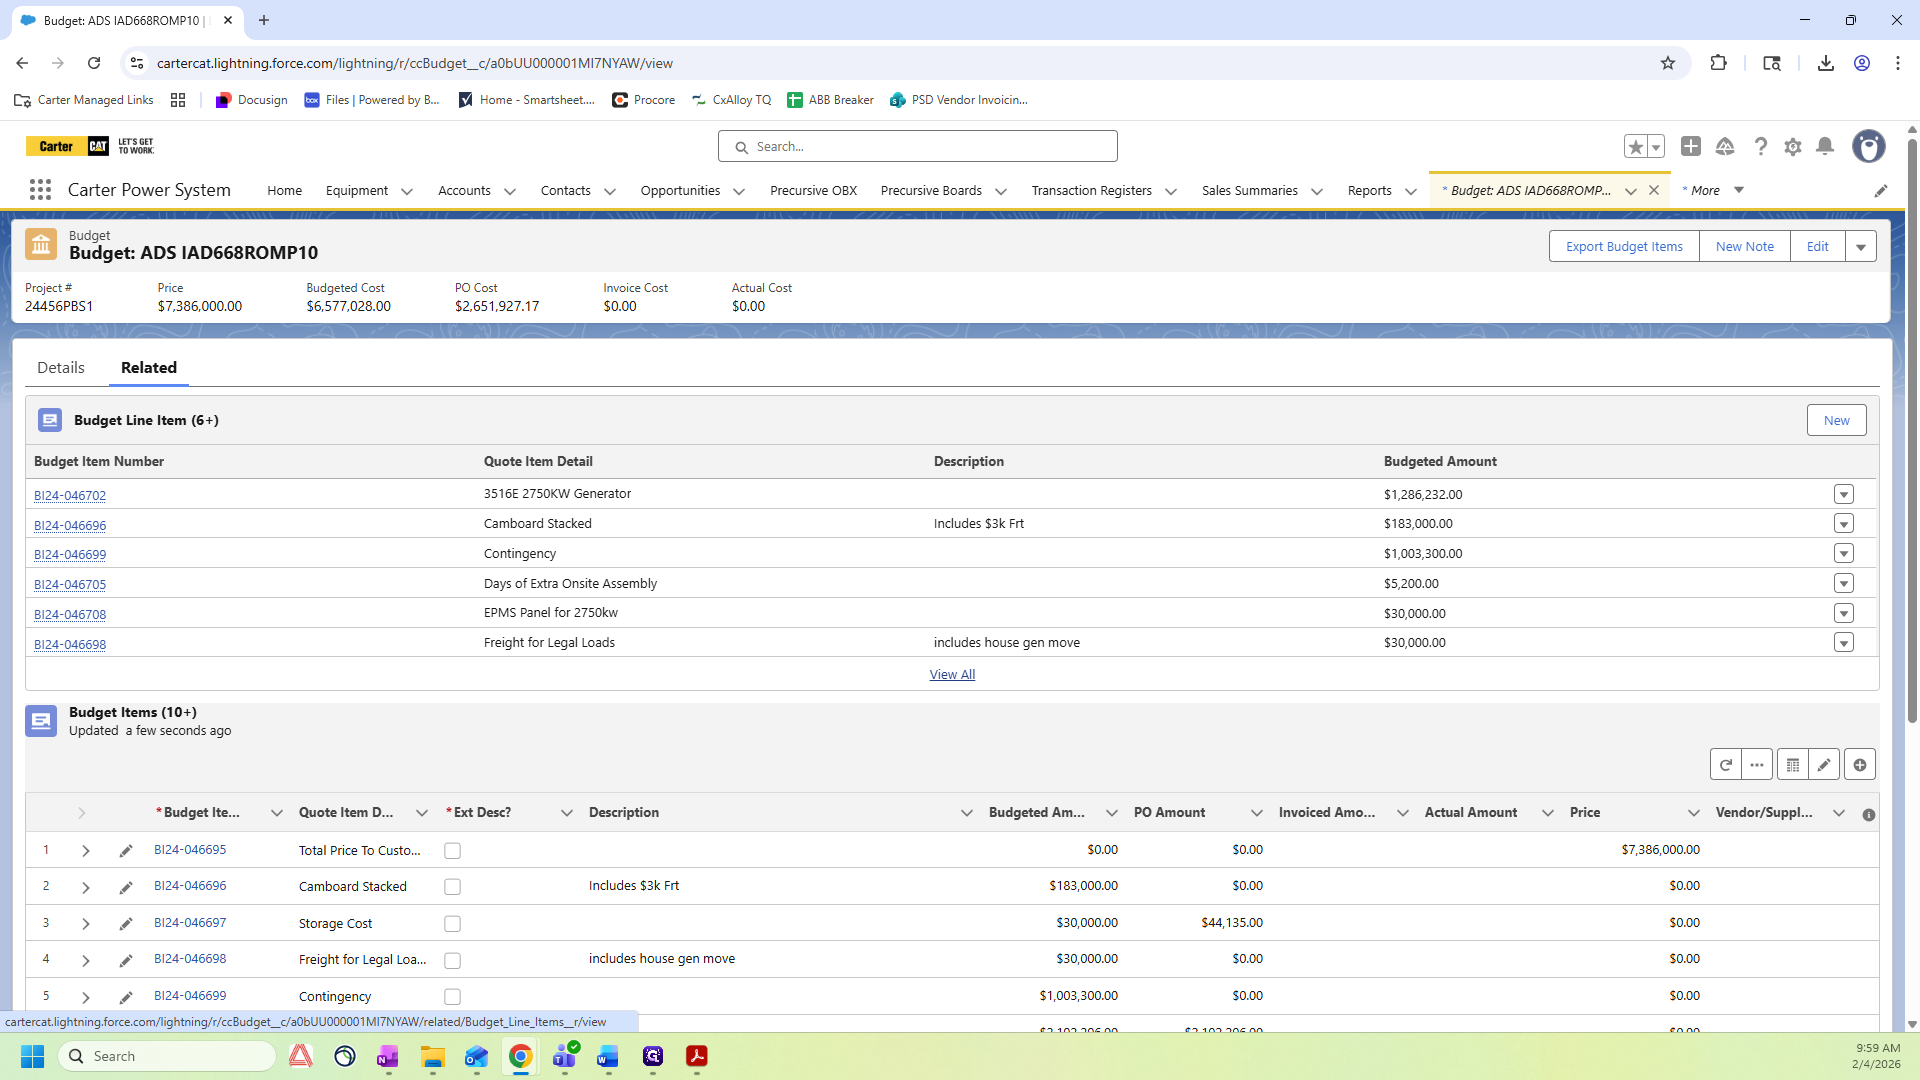
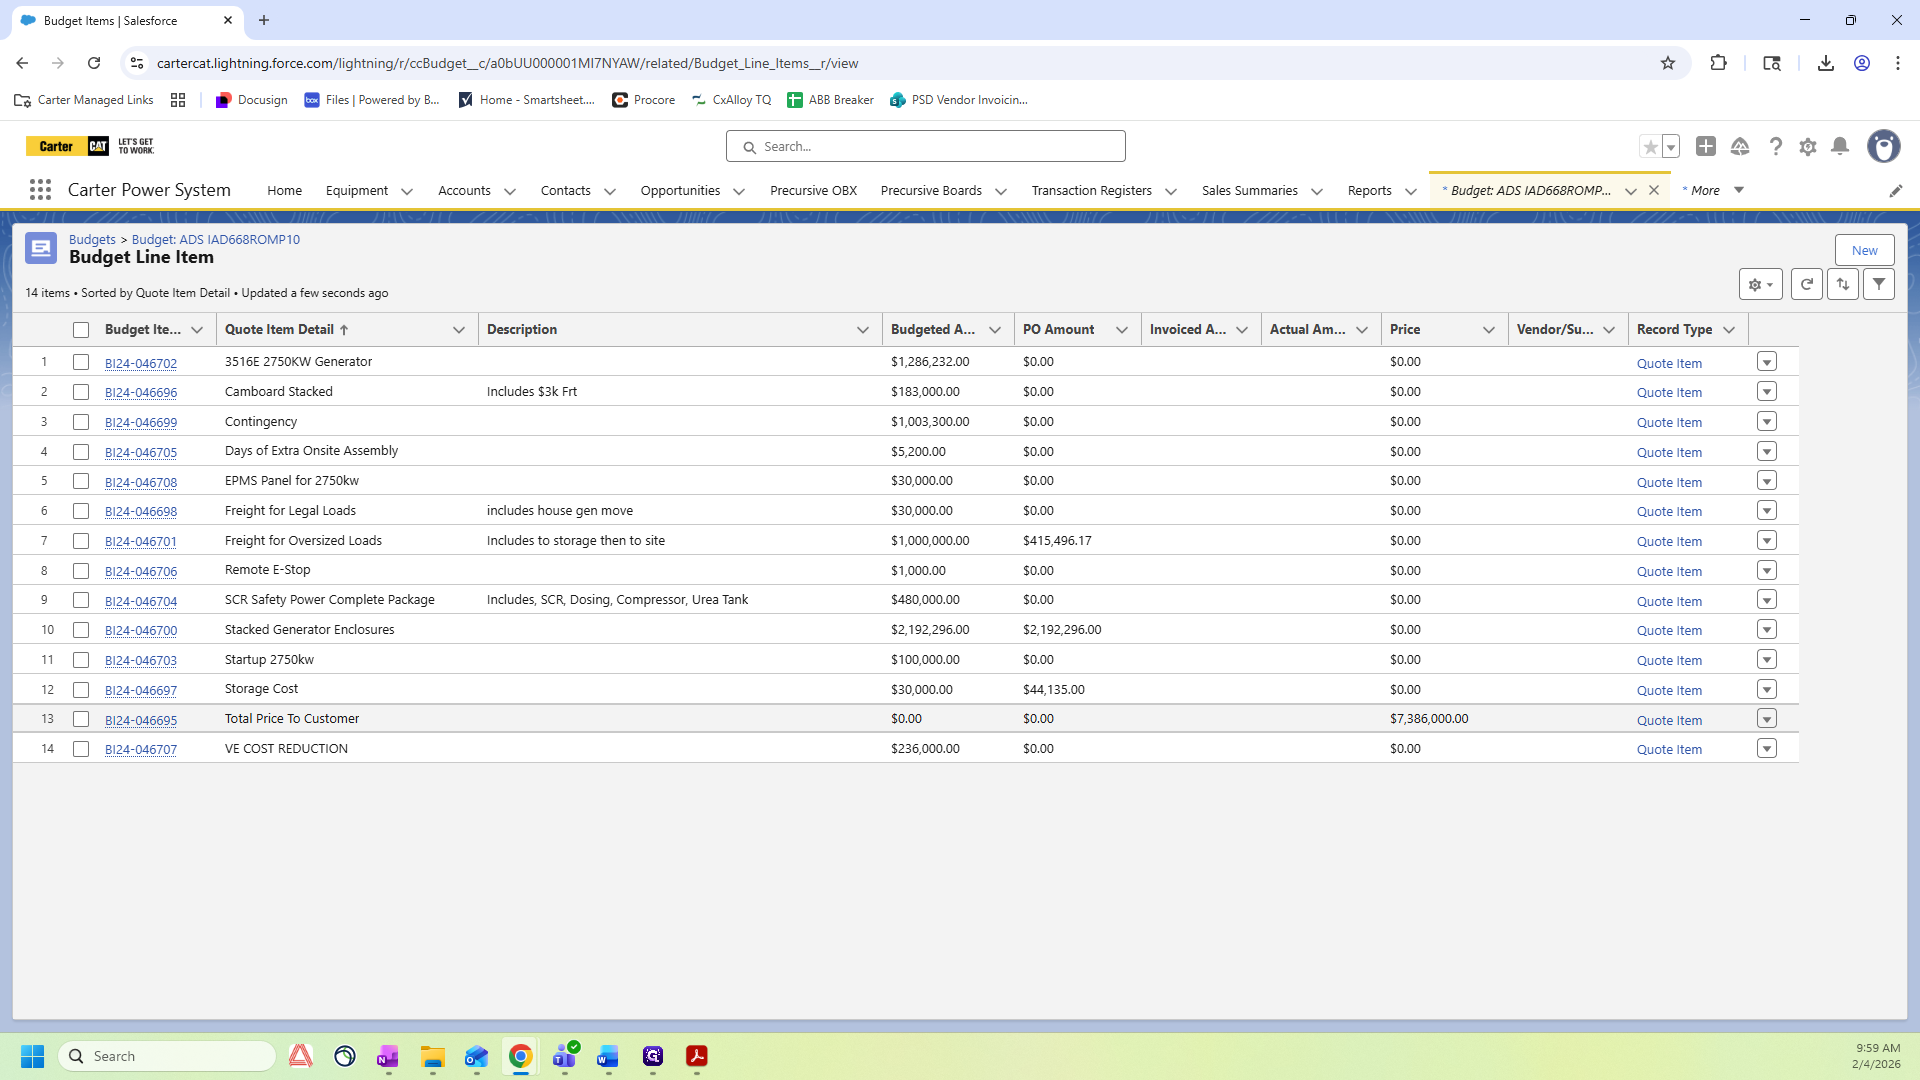
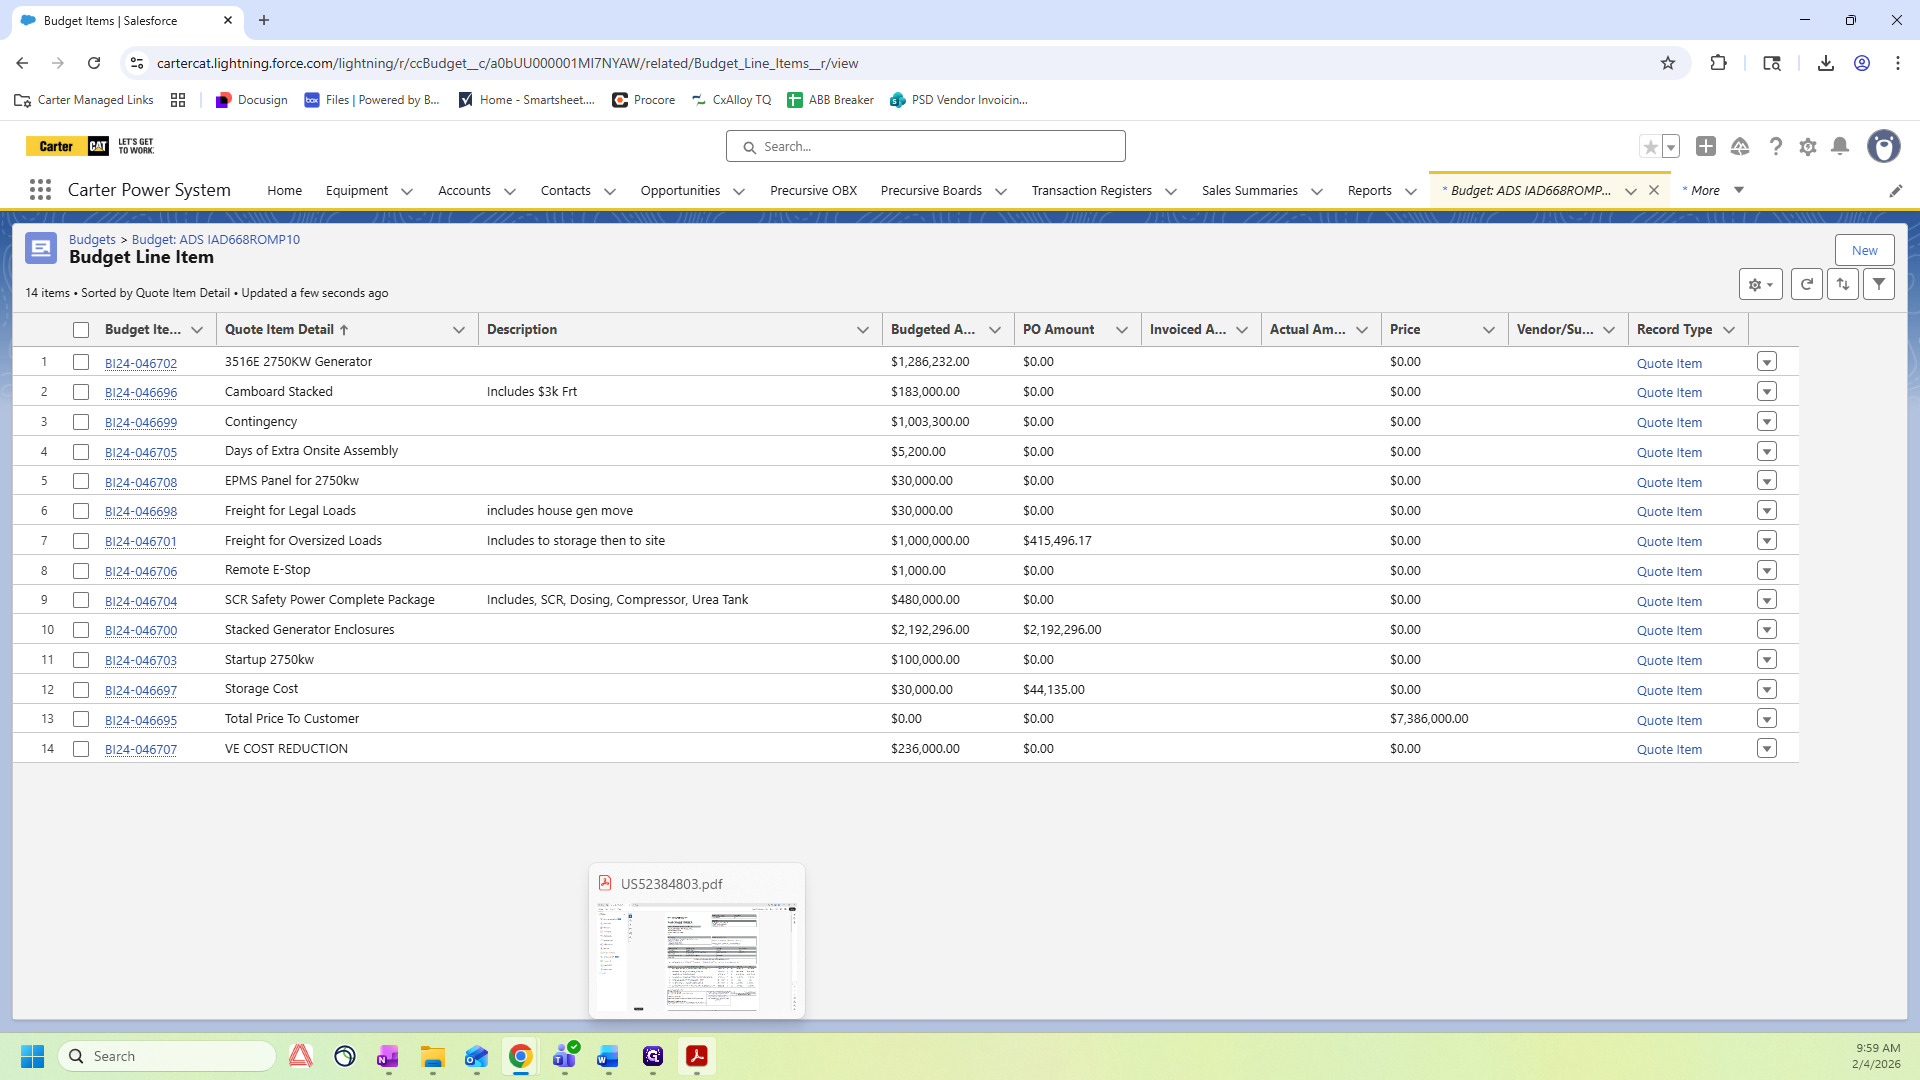
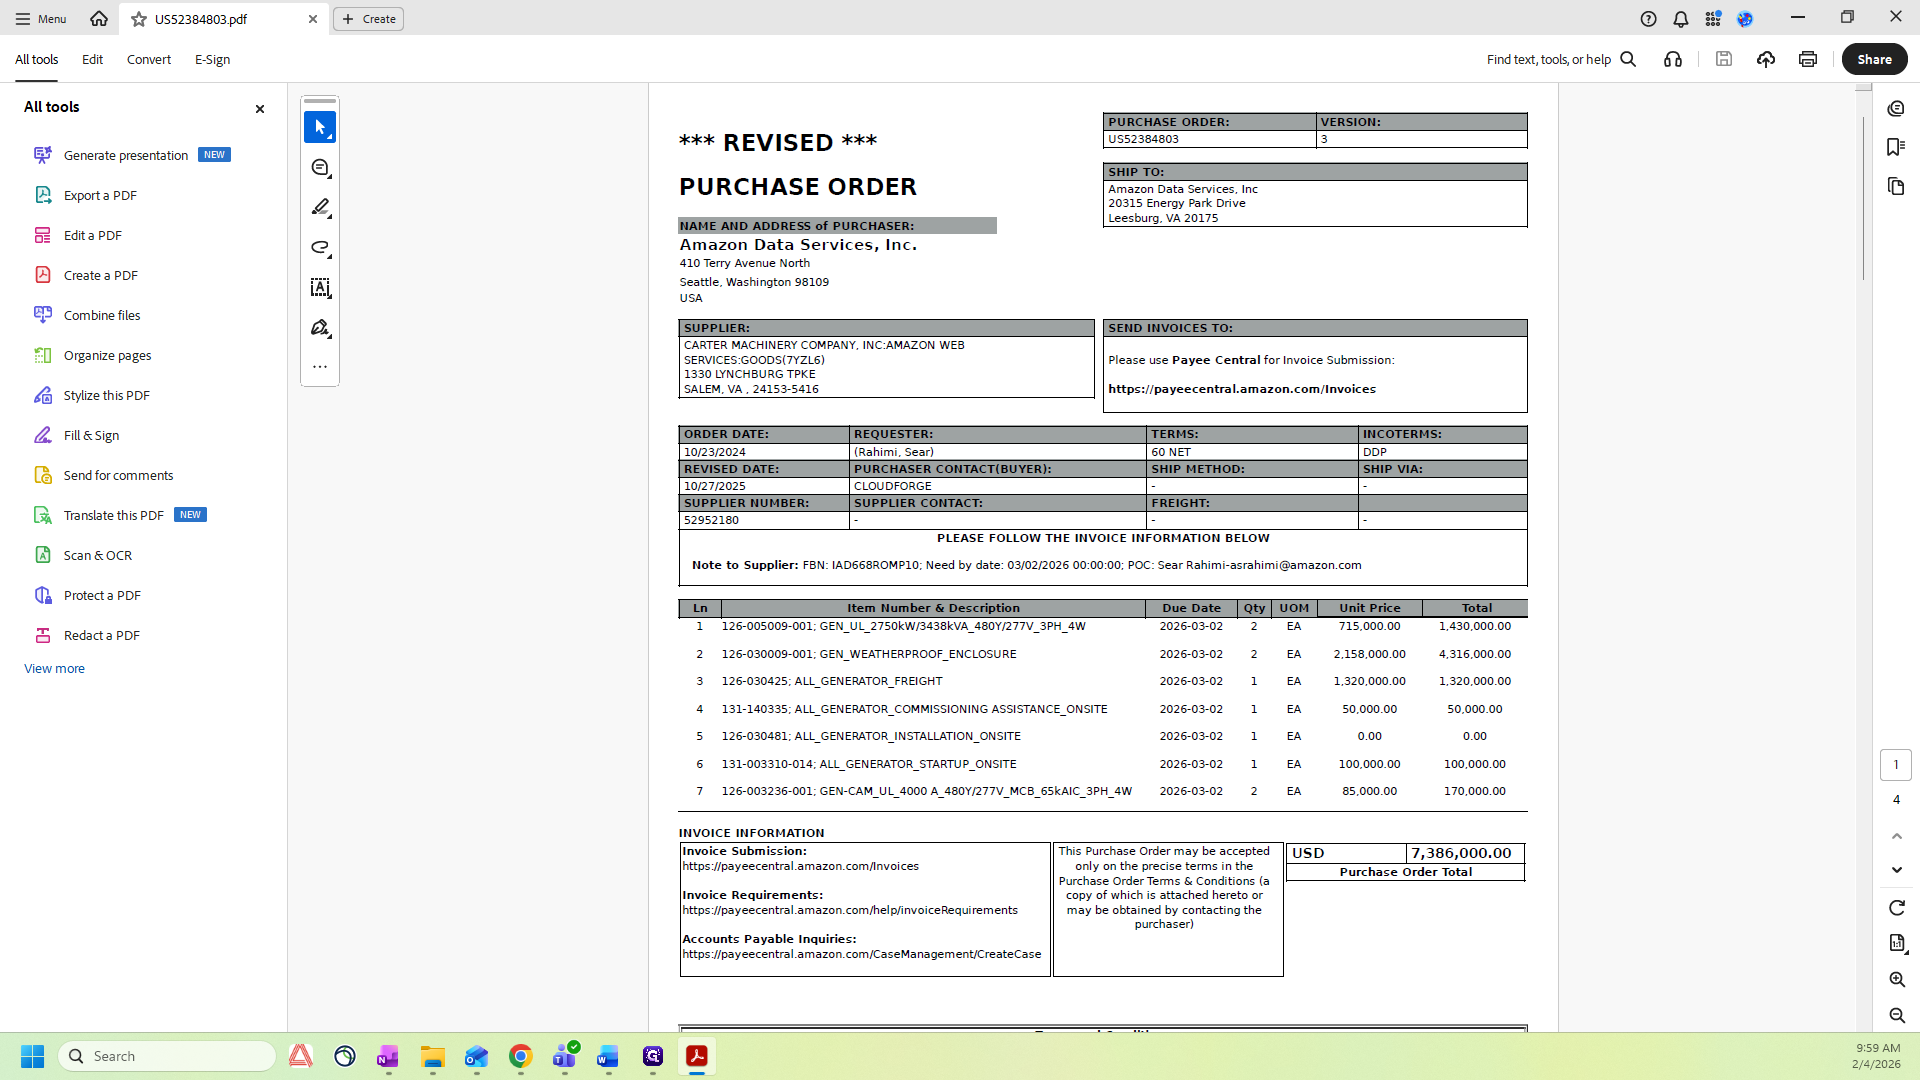
If your Salesforce budget does not match the customer PO contact the Operations Manager for further assistance.

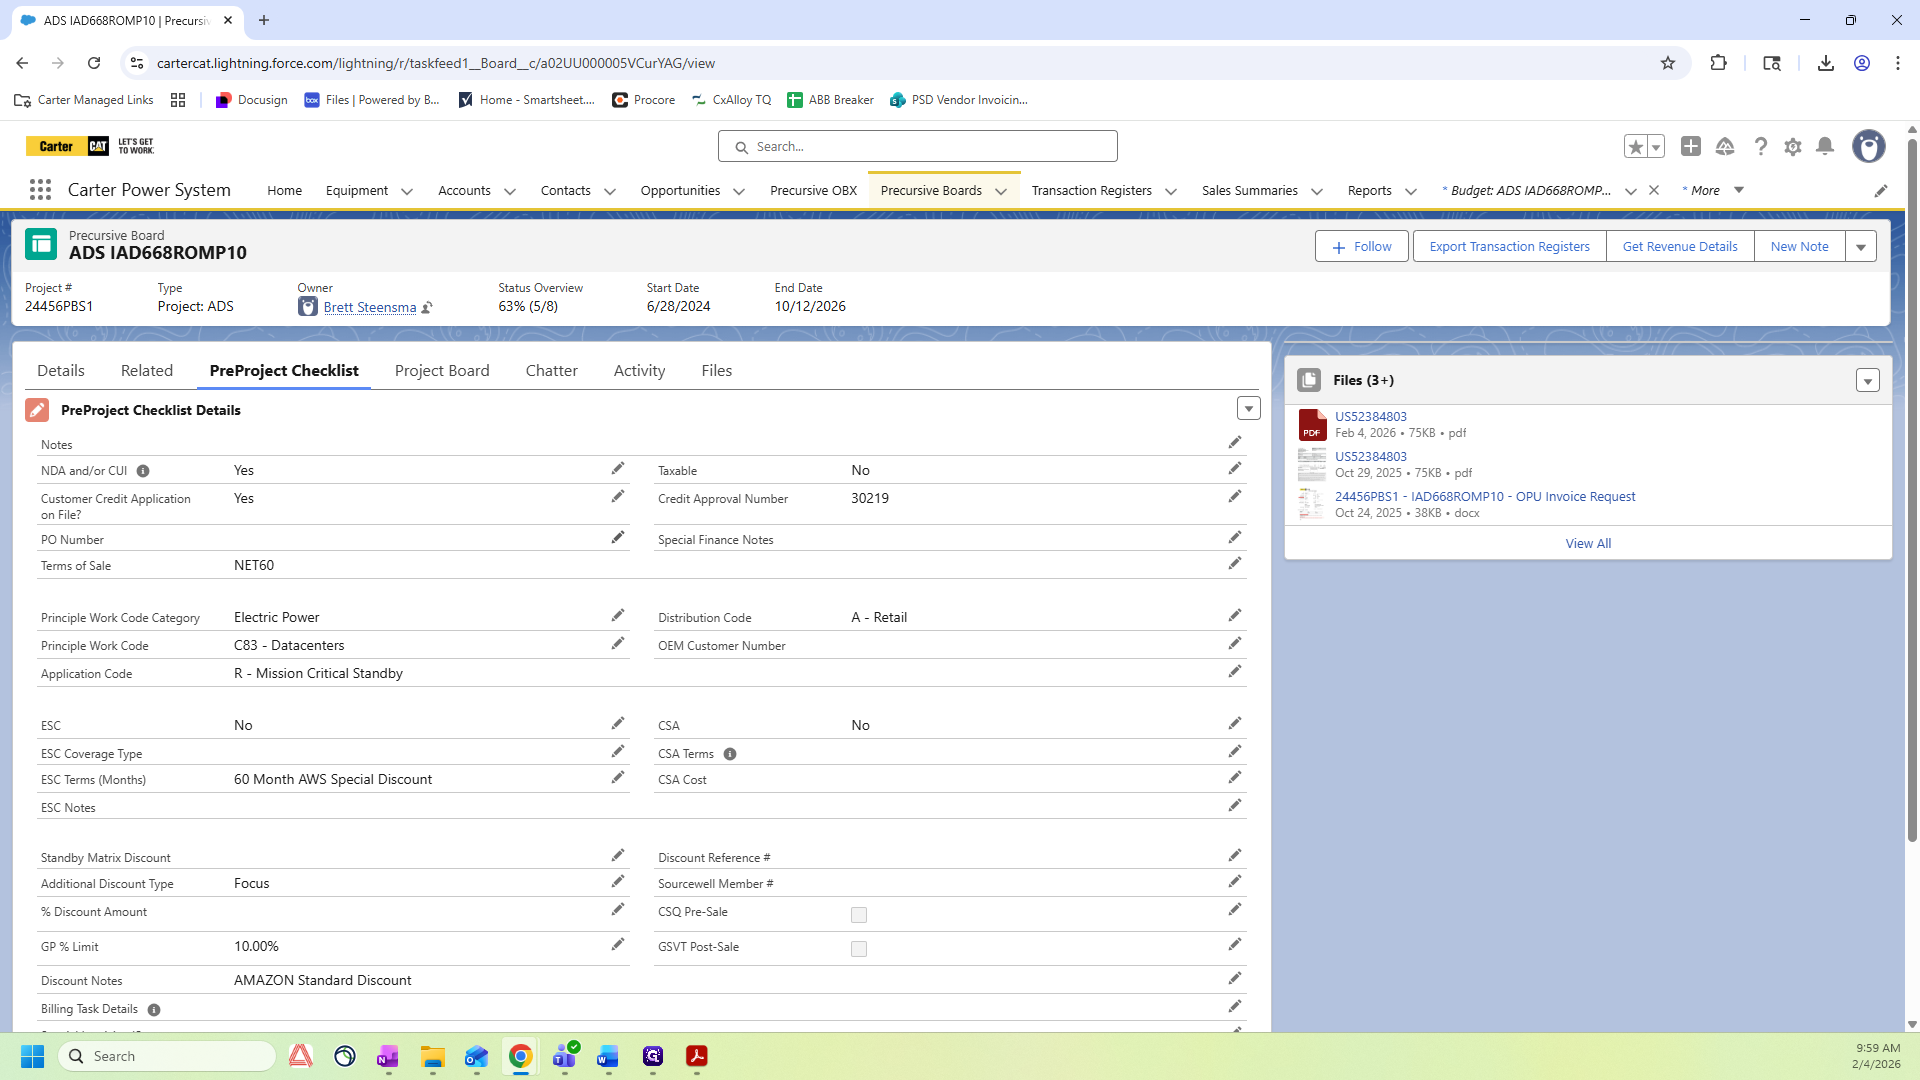
When verifying the purchase order total, confirm the Need By Date found on the PO is 7 days before the delivery date in the budget tasks. If there are questions on finding the budget tasks, there is a separate SOP for that.

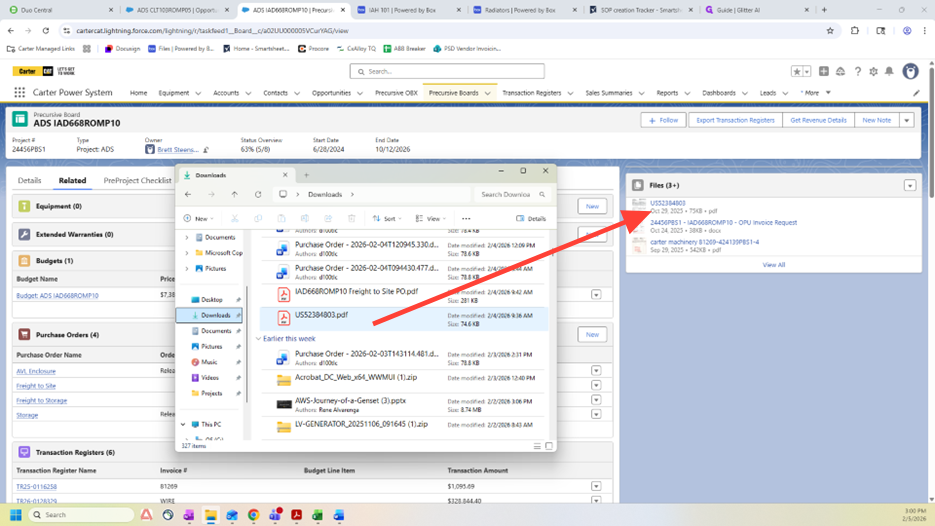
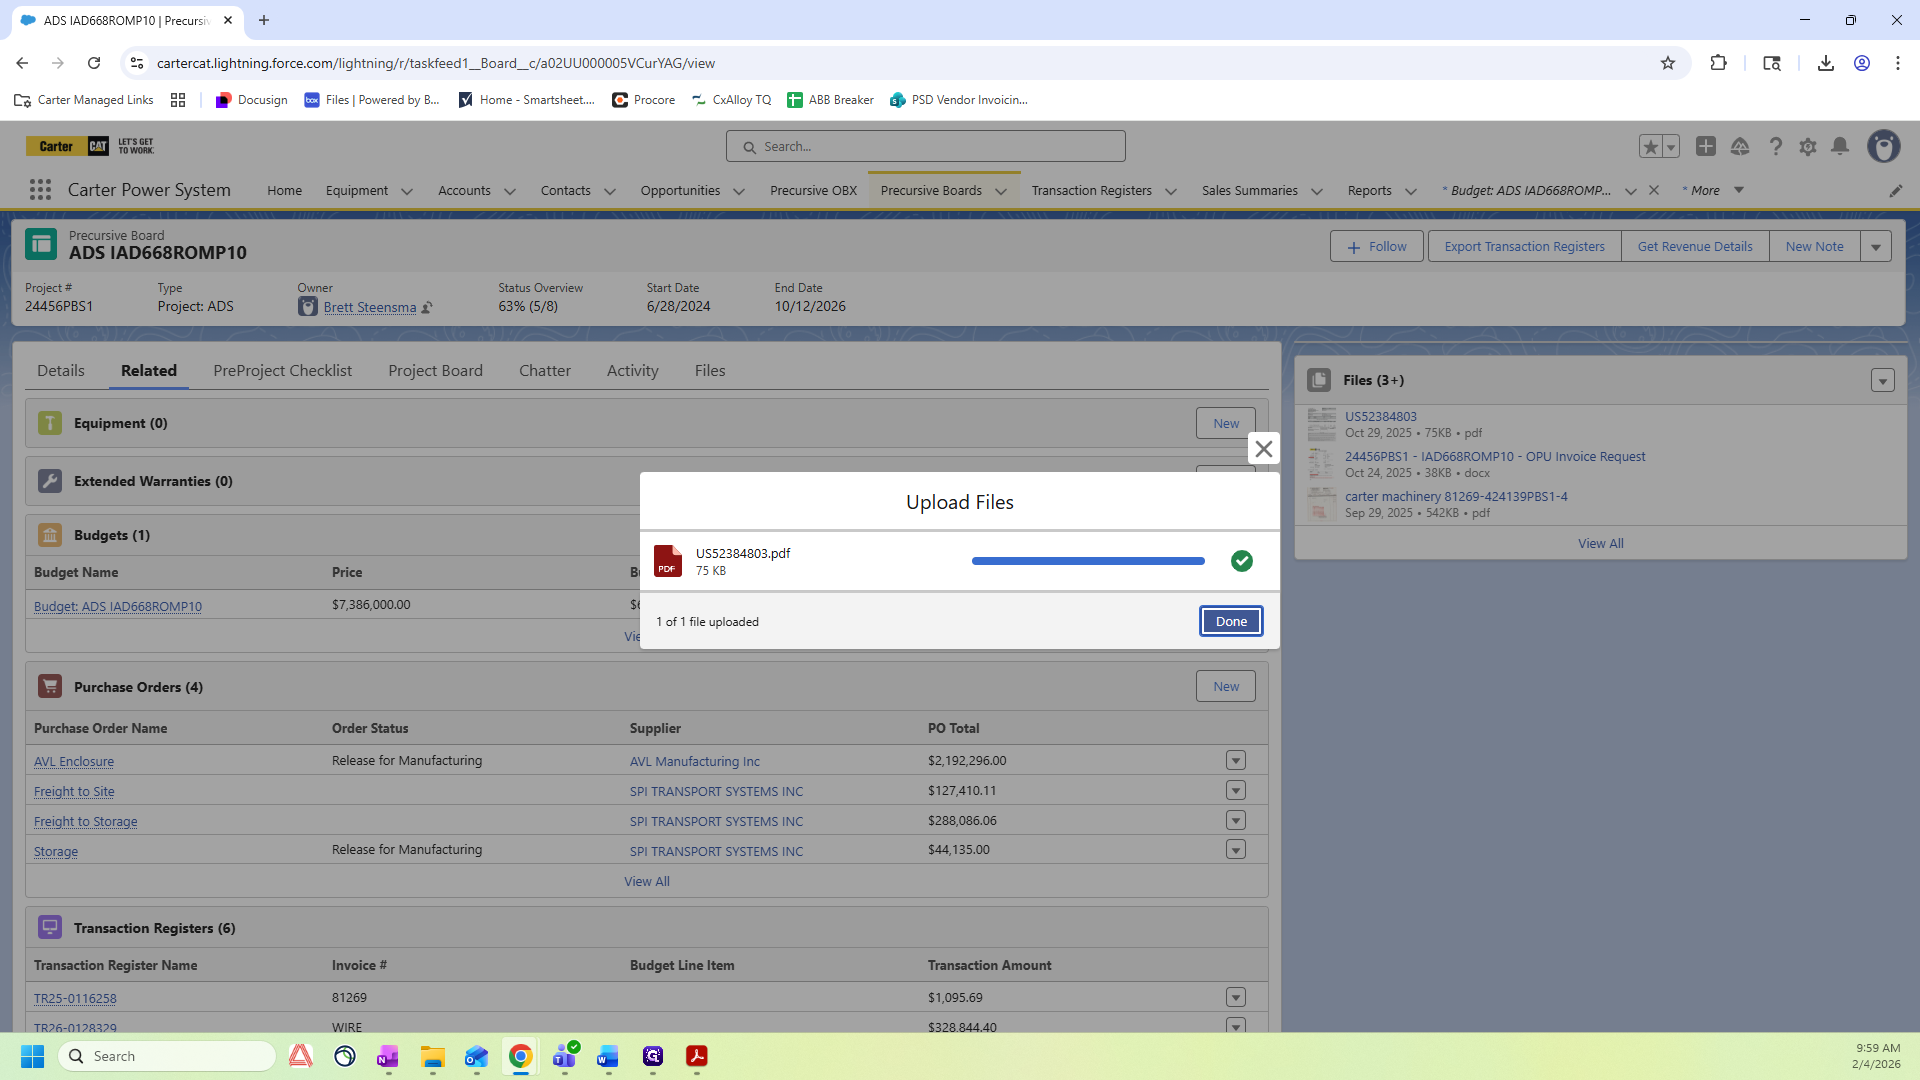
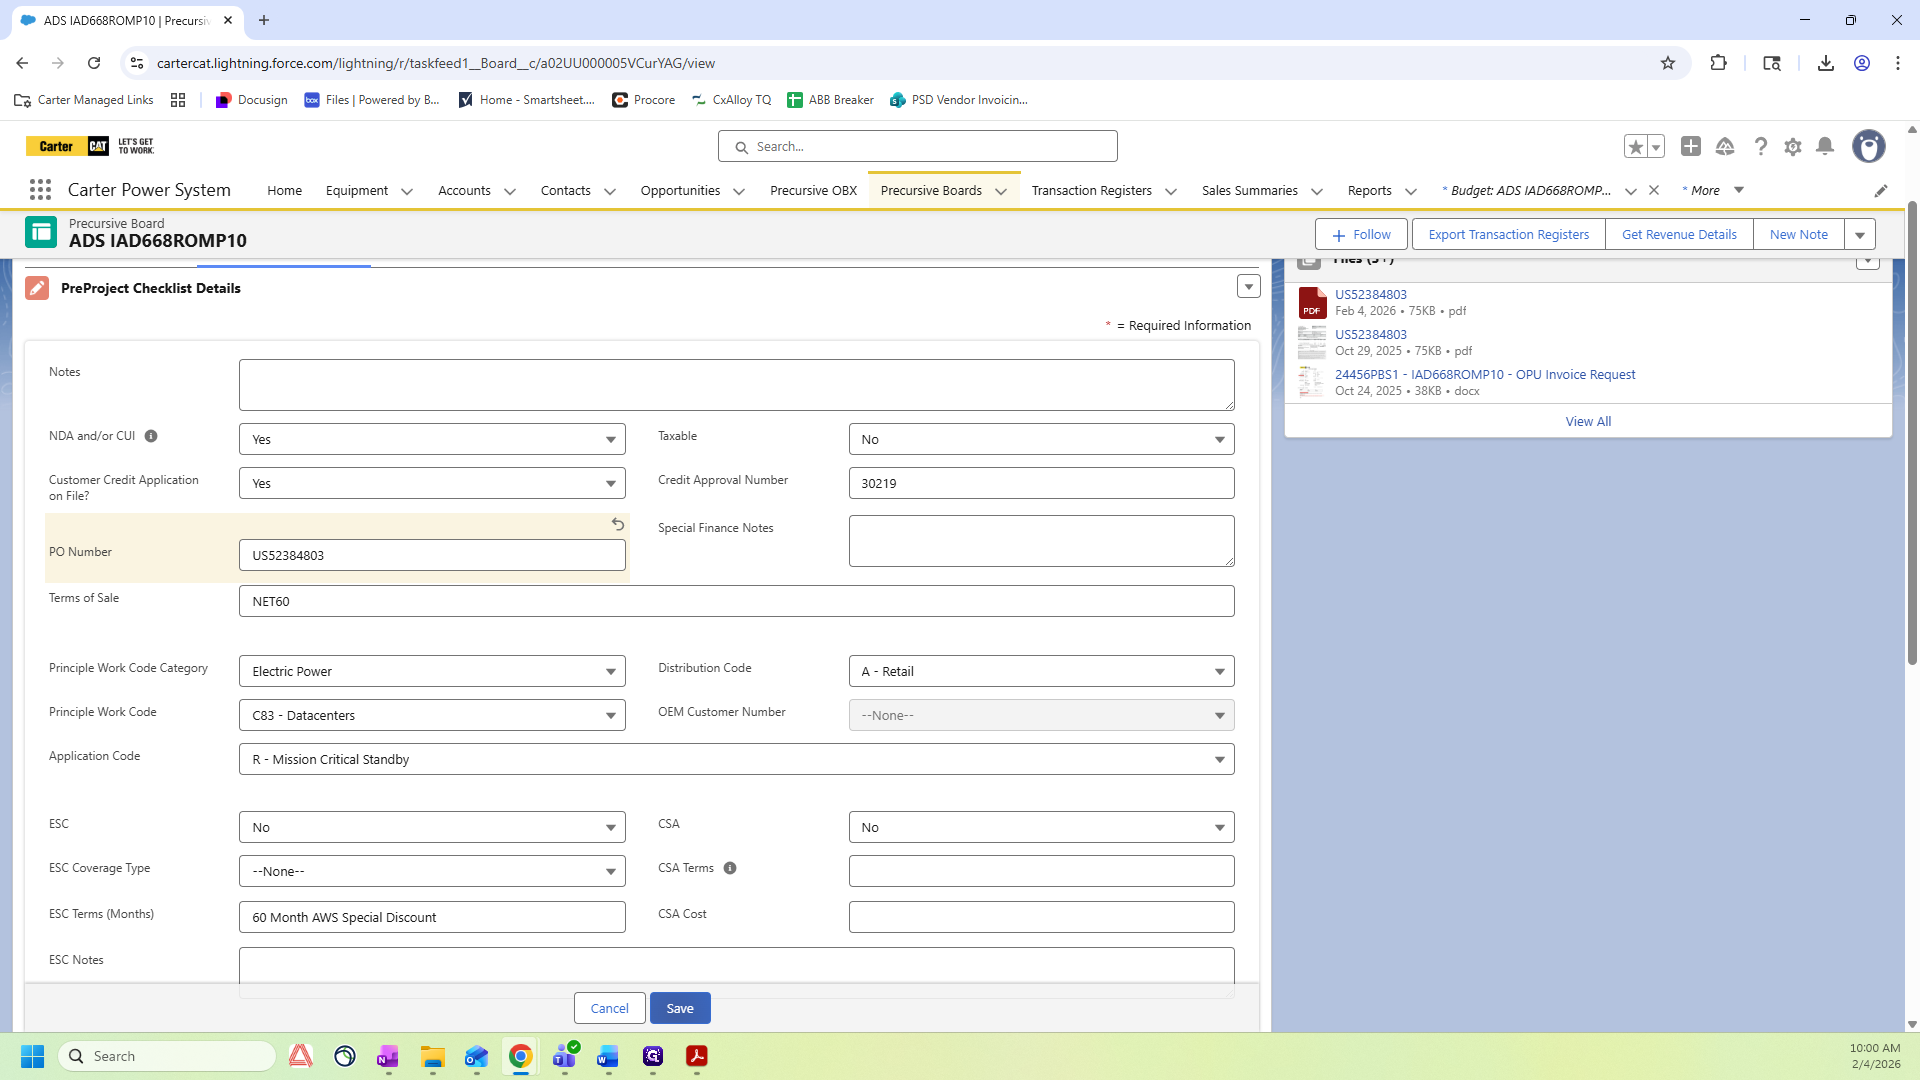
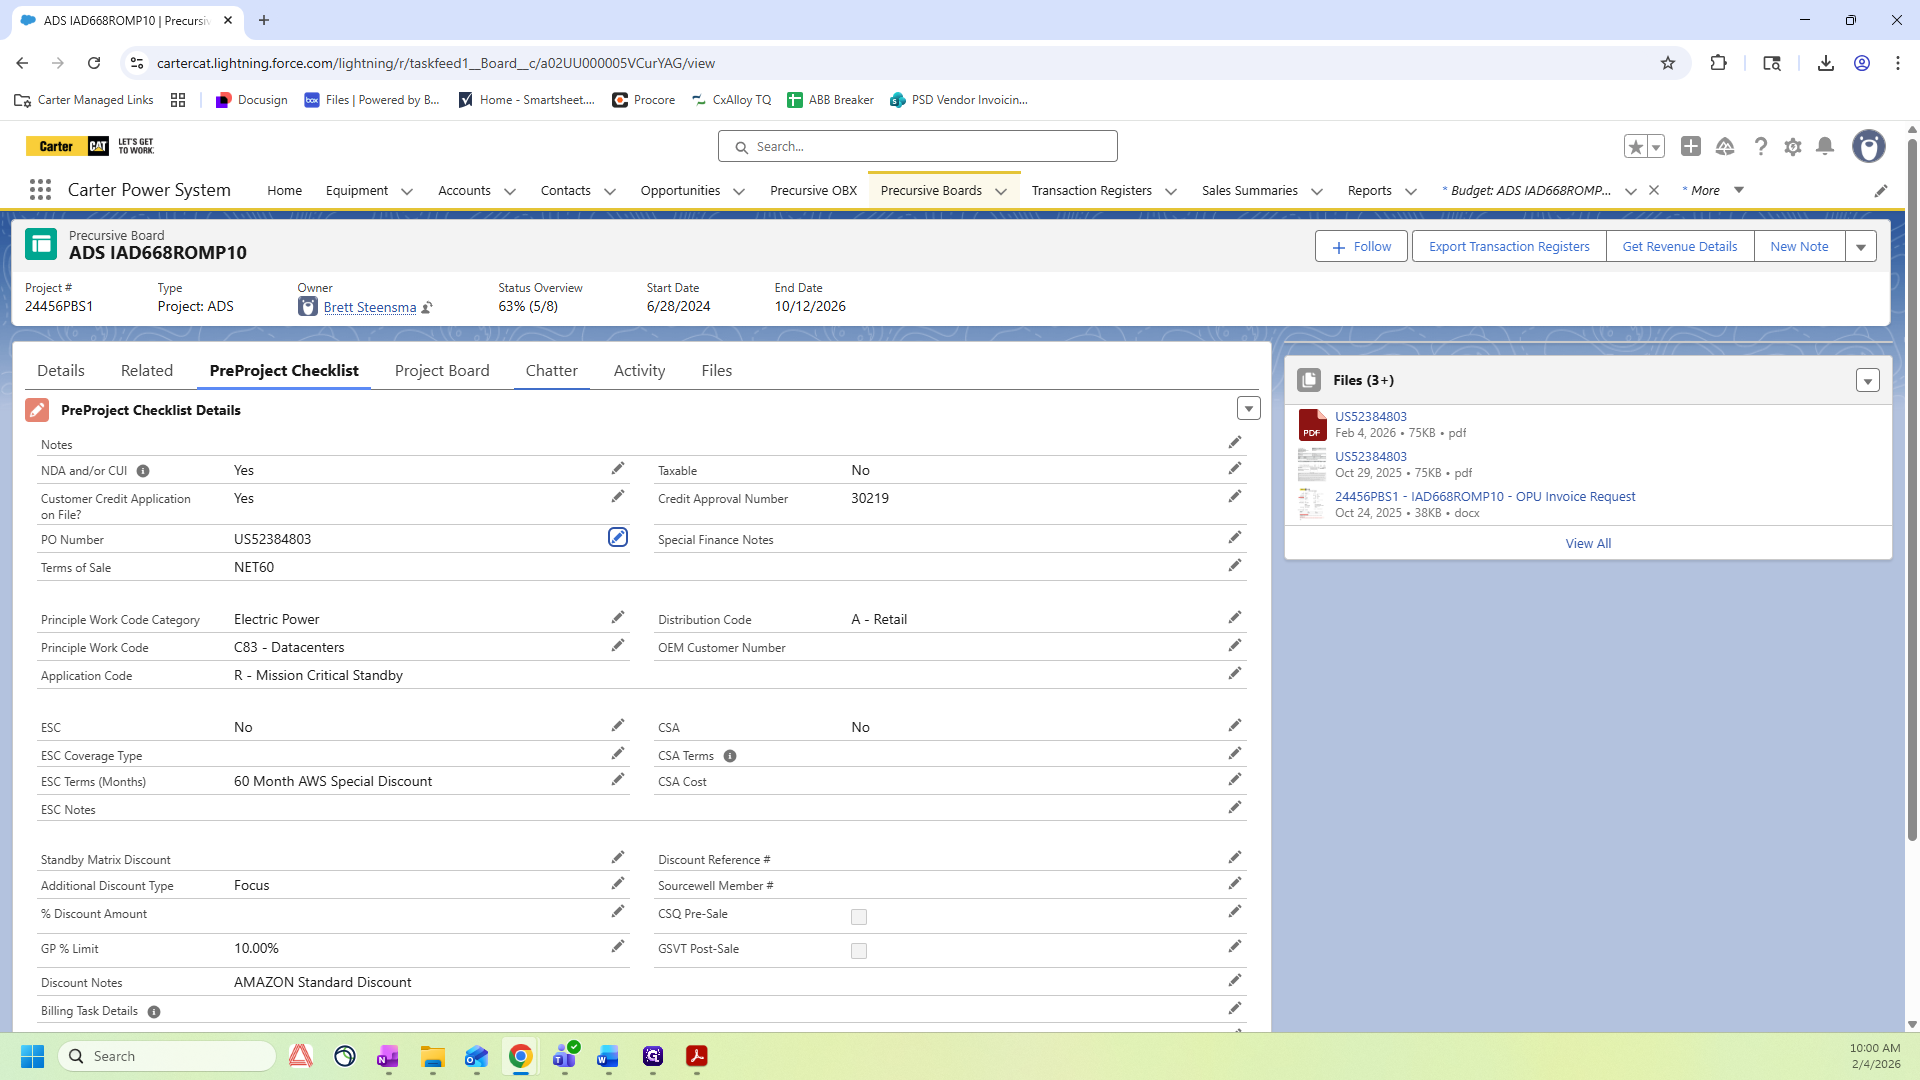
If the purchase order and Budget match, as well as the Need By Date, move on to the next steps. Steps 7-10 walk through how to attach a PDF copy of the purchase order to the Salesforce Board.

7
Go back to Salesforce and navigate back to the Precursive Board main page by clicking on "Budget: ADS IAD668ROMP10"
Step #7: Go back to Salesforce and navigate back to the Precursive Board main page by clicking on "Budget: ADS IAD668ROMP10"
8
Click on "Project: ADS IAD668ROMP10"
Step #8: Click on "Project: ADS IAD668ROMP10"
9
Drag the document to the right side of the Precursive Board
Step #9: Drag the document to the right side of the Precursive Board
10
Click on "Done" to complete the upload
Step #10: Click on "Done" to complete the upload
11
Click on "PreProject Checklist"
Step #11: Click on "PreProject Checklist"
12
Look for the PO Number line and click the pencil to edit
Step #12: Look for the PO Number line and click the pencil to edit
13
Type in the PO Number found on the PO and Click "Save"
Step #13: Type in the PO Number found on the PO and Click "Save"
14
Click on "Chatter"
Step #14: Click on "Chatter"
15
Type "@Tony Scheler @Colleen Conway PO uploaded and ready for review. Thank you" and hit Share
Step #15: Type "@Tony Scheler @Colleen Conway PO uploaded and ready for review. Thank you" and hit Share

How to Process a Customer PO in Salesforce: Step-by-Step Guide