
How to Process a Return in ShipHero WMS
Learn how to manually create an RMA, process returned inventory, assign restocking bins, and manage return statuses for accurate refunds in ShipHero.
This guide walks through manually creating a Return Merchandise Authorization (RMA) and processing a return in ShipHero WMS. By following these steps, you will learn how to properly record returned inventory, assign it to a restocking bin, and select the correct return status to ensure downstream systems trigger refunds accurately.
This workflow applies to warehouse operators, fulfillment teams, or return specialists managing RMAs and receiving returned inventory directly into the ShipHero system.
Creating the RMA
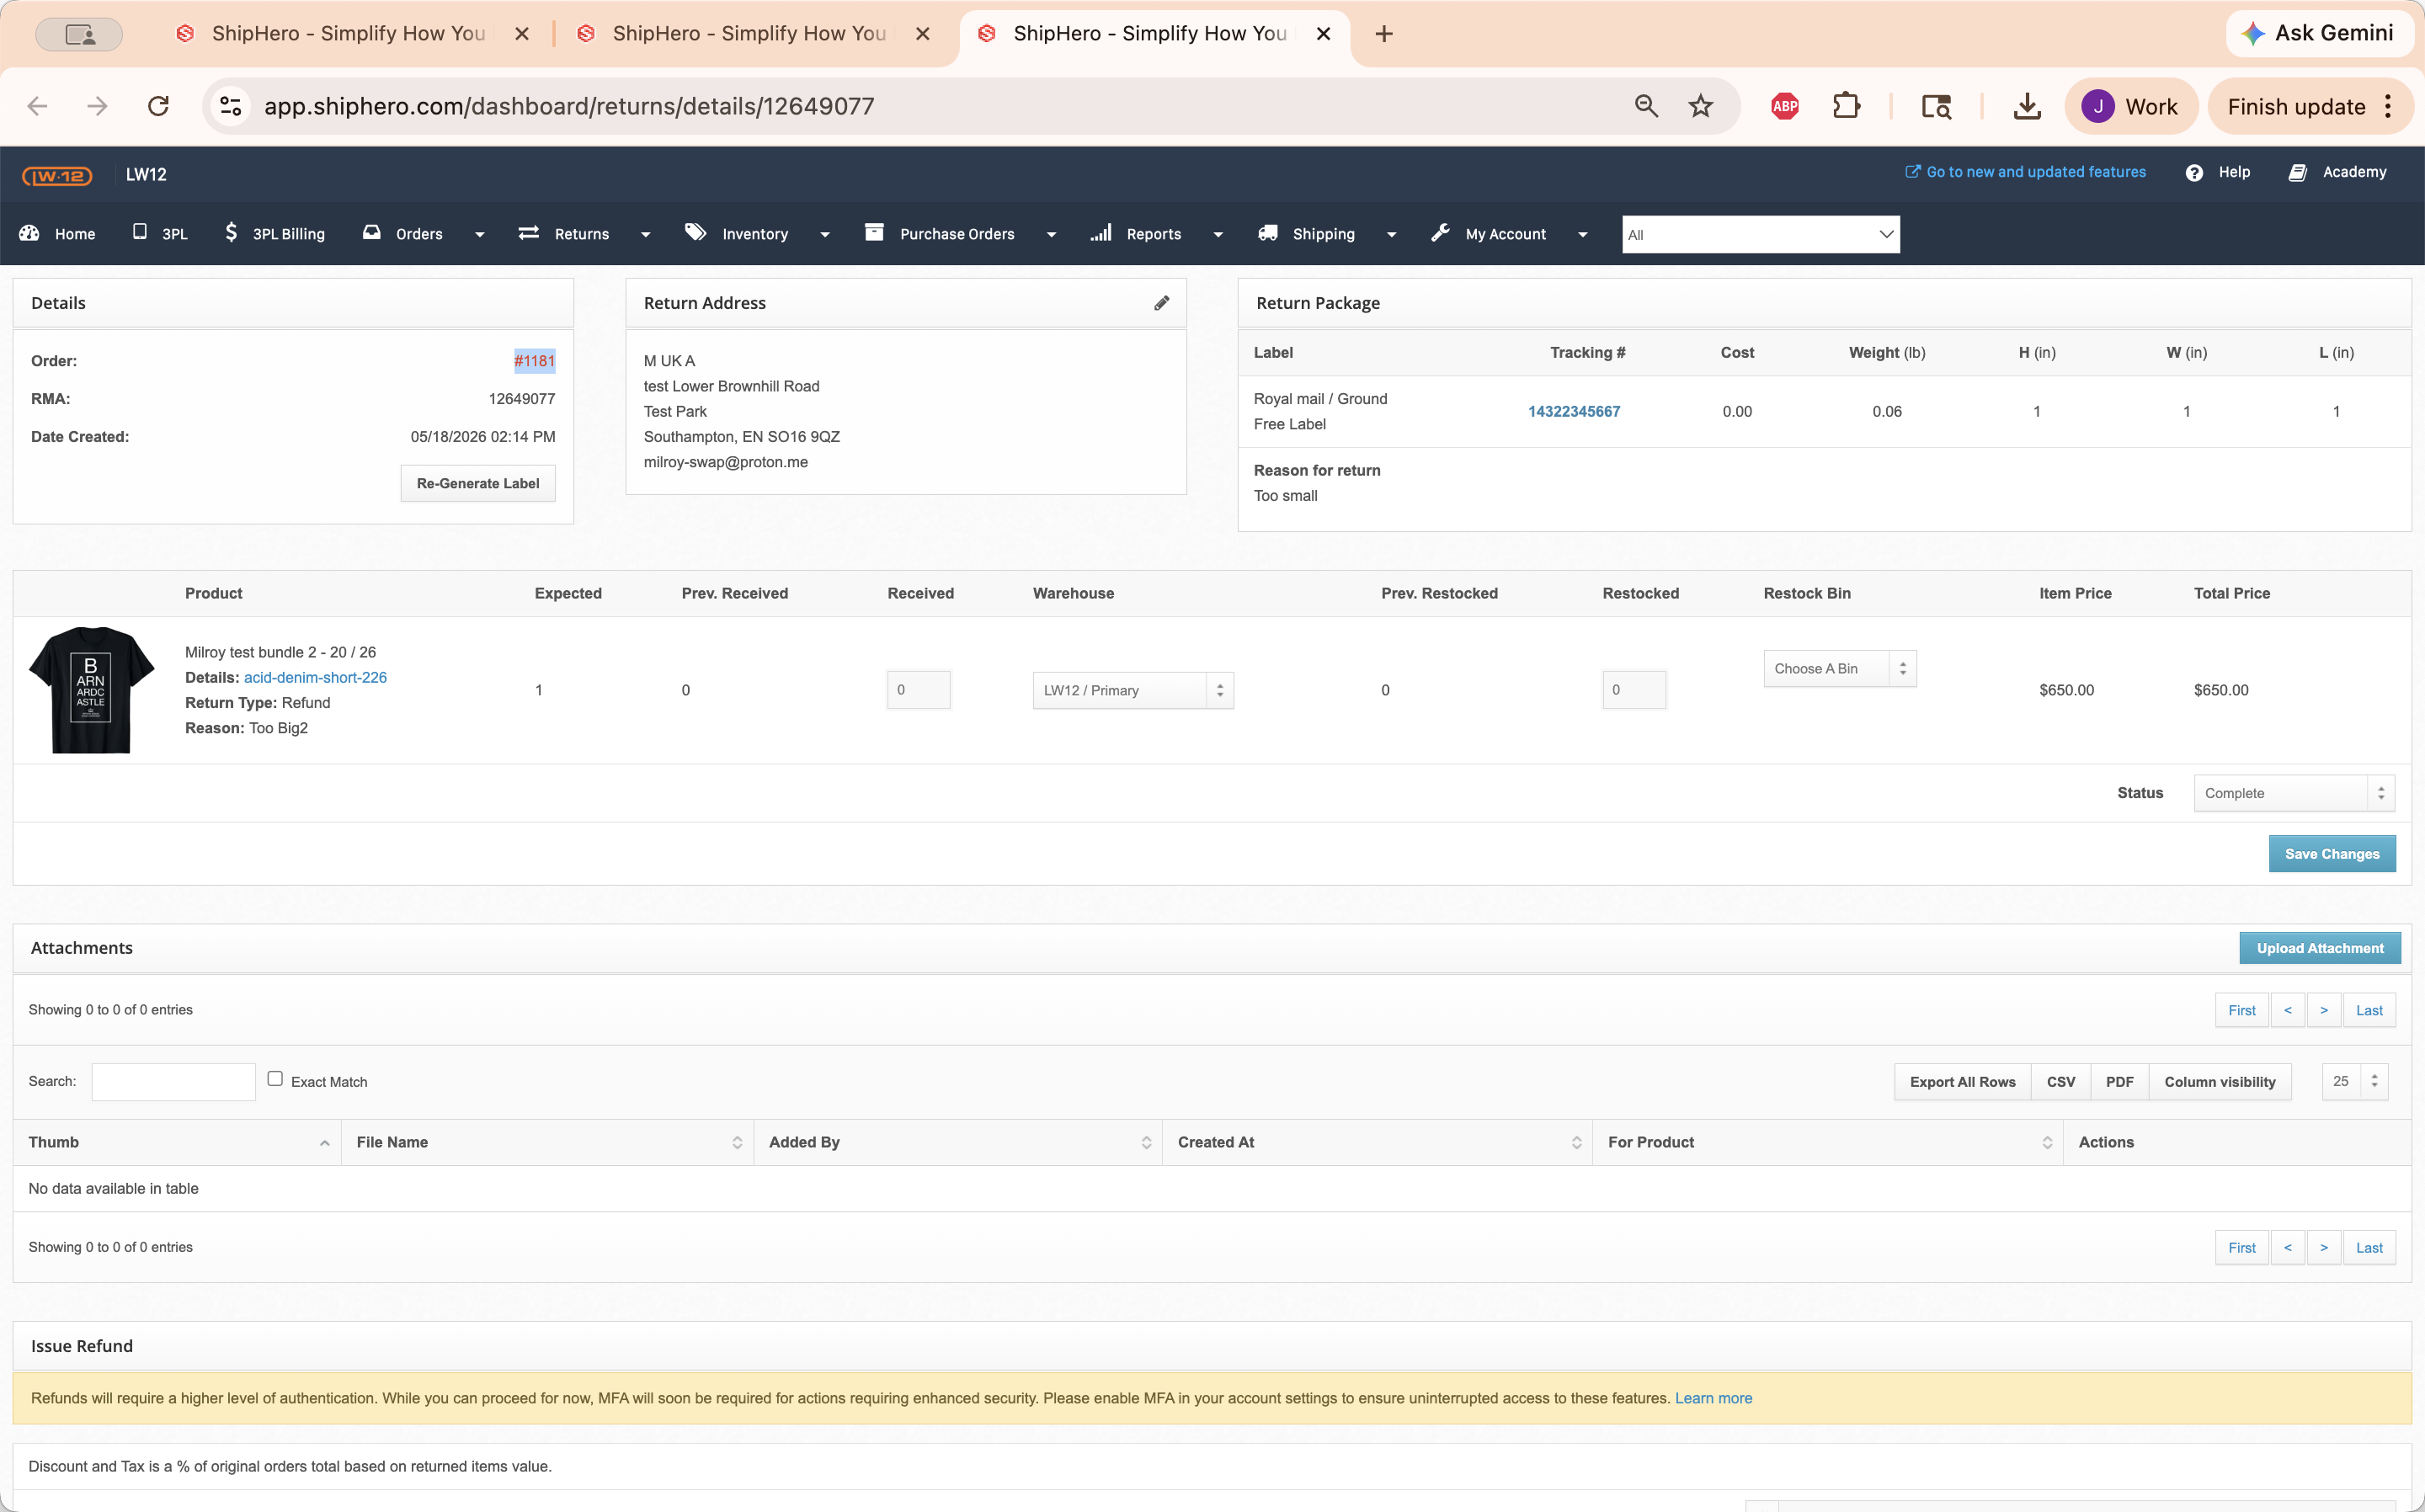
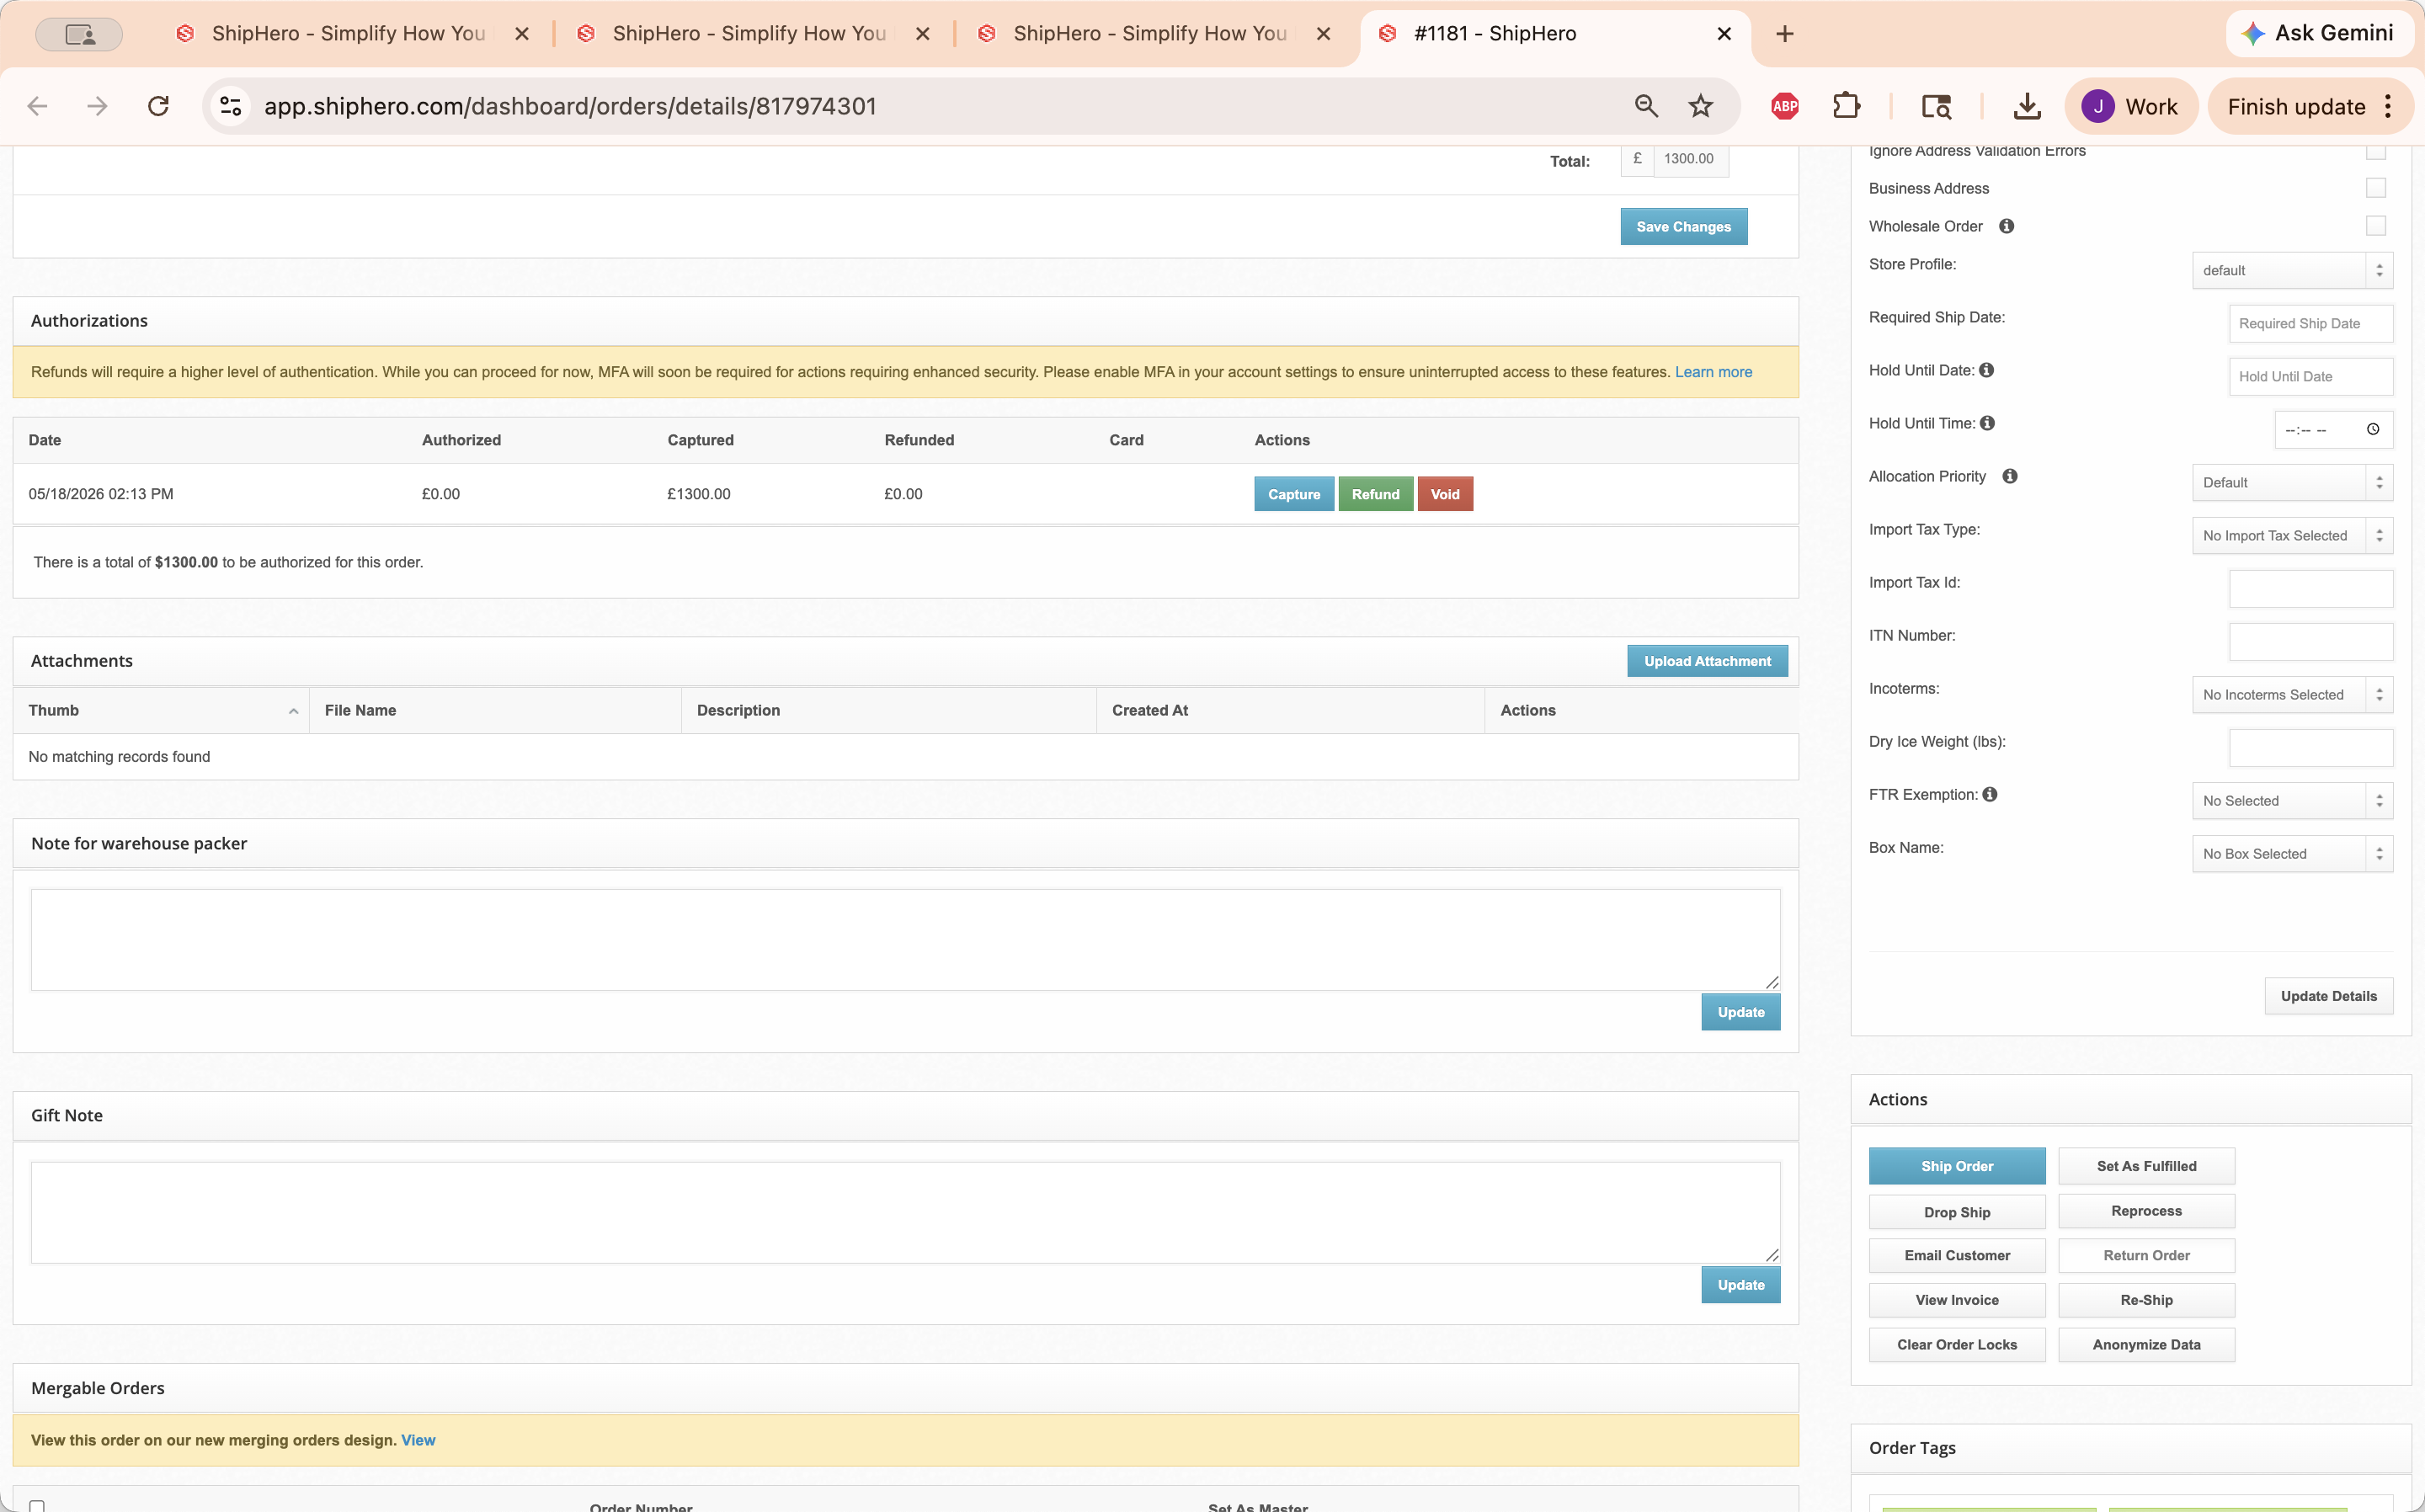
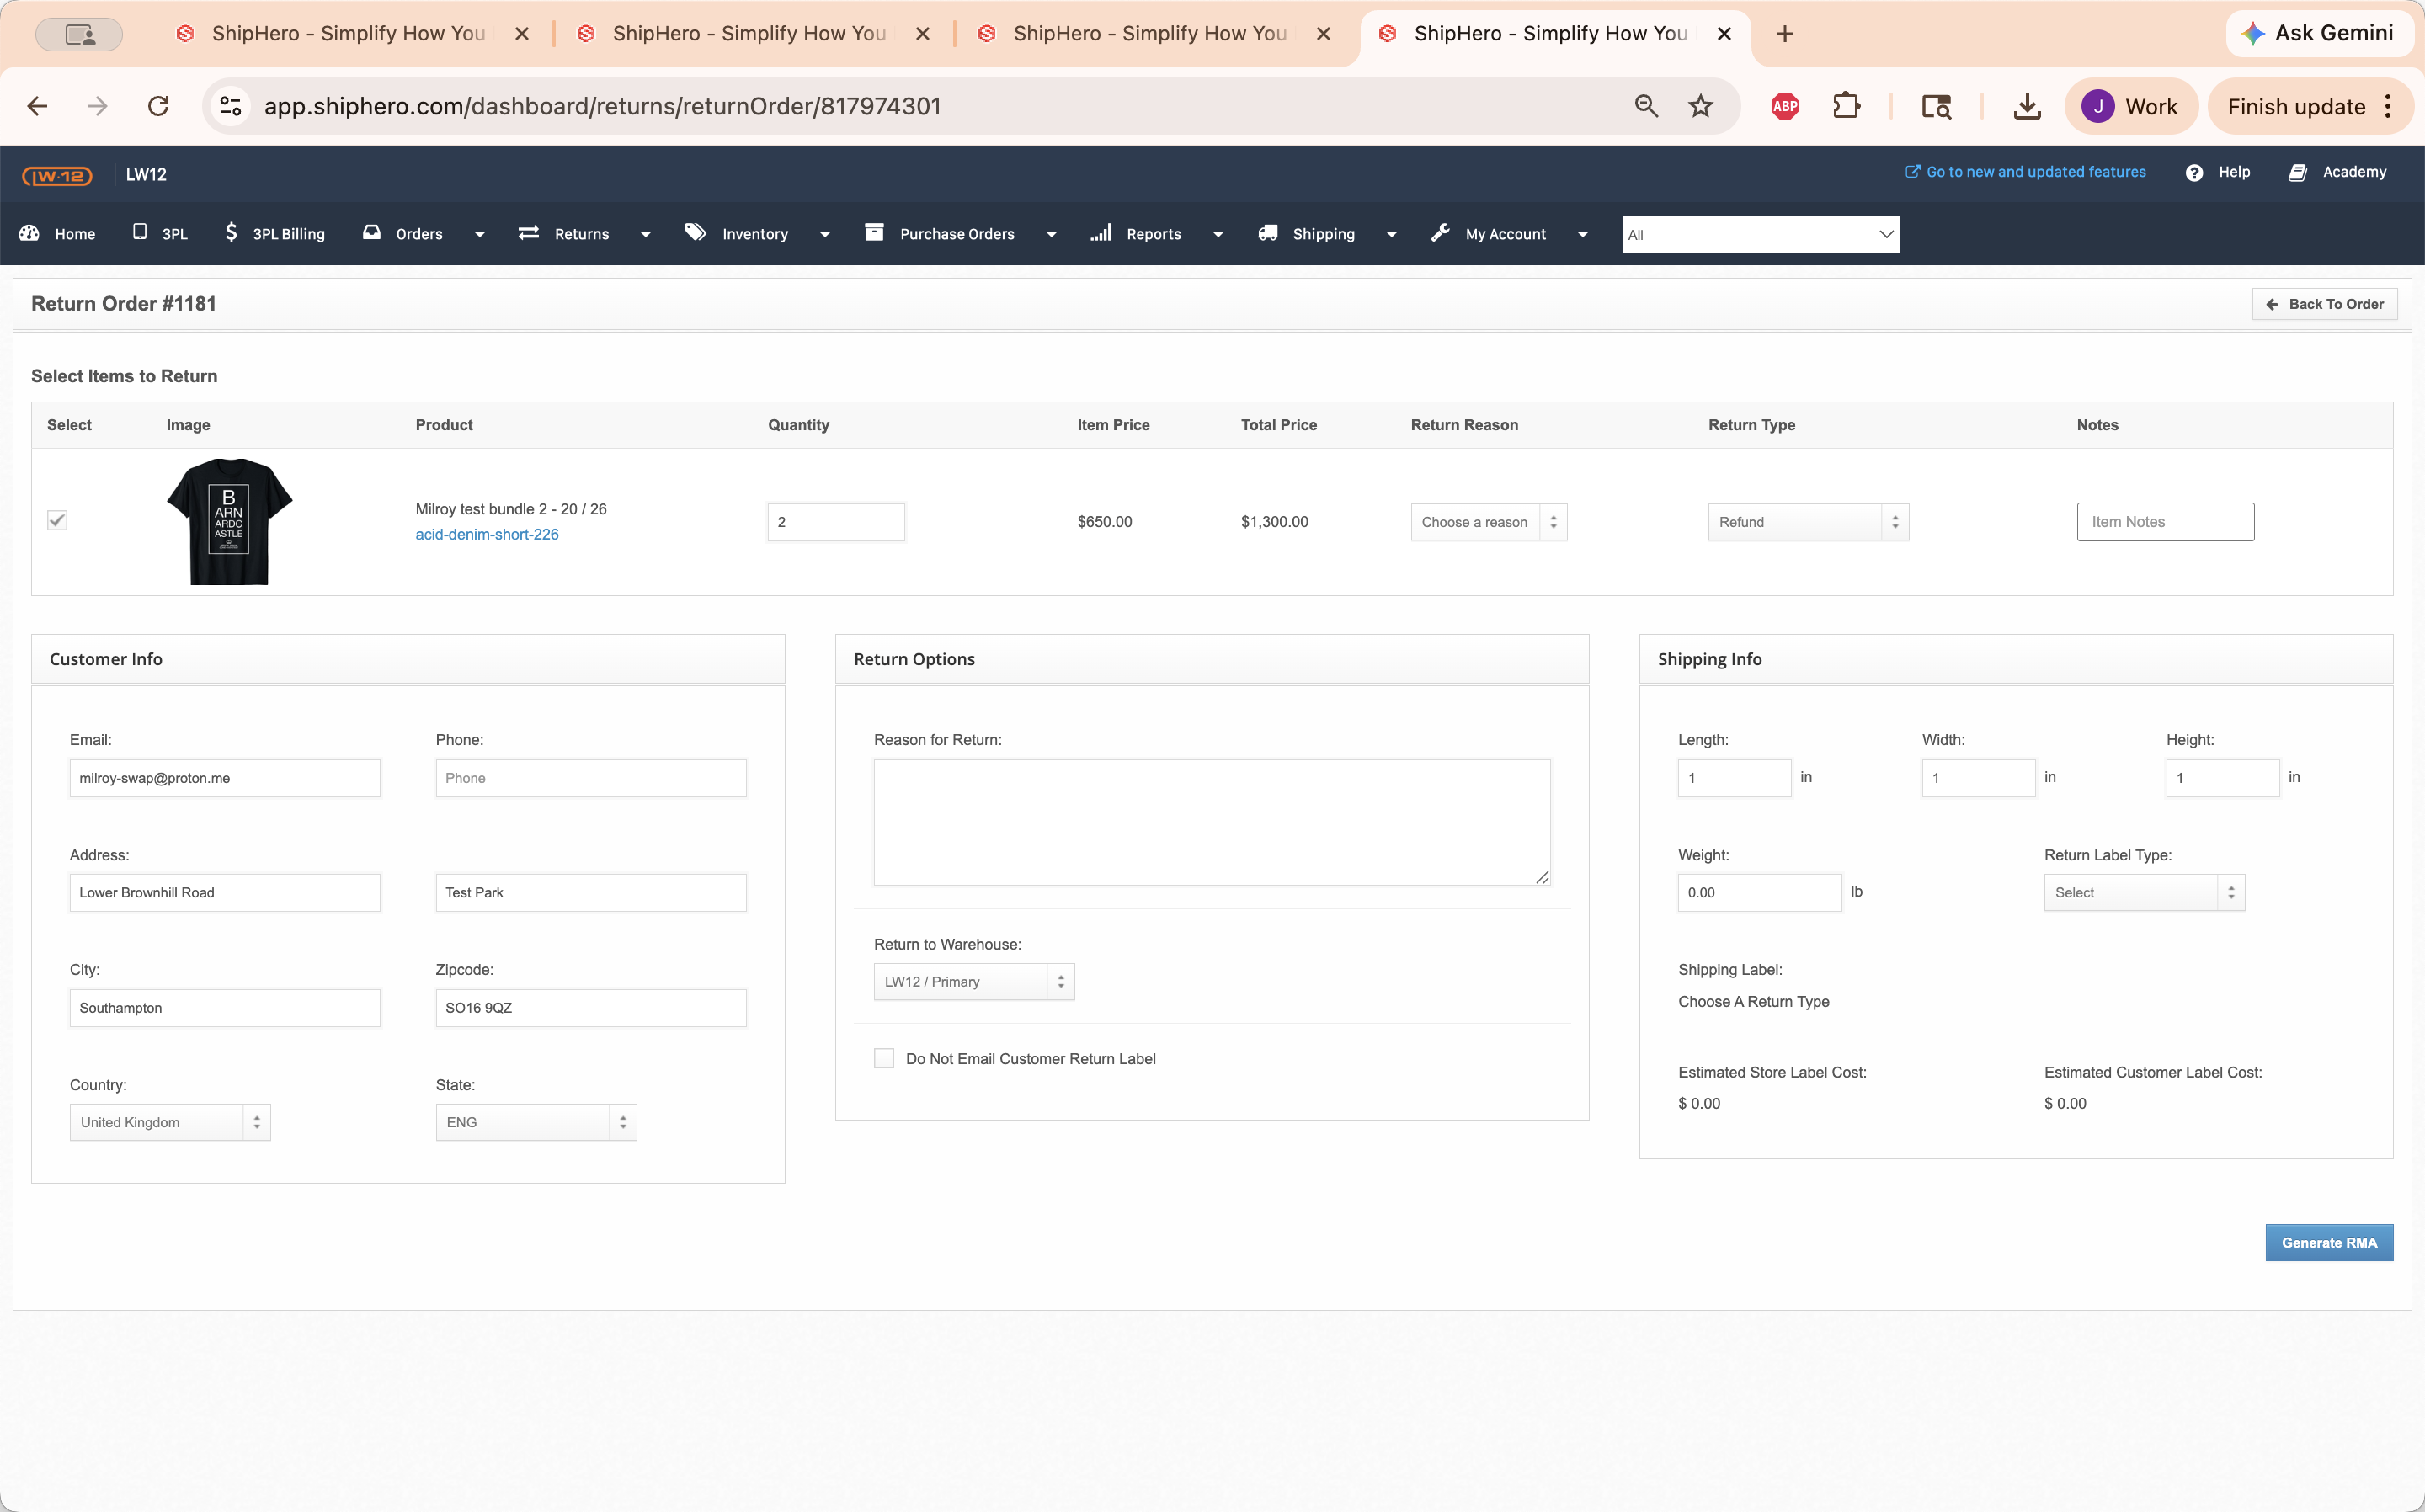
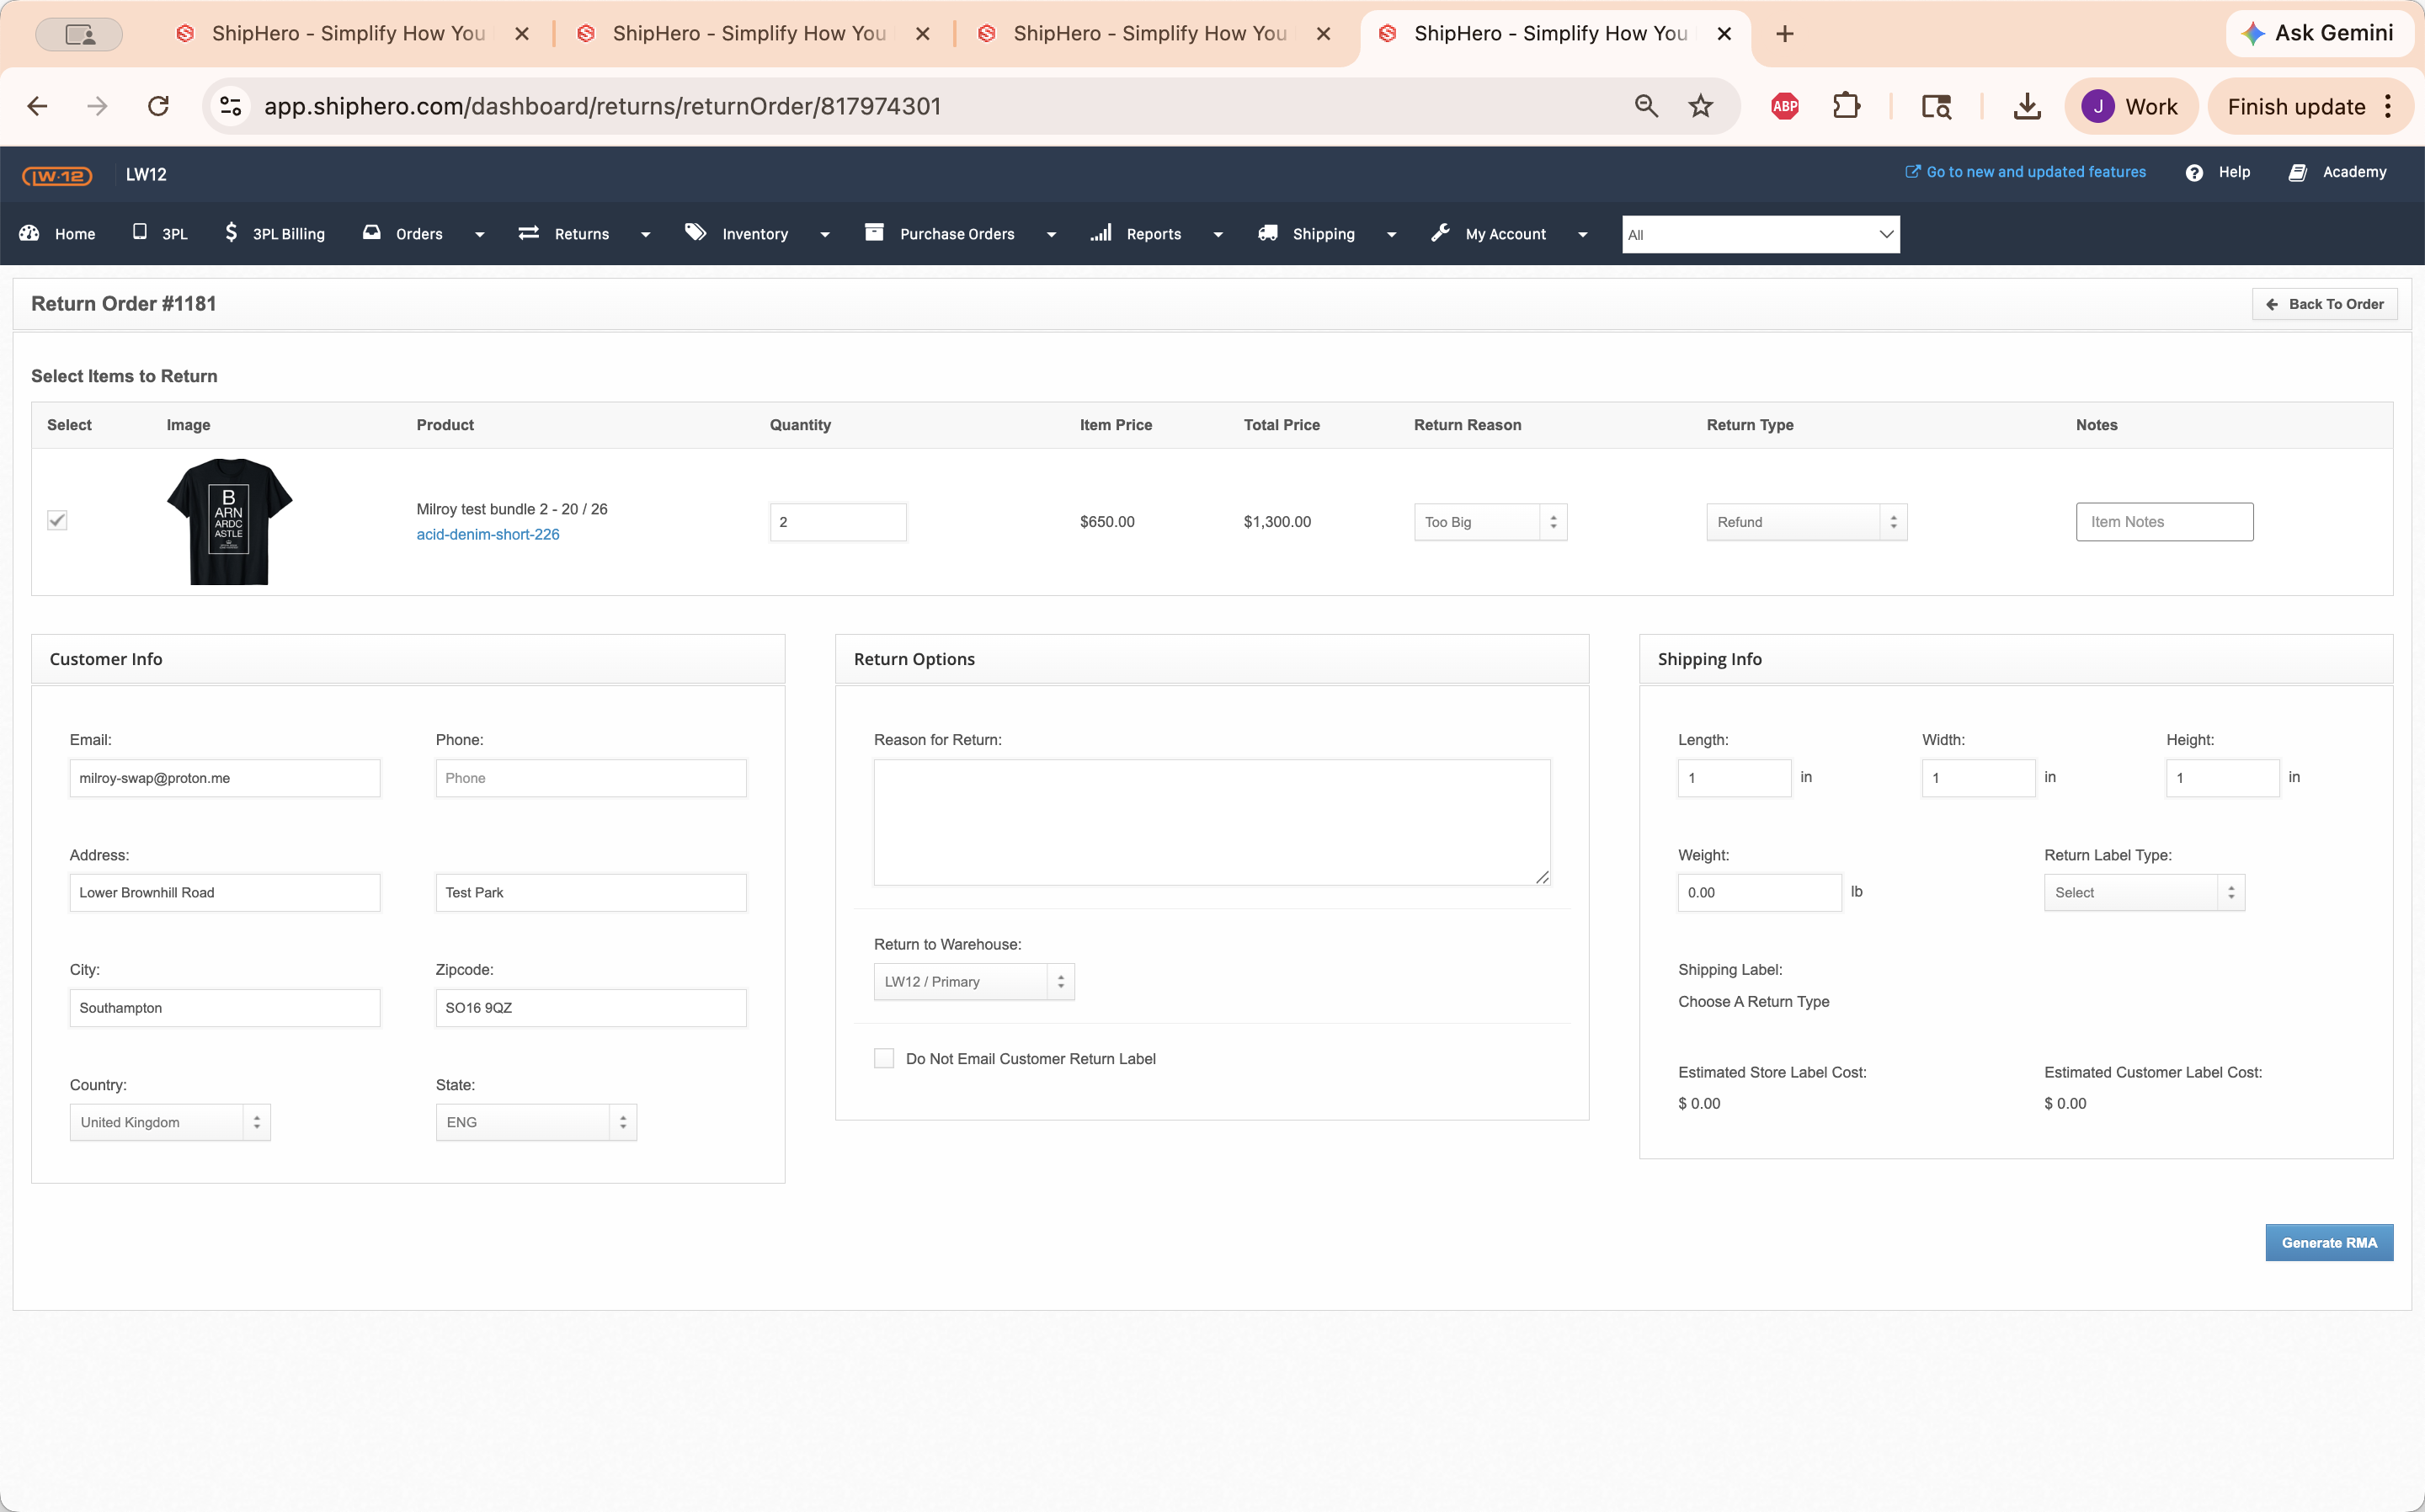
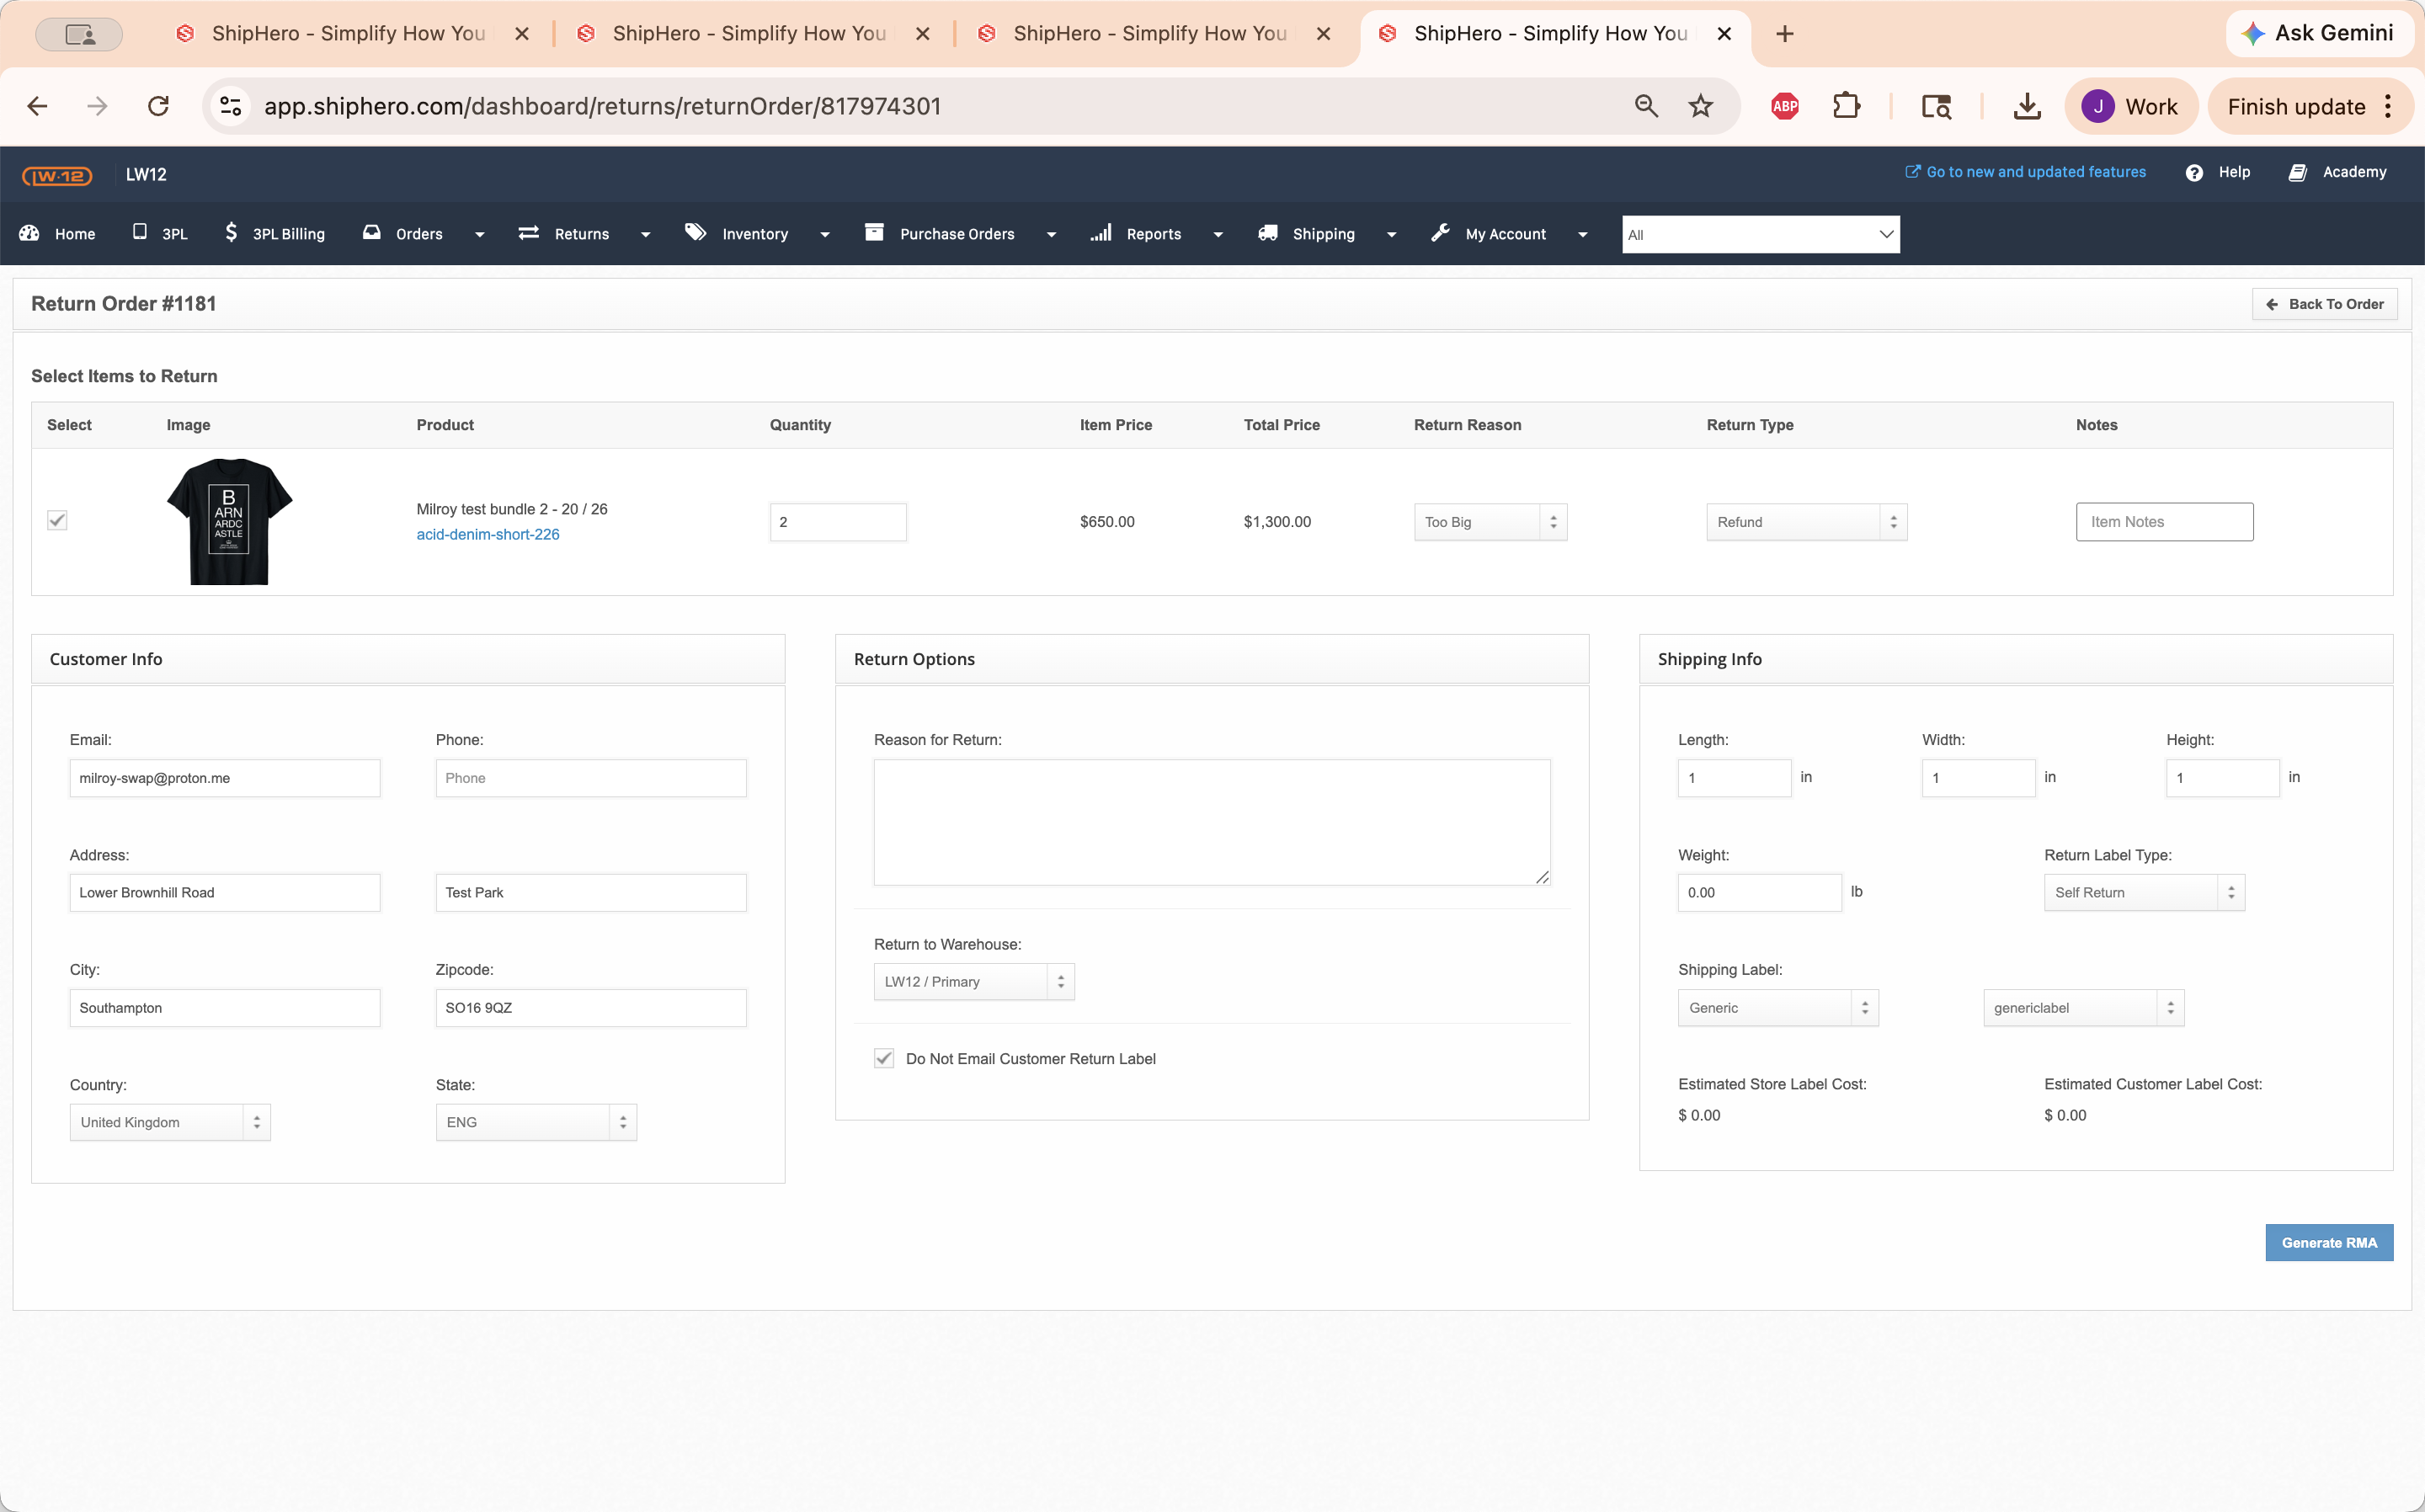
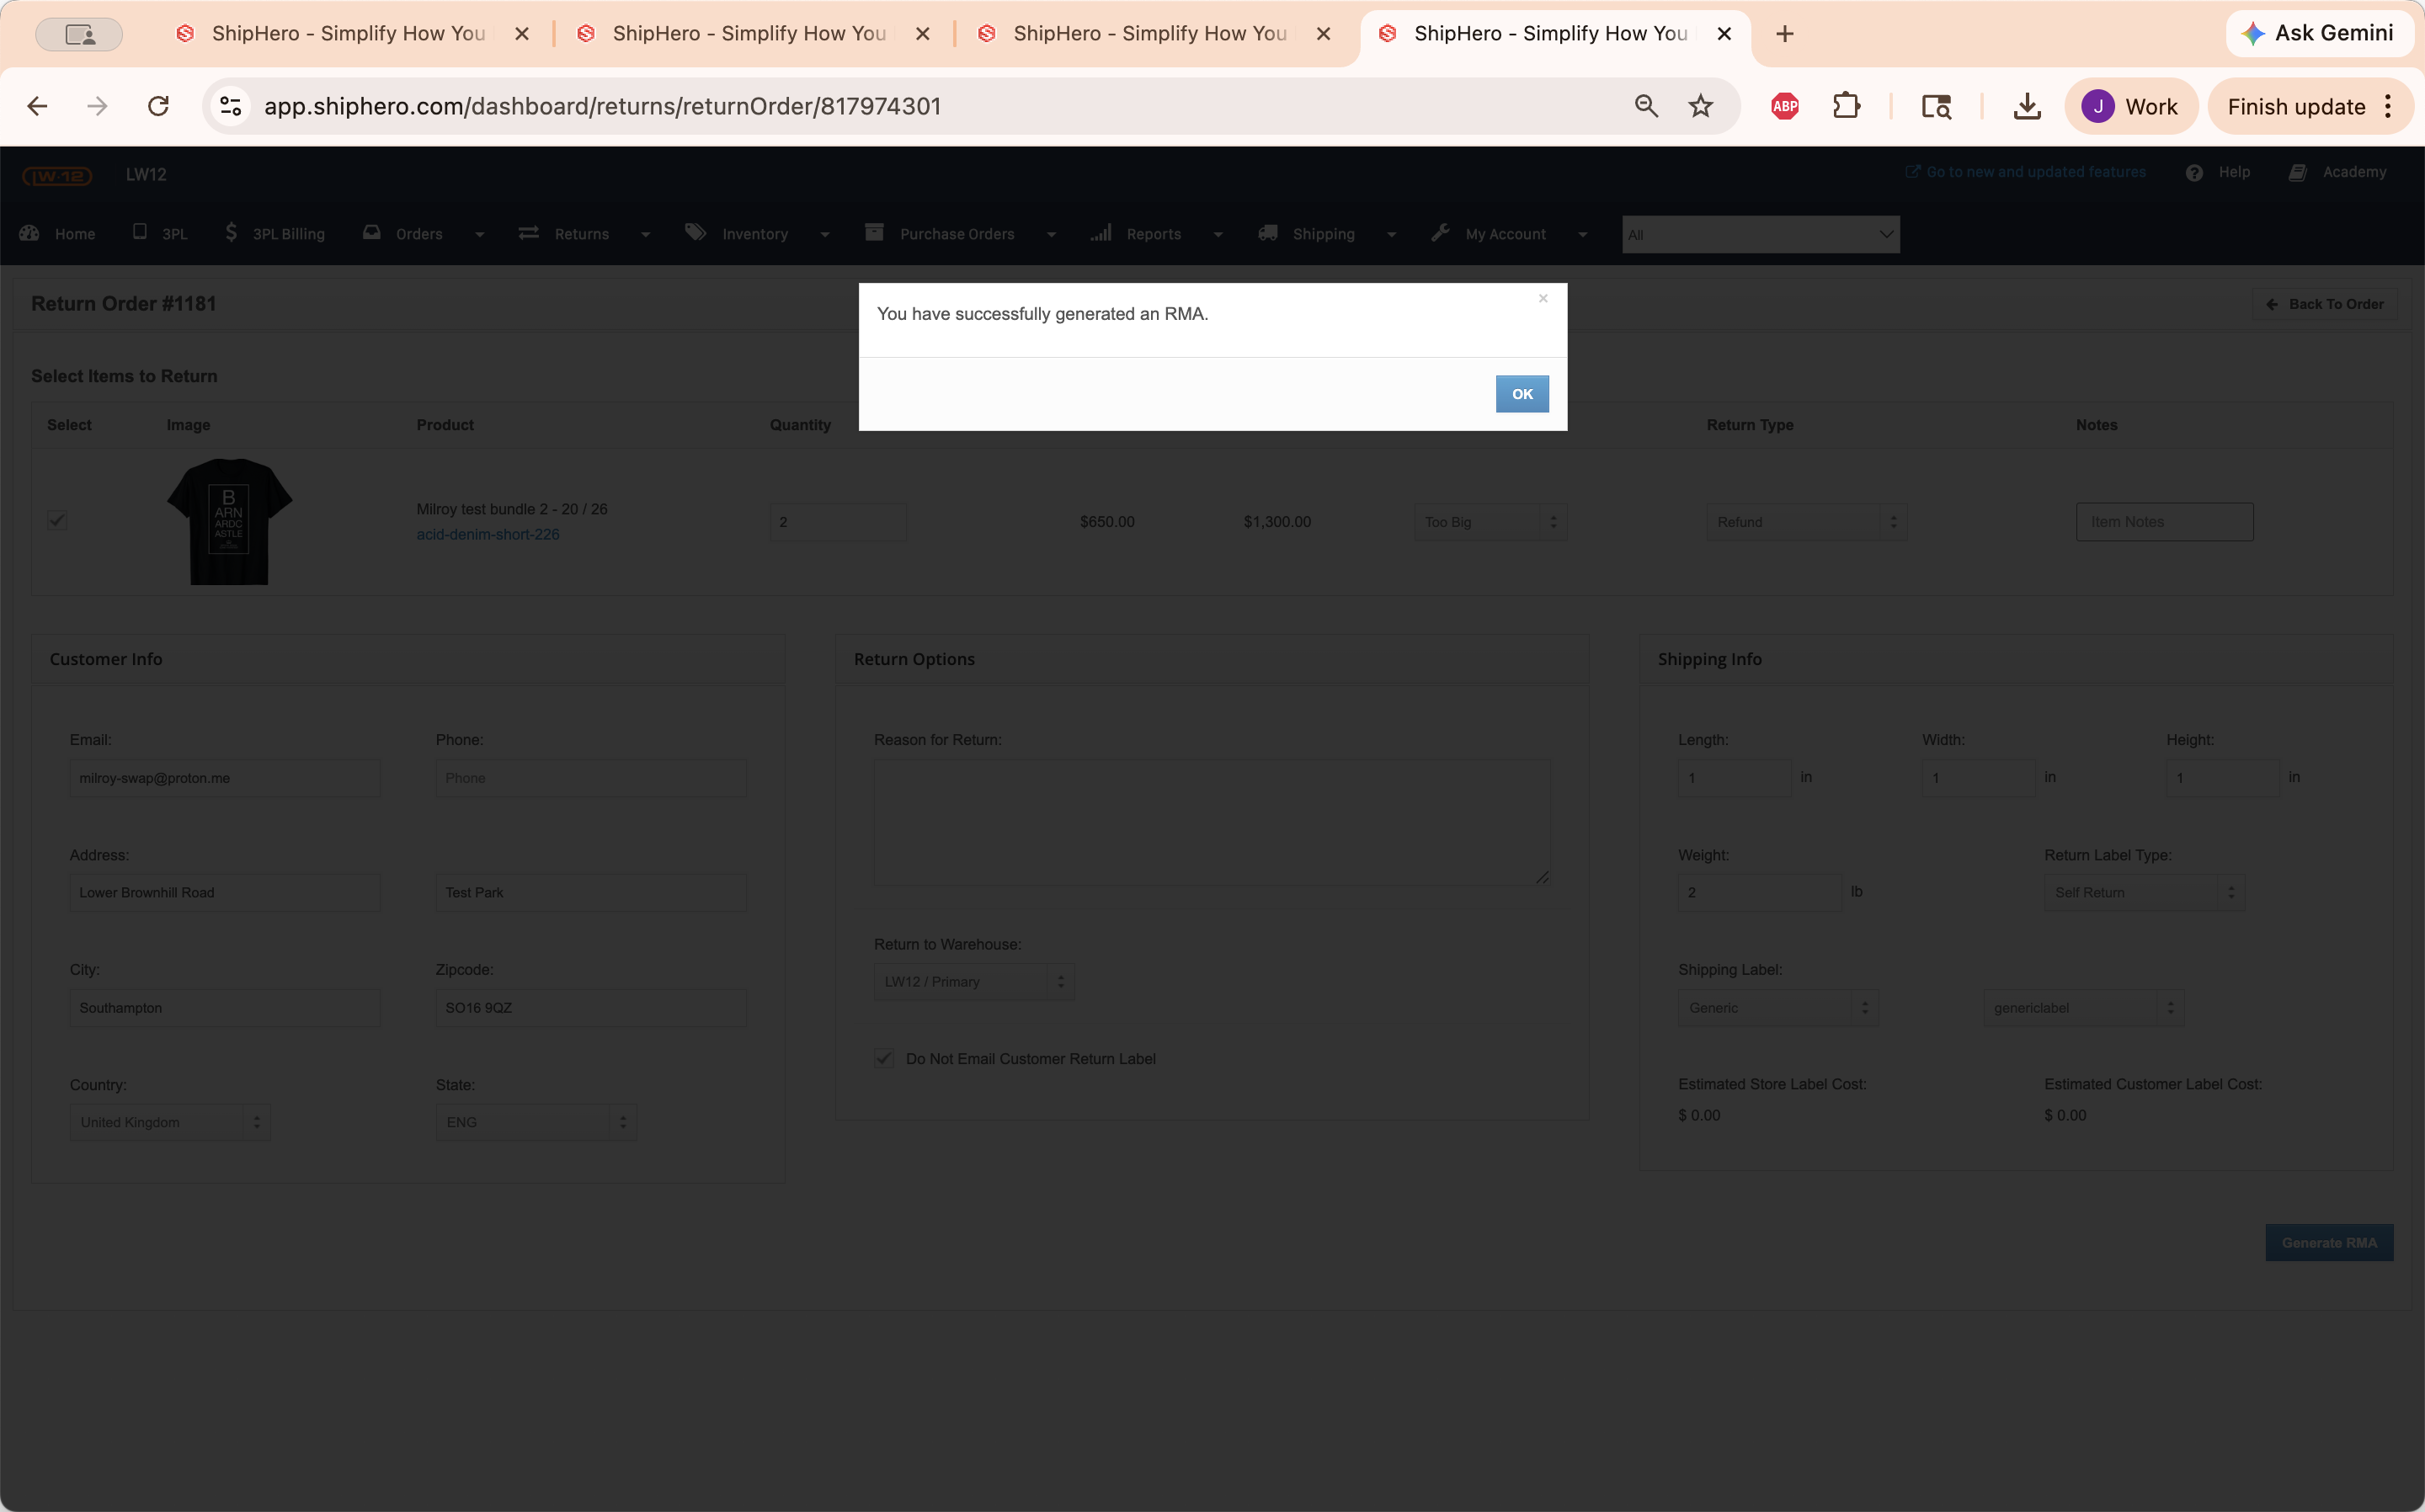
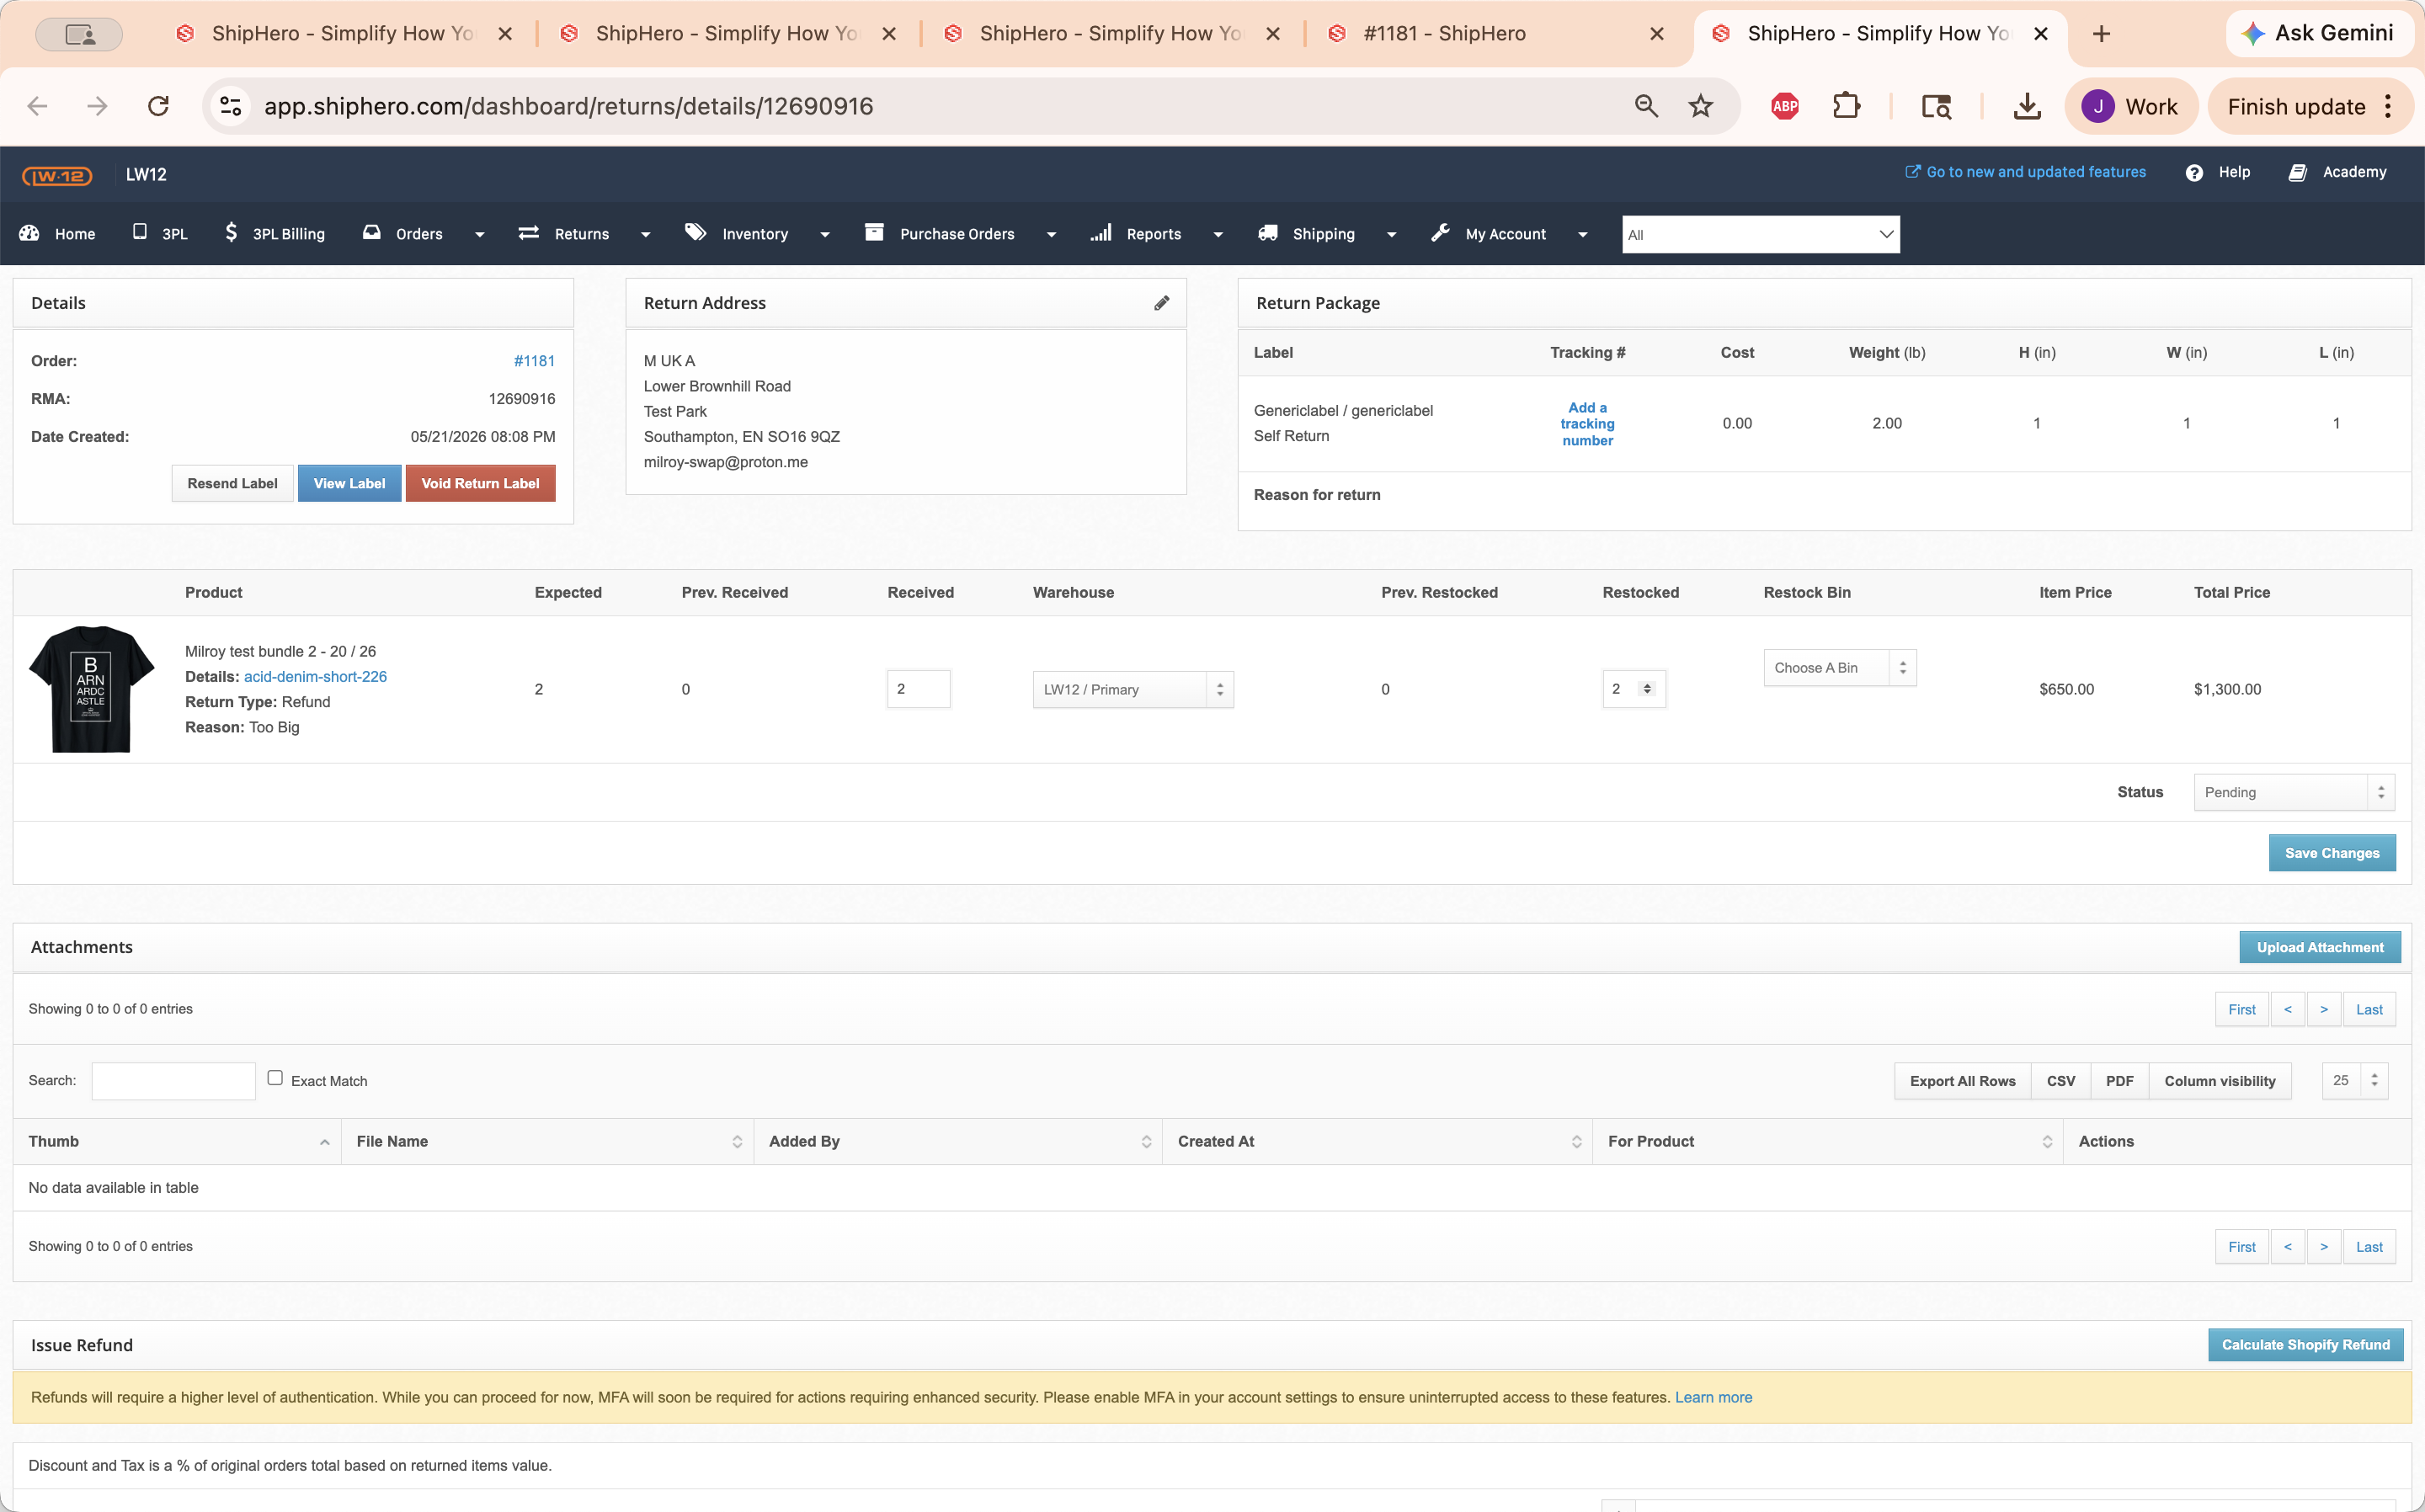
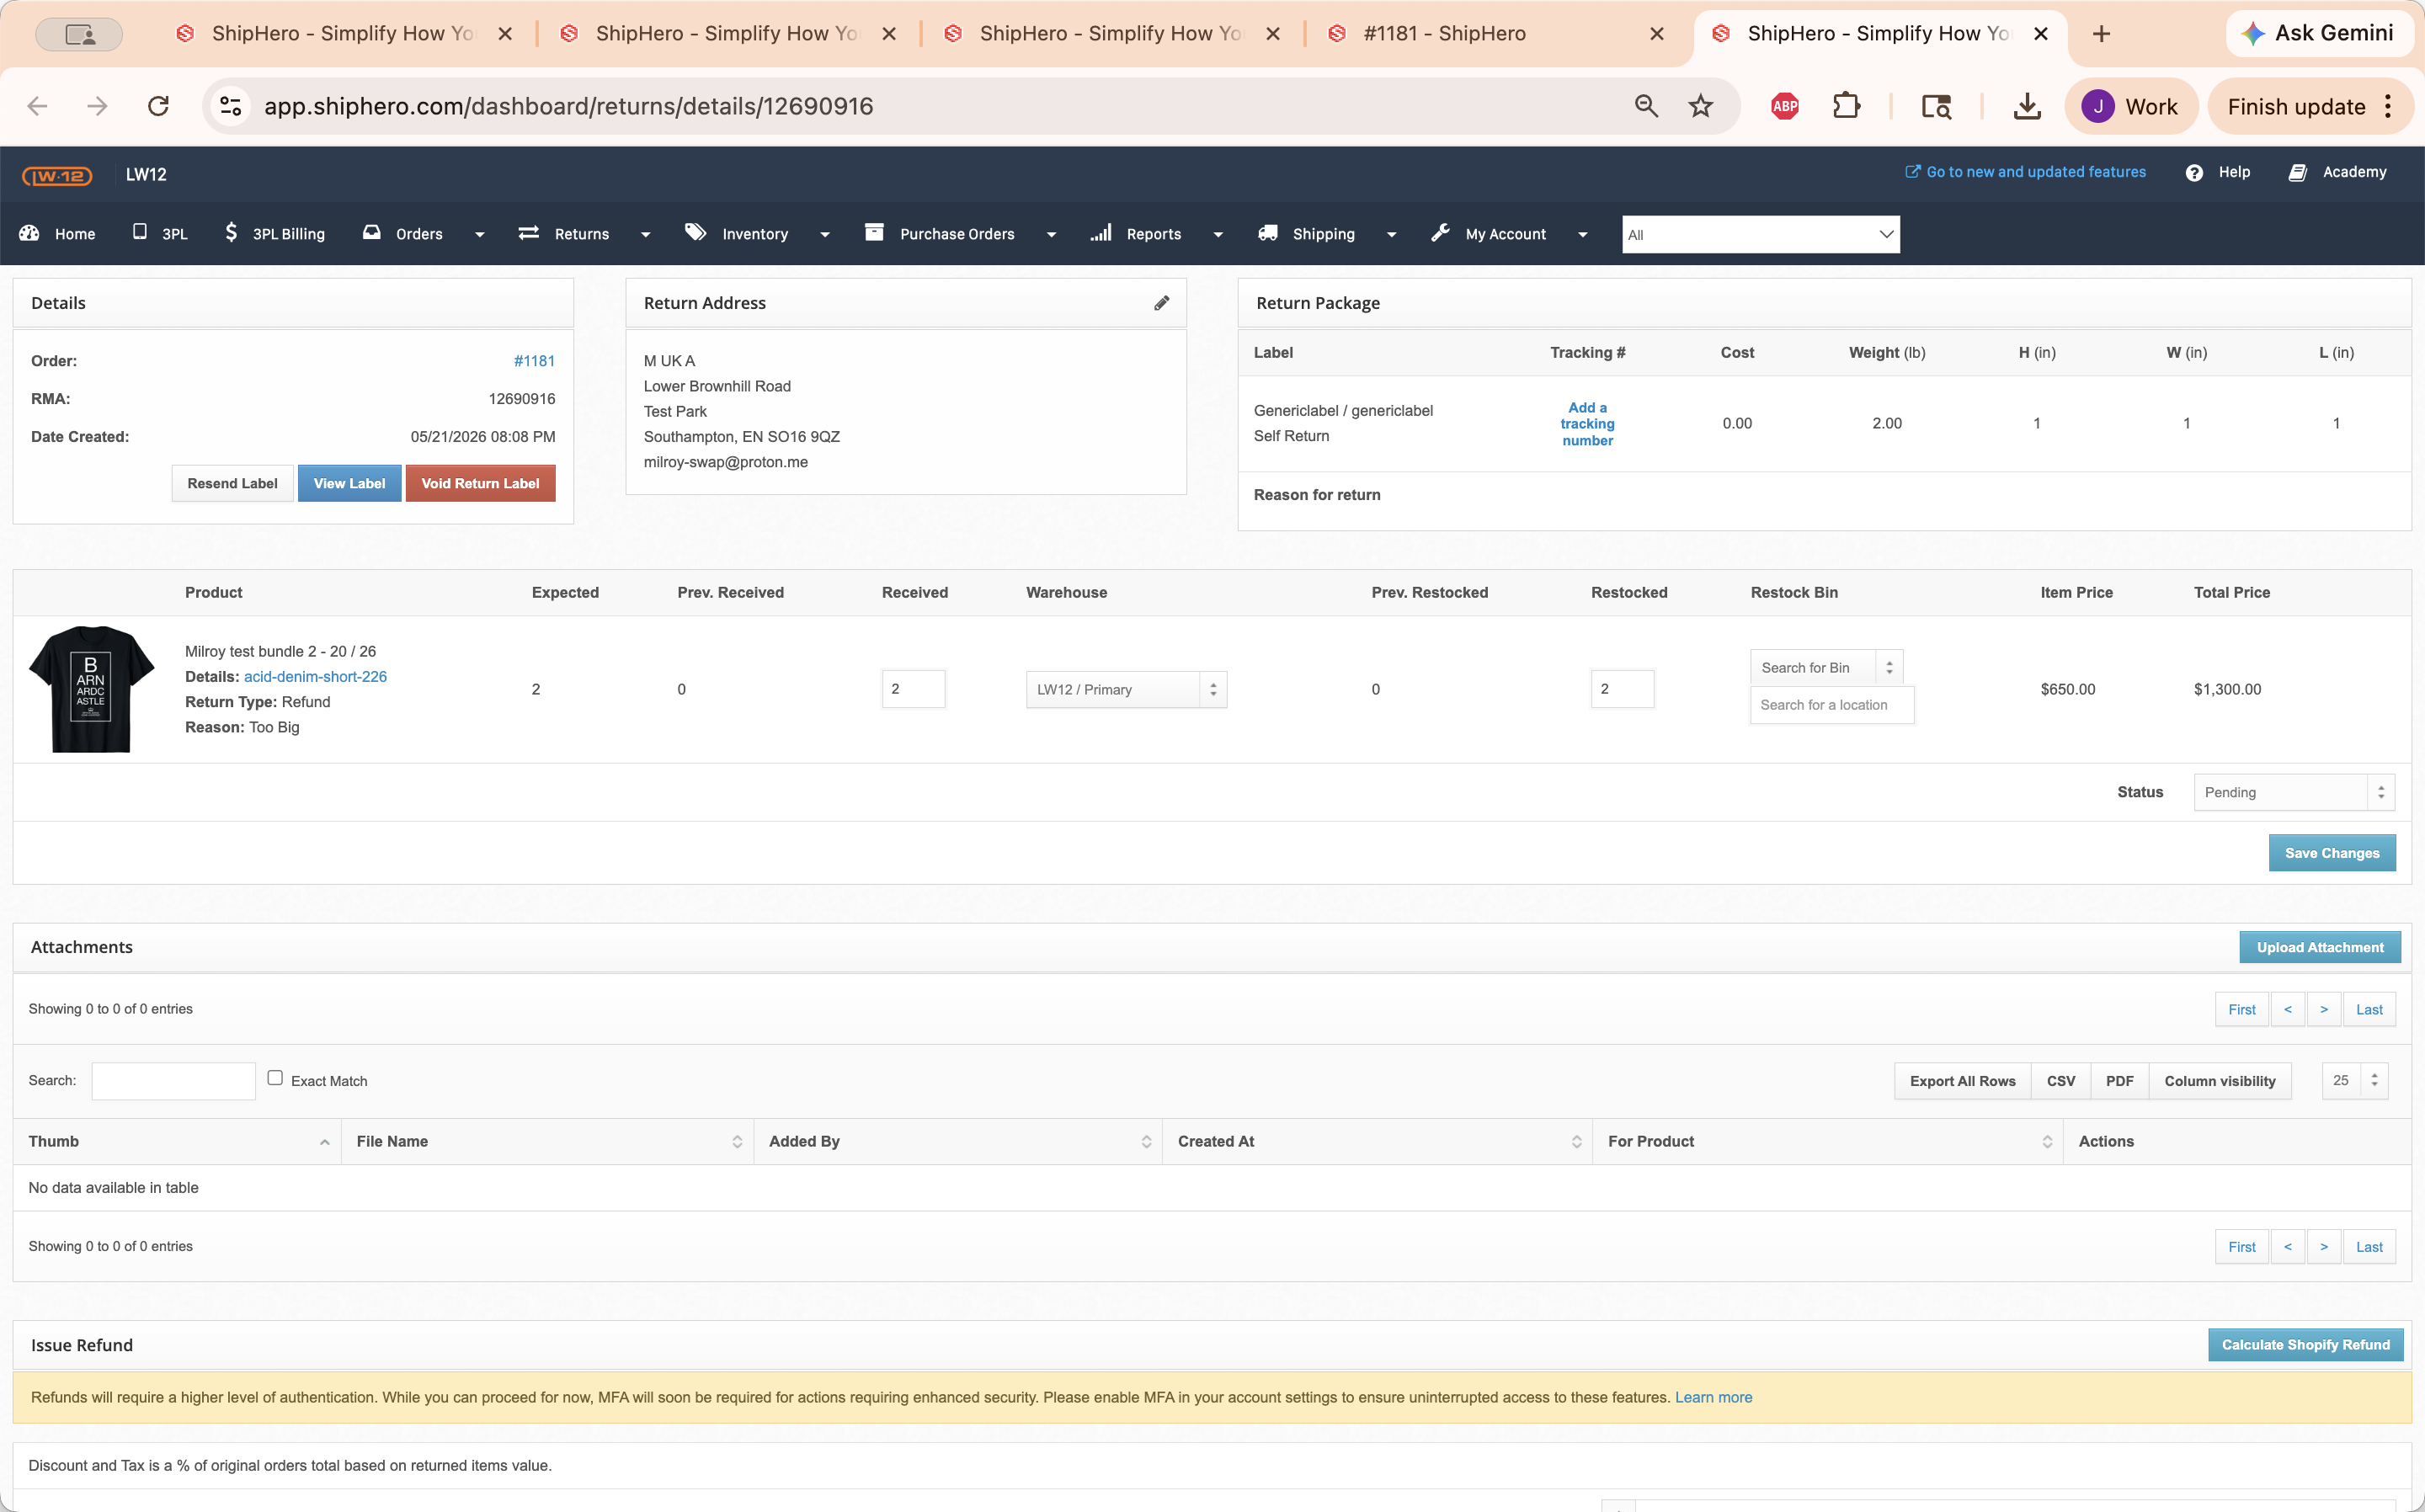
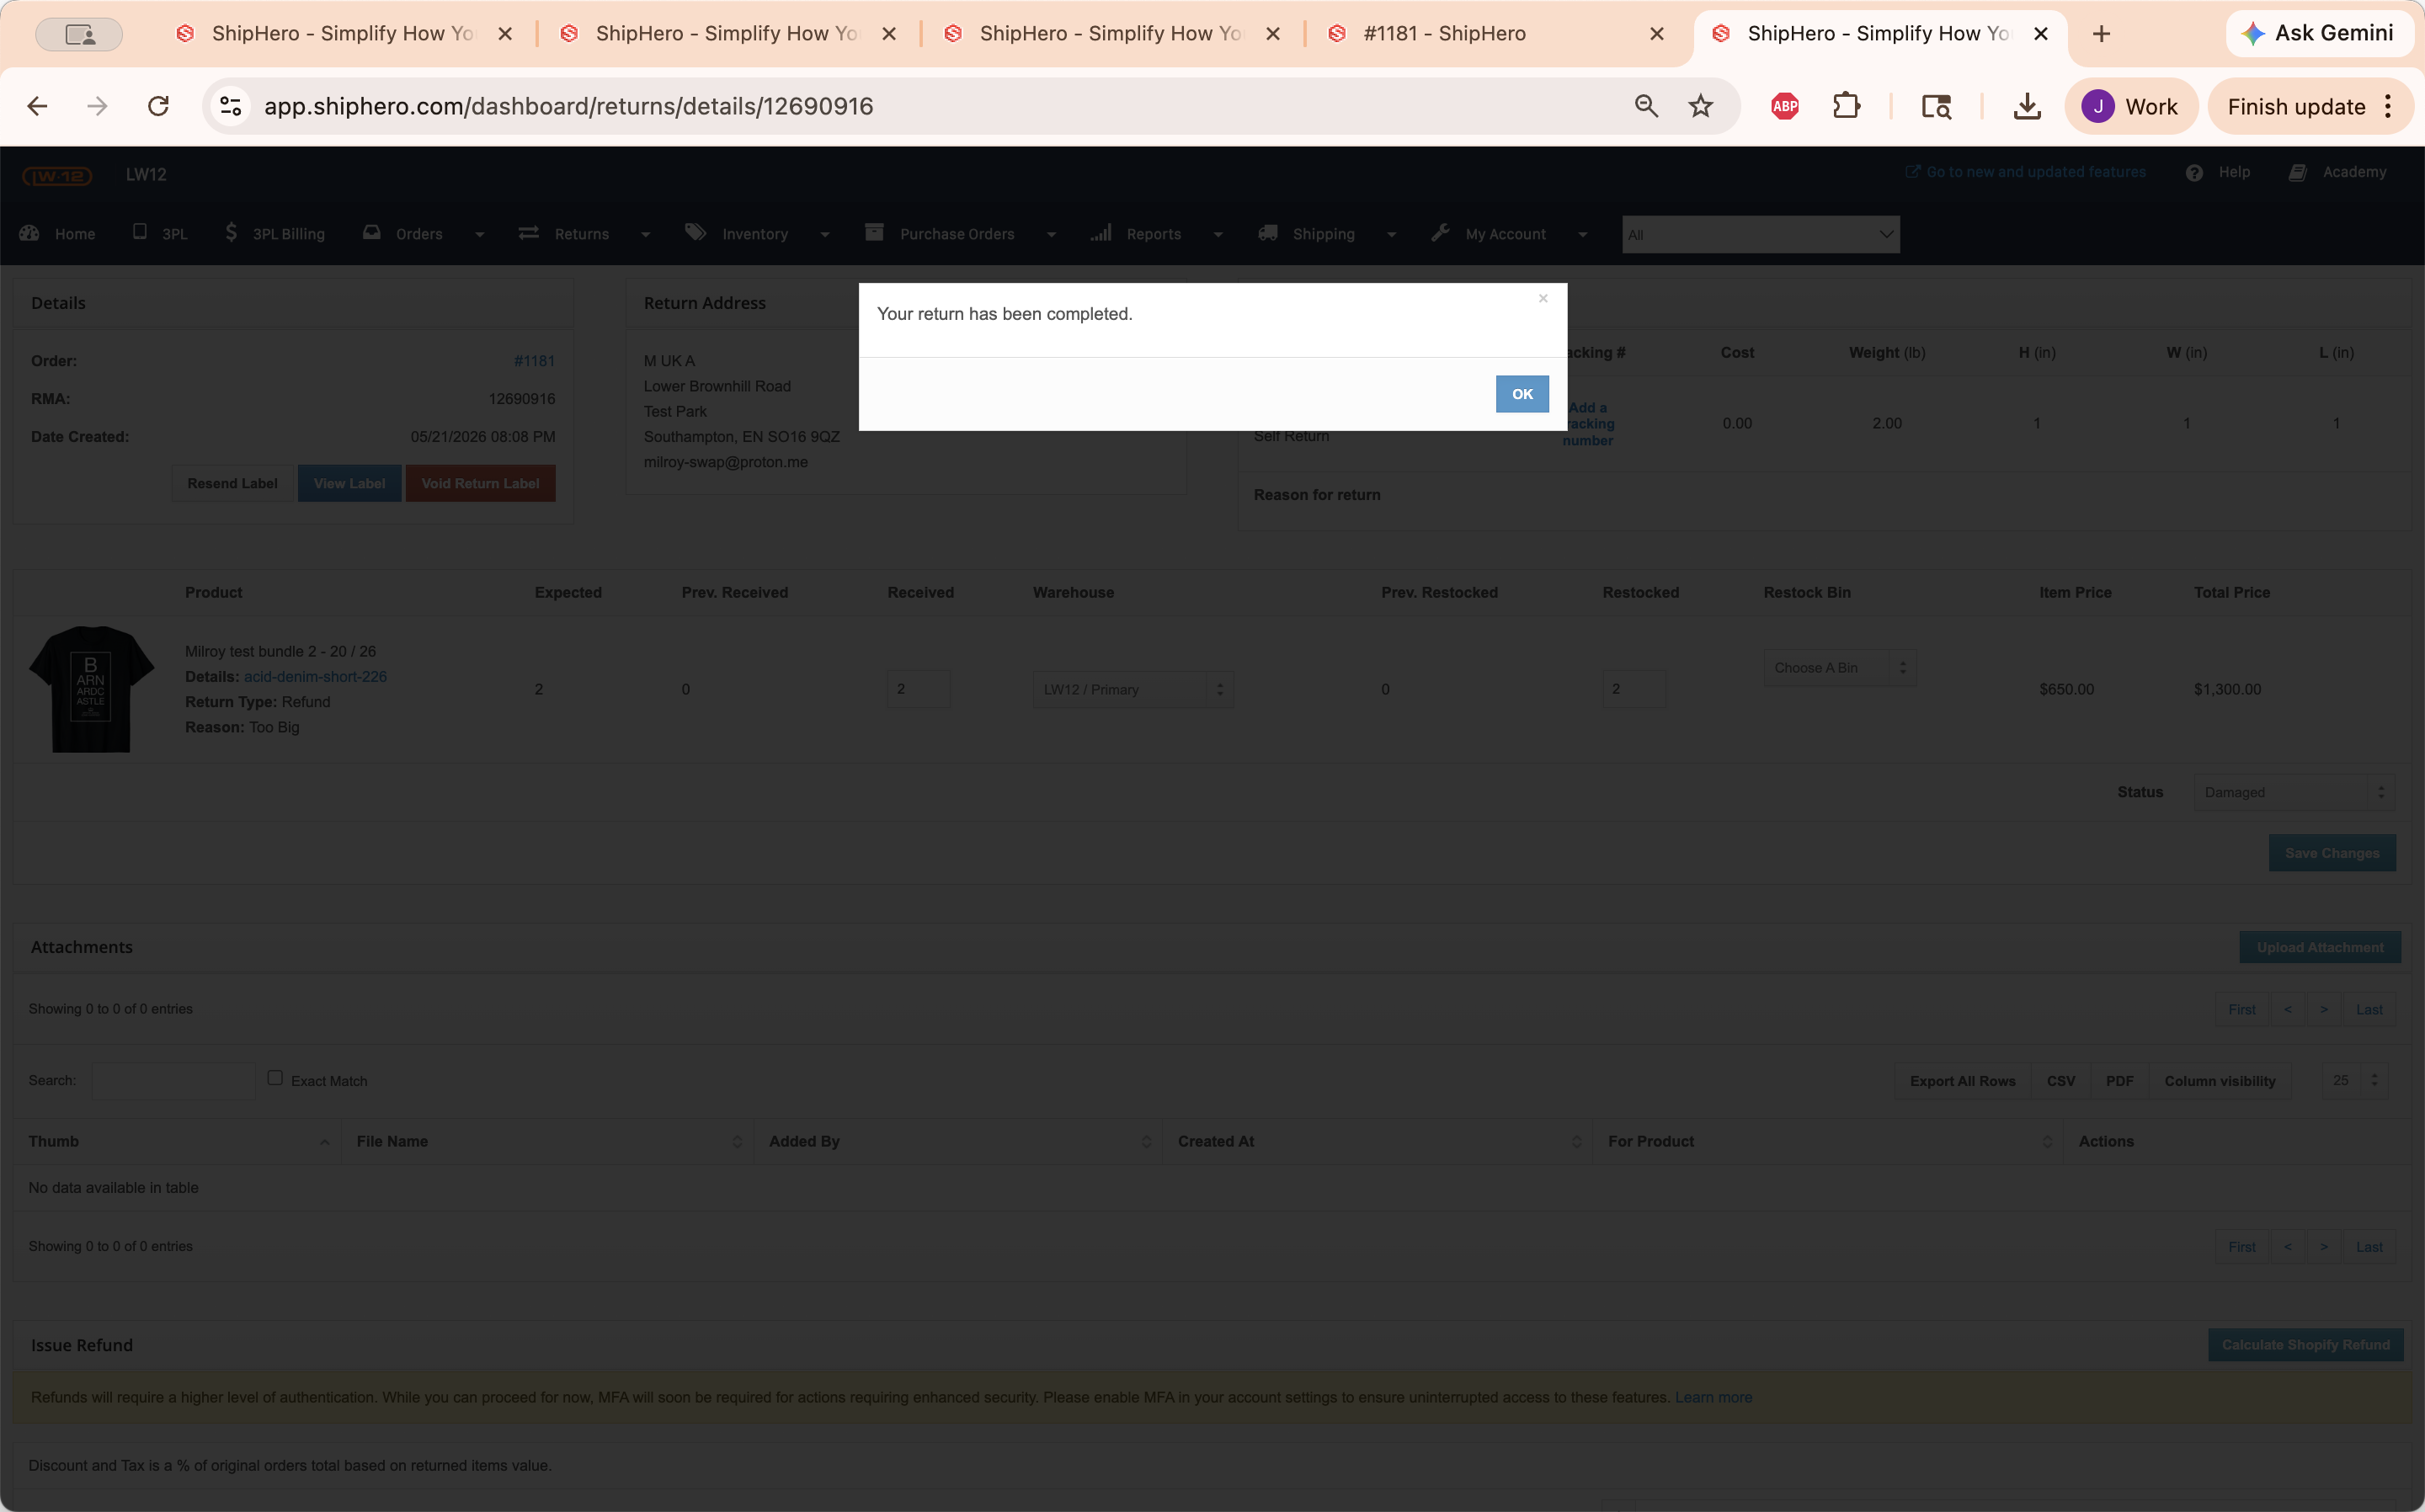
Processing the Return and Restocking
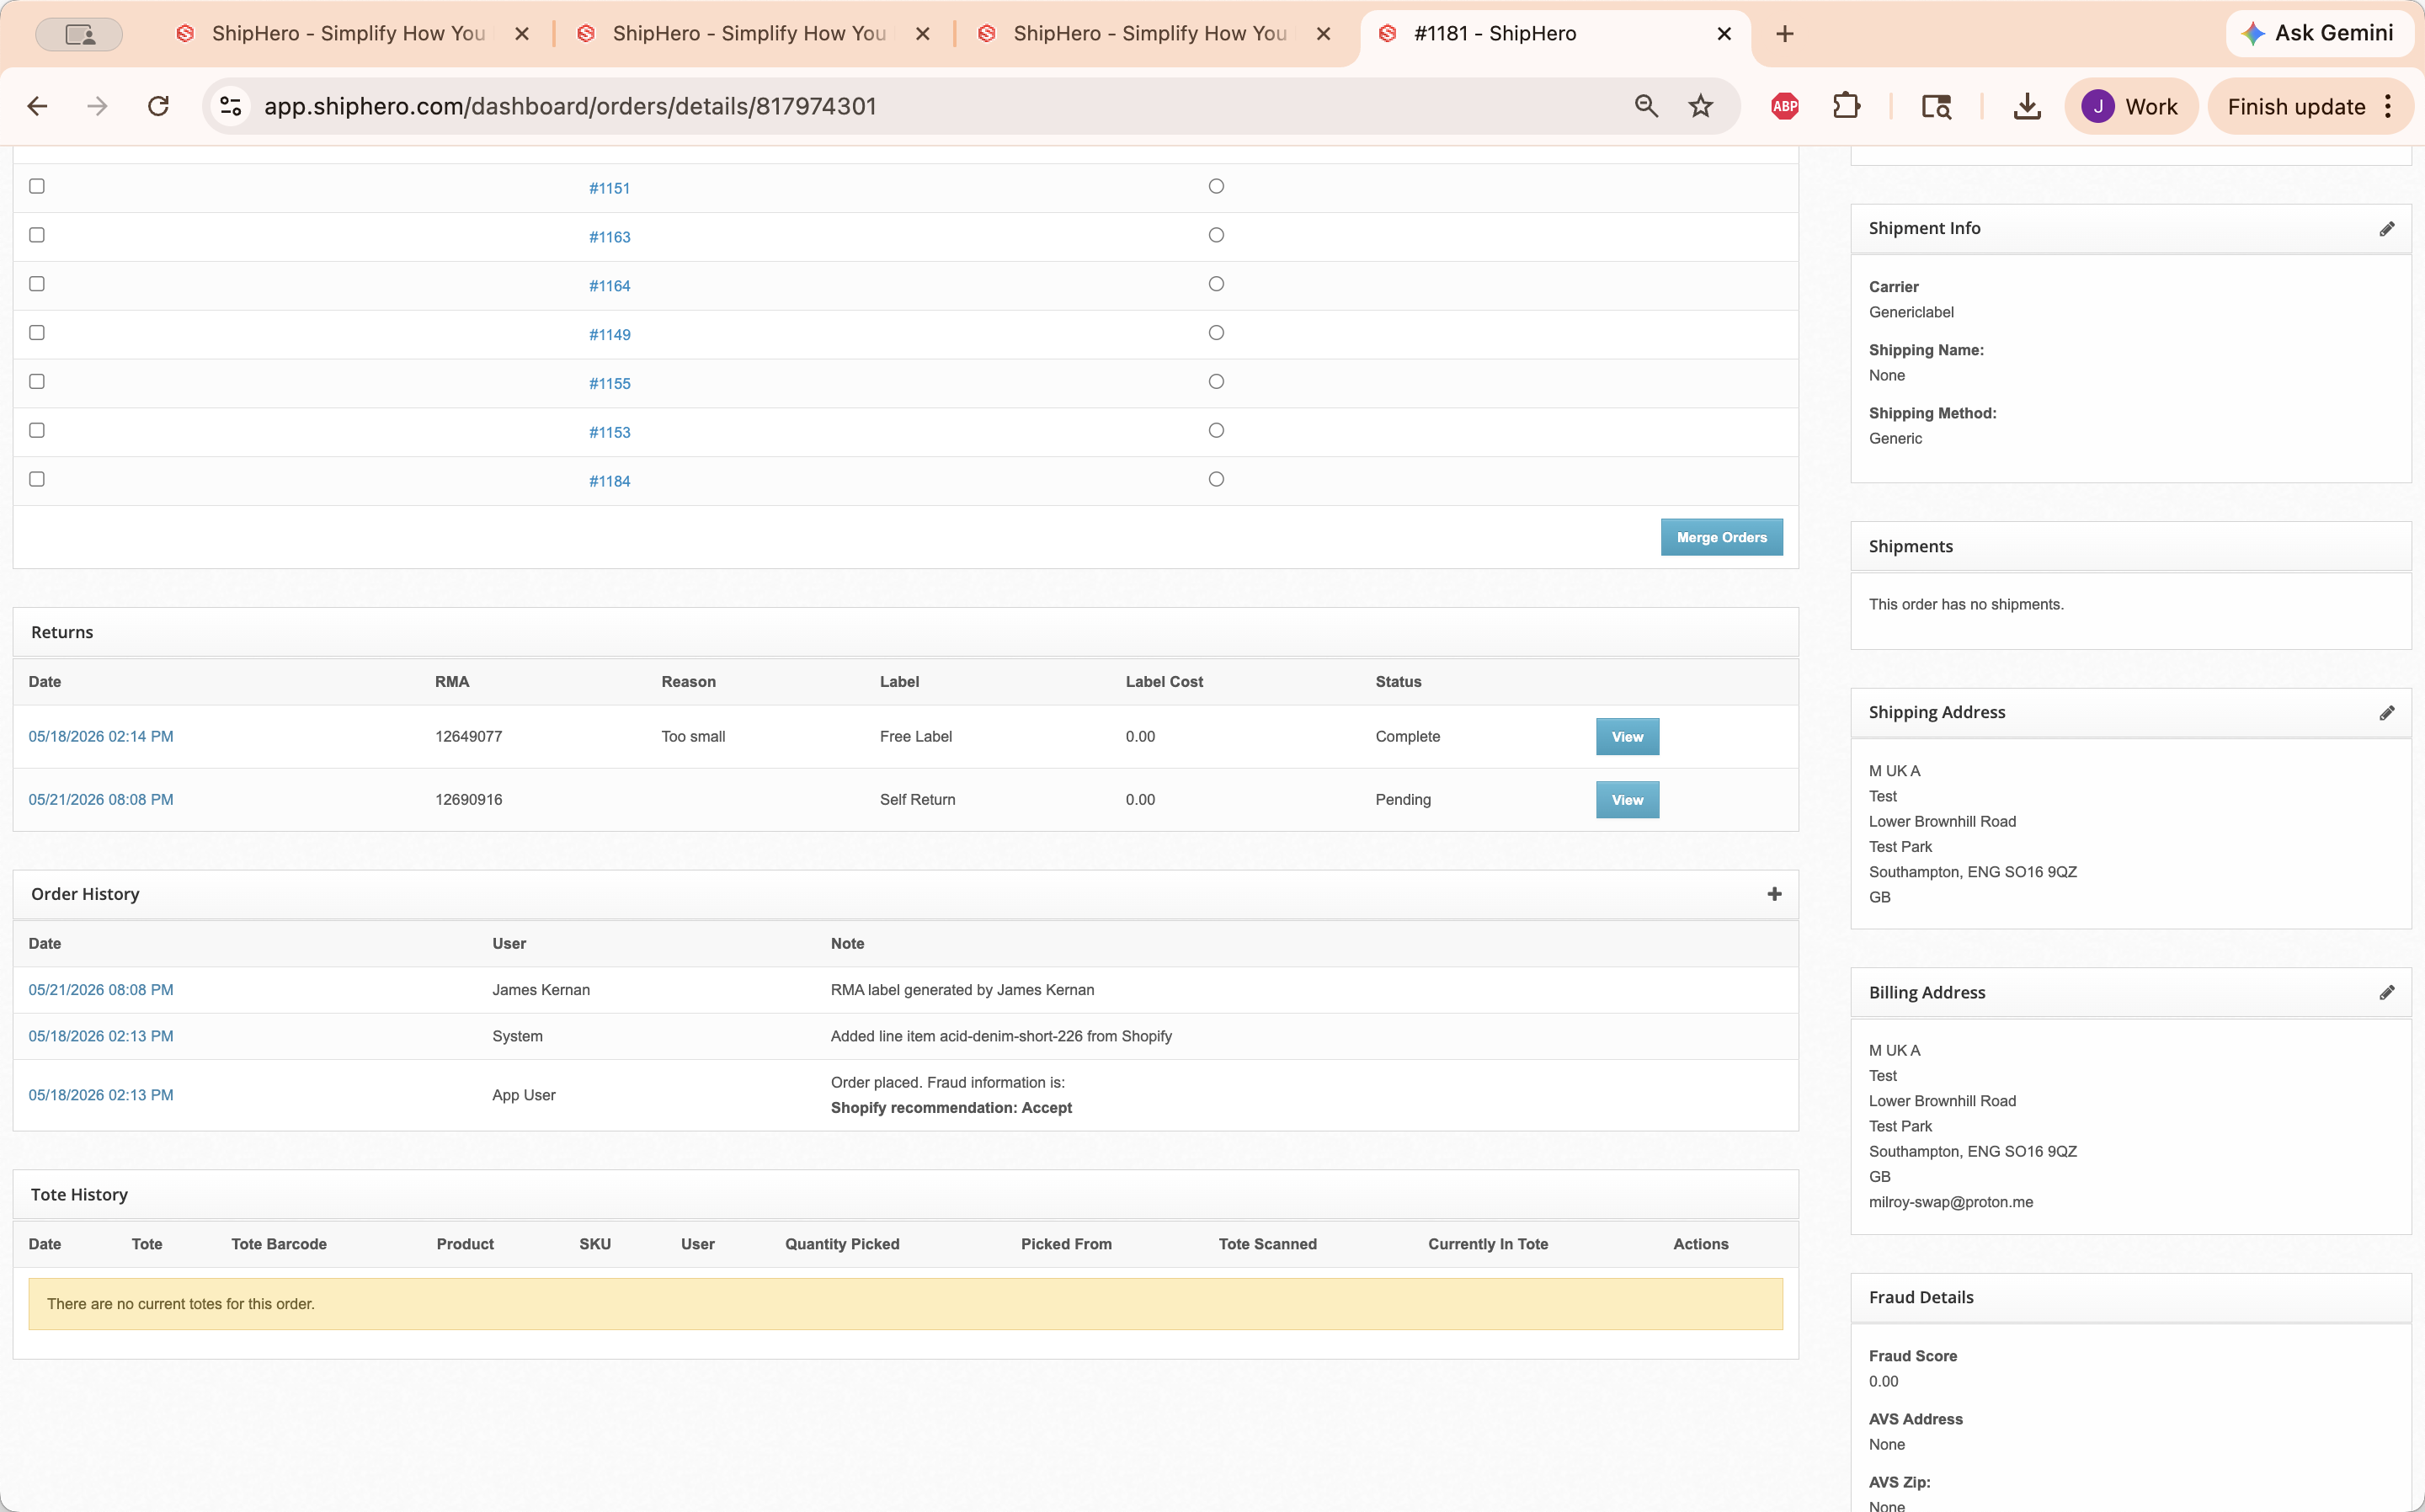
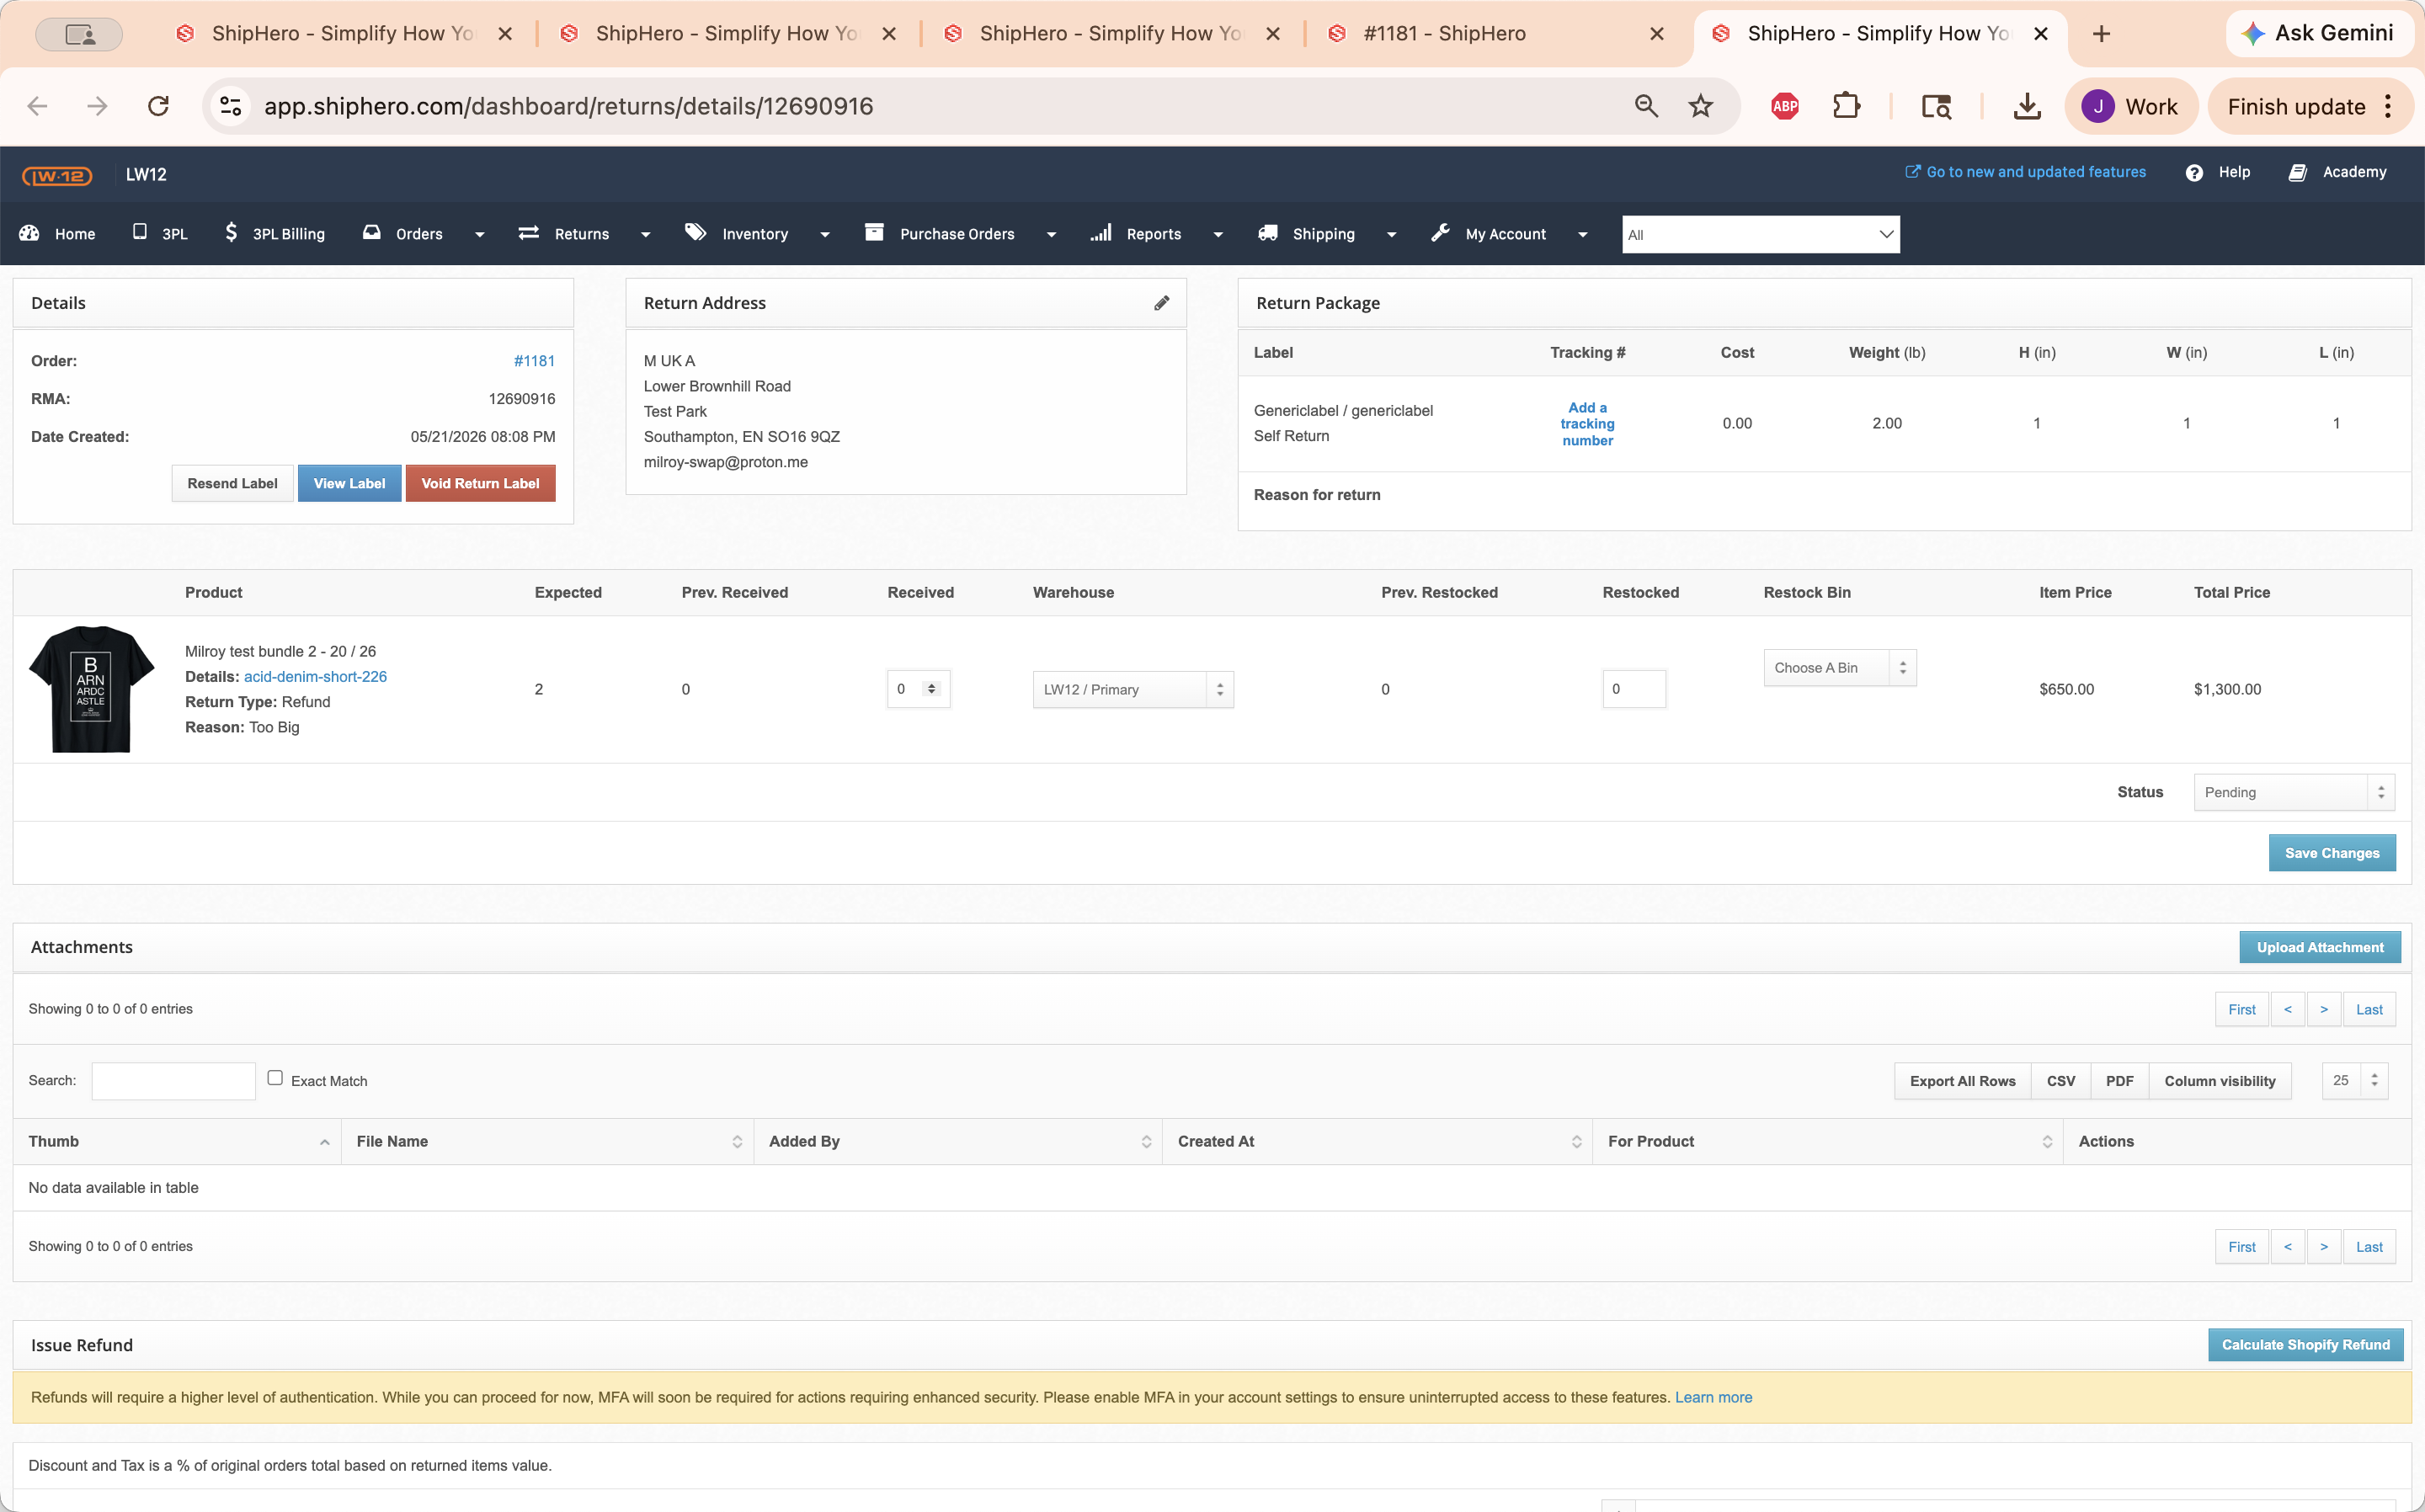
Return Statuses and Auto-Refunds
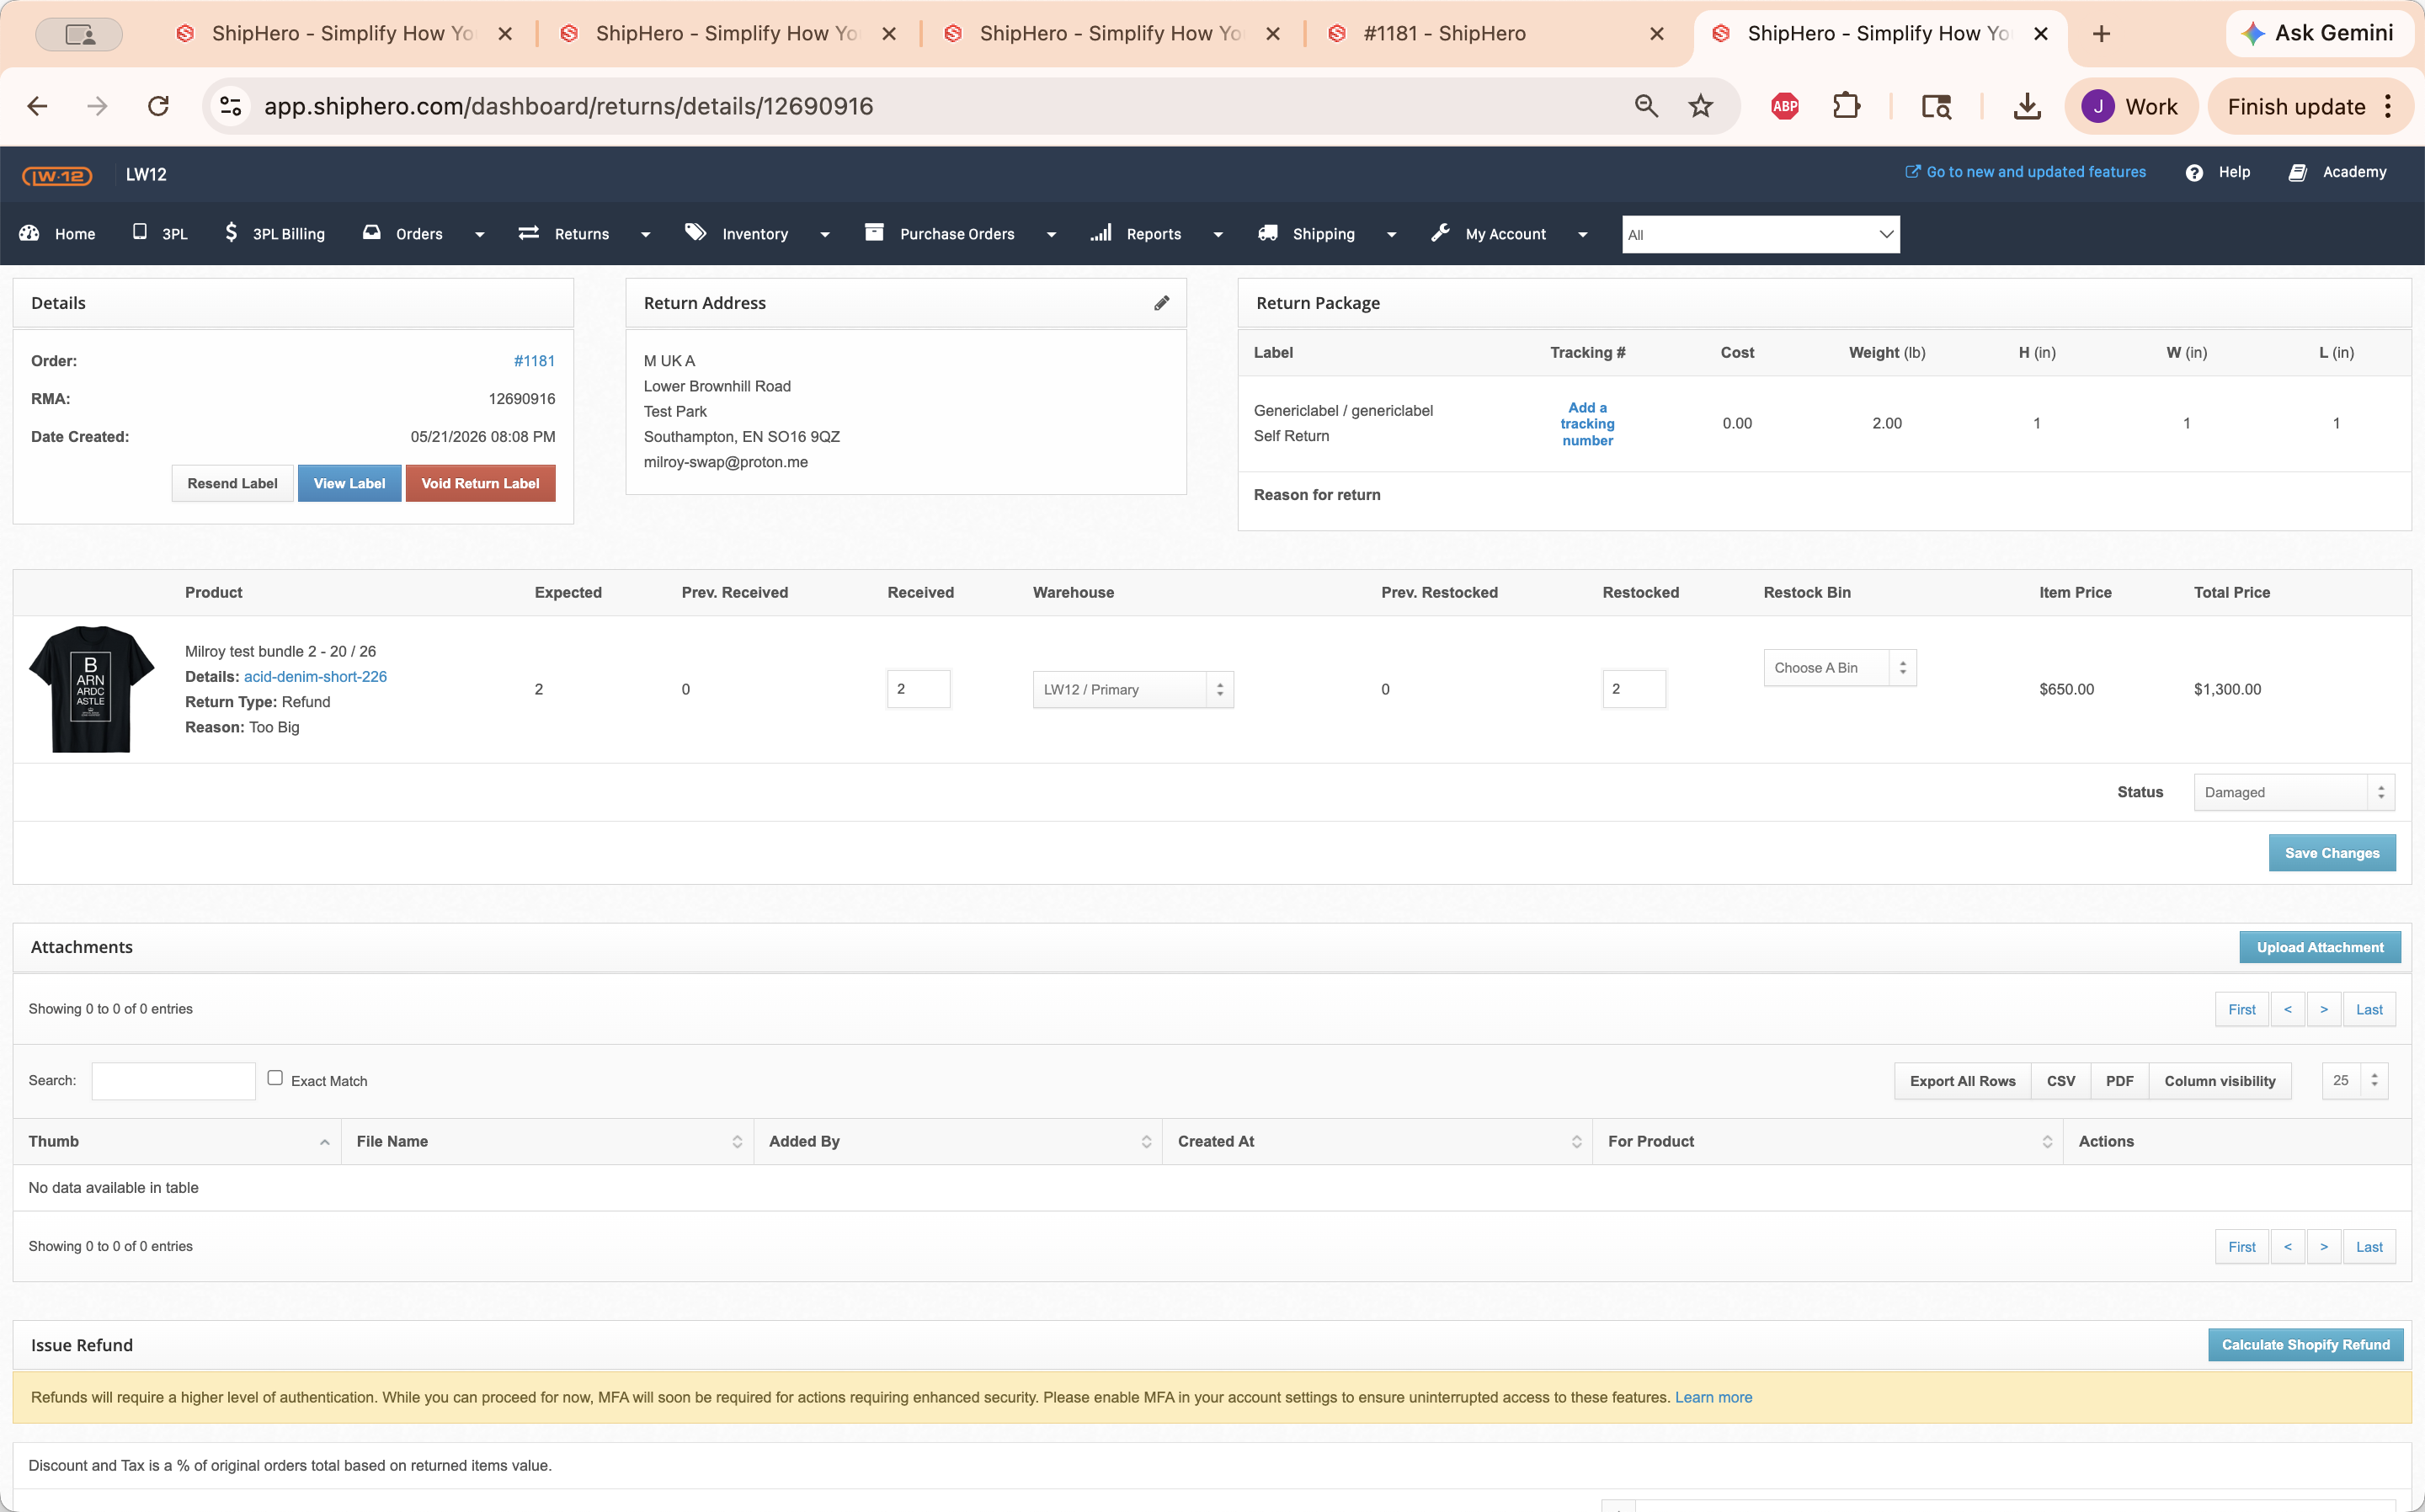
The return status you select directly impacts whether the customer automatically receives a refund. Review the standard options below to ensure proper financial processing:
Return Status | When to use | Refund Action |
|---|---|---|
Complete | The item is in sellable condition and has been restocked. | Triggers automatic refund. |
Damaged | The item is returned damaged and cannot be restocked normally. | Does NOT trigger automatic refund. |
Manual Review | The return requires further inspection before processing. | Does NOT trigger automatic refund. |
Missing | Expected items were not included in the return package. | Does NOT trigger automatic refund. |
FAQ
Q: Why didn't my return go through when I clicked Save Changes?
A: You must select a specific restocking bin. If the bin field is left blank, the return process will skip the item and fail to complete. Go back and ensure a valid bin is selected for every restocked item.
Q: Do damaged returns automatically refund the customer?
A: No. In most automated refund setups, only returns marked as "Complete" will automatically trigger a refund. If you flag a return as Damaged, Missing, or Manual Review, a manual refund must be issued directly from your e-commerce platform.