How to Rebook a Customer in FareHarbor
Learn how to modify a reservation, rebook a guest to a new time slot in the FareHarbor dashboard, and send an updated email confirmation.
By Jessica Herford
This guide outlines the process for rebooking a customer to a different activity or time slot within the FareHarbor dashboard. By following these steps, you will successfully update a guest's reservation and ensure they receive an accurate, newly generated itinerary.
This workflow is intended for reservation agents, front desk staff, and booking managers who need to accommodate guest schedule changes during daily operations.
Initiating the Rebook
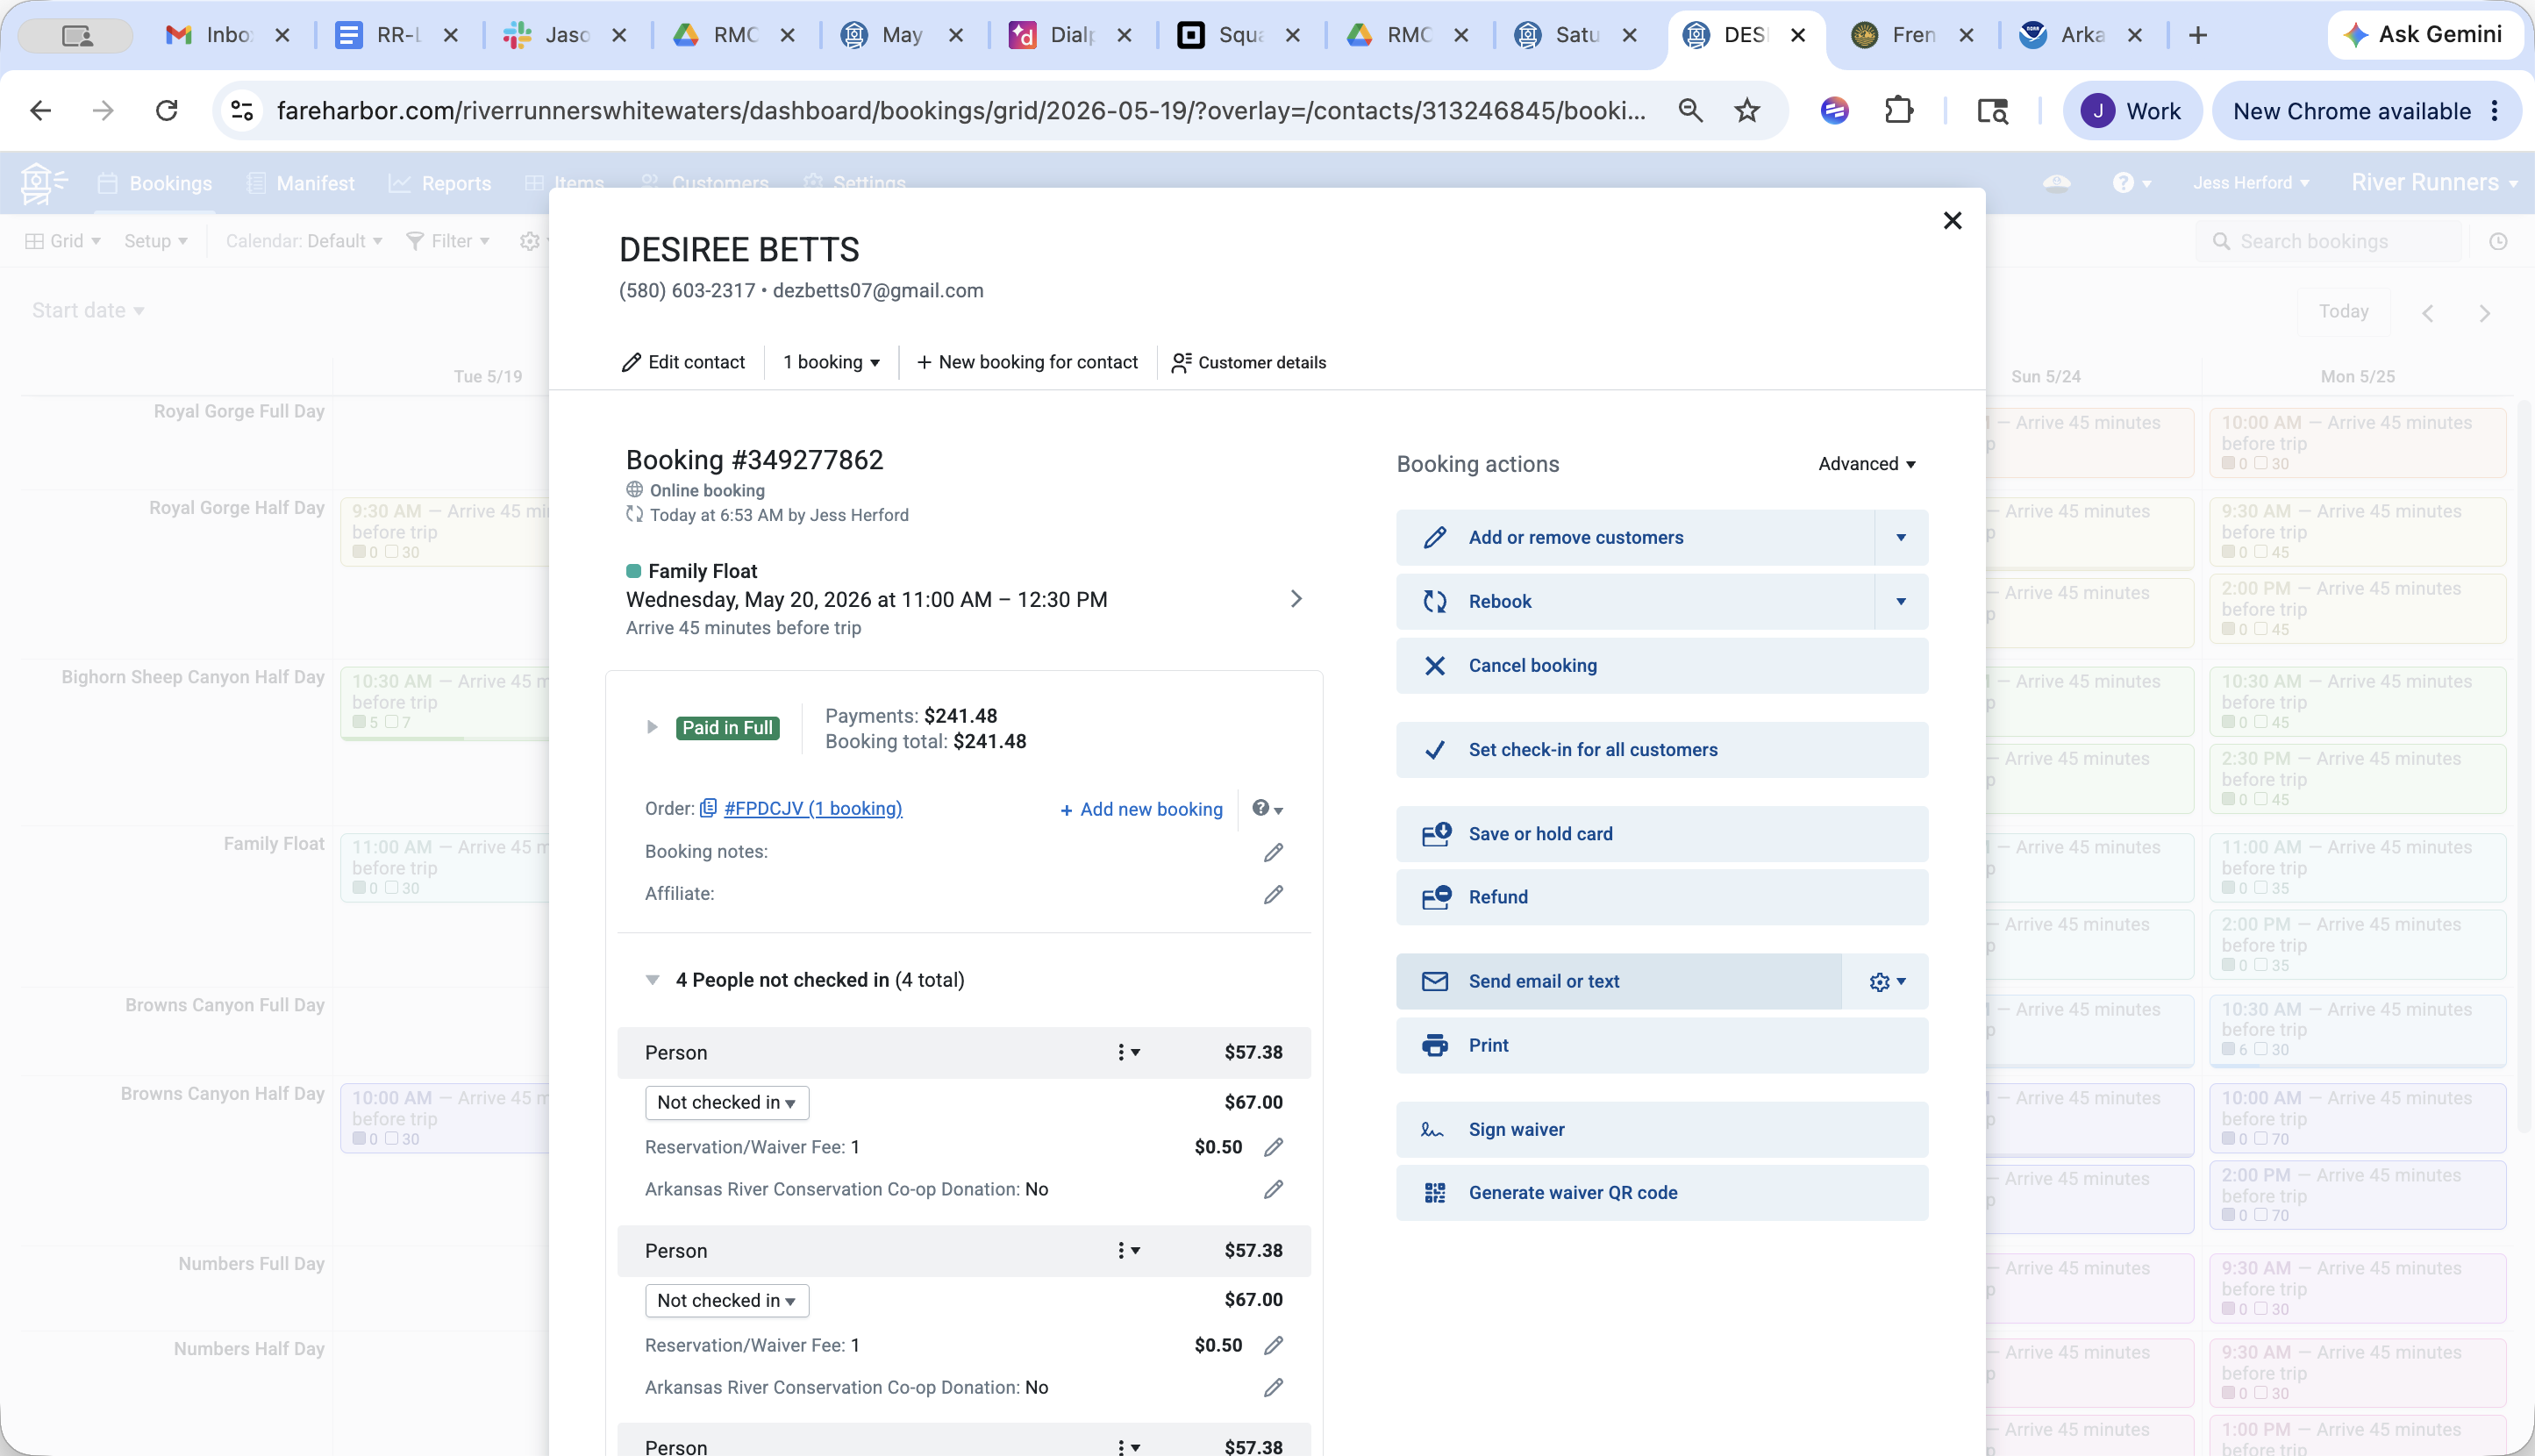
First, locate the customer's current reservation from your dashboard to open their booking details overlay.
1
Click Rebook in the booking actions menu located on the right side of the pop-up.

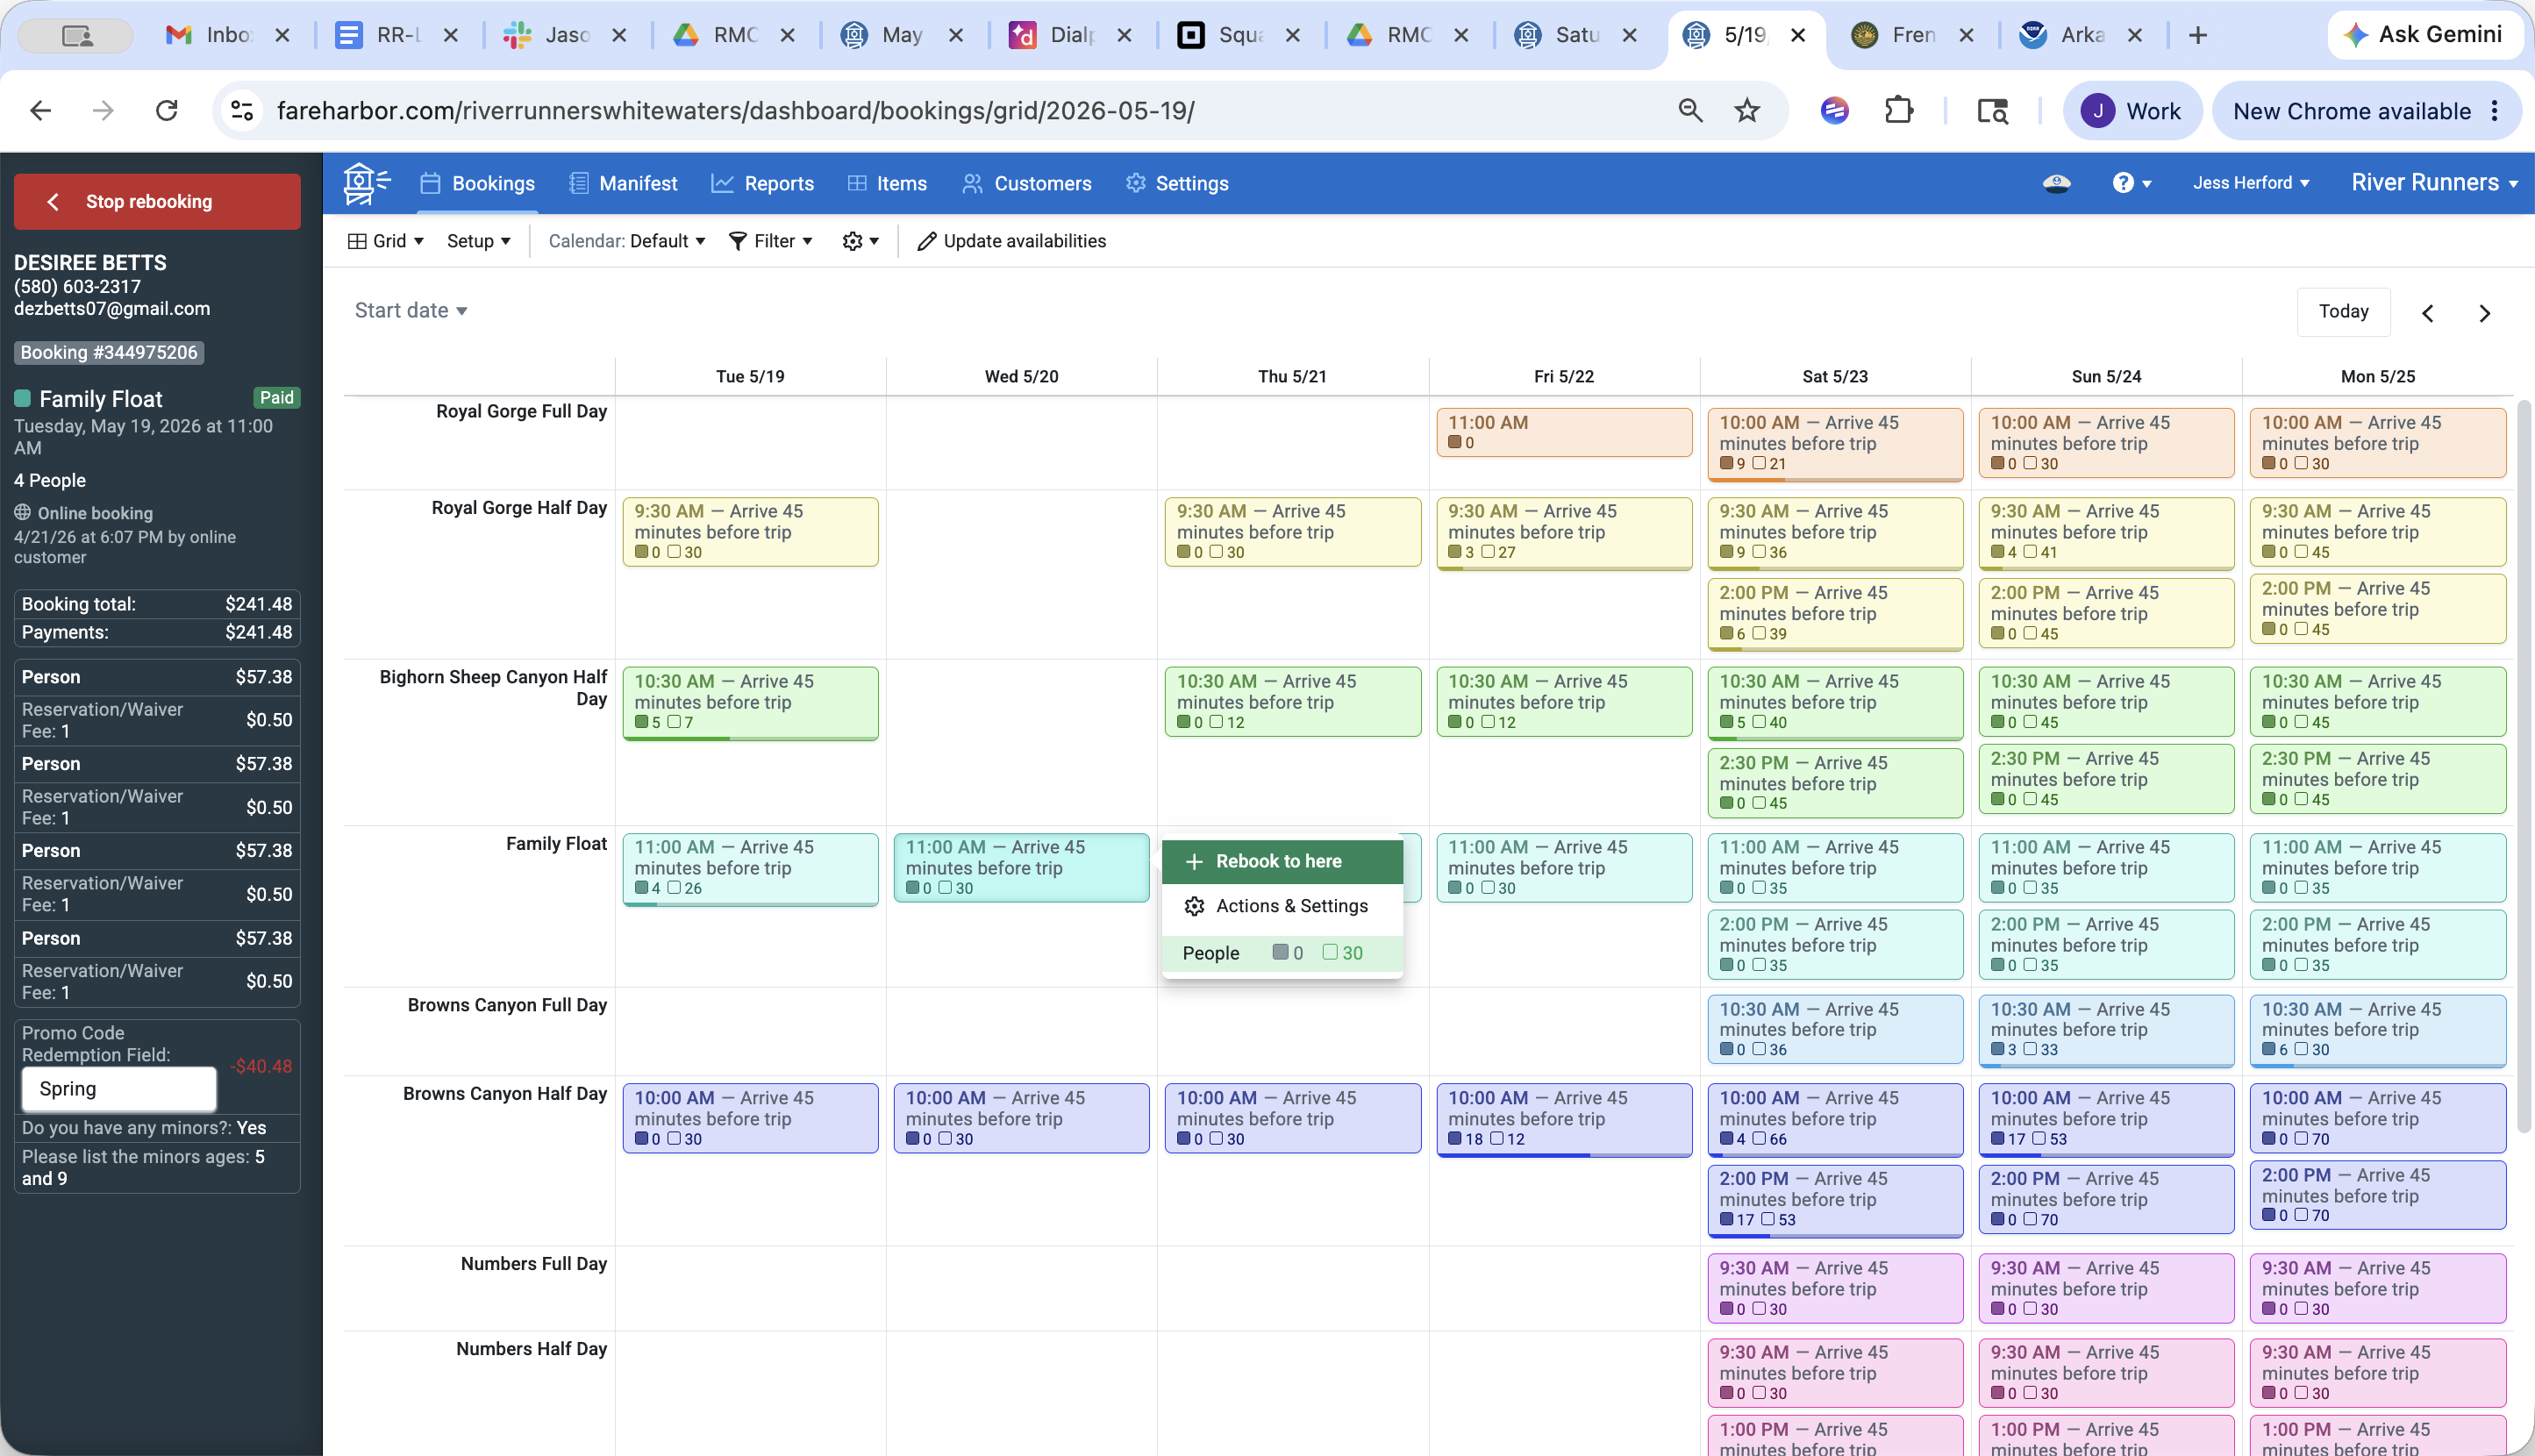
Selecting the New Time Slot
2
Navigate the main dashboard calendar grid to locate the customer's newly requested date.

3
Click the specific excursion time block (e.g., 10:00 AM - Browns Canyon Half Day) that the customer wants to switch to.

4
Click + Rebook to here on the pop-up menu that appears over the chosen time slot.
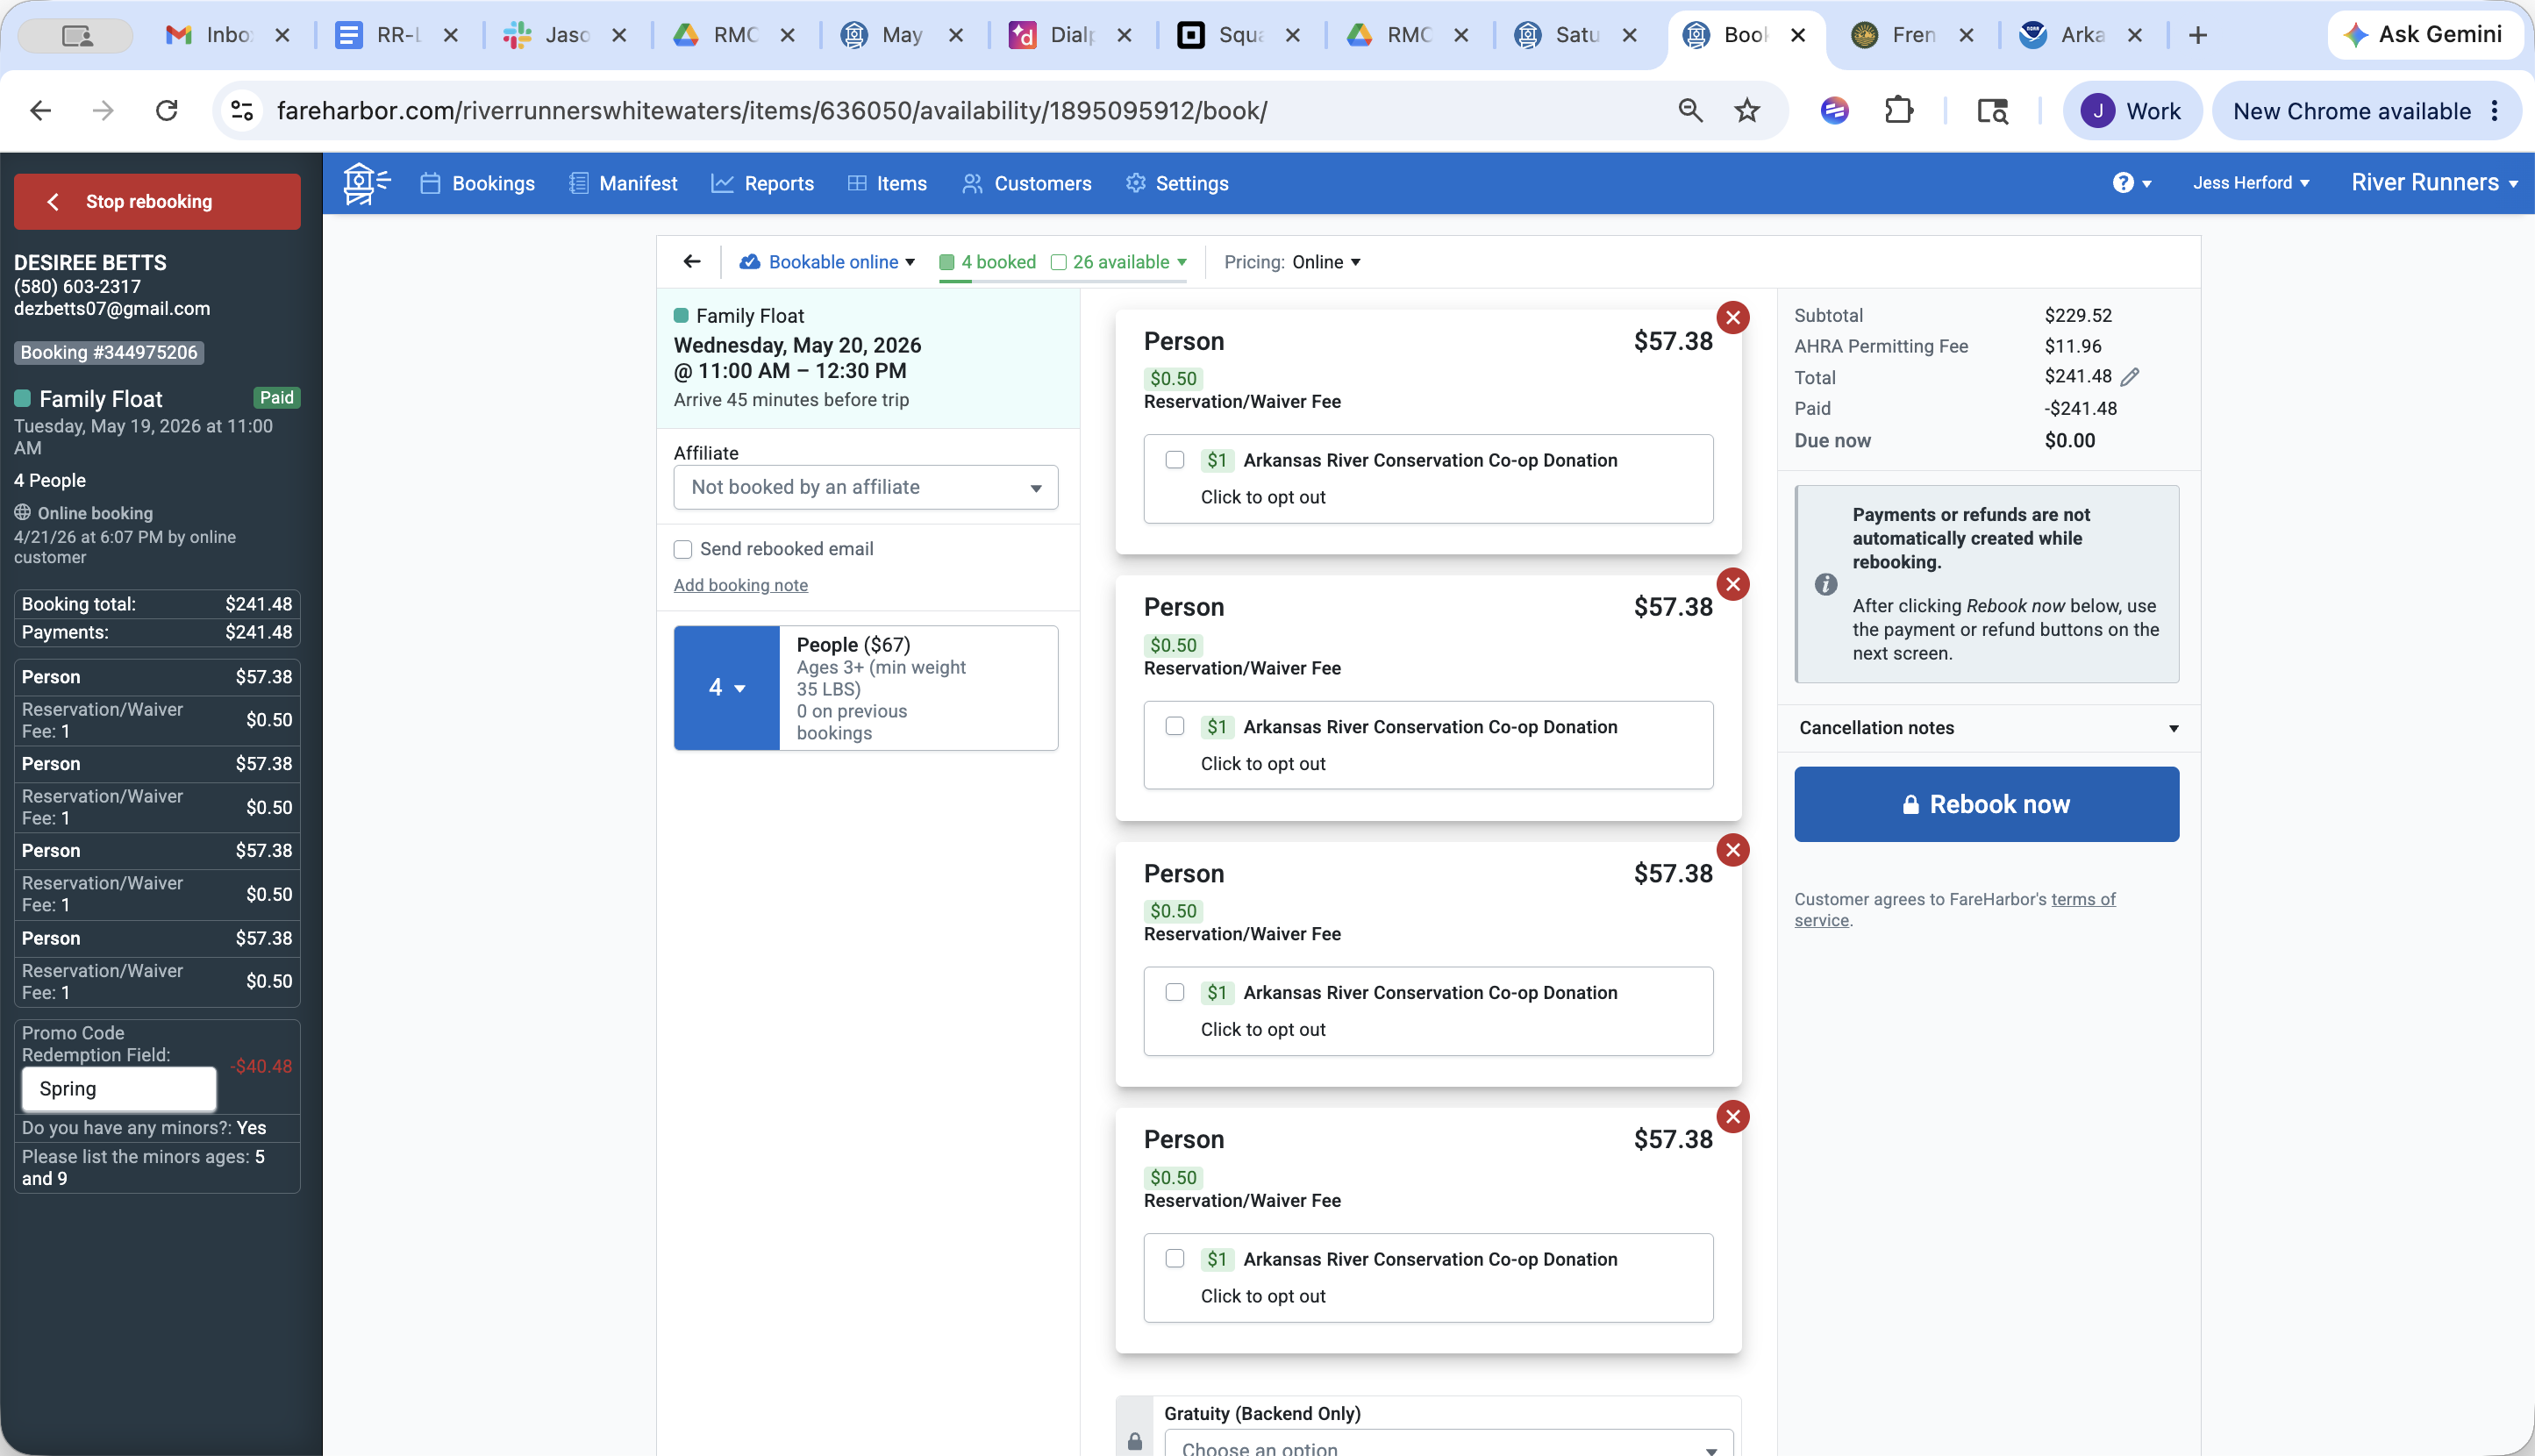
5
Review the modified itinerary details in the right-hand panel, then click Rebook now to finalize the schedule change.
Sending an Updated Confirmation
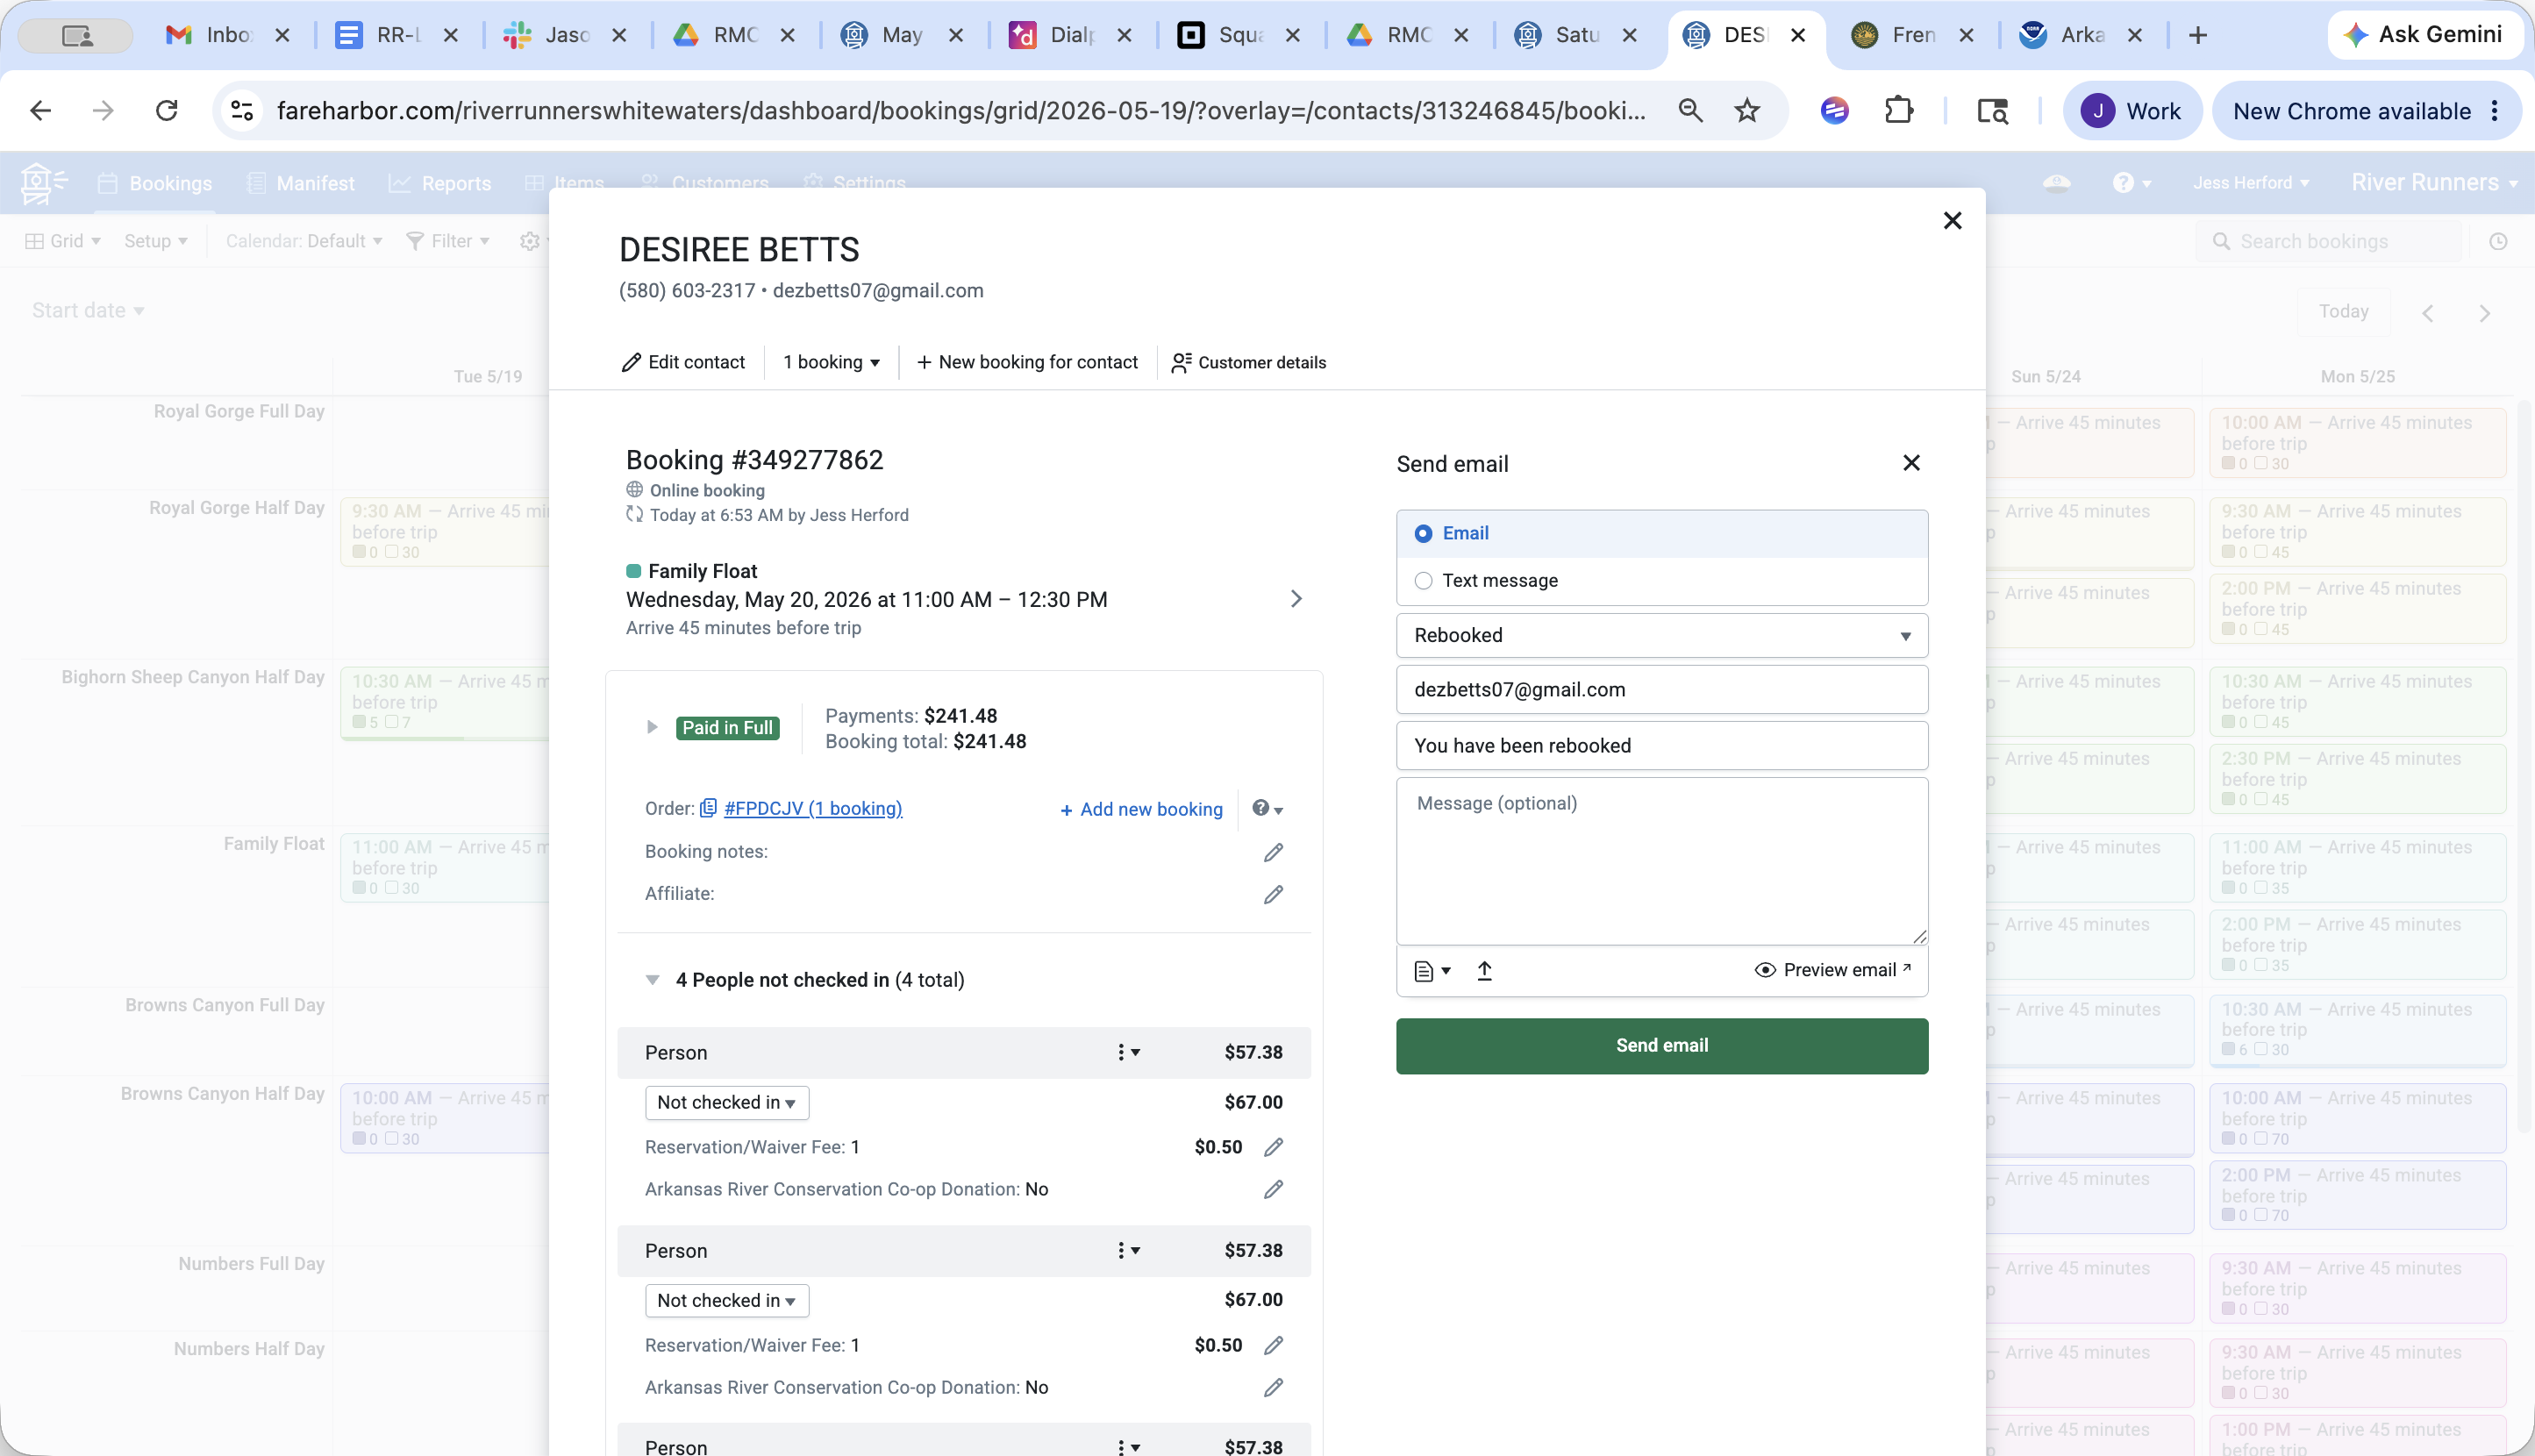
After successfully moving the reservation, immediately notify the guest of their new trip details.
6
In the customer's updated booking window, click Send email or text from the right-hand sidebar actions.
7
Click Send email to dispatch the updated confirmation itinerary directly to the customer's inbox.