SOP: Recording Check Deposits (1)
Learn how to efficiently record payments and check deposits in IES or QuickBooks on a daily basis. This guide covers step-by-step instructions, tips for managing invoices, applying credits, and ensuring accurate records.
In this guide, we'll learn how to record check payments and deposits in IES or QuickBooks. This process helps you keep track of daily or regular check deposits, match payments to invoices, and ensure all details are accurate. You will also learn how to handle credits and reference numbers to avoid errors.
Let's get started
Good morning. For this specific video, we will cover how to record payments or check deposits on a daily or every-other-day basis. Every day, you send me check deposits.
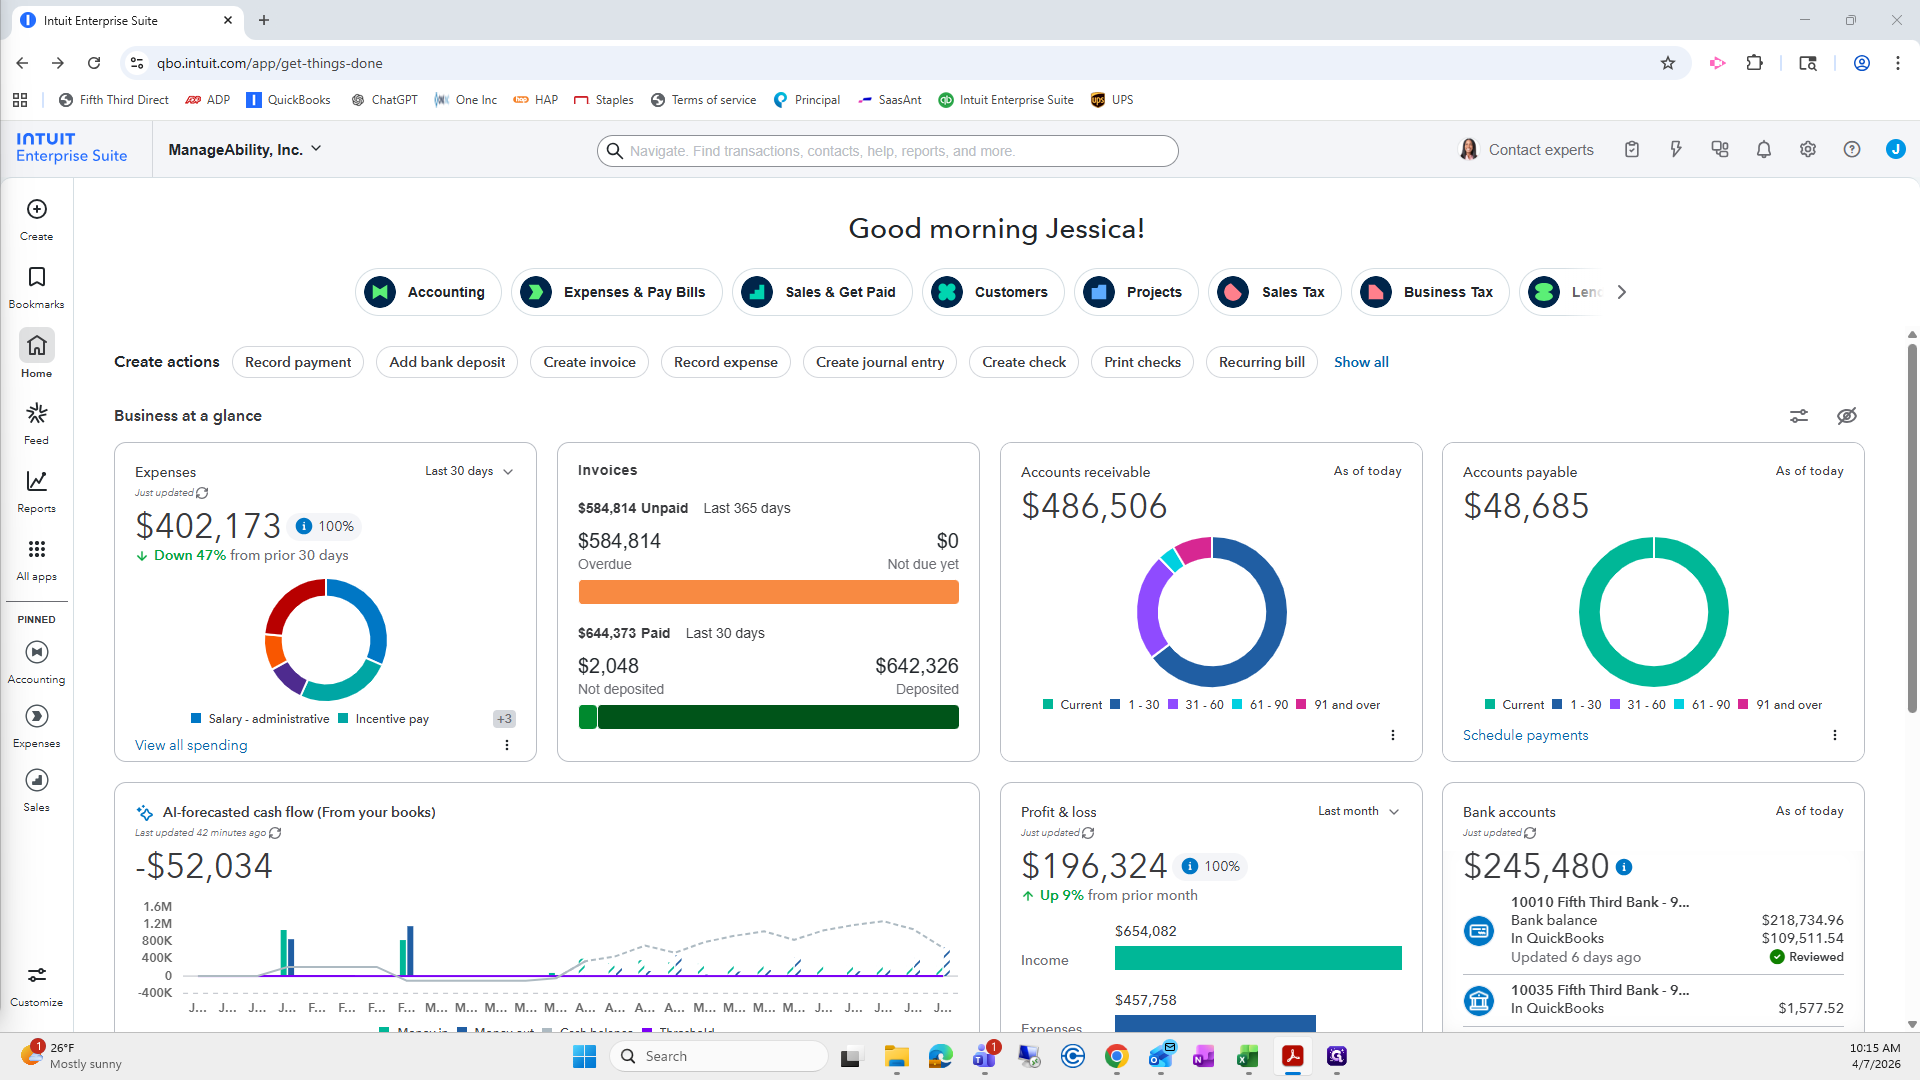
This one is from yesterday. It's much easier than Sage, which is a good thing, and it works ten times faster. I will try to split the screen. It might be a little hard, but it's worth a try. I'll make this one smaller.
I hope you have good eyesight.

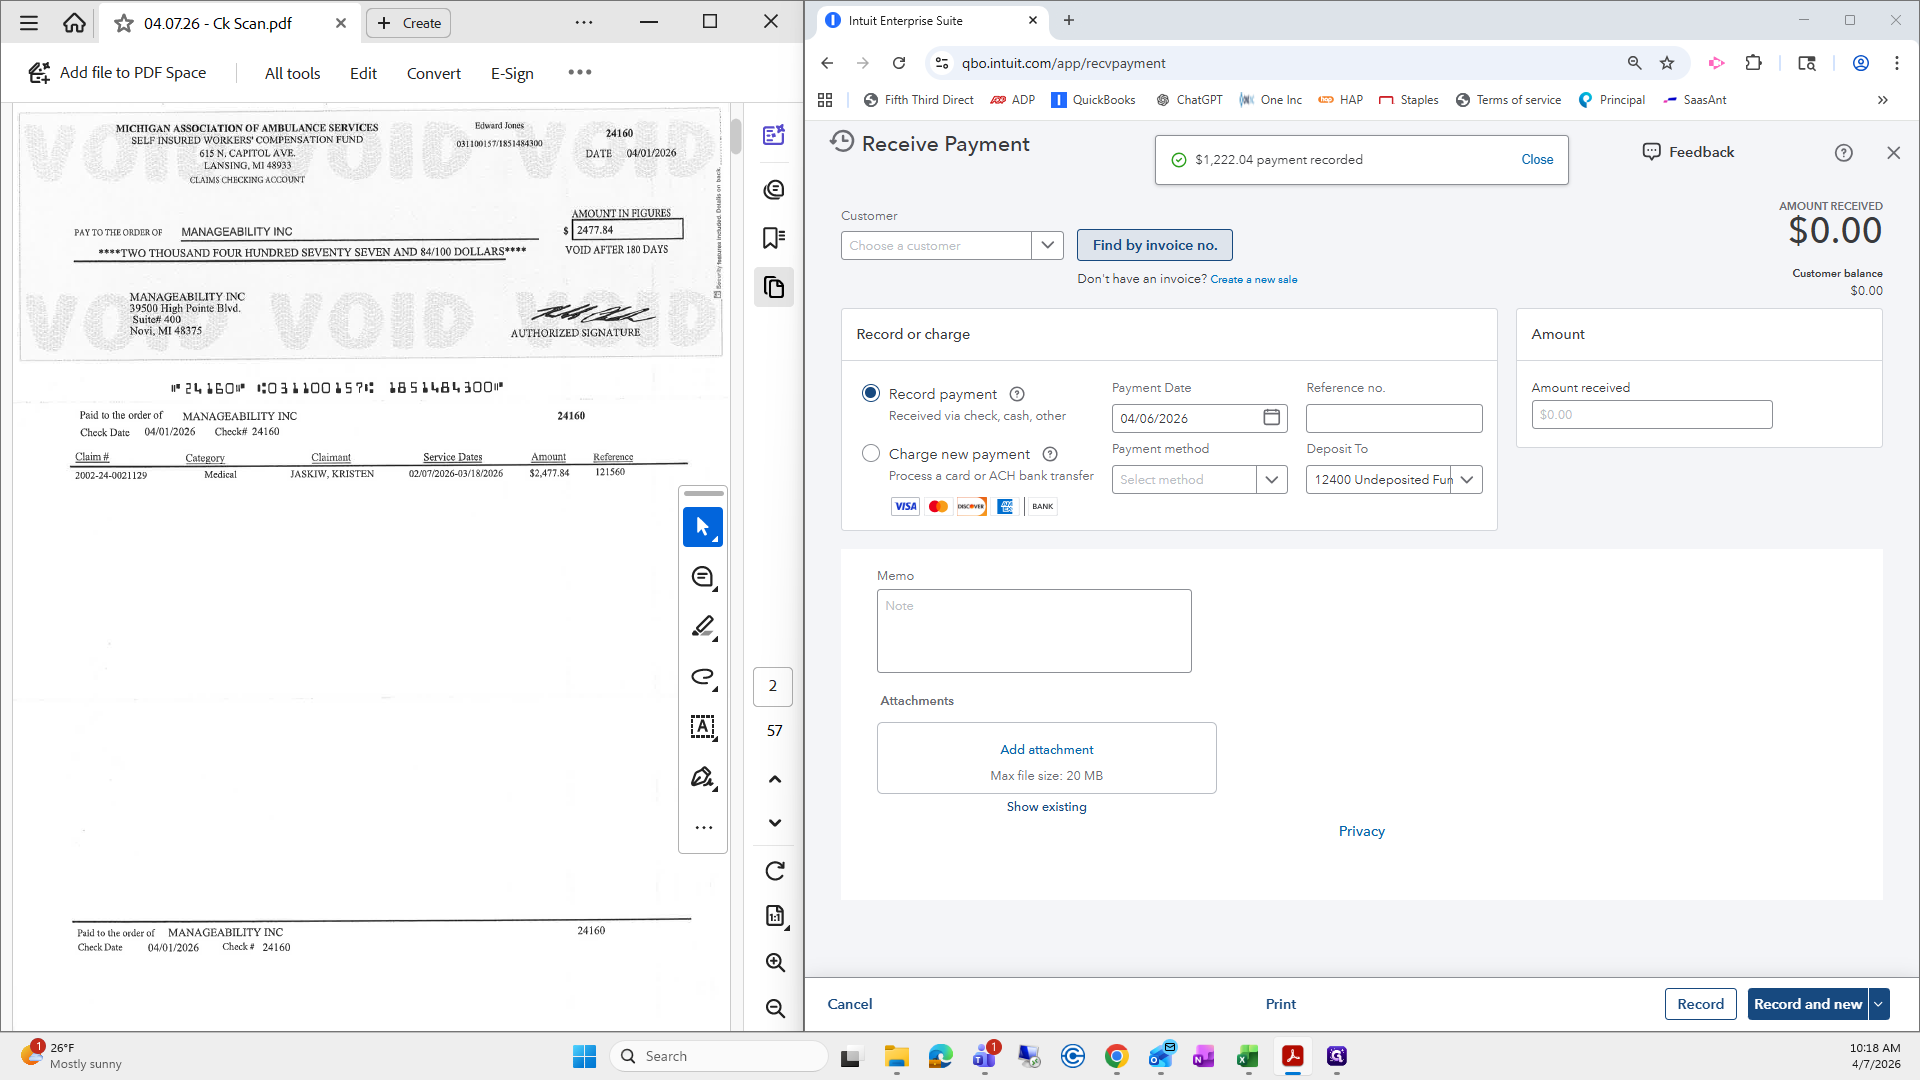
If not, I apologize. When you enter IES or QuickBooks, go to your home screen. Amanda may have already given you access to manageability. If she did not, I will make sure you have it.

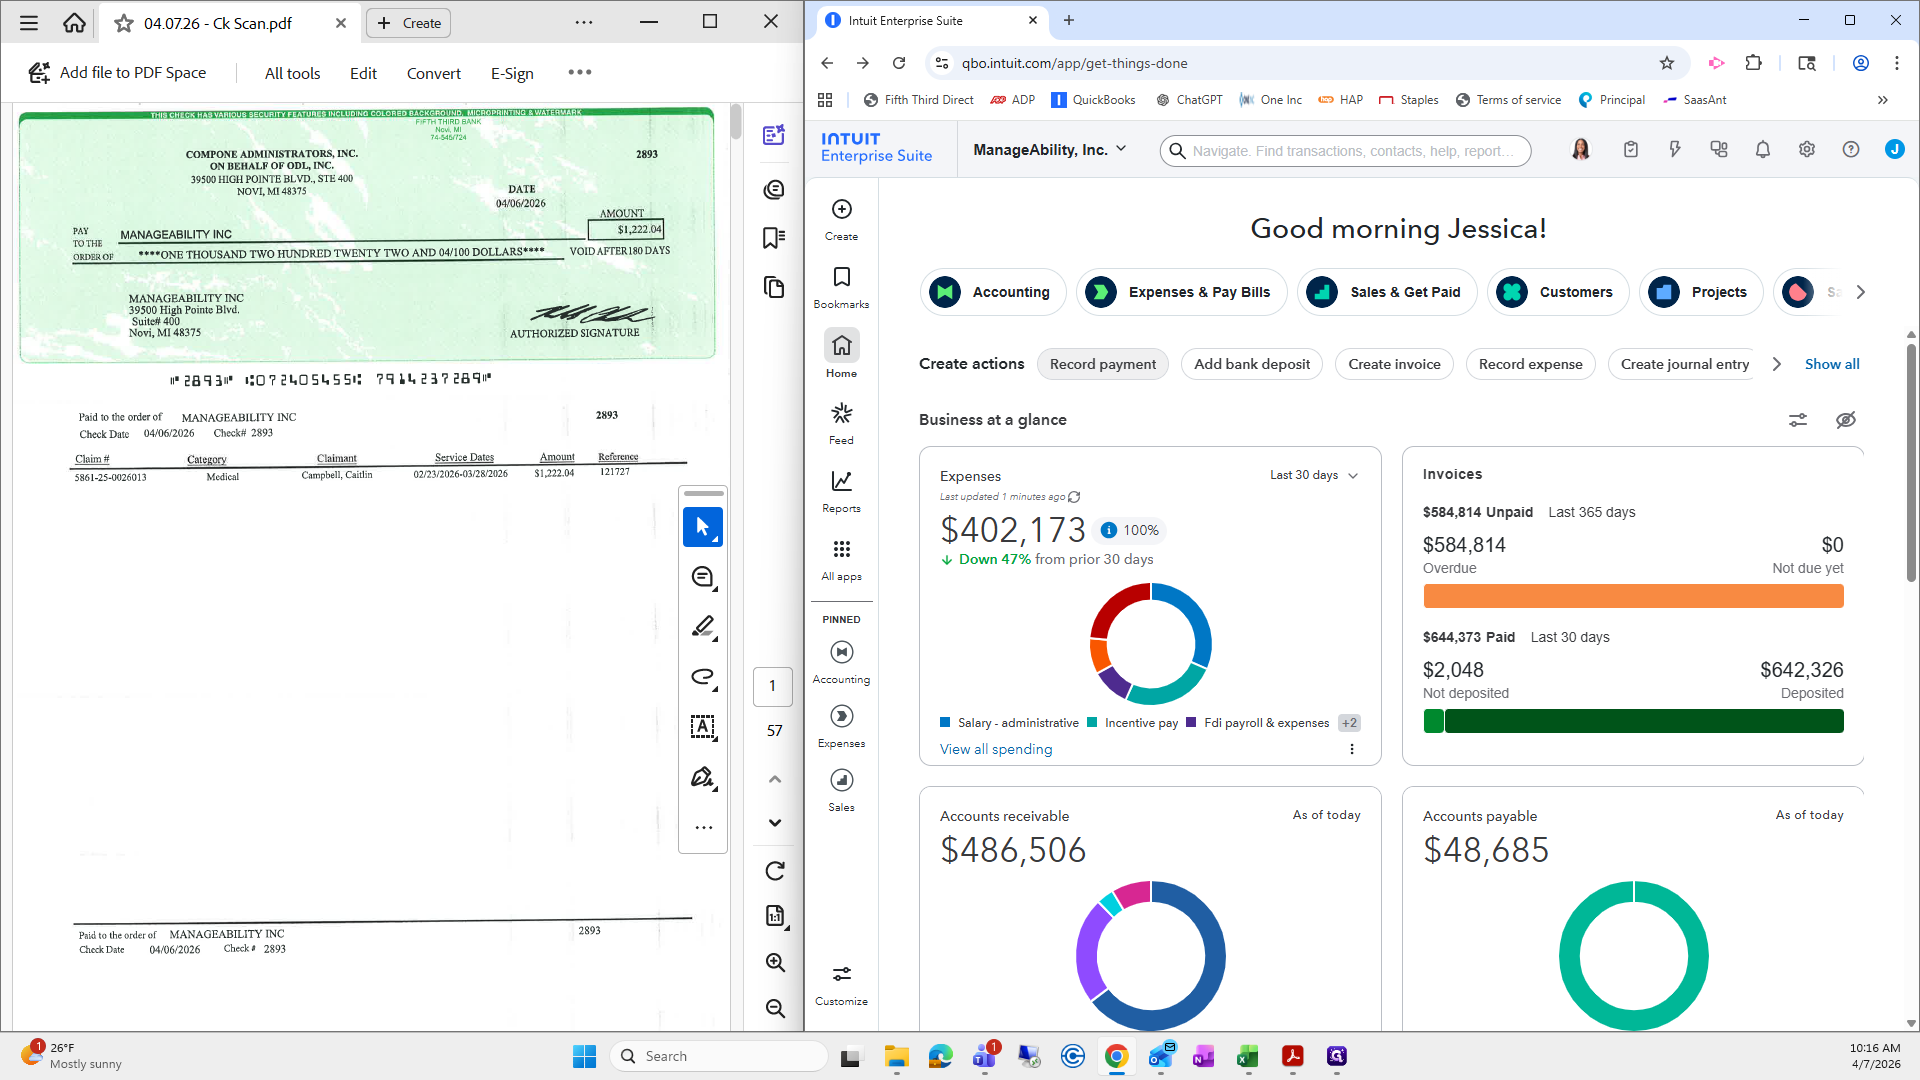
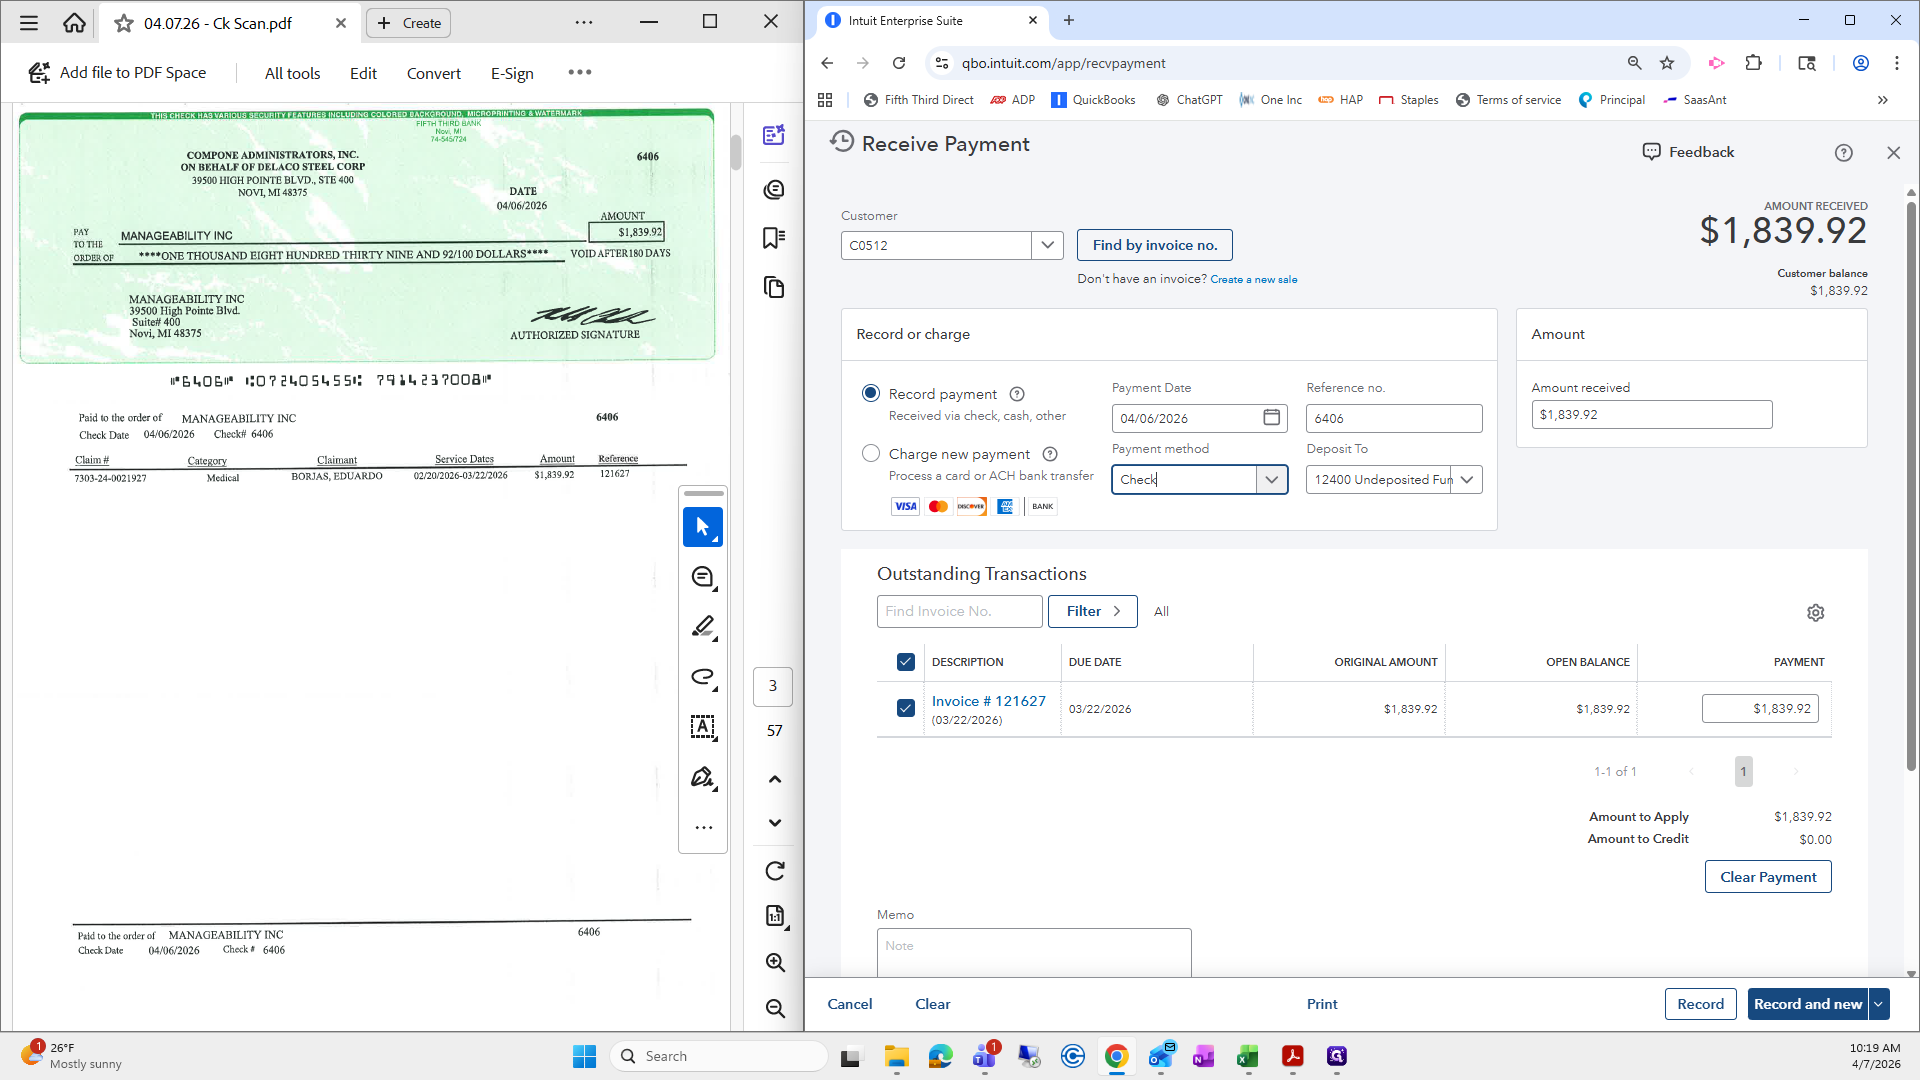
Toggle to Manageability from Star Tech. Then, go to the top where it says "Record Payment."
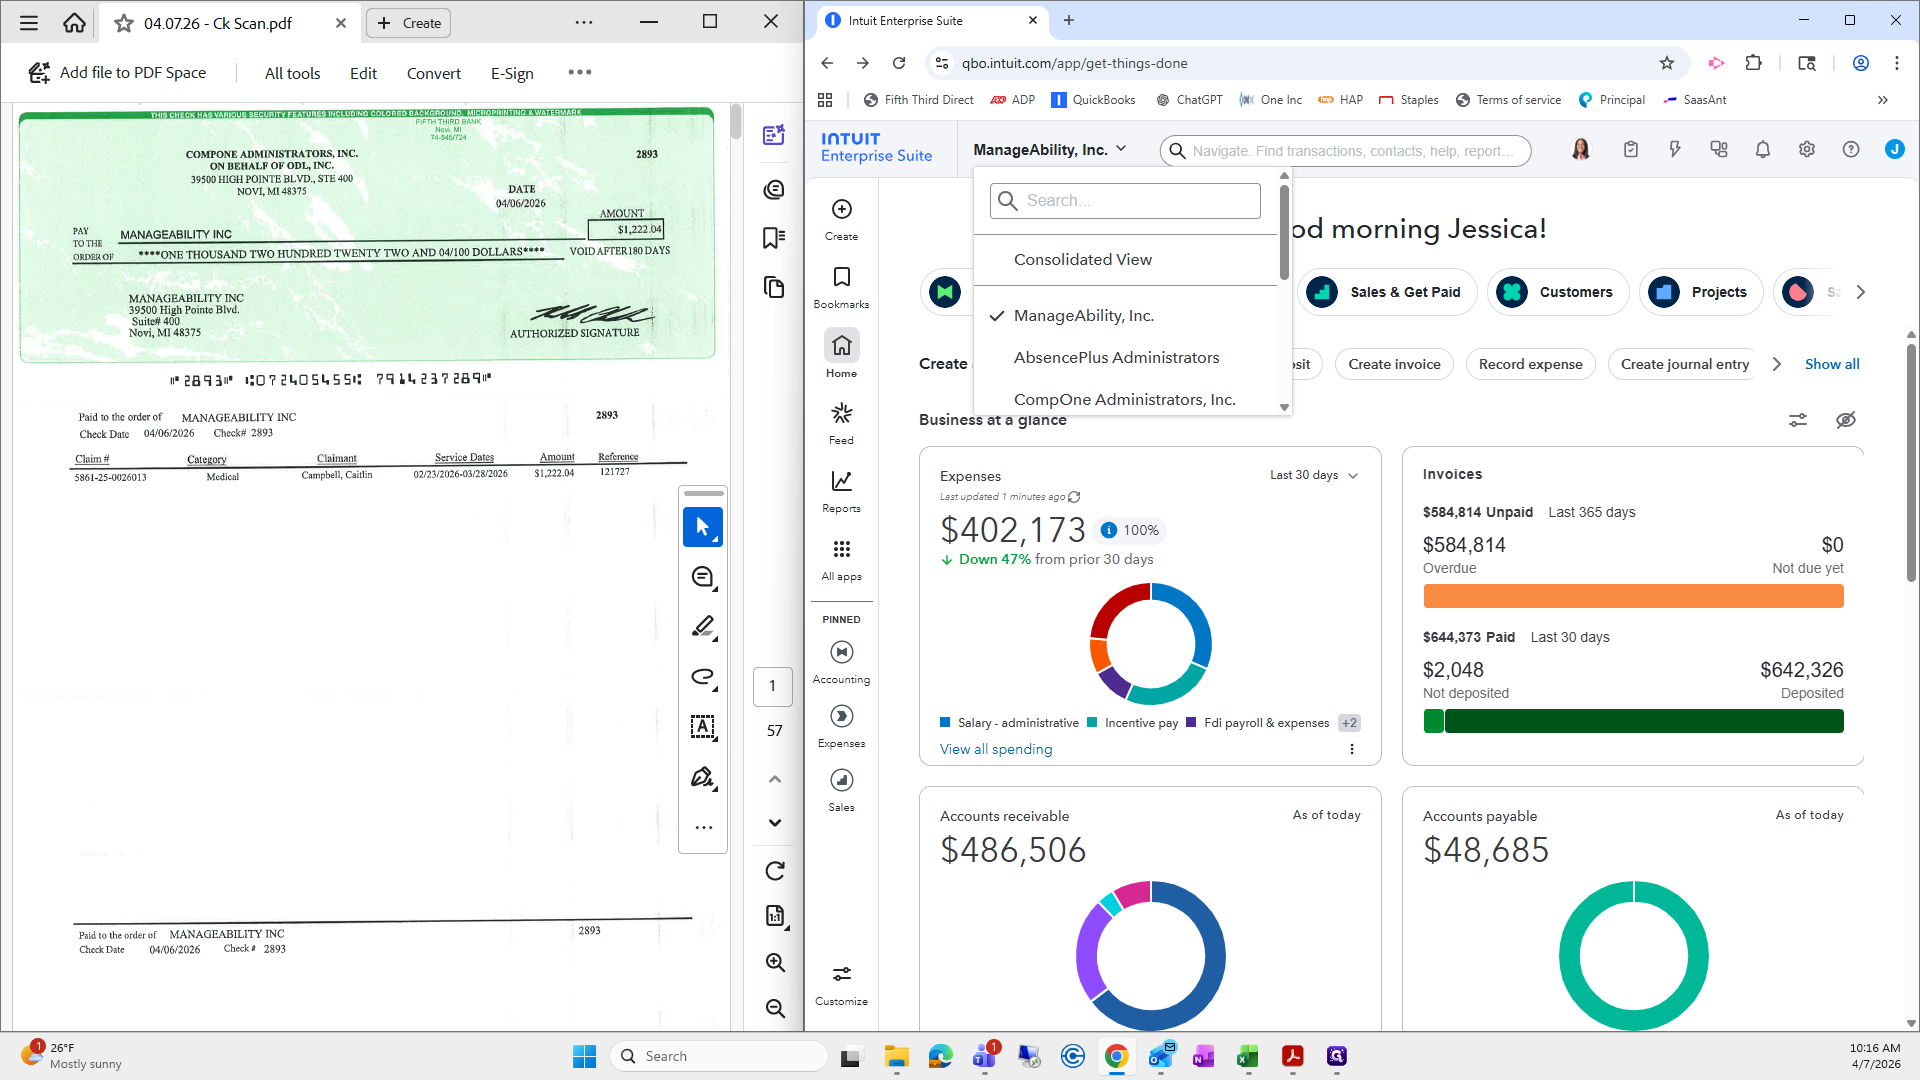
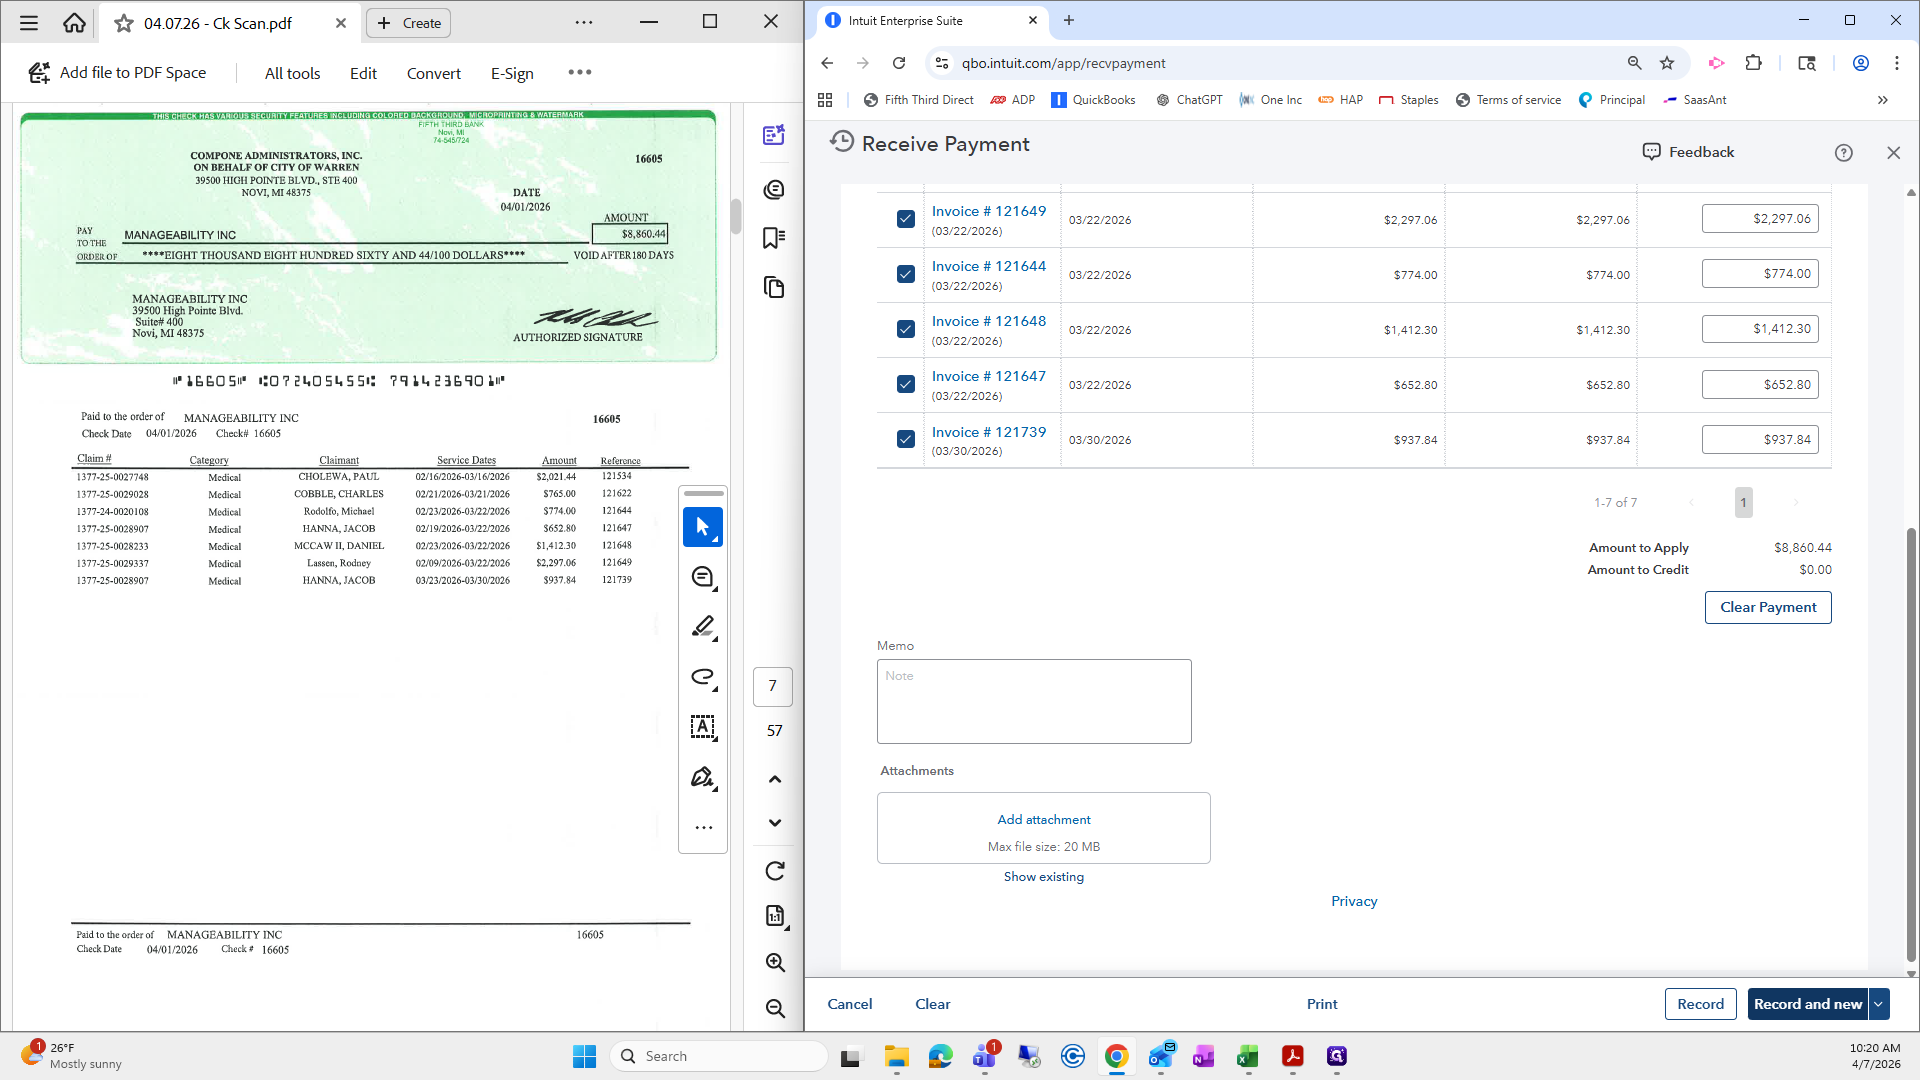
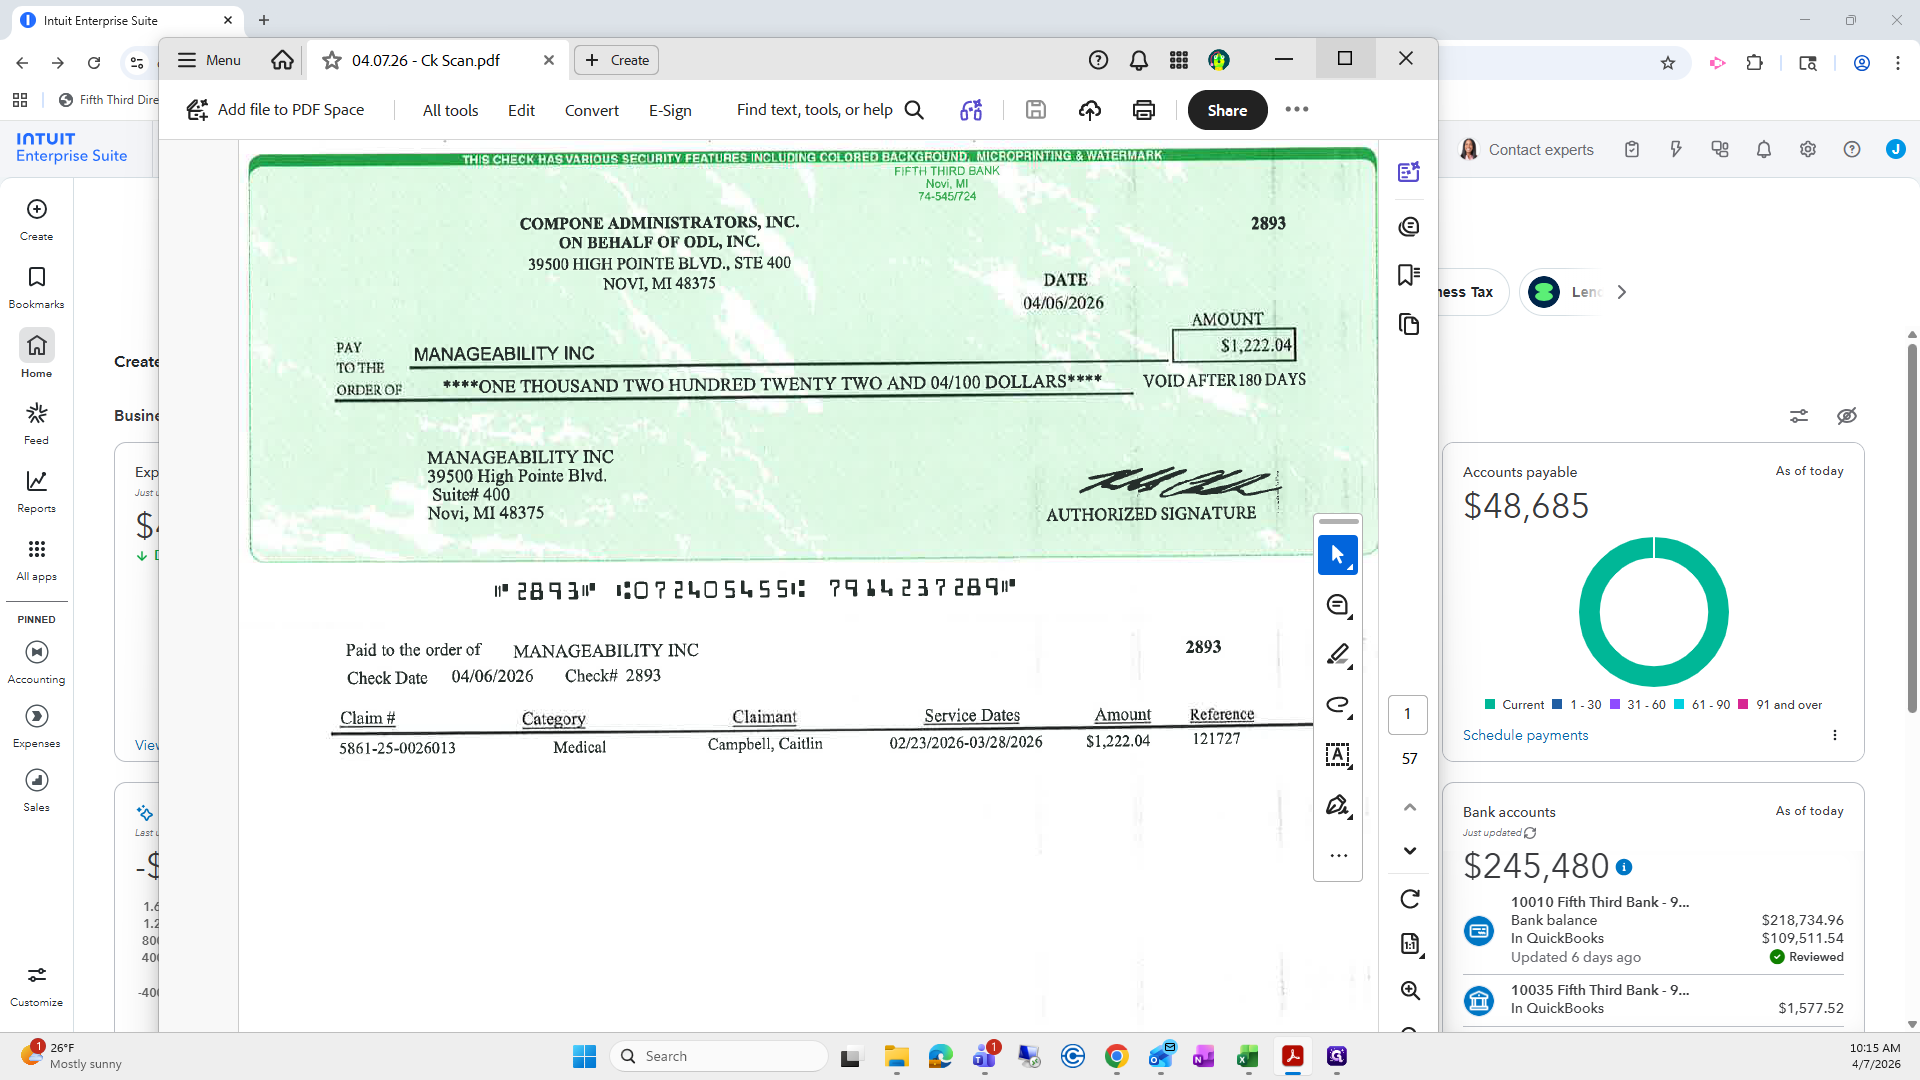
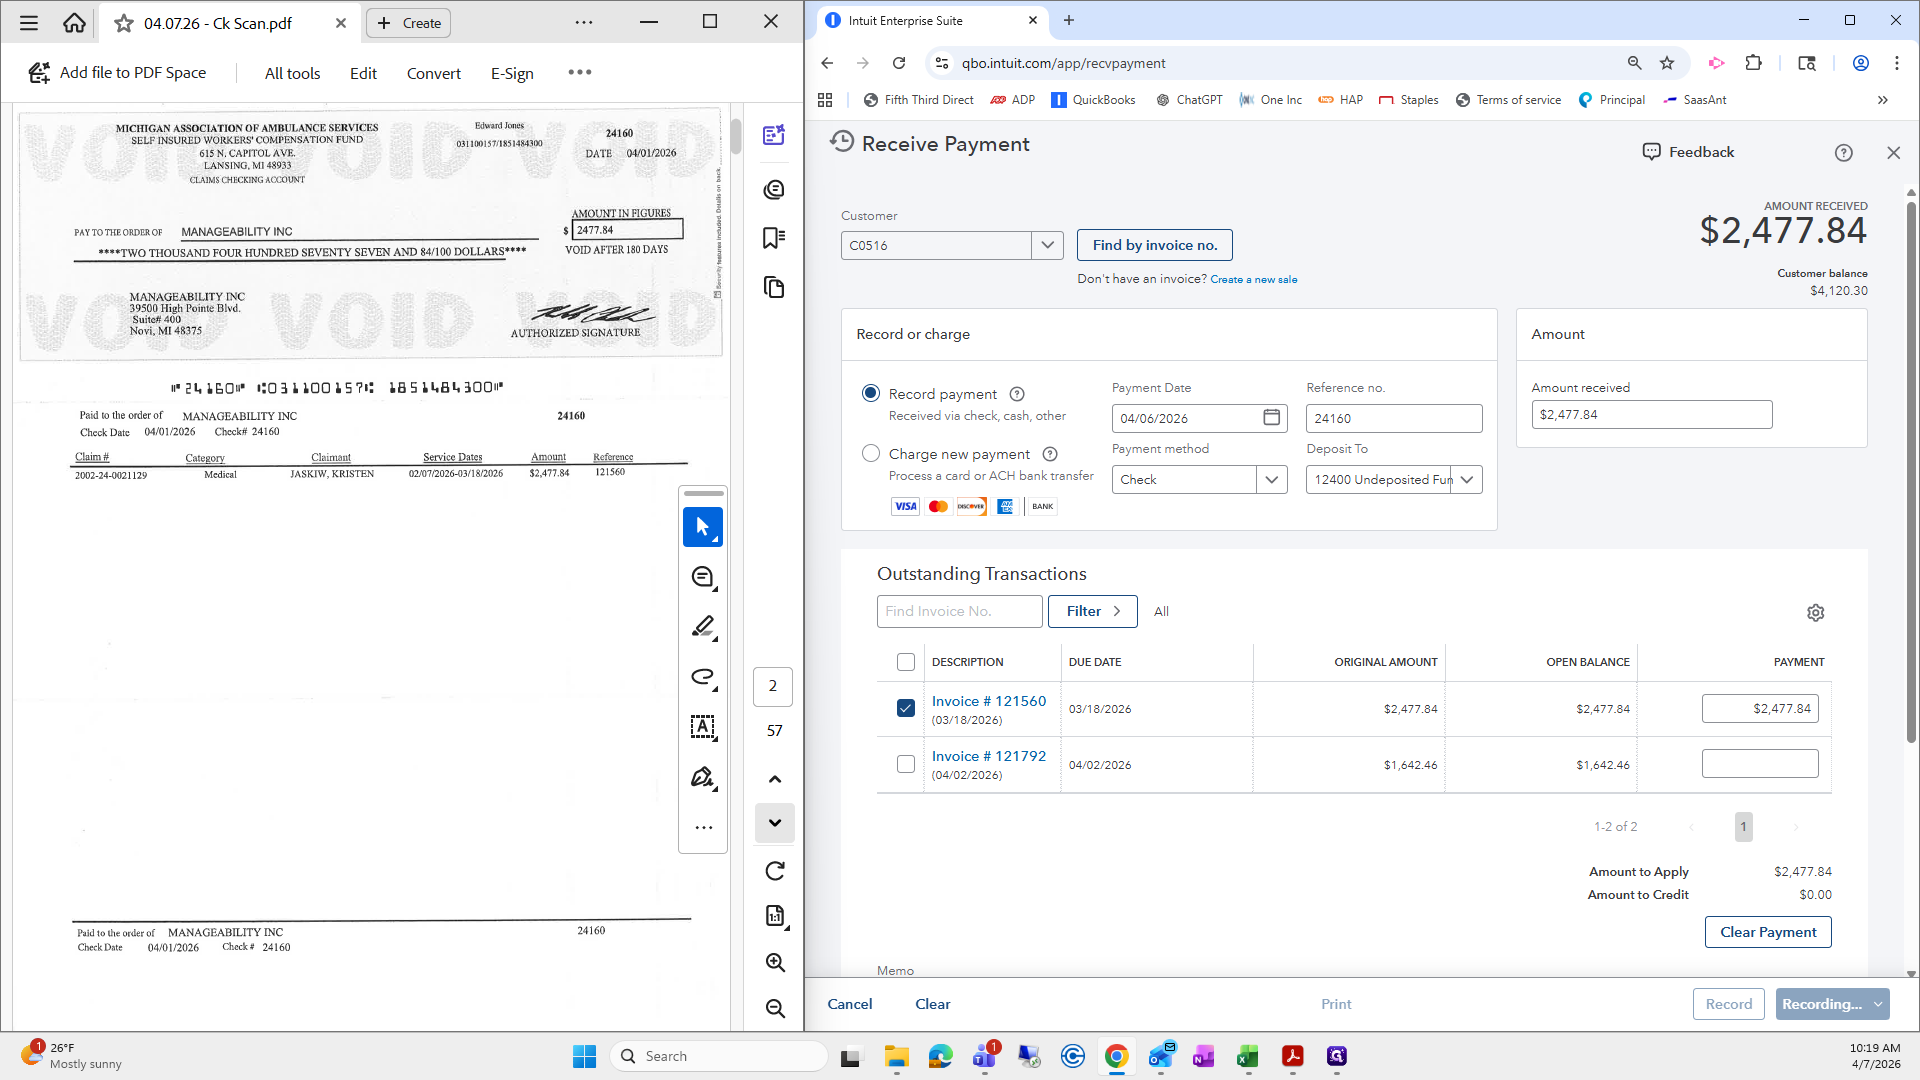
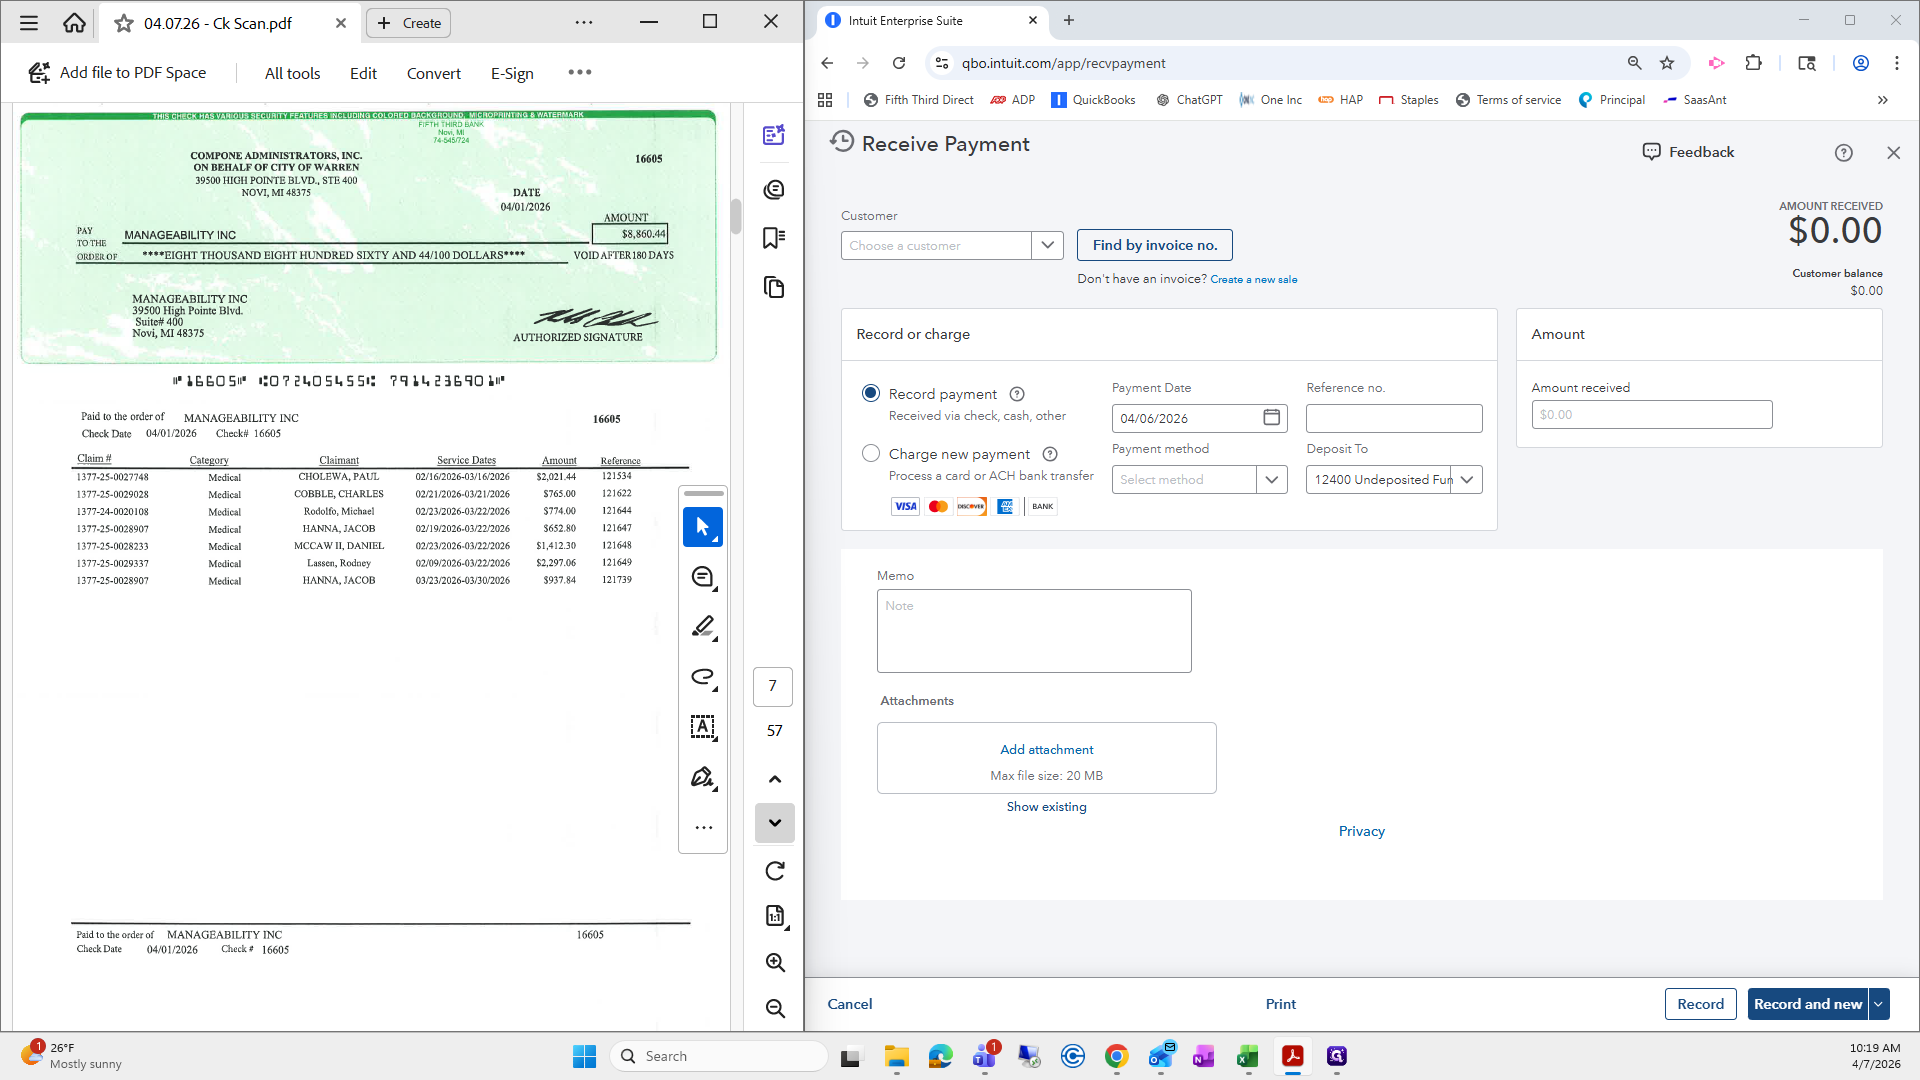
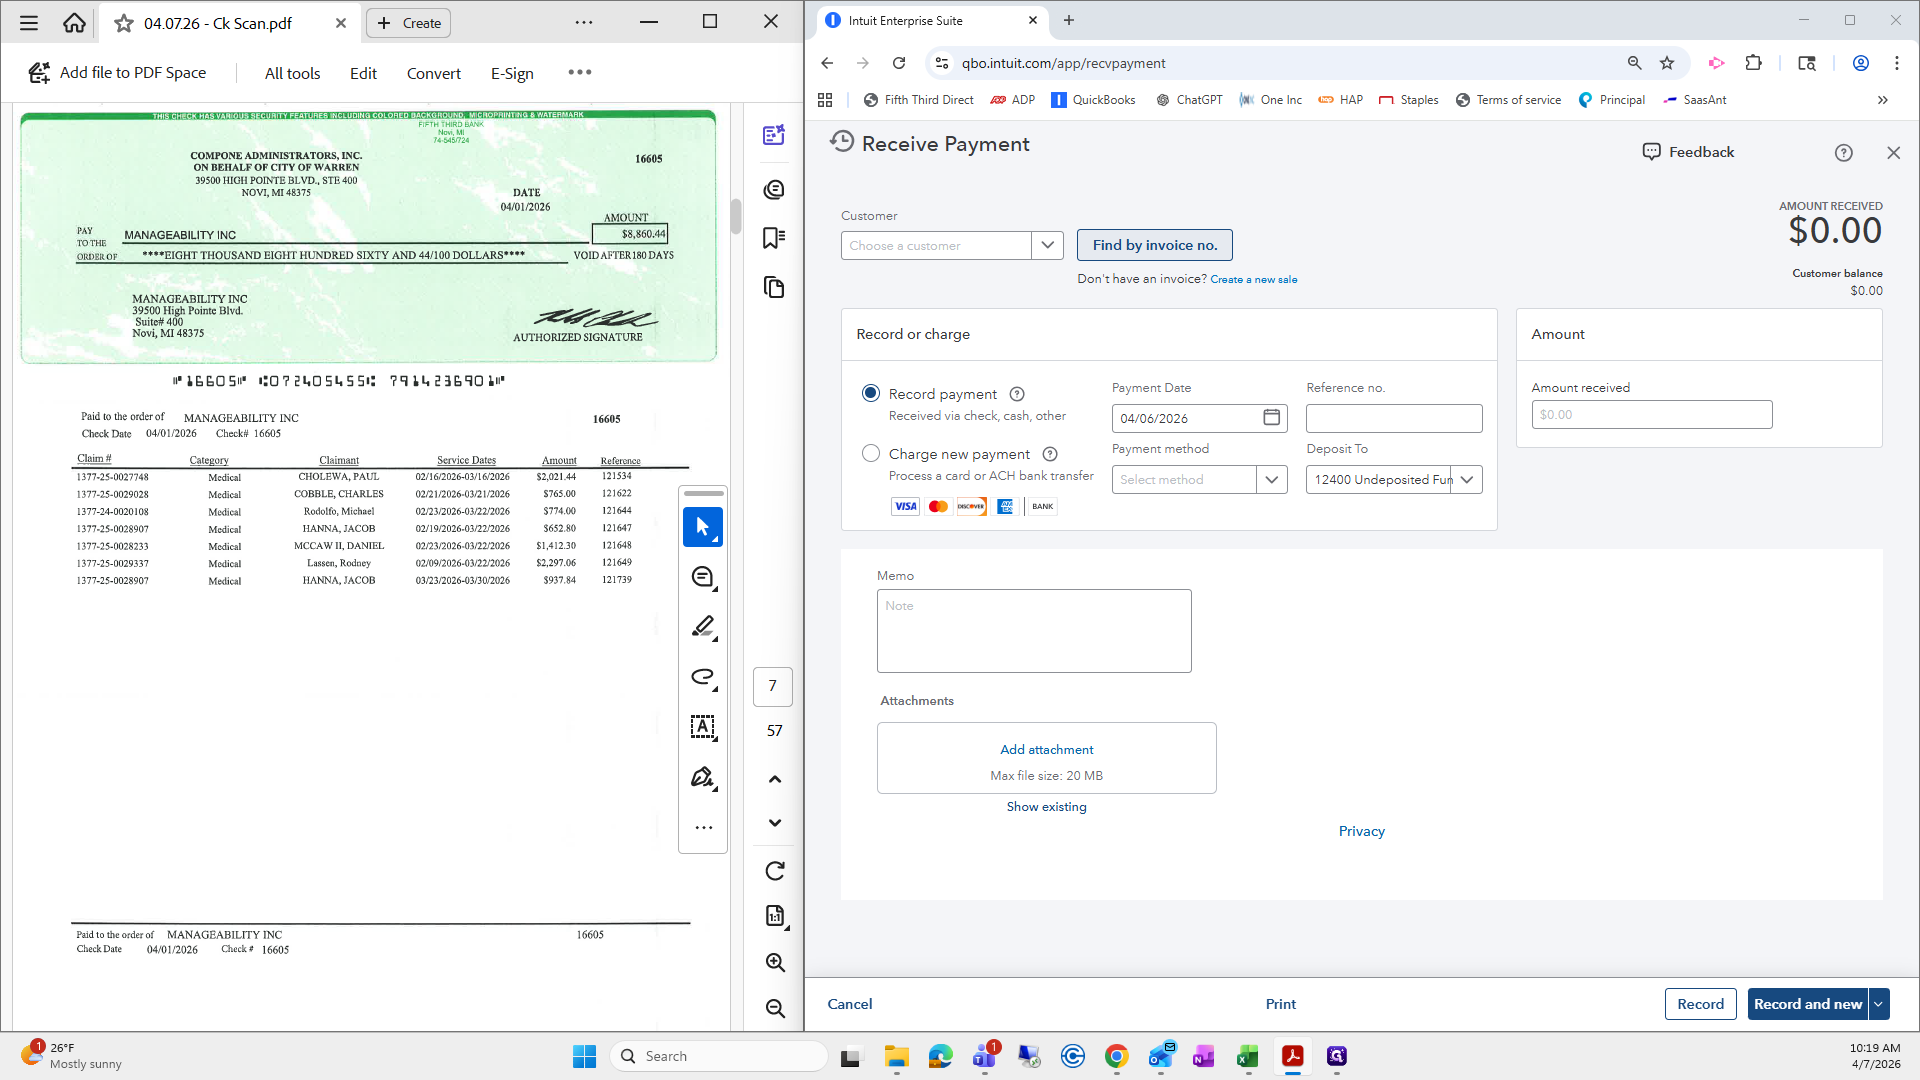
From here, we will set the payment date to the day you provide the scan.
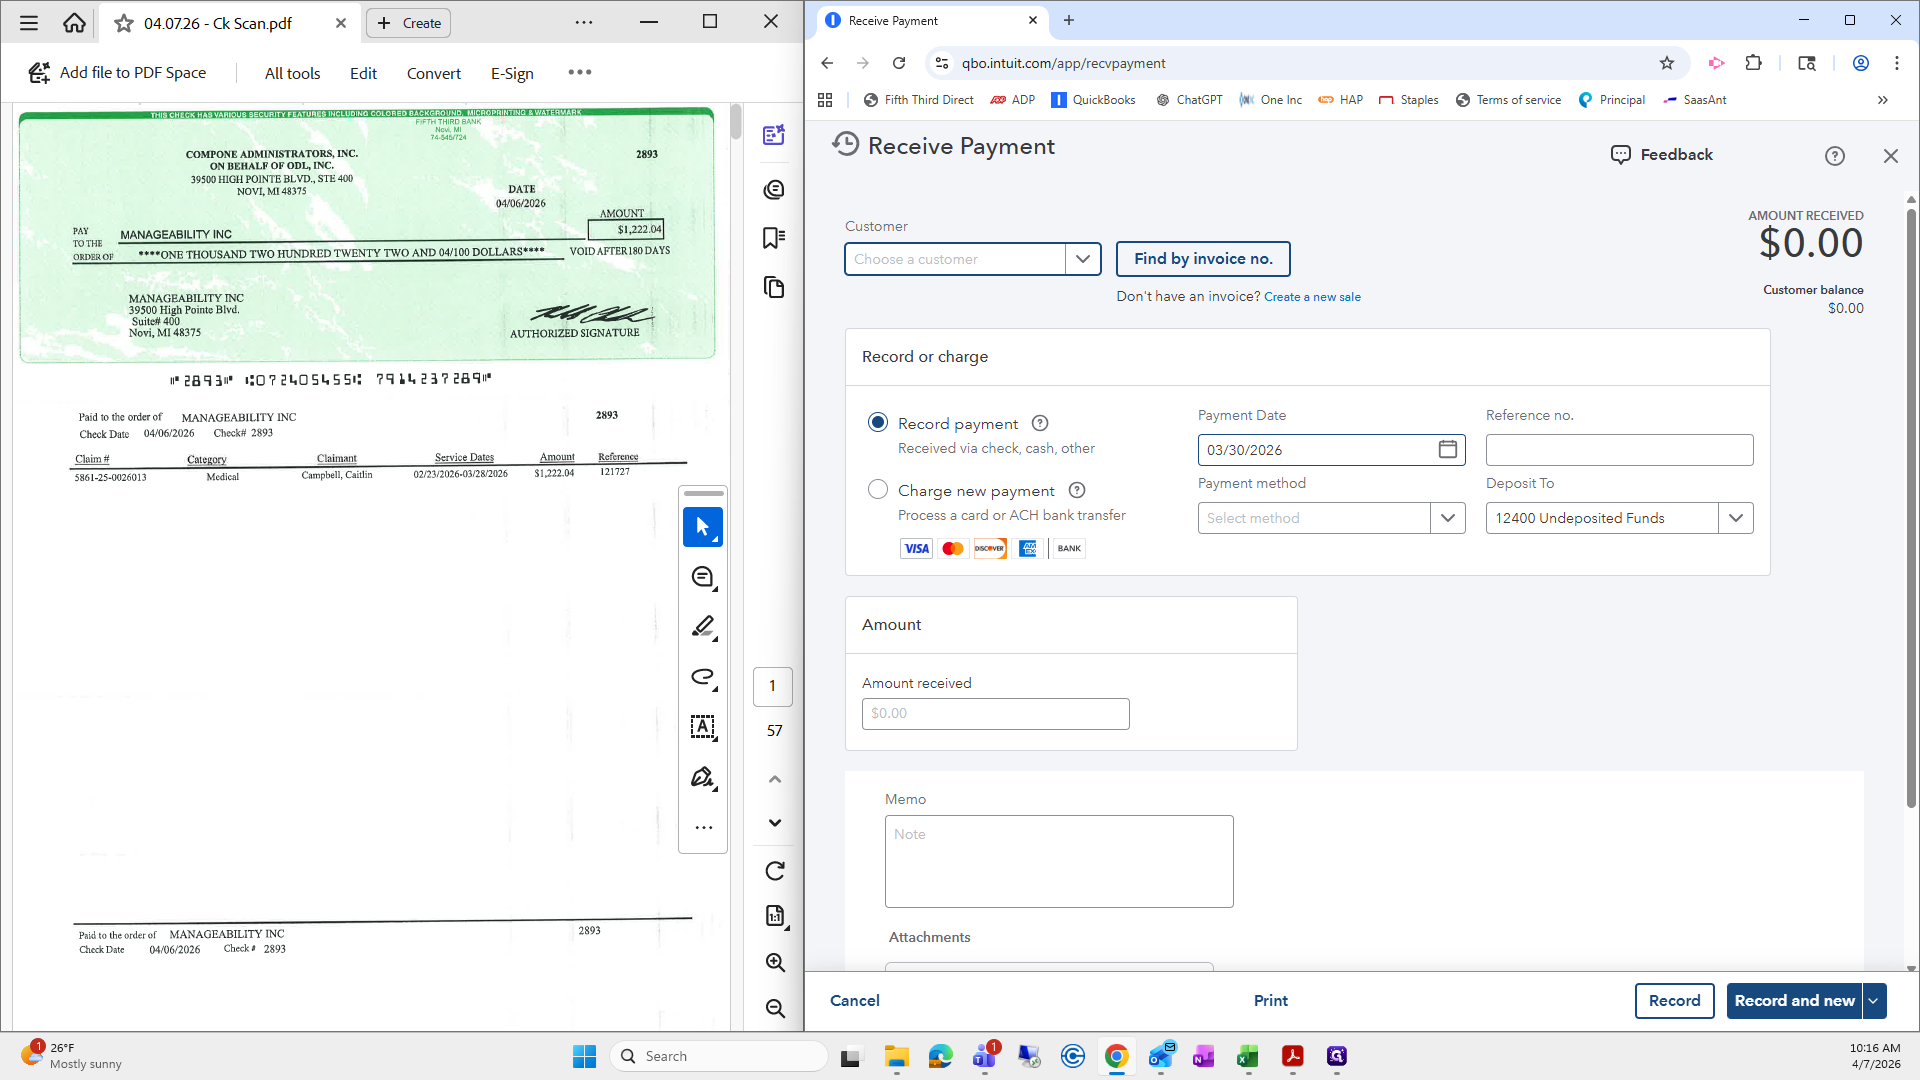
This scan was actually done yesterday, although it is dated for today. It was actually yesterday, so I'll put 4/6.

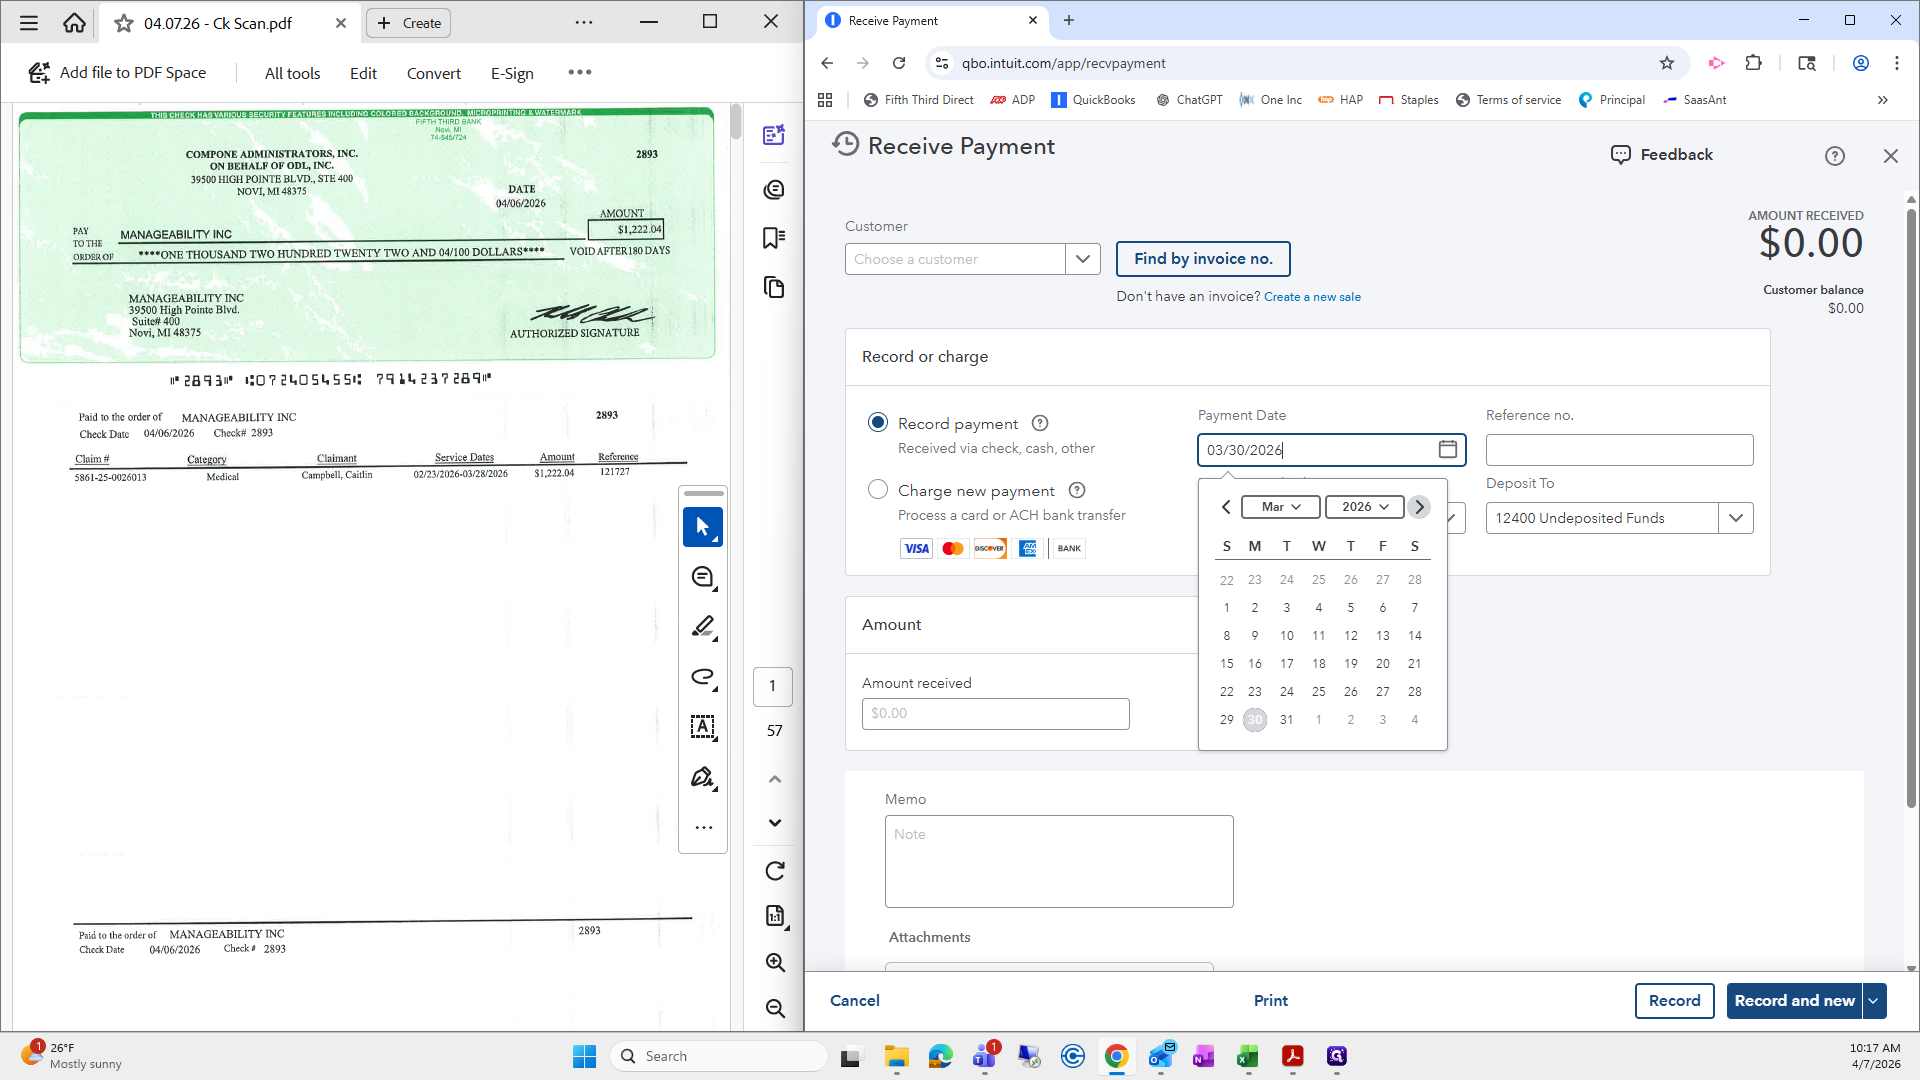
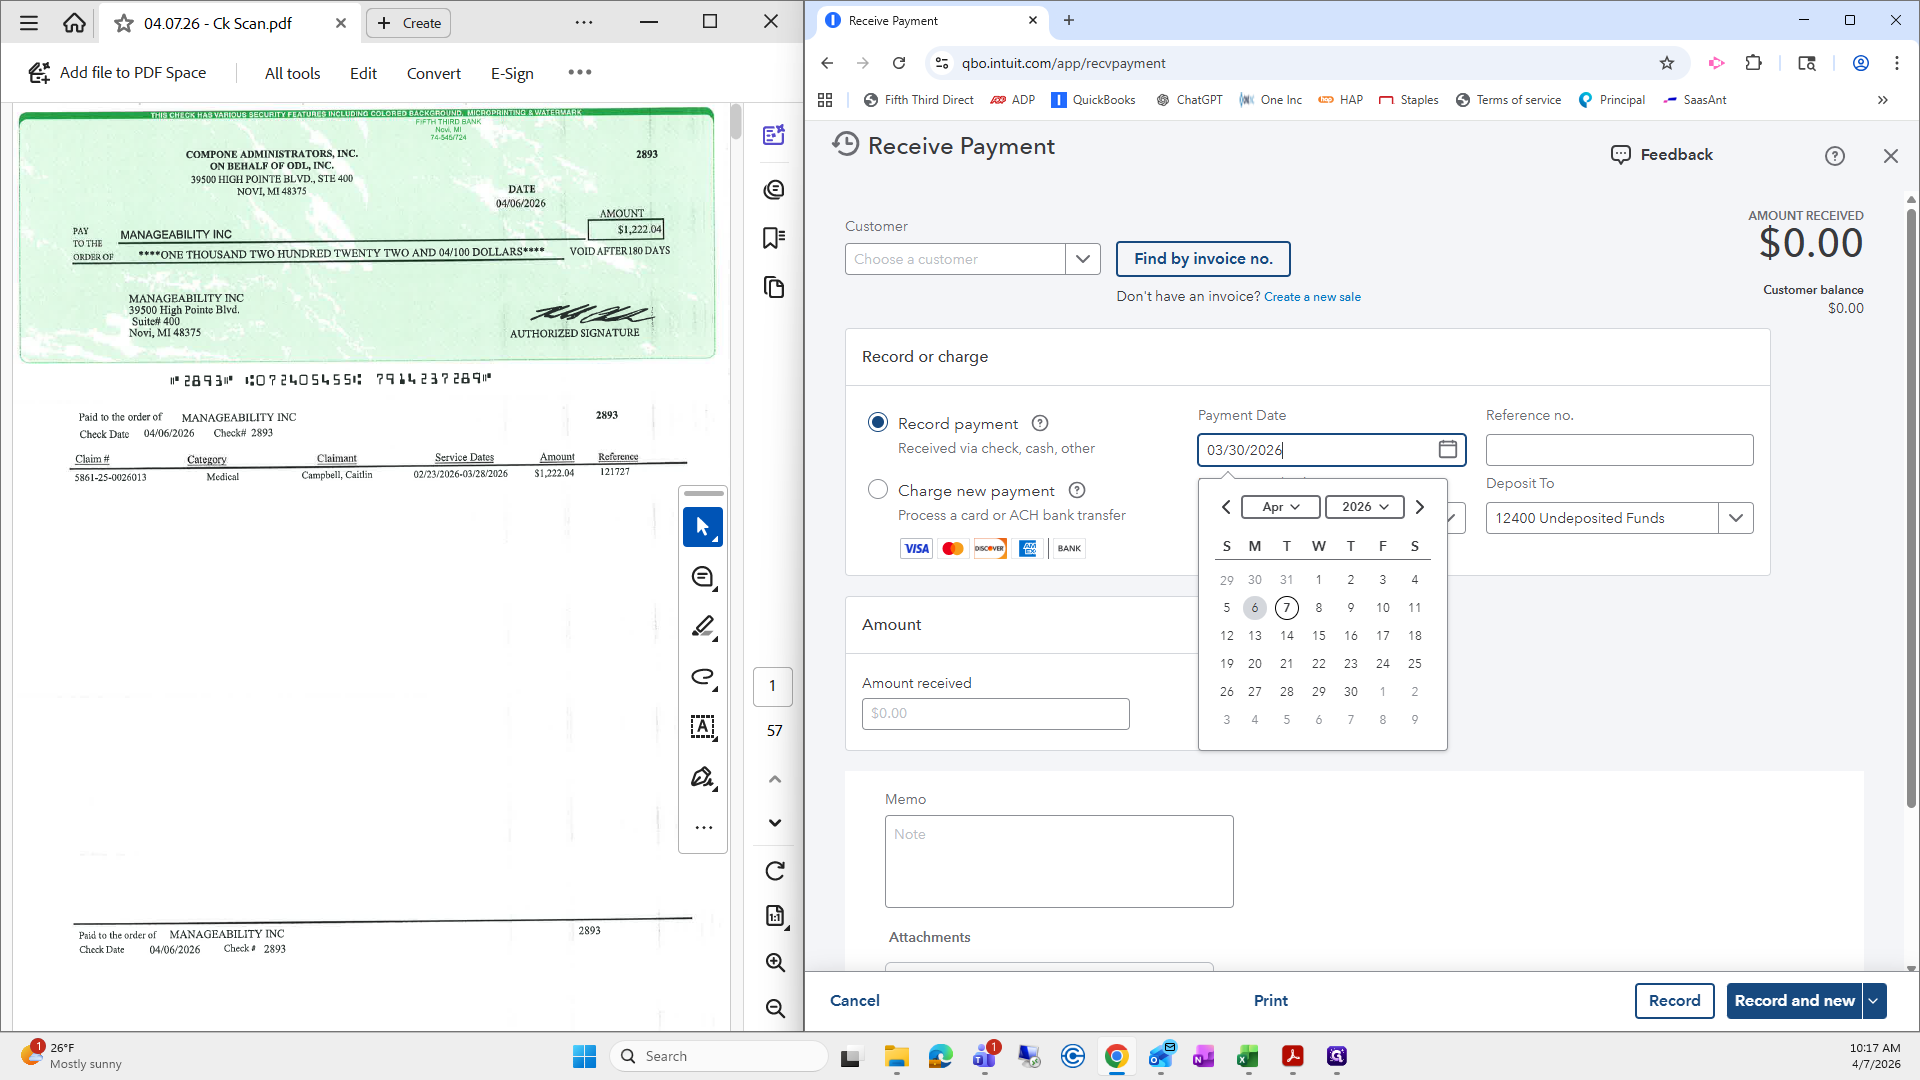
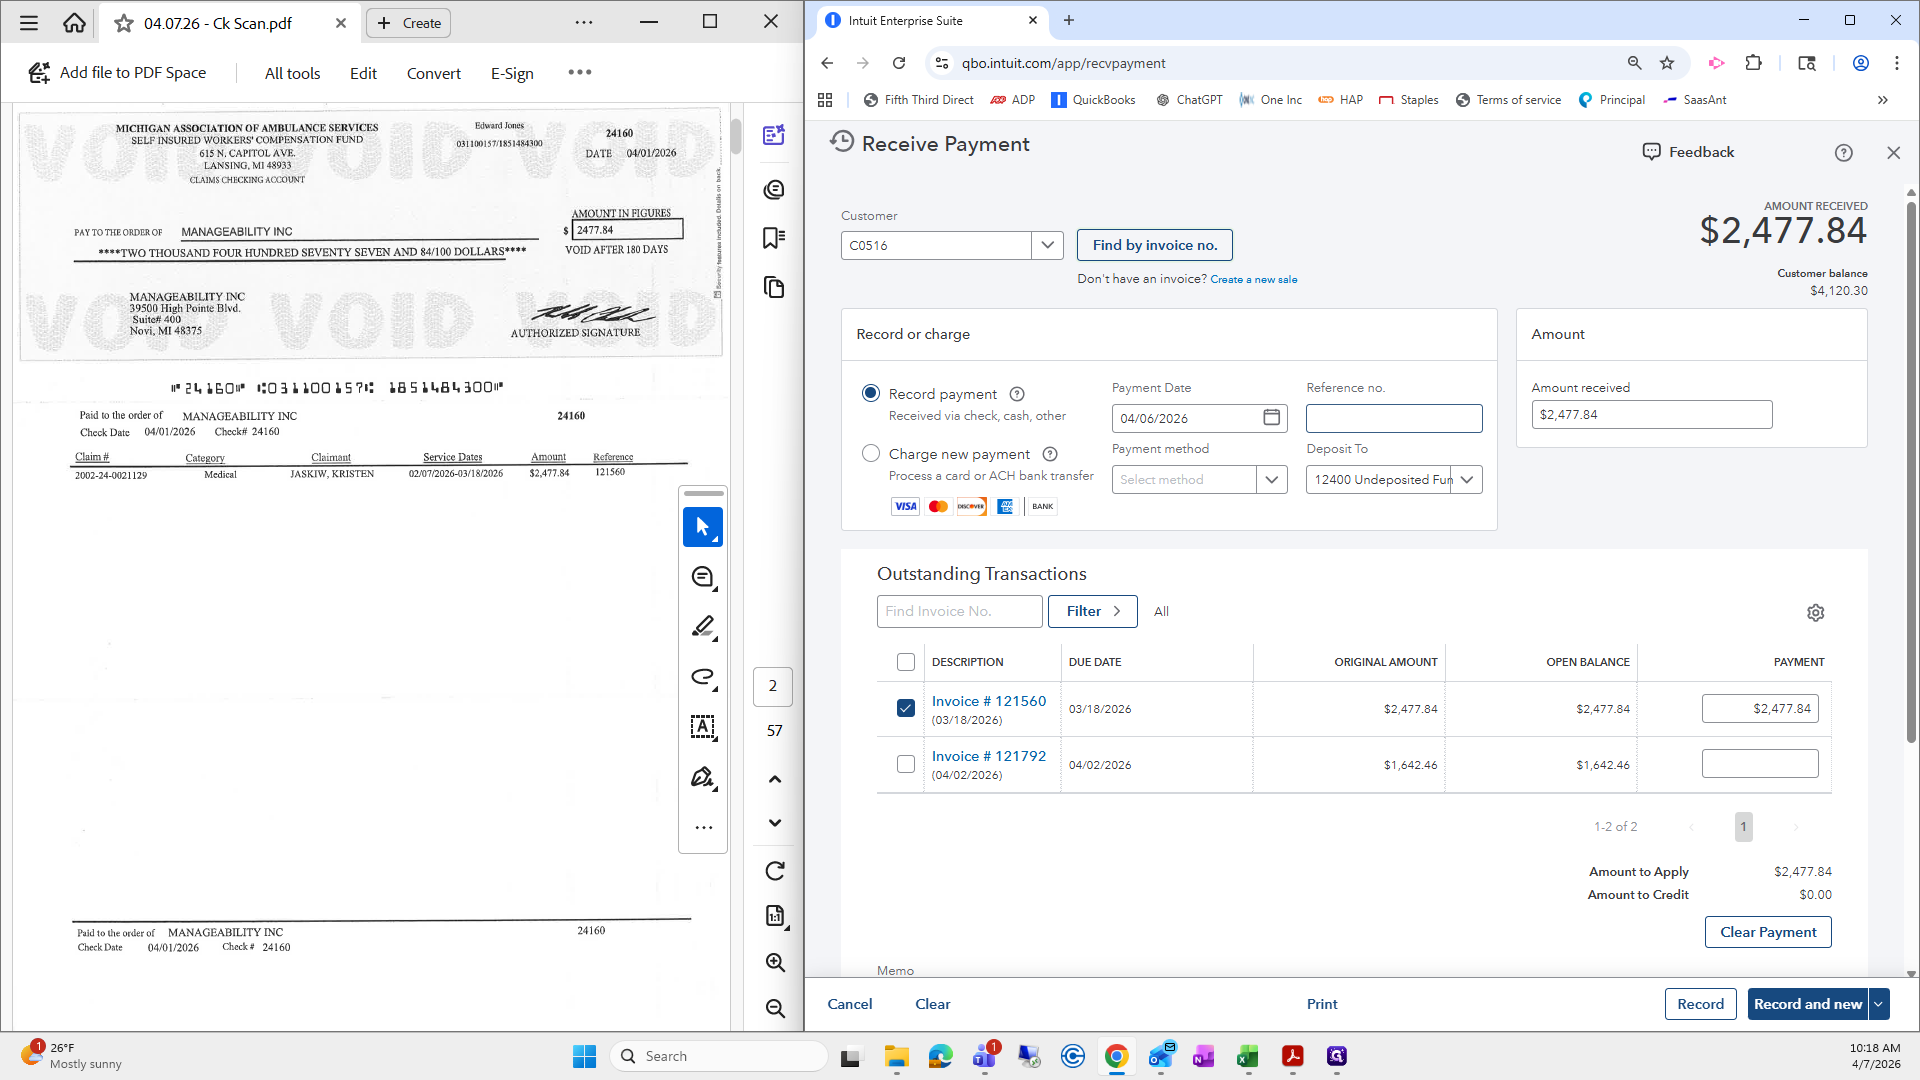
Always make sure the deposit is set to Undeposited Funds.
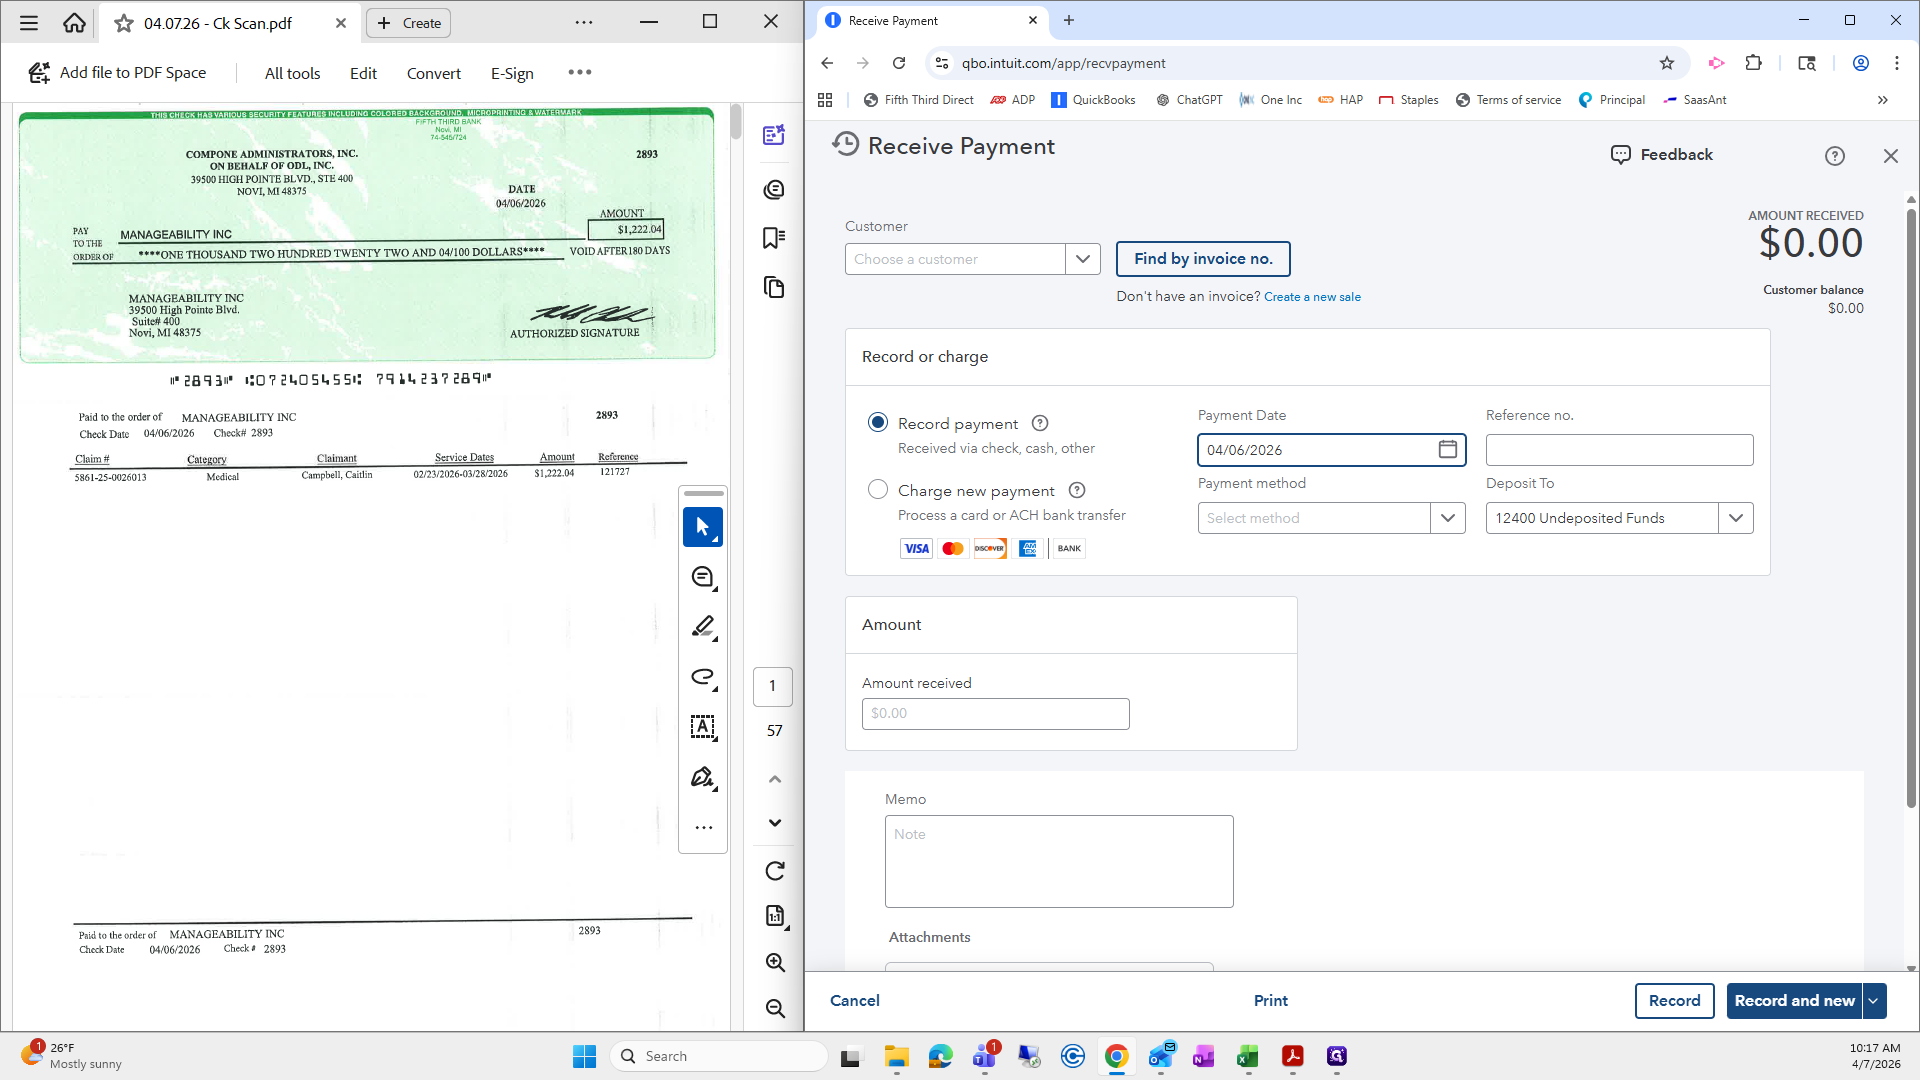
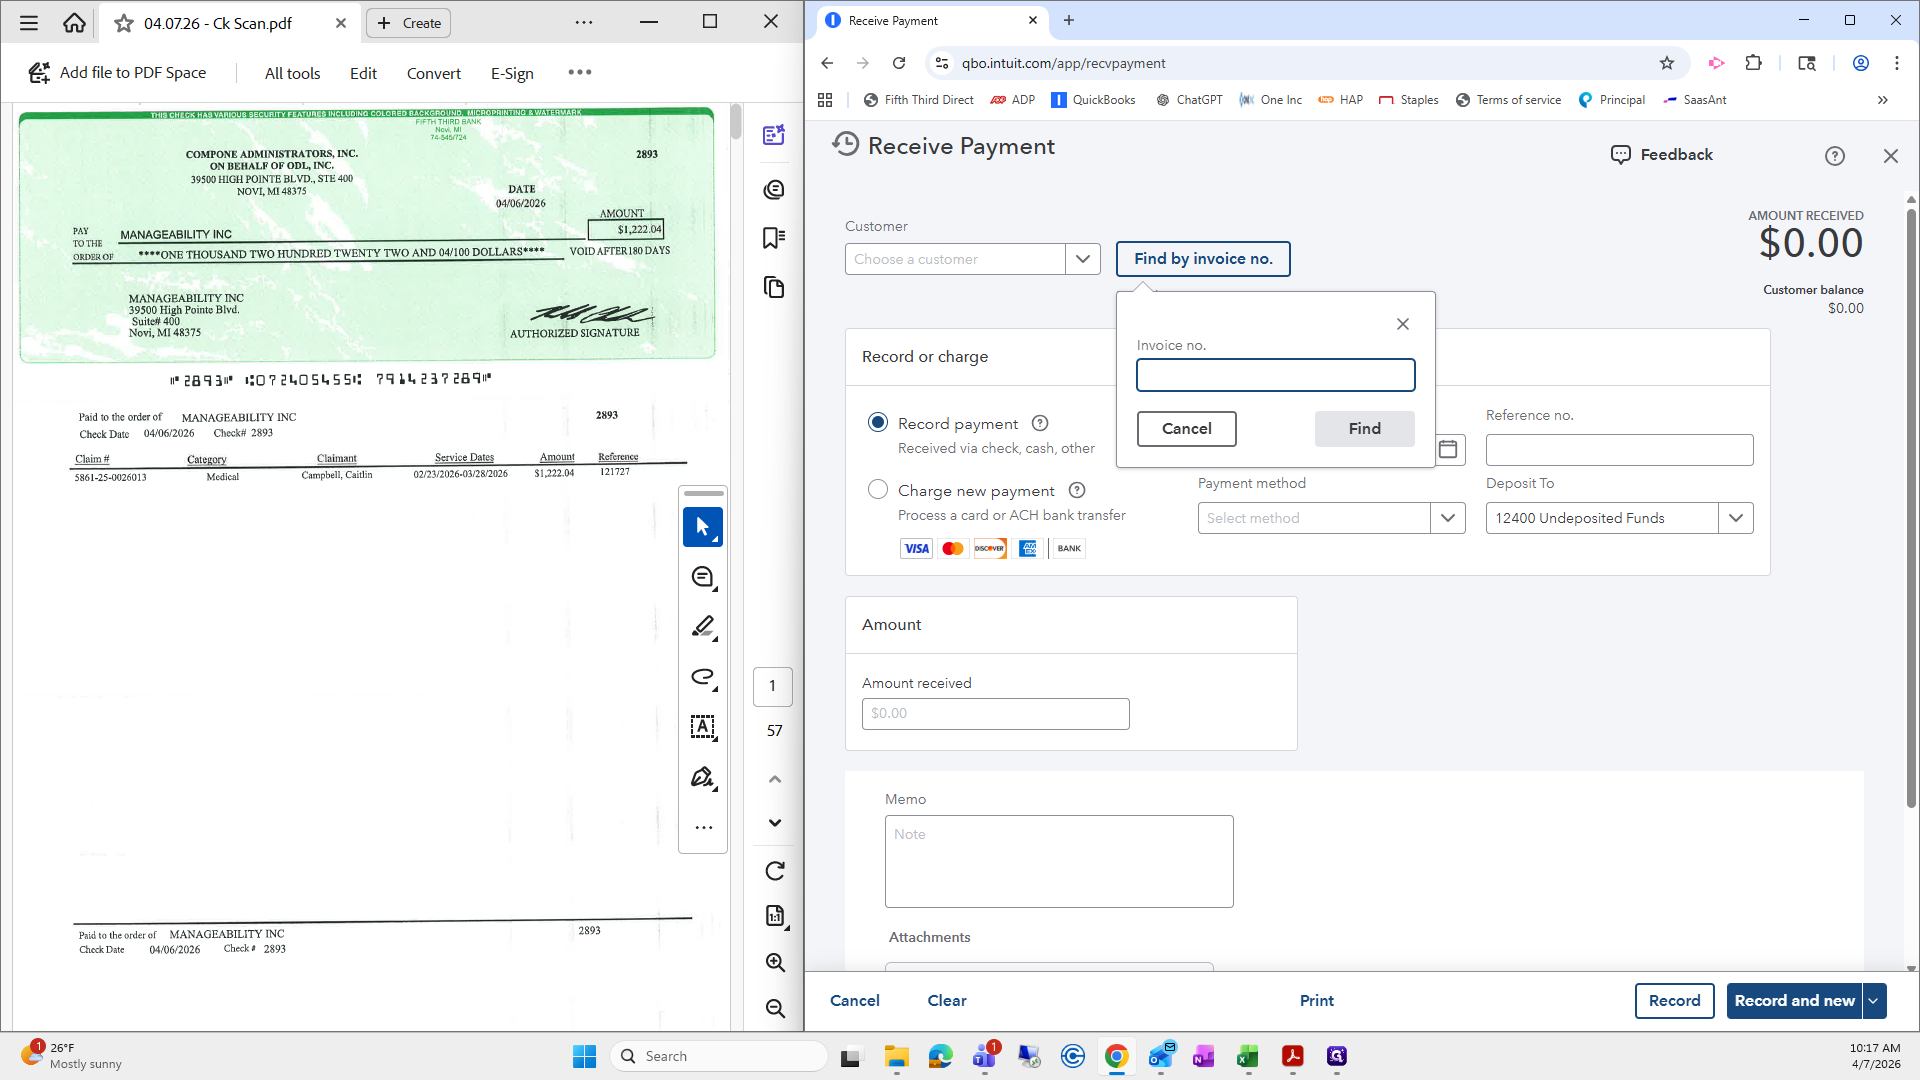
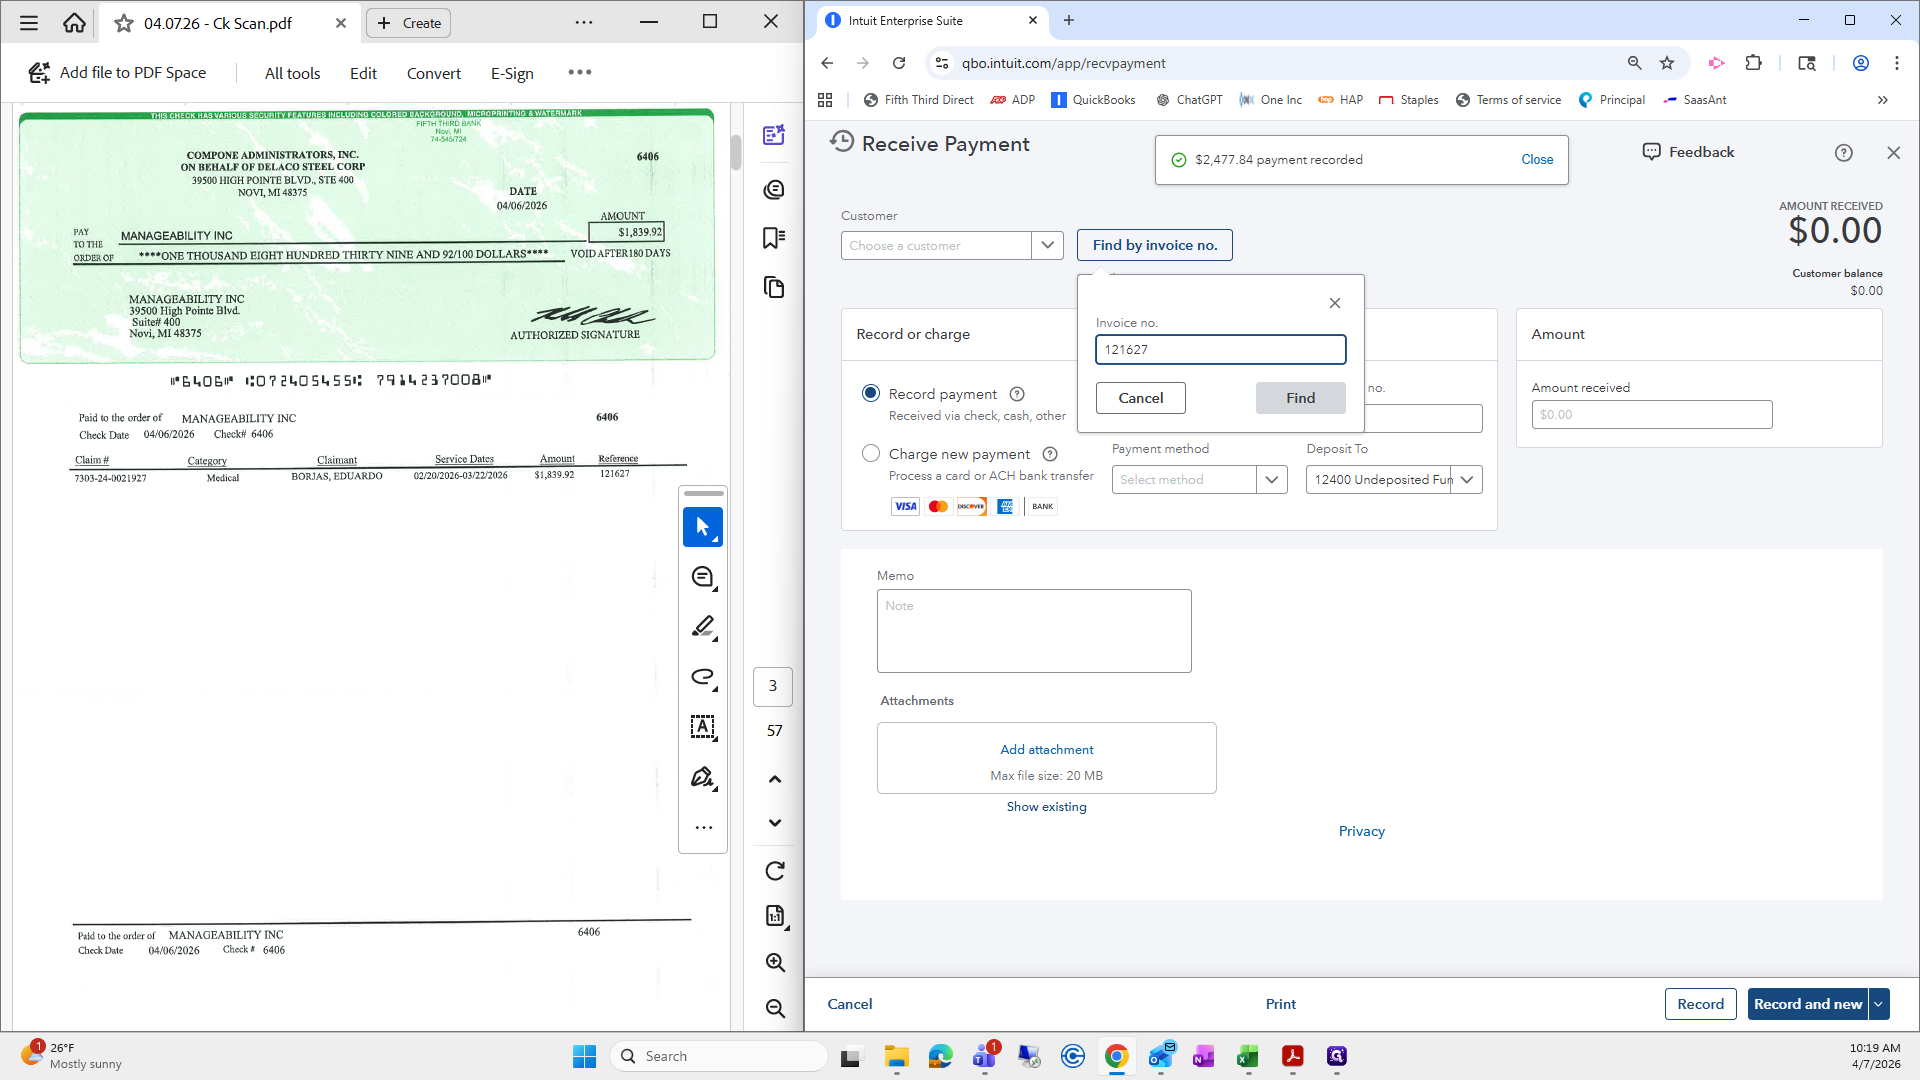
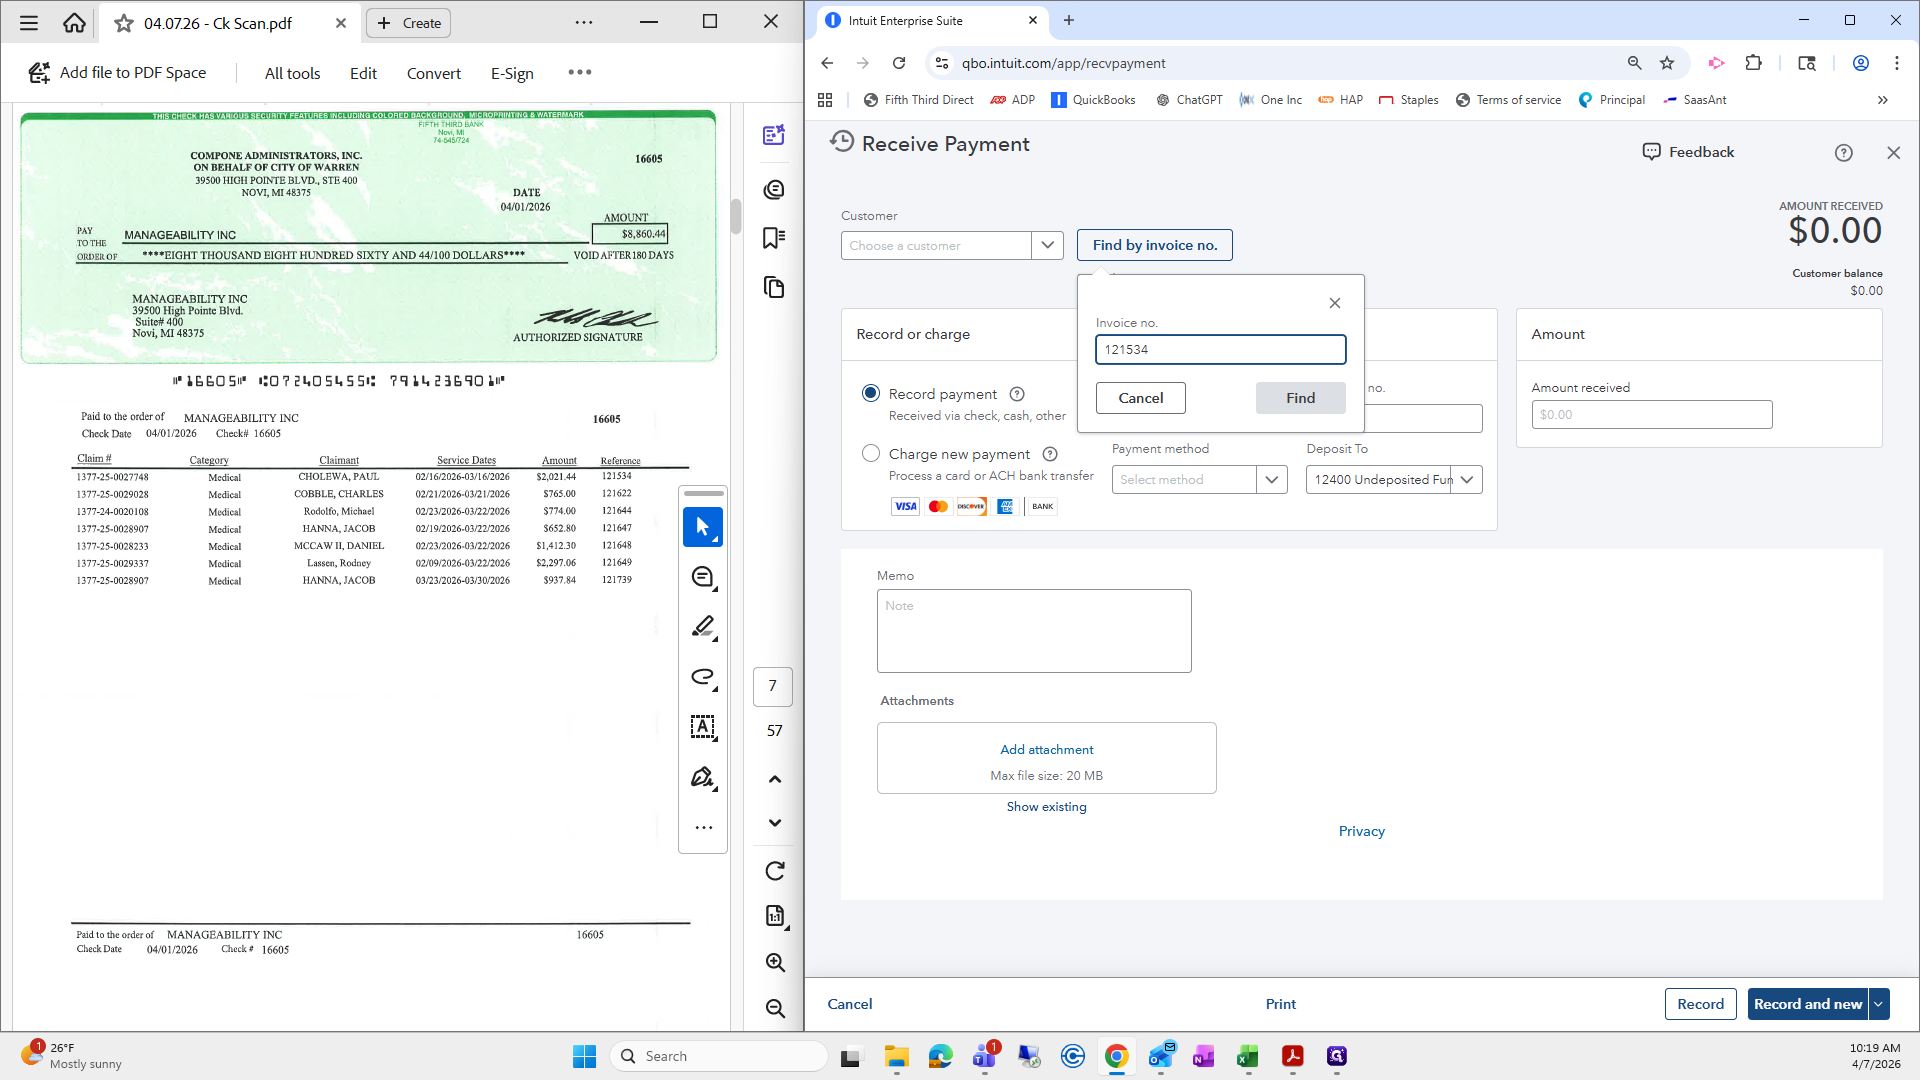
Next, we will search by invoice number.
This invoice number is 121727.

I'm going to click find, and sometimes it will automatically choose the invoice for you.

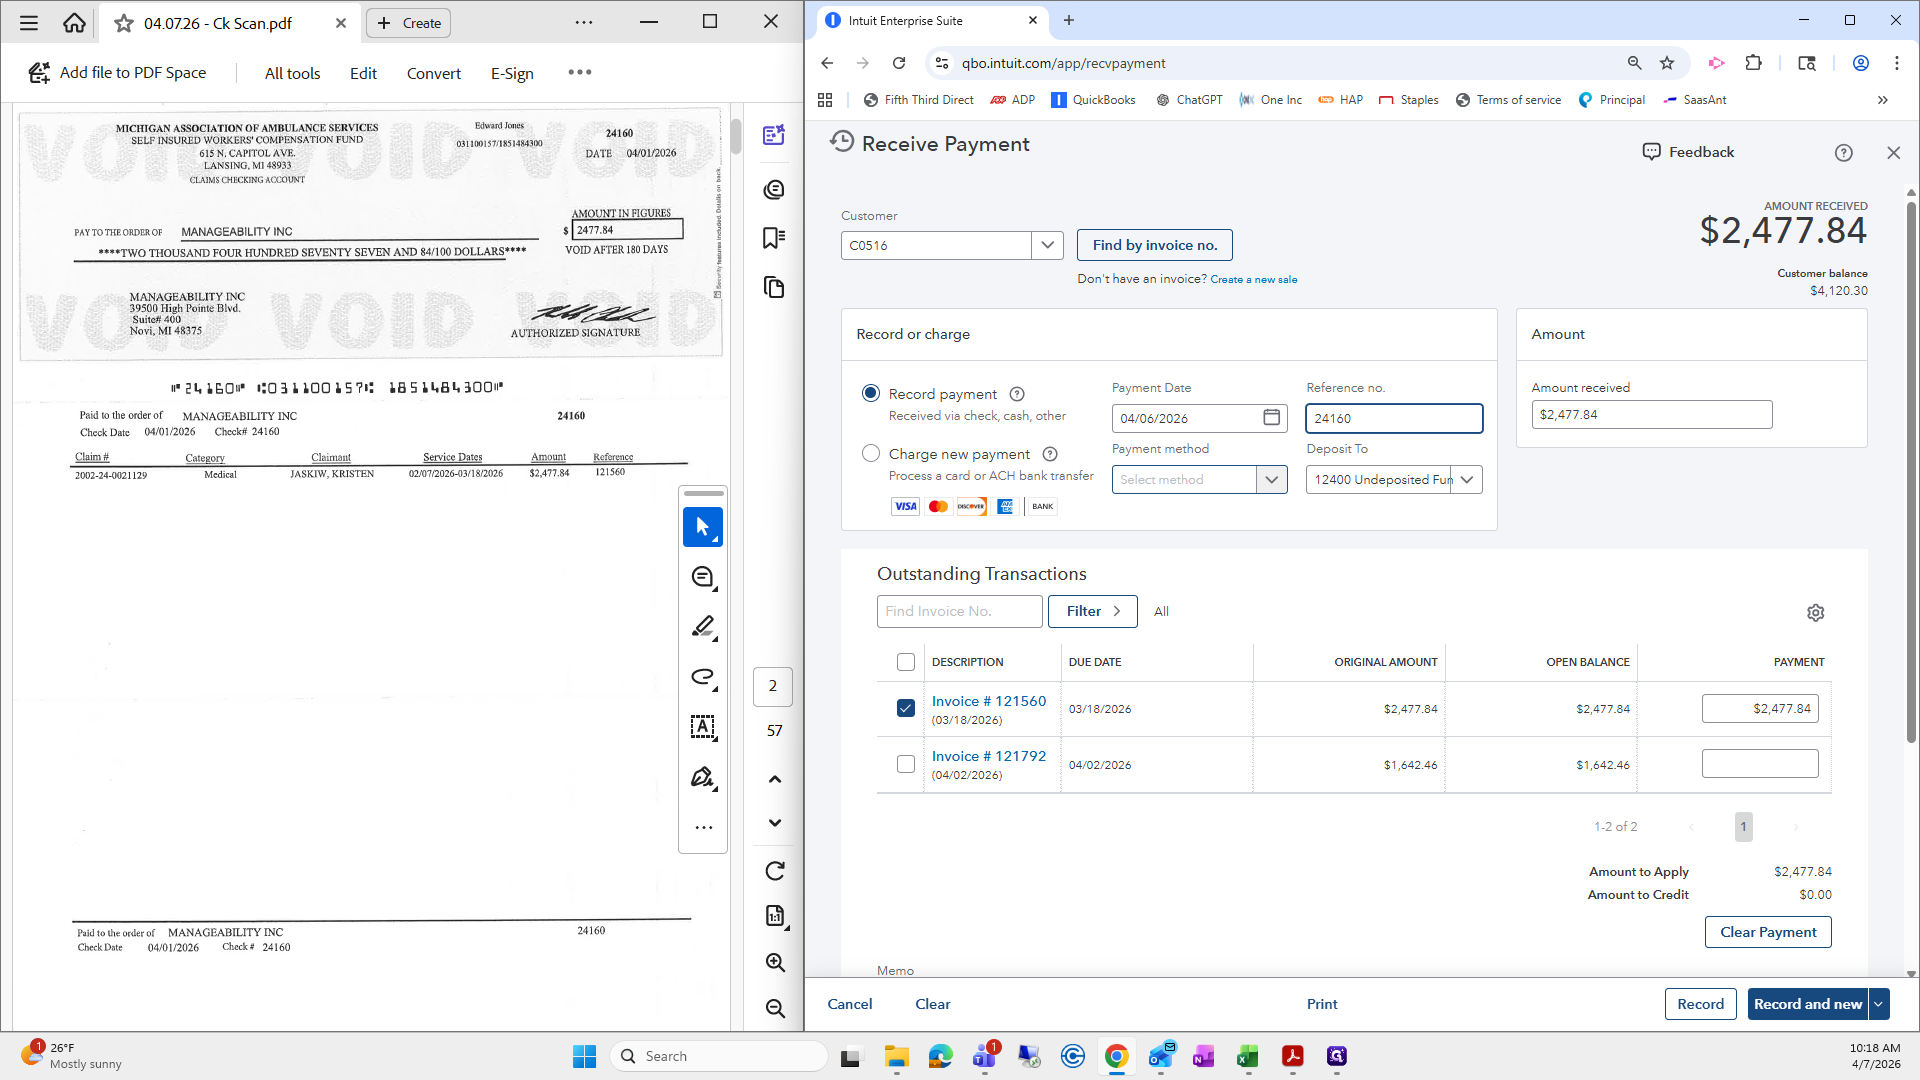
This one actually worked out perfectly. Be sure to double-check that any credits a customer has on file are automatically applied. This one doesn't have any credits, which is great. I always scroll down to make sure no credits are being applied to this payment. This one looks perfect. The reference number is always the check number, which is located here or here.

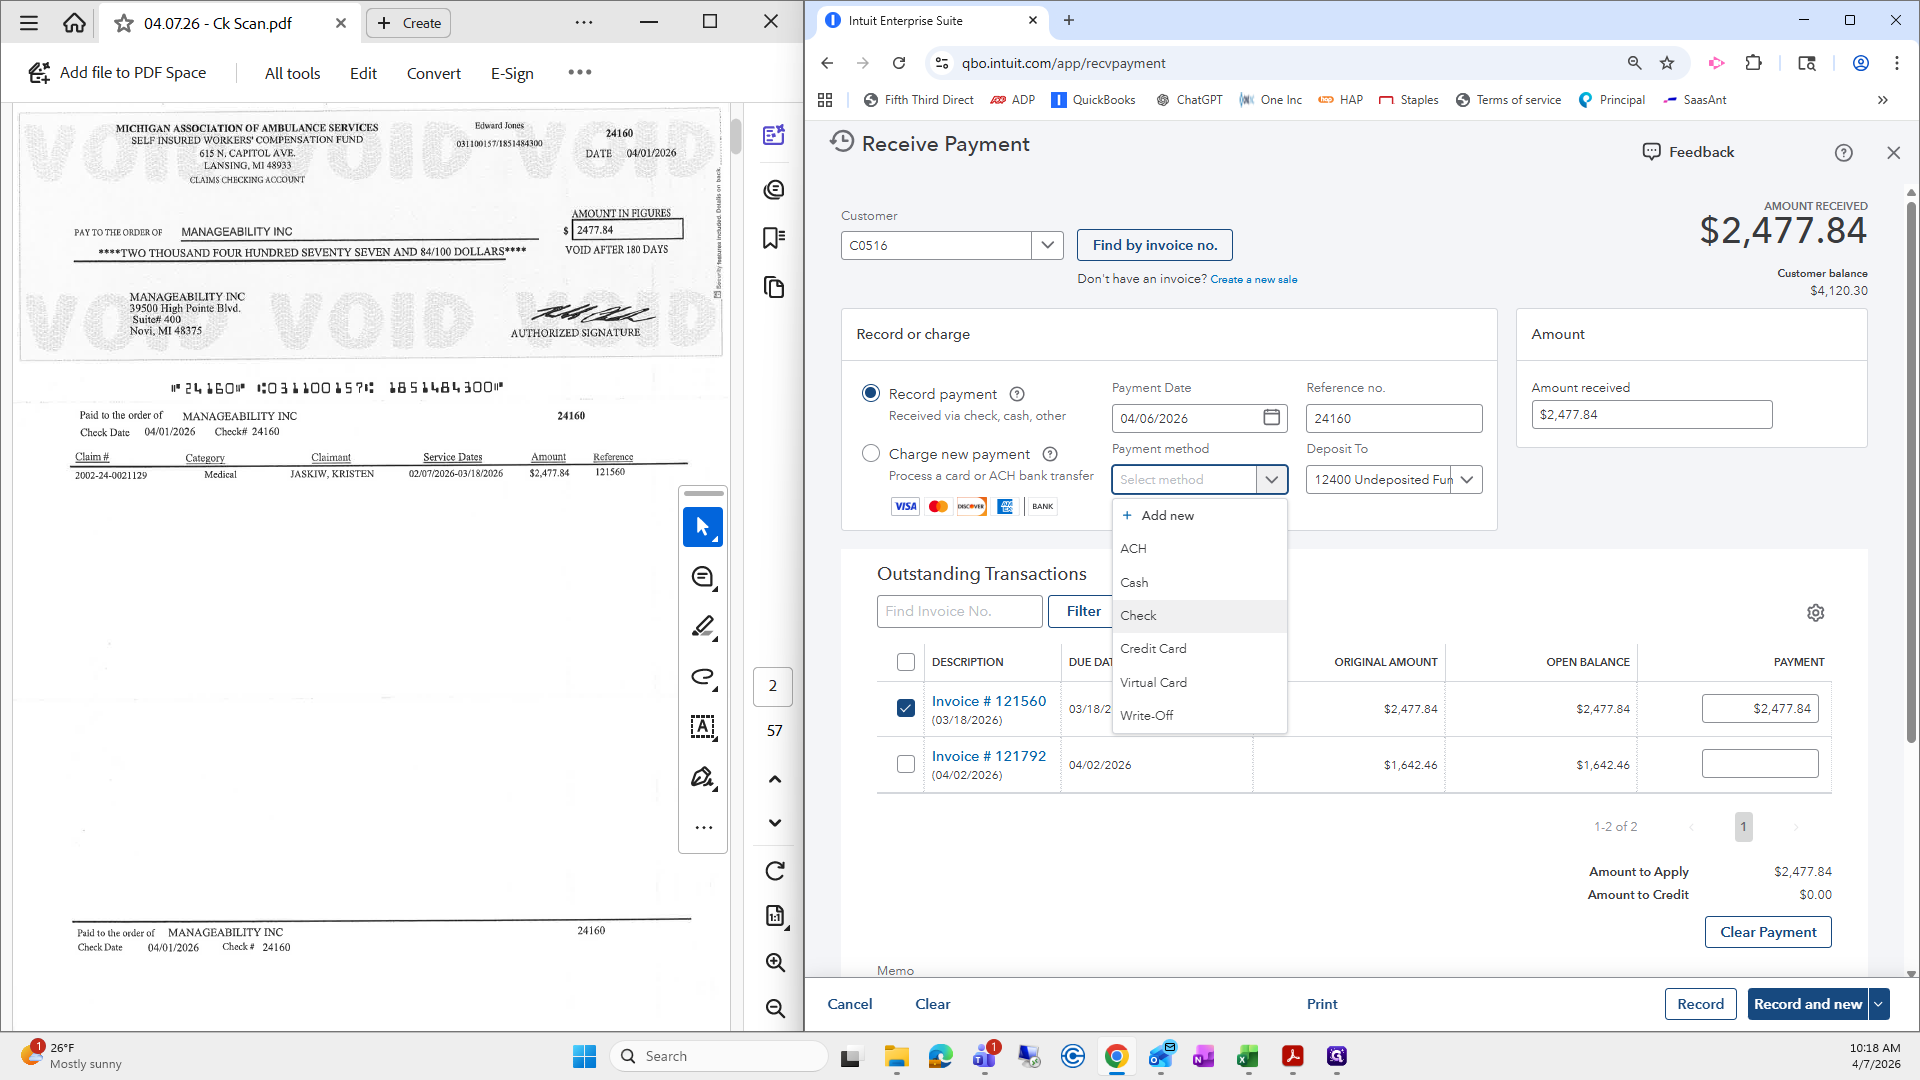
Then, for the payment method, I always select check.


I usually select the reference number, enter it, and choose the payment method after confirming the amount received for the check.

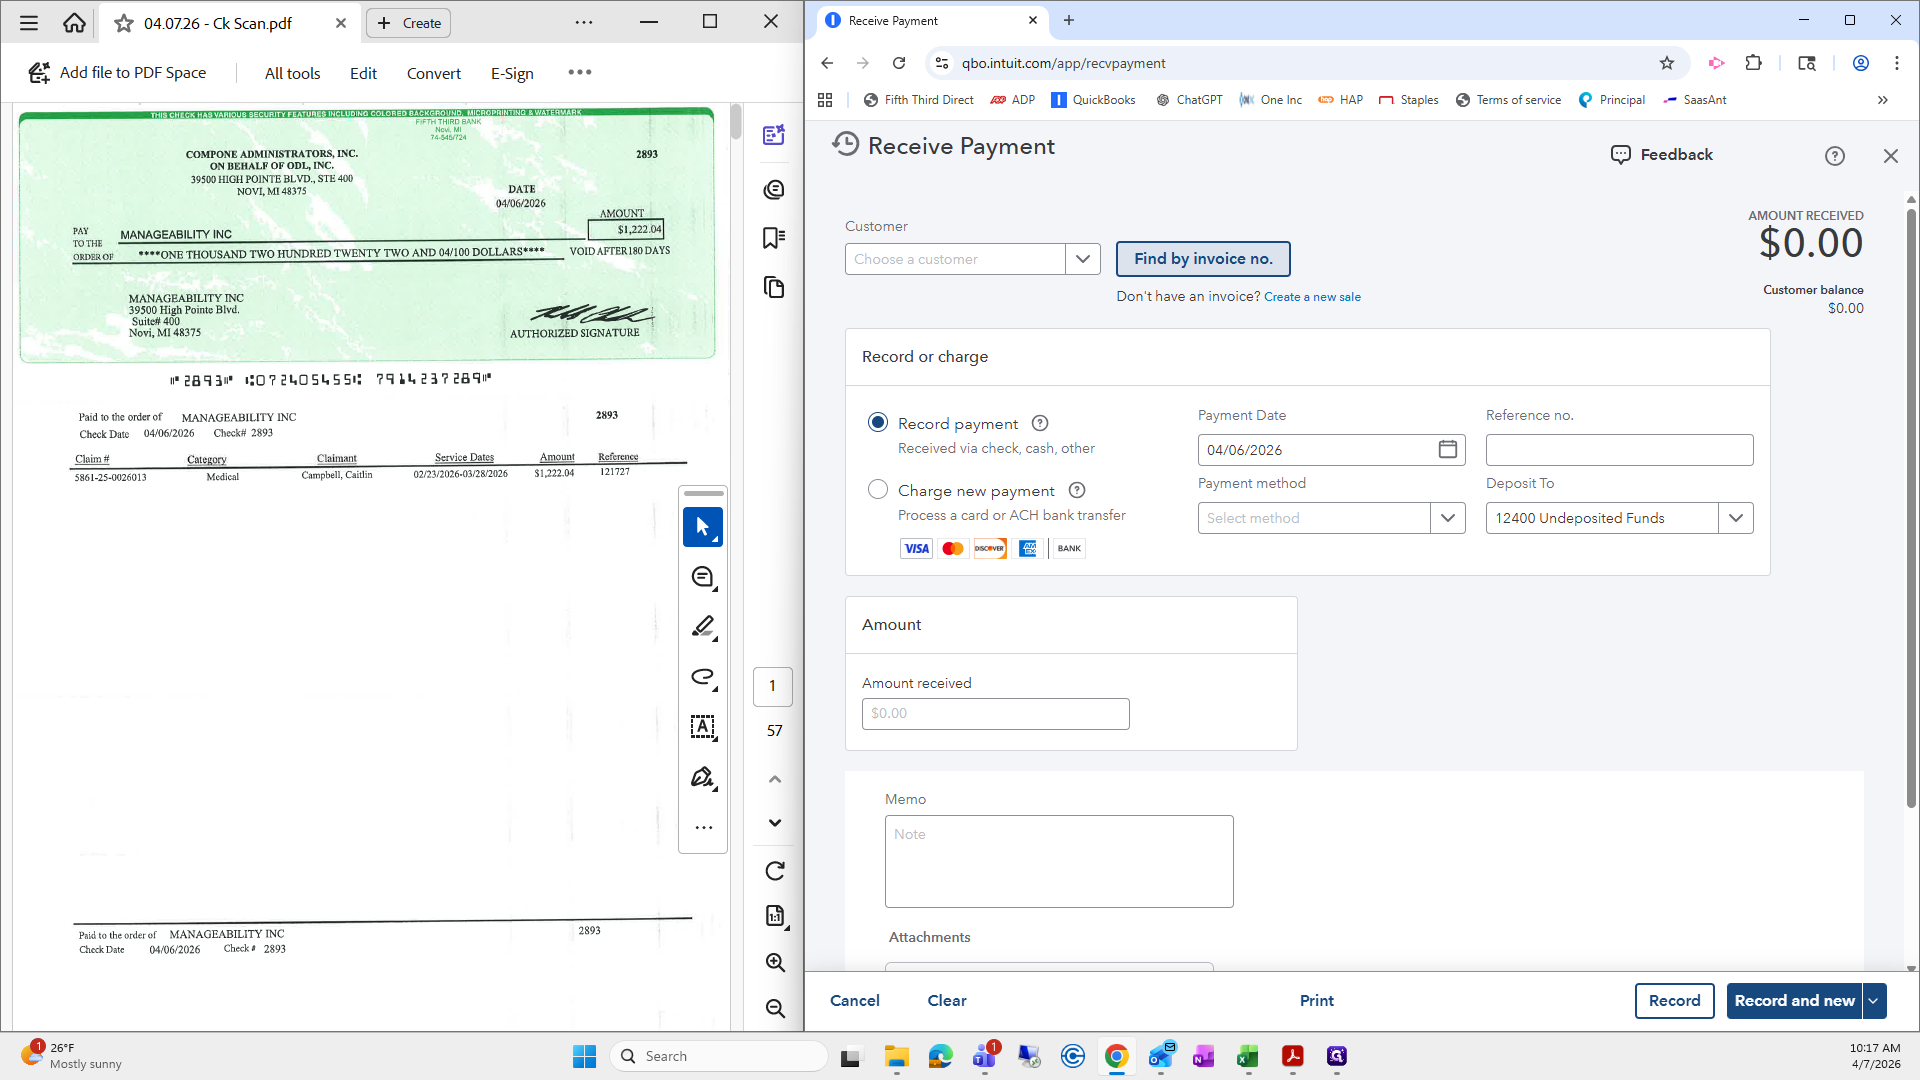
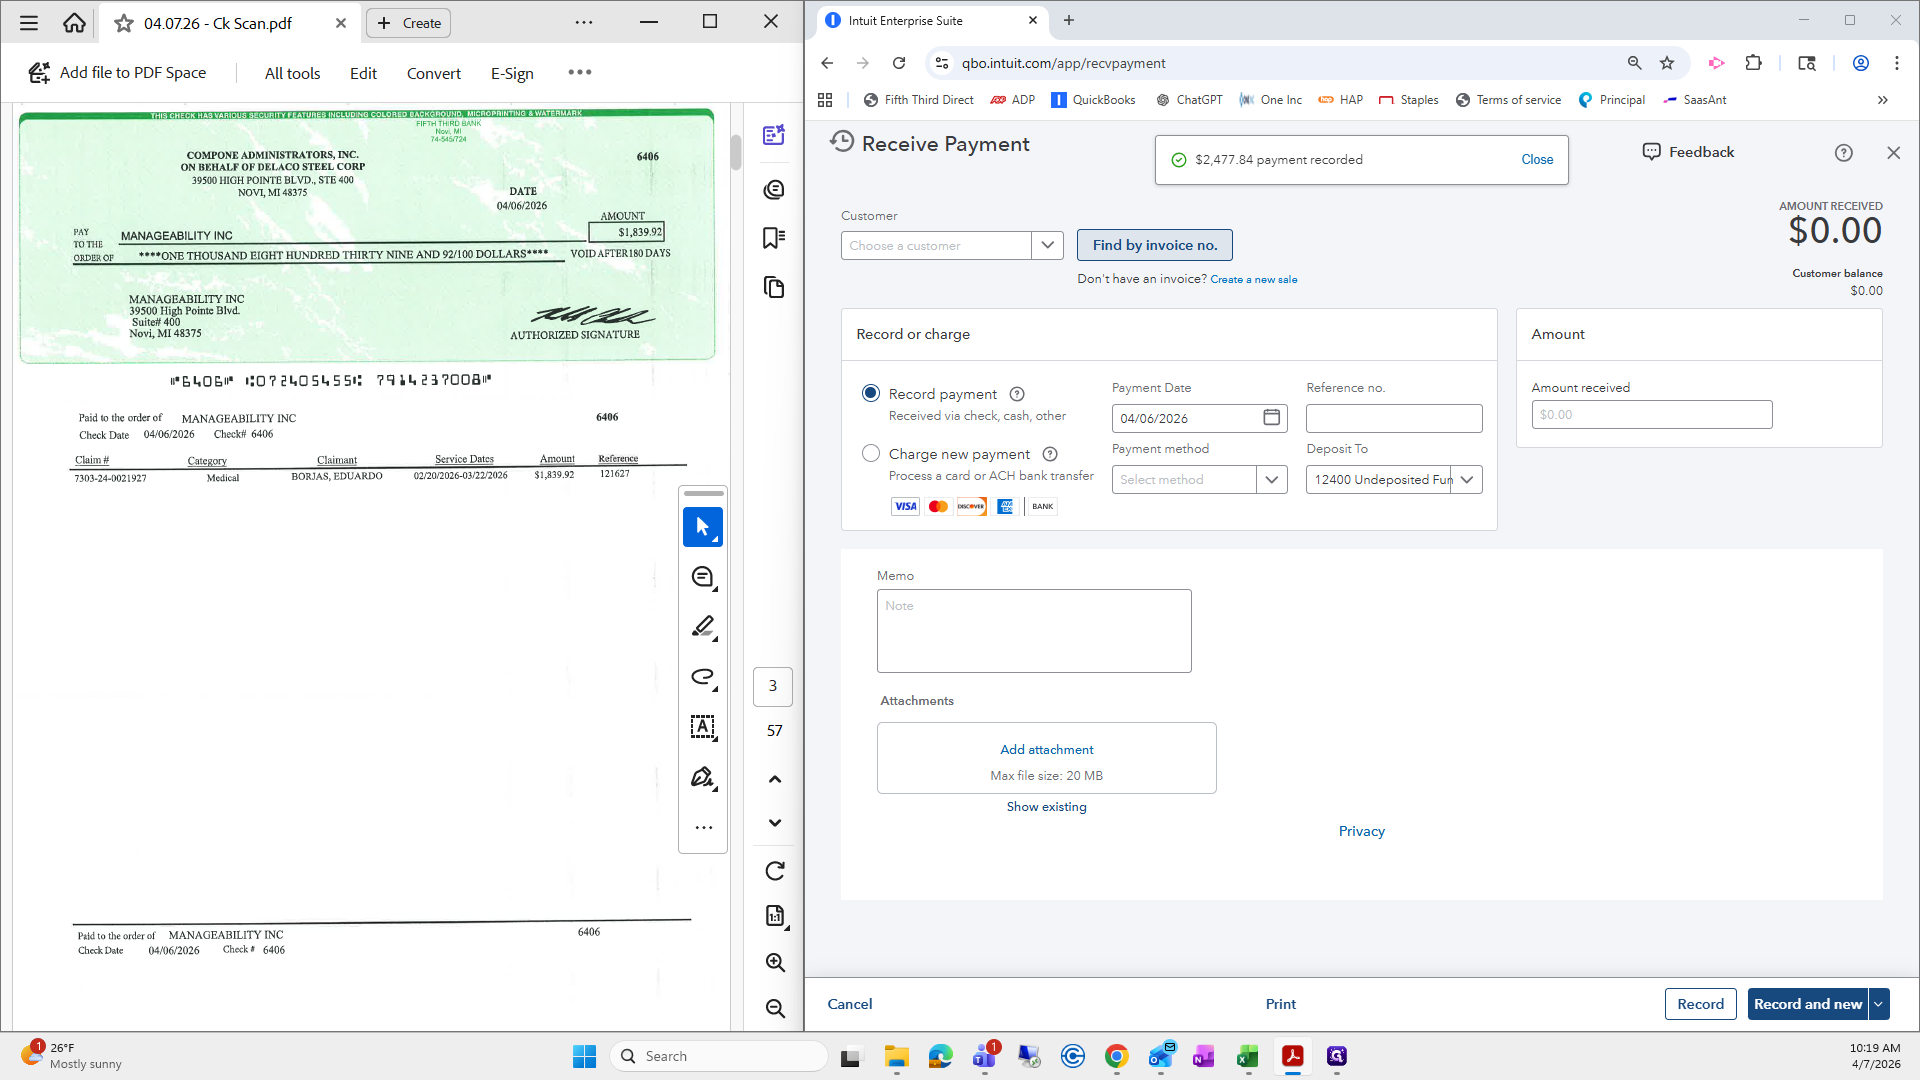
If I don't do this, when I deposit in the bank in IES, the reference number won't appear. Then we have to re-enter it, which is really annoying. From here, I select "Record" and "New," then go to the next page.


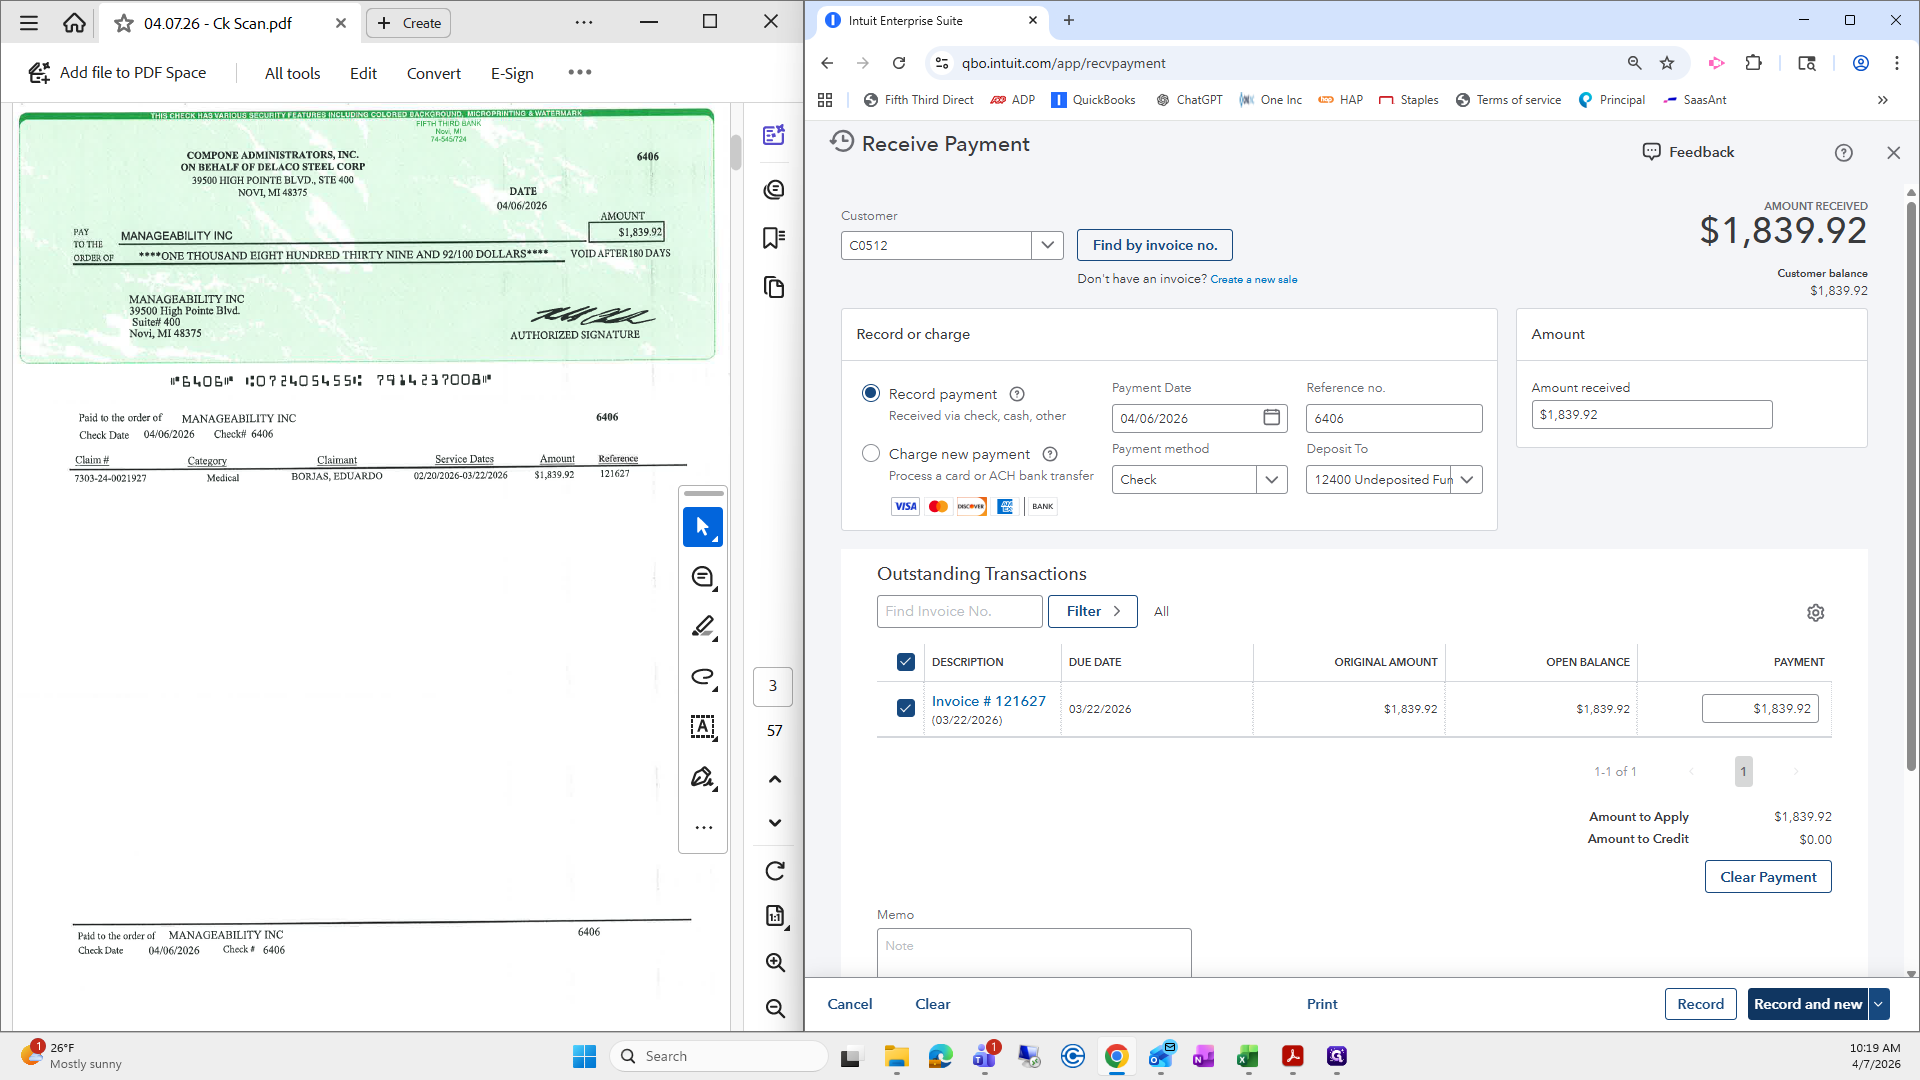
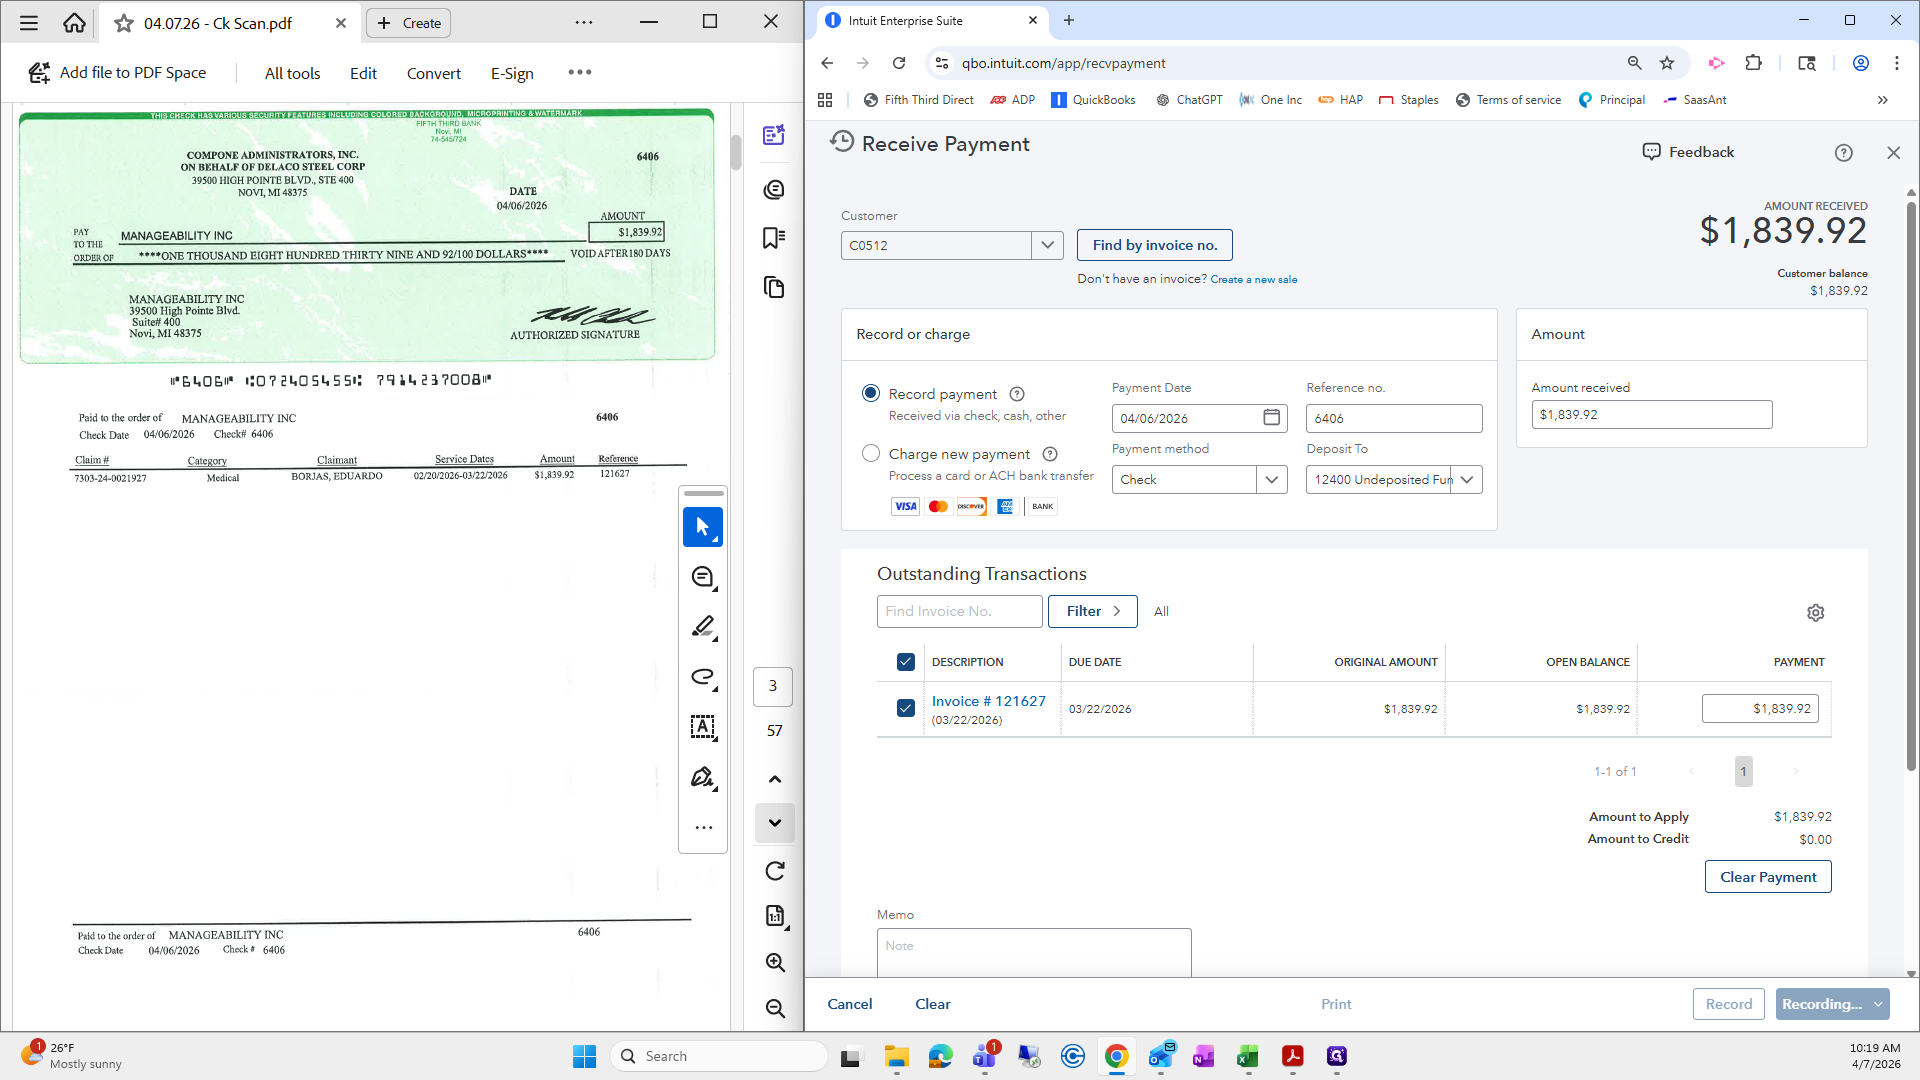
Then find by invoice number. This one looks good.

The amount matches. I will do a few of them in hopes that there are different ones and various scenarios included.
Again, I will enter the reference number, check that everything looks good, and record a new entry.


Yes, it is this easy.
Sometimes a few can be annoying, but that's okay. We can always go back.
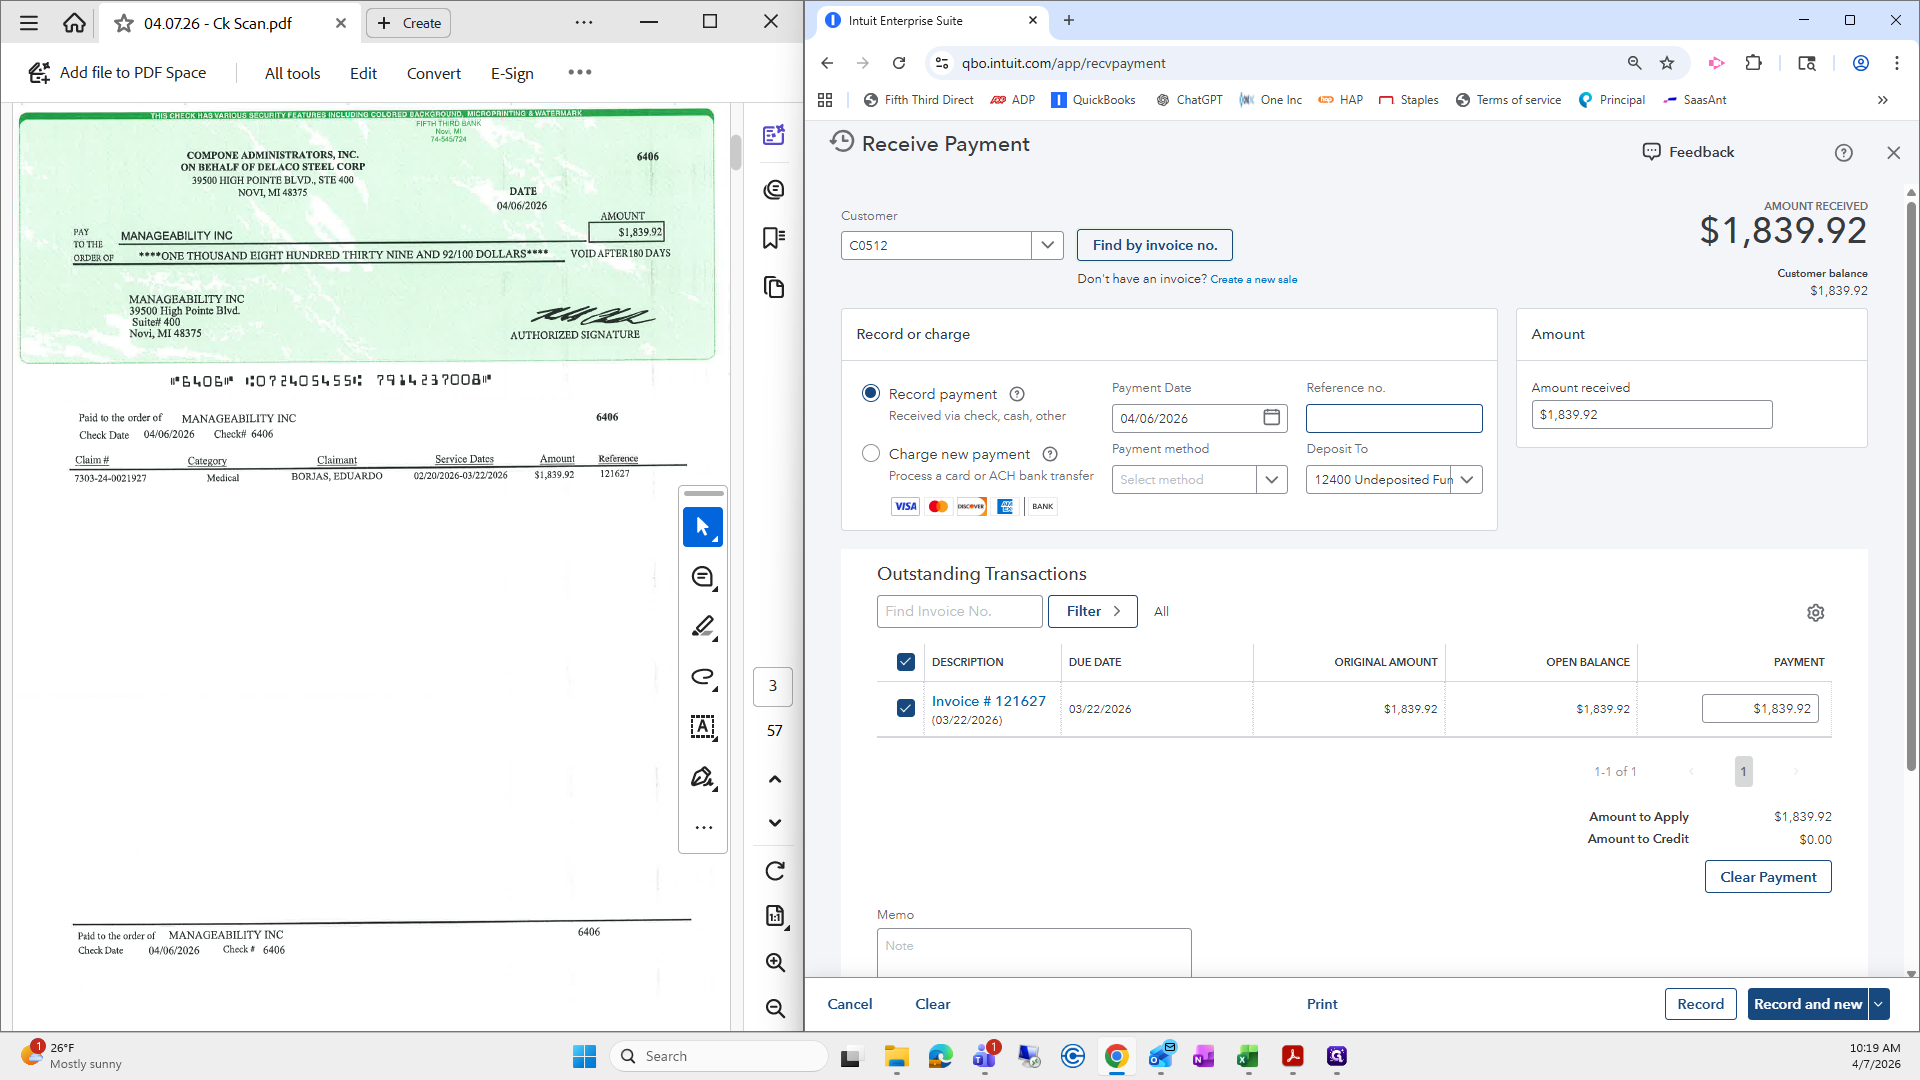
Always make sure the amount matches and the payment method is check. If everything looks good, select "Record and New" to proceed to the next one.

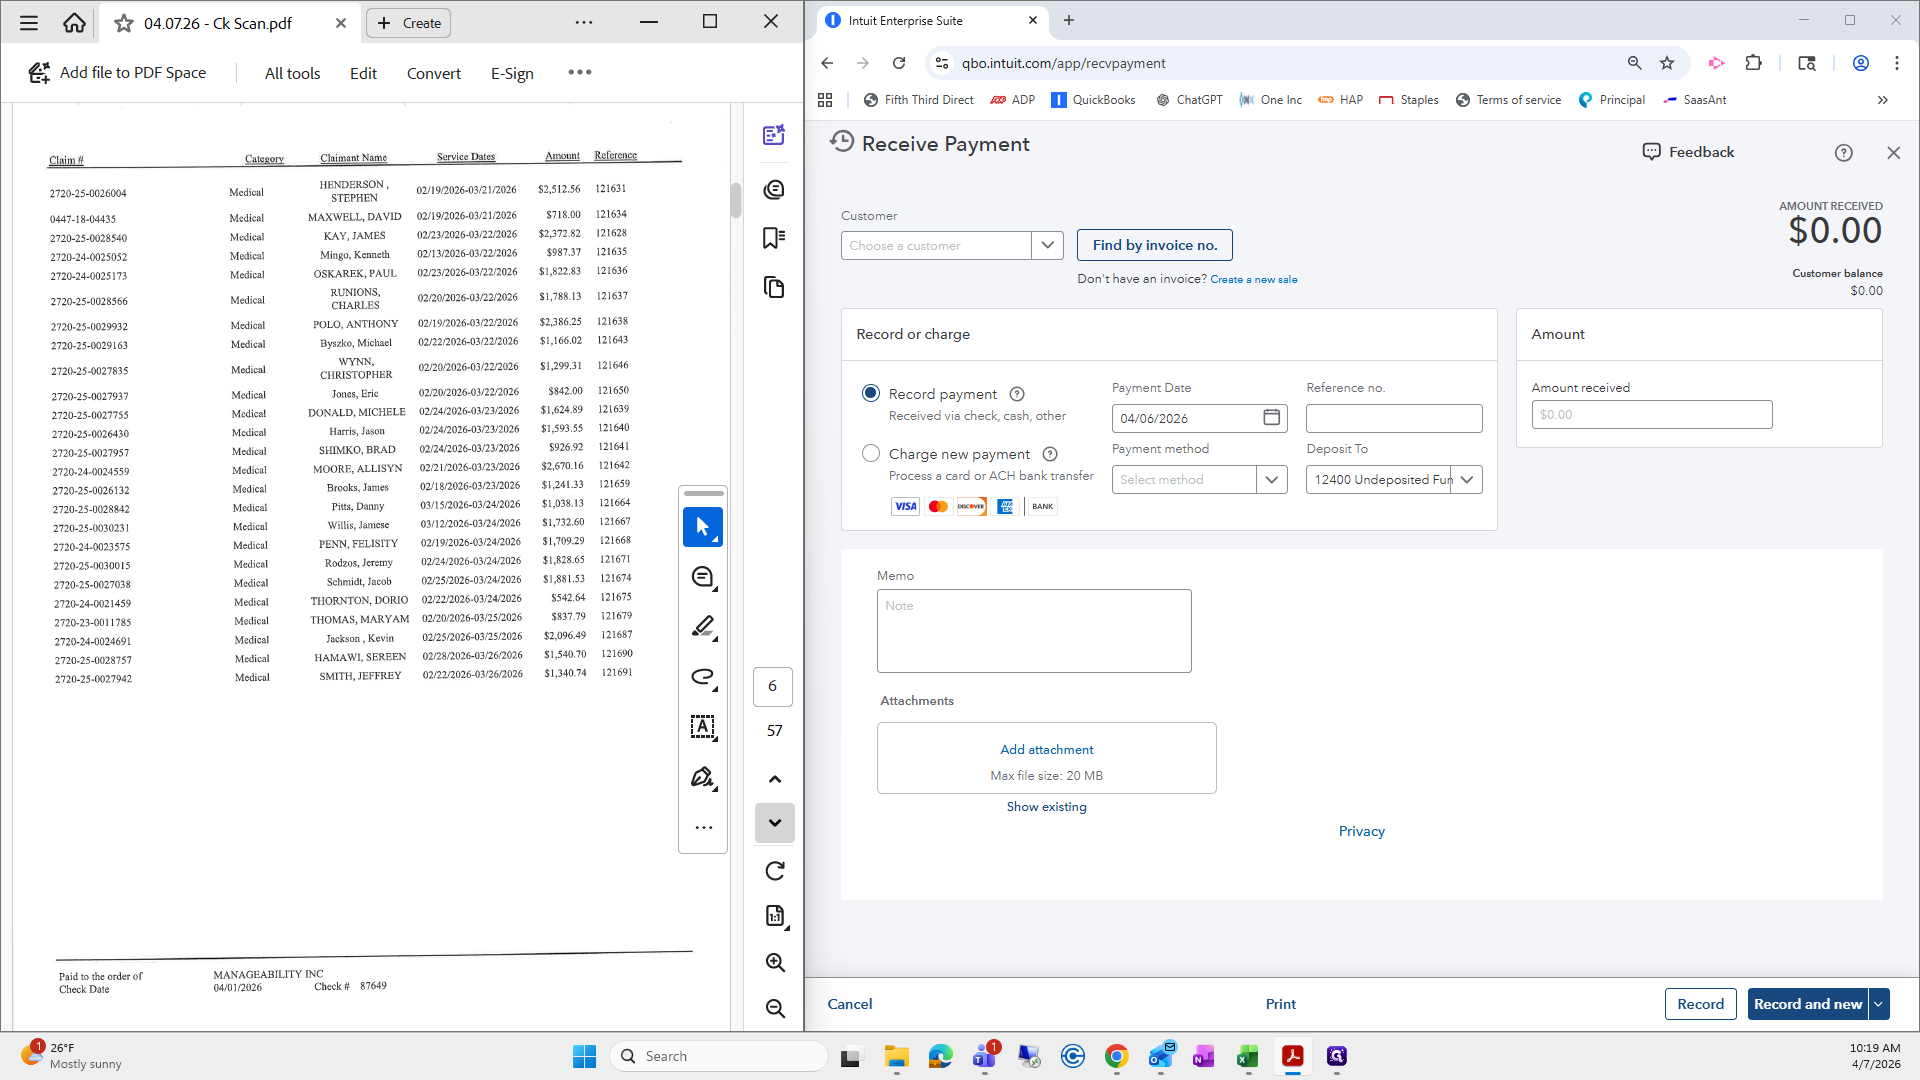
Now, this large one here—I always ask Shannon for one, what's it called? A check register. I'm going to skip the large one first.
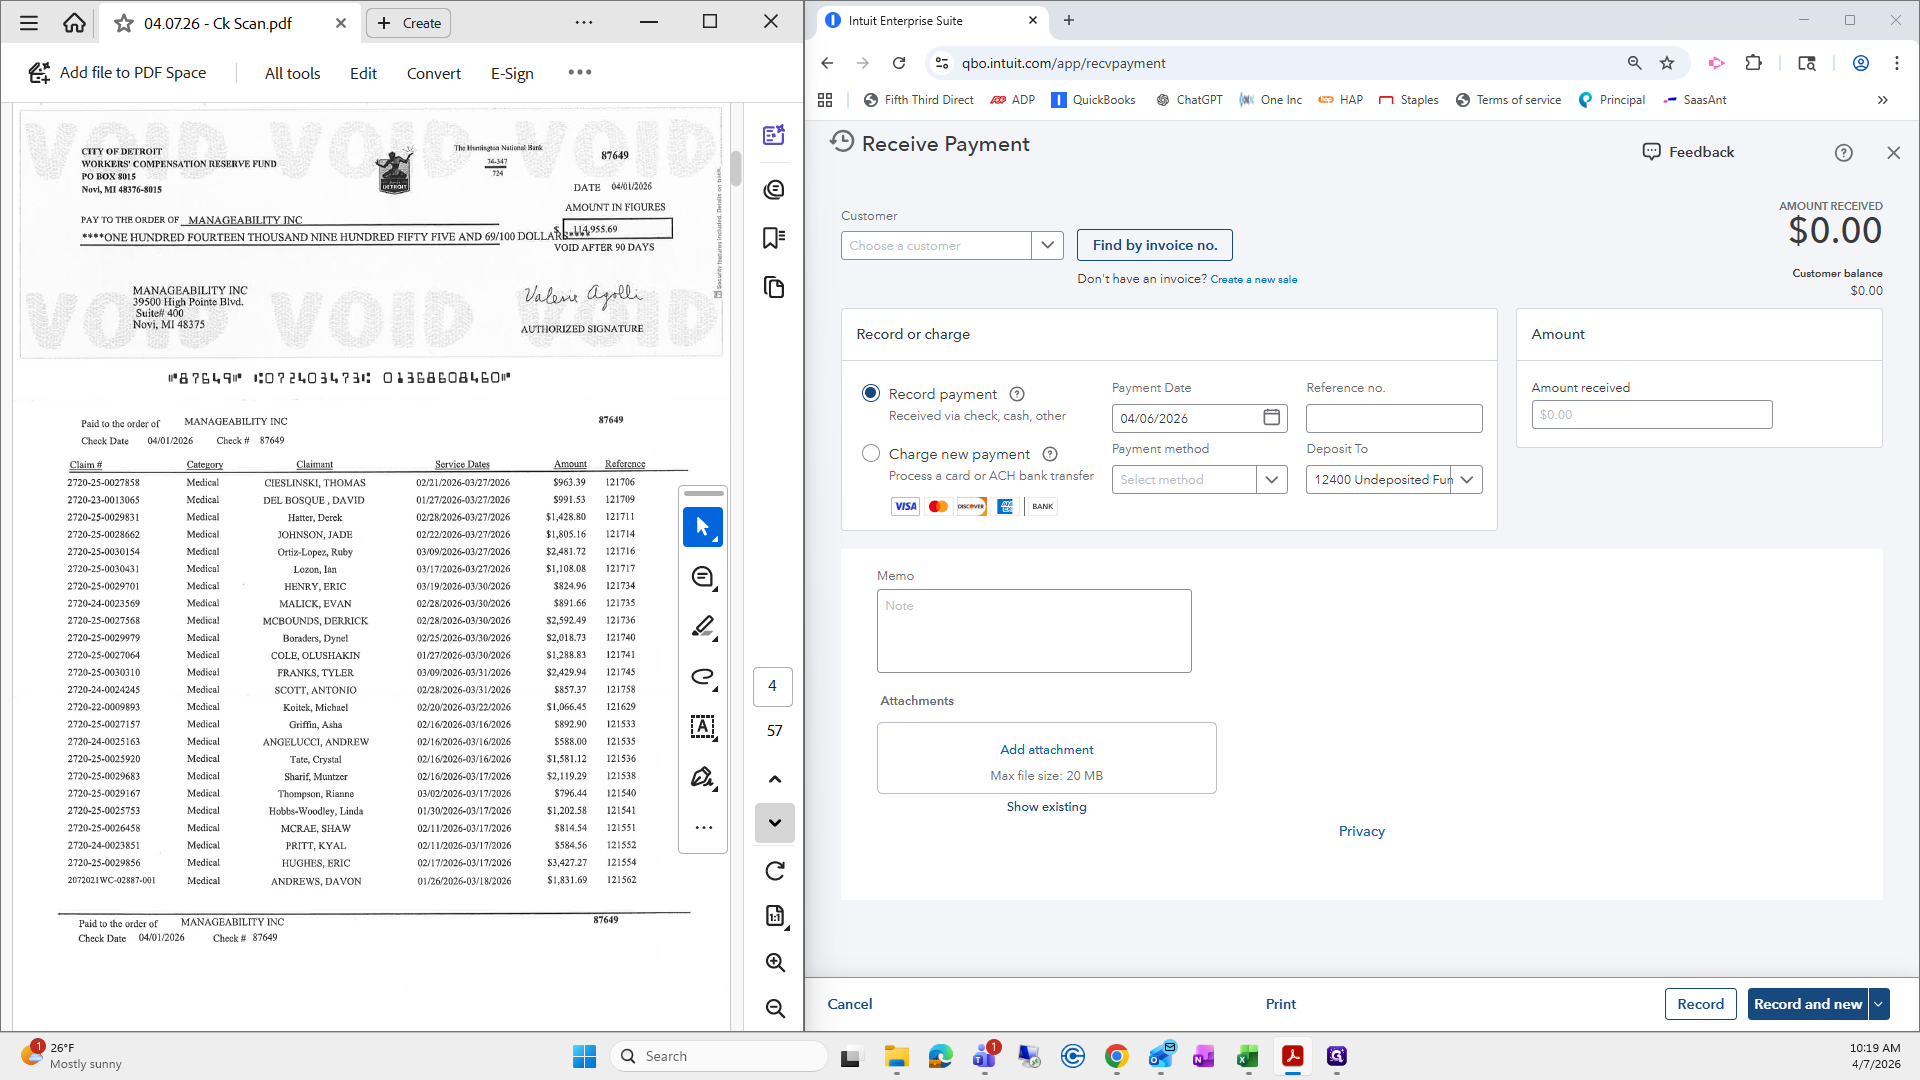
Oops.
I'll come back to that.

I will do one more of these, and then we will go over one with credit to make sure it is correct.
I typed in the first reference number, and it automatically checked off the first invoice.

Next, I will check that the rest are applied and verify the amounts and invoice numbers.

There is 121644, 48, 47, 49, and the amount is 8816.44.
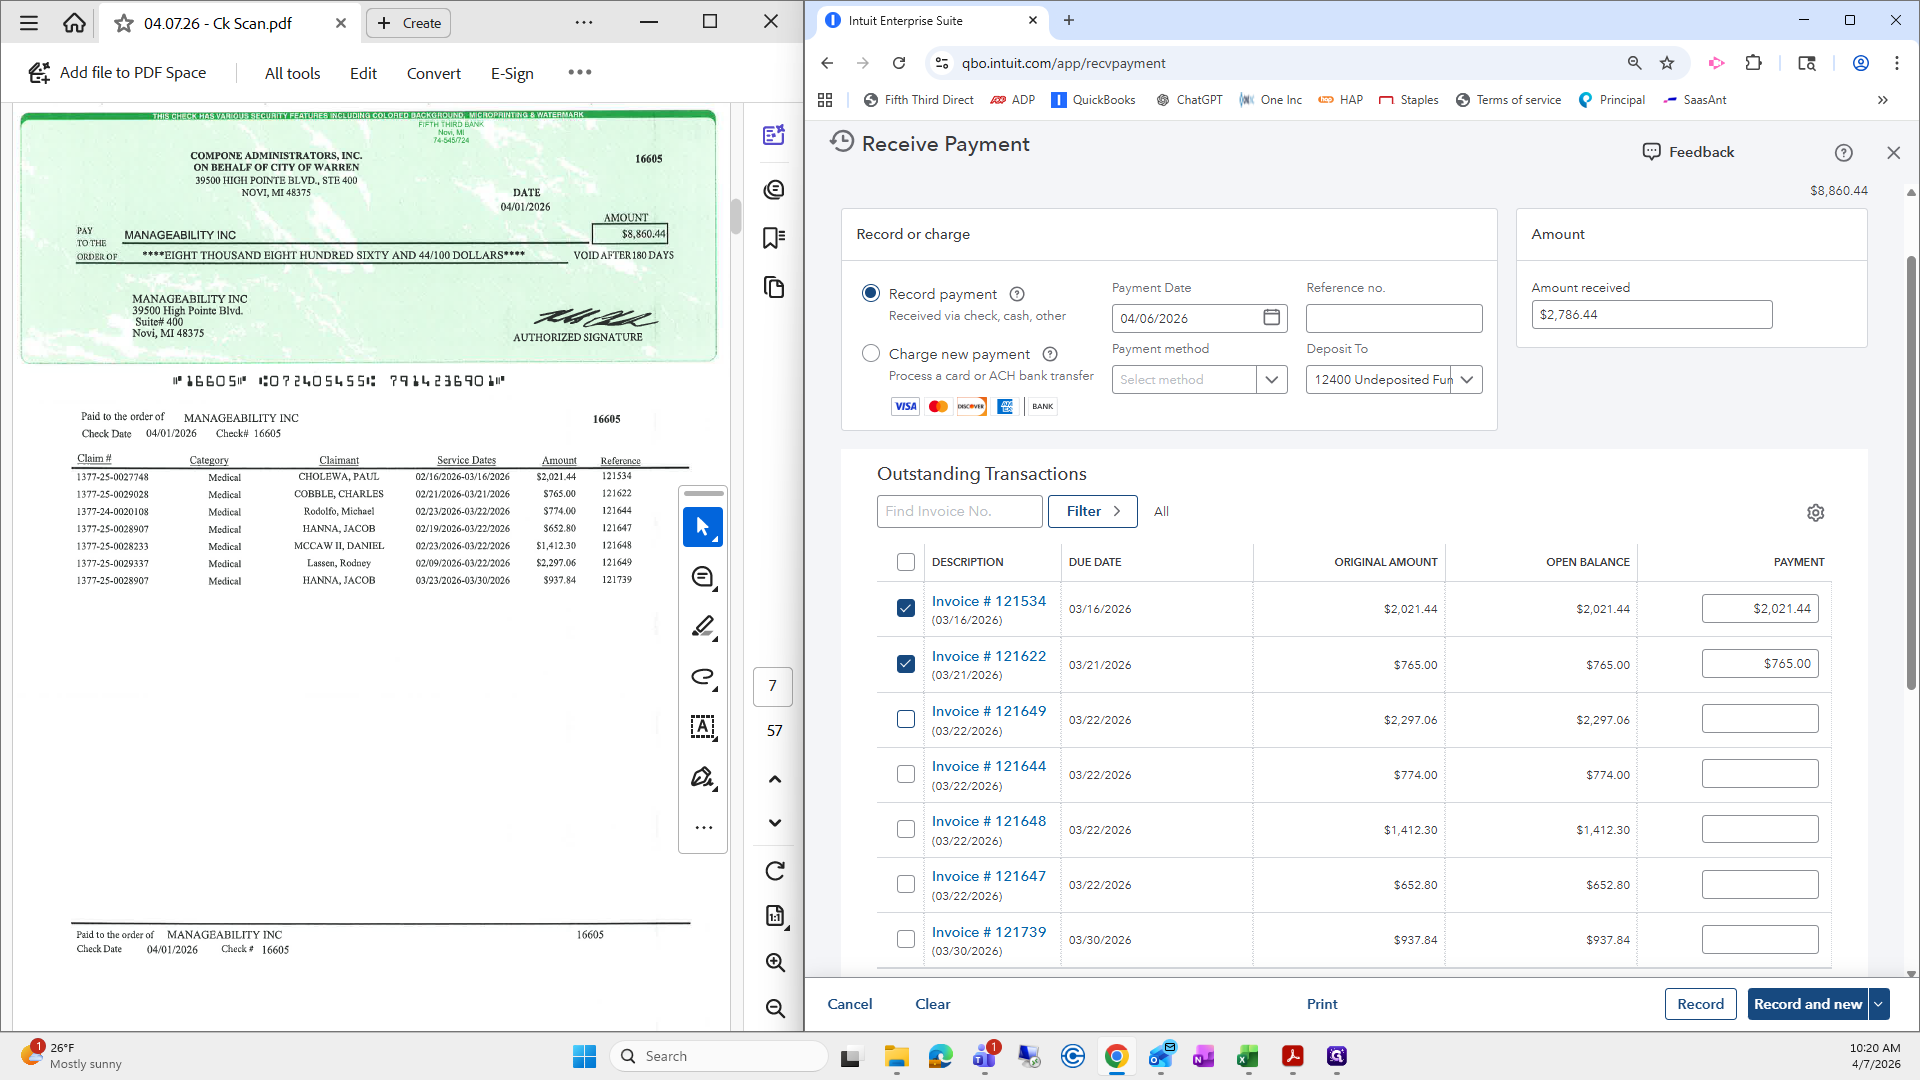

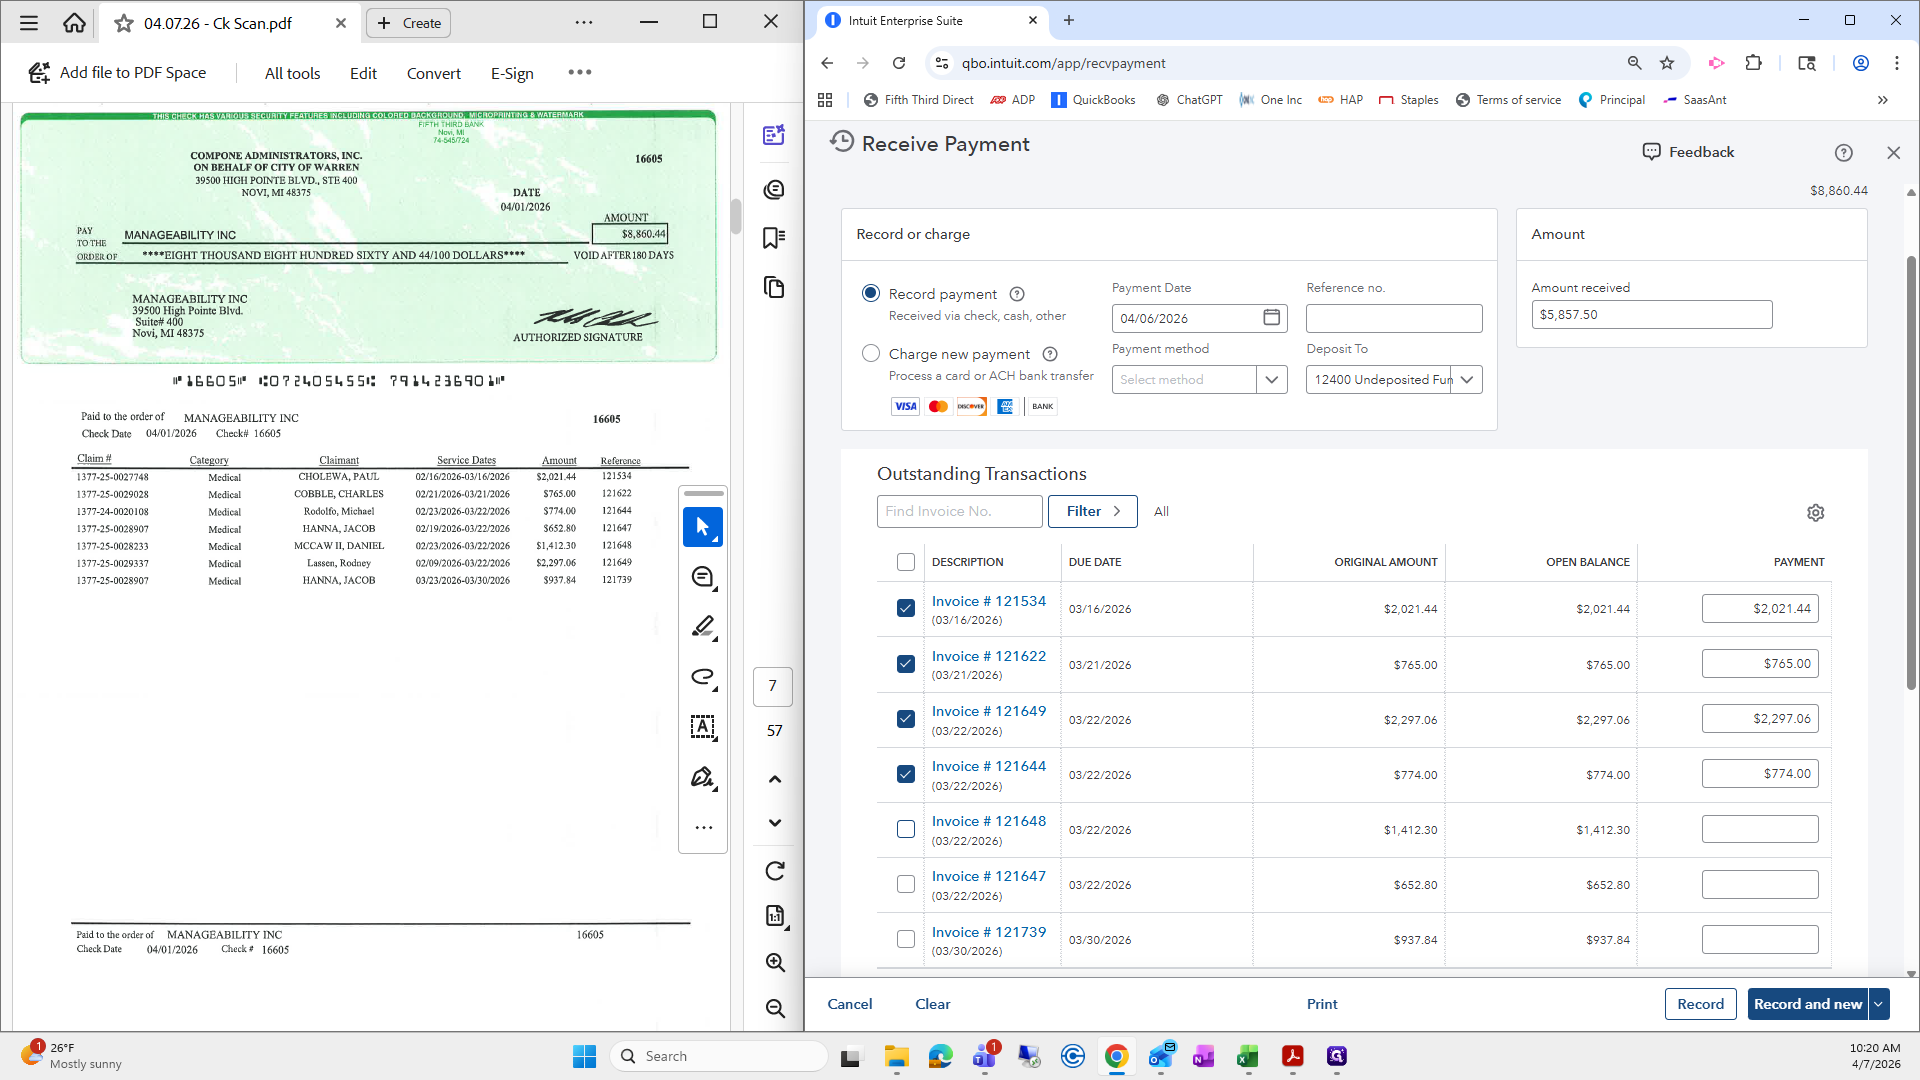


That looks wonderful. Record and create new.