
How to Register and Service Cards on Dash Solutions Portal
Learn how to register and service cards for patients in the COVER DFUs II clinical trial using the Dash Solutions portal. Step-by-step guide for Clinical Site Coordinators
In this guide, we'll learn how to register and service cards for patients in a trial using the Dash Solutions portal. This process involves logging into the portal, entering patient and card details, and managing card values for patient visits.
We'll cover how to navigate the portal, input necessary information, and ensure that cards are correctly registered and serviced.
Let's get started
First, navigate to portal.dashsolutions.com/login. You should have received a login and password from the Dash Solutions administrators within the past few days. Check your email, and if you have any problems, reach out to madisonwarner@polarityTE.com for assistance in obtaining your login details. Once you have your login details, log in, and your view will look like this.
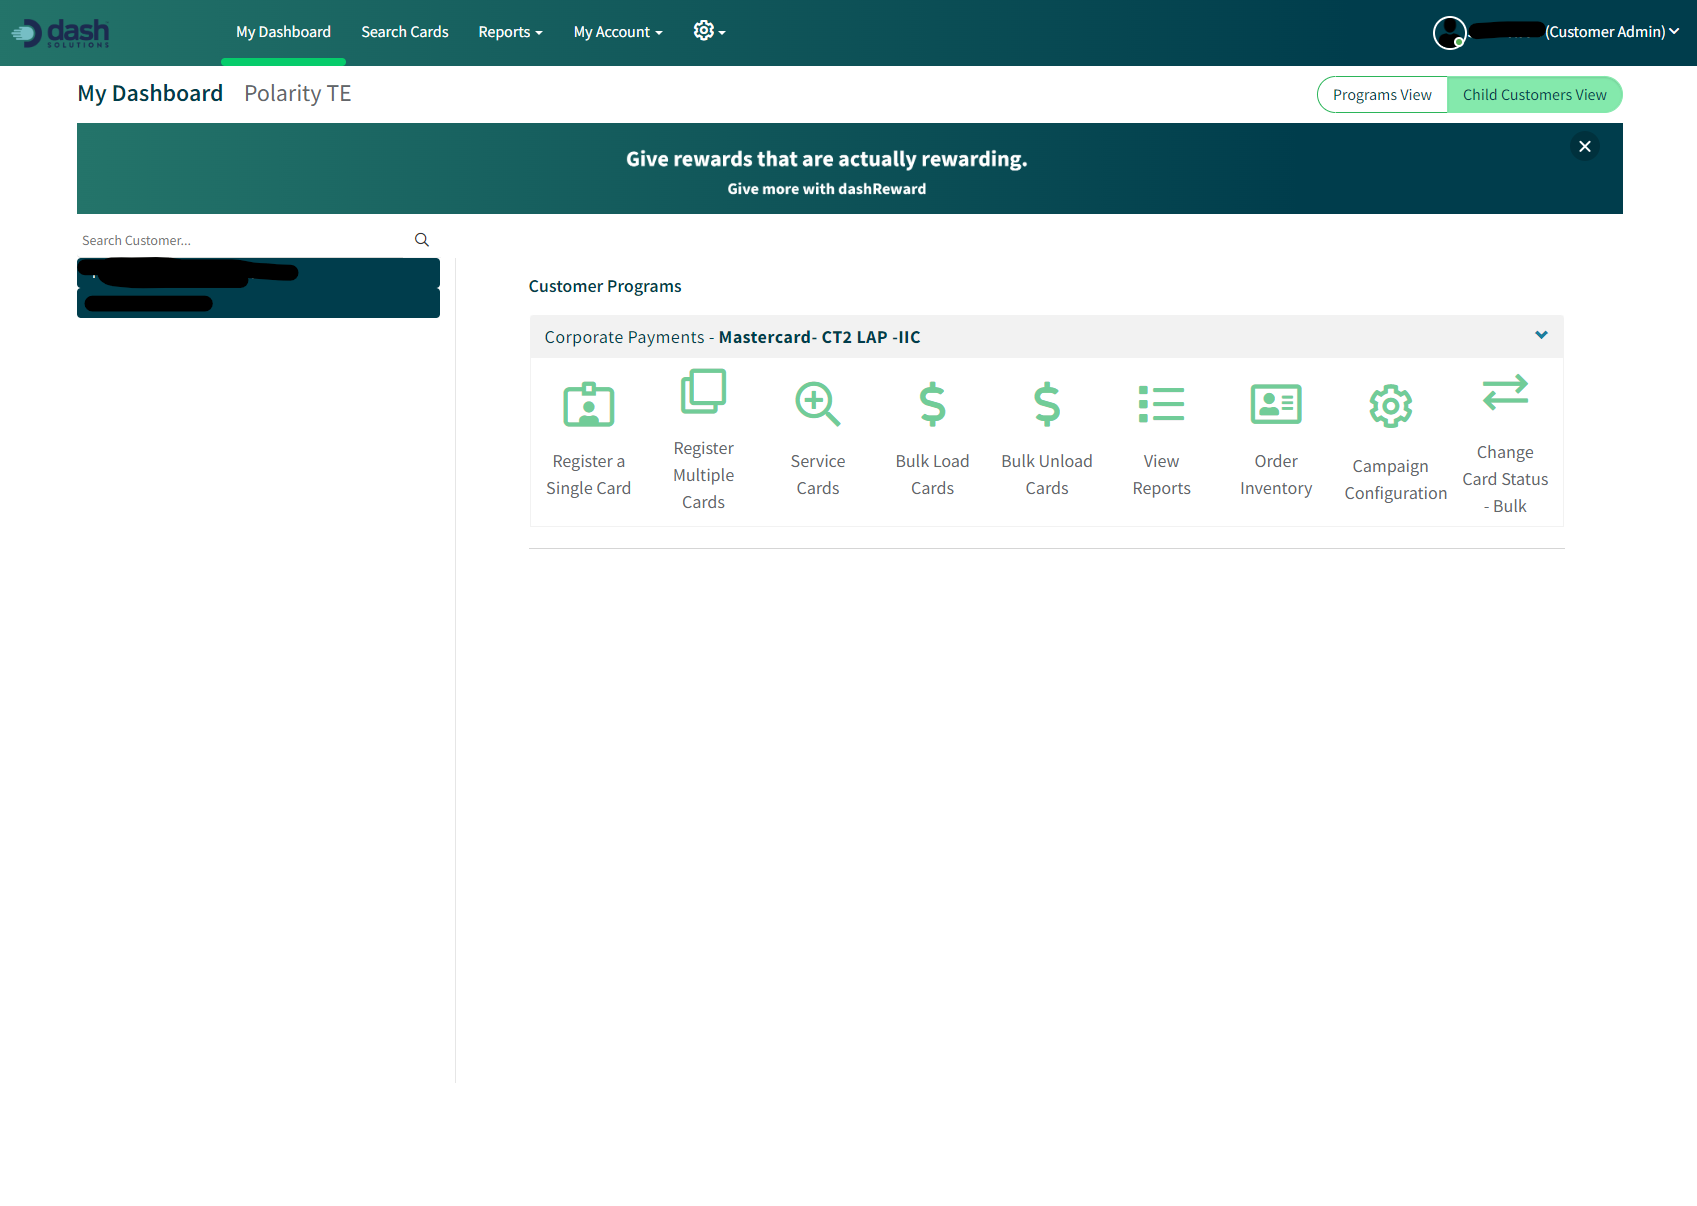
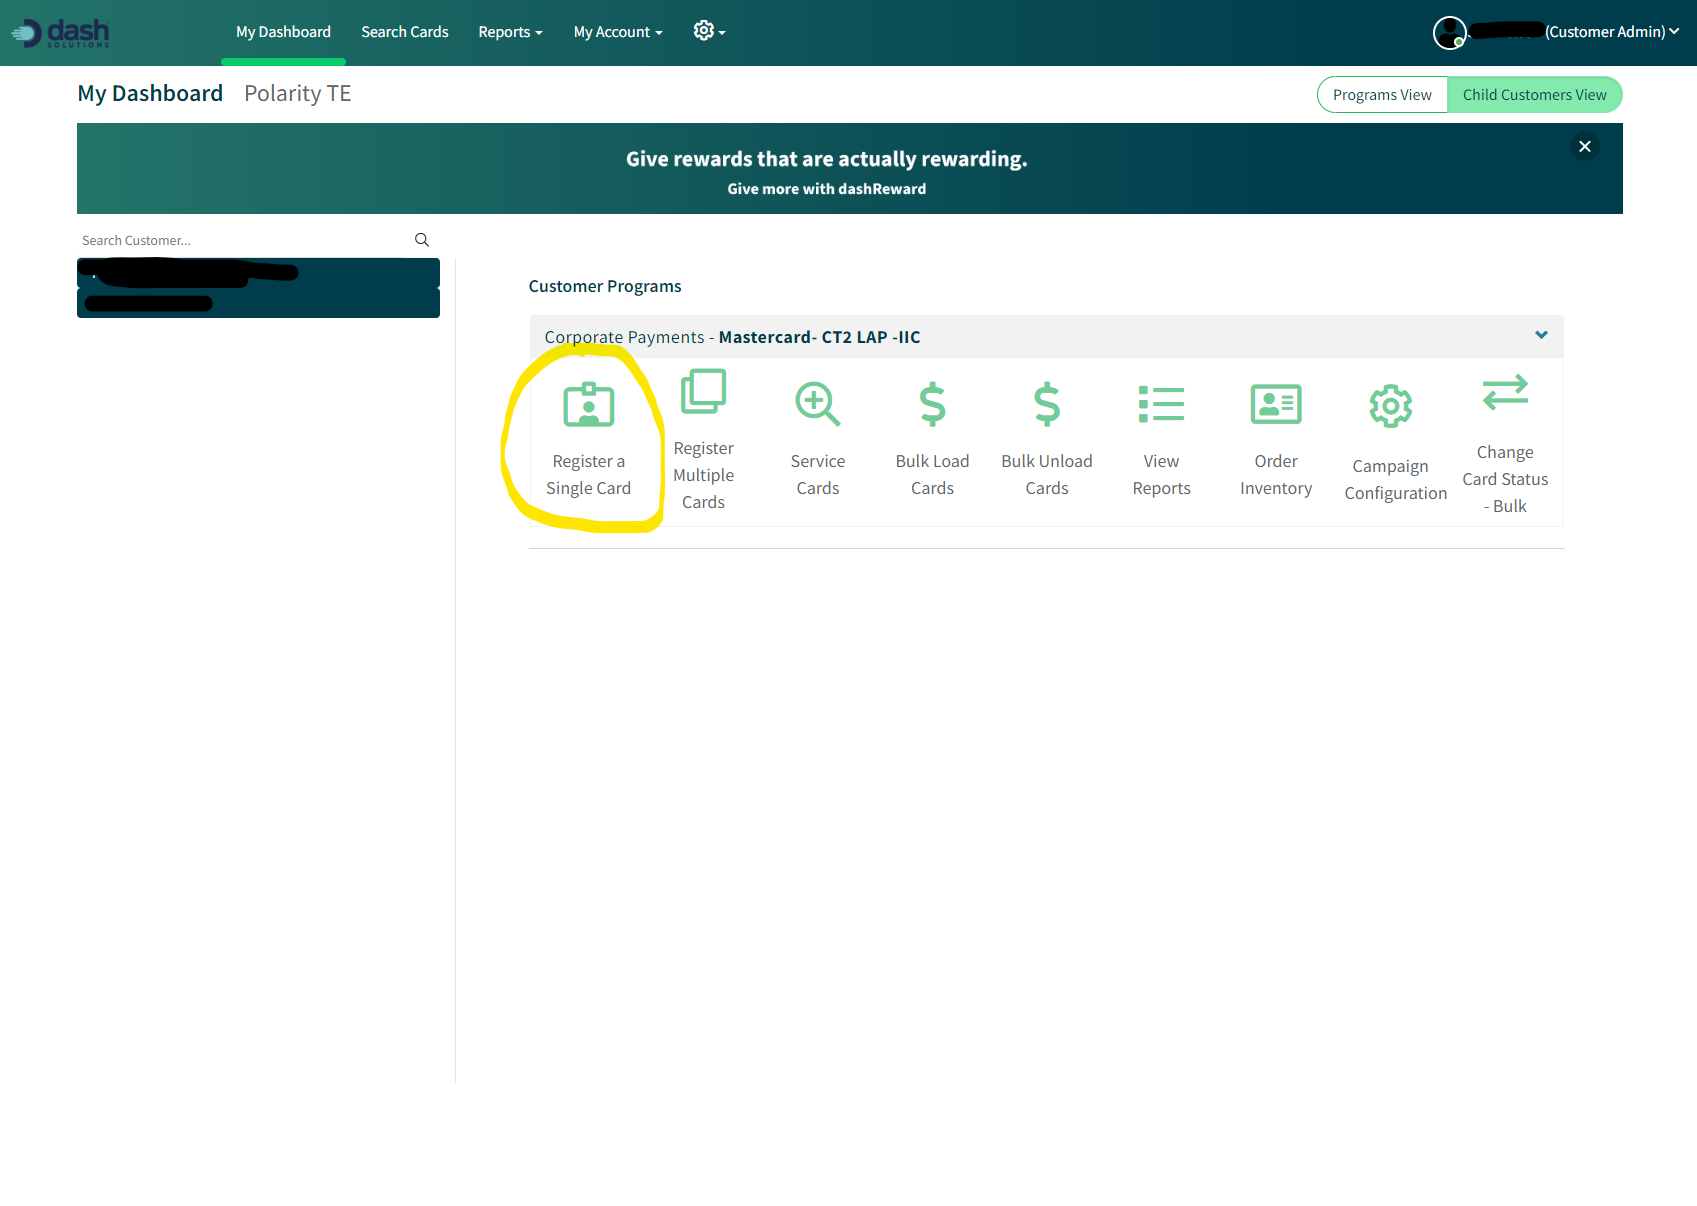
You'll see multiple options available, but what matters is registering a single card and servicing cards. The first thing you need to learn is how to register a card for a prospective patient in the trial. Go to "Register Cards."
You can assign a card to a particular patient using the proxy number printed on the card or the card number itself. Insert all the patient's card details. For the social security number, you don't need to input the actual number; you can enter 999-99-9999. Make sure to input the date of birth. In the "other" field, entering the unique patient ID assigned to you by Polarity is very important to separate and protect patient PHI.
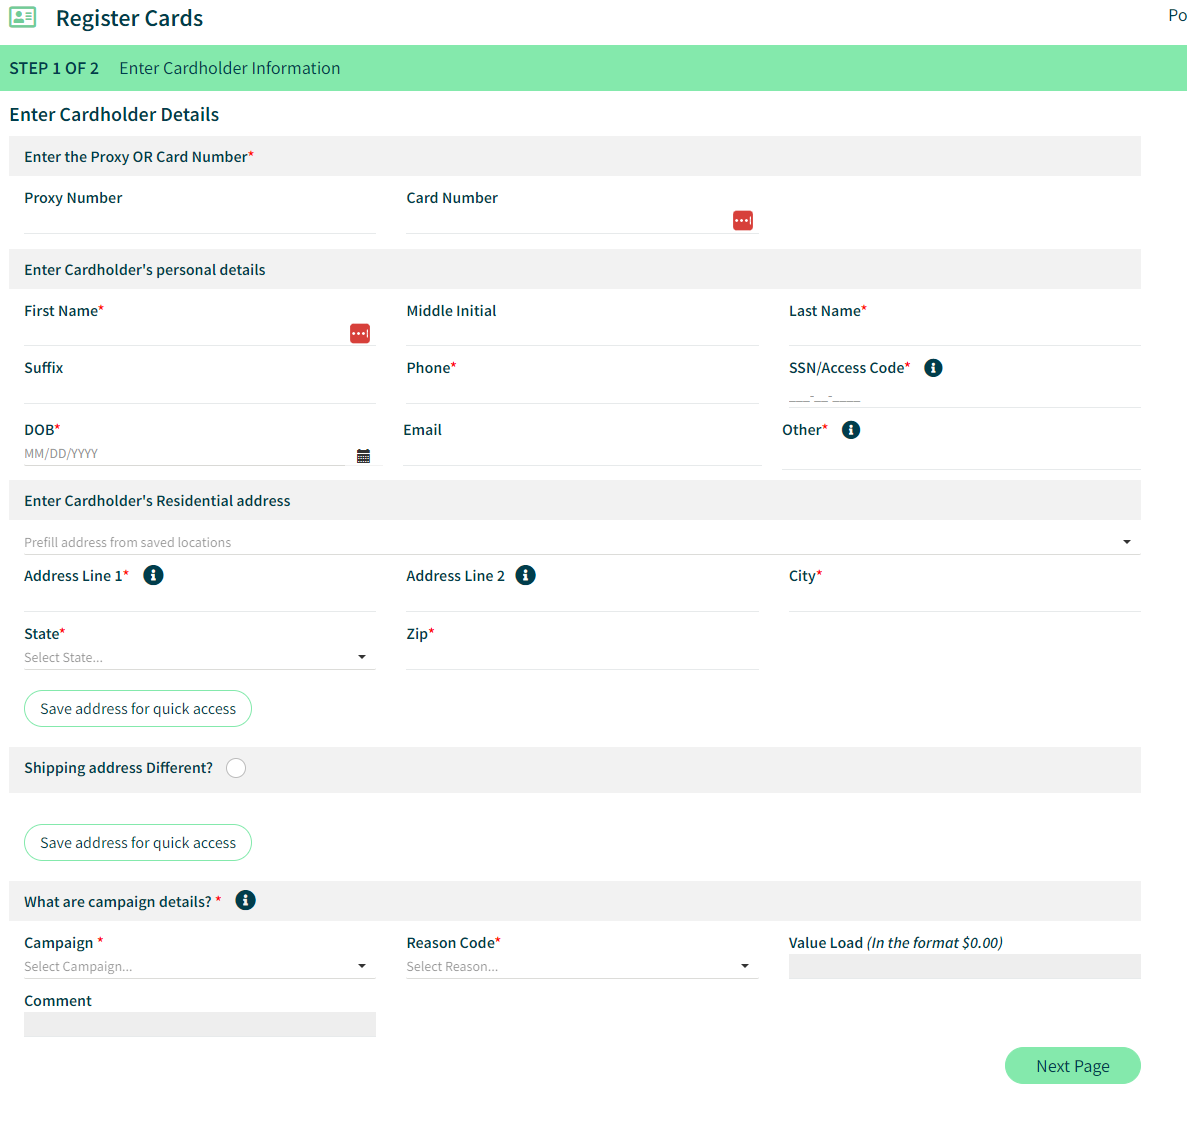
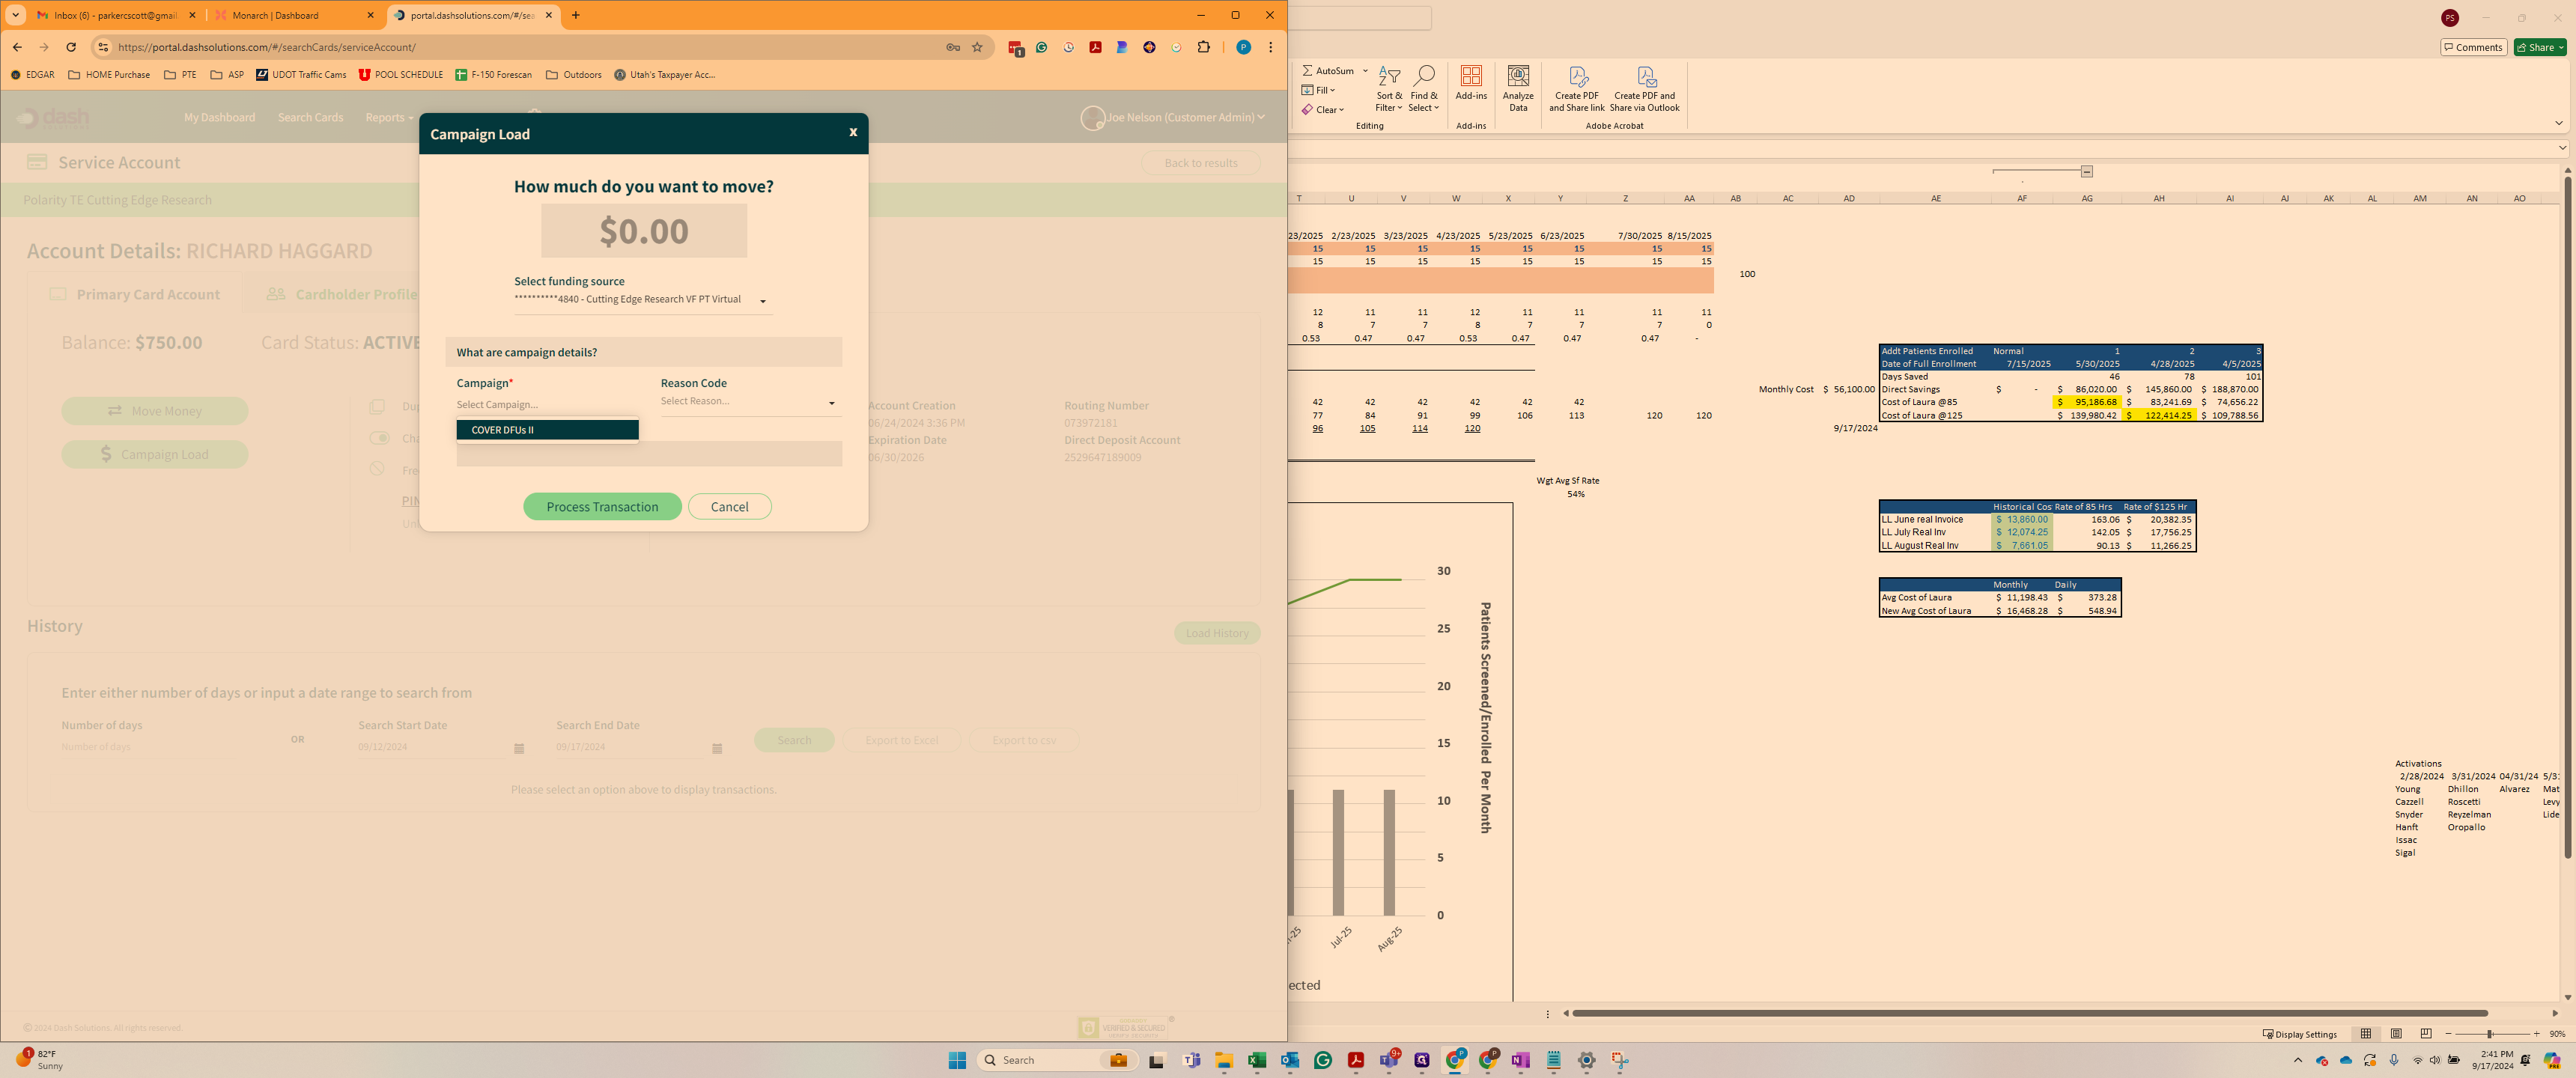
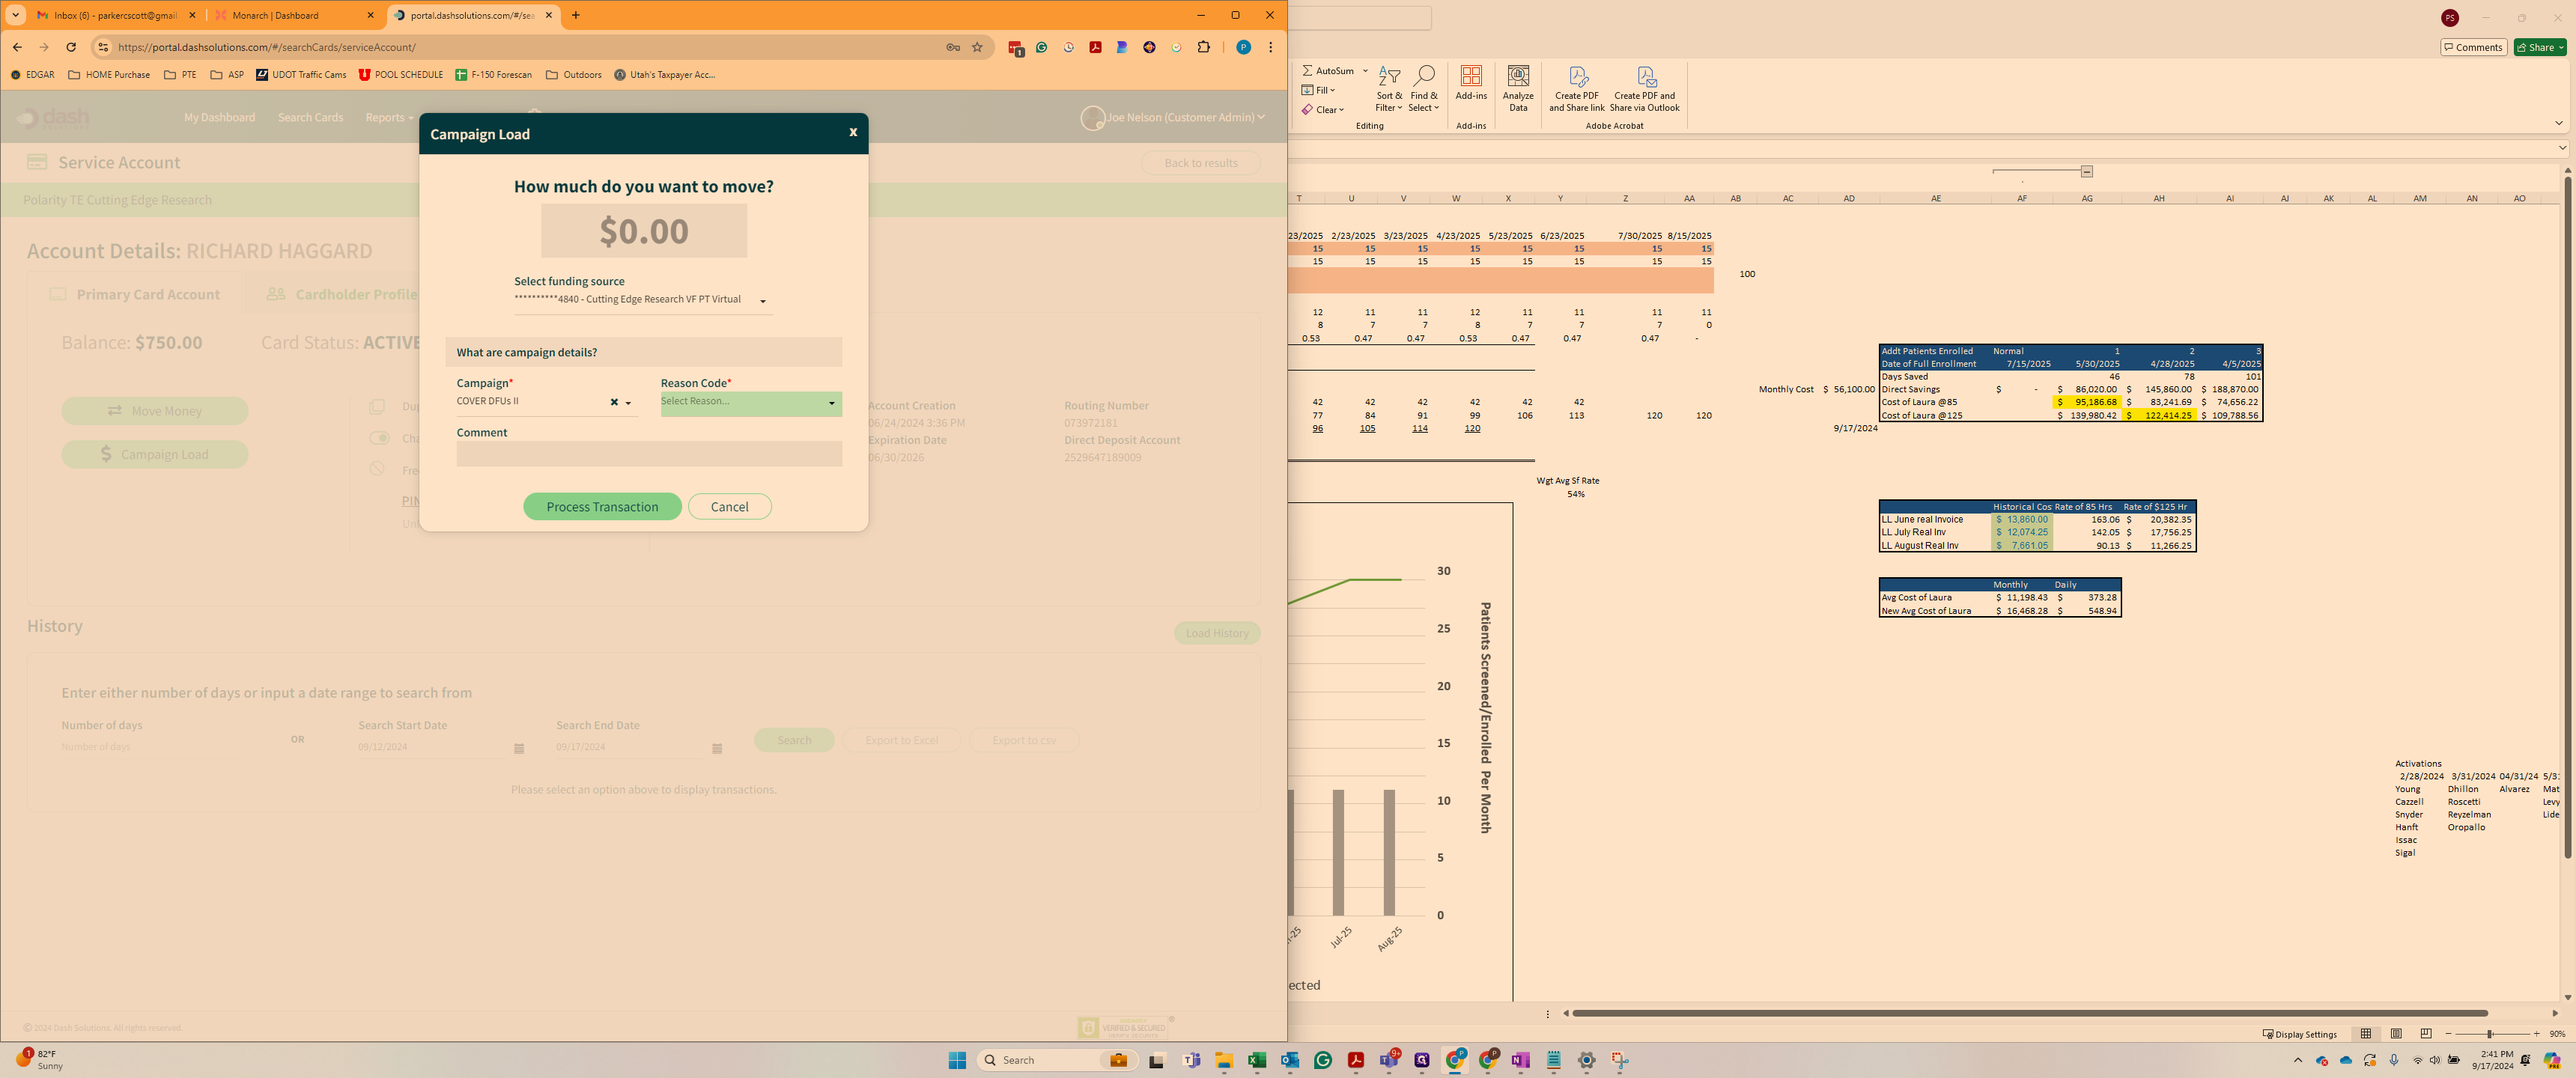
Next, insert the campaign details.

Under the campaign, select "COVER DFUs II." For the reason code, select the visit the patient is coming in for. If the patient is new, choose SV1. The value load will happen simultaneously for $150. Then, hit next and confirm the card details.
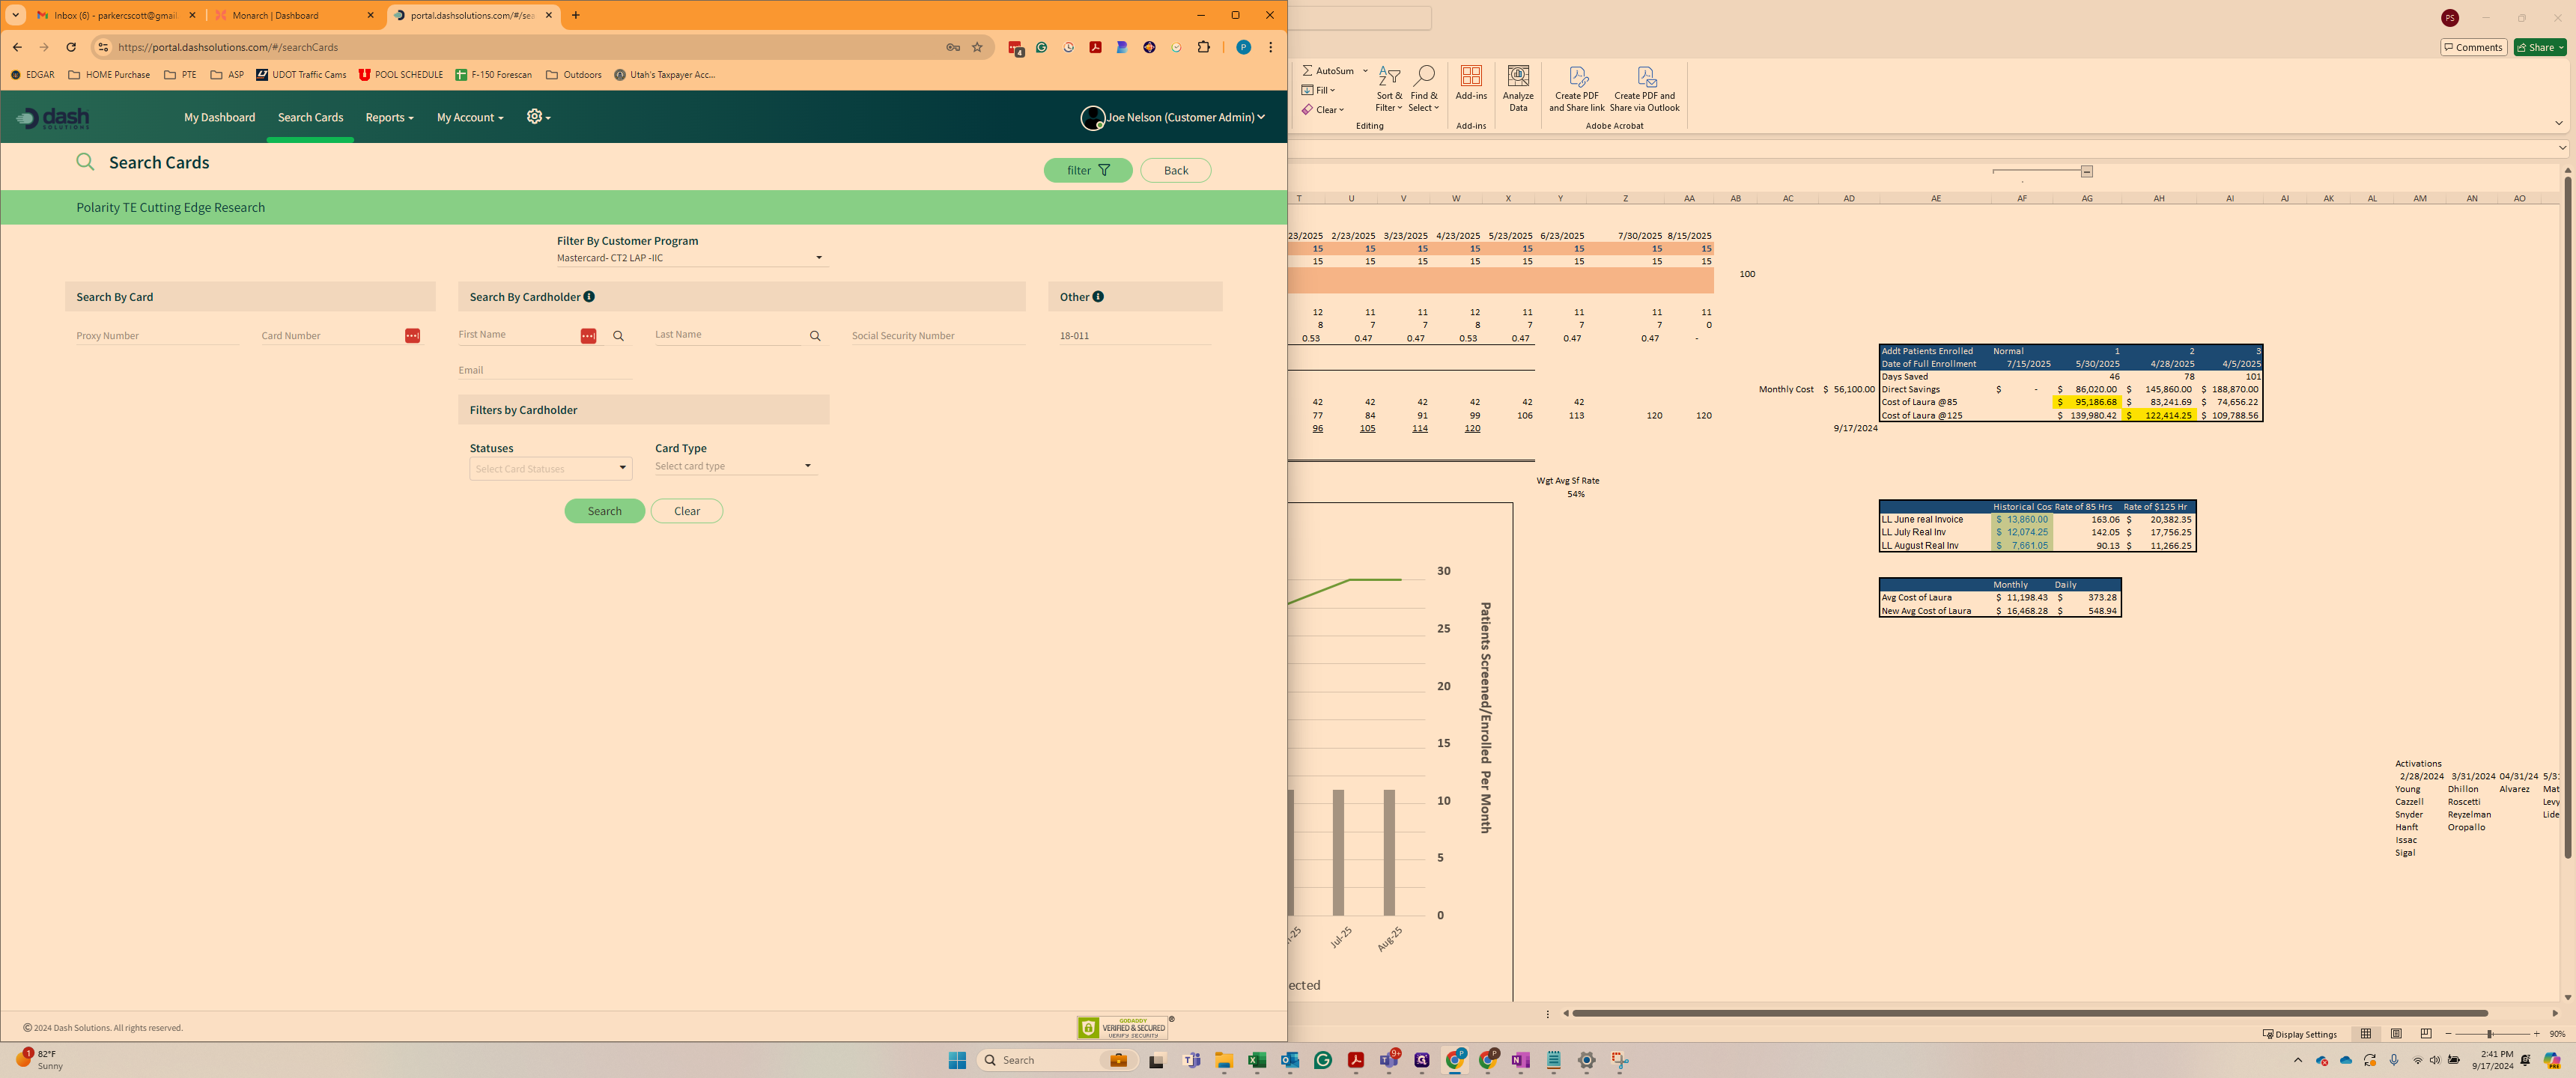
Select " service cards " to load subsequent values onto already registered cards. Search for the cardholder by proxy number, card number, first or last name, or other patient identifier.
In this example, we'll use "other" to complete our search. In this case, we can insert 18-011. Let's search.

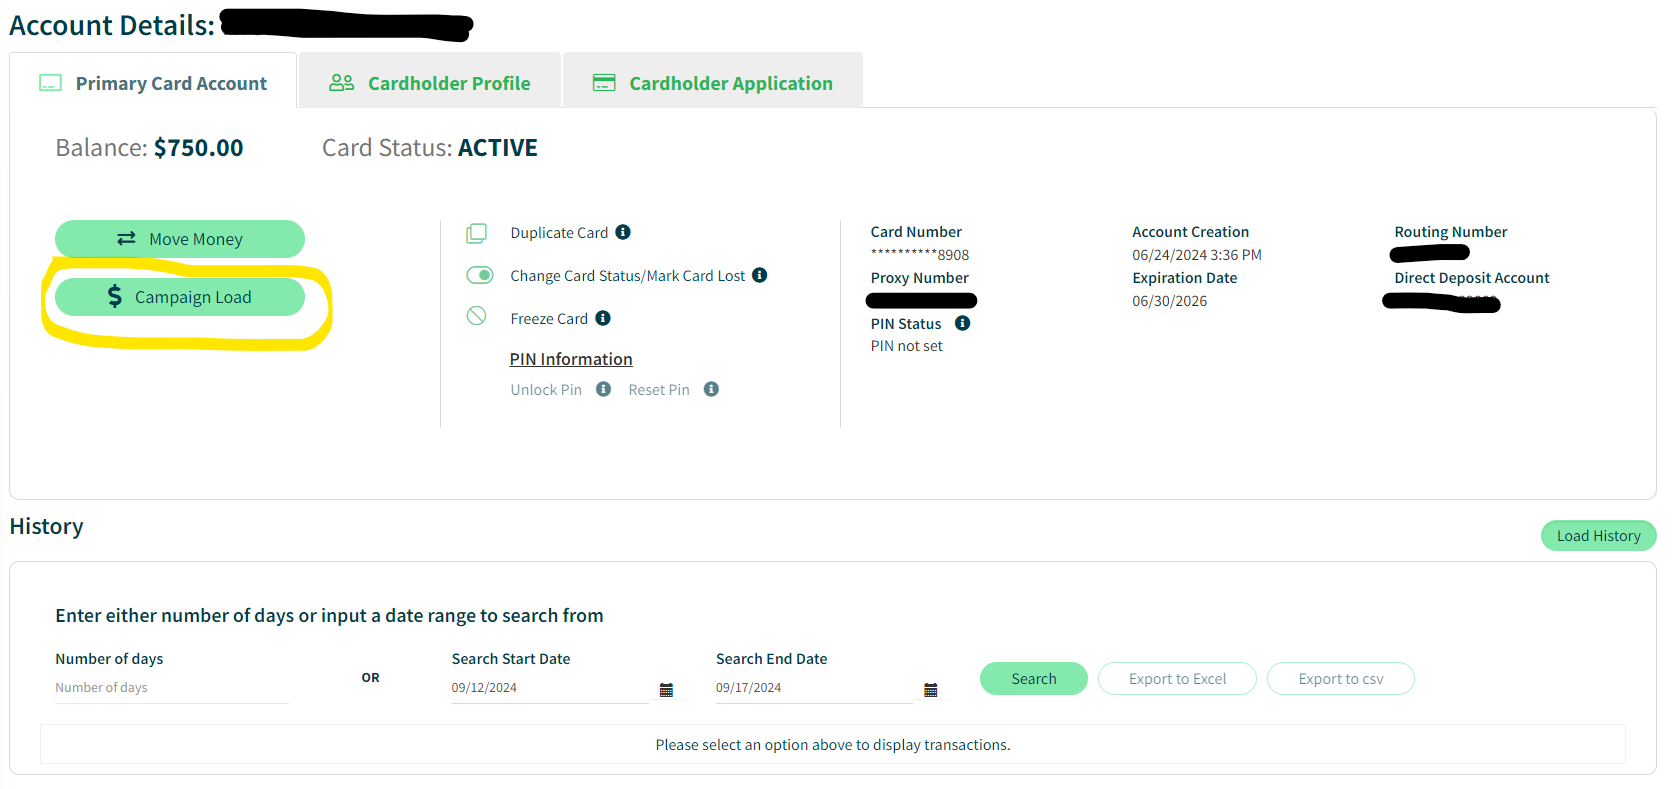
Once you've clicked "View Account Details," select "Campaign Load."
This is how you register cards as well as load values onto cards themselves. If you have any questions about canceling a card or ordering new cards, reach out to Madisonwarner@polarityTE.com, and we will take care of it for you!