
How to Review a Project Setup: Step-by-Step Guide (Part 1 of 2)
Learn how to review project and invoice setup in your system, including verifying project details, contract installments, upgrades, and automation settings. Follow this step-by-step guide for accurate project management.
In this guide, we'll learn how to review project setup in Insightly. We'll cover how to search for a project, verify project details, check contract and payment information, and ensure all automated processes are set up correctly. This process helps maintain accurate records and smooth project management.
Let's get started
Go to the "All Tasks" filter to see everyone's tasks.
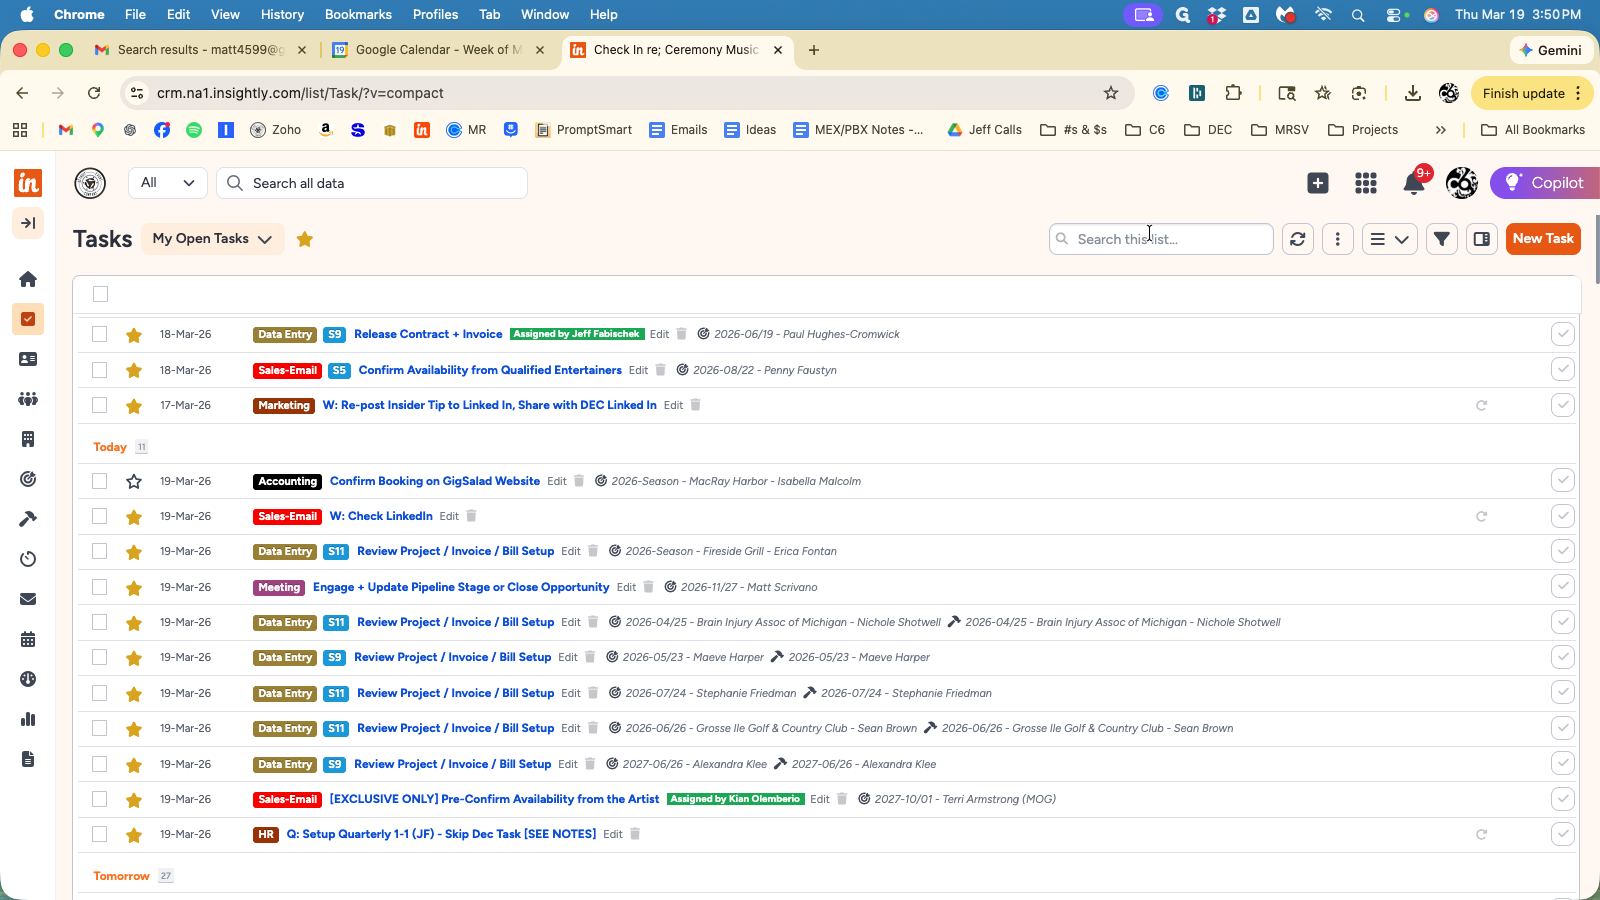
This will show all tasks related to a specific Project. Next, we will check the Project.
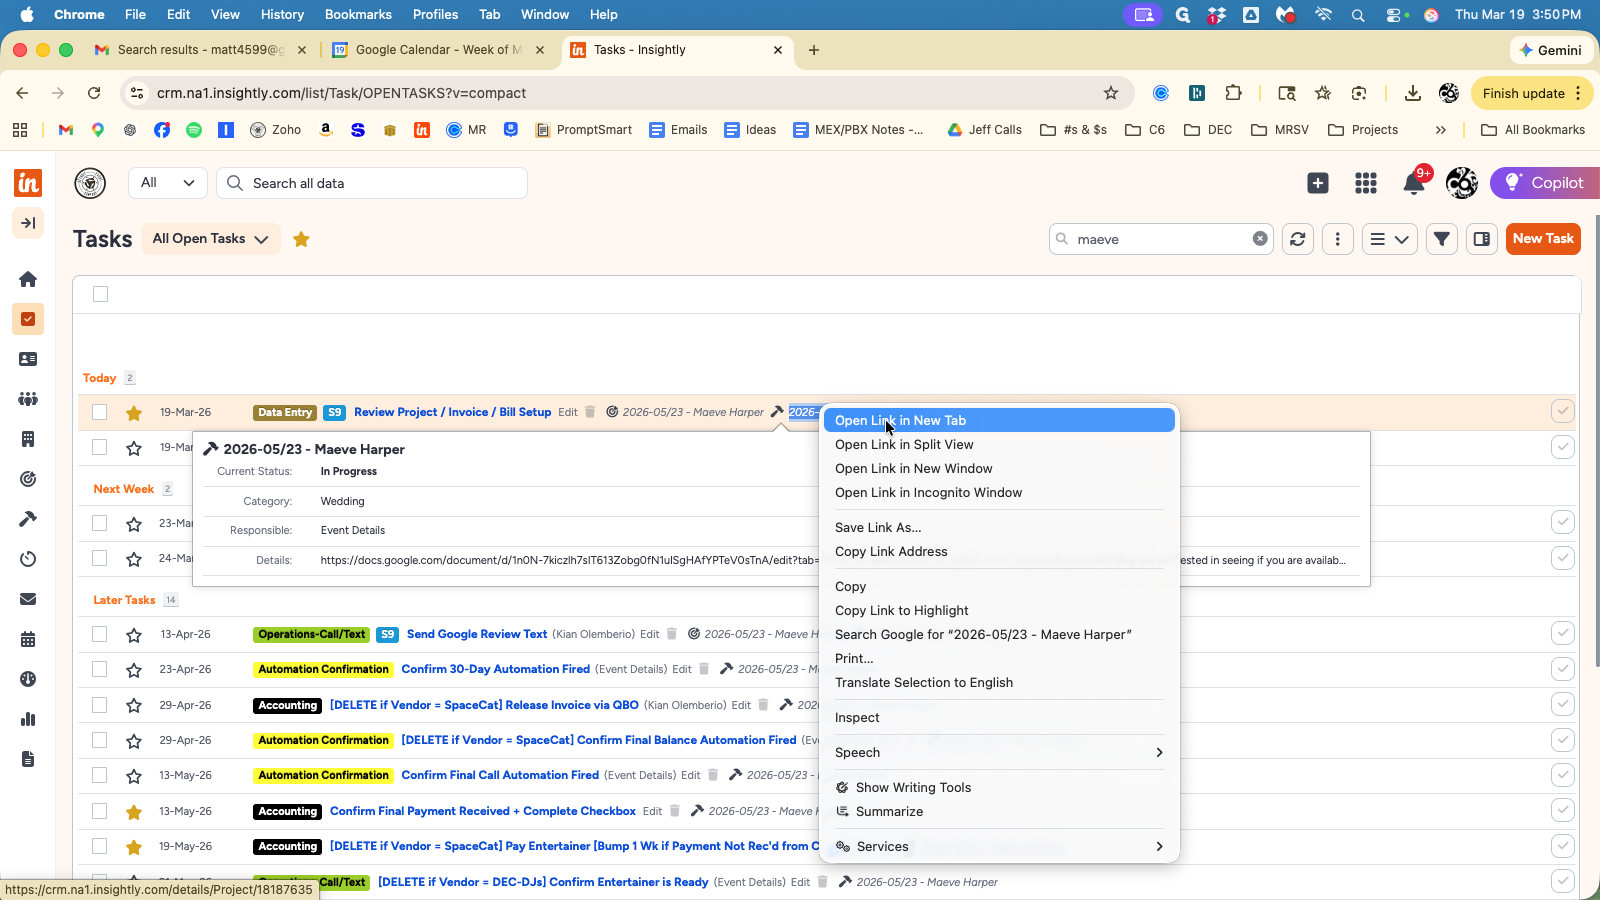
I will go to that project, right-click to open it in a new tab, and review its contents.

Project Name = YYYY/MM/DD - Client Name (should contain a business name if non-wedding)
Status = In Progress
Category = verify this matches the event type on the contract
Make sure "Music" categories are not used for non-music vendors. For example, if we book a stage for a wedding, the contract will say "Wedding Reception," but the correct Insightly Category should be "Production."
Vendor Name = verify this matches the Artist/Vendor on the contract
Account Manager = who booked the job
User Responsible = who is coordinating the event (Matt = C6/special clients; Emily = else)
Lead Source = review the meeting notes (Description field) to see if this captures all sources.
Event Date = verify this matches the contract and Project Name
Venue = verify this matches the contract
Contract Amount = verify this matches the contract
Installment Amounts & Due Dates = Review that Installment 1 Amount/Due date match the 2nd payment listed on the contract, and that Installment 2 Amount/Due match the 3rd payment listed on the contract. If the entire event is paid upfront, all of these fields should be blank. If only 2 payments are made, skip Installment 1 fields.
Note: Clients will receive an automated email 24 days before their event if Installment 2 > 0. If the client pays in full, leave Installment 2 Amount/Due fields blank.
Upgrades = list anything noted on the contract. Note: For weddings, the live cocktail music is an automatic "upgrade" unless the "Cocktail Discount" is taken. If you see a Cocktail Discount, it means the client opted for a playlist and did not get that upgrade. All other upgrades will be noted in the billing with an amount or "Included."
Description = includes all notes from sales process; will often be a Google Doc
Enhancements Link & Song List = these are populated via automation, but should be verified.
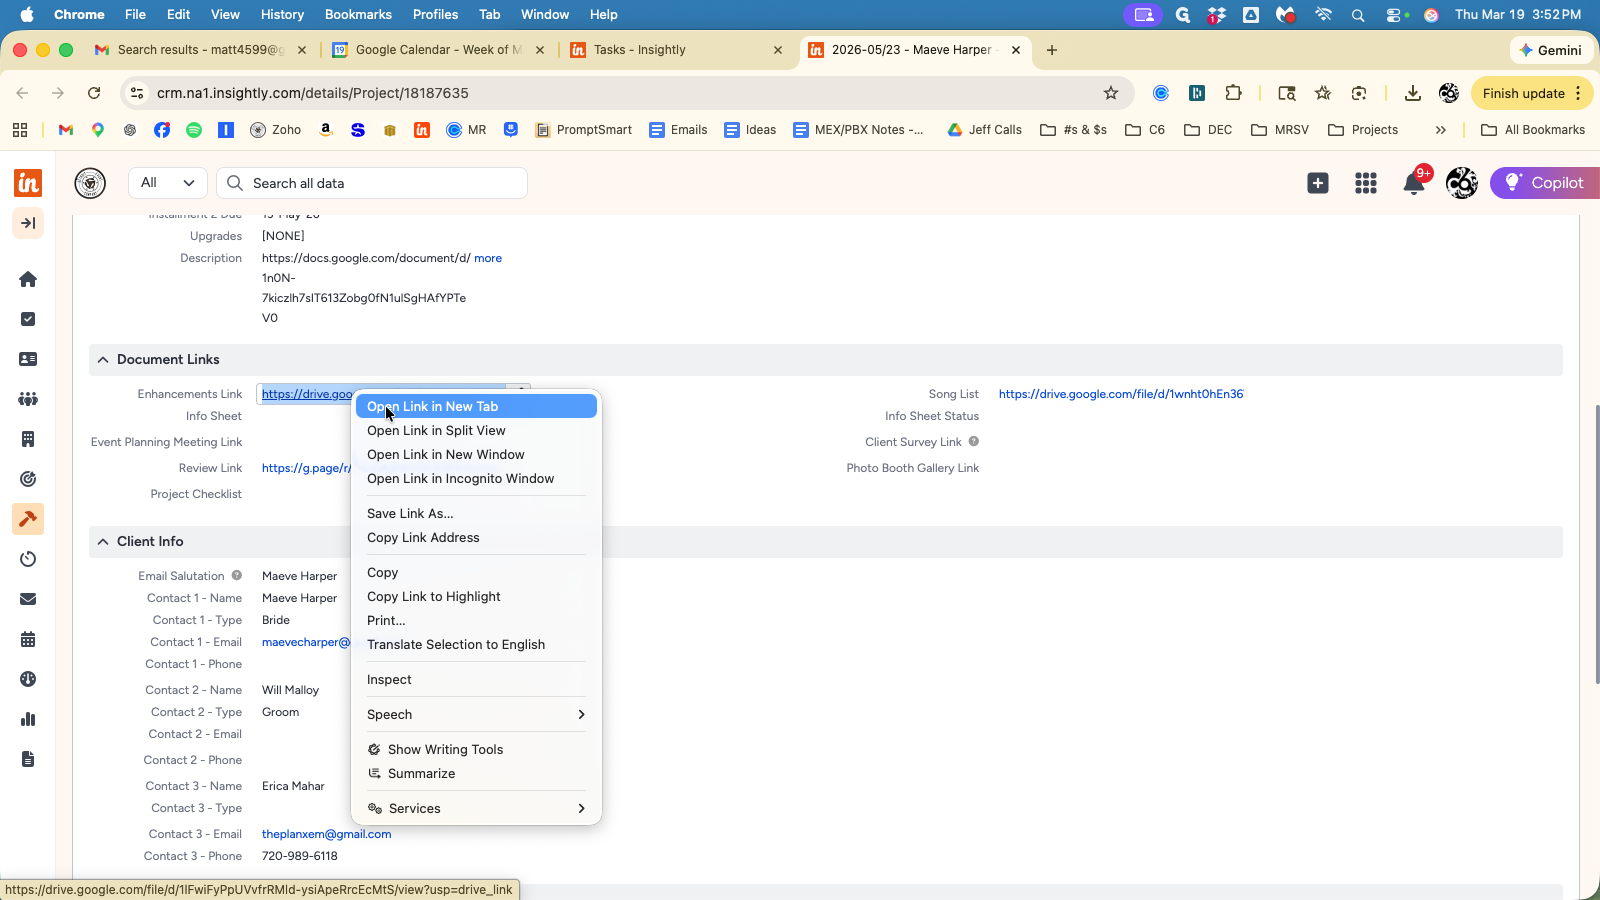
Review Link = should be populated for exclusive acts; blank for non-exclusive acts. This is included in a post-event automation asking for reviews on behalf of our exclusive acts.
Email Salutation = all of our automated emails say "Hi _____," so make sure this is addressed to the contacts listed. If a parent/planner is the 3rd contact for a wedding, don't list them here.
Contact Names, Types, Email, Phone = these fields indicate who the key-players are for the Project. All automated emails go out to all email addresses indicated, and phone numbers are used for text messages. This information should be completed to the extent we have it. Name & Type are mandatory fields. Ask the account manager if details are missing or unclear.
Vendor Info = this information is pulled in automatically, but verify the "Vendor Type" is accurate per the contract. Sometimes vendors offer multiple services, and the automation is set up to handle the most common one. Example: Lyrical Heat provides karaoke hosting, DJ services, small ensembles and bands.
Note: If multiple artists are hired for 1 event, make sure only 1 Vendor Type = band" or "small ensemble" or "DJ", and the other Projects have Vendor Type = "second vendor."
Automation Triggers
"New Event Confirmed" should be checked, meaning the "new event" automations have fired. If this is not checked, edit any field (sometimes a 'spacebar' in the description is easiest if all details are accurate). Once a field is edited, the automation will trigger, which includes an email to the Artist/Vendor to confirm the date.
"First Installment Paid" and "Paid In Full" should be checked only when payments are received; checking these triggers an email to the client indicating their payment was received. If a client pays a retainer + installment upfront, do not check the "First Installment Paid" checkbox, since they would know that information already from the Confirmation email. Otherwise, we will check these boxes when payments are received per the schedule noted in the Installment Payments section above.
"Check Ins" are automated emails that will fire at appropriate intervals. If any of these should not be sent, you can block the automation by checking the box. This may apply if a more personalized email would be appropriate to send (like Design Kick-Off for a multi-vendor job OR if you want to send a personalized thank-you vs. the automated option).