How to Run Payroll and Process IRA Staff Contributions
Learn how to generate time reports, approve timesheets, run payroll in QuickBooks, process Invesco IRA transfers, and log matching contributions.
By Operations Department
Running payroll involves several steps: generating and sending time reports for employee review, approving timesheets, running the payroll itself, and manually processing and recording IRA matches through Invesco. Here is the complete workflow.
1. Generate Time Reports
First, pull the timesheets for the current pay period and send them to your staff for review.
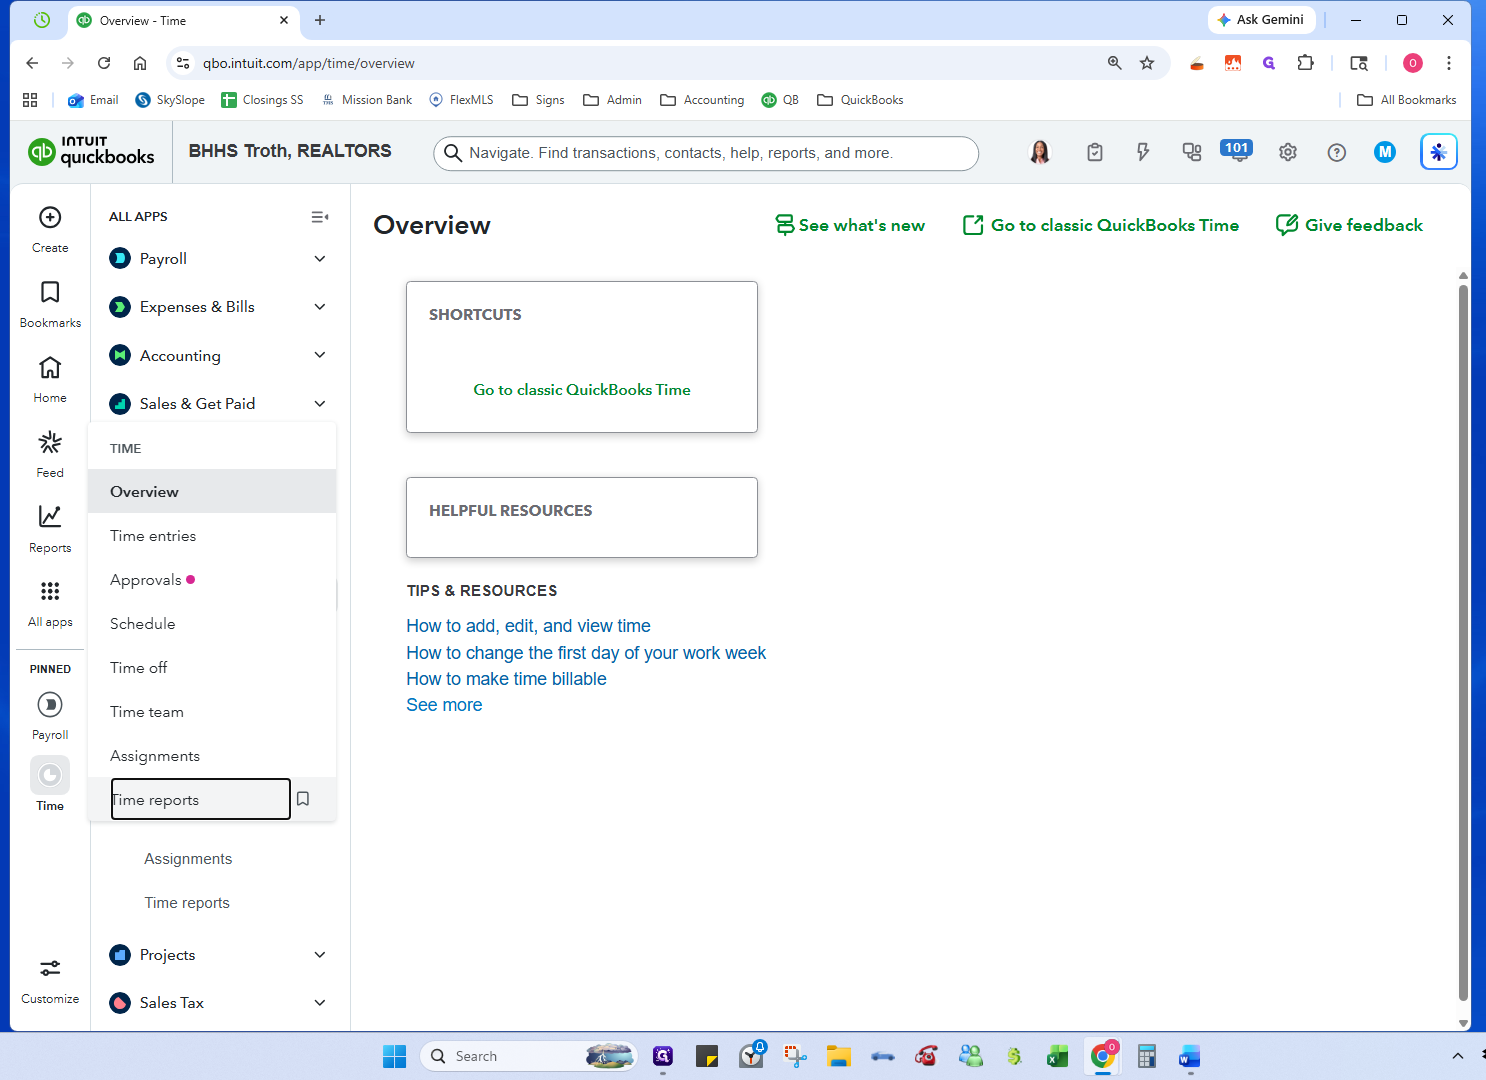
1
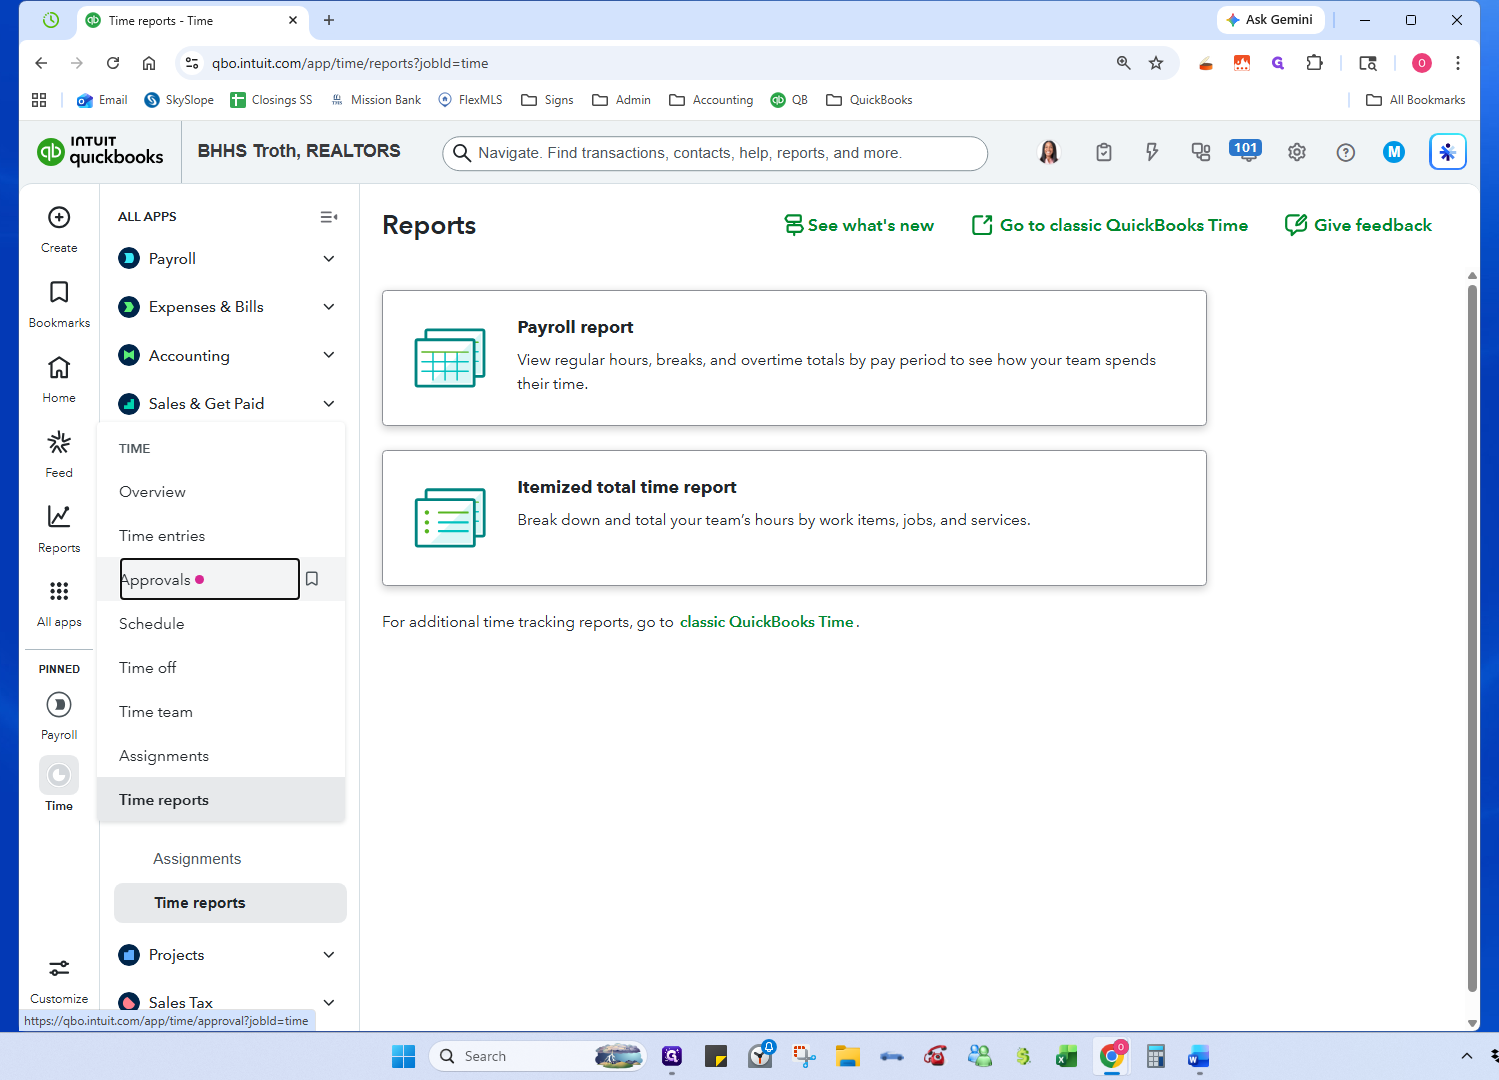
Navigate to the Time app on QuickBooks Navigaion Bar and select Time--> Time reports.
2
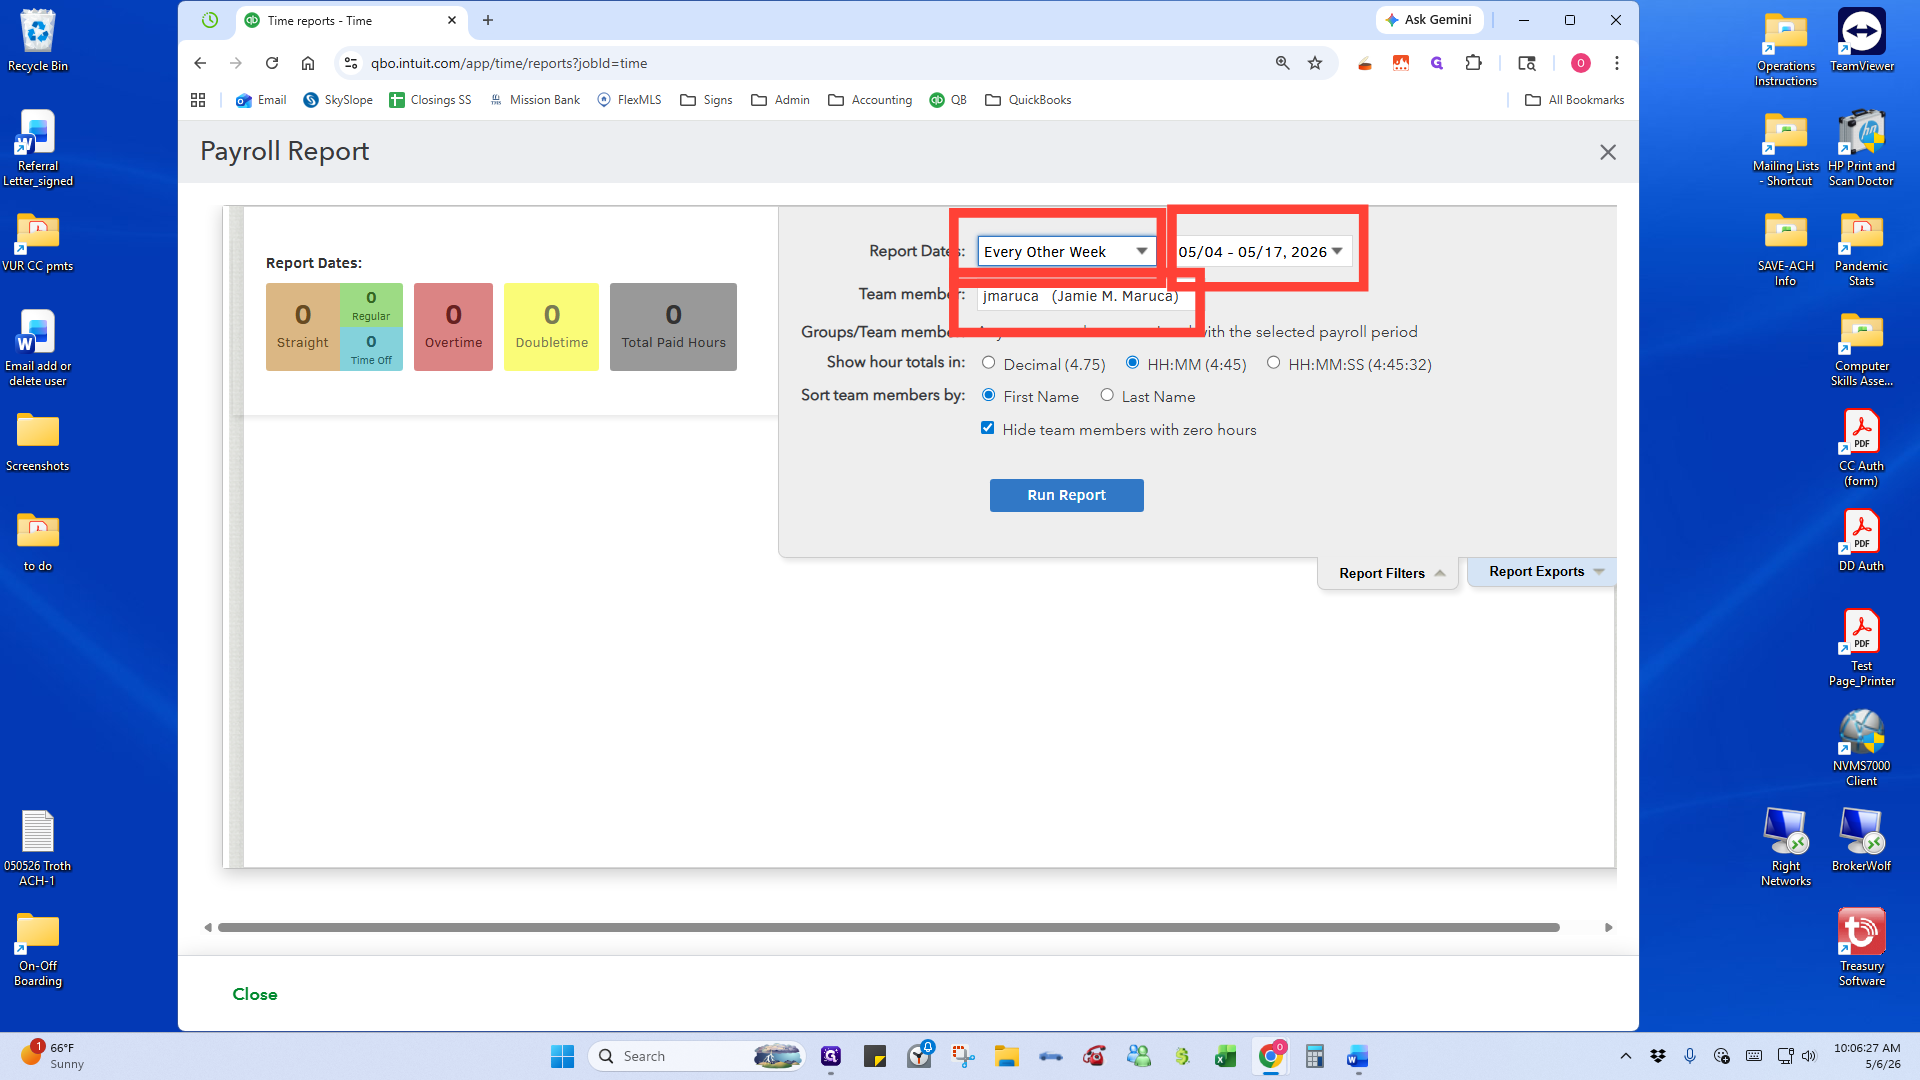
Select Payroll report.
3
Choose date range: Every Other Week, the range for the payroll period, and the employee. Click Run Report
4
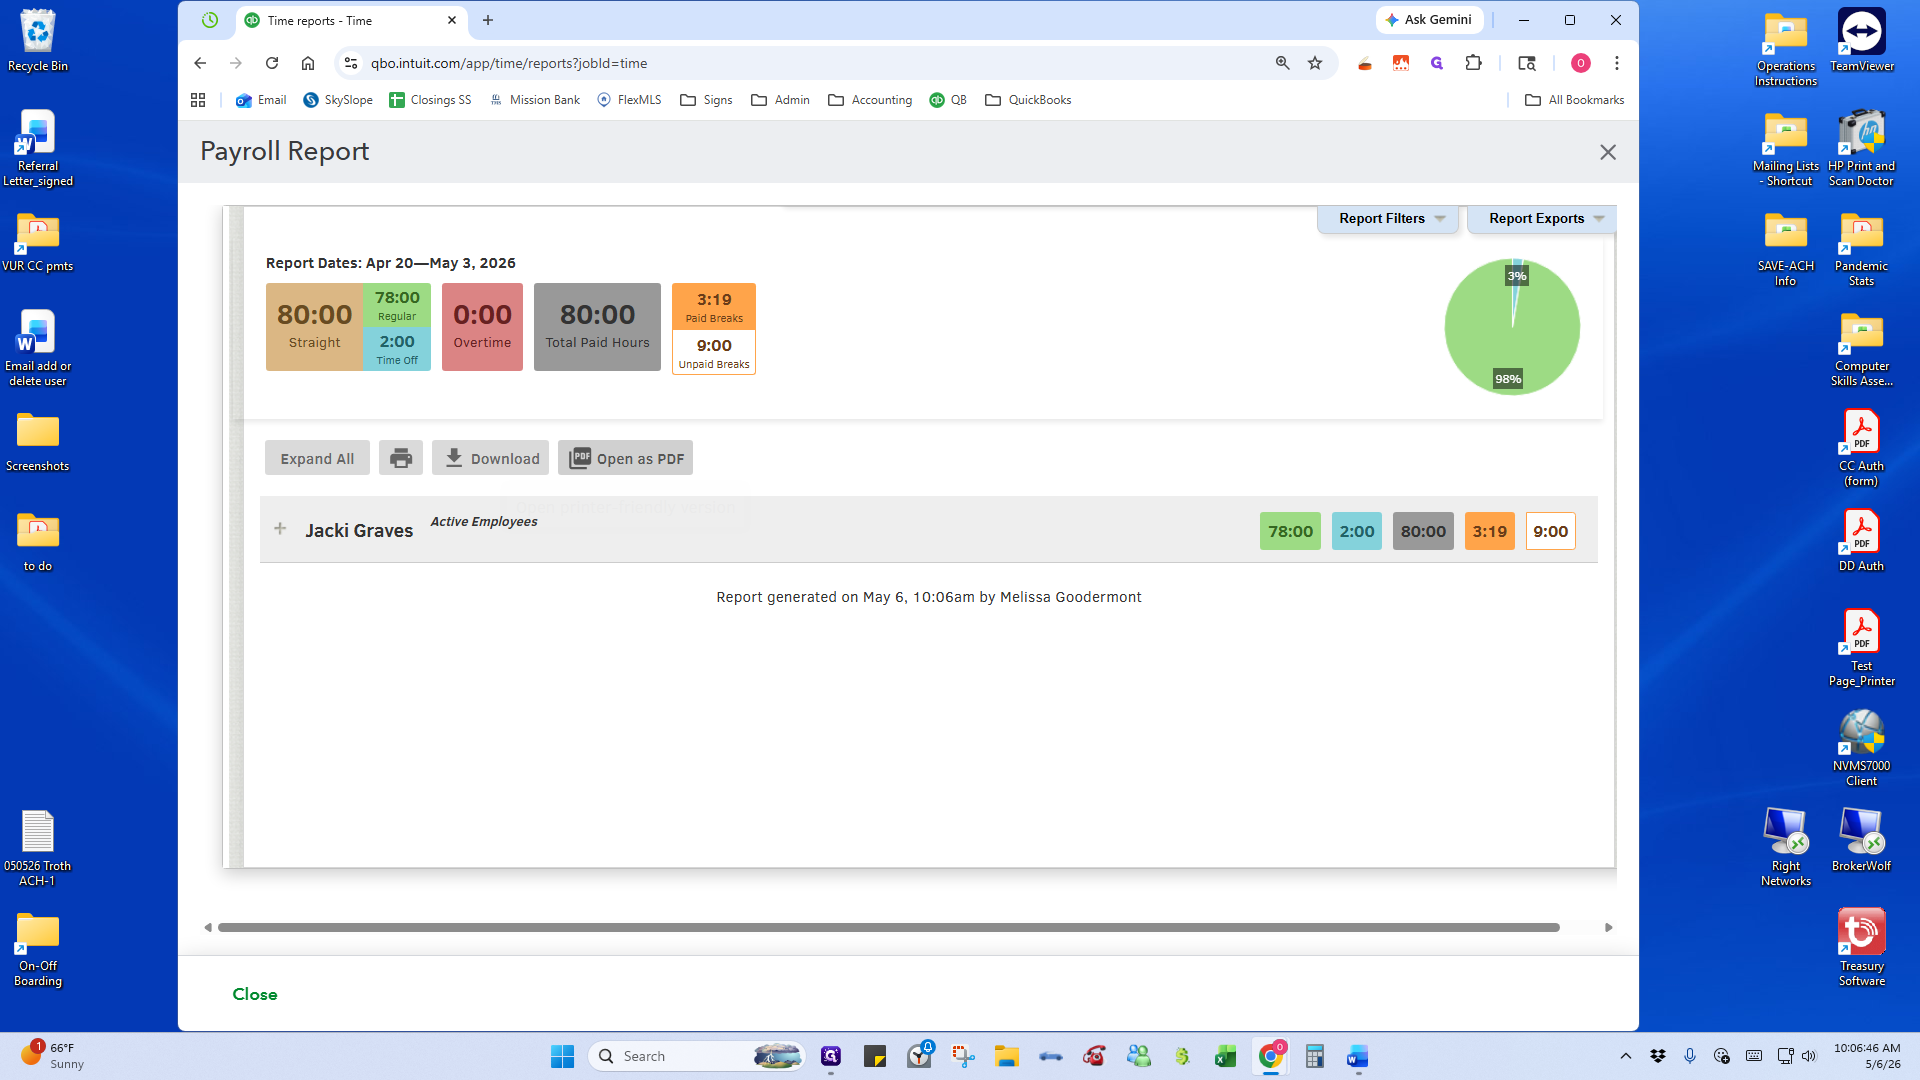
Click Open as PDF. Inside the preview screen, select download the timesheet. Repeat for all employees. Email email The Payroll Report to the employees for their review/approval.
Repeat these steps for any remaining employees:
2. Approve Timesheets
Once you have received approval from your staff, officially approve their timesheets in the system.
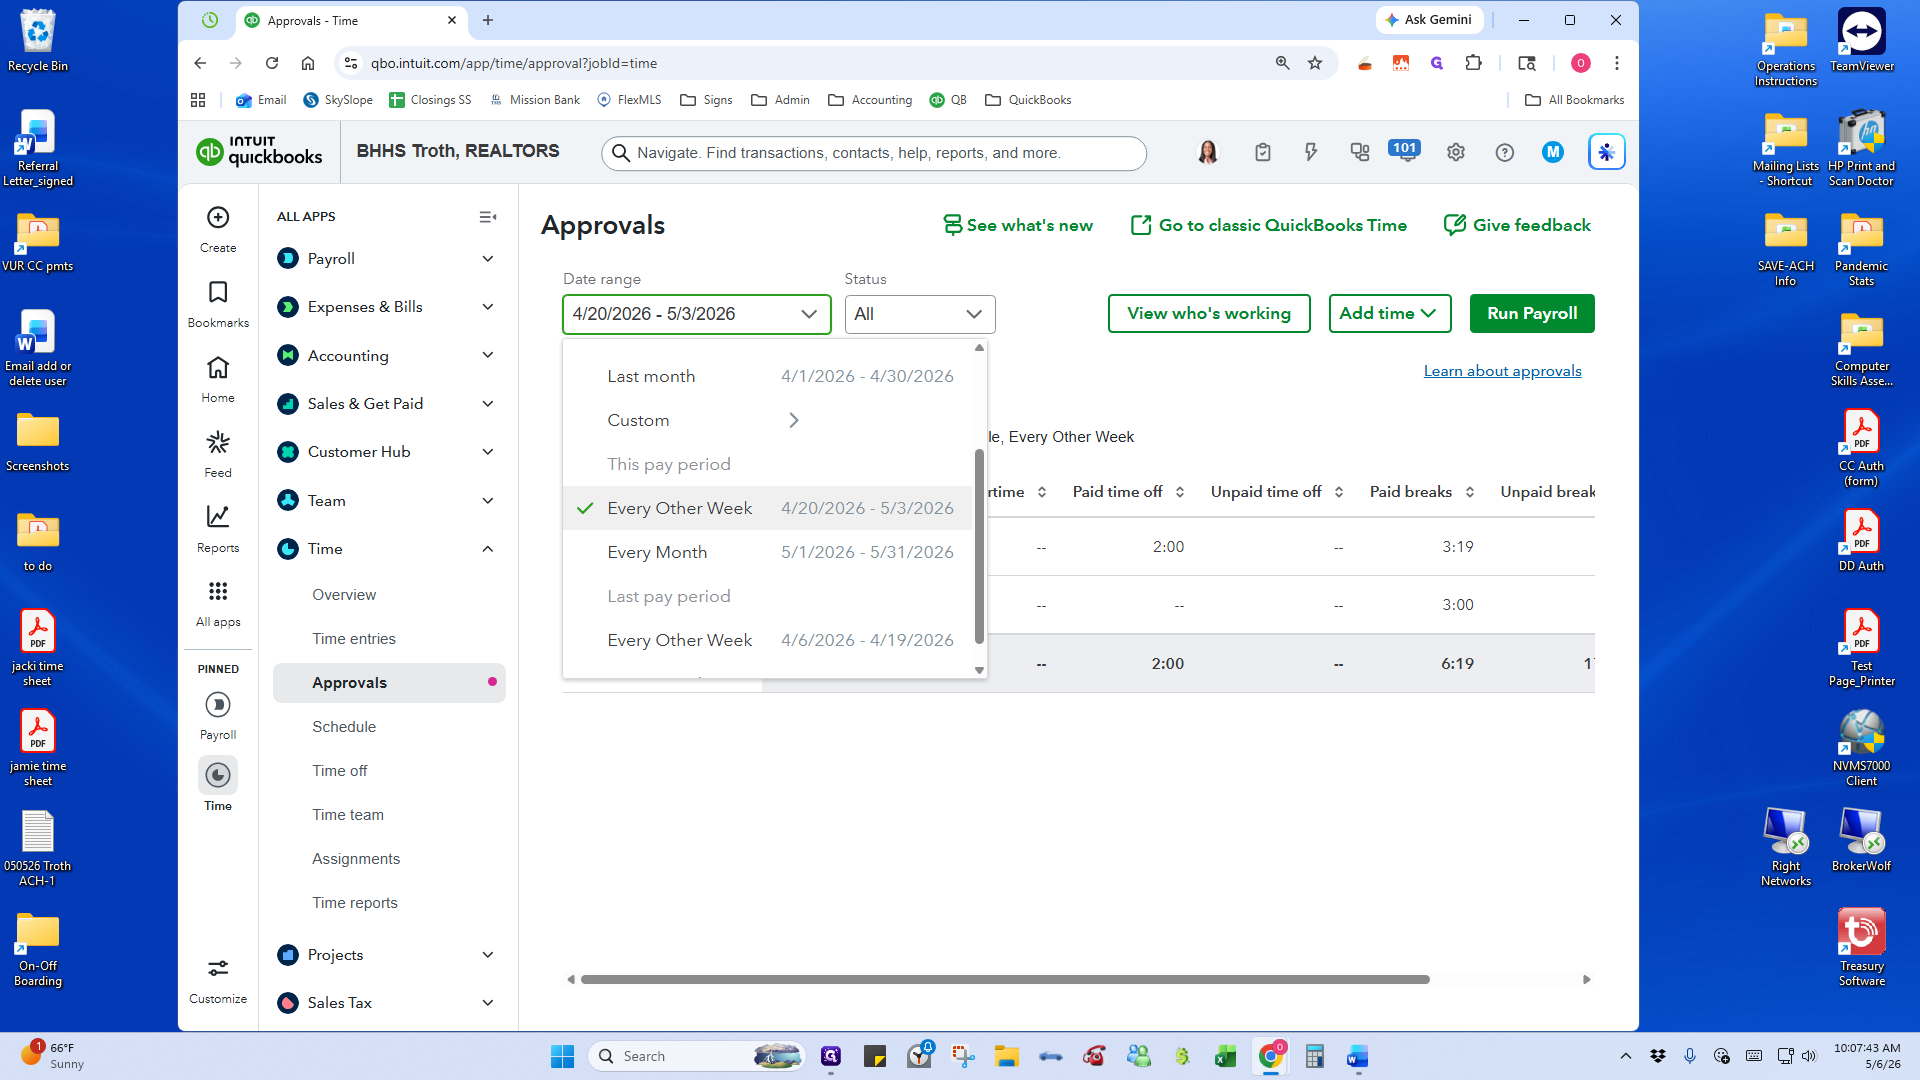
5
Go to Approvals in the Time navigation menu.
6
Ensure the correct pay period date range is selected.
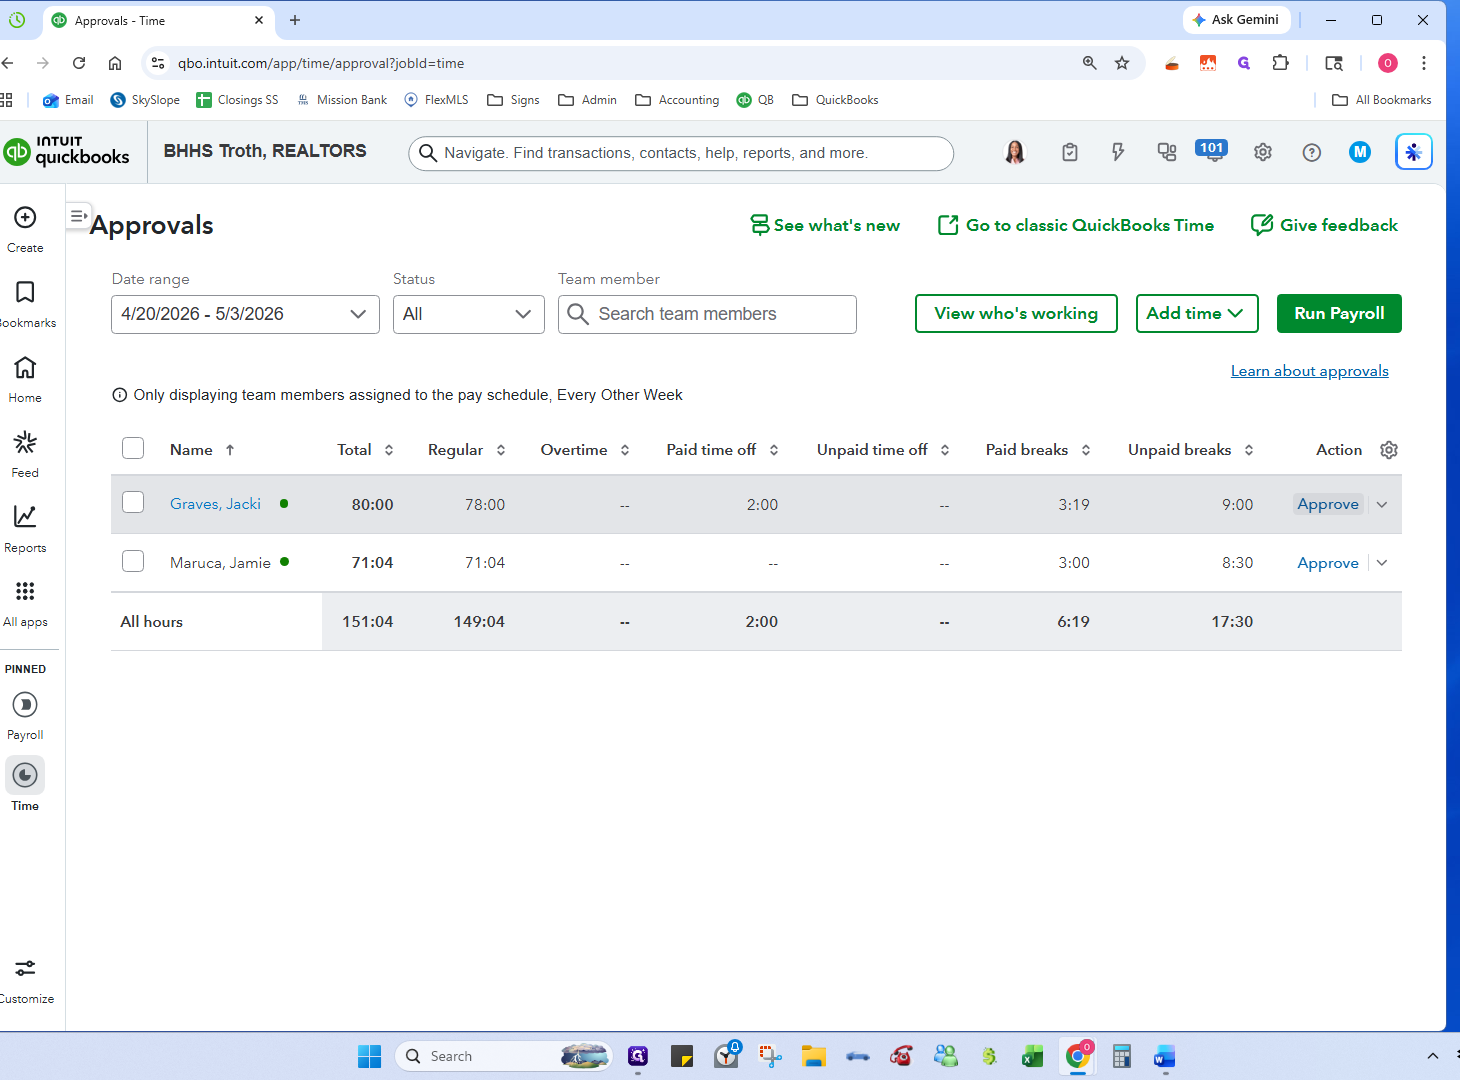
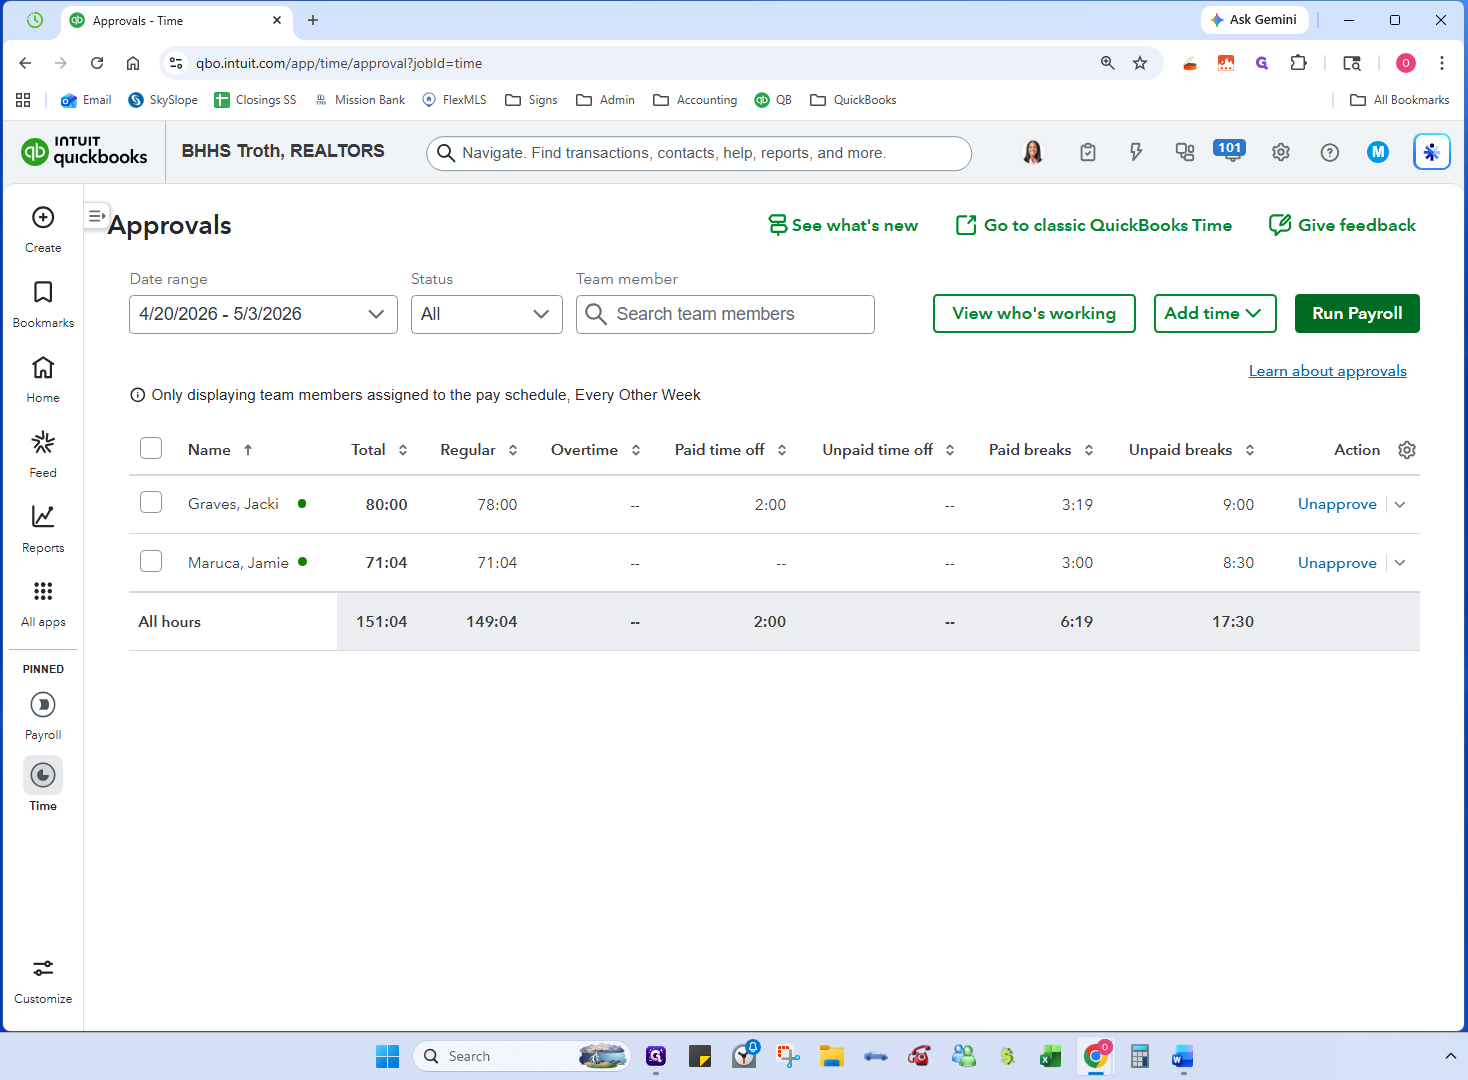
7
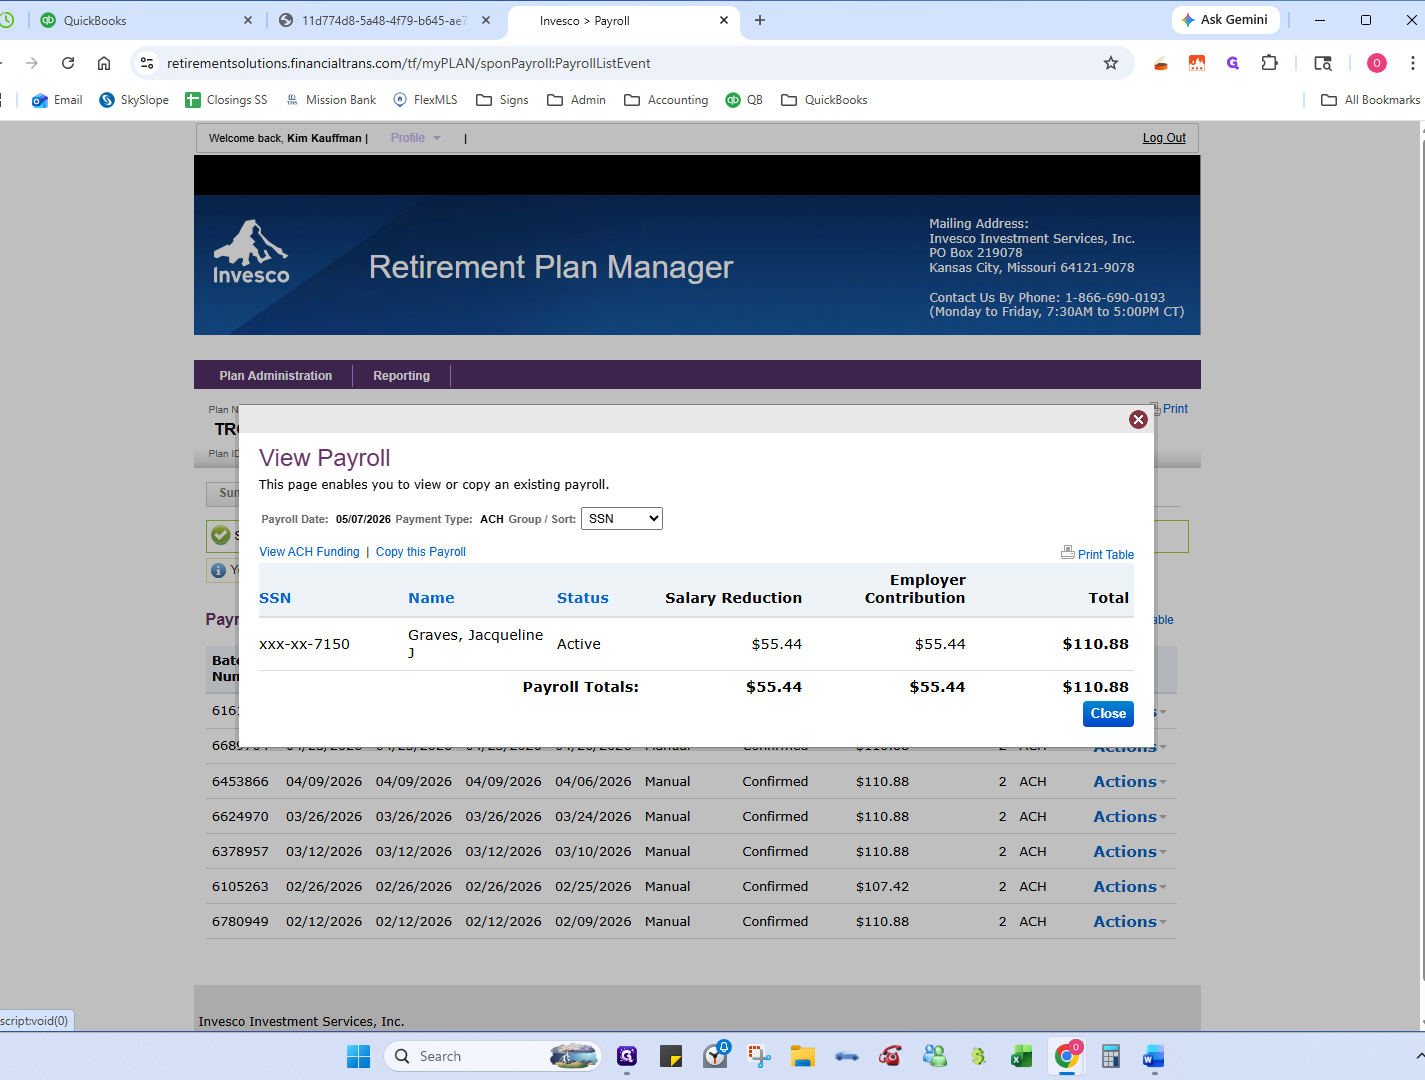
Review the total hours and click Approve for each employee.
3. Run Payroll in QuickBooks
With timesheets approved, you are ready to process payroll.
8
Click the Run Payroll shortcut.
9
Select the Every Other Week pay schedule and click Continue.
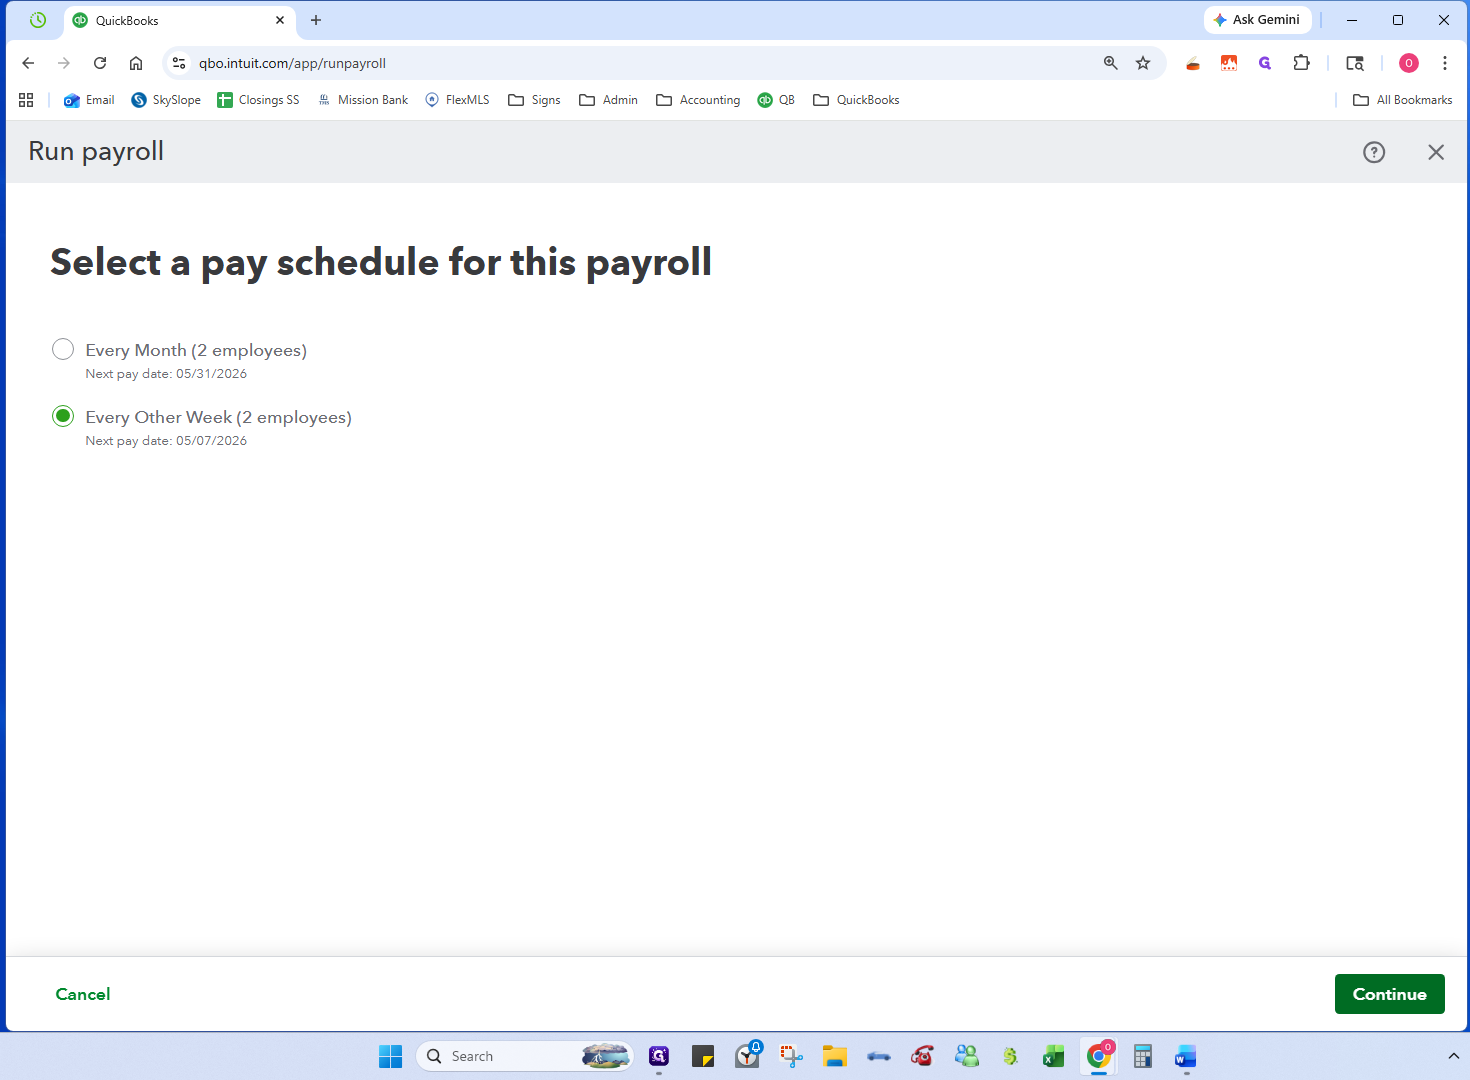
10
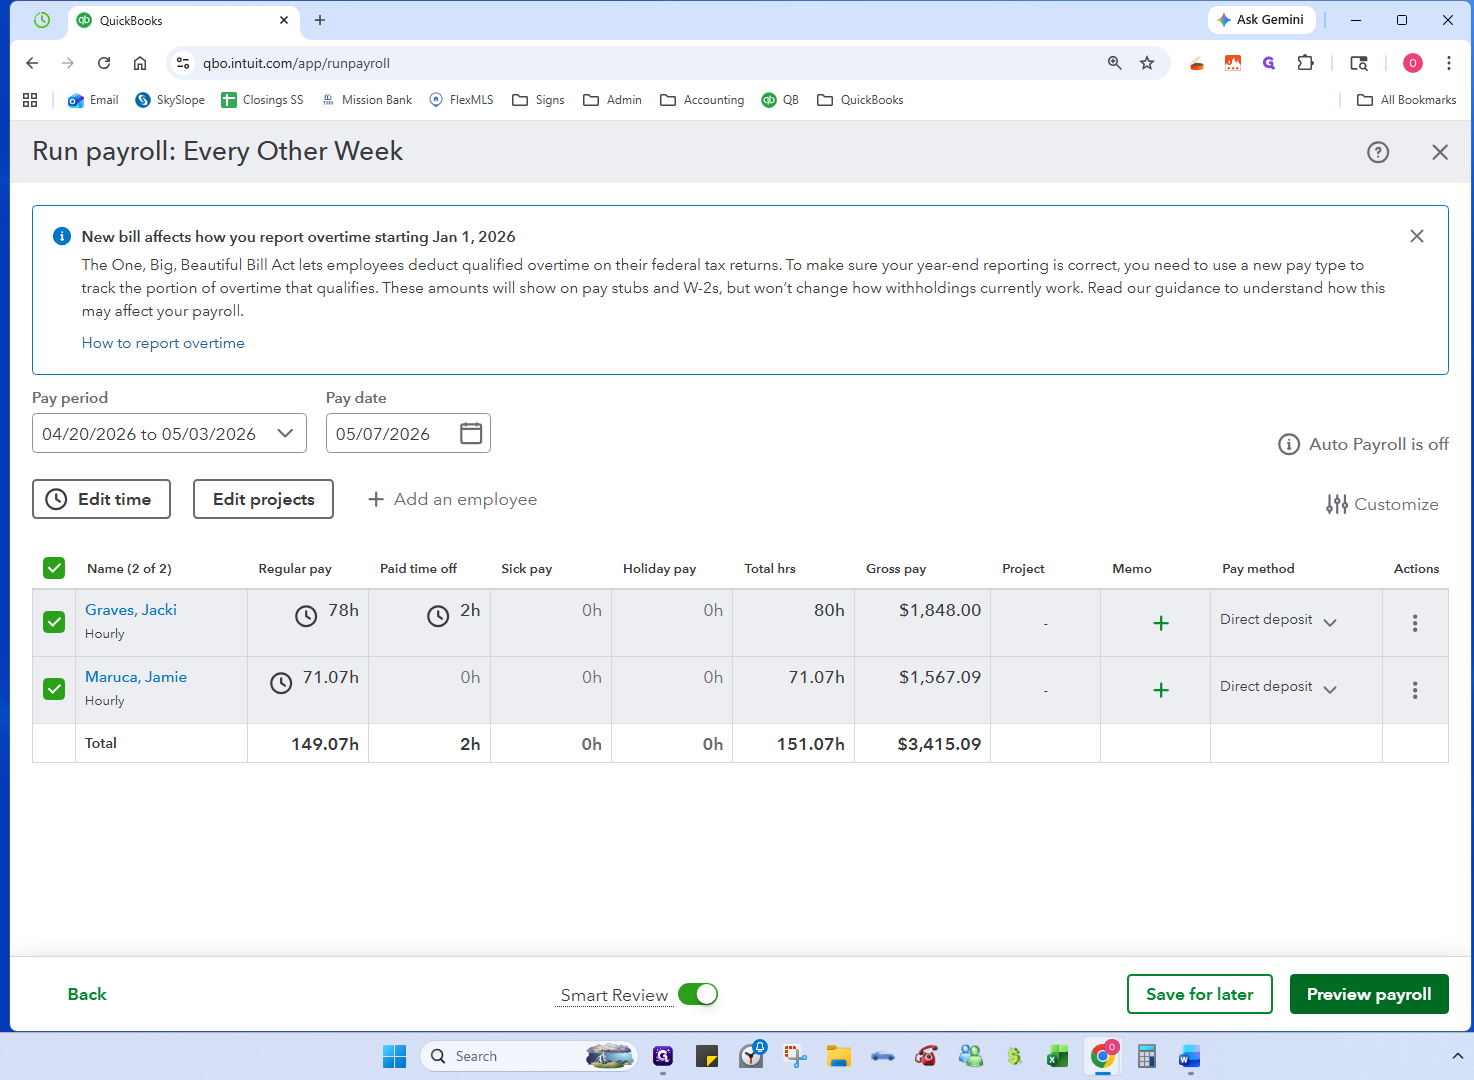
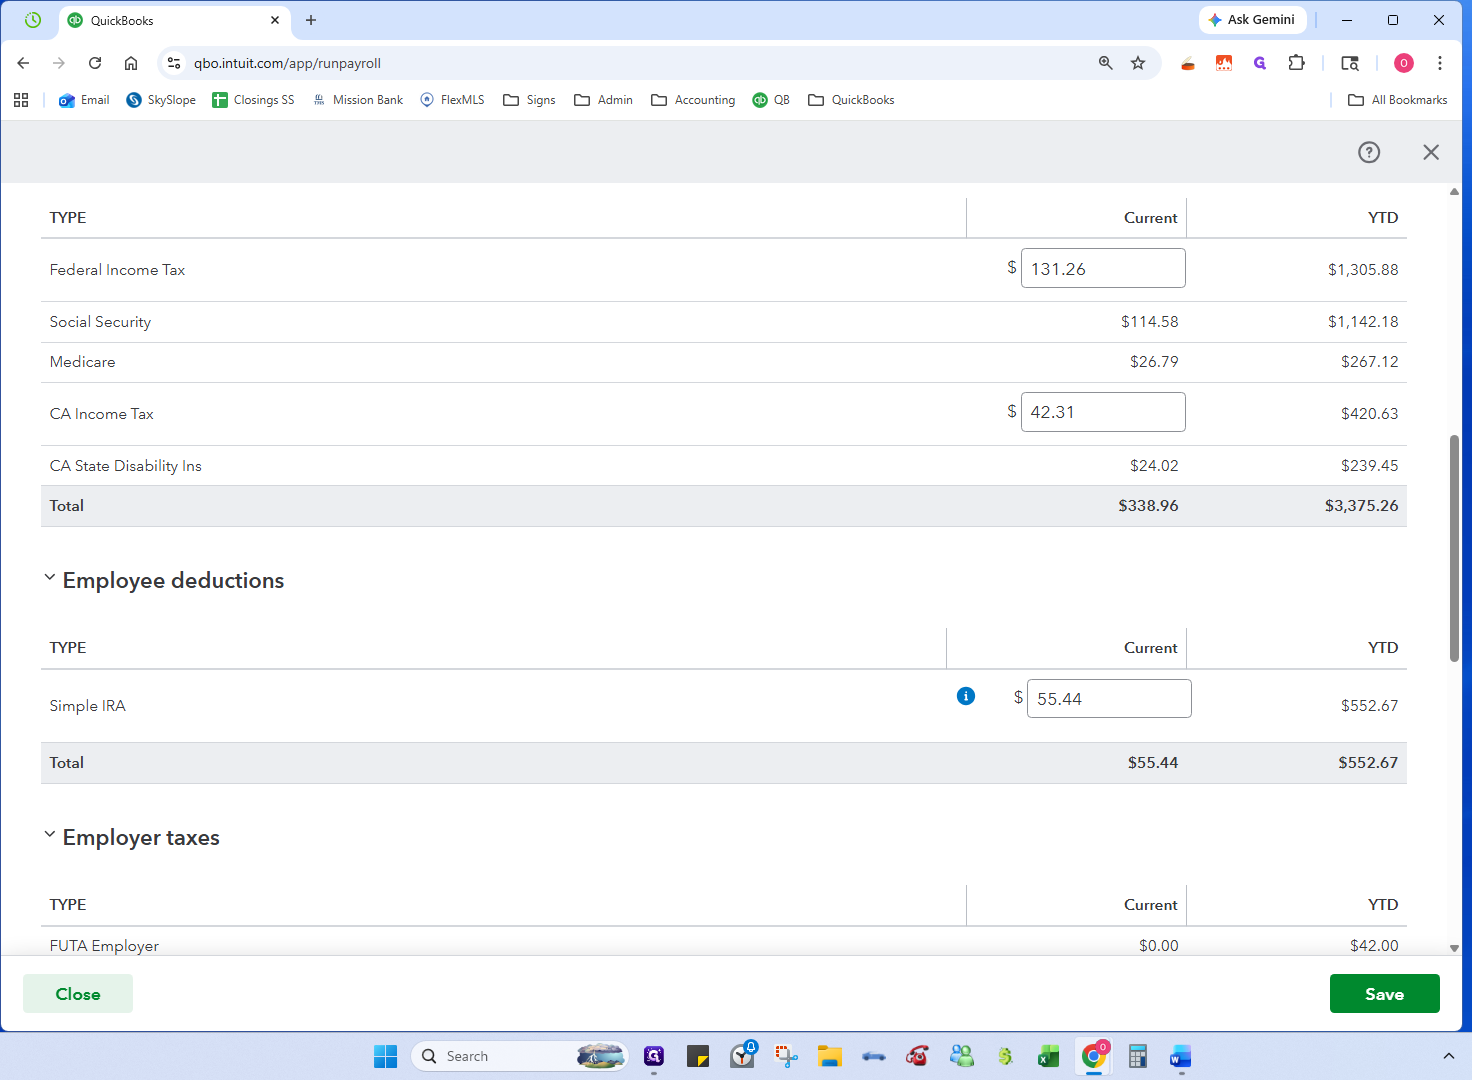
Verify the hours, and click Preview payroll to review employee hours, deductions, and IRA contributions/matching.
11
Click Close when you are finished reviewing (or Save if you made changes).
12
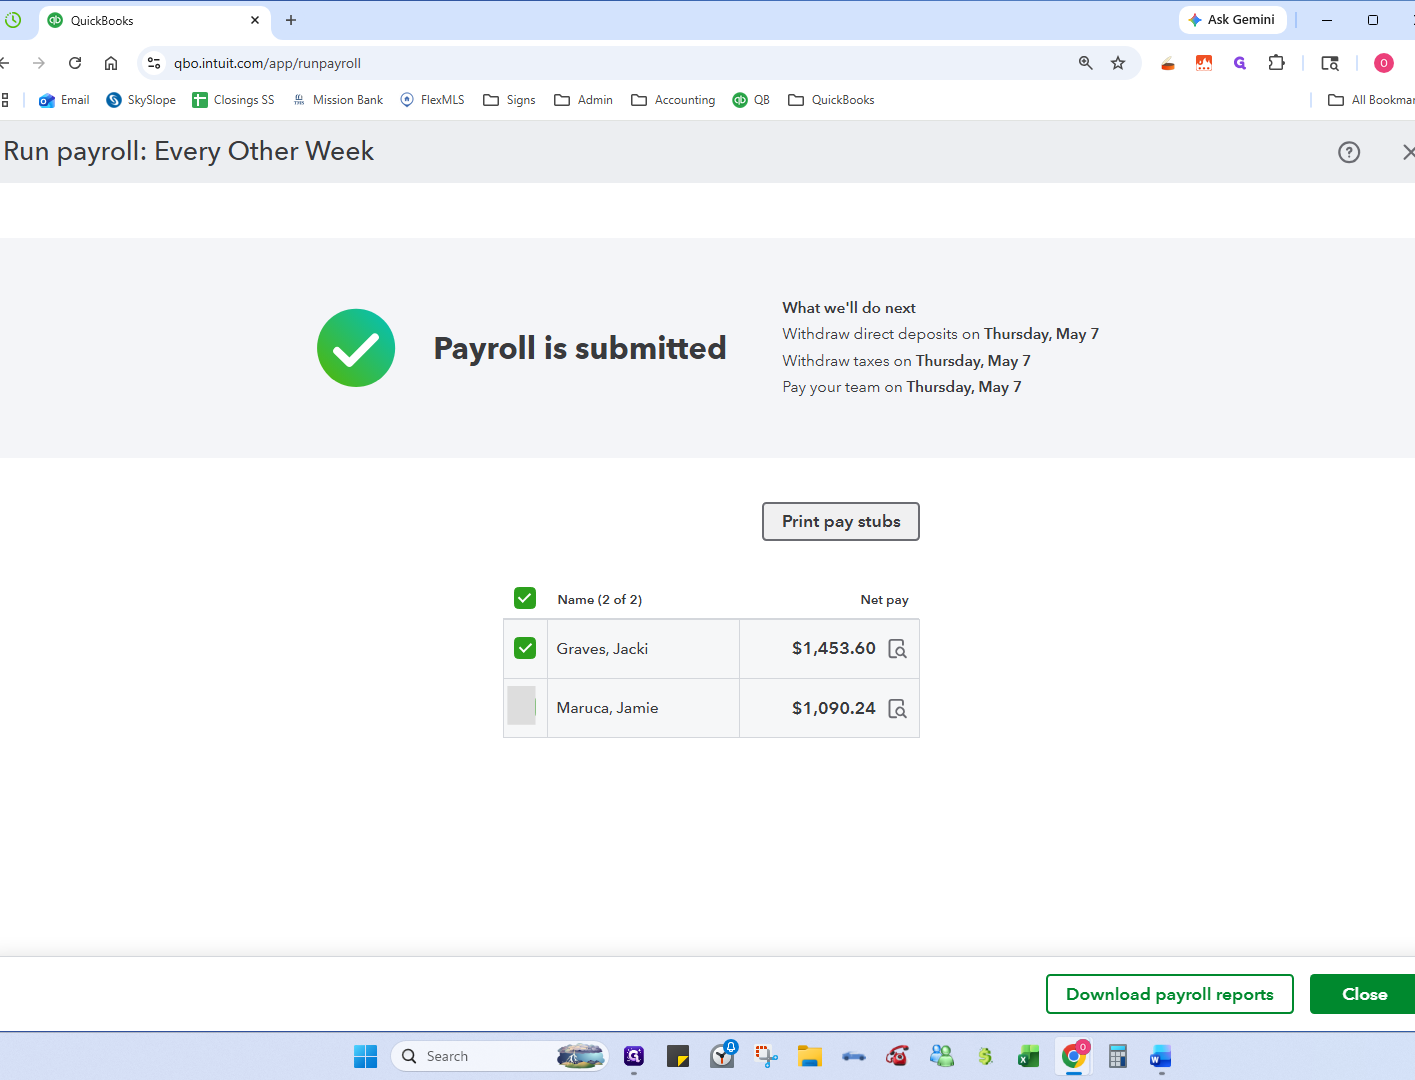
Click Submit payroll.
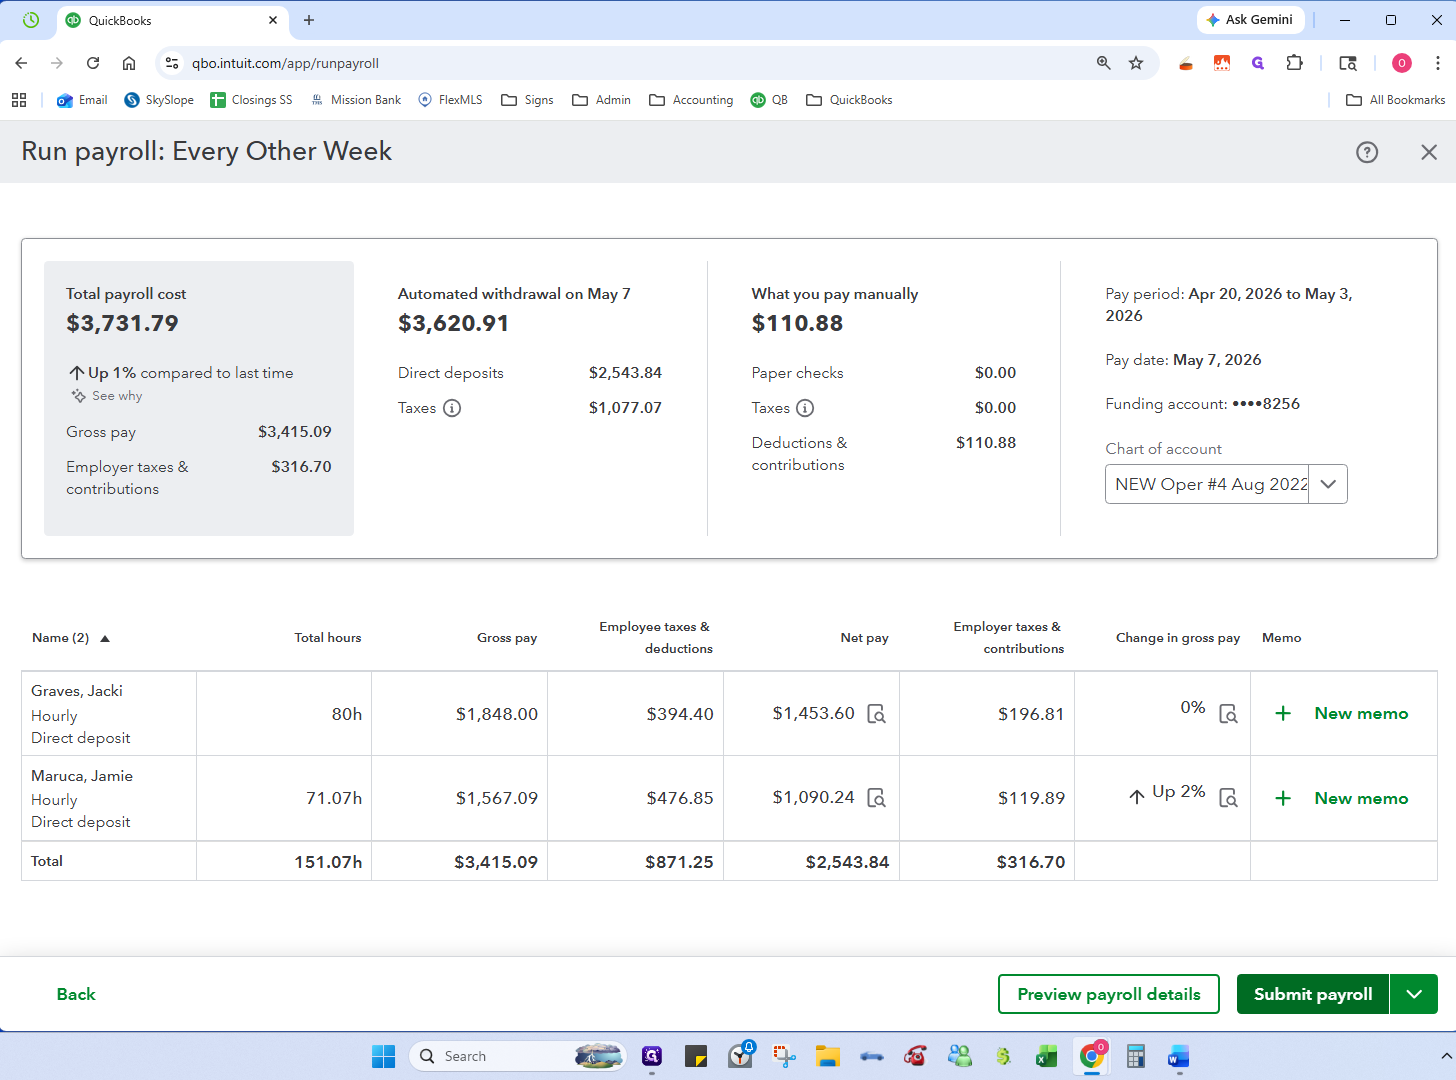
13
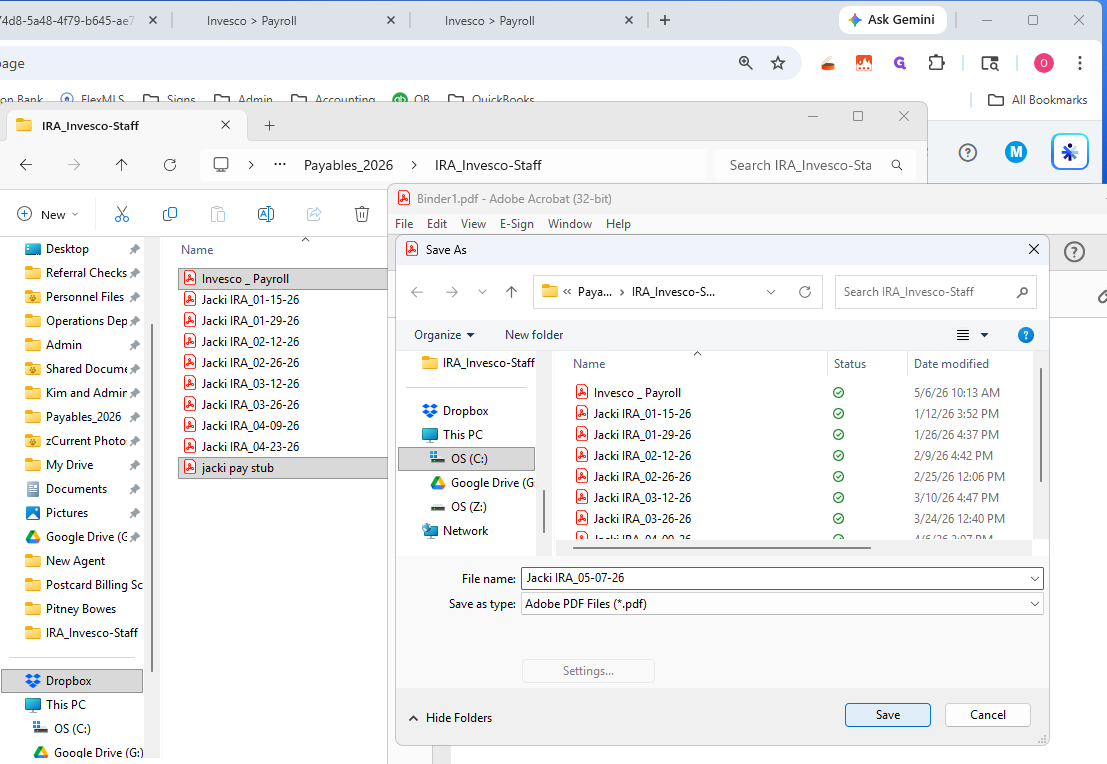
Select the employee with an IRA deduction and print their pay stub as a PDF. You will need this document to reference the exact deduction amount for the Invesco transfer, and to file. Select only their name and Click Print pay stubs.
4. Process IRA Staff Contribution(s)
14
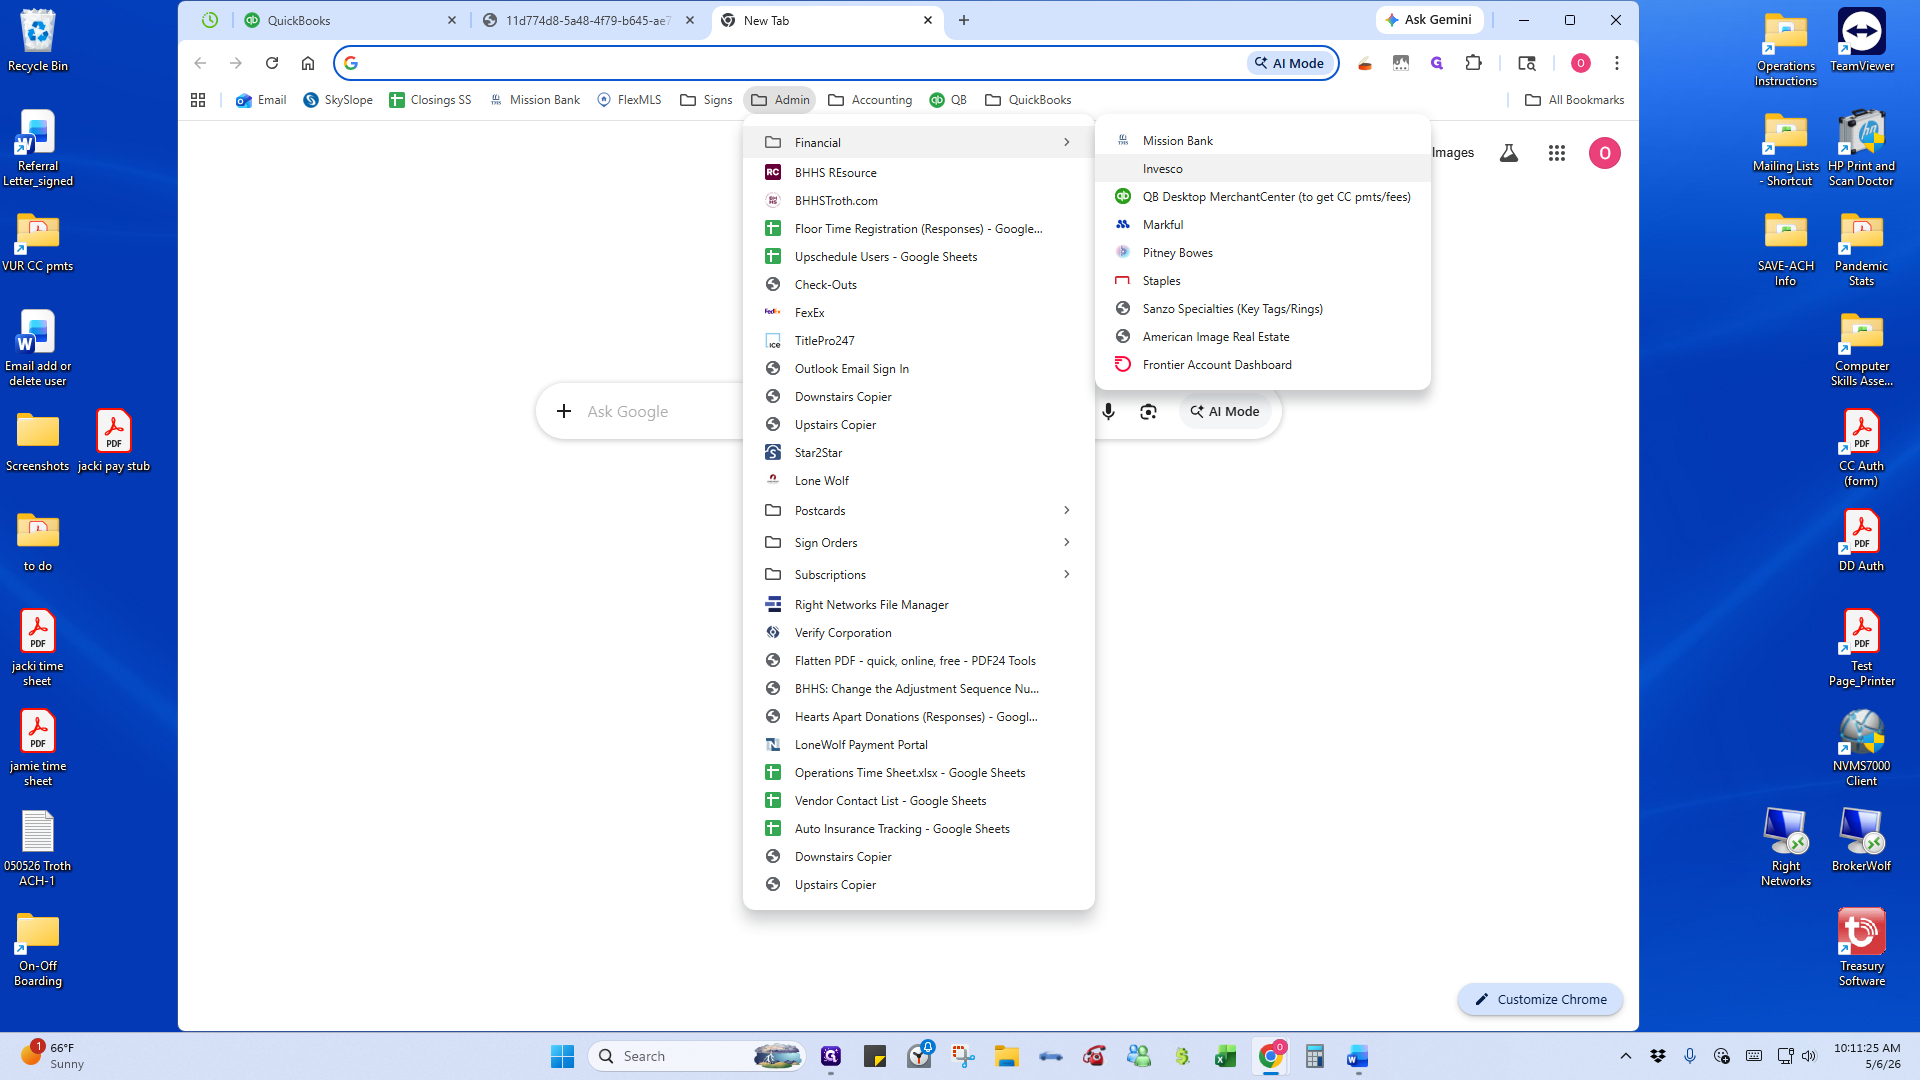
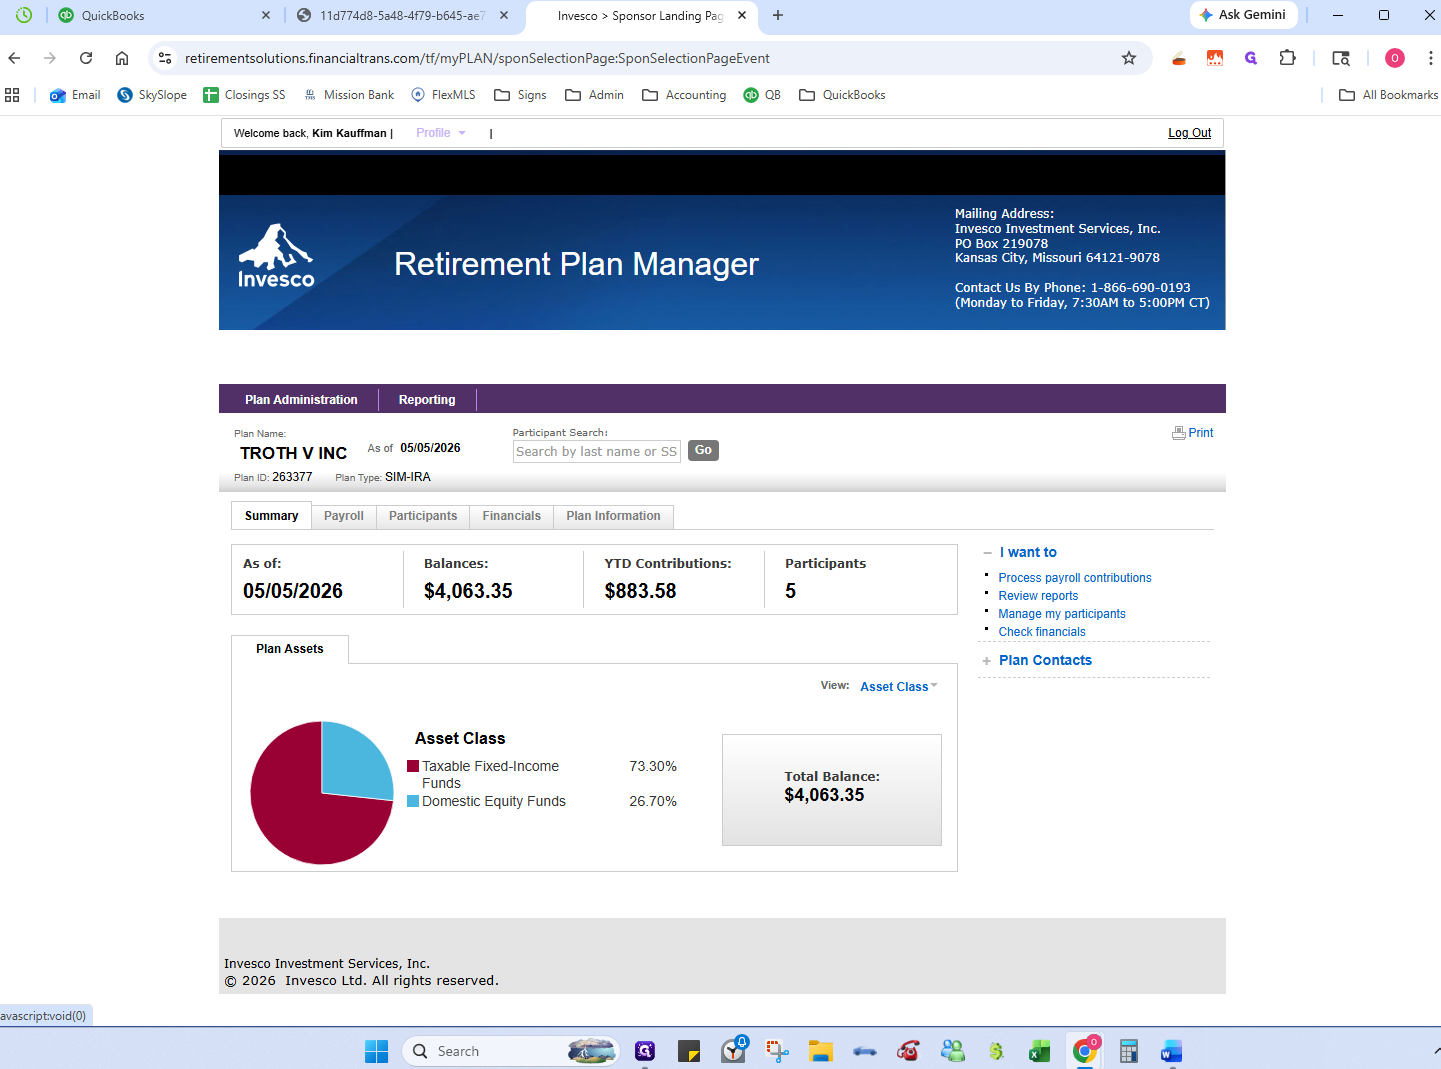
Log in to your Invesco Retirement Plan Manager portal.
15
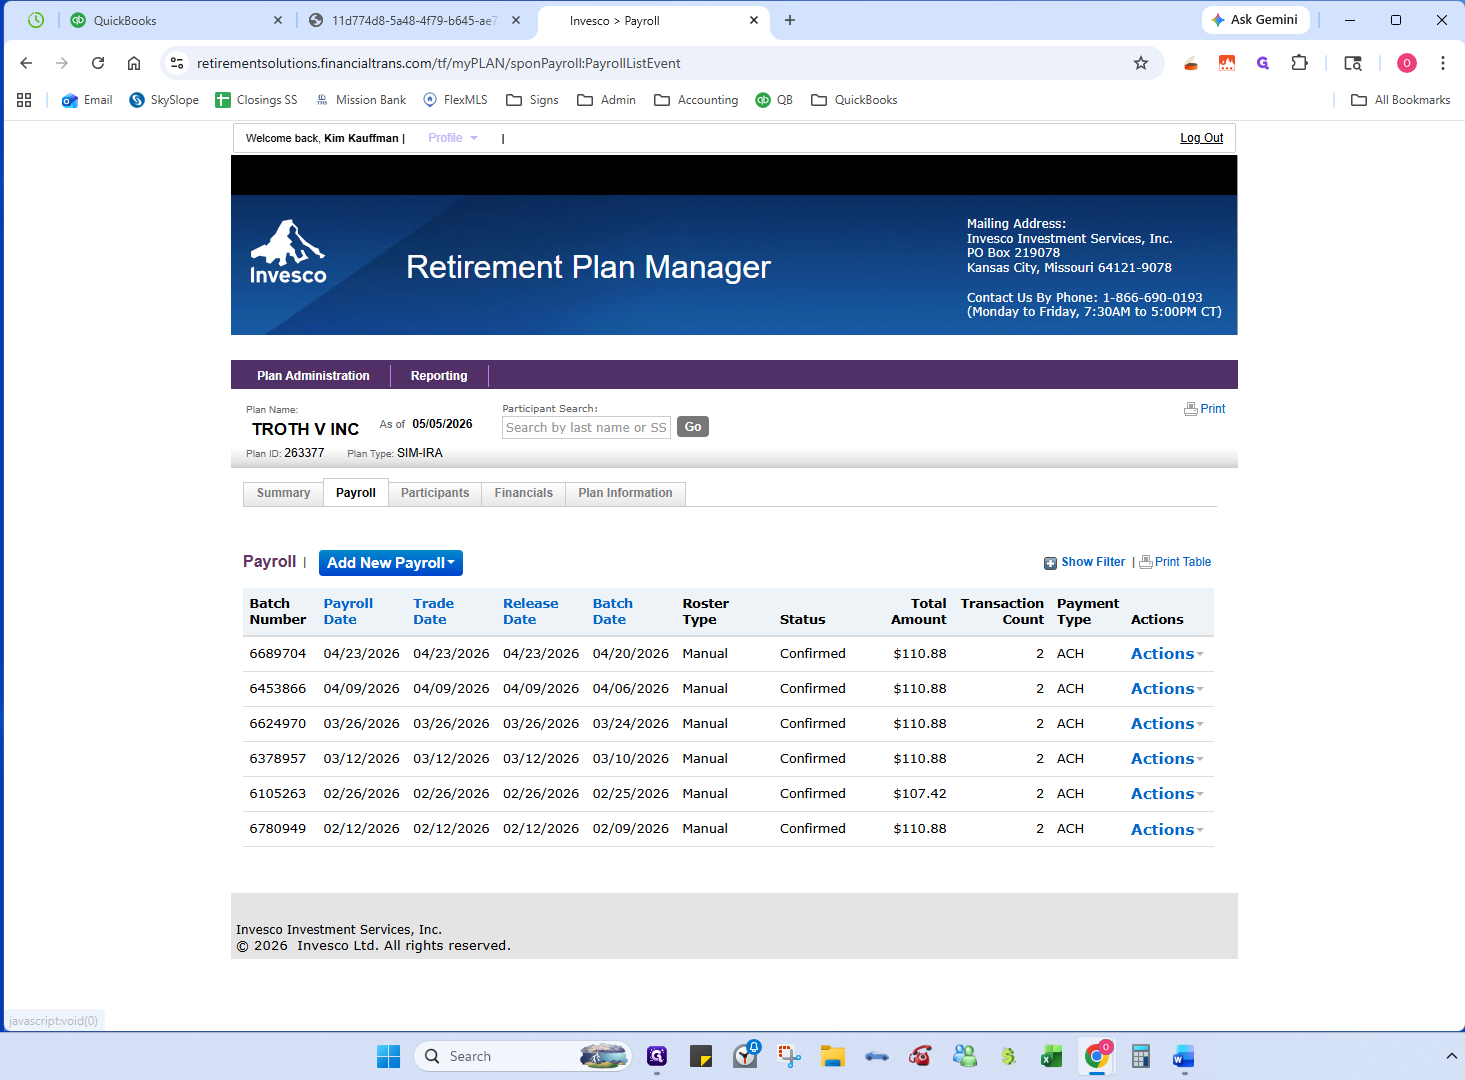
Navigate to the Payroll section.
16
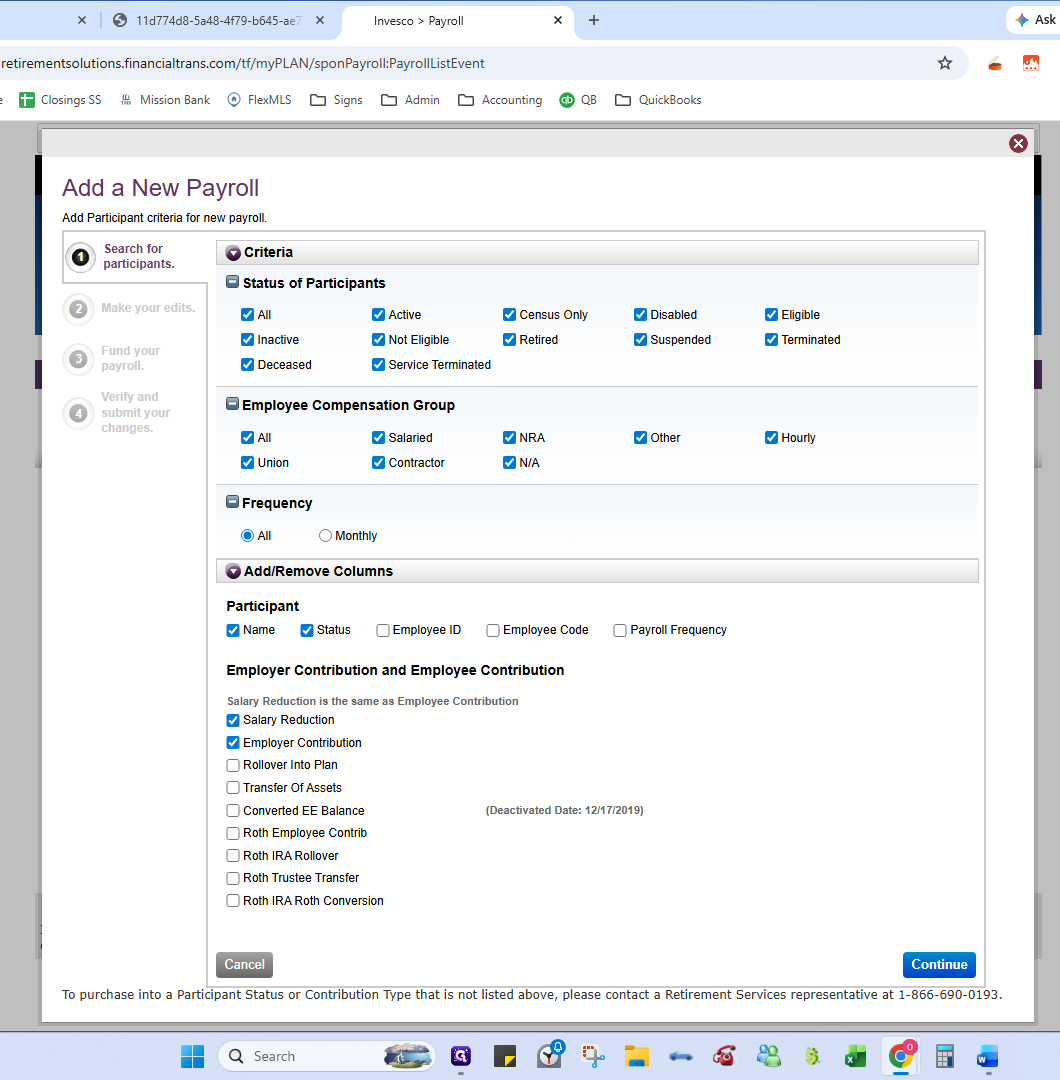
Click Add New Payroll and select Manual.
17
Ensure Salary Reduction and Employer Contribution are checked, then click Continue.
18
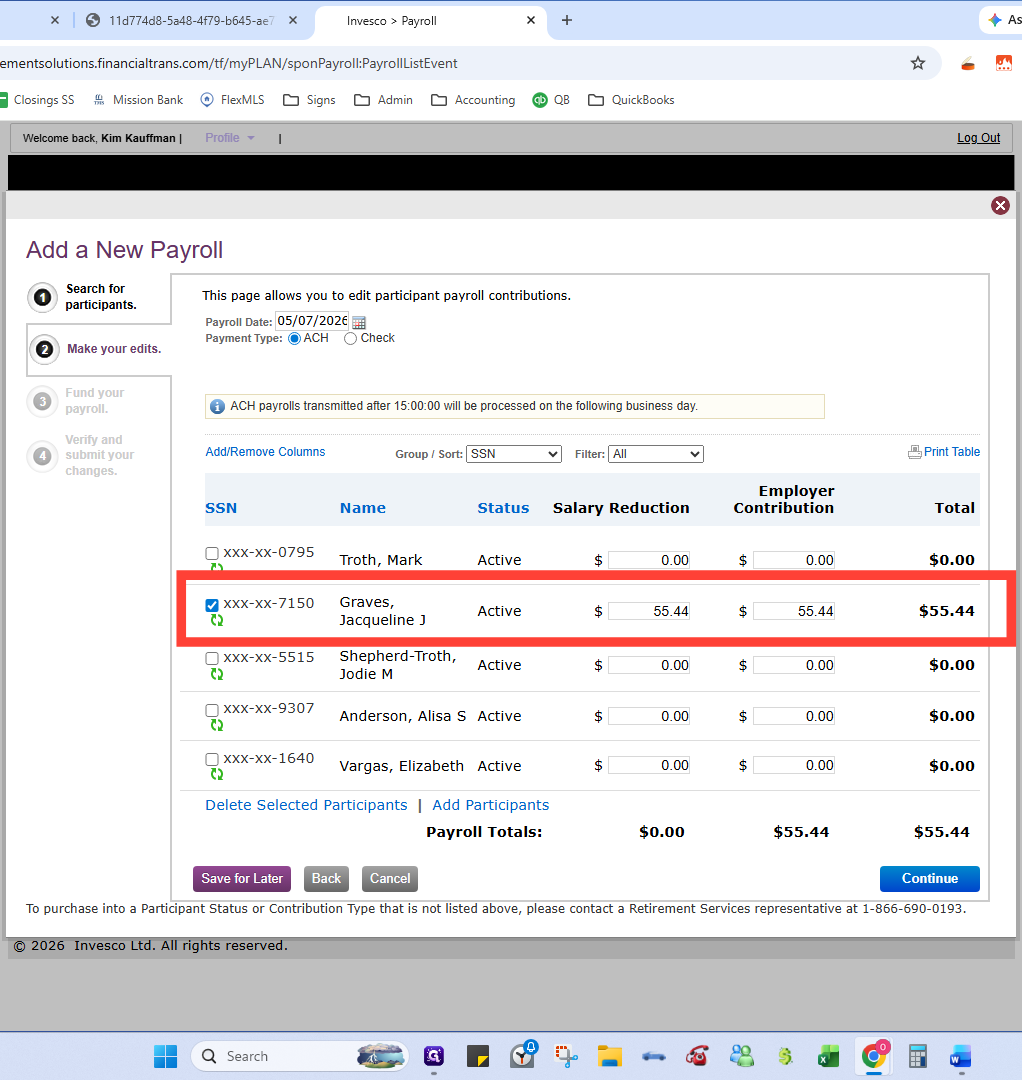
Enter the employee's salary reduction and employer match amounts exactly as they appeared on the pay stub.
19
Click Continue.
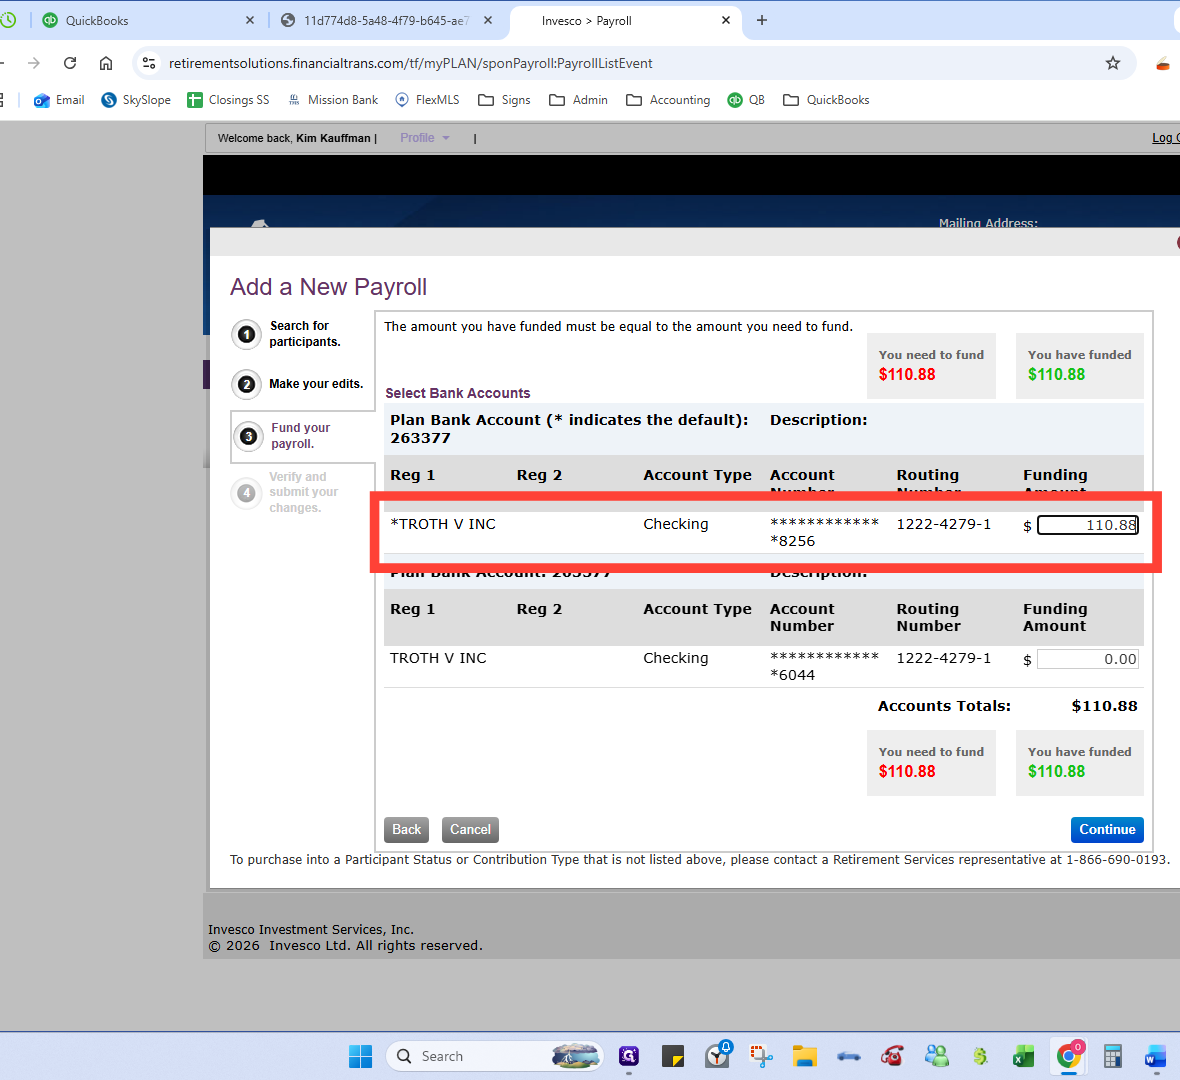
20
Verify it's the correct bank account and amount and click Continue.
21
Review the transaction summary and click Submit.

22
Click Actions-->View on the recently submitted payroll batch.
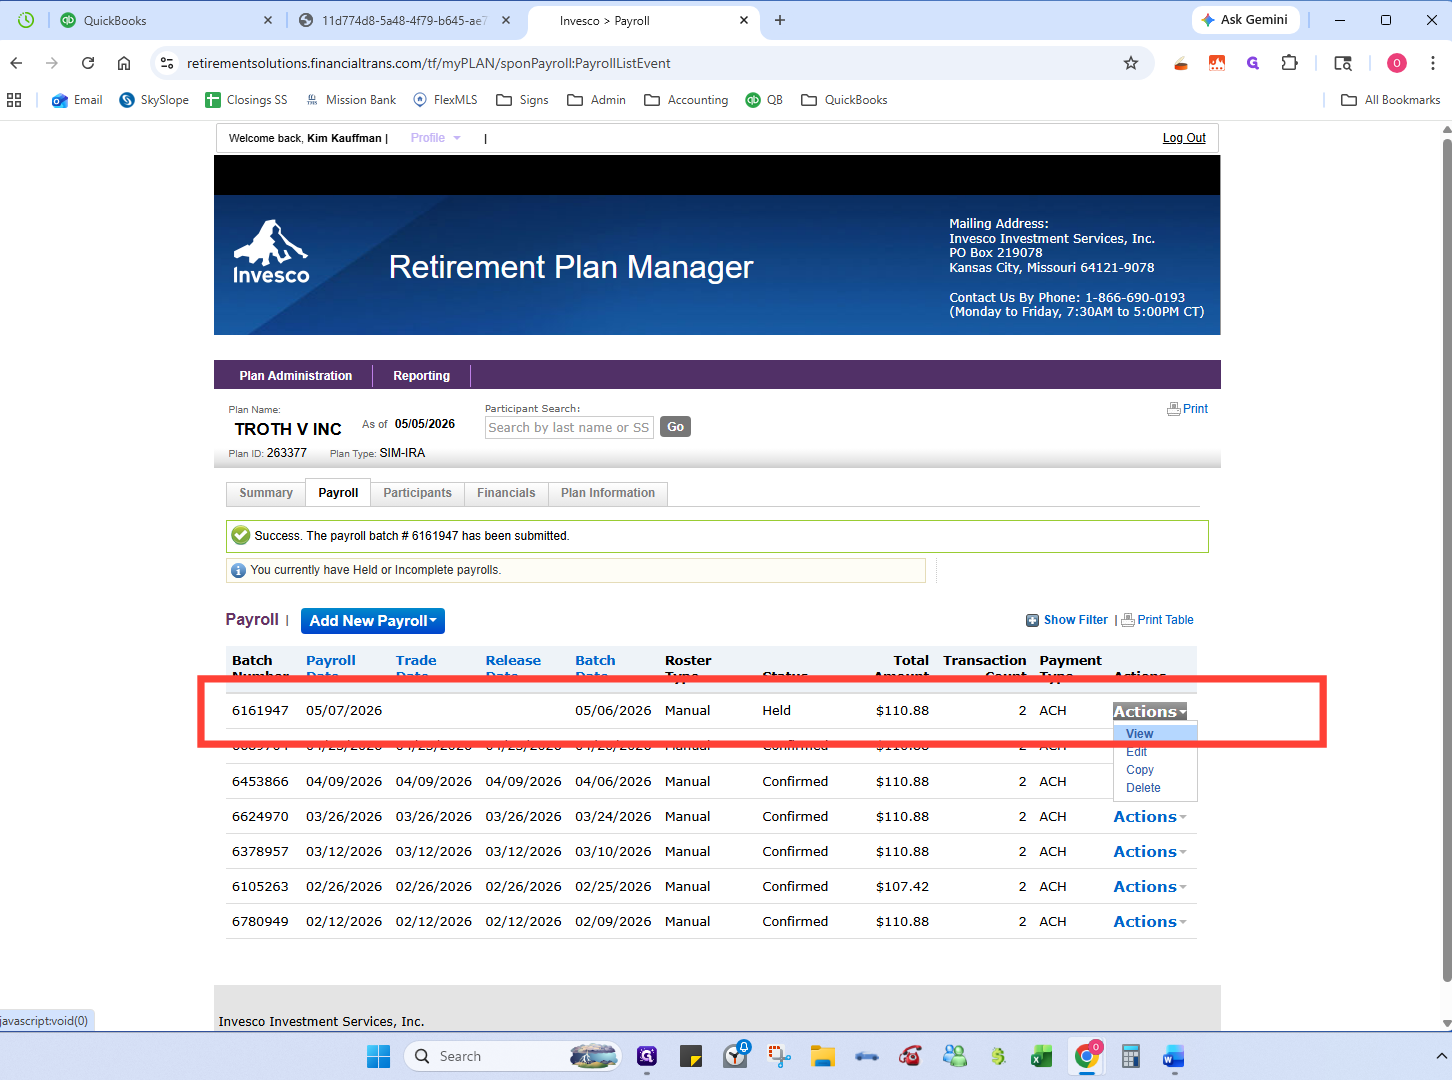
23
Click Print Table to PDF.
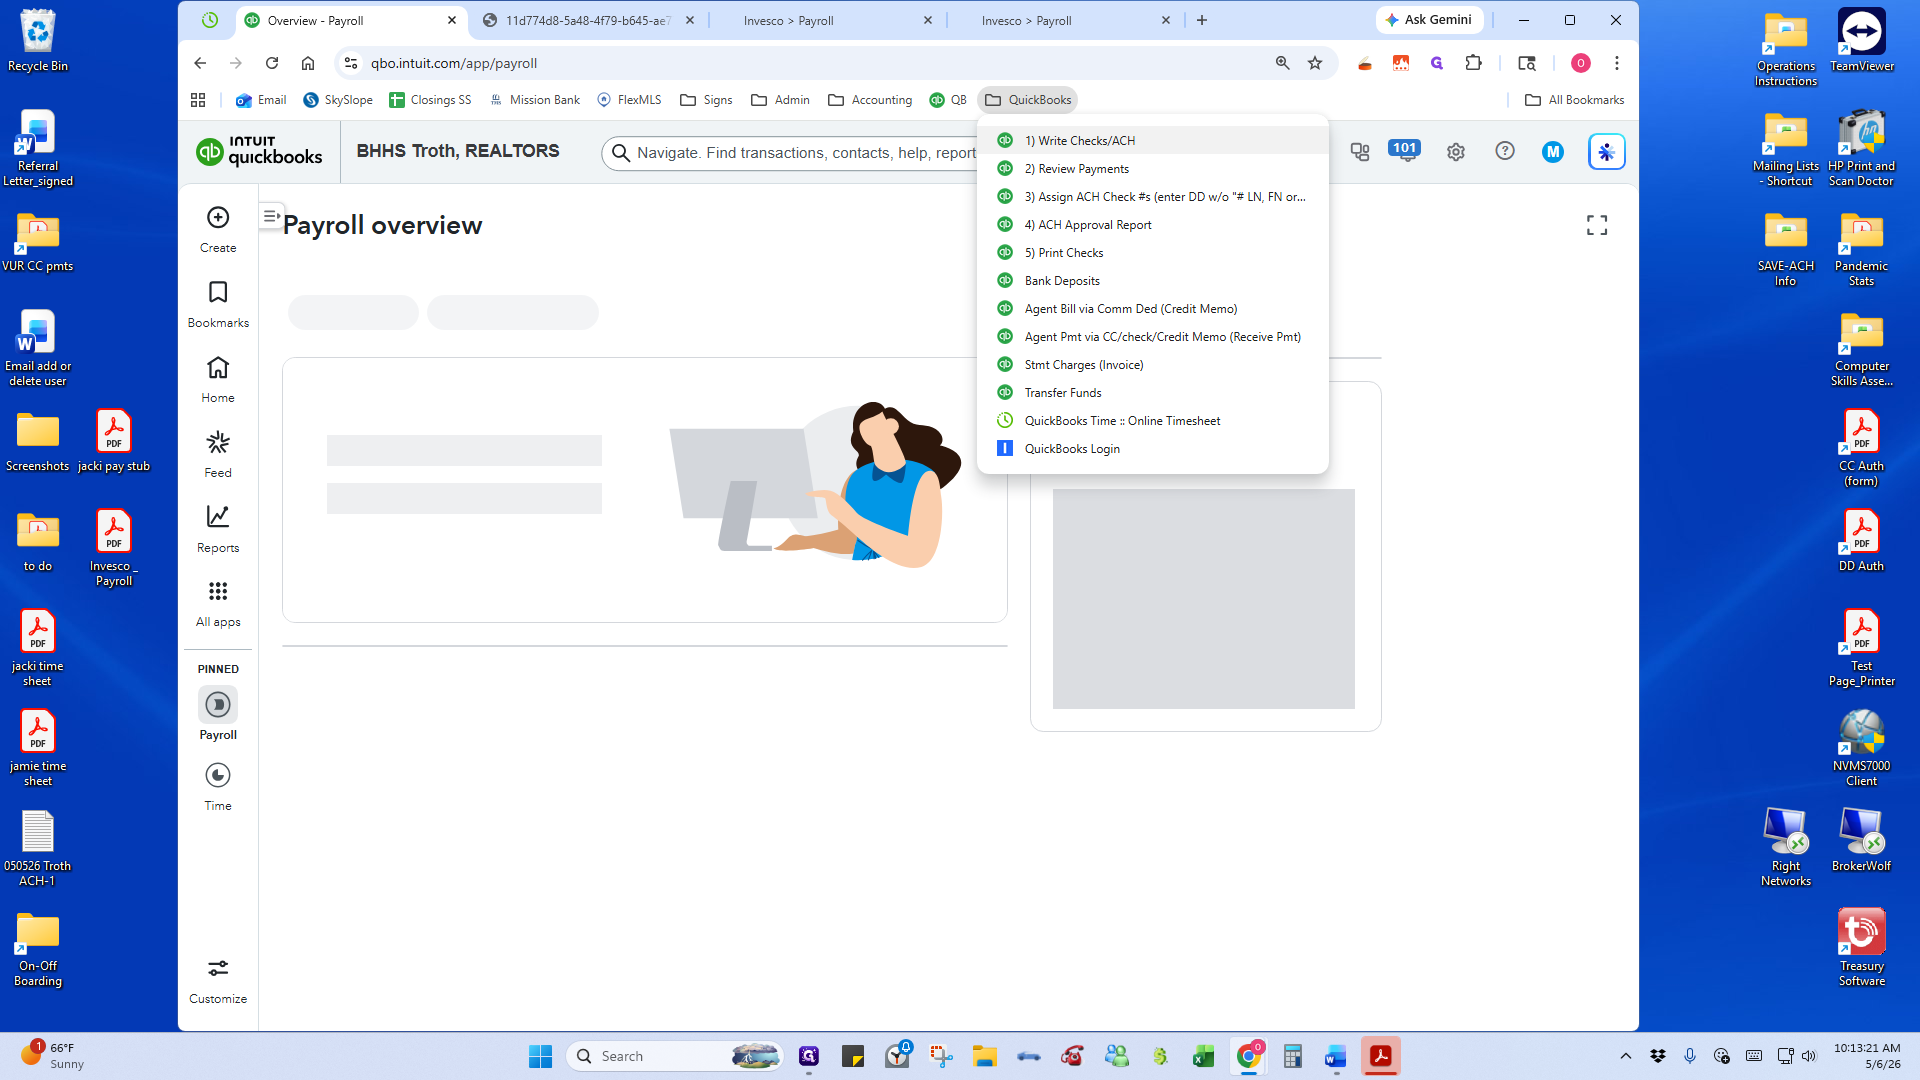
5. Record the Invesco Transfer in QuickBooks
24
Back in QuickBooks, go to Write Checks / ACH.
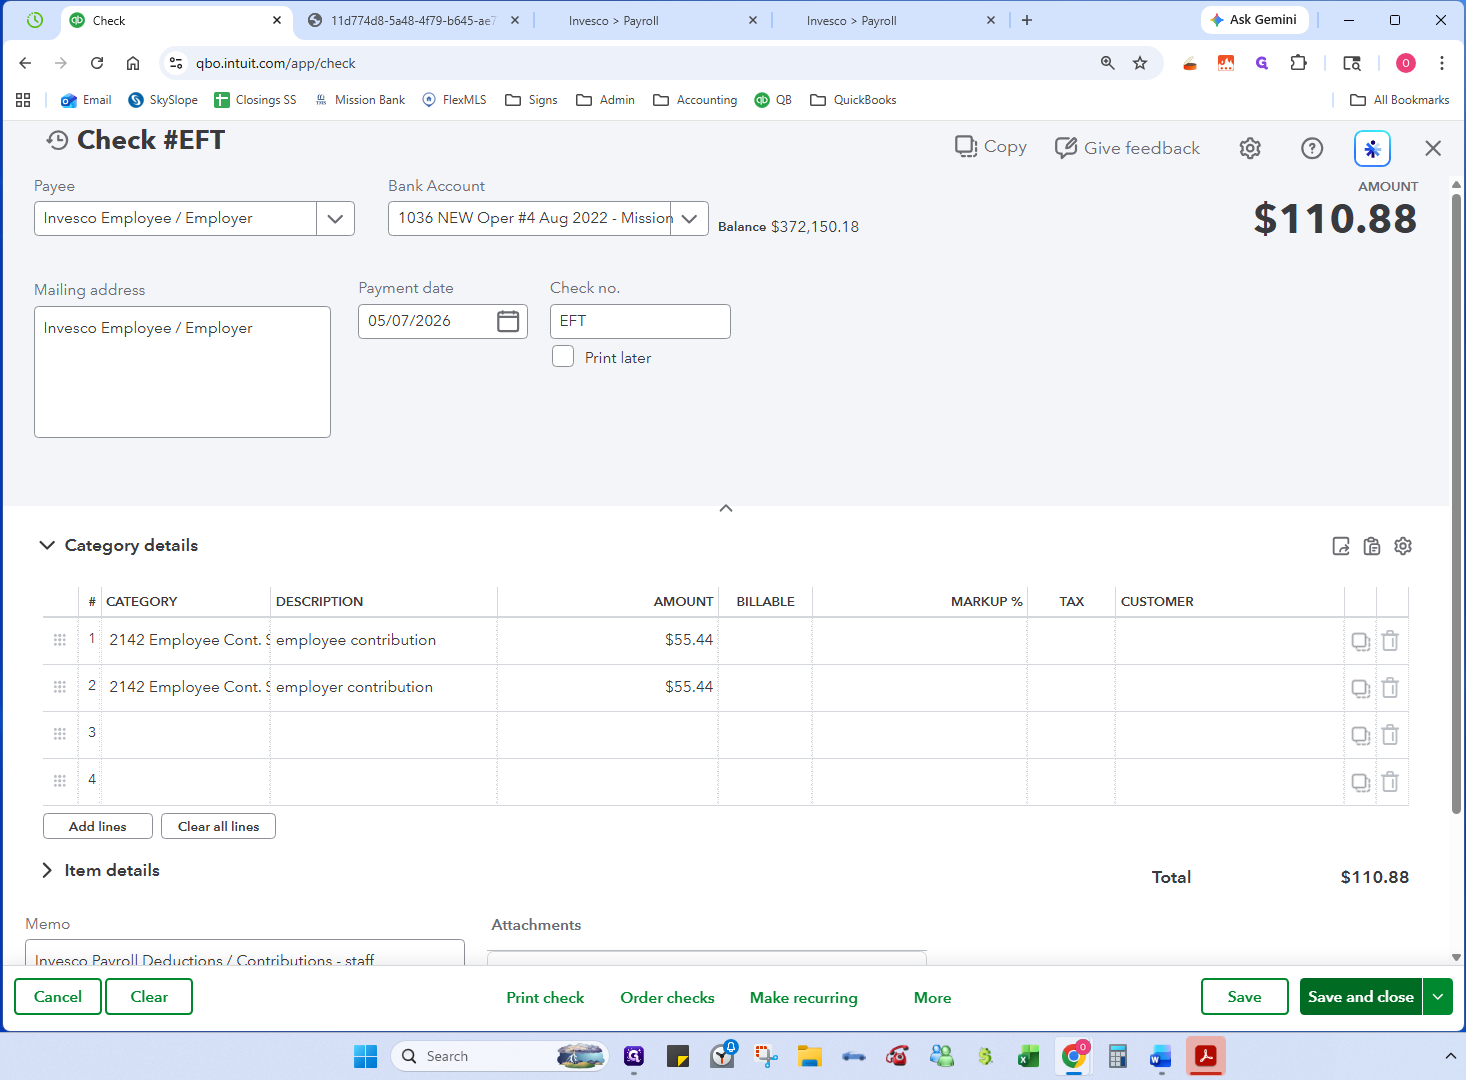
25
Select Invesco Employee / Employer as the payee. Make sure the correct bank account is selected (our General Operating Account), the Payment Date is set to the Payroll Date, and Check no. is EFT.
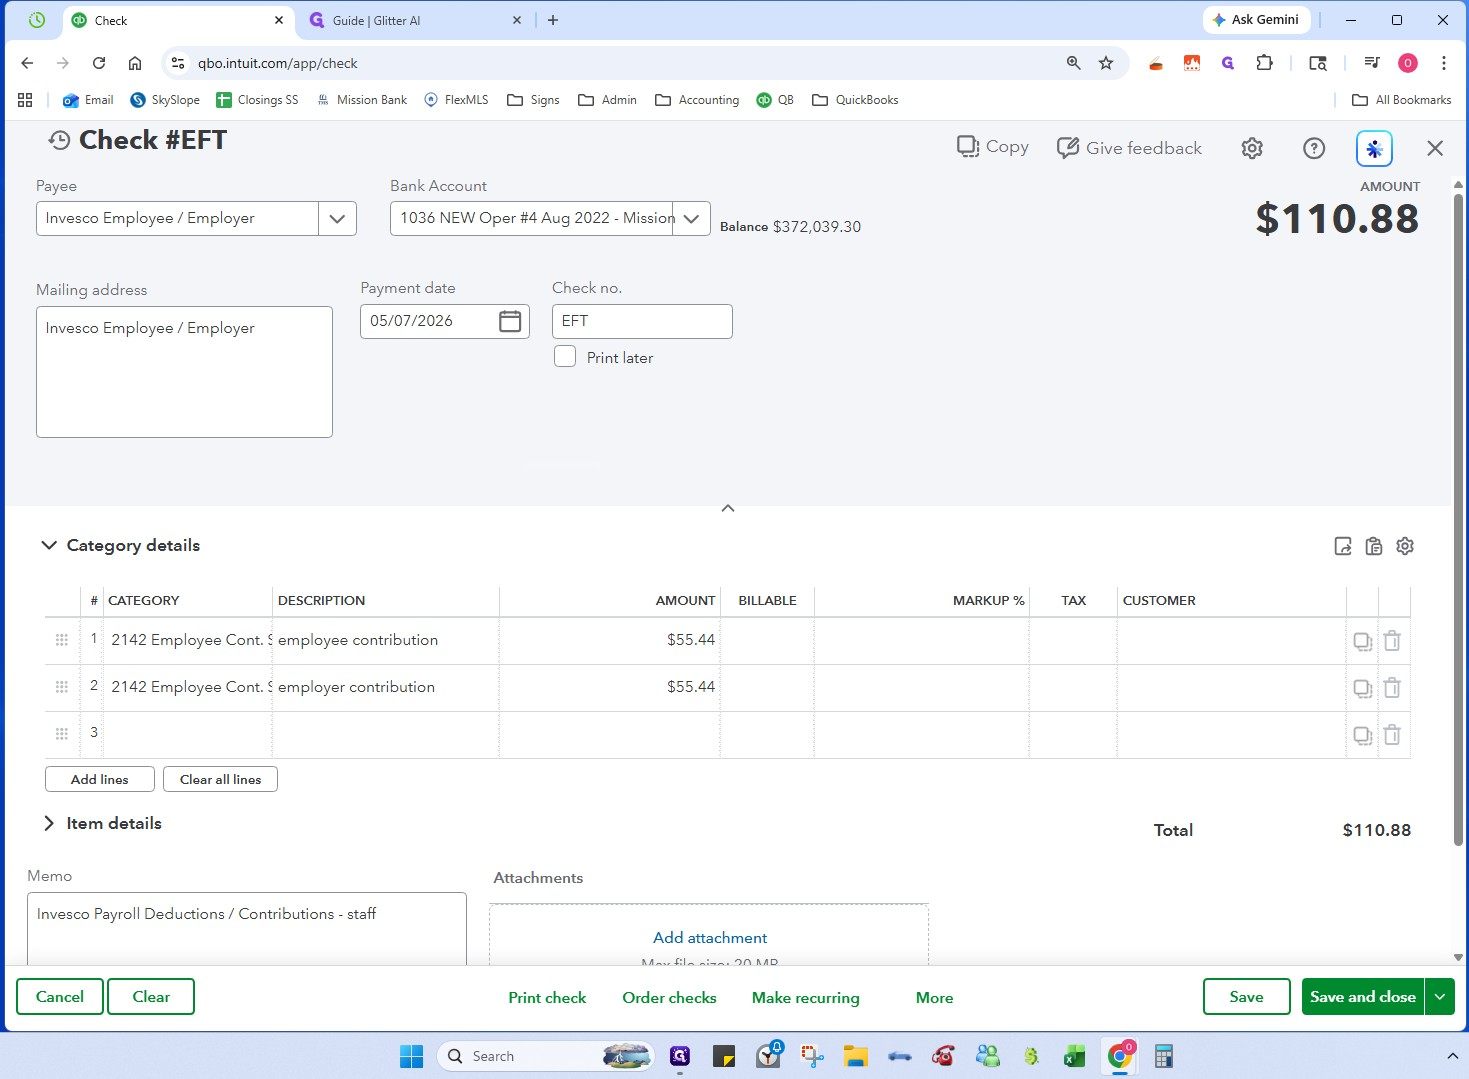
26
The check should pre-fill. Verify the selected chart of accounts and amounts are correct, then click Save and close.
6. Combine and File Documents
Finally, organize the payroll documents into a single record.
27
Open File Explorer and navigate to your current Payables folder (e.g.,
Payables_2026/IRA_Invesco-Staff).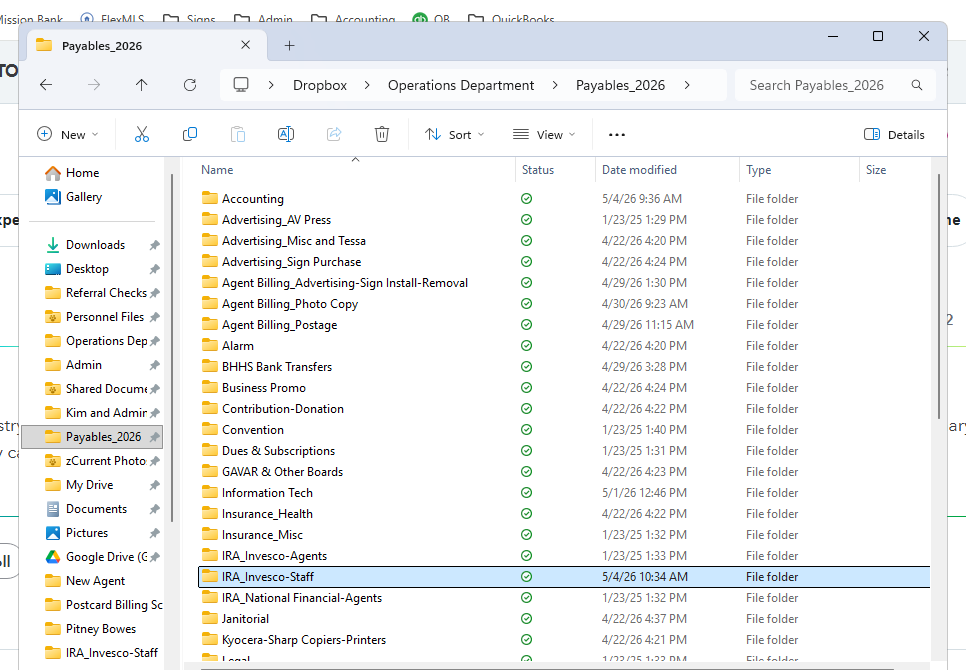
28
Combine the 2 PDFs (paystub and Invesco) with the standardized naming convention of the destination folder.