How to Select or Create a Class for a Transaction
By Aasma Technology Solutions
This guide explains how to assign a Class to a transaction from the Review Transactions section. Users can select an existing class from the available options or create a new class if the required class is not available.
1
Go to Review Transactions of Transactions tab
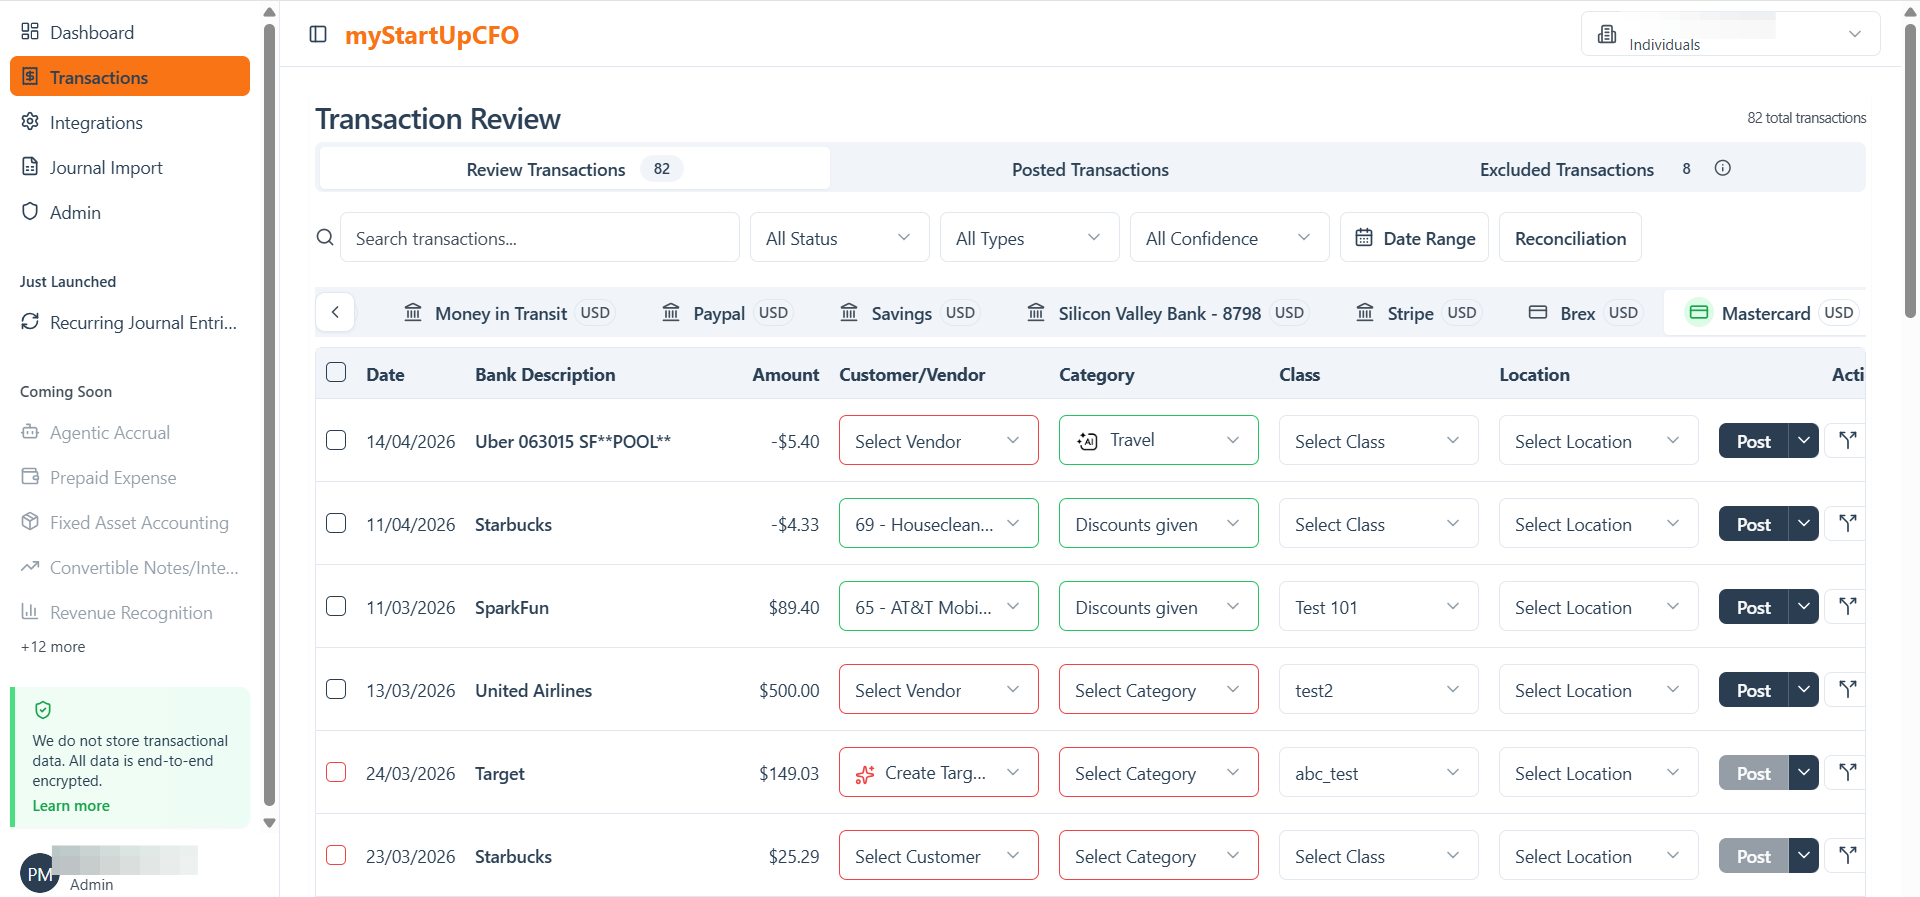
You need to make sure that Class is enabled for this client.
2
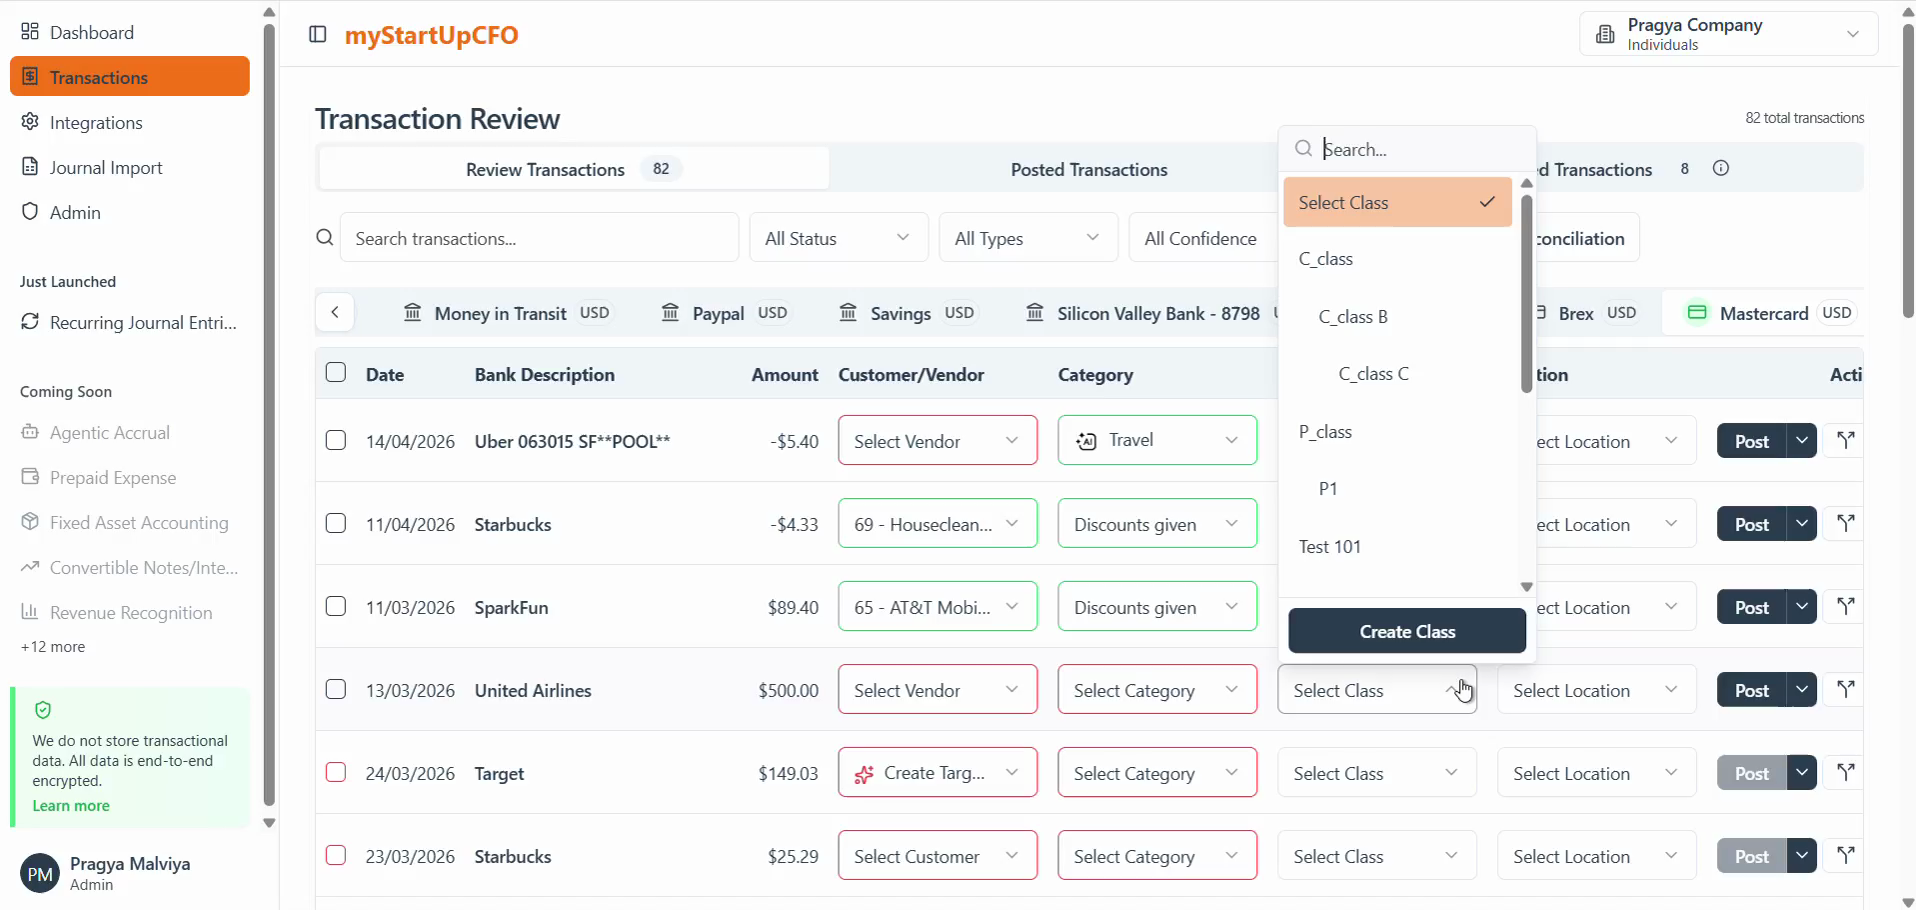
Click the Select Class dropdown on any transaction row, the if the Class is already existing select from the Drop Down.
3
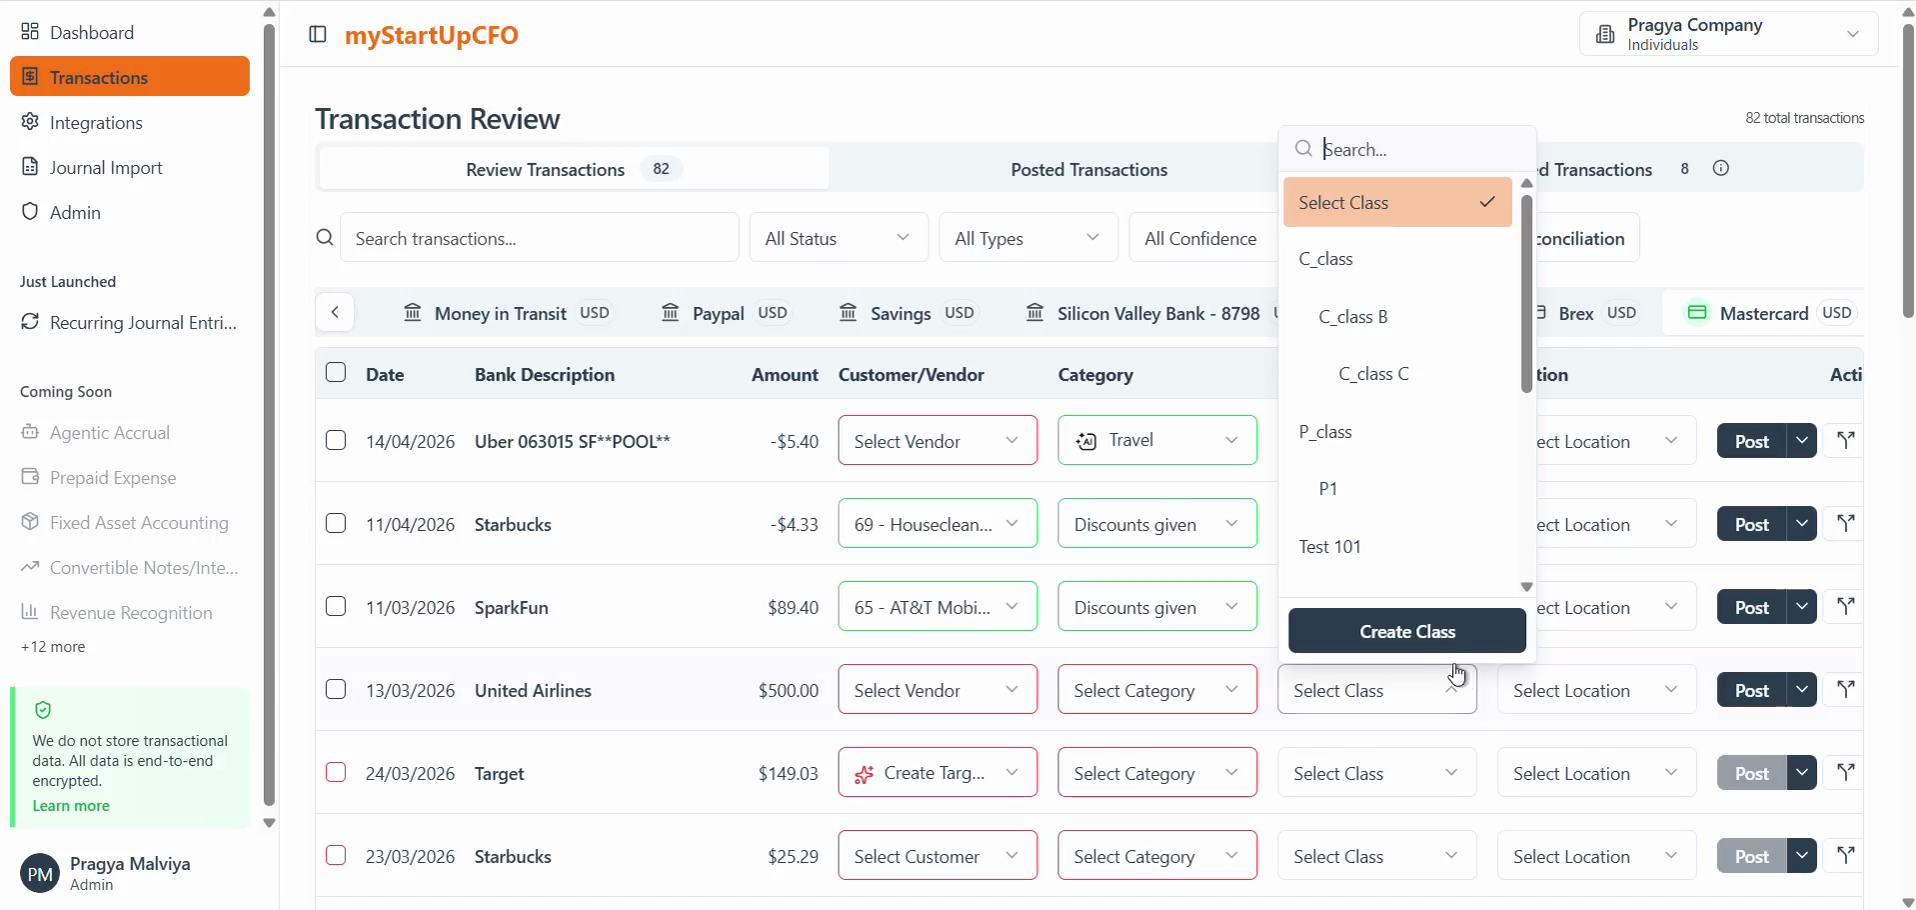
If Class doesnot exist, Click the Create Class button at the bottom of the dropdown menu.
4
Type your new Class name in the Name field. Click Save to confirm and create the top-level class.
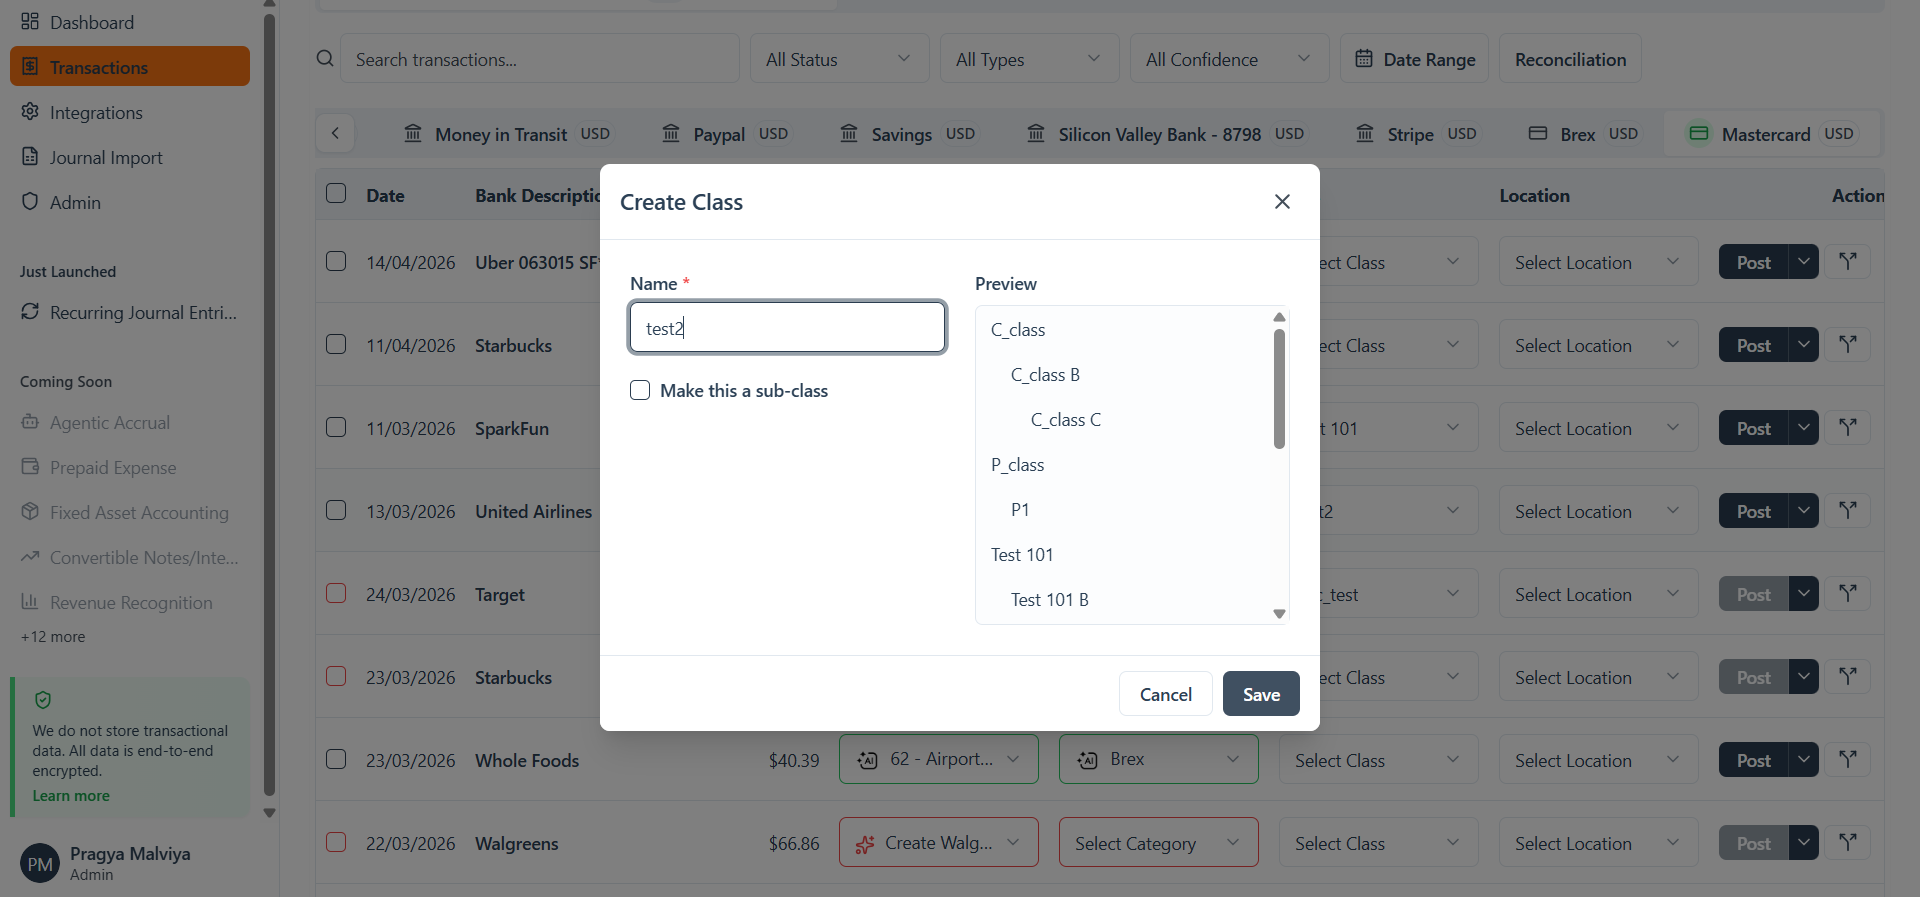
The created Class will be updated in that particular transaction.
For creating a Sub Class these are the steps:
5
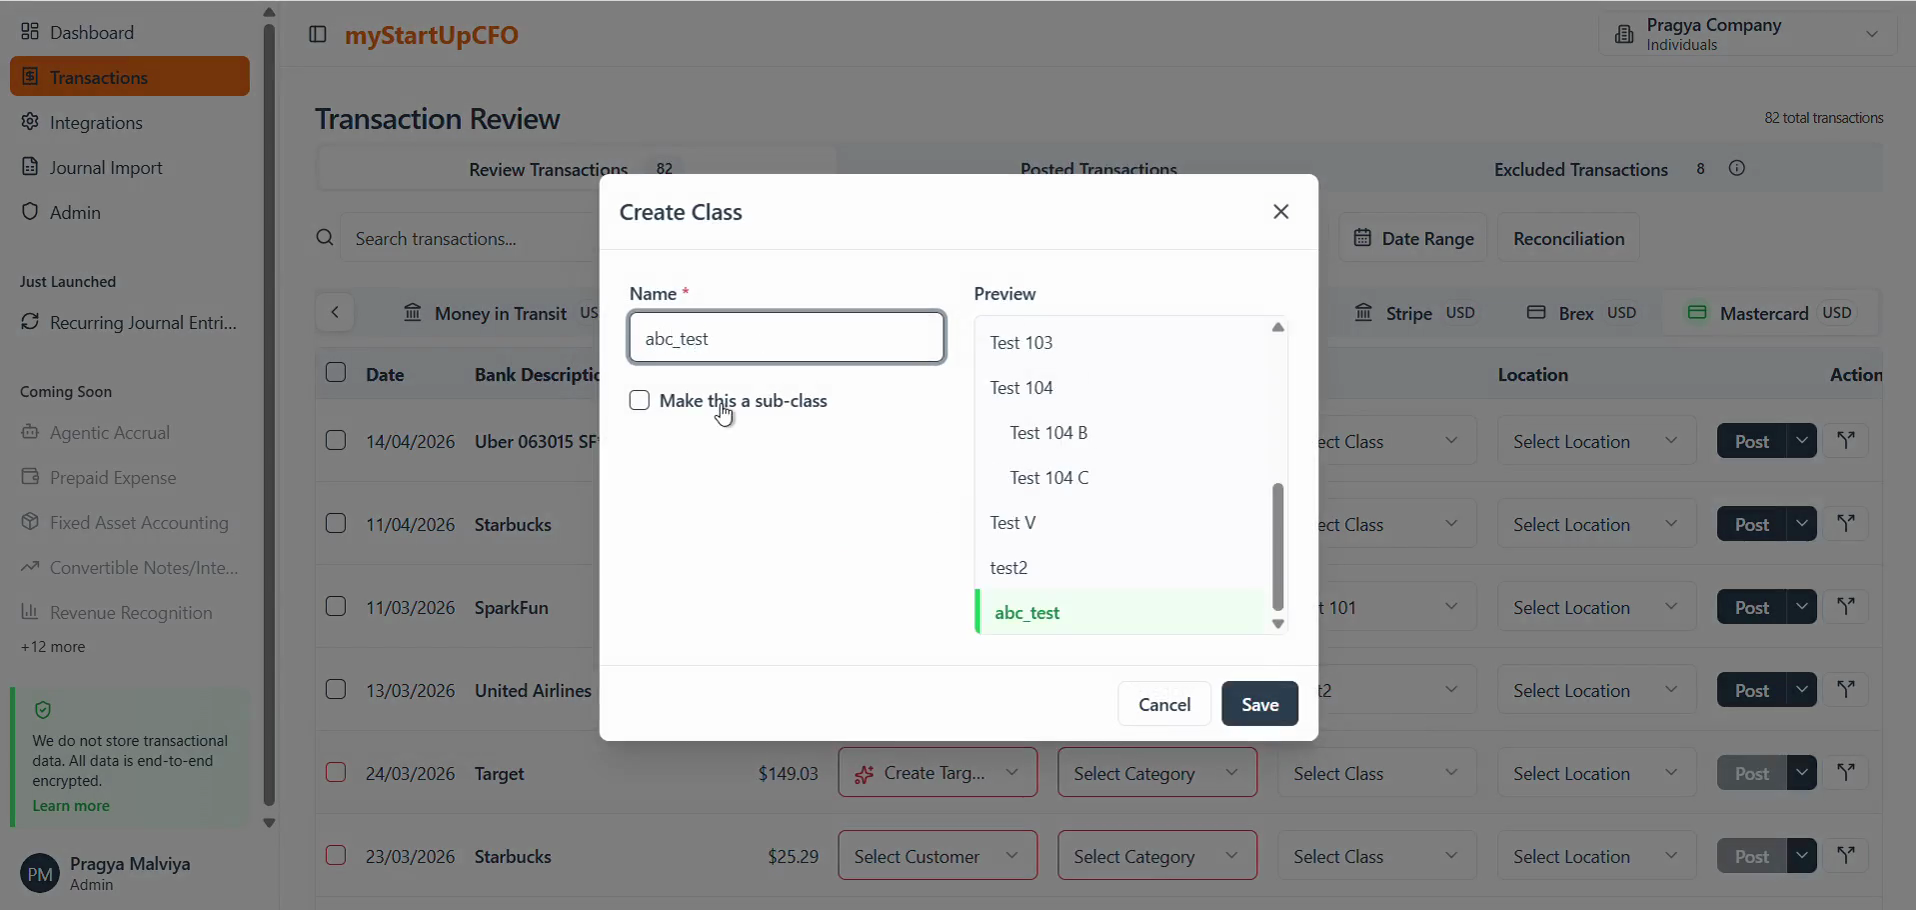
Type your new sub-class name in the Name field. Check the Make this a sub-class checkbox to enable nesting options.
6
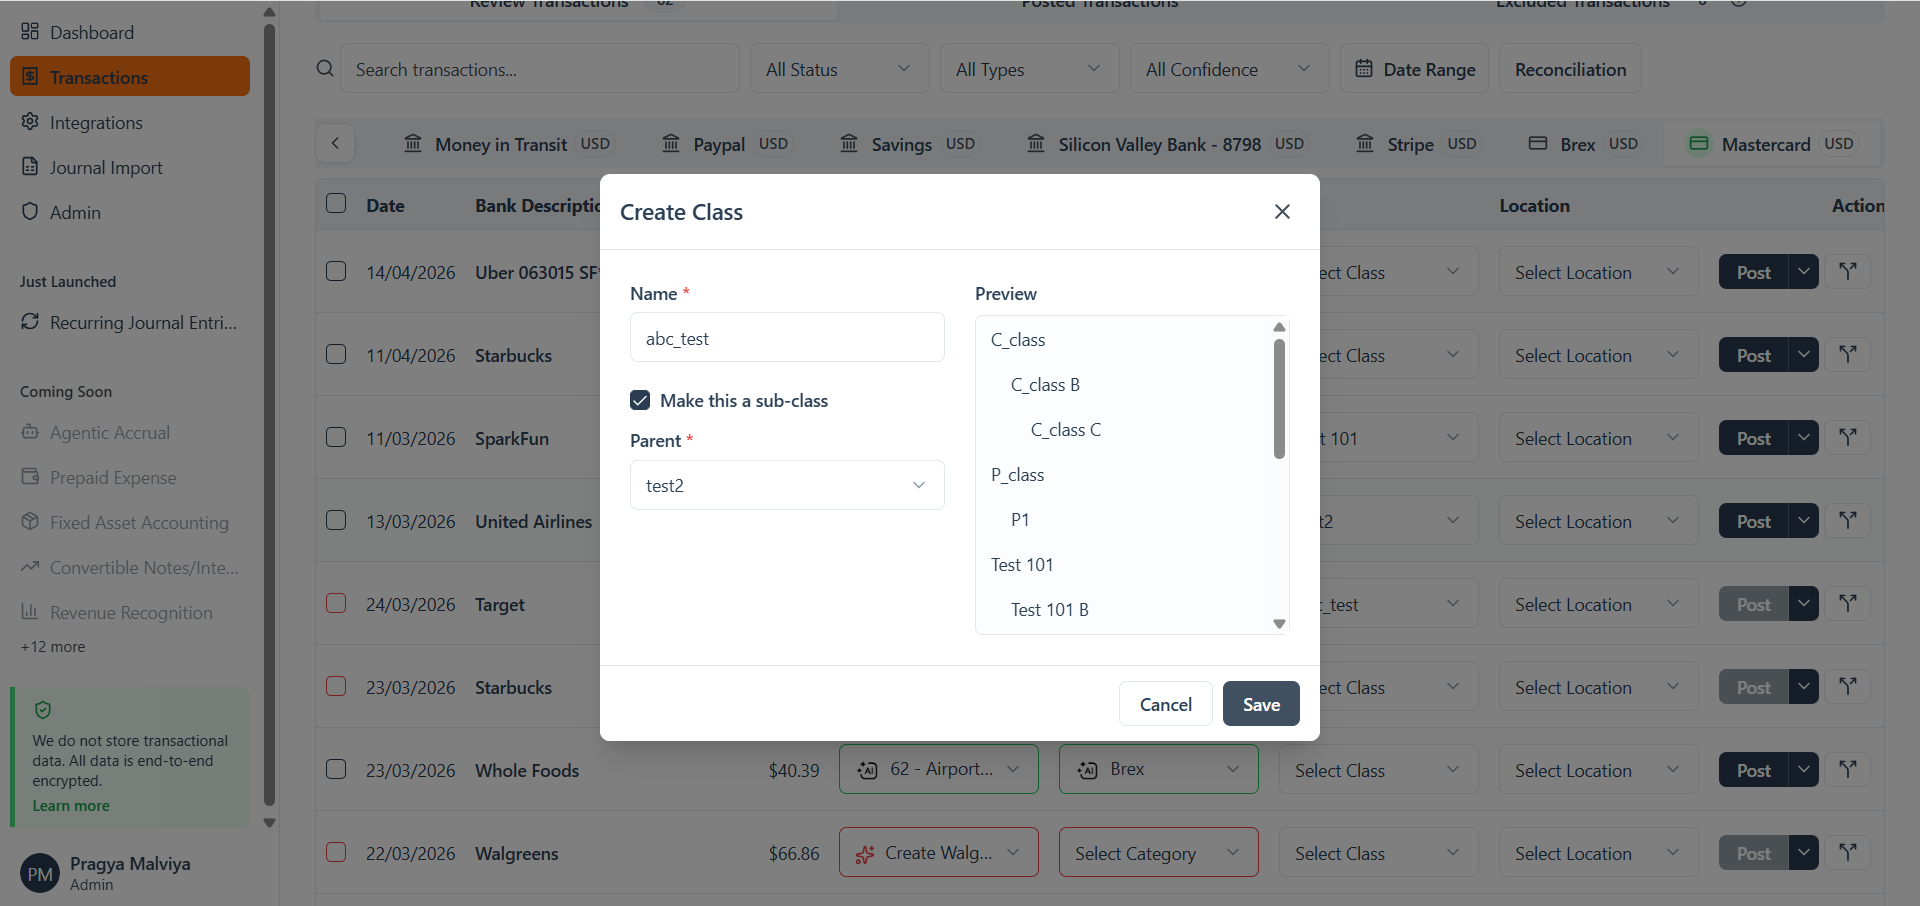
Select the desired parent class from the list.
7
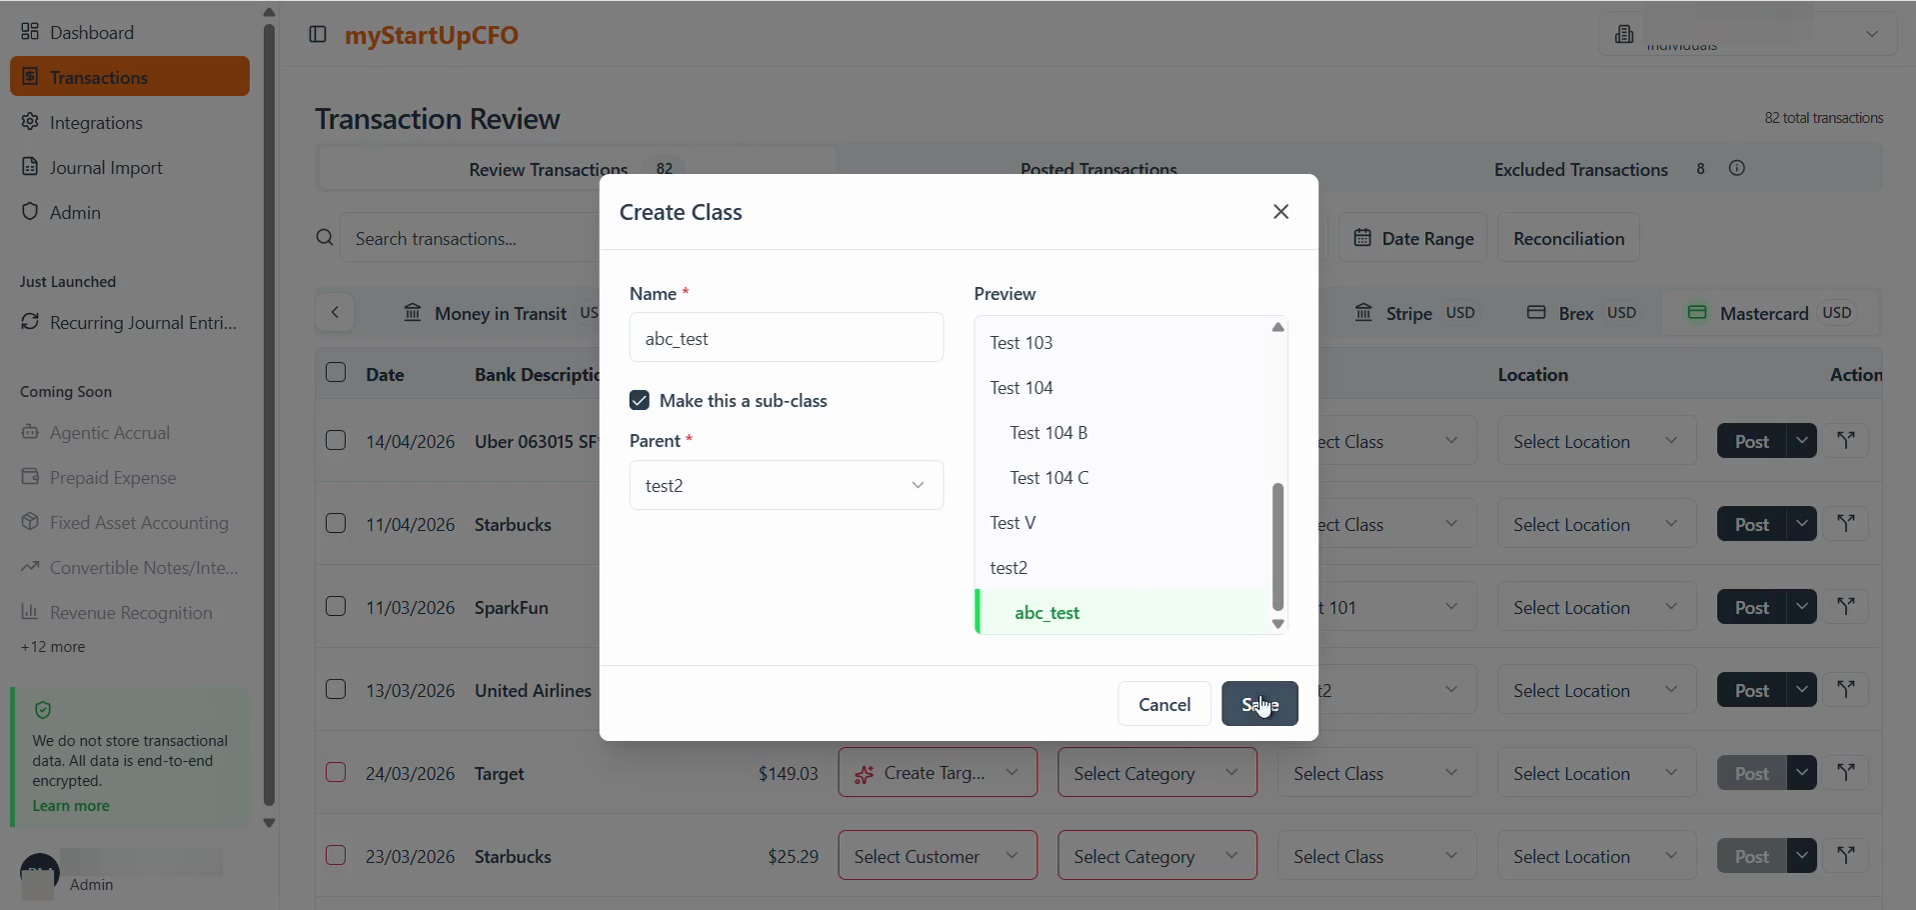
Click Save to finalize the creation of your nested sub-class.
The Class feature allows users to select existing classes or create new ones directly while reviewing transactions, making transaction categorization more convenient and consistent.