
How to Send a CRM Broadcast in Ideal: Step-by-Step Guide
Learn how to send a CRM blast in Ideal to notify customers about promotions or share mass information. This step-by-step guide covers creating broadcasts, attaching files, targeting customer groups, and scheduling messages.
In this guide, we'll learn how to send a CRM broadcast message to customers using the Ideal platform. This process helps you share promotions or important information with many customers at once. You will see how to create a new broadcast, choose between SMS and MMS, attach files, test your message, select recipients, and schedule or send your broadcast.
Let's get started
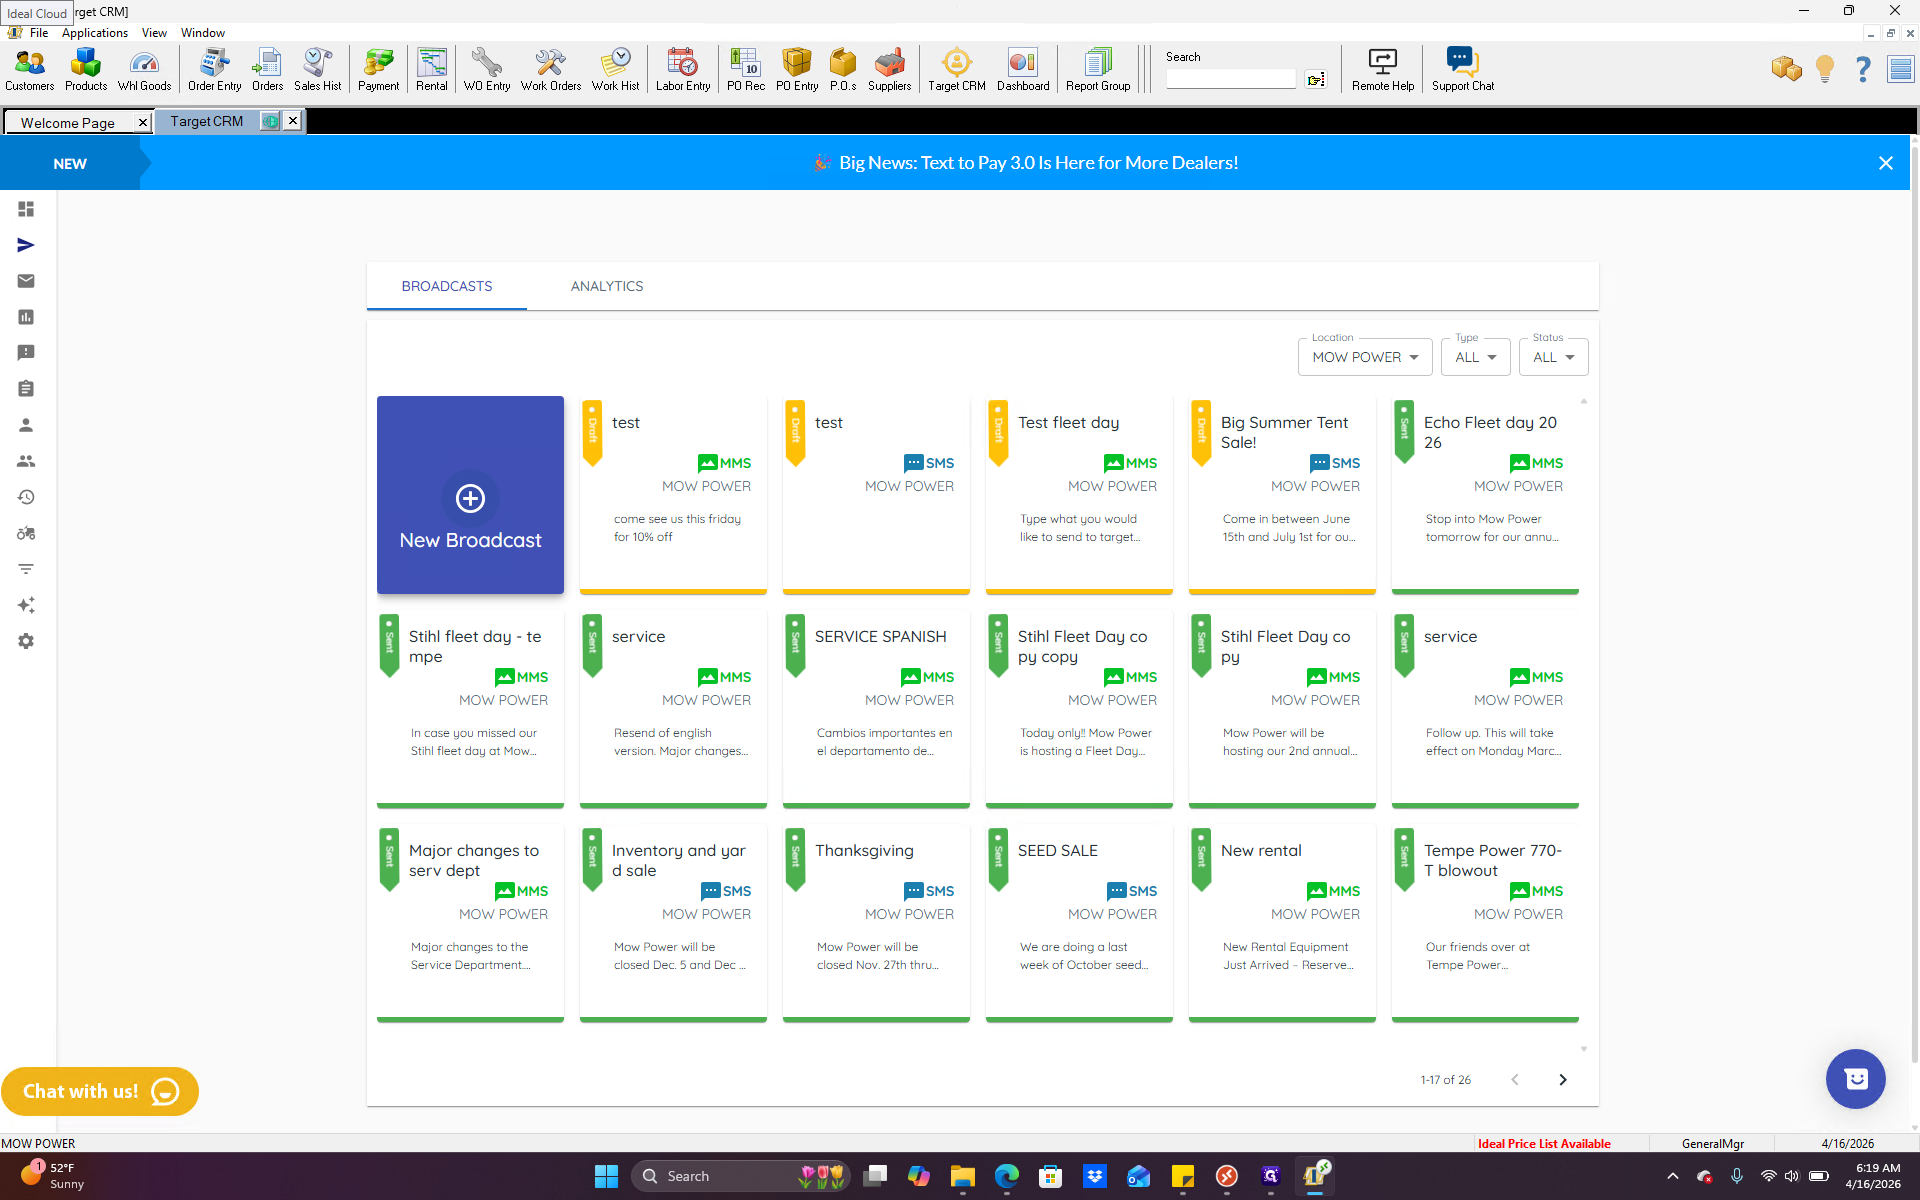
In this video, we will walk through how to send a CRM blast to customers about promotions or to share mass information. Starting in Ideal, go to the target CRM icon and click it.
A small box may open. If it does, just click "No thanks." Once we're here, in the upper left, you see something called "Broadcast." Click that, and it will take you to the broadcast screen.
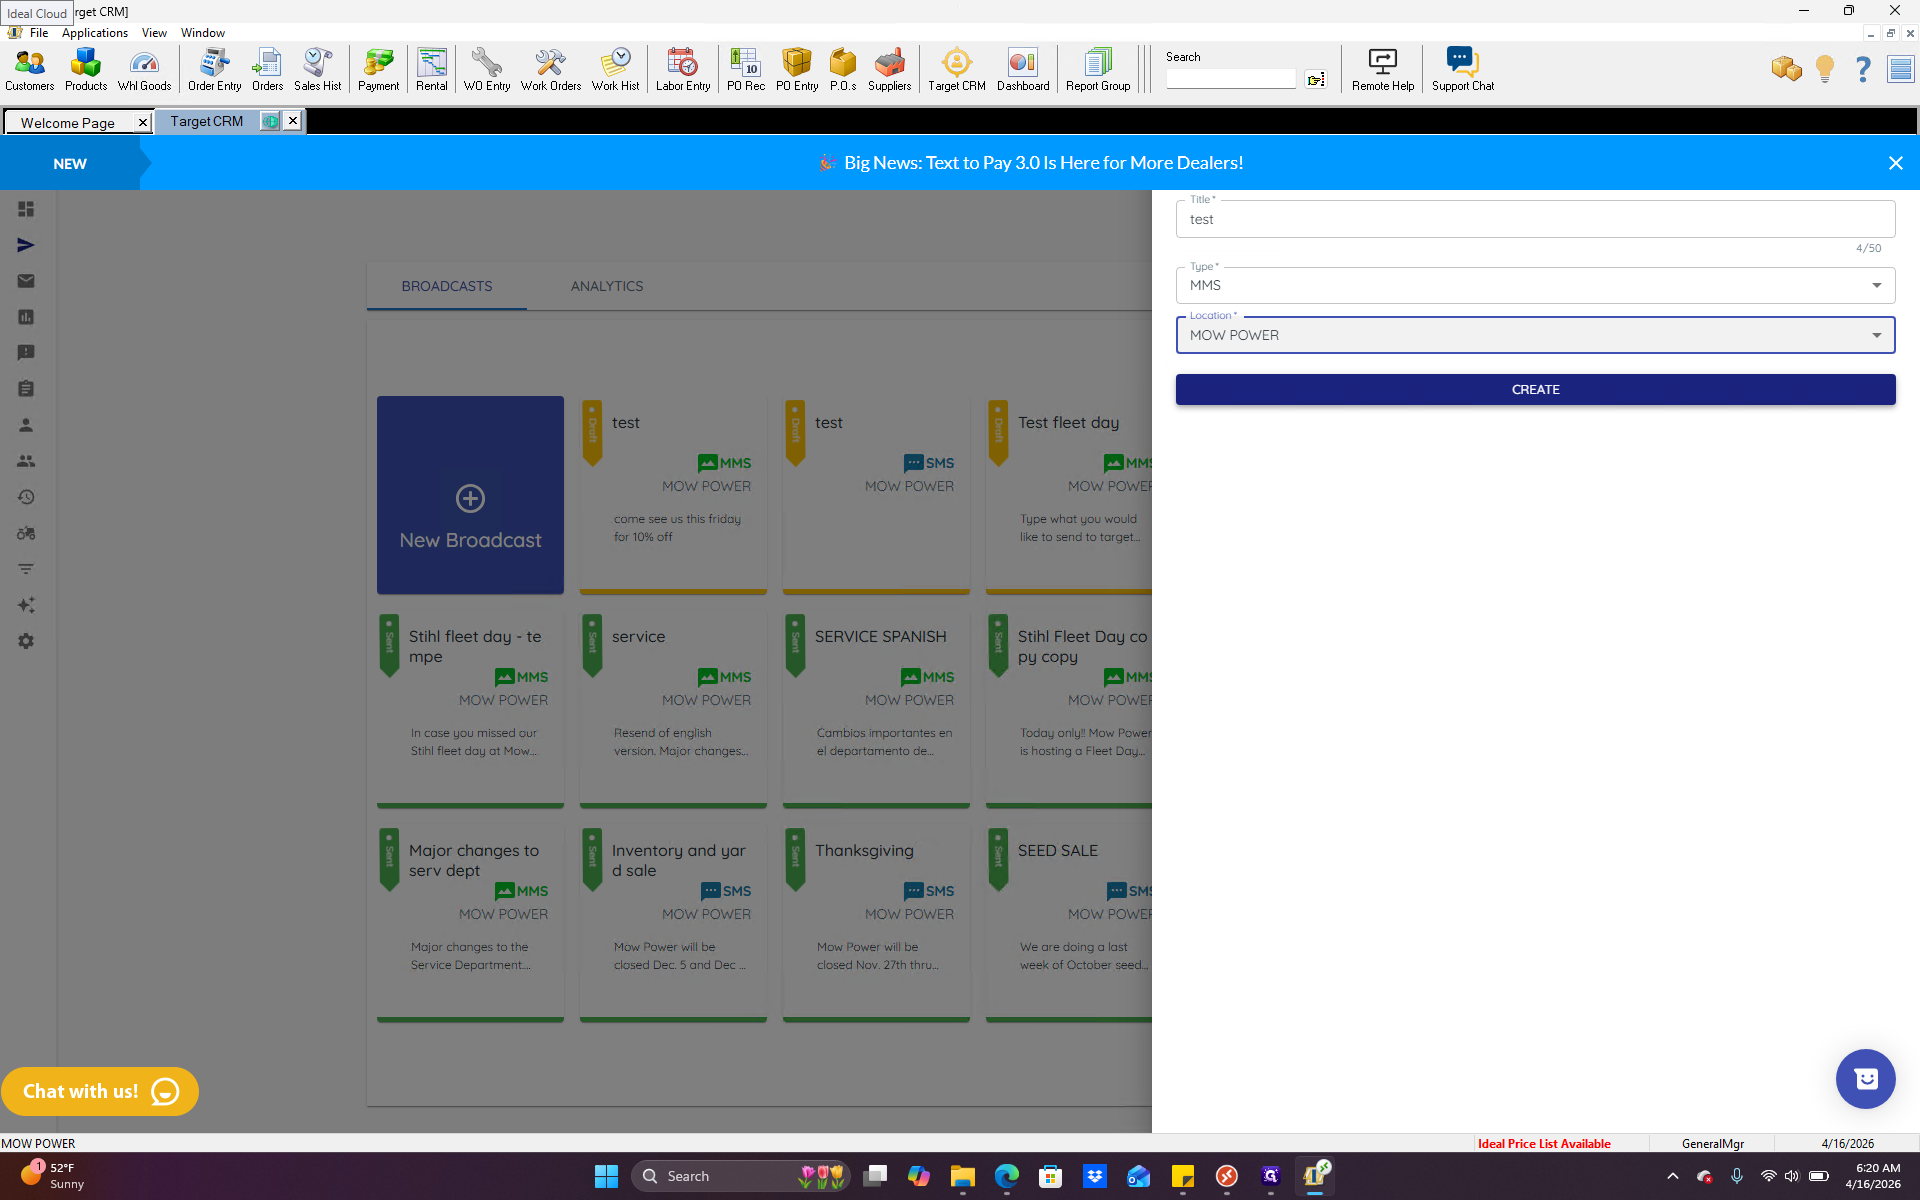
All of these are ones we've done in the past. For a new one, just click "New Broadcast."
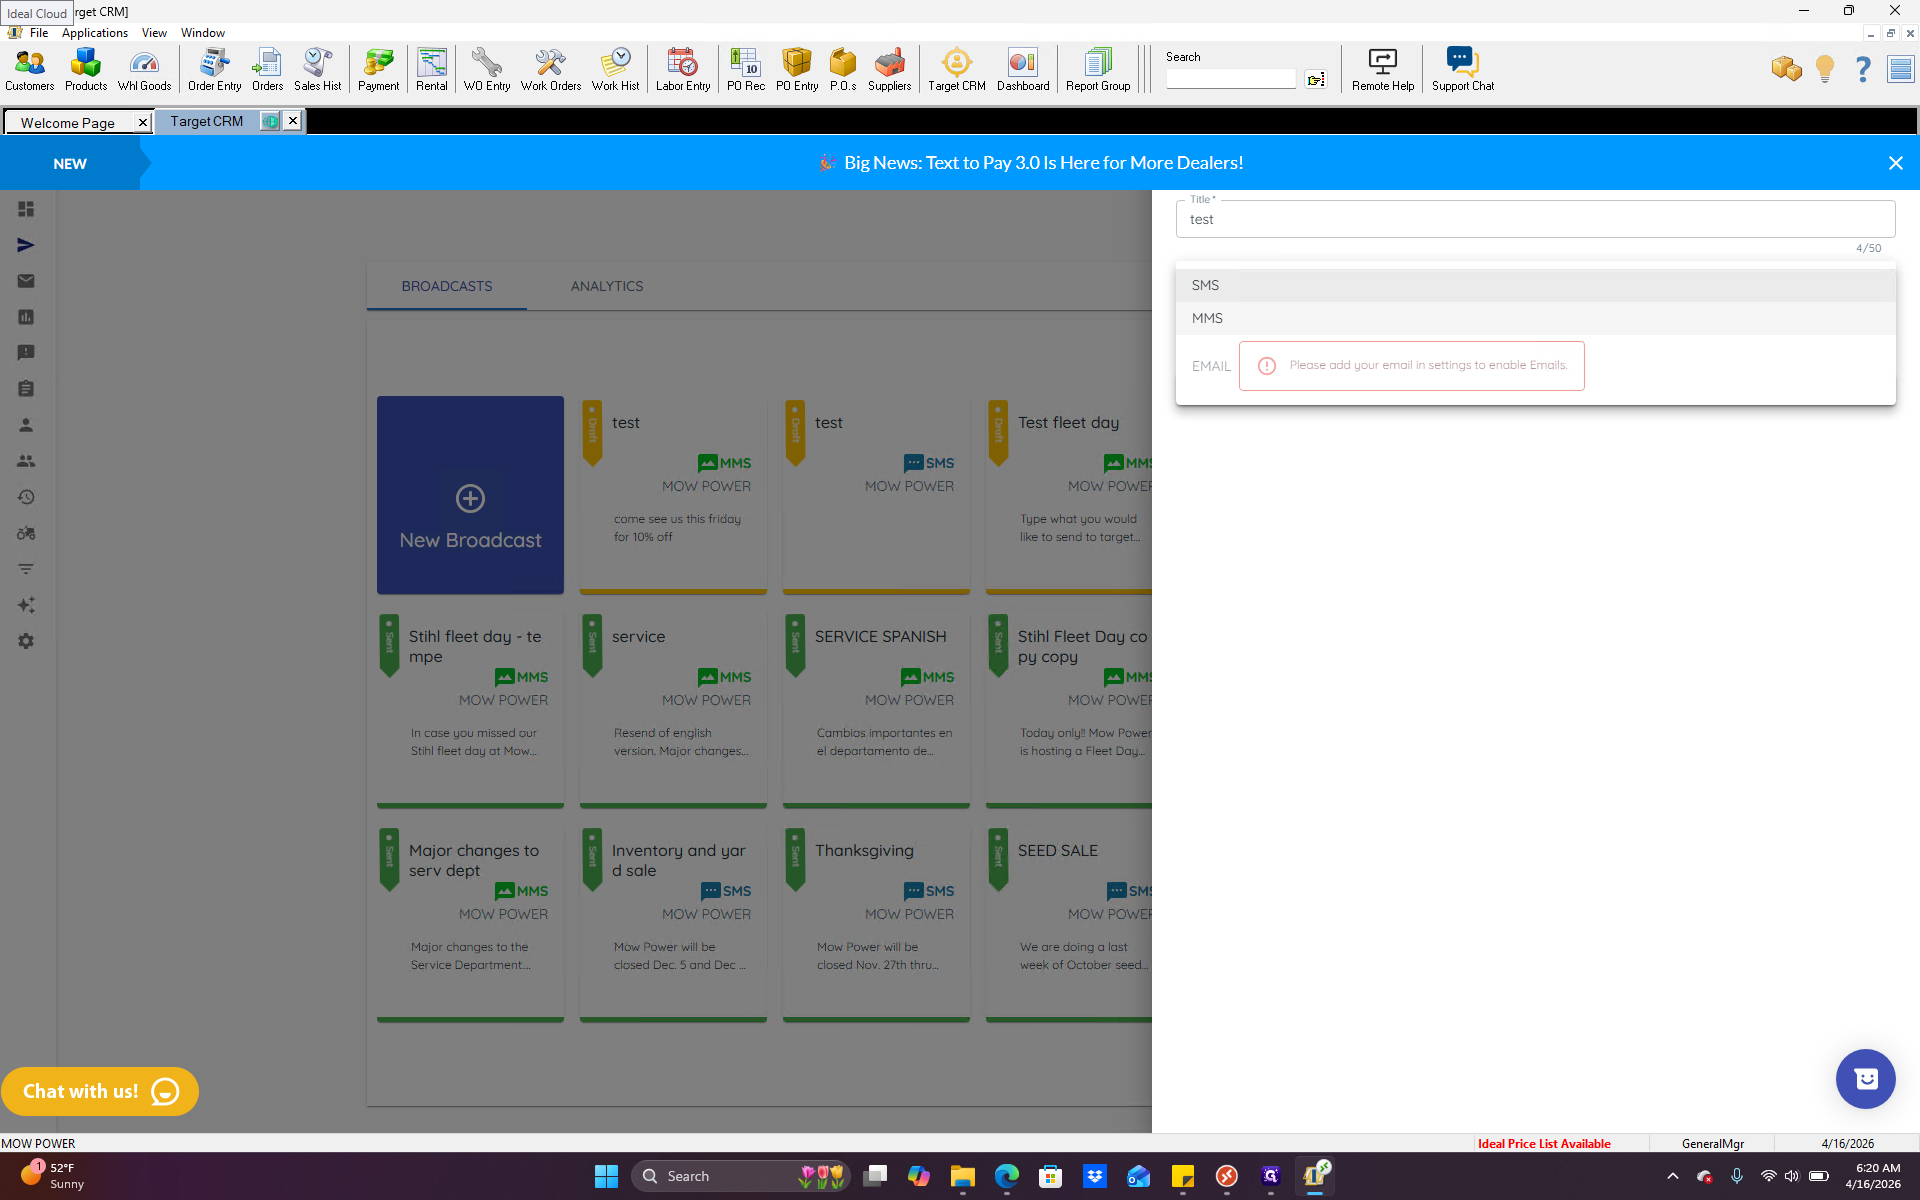
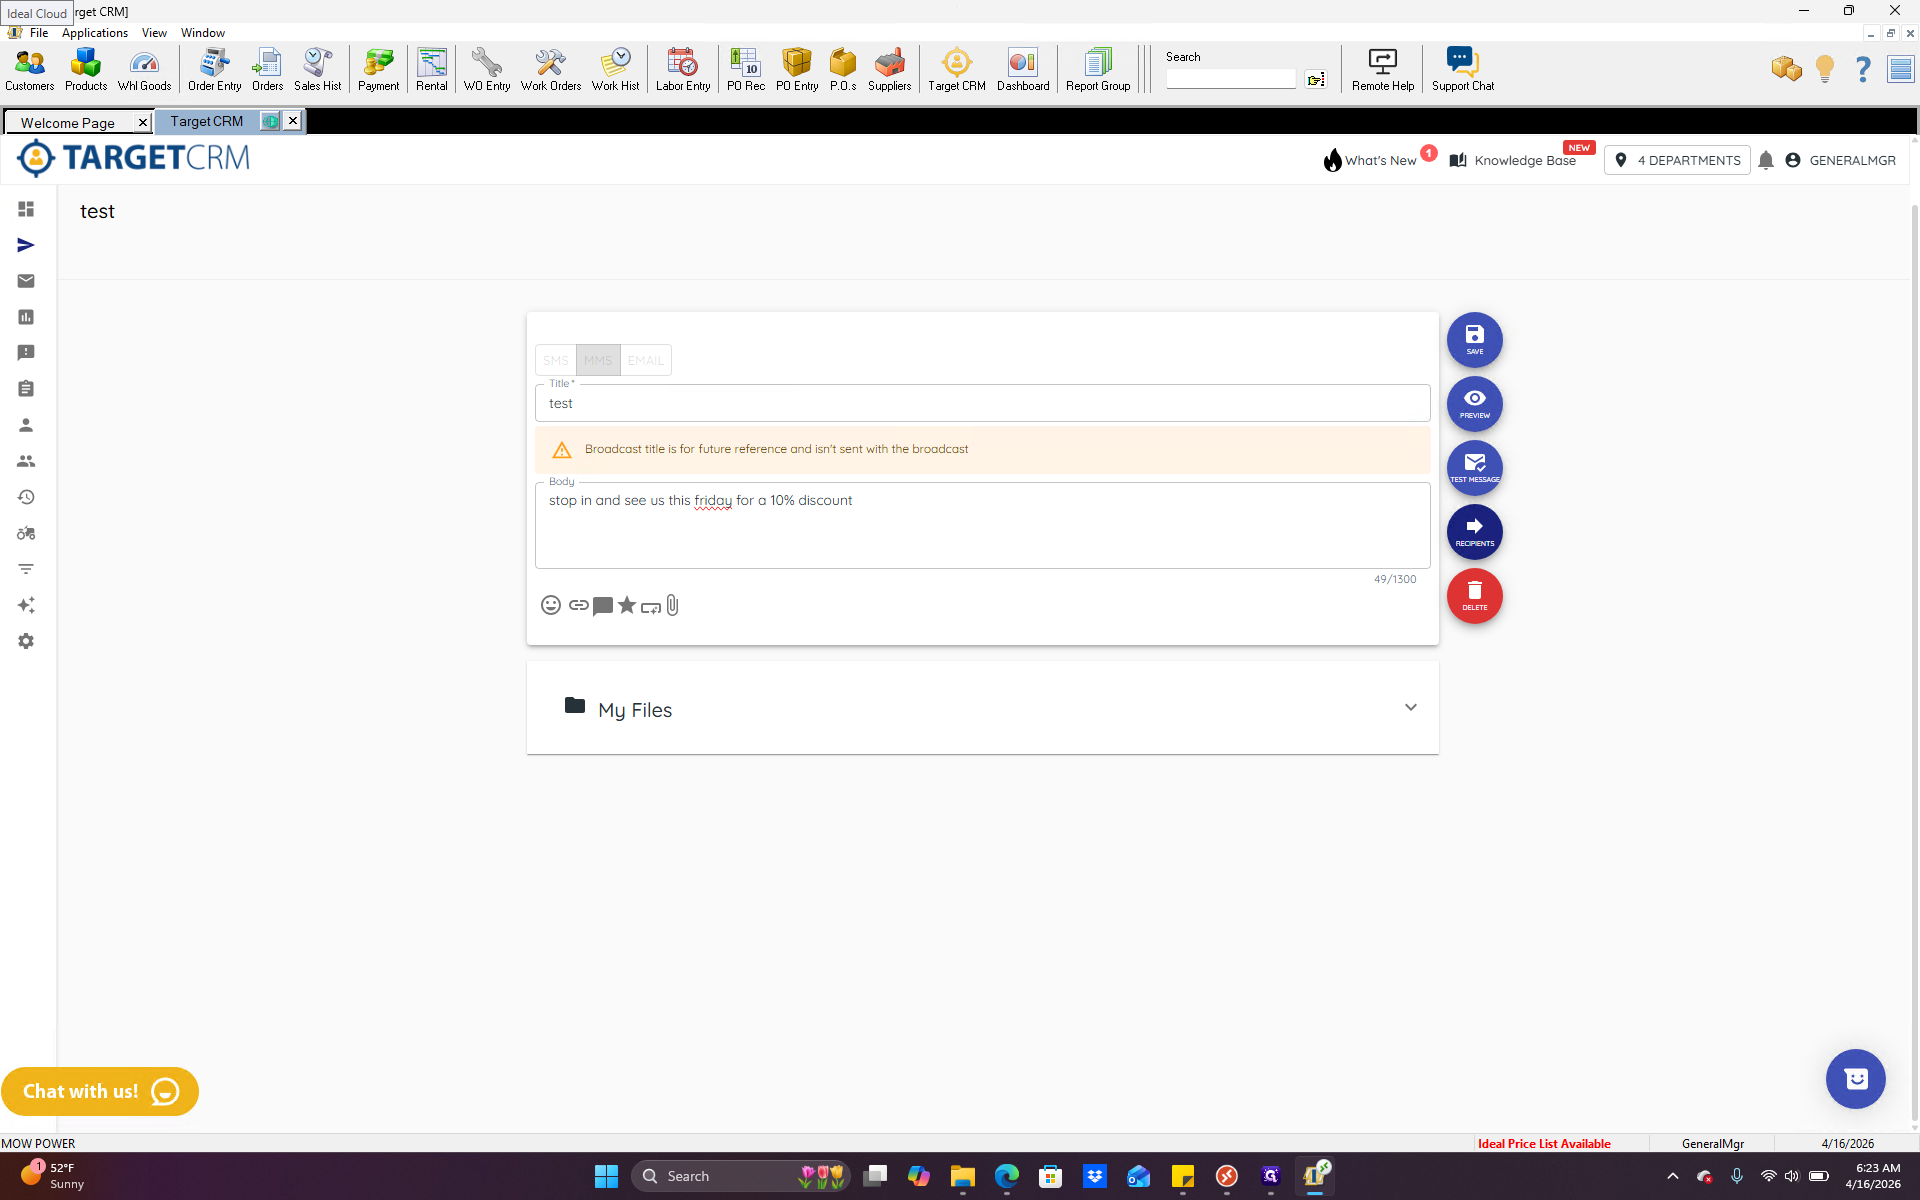
Here, we will give it a title. This title can be anything. It is not included in the text message the customer receives. The easiest way is to reference what you are sending so you can view it in the main menu.
Below that, we have the type. There are two options here: SMS or MMS.

SMS is a simple text message with no files or images. MMS should be selected if you want to attach something. Even if it's just one picture, anything attached must be sent as an MMS. Location: For now, we have only one MoPower location.
As we expand and add multiple stores, you will be able to select the customer base by location. For now, it will default to MoPower Mesa.


Click Create.
From here, this is the body section. This is where we can enter the message we want to send to a customer.
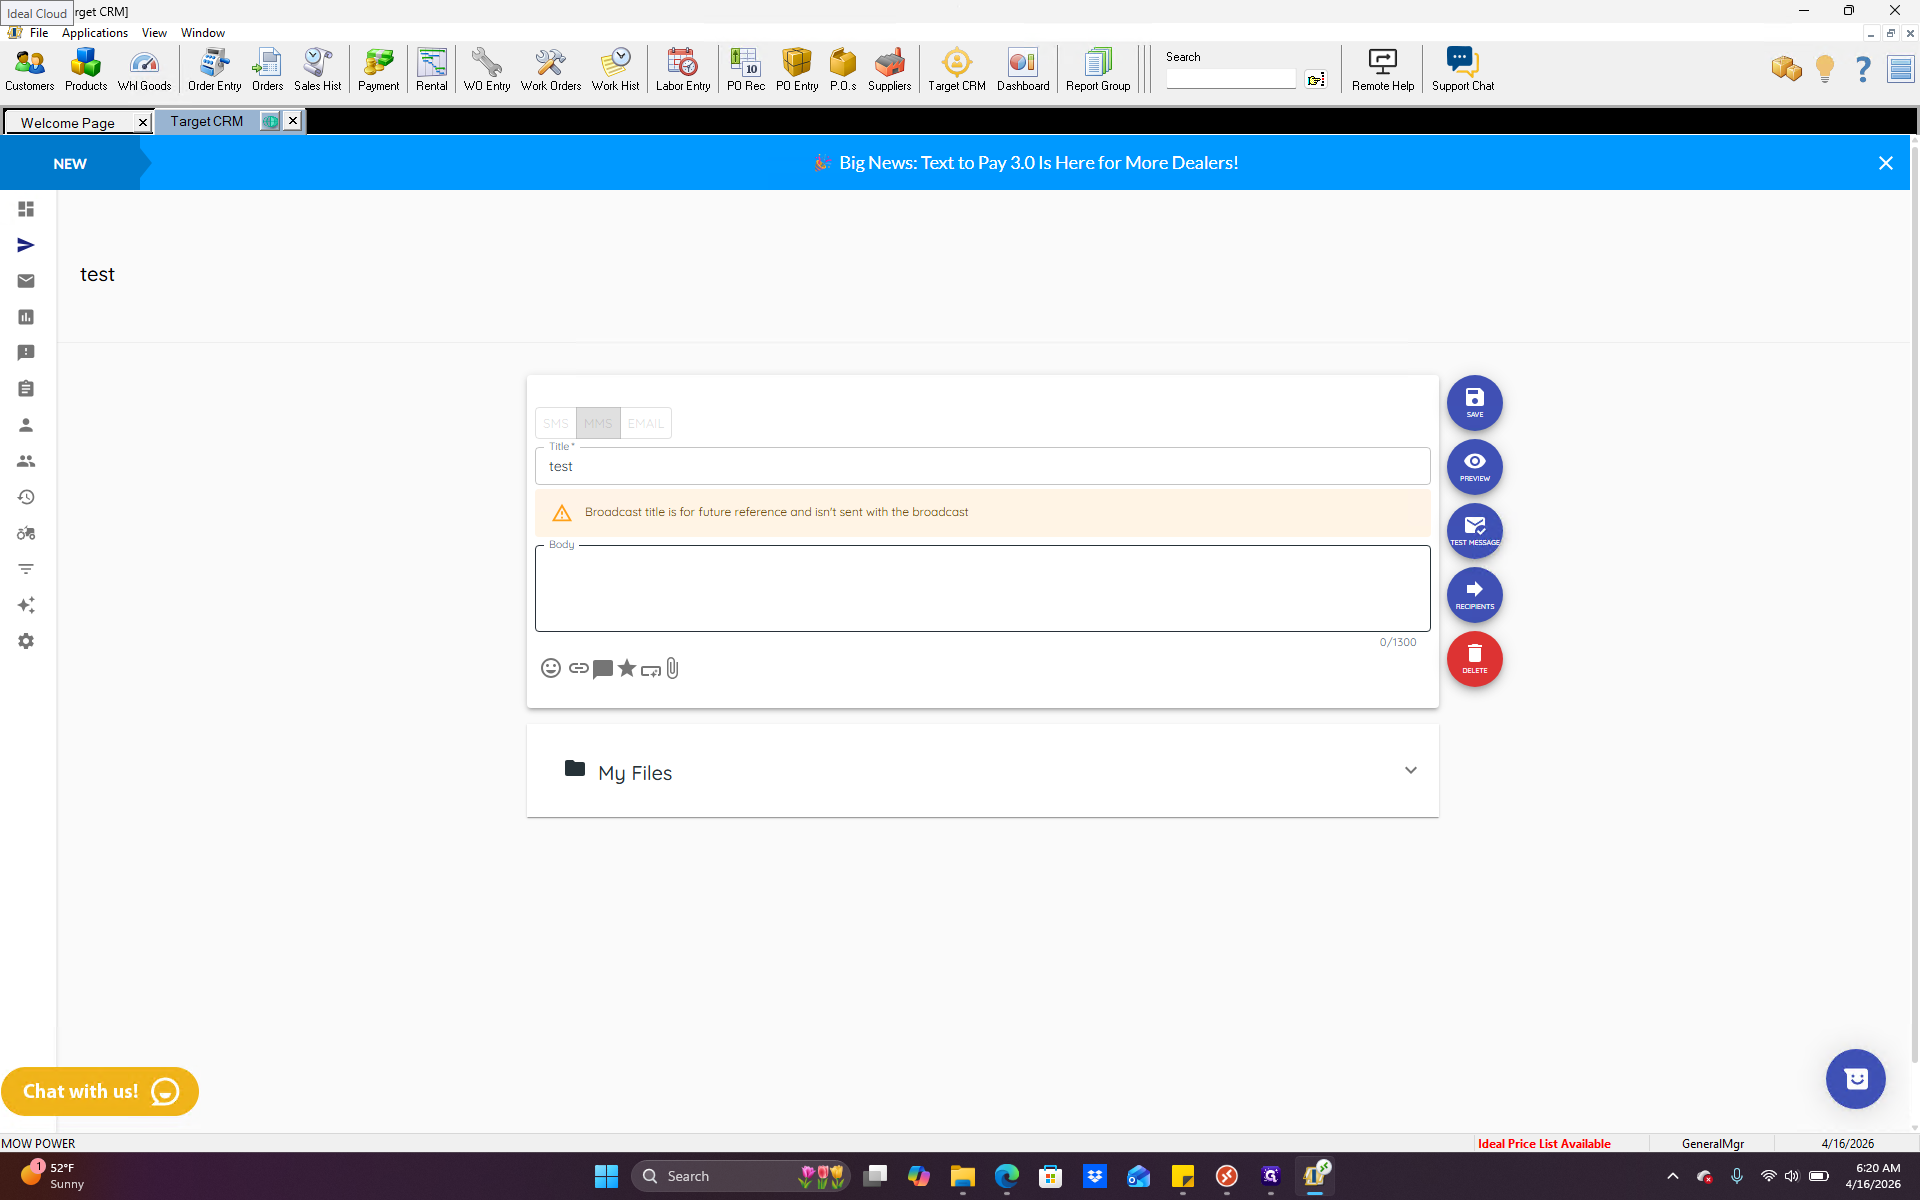
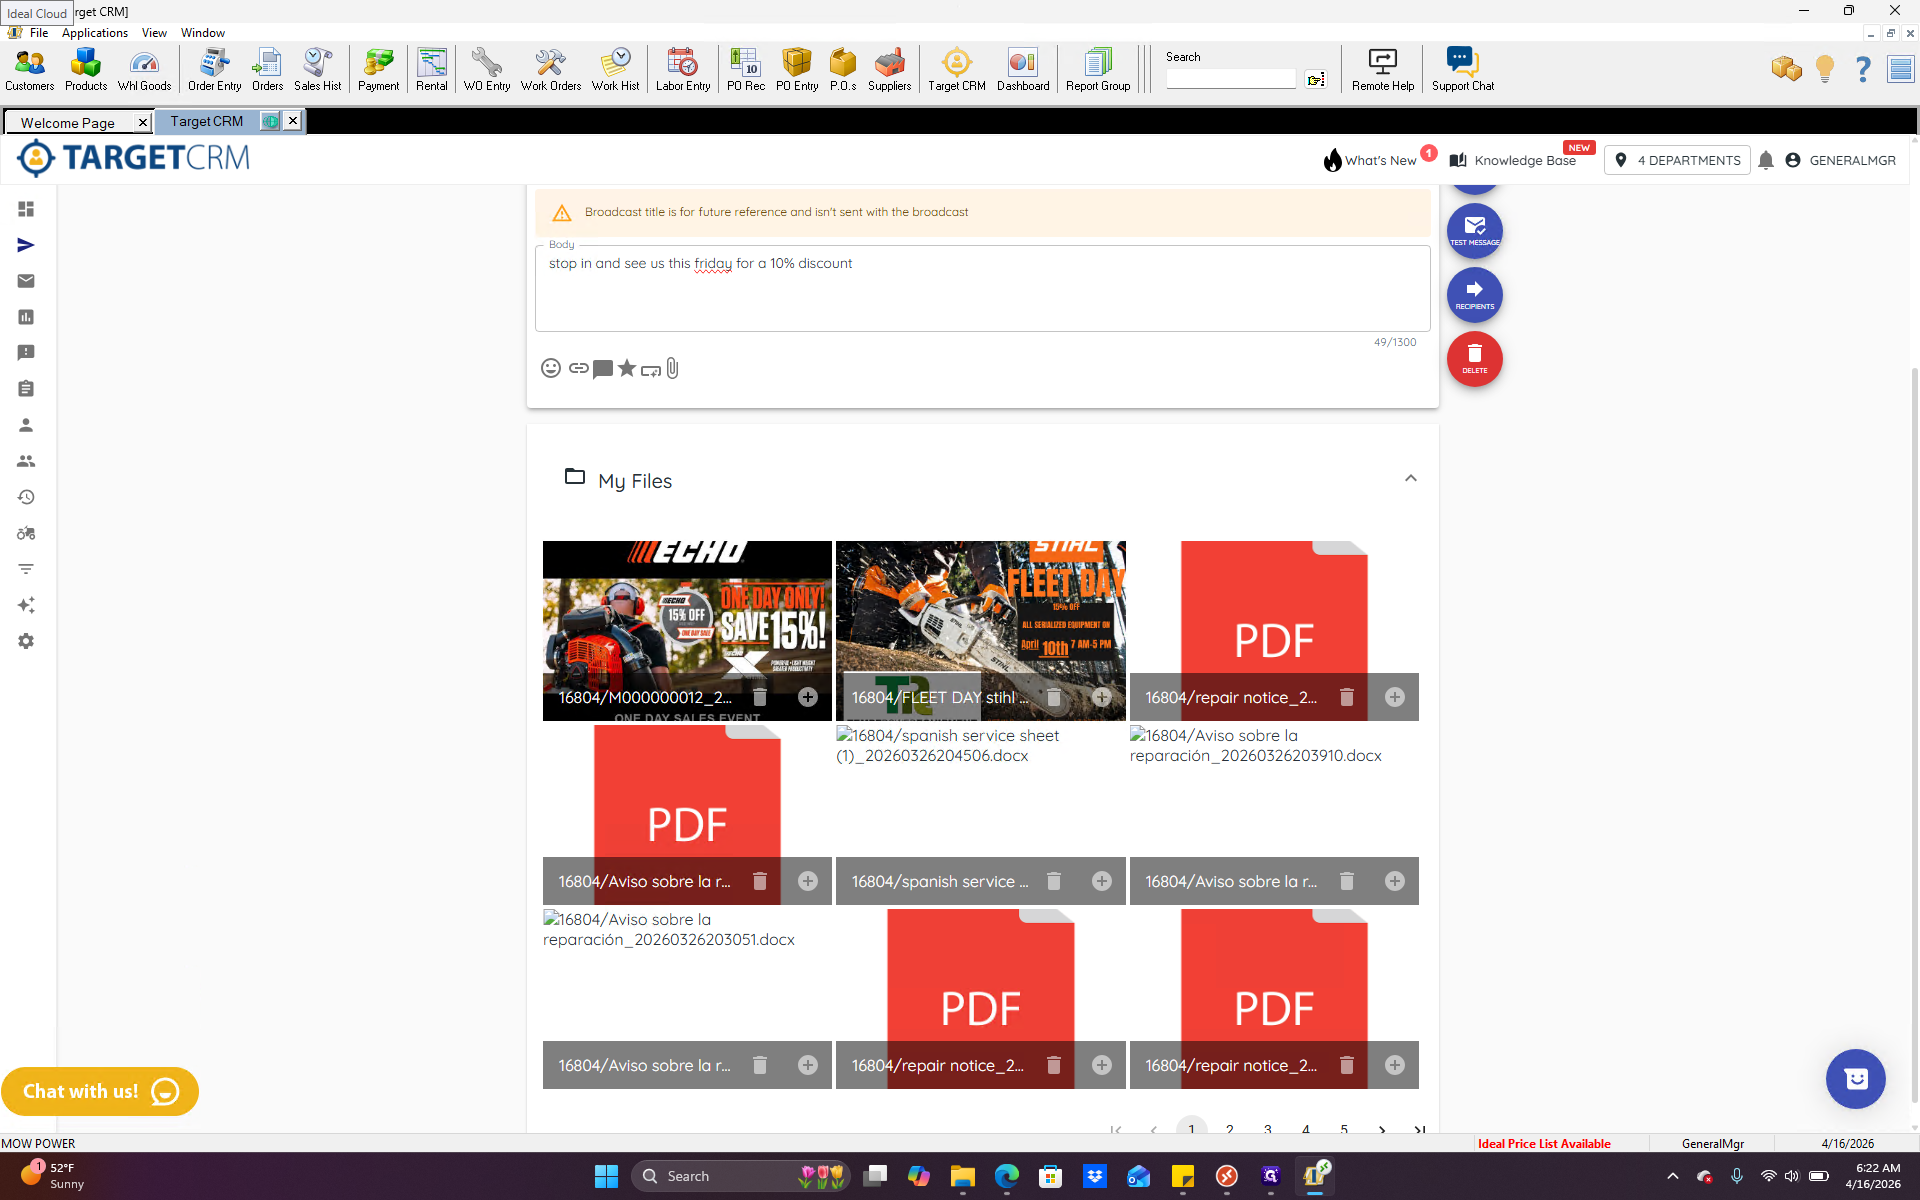
If it's a Fleet Day promo, stop in and see us this Friday for a 10% discount, or whatever the offer is.

Once you have typed that up and it's ready, you will see some icons with several options below.
Mainly, there are two that we would probably use. This option lets you add a hyperlink or URL. The paperclip icon is used to attach files. If we click that, and want to attach a file, it is important to have the file created or saved on your computer before starting this process.

That way, you can easily grab it. Clicking the paperclip opens your downloads or desktop, allowing you to select and drag a file. As you complete more of these, look below where it says "My Files." Click the drop-down arrow to see files you've attached previously.


If you have something reusable without a date or time on it, it may be faster to use that. Once we have attached the desired file and typed out the body as we want, the next step is to go to the blue and red icons.
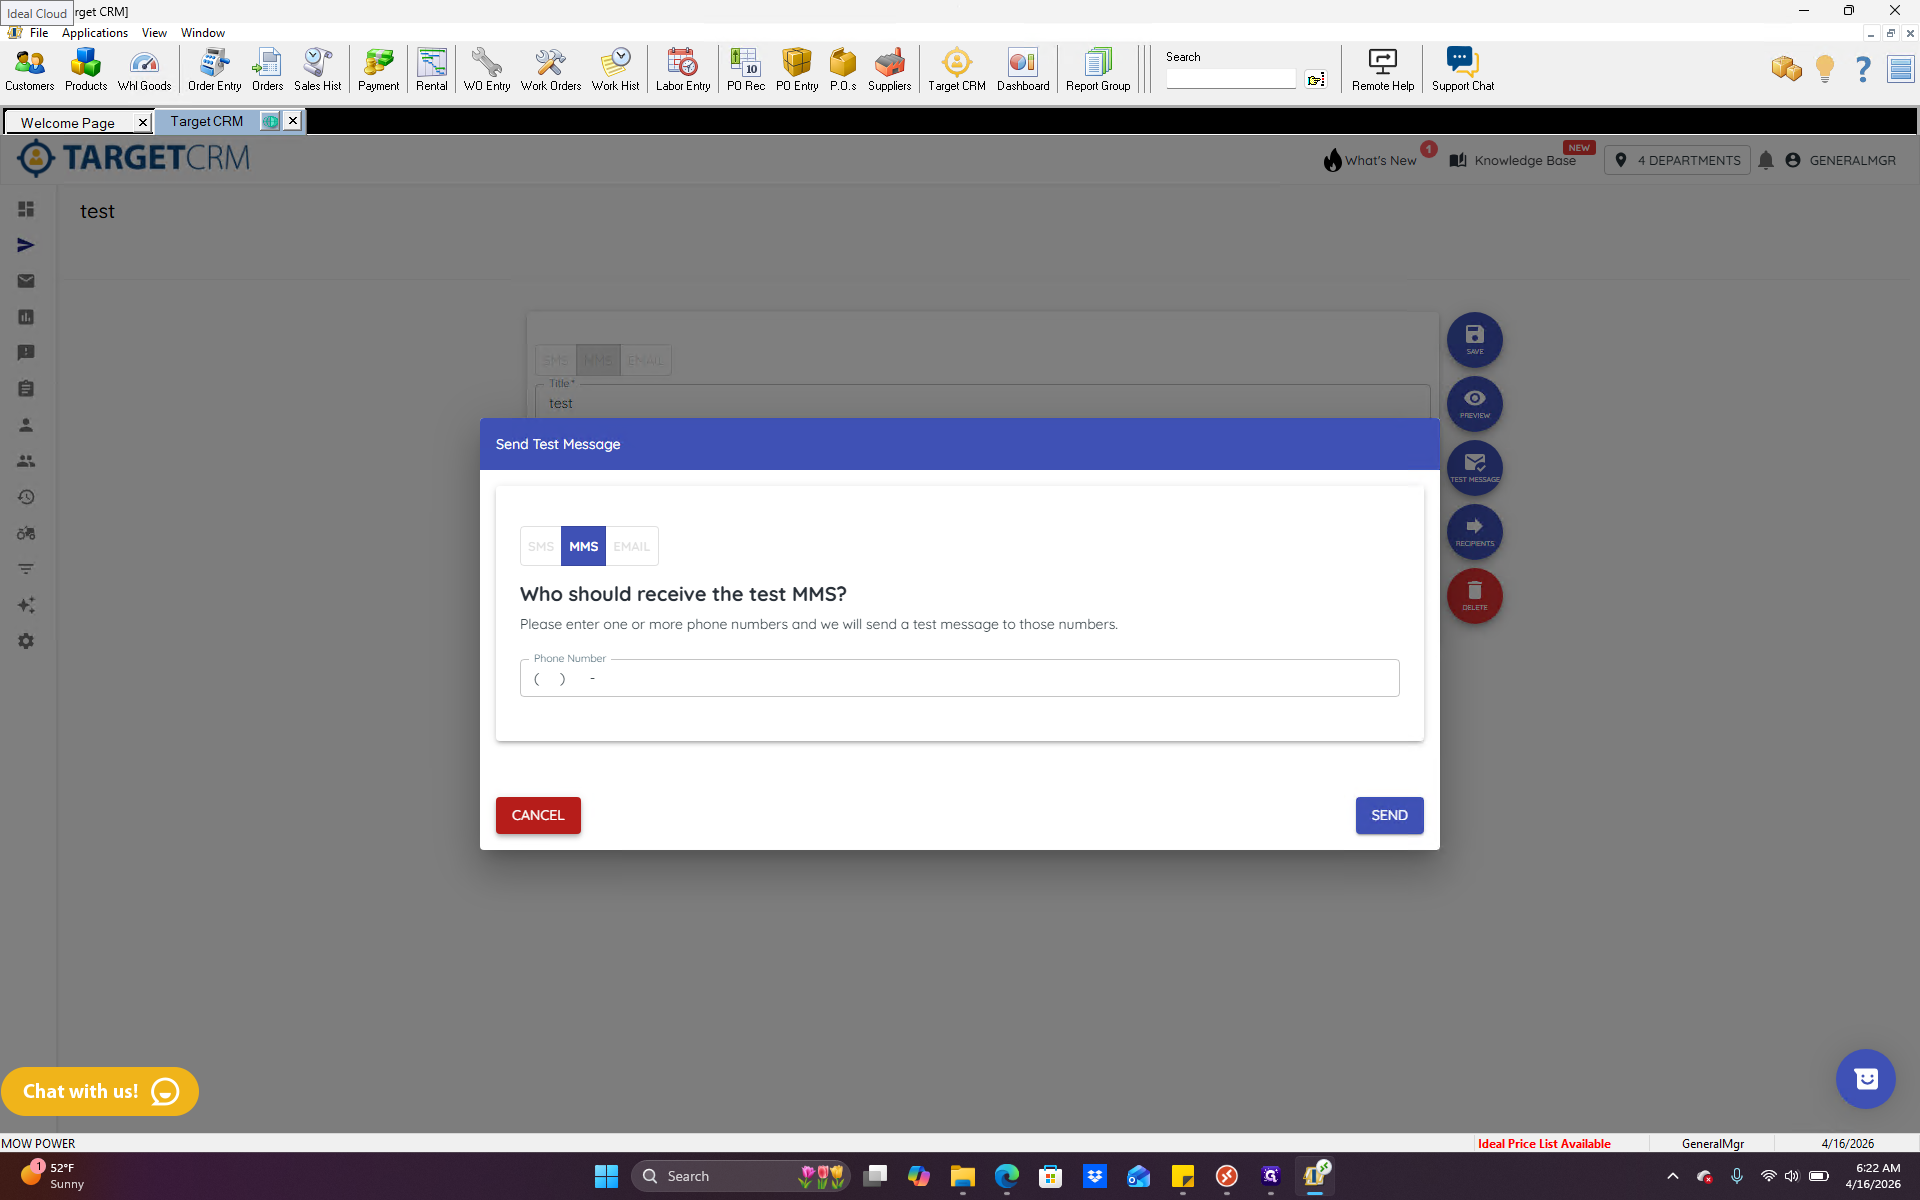
The middle one says "test message." We click that.
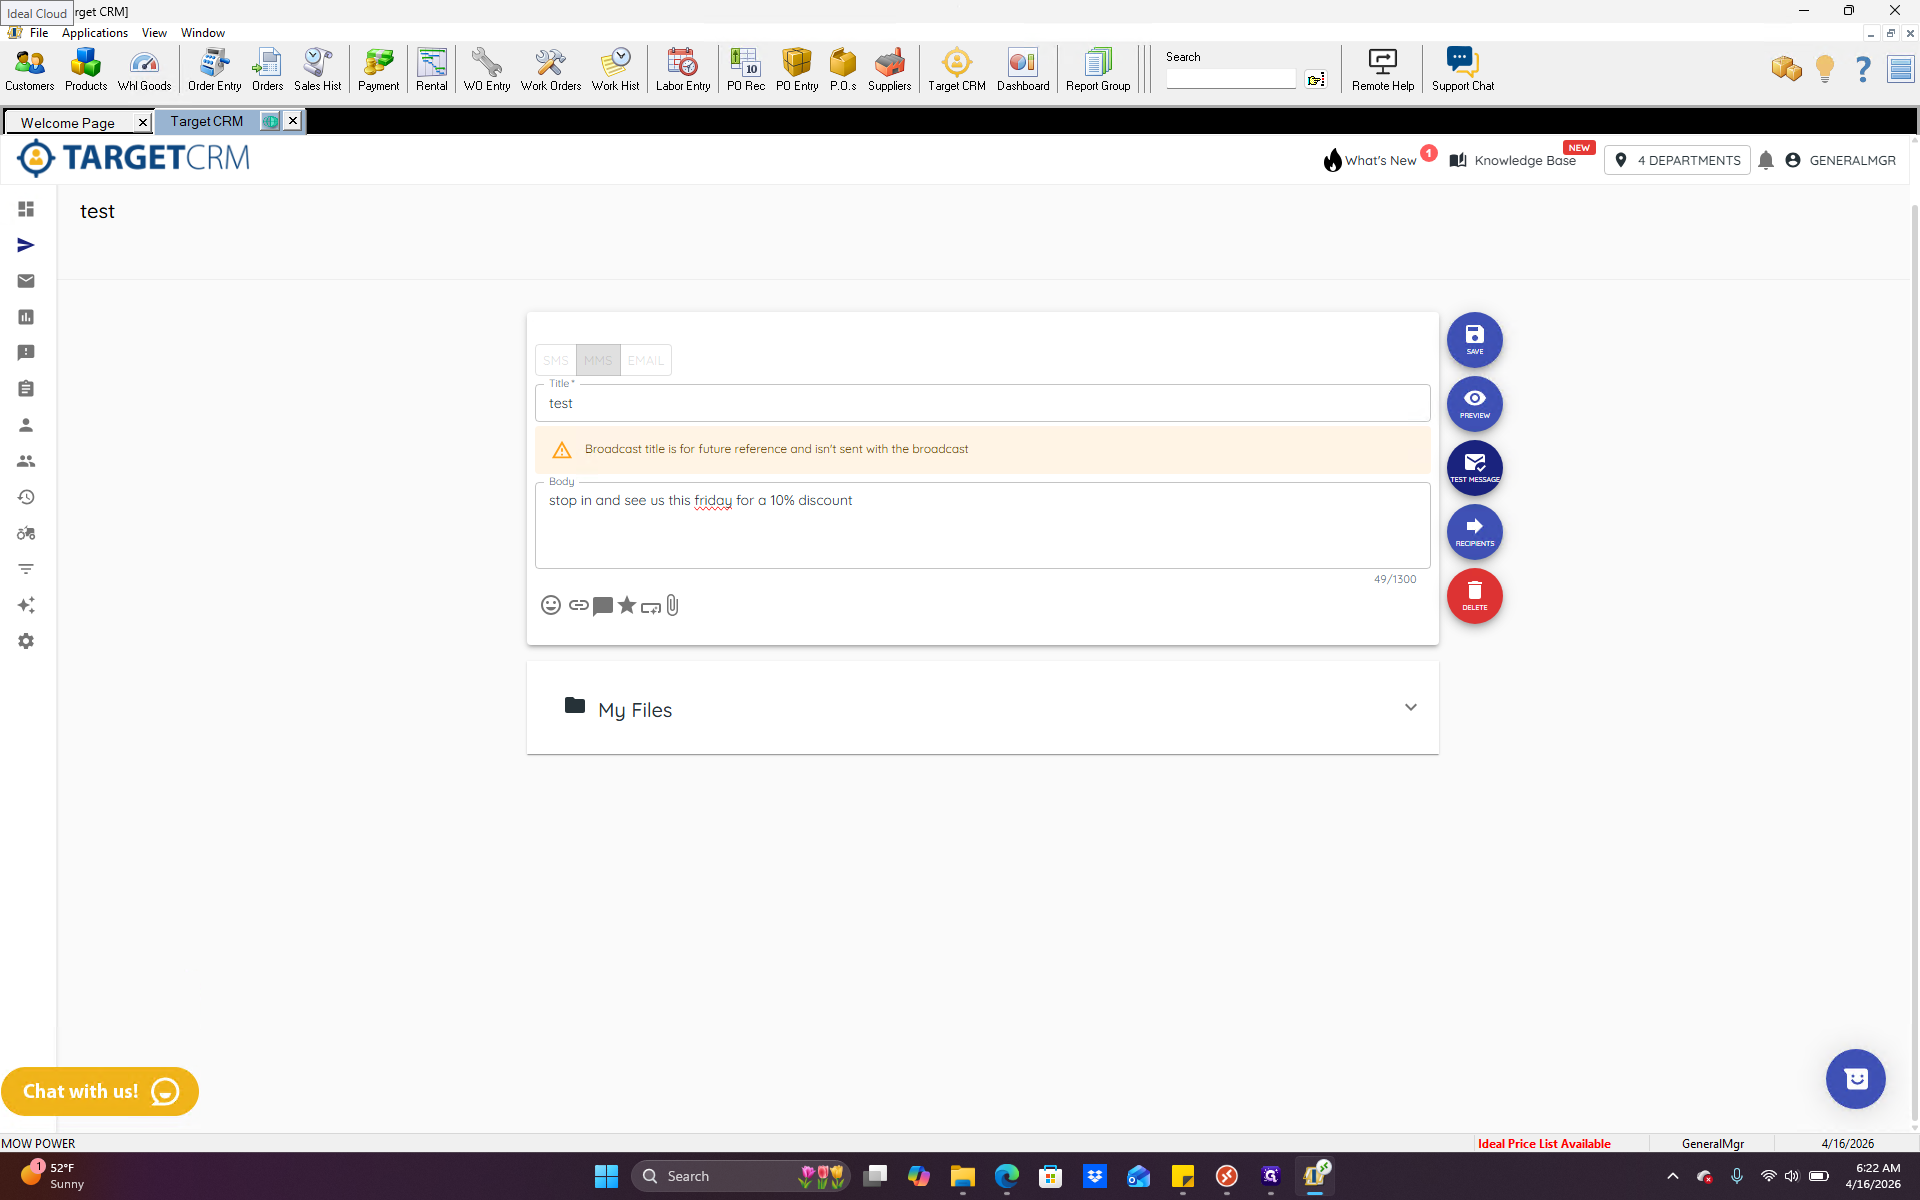
This allows us to enter a phone number and send it, so we can see what it looks like. The best thing to do is enter your own cellphone number here, or use someone close to you who can respond quickly to see how it looks. Once you enter it, click send. It will send this message to you so you can see what it looks like from the customer's perspective.
Once everything looks good, click on the blue icon labeled "Recipients." This is where you choose who will receive the text message.
There are many options on this screen. The most common option is at the bottom, where it says "all customers 240 months." This means the text message will be sent to everyone in Ideal who has been there for the past 240 months. If you click it, you'll see at the bottom how many customers there are and how many times this message will be sent.
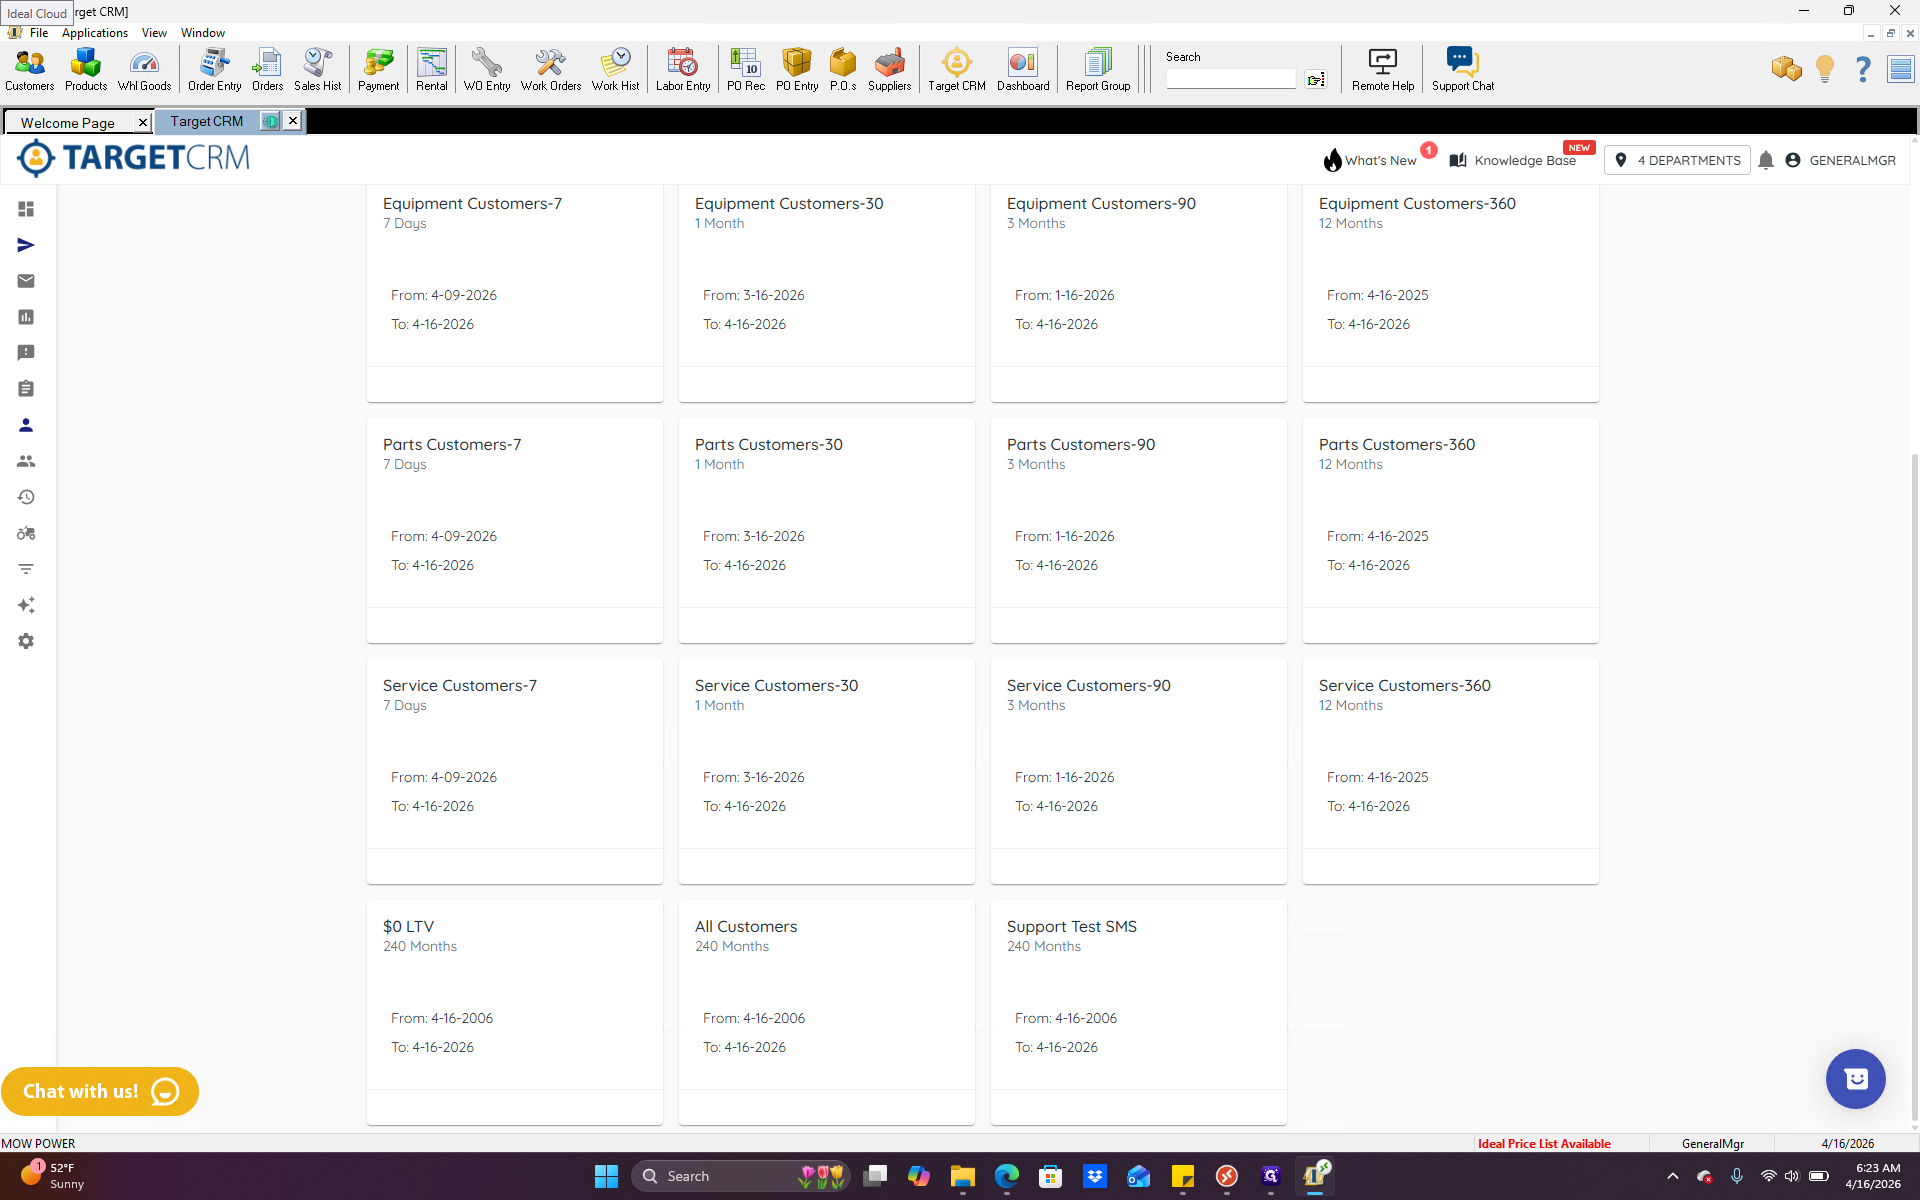
It separates our customers into equipment customers, parts customers, and service customers, based on what they have purchased.
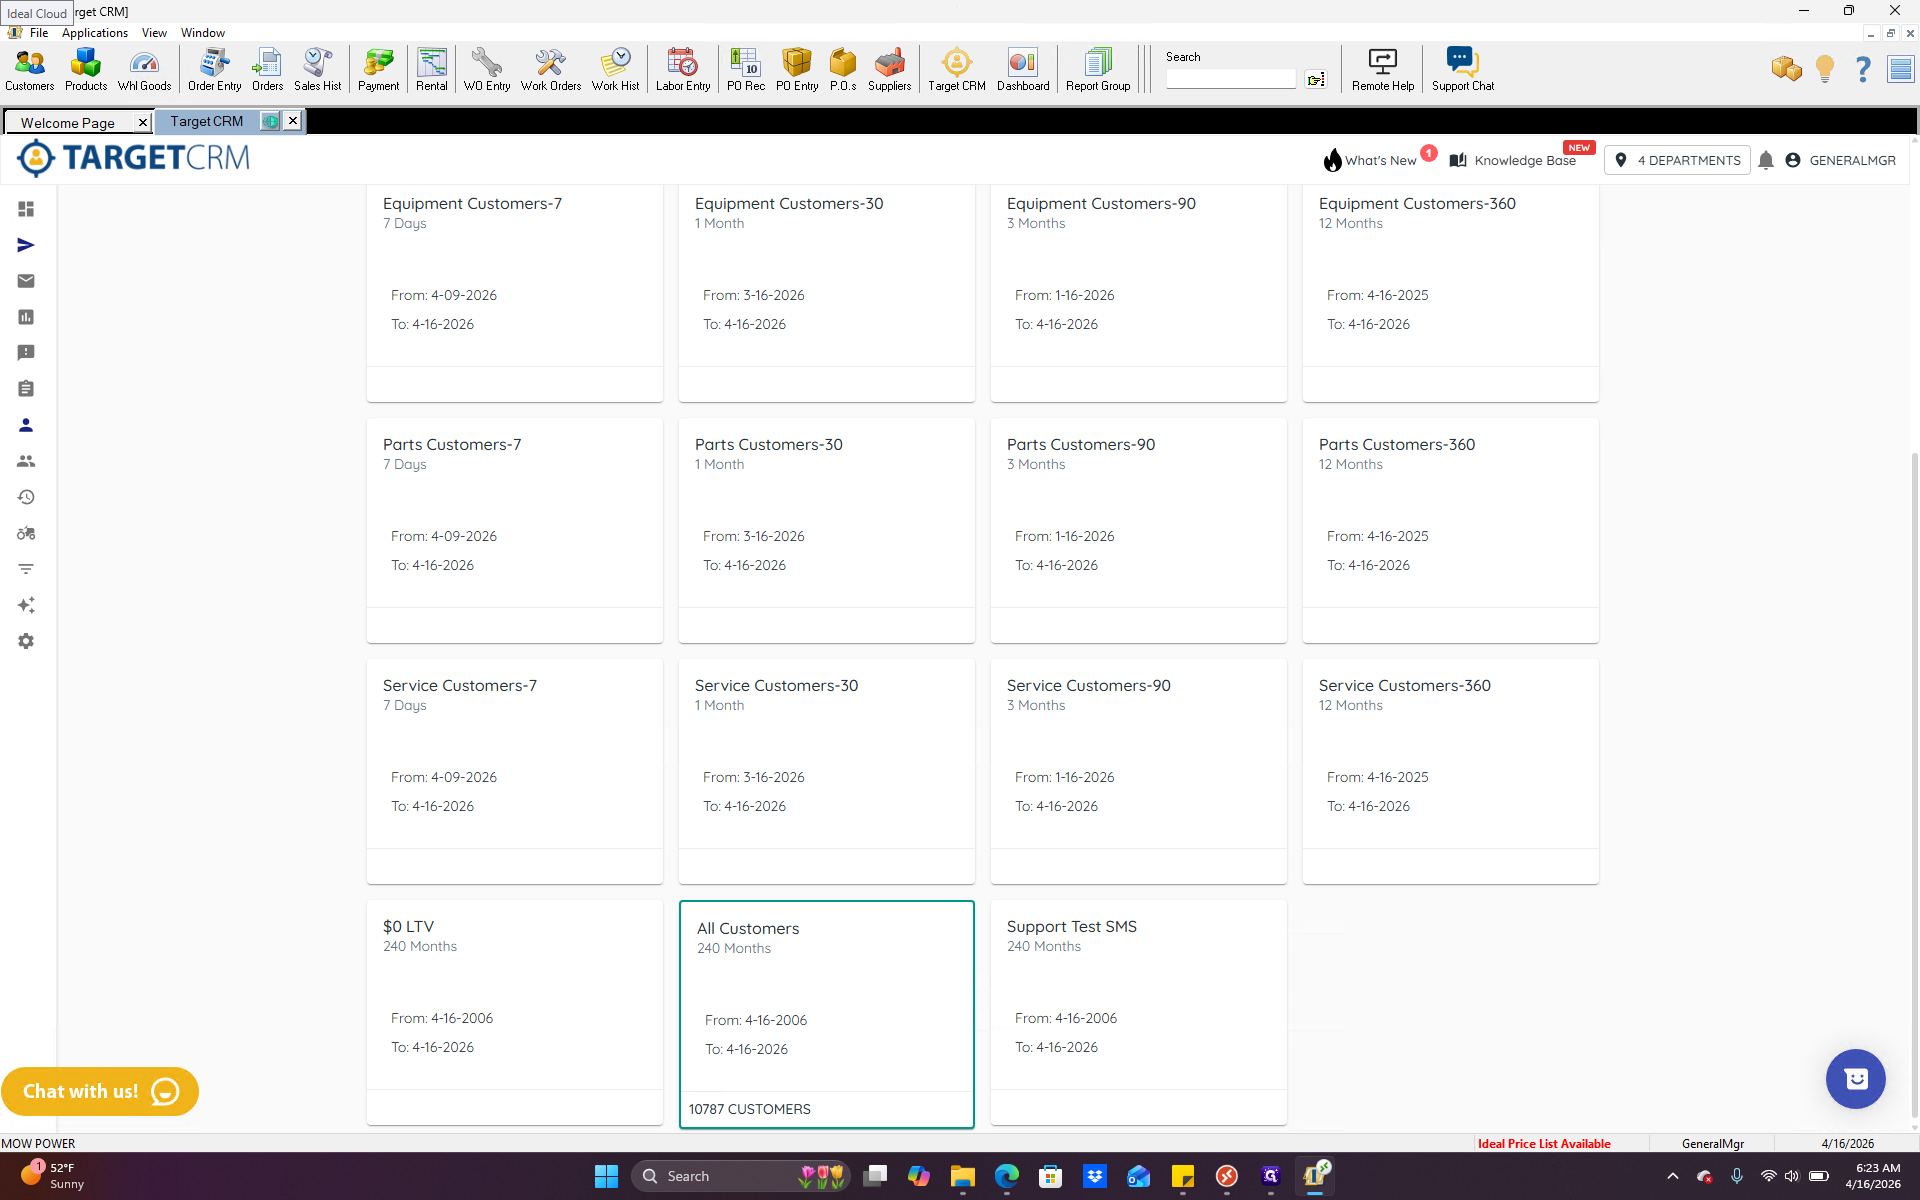
If we are running a service promotion, it may make sense to target only service customers. Generally, when we have Fleet Days or sales in the store, selecting "all customers" is the best option. Once we have selected the group at the top, we have several options available.
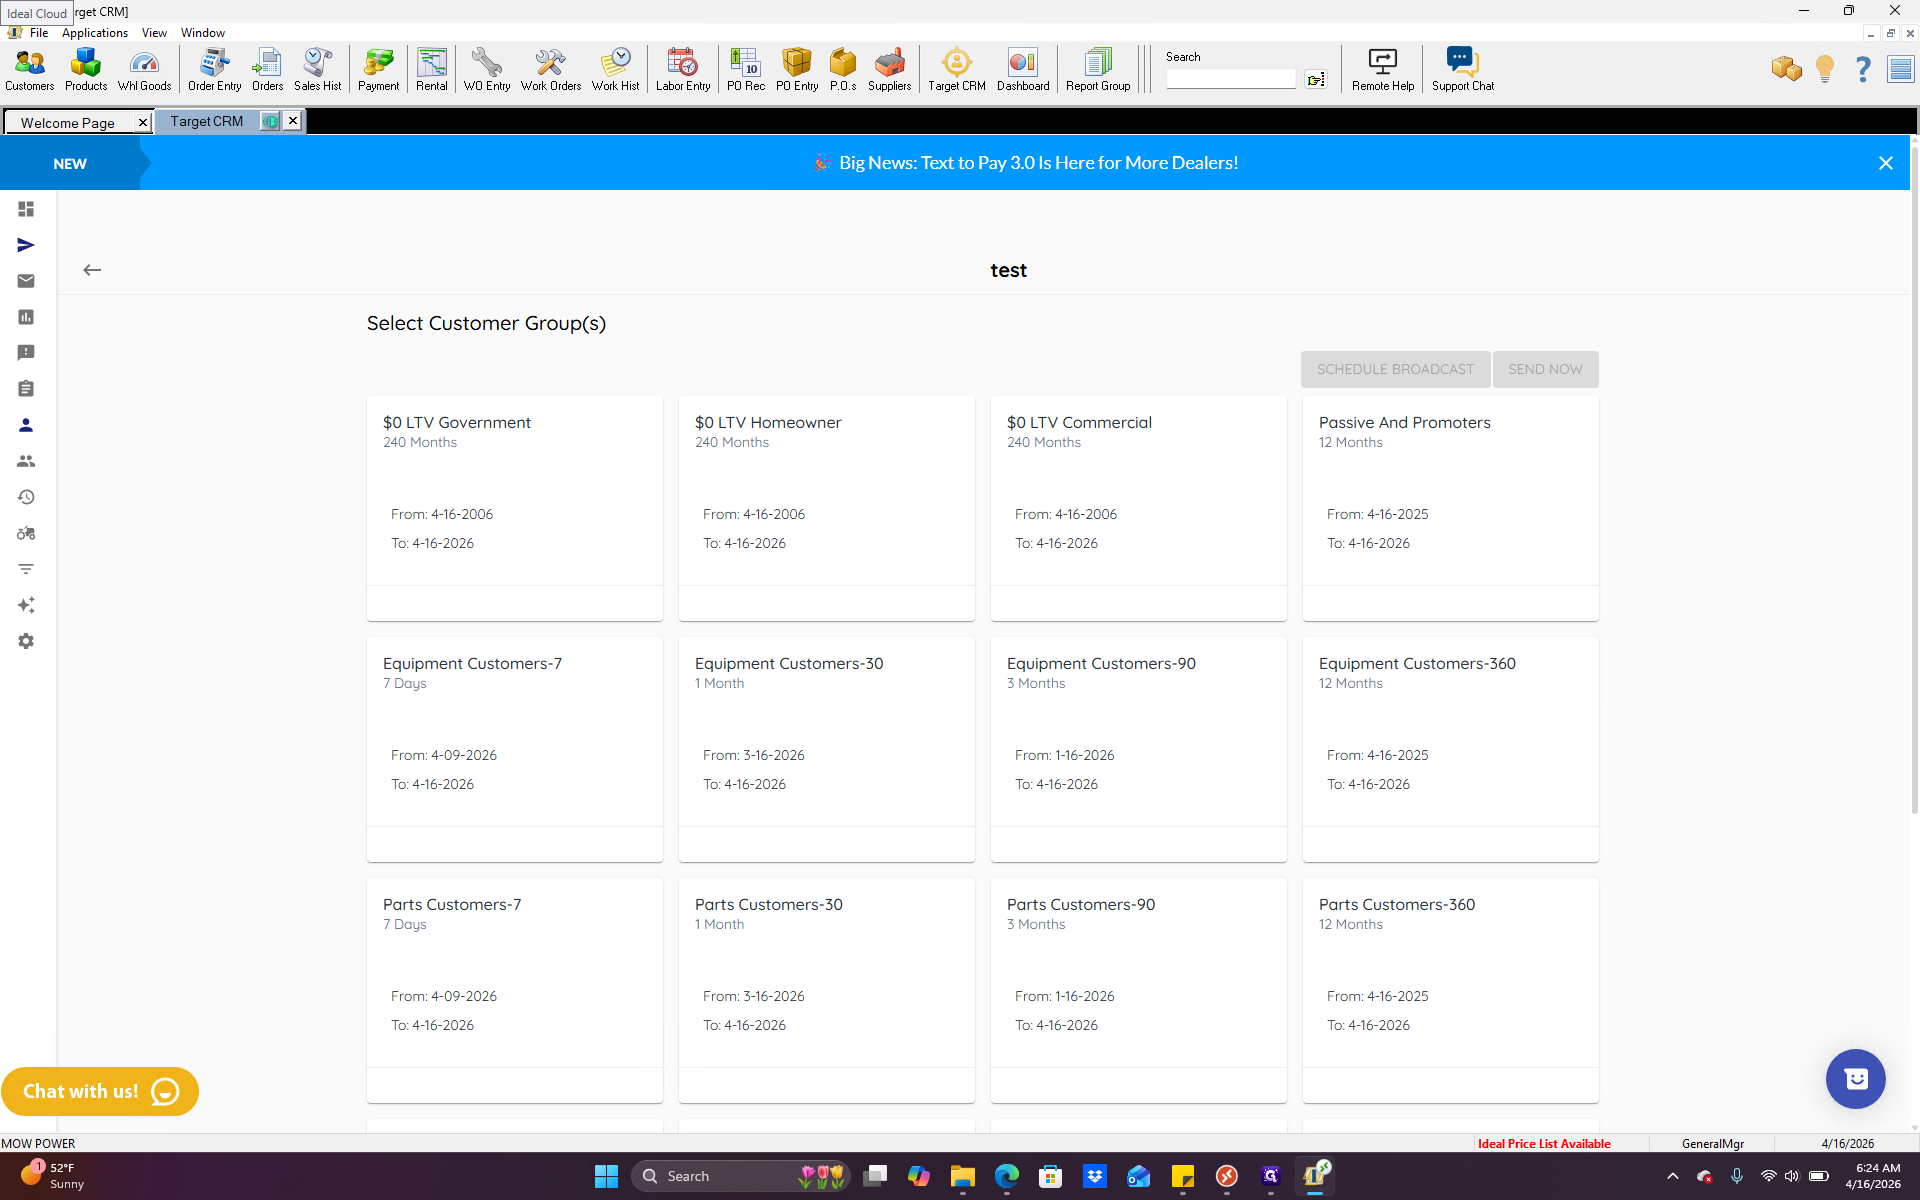
You'll have schedule broadcast and send now. Schedule broadcast. This is self-explanatory. If you are working on this a week or a day in advance and have a specific date and time to send it, follow these steps. Next, go here and set the schedule. Send now means the message will be sent immediately when you click this button.
There is a queue, so after you hit send, it takes about an hour for the message to go out to everyone. Keep this in mind if you are working early in the morning or late at night. Do not hit send now, as this could send a text message to many people at an odd hour, such as late at night or early in the morning. If you are doing that, it's best to schedule the broadcast for the next day. That way, it doesn't show up at an inconvenient time. Beyond that, that is all there is to sending a broadcast.