How to Set Up and Use the New Screen-Sharing Feature in Messaging and Live Chat
Learn how to set up and use the new screen-sharing feature in our messaging and live chat product. This tutorial guides you through enabling screen sharing for agents and visitors.
In this guide, we'll learn how to set up and use the new screen sharing feature in the messaging and live chat product. The feature is now live for internal testing only. We would love to hear from you about any issues or suggestions before we take it live for our customers.
This feature allows both agents and visitors to share their screens, enhancing communication and troubleshooting. We'll cover the steps to activate screen sharing, customize settings, and manage permissions. This internal documentation aims to ensure a smooth setup and operation of the feature, providing a better experience for both agents and visitors.
Let's get started
Select the widget of your choice, go to the settings and navigate to Hub and Screen Sharing. Enable both "Visitor can share their screen with the agent" and "Agent can share their screen with visitors." This is customizable for each customer, but for the best experience, we propose the enabling both. Now, click the Save button.
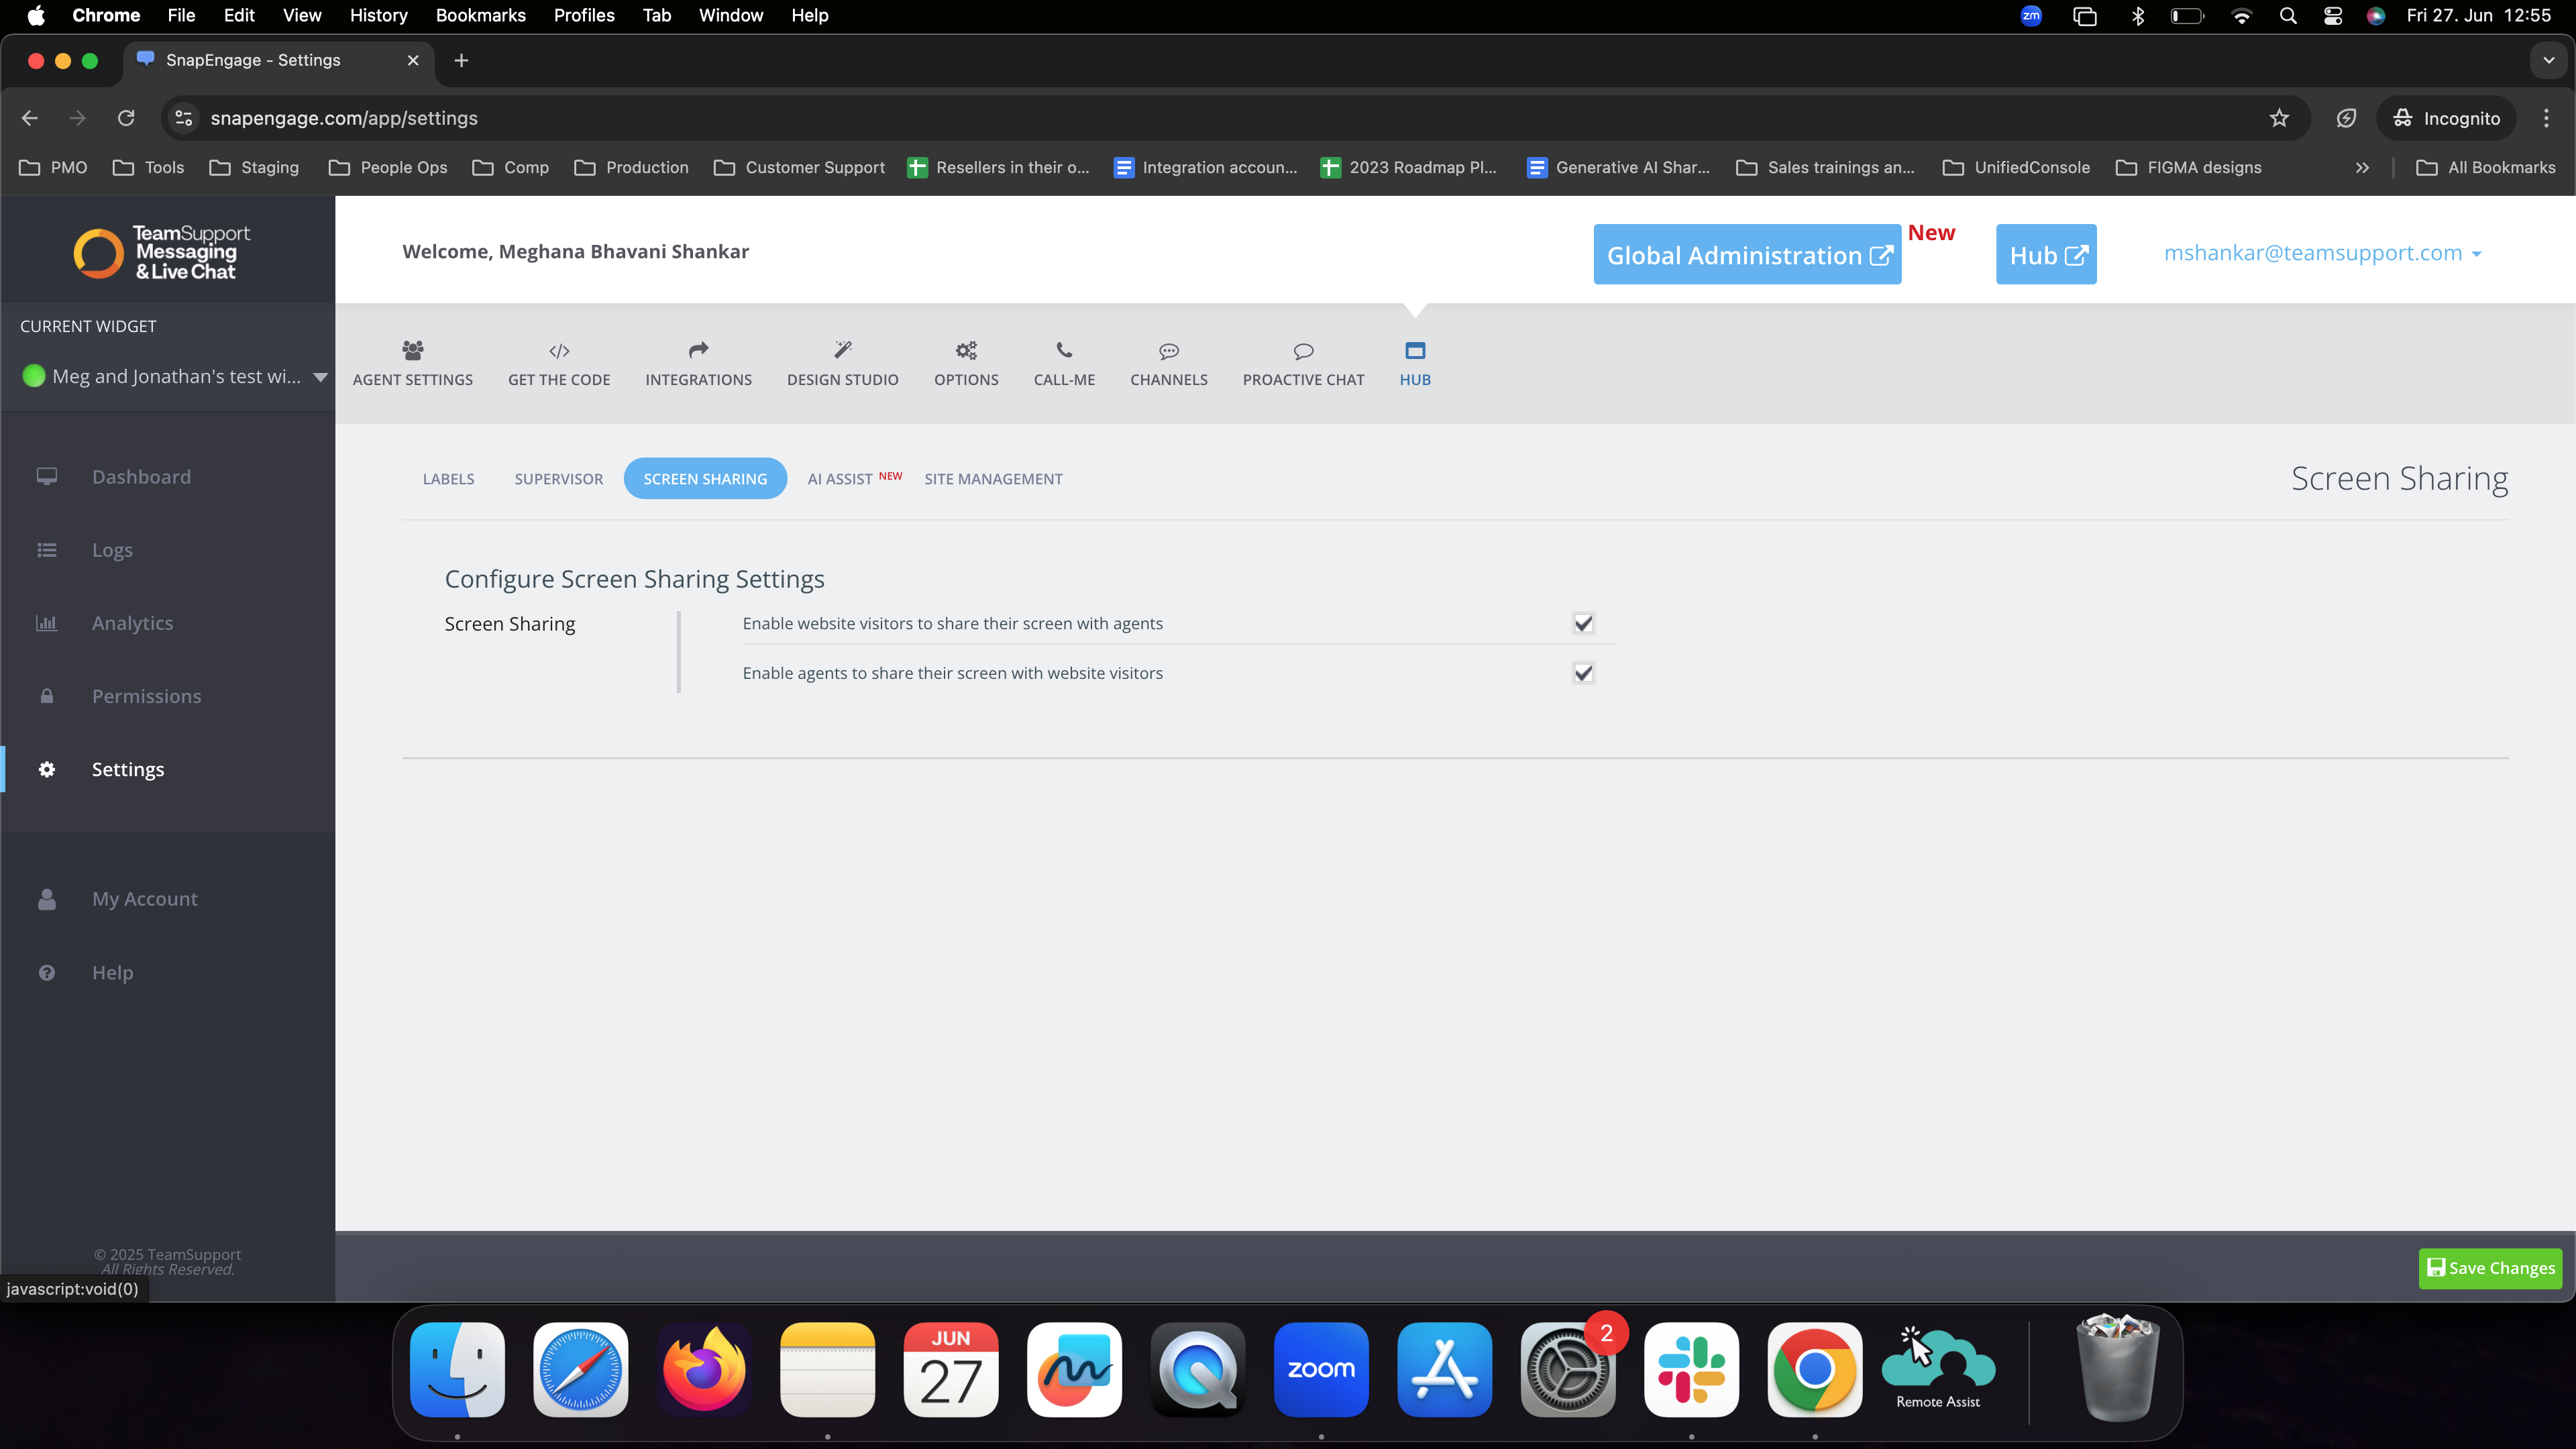
We also request that you regenerate your visitor.js by saving the Design studio settings before proceeding further.
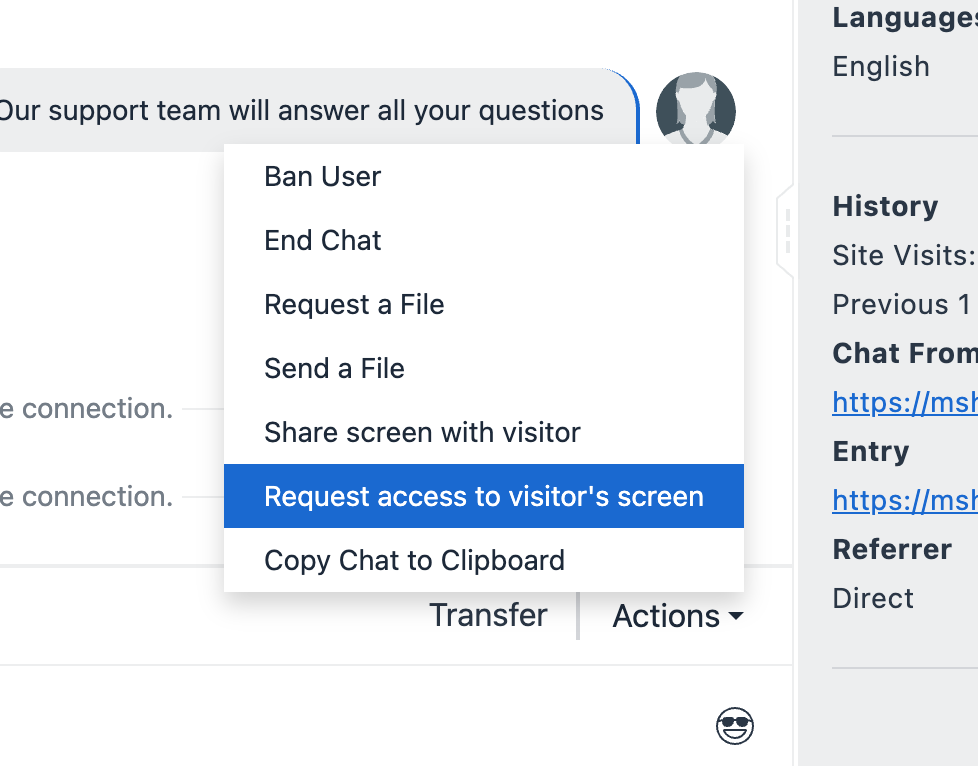
Now, we are ready to enter the hub. When in an ongoing chat, click on Actions and observe that we have 2 new options : Share screen with a visitor and Request access to visitor's screen.
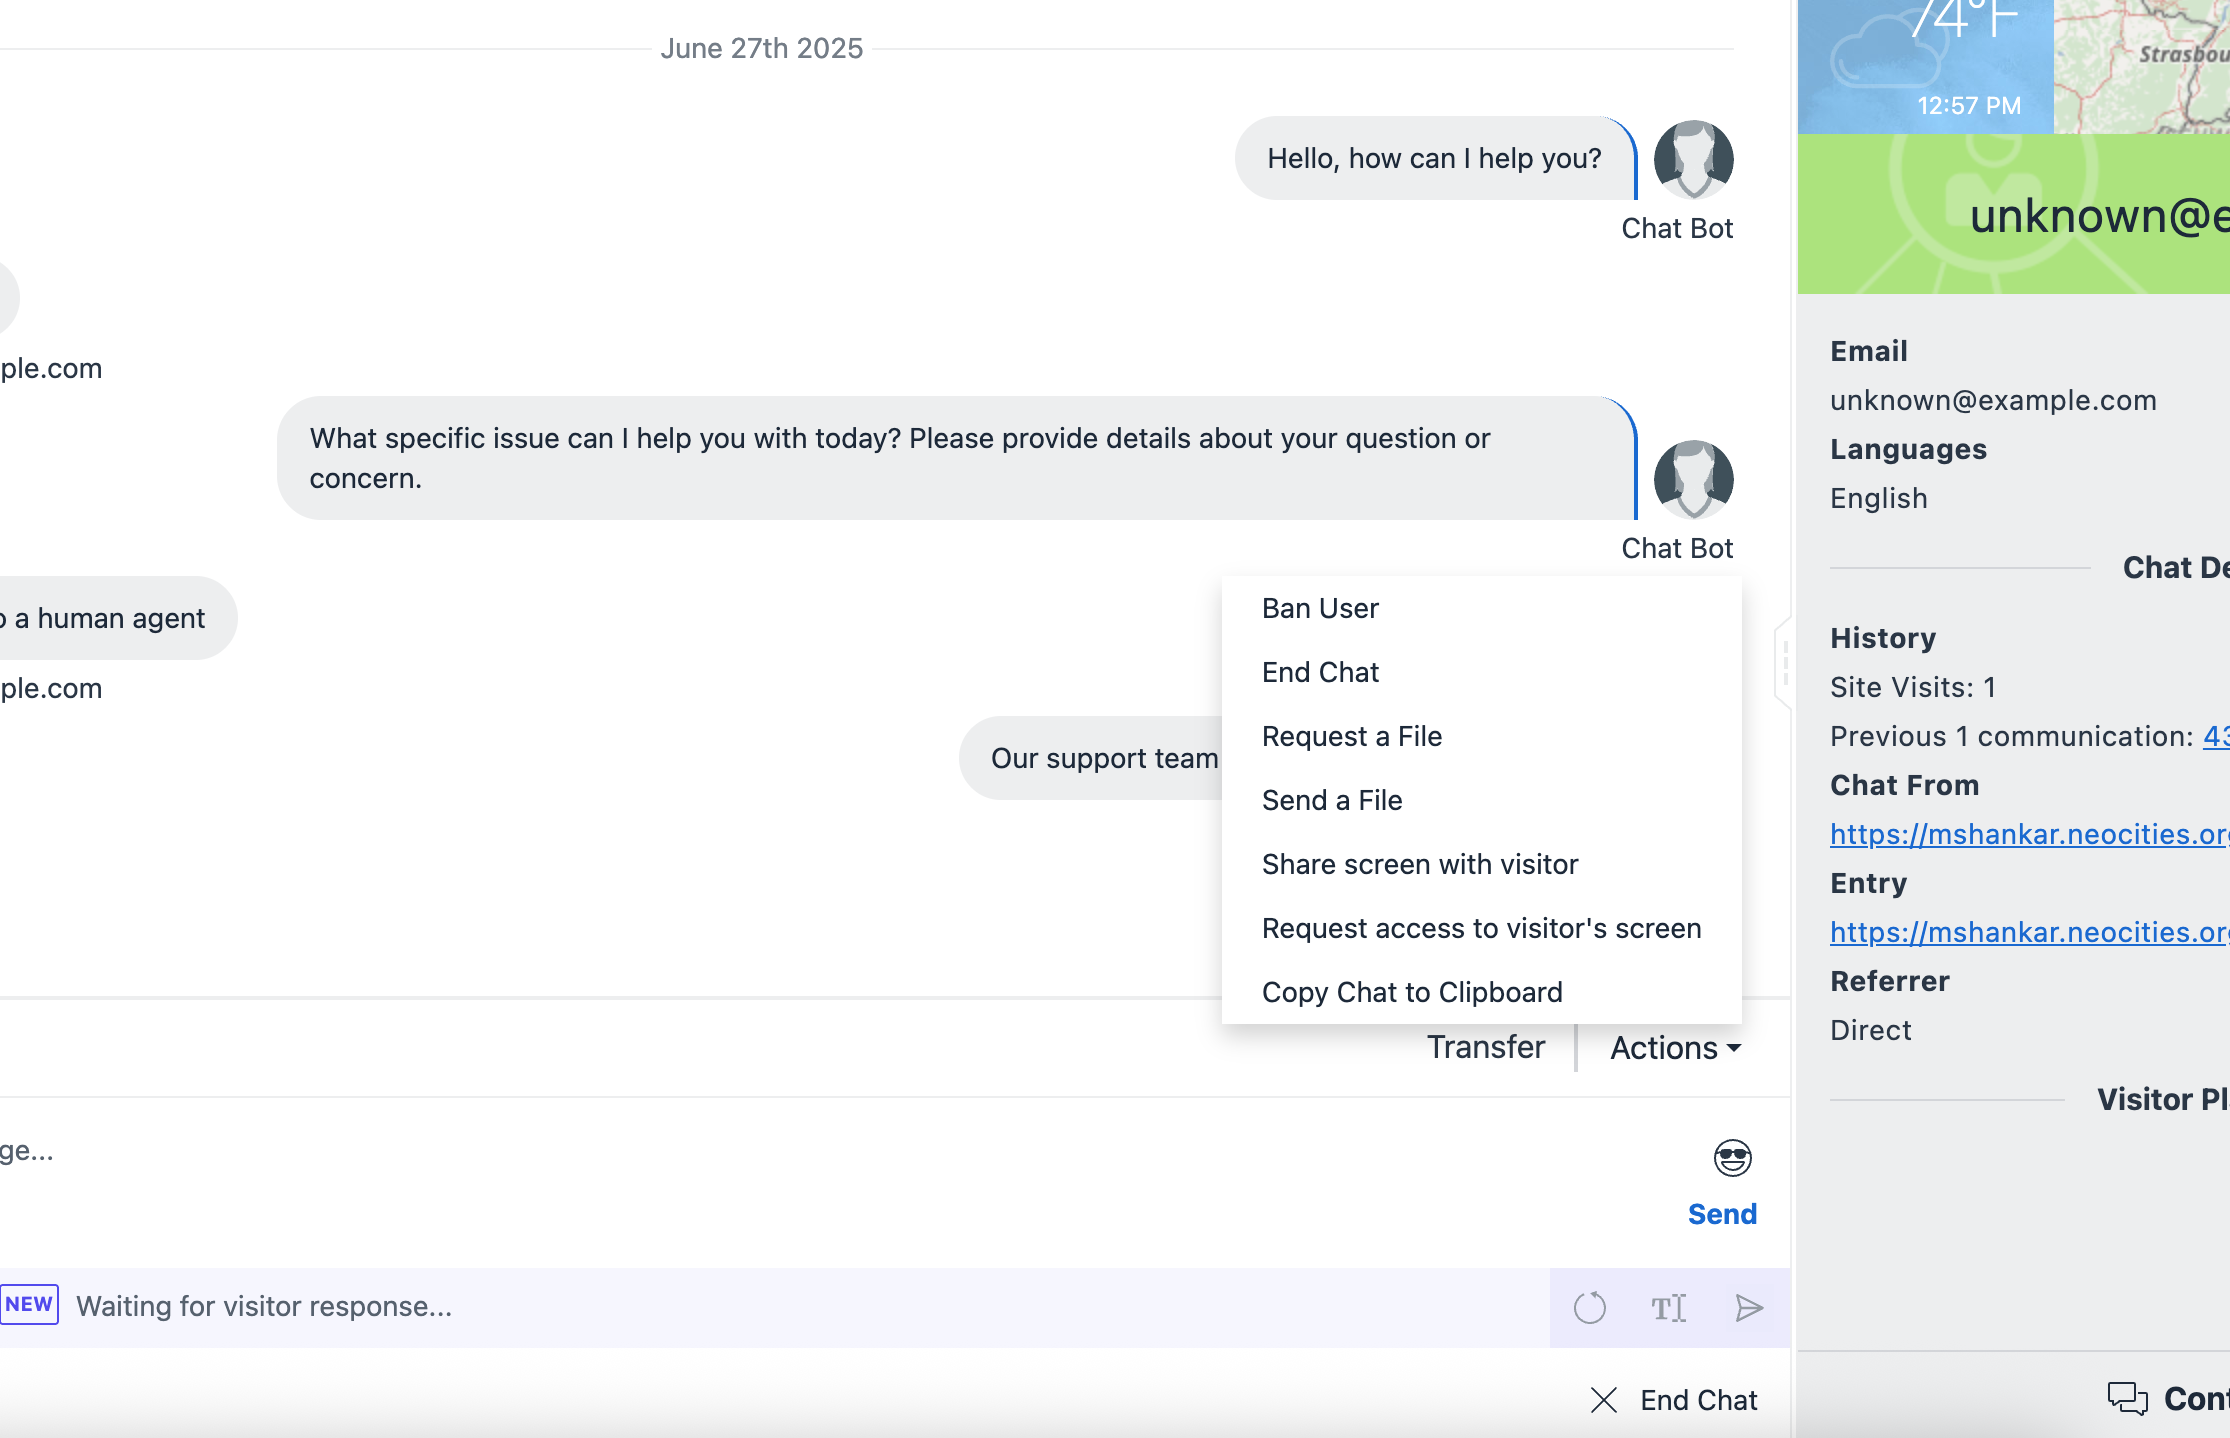
The first option is "Share screen with visitor," which is used when the agent wants to share their screen. The second option is to request the visitor to share their screen, useful for debugging or similar tasks. Lets start by sharing agent screen with the visitor.
Click on "Share Screen" with the visitor.
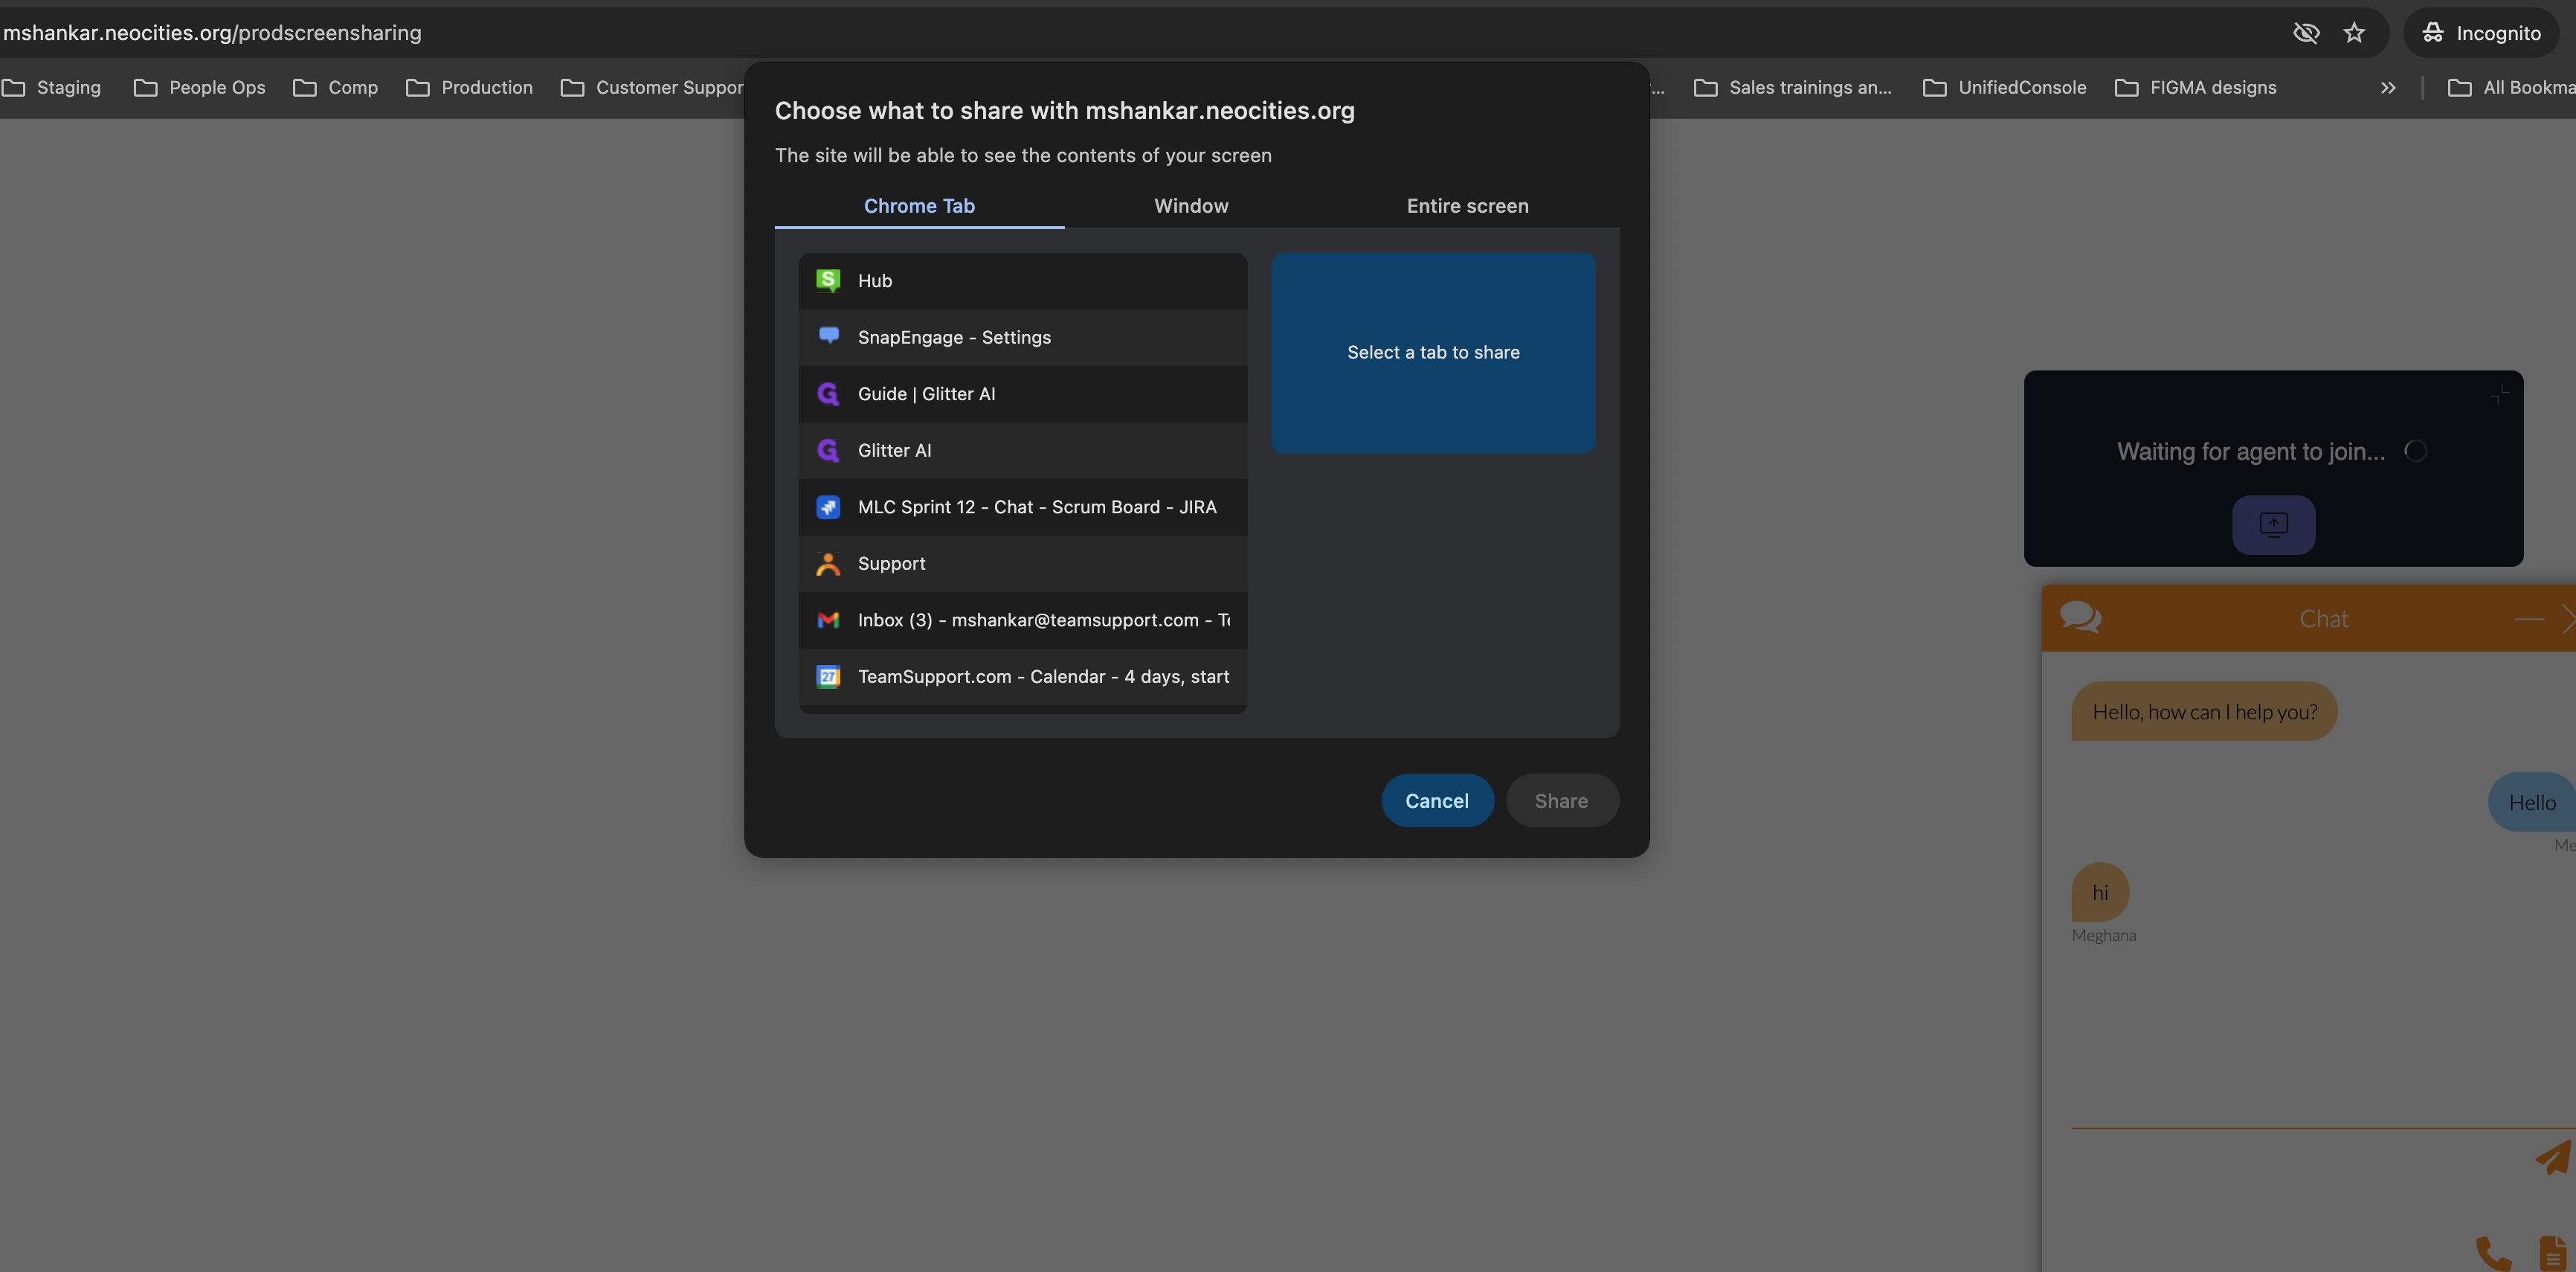
Agent will be directed to choose the tab/window/screen based, go ahead and choose what you want the visitor to see.
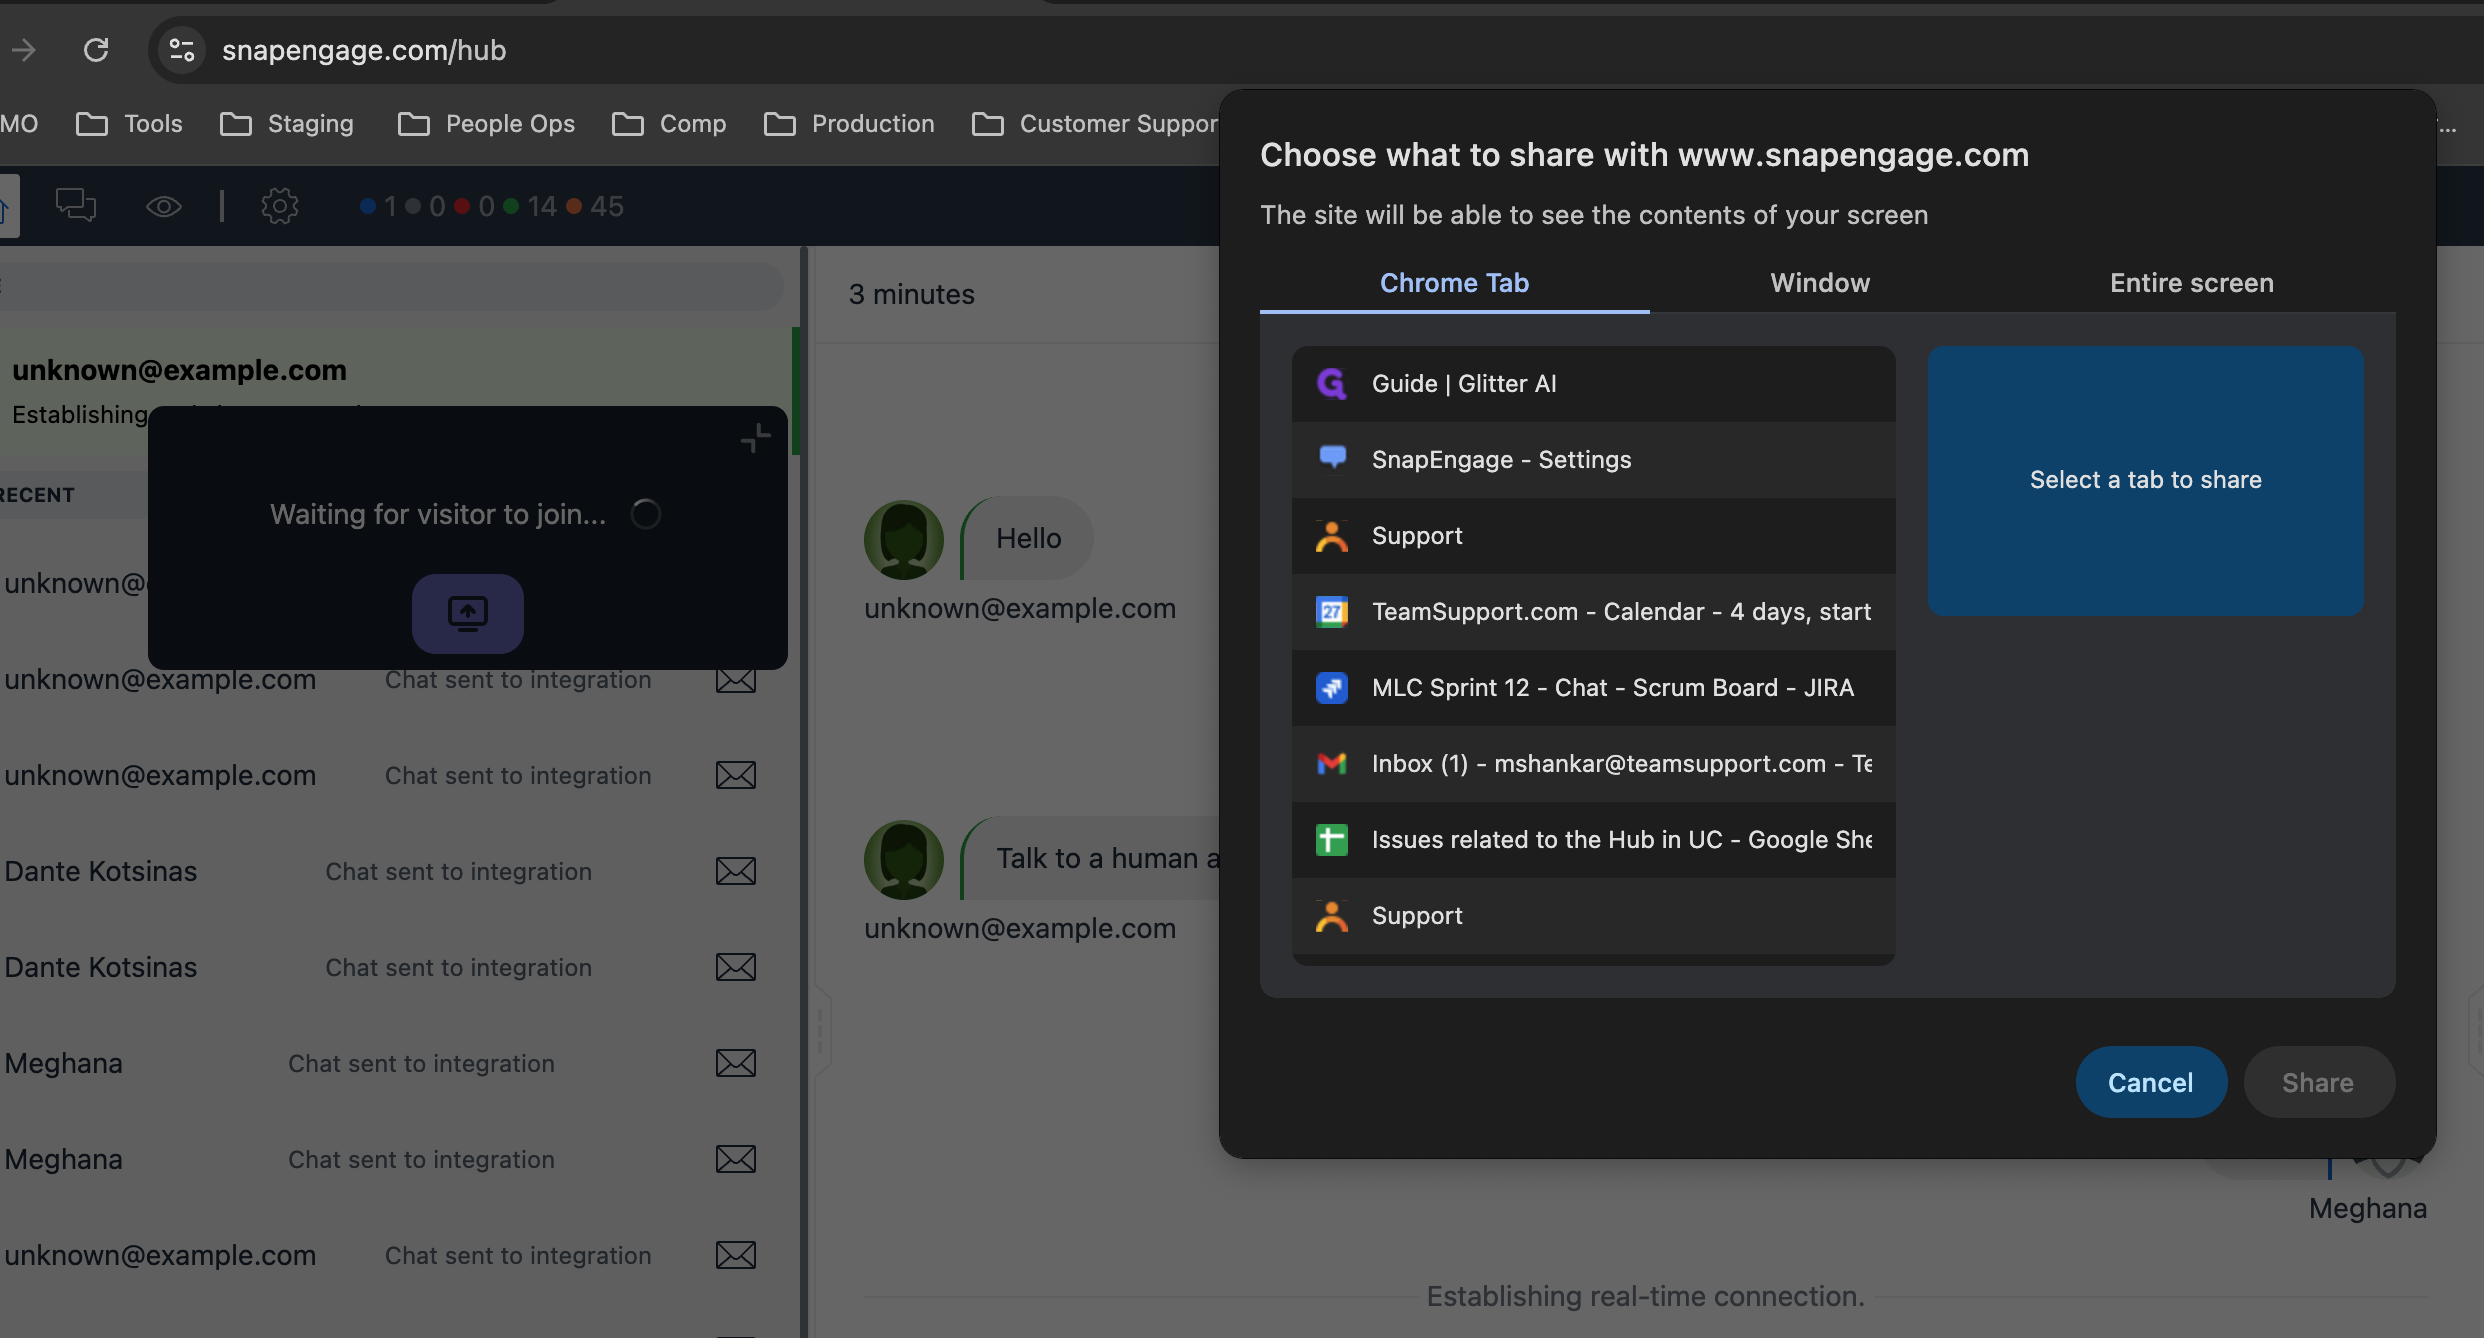
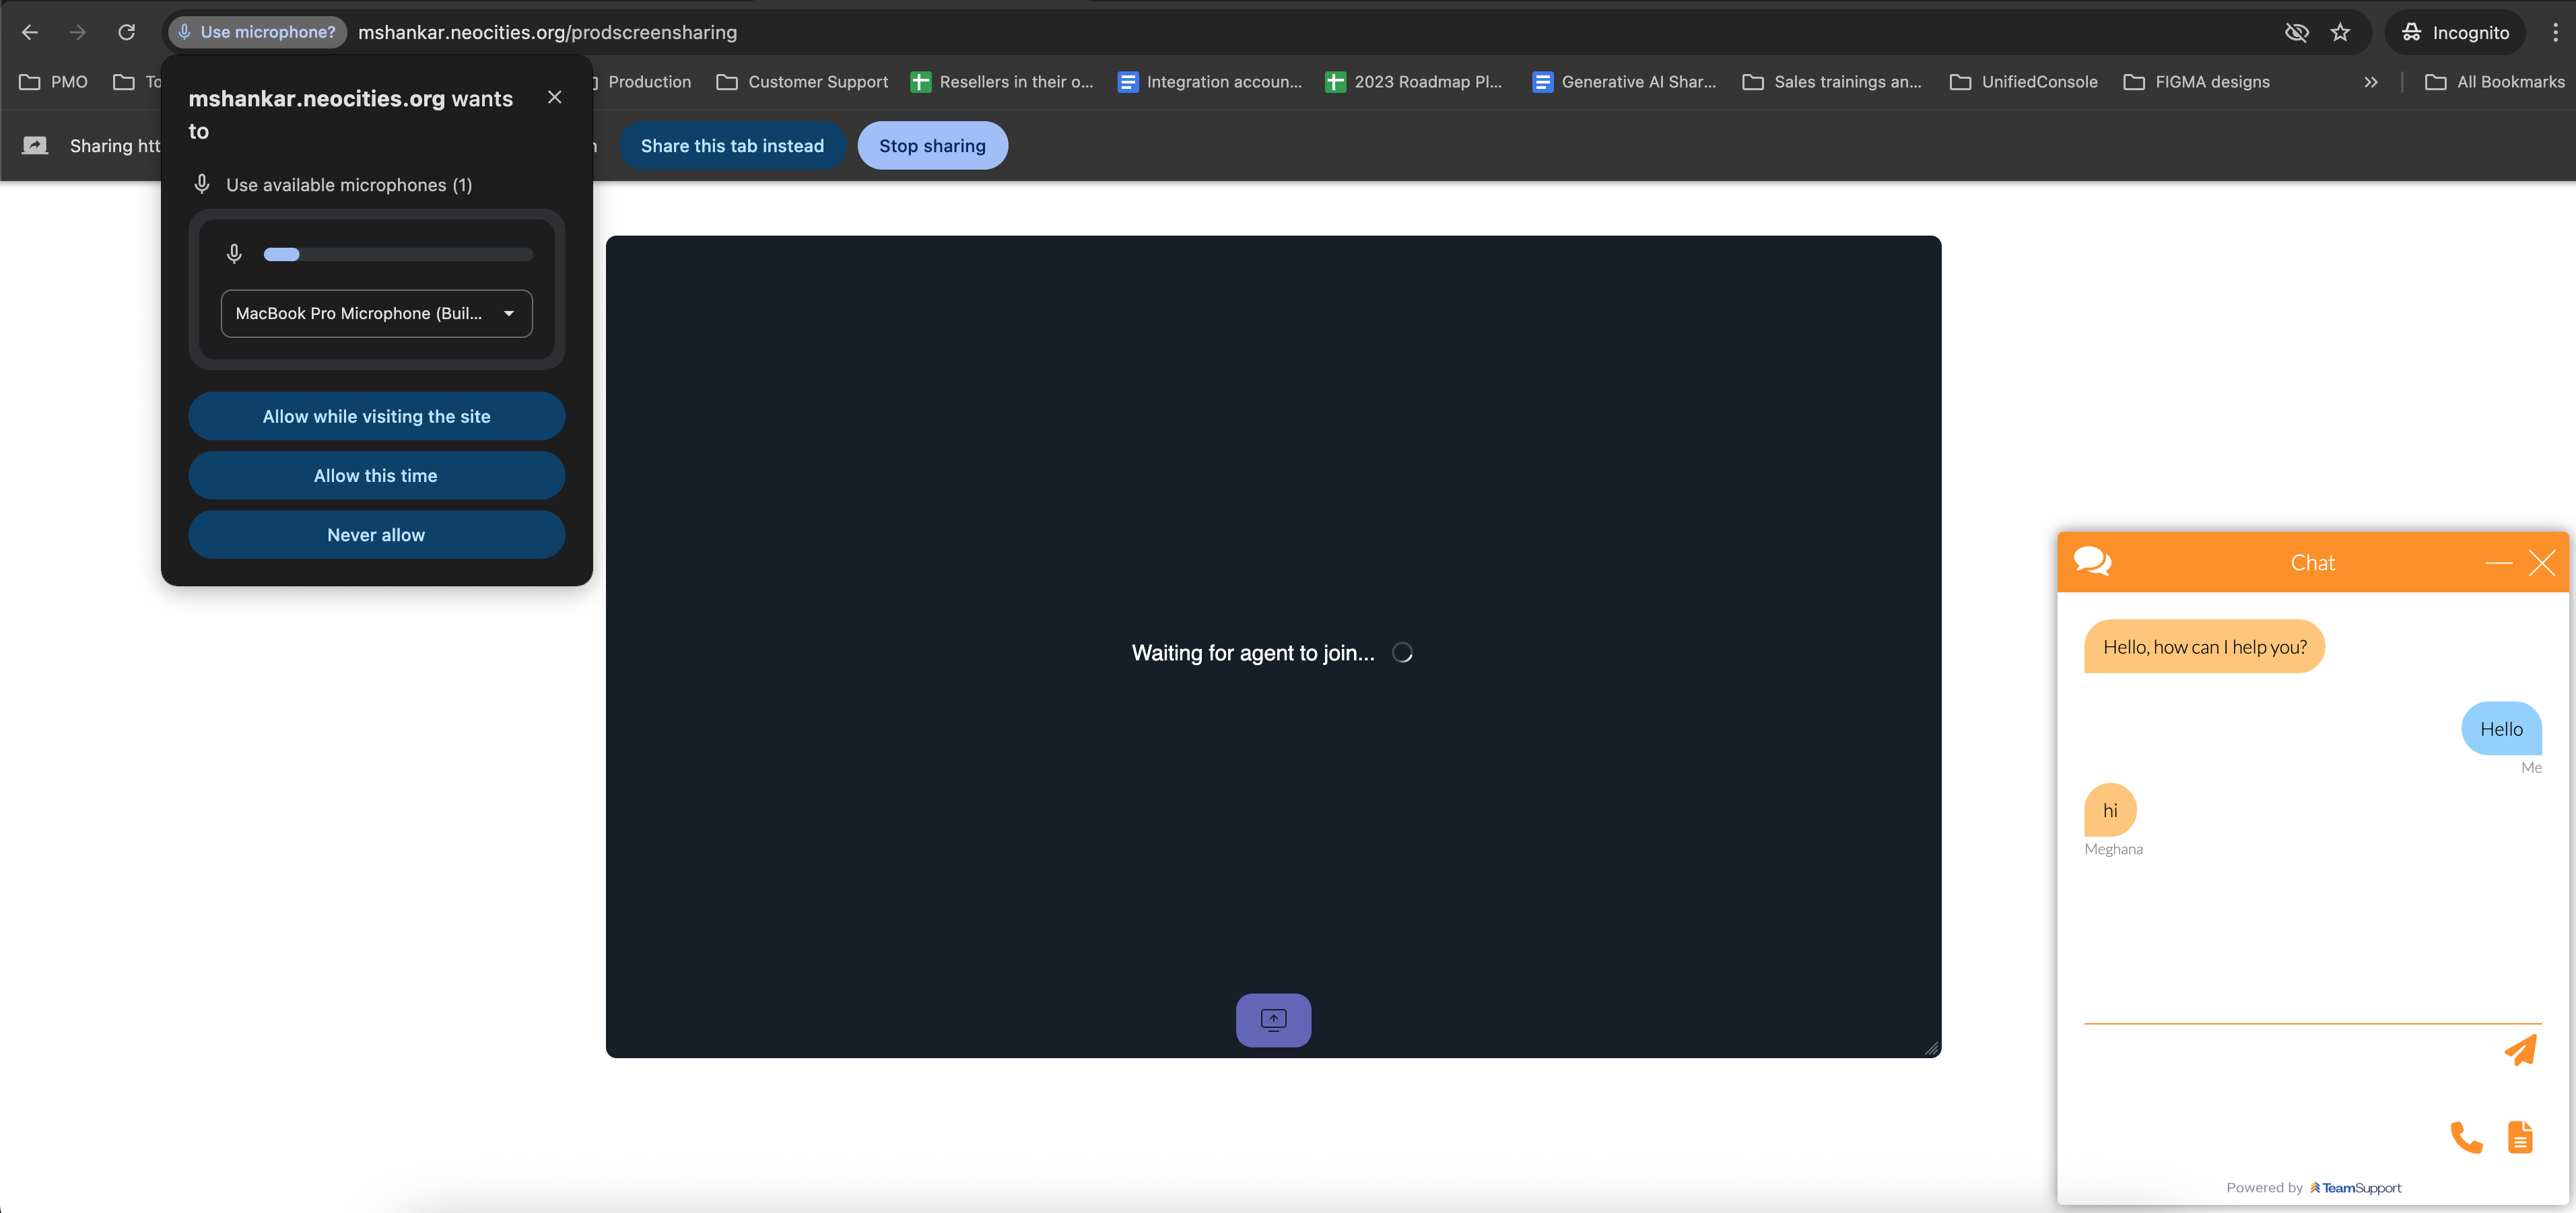
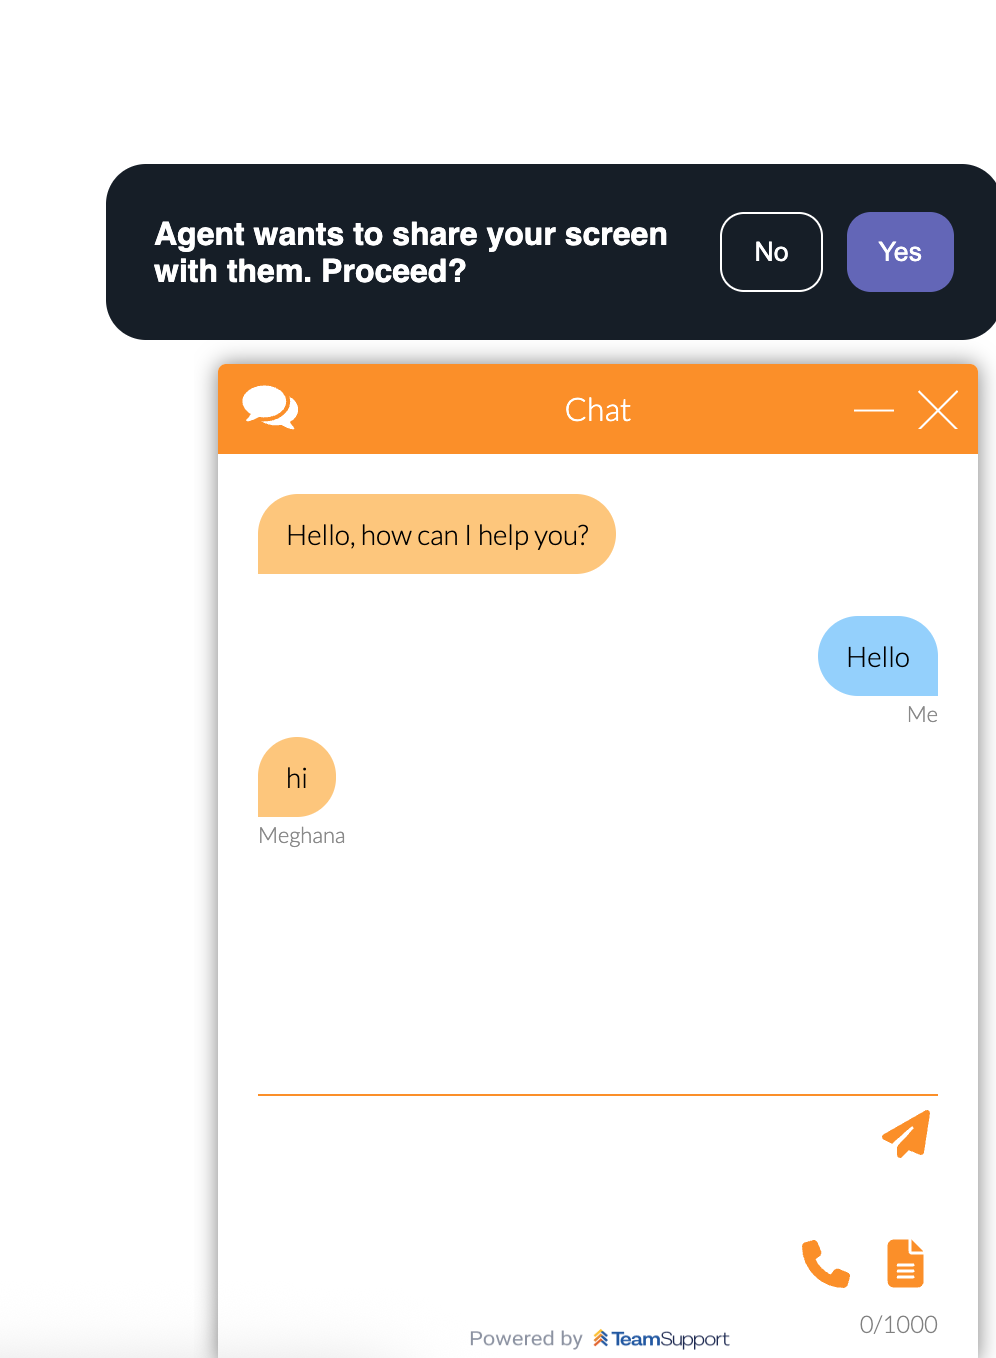
Please ensure you return to Hub and allow access to microphone without fail. The screensharing session will not be initiated unless we have microphone permission to proceed. This is a one-time request. Please allow all visits, not just this time or never.
On the visitor's side, they need to accept the screen sharing session request and allow microphone permissions as well.
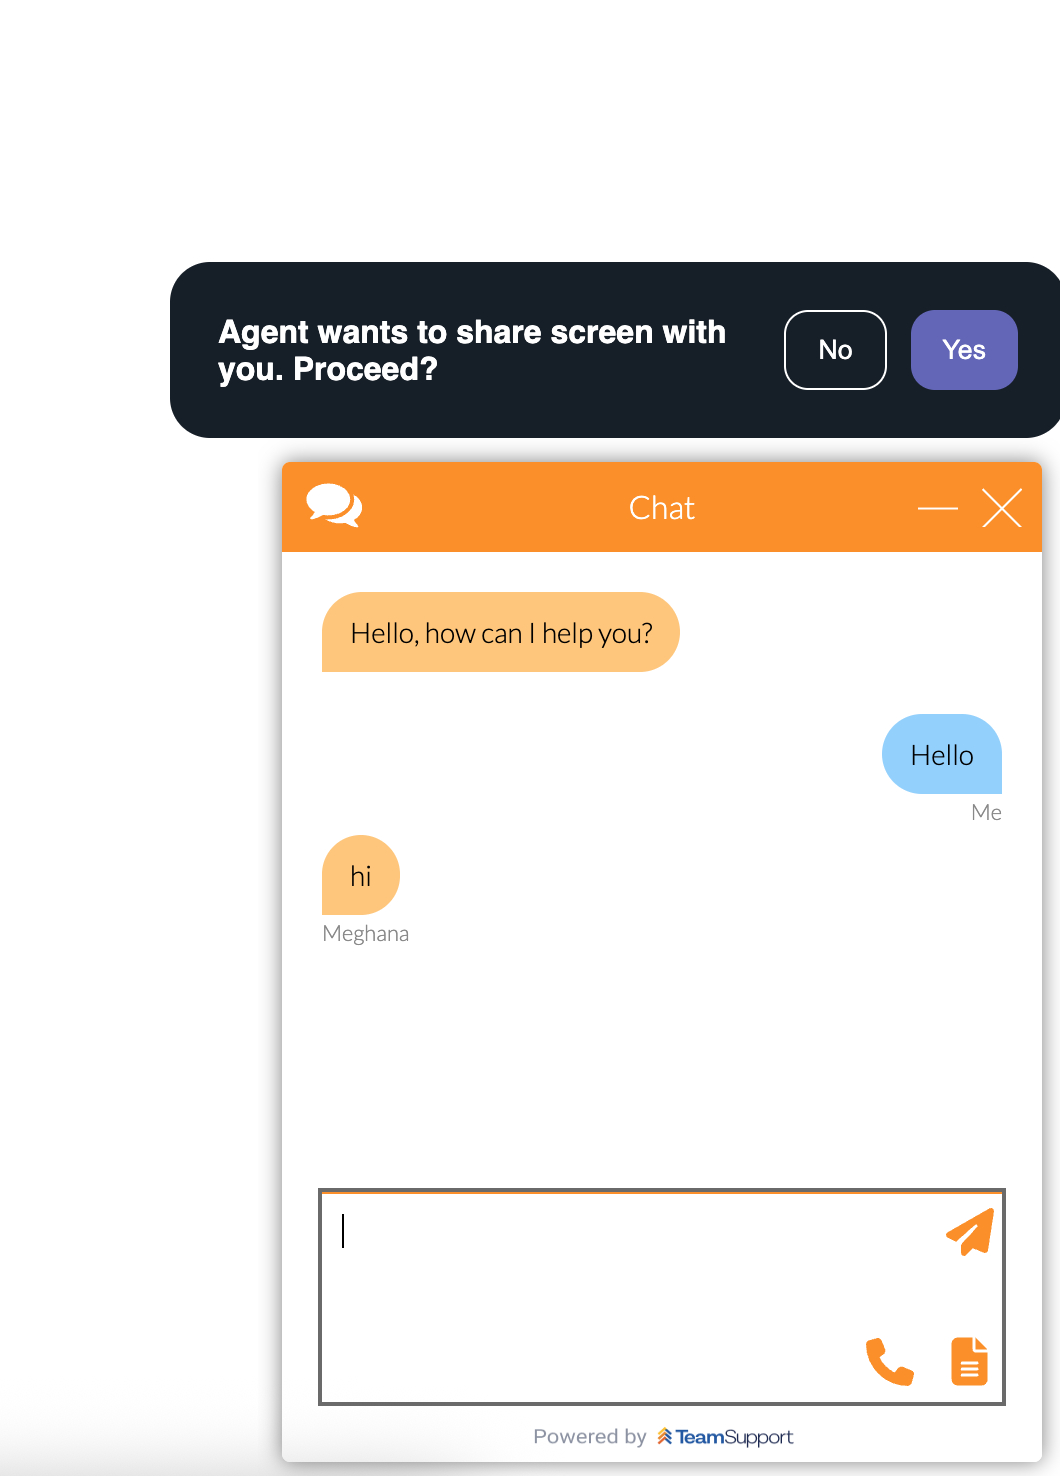
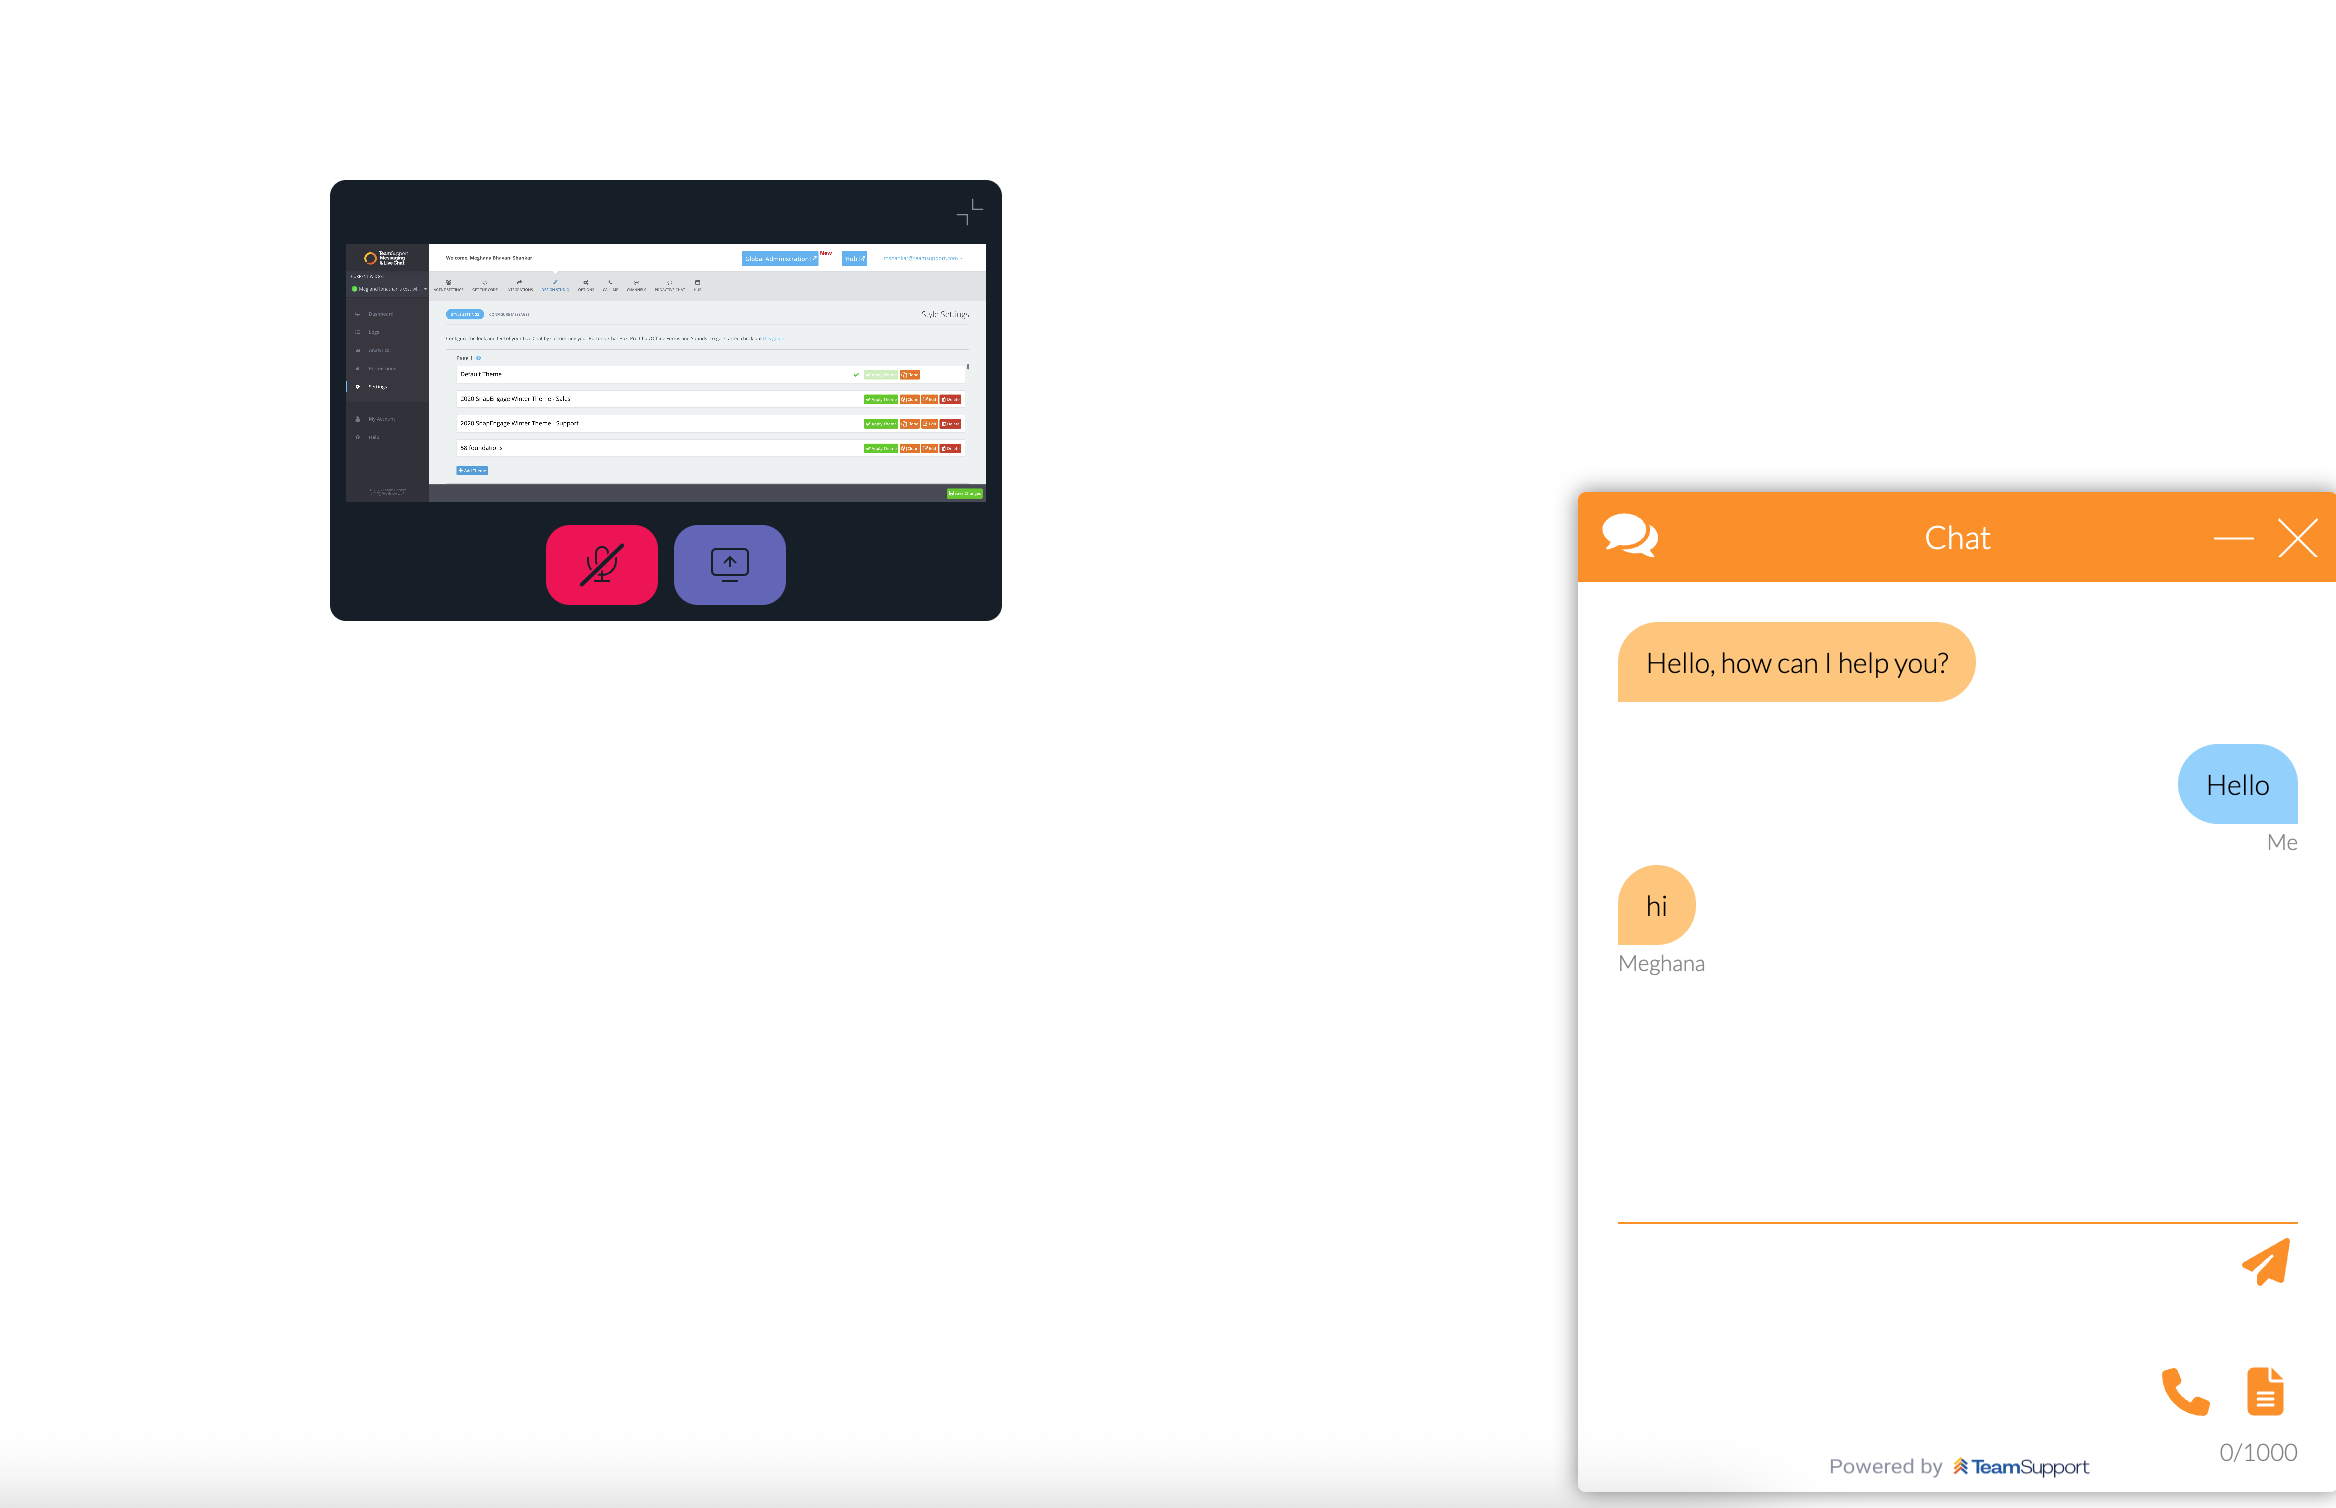
Once that's done, the visitor will begin seeing the agents screen on their end.
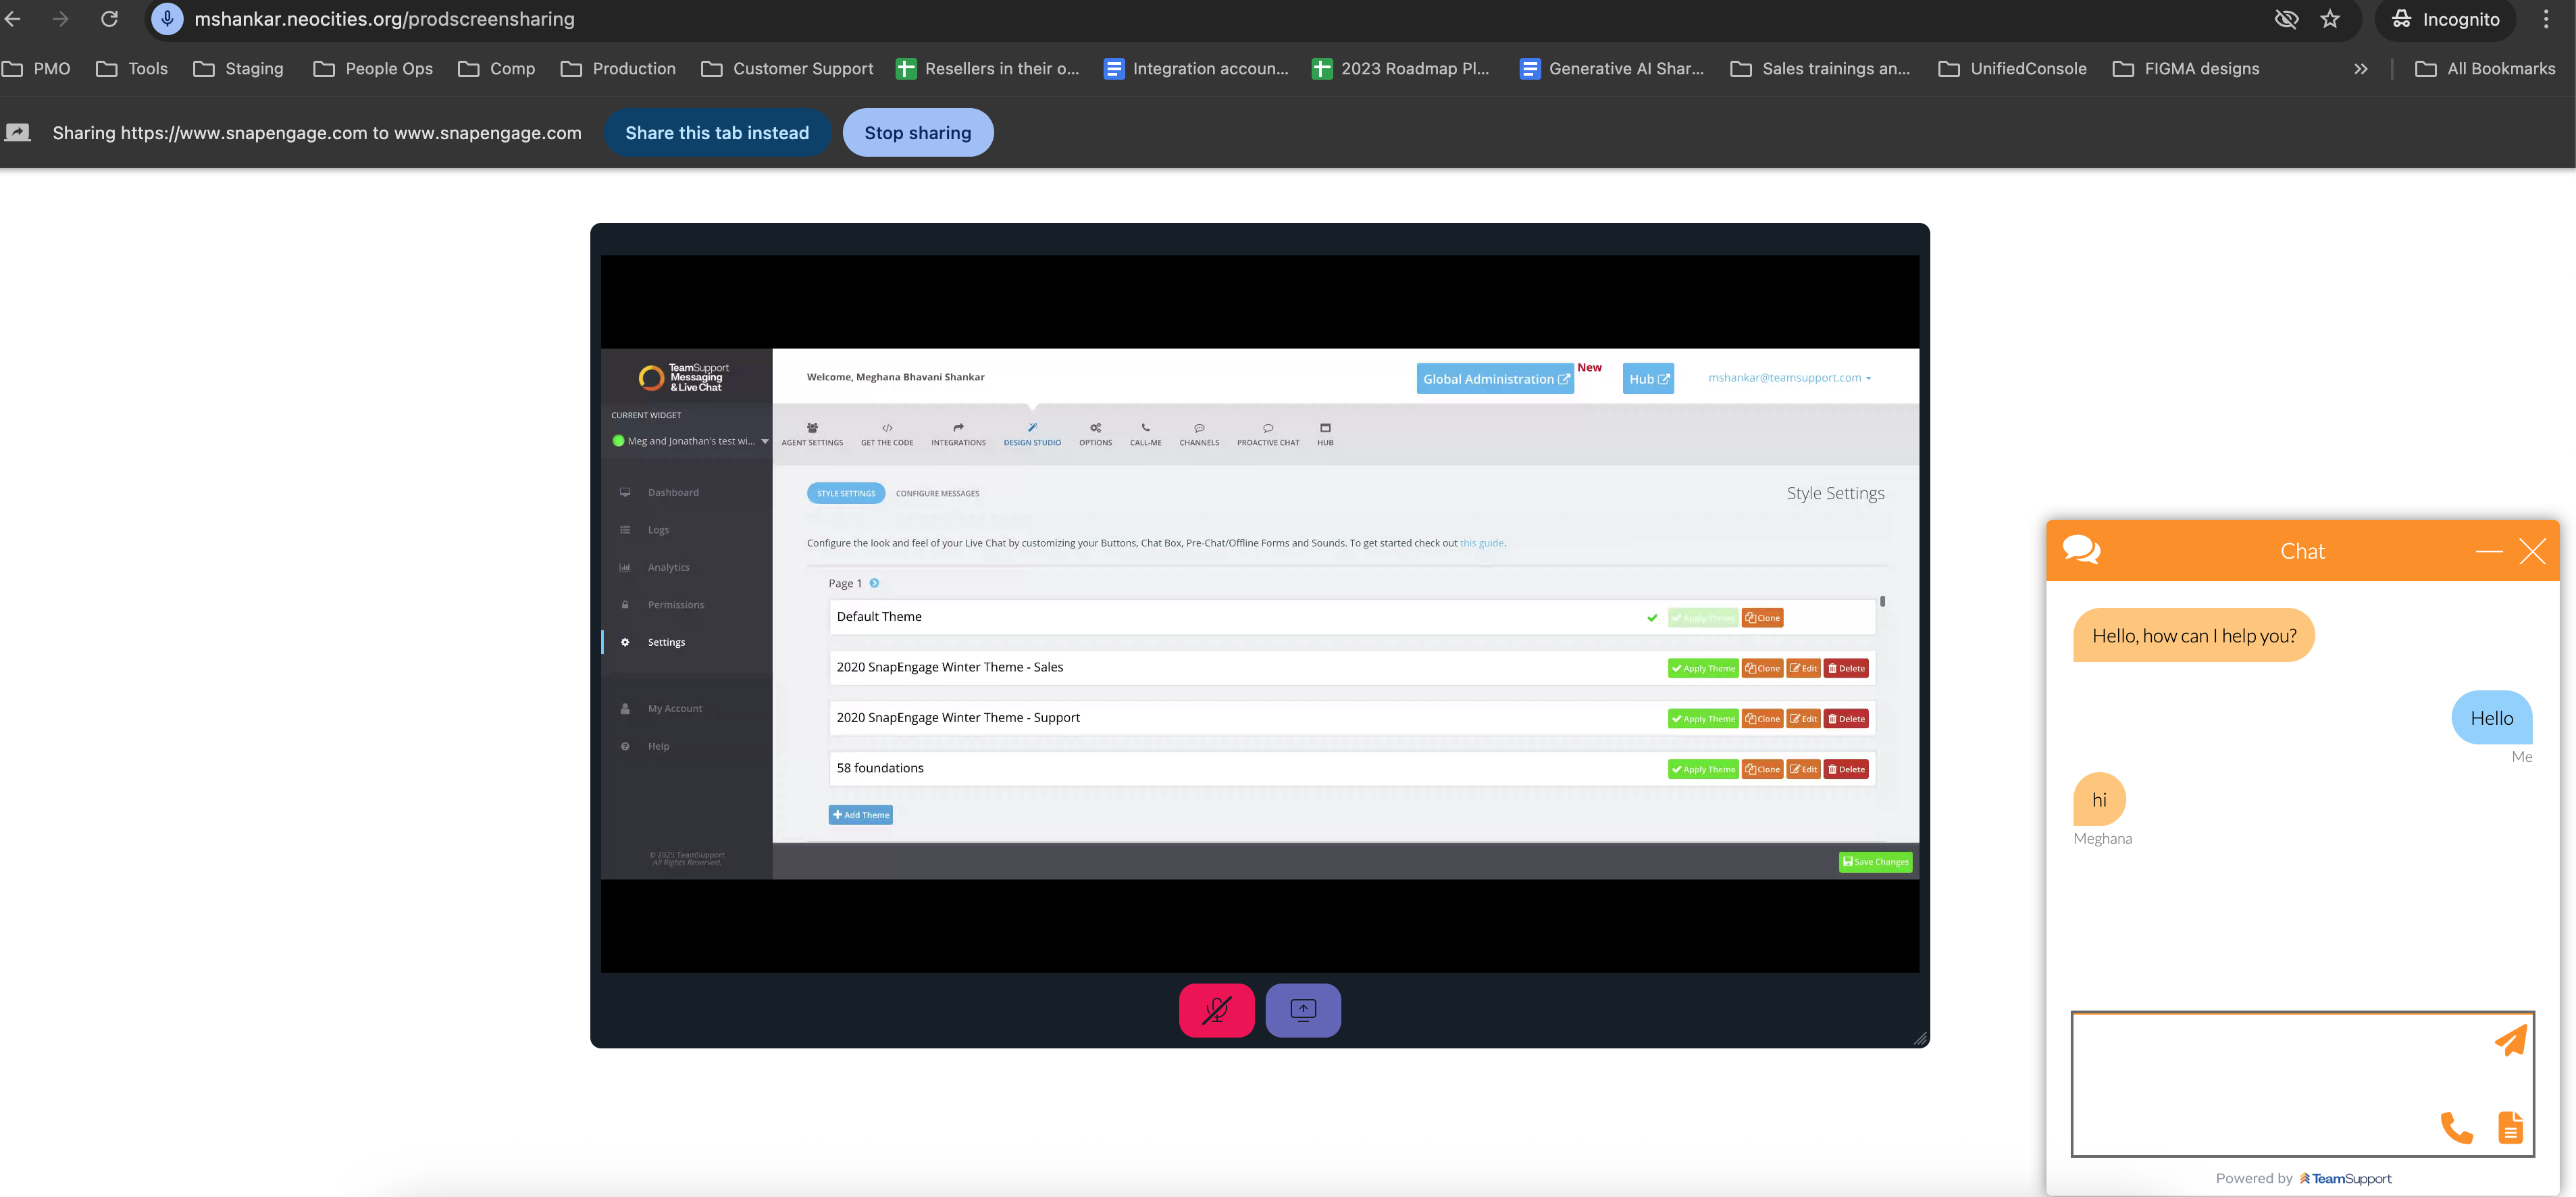
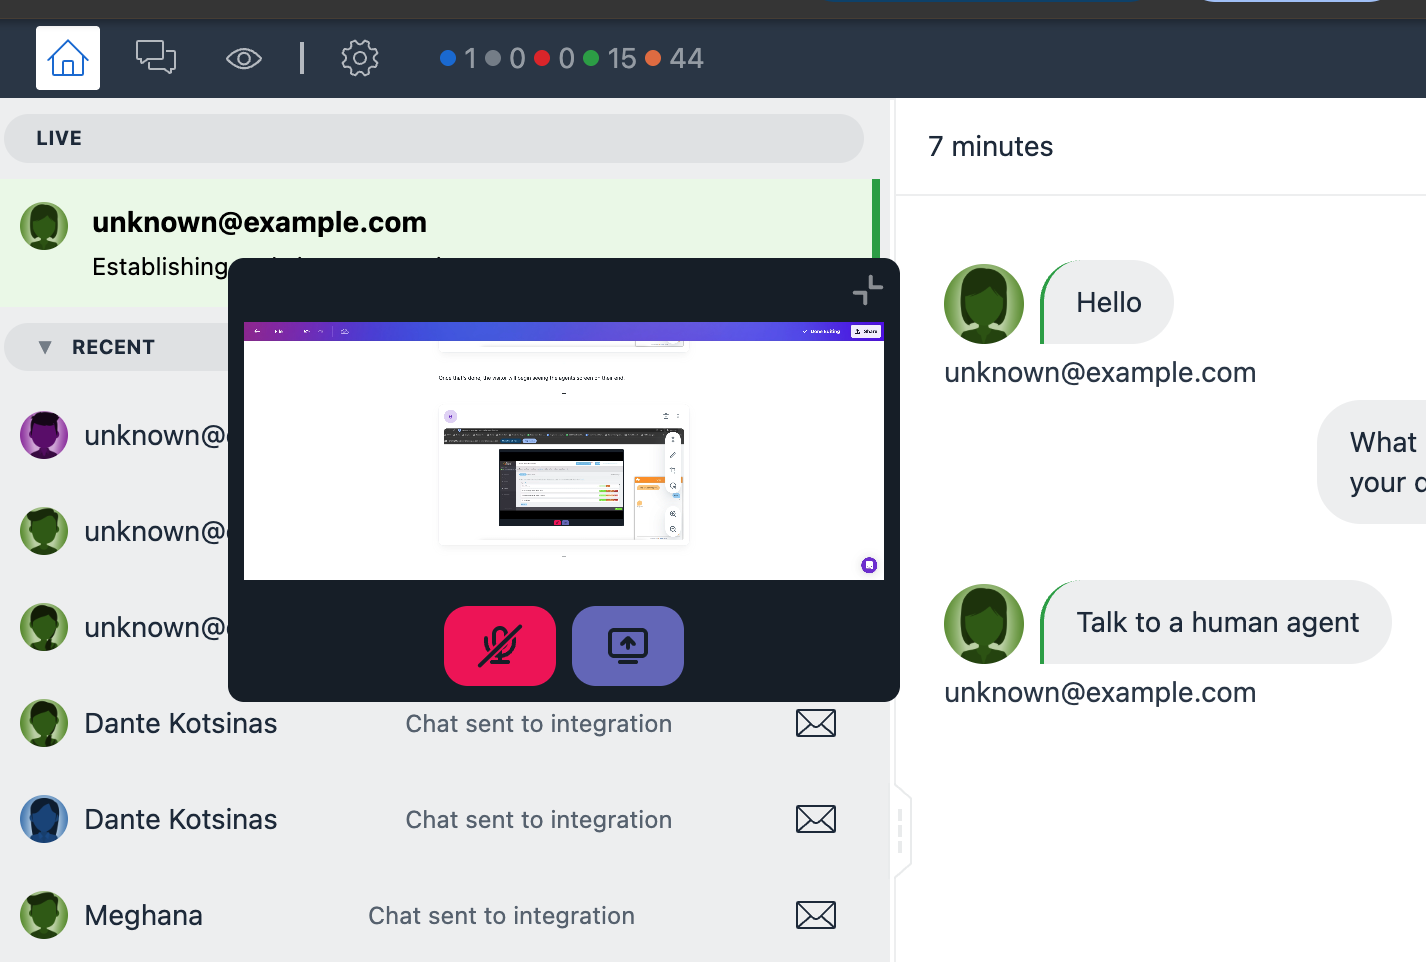
On the other hand, Agent will also see a small pop up window within their hub of the screen being shared with the visitor.
Both the agent and visitor can unmute themselves to speak with each other during the screen sharing session by clicking on the red icon. Clicking on the blue button lets you end the screen sharing session.
Next, let's see how to request the visitor to share their screen.
As an agent, click on "Request access to visitor's screen"
The visitor has to first accept your request and choose the tab they want to share to begin the session. While they work on it, the agent waits.
Again, the mute and end screensharing buttons work similar to the explanation above. Both the agent and visitor can move the screen share pop up and place it on a part of the screen that suits them the best and can also resize based on their needs if they are on the viewing end of the session.
NOTE :
- Microphone permission is crucial for this feature to work. Please make sure to remind visitors to enable microphone permission for the session to work as expected
- Due to browser limitations, Screen sharing does not work on Mobile when requesting visitor to share their screen