Tutorial: Newsletter - Preview Graphic
Learn the step-by-step process to update and export newsletter preview graphics.
In this guide, we'll learn how to update and export preview graphics for the quarterly newsletters. We'll start by renaming files for the current quarter. Then, we'll export specific pages from a market report as PNG files, ensuring they are saved in the appropriate location. Finally, we'll use Adobe Illustrator to relink images and export the updated file with the correct settings. This process ensures that the newsletter graphics are current and ready for distribution.
Let's get started
First, open the folder for the newsletter you are working on. Then, navigate to the Preview Graphics folder.
When we created the folder for the market report, we copied the folder from last quarter, so we need to change the file name to the correct quarter. In this case, we are changing it from Q3 to Q4. Change both the Illustrator file (.ai) and the image file (.png).
![Step #3: Click on "[IN] Q3 2024 - Market Report Preview.ai"](https://di8mn0rali2ic.cloudfront.net/uploads/deec4c1f-0fae-4079-a90b-bbbec057d8e3/399ba96a-7aad-4ae0-893e-3bb9ac14c24e.png)
Change the file name.
![Step #4: Click on "[IN] Q3 2024 - Market Report Preview.png"](https://di8mn0rali2ic.cloudfront.net/uploads/deec4c1f-0fae-4079-a90b-bbbec057d8e3/f2e793ea-2ef2-4d8e-a45c-e6a7f8abe6e5.png)
Change the file name.
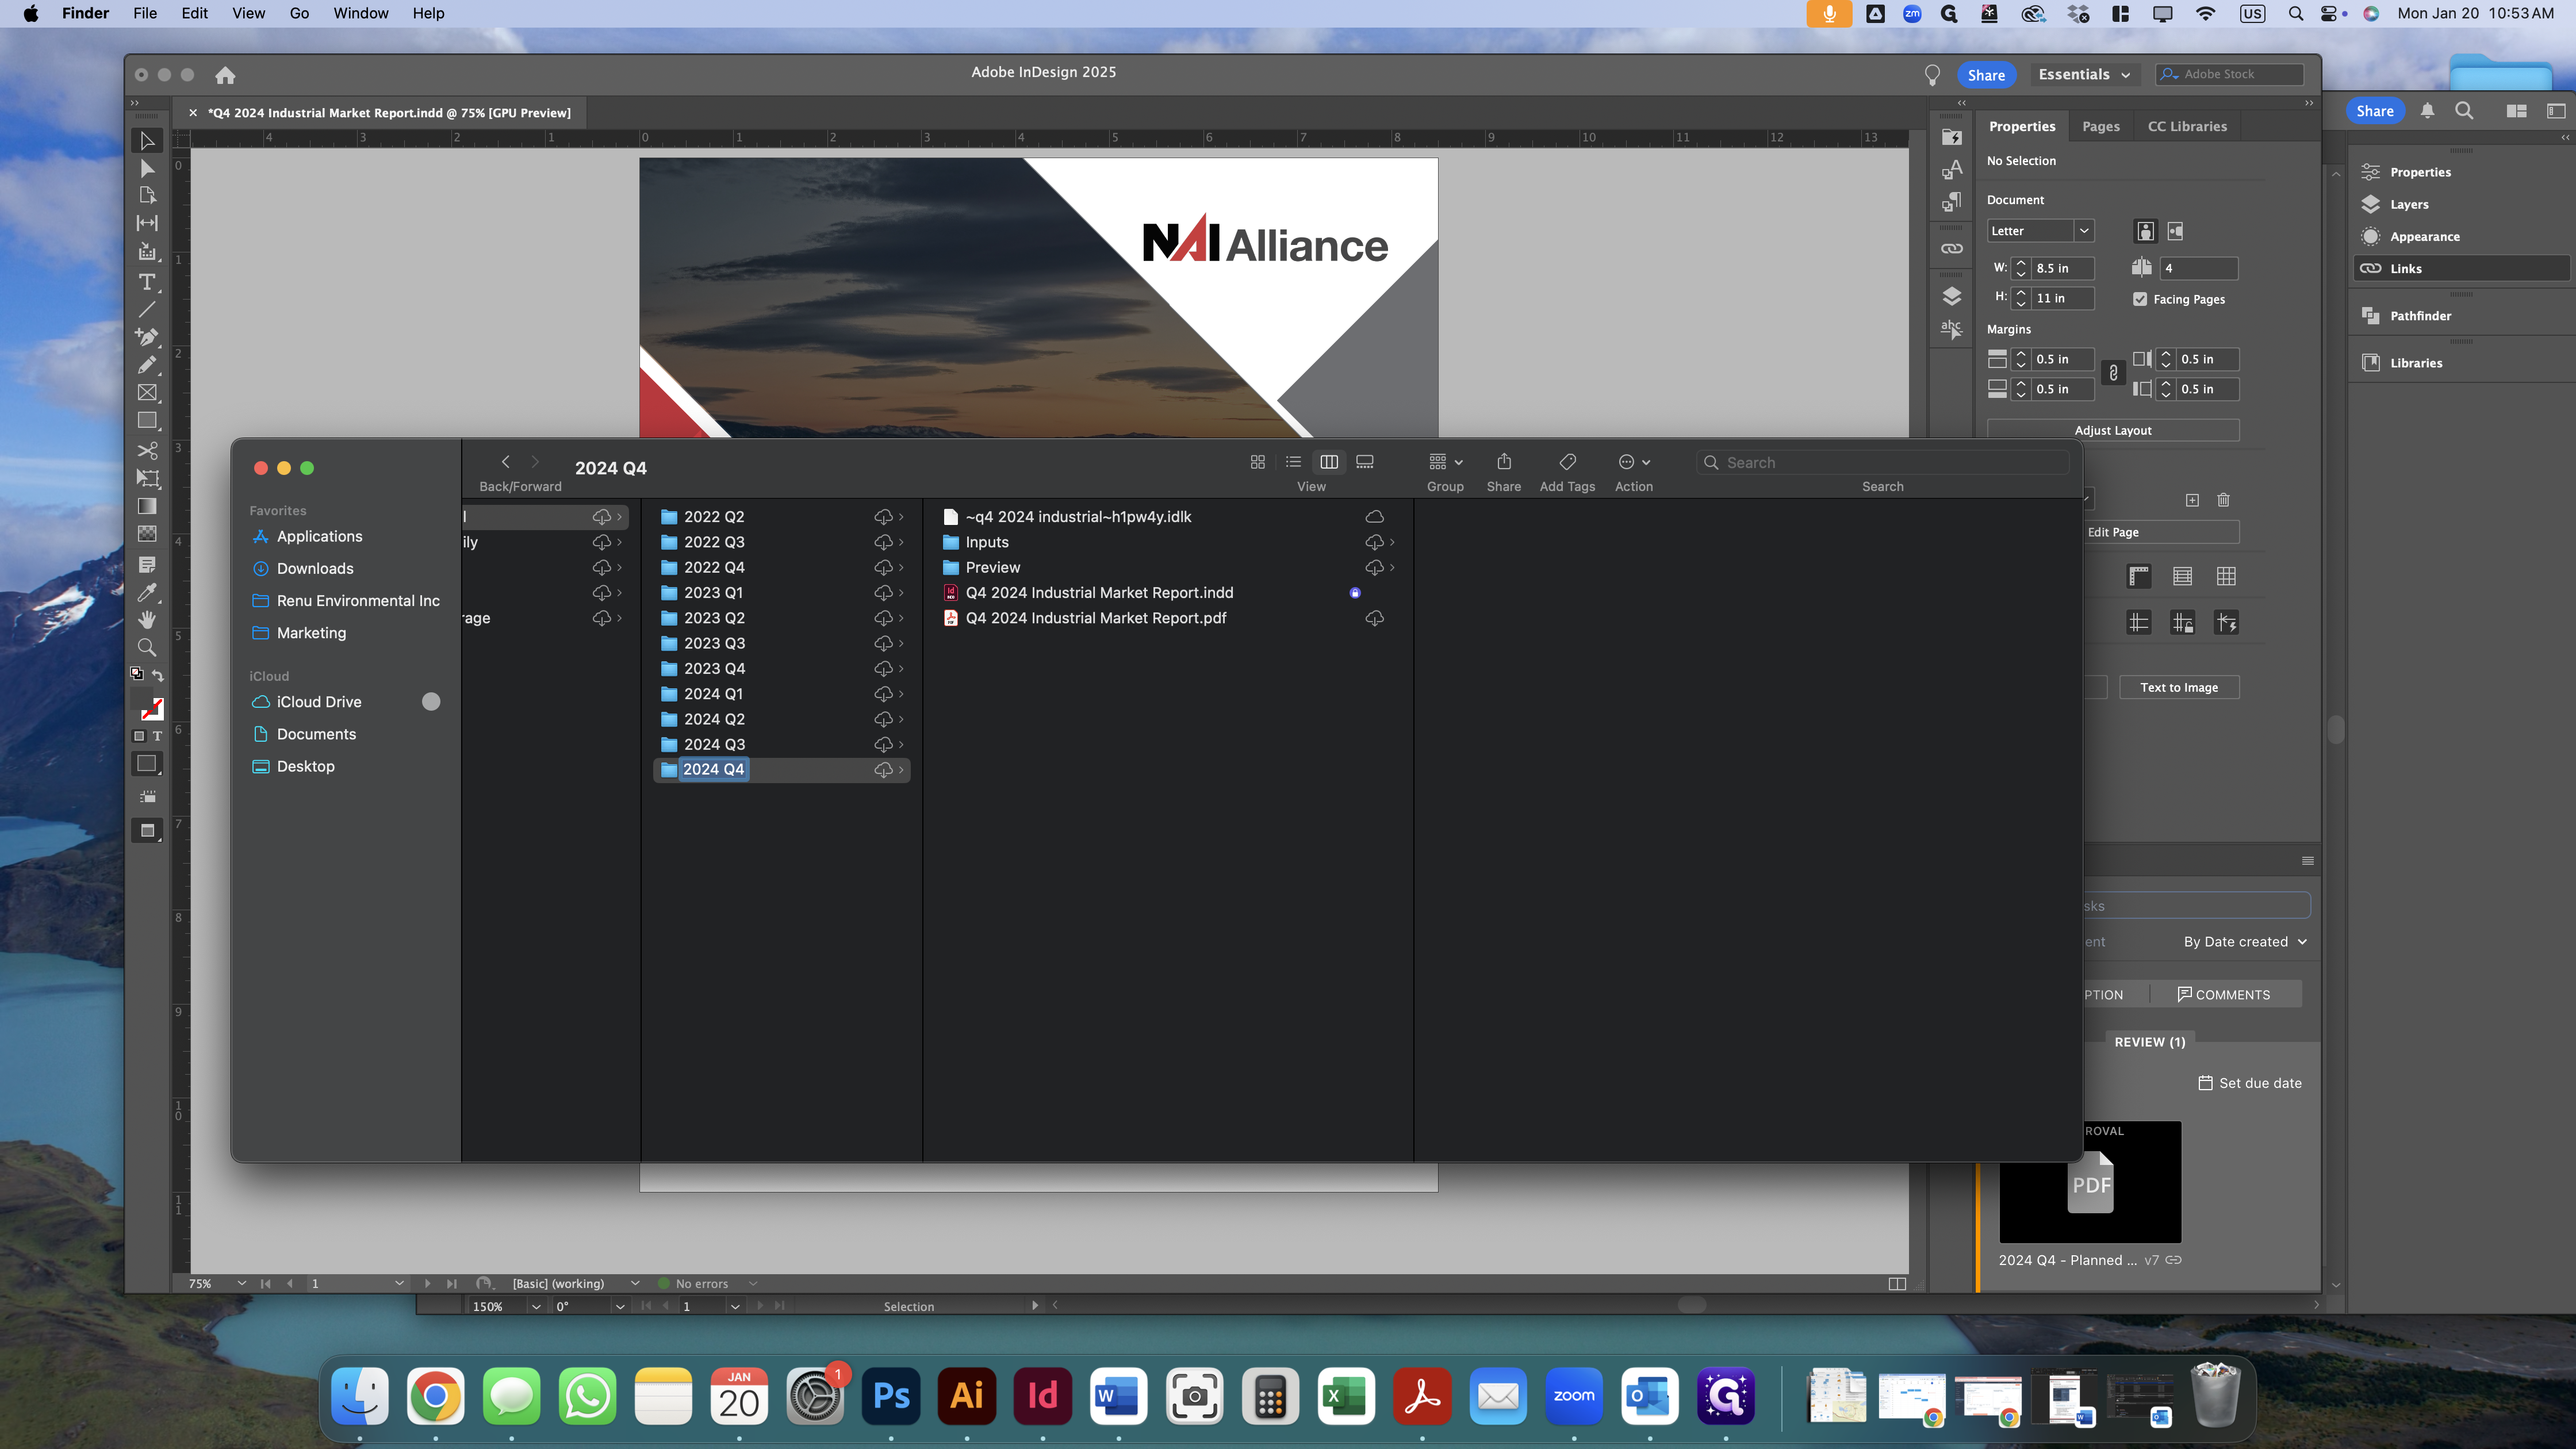
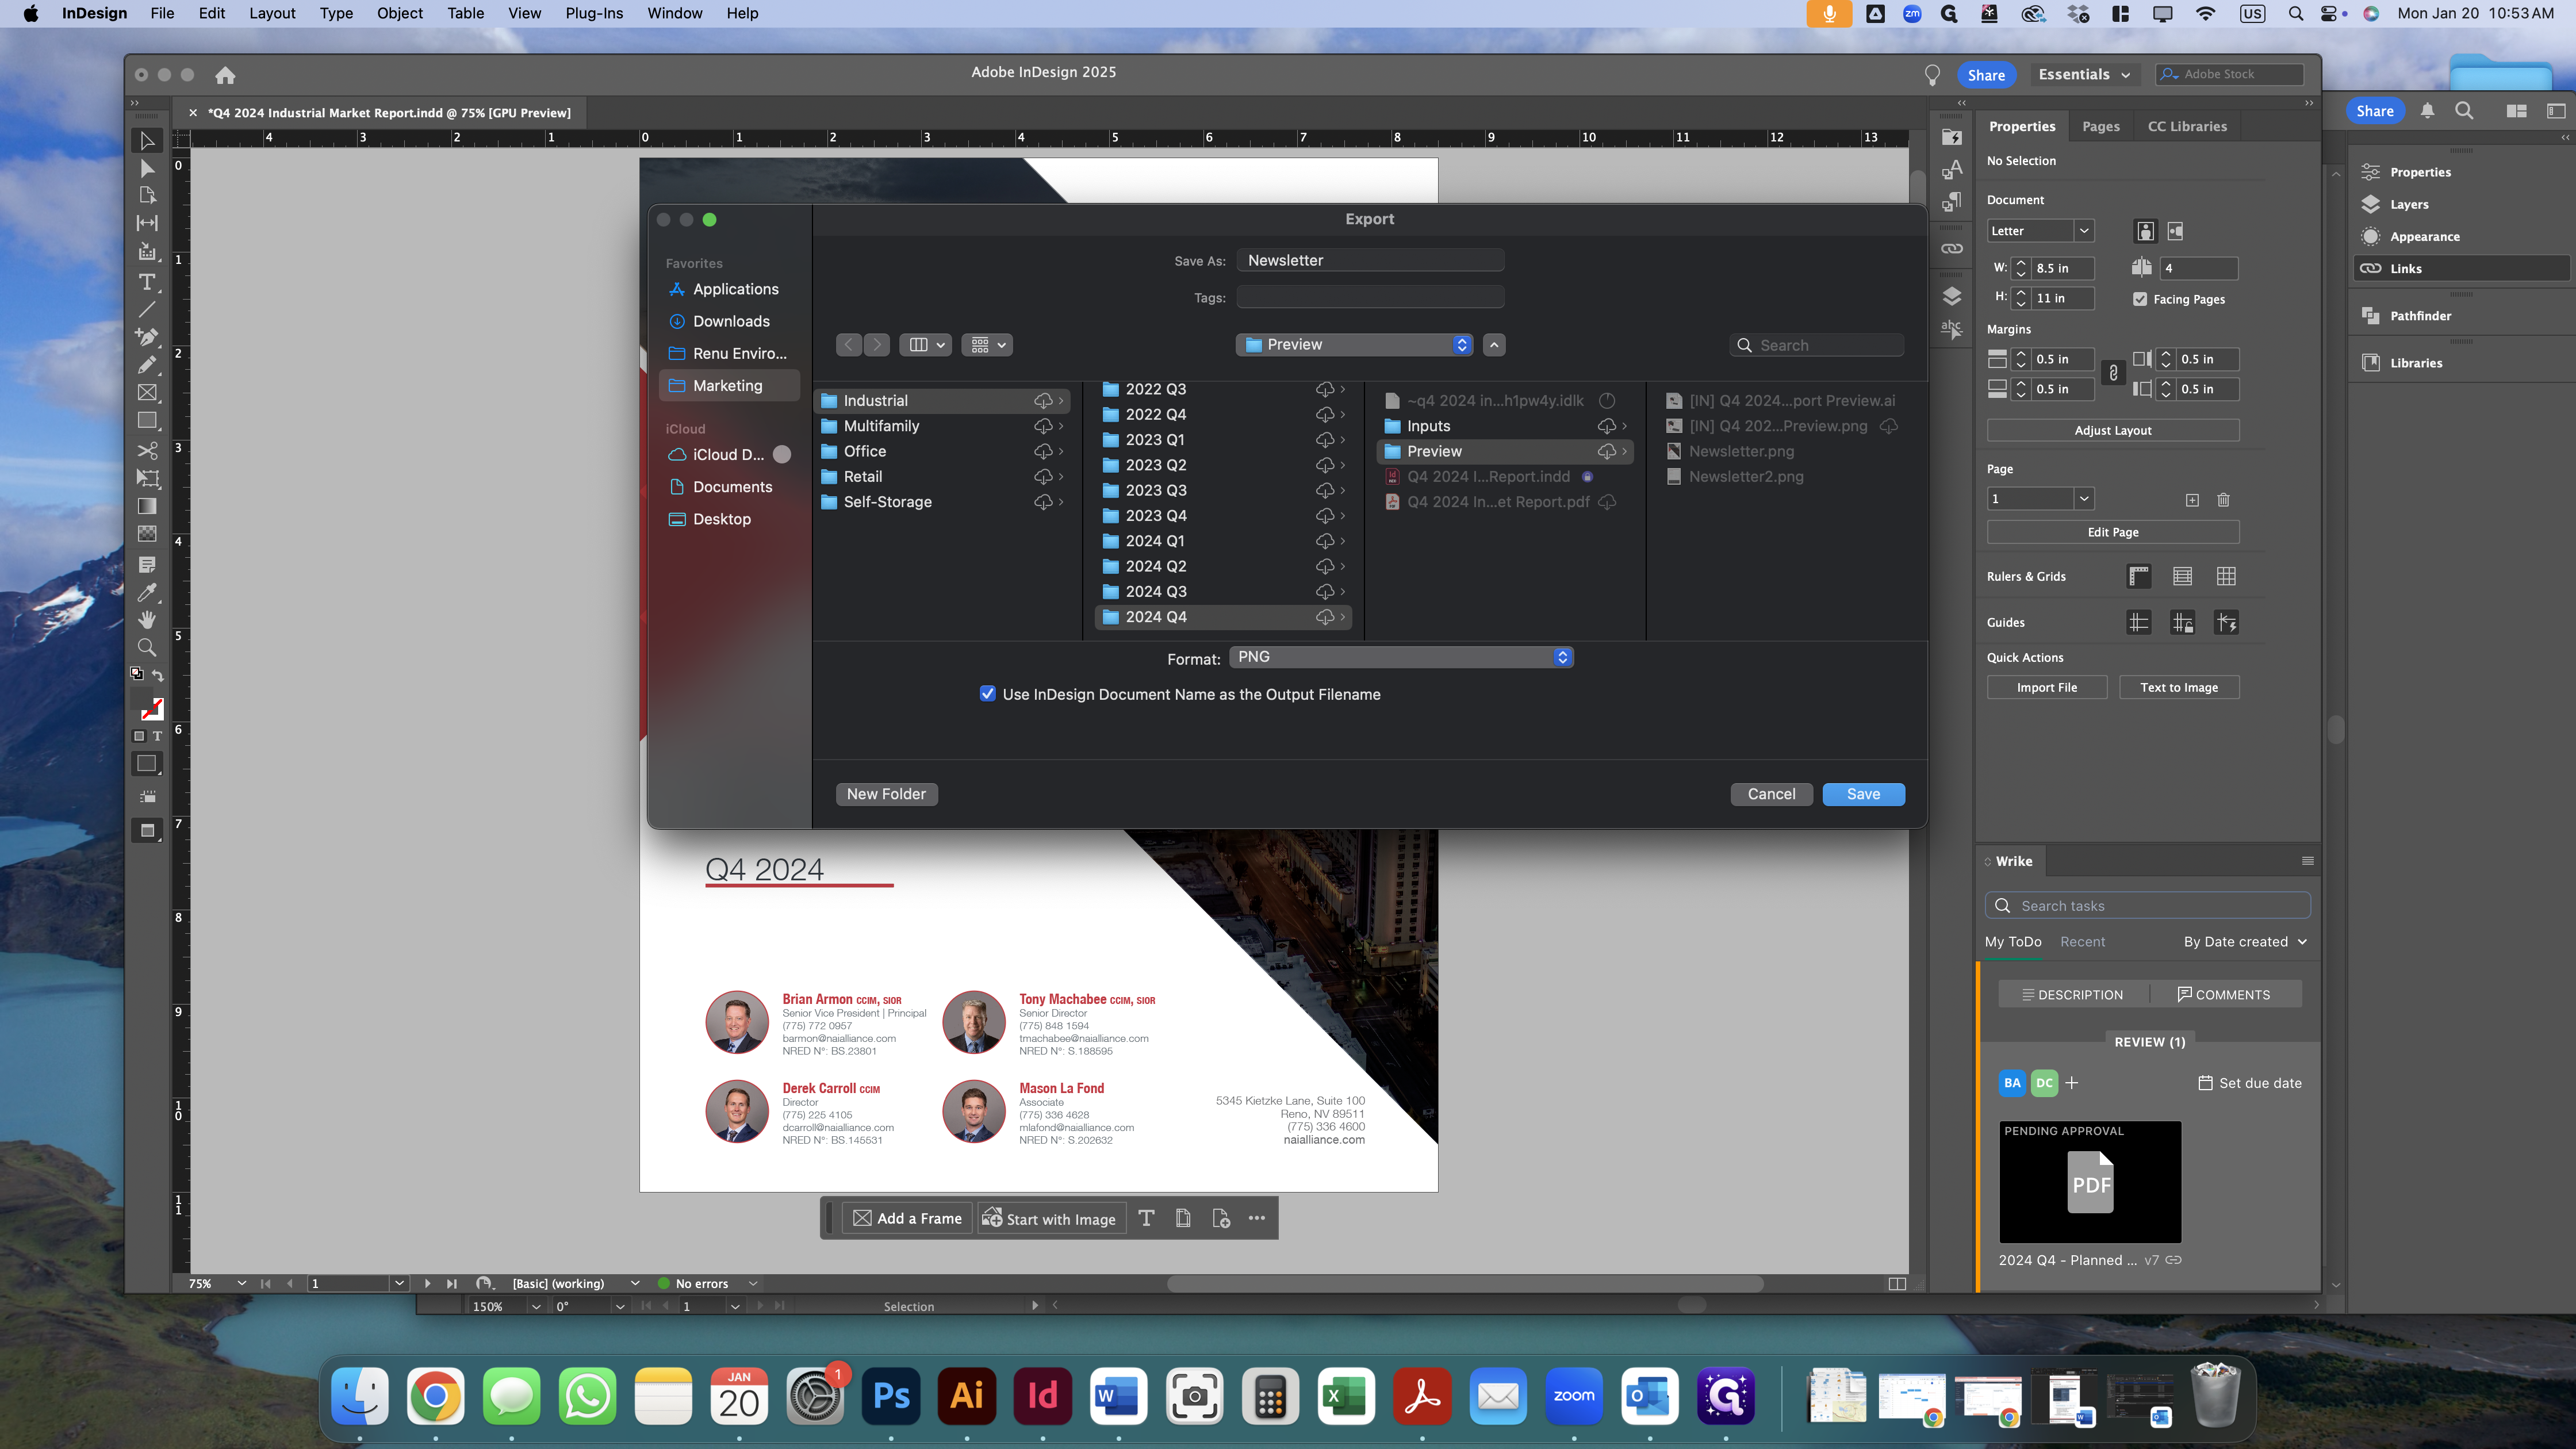
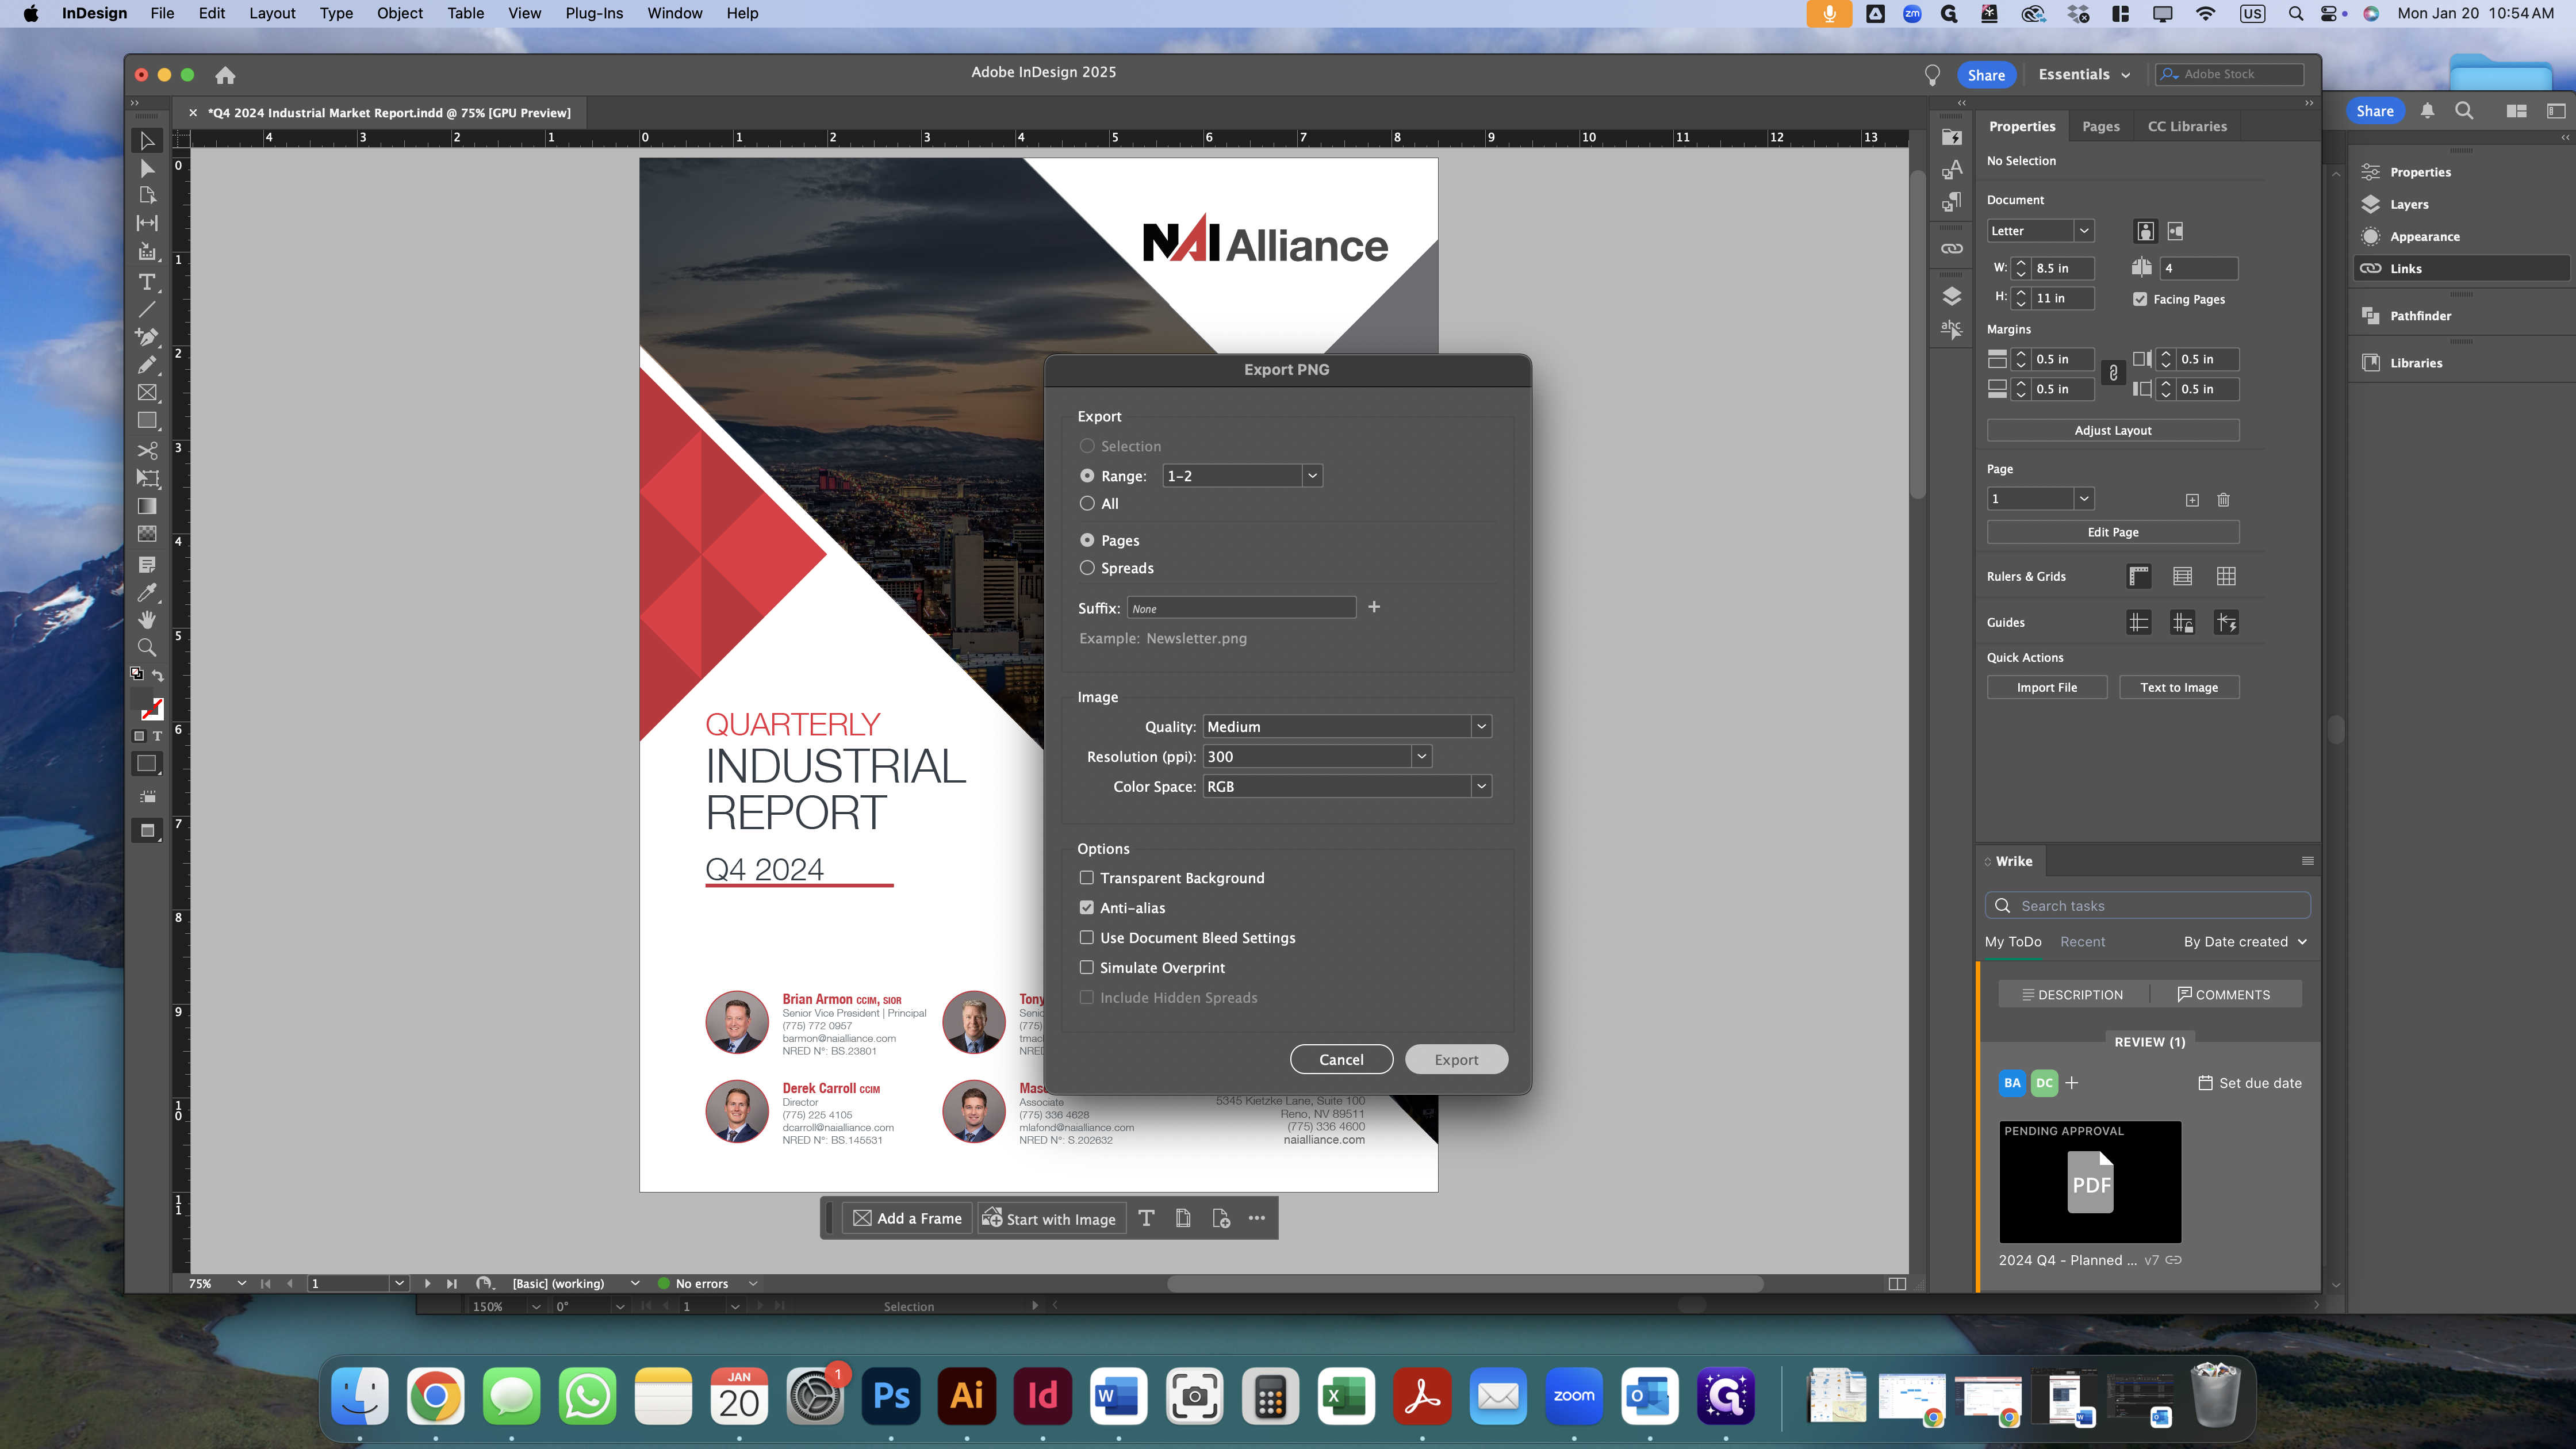
Next, go to the completed market report and export the first two pages as PNG files. Ensure you save them in the "Preview Graphics" folder.

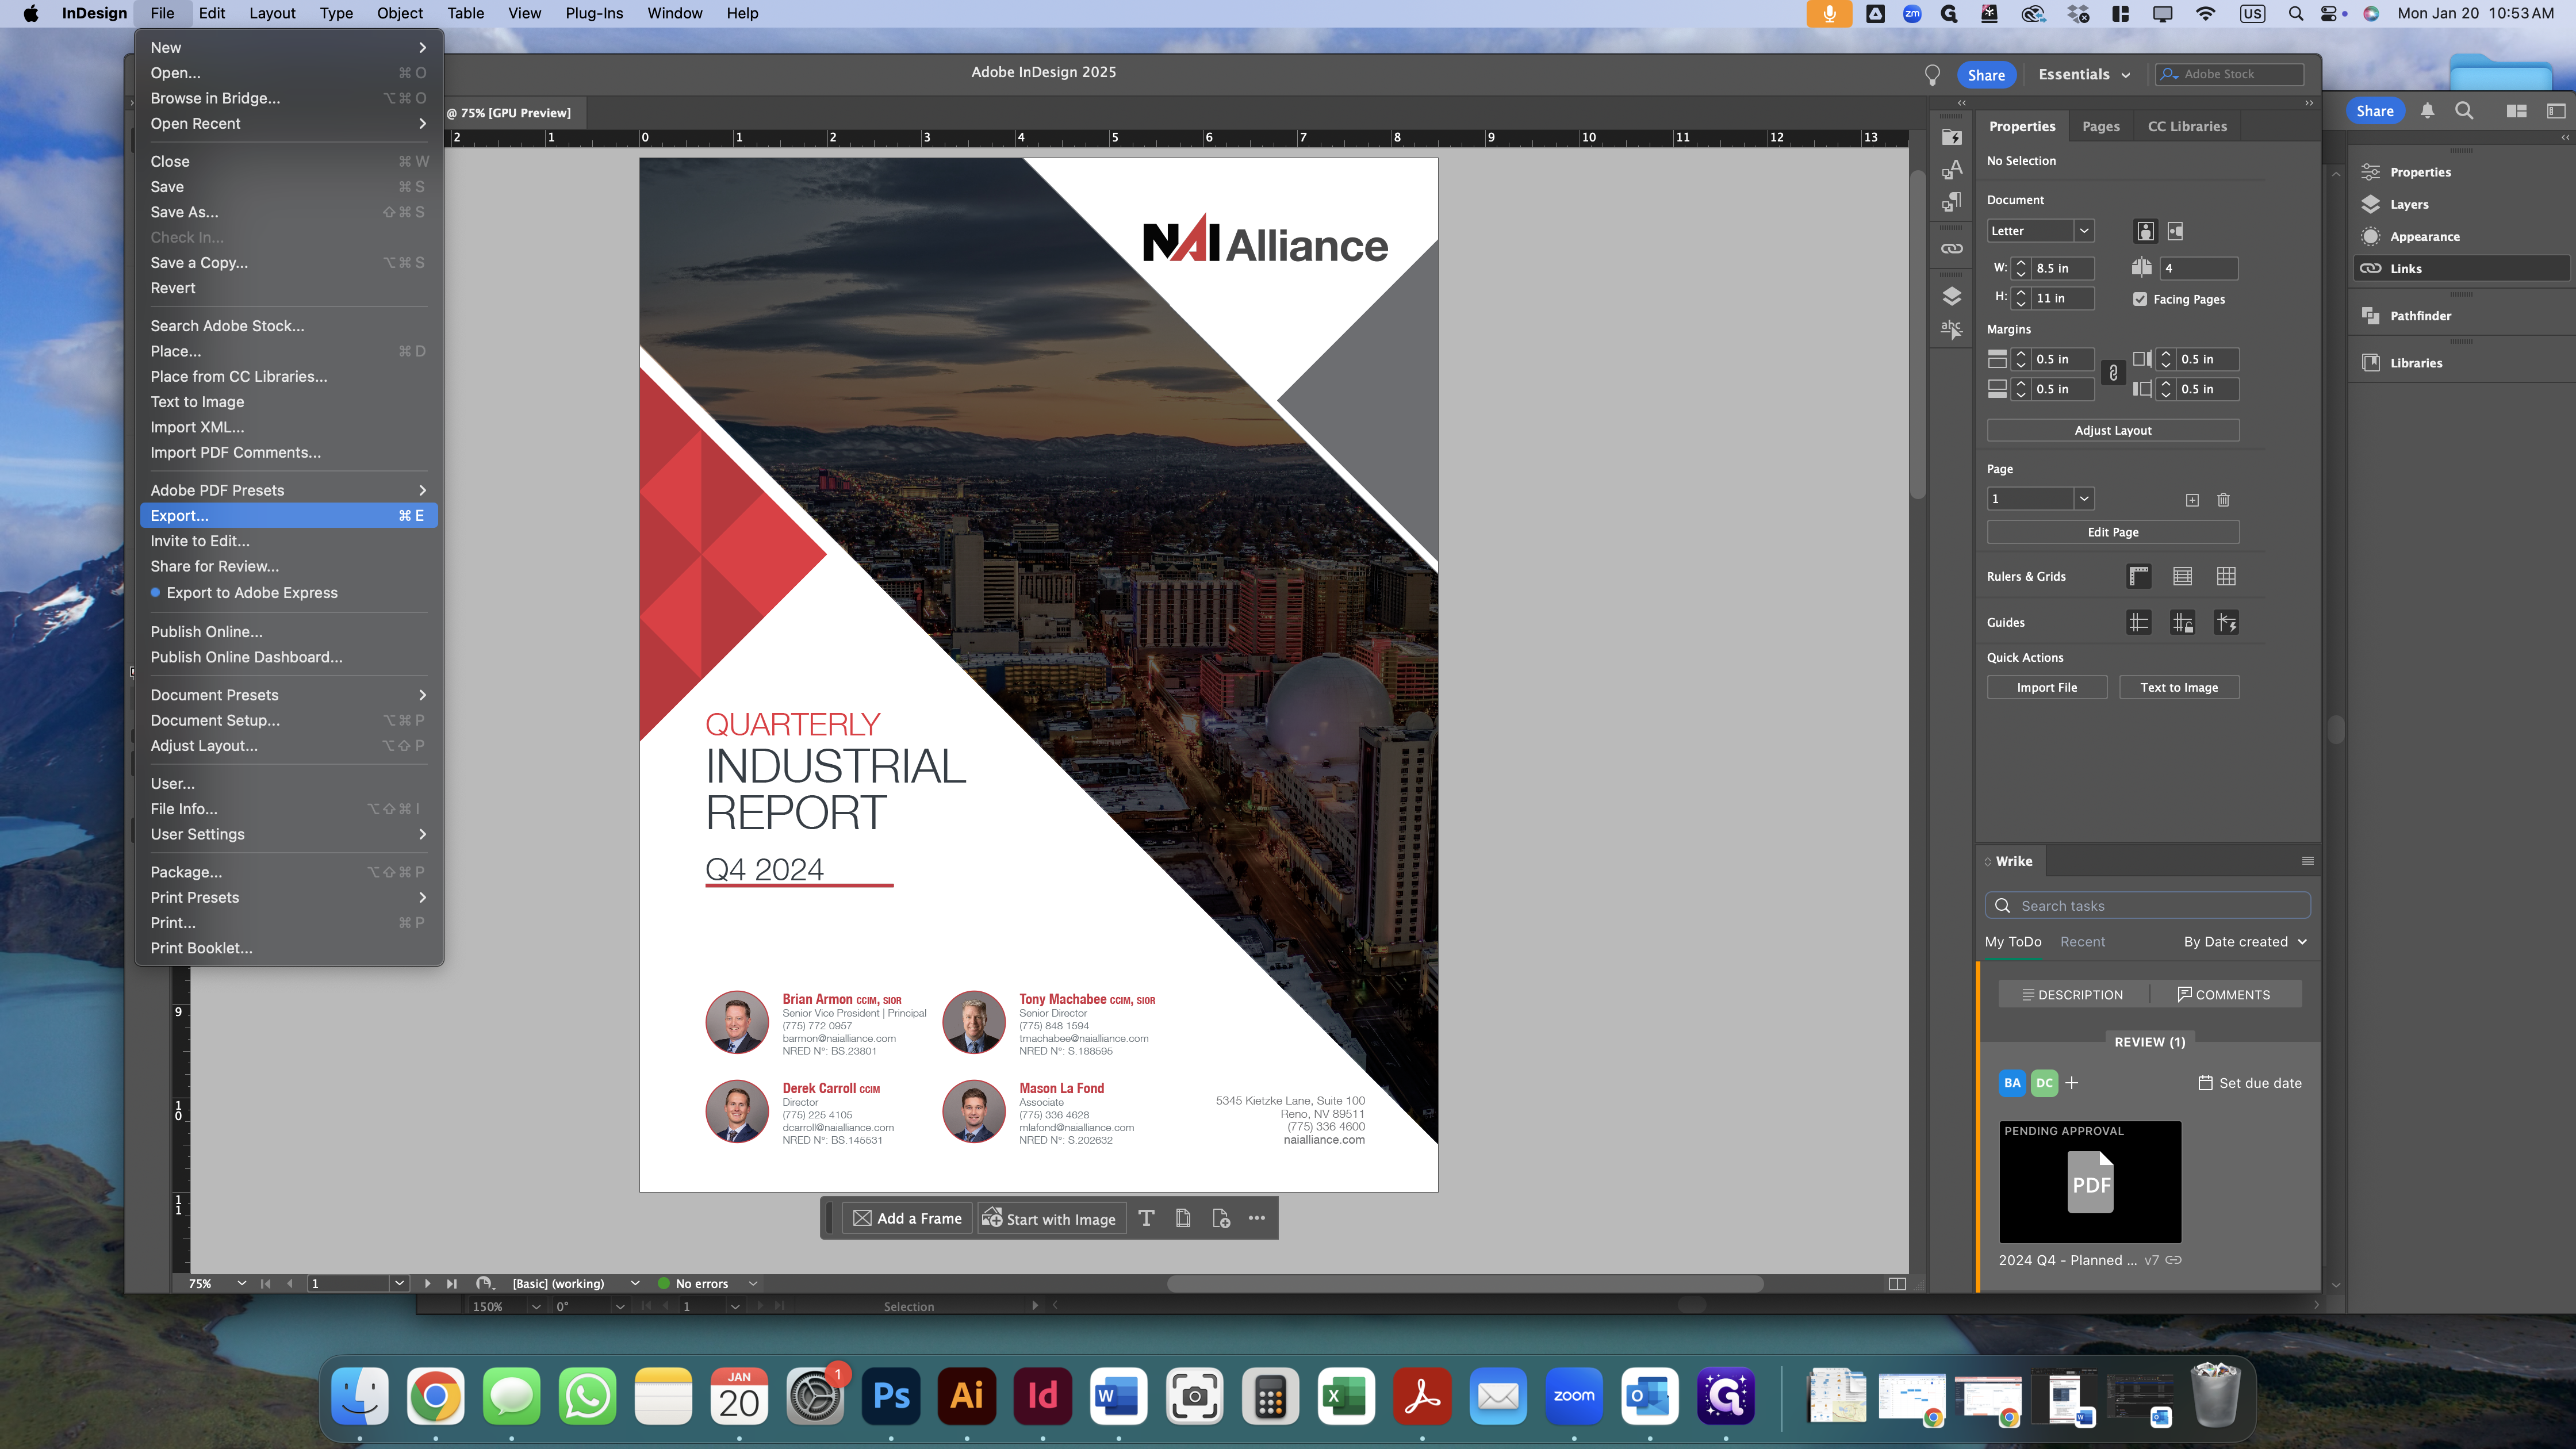
Name the file "Newsletter.png". You can do this quickly by simply clicking on the "Newsletter.png" file in the folder to rename the save file.

The range should be 1-2 because we only need the first two pages.
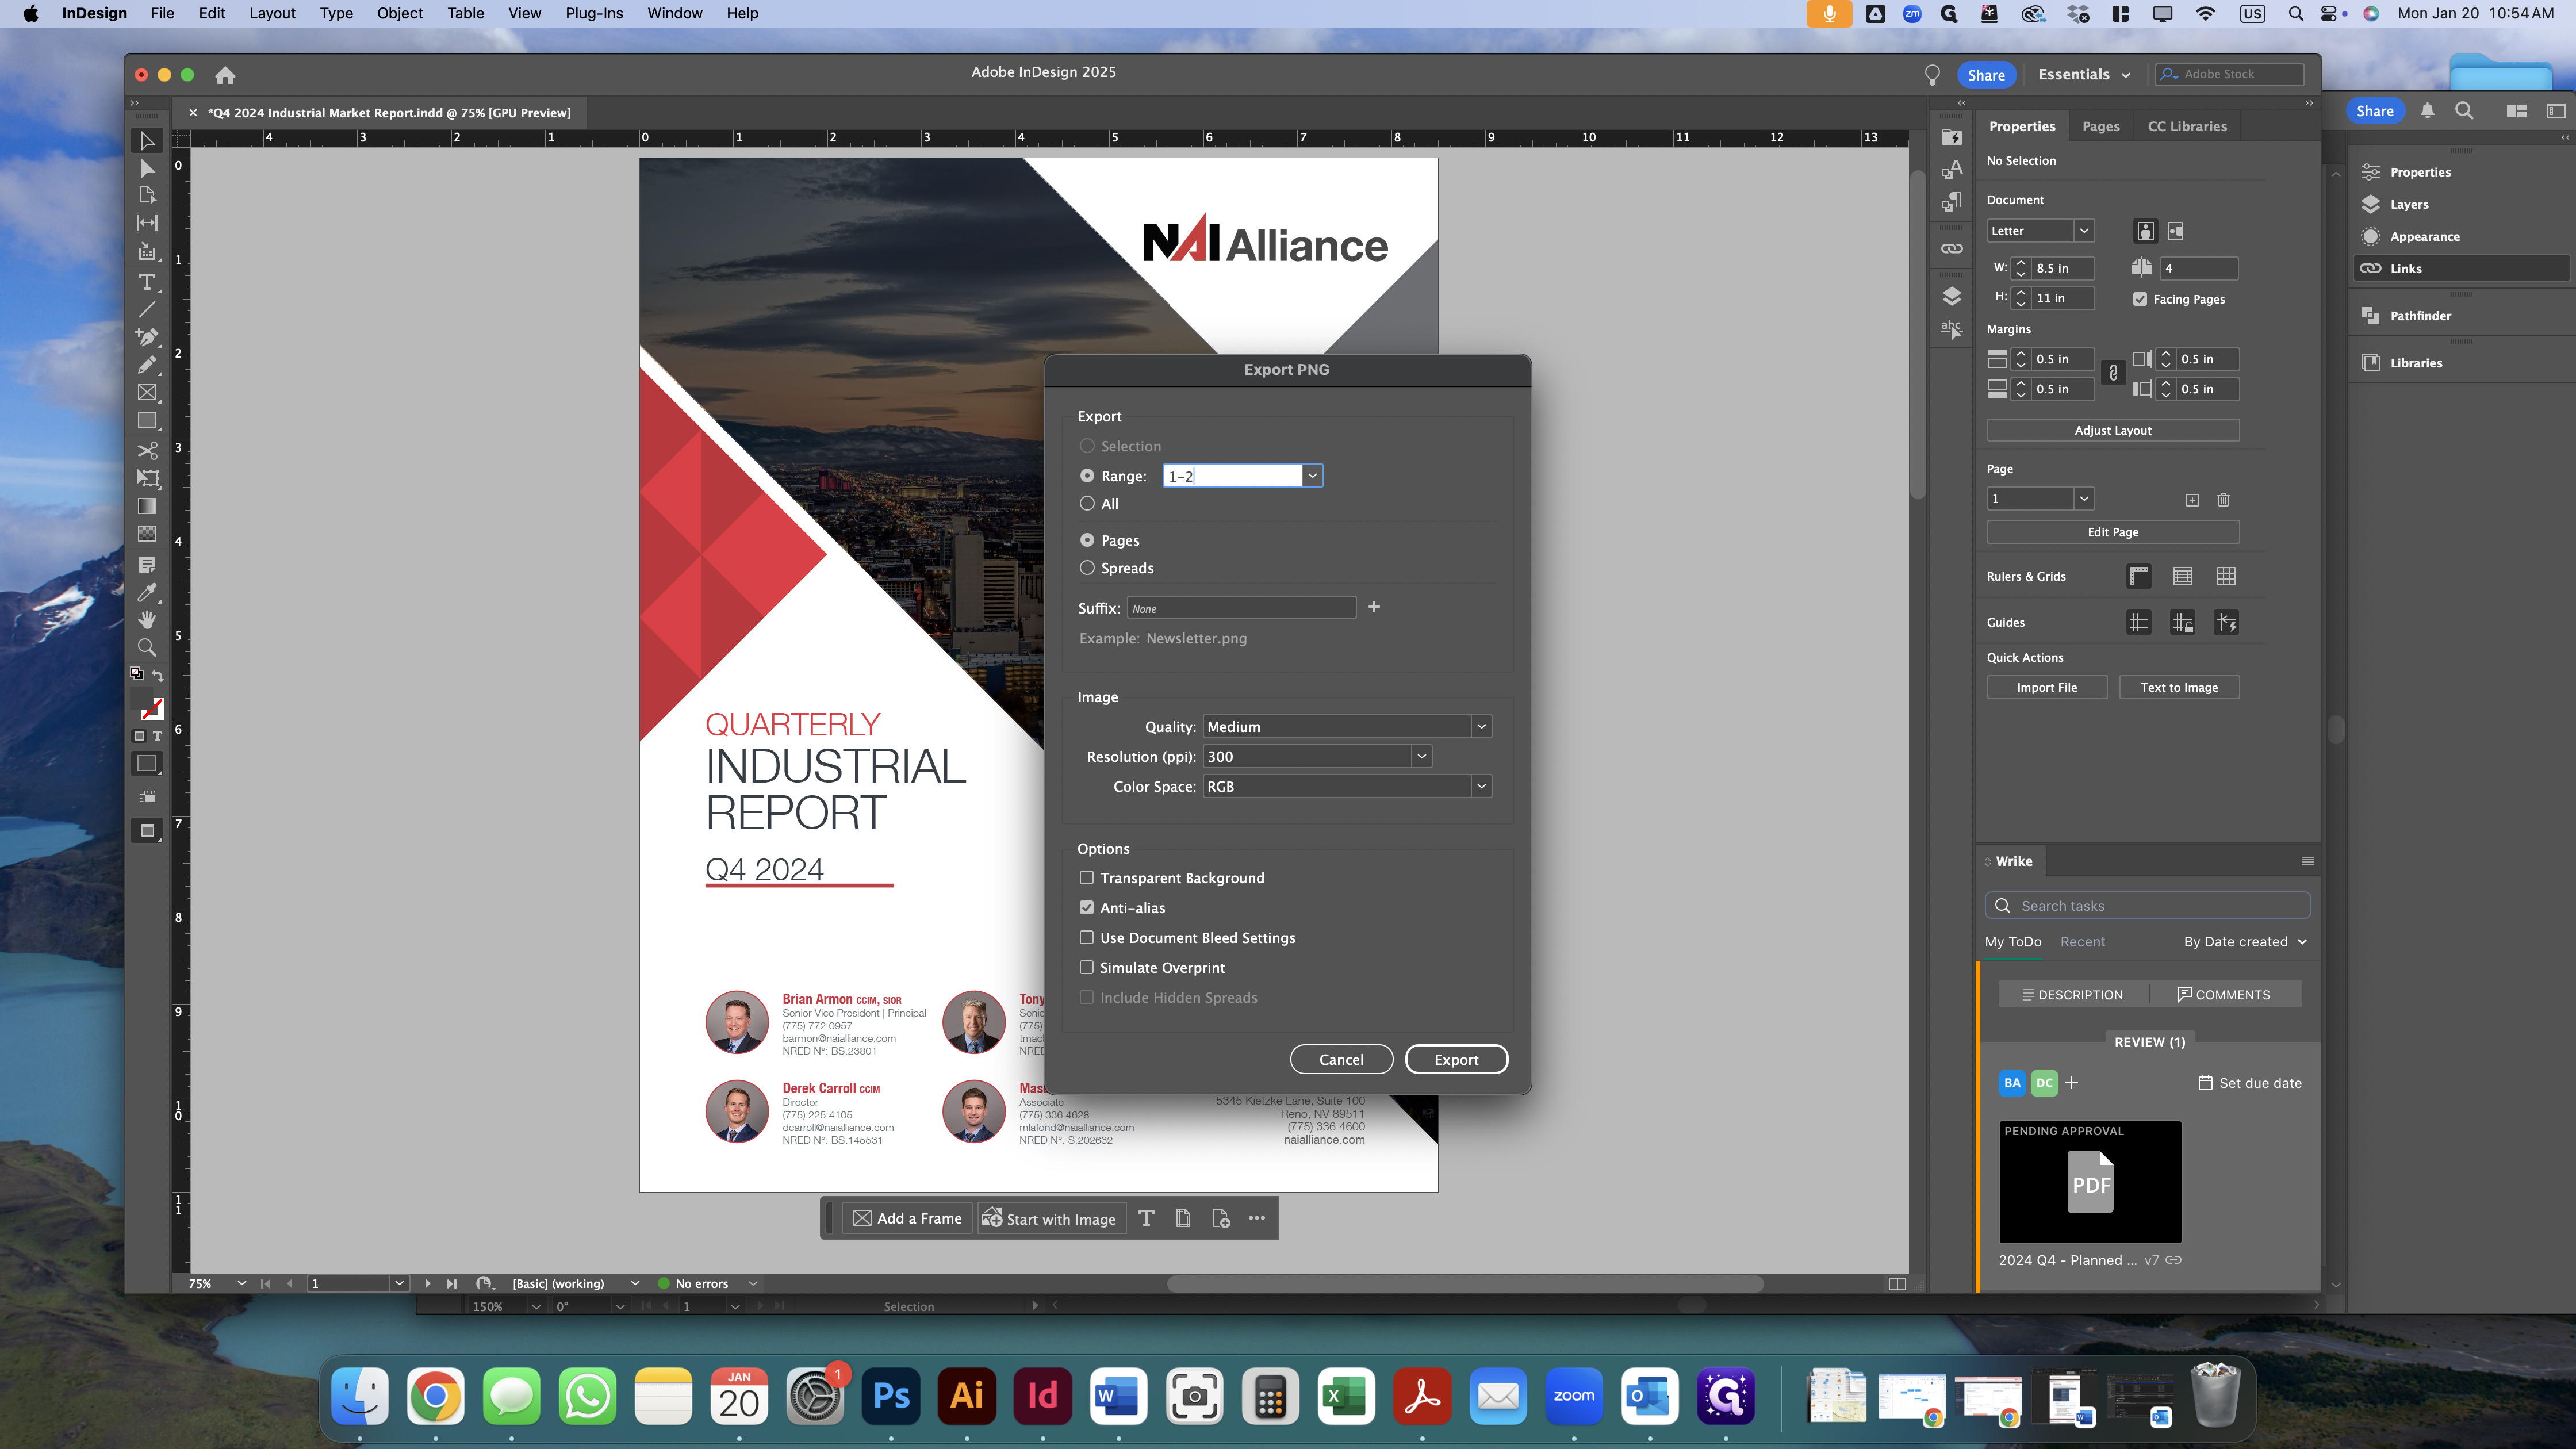
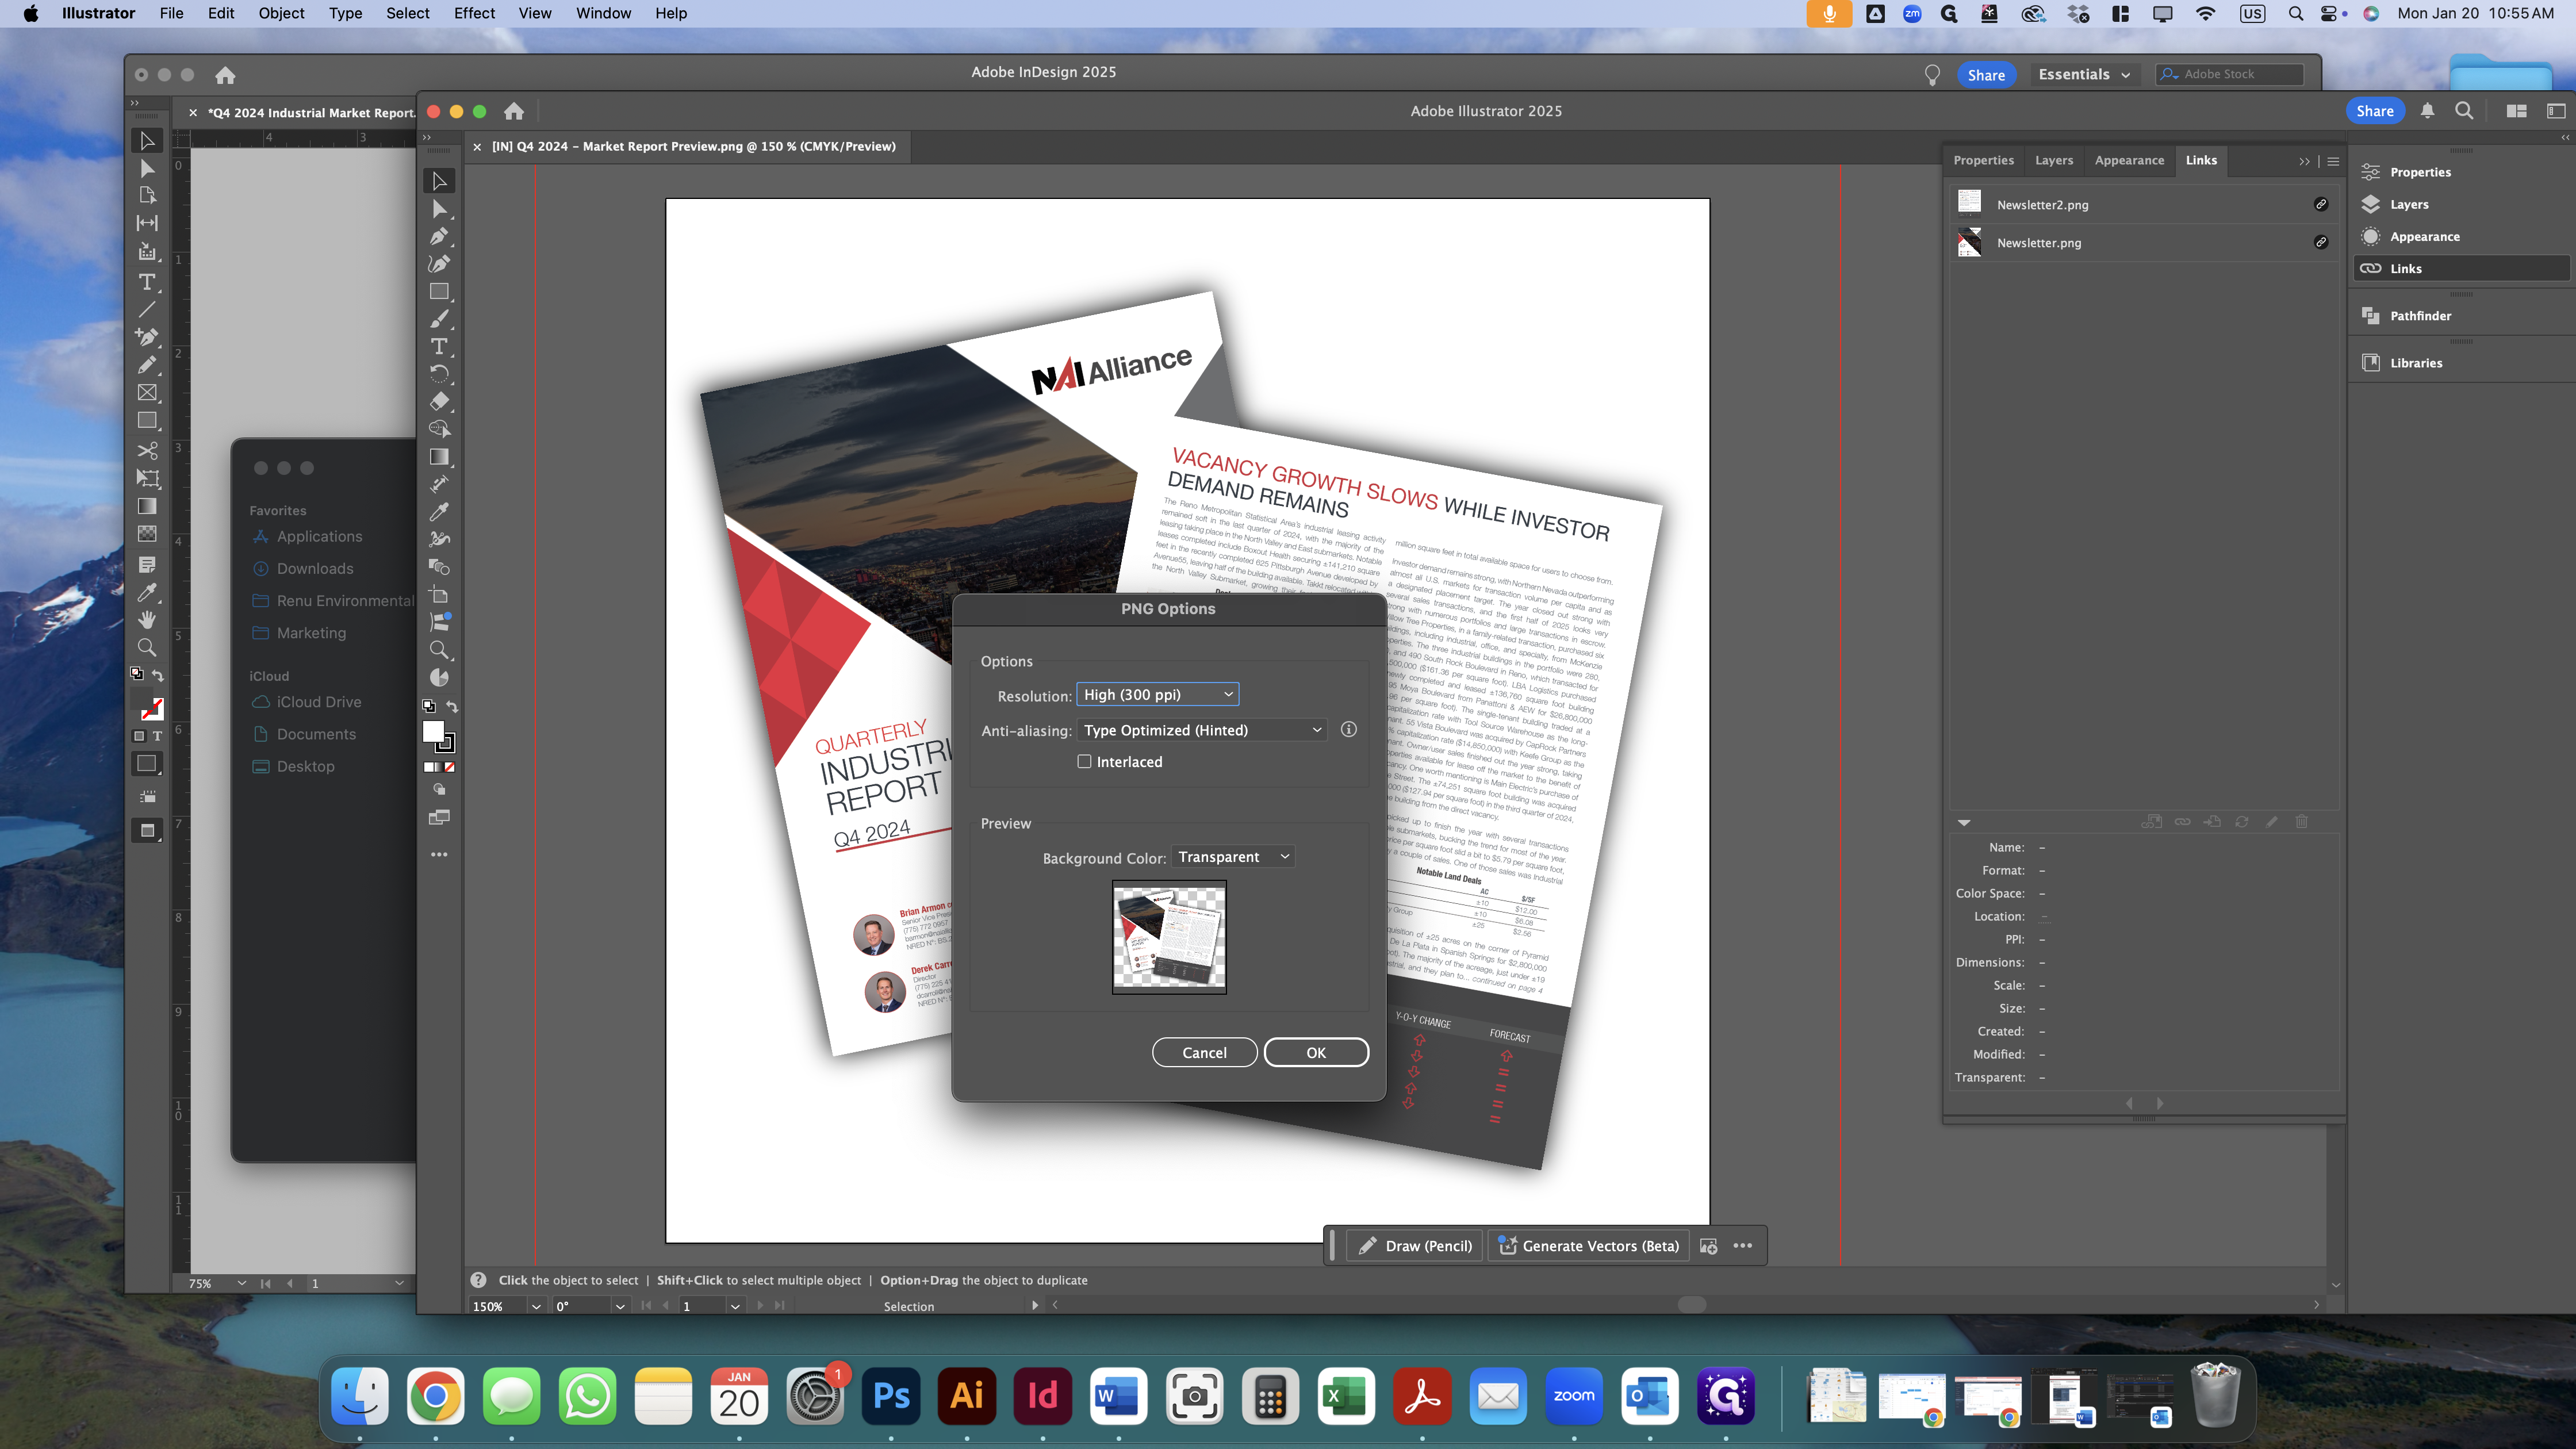
The the following export parameters:
Quality: medium
Resolution: 300ppi
Color Space: RGB.

Then, we'll select export.
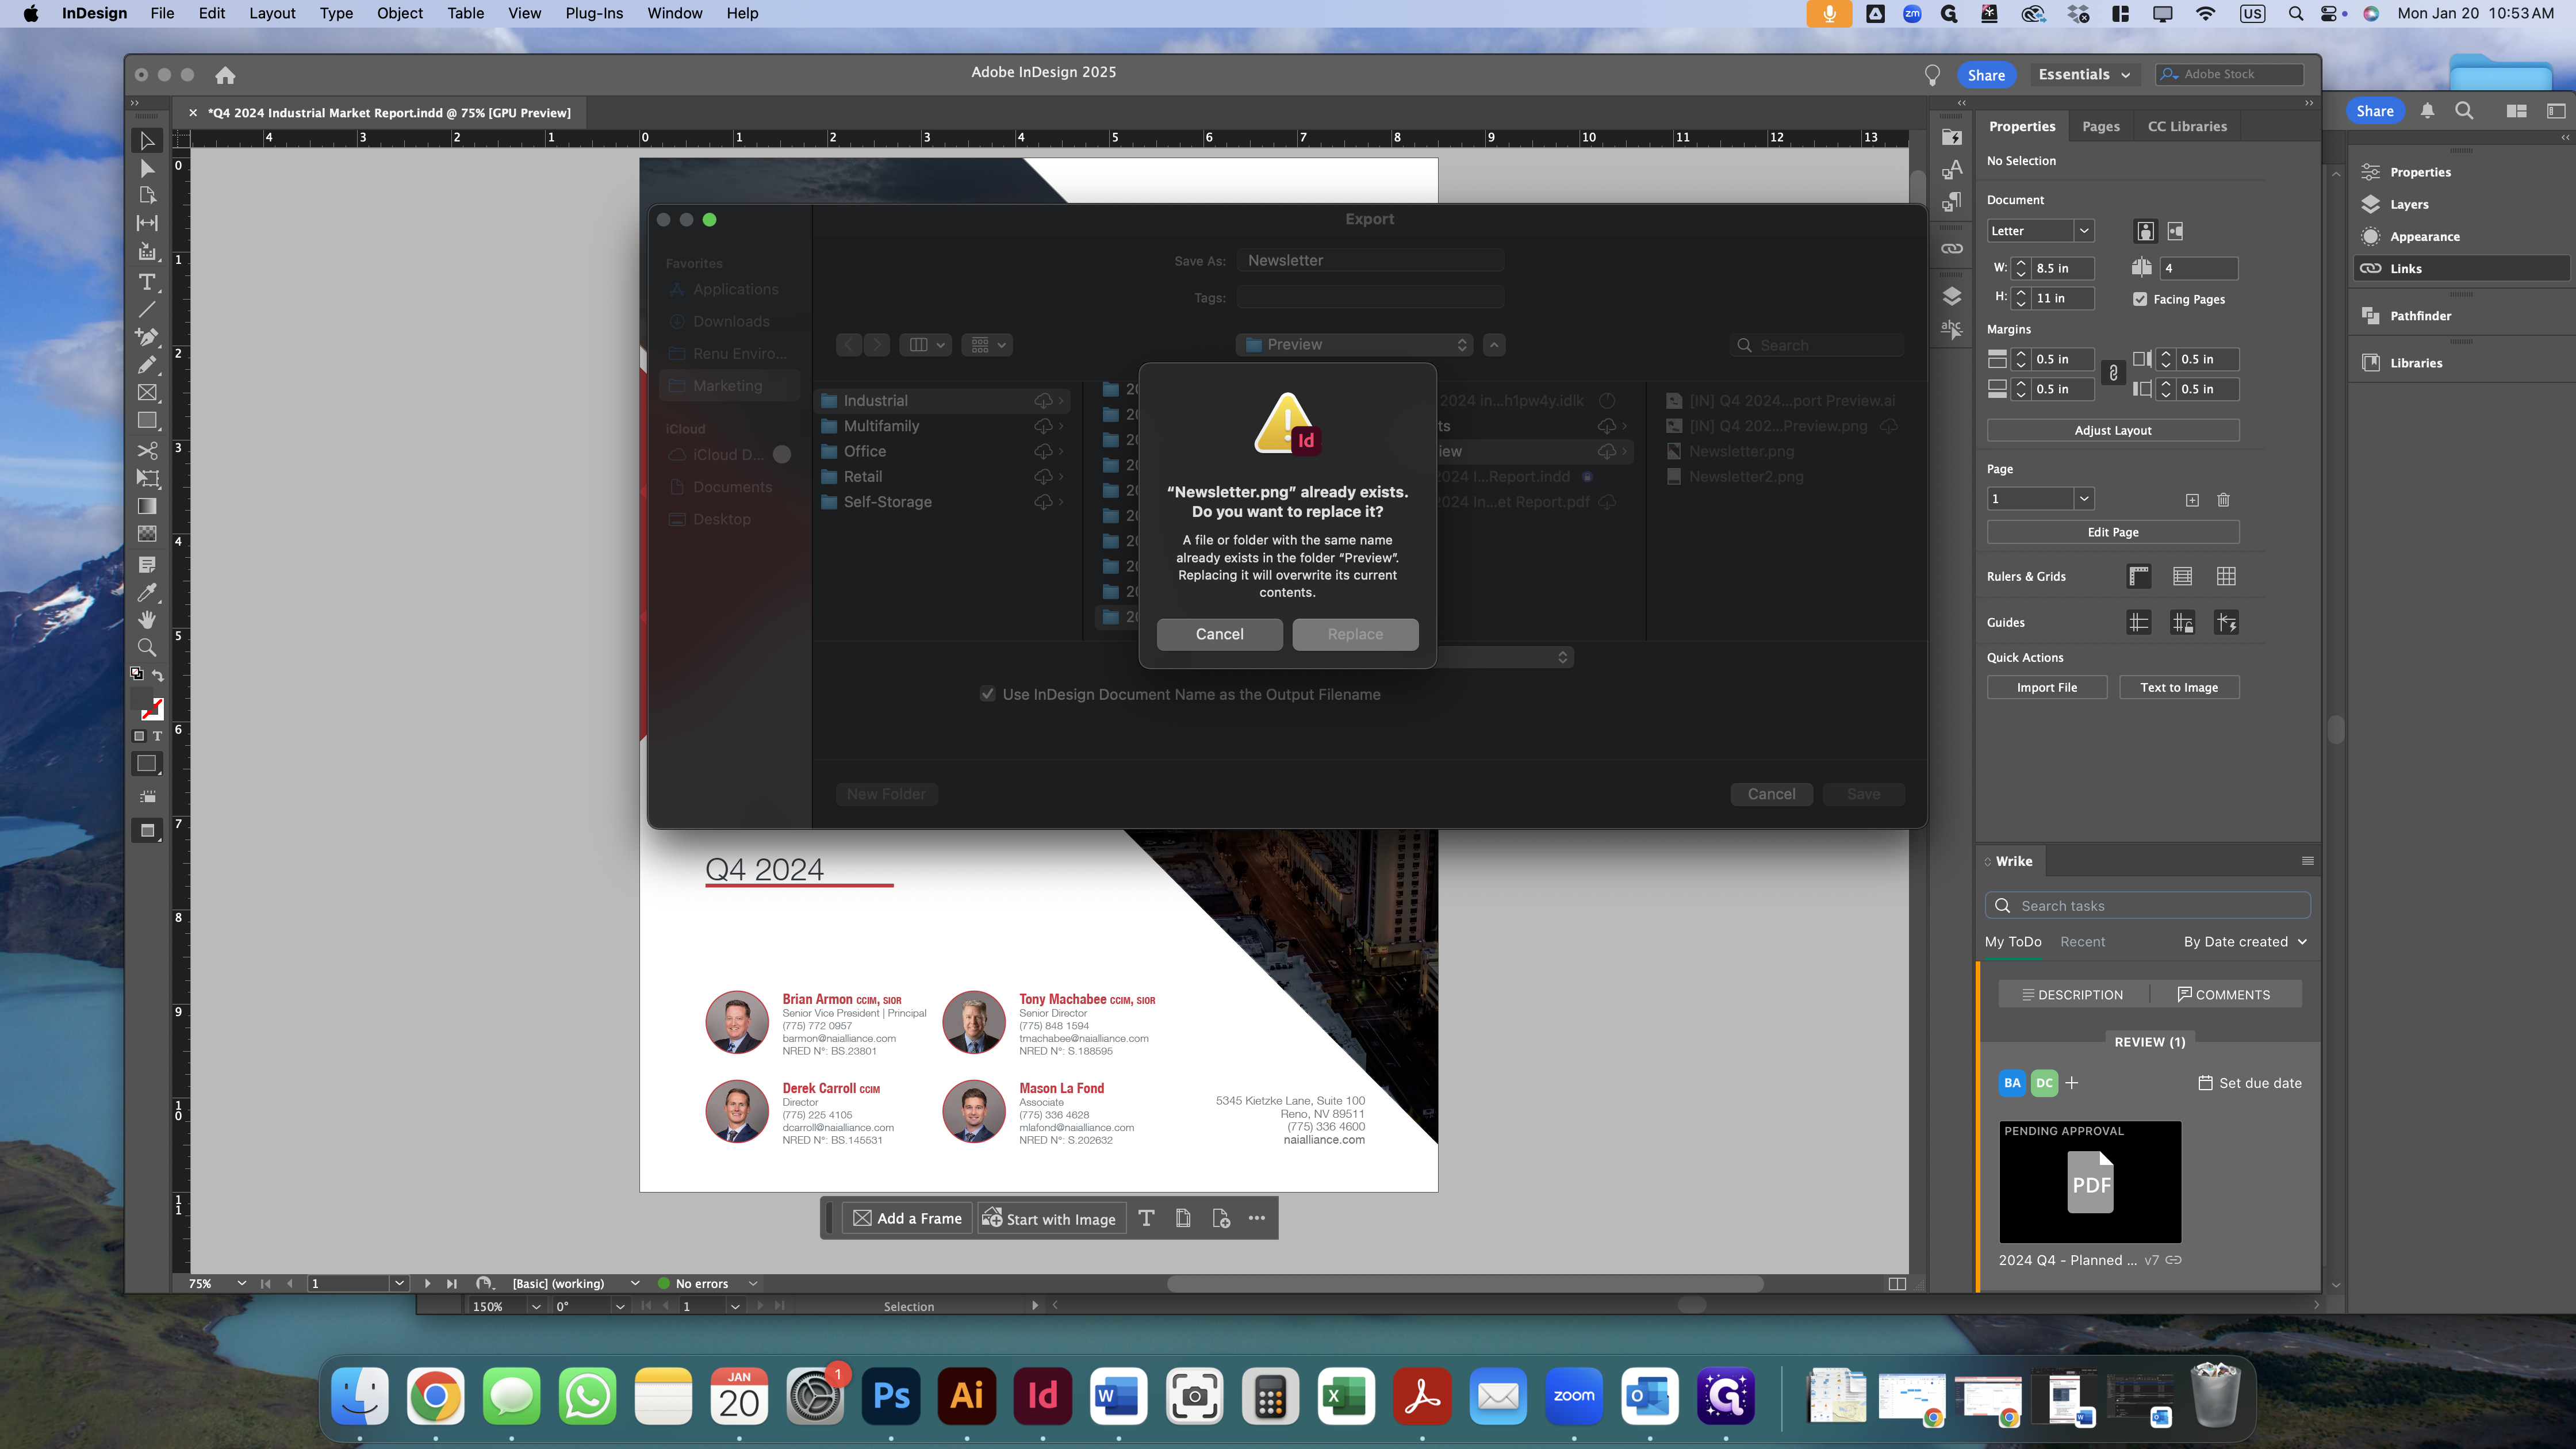
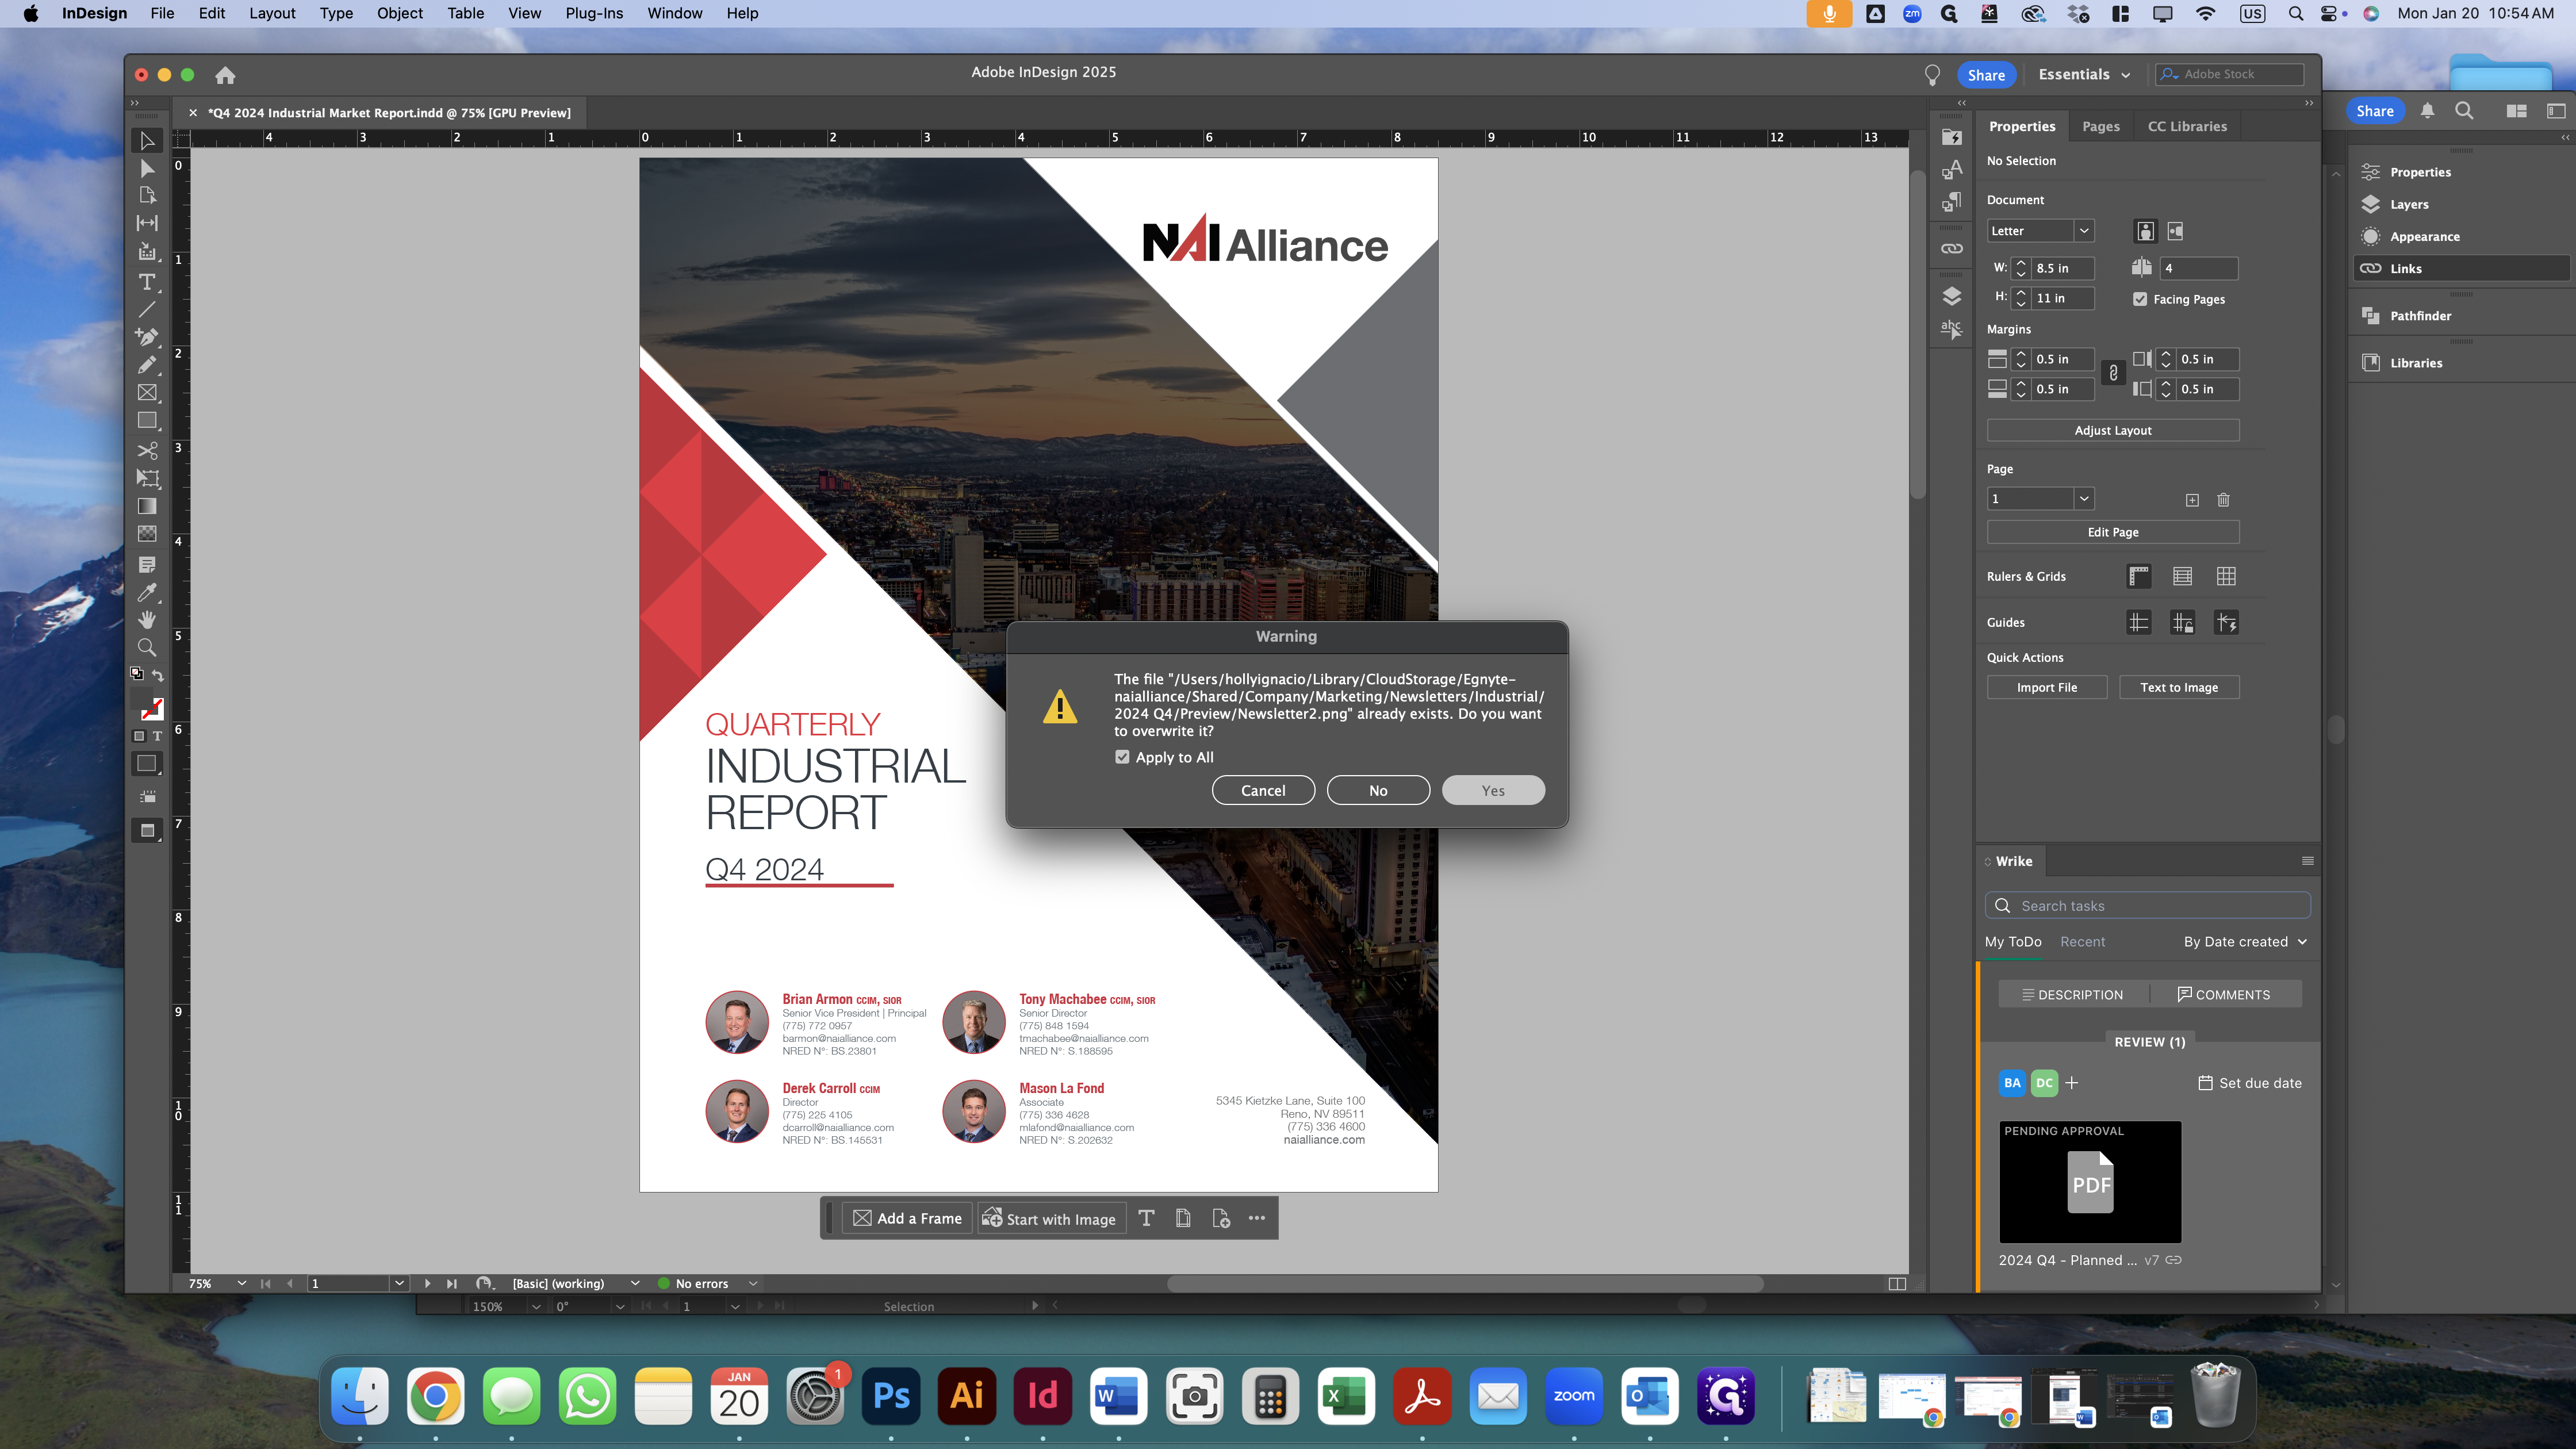
Yes, we want to overwrite the previous files.

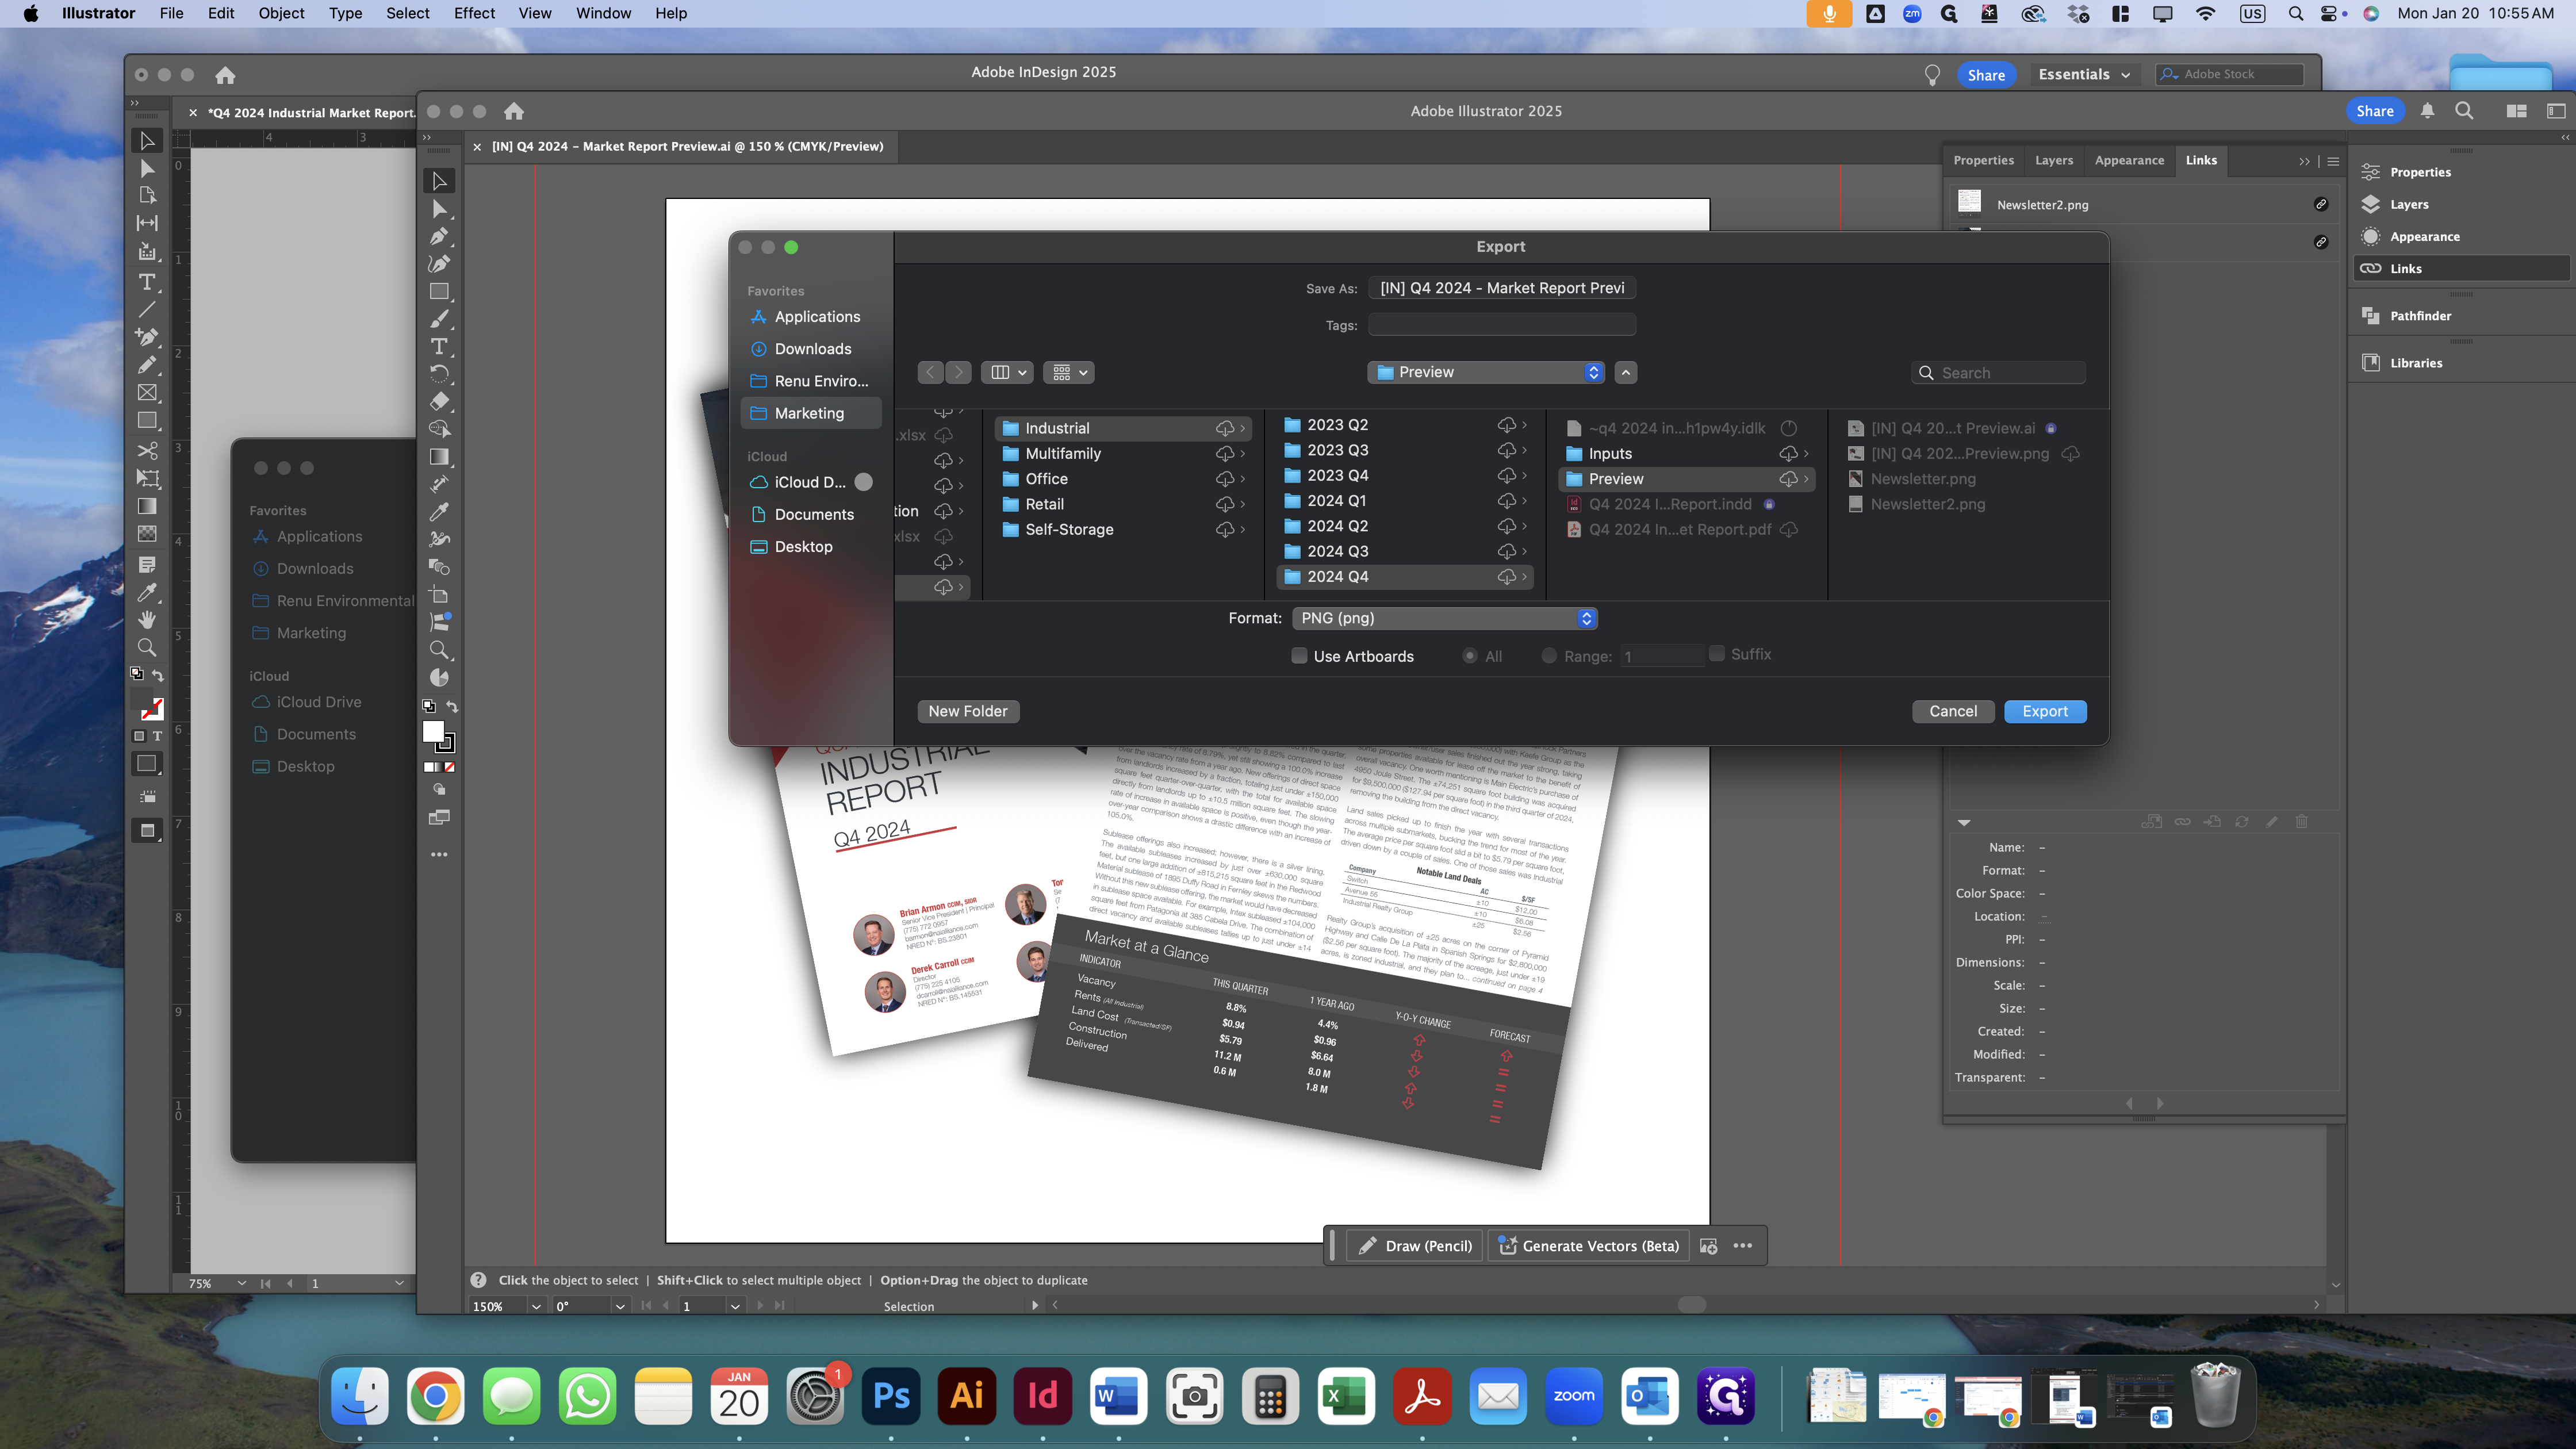
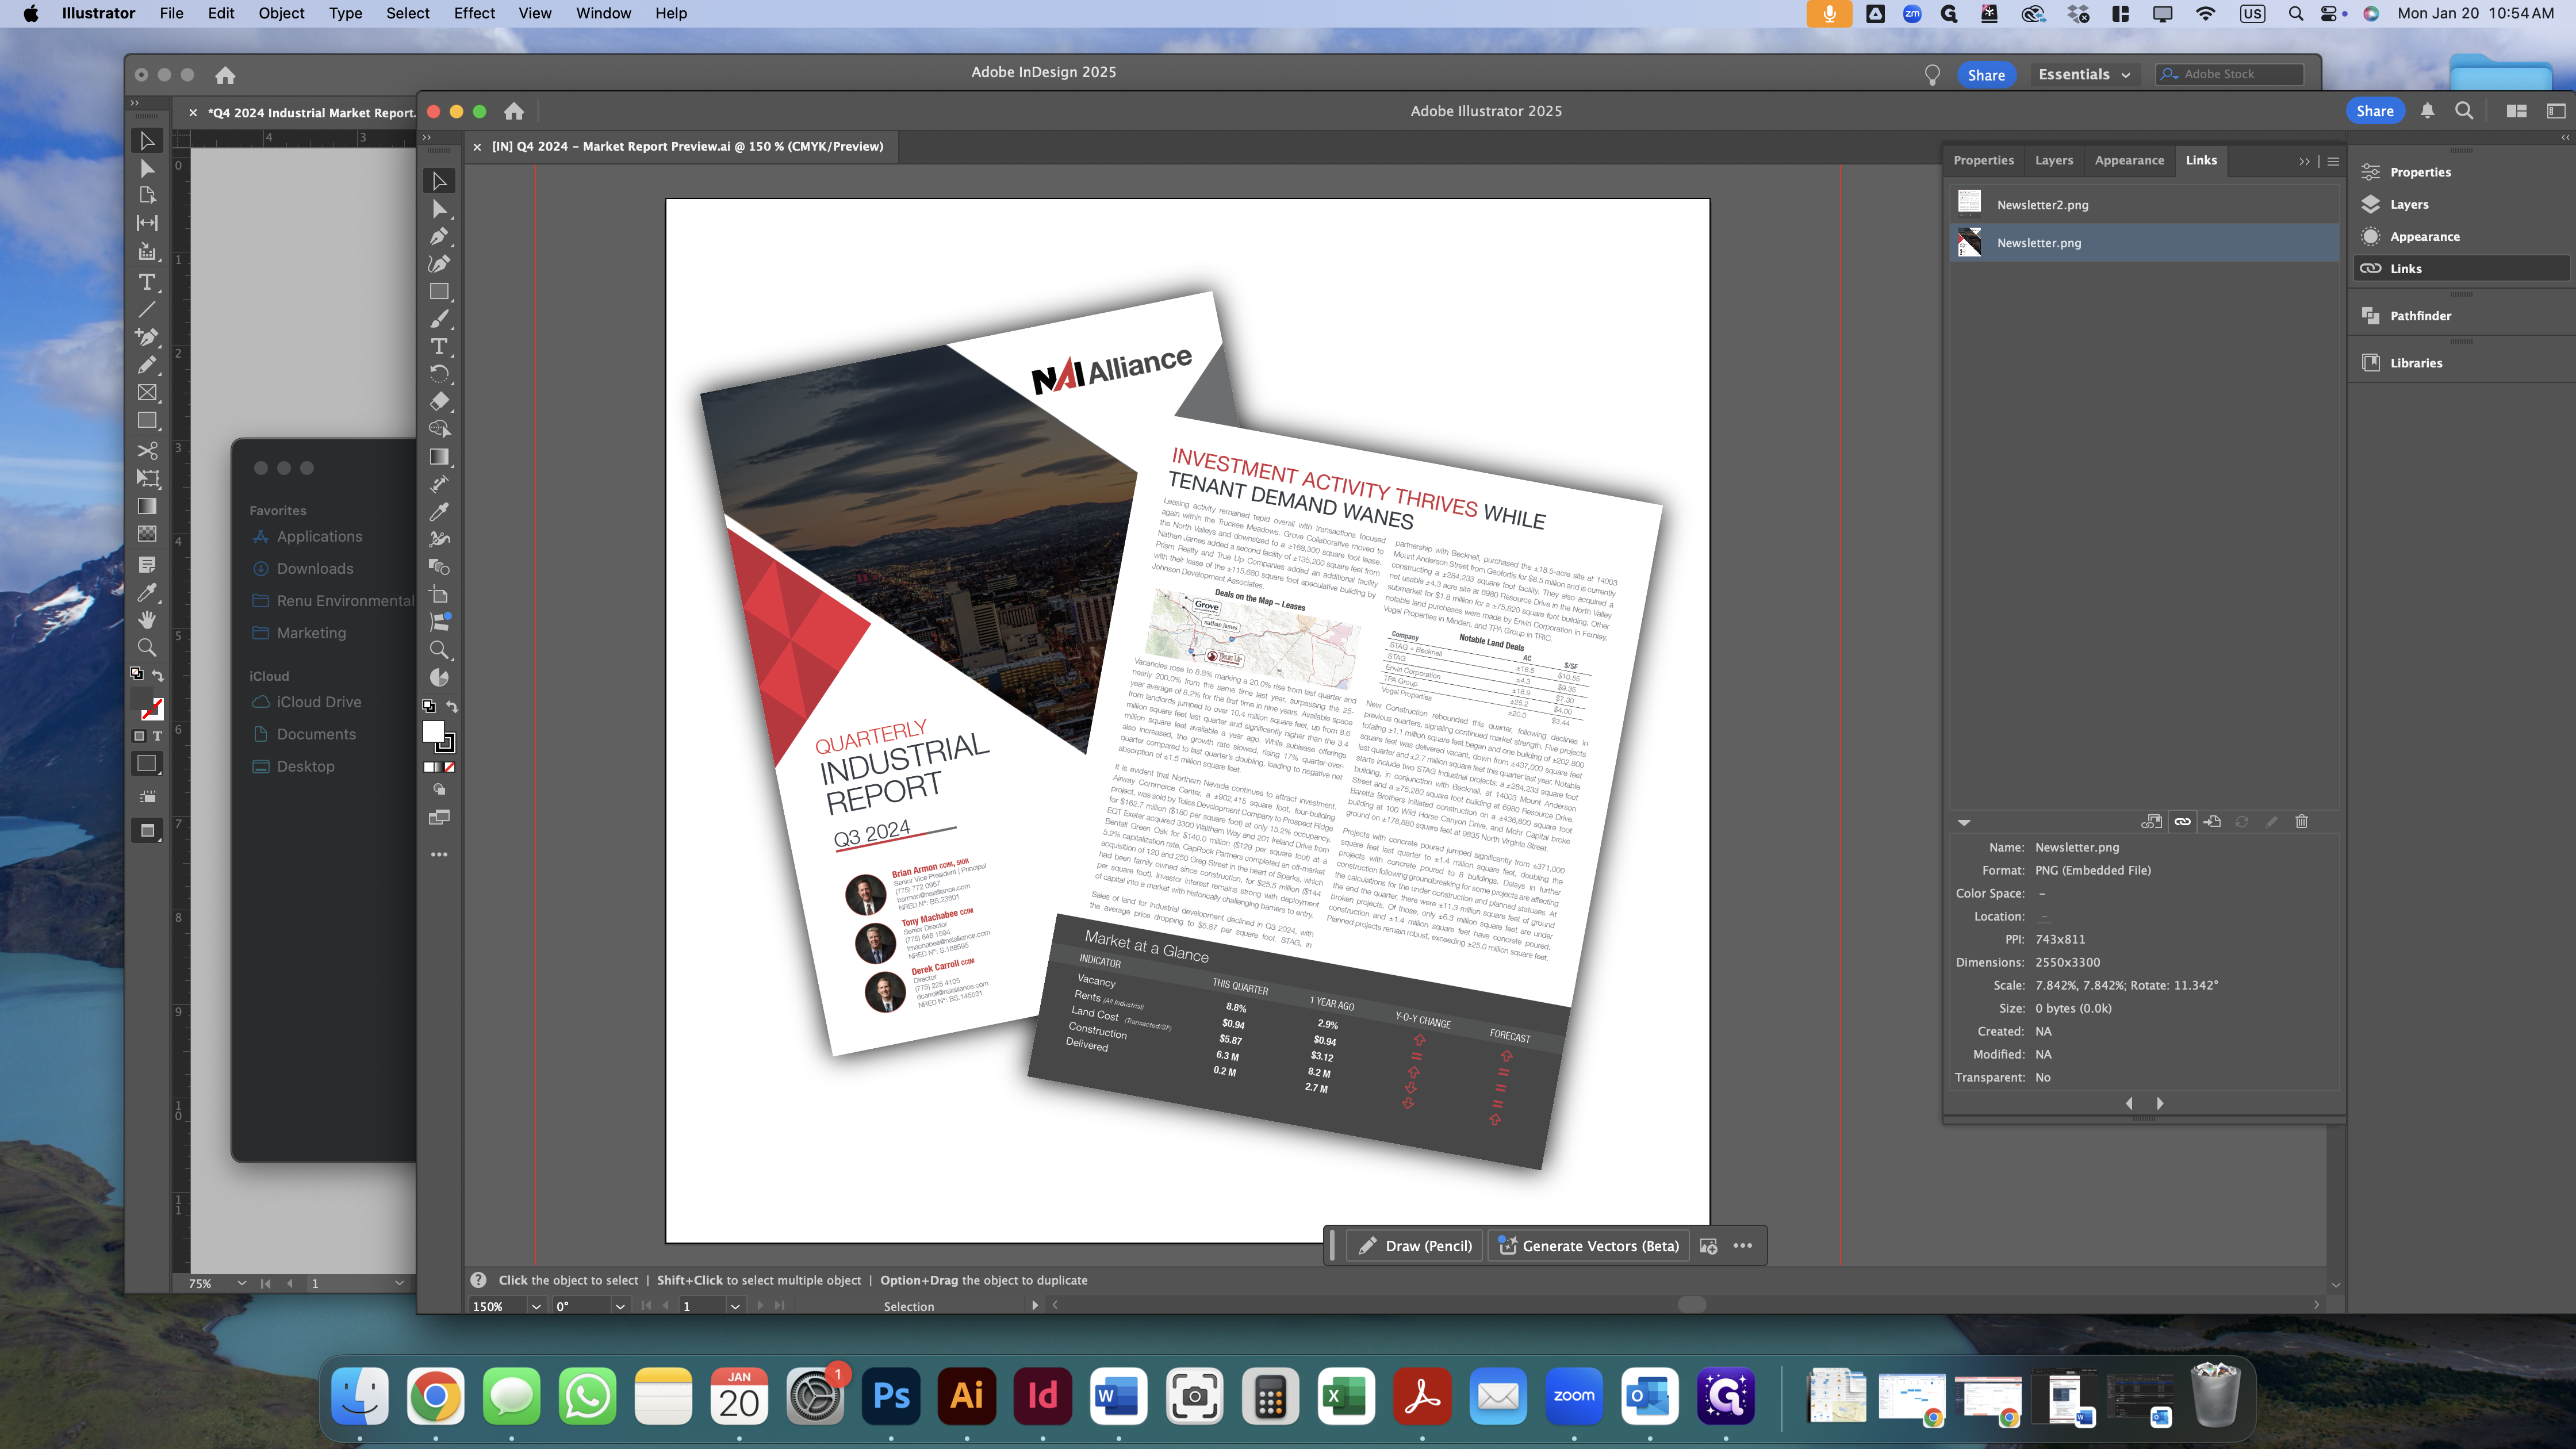
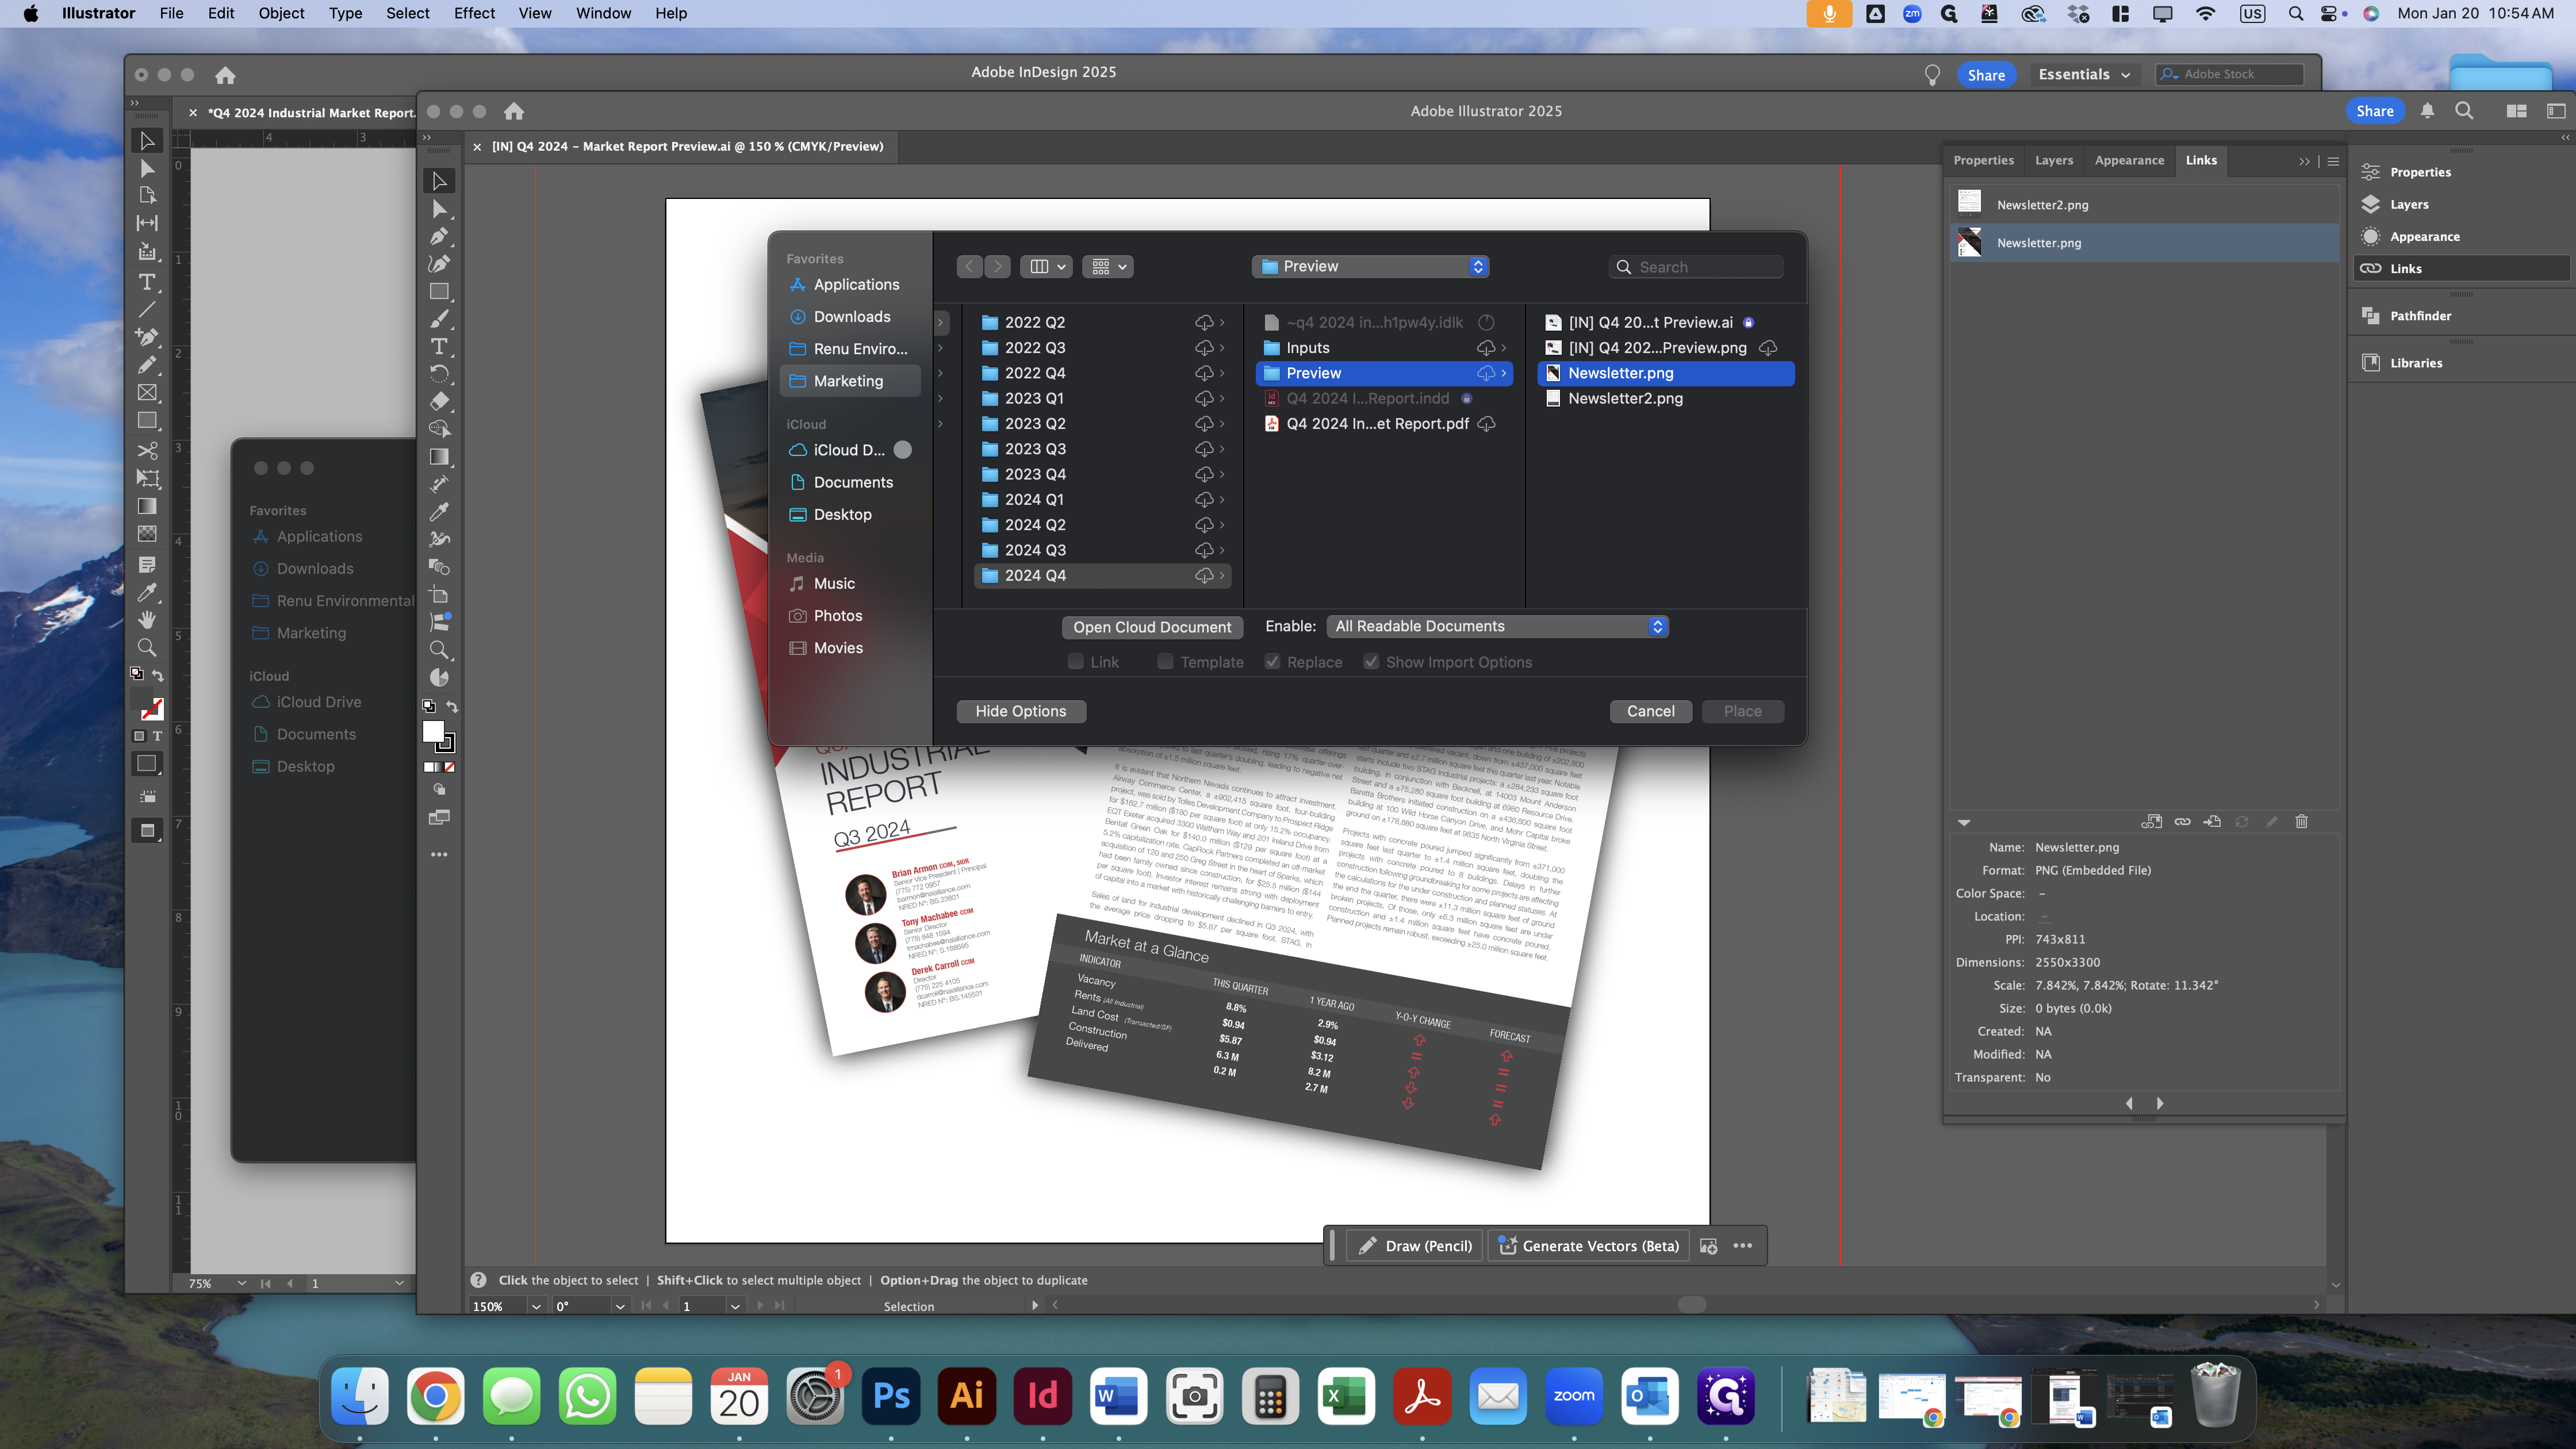
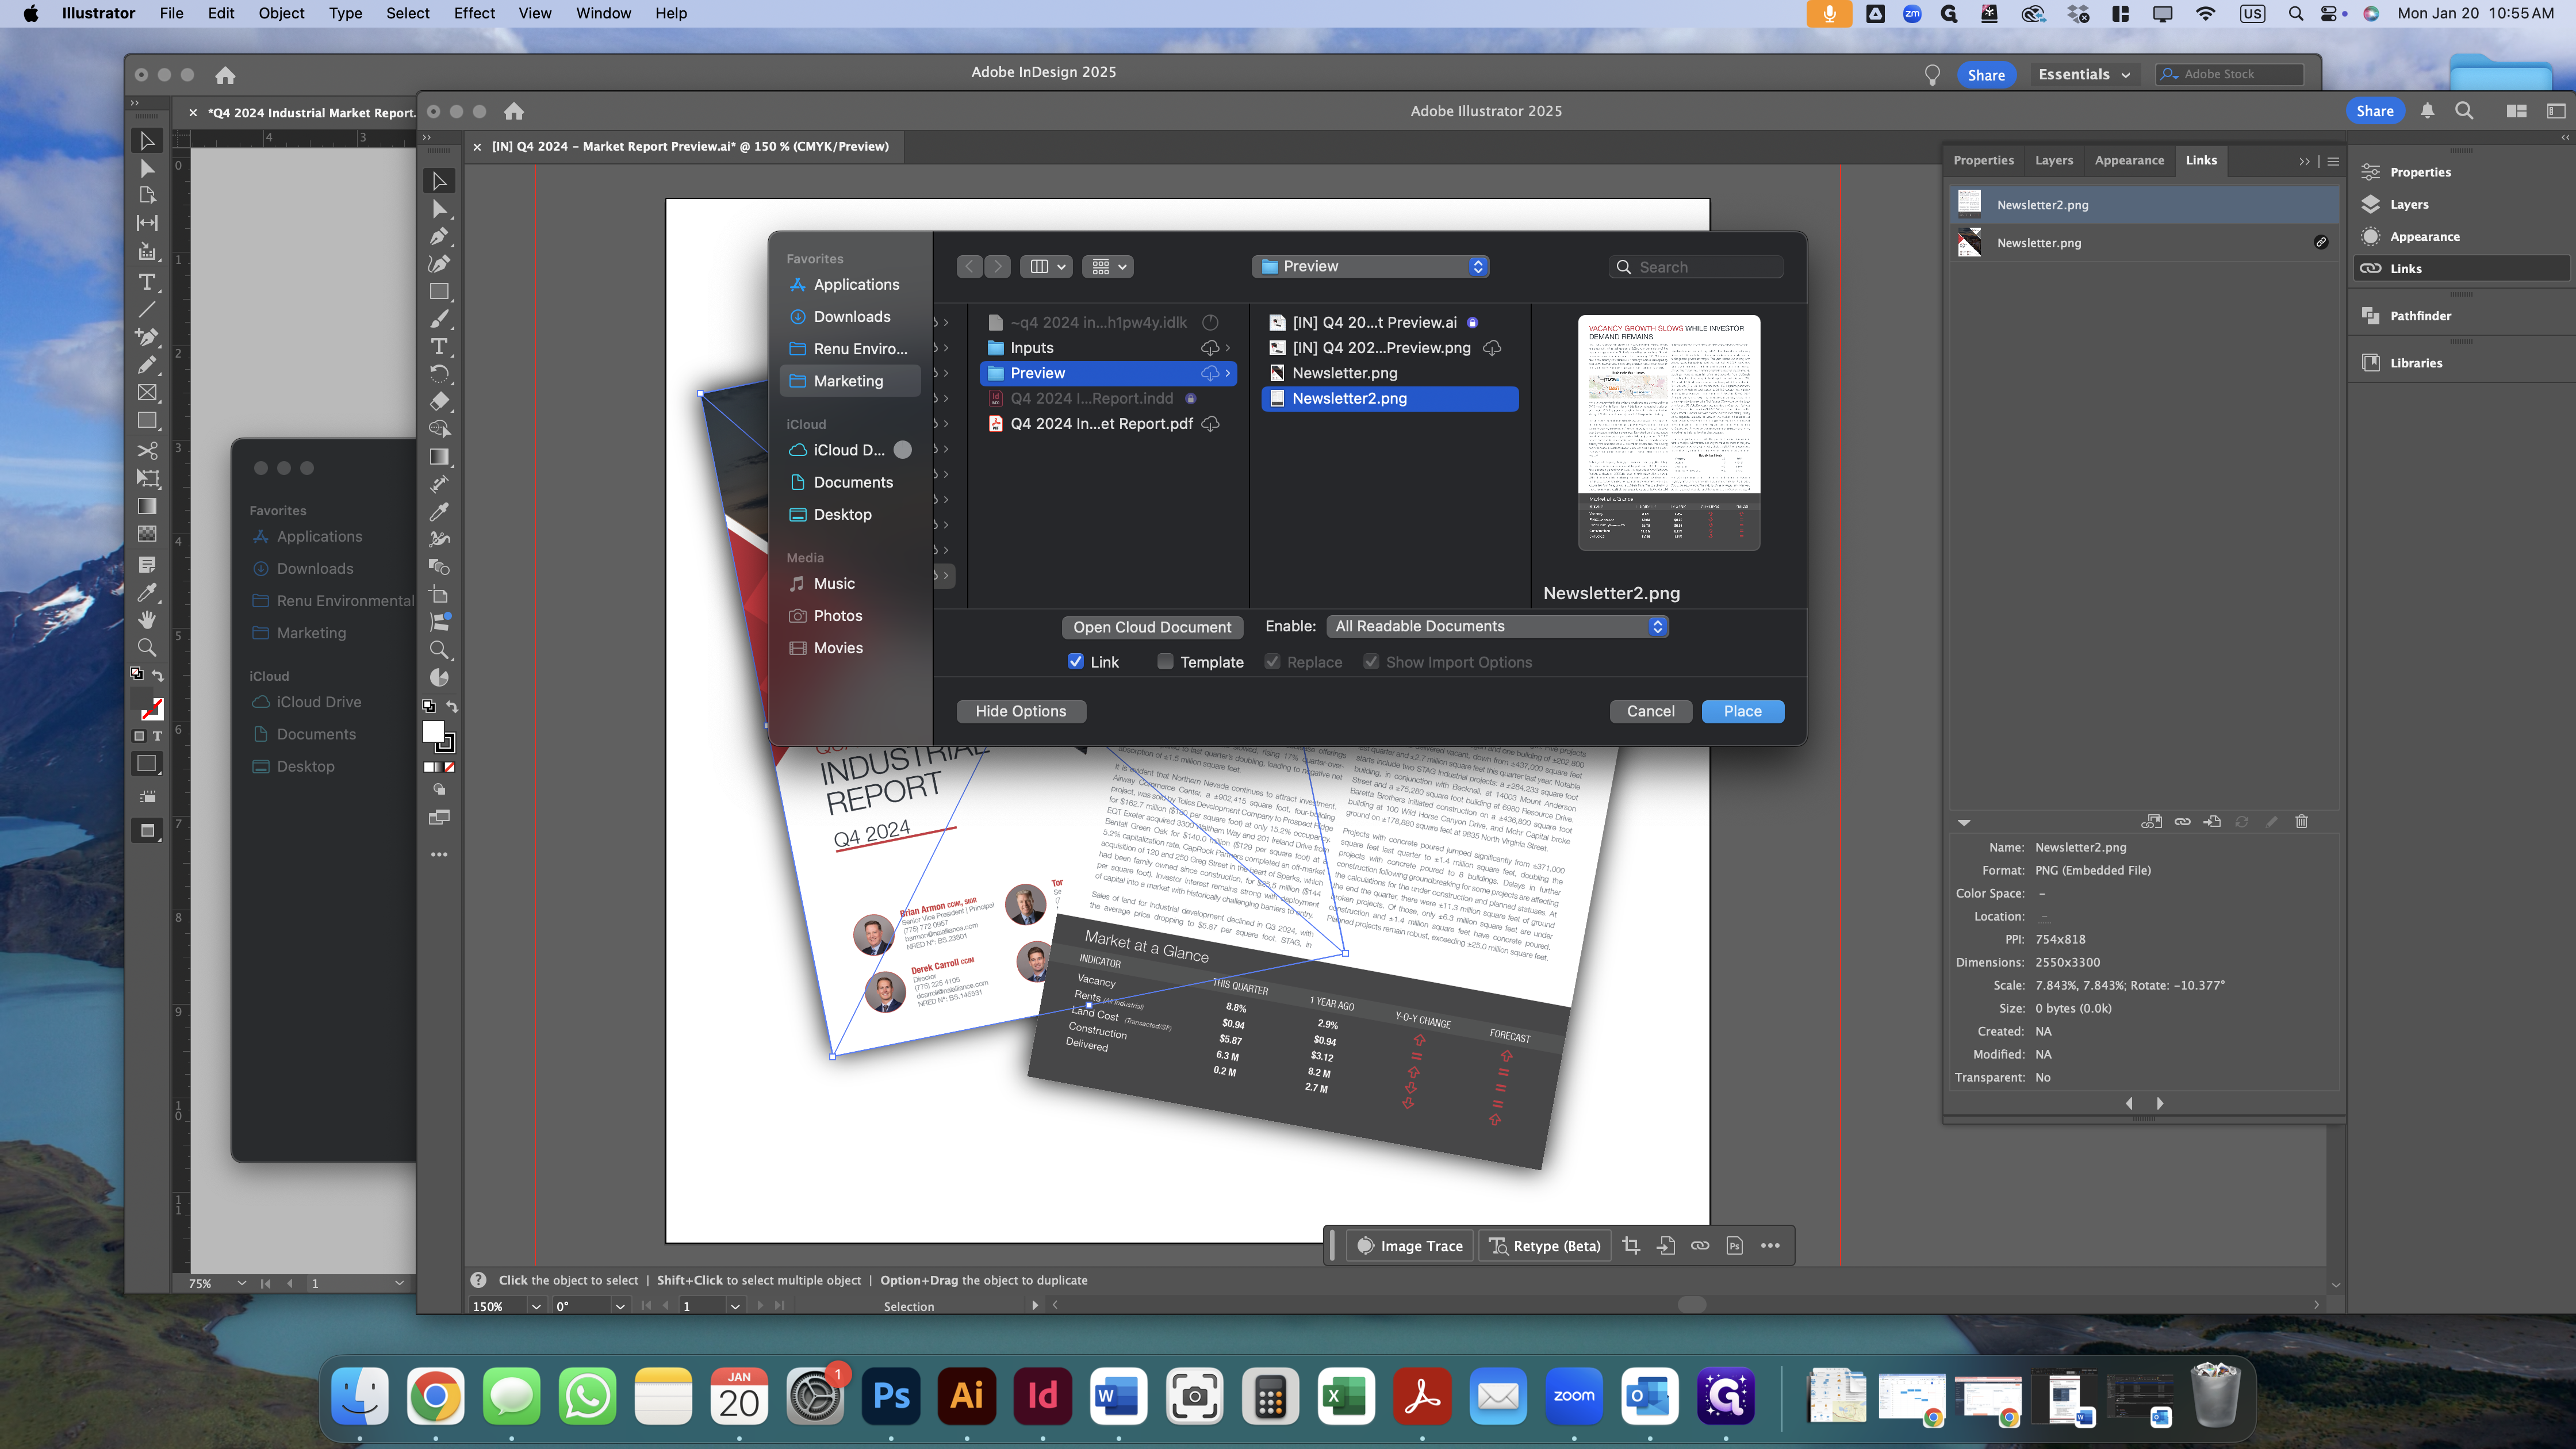
Now, go back to the file browser and open the market report preview Illustrator file. Next, relink the pictures by selecting both of them. Then, select each one individually and click the relink button.
![Step #15: Double-click on "[IN] Q4 2024 - Market Report Preview.ai"](https://di8mn0rali2ic.cloudfront.net/uploads/deec4c1f-0fae-4079-a90b-bbbec057d8e3/78e87bc6-4267-4020-bc2f-866bf5e2c61c.png)

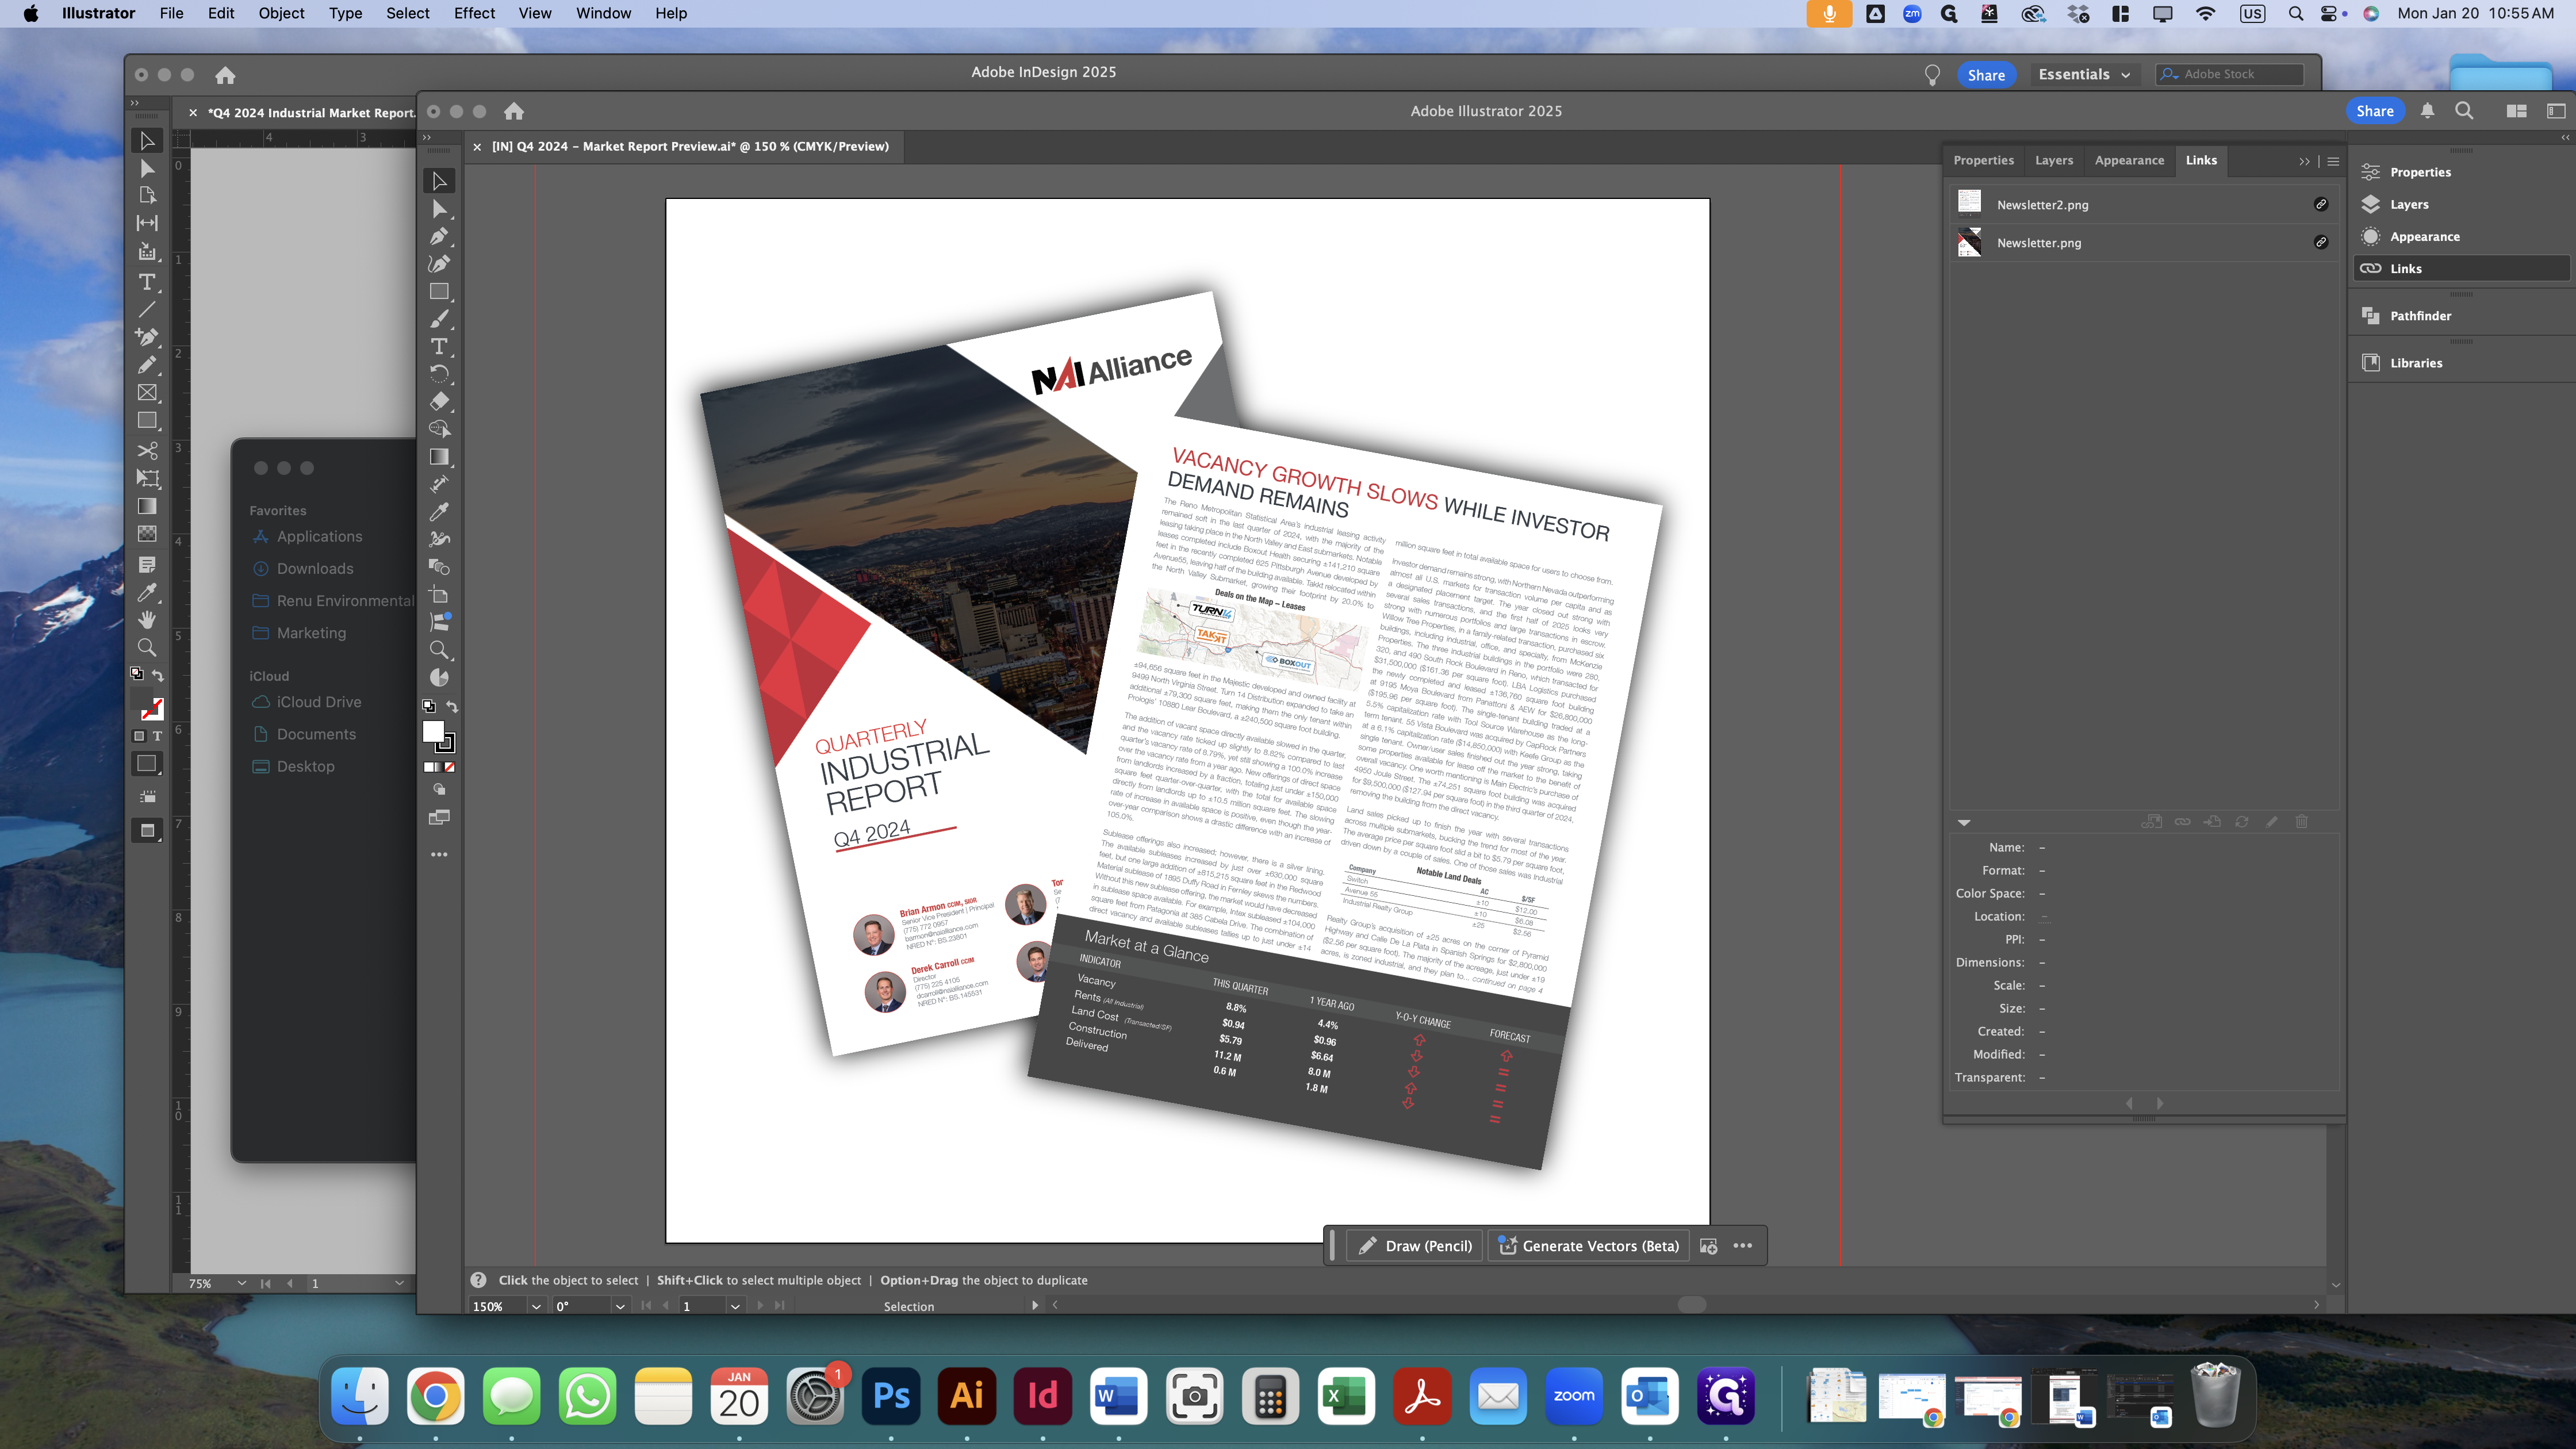
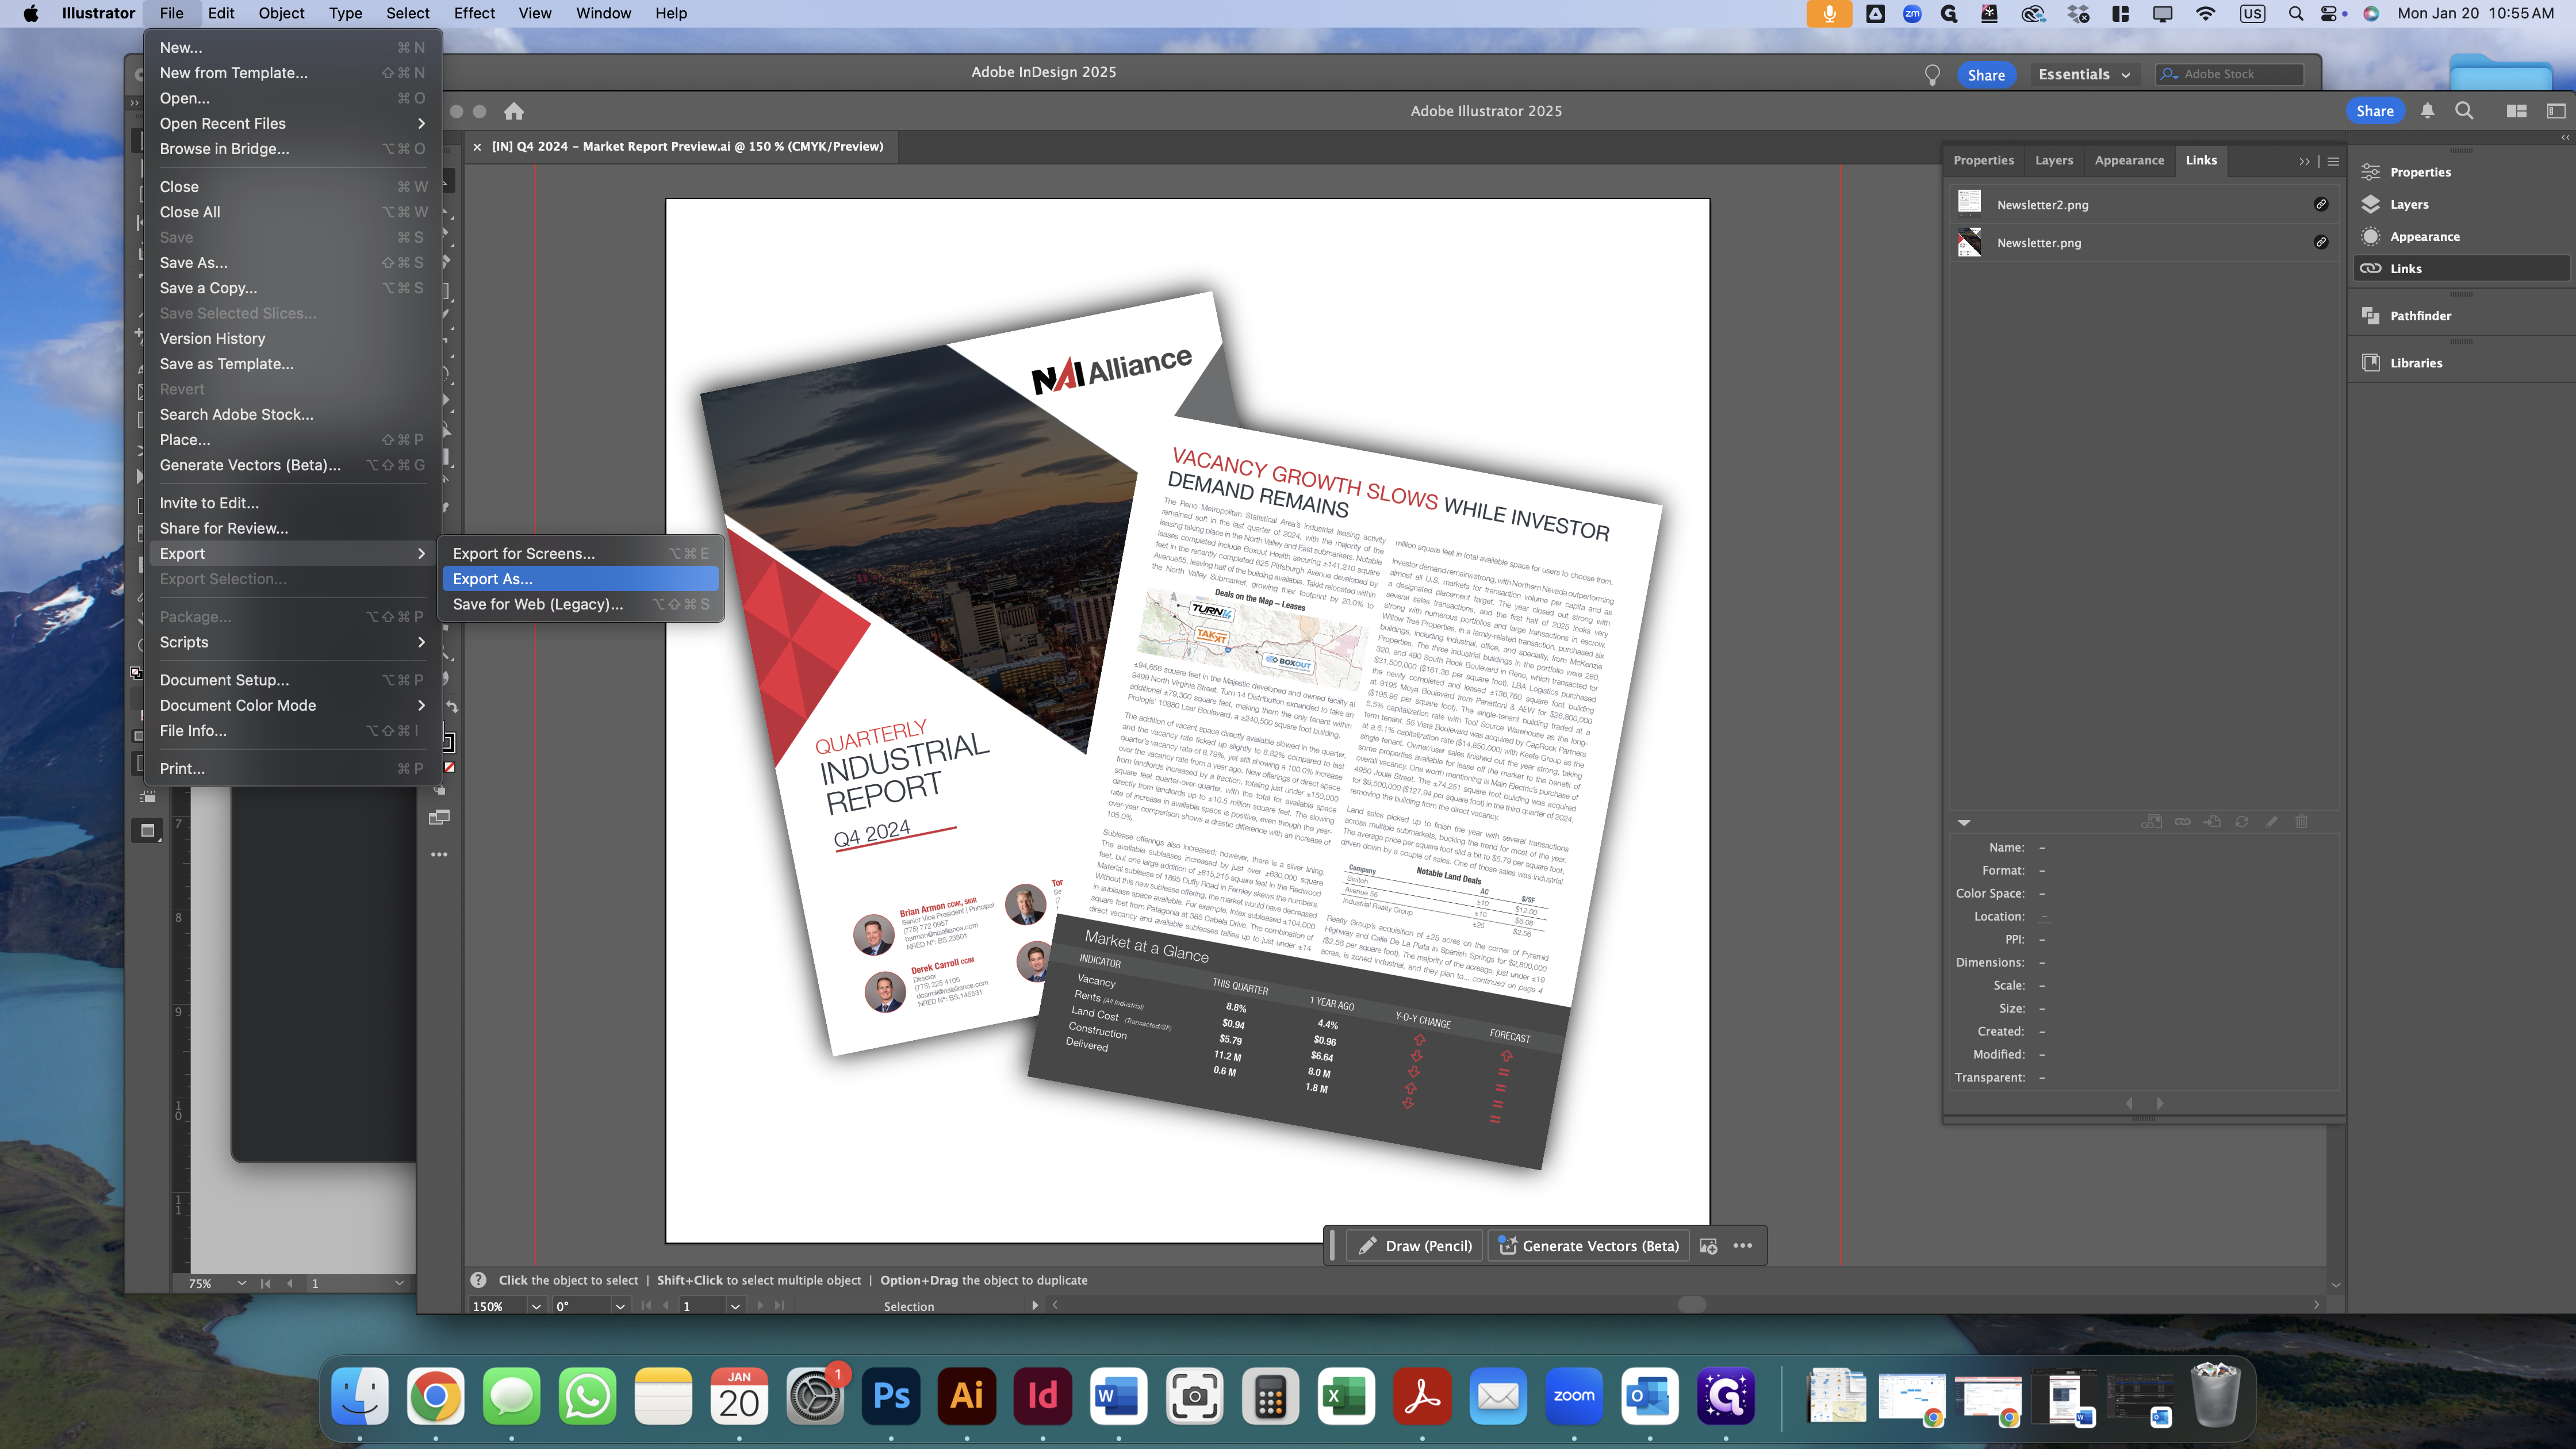
Once they are properly linked, save the file and export it. Name it the same as the current document and export it as a PNG.


![Step #24: Click on "[IN] Q4 2024 - Market Report Preview"](https://di8mn0rali2ic.cloudfront.net/uploads/deec4c1f-0fae-4079-a90b-bbbec057d8e3/747d0895-9fc9-429f-aaa7-7414d0fdff15.png)