How to Update Billing Milestone Tasks, Revenue, and Dates in Precursive Projects
Learn step-by-step how to update billing milestone tasks, including setting revenue and dates, in Precursive projects. This guide covers OPU Milestone, Initial Billing for Delivery, and Billing for Startup and Commissioning.
In this guide, we'll learn how to update billing milestone tasks, including revenue and dates, when starting a new project. This process uses the Precursive board to adjust key milestones and relies on information from your project's autogenerated quote in Box. The goal is to ensure that all milestone dates and revenues are accurate and that the project revenue matches the milestone totals. This process should be complete no more then 48hr after kickoff.
Let's get started
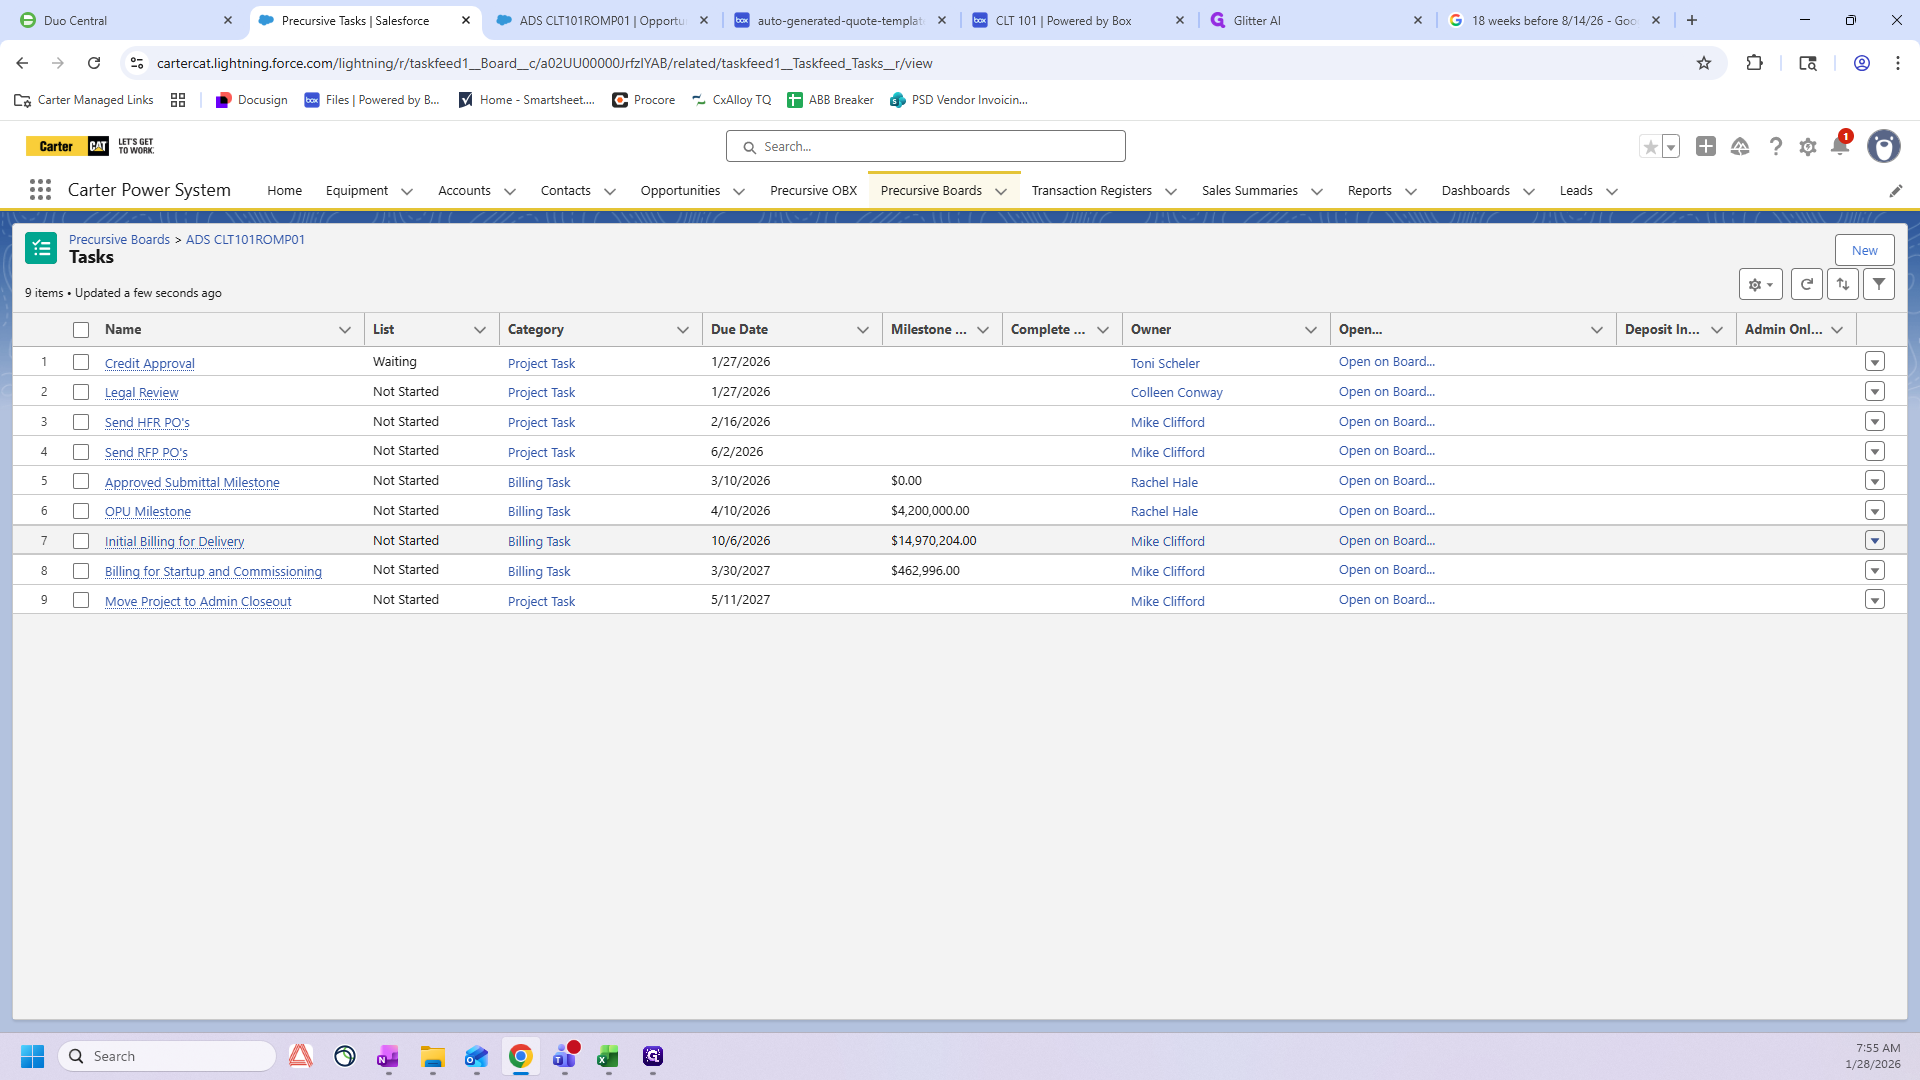
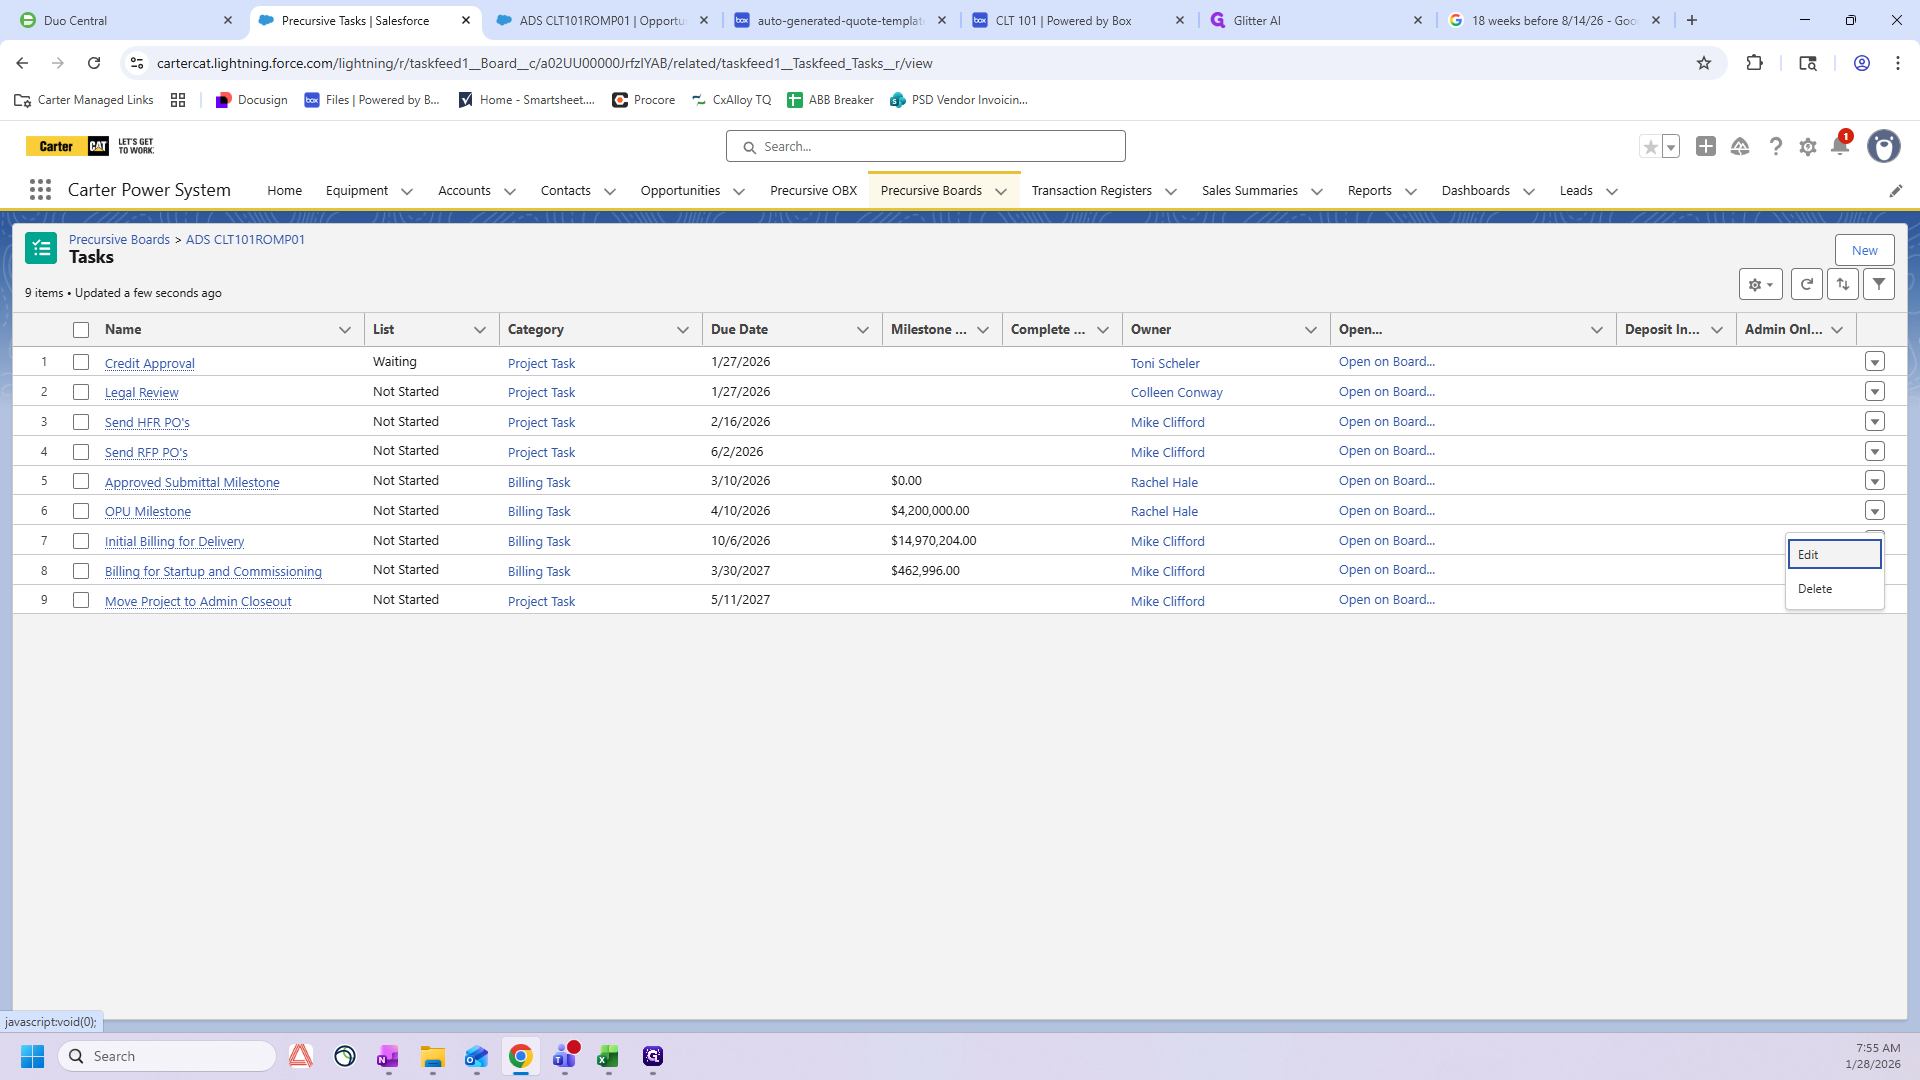
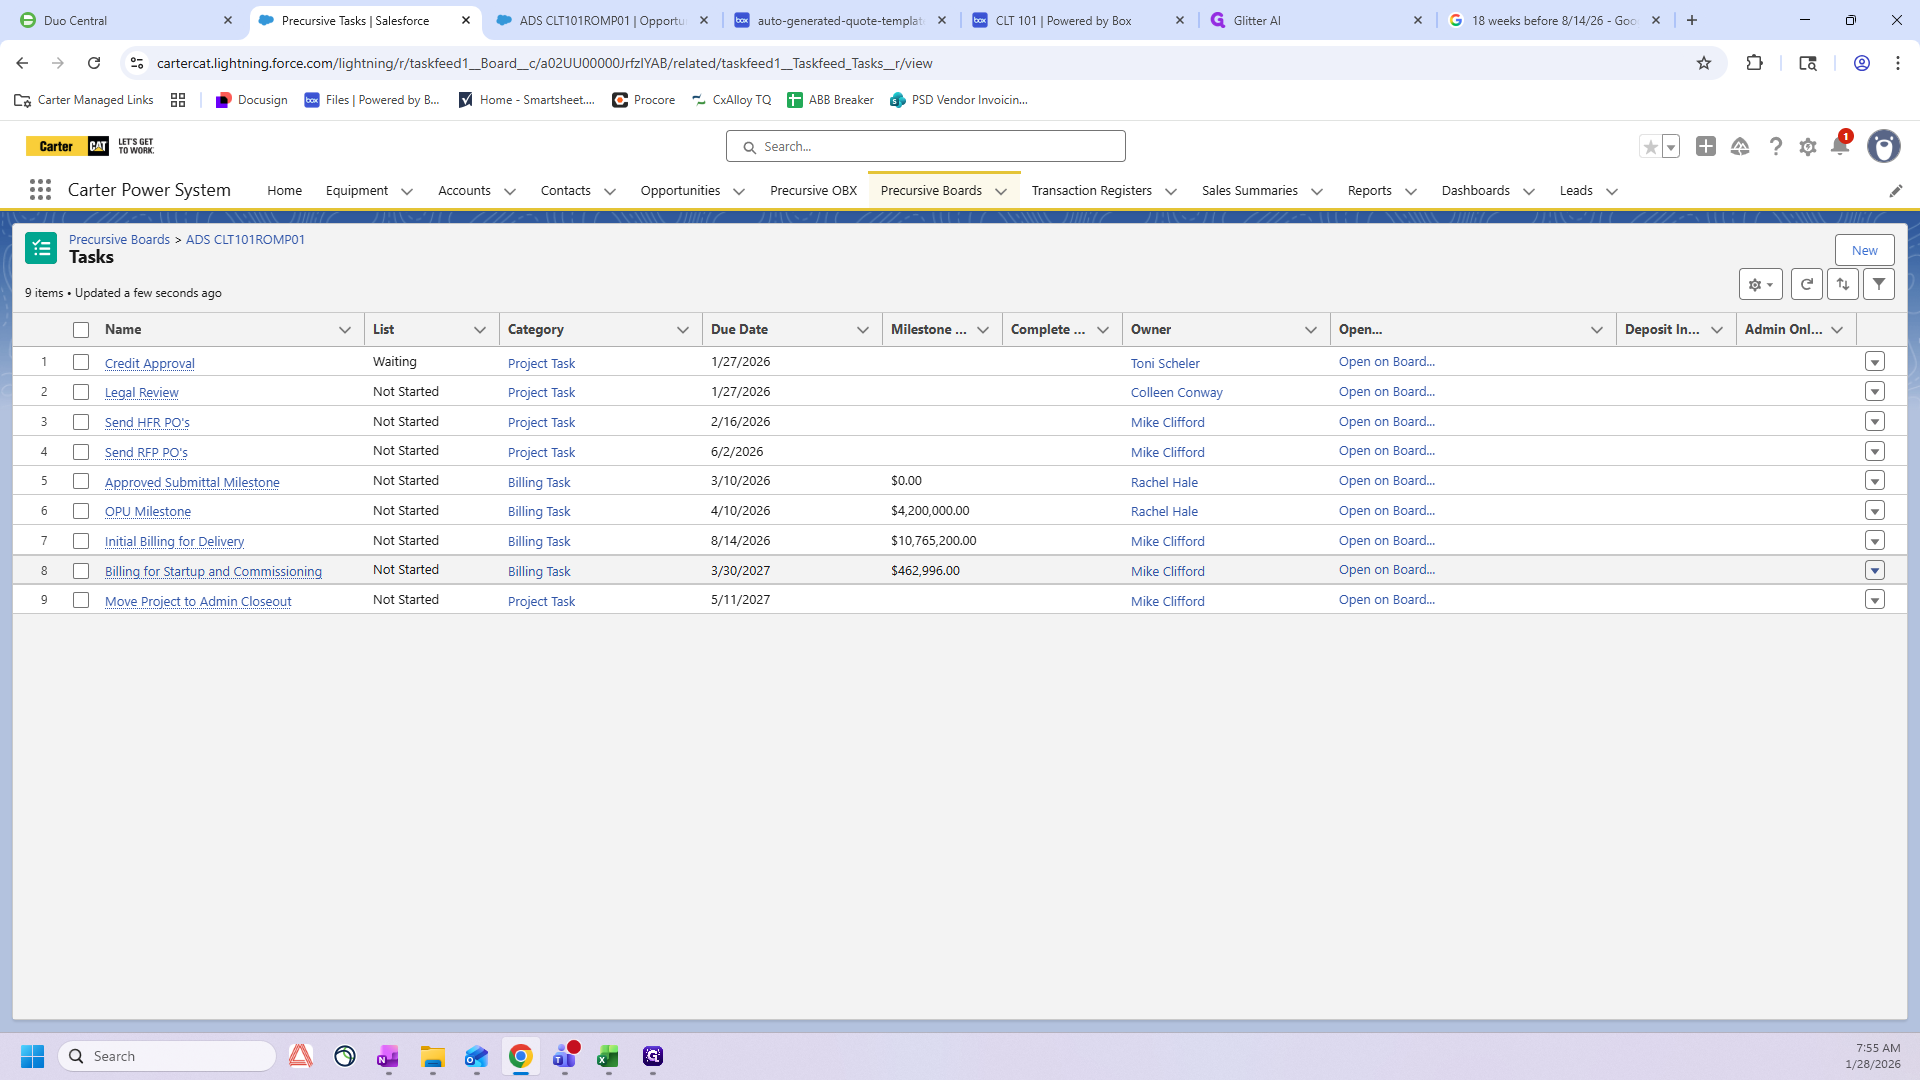
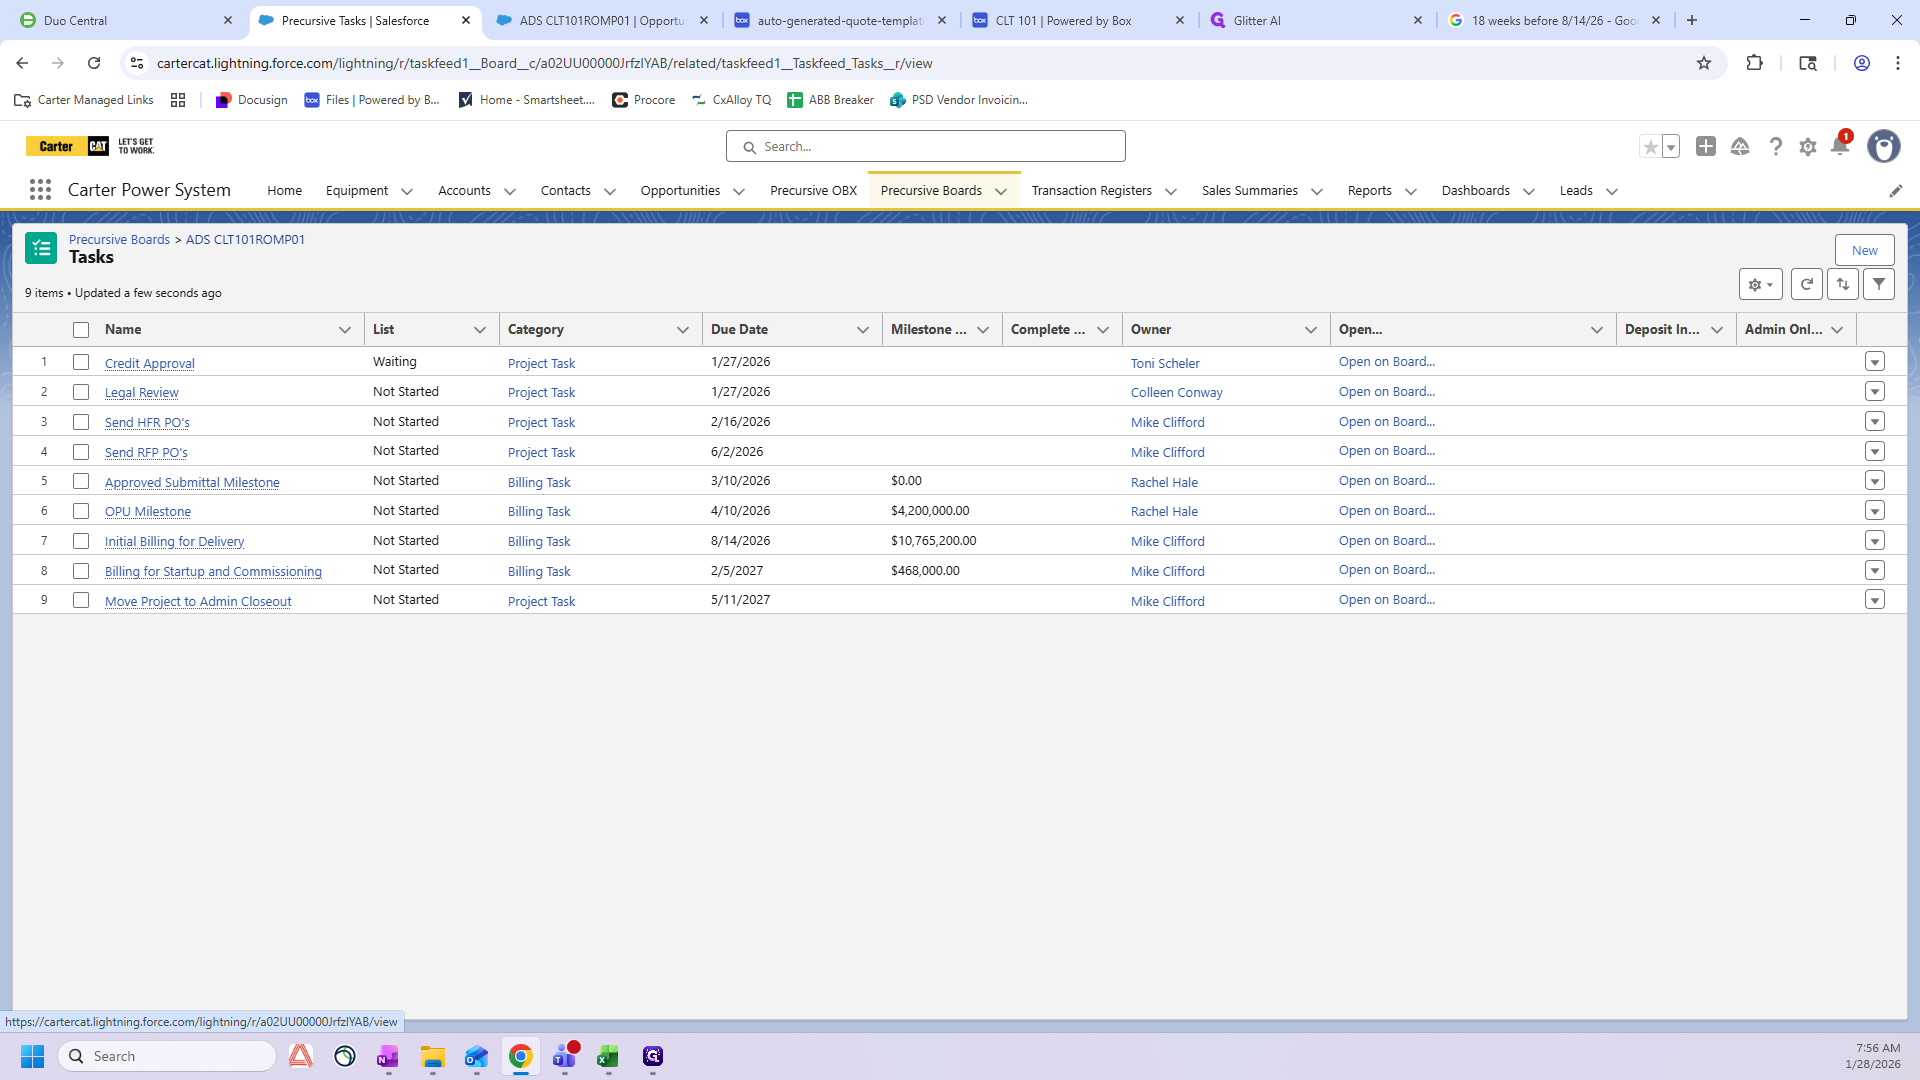
I will show you how to update the billing milestone tasks, including revenue and dates, when starting a project. First, go to the Precursive board for the specific project and romp. Scroll down until you reach Tasks, then click View All.
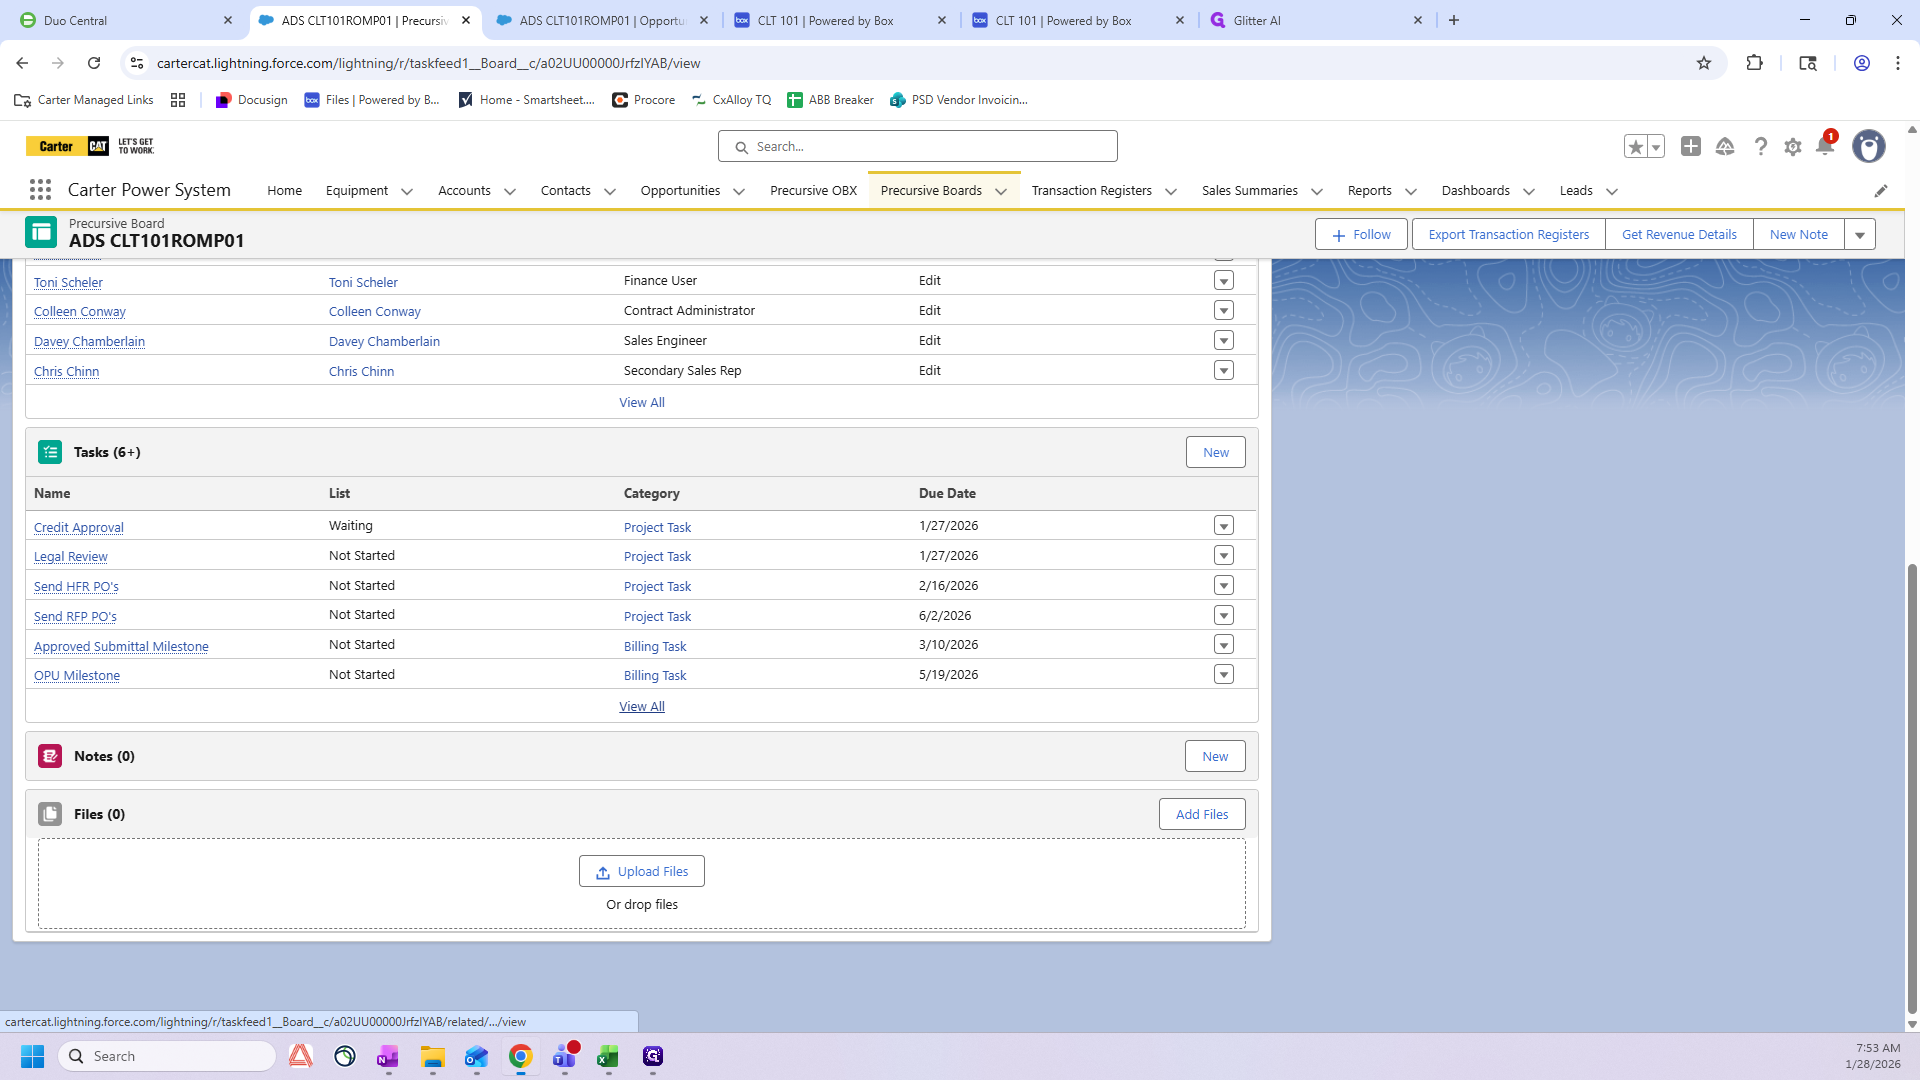
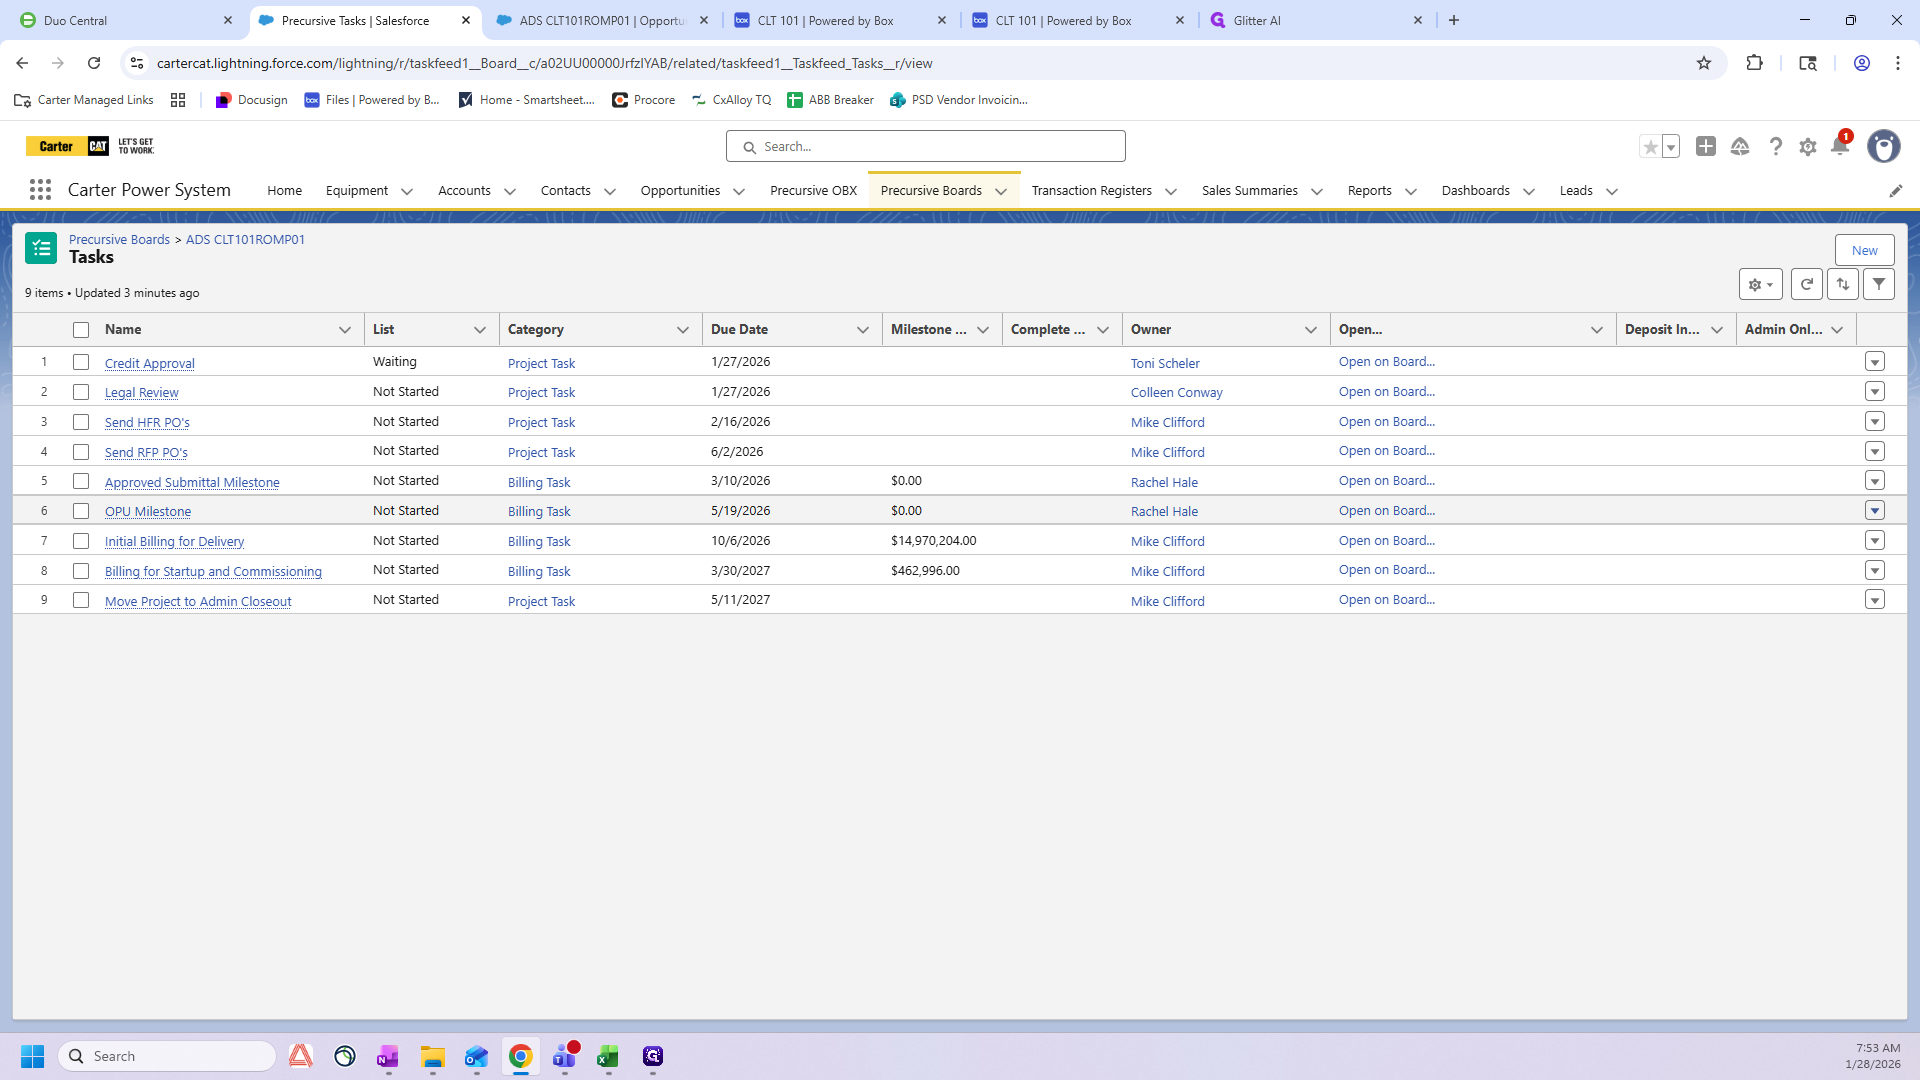
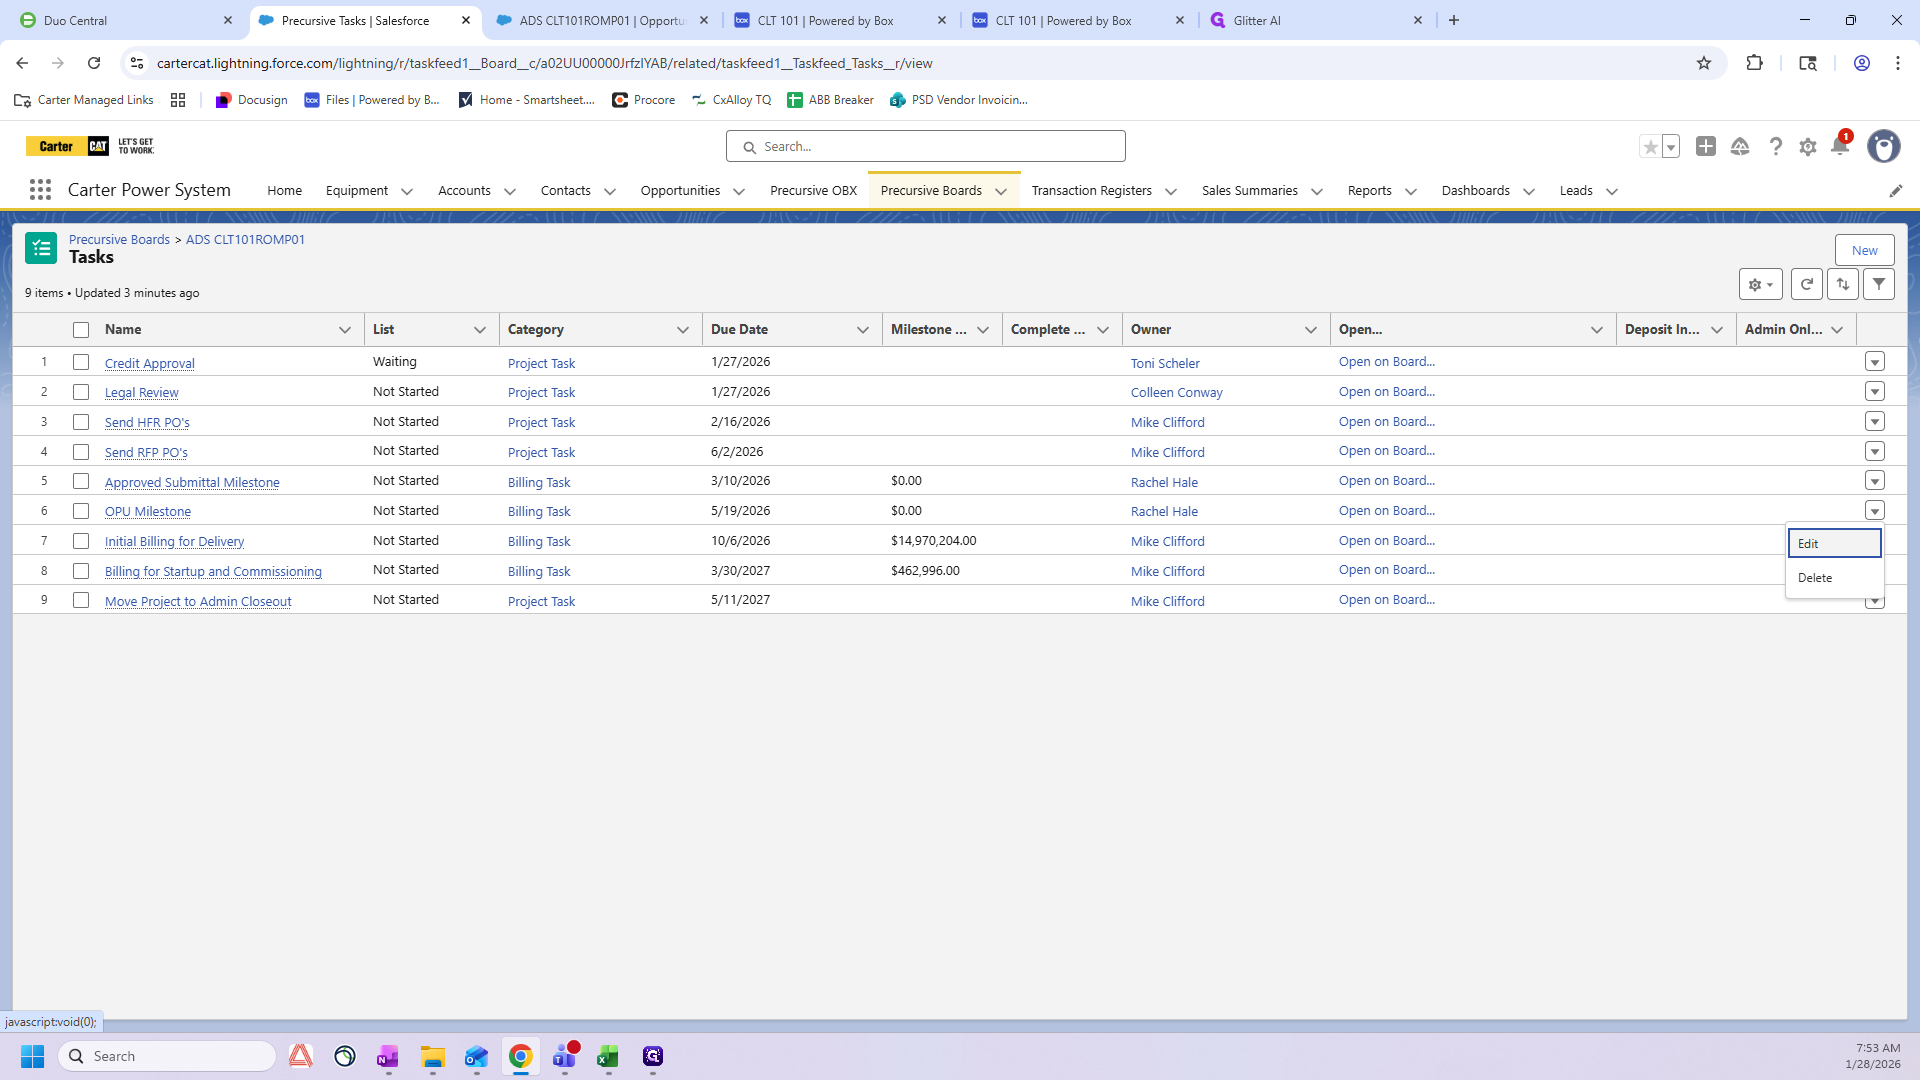
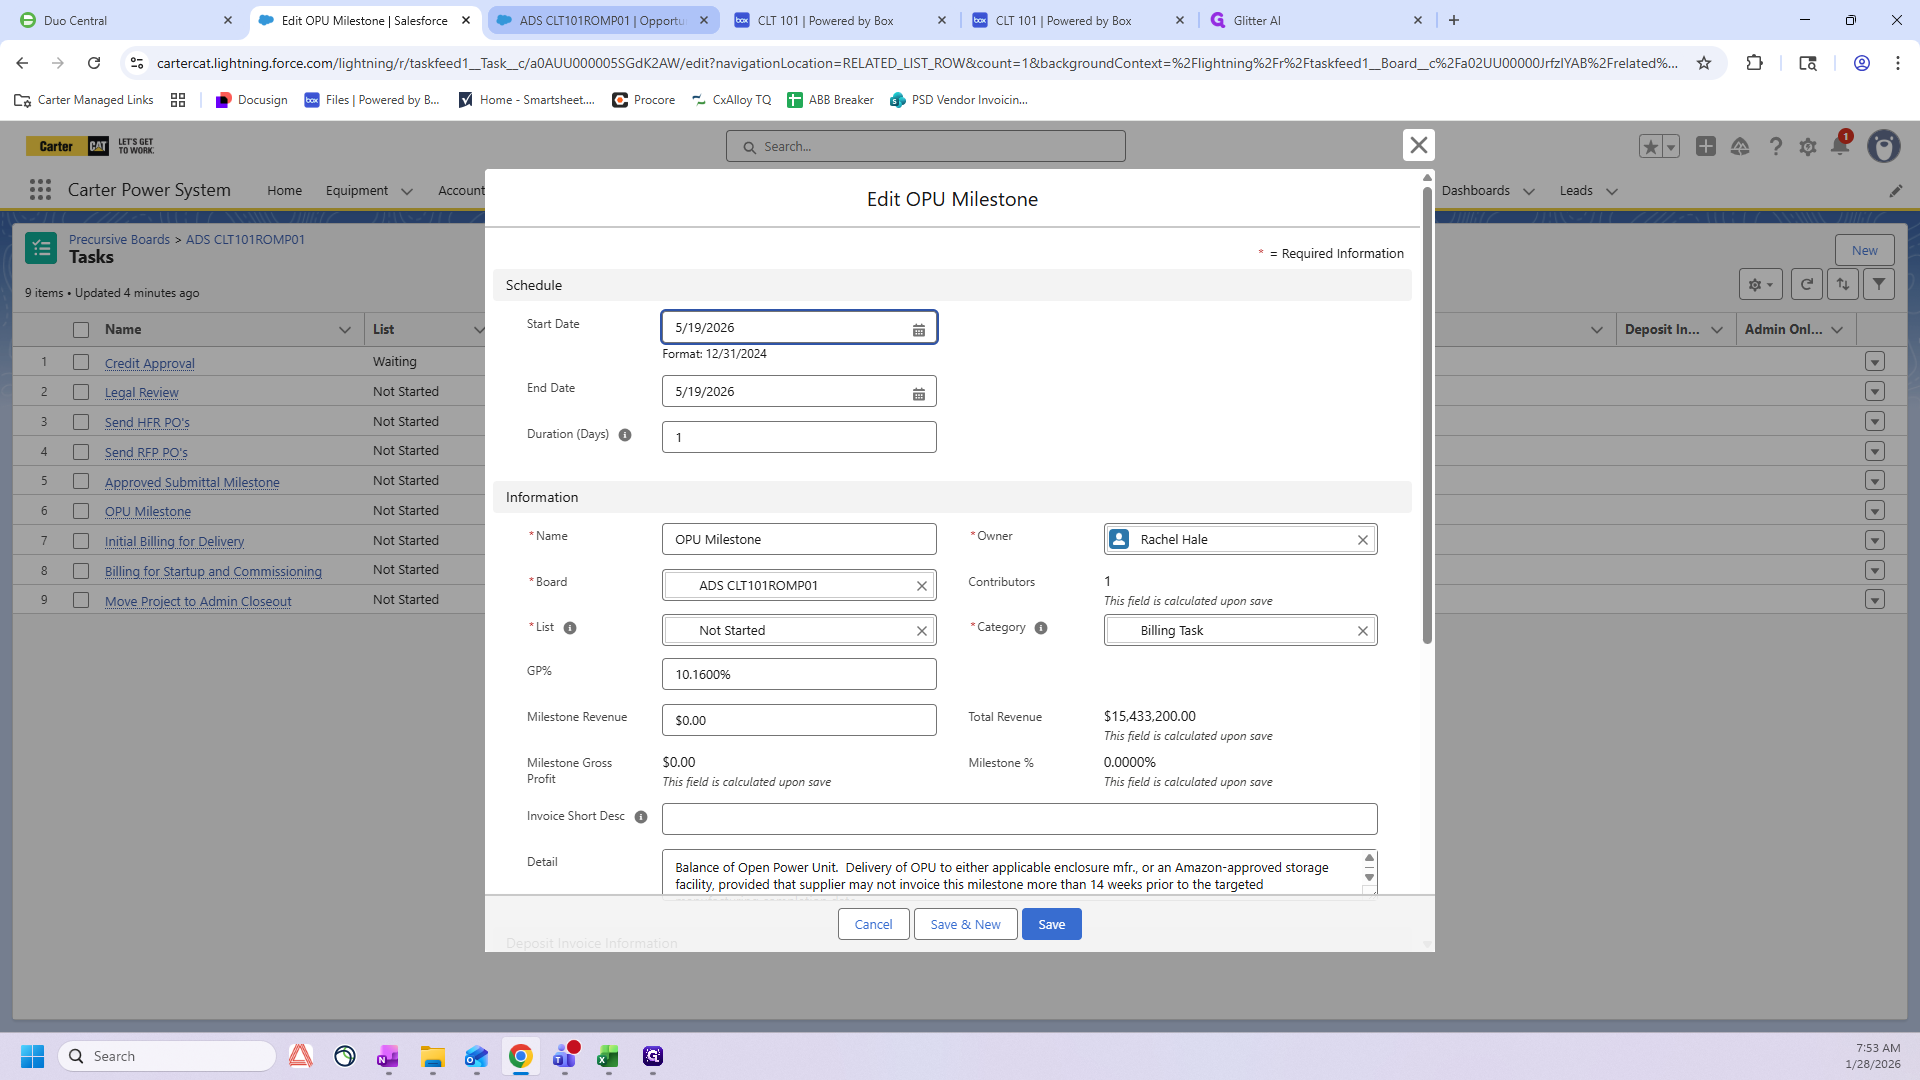
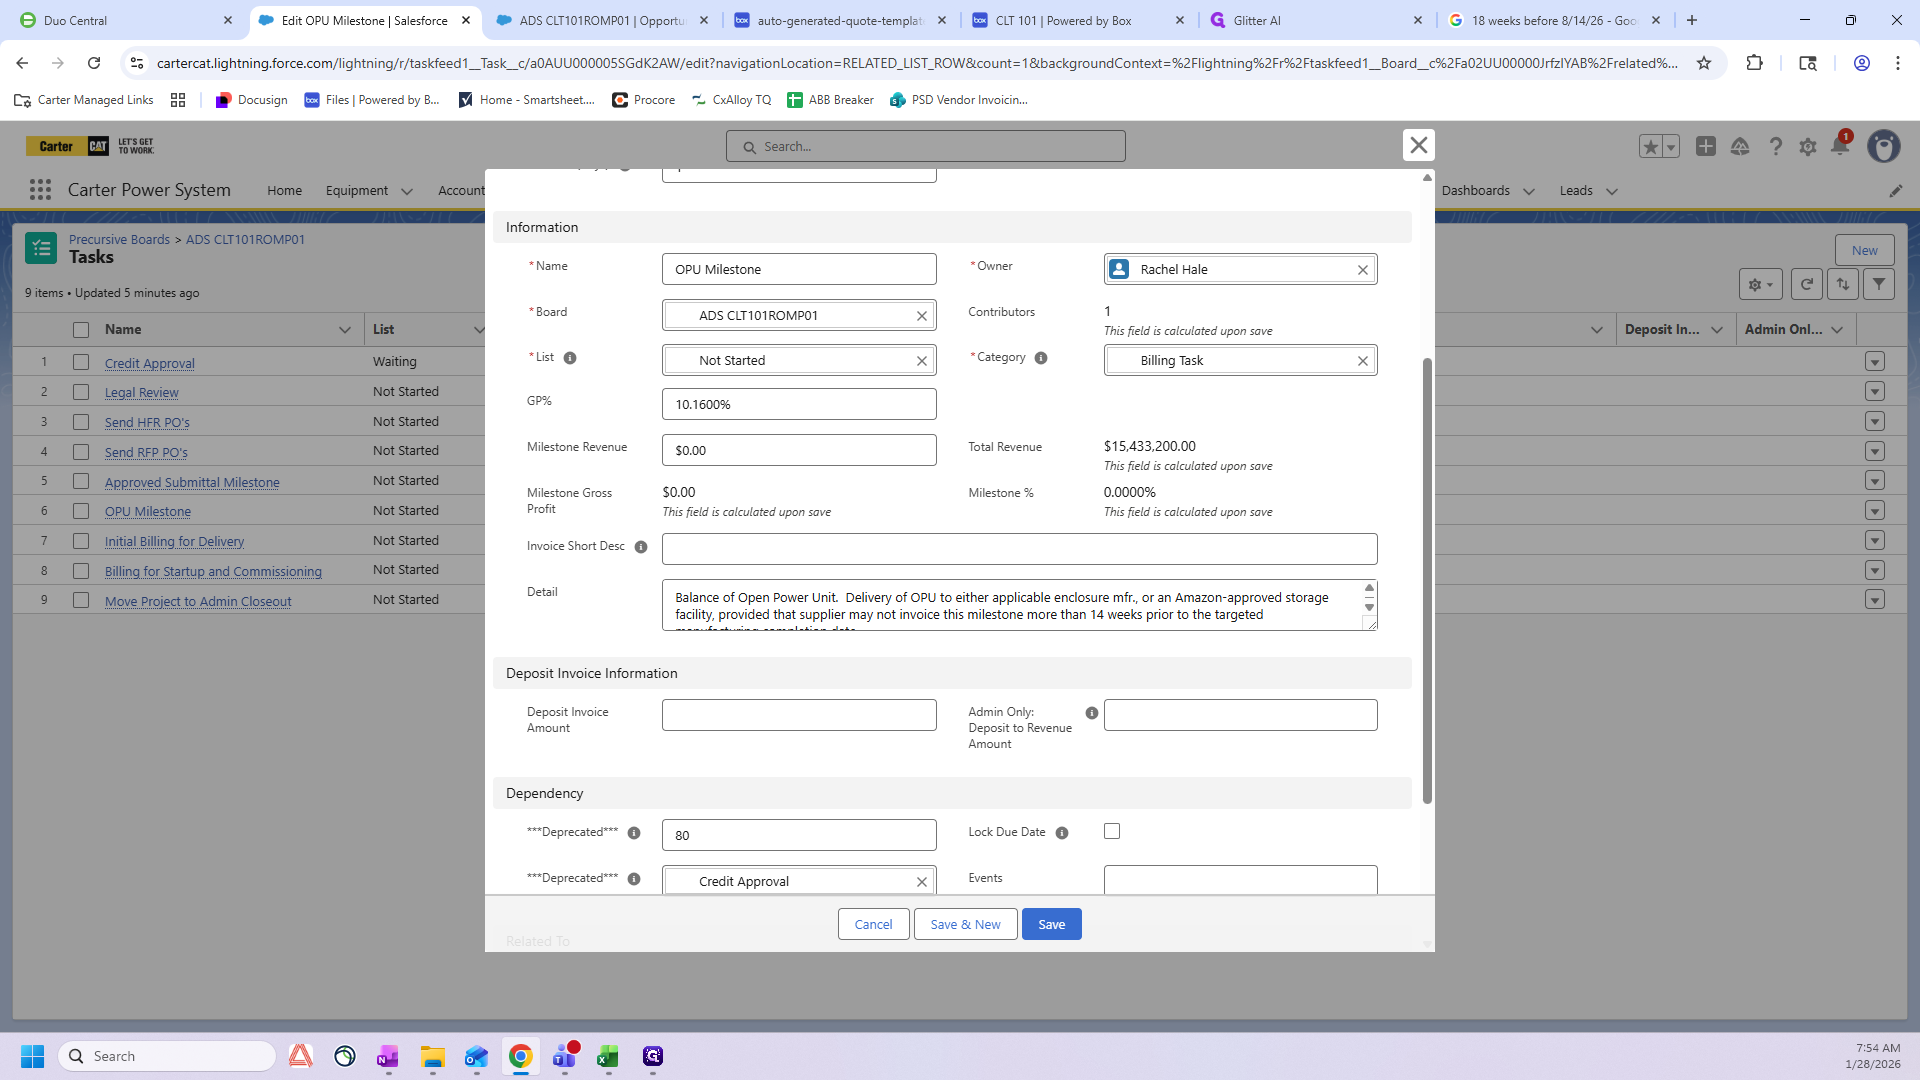
There are only three tasks here that we will address. It will include the OPU Milestone, Initial Billing for Delivery, and Billing for Startup and Commissioning. We'll start with the OPU Milestone. First, click here, then select Edit.
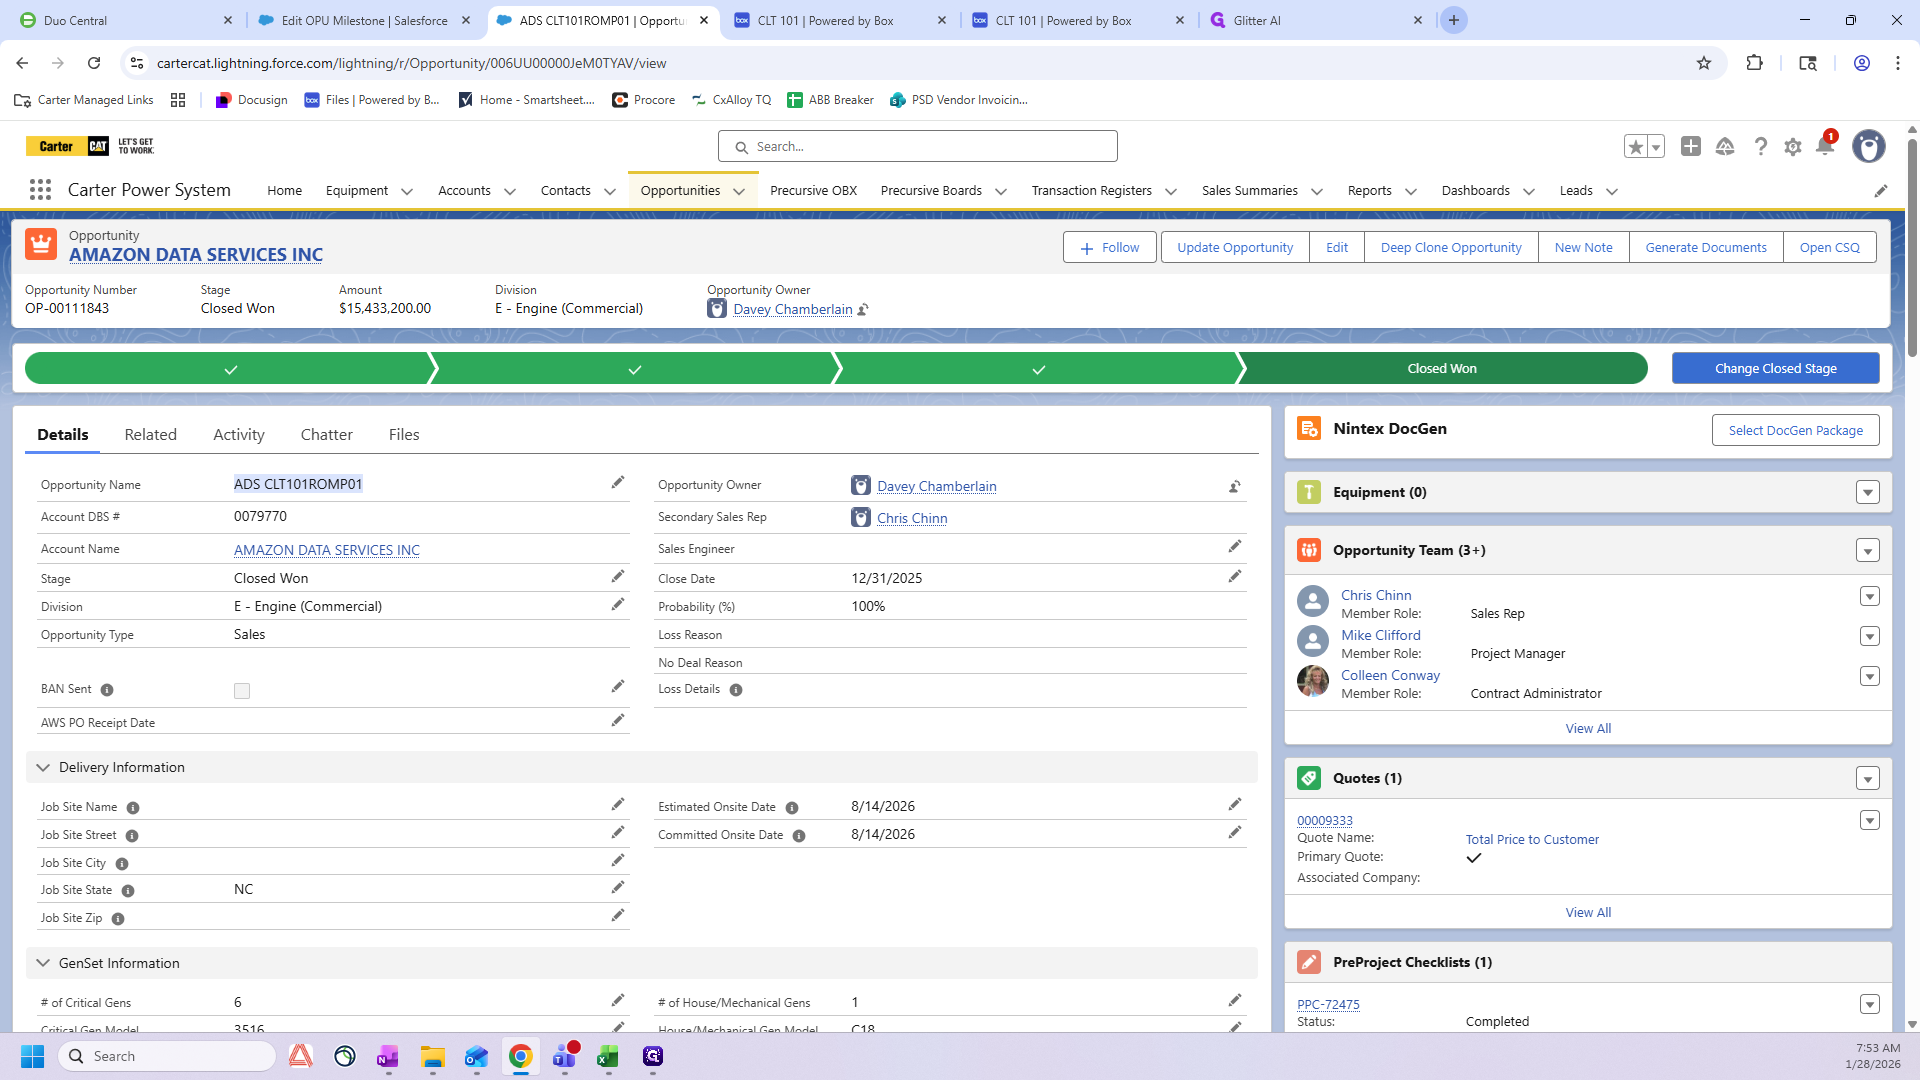
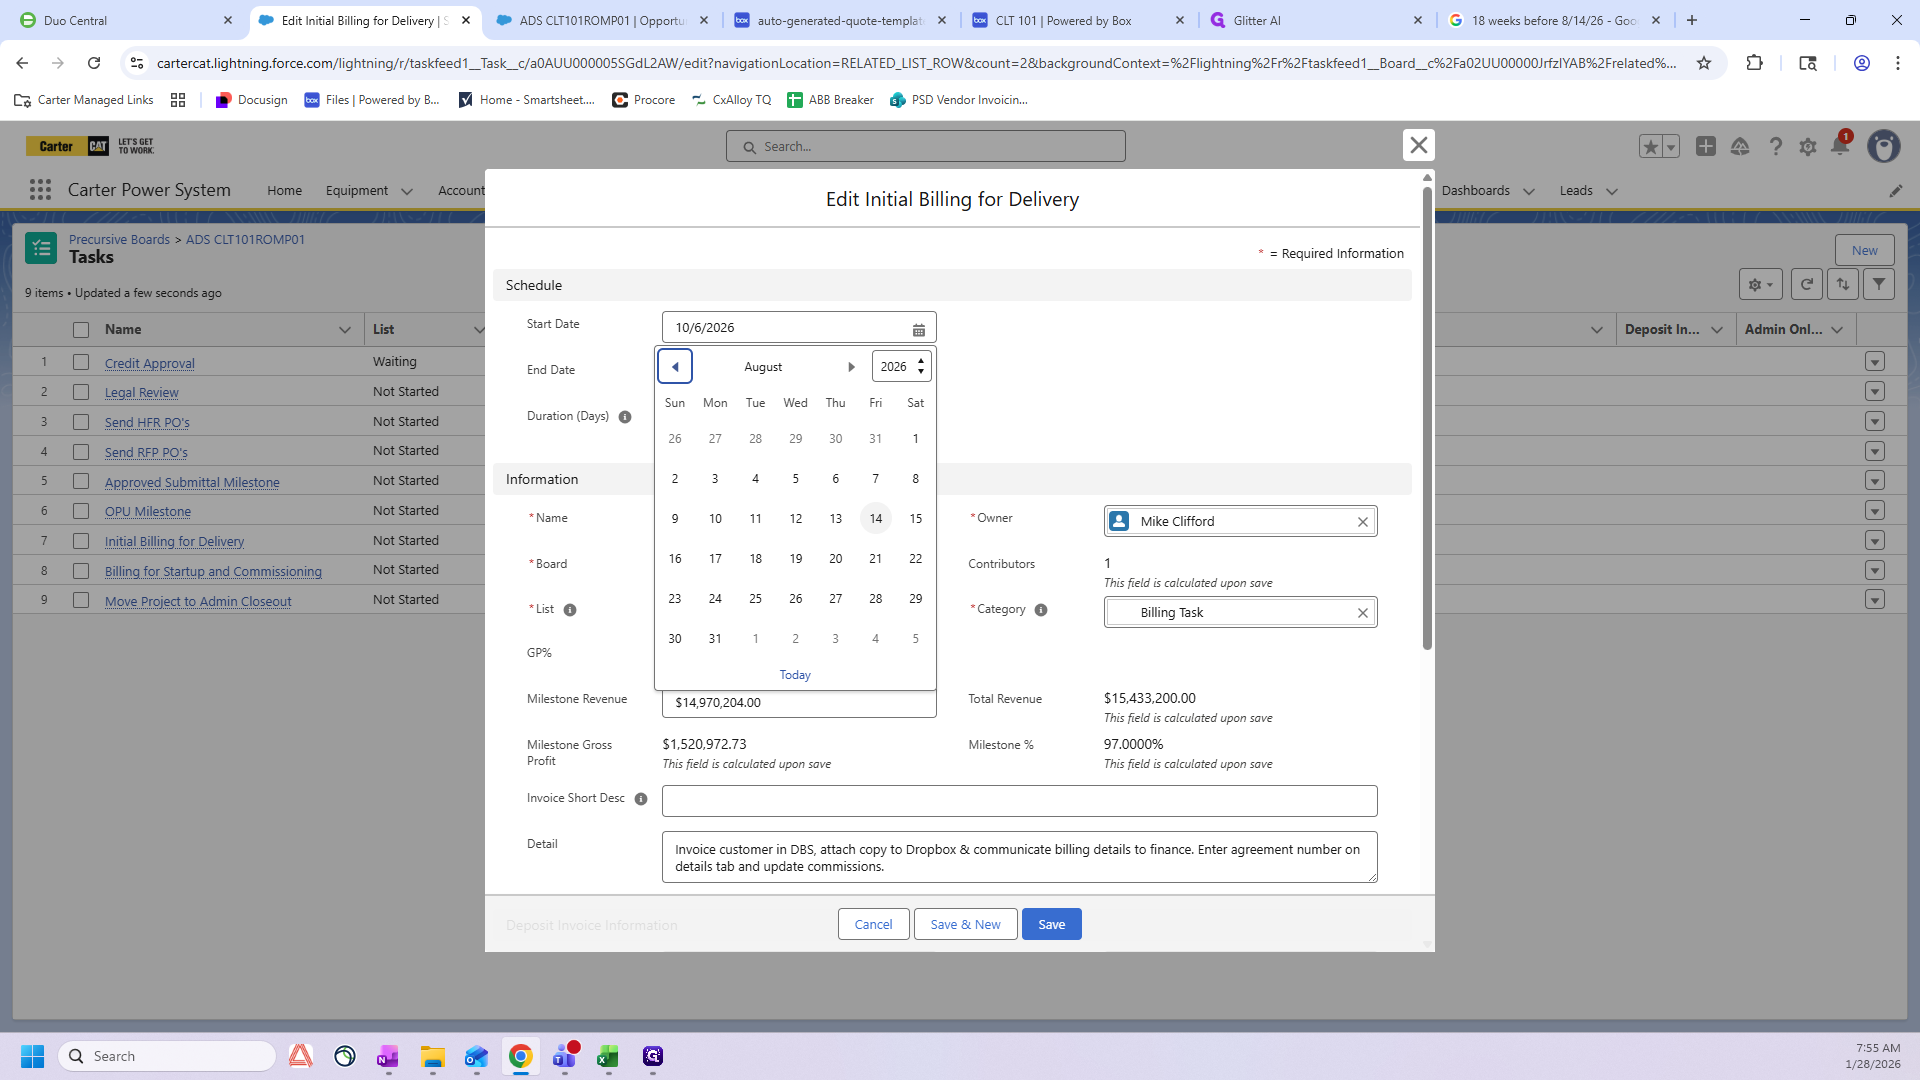
The start date for your OPU milestone should be 18 weeks before the need-by date listed on the PO. If you don't have the PO, go to the Opportunity for your project and find the committed on-site date. For this example it is 8/14/2026
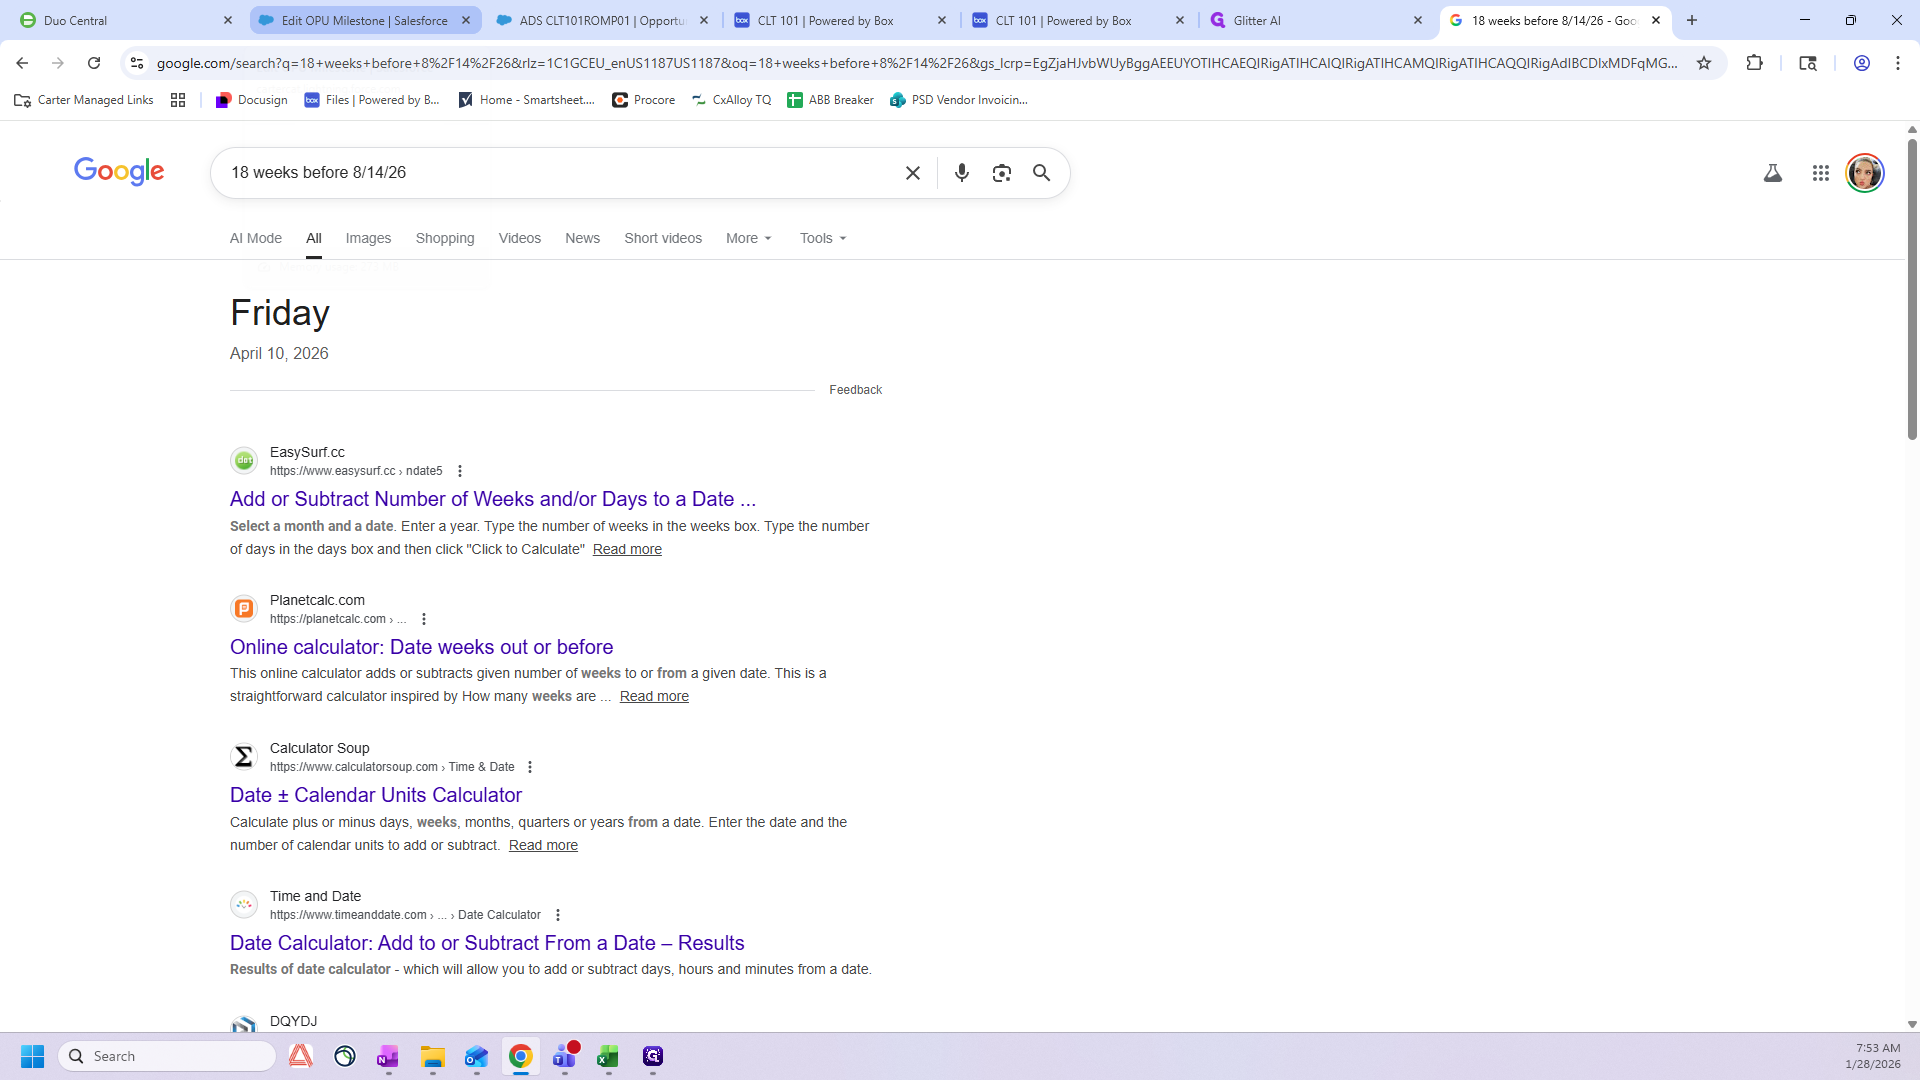
This is your need-by date. I usually go to Google and search for "18 weeks before 8/14."
That will be Friday, April 10th. We'll will now go back to the OPU milestone to enter this date.
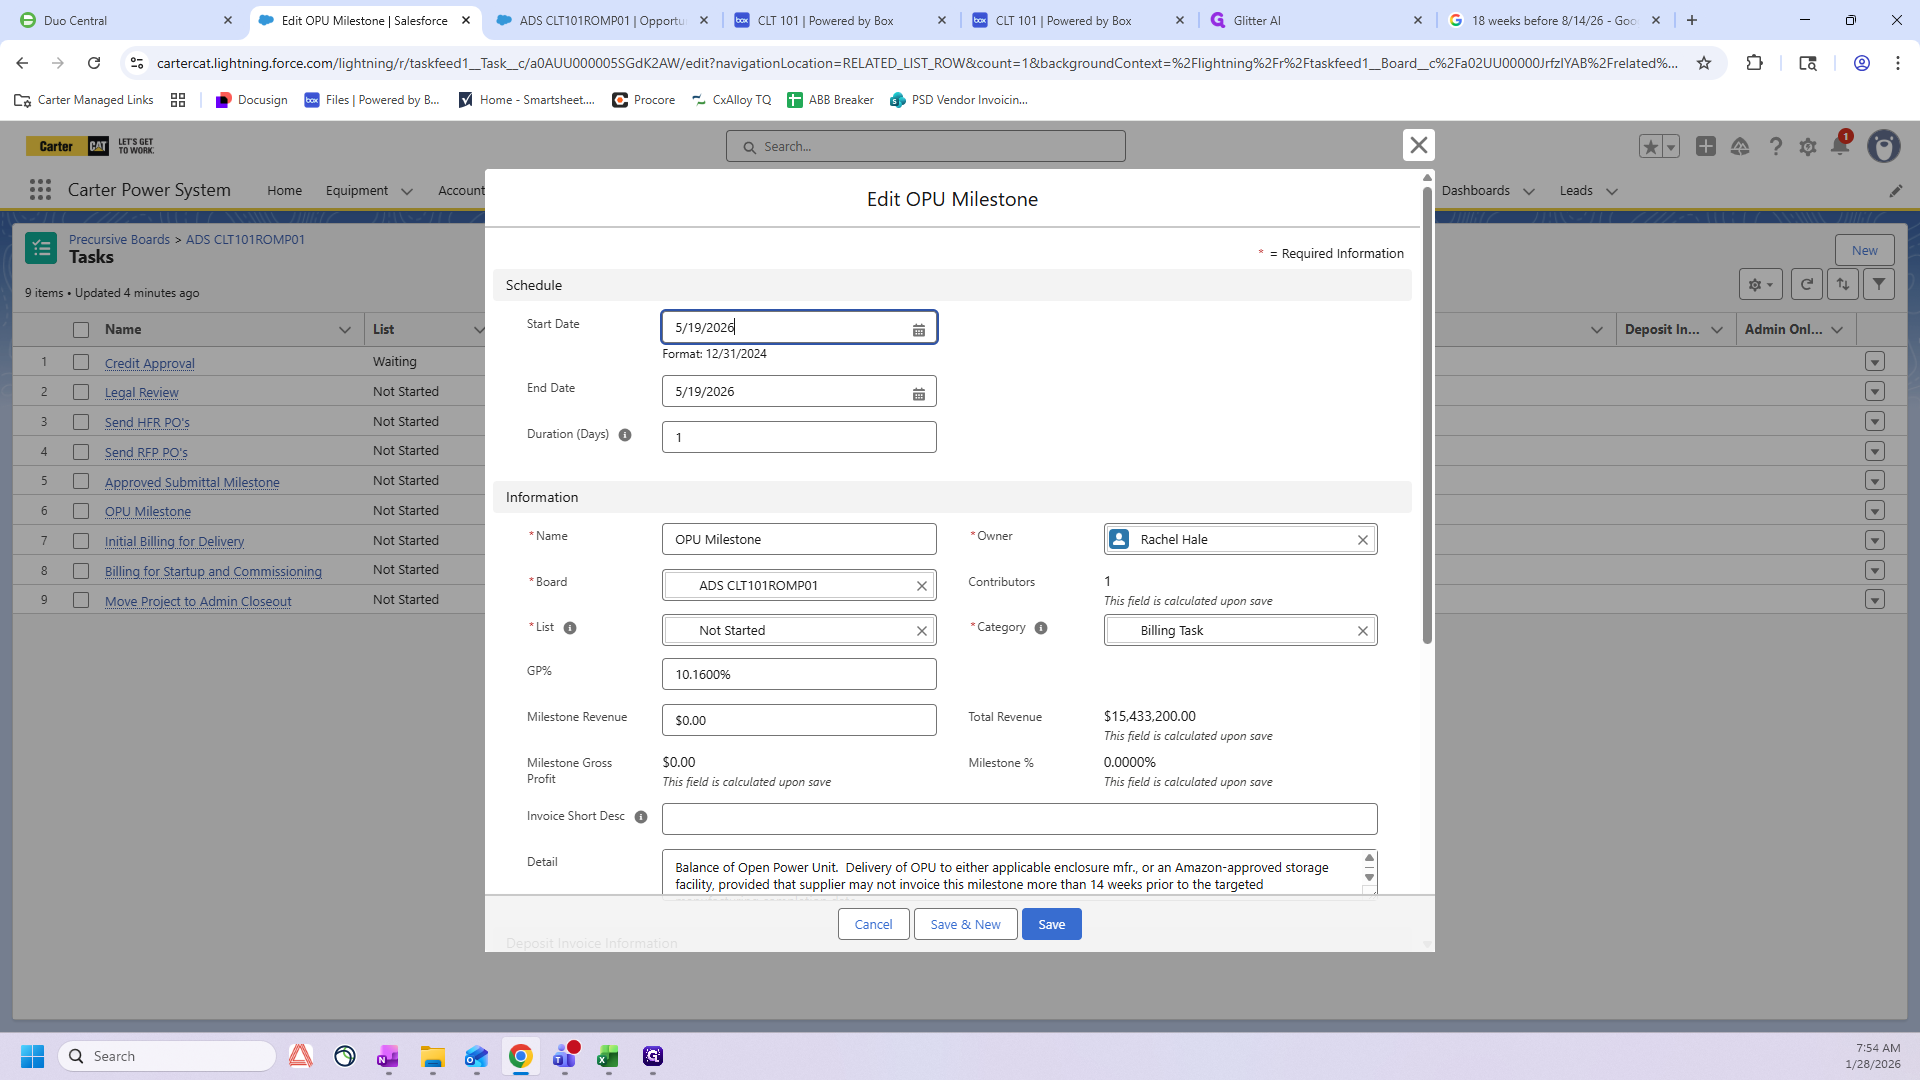

Both the start date and end date must be the same.
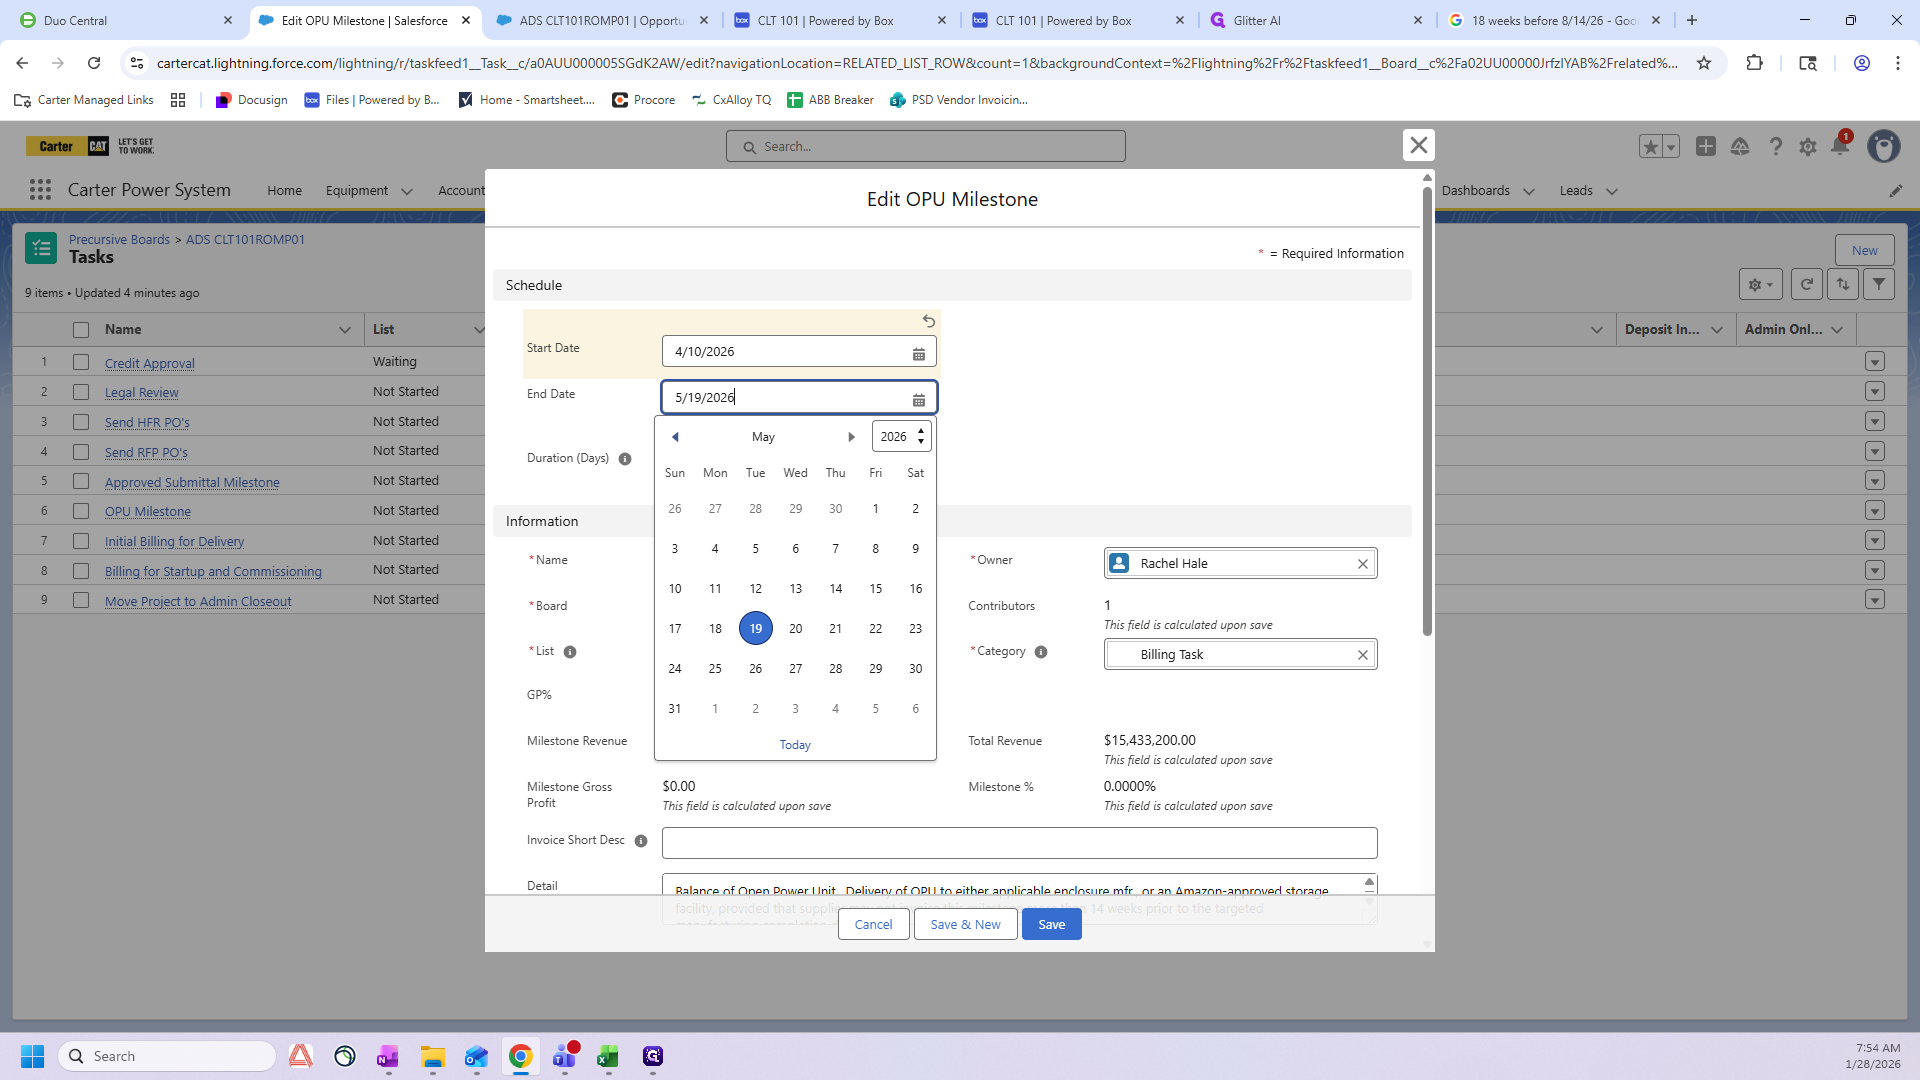
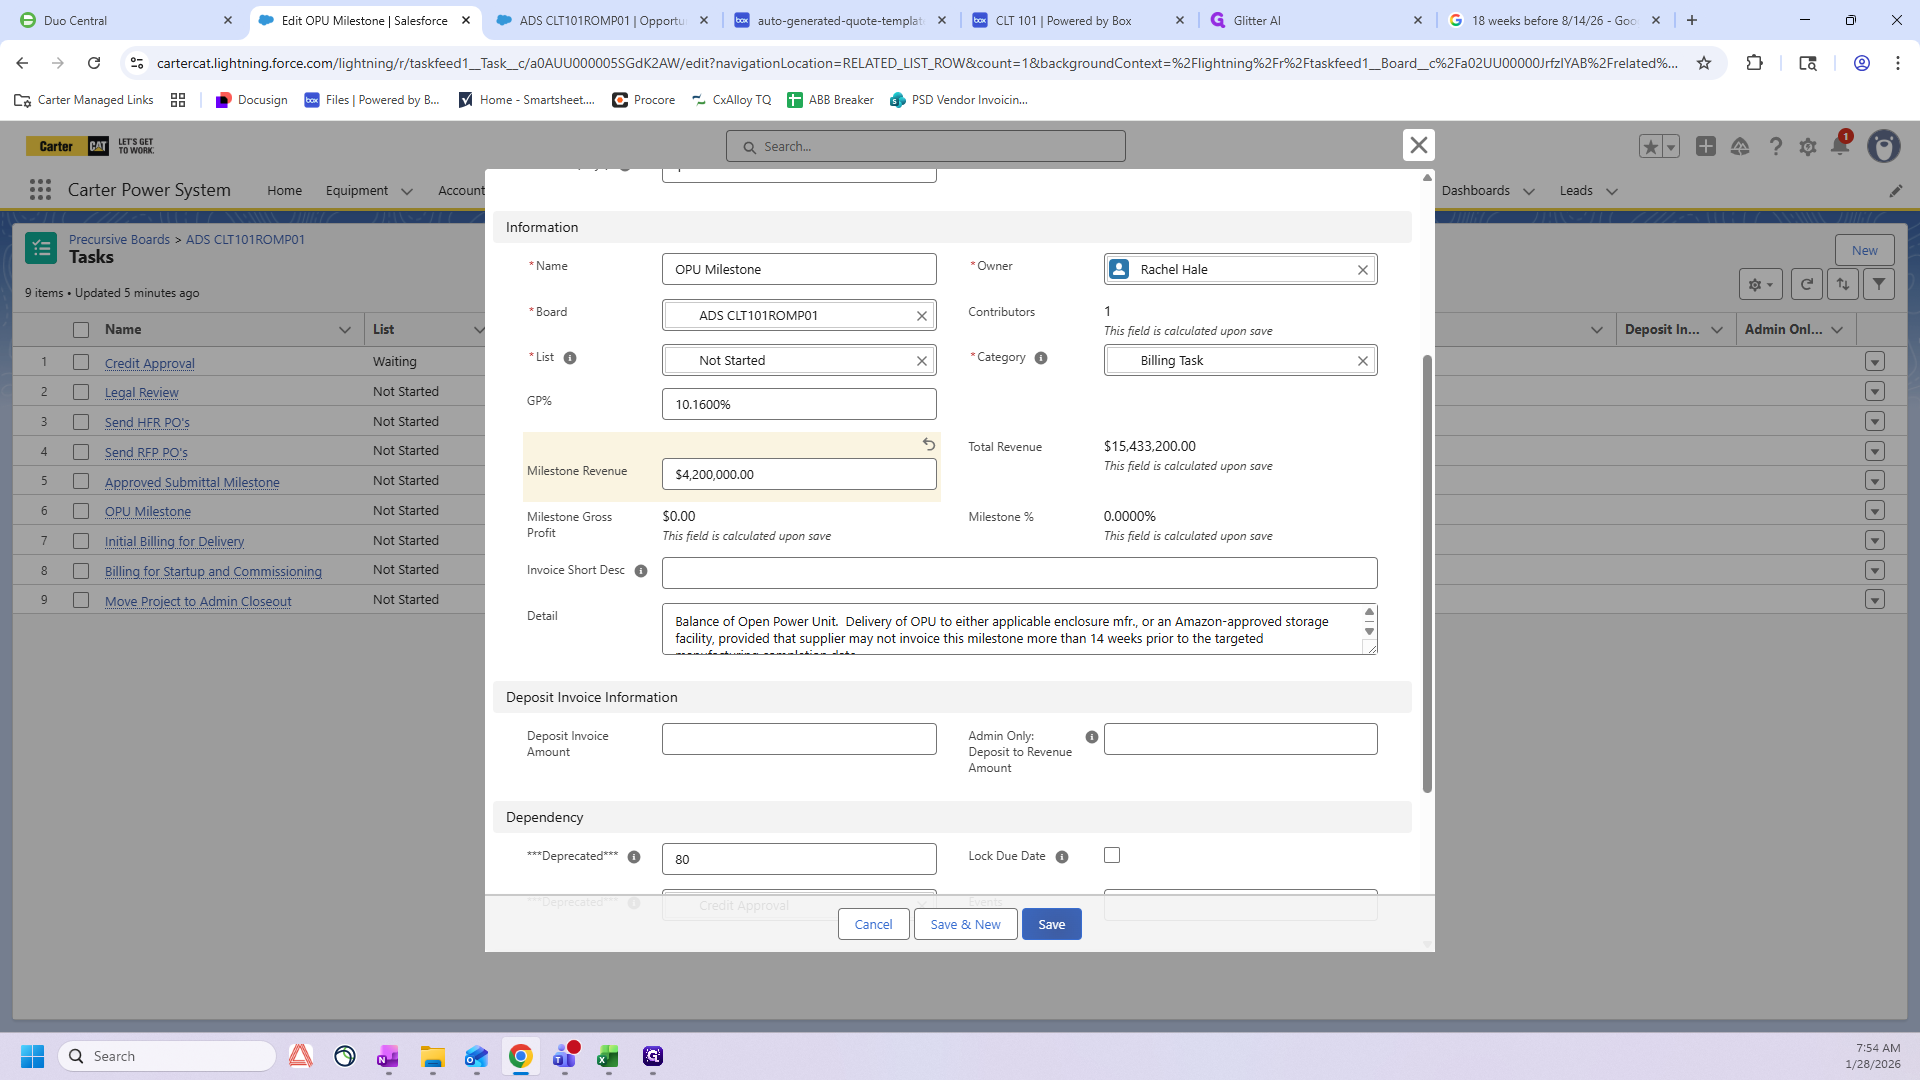
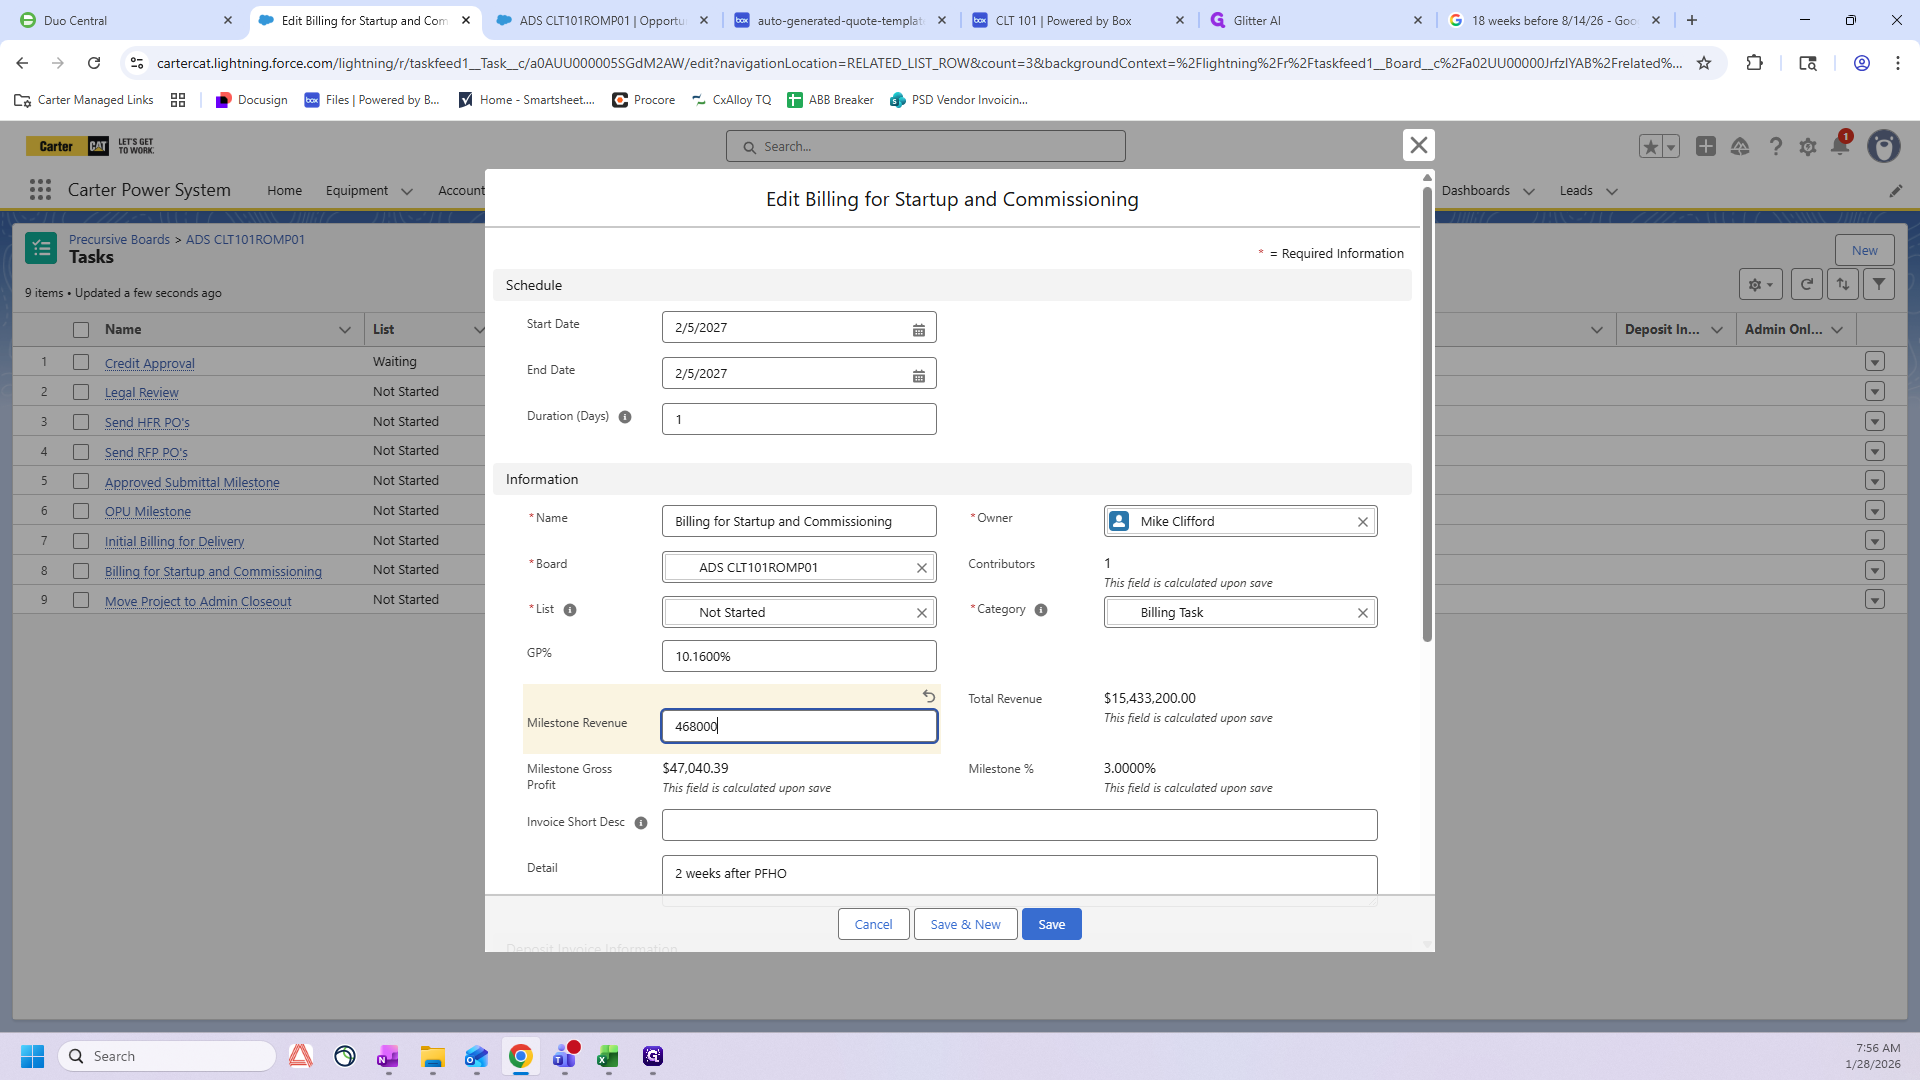
The final step is to enter the Milestone Revenue.
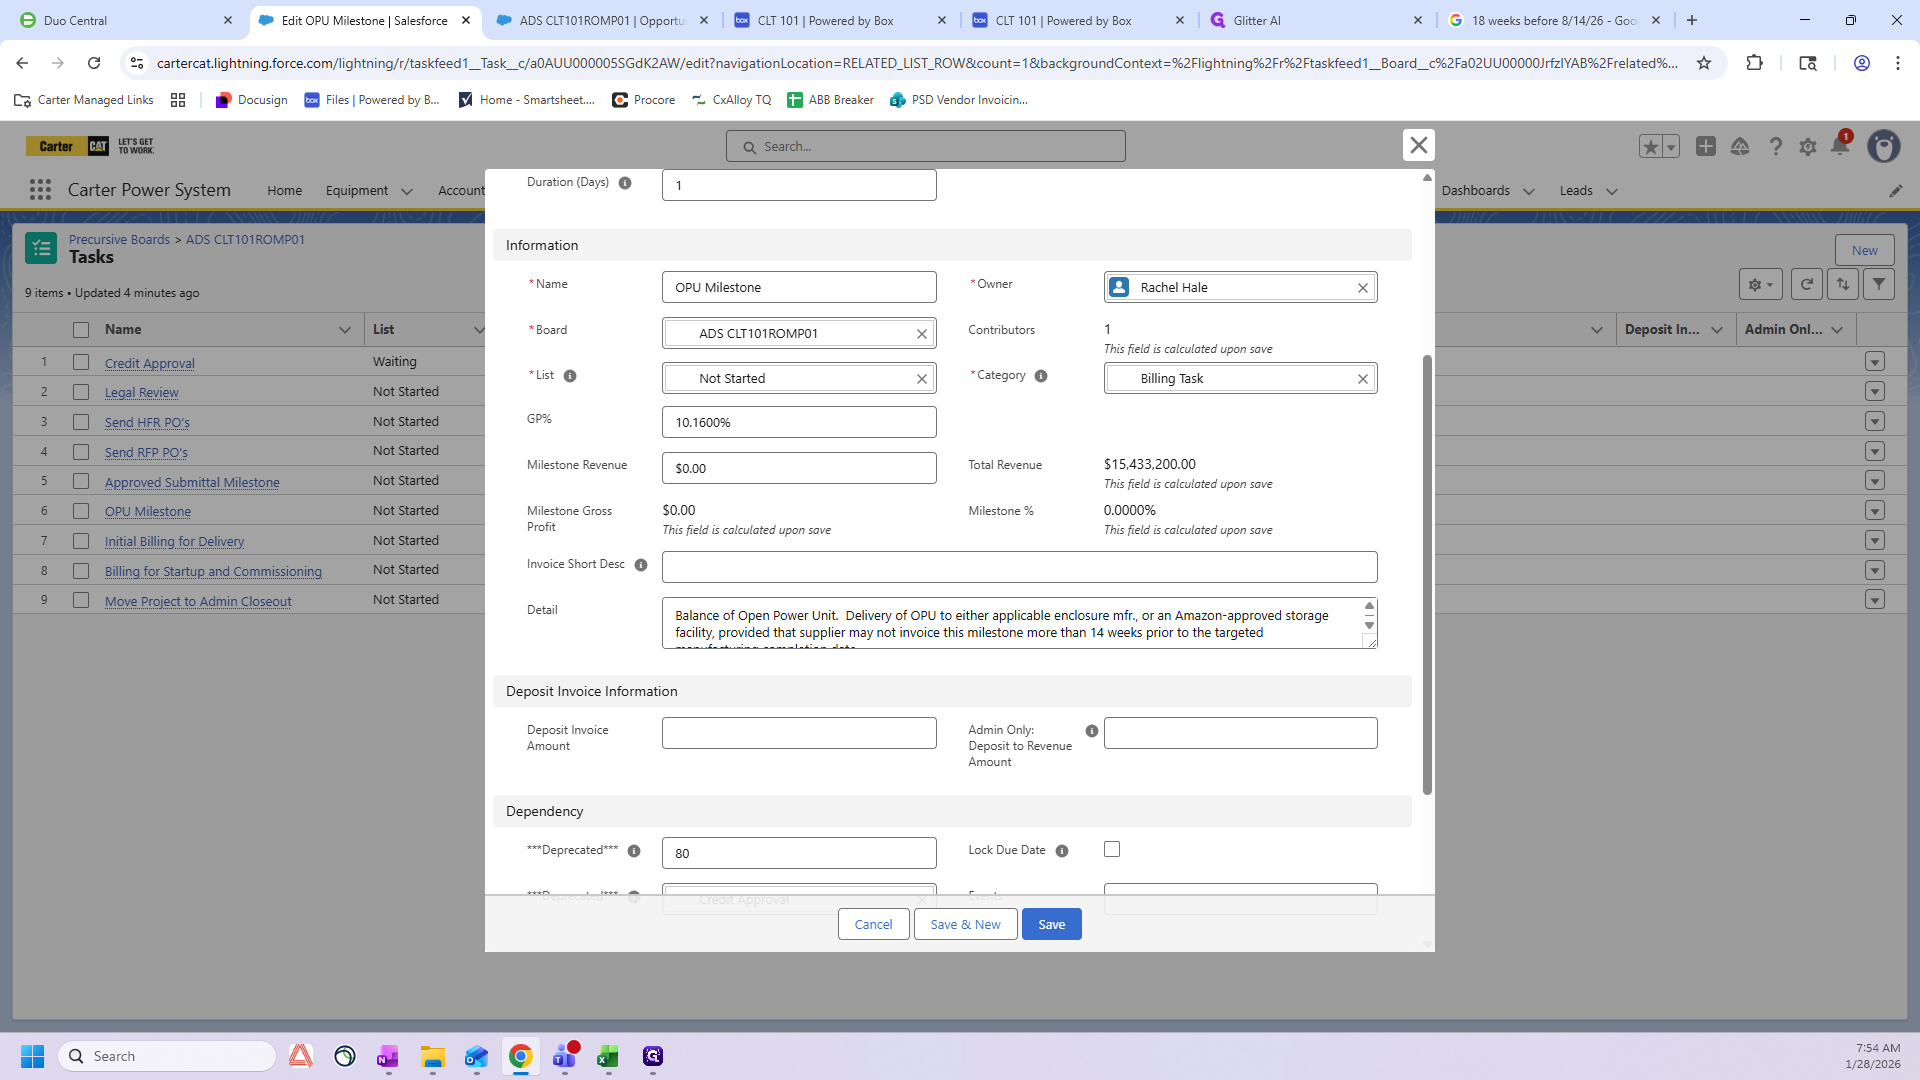
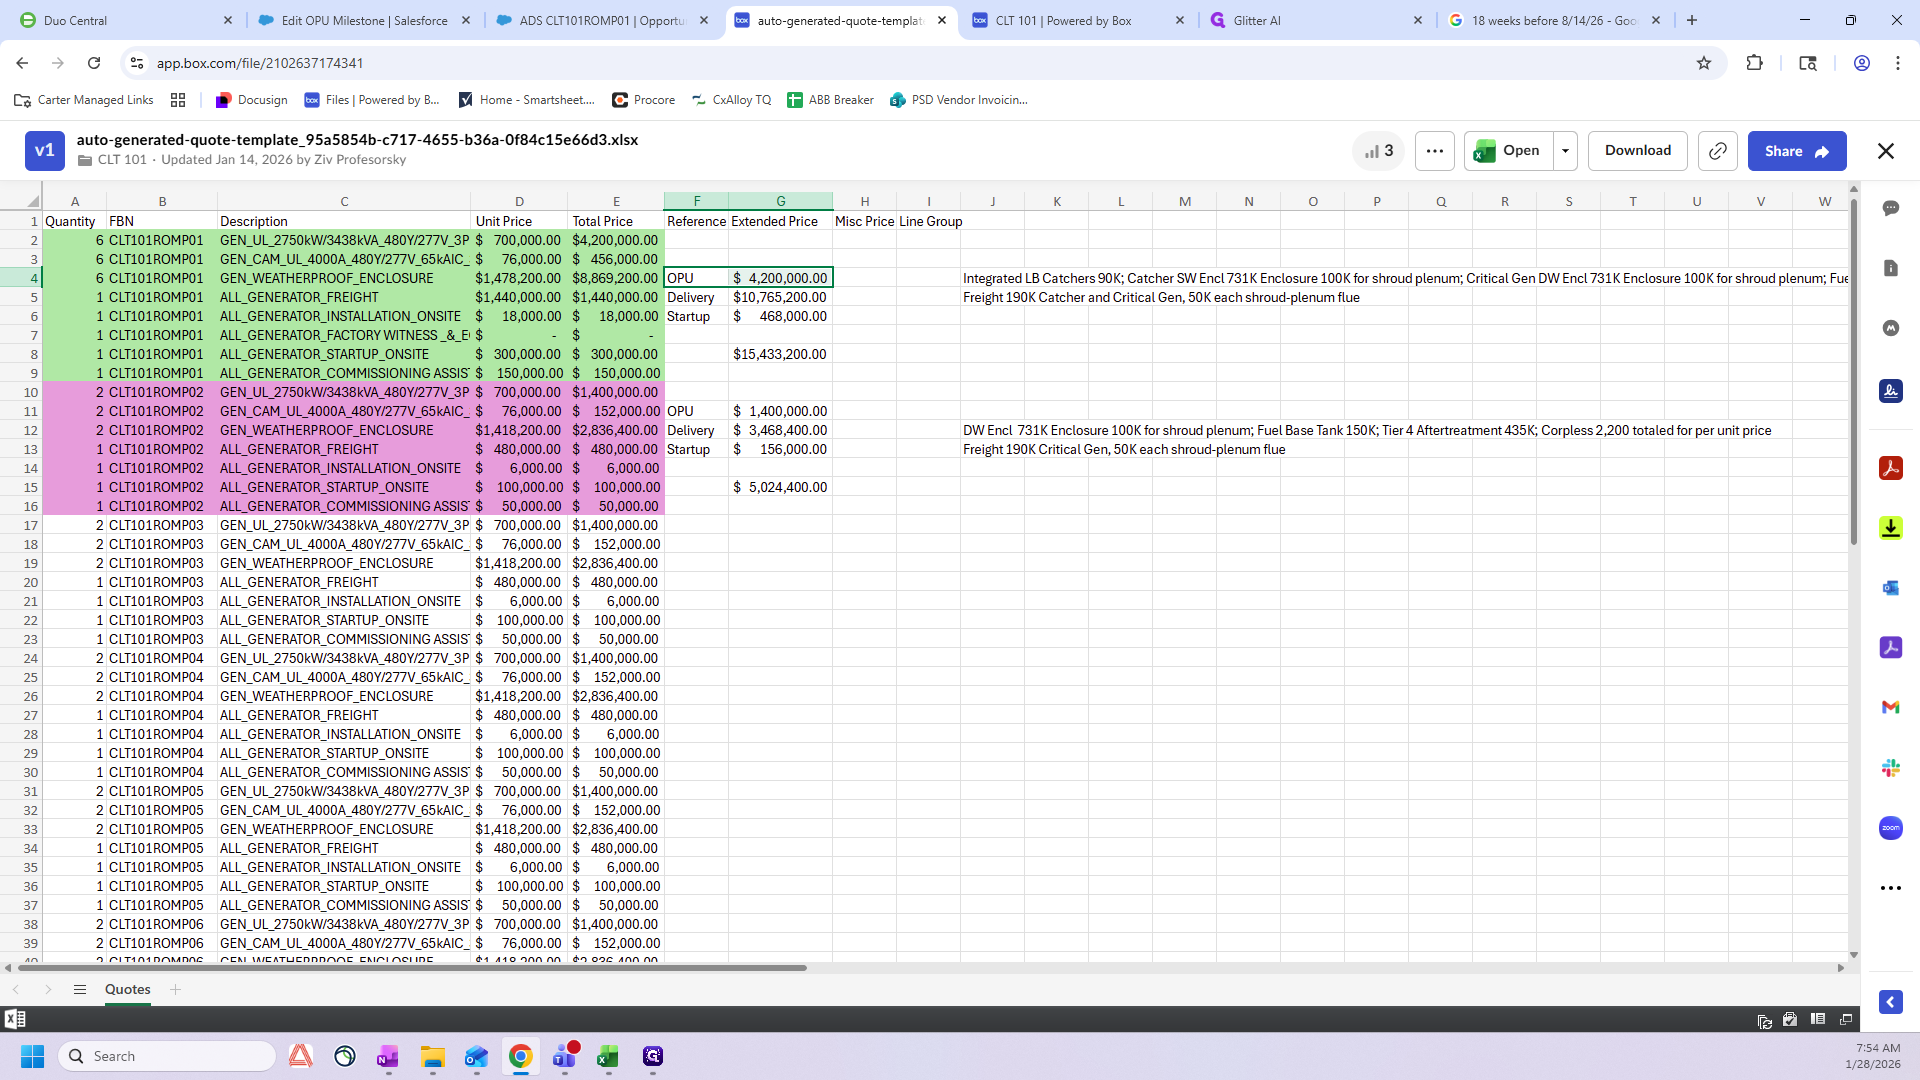
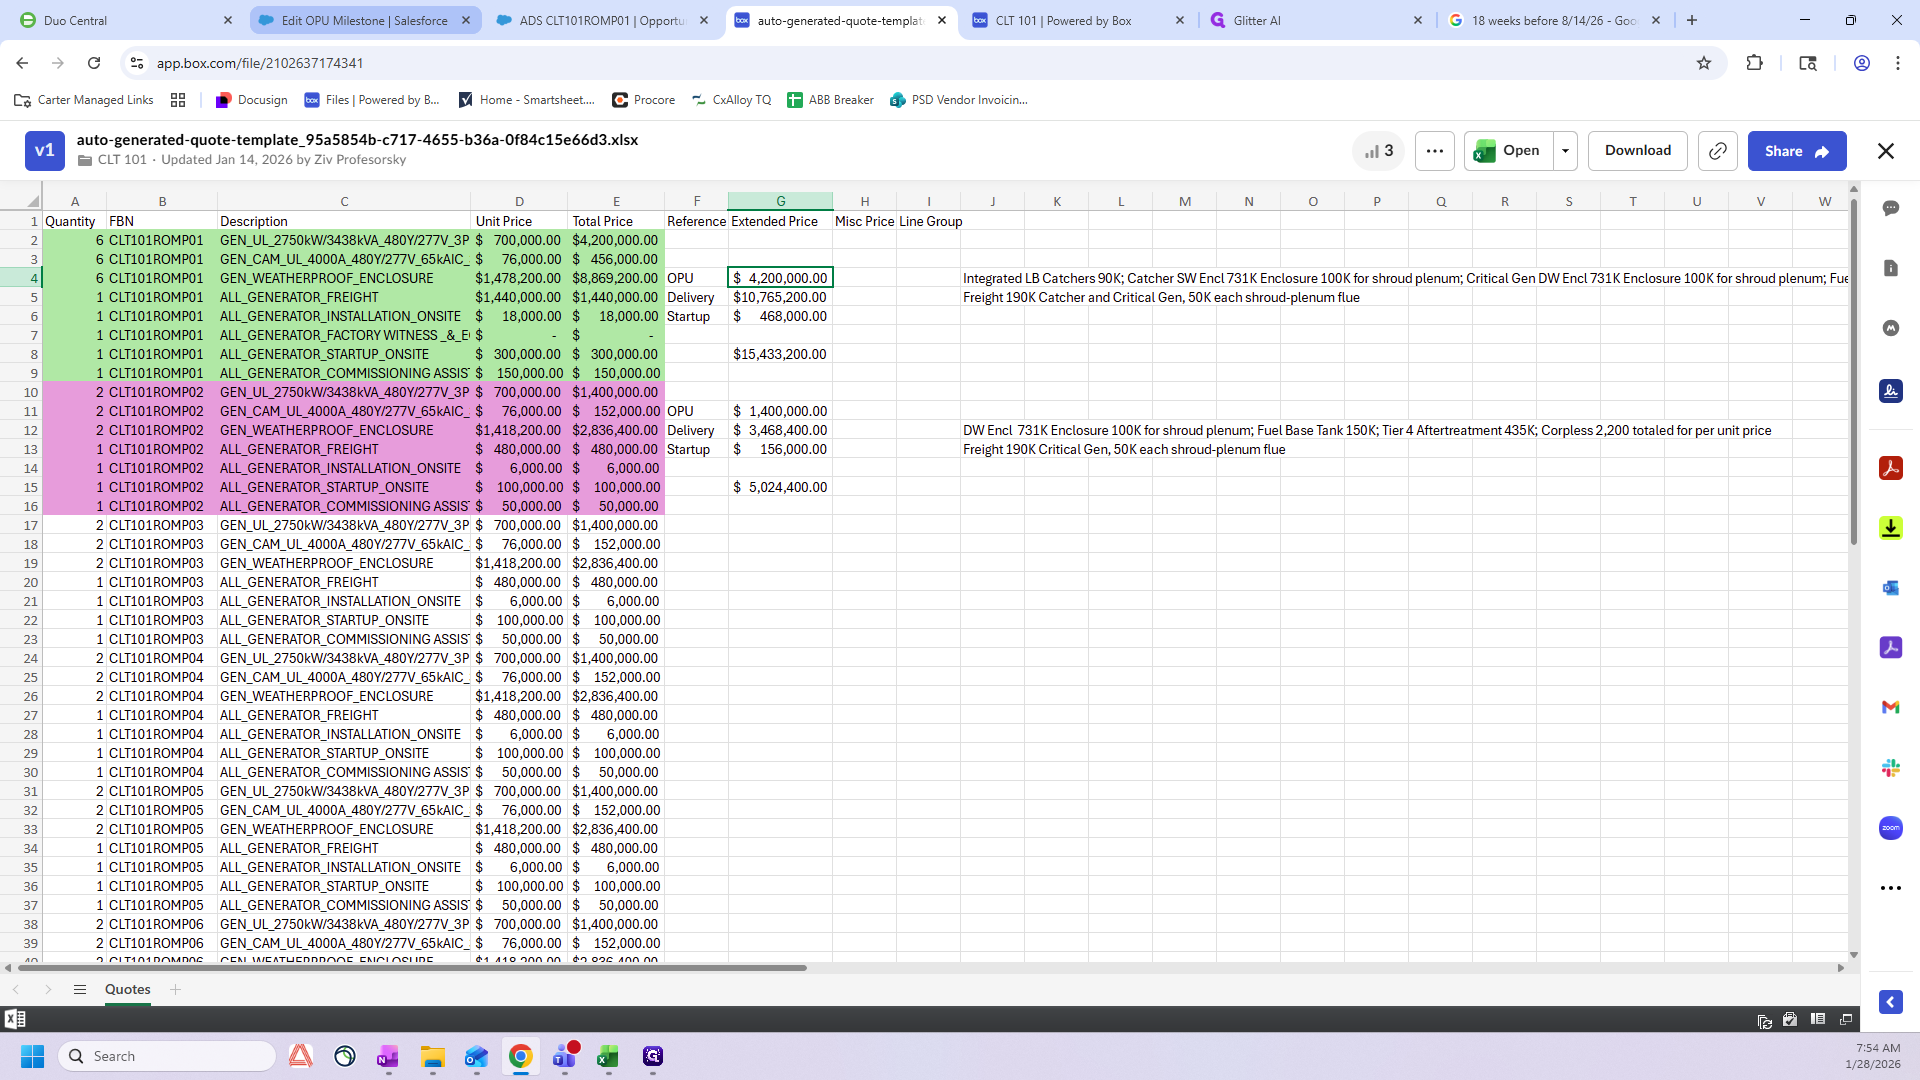
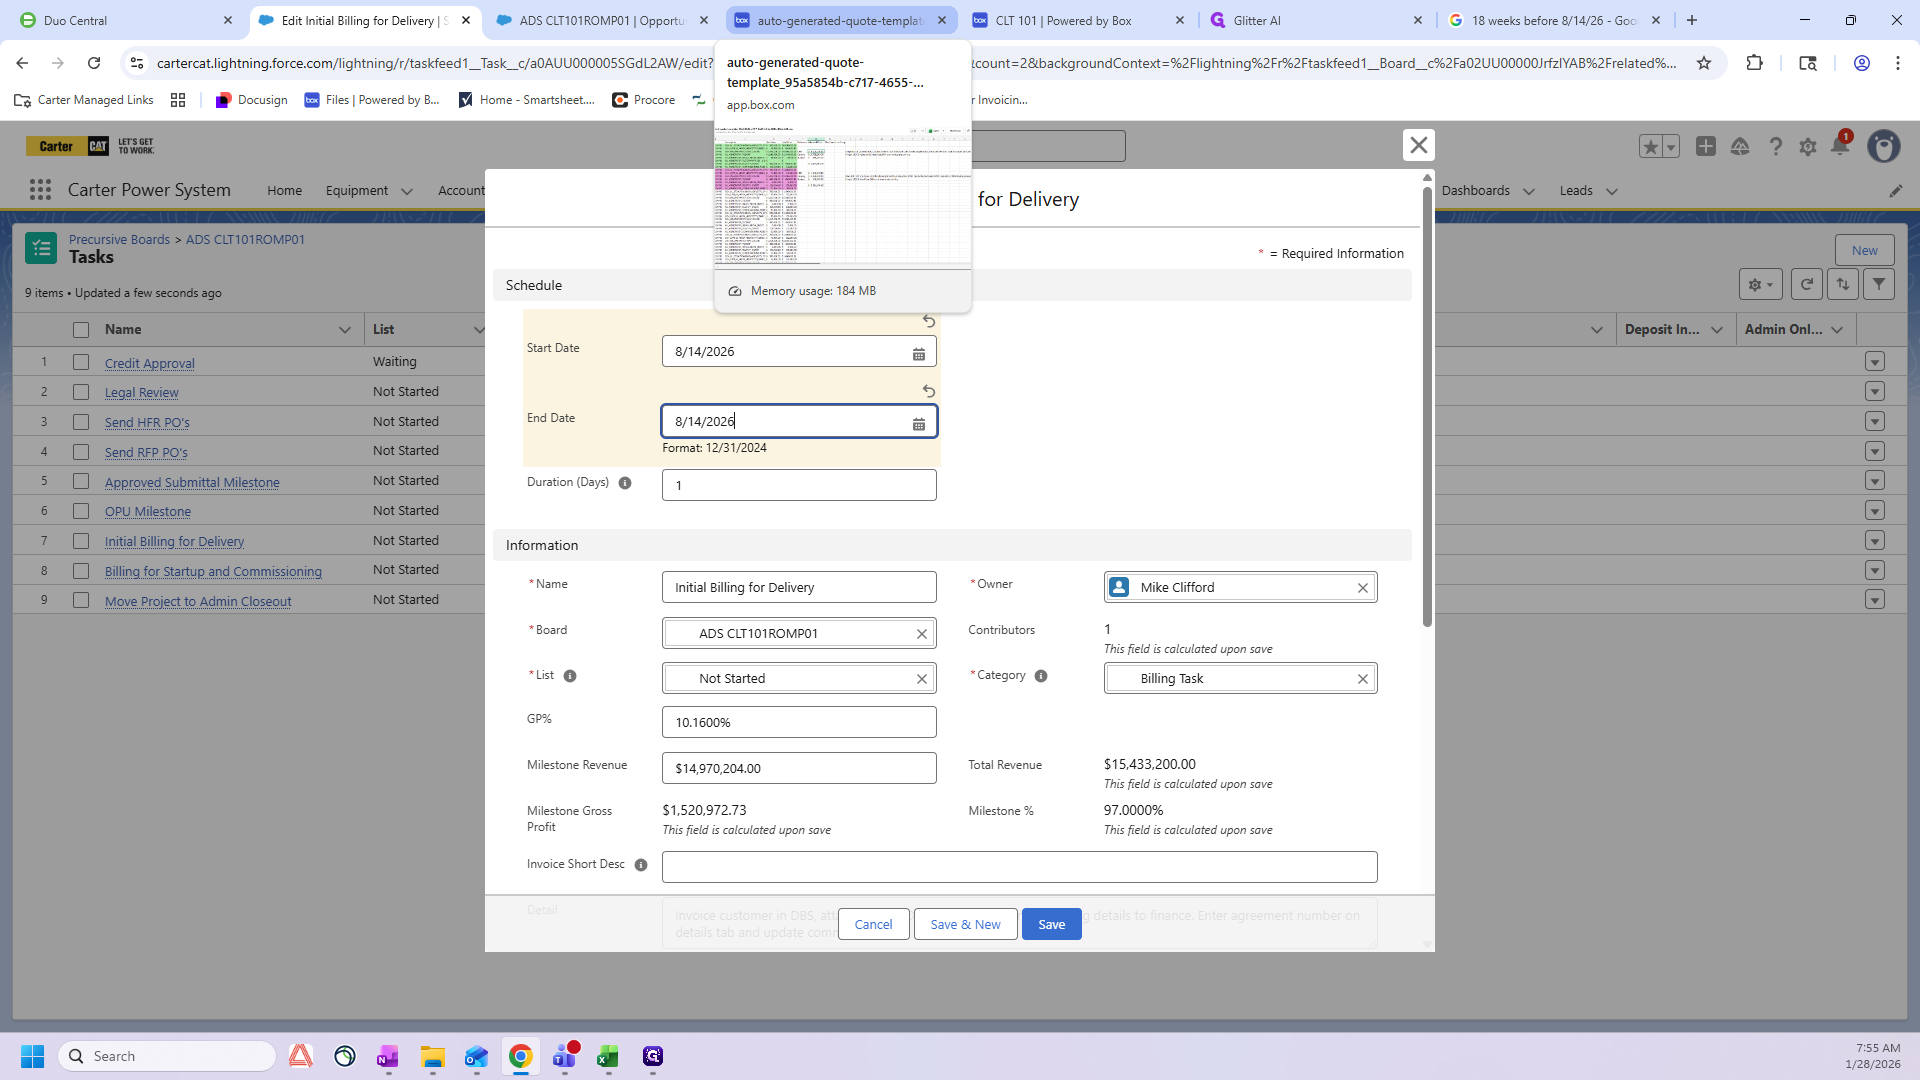
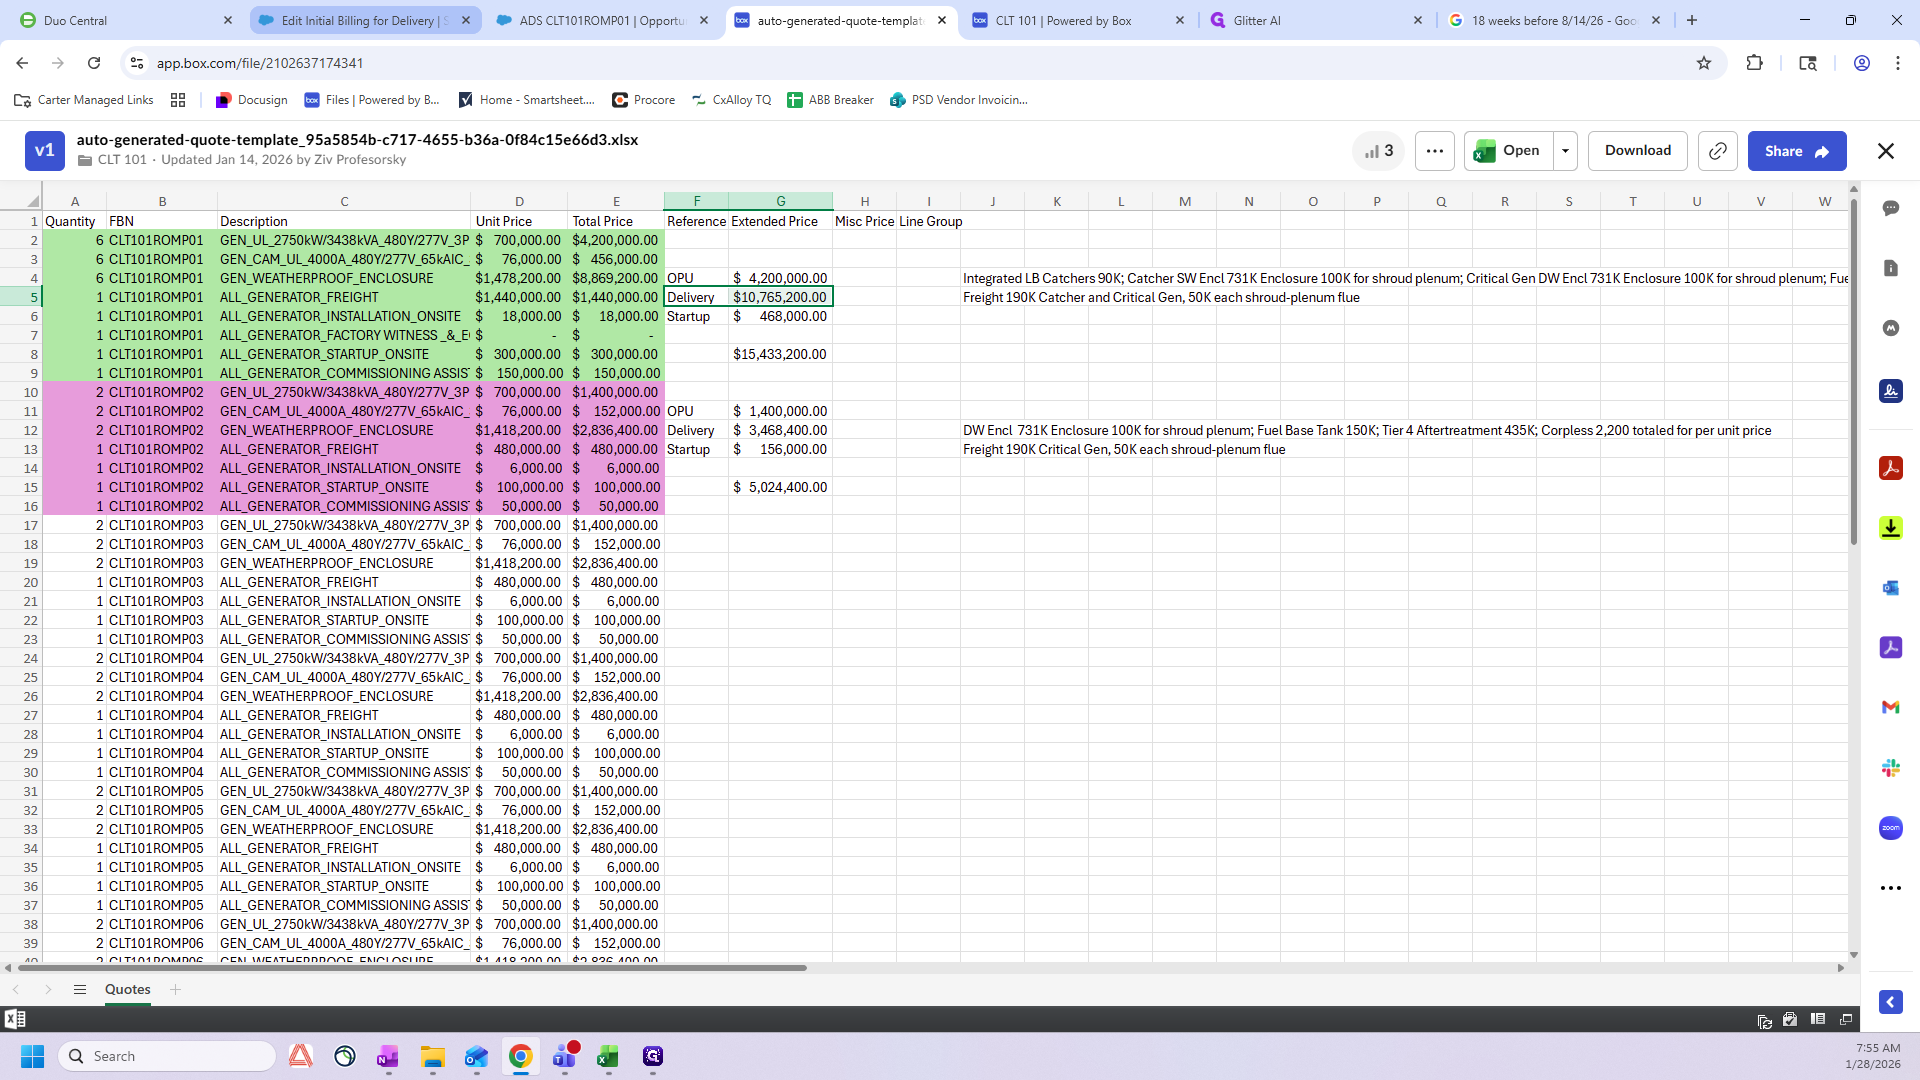
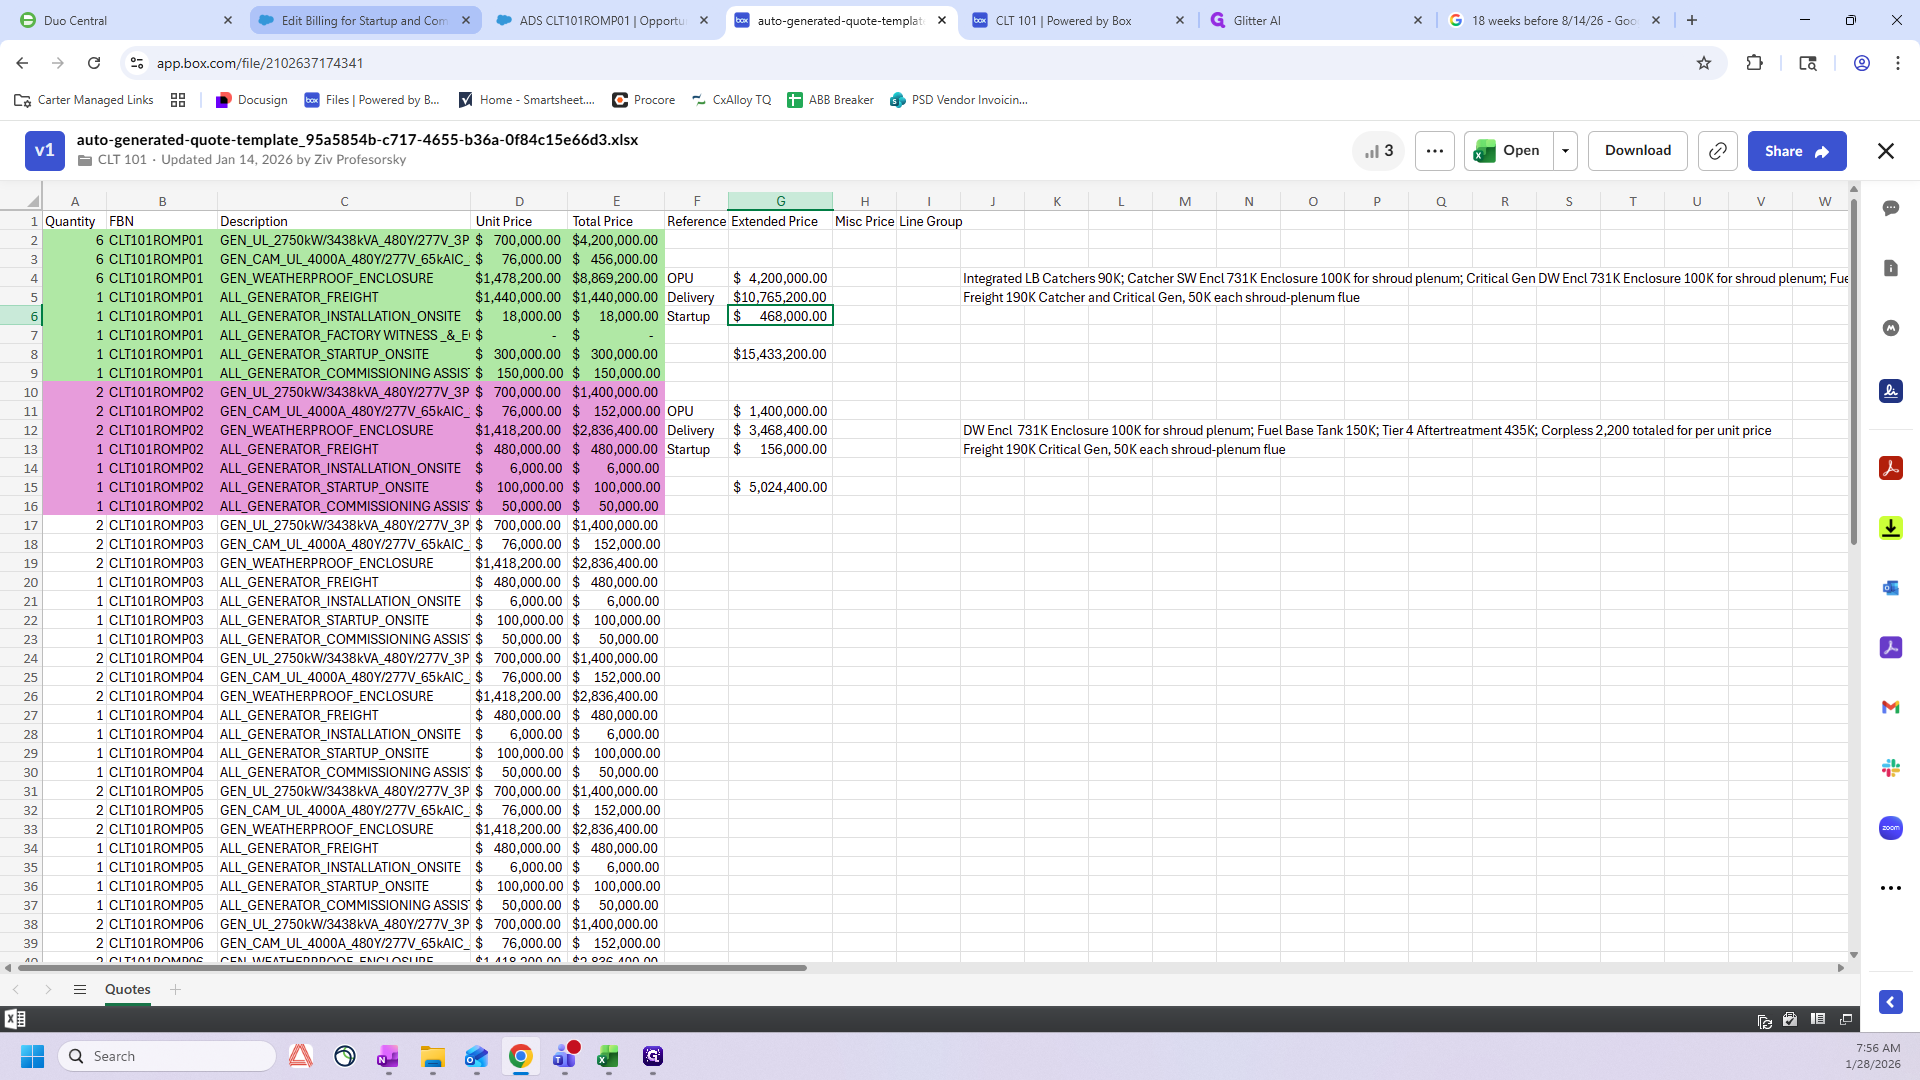
You can find the Milestone Revenue number in the autogenerated template in Box. Go to your folder in Box and open the autogenerated quote template.

Use the number for the OPU milestone revenue for whichever Romp you are working on.
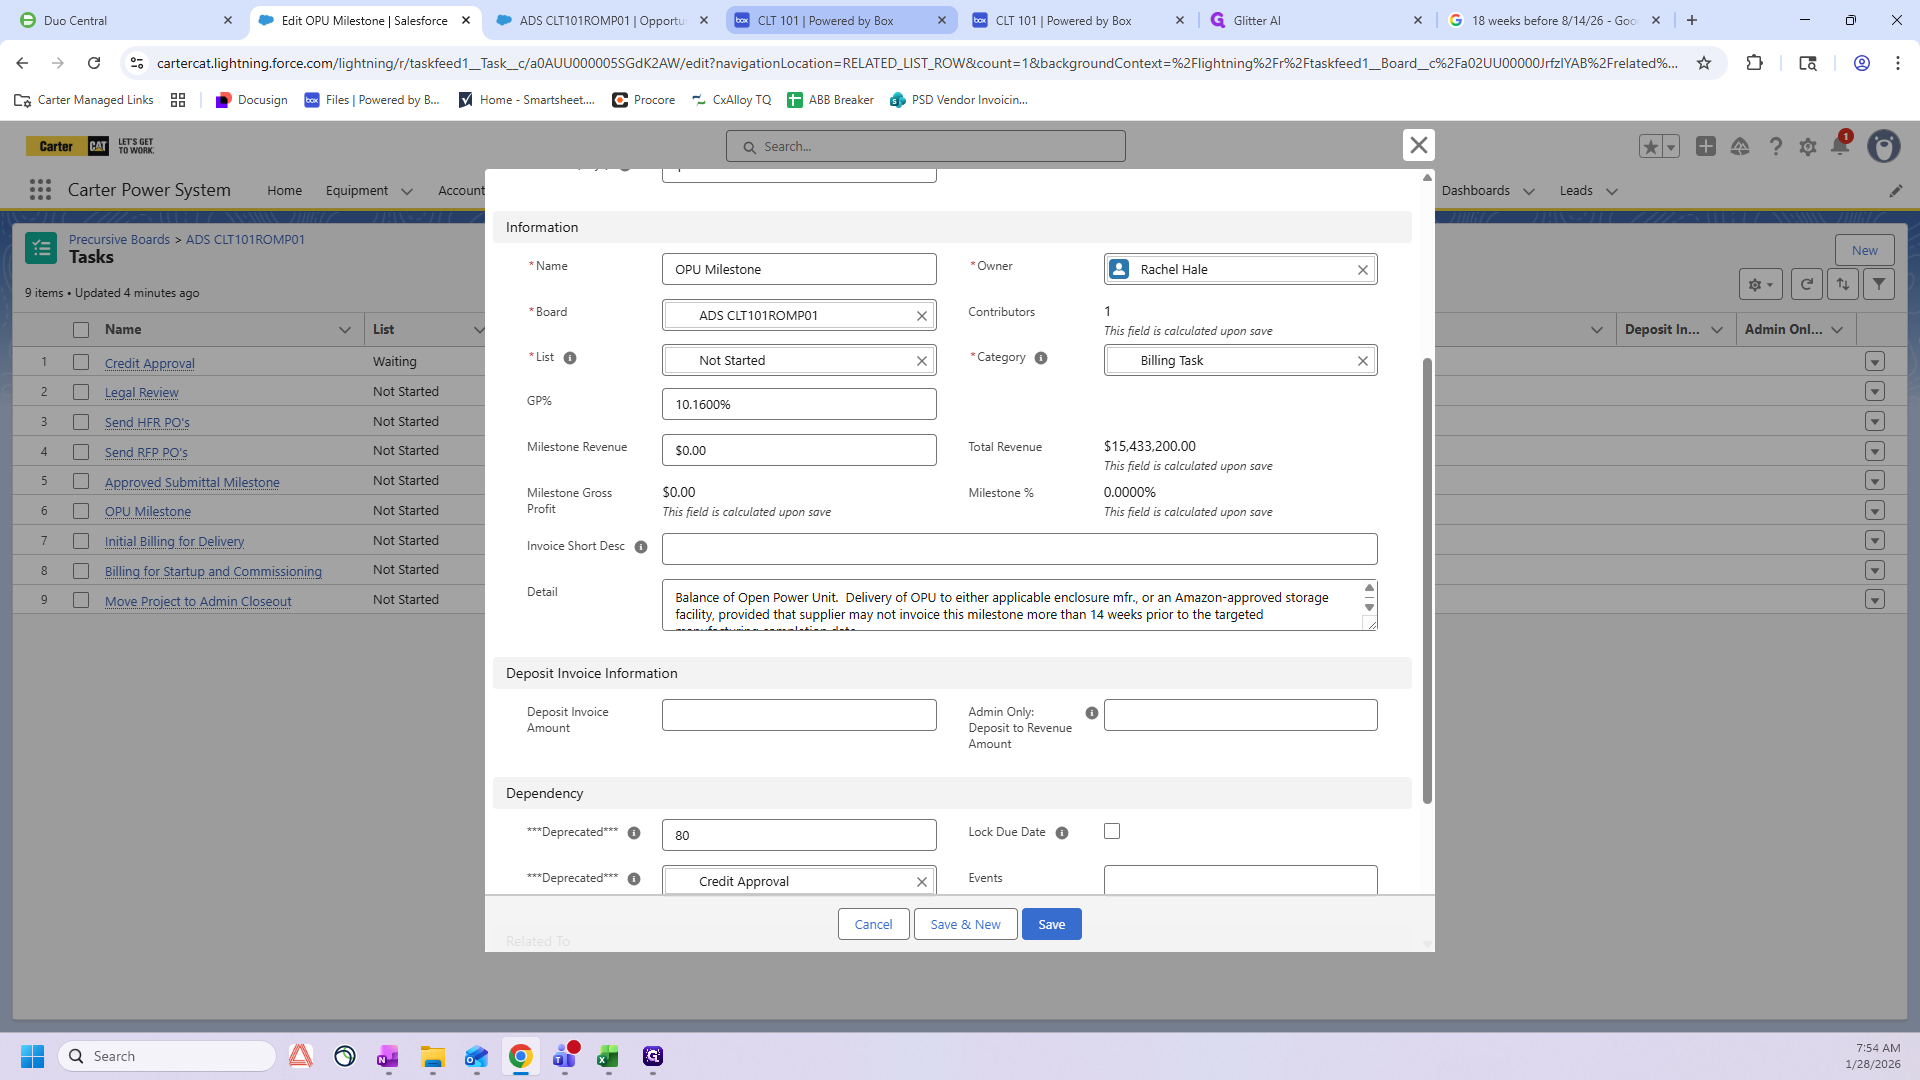
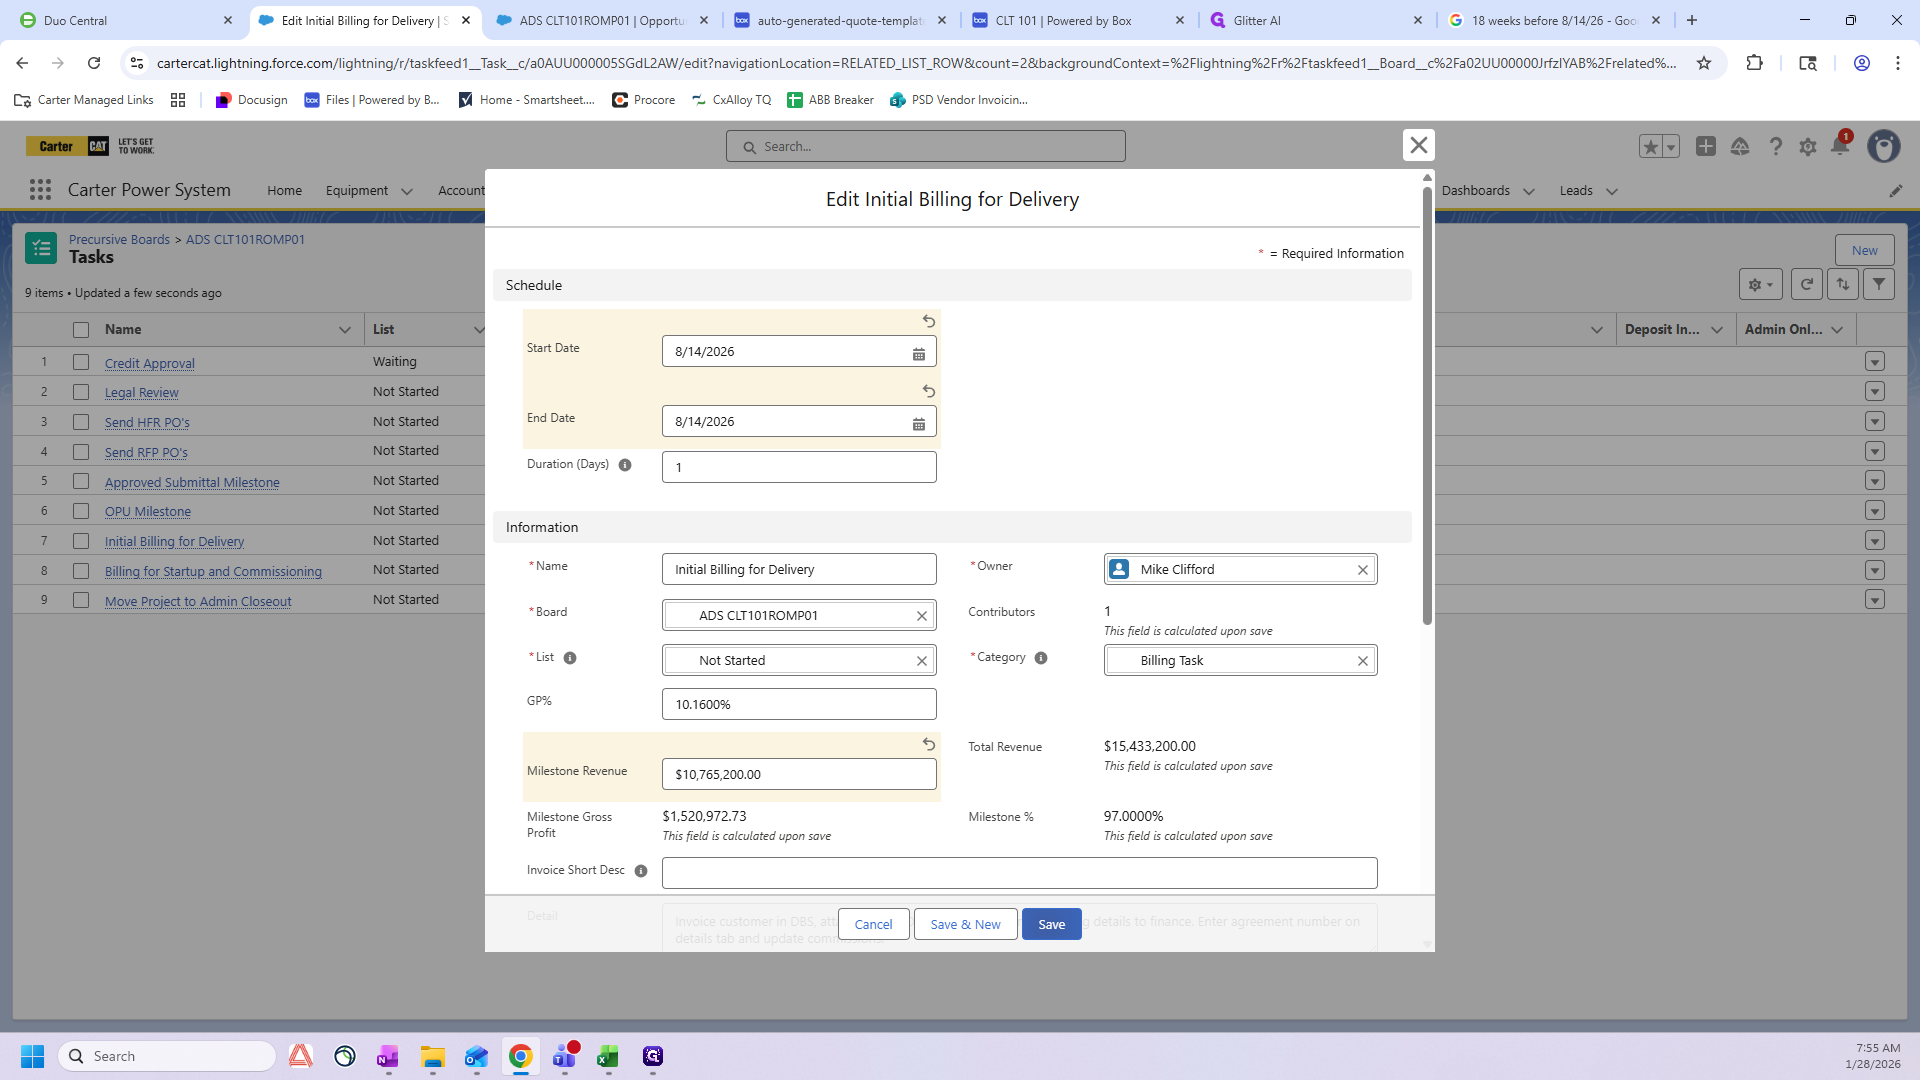
After I make these updates, the project manager does not modify the OPU Milestone again. This milestone is managed by our sales admin team from here on out. Next, I'll cover Initial Billing for Delivery.
This date will be 7 days after the "Committed Onsite Date" shown on the opportunity.
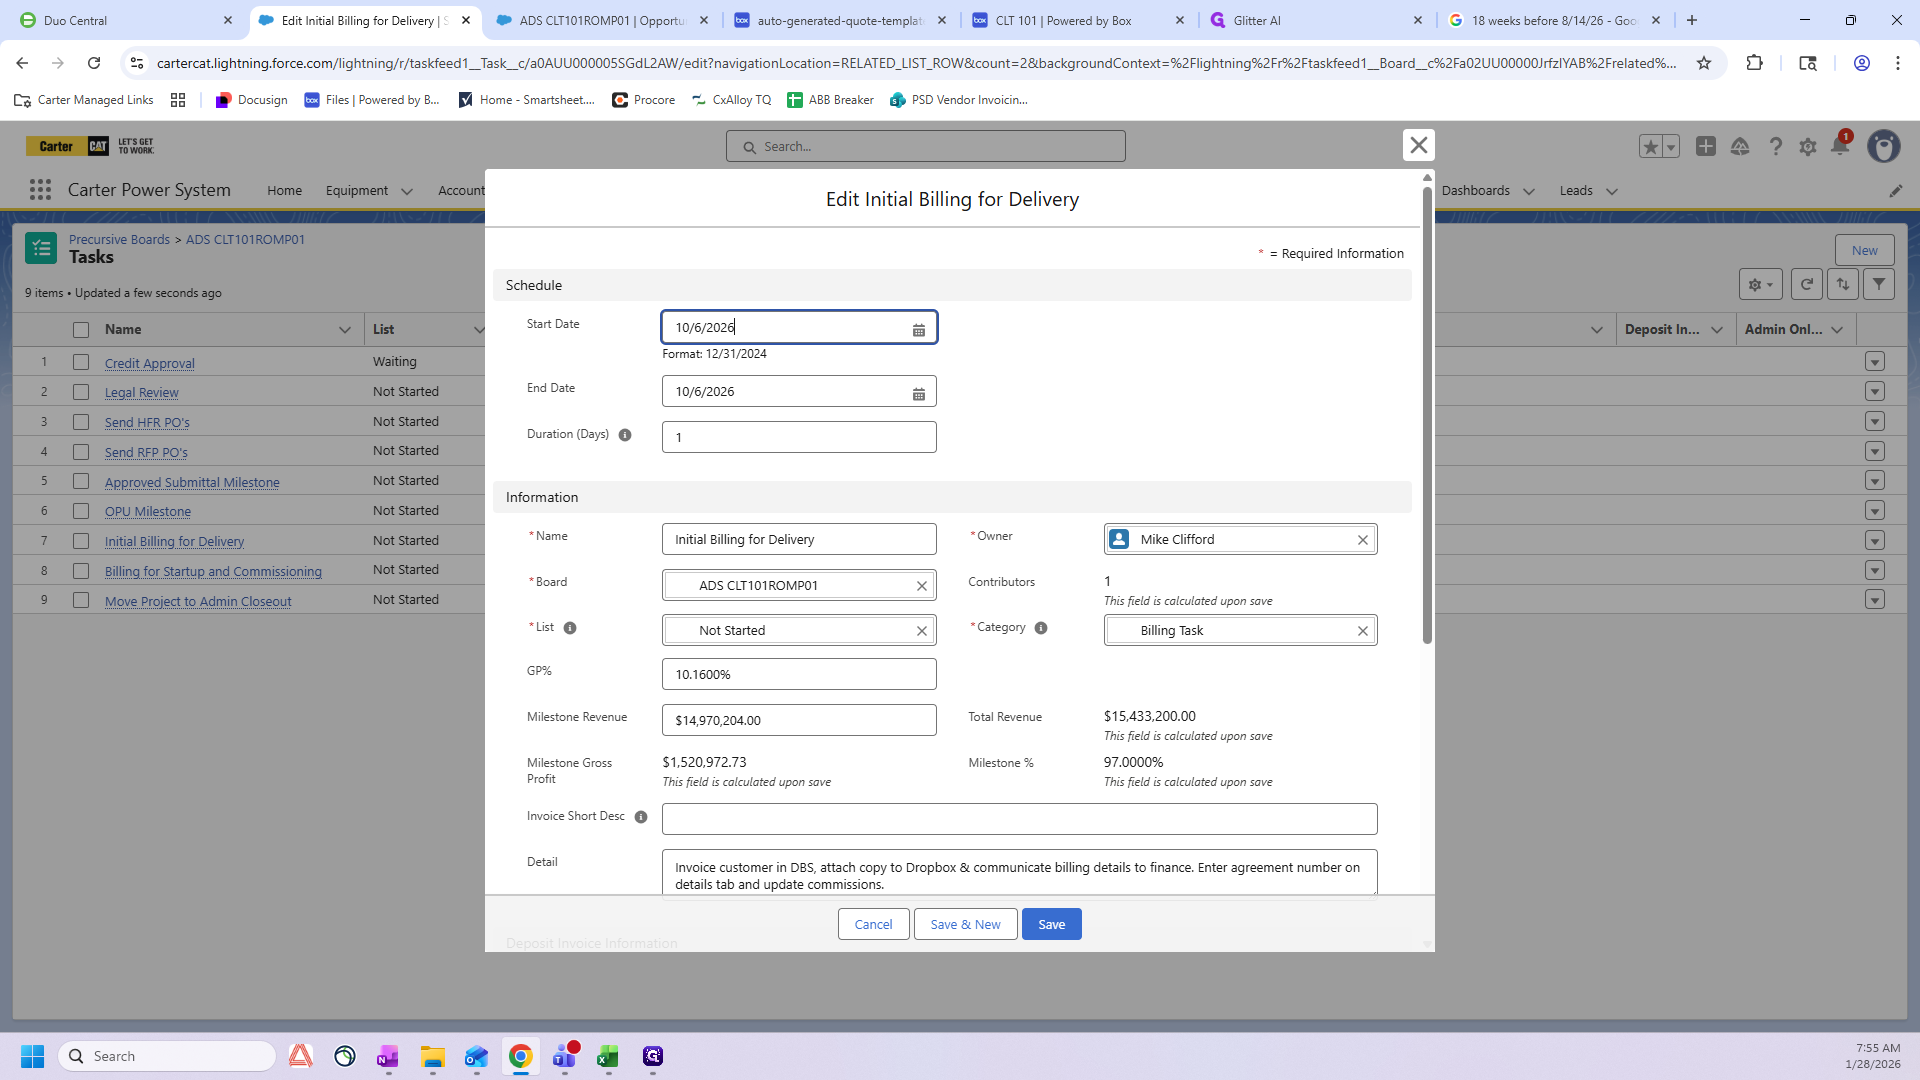
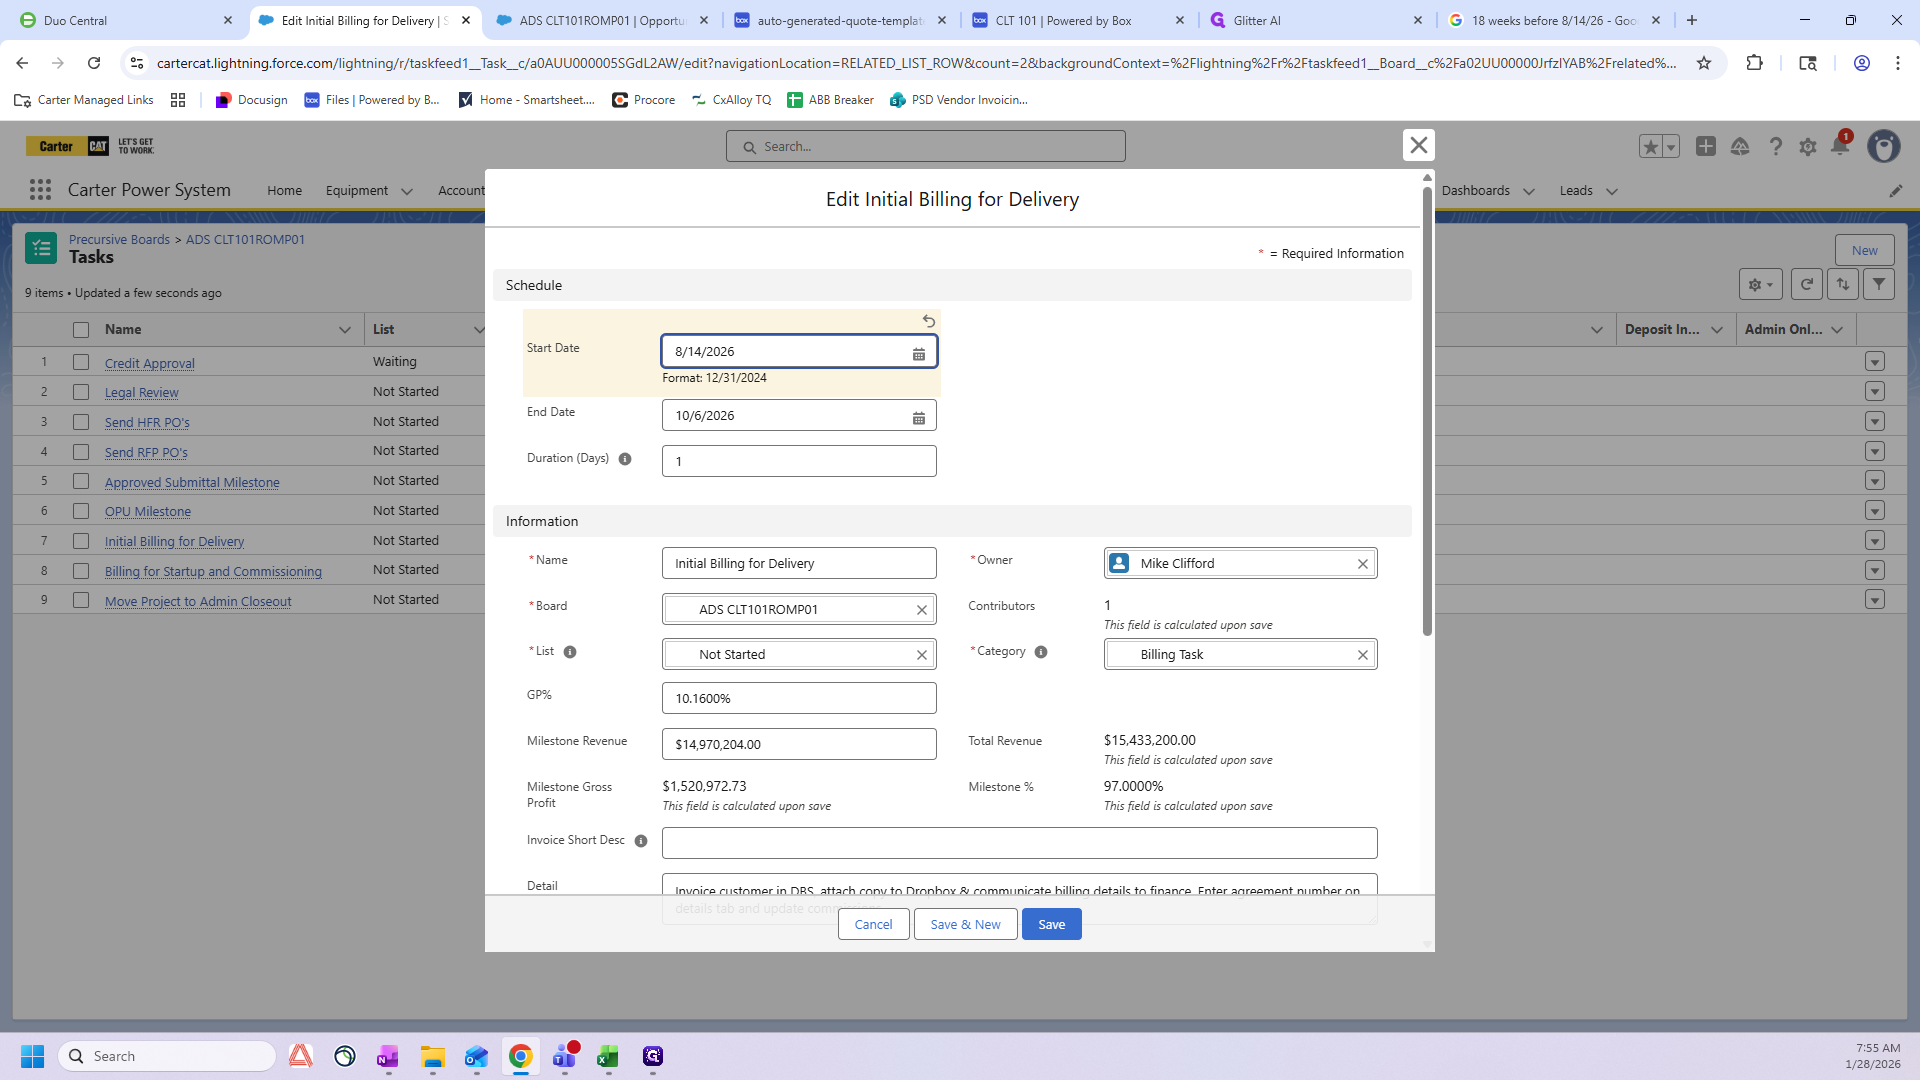
Make sure your start date and end date are the same. Then, return to the autogenerated quote to find the correct milestone revenue.
Find the appropriate revenue on the delivery line item for the ROMP you are working on.
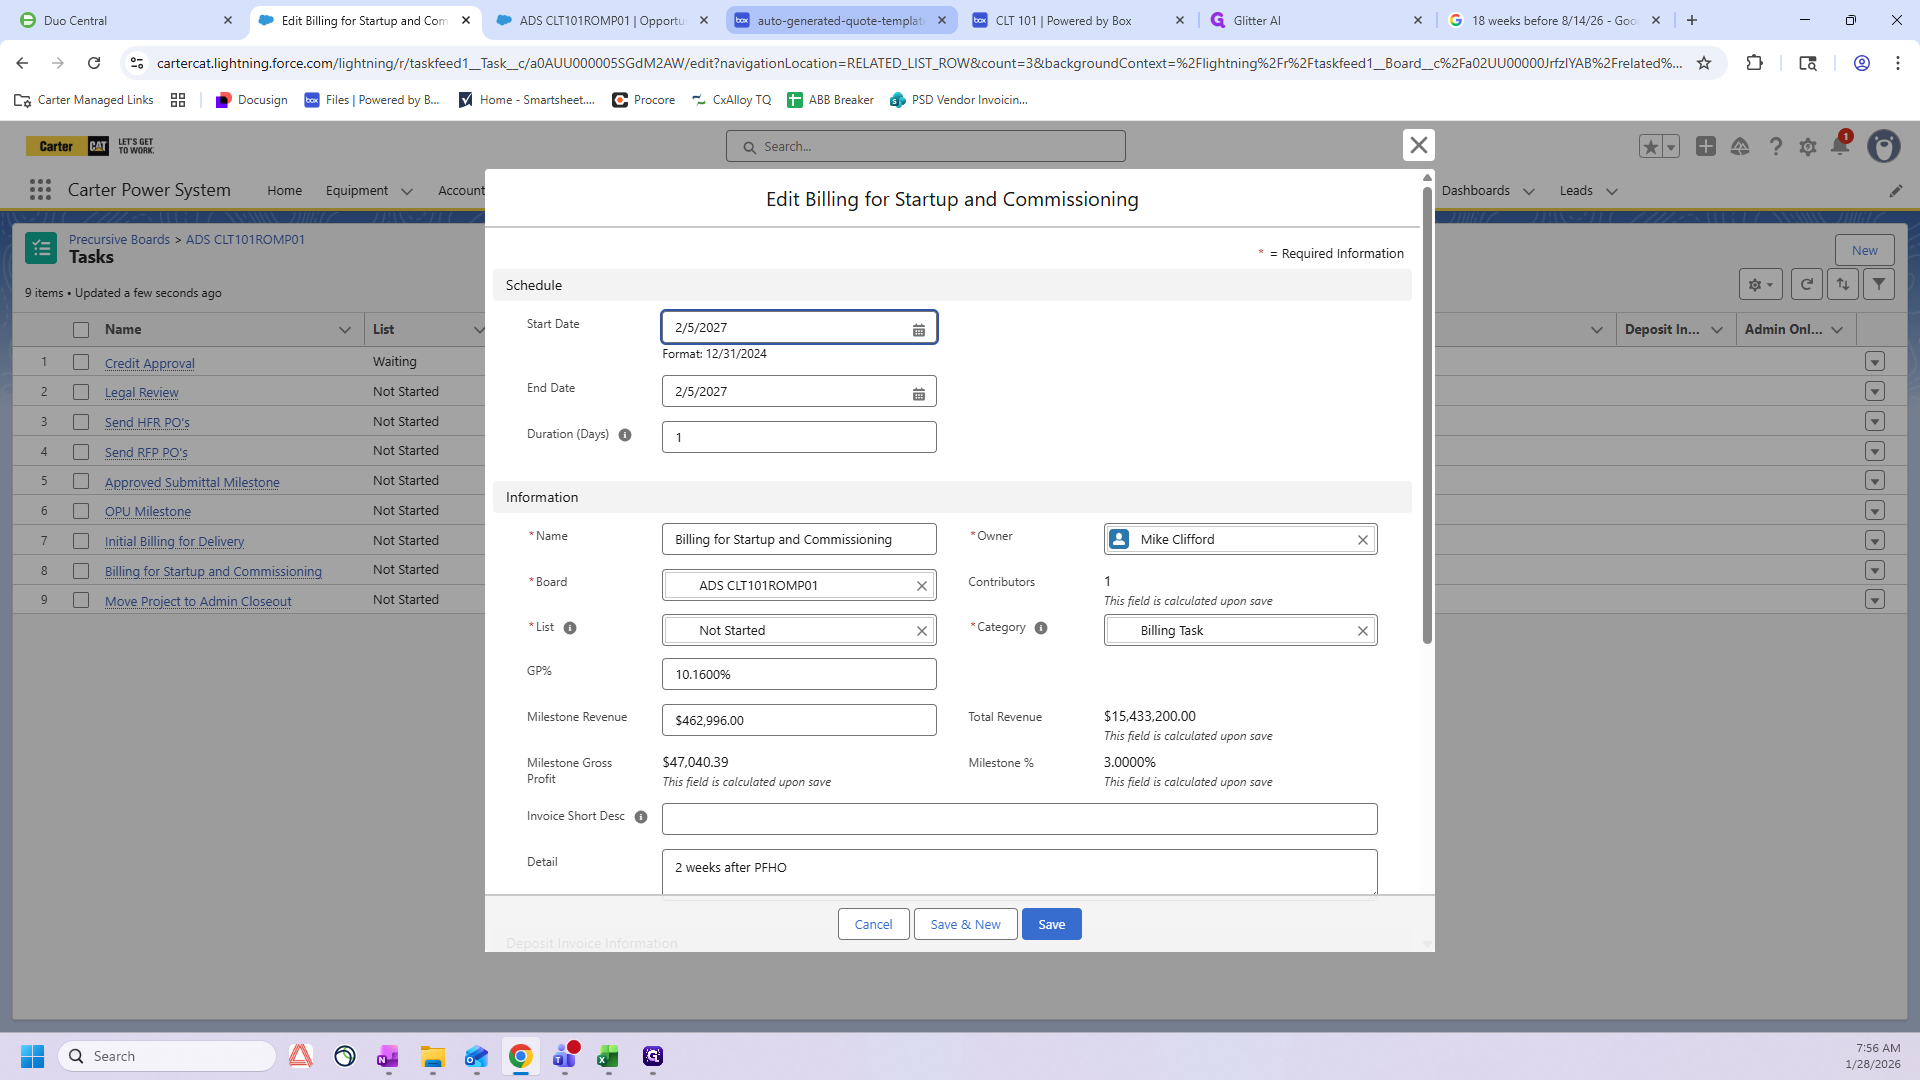
Next, I'll cover Billing for Startup and Commissioning.
The commissioning milestone date fills in automatically, so you don't need to change it.
You only need to focus on editing the Milestone Revenue for the Startup and Commissioning task. This amount will appear on the autogenerated quote as the startup number, in this case, $468,000.
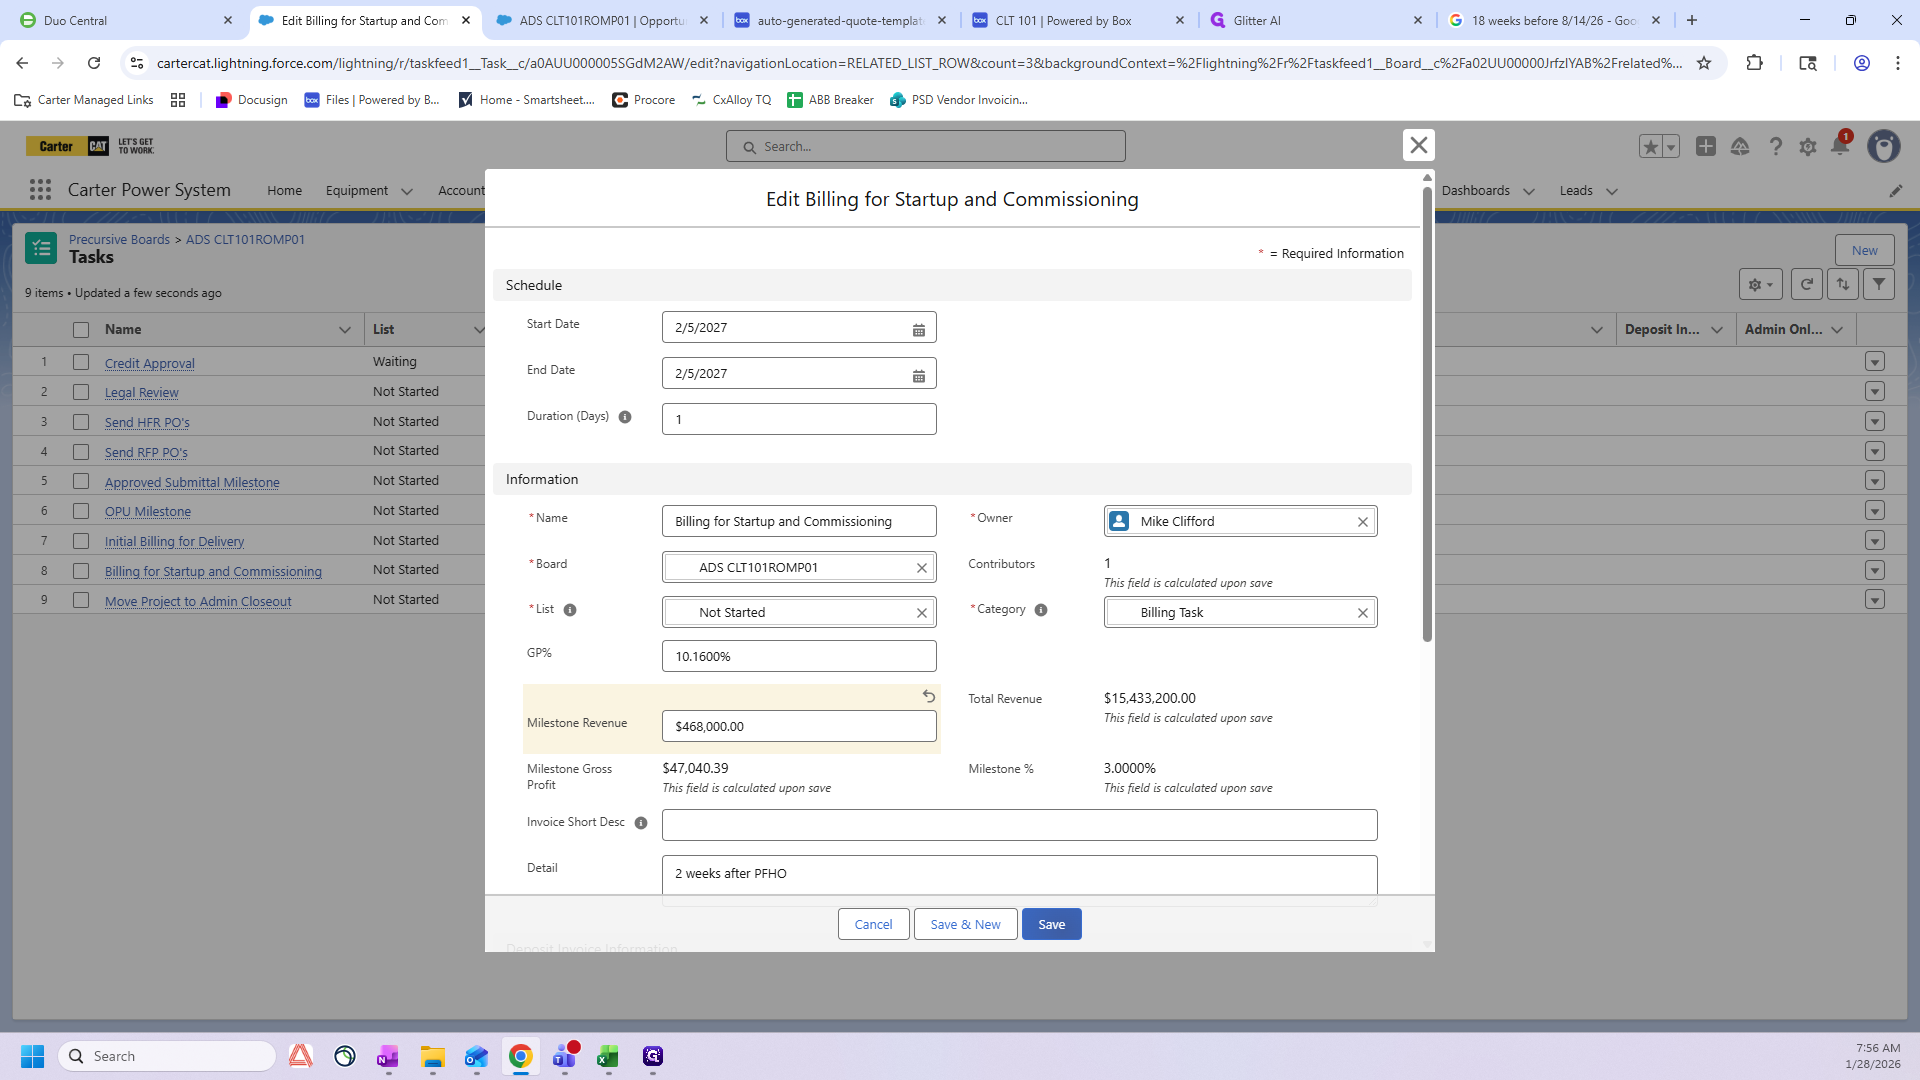
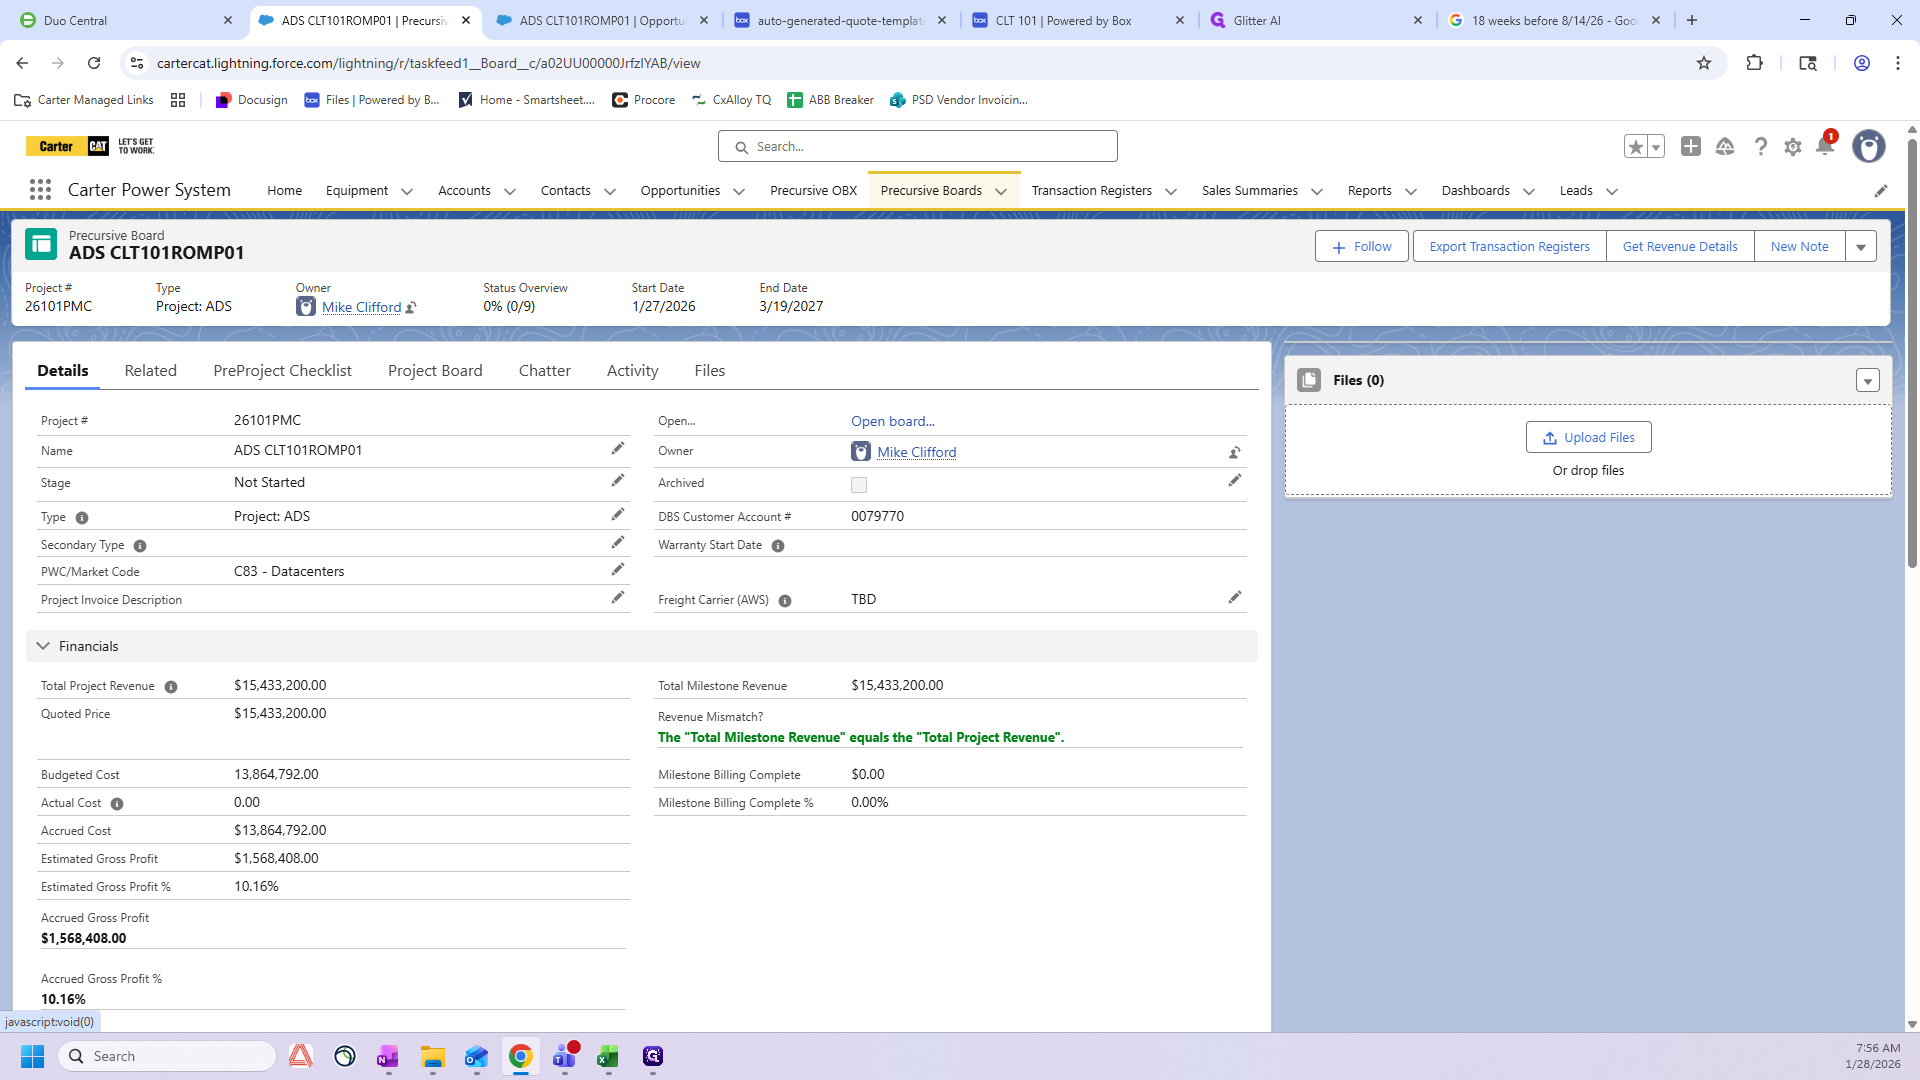
You have updated the dates and the Milestone Revenue. Finally, when you return to the project and open the Details tab, ensure the revenue mismatch indicator is green.
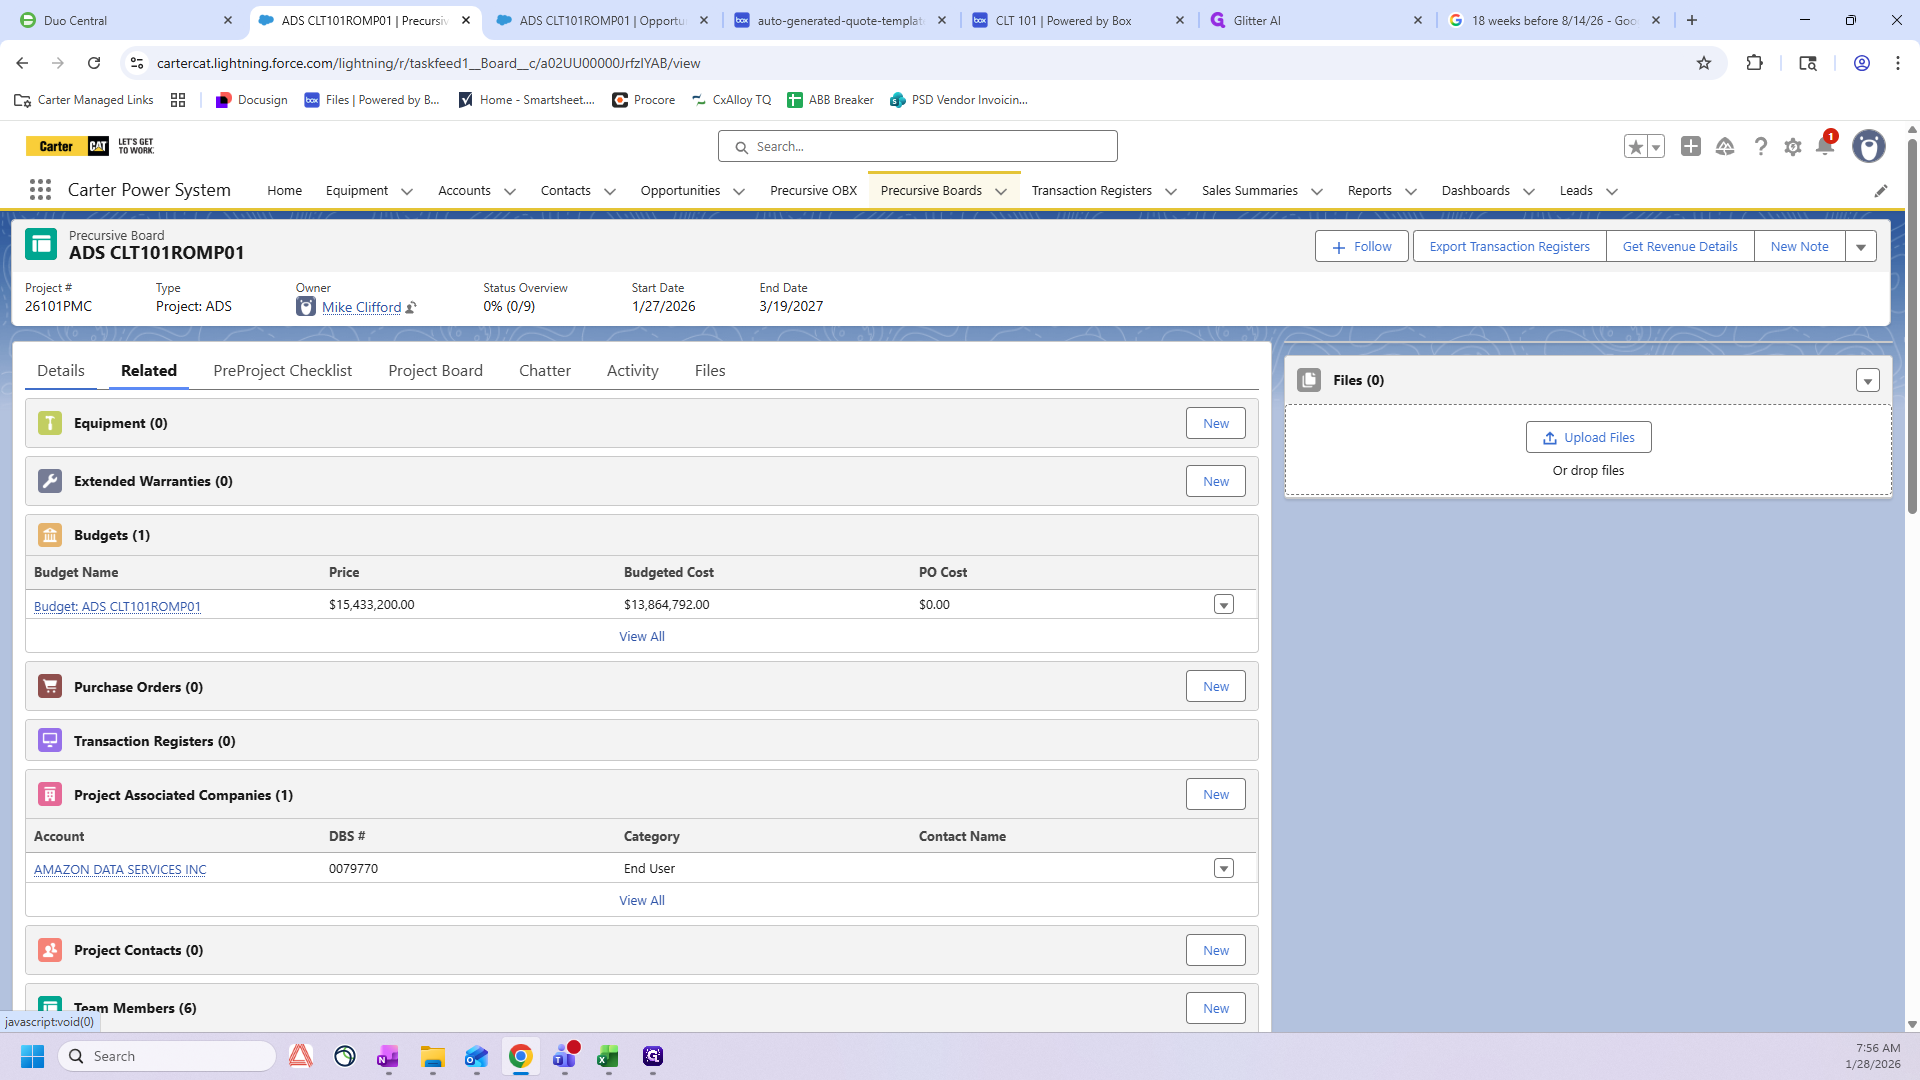
If "Revenue Mismatch?" is red, something is wrong and you need to double-check your numbers. It should say, "The total missed milestone revenue equals the total project revenue." Make sure this is green.