Icon

How to Upload a Specialist's Report to a Patient Account

Learn the step-by-step process of uploading a specialist's report to a patient account, including file naming, uploading, and notifying the doctor for review.

By Joey Grosse

In this guide, we'll learn how to upload a specialist's report to a patient's account using Curve. This process involves downloading the report, naming it appropriately, and uploading it to the patient's file. We will also cover how to add a templated note with details from the report and alert the doctor for review. This ensures that all relevant information is accurately recorded and easily accessible for future reference.

Let's get started

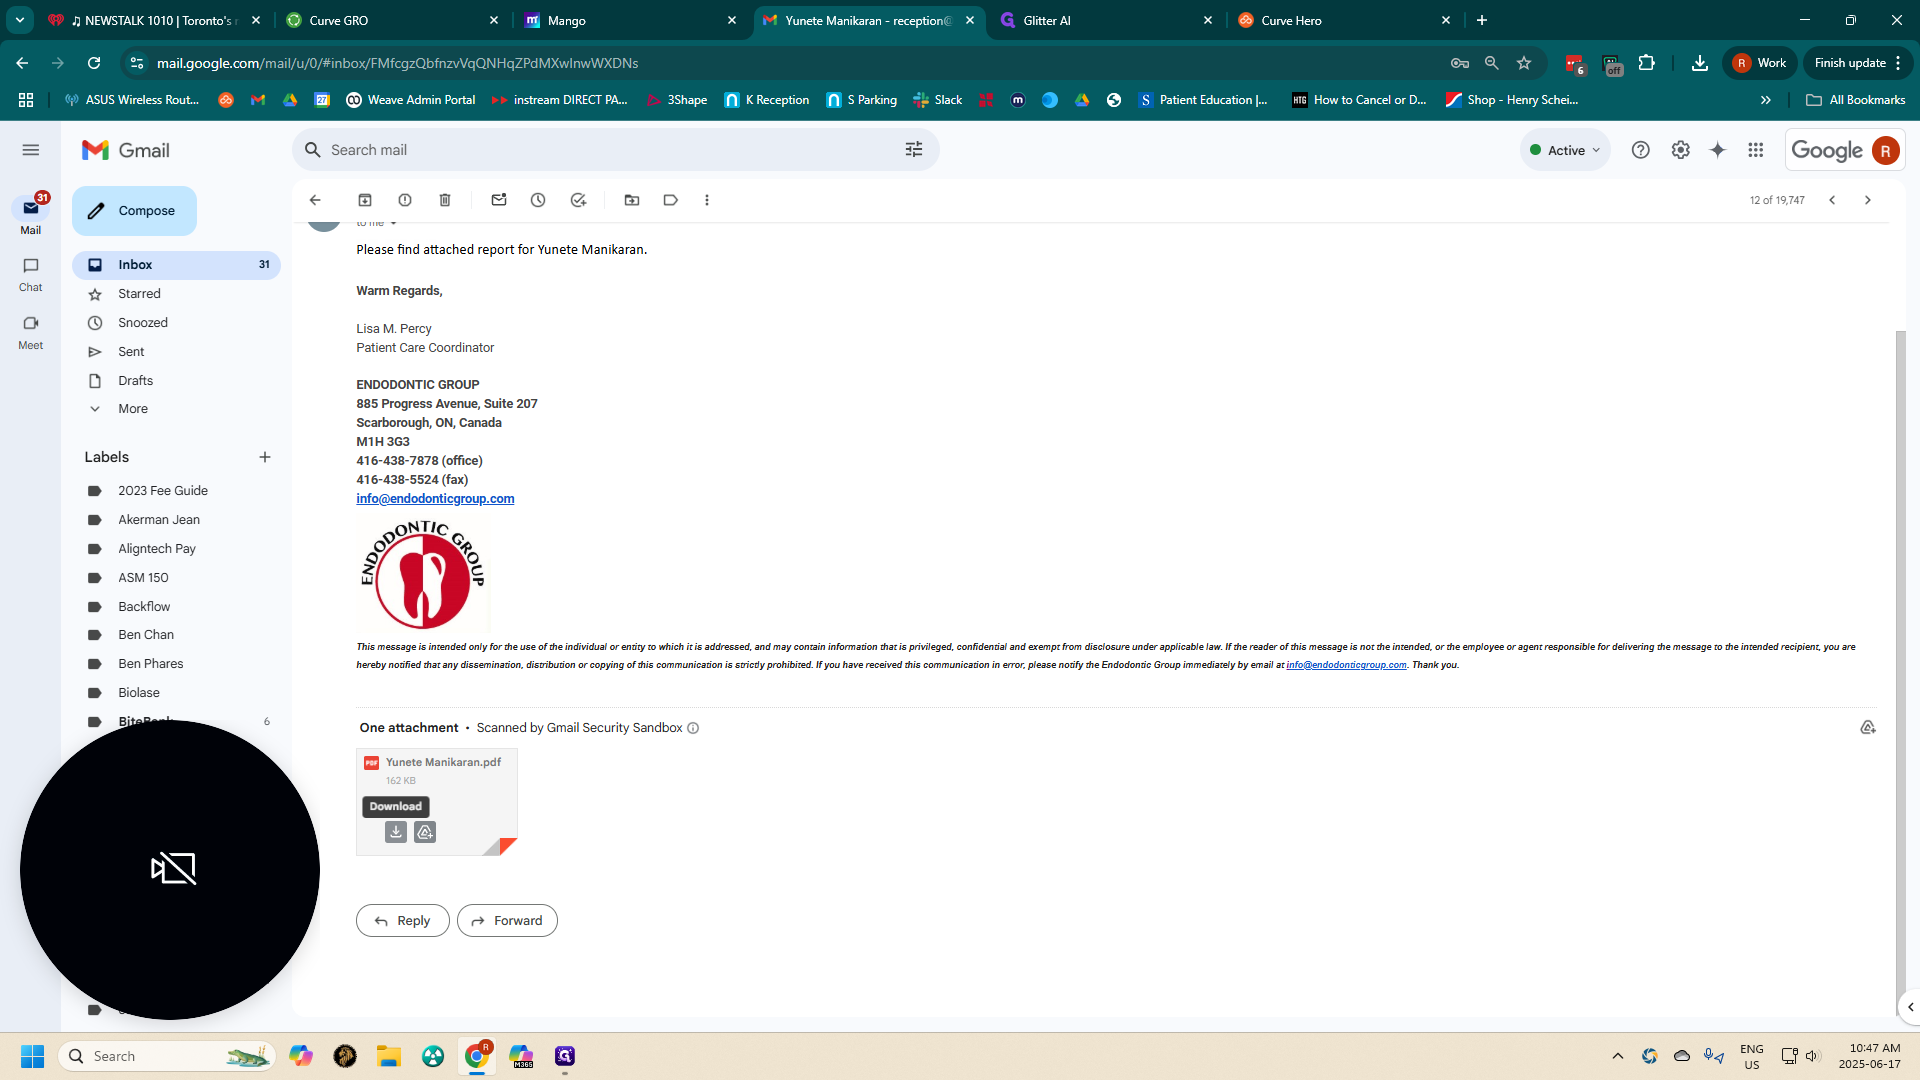
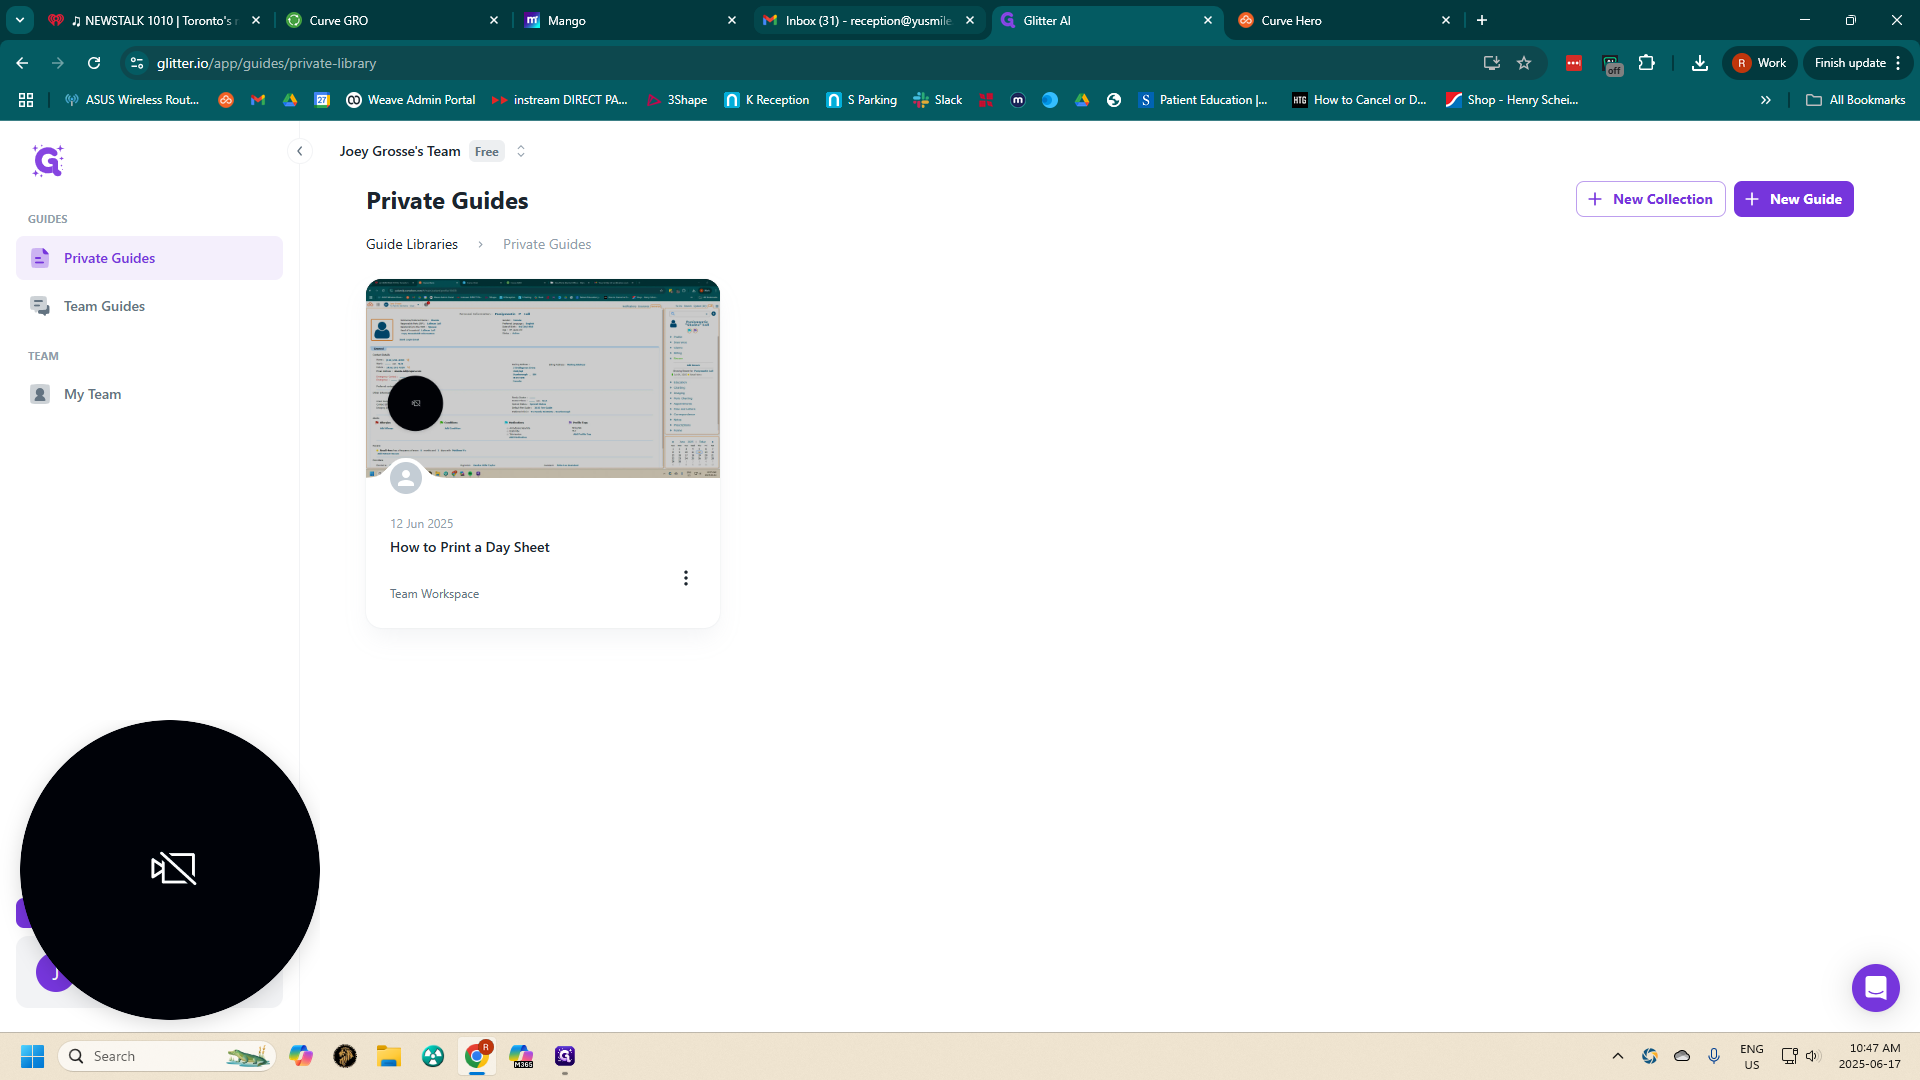
Uploading a specialist's report to the patient account. Select the report emailed to our office by the specialist.
1
Click here
Step #1: Click here
2
Click on "reception @ yusmile"
Step #2: Click on "reception @ yusmile"
3
Click on "attached report for Yunete Manikaran"
Step #3: Click on "attached report for Yunete Manikaran"

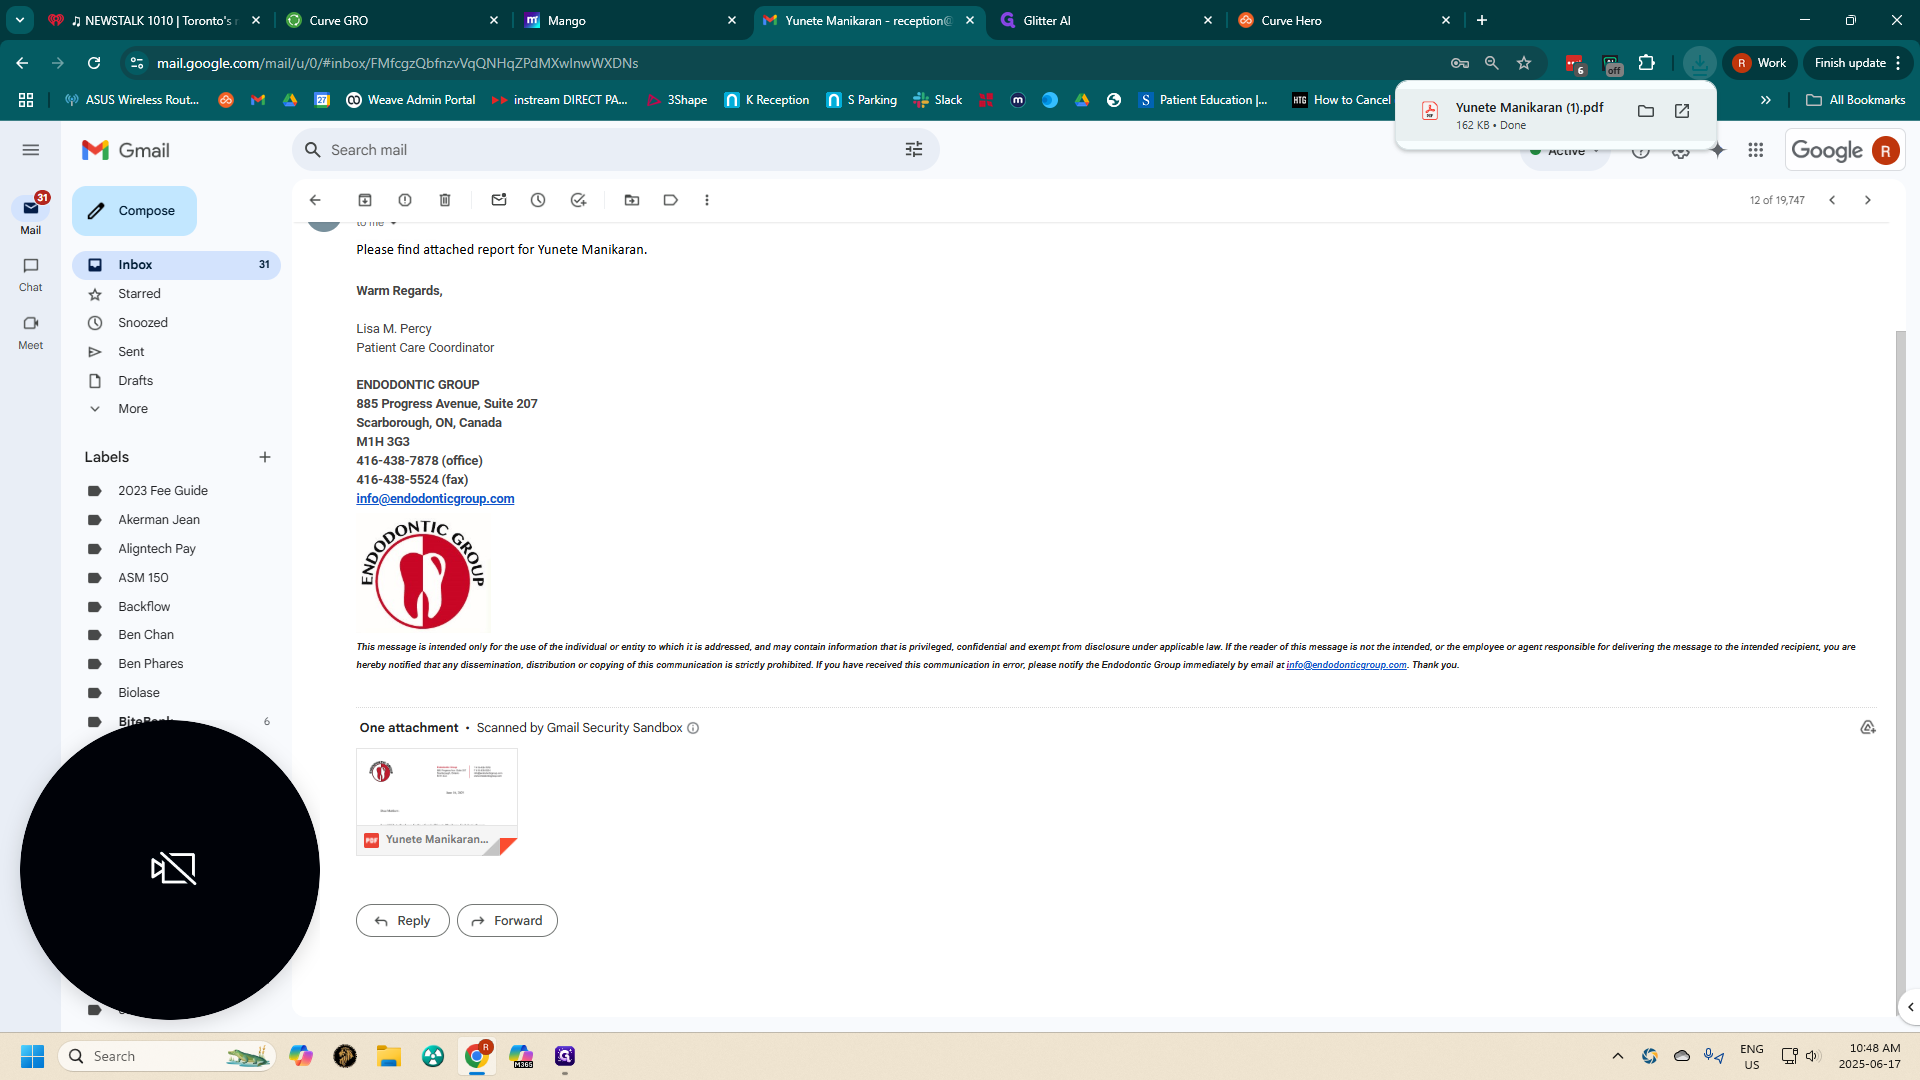
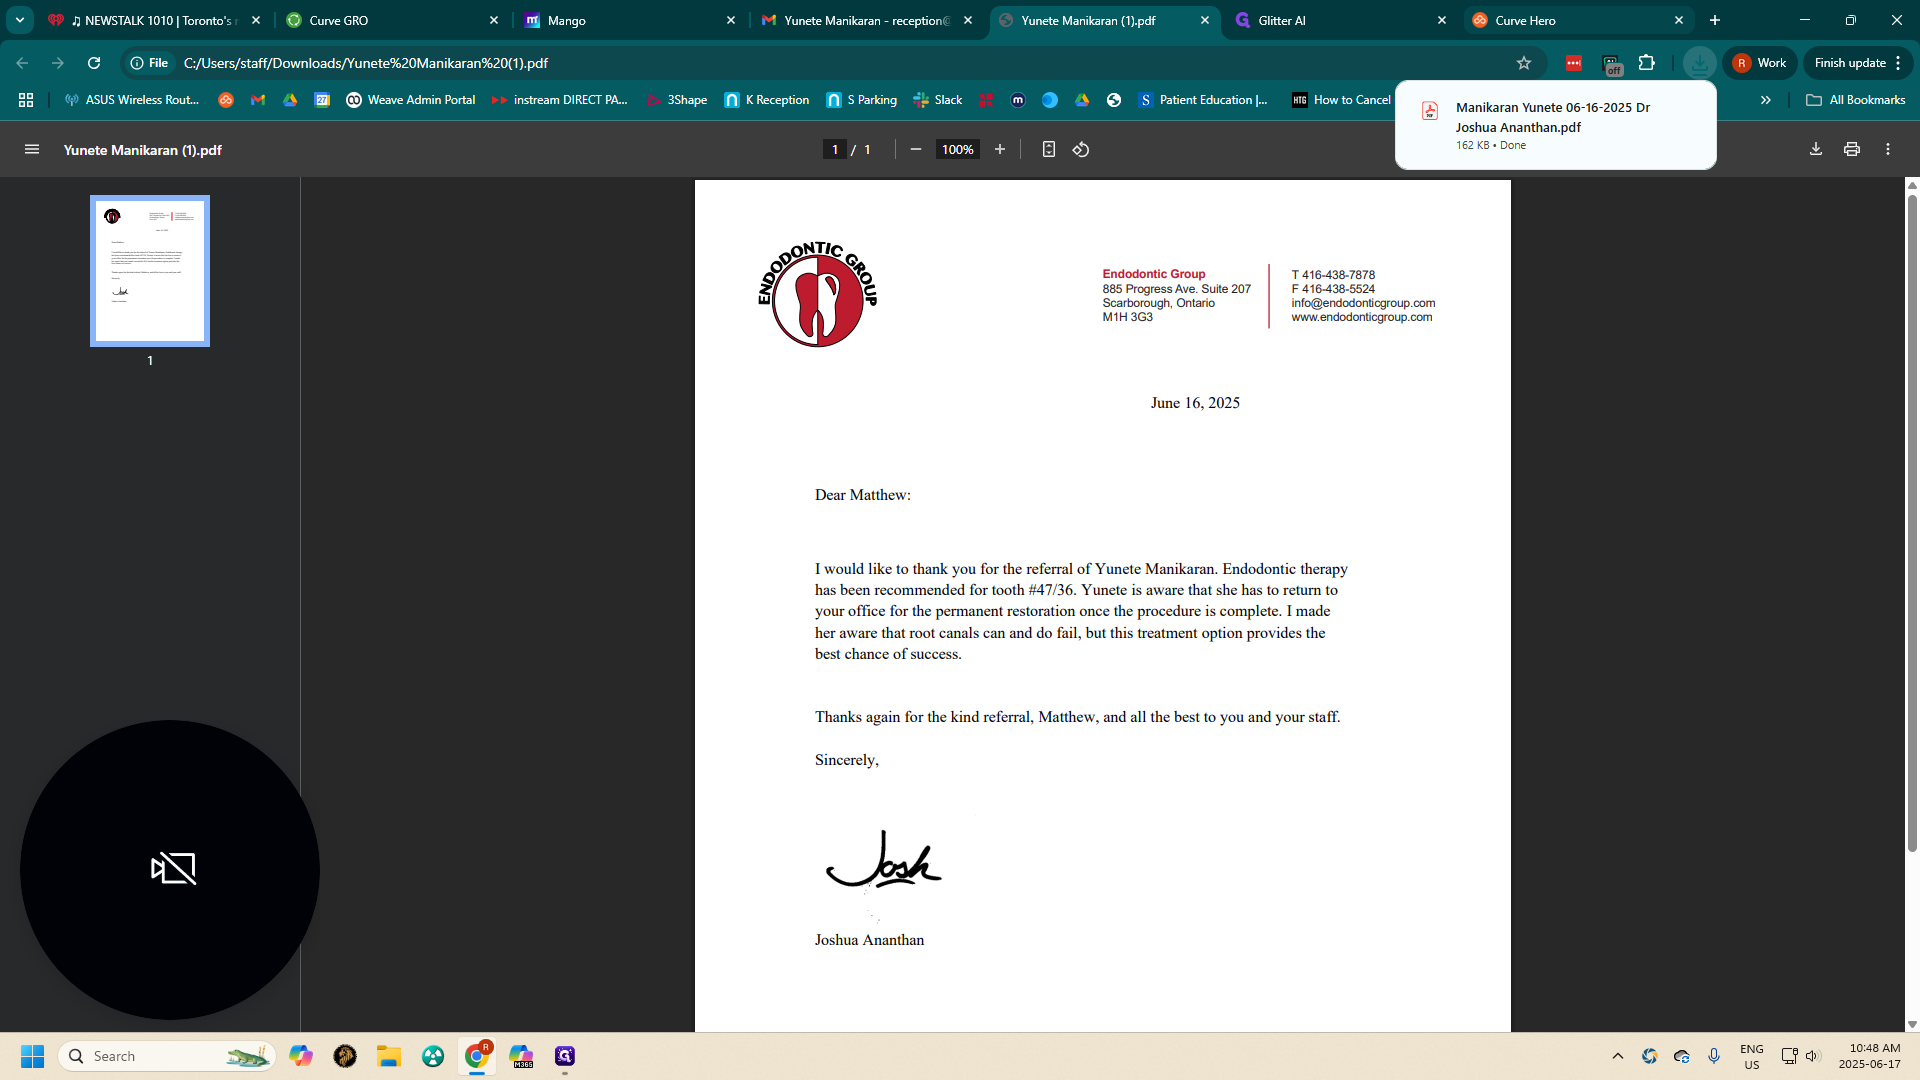
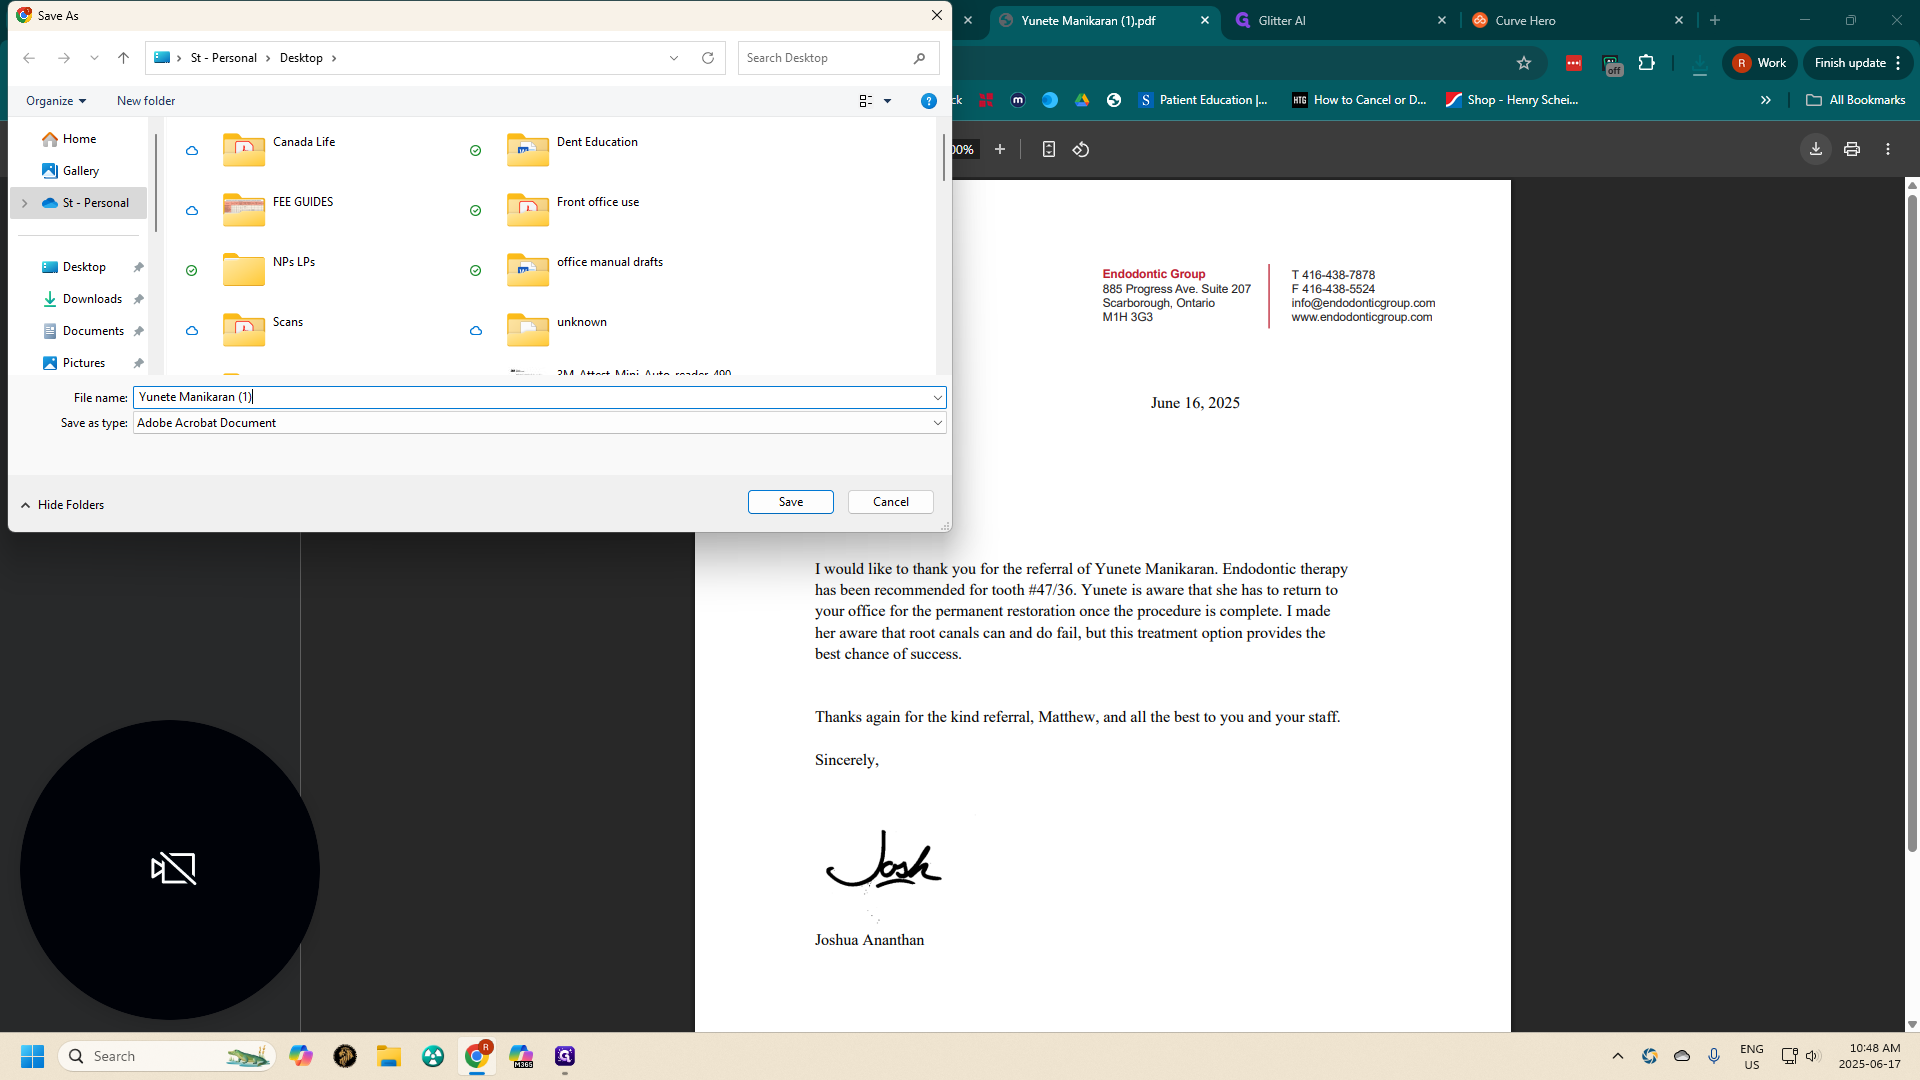
Begin by downloading the report.
4
Click here
Step #4: Click here
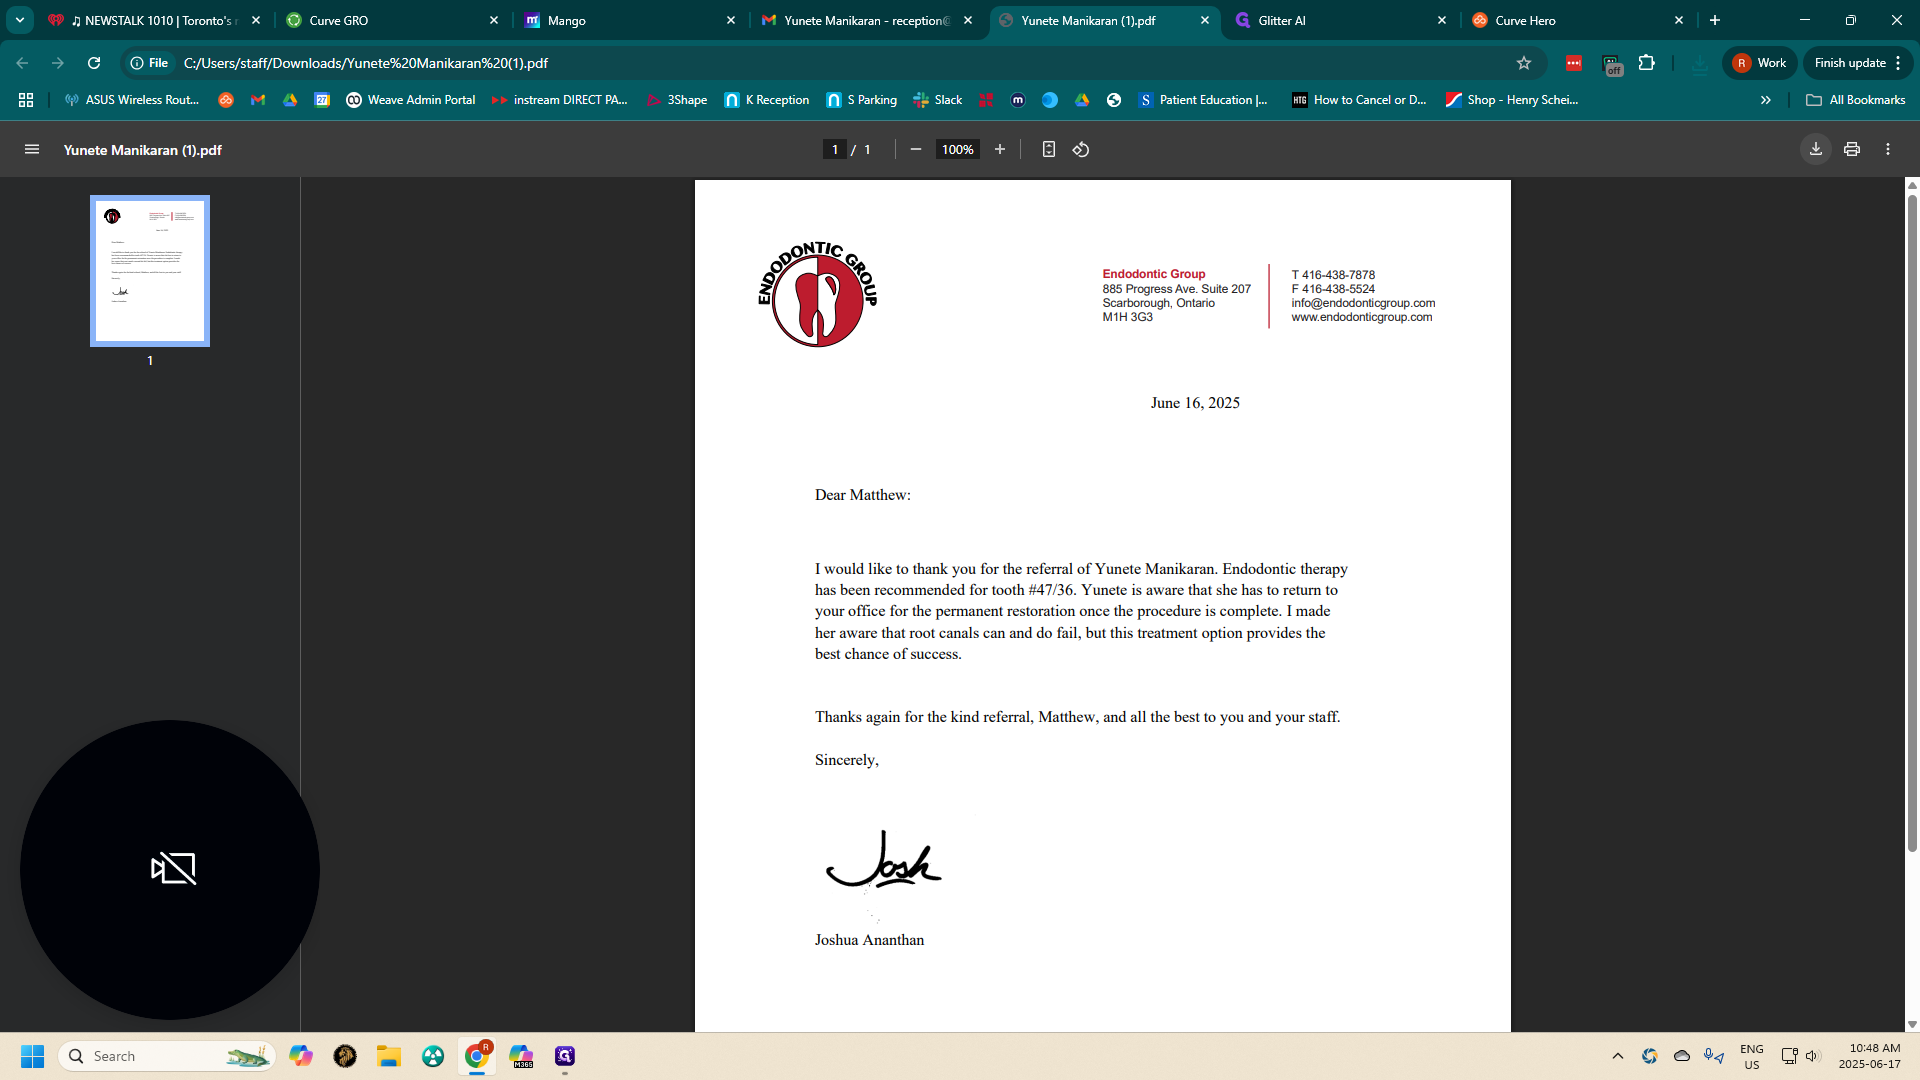
5
Click on "Yunete Manikaran"
Step #5: Click on "Yunete Manikaran"

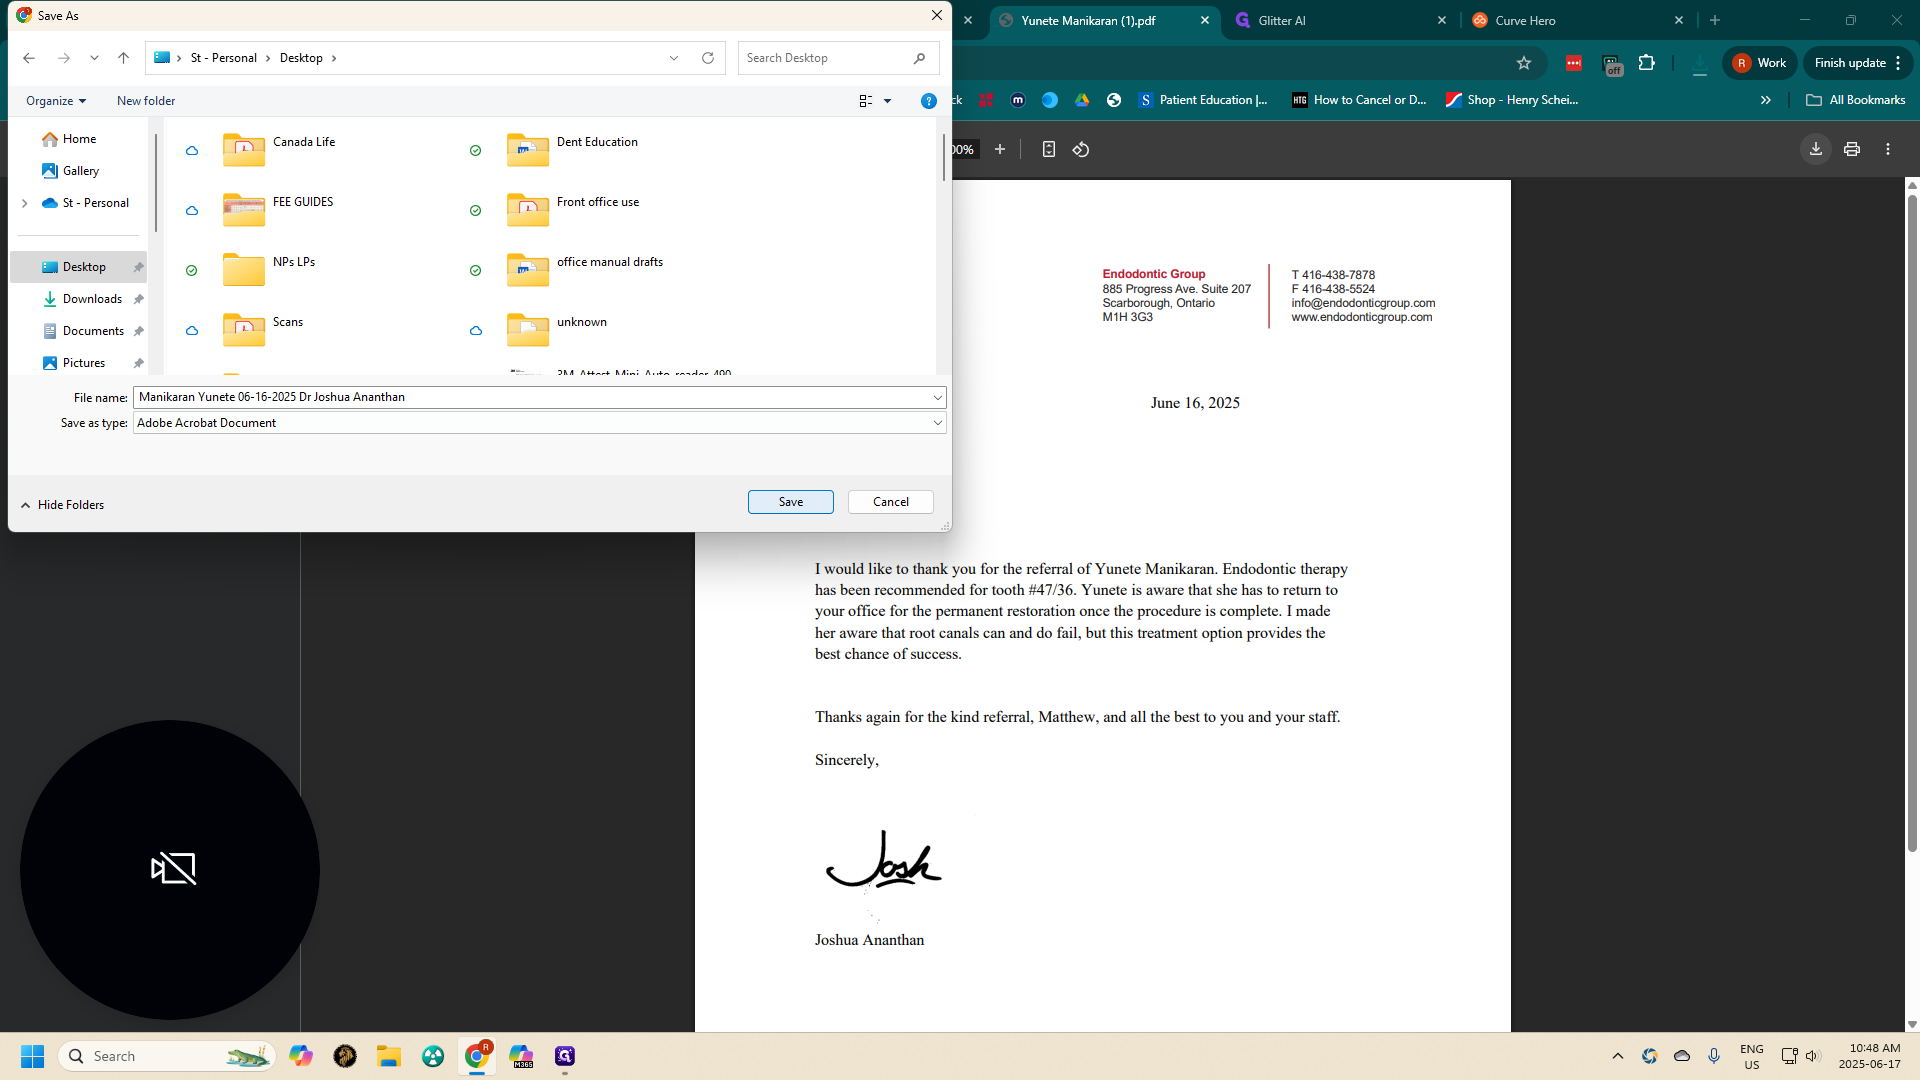
6
Click on downloads & title the report with the patient's last name, first name, the date of the report, and the specialist's name
Step #6: Click on downloads &  title the report with the patient's last name, first name, the date of the report, and the specialist's name
7
Step #7:
8
Click on "Save"
Step #8: Click on "Save"

Open a patient account on Curve.
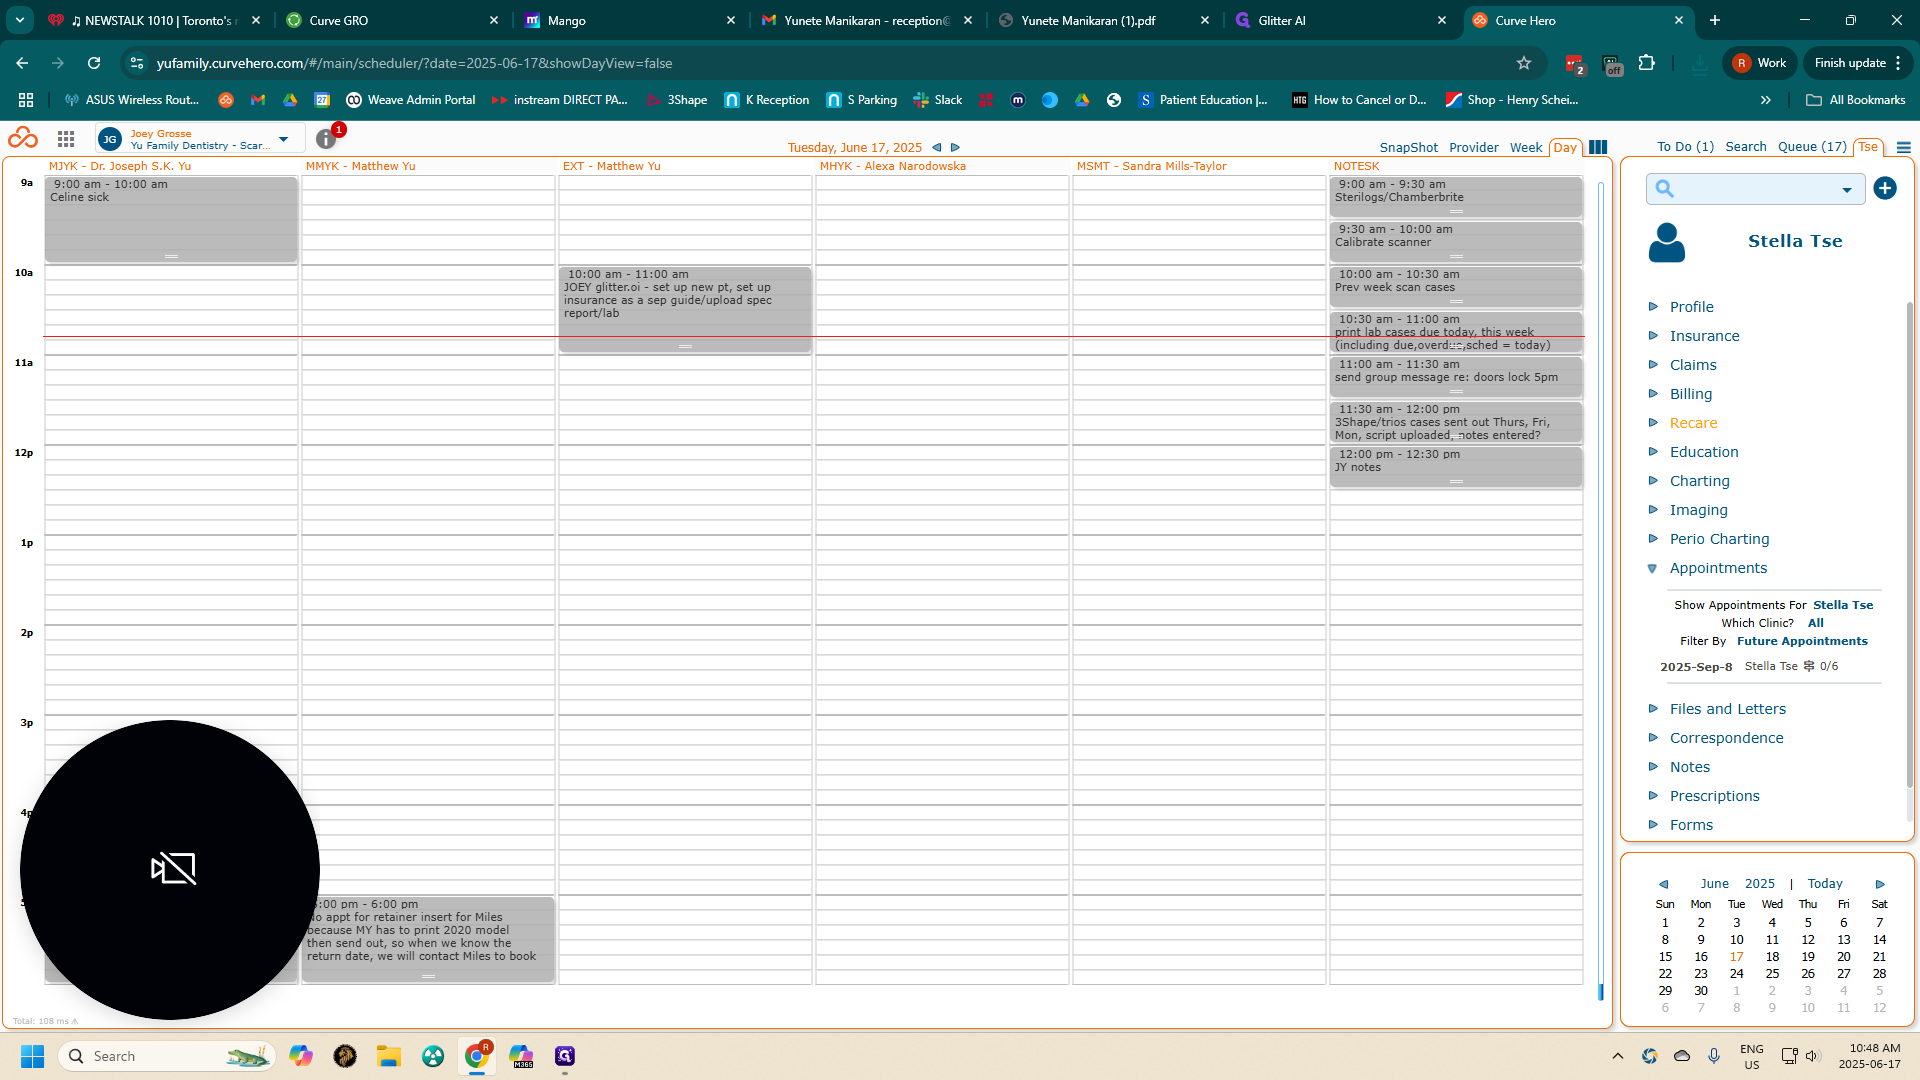
9
Click on "Curve Hero"
Step #9: Click on "Curve Hero"
10
Click here
Step #10: Click here

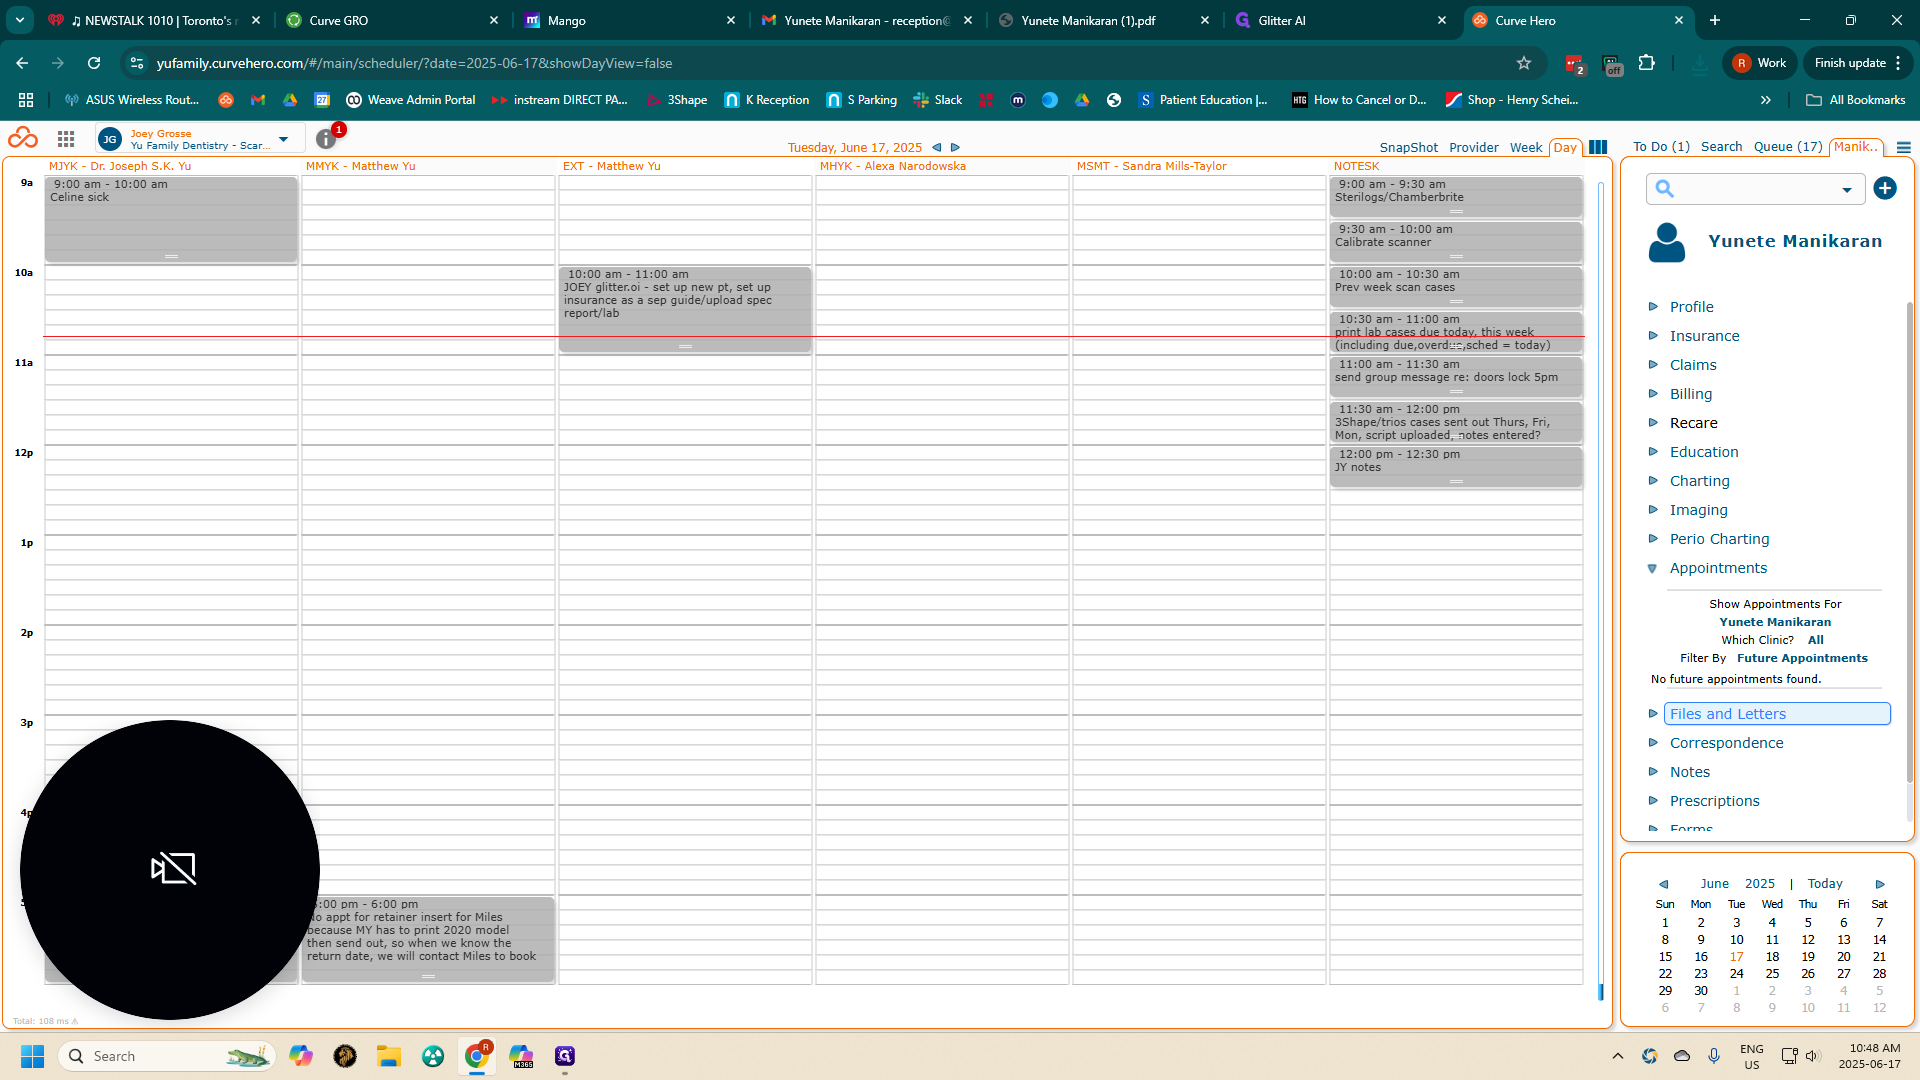
Go to Files and Letters.

11
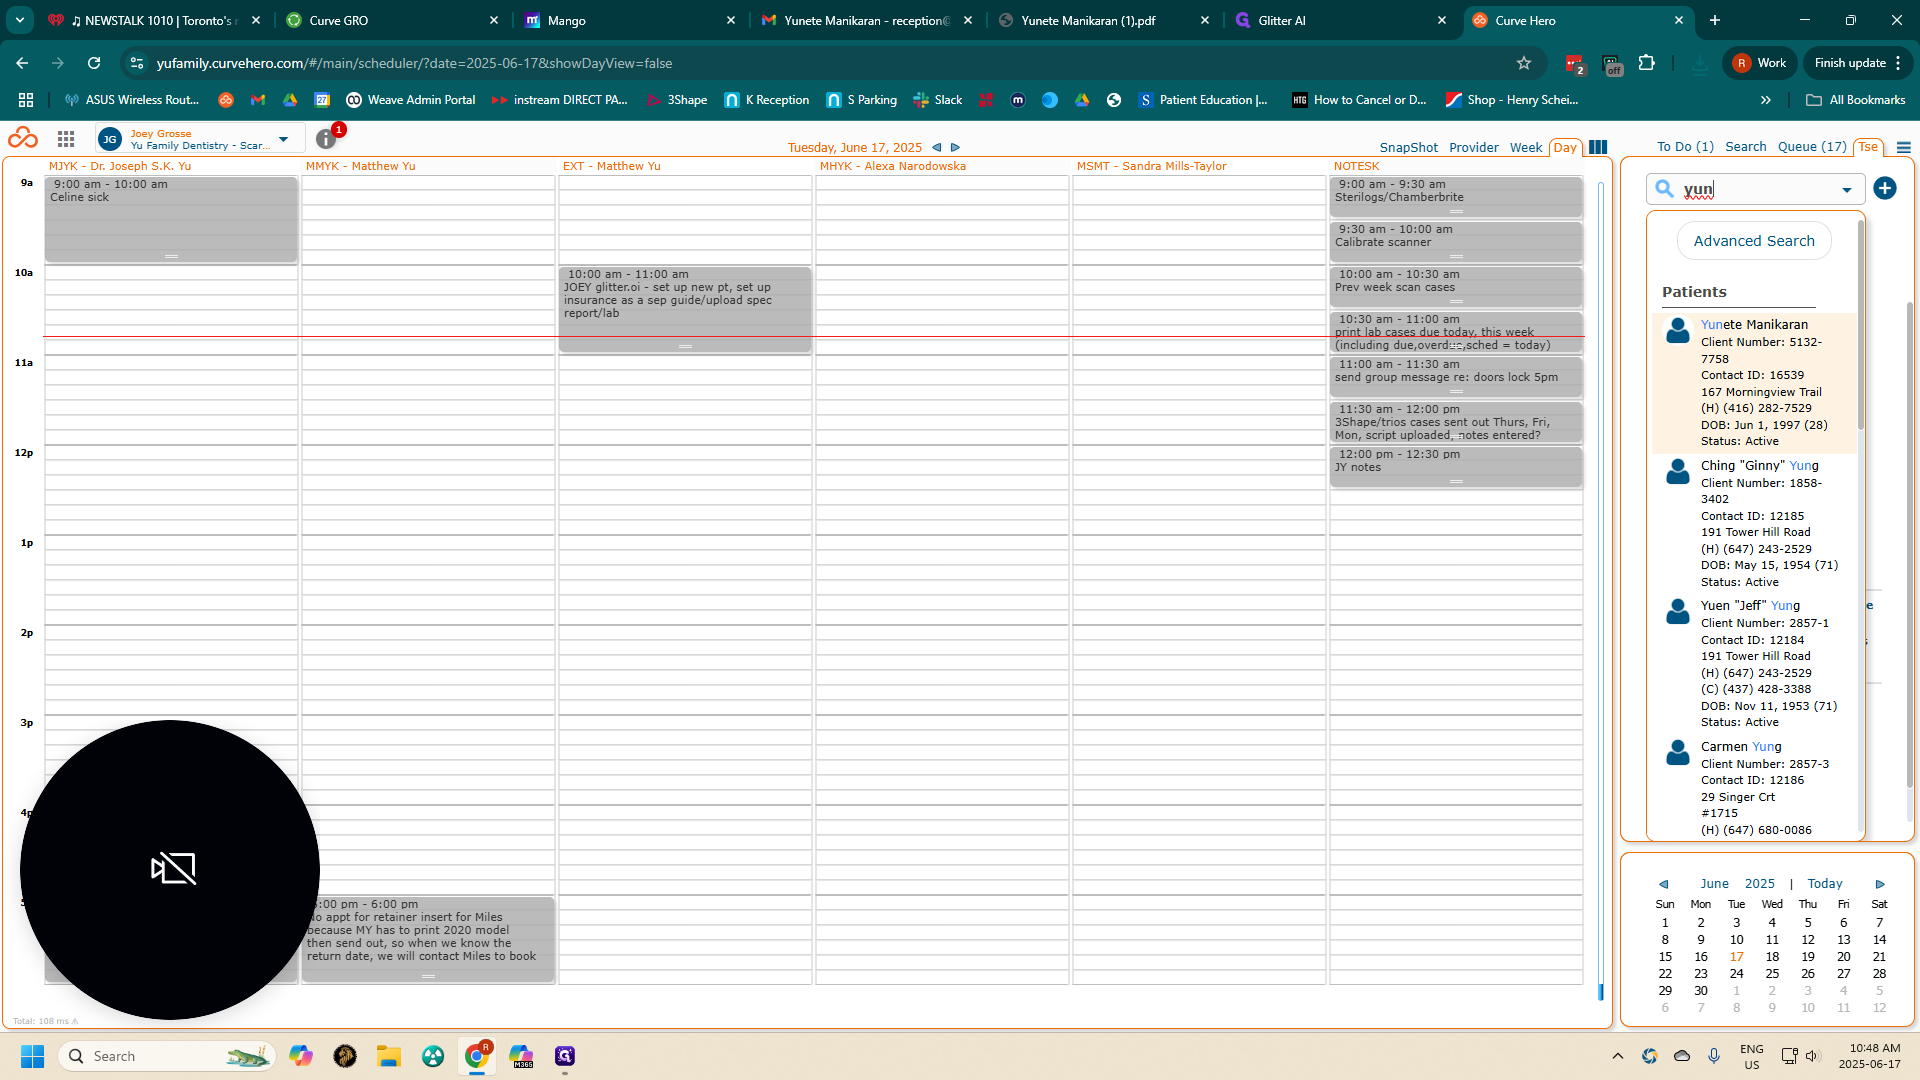
Type patient's name
12
Click on correct patient
Step #12: Click on correct patient
13
Click on "▷ Files and Letters"
Step #13: Click on "▷ Files and Letters"

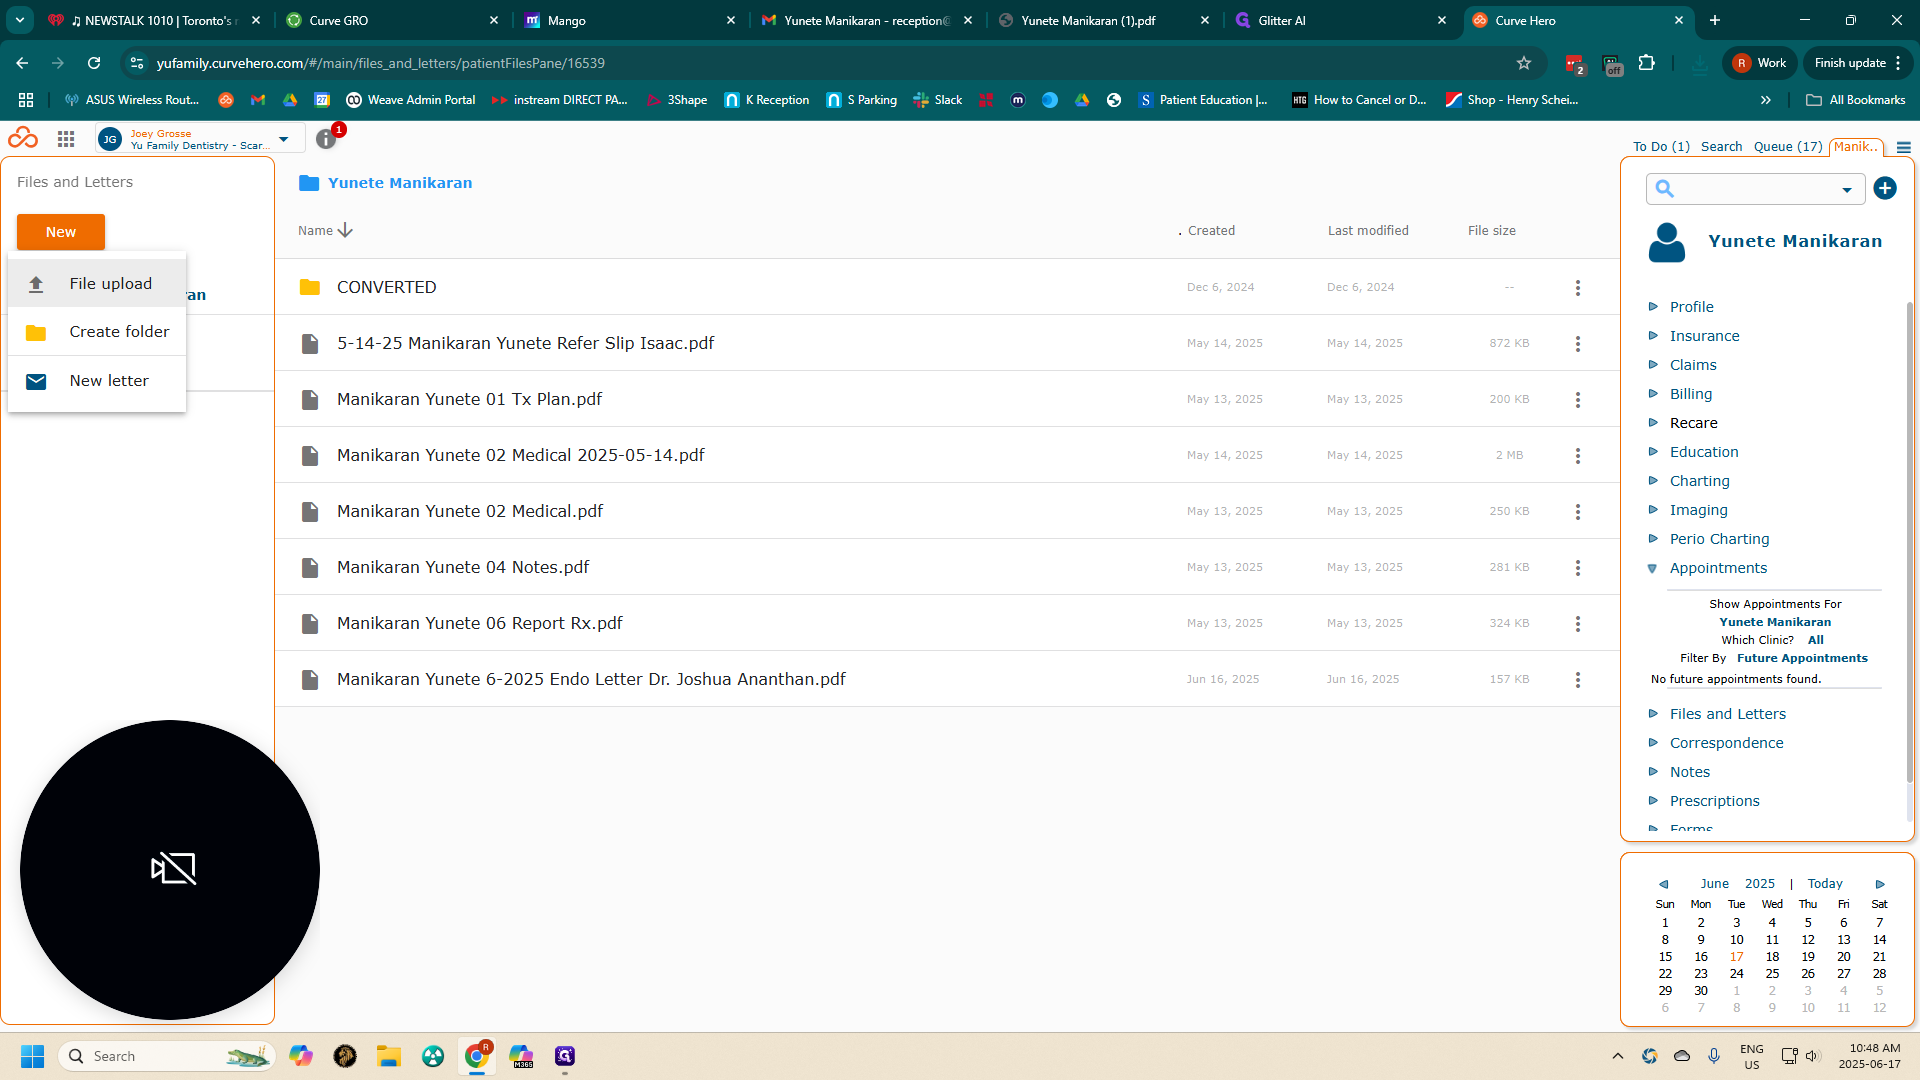
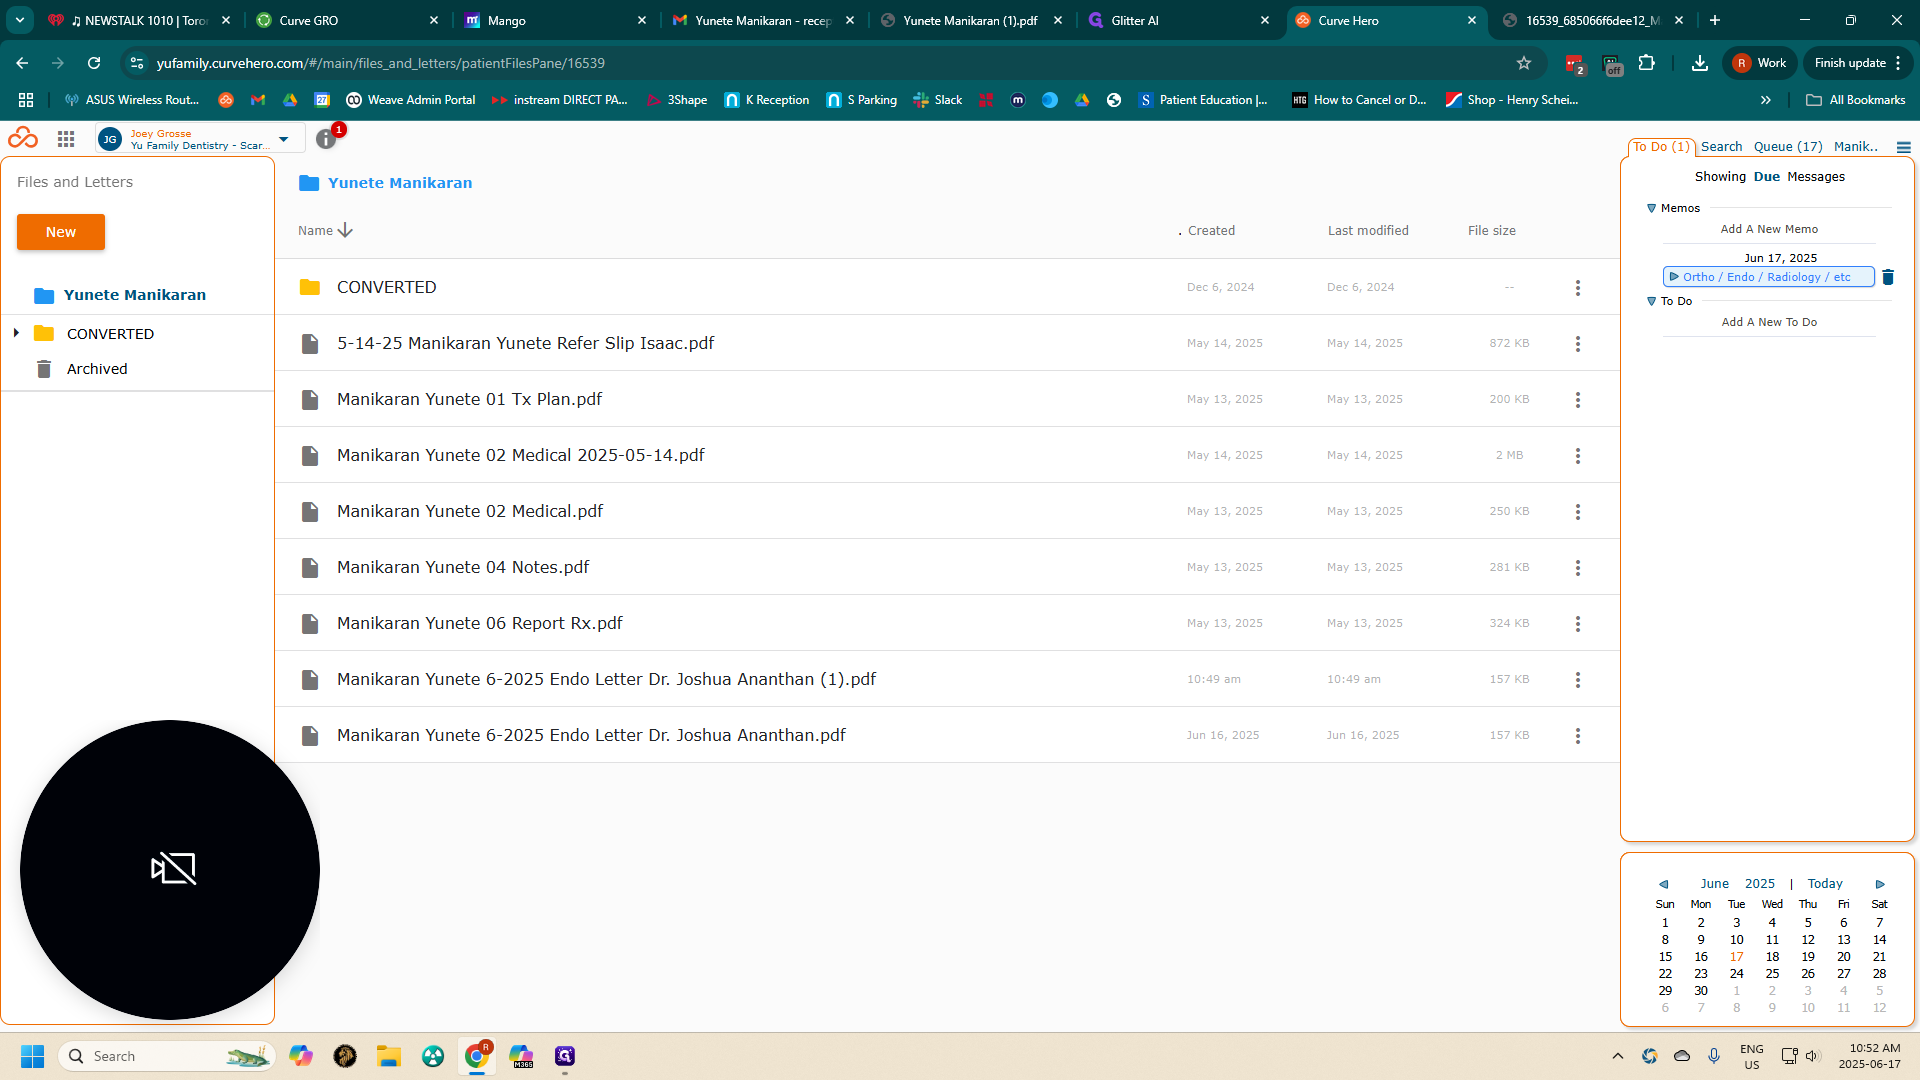
Click "New," then select "File Upload."
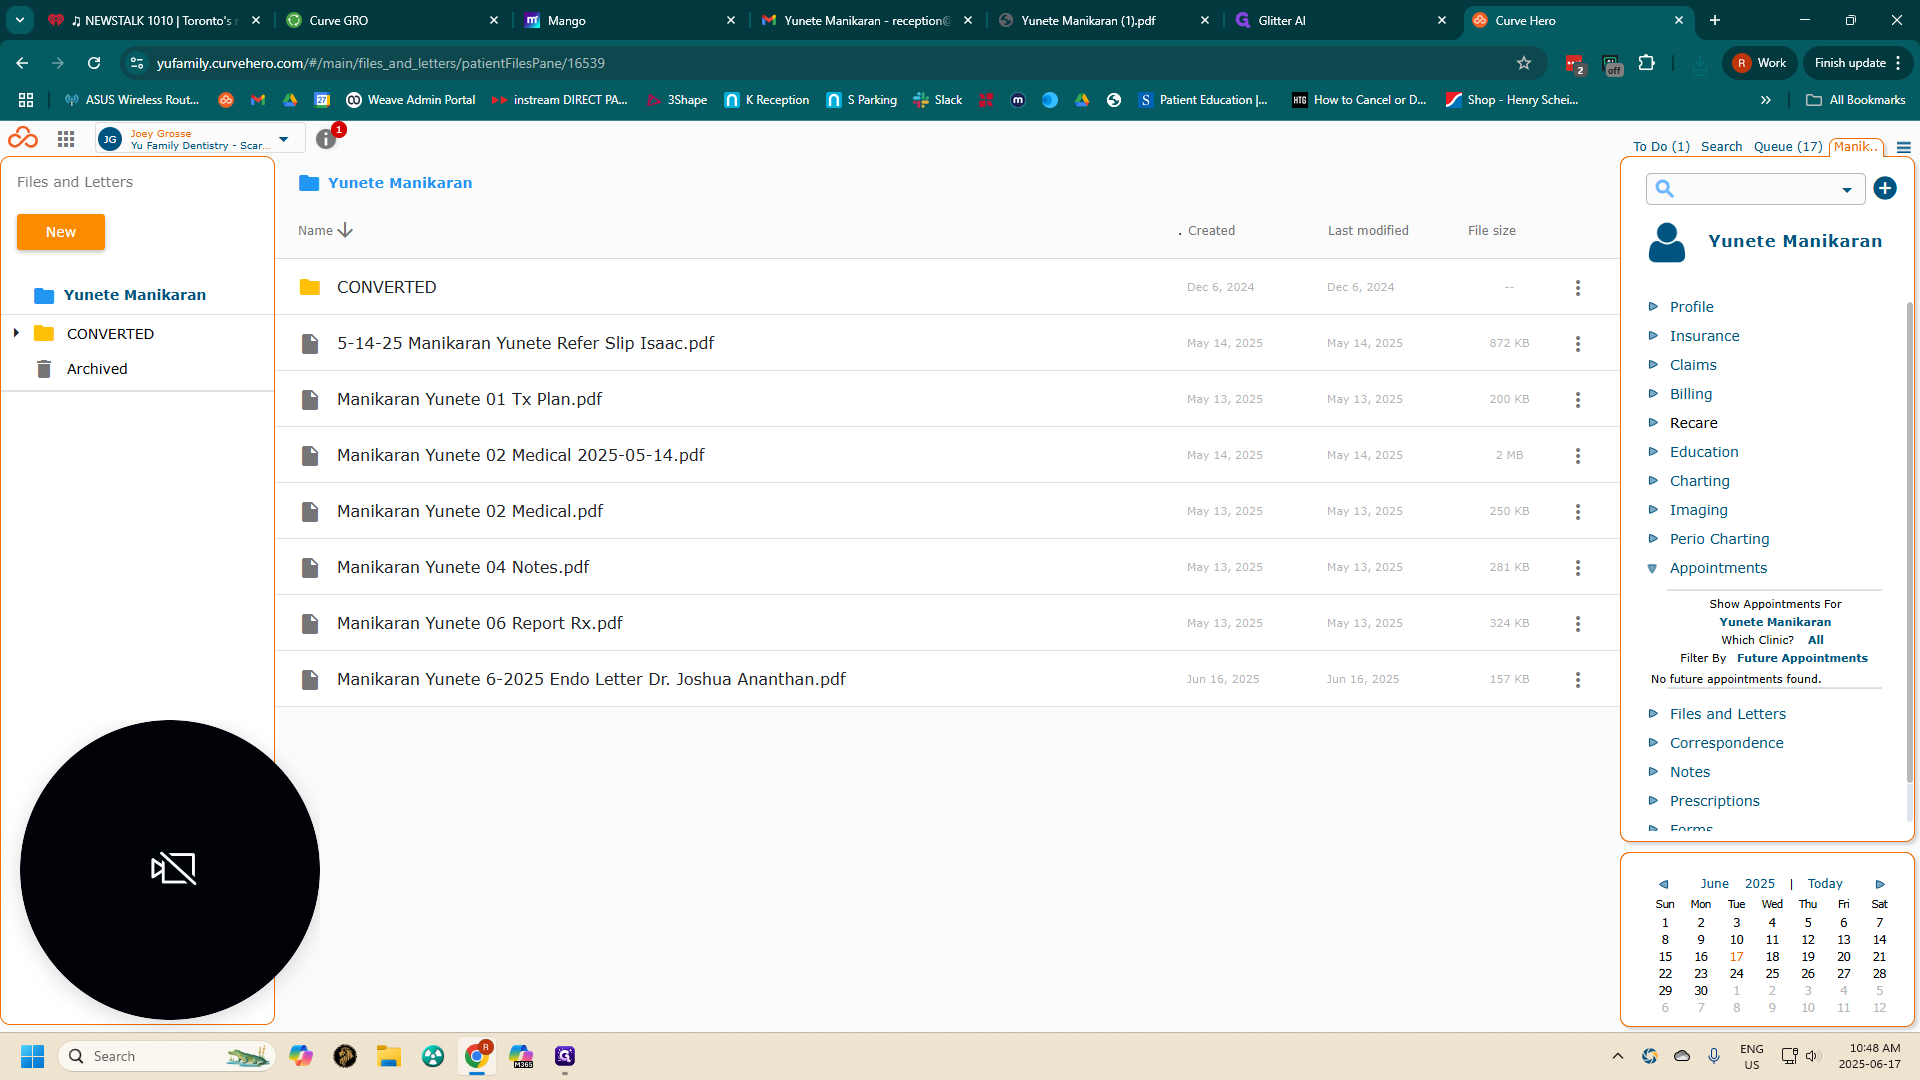
14
Click on "New"
Step #14: Click on "New"
15
Click on "File upload"
Step #15: Click on "File upload"
16
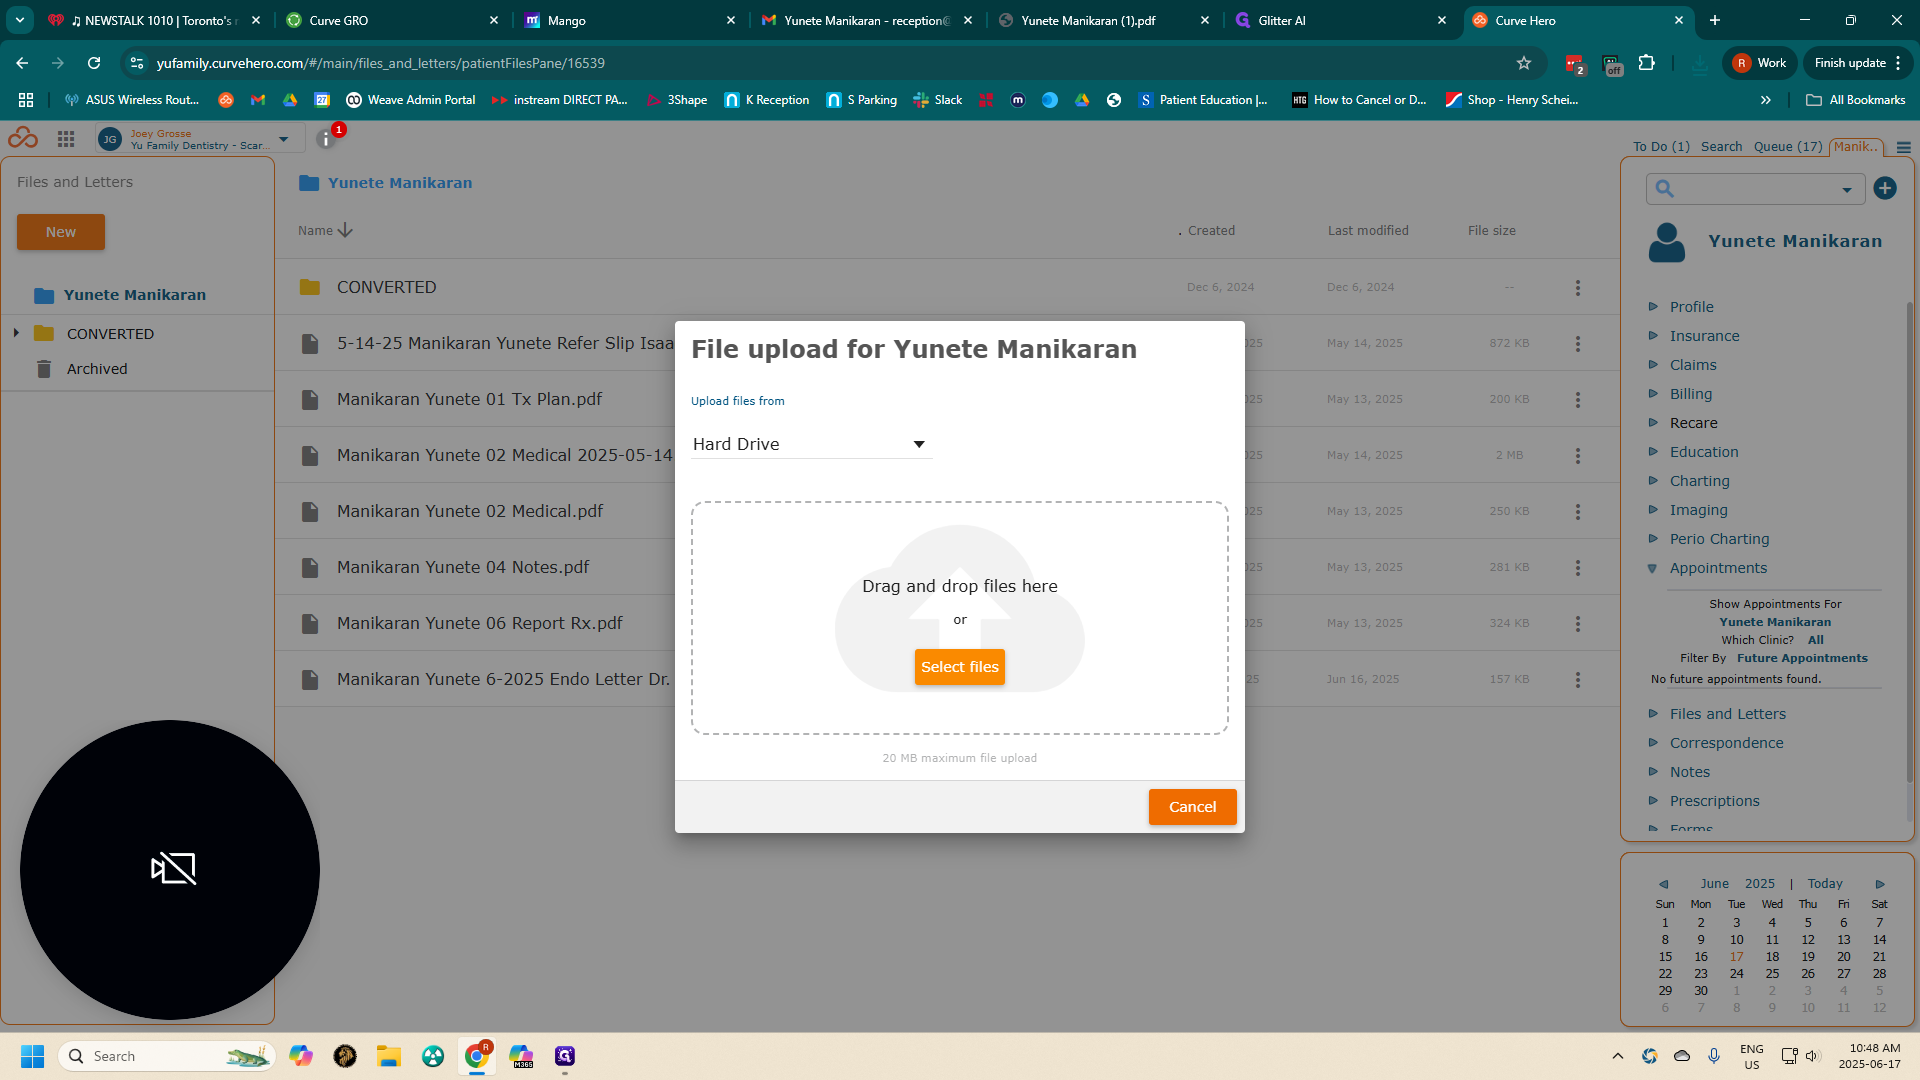
Click on "Select files"
Step #16: Click on "Select files"

Choose the file from your desktop that you want to upload.
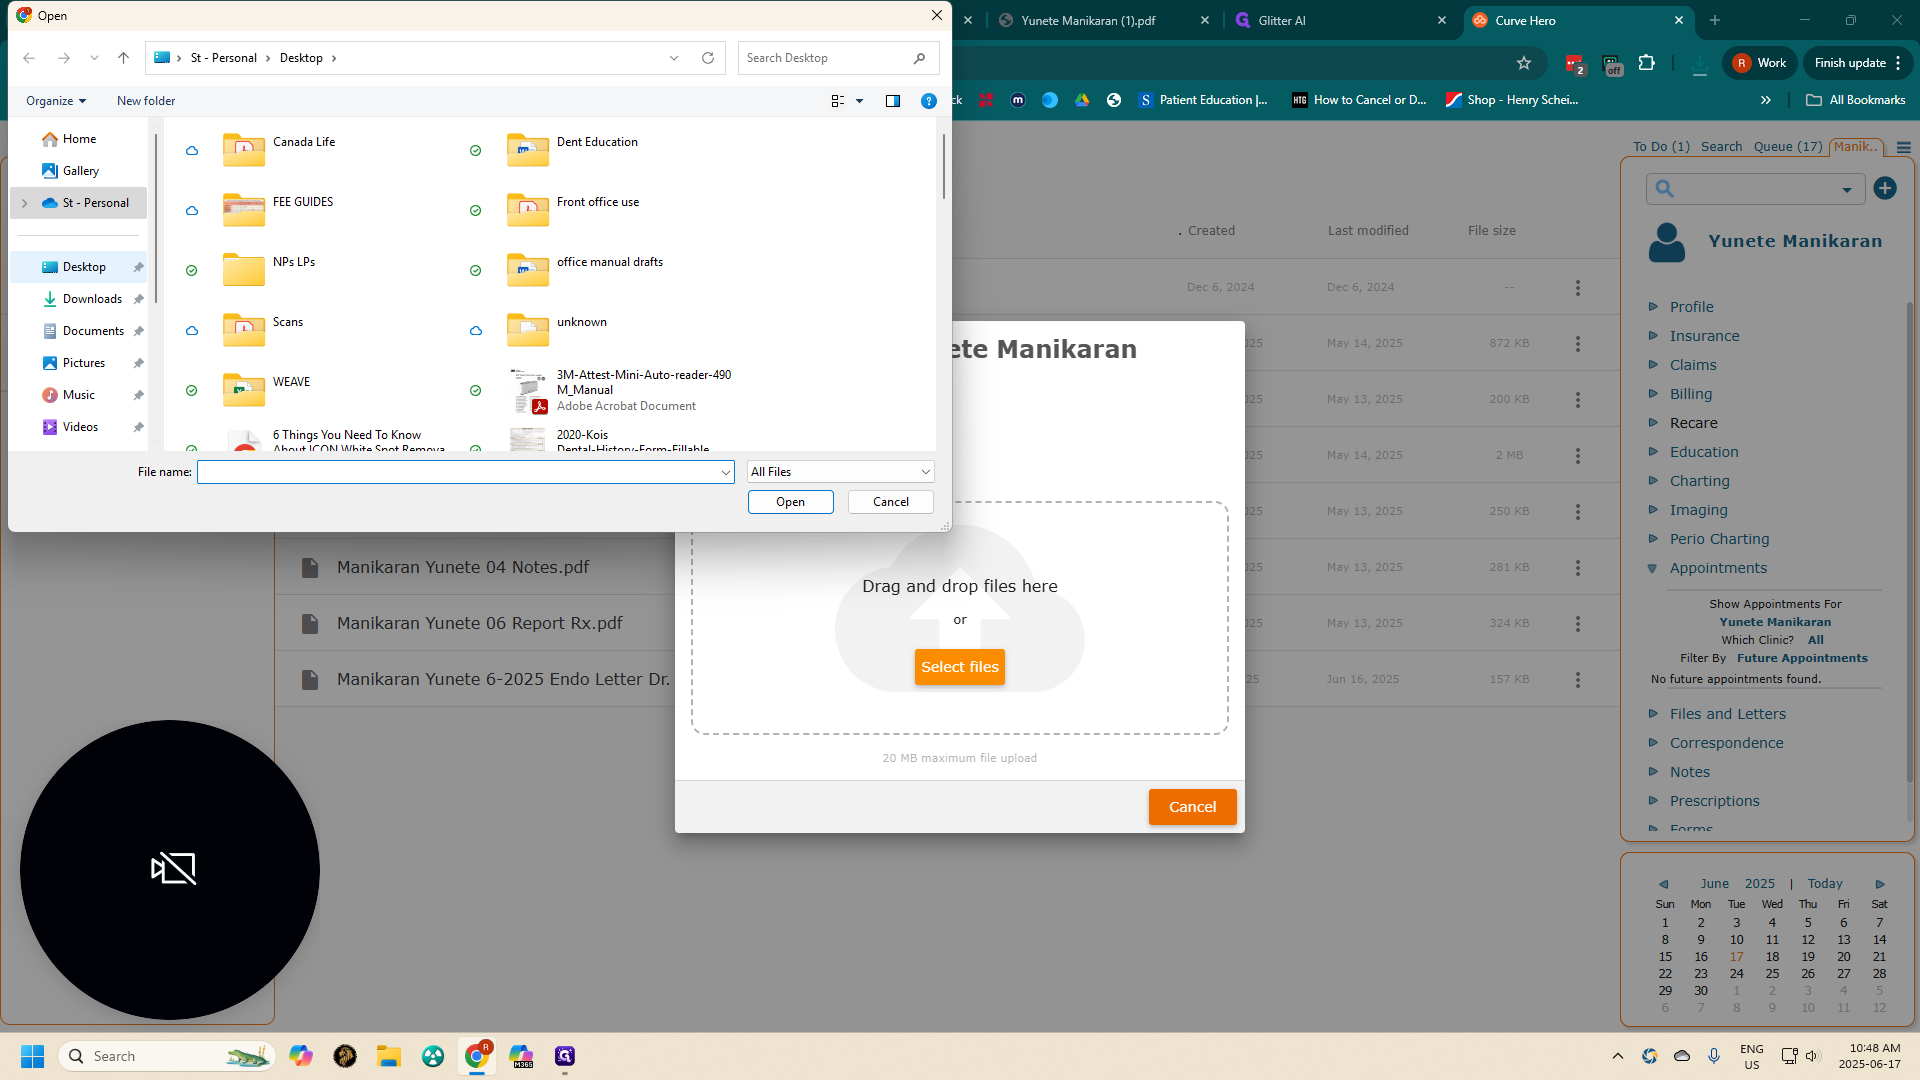
17
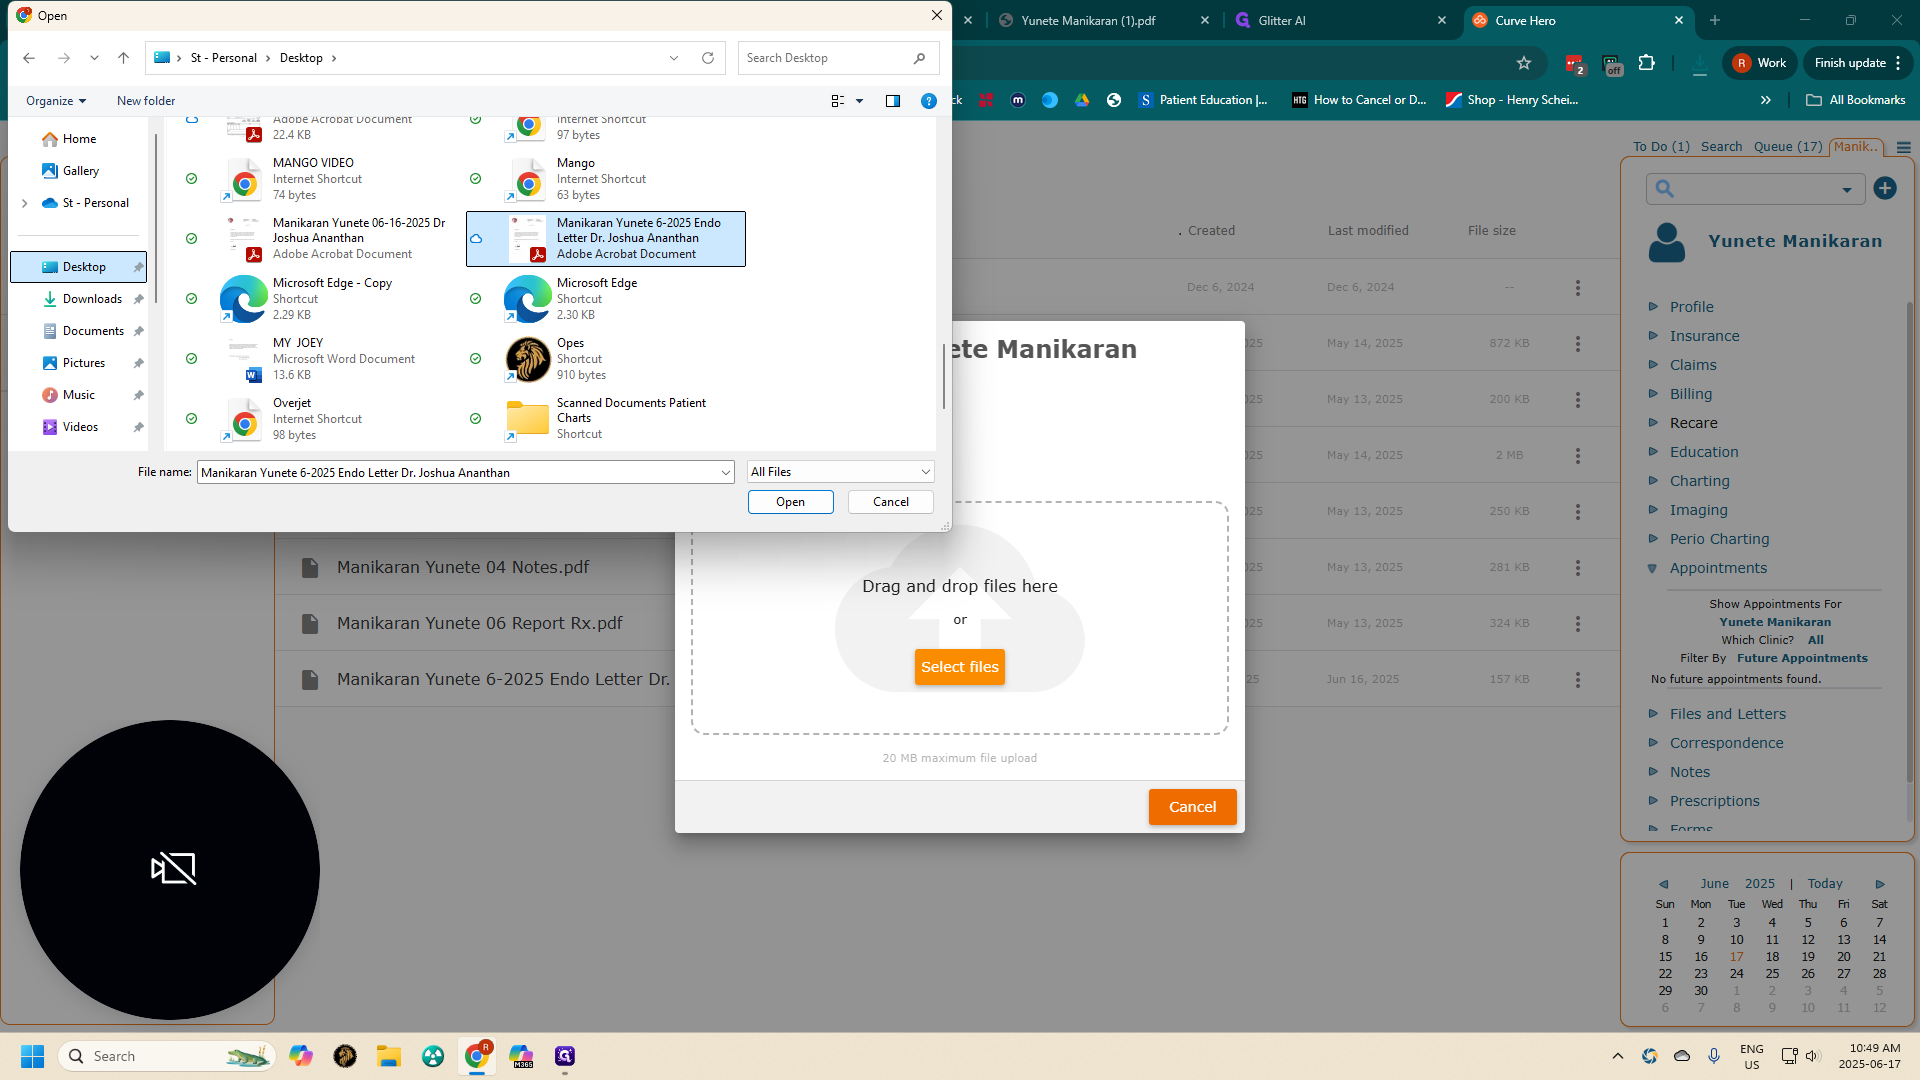
Click on "Desktop"
Step #17: Click on "Desktop"
18
Click on "Letter Dr. Joshua Ananthan"
Step #18: Click on "Letter Dr. Joshua Ananthan"
19
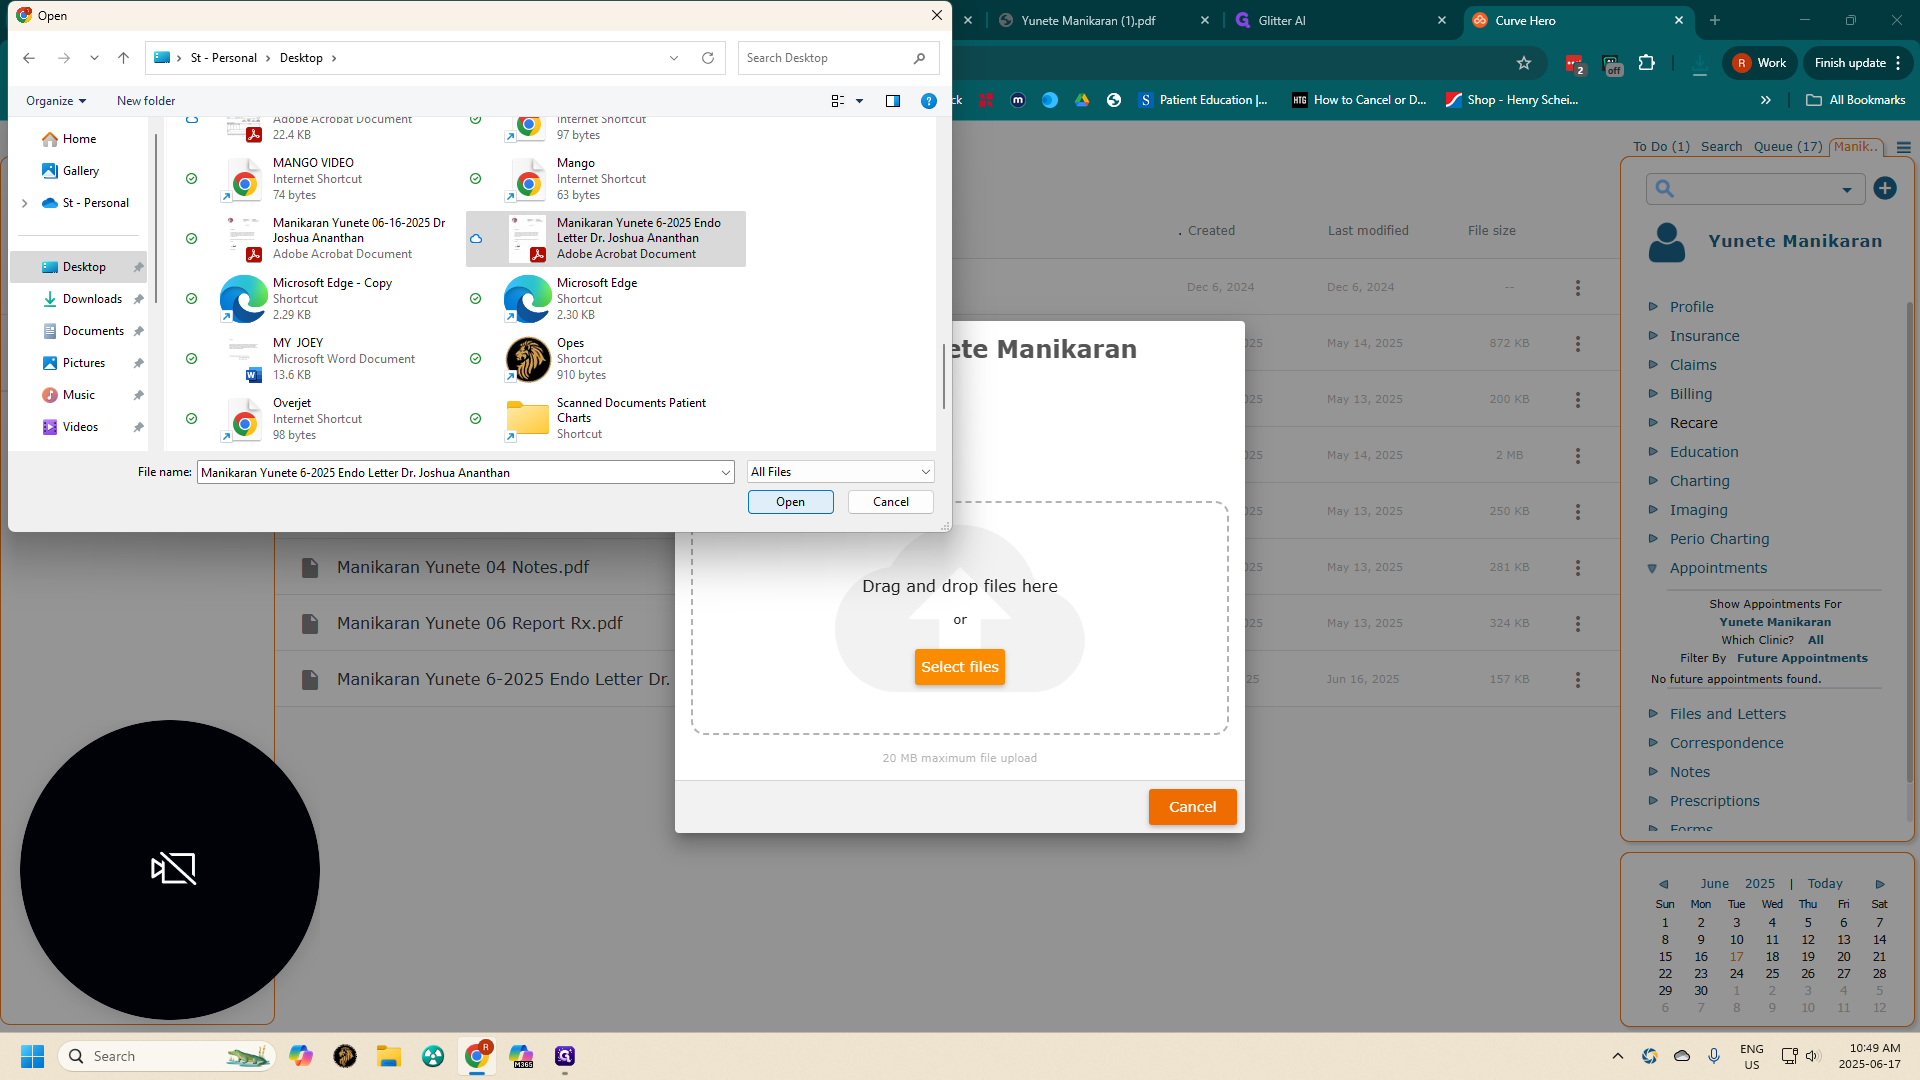
Click on "Open"
Step #19: Click on "Open"

Report will upload to patient's "files & letters"
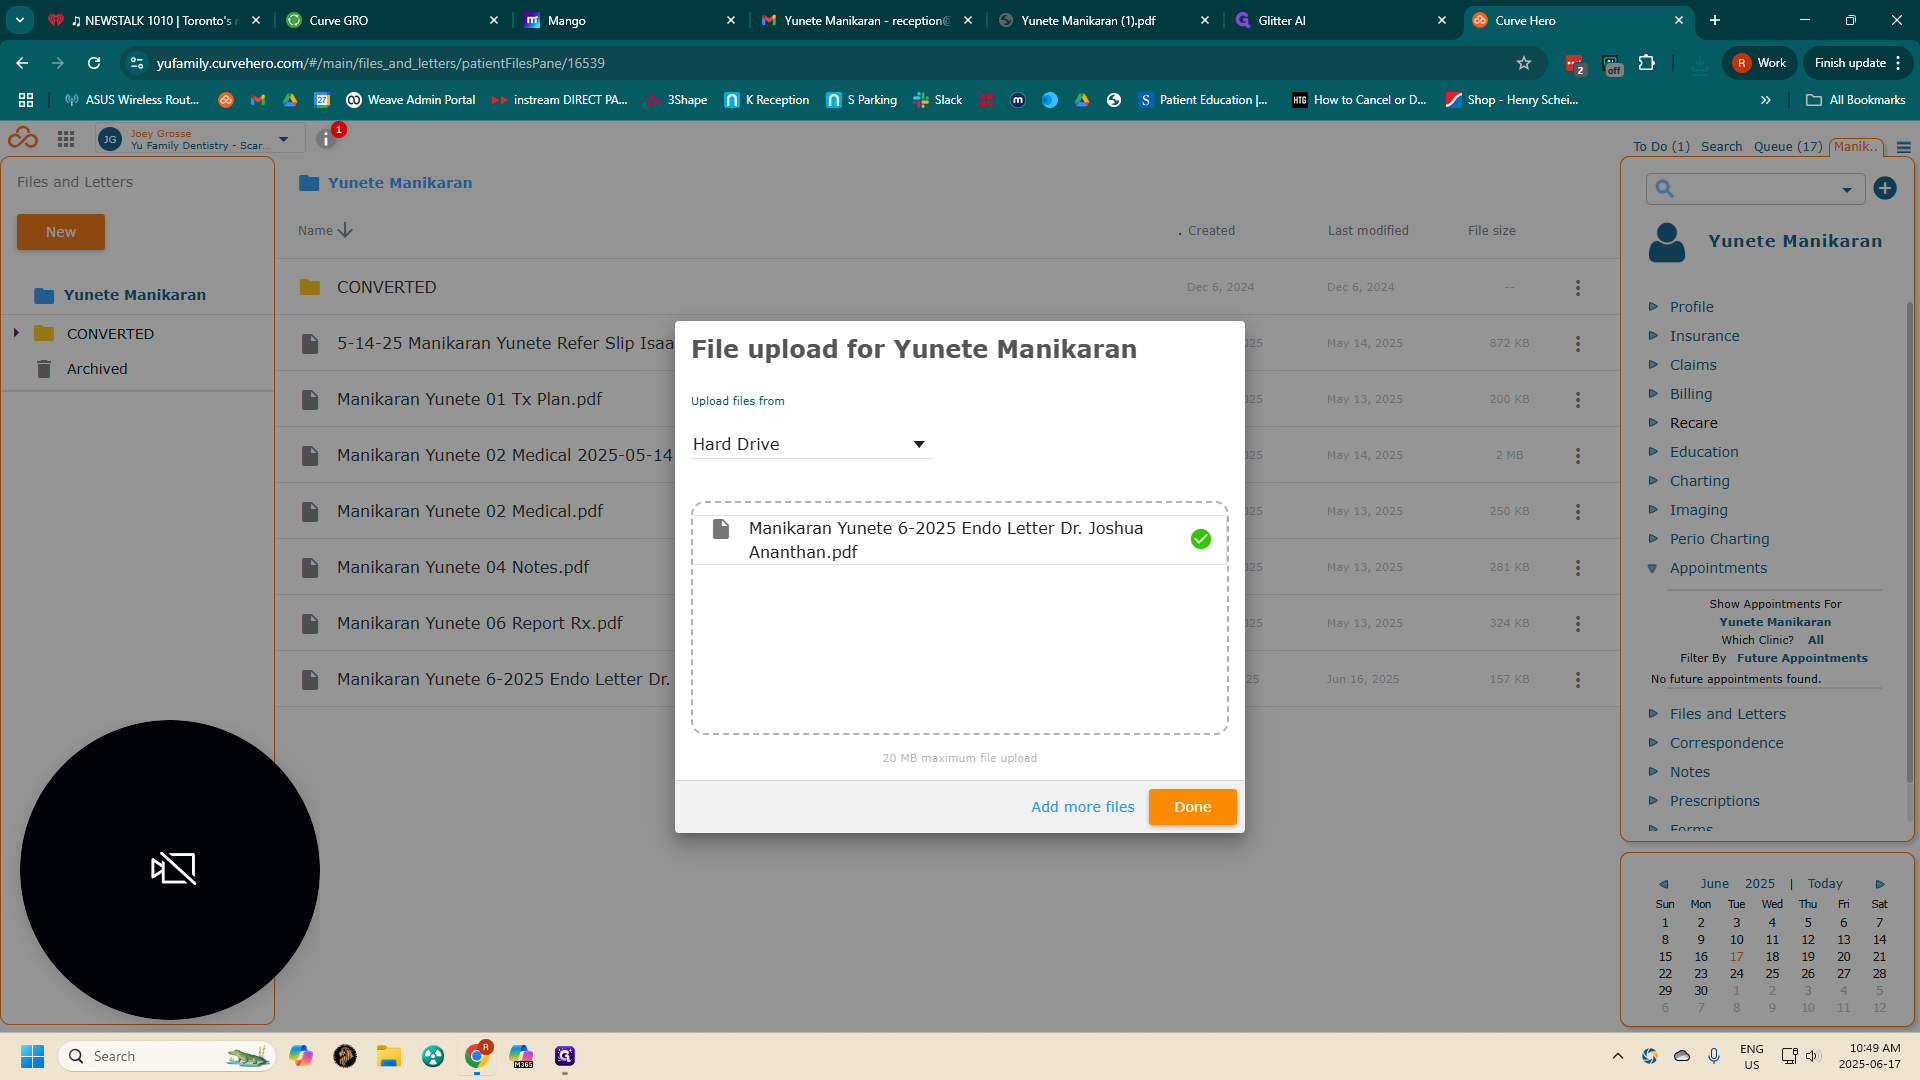
20
Click on "Done"
Step #20: Click on "Done"

Click Done. I uploaded this earlier, so it's asking if I want to replace or rename it. Please disregard in this case
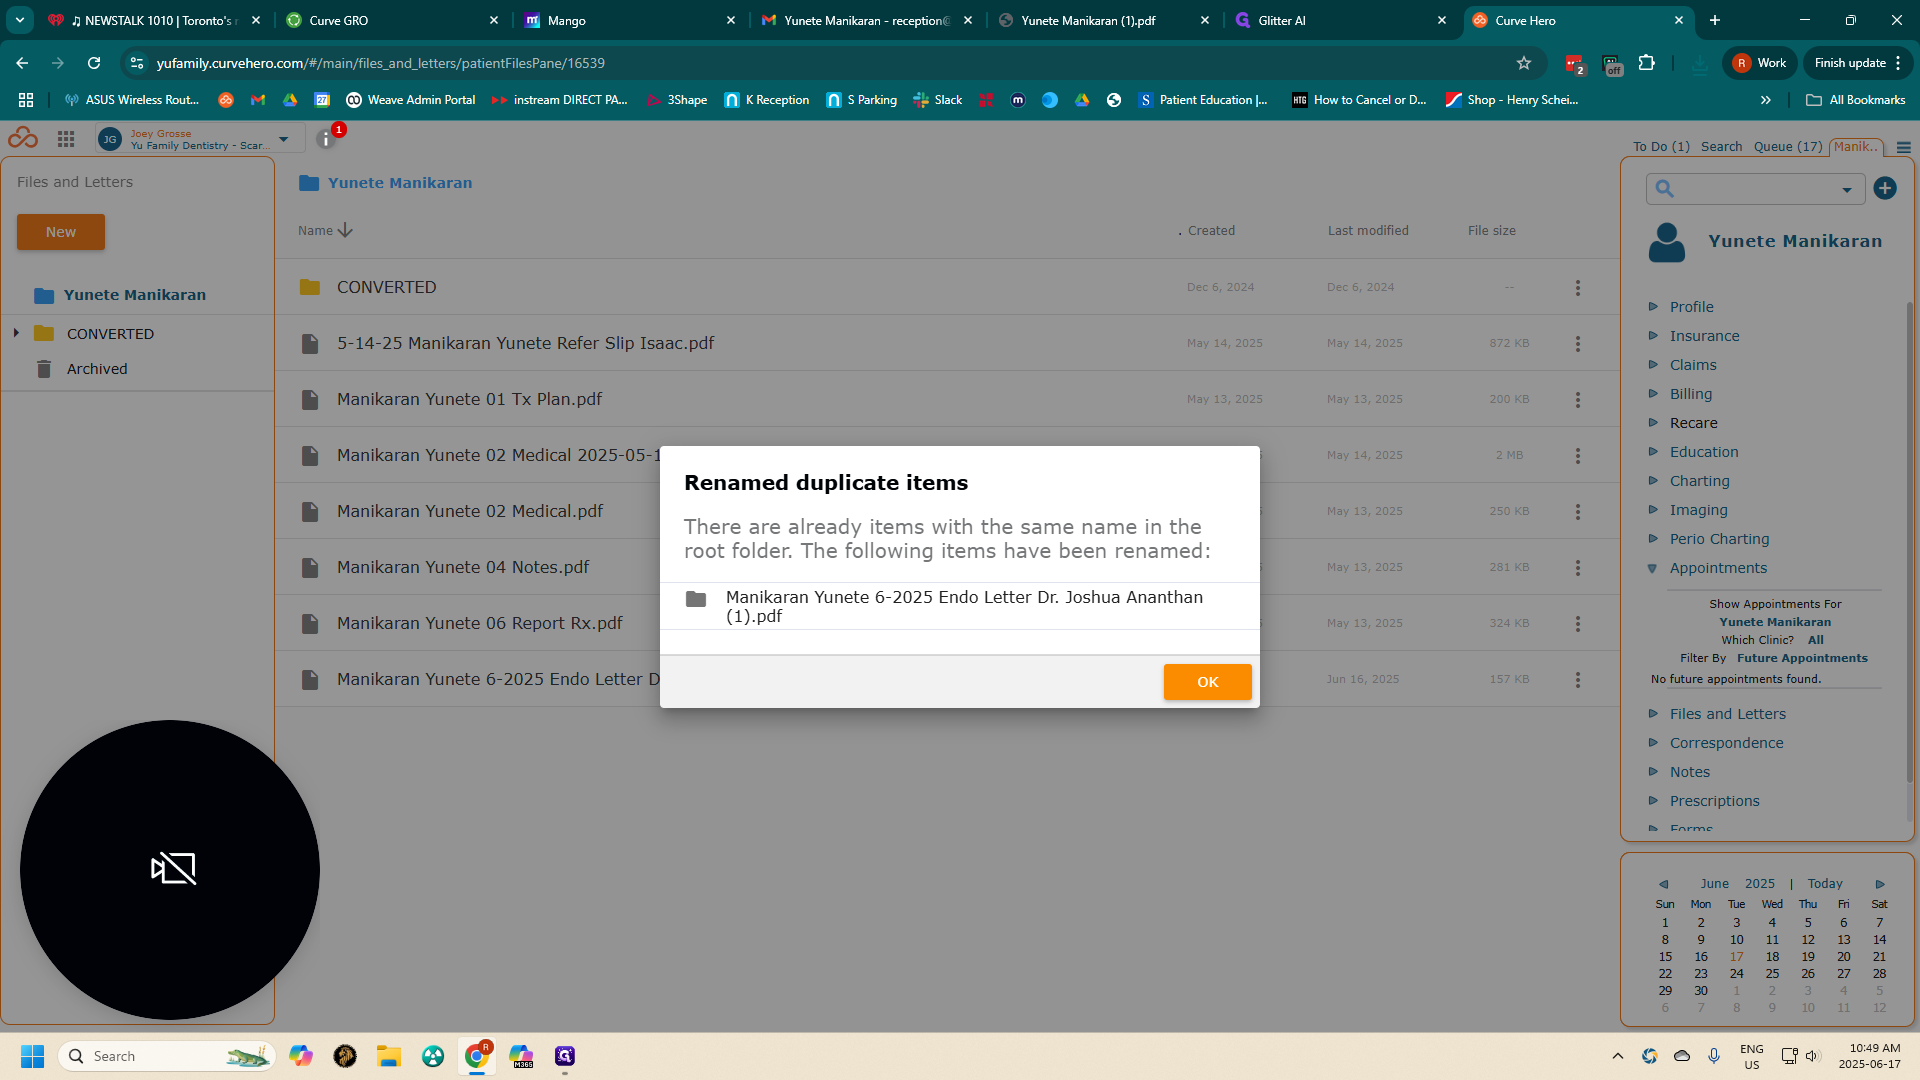
21
Click on "OK"
Step #21: Click on "OK"

That's why you'll see a duplicate entry there. After uploading the file, navigate to Notes.
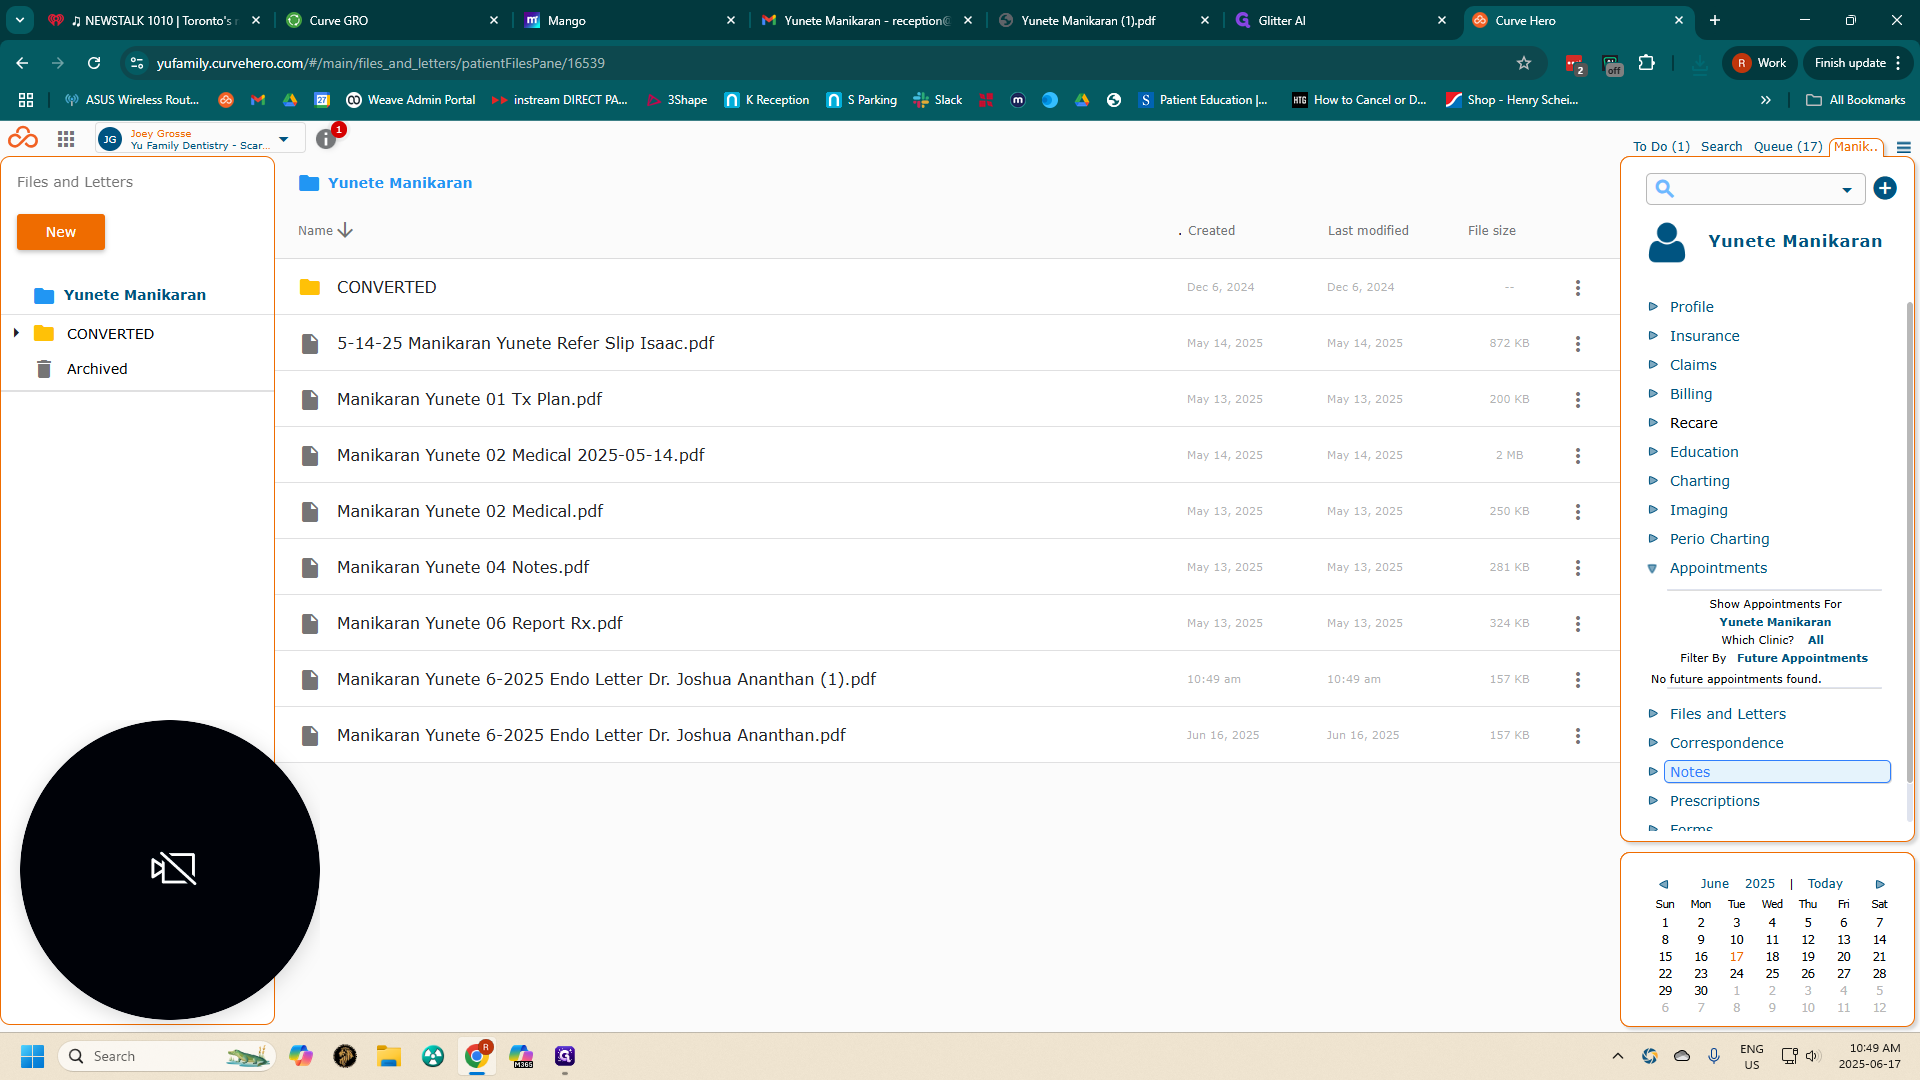
22
Click on "▸ Notes"
Step #22: Click on "▸ Notes"

You will add a templated note.

23
Click on "Add Templated Note ]"
Step #23: Click on "Add Templated Note ]"

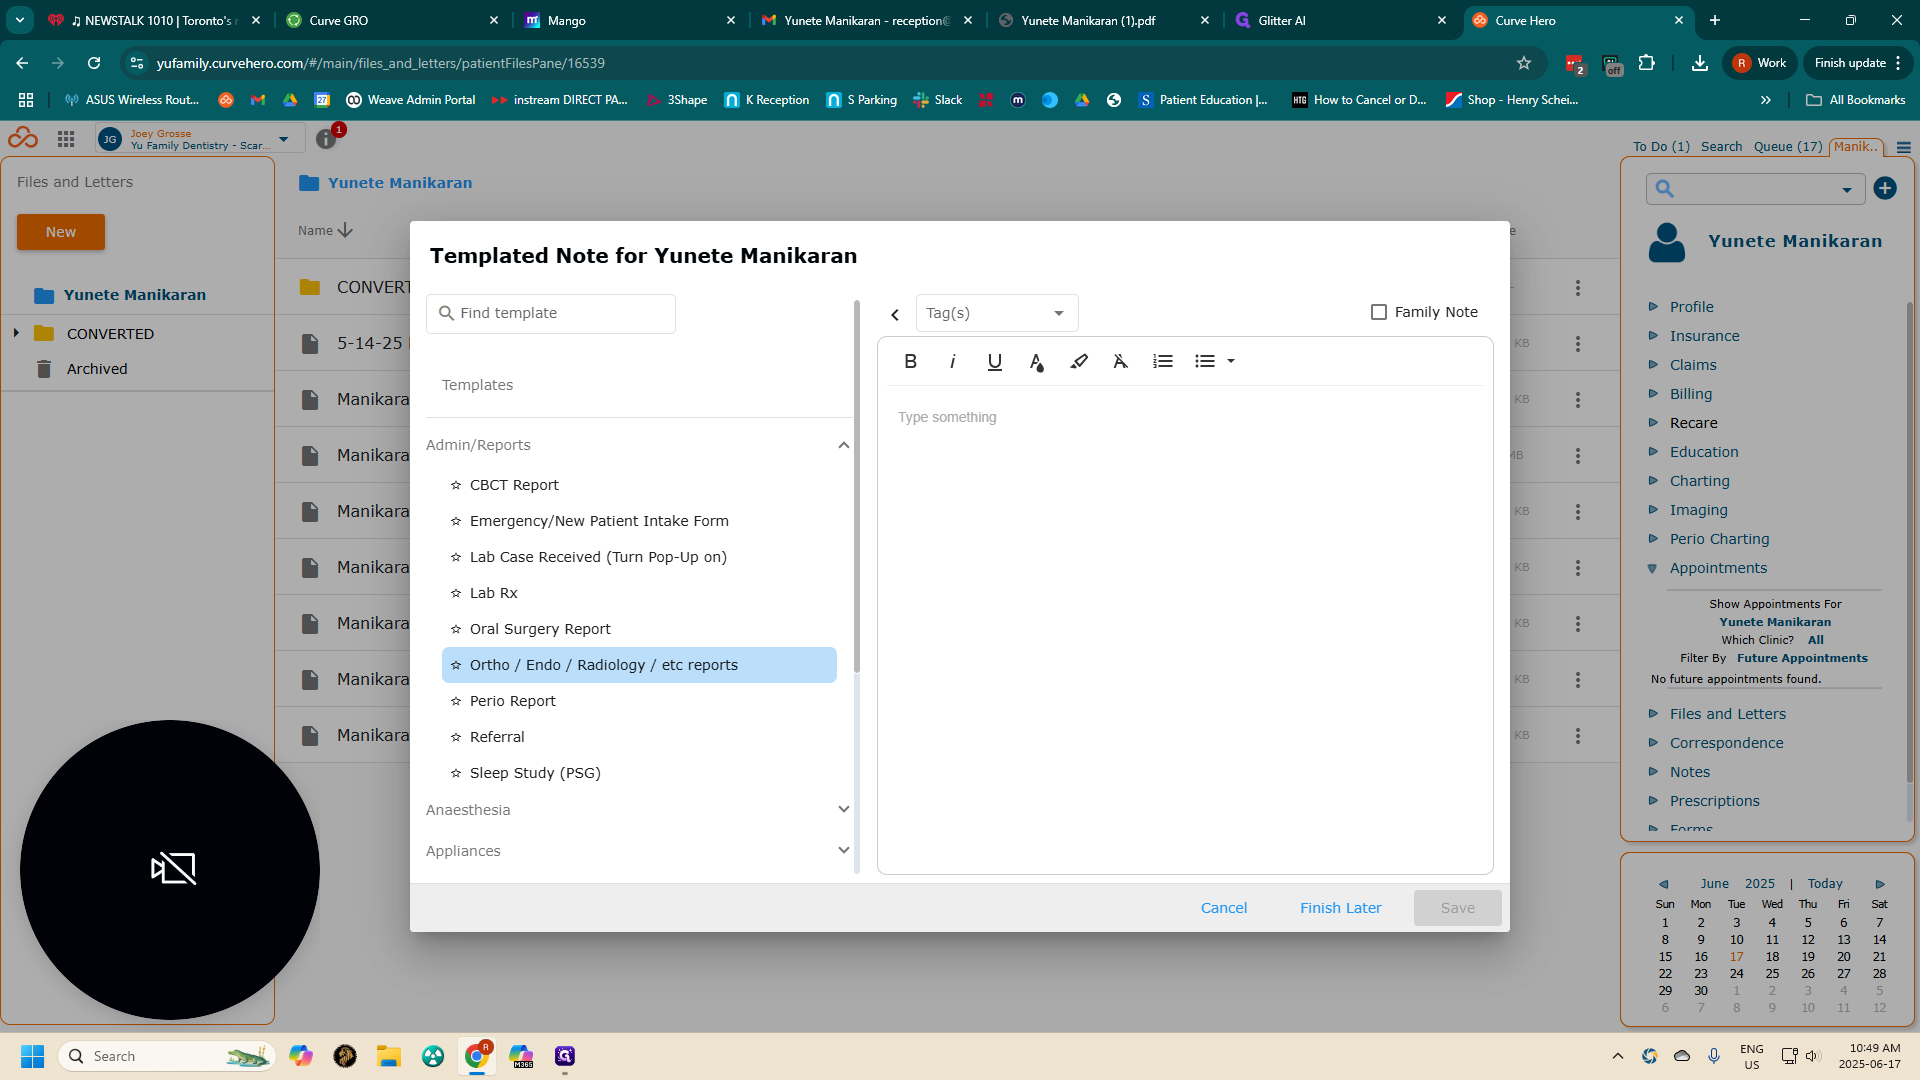
In Admin Reports, select the appropriate specialist.
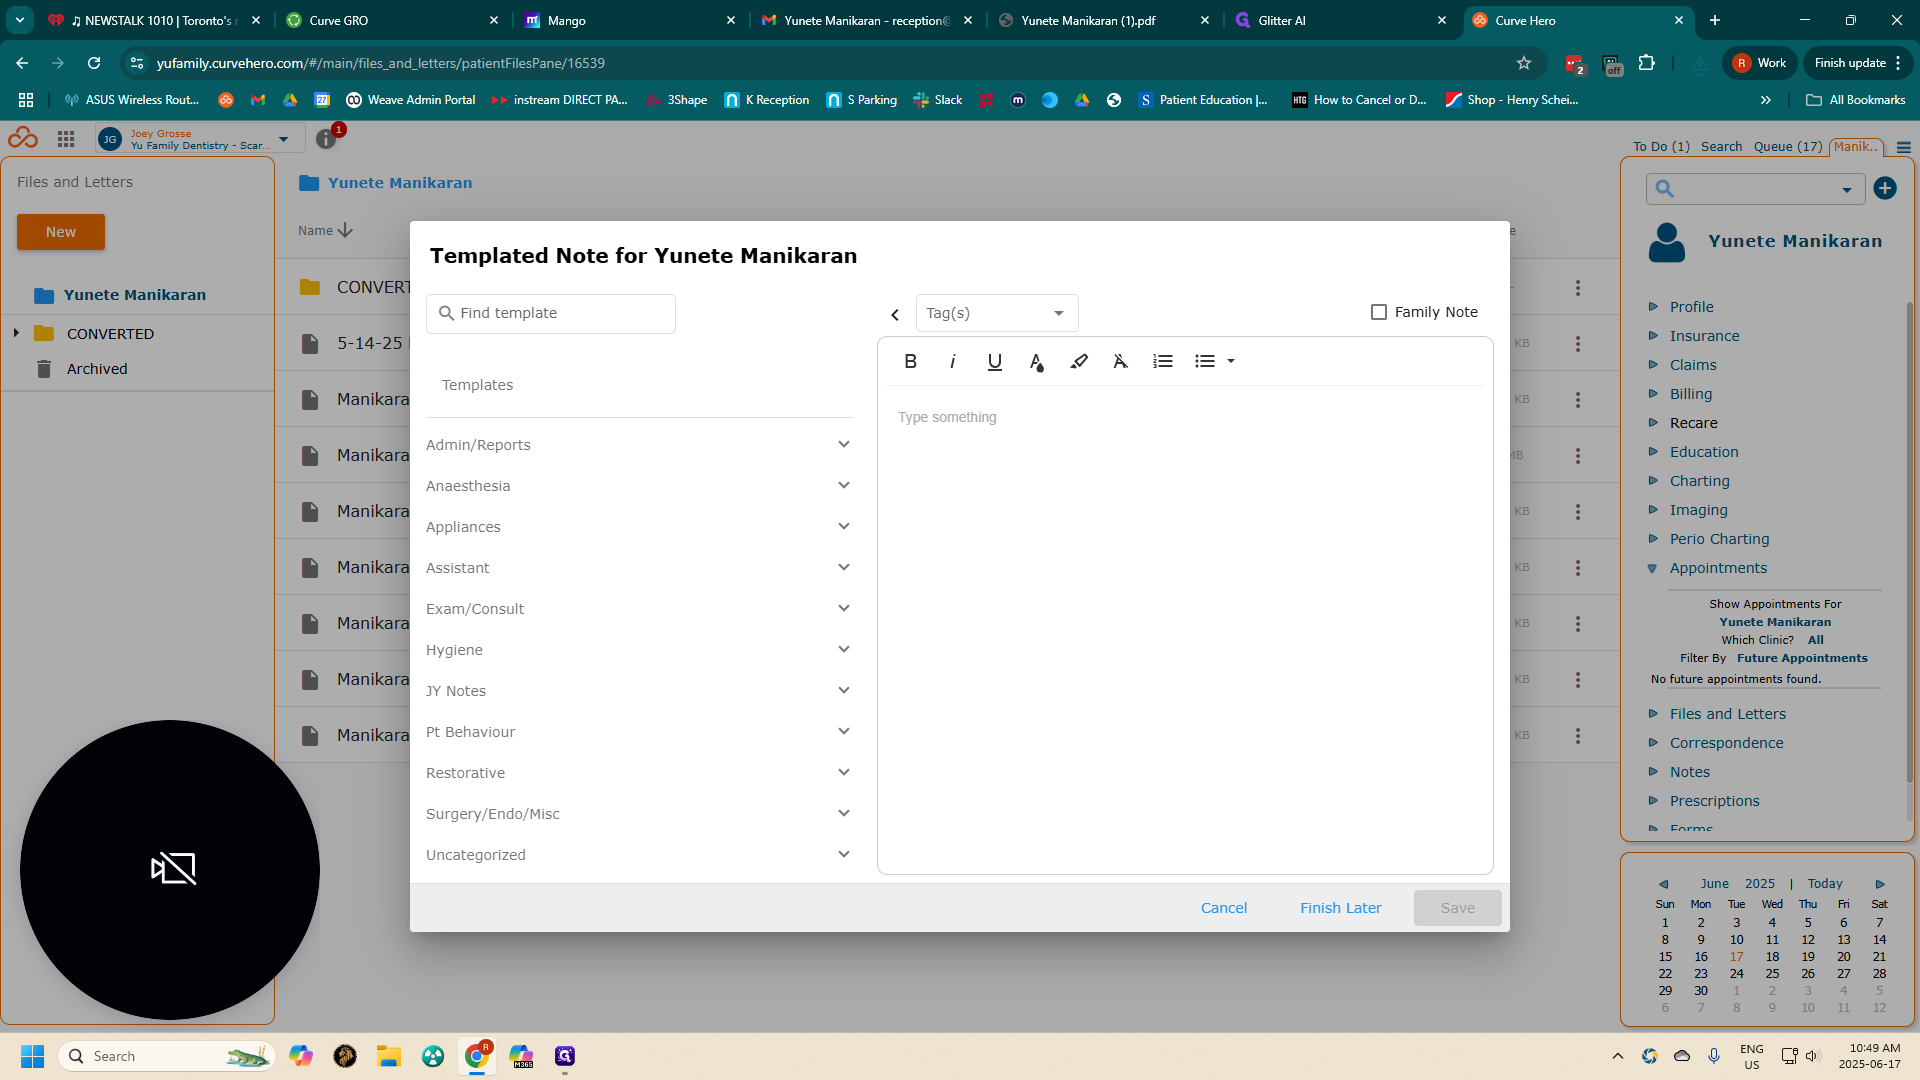
24
Click here
Step #24: Click here

In this case, it is endo.

25
Click on "Ortho / Endo / Radiology / etc reports"
Step #25: Click on "Ortho / Endo / Radiology / etc reports"

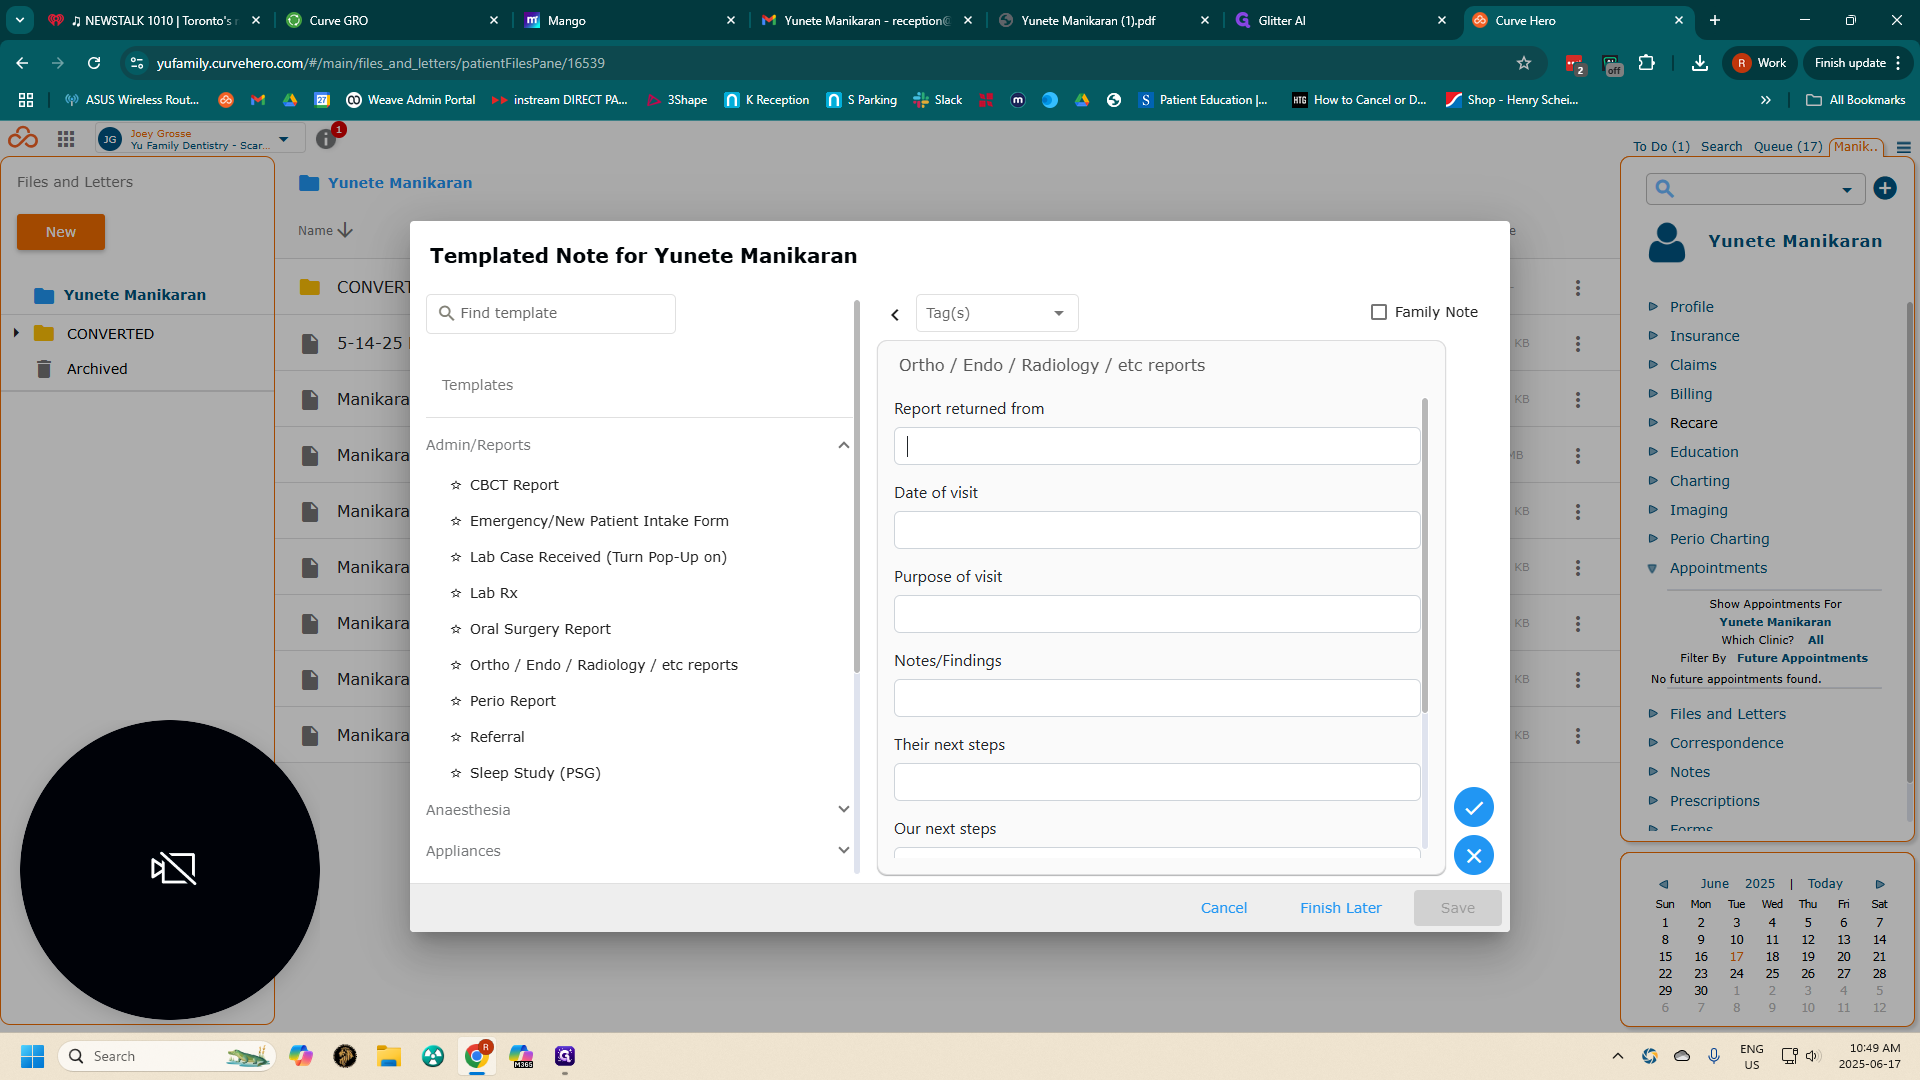
Enter who the report is from.

26
Click here
Step #26: Click here

It's often useful to have the letter handy for reference when entering notes.
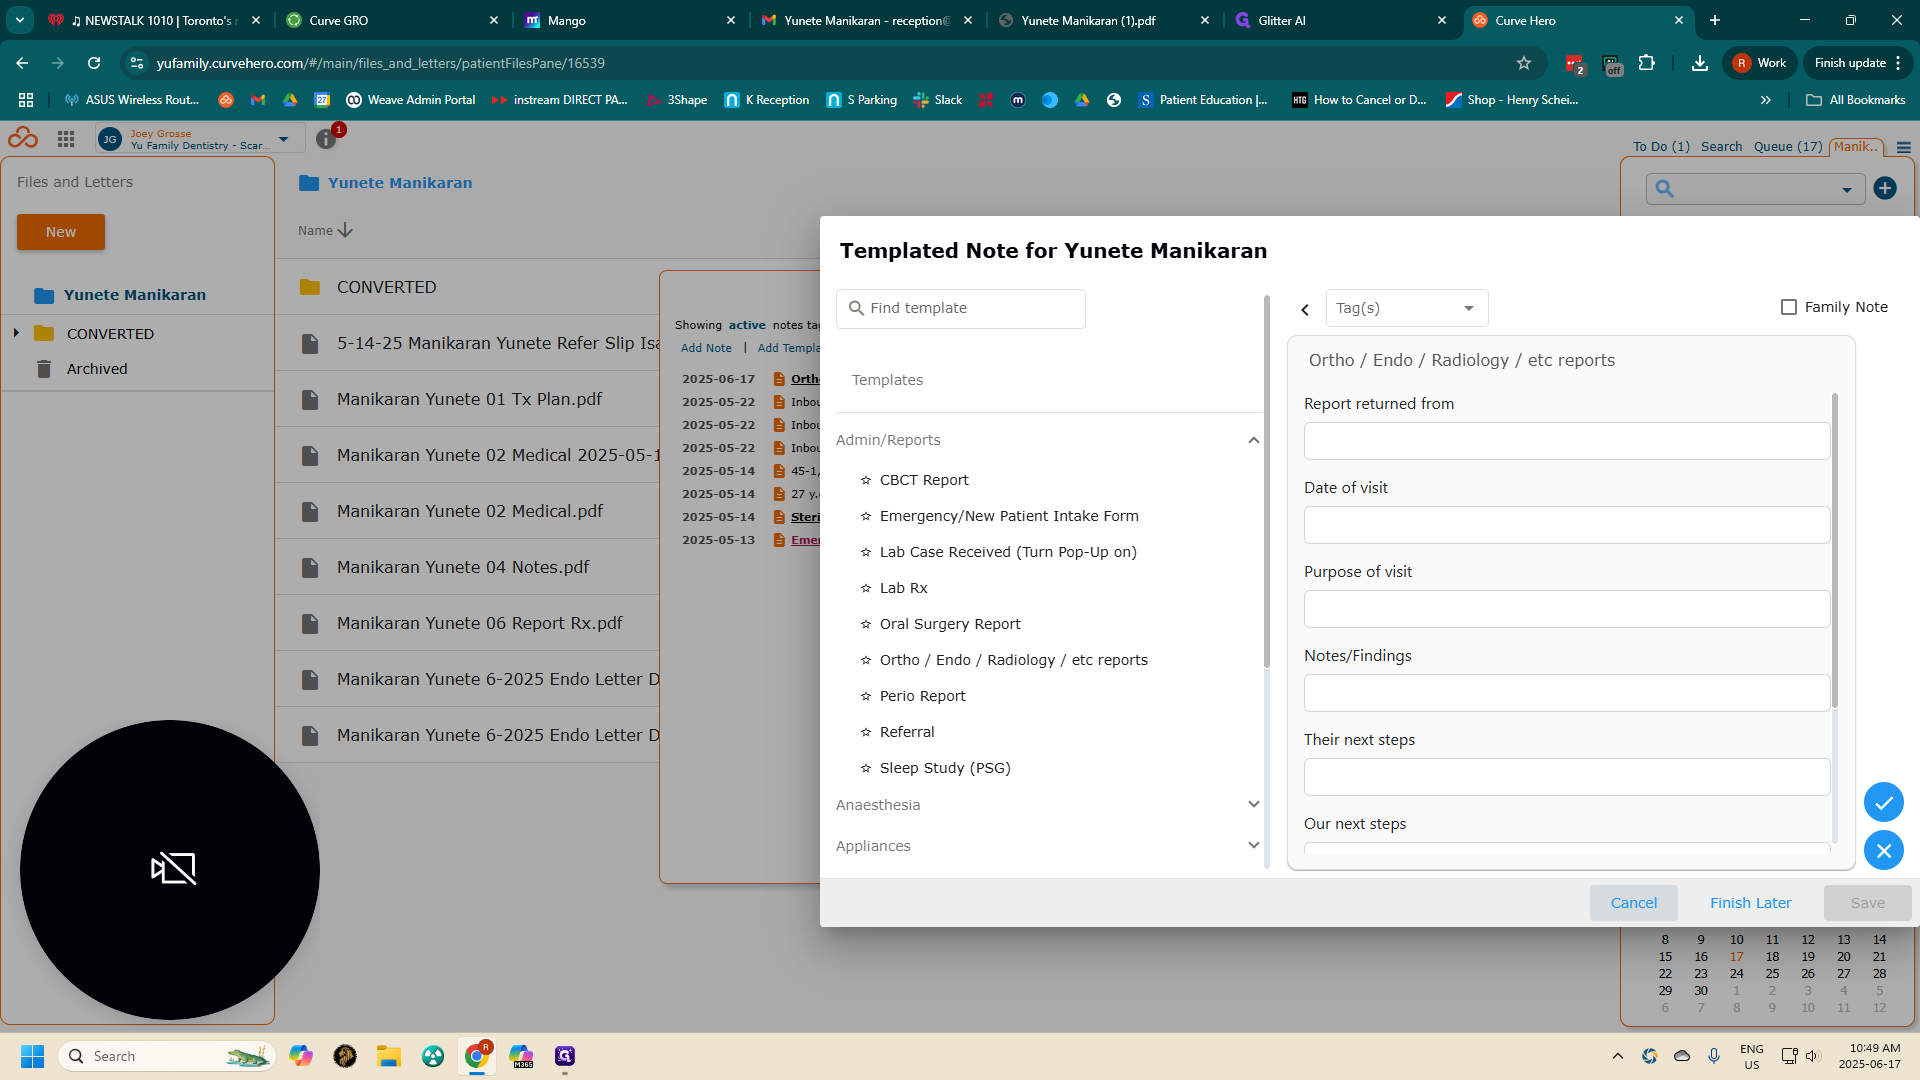
27
Click on "Cancel"
Step #27: Click on "Cancel"

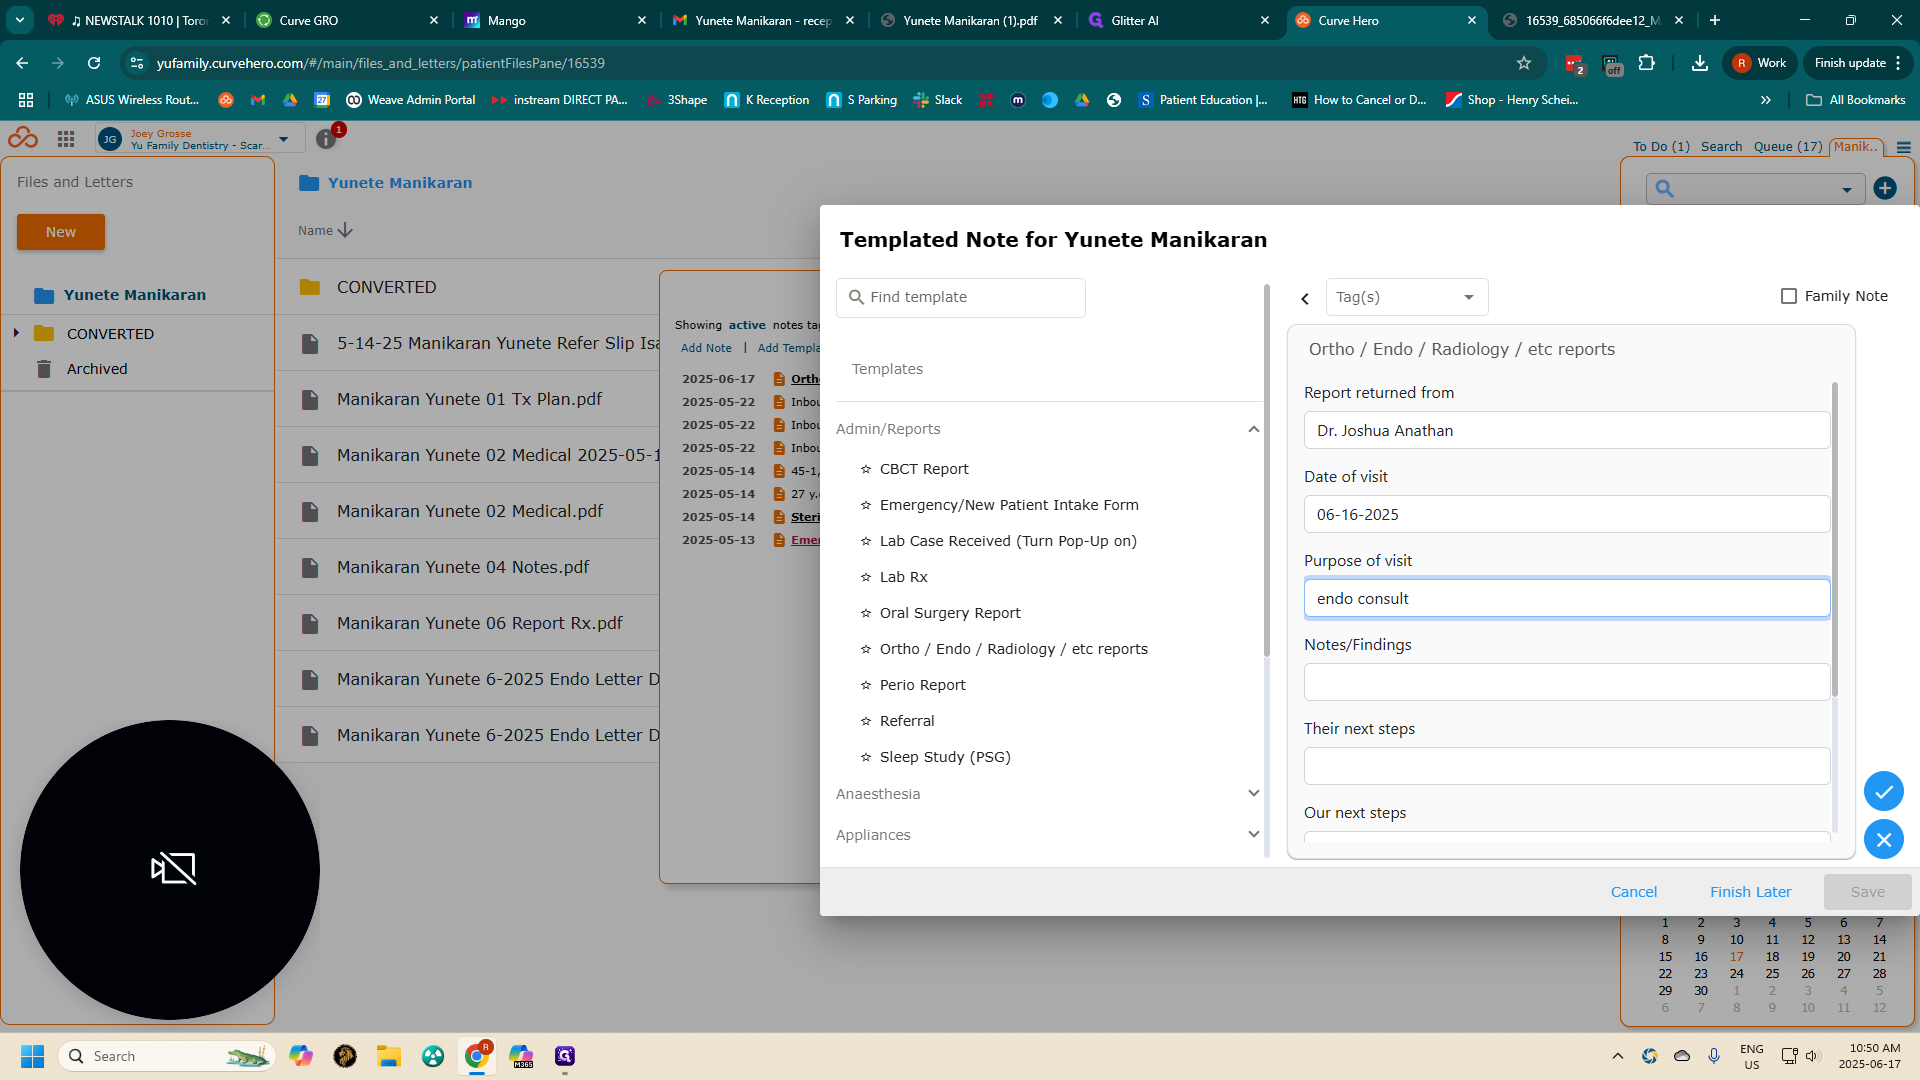
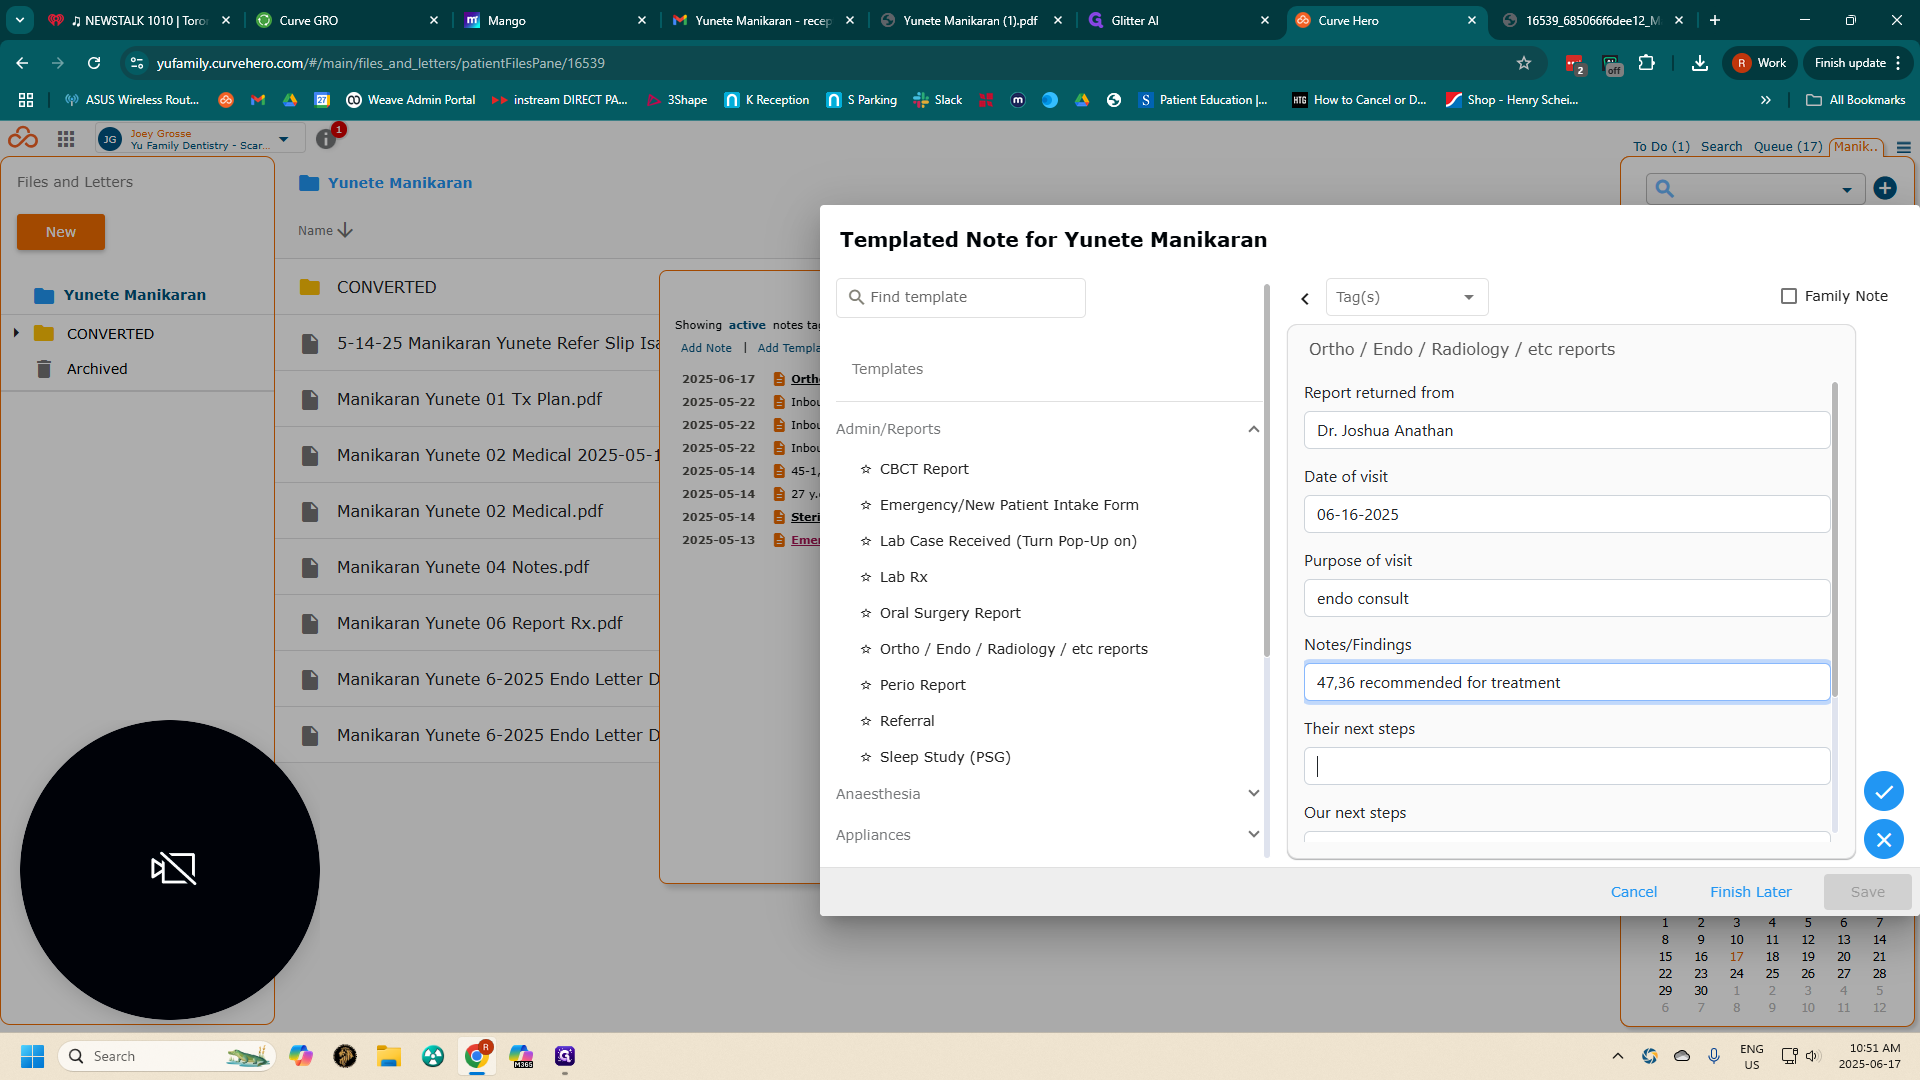
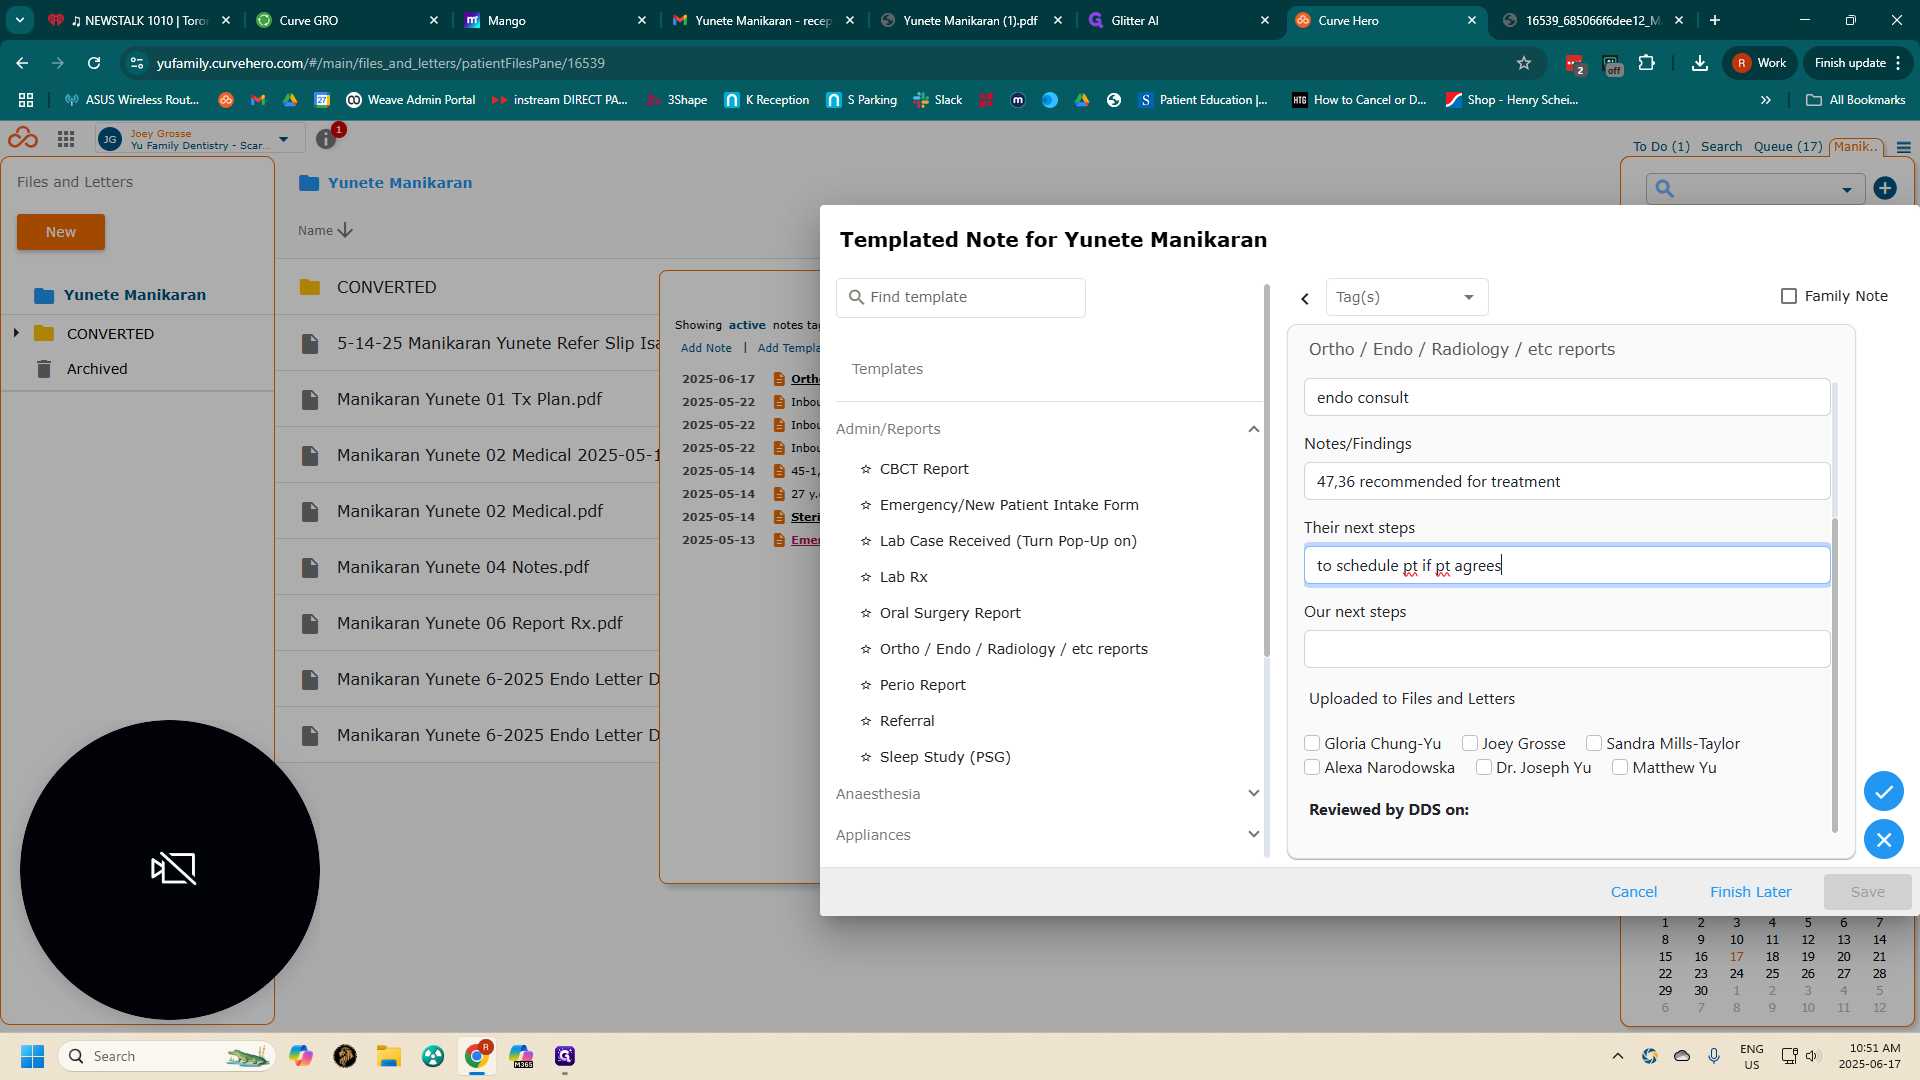
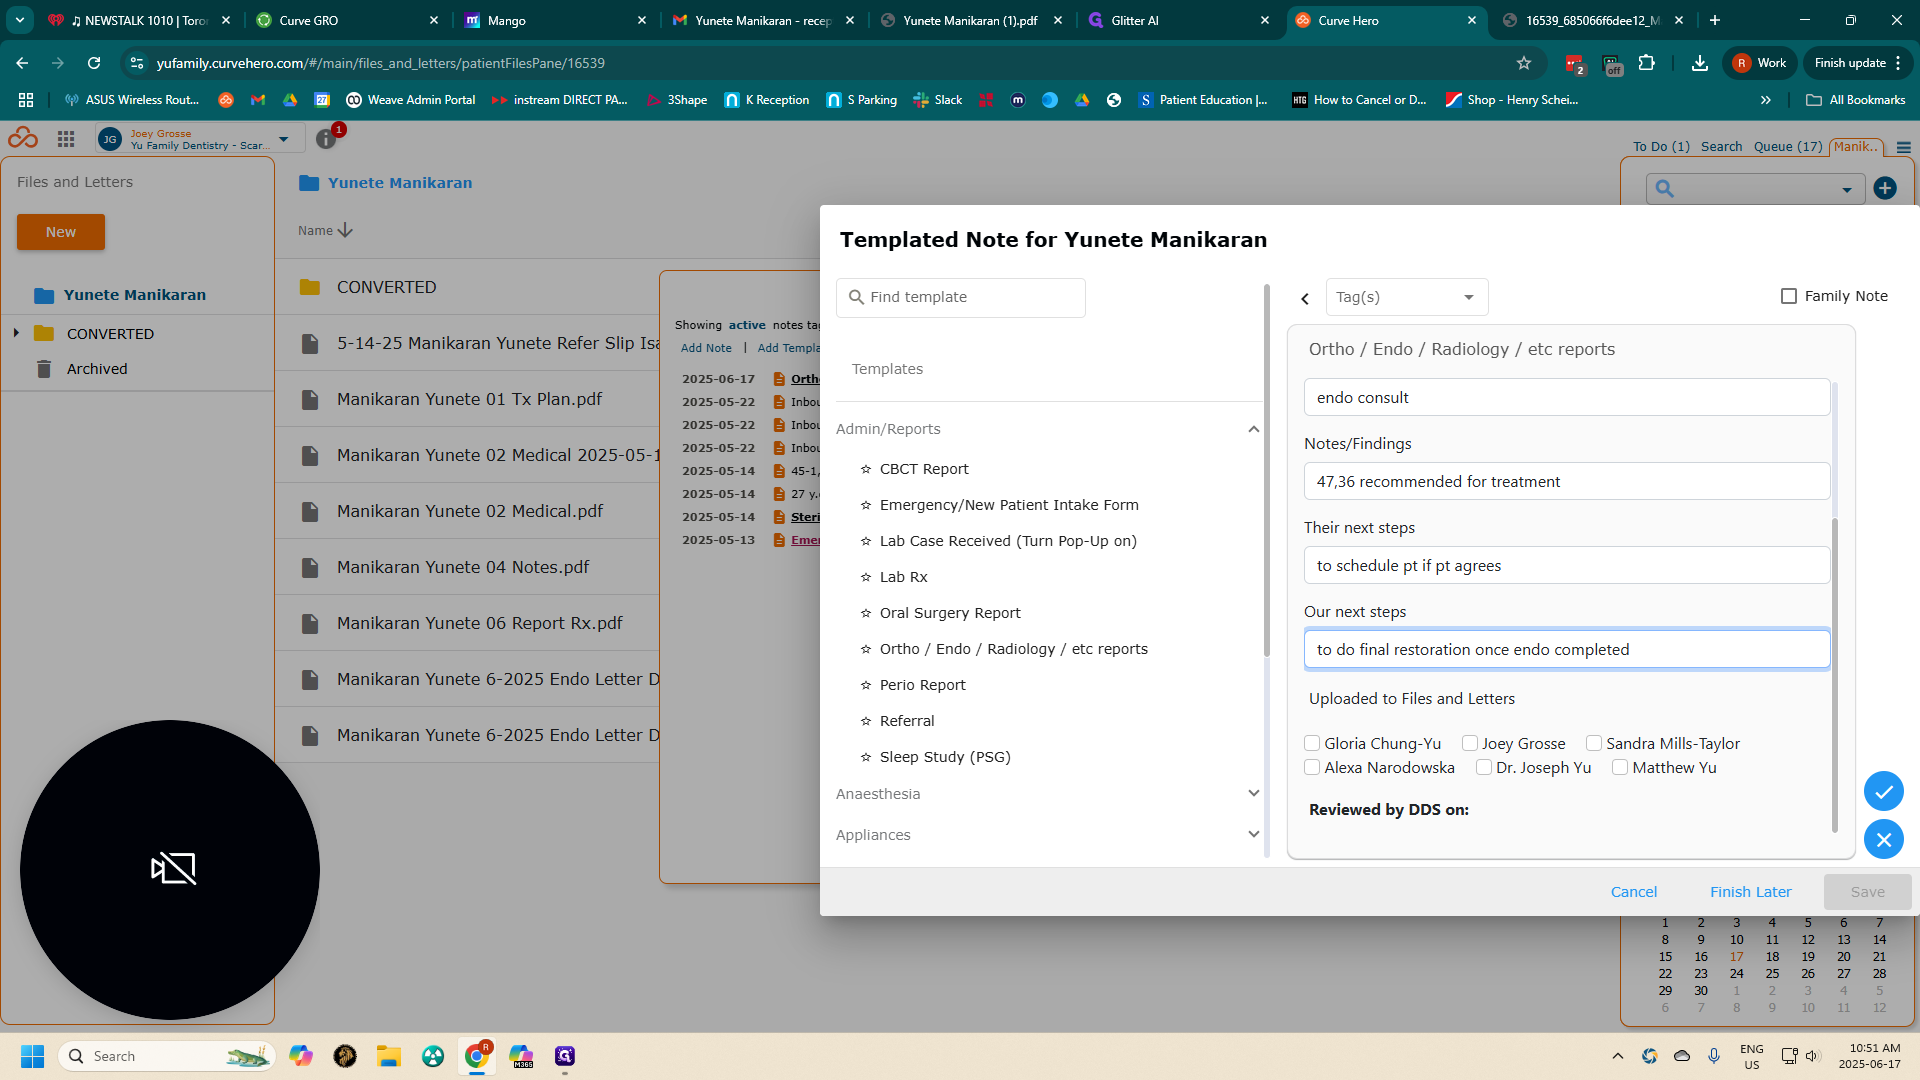
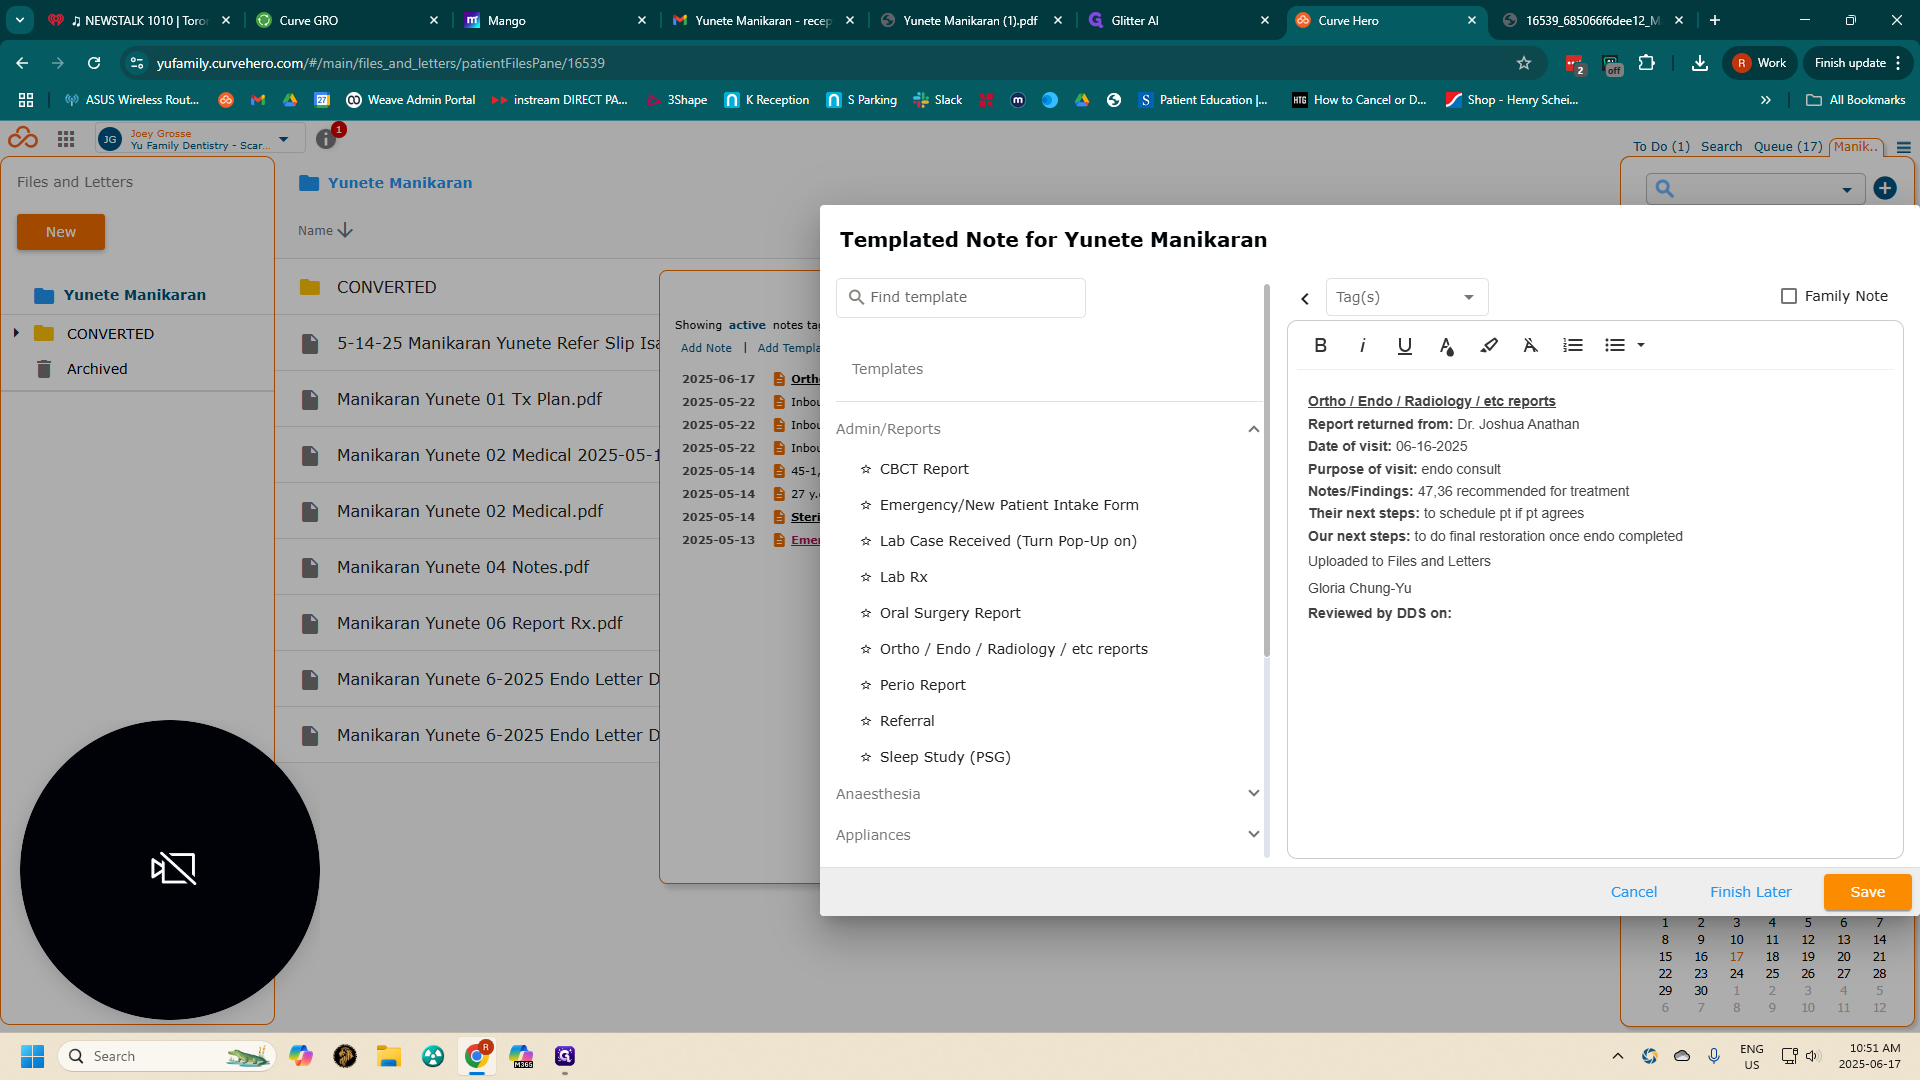
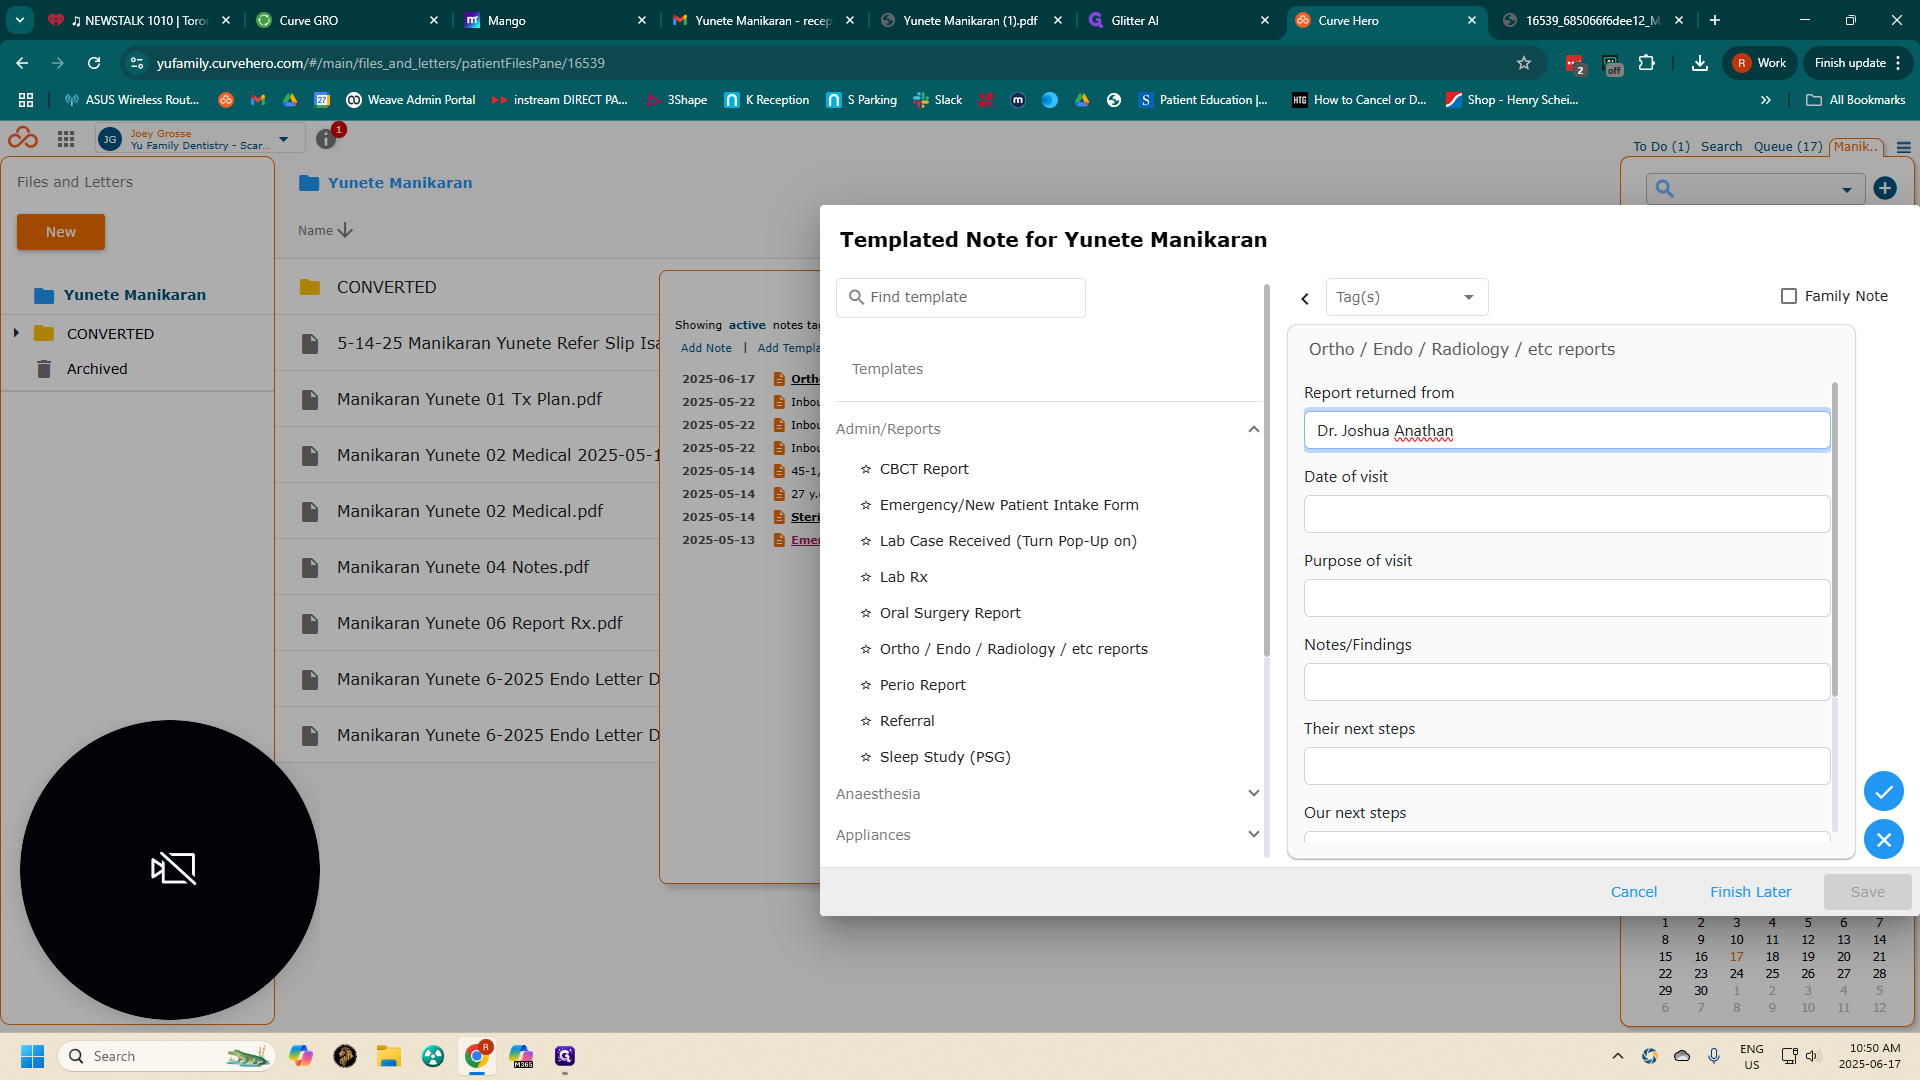
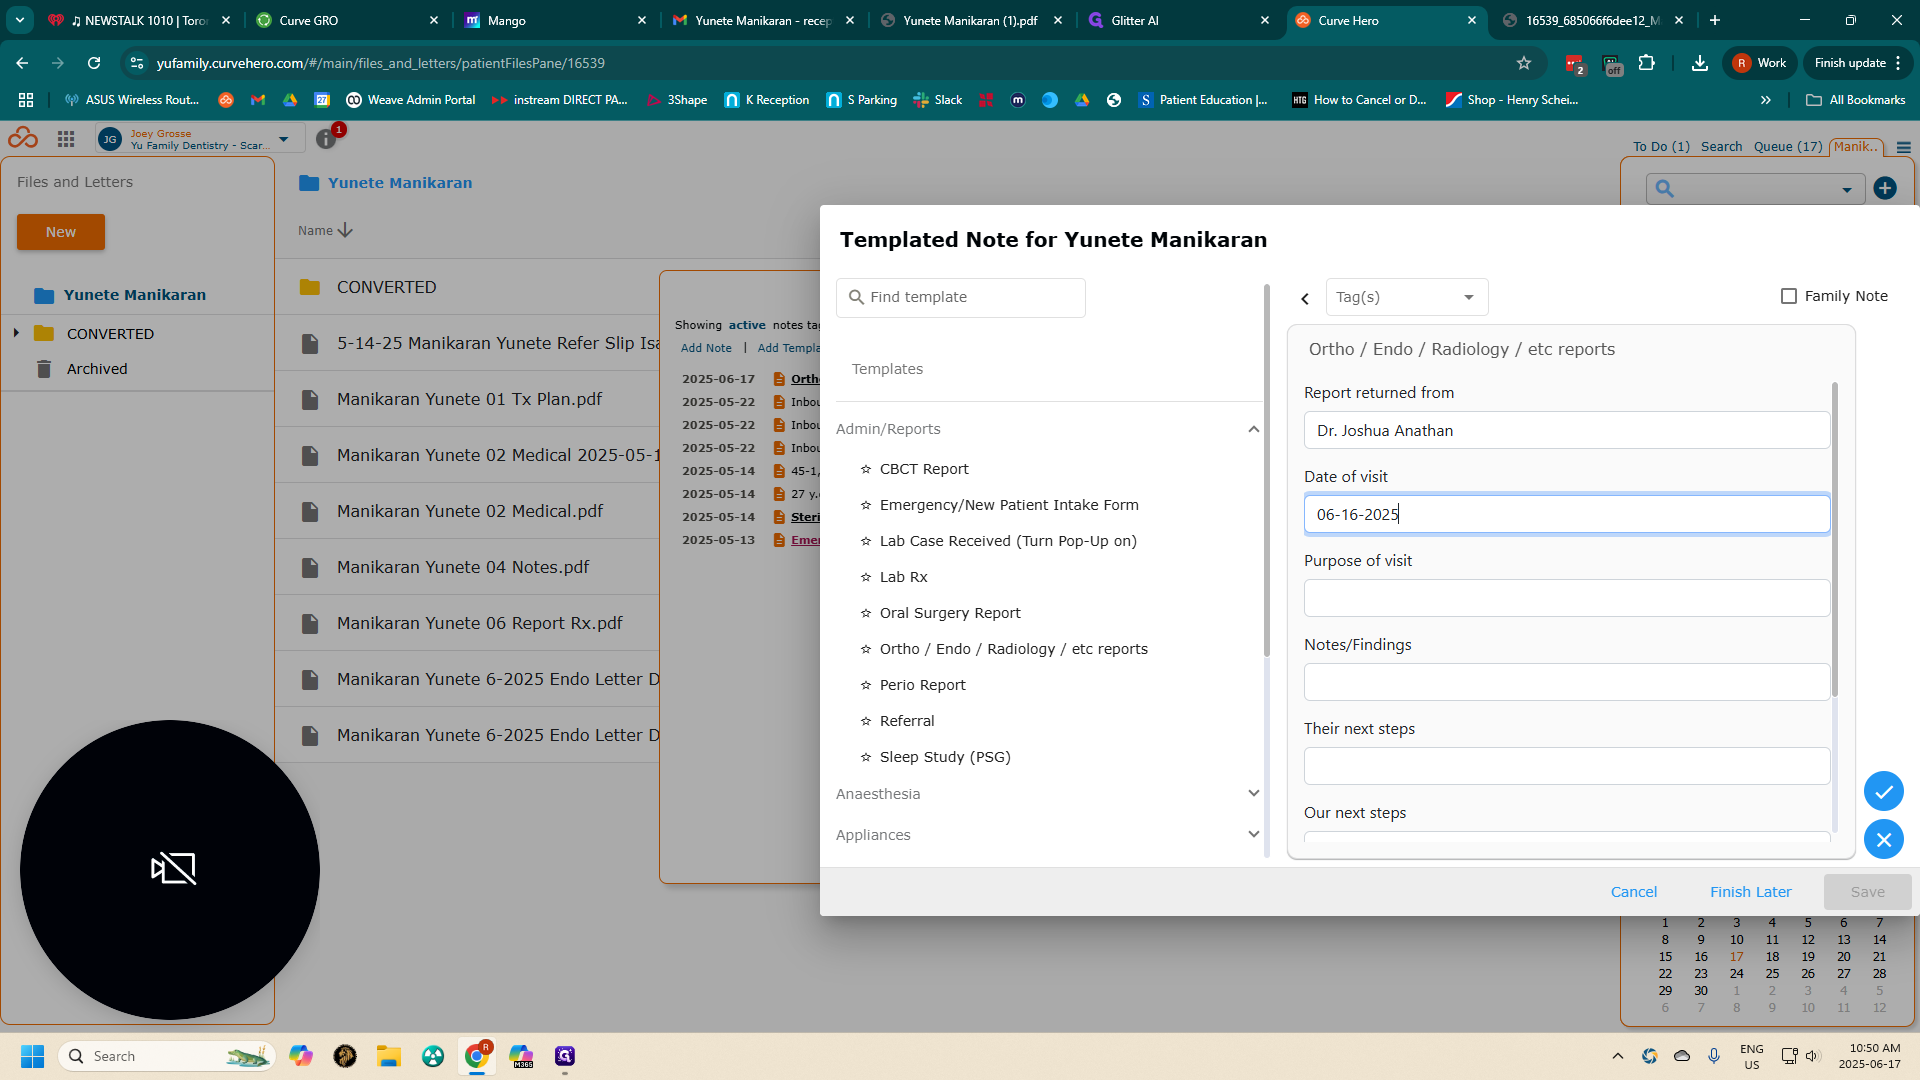
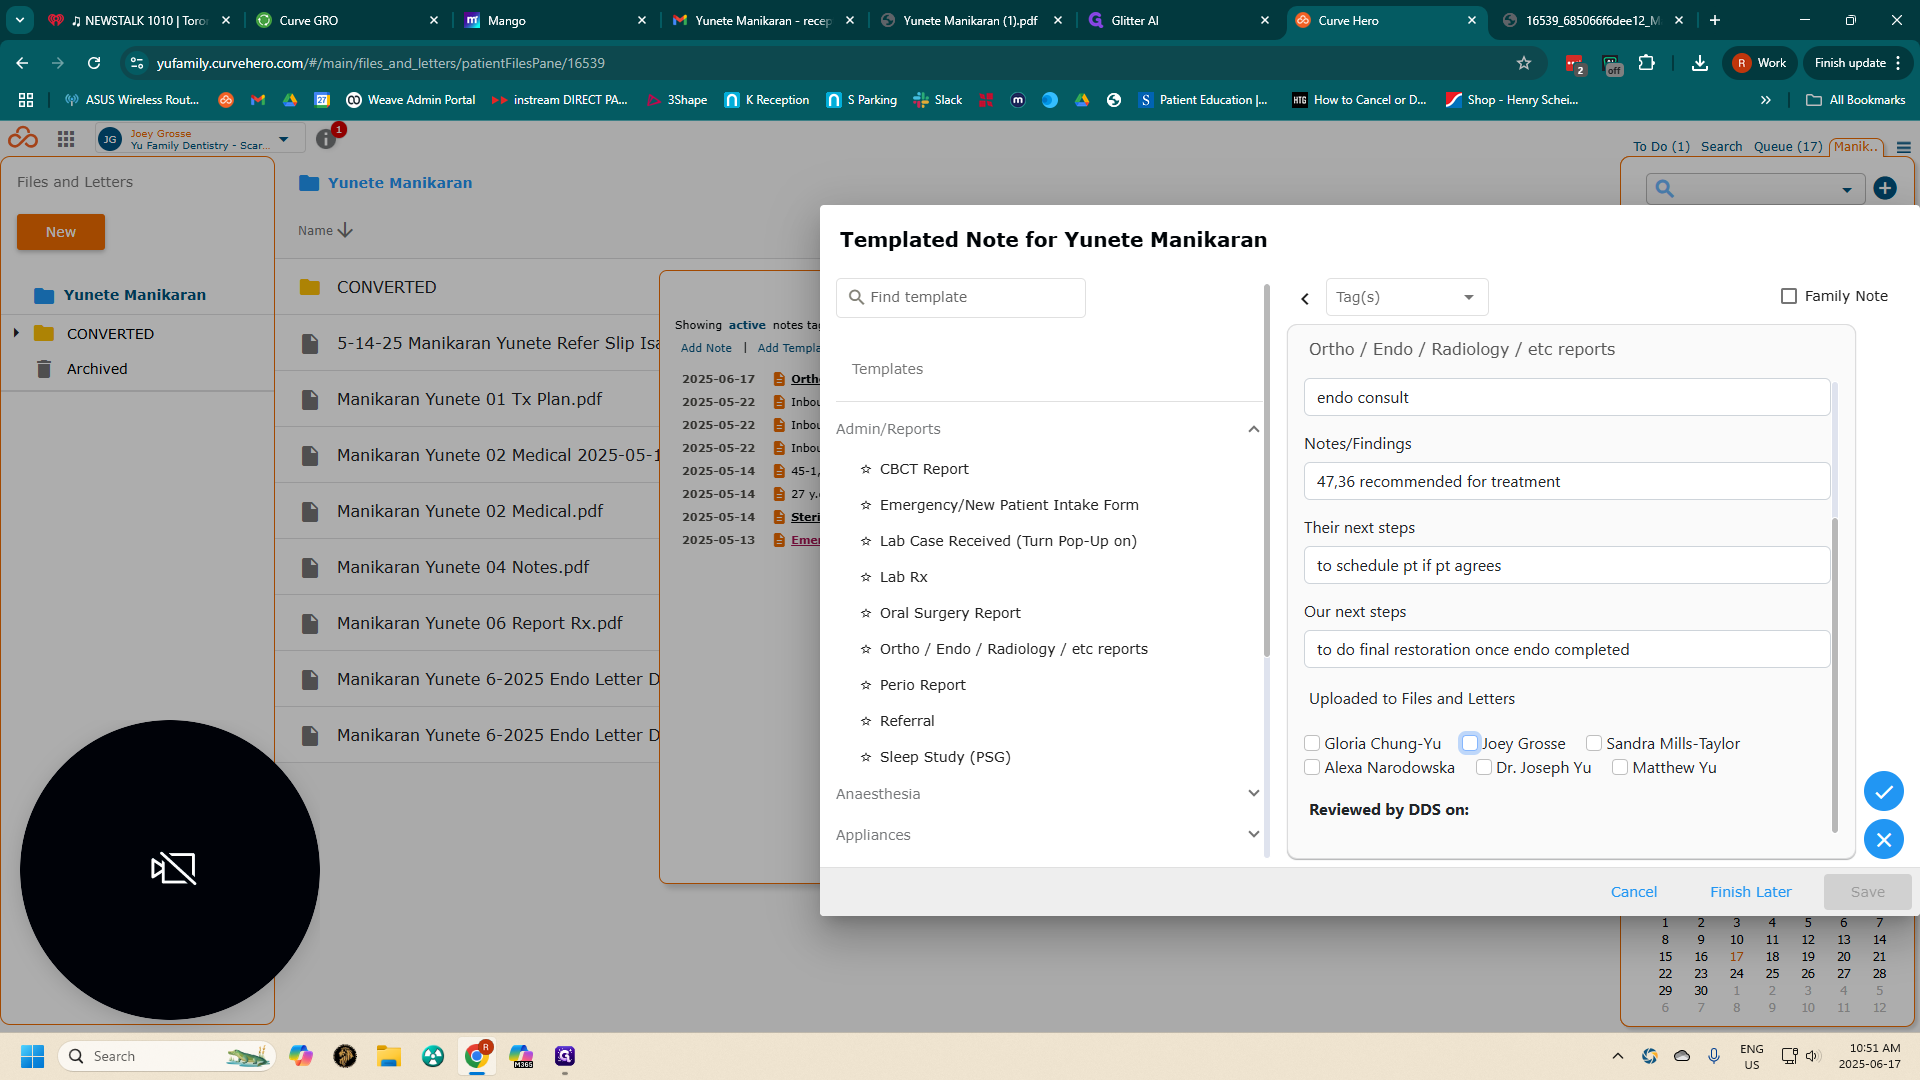
Enter the name of the doctor or clinic, the date of the patient's visit, and the purpose of the appointment, which in this case was an endo consultation. Include the specialist's findings, their next steps, and our next steps.
28
Type "Dr. Joshua Anathan"
29
Click here
Step #29: Click here
30
Enter date of report
31
Click here
Step #31: Click here
32
Enter purpose of patient's visit
33
Click here
Step #33: Click here
34
Enter specialist findings &/or what was done at visit
35
Click here
Step #35: Click here
36
Enter next steps to be done by specialist
37
Click here
Step #37: Click here

38
Enter what our next steps are to be
39
Click on the name of the person who uploaded the specialist report to "files and letters"
Step #39: Click on the name of the person who uploaded the specialist report to "files and letters"

This was previously uploaded by Gloria, so I will click on Gloria.
40
Click on "Gloria Chung - Yu"
Step #40: Click on "Gloria Chung - Yu"

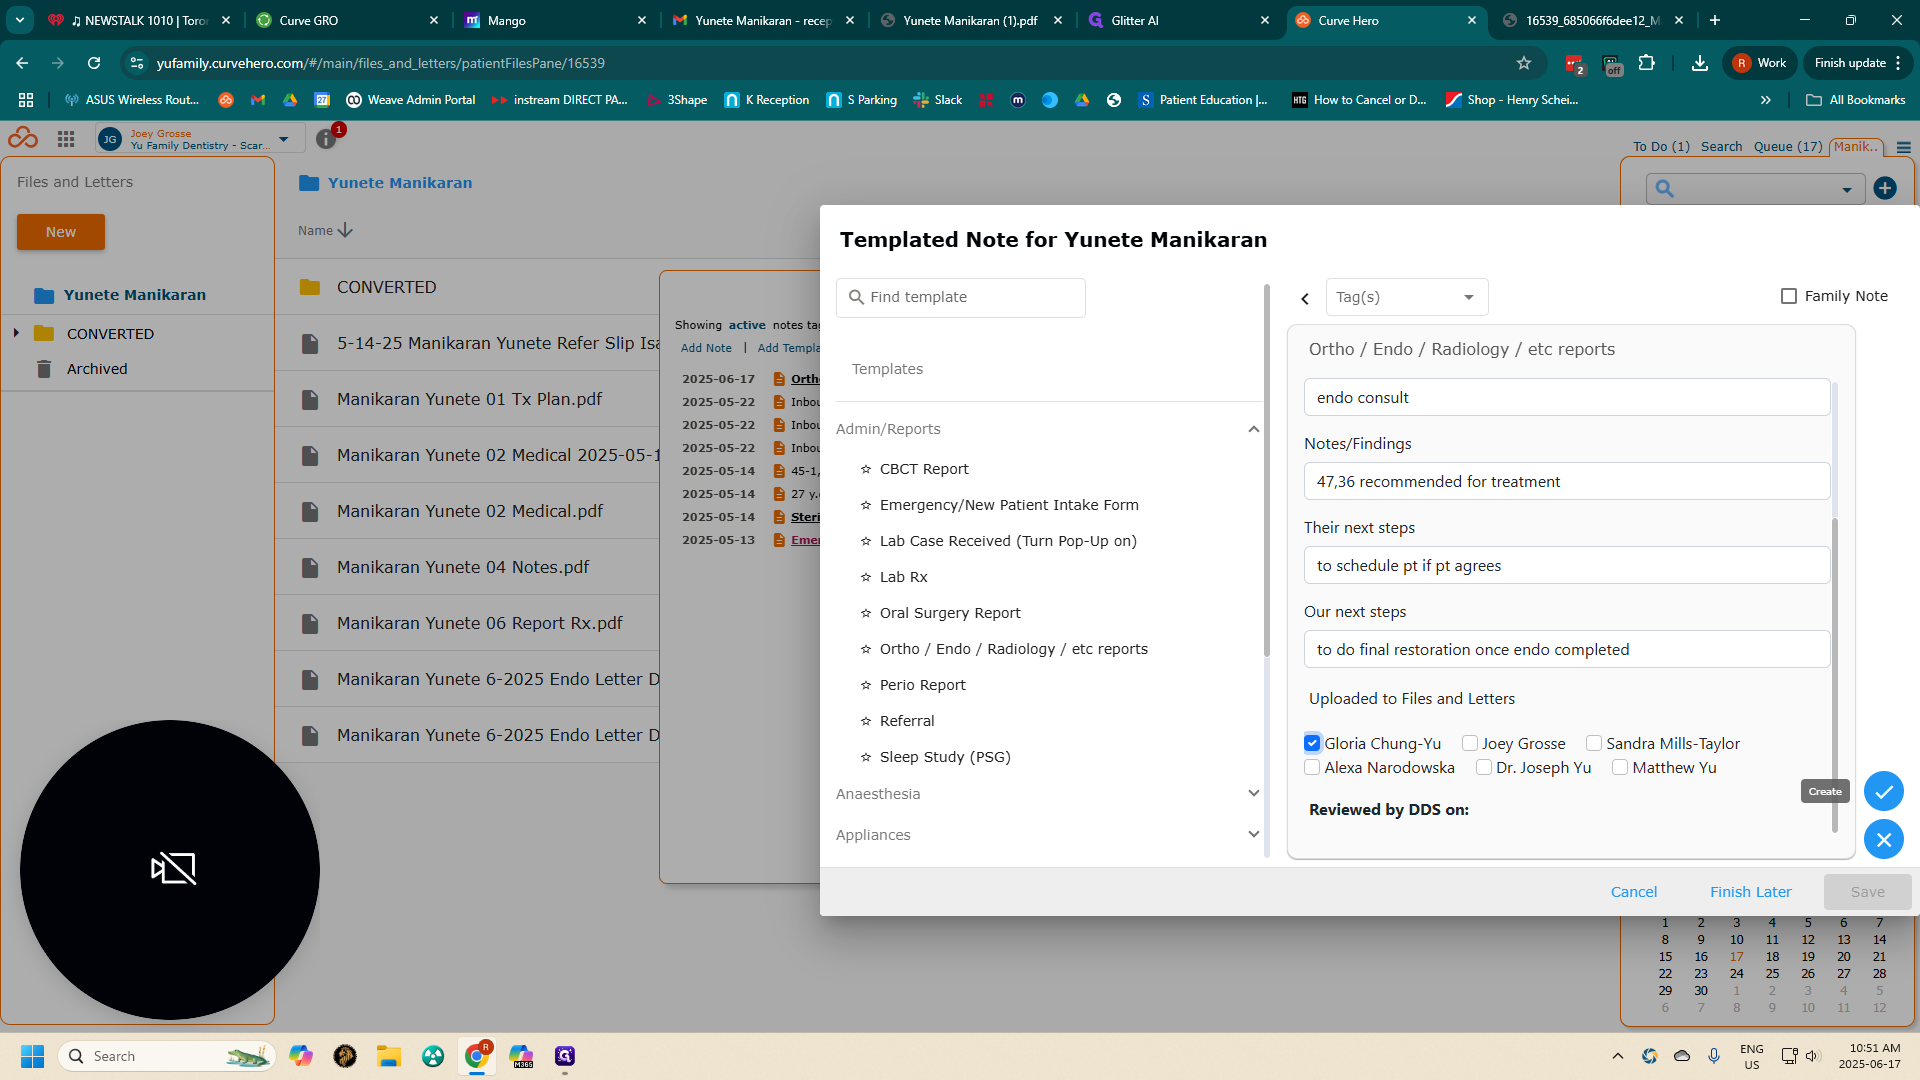
Then, I will click the check mark and save.
41
Click here
Step #41: Click here
42
Click on "Save"
Step #42: Click on "Save"

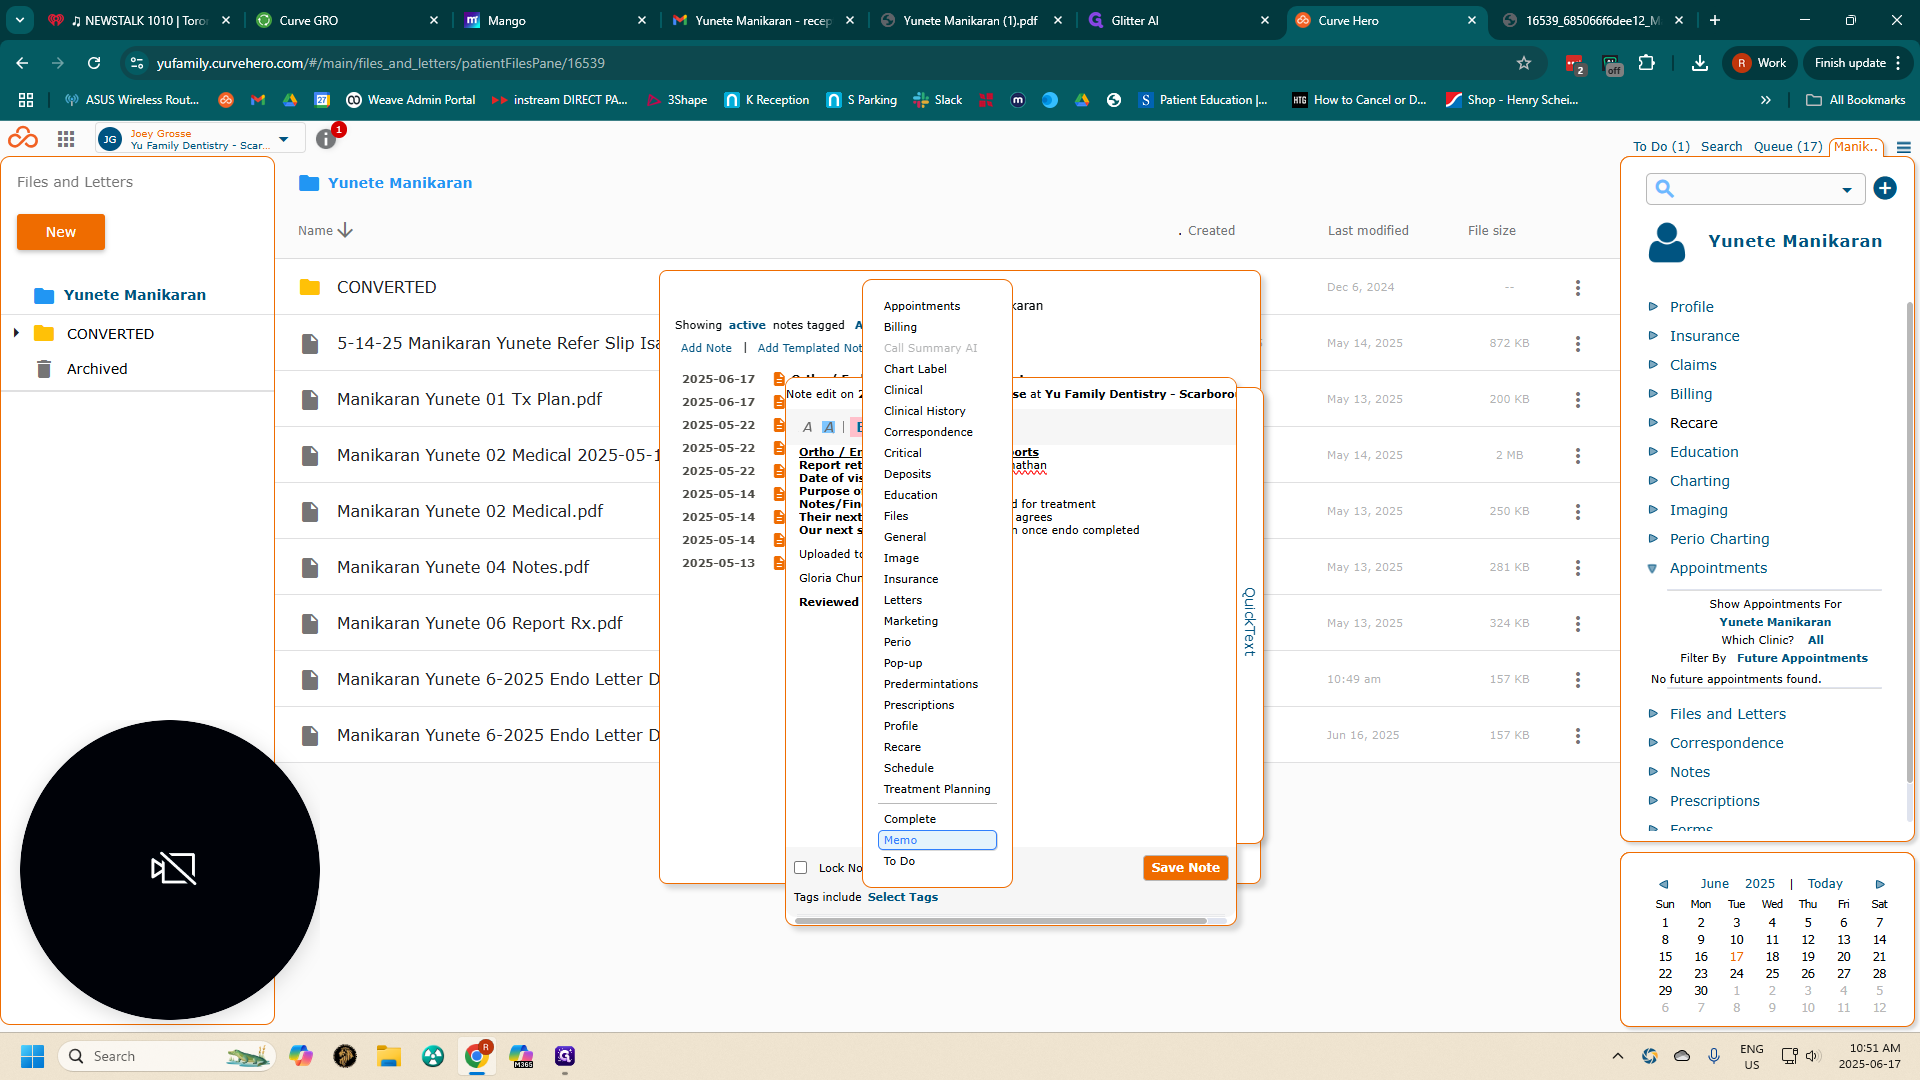
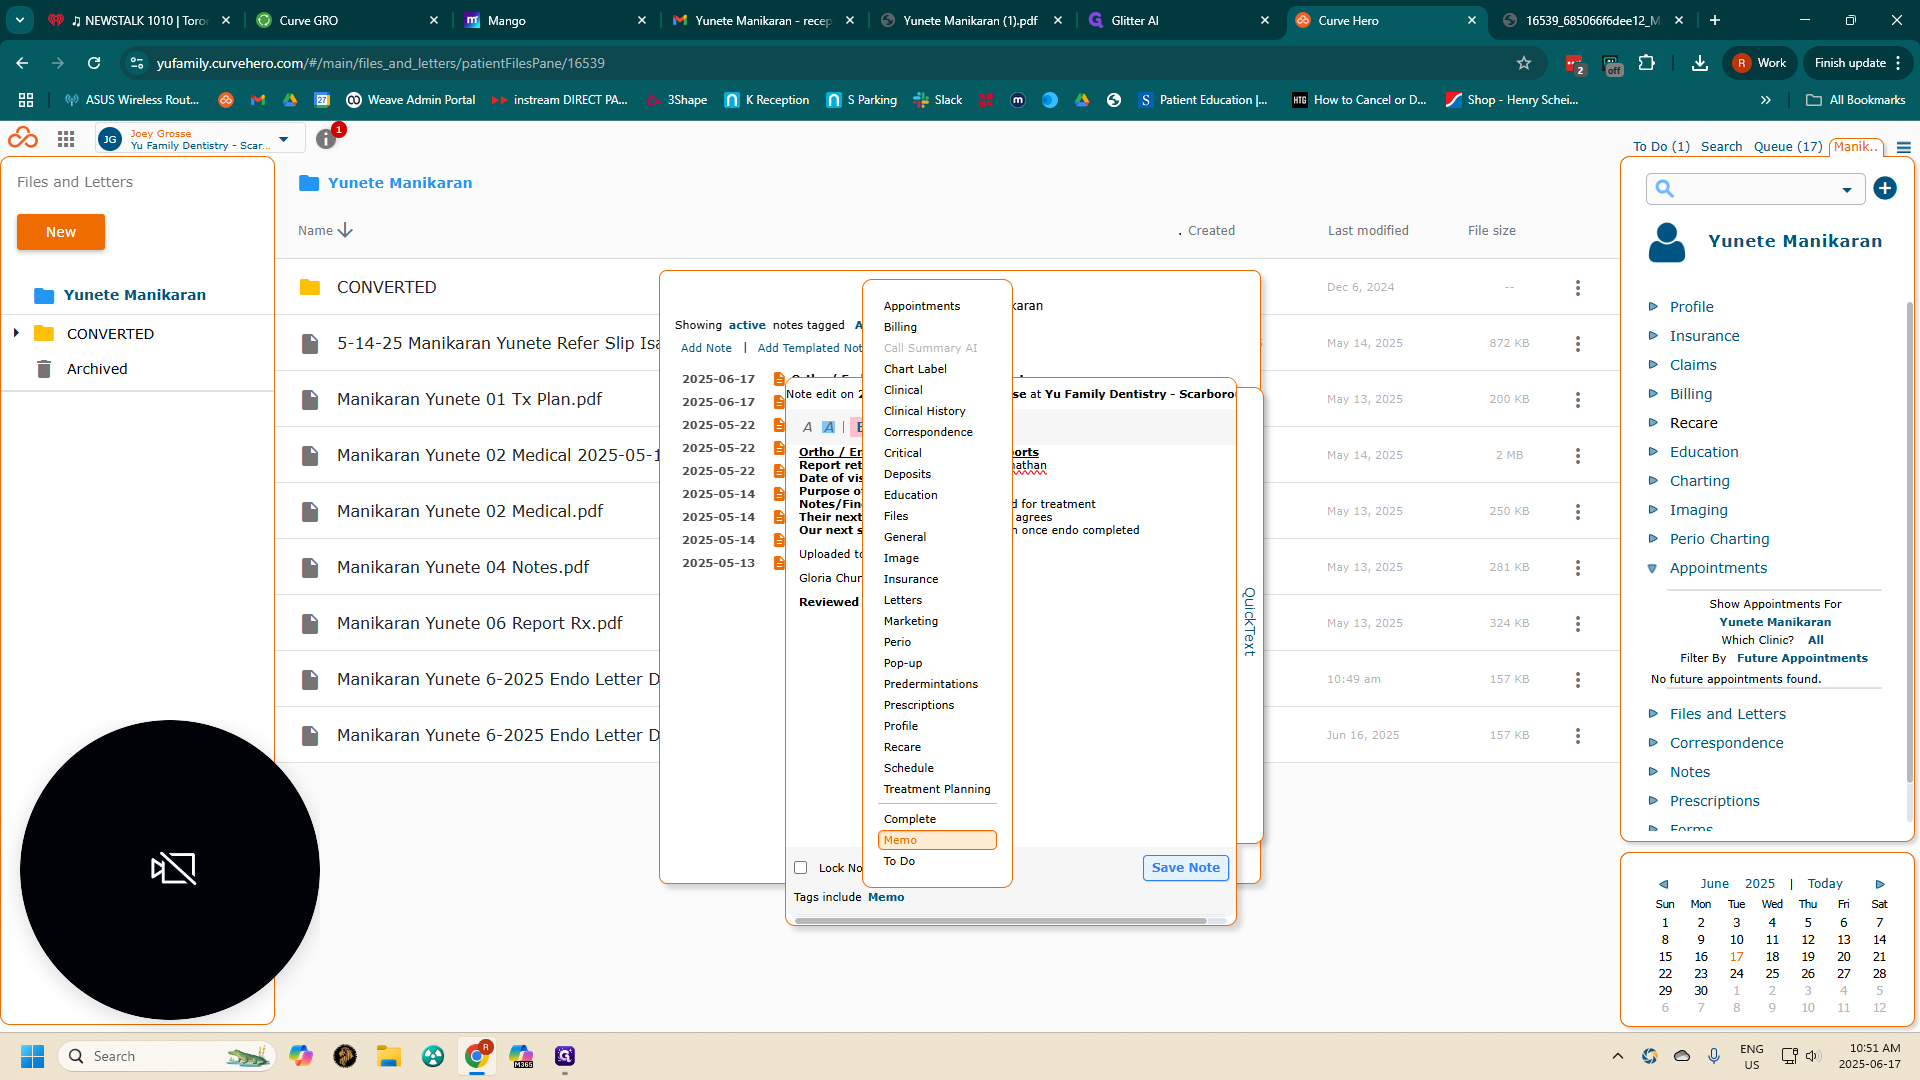
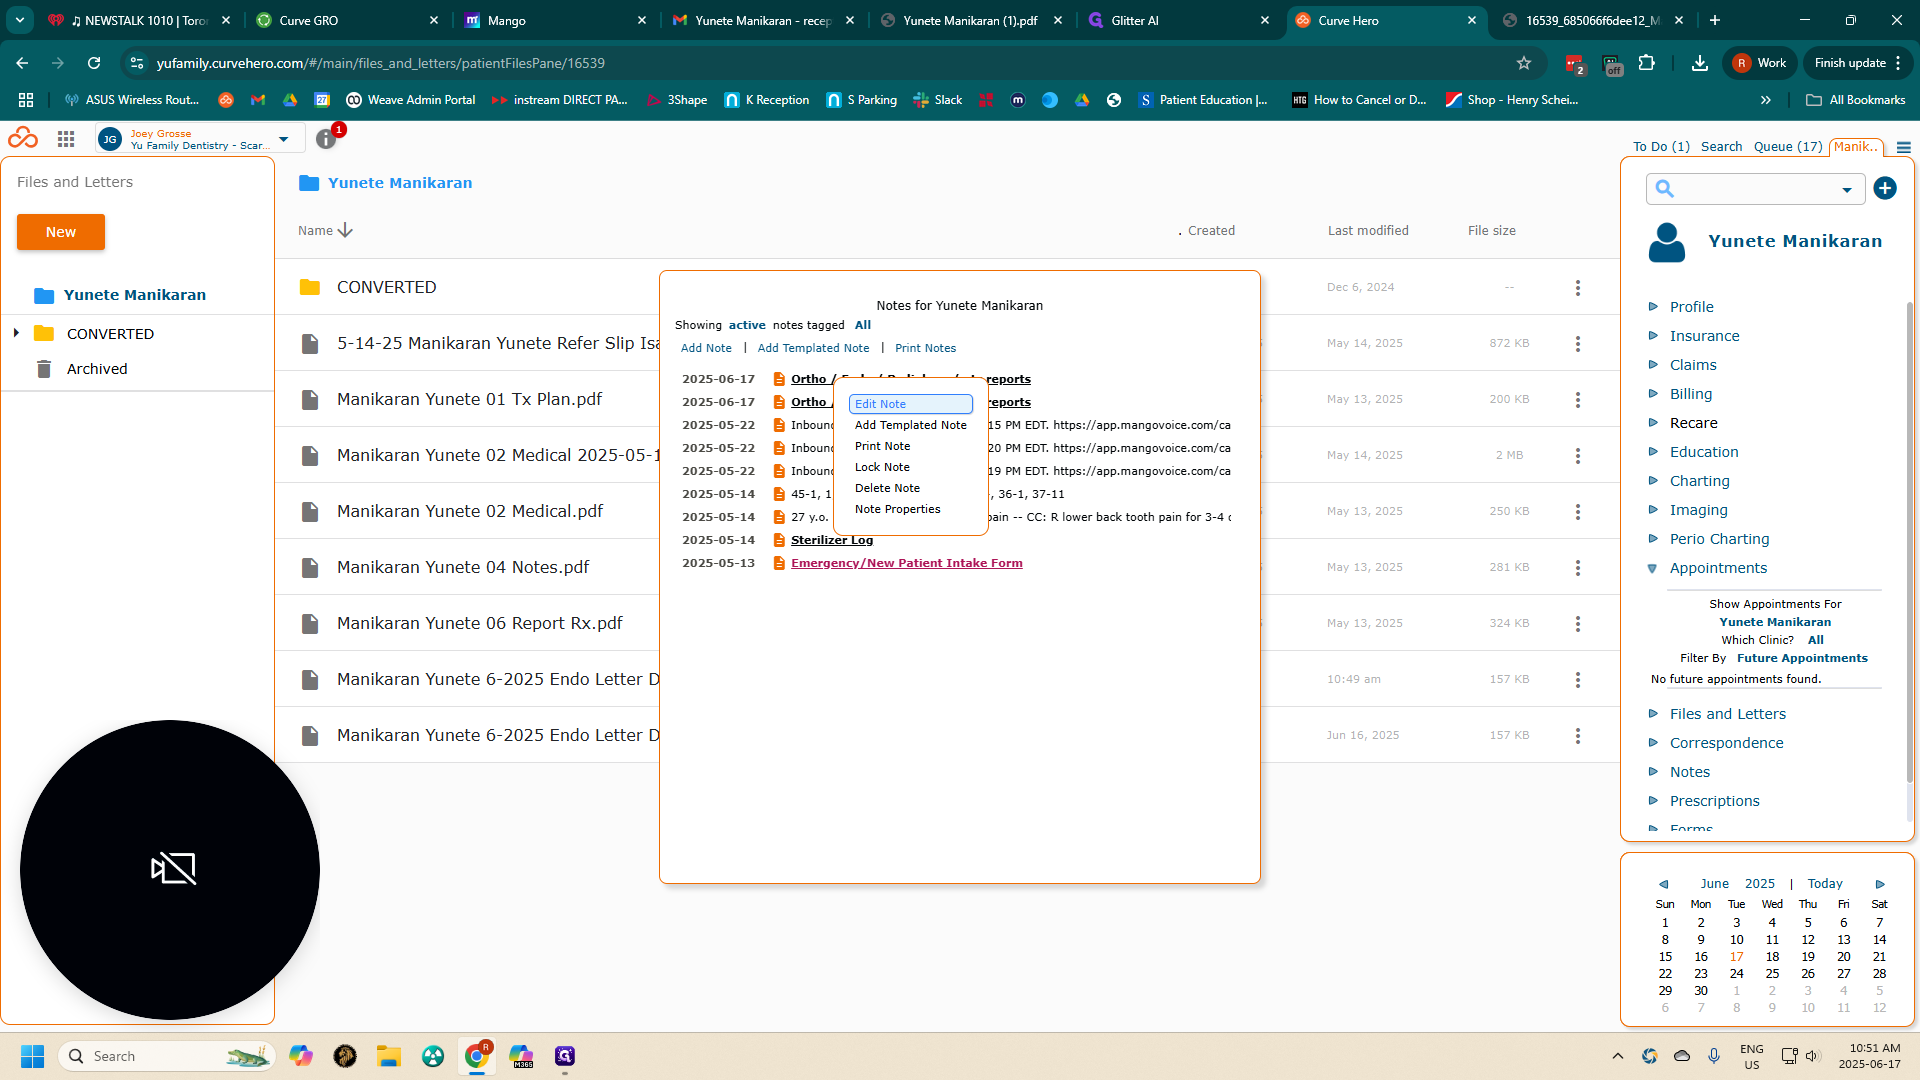
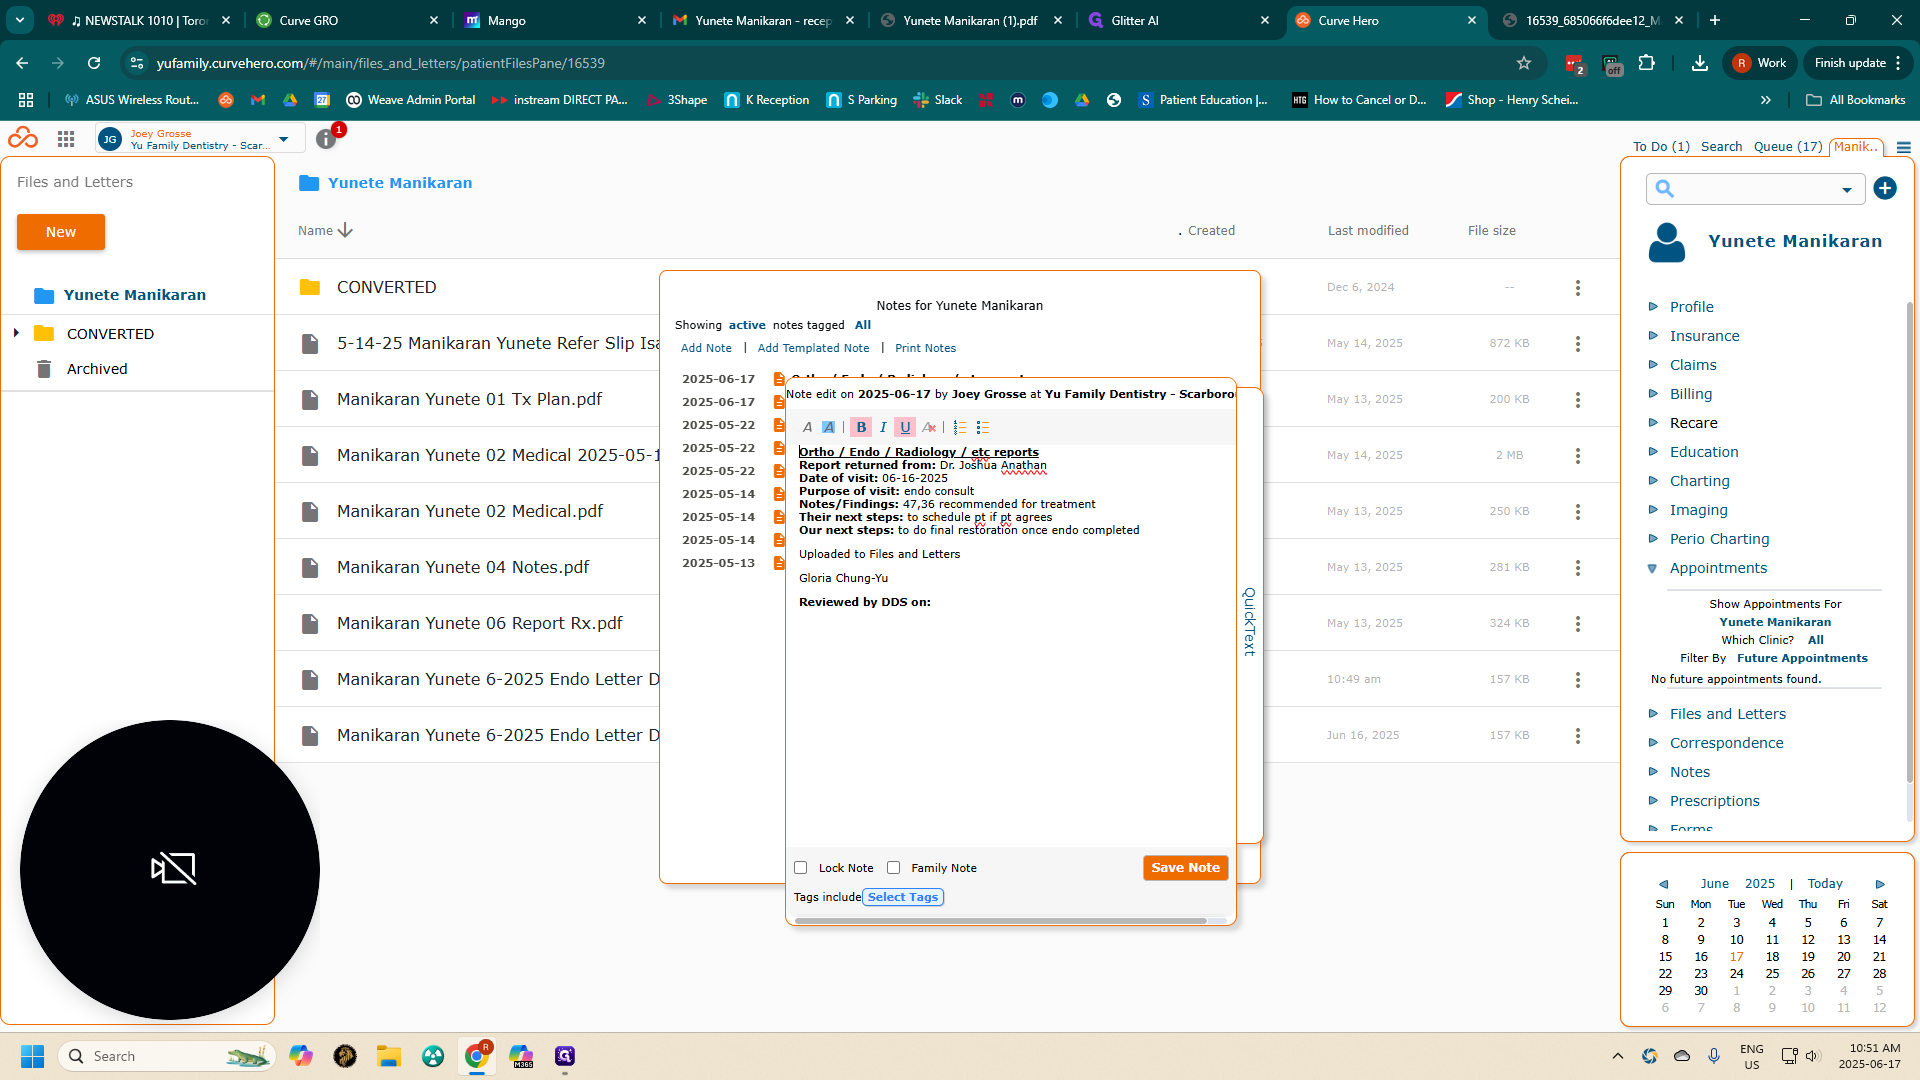
To alert the doctor that a report is ready for review, go to the Edit Note feature. Under tags, select "Memo" and then Save Note.
43
Click on "Edit Note"
Step #43: Click on "Edit Note"
44
Click on "Tags include Select Tags"
Step #44: Click on "Tags include Select Tags"
45
Click on "Memo"
Step #45: Click on "Memo"
46
Click on "Save Note"
Step #46: Click on "Save Note"

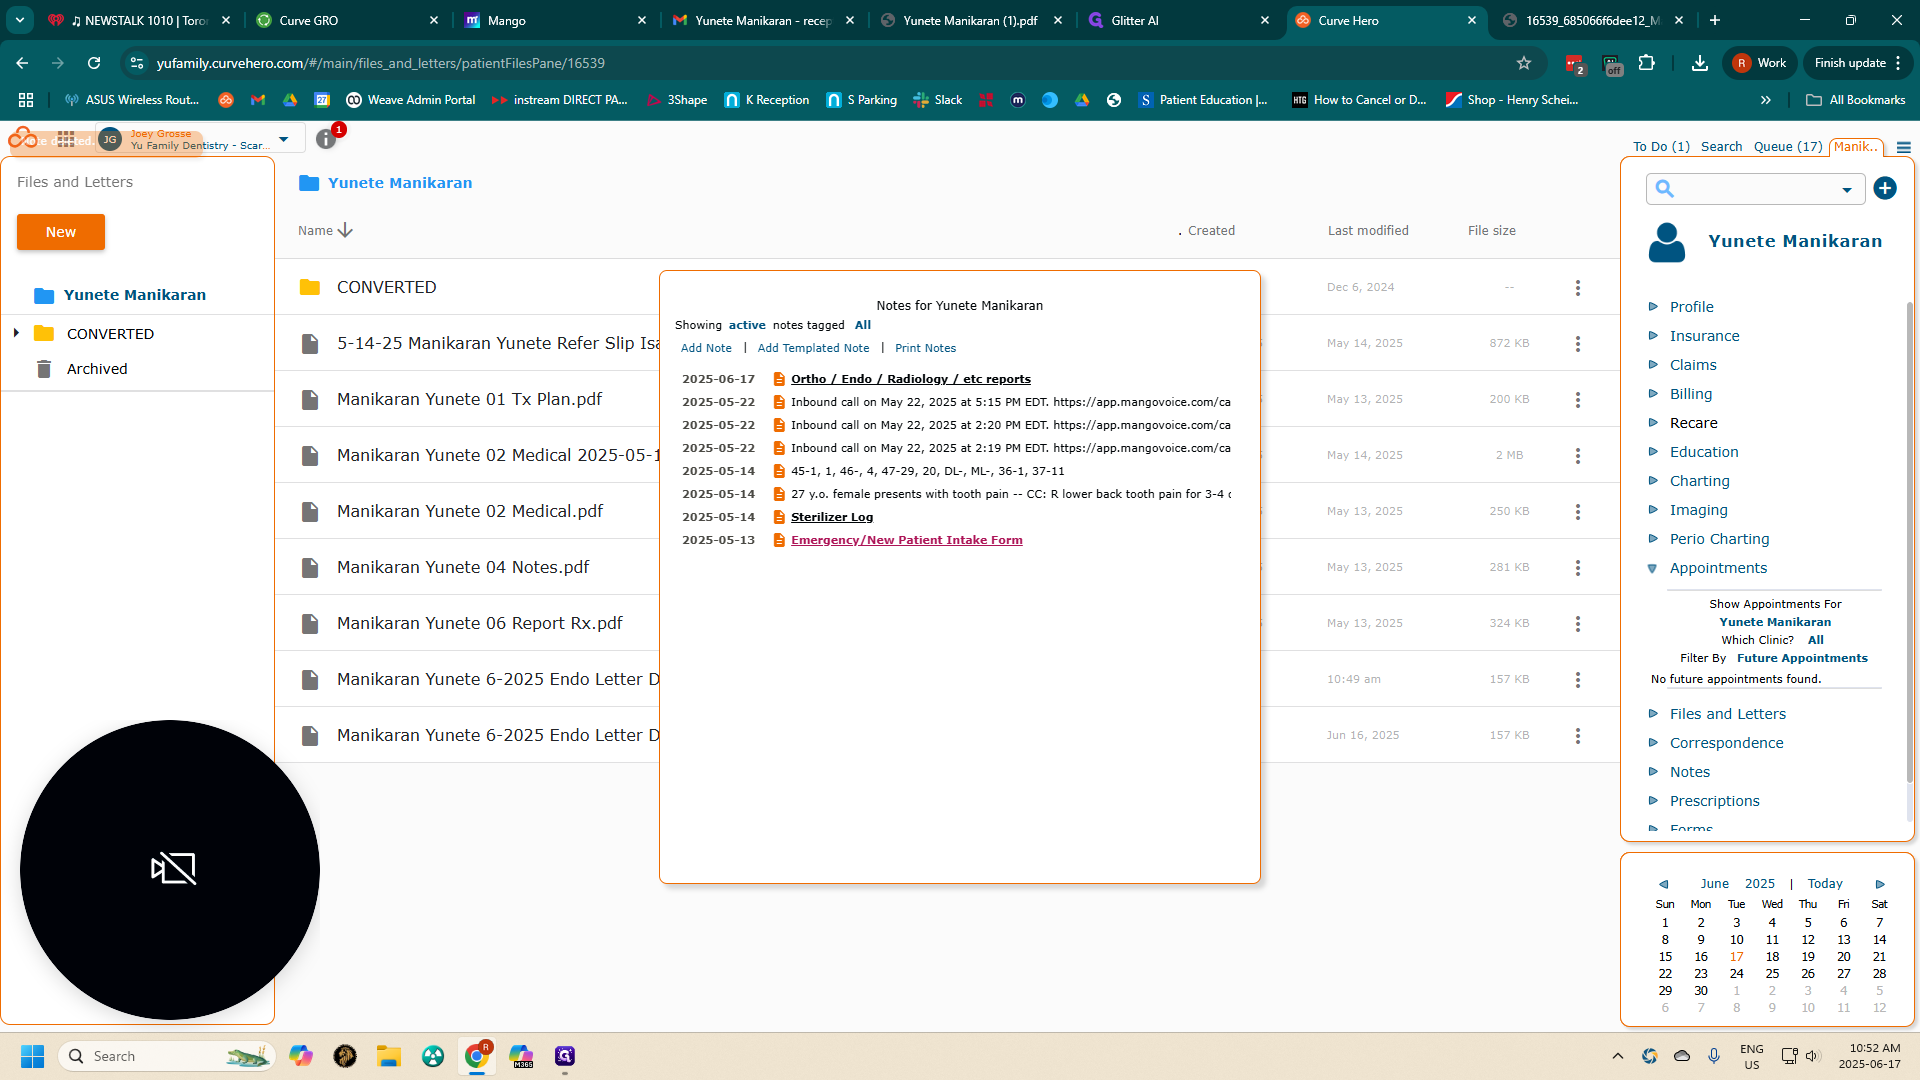
In this case, I will delete this note because I've already done this before.

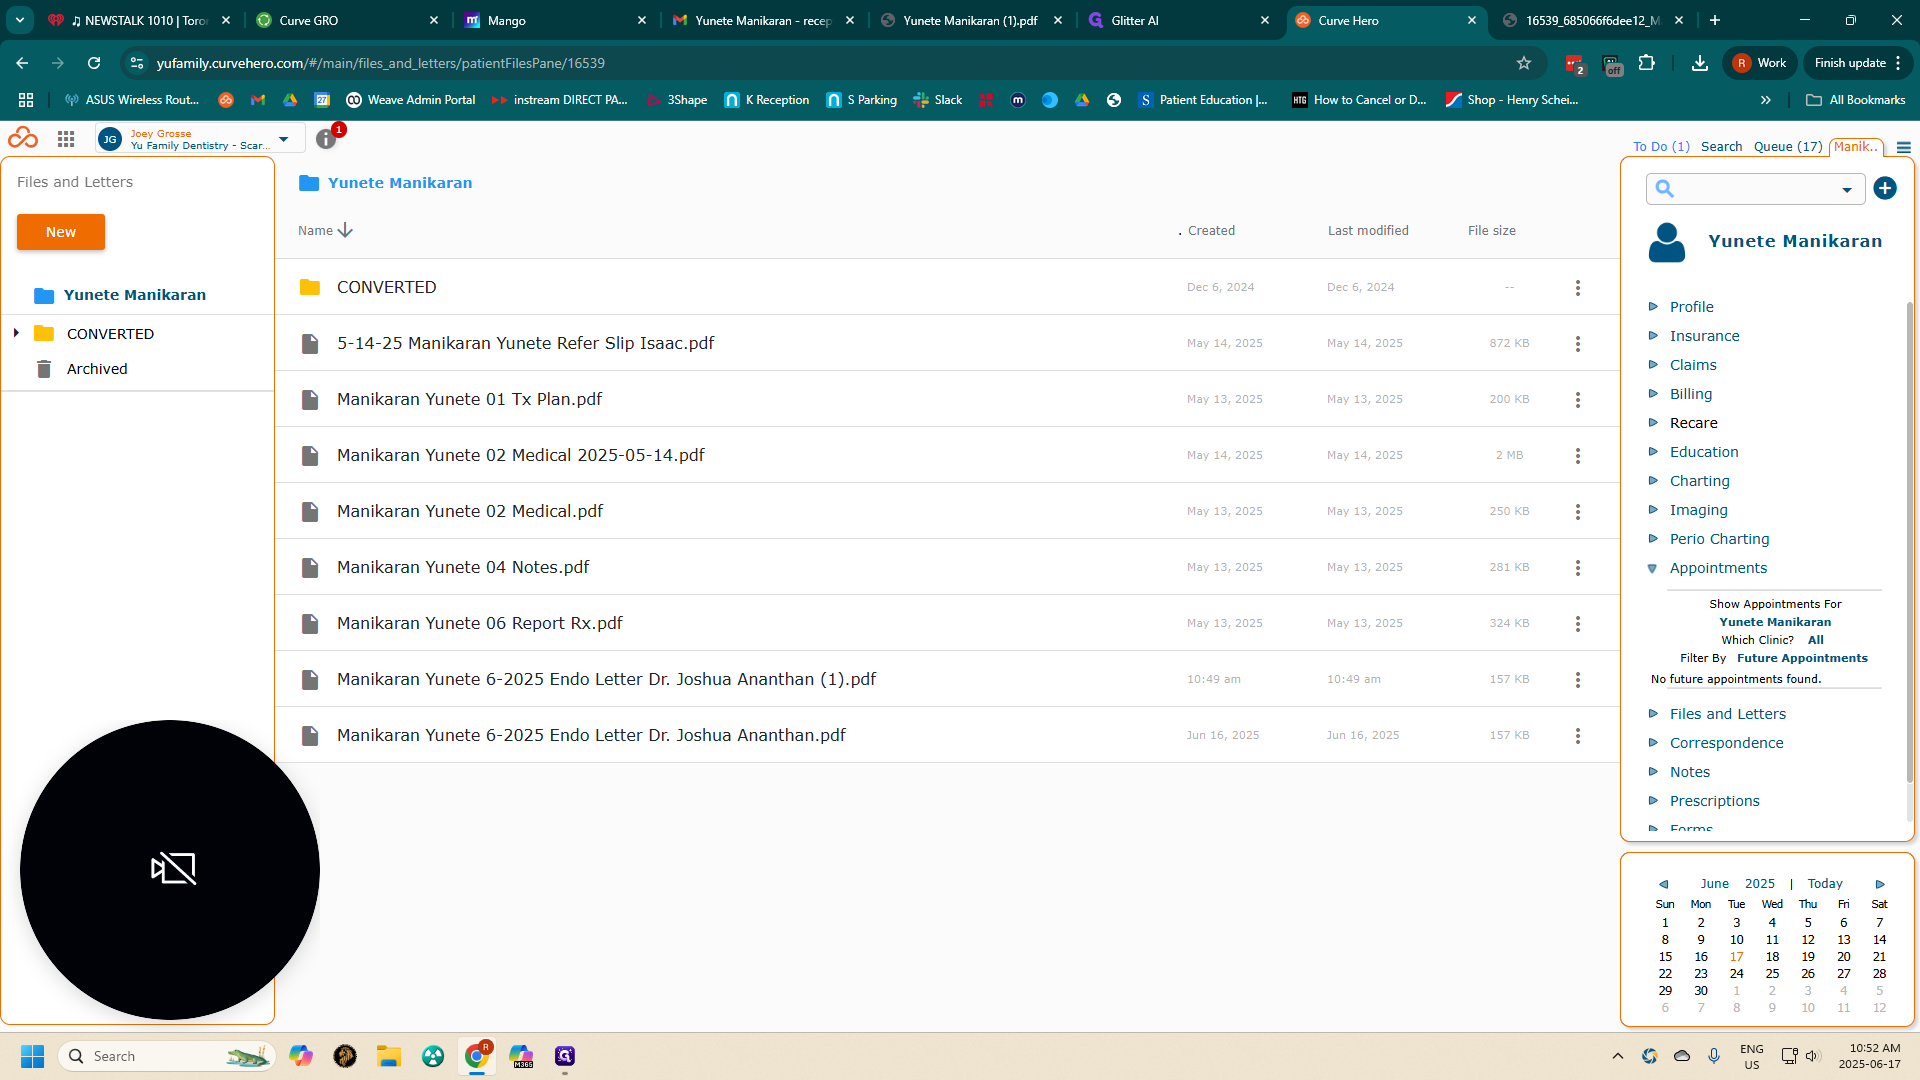
You'll see the note we just created today, which will alert the doctor to review and sign off on it.
47
Click on "To Do ( 1 )"
Step #47: Click on "To Do ( 1 )"
48
Click on "To Do ( 1 )"
Step #48: Click on "To Do ( 1 )"
49
Click on "▷ Ortho / Endo / Radiology / etc"
Step #49: Click on "▷ Ortho / Endo / Radiology / etc"