
How to Use CloudNine Software for PC Reservations and Guest Passes
Learn how to manage PC reservations, guest passes, and computer access using Cloud9 software. Step-by-step guide for staff on generating guest passes, managing reservations, and utilizing new features in the Cloud9 web portal.
In this guide, we'll learn how to use the CloudNine web portal to manage guest passes, computer reservations, and session controls at your library location.
You will see how to generate and print guest passes, manage computer sessions, and handle reservations for both individuals and groups. This guide will also cover how to lock, resume, or end sessions, and how to take computers out of service when needed.
Let's get started
Second time's a charm. We are going to look at CloudNine software.
Excuse me while I log out. First, go to cloudnine.envisionware.net. This will bring you to the login screen.
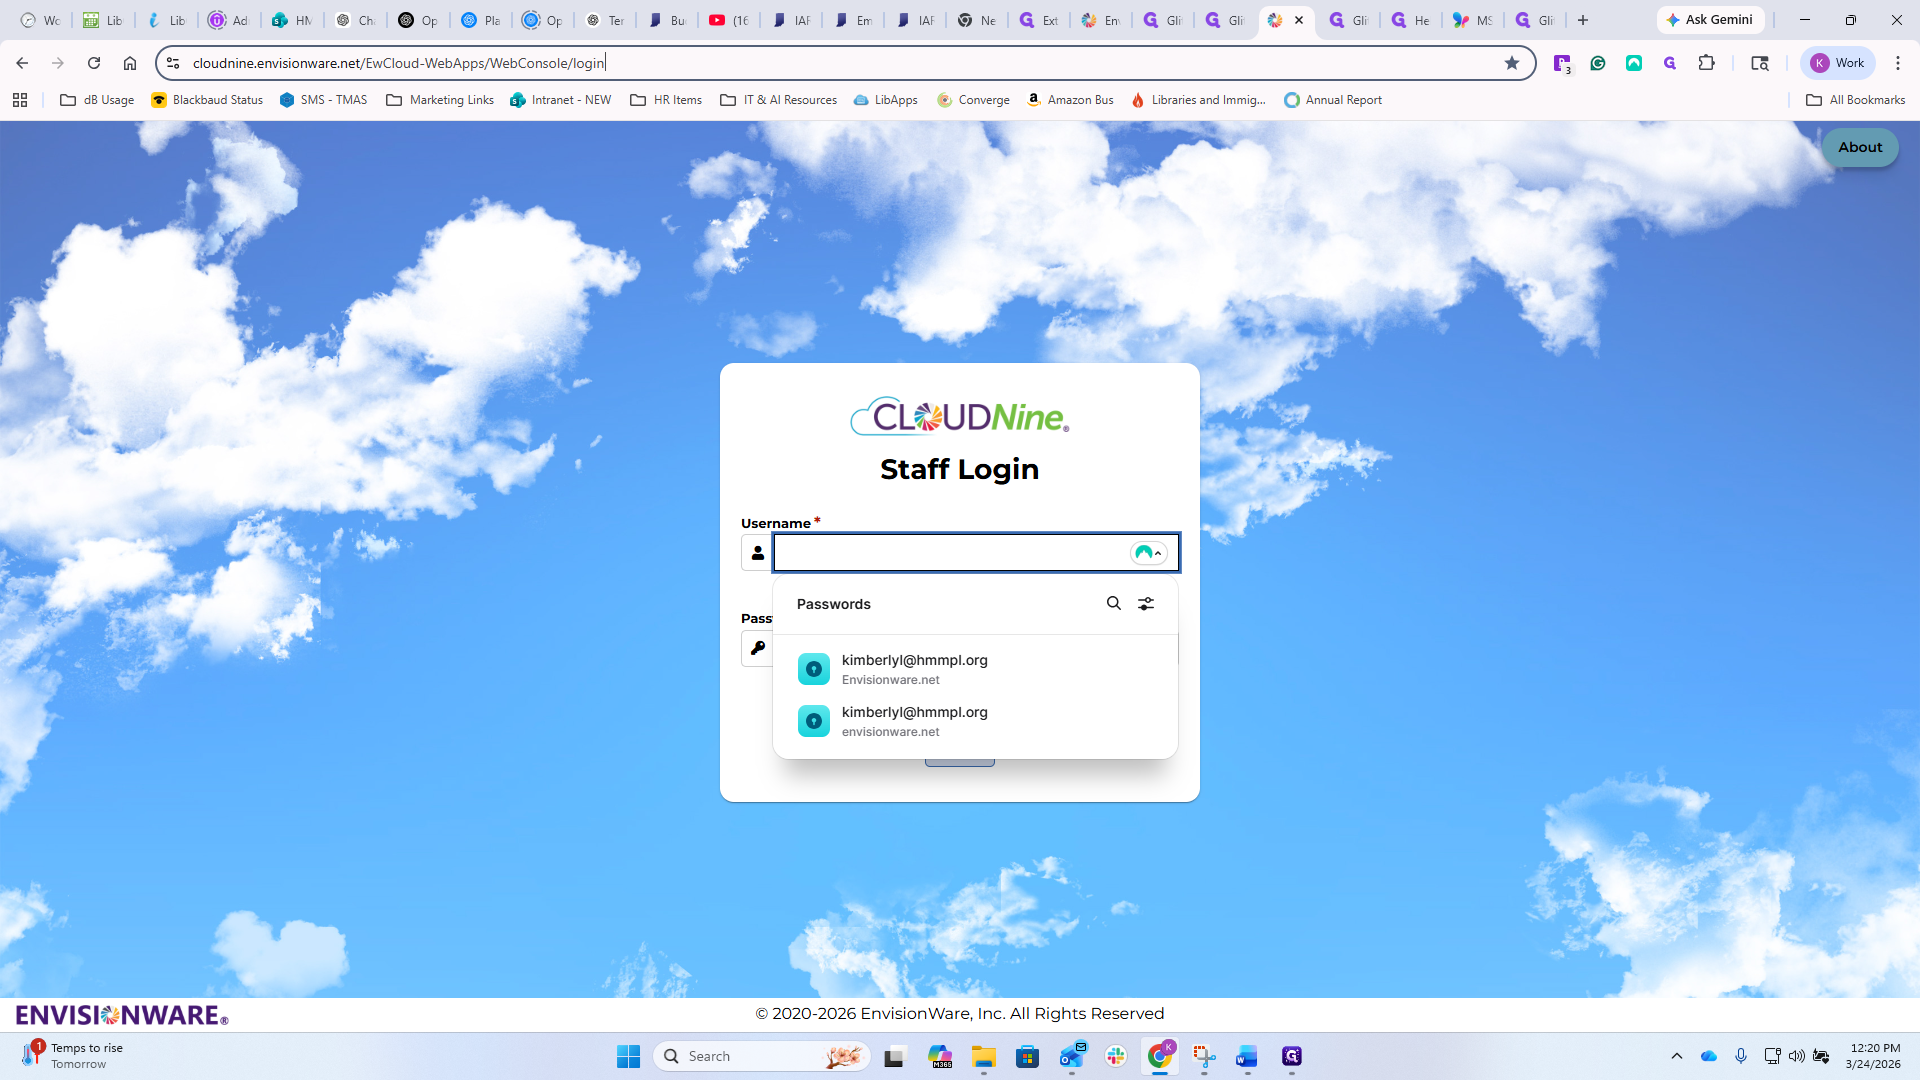
You'll have shared credentials, and your supervisors will have access to them and make them available at your service desks. You will notice that when I log in, I have references to both locations and a setup functionality on my navigation bar on the left.


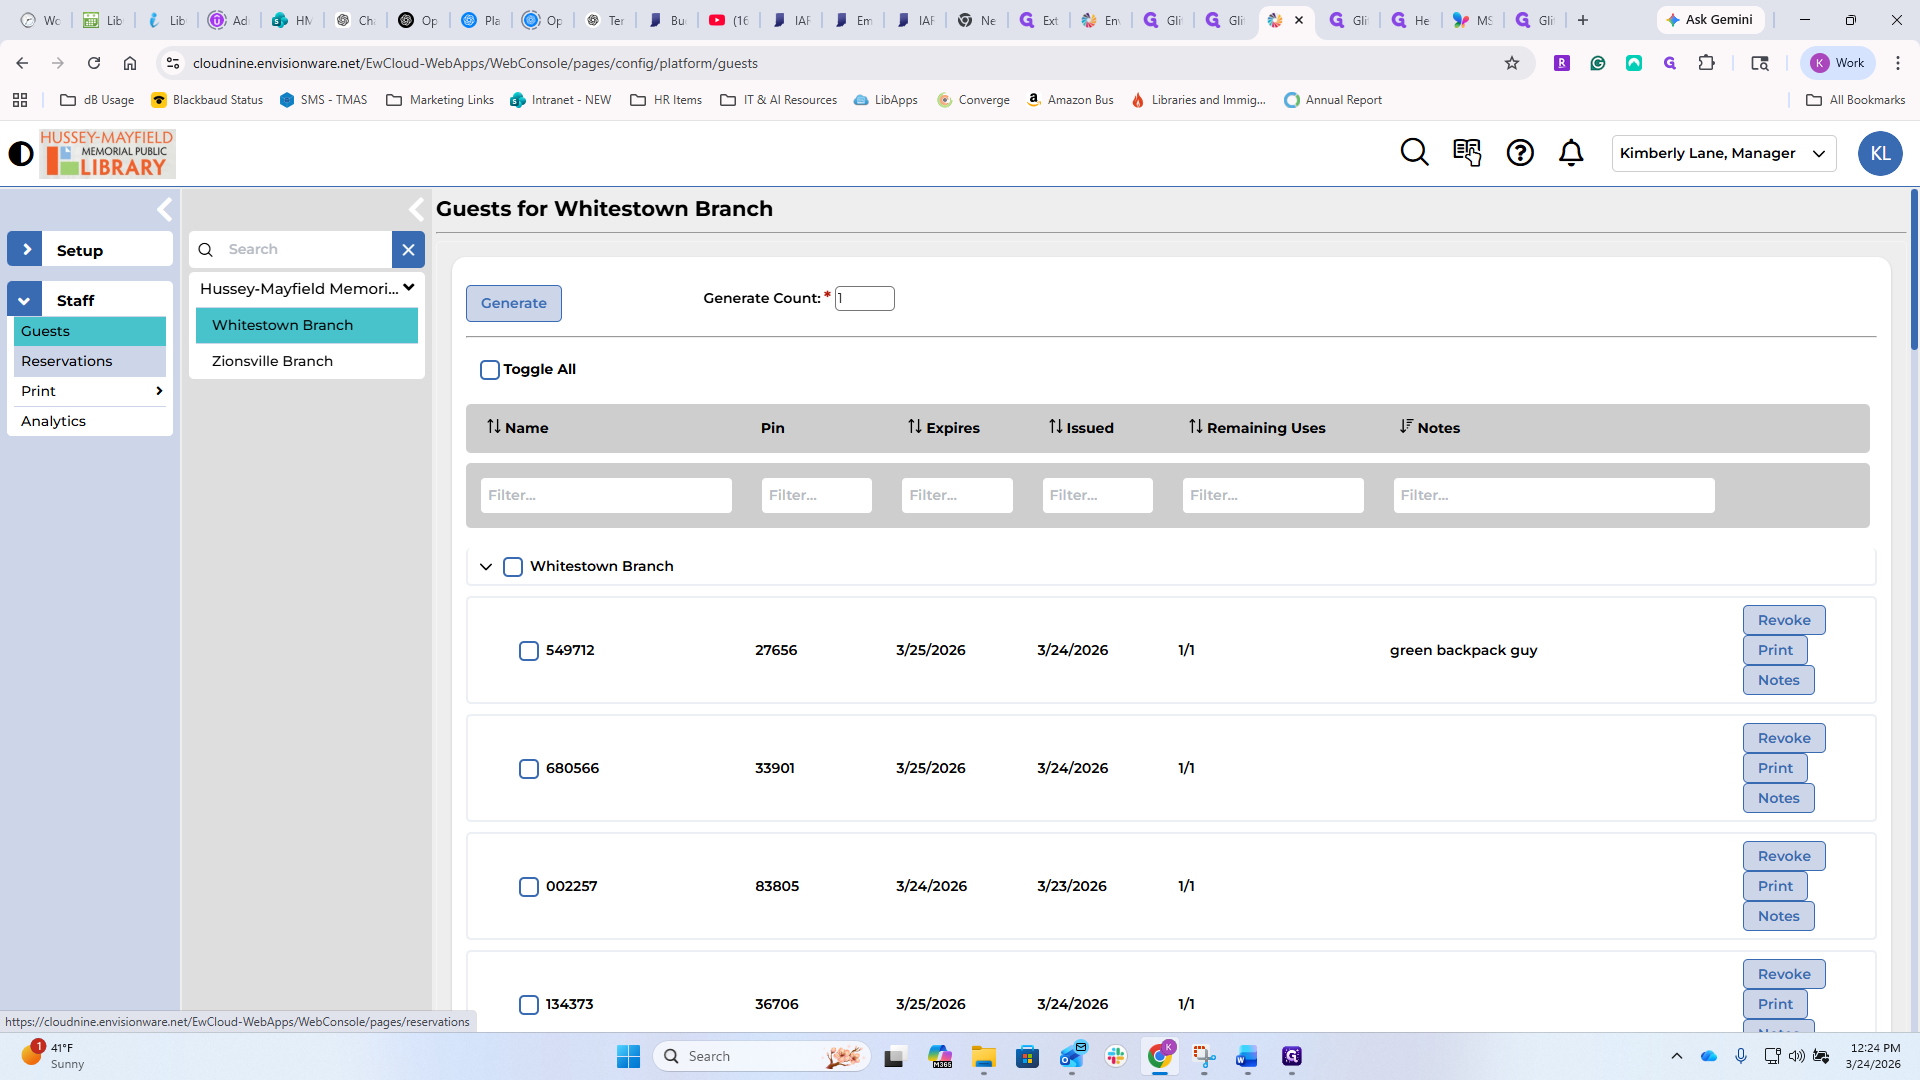
You will not usually have that. You will likely have a reference to either Whitestown or Zionsville, depending on your assigned location. For the replacement or update to PC reservation, you will access everything through the CloudNine web portal. If you click on Guests, you will see...
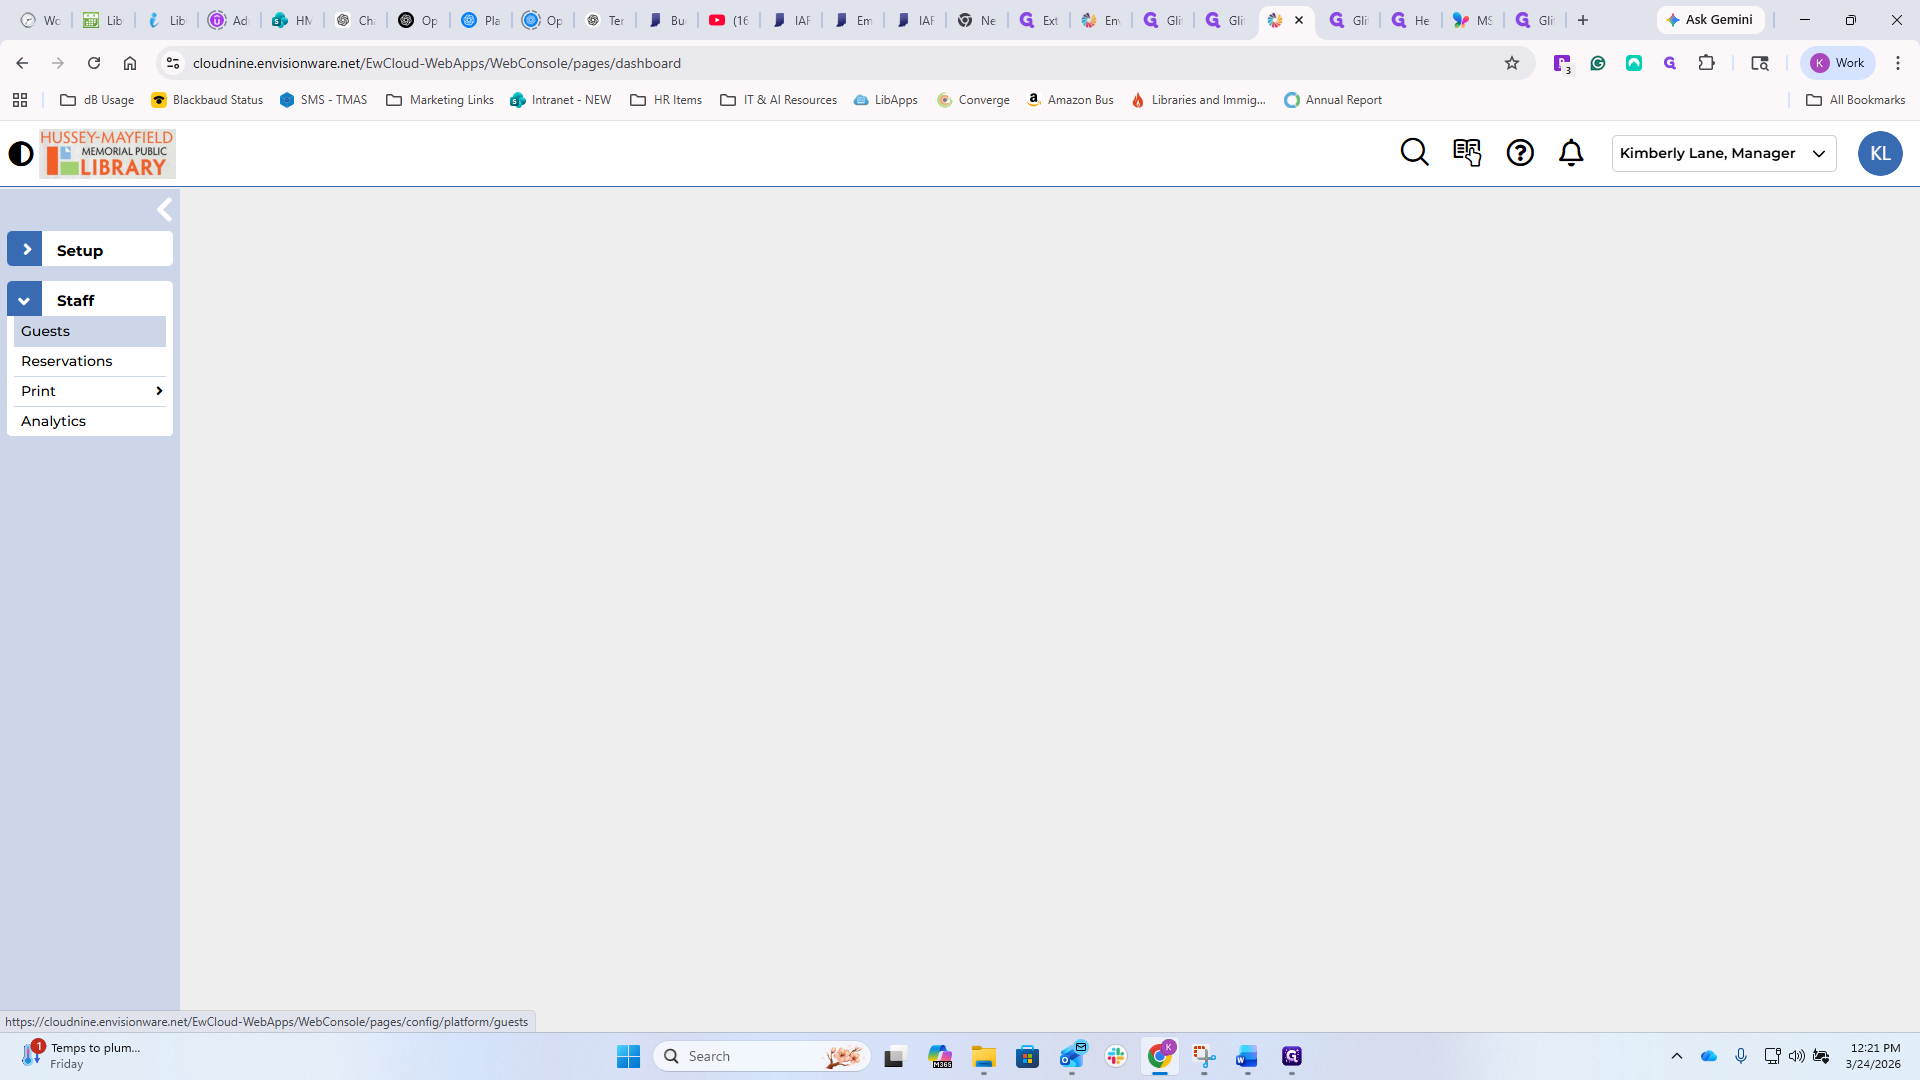
I am limiting that to just Whitestown for now.

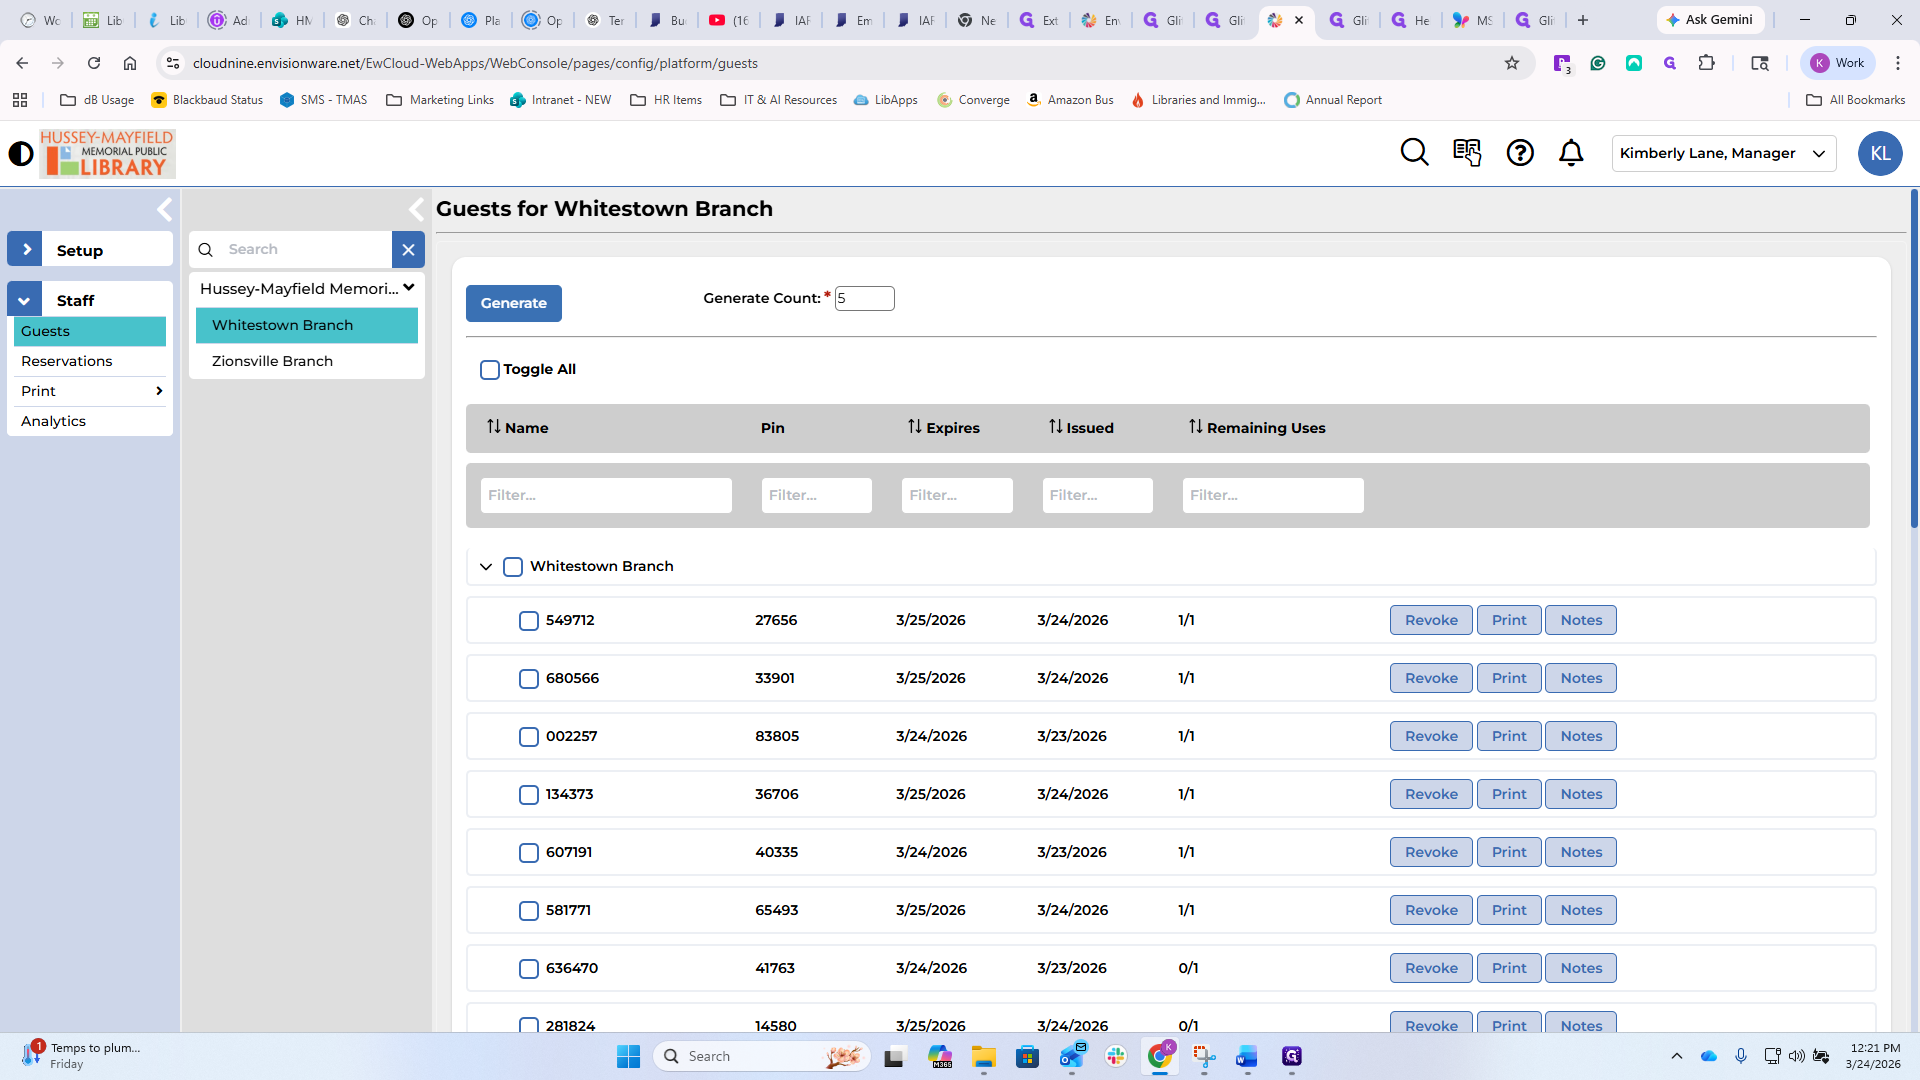
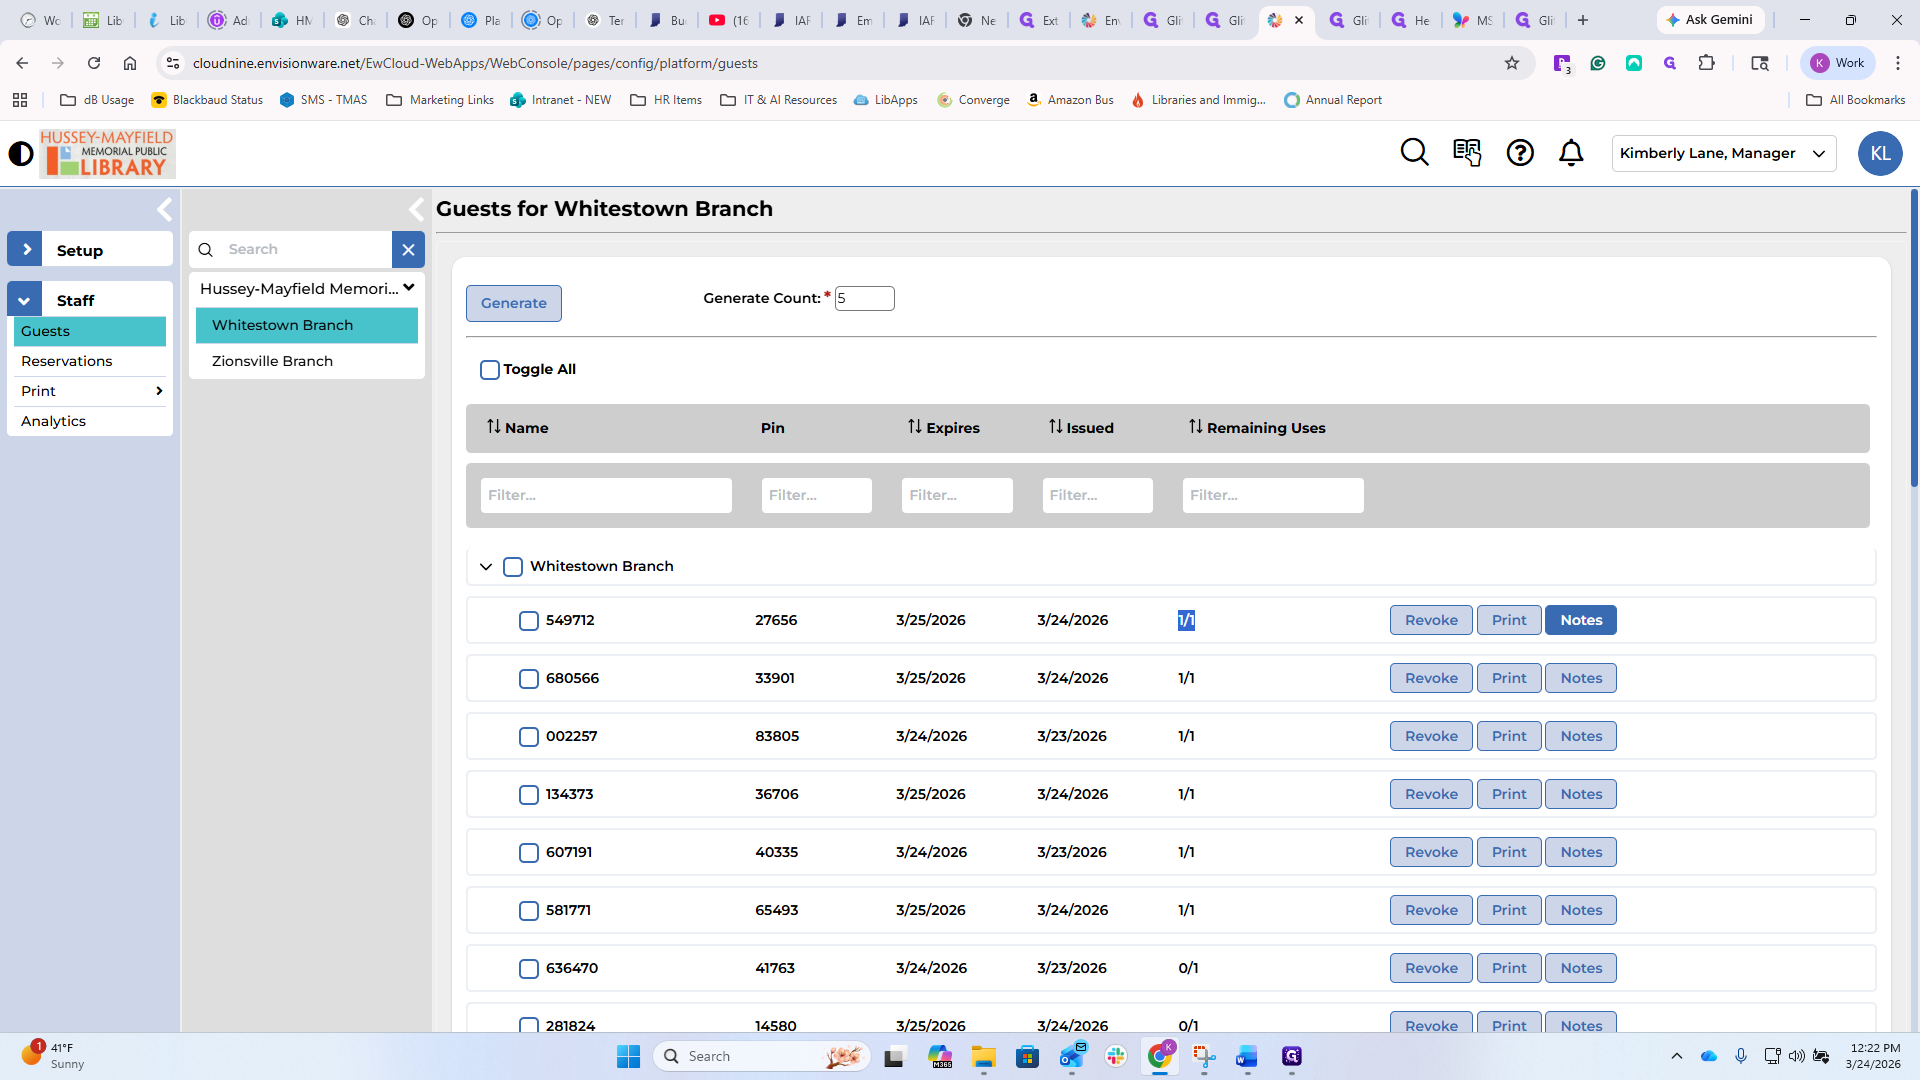
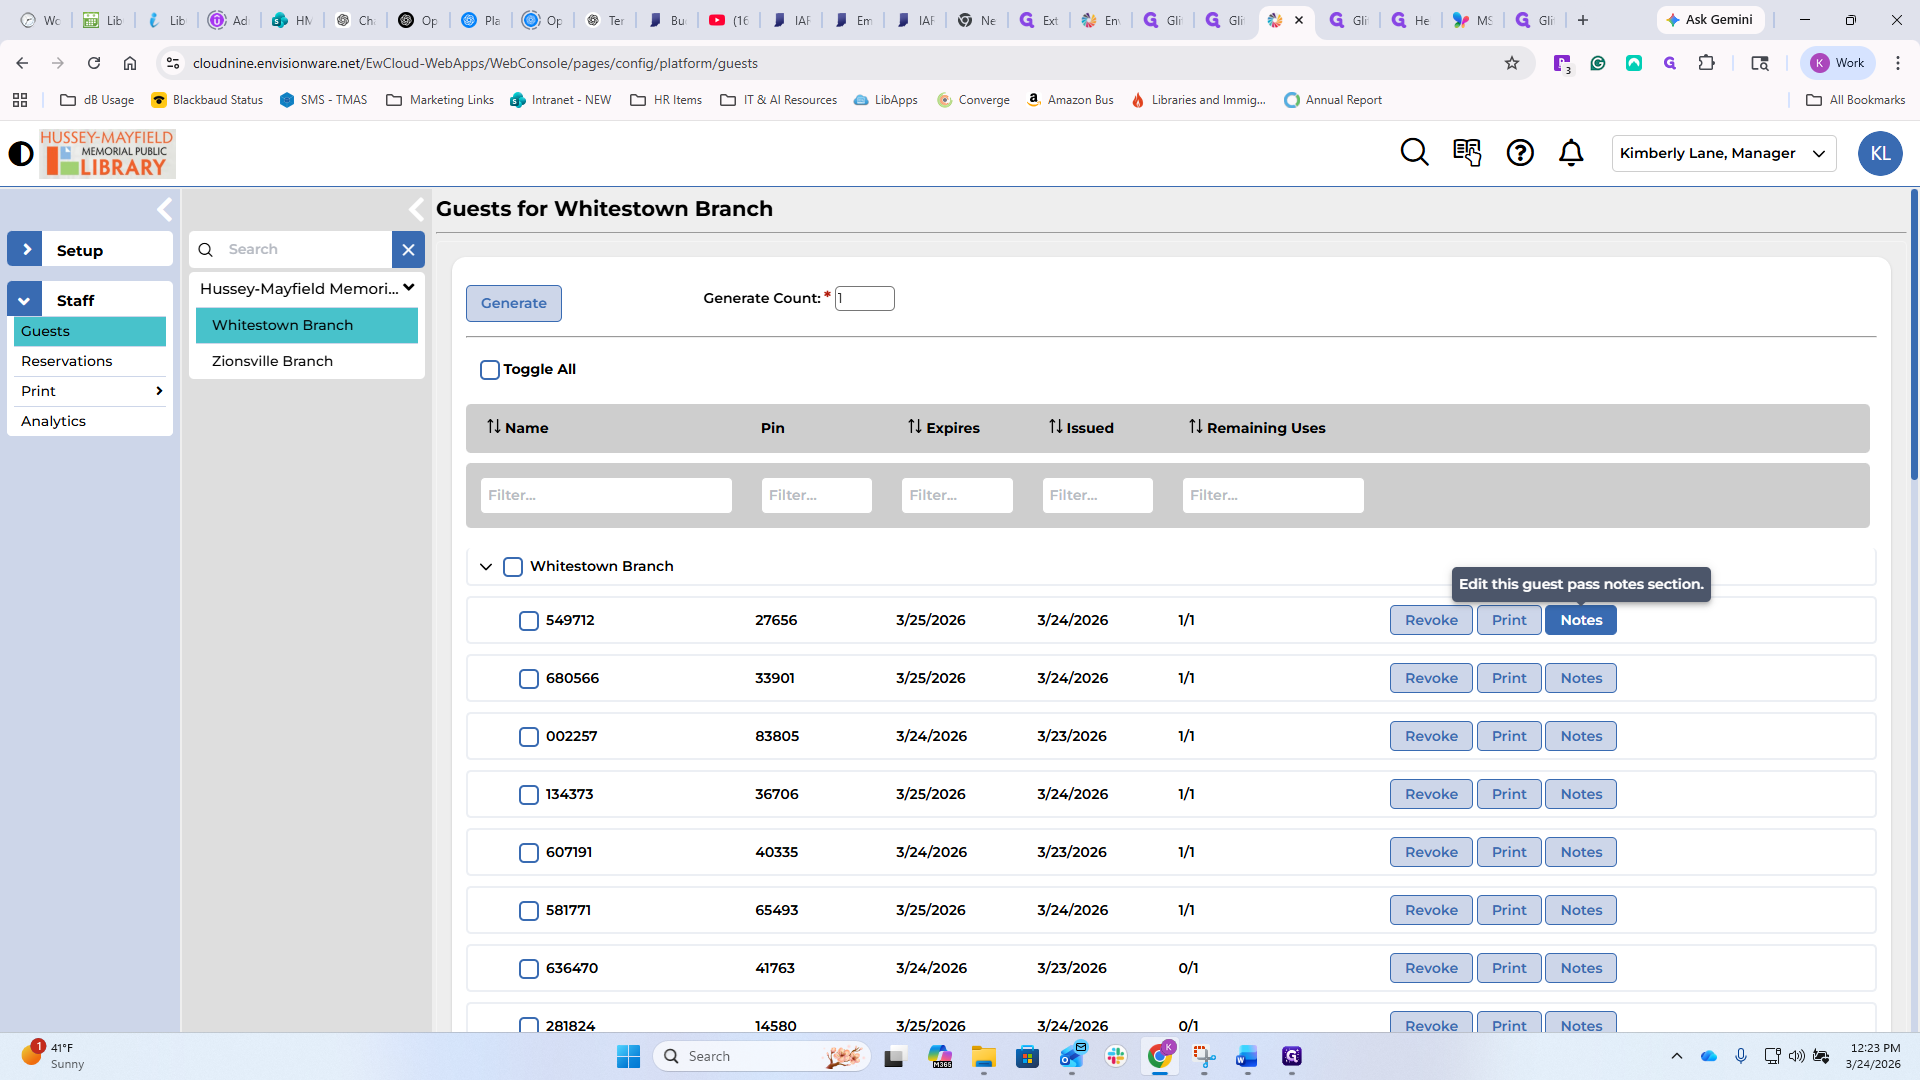
Here you can see all the guests who are logged in. These are all guest passes, rather than patrons. You can generate a guest pass here. You can do any number of them.
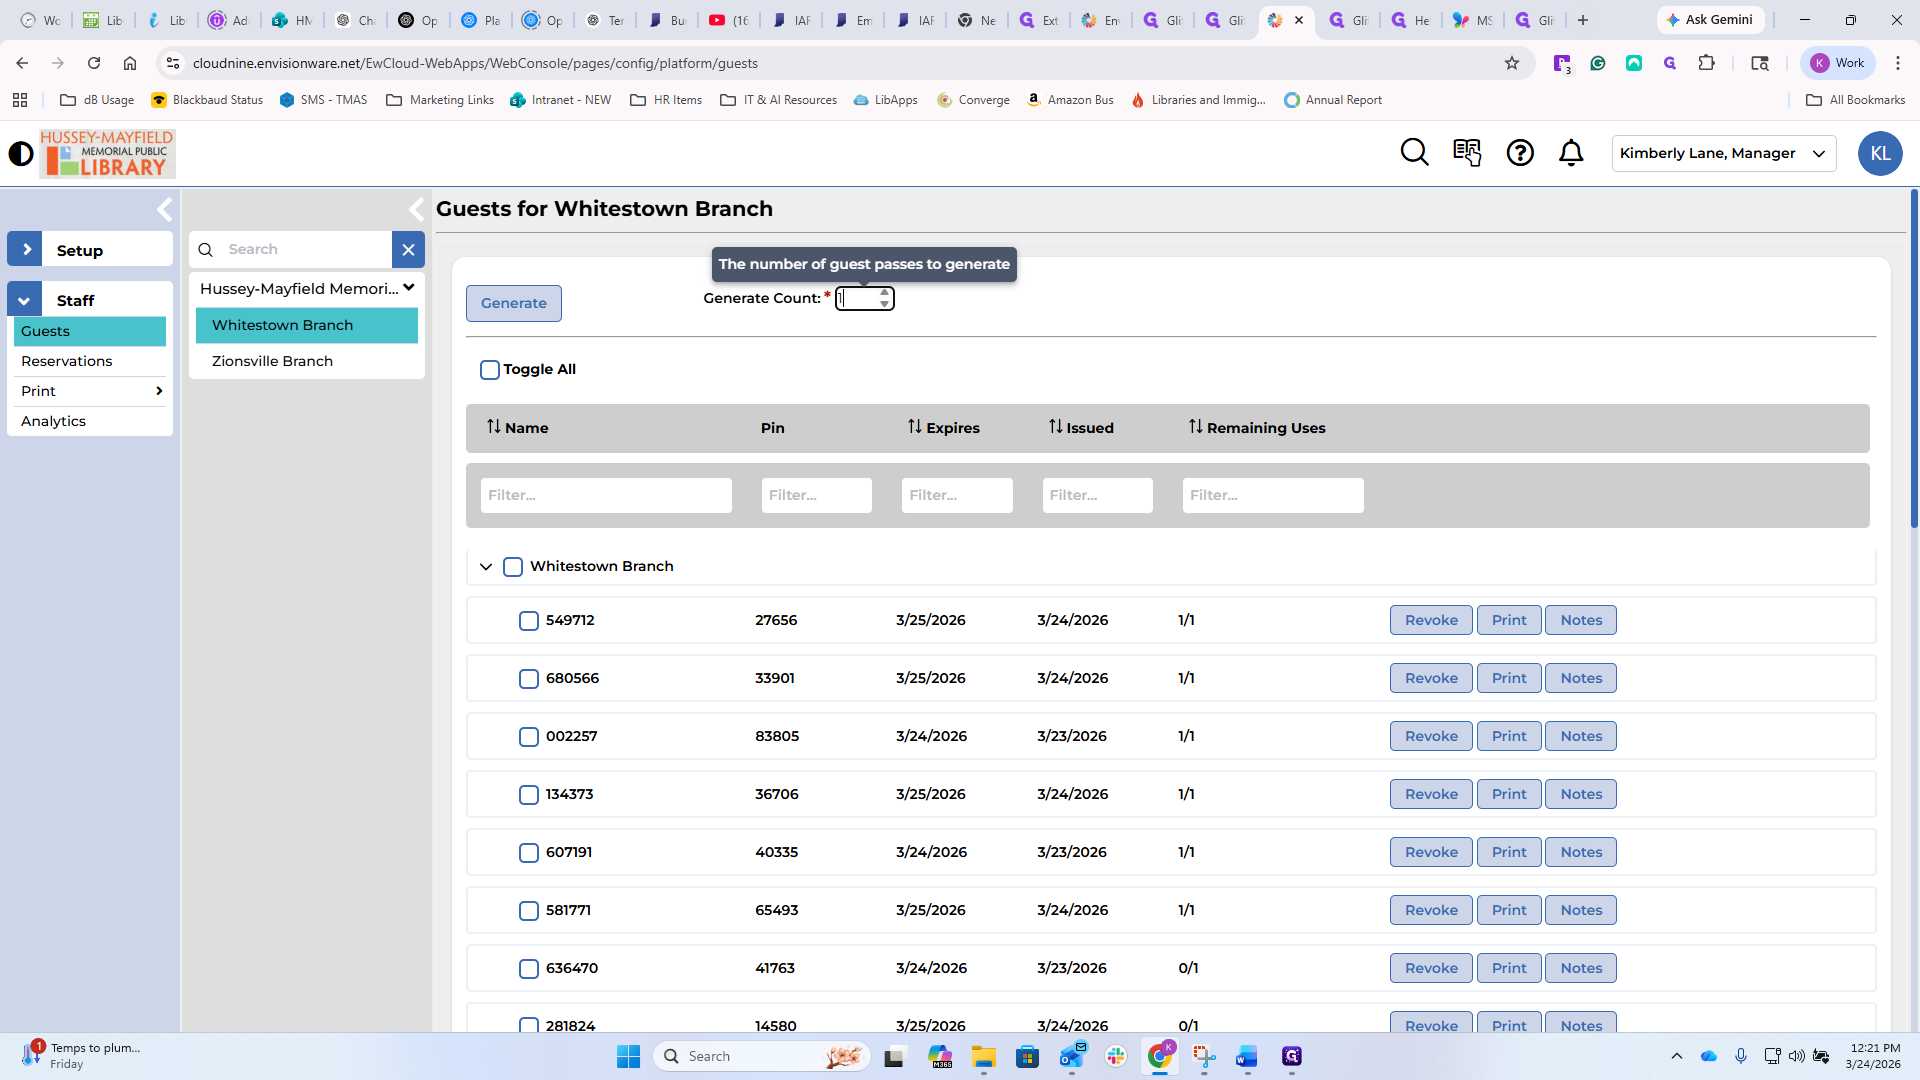
You can enter them on your keypad or keyboard, or use the arrow keys to move up and down.
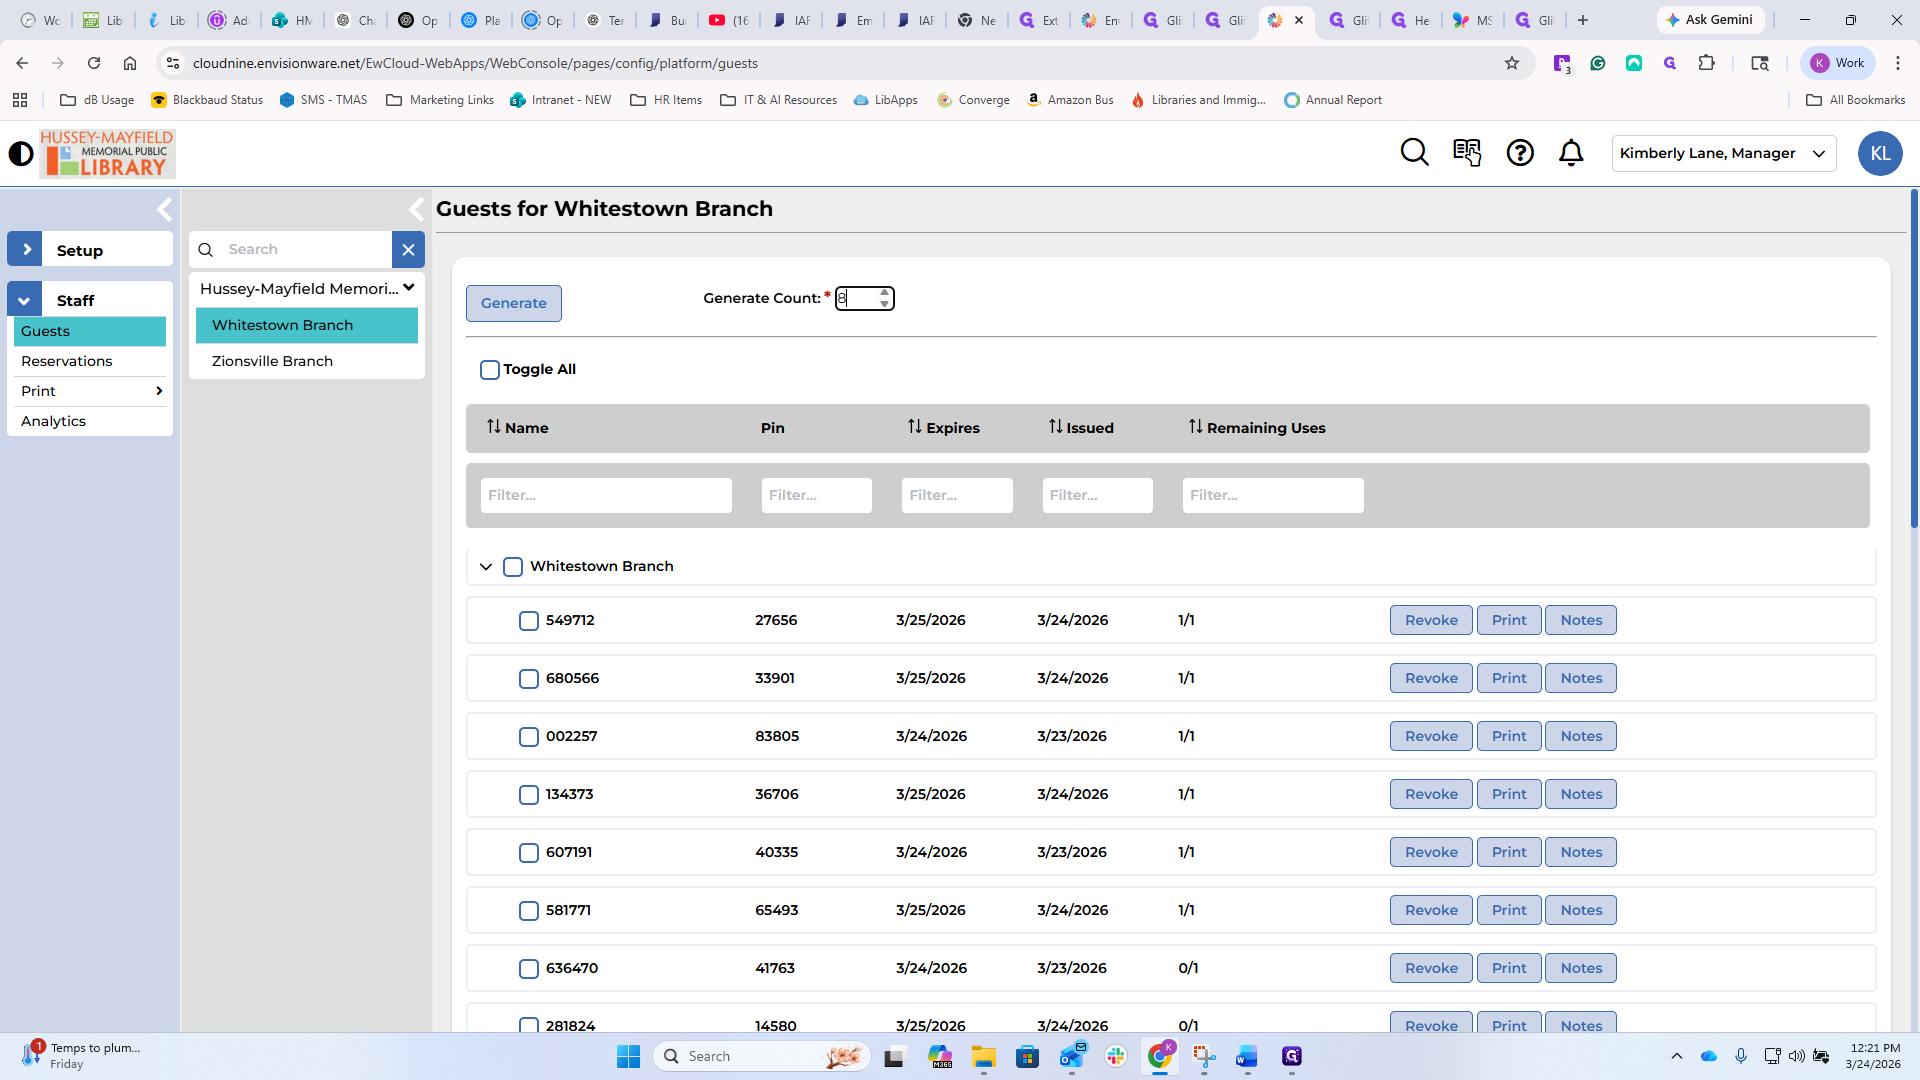
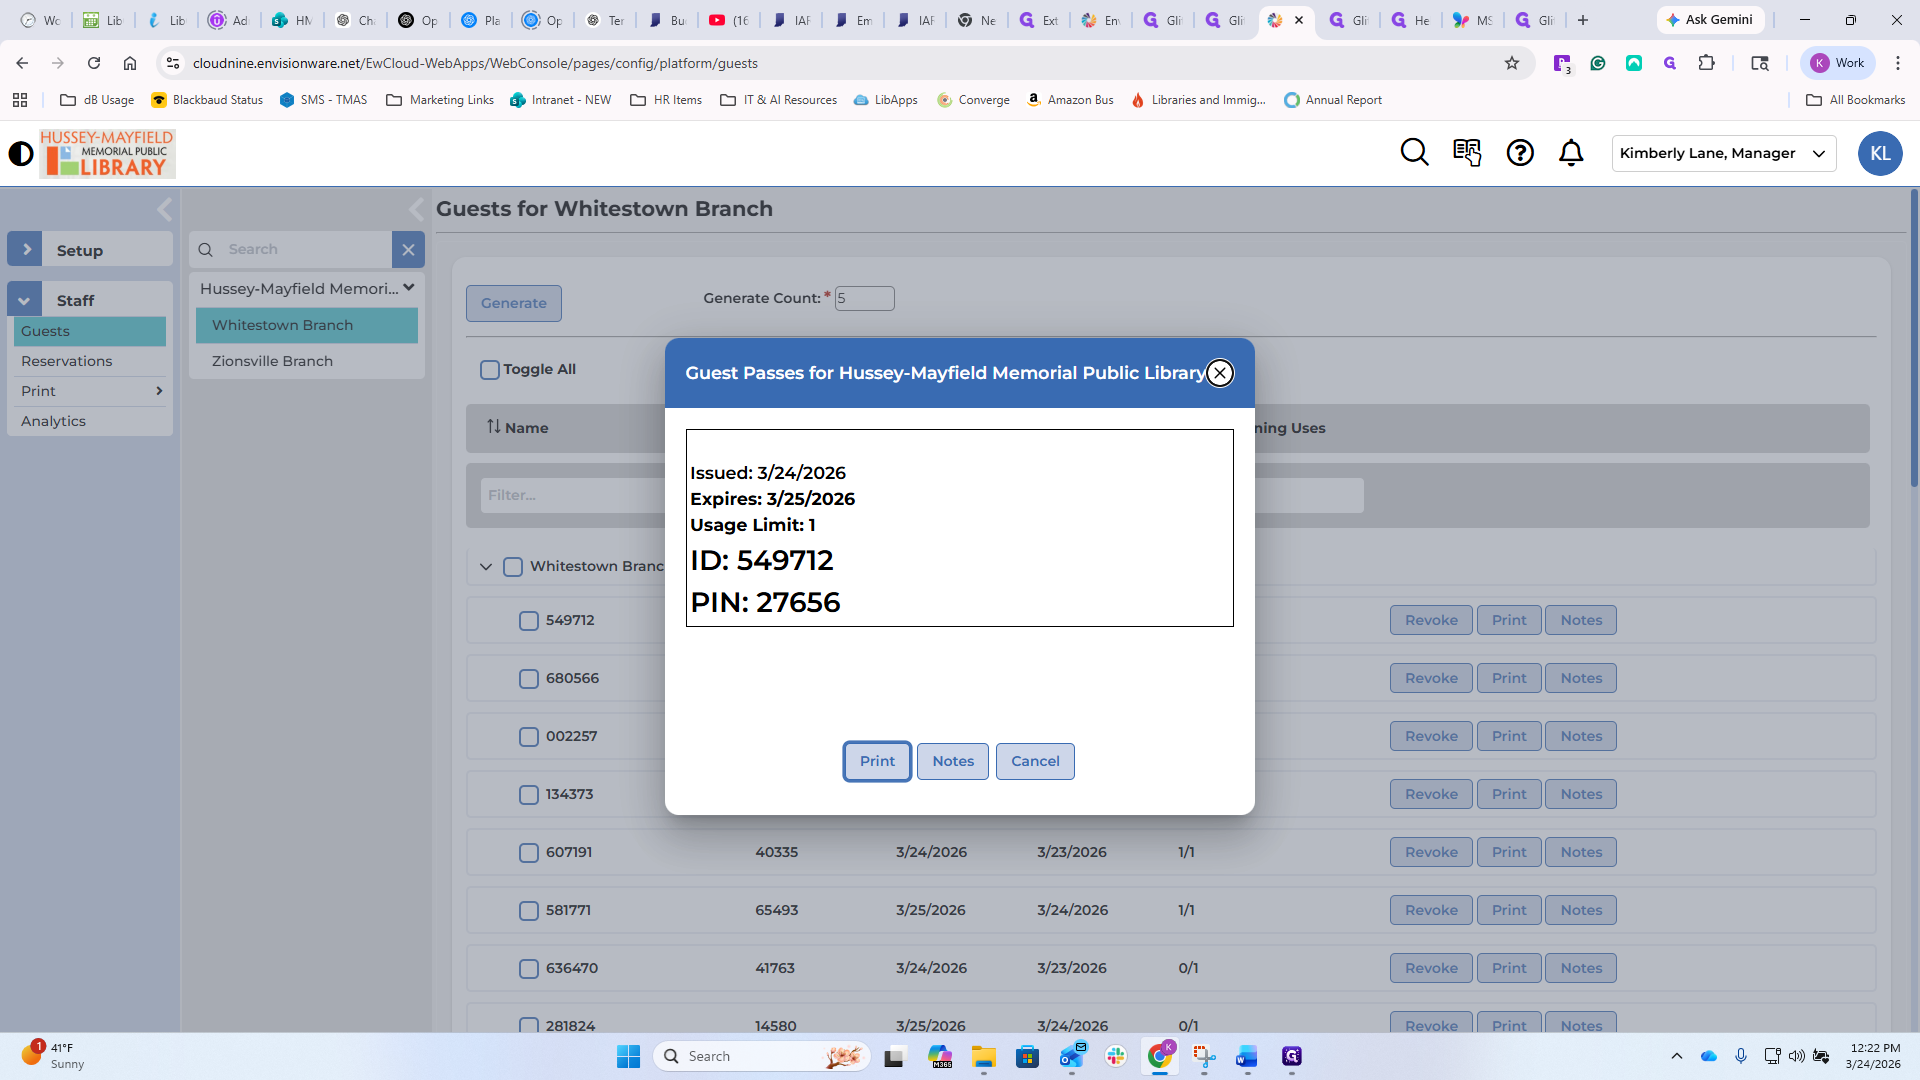
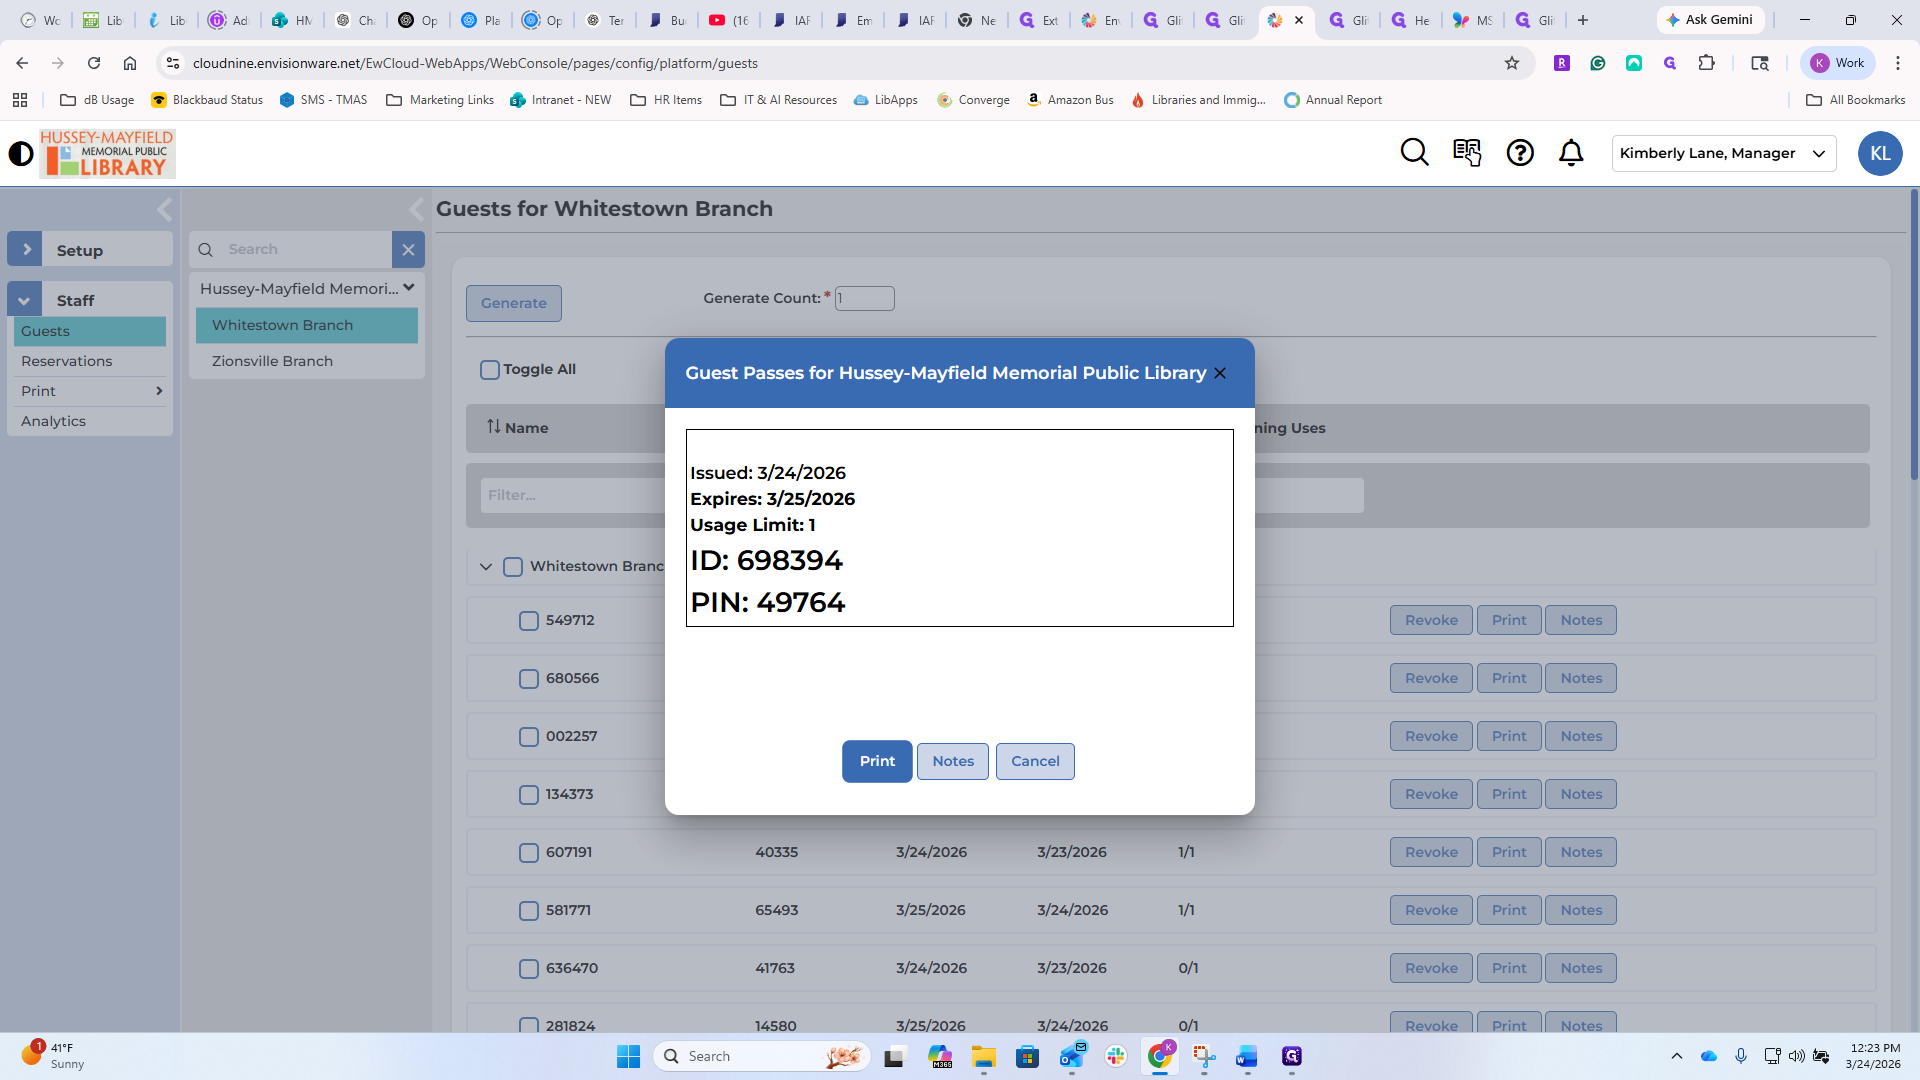
Once you have that set, click Generate. This will bring up the document to be printed. The line breaks indicate where the printing will occur.
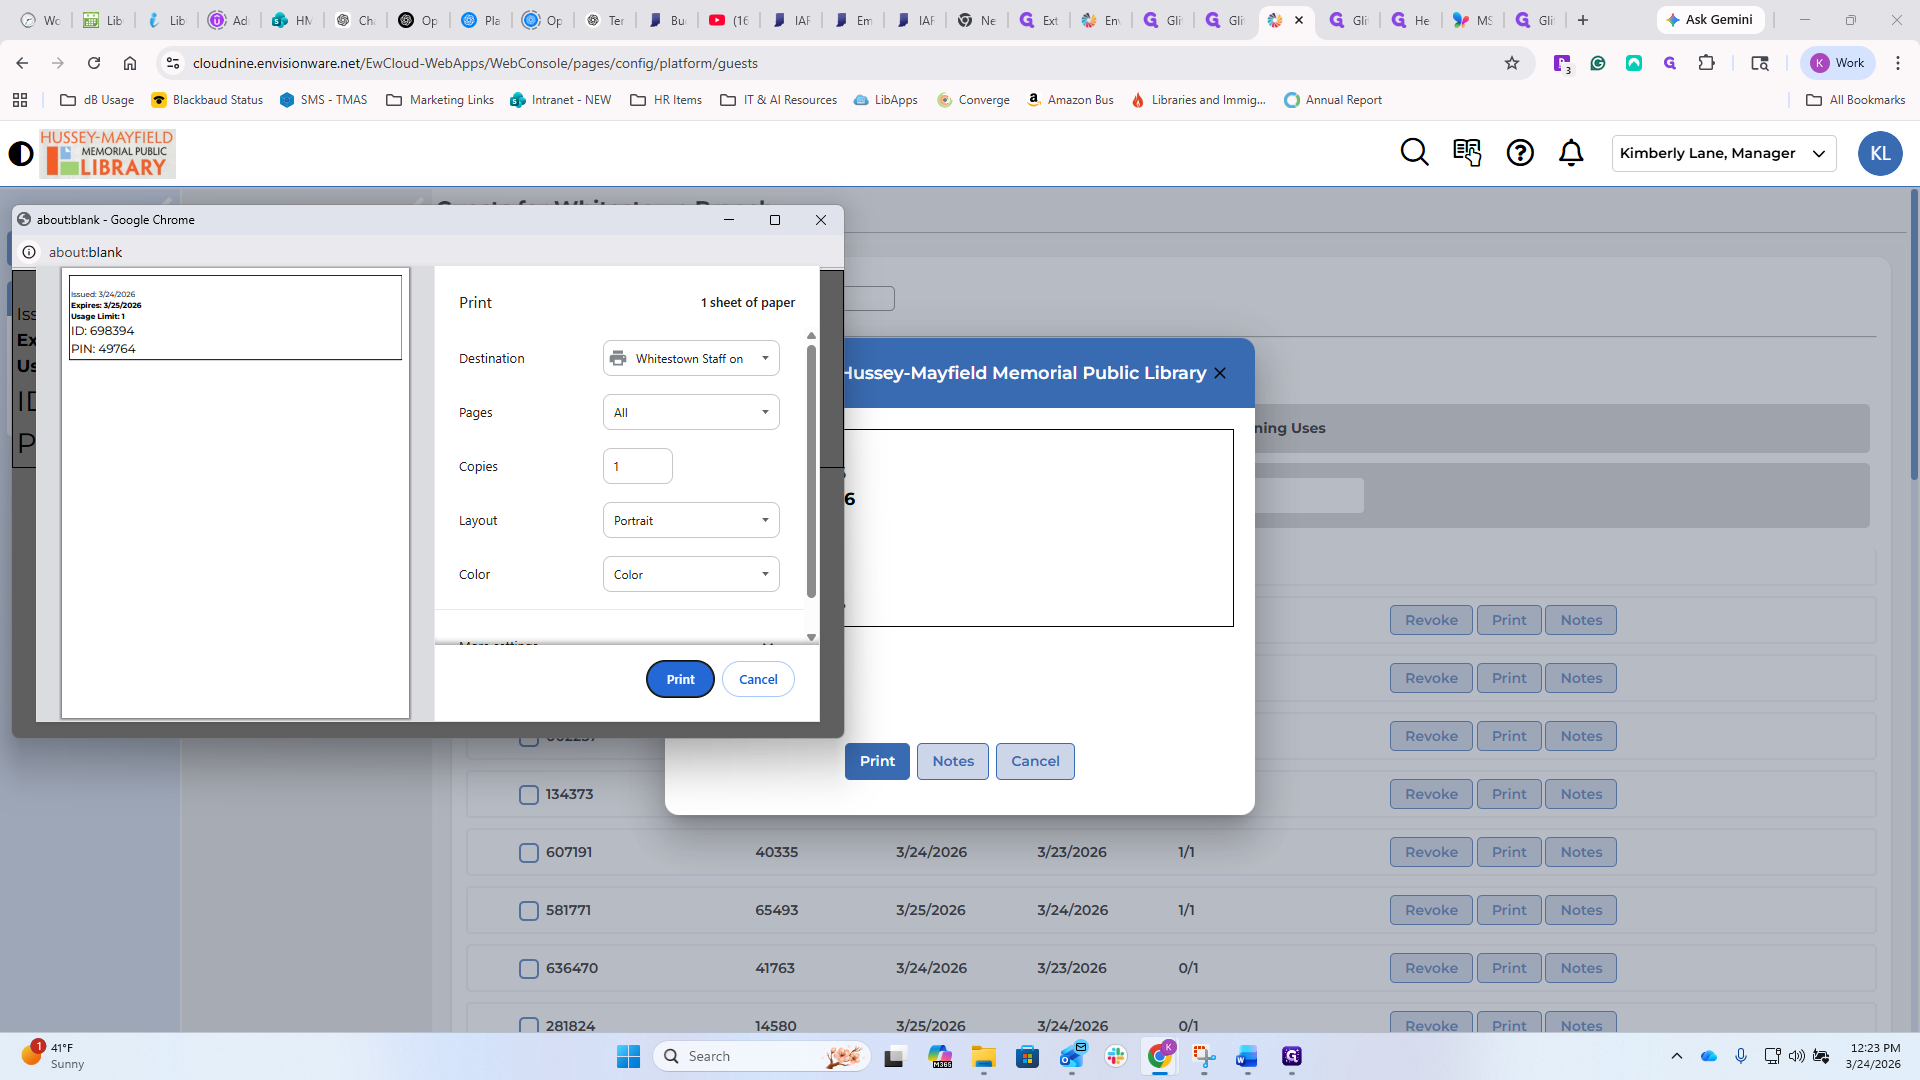
The first time you print this, make sure you select the receipt printer connected to your computer.
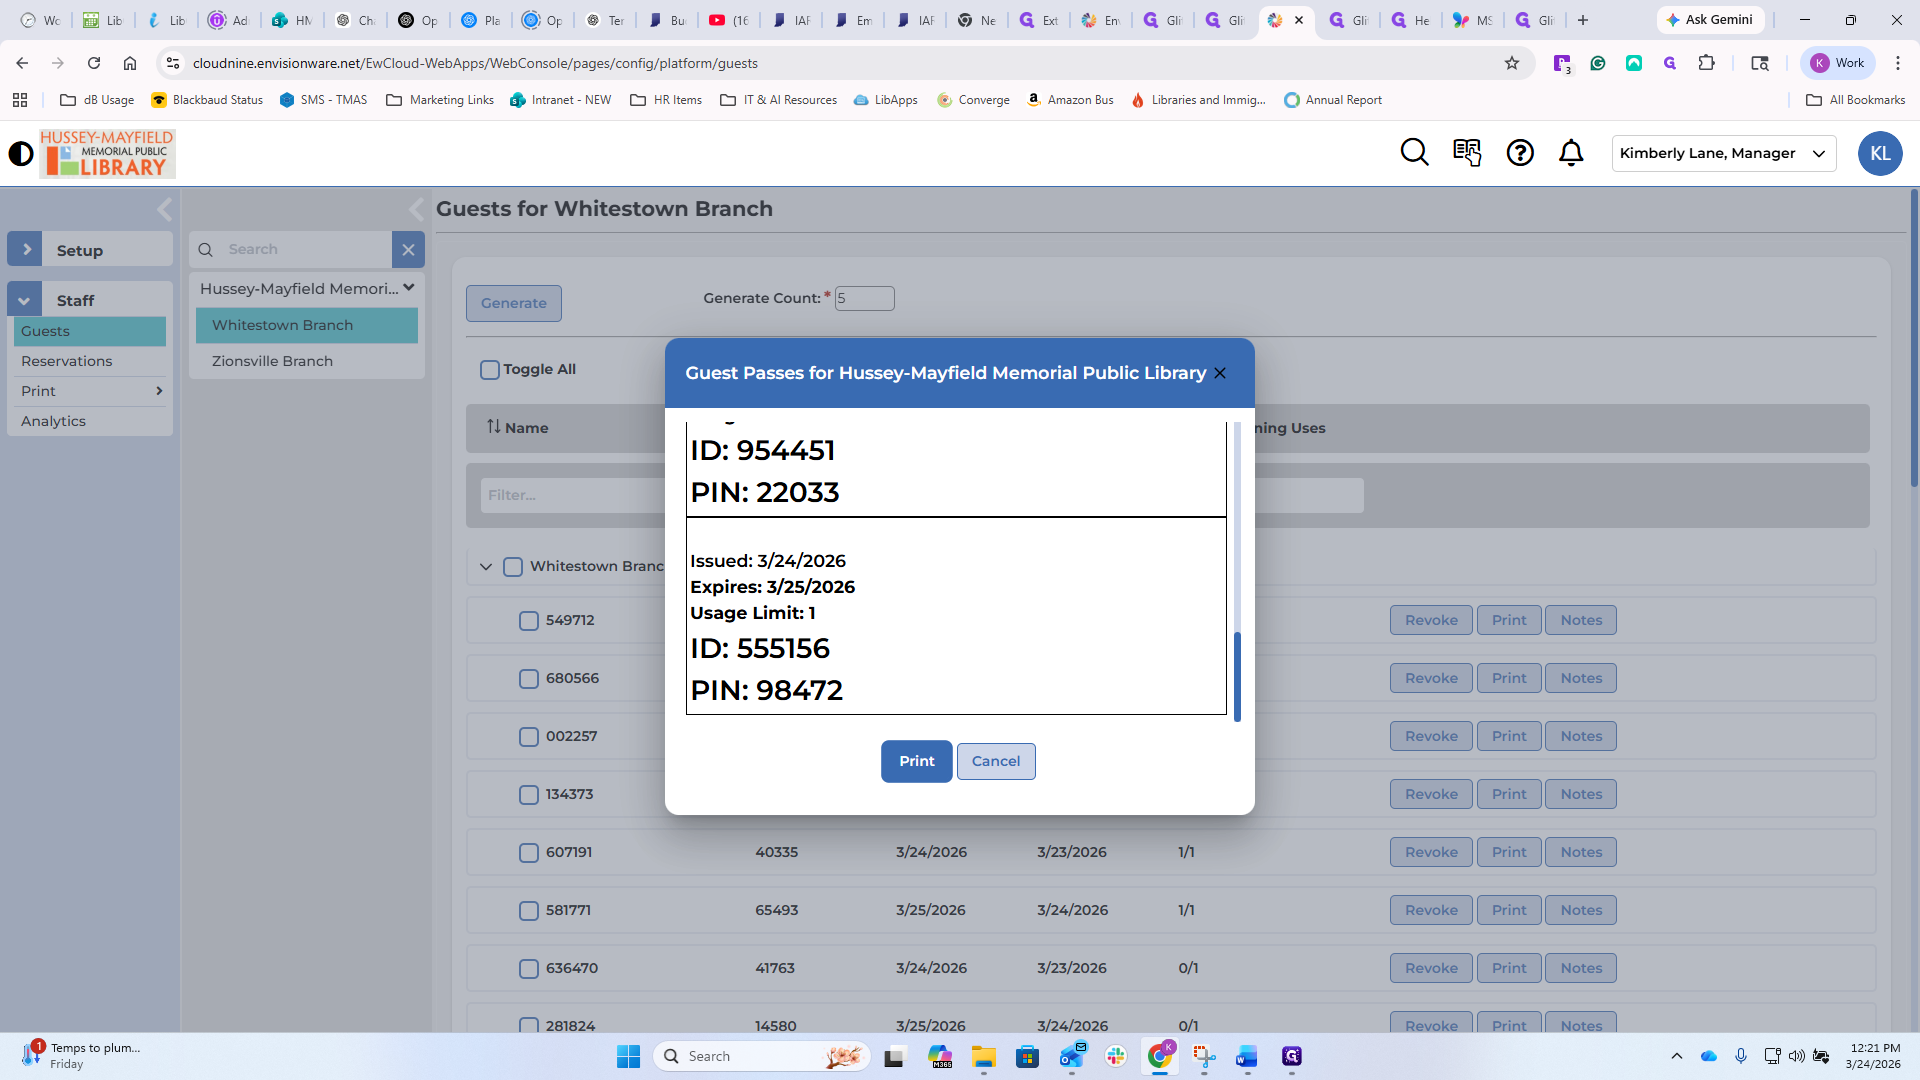
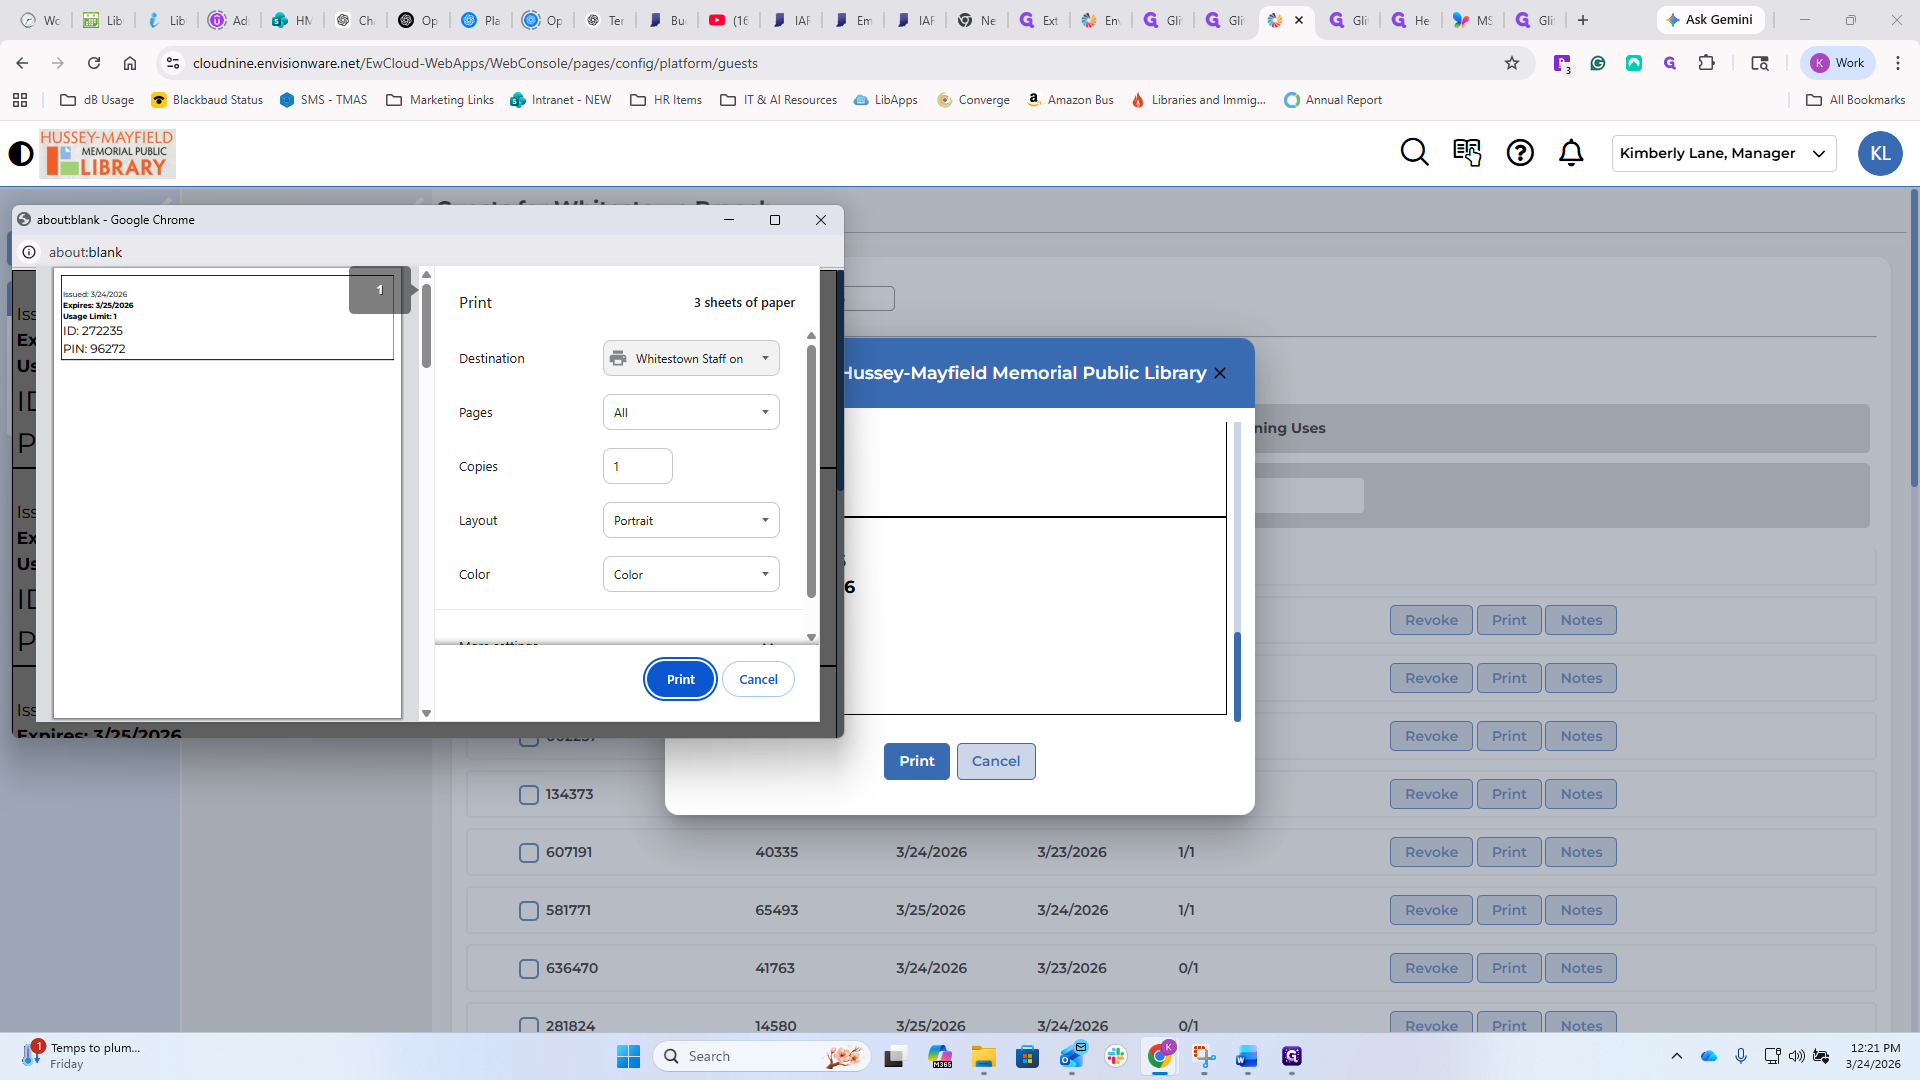
It can print to the staff computers if needed, but most of the time this will happen at the public desk. You can print them in advance to hand out or as needed on the receipt printers. I'm going to cancel this for now.

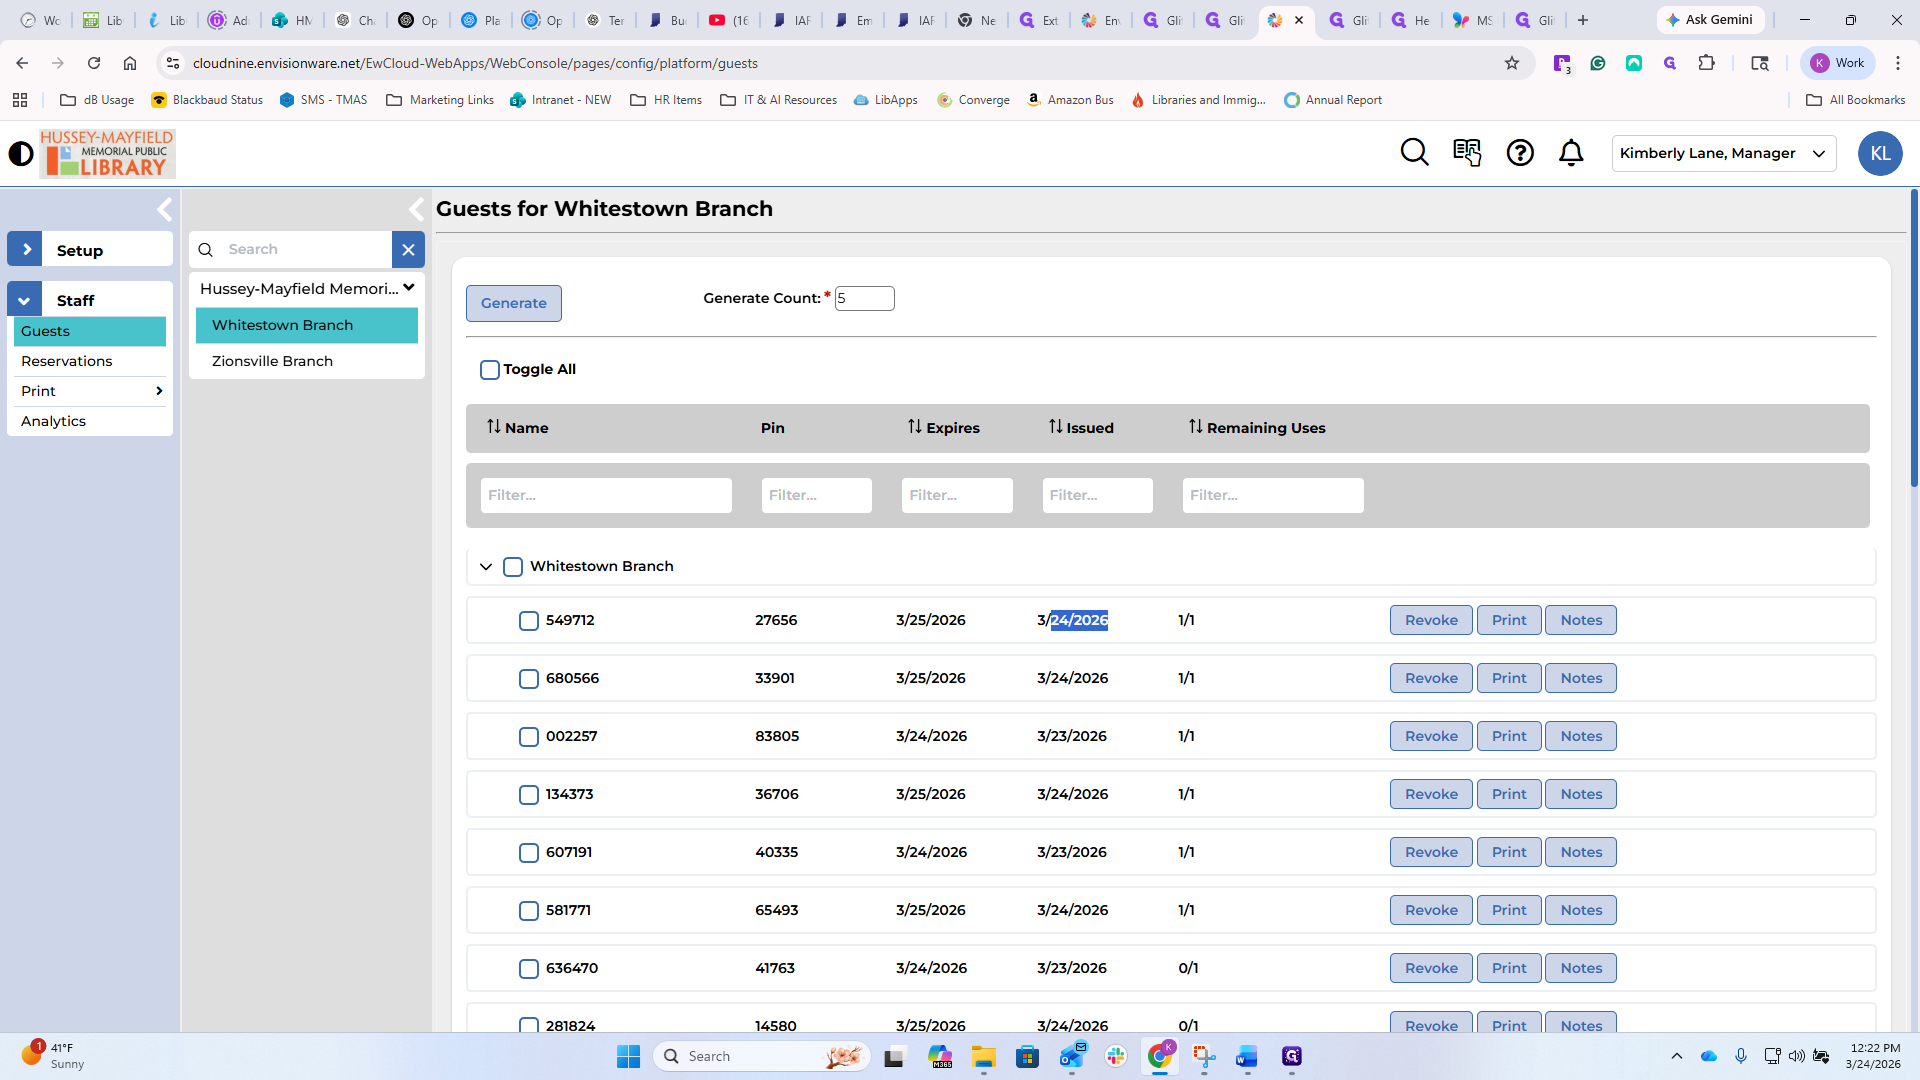
You can see everything here. The most recent one was issued on the 24th of the month.
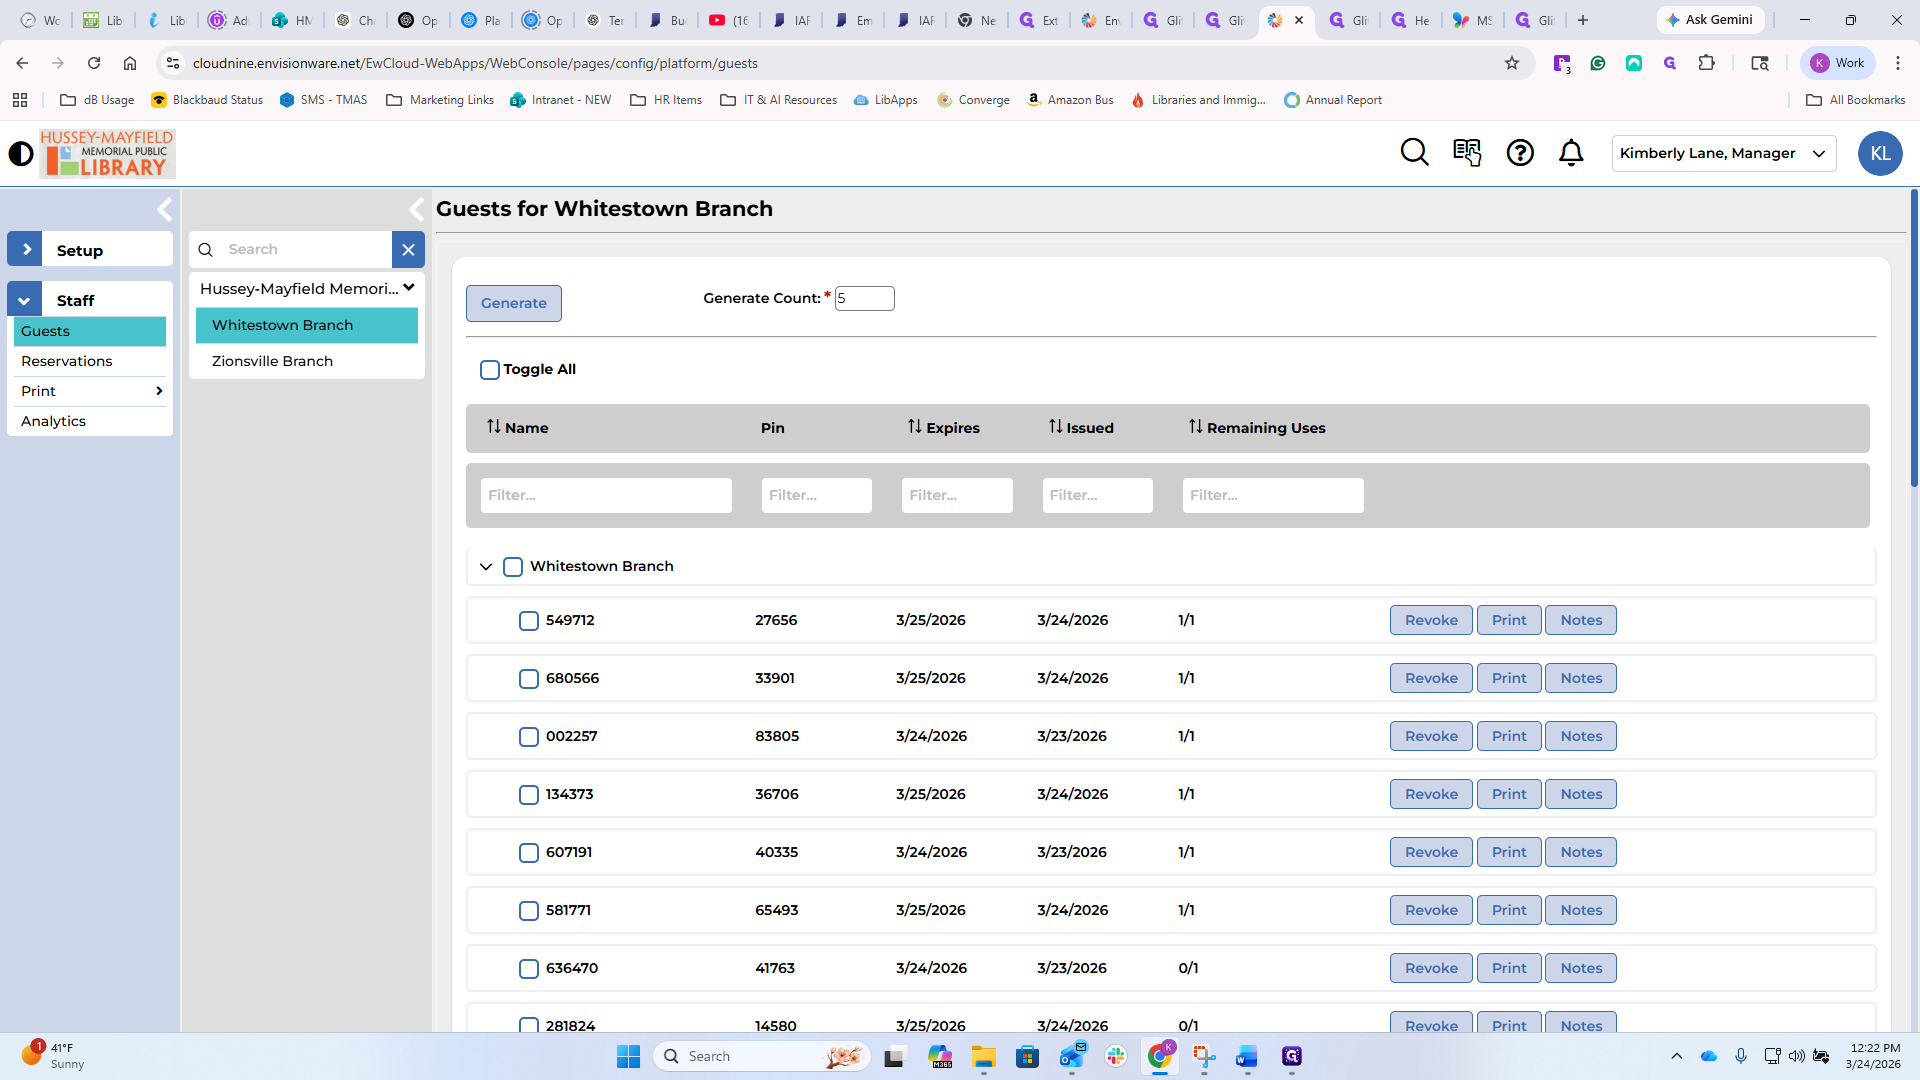
It expires in one day. Remaining uses are one of one. This means the person has either not received it yet or has not used it.
You can revoke it. If you accidentally print many of them, you can revoke them, and they will no longer be valid. You can print it from here.
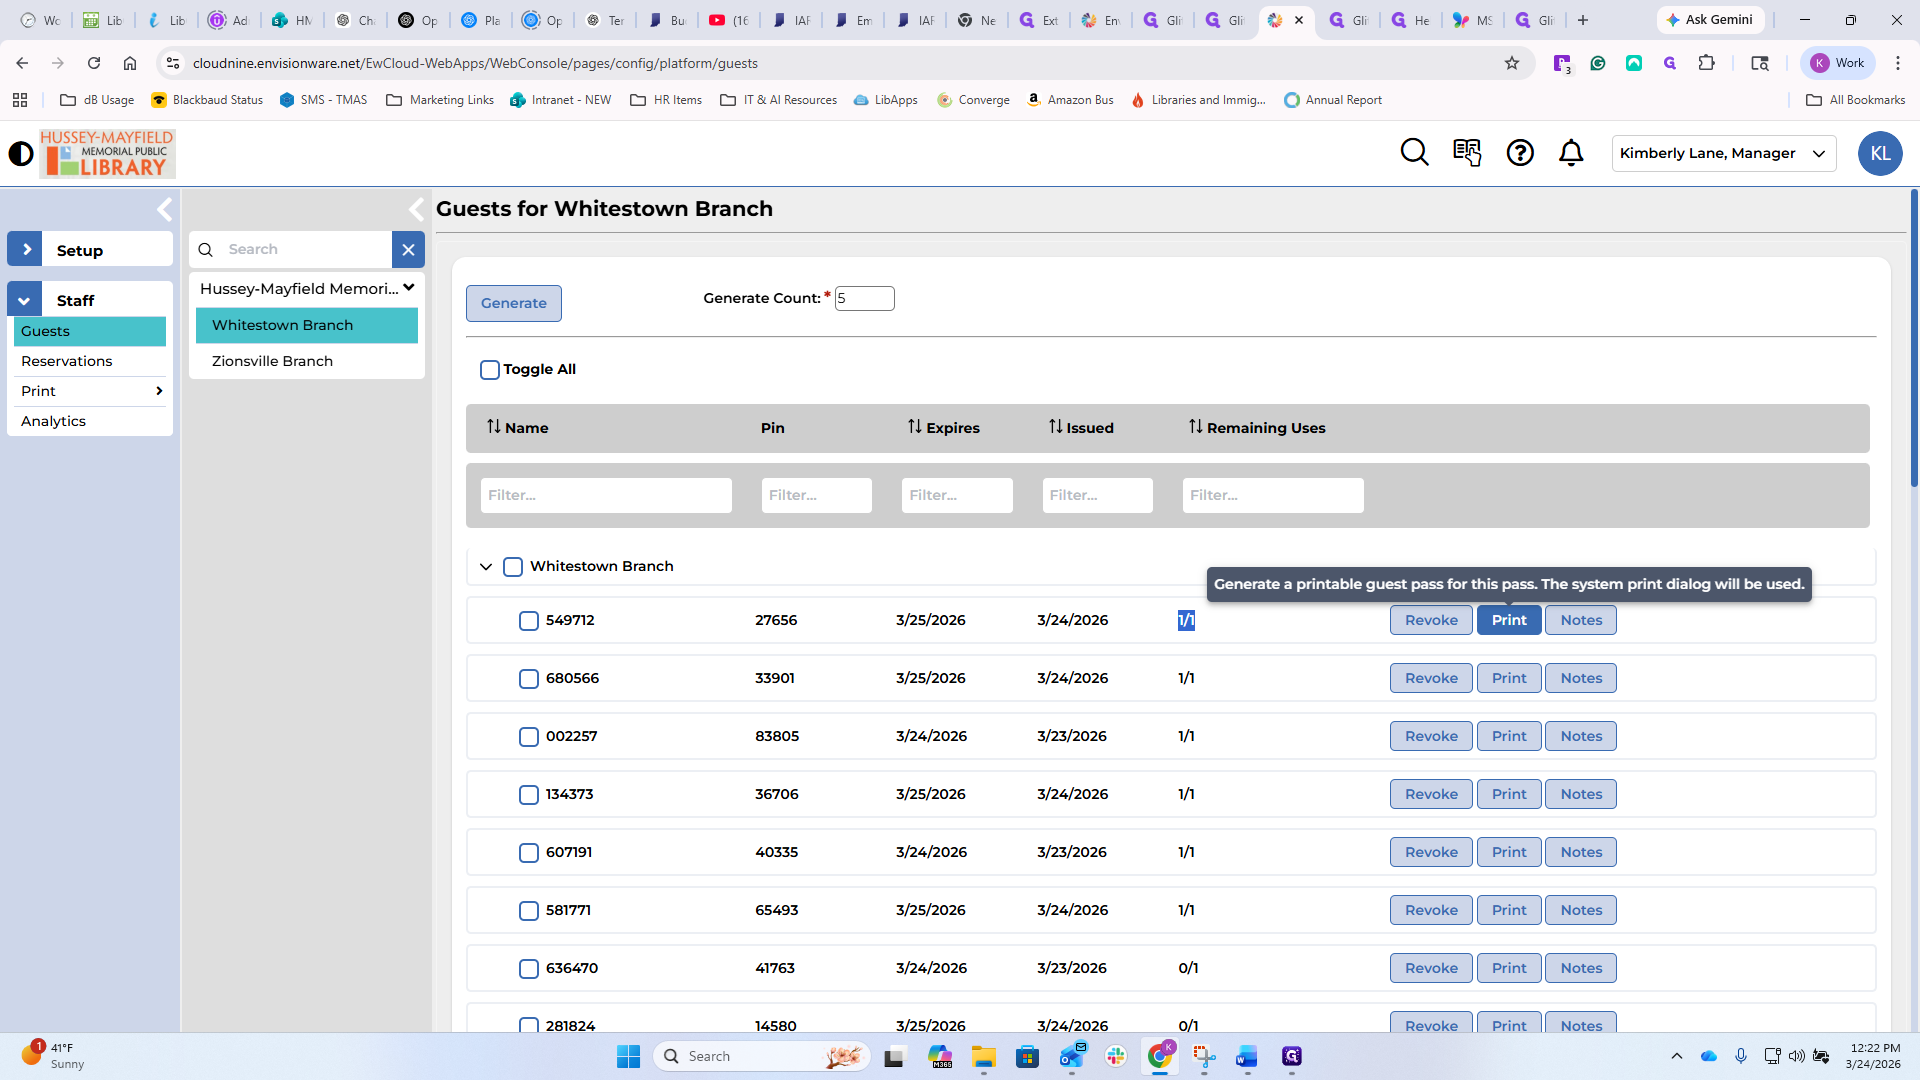
It opens the same print box.
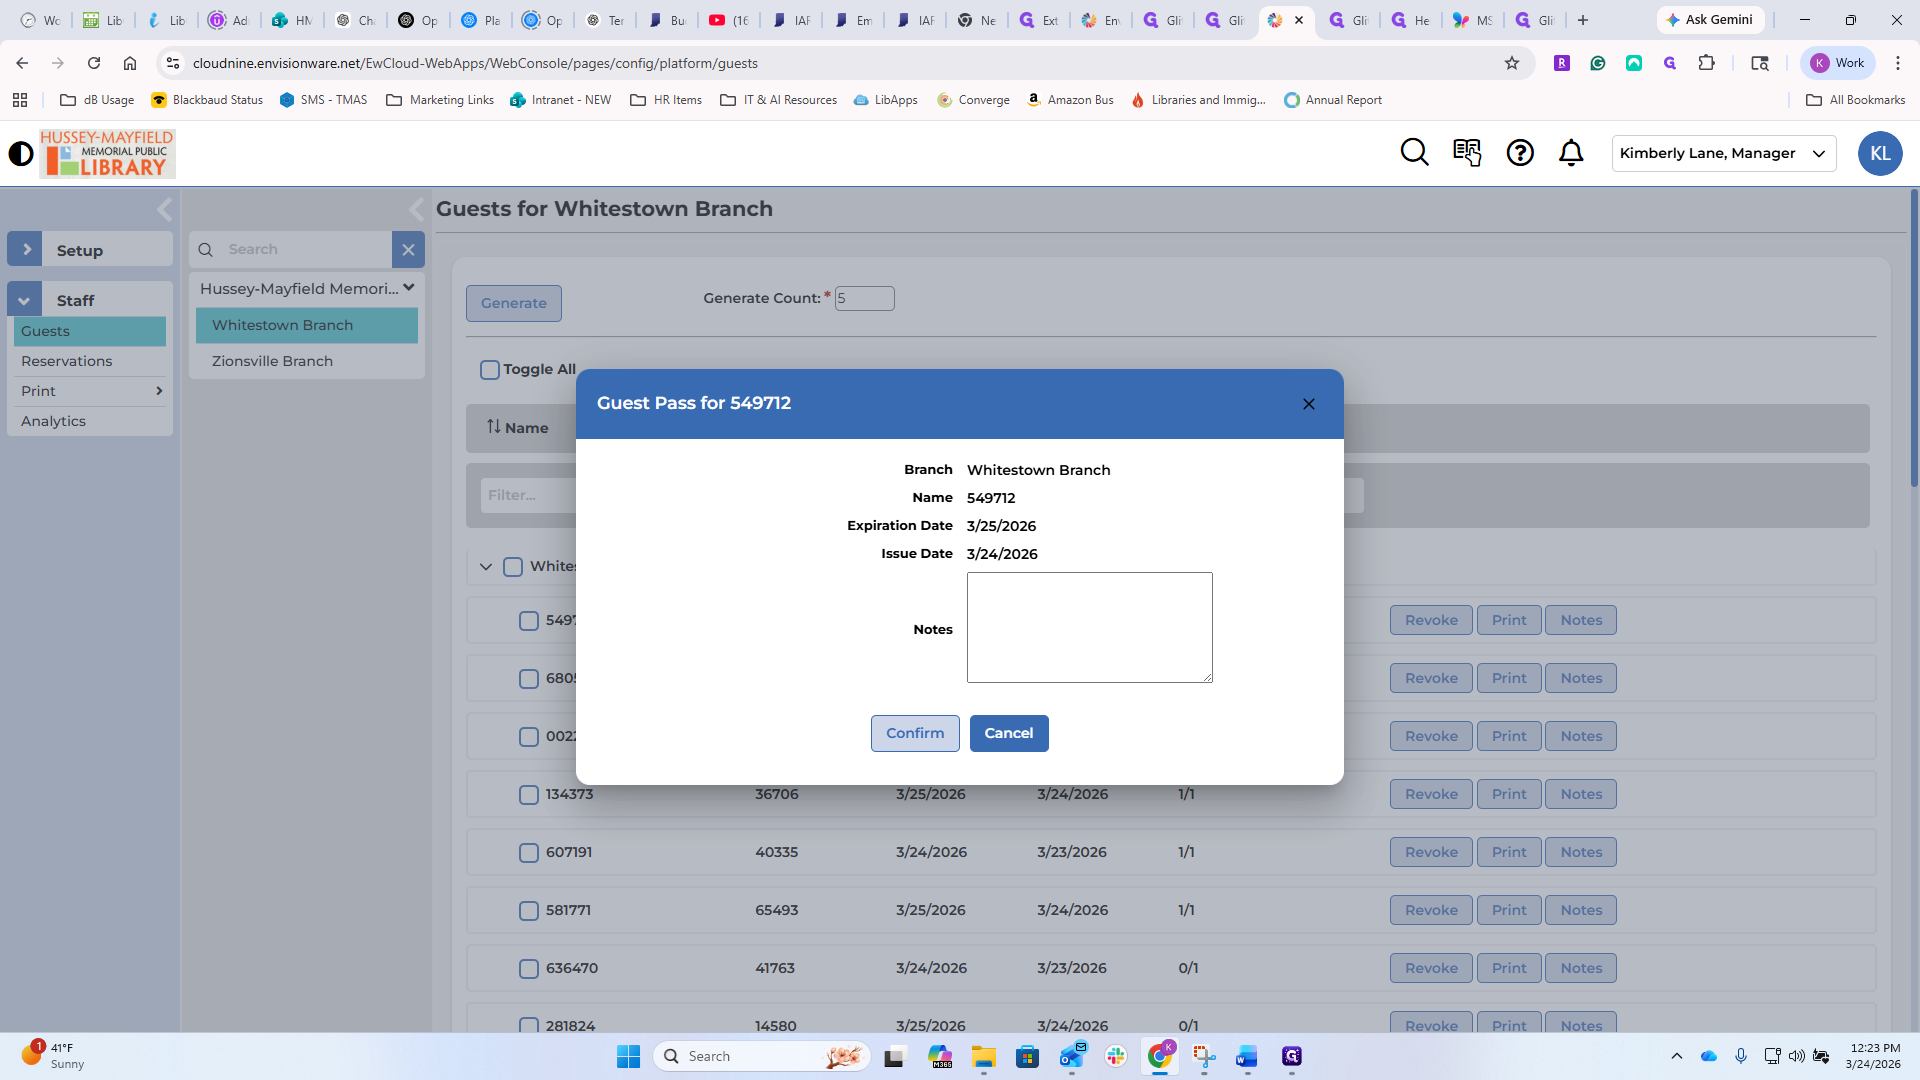
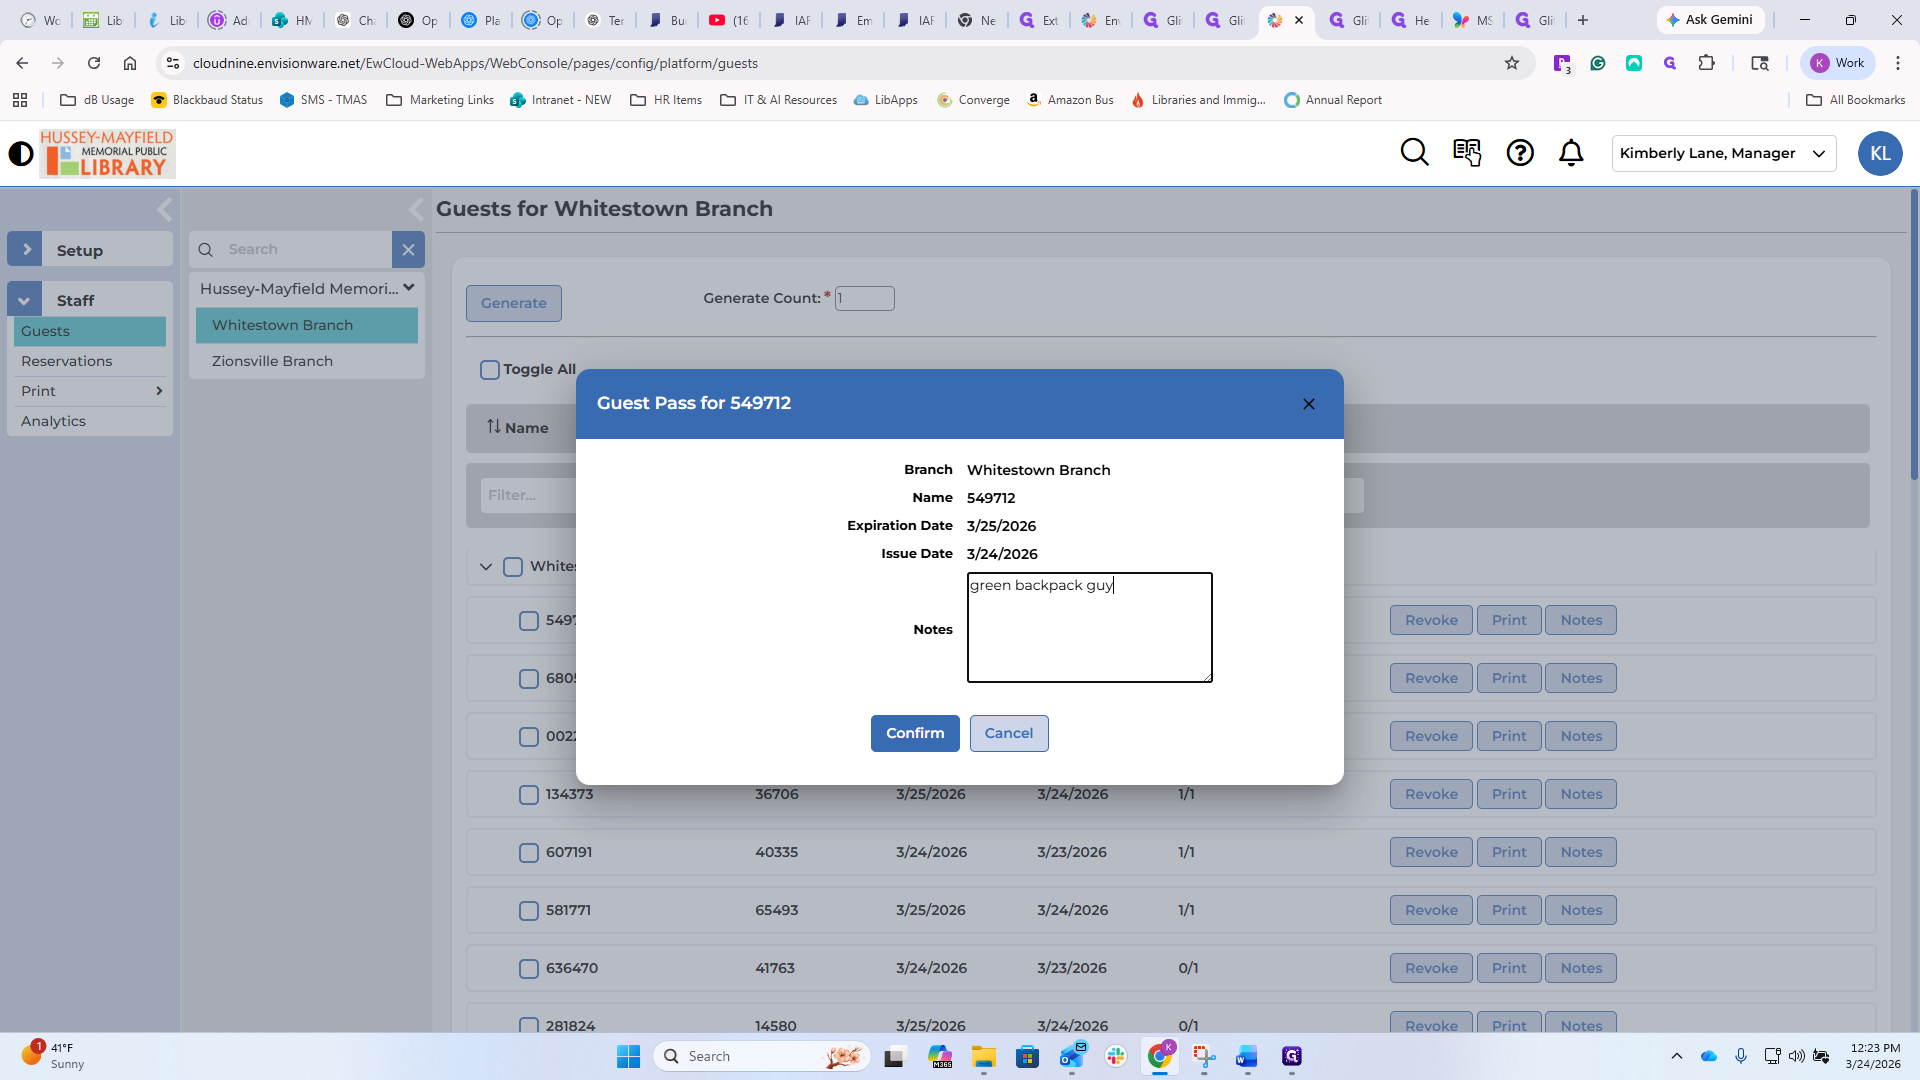
You can add notes.
This might be helpful if you give this guest pass to the guy with the green backpack. If you do that...

Let me make my own guest pass.

Generate and print.
Then I'll print it to make it real.
I think that was this one. Um, and we're gonna, um...

Green backpack. Um... It will then change the functionality slightly.
Whoops. Let's sort by notes.
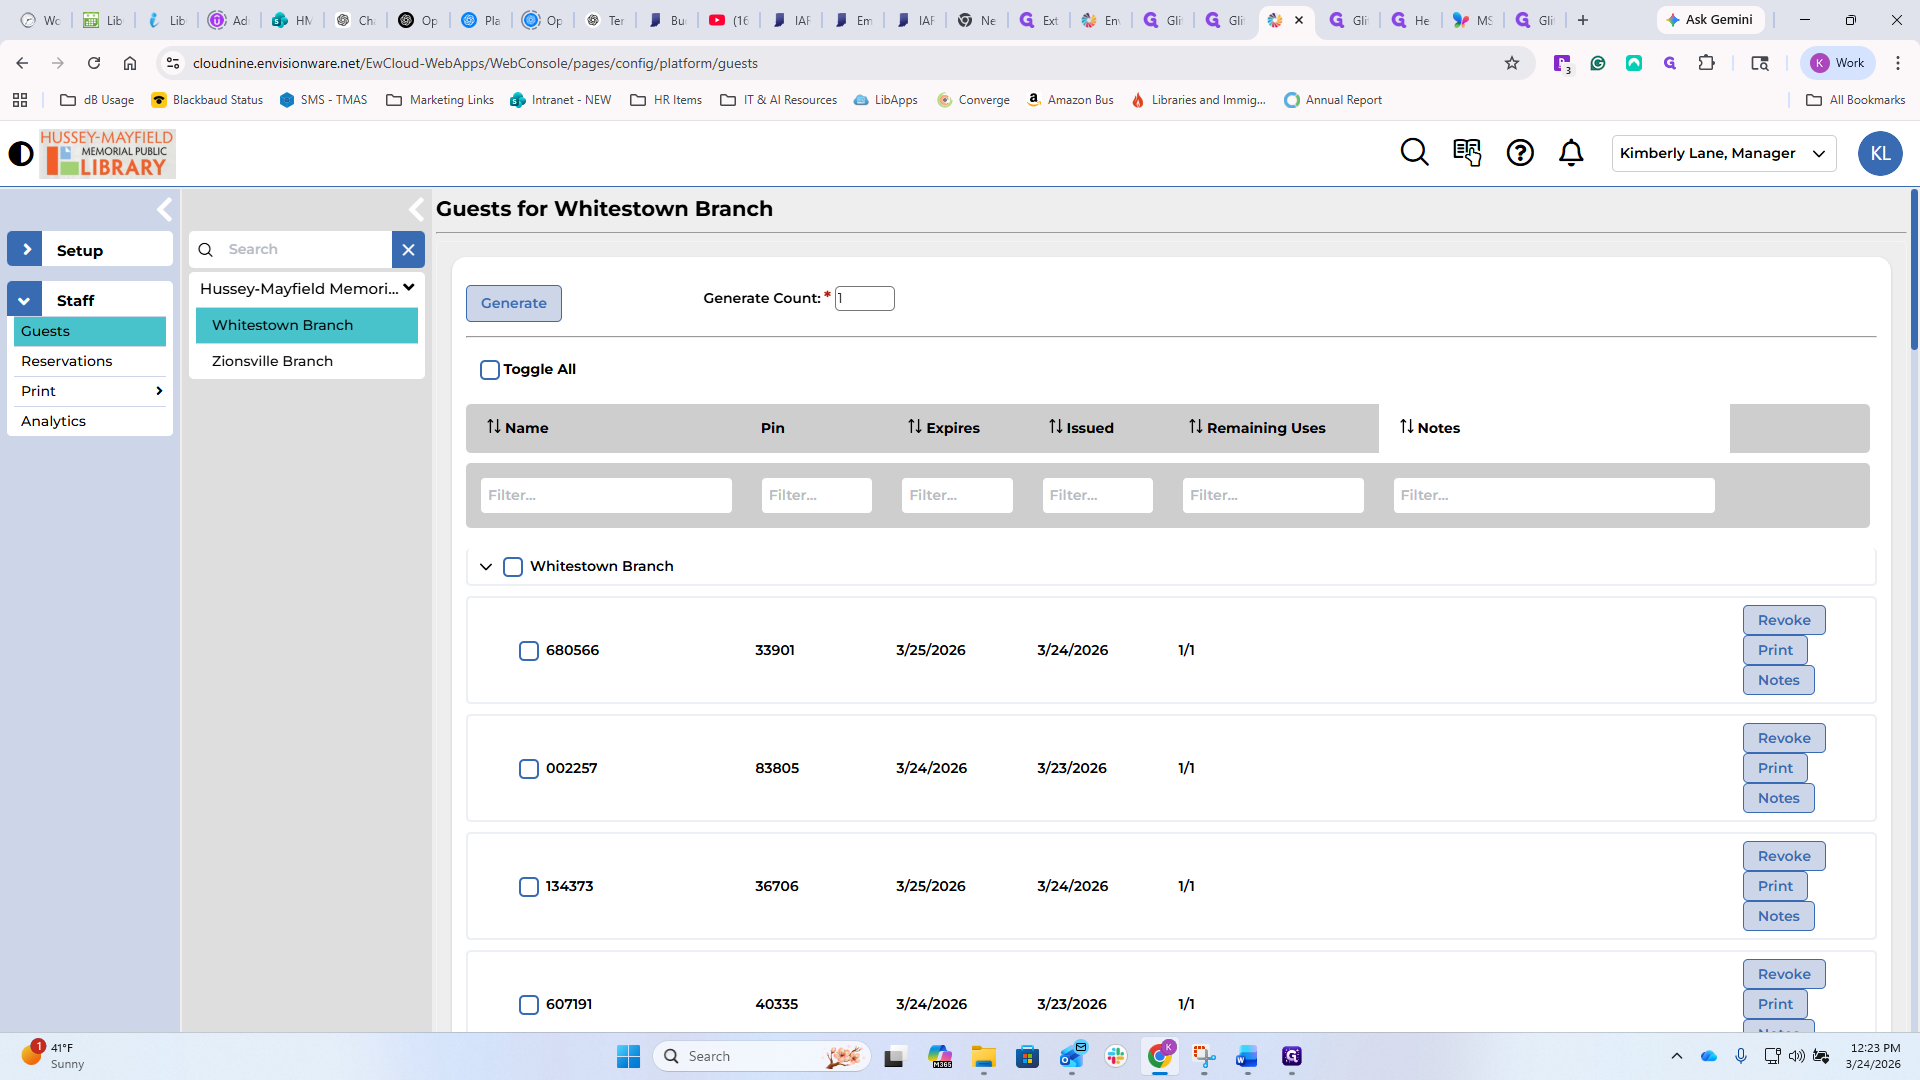
There we go.
There he is. You can see it here. It could be useful. We have never done this. It doesn't make any difference, but I wanted you to see the functionality.
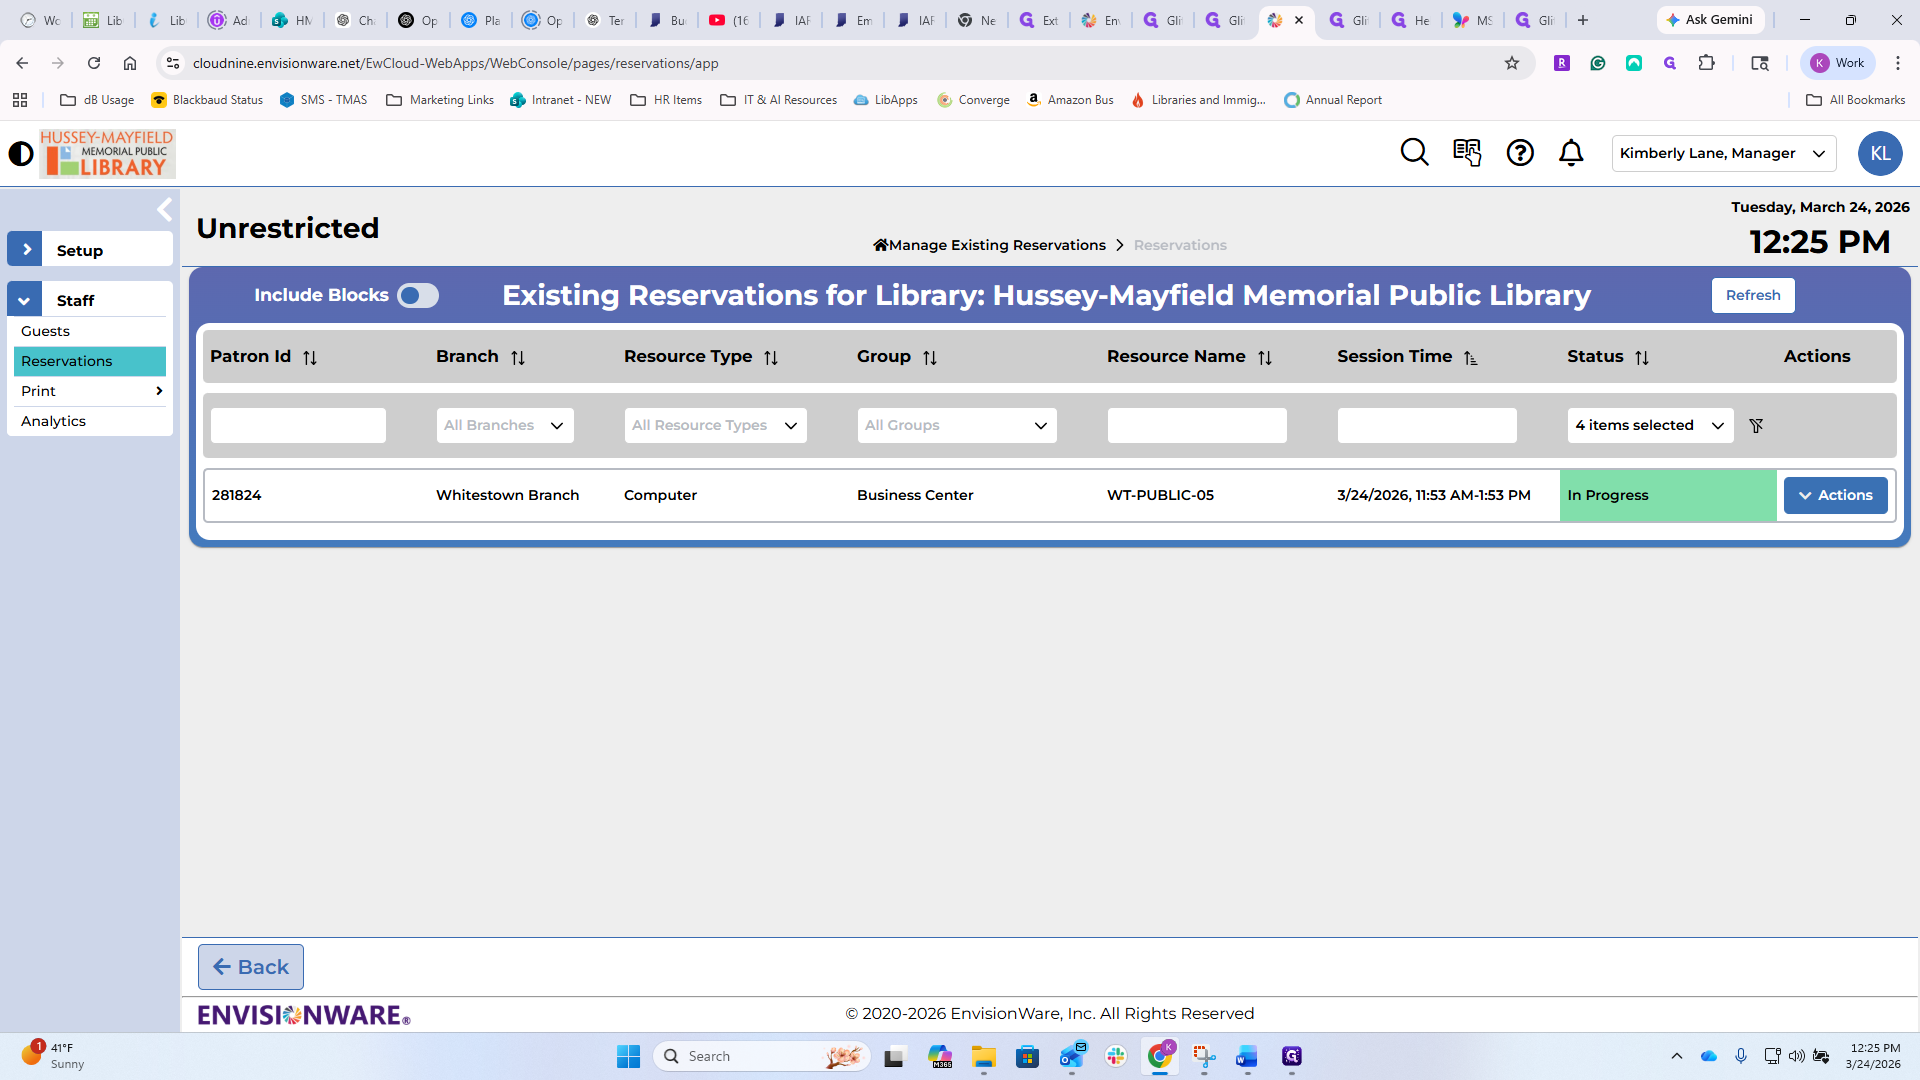
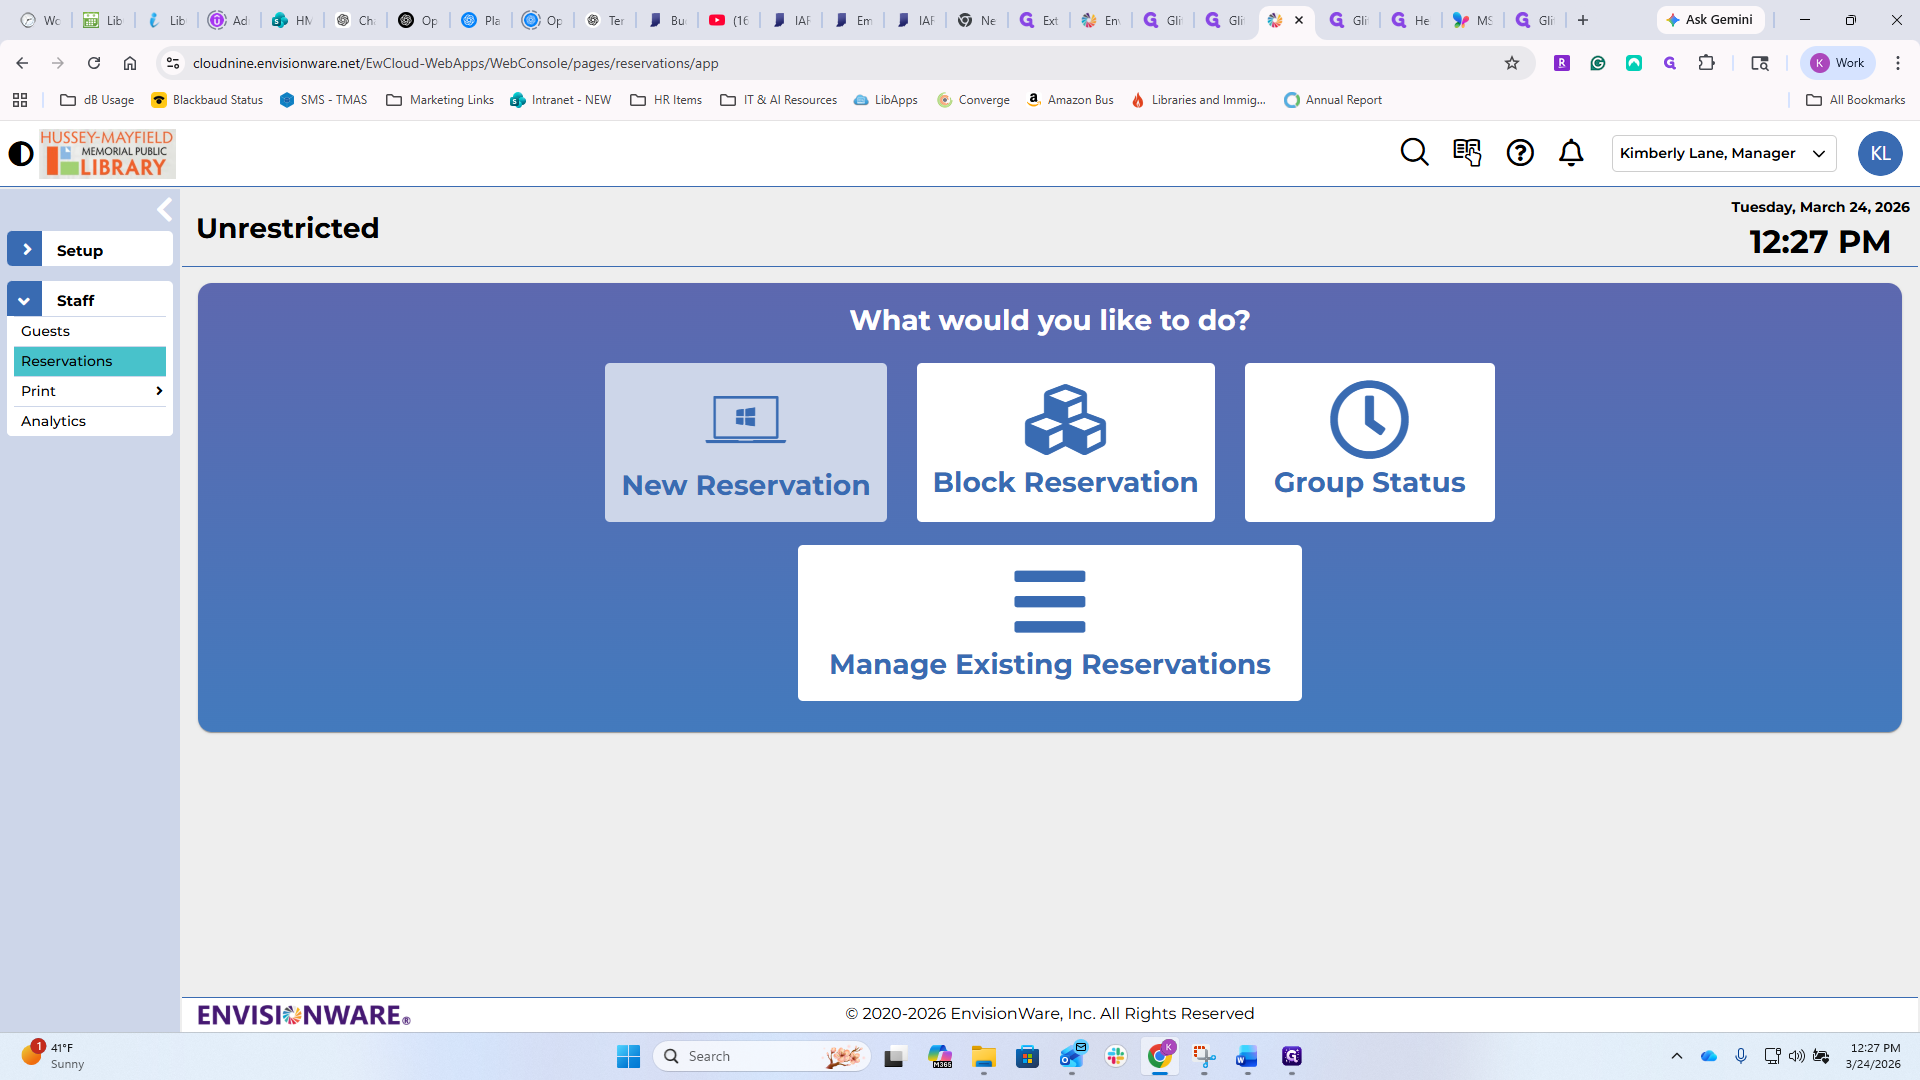
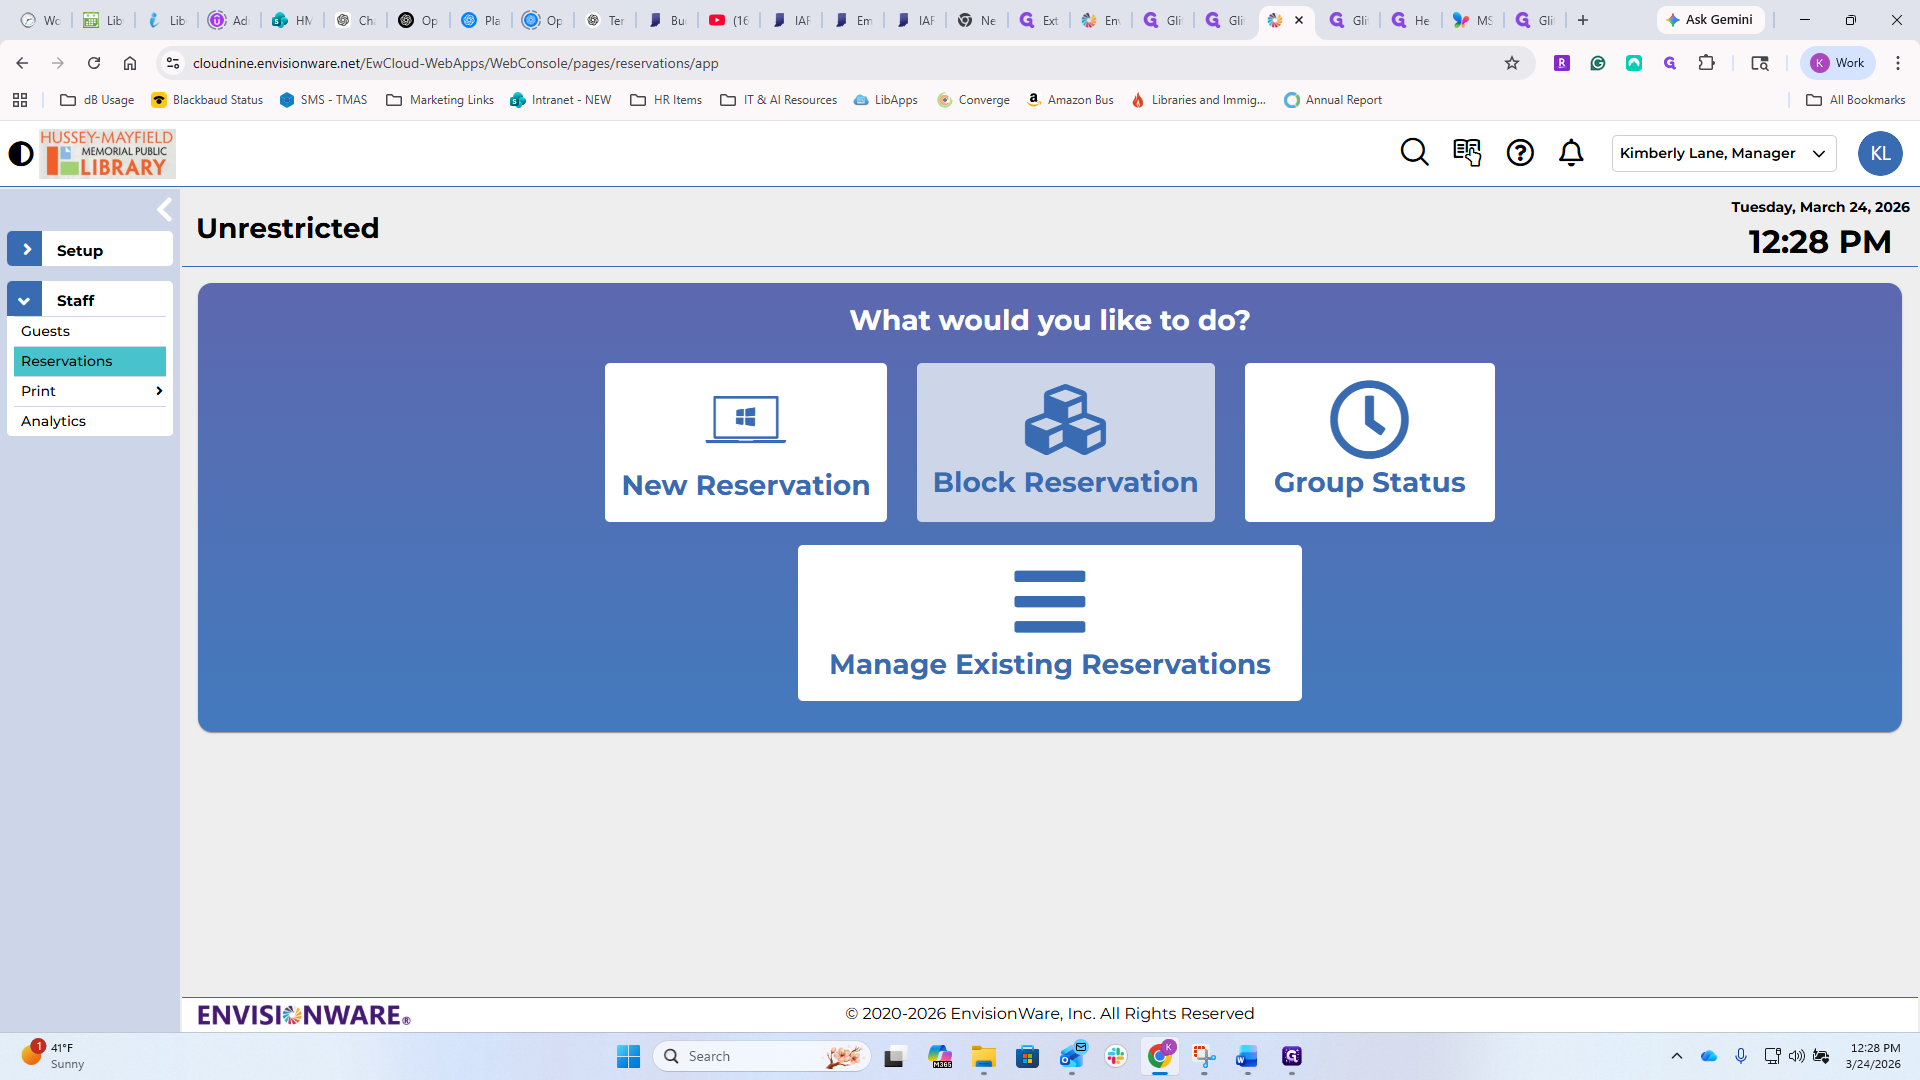
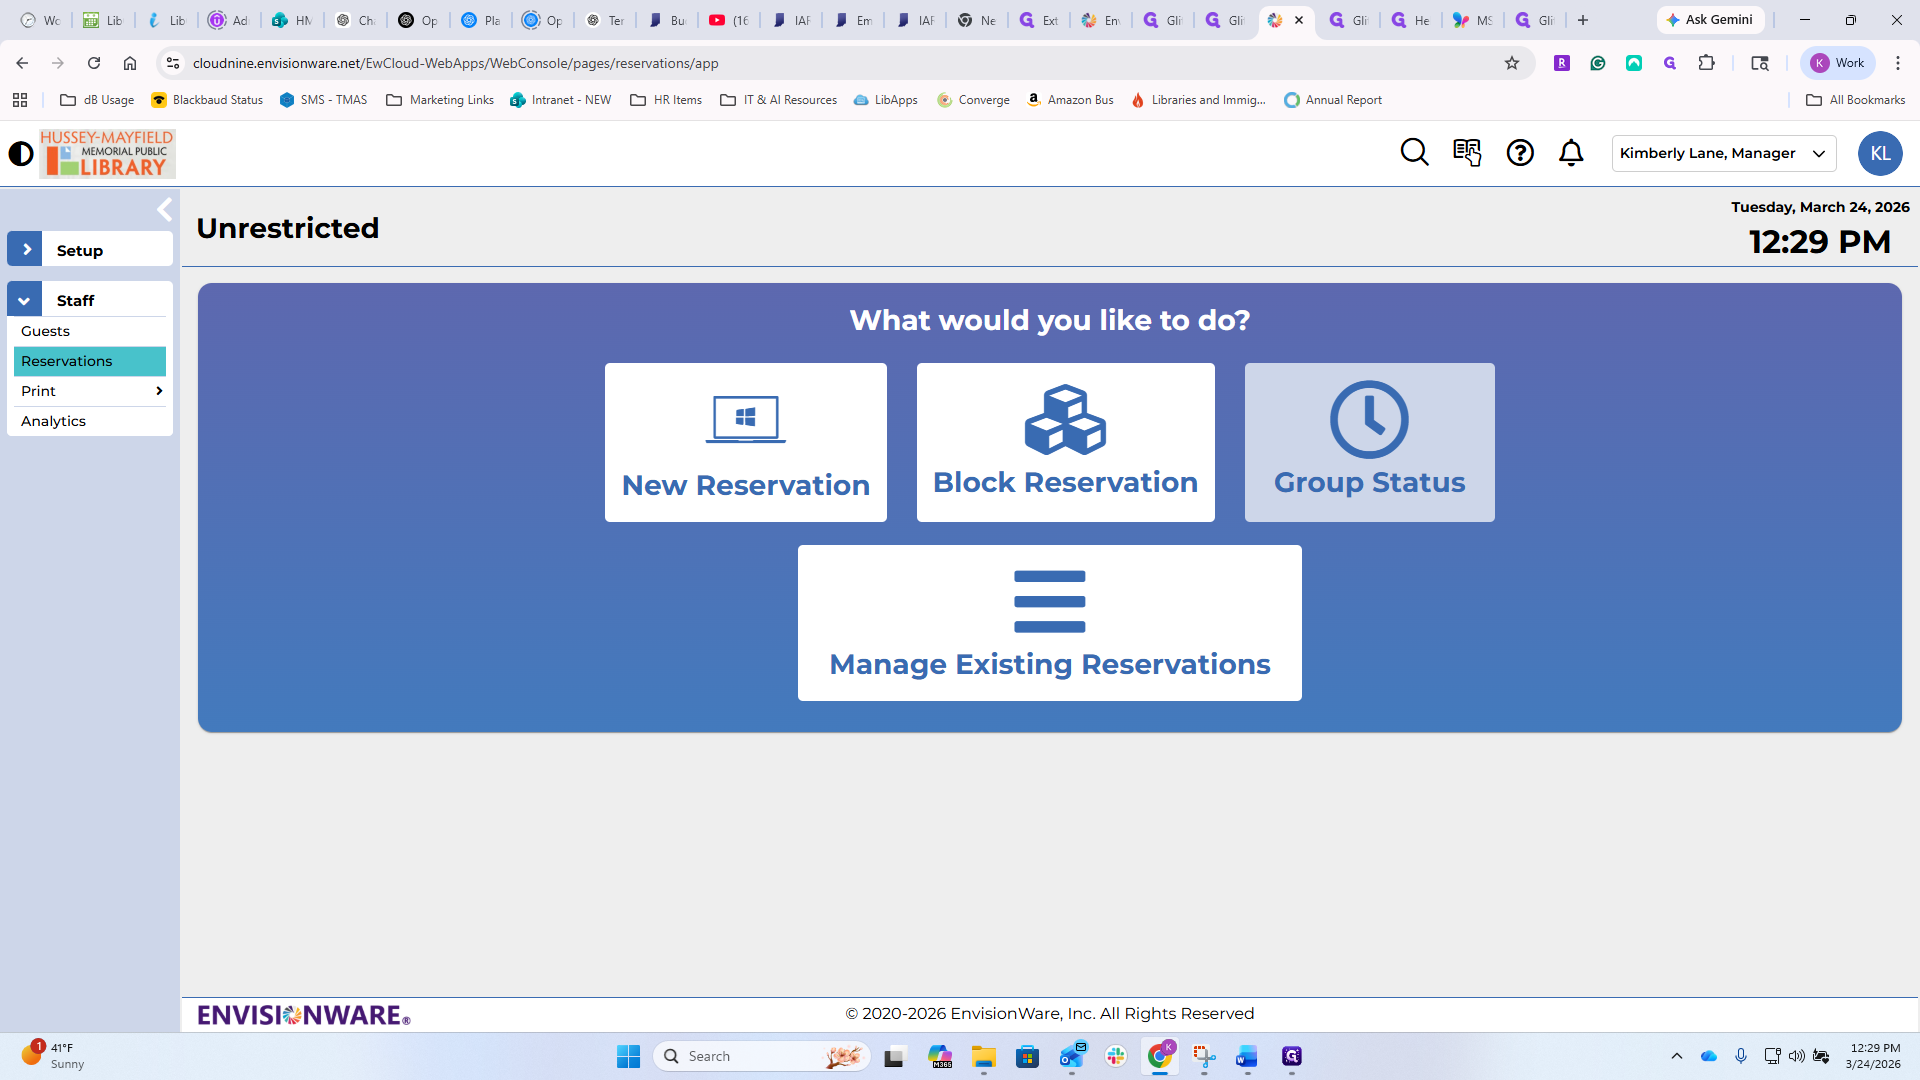
If you go back to Reservations, you will see some additional options we haven't used before, including my computer monitor going back.
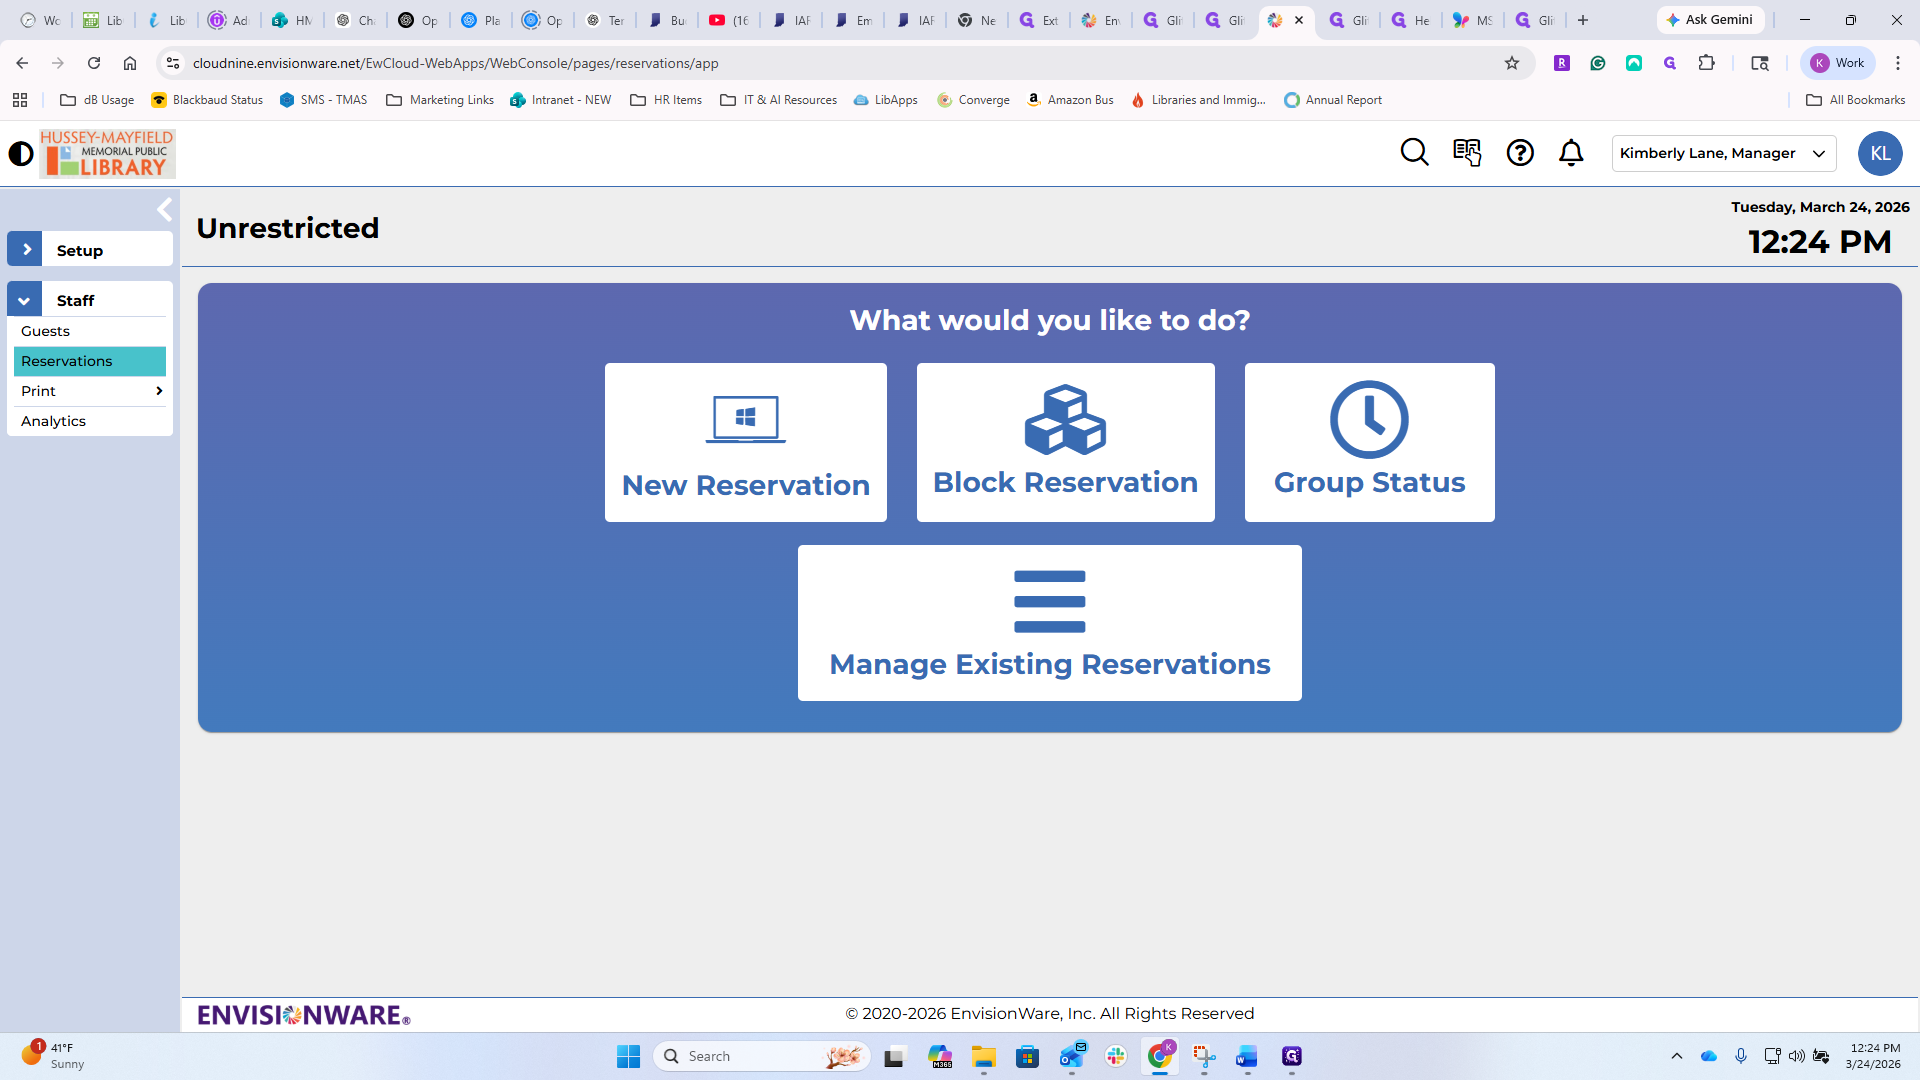
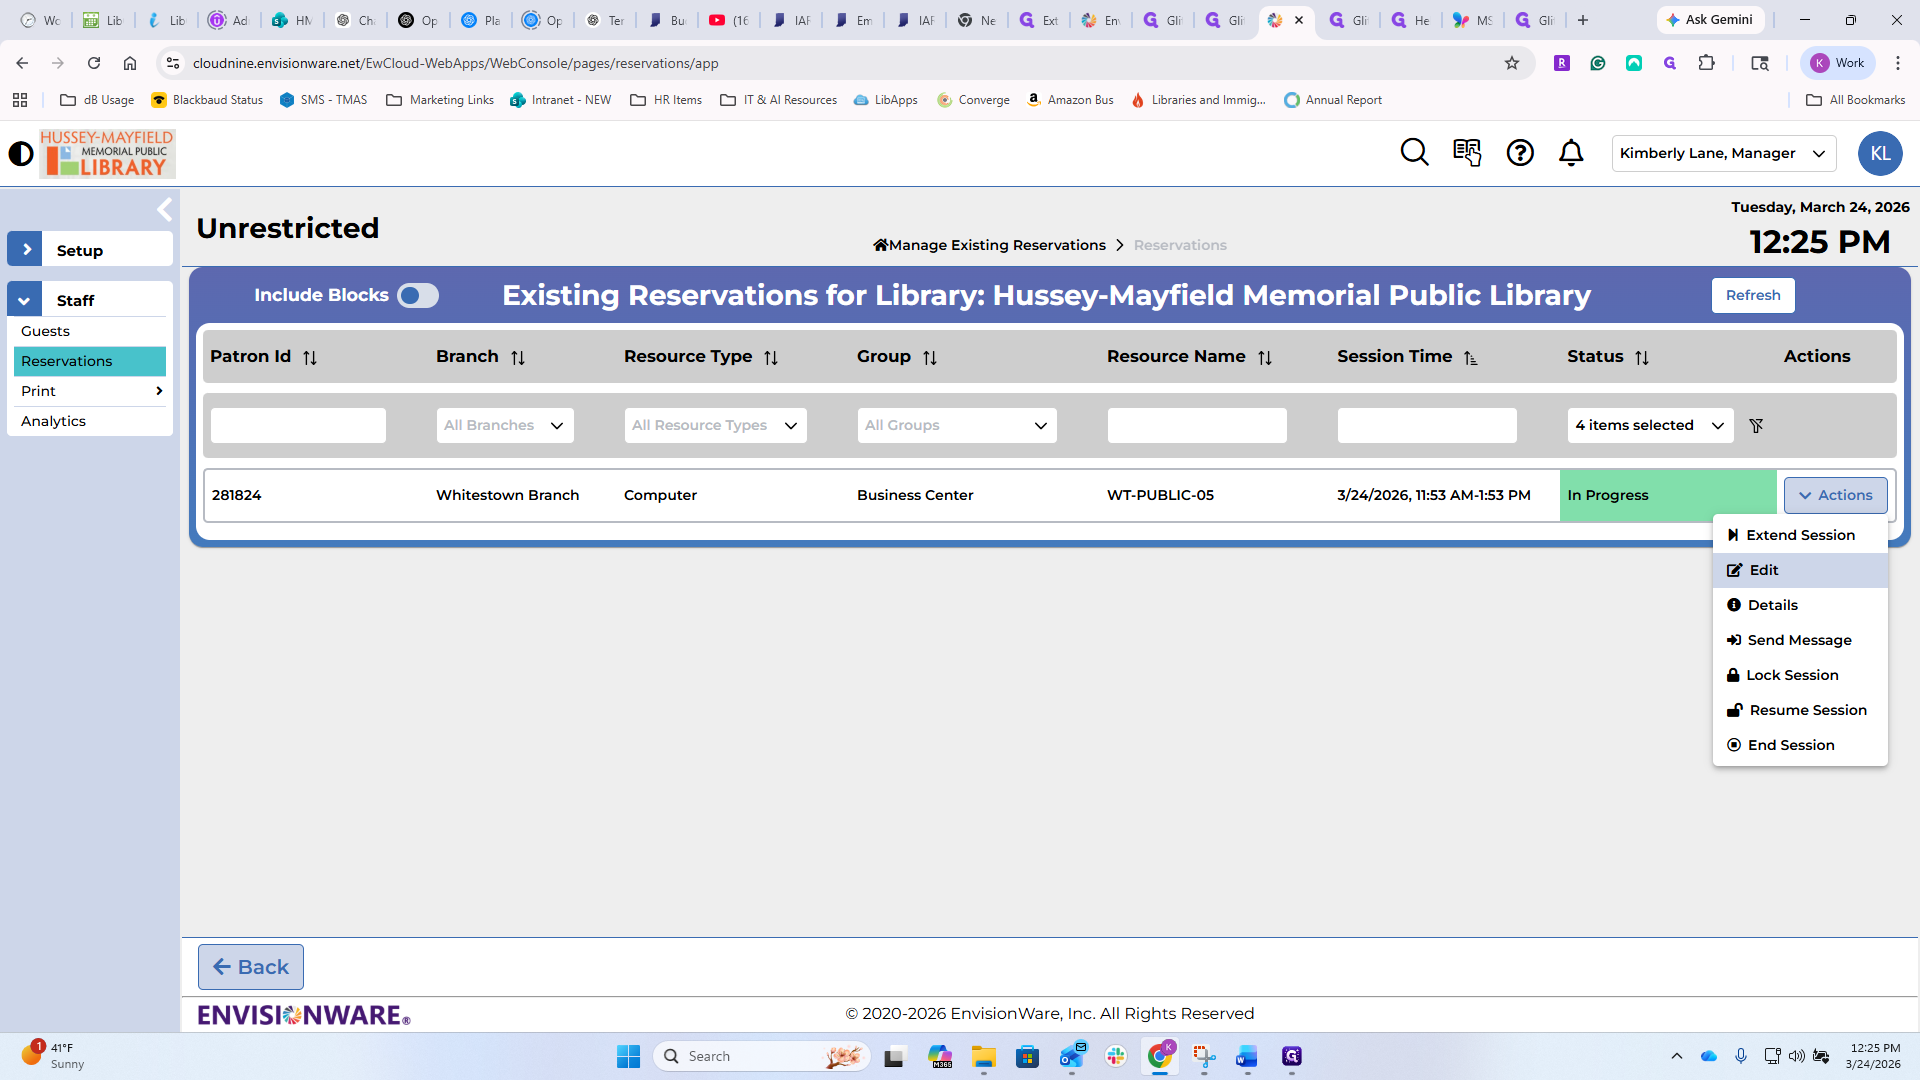
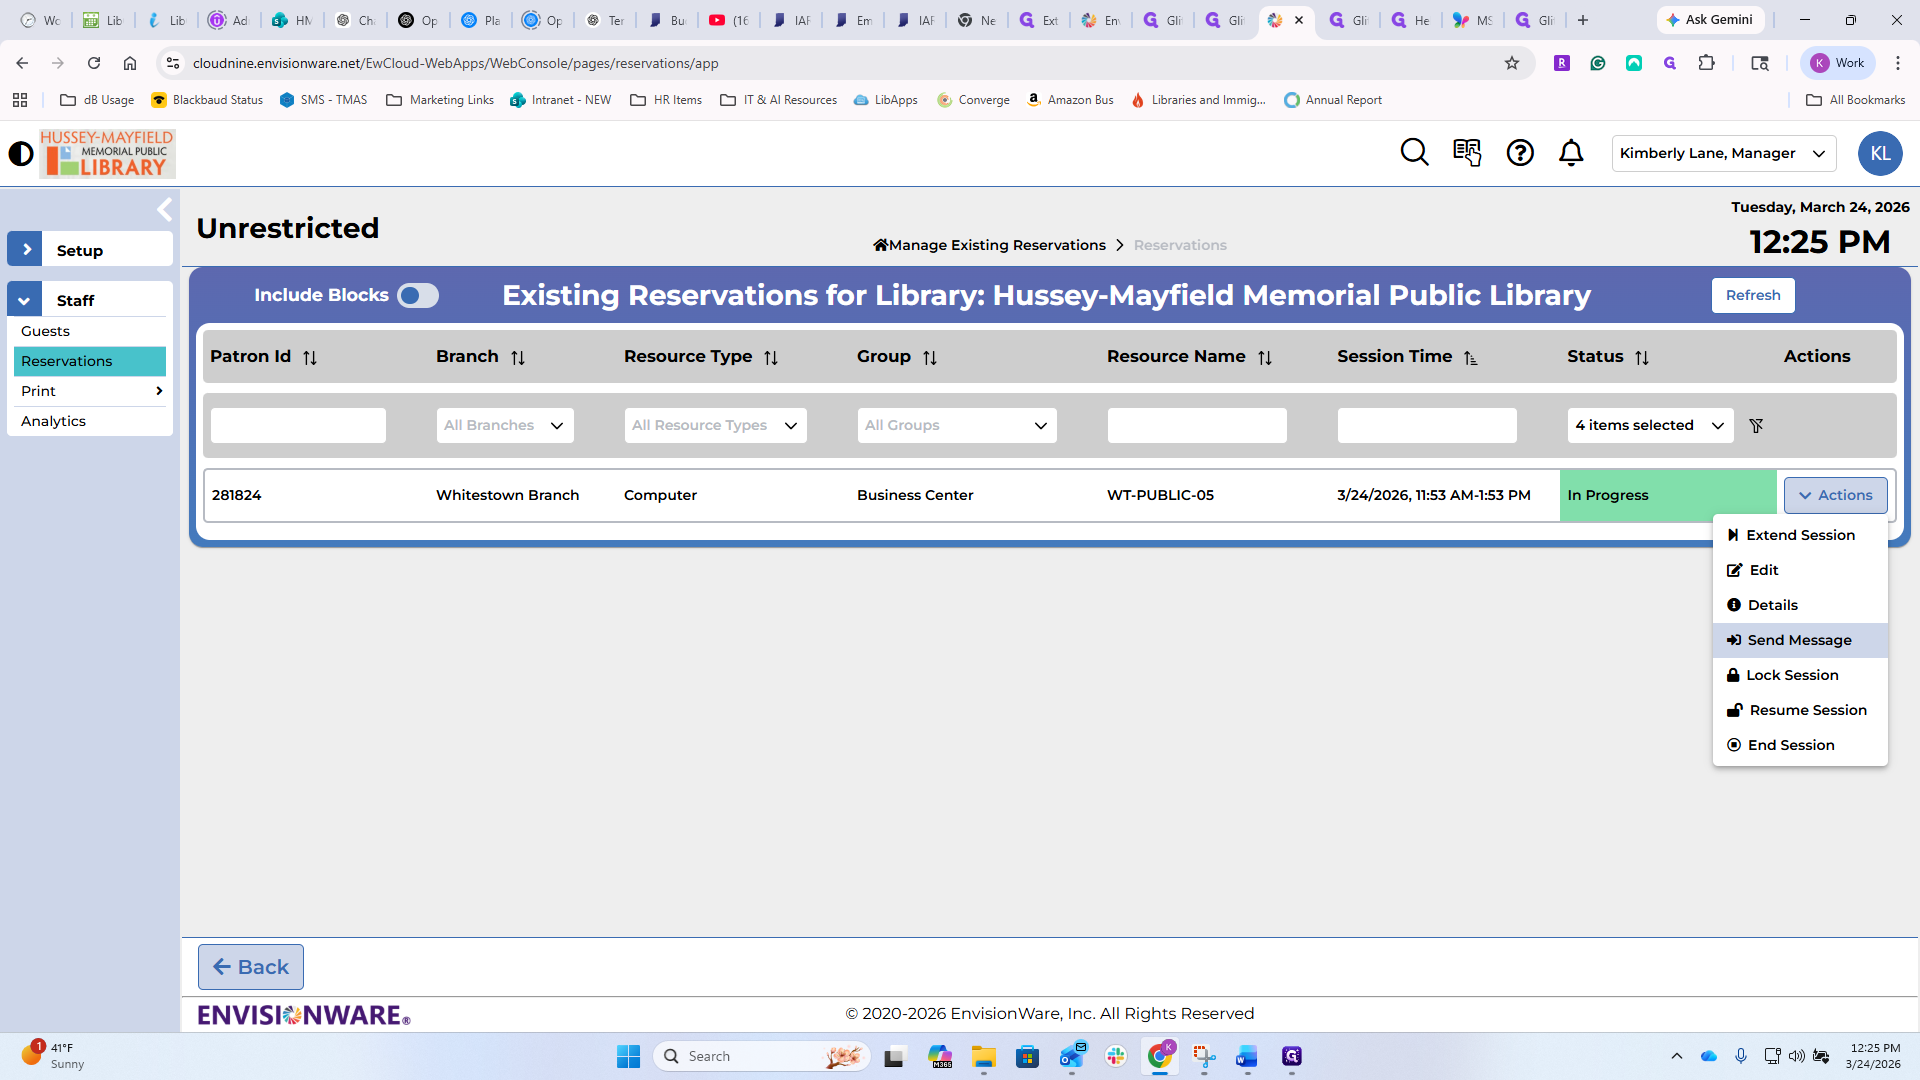
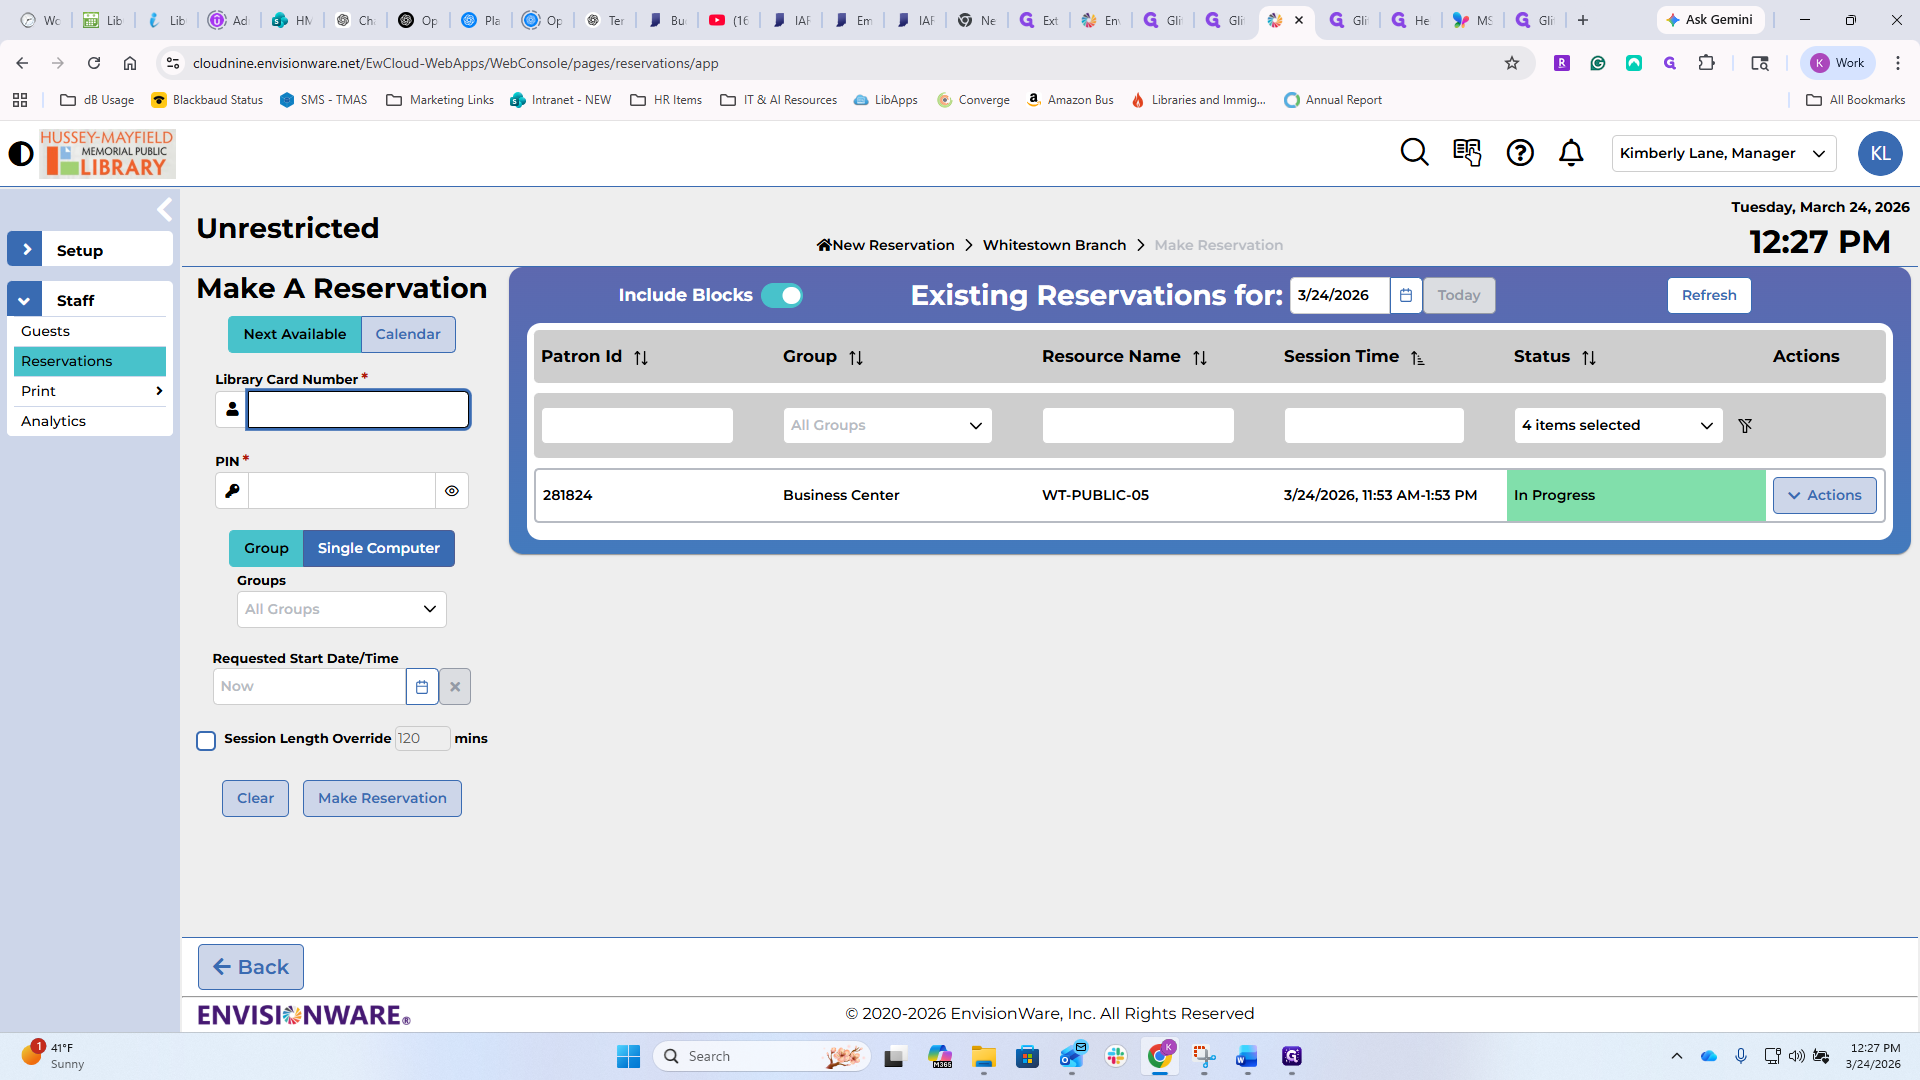
If you are managing existing reservations, this is where you will see all the computers currently in use.
You can see that this one is in the business center at Whitestown and is in progress. From this location, you can extend the patron's session if they need more time. You may do this at your discretion if it is not too busy and no one is waiting. Add more time as needed.

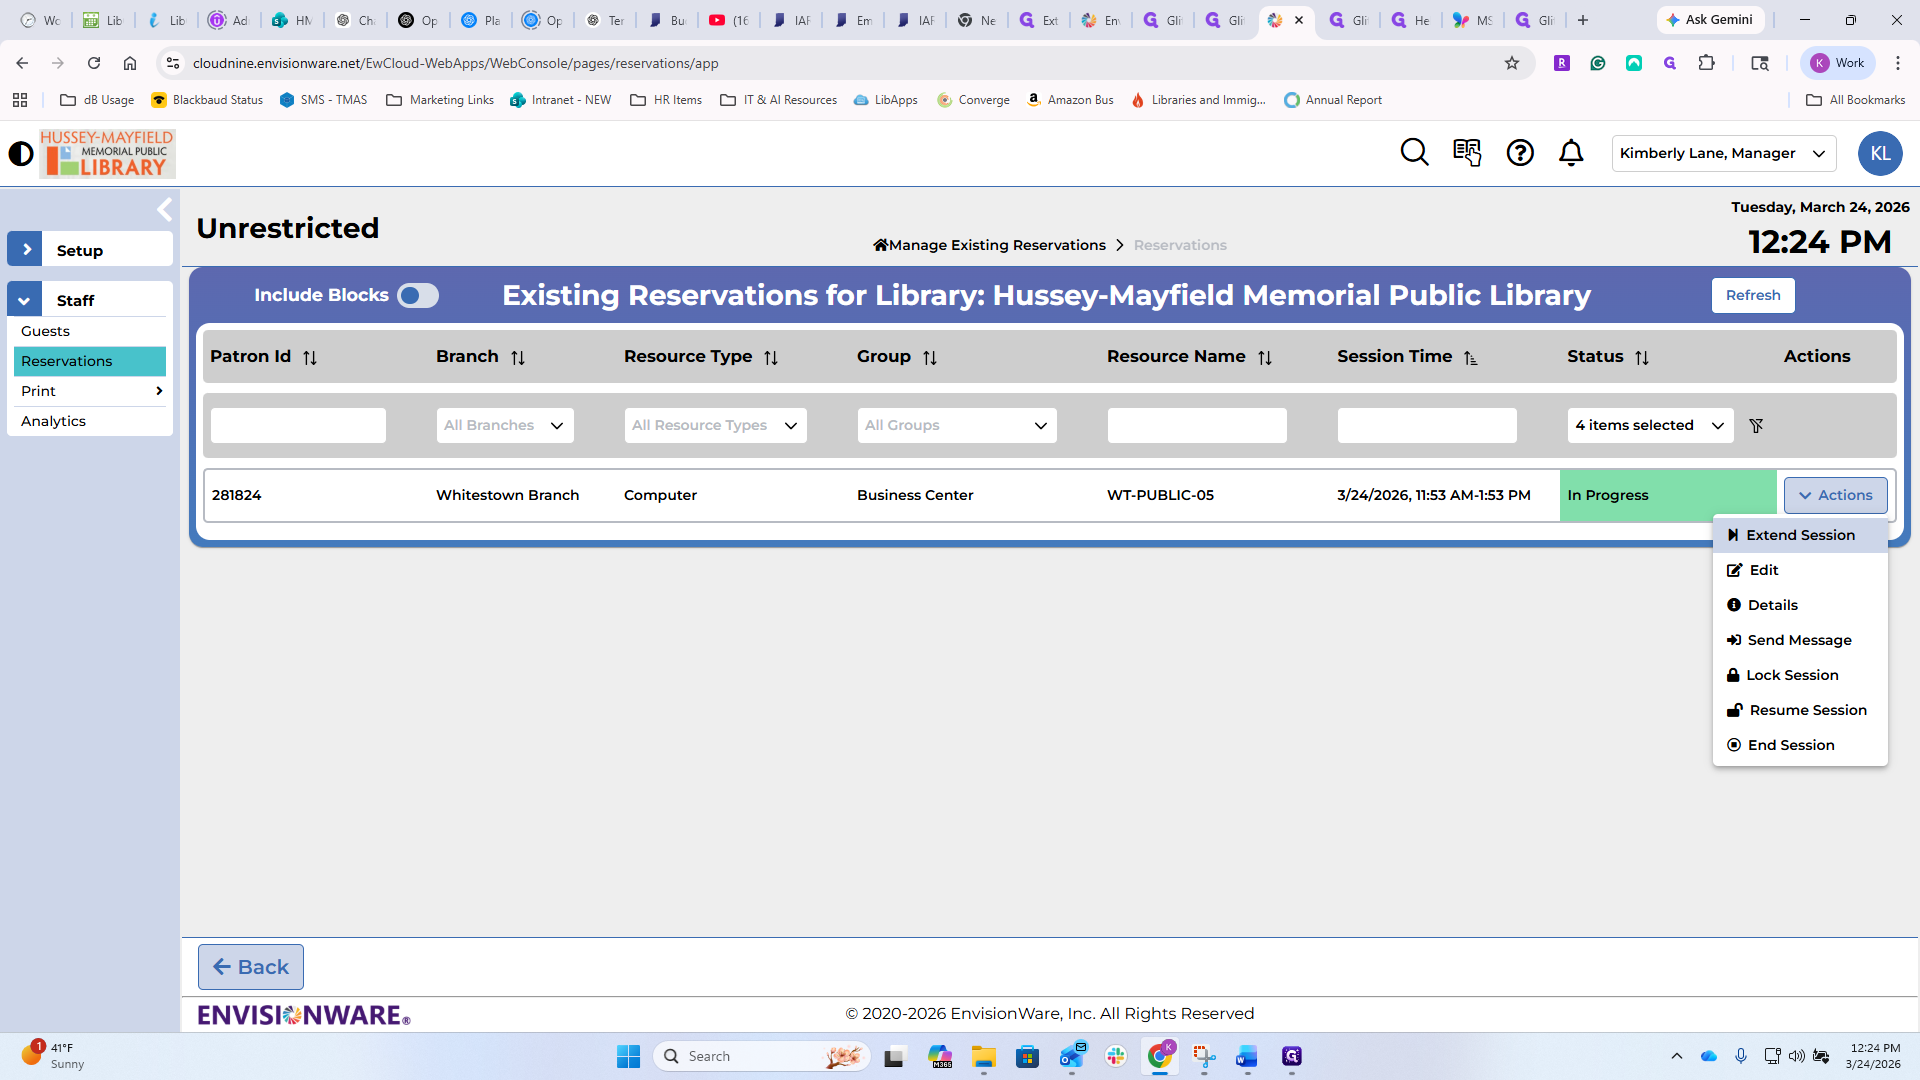
You can add a note if you need to. You can print this. You may never need to, but just in case.
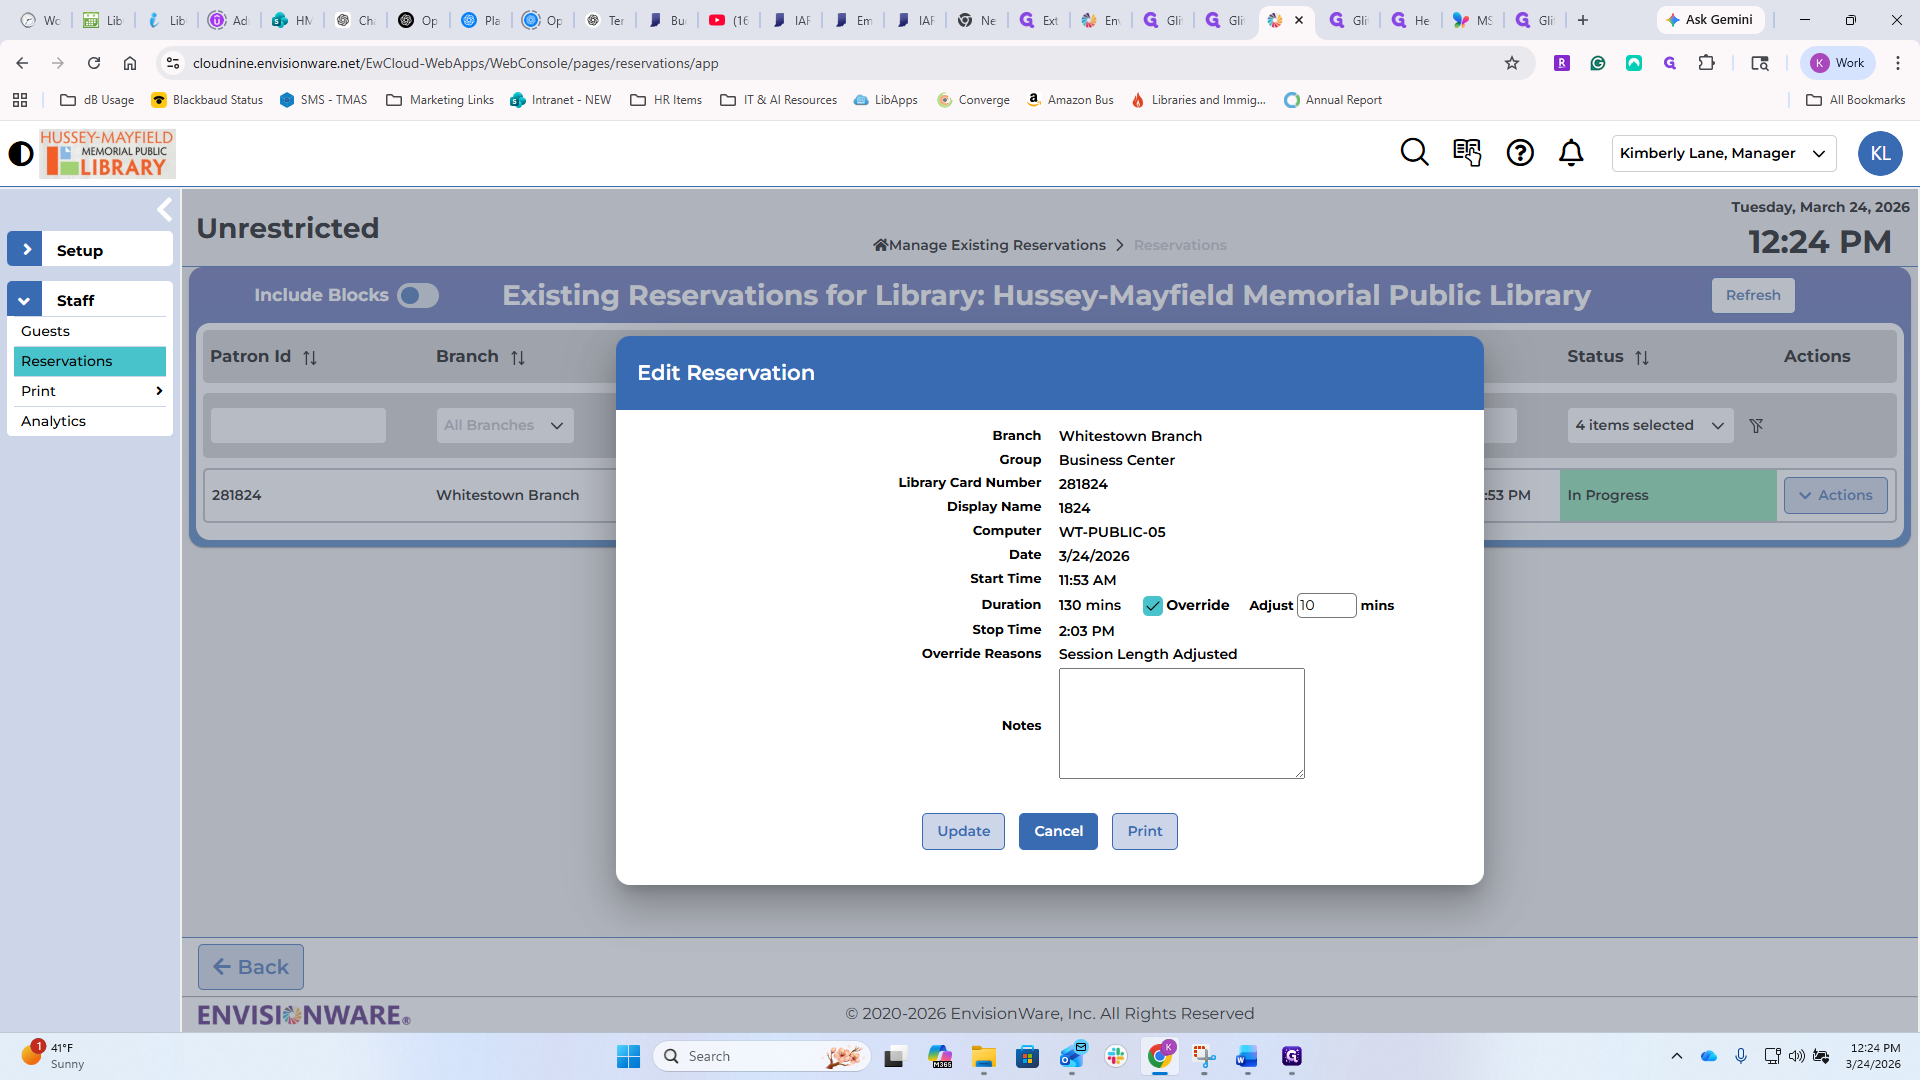

You can also do the same thing from Edit.
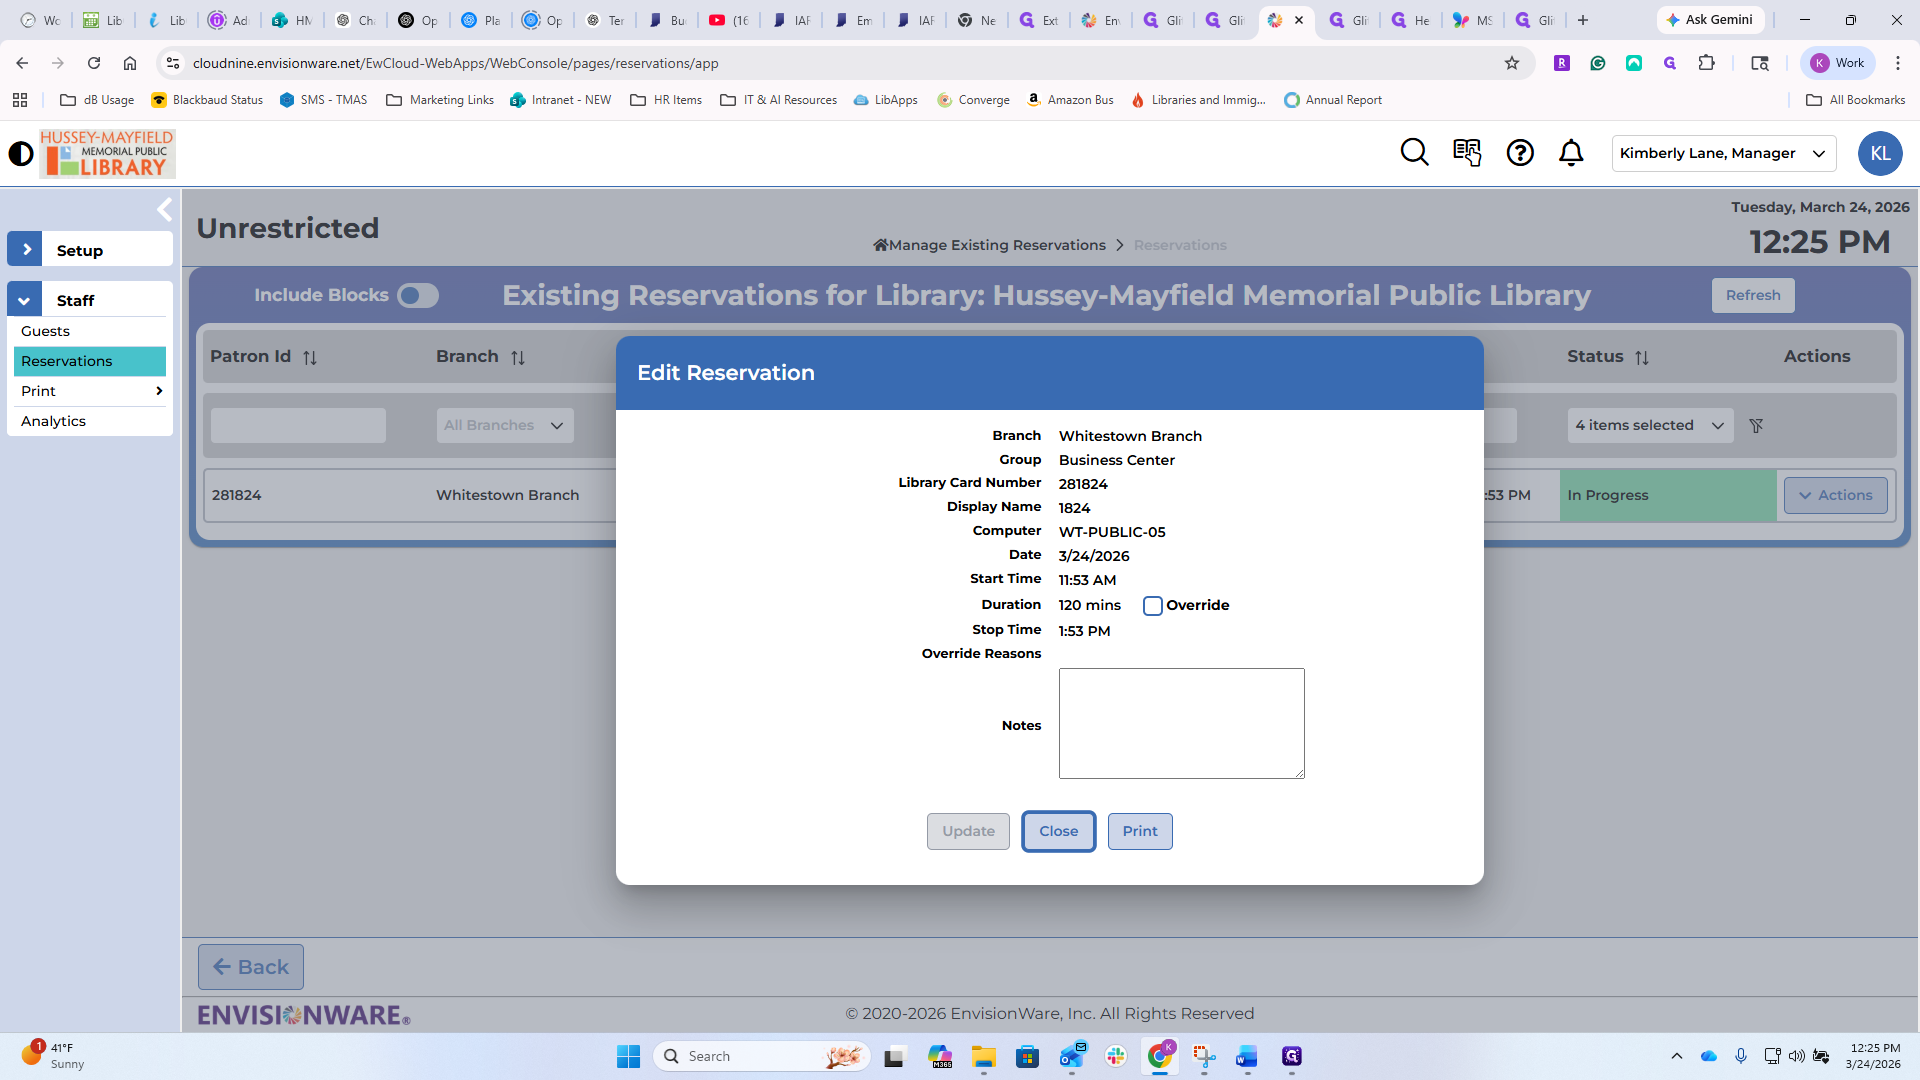
You can override and adjust, and it will return to the same screen I just saw.

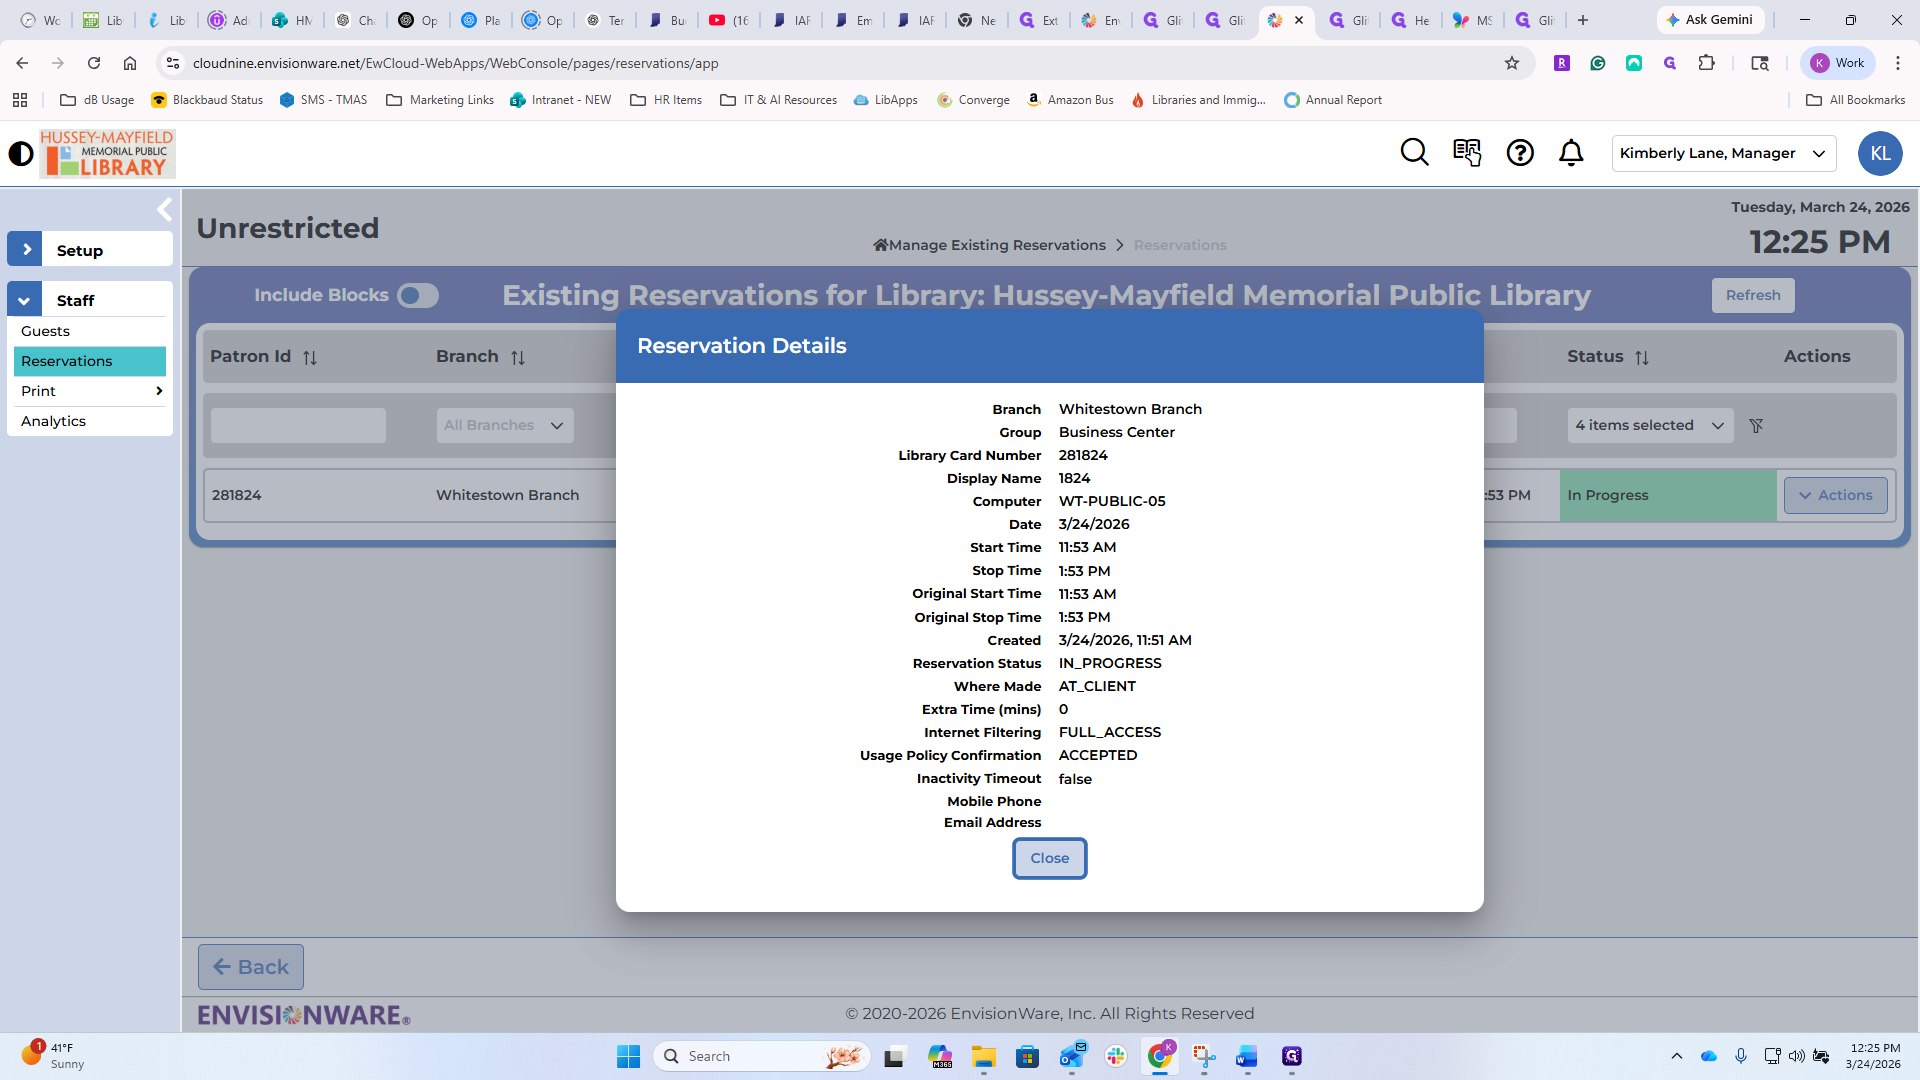
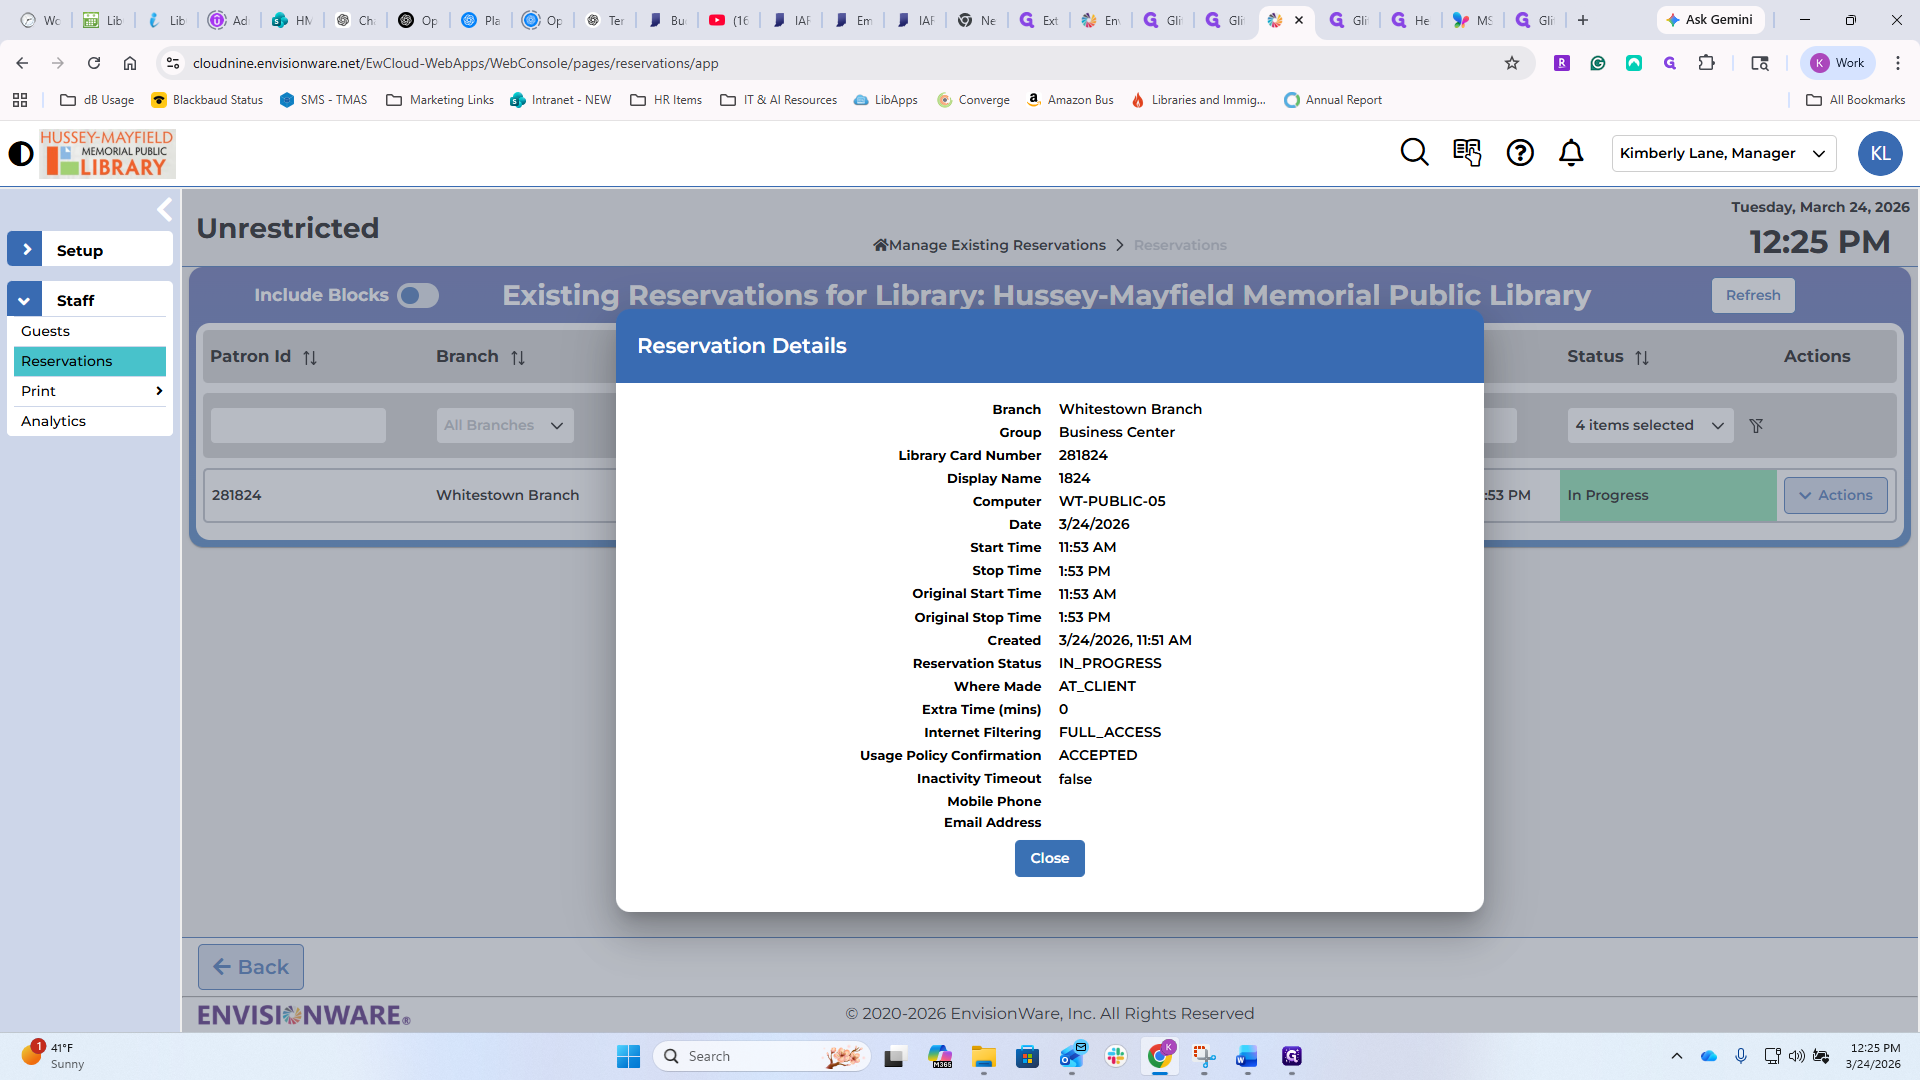
Details will provide a comprehensive list of all information about that patron.


It is probably more important if they use their library card rather than a guest pass.
You can send them a message.

If you are walking through the building and need to send a patron information about a website, click here, type your message, and hit send.
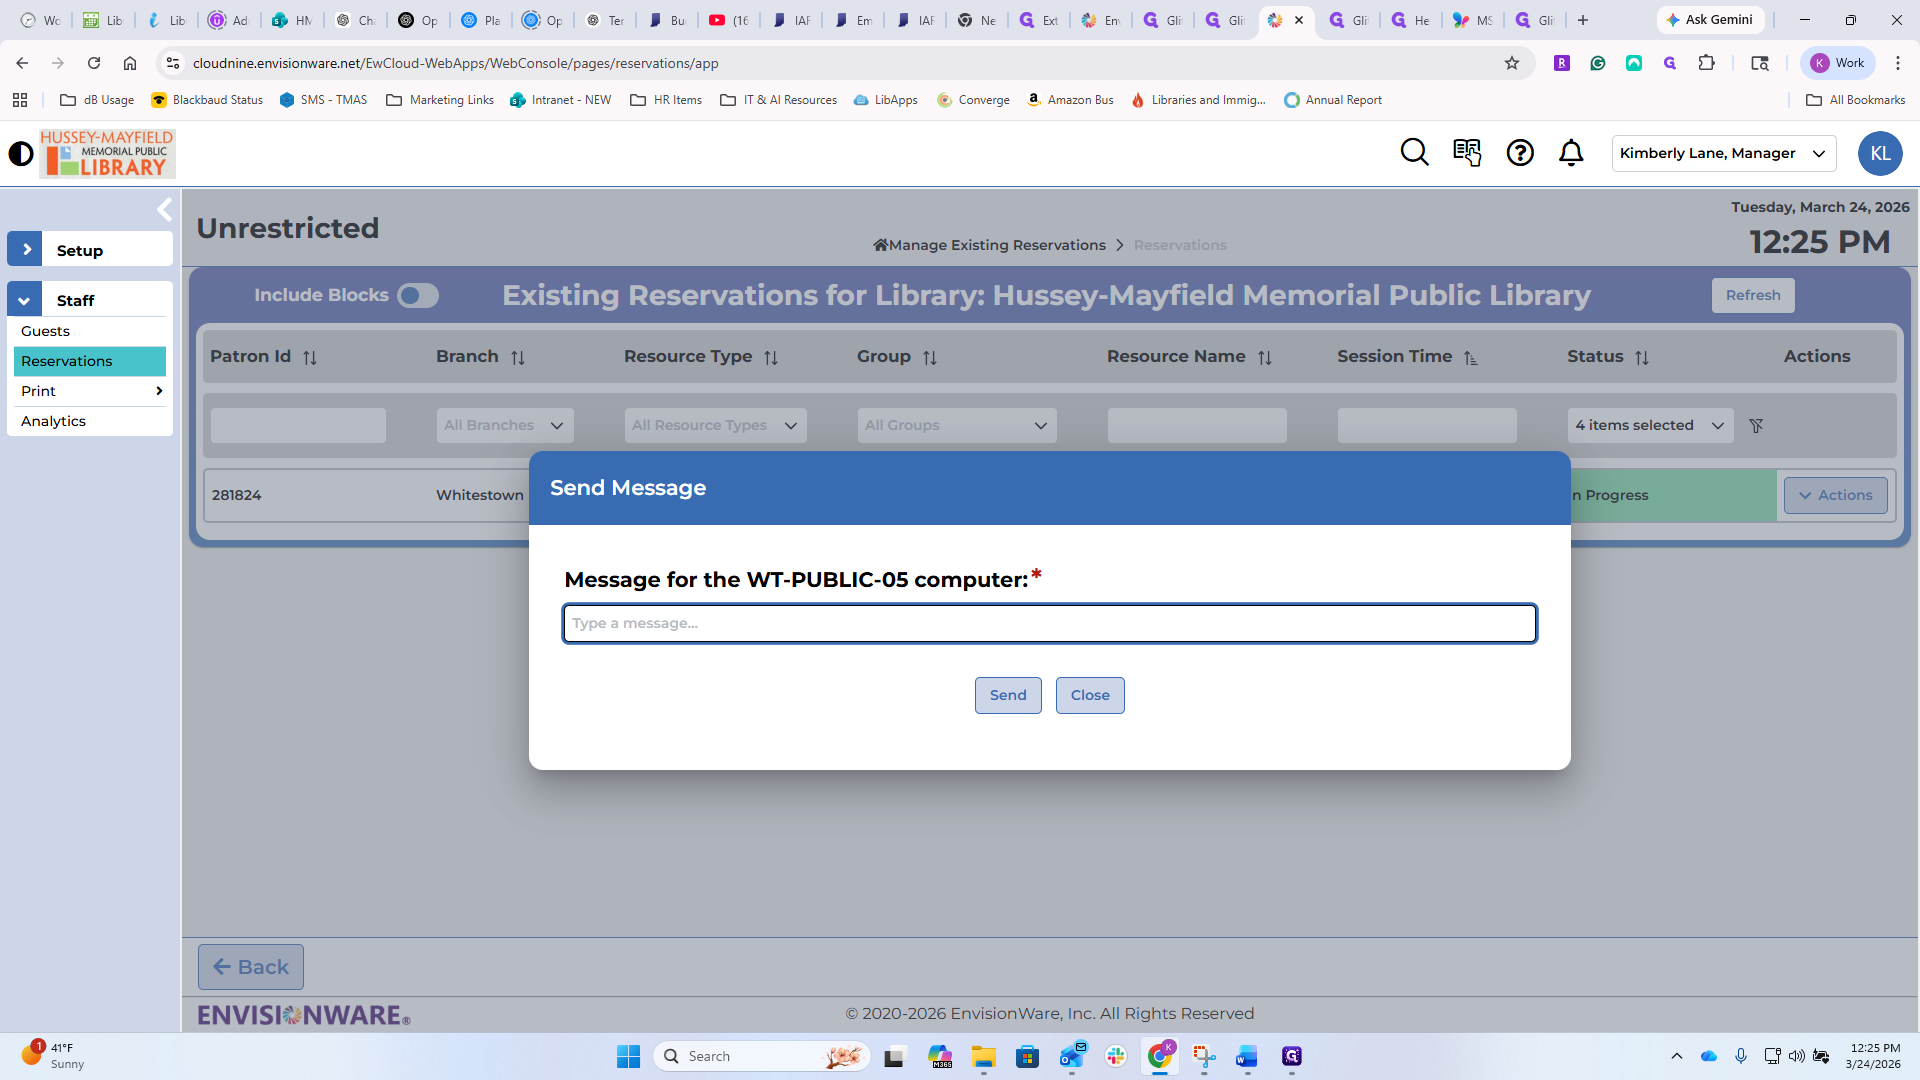
I won't do it because there's a patron on that computer, and it would send them a pop-up with that information.
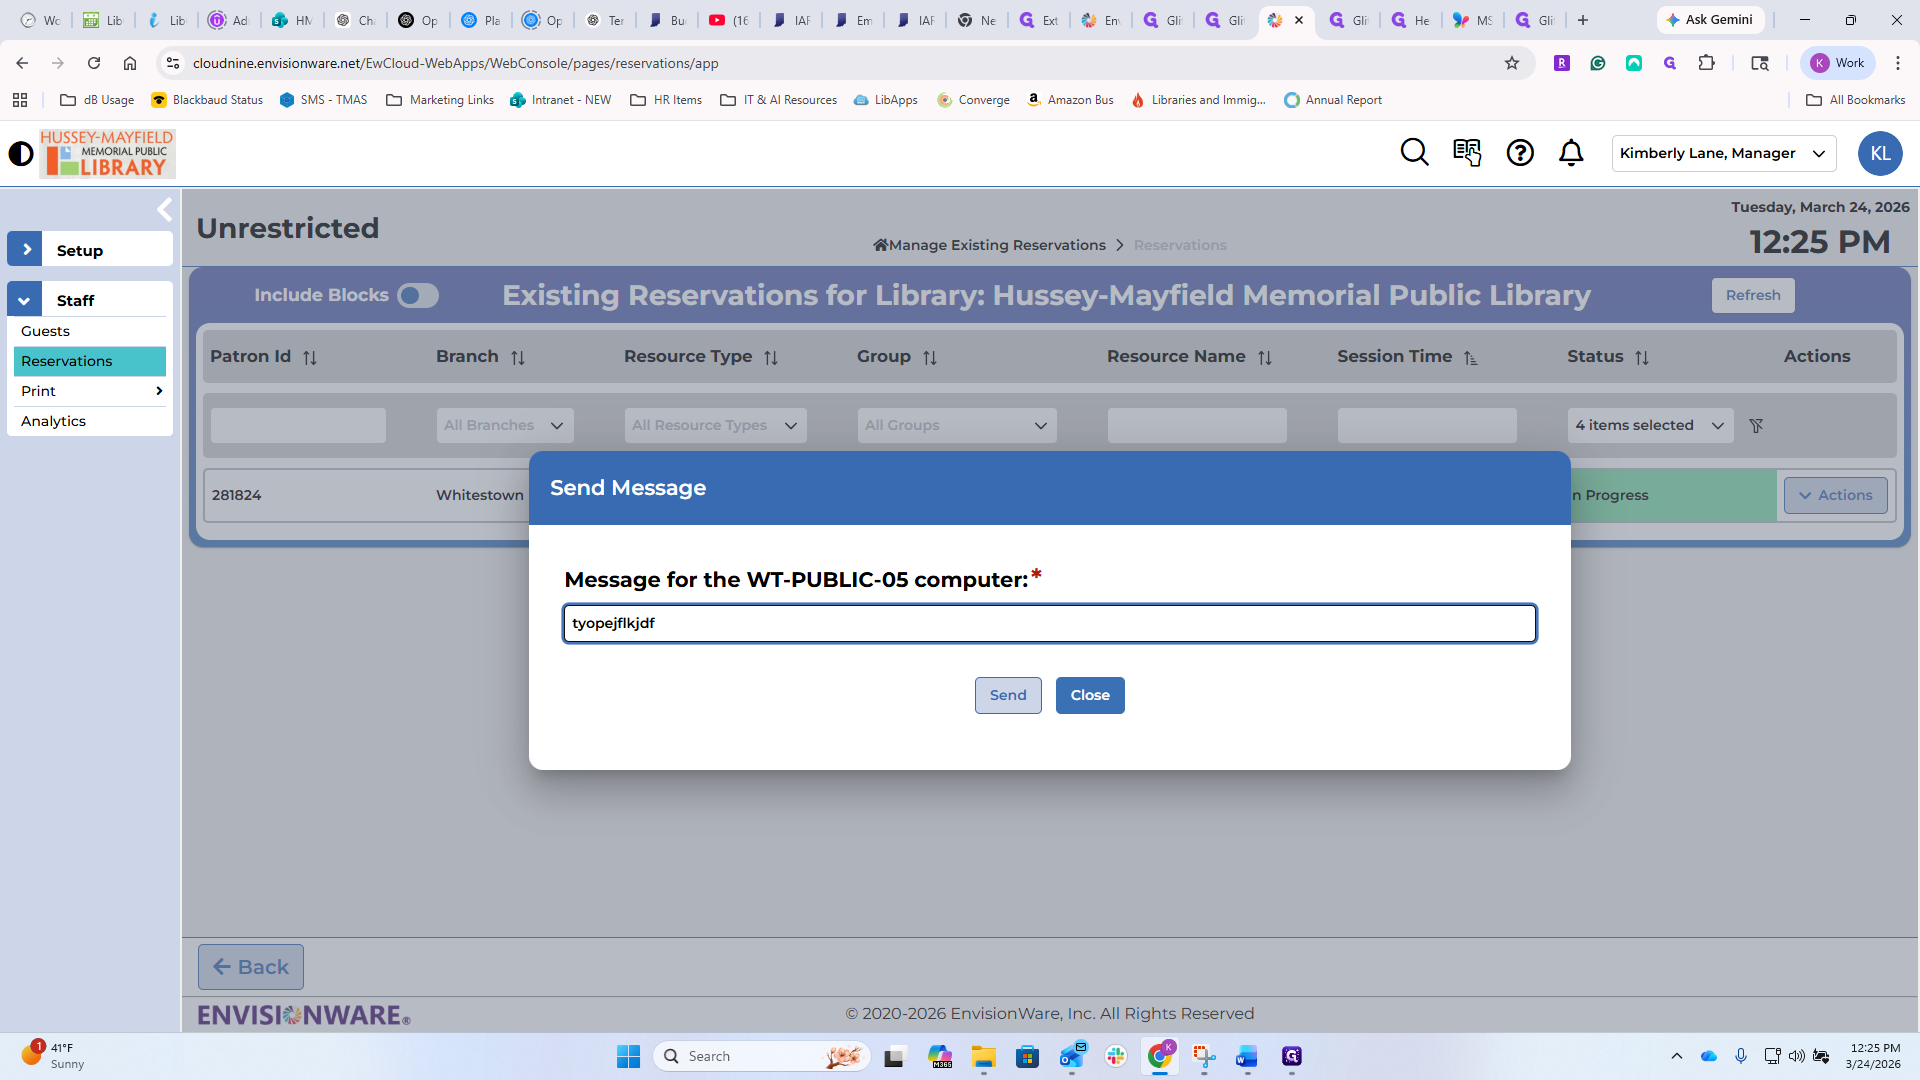
If you can't respond to them in person with information, or if you want to share a useful website and need to look it up before sending the URL,
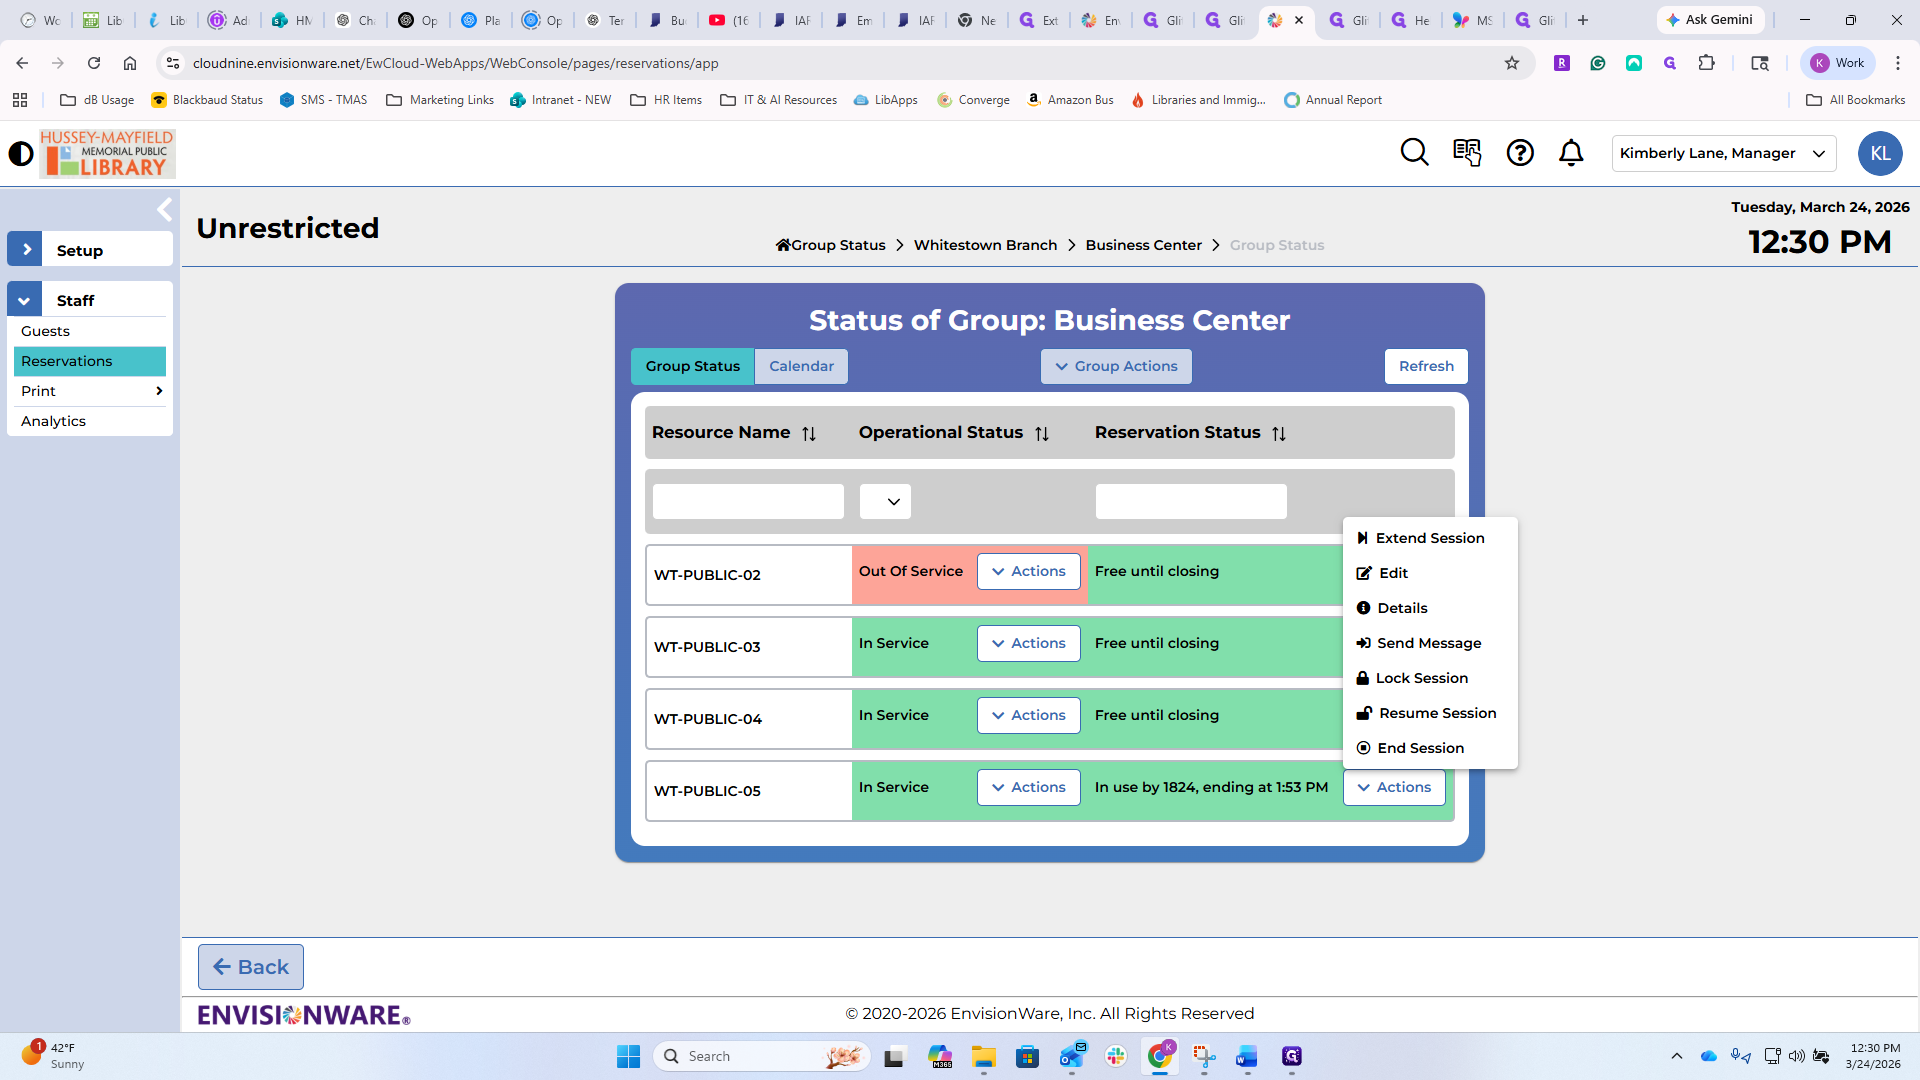
That's where you can do it. If you notice a patron has left their computer and you want to lock the session to prevent others from accessing their materials, you can do so. If the patron initiates the lock process, they will be prompted to create a four-digit code. When they return, they must enter this code to unlock the computer. If they didn't do it and just walked away, you can lock it from here for safekeeping. You can also resume the session from this screen. This is also how you can resume it if someone locked it with a four-digit code but can't remember the code.
You can also end a session from here. If something is happening or they... You should have an in-person interaction with the patron before ending their session. If there were anything catastrophic happening, such as viewing really inappropriate content, I would probably lock it before ending it and have a conversation with them. Those are all tools you can use.
Go back to Reservations to make a reservation for a patron. You can enter all their information yourself.

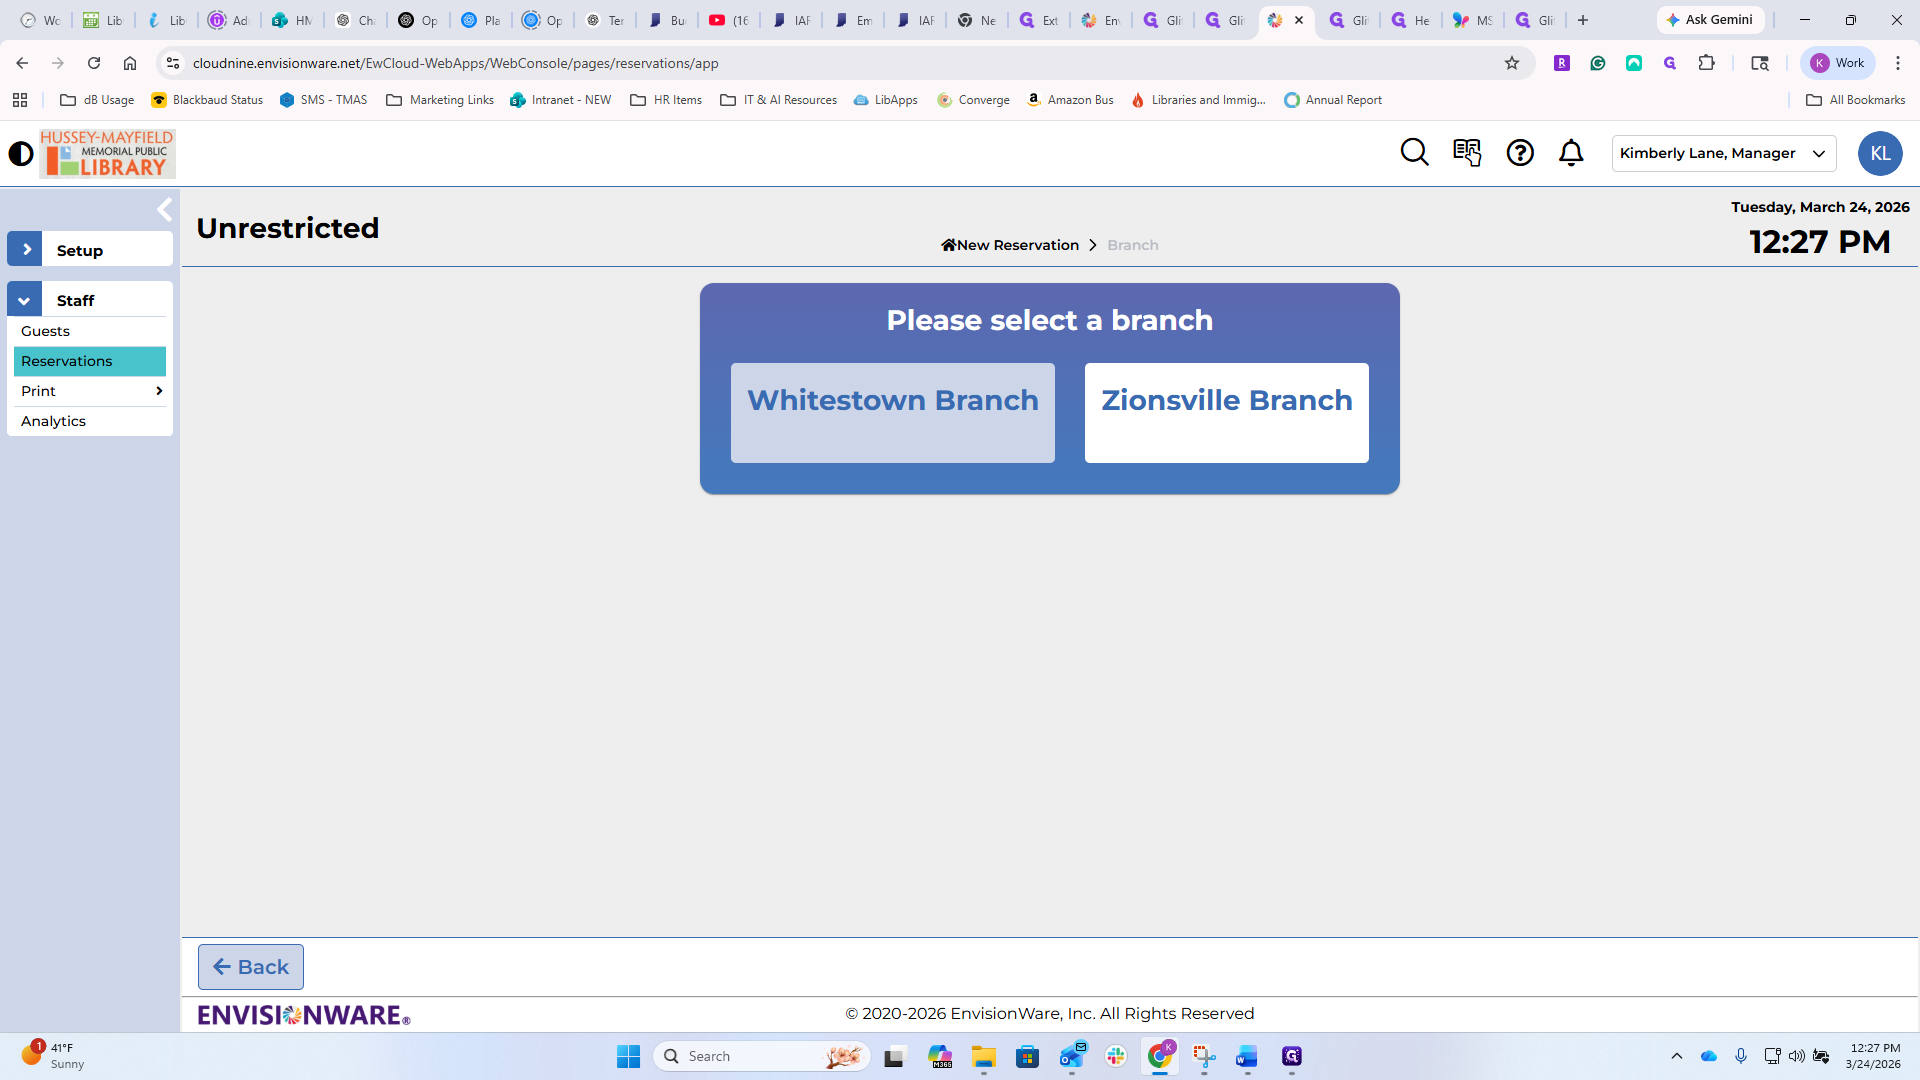
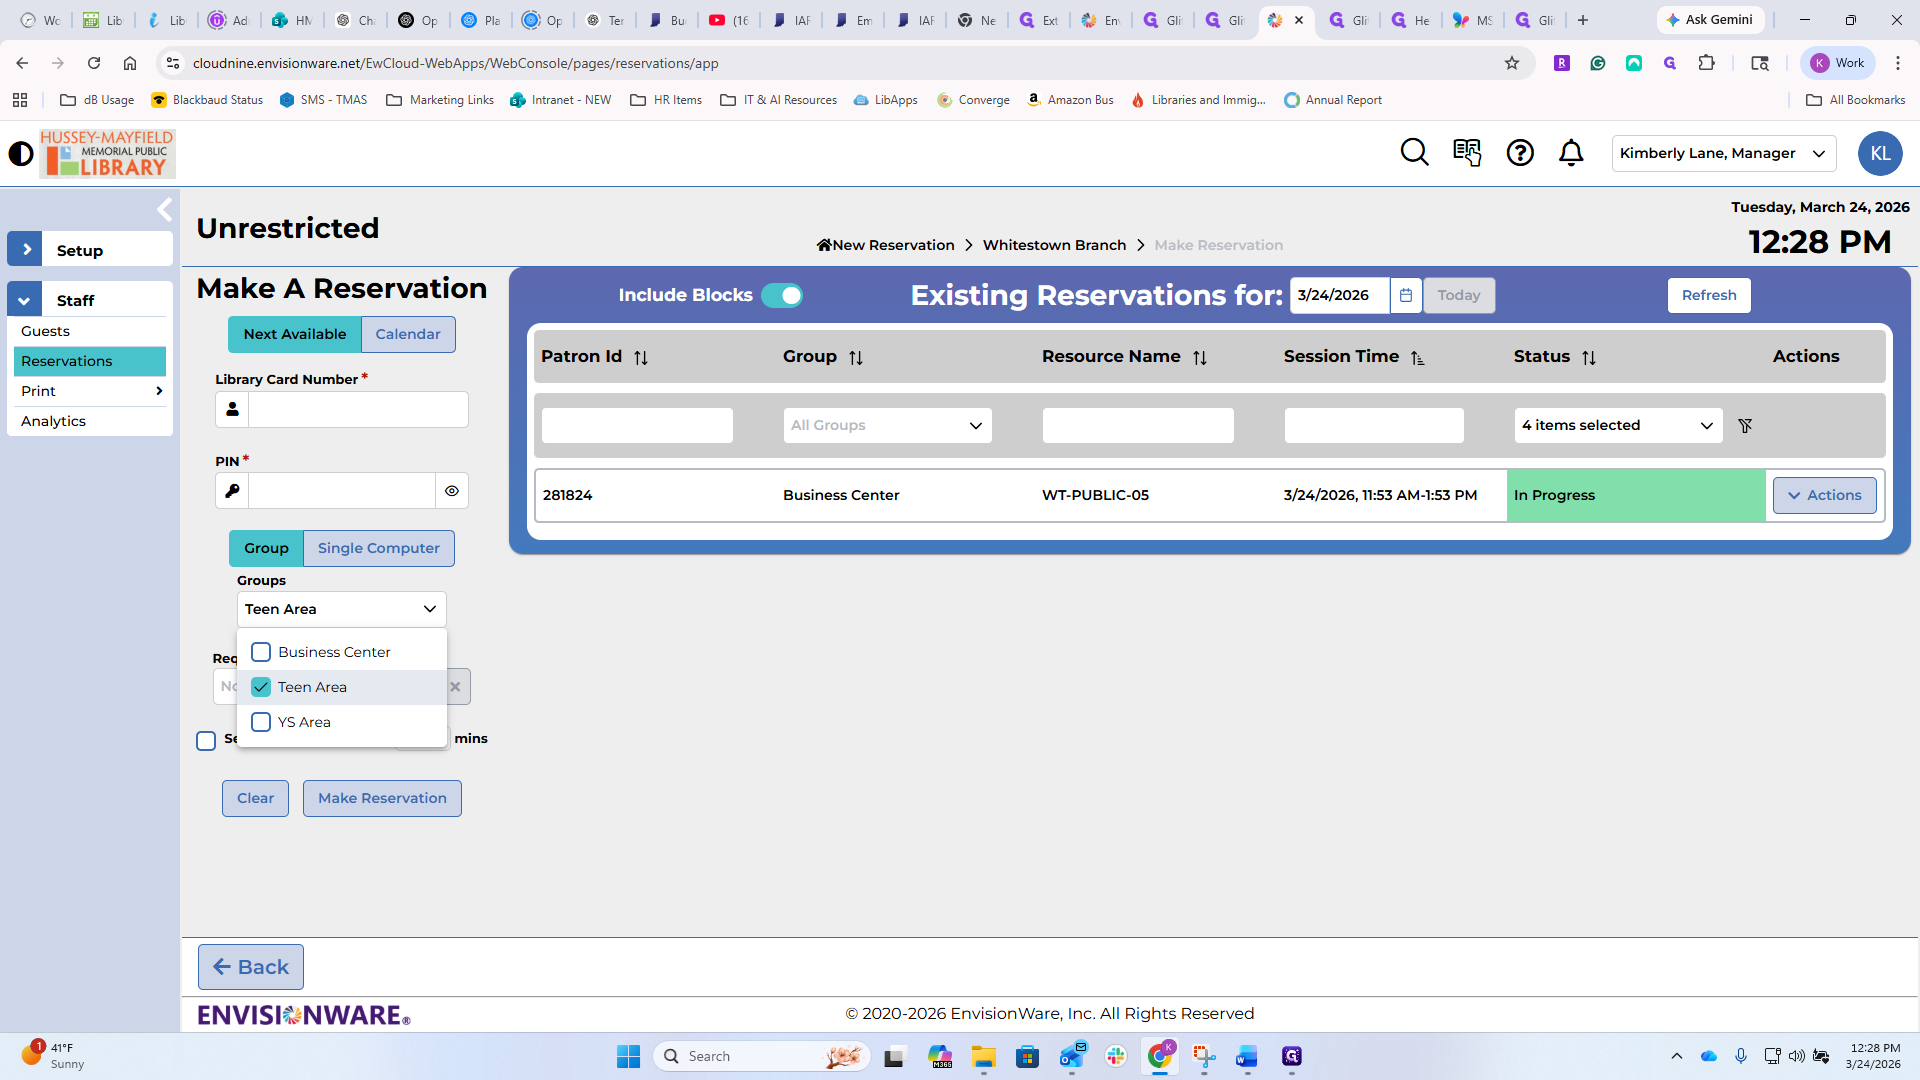
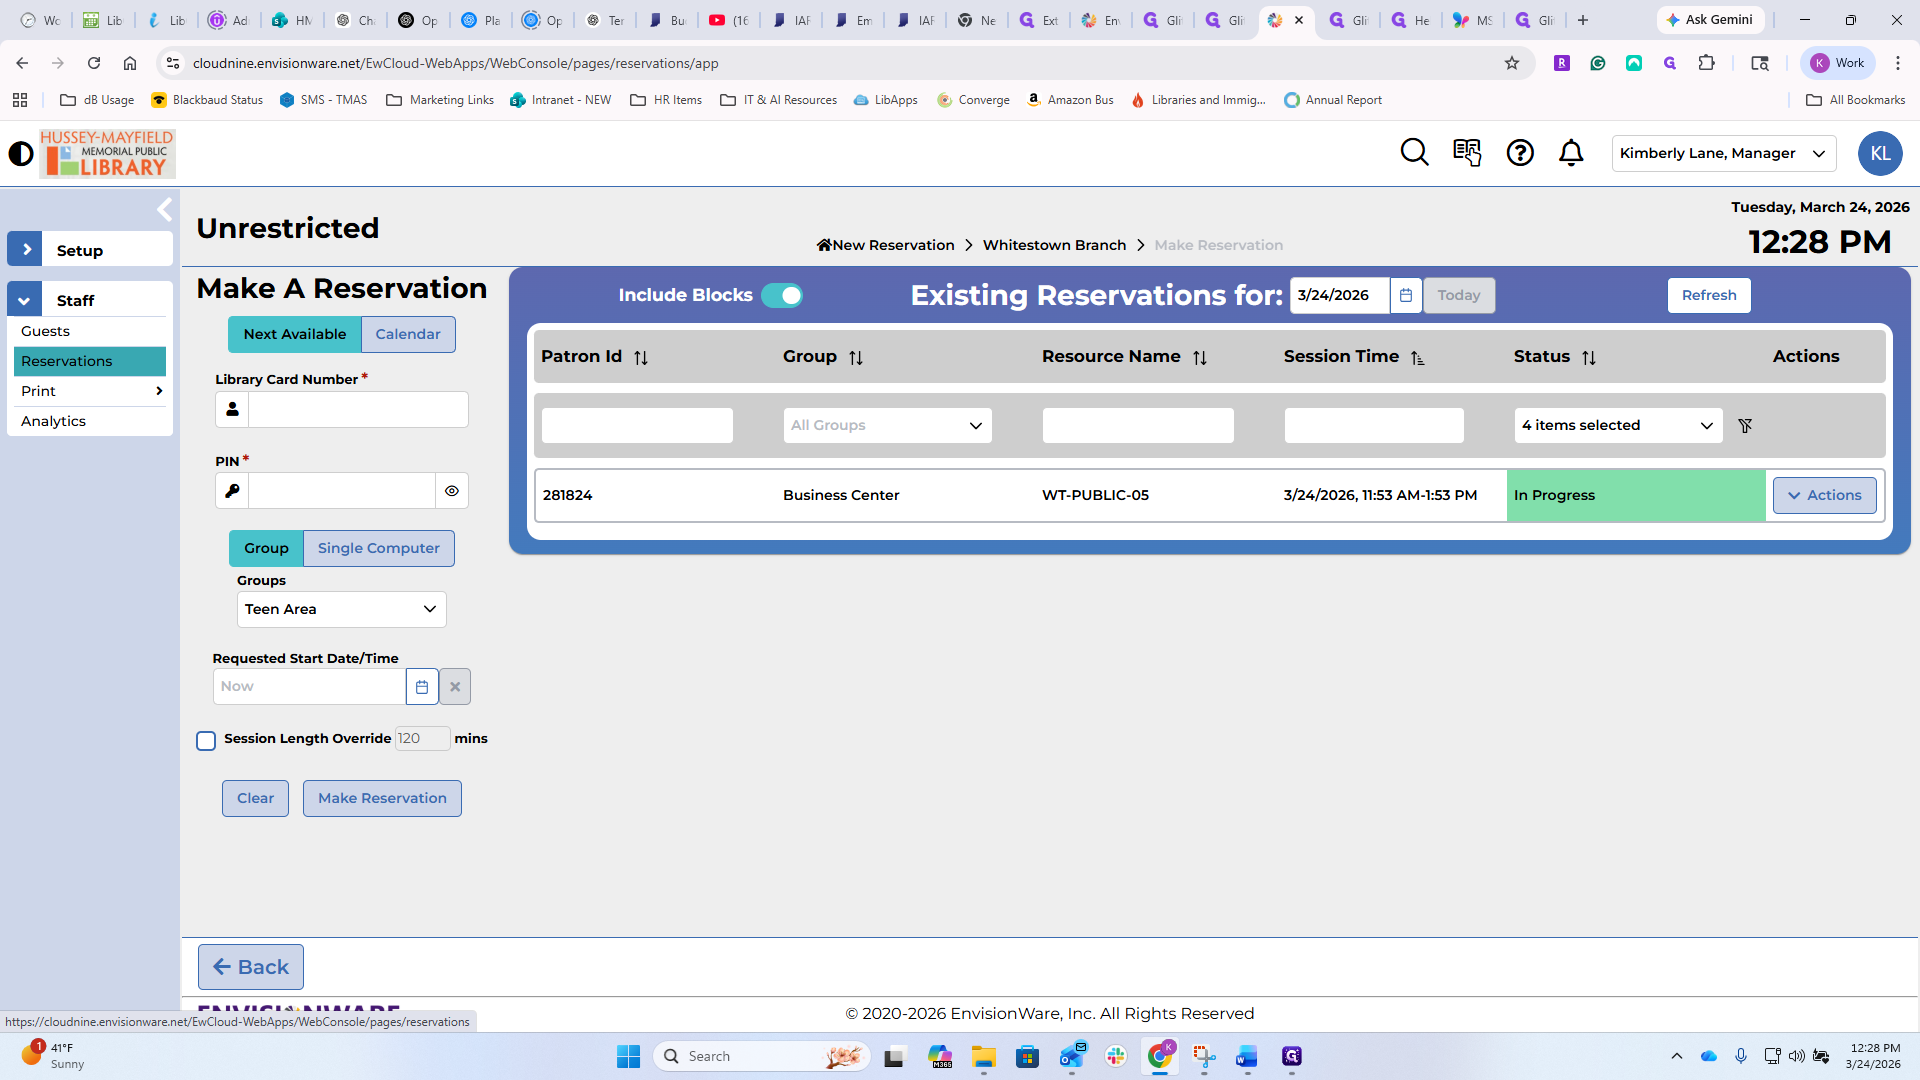
You can do it for a single computer, in which case you'll get a list of all the computers in that area. You could also do it for a group of computers.


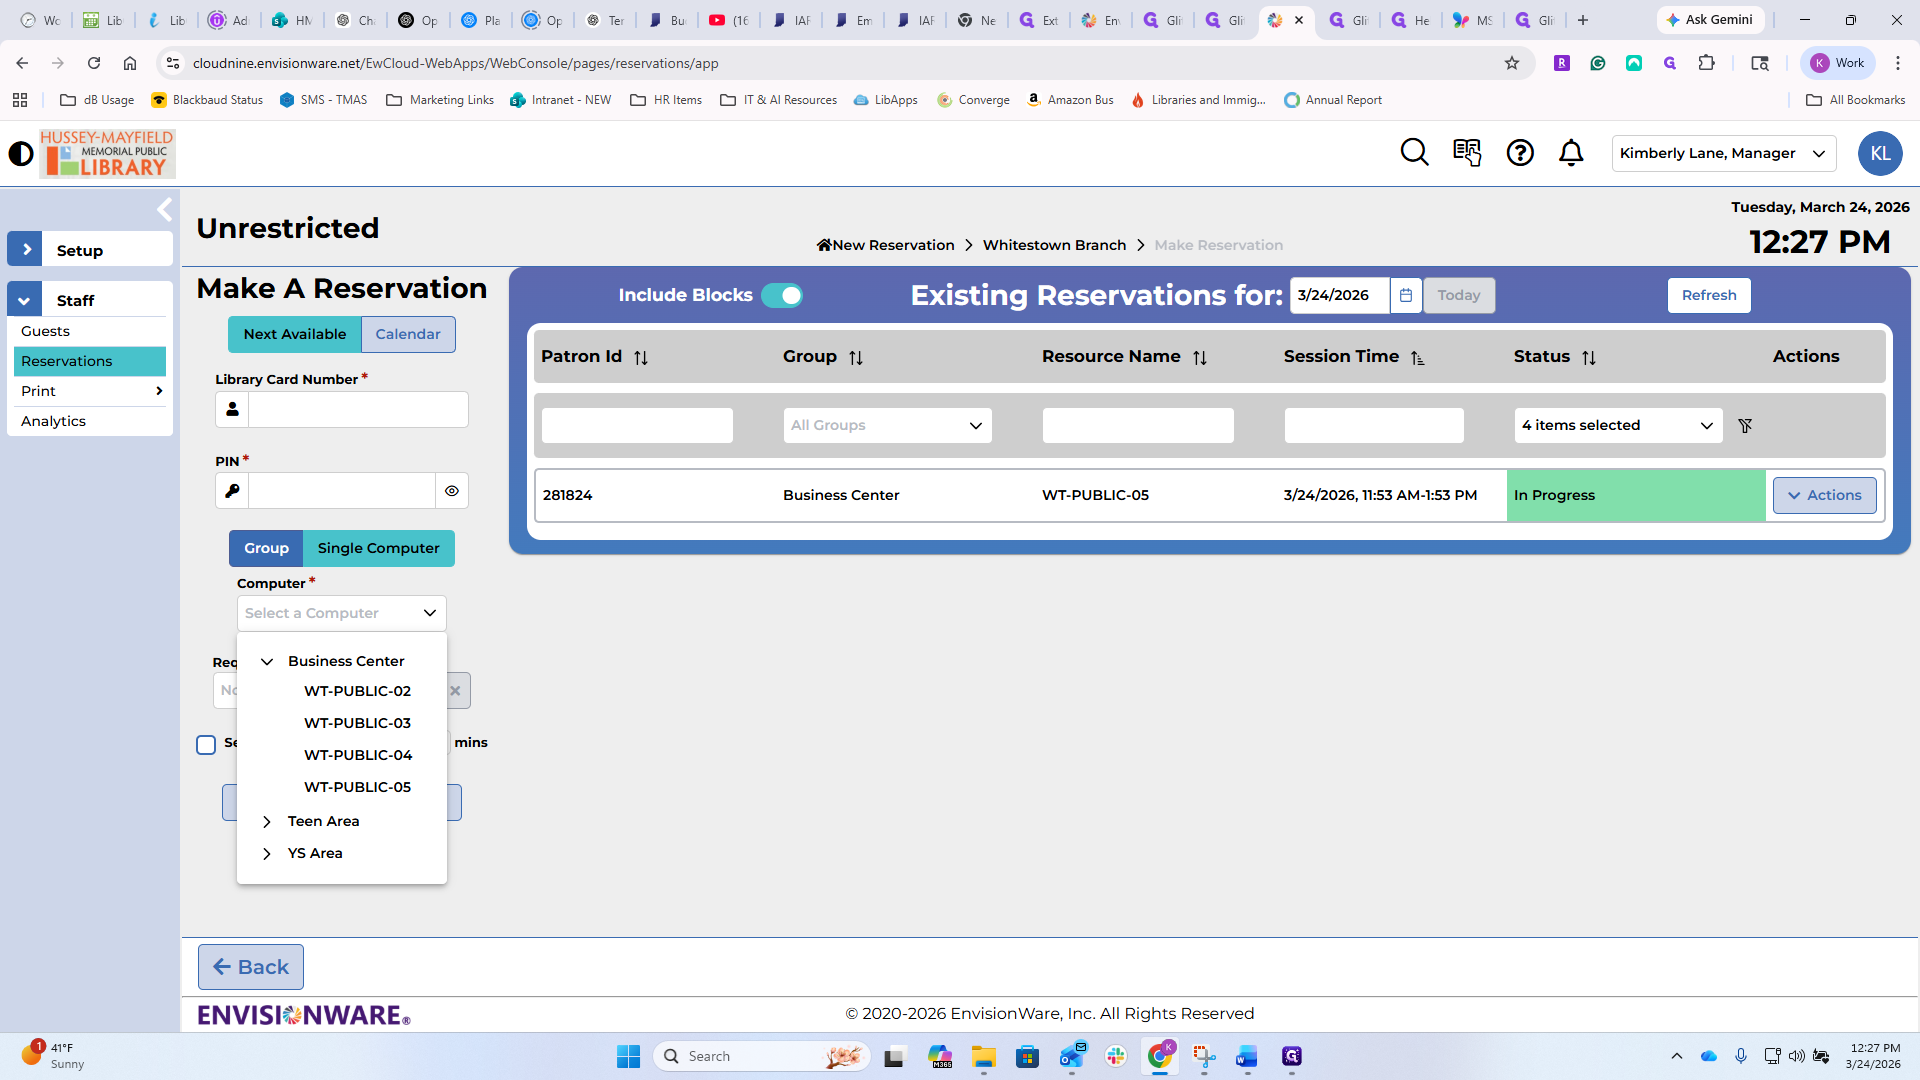

If you need... You could set up a group of computers for a patron, although the reason for doing so may not be clear. Maybe there is a program in the teen room, and the presenter needs the computers to show things or for the teens and patrons to interact with them, but only for that specific use. You could block all the computers in the teen area, continue entering the information, set when the reservation starts, and choose how long it will last. You can also schedule it further in advance if you’d like.
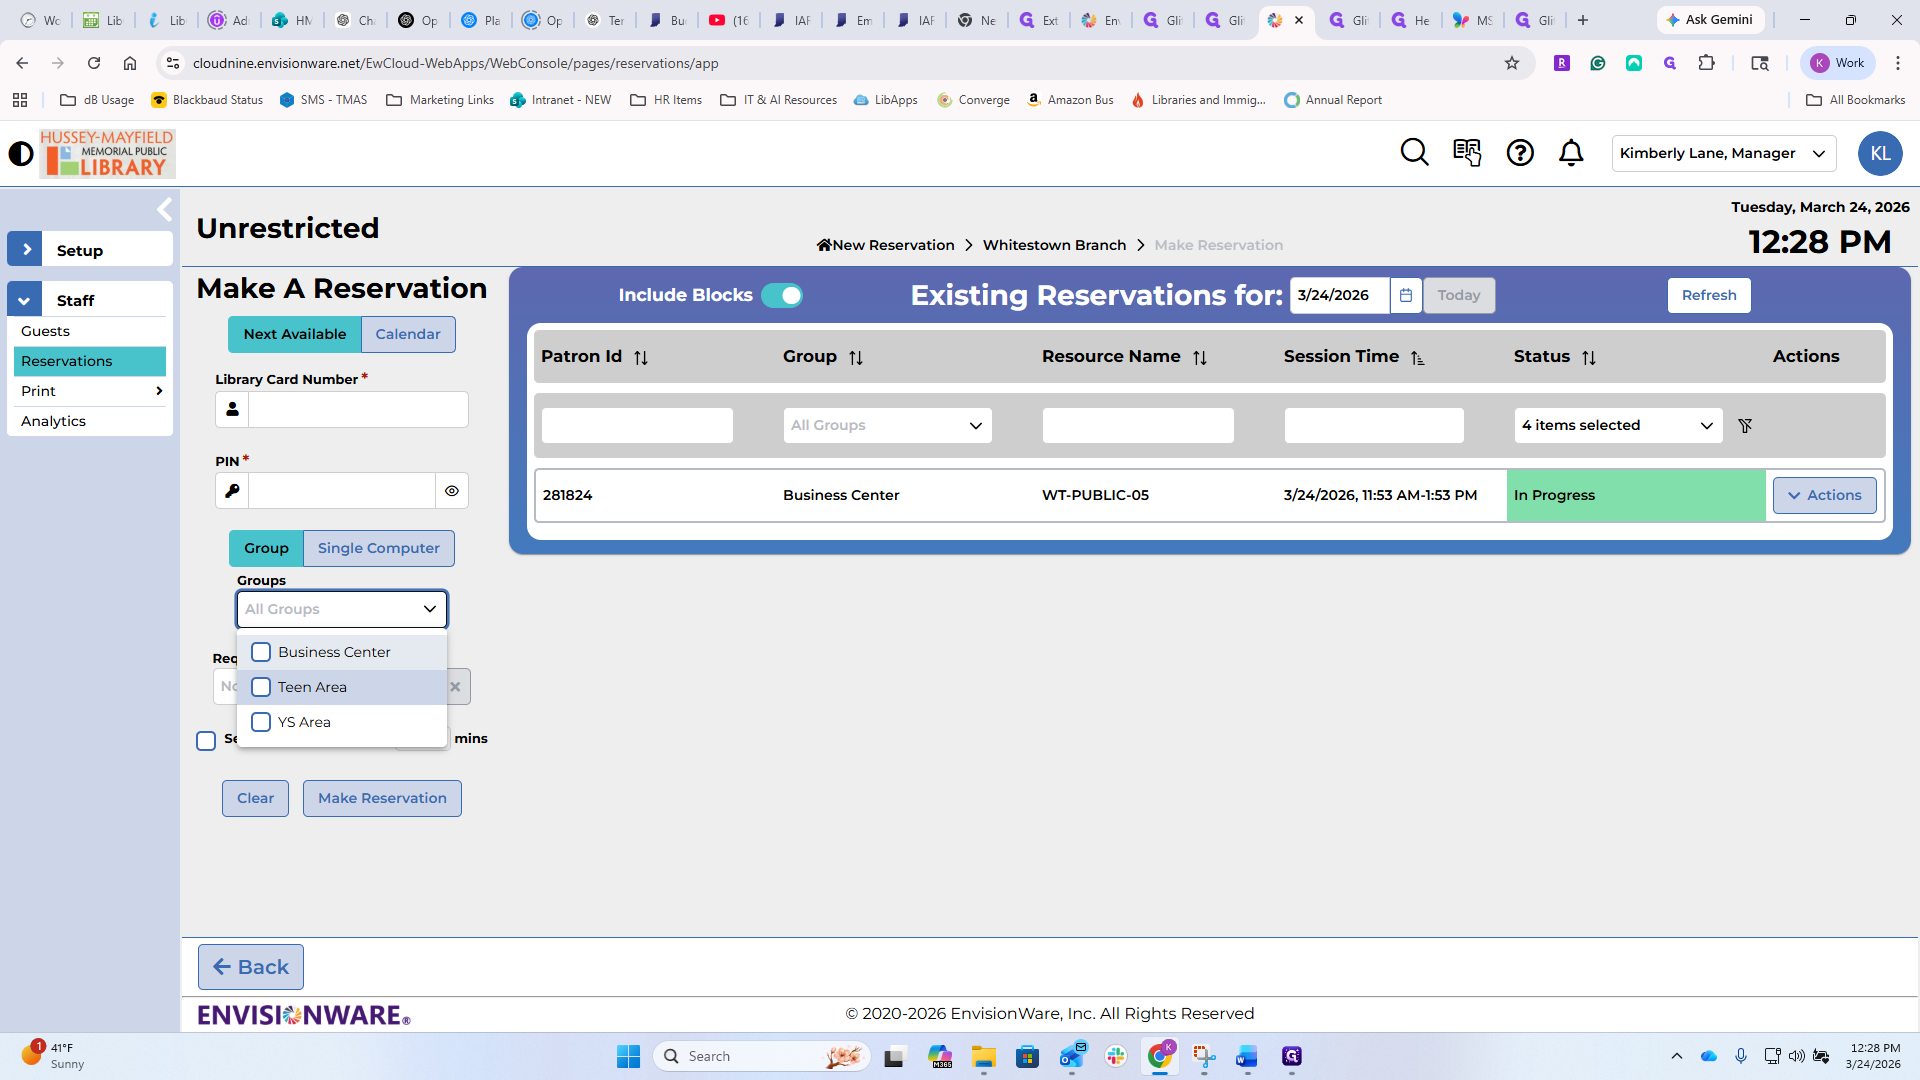
You can also make a block reservation in much the same way.


It would block all the business center computers.

You could block out all of the computers in the building. I did this morning when we were working on this. Name the date, how long you need it, and if it's a repeating event.

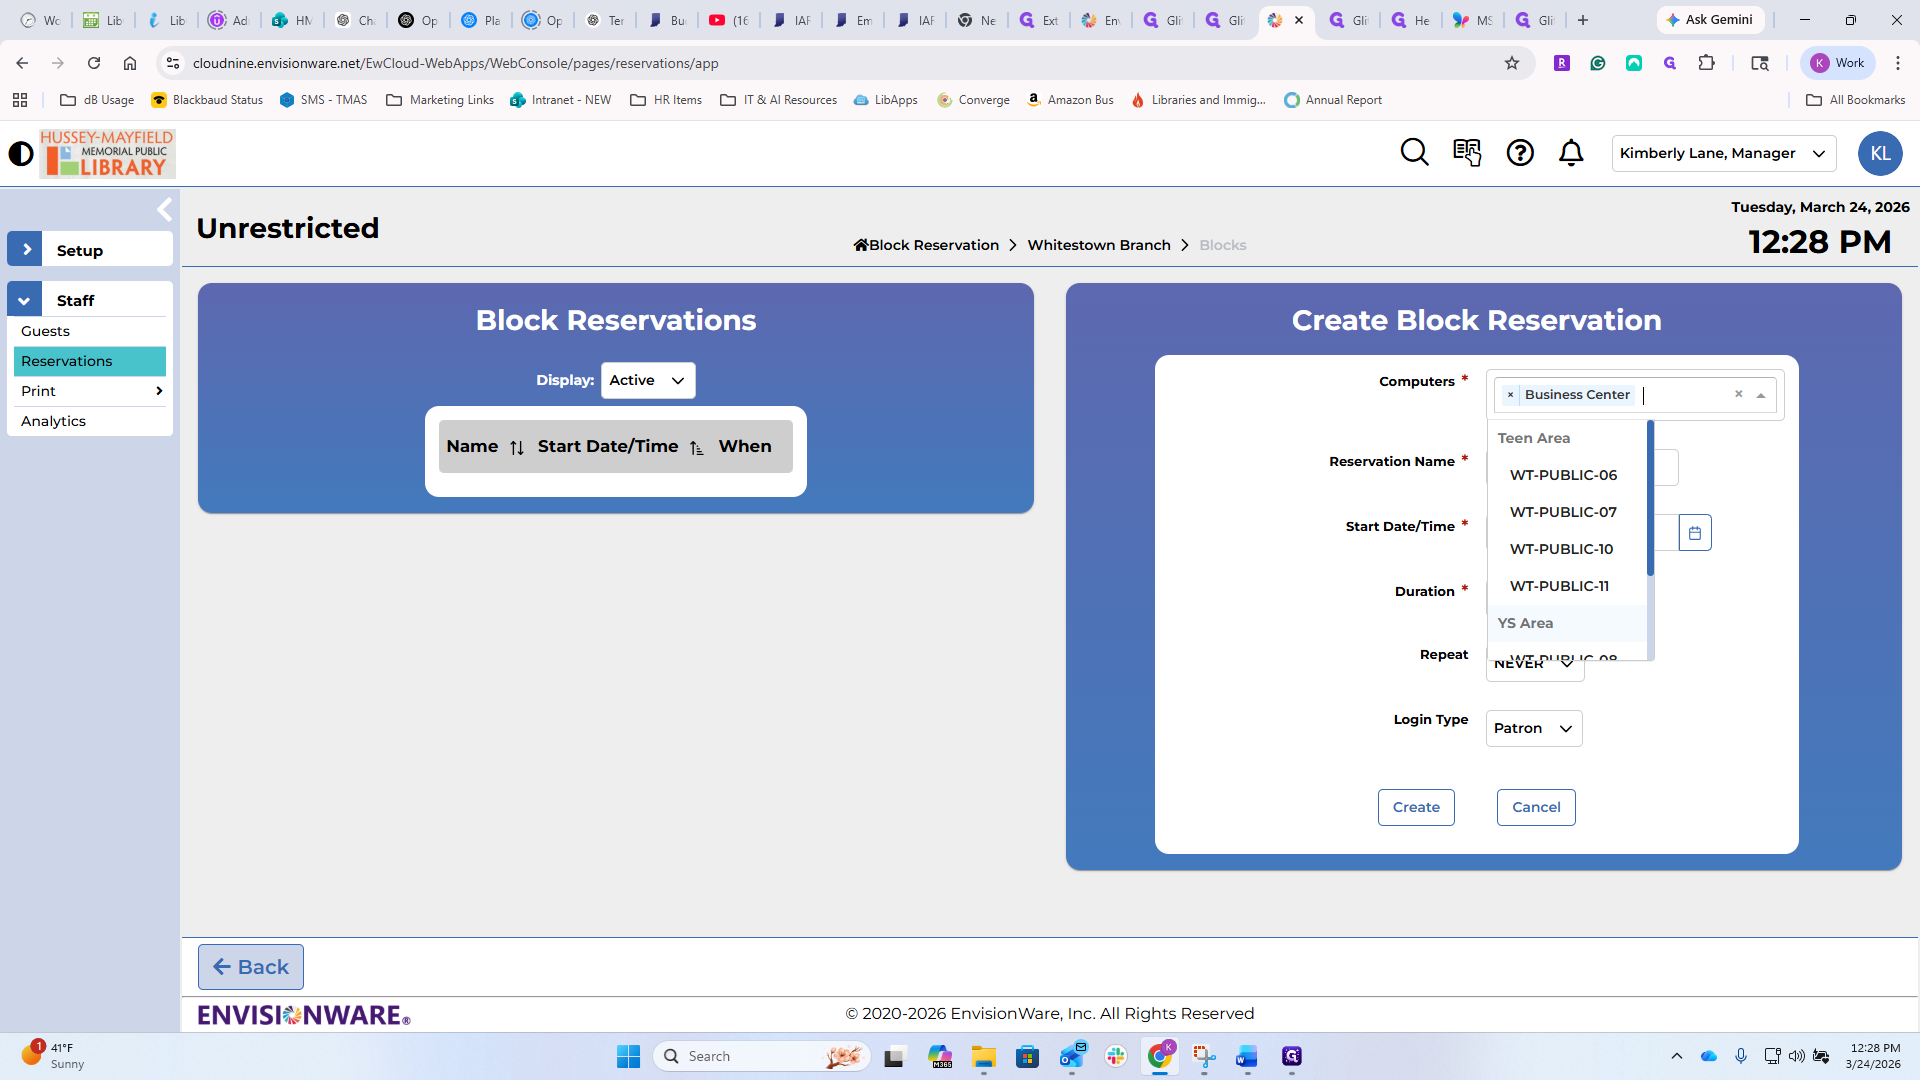

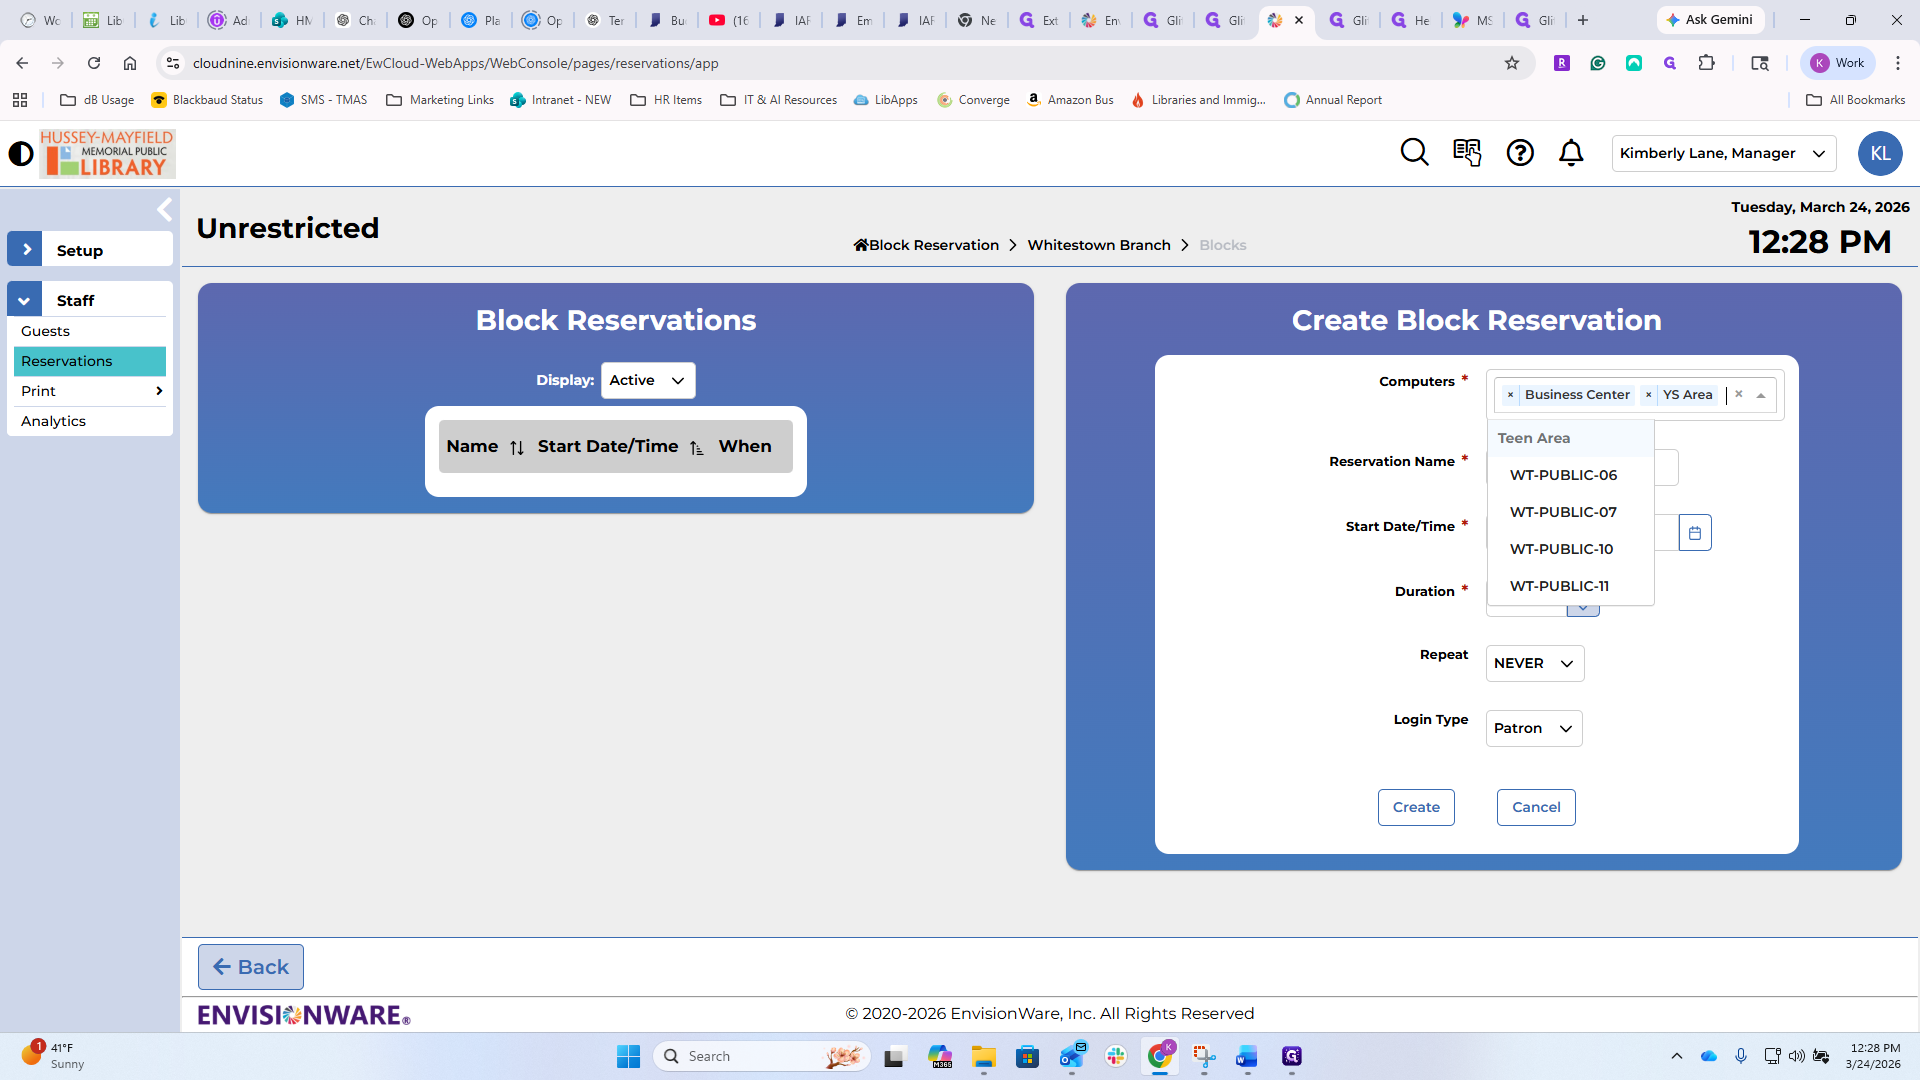

If we schedule updates at a specific time each month, I could take everything down so they wouldn't be available to the public while the e-keepers and I work on them. You can have it be patron or staff-generated.


Again, this is not functionality that we have ever used.

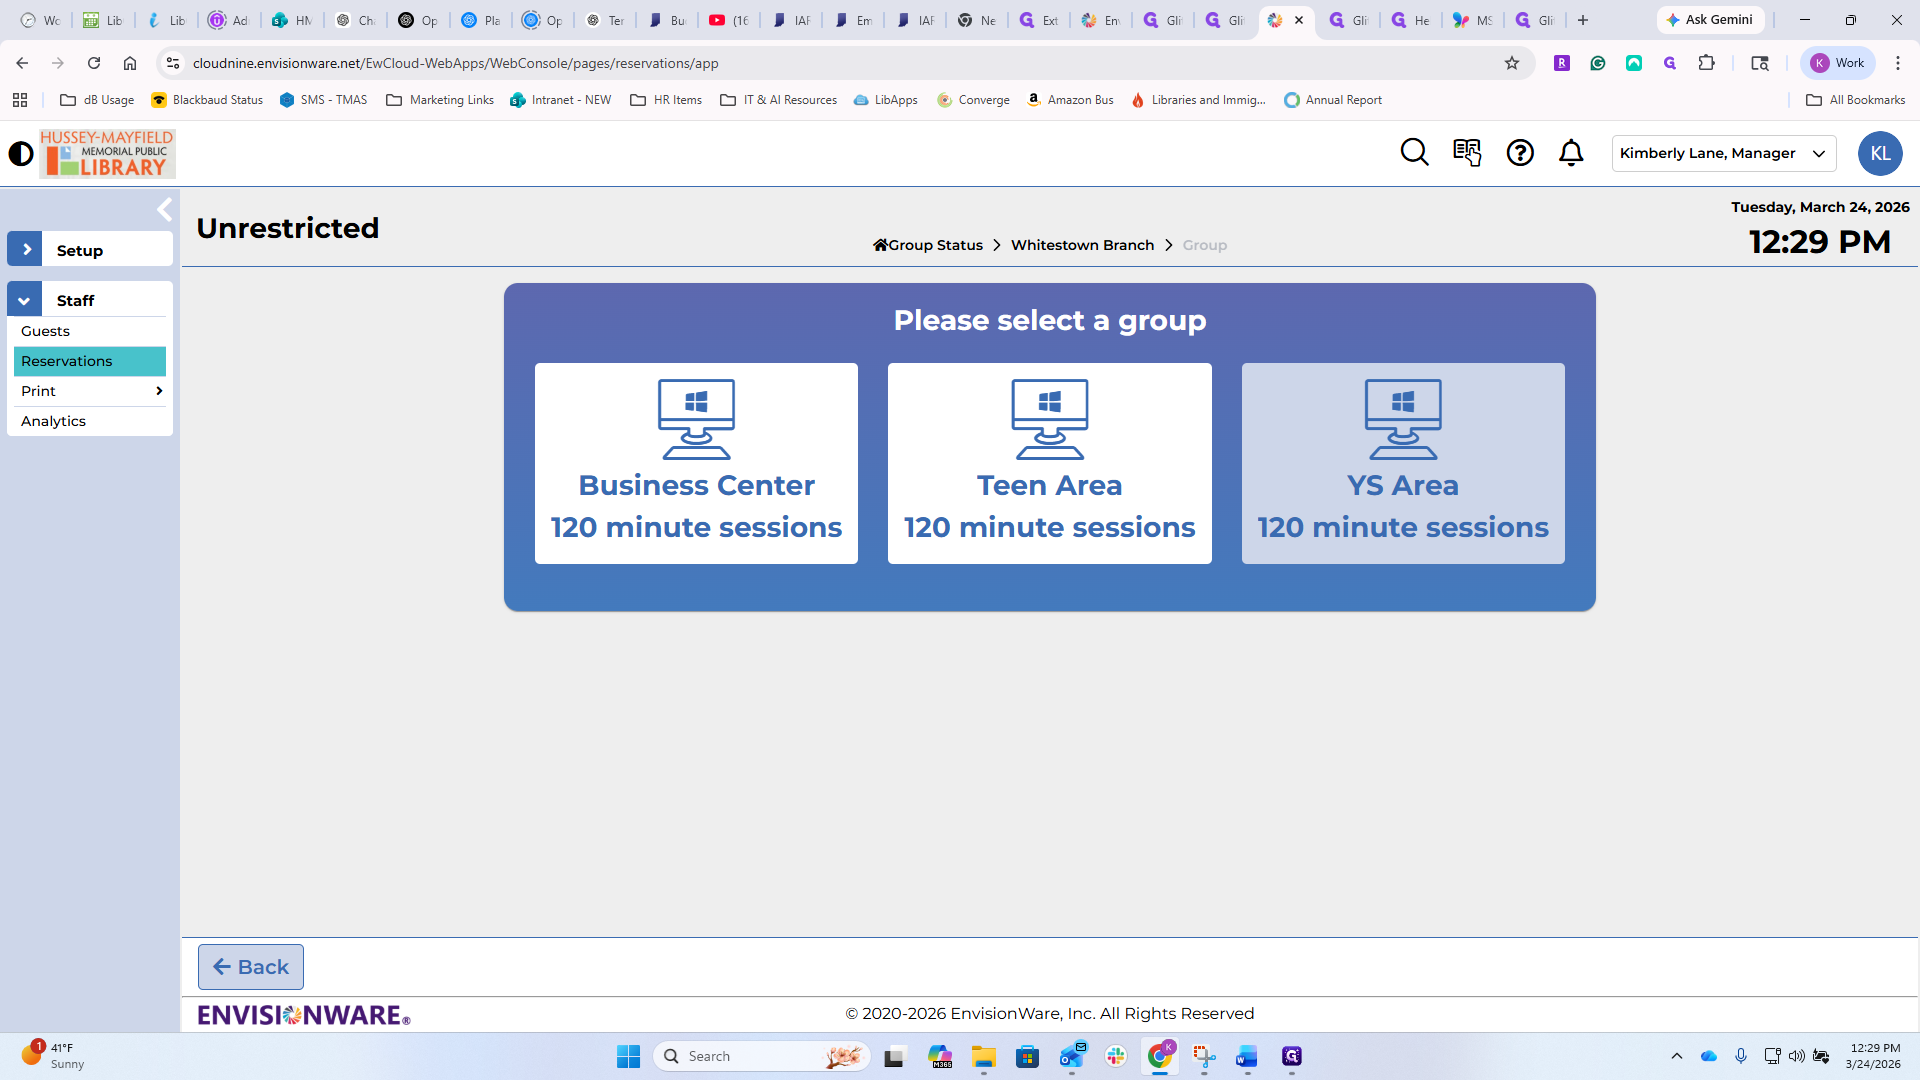
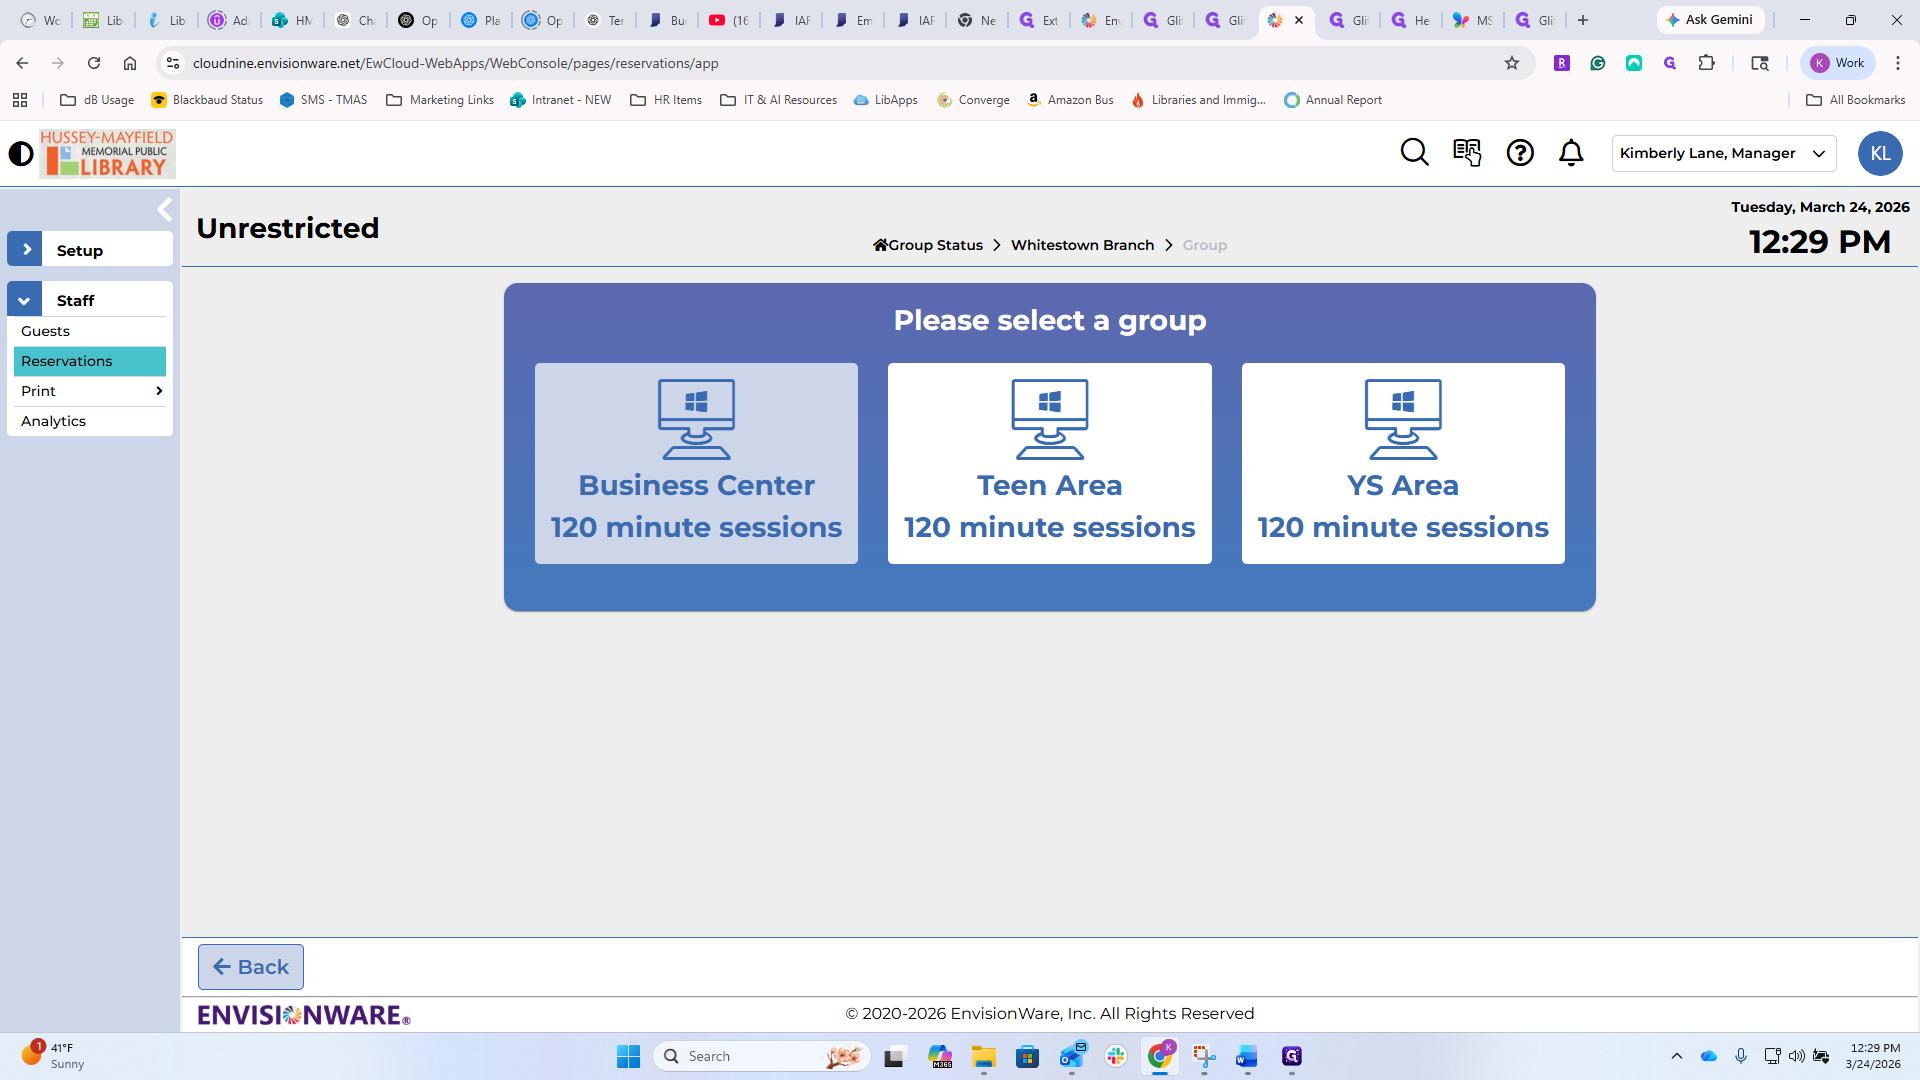
You can create a group status. For example, if you want to check on the computers in the Whitestown youth service area, you can view their status.

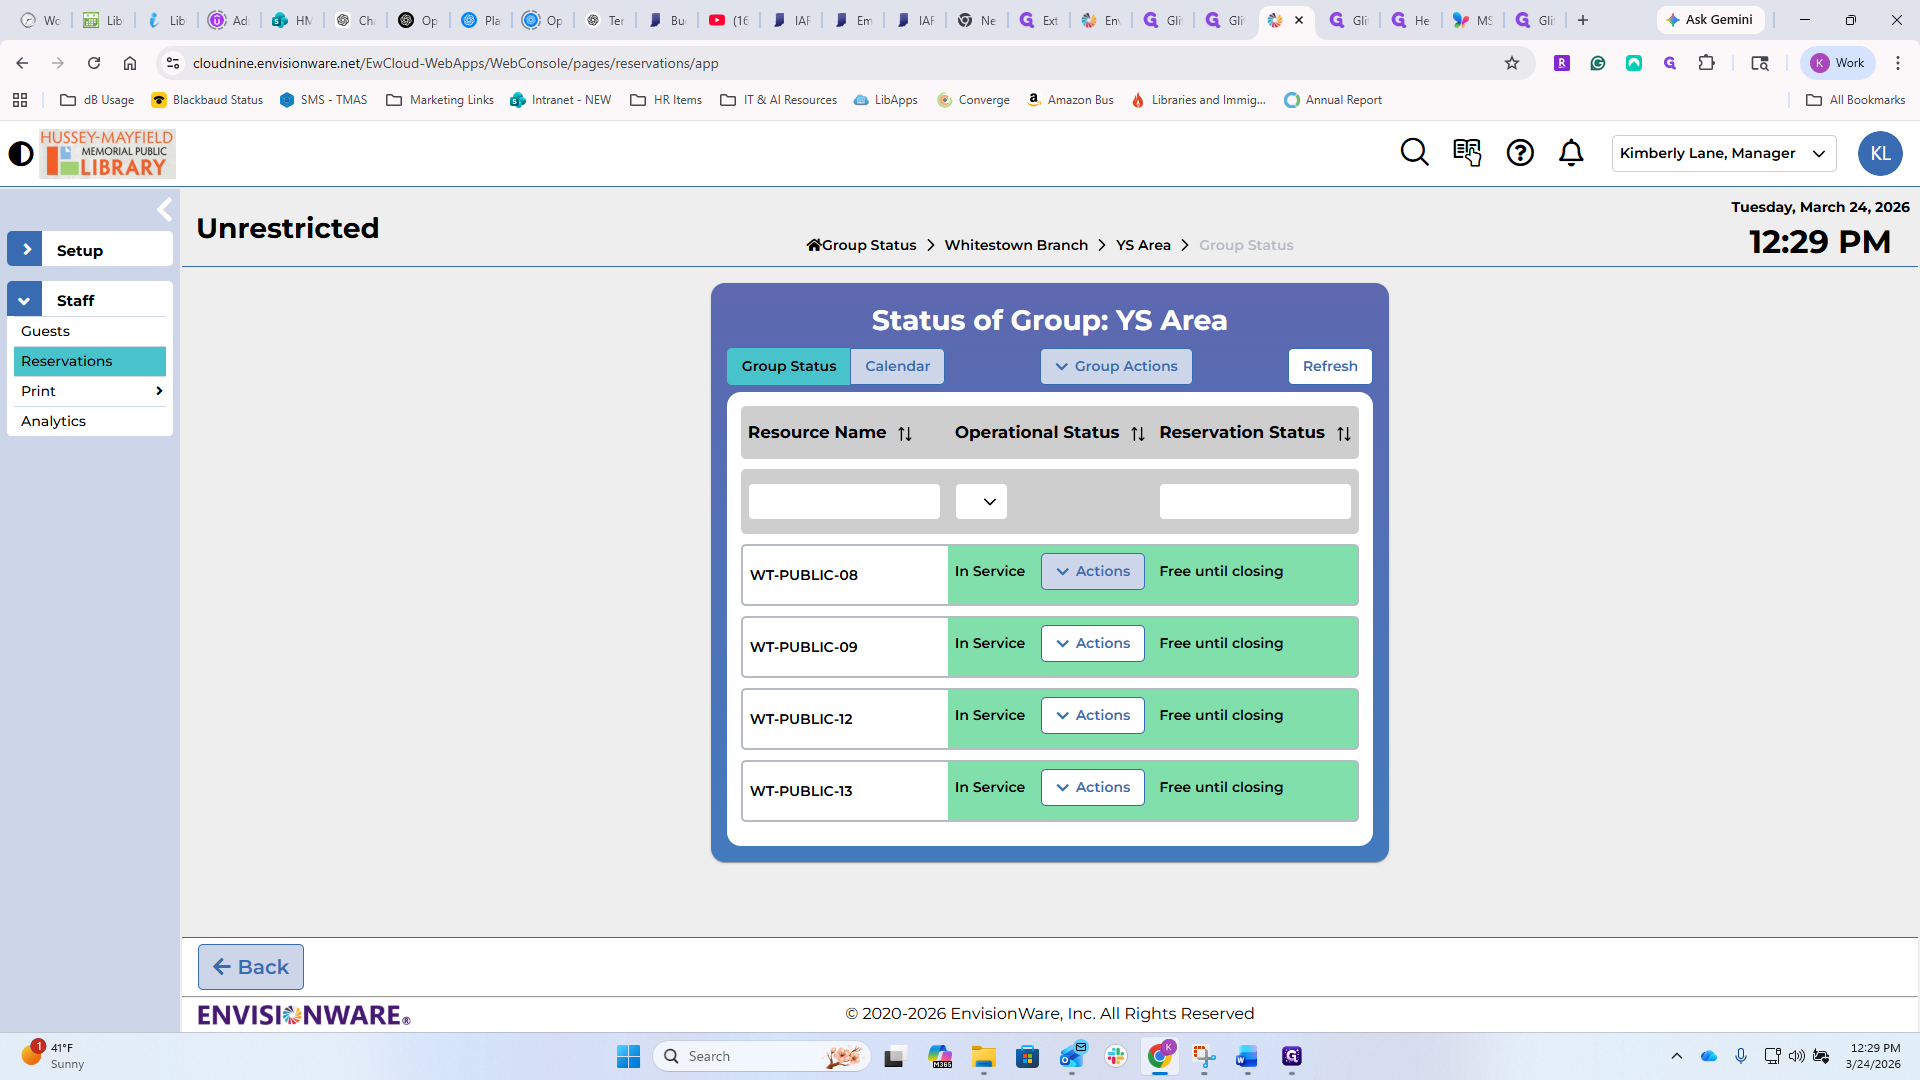
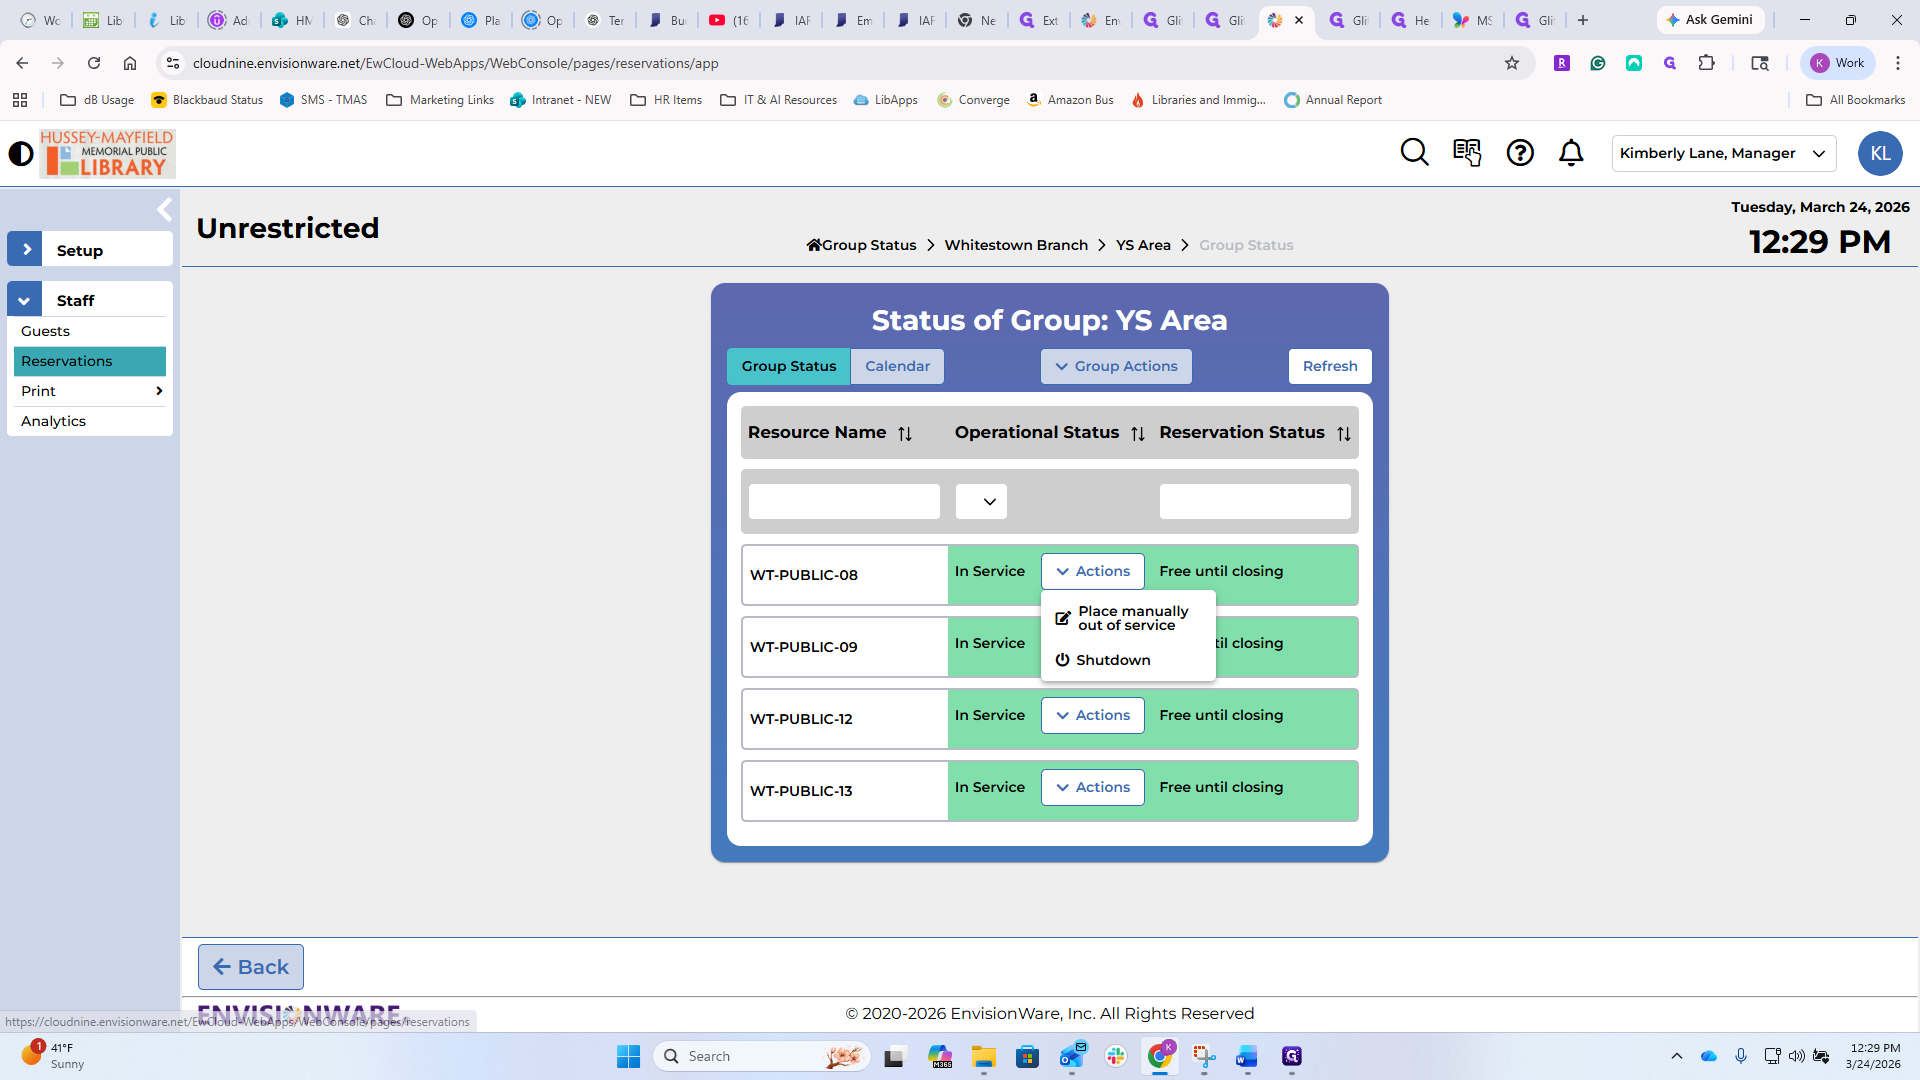
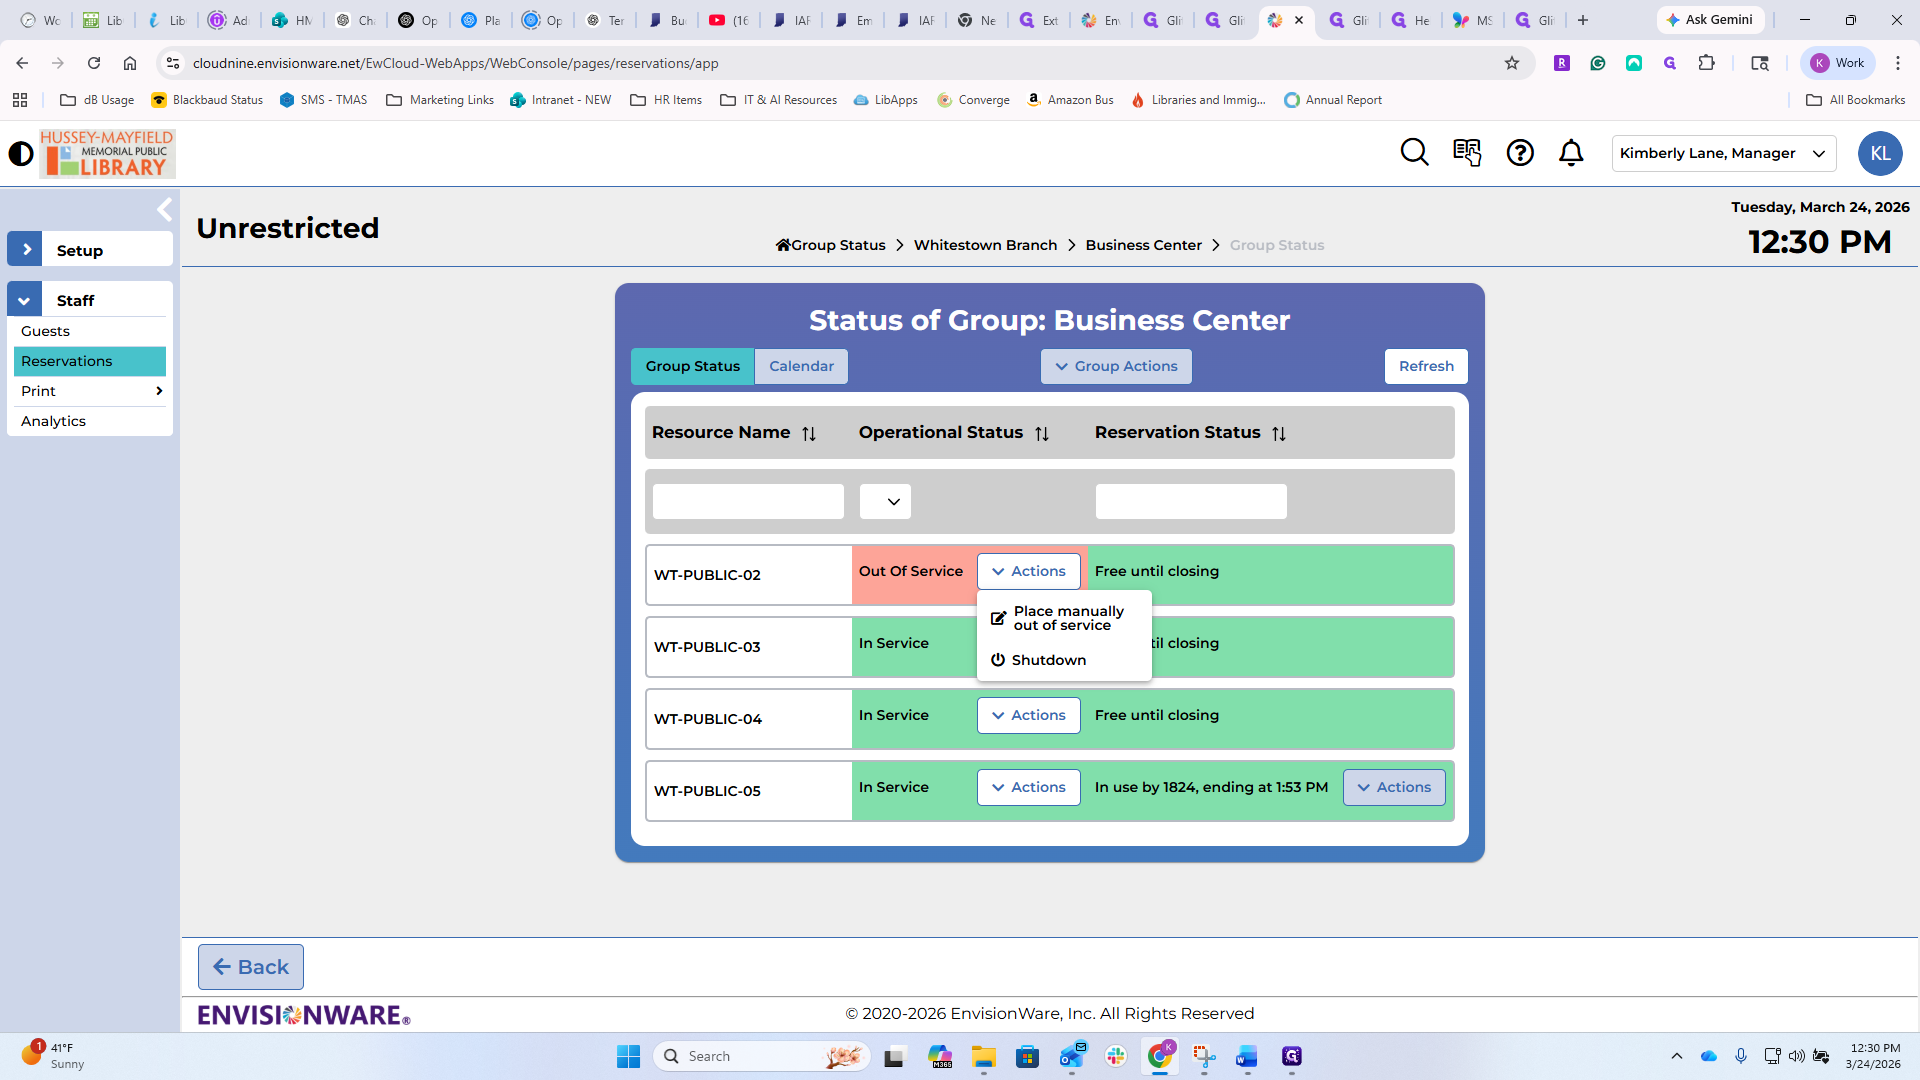
You can manually take one out of service. For example, if eKeeper calls and there is an issue, you can remove it from service manually. You can also shut down that computer from here. You cannot turn it back on without physically going to the unit. This is a great option for...


You can see that one is out of commission here. I need to check why that is, see if we need to do something, submit a ticket, or just cycle the power.
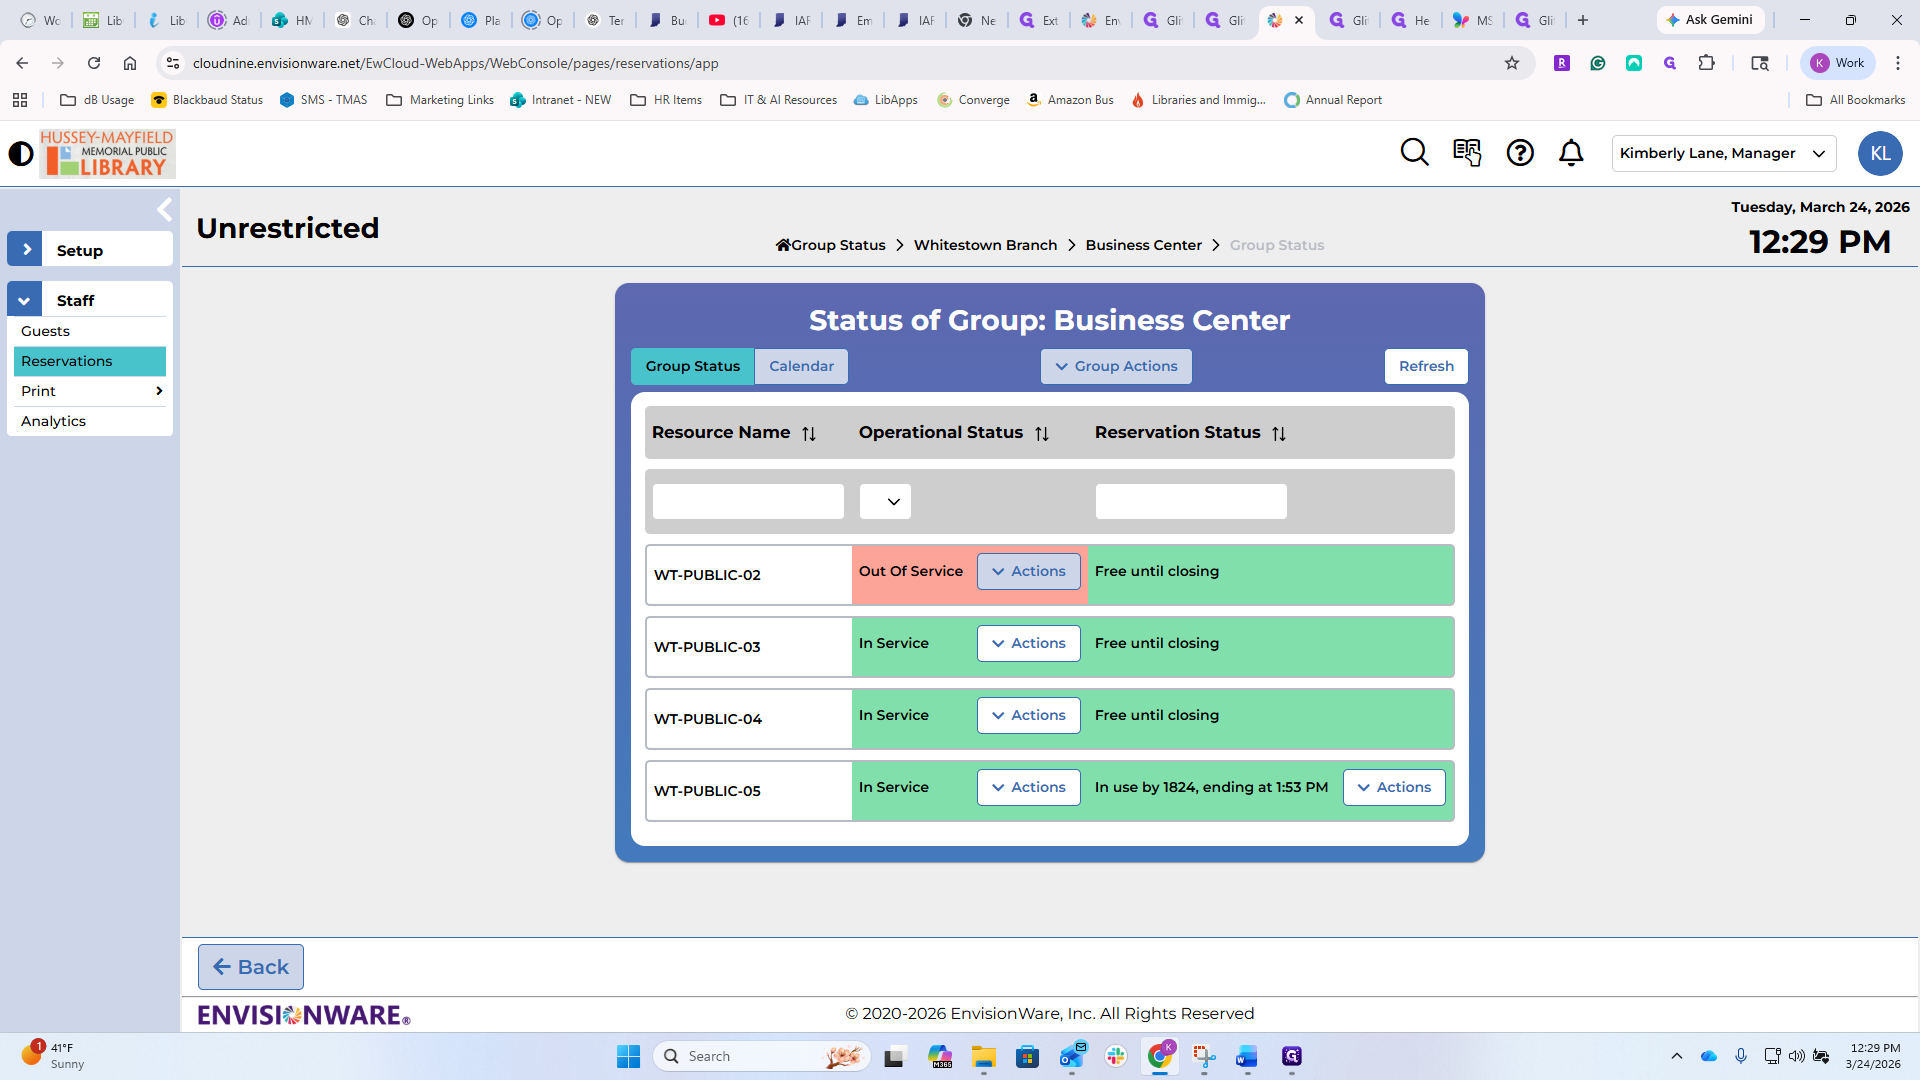
You can manually take it out of service or shut it down. There is a patron on this one, and you have the same options as on the previous screen to interact with that patron or computer in the area.
Managing existing reservations.


This is an overview of everything happening. You can see every computer that is currently on here. There is only one computer, but if there were computers in different areas or groups, you would see the computer name and session time. You can perform all the interactions we discussed earlier. This concludes the update to PC reservation on the staff side.

On the patron side, it looks very similar and functions the same way as before. It basically got a facelift and now looks more modern and current. The interface users see when they log in with their credentials has changed. One thing that did change, both with reservations and printing, is how staff access the computer. If a patron is having a problem and you need to help, click on the EnvisionWare icon at the bottom of the screen. It will prompt you to enter your credentials, the same ones you use for the web interface. If you enter those, you'll have the same access on your machine because it's all web-based and in the cloud. You can do this from anywhere. Occasionally, that might come up, but it's a little different than when we've done it before.