
How to Use the Changes Function for State Transitions
Learn how to effectively use the changes function to manage state transitions and trigger event-based rules in ticketing systems.
In this guide, we'll learn how to use the changes function to set up conditions that trigger actions based on state changes. This function is useful when you want to monitor transitions, such as when a ticket's severity changes from any status to a specific one, like urgent. By understanding how to configure these conditions, you can ensure that event-based rules are executed effectively, such as notifying users when a ticket's severity changes. This approach differs from simply checking if a ticket's severity is equal to a certain status, as it focuses on the transition itself.
Let's get started
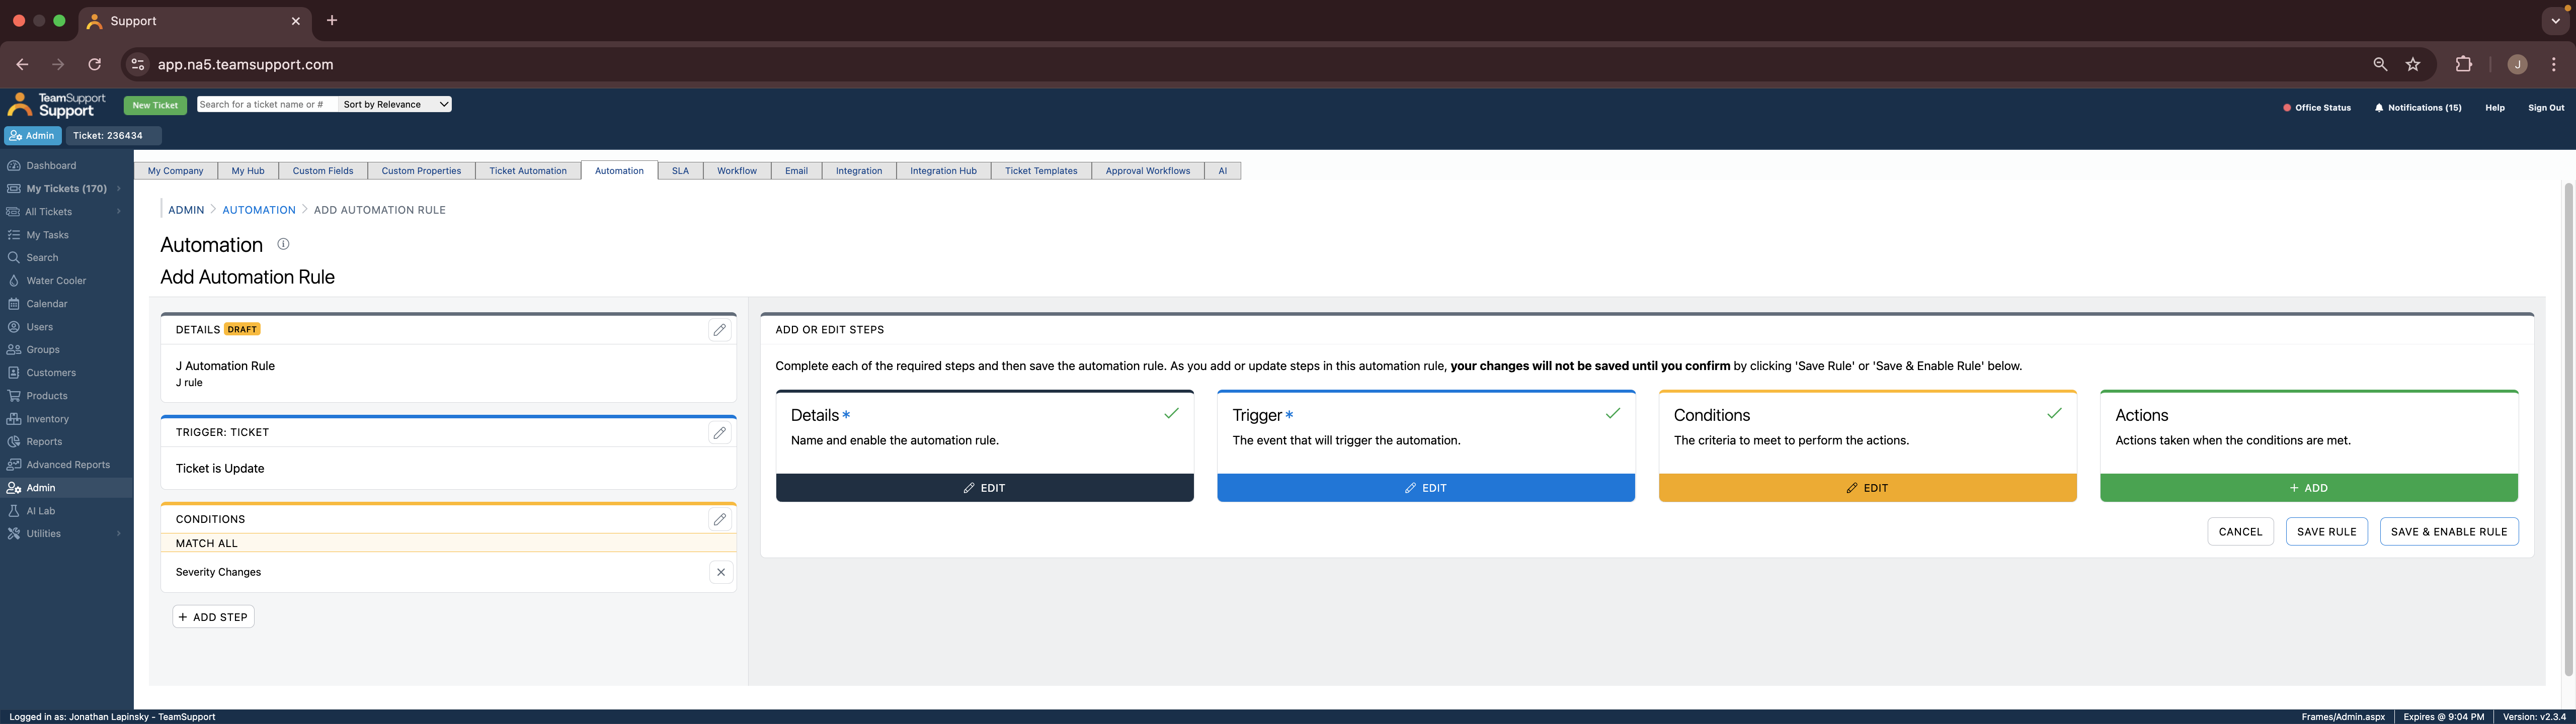
Here's how to use the changes function. It's crucial when setting up conditions to change from one state to another. In this example, we'll examine a rule and navigate to your conditions.

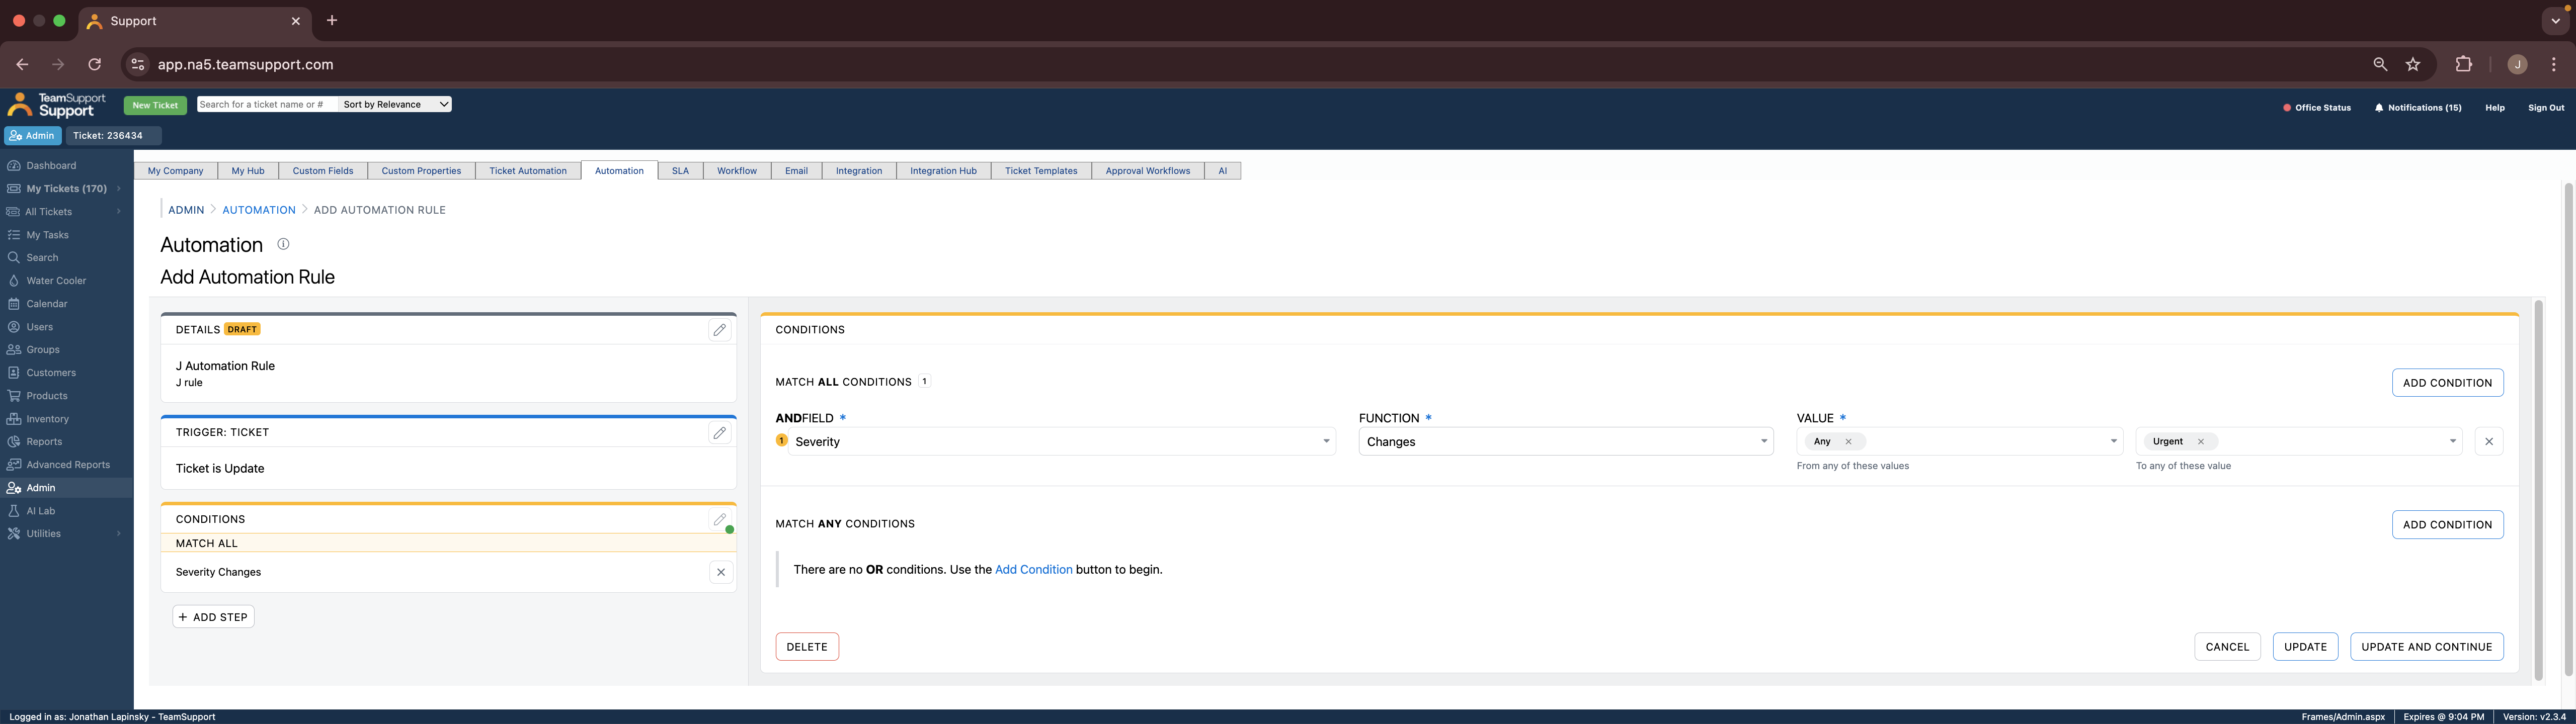
In the conditions section, you can change the severity.

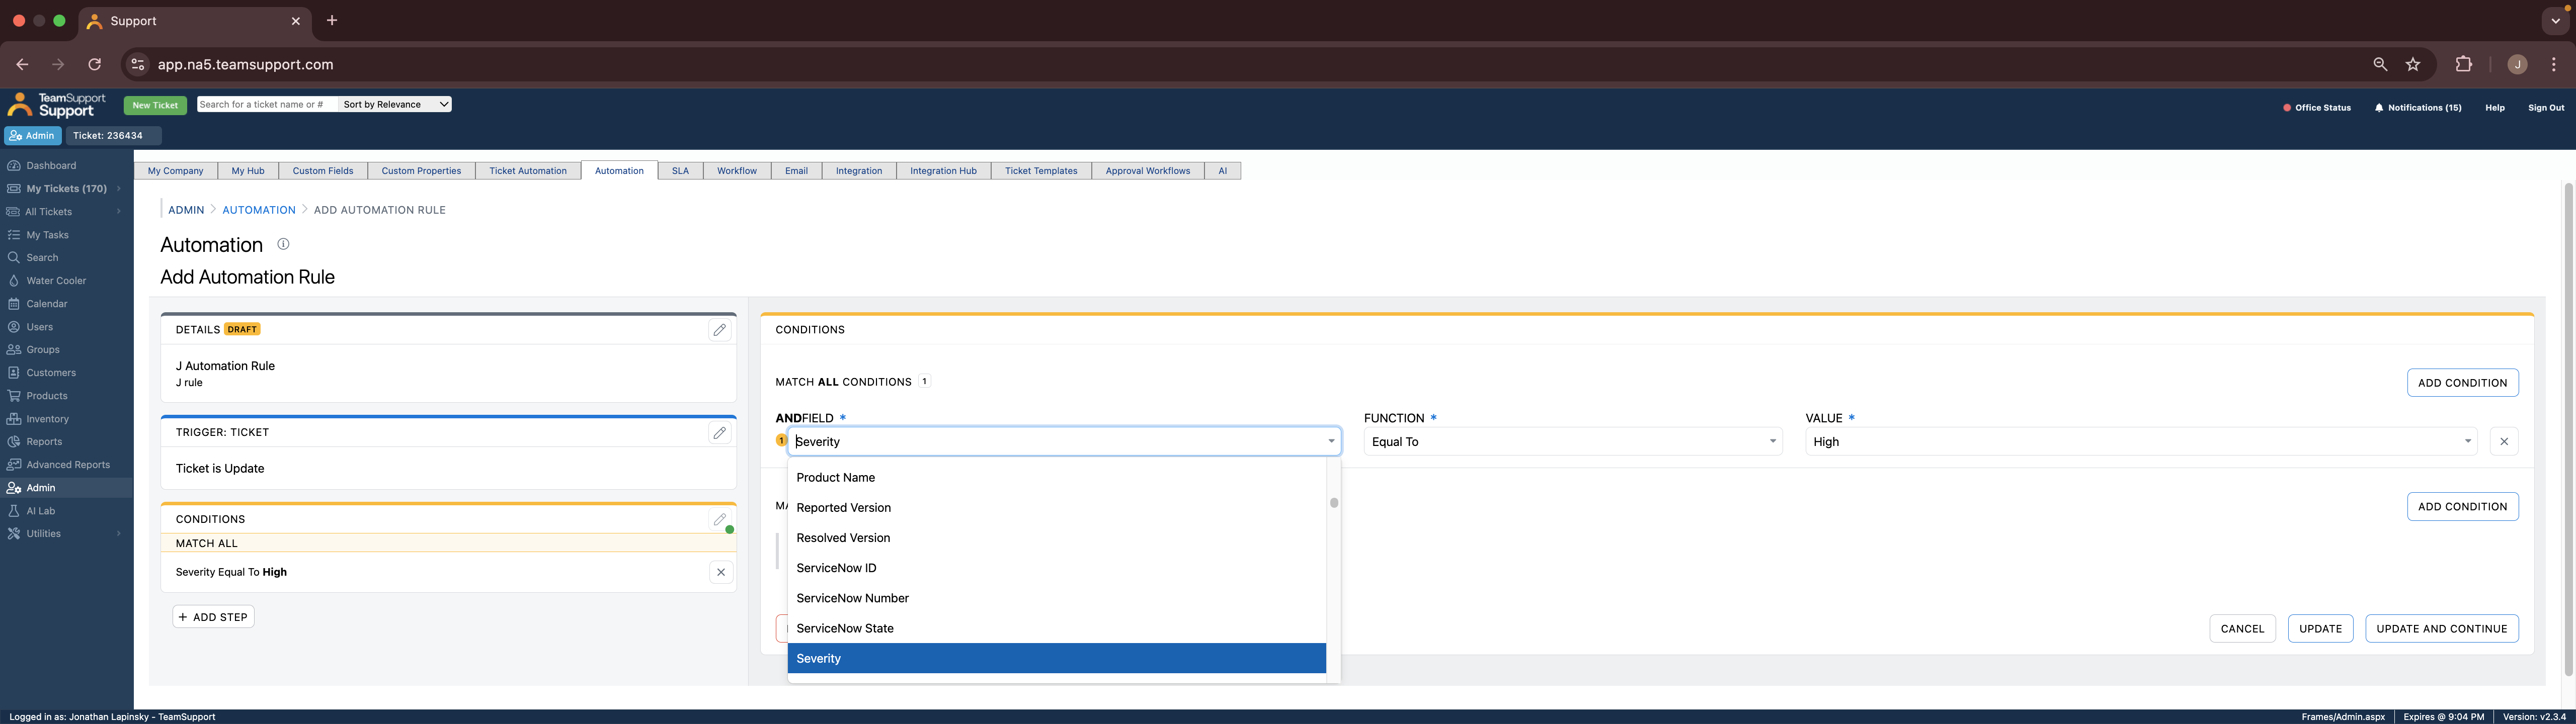
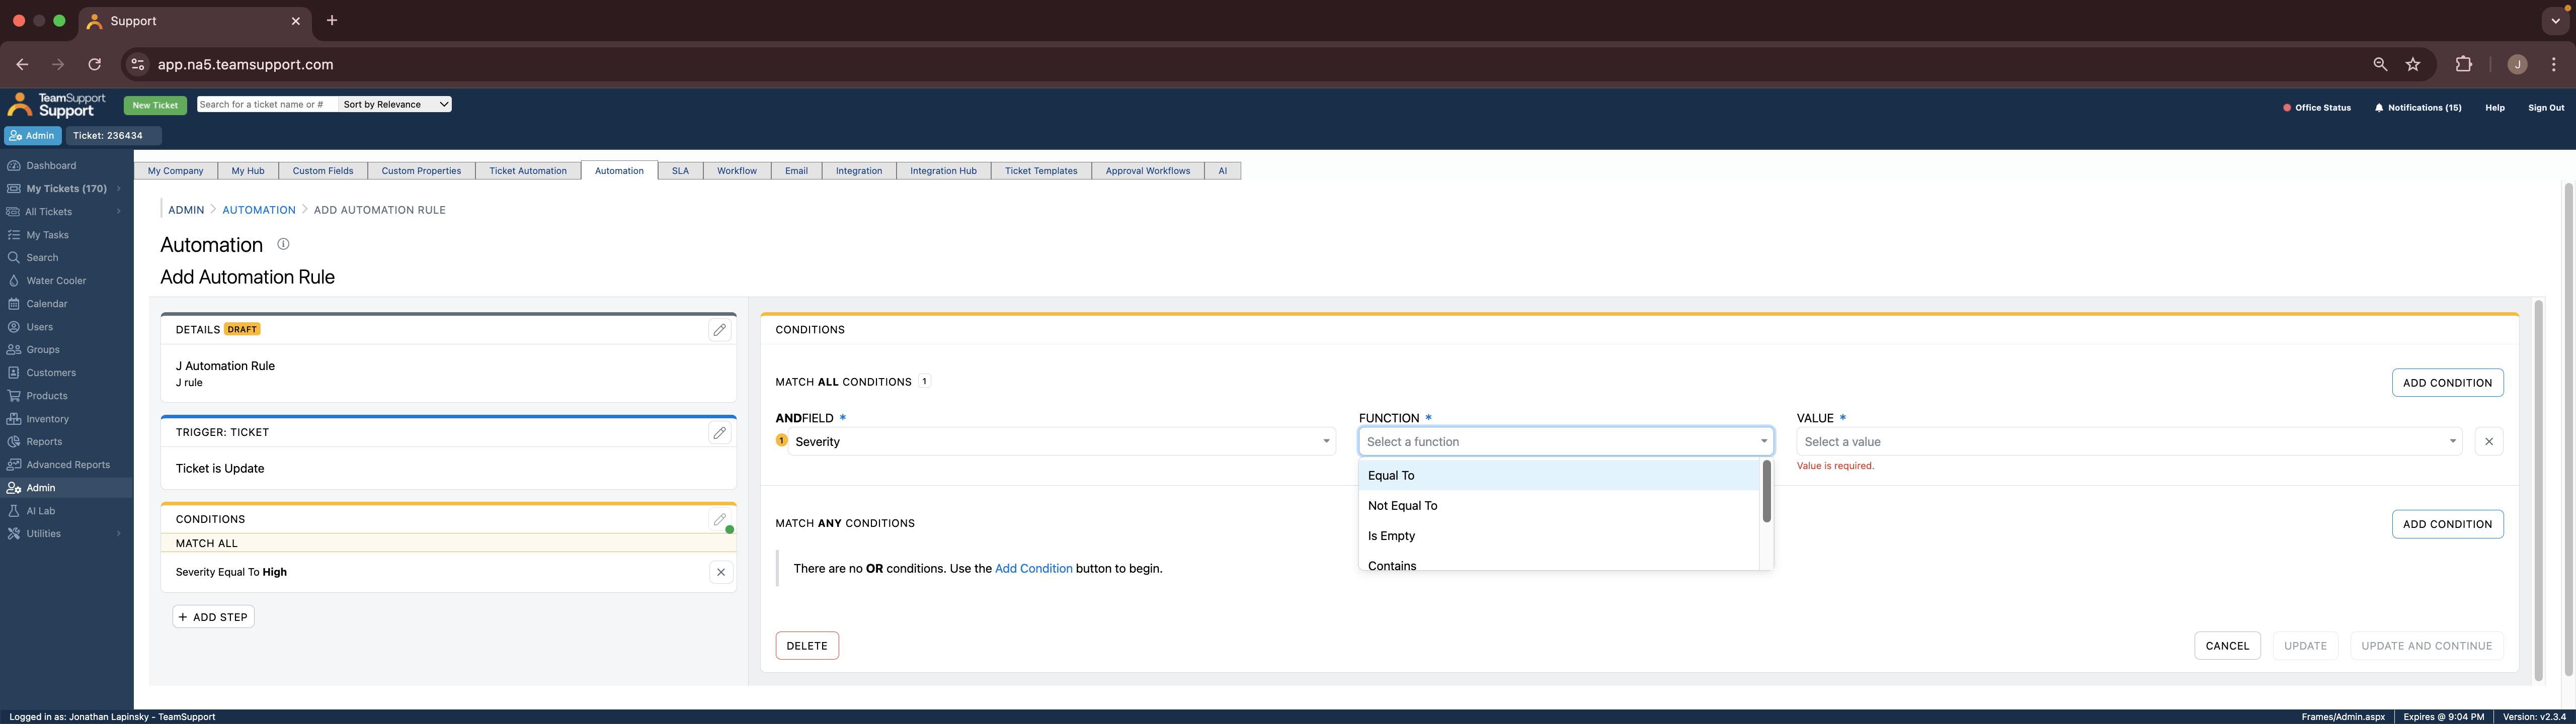
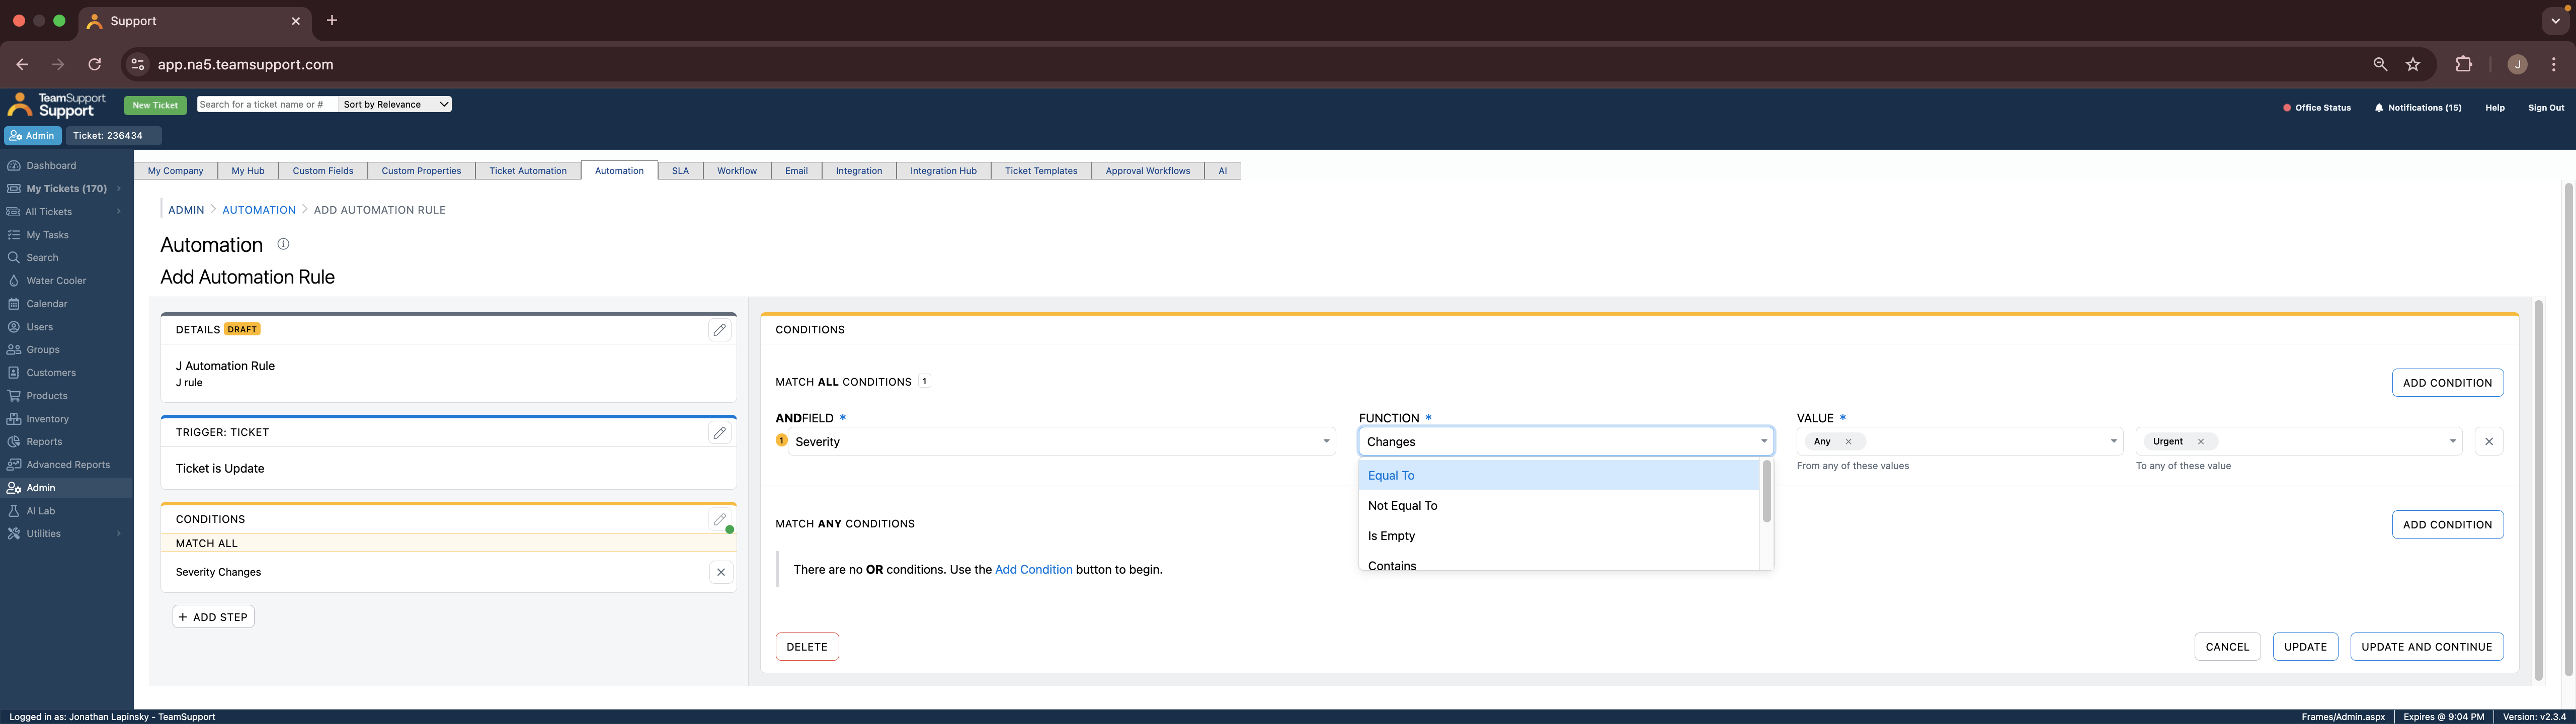
Select a function

Notice in the function dropdown that you can select "changes", providing you with two different values.
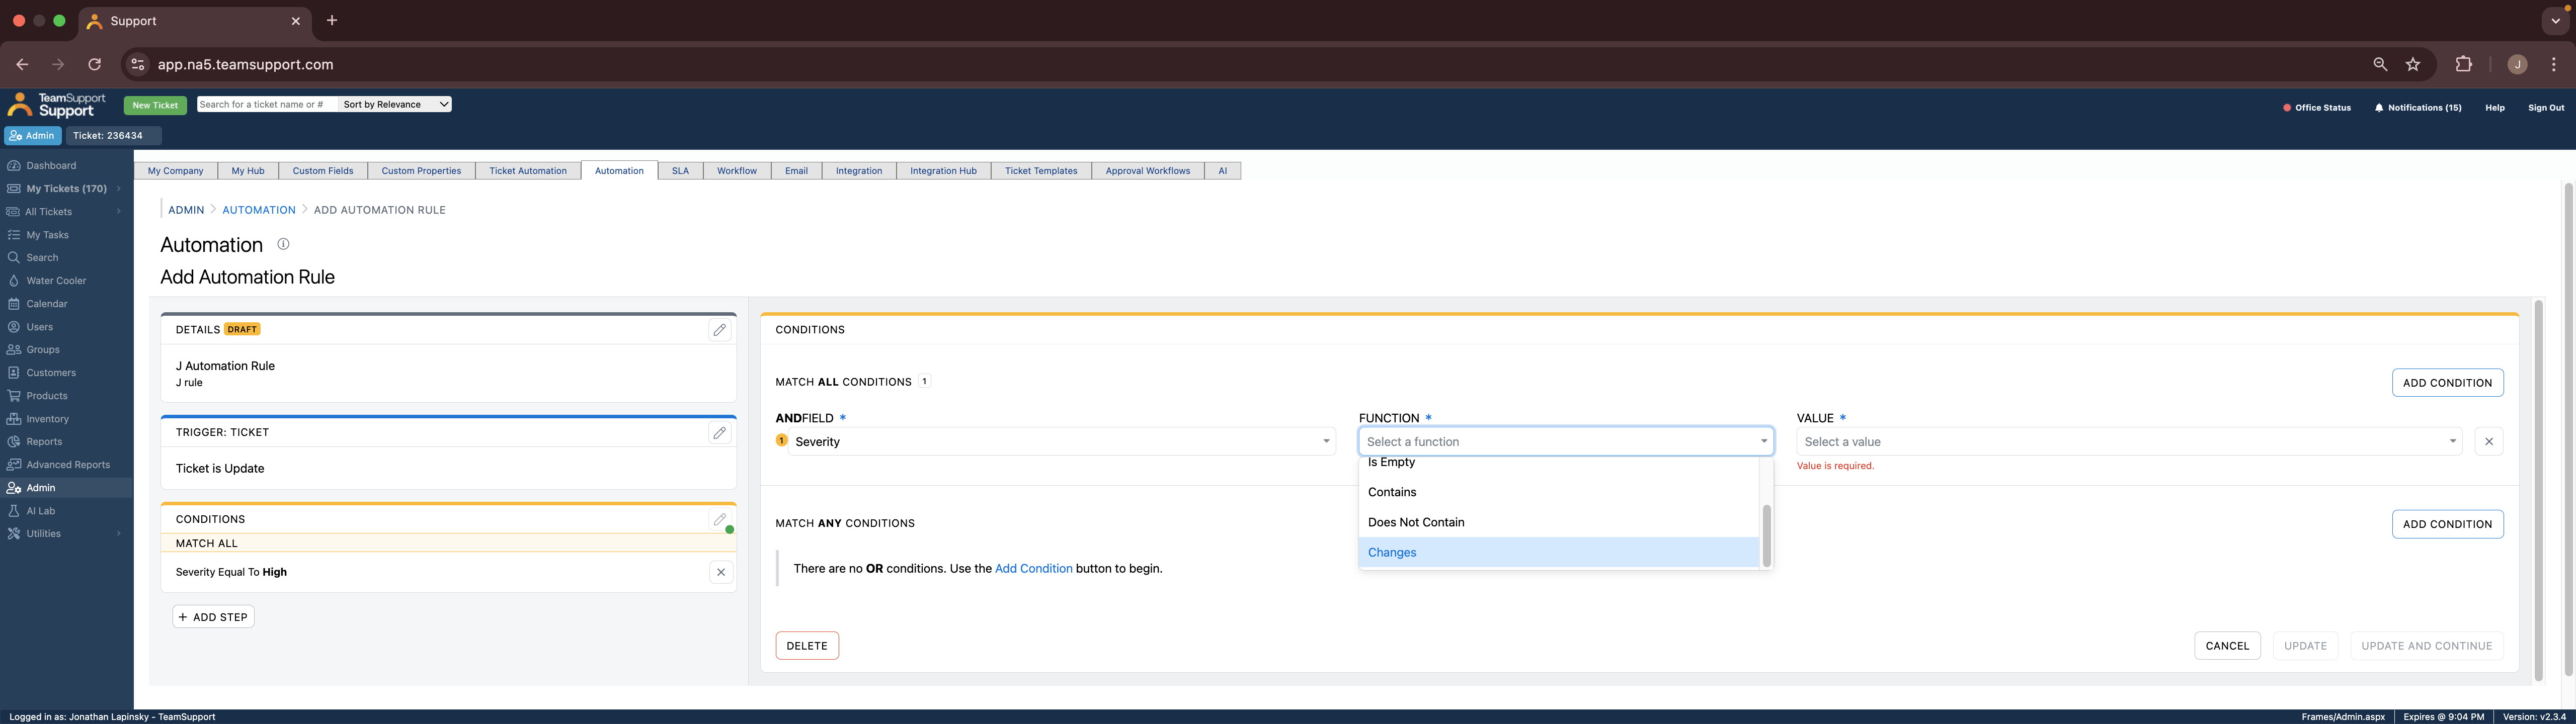
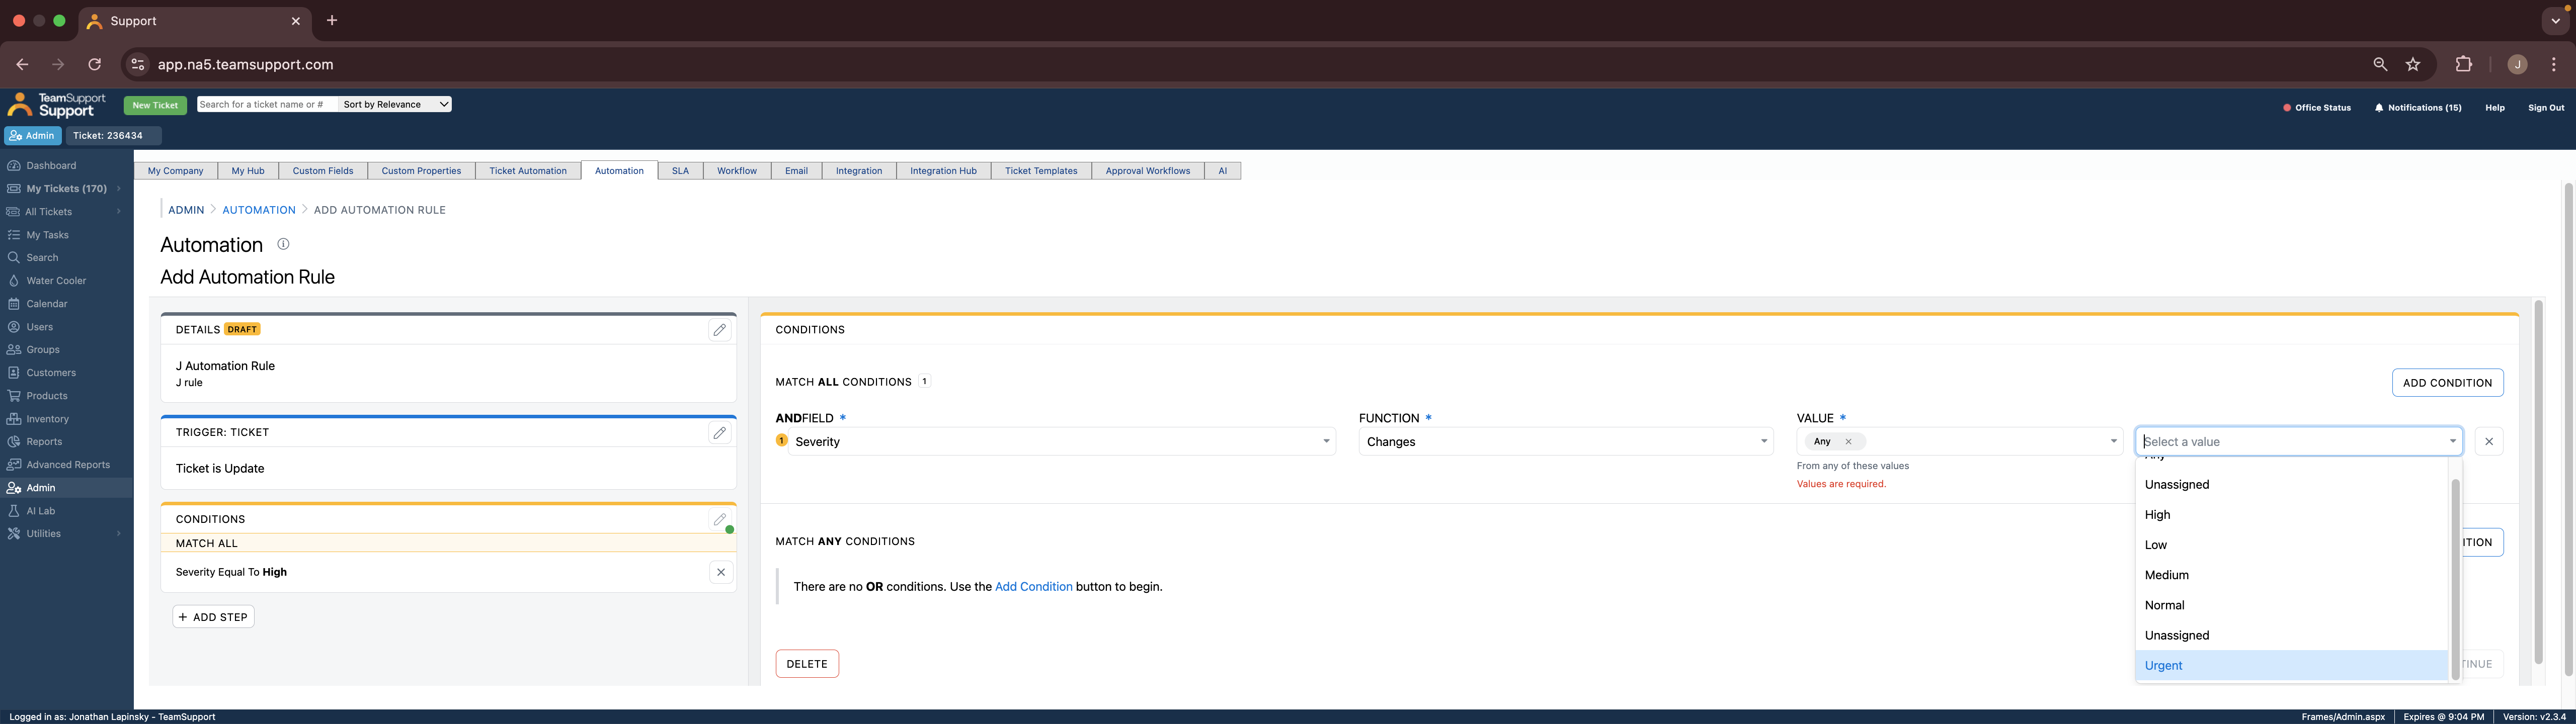
This allows you to trigger an event-based rule whenever the severity changes from any status to a specific one.


This status would be something like "urgent."

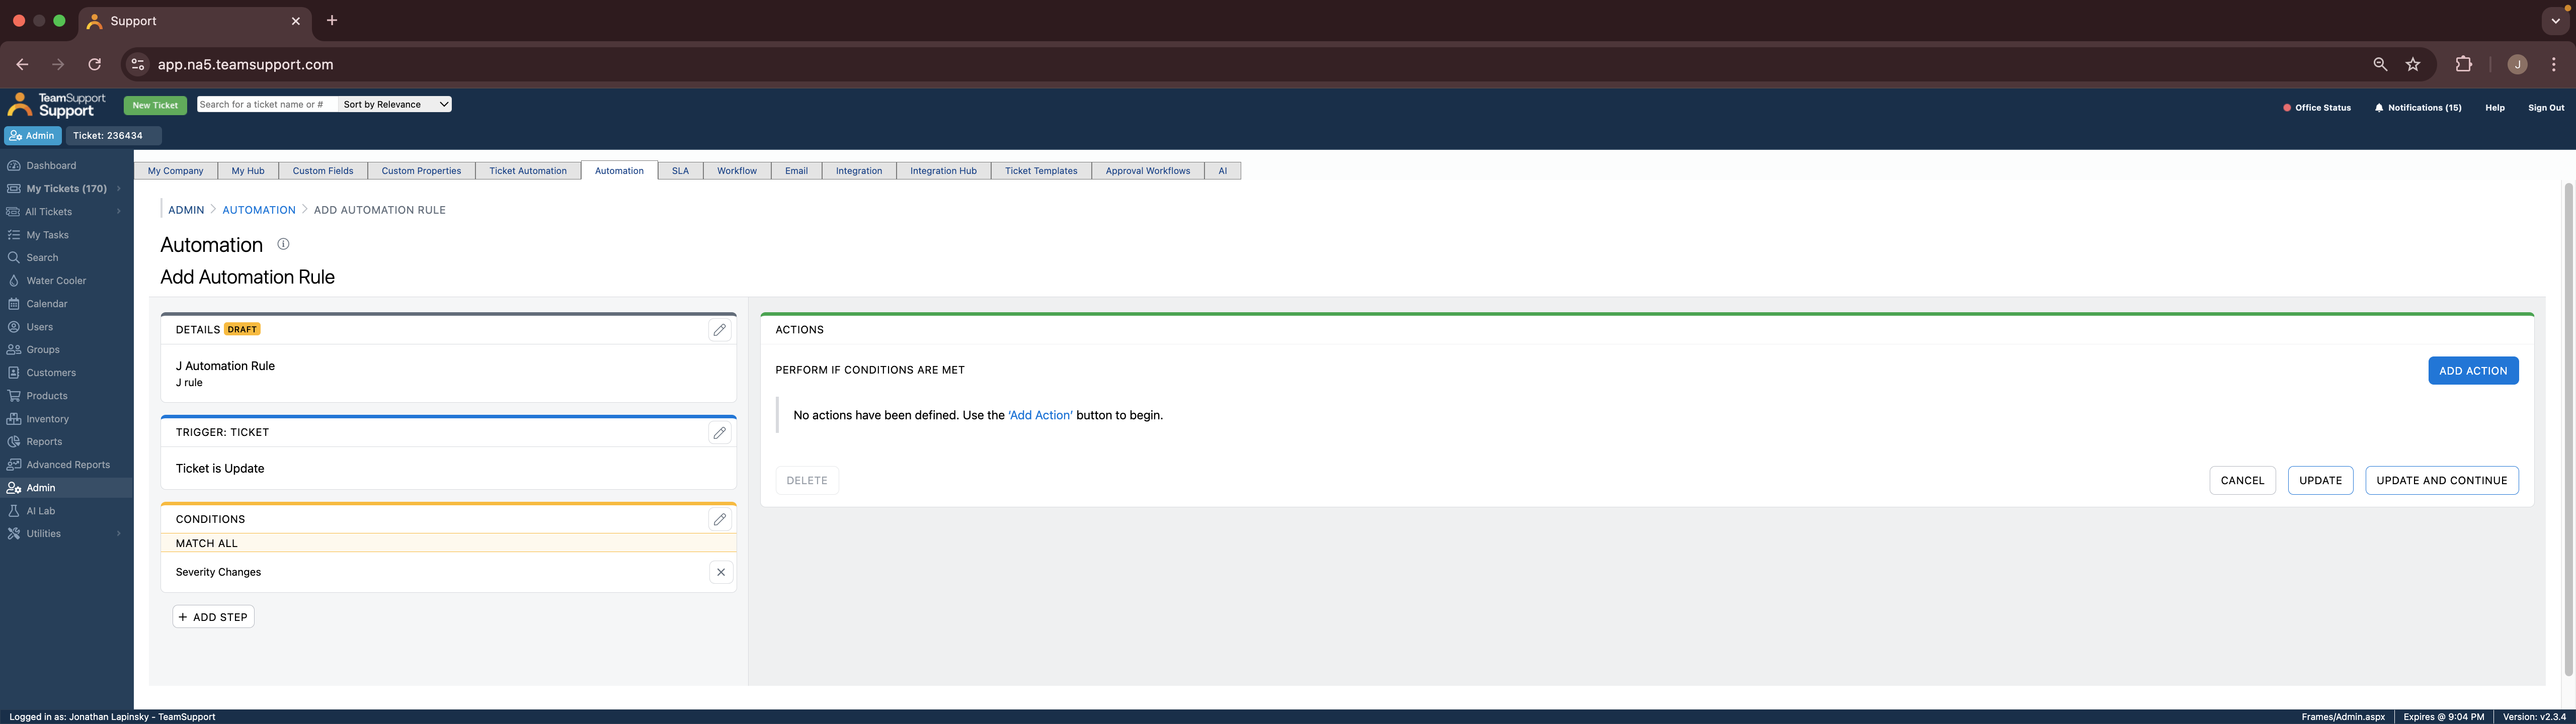
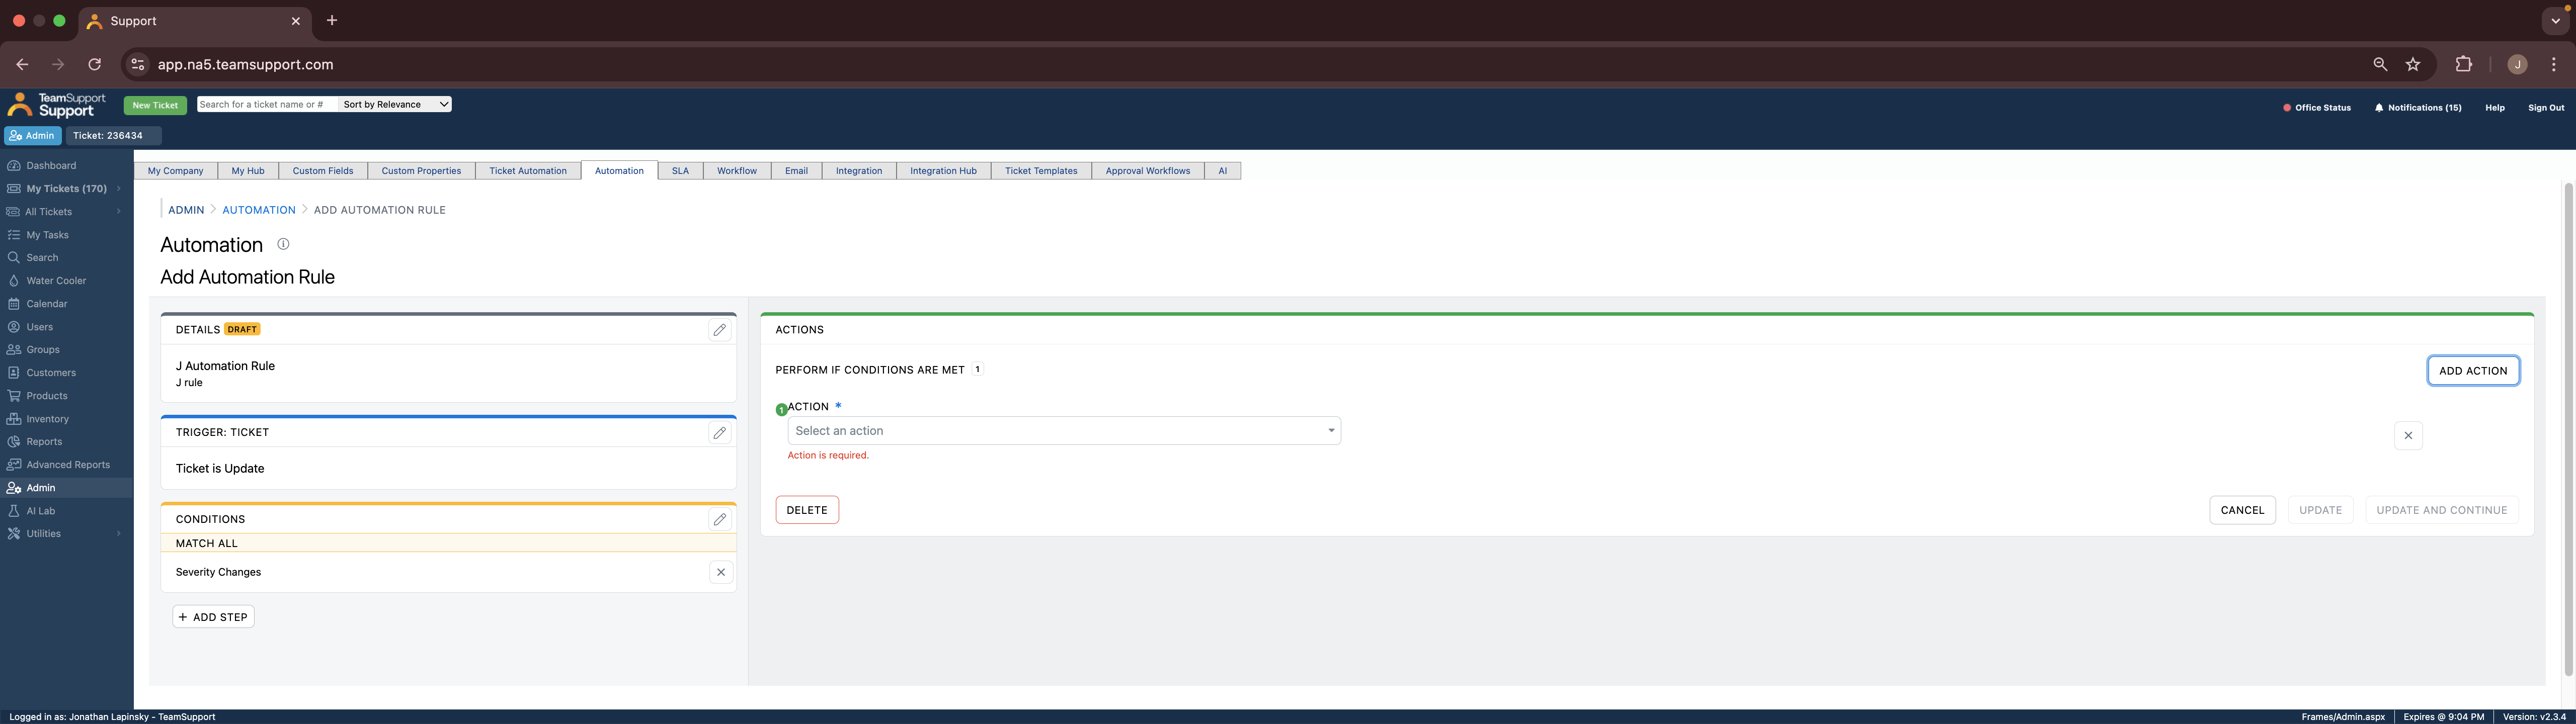
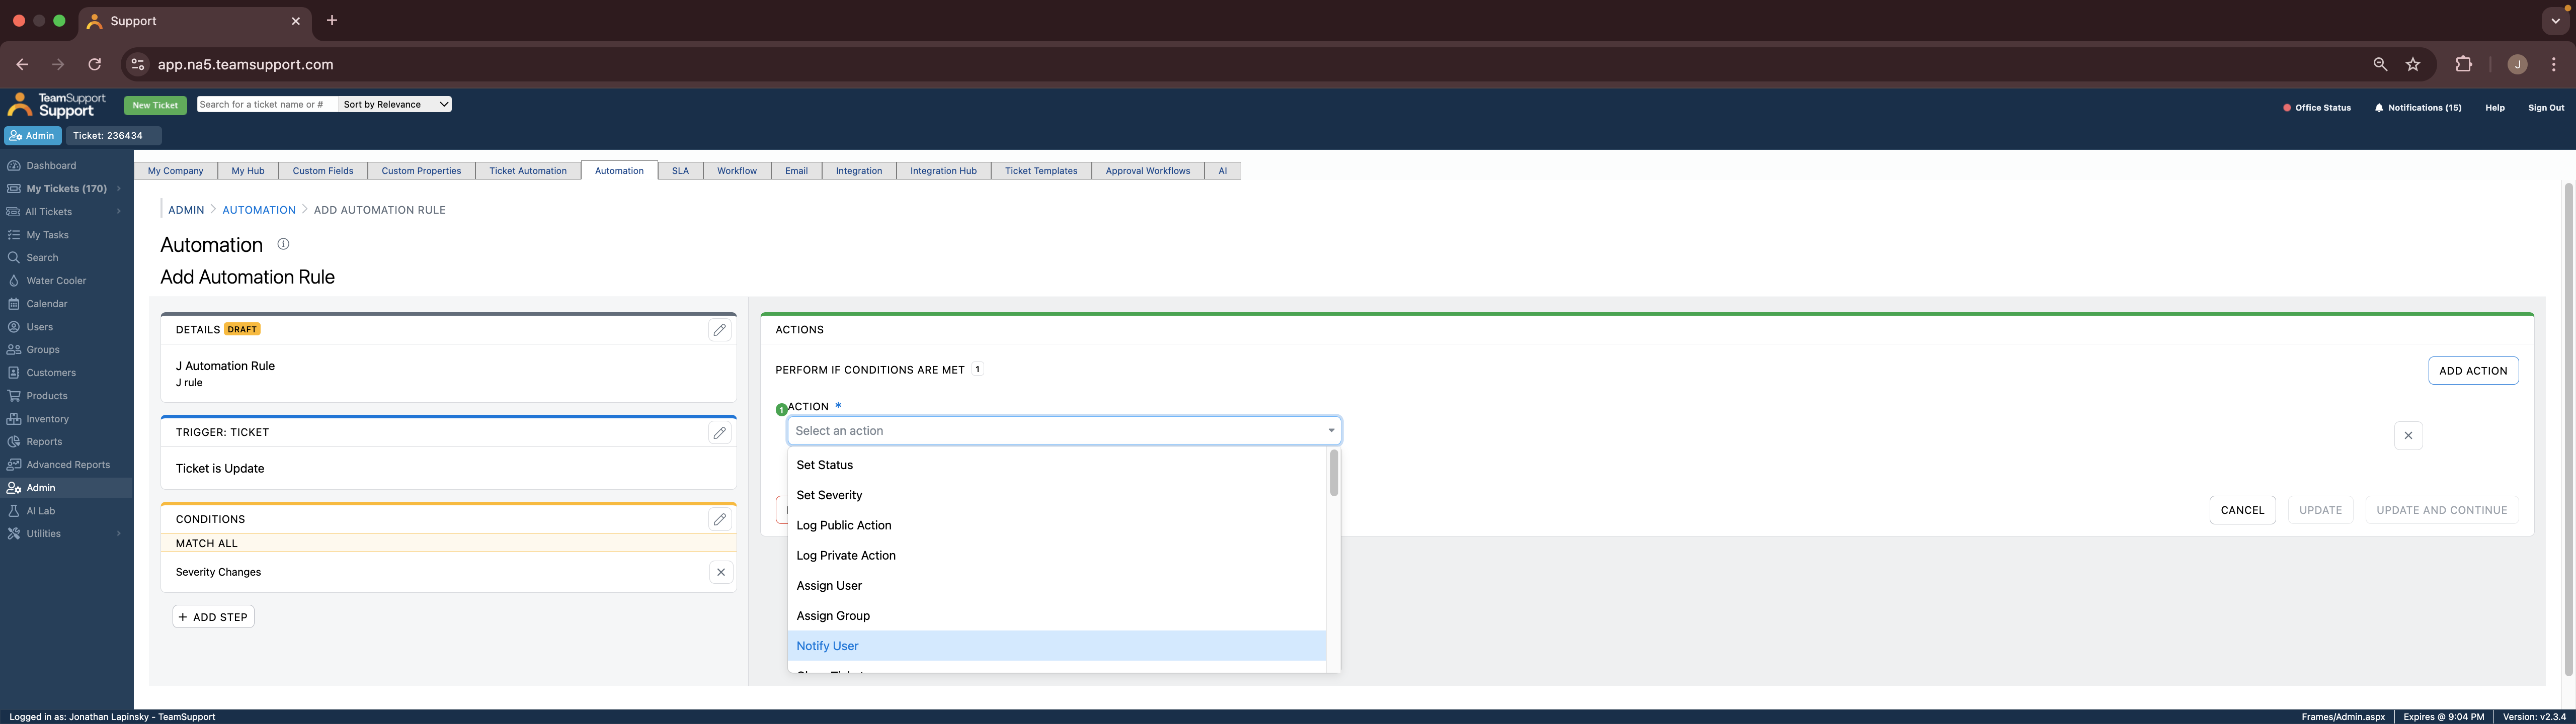
Whenever a ticket is updated and its severity changes to urgent, any configured actions, like notifying a user, will be triggered.
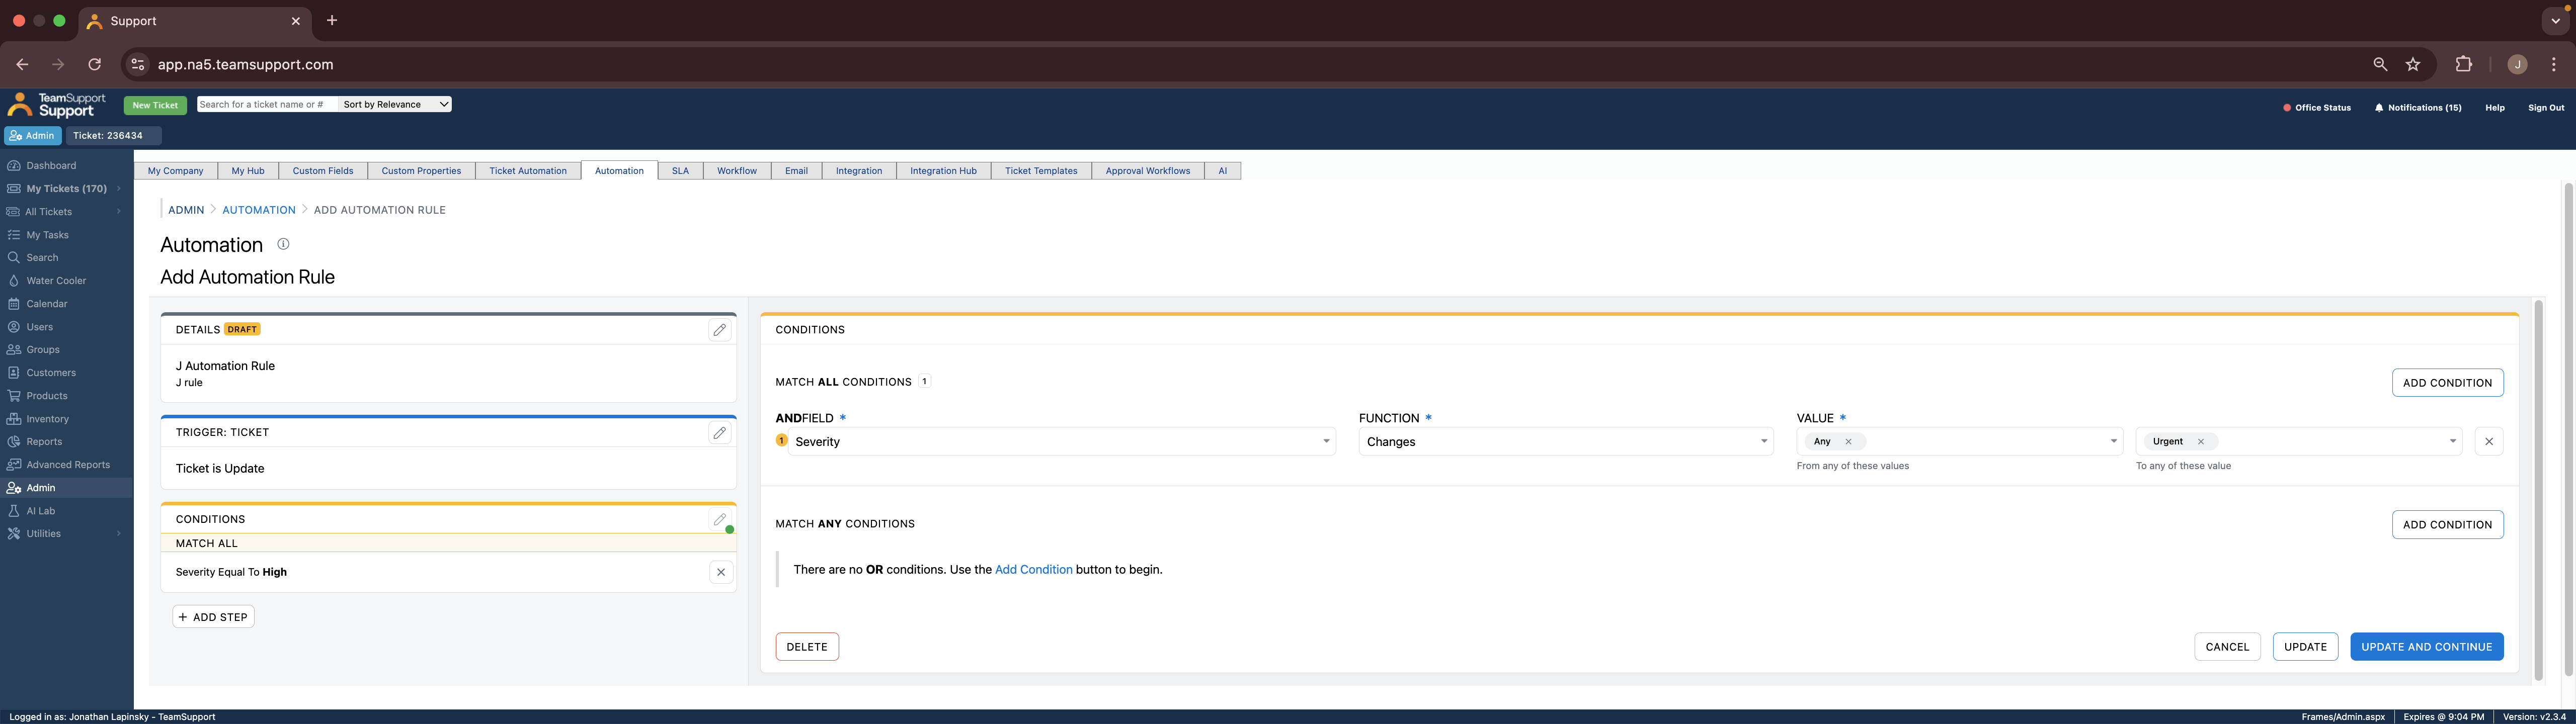
This differs slightly from setting up a condition where the severity is marked as urgent.
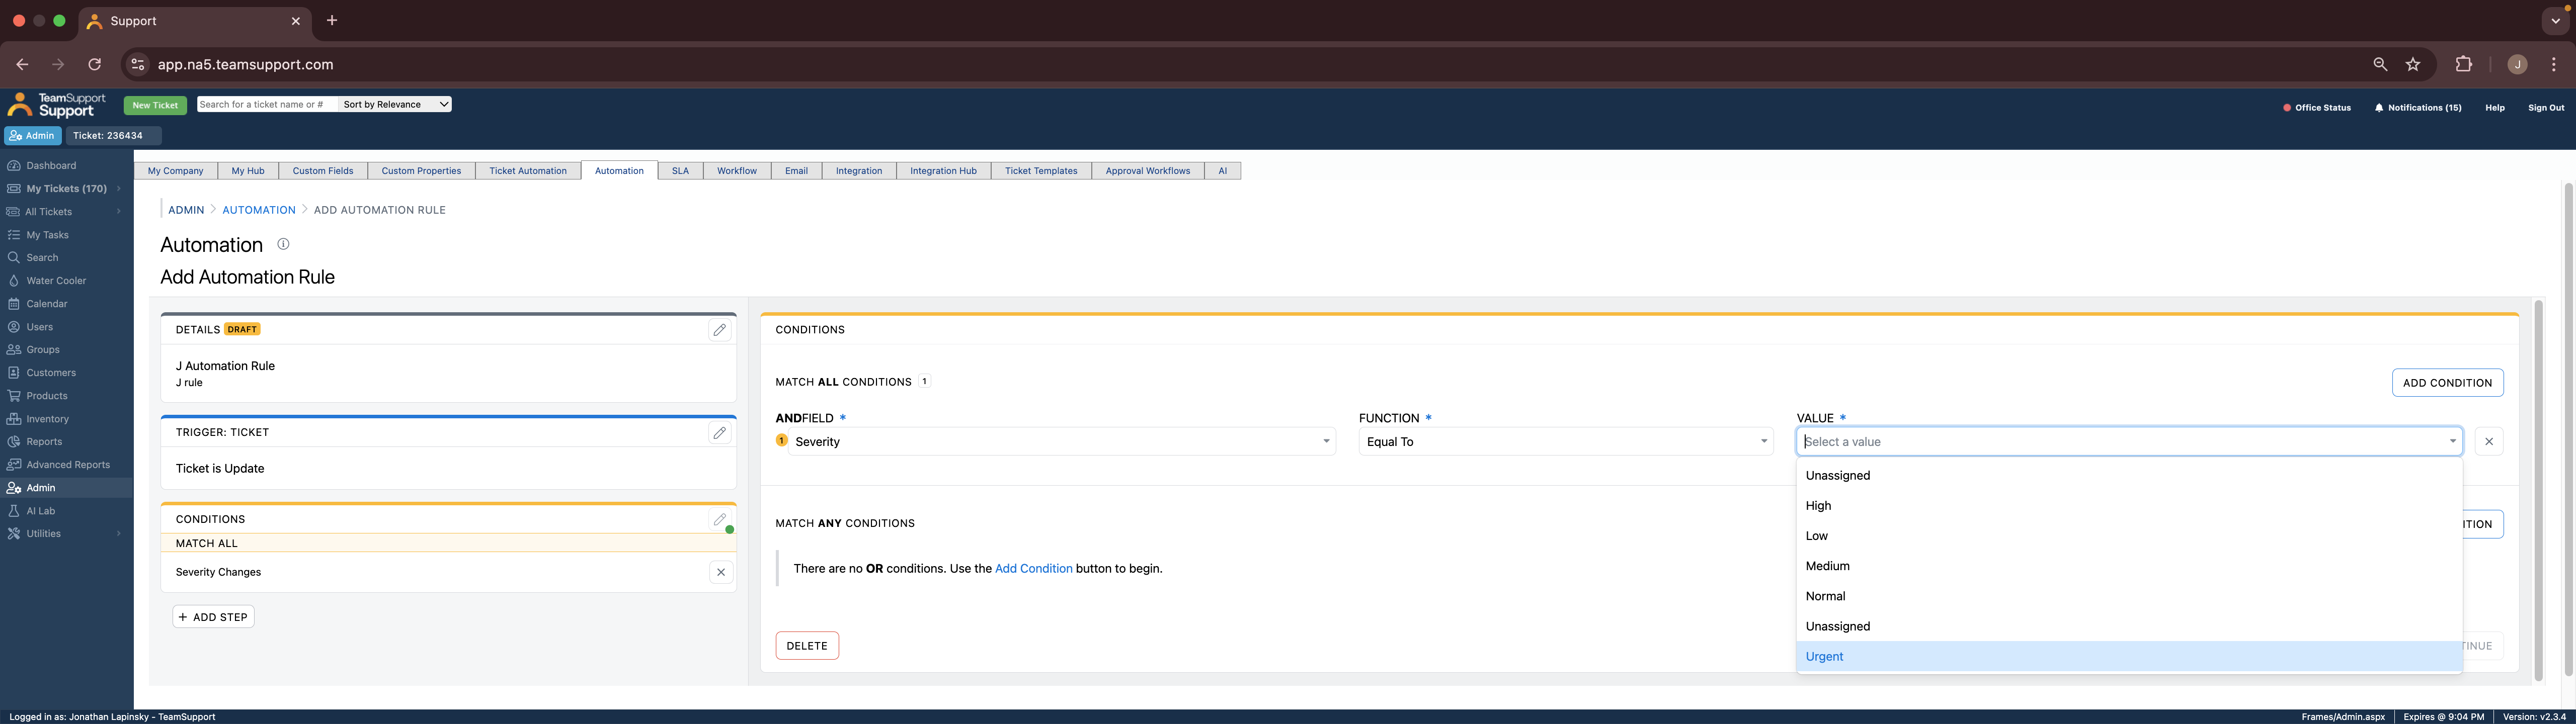
This will trigger your actions whenever a ticket with a severity marked as urgent is updated. Any updated ticket with urgent severity will activate these actions. It doesn't focus on status changes, such as from high to urgent or urgent to low. It simply checks if the severity is urgent. You can set up two different options, allowing you to monitor state changes between two different conditions.