
How to Use the New Version History Feature in Glitter Guides
Learn how to use the new version history feature in Glitter guides. Discover how to view, save, and restore previous versions, create manual checkpoints, and easily manage your guide edits.
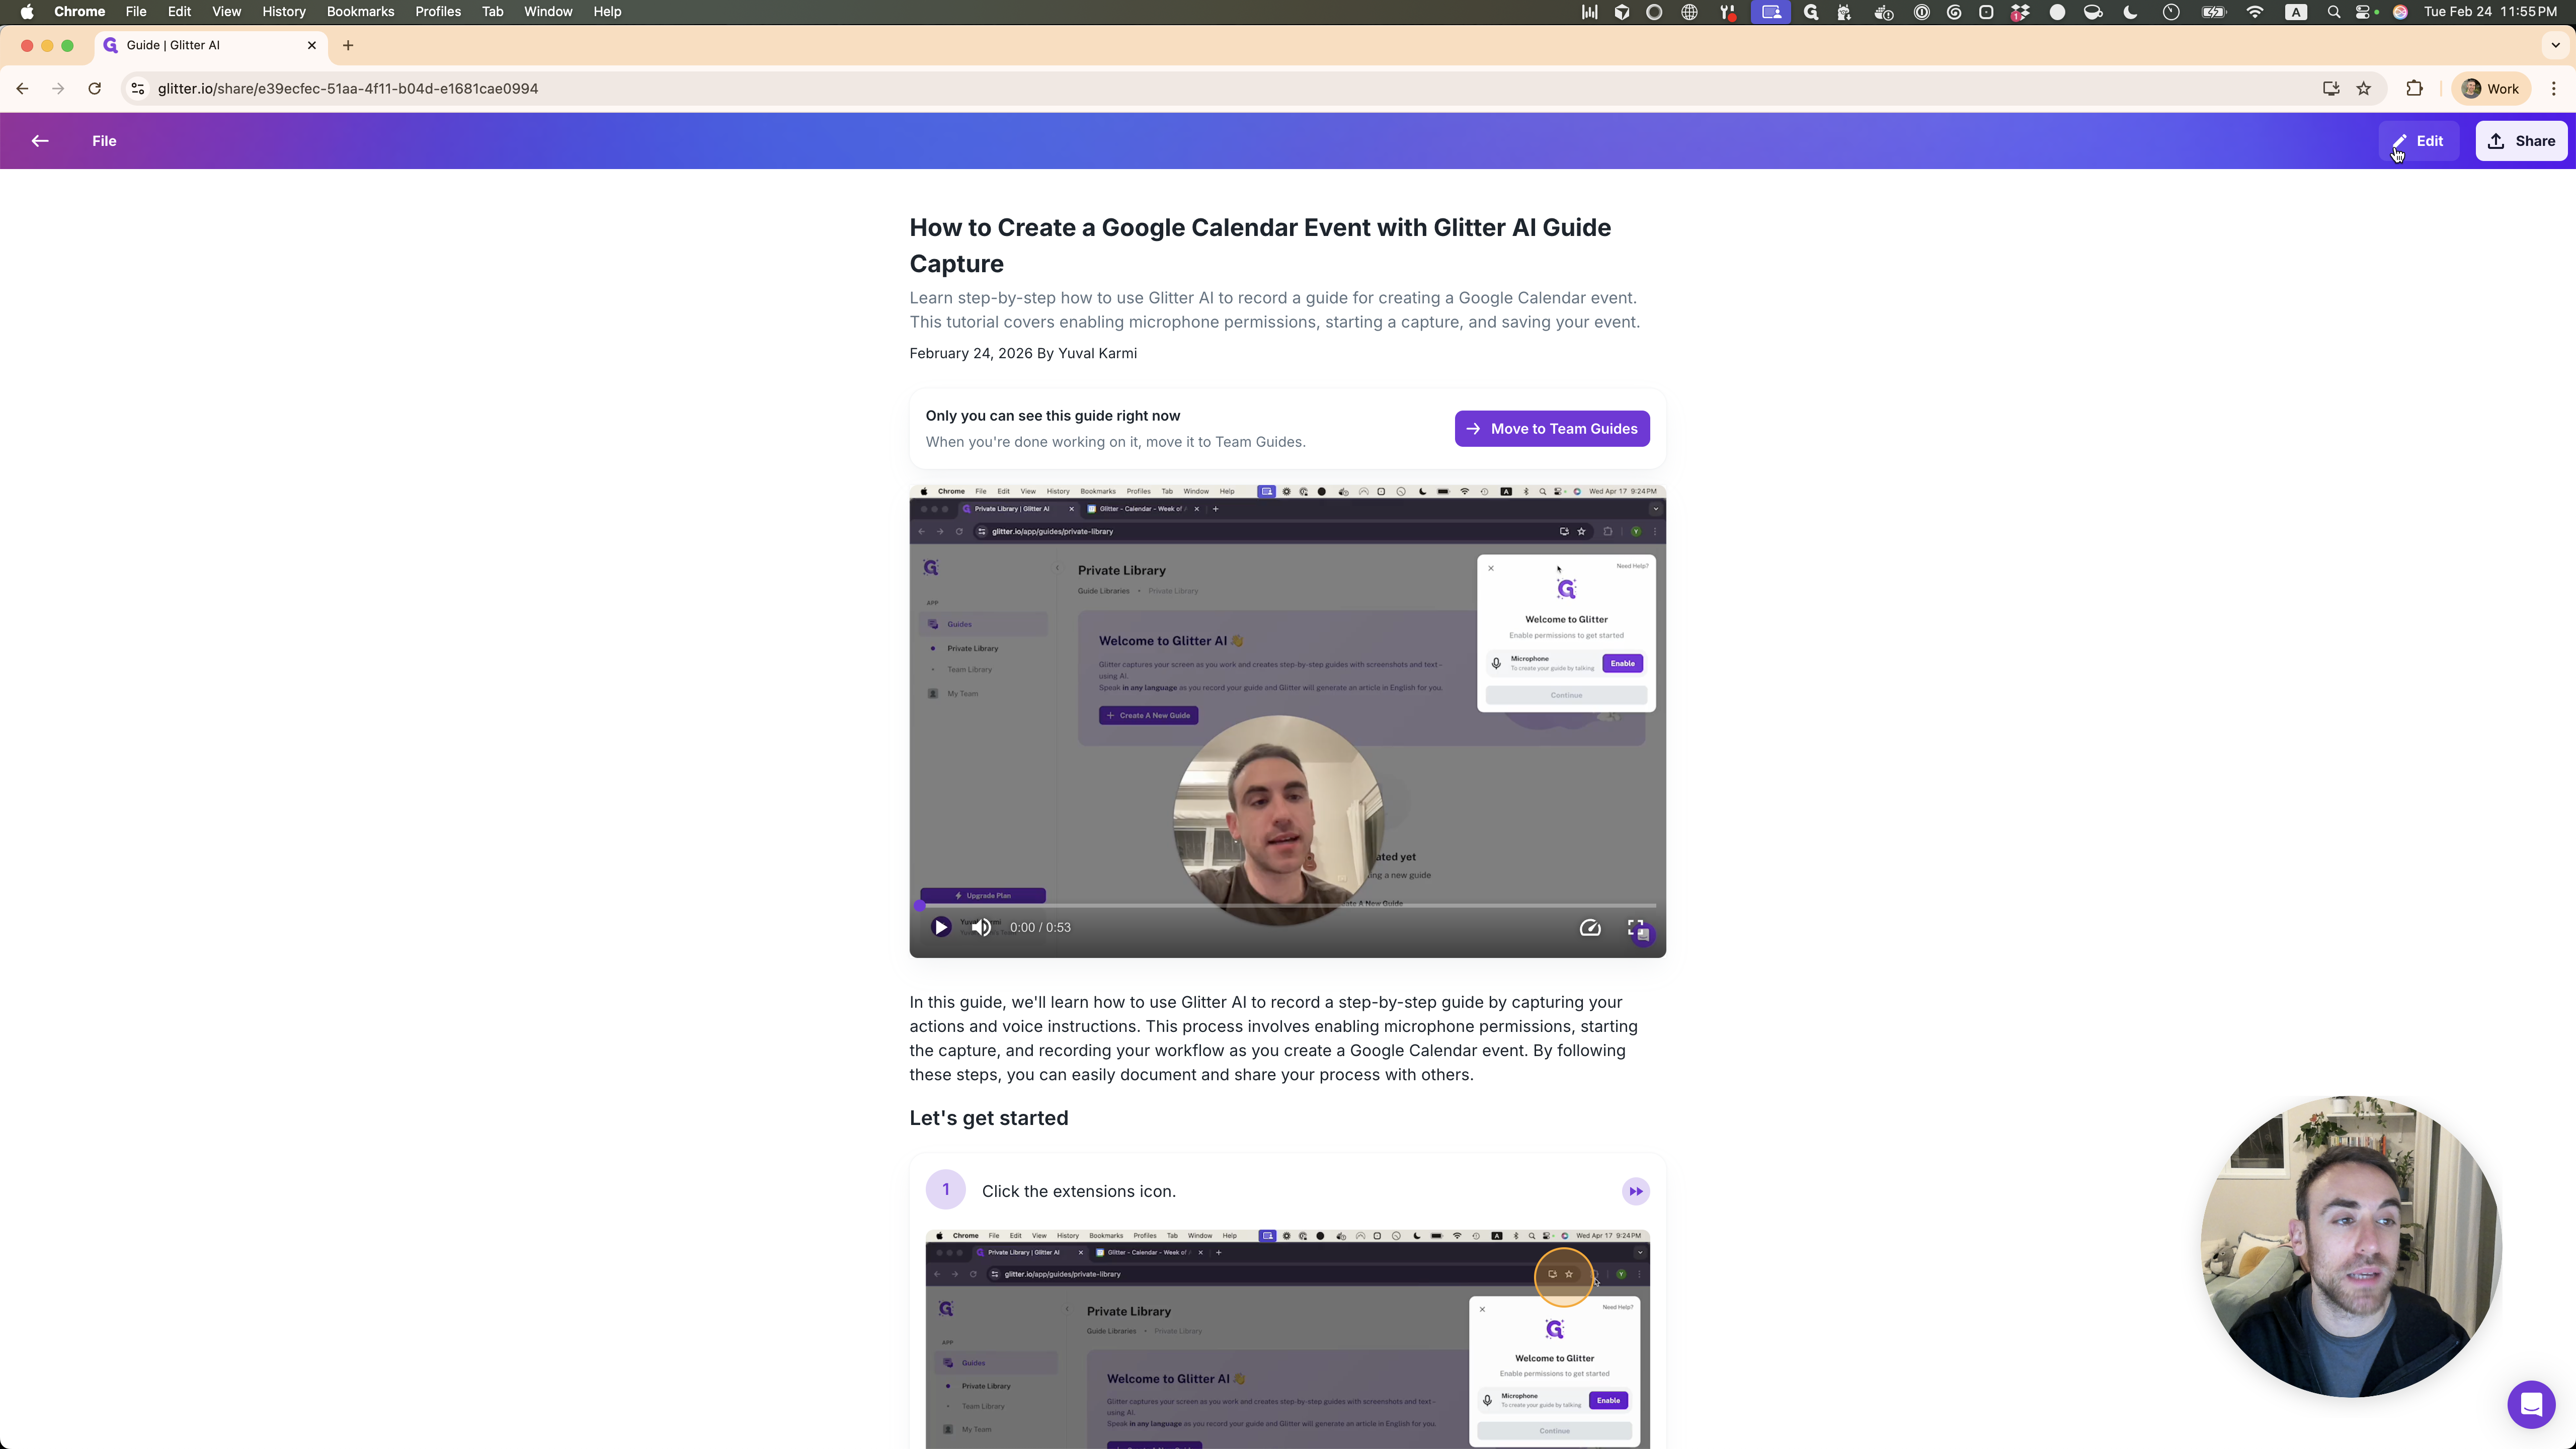
In this guide, we'll learn how to use the version history feature in your guide editor. This feature lets you view, save, and restore previous versions of your guides. It helps you keep track of changes and recover earlier content if needed.
Let's get started
Here's how the new version history feature in Glitter AI works.
If you open any existing guide, you can edit it as usual.
You can click and add anything.
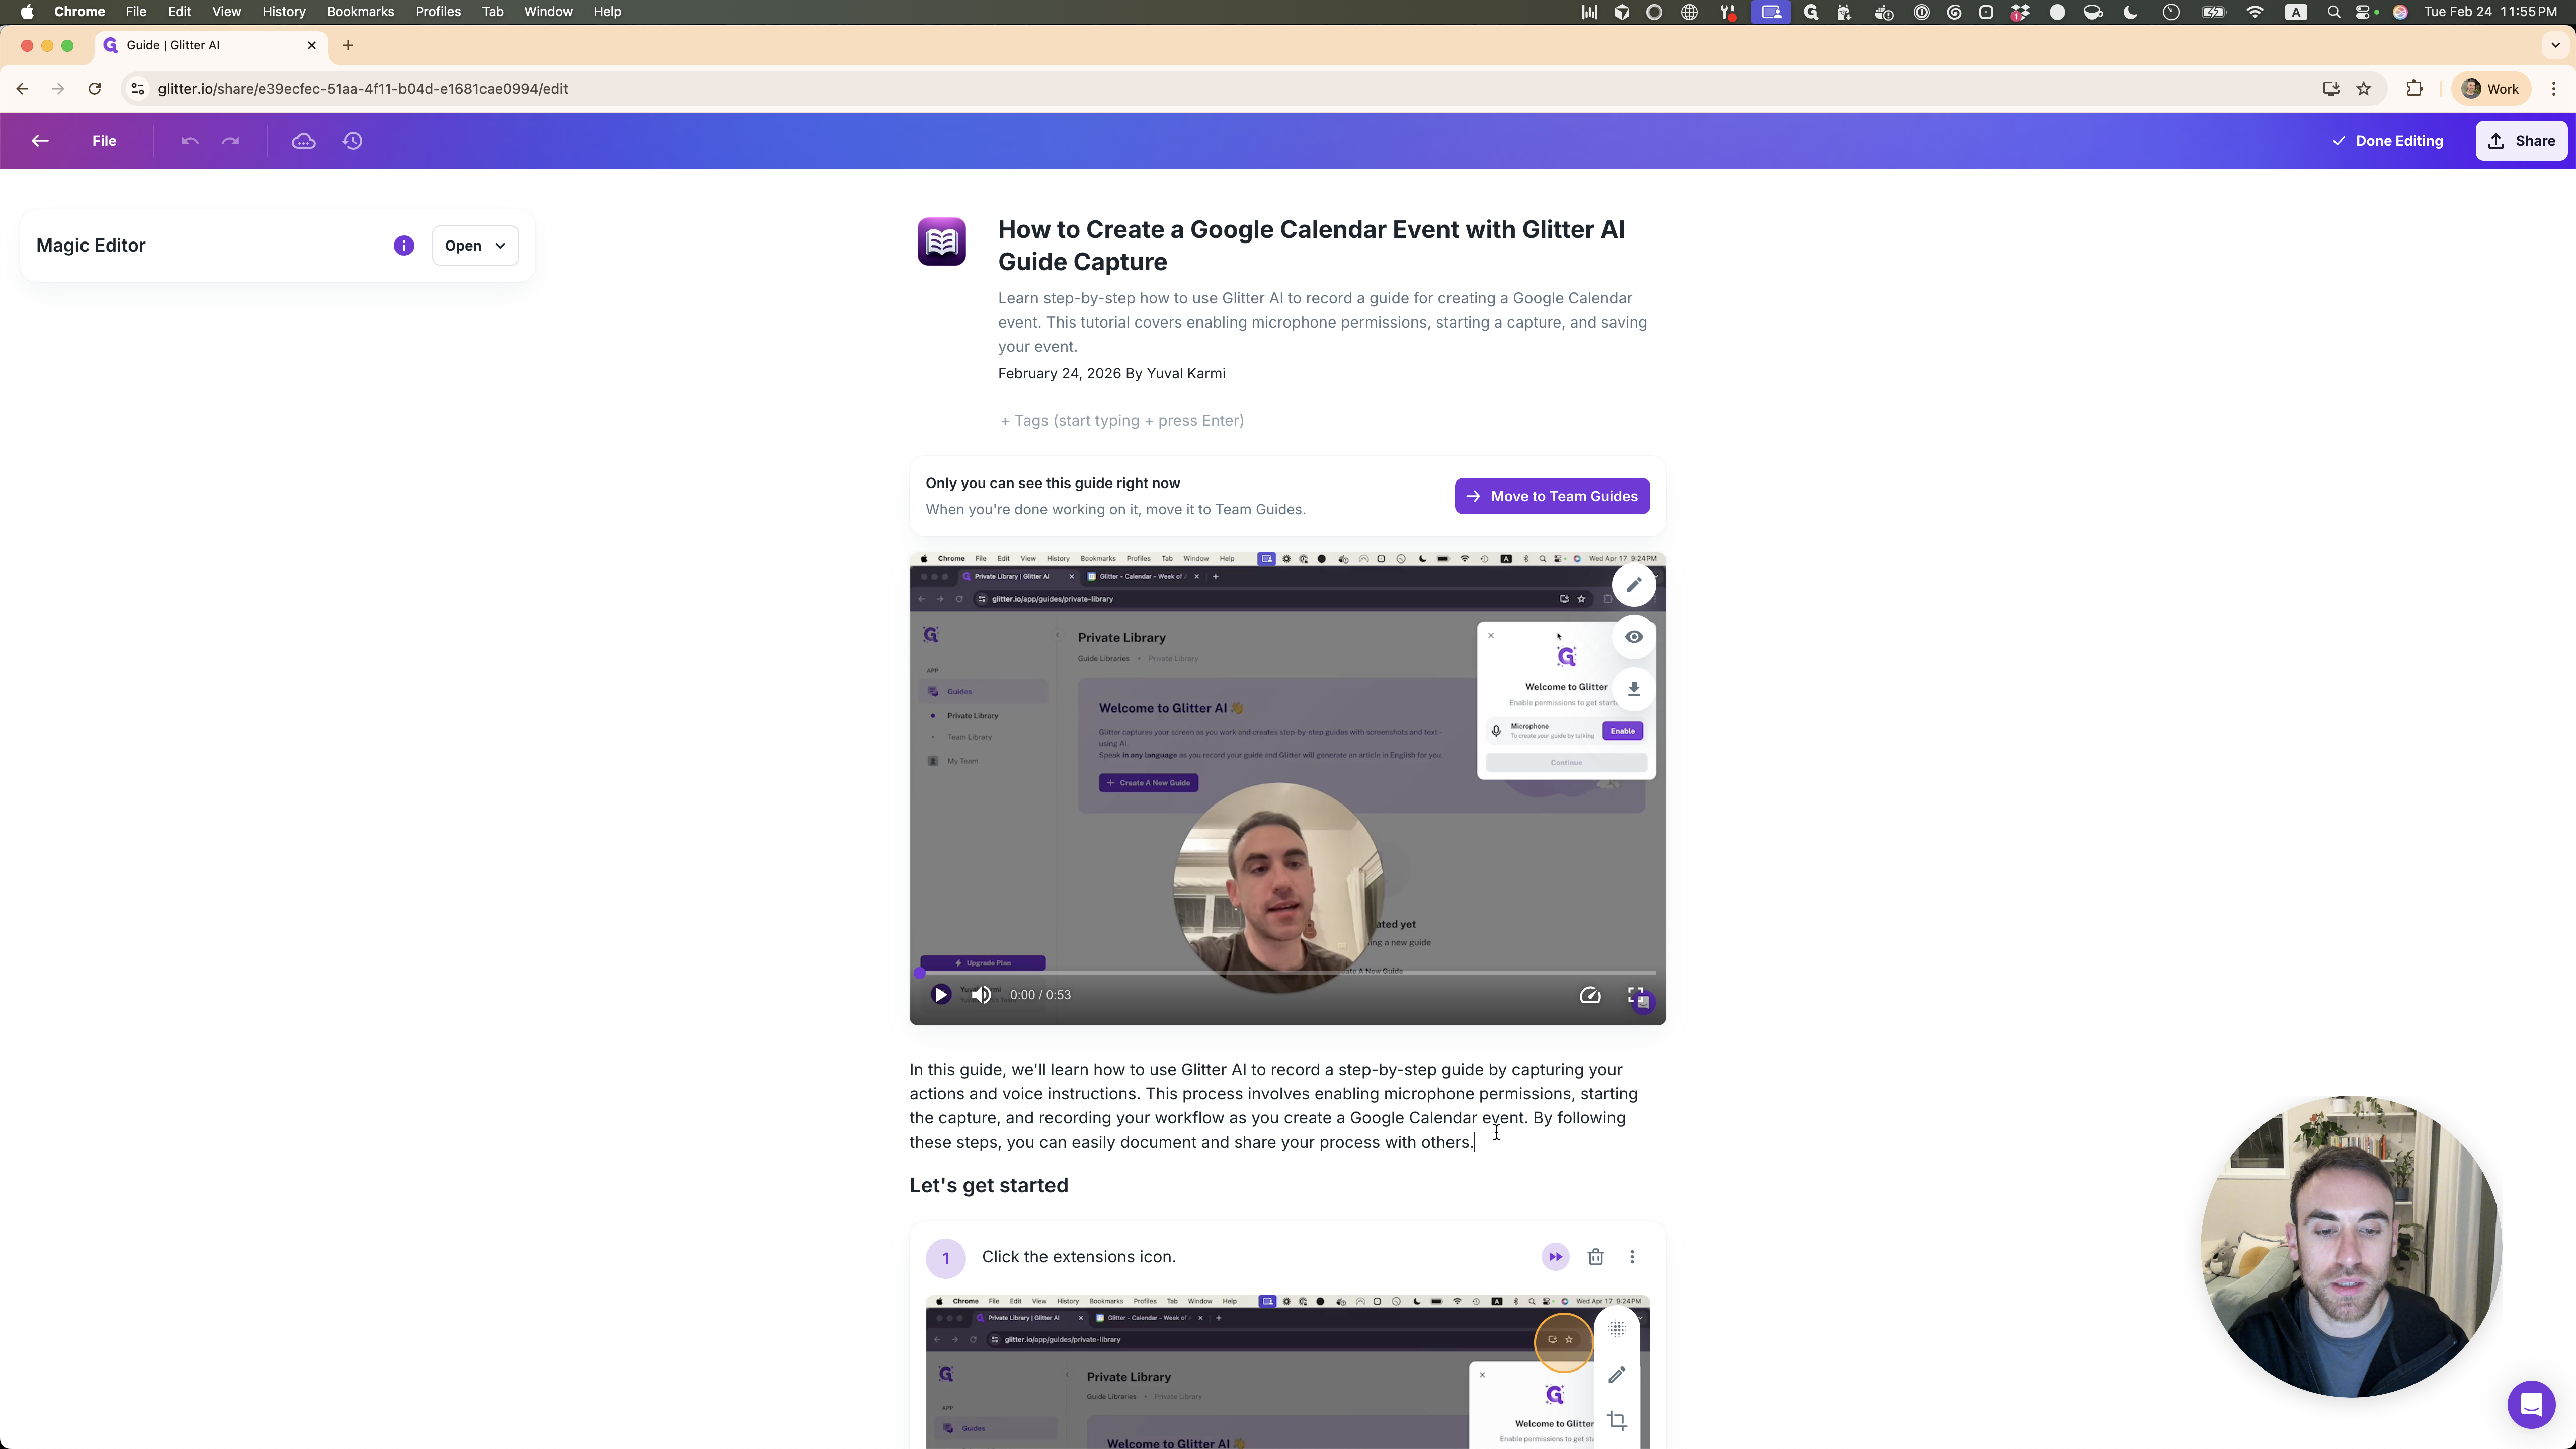
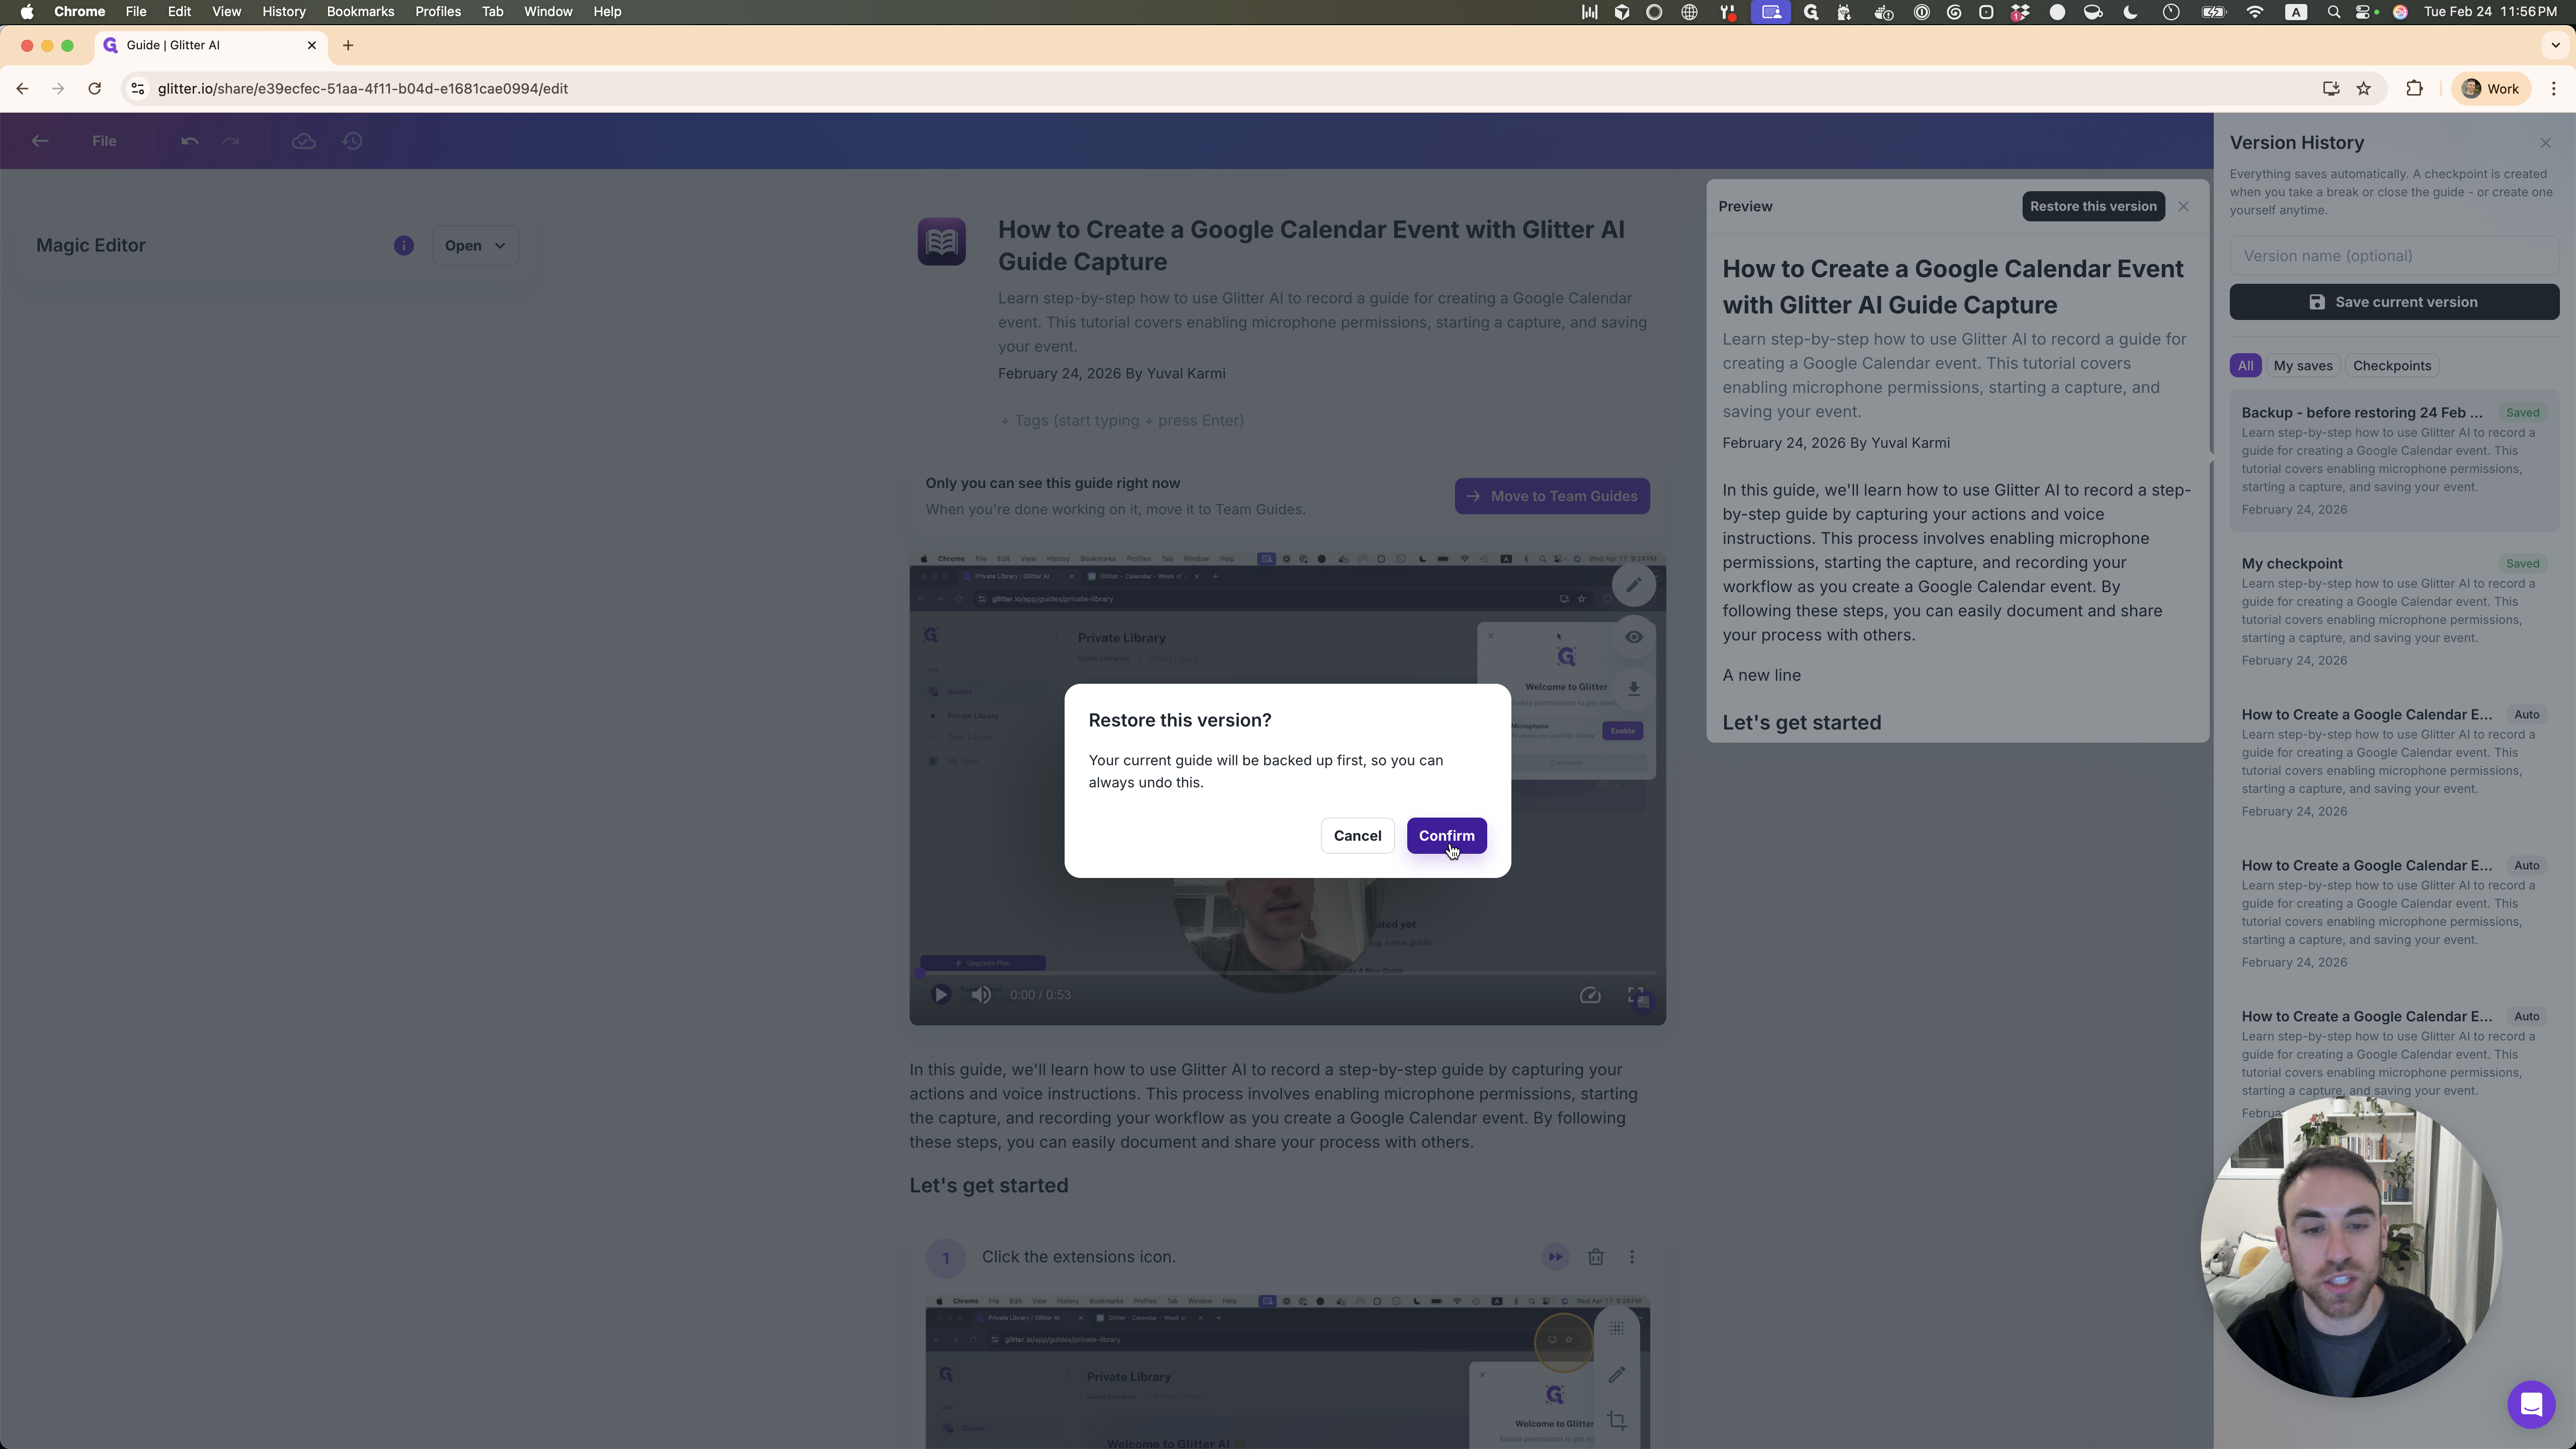
Add a line, let's say. There is a new button called Version History. Click on it to see the previous versions of the guide that have been saved.
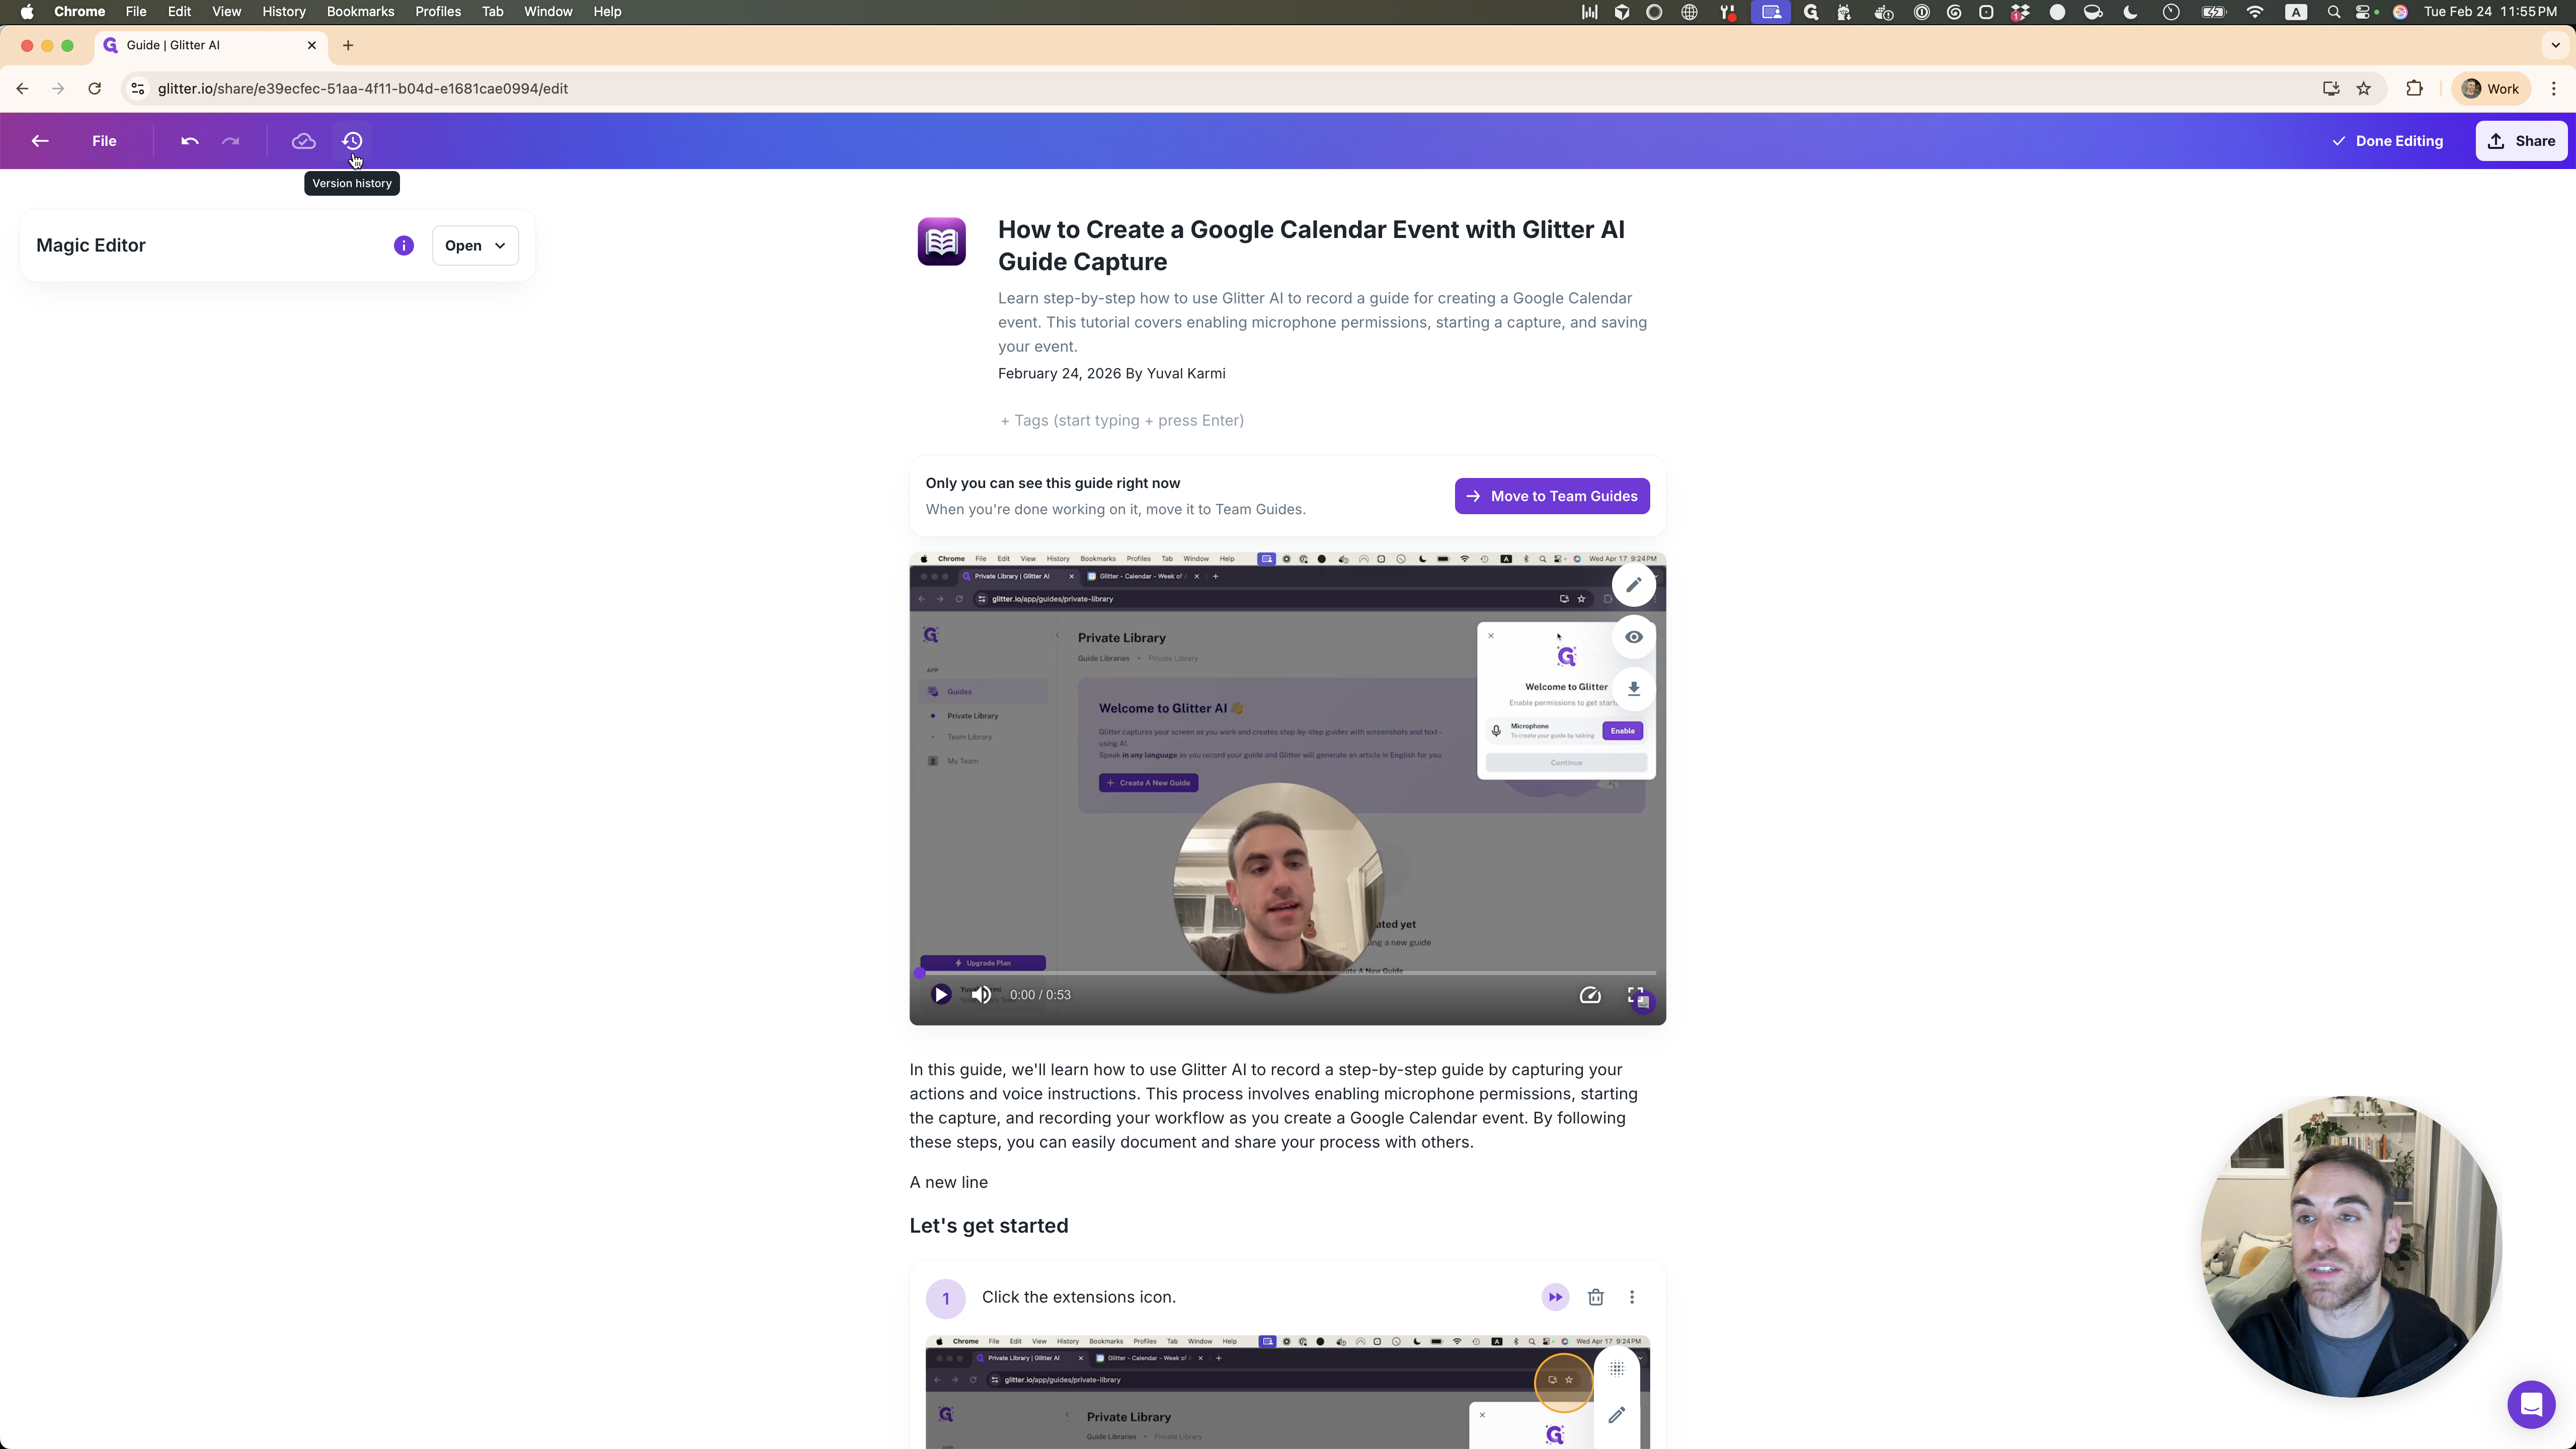
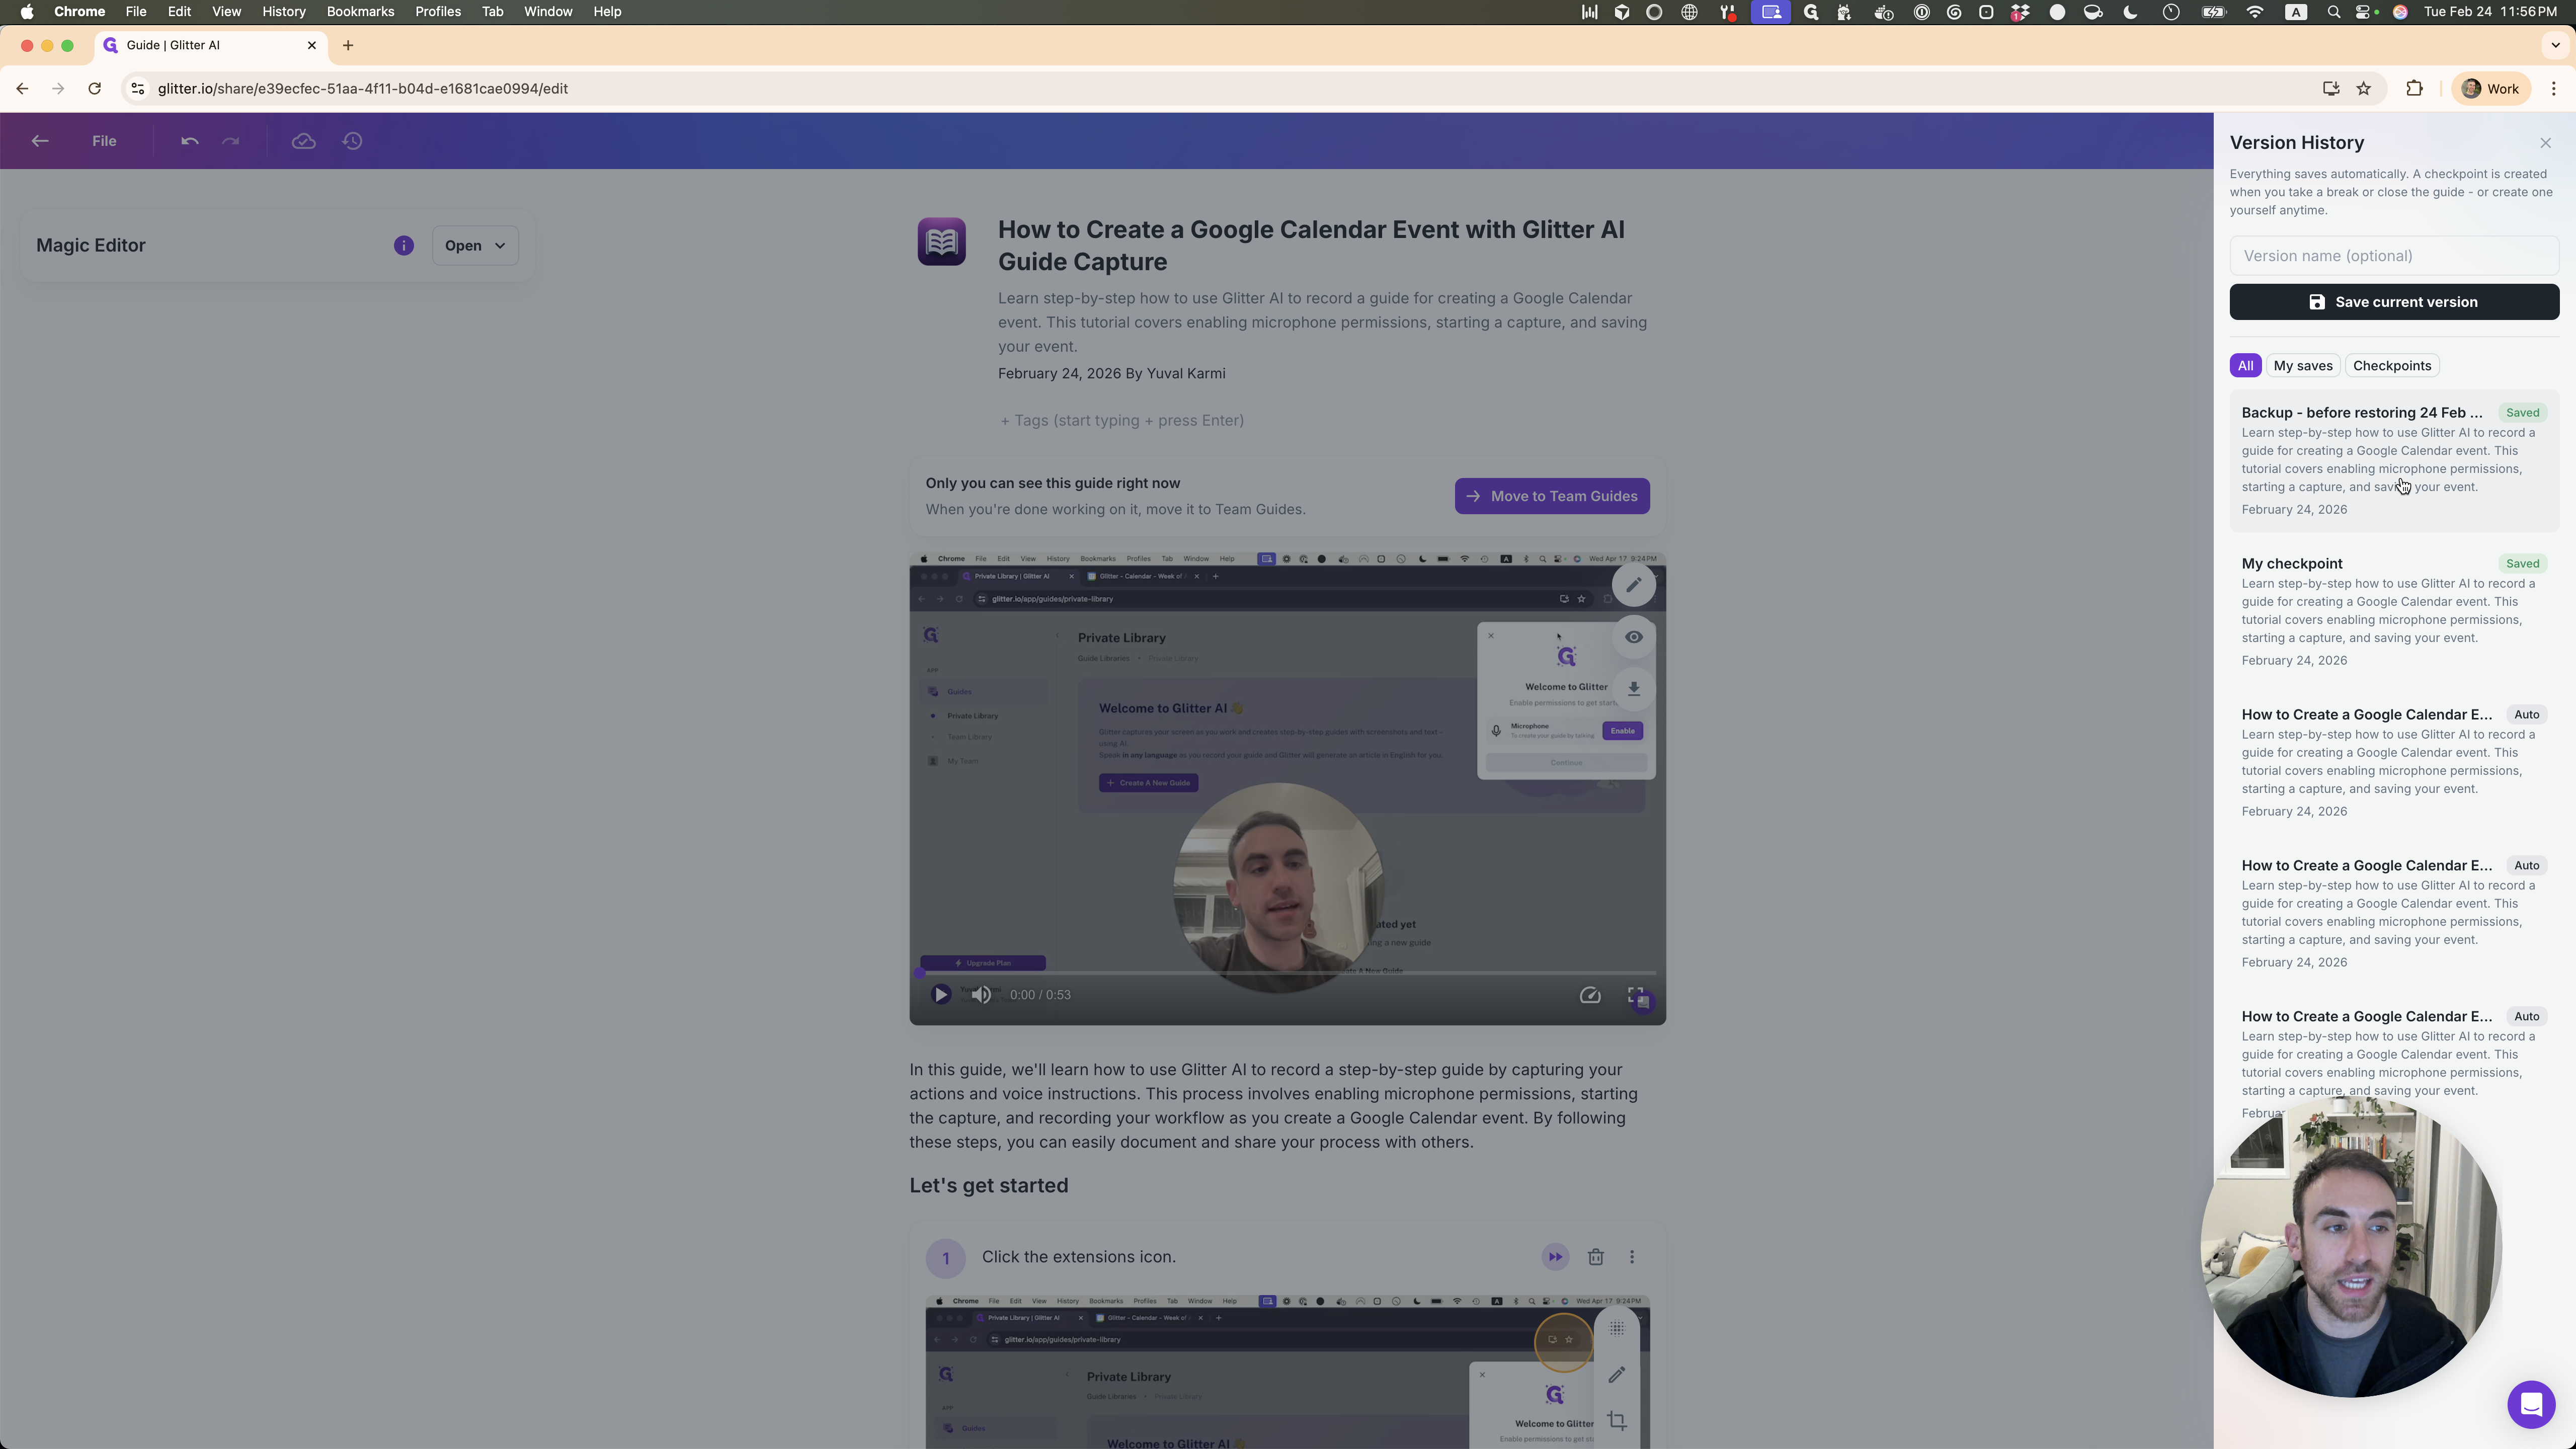
They are auto-saved whenever there is inactivity or when people log off from the guide. You can also save individual versions if you want to create checkpoints manually.
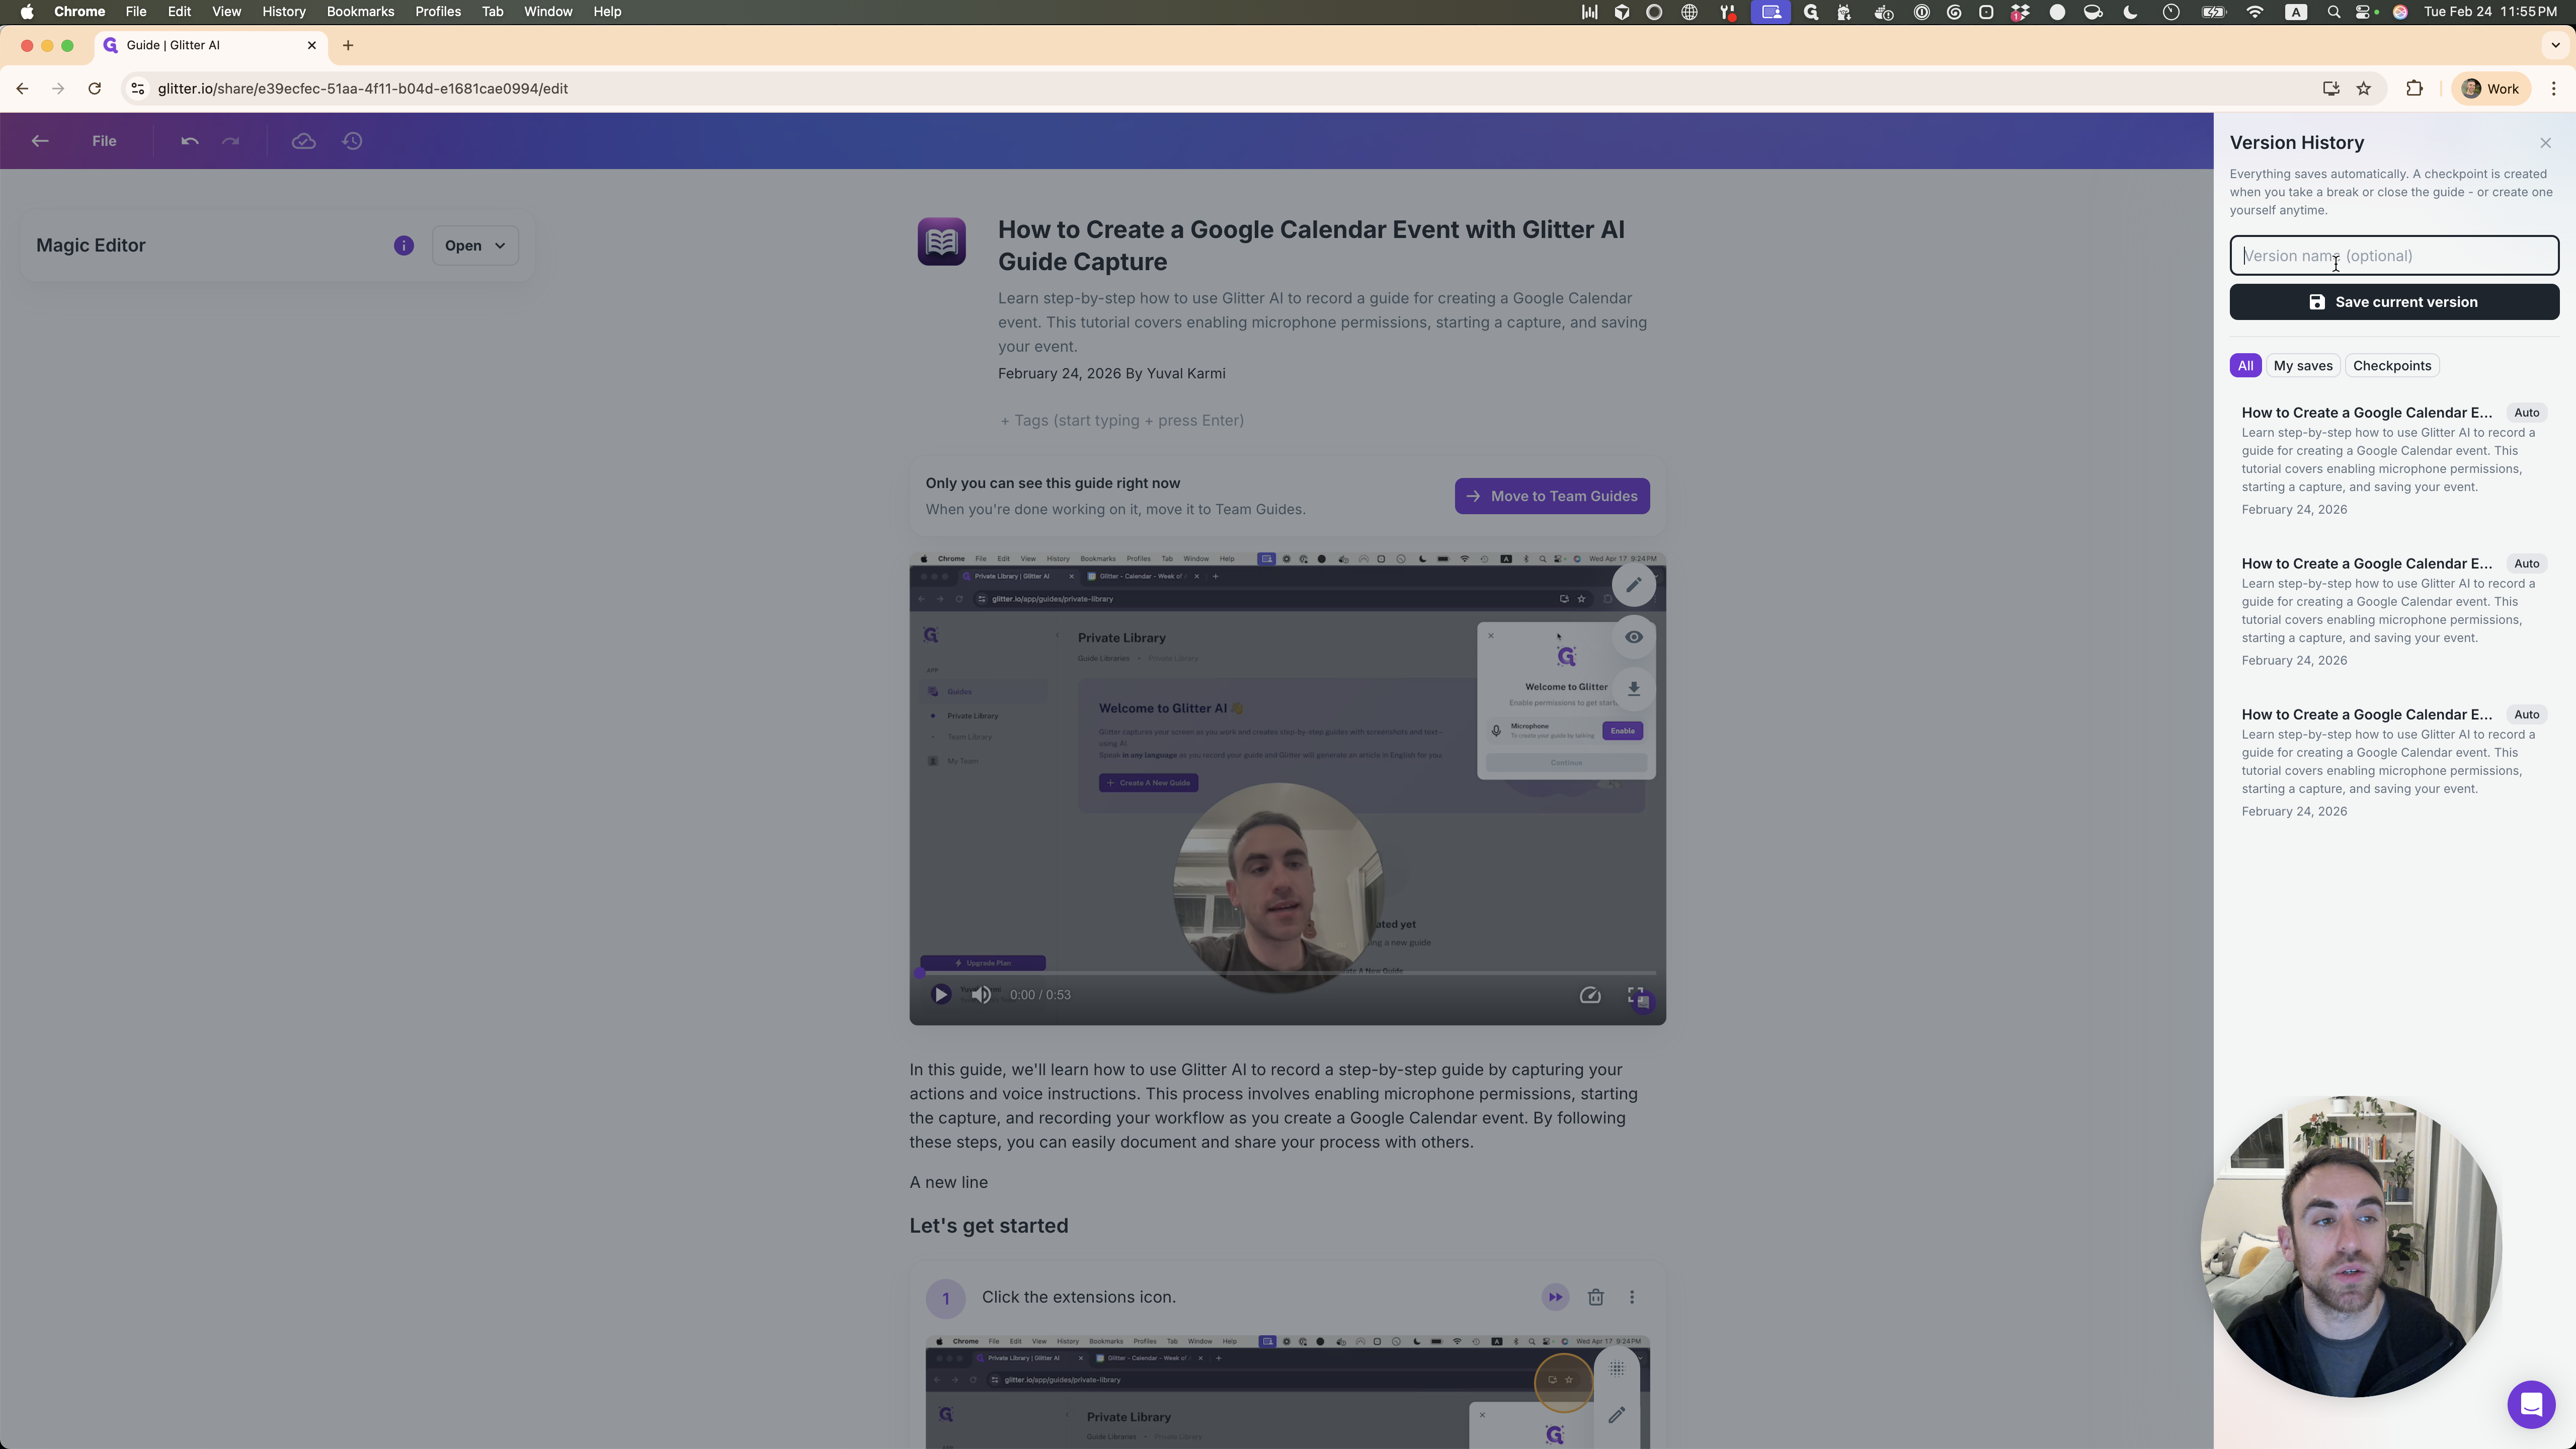
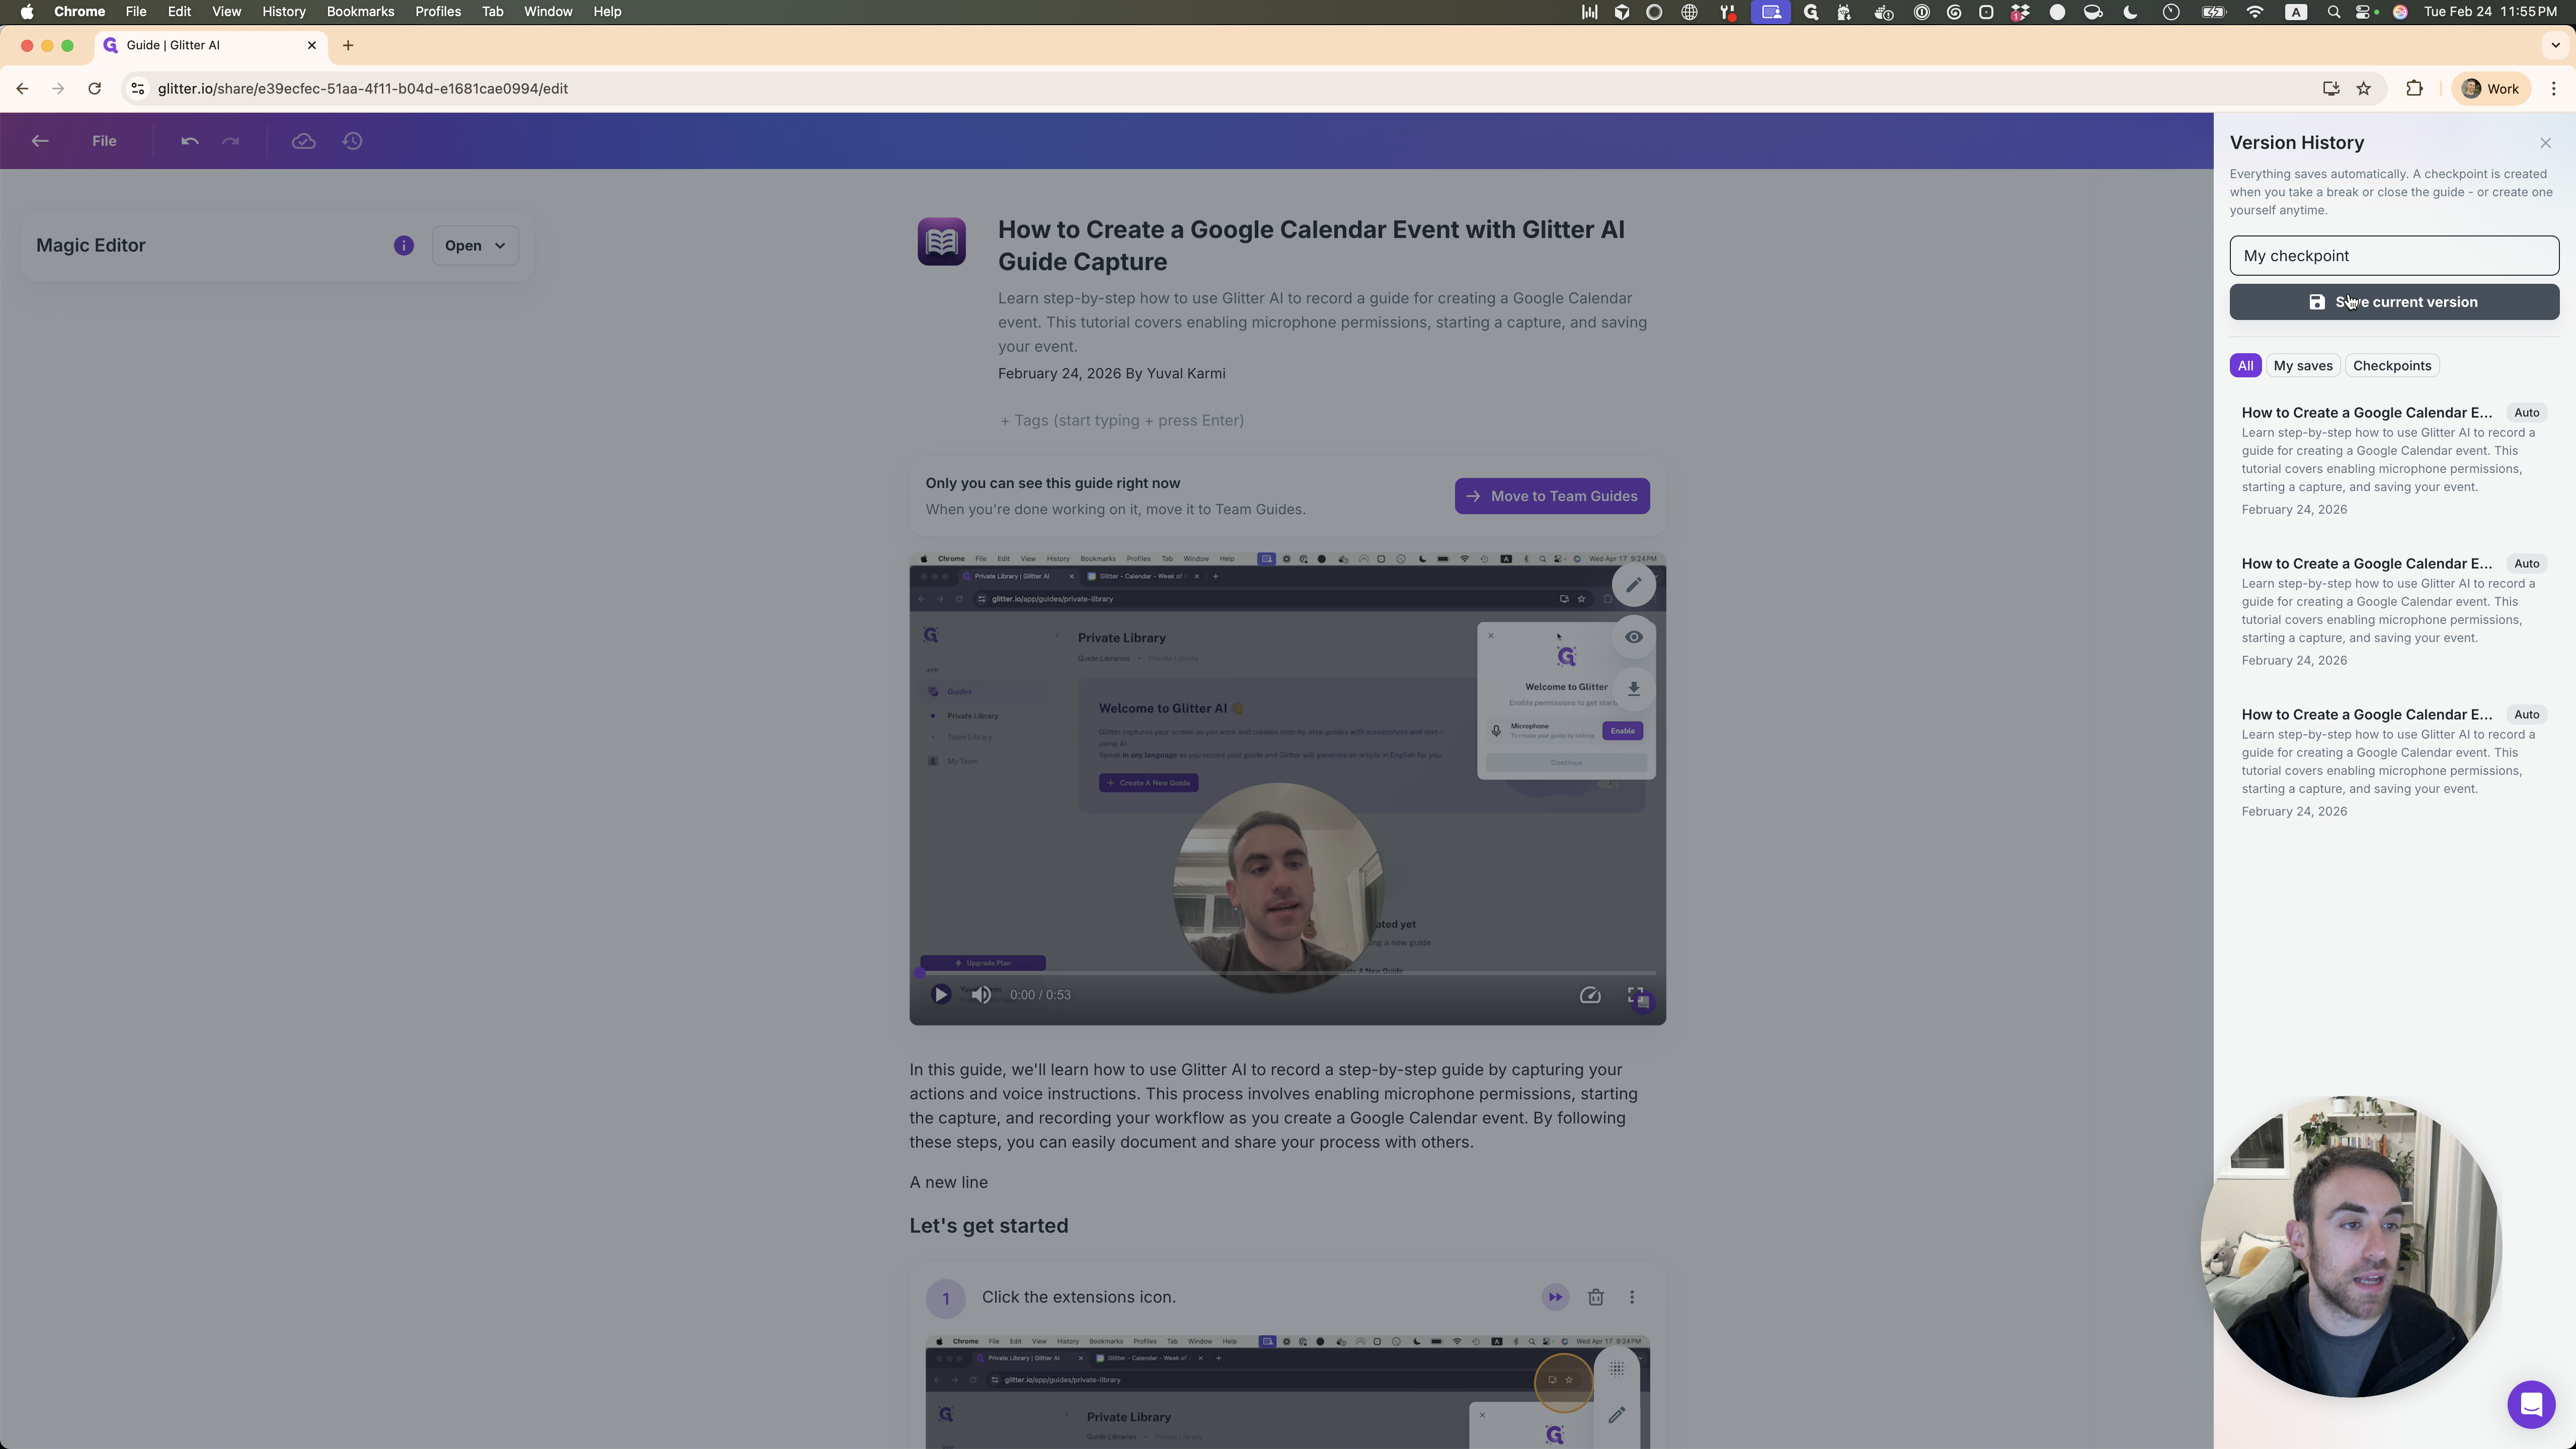
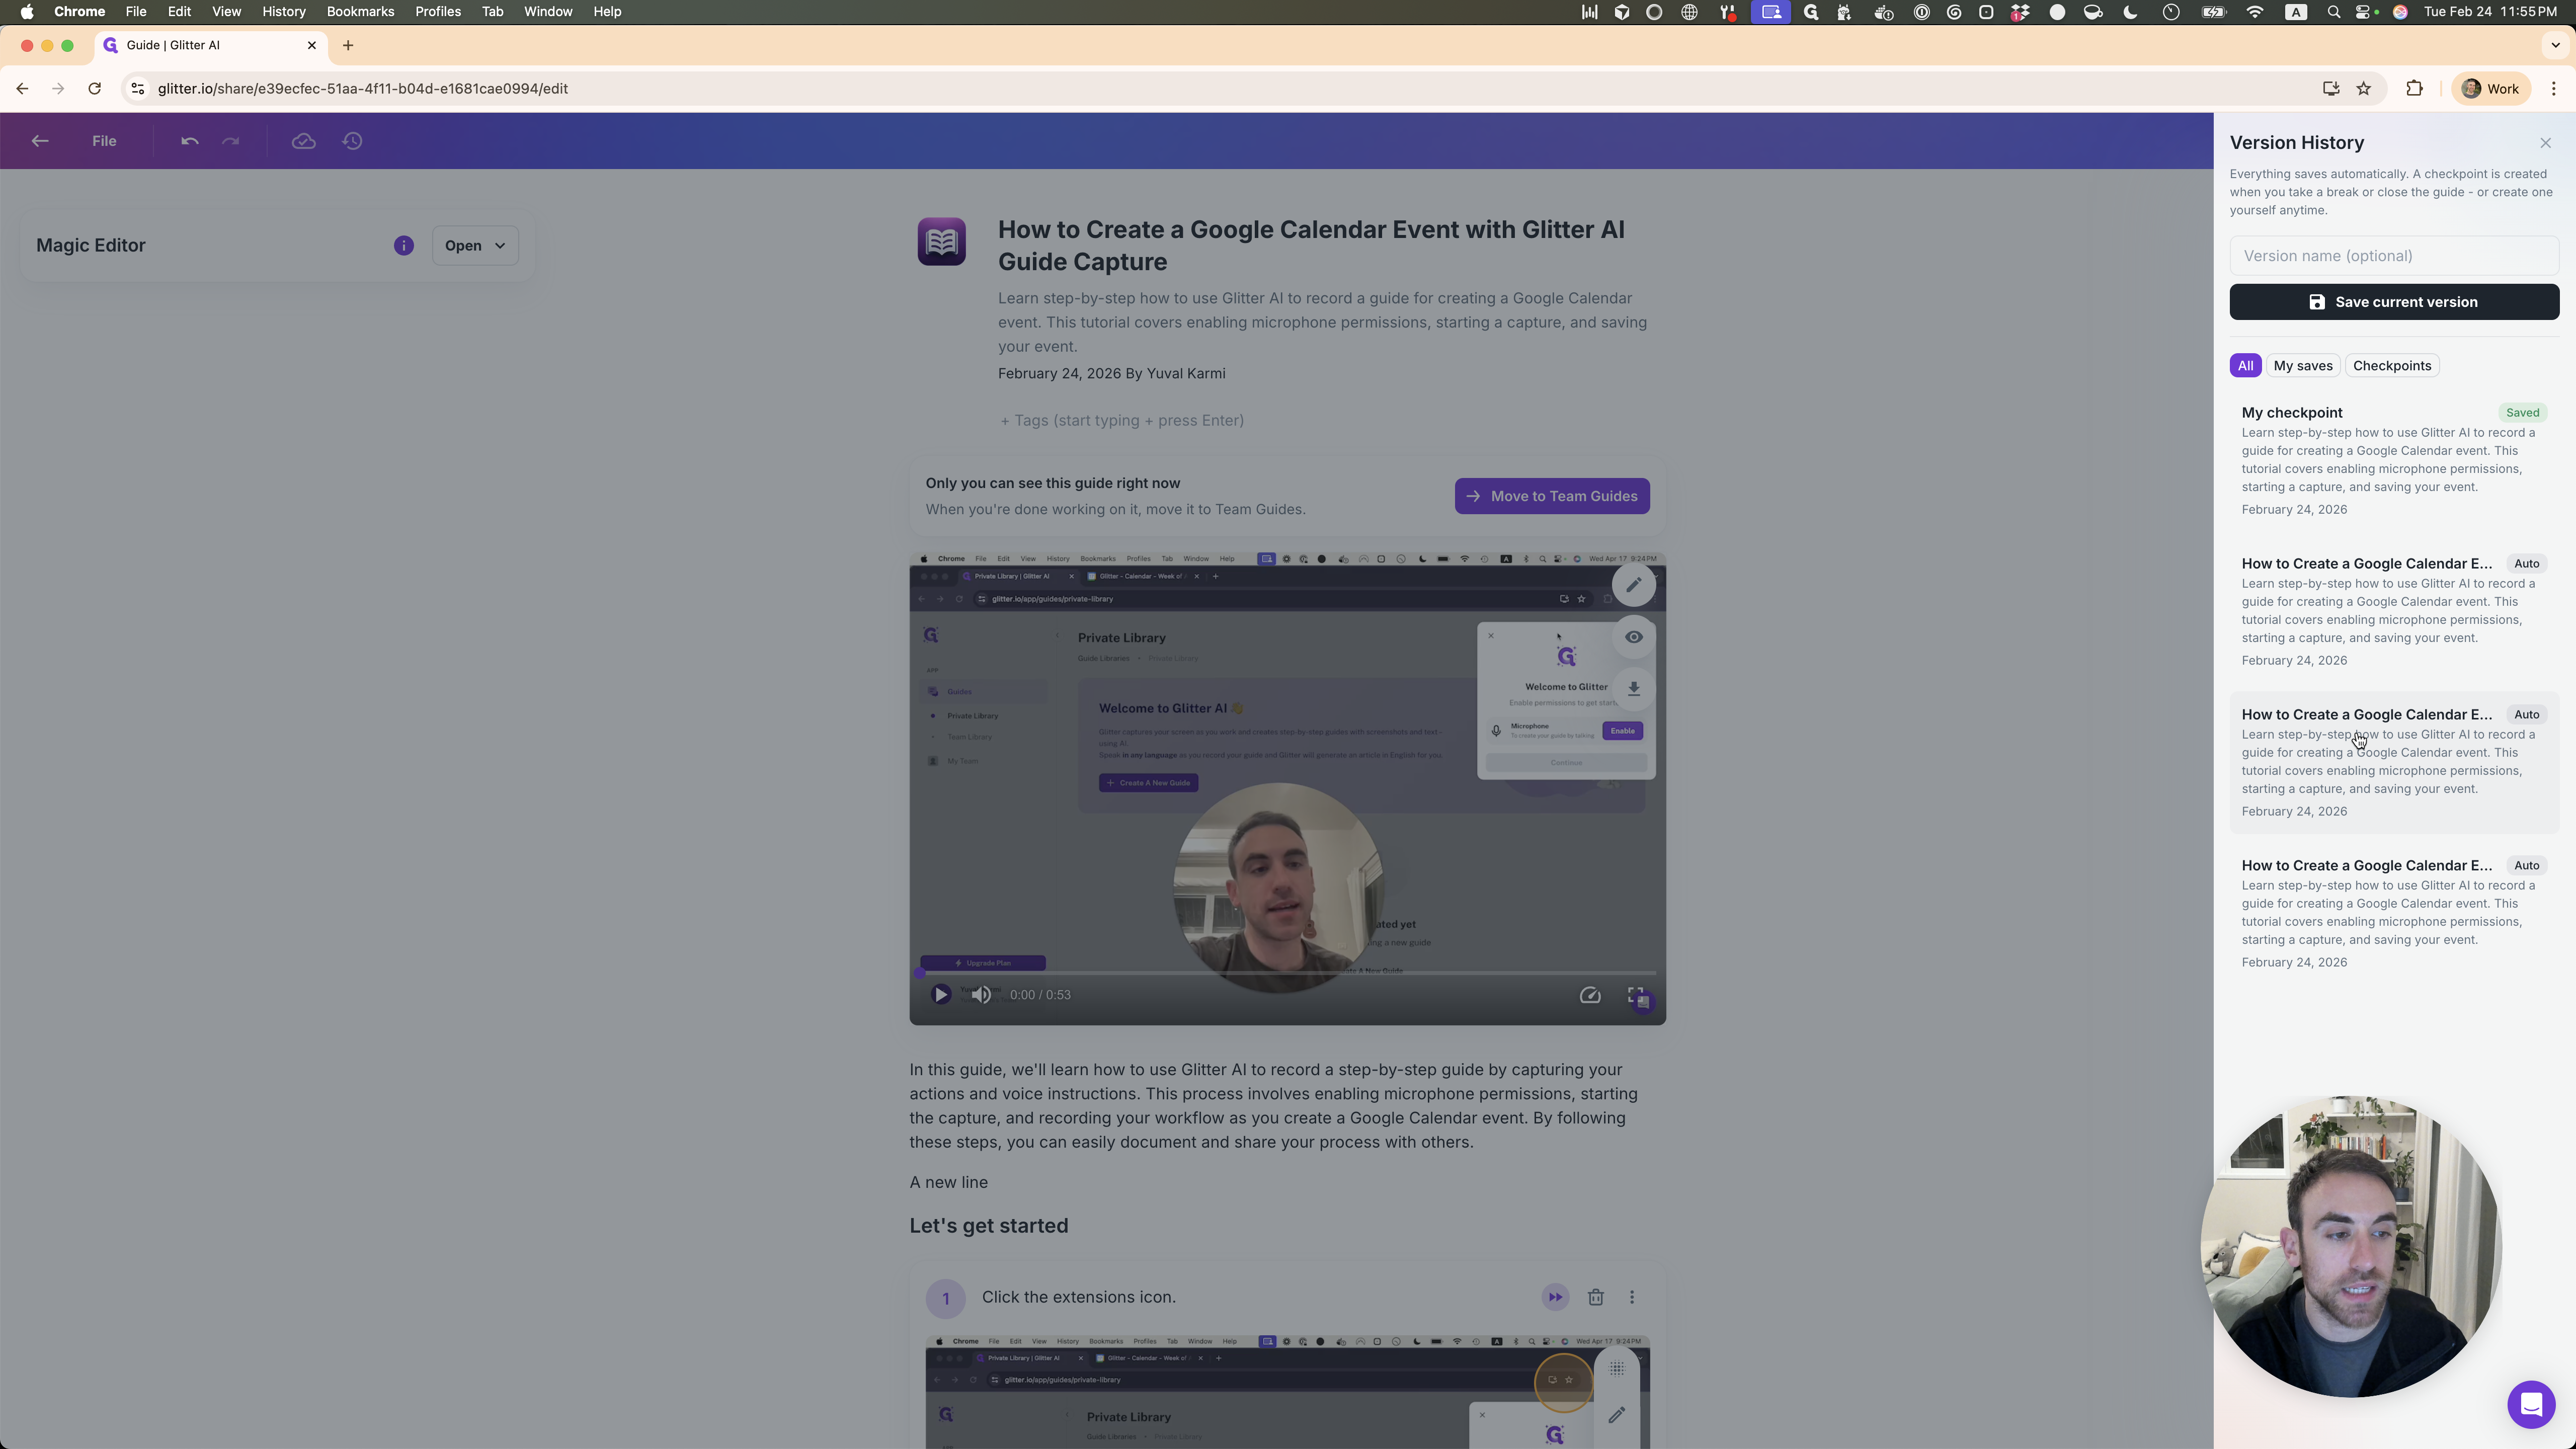
I can name my checkpoint, click Save Current Version, and restore to it later.
If I want to see a previous version, such as the one without a new line, I can click on it. It shows "Let's get started," and there is no new line.
I can restore that here.
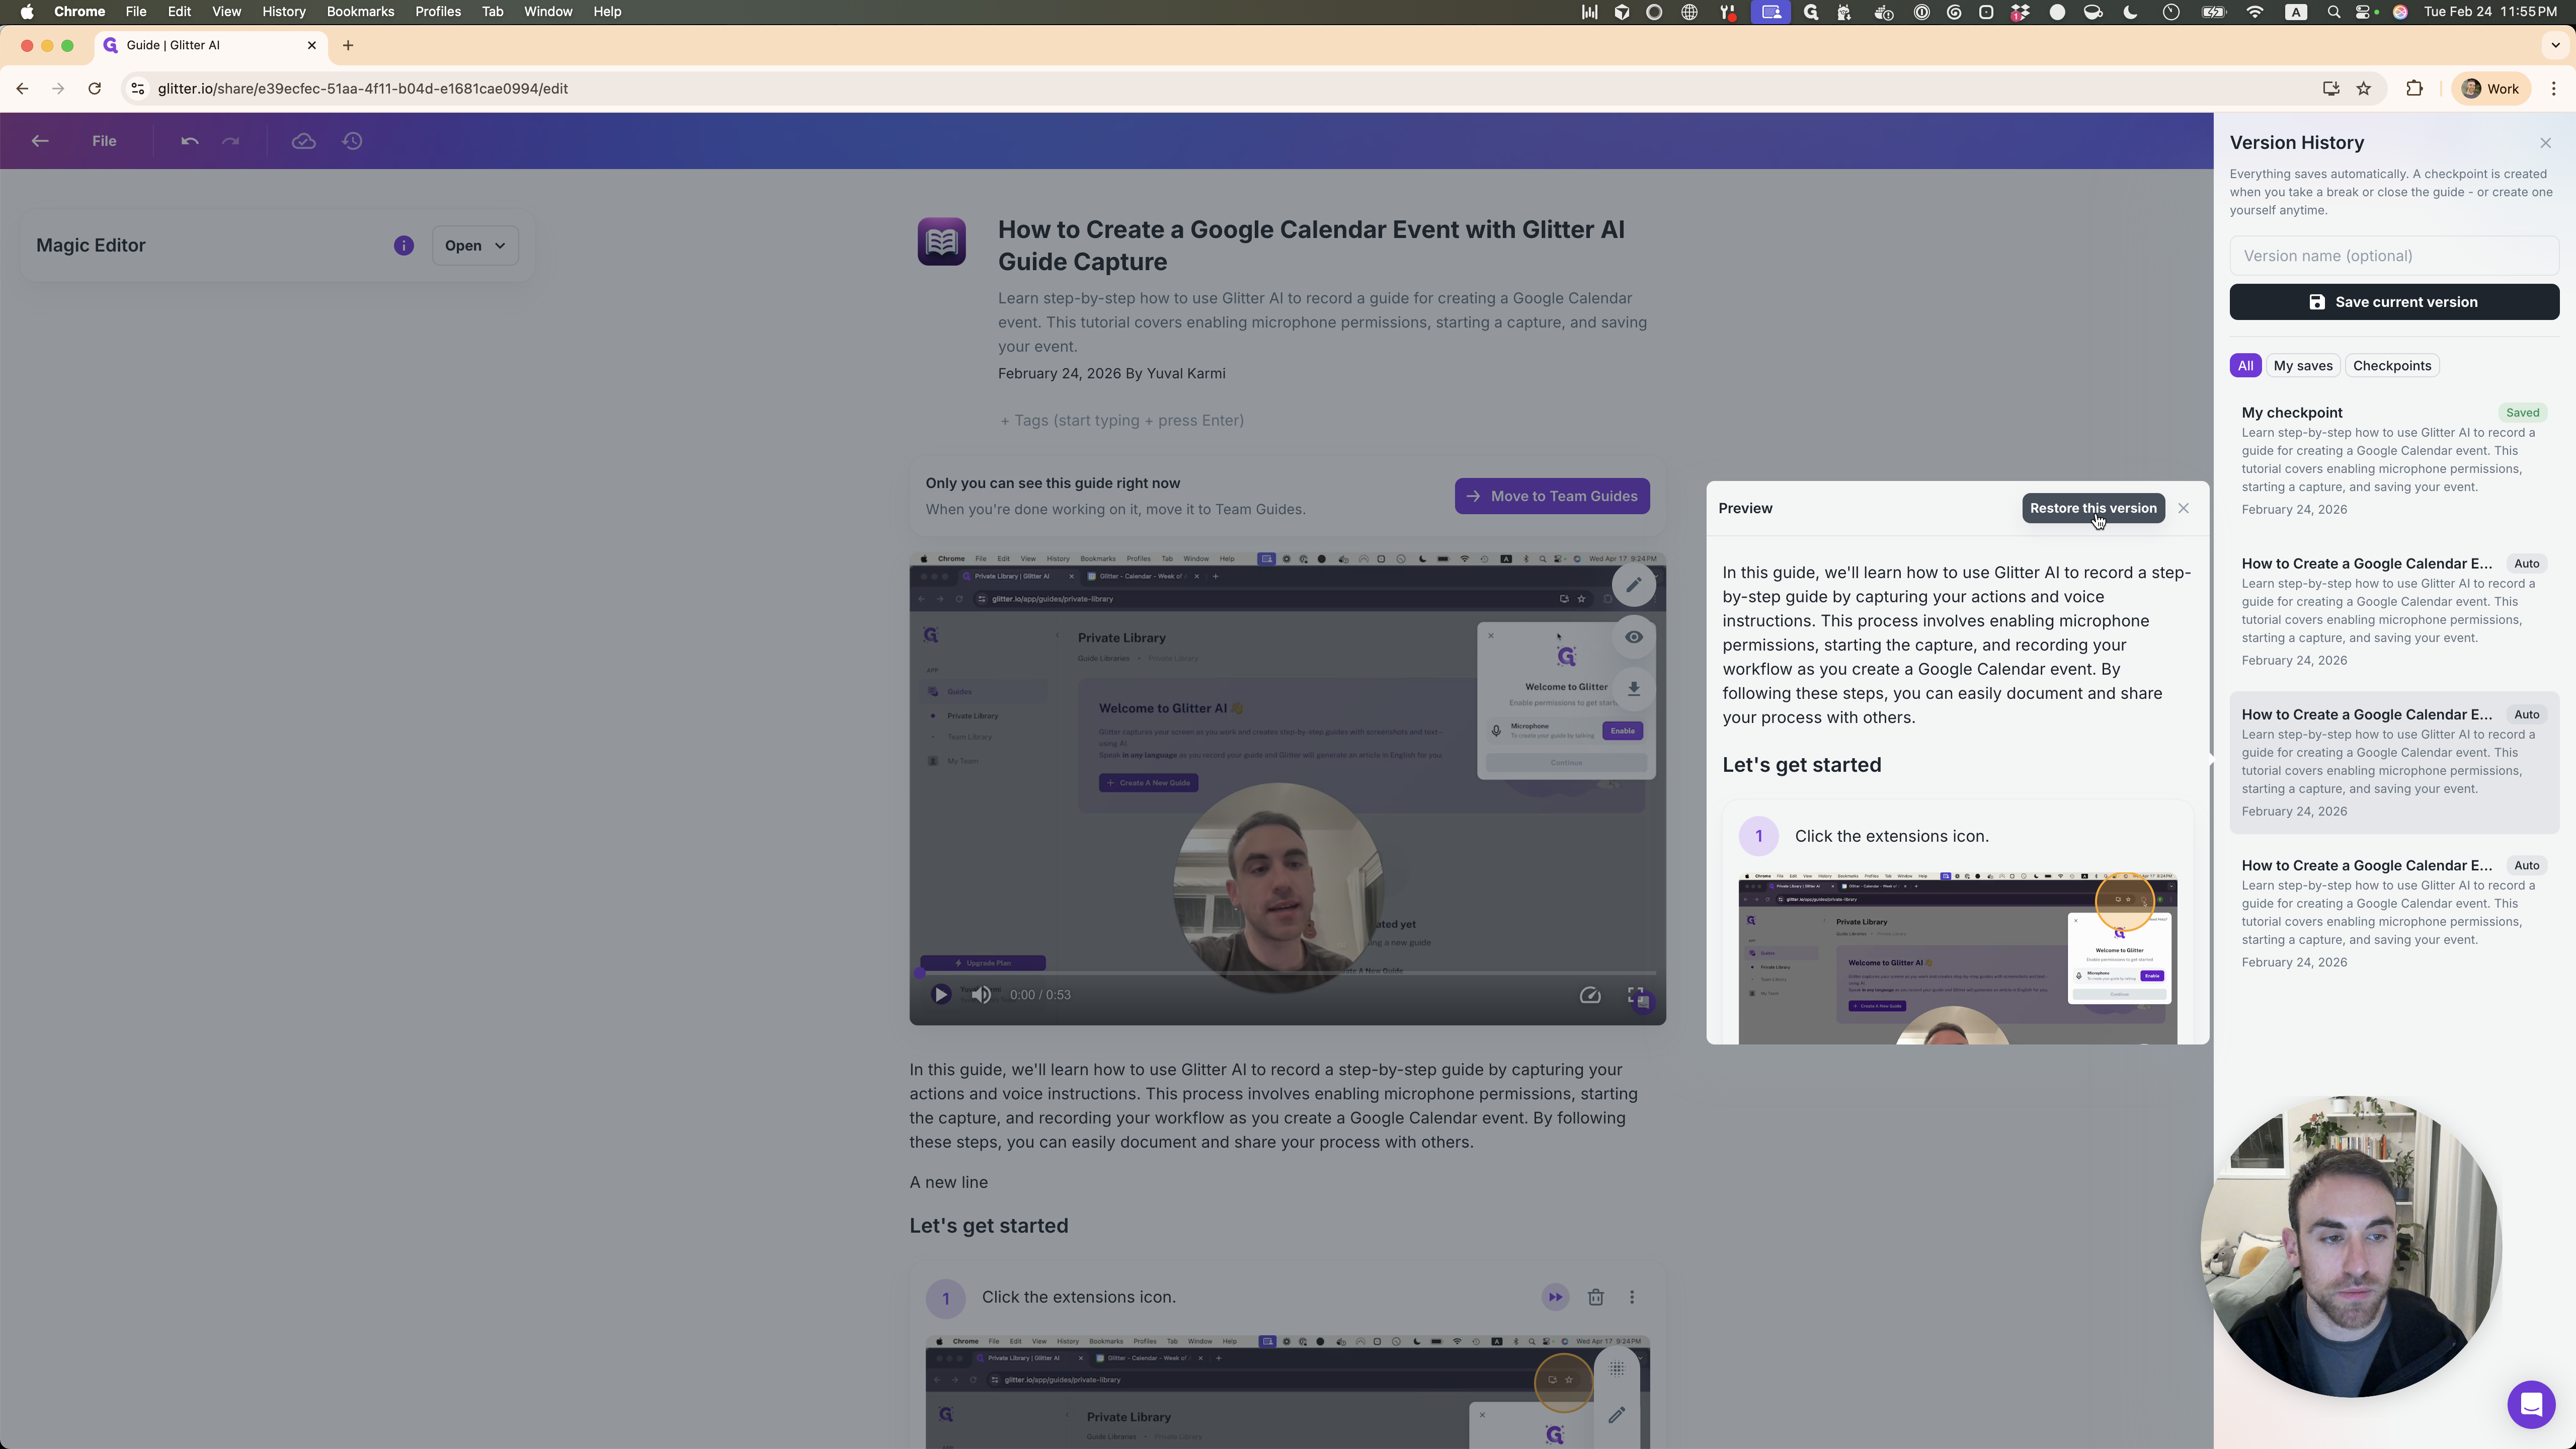
Just confirm, and there we go.
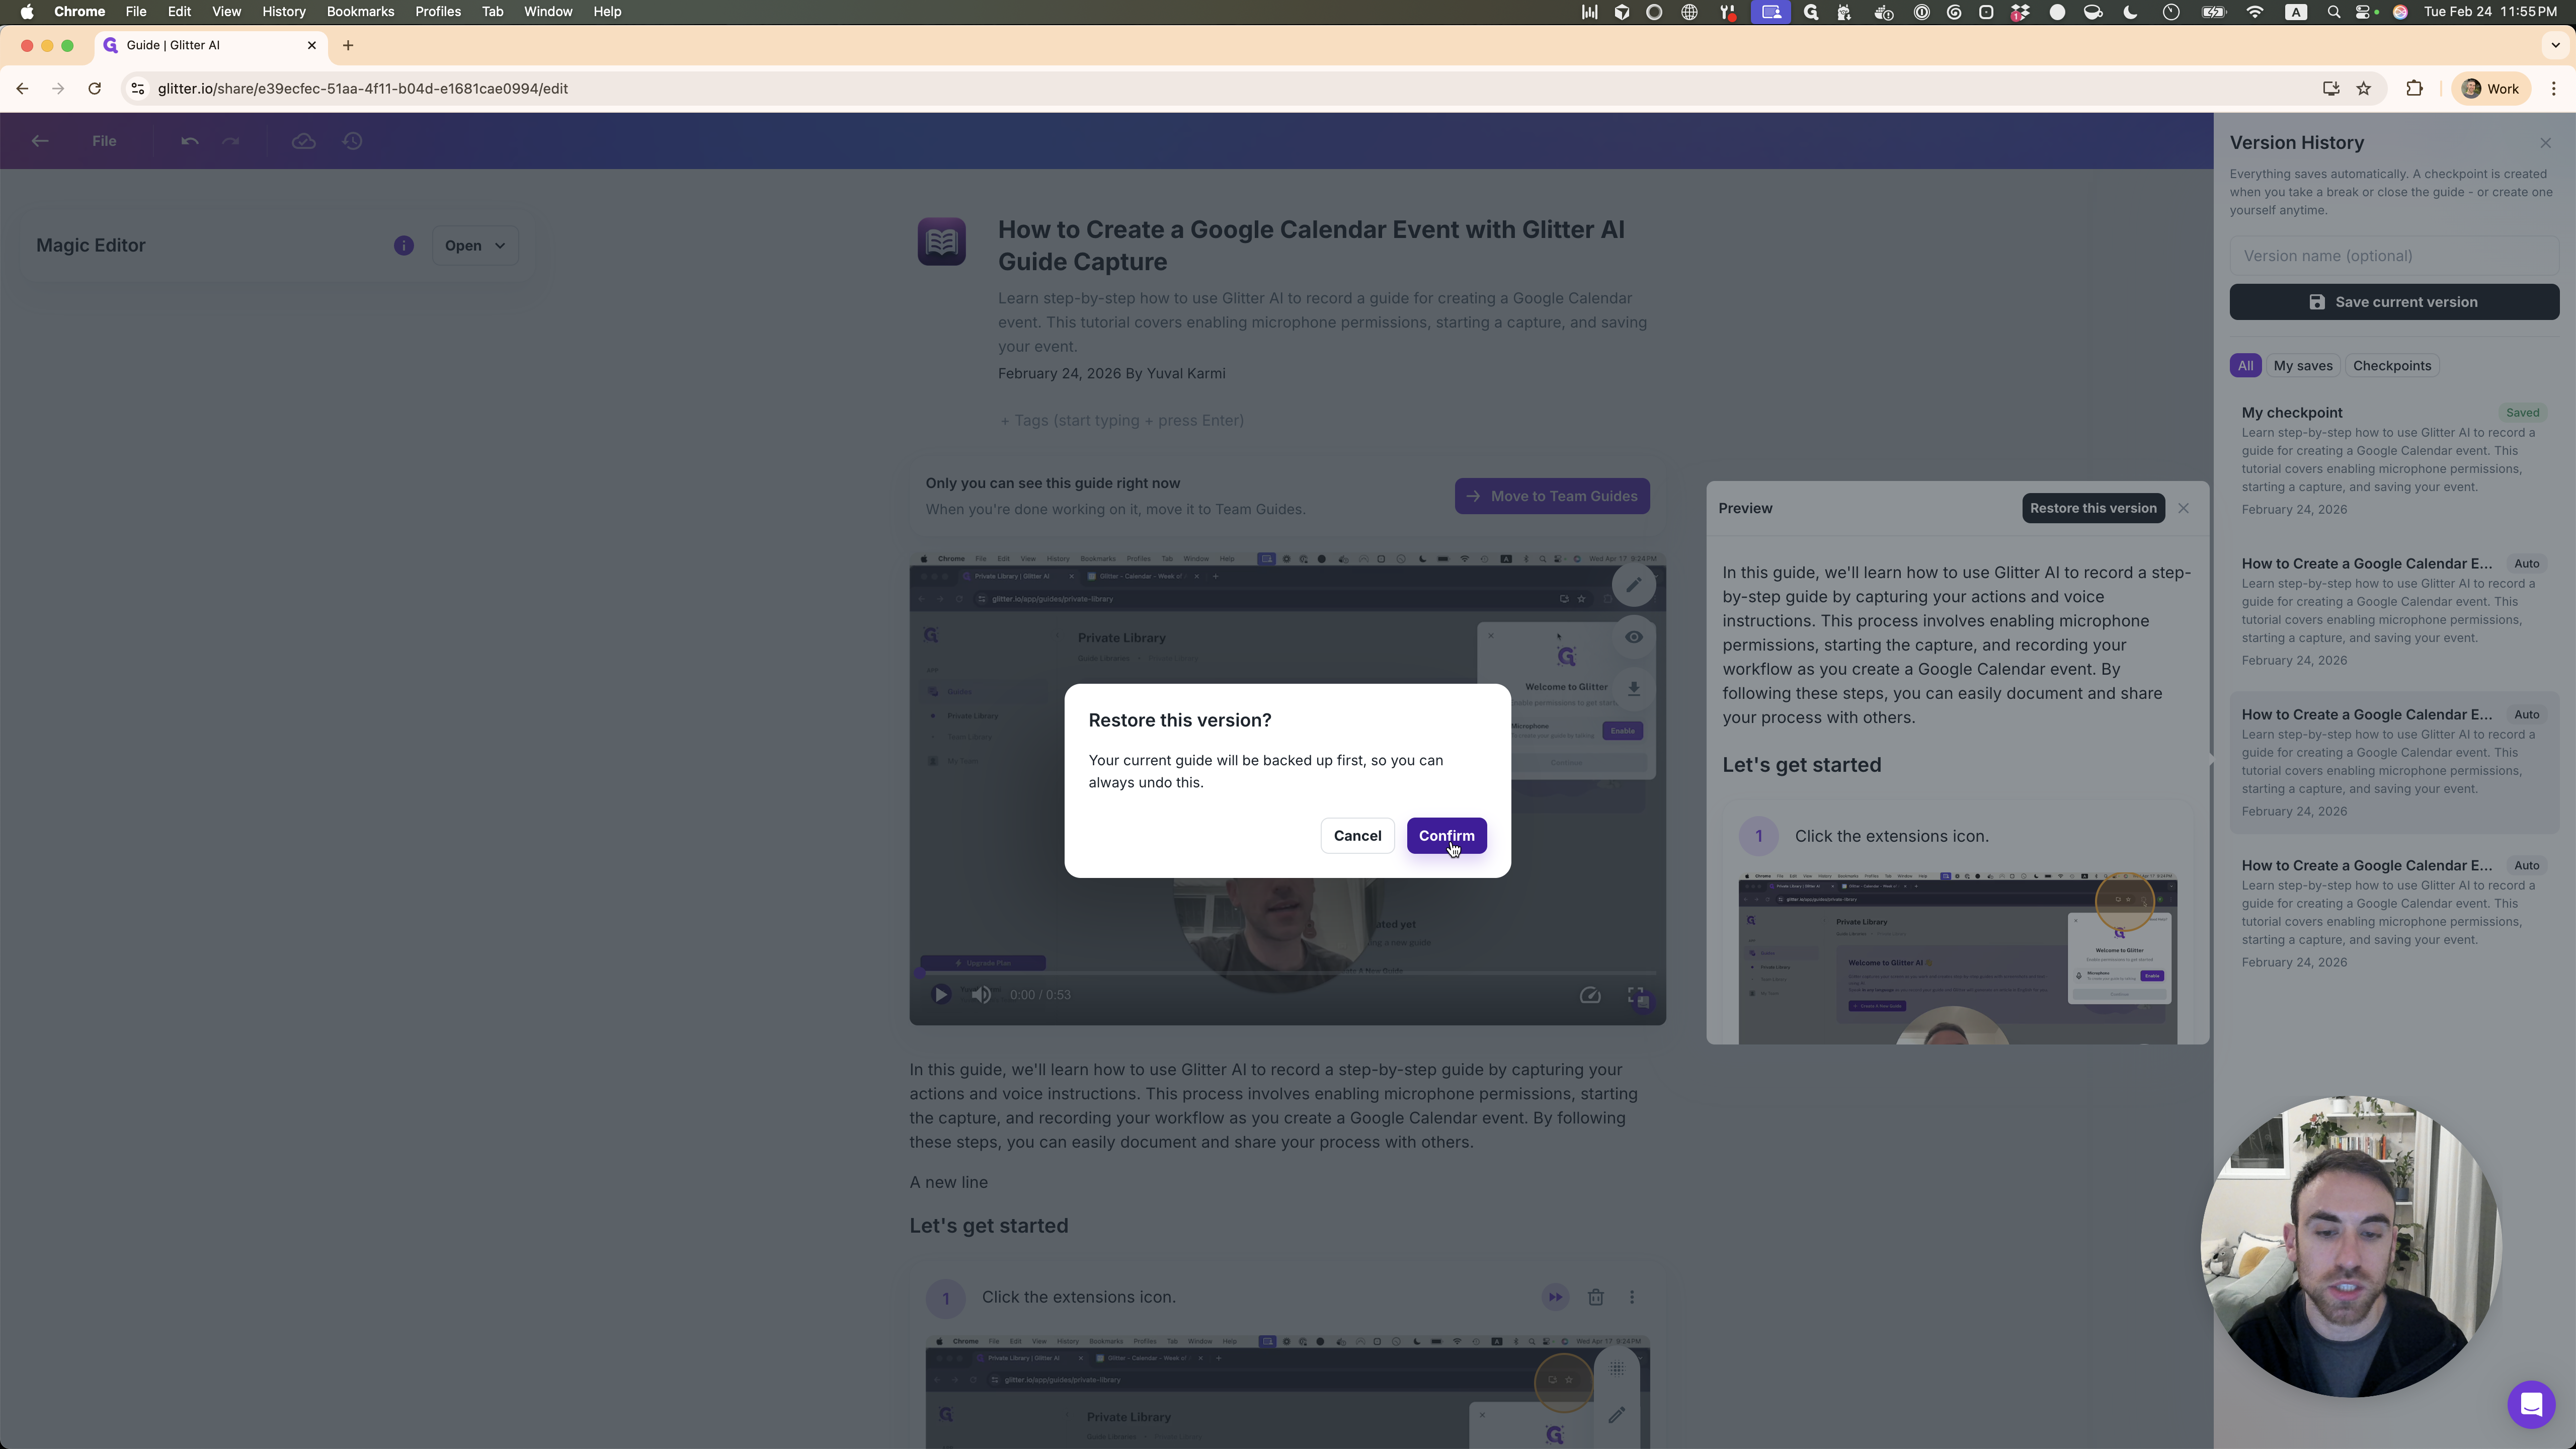
It creates a checkpoint for you when you restore.
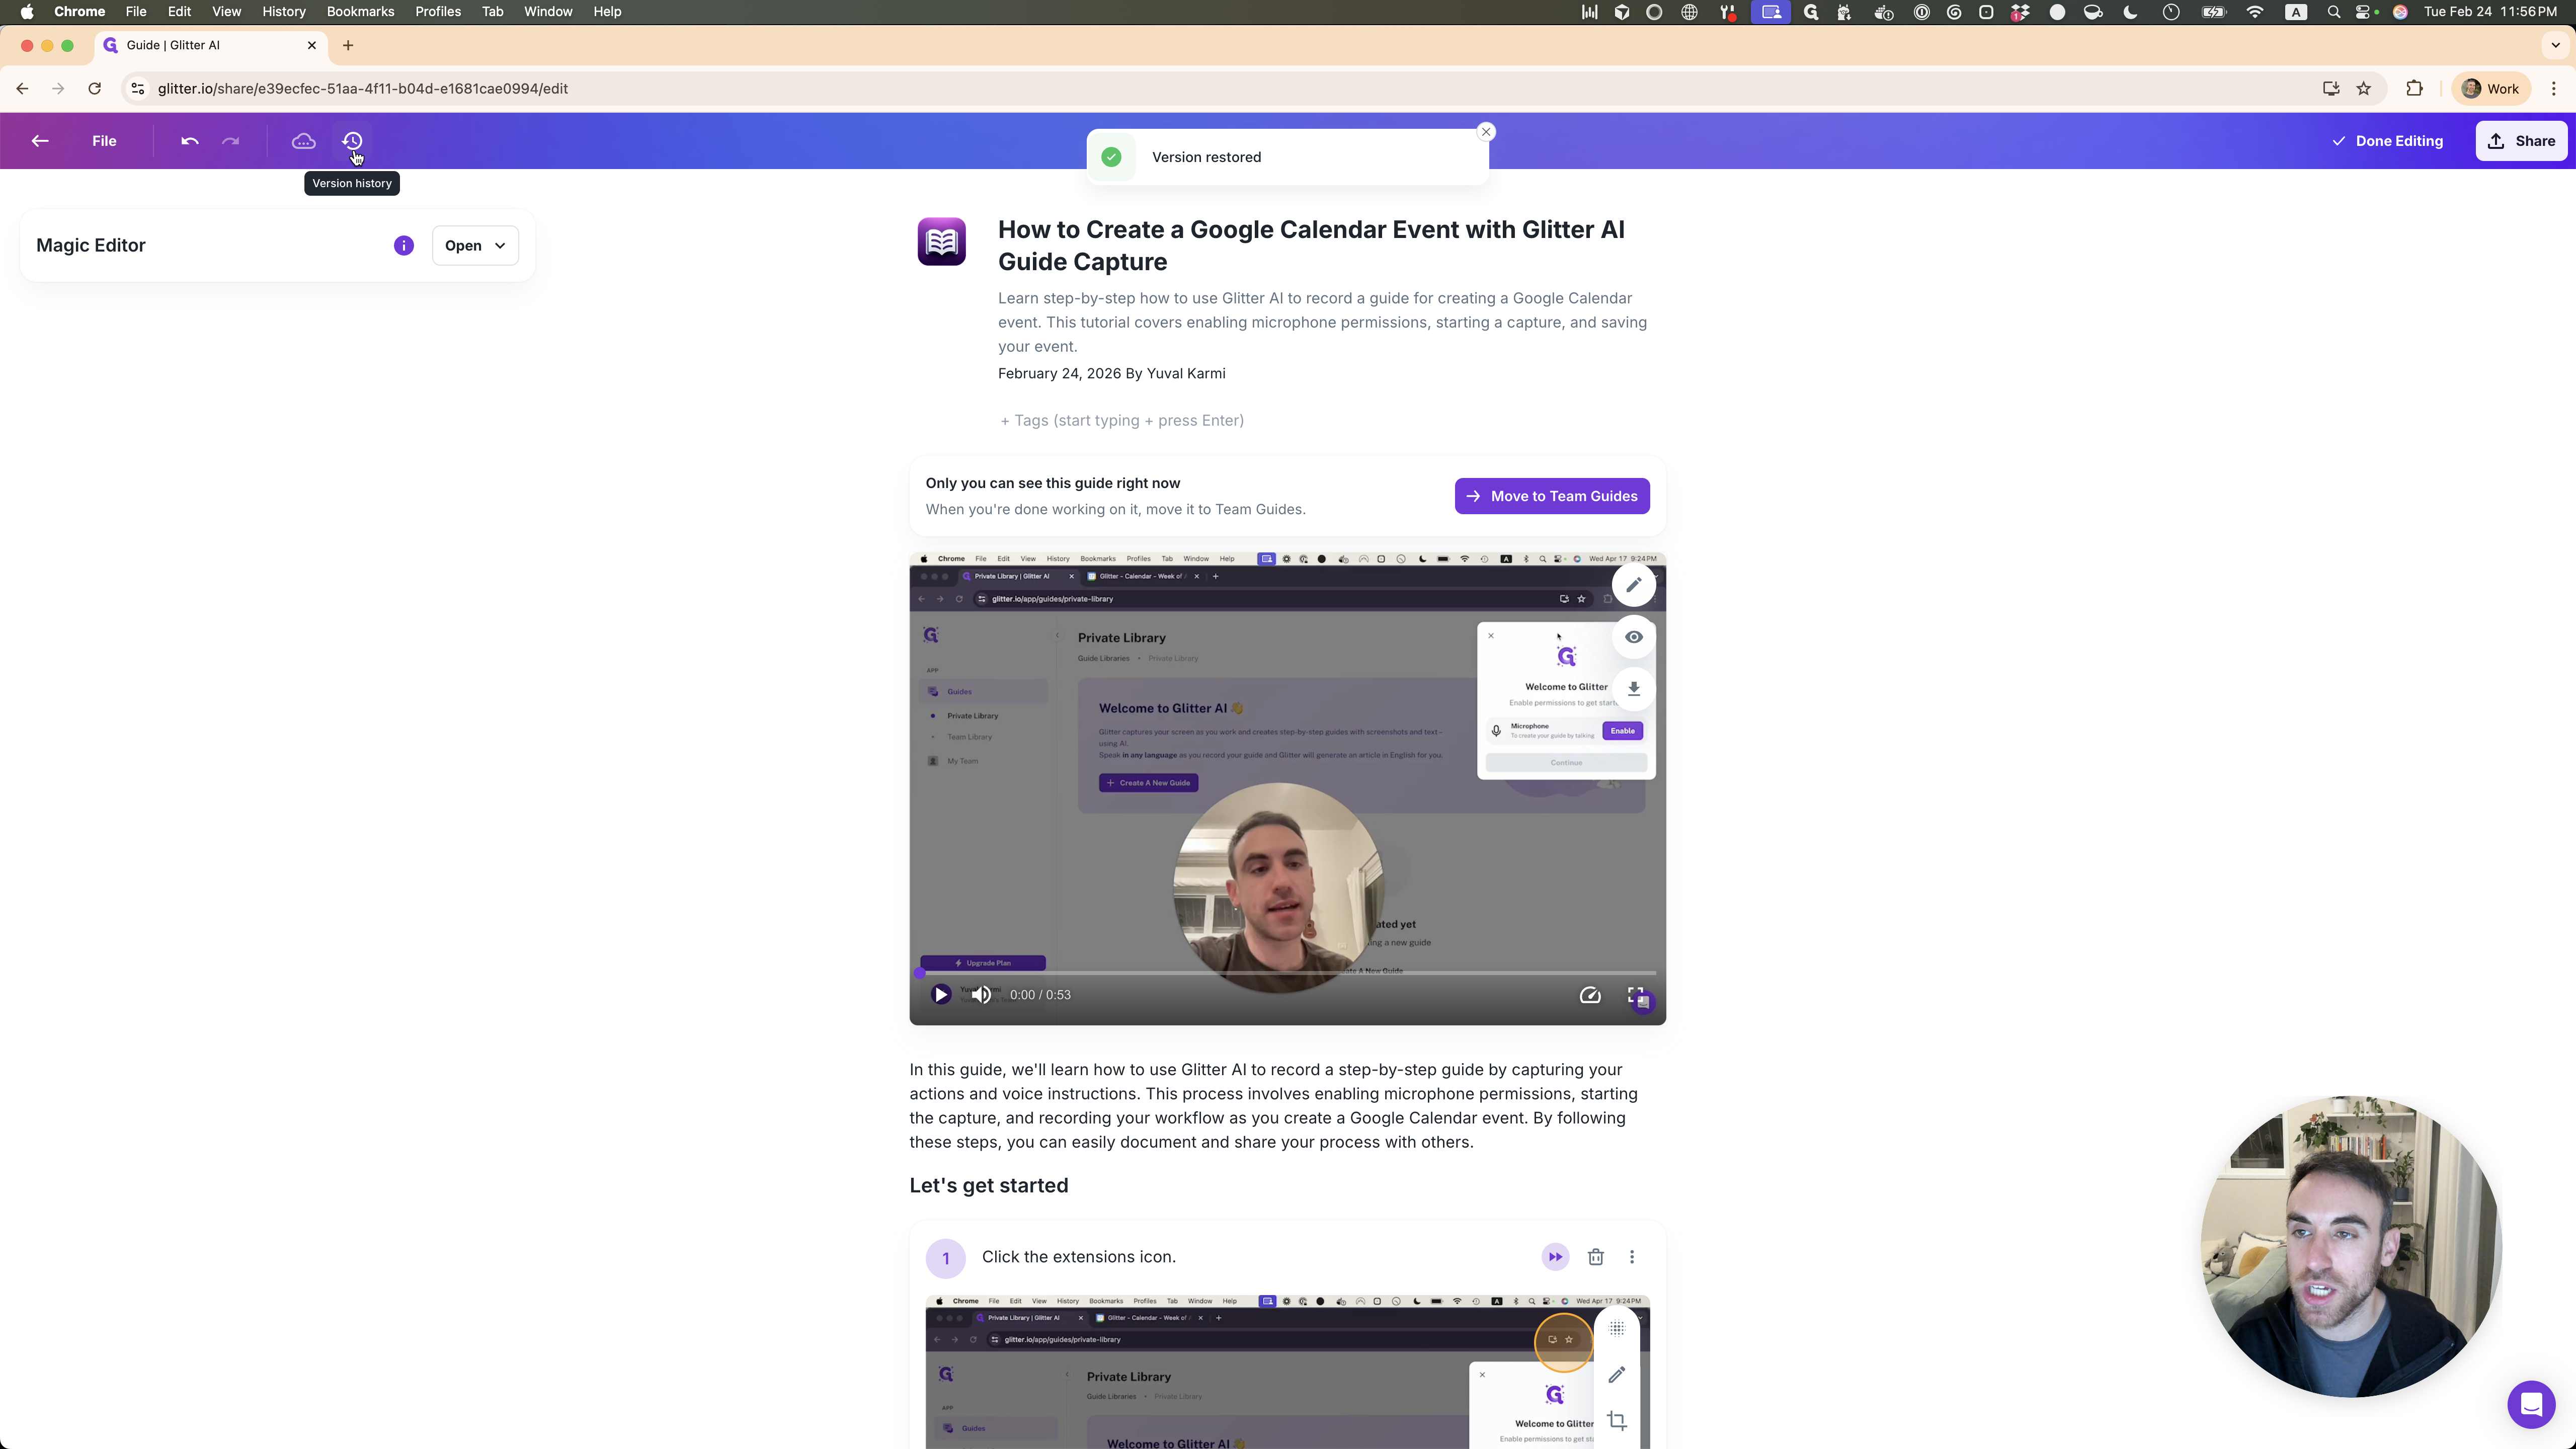
If you made a mistake, you can go back to that.
That's very easy as well.
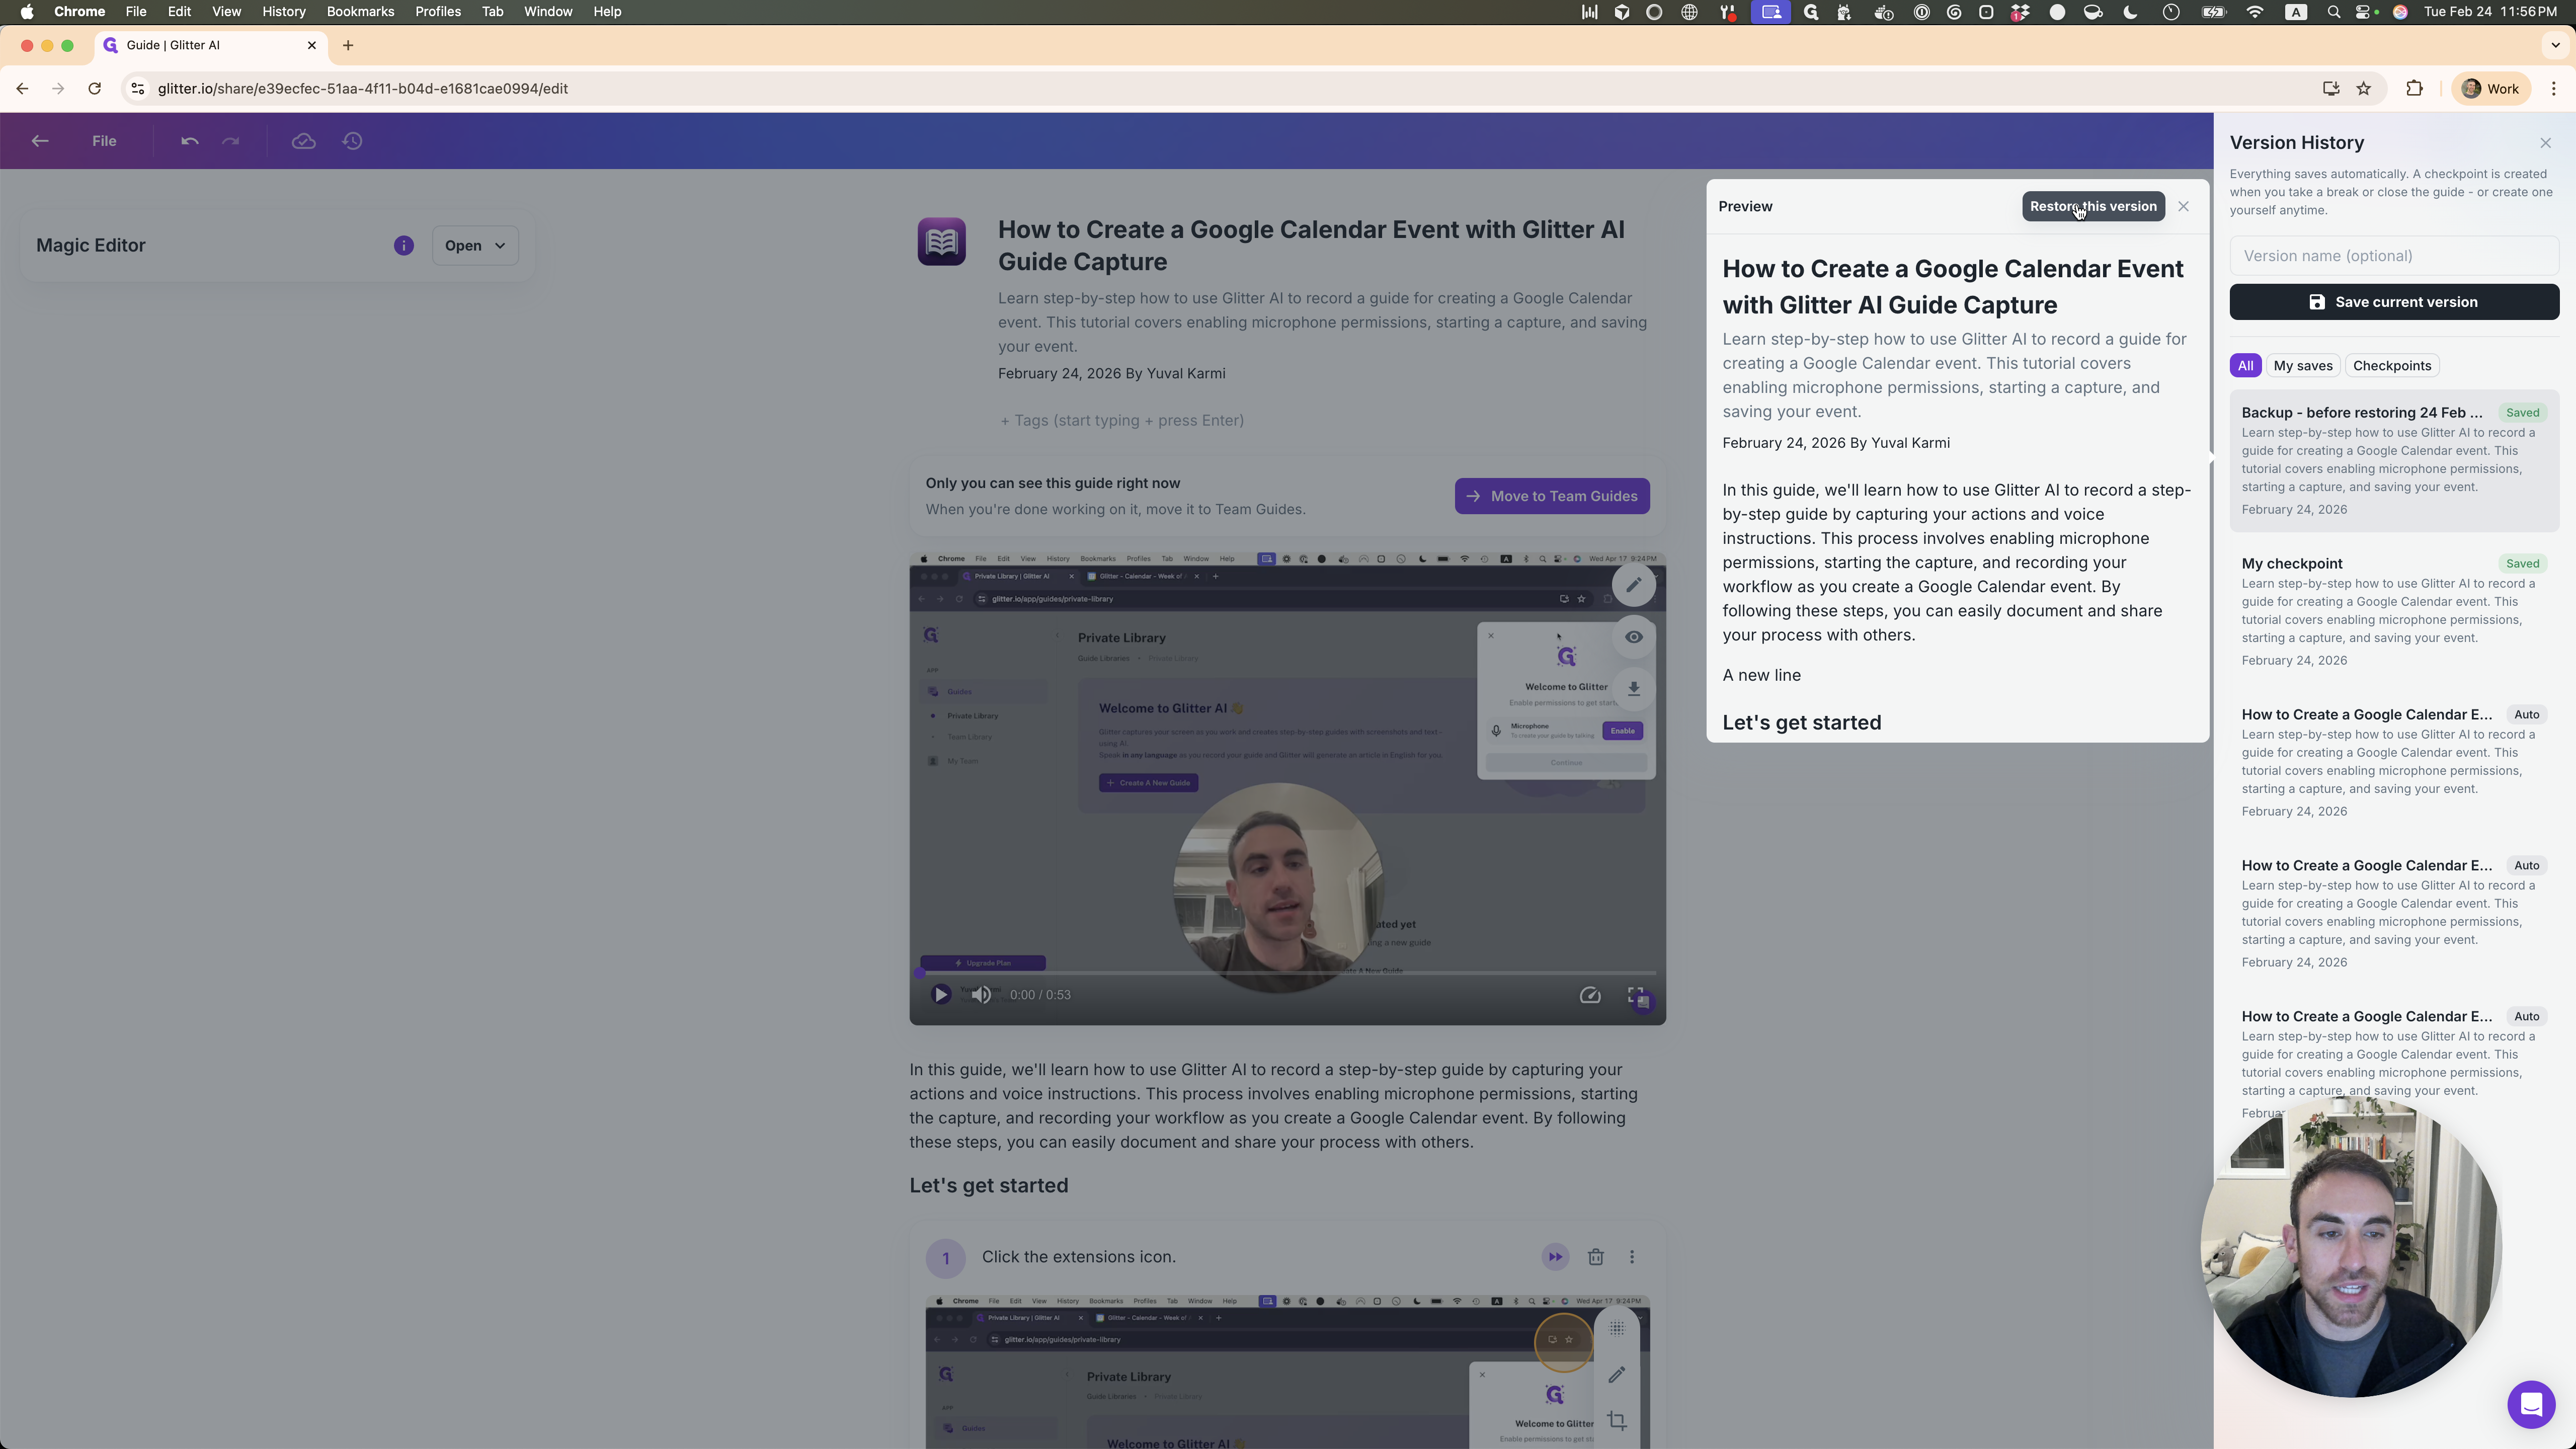
I want to go back to the version that included the new lie.
There is a line in it, and there it is again. Thank you for pointing out that this was missing in Glitter. Now it does. I'm happy to answer any questions you have and would love to chat live if you're interested.