How to Use the Shipsy Local Courier Dashboard: Features & Step-by-Step Guide
Learn how to use the Shipsy Jetline Jio portal for logistics operations with this comprehensive step-by-step guide.
In this guide, we'll learn how to use the Shipsy Local Courier Dashboard to manage logistics operations. You will see how to track shipments and check details related to trips and consignments.
We will also cover how to search for consignments, filter by date or hub, and view detailed information for each consignment. We will explore features like how to update consignment statuses, perform certain actions on consignments and download shipping label, LR copy etc.
Let's get started!
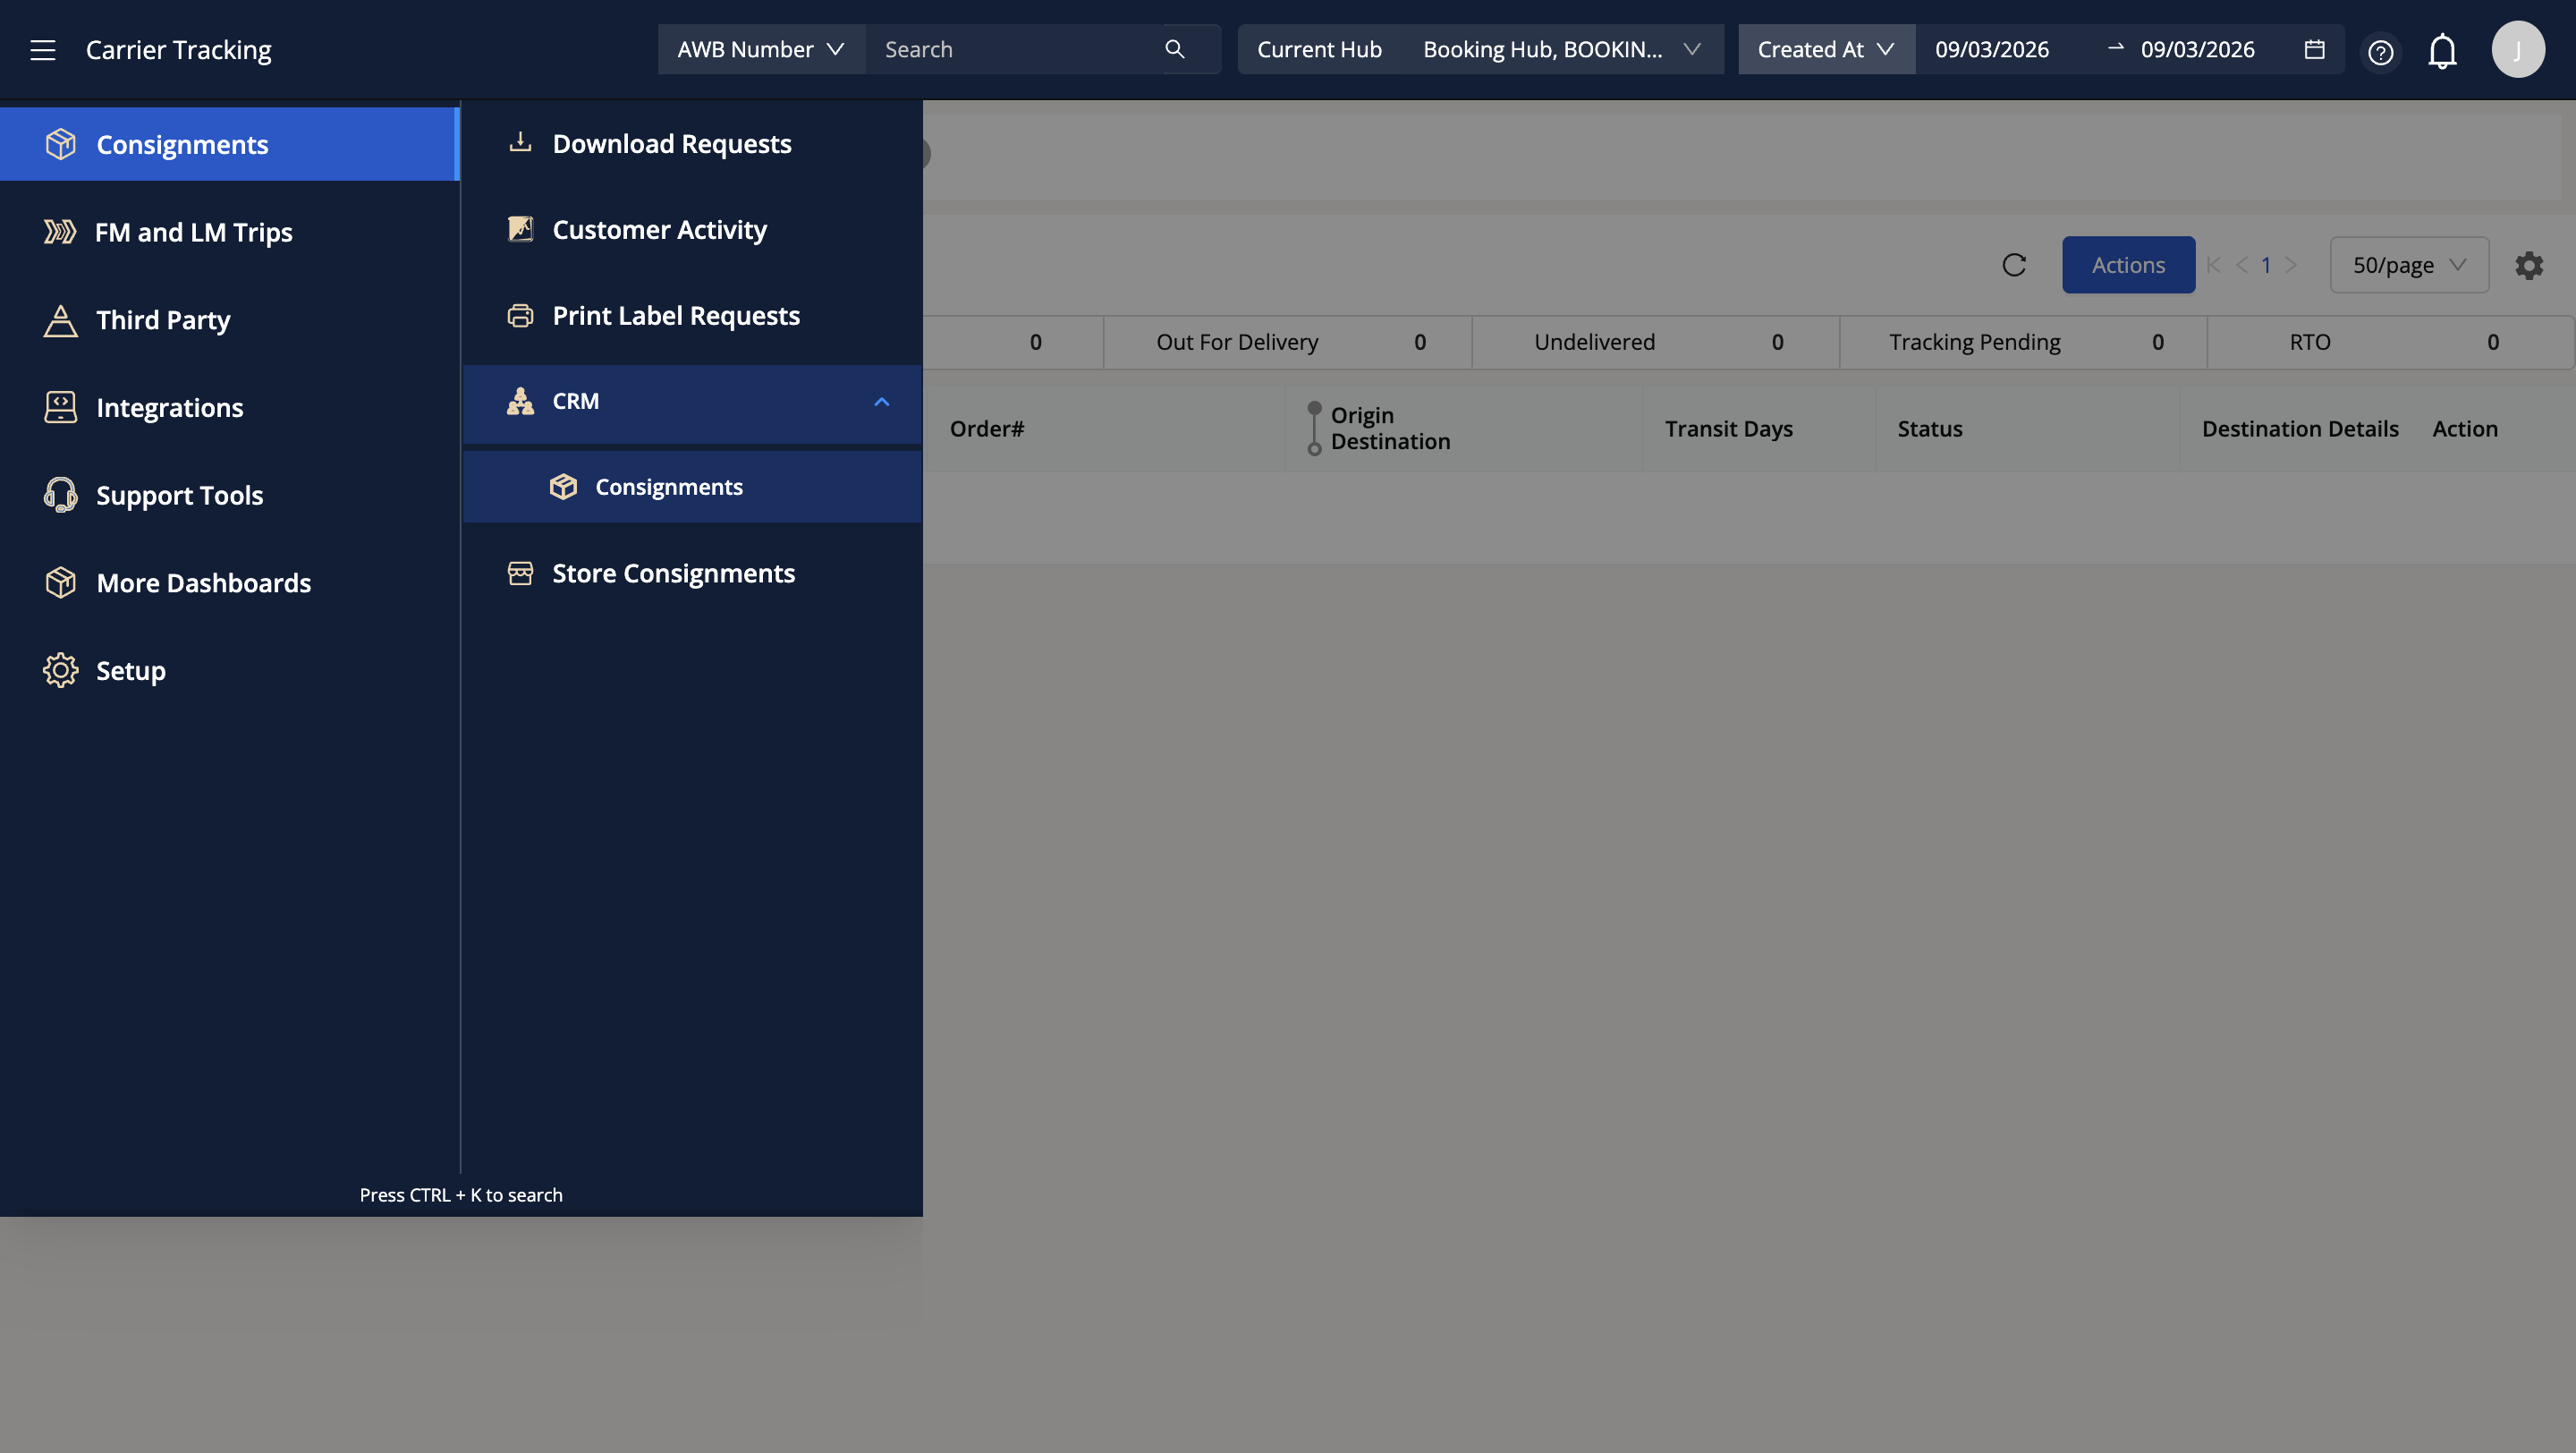
First off, Click the hamburger menu in the top left corner. You are now viewing all the available options on the Shipsy dashboard.
To begin with, we will explore the consignments page.
Go to Consignments and click on CRM, then Consignments.
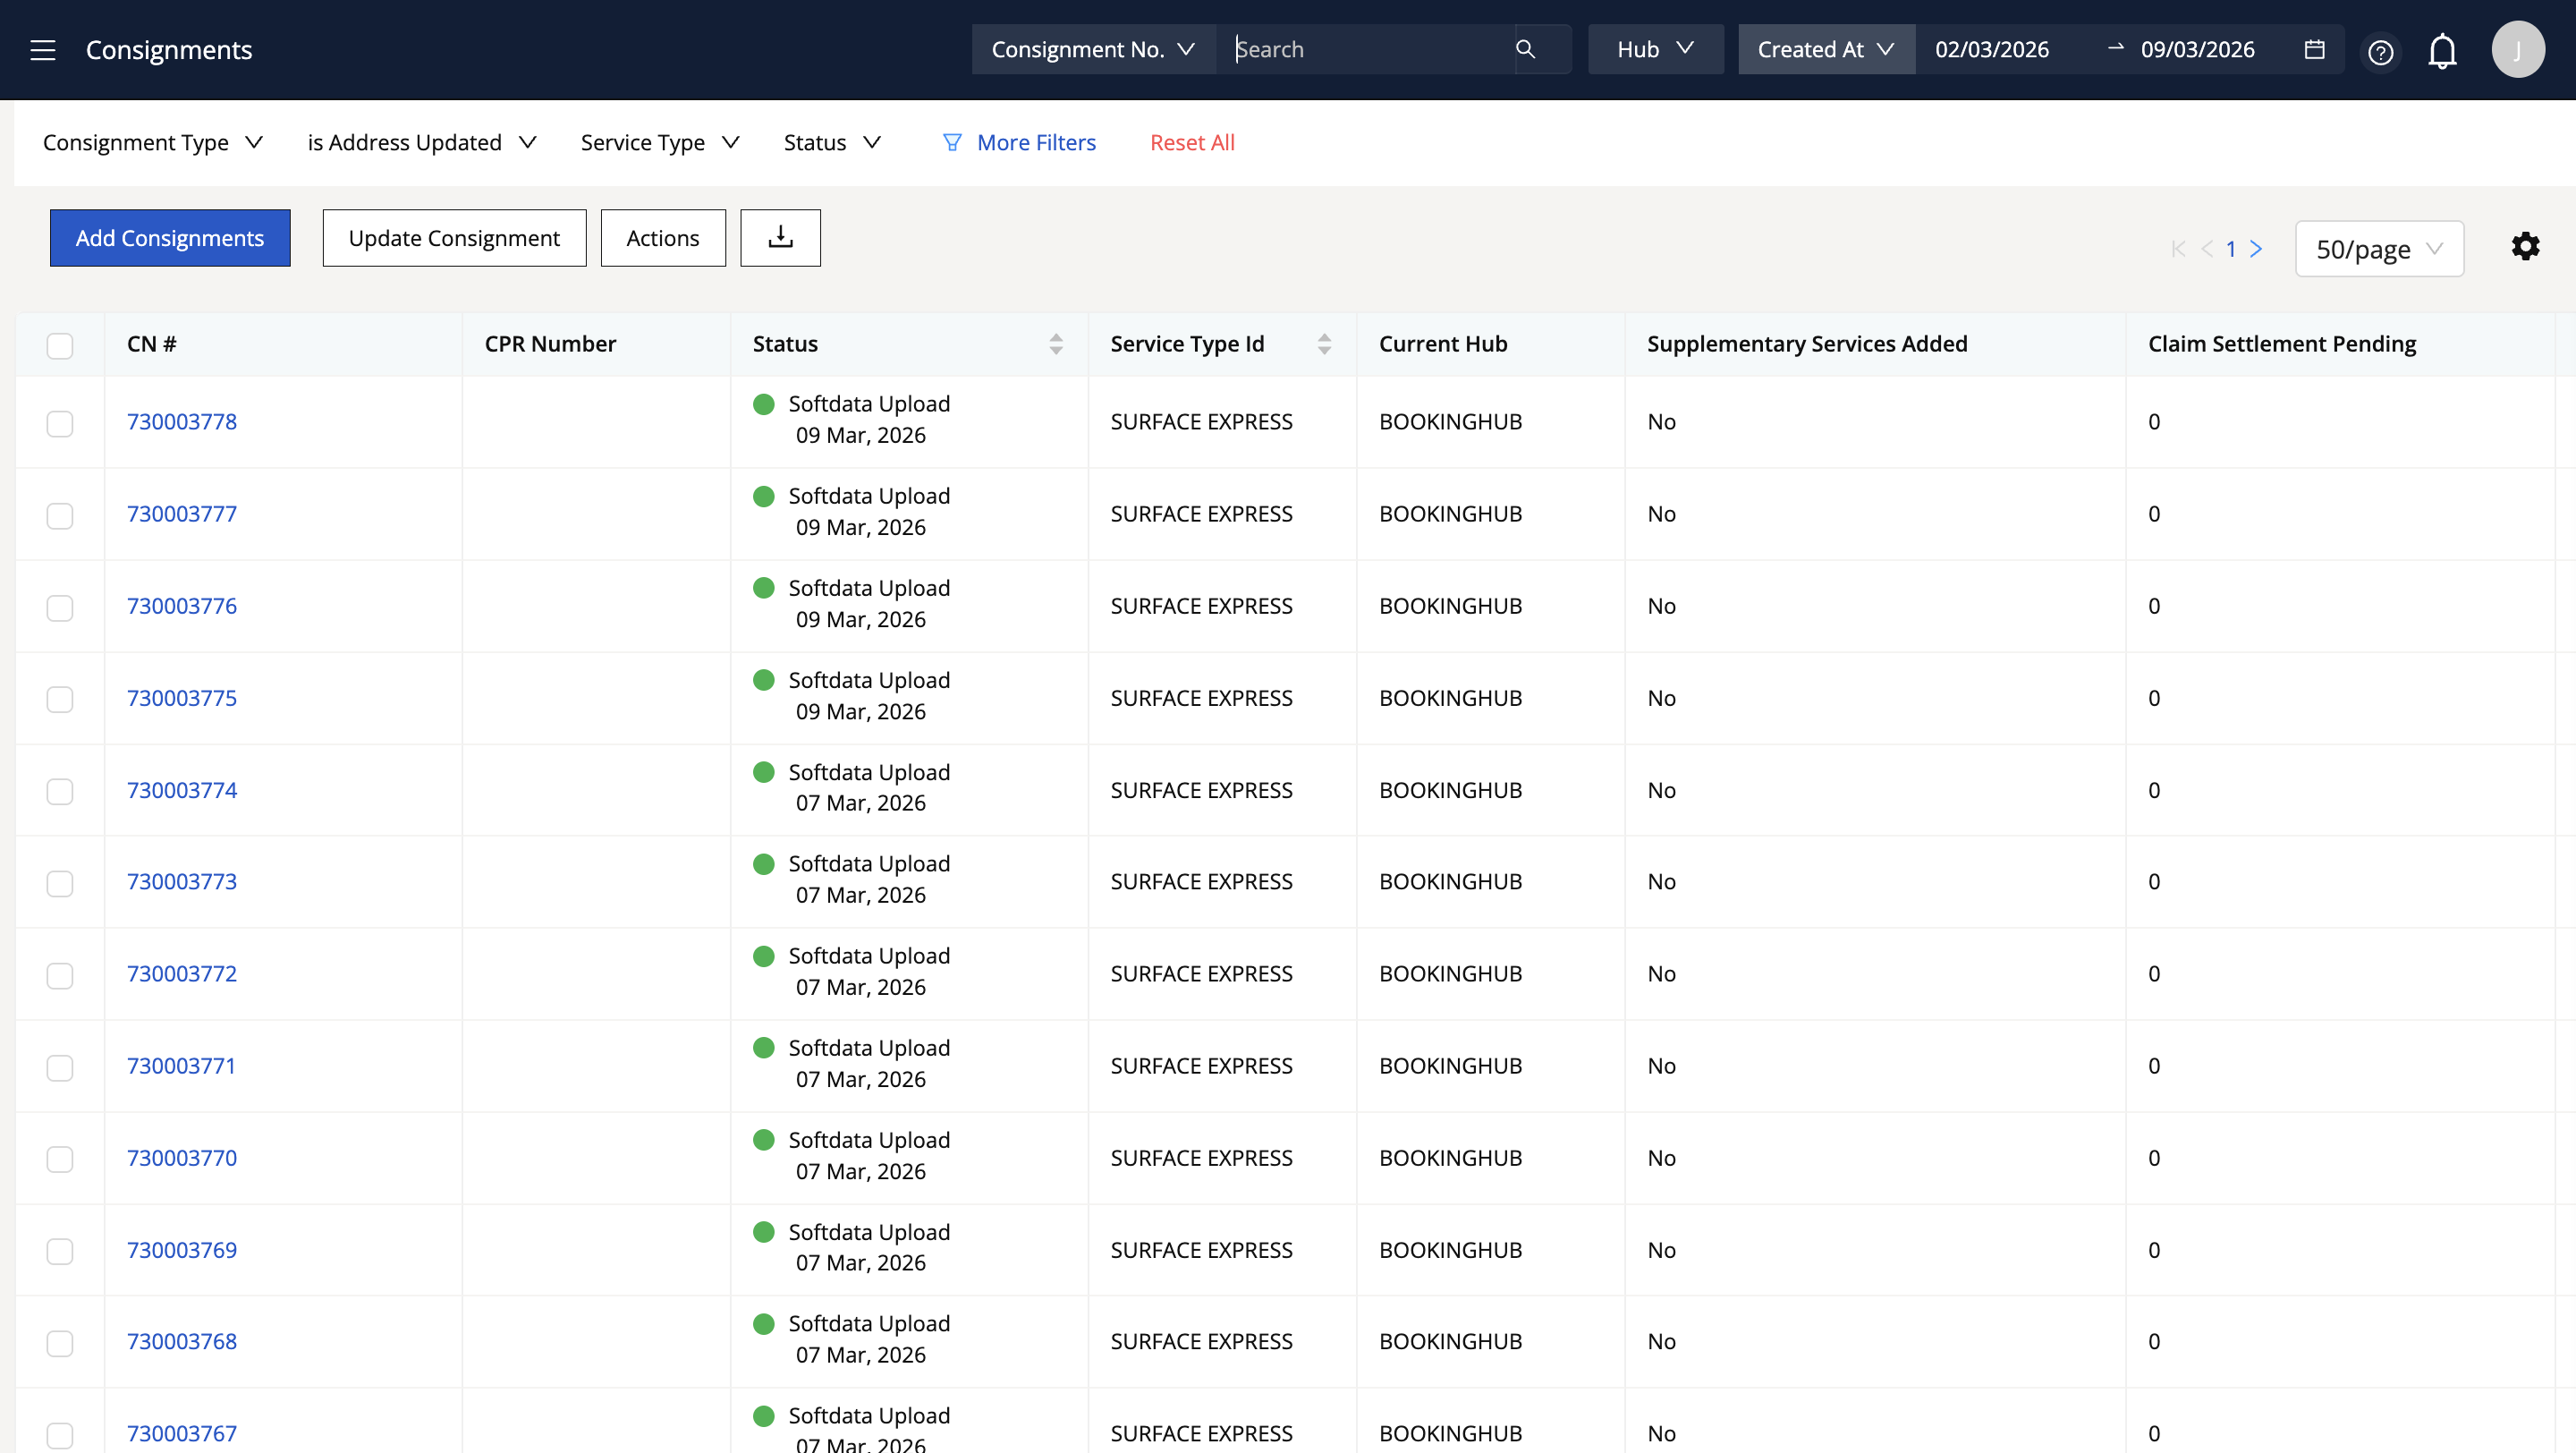
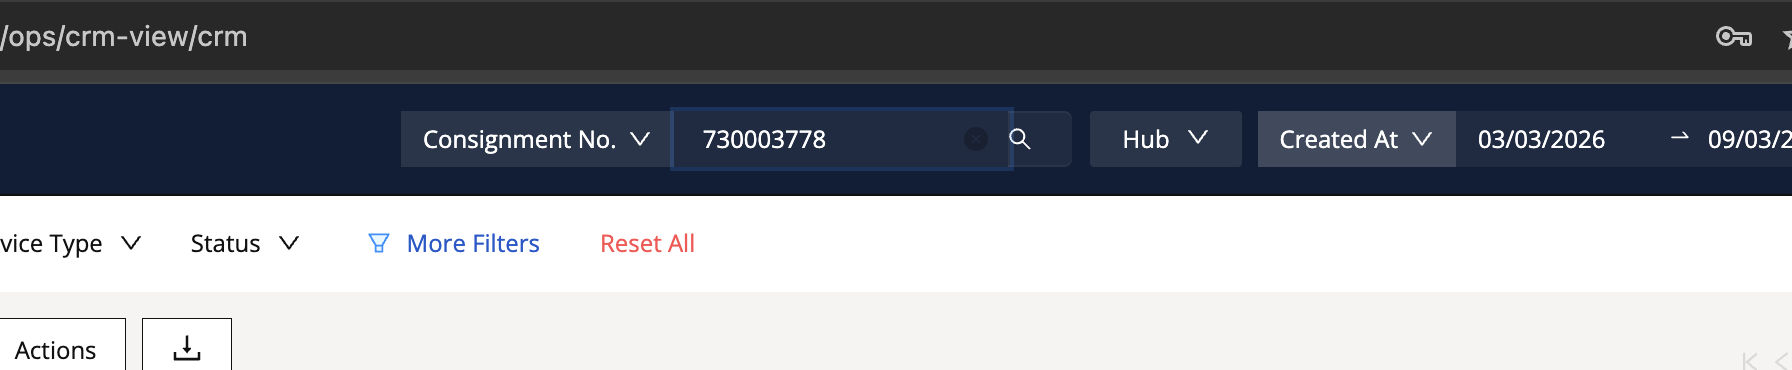
This is the first page we will view. Look at the top dark blue bar. It has fields such as consignment number, hub, created at, and others.
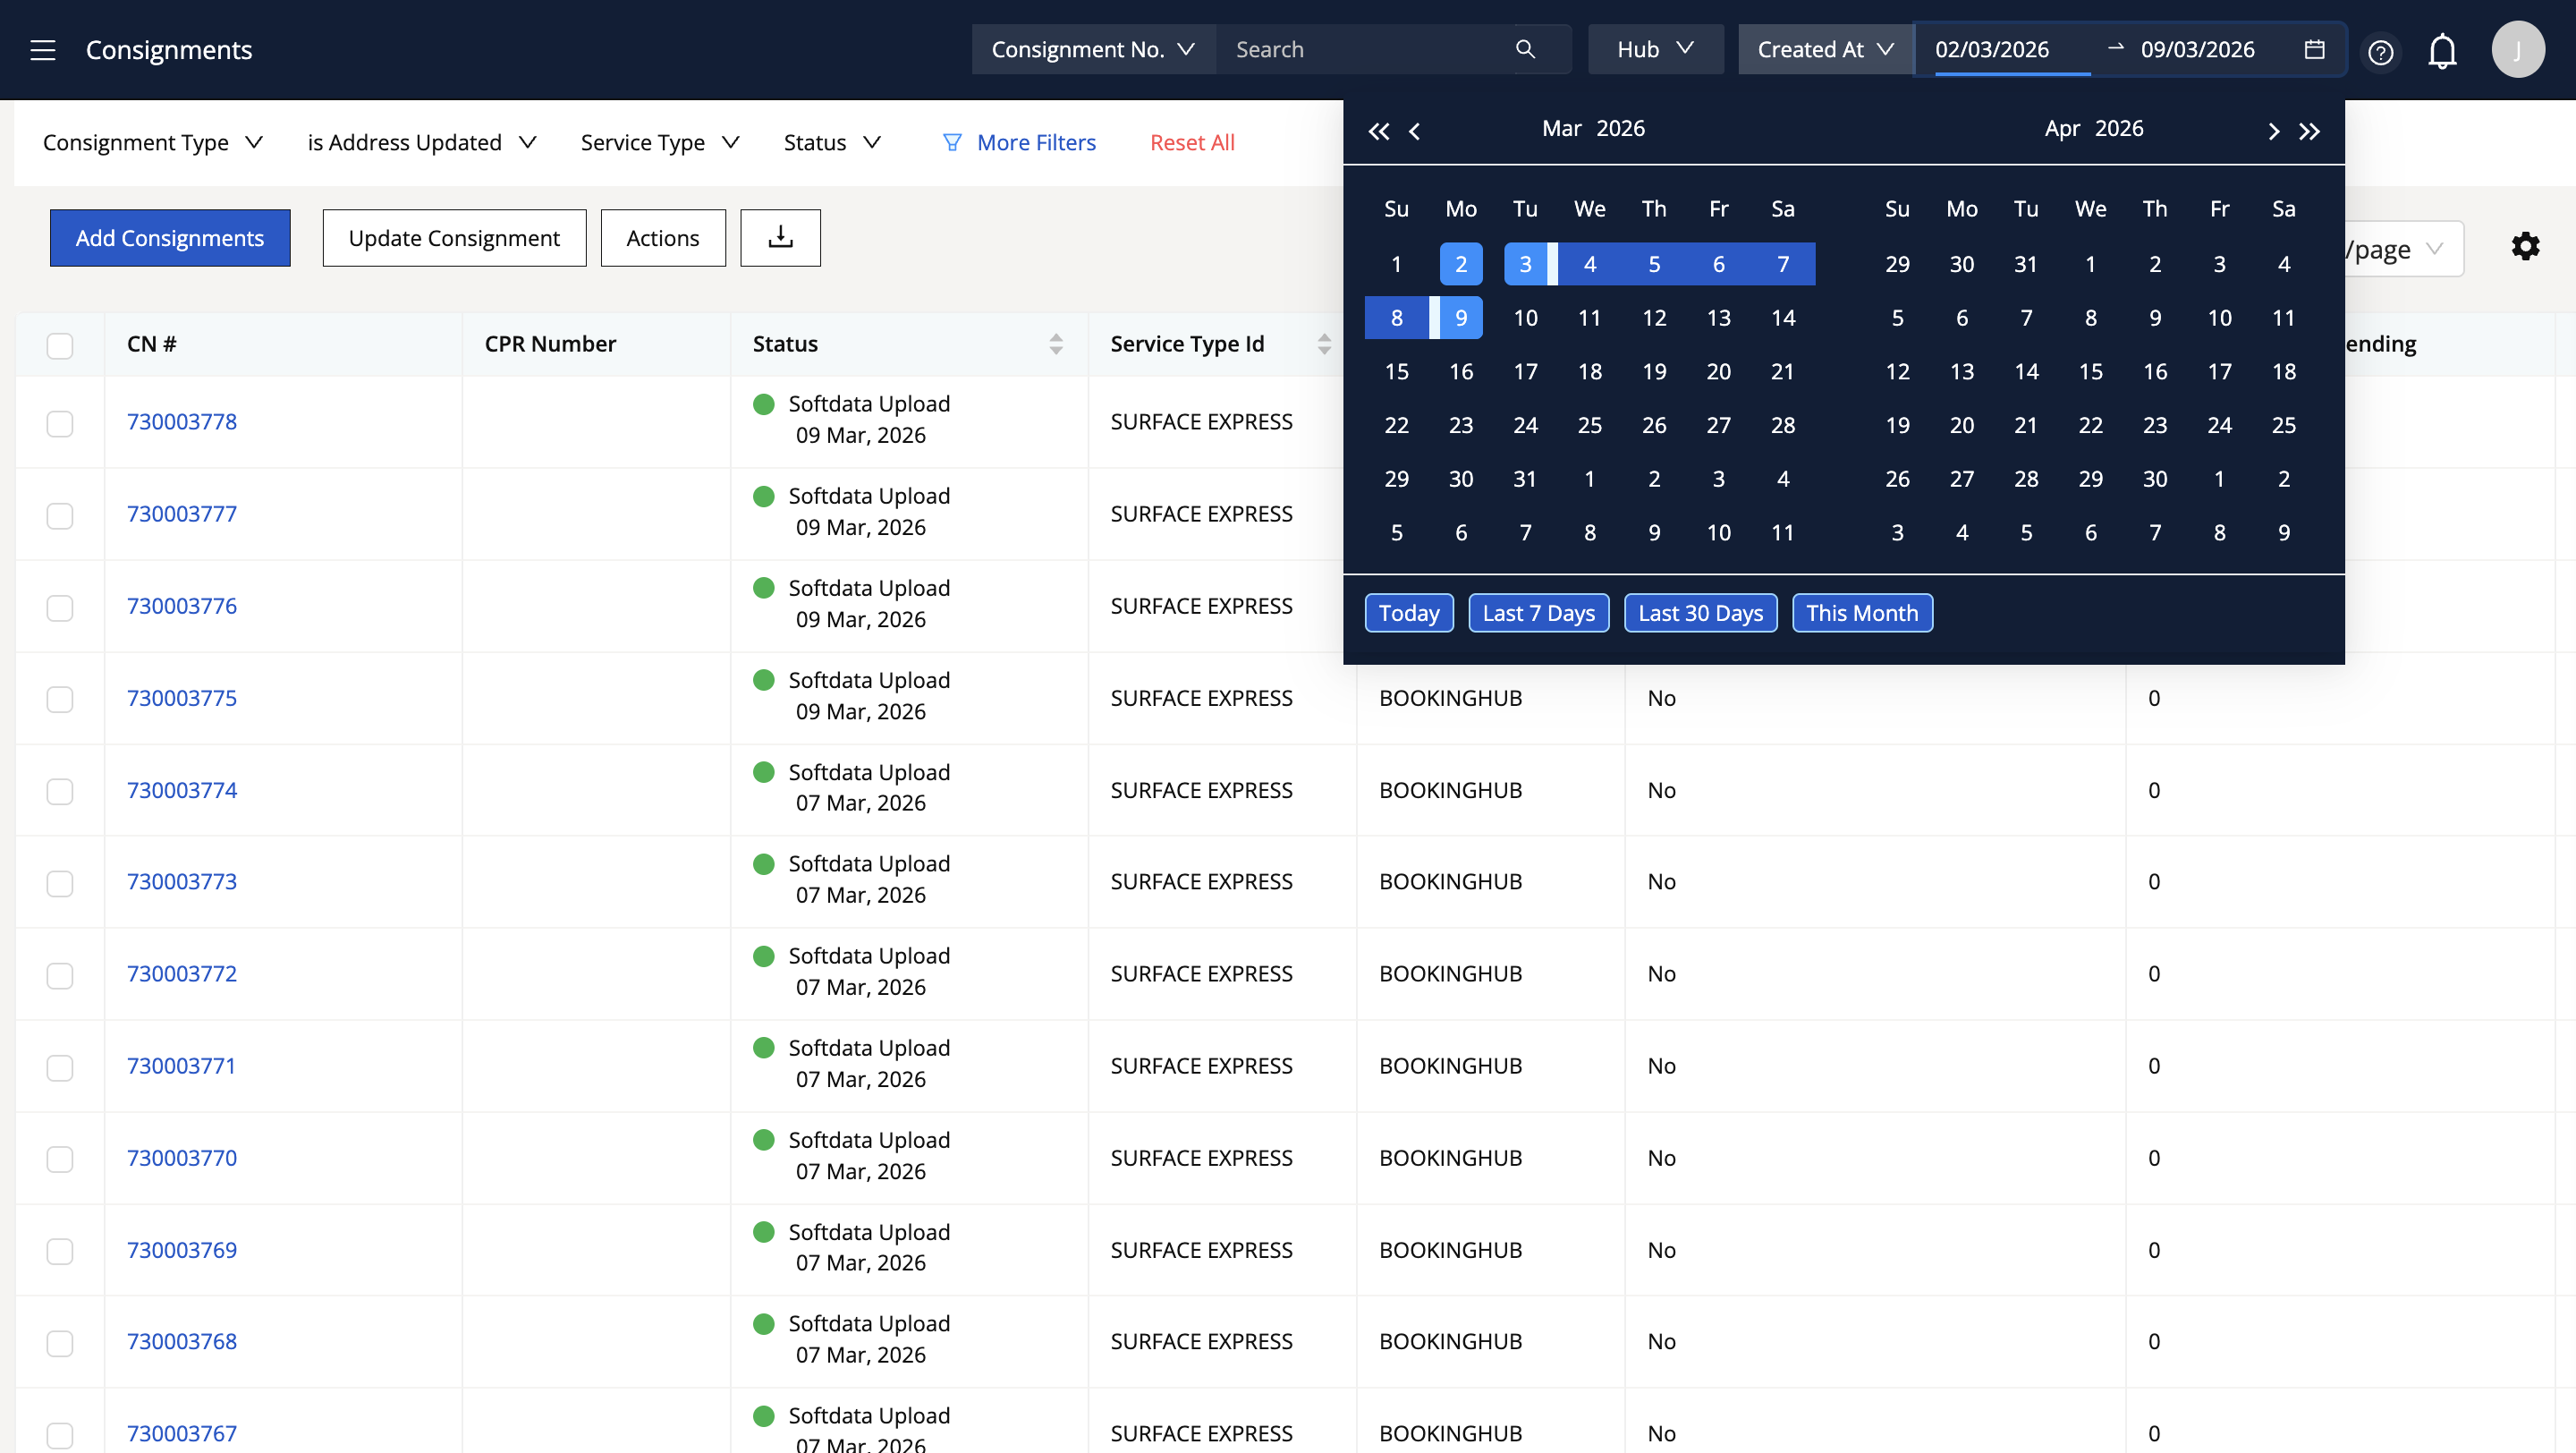
Click the Calendar option here.

This option lets you check consignments created within a specific time range. For example, to view all consignments created in the last seven days, click on "Last Seven Days." You will then see all consignments from that time range.
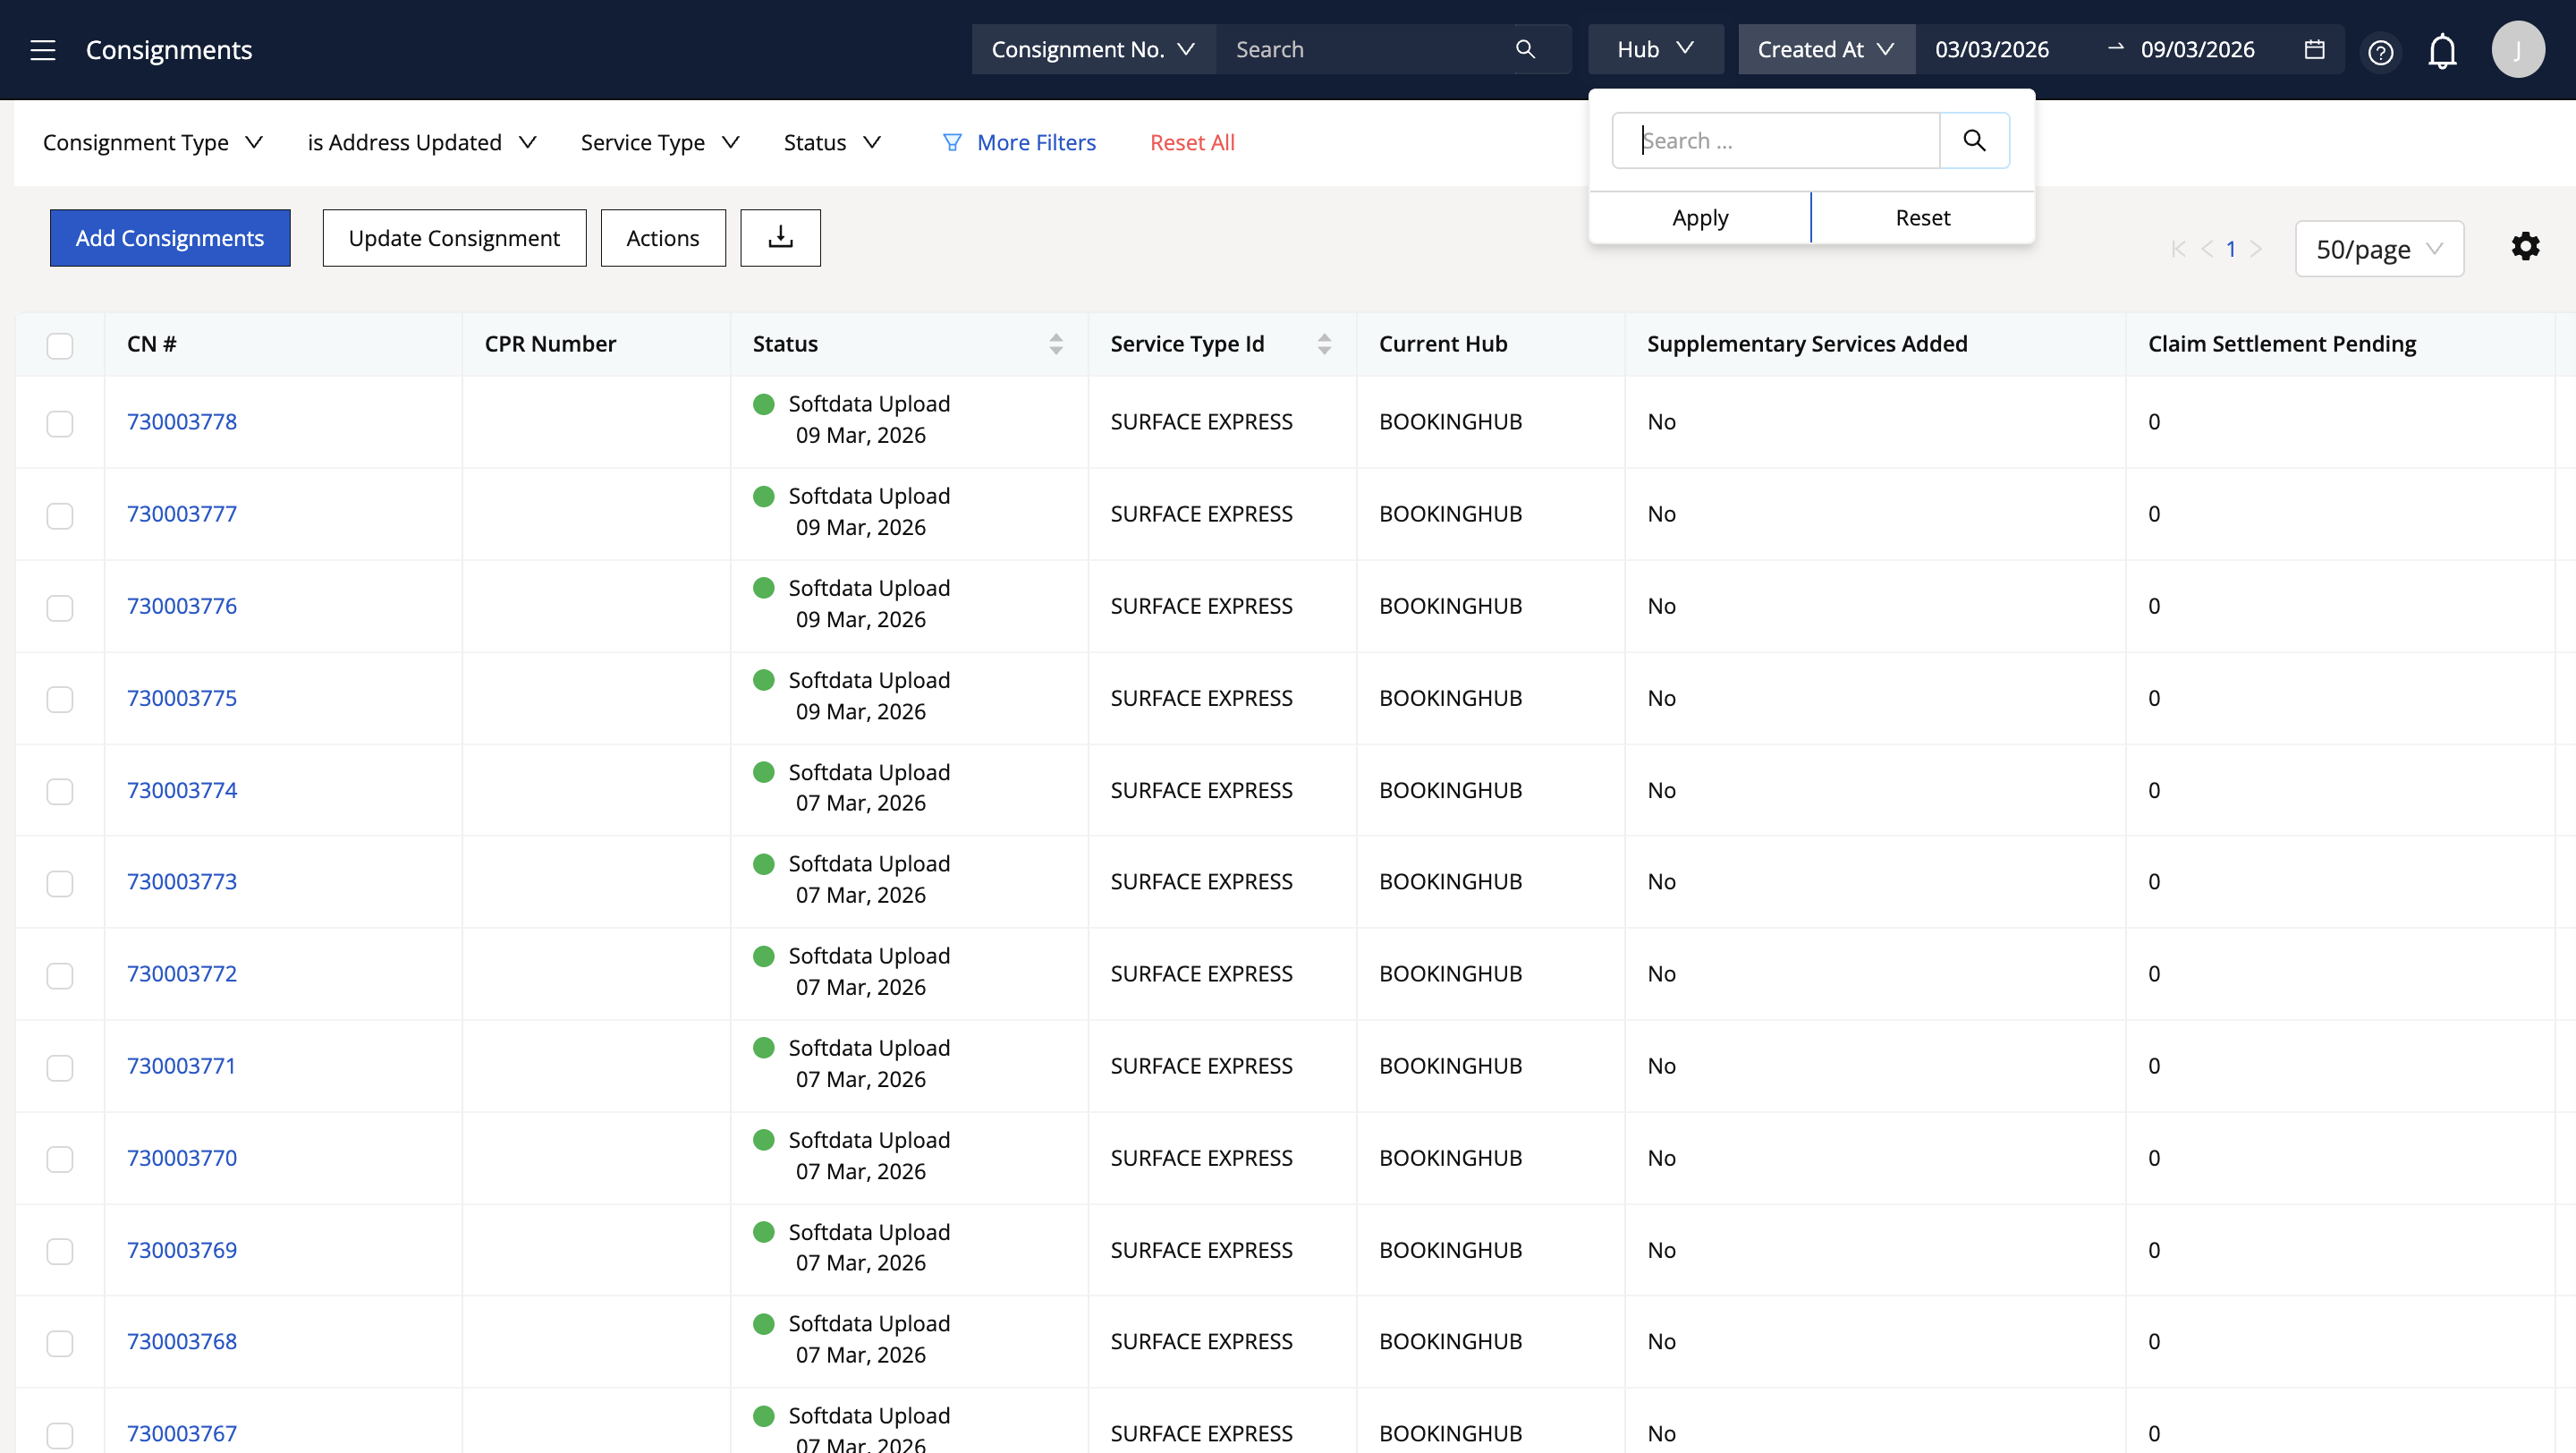
There's also an option of hub. Click on "Hub"
You can select a specific hub and click Apply. This way, you will be able to check all the consignments created at that specific hub.
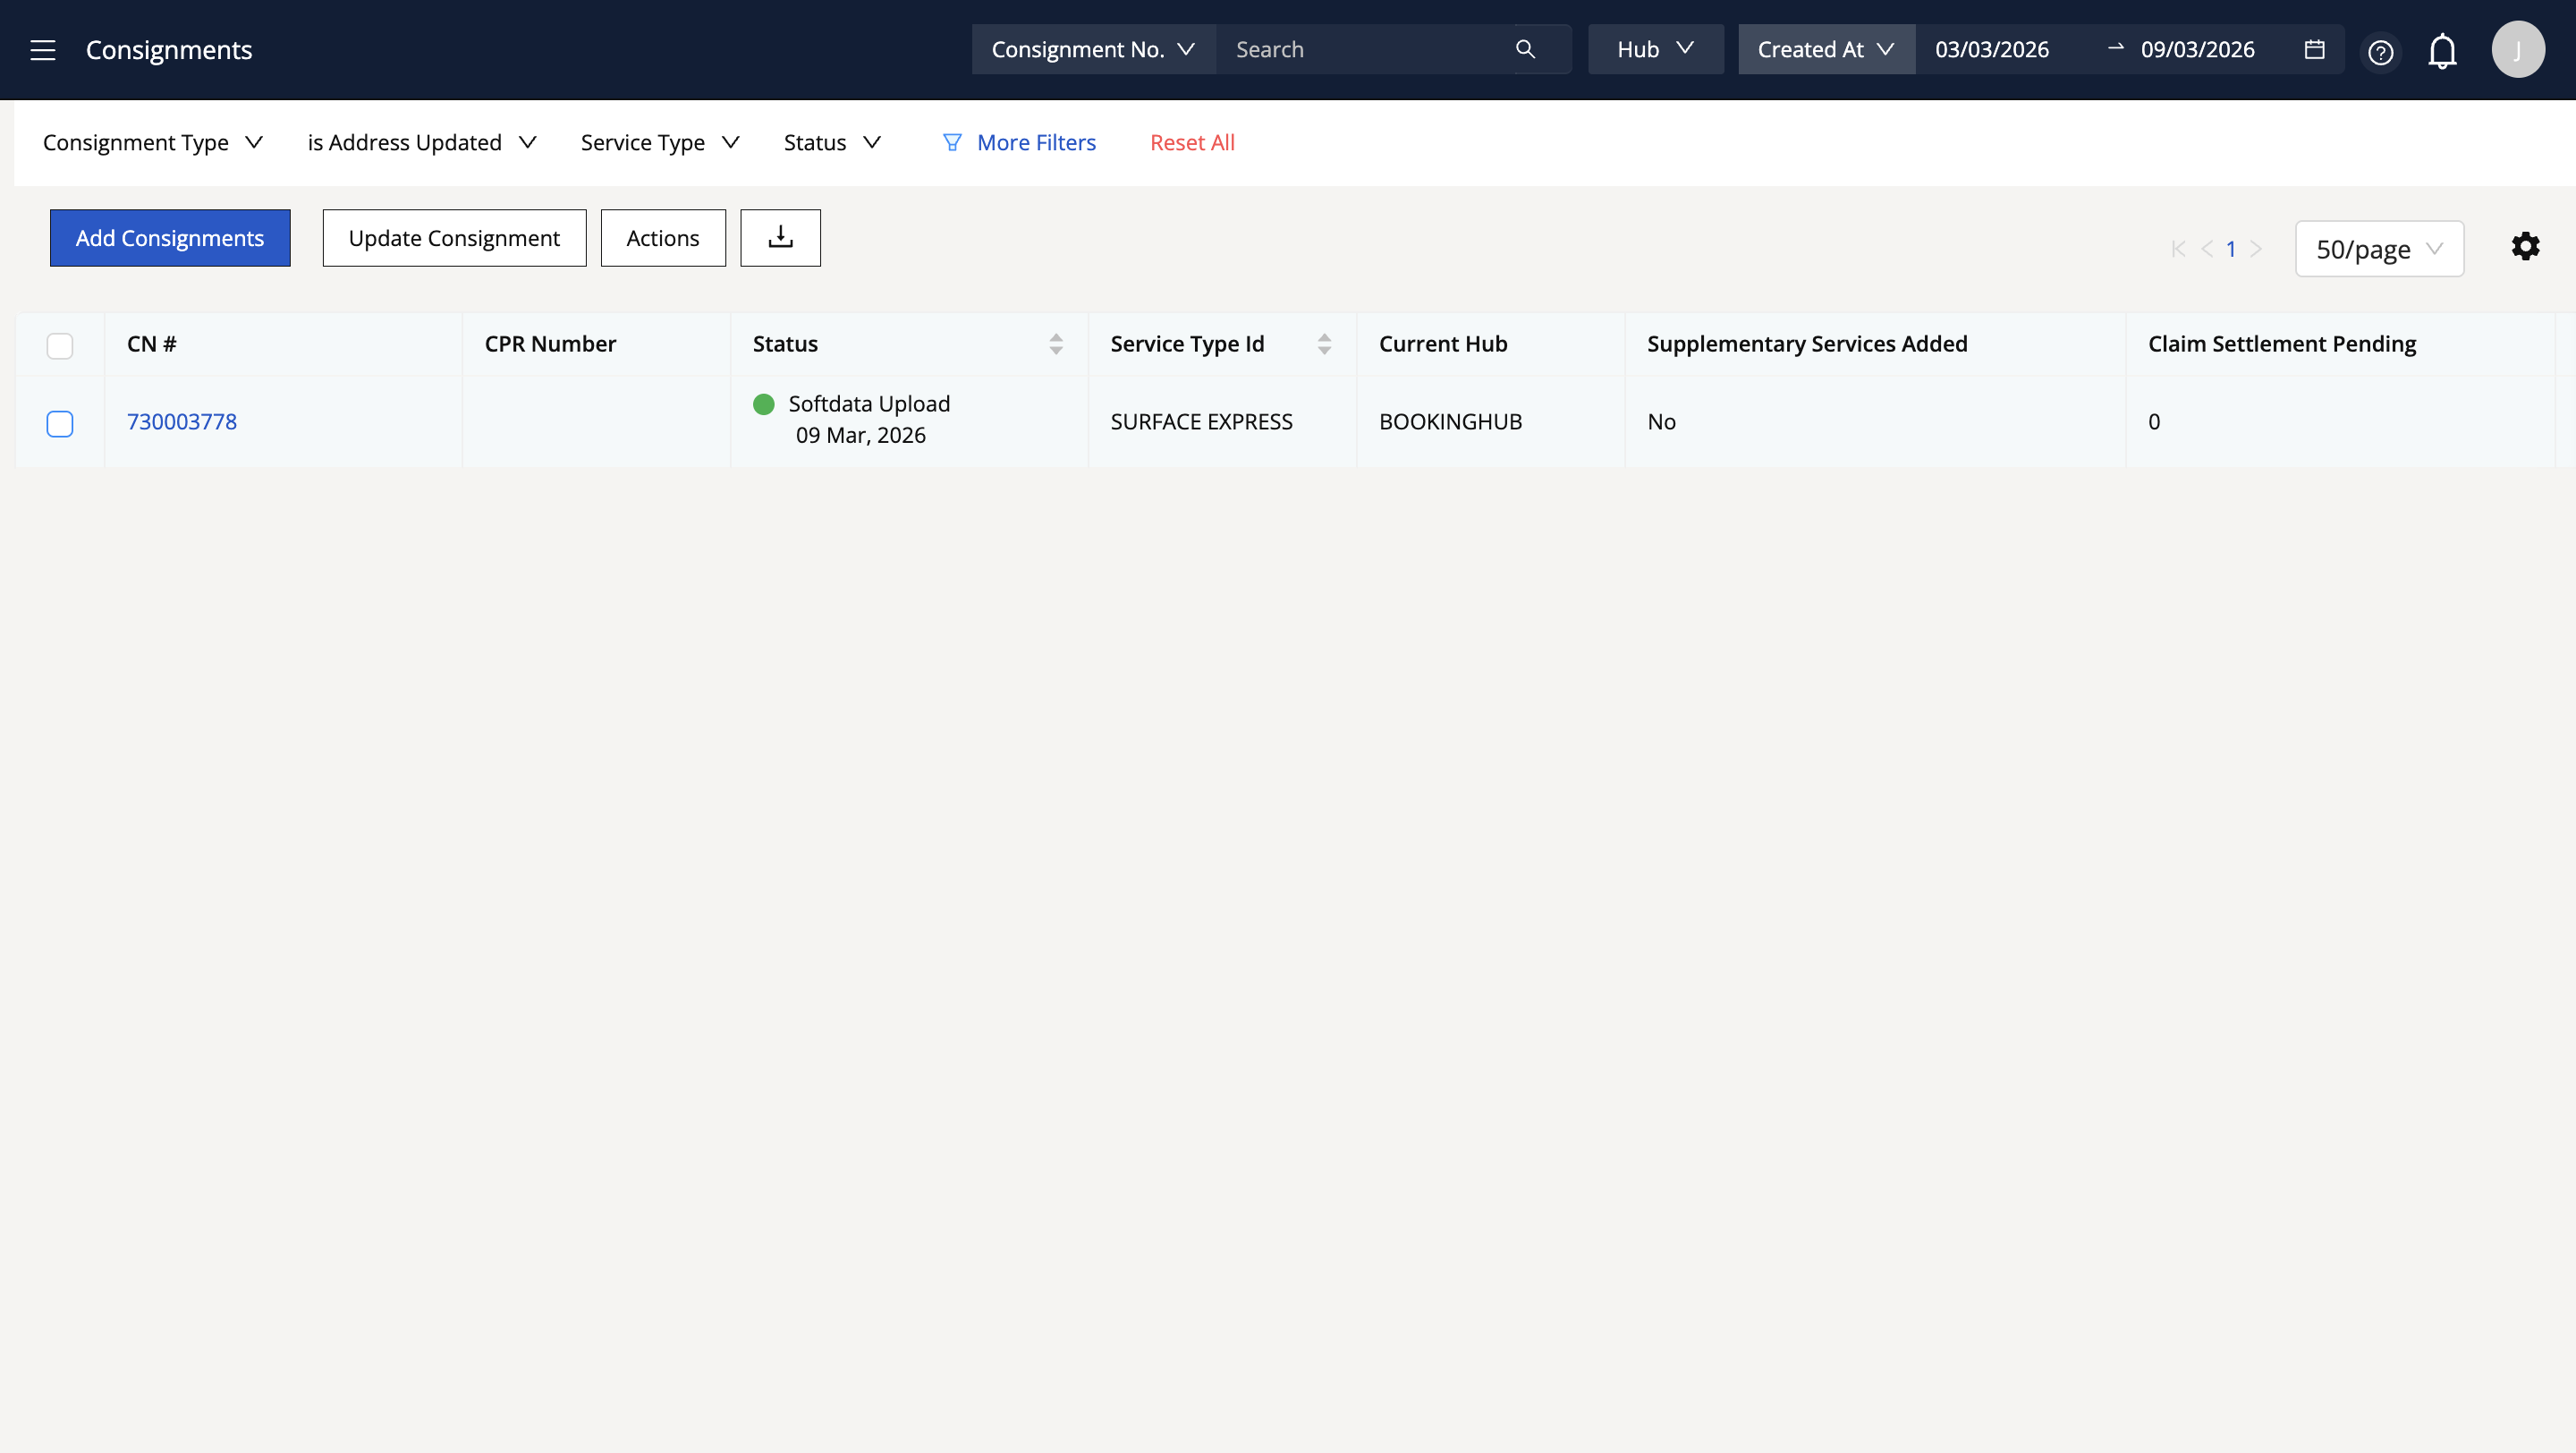
Lastly, you can check a specific consignment number. If you enter a specific consignment number and click Search, you will see the details for that consignment only.
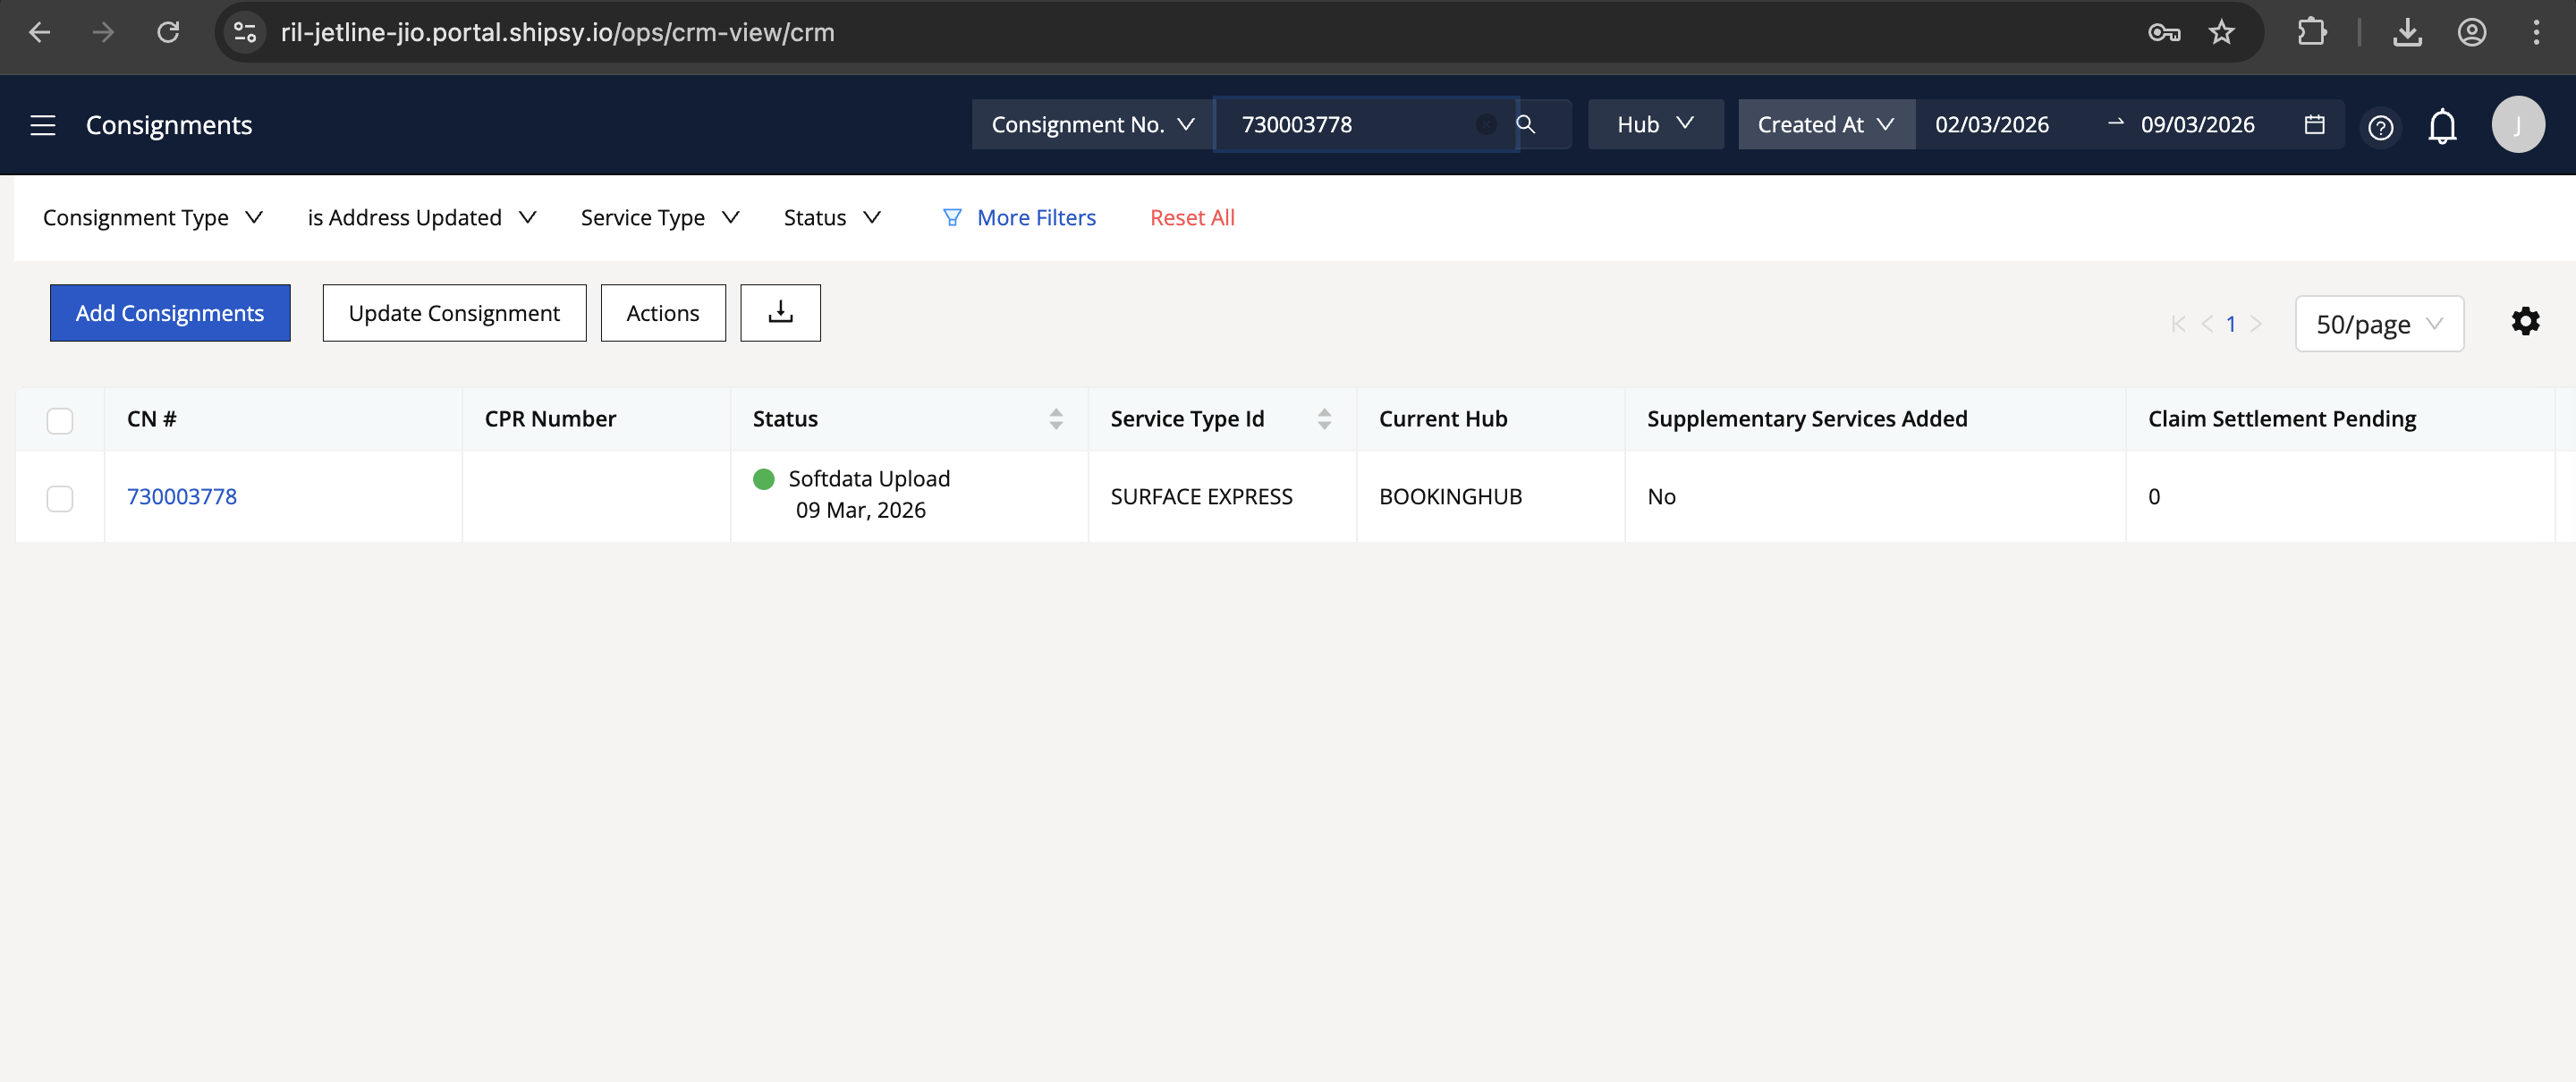
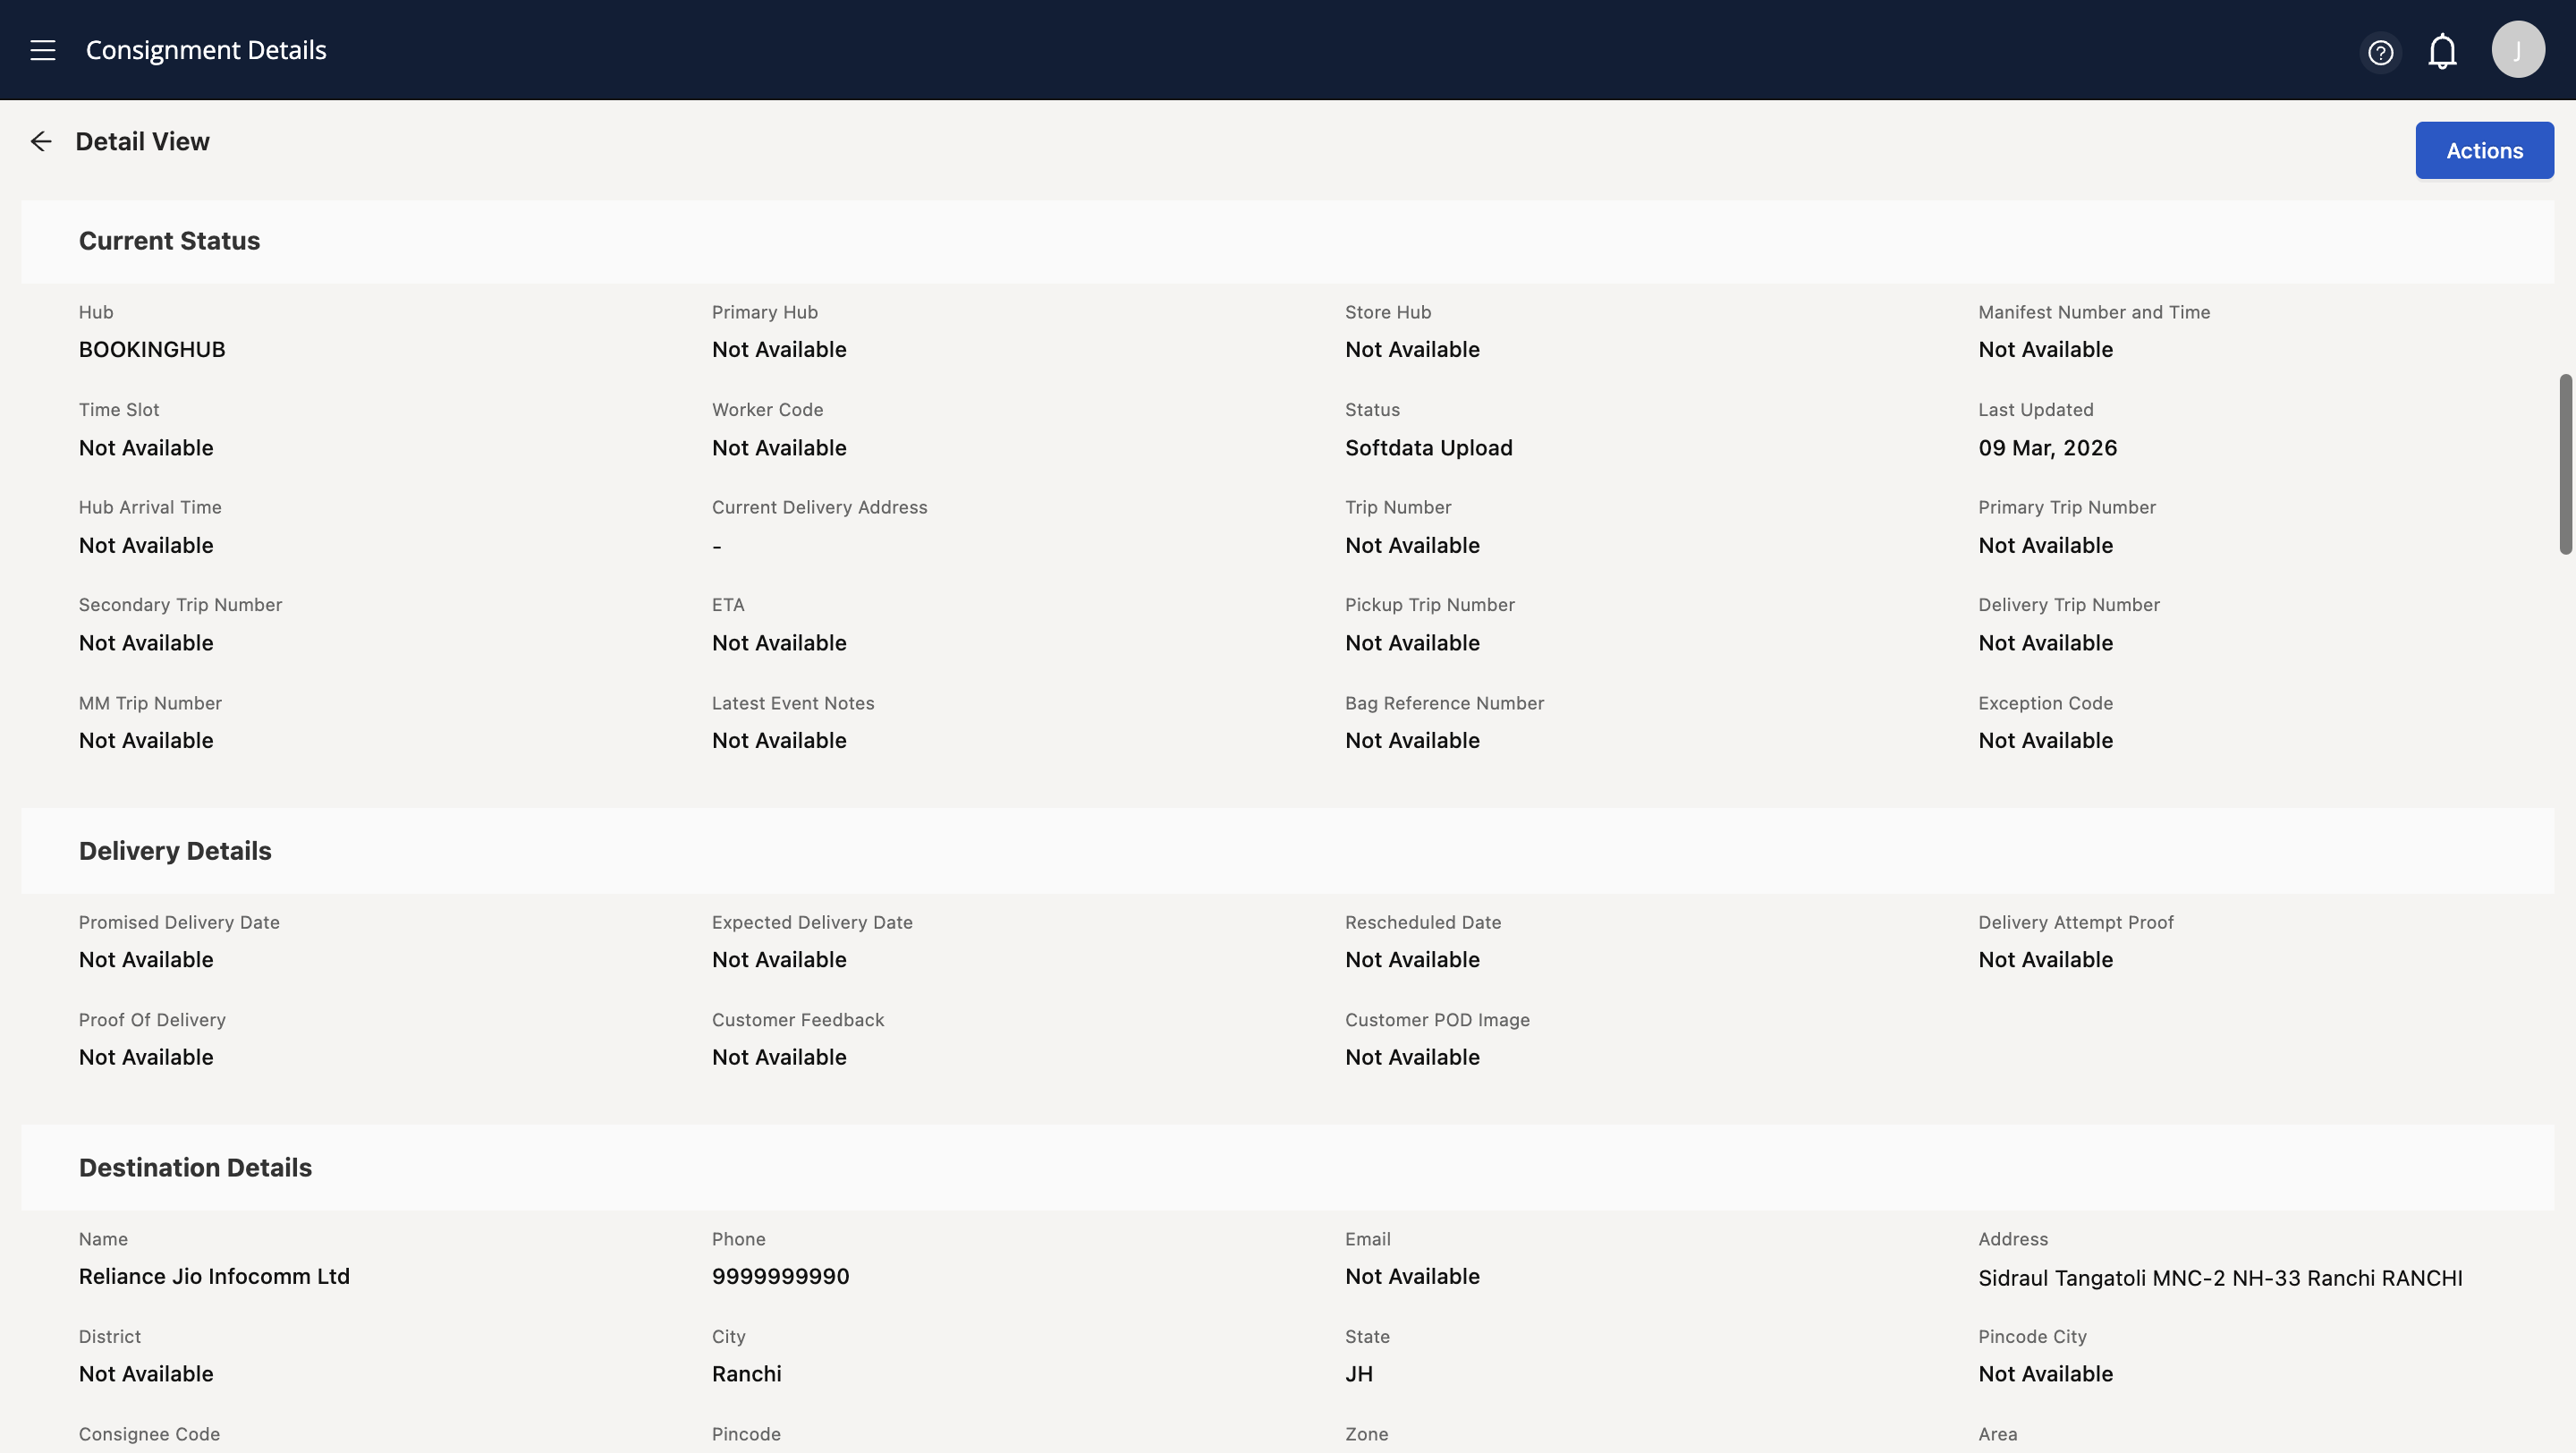
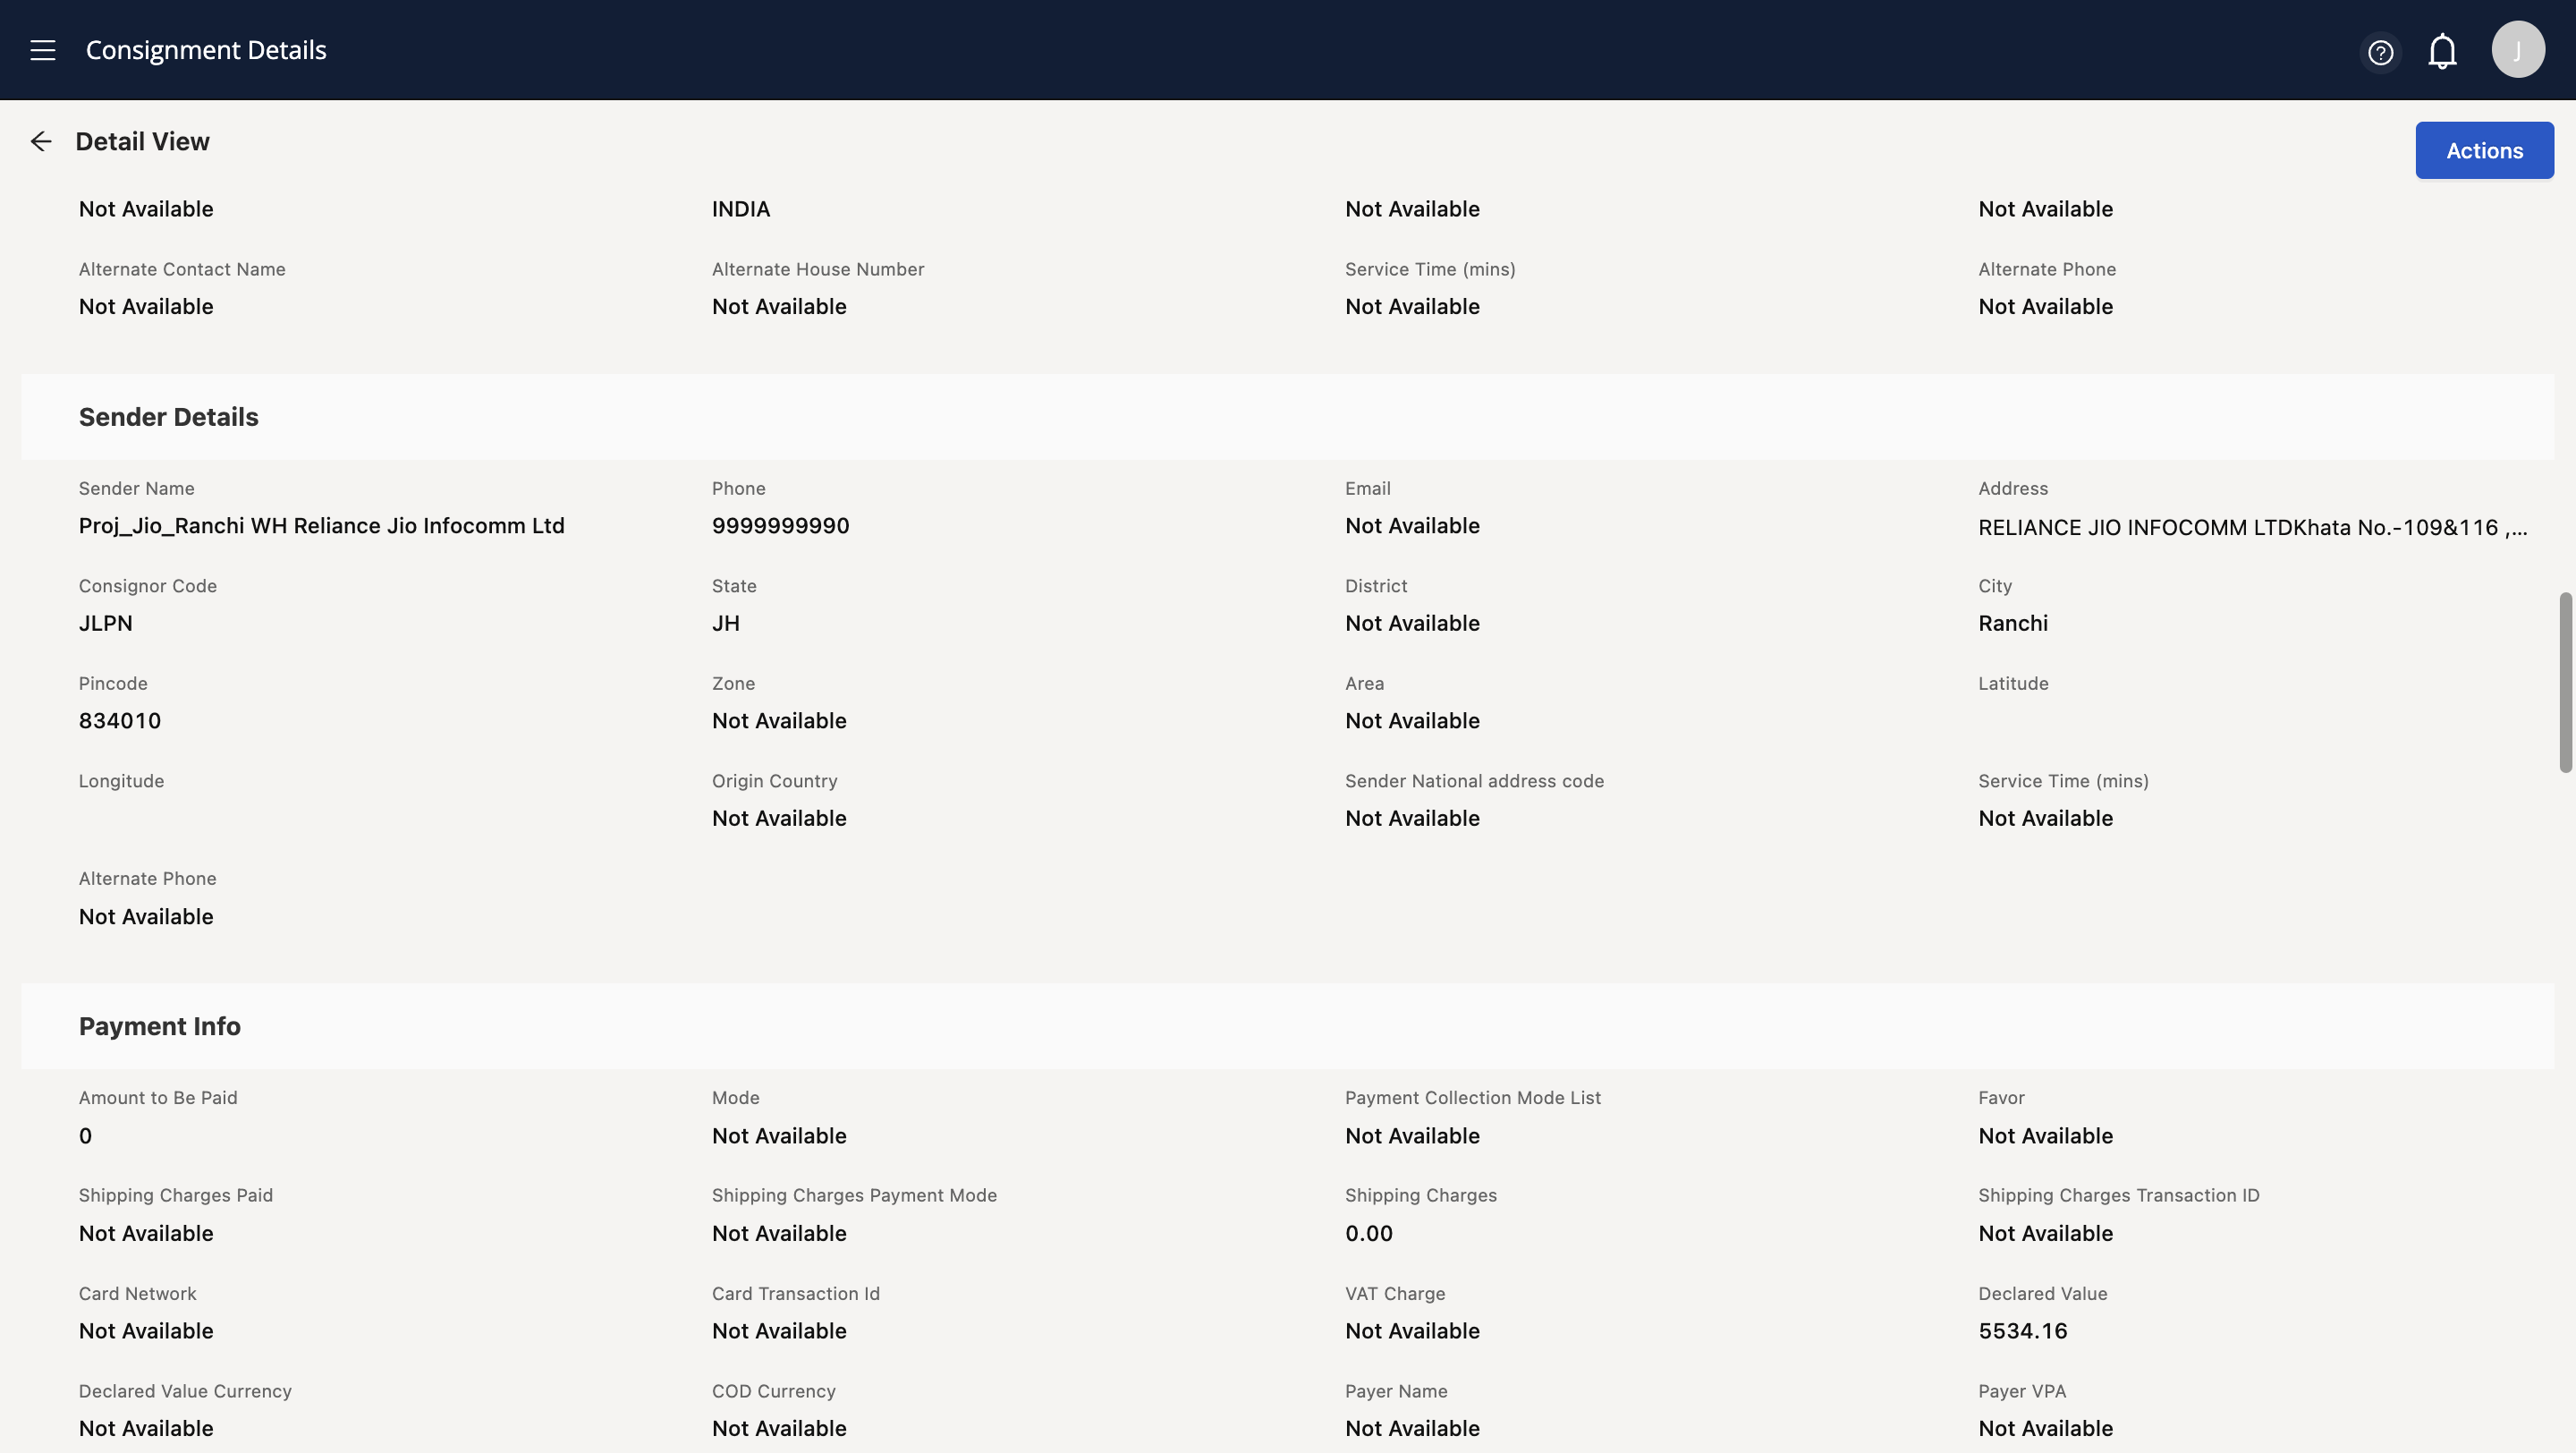
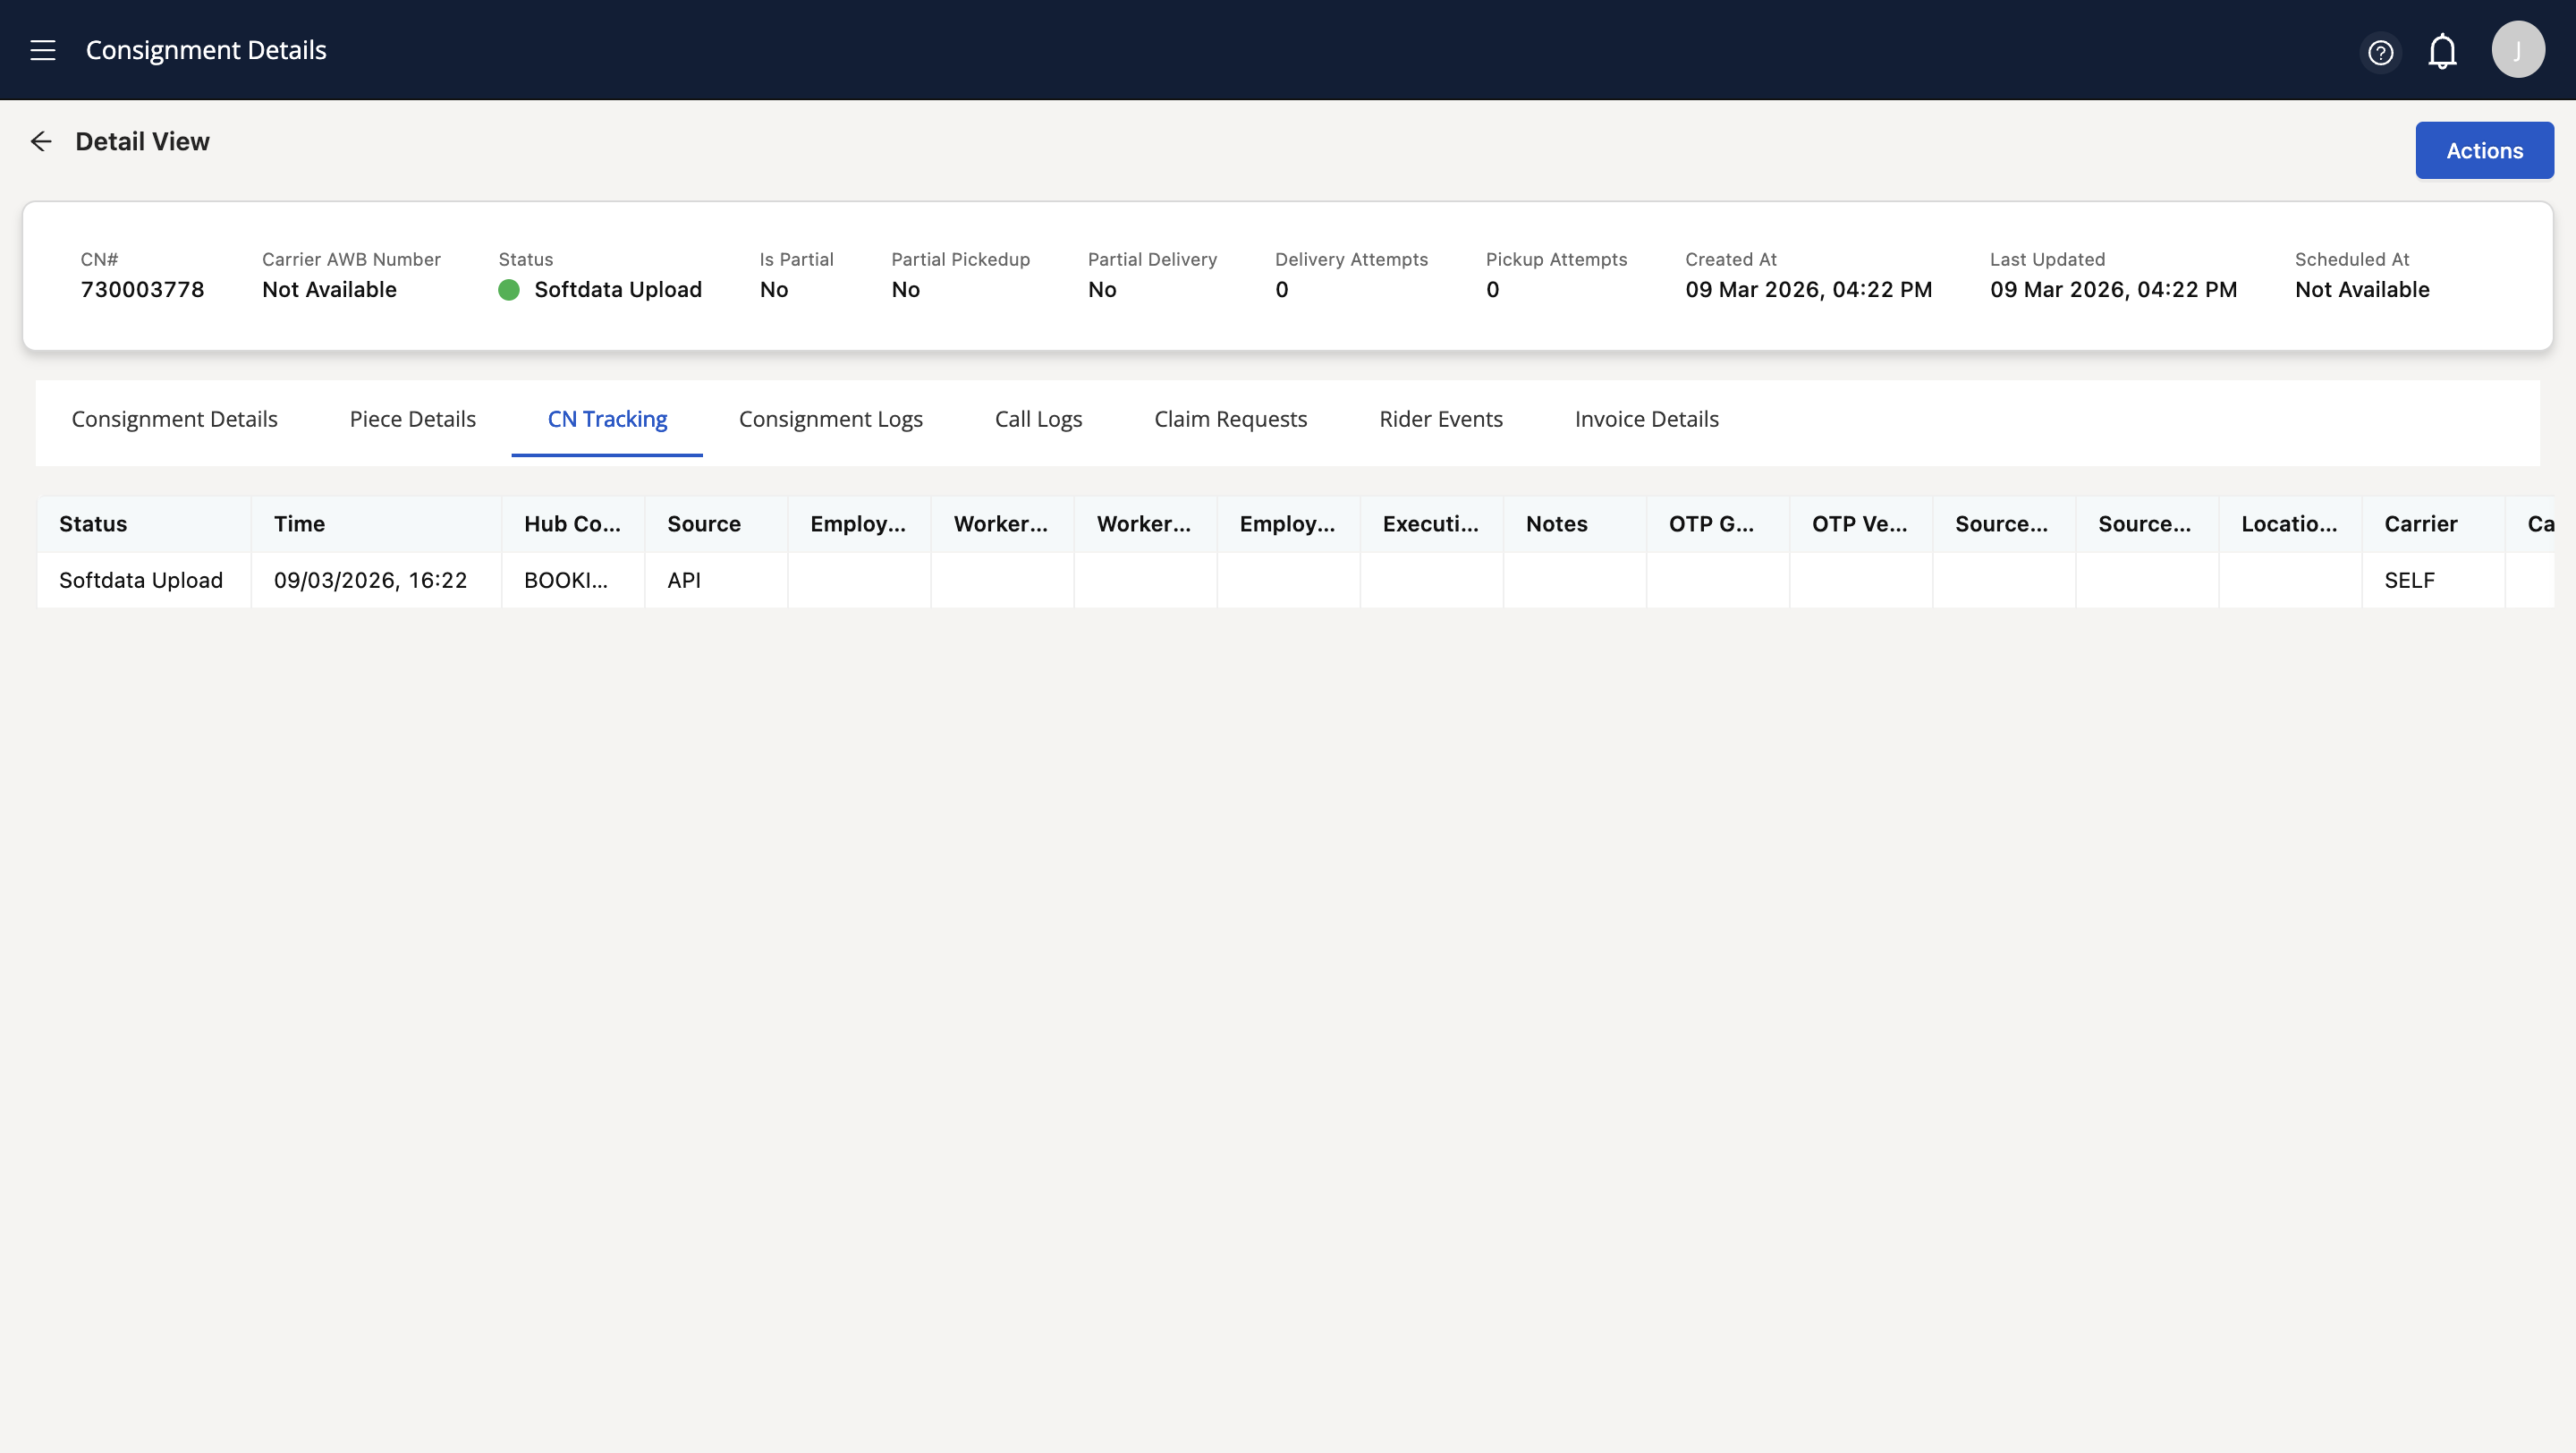
If you click on the consignment number (in blue color), you will see detailed information related to that specific consignment.
You can check details like current status, destination details, sender details, and so on.
You can also go to CN Tracking to see all actions performed on that CN along with the time and date at which the event was performed.
If you go back to the previous page where we searched for consignment number, there is another useful feature. You can select consignment numbers and perform a particular action on them. Actions like:
Mark as delivered or undelivered
Markets picked up, not picked up
Set RTO etc
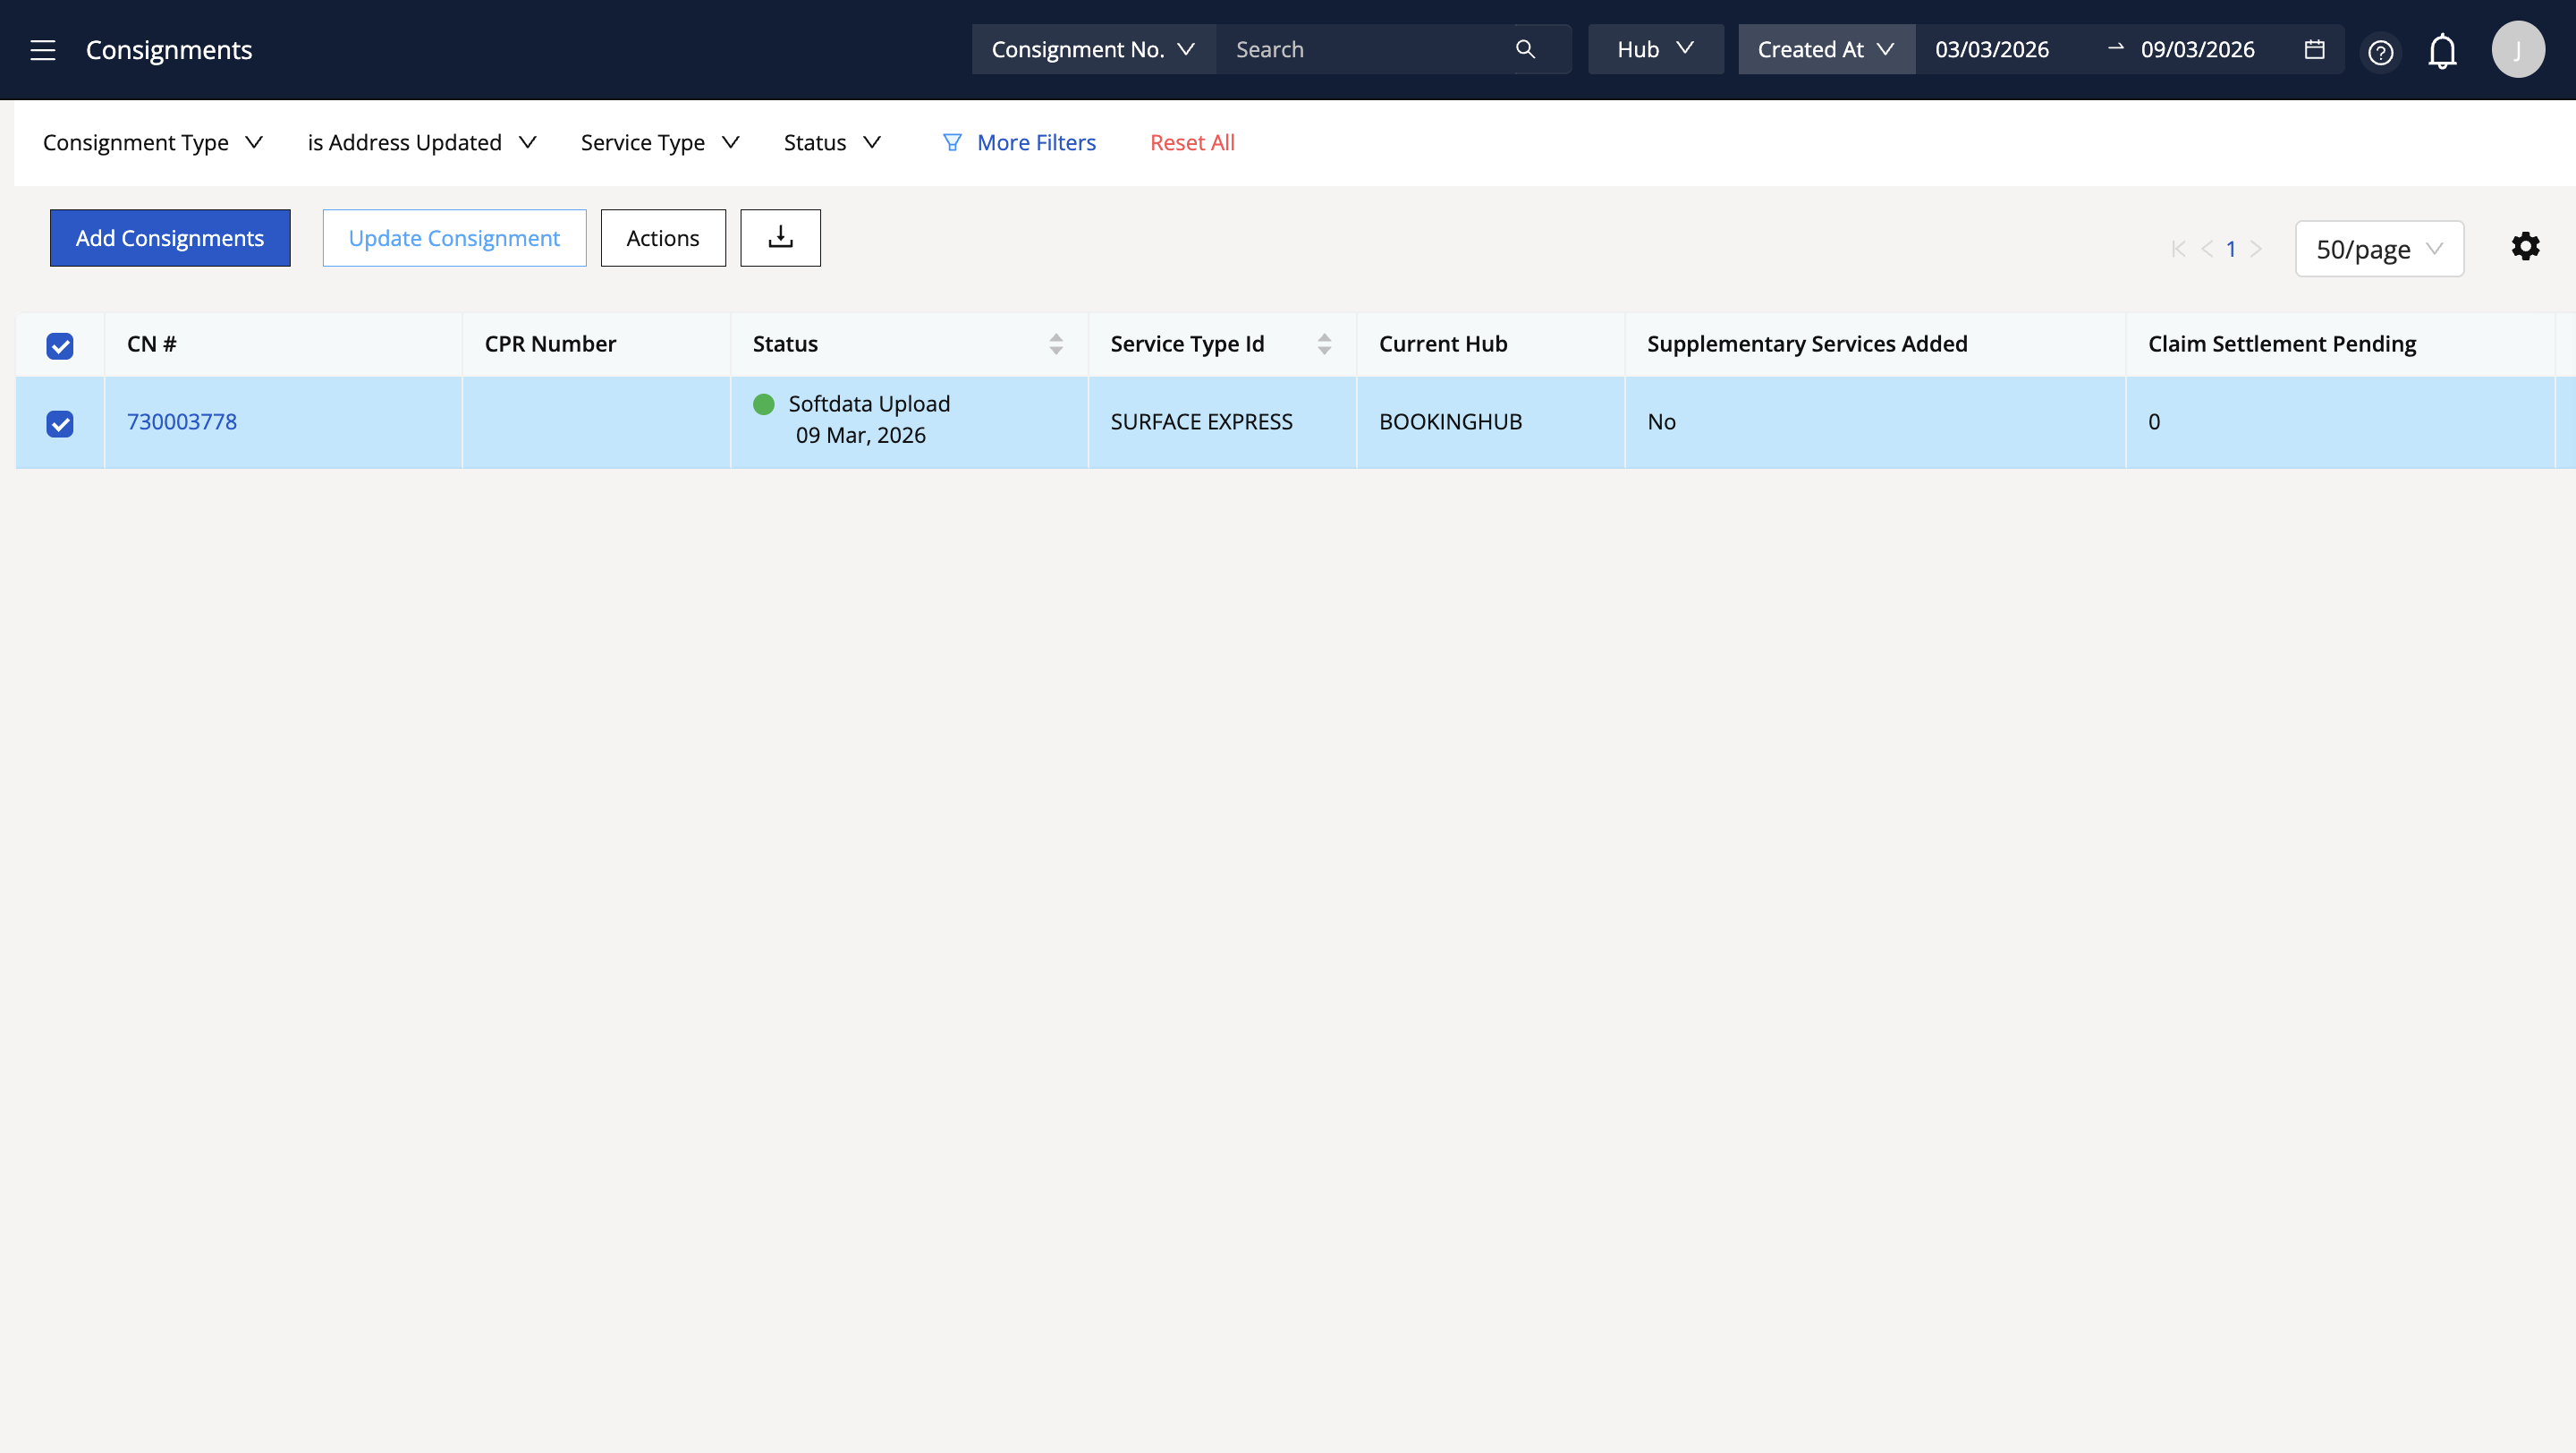
Select CNs by clicking on the checkbox next to consignment number, then click Update Consignment to explore all the available options.
Select the required action to be performed on the consignment. For example, set RTO, mark a CN as delivered or undelivered, cancel a particular consignment, or mark different statuses Mark as pickup awaited, and so on.
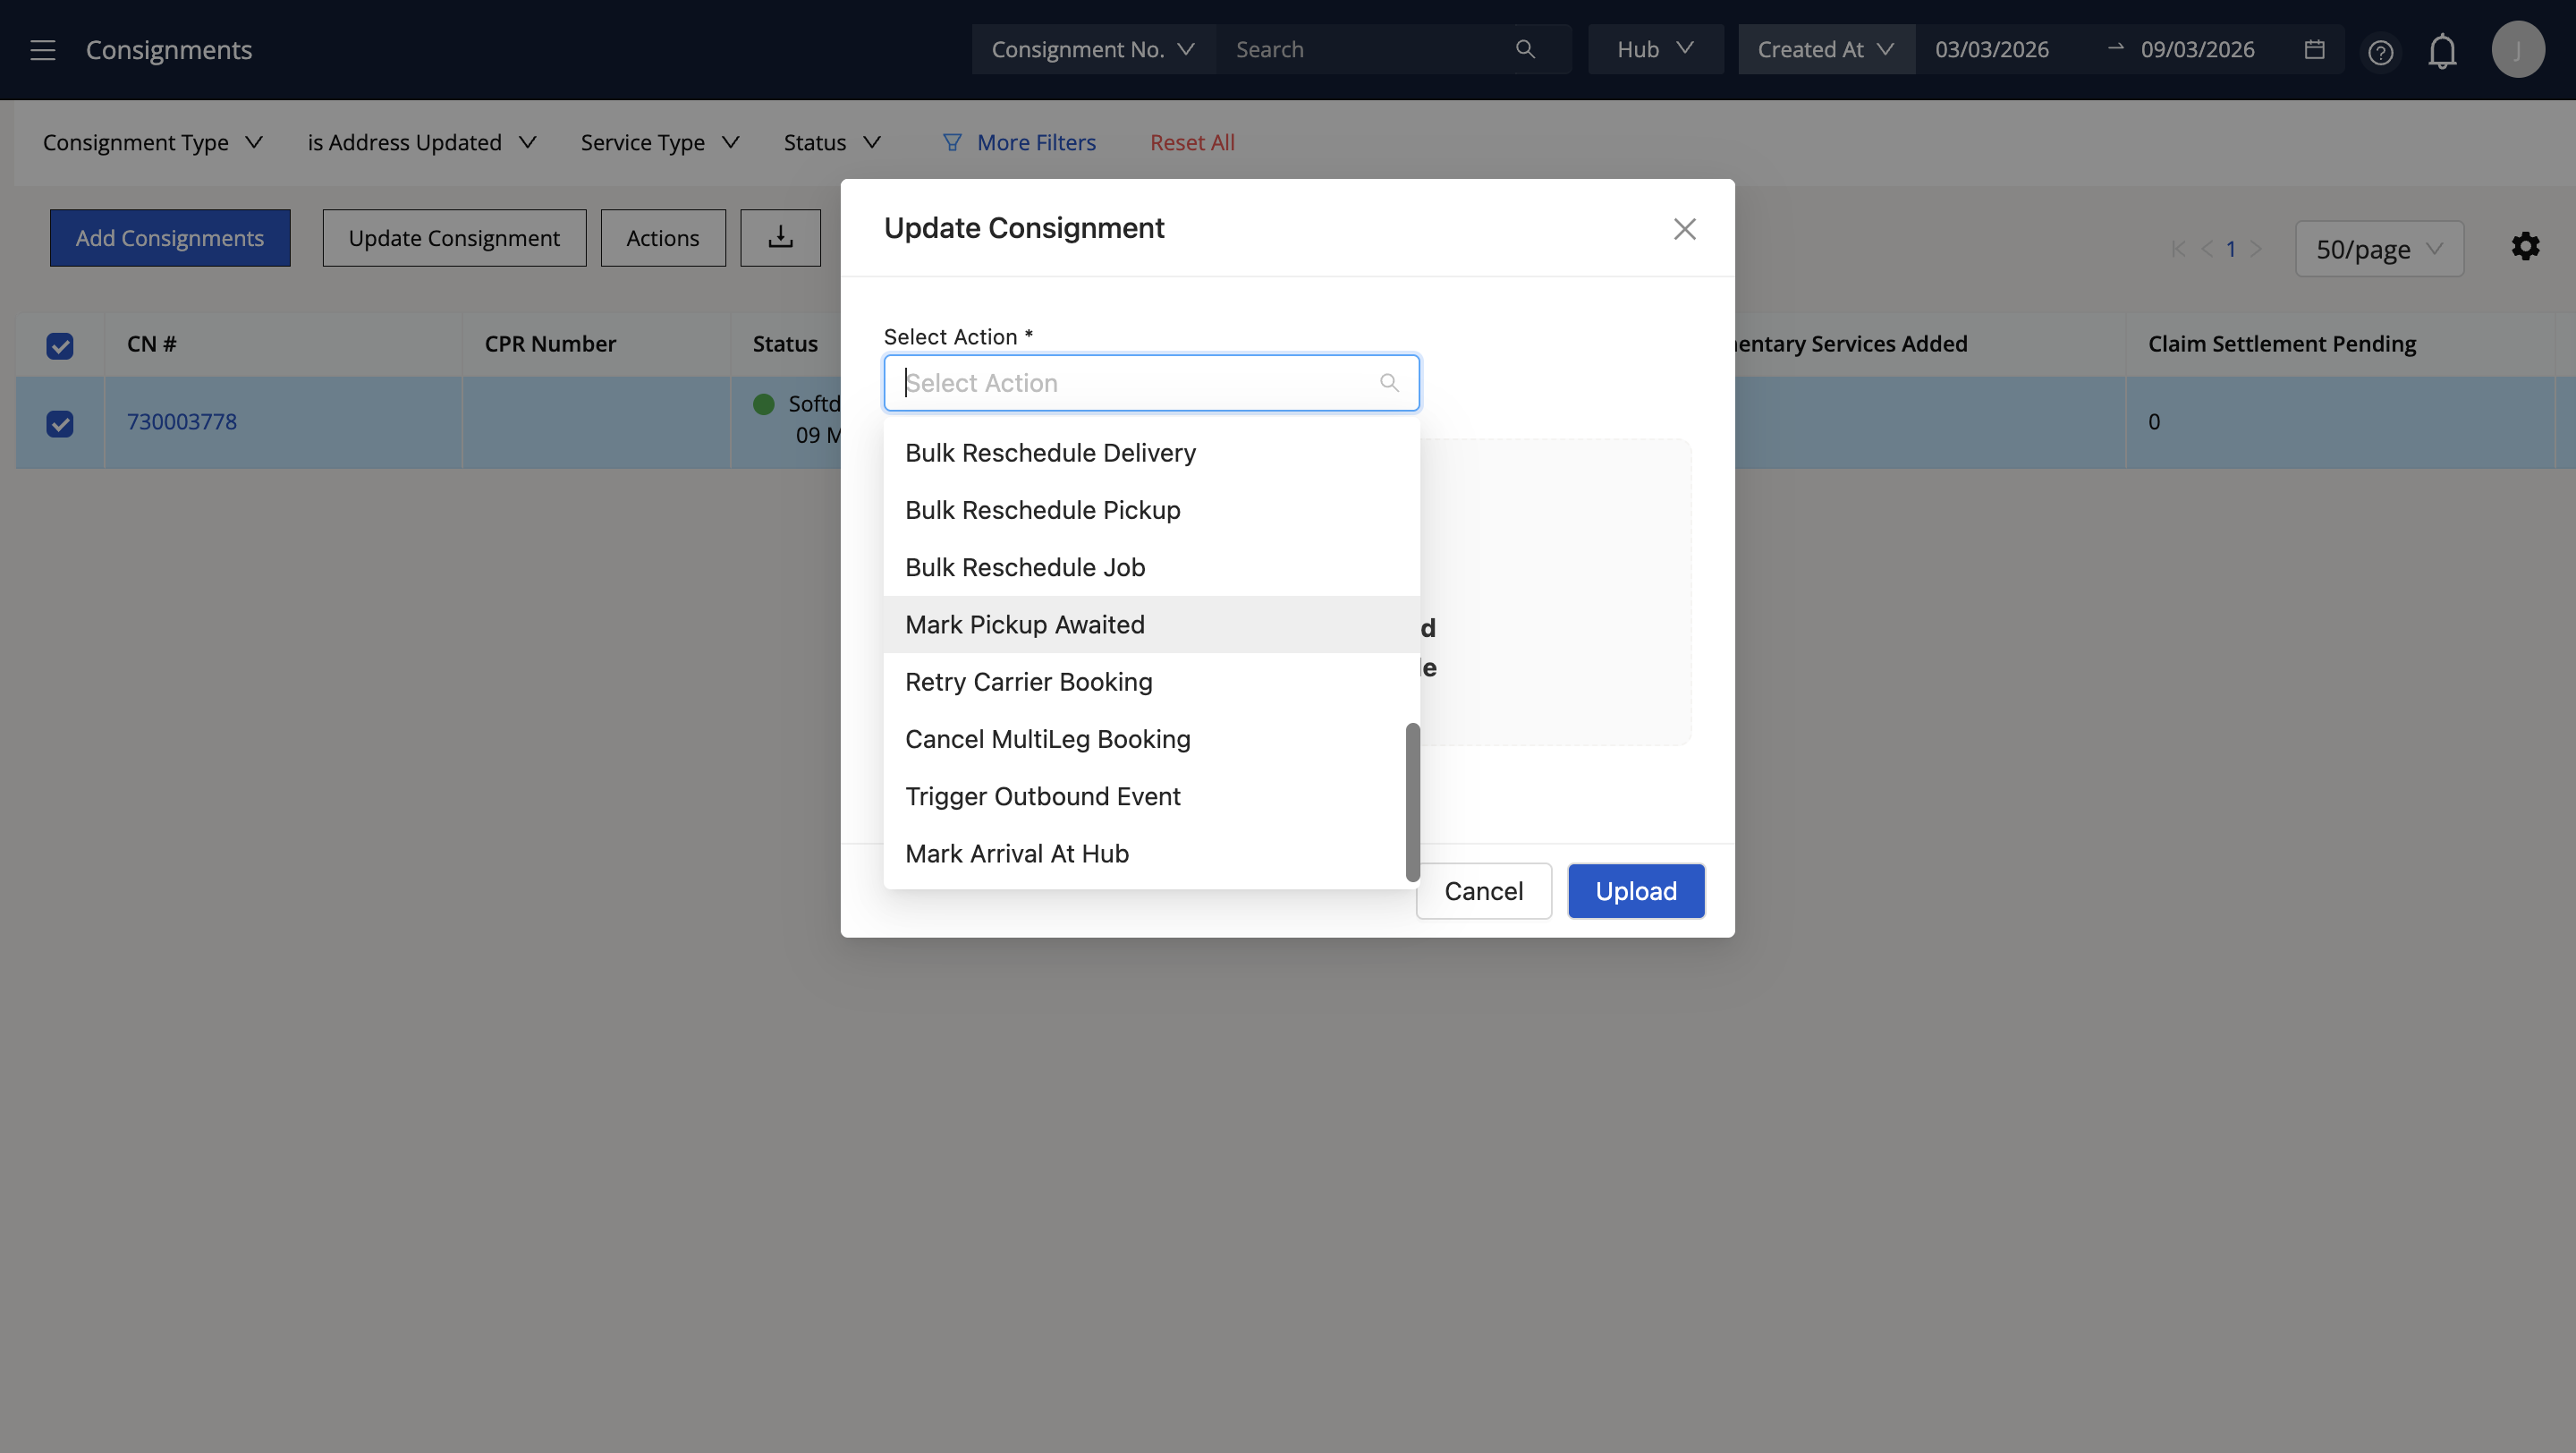
After selecting the required action, download a sample file and Click on upload to execute the action.
Likewise, you have more options when you click on Actions.

To download the CN data, click the Download button, then select "Download All" to download all the CN dump, or click on "Download Consignment" to download select consignments .

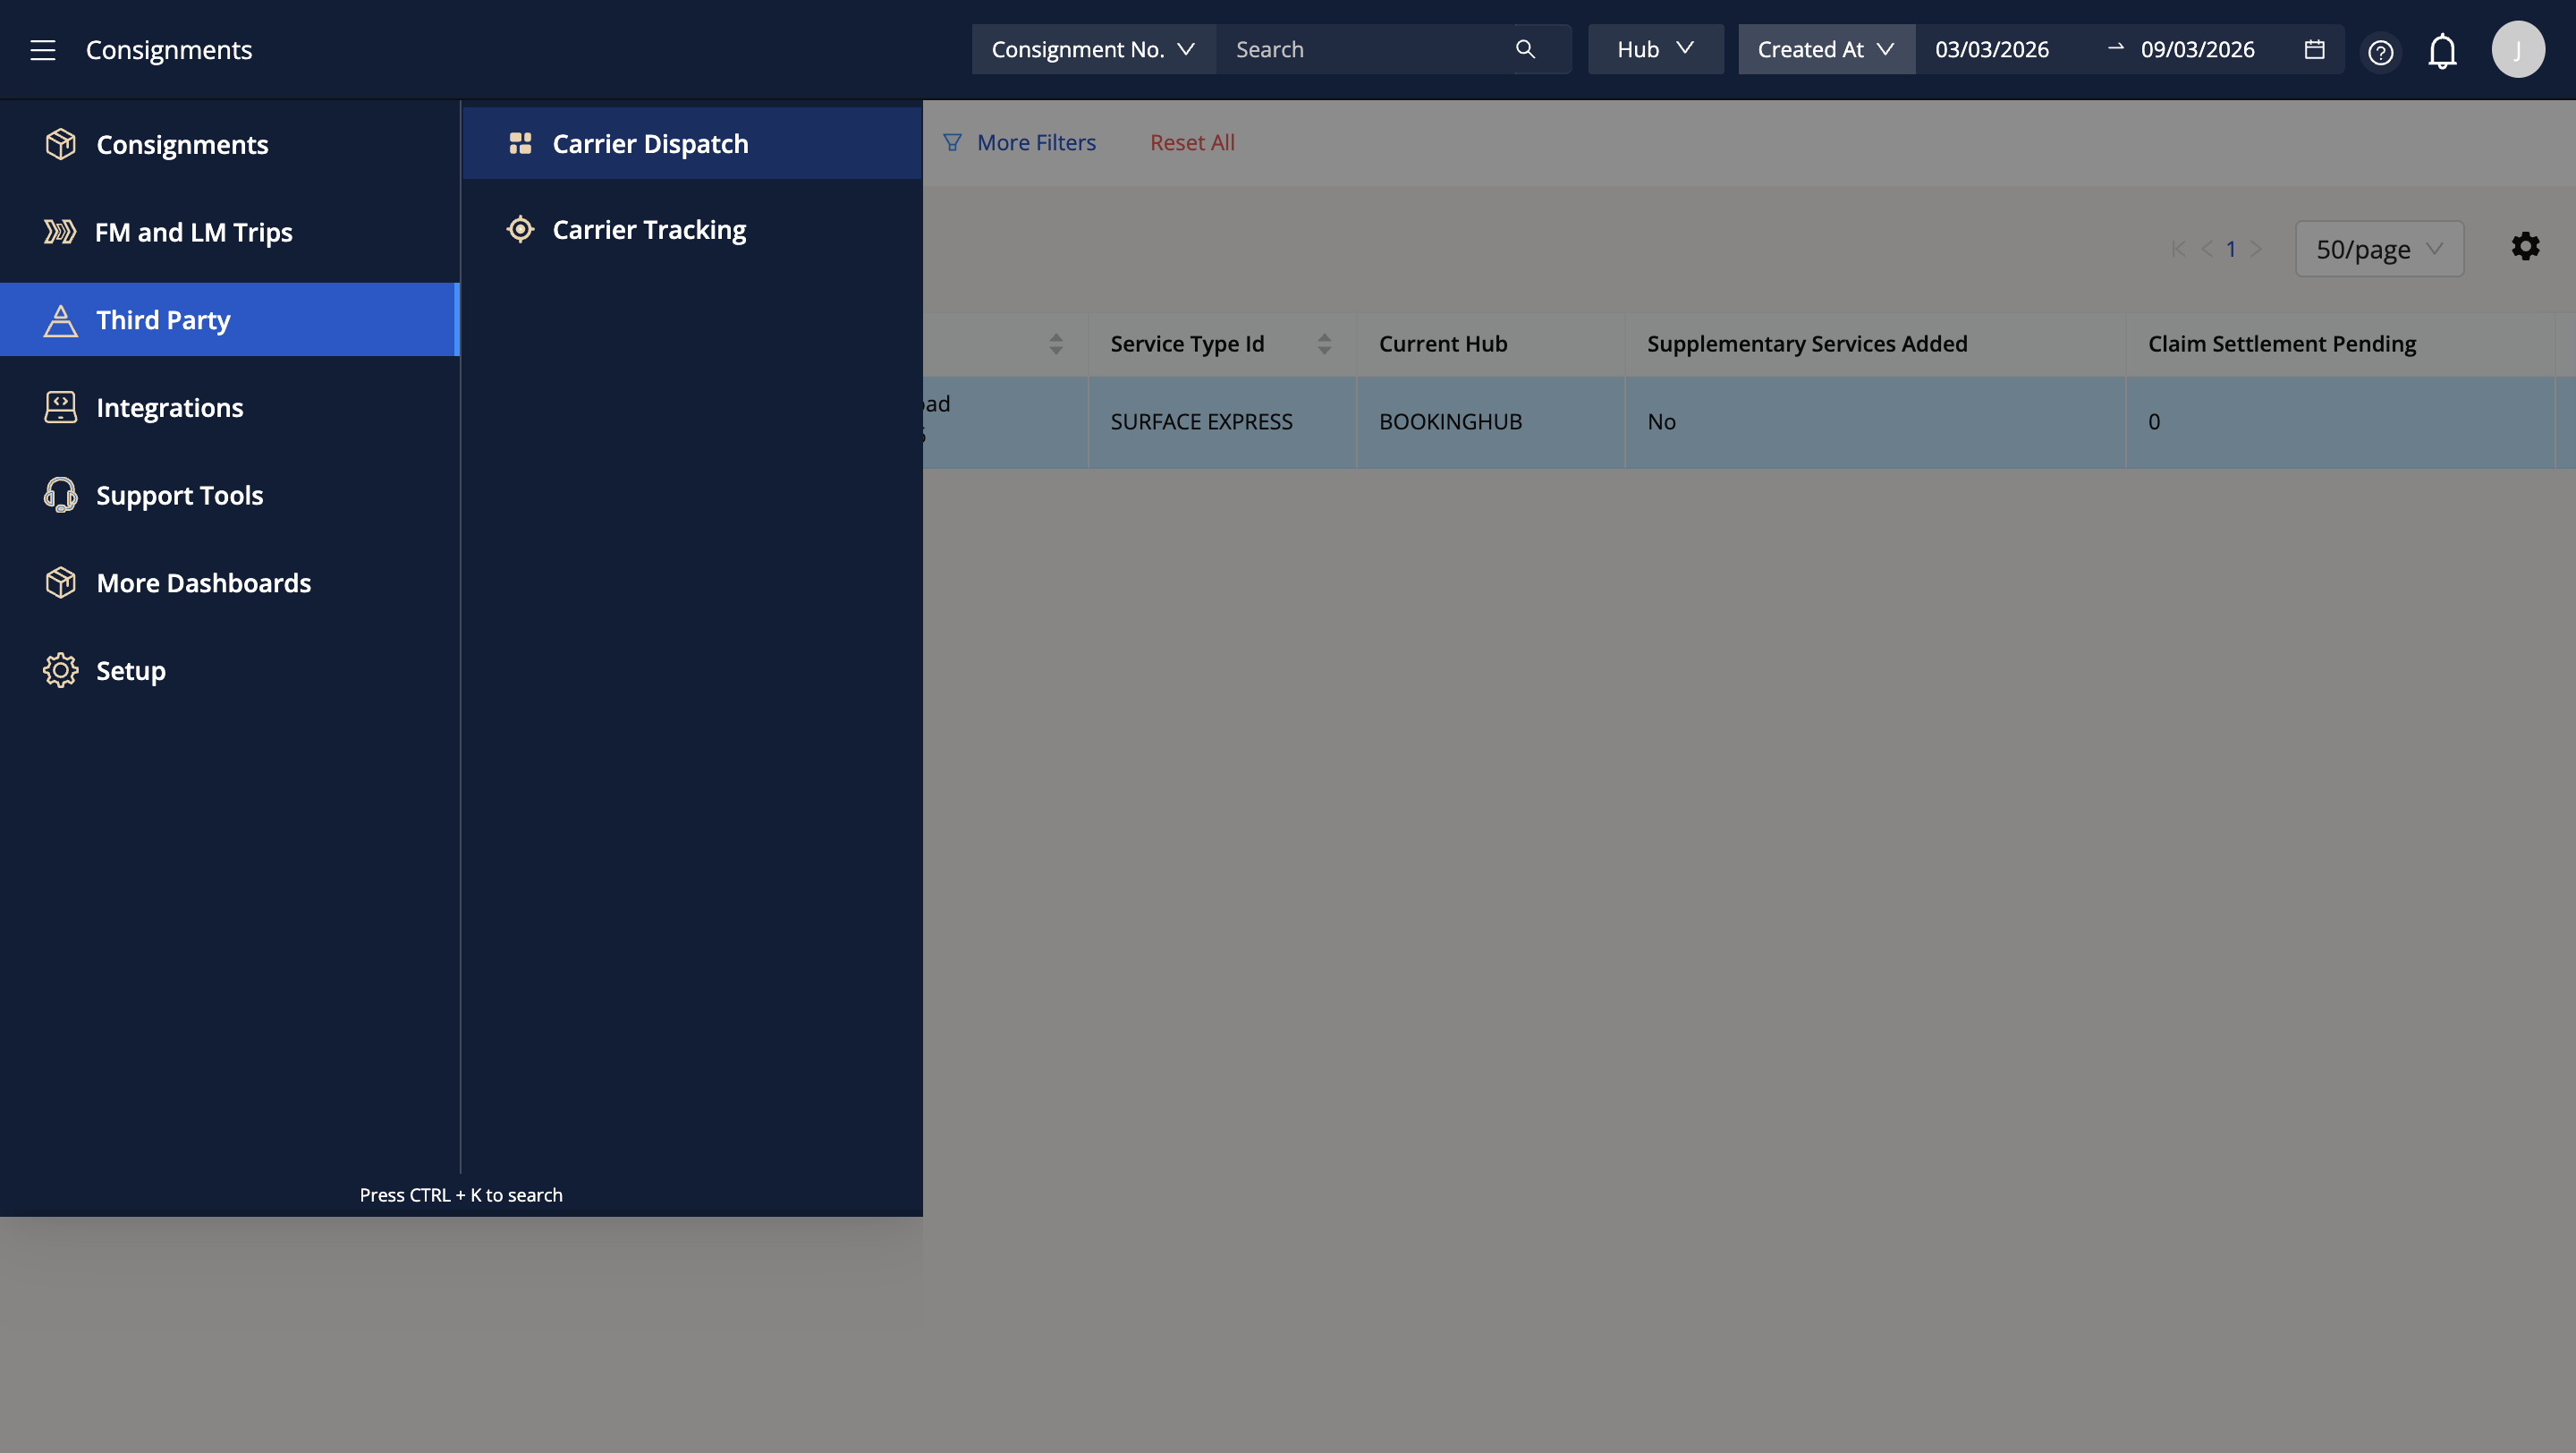
Next, we will explore the third-party page
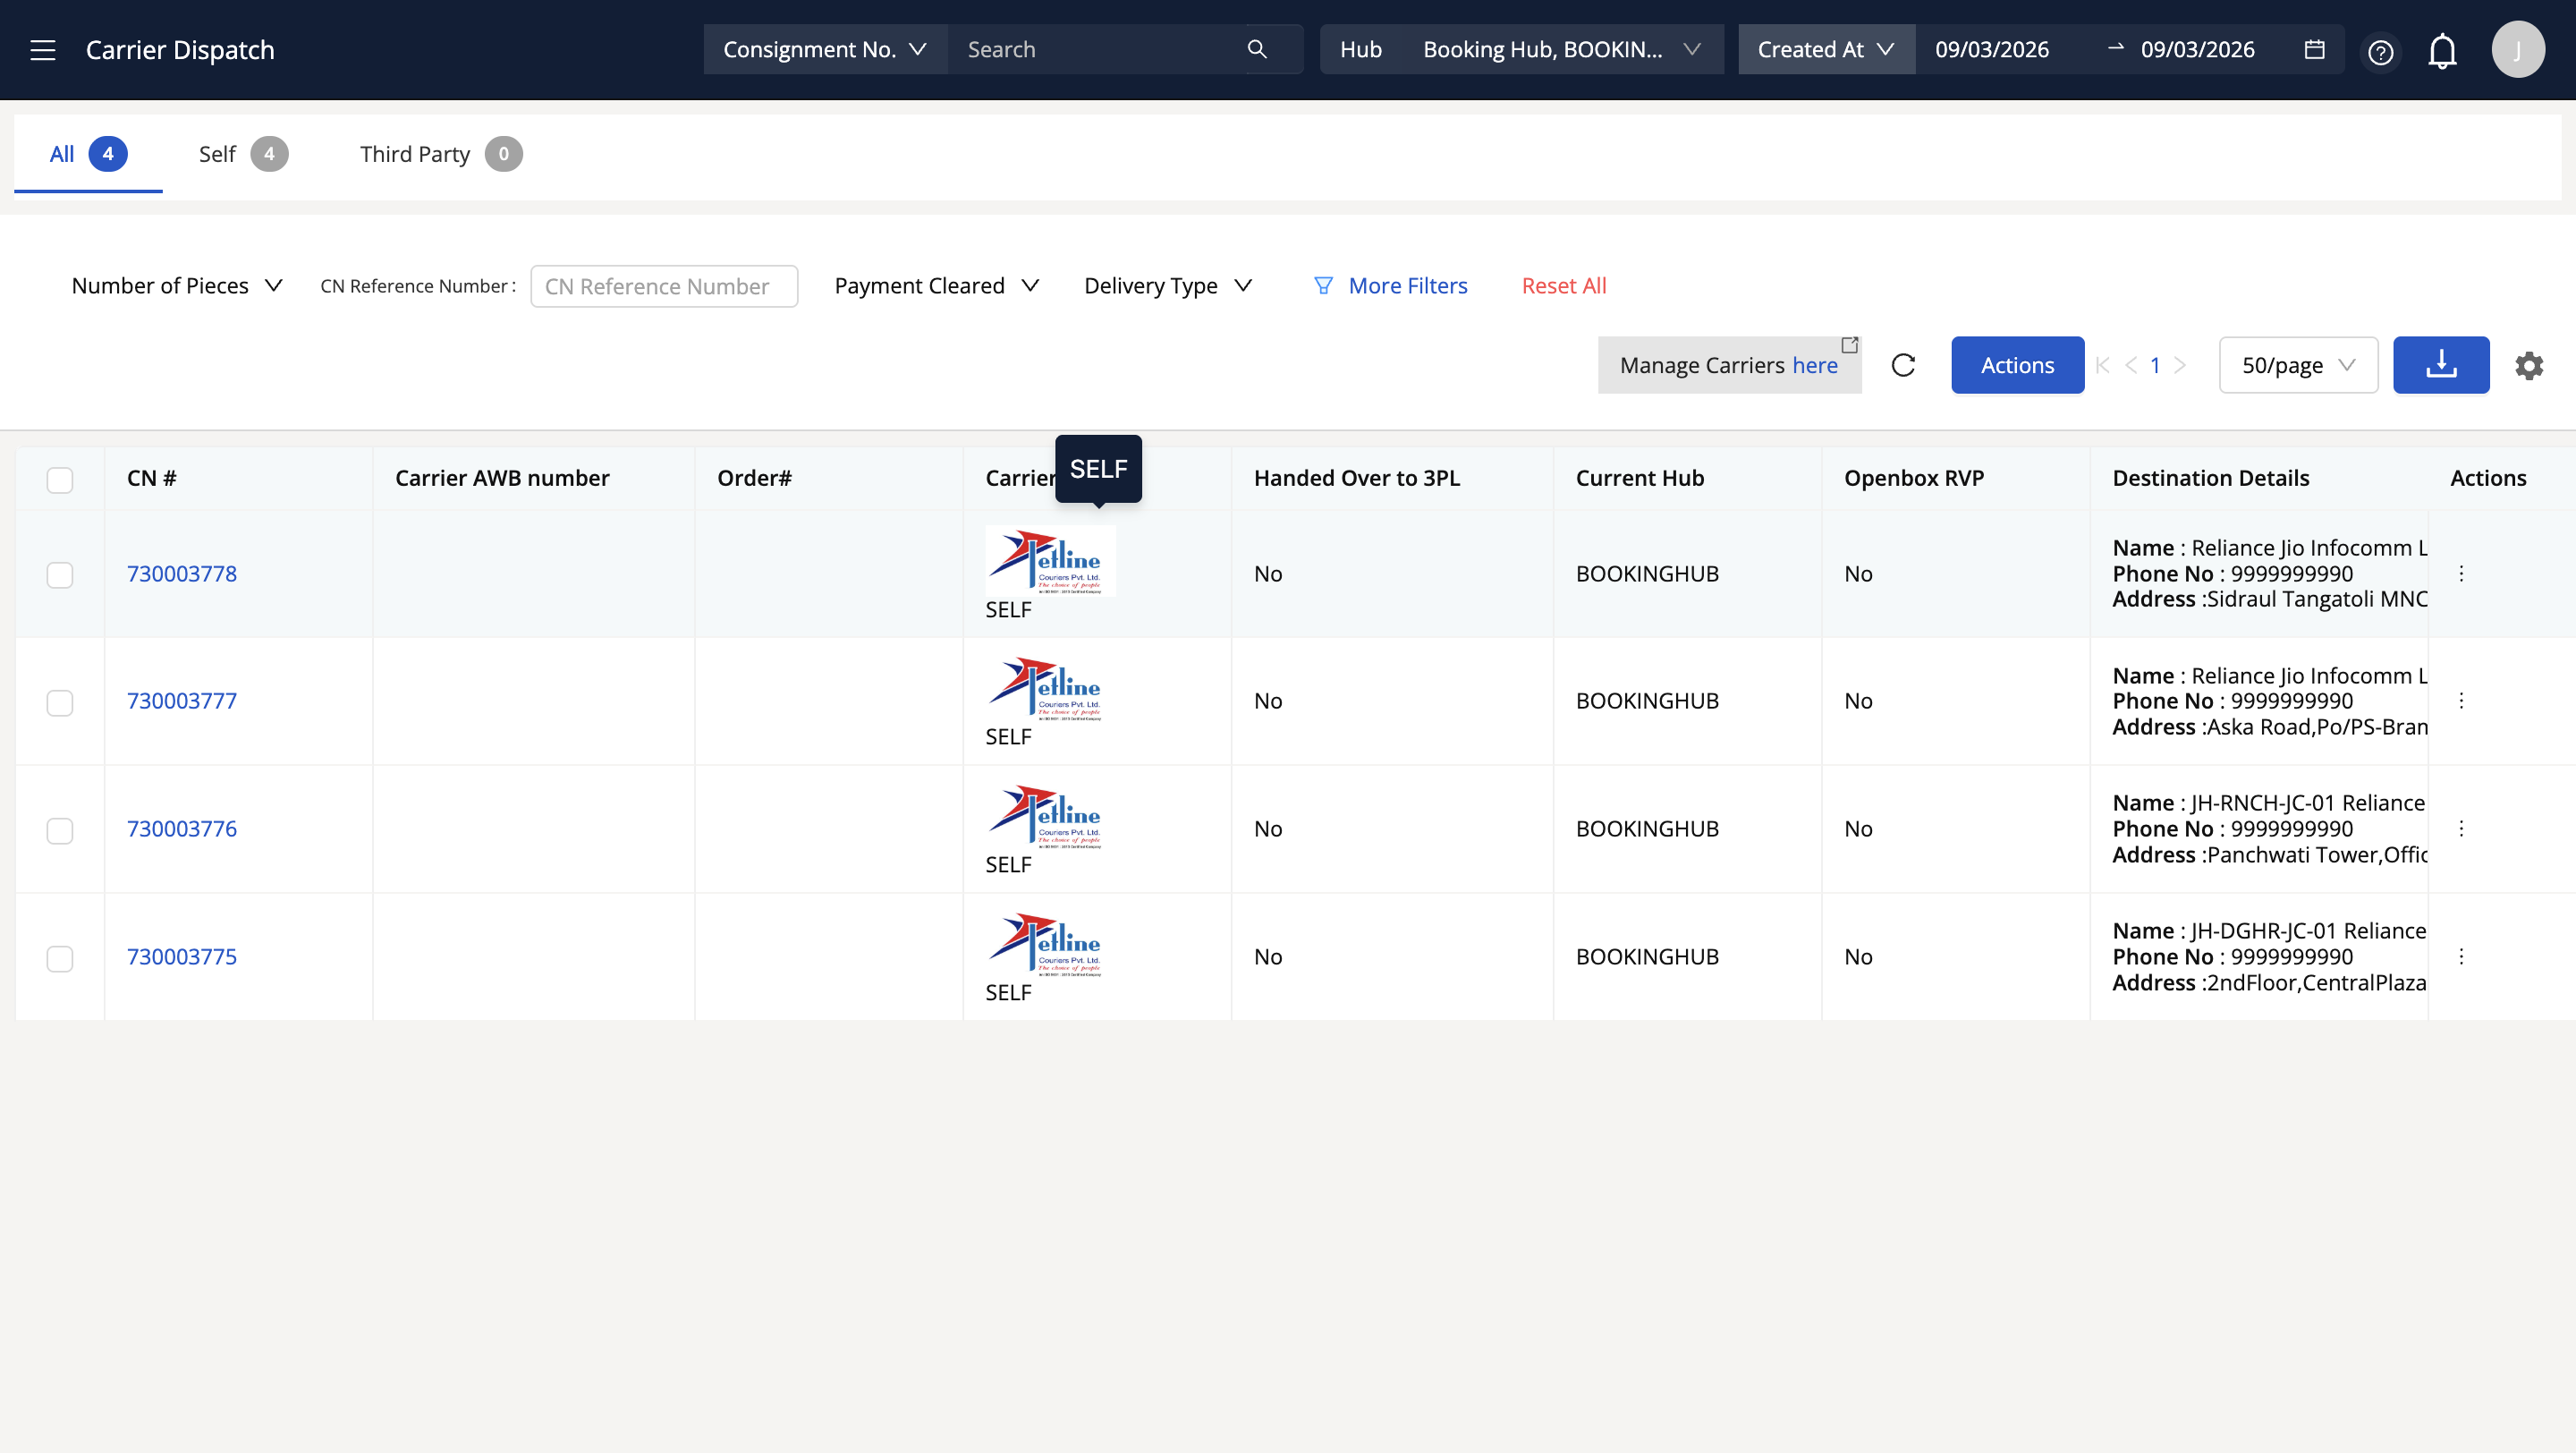
Click on third-party -> carrier dispatch
Here, you can check which carrier a specific consignment number is assigned to
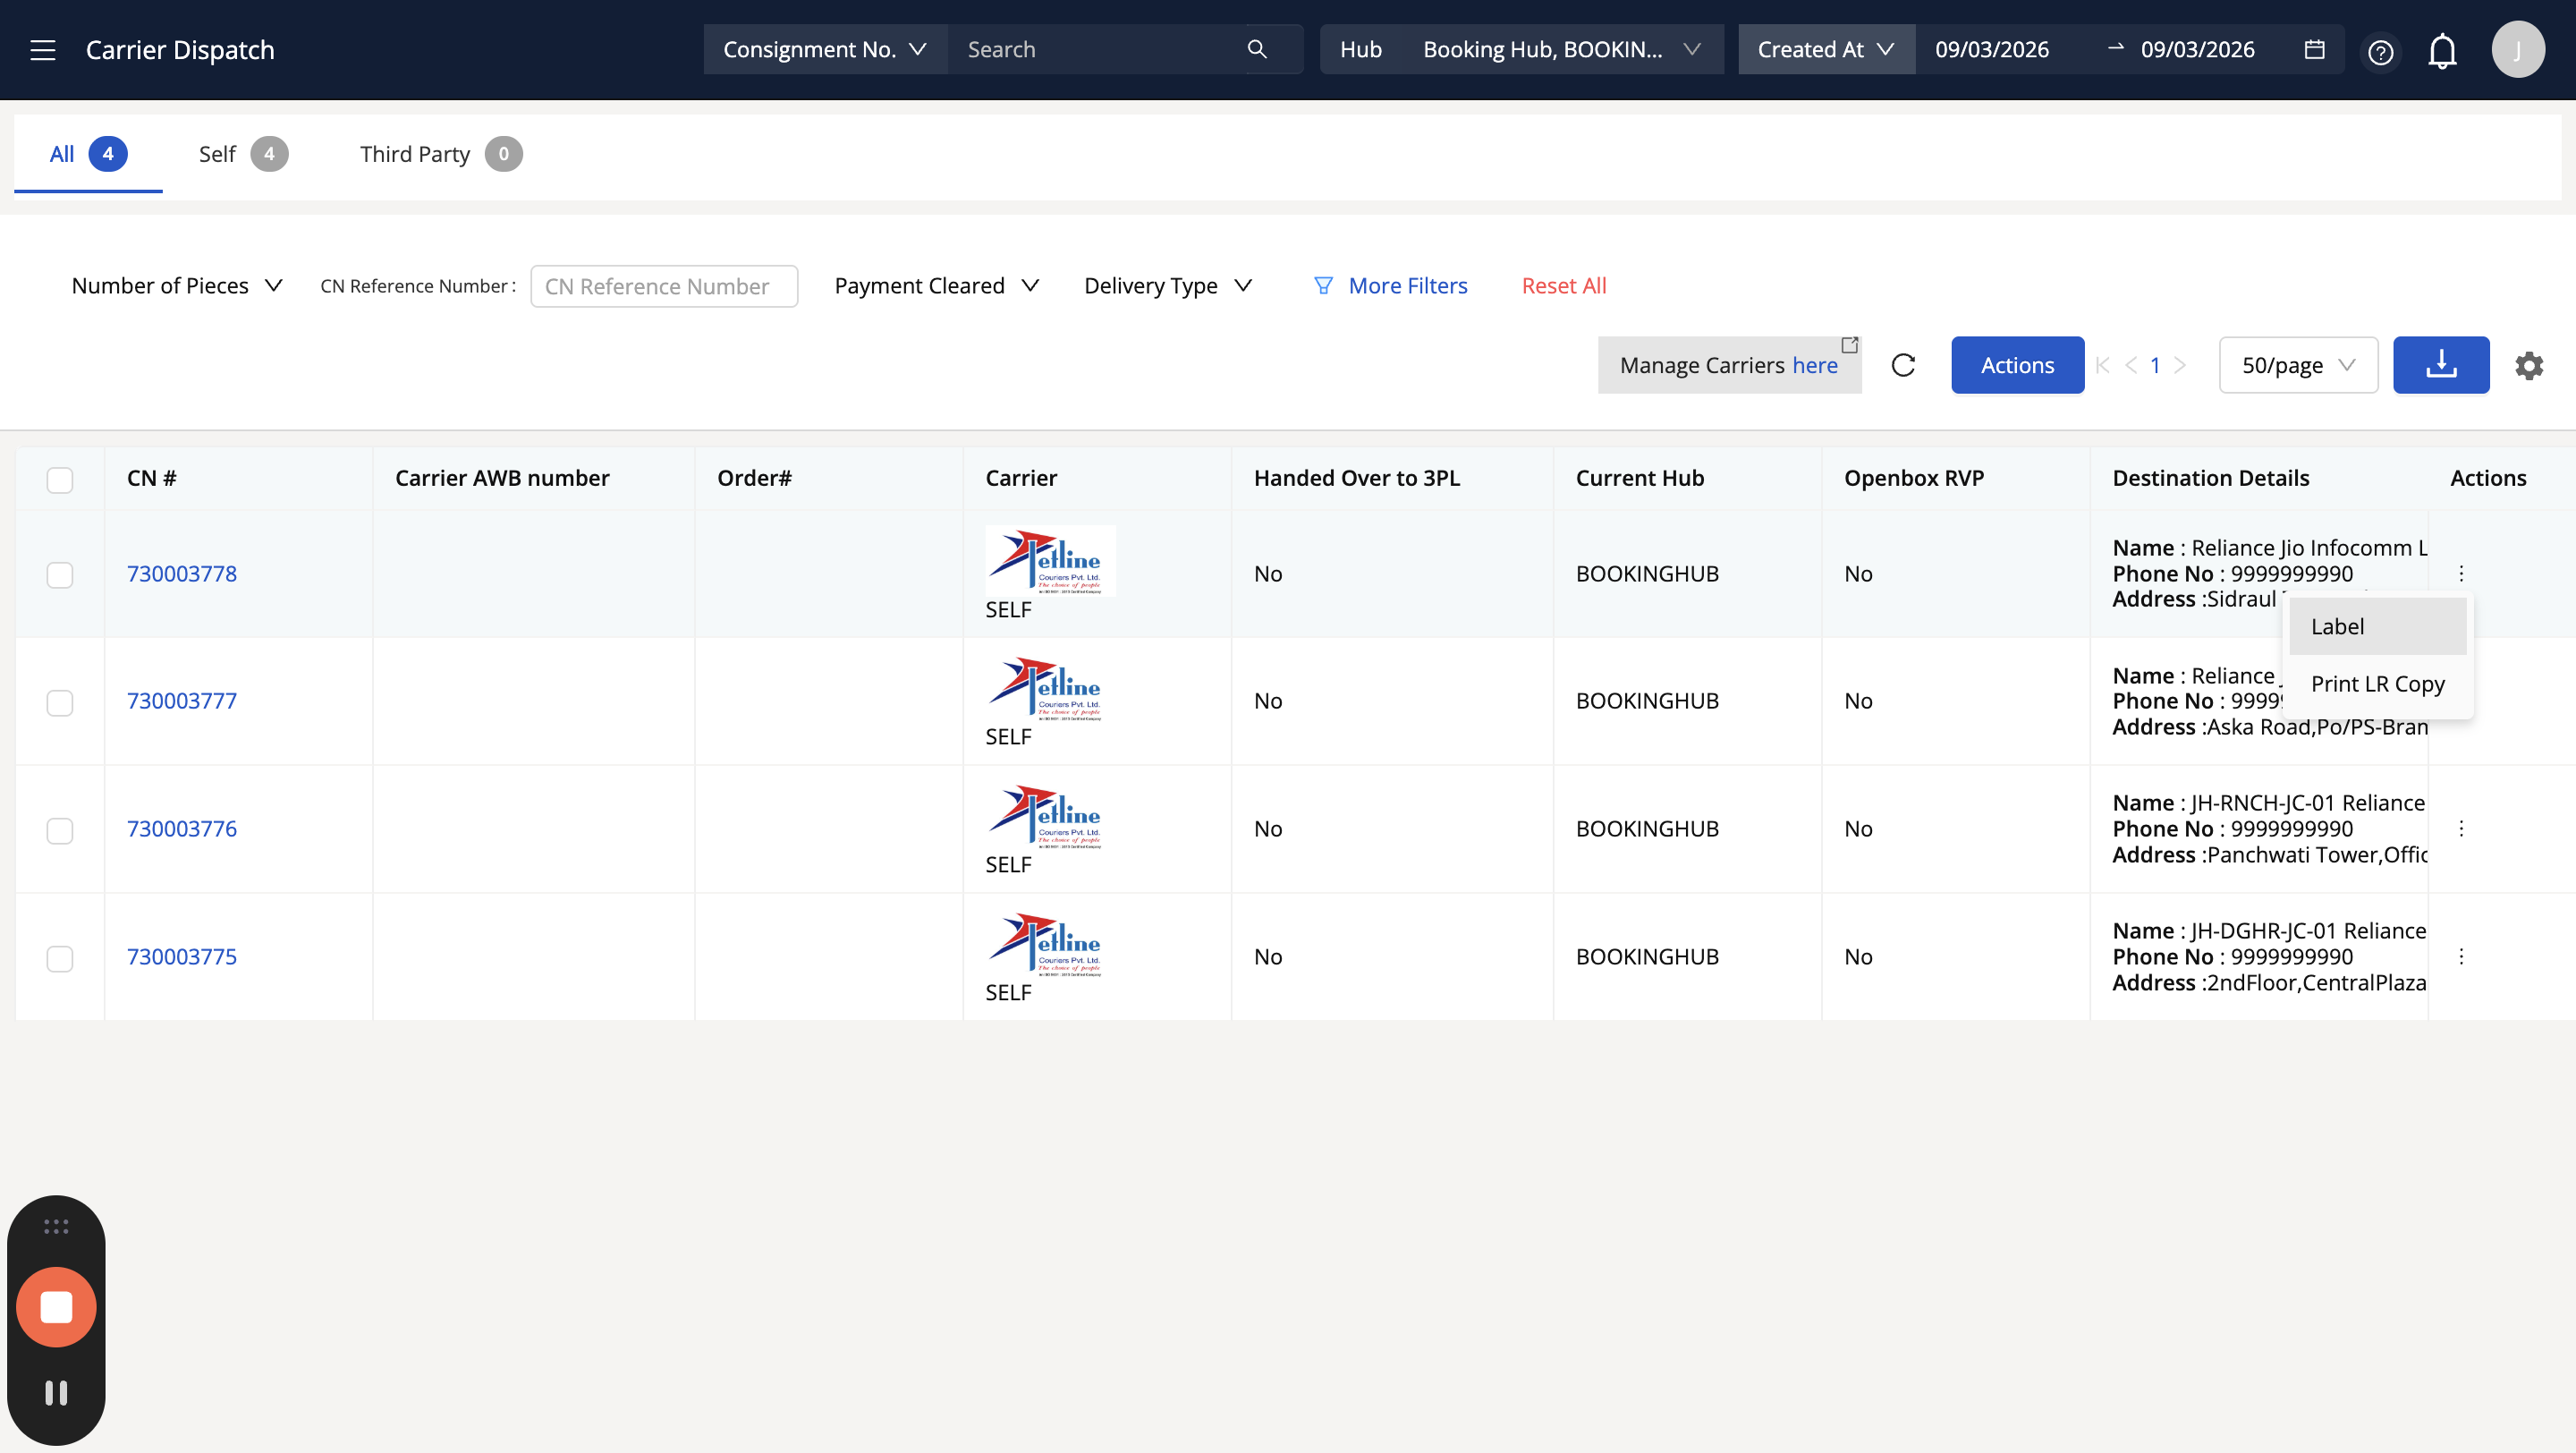
Click on the three dots under "Actions" on the far right. You have two options. You can print the label or the LR copy once you click on this.
On this page also, you can search by consignment number, select the hub, and filter by creation date. You can fill in the details to filter out a particular consignment or directly enter the consignment number.
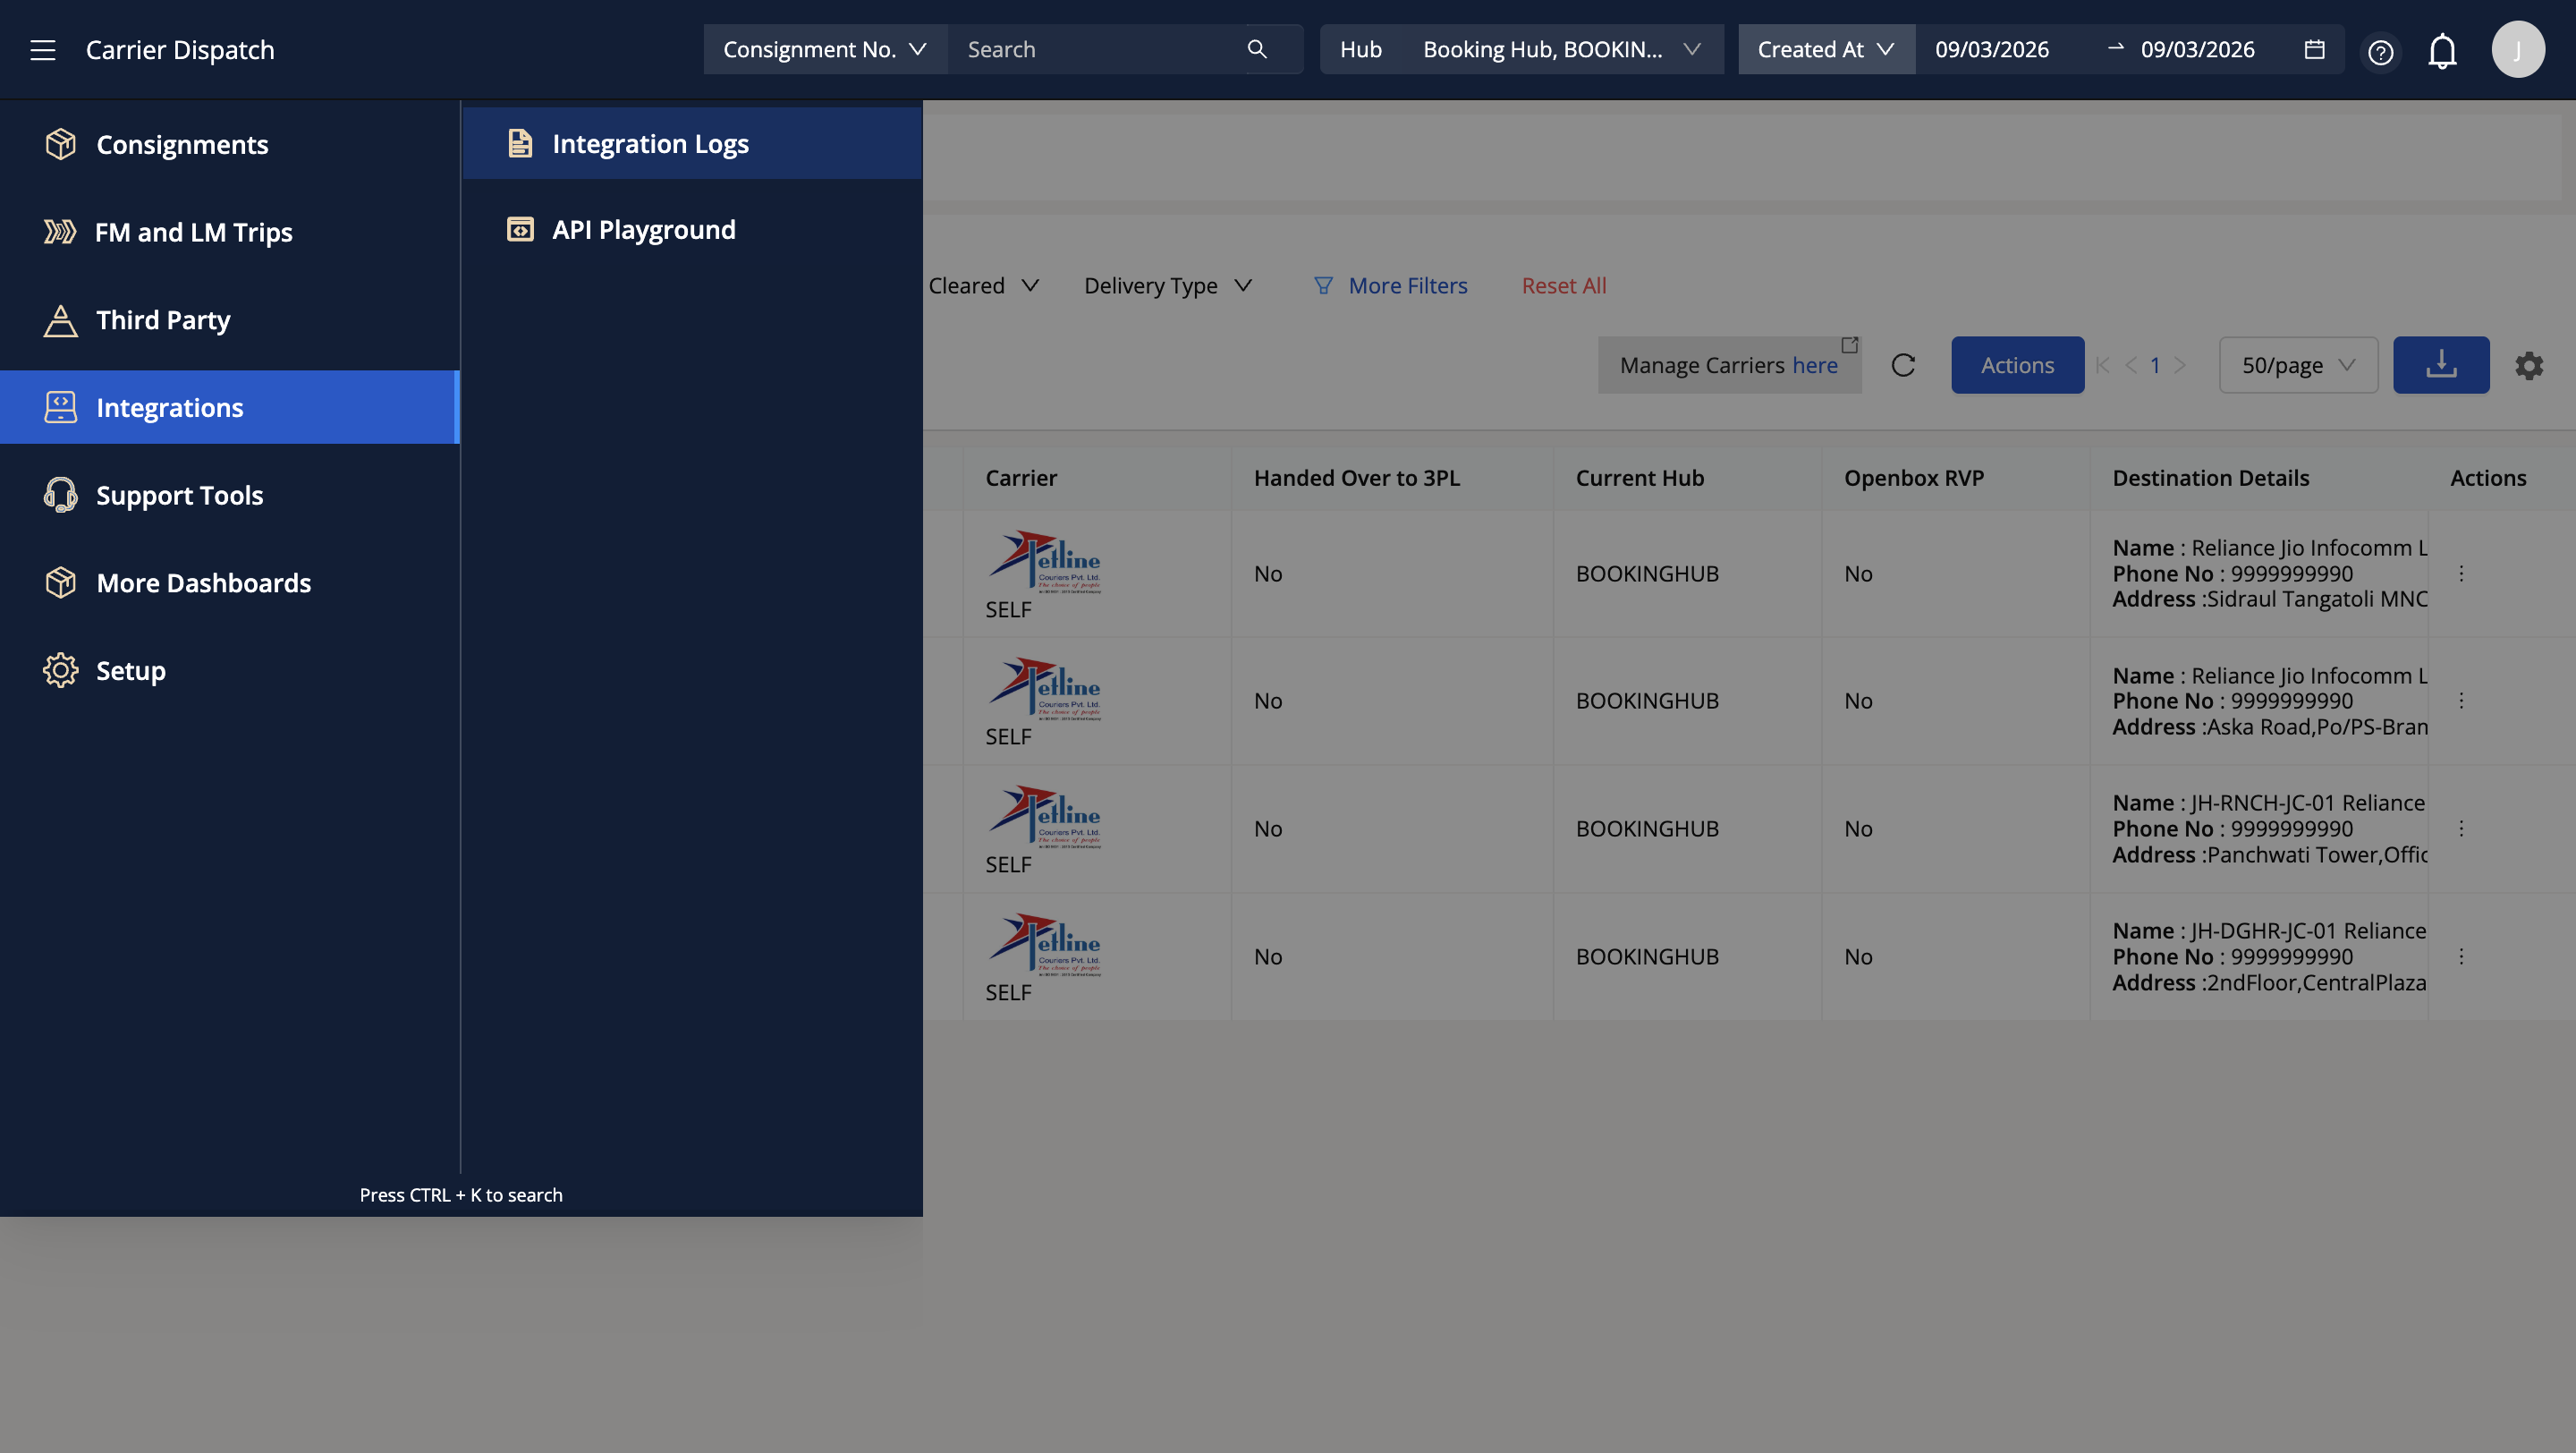
Finally, let's explore Integrations and Integration Logs
Click on Integrations-> Integration logs
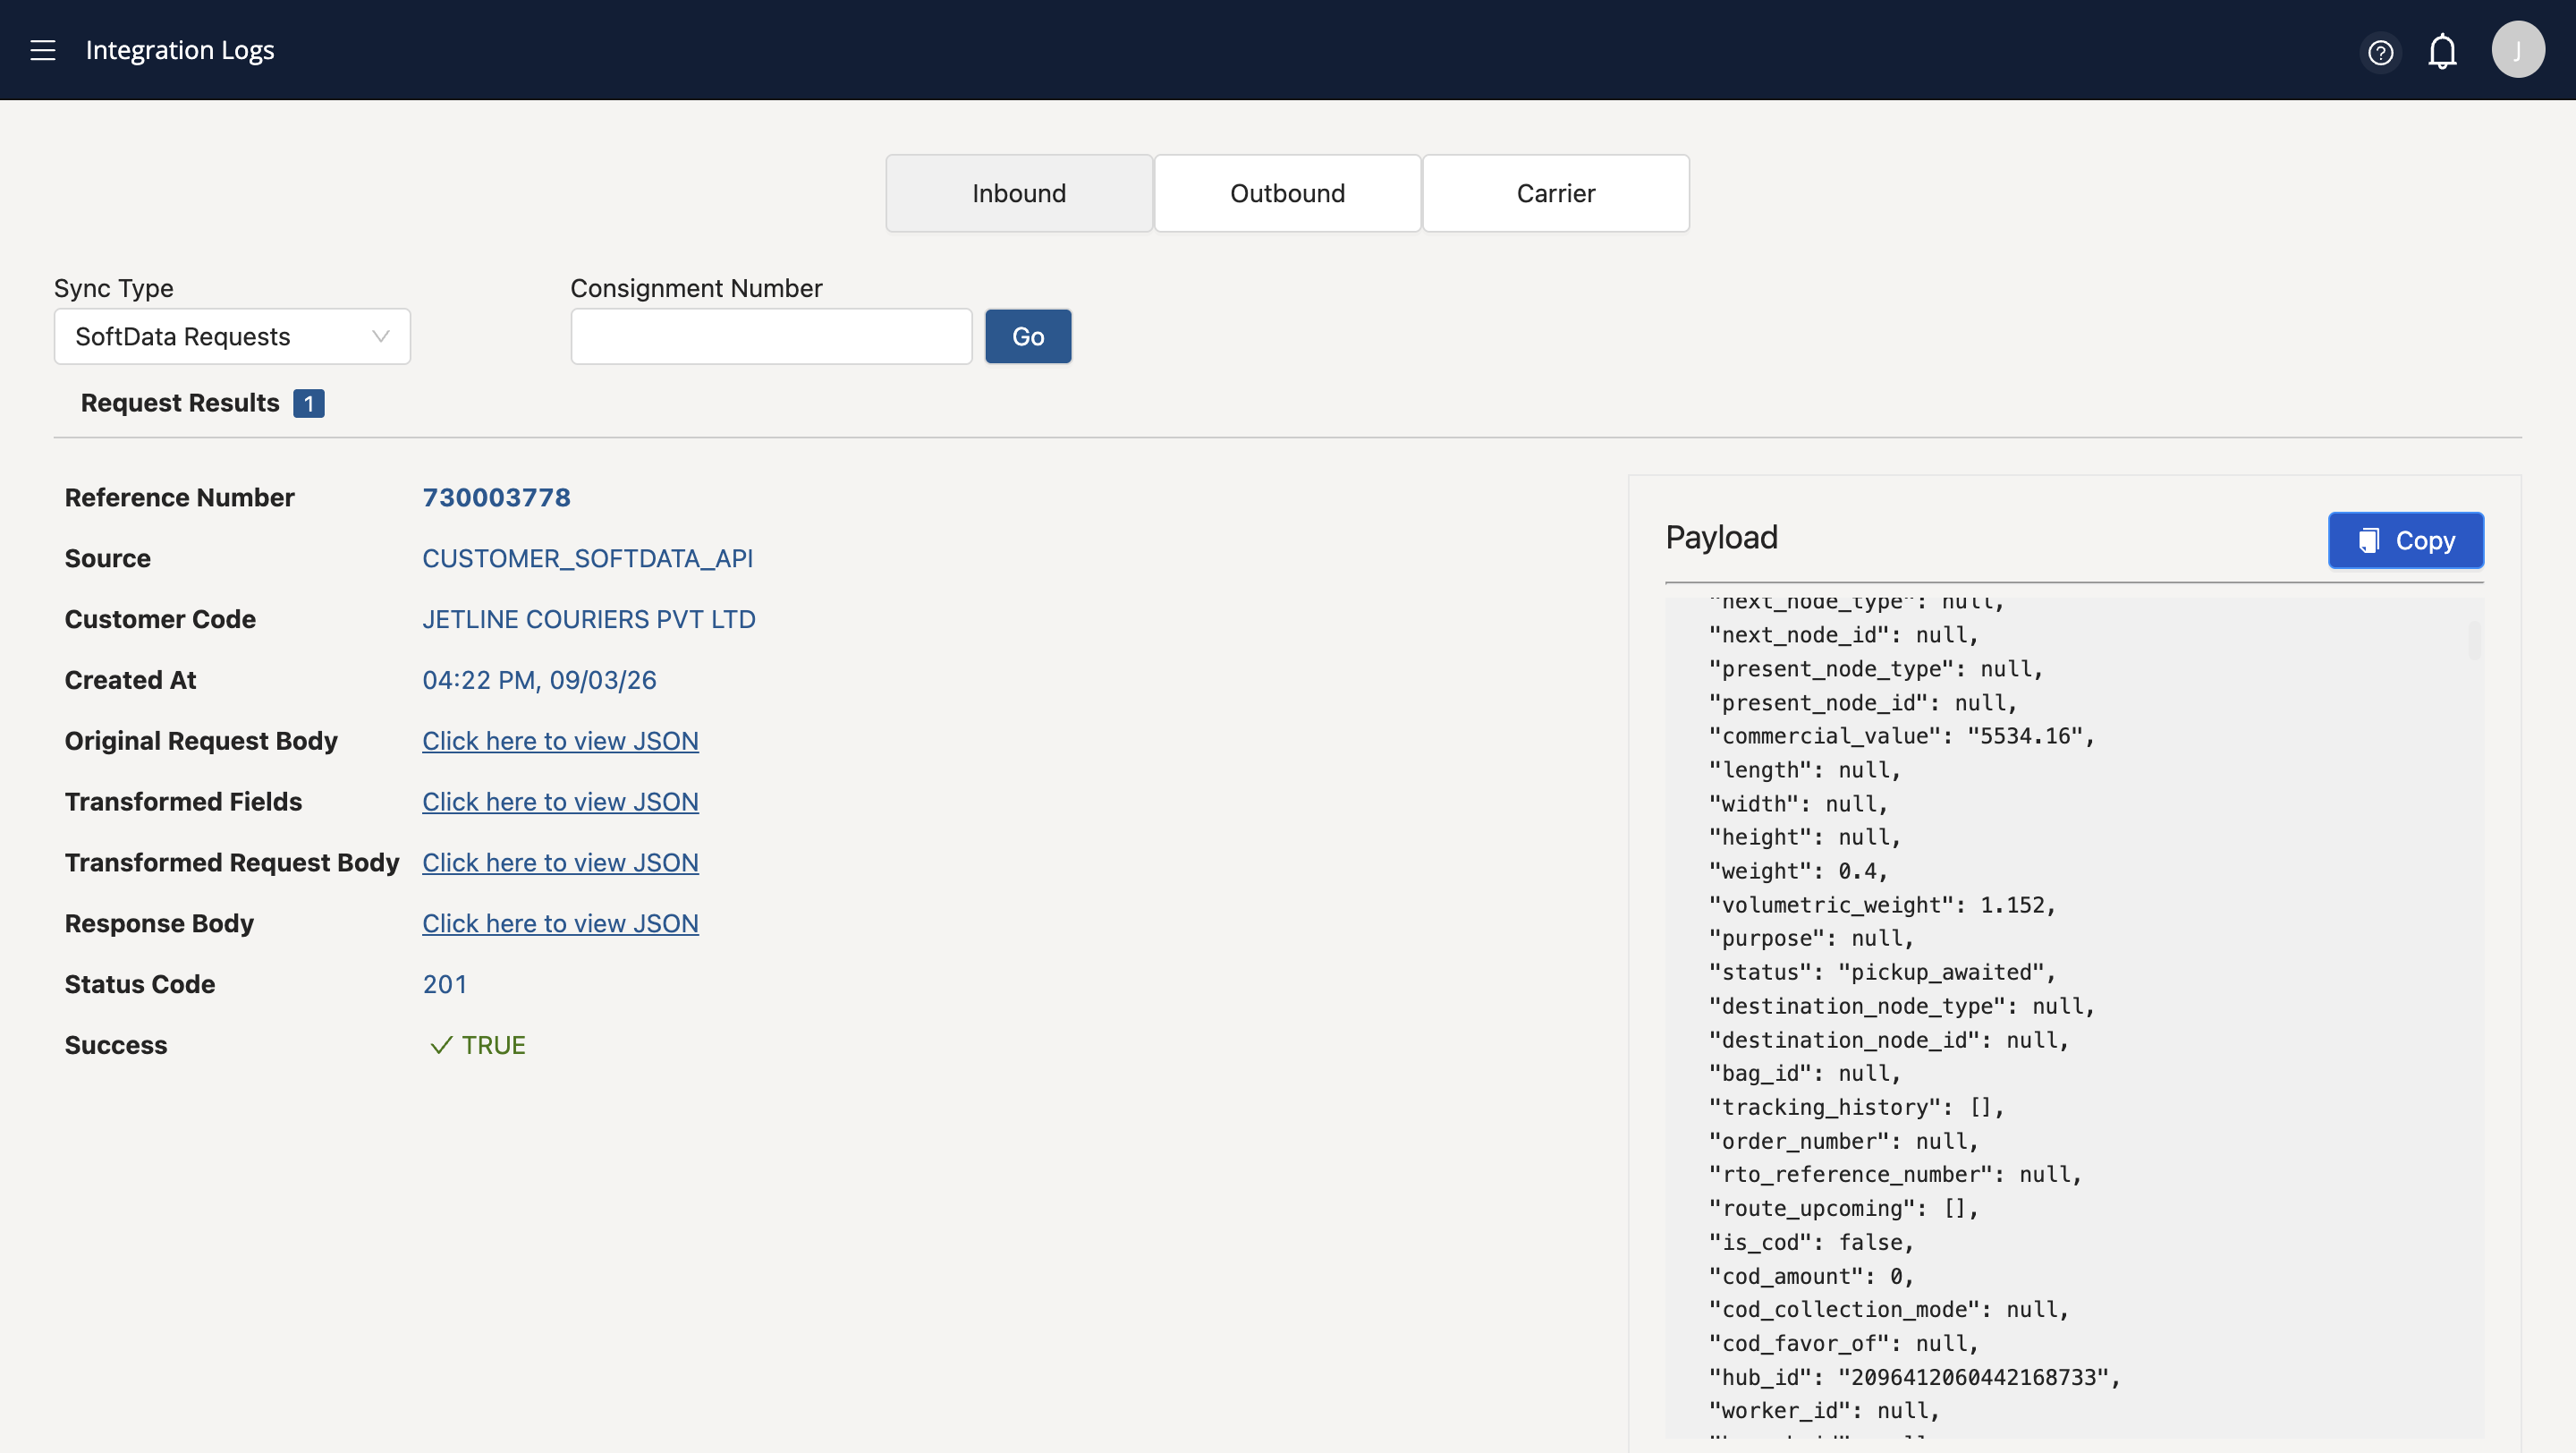
We have three areas here: inbound, outbound, and carrier.
Inbound is used to check the details with which the consignment is created in Shipsy using the option of soft data requests.

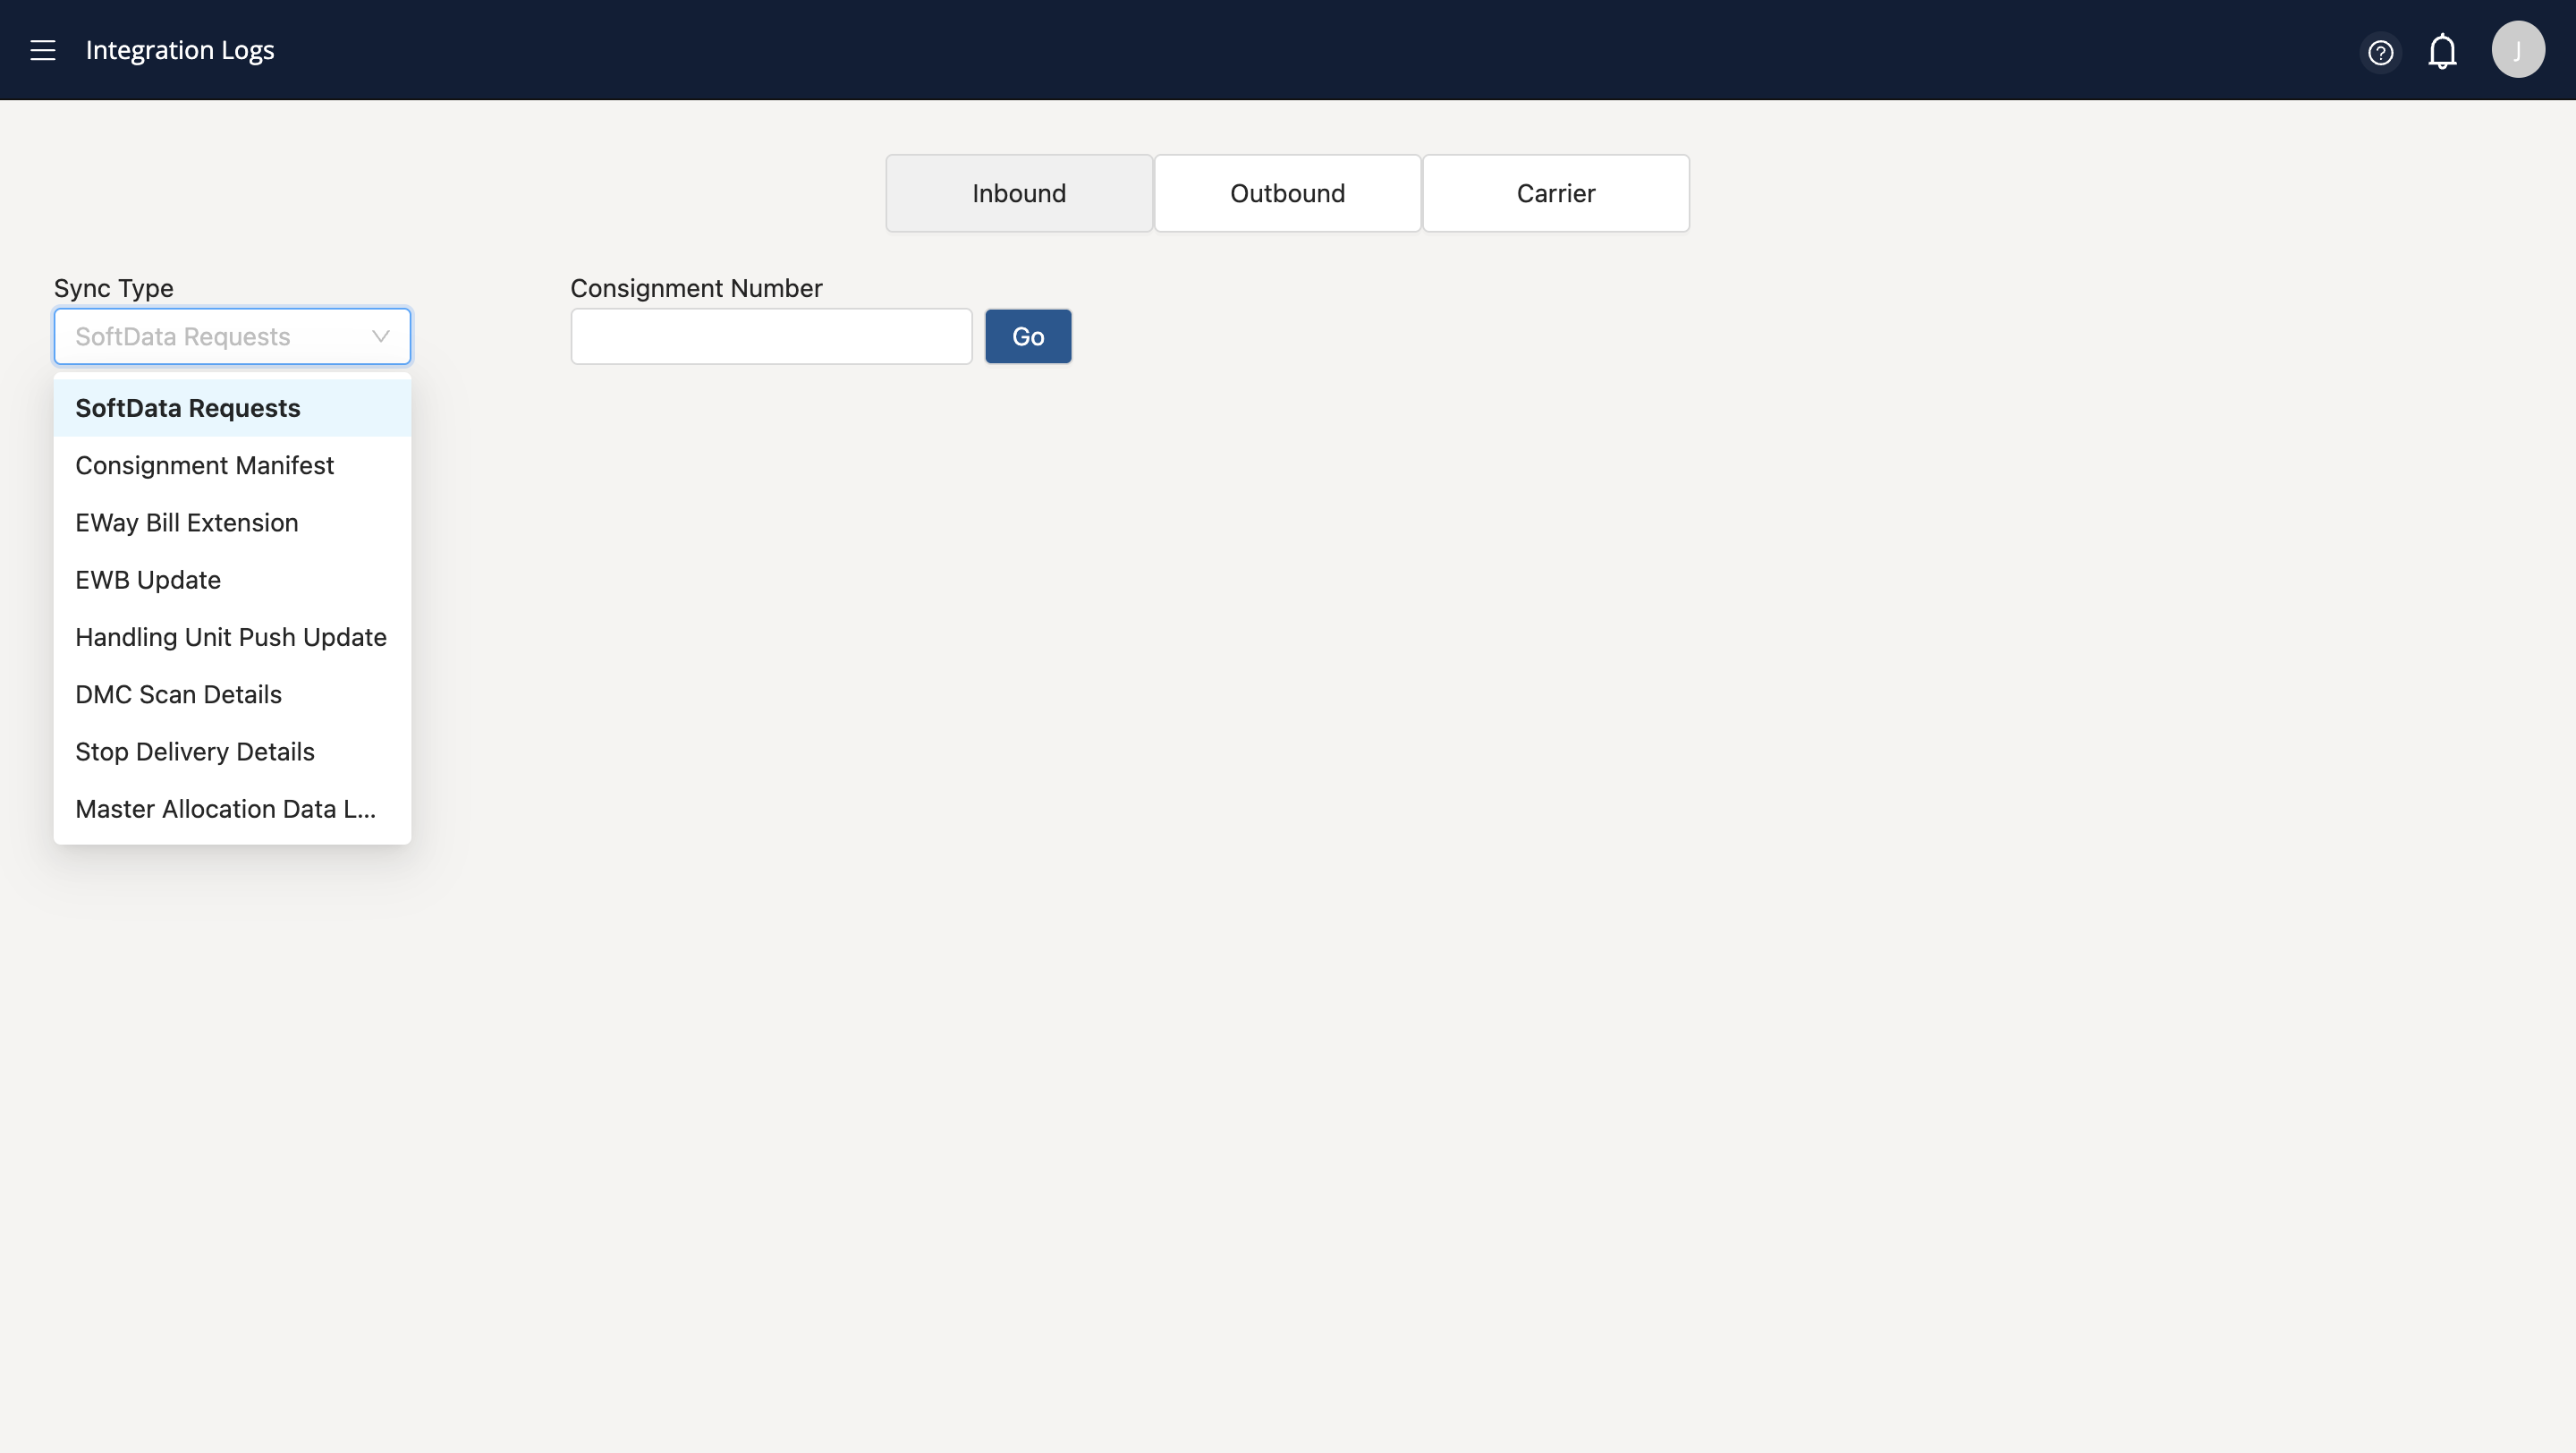
Example- you can check the length, height, weight, and other details used during consignment creation.
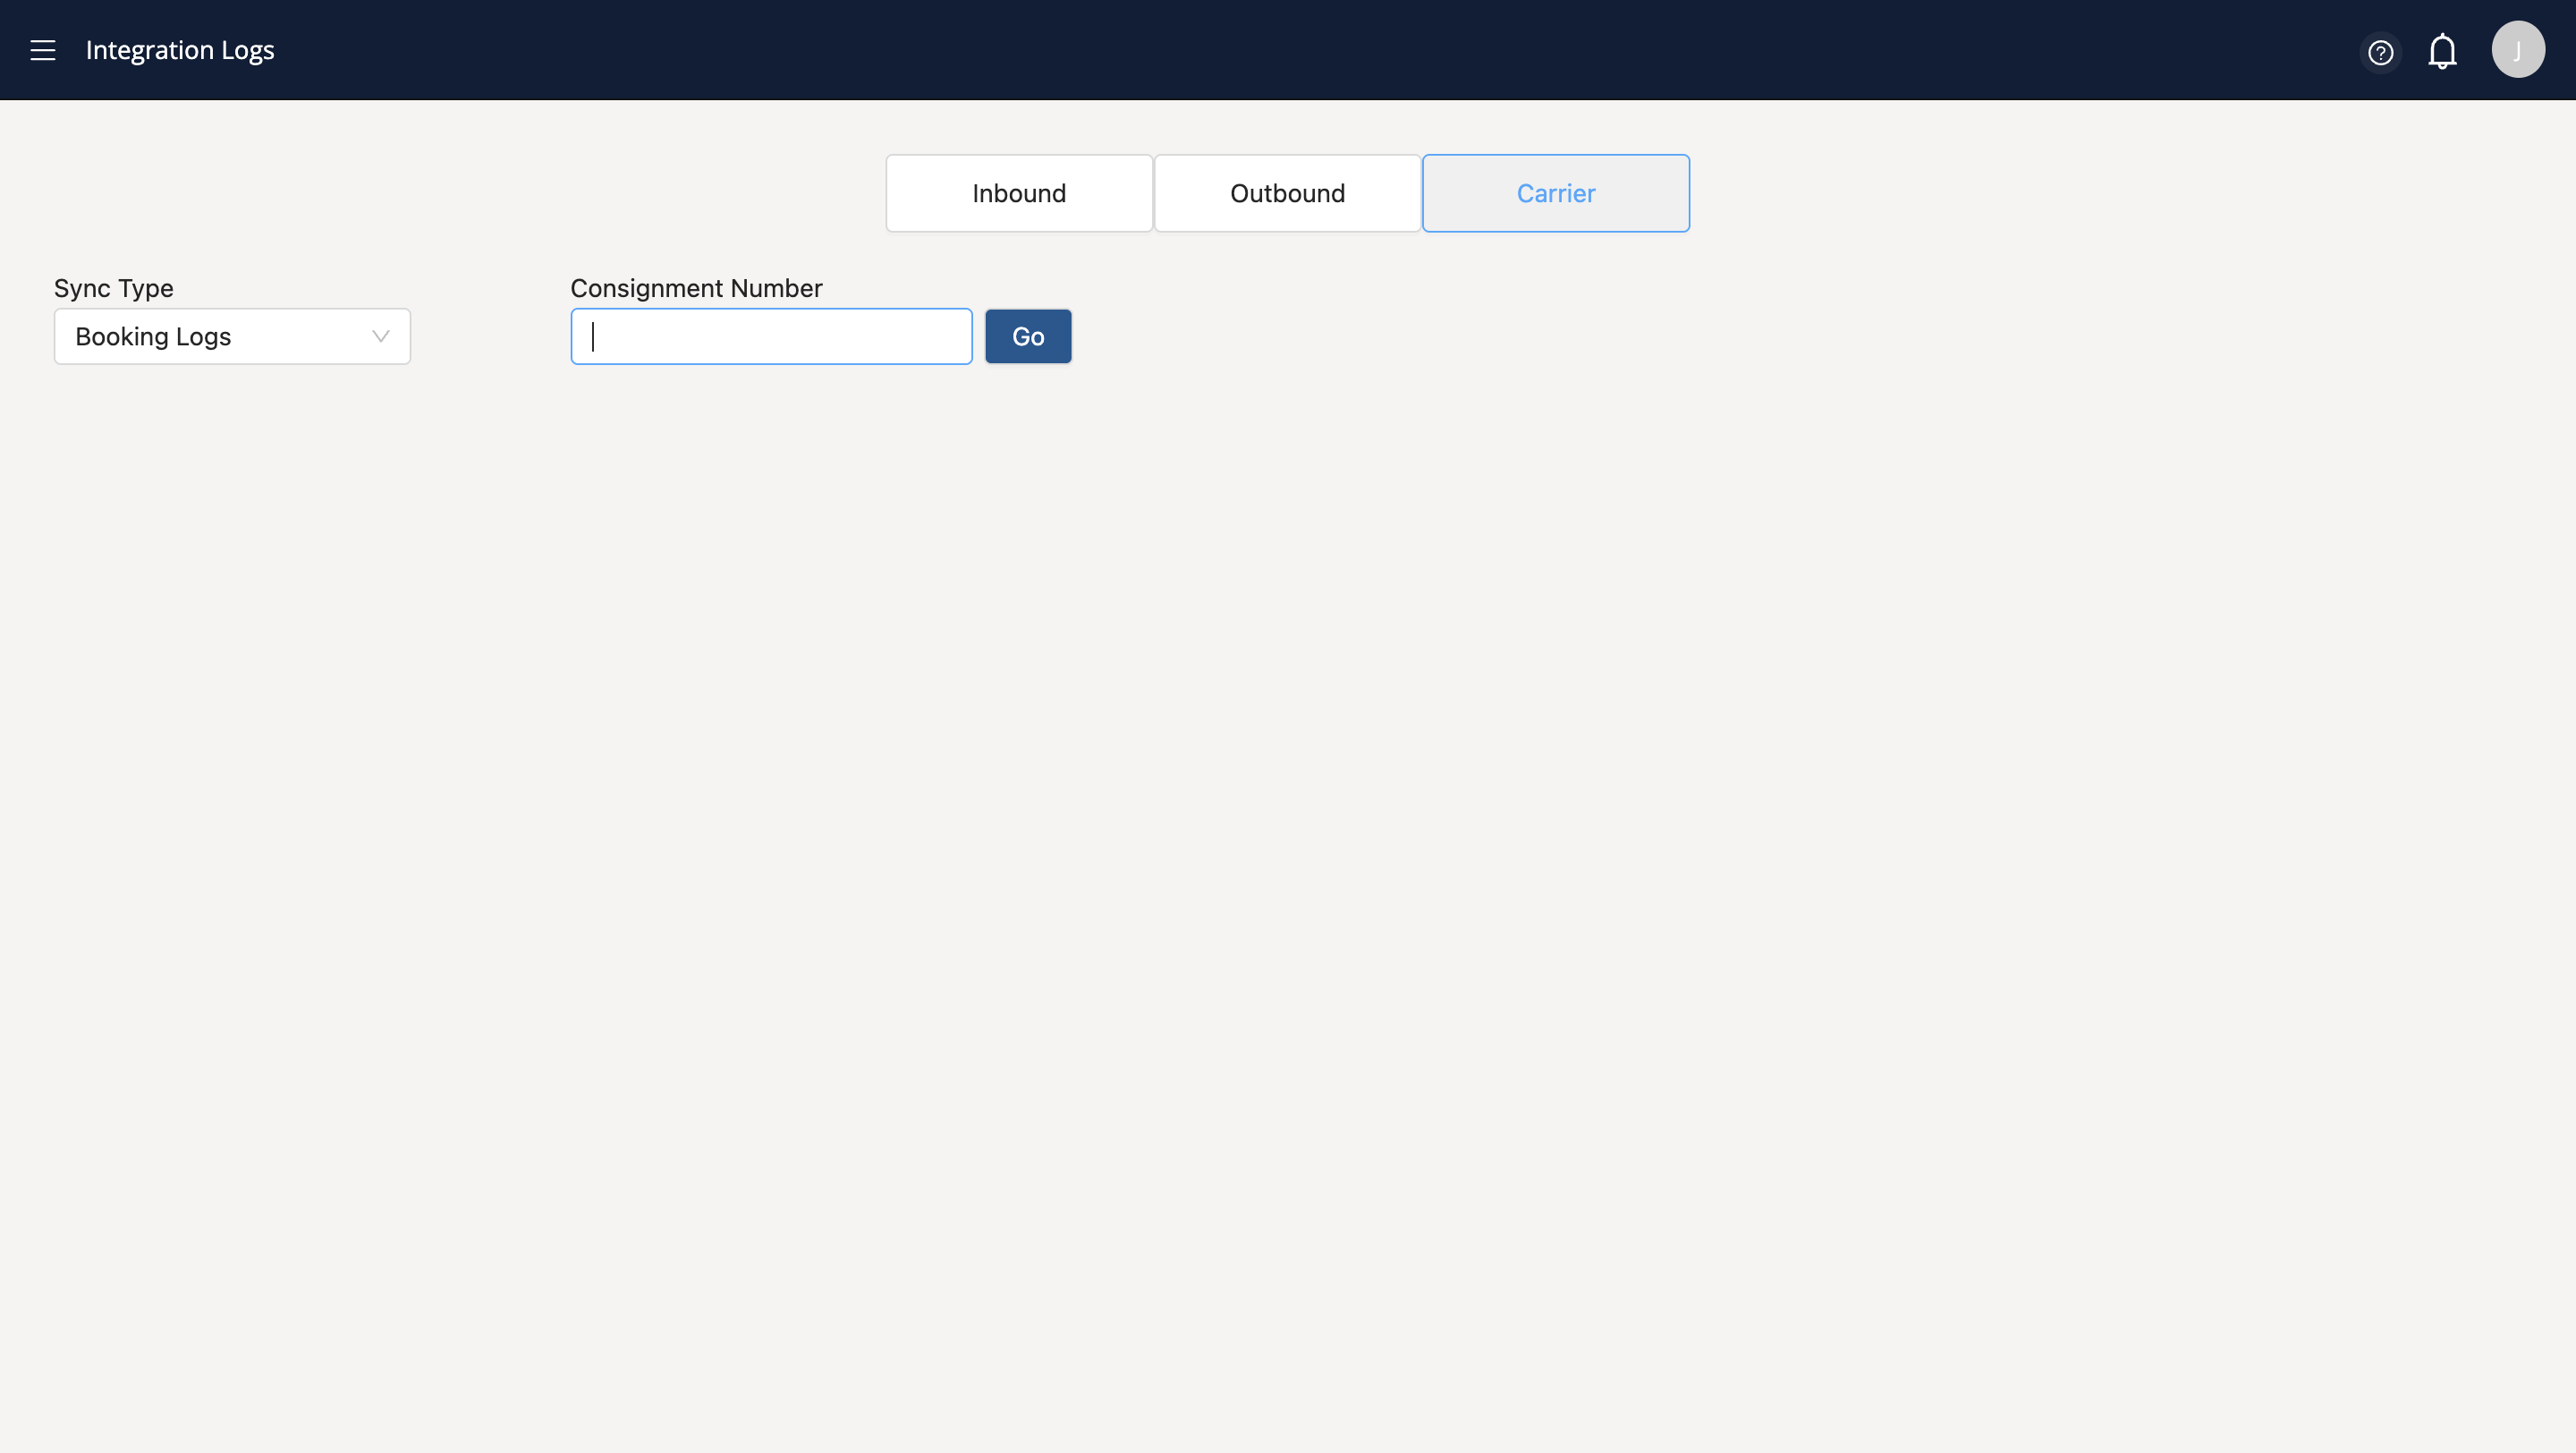
Let's explore the carrier section next
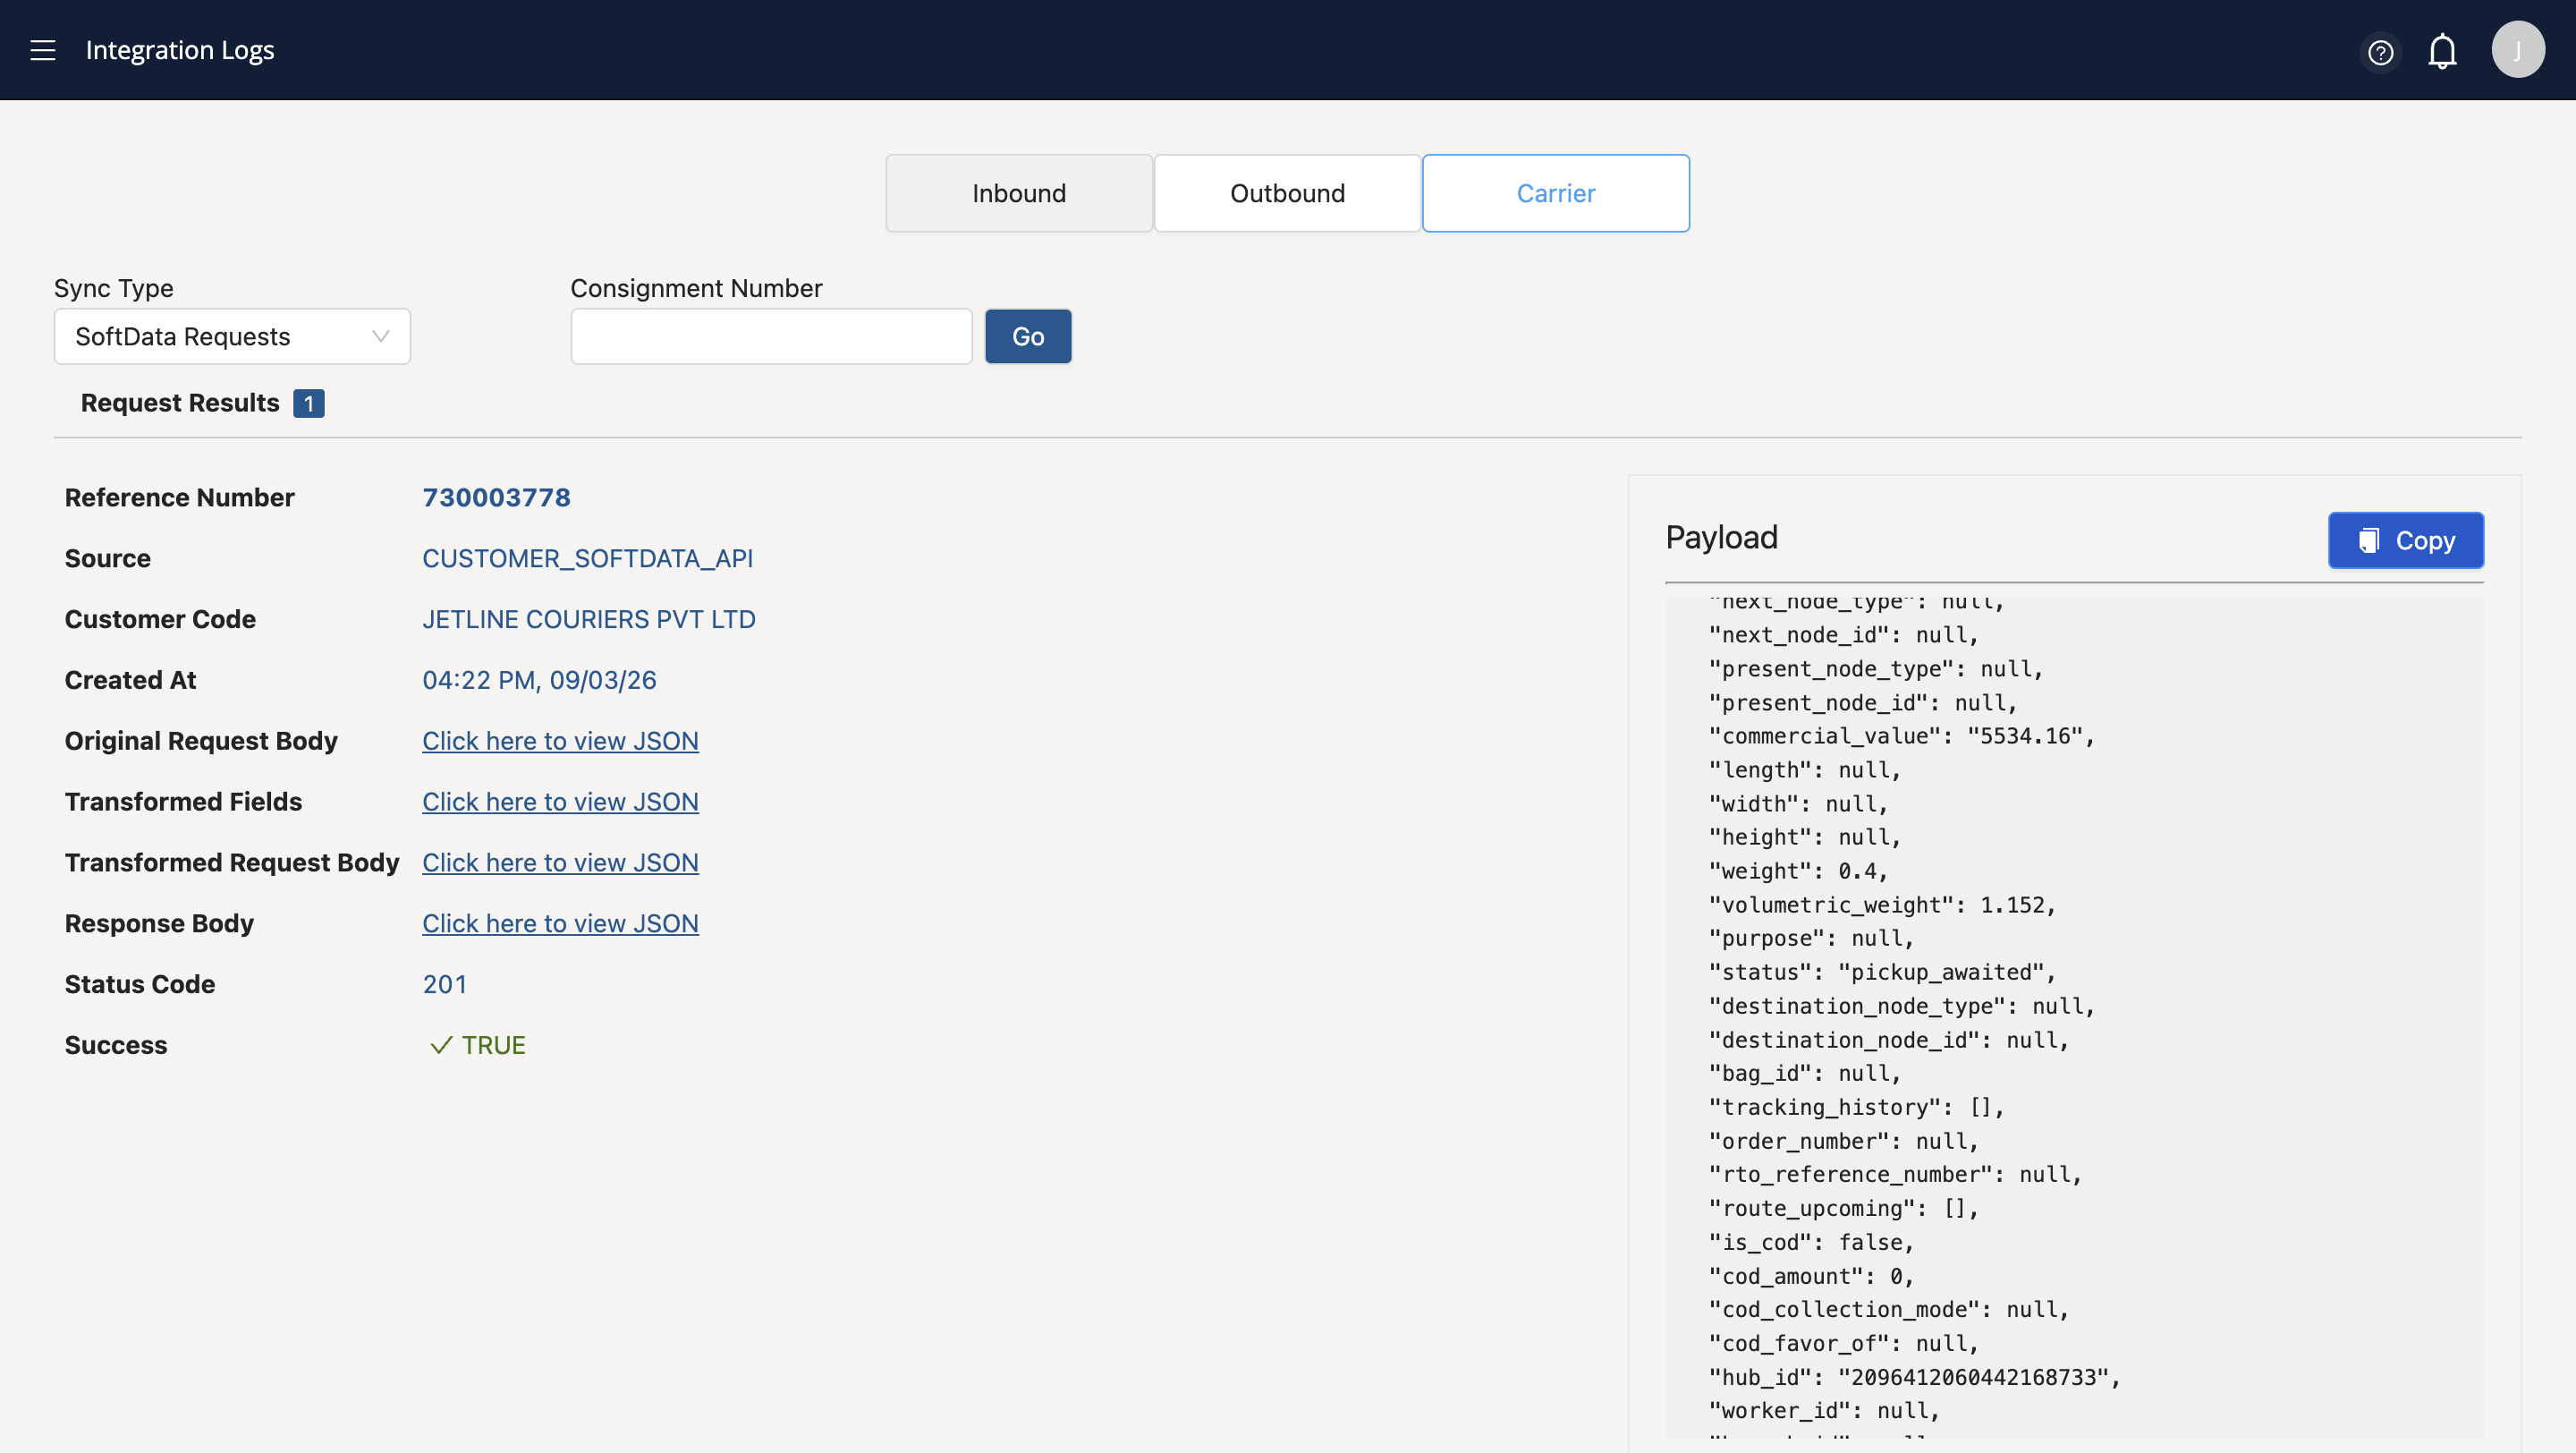
When you go to Carrier, you can check the details of courier booking for a particular consignment.
Click on carrier, enter the consignment number, and click on go to check carrier booking payload
This was the basics of using the Shipsy portal to perform logistics operations. You are now ready to use the dashboard to track shipments, manage trips, and handle consignments efficiently!
Please feel free to reach out to support@shipsy.io or helpdesk@shipsy.io if you face any difficulties.
Thank you,
Support Team Shipsy