How to Use VegVisir Situational Awareness Controller and HMD Functions

Learn how to navigate menus, control camera feeds, and utilize HMD head tracking with the VegVisir multi-camera controller system.

By vedant swadia

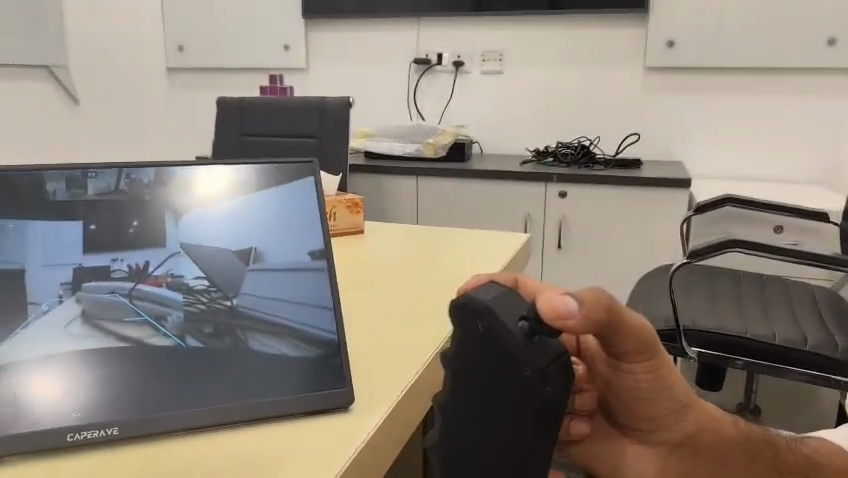
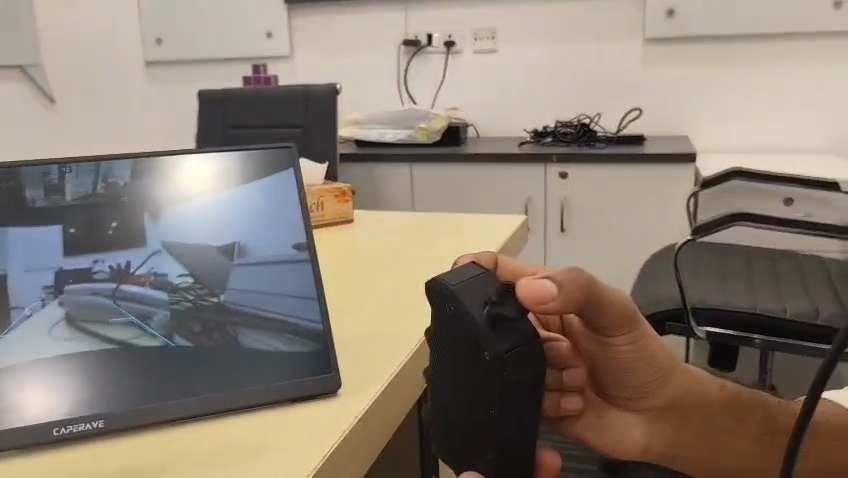
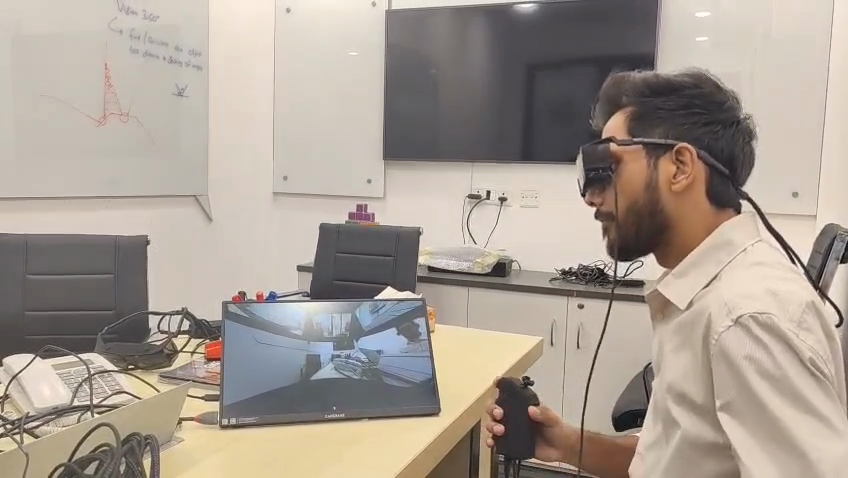
This guide explains how to use the handheld controller and Head-Mounted Display (HMD) to navigate system menus, control multi-camera views, and operate vehicle features. By mastering these controls, you can effectively monitor all angles and customize your display settings.

This procedure applies to operators using the Caperave multi-camera system in field environments. It covers basic menu navigation, physical controller inputs, and hands-free HMD head-tracking functionality.

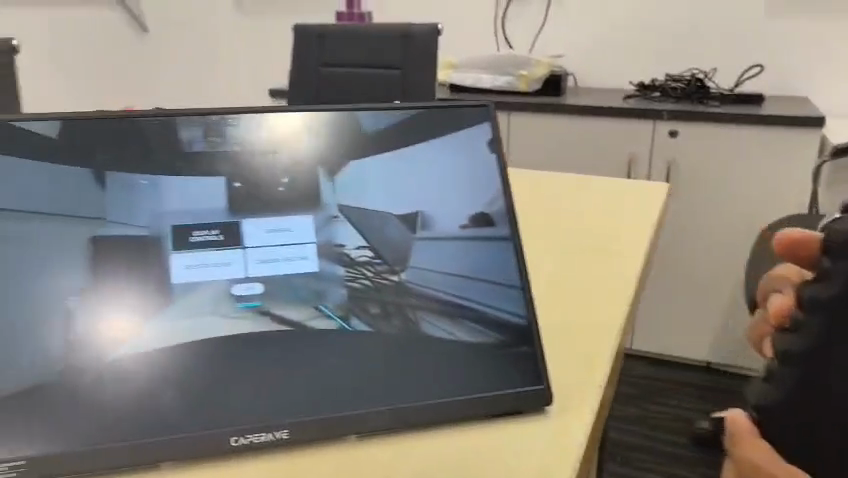
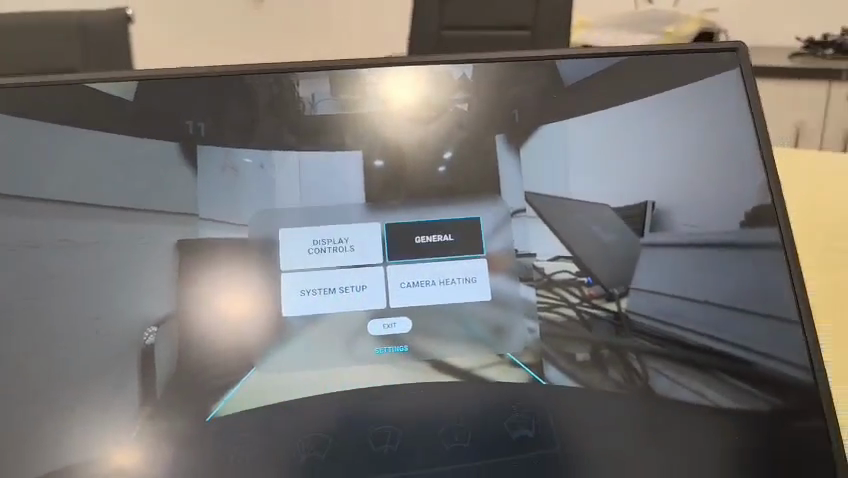
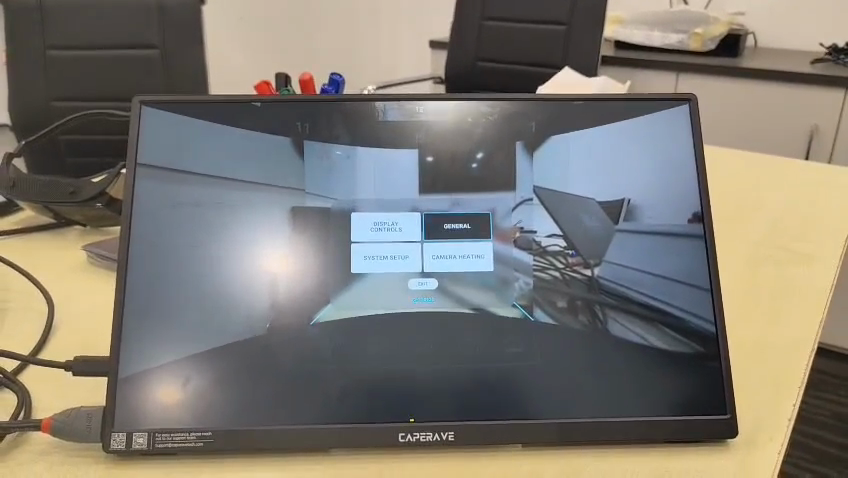
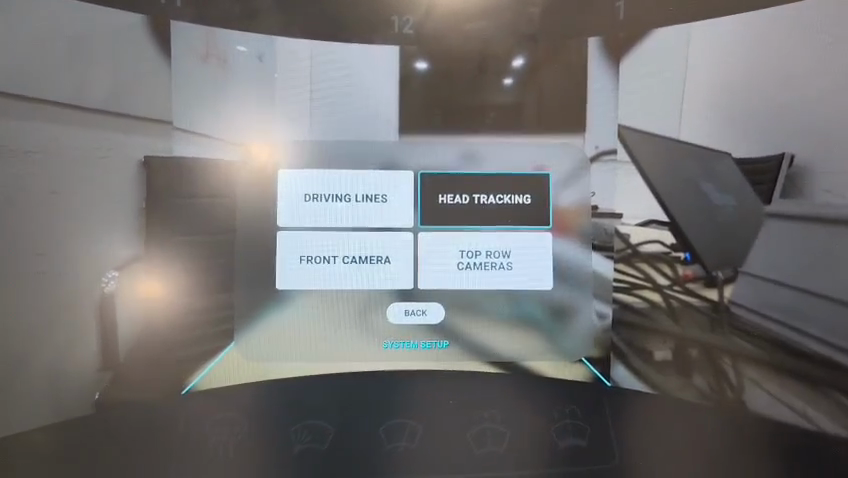
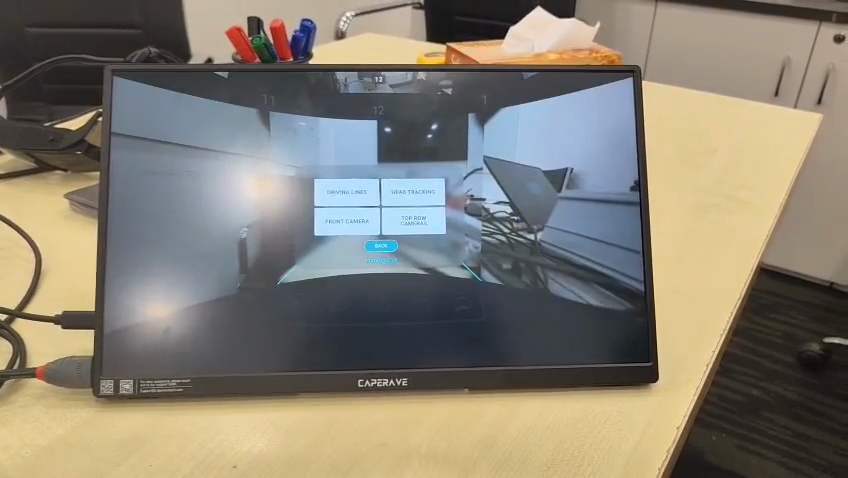
Navigating the Main Menu

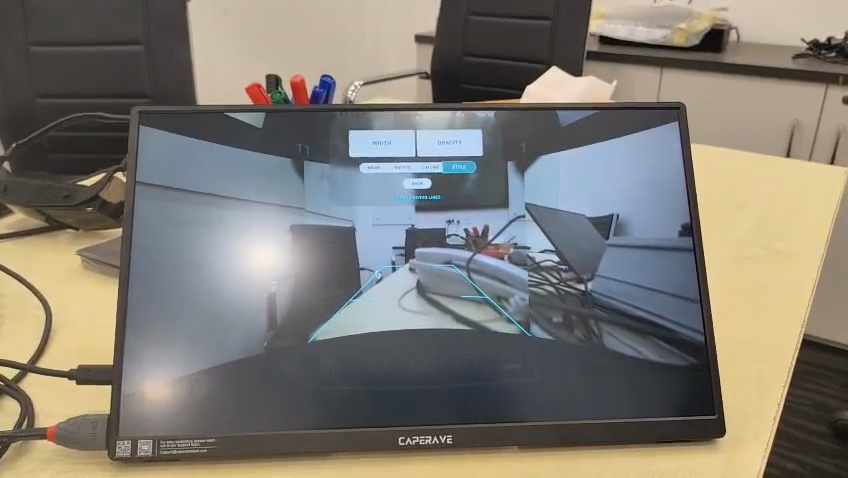
The controller allows you to access and configure all system settings via an on-screen overlay.

1
Press the bottom-most button on the controller to open the main menu.
Step #1: Press the bottom-most button on the controller to open the main menu.
2
Use the joystick to navigate through the menu options.
Step #2: Use the joystick to navigate through the menu options.
3
Press the joystick down to select your highlighted menu option.
Step #3: Press the joystick down to select your highlighted menu option.
4
Select System Setup to open advanced camera configurations.
Step #4: Select System Setup to open advanced camera configurations.
5
Select Driving Lines to customize the width, opacity, and style of your on-screen guidelines.
Step #5: Select Driving Lines to customize the width, opacity, and style of your on-screen guidelines.
6
Click Rotate to adjust the camera alignment relative to the driving lines.
Step #6: Click Rotate to adjust the camera alignment relative to the driving lines.
7
Select Head Tracking to adjust sensitivity settings for the HMD.
Step #7: Select Head Tracking to adjust sensitivity settings for the HMD.
8
Click Back to return to the System Setup menu.
Step #8: Click Back to return to the System Setup menu.
9
Select Front Camera to adjust settings like brightness and white balance.
Step #9: Select Front Camera to adjust settings like brightness and white balance.
10
Click Back when finished to return to the previous screen.
Step #10: Click Back when finished to return to the previous screen.
11
Select Top Row Cameras to access zoom, rotation, and directional movement settings for overhead views.
Step #11: Select Top Row Cameras to access zoom, rotation, and directional movement settings for overhead views.
12
Click Back on the Top Row Cameras screen to exit the sub-menu.
Step #12: Click Back on the Top Row Cameras screen to exit the sub-menu.
13
Repeatedly click Back to close the System Setup and return to your live feeds.
Step #13: Repeatedly click Back to close the System Setup and return to your live feeds.

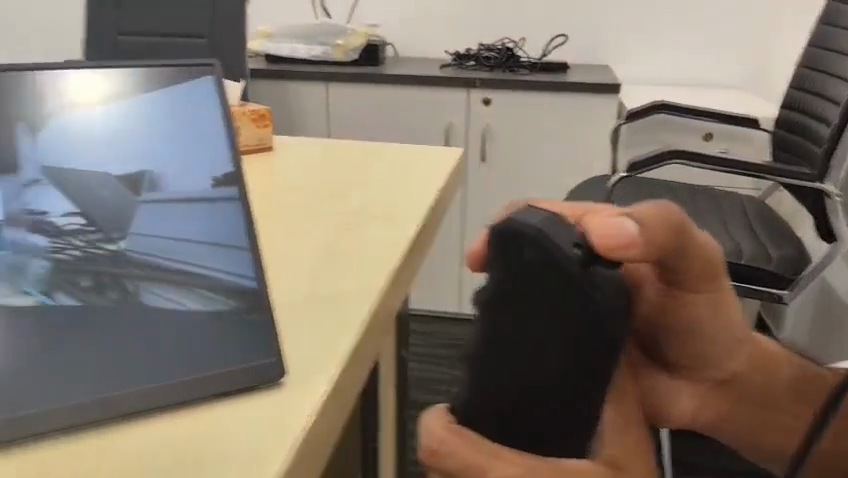
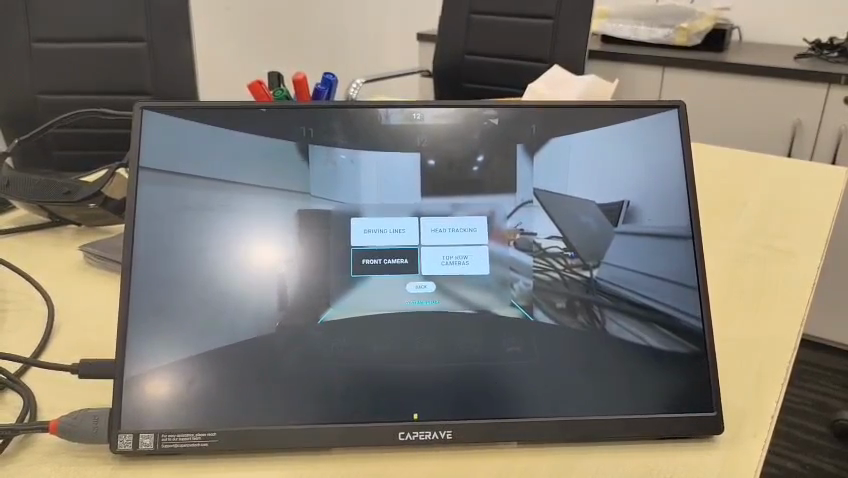
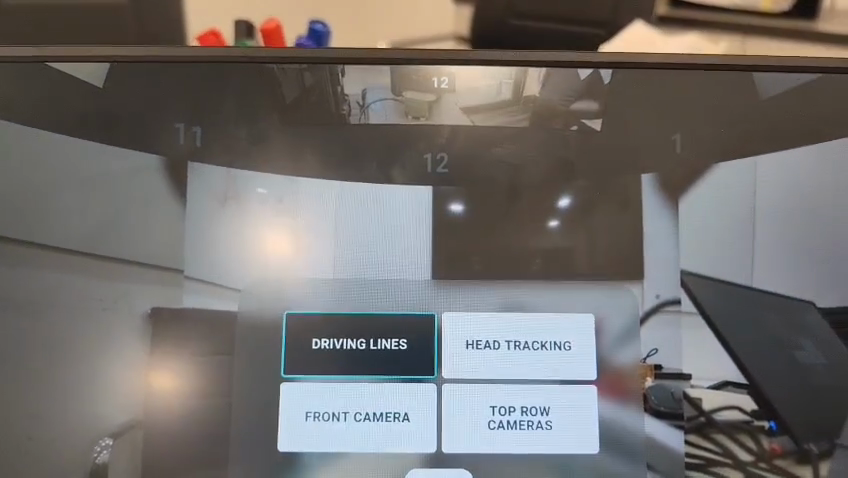
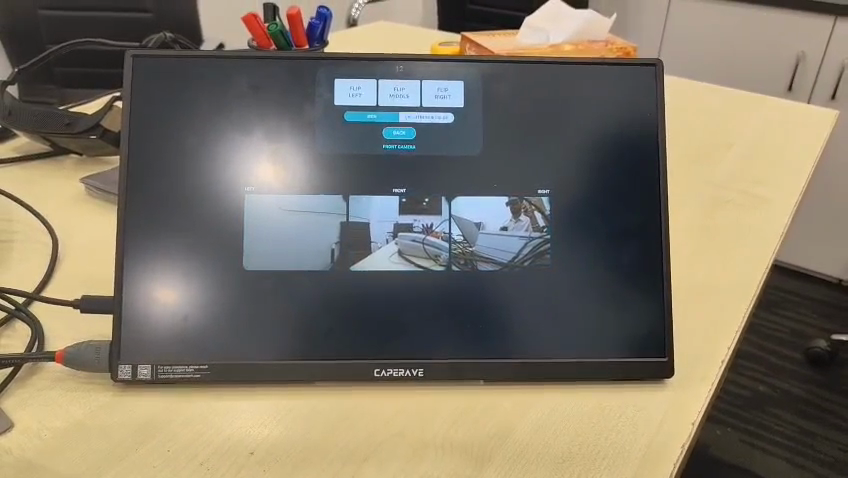
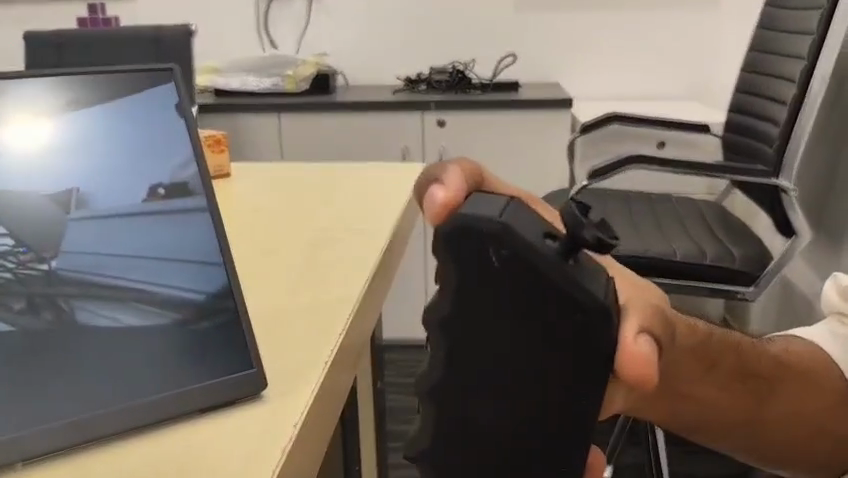
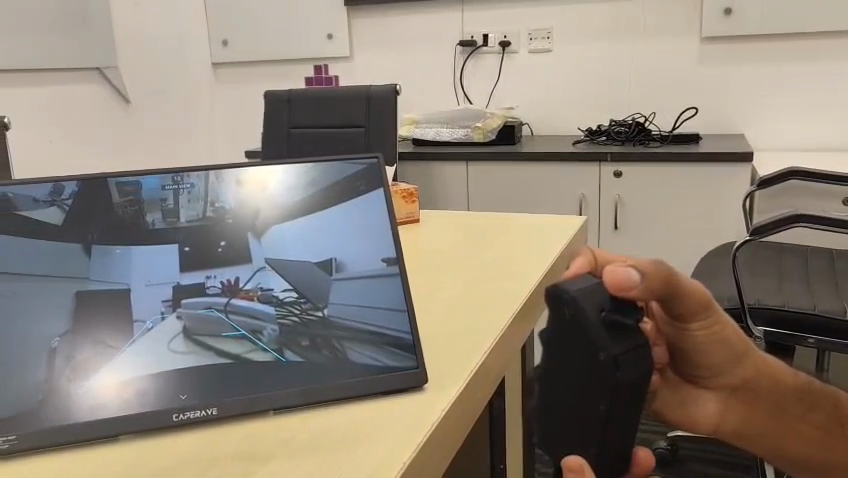
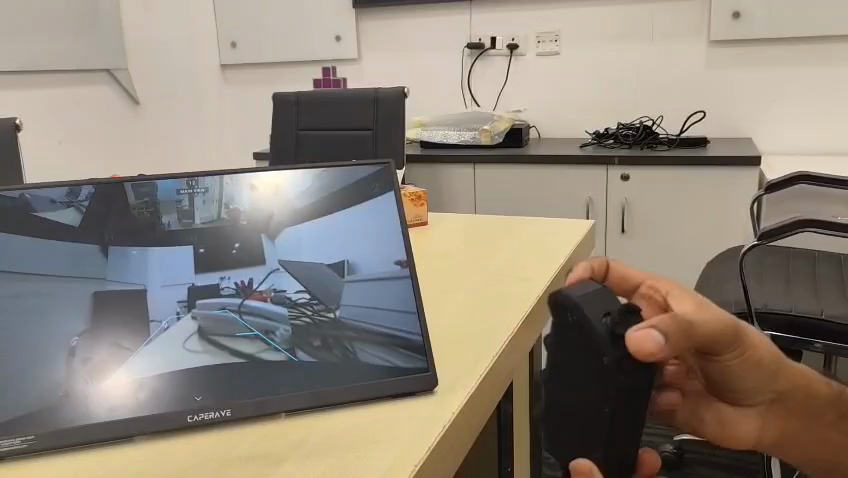
Using Hardware Buttons and View Controls

The handheld controller features dedicated buttons for environmental controls and camera manipulation.

14
Press the second button to activate the camera wipers for both the front and rear cameras.
15
Press the second button again to stop the wipers once the lenses are clear.
16
Look in your desired forward direction and press the Reset button on the top edge of the controller to re-center your display view.
Step #16: Look in your desired forward direction and press the Reset button on the top edge of the controller to re-center your display view.
17
Click the joystick straight down to toggle the active feed between thermal mode and the standard day camera.
Step #17: Click the joystick straight down to toggle the active feed between thermal mode and the standard day camera.
18
Press the plus (+) and minus (-) buttons located below the joystick to zoom your current camera feed in or out.
Step #18: Press the plus (+) and minus (-) buttons located below the joystick to zoom your current camera feed in or out.

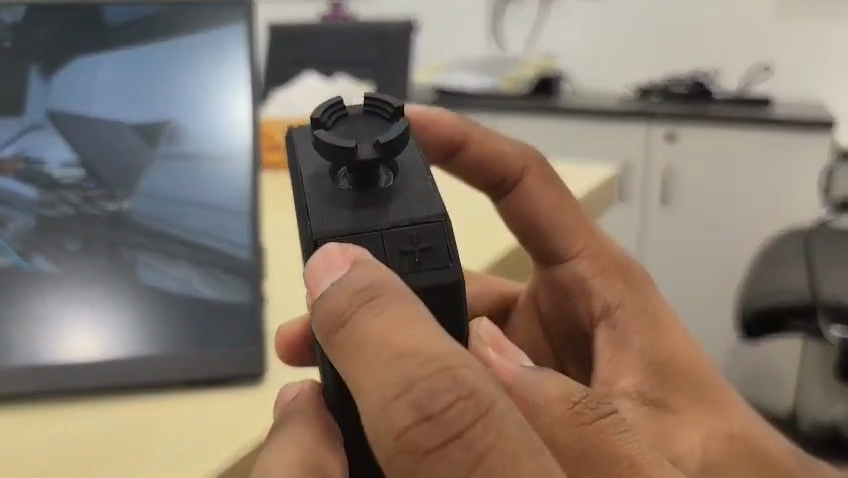
Joystick Camera Selection

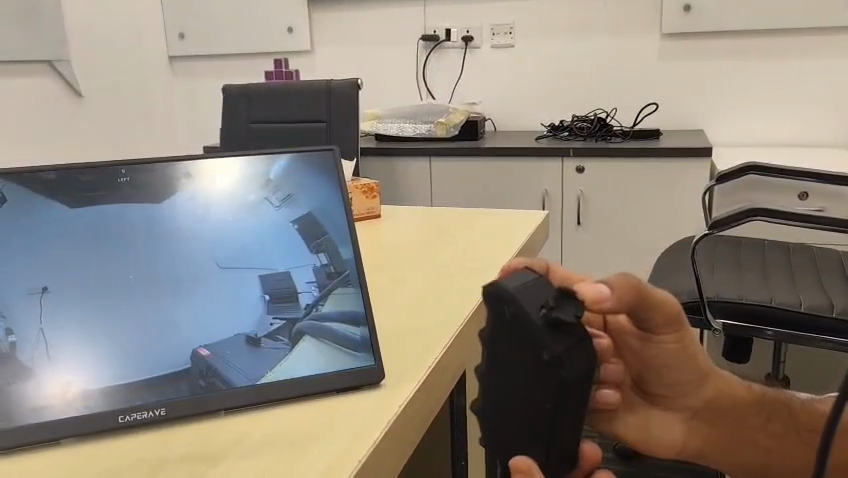
You can manually snap to different camera views by pushing the joystick in specific directions.

Joystick Direction

Resulting Camera Feed

Up

Default Front Feed

Down

Rear Feed

Left

Left Feed

Right

Right Feed

19
Push the joystick right to snap to the right camera feed.
Step #19: Push the joystick right to snap to the right camera feed.
20
Push the joystick left to snap to the left camera feed.
Step #20: Push the joystick left to snap to the left camera feed.
21
Push the joystick up to return to the default front-facing feed.
Step #21: Push the joystick up to return to the default front-facing feed.
22
Push the joystick down to switch to the rear camera feed.
Step #22: Push the joystick down to switch to the rear camera feed.

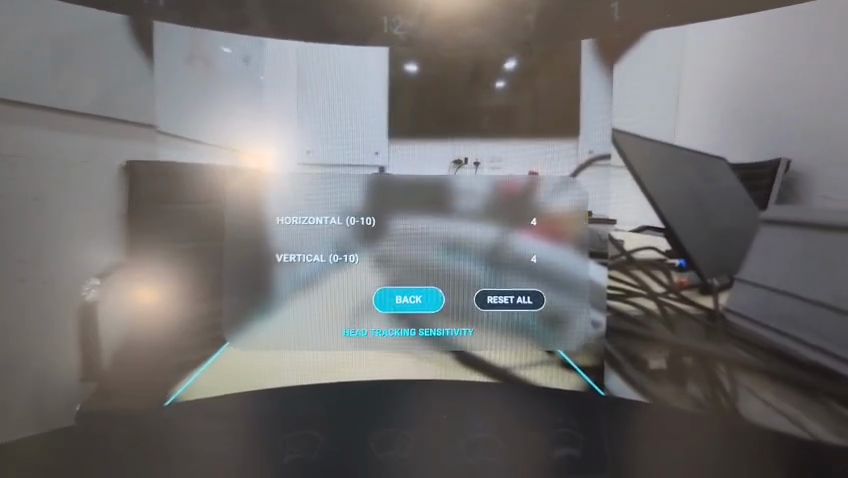
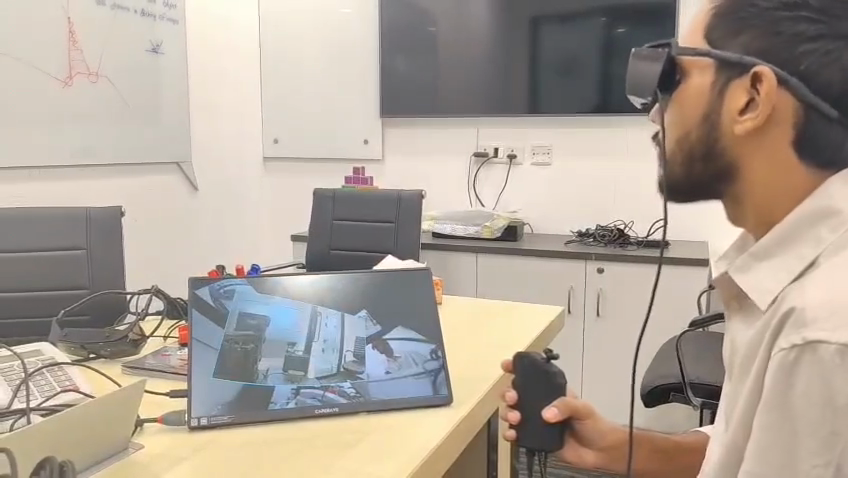
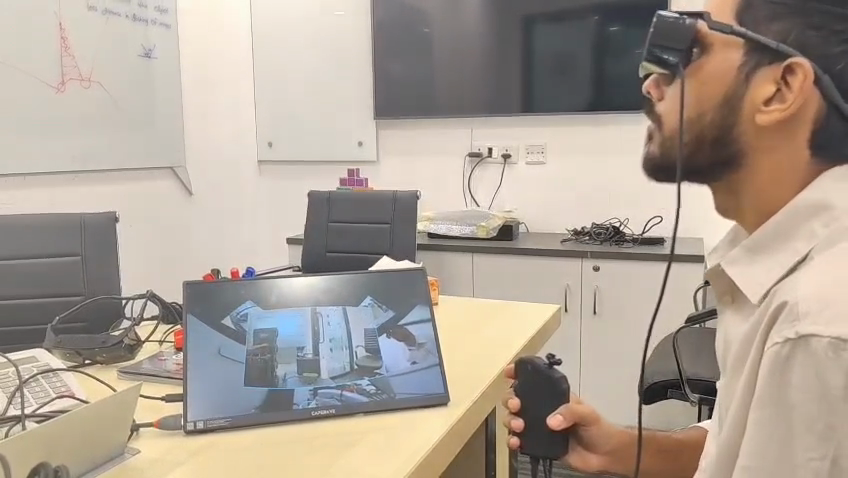
Using HMD Head Tracking

If you prefer a hands-free approach, the Head-Mounted Display uses a built-in gyroscope to detect your physical head movements and update the active camera feed automatically.

23
Move your head naturally while wearing the HMD to select and view different camera feeds around the vehicle.
Step #23: Move your head naturally while wearing the HMD to select and view different camera feeds around the vehicle.
24
Tilt your head to the right and look slightly up to seamlessly switch to the right camera.
Step #24: Tilt your head to the right and look slightly up to seamlessly switch to the right camera.
25
Tilt your head to the left to seamlessly switch to the left camera.
Step #25: Tilt your head to the left to seamlessly switch to the left camera.
26
Press the physical reset button on your controller at any time to re-center your default perspective based on your current physical positioning.
Step #26: Press the physical reset button on your controller at any time to re-center your default perspective based on your current physical positioning.

FAQ

Q: Why do the first and third buttons on my controller do nothing?

A: The first and third buttons are user-programmable macros. By default, they have no assigned function, but they can be mapped to specific system tasks depending on user requirements.

Q: Why can't I switch to thermal mode on the left or right cameras?

A: The thermal camera sensors are only equipped on the front and rear assemblies. Thermal mode cannot be activated for side feeds.

Glossary

Term

Definition

HMD

Head-Mounted Display; a wearable device that projects the camera feeds directly into the operator's field of view.

Thermal mode

An alternative camera setting that displays heat signatures instead of visible light, useful for low-visibility environments.

Head tracking

A gyroscope-enabled feature that allows the system to shift active camera feeds based on the physical direction the user is looking.