Introducing Our Enhanced AI Chat Agent: Improved Accuracy, Customization, and Unified UI
Discover our new AI chat agent with advanced response accuracy, customizable prompts, and seamless integration through a unified UI. Learn how our latest features help you train, deploy, and manage AI agents for your website, boosting customer support efficiency.
In this guide, we'll learn how to create and configure an external AI chat agent for your website using the unified UI. The goal is to help you set up an agent that can accurately respond to customer inquiries, use specific data sources for context, and be easily managed through a single interface.
You will also see how to connect your agent to various data sources, such as websites, files, and connectors like Confluence or SharePoint, to improve its responses. This process will allow you to tailor the agent's identity and behavior to match your brand and support needs.
Let's get started
I want to highlight our new AI agent.
We received feedback after launching our first external AI chat agent, indicating the need for improvements. We have worked to enhance response accuracy and added new features to help customers feel more confident when training and deploying their agents on their websites, leading to better results. We have used the second version of our AI agent for about a month and a half on our team’s customer support hub with great success. Ticket closure rates have increased from about 3–4% to over 30%. We are excited about the experience we will provide to our customers. We are building this within our unified UI, creating a new AI interface. This single location allows you to set up all AI-related features, regardless of which product you are using.
When you enter the admin section of the unified UI, you will see that we are building what I call our connector marketplace.
It's essentially a list of micro integrations. For example, Confluence, SharePoint, MindTouch—anywhere someone has documents behind authentication that they want to pull in and use for AI responses in our platform. We will support those.
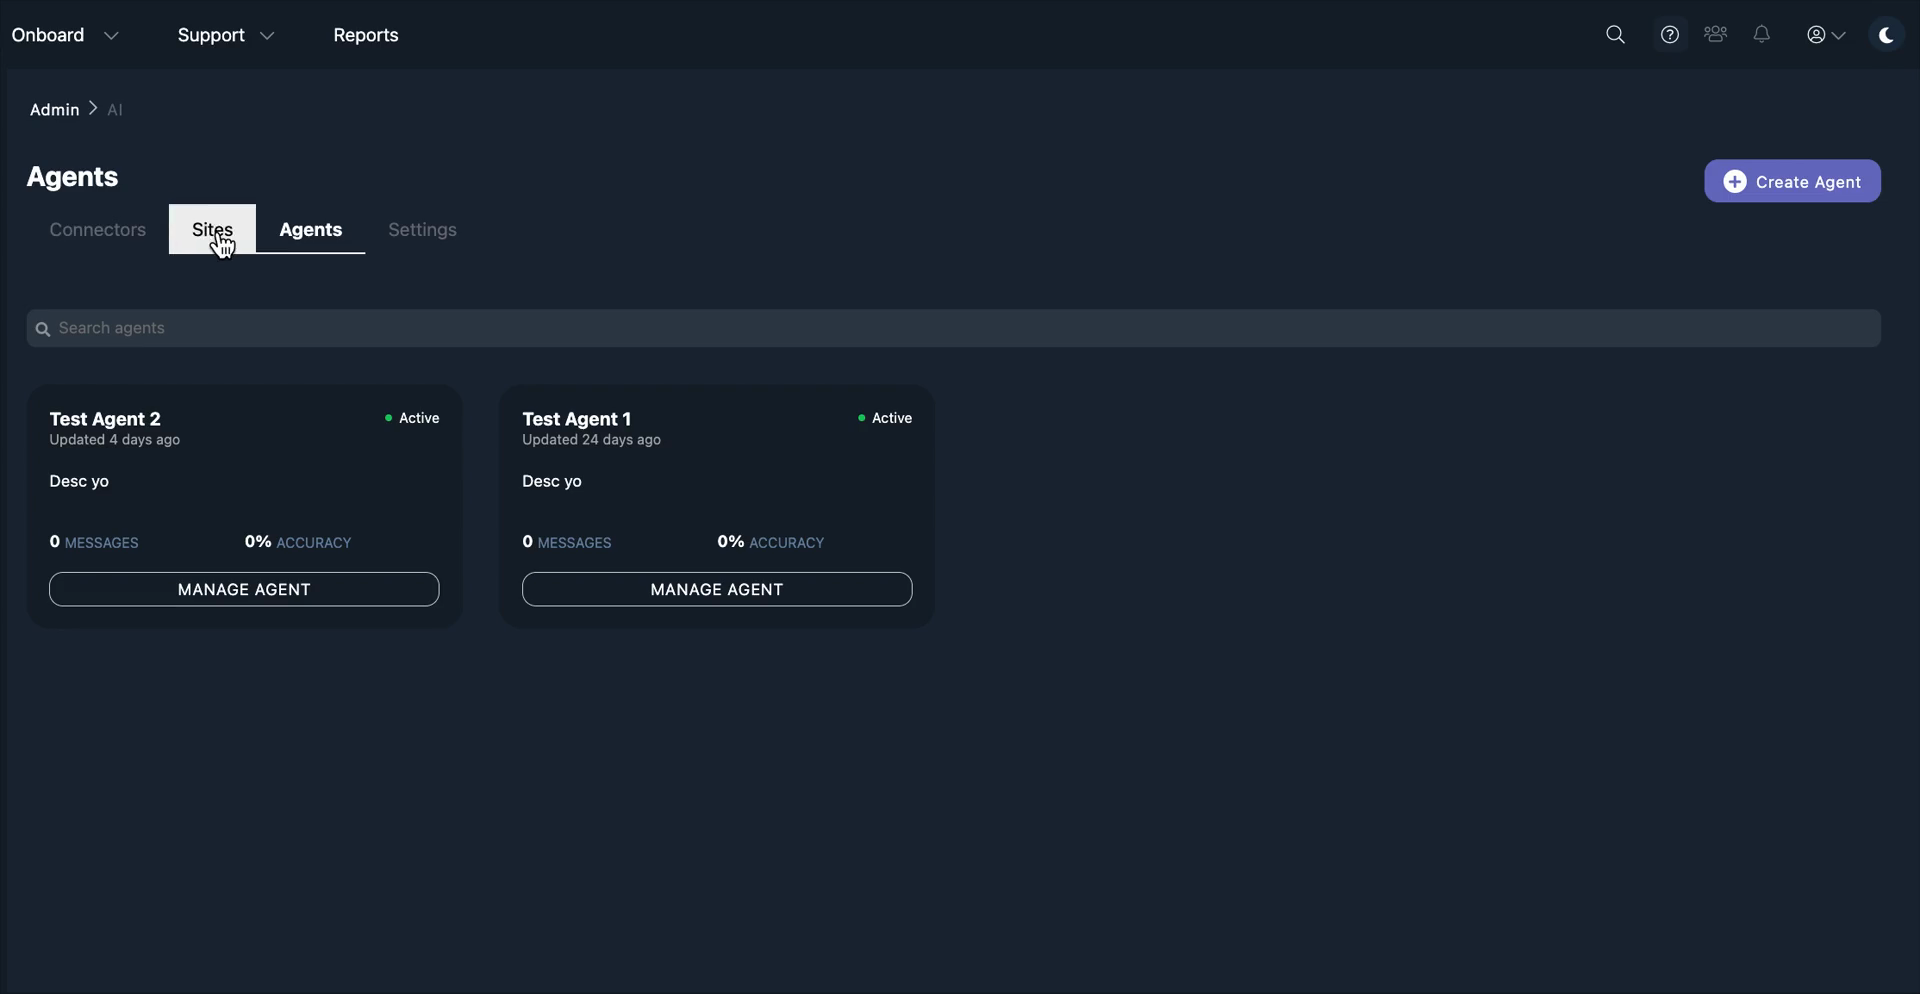
You will have a section to manage your website. Here, you can crawl websites, ingest their data, and use it as context.
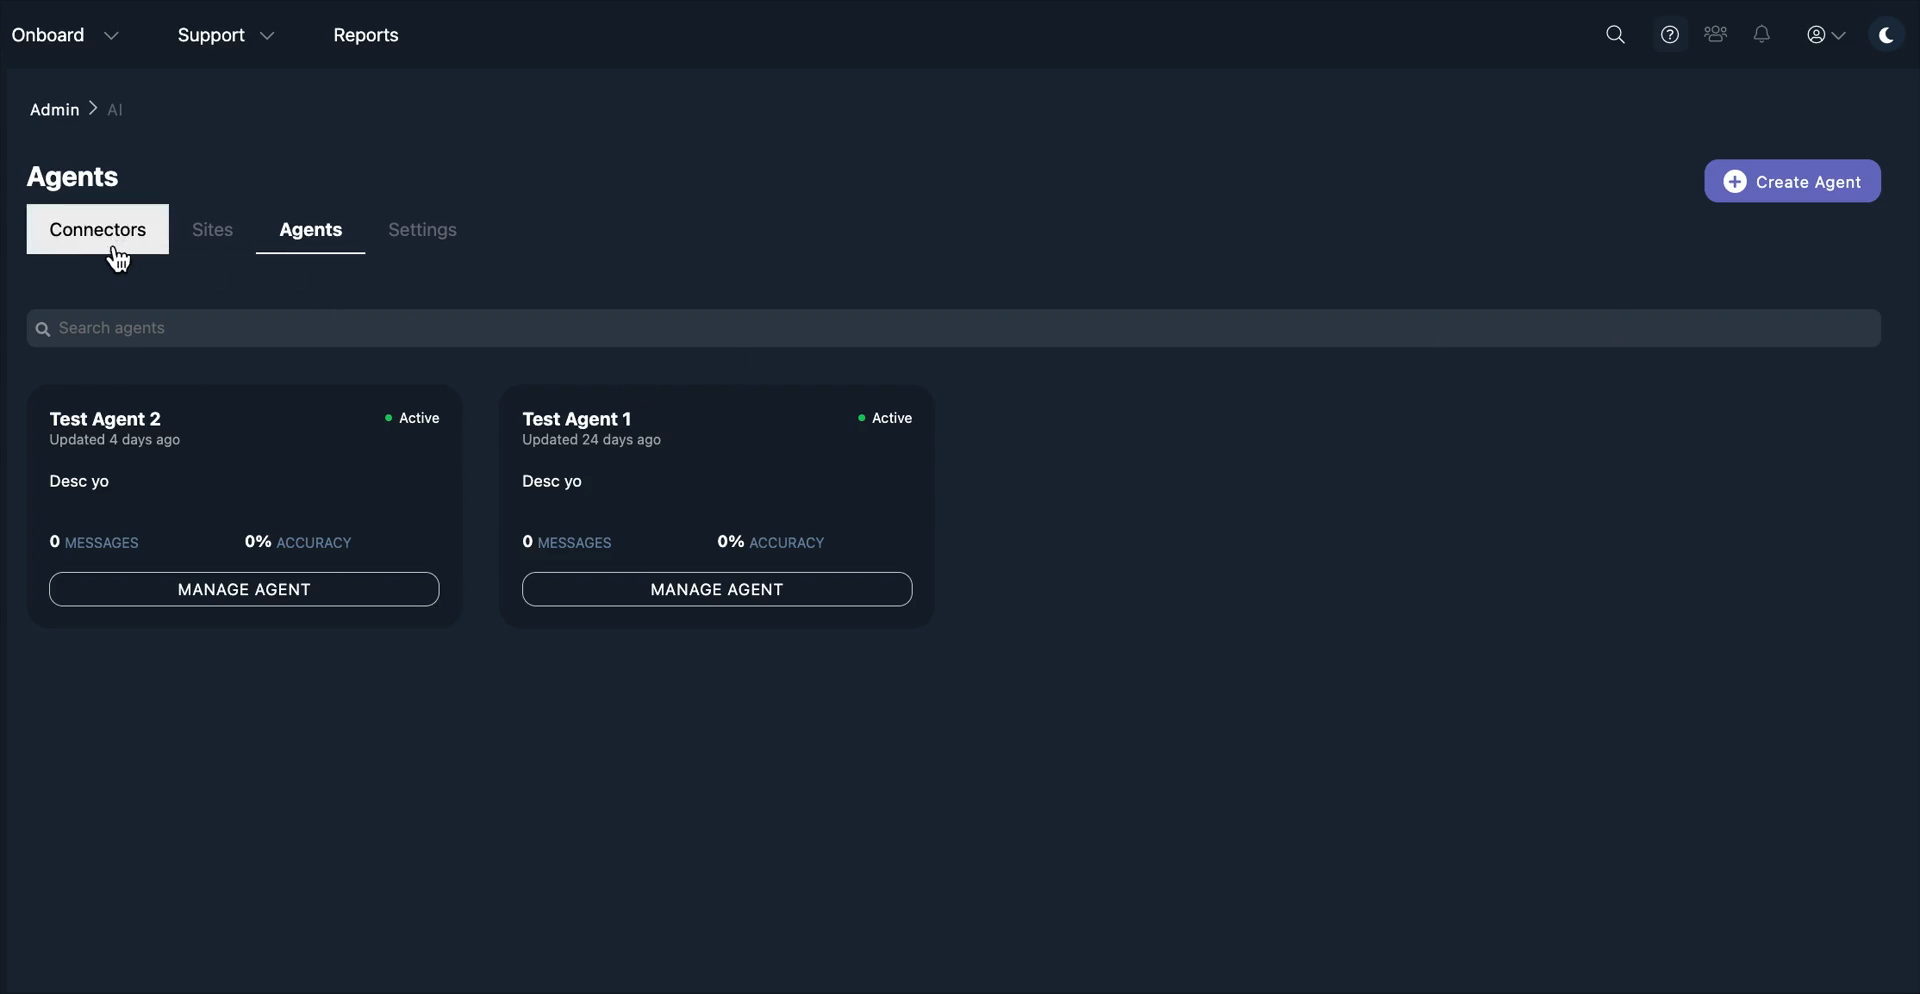
We will add a new section for uploading individual files. You can upload these files and use them as context. You will also see a section called Agents, which I will highlight today. The Agent section refers to external agents that can be embedded on customer websites. These agents are used to provide support for customer software. The middle section displays a list of all agents. You can also create a new agent. The agent icons will provide more metadata, including information to help customers understand the accuracy of the responses.
You will be able to see how many messages that agent has exchanged with customers.
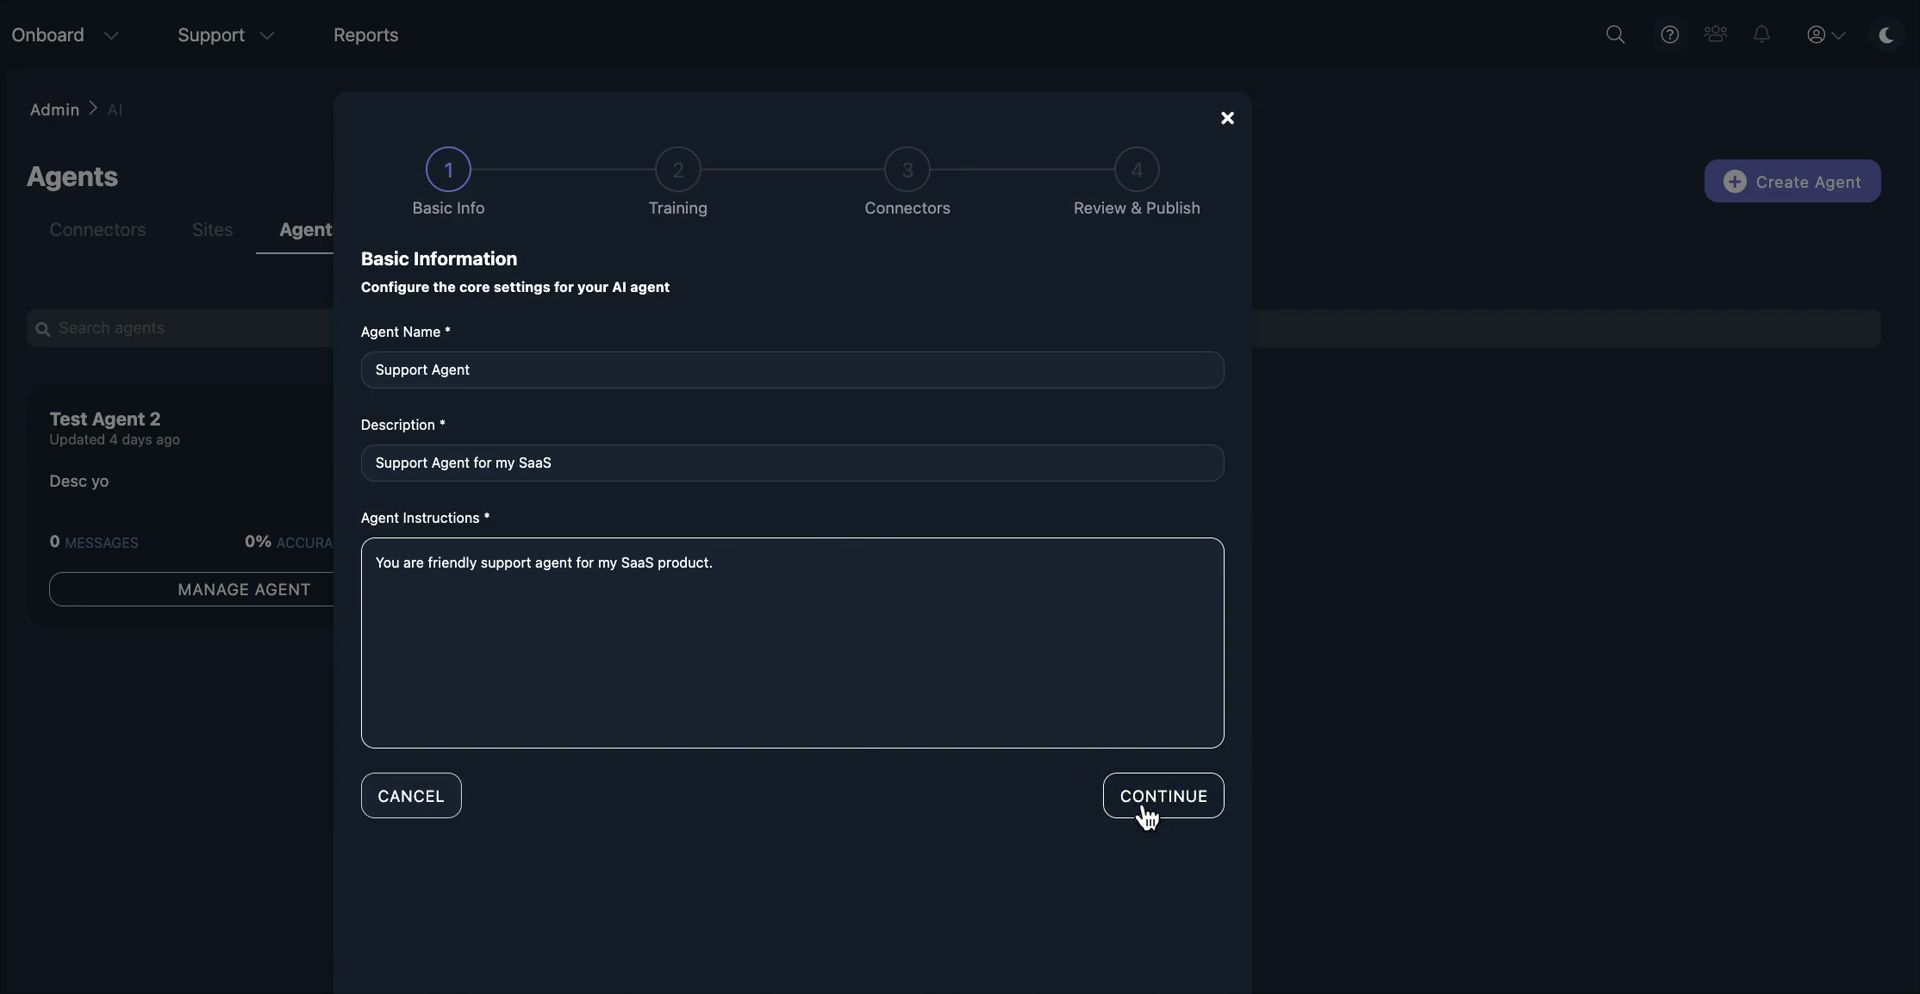
Let's go through the process of creating an agent. We’ve made this a simple four-step walkthrough. First, set up your agent name. Then... One of the newest features customers requested, and that we needed to offer to stay competitive, was the agent prompt.
Now, we are exposing the system prompt to customers. You can give it an identity and set boundaries. You can also specify the tone to match your brand or any other preference. We will take that information and combine it with our system prompt for the agent. This allows customers to customize it. This is a basic prompt written in natural language. You could say, "Hey, you're a friendly..."
"You are a friendly support agent for my SaaS product." This is a very basic prompt. This essentially gives the agent an identity. This was a major feature customers requested. It was missing from the first version, but we are adding it in the second.
After entering your agent's name and adding the customer or agent prompt, proceed to the training section. As we move to the unified UI and combine our products into one platform, AI training will be set up at the account level. If I’m working with team support, any changes I make in my AI settings—such as adding a connector, a website, or documents—will be set up at the team support level.
From there, I can decide which AI features to use with different documents as context. For example, I may have indexed support.teamsupport.com and want my AI agent to use only that website for context. However, I may not want my support ticketing AI to use it.
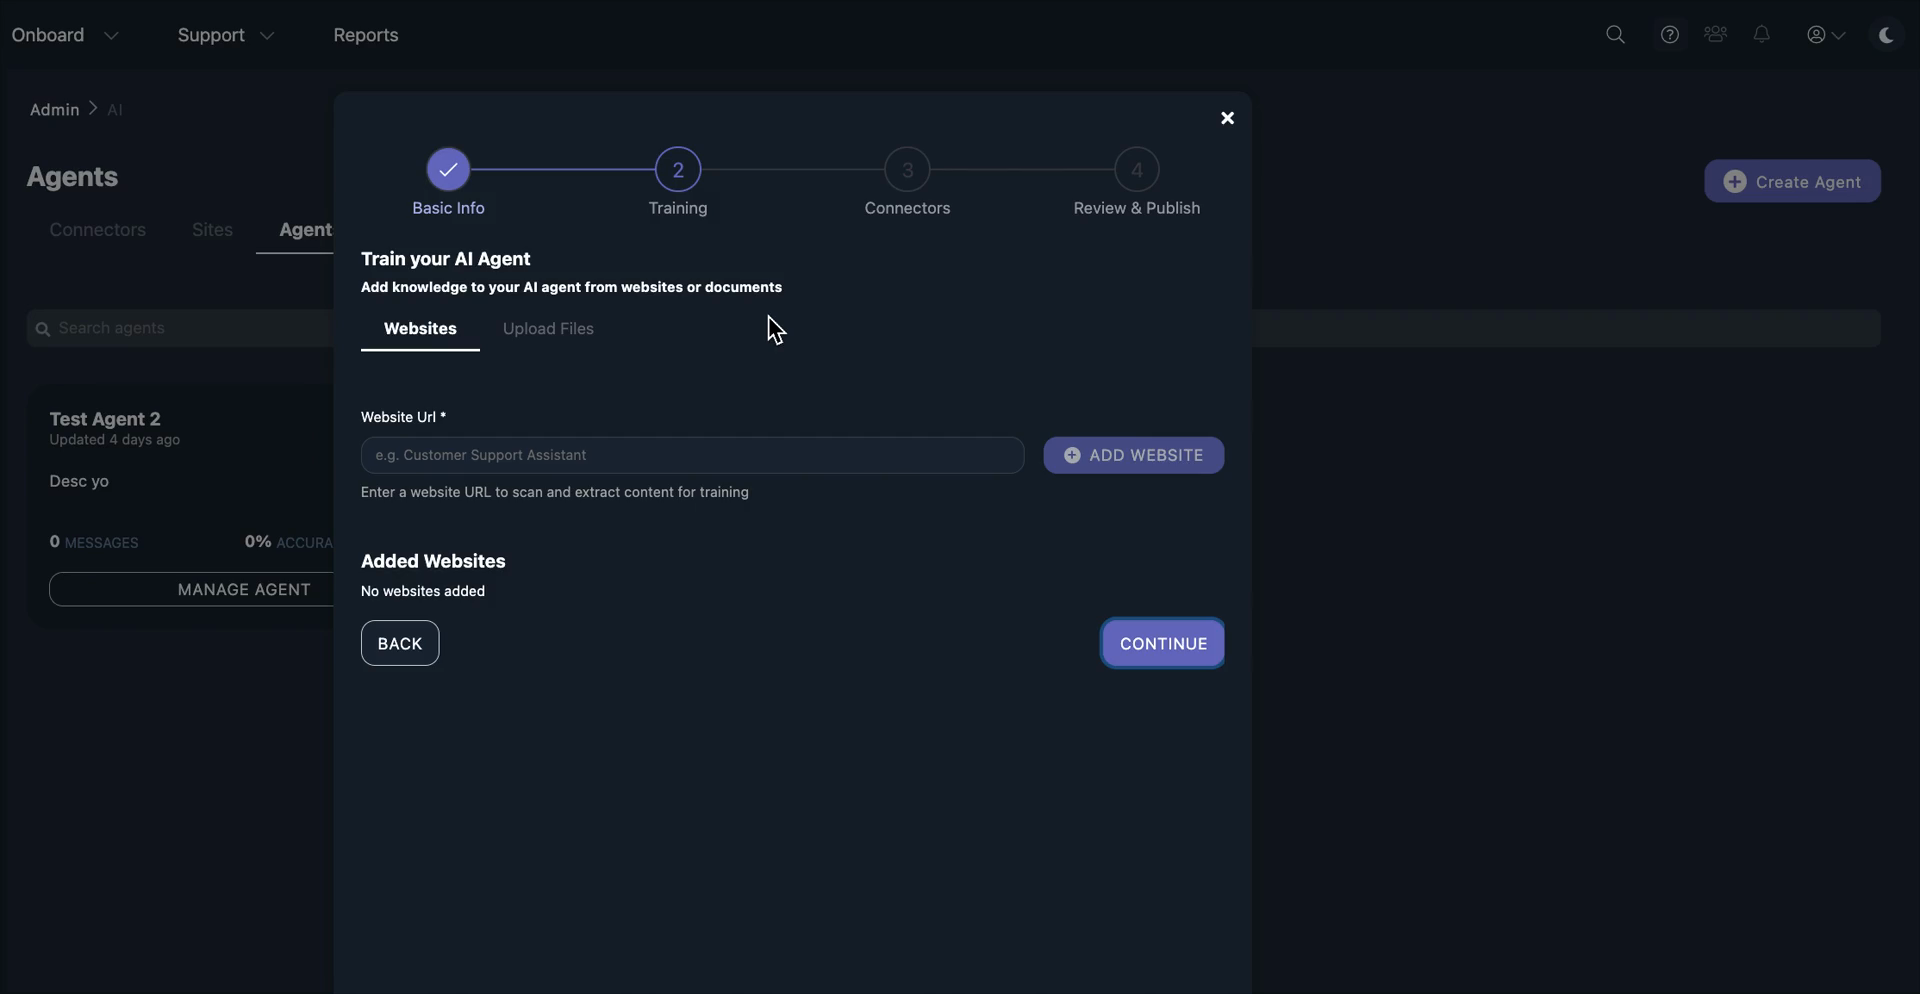
I will be able to choose between sources based on the AI I am configuring. In this modal, you will see any websites you have already configured. We will make sure you do not accidentally duplicate the websites. If you've already added support.teamsupport.com to your account, you can select it from the added websites. If you have not, it will allow you to access the website and crawl it.
The same applies to files.
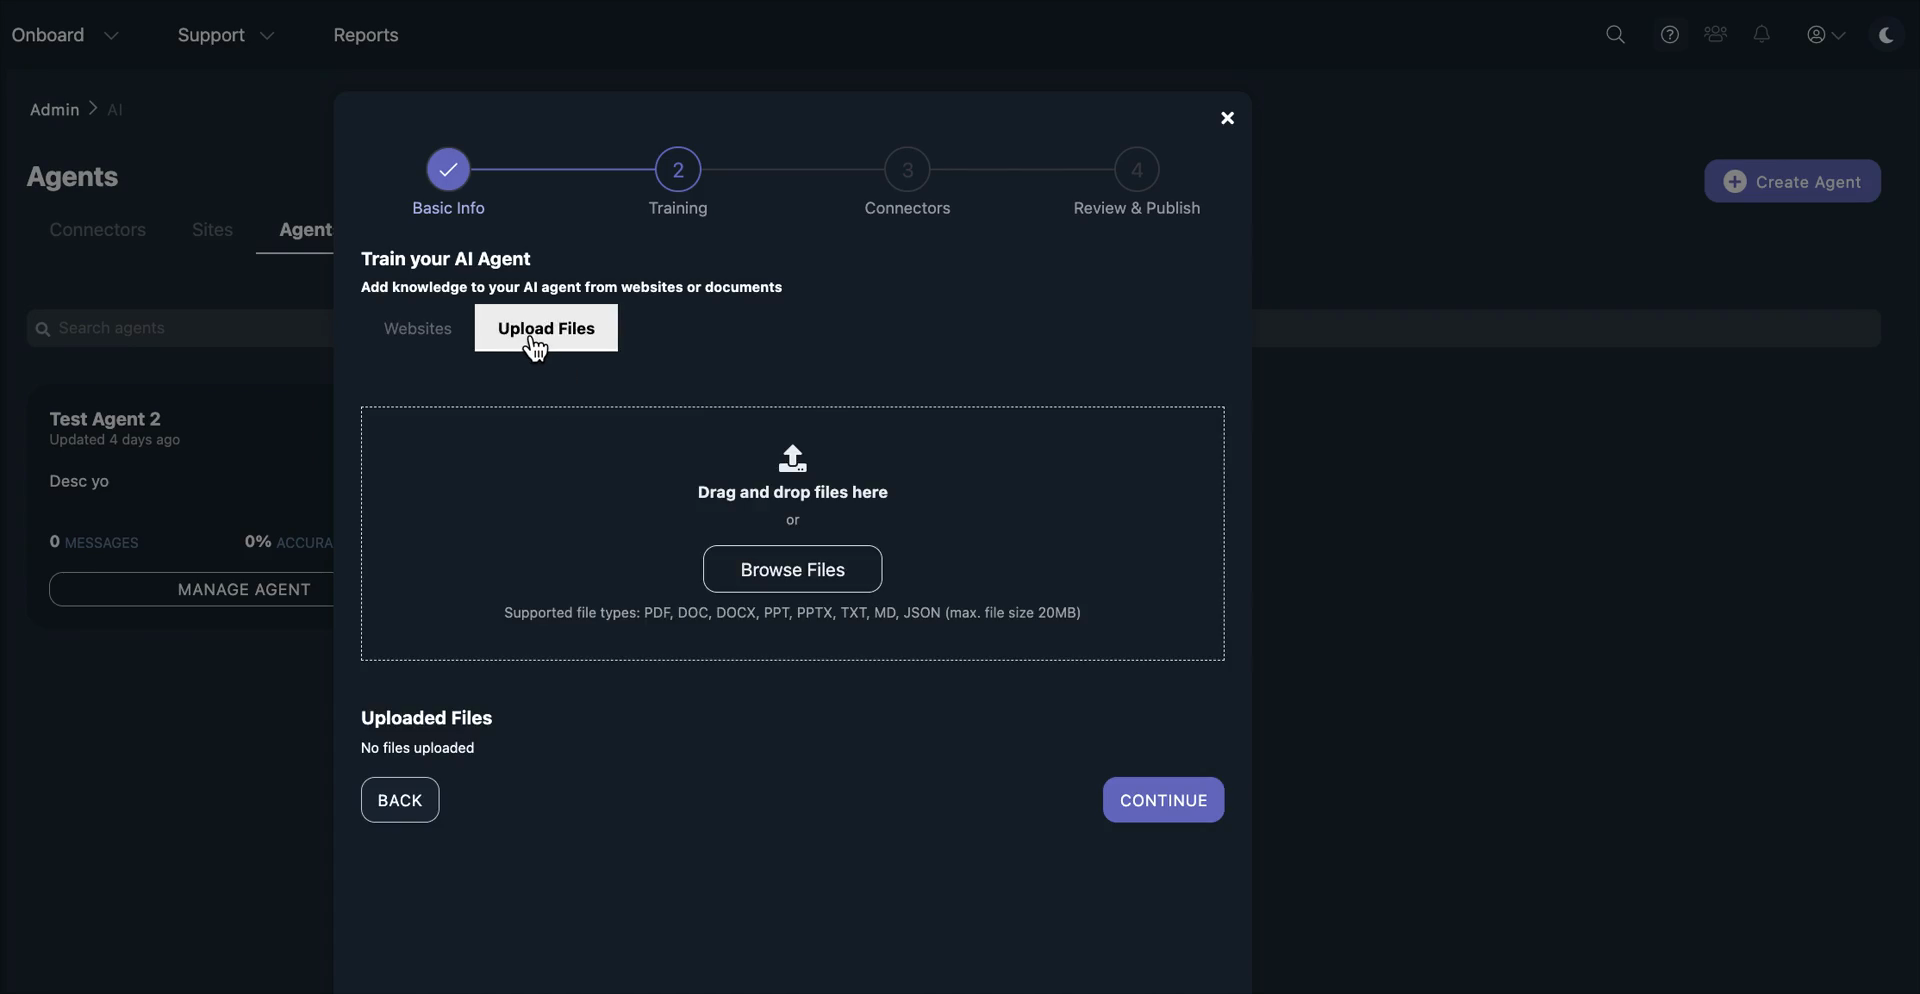
Any files you upload will appear in the Uploaded Files section. You can then select them and allow the agent to view these files for context. If you have not uploaded those files, you can upload them directly in the interface. Connectors will follow a similar pattern.

If you've already authenticated and set up a connector at your account level, such as Confluence or MindTouch, you can easily add it to the agent by clicking the plus symbol.
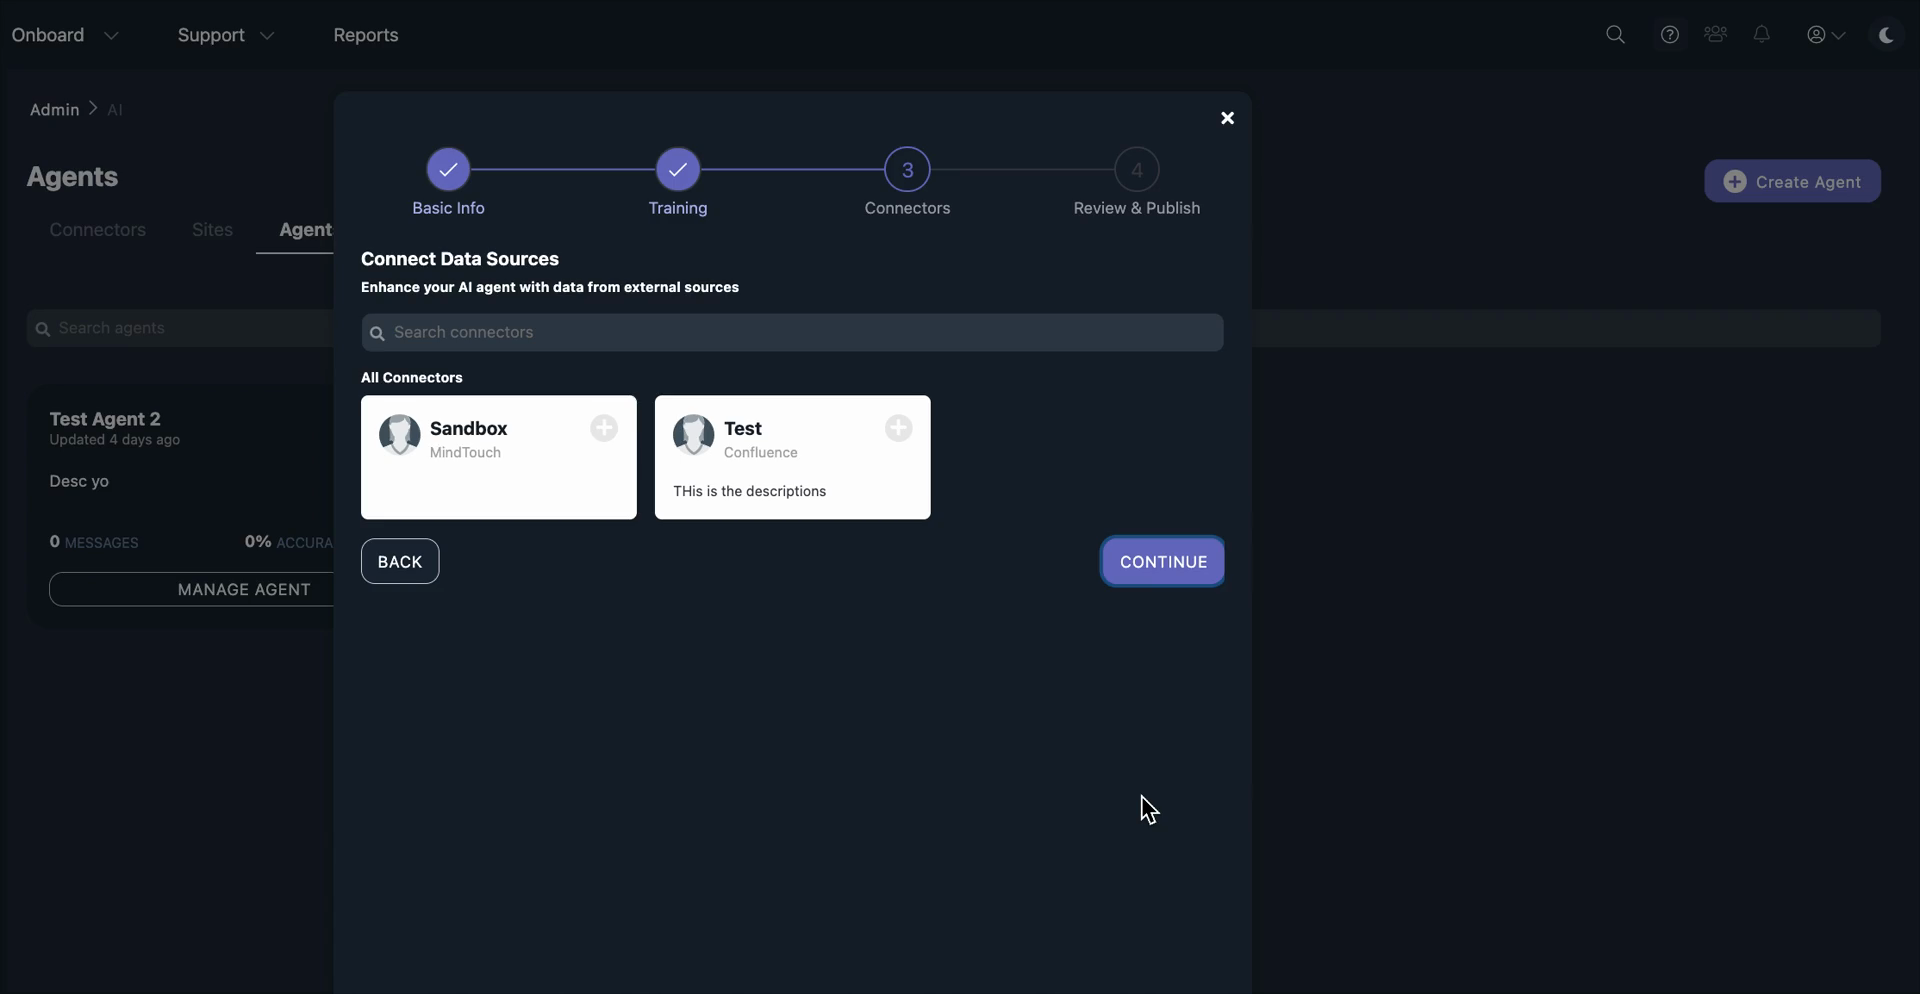
If you have not added it to your account, you will still see all the available connectors. You can authenticate directly from this modal. It will then add it to your agent.

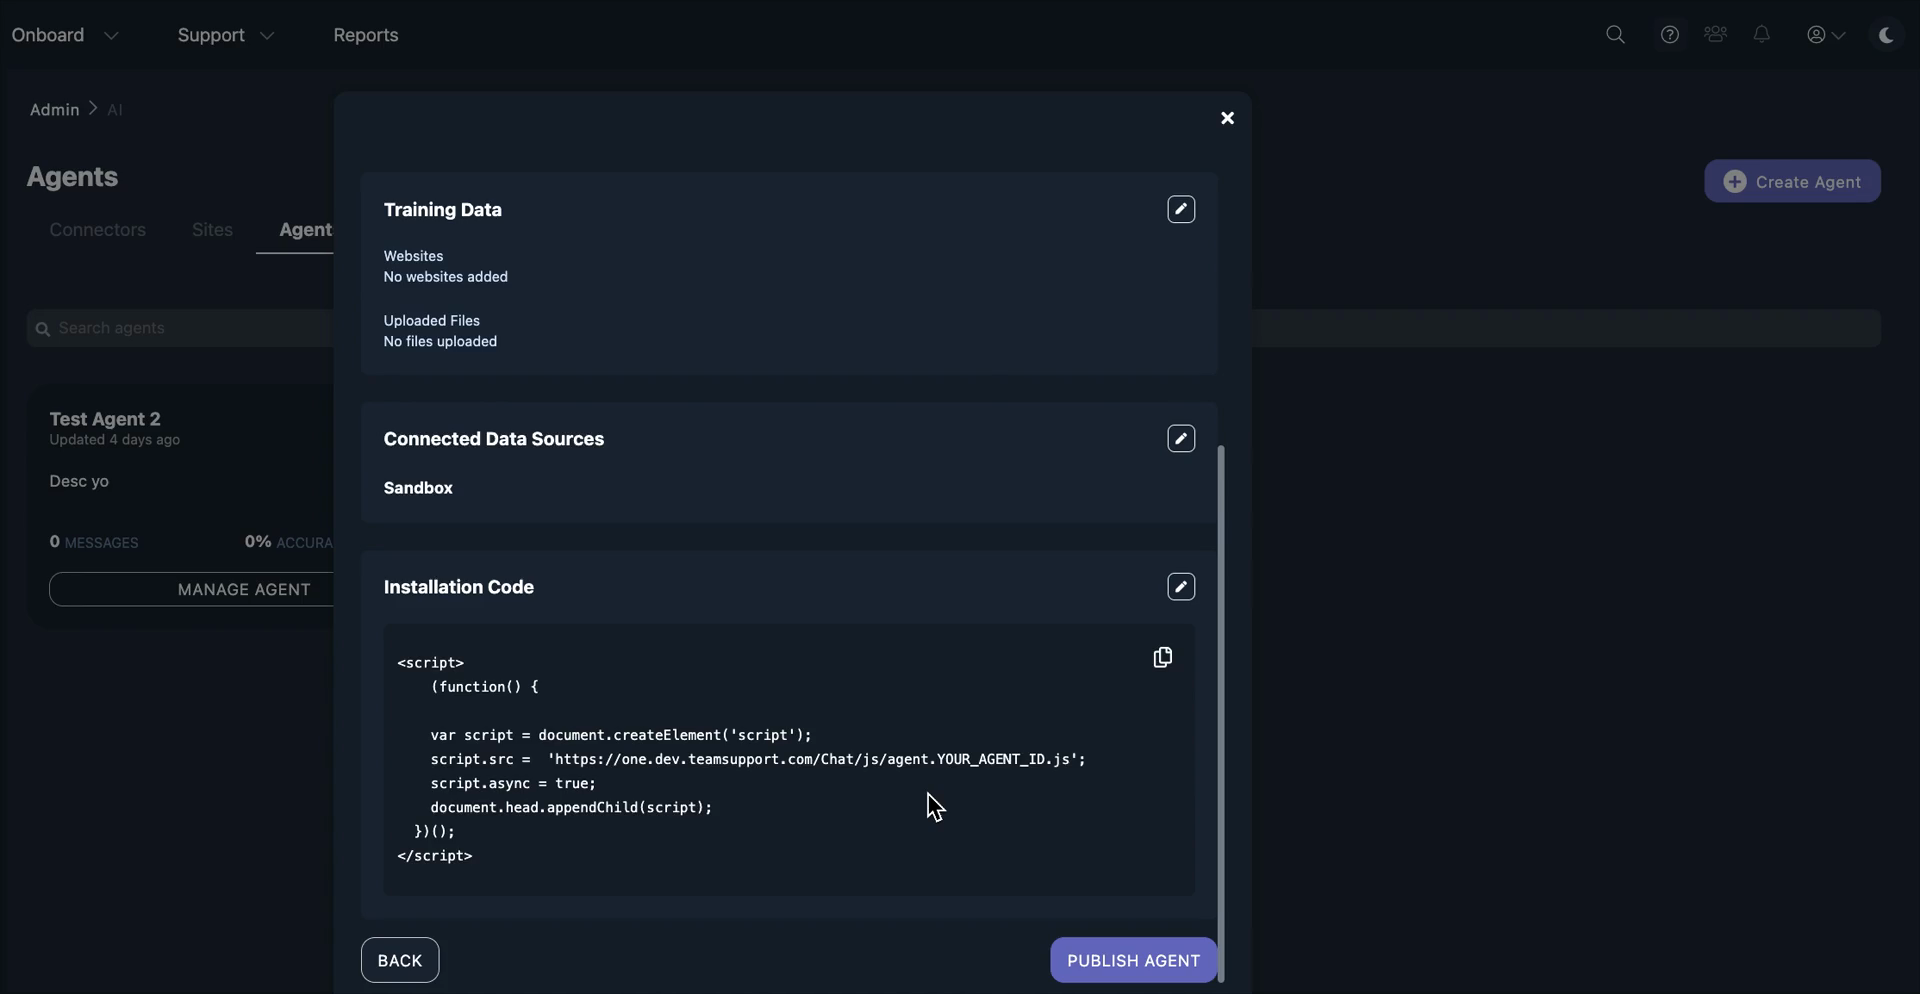
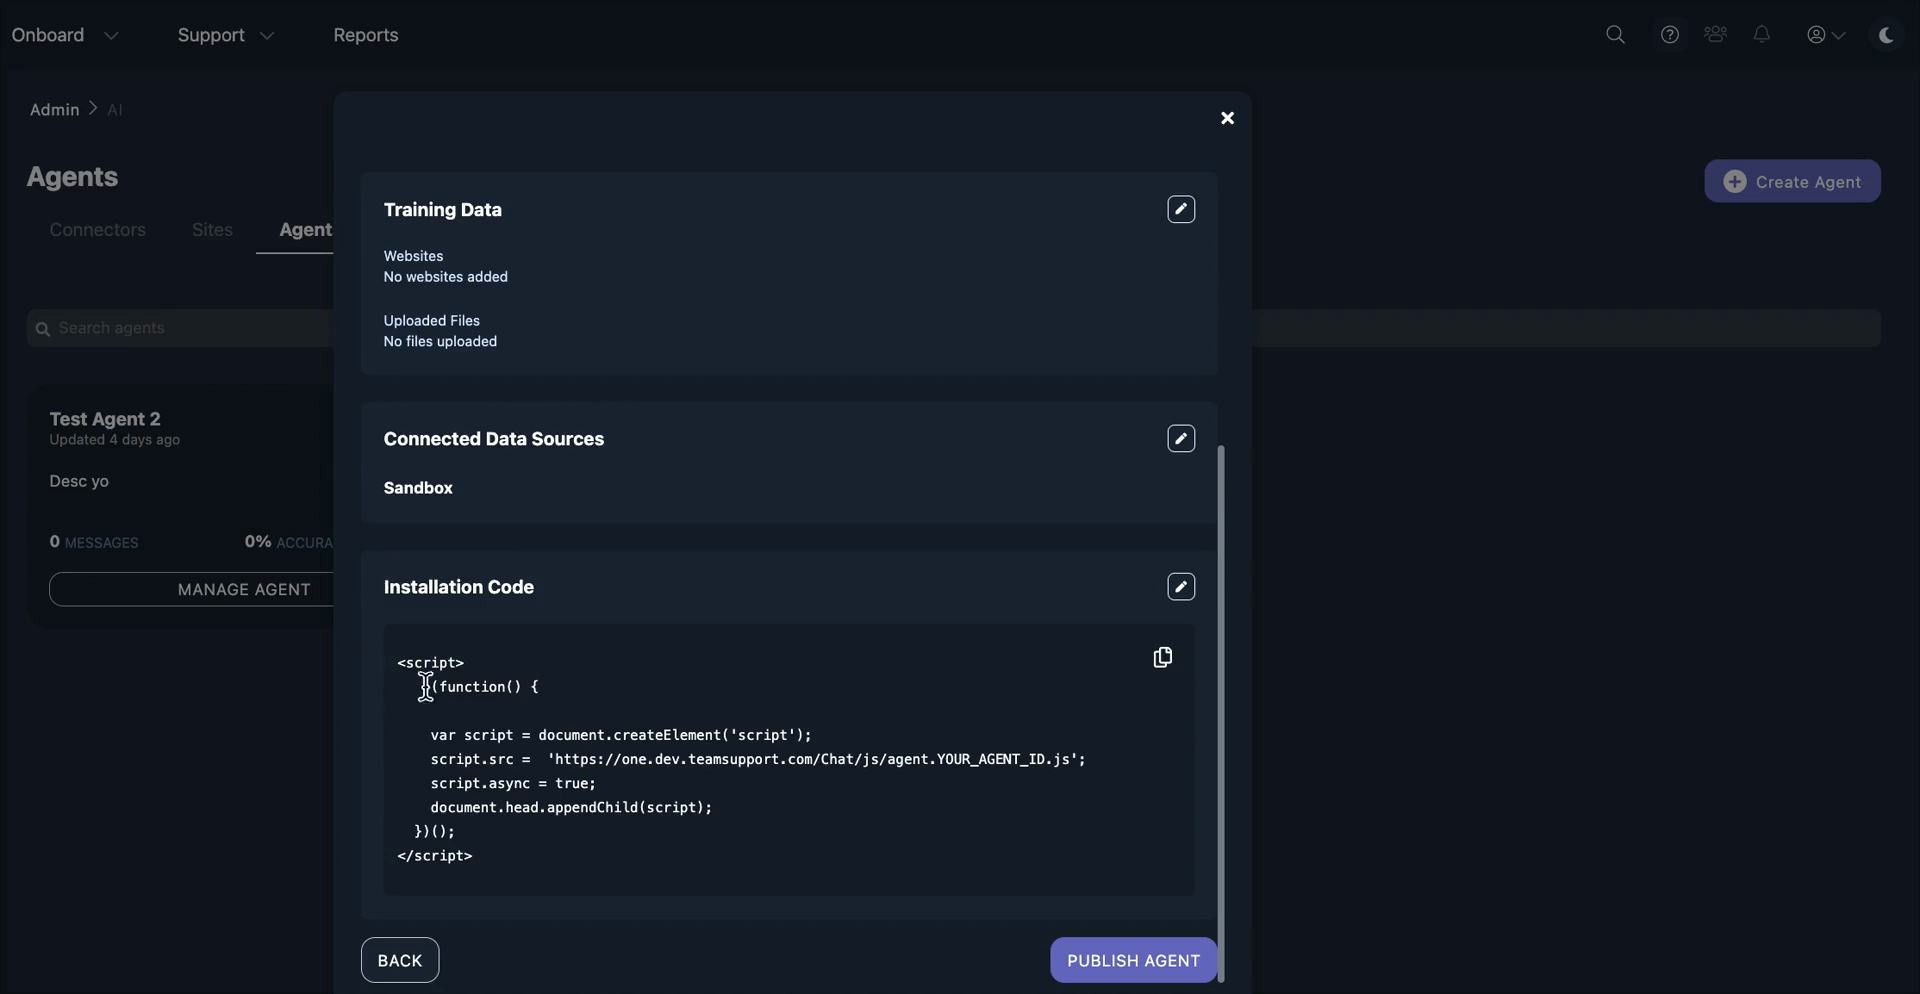
Next, you'll see a summary with the name, description, and the prompt you added. You'll also see any training data provided to the AI agent and the connected data sources from our marketplace.
Similar to messaging and live chat, we will provide a snippet for you to embed on your website. Customers can place this in the header of their site, just as they do with our standard messaging and live chat widgets.
While it is independent, this is directly connected to our AI stack.
Our AI is an independent service that all our products can use. It uses messaging and live chat features, including a chat bubble. If a customer wants to speak to a human, they can simply say, "Hey, transfer me to a human." Since it is already connected to messaging and live chat on the backend, the conversation is placed into the queue, and an agent can take over from there.
It will transfer from our AI to messaging and live chat with a human. This is especially helpful for cross-selling. Users can use this autonomously, but if they want additional support, it's a great opportunity to offer human assistance with natural language.
We have another product available that allows you to staff a few human agents and easily transfer your AI chat to a human chat. This product will enter customer beta on August 11th. We will begin allowing some customers to try out the entire process.
We have a few things left to finish. We will gather feedback and make improvements based on it.