Lock and Unlock Periods in Recurring Journal Entries
Learn how to lock and unlock financial periods, secure recurring journal entries, and track changes using the audit trail.
By Aasma Technology Solutions
This guide explains how to lock and unlock financial periods for recurring journal entries. Locking a period safeguards data integrity by preventing unintended changes to historical accounting records, while unlocking gives you a controlled way to reopen a period when needed.
Lock an Accounting Period
1
Click Lock Period in the top right corner of the recurring journal entries table to open the scheduling modal.
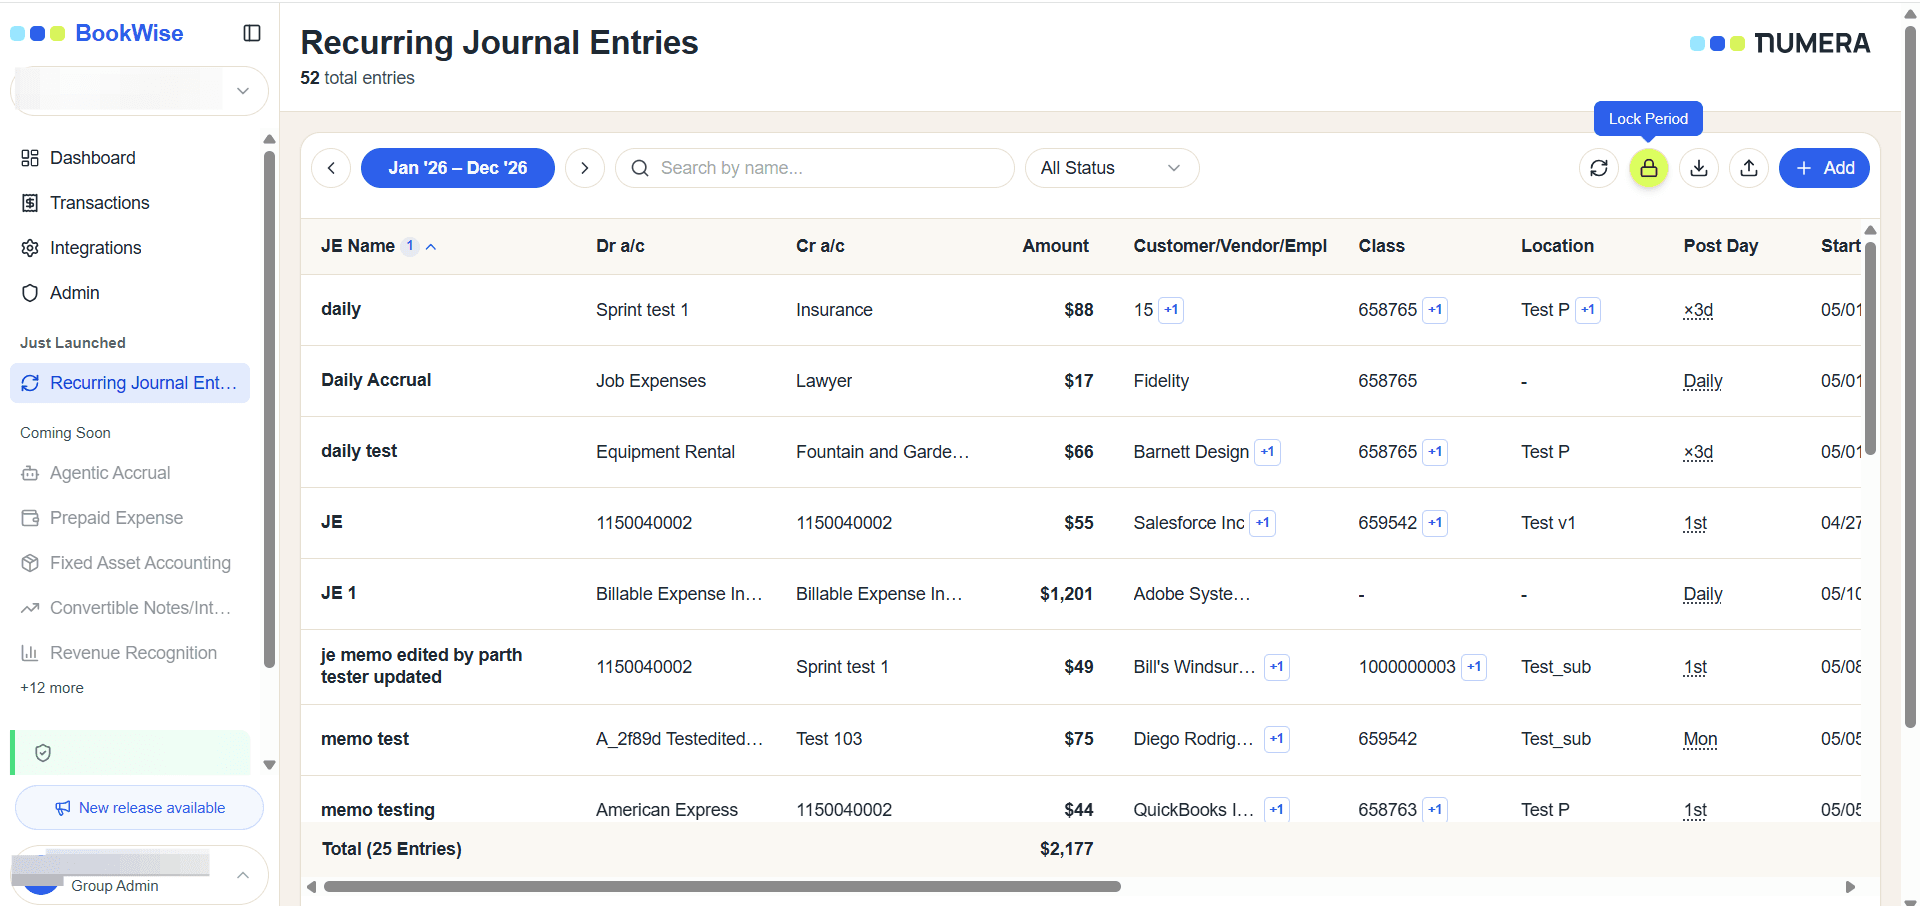
When you lock a specific month, the system automatically locks all previous months and years to preserve historical data.
2
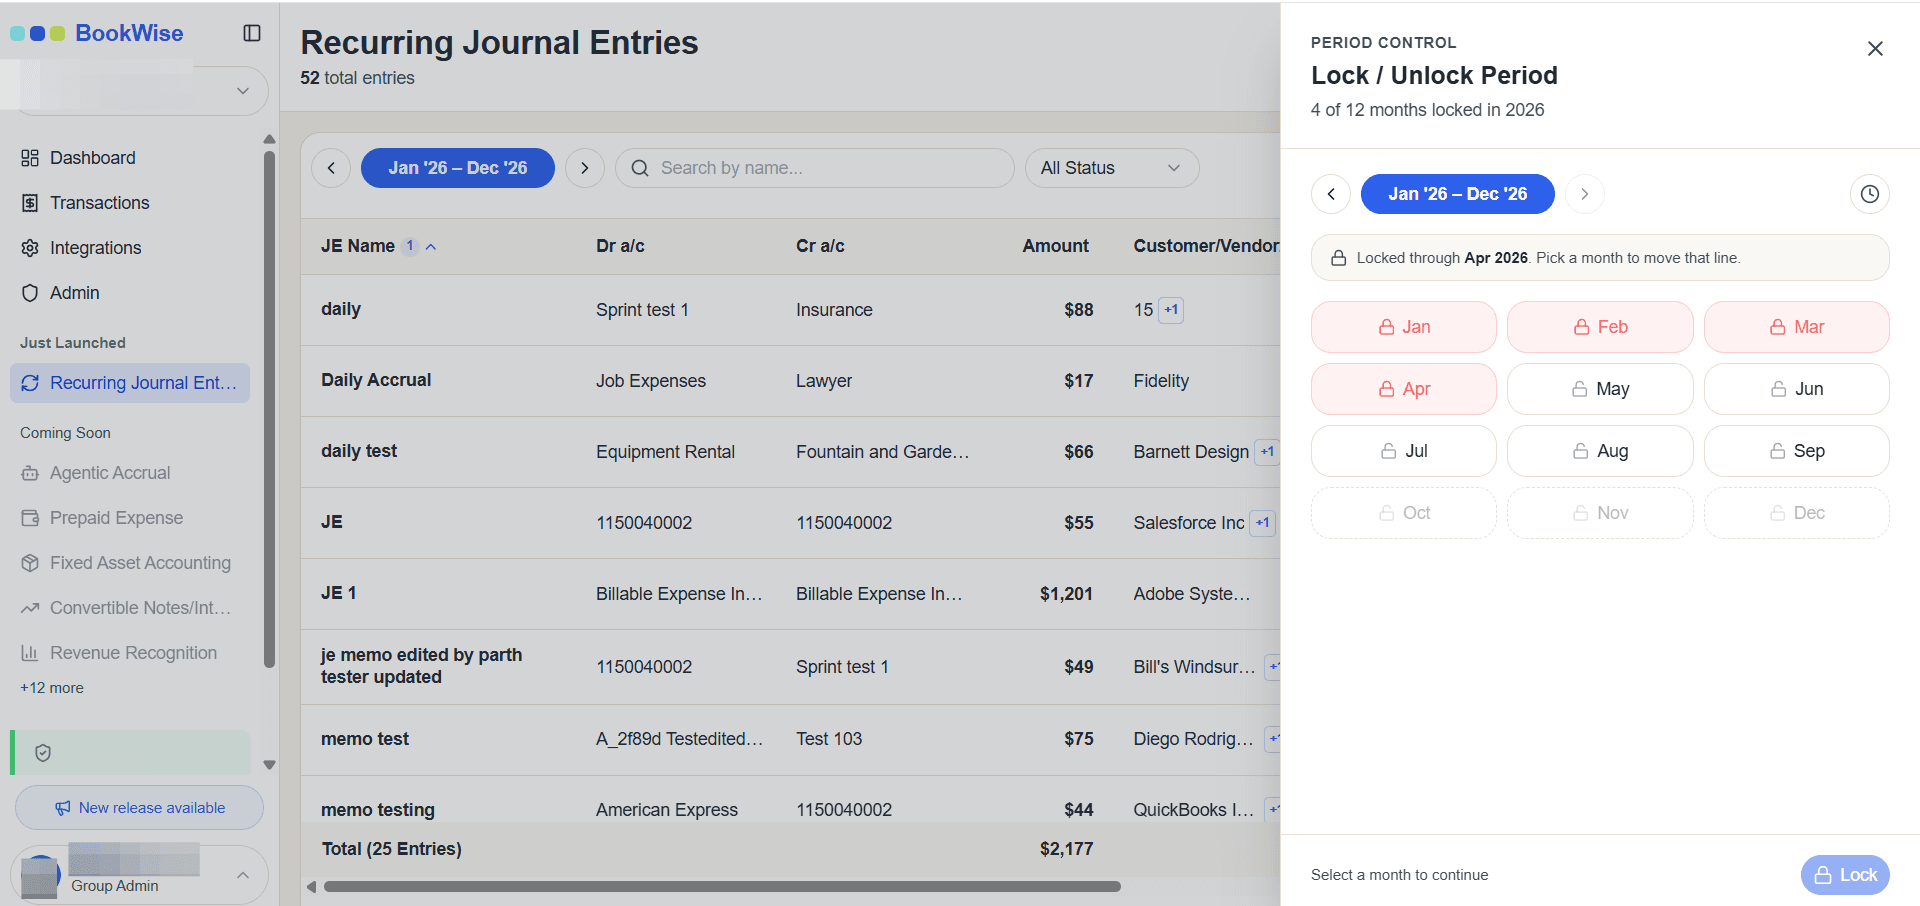
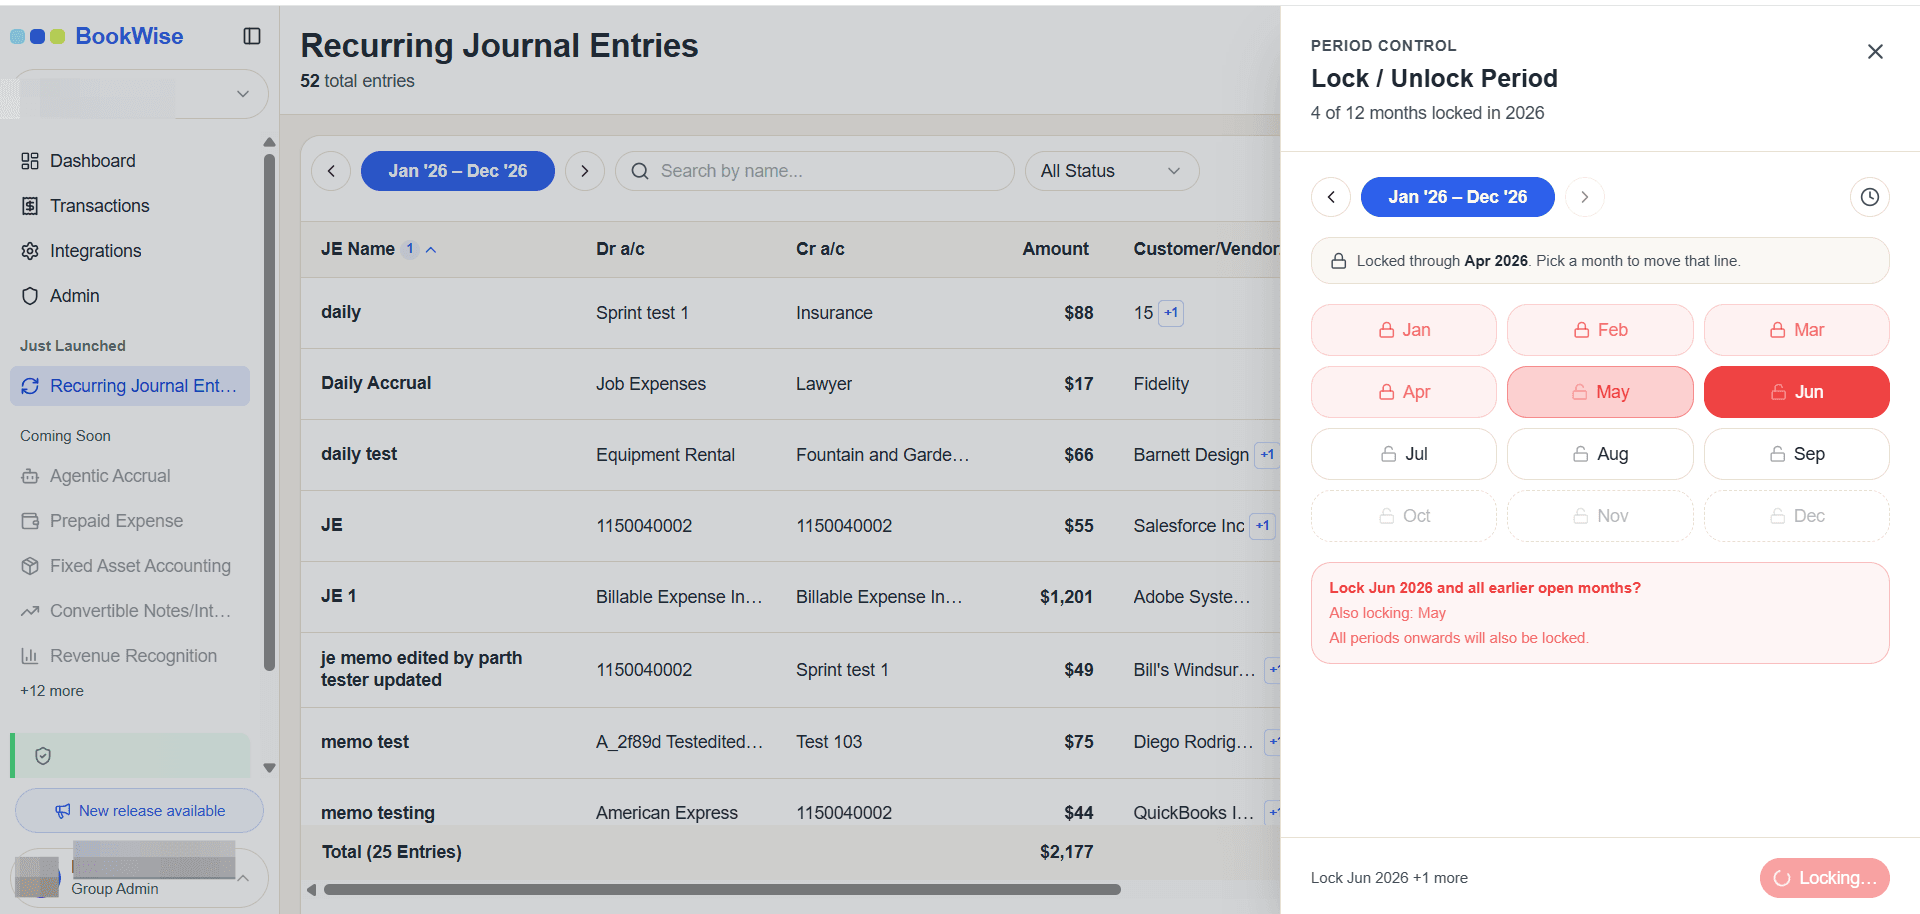
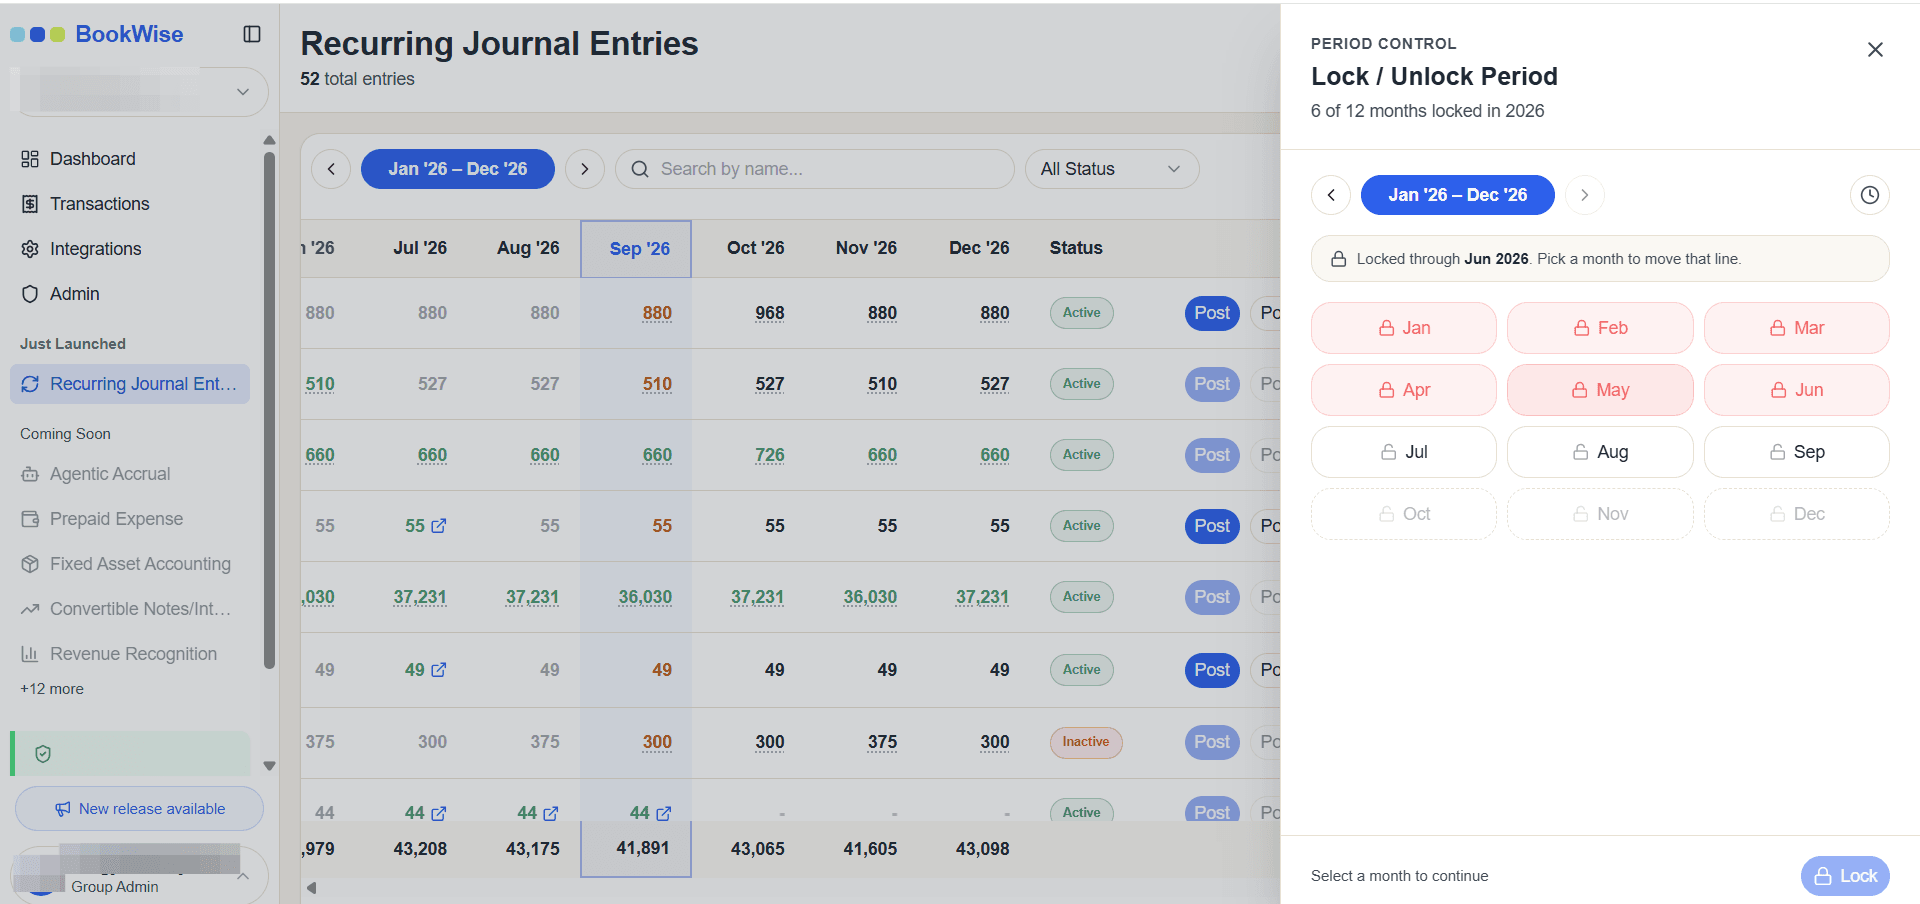
Select the month you want to lock from the grid, such as May '26.
3
Click Lock Period to confirm your selection.
4
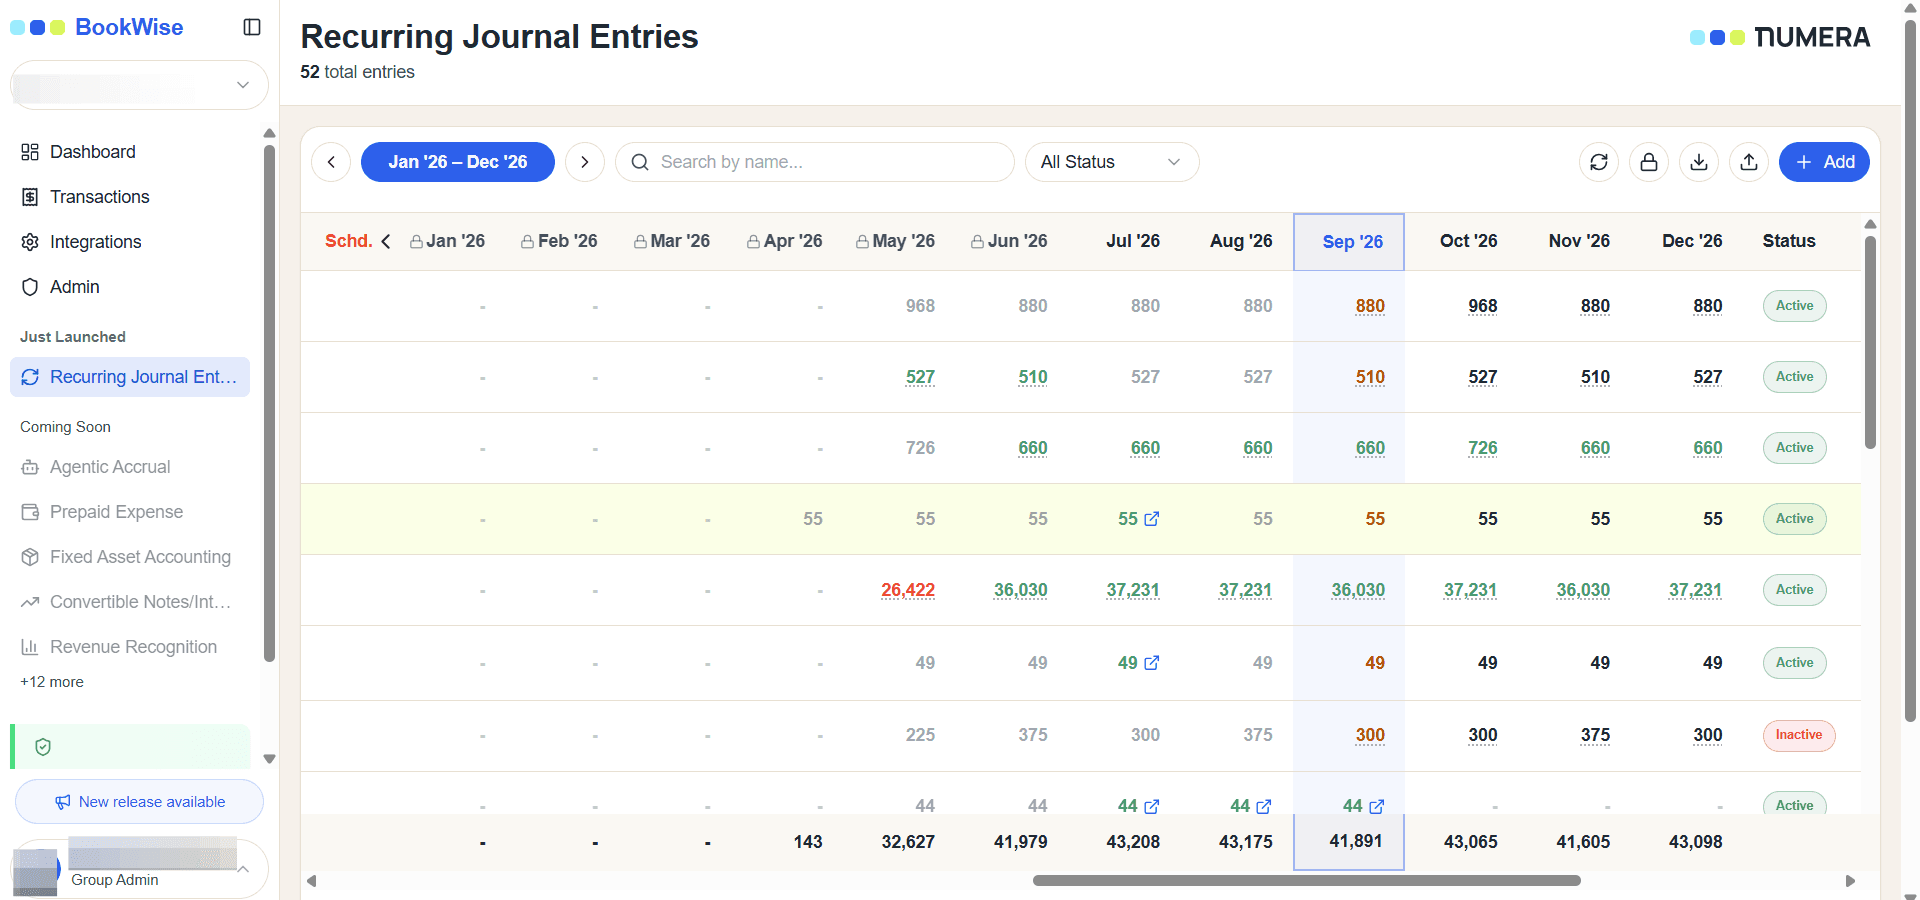
Locked months shows with the lock icon
Unlock a Period
If you need to make adjustments to a previously locked month, you can reopen it.
5
Open the Lock / Unlock Period modal .
6
Select the locked month you wish to reopen, such as May '26. Click Unlock Period to apply the change.
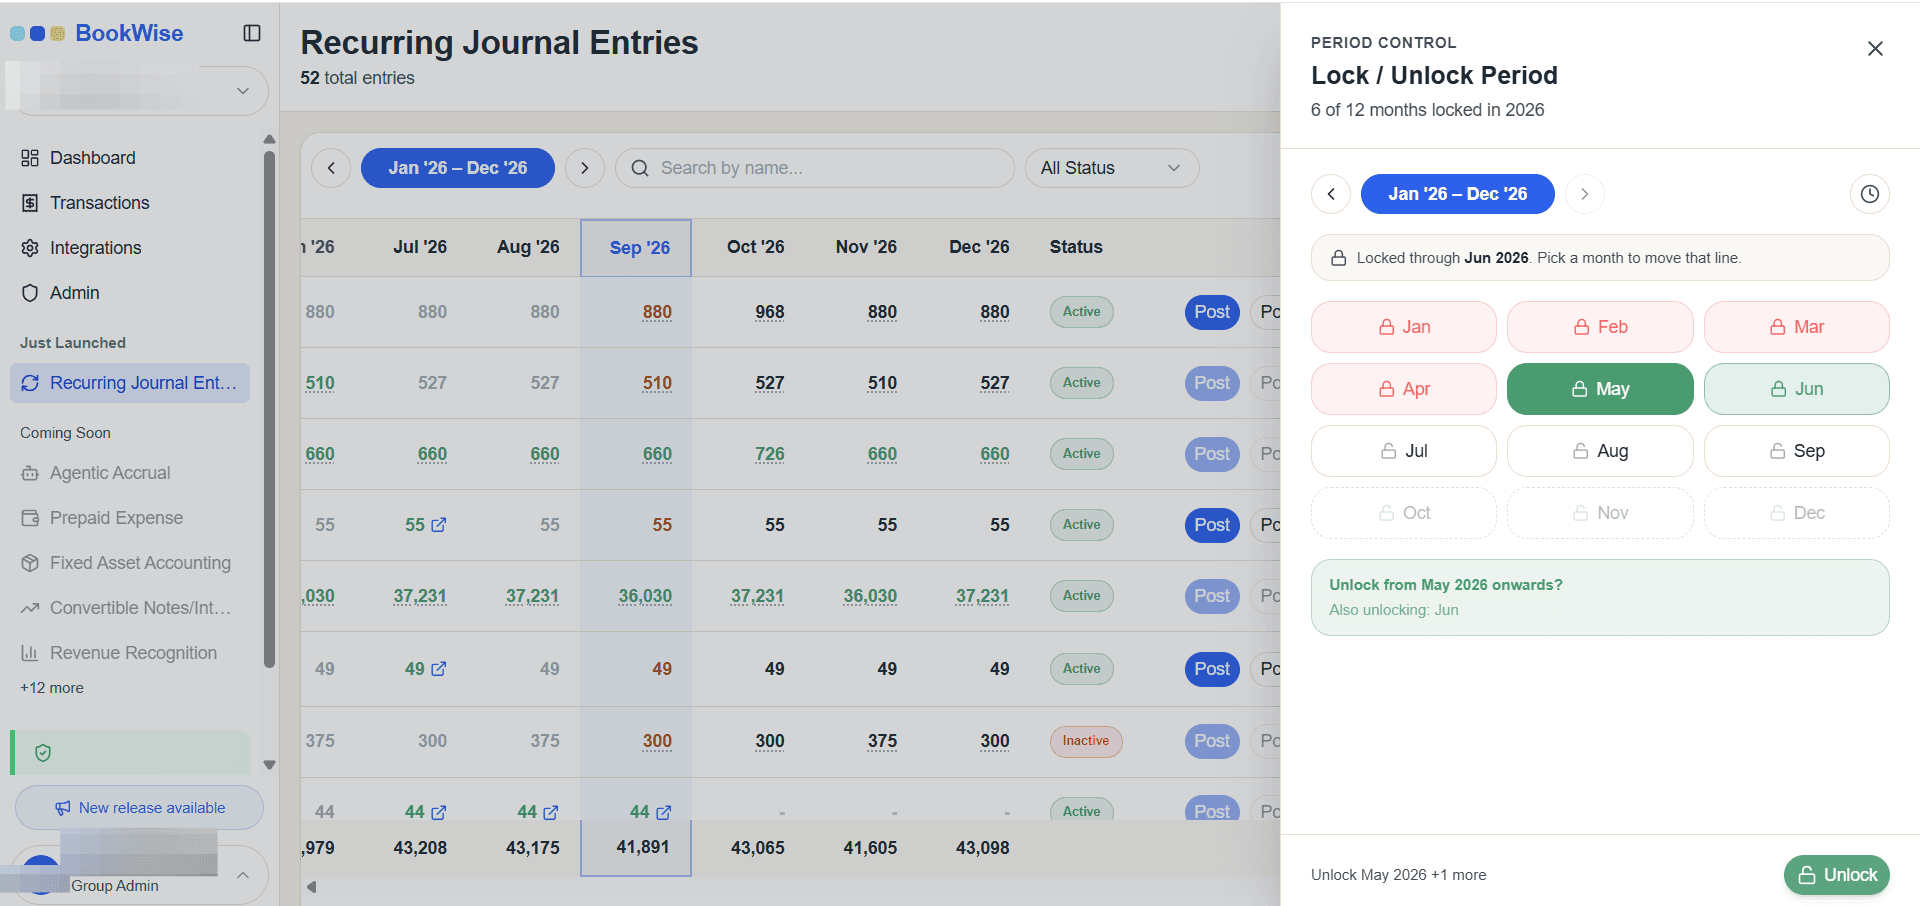
Unlocking a period will also automatically unlock all upcoming months that were previously restricted.