How to Manage and Share Customer Success Plans in Airtable
How to Manage and Share Customer Success Plans in Airtable
Learn how to initialize, configure, and share Airtable Customer Success Plan (CSP) interfaces. Add contacts, track goals, manage projects, and share read-only links.
By Izzy Pett
This guide explains how to initialize, customize, and manage an Airtable Customer Success Plan (CSP) interface for your accounts. By following these steps, you will learn how to configure customer details, track goals and project steps, and securely share a read-only view with your clients.
This procedure applies to Customer Success Managers (CSMs) and account teams. It is used when onboarding a new customer or actively tracking ongoing account progress via the Airtable CSP interface.
Access Your Base
1
Log into airtable.com
2
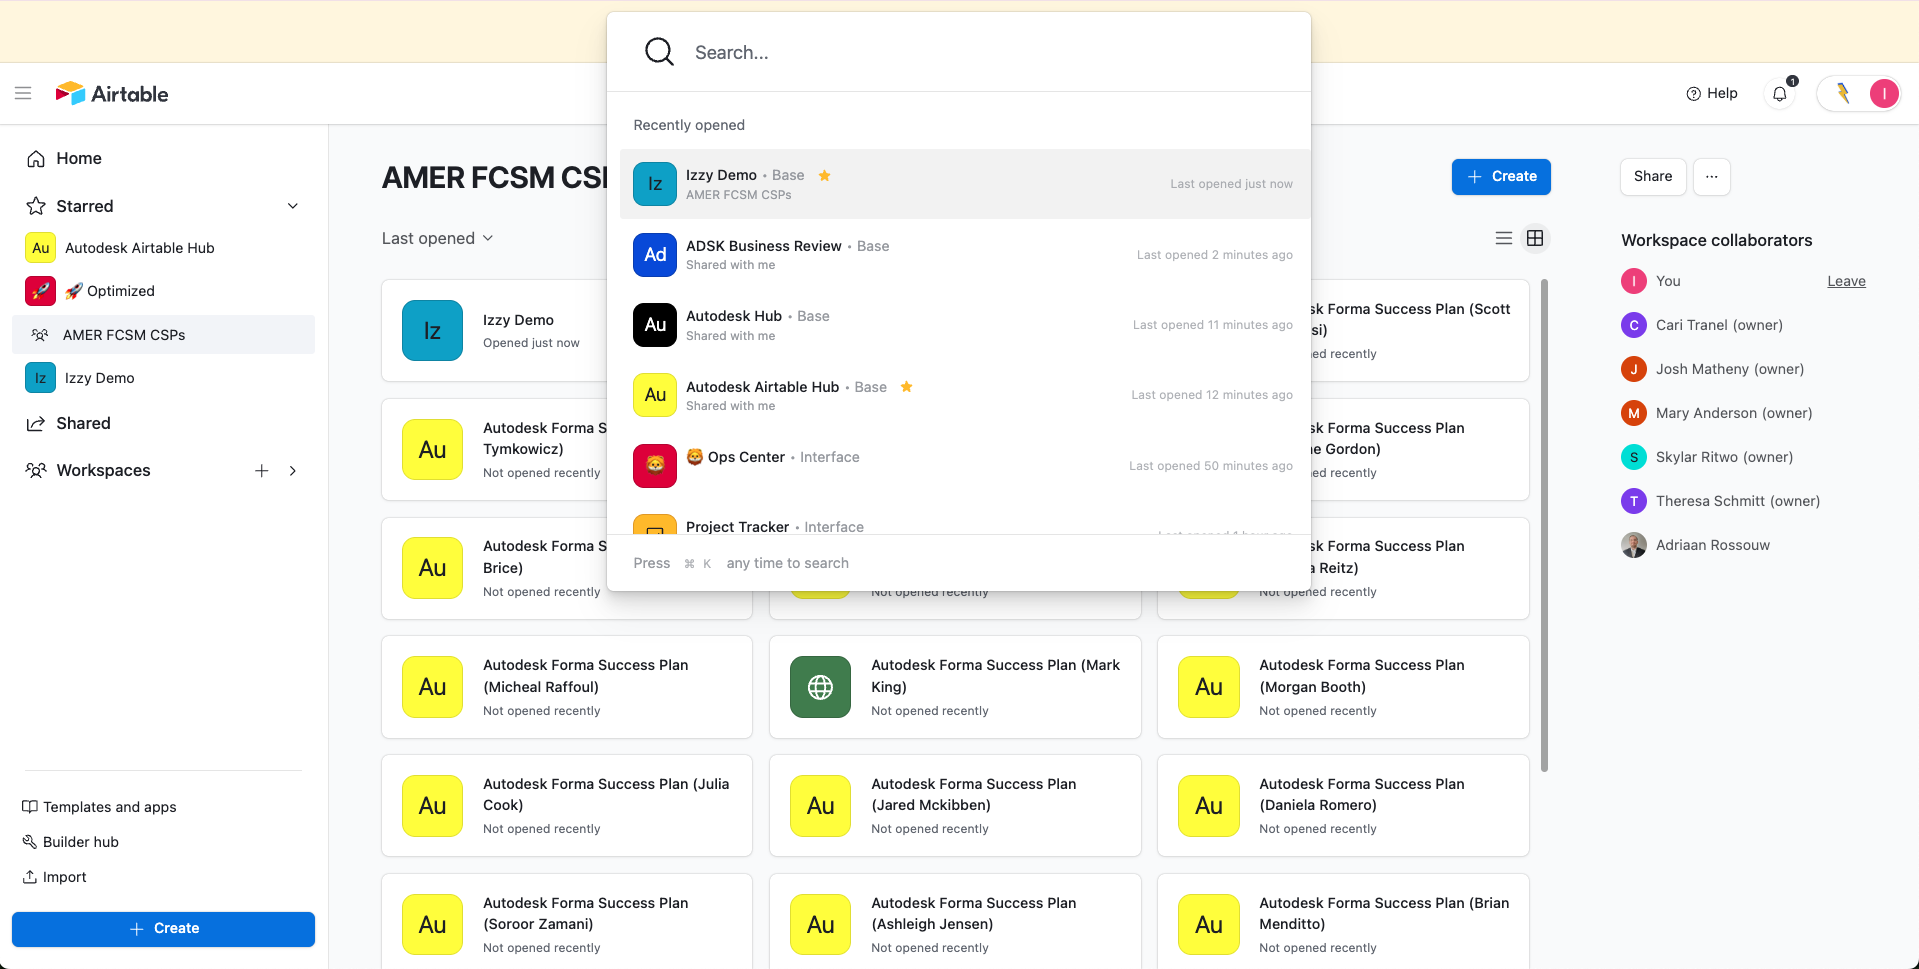
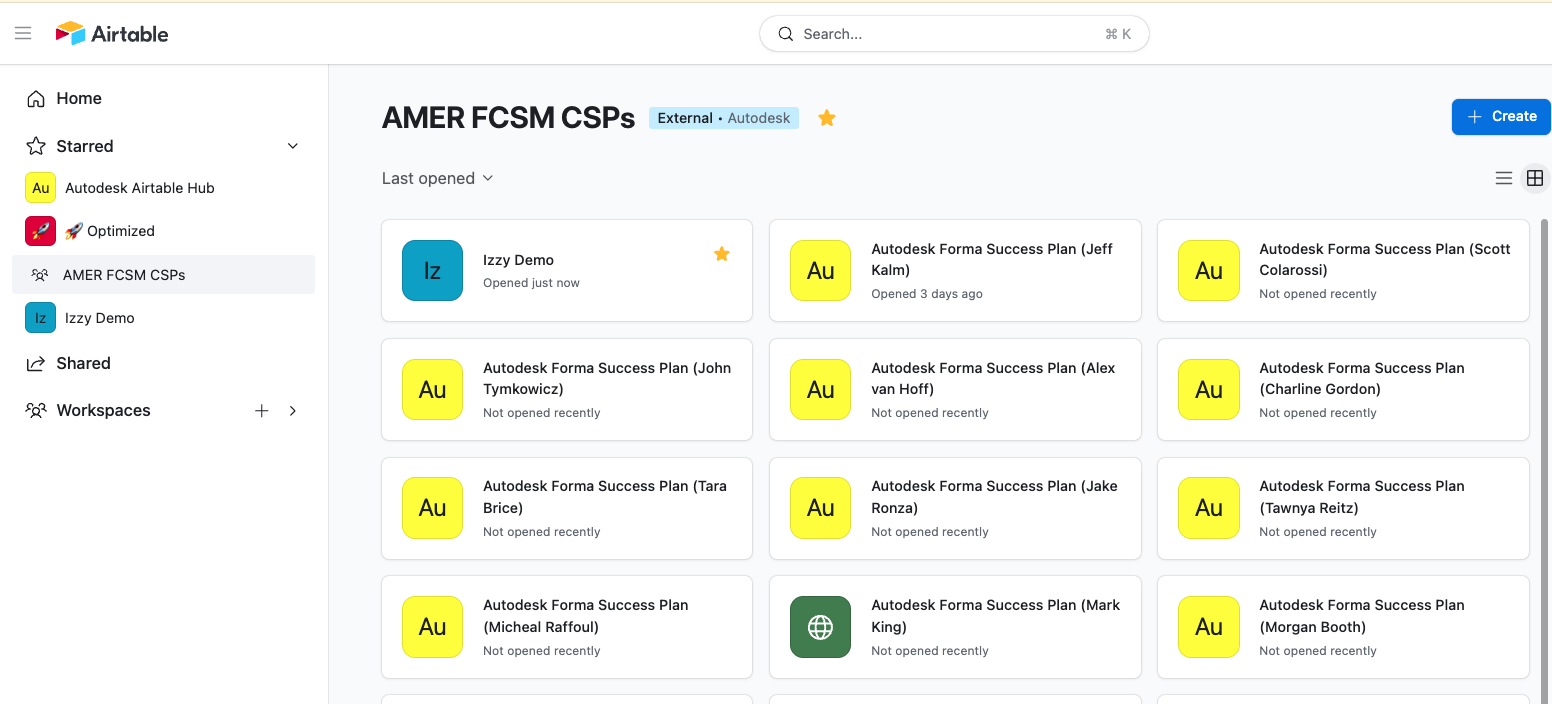
Open the search bar and type in your base name. It will be "Autodesk Forma Success Plan (YOUR NAME)"
3
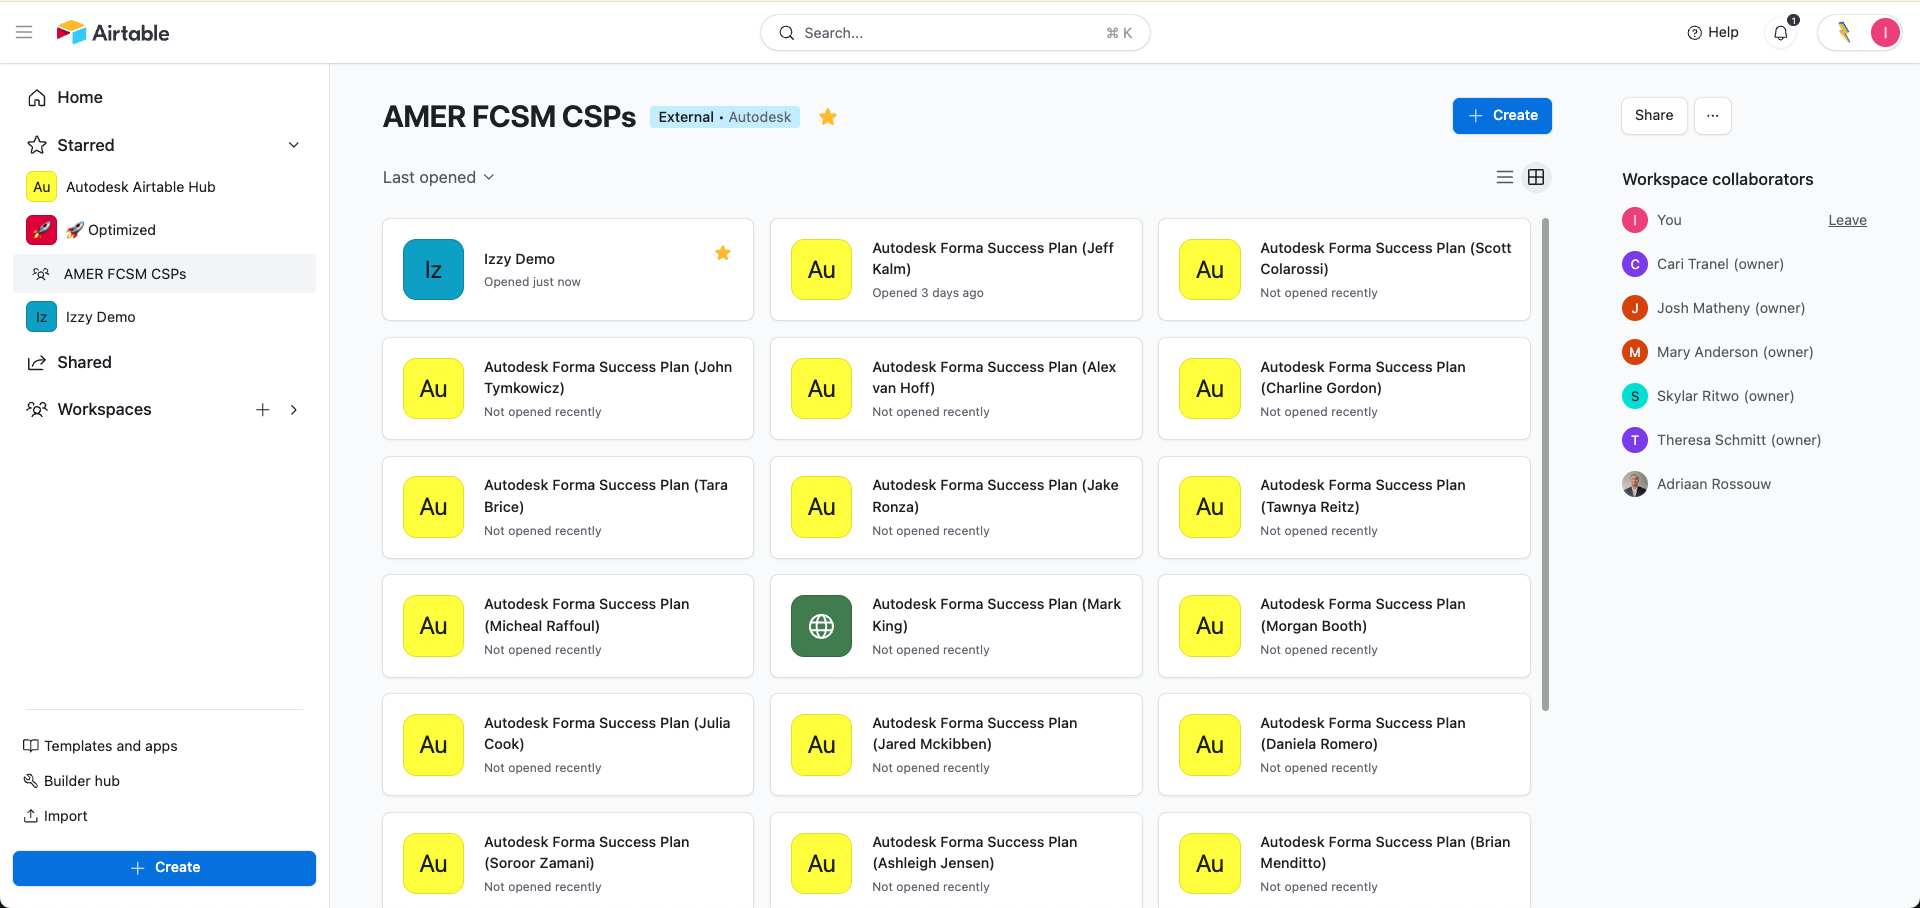
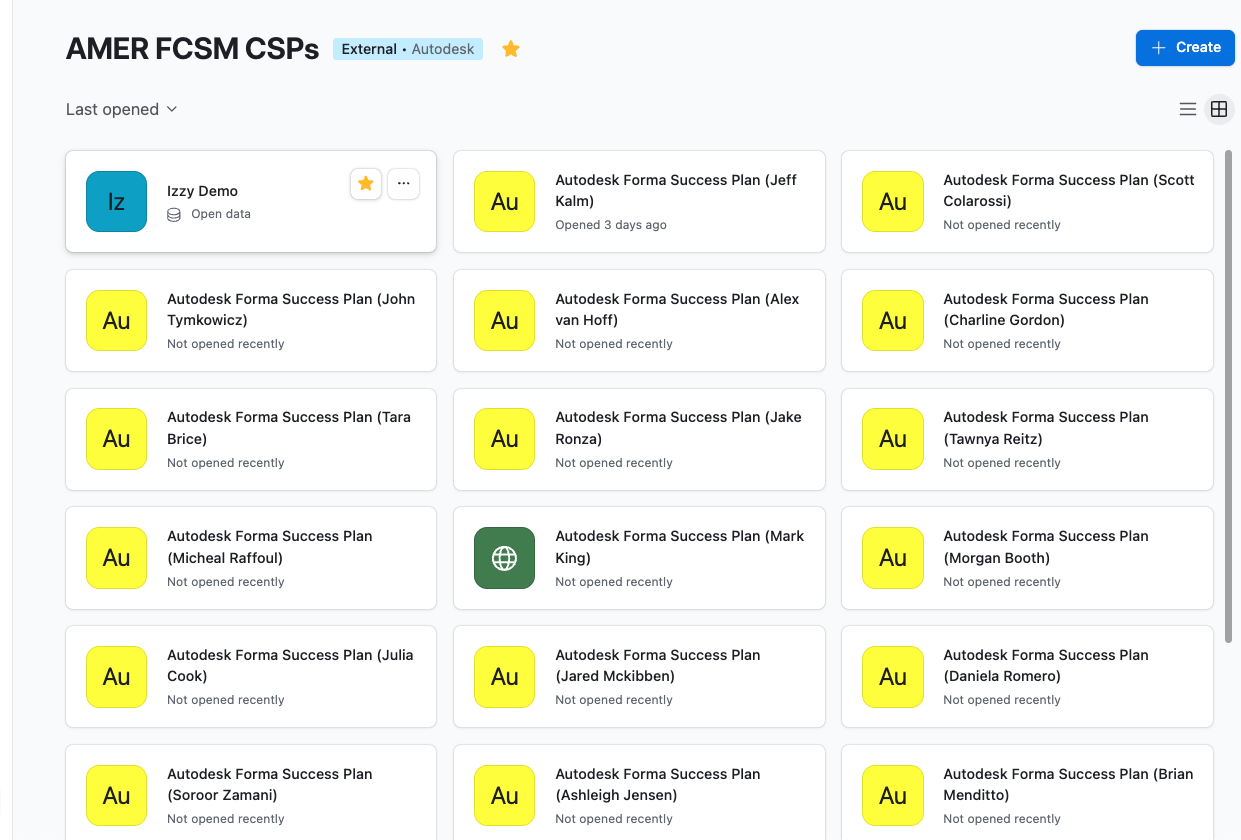
STAR your base - this will make it easier to find when you login next time! You can either star your base from your homepage (see below), OR
4
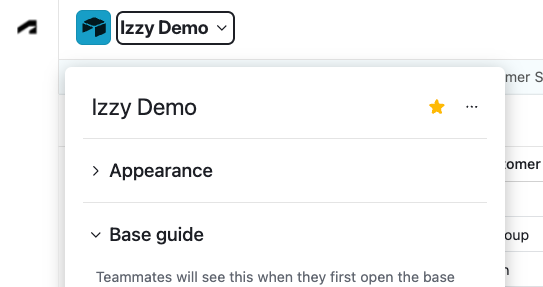
If you're already in your base, from the data layer, you can navigate to your base name in the top left and click the "expand down" carrot, and star from there:
5
Once your base is starred, you'll easily find it from your left hand navigation bar moving forward:
Entering your Base - Data Layer vs. Interface
6
Once you open your base you will have two areas to work from, the Data Layer and the Interface.
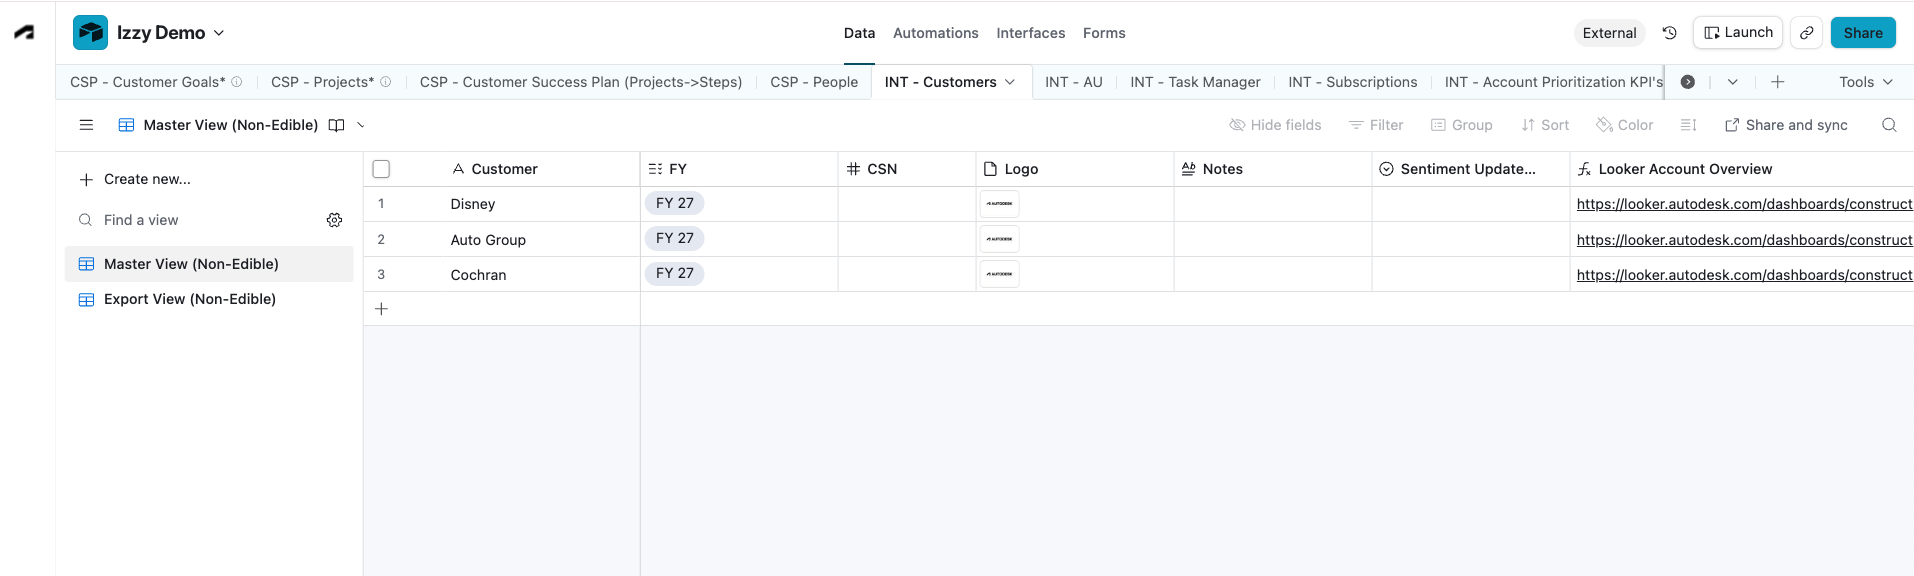
The Data Layer looks like the below. If you're wanting to access the Interface, click the Launch button on the top right of your window.
7
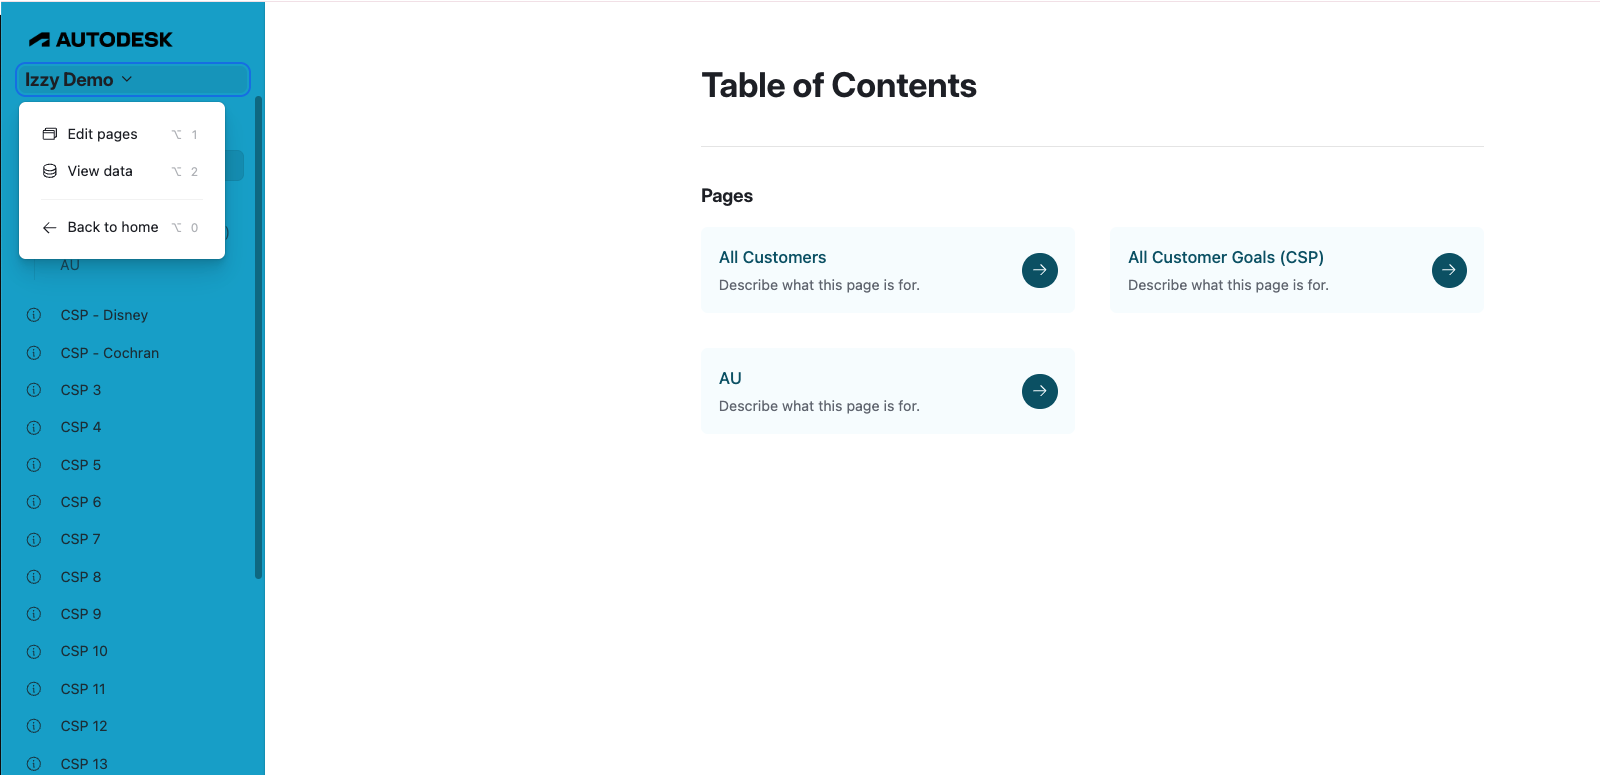
The Interface looks like the below. If you're wanting to access your Data Layer from this page, click on your base name in the top left of your window, and then click "view data".
Add a New Customer
When initializing a CSP, start by adding your customer's foundational details. You only need to fill out the required fields at this stage.
8
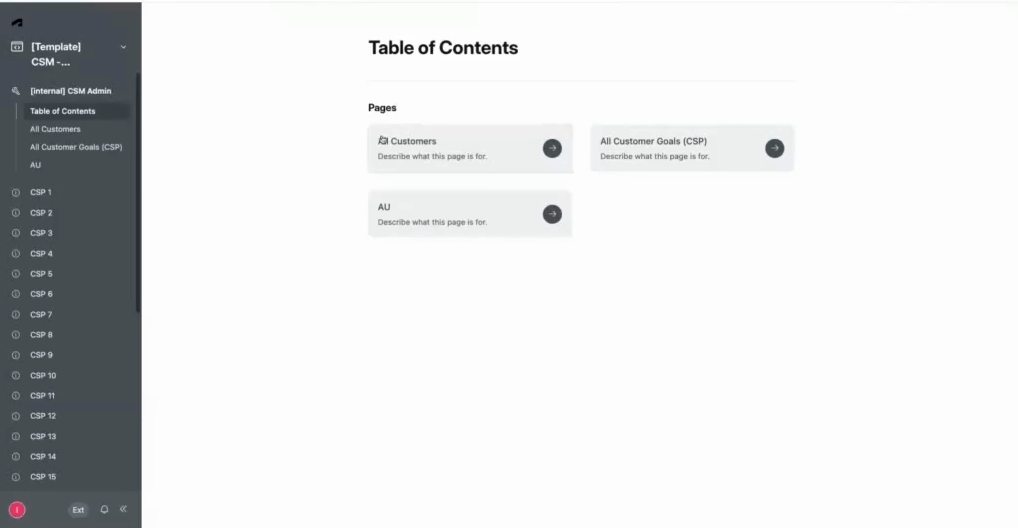
Enter the Interface and click All Customers.
9
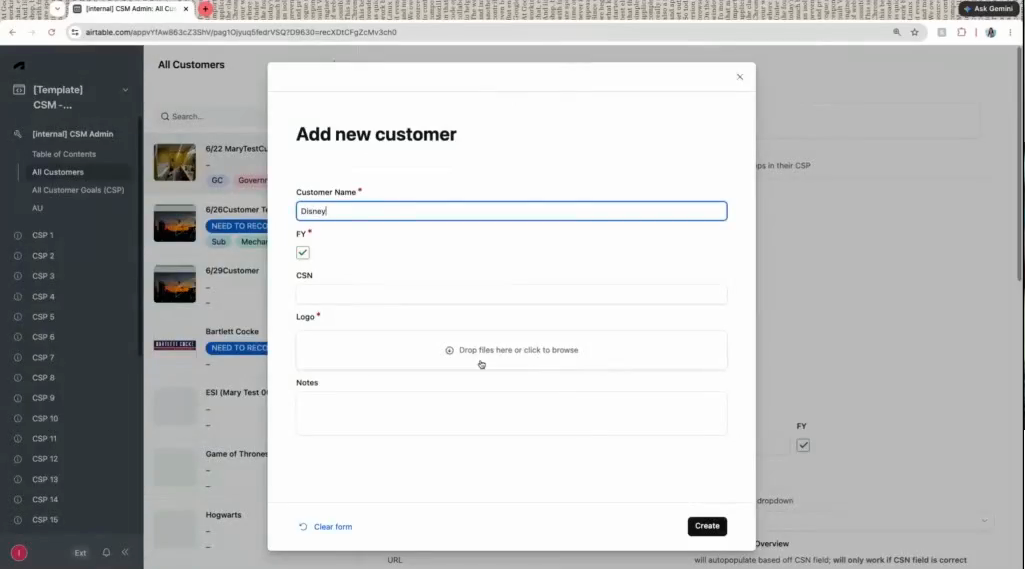
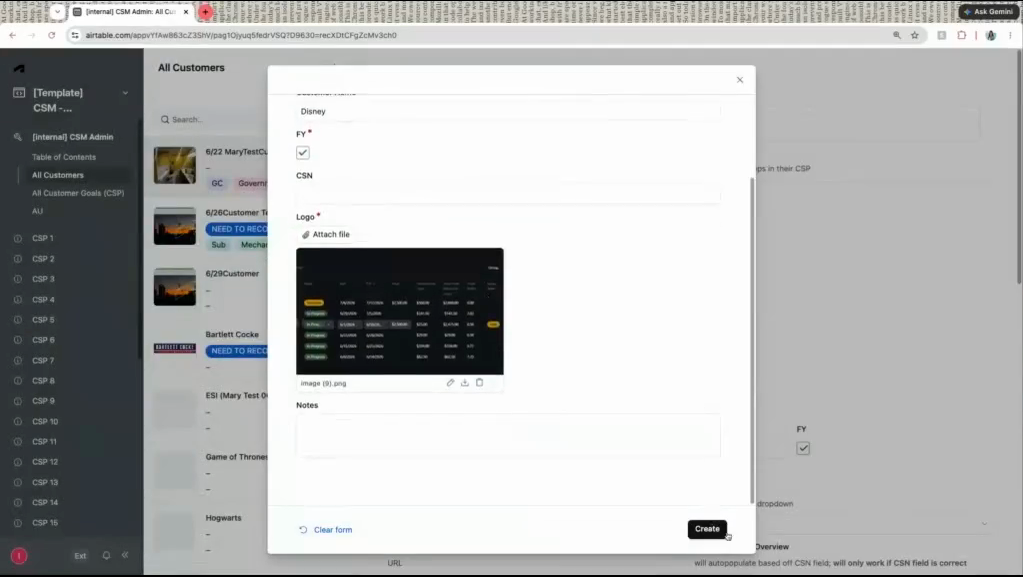
Type your customer's name in the Customer Name field and upload a logo in the Logo field.
10
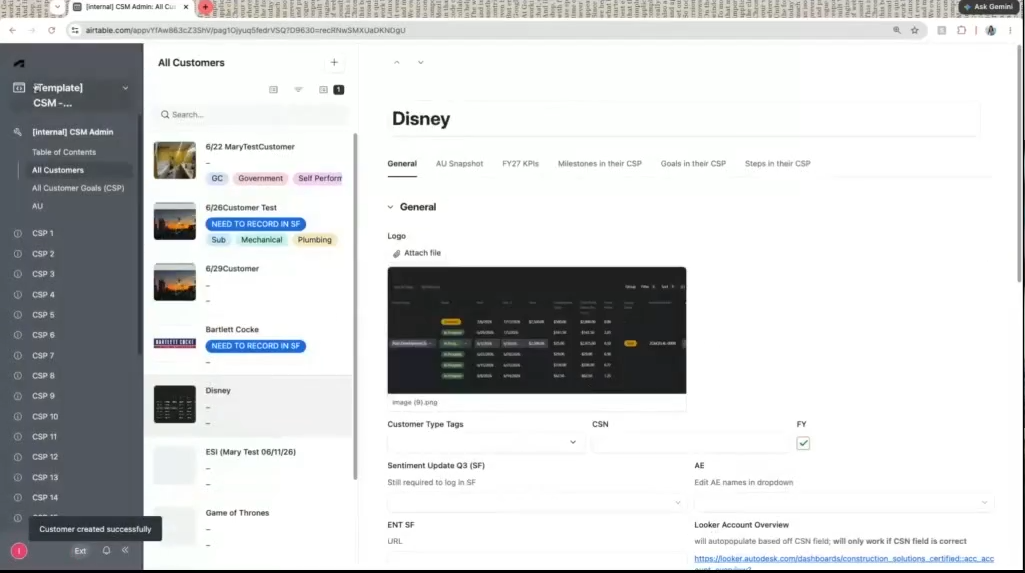
Click Create to save the new customer record.
Configure the Success Plan Interface
Next, you must set up the interface page so it explicitly filters and displays data for this specific customer. This is a one-time setup per CSP.
11
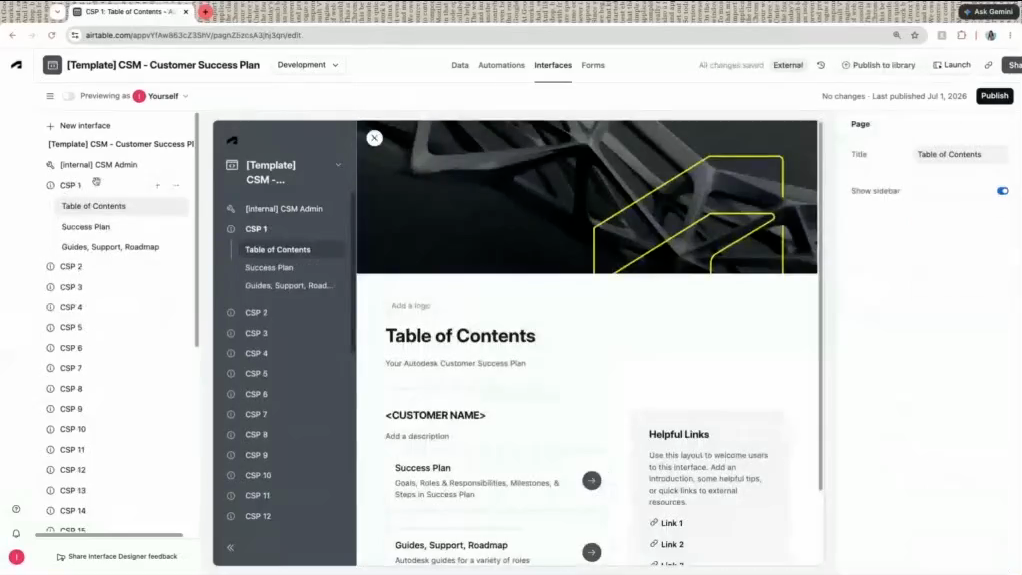
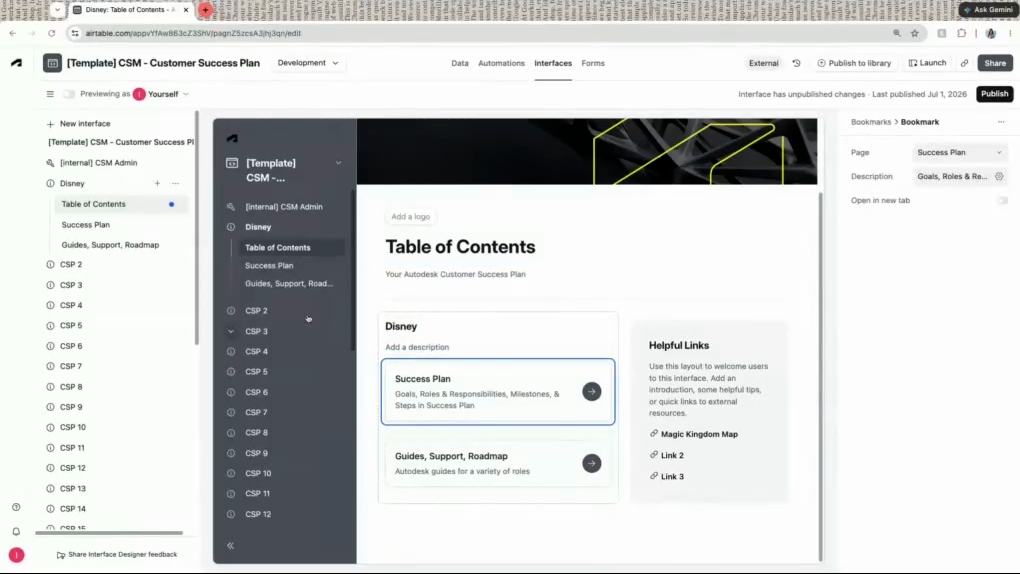
Click on Edit pages in the top-left navigation section.
12
Click on the three dots icon next to the CSP template you want to edit. Click Rename and update the name to match your customer.
13
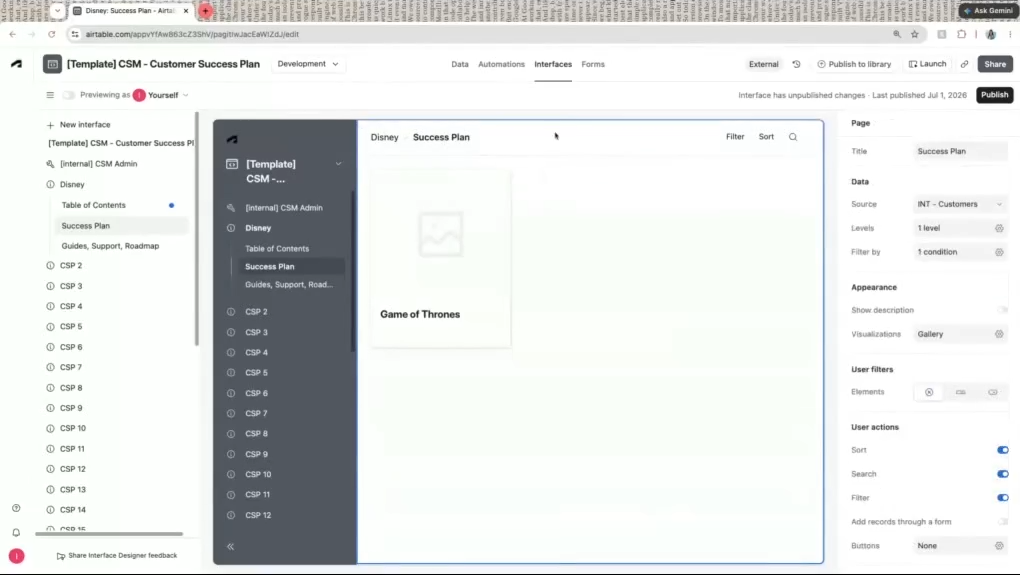
Click on Success Plan.
14
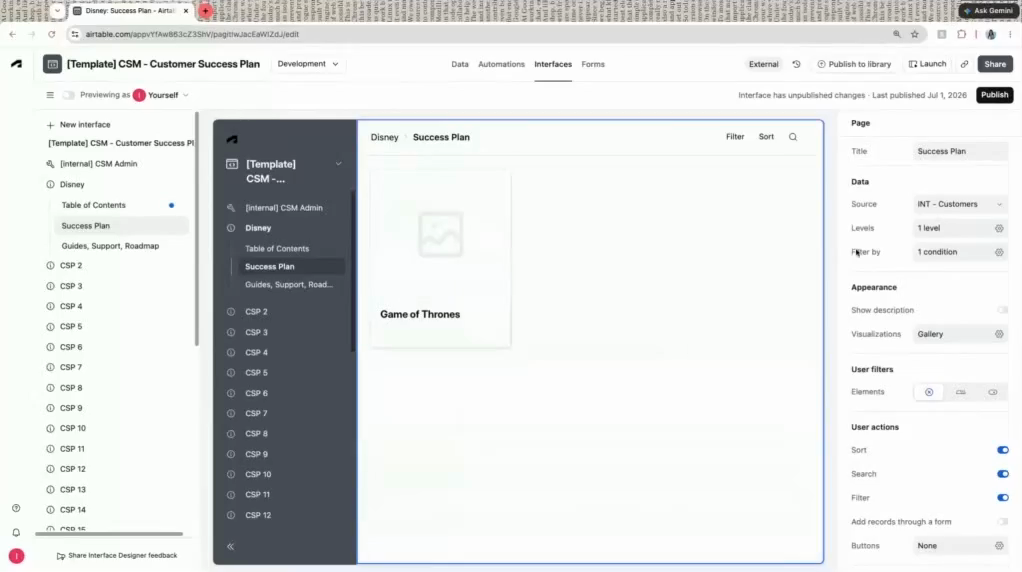
Click near the "Customer - Success Plan" title area in the main display block to select the entire Success Plan page. Make sure the blue highlight is surrounding the entire page, not a small subsection.
15
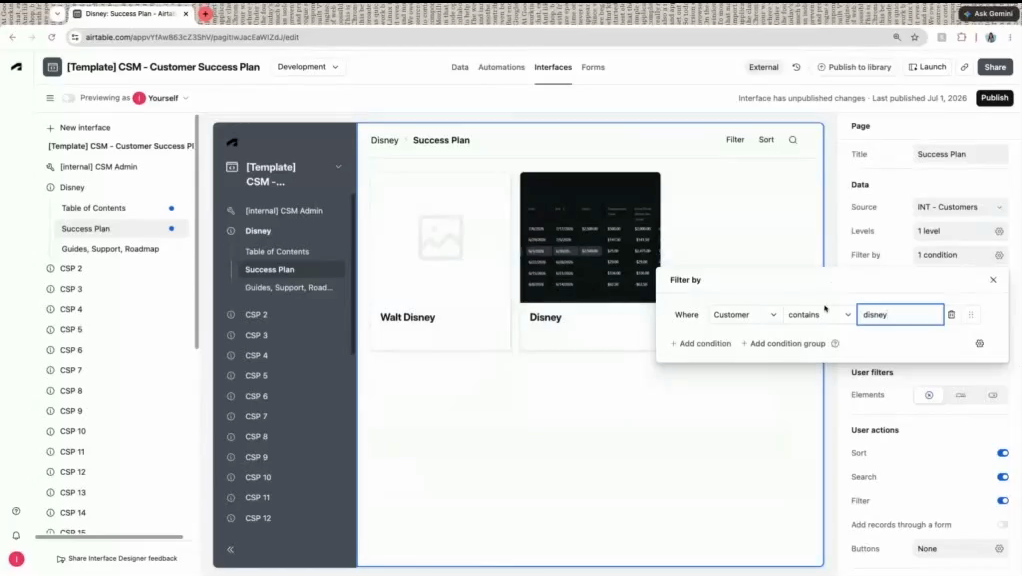
Click the "Filter by" section in the right hand panel and click the gear icon.
16
Enter your customer name in the open text field.
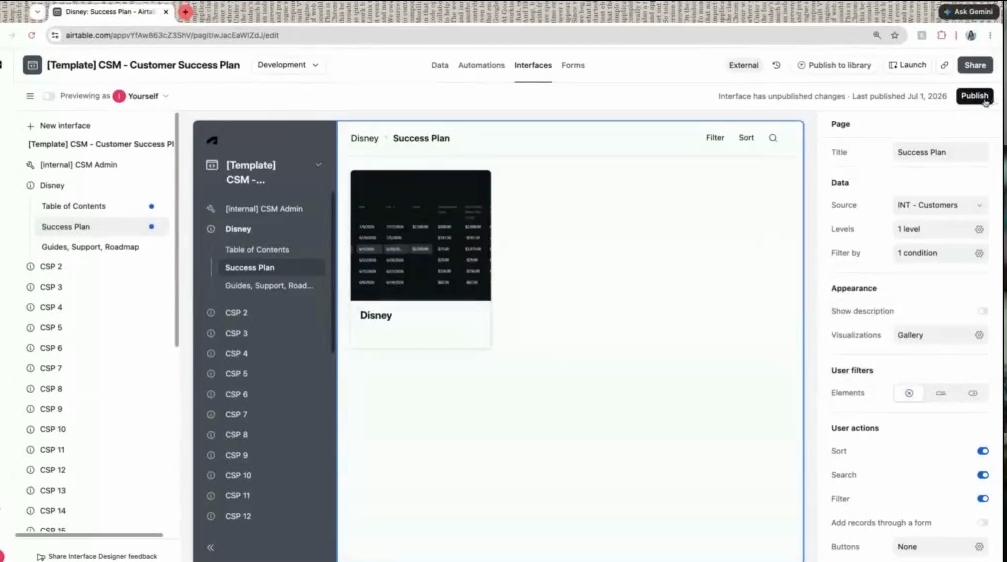
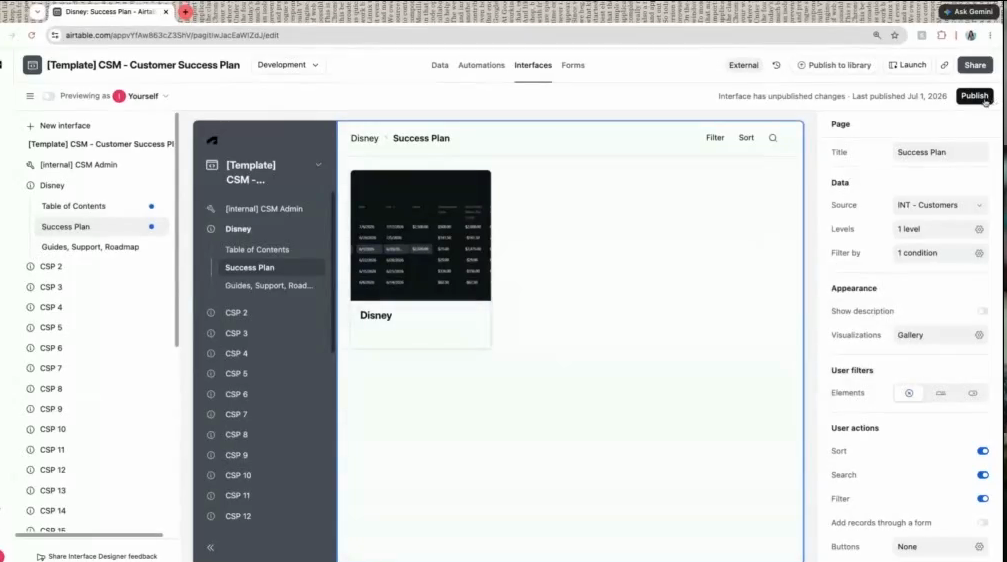
17
Click Publish in the top-right corner to deploy your changes. Now your CSP is set up to filter for your singular customer!
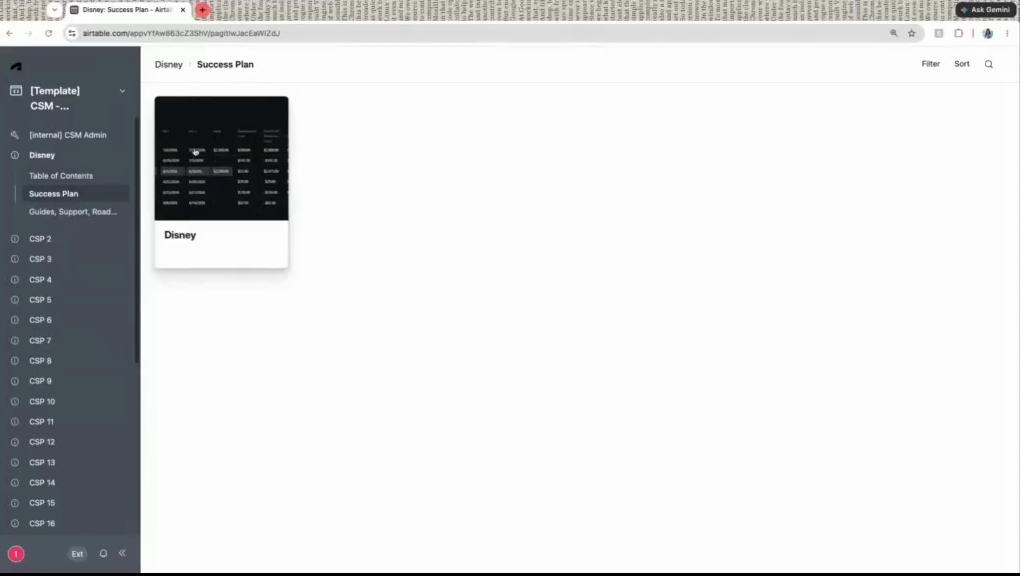
18
Click Launch in the top-right corner to work out of your live workspace.
Once you have published these filtering changes, you must work out of the live launched interface. Do not continue working in "Edit pages" mode, or your updates will not be visible to clients.
Adding People to your Success Plan
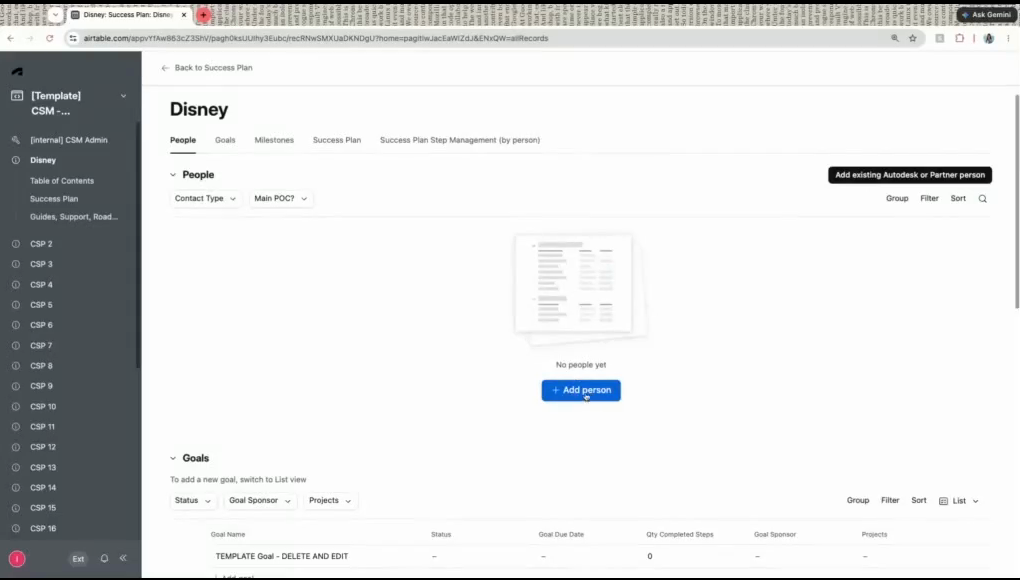
19
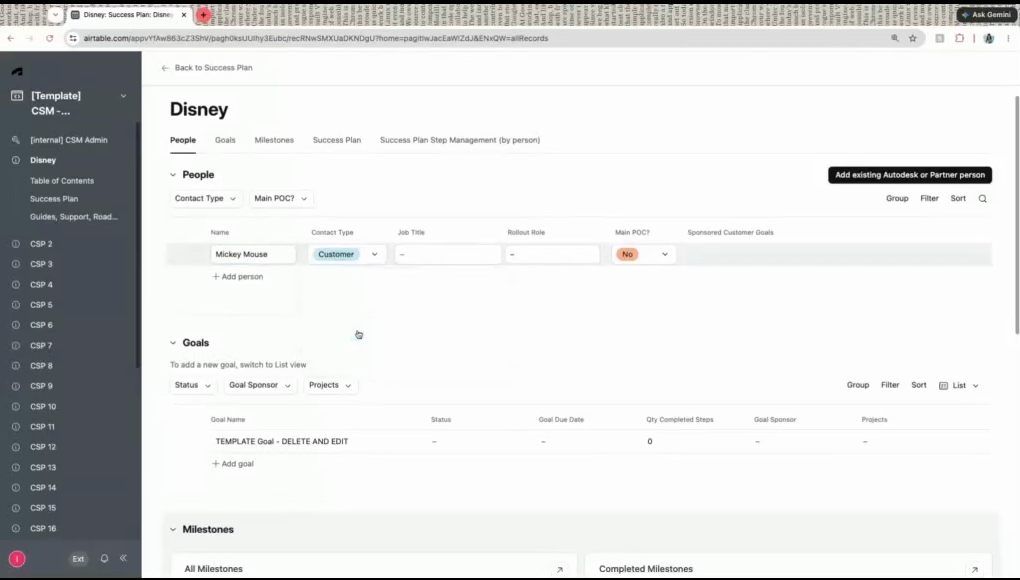
Click on your customer's card to open their success plan view.
20
Click Add person to add a new customer contact.
21
Fill out customer details such as name & contact type. It is important to select the correct contact type so that customers do not show up in each other's CSPs!
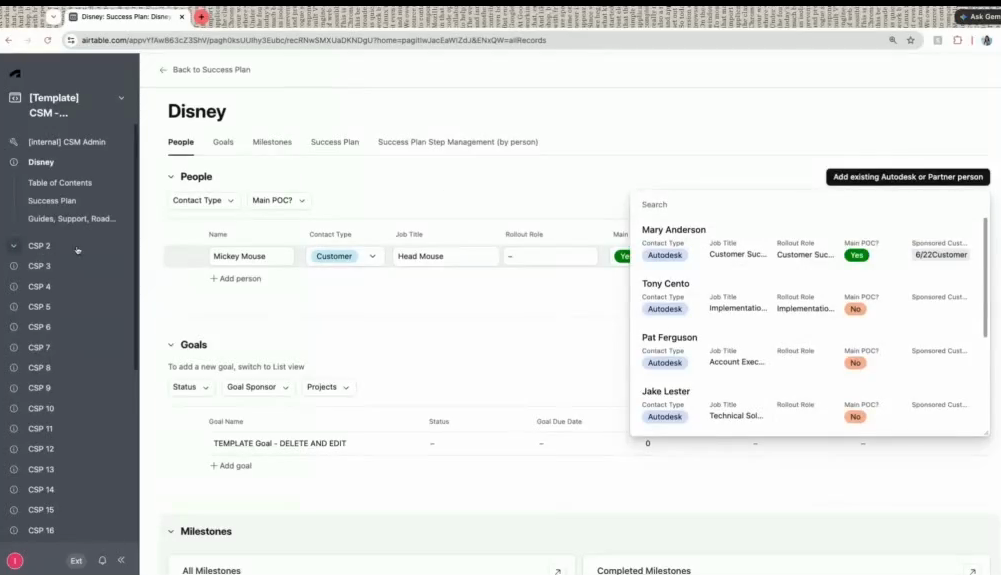
22
Click Add existing Autodesk or Partner person to assign internal team members to the customer. If the team member has previously been added to your base, they will show here. If they do not appear, you need to add them as a new person and make sure to select "Autodesk" or "Partner" as their Contact Type. Refer to step 16 - 17 for how to add a new contact.
Build Out Goals, Projects, and Steps
The structure of a Success Plan works top-down: Goals contain Projects, and Projects contain Steps.
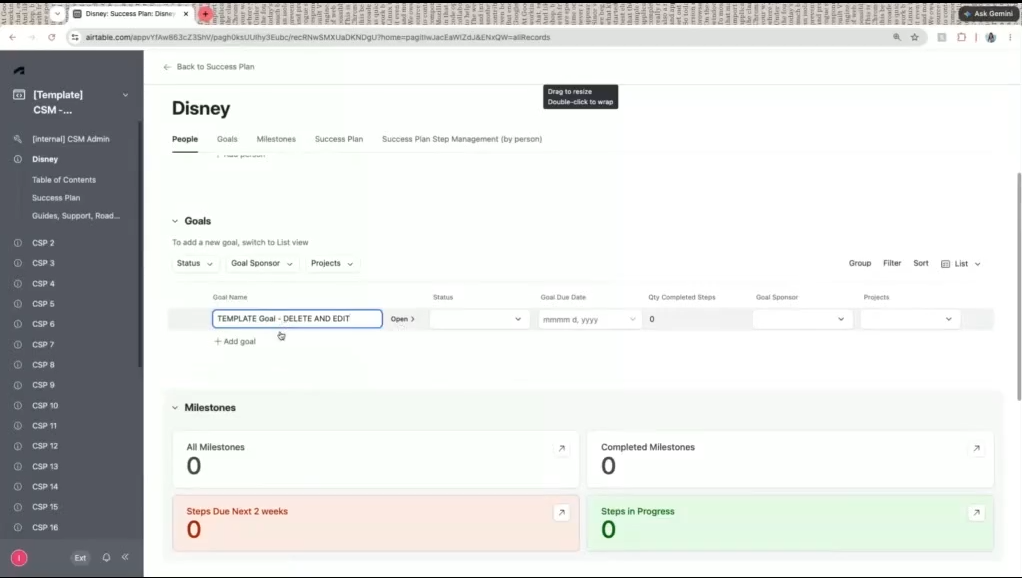
23
Each new customer will have their first goal auto-created. Click into the Goal Name field to edit the template goal's name.
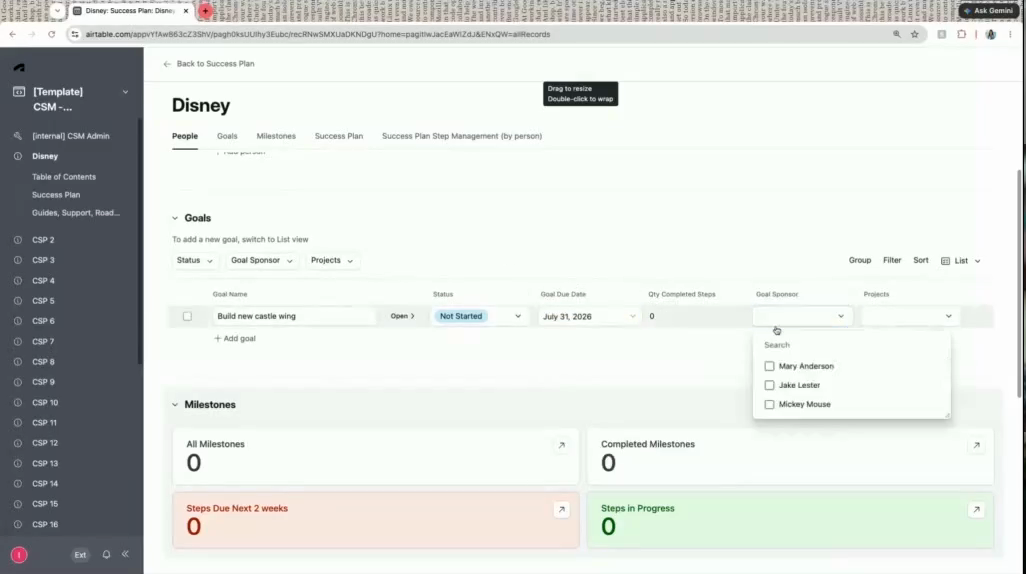
24
Add details to the Goal such as status, due date, and assigned sponsors.
25
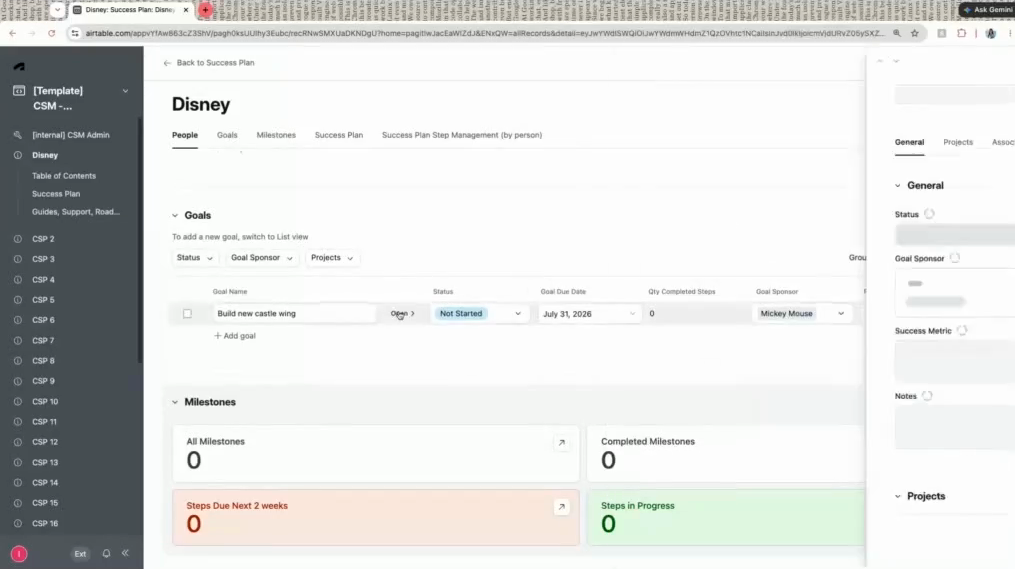
To add a Project to your Goal, click the Open button next to your Goal Name.
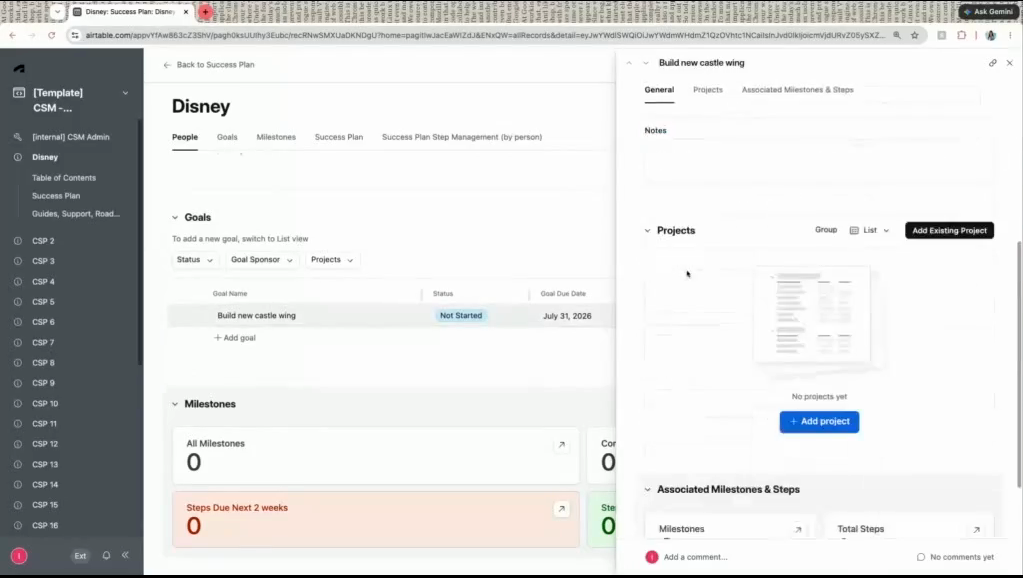
26
In the Goal panel on the right side, you will be able to scroll to "Projects" and click Add project.
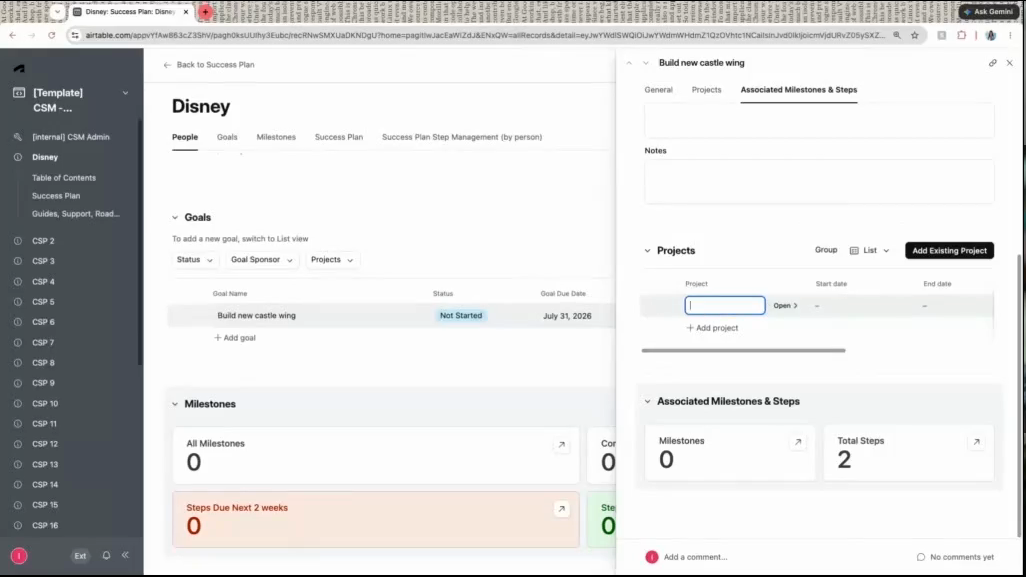
27
Fill in Project details in-line, such as name & start/end dates.
28
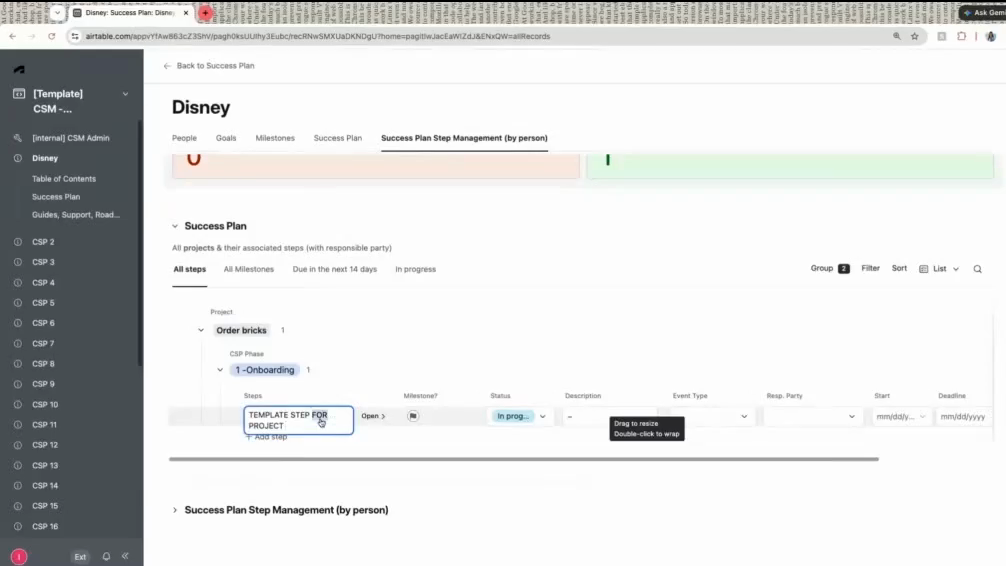
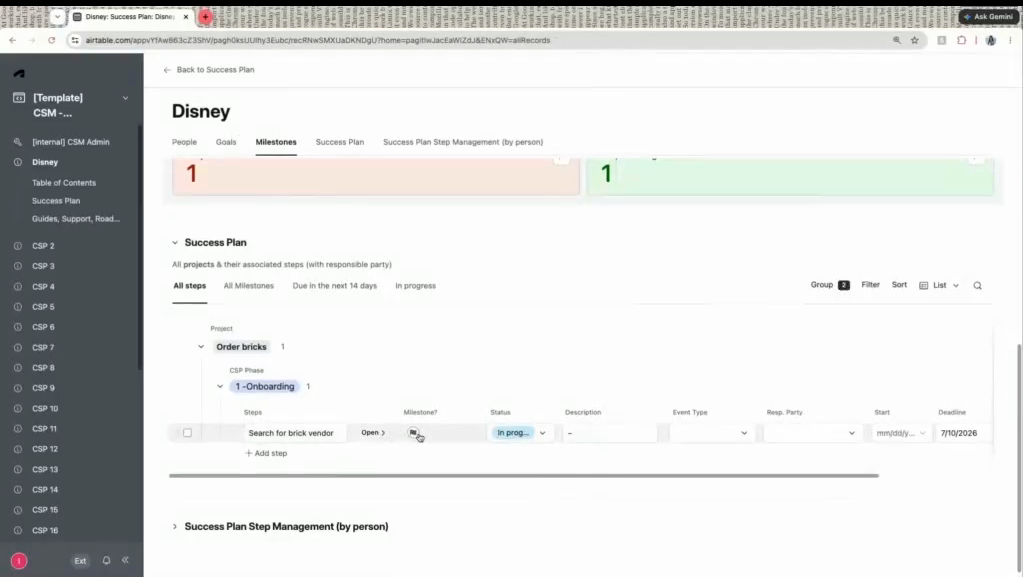
Return to your main Success Plan panel. You'll see your new project has an auto-created first step nested under it in the Success Plan section of your panel. Just as you did with your template Goal, you can click into the Step name field to edit the text, and fill in subsequent information in-line.
29
Click the checkbox in the Milestone? column to flag significant steps as milestones.
Share the Interface with Customers
When you are ready to share the interface, you can generate a read-only link tailored strictly to that customer.
30
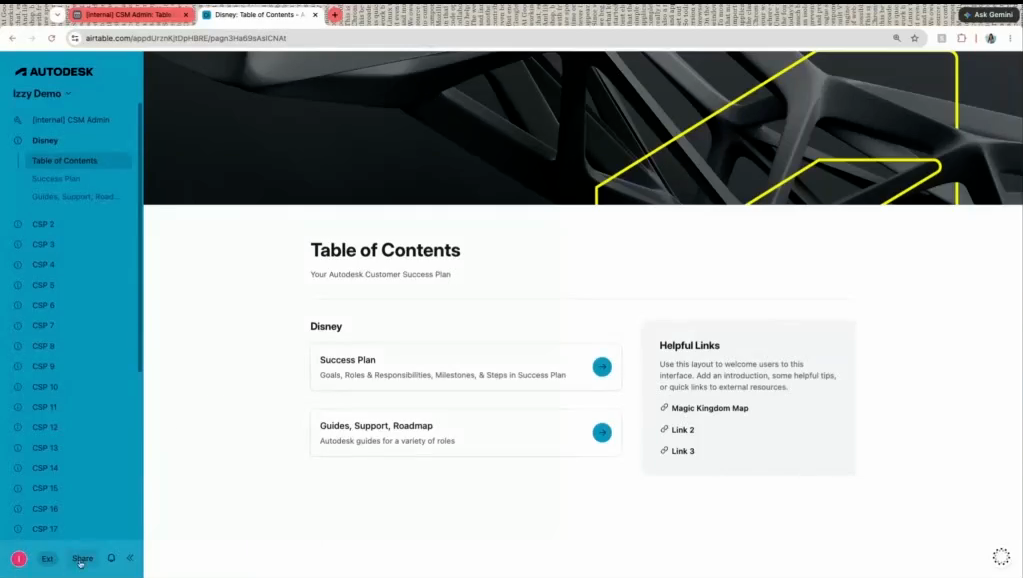
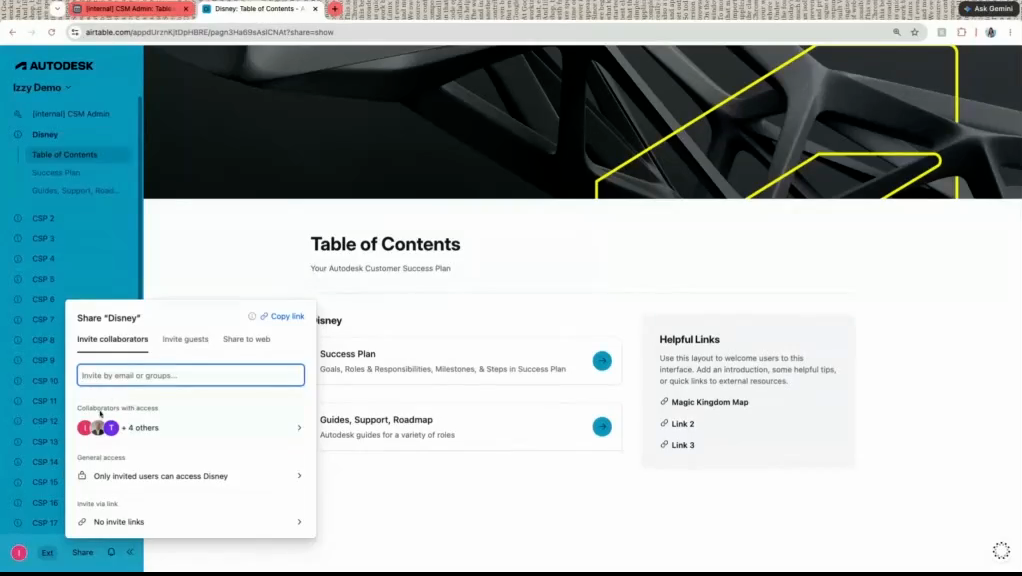
Click the Share button in the bottom left corner.
31
Click Invite via link.
32
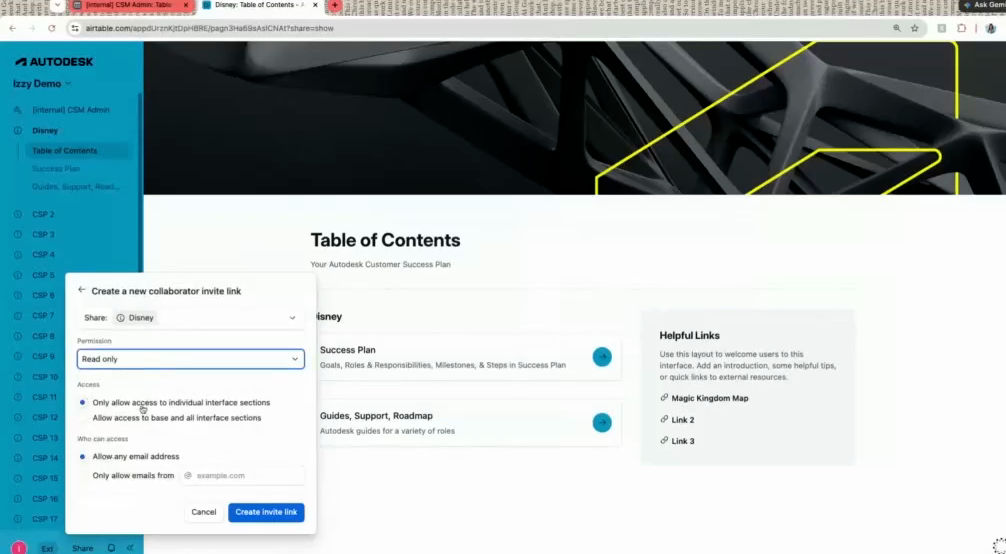
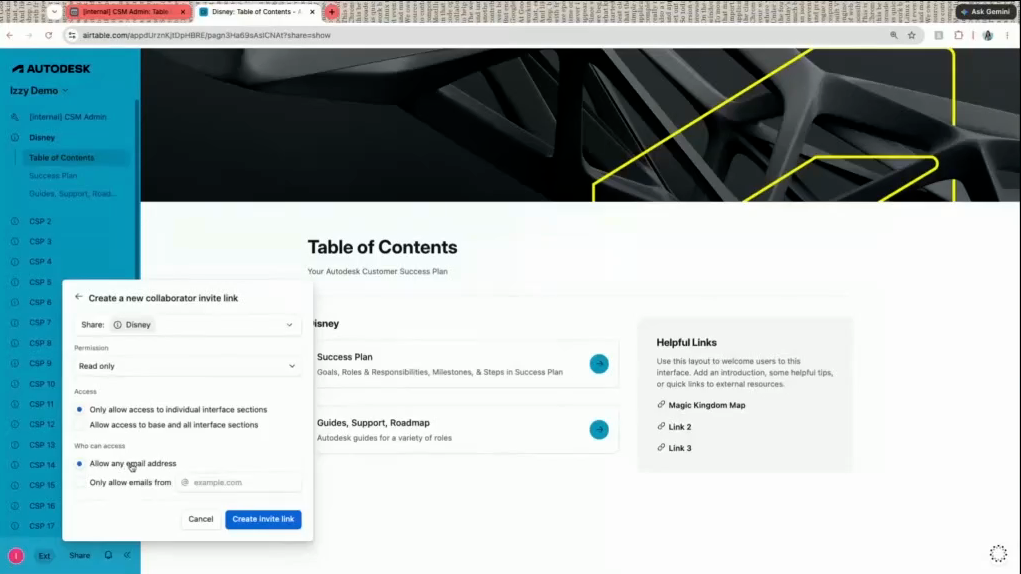
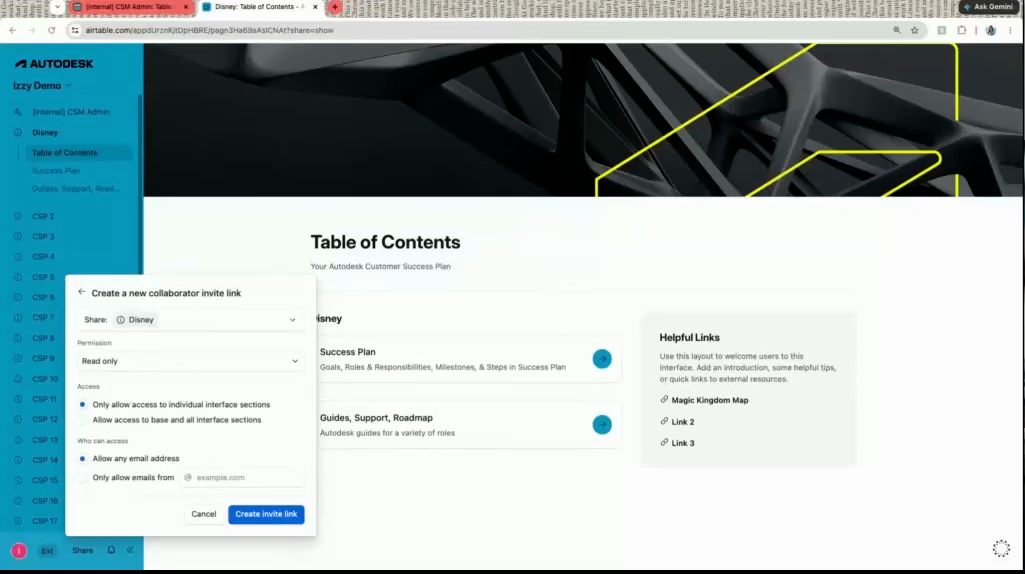
Set the permission level to Read only. Ensure access is explicitly limited to the specific customer interface.
33
Ensure Only allow access to individual interface sections and Allow any email address are selected.
34
Click Create invite link and share the resulting URL with your client.
When customers click the link, they will be prompted to create a free Airtable account using their work email. No paid license is required to view the read-only CSP.
FAQs and Do Not Dos!
Do not make any edits in the "Edit Pages" mode outside of what was explained in steps 11 - 18. If you edit pages beyond those steps, the adjustments will take effect on all of your customer's CSPs (not just the one you are actively working on). If you have requests for edits to your interface outside of what was explained in steps 11 - 18, please check with your manager on what is possible!
Did you accidentally delete a CSP? Here's how to recover it!
35
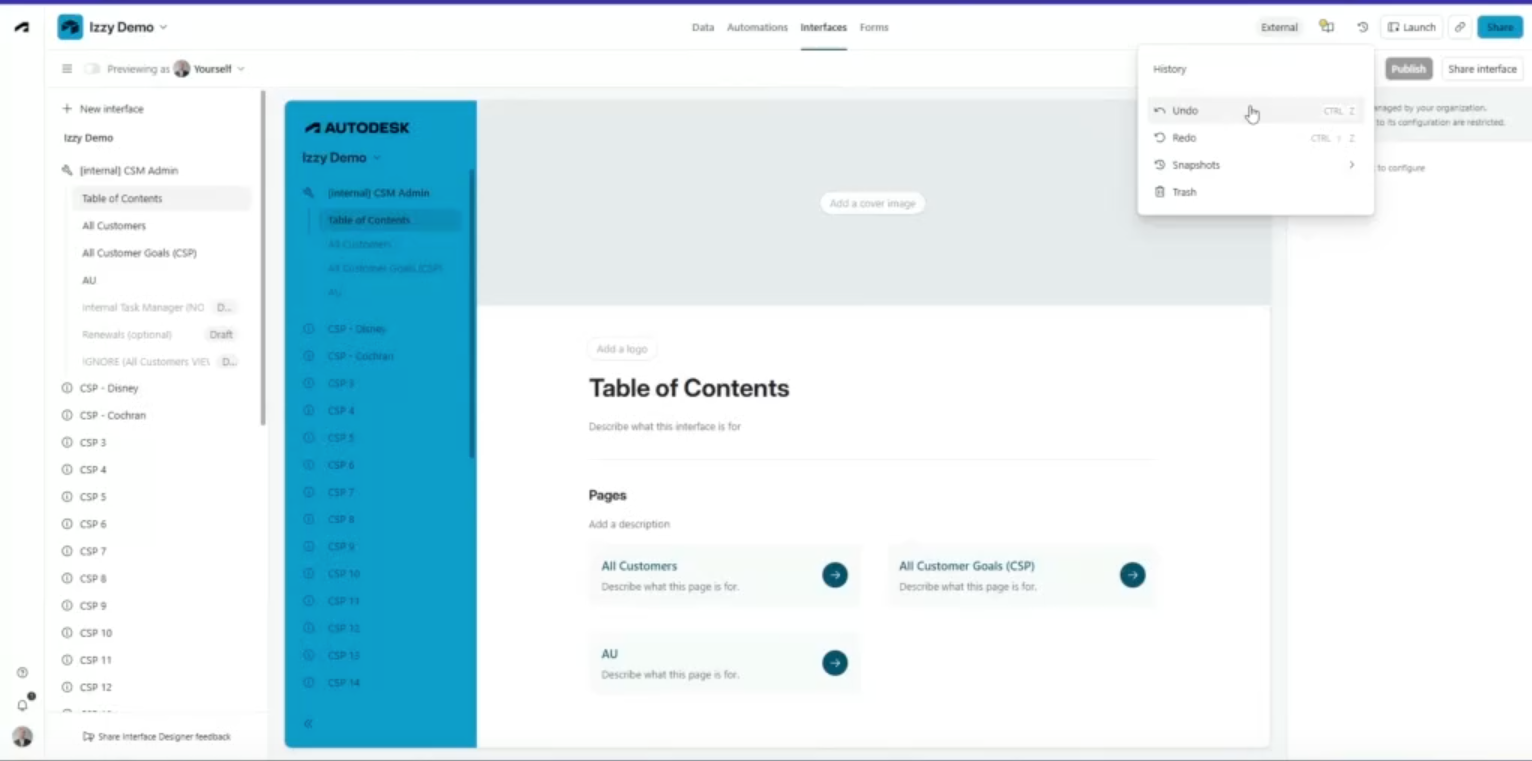
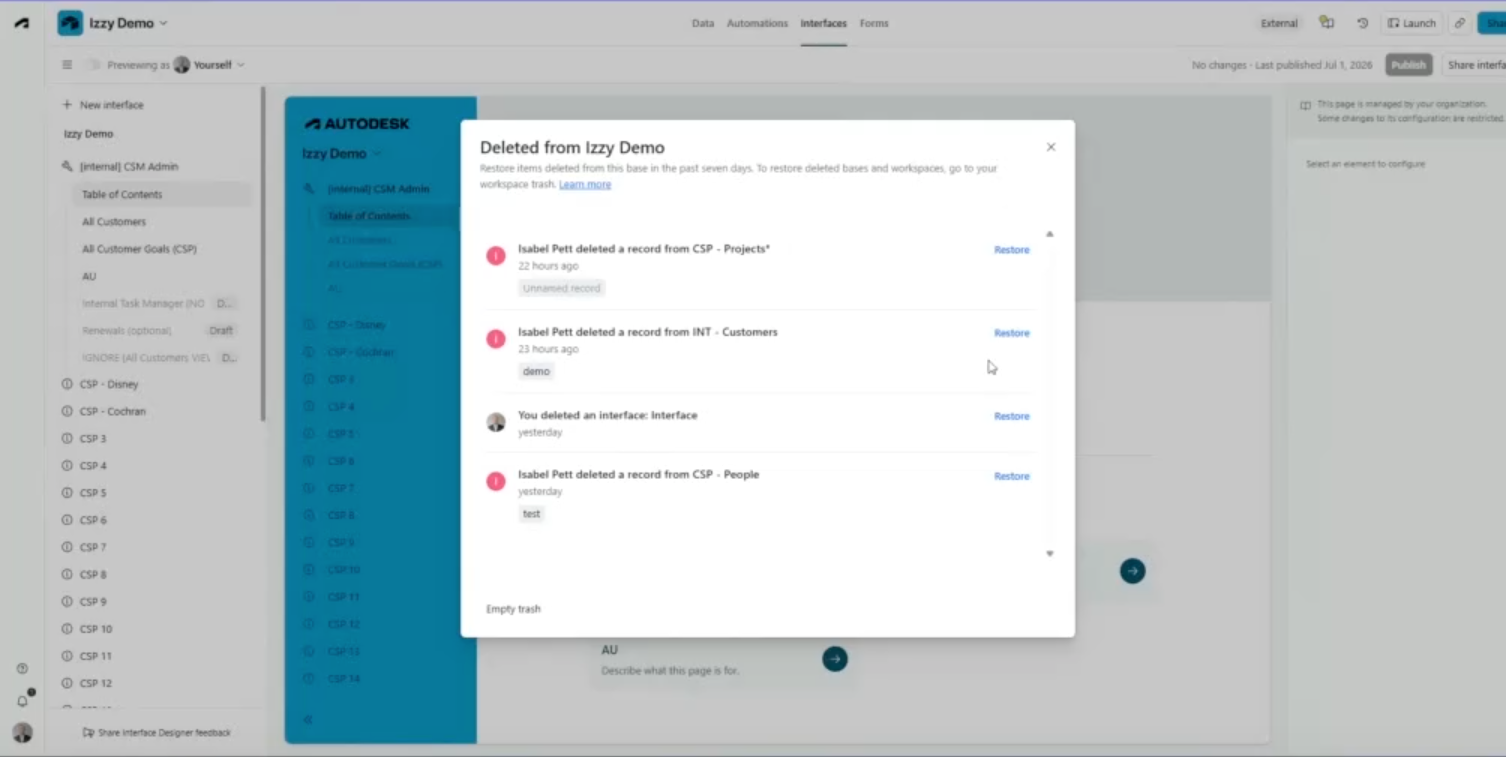
Enter Edit Pages mode (see step 11) and click the History button at the top right of your page. The button looks like a clock with a rewind arrow encircling it. Click on Trash in the drop down menu.
36
If you can see your deleted CSP in your trash, click Restore to the right of it to restore the CSP. If you do not see your deleted CSP here, or cannot restore it, reach out to your manager to see if they can assist or to have them create a new CSP for you.
Do not create a new interface from scratch, as it will not function properly with the rest of your base and the department-wide app!
DO repurpose any one of your pre-existing CSP 1 - CSP 30 interfaces to set up for a single customer.
DO NOT create a new, blank interface that has not already been created for you (aka CSP 31 or beyond). If you need a new interface created, reach out to your manager and they will push a fresh interface to your base from the app level!