How to Manage Subjects in Edusua
Learn how to add, edit, and delete subjects in the Edusua web application.
By Seth Tawiah Nortey Jr (NSJ)
Learn how to create, edit, and remove custom subjects in Edusua to organize curriculum and course offerings effectively.
This guide applies to school administrators and teachers configuring academic subjects within their Edusua workspace.
Add a New Subject
1
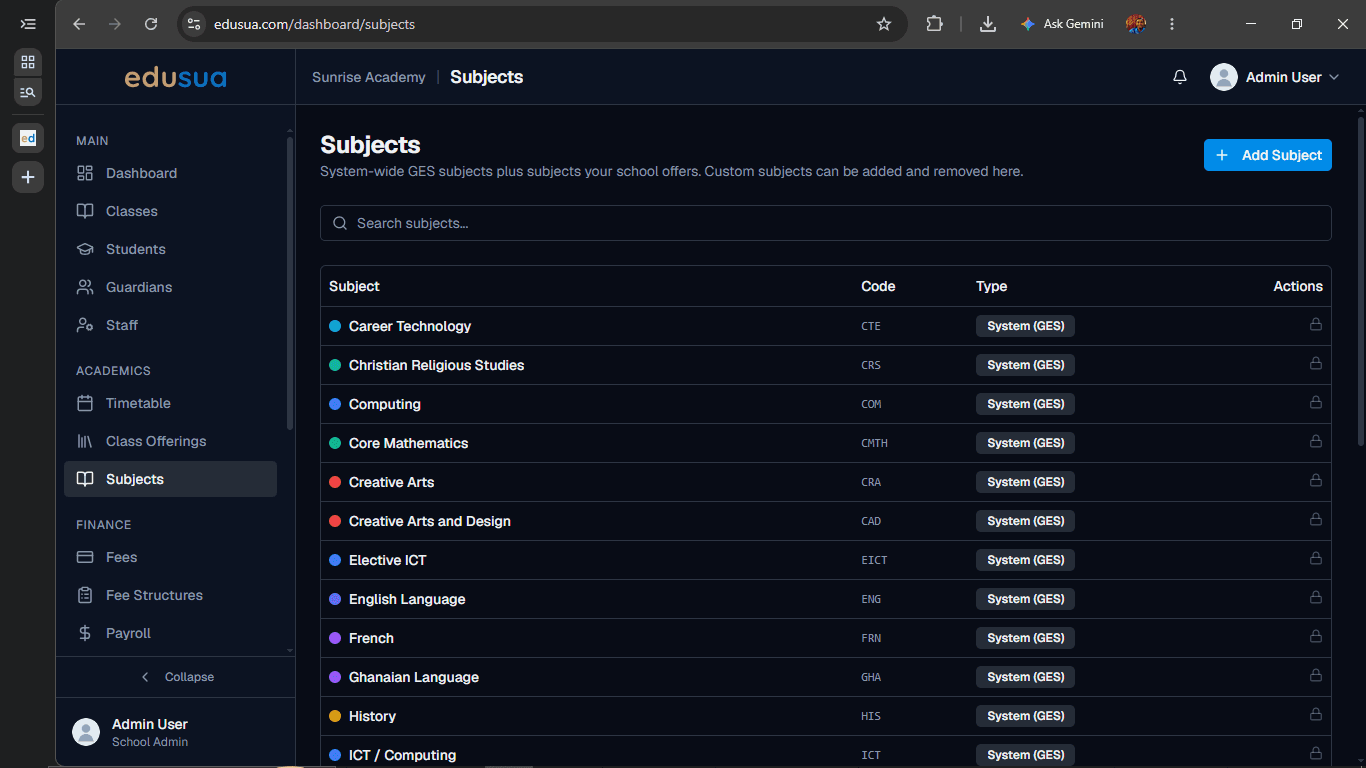
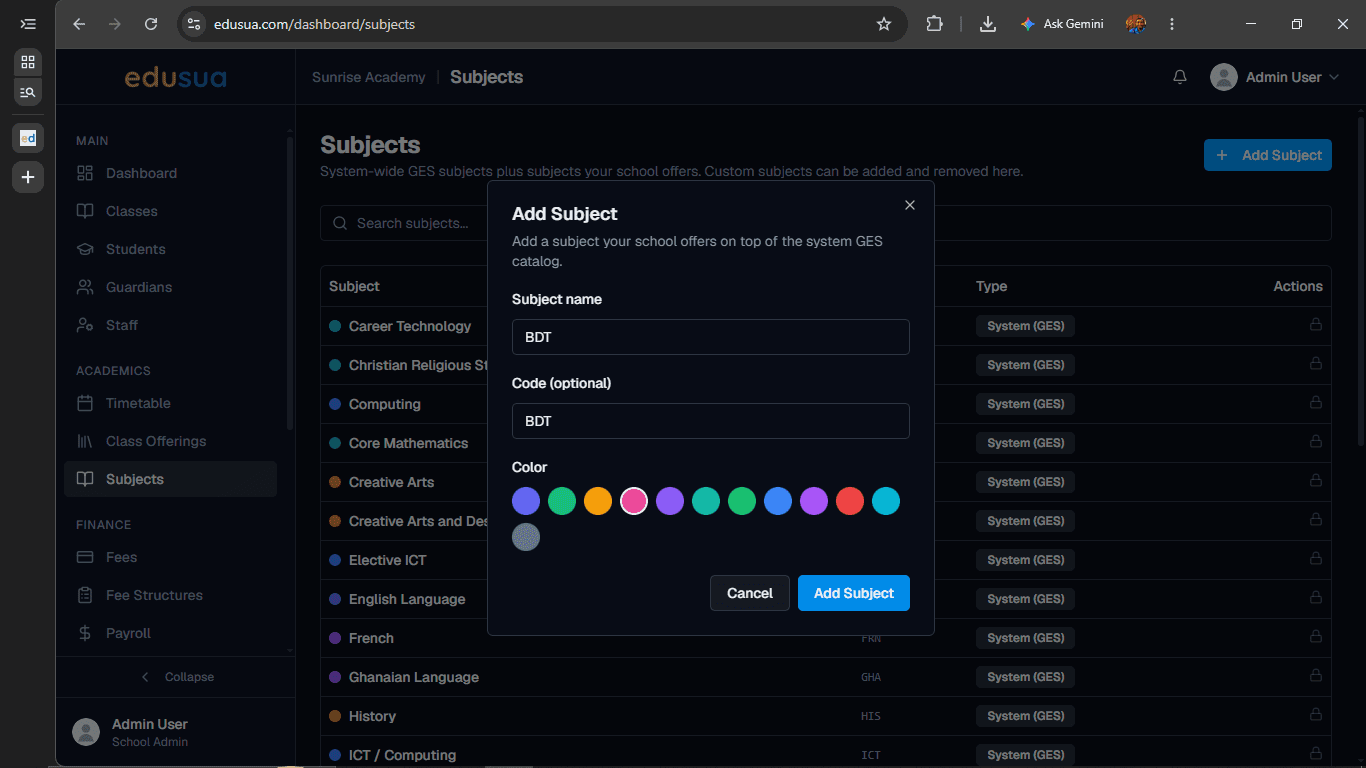
Click + Add Subject on the Subjects page.
2
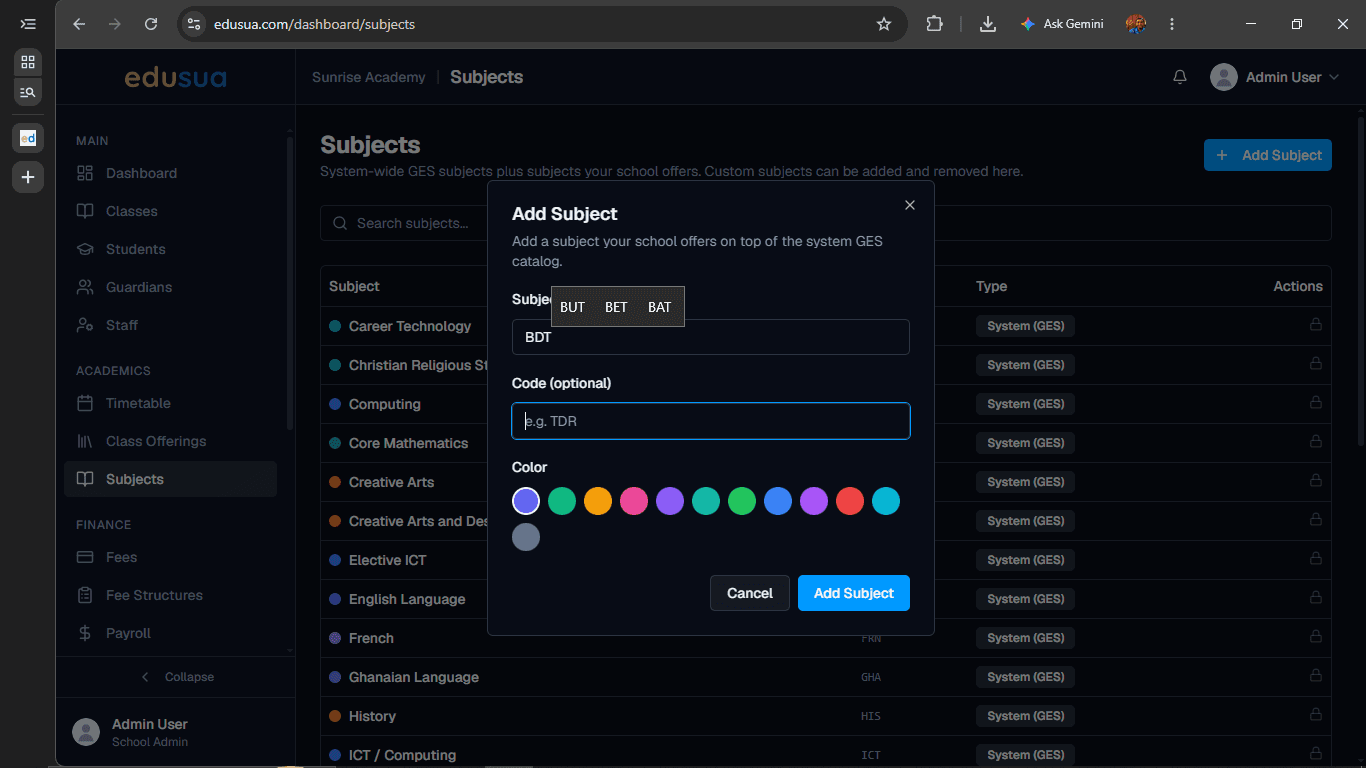
Type the subject name in the Subject name field.
3
Click the Code (optional) field and enter a subject code if needed.
4
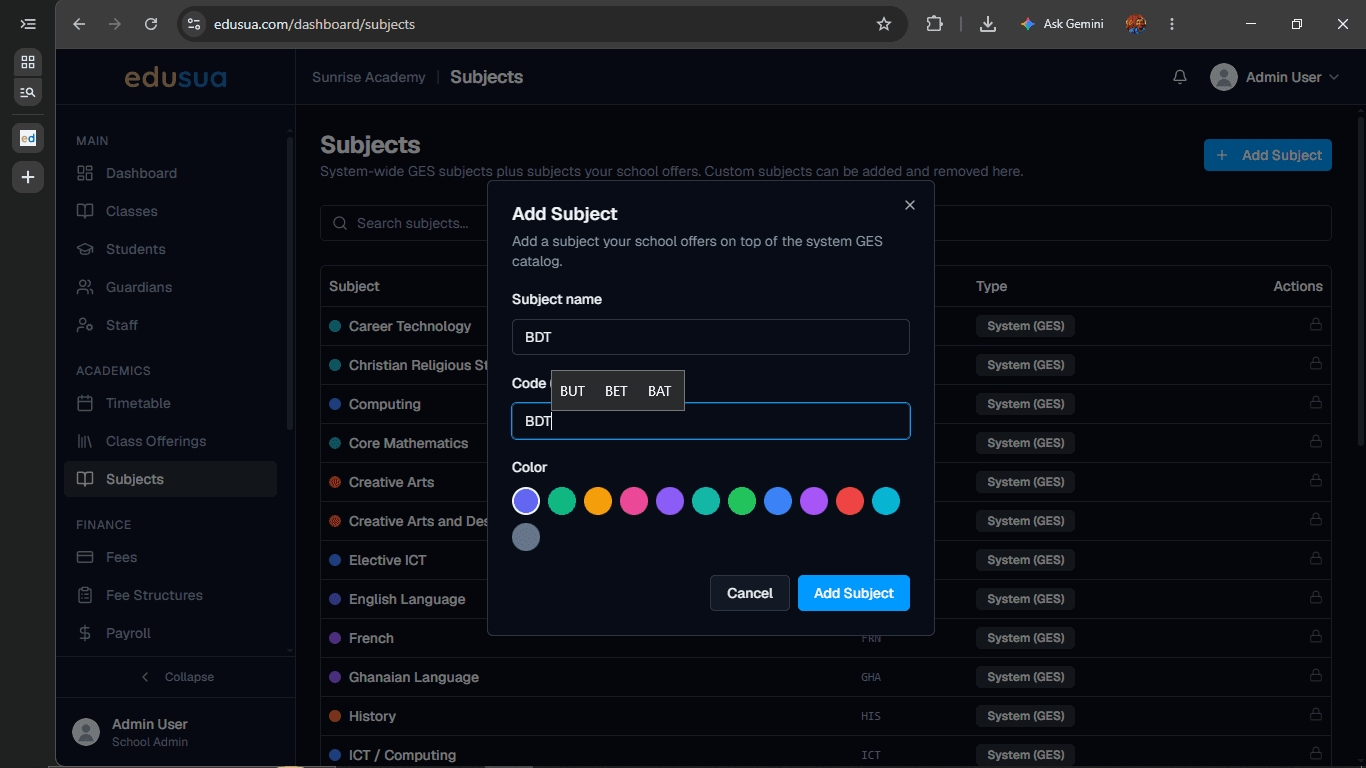
Click a color swatch to assign a display color to the subject.
5
Click Add Subject to save the new subject.
Edit an Existing Subject
6
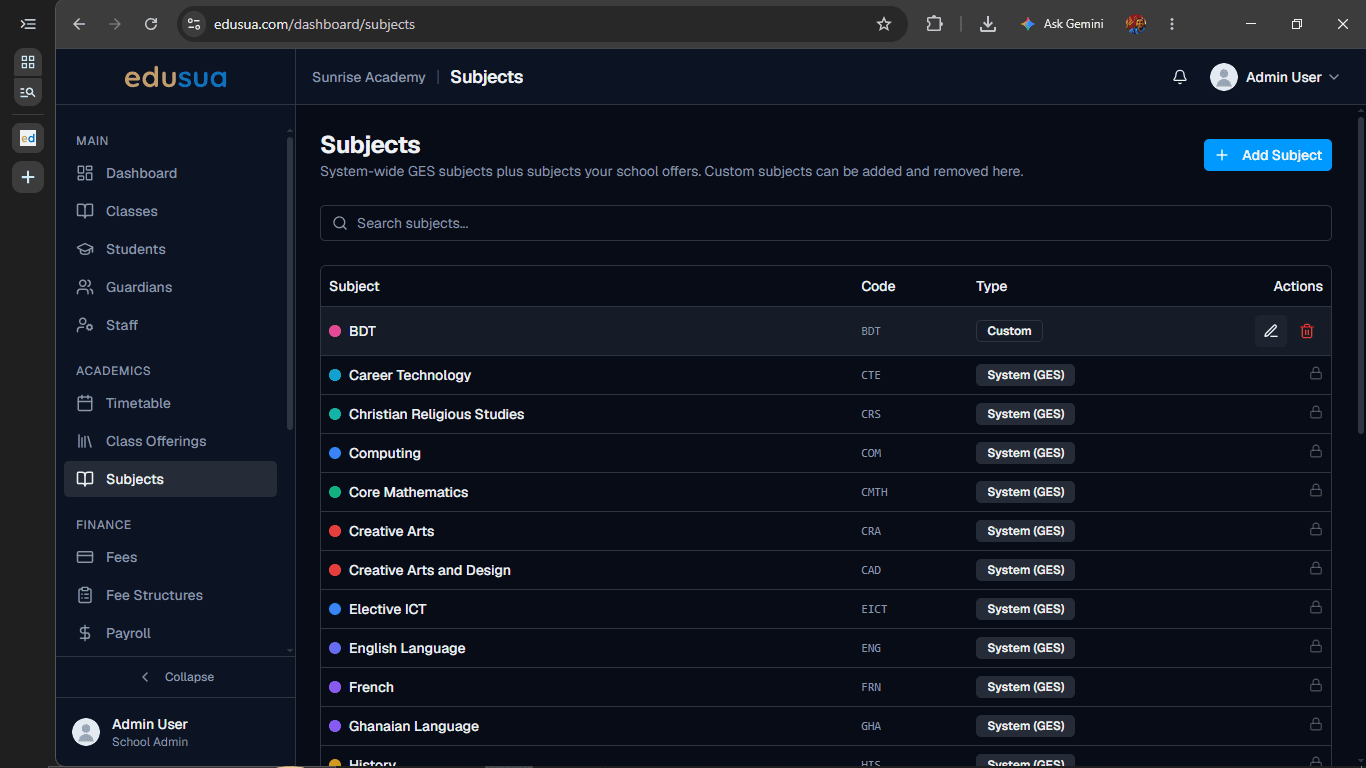
Click the edit pencil icon in the Actions column for the subject you want to modify.
7
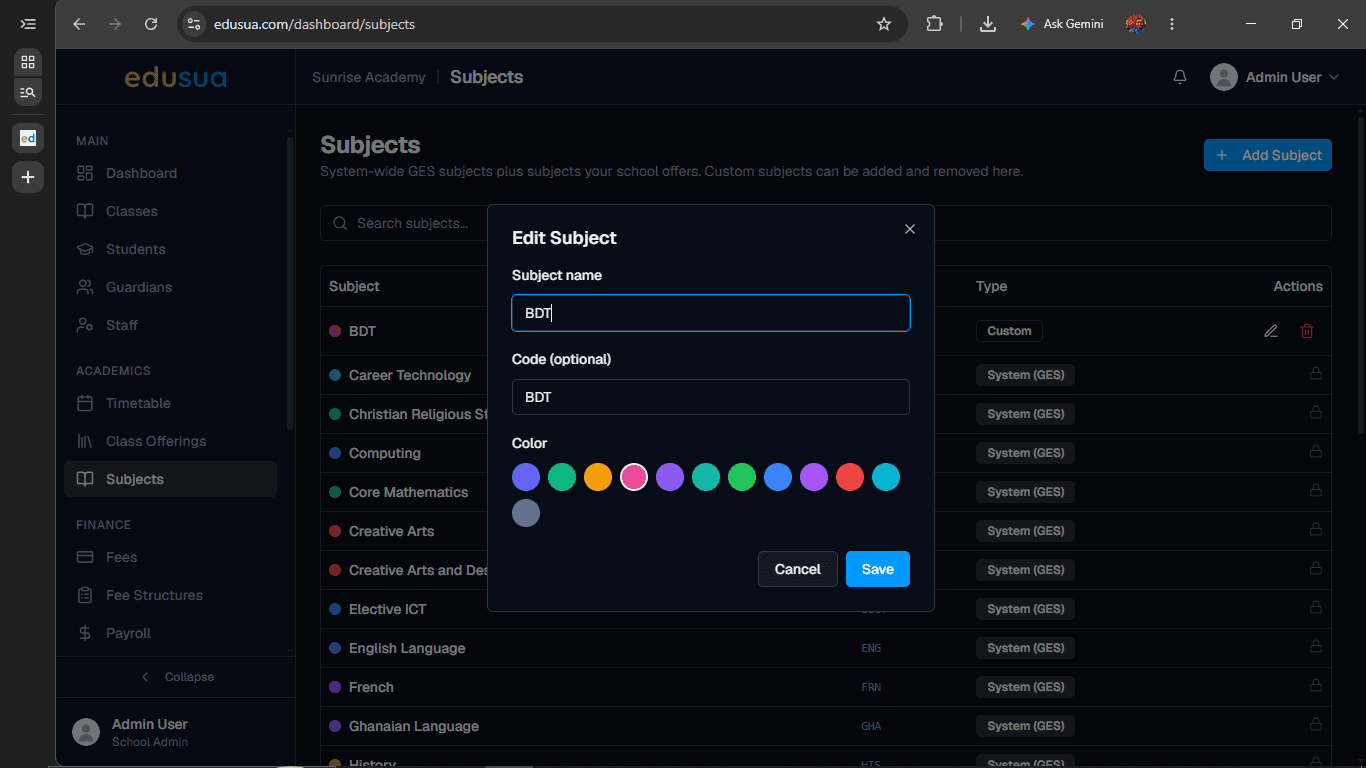
Click the Subject name field to adjust the name.
8
Type any updates to the subject name.
9
Click Save to apply your changes.

Delete a Subject
10
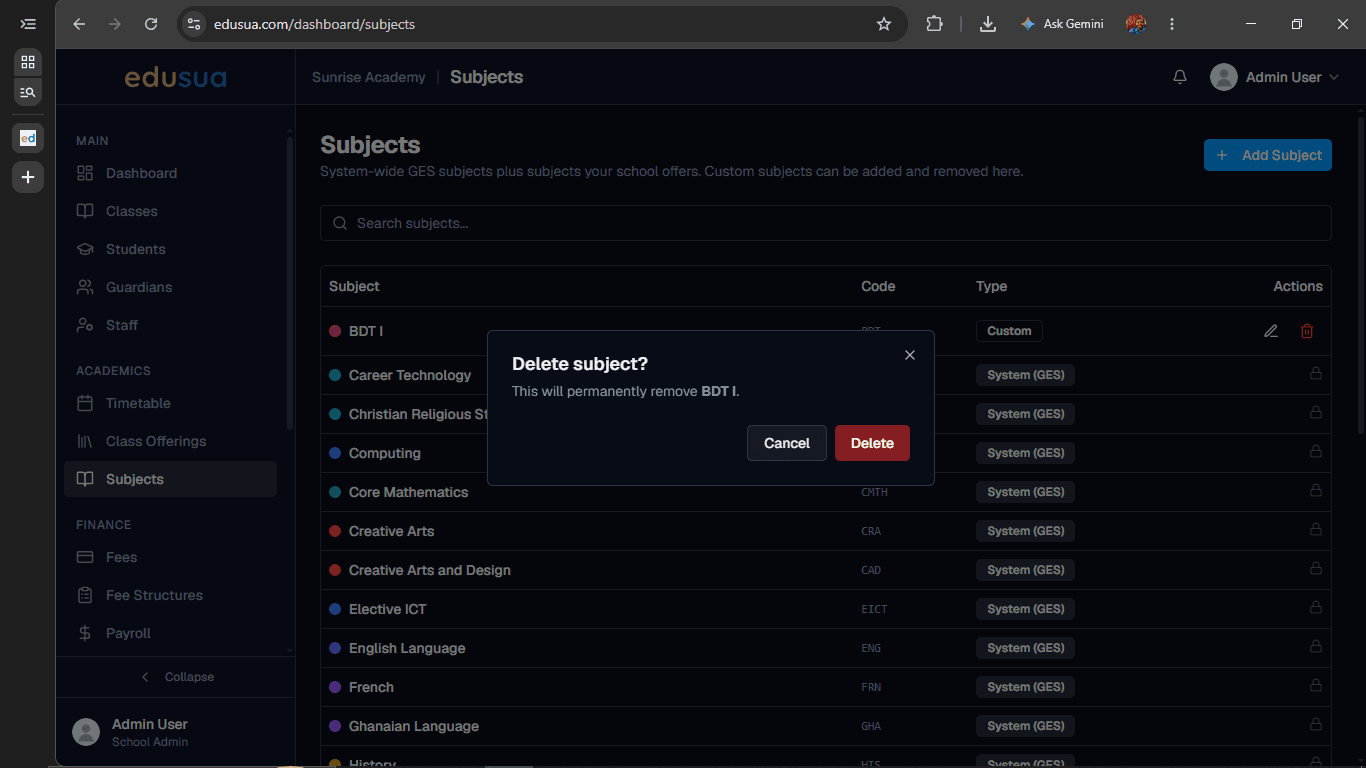
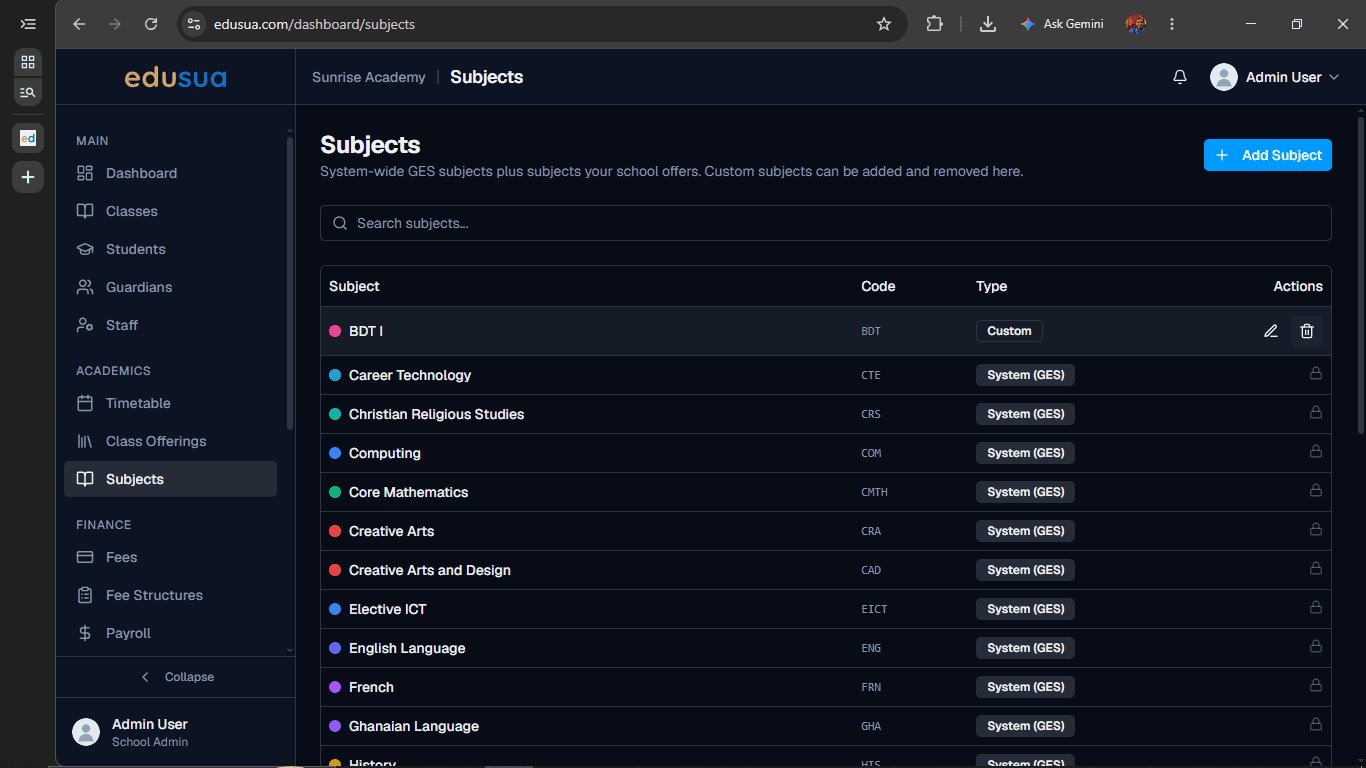
Click the delete trash icon in the Actions column for the subject you want to remove.
11
Click Delete in the confirmation dialog to confirm removal.