
Mastering the eBuilder Documents Module: A Comprehensive Guide
Learn how to effectively use the eBuilder documents module for project management in Washoe County. This guide covers uploading, downloading, sending files, and more.
In this guide, we'll learn how to navigate and utilize the eBuilder documents module effectively. This module serves as a document repository for your projects, ensuring that all necessary files are organized and accessible. We'll explore the folder structure, which is consistent across projects, to maintain order and ensure documents are saved in the correct locations. Additionally, we'll cover basic functionalities such as uploading, downloading, and sending files, as well as managing permissions and version control. Understanding these features will help you manage project documents efficiently within eBuilder.
Let's get started
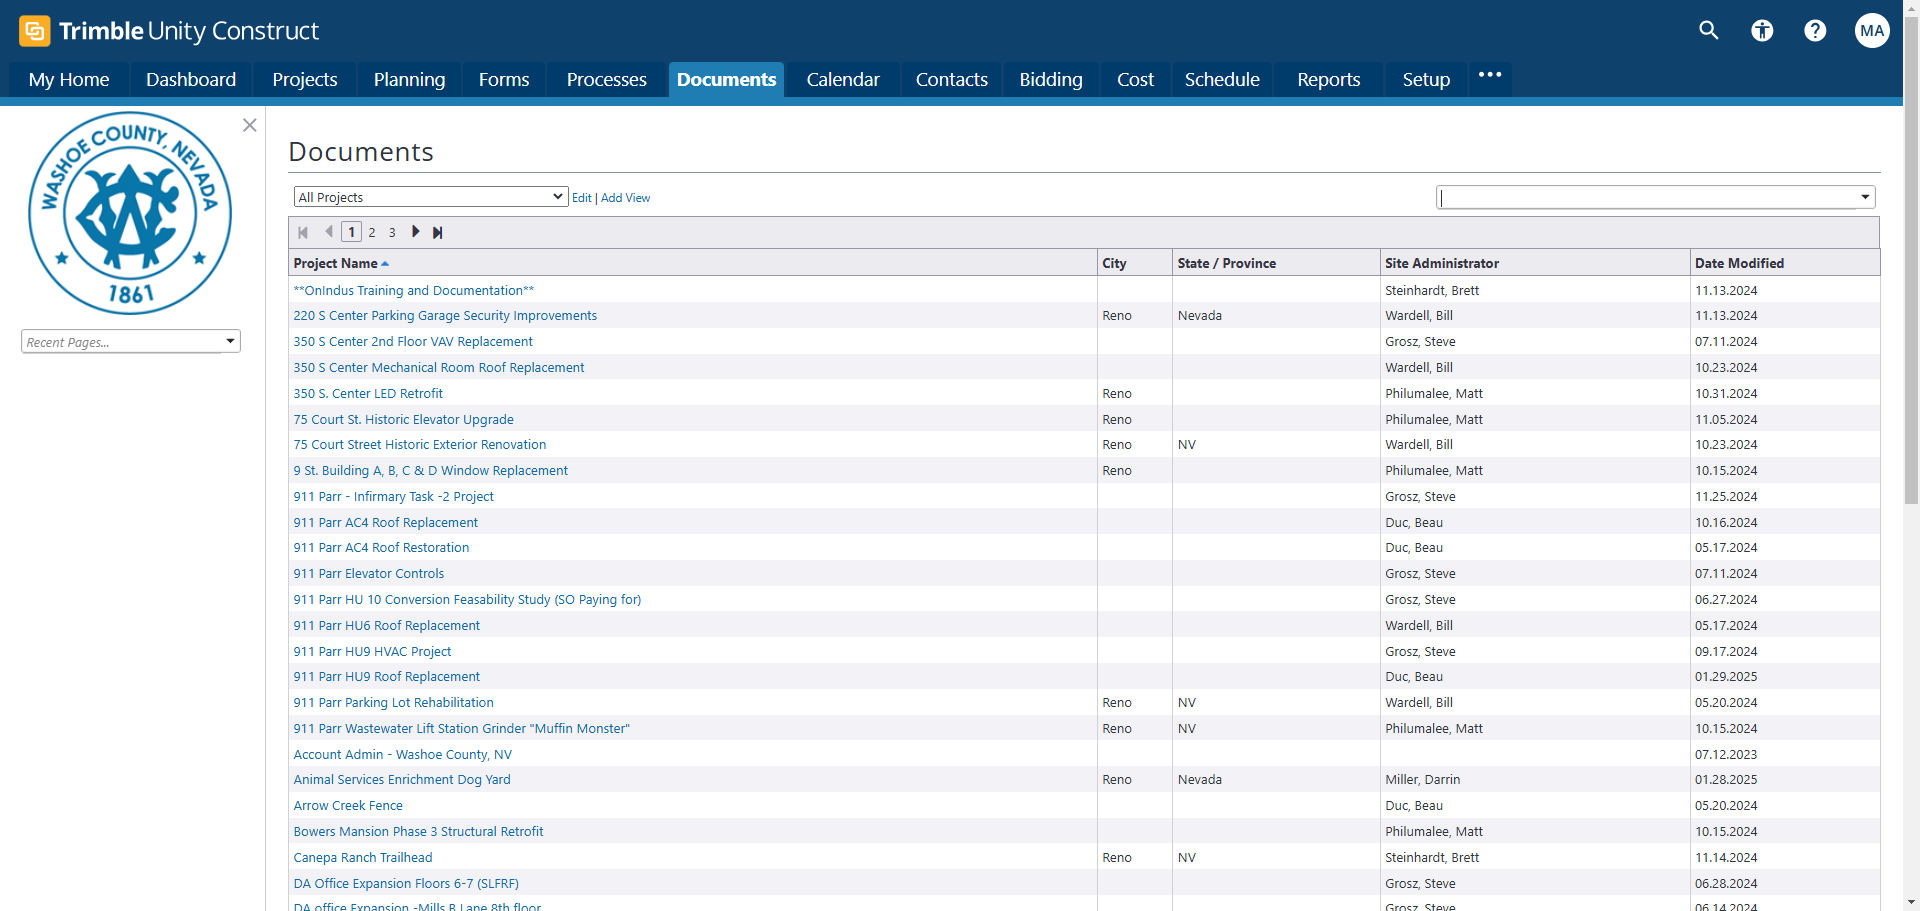
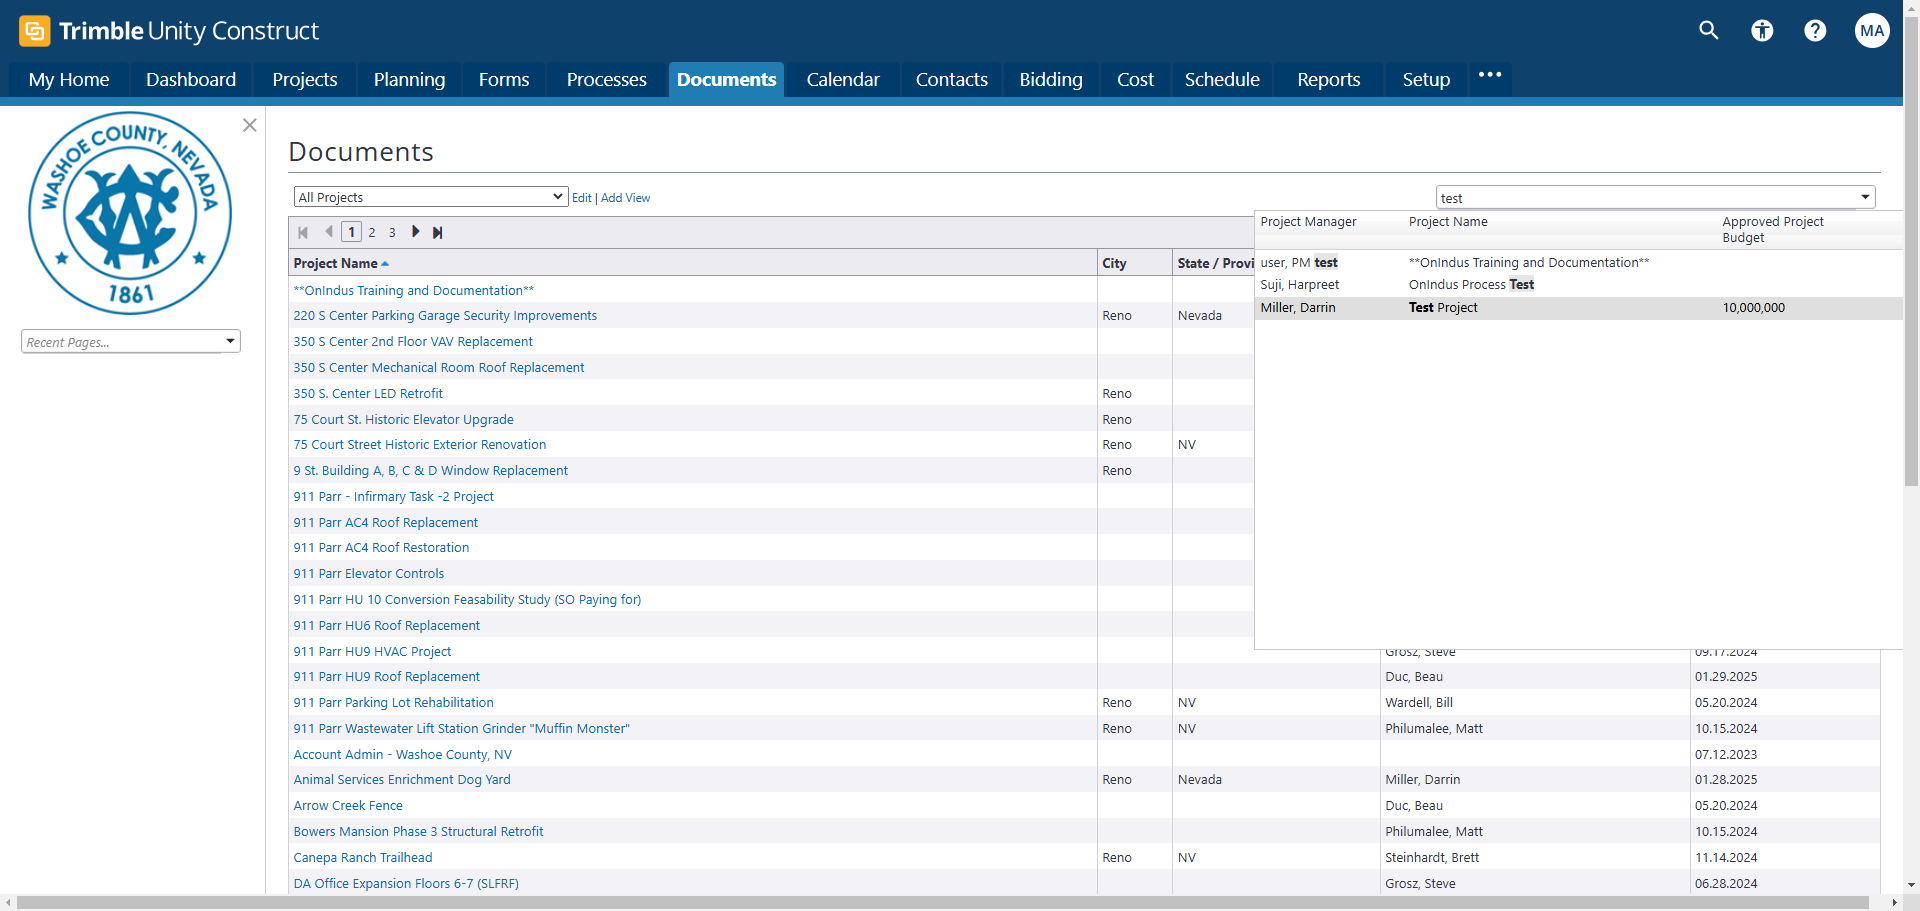
Good day, Washoe County. This is Martin from Monindis. Today, we'll be training on the eBuilder documents module. To access the module, you must first be in the correct project to use all the functions of the documents module within eBuilder. First, click on the documents tab, then navigate to your test project.
Once you are in the test project, you'll see what the documents module offers. First, let's discuss how the documents module is structured.
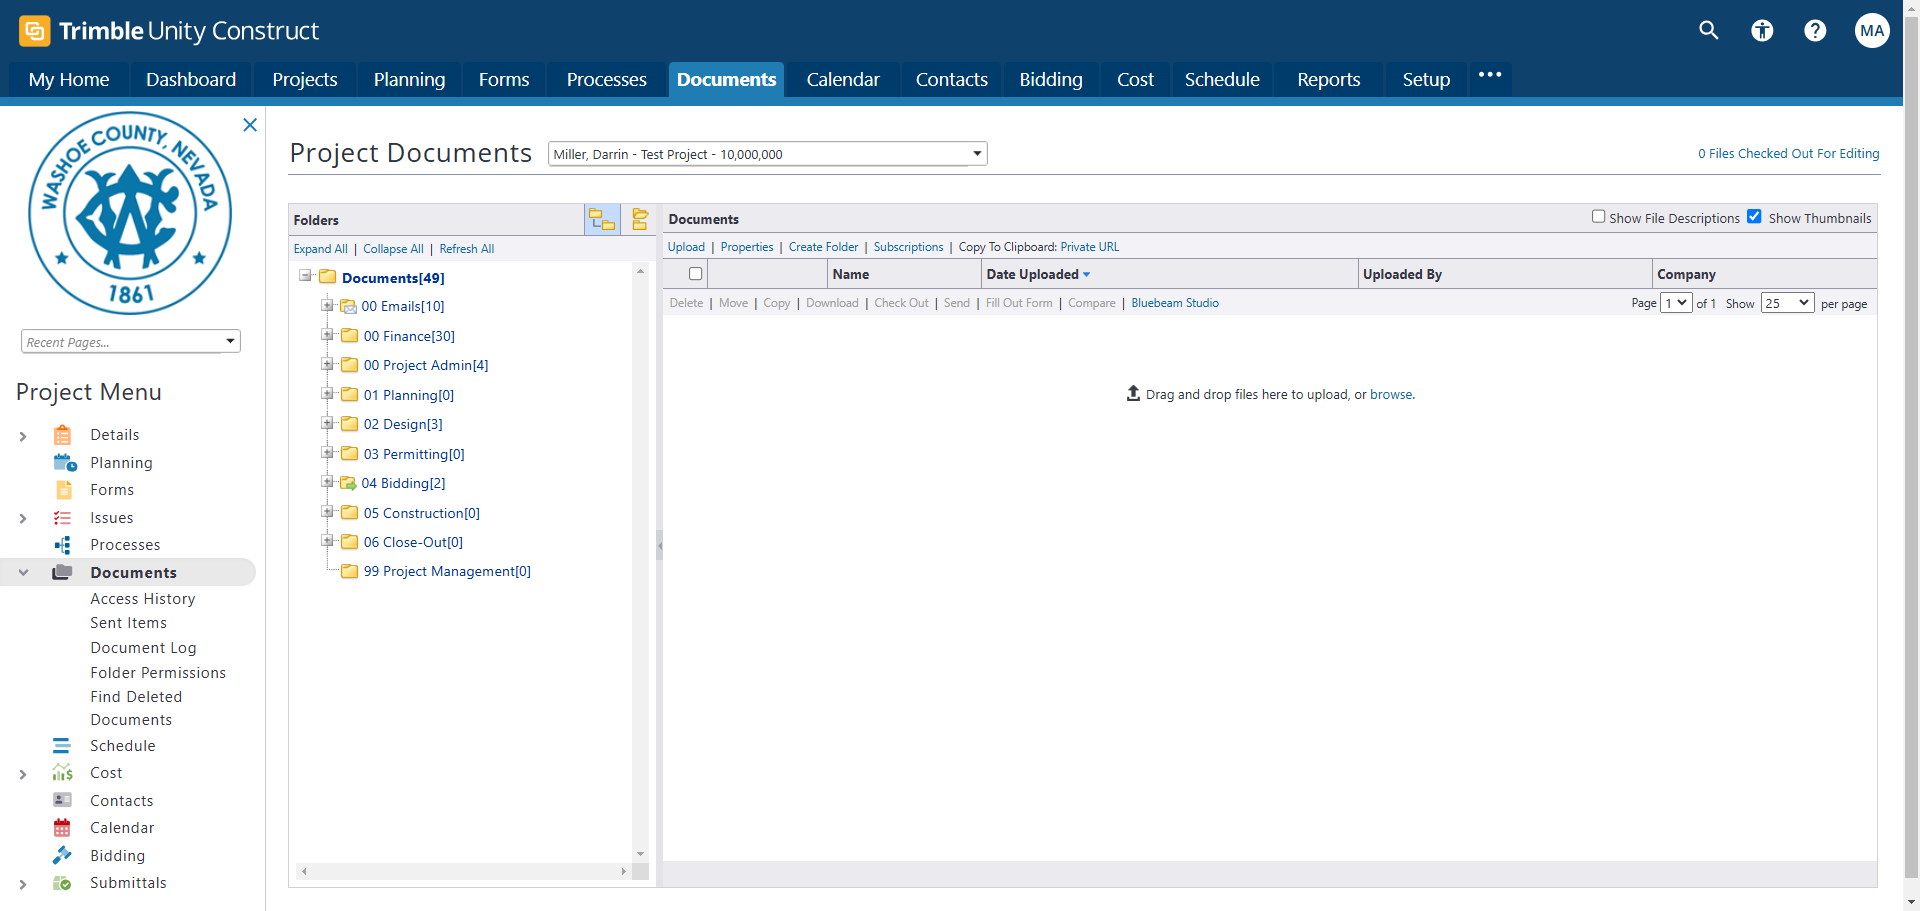
The document management system is organized into folders. These folders are standardized, meaning they are consistent across all projects you can access. This templated structure ensures that documents are saved in the correct locations across all projects. By clicking the expand link in the upper left, you can view the extensive folder structure and the numerous subfolders within the main folders. I recommend that everyone learning this module explore the folder structure to understand the available folders and use them wisely when uploading documents. Since eBuilder is a permission-based system, you may not have access to all folders, depending on your role.
If you have access to all folders, I encourage you to explore each major category and review the available subfolders. This will help you save documents effectively when needed. The documents module in eBuilder functions similarly to most file management systems you may have used before. The first basic task in any filing system is uploading a file. As mentioned in earlier training, the documents module serves as the document repository for your projects within the eBuilder platform. Anything related to design drawings, meeting notes, cost information, or bidding documents will be stored in this module. This ensures that anyone with the necessary permissions can reference it in the future. Let's practice uploading a document.
First, target the folder where you want to upload a document. When you select a folder, such as "Cost Estimates," it will highlight in blue. This window will display all files within that folder. If there are no files, the window will be empty. For example, if you go to the "Finance" folder, which contains several documents in different folders, and click on "Draft Supporting Documents," all files will appear. Ignore the file types in this folder, as they are for training purposes.
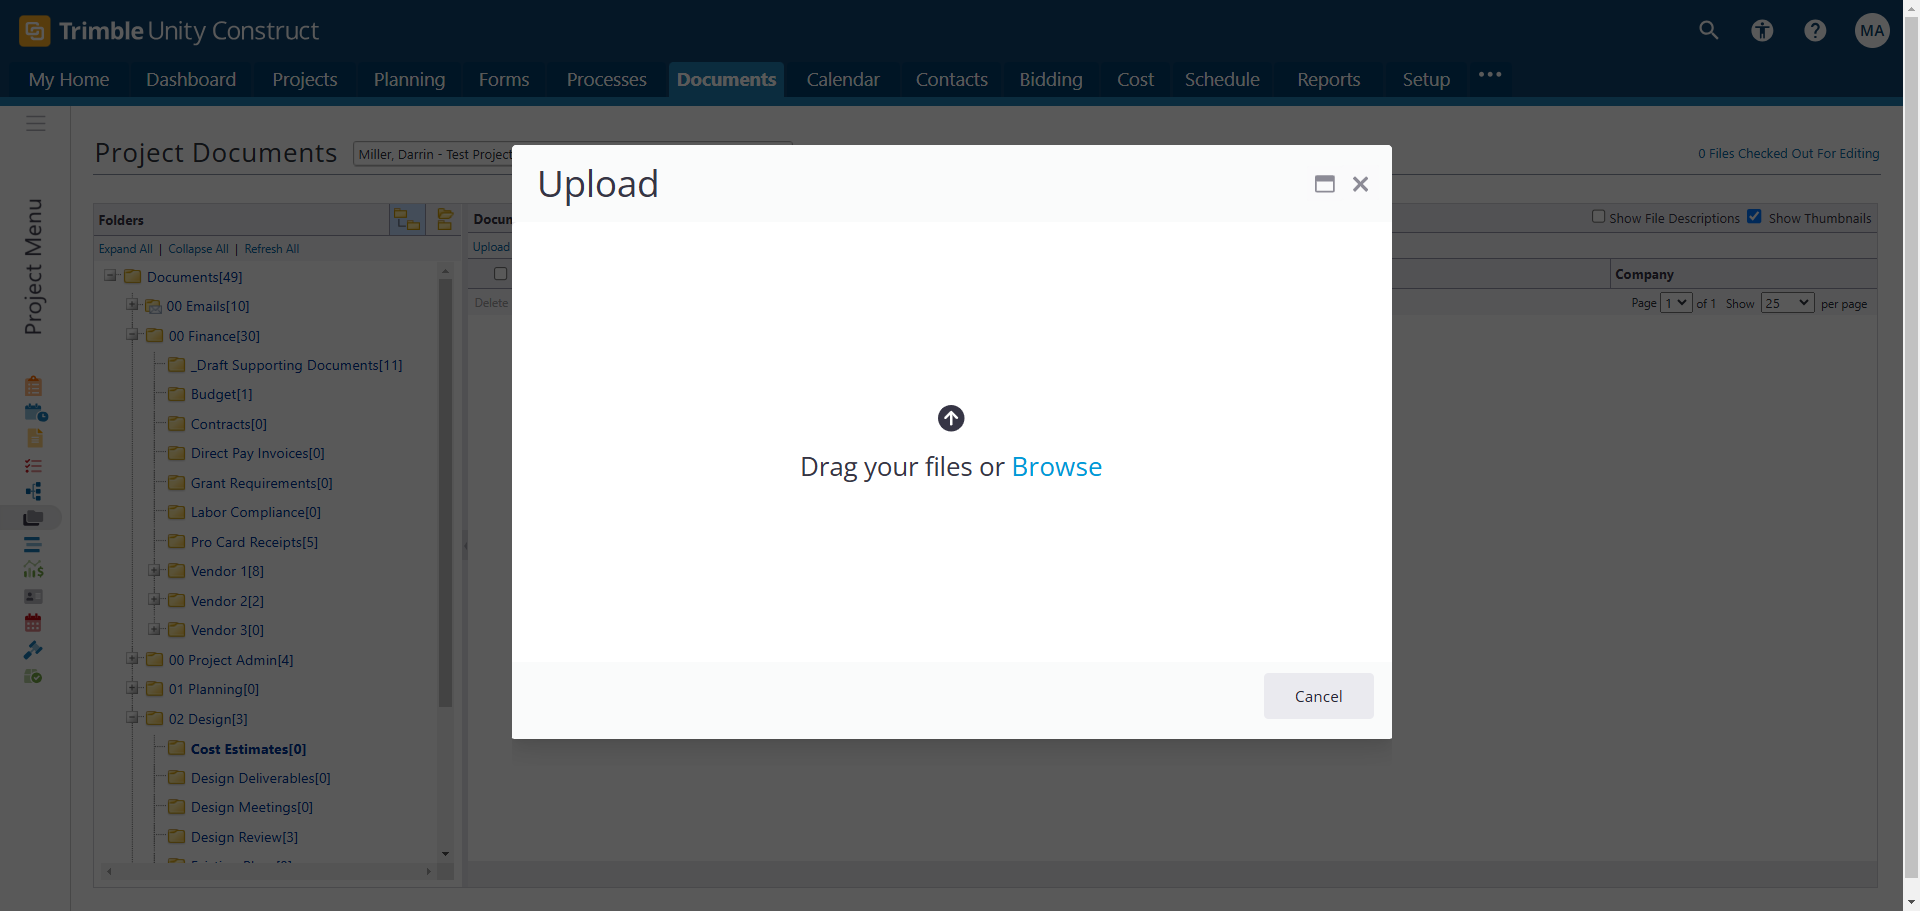
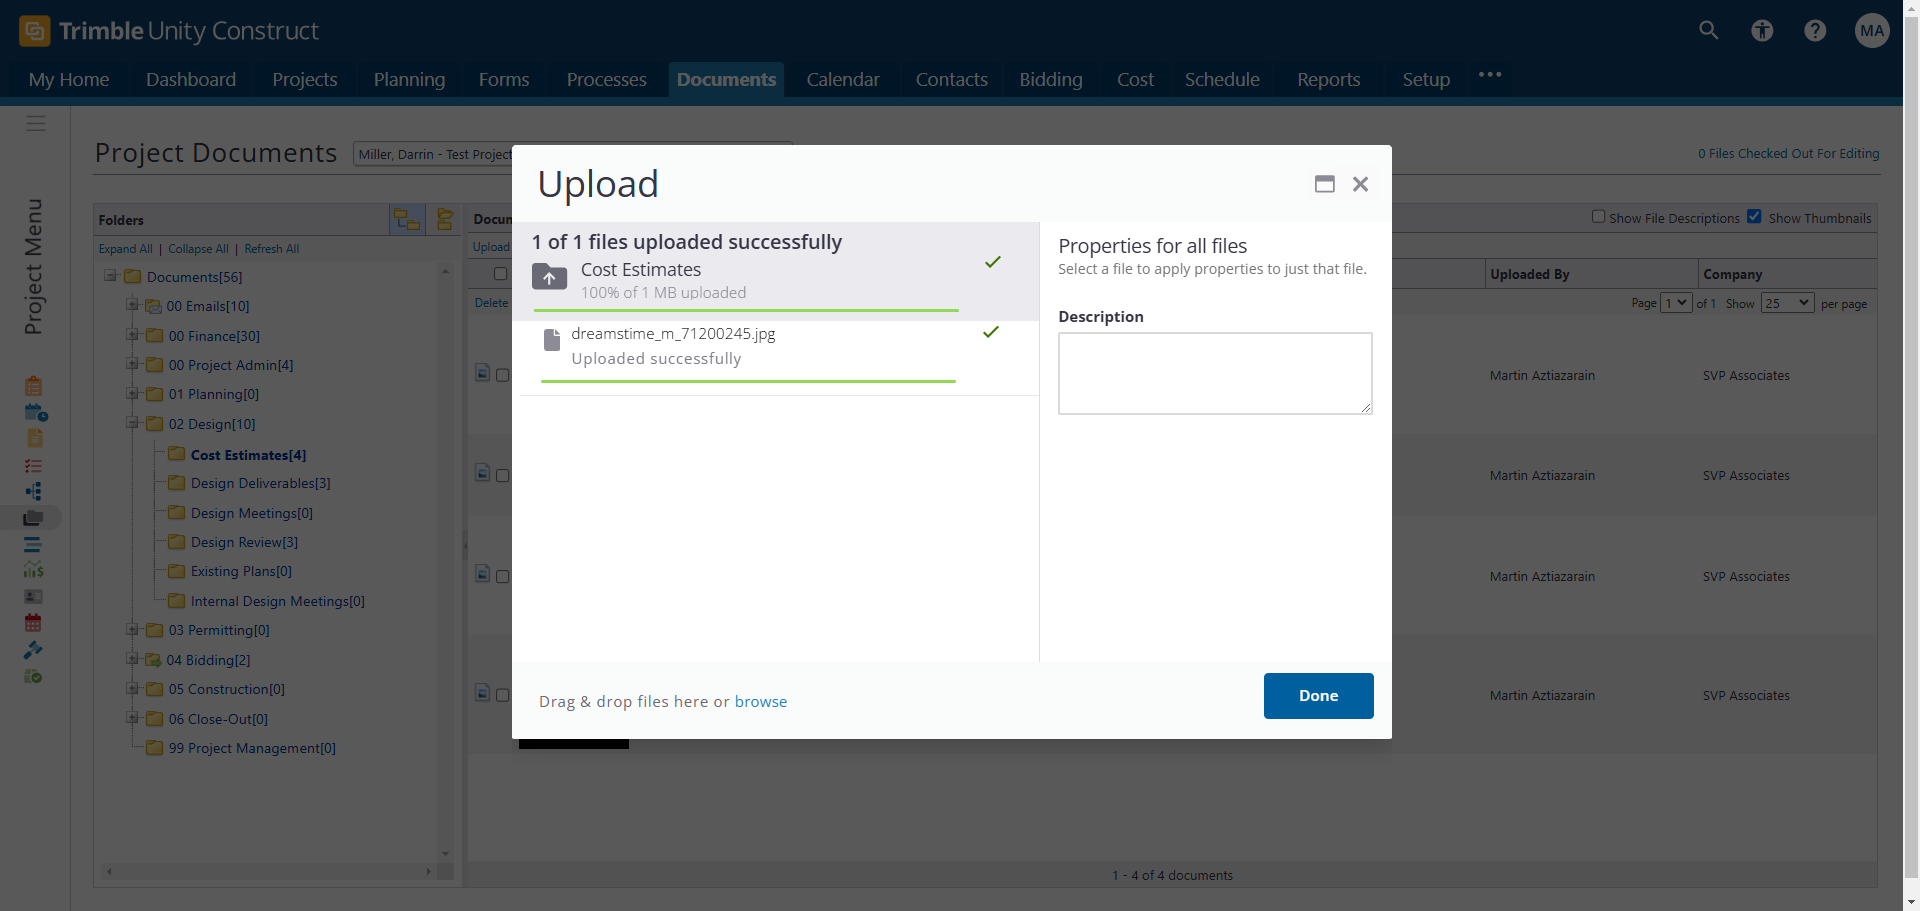
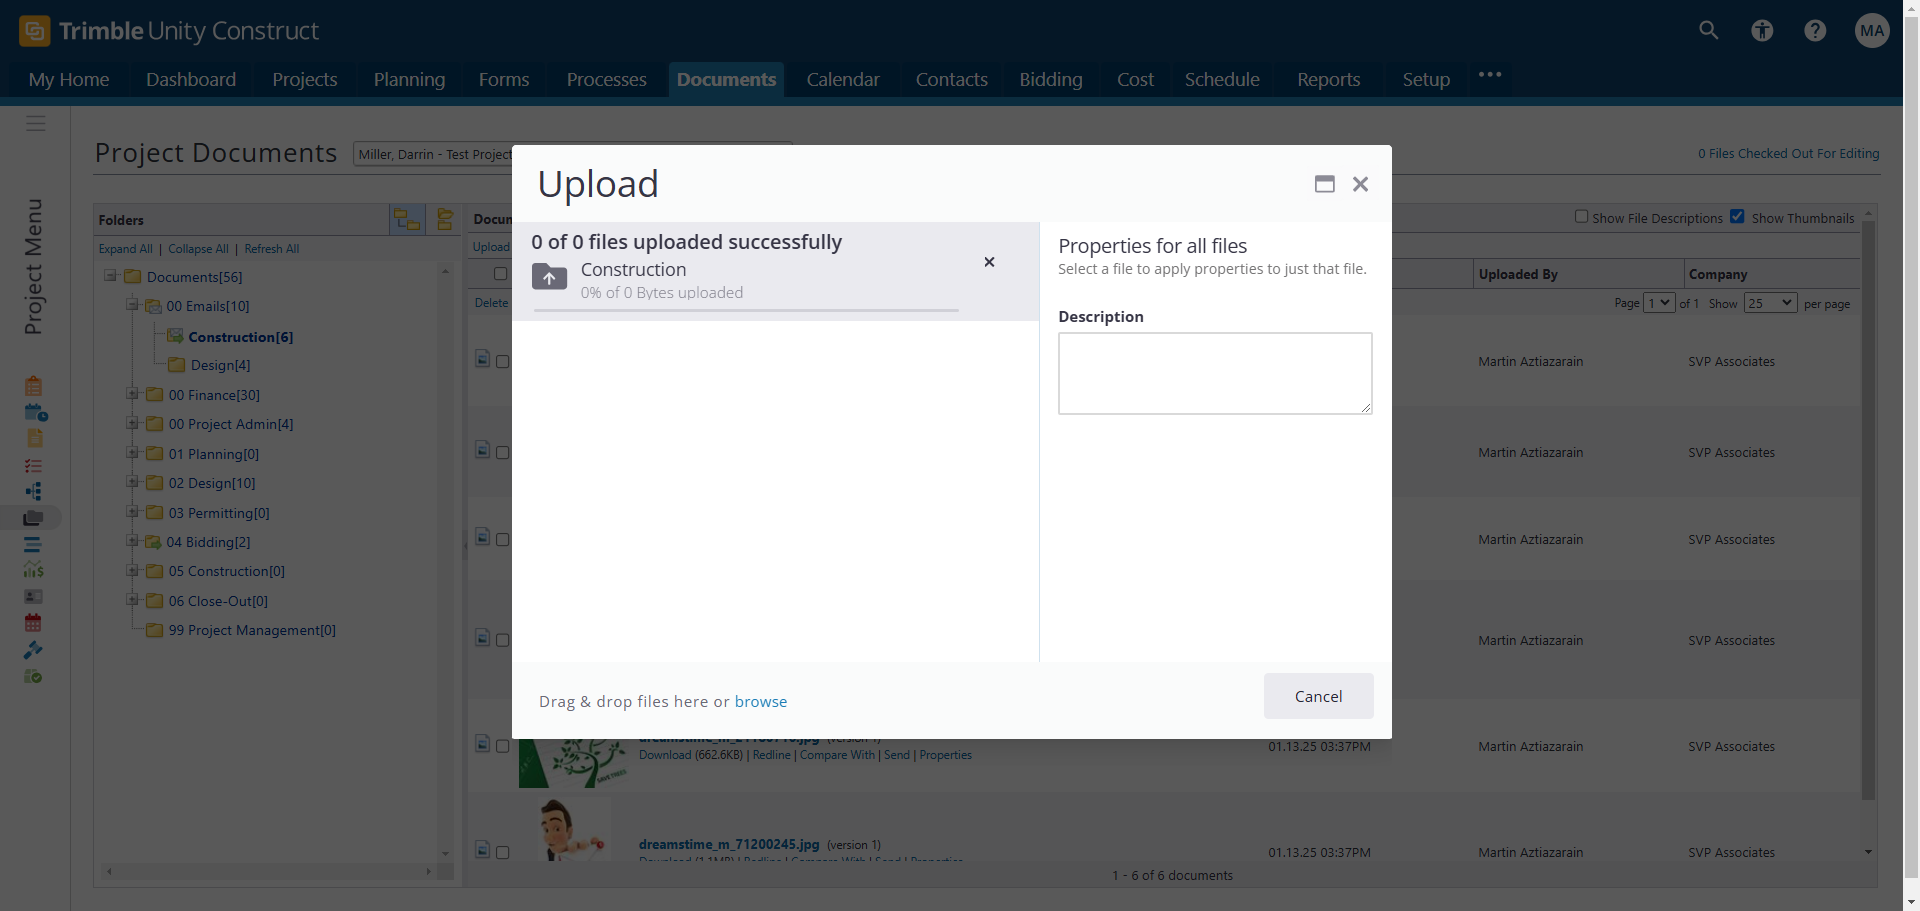
The most important thing is to understand the layout. I'll return to my cost estimates folder, and we'll go through the basic exercise of uploading a file. There's a long way and an easy way to do this. If you have the necessary permissions, click the upload link in your target folder. Then, click browse to open your local drive.
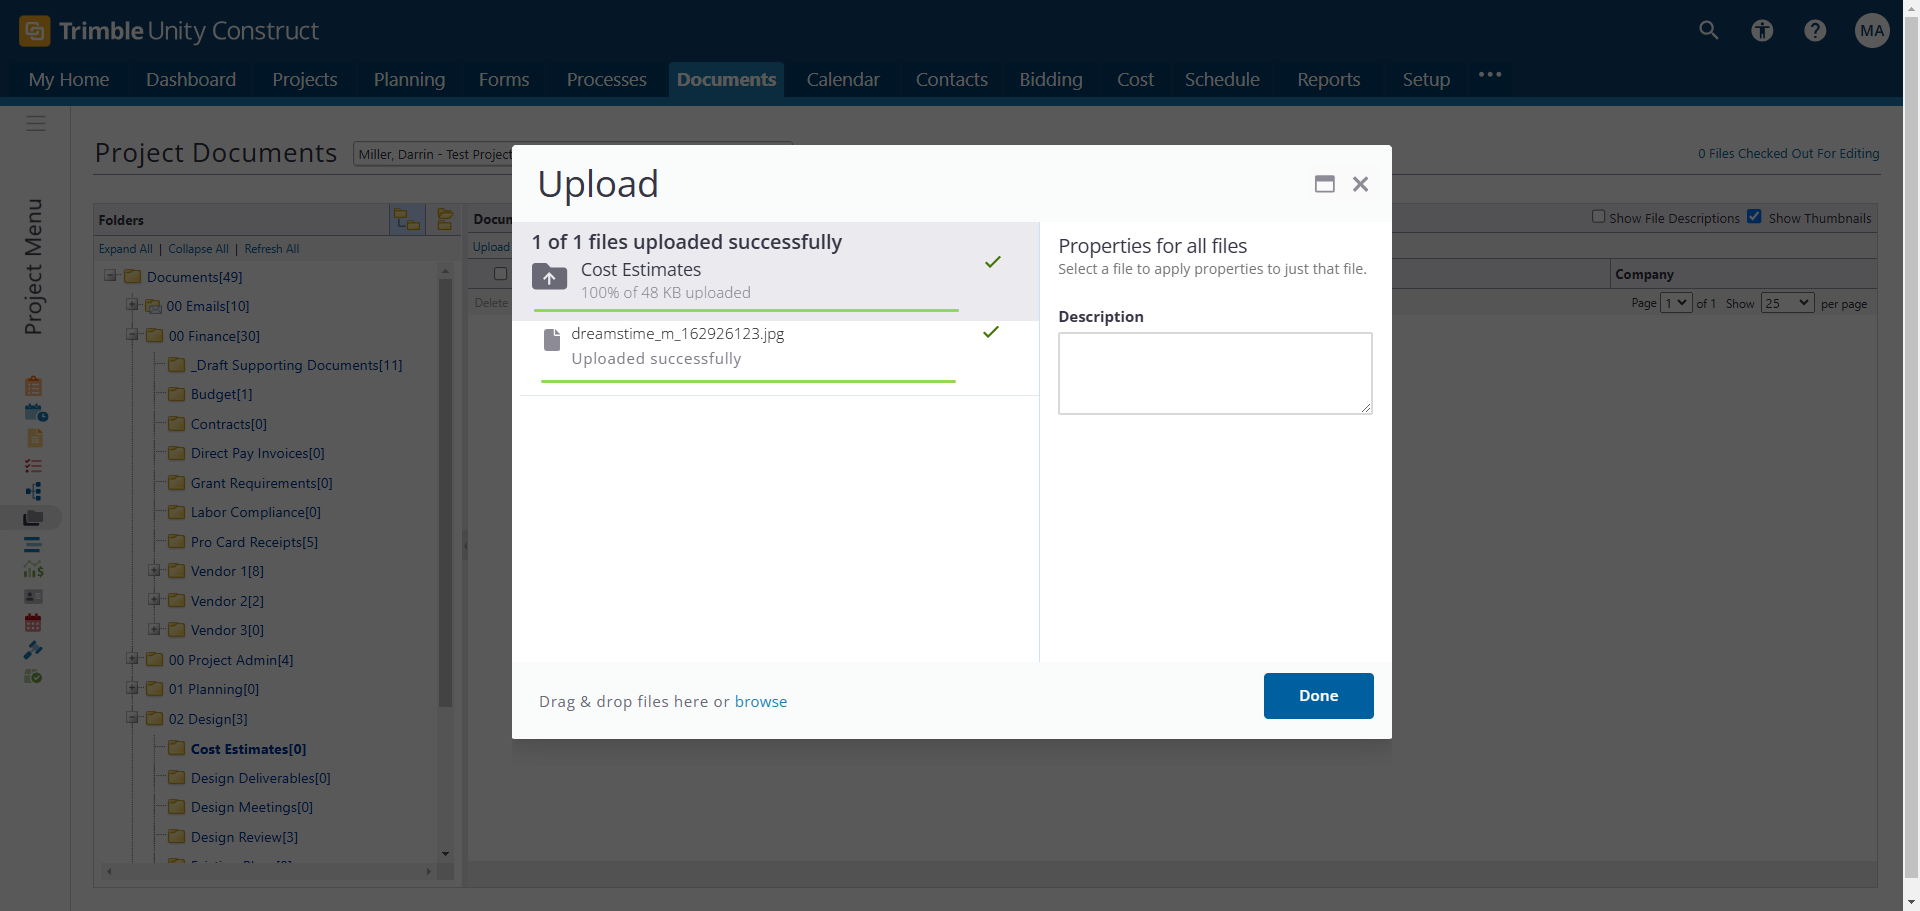
Once on your local drive, you can access any files you want. By double-clicking a file, it will automatically upload. This is similar to past exercises where double-clicking uploads the file into the system.
eBuilder allows you to use a feature called drag and drop. This feature lets you open your local drive, which I'll demonstrate by bringing it onto the screen. Here's my local drive, and I can select multiple files to bring in simultaneously. This process is known as dragging and dropping. It's a popular method, especially for those who work with many files at once.
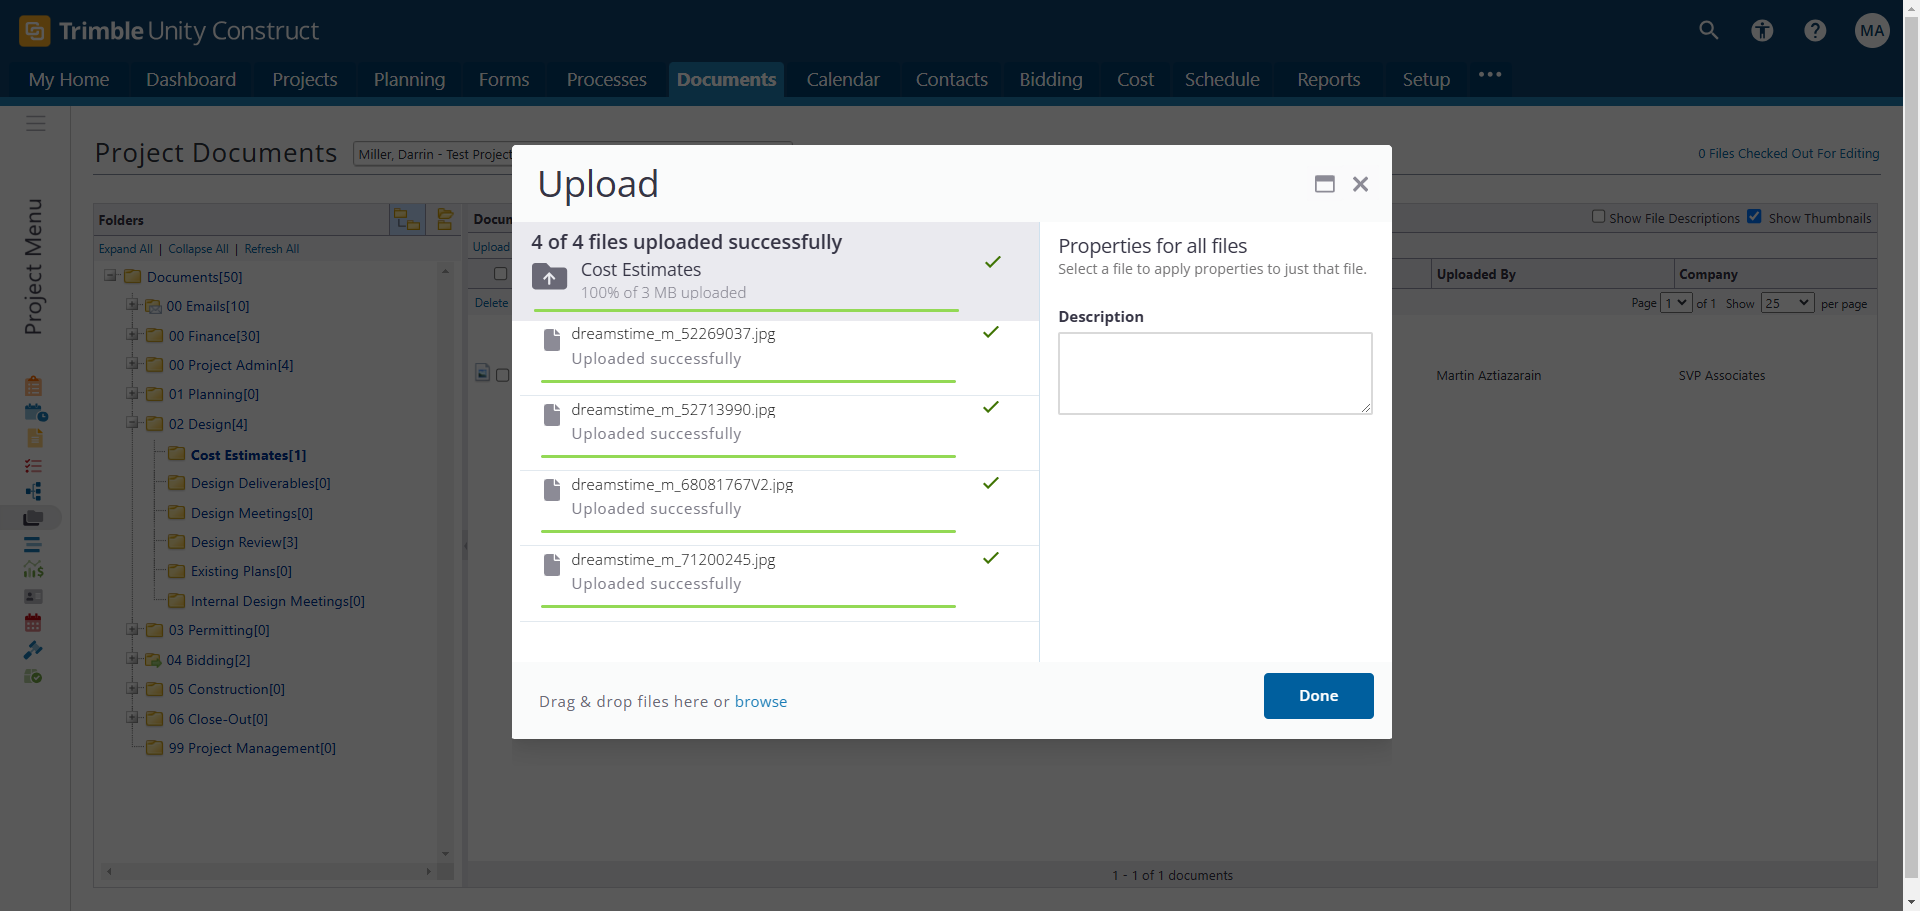
All the files have been uploaded, and each line is date and time stamped with my name and company. This ensures everything is audited within the documents module. What are some basic functionalities after uploading a document? The first is downloading. Most people have likely downloaded a document before. Downloading is necessary if you plan to change the document. It allows you to bring the document to your computer, make alterations, and potentially re-upload it to eBuilder to create a new version.
You can view the document without downloading it by clicking on its name. This action opens a PDF viewer, allowing you to see the file even if you don't have the native software on your computer. For example, if you have a BIM model or a DWG AutoCAD file and lack the necessary software, the PDF viewer lets you view it in a static PDF format. You can see the file's contents, but you cannot manipulate or change it.
If you download a file for manipulation, click on "Download" here. There are also commands in the top banner to execute this function on multiple files. By selecting the checkbox and clicking "Download," you can download all three files simultaneously. In Google Chrome, you'll see the files downloading. Another basic function in the documents module is sending a file.
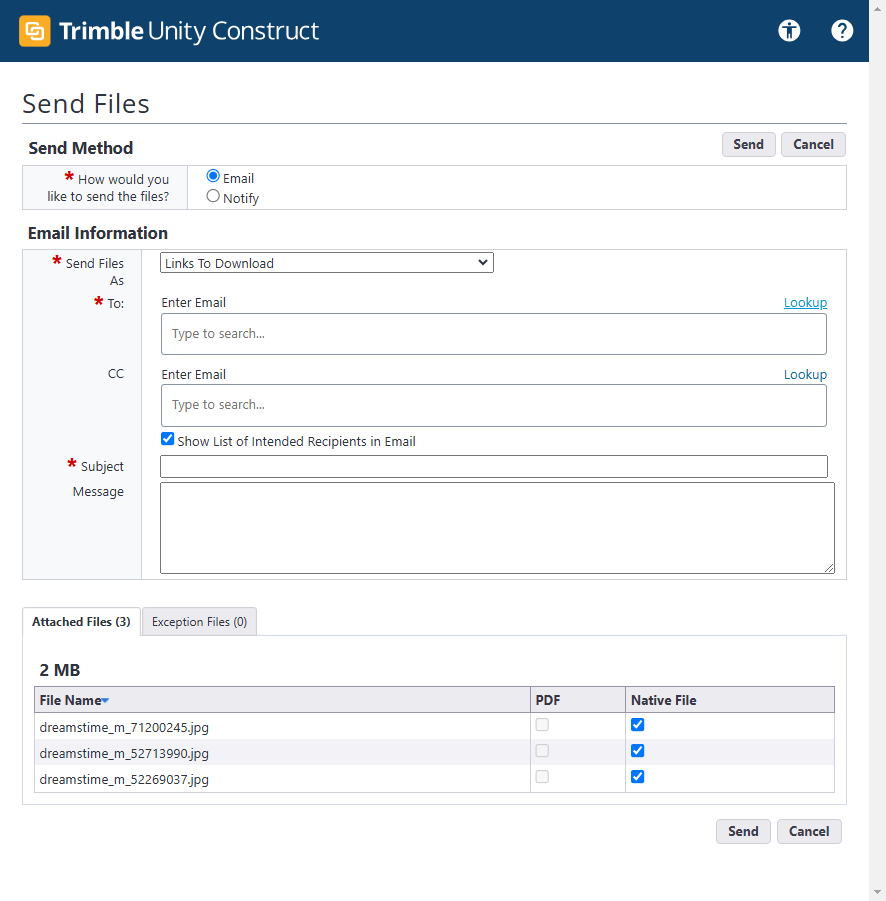
Let's discuss this. Sending a file is sometimes necessary, whether to someone within or outside the eBuilder space. This process is similar to emailing an attachment. eBuilder has a built-in feature that allows you to do this quickly. If I want to send the first three files, I simply click the checkboxes, then click the send link. This opens a window that resembles an email window.
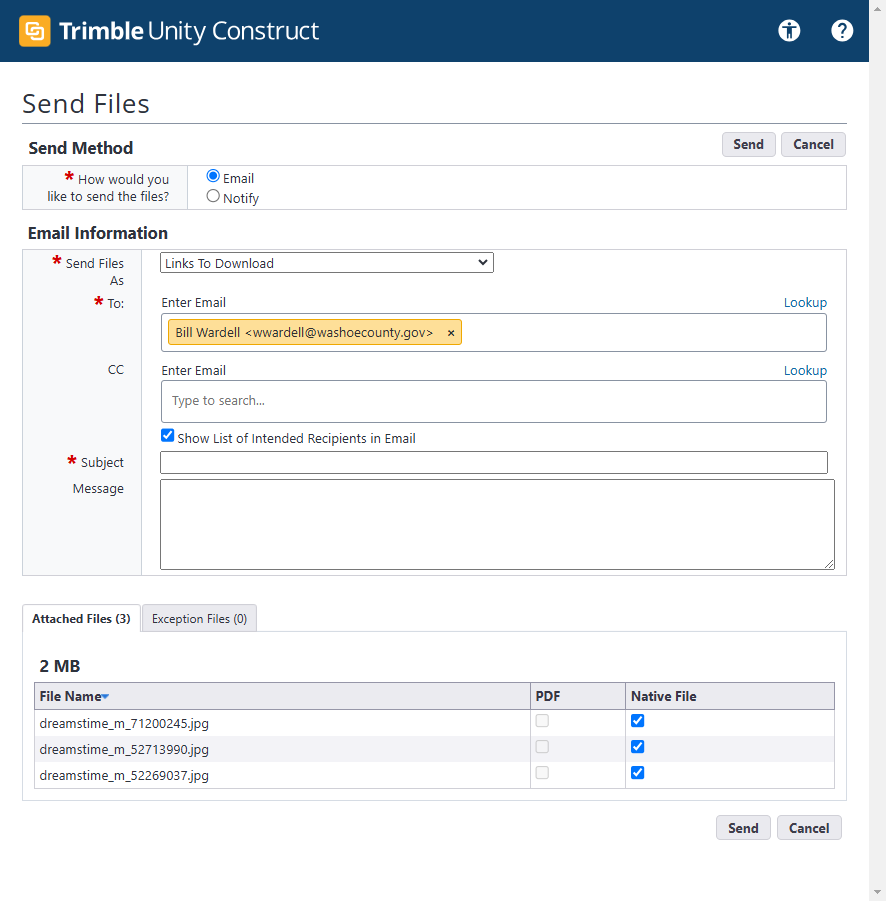
I'll expand the view to show more on the screen and demonstrate how it works. First, you'll choose whether to send it as an attachment or a download link.
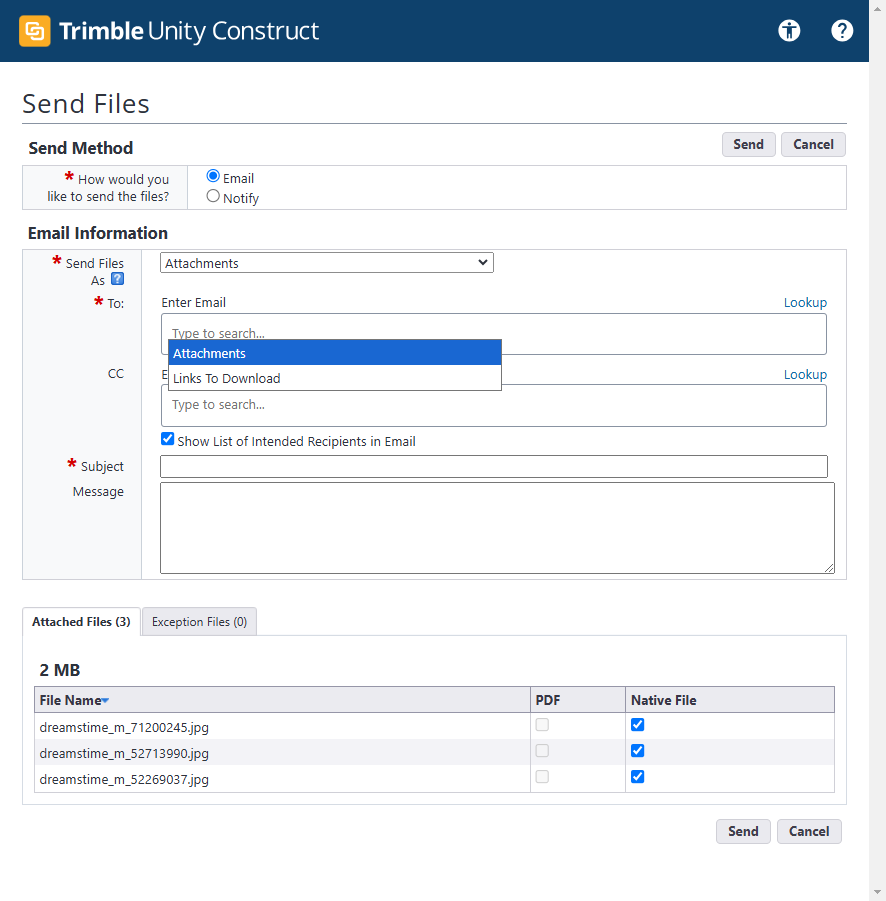
My personal favorite is sending a link to download. The advantage is that the file is hosted on eBuilder's servers. When the recipient gets the email, they can download it directly from eBuilder. If you send a large file as an attachment, the recipient's email service might not support it. So, I advise sending as many items as download links as possible. Next is the email.

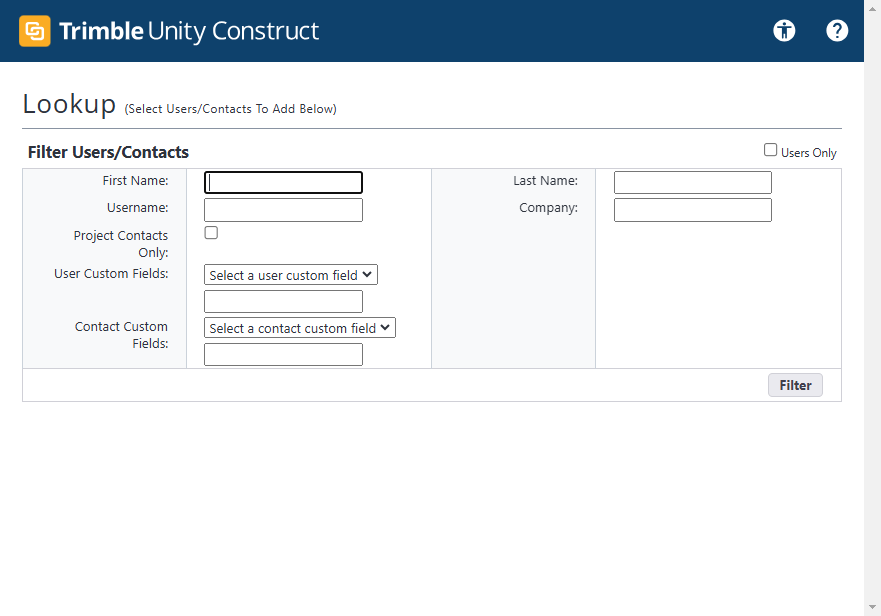
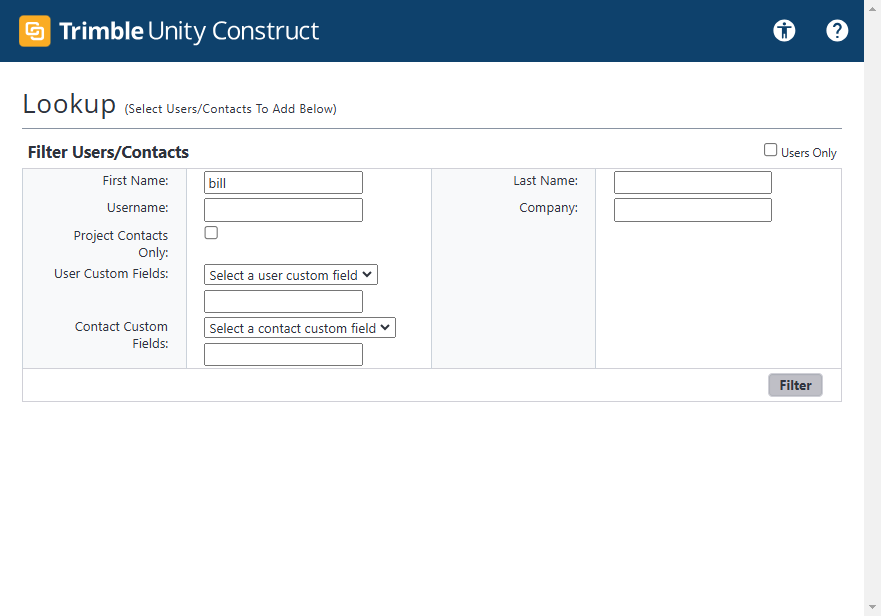
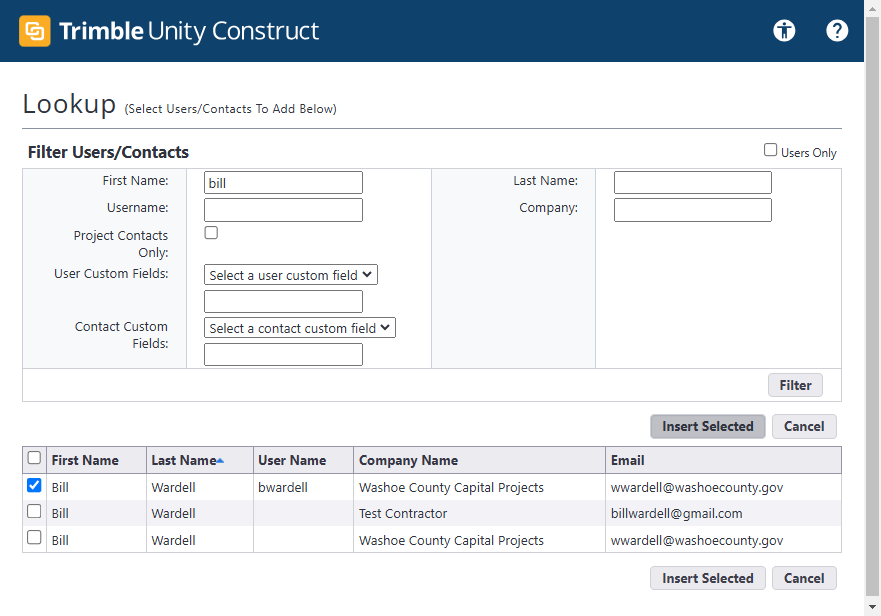
If you've ever sent an email, this part of the training is quite easy. Simply enter the email address. You can include both people within the eBuilder space and those outside of it, meaning non-users. This allows you to communicate with the outside world. If you're emailing someone within eBuilder, I recommend clicking the lookup link. You can then type a few letters of the person's name to find them.
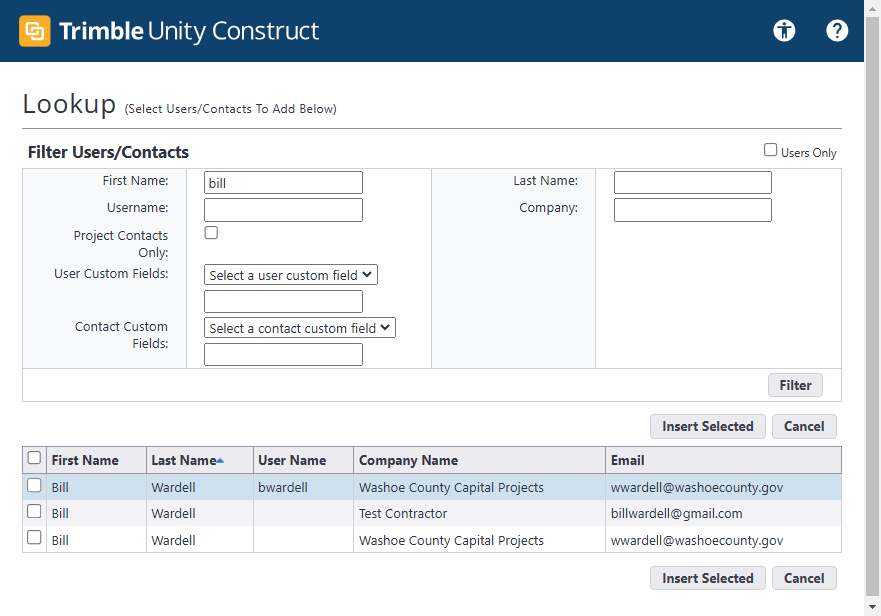
As you can see, Bill appears as my example. I click on Bill, hit "Insert Selected," and his information is now there.
On the other hand, I can manually type in an email, such as my personal email, like this.

That would work as well.
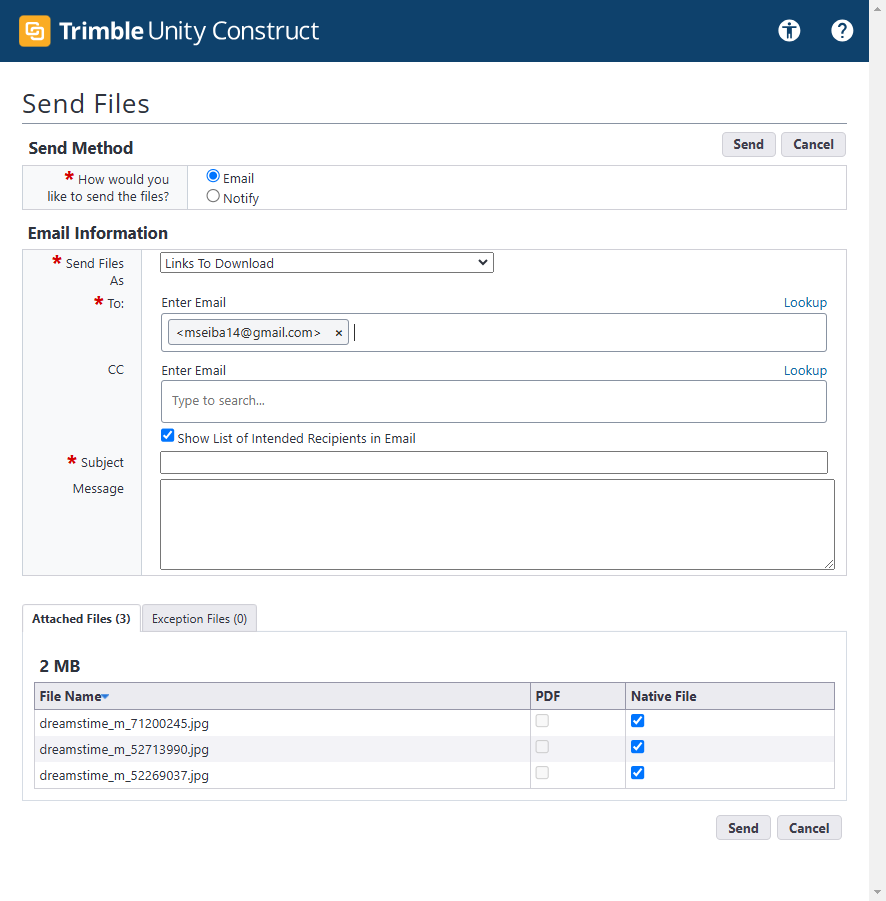
Sending an email or a file is as simple as typing in the email address and ensuring it has the correct format. You can add multiple email addresses and copy as many people as you like, similar to a standard email.
The CC function is the copy function. This checkbox is eBuilder's version of a blank copy. If you send this to many people and uncheck the box, you're telling eBuilder not to show the list of recipients in the email.

If I had more than one recipient and left this unchecked, none of the recipients would know who else received the email. If I check it, everyone will see all the recipients of the email.

Besides that, enter a subject, similar to the one you would use in an email you are sending.
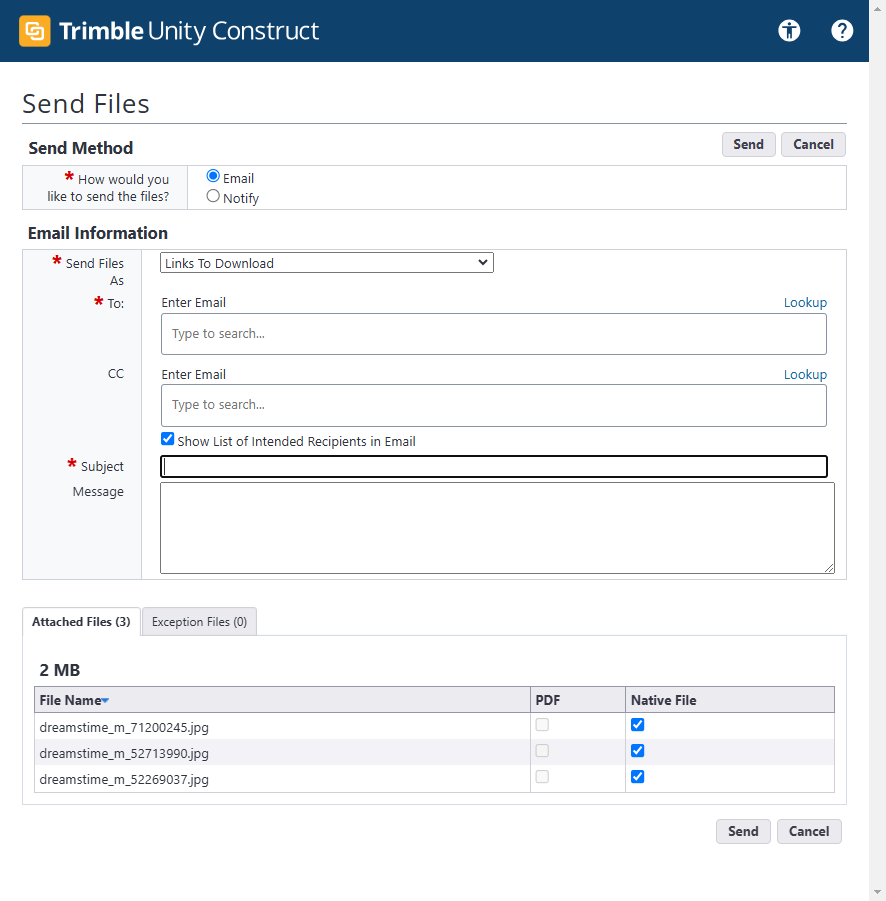

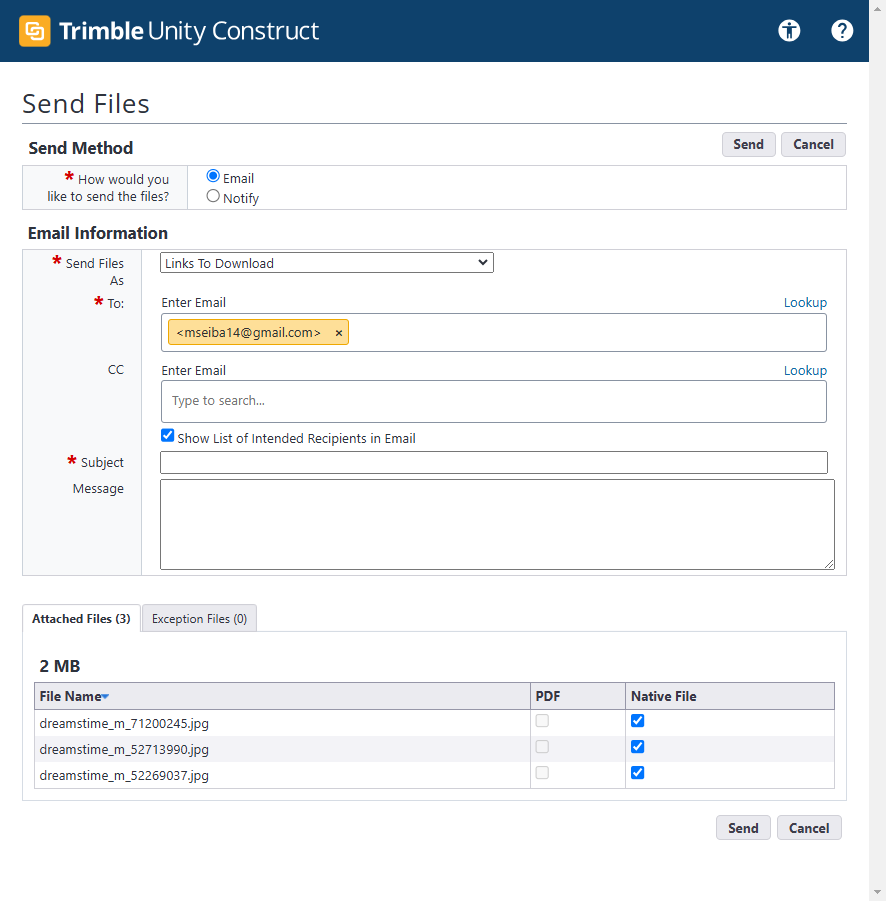
You're going to send your message. As you can see at the bottom, the files we chose are attached. It also shows the size of the files we're about to send.

If you're sending an AutoCAD file, it will indicate the file size in gigabytes or megabytes. This helps you understand how large the file is before sending it. A feature to note is the PDF first native option. While this doesn't work for JPEGs, eBuilder includes a PDF converter. If you're sending a Microsoft Word document, an AutoCAD file, or any file that might require specific software to open, you can check the boxes to send it as both a PDF and a native file. Sending it as a native file allows the recipient to edit it if they have the necessary software.
If they can't open the file, sending it as a PDF will ensure they can at least view it. Once you've filled out the basic information, click send, and the email will be transmitted to the recipient. When they respond, it will return to your current Washoe County email because it's linked to your eBuilder account. Next, let's discuss some basic functions beyond downloading and uploading. First, I want to highlight these simple commands we see here. We've already covered upload, download, and send.
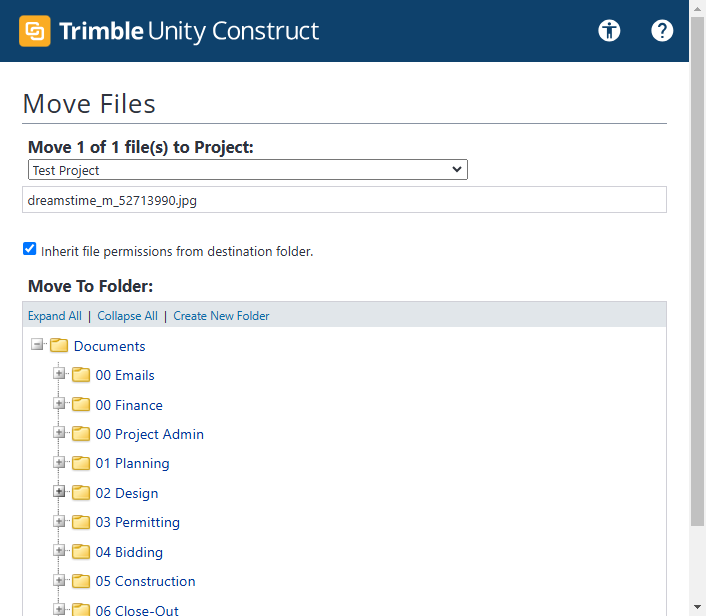
Let's discuss moving and copying files. It's quite simple. To move a file from one folder to another, select the file and click "move." You'll be prompted to choose the destination folder. Select your target folder, and the file will be moved there.
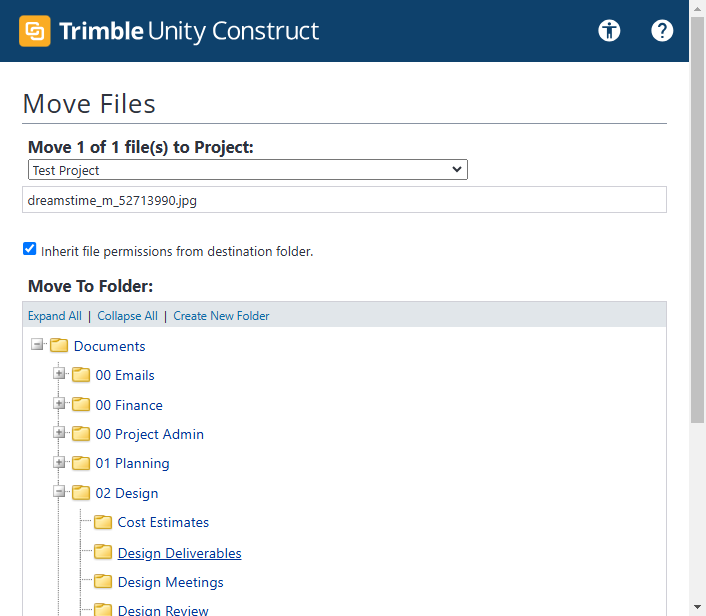
You'll notice that the file is no longer there among the ones I originally uploaded. To copy files, click on the files you want to copy, select the target folder, and the files will then exist in both folders.

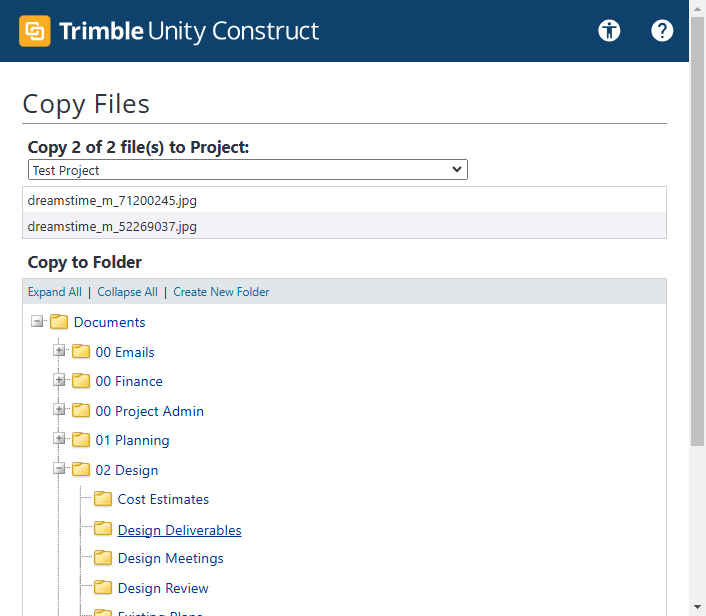
Not only the one I copied from, but also the one I copied to. This is basic information. Next, let's discuss checkout. Checkout is closely related to a concept I want to include in this training: version control. The purpose of checkout is to lock a document to prevent others from creating a new version. First, let's discuss creating a version of the document.
In eBuilder, to create a new version, you upload the file you have changed or recreated on your computer using the same file name as in eBuilder. For example, if you have a file with a specific name and want to create another version, do not rename it to include "V2" on your local drive. Instead, select the file and drag it into the folder with the same name. It will re-upload, and you will see that the file now has version number two next to it.
This tells us a couple of things. eBuilder always shows the most current version and never the oldest version on the front end. The first question people ask is, how do I see the original version or versions of the file? Click on the file's properties and then click on the tab called "versions."
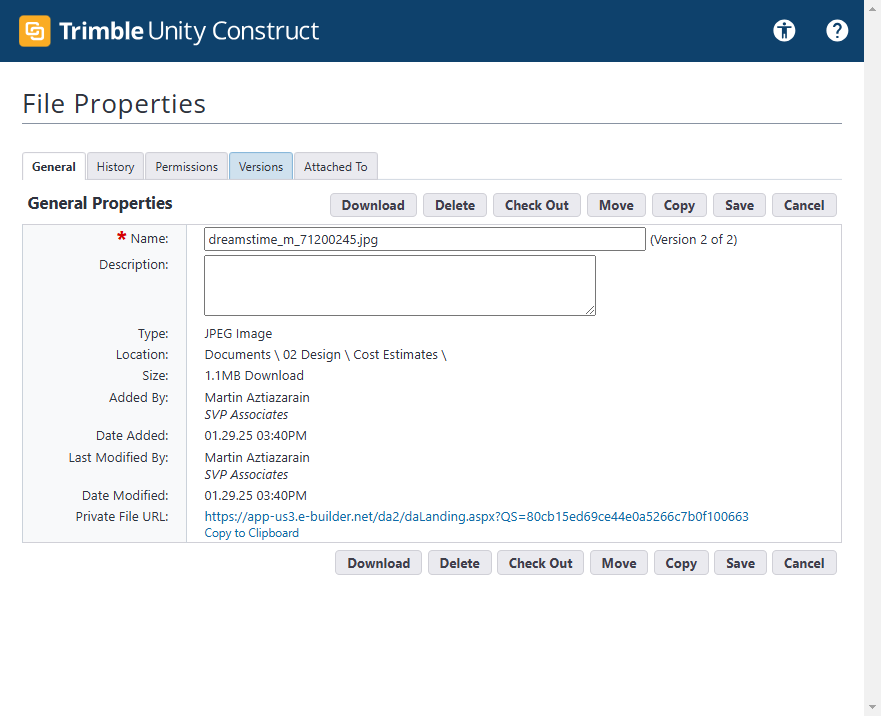
This will provide a complete audit trail of all the versions for that specific file within eBuilder. It's important to note that uploading a file with a "V2" in the name isn't wrong; it will simply create a new file in the stack. The best way to manage your files and track changes is to use the versioning approach I demonstrated in eBuilder. Now, let's return to the checkout process, as it is closely related. If I check out this file by selecting the checkbox and clicking cancel, you will see a green line appear momentarily.
By checking out the file, I am preventing others from creating a new version. Even if someone else can view, download, or send the file, they cannot re-upload it as a new version. My name appears next to the file name with a green check mark, indicating that I am the only person who can create a version or check the document back in. It may sound amusing, but that's how it works.
If I want to stop holding the authority to create a version of this document, I'll click on properties and select undo checkout.
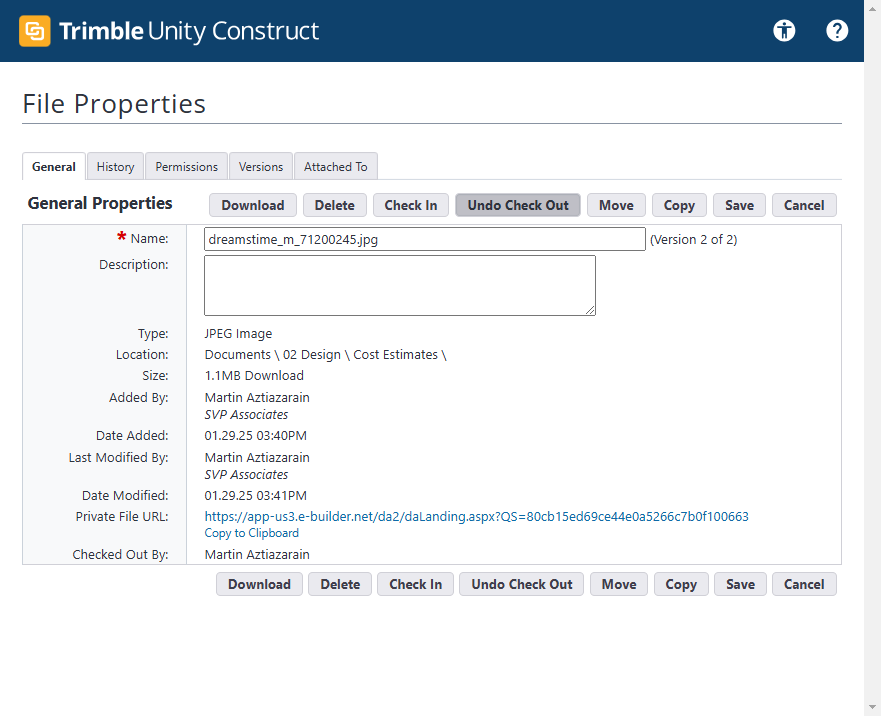
This will act as a light switch. Anyone with access to that file can add a new version. We've covered some commands, so let's discuss delete. Delete is a straightforward concept for most people.
Most of you will not have this function, and I want to let you know. You see it on my screen because I'm an administrator. An administrator can delete files, but we want to control that since all files are official project records. Deleting files from a PMIS system like eBuilder is delicate. We must ensure every archive and file is available for reference, as required for managing the project within eBuilder. I want to point out a couple of things up here.
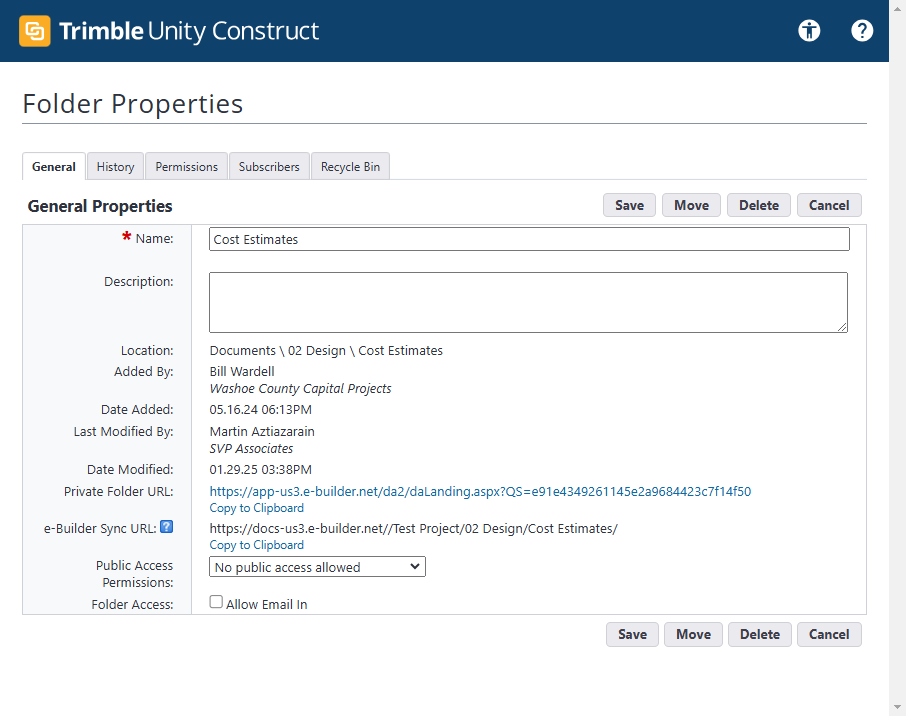
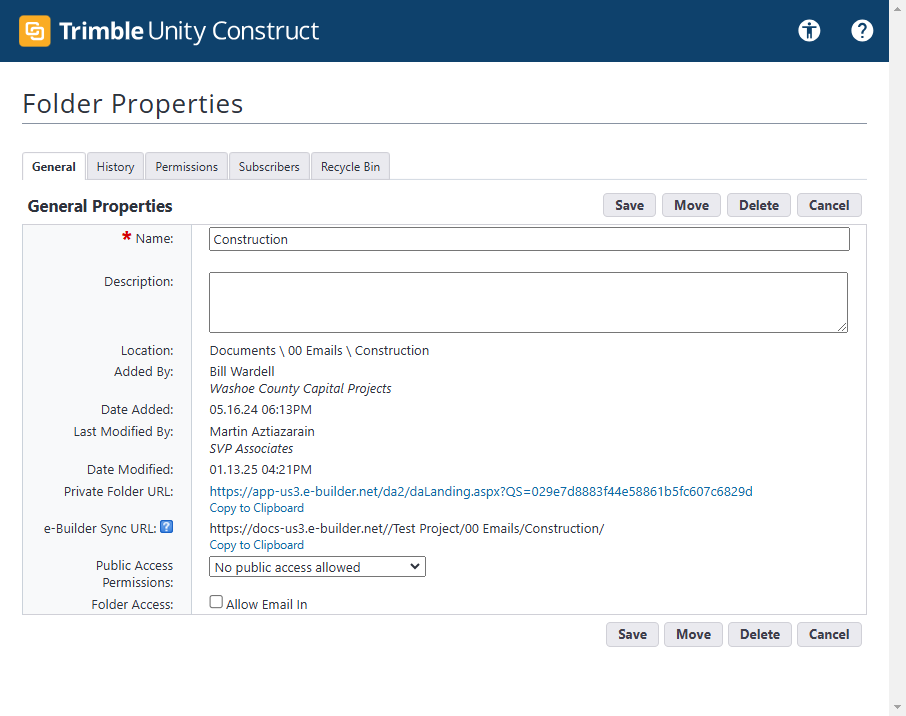
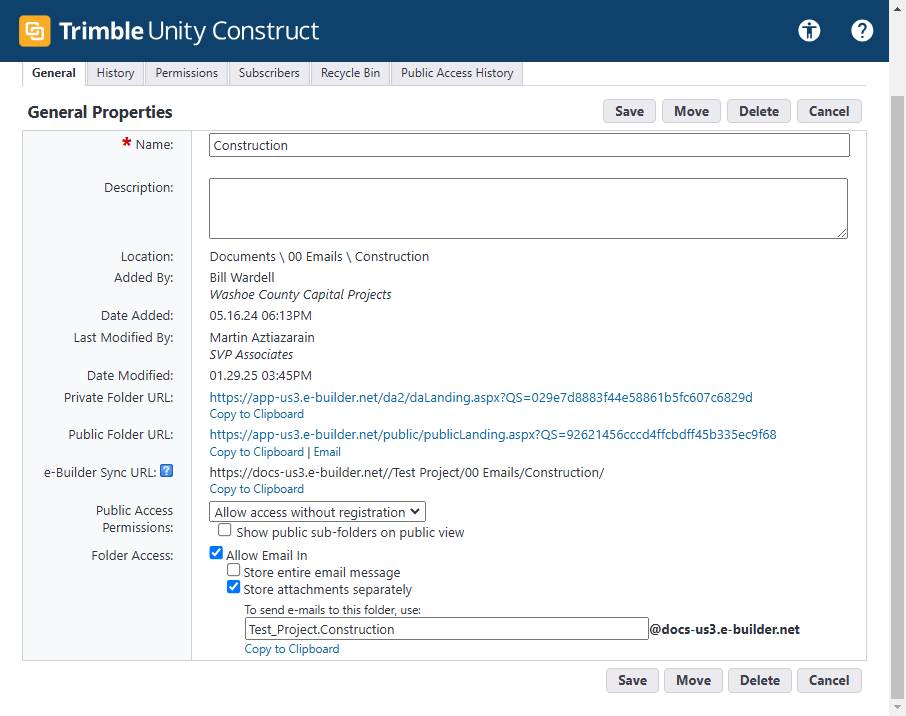
Up here, you'll notice that these commands are more associated with a folder. For instance, these commands relate to actions you can perform with a file. If you click on "Properties" in the upper banner, you're accessing the properties of the cost estimate folder. Let's do that and examine the screen. I wanted to show you this because there are some useful tools available in the folder properties, provided you have permission to access them. The first thing I want to discuss is email integration.
In your current structure, you have an email folder on the left. It's probably unnecessary to make this folder an email inbox. However, if you do, it means that if someone sends an email to this address, they can email a file directly into that folder.

The person sending you the file via email doesn't need to be an eBuilder user. Consider the function and where you'd want to apply it. Most would agree that since the email folder is already set up for construction, I'll open its properties. However, it seems it hasn't been set up here.
Enter the email here, and provide this email address to every vendor you work with. Tell them that if they need to email you, they can use your regular Washoe County address.

Please make sure you copy this specific email address so everything will land in that folder. eBuilder can retain emails and attachments. As you can see, it allows you to store attachments separately.
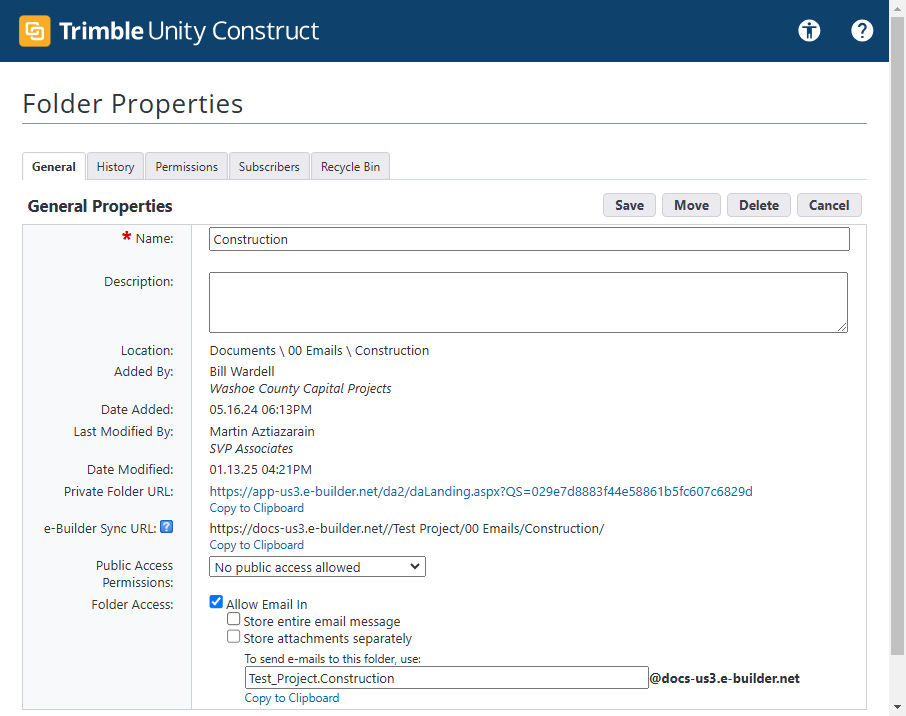
You can separate the email from the attachment. This folder currently lacks that function, but I want to make you aware that it exists. Another topic I want to discuss is making a folder public.
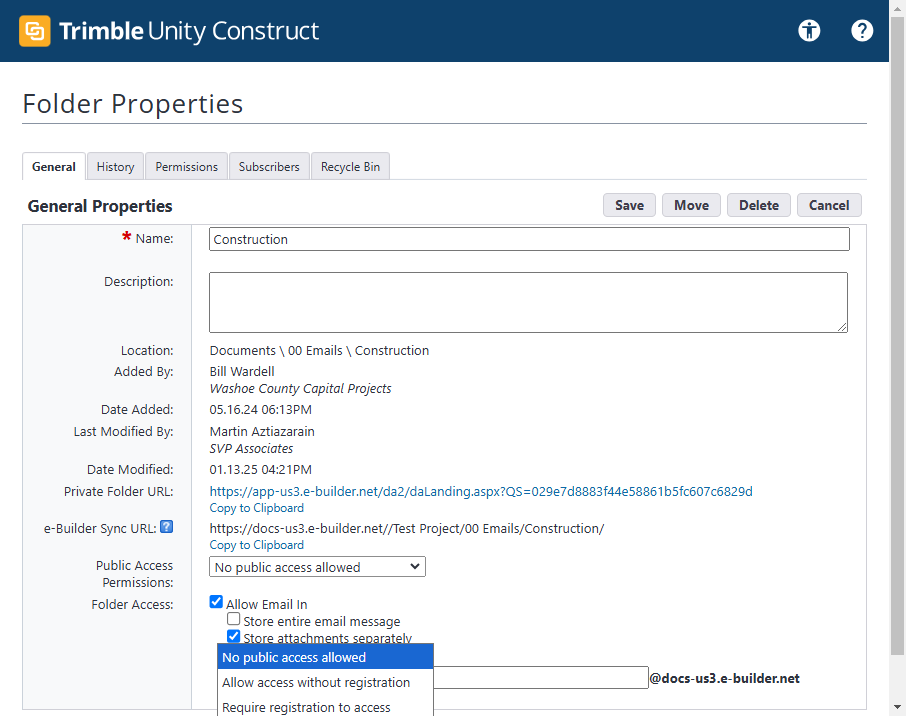
This is an administrative function that allows this to happen because it's a delicate matter. When you make a folder public, you're essentially enabling someone outside of eBuilder to access and manage documents in the folder with you. This can be helpful in some cases but dangerous in others. Ensure the folder doesn't contain overly sensitive information before enabling this feature. Choosing either "allow access without registration" or "require registration to access" will make the folder public. After clicking save and returning to the properties, you'll notice a few additional options appear.
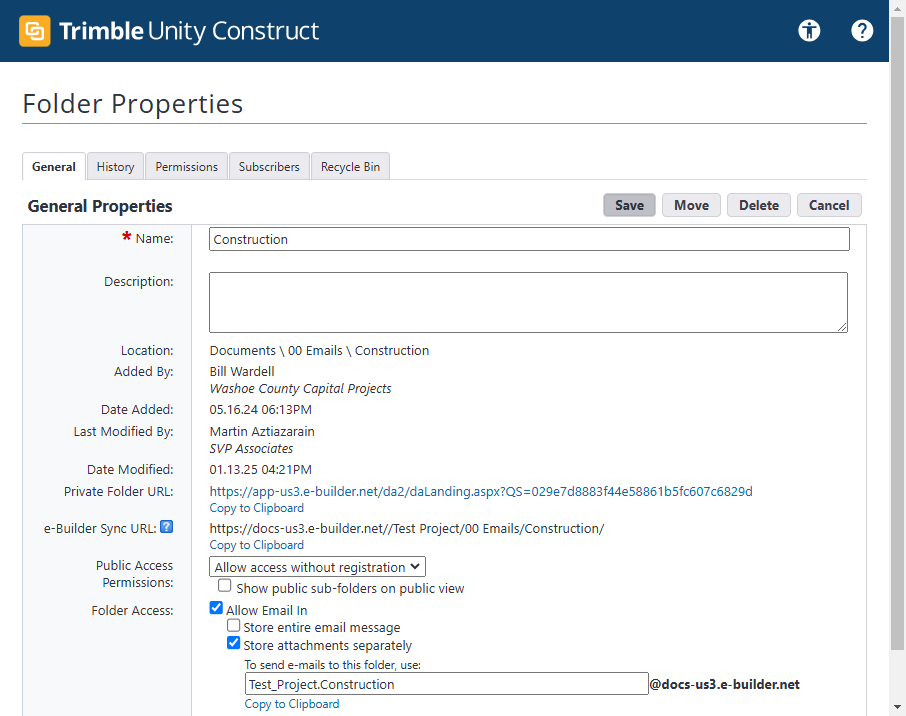
First, you will have a public folder URL.
If I copy this and open my browser to paste the URL, it will prompt me to sign in. This is because I'm forcing it to require registration. After signing in, it will display the folder I've selected.
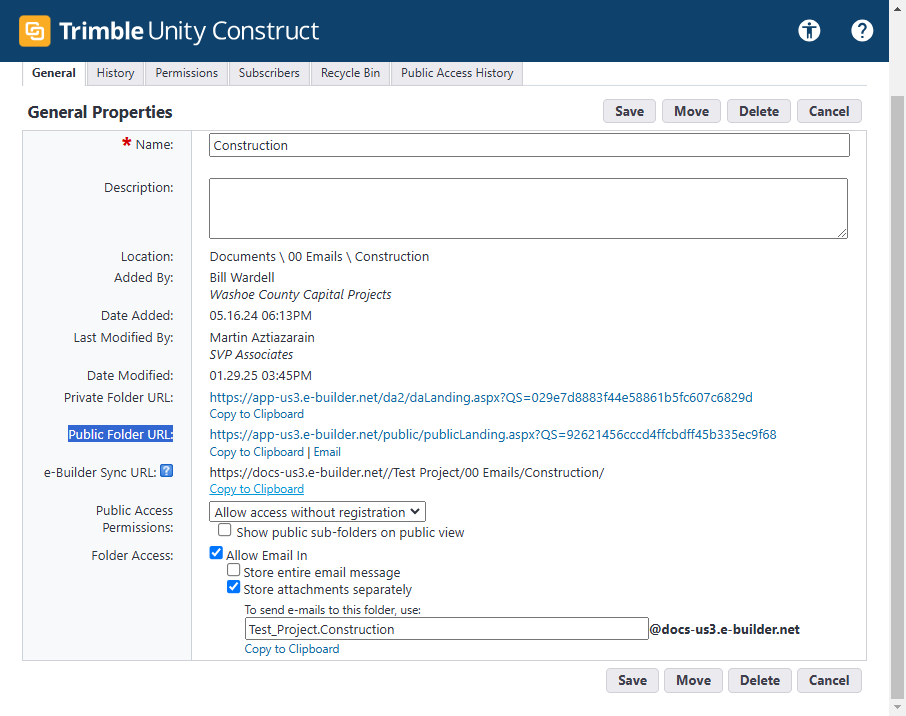
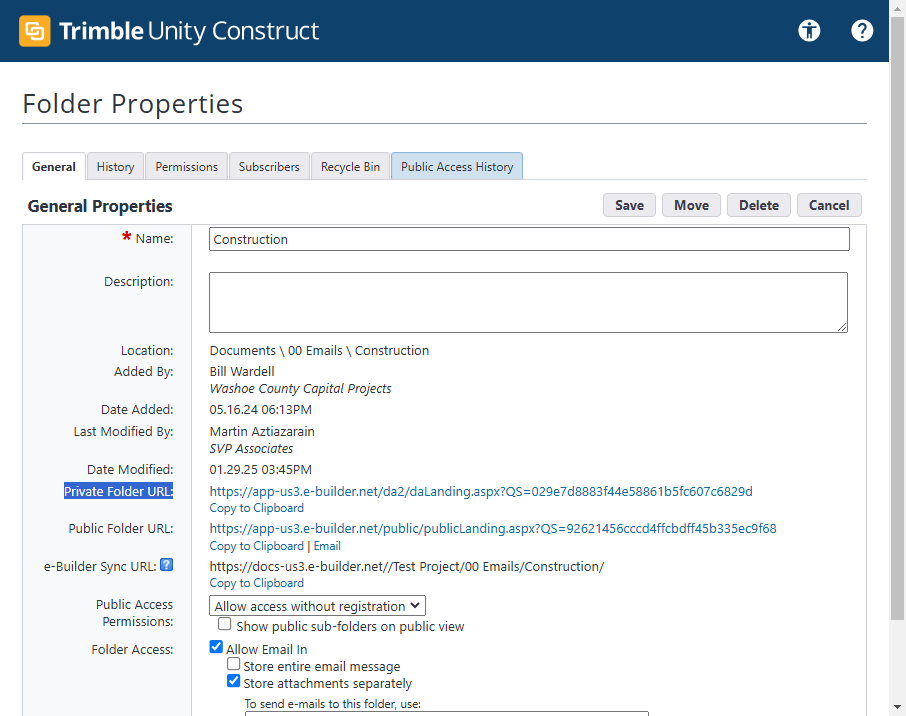
That's the purpose of that function. If I send it to a private folder URL, it will prompt the person to log into eBuilder and ensure they have the necessary credentials.
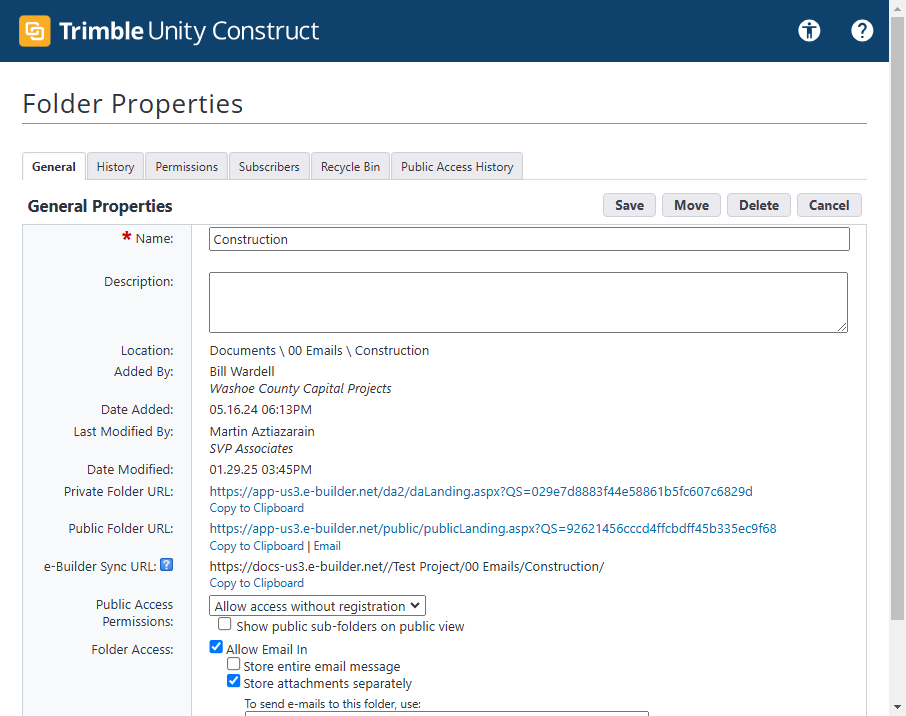
If you click the eBuilder sync URL, you'll see instructions that say "click here to learn more." In short, this feature lets you sync a specific folder with an external system. You can use it to sync with another document management system. It's a bit advanced but useful for understanding the function if needed. Another tab to note is the public access history.
This appears when you make a folder public, showing who has access to it over time. It's not just about giving everyone access without control. You can see who is accessing your folder and their actions, such as downloading, uploading, or creating a new version of a document, depending on the permissions you set.
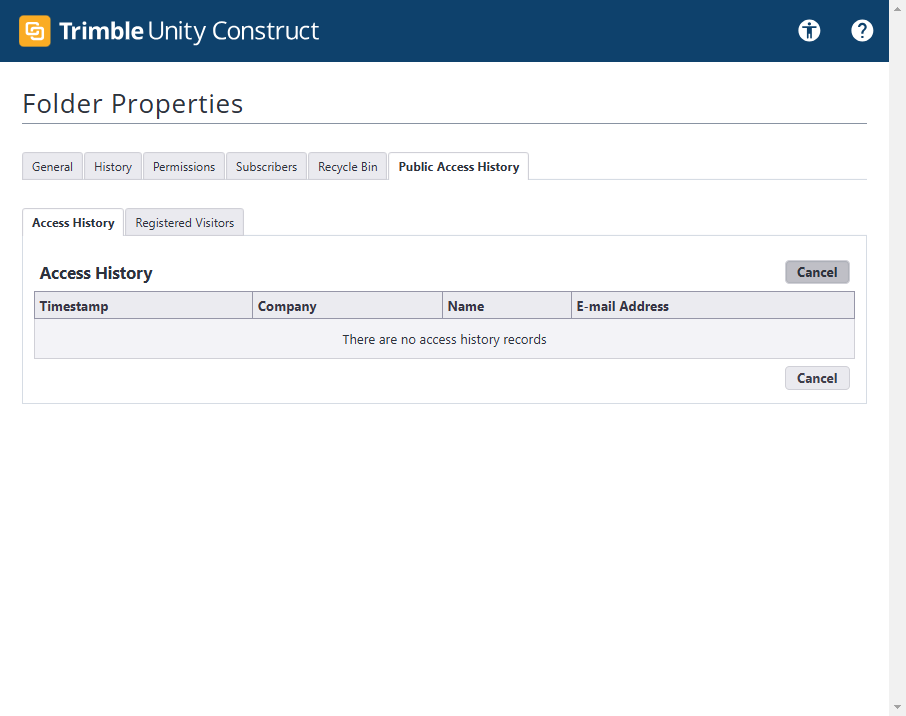
At the end of the day, you can allow someone to access the file folder. You'll also notice that I can access the private URL for my folder here.
I can also access the public URL here. This acts as a shortcut. Regarding the documents module, these are the basic functions. There's much more you can do within the module, but this training serves as a simple introduction. The functions I've shared are straightforward and help you build confidence in the system, allowing you to upload and manage your documents easily. If you have more questions about this module or need advanced training, please contact an administrator at Washoe County. It was a pleasure training you today.
Thank you for watching.