Icon

How to Onboard a New Client for Lead Generation

Learn how to onboard a new client by updating their GoHighLevel subaccount, applying template snapshots, and launching a Meta leads campaign.

By Pommes Fritten

This guide explains how to onboard a new client by updating their GoHighLevel subaccount, loading the necessary template snapshots, and initializing their Meta lead generation campaign. Completing this ensures all platforms are properly configured and integrated before launching the client's ad traffic.

This workflow is intended for onboarding specialists or account managers configuring a brand-new client account or resetting a previously churned client's environment.

Part 1: Configure the GoHighLevel Subaccount

Ensure you have the client's onboarding data accessible (e.g., from an onboarding Google Sheet) before you begin.
1
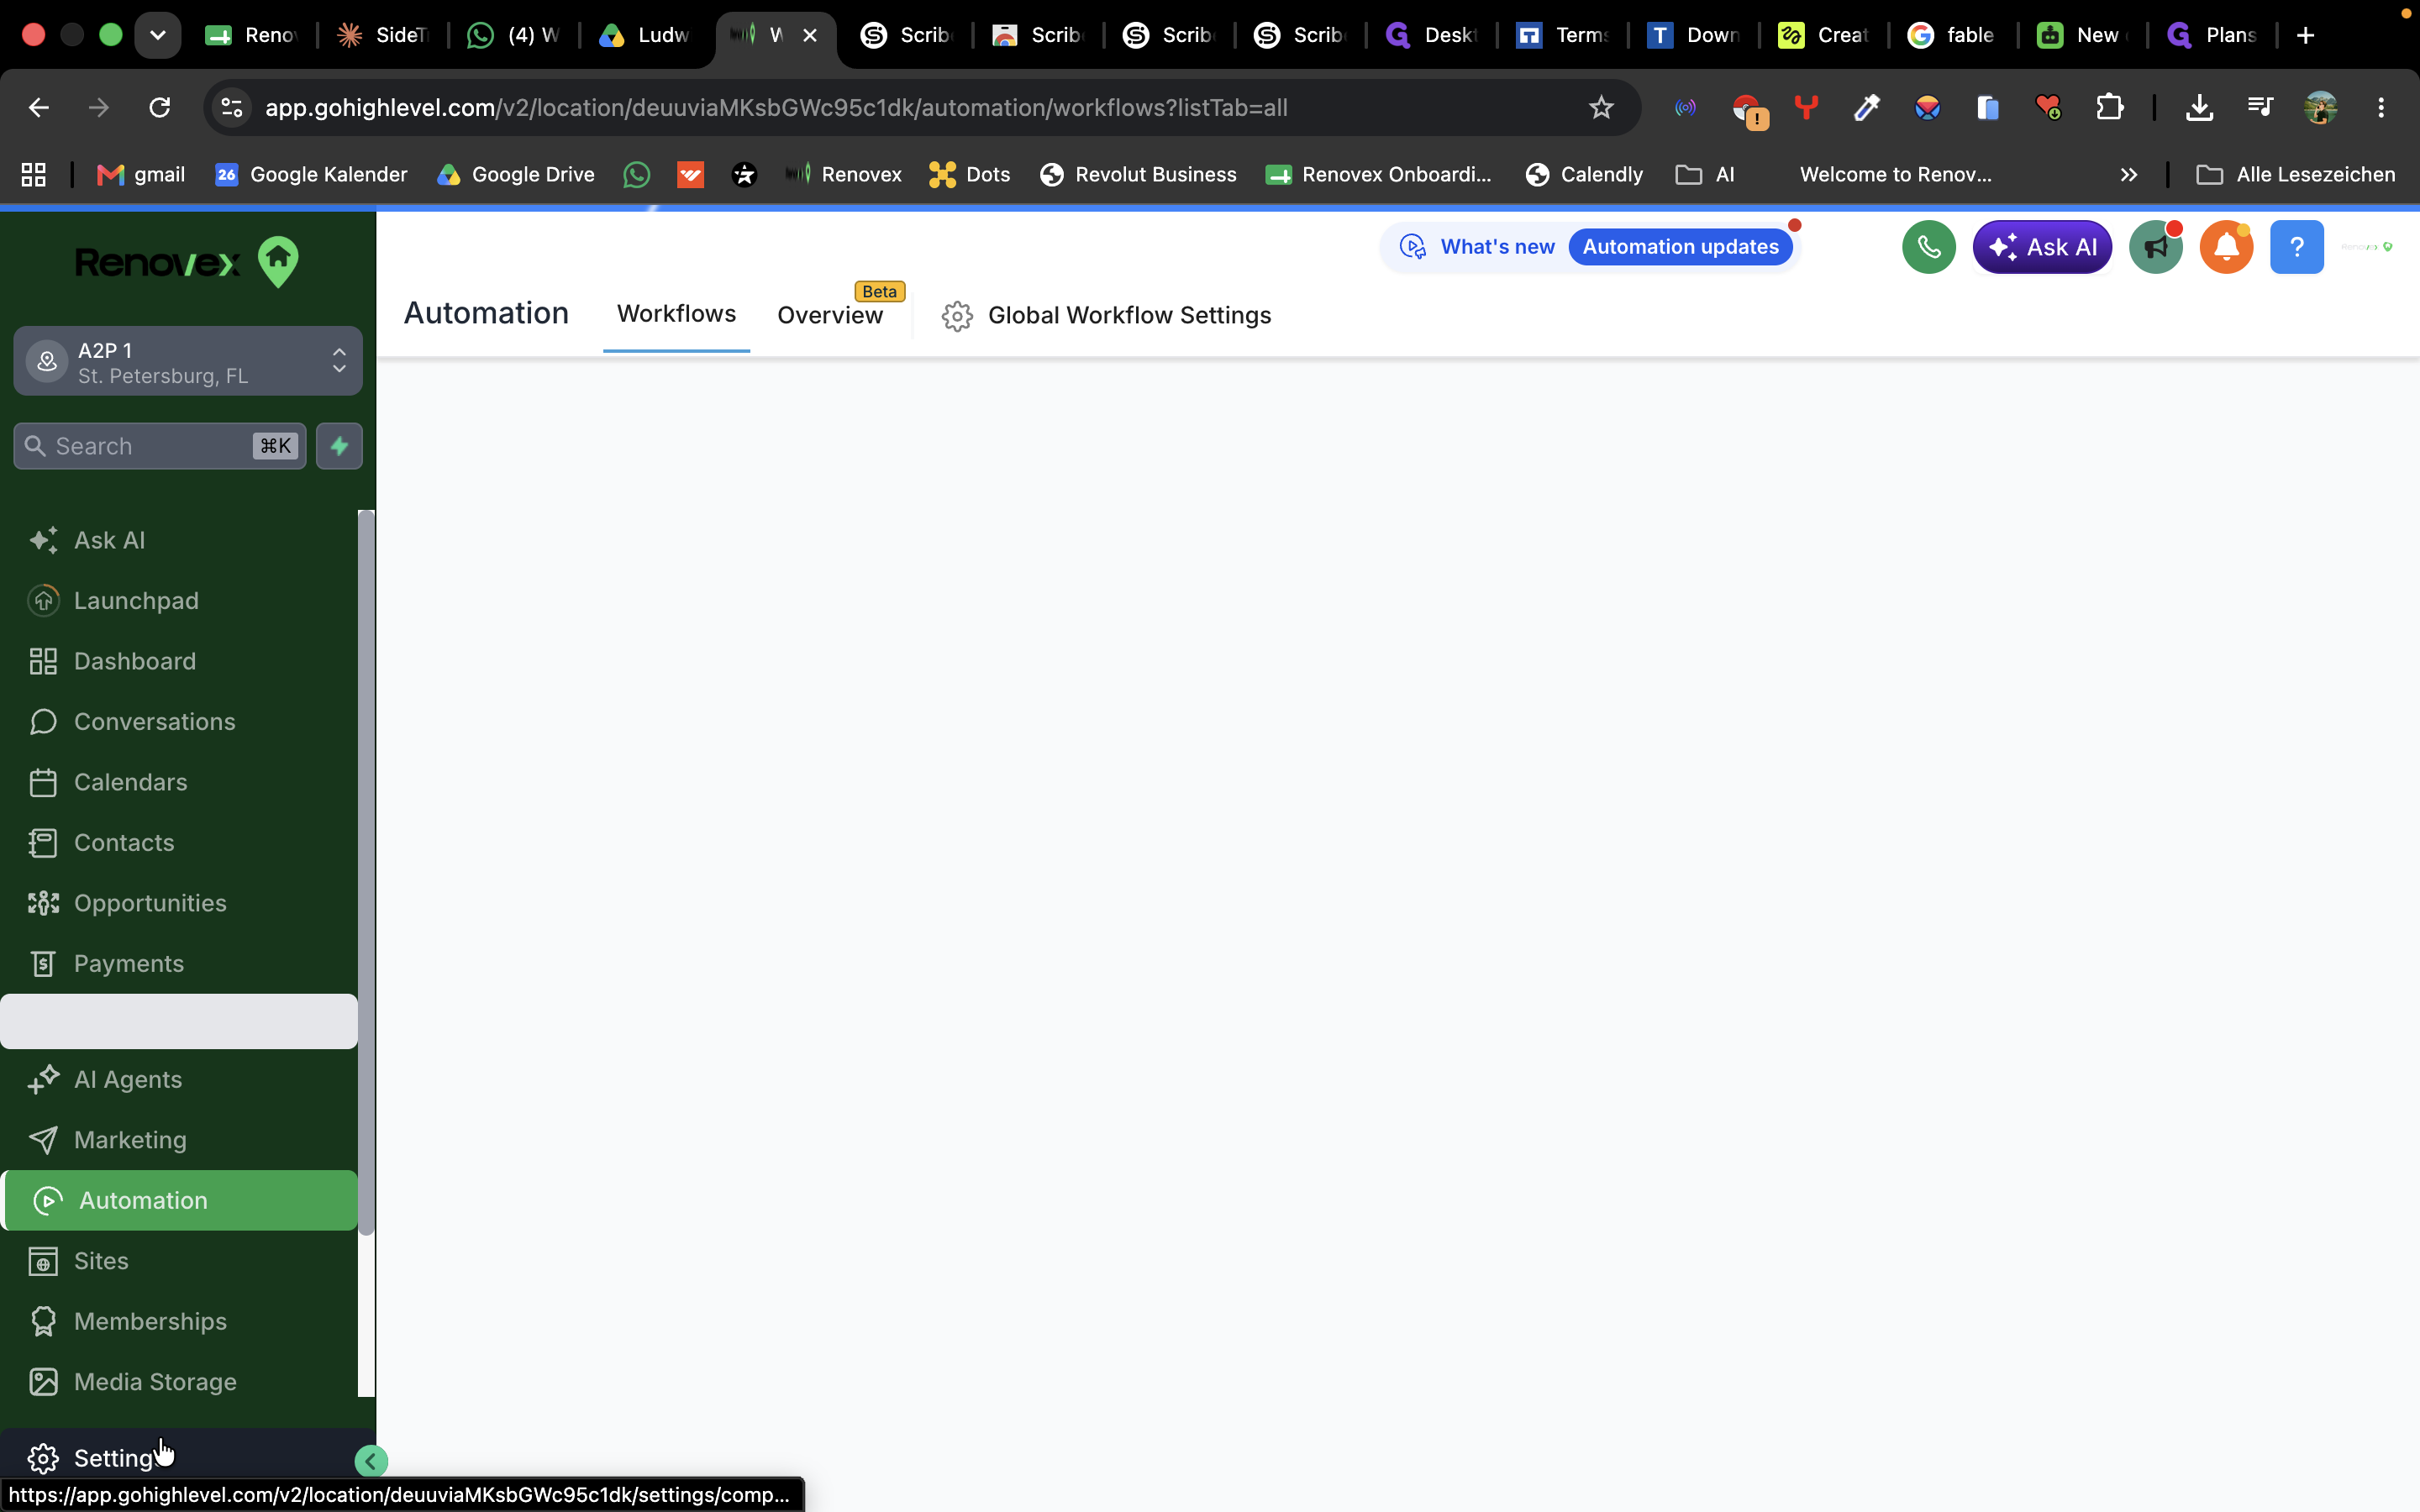
Click Settings in the bottom-left corner of the subaccount.
Step #1: Click Settings in the bottom-left corner of the subaccount.
2
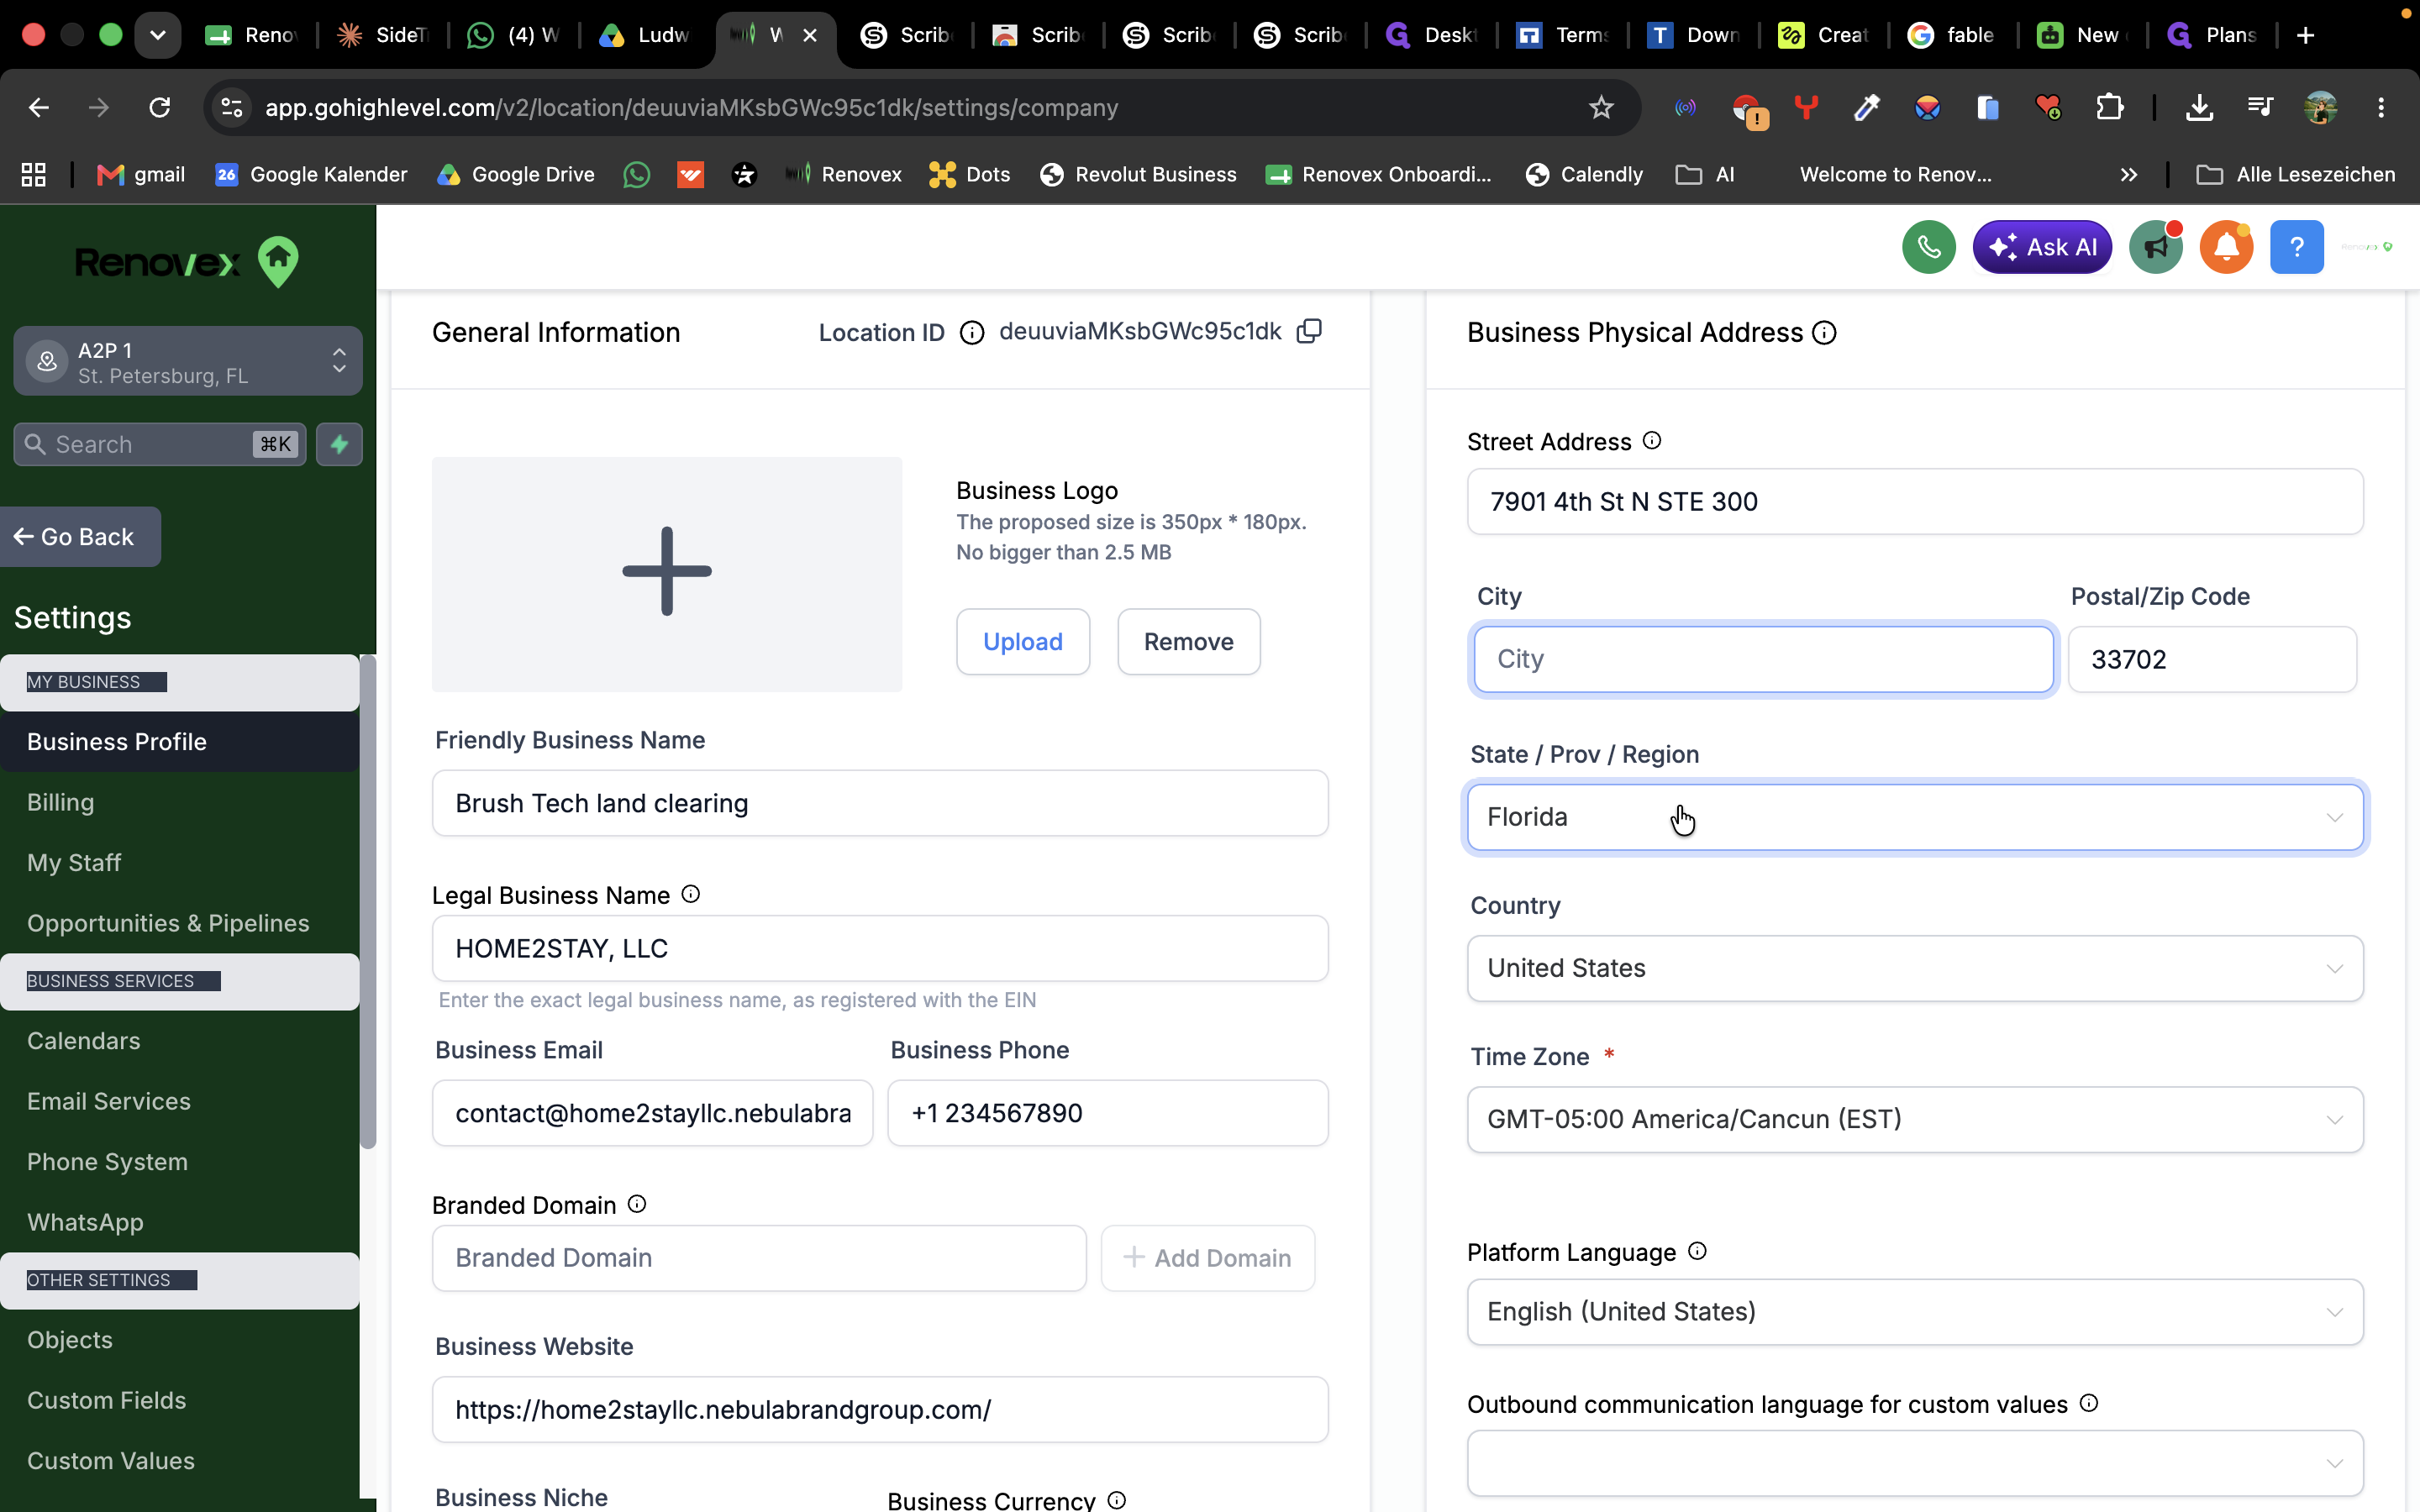
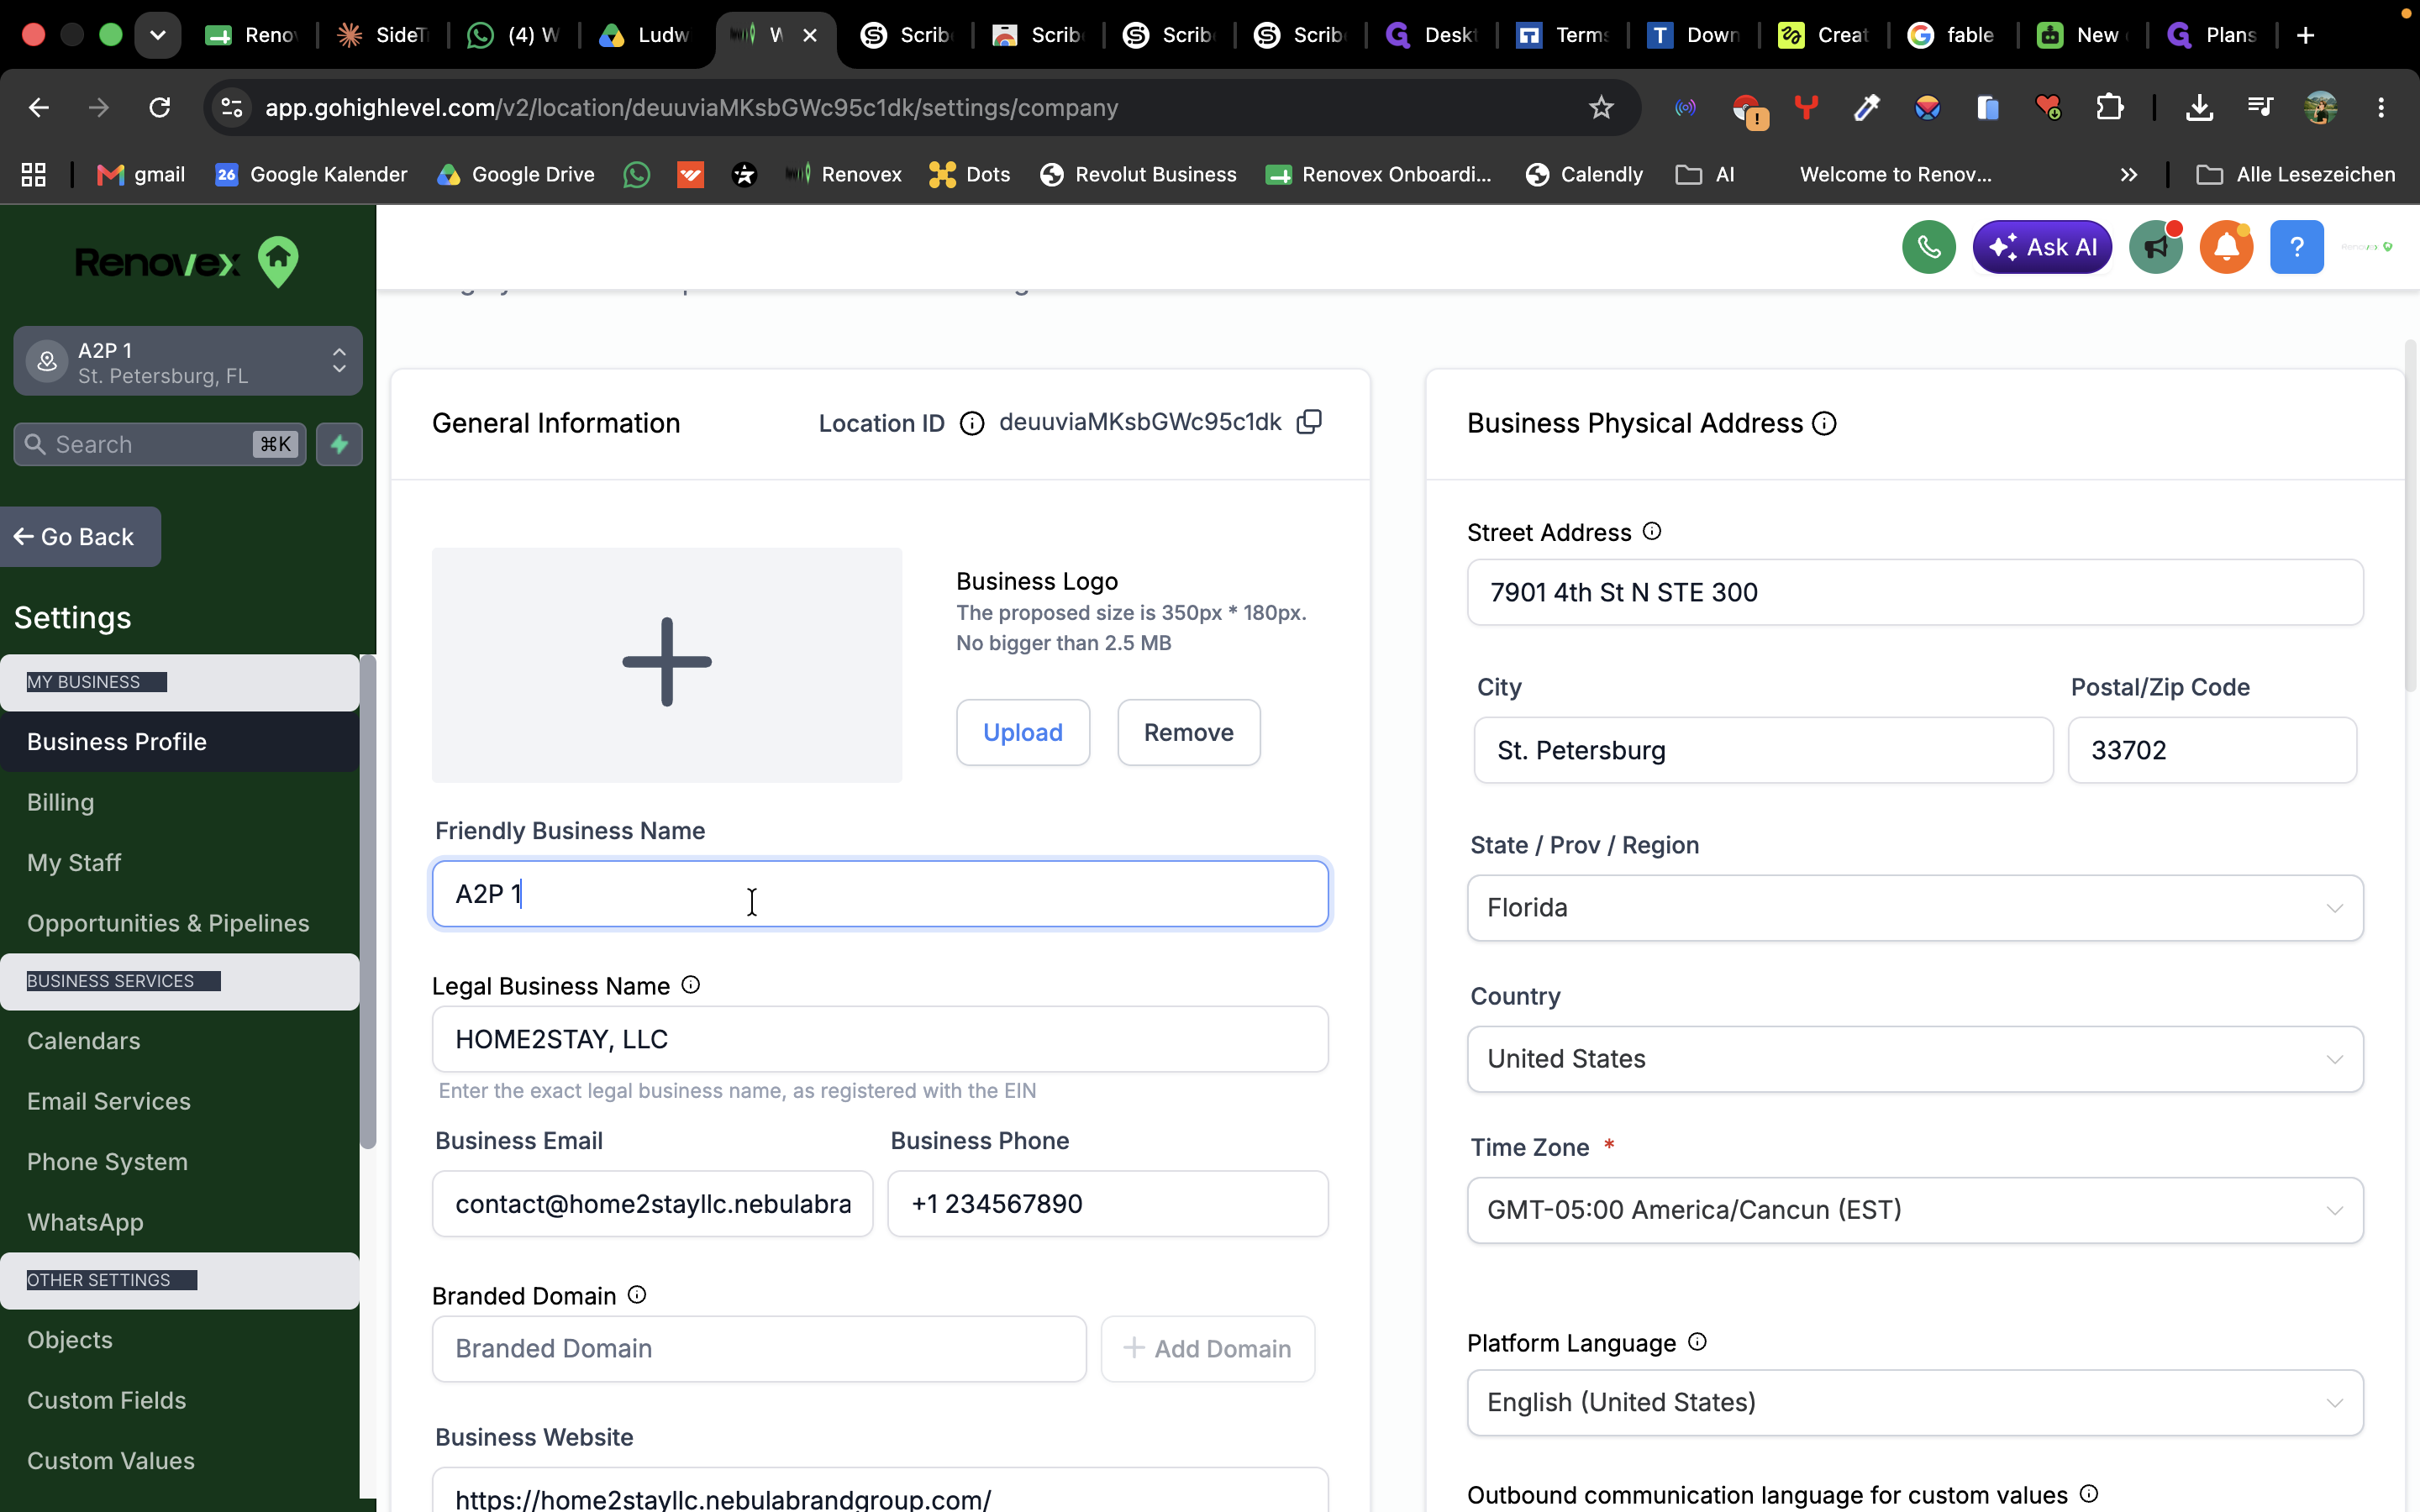
Enter the client's business name into the Friendly Business Name field.
Step #2: Enter the client's business name into the Friendly Business Name field.
3
Select the appropriate state from the State/Prov/Region dropdown menu.
Step #3: Select the appropriate state from the State/Prov/Region dropdown menu.
4
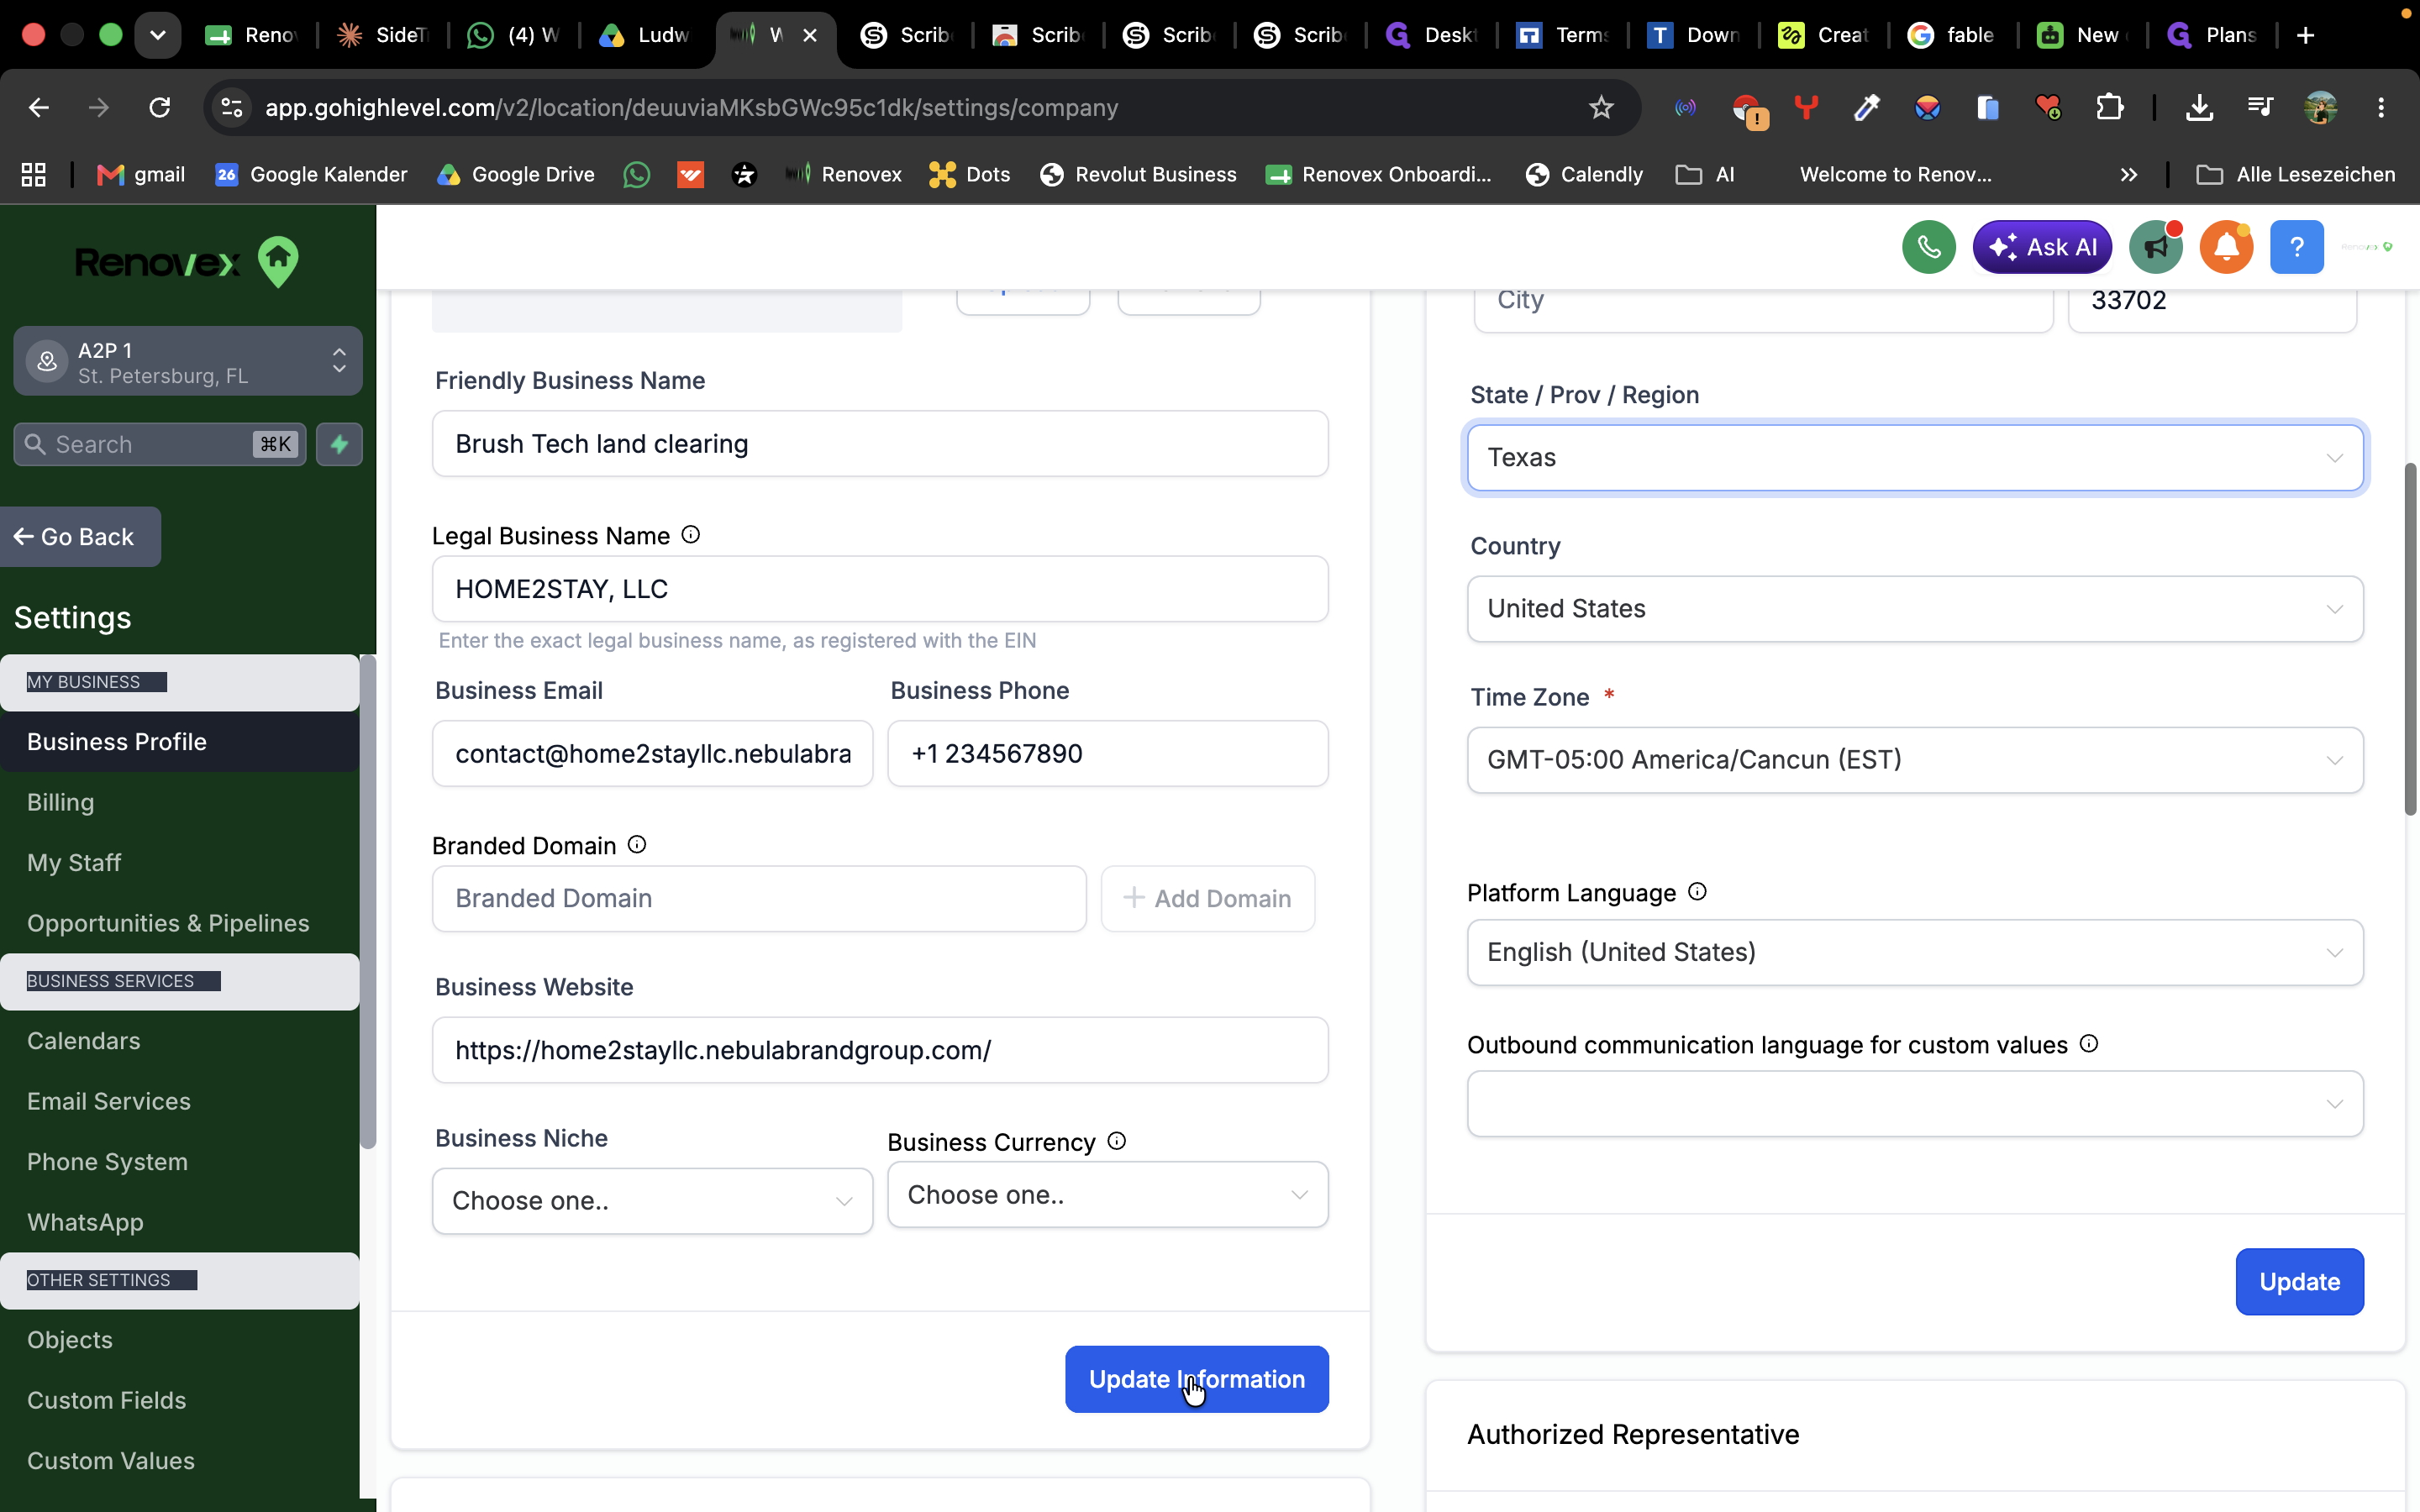
Click Update Information to save the changes.
Step #4: Click Update Information to save the changes.

Part 2: Load the Subaccount Snapshot
5
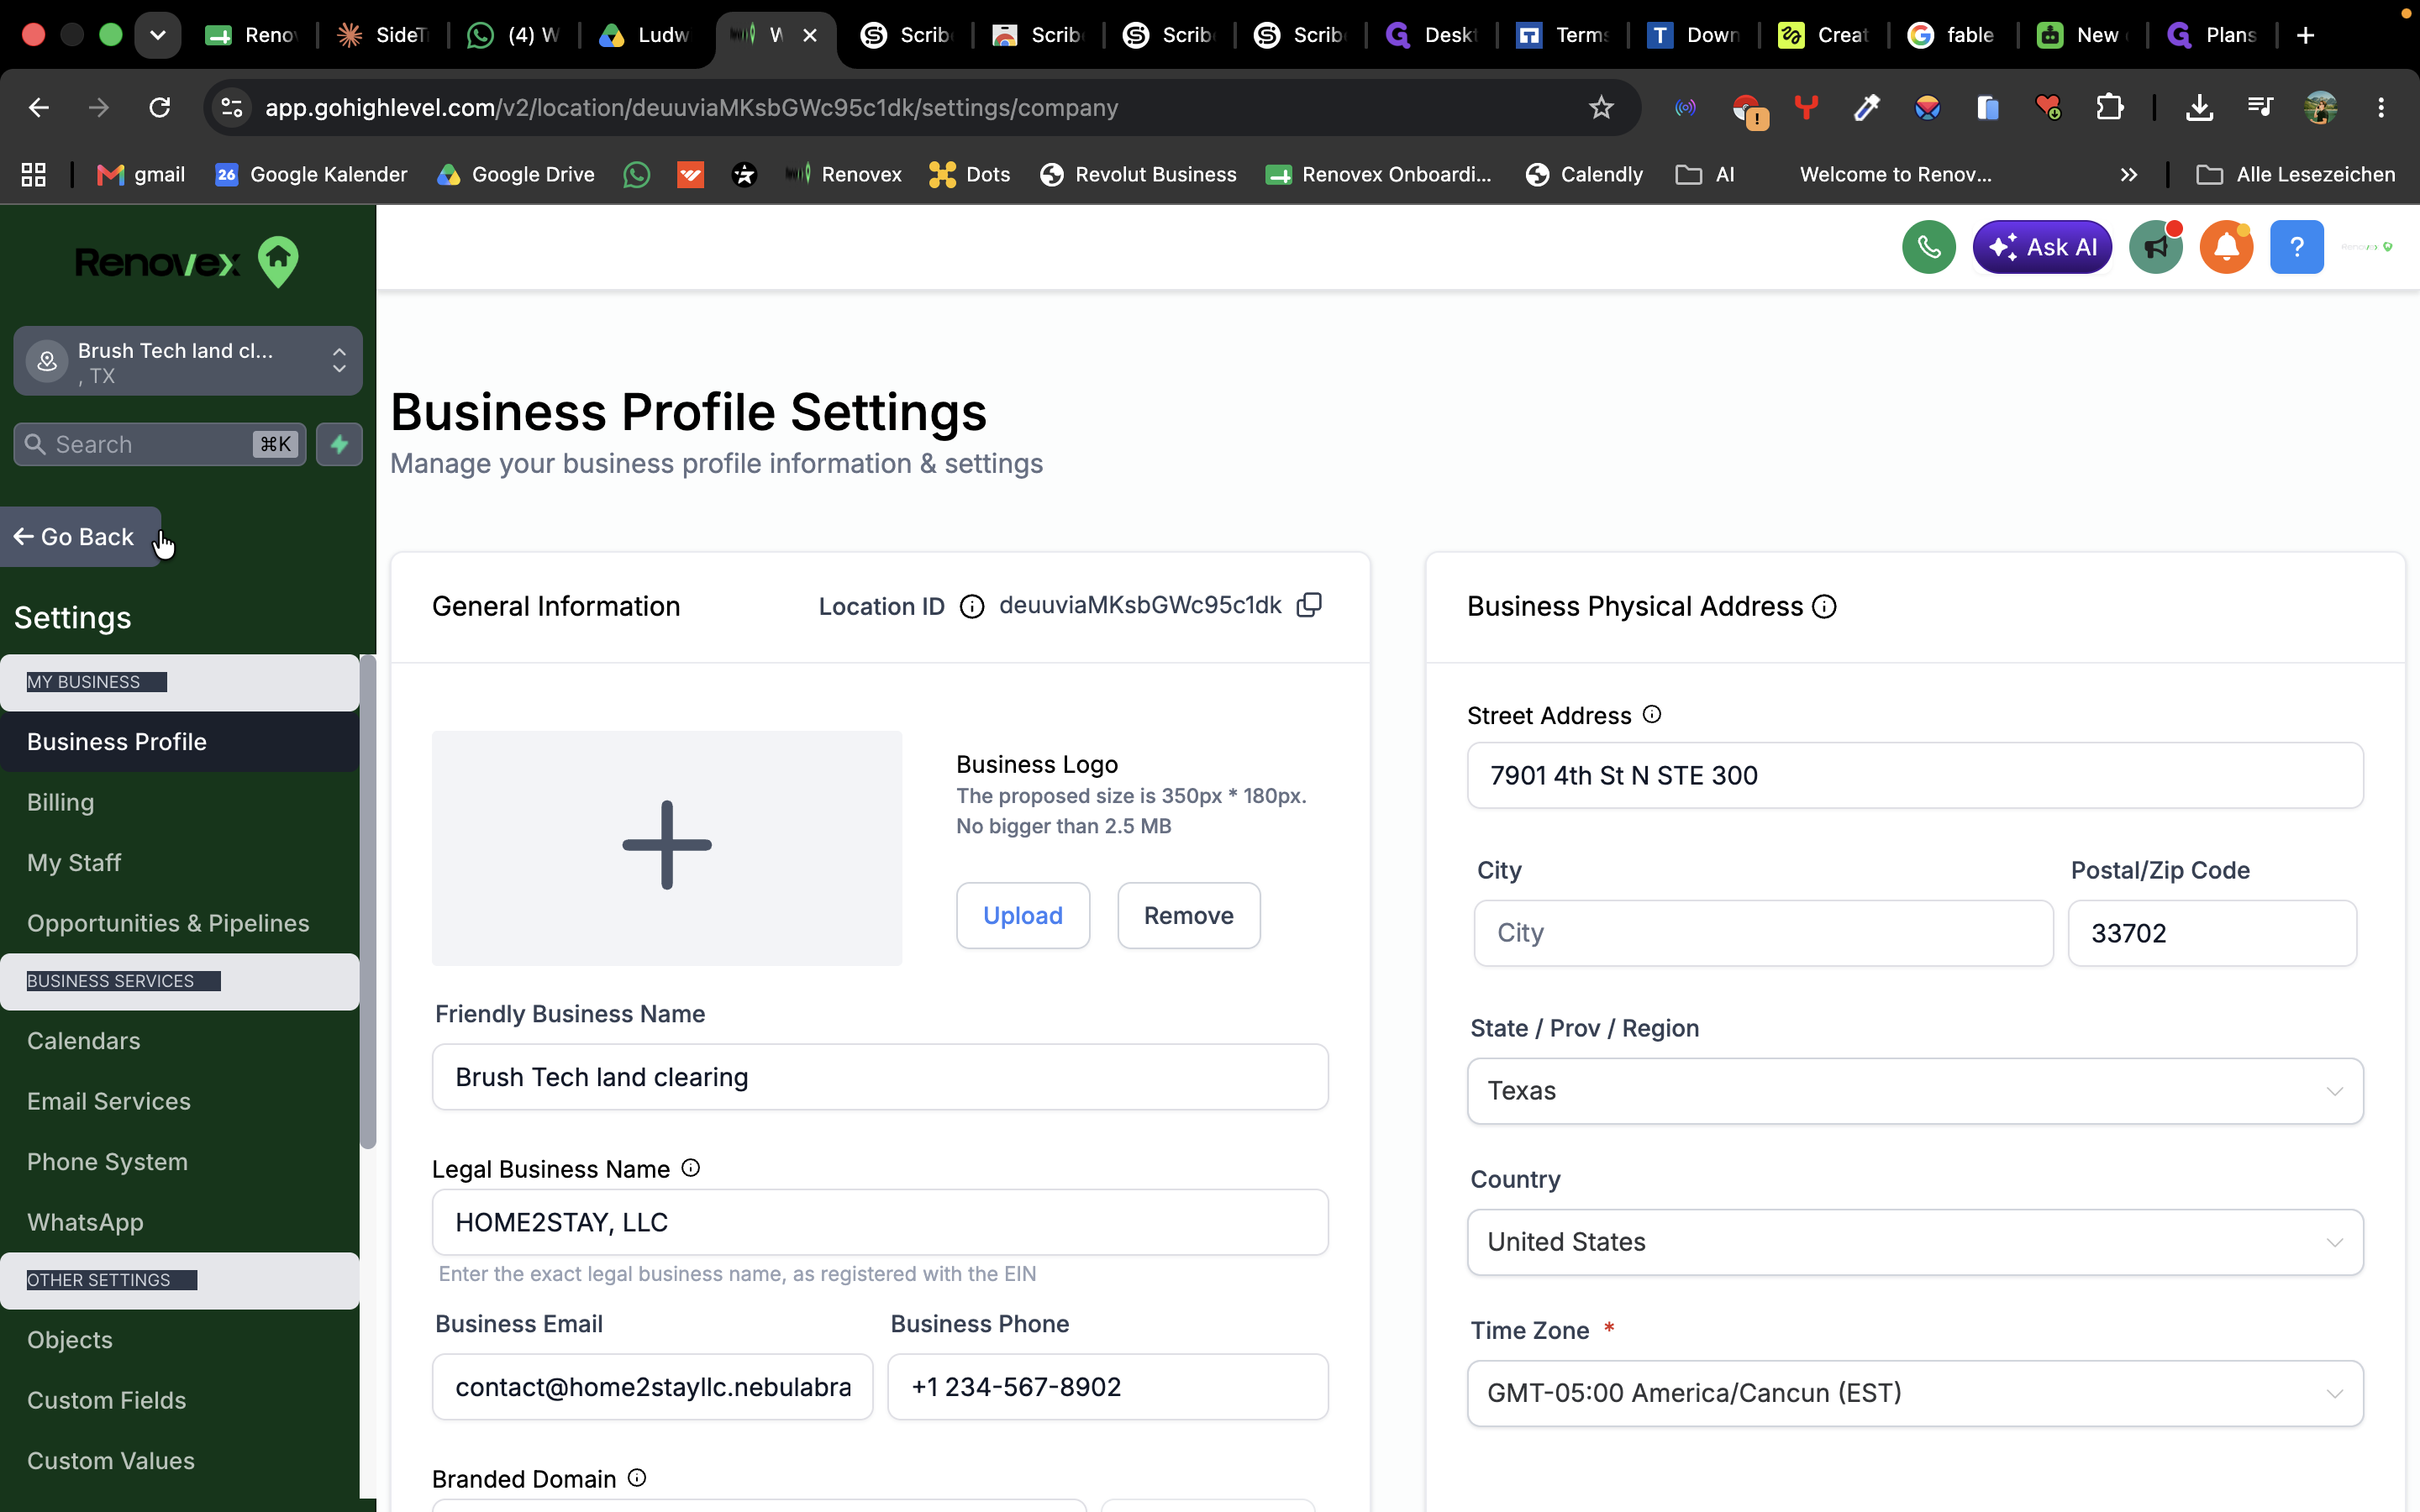
Click Go Back in the sidebar to return to the main dashboard.
Step #5: Click Go Back in the sidebar to return to the main dashboard.
6
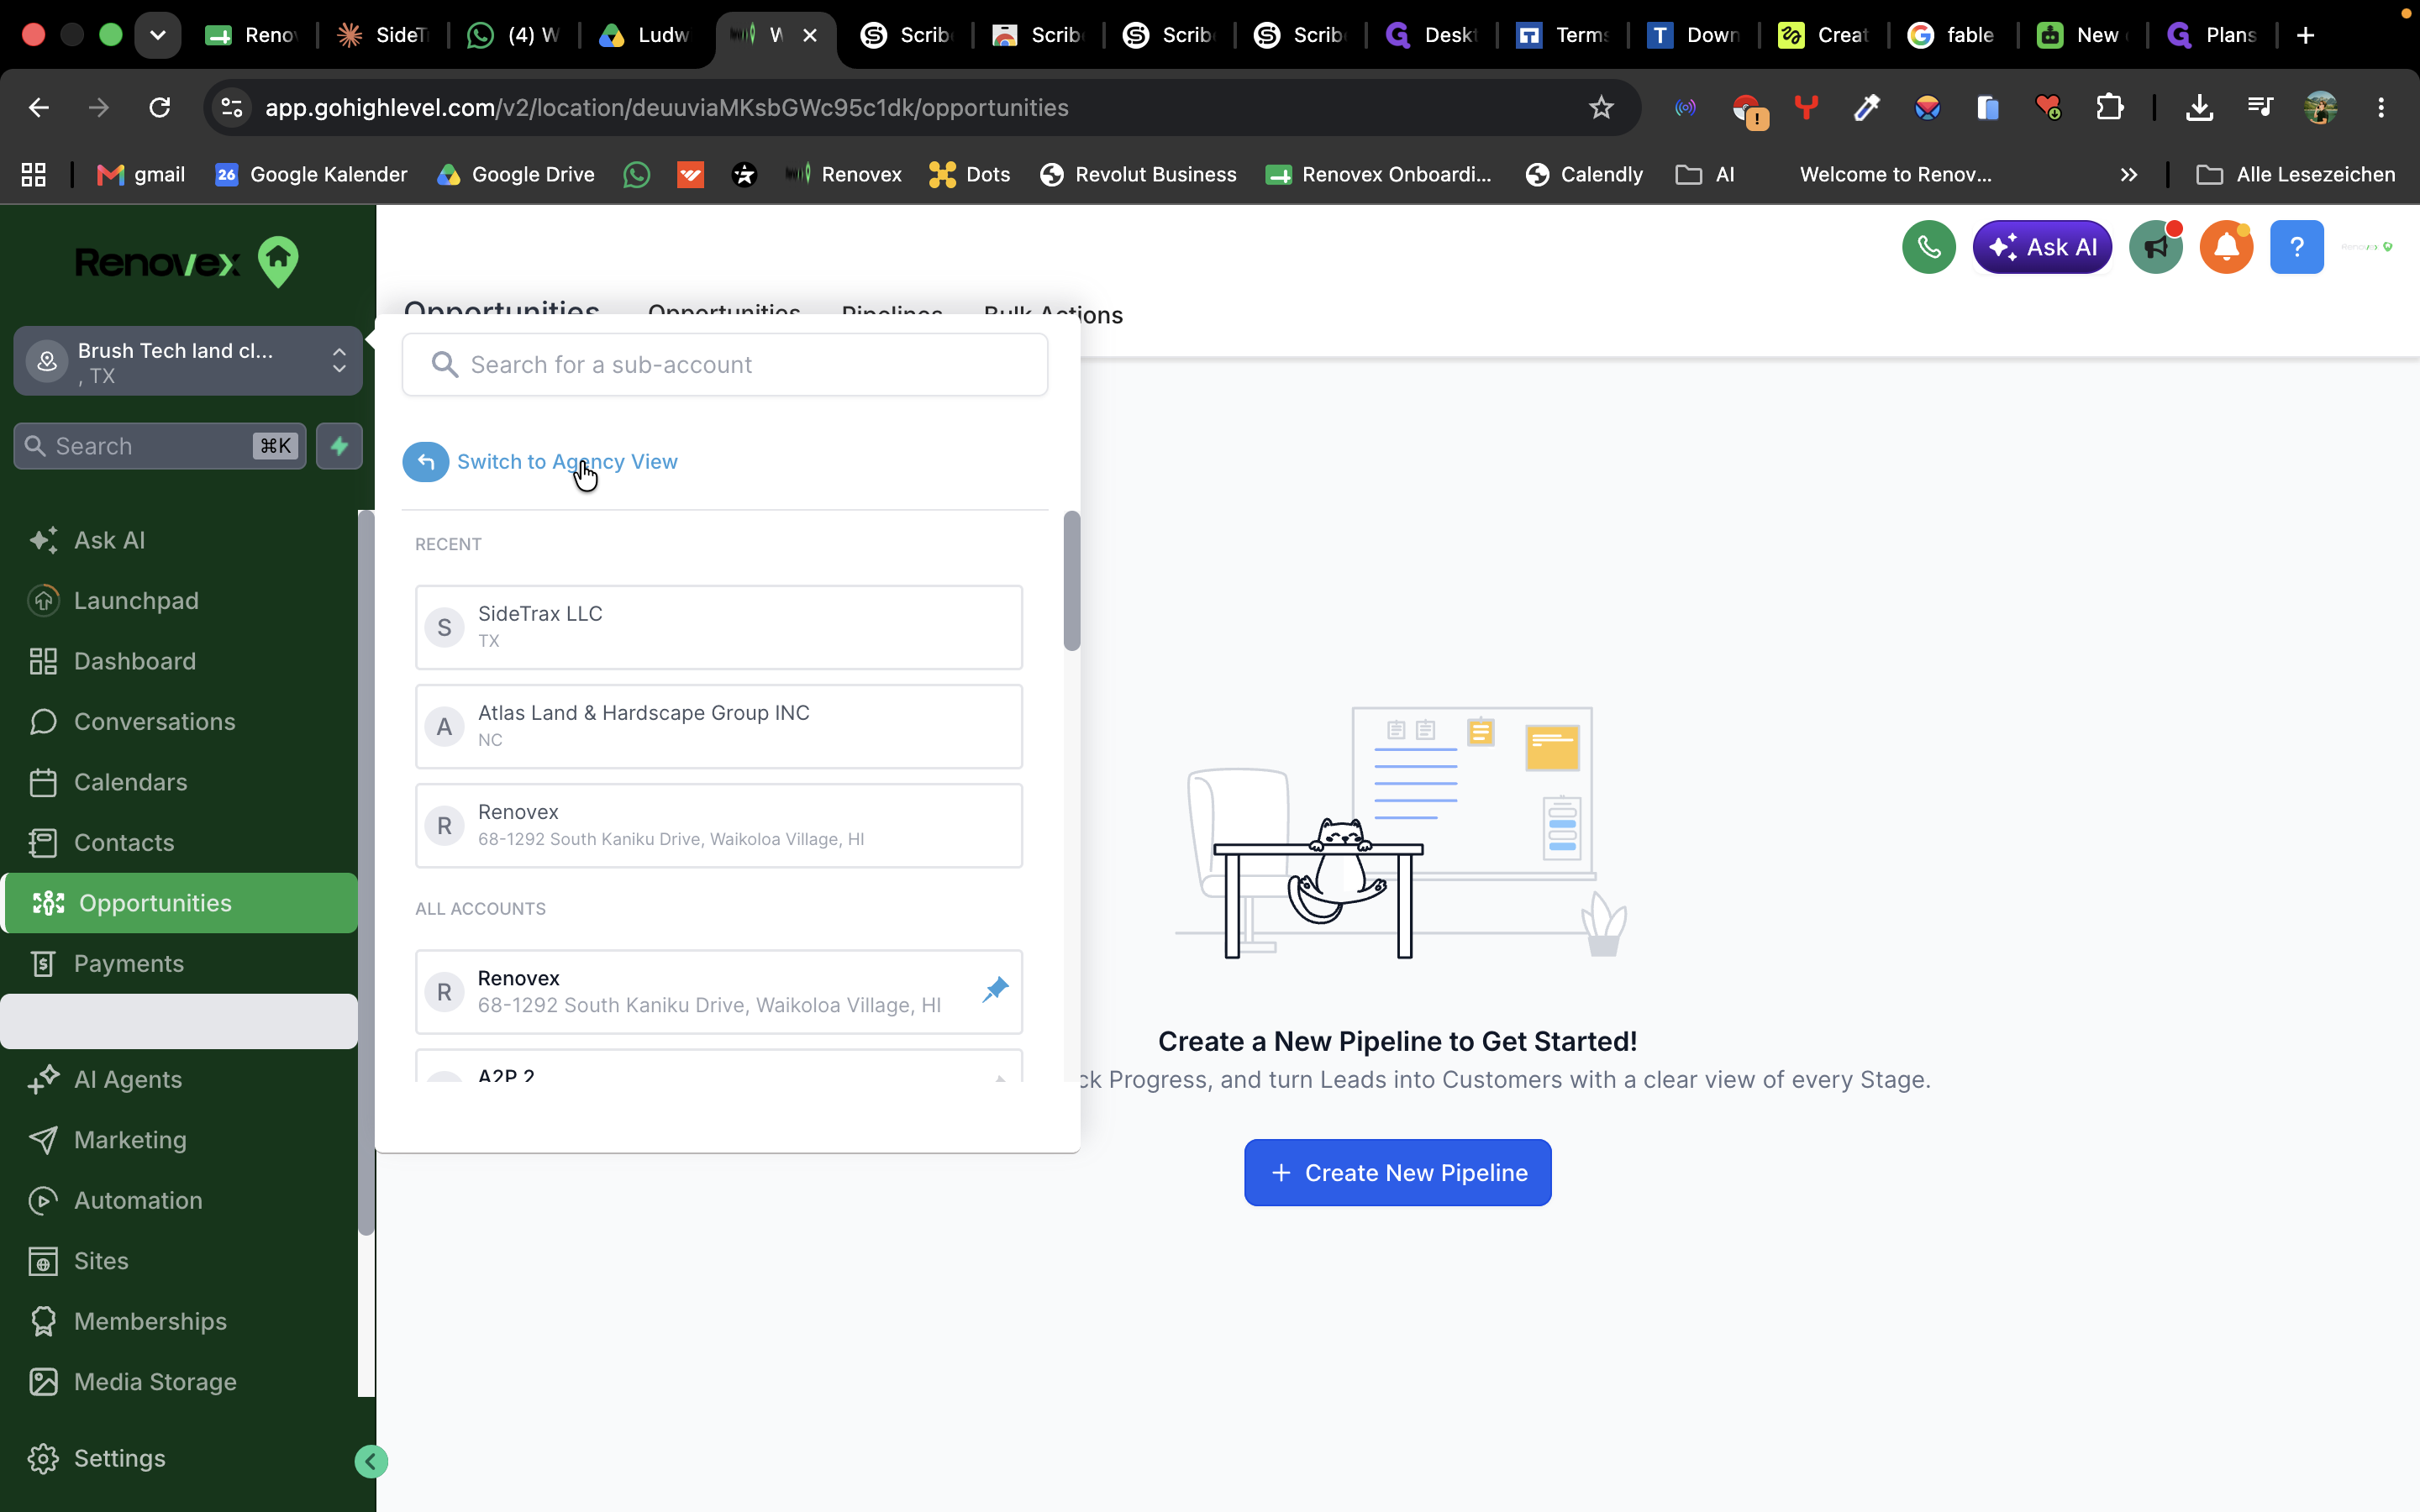
Click Switch to Agency View from the top-left menu.
Step #6: Click Switch to Agency View from the top-left menu.
7
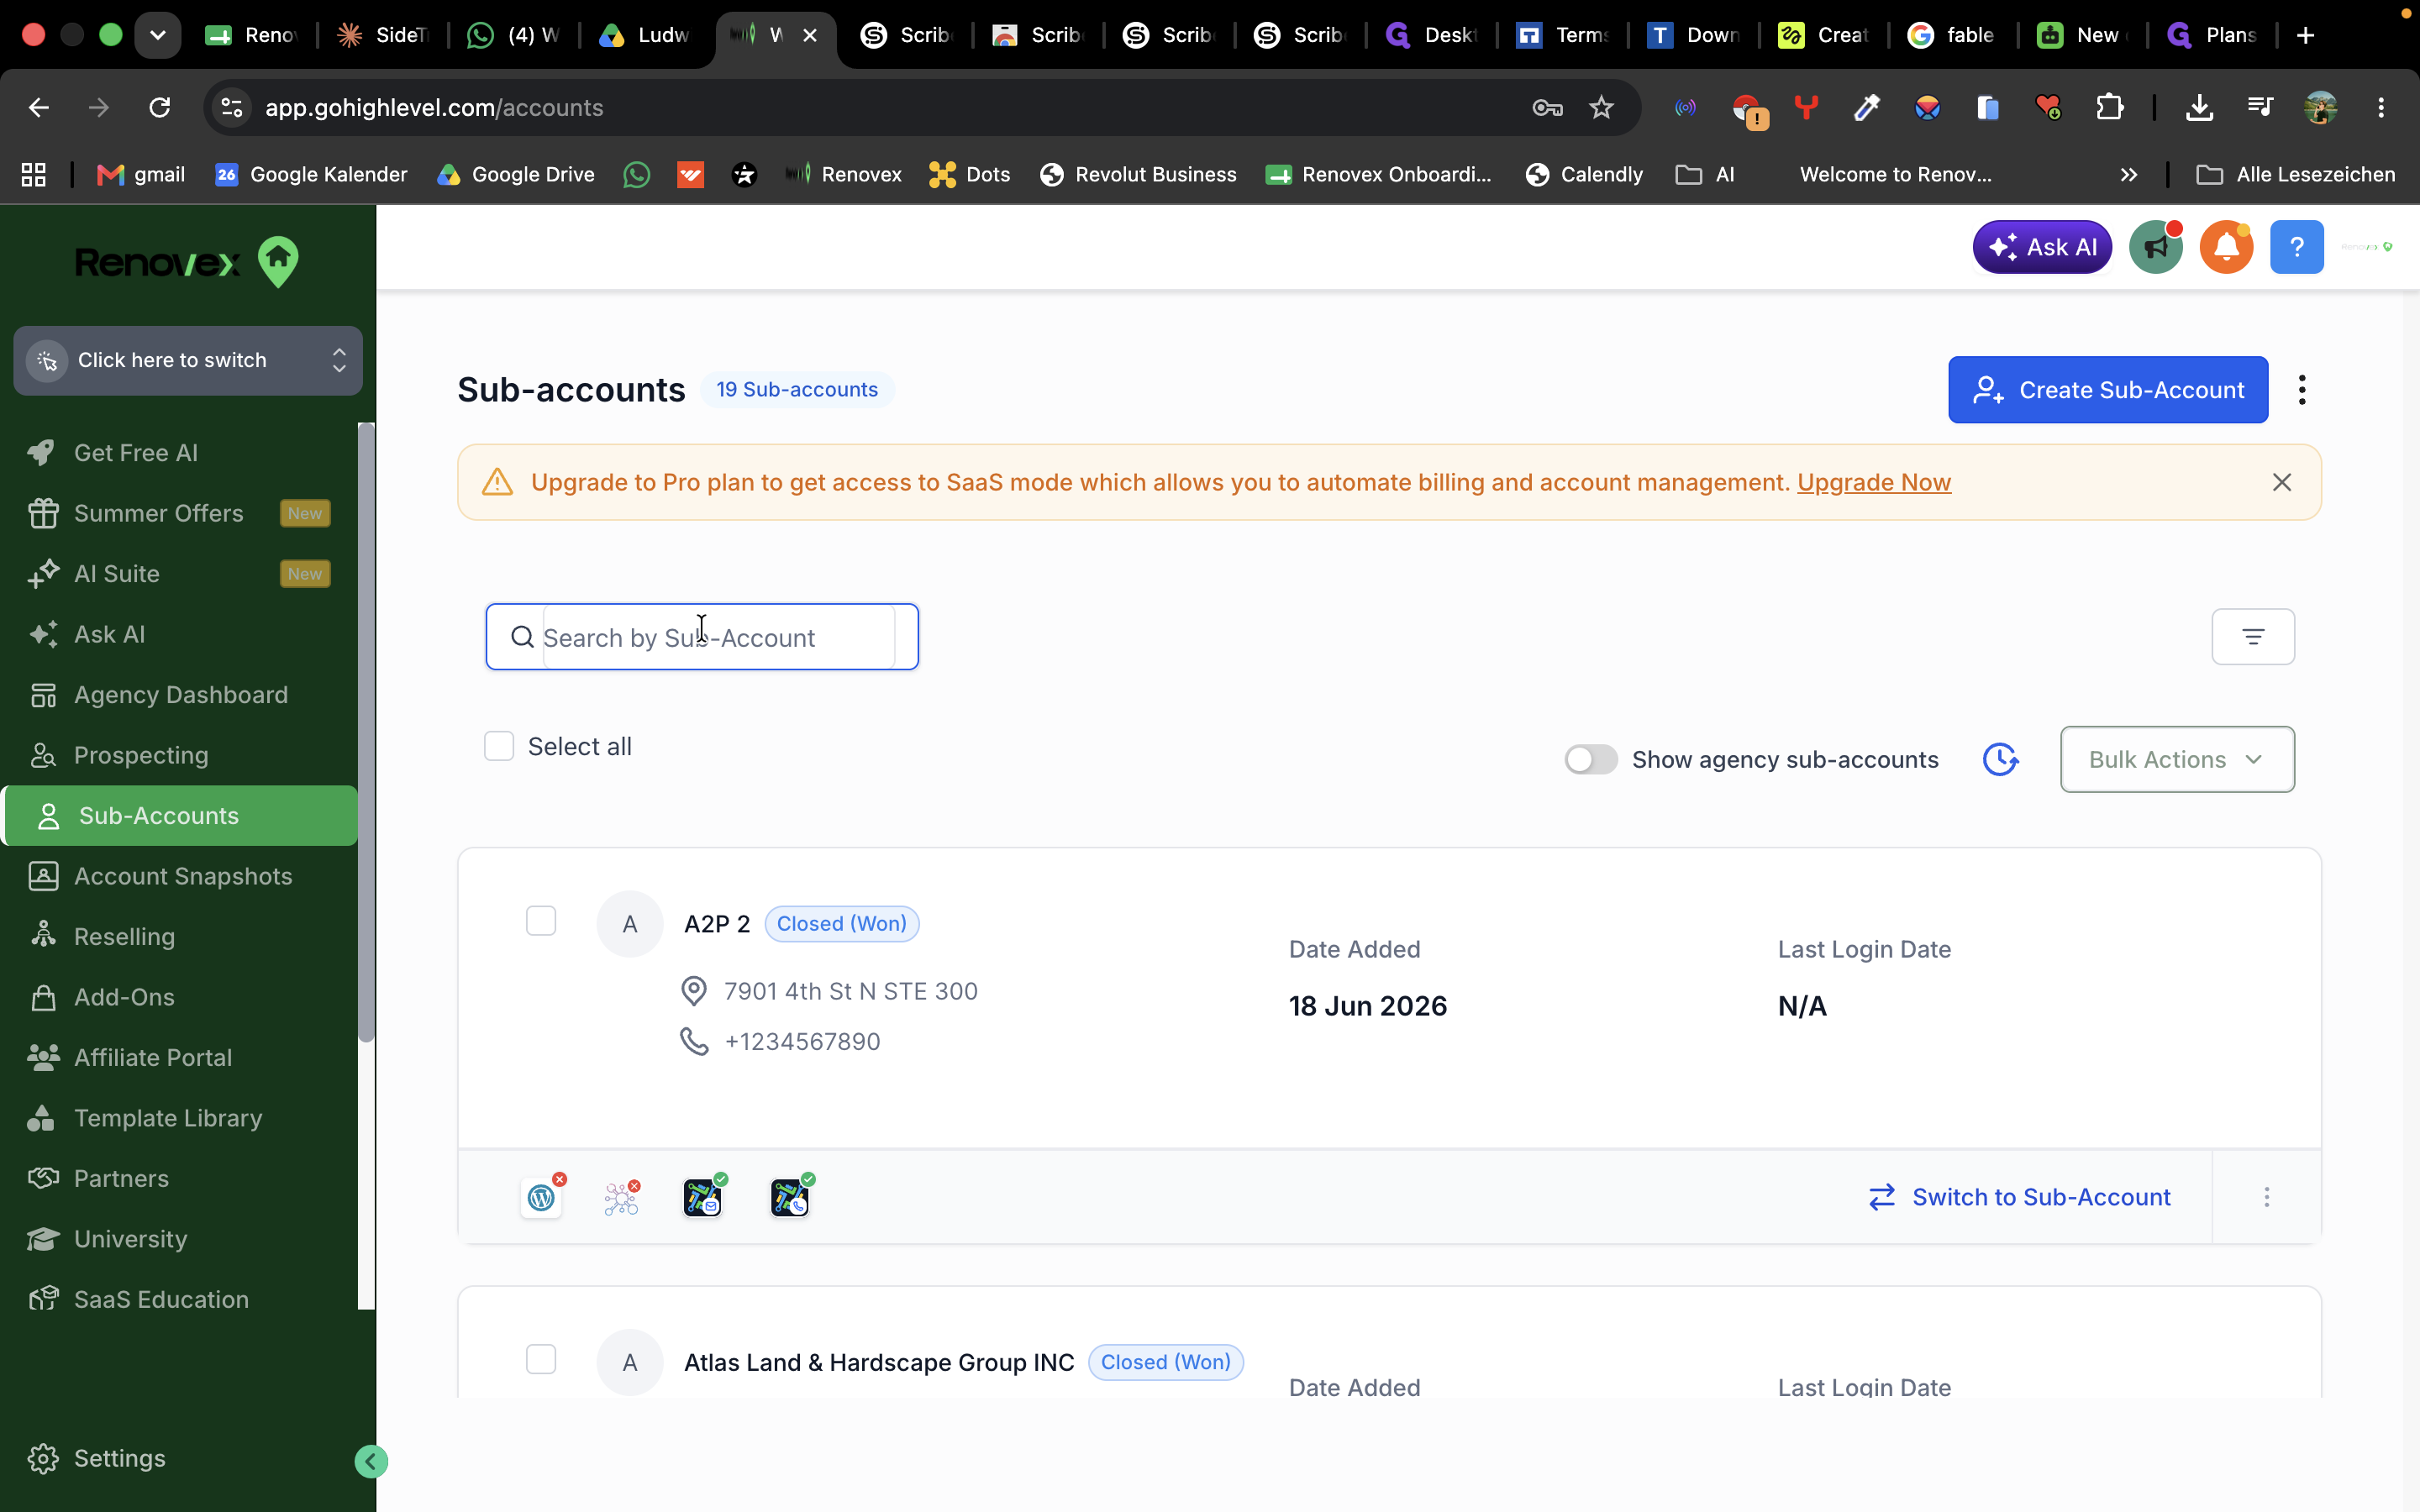
Search for your client's subaccount and select it.
Step #7: Search for your client's subaccount and select it.
8
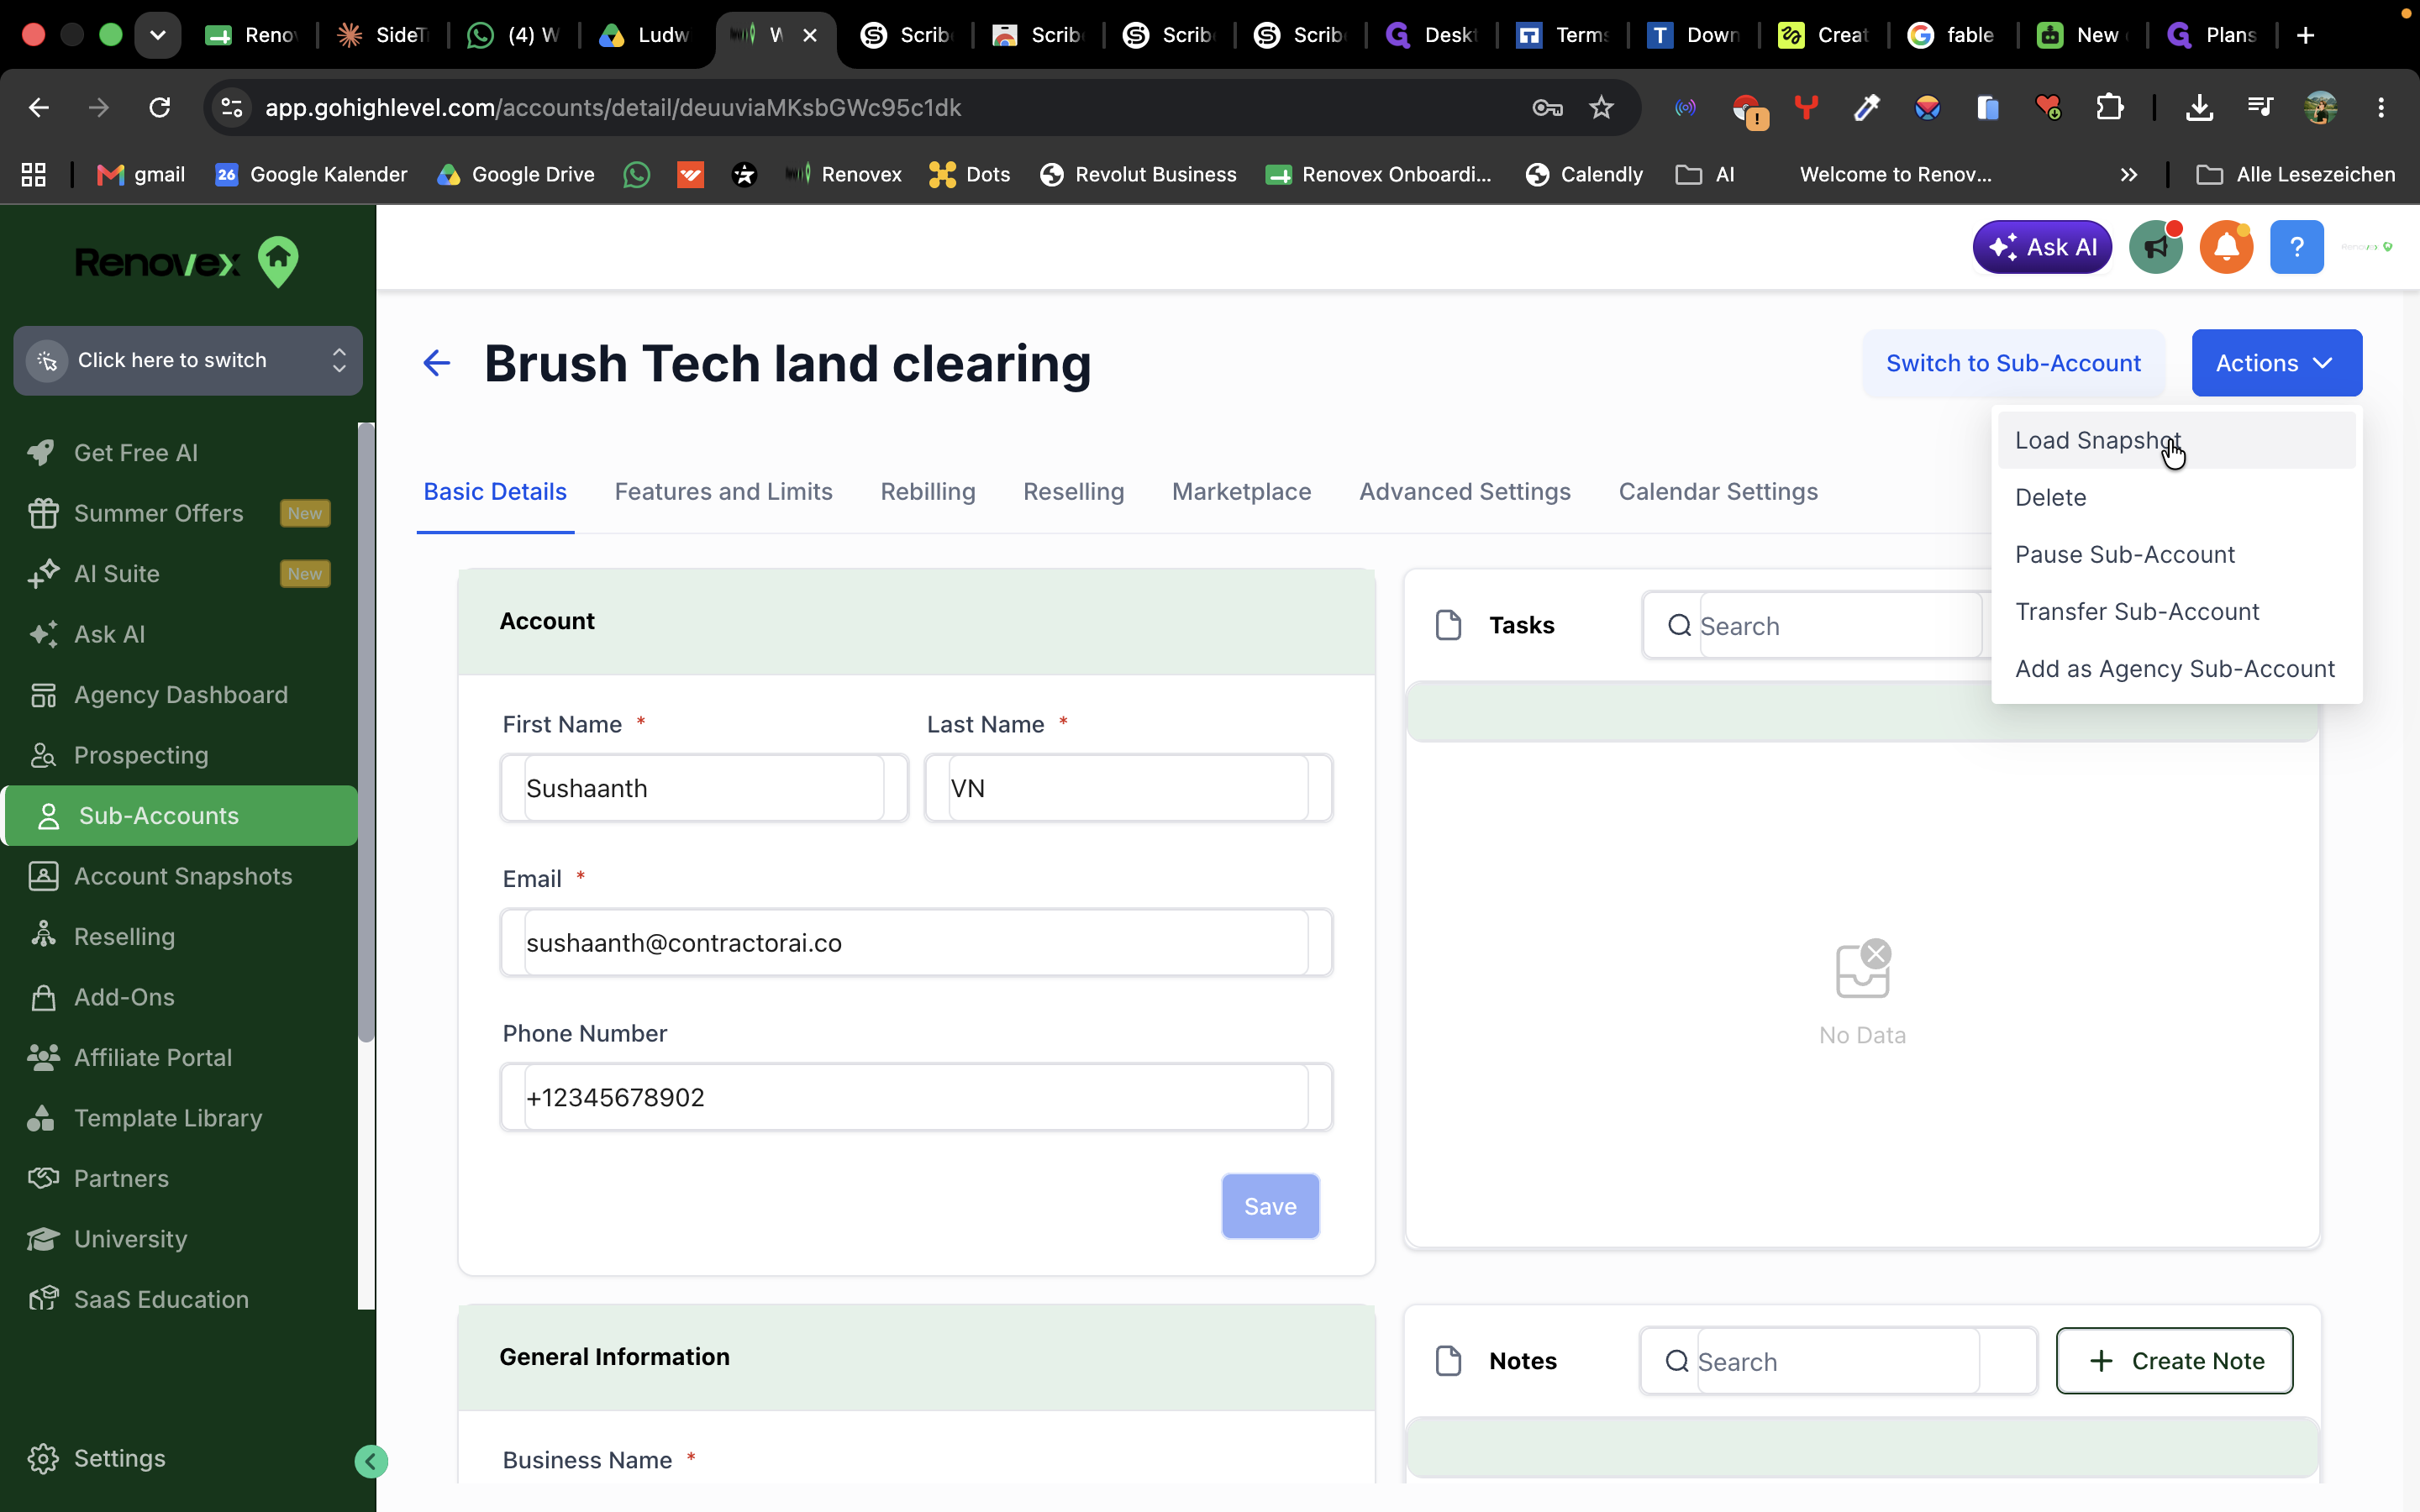
Open the Actions dropdown menu and select Load Snapshot.
Step #8: Open the Actions dropdown menu and select Load Snapshot.
9
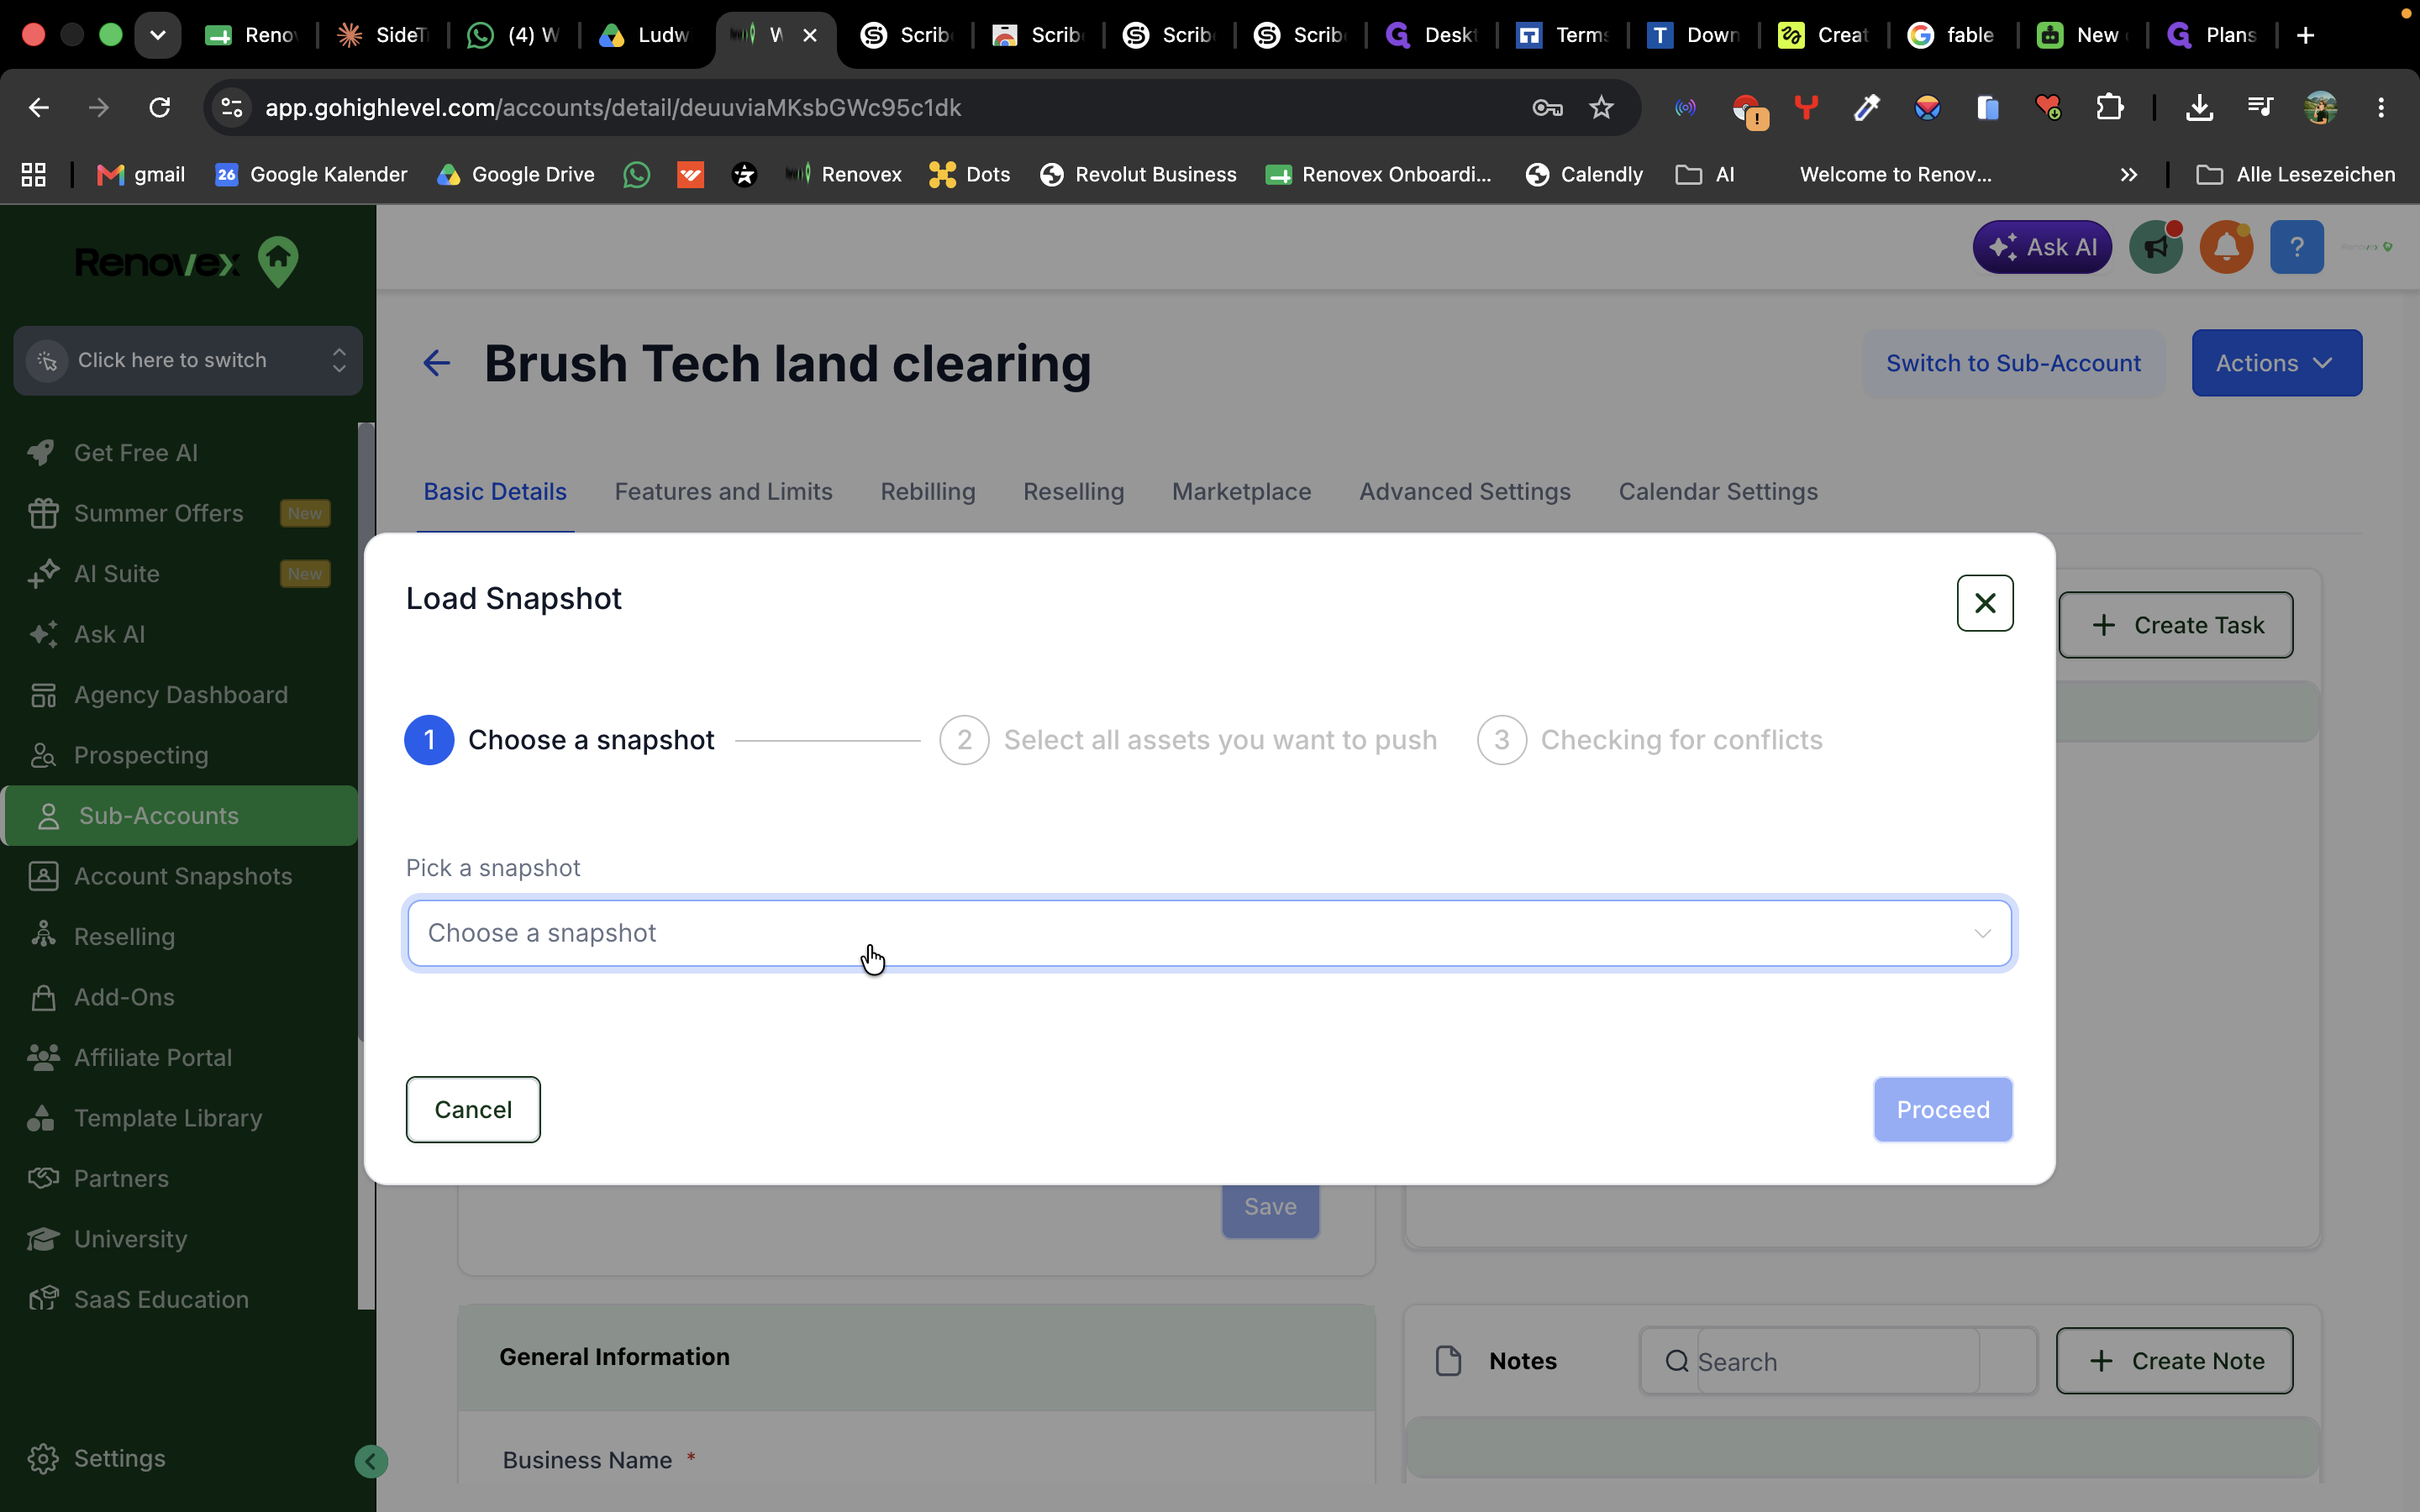
Open the Choose a snapshot dropdown menu.
Step #9: Open the Choose a snapshot dropdown menu.
10
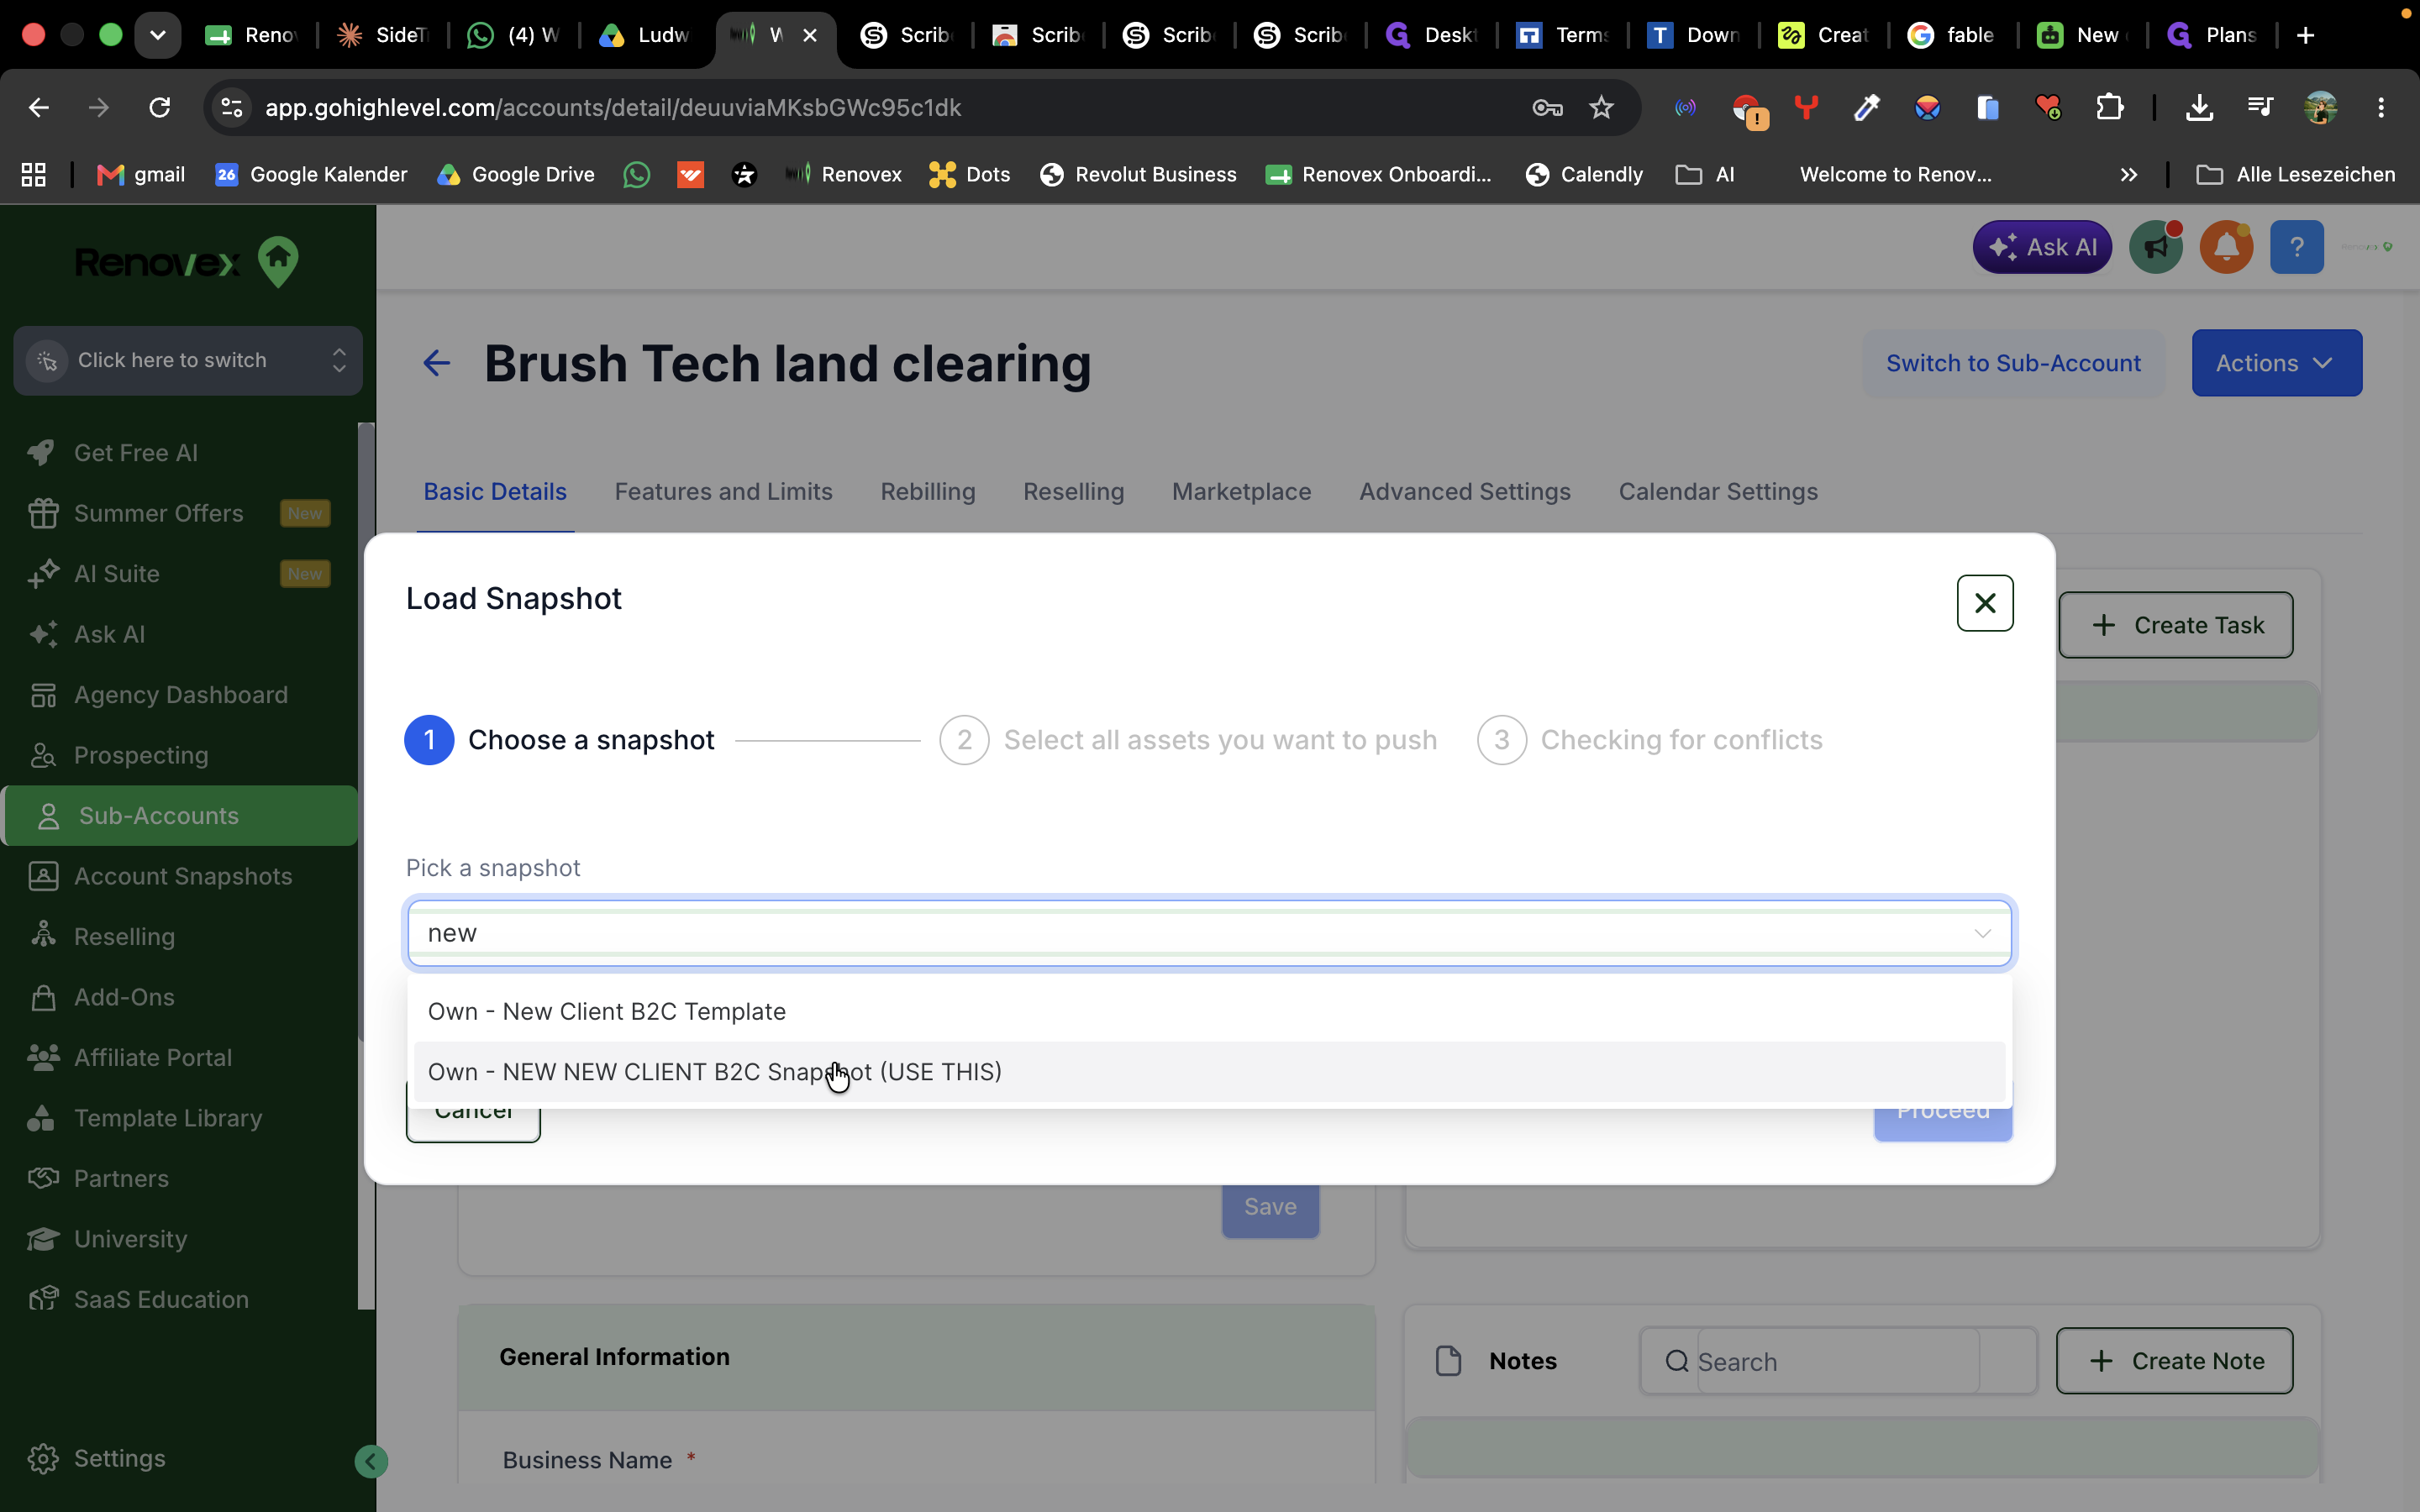
Select the NEW NEW CLIENT B2C Snapshot.
Step #10: Select the NEW NEW CLIENT B2C Snapshot.
11
Click Proceed.
Step #11: Click Proceed.
12
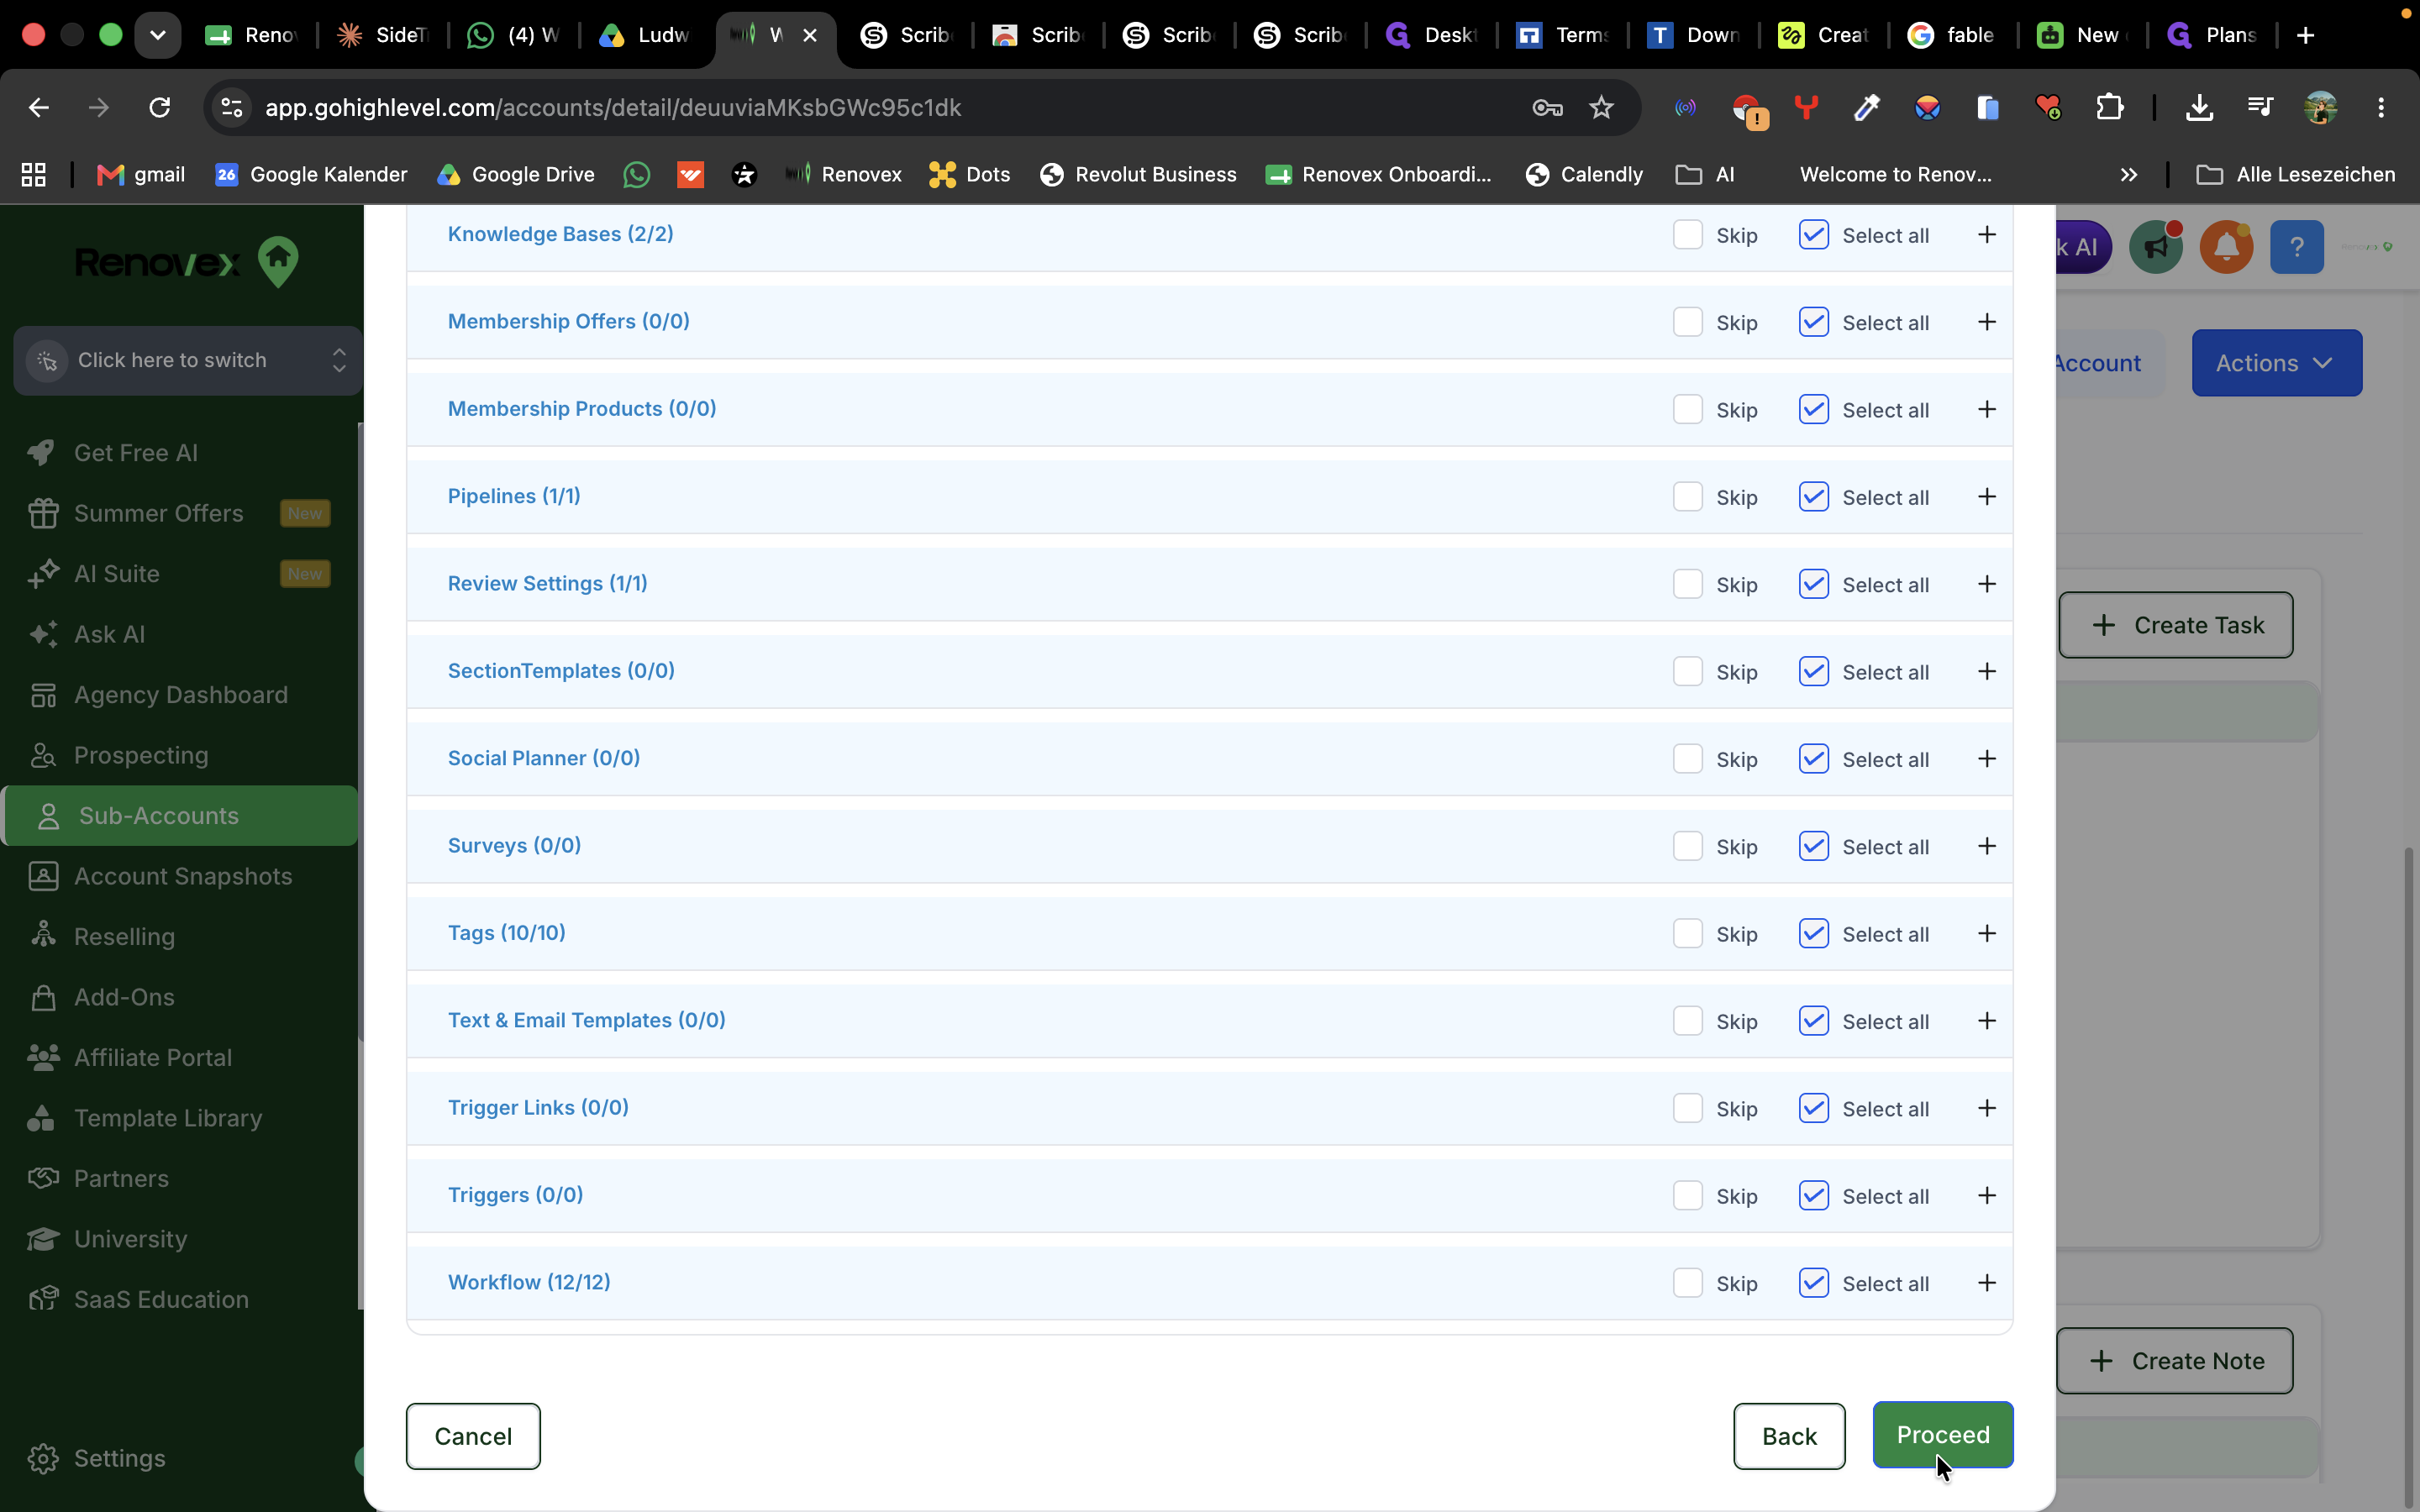
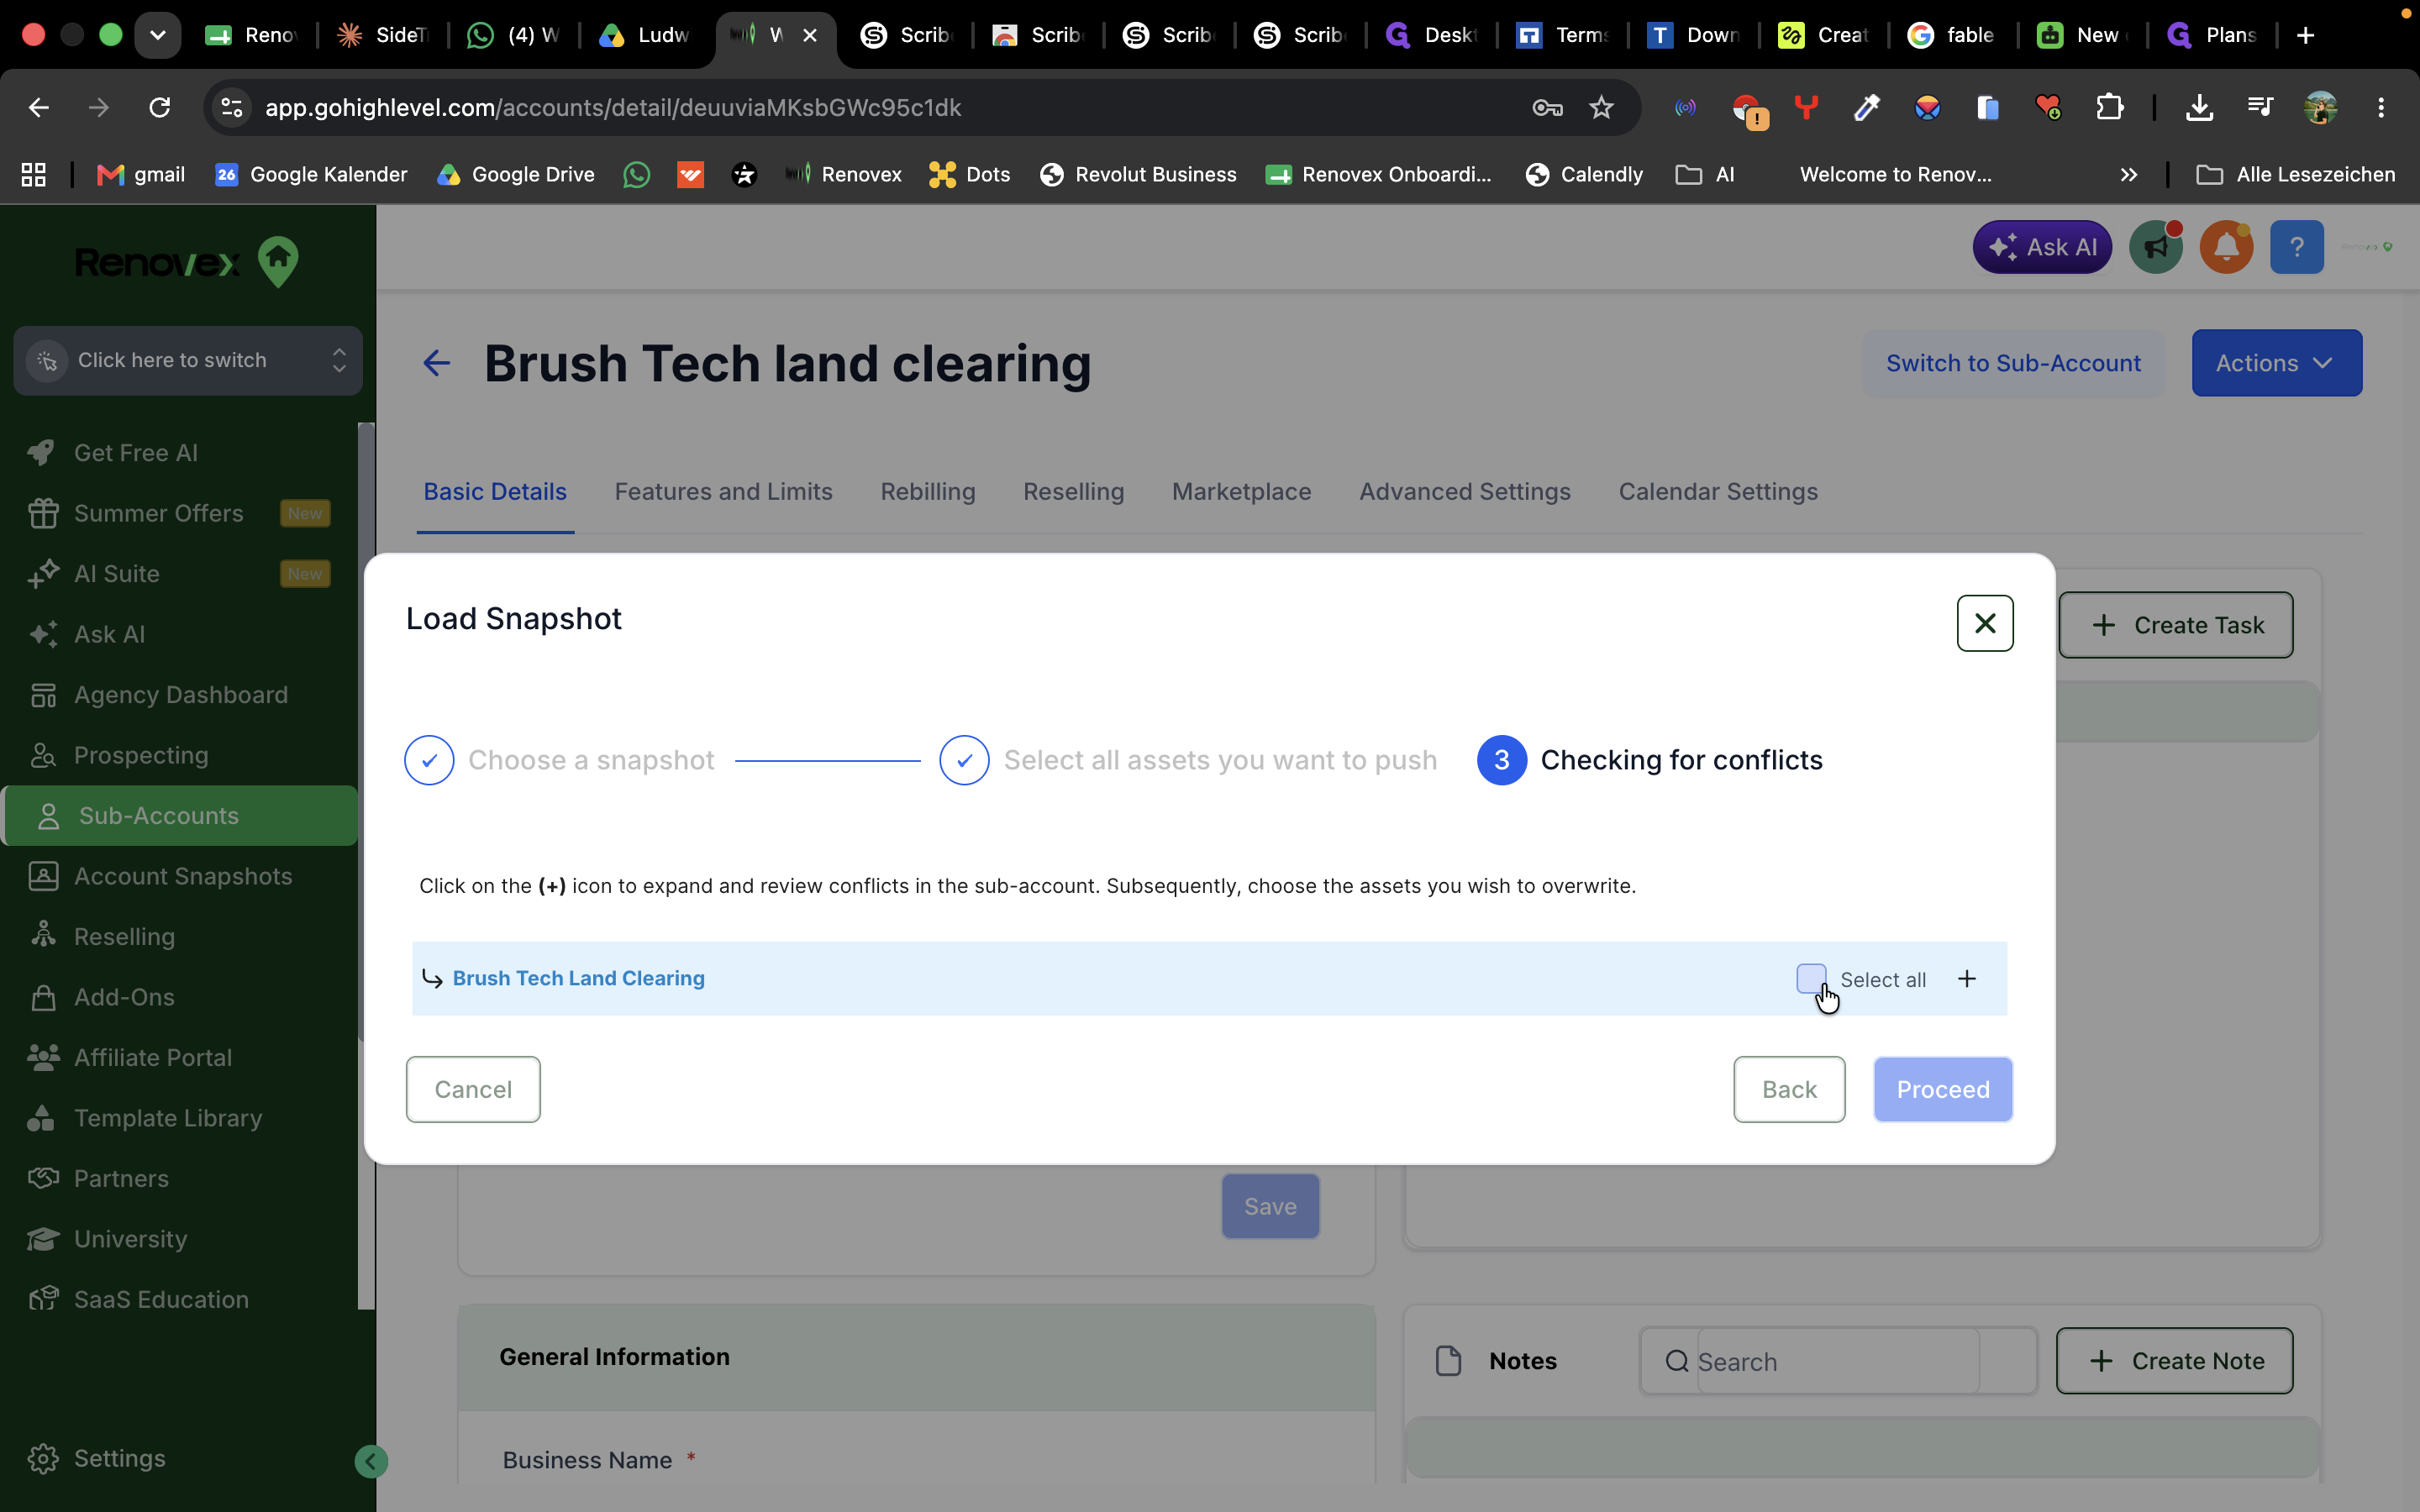
Click Select all to ensure all necessary assets load into the account, then click Proceed.
Step #12: Click Select all to ensure all necessary assets load into the account, then click Proceed.
13
Type CONFIRM into the confirmation field.
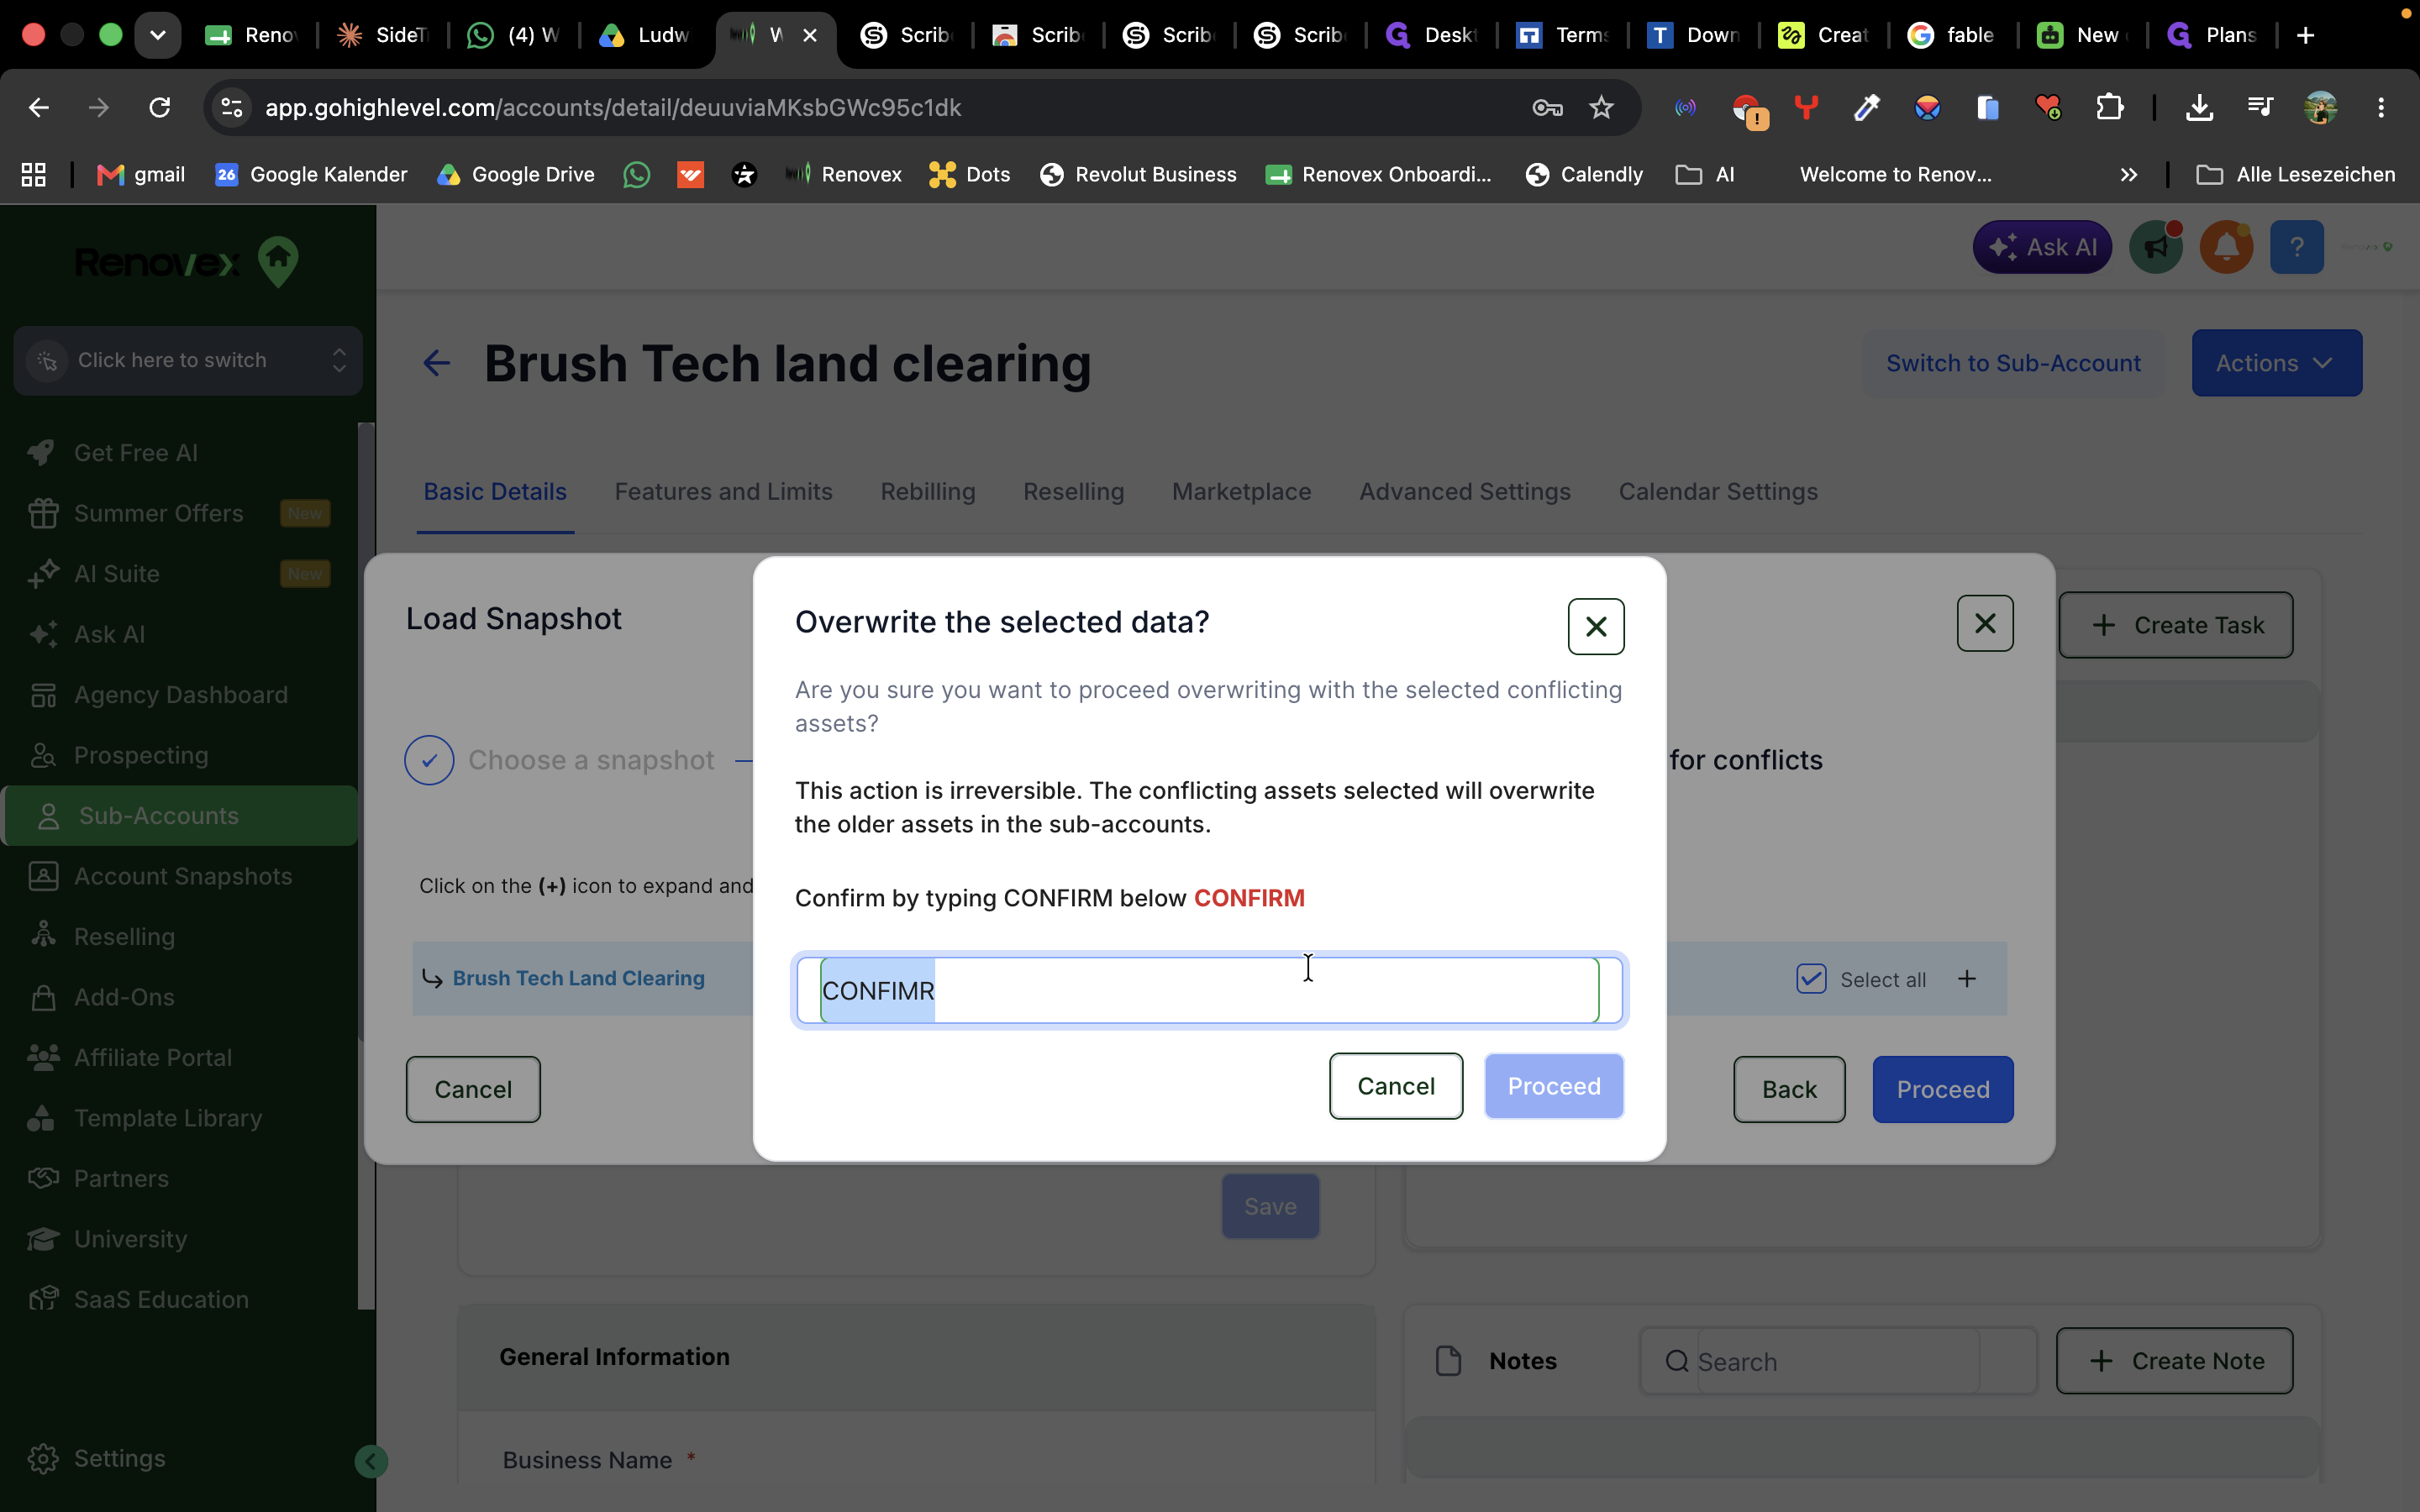
Step #13: Type CONFIRM into the confirmation field.
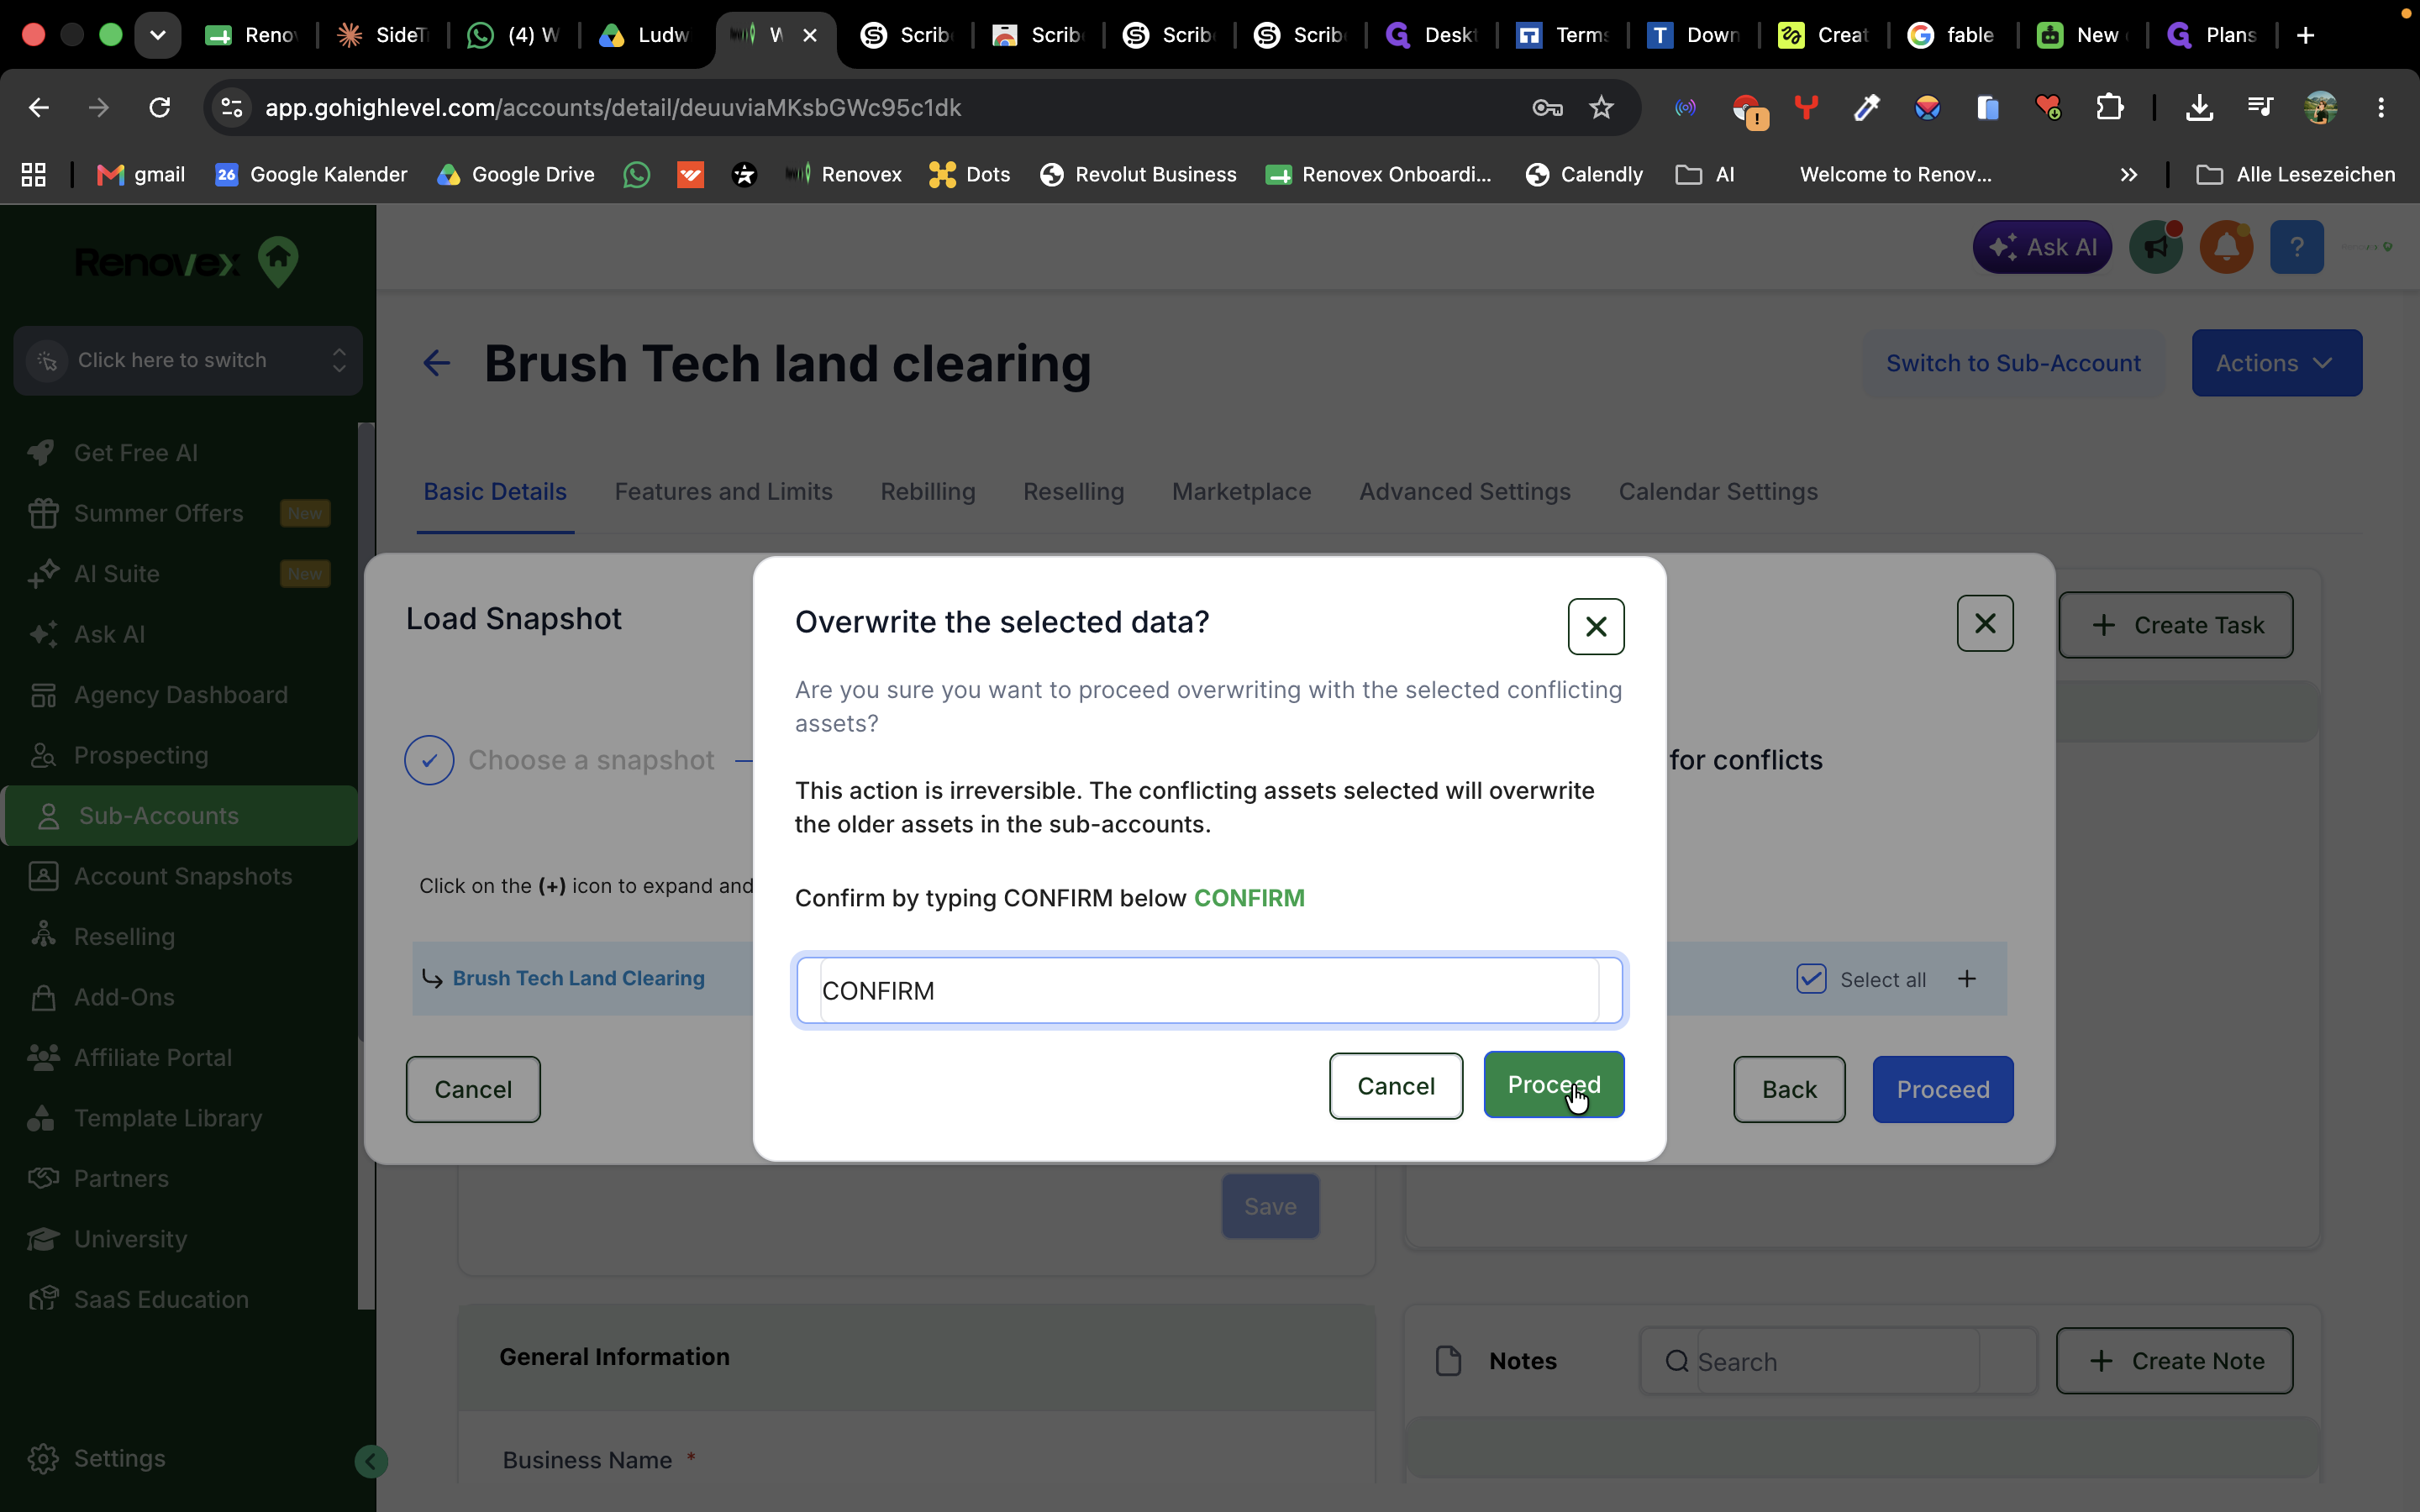
14
Click Proceed to apply the snapshot.
Step #14: Click Proceed to apply the snapshot.

Part 3: Assign Meta Business Suite Permissions
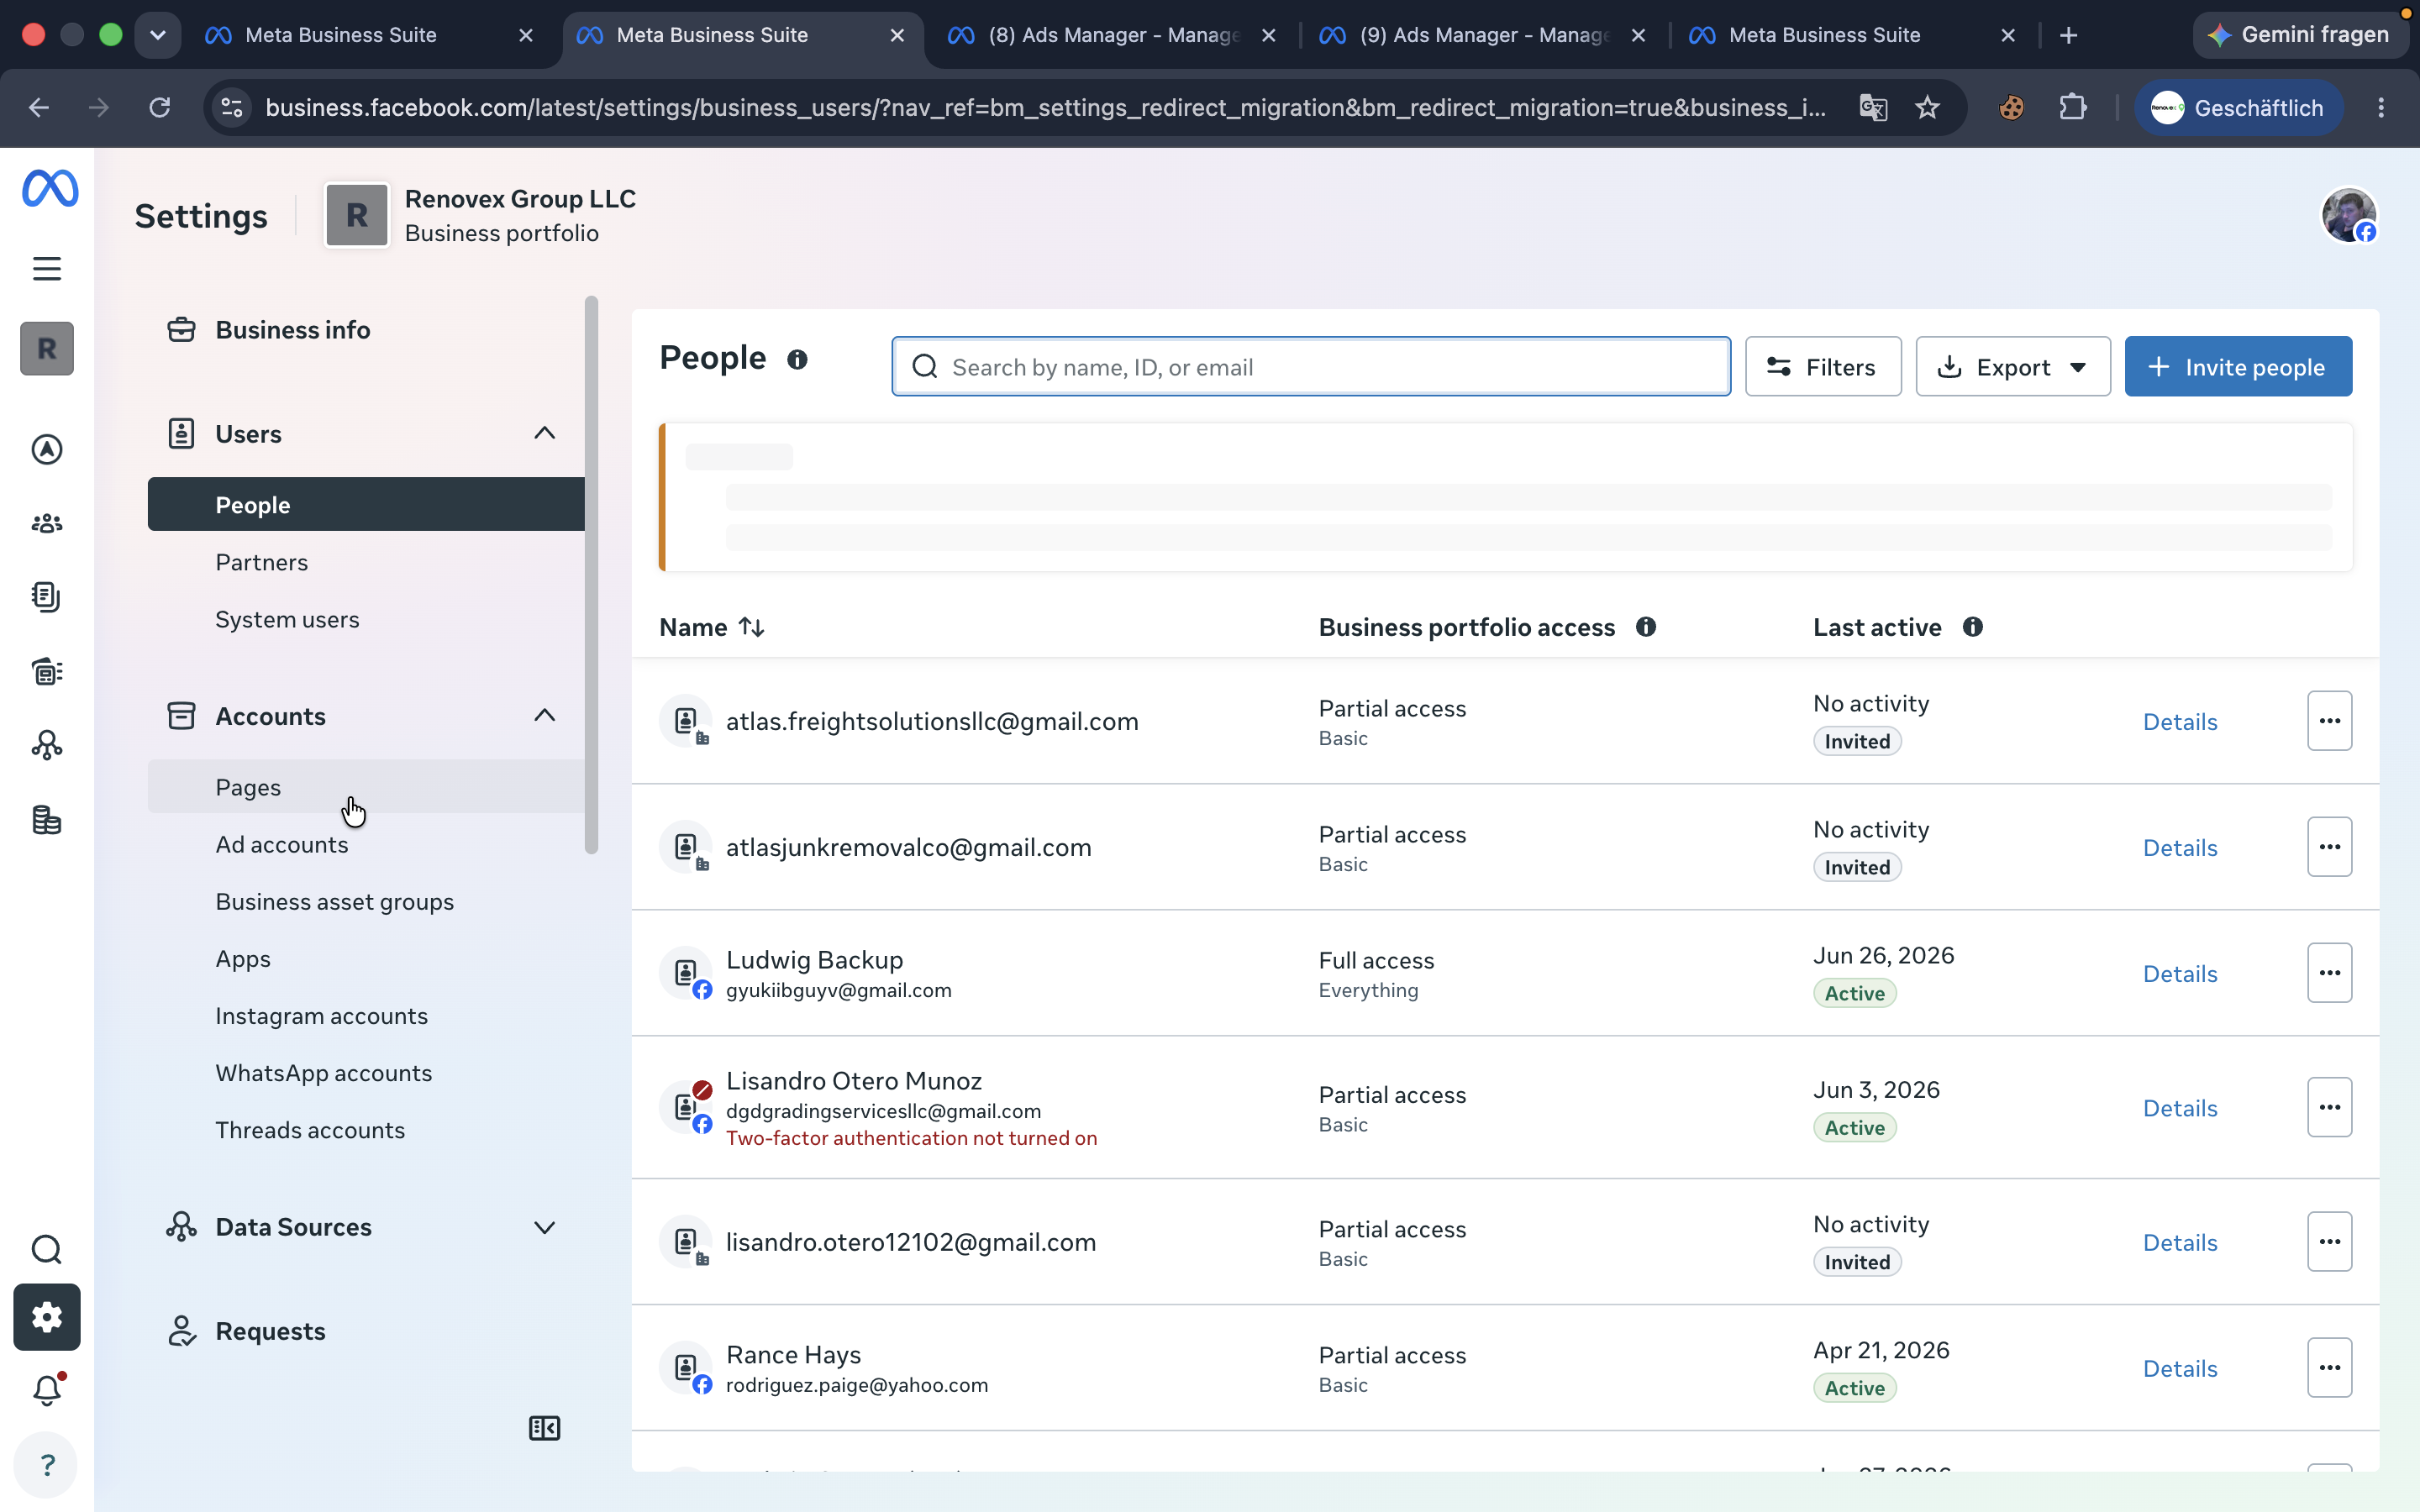
15
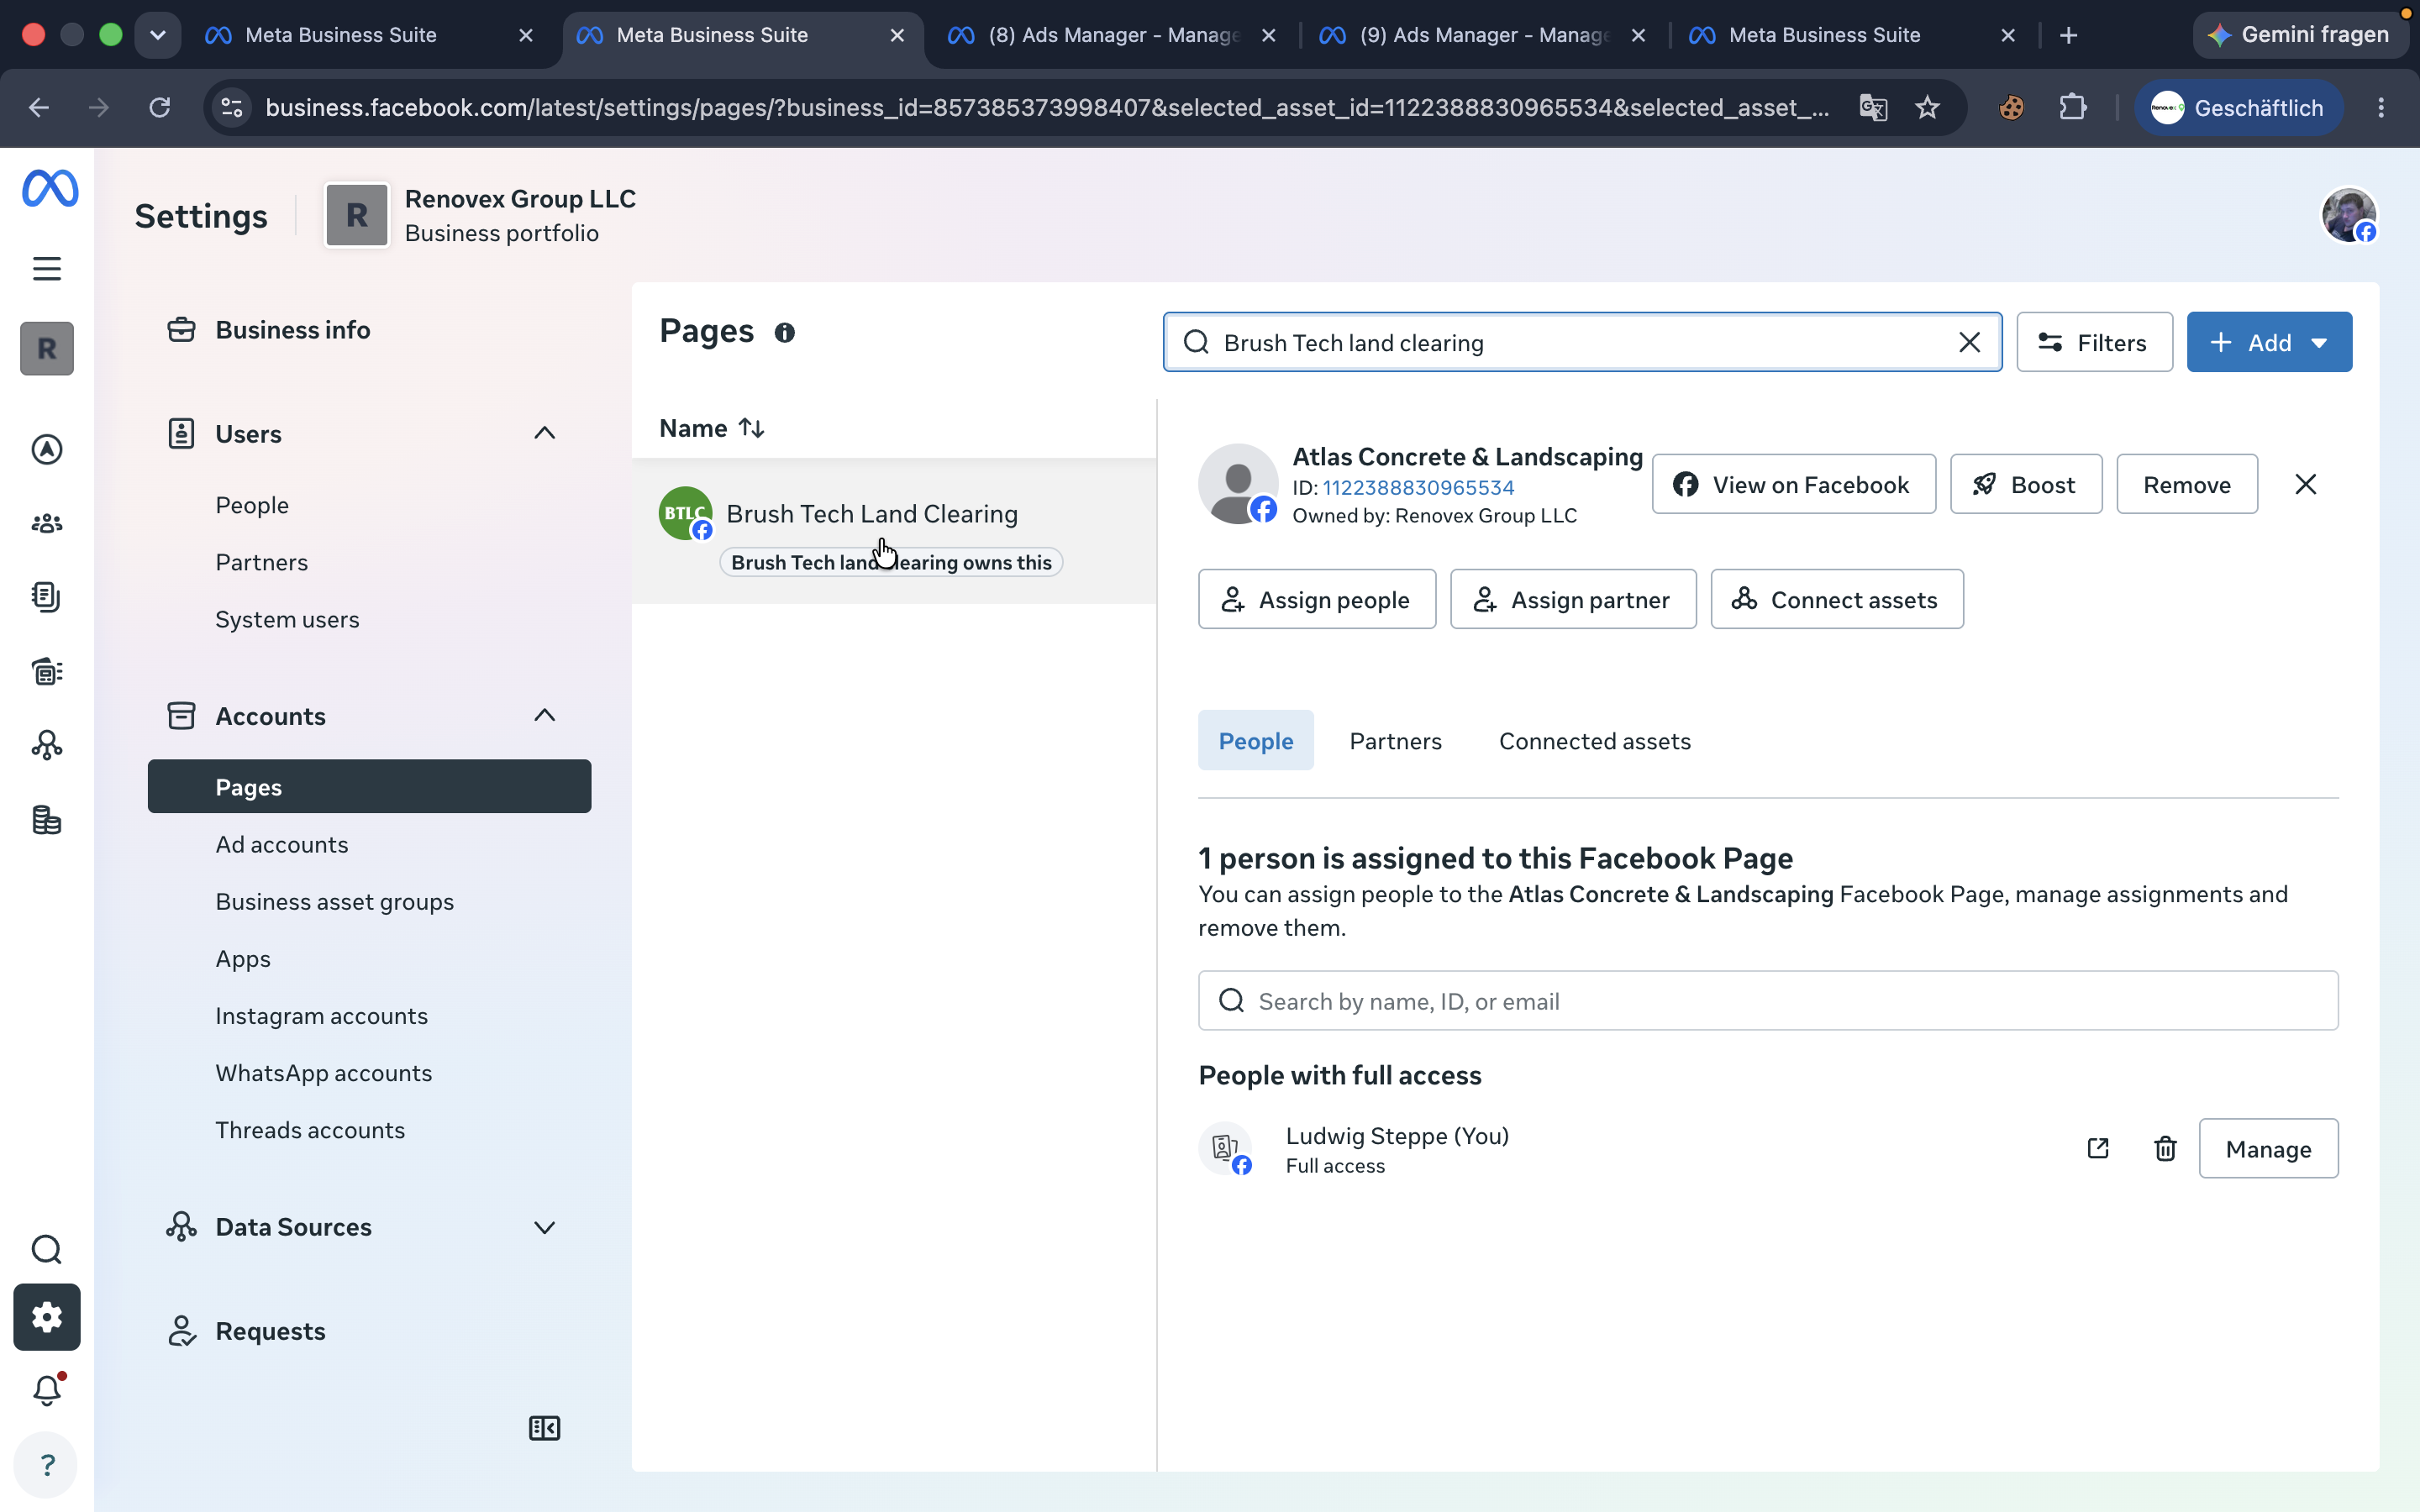
In Meta Business Suite, expand the Accounts section and click Pages.
Step #15: In Meta Business Suite, expand the Accounts section and click Pages.
16
Select the client's Facebook Page from the list.
Step #16: Select the client's Facebook Page from the list.
17
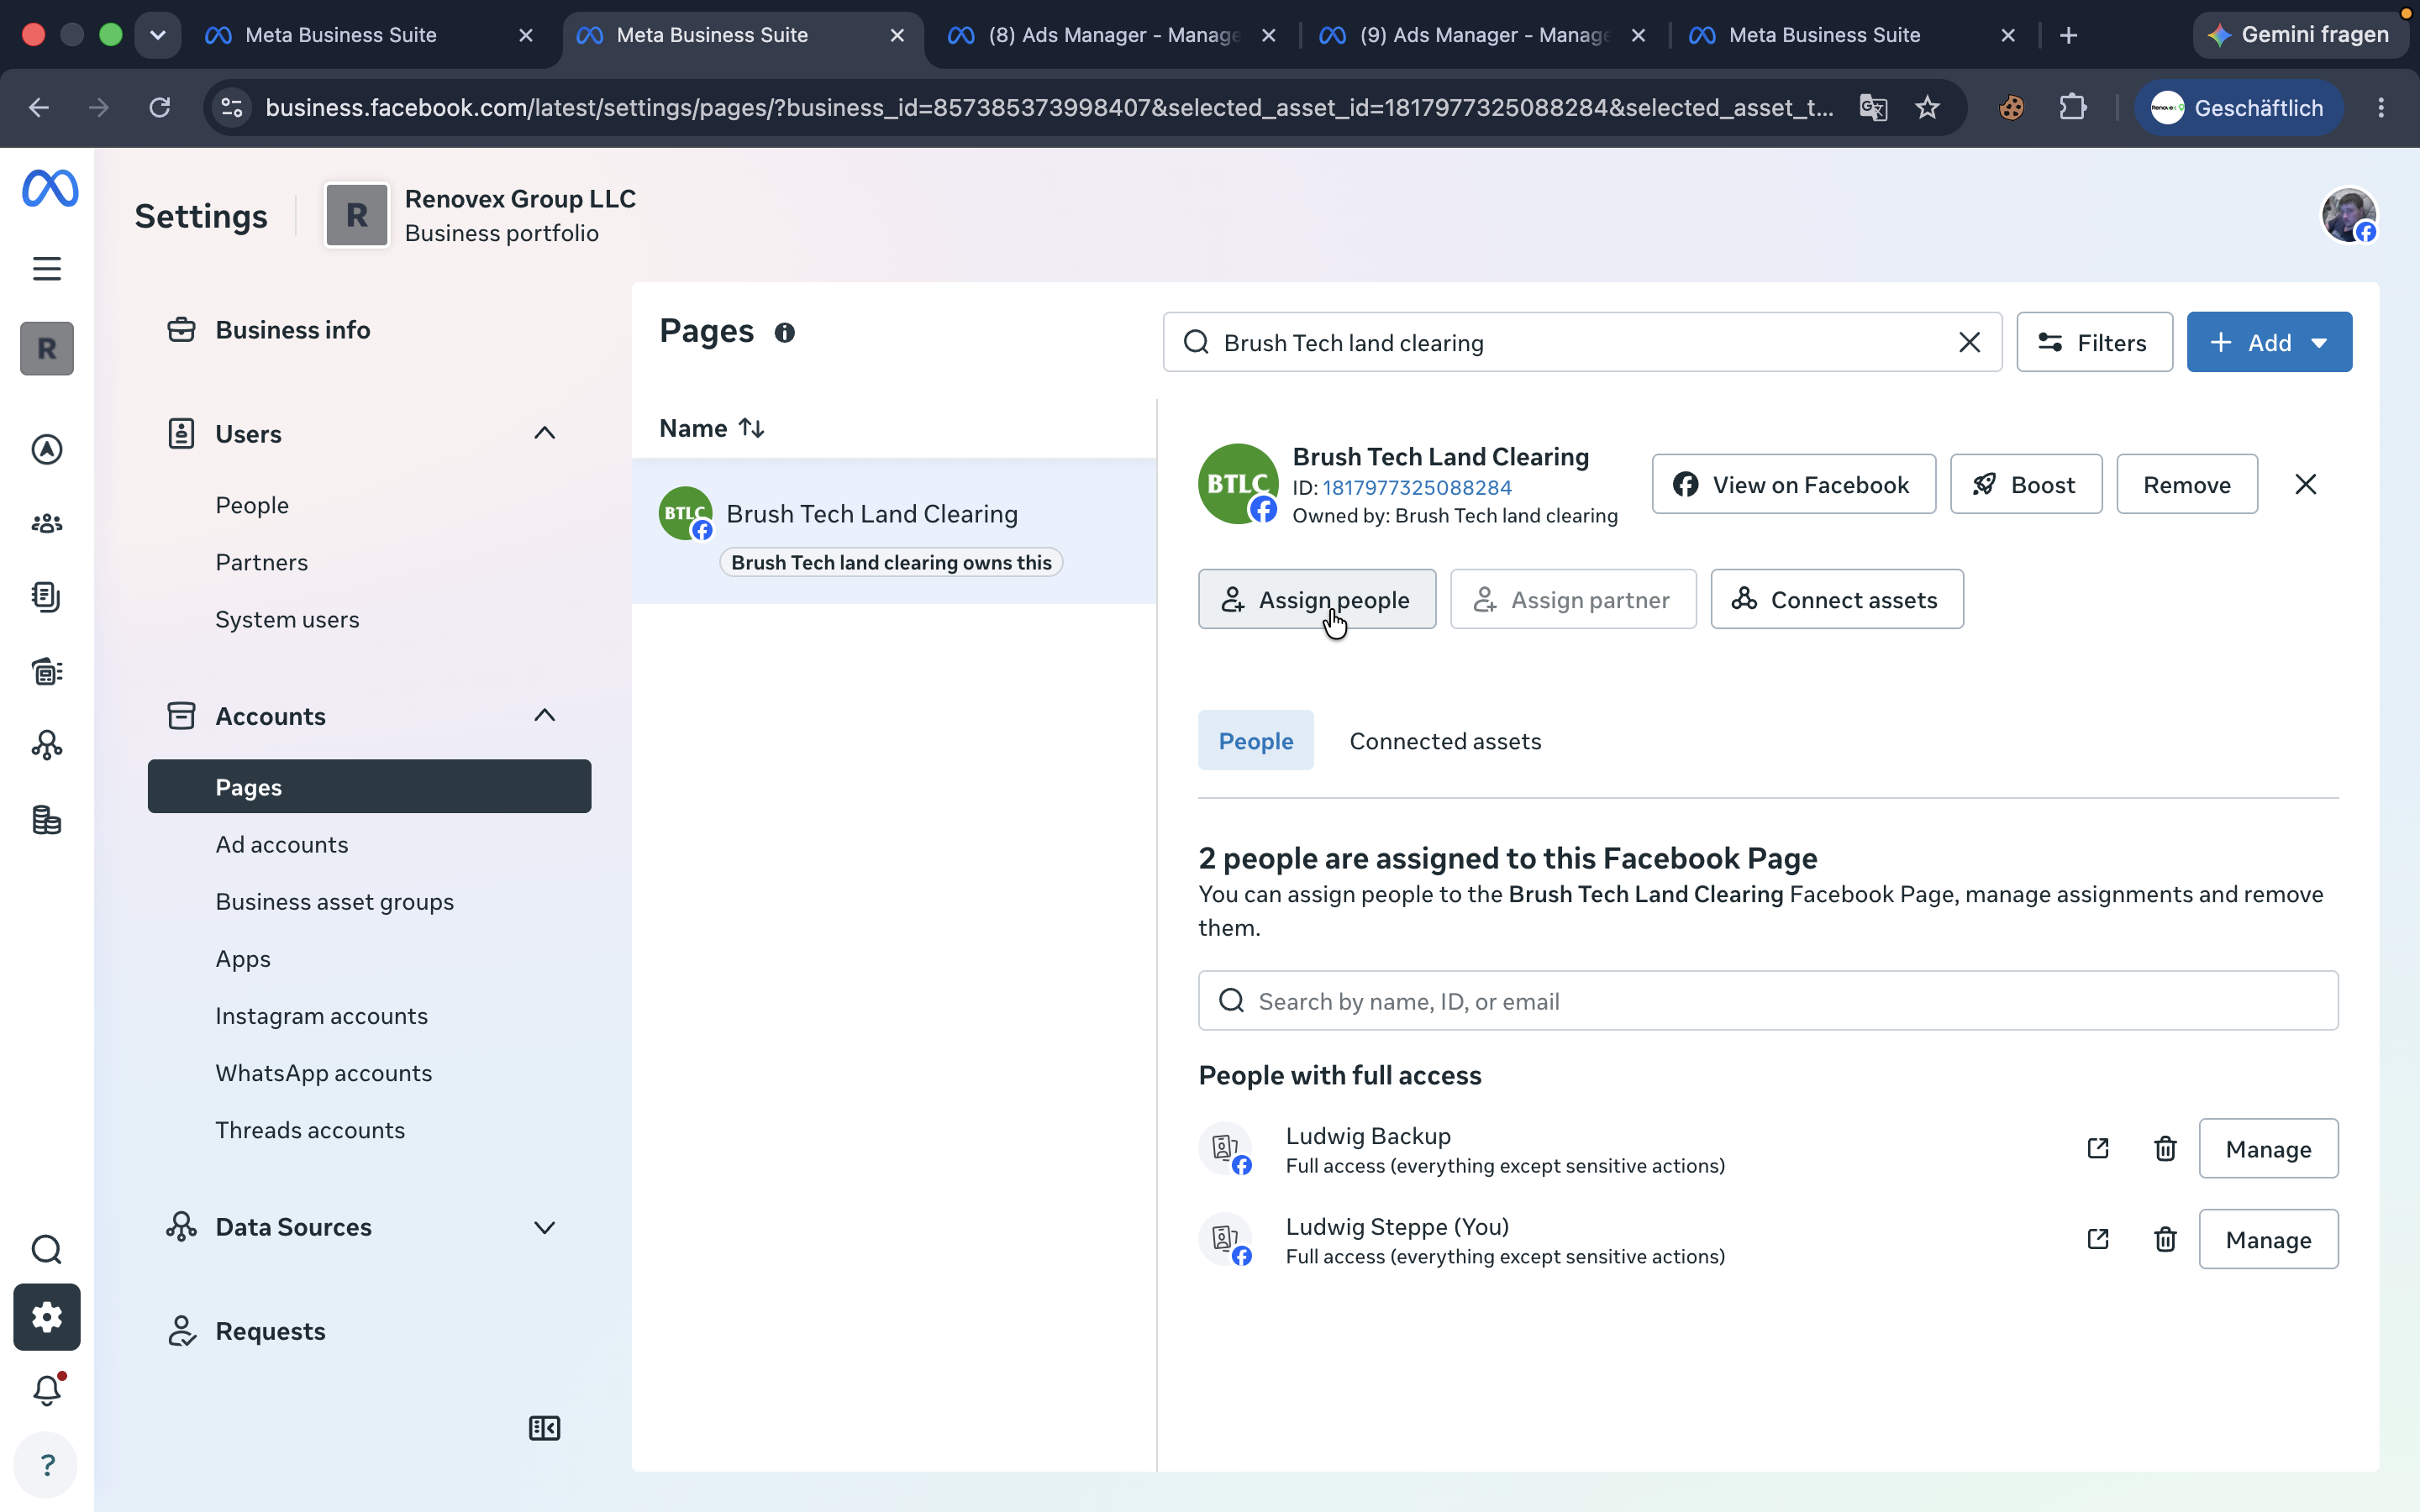
Click Assign people.
Step #17: Click Assign people.
18
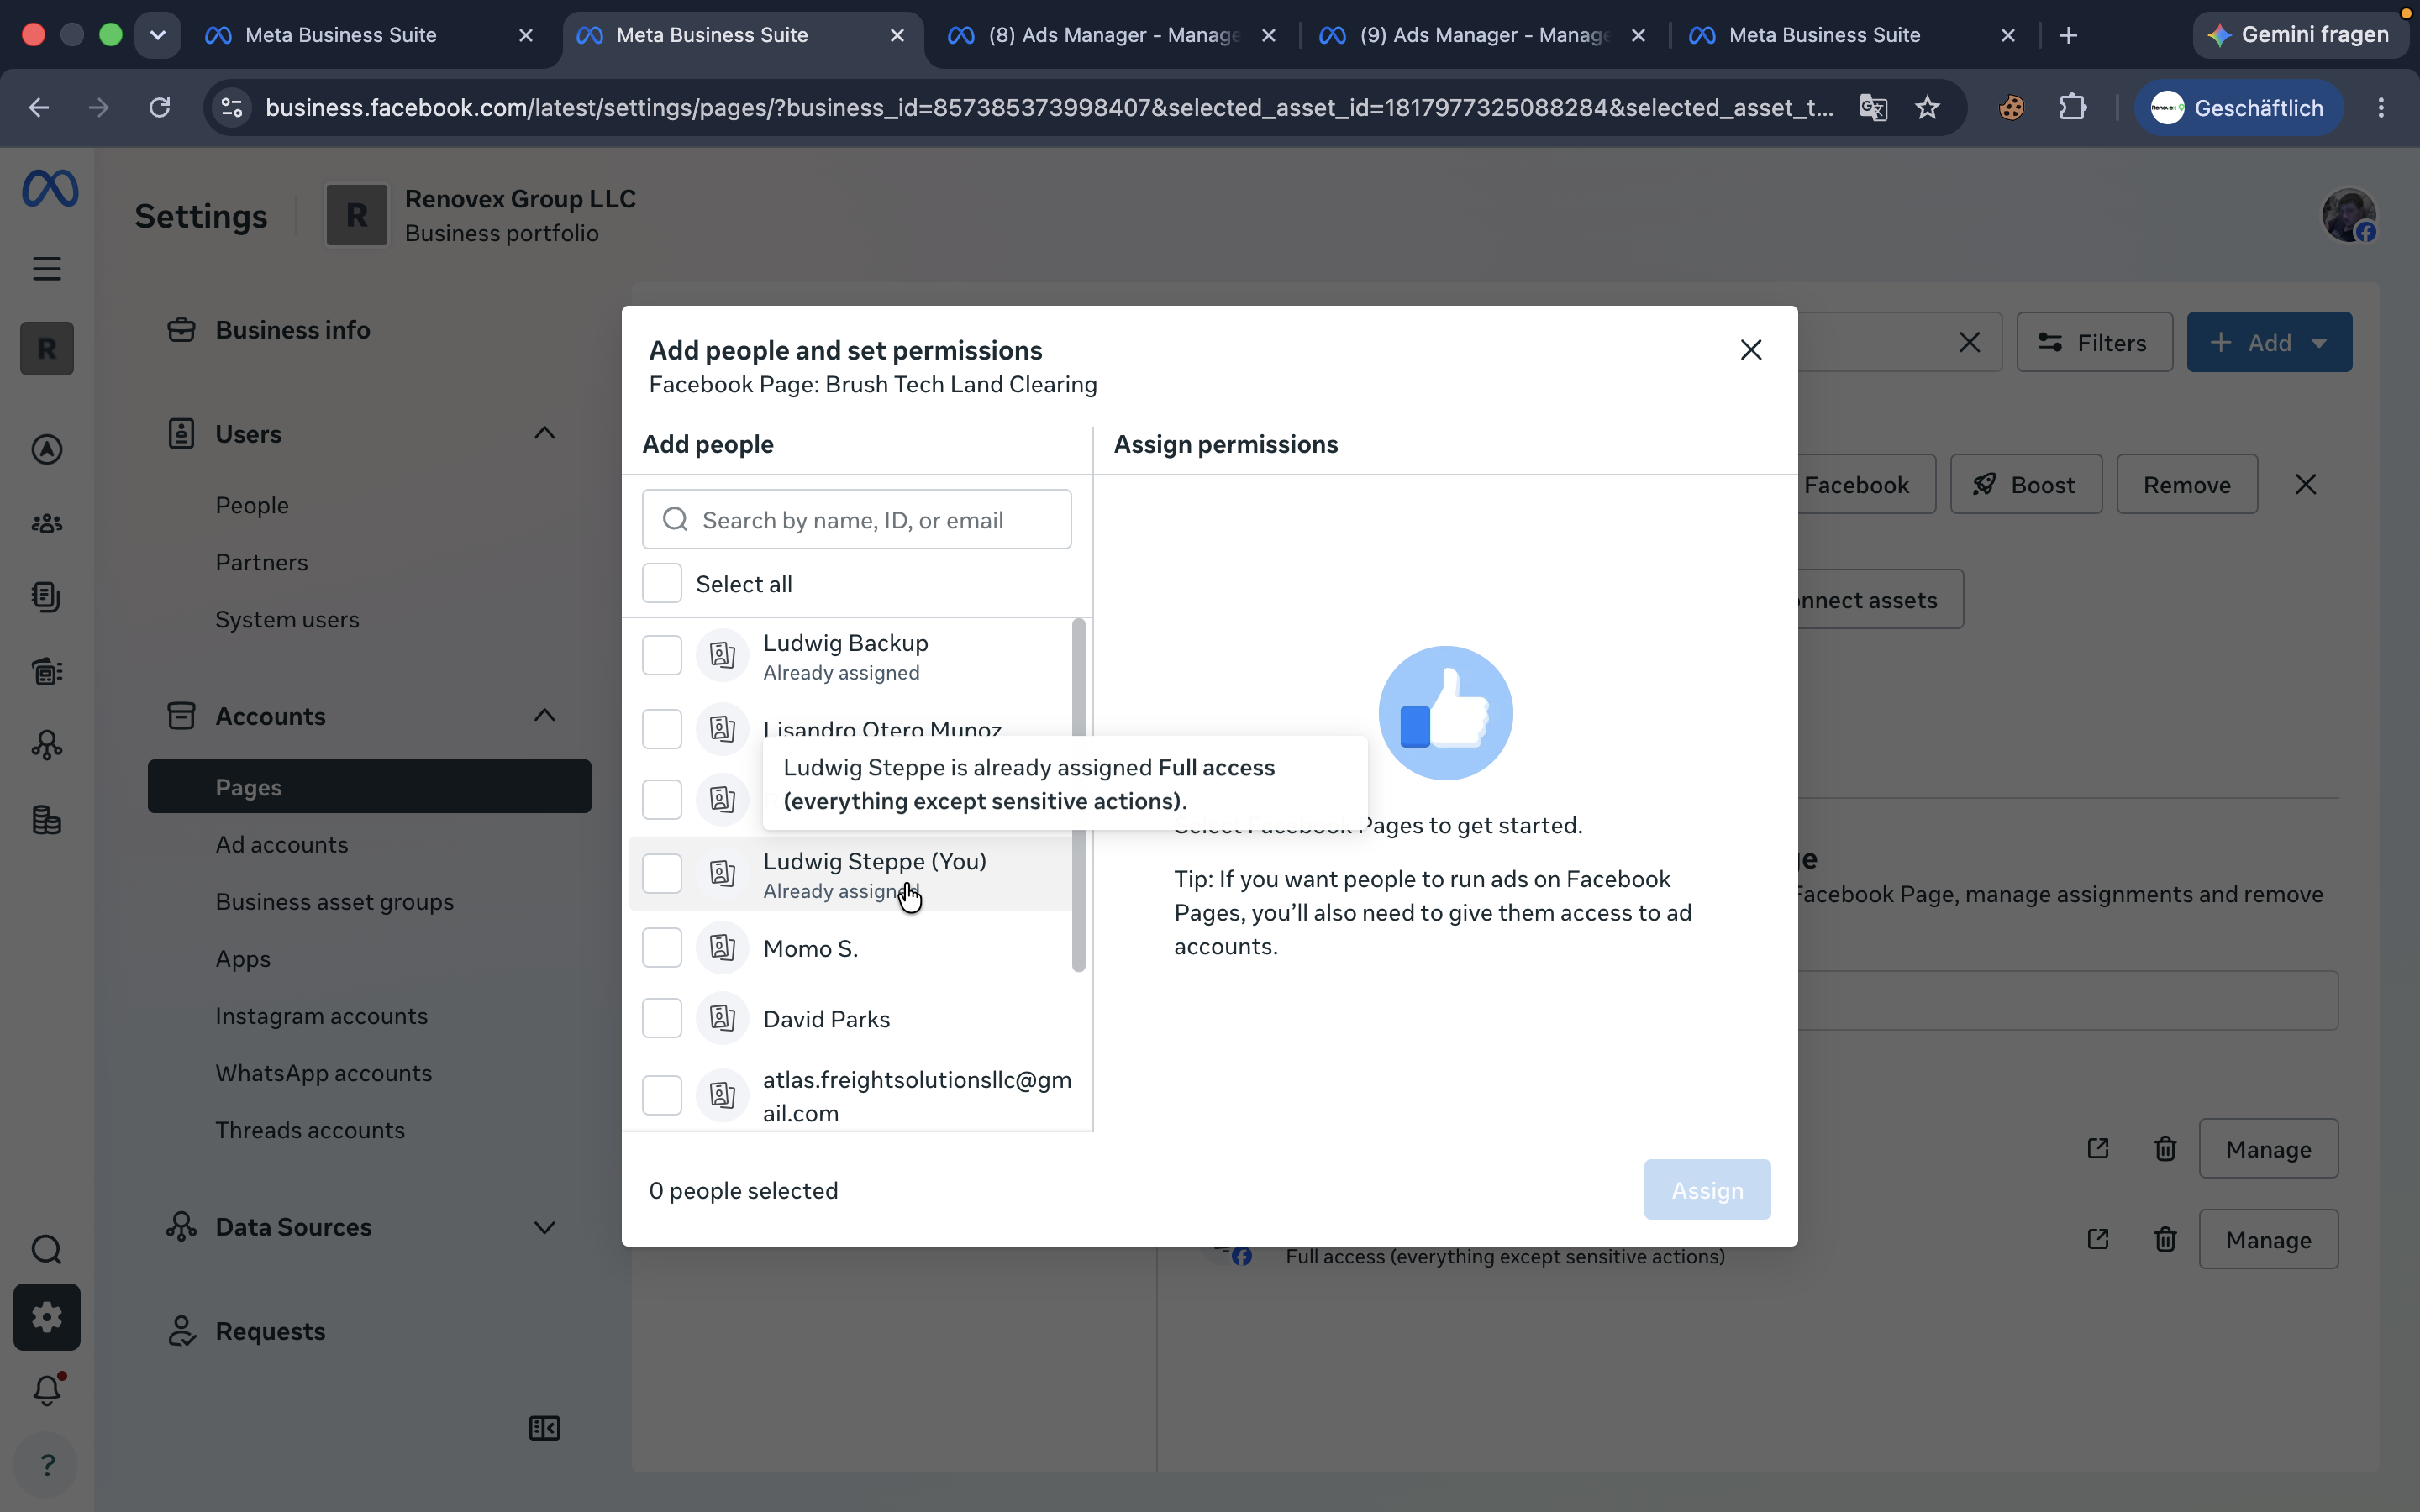
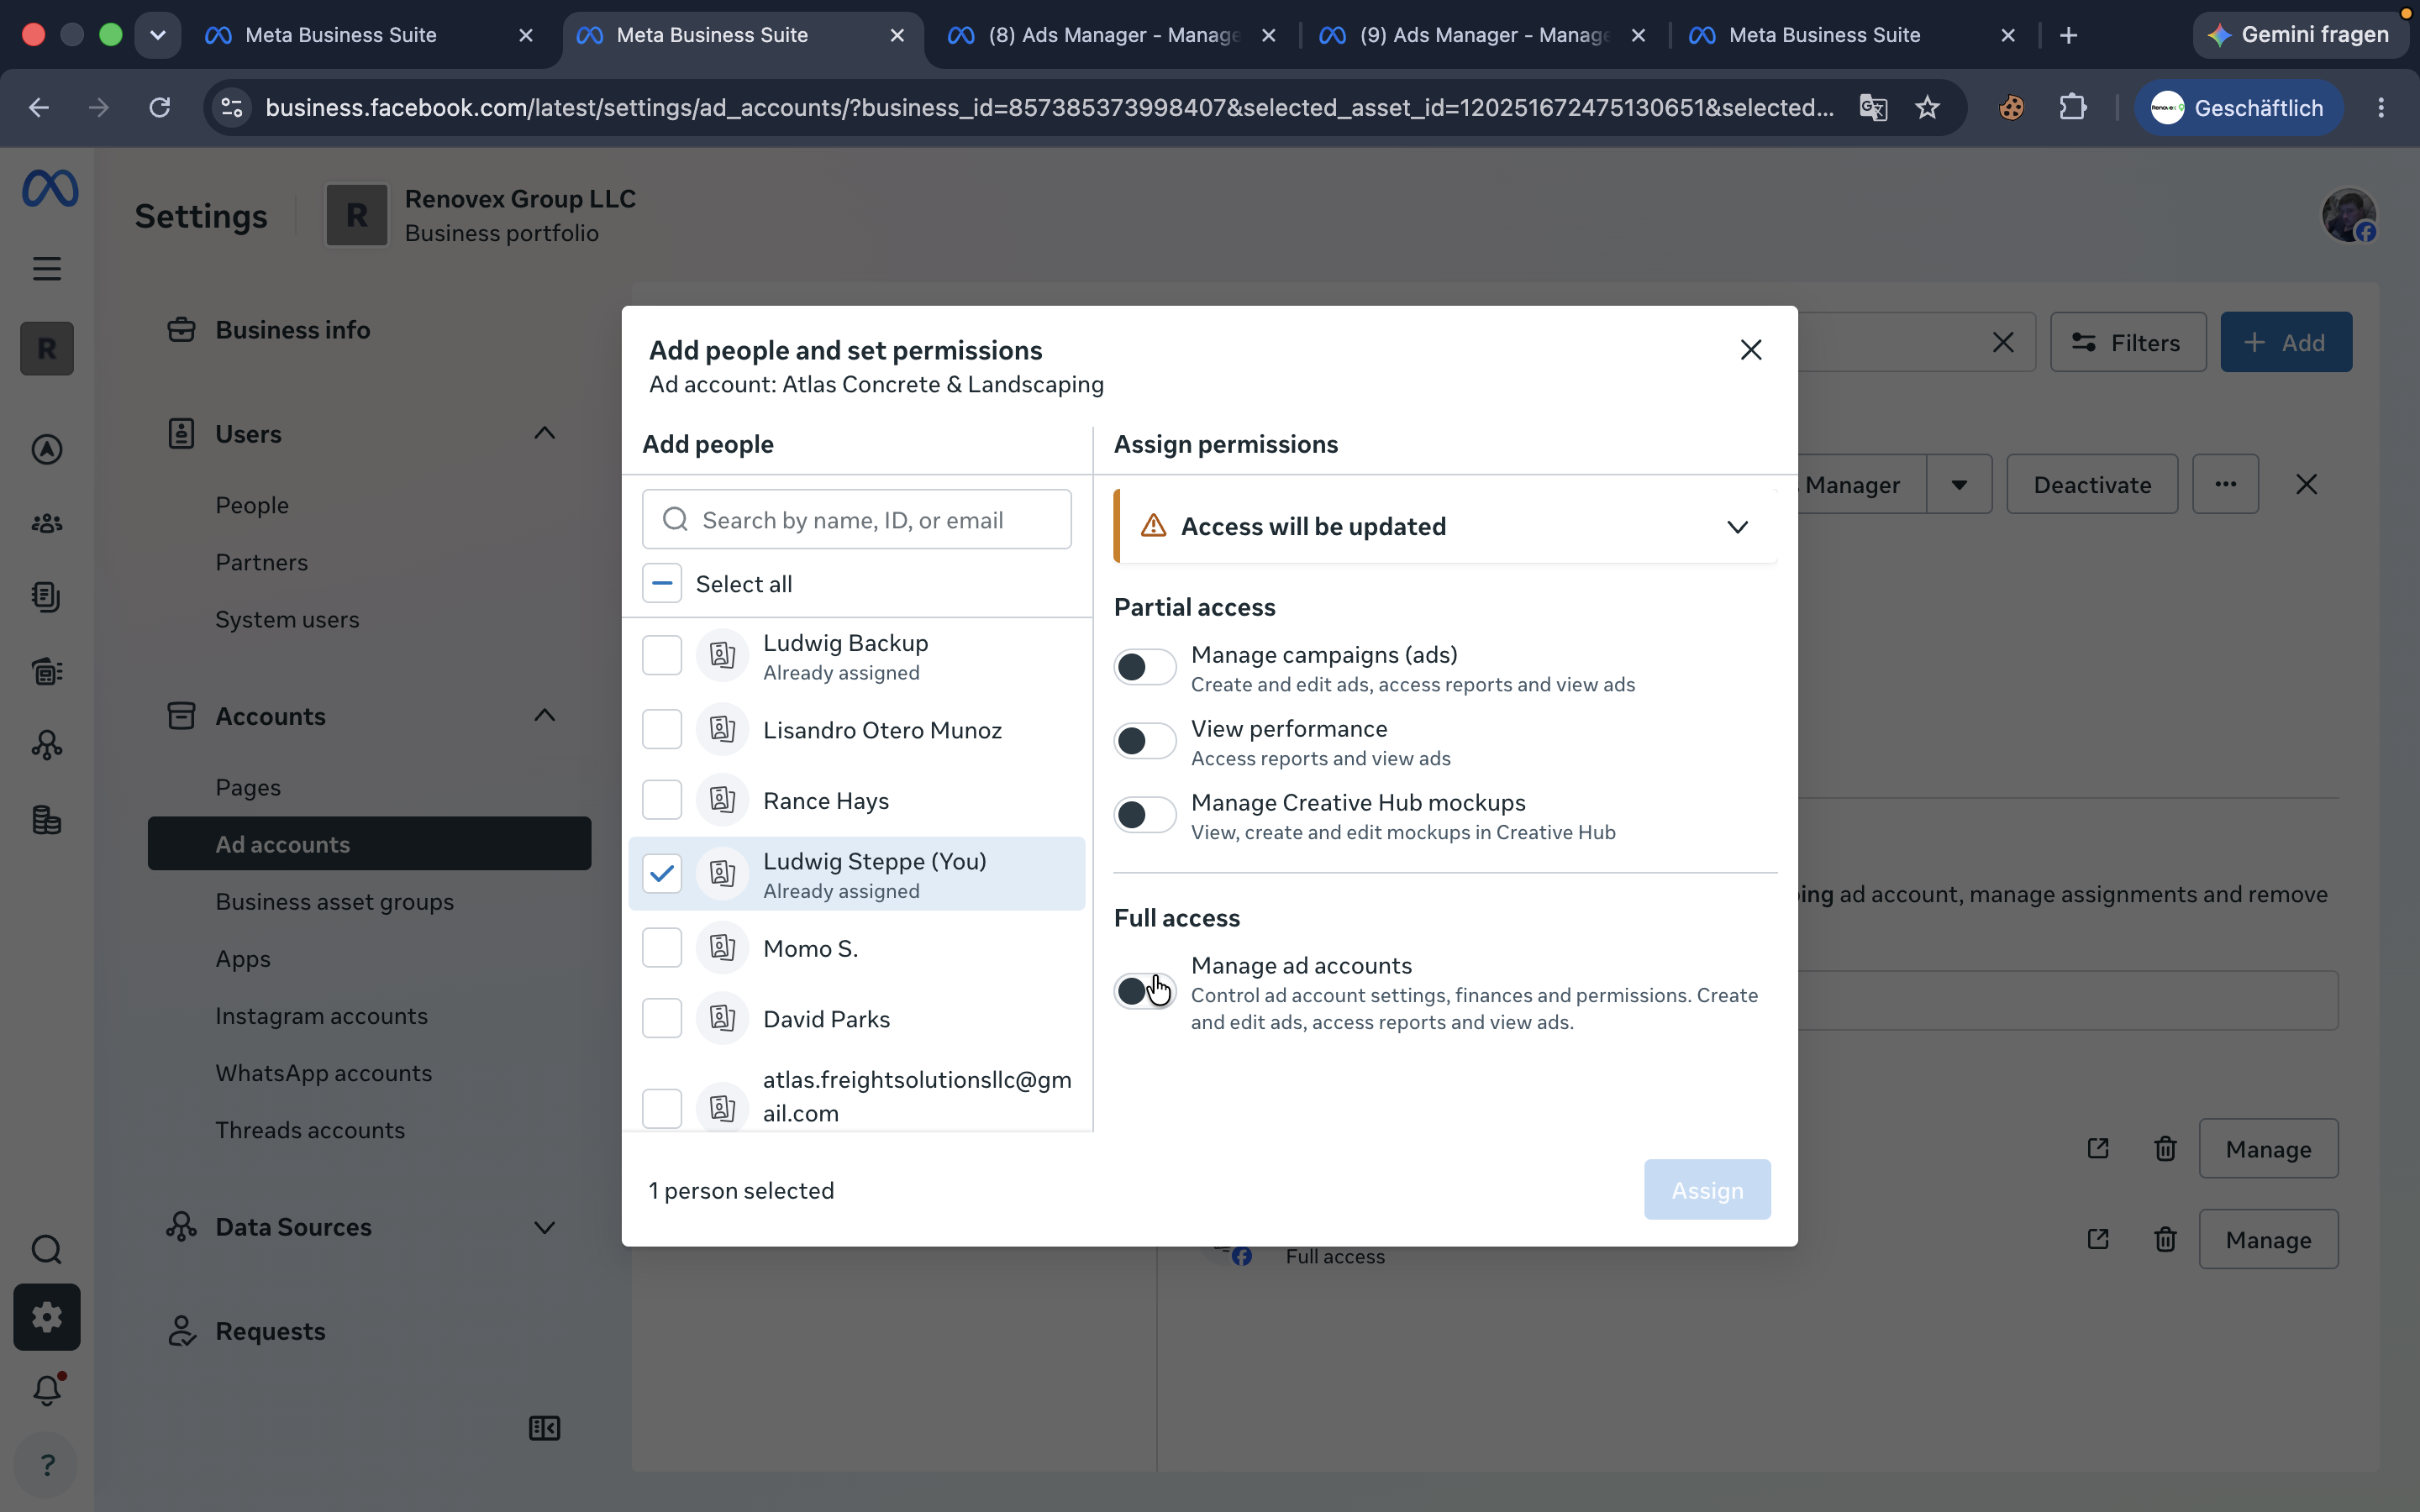
Select yourself from the list of users.
Step #18: Select yourself from the list of users.
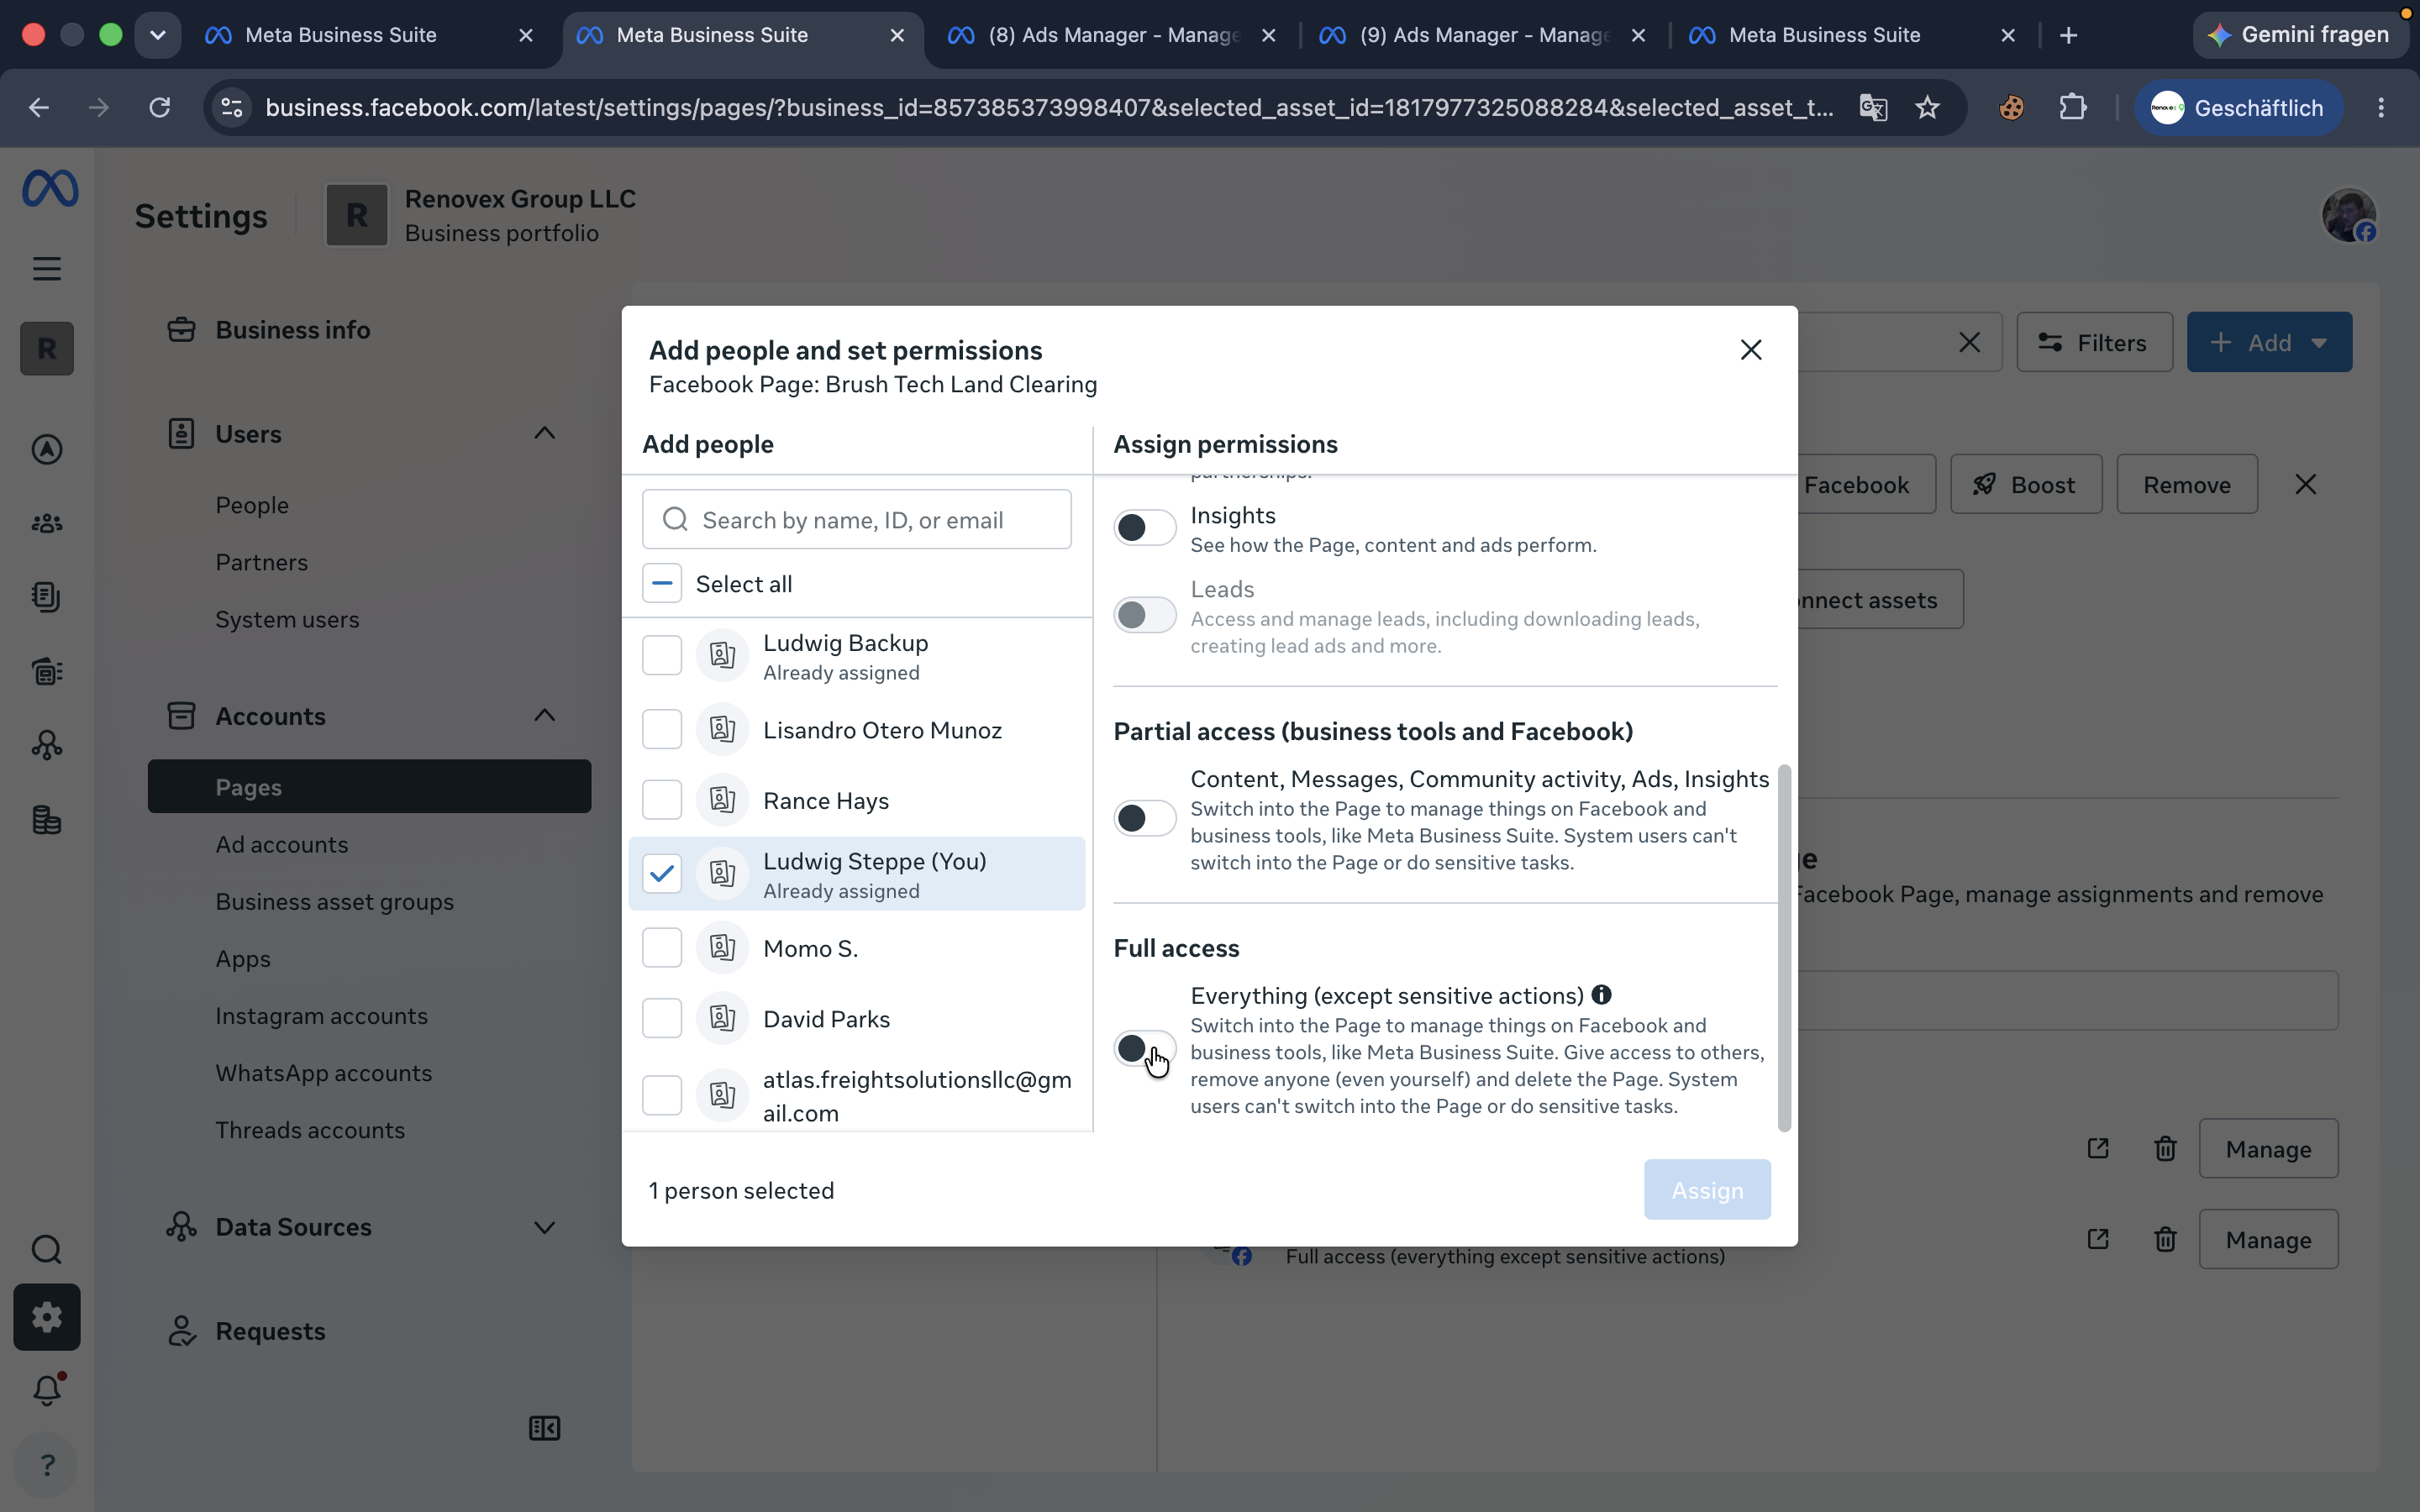
19
Toggle on Full access, then click Assign.
Step #19: Toggle on Full access, then click Assign.
20
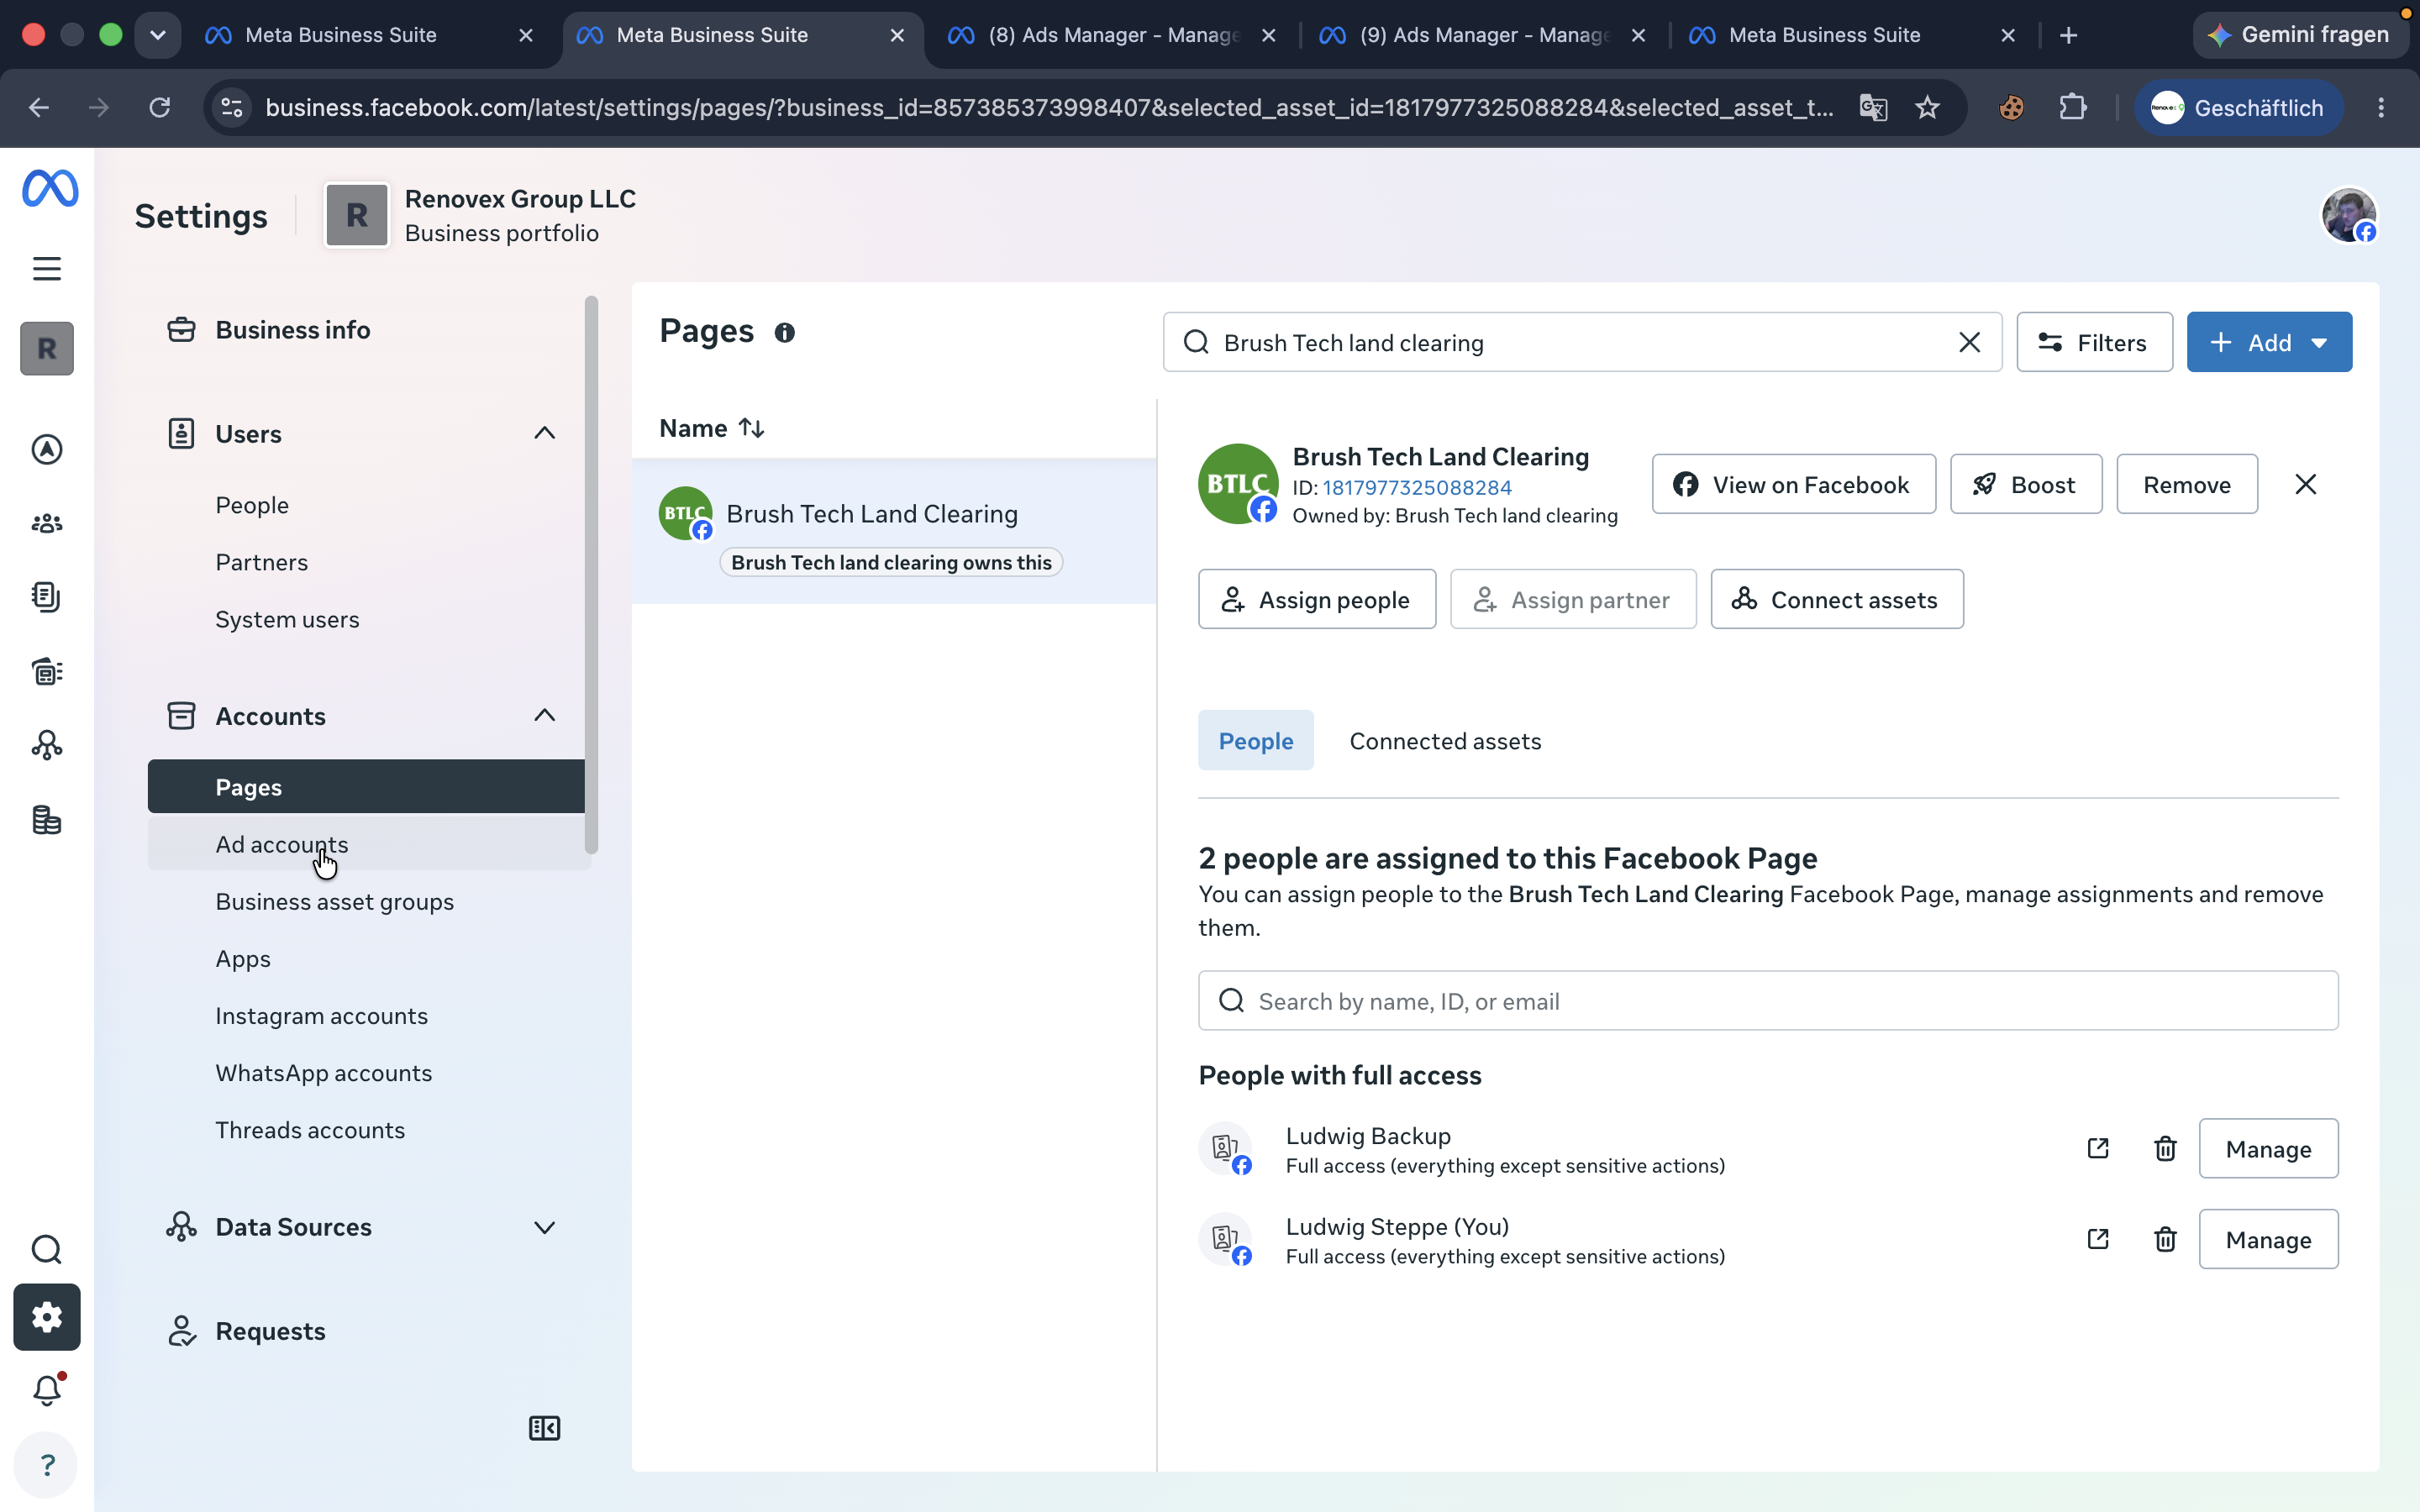
Navigate to Ad accounts under the Accounts section.
Step #20: Navigate to Ad accounts under the Accounts section.
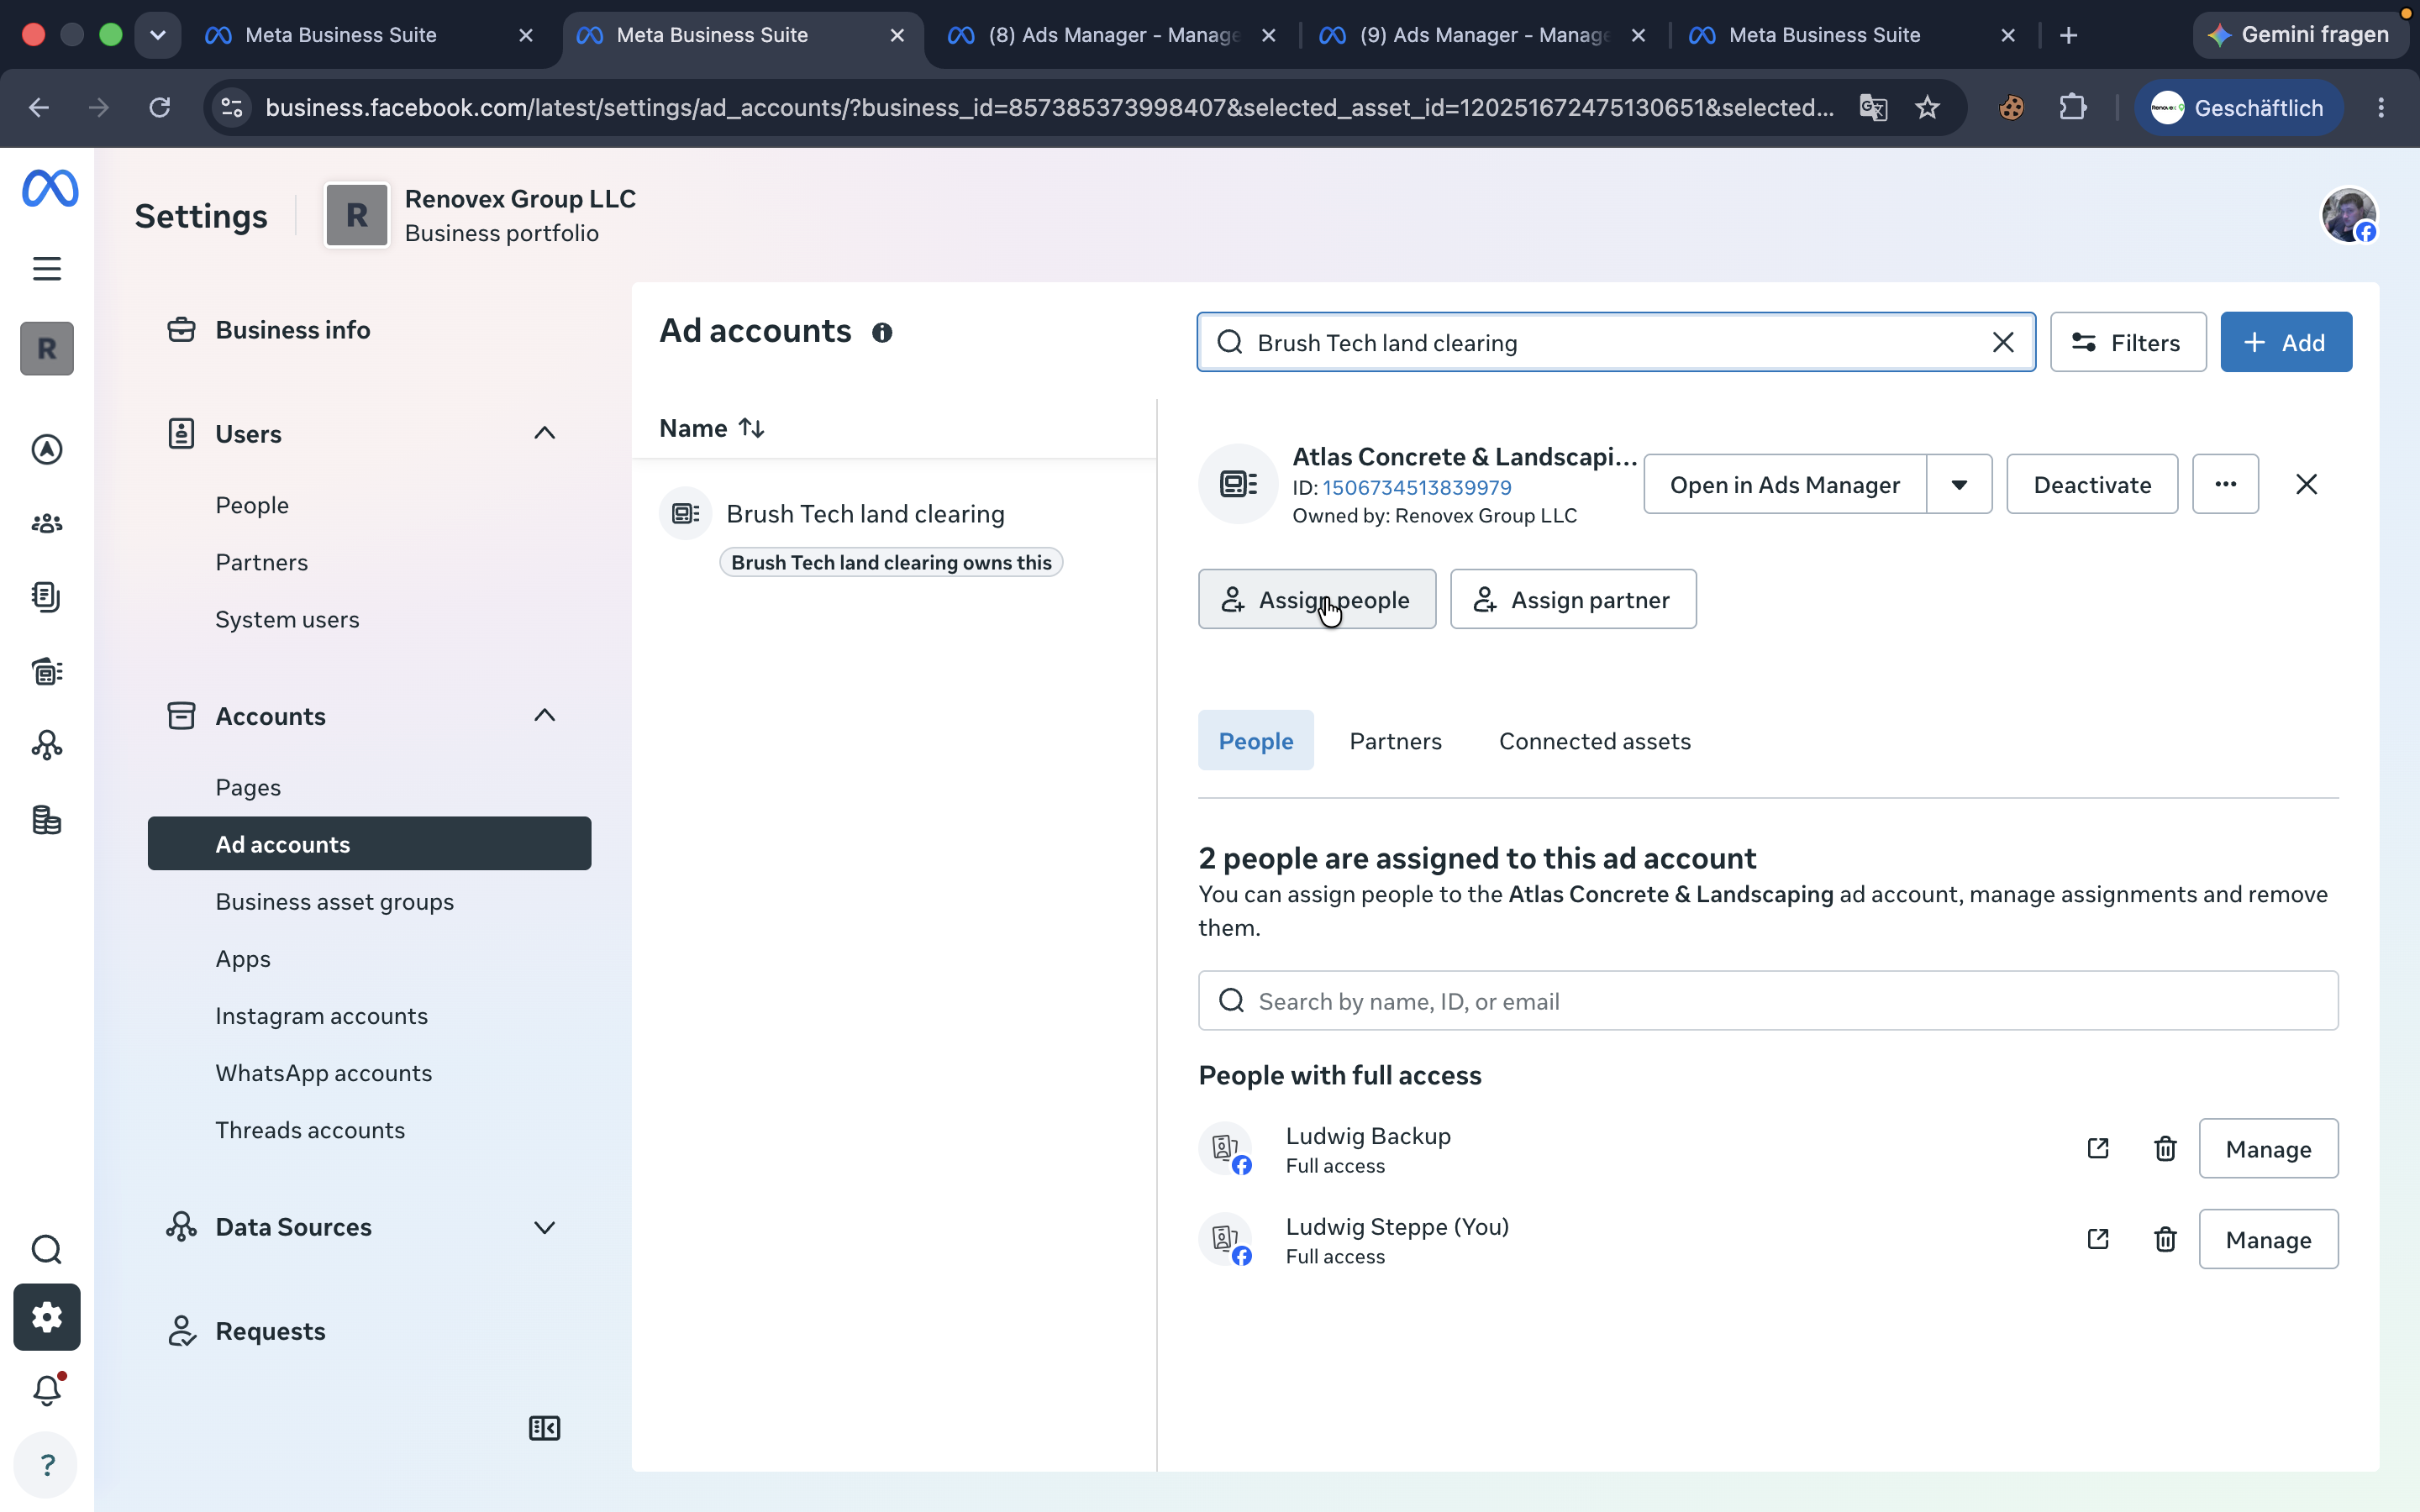
21
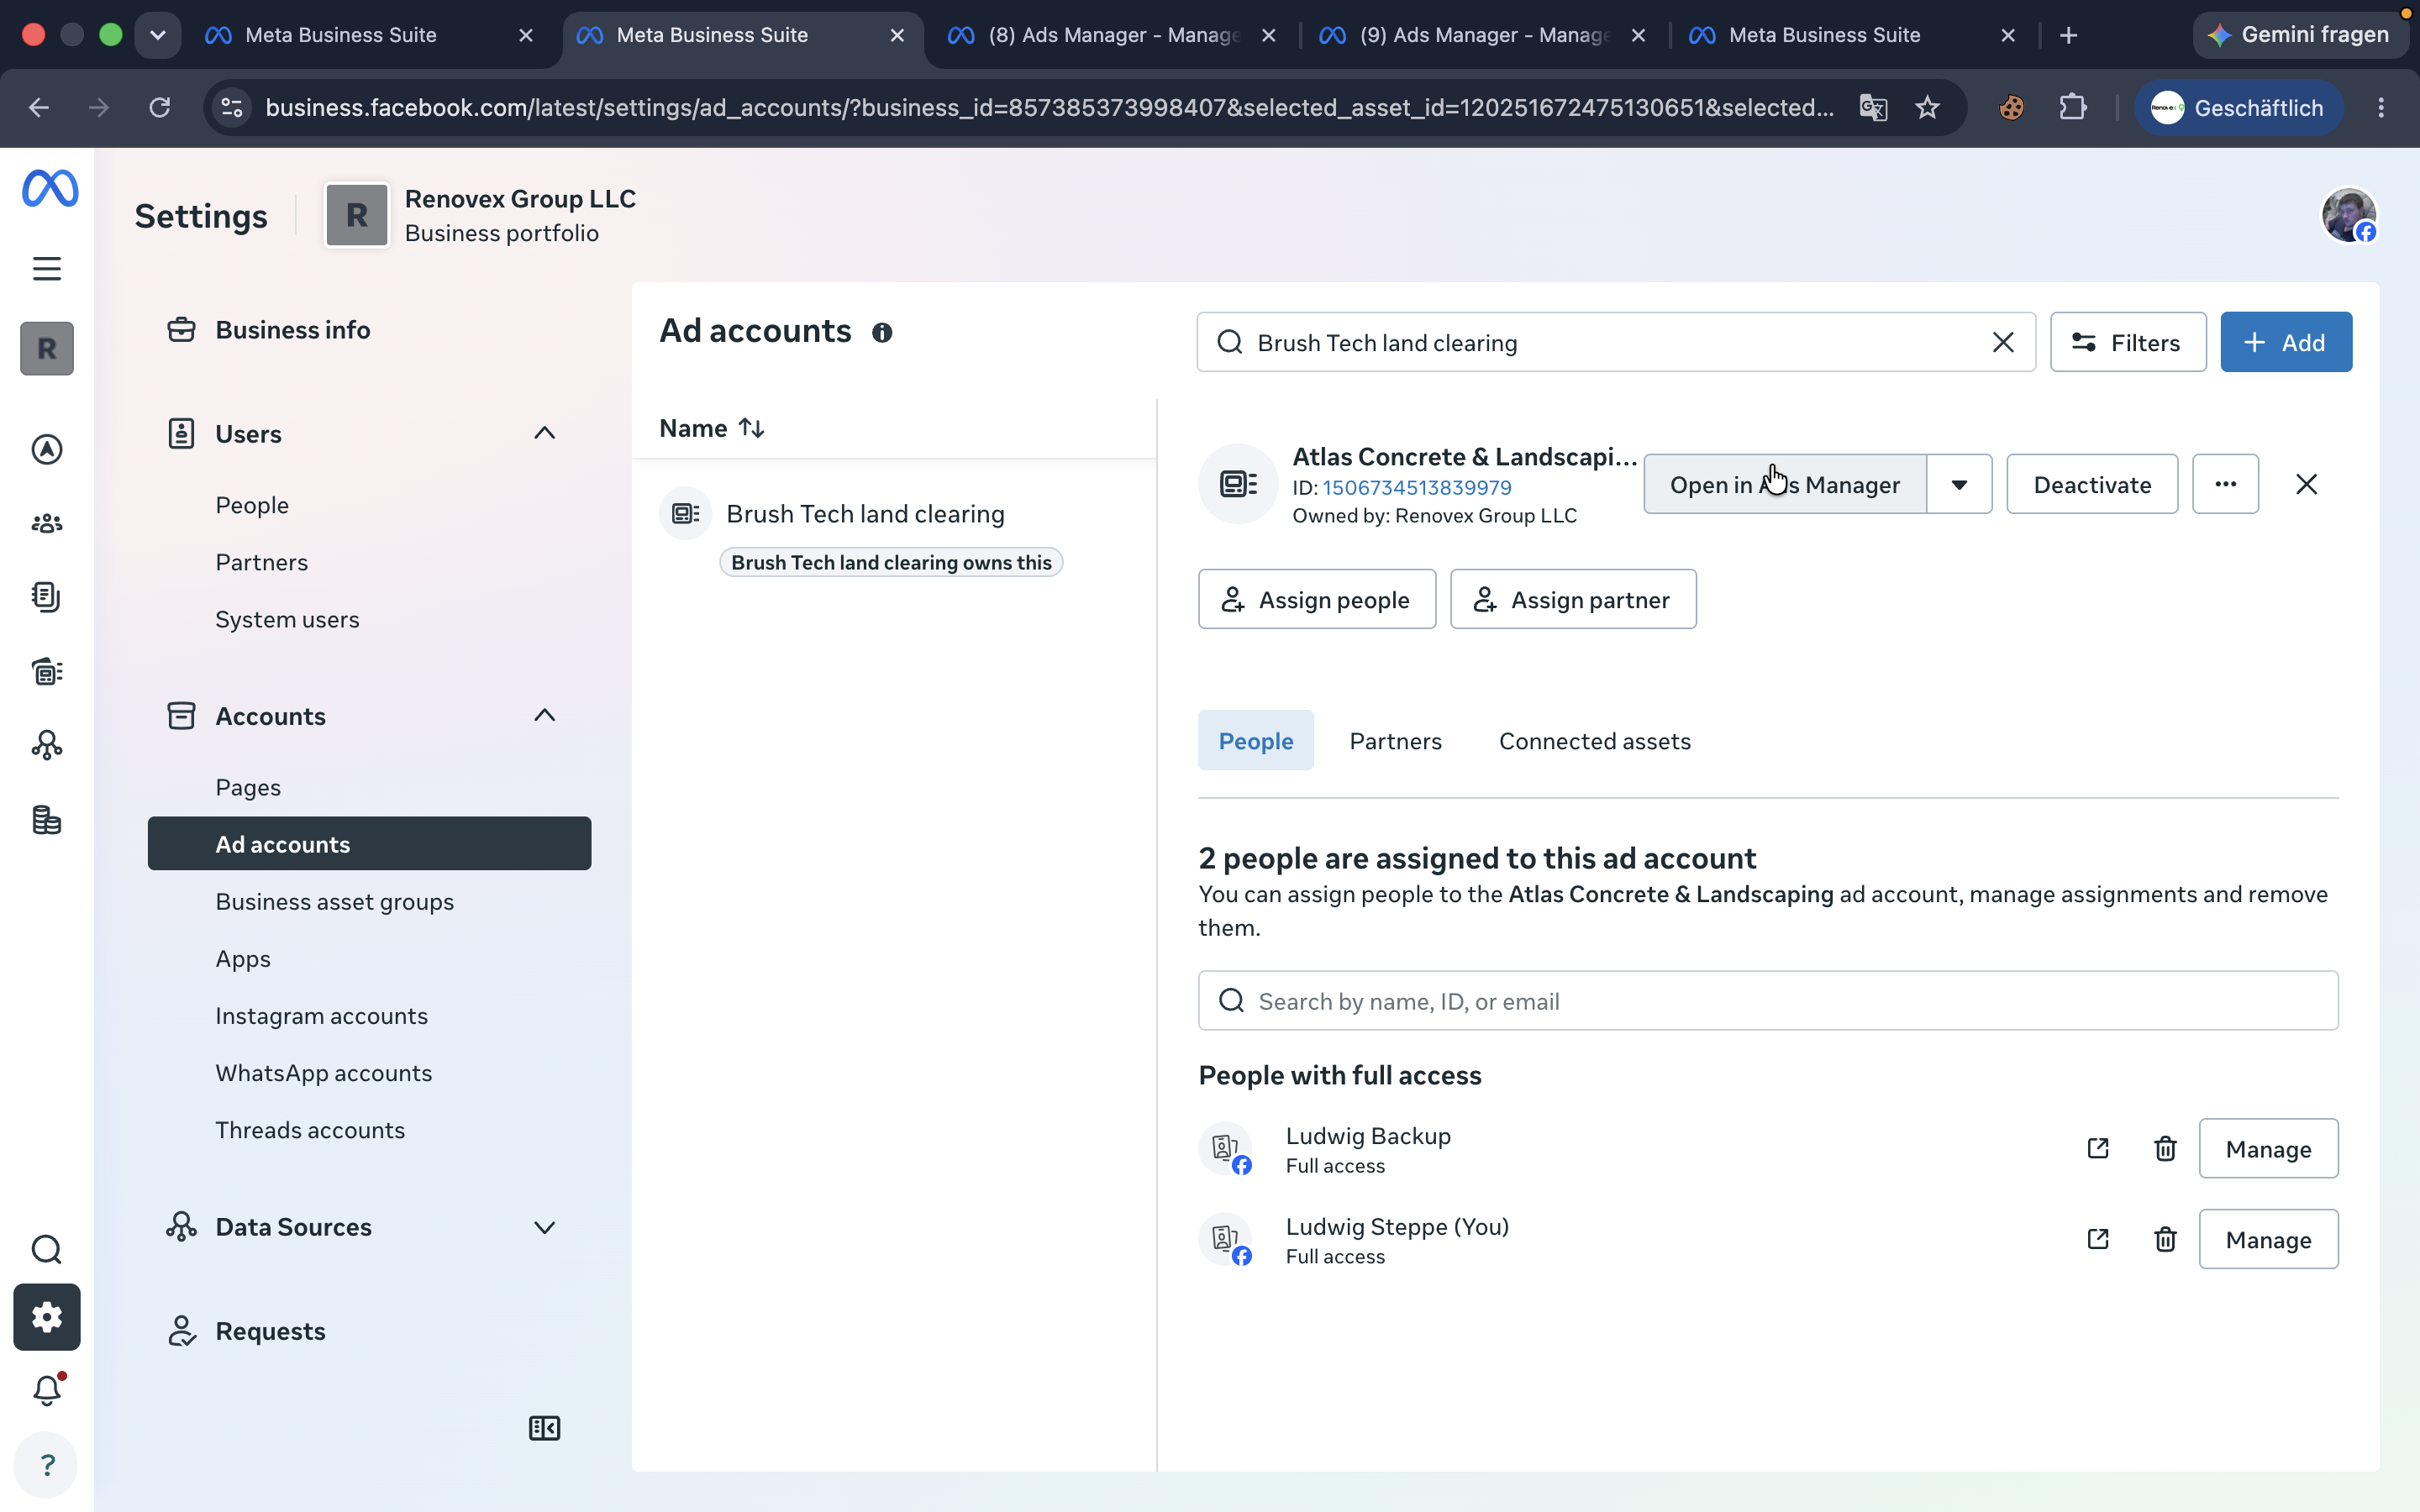
Select the client's ad account and click Assign people.
Step #21: Select the client's ad account and click Assign people.
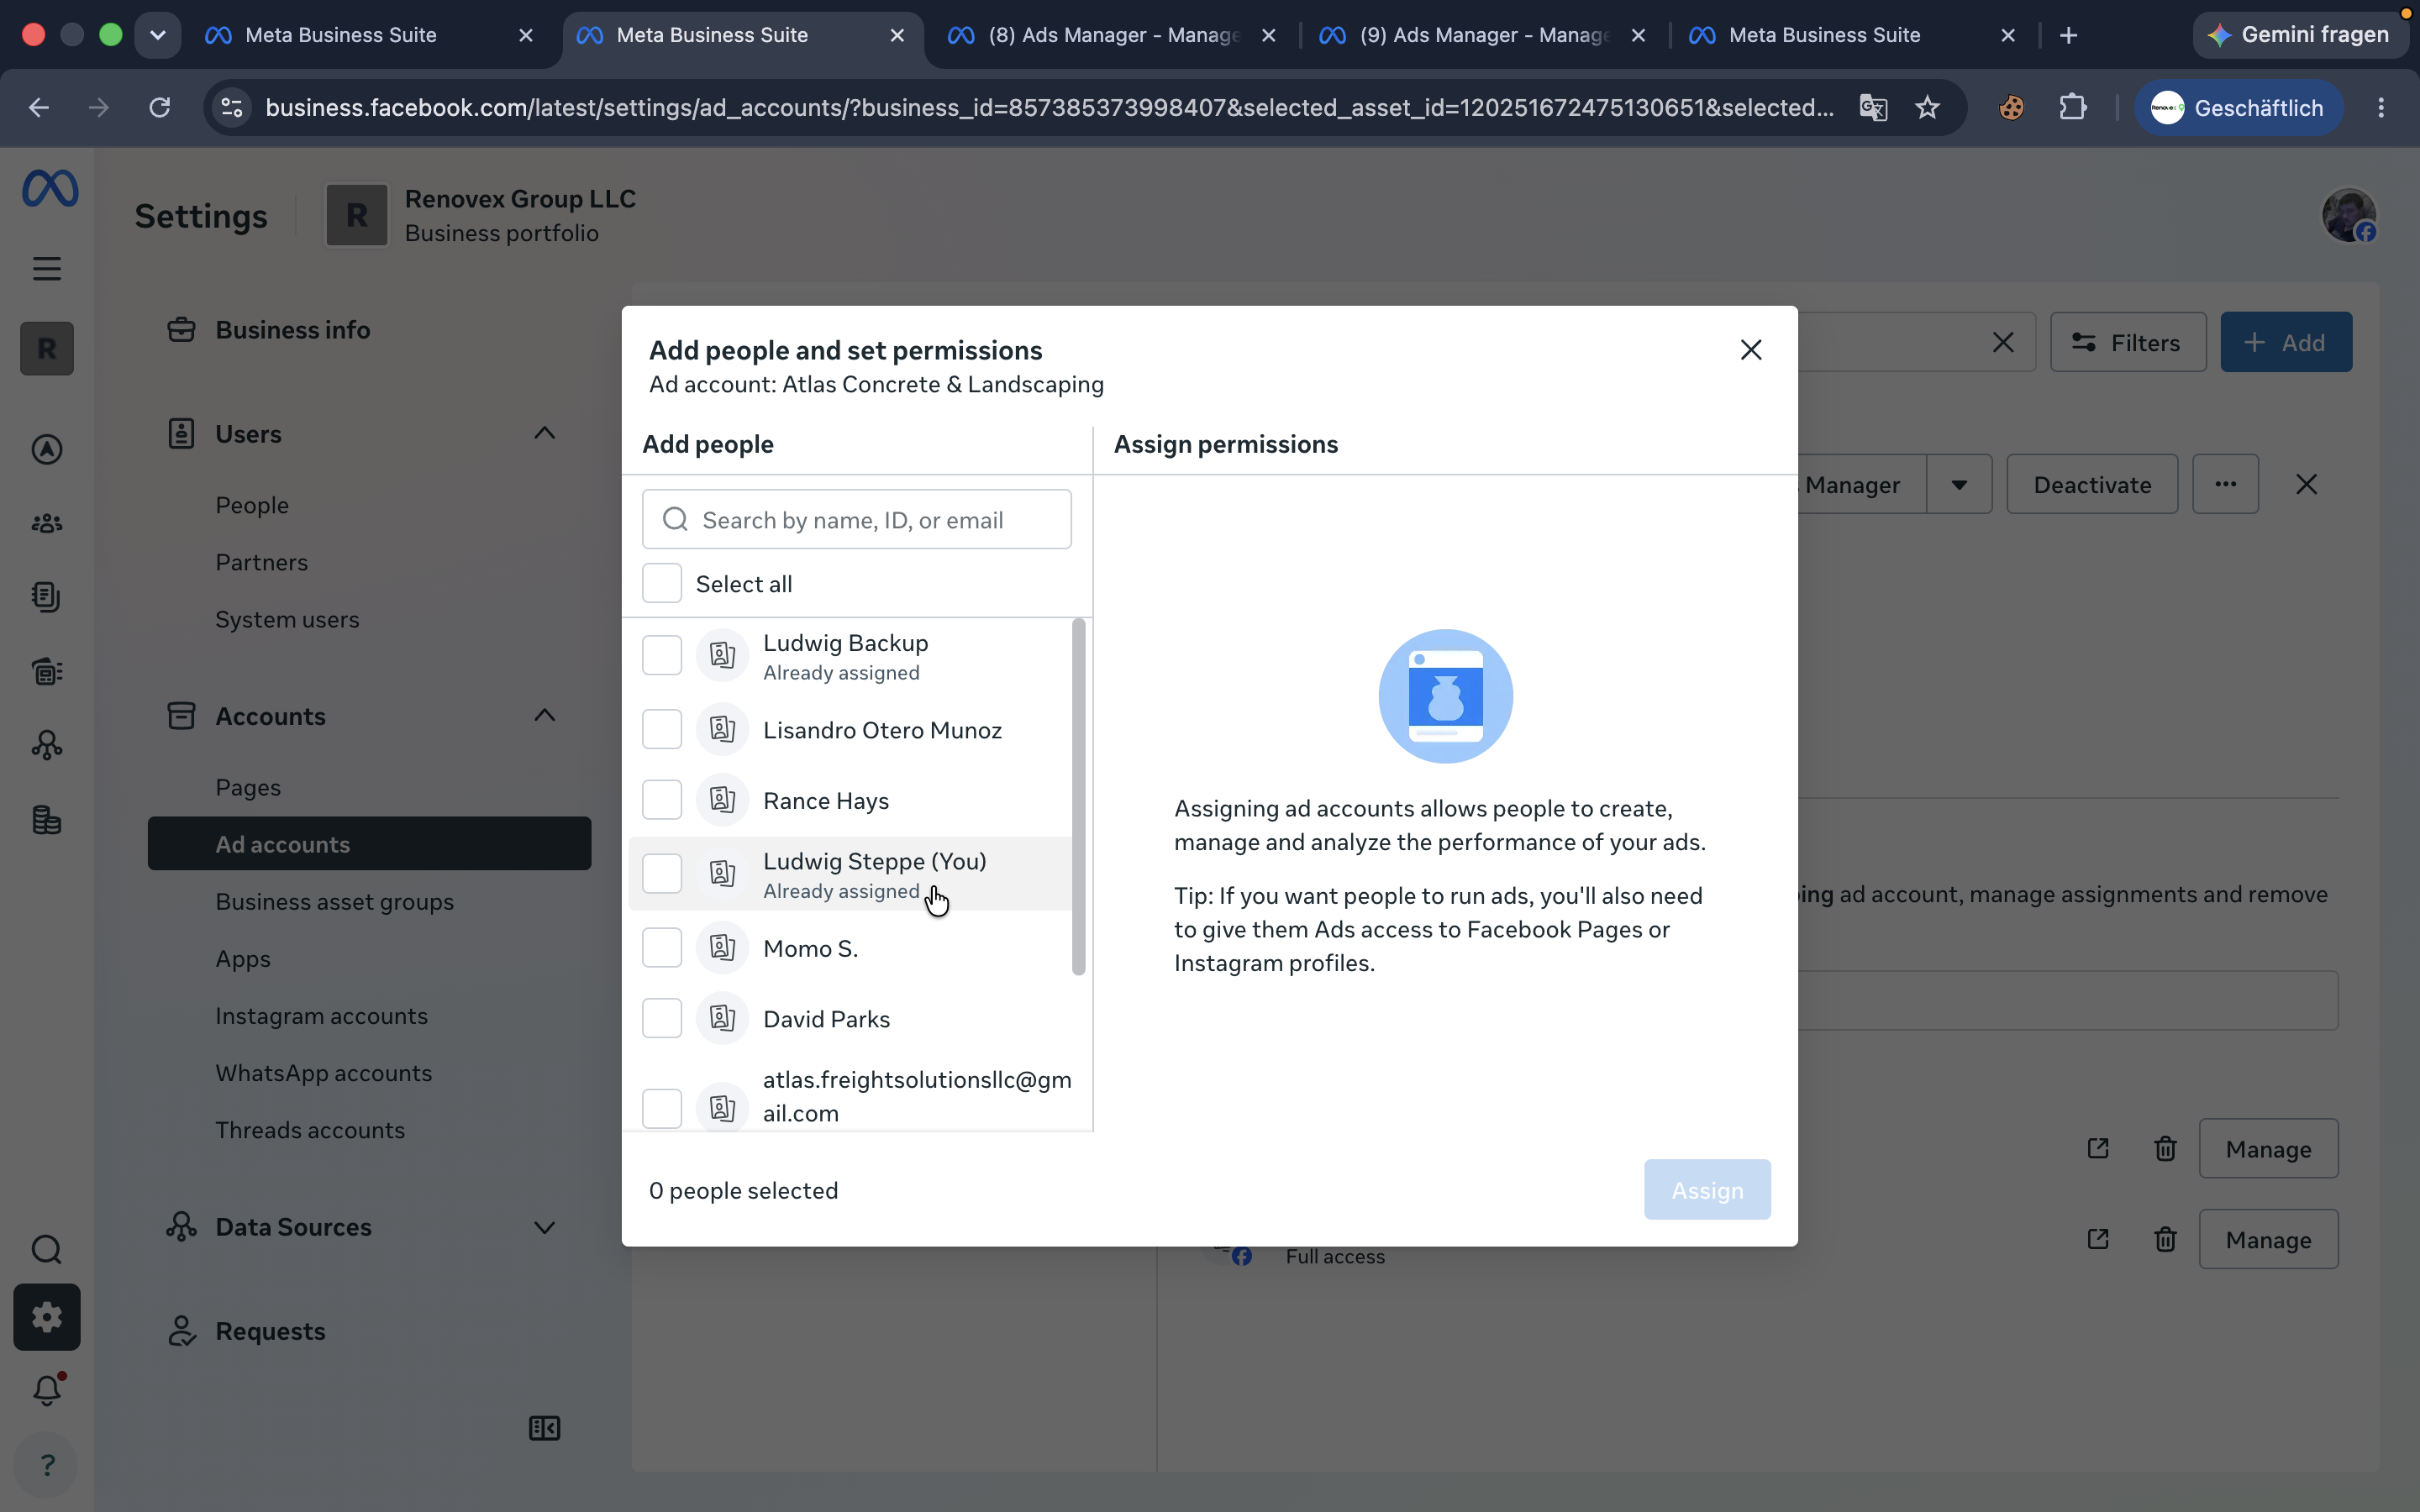
22
Select yourself from the user list.
Step #22: Select yourself from the user list.
23
Toggle on full access permissions, then click Assign.
Step #23: Toggle on full access permissions, then click Assign.
24
Click Open in Ads Manager to jump into campaign creation.
Step #24: Click Open in Ads Manager to jump into campaign creation.

Part 4: Create the Leads Campaign
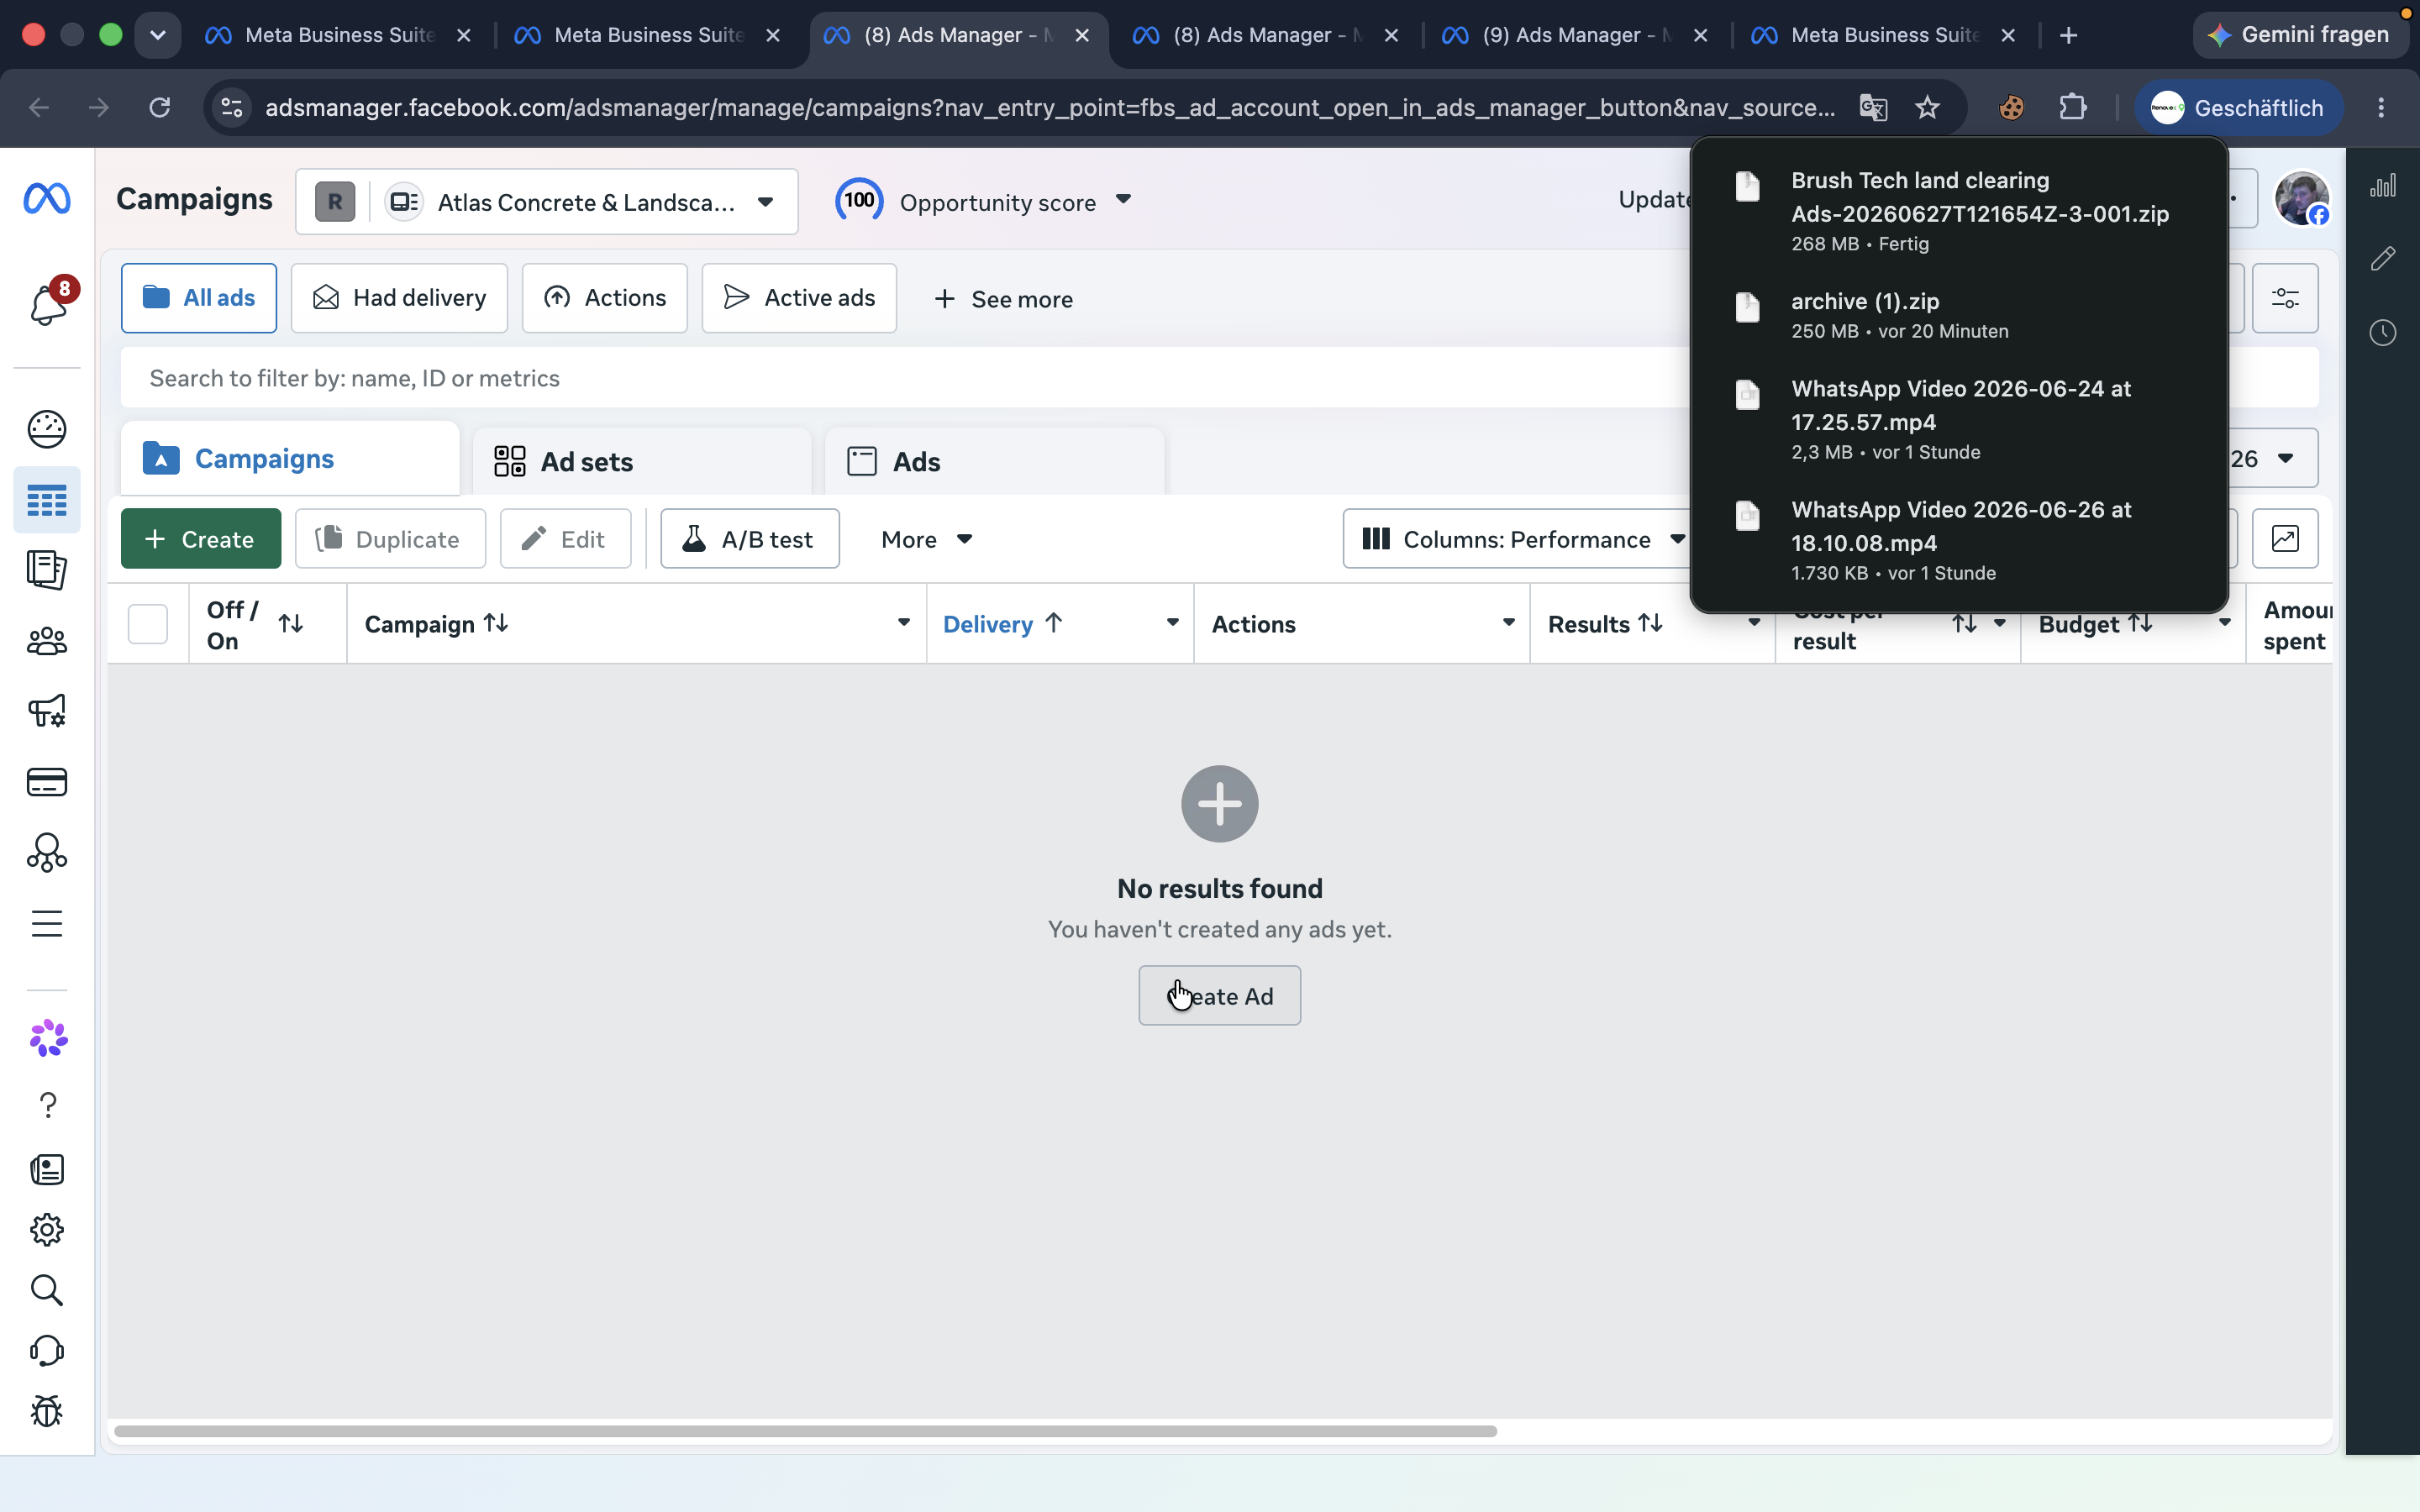
25
Click Create Ad.
Step #25: Click Create Ad.
26
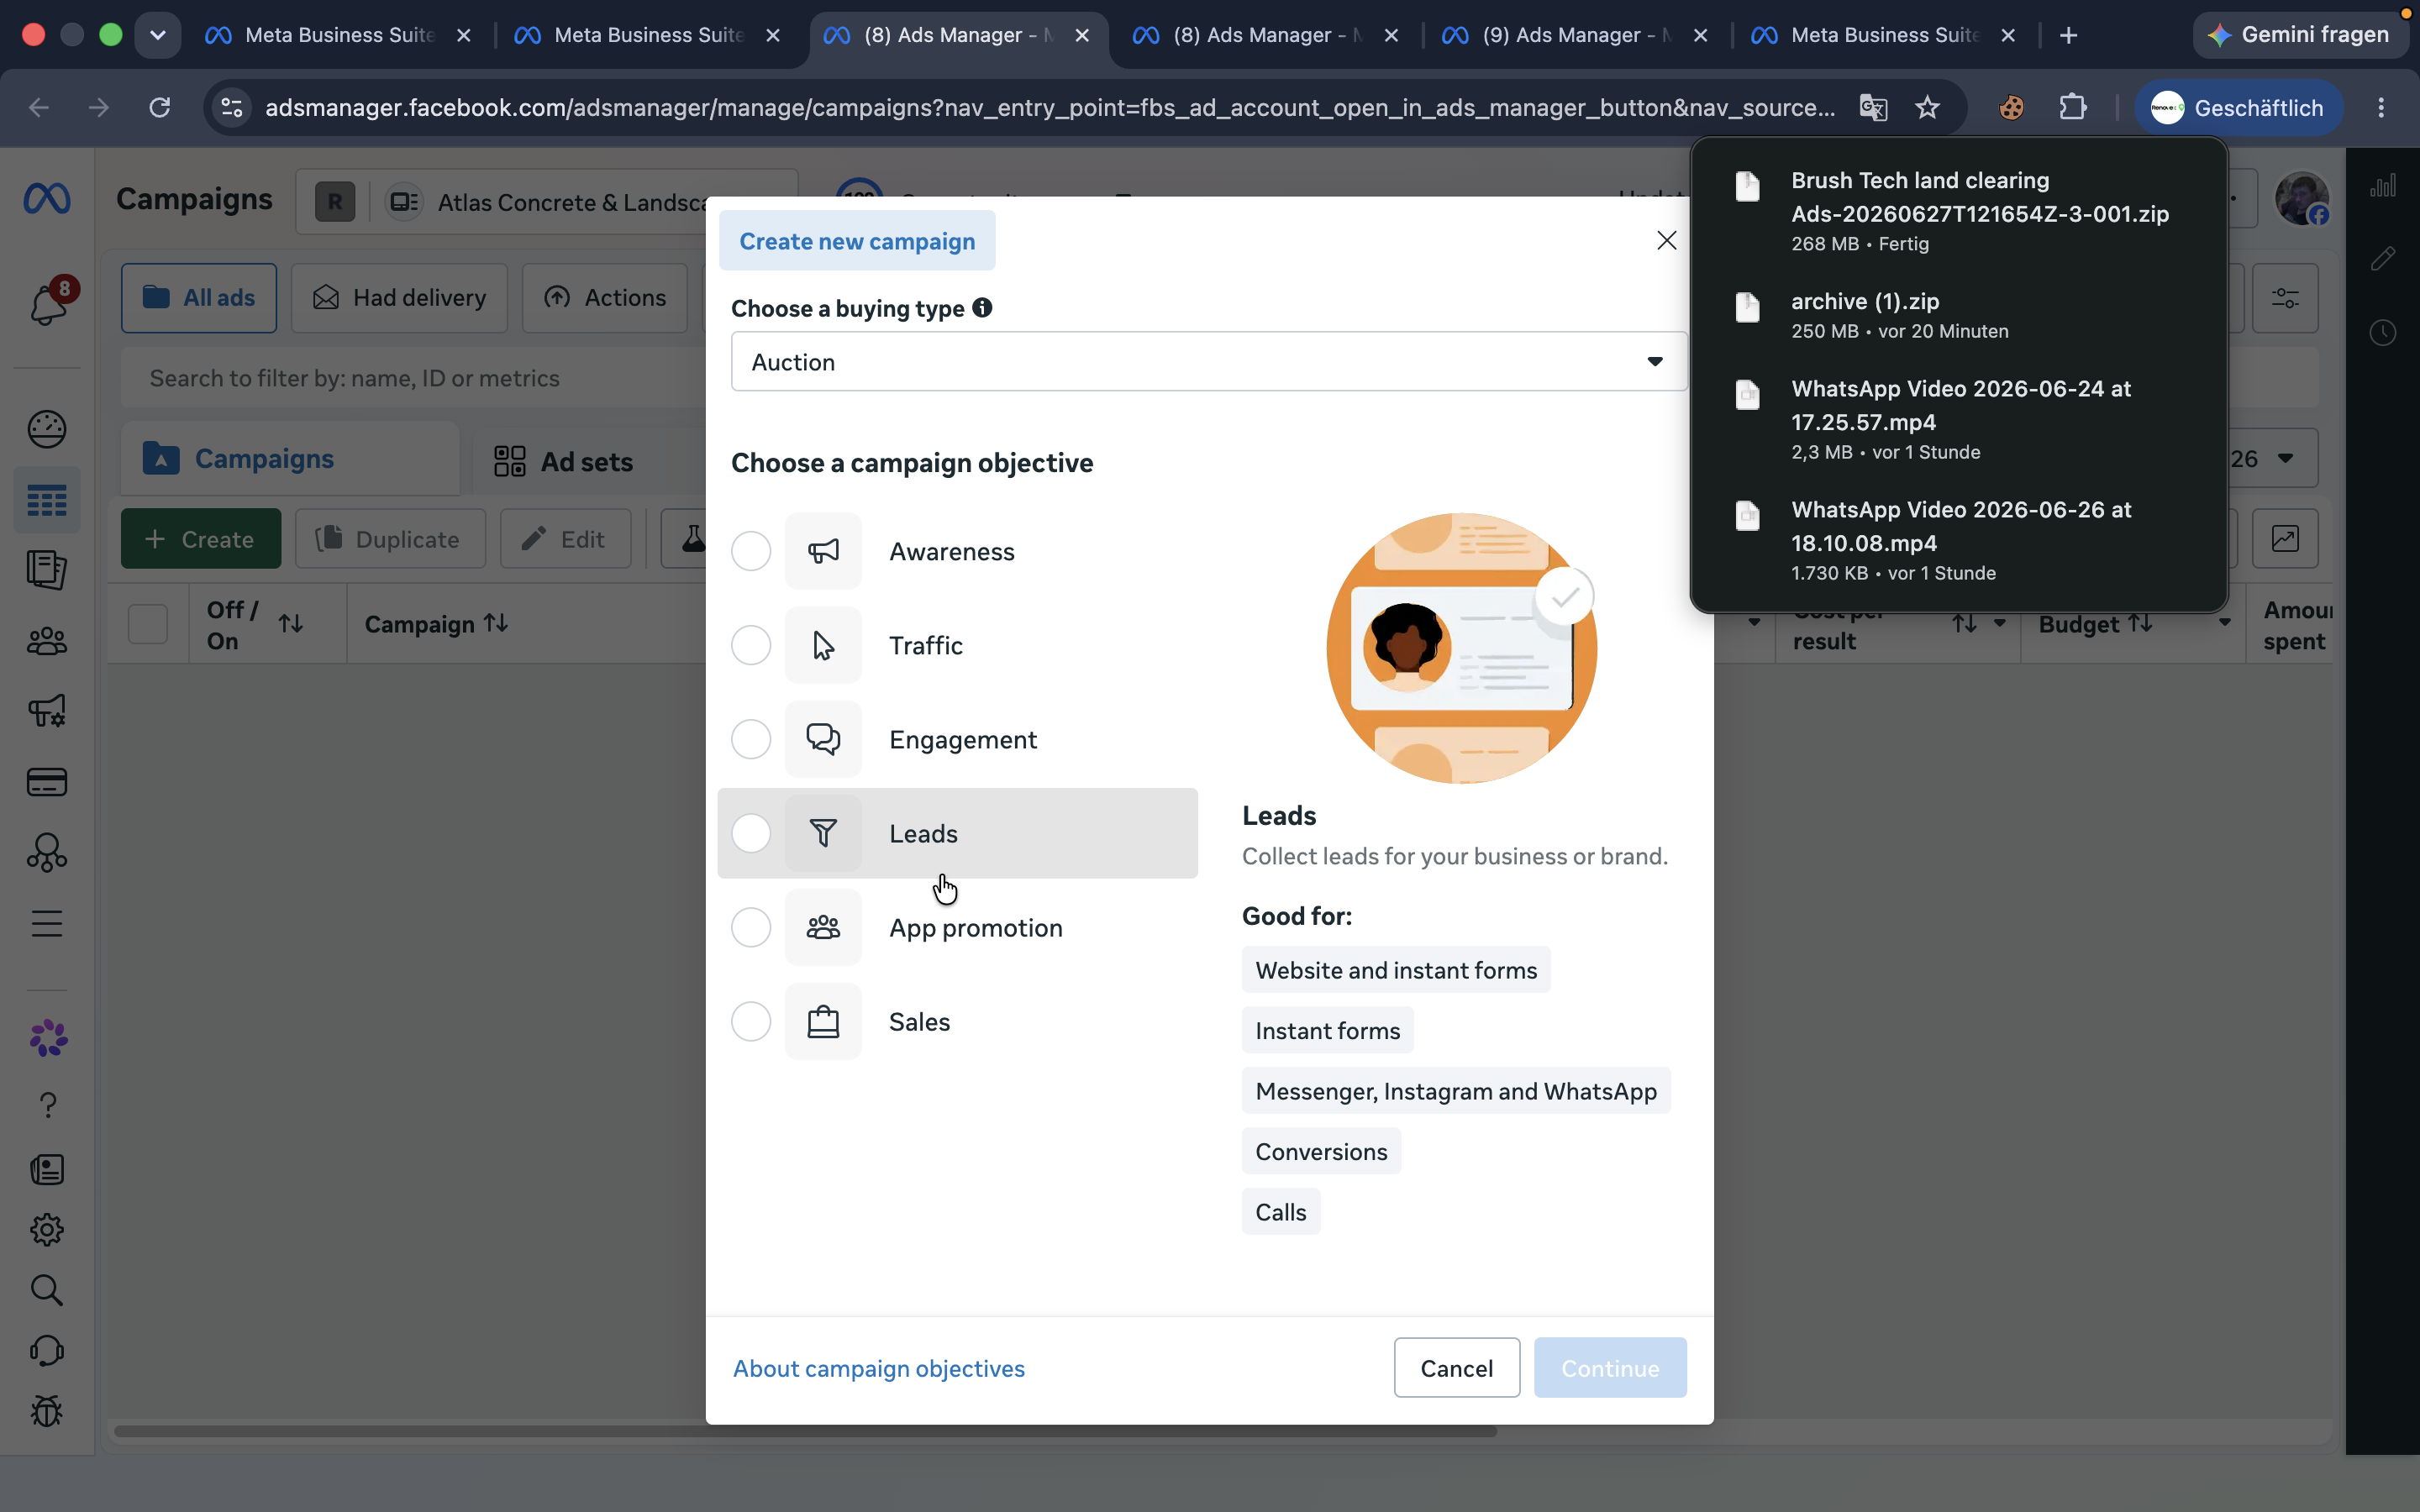
Select the Leads objective.
Step #26: Select the Leads objective.
27
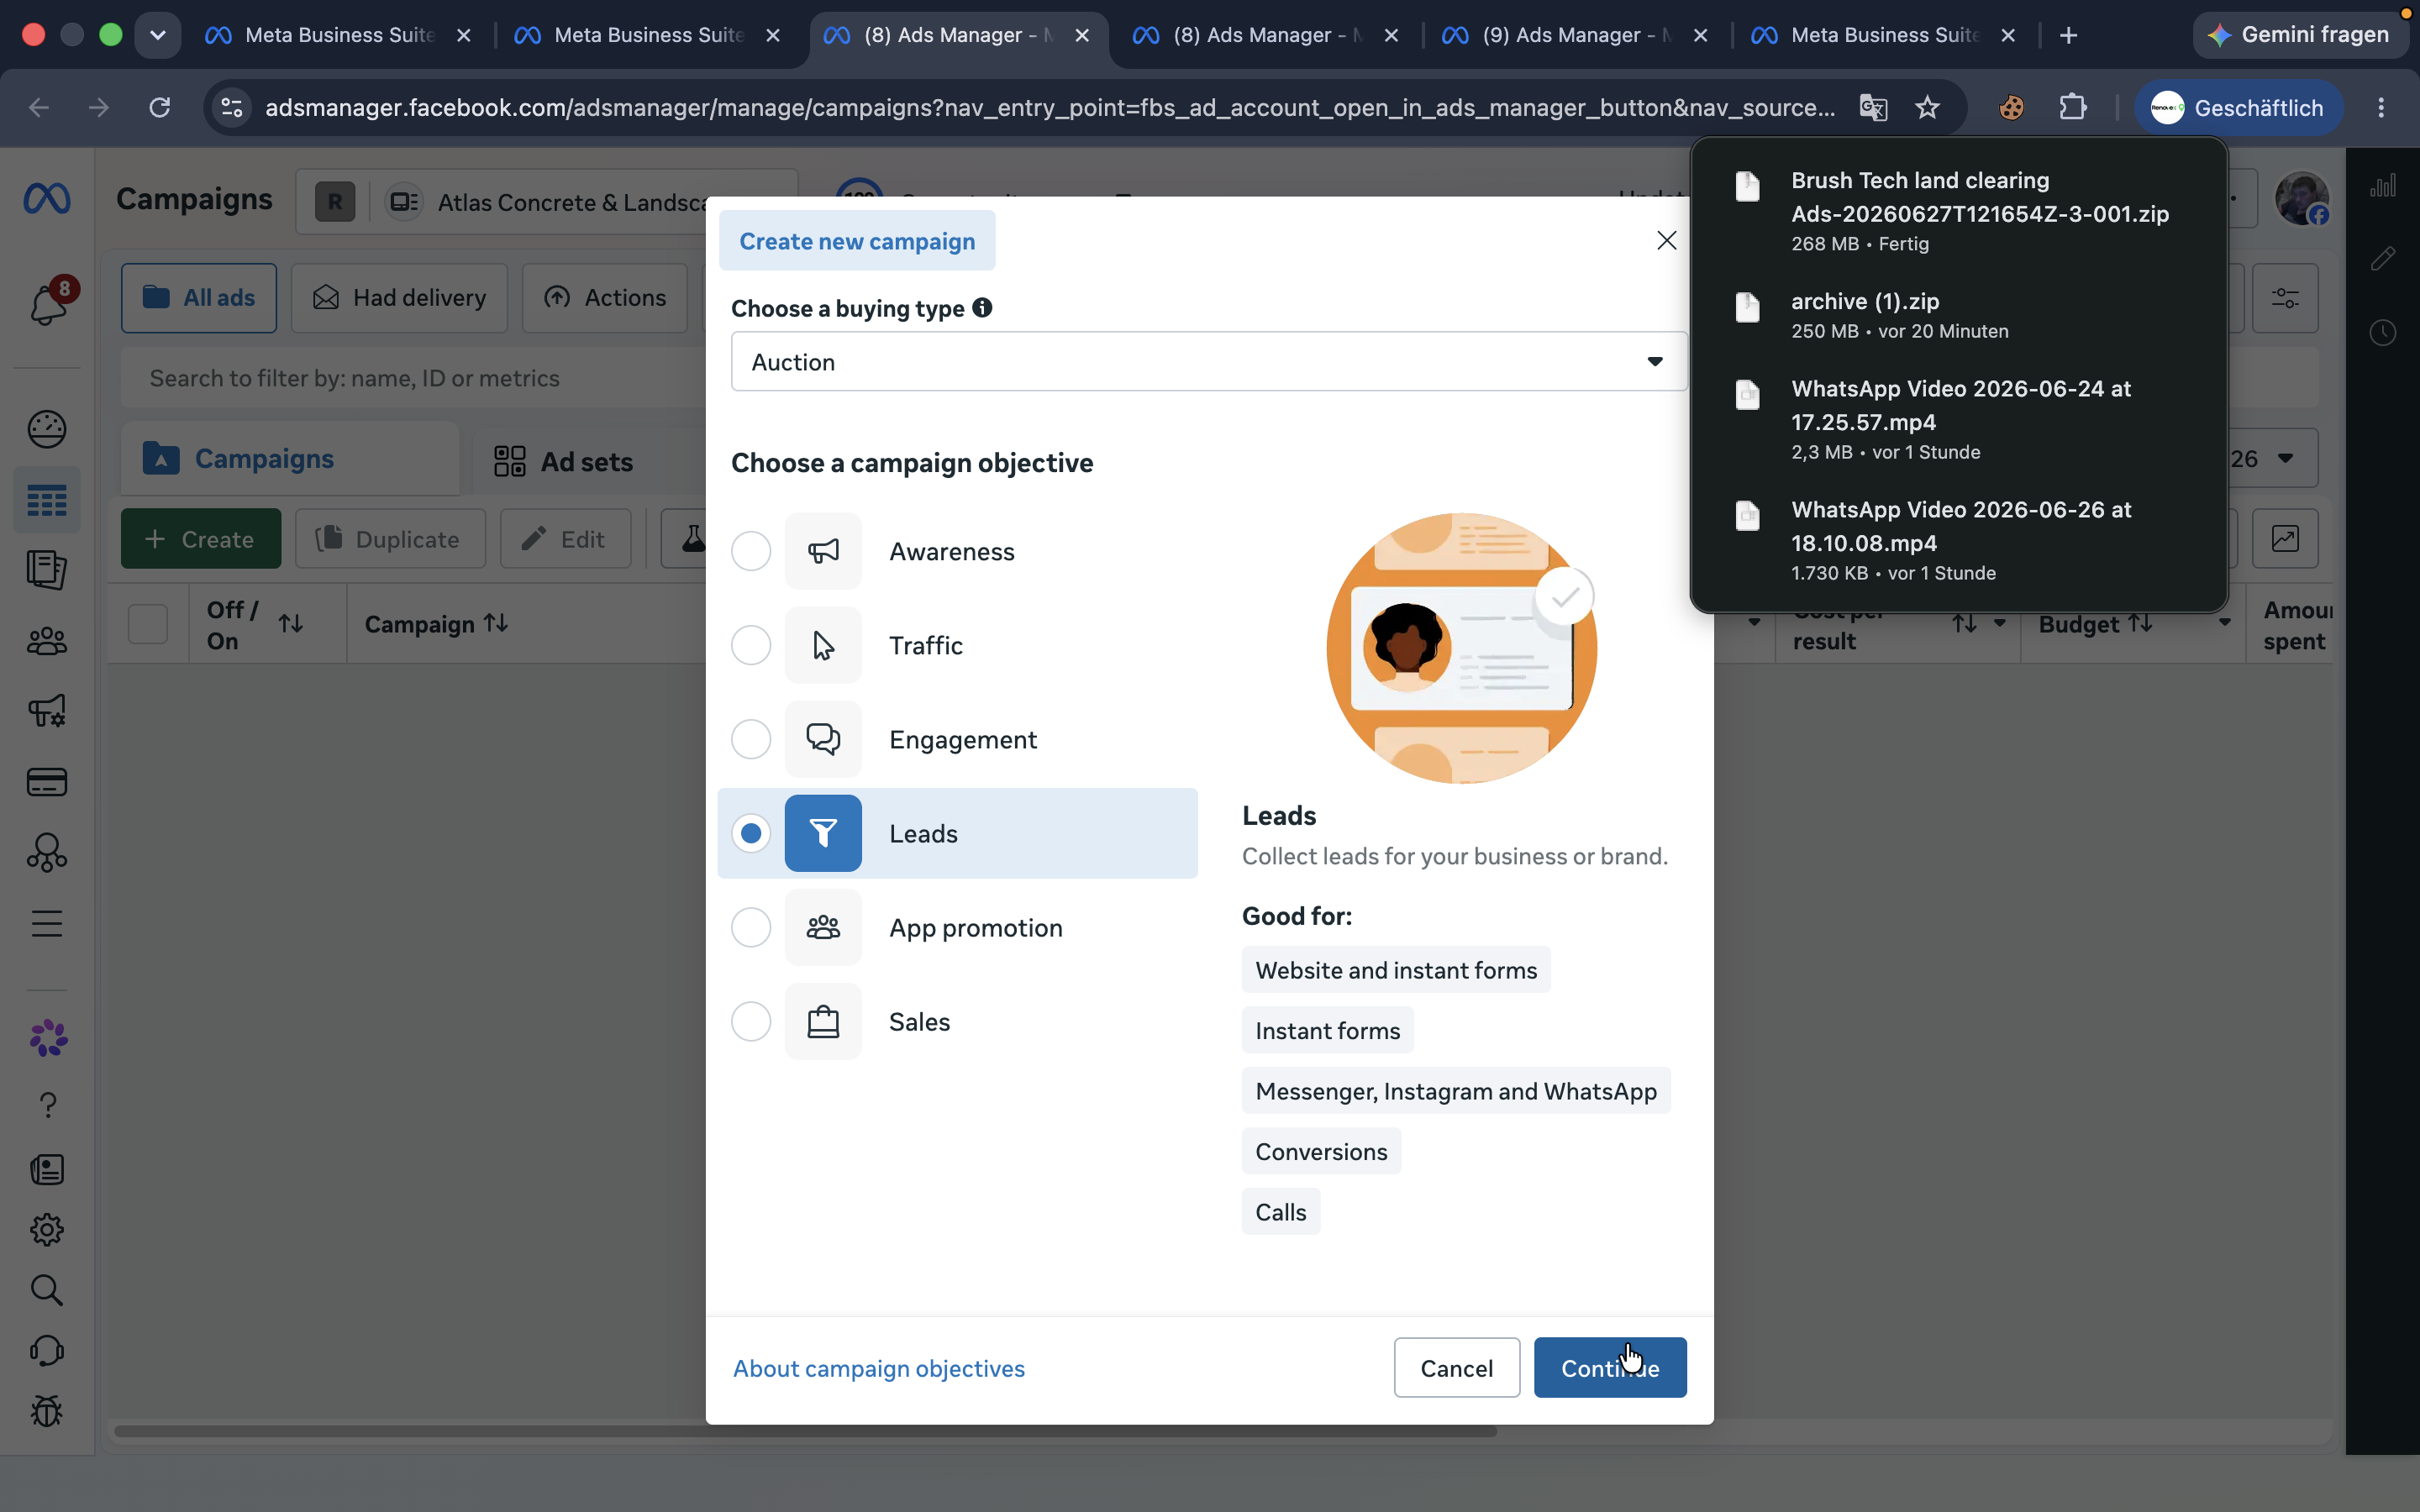
Click Continue.
Step #27: Click Continue.
28
Enter the new campaign name at the top level.
29
Navigate to the ad set level in the sidebar to configure targeting.
Step #29: Navigate to the ad set level in the sidebar to configure targeting.
30
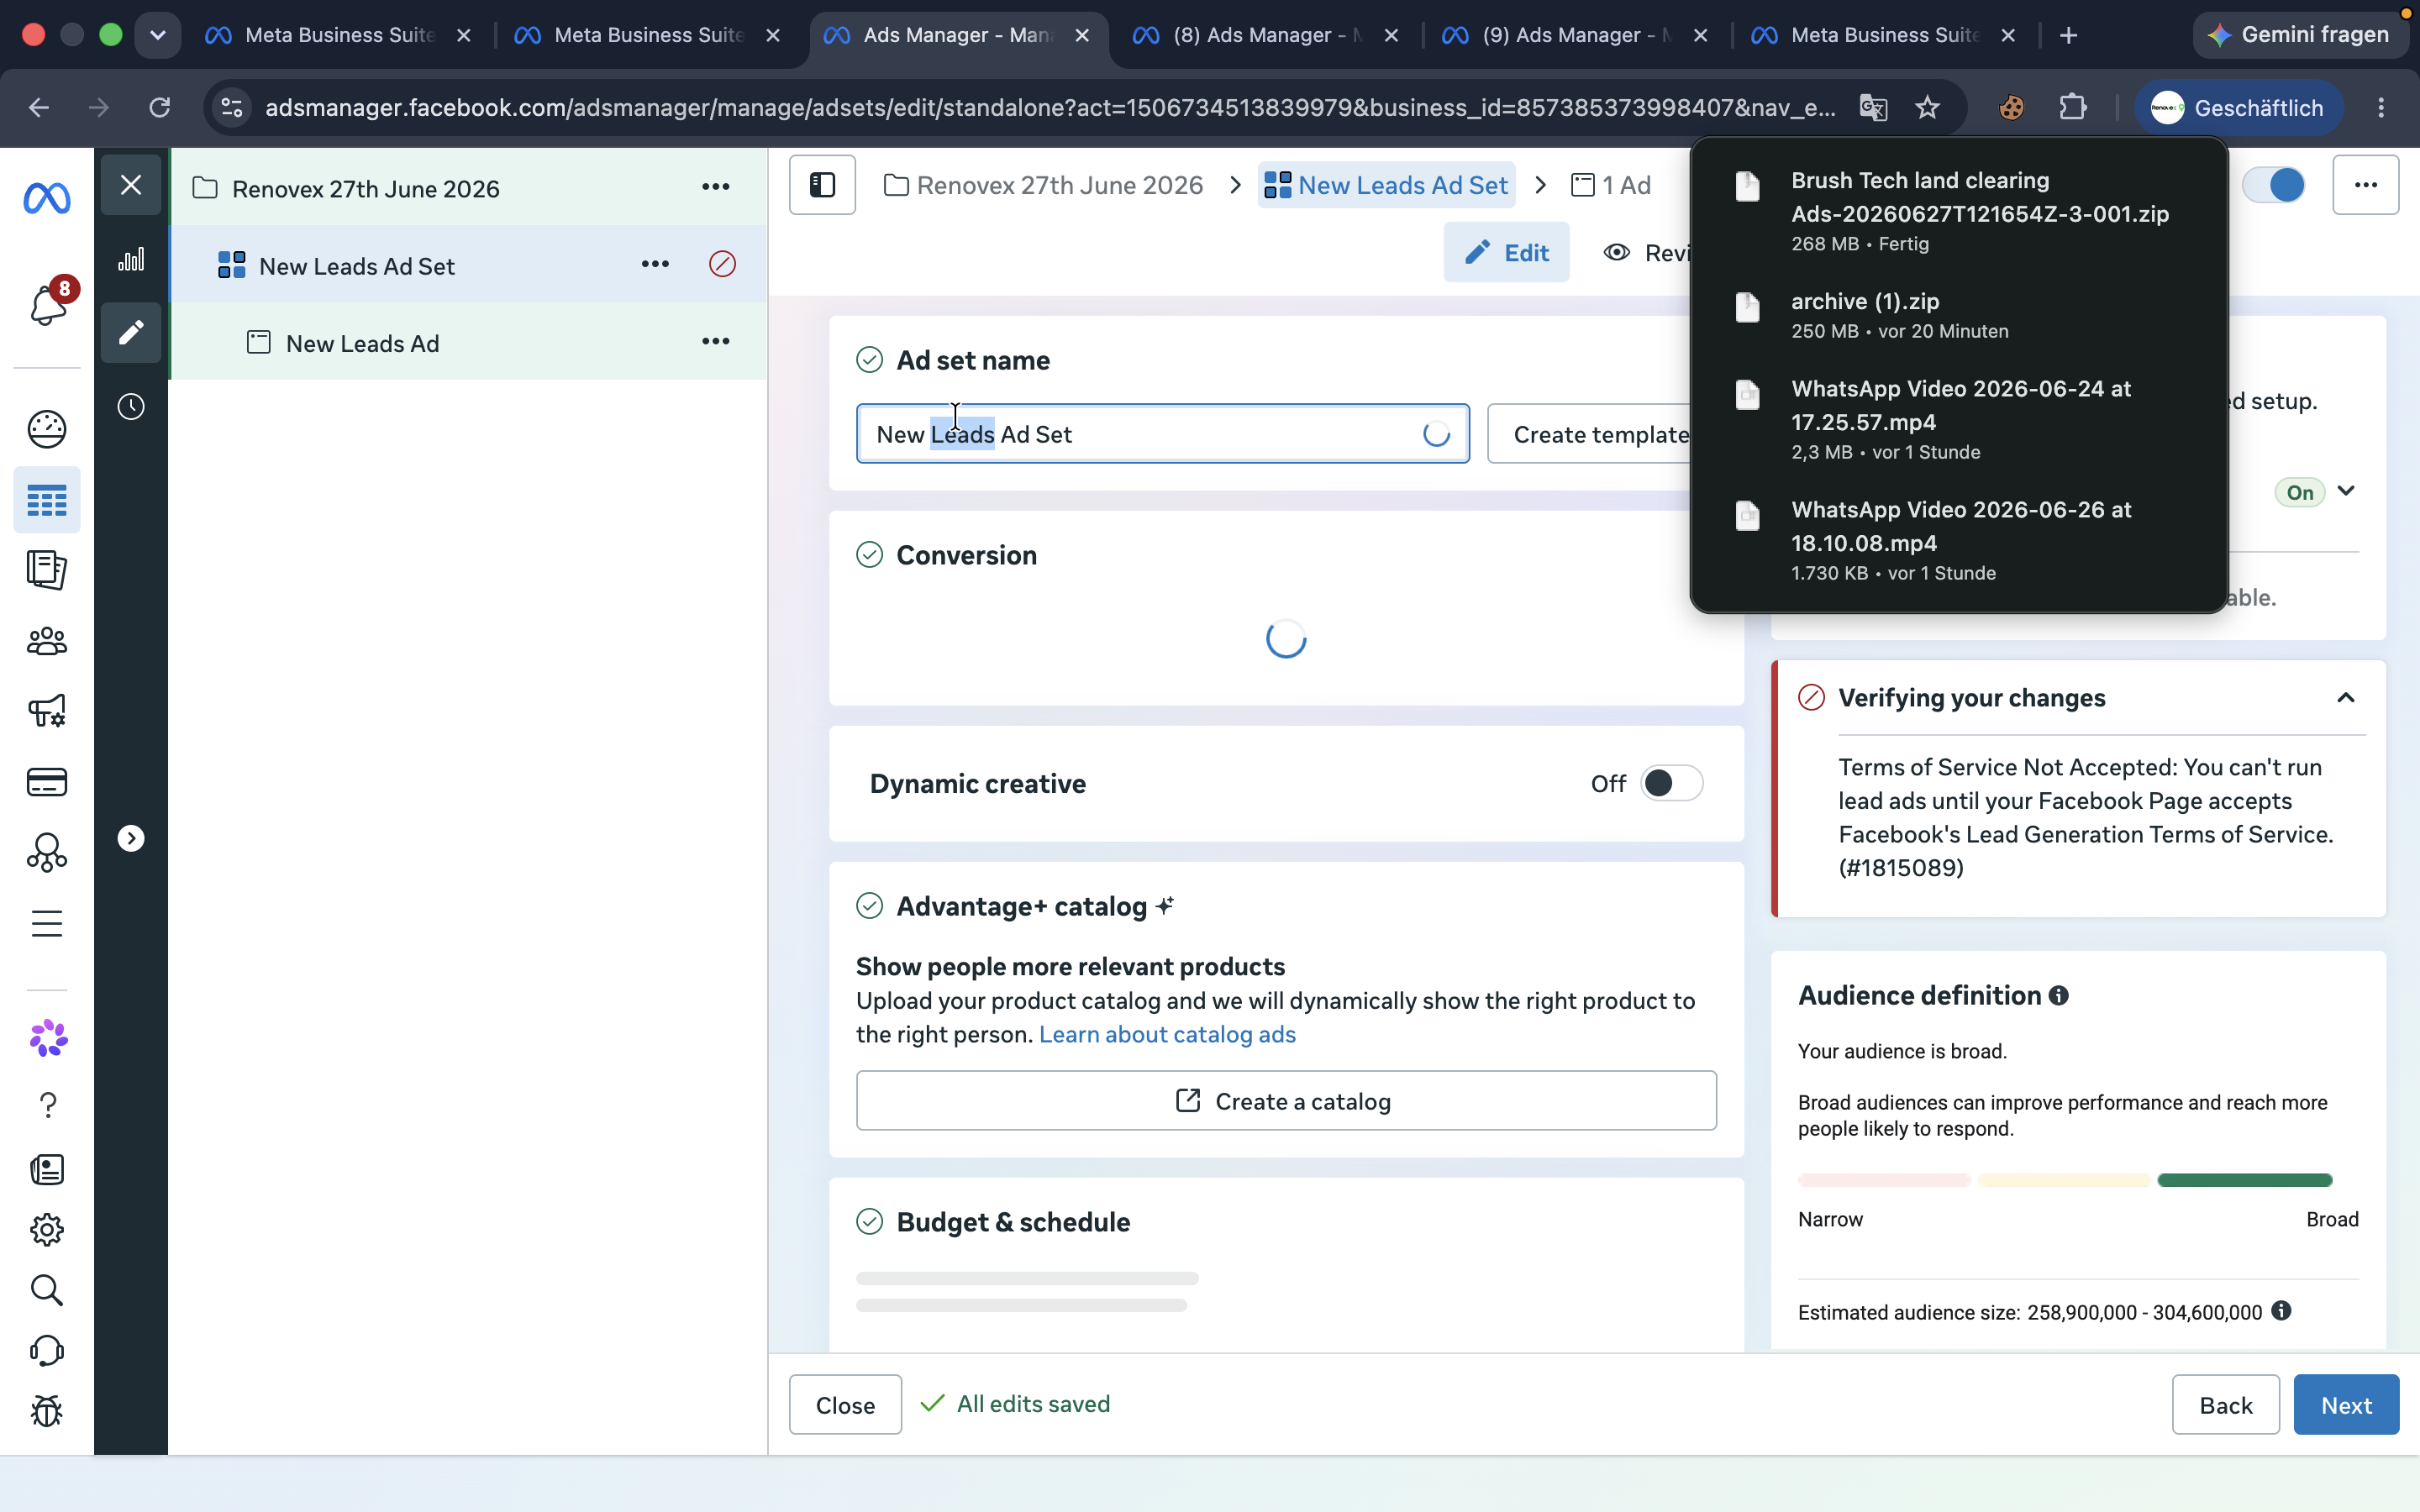
Name the ad set.
31
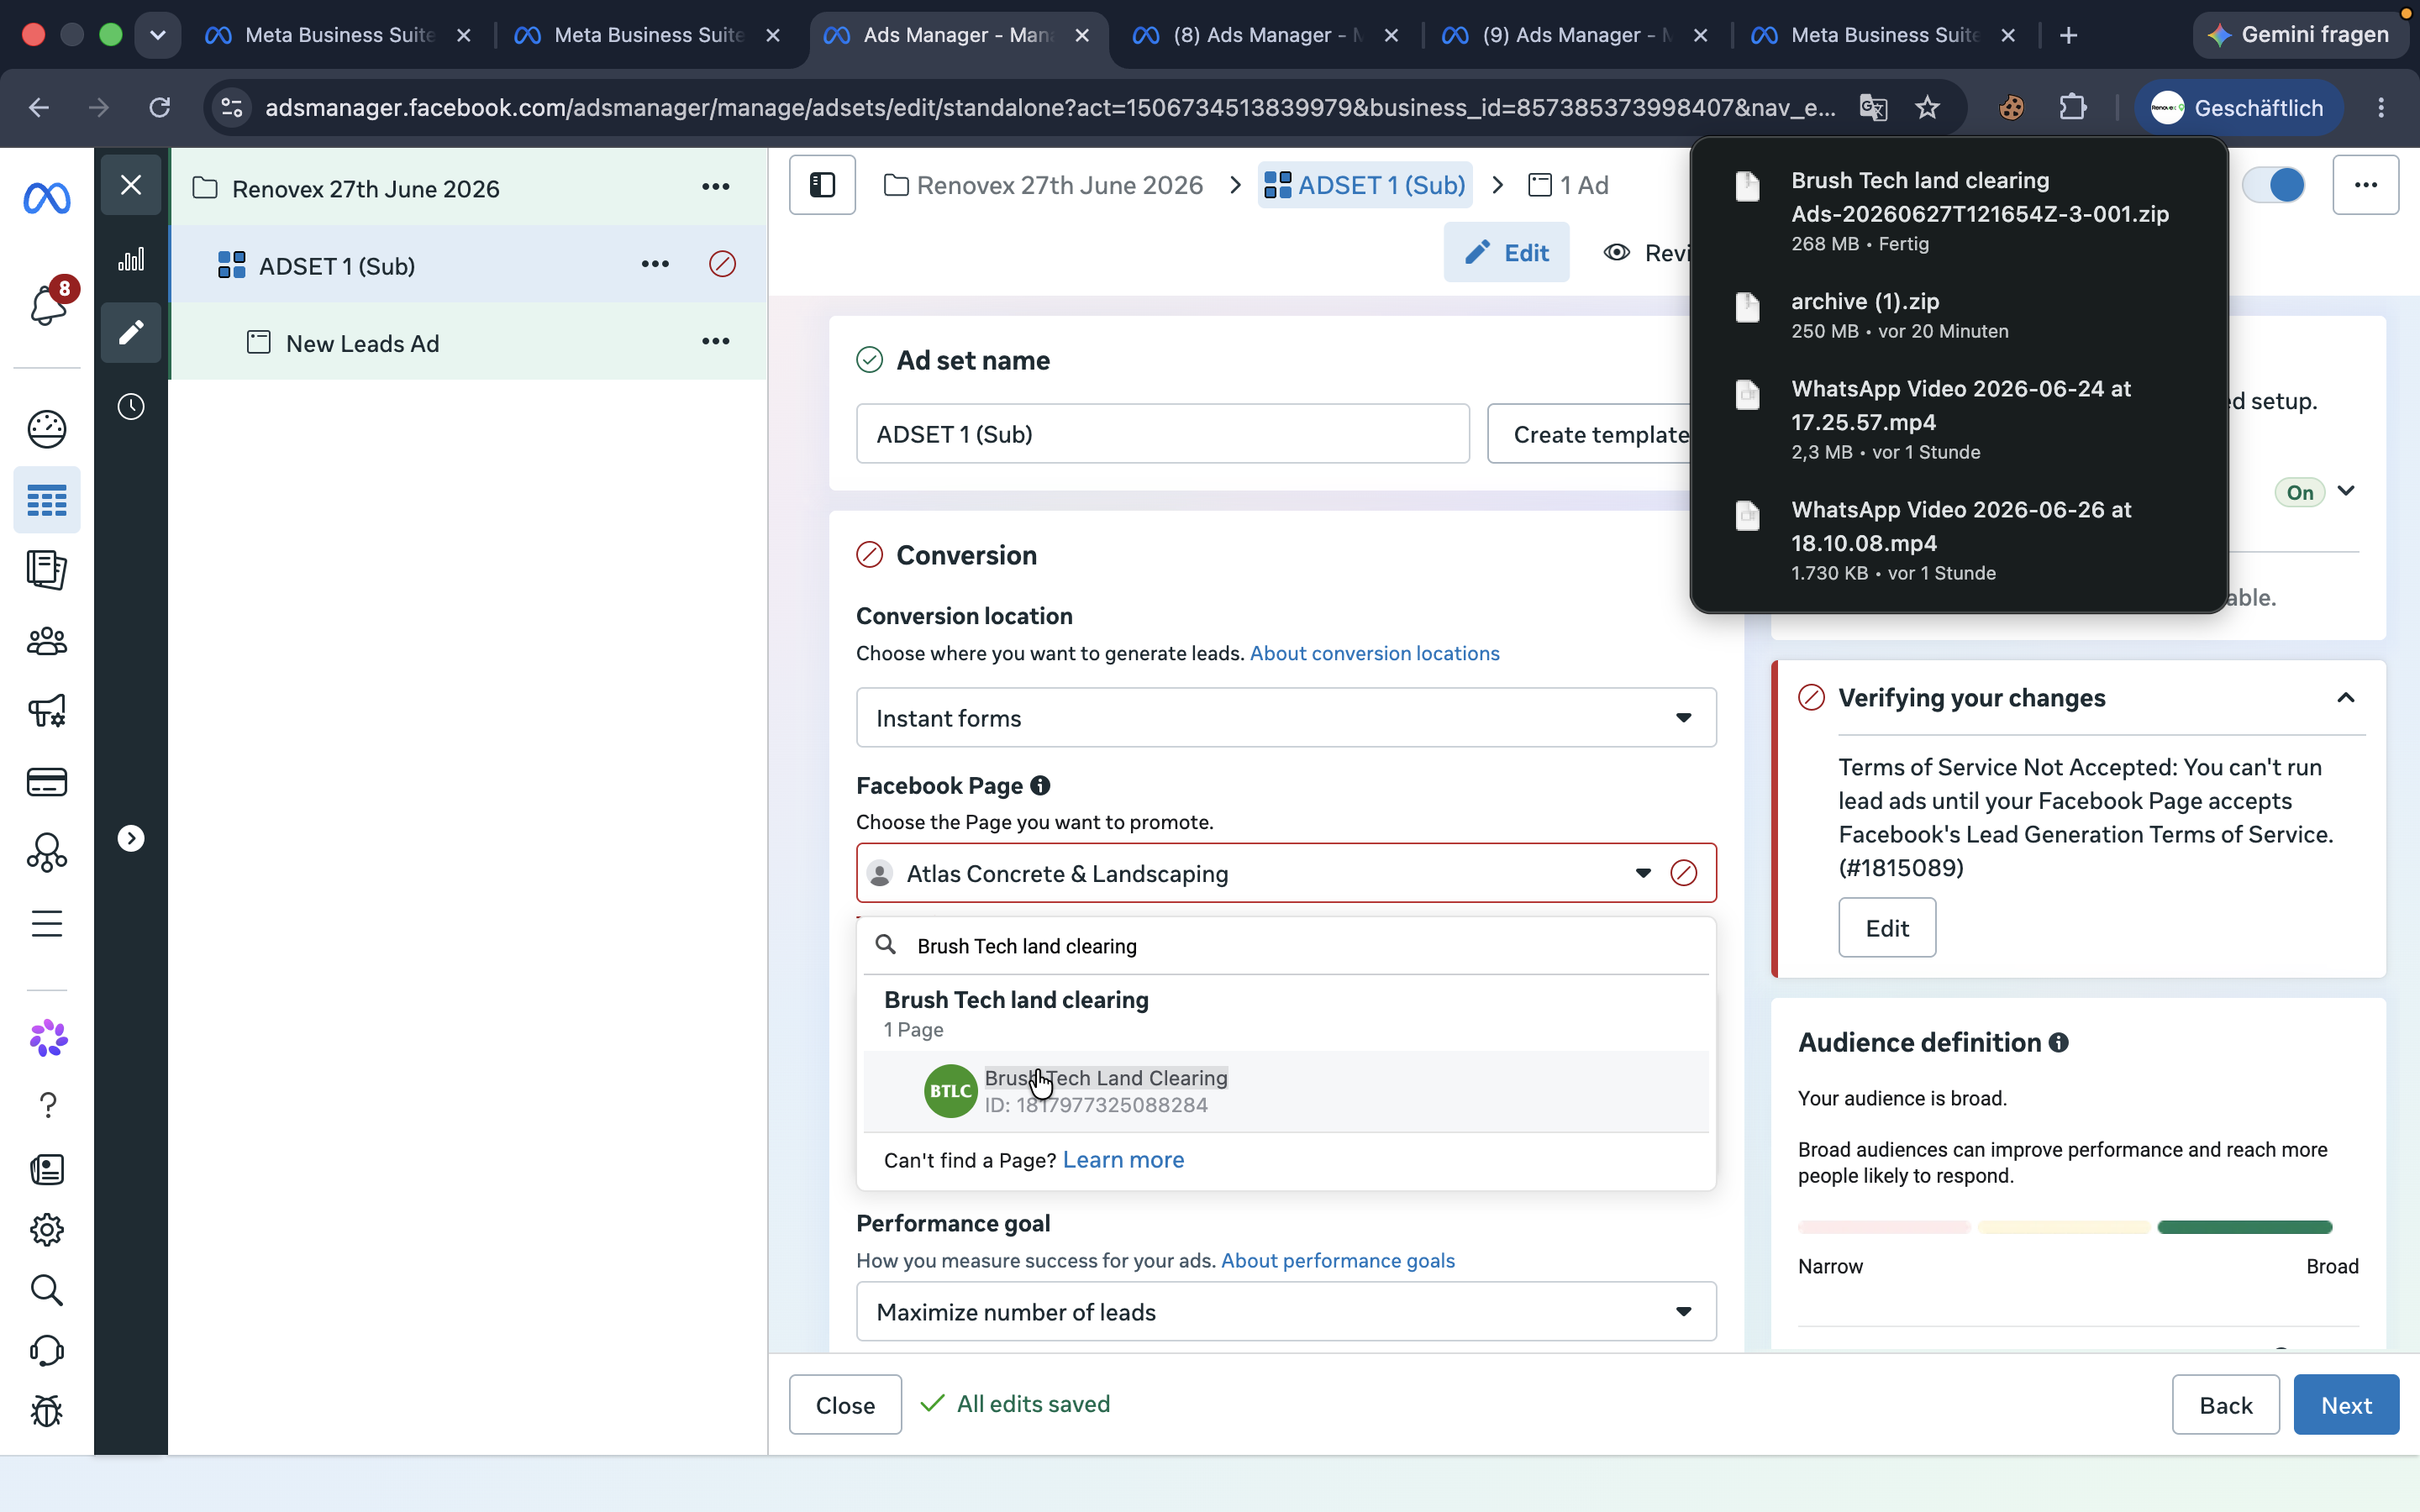
Select the client's Facebook Page from the dropdown menu.
Step #31: Select the client's Facebook Page from the dropdown menu.
32
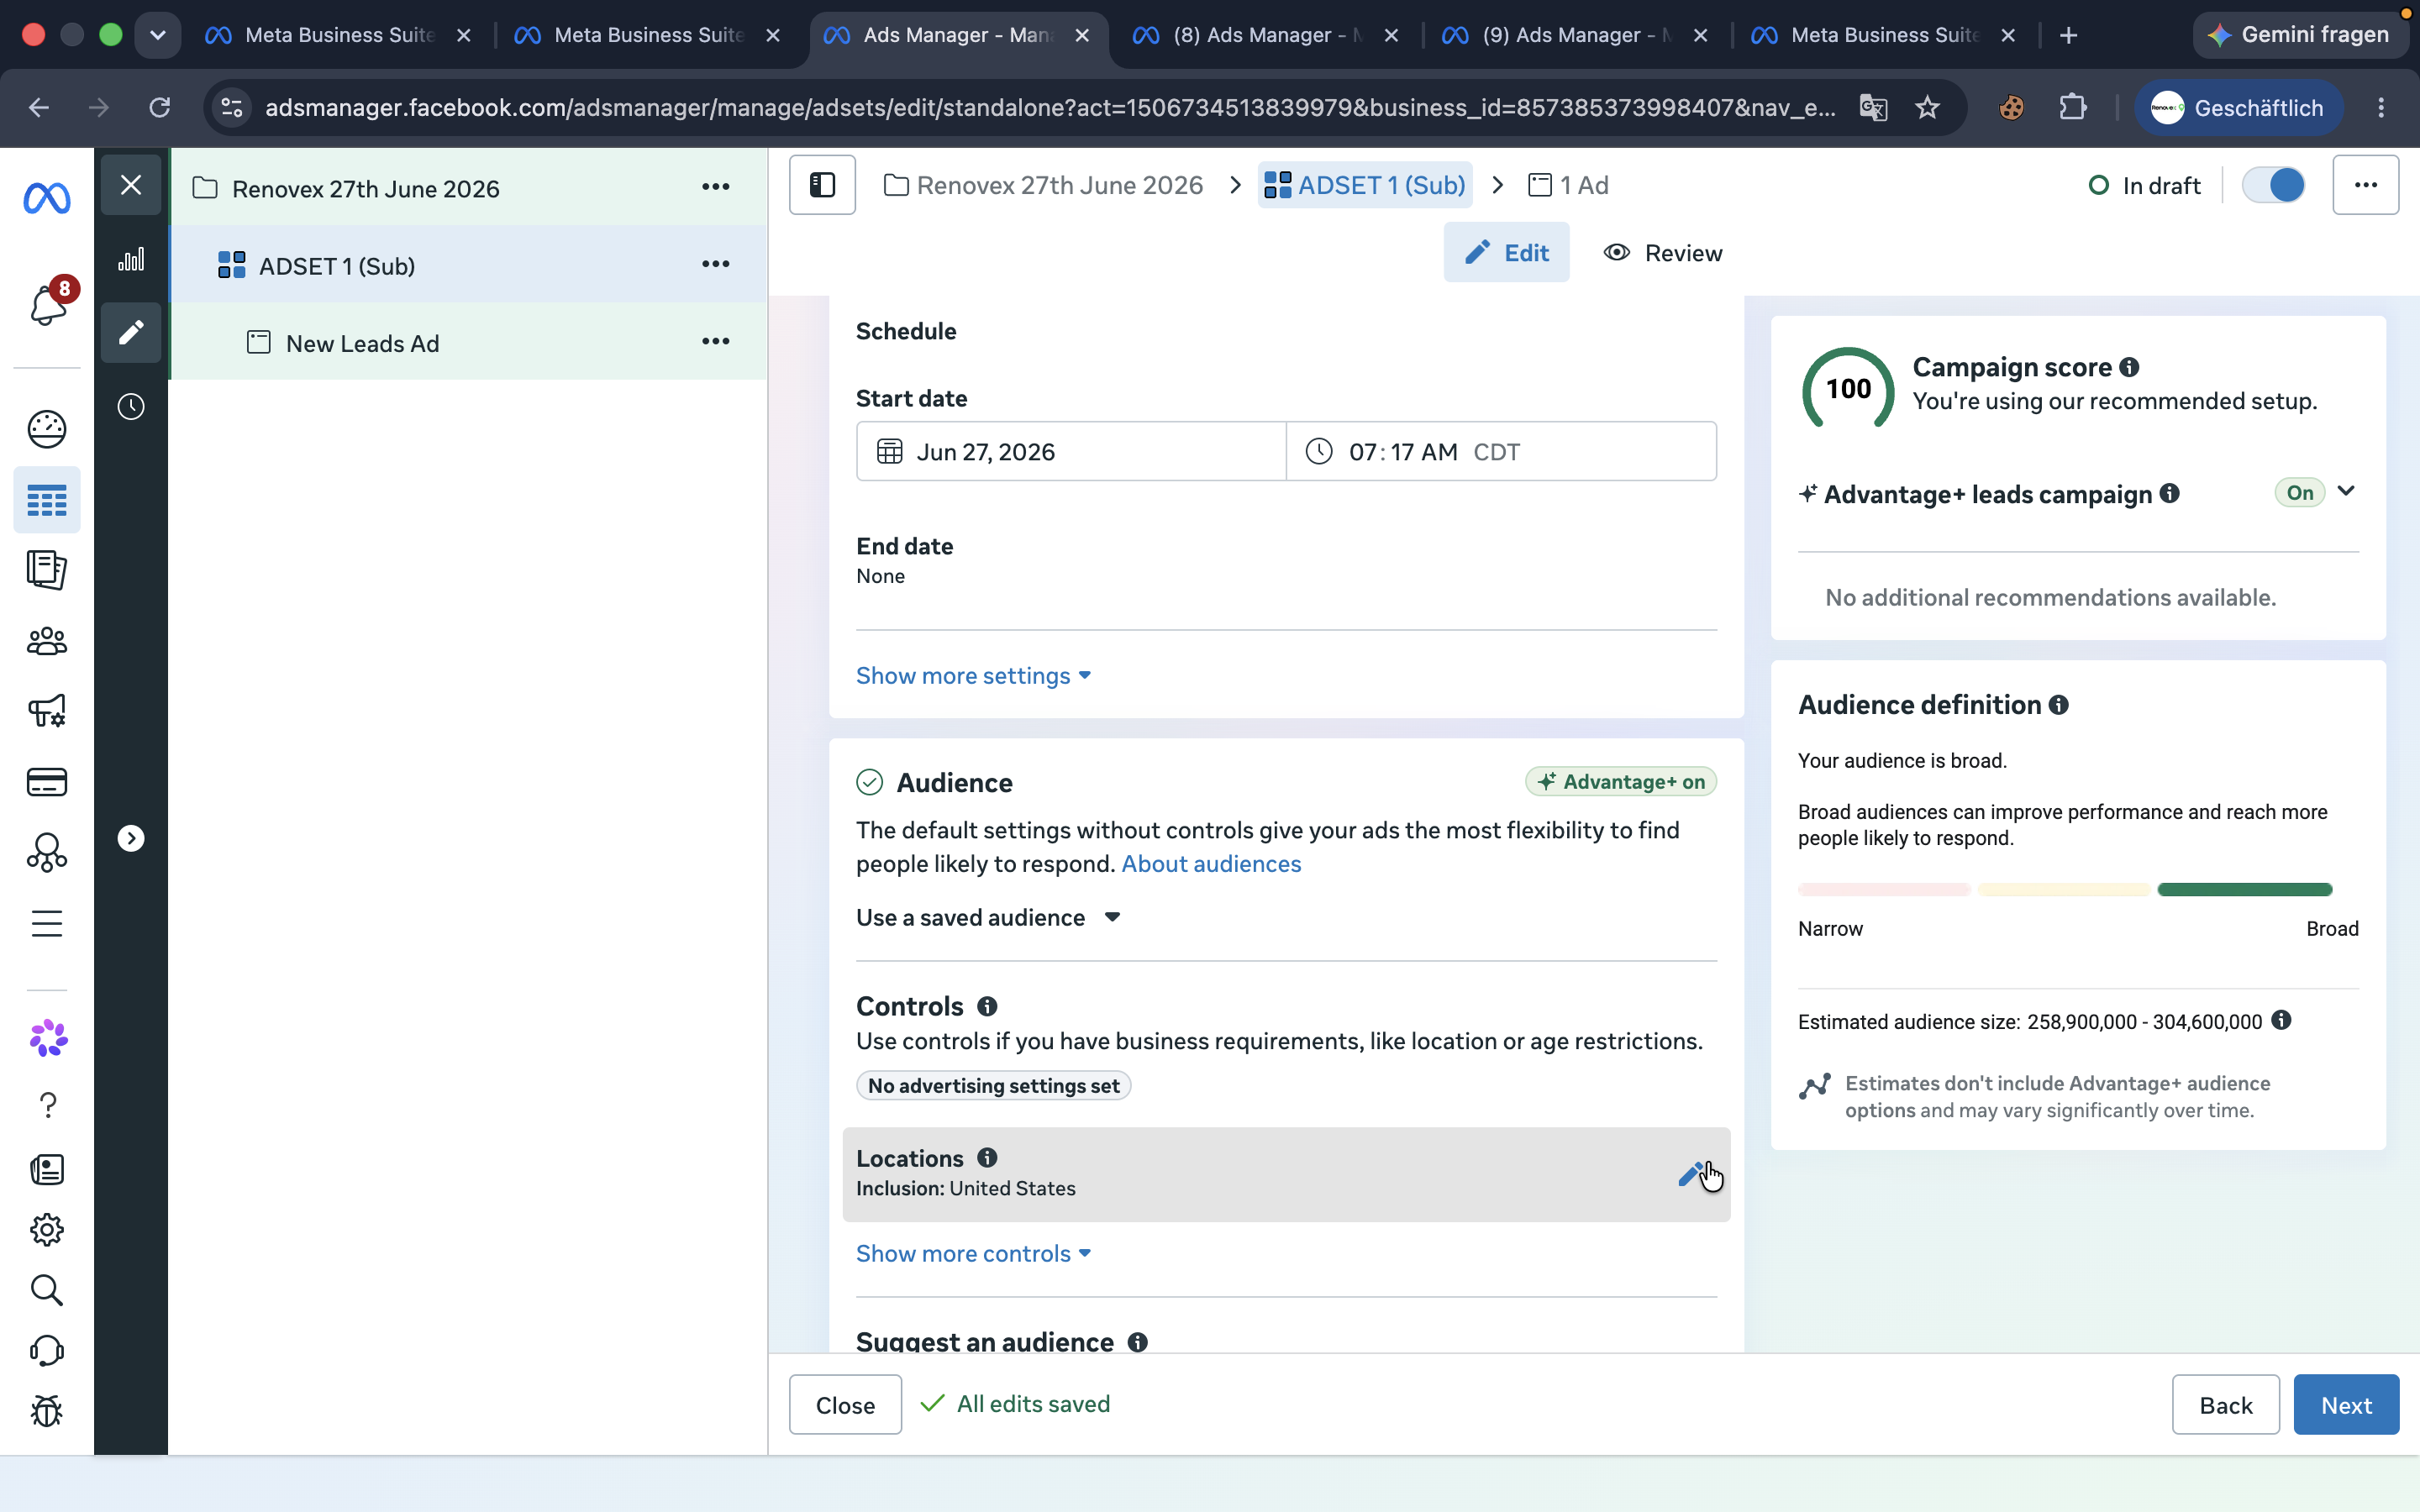
Scroll down to the Locations section and click the edit icon.
Step #32: Scroll down to the Locations section and click the edit icon.
33
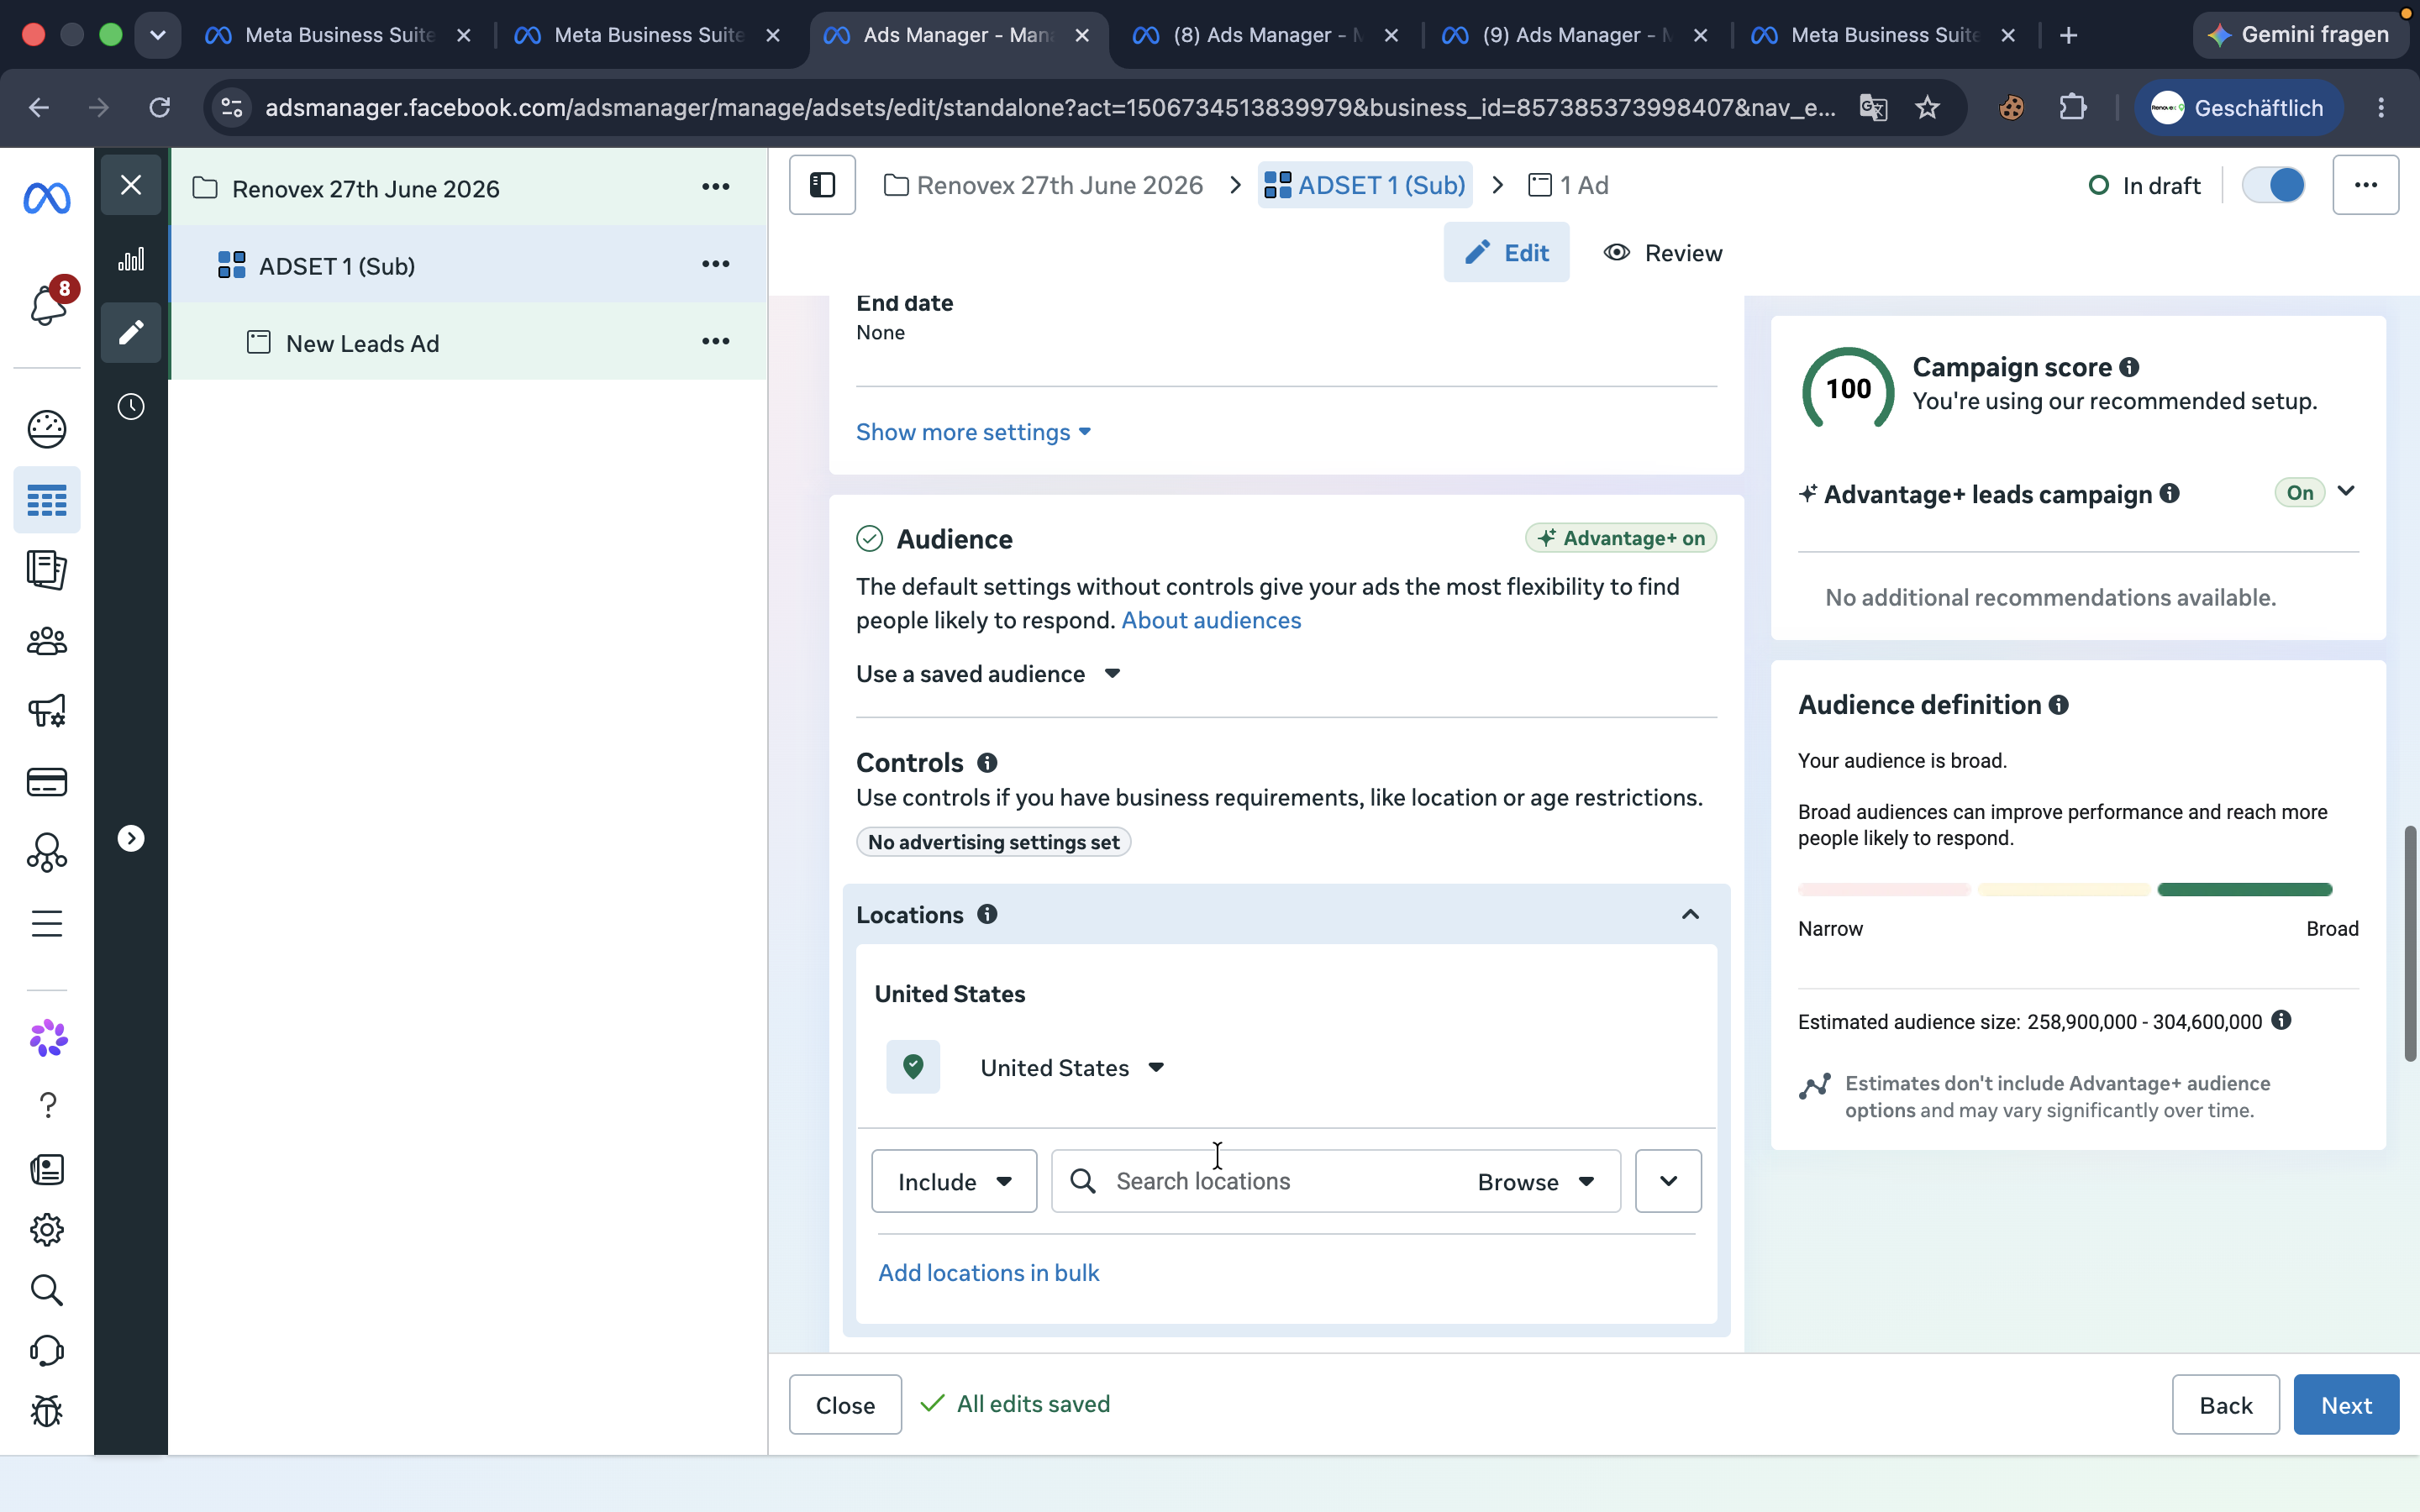
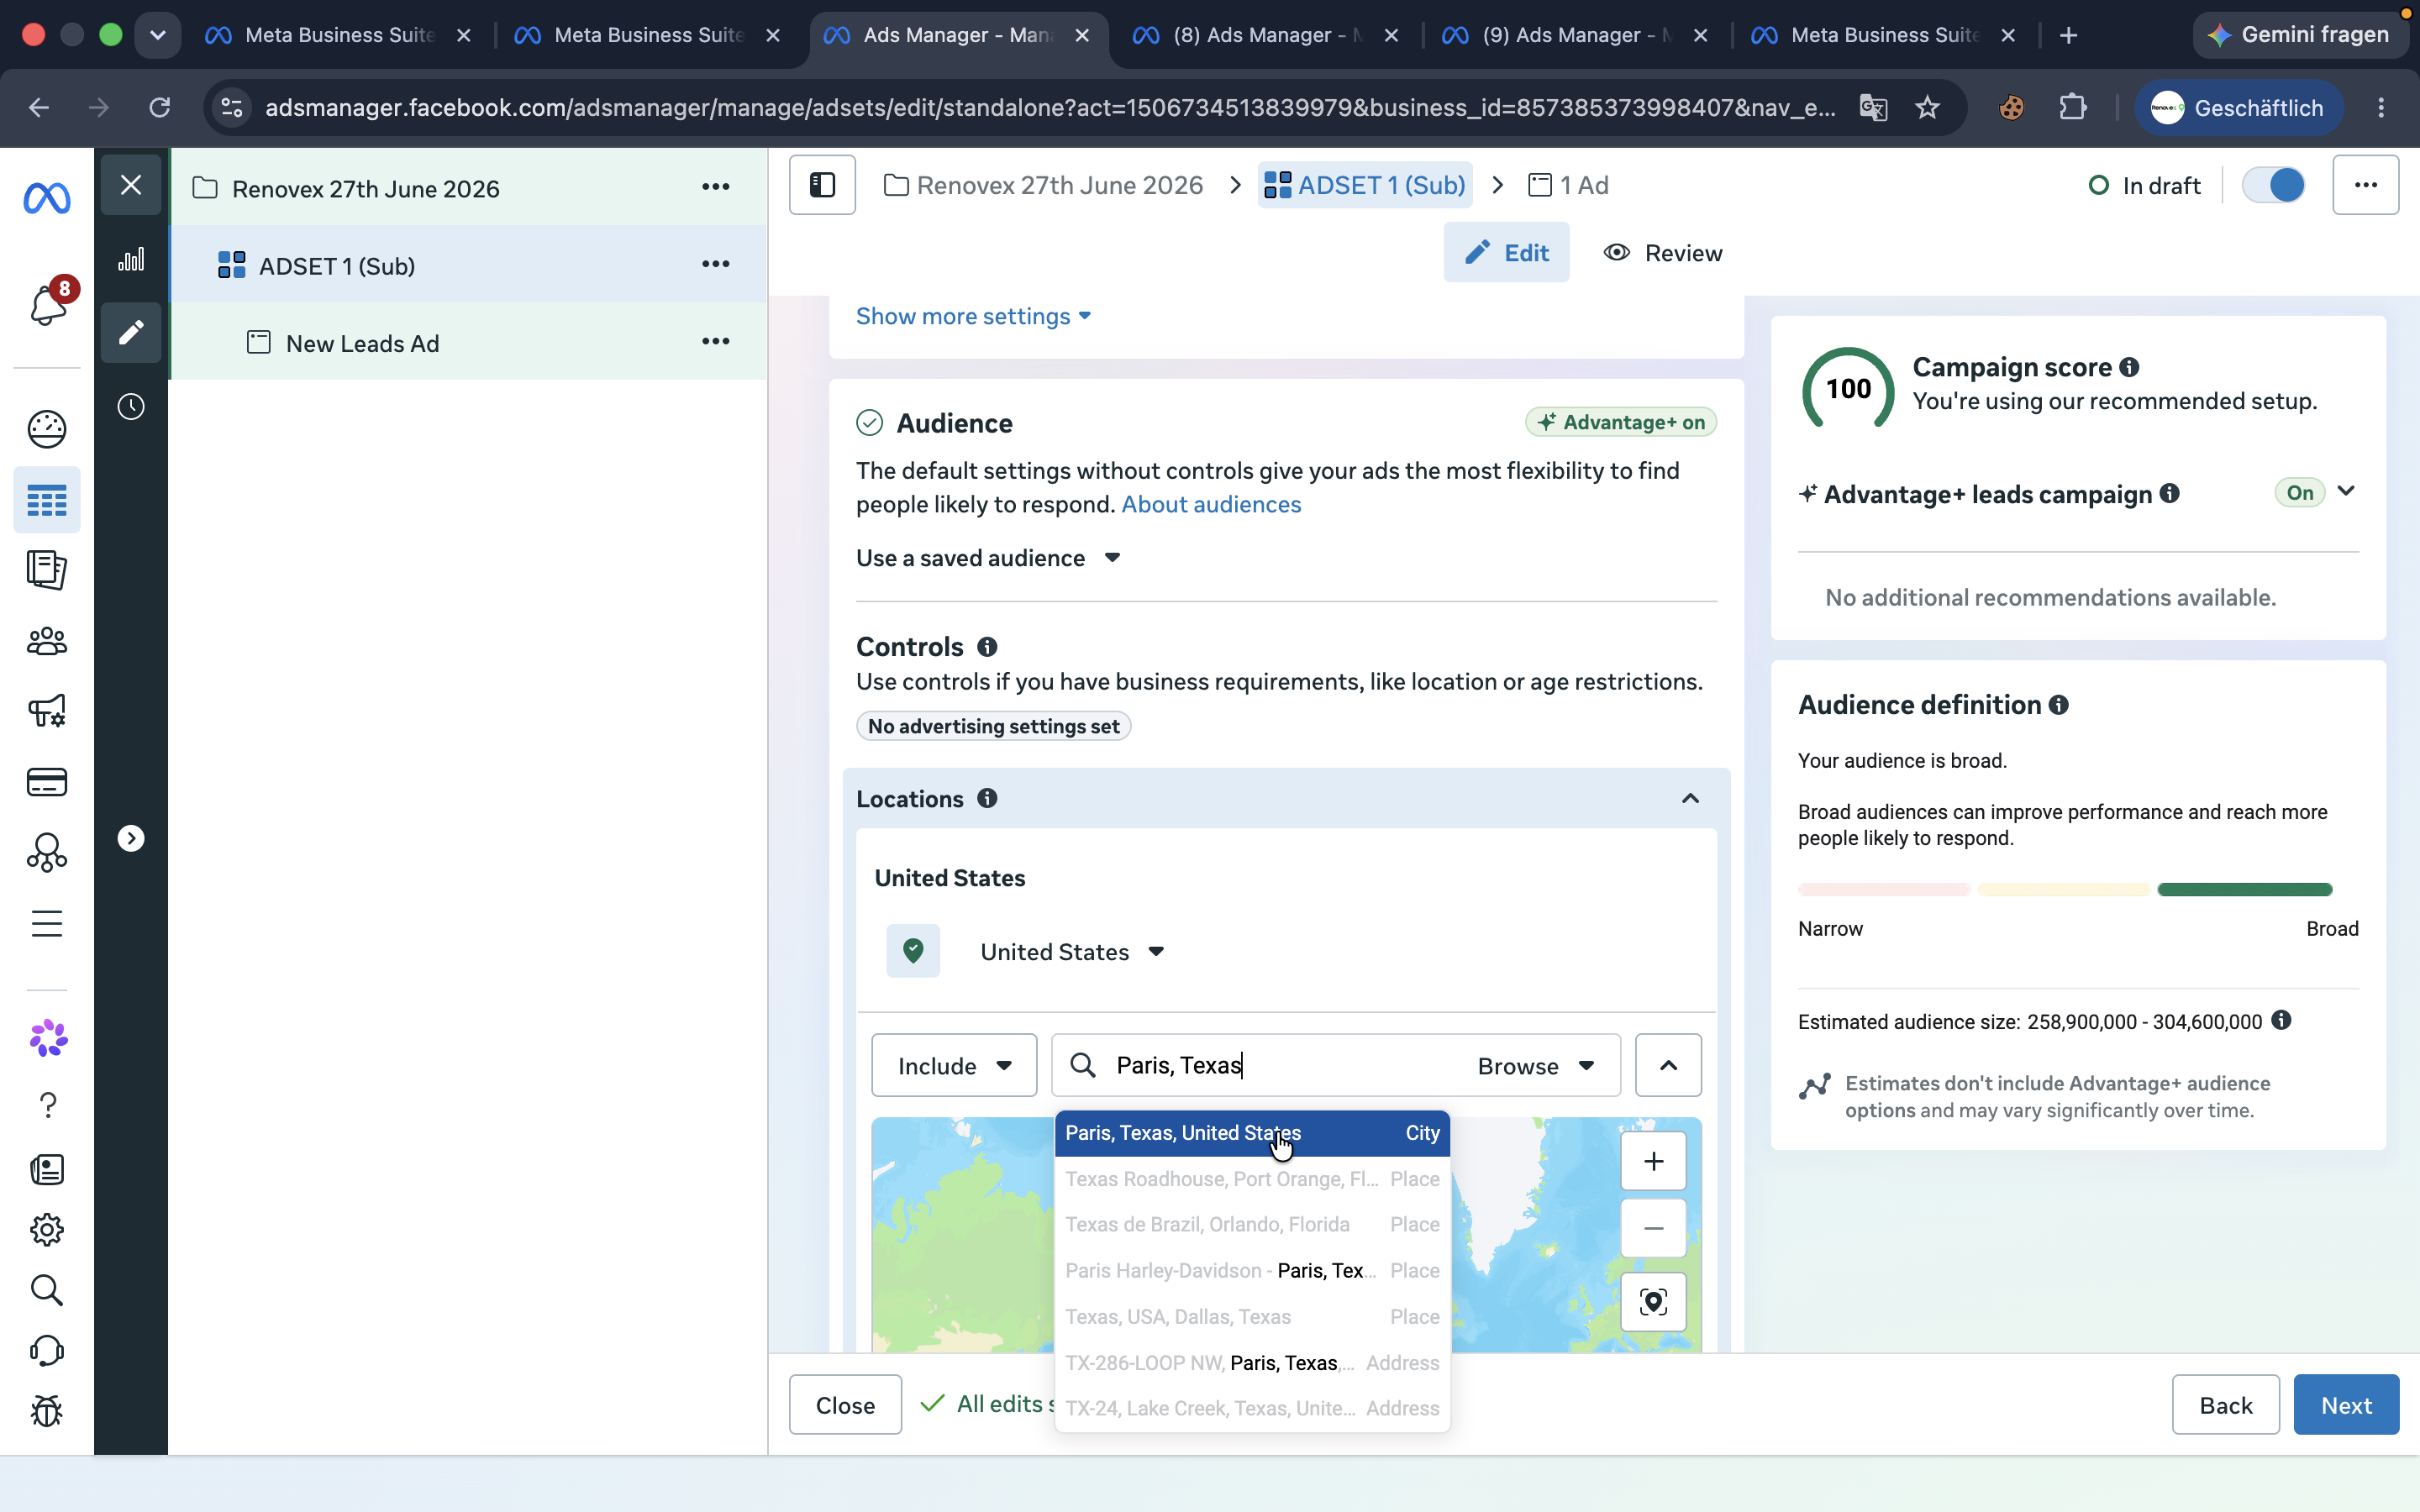
Search for the client's target city.
Step #33: Search for the client's target city.
34
Select the correct location from the dropdown.
Step #34: Select the correct location from the dropdown.
35
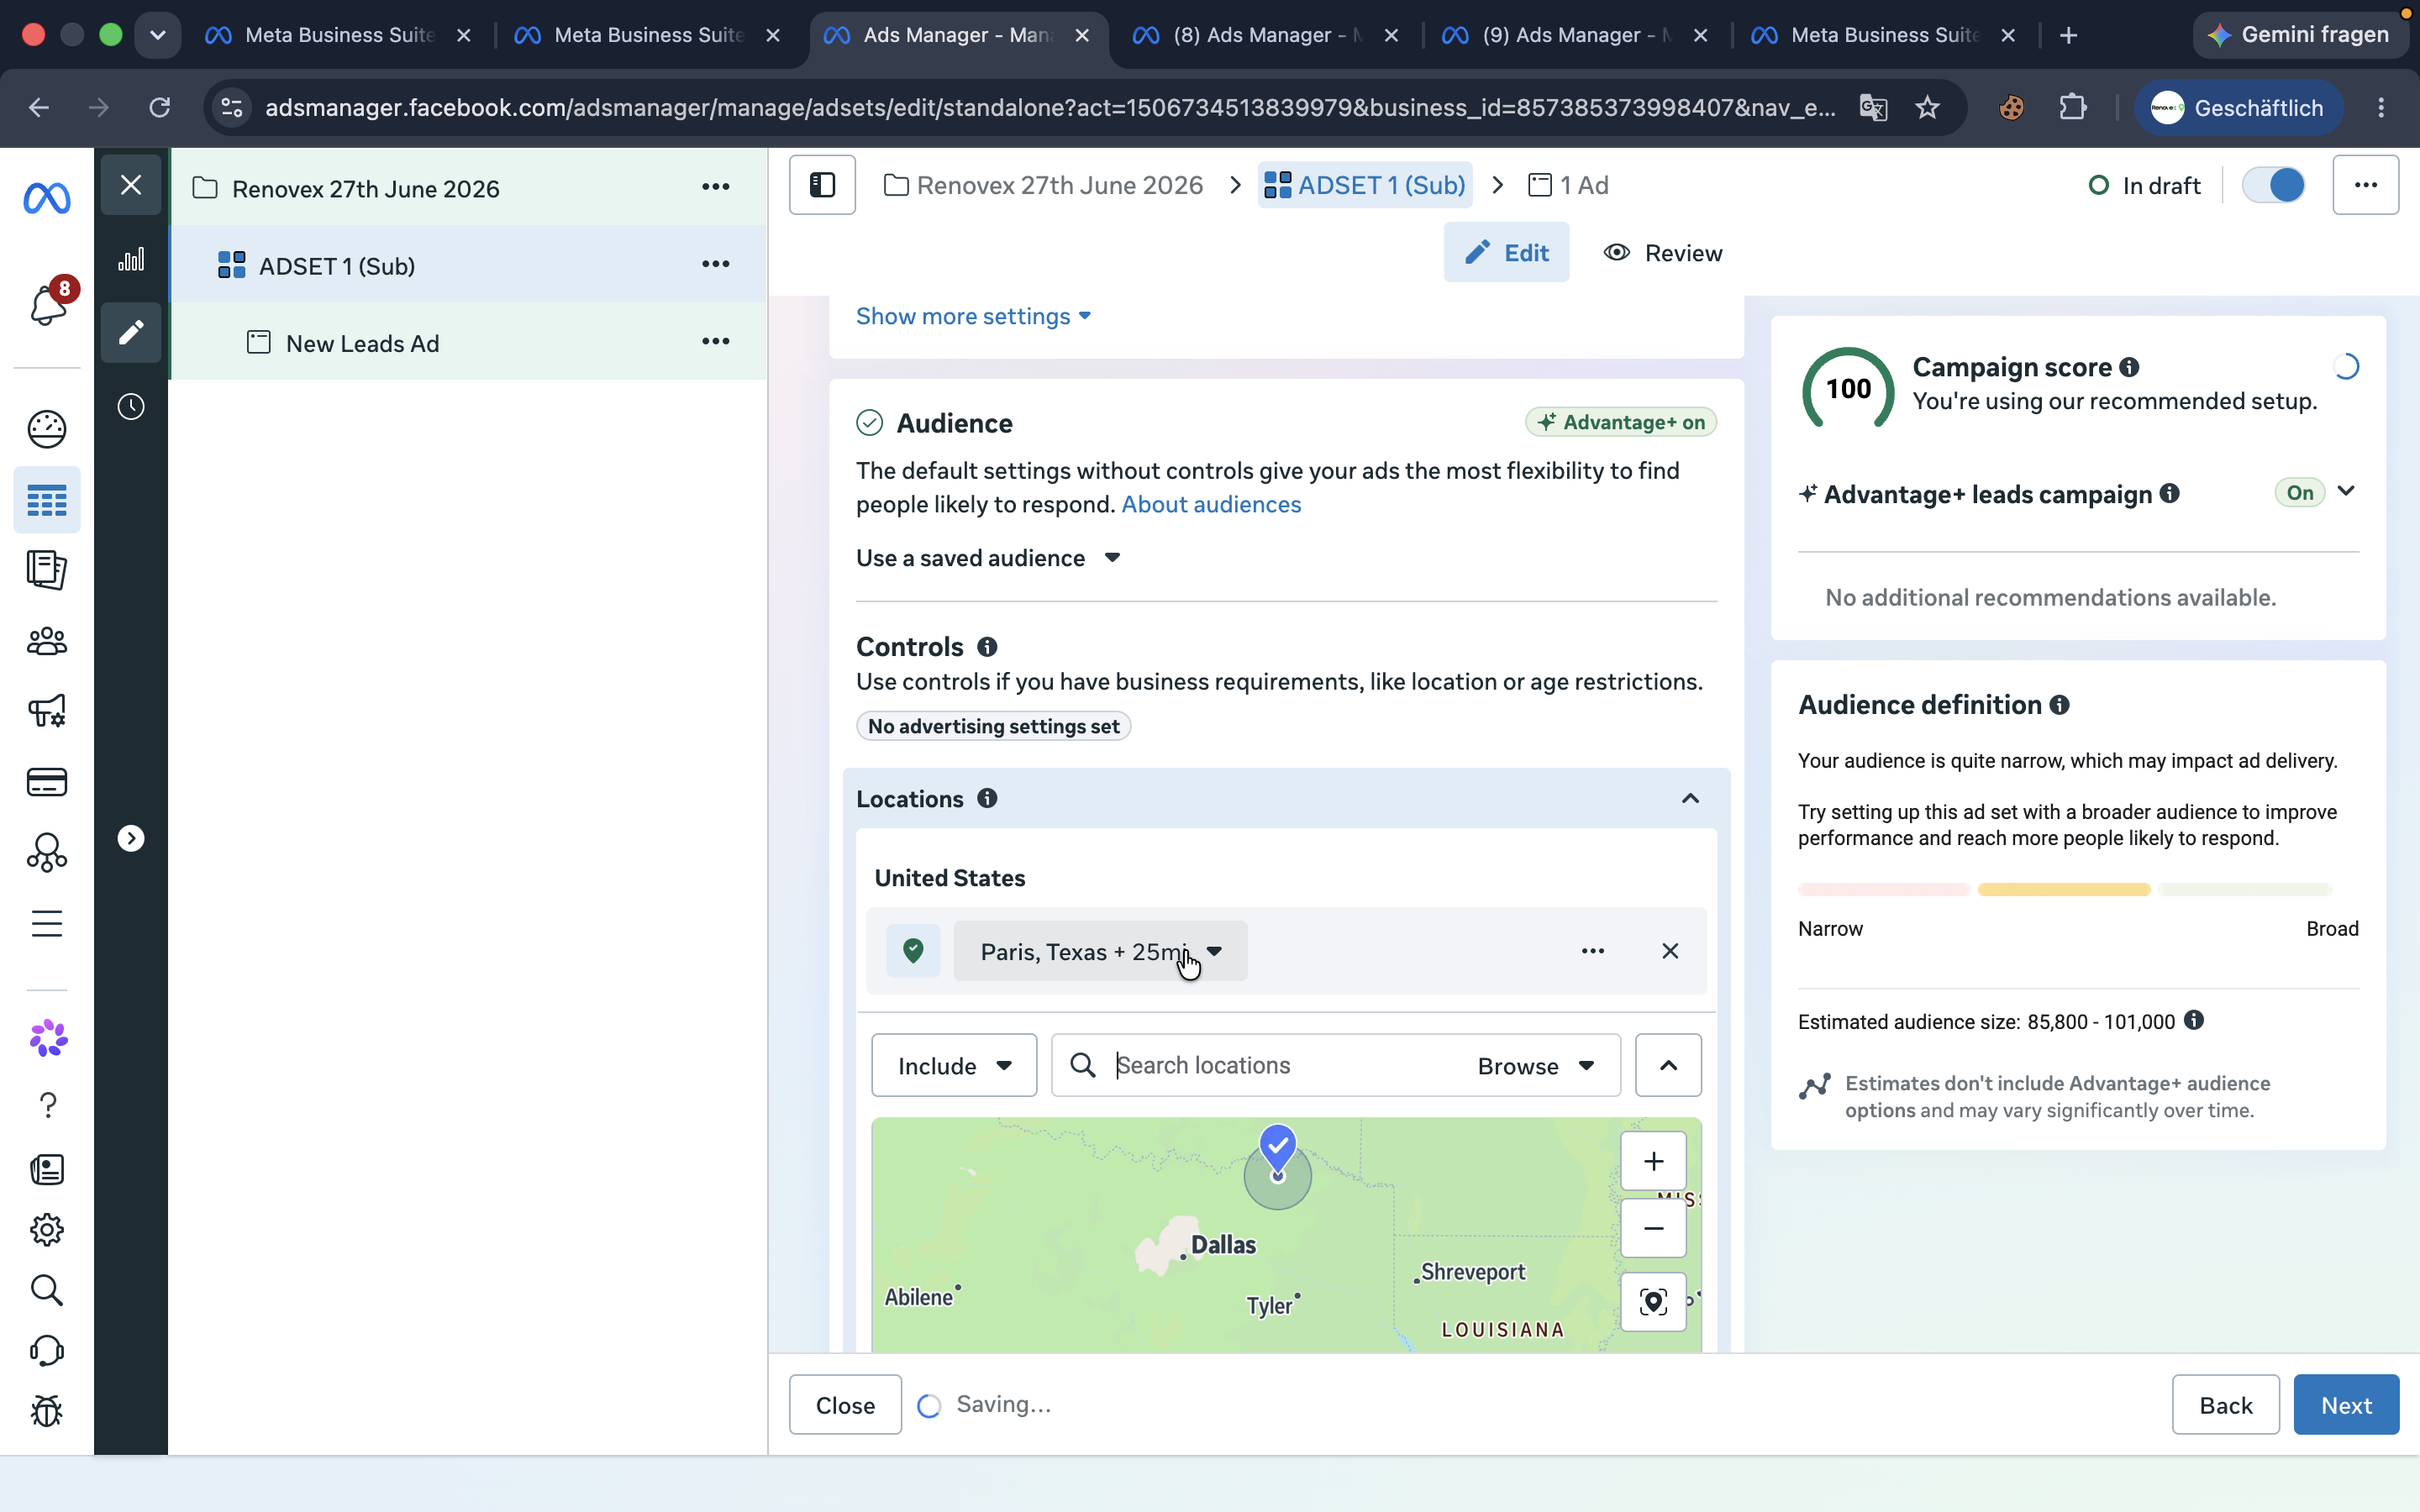
Adjust the service radius based on the client's onboarding instructions.
Step #35: Adjust the service radius based on the client's onboarding instructions.
36
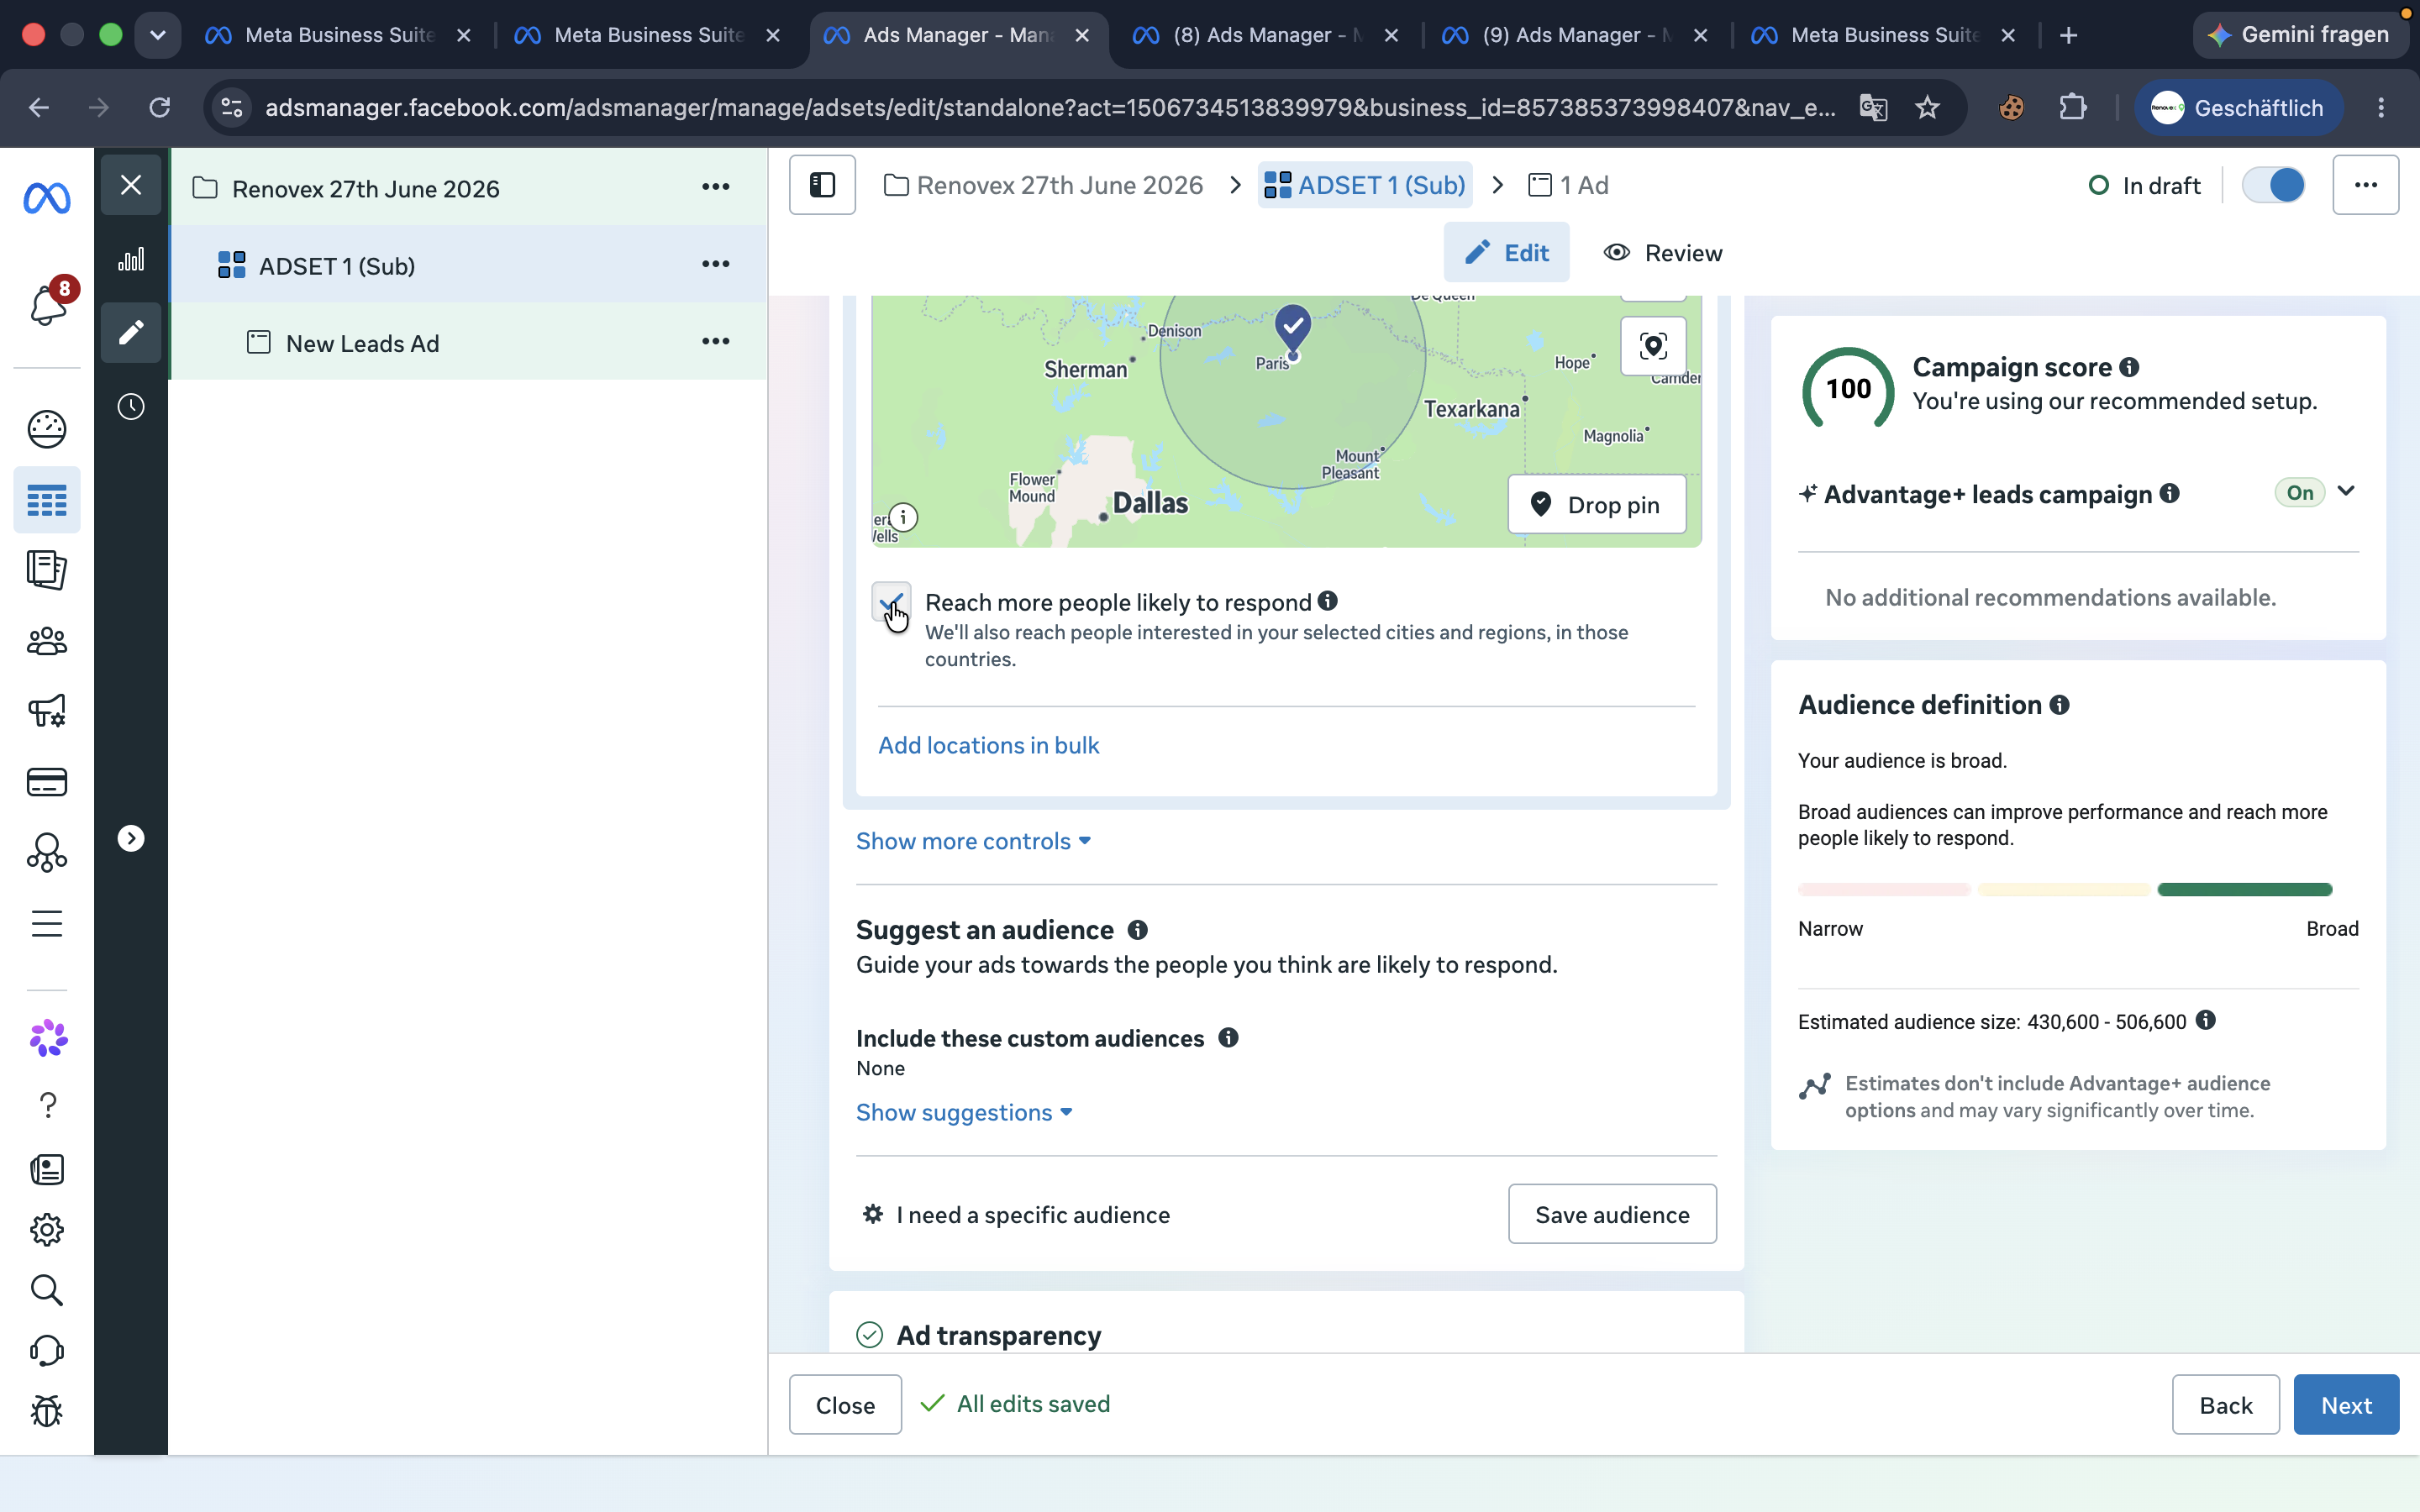
Uncheck the Reach more people likely to respond box to strictly respect the client's geographical limits.
Step #36: Uncheck the Reach more people likely to respond box to strictly respect the client's geographical limits.
37
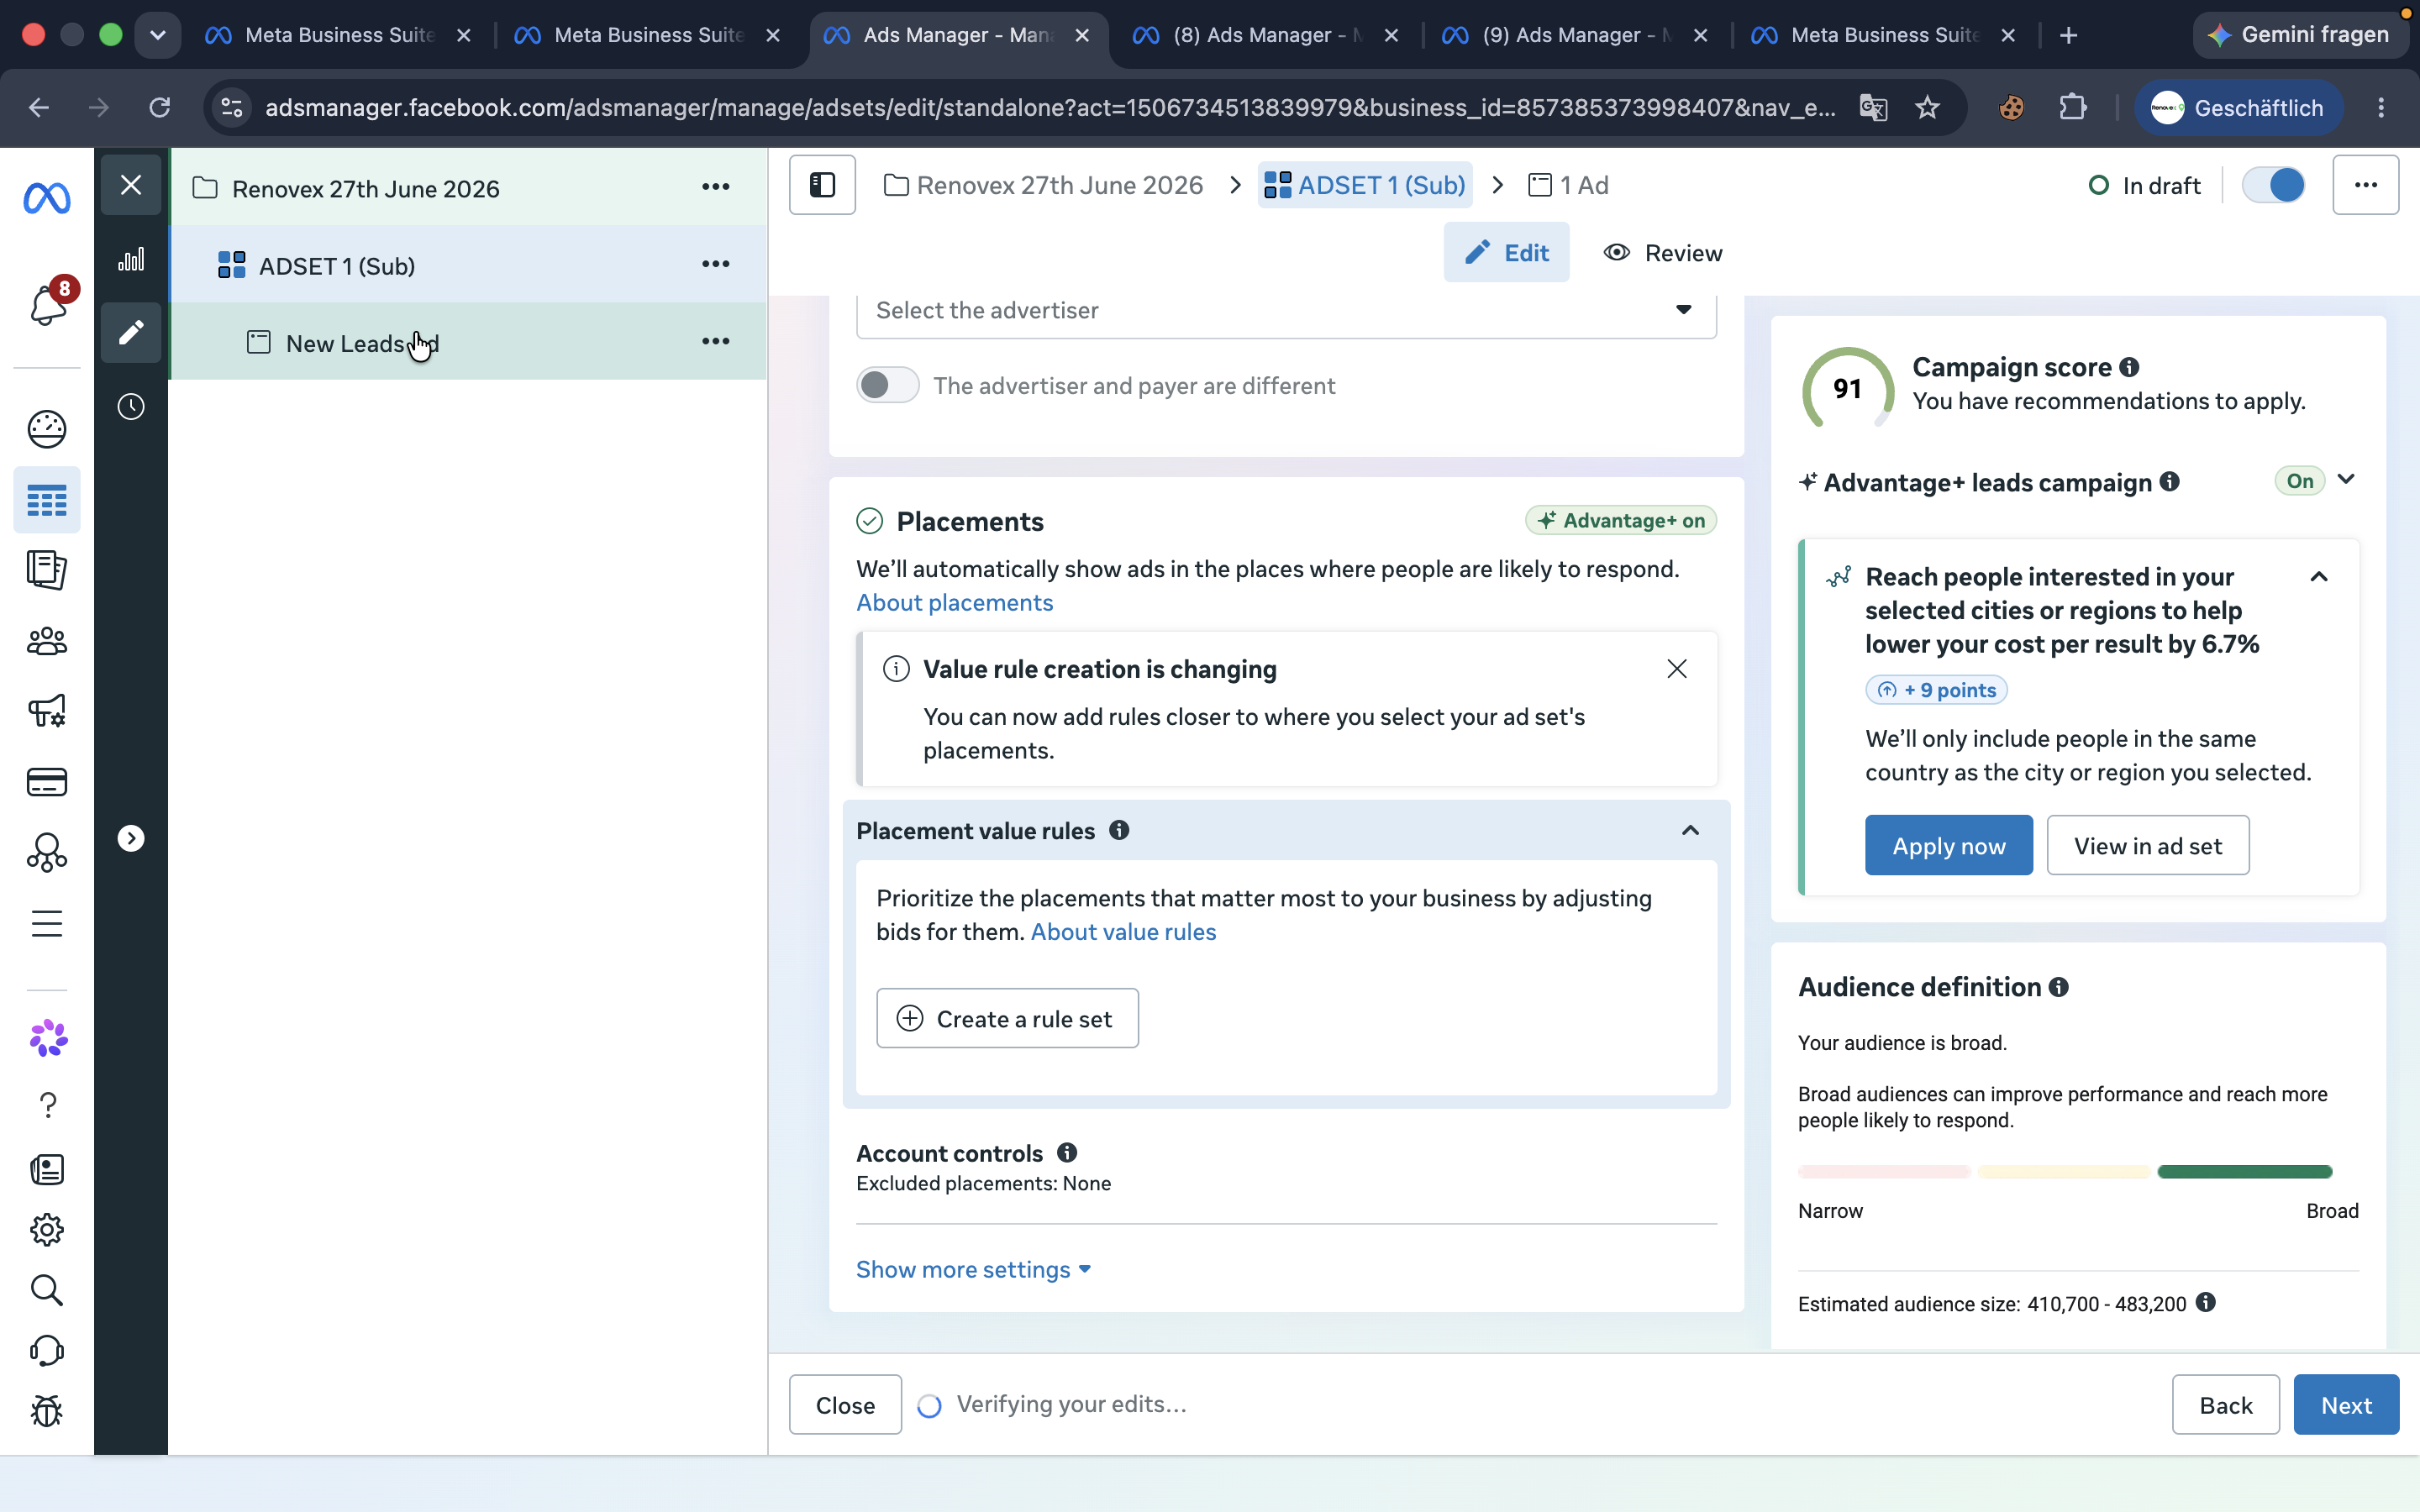
Navigate to the ad level in the sidebar.
Step #37: Navigate to the ad level in the sidebar.
38
Name the ad.
39
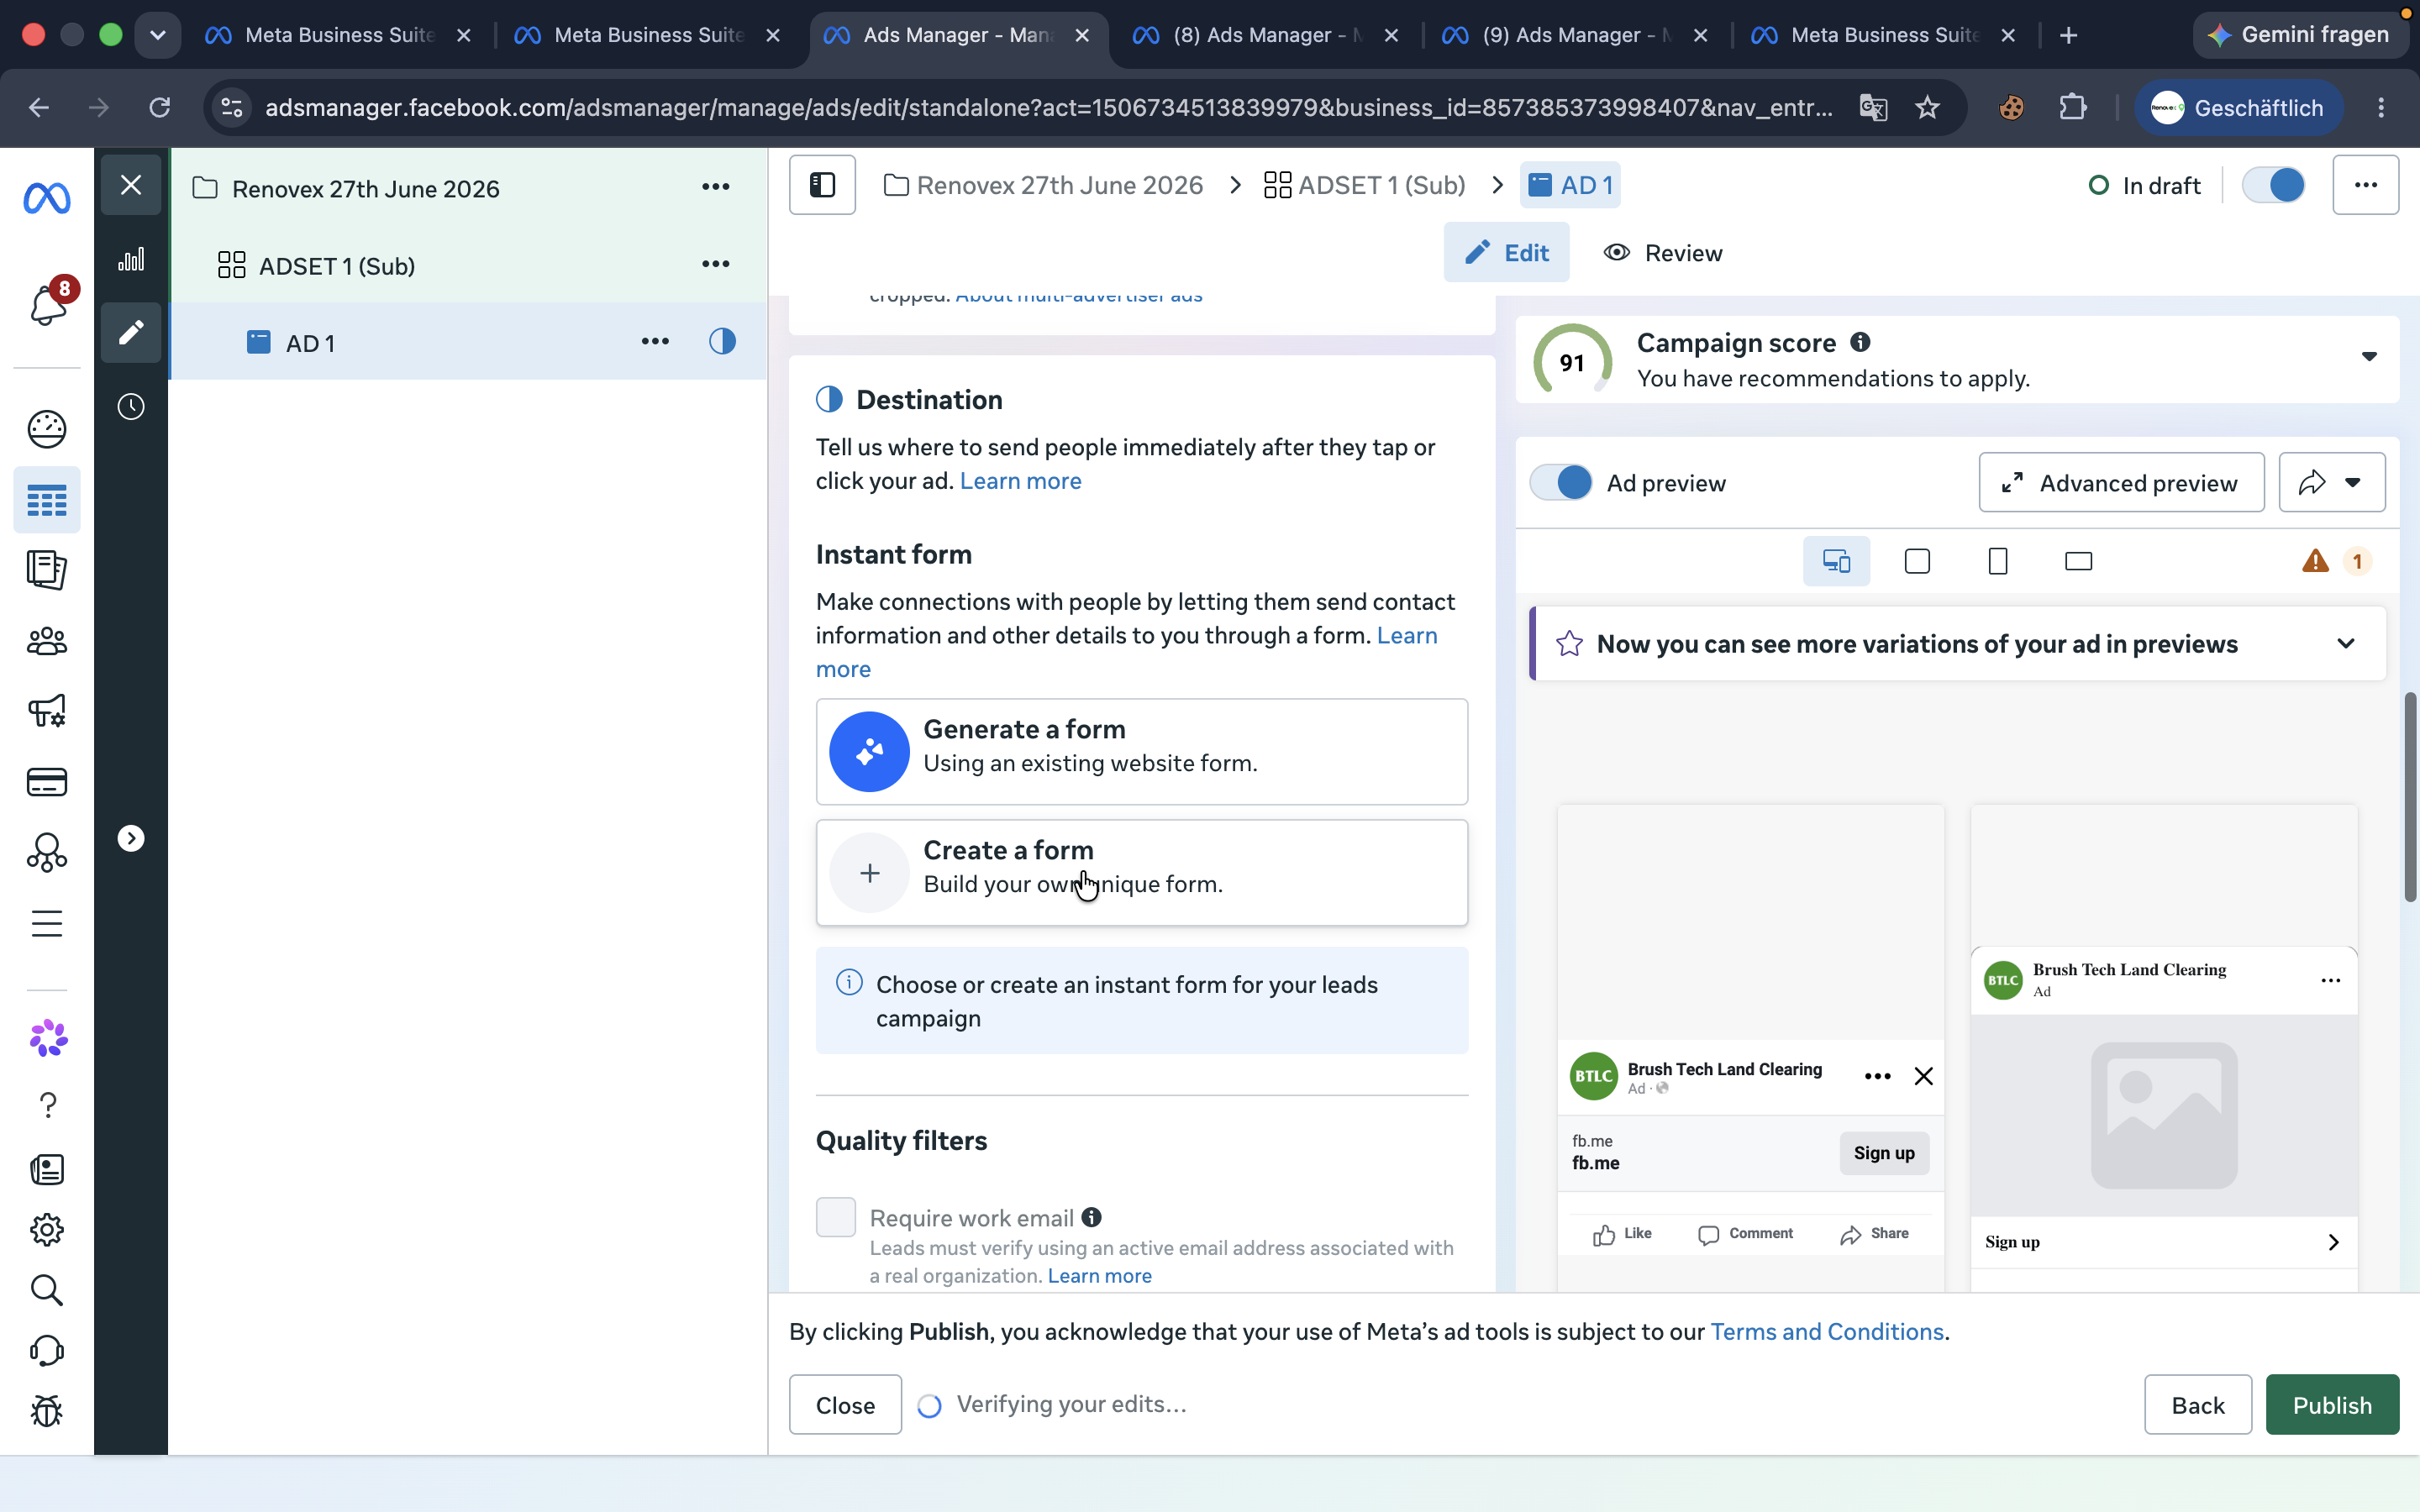
Scroll down to the destination section and click Create form to begin building the lead generation form.
Step #39: Scroll down to the destination section and click Create form to begin building the lead generation form.

Q: Do I need to clear data for a returning or churned client?

A: Yes. If you are reusing a subaccount for a client who previously churned, you must clear all old opportunities, sites, and contacts before proceeding.

Q: What if I don't see the client's Facebook page or ad account in Ads Manager?

A: You need to assign yourself full access permissions within Meta Business Suite under the Pages and Ad Accounts settings.

Q: Why is my lead ad displaying a warning about terms of service?

A: You must accept Meta's Lead Generation Terms of Service for the specific Facebook Page before the system will allow you to publish lead ads.

Q: Should I leave the "Reach more people" option checked in the Ad Set?

A: No, you should always uncheck "Reach more people likely to respond" to strictly adhere to the client's desired service radius.

Term

Definition

Snapshot

A pre-configured template containing workflows, pipelines, and settings that can be applied to a GoHighLevel subaccount.

Subaccount

An individual client workspace within an agency's main GoHighLevel account.

Agency View

The top-level administrative dashboard in GoHighLevel used to manage multiple subaccounts and load snapshots.

Lead Ad

A specific type of Meta advertisement designed to collect user information directly via an instant form.

Ad Set

A grouping of ads within a Meta campaign that shares the same budget, schedule, location, and audience targeting.