Optimizing and Monitoring SQL Server with Metis and Stackgres
Learn how to use Metis with Stackgress to optimize and monitor your SQL Server instance. This guide includes creating a Kubernetes cluster using Minikube, installing the Stackgress operator, and more.
In this guide, we'll learn how to integrate Metis with Stackgress to monitor a PostgreSQL server deployed on a Kubernetes cluster. The objective is to set up a live database observability tool, Metis, to extract detailed server activity metrics and optimize performance. We'll utilize Stackgress, an operator for managing PostgreSQL Server instances on Kubernetes, to facilitate this integration.
Creating a Kubernetes Cluster with Minikube
To begin, we'll create a Kubernetes cluster using Minikube. This step is crucial for setting up the environment to deploy and manage the PostgreSQL server with Stackgress.
Installing the Stackgress Operator with Helm
Next, we'll install the Stackgress operator using Helm, a tool for managing applications within Kubernetes clusters. This operator will handle the deployment and configuration of the PostgreSQL server instance.
Configuring the PostgreSQL Server for Metis
We'll proceed by setting up the PostgreSQL server instance with the necessary configurations for Metis to connect and monitor the server effectively. This involves creating a user, granting permissions, and installing required extensions like PGstatstatements.
Deploying Metis for Live Monitoring
Finally, we'll deploy Metis to live monitor the PostgreSQL server. We'll configure Metis to connect to the server, set up the necessary permissions, and initiate the monitoring process. Metis will provide insights into server performance, query optimization, and database metrics.
Let's get started.
In this video, we will learn how to use Metis with Stackgress. Metis is a live database observability tool that connects to your SQL Server instance to extract details about server activity, including infrastructure metrics, databases, schemas, live queries, indexes, transactions, and more. It also offers insights on optimization, performance enhancement, and automated issue troubleshooting. On the other hand, Stackgress is a solution for deploying PostgreSQL Server on your Kubernetes cluster. It acts as an operator for managing the deployment of your PostgreSQL Server instance. In this video, we will create a Kubernetes cluster using Minikube.
We will install the Stackgress operator and create the PostgreSQL Server instance. Then, we will connect Metis to it for live monitoring. All the steps are detailed on our blog, where the commands I use are explained. You can refer to the blog for guidance. First, we must create a Kubernetes cluster. I will use Minikube, but you can choose any tool you prefer.
For example, Kind or AWS EKS, or any other platform you have. I prefer using Minikube for its convenience. I already have Minikube installed on my machine, so I won't be installing it again. You can find a link to the documentation on how to install it on your operating system, be it Windows, Linux, or macOS. The process should be universal. Essentially, it involves downloading the binary and installing it. Next, we need to create the Kubernetes cluster using Minikube.
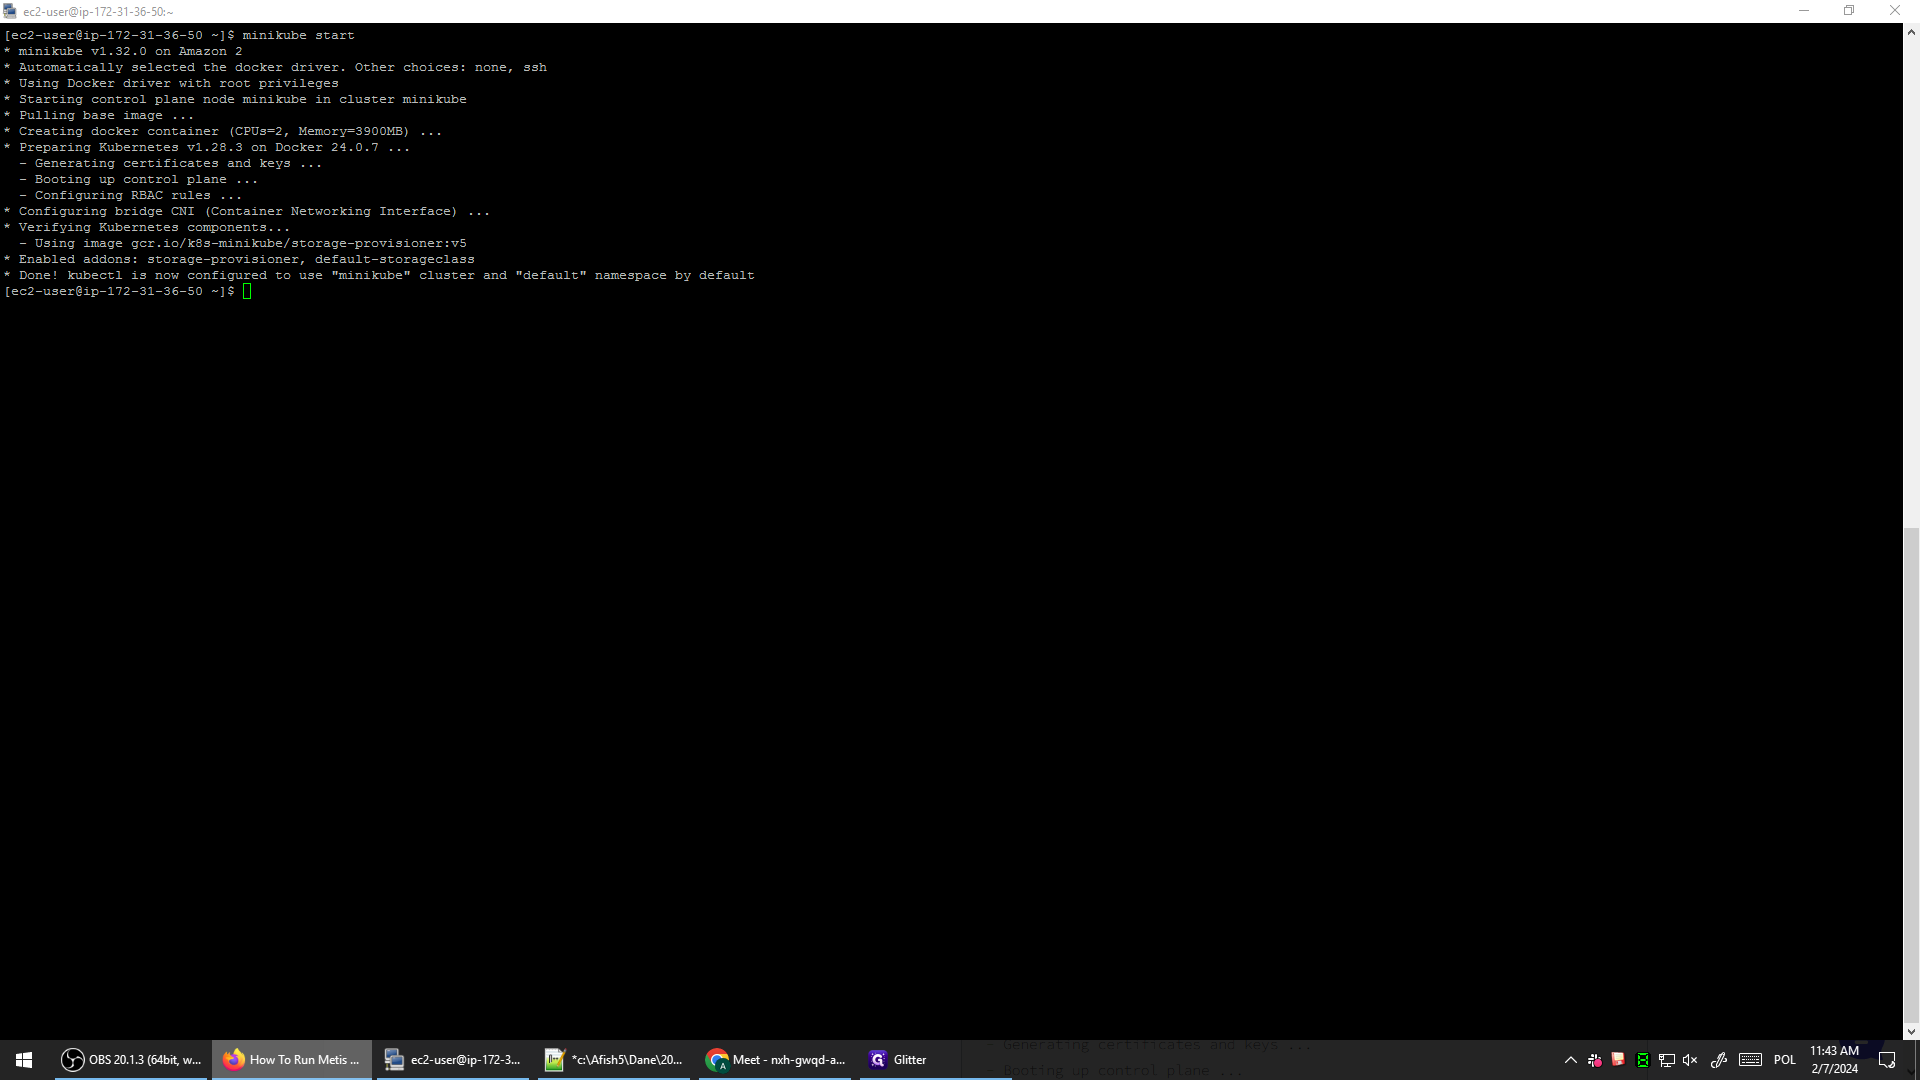
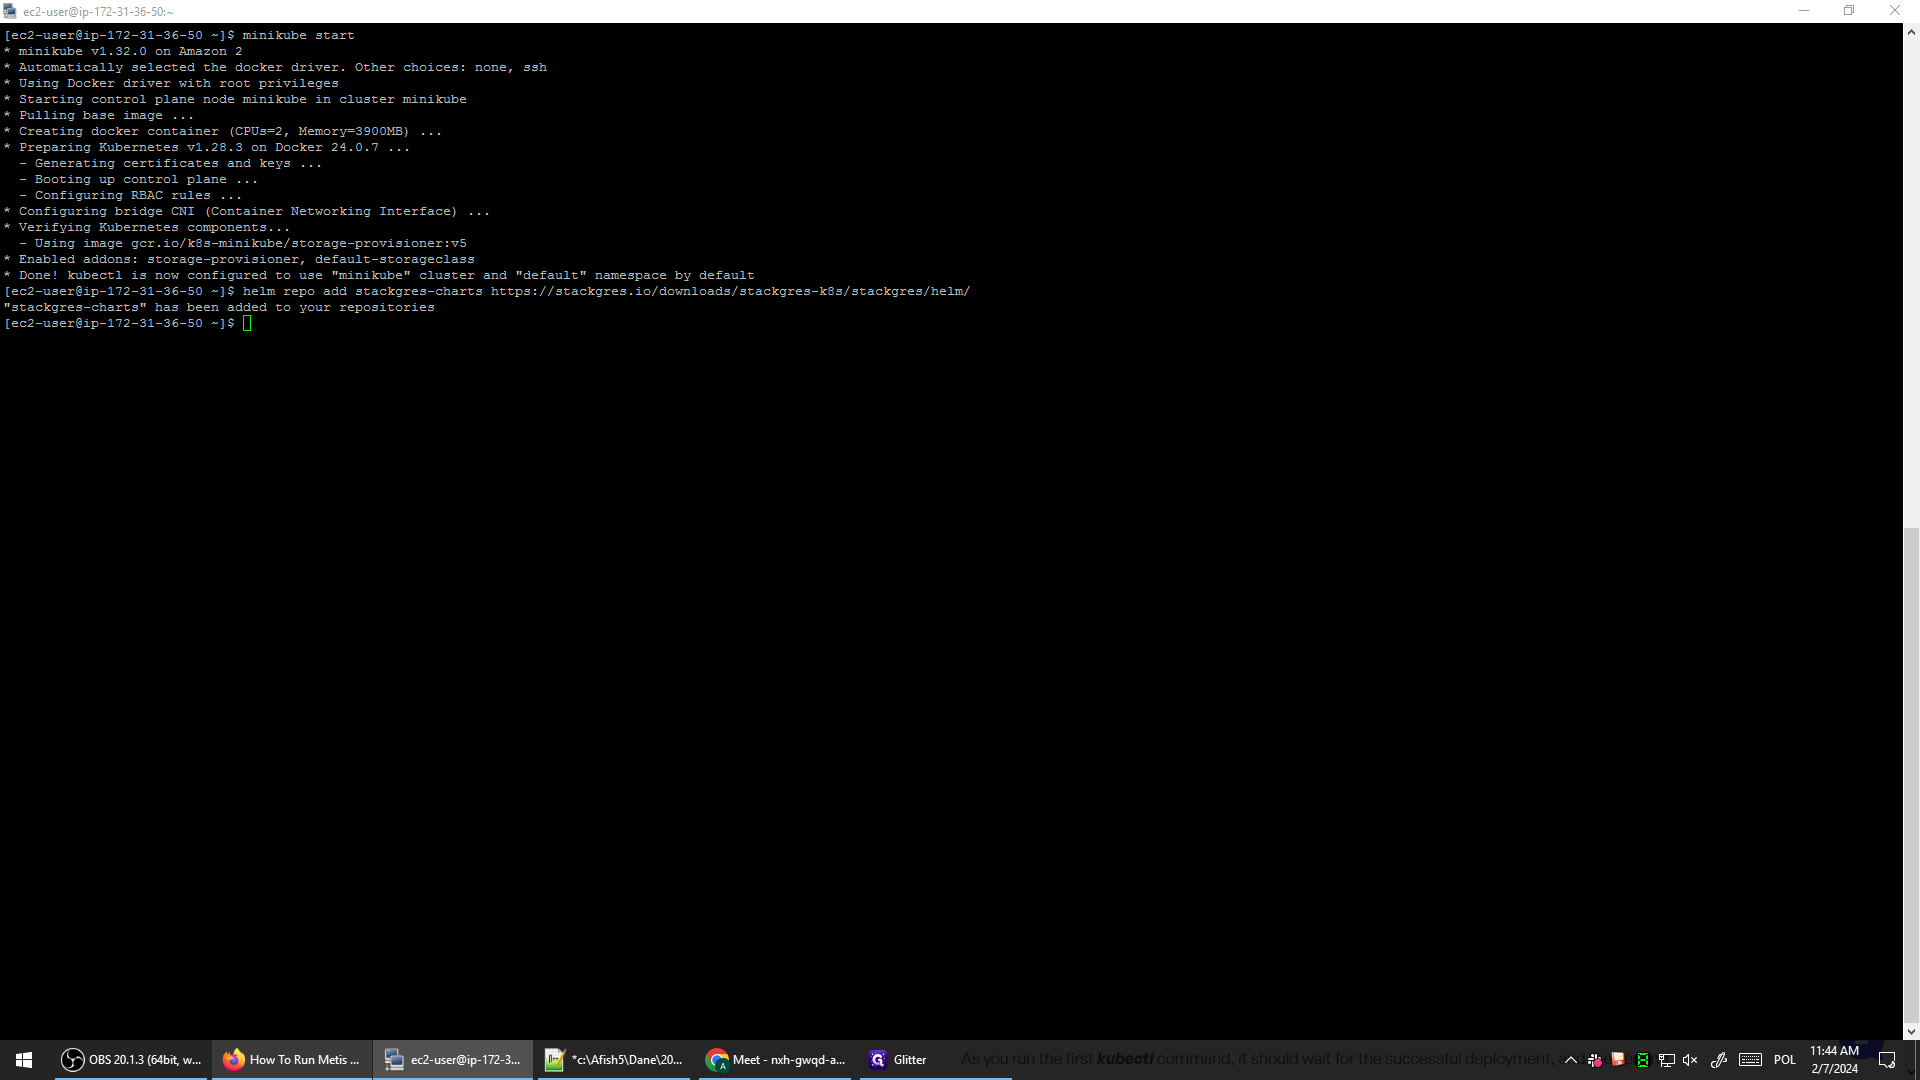
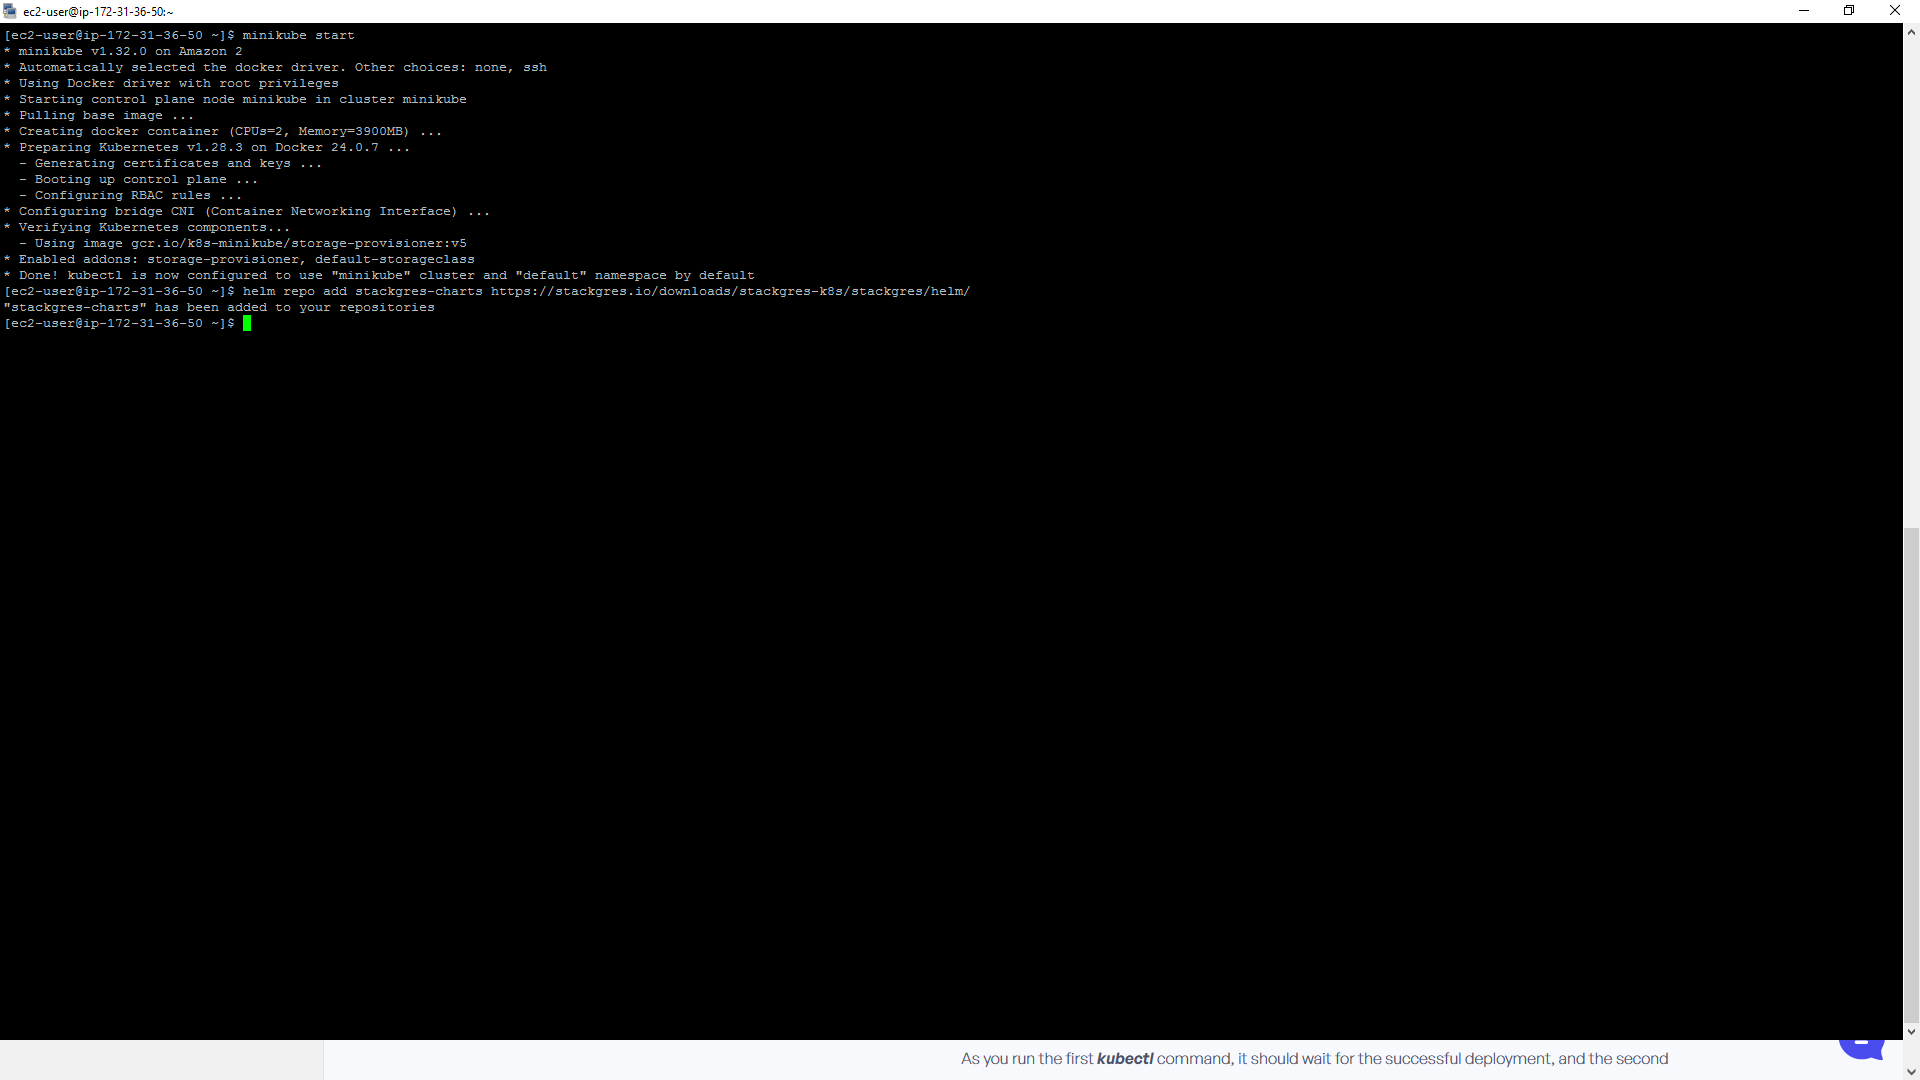
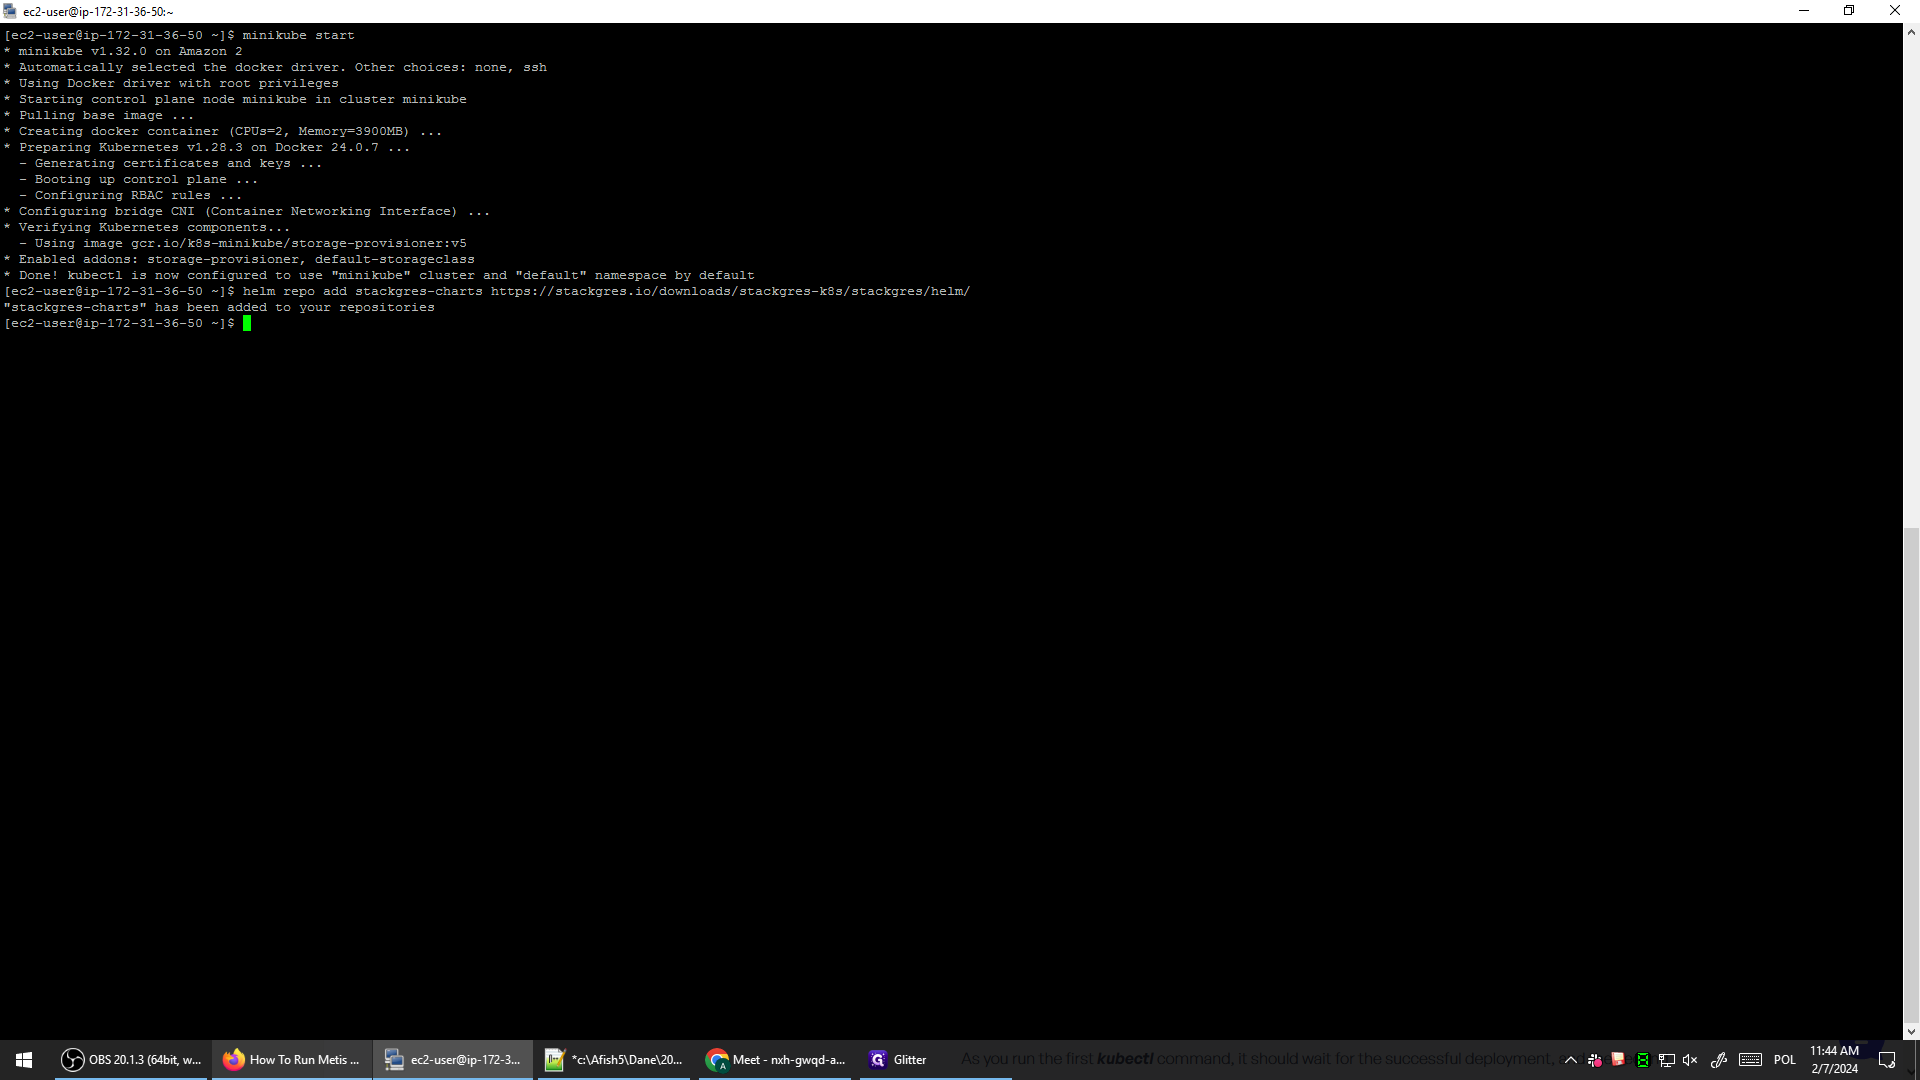
Let's start by copying Minikube. Go to your terminal window and execute the command. Minikube is creating the Kubernetes cluster using Docker. Ensure Docker is installed; it will utilize two CPUs and around four gigs of memory. The setup duration varies based on your configuration and host, typically taking 30 to 60 seconds.
Obviously, your mileage may vary. At the very end, this command will also configure kubectl. This means your kubectl will be set up to interact with your Kubernetes cluster.
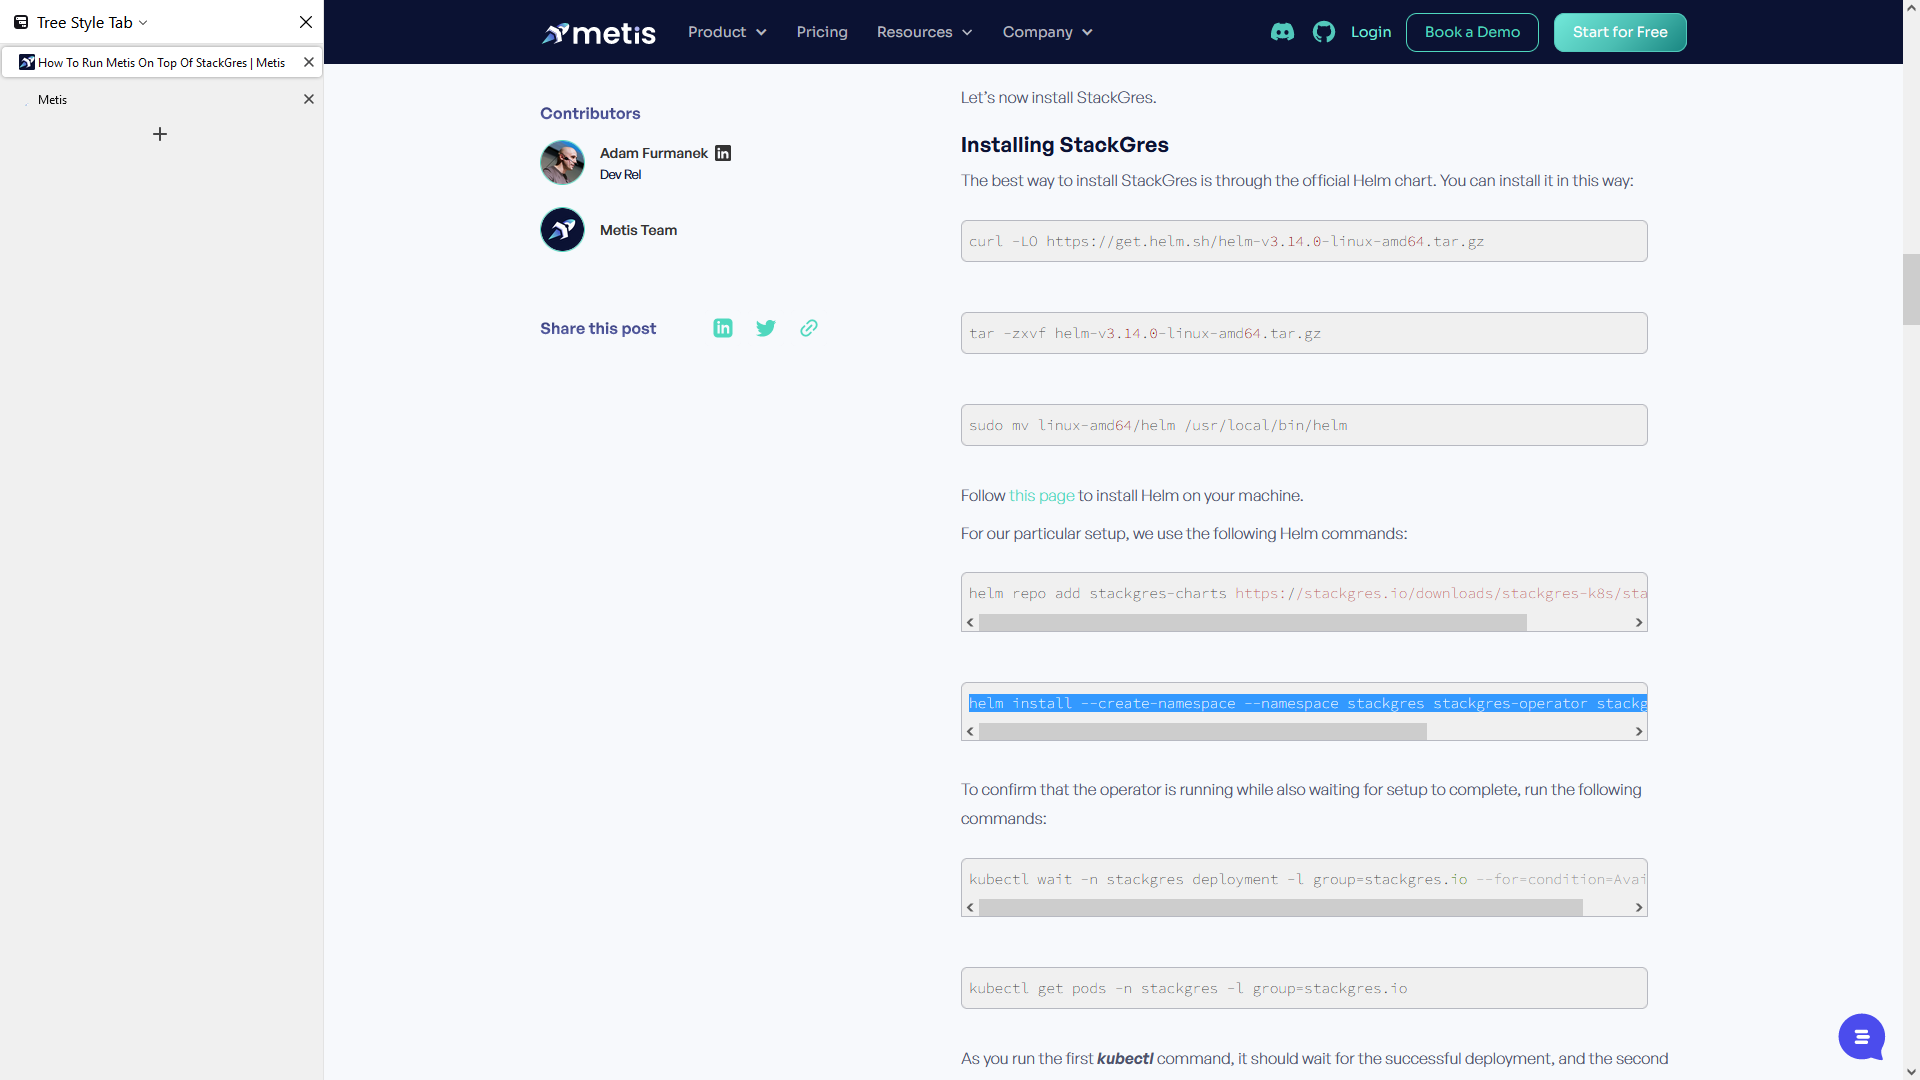
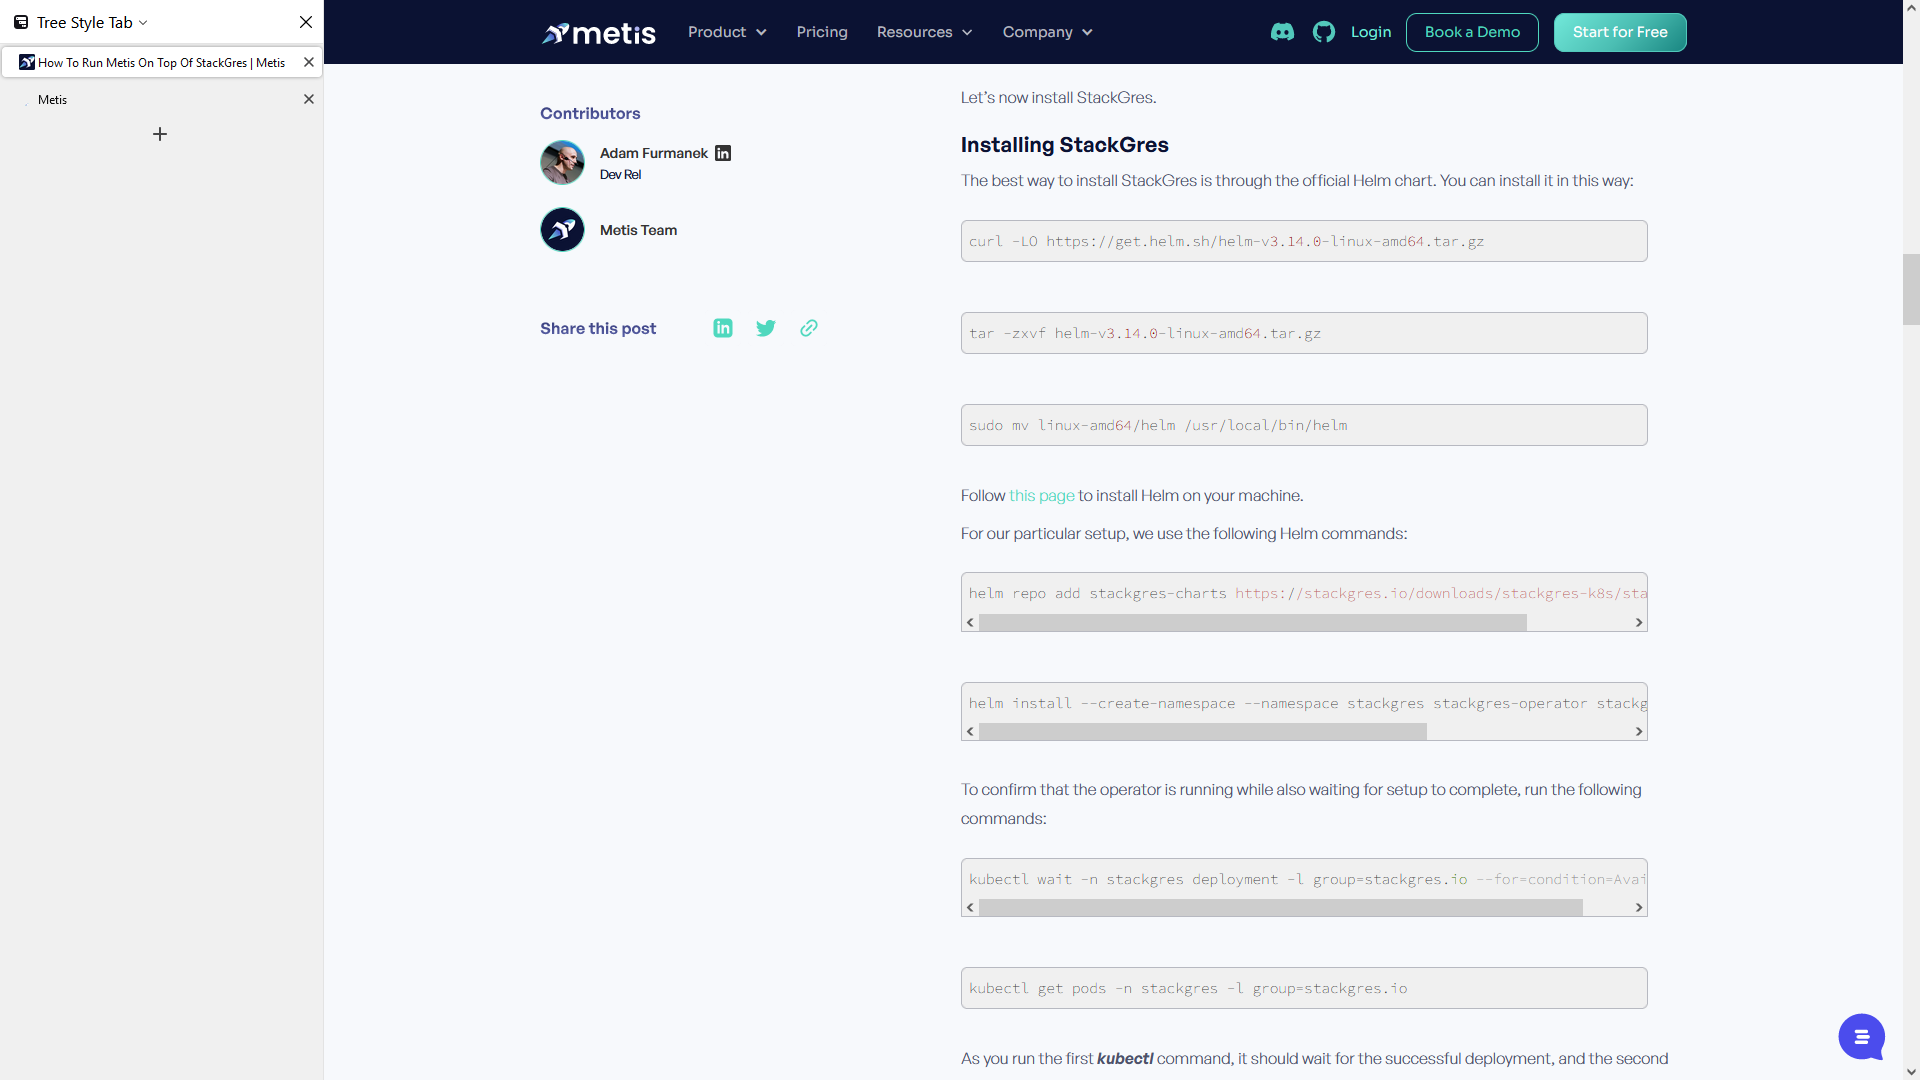
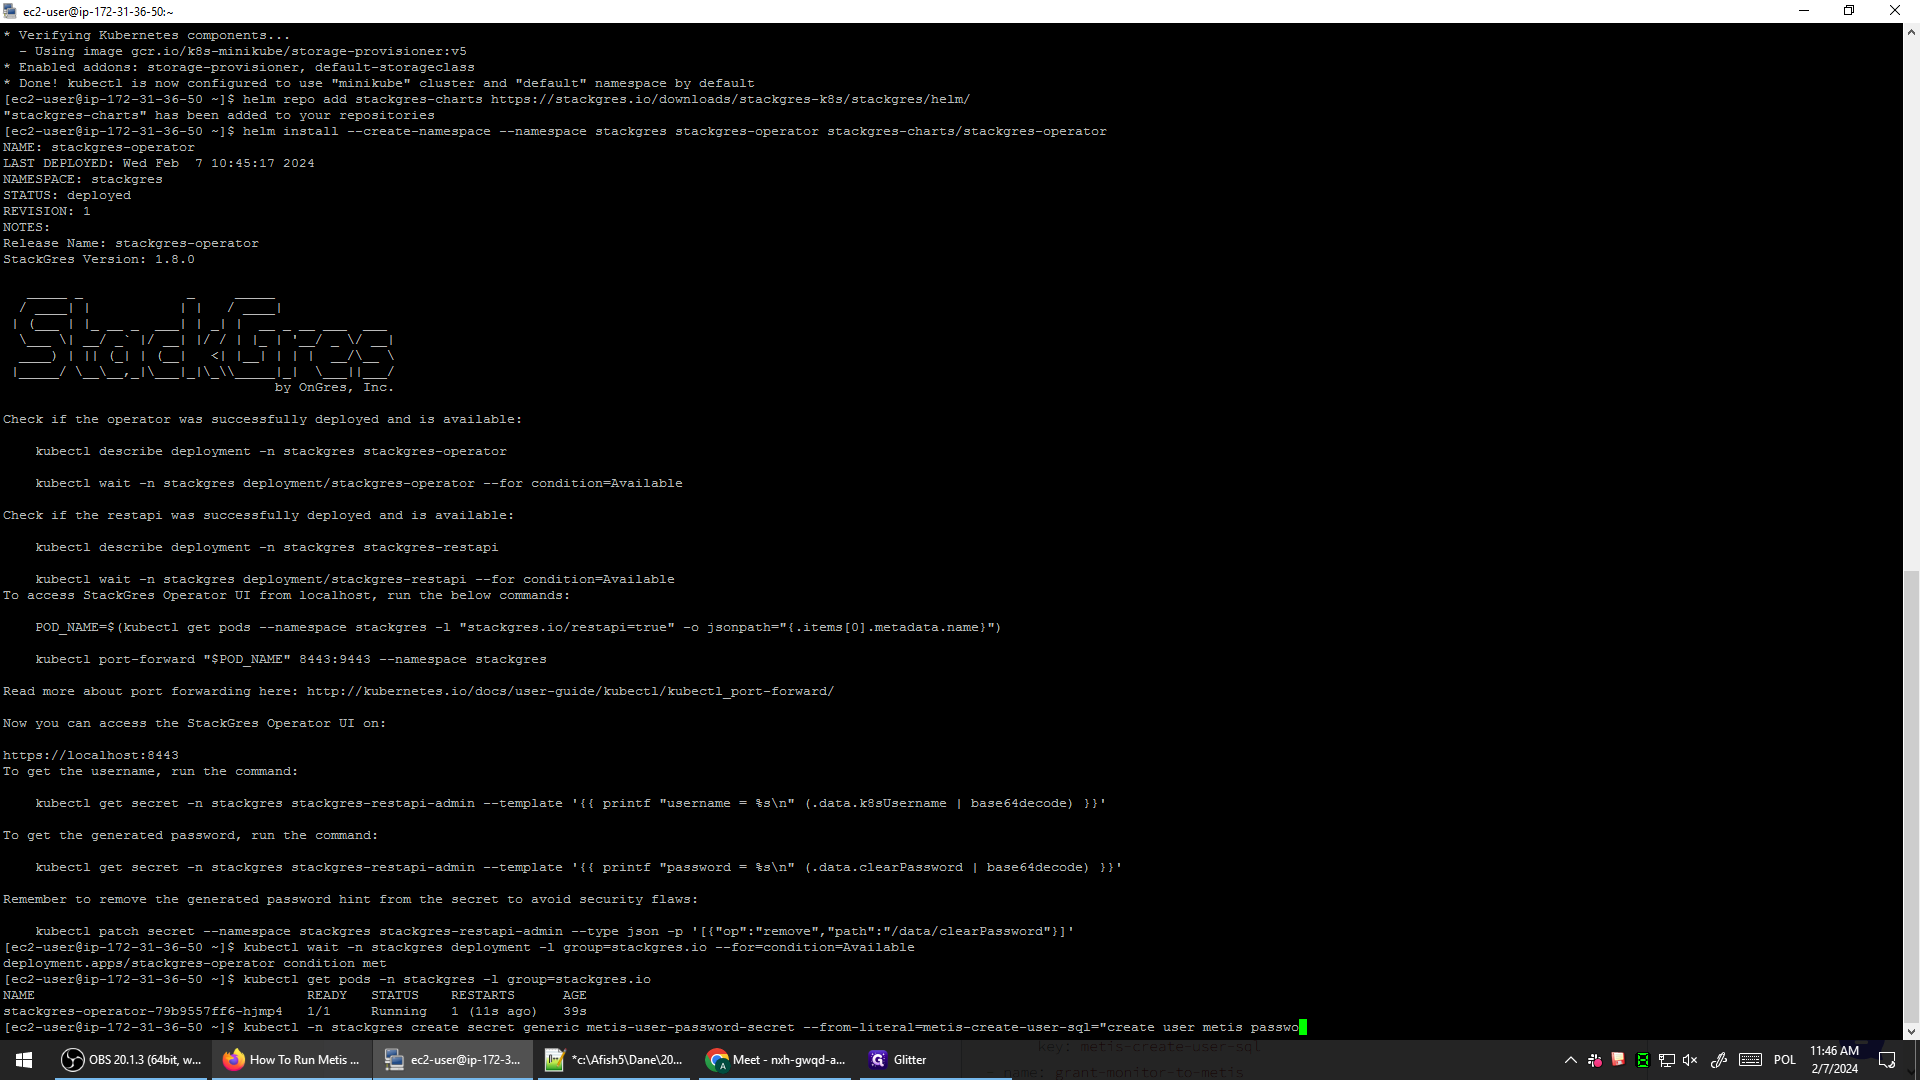
What we need to do now is install the StackGres operator. An operator is a tool that can install and manage components within a Kubernetes cluster. It can monitor drifts, apply configurations, and ensure proper functionality. To install the StackGres operator, we can utilize Helm. Helm is a tool for installing components in a cluster. Since I already have Helm installed on my machine, I will skip that step.
But once again, there is documentation you can follow. It should work on Windows, Linux, MacOS, everywhere. It basically involves downloading tar.gz, untarring it, and moving the binary to the appropriate place. Once you have Helm, what we need to do is add the repository. This repository indicates where the stackgres operator is located. Helm will then know where to download it from and how to use it.
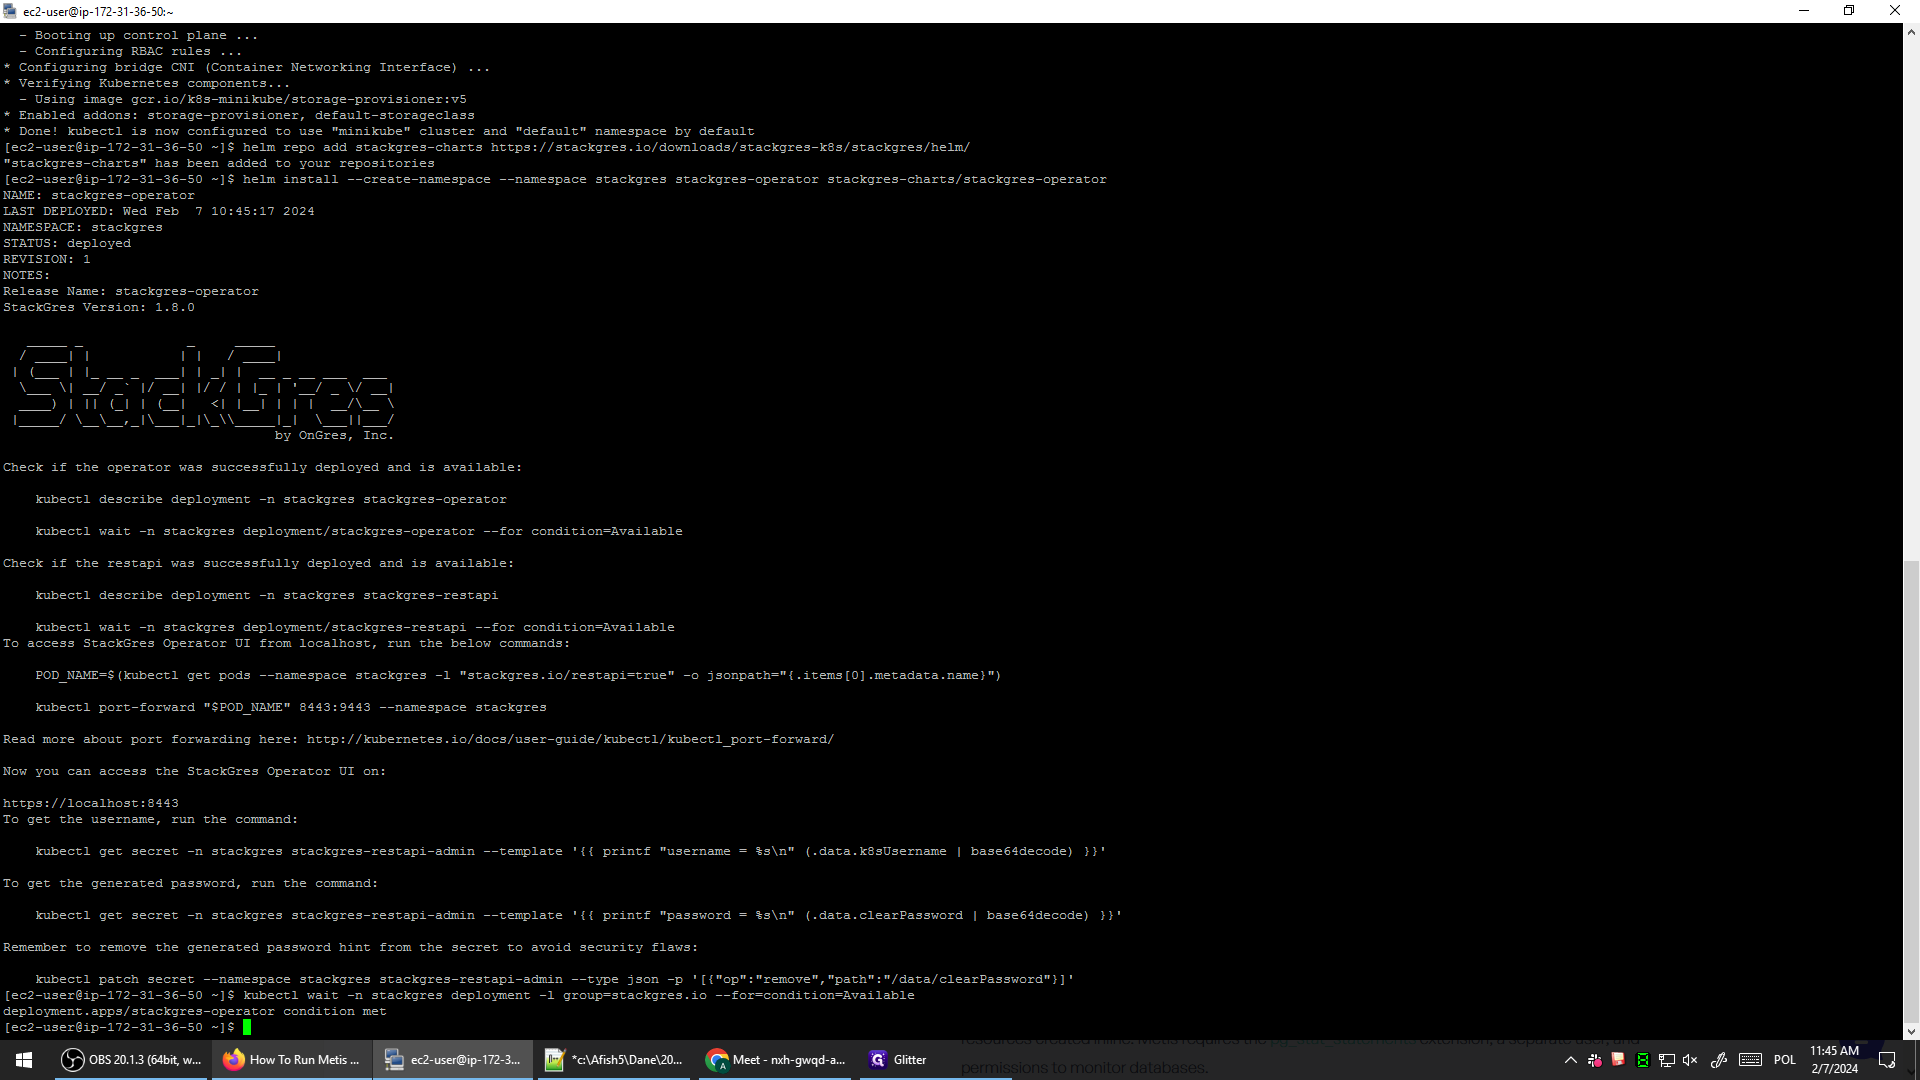
So, we want to add the StackGres repository. Let's proceed with adding it. Once added, we can then install the operator and create a new namespace named StackGres to organize everything efficiently.

Let's execute this command.
This command is now being sent to the repository to download the StackGres operator and initiate its installation in the Kubernetes cluster. After that, initialization processes need to occur in the background.
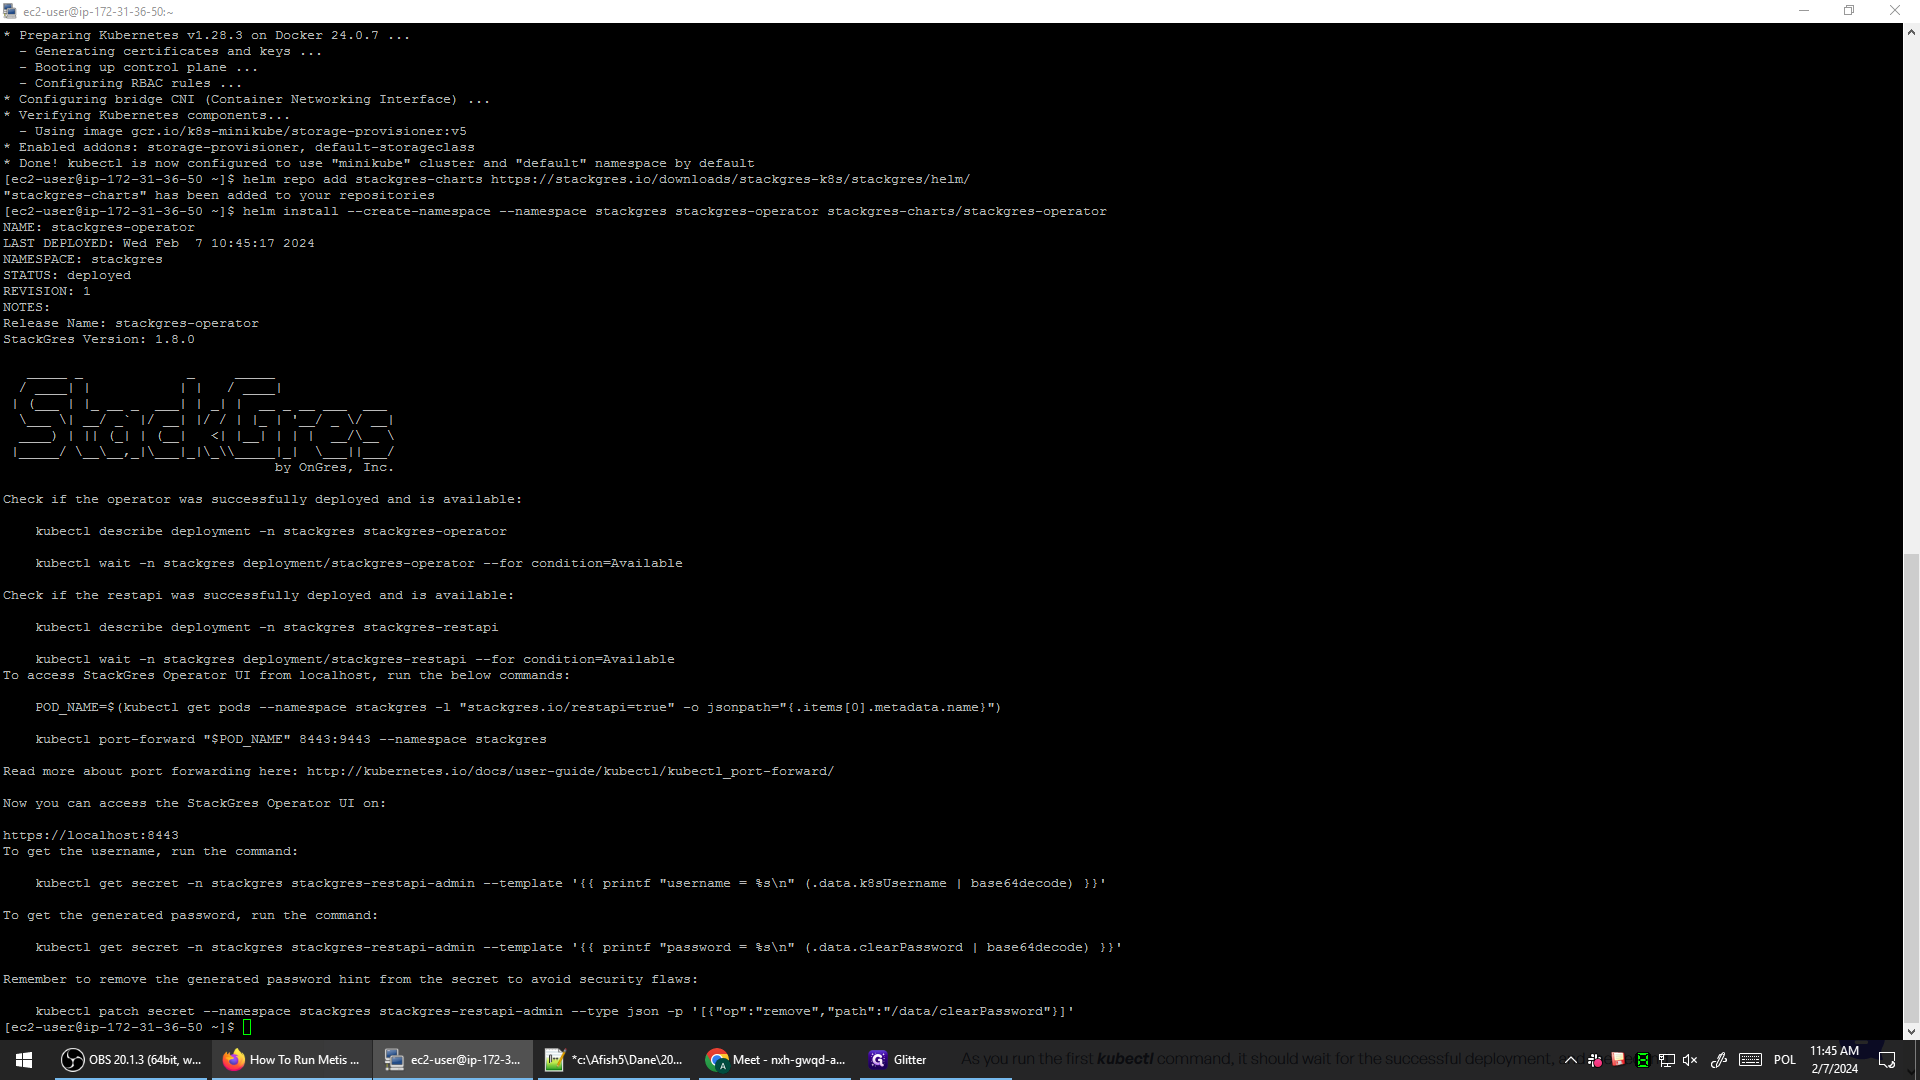
We can use another command to synchronously wait for everything to complete before running it.

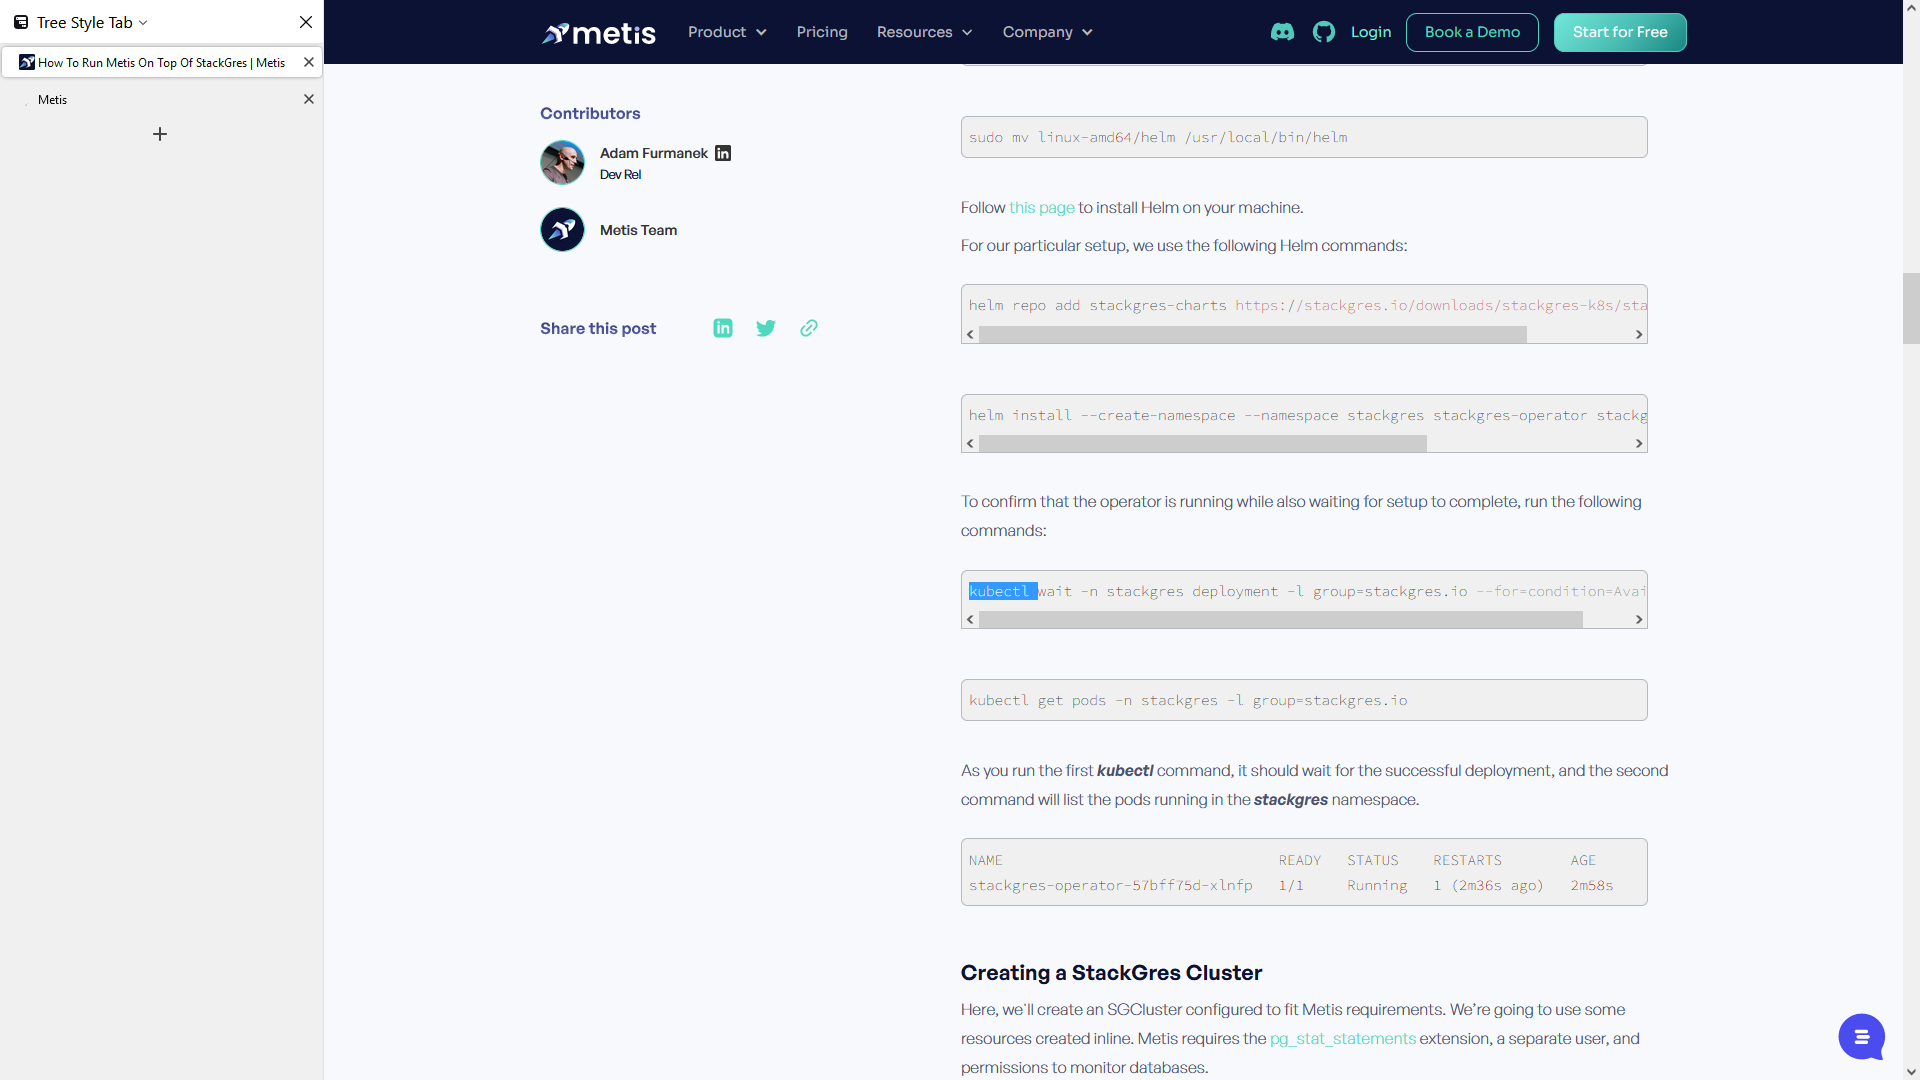
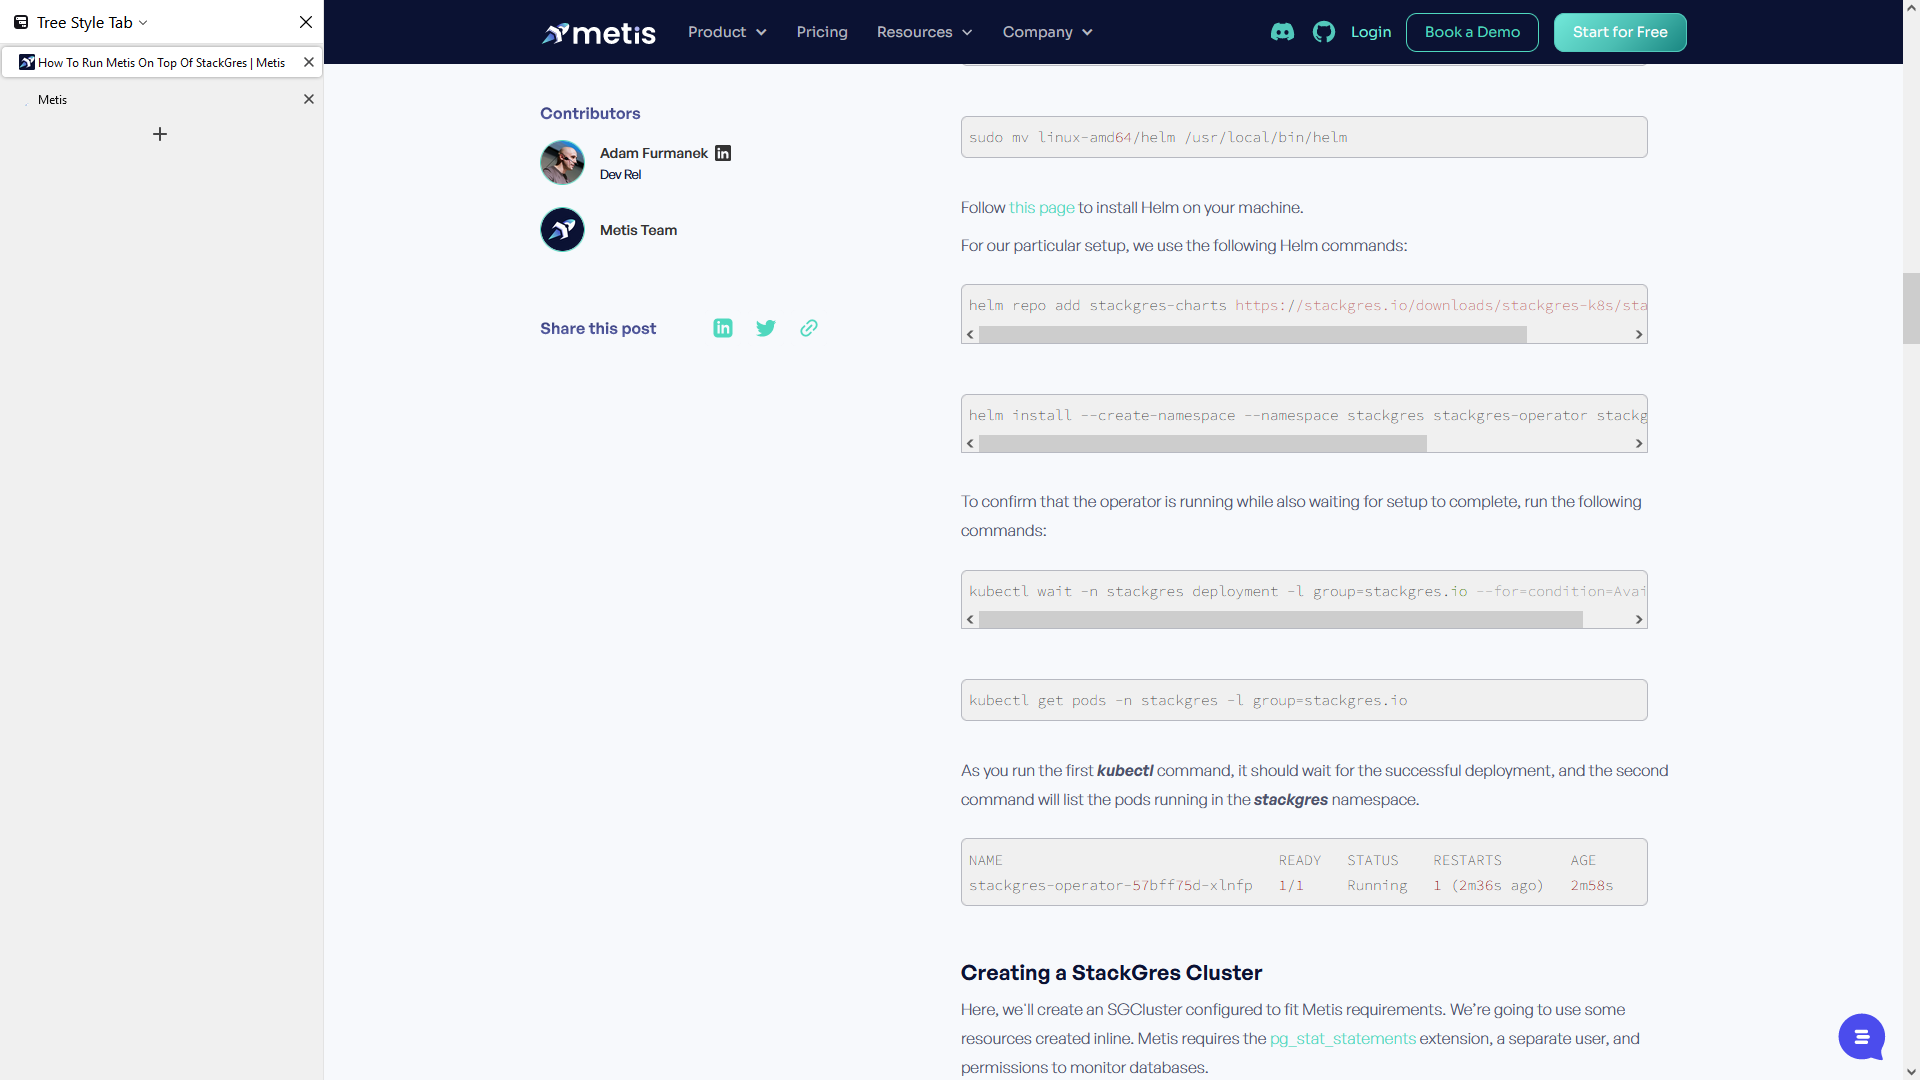


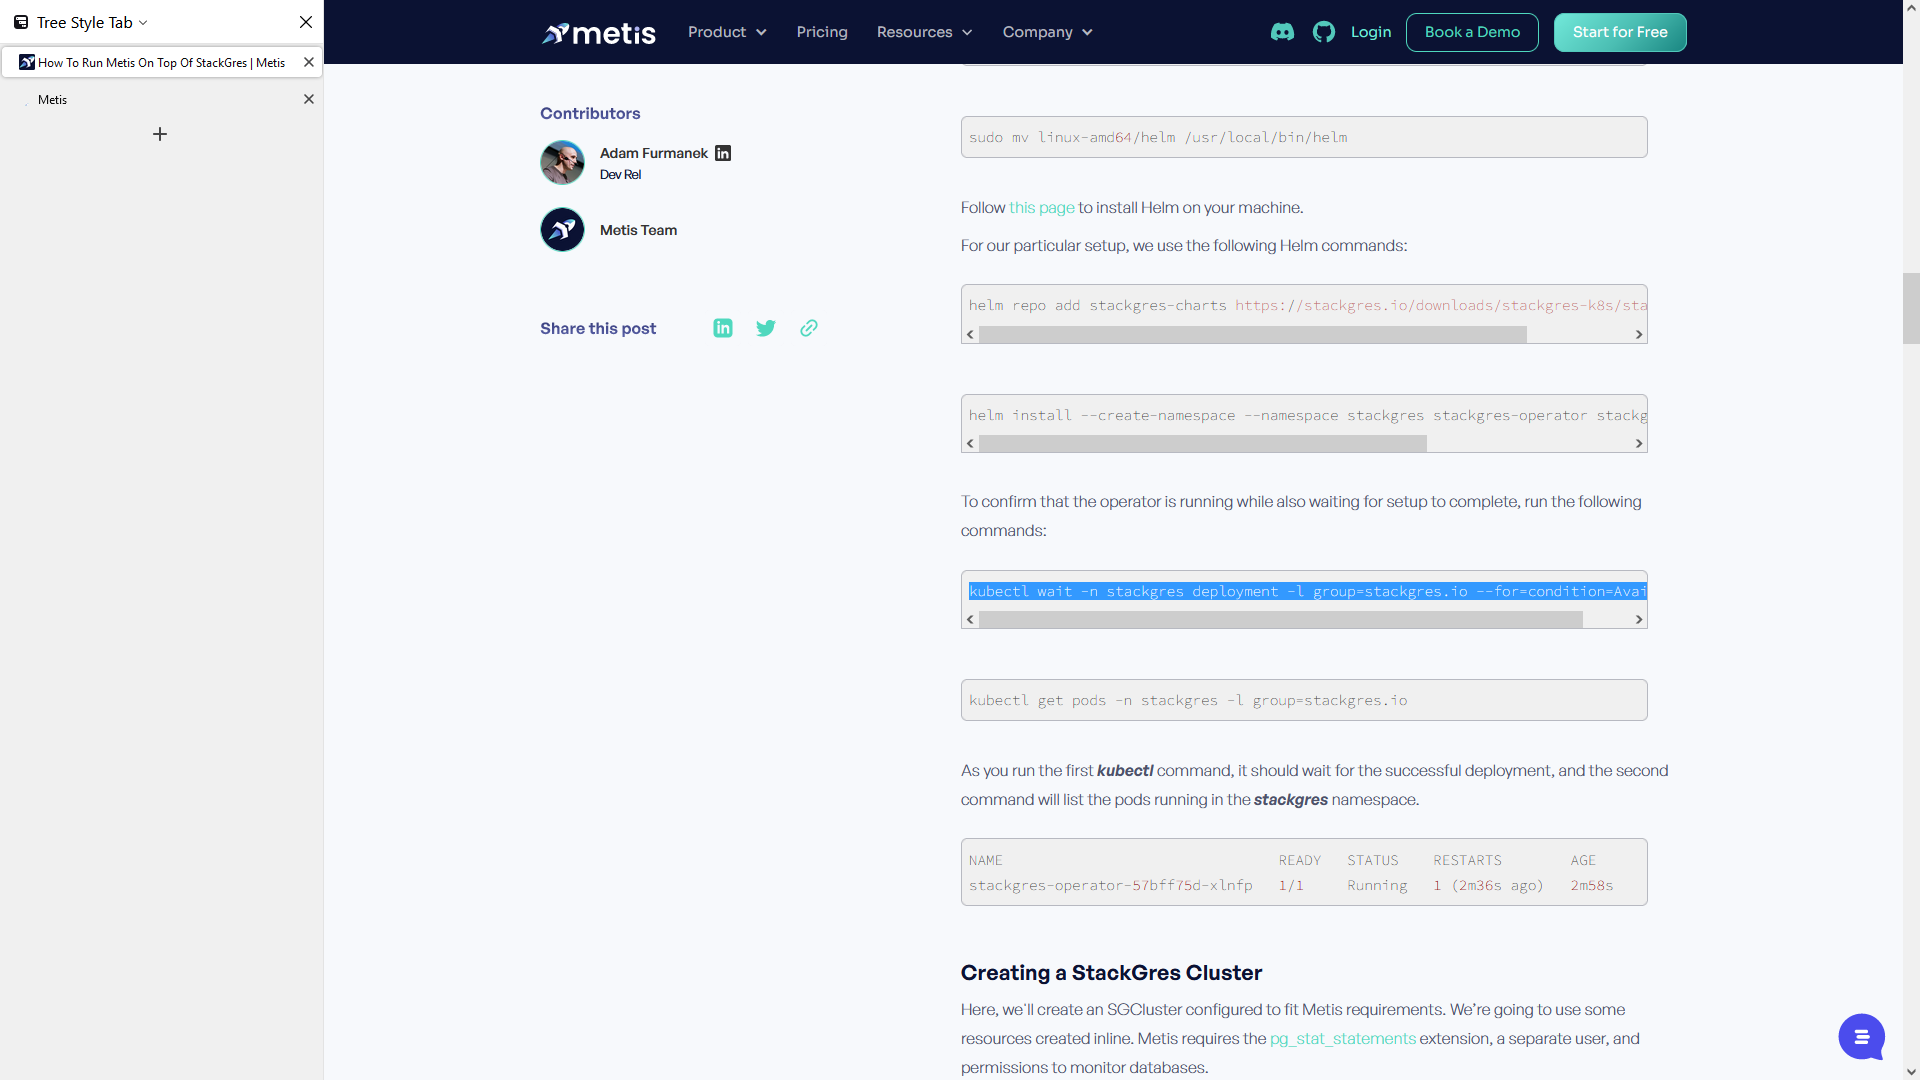
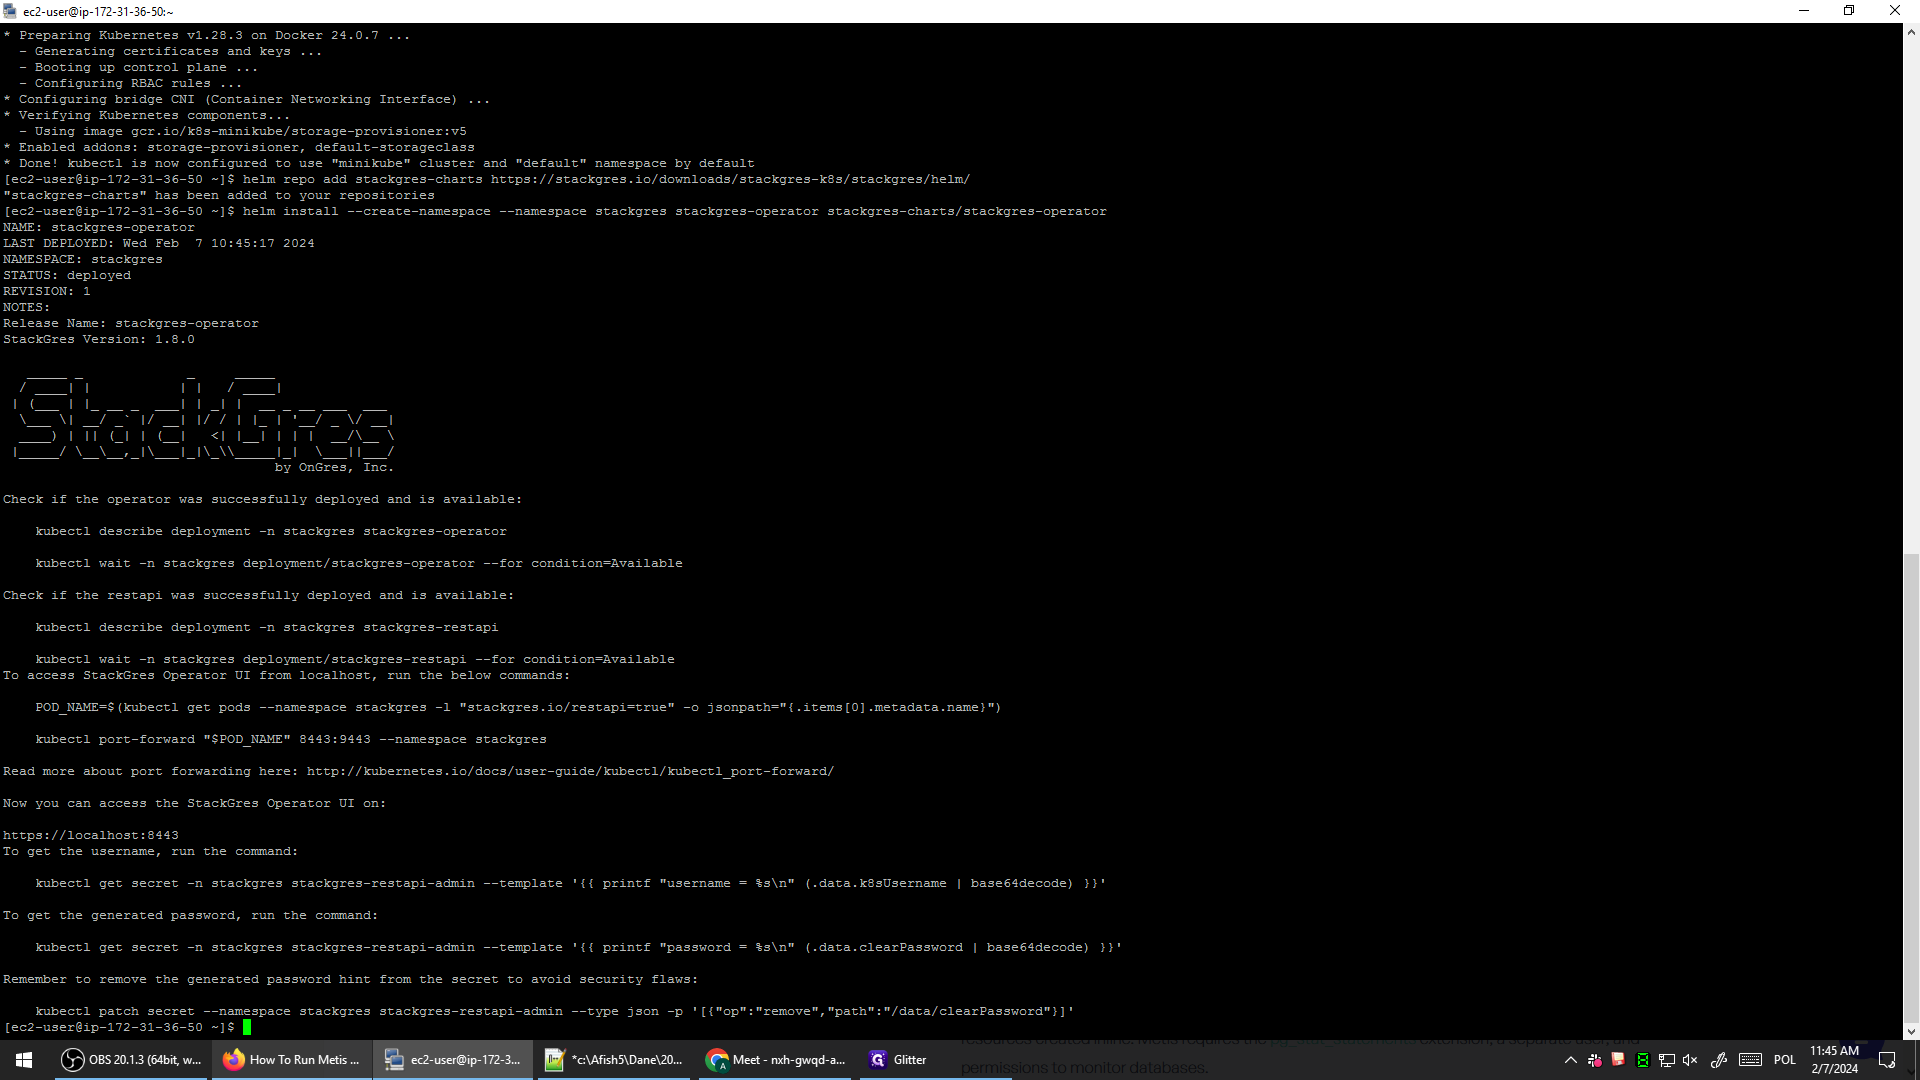
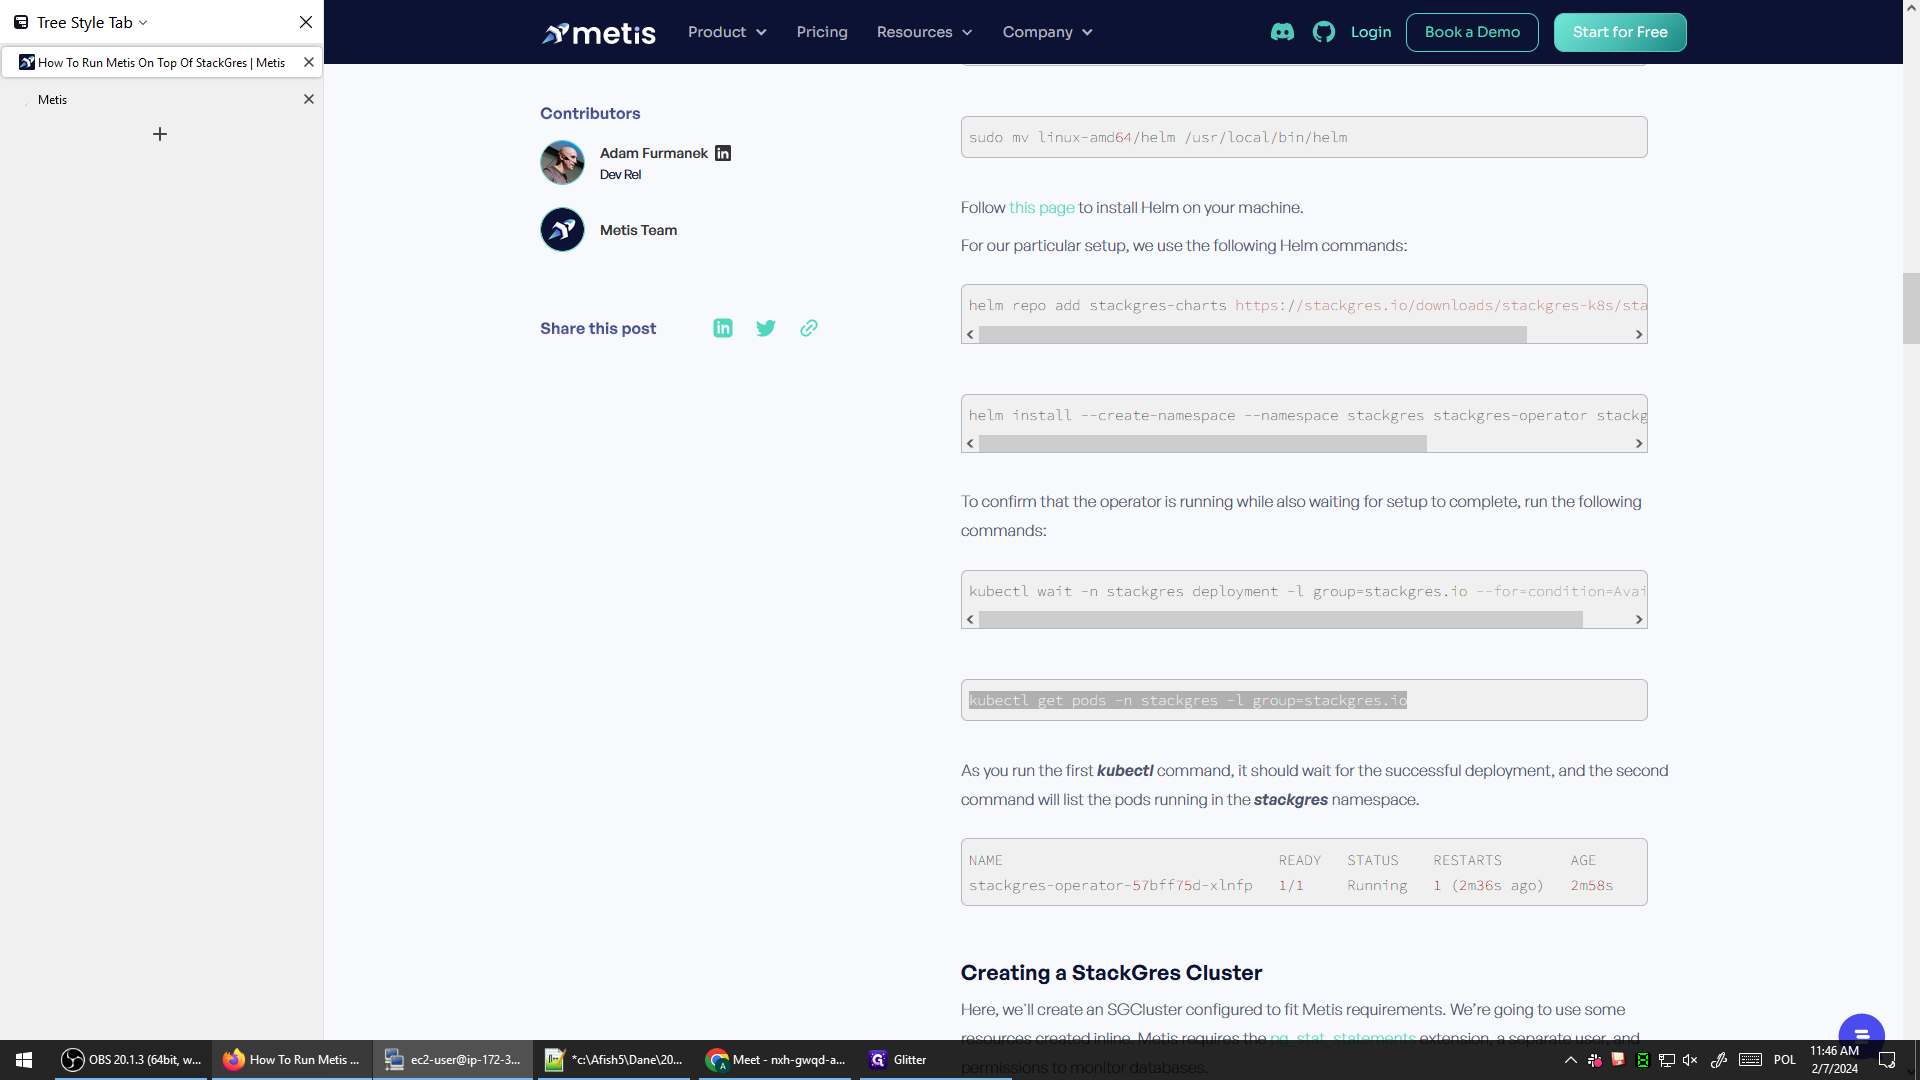
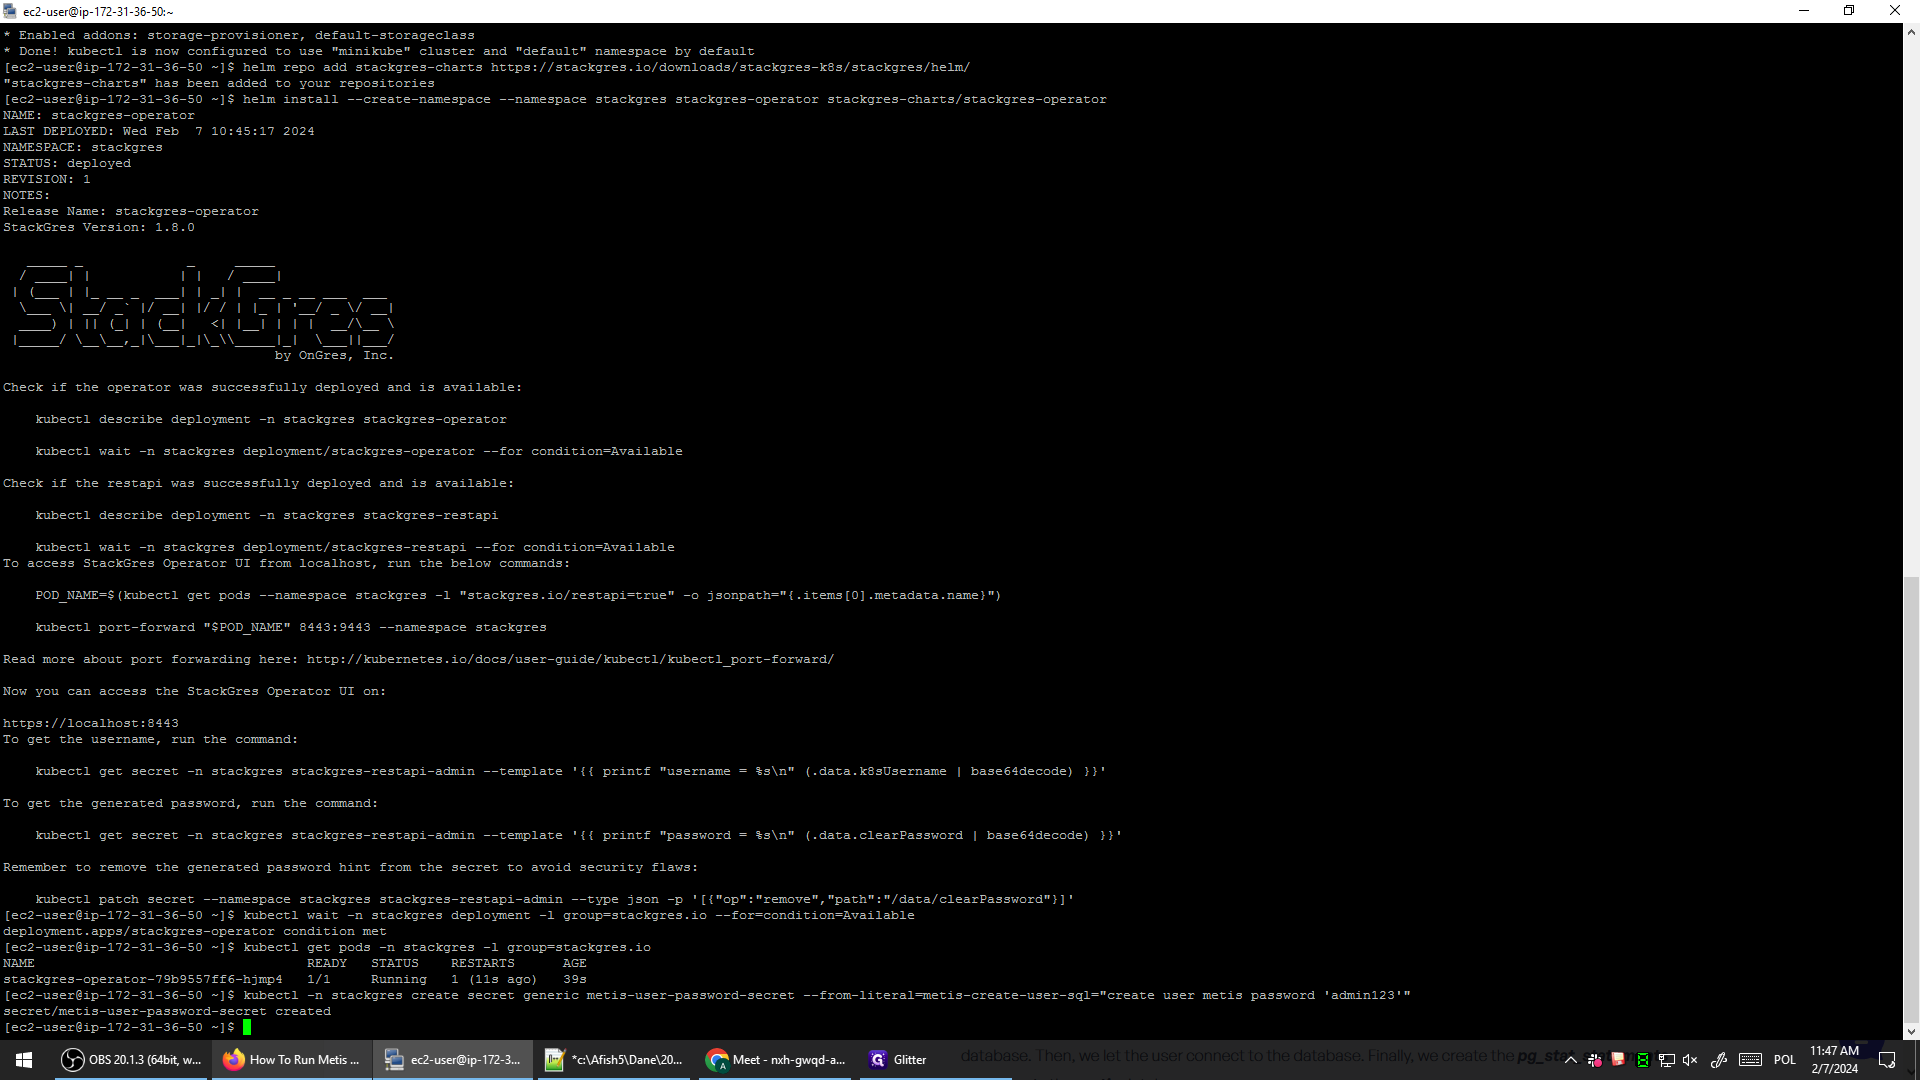
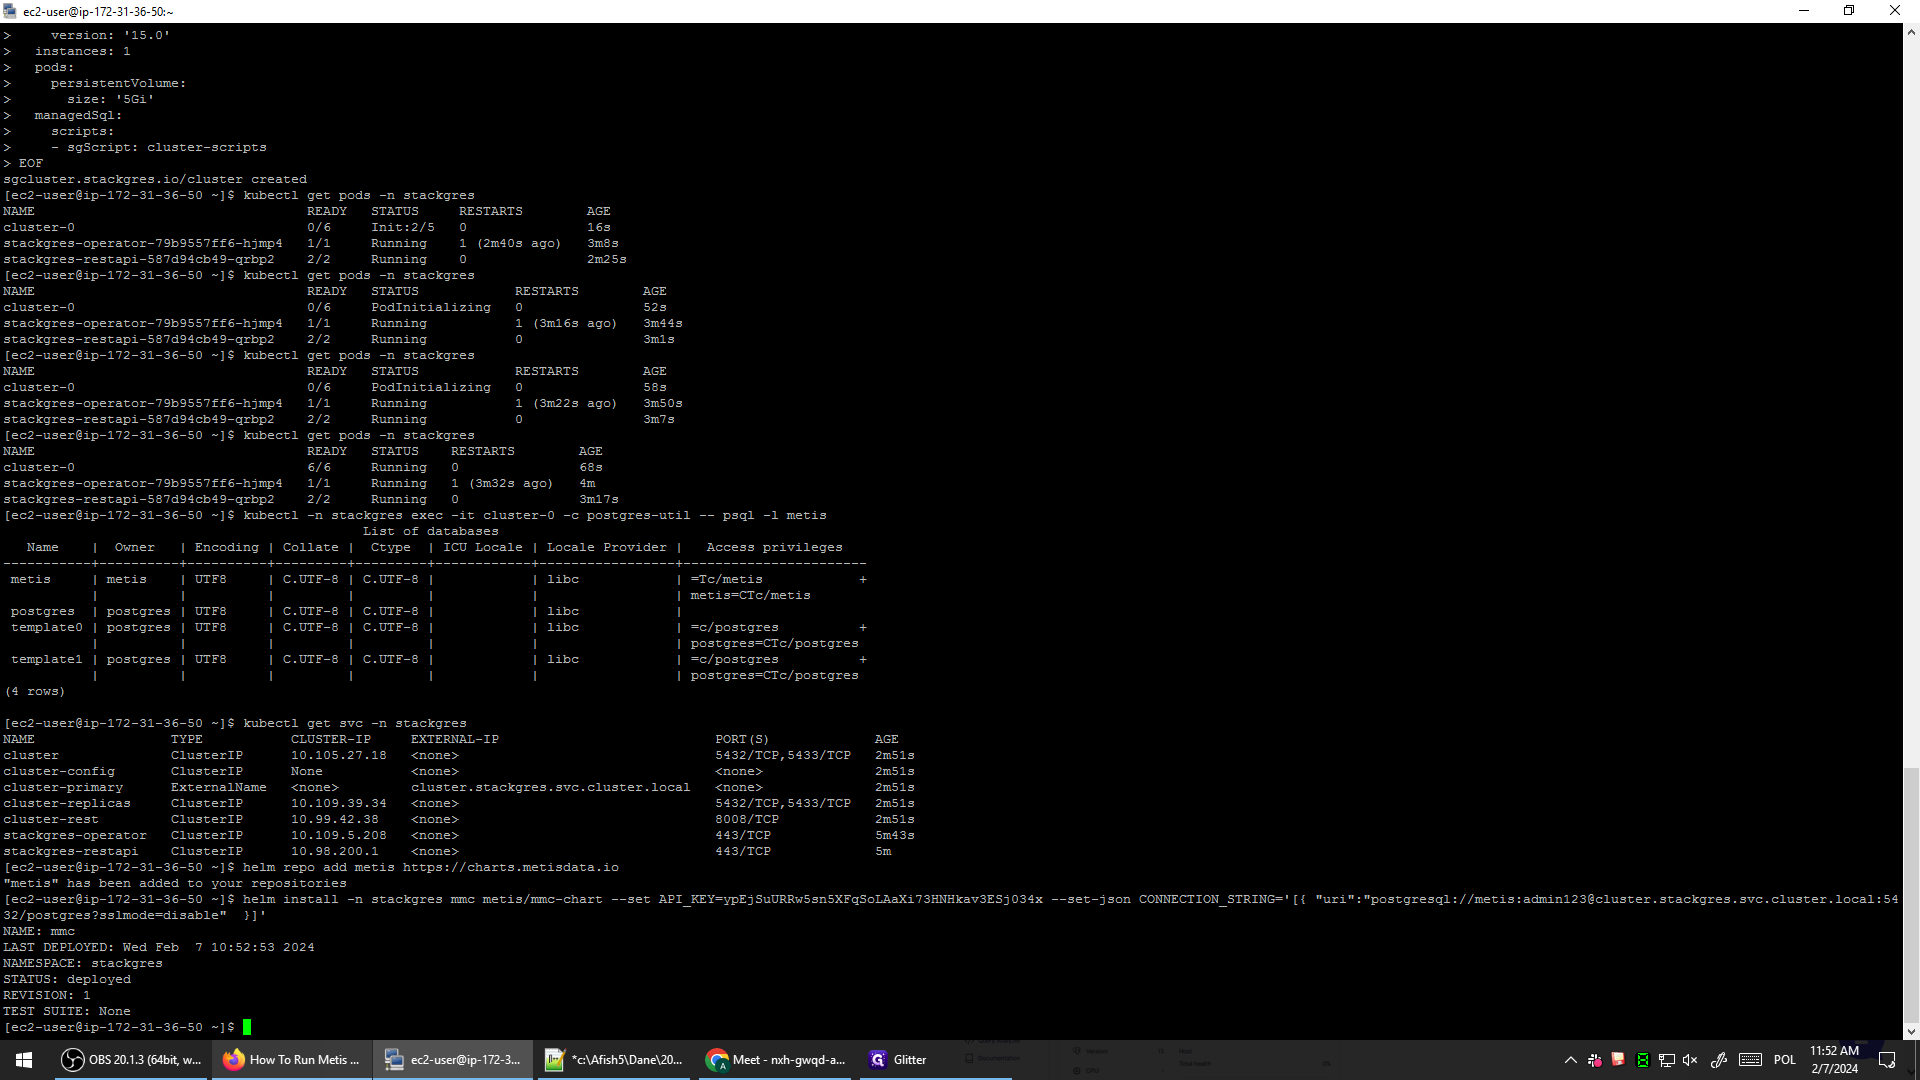
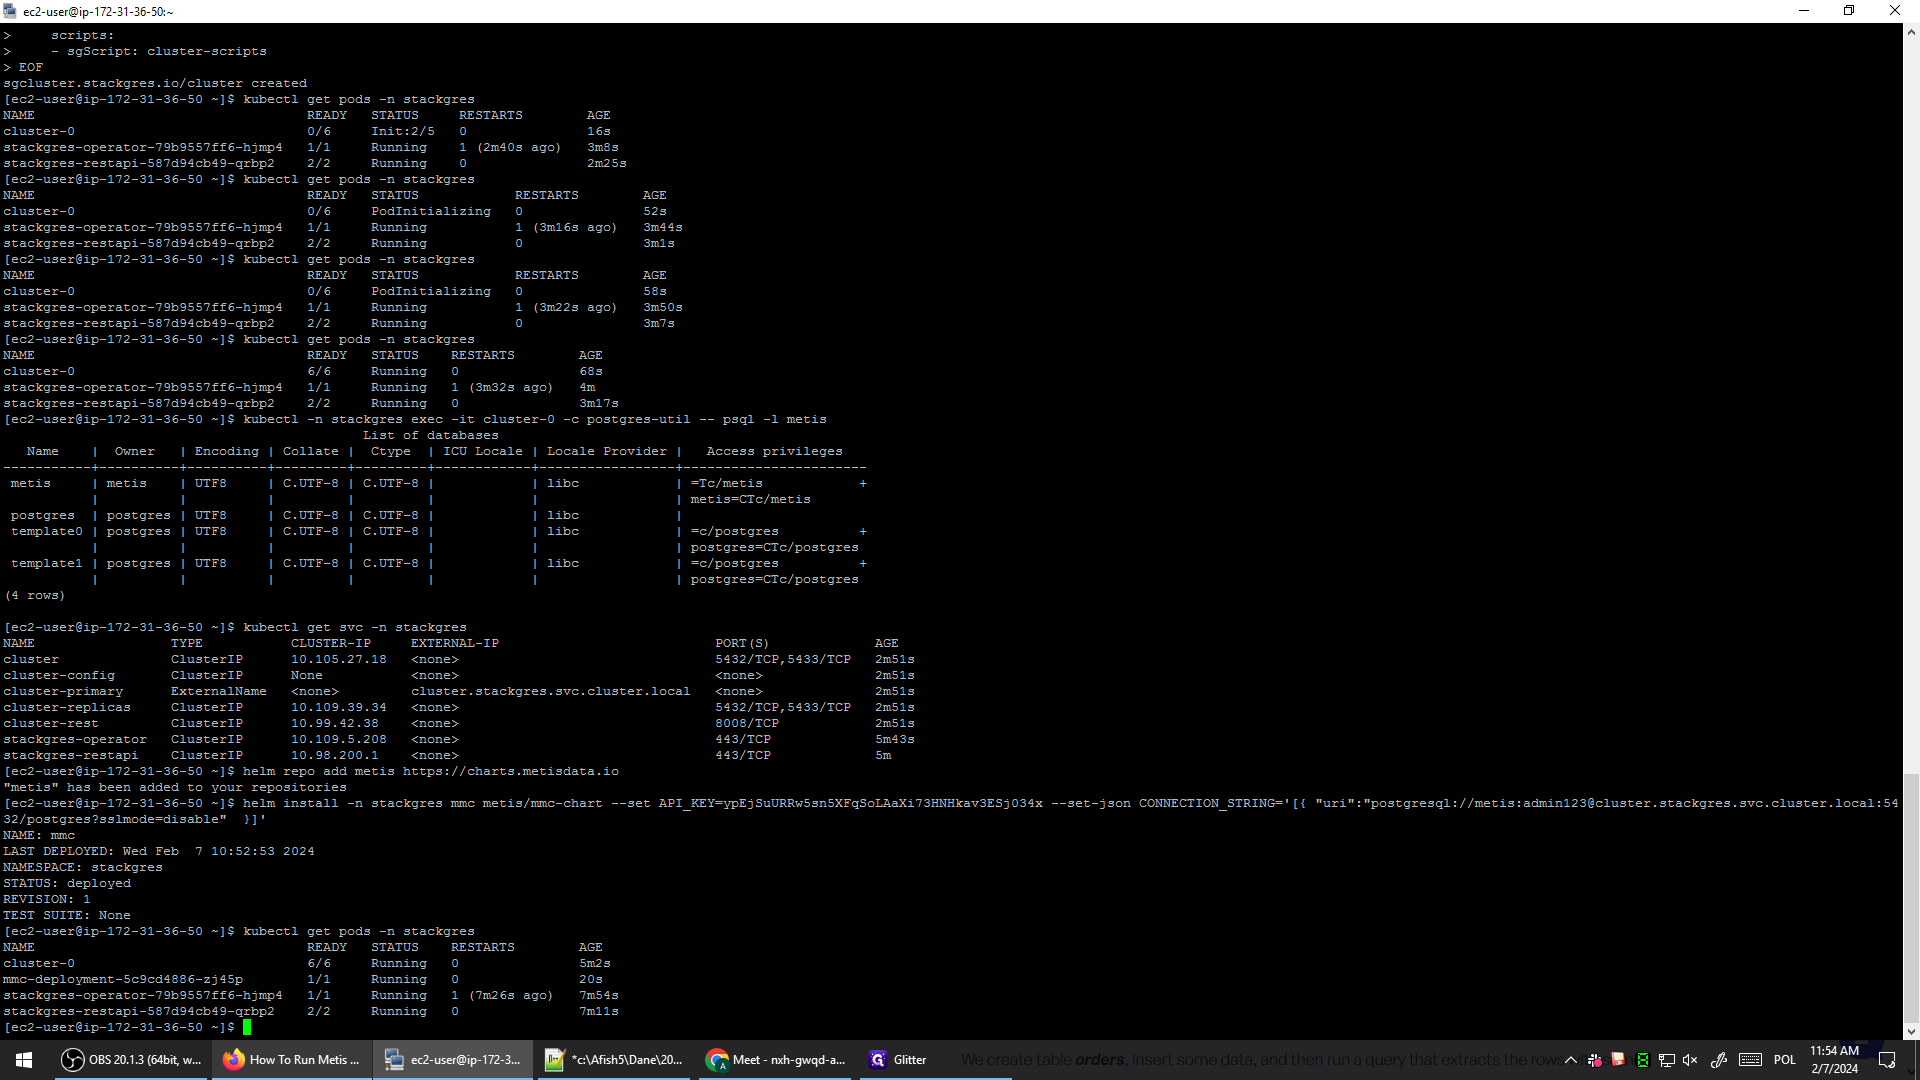
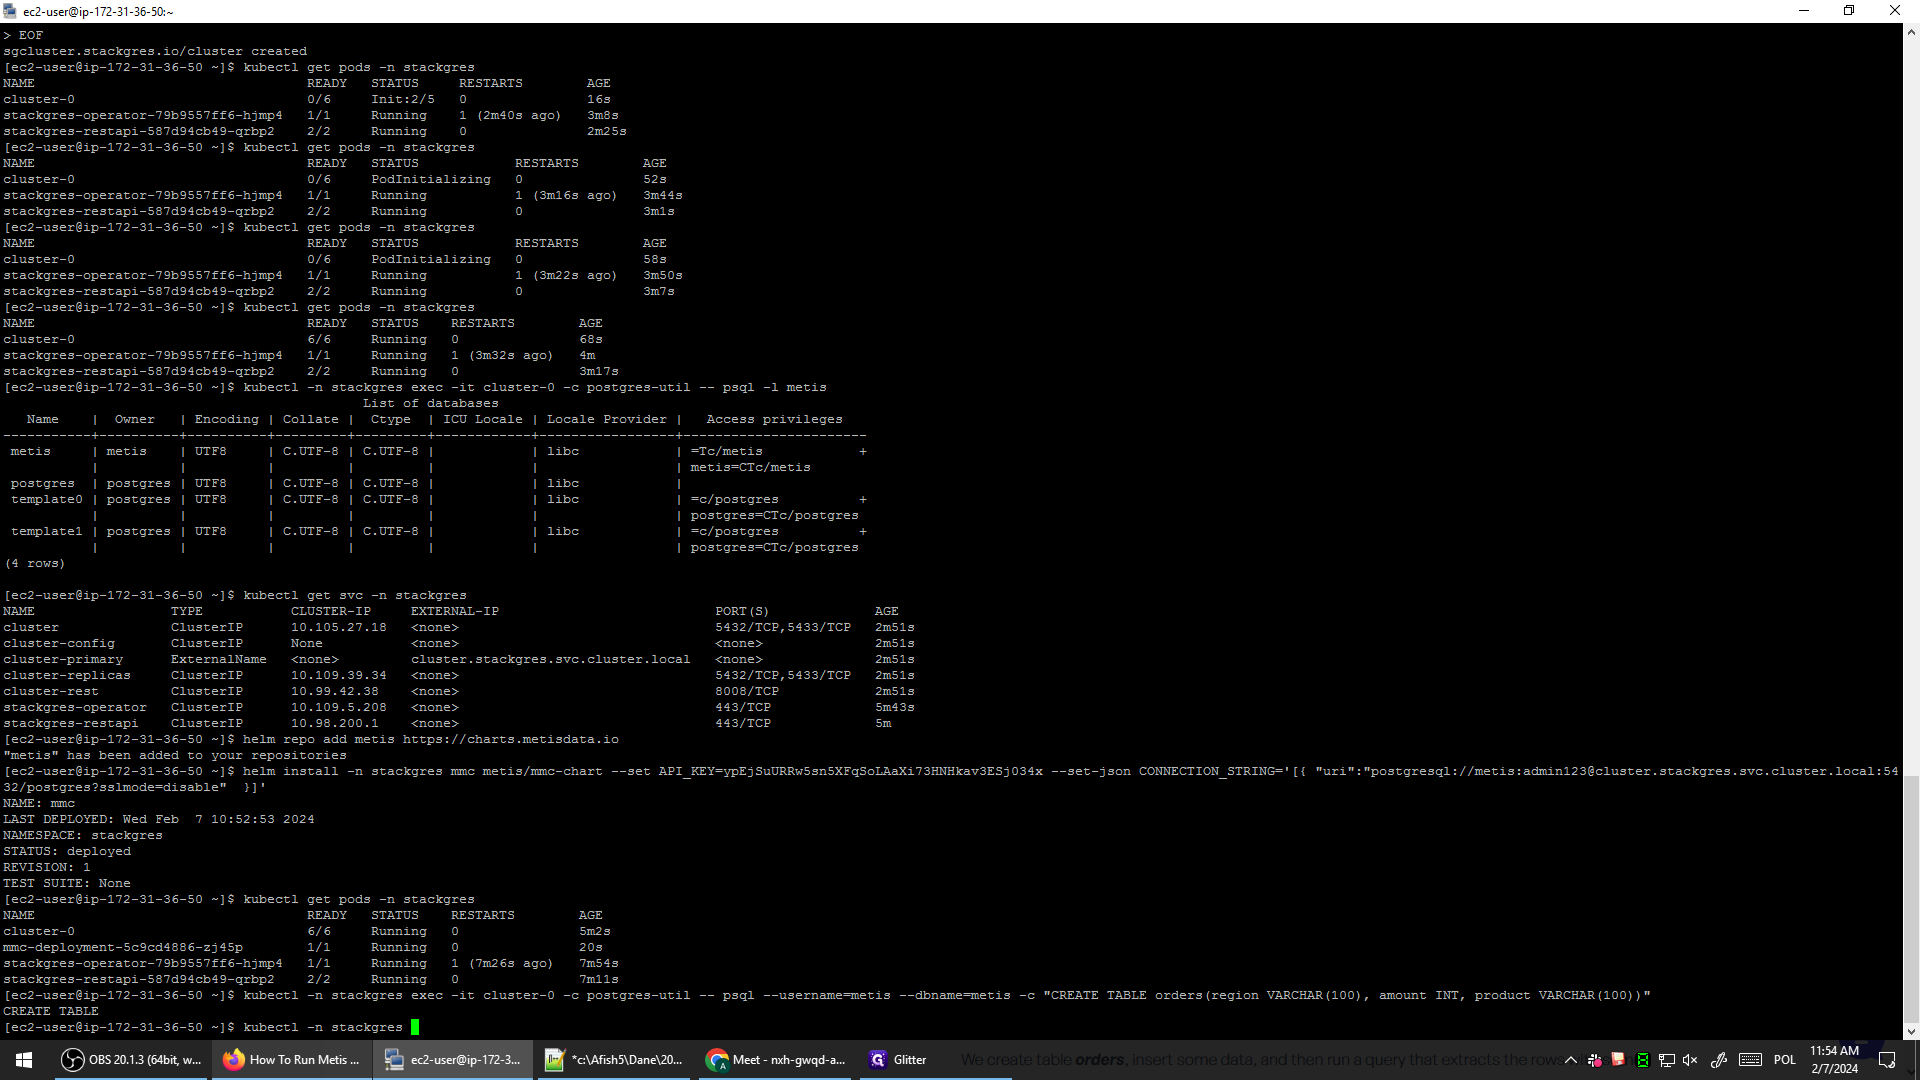
And once this command finishes, we will have the operator up and running, ready for us to use. Let's allow it some time to complete. Then, we can check what has been installed and configured on our Kubernetes cluster. We can run another command to retrieve all the pods from the stackgres namespace.
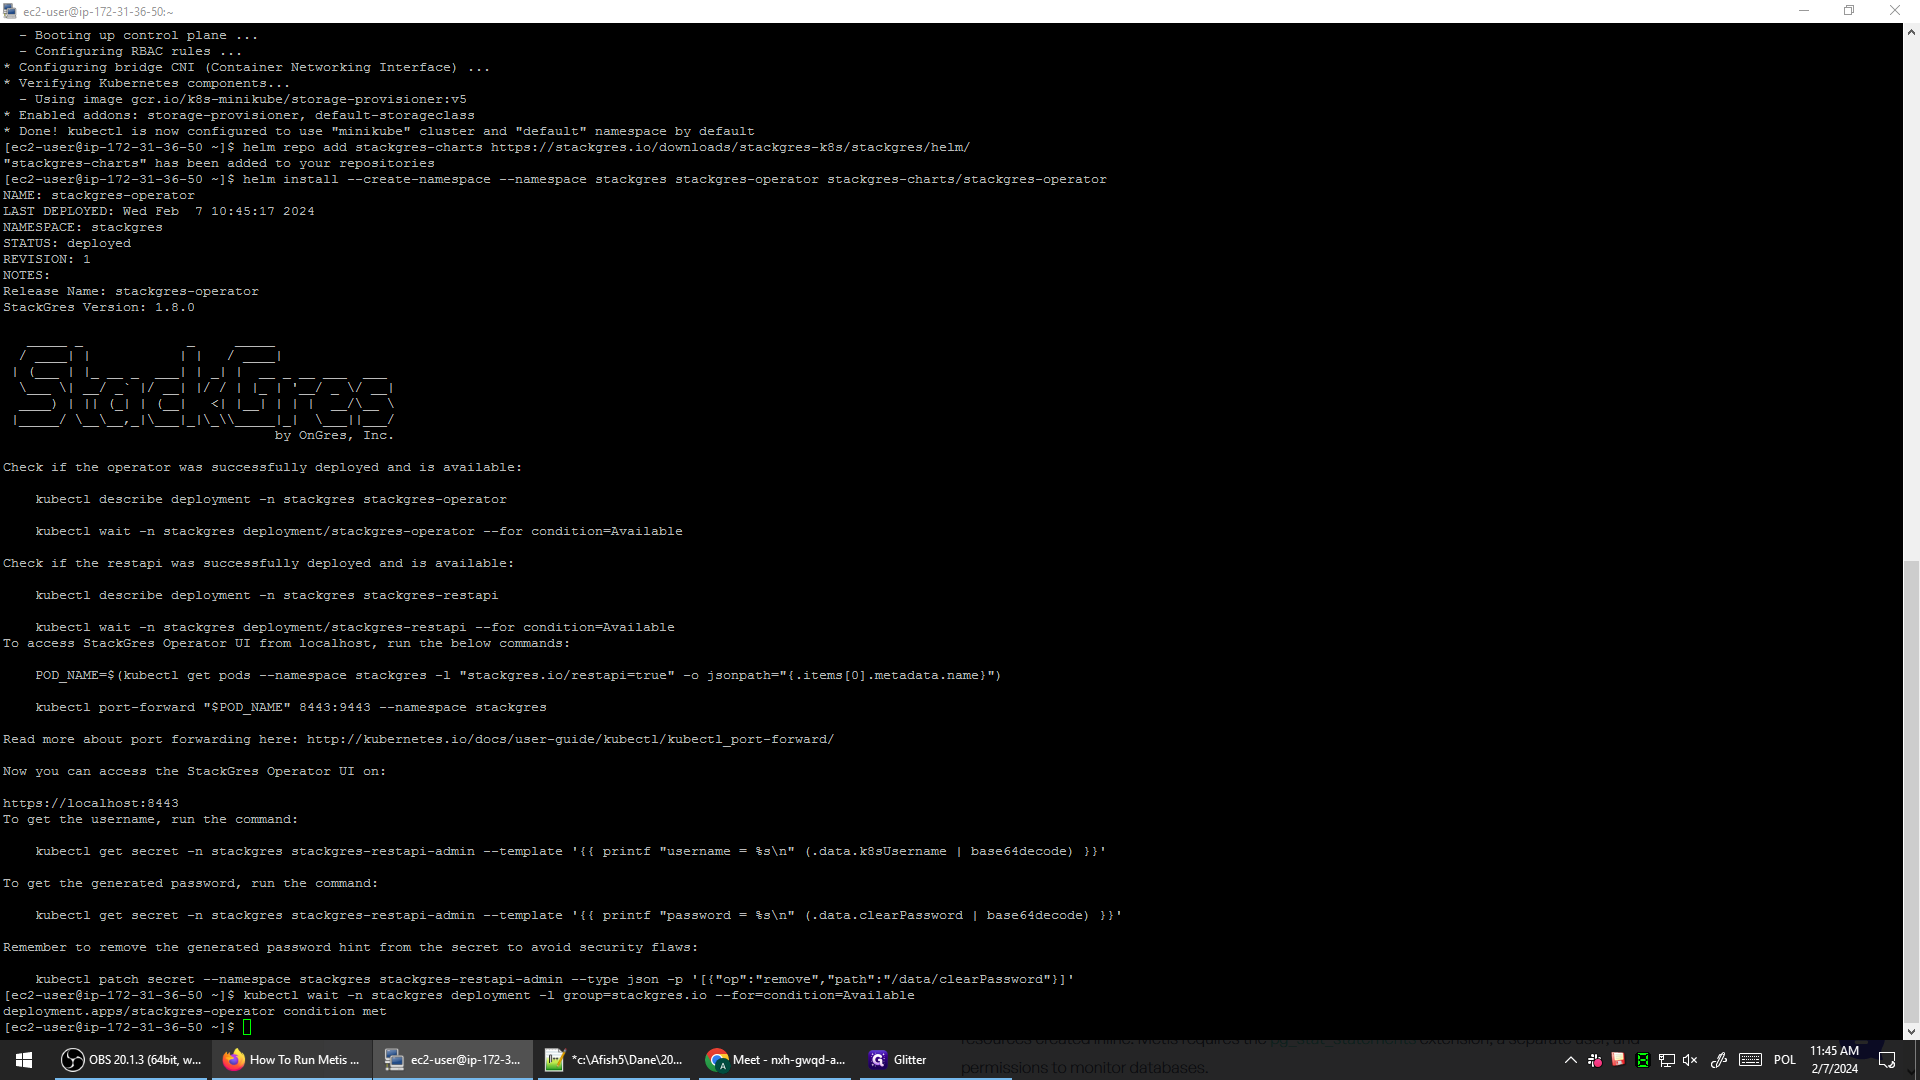


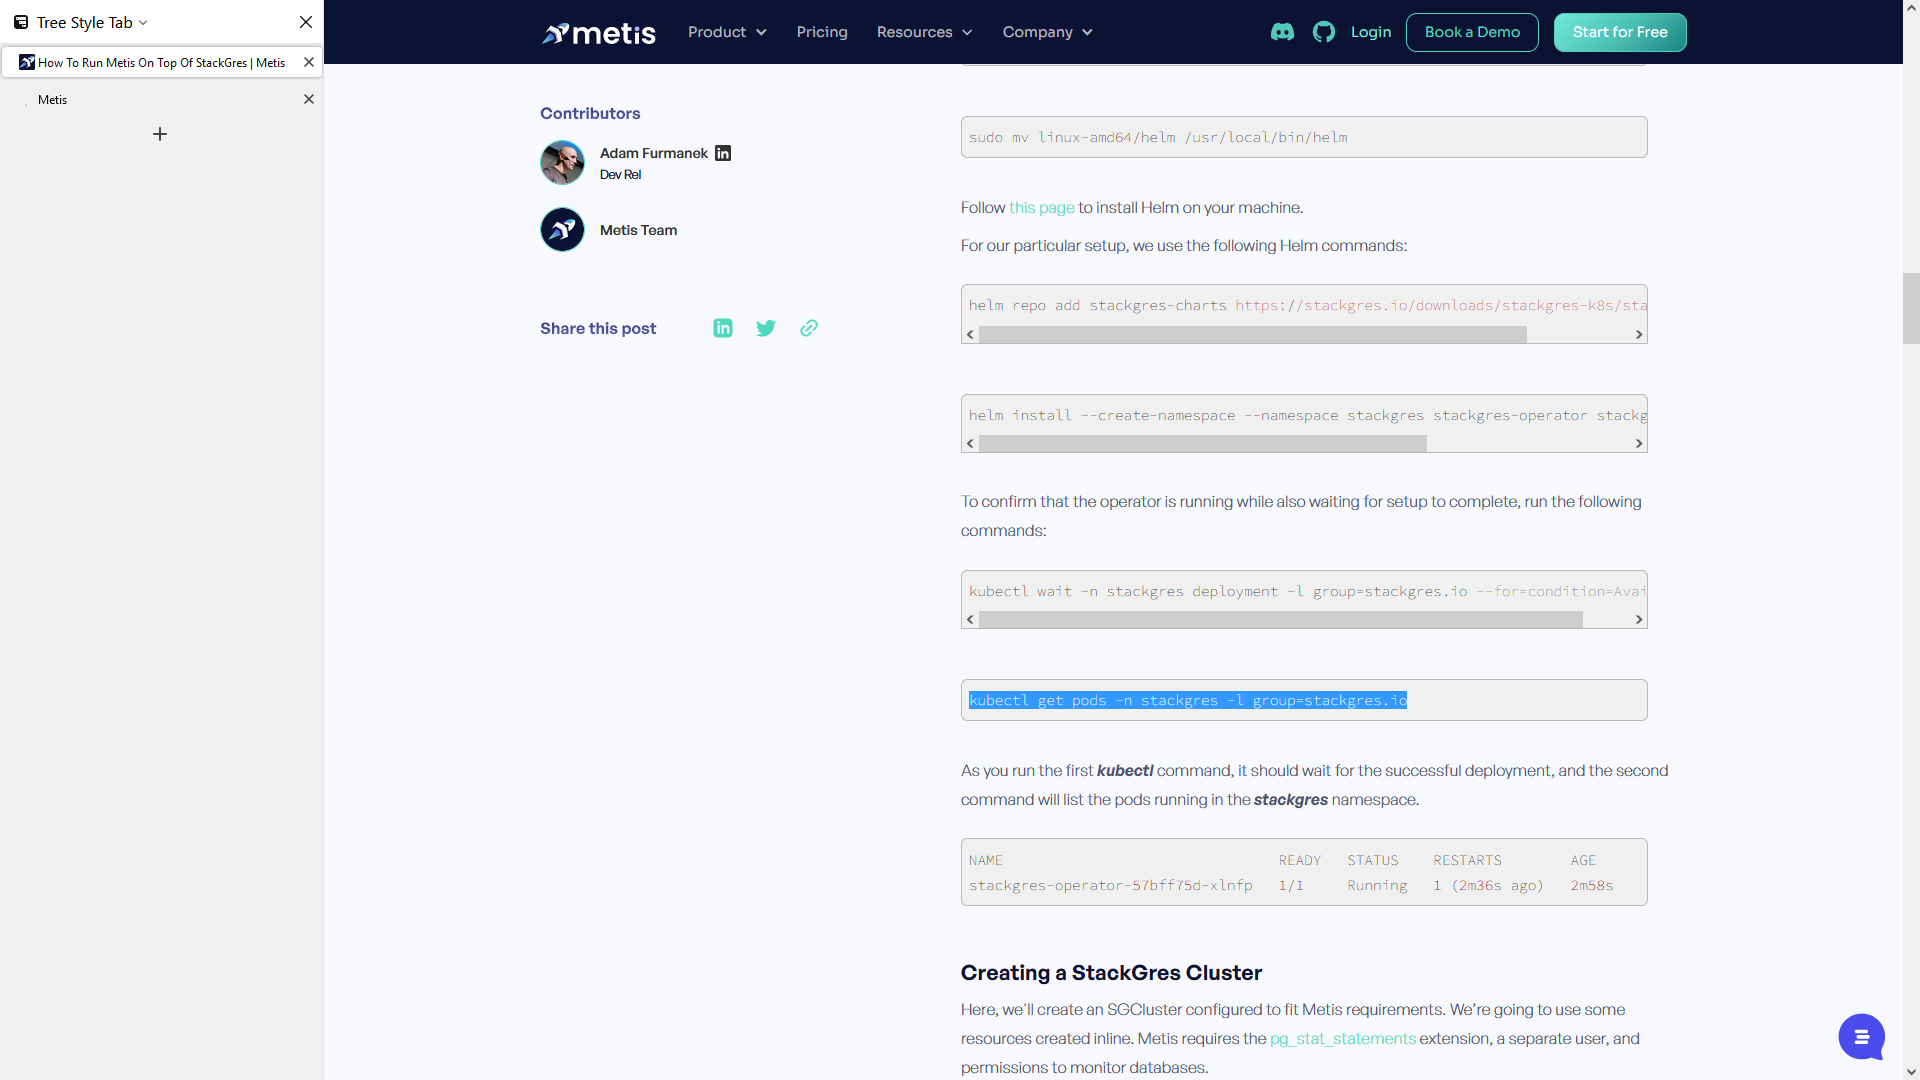

After running the command, the operator is up and running in our Kubernetes cluster. Next, we will utilize the stackgres operator to establish a PostgreSQL server instance. It is essential to configure the server for Metis usage by granting permissions, installing required extensions, and completing other necessary tasks. Let's revisit the instructions.
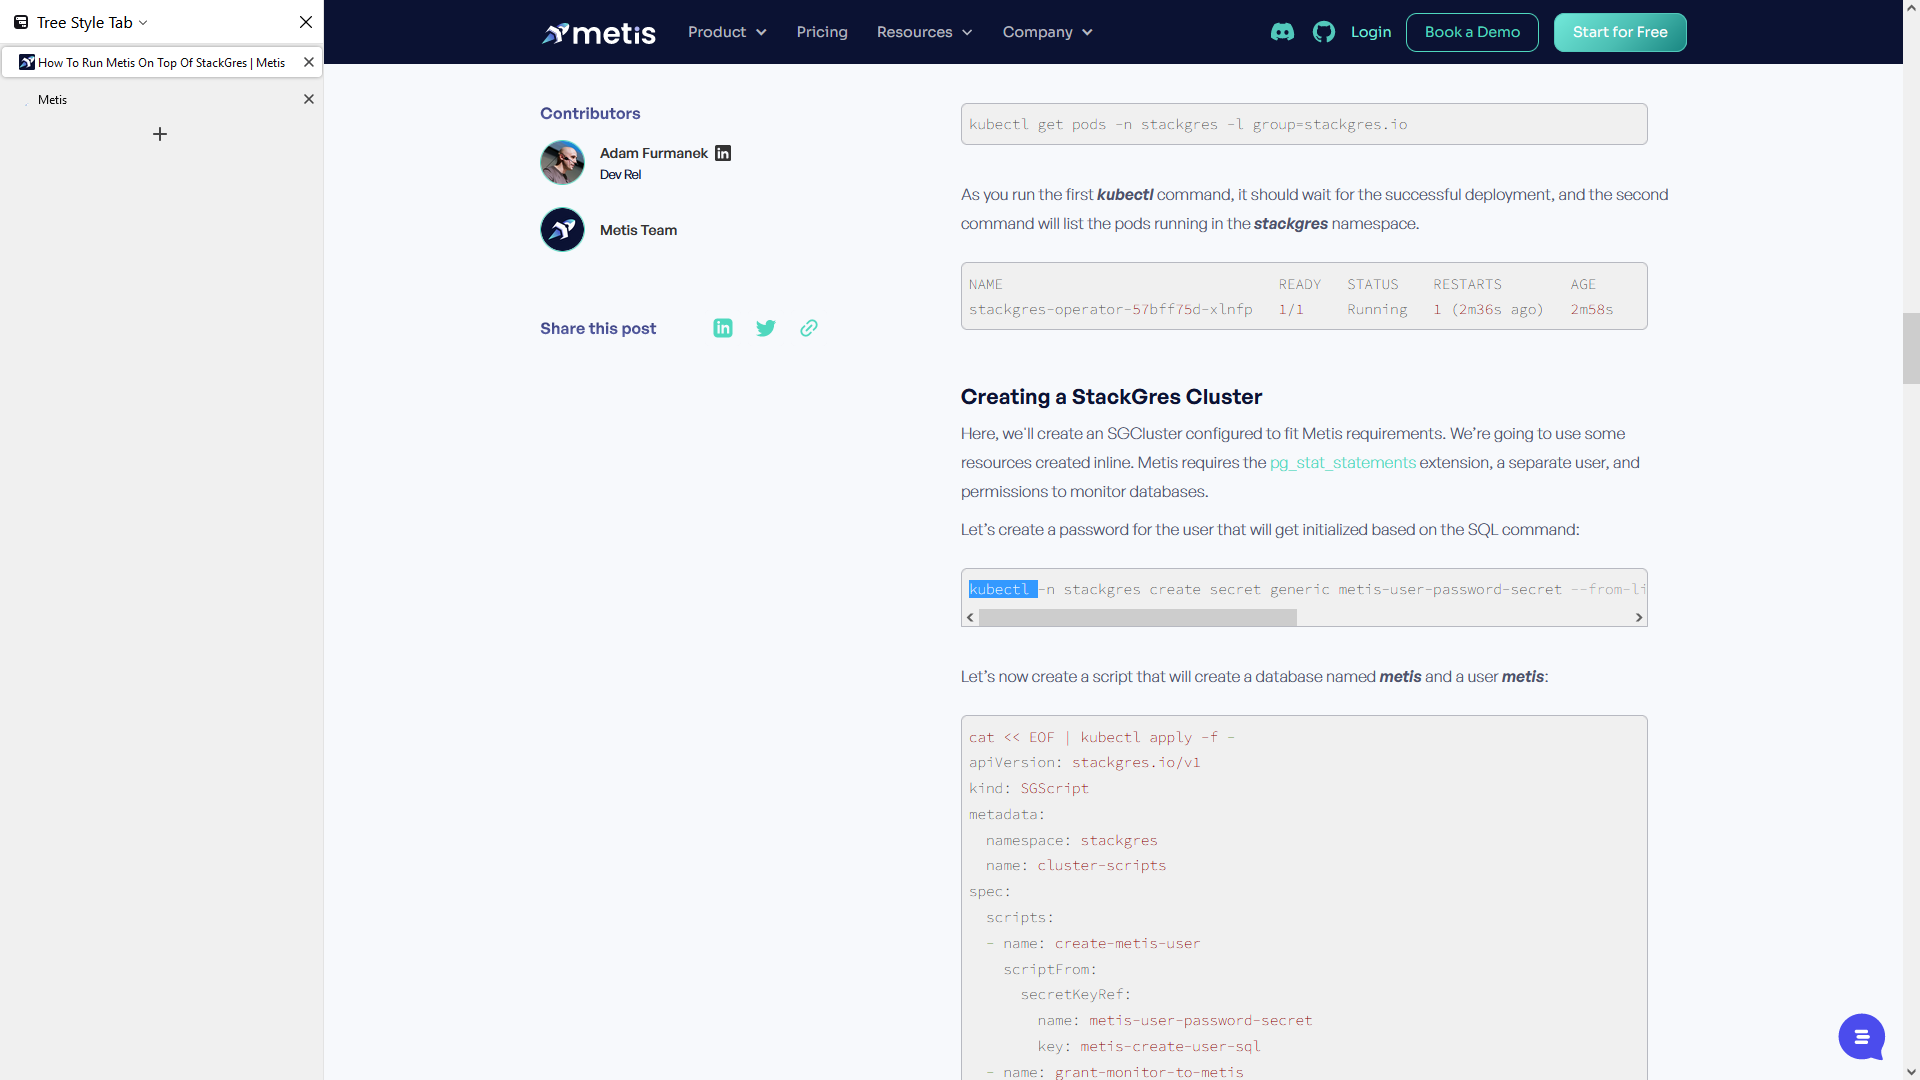
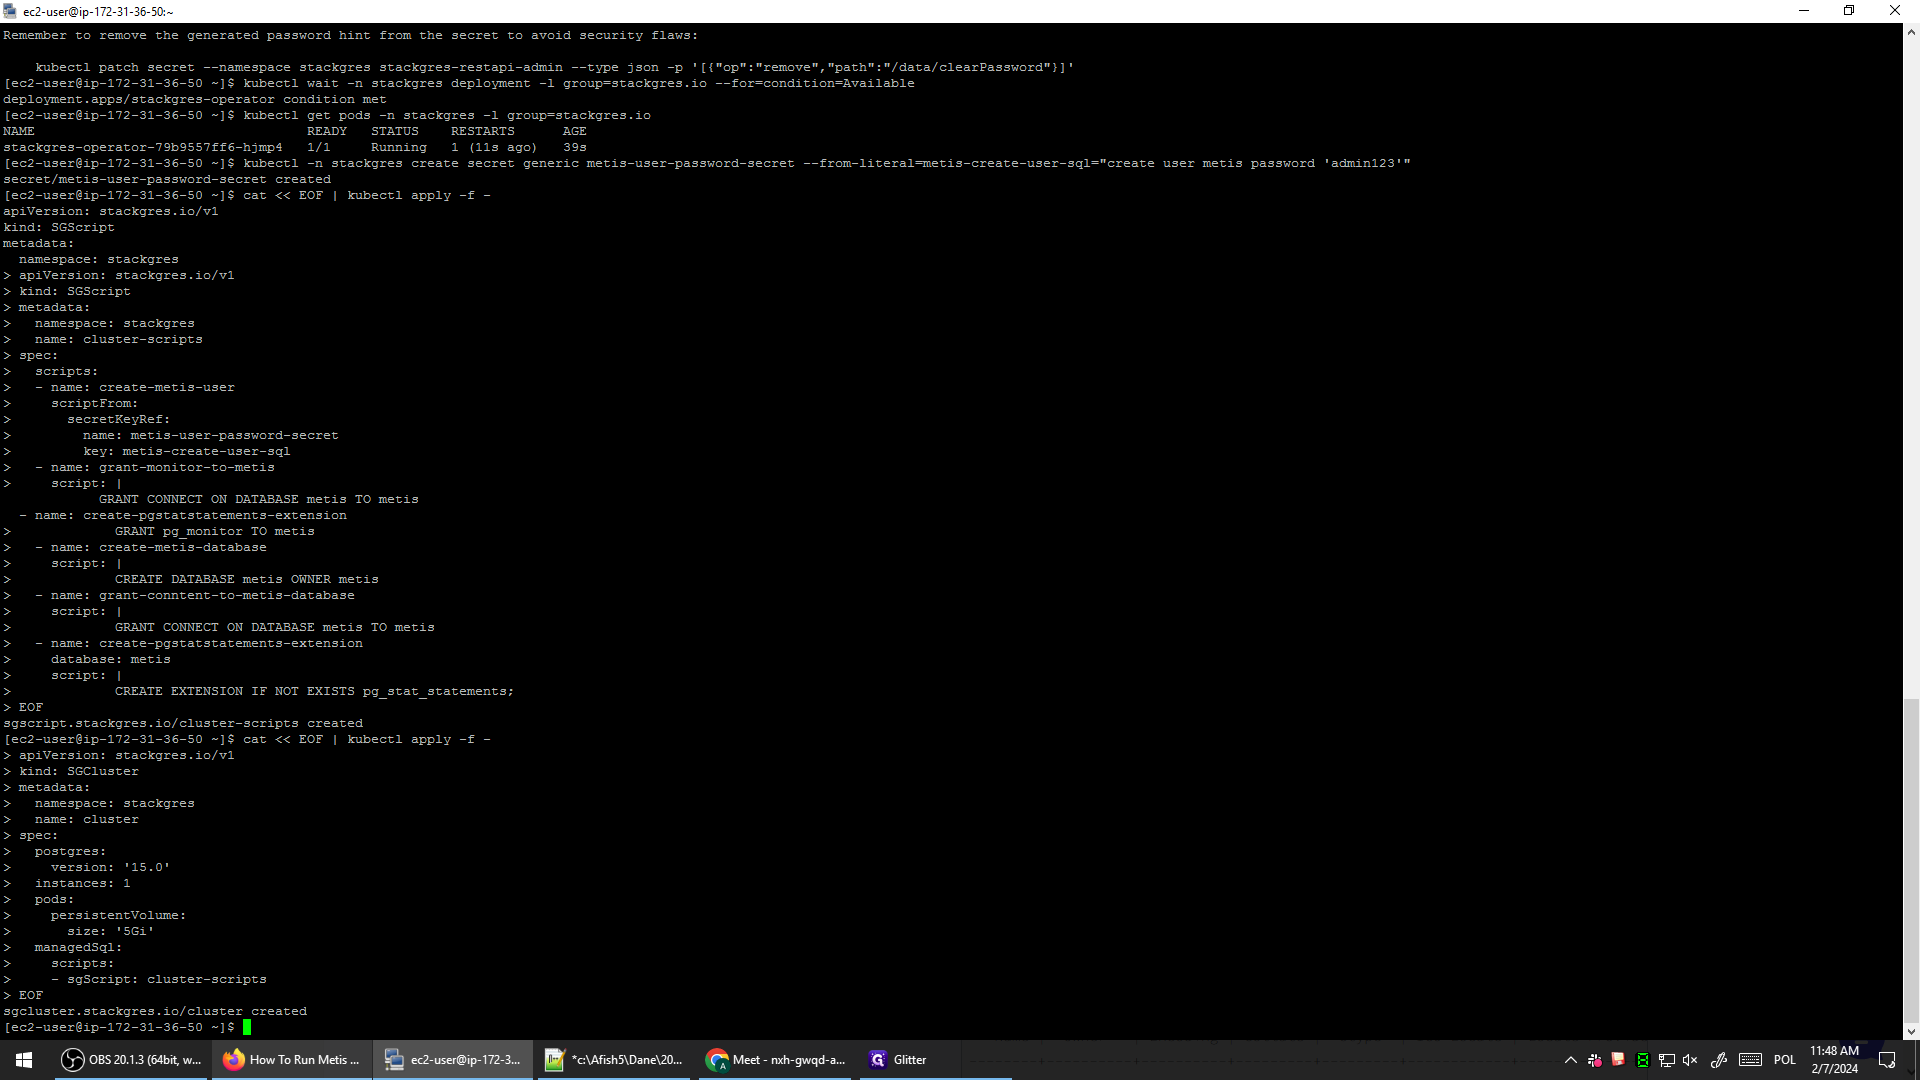
The first thing we need to do is create a username and a password.

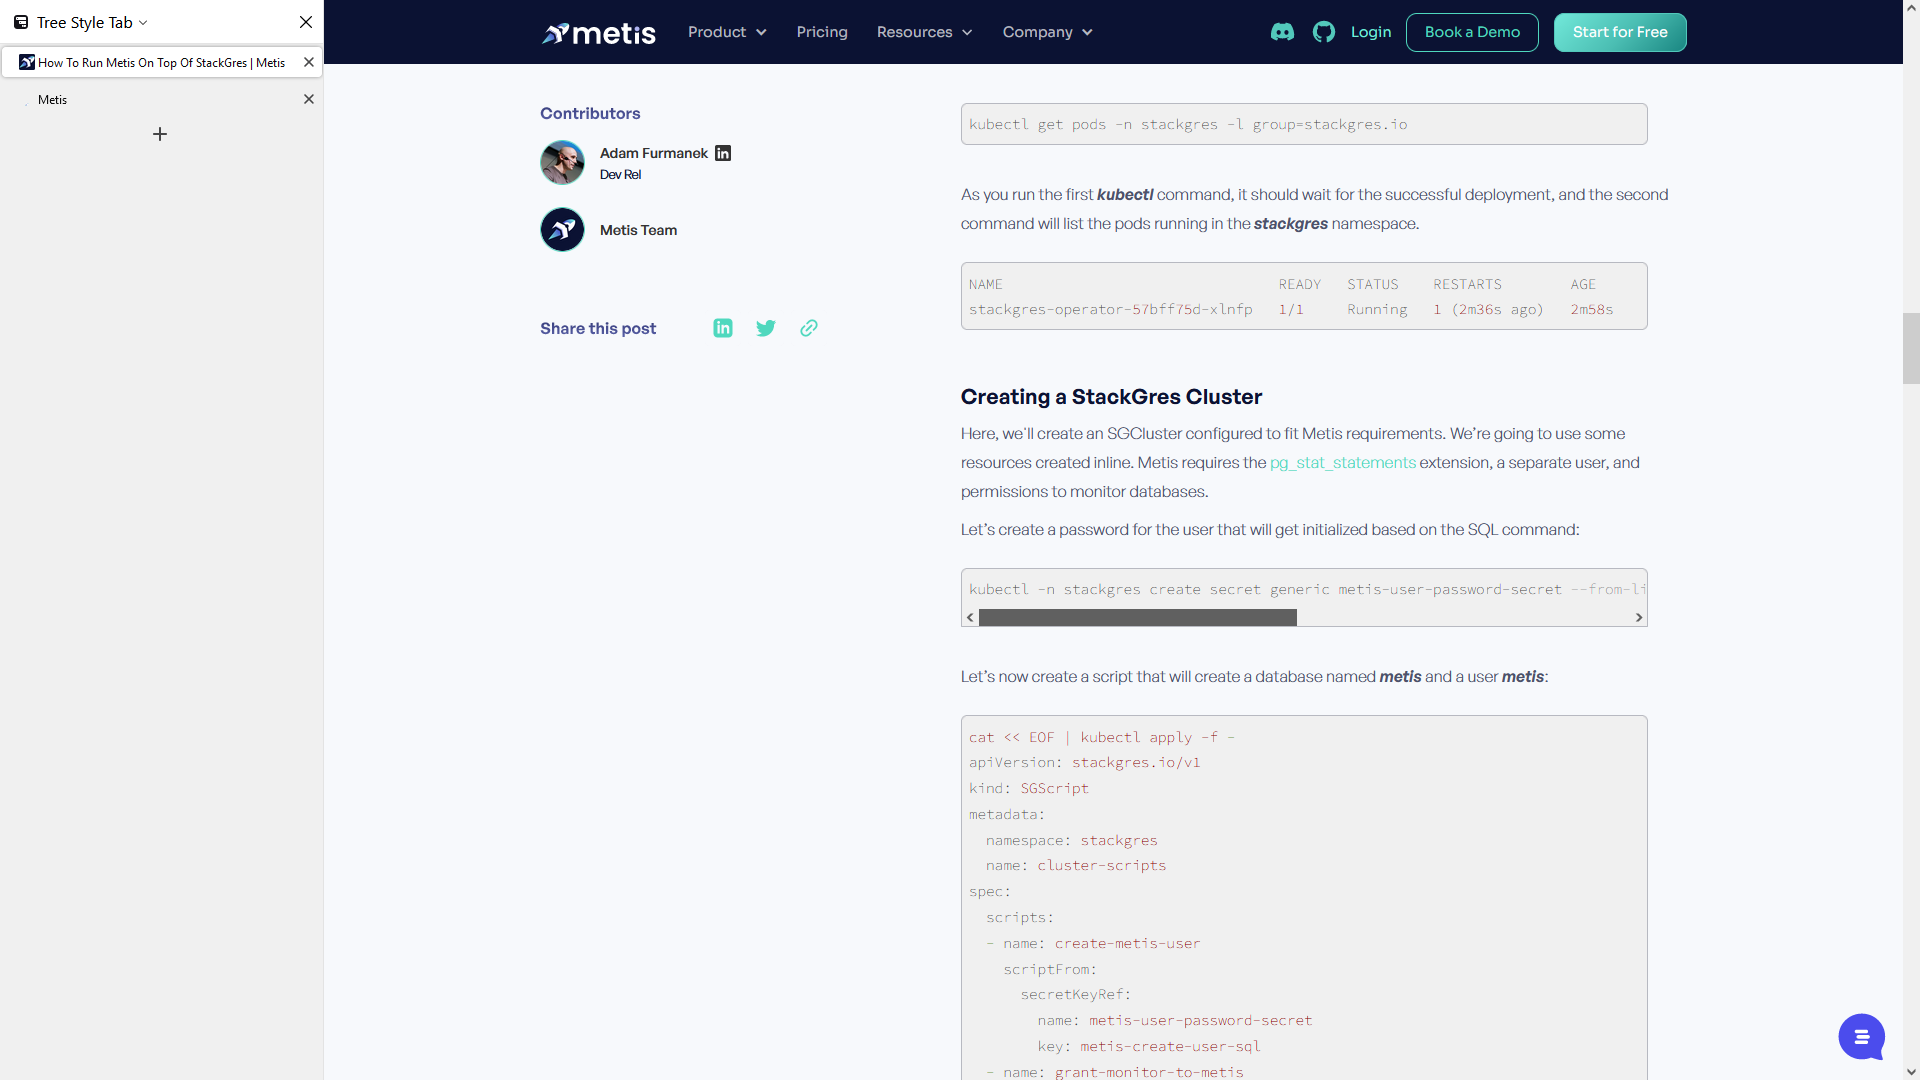
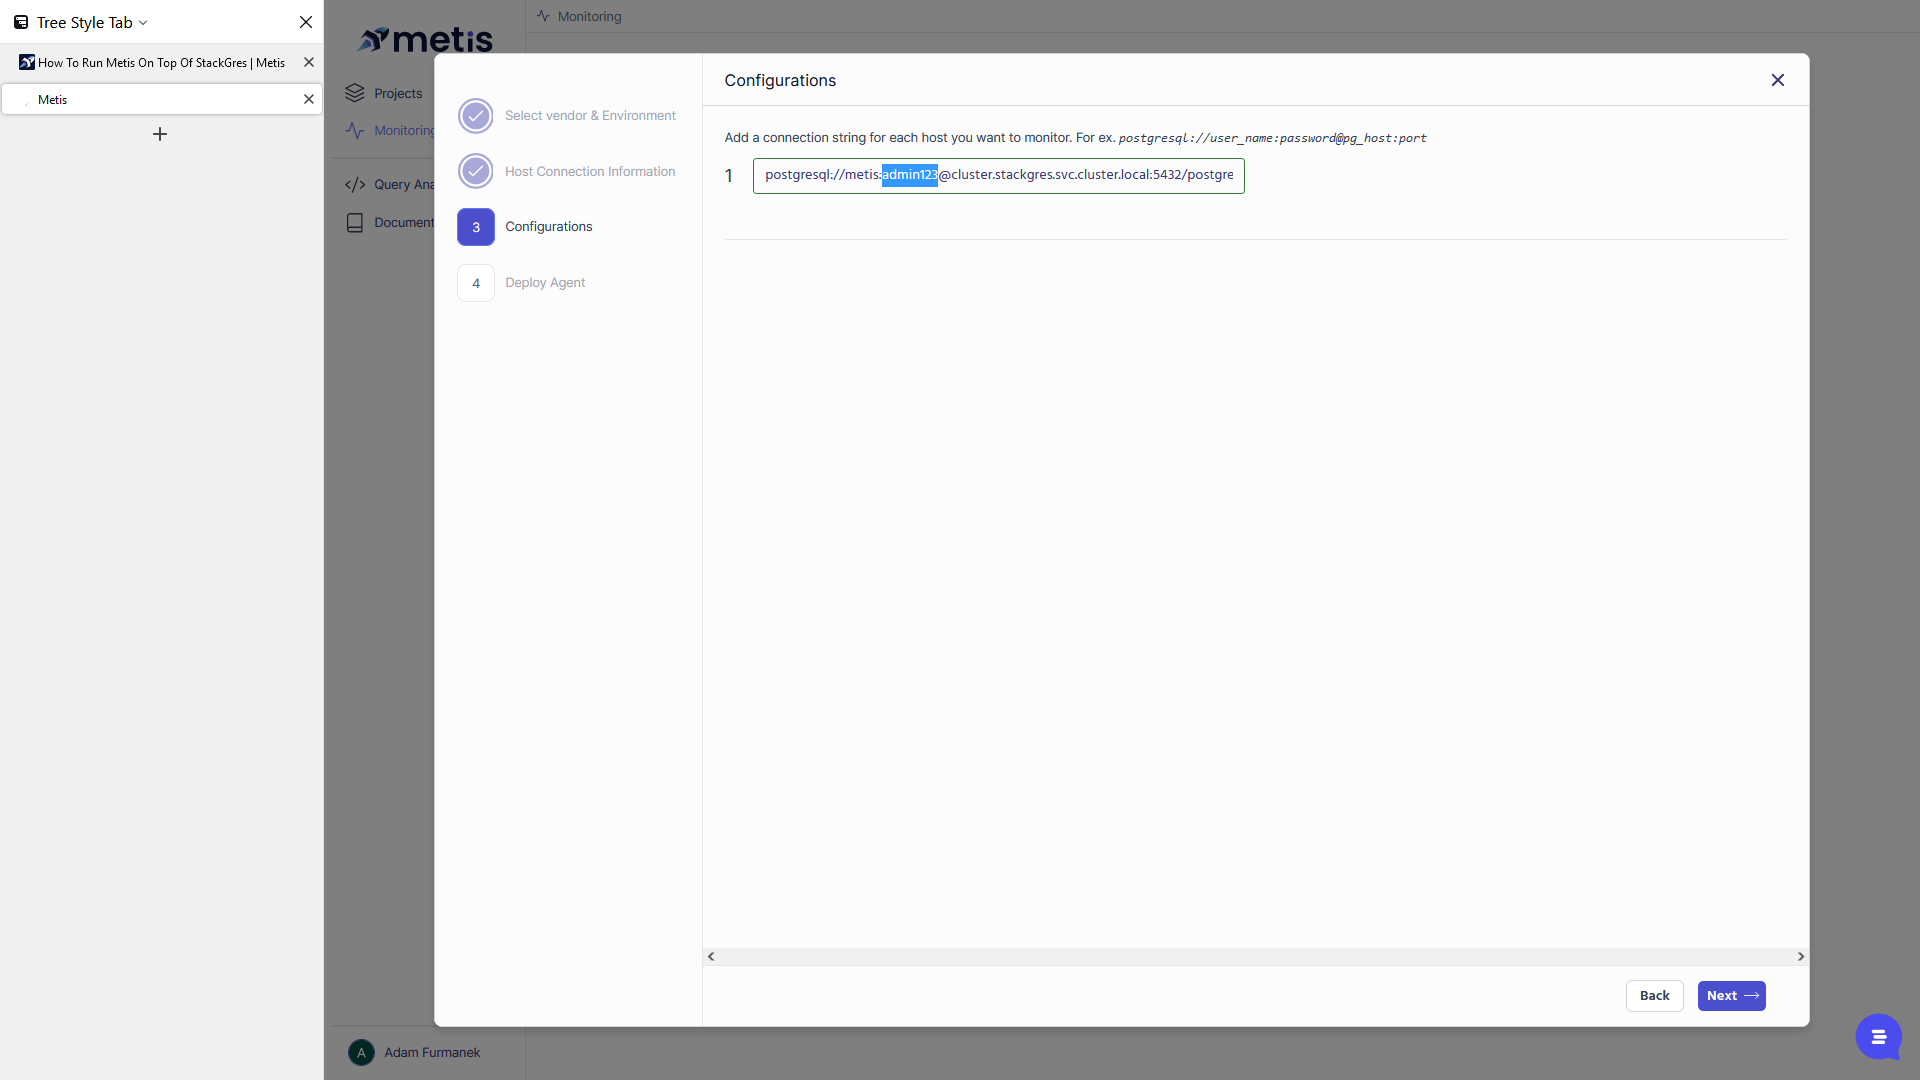
We will create the username "metis" with the password "admin123."
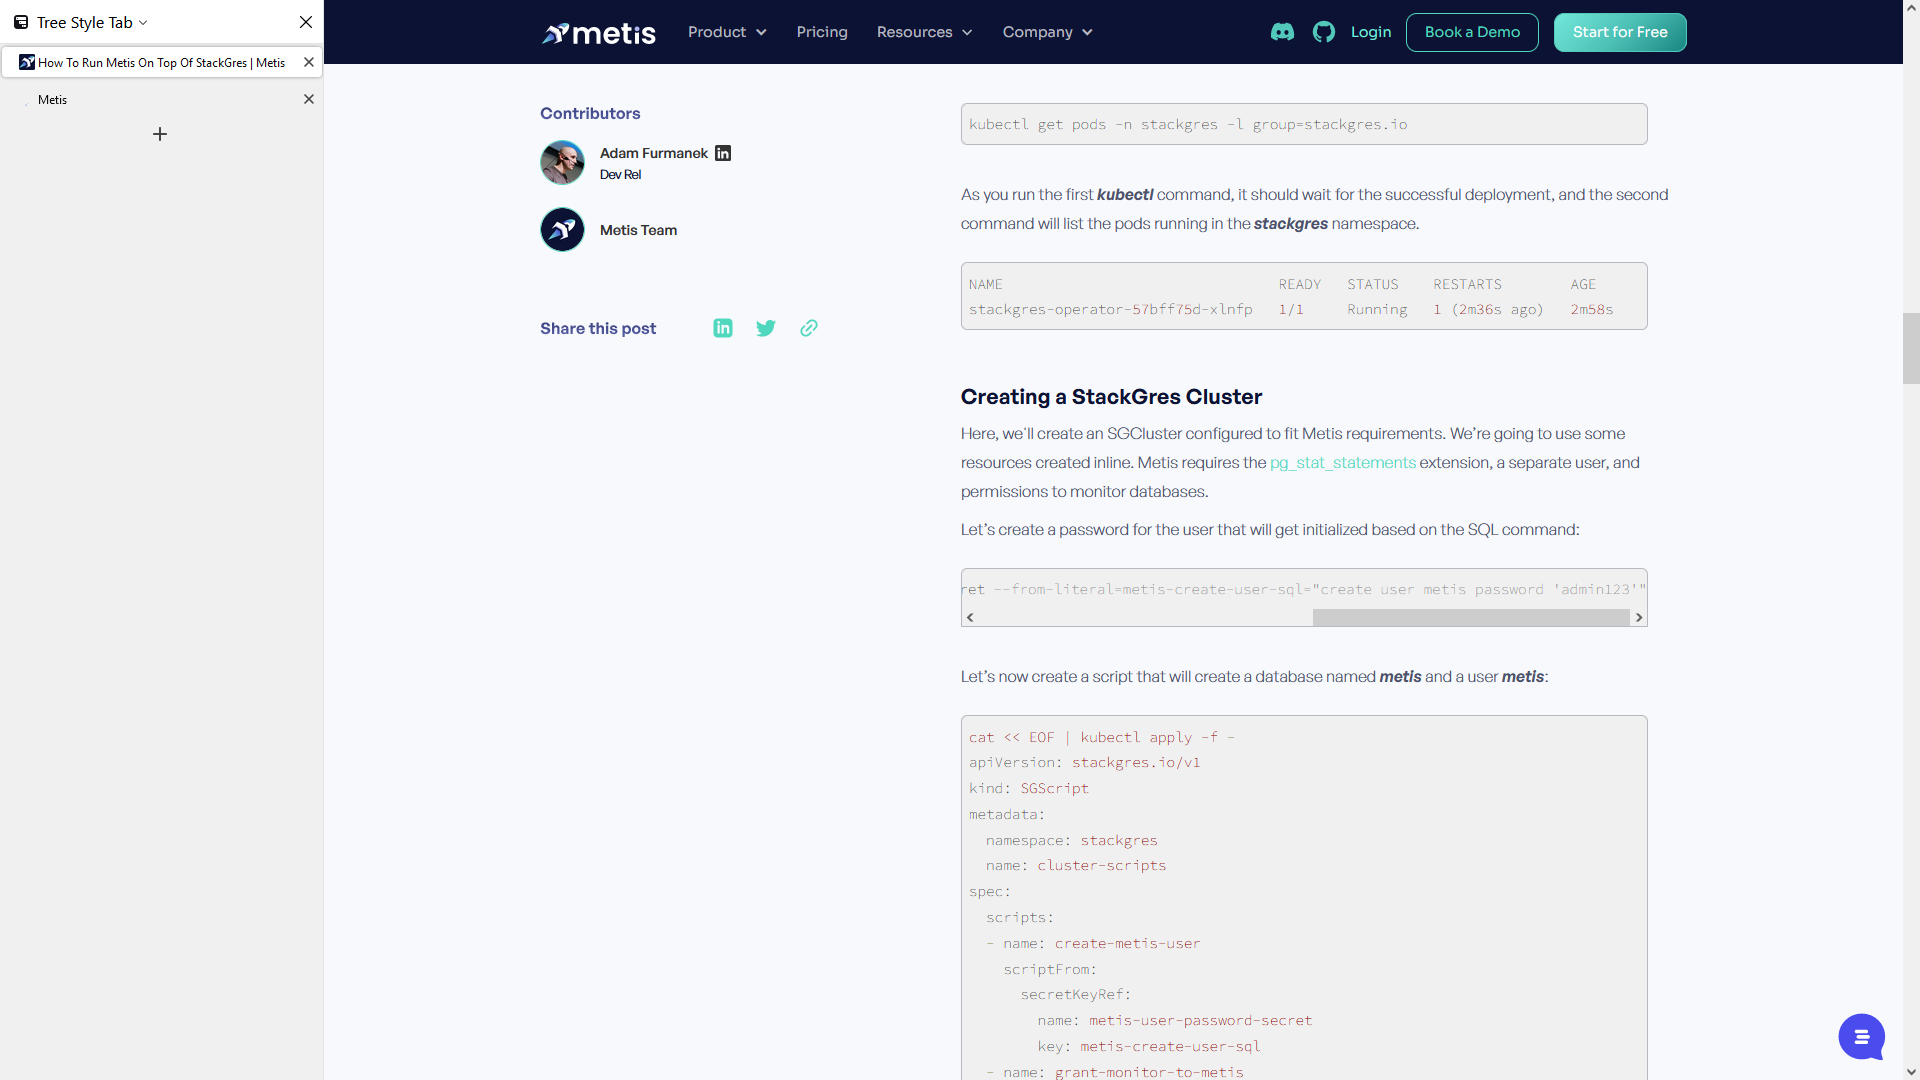


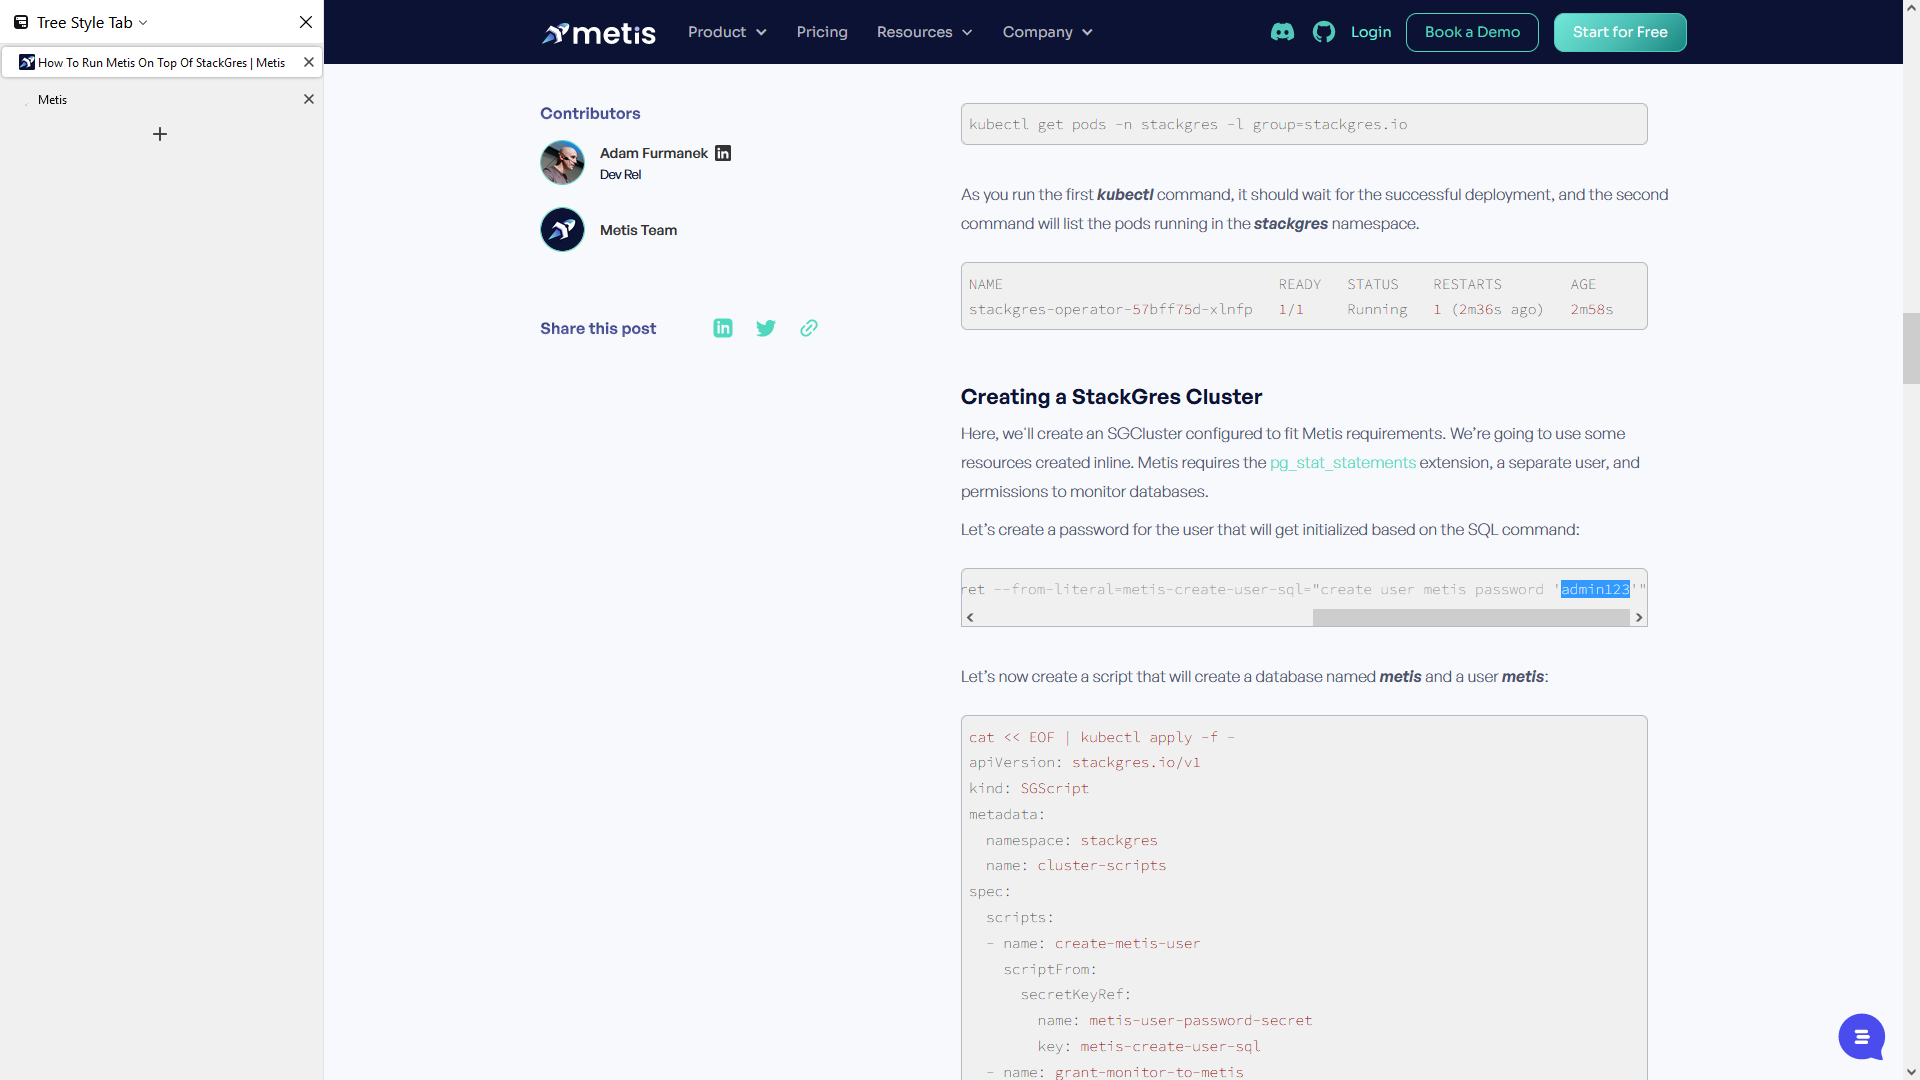

Feel free to use a different password instead of sticking with the default one.


Metis will use this user to monitor your cluster and database server.
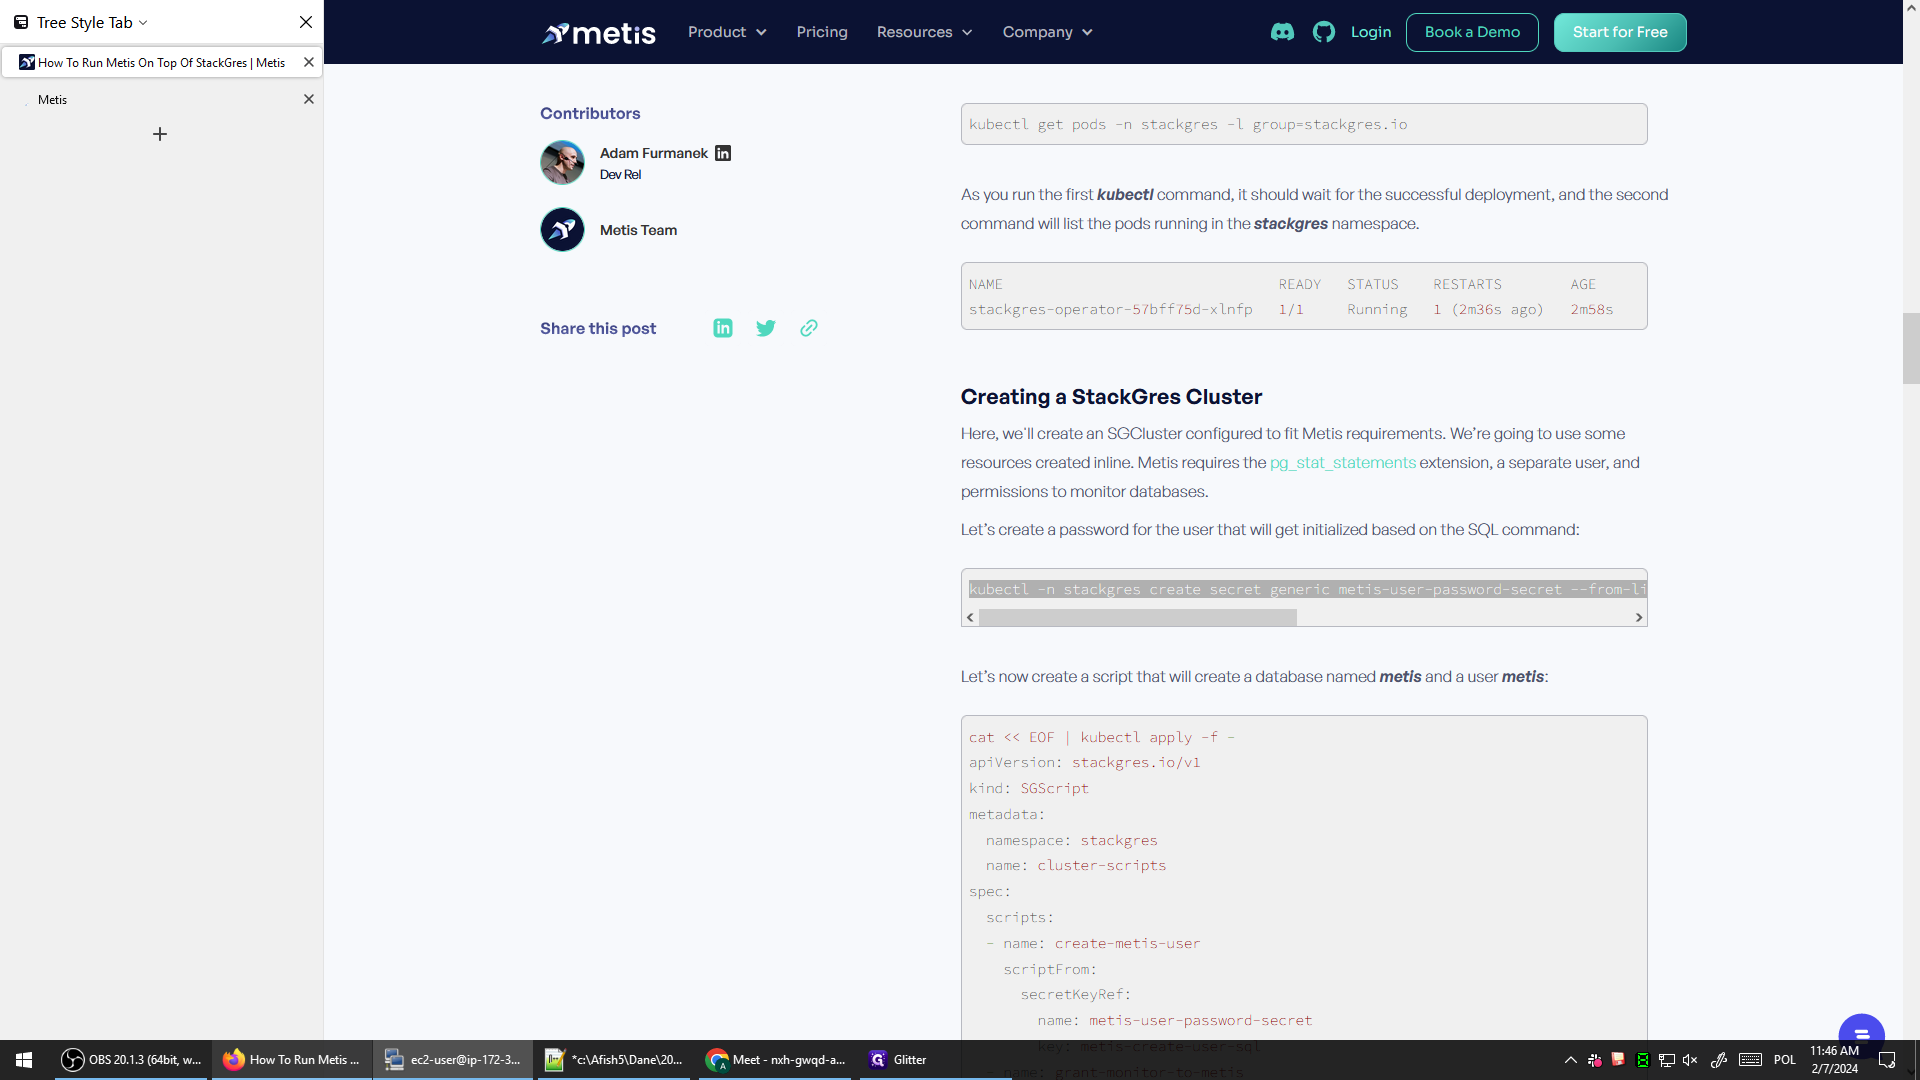
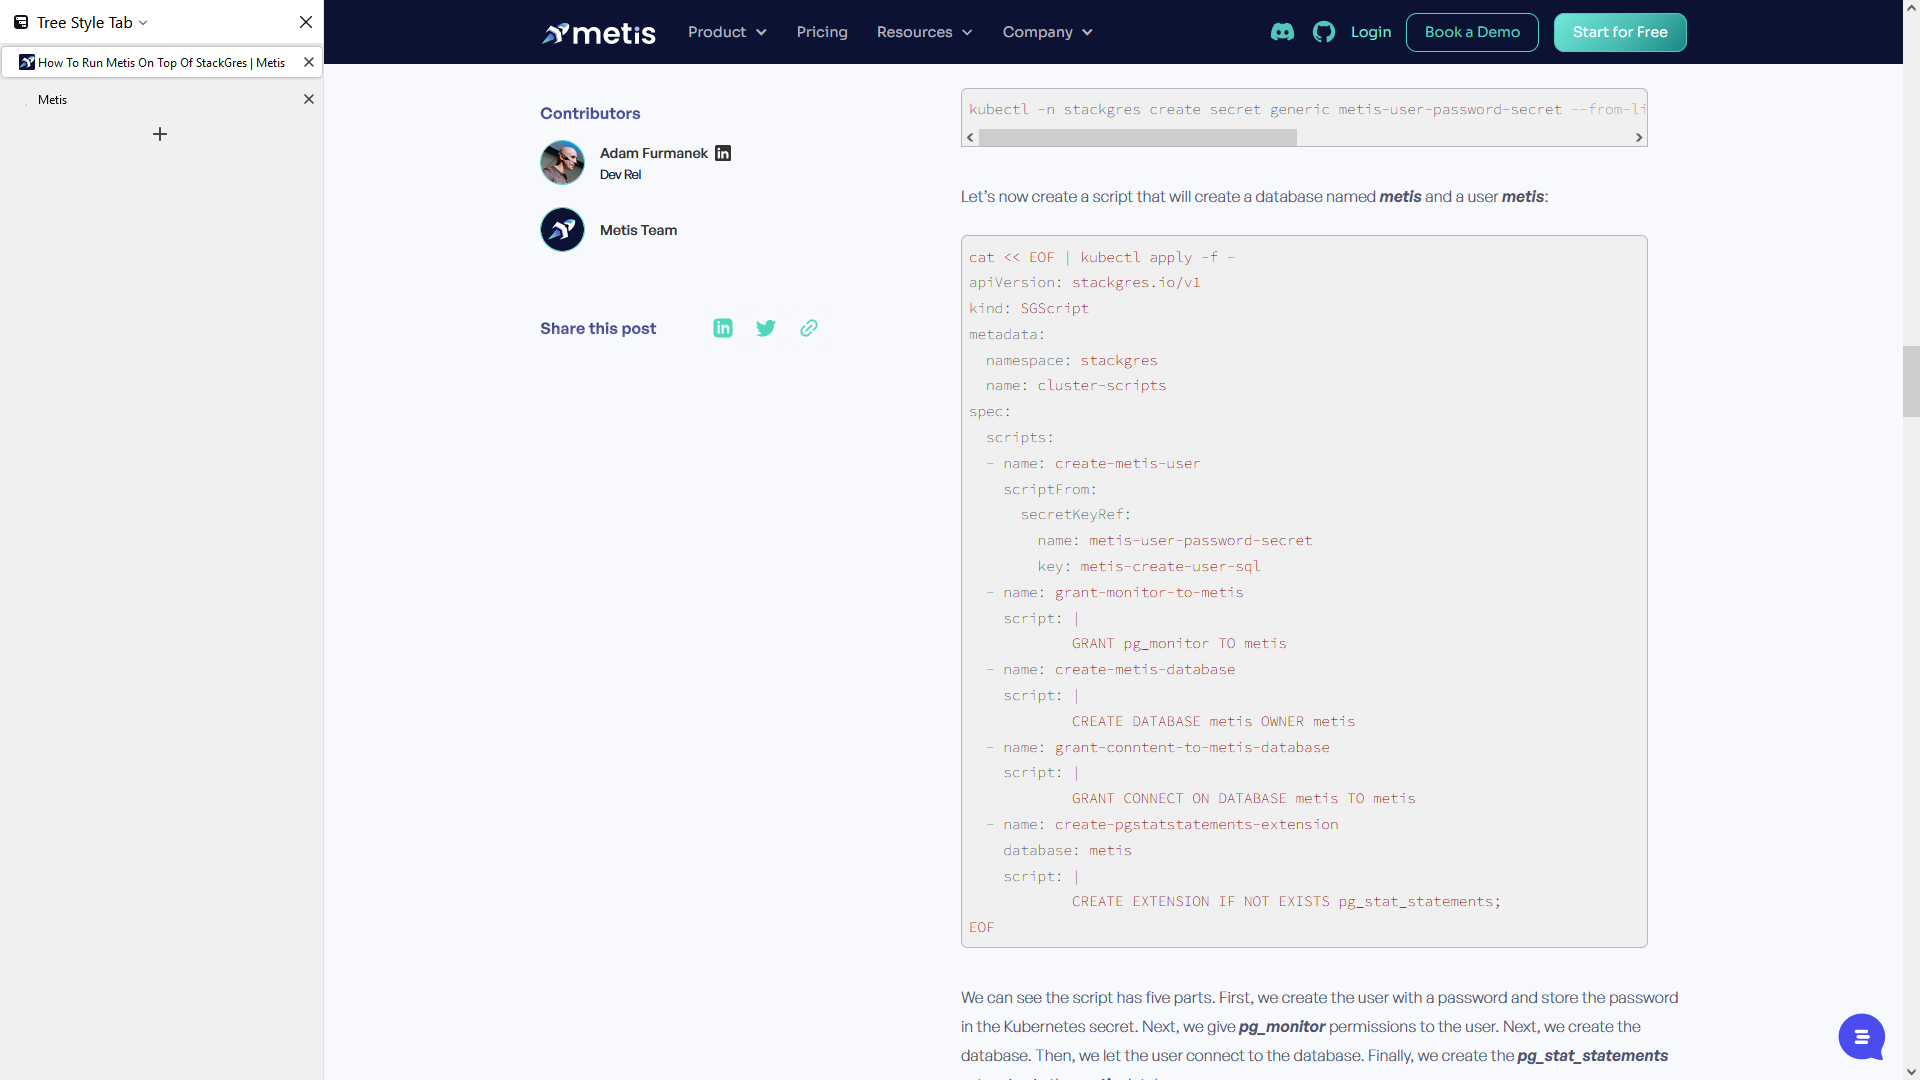
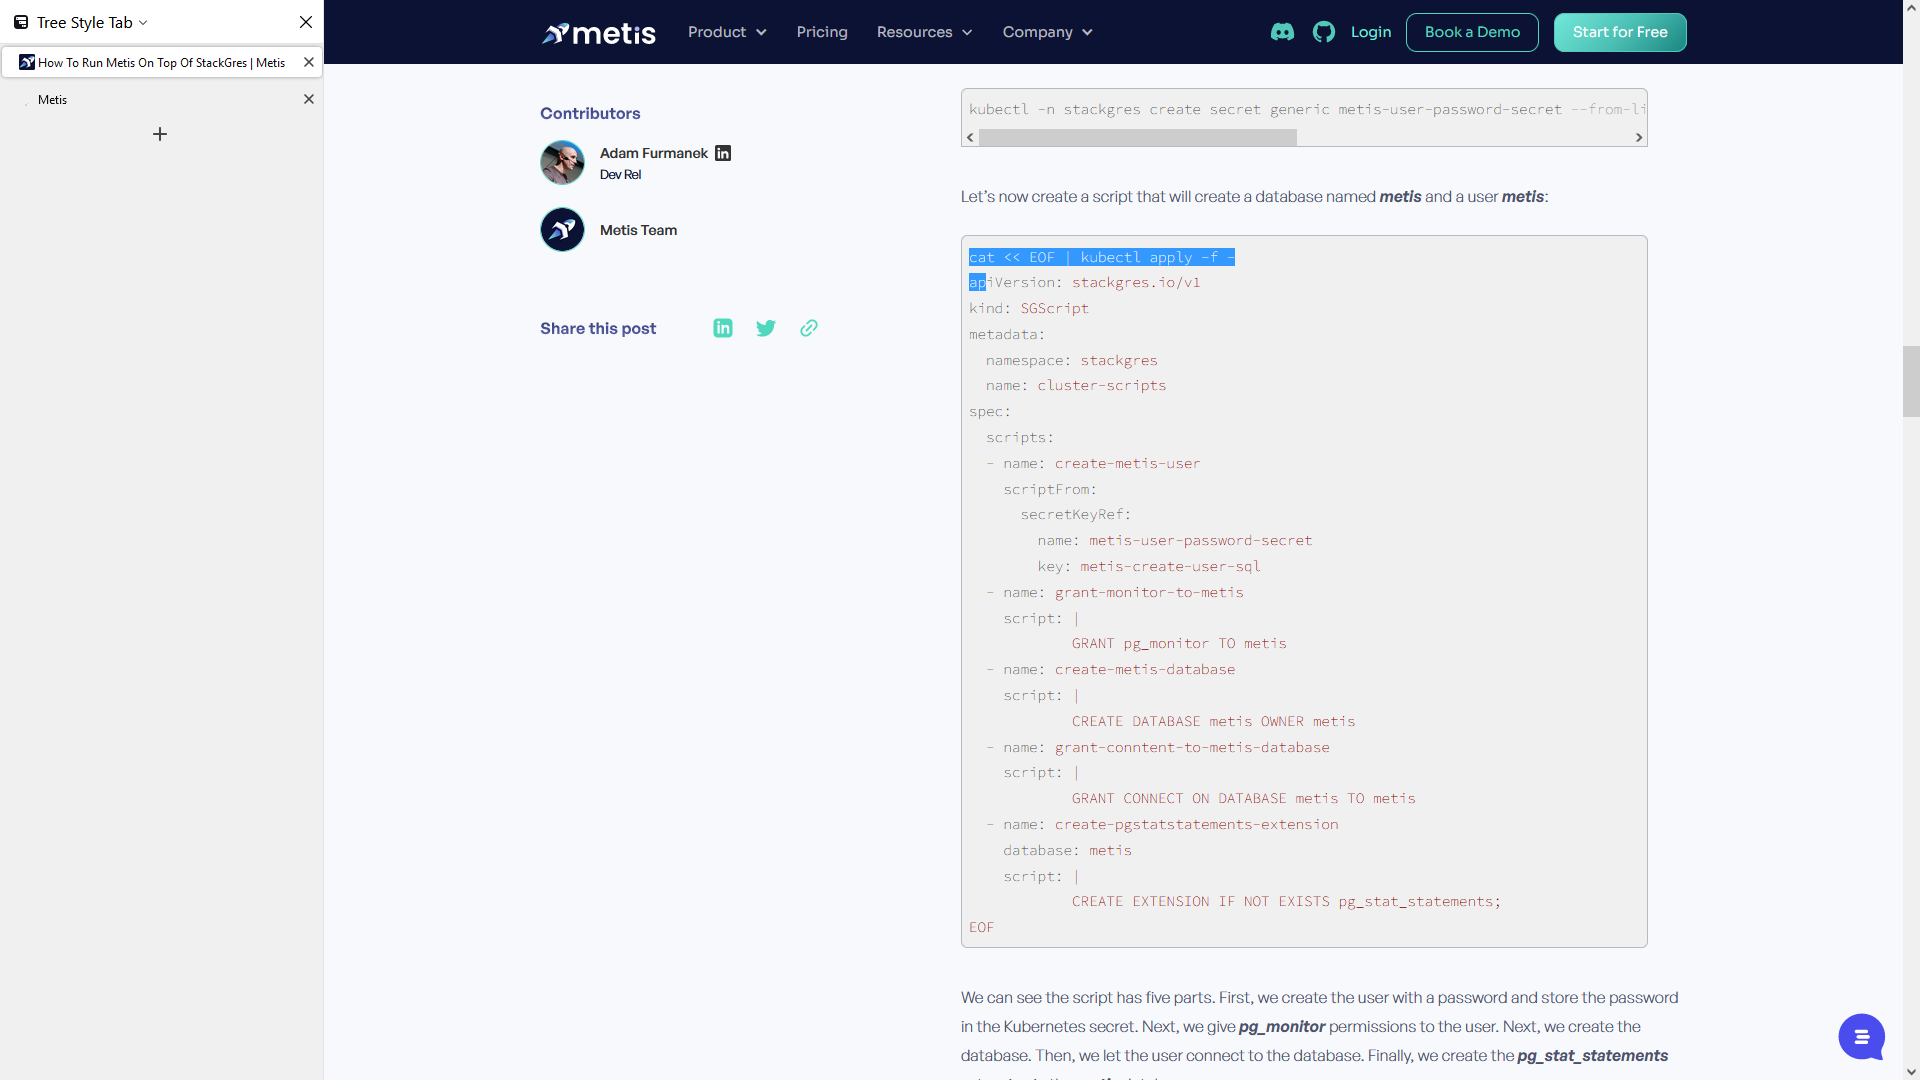
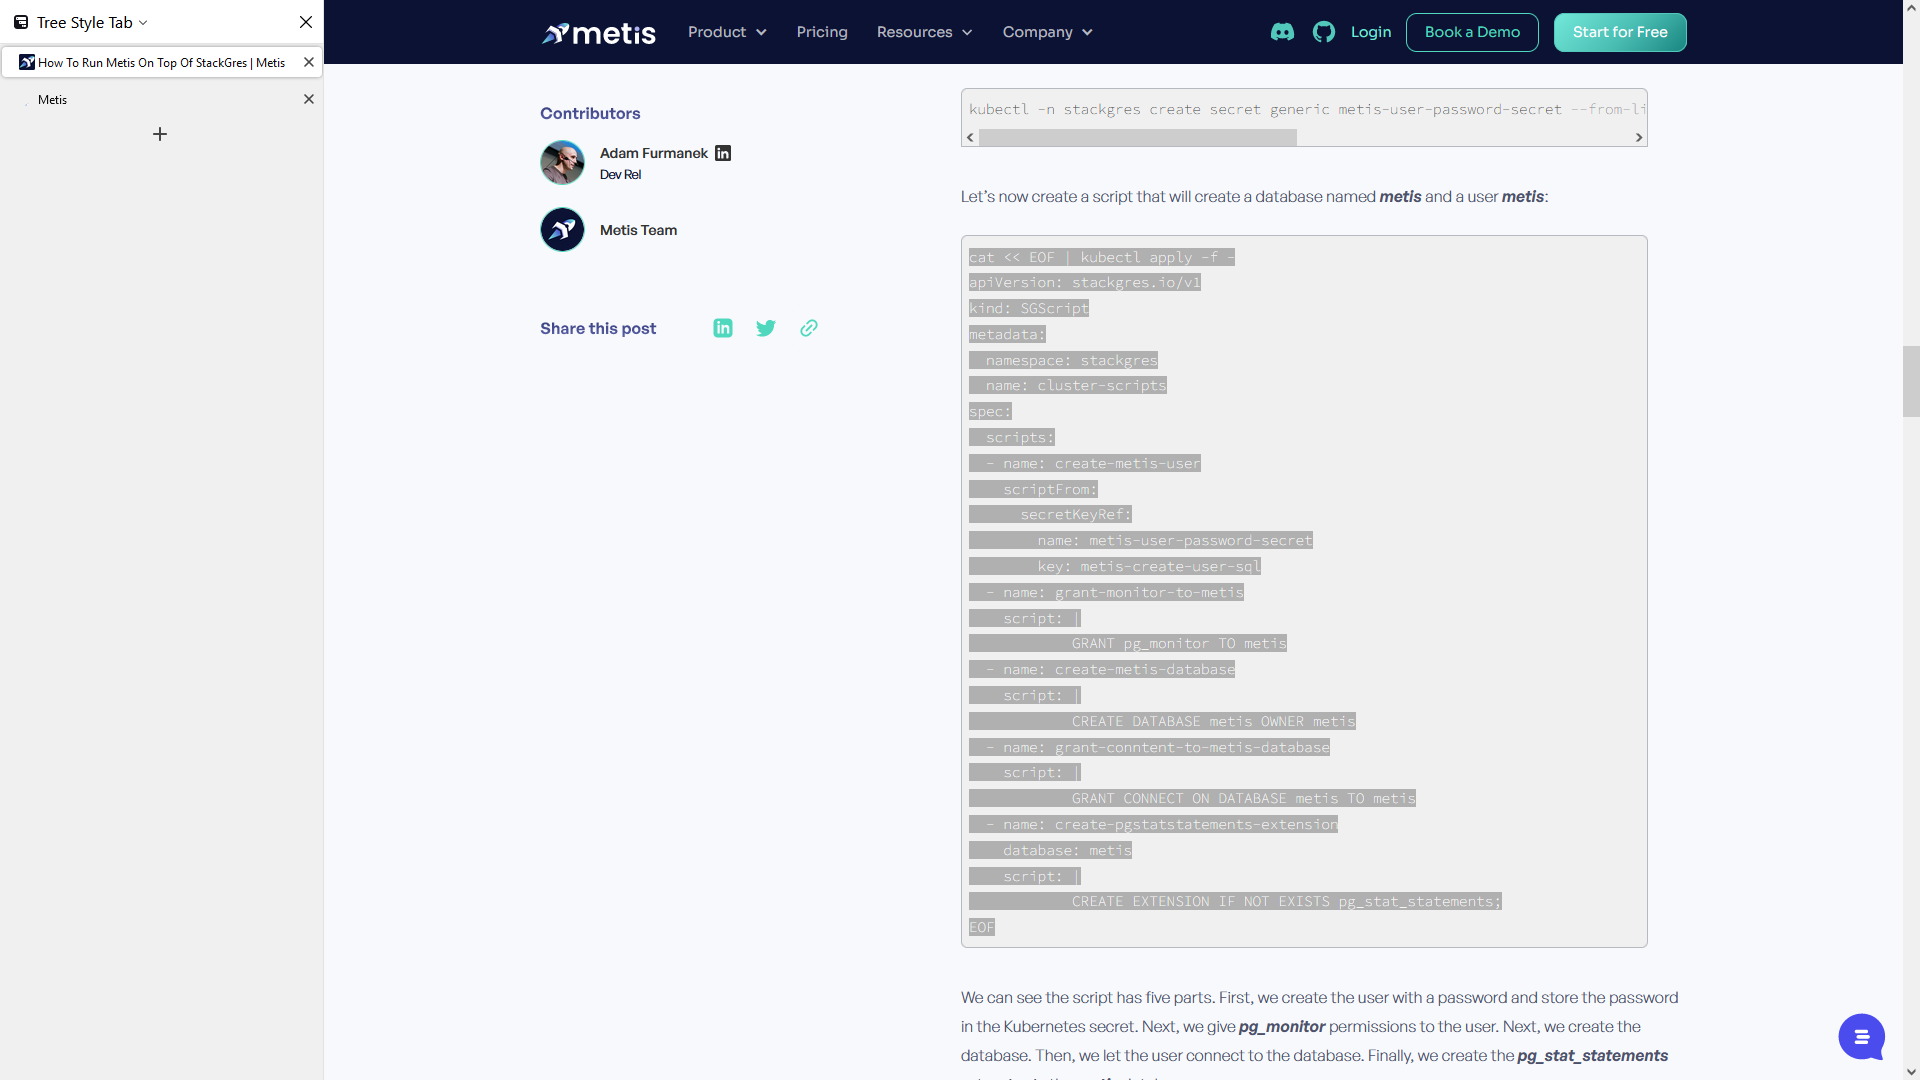
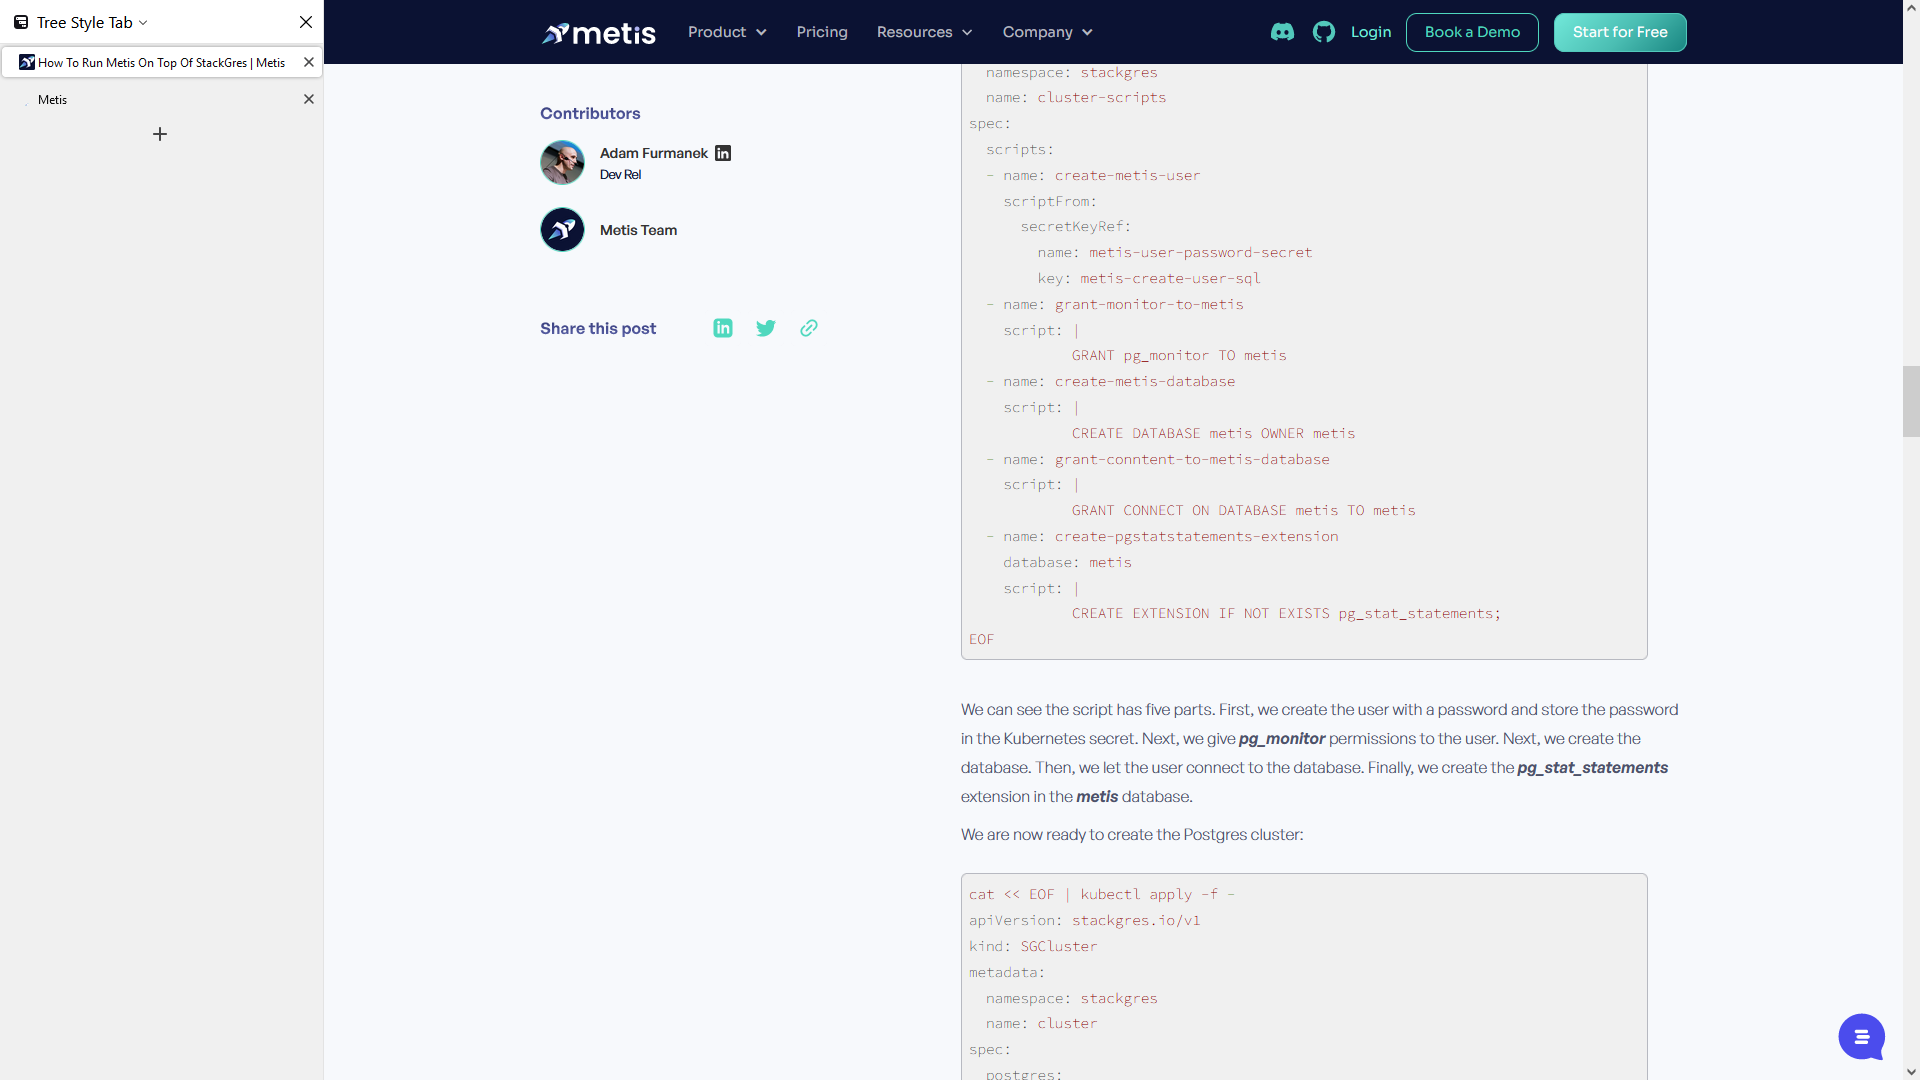
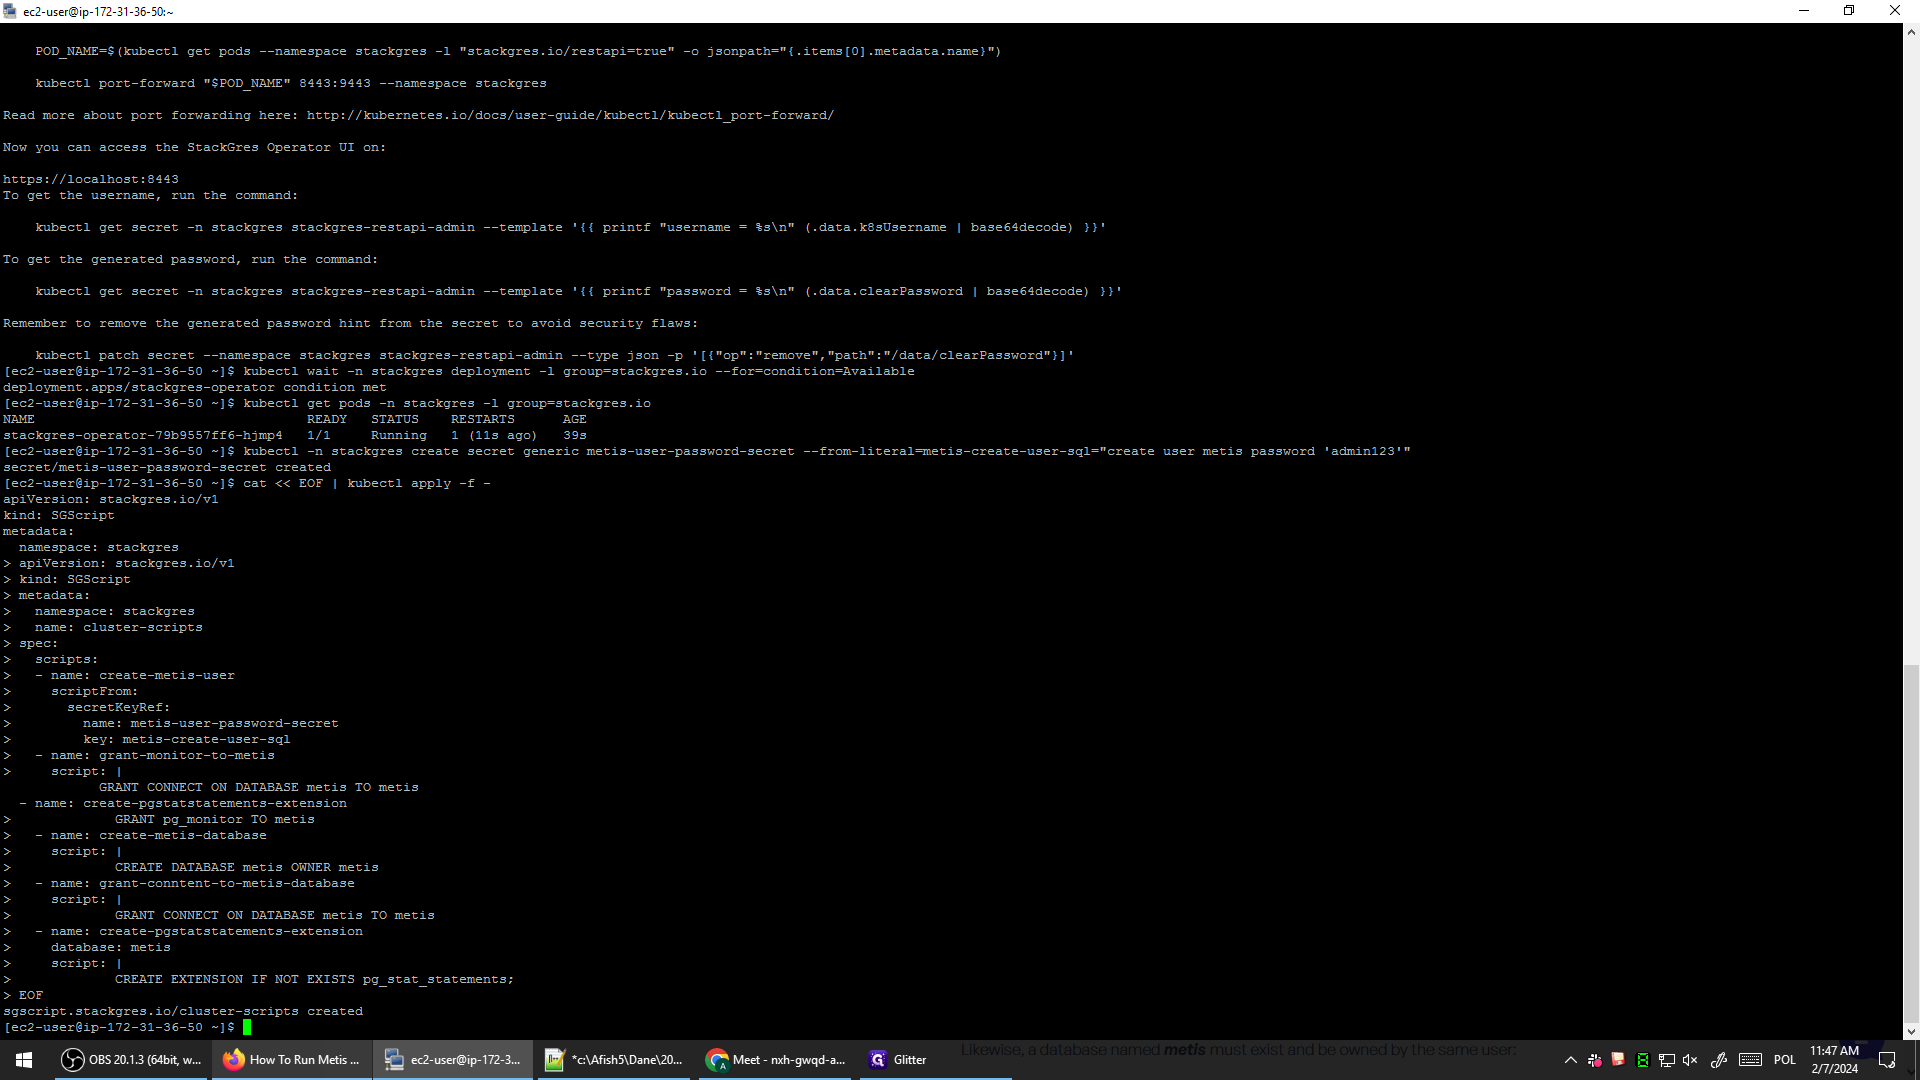
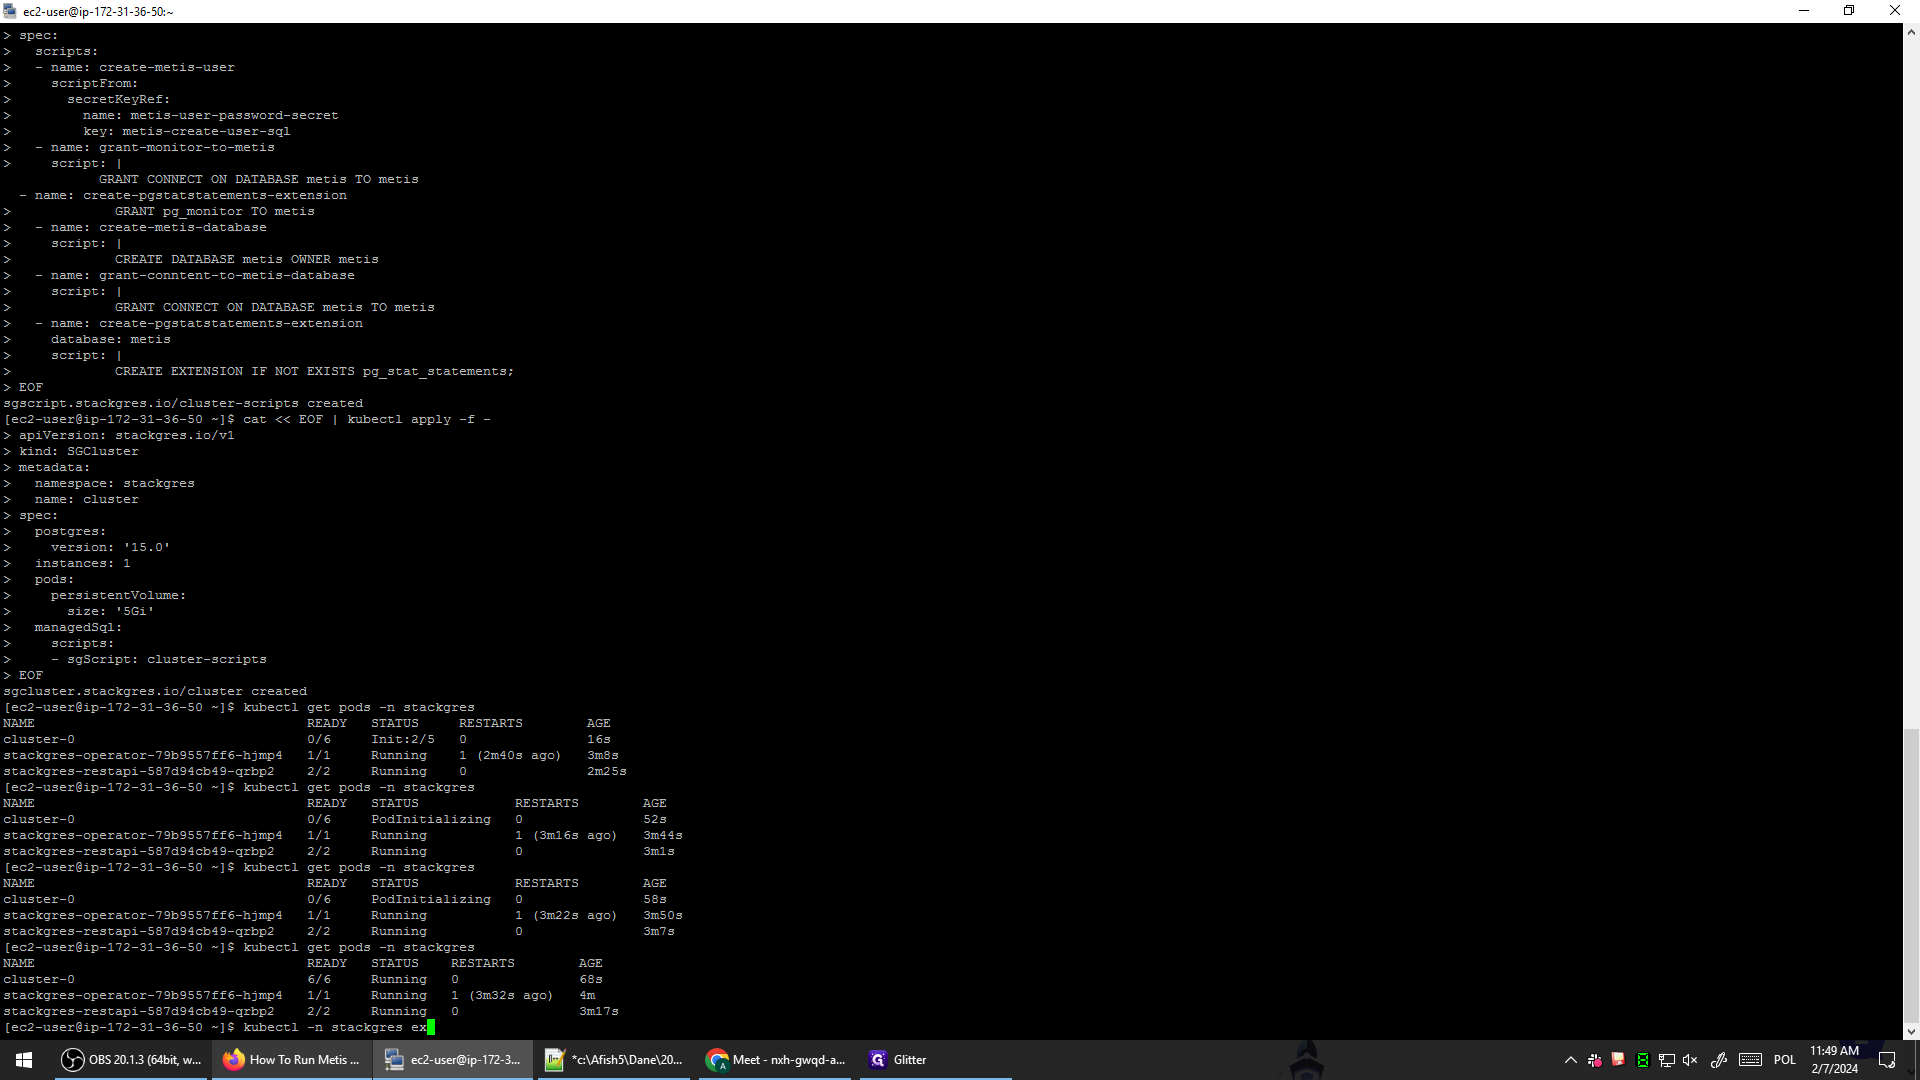
Once we have that, what we need to do now is create a script that will initialize the server correctly on the first run.
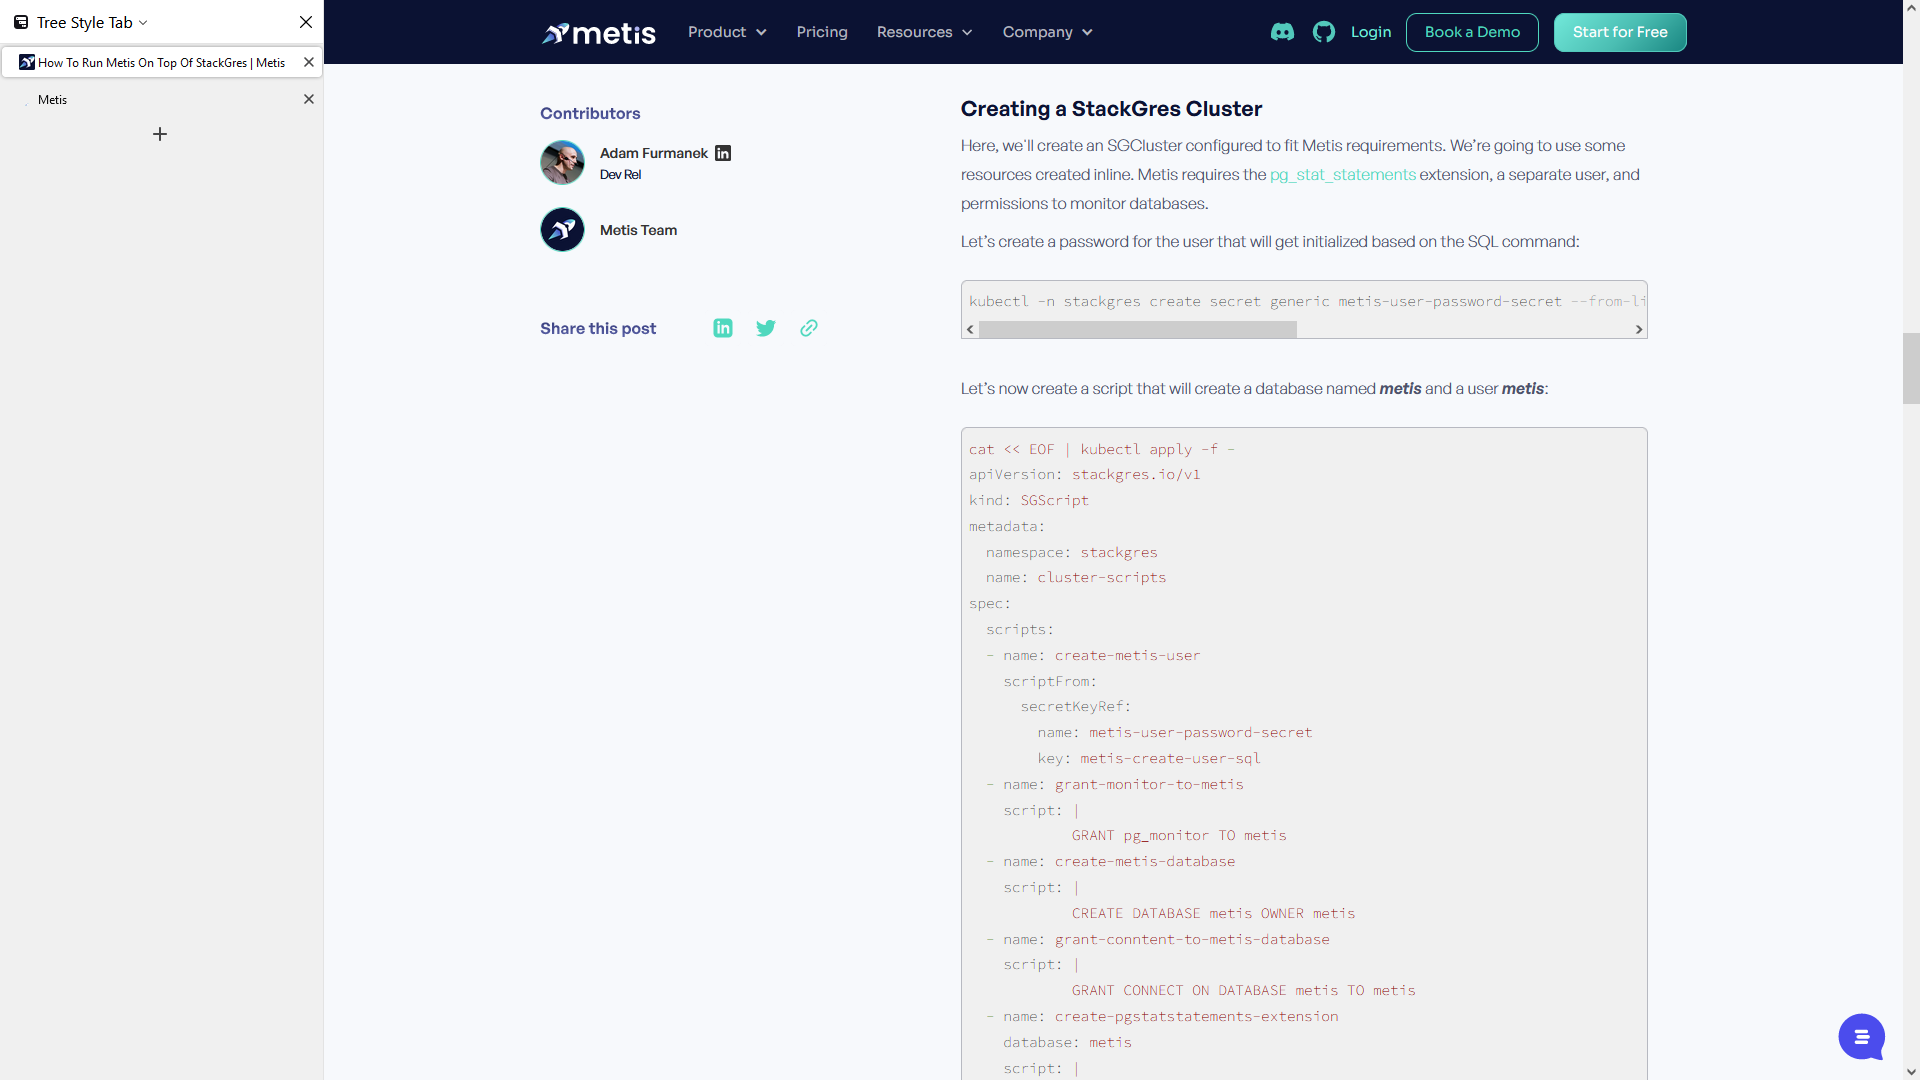
In this guide, we will create a user with a password.
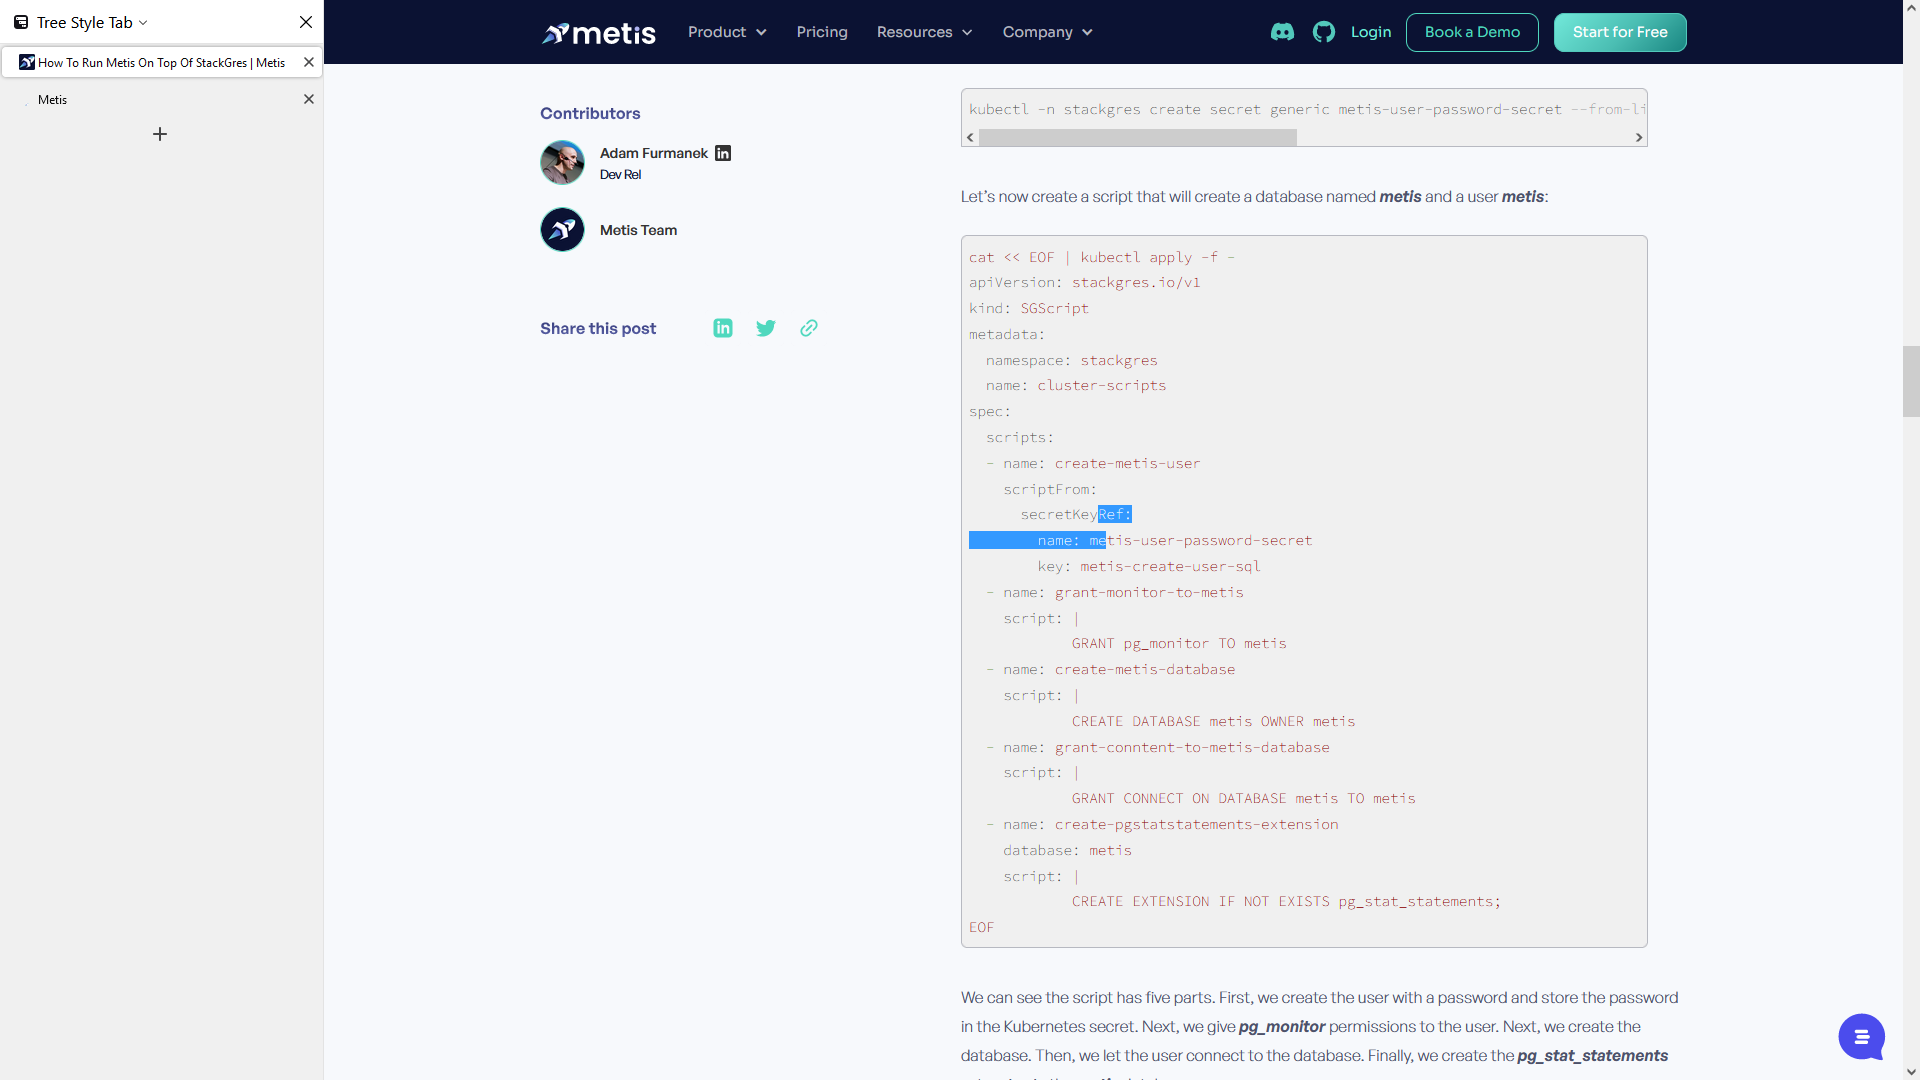

We will grant PG monitor permissions to this user in Metis.


We will create a database named Metis and assign ownership to the Metis user.


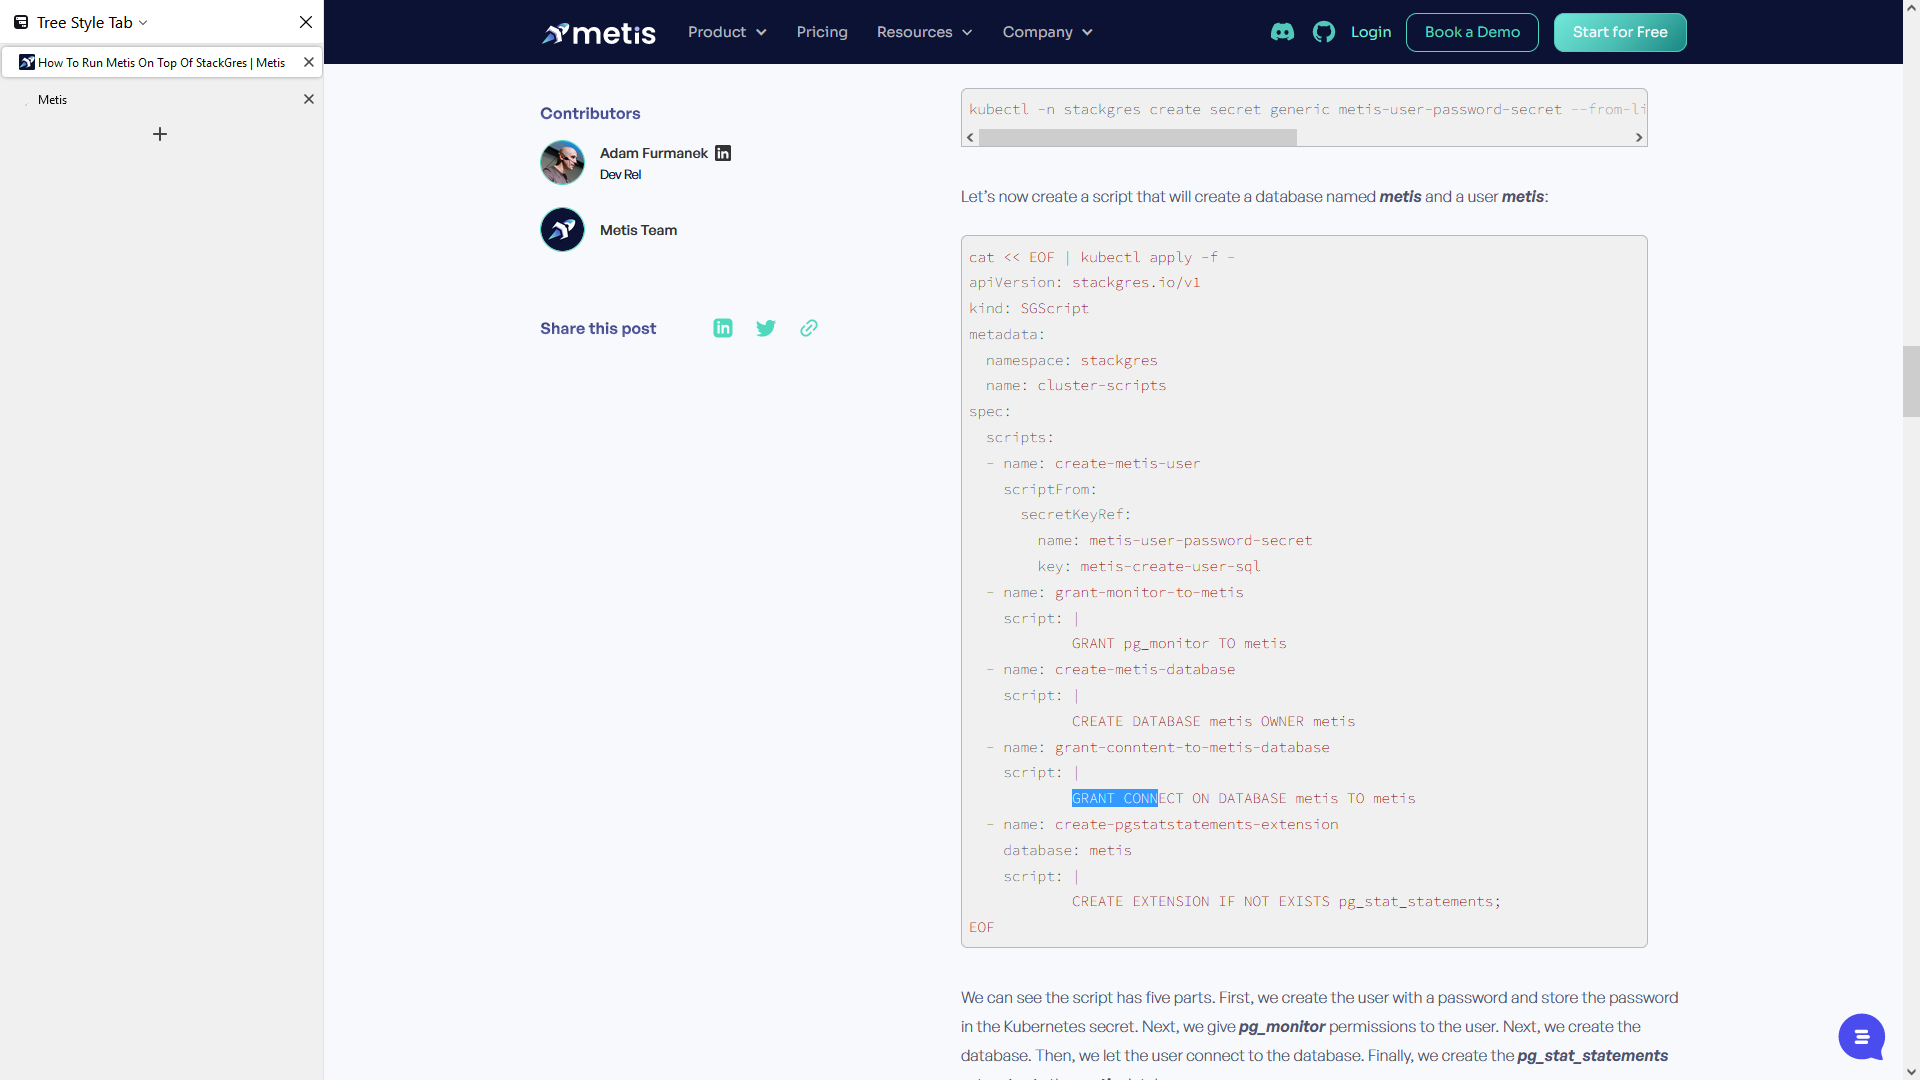
Then we will grant connect permissions to the user named Metis.

Finally, we will create the extension called PGstatstatements, which Metis utilizes to monitor your database.
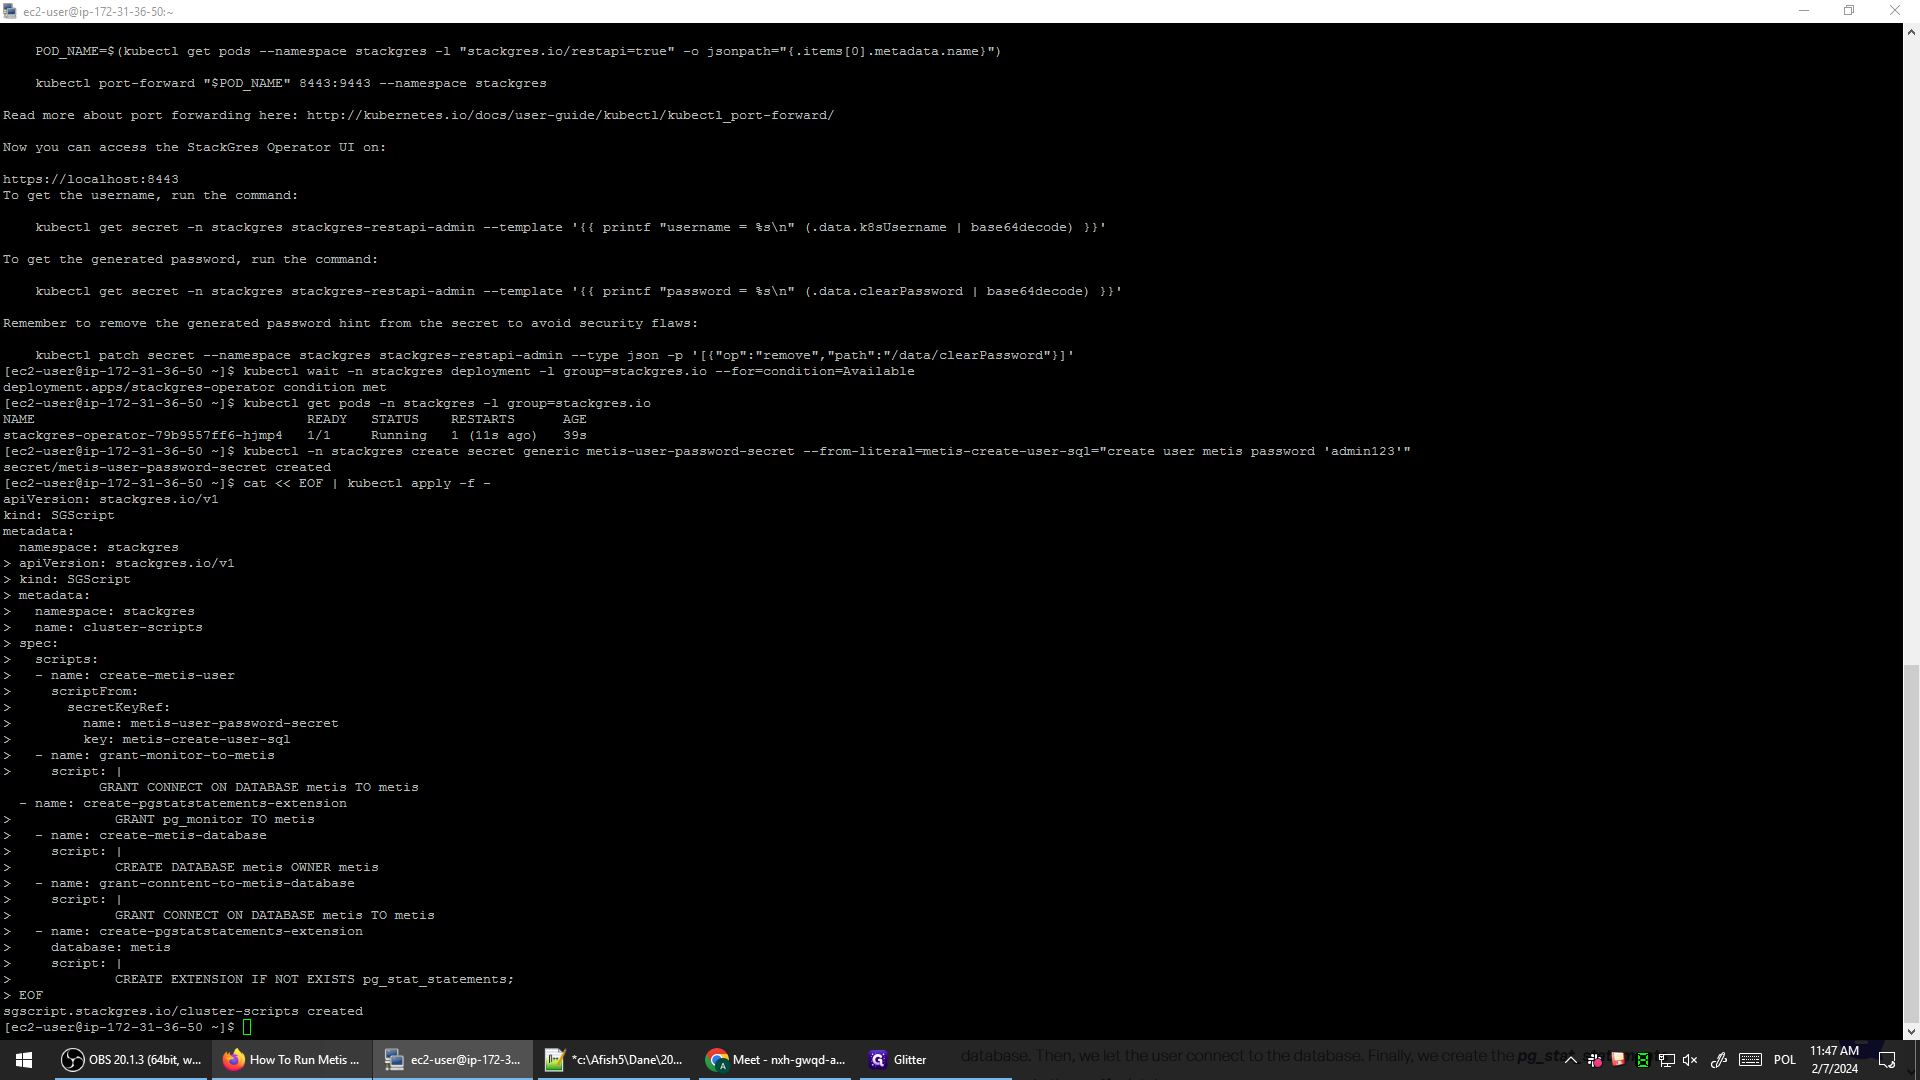
Let's copy this command and create the script.
This command is for the bash shell.
If you are using a different shell, such as PowerShell, batch, or any other, you may need to adjust the syntax. In bash, it works just like that - copy and paste. Now, the script has been created.
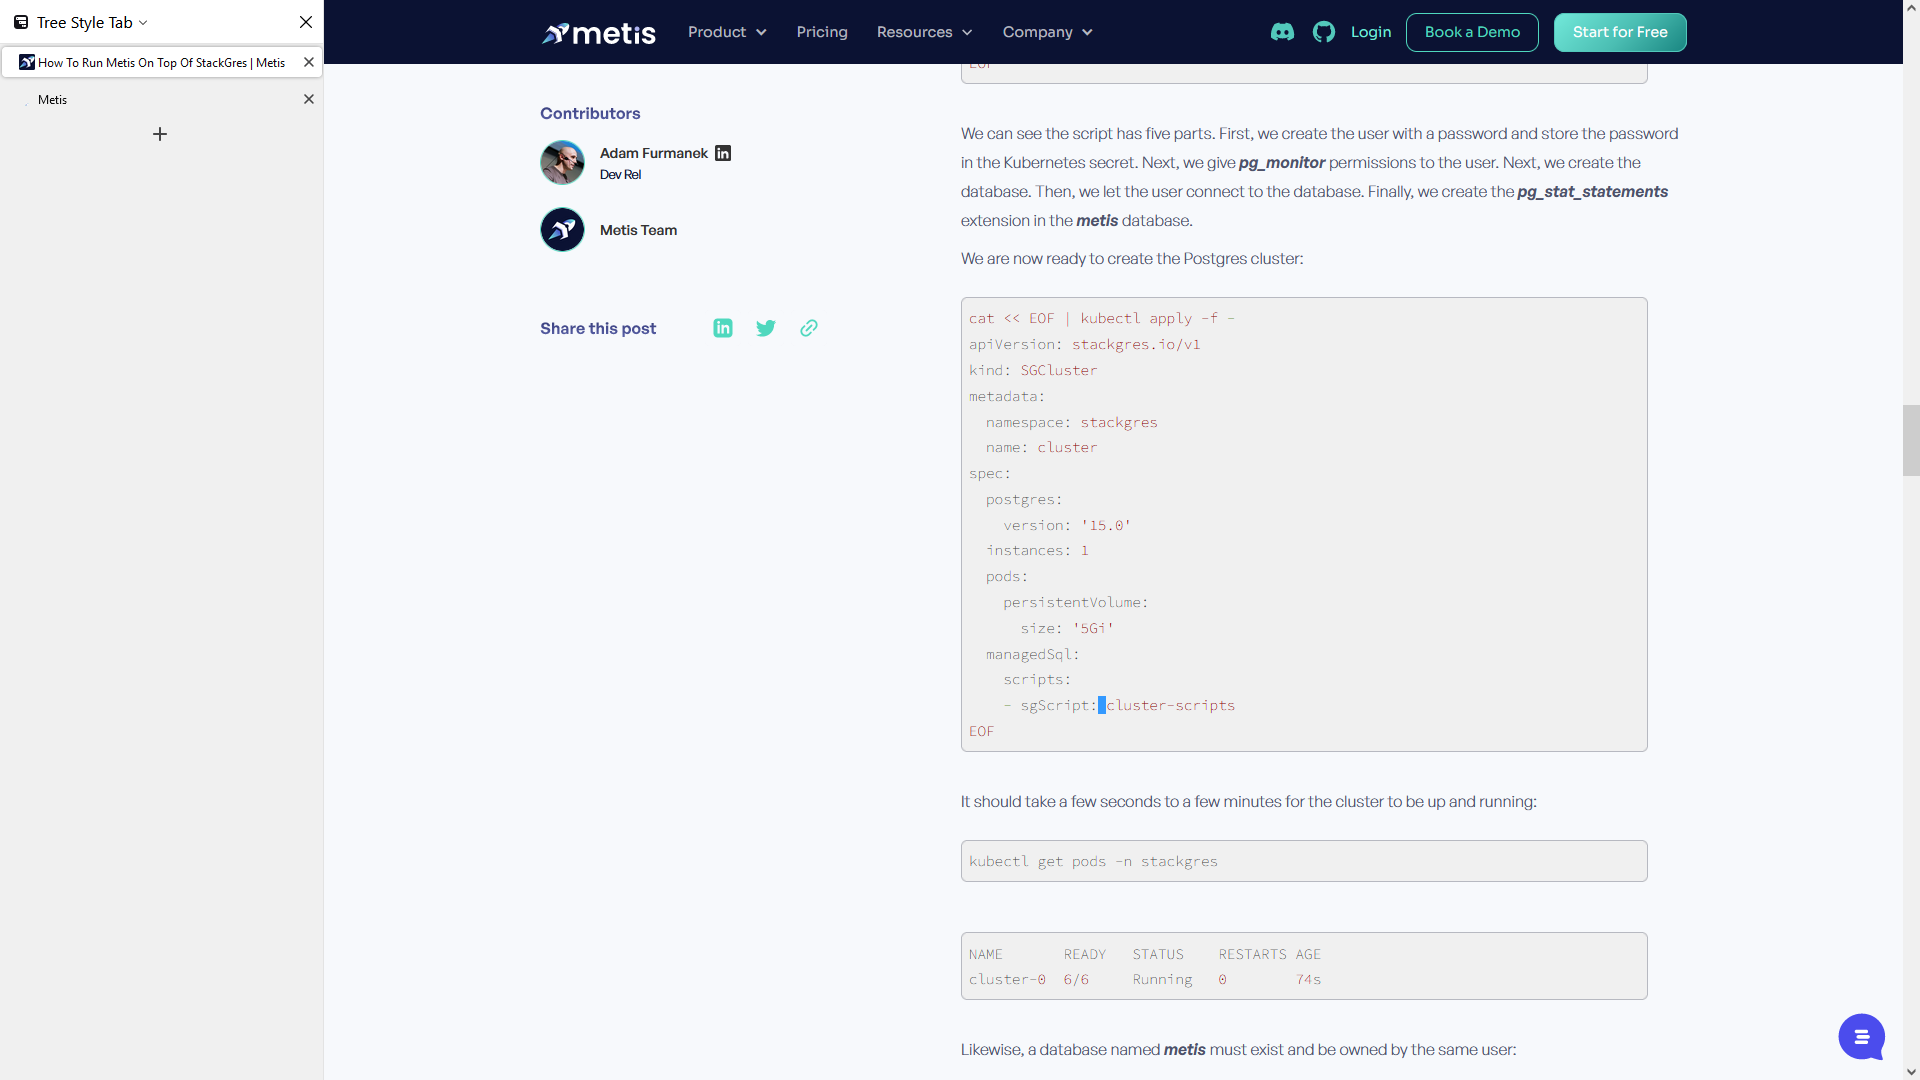
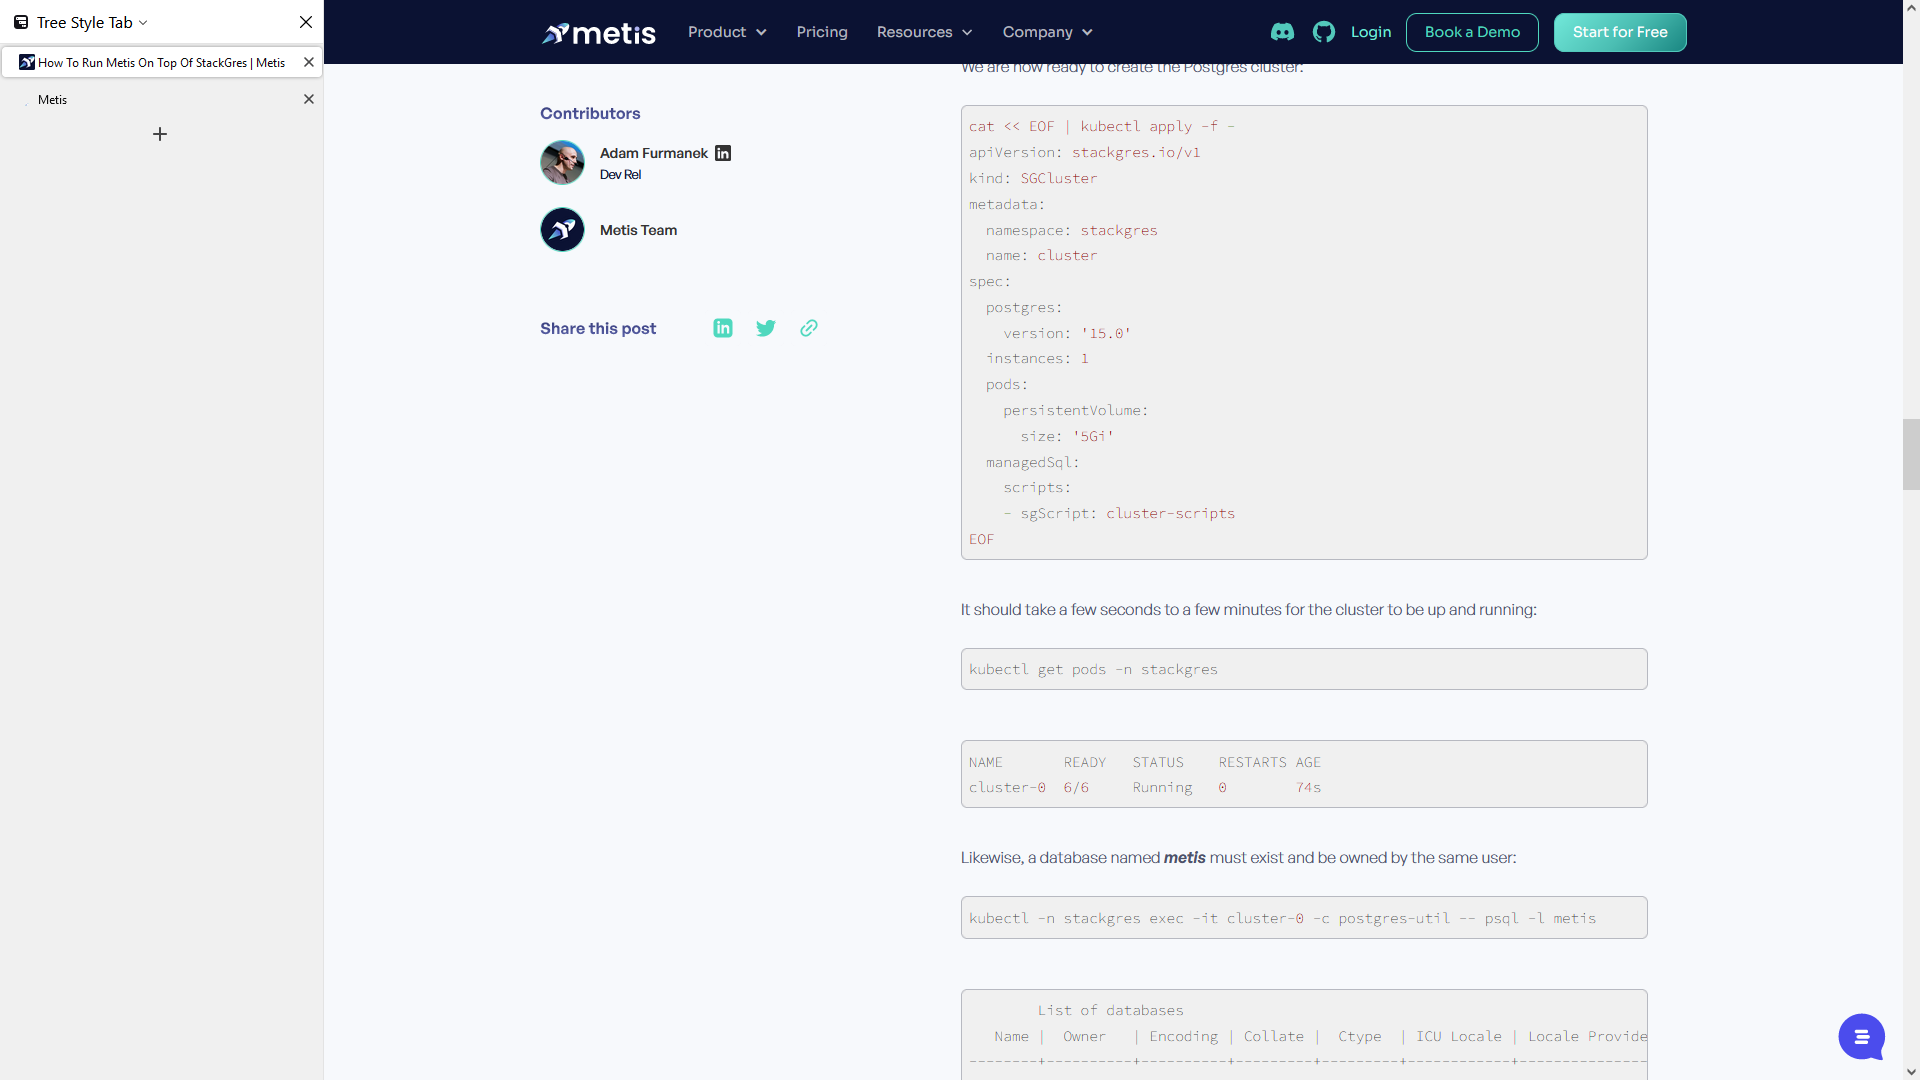
We need to create the configuration and trigger the creation of the SQL server.
To create a cluster with Postgres version 15, follow these steps.
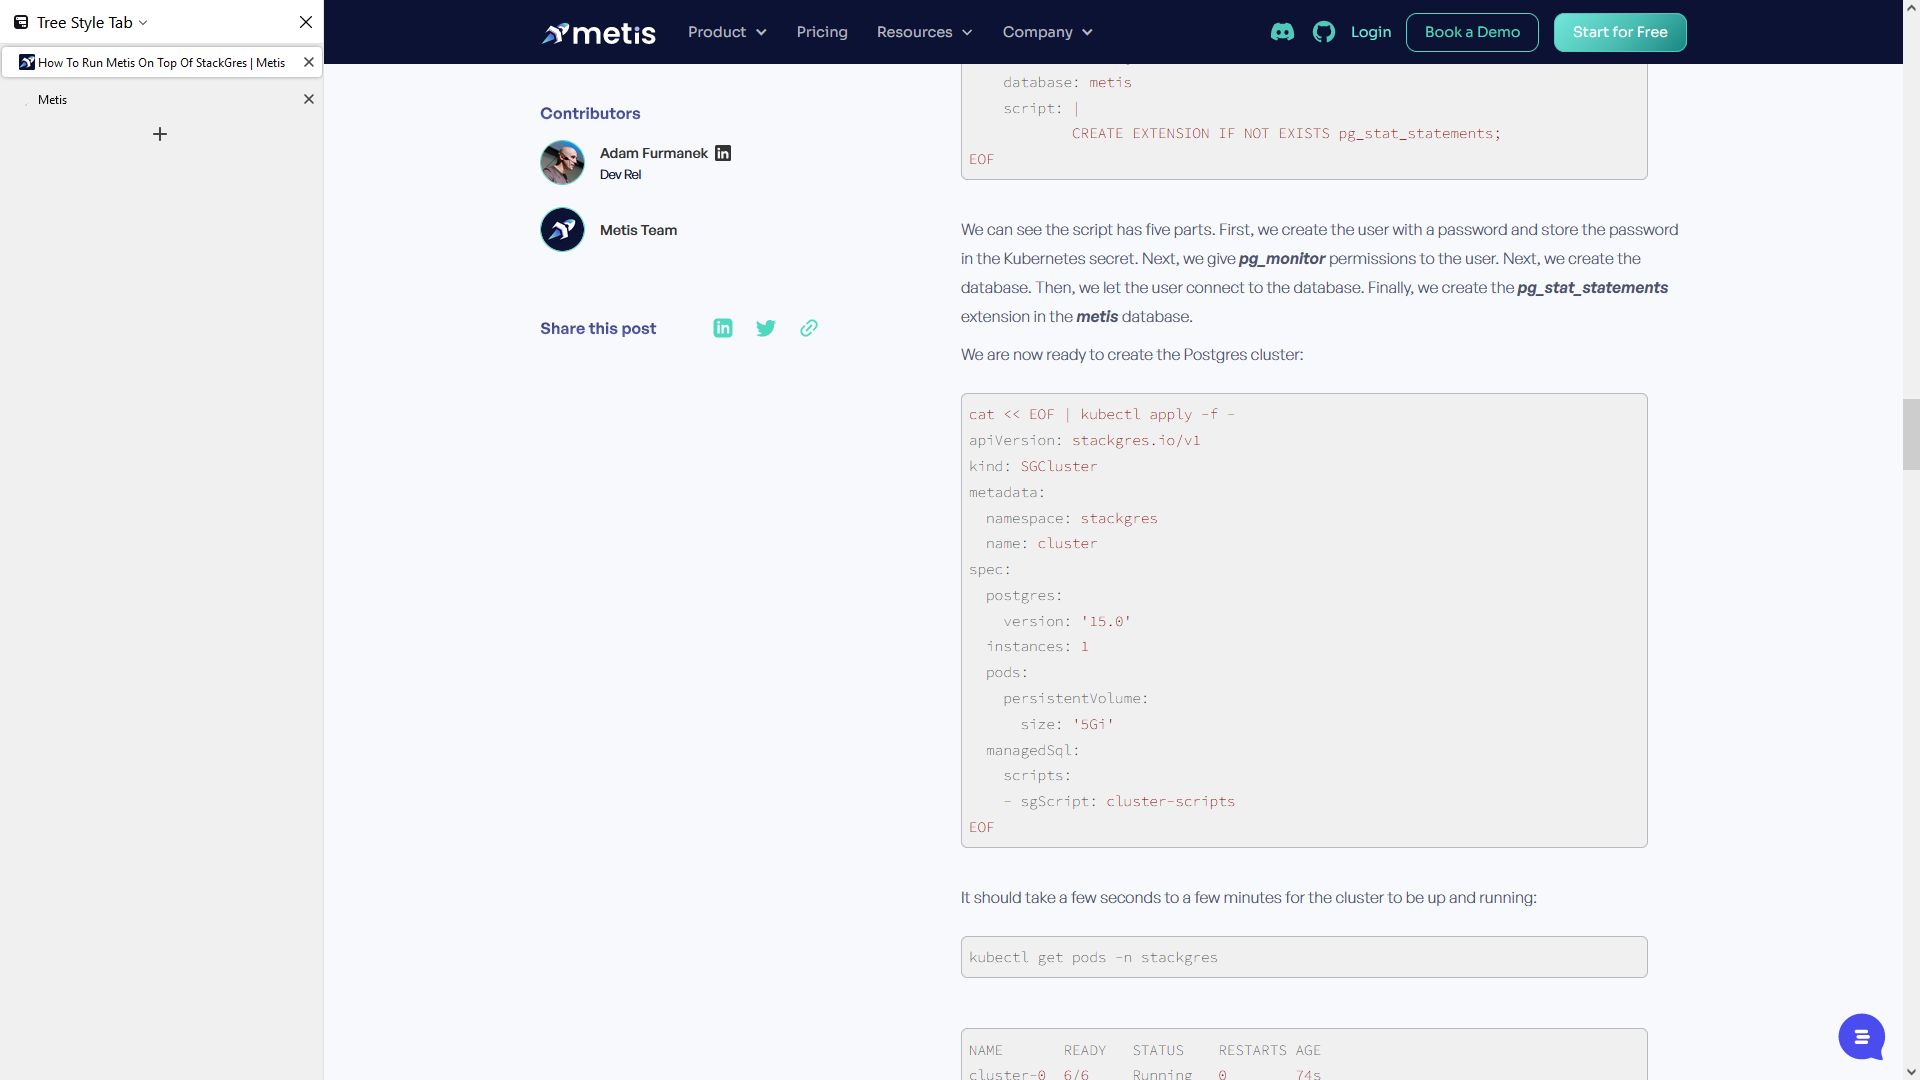

With 5 gigabytes of storage volume and using the script we just created.


So, once again, let's copy this command and run it.
This item will now be sent to your Staggers operator to set up the server and initialize it correctly.
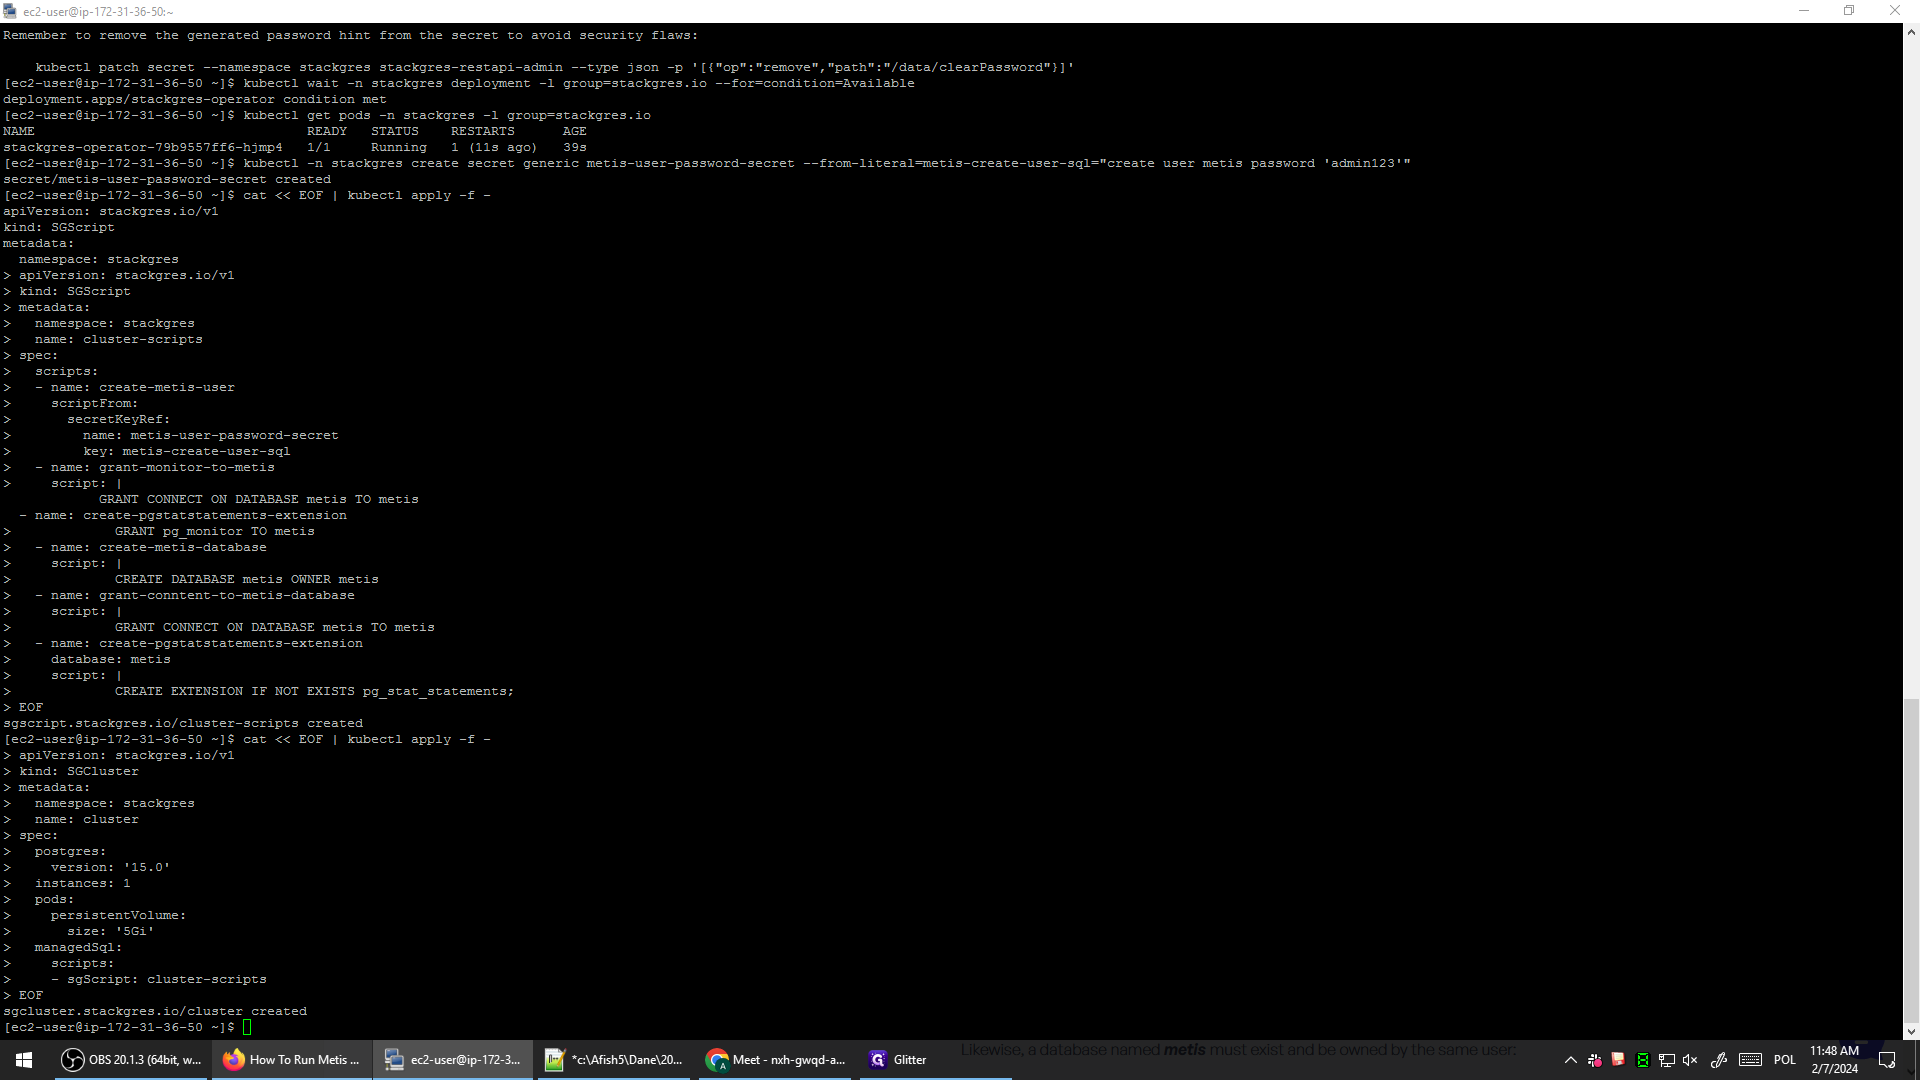
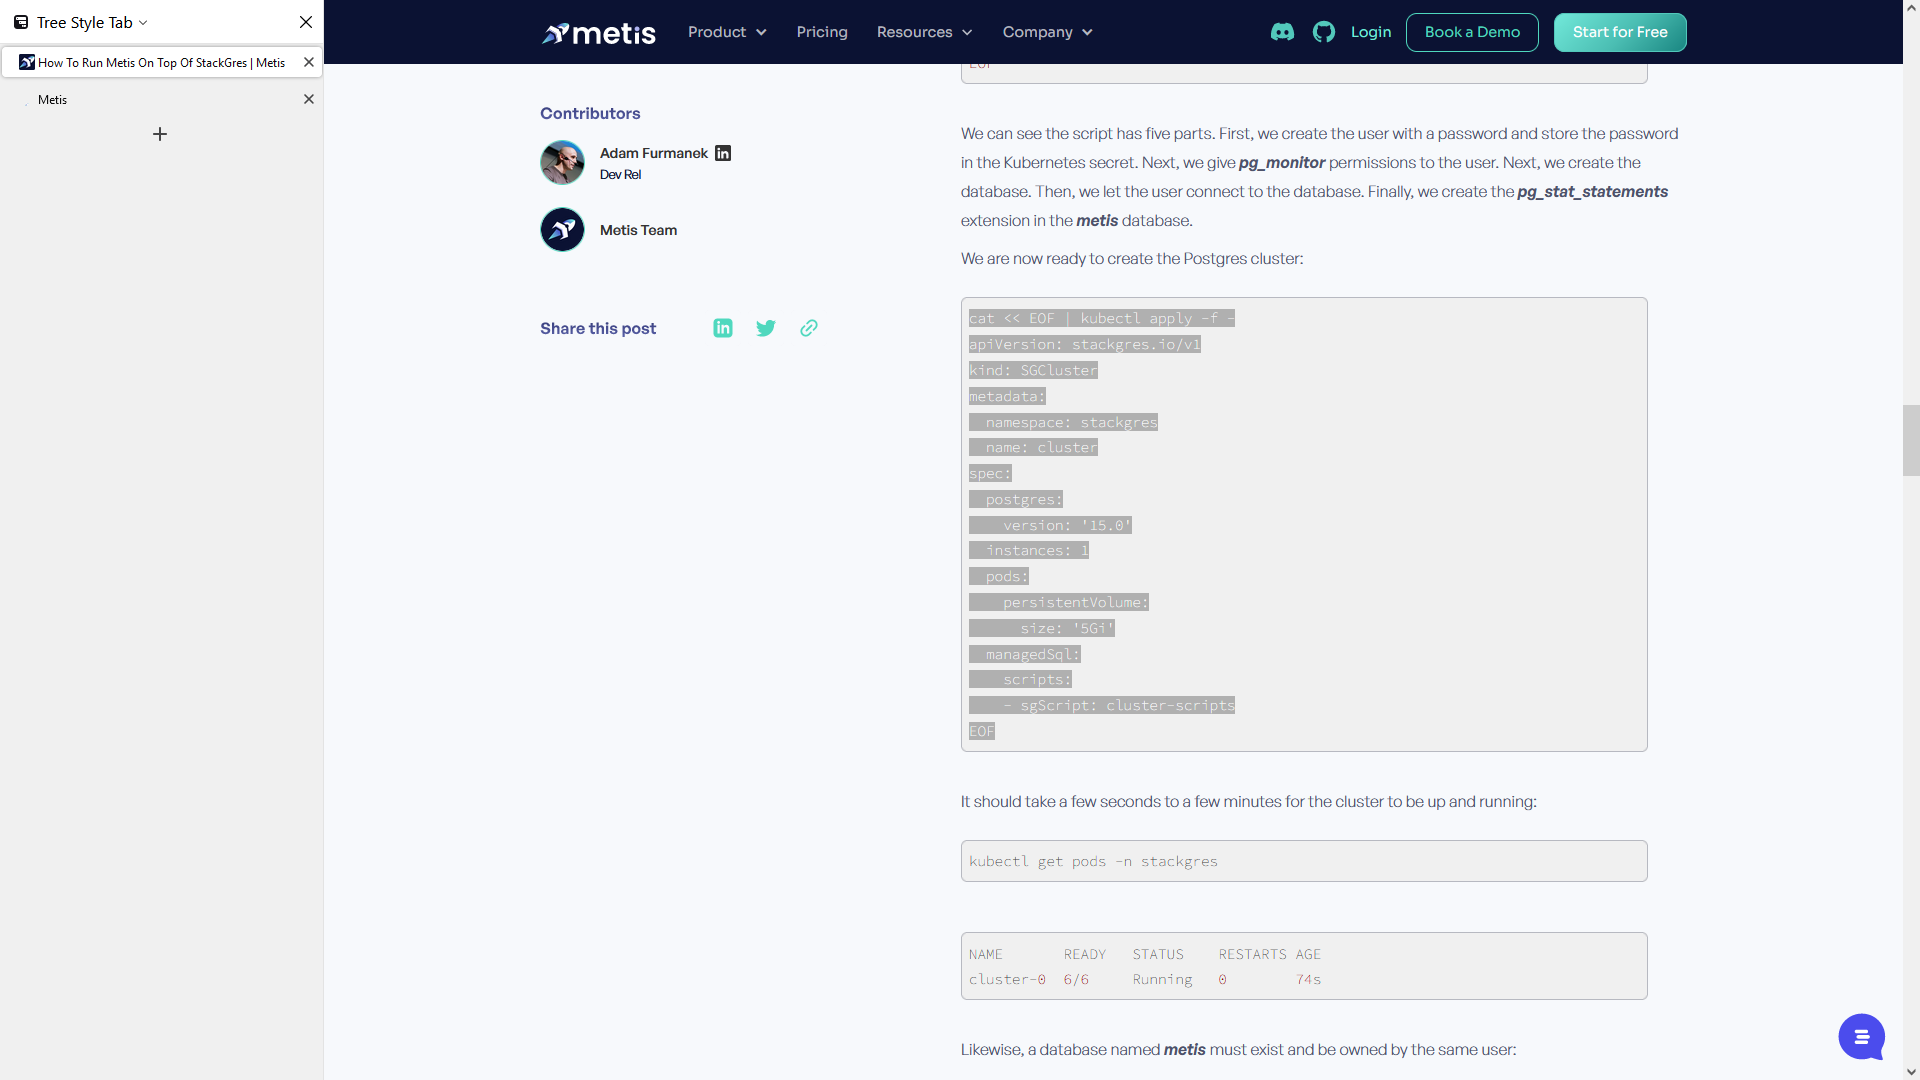
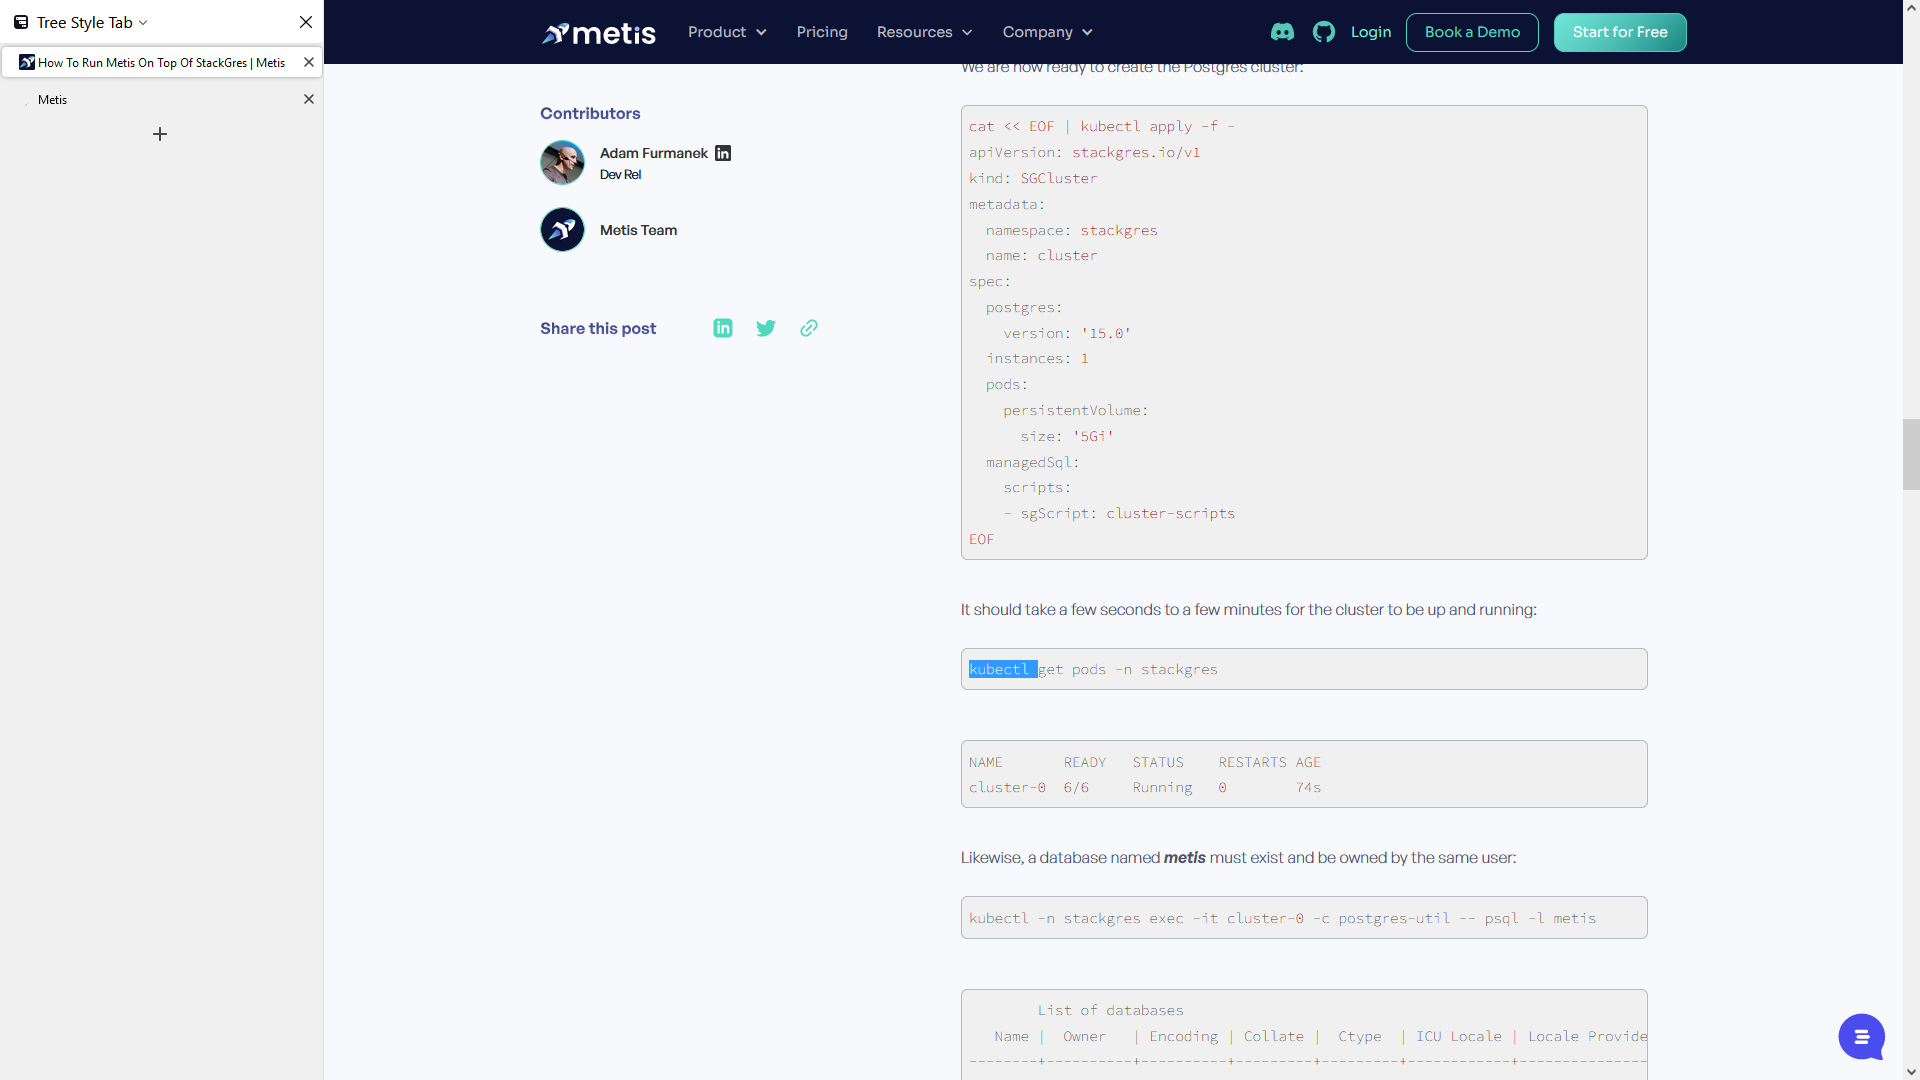
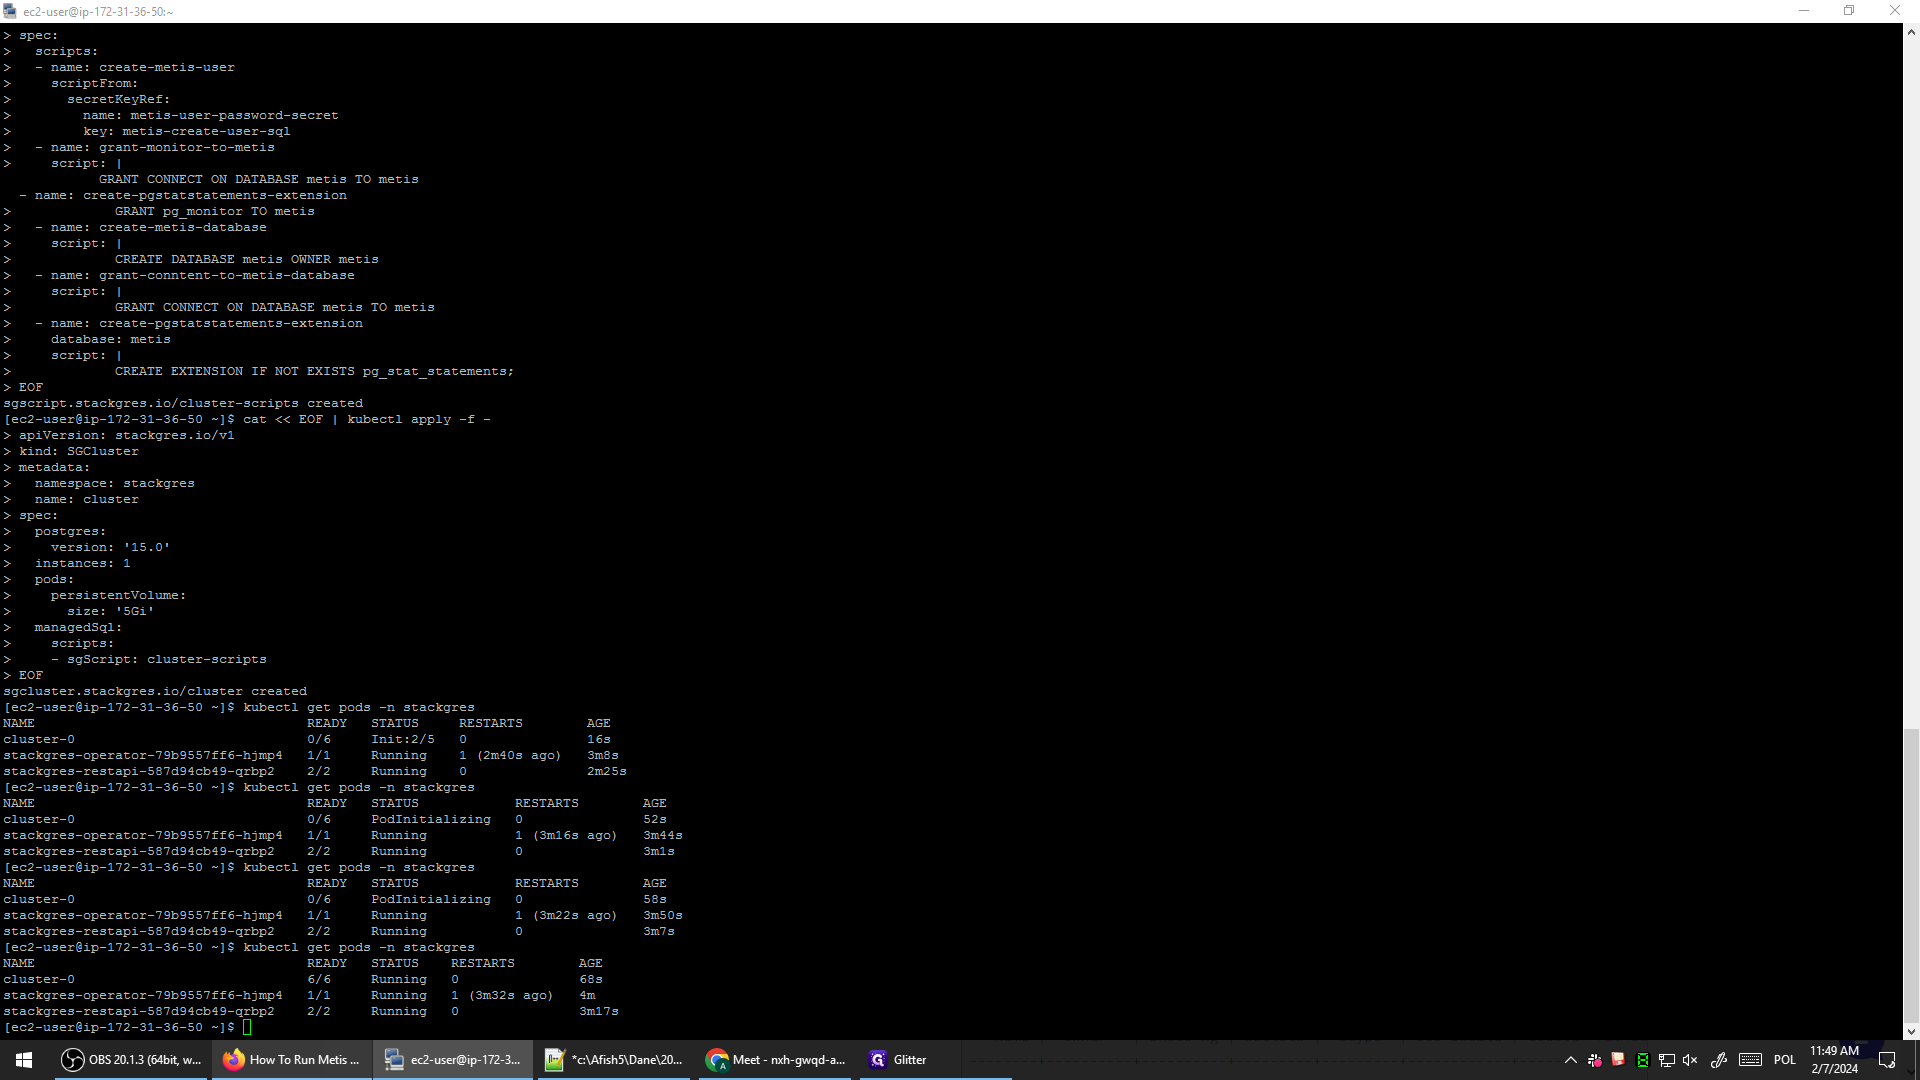
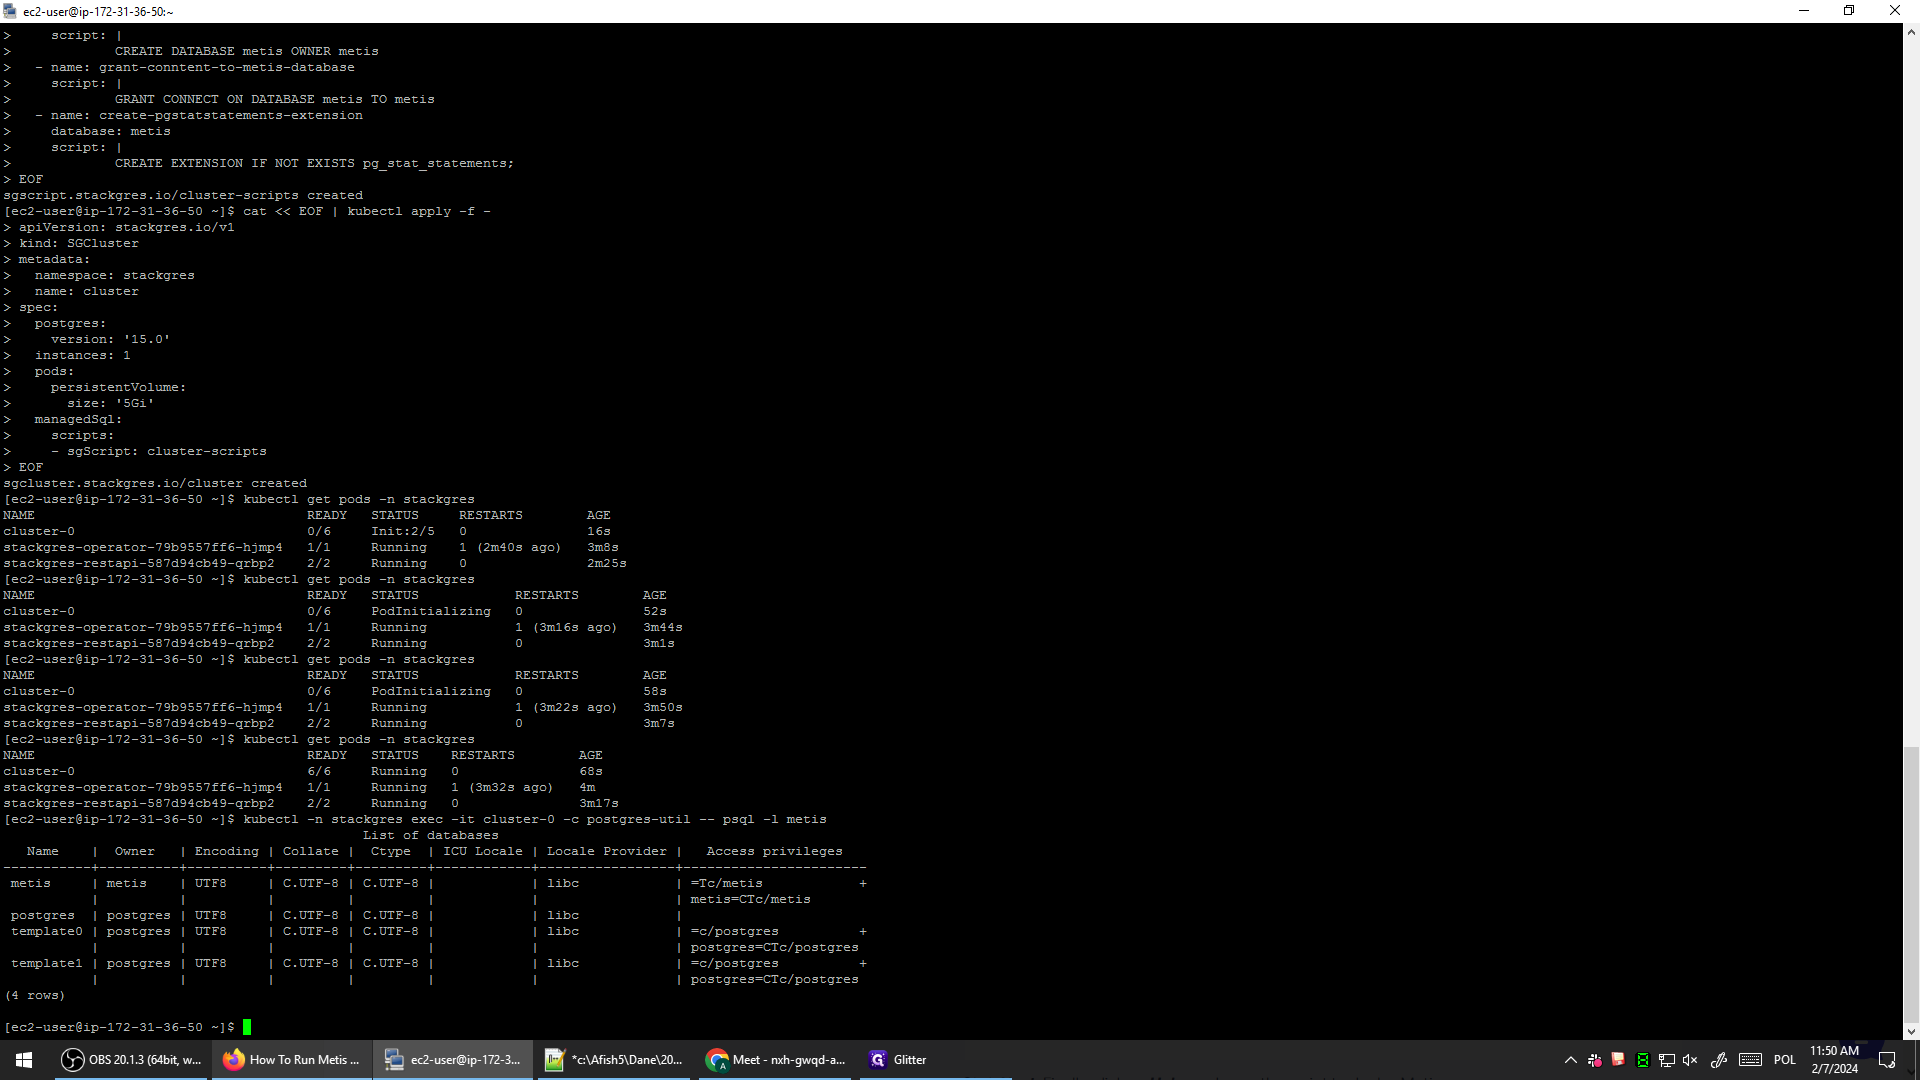
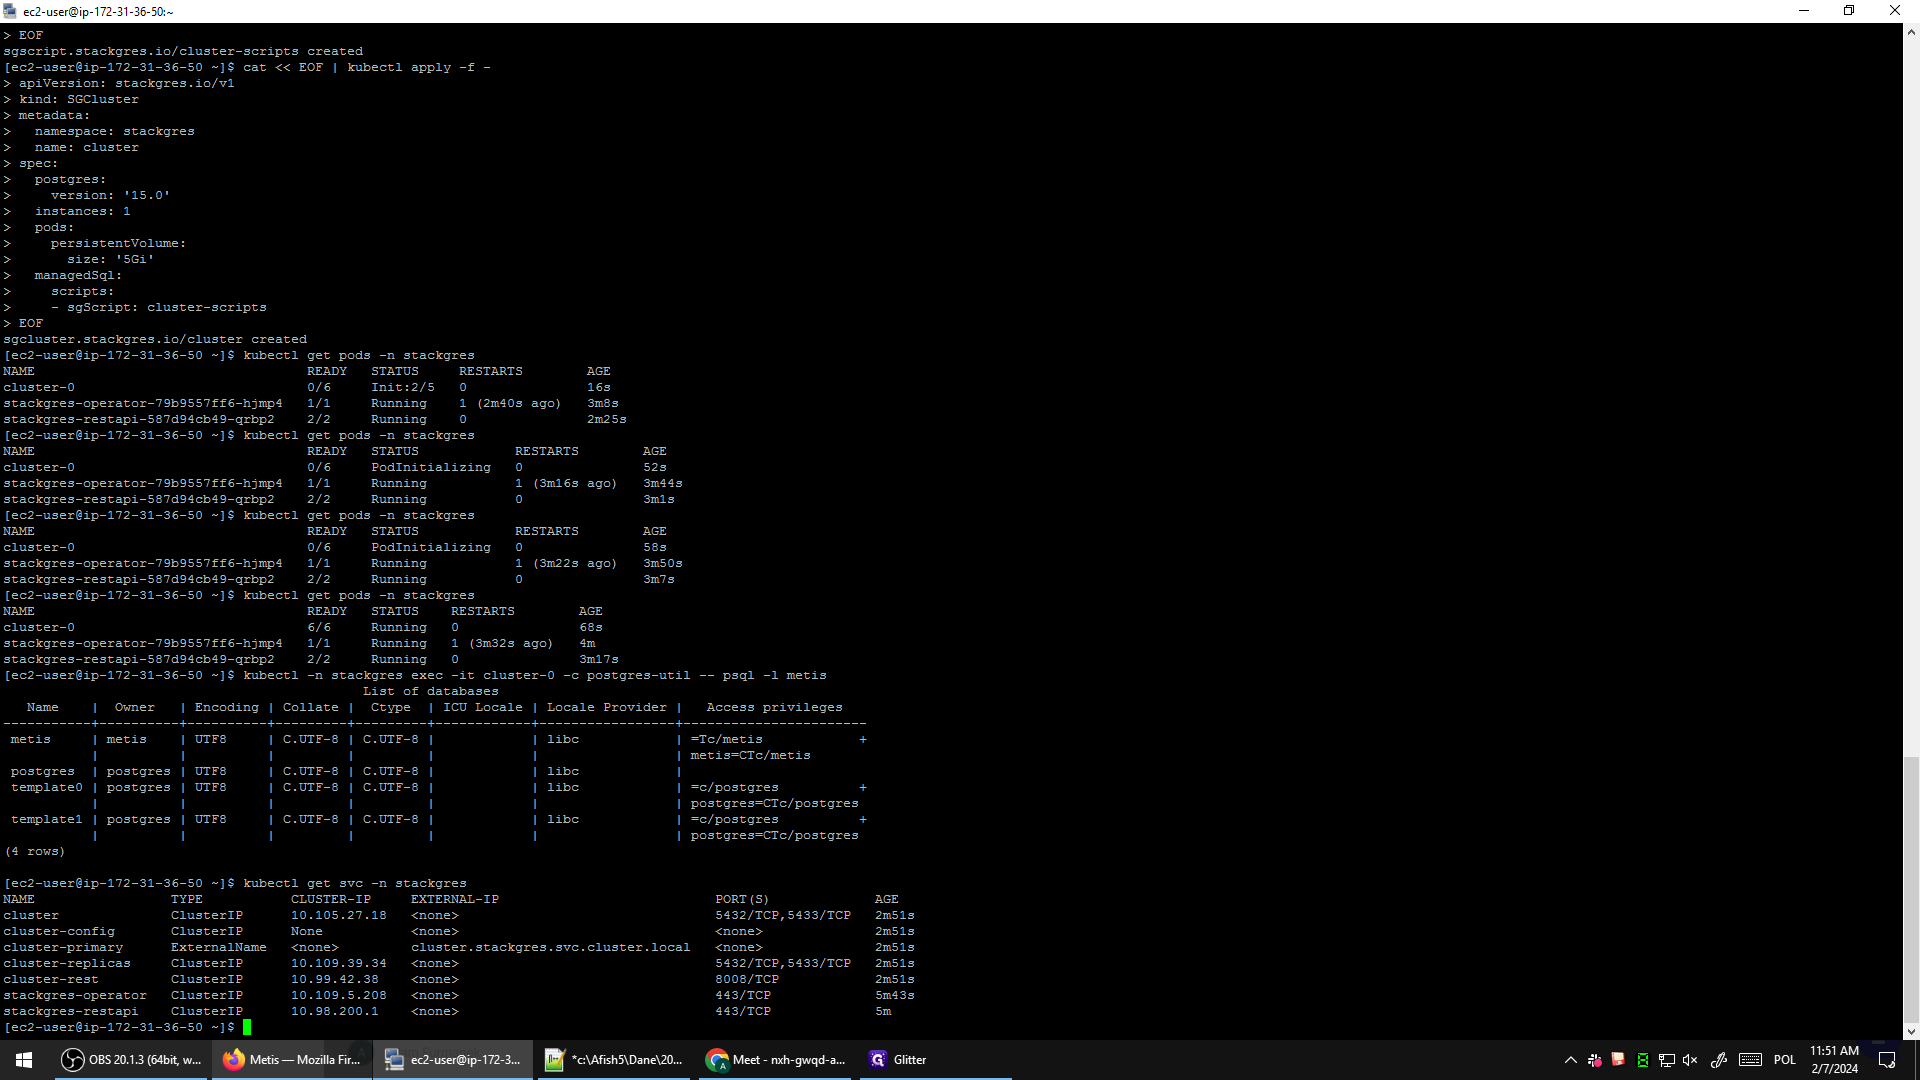
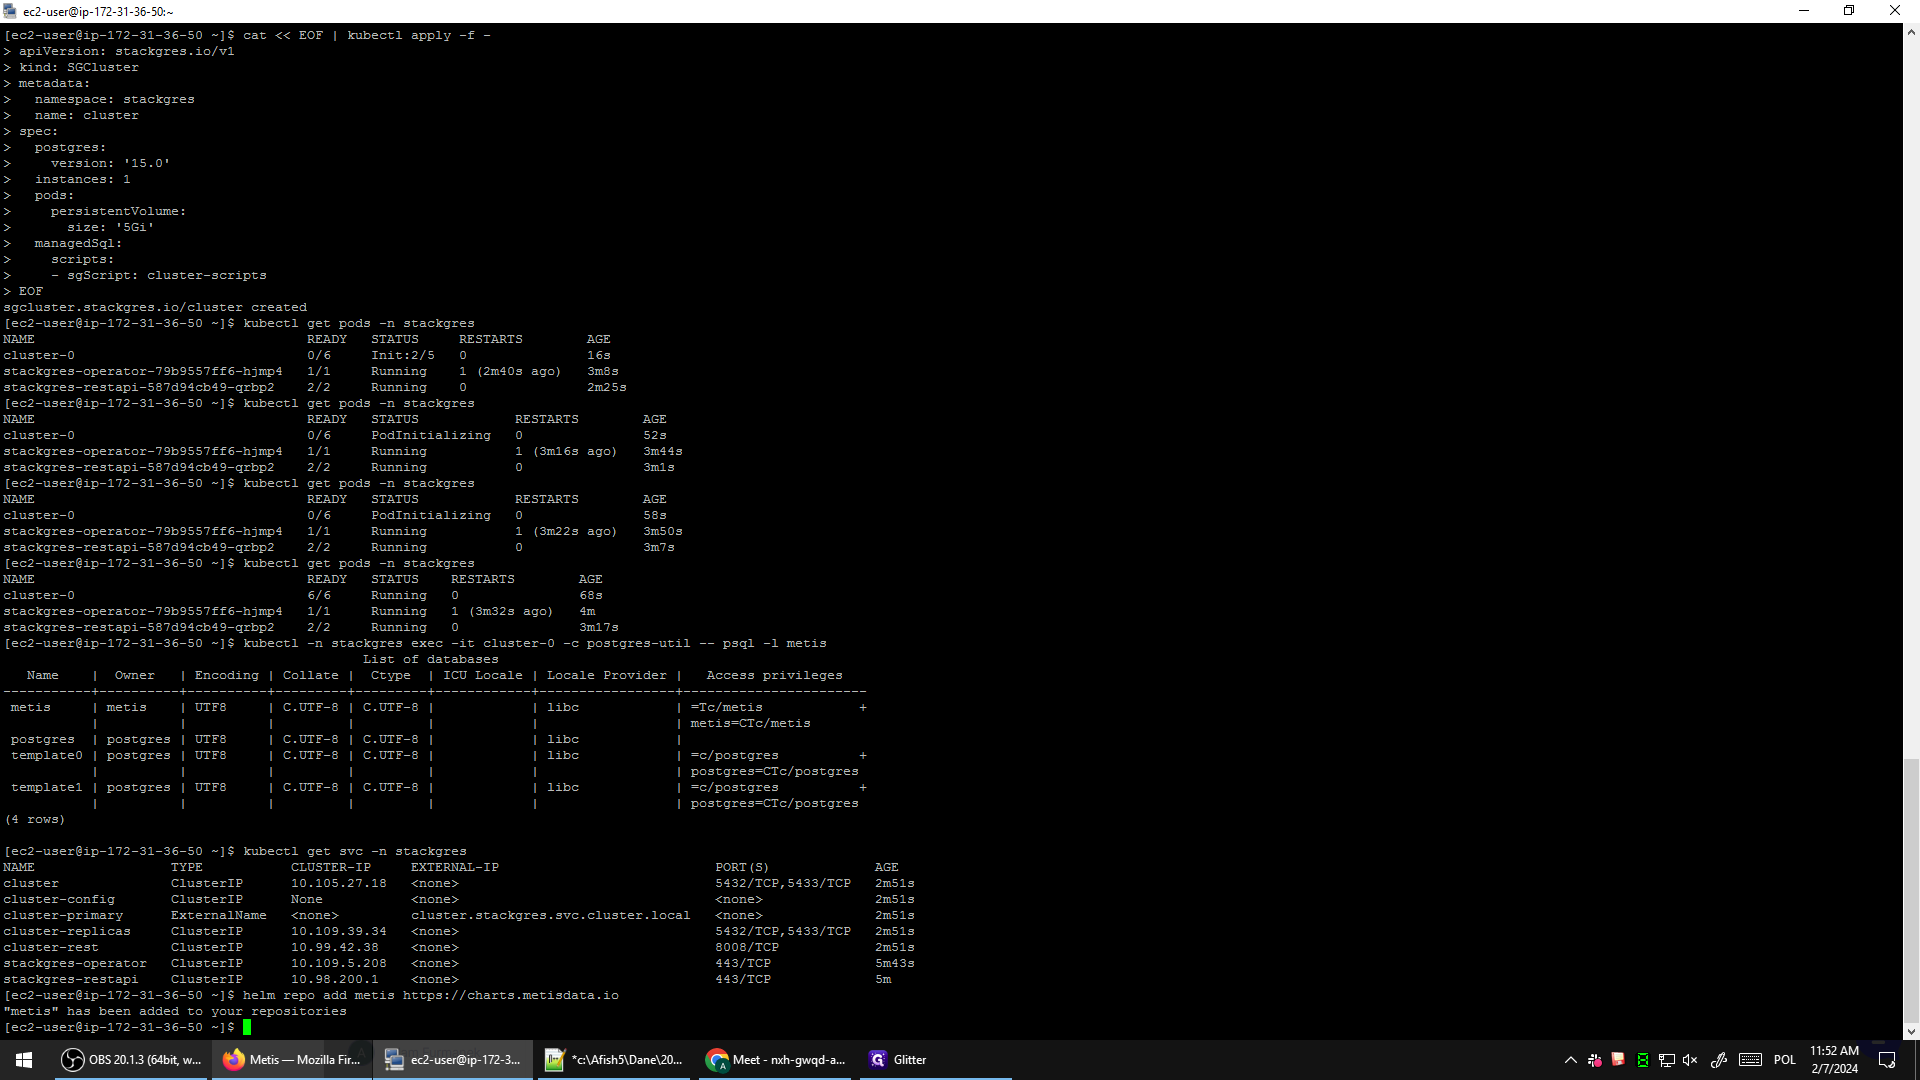
It will take about one minute on my machine. We can monitor the progress using the "get pods" command.
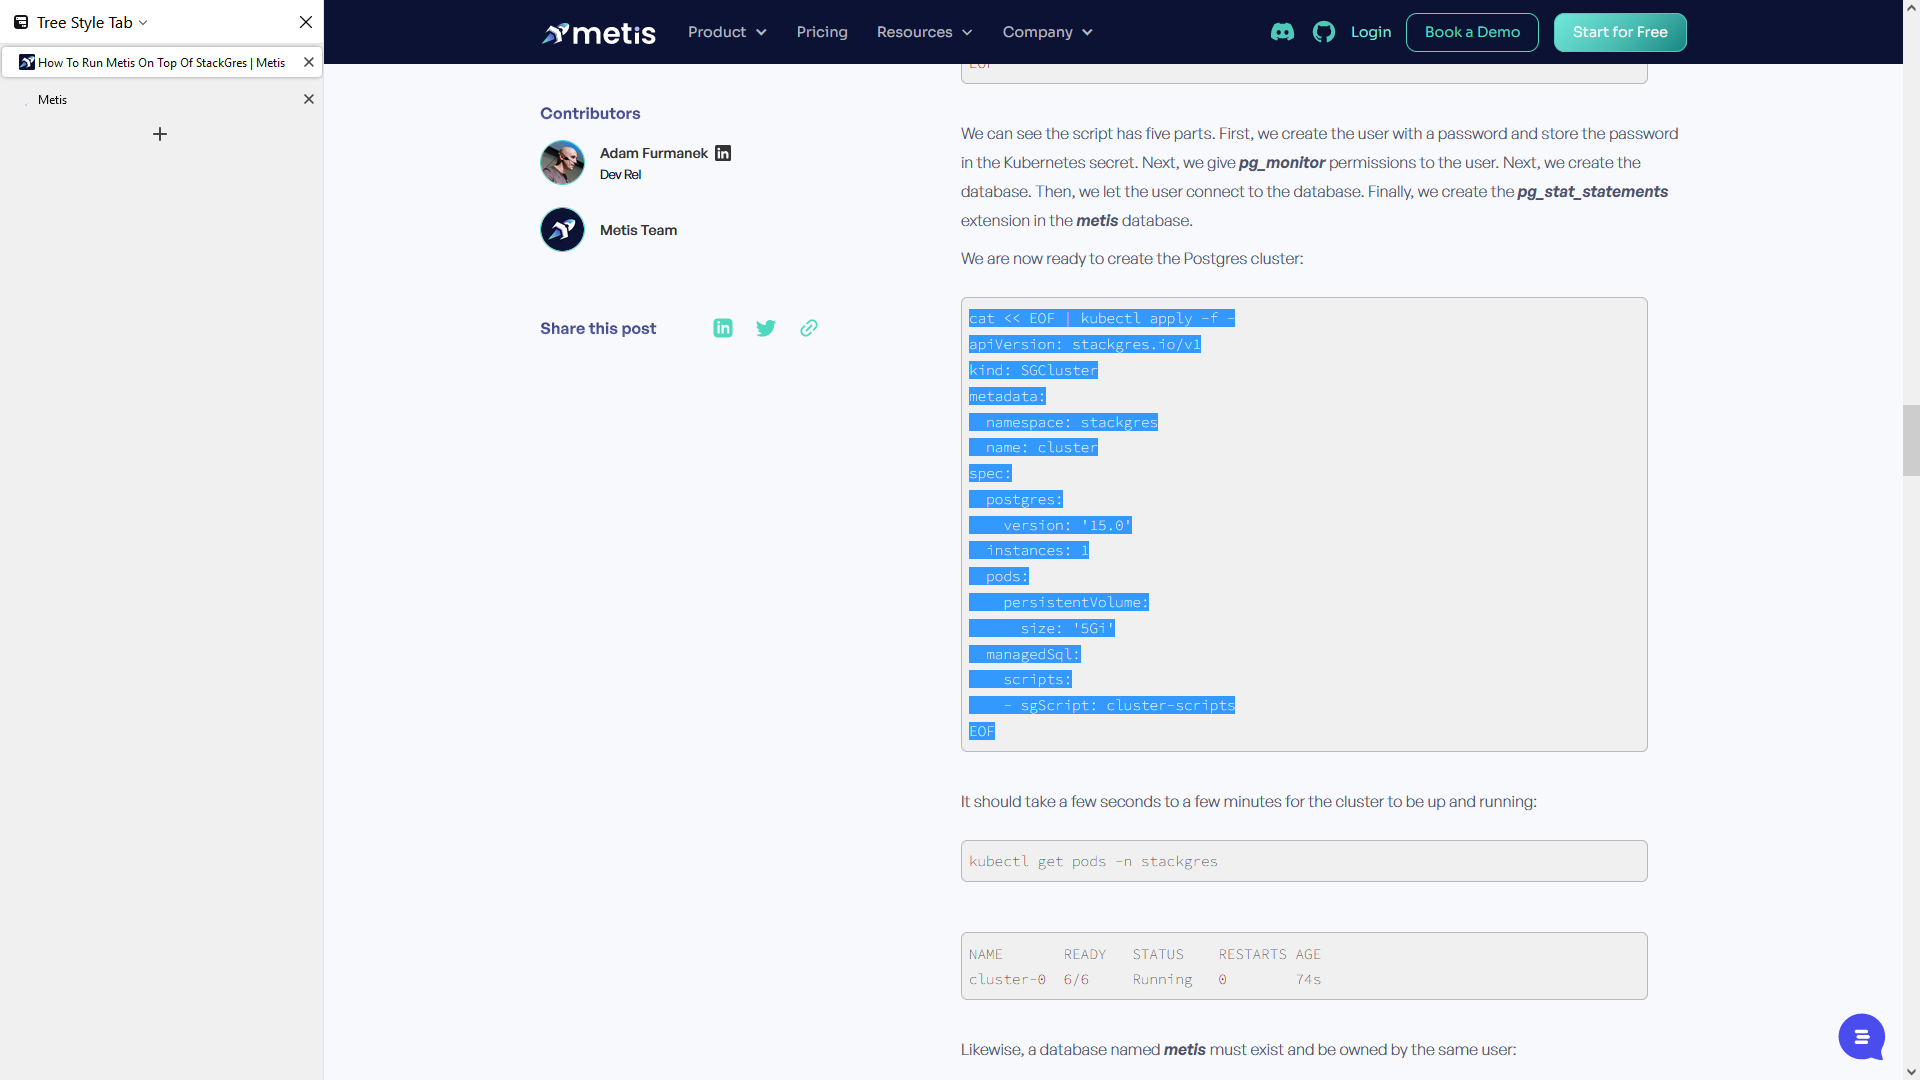
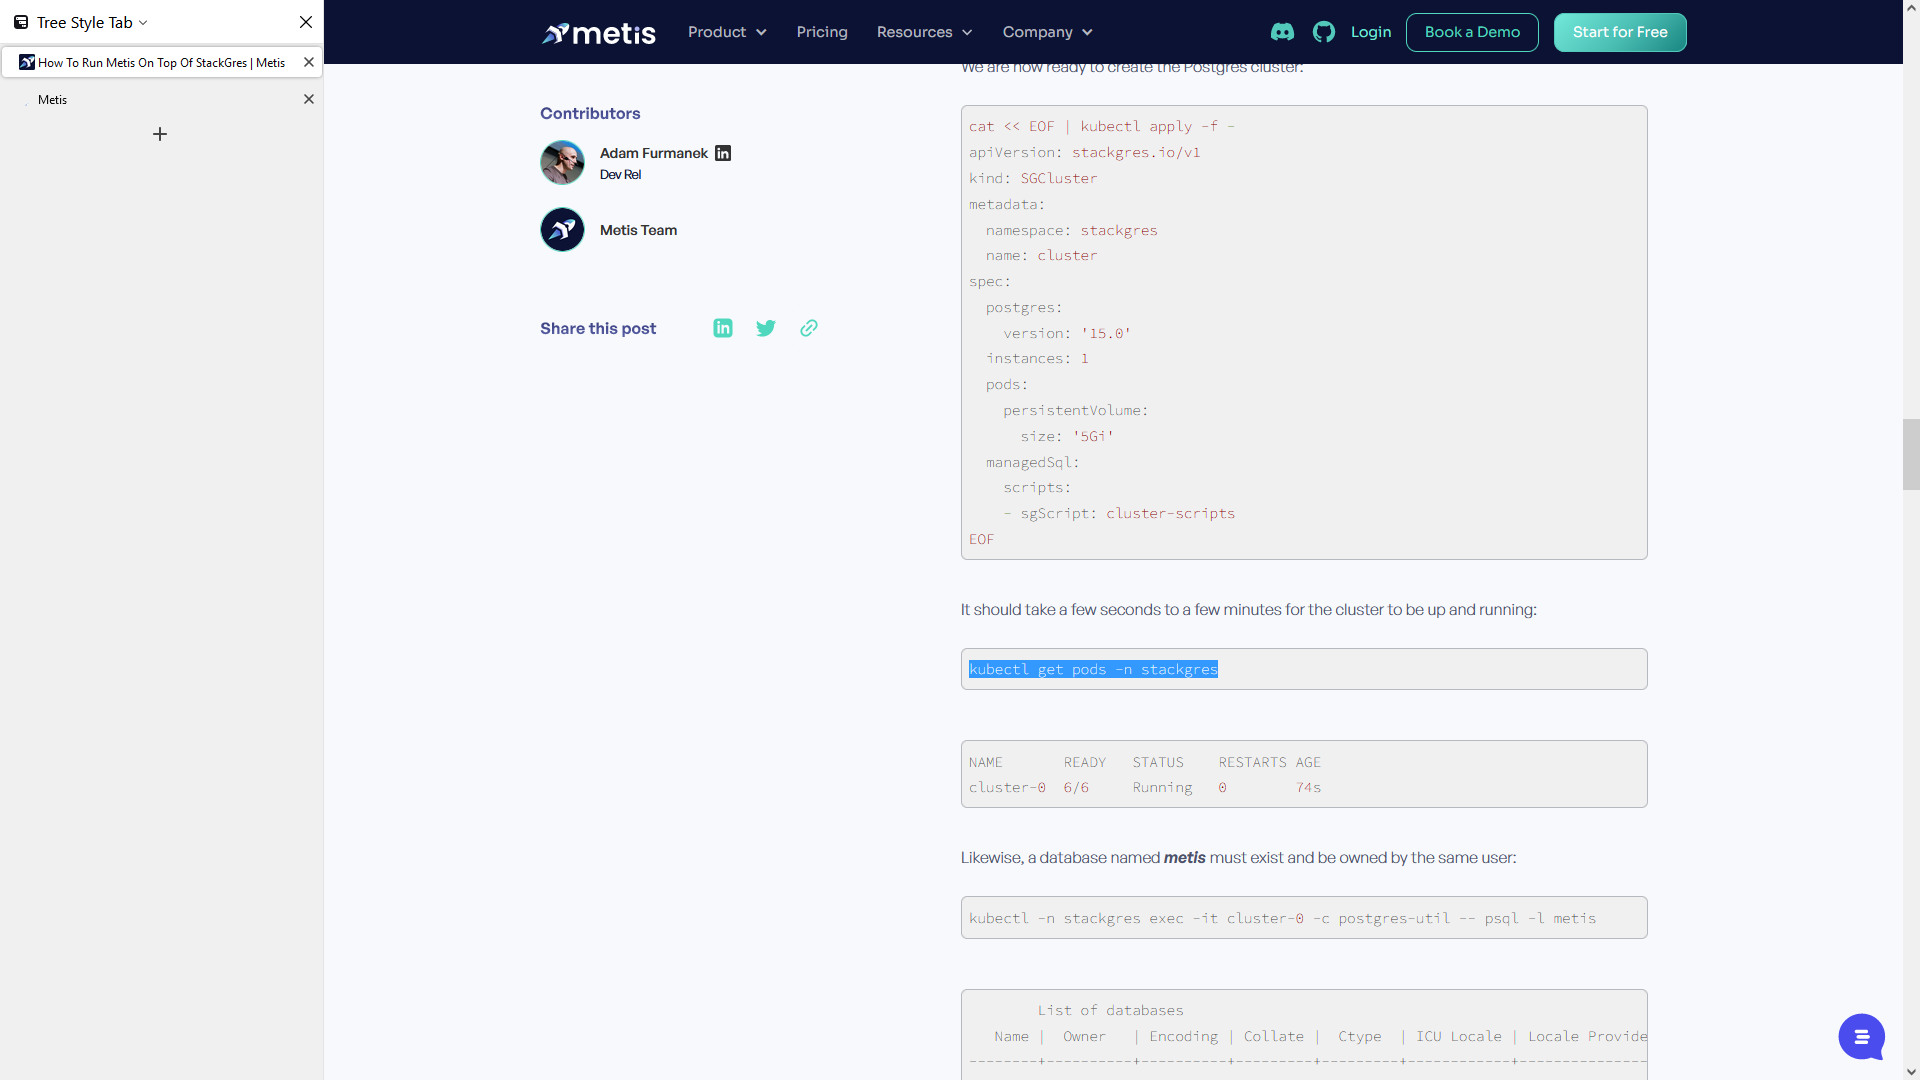

We can now see that the cluster is being created and initialized.
The Staggers operator, installed via Helm, is currently setting up the PostgreSQL server. The server will then initialize using the script prepared earlier. This script will create a user with the username and password configured as secrets in our cluster.
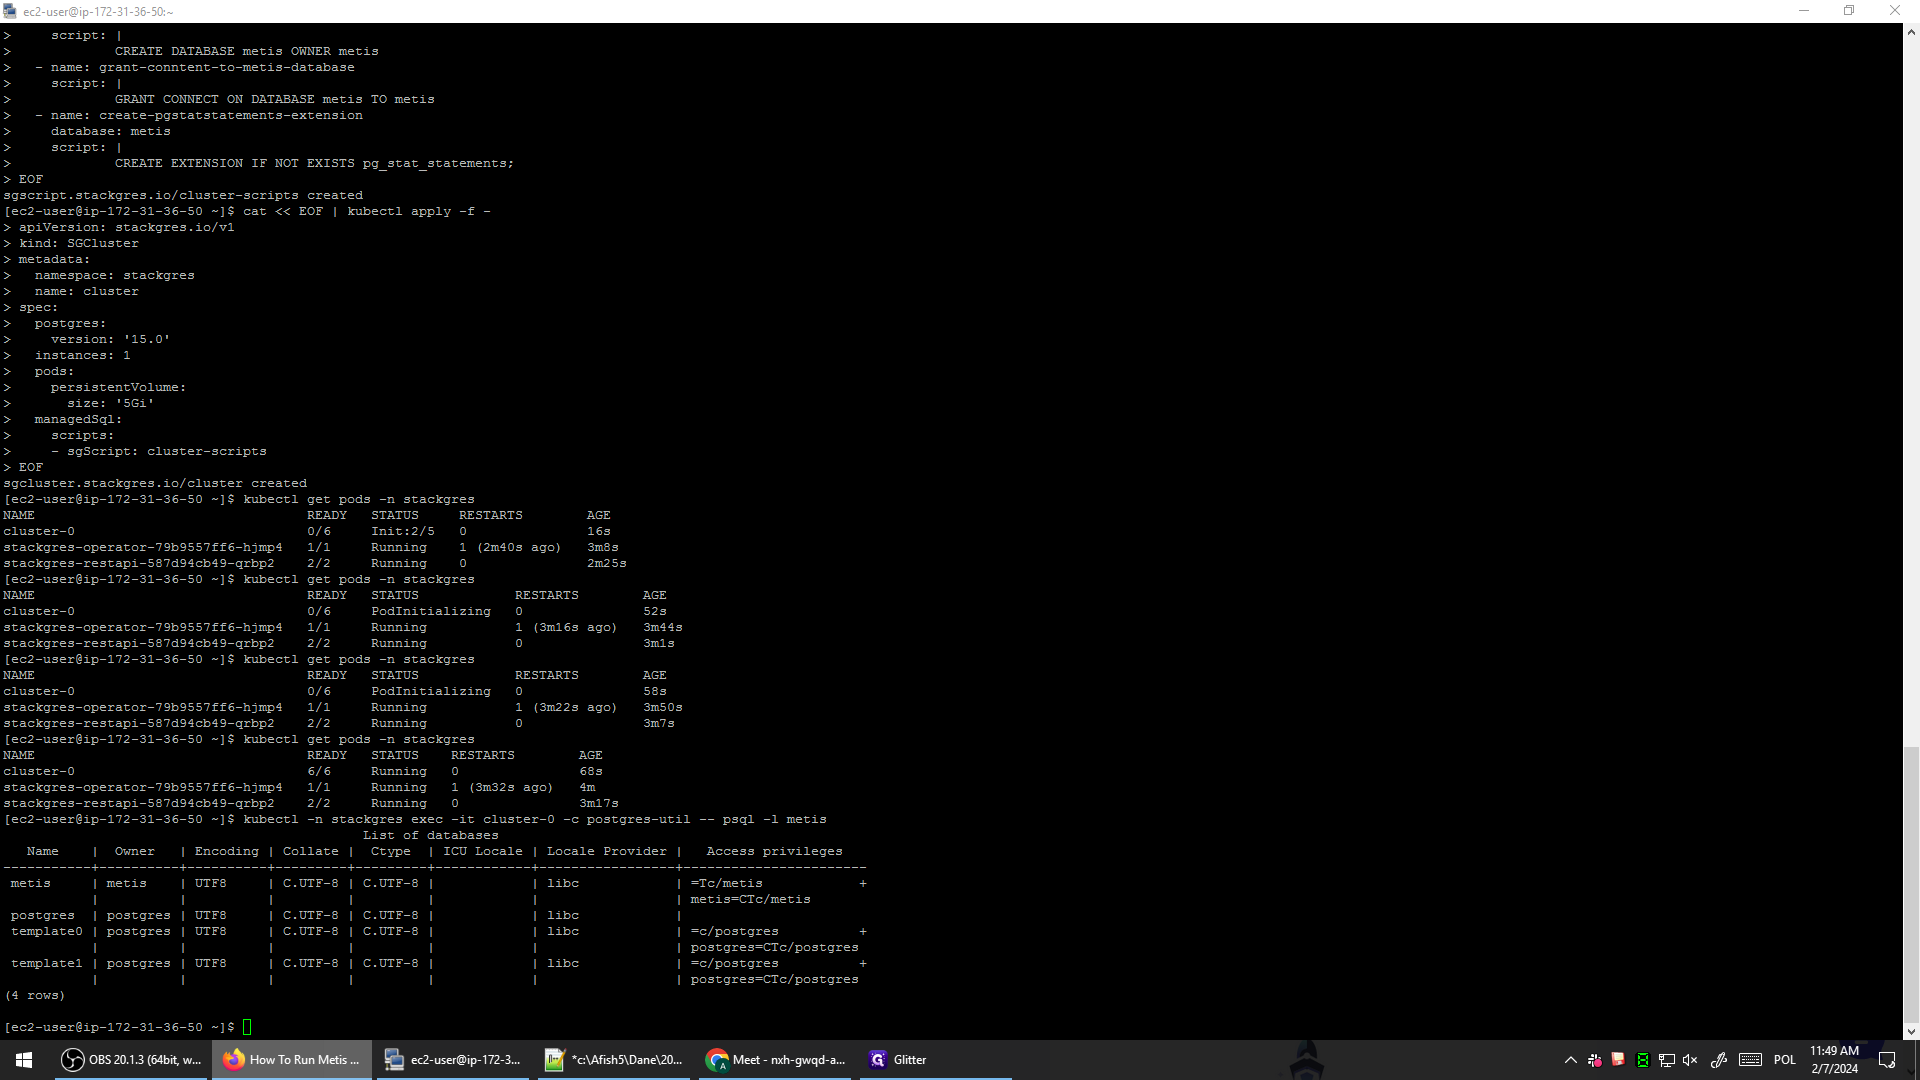
Let's run the command again to check if the pod is initializing. Wait a few more seconds. We should see that everything is up and running, indicating that the PostgreSQL server is initialized correctly with the triggered script.
And now, everything is ready for use.
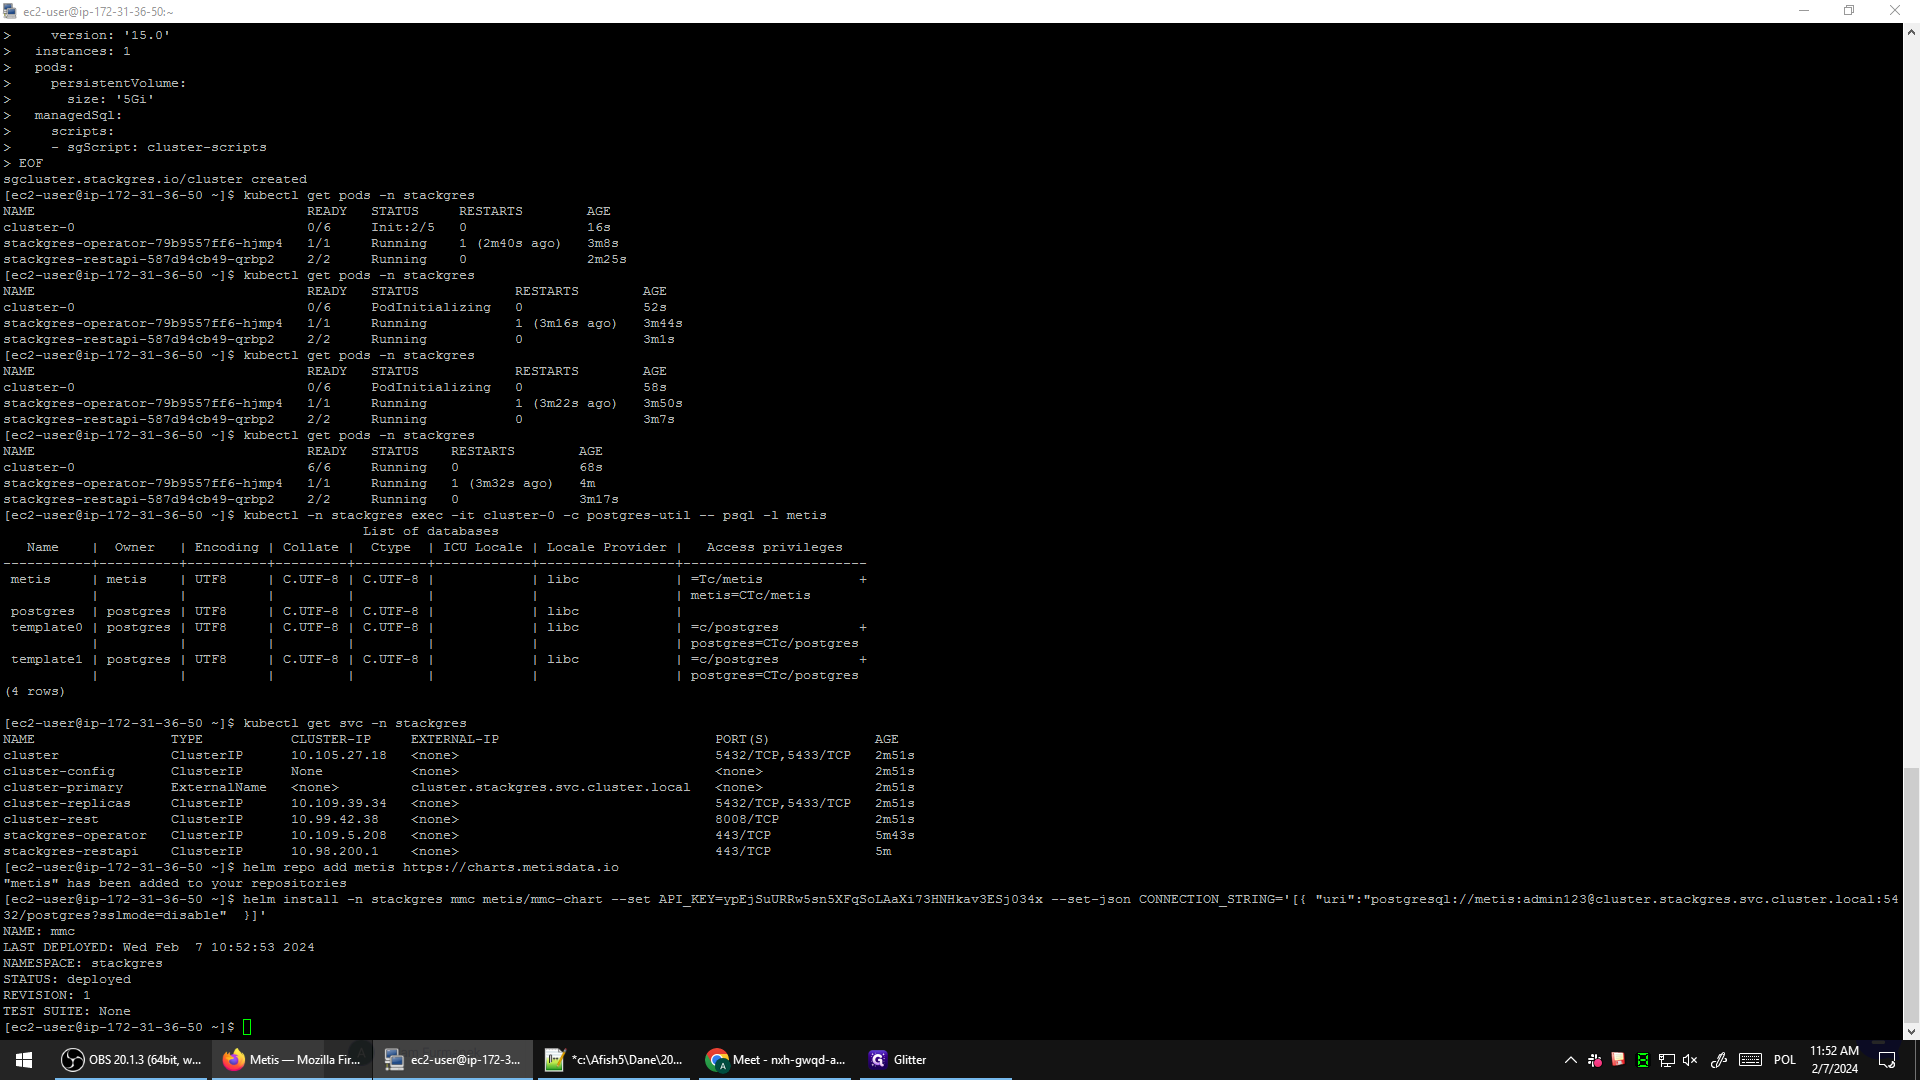
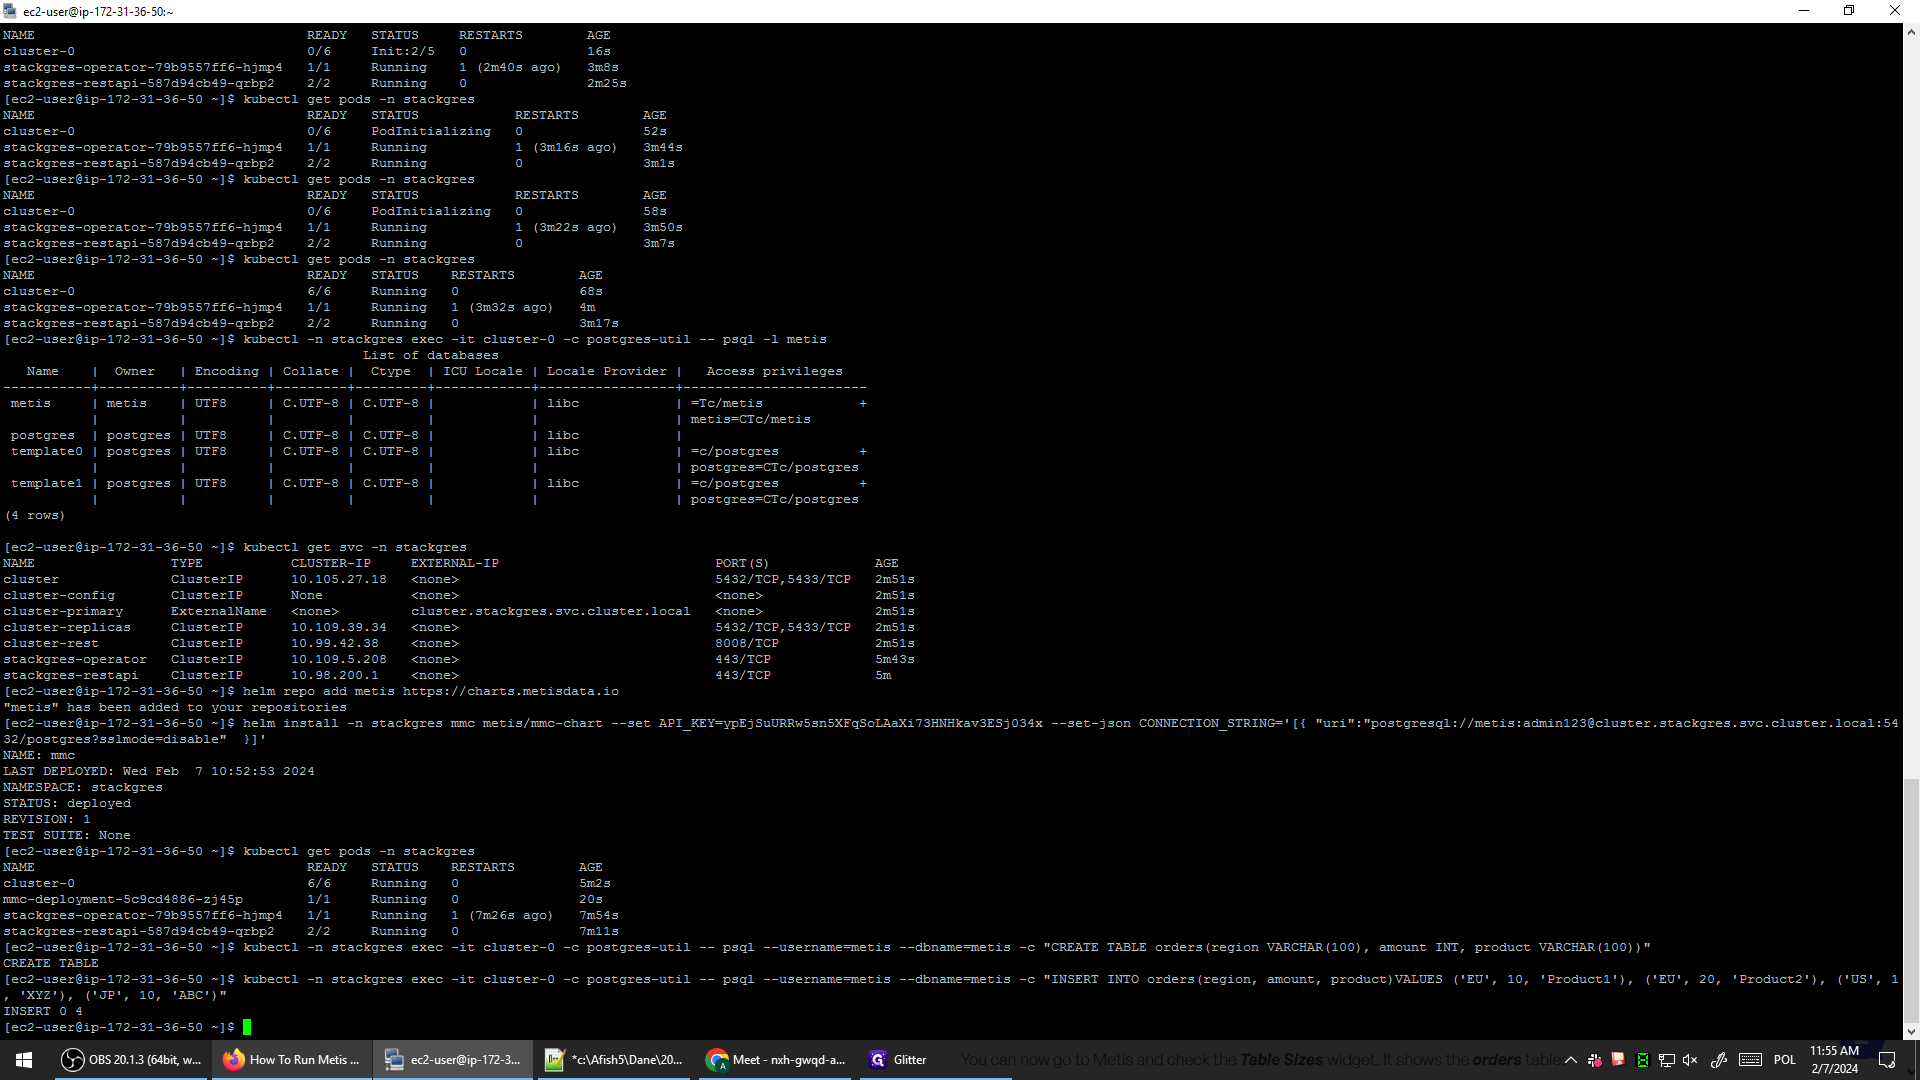
We can verify that the database has been created properly with this command. It will list all the commands and all the databases.
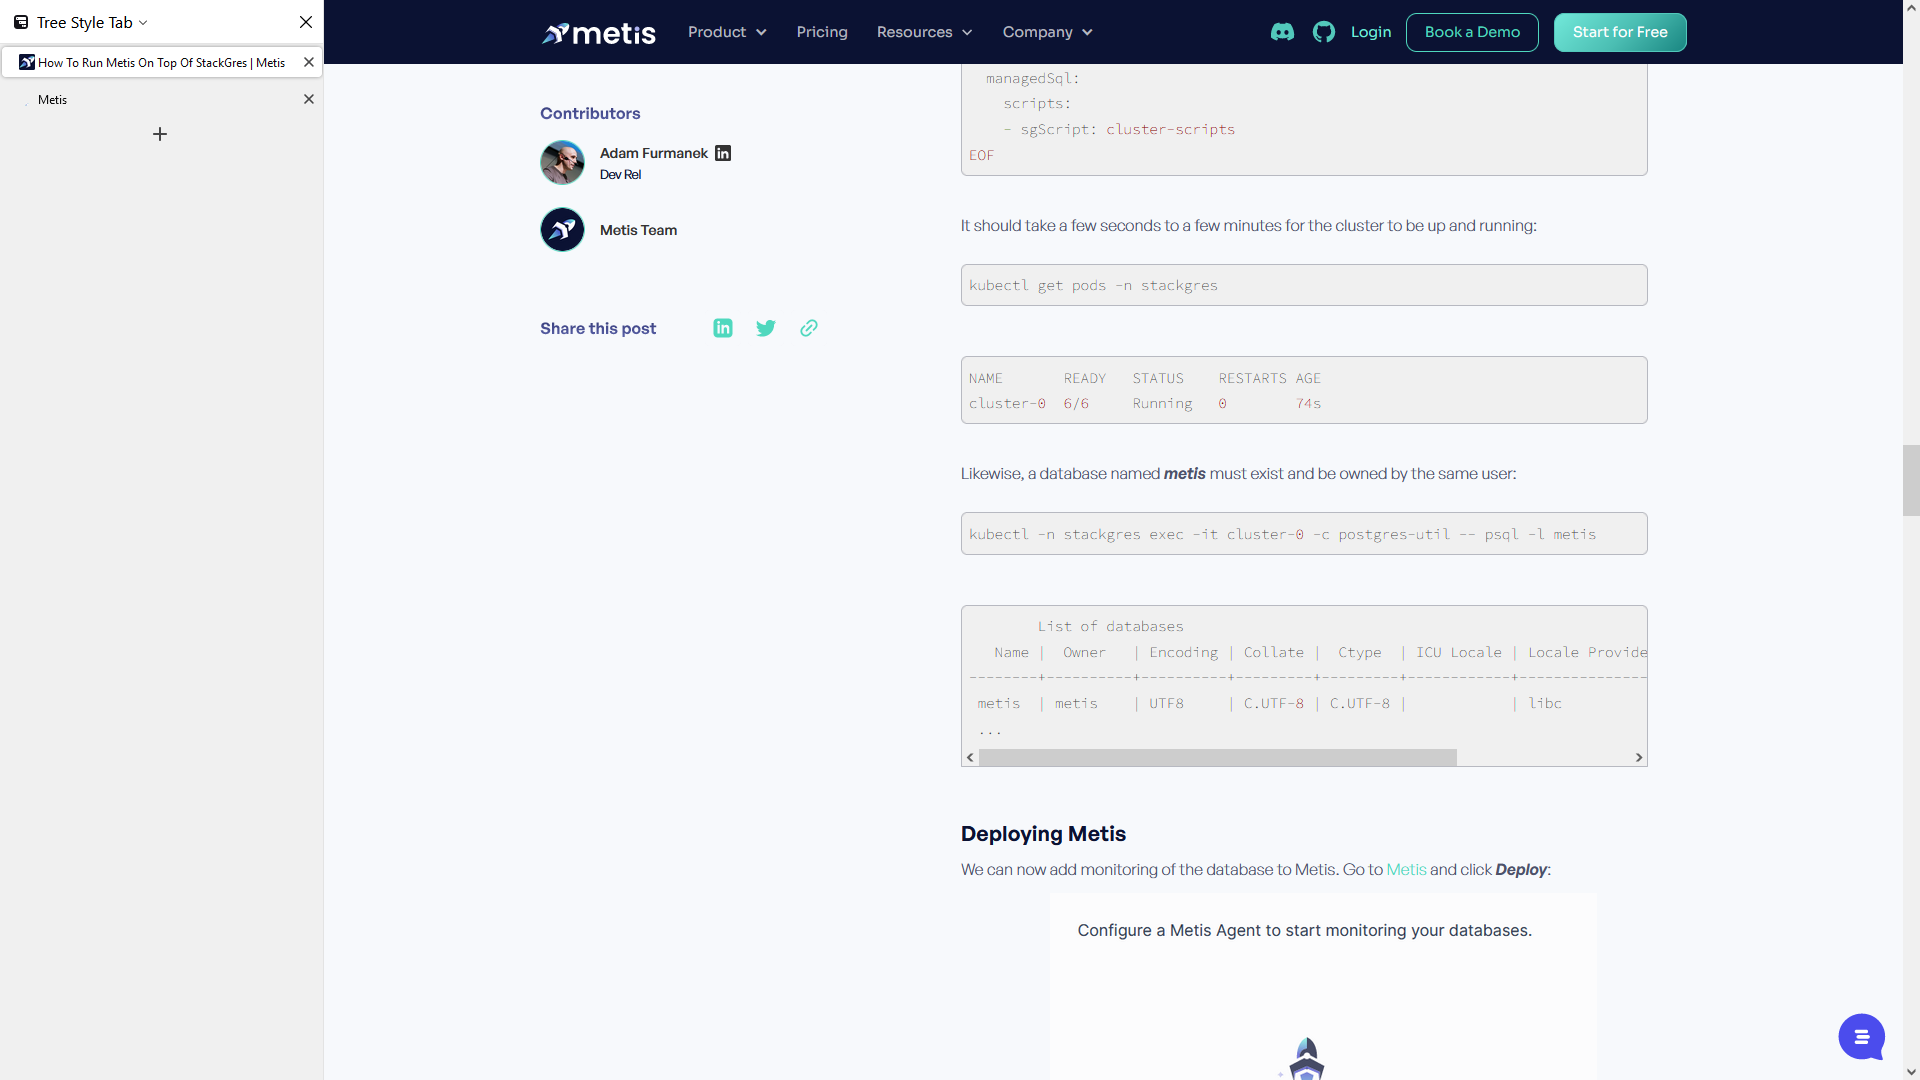
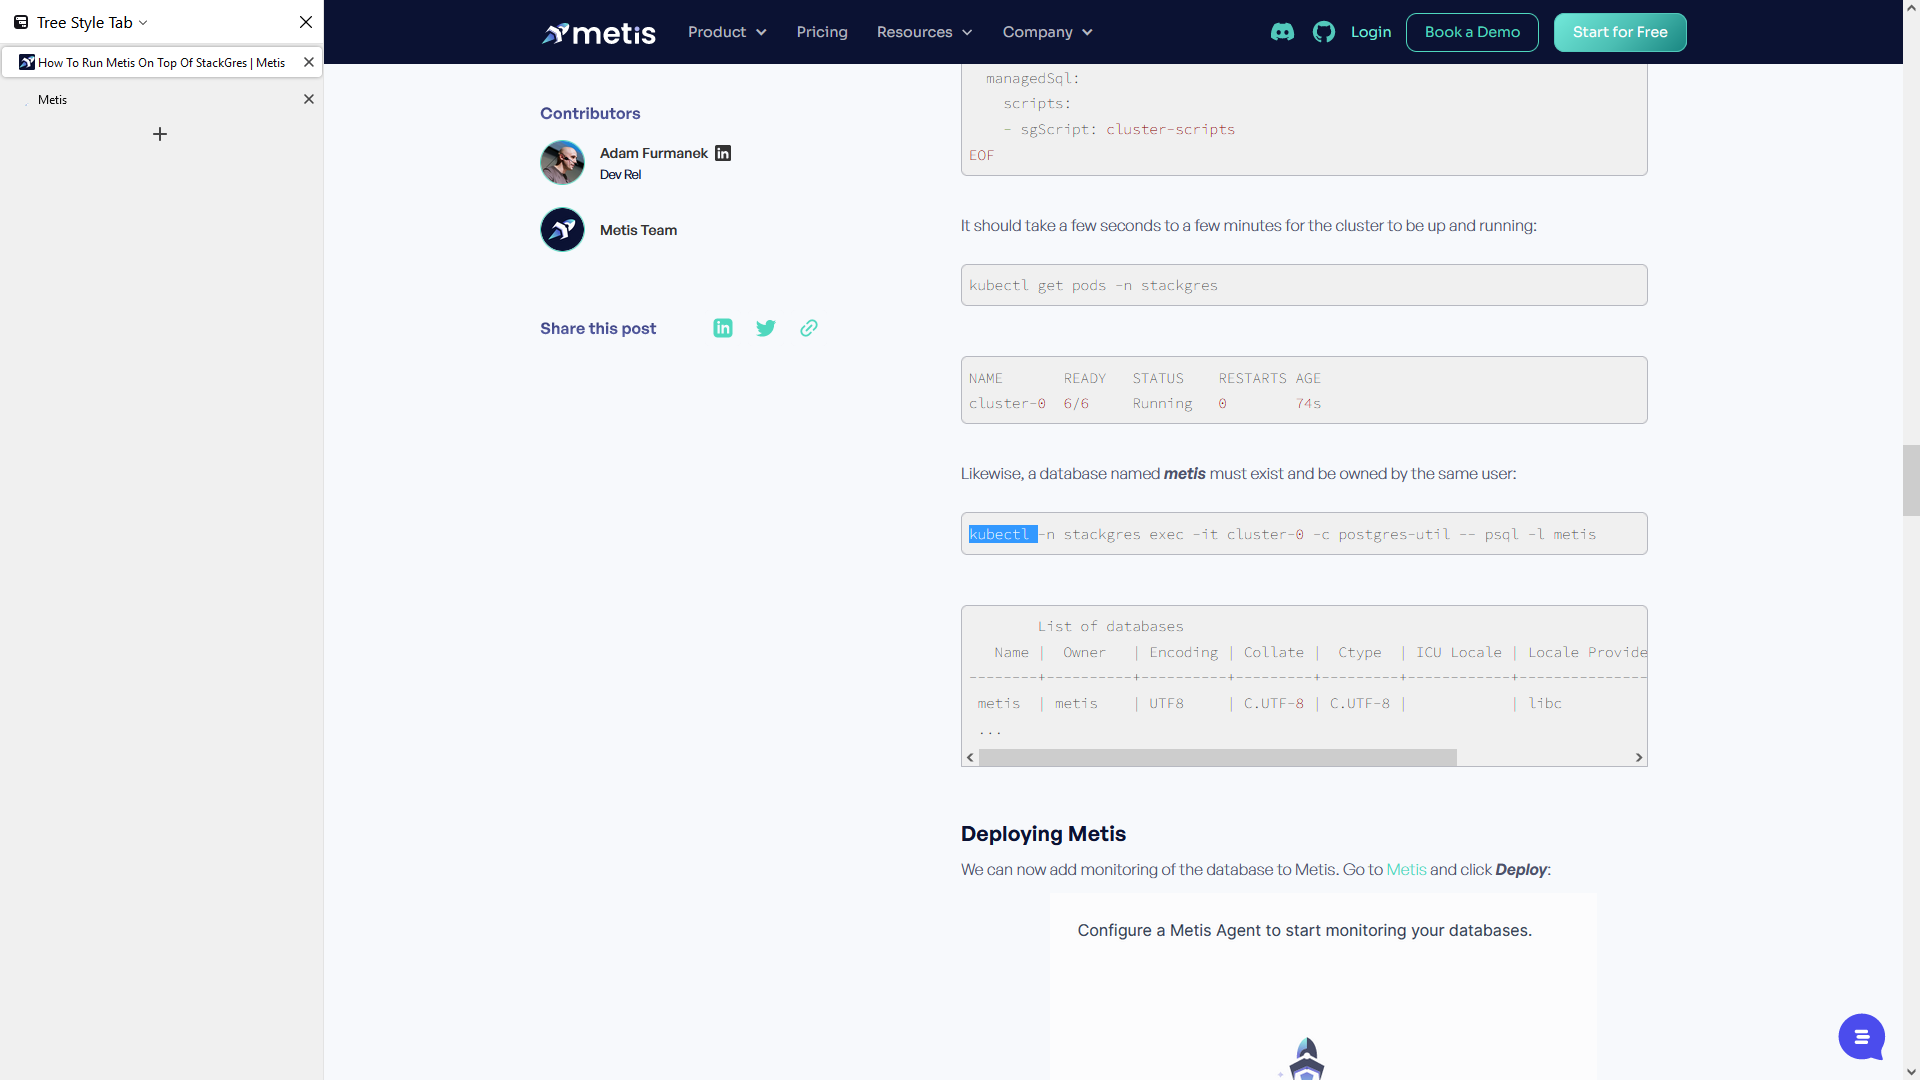
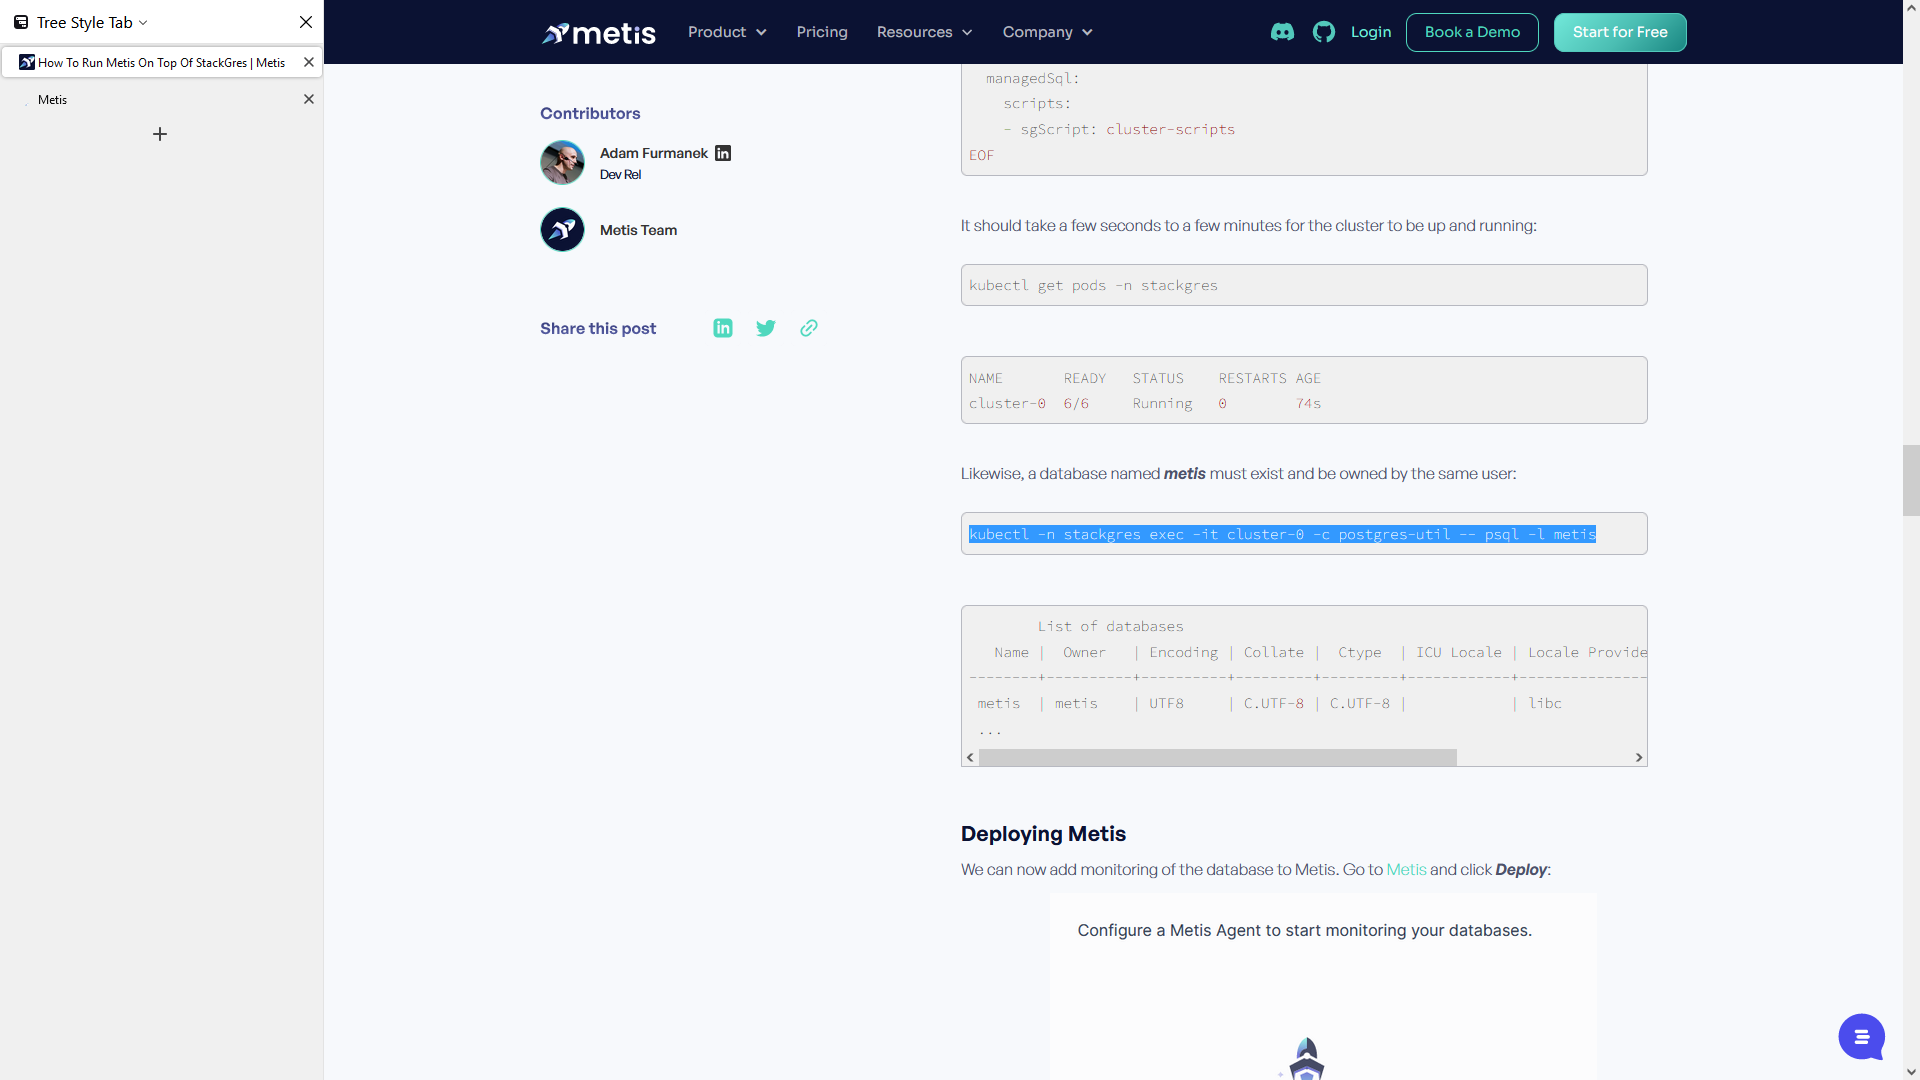
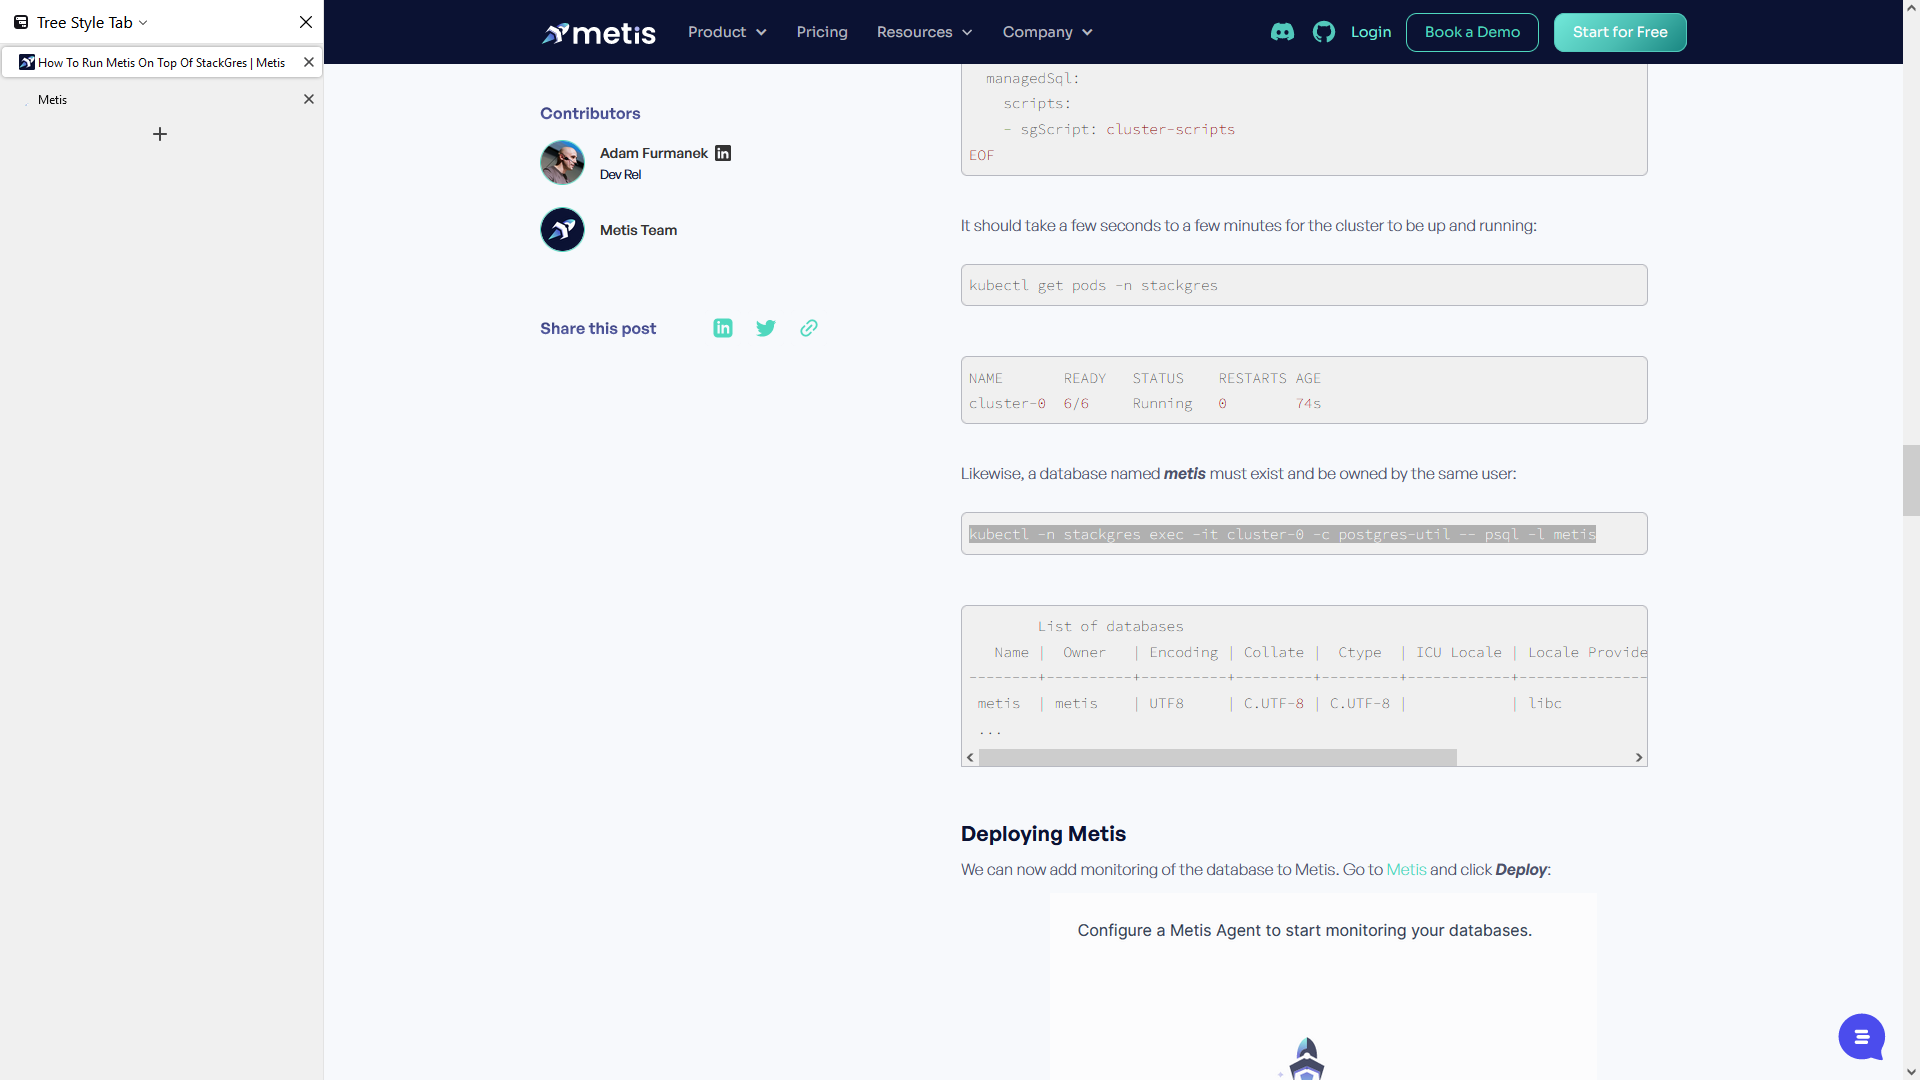
There is a database named "metis" with the owner "metis." All is good.
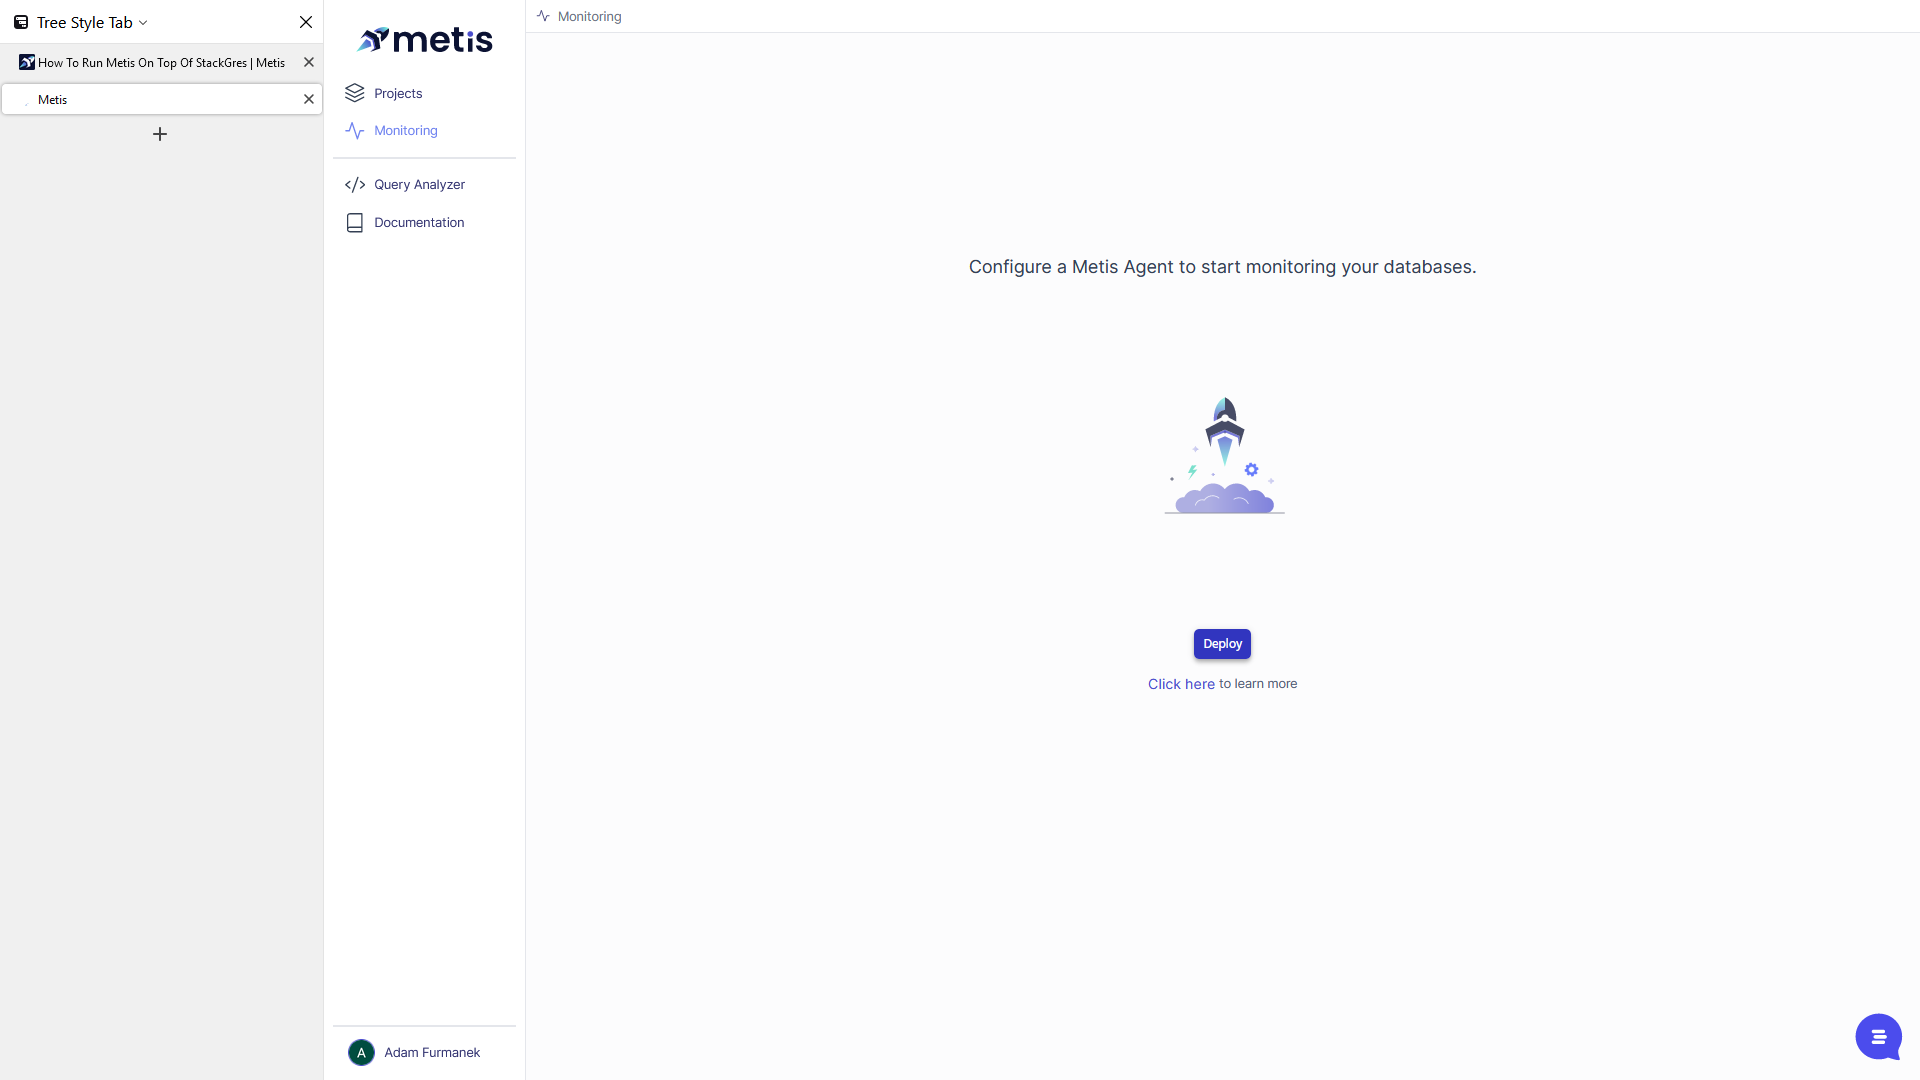
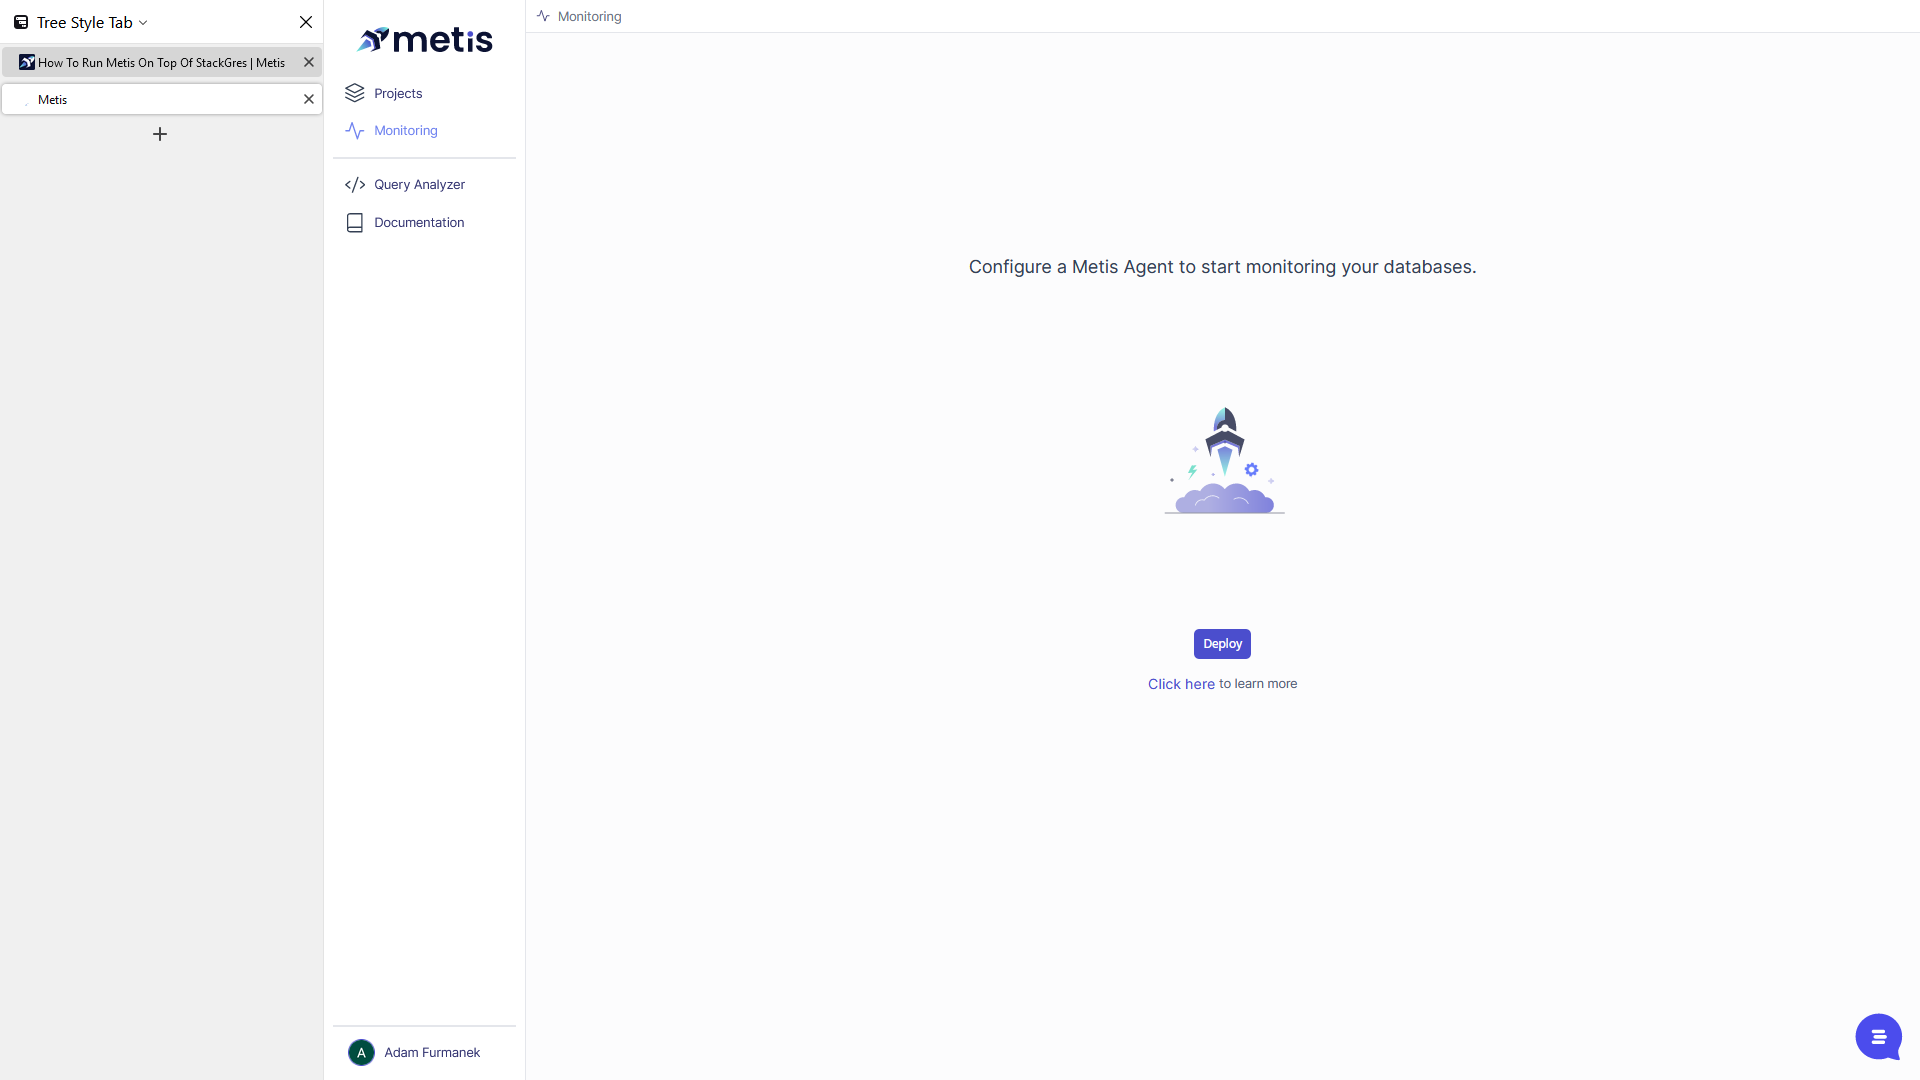
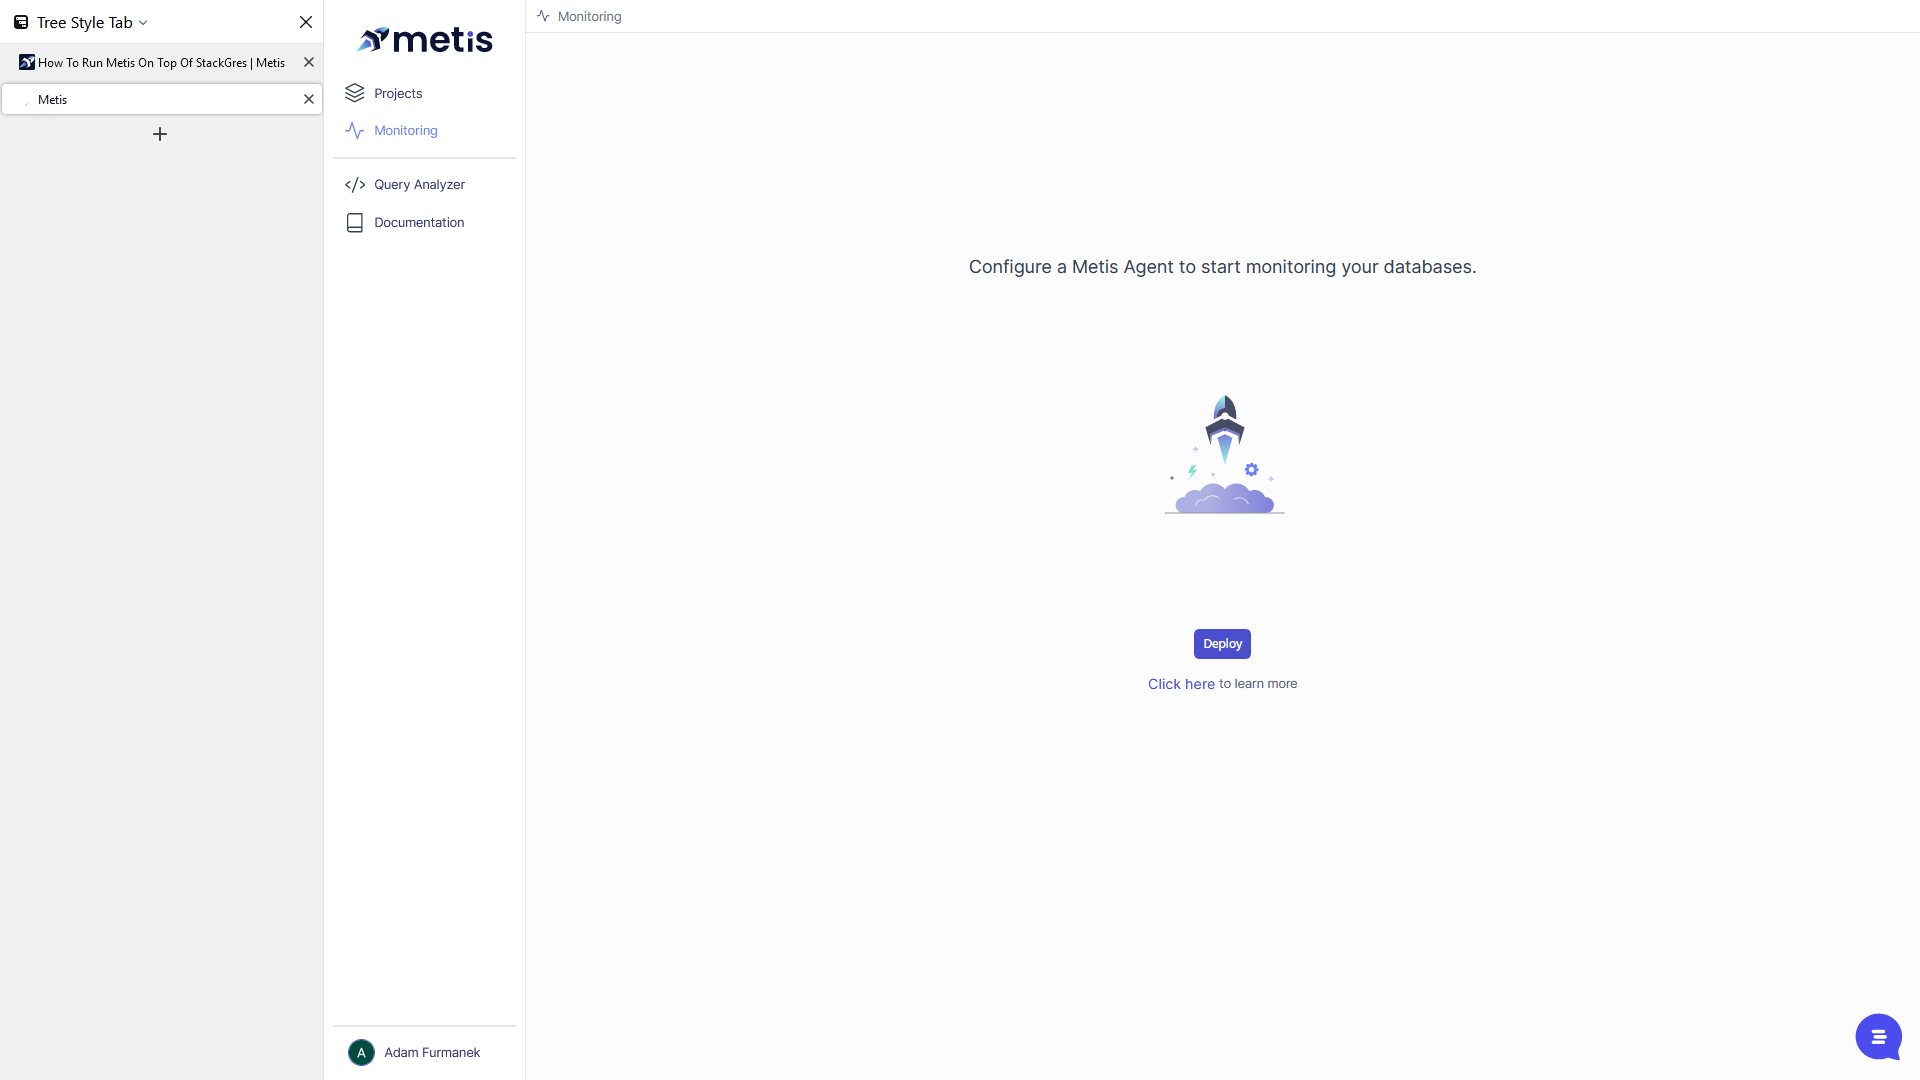
What we need to do now is to use the server created with Staggers. Next, we will utilize Metis to live monitor the server. Let's open the Metis application.
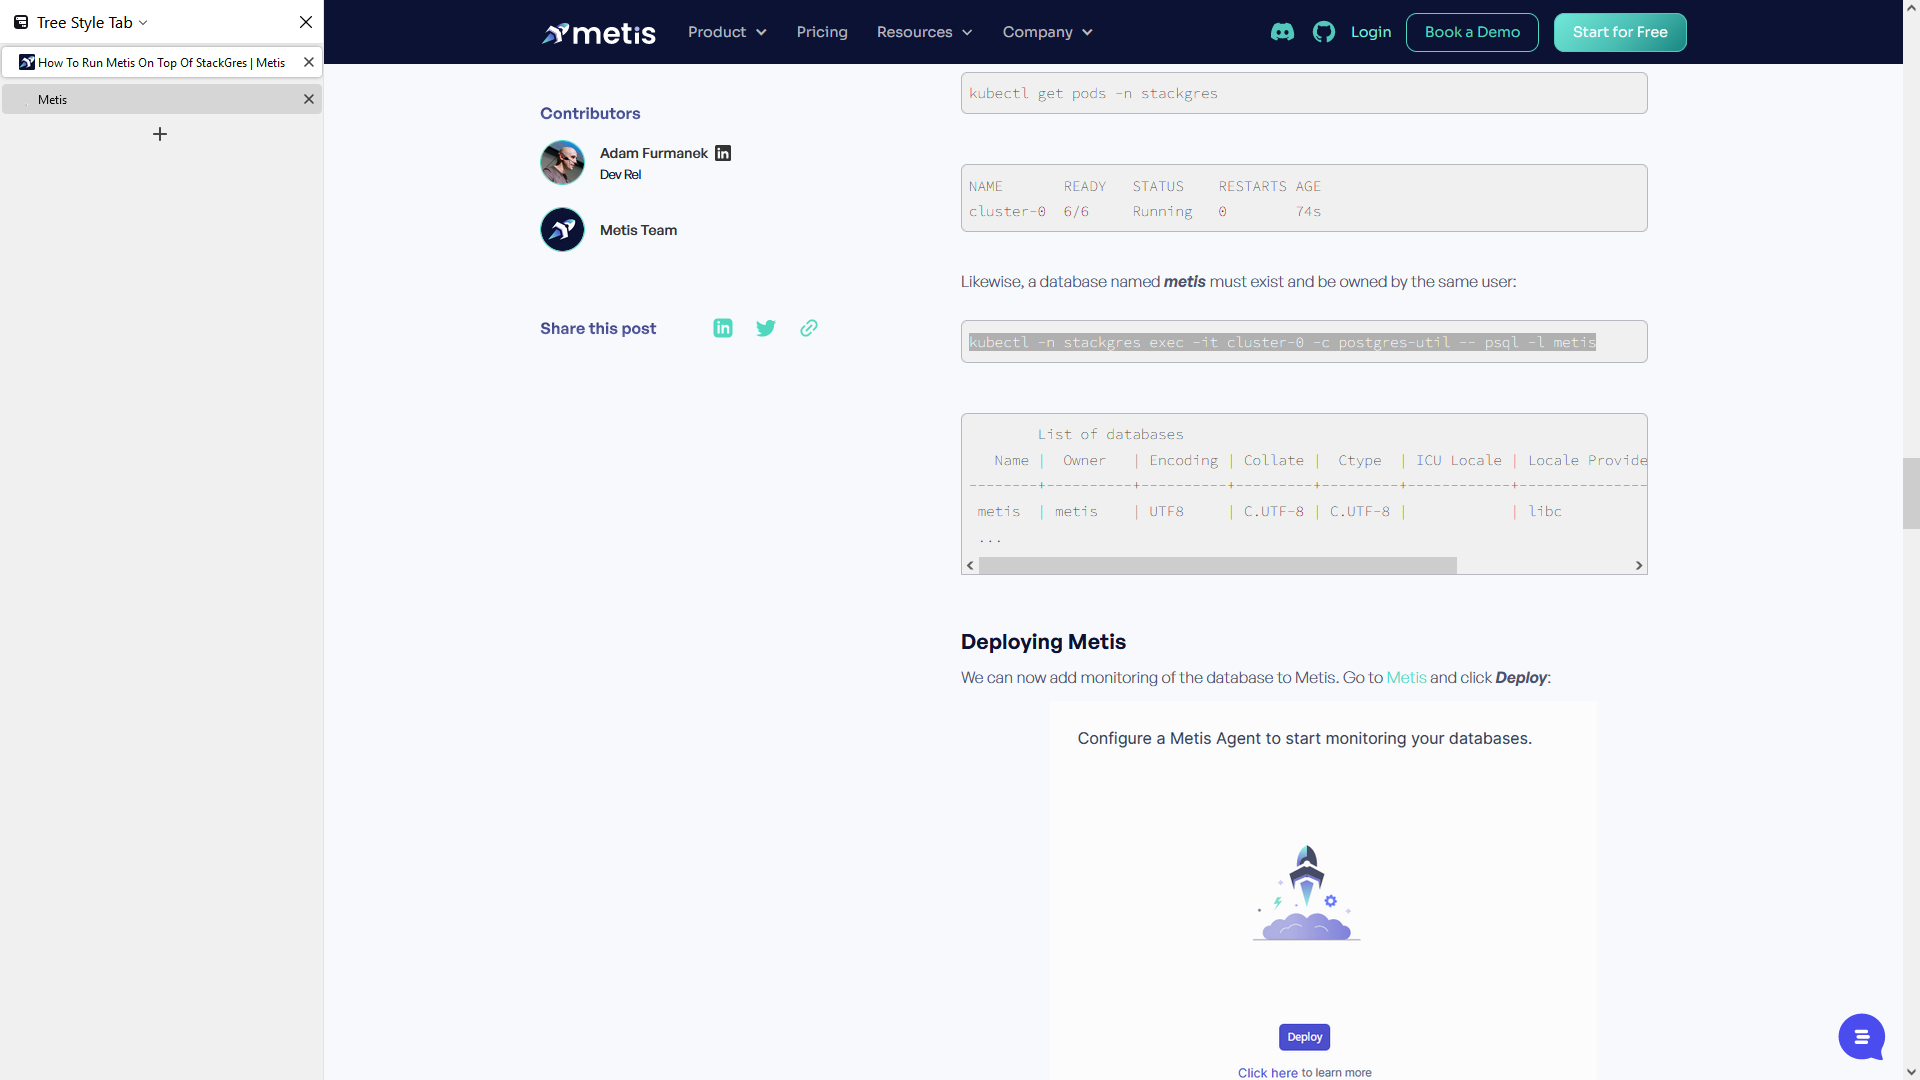
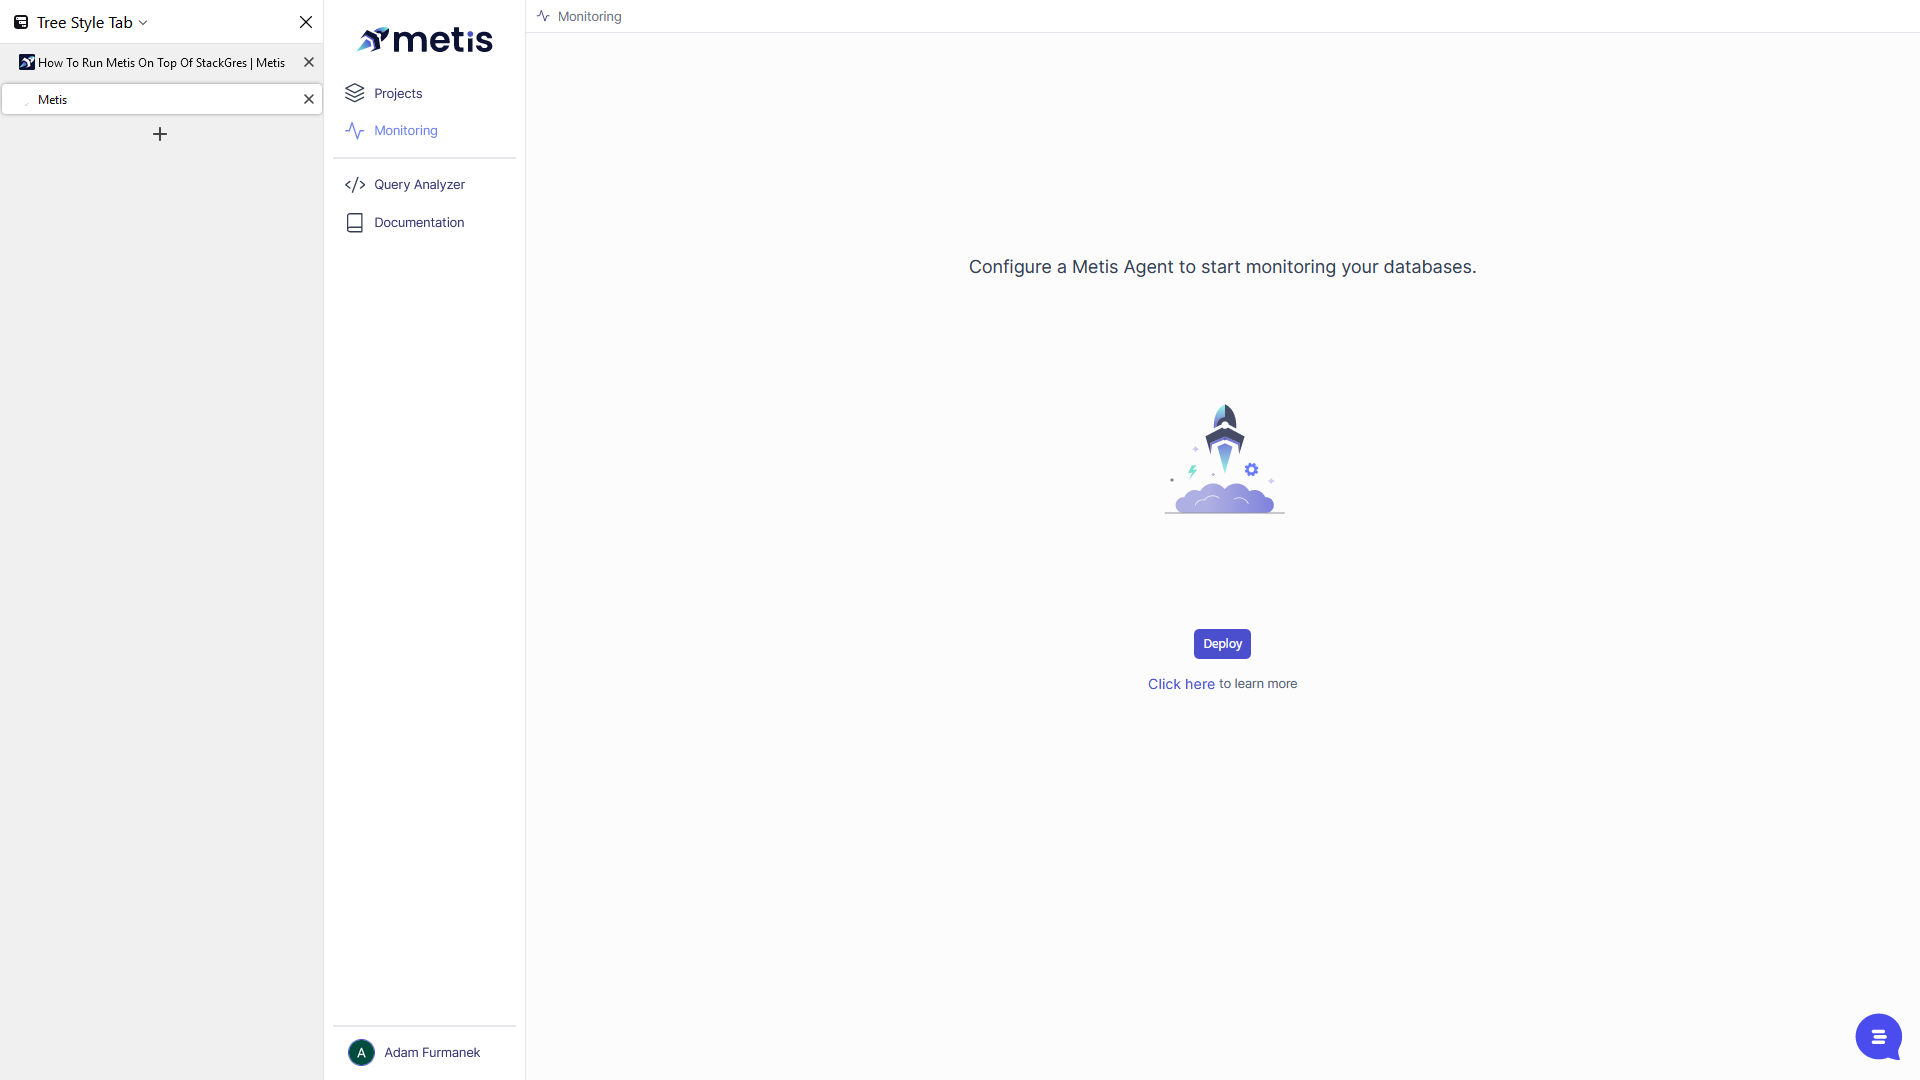
If it's your first time, you need to log in and go to monitoring. Then, click deploy.
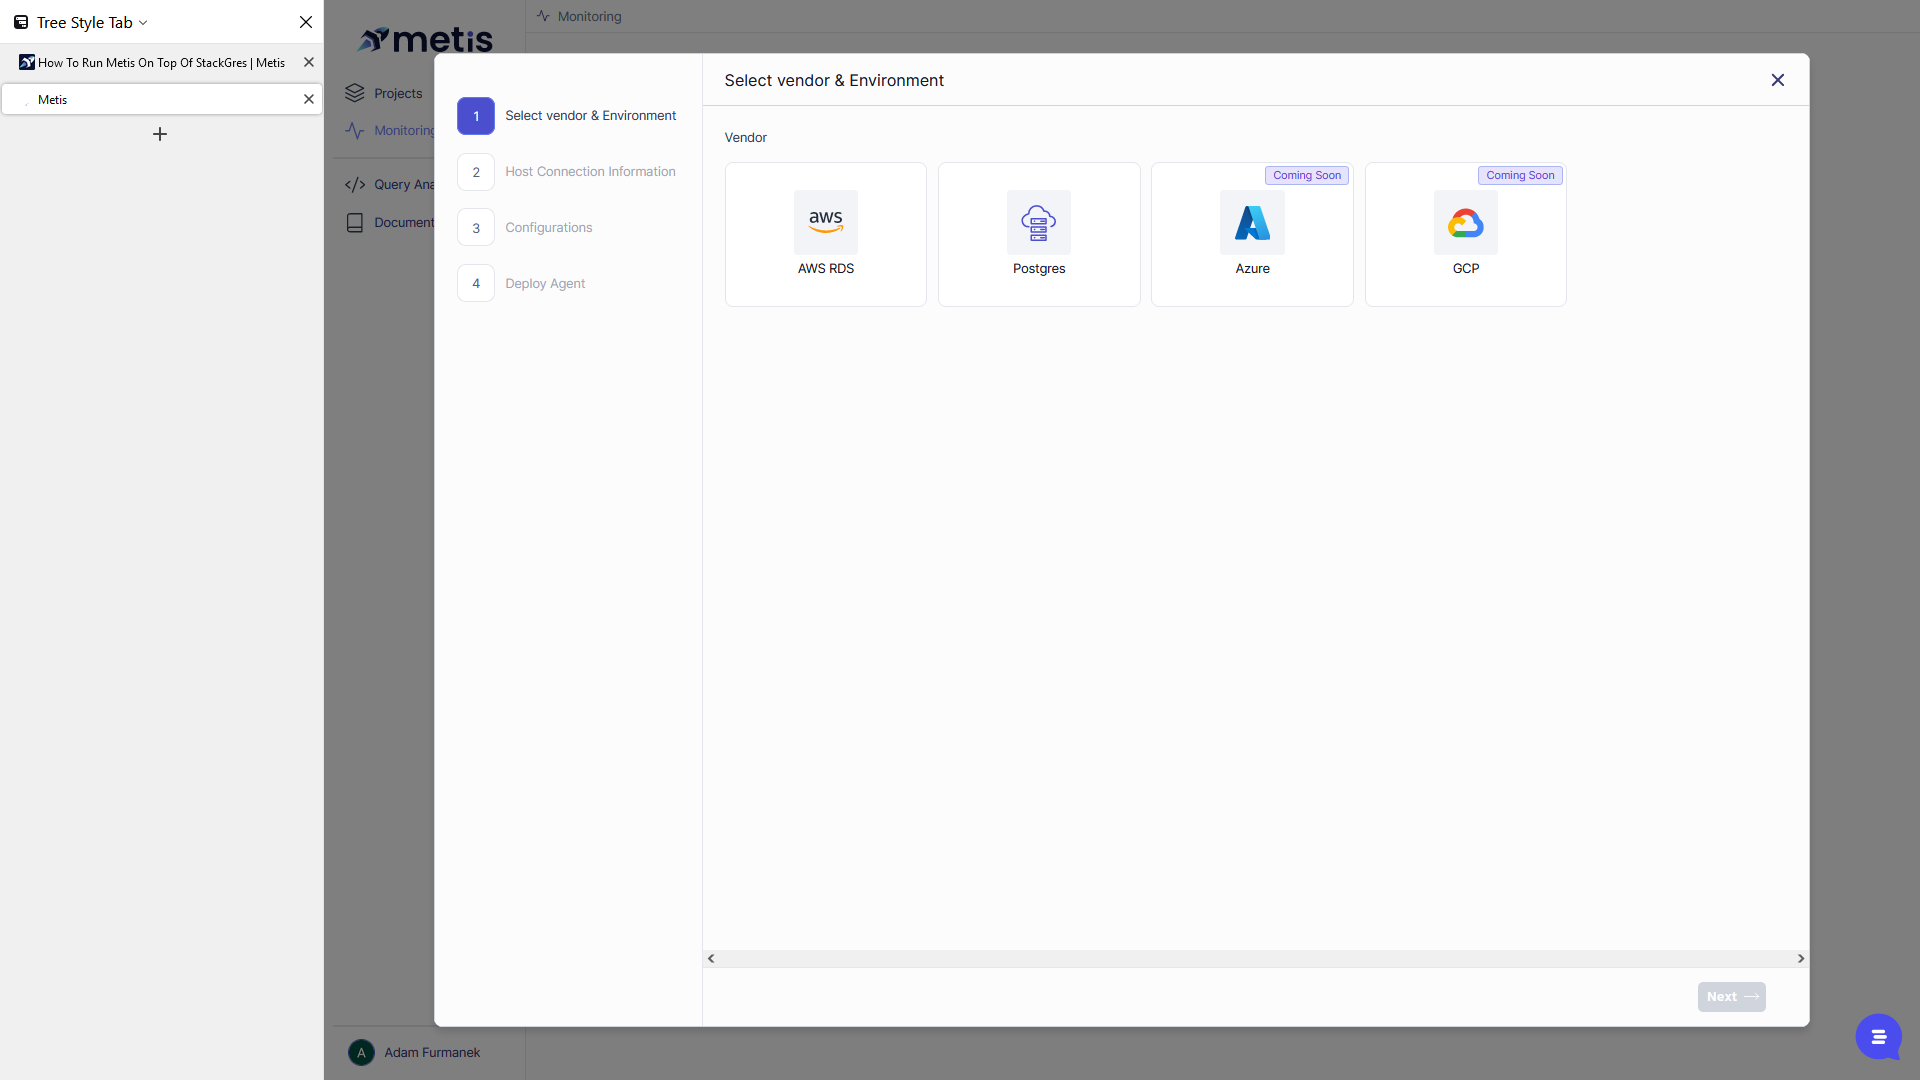
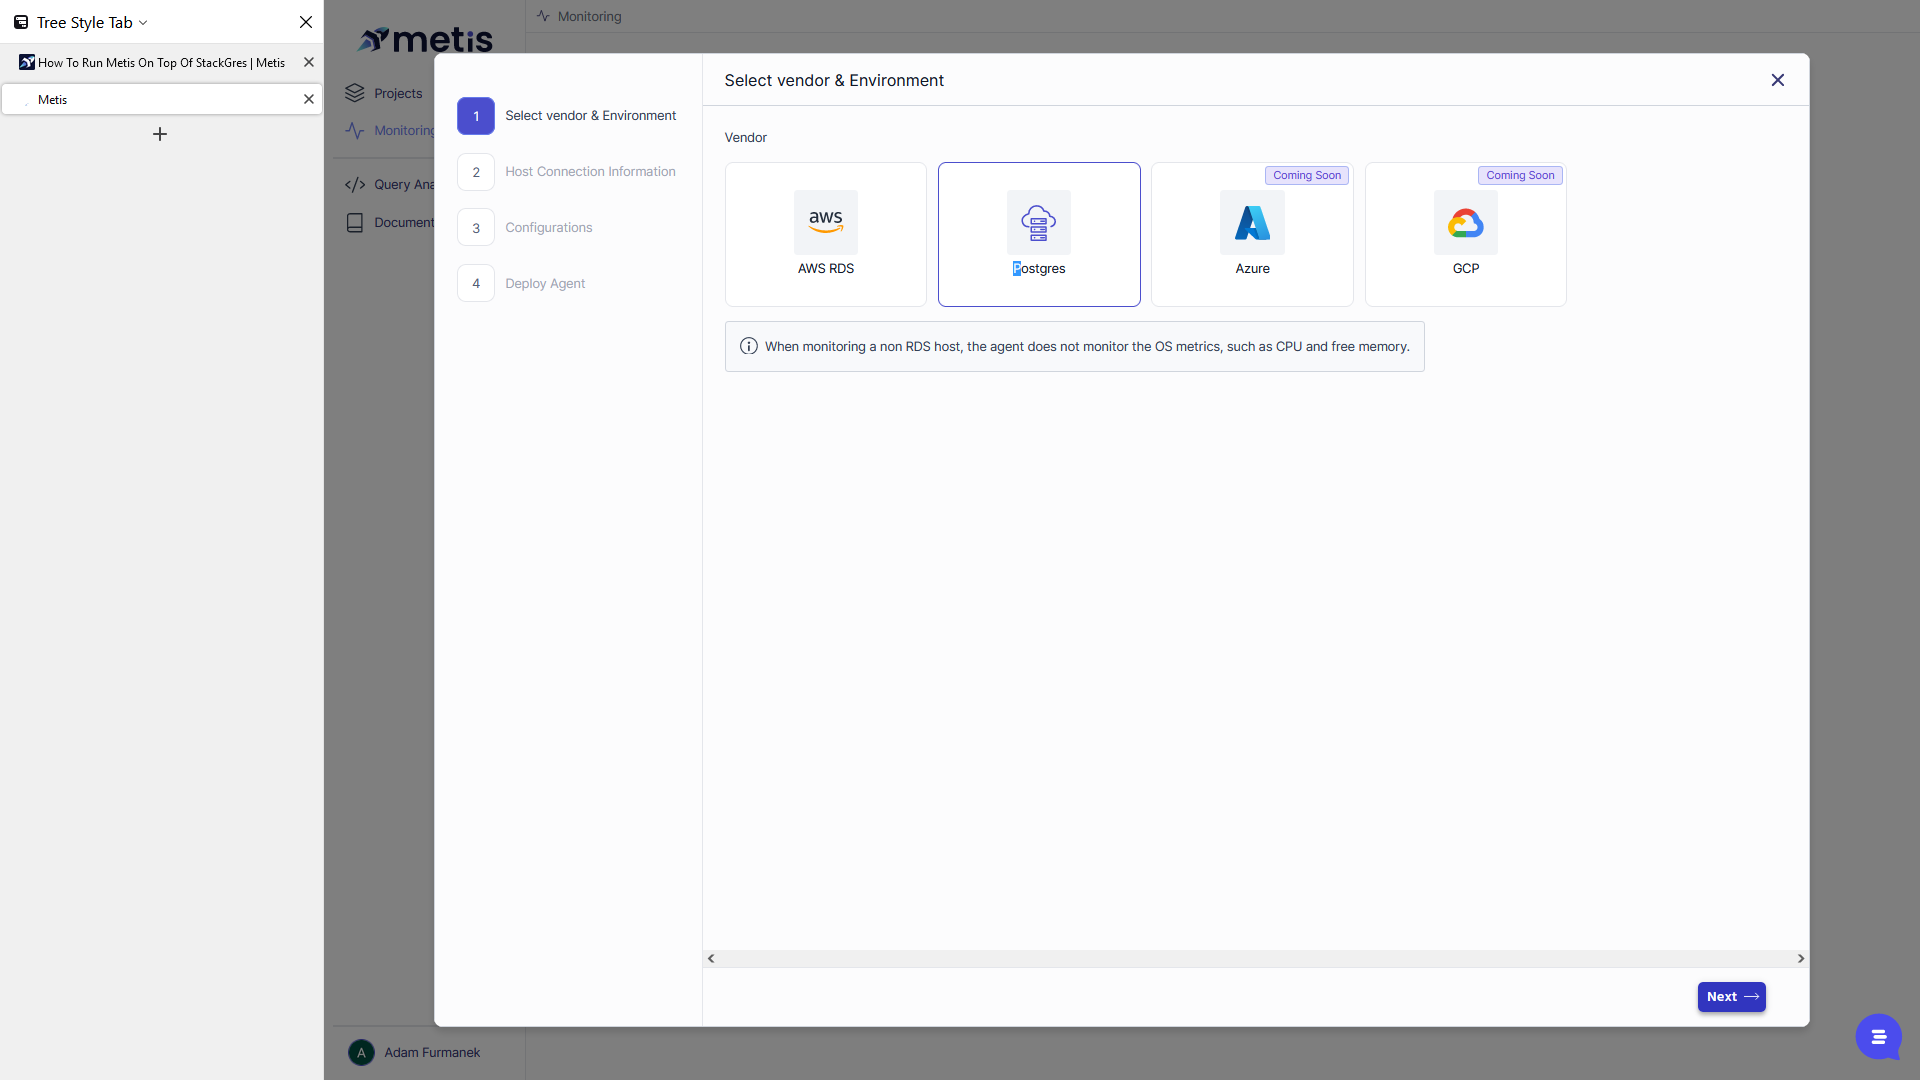
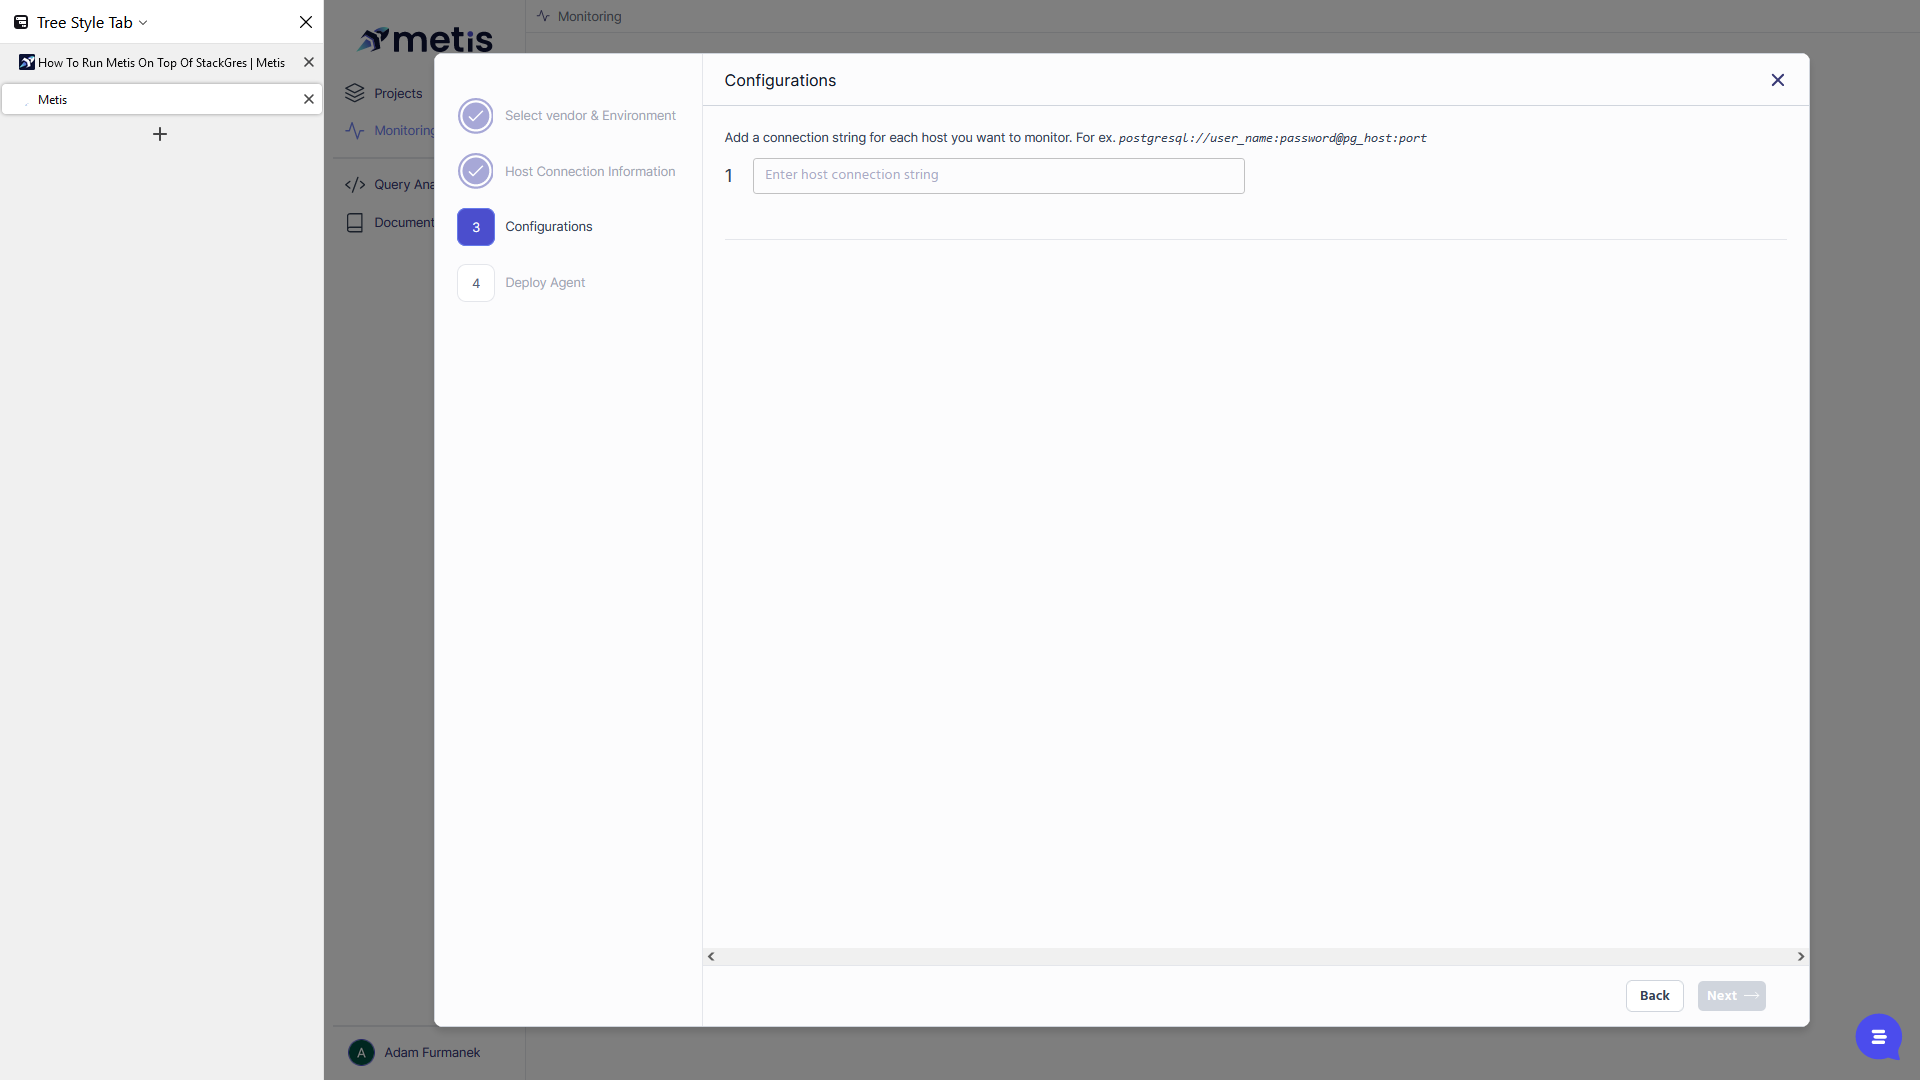
This wizard will guide you through the steps to deploy the Metis Docker container and monitor your database server live. Since we are hosting Postgres locally, I will select Postgres and proceed by clicking next.
Metis explained how to configure the database server for its use. It involves creating the pg_stat_statement extension, setting up a new user, and granting pg_monitor and connect permissions to the database.

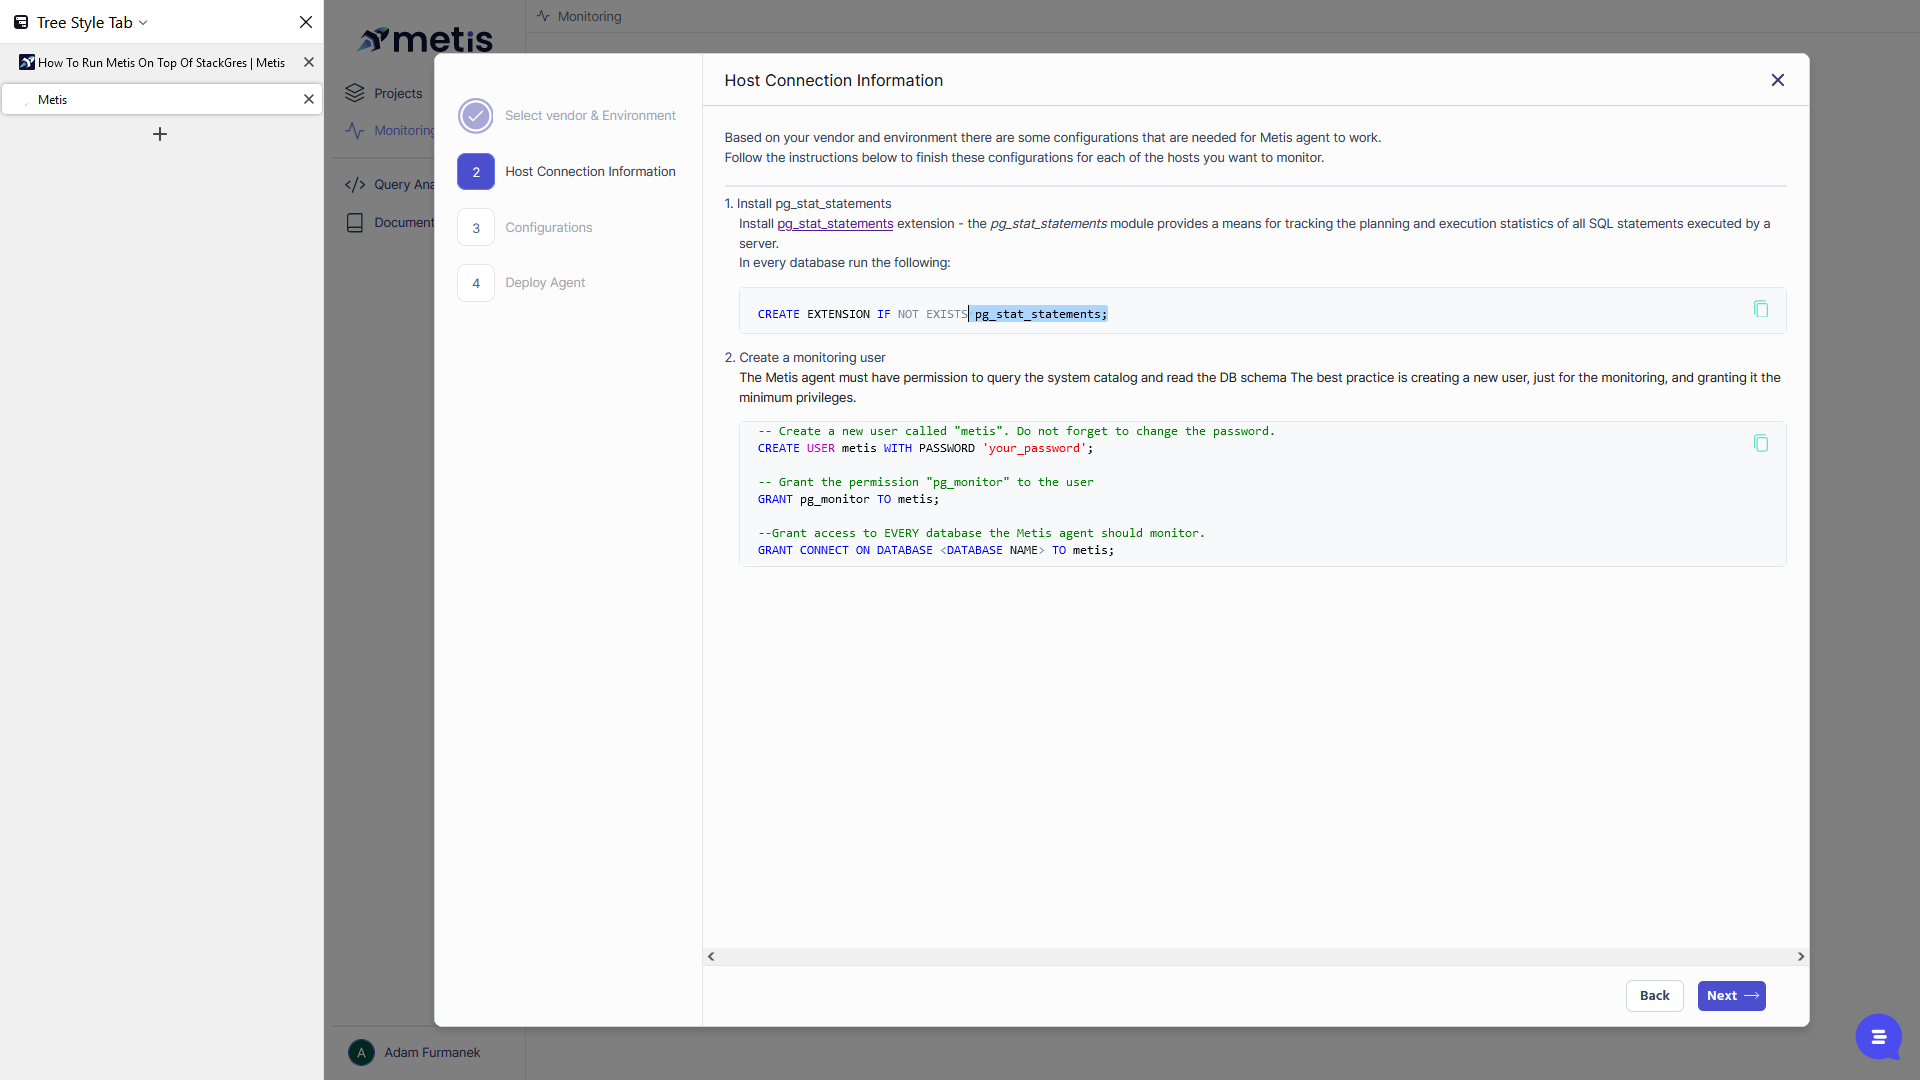
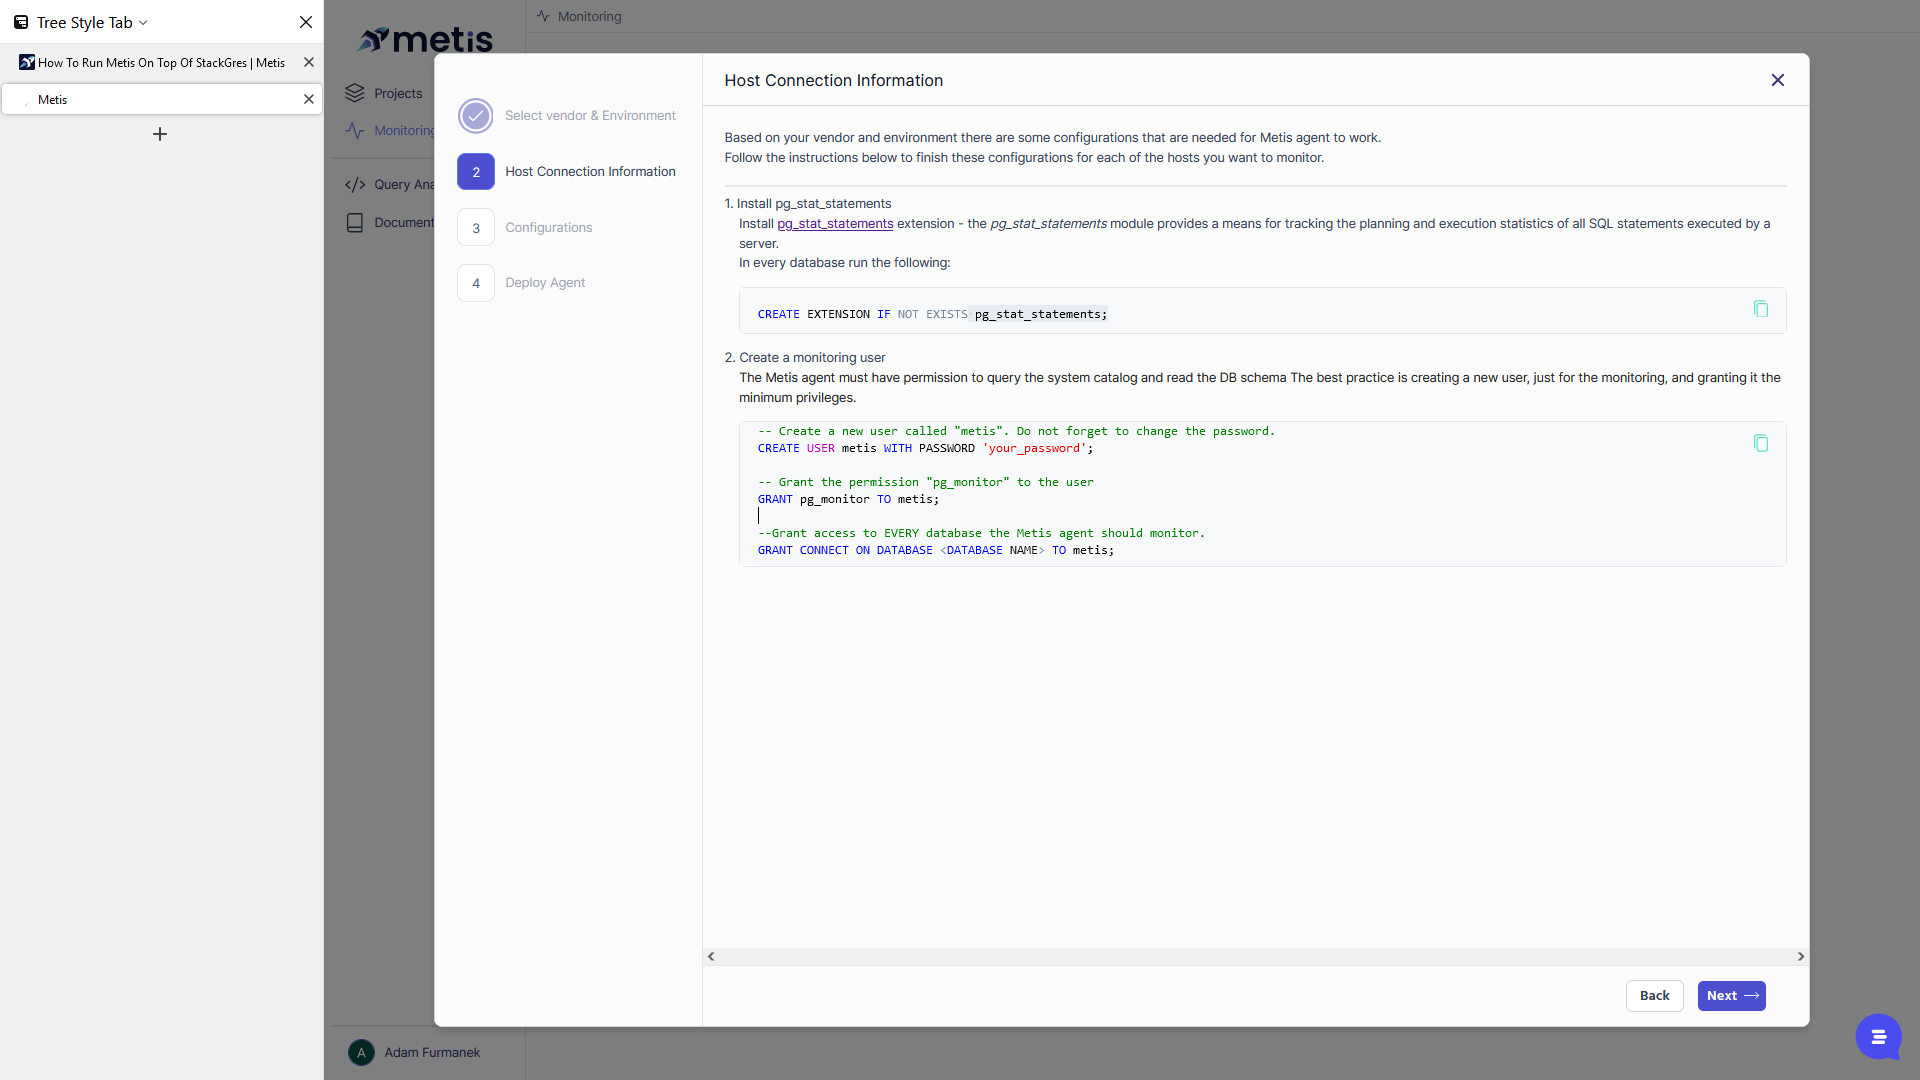


All the tasks we have completed for specifying the initialization script for the Staggers operator for the SQL server are done. Click "Next."

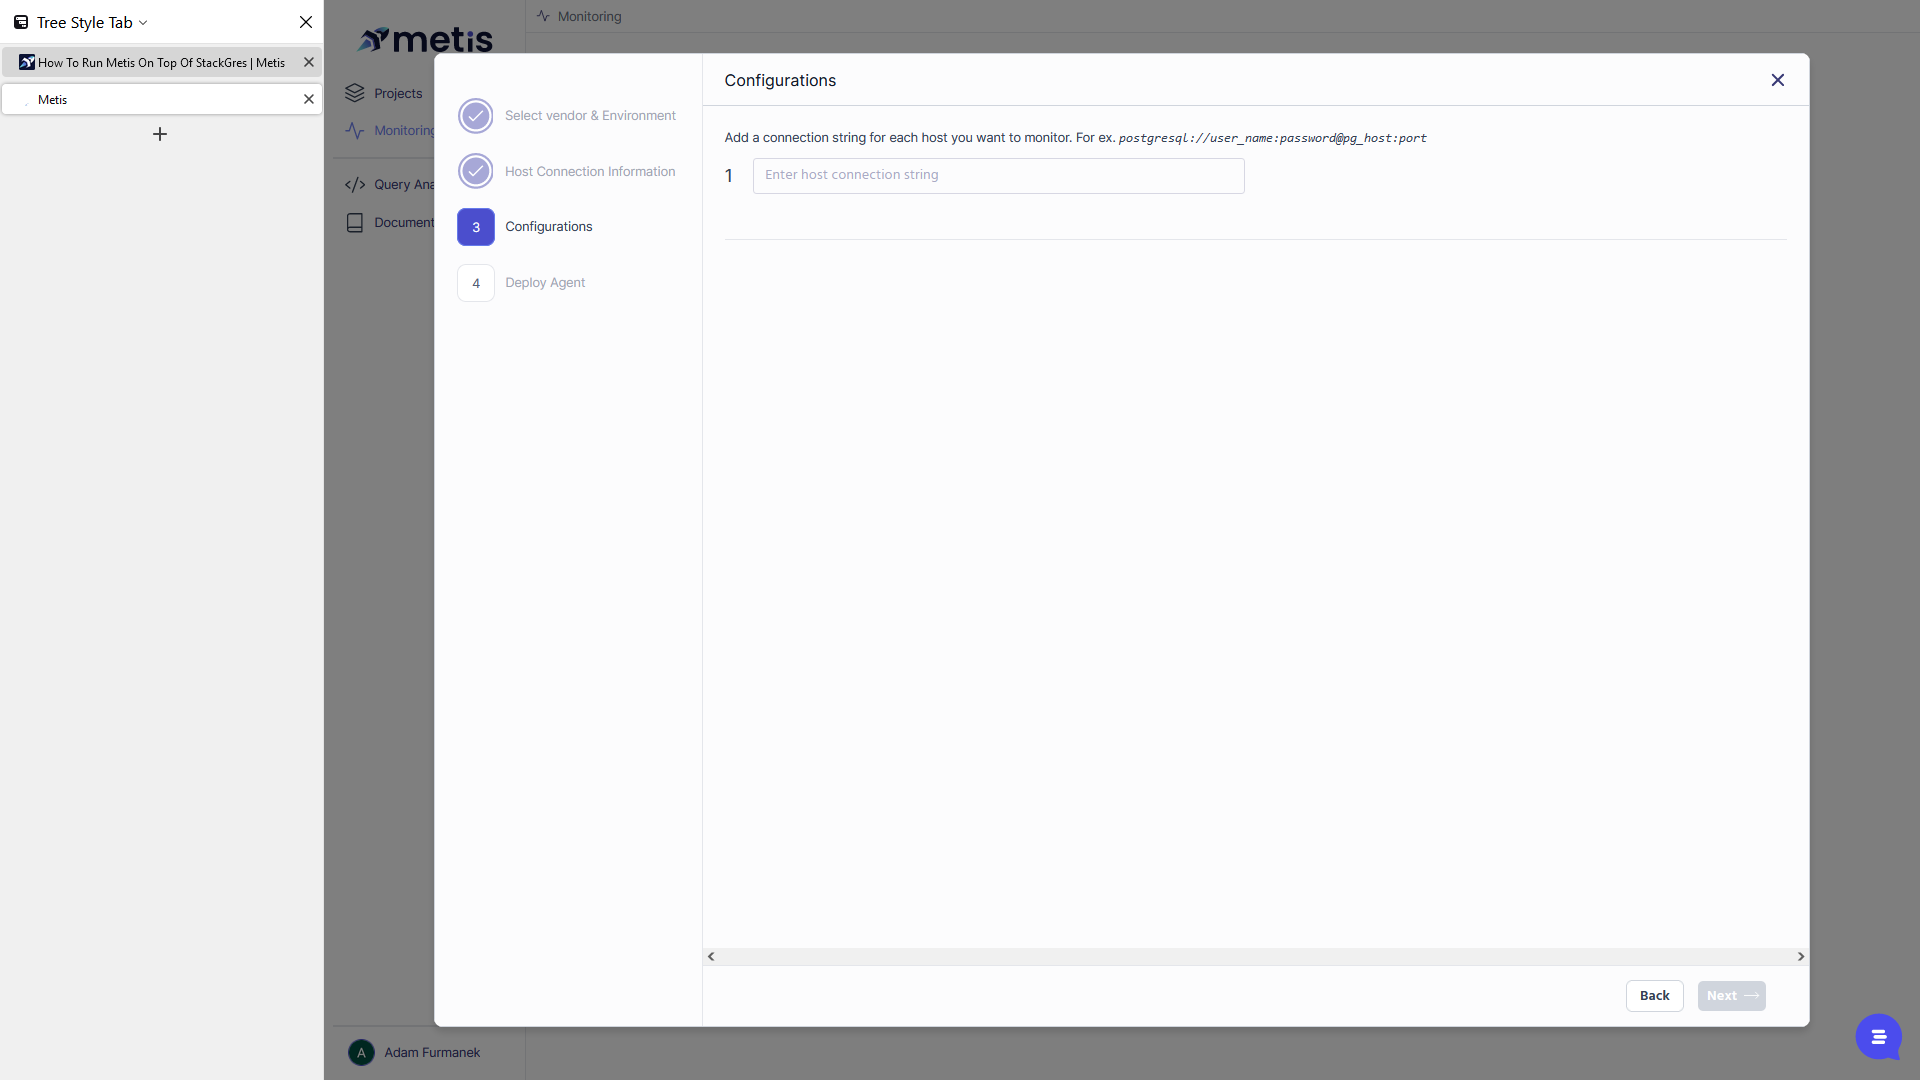
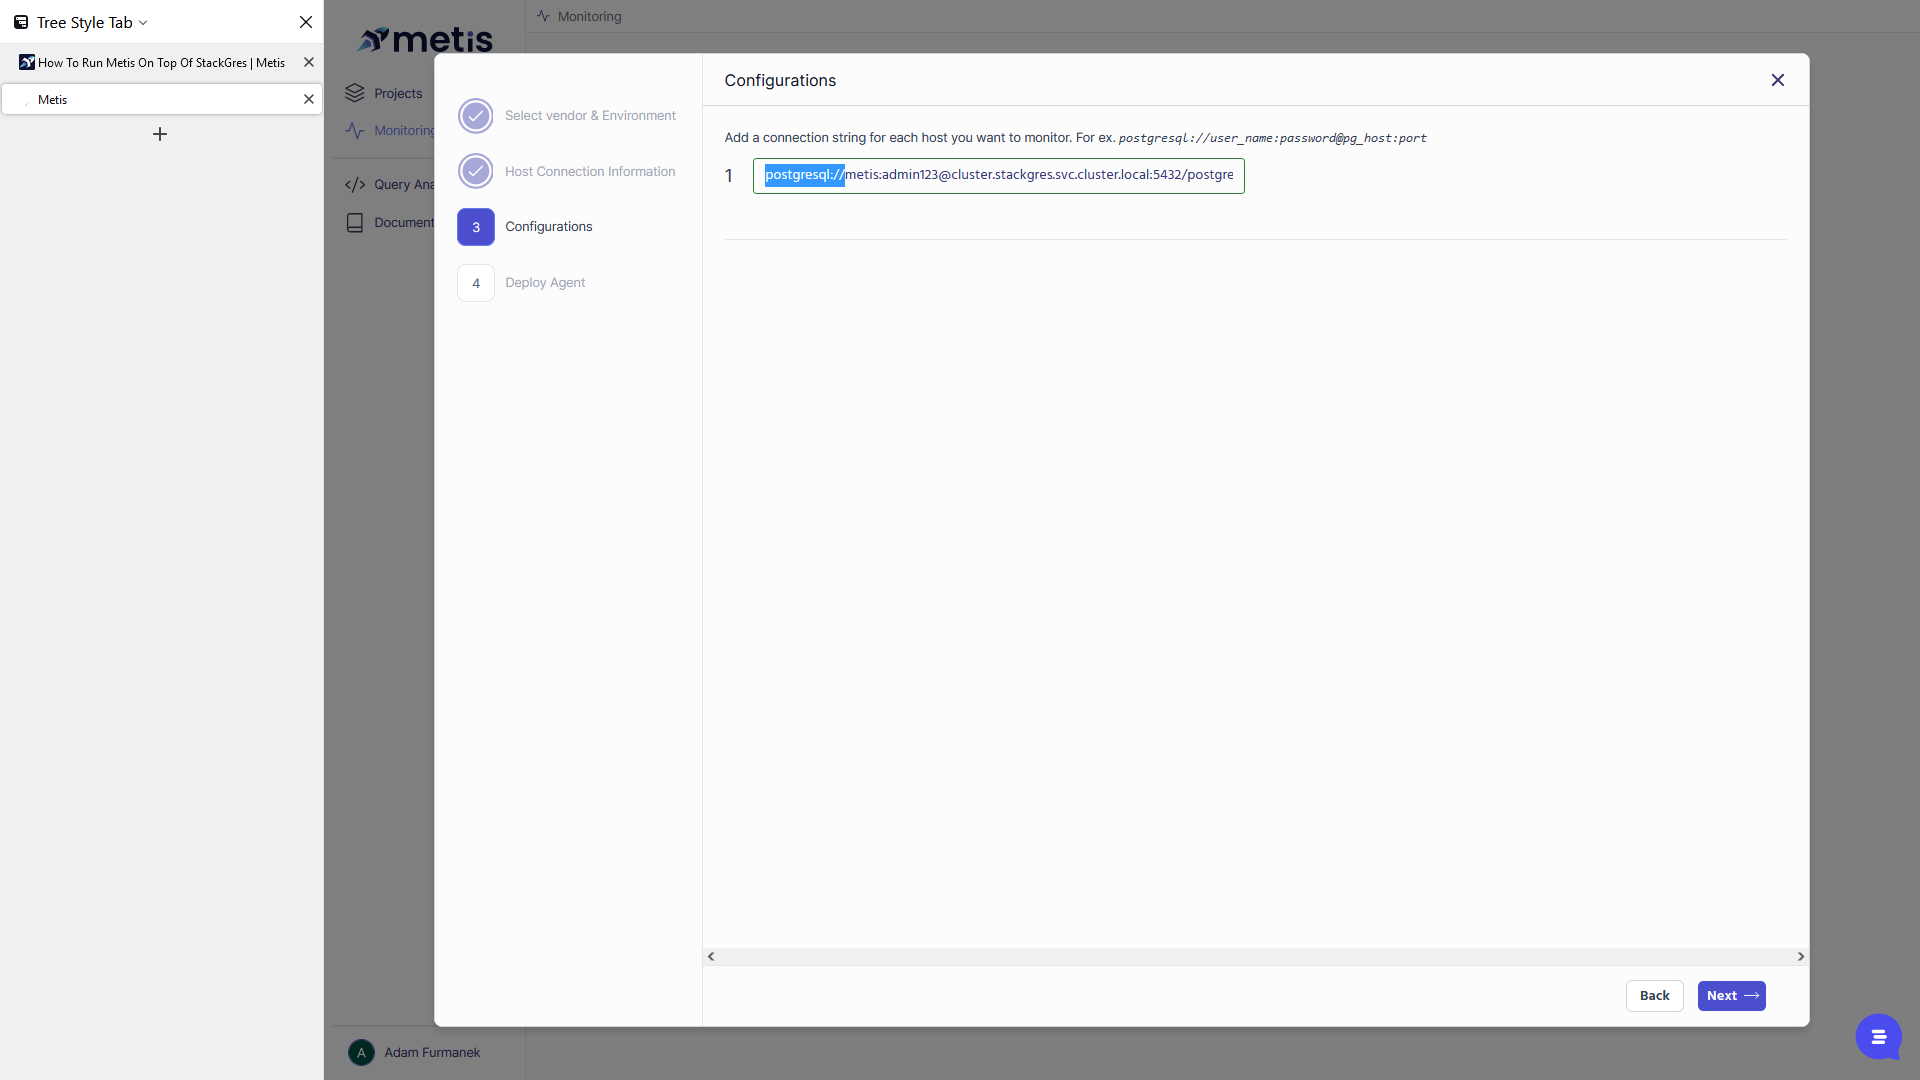
And now, I need to provide a connection string for connecting to the database.
We can revisit the blog post to find a command that lists all services running in our cluster.


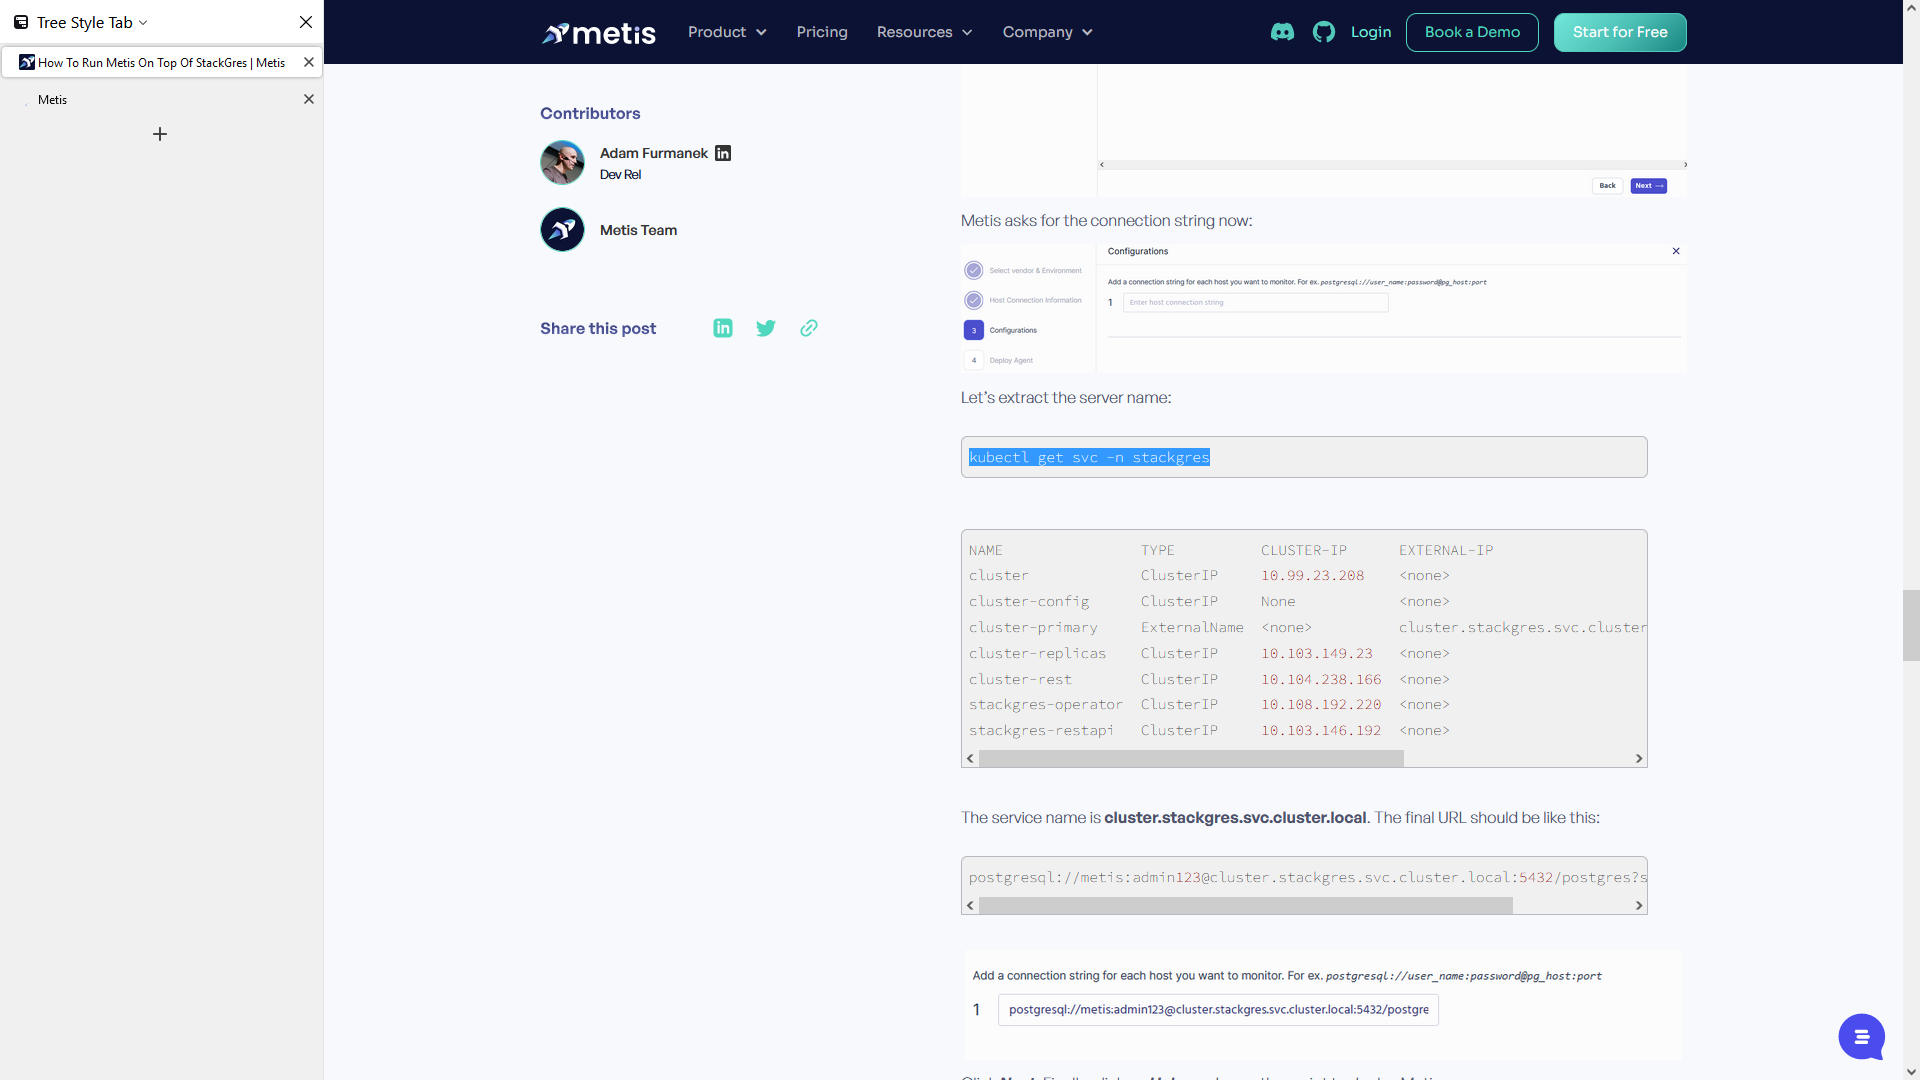
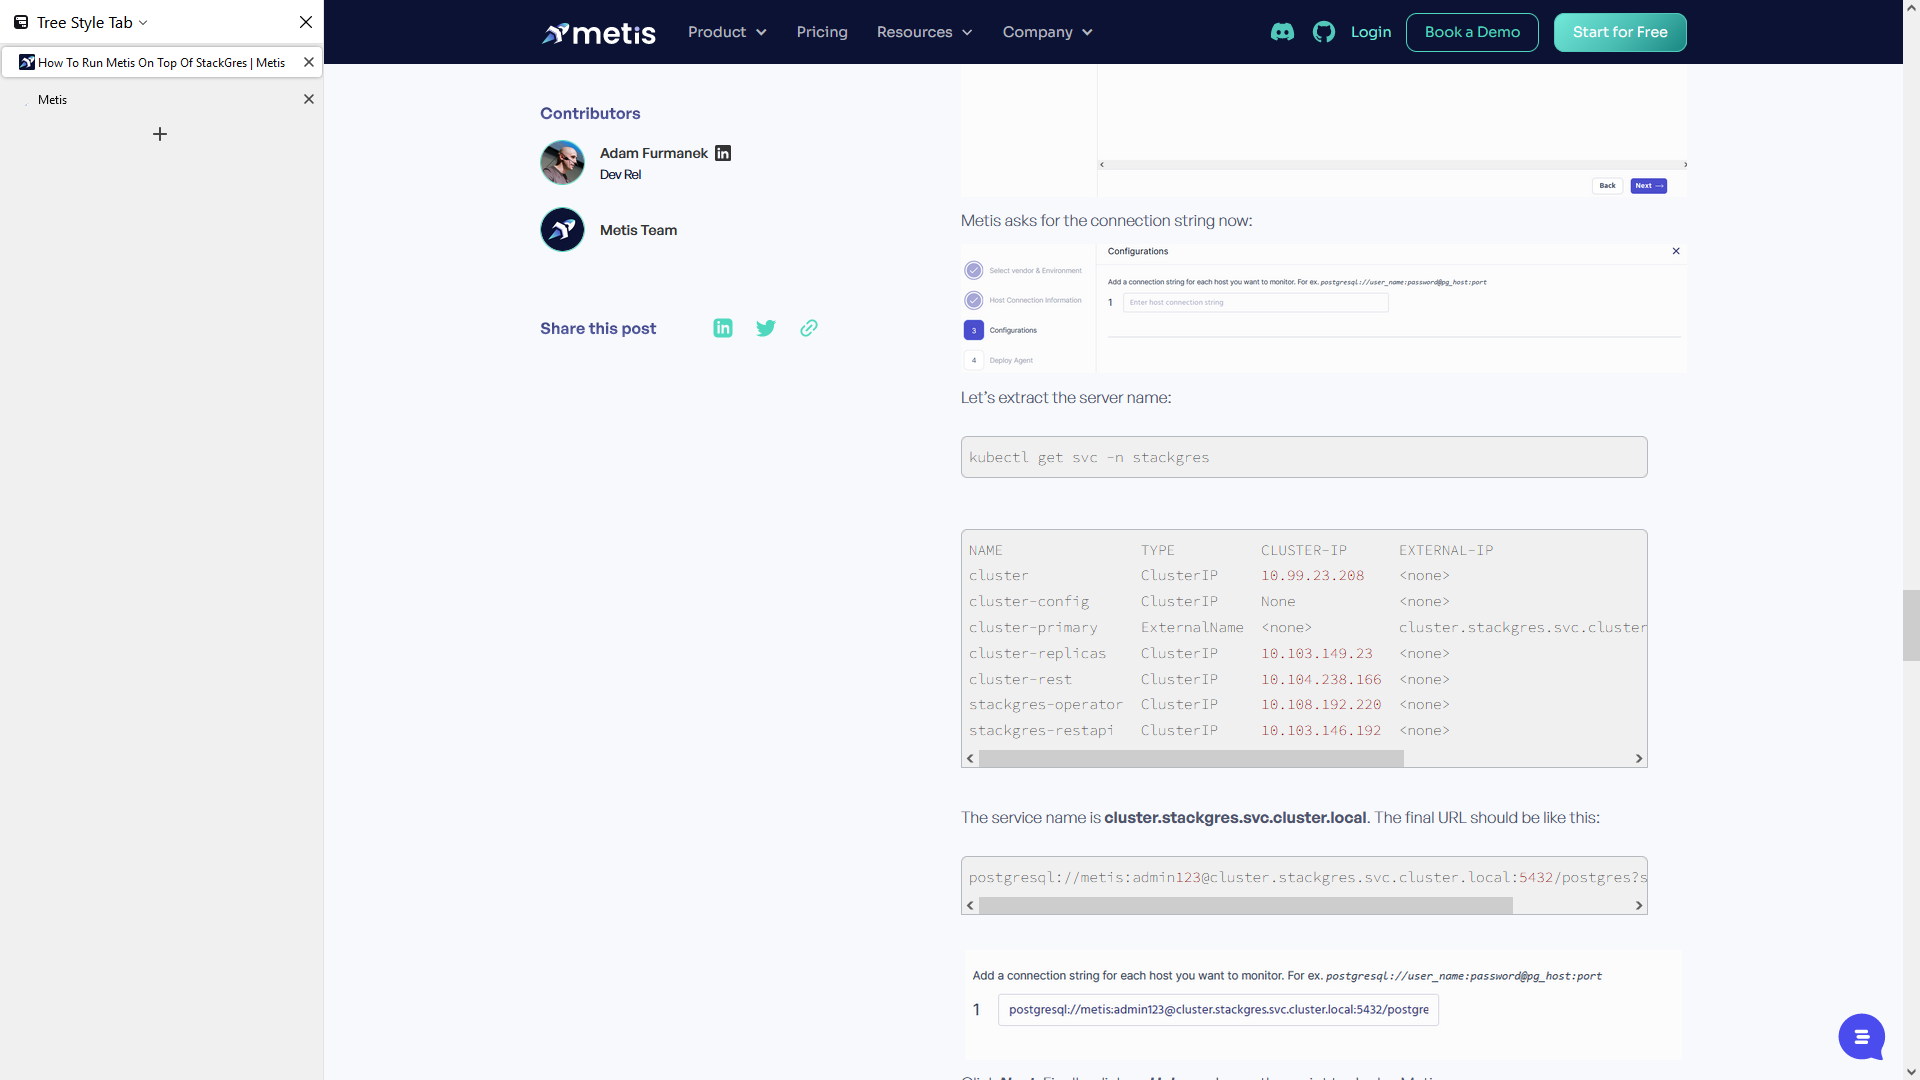

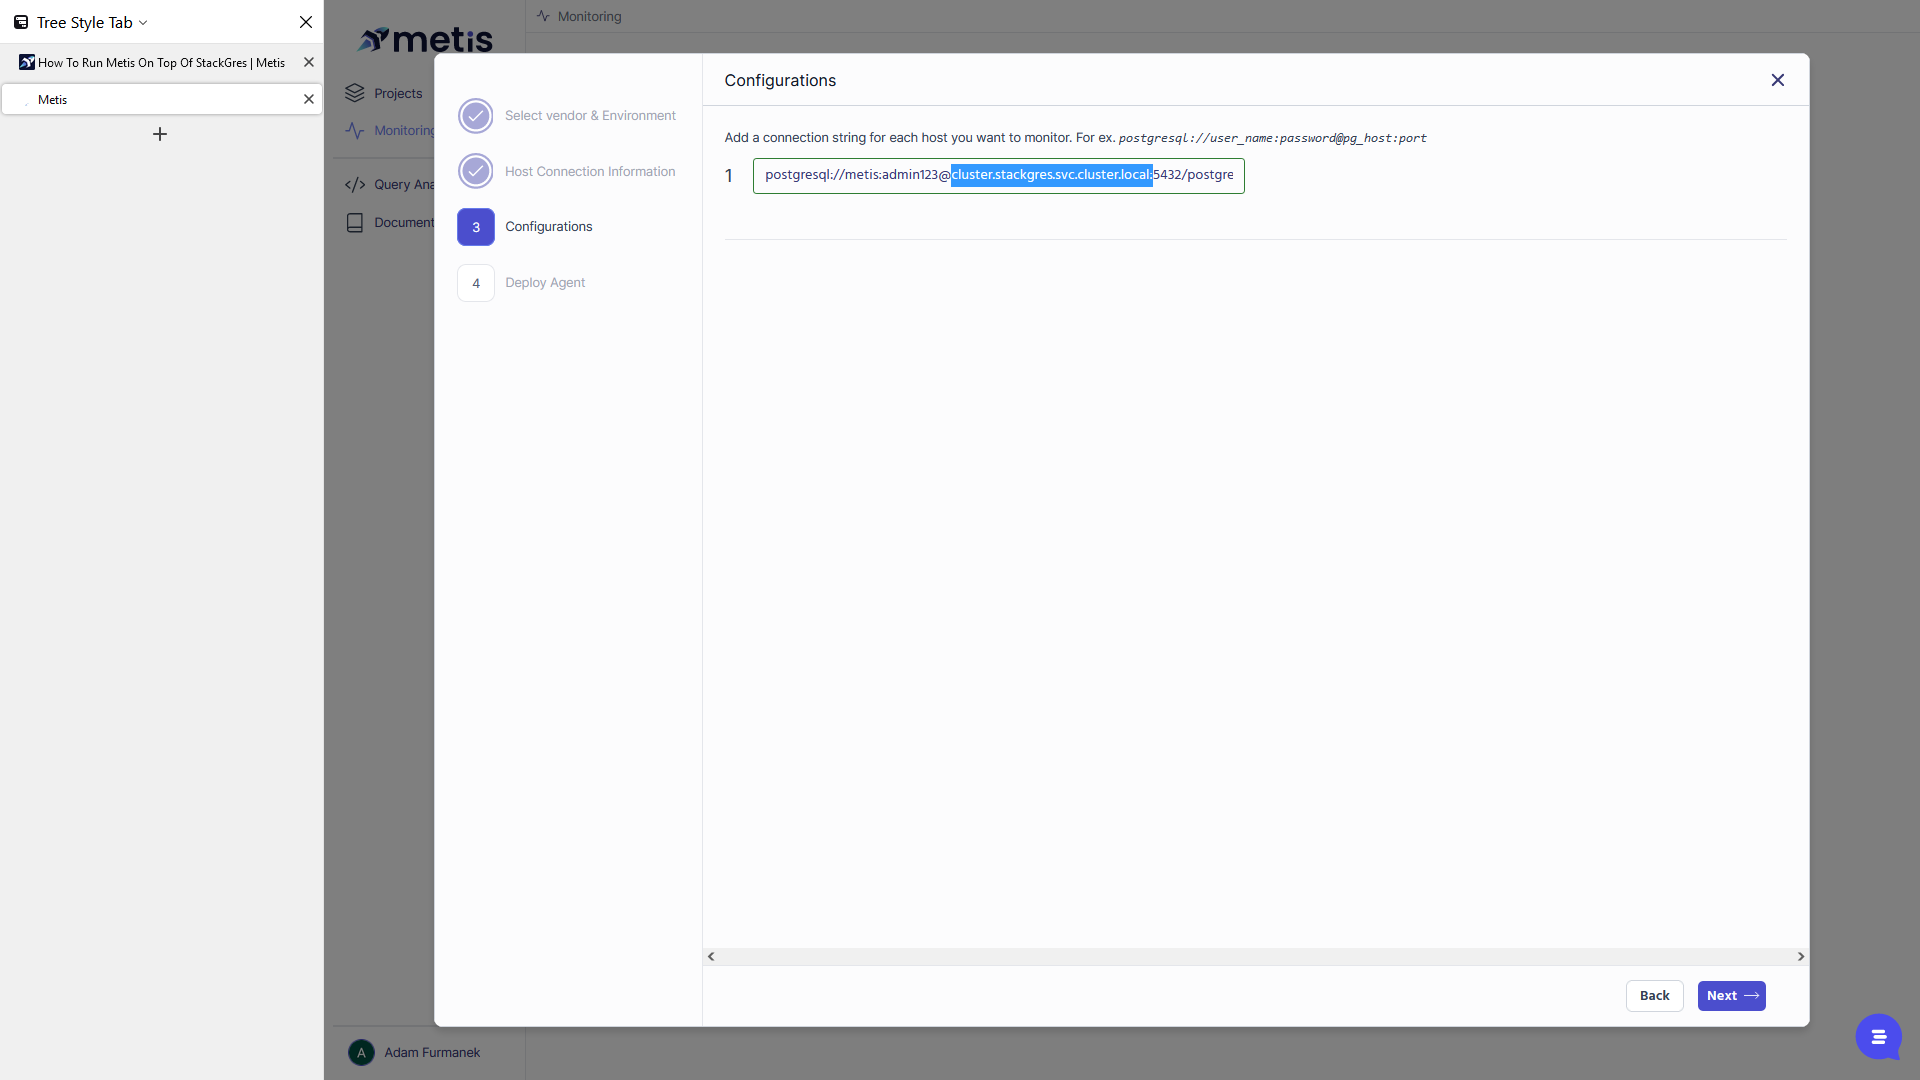
One of the services available is the primary cluster with an external host name that can be used in the connection string.
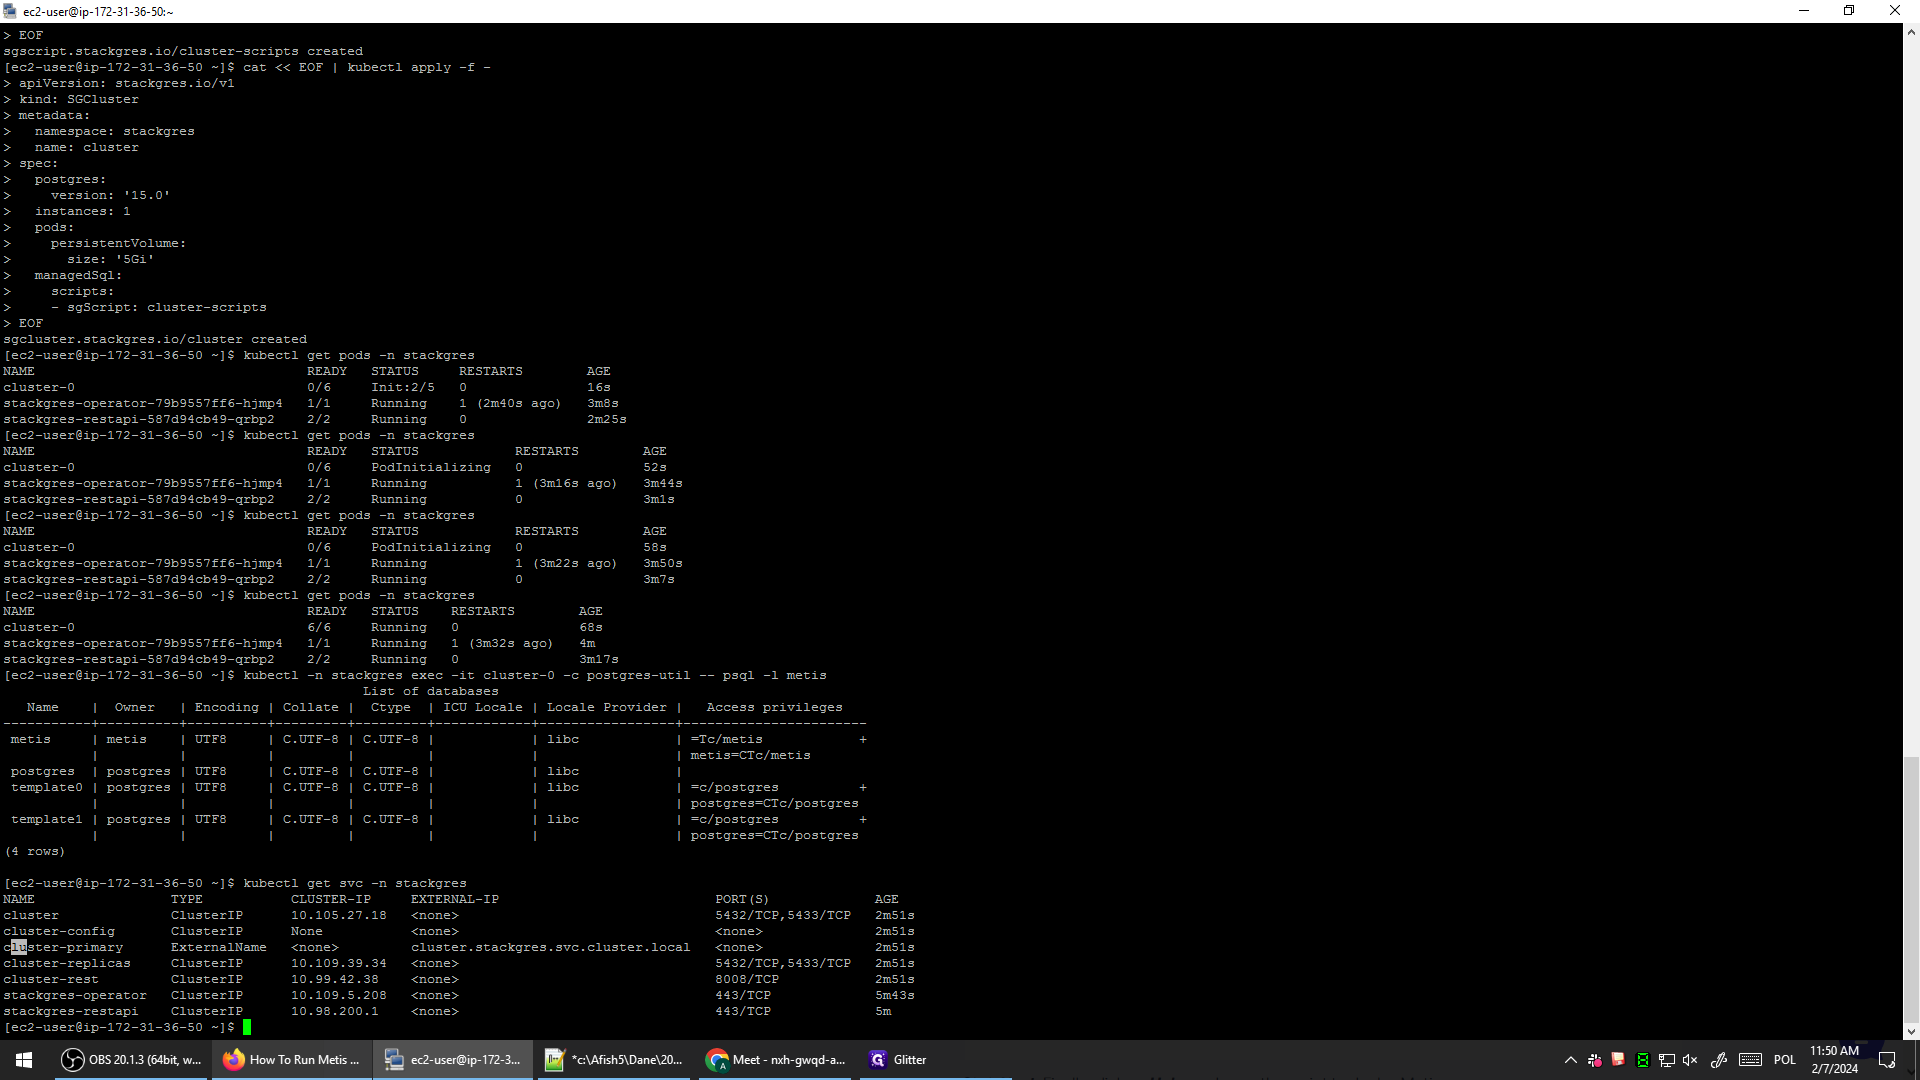
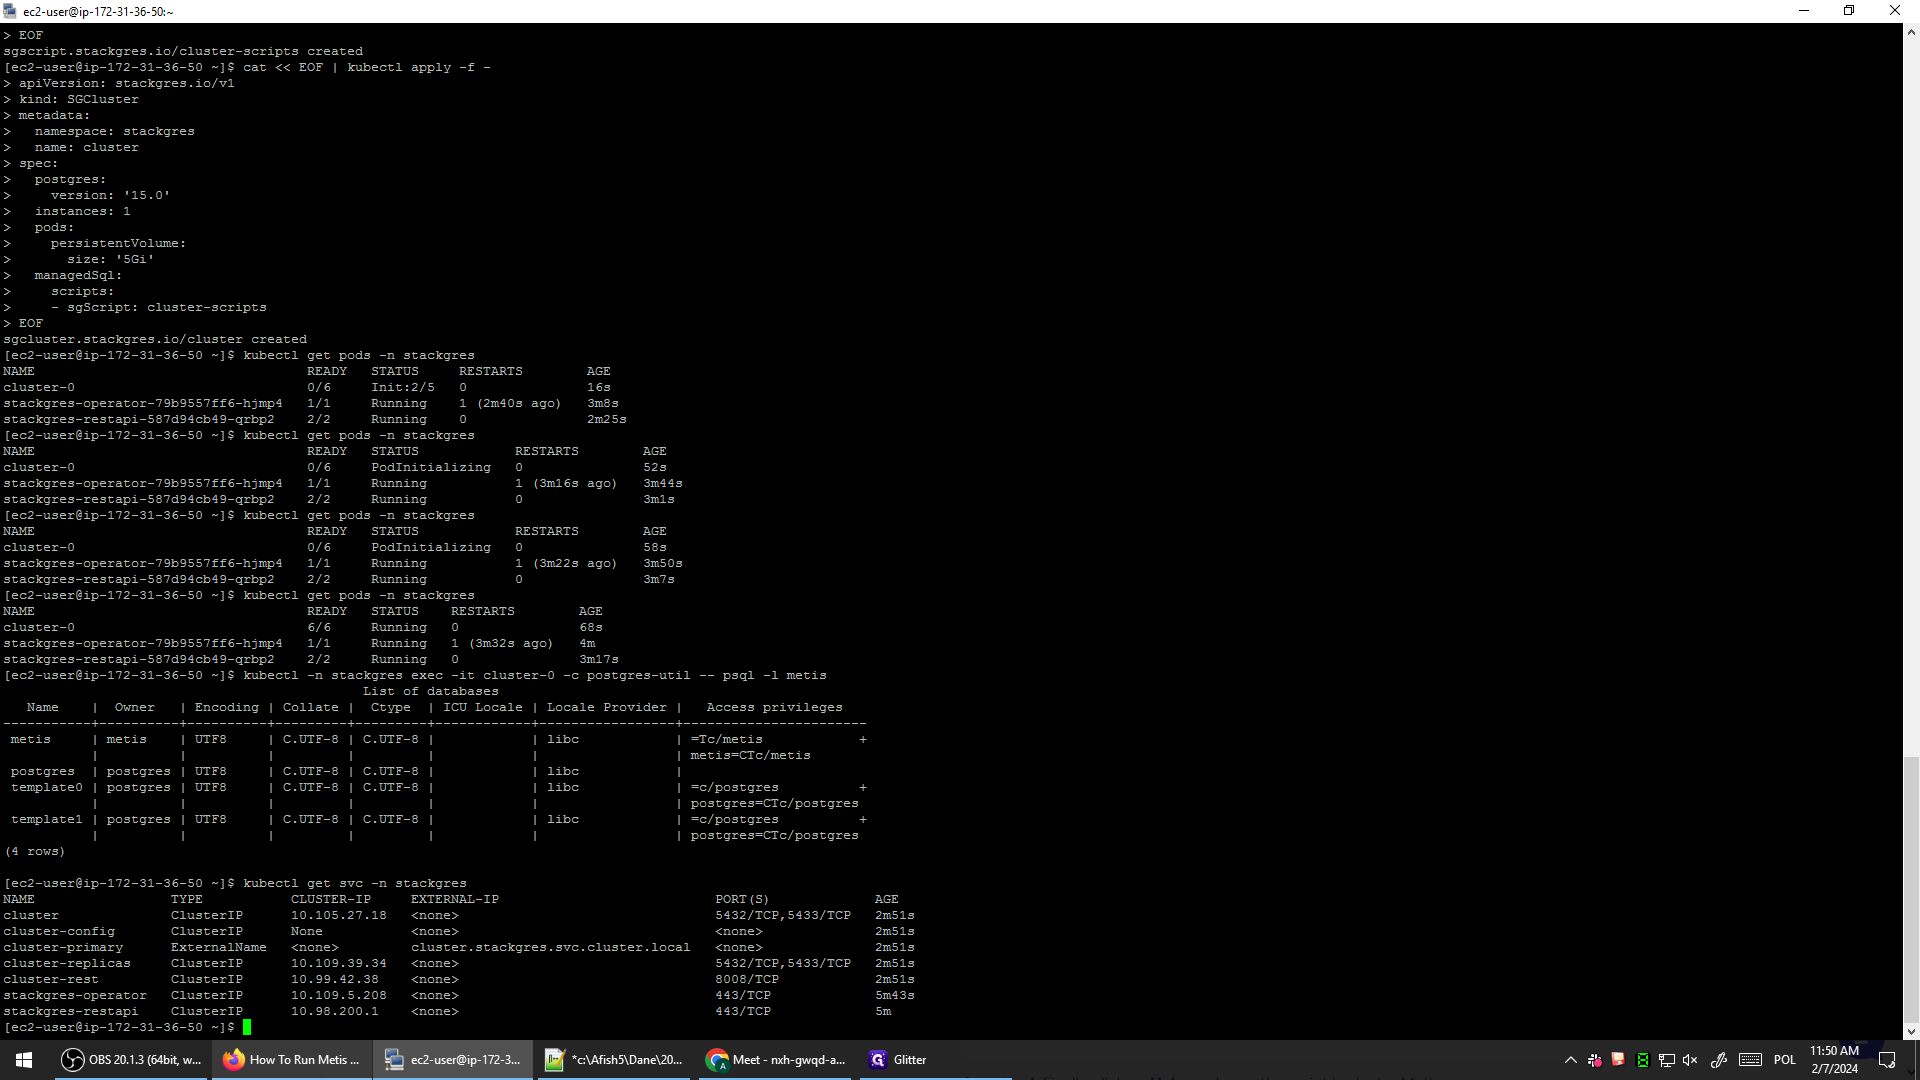
This host name is cluster.stagres.svc.cluster.local. This is the server name within the cluster.
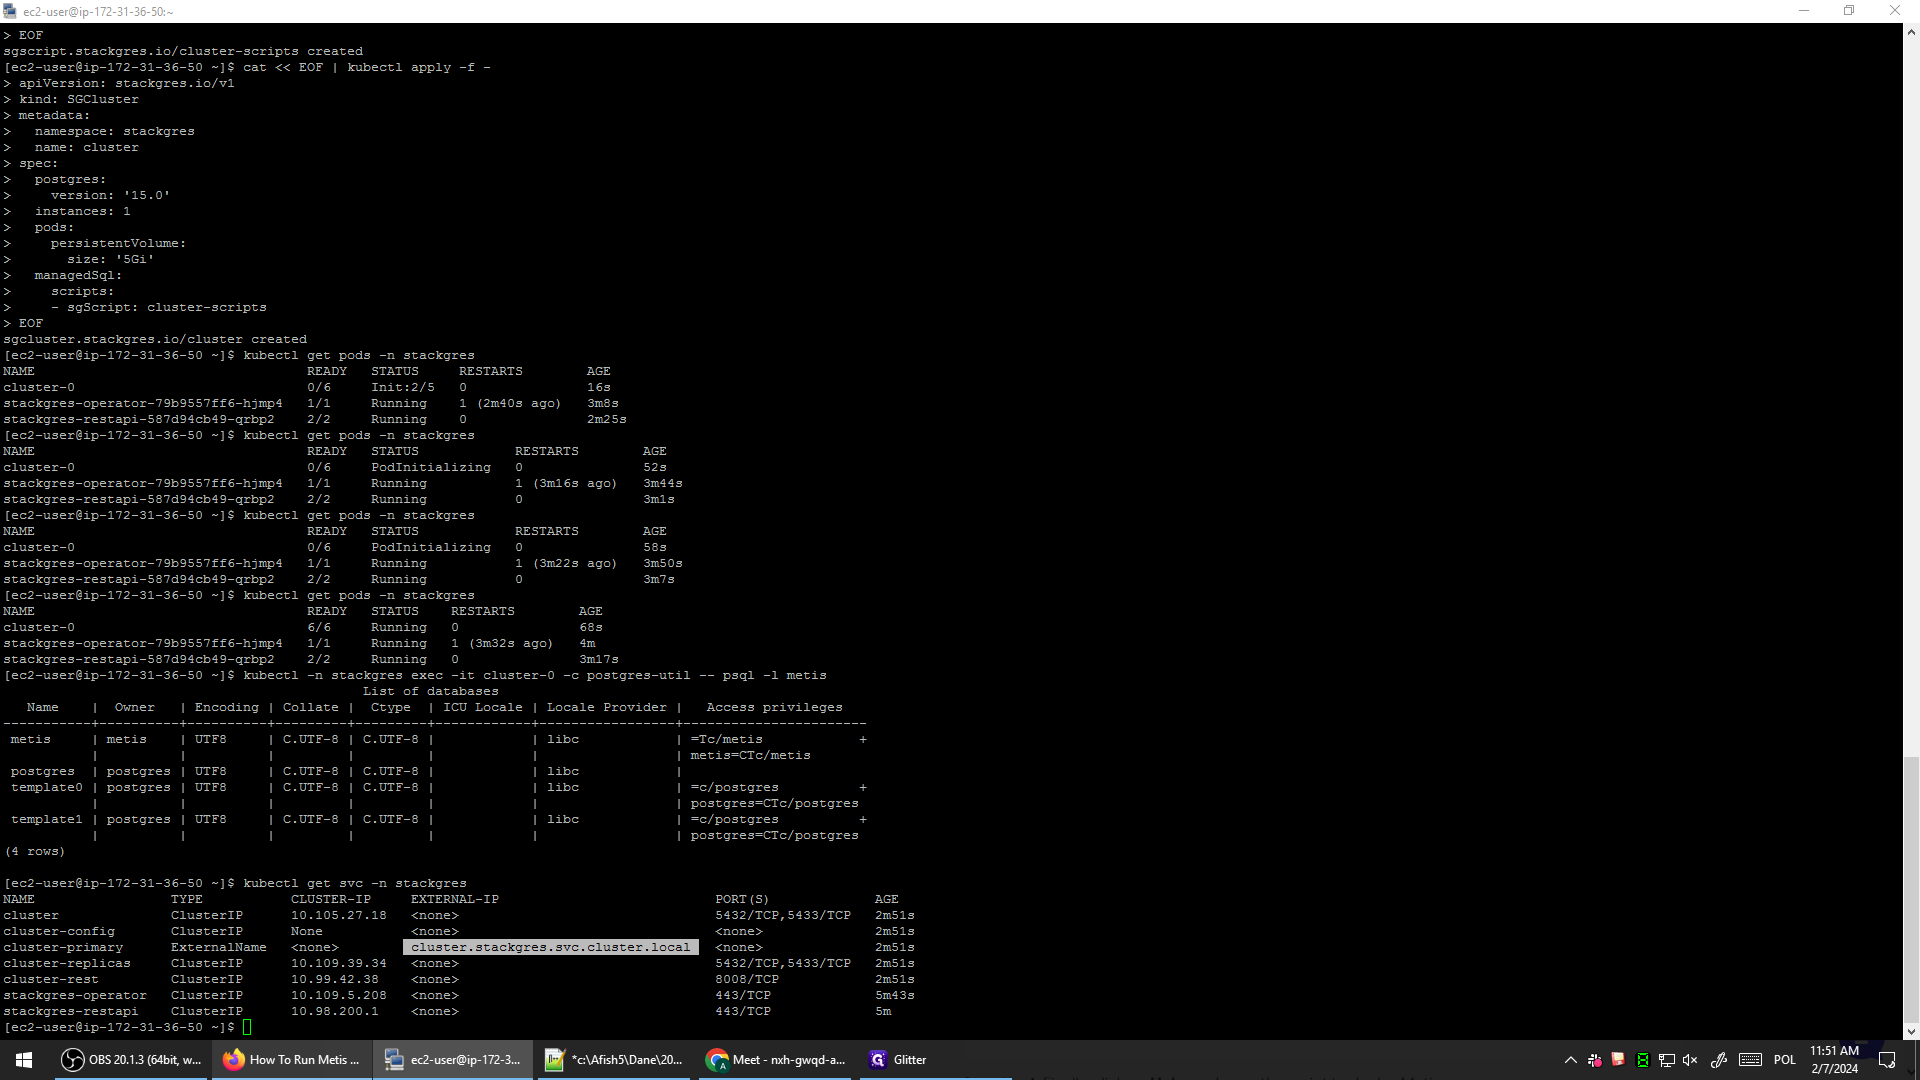
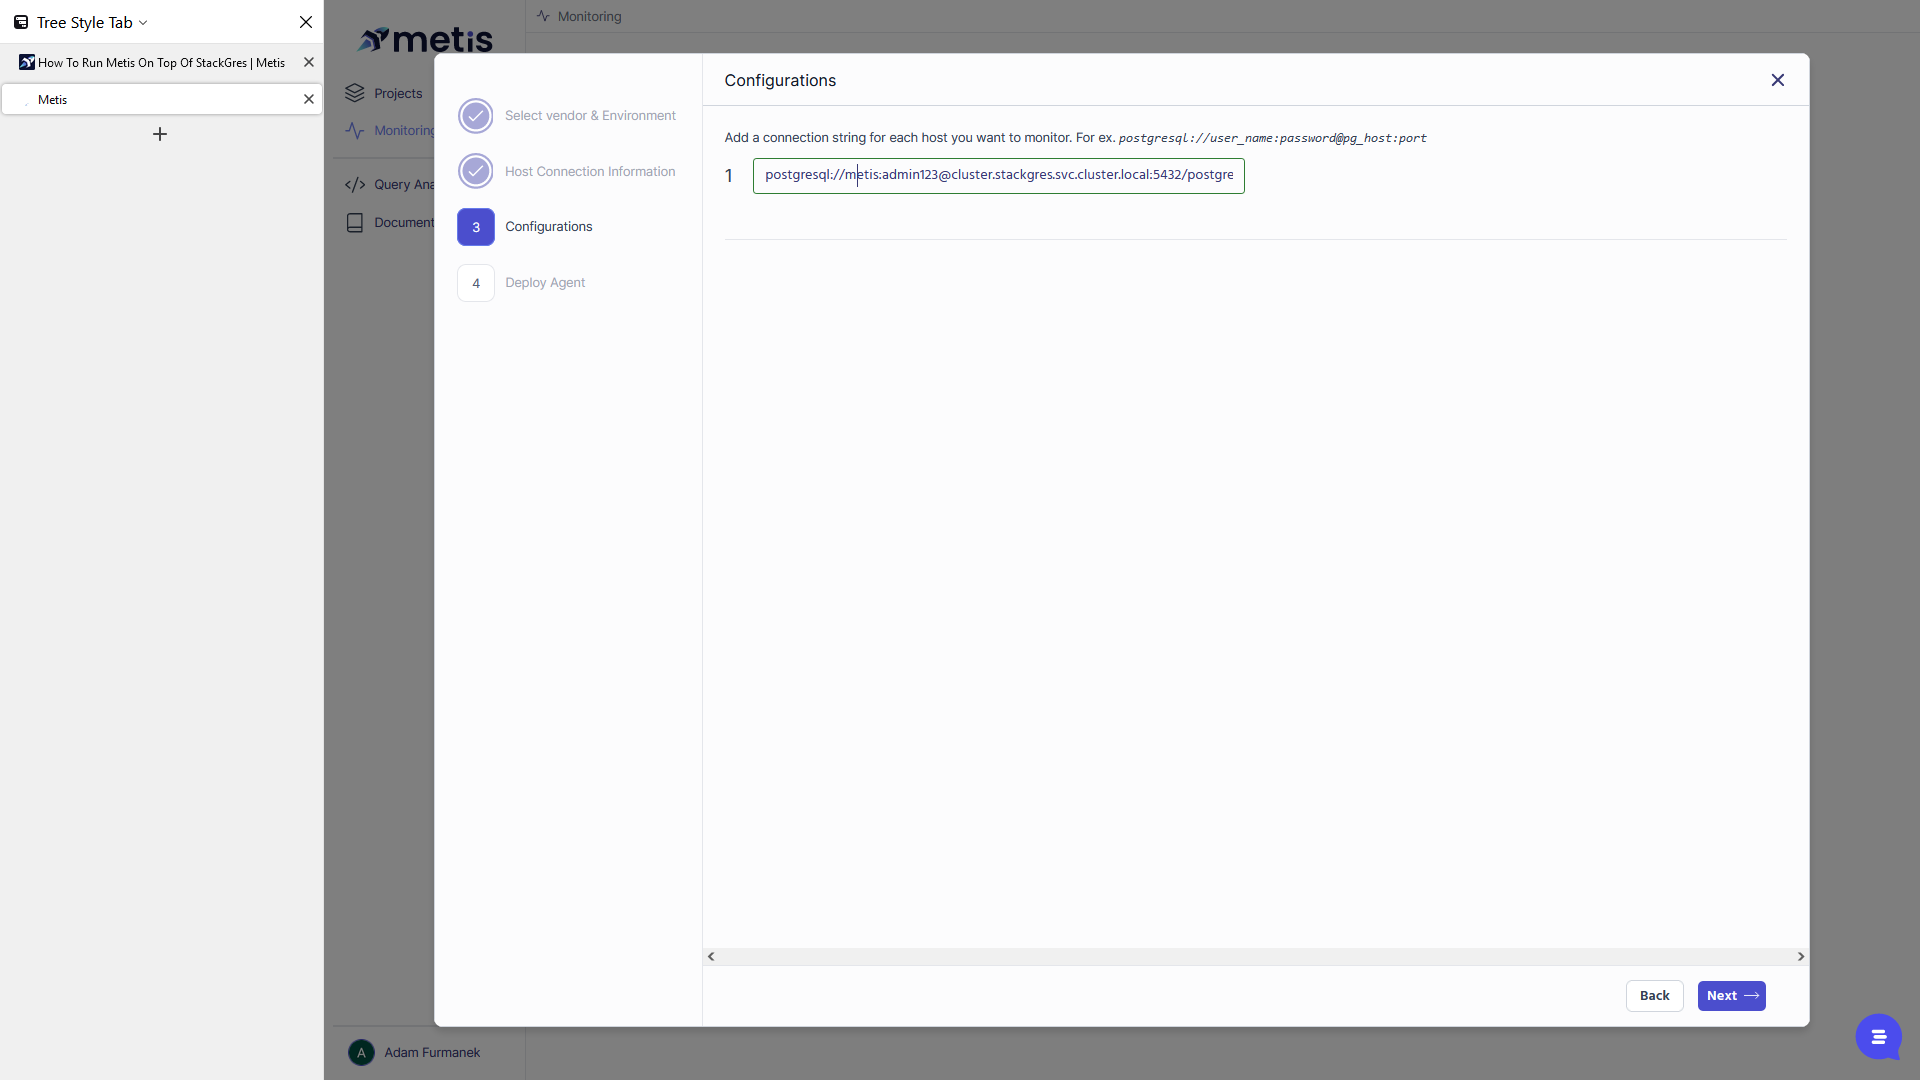
The connection string we need to use is as follows.
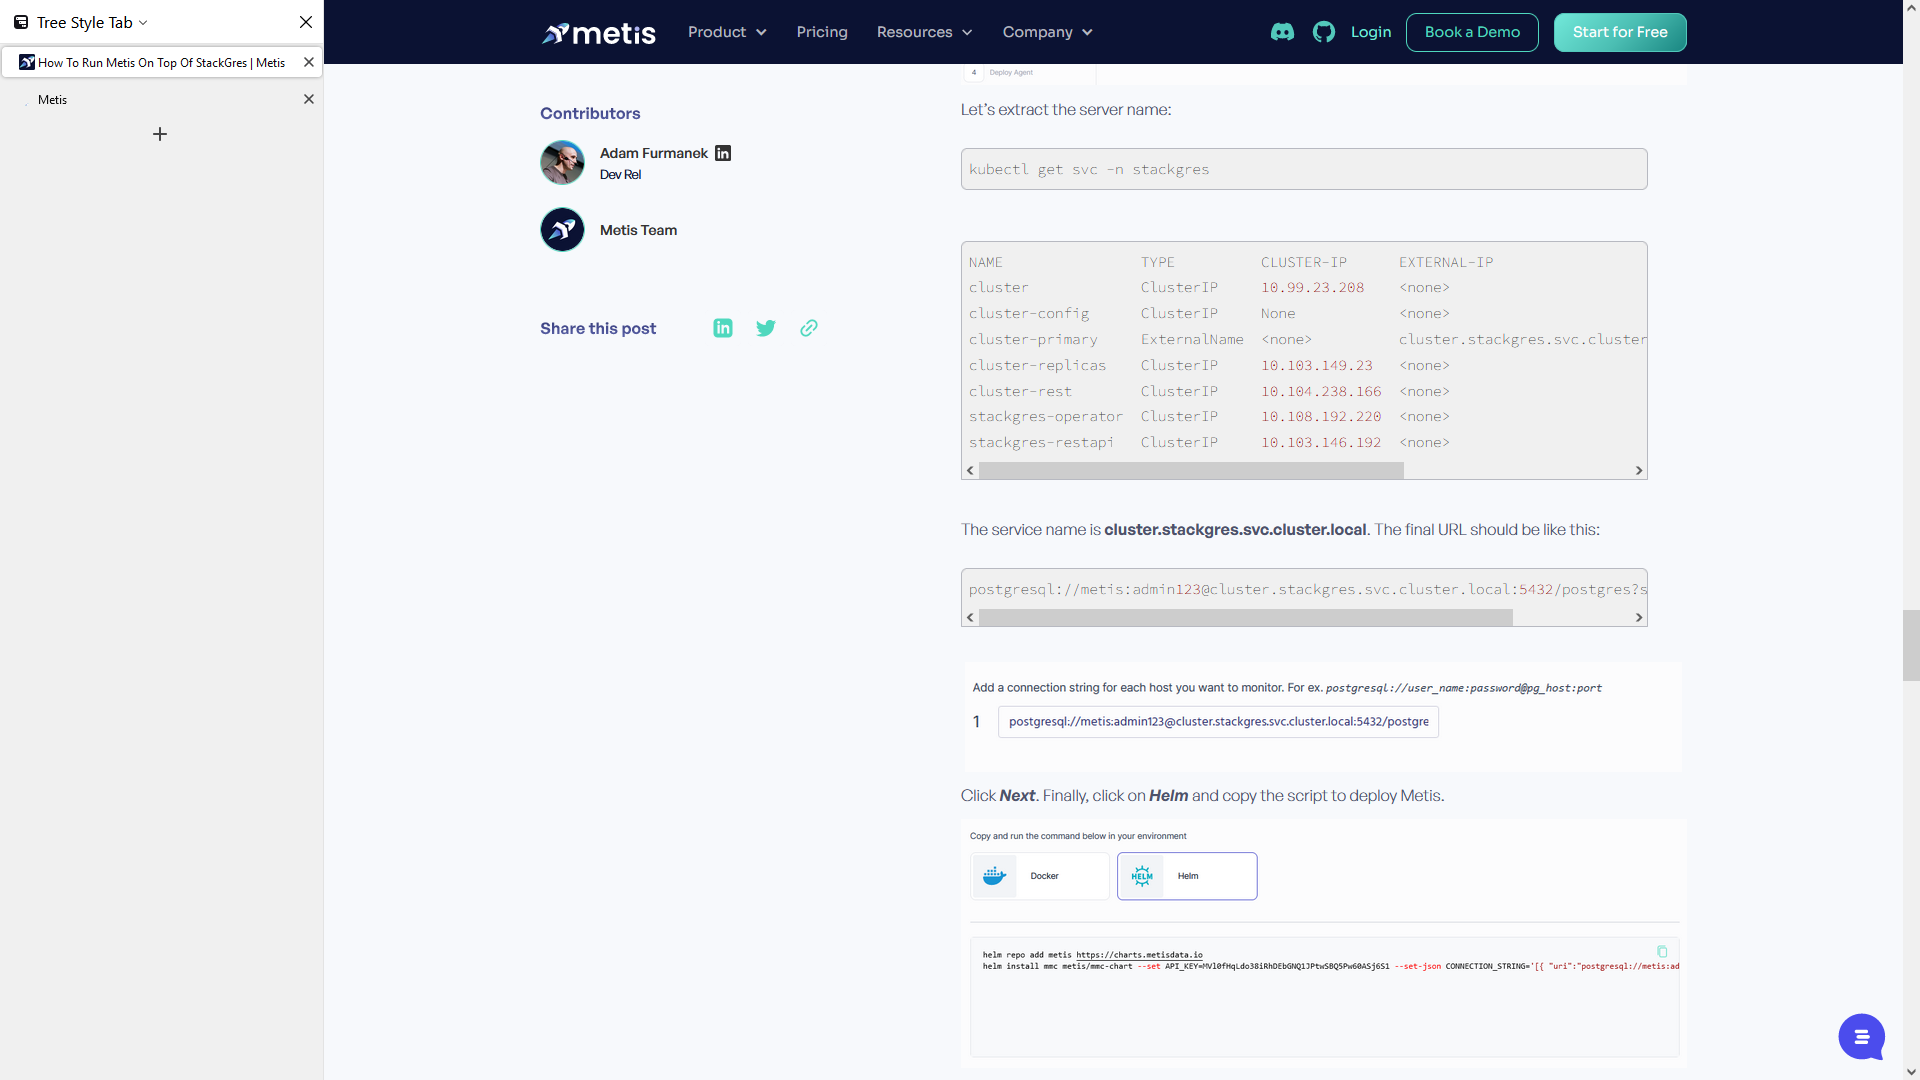
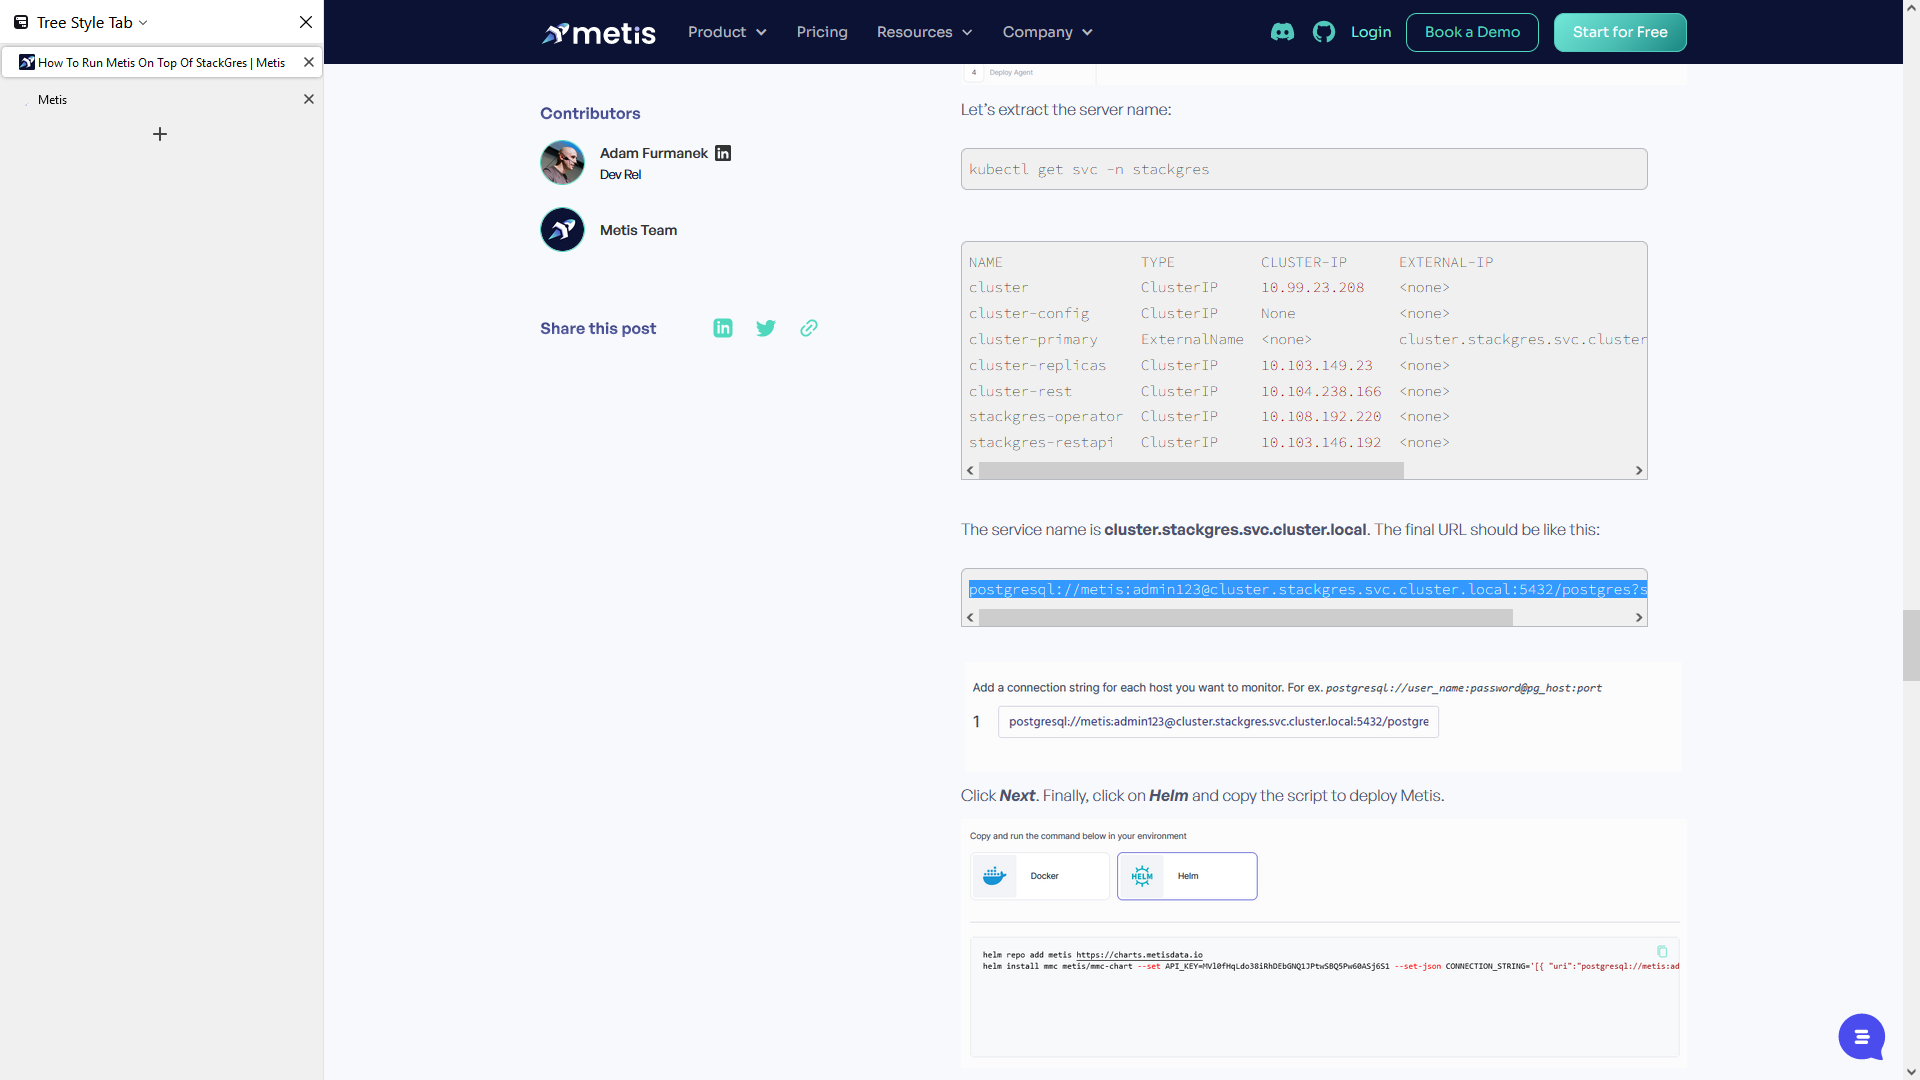

And we can copy it here.
We want to connect to Postgres using the username "metis" and the password "admin123" to the server name we copied from the cluster. We will use the default port 5432 to access the database named Postgres.


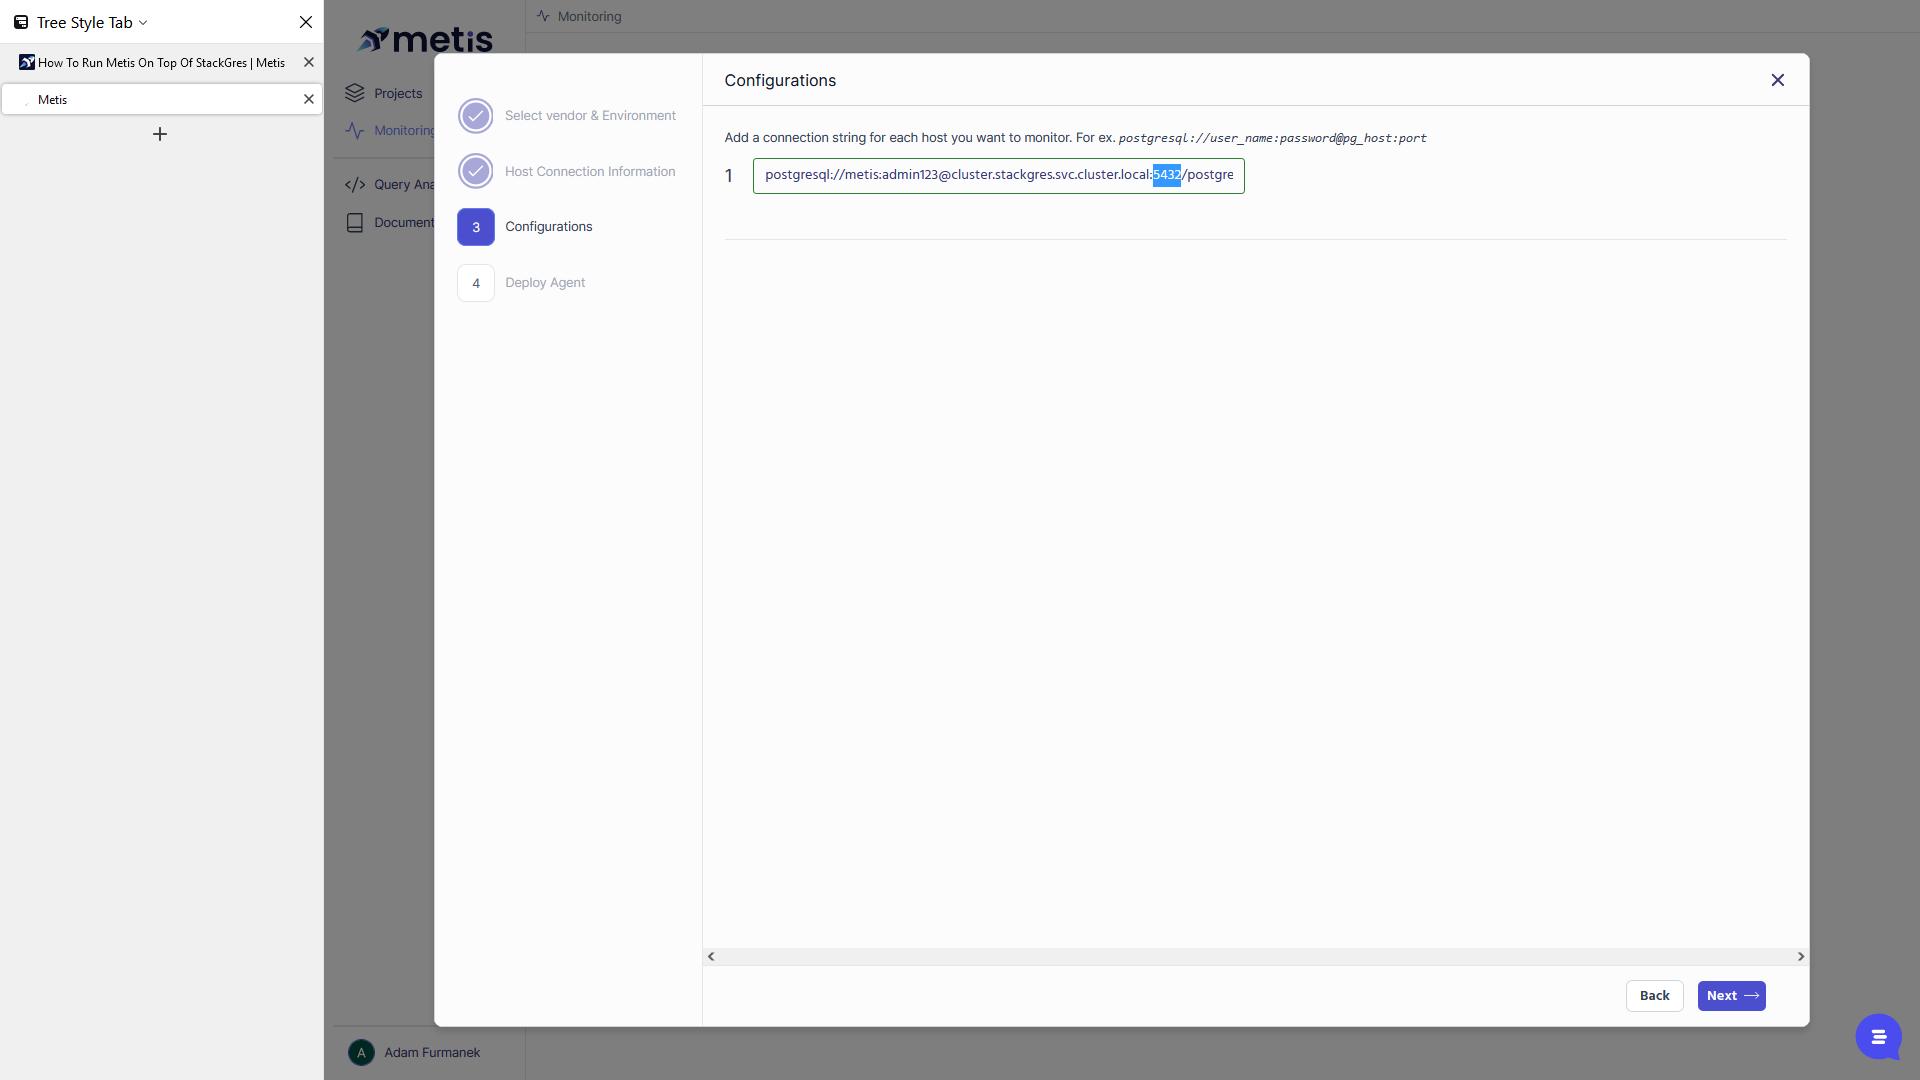
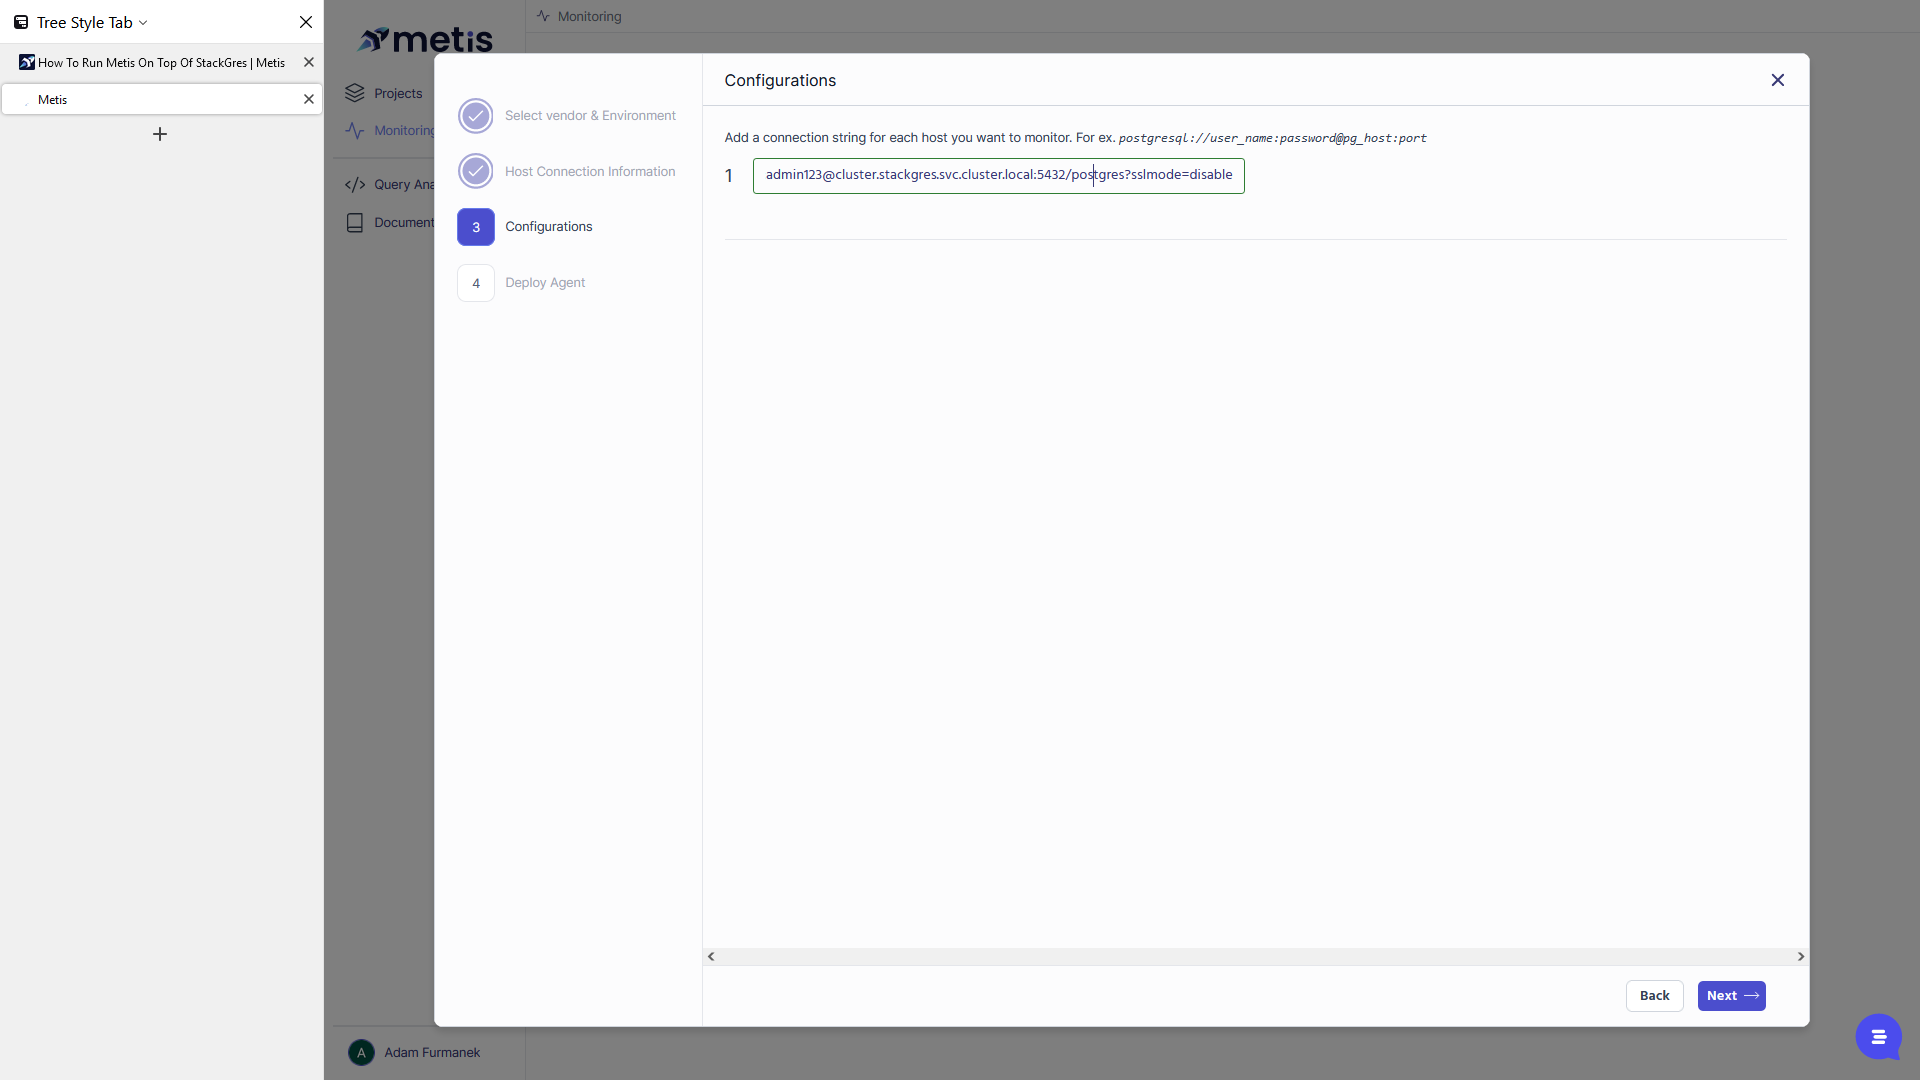
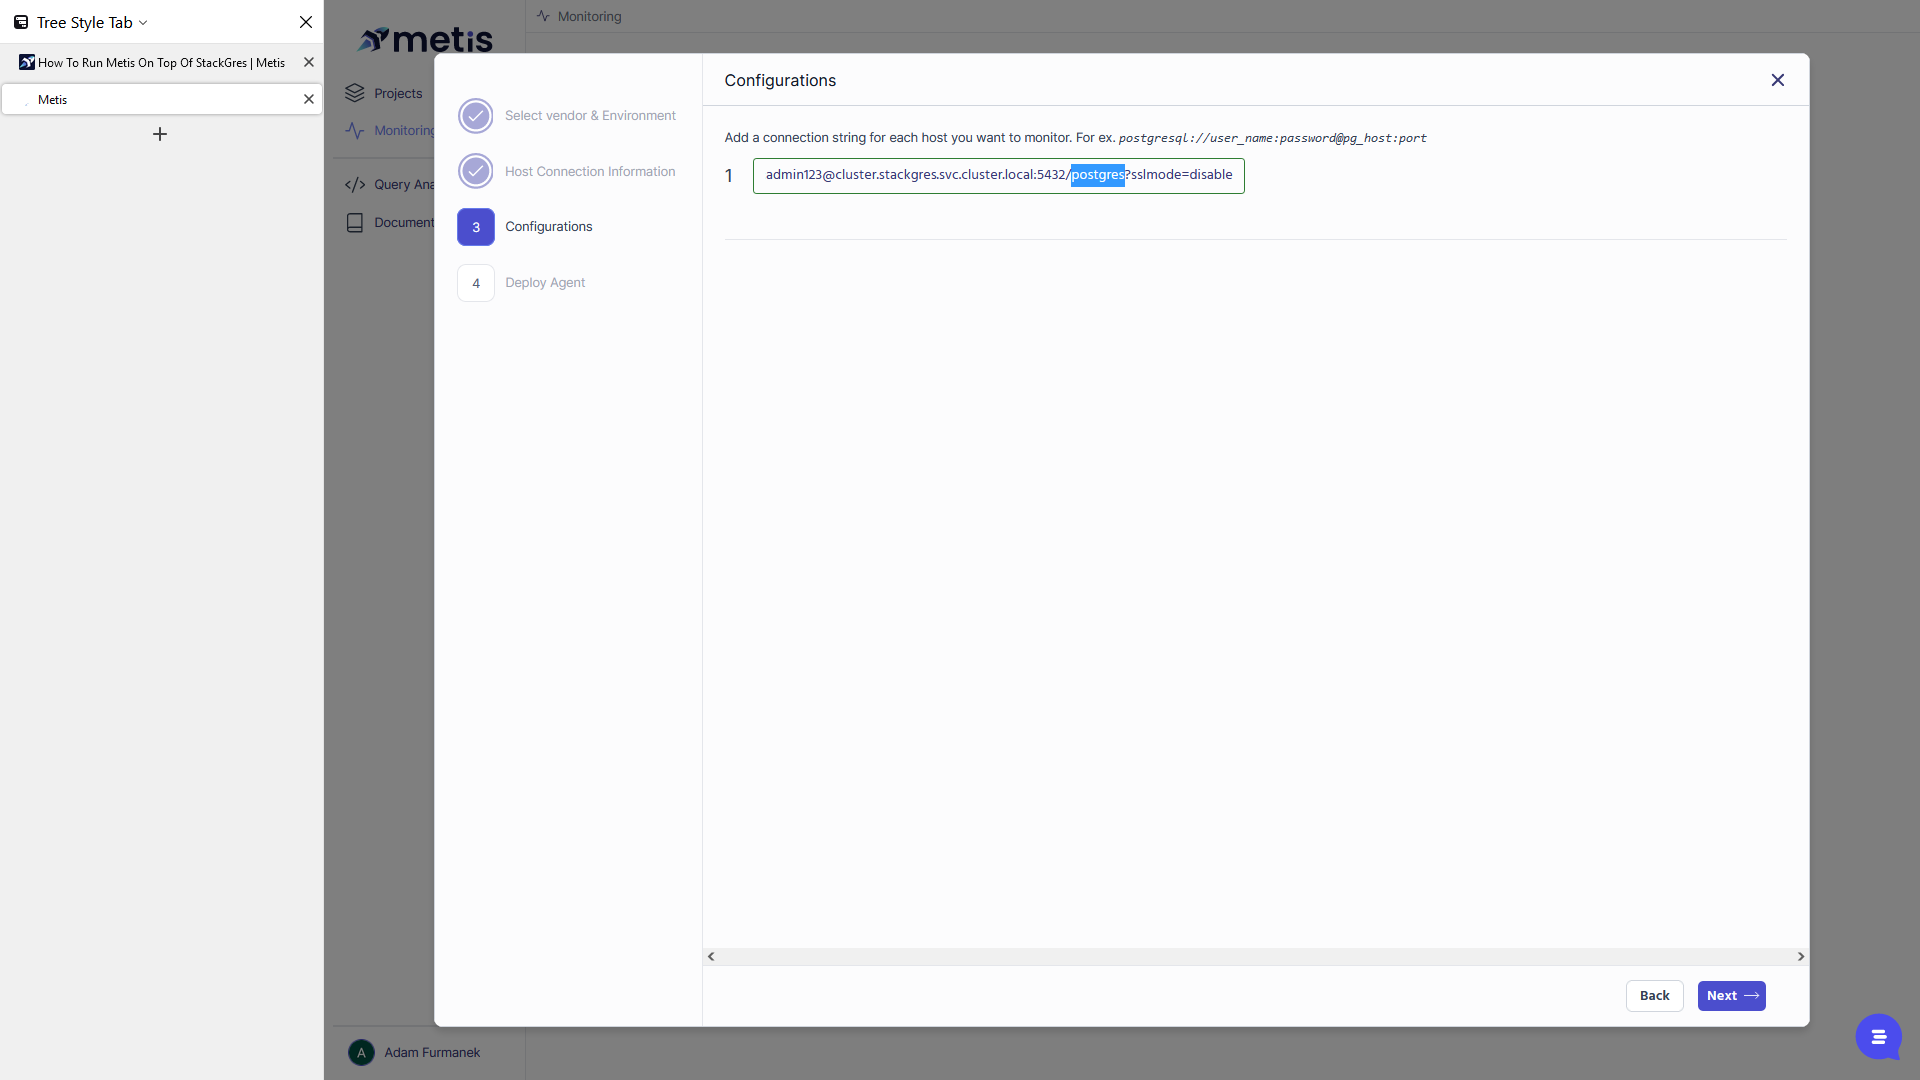
Metis will attempt to connect to all the databases available and disable SSL and TLS.

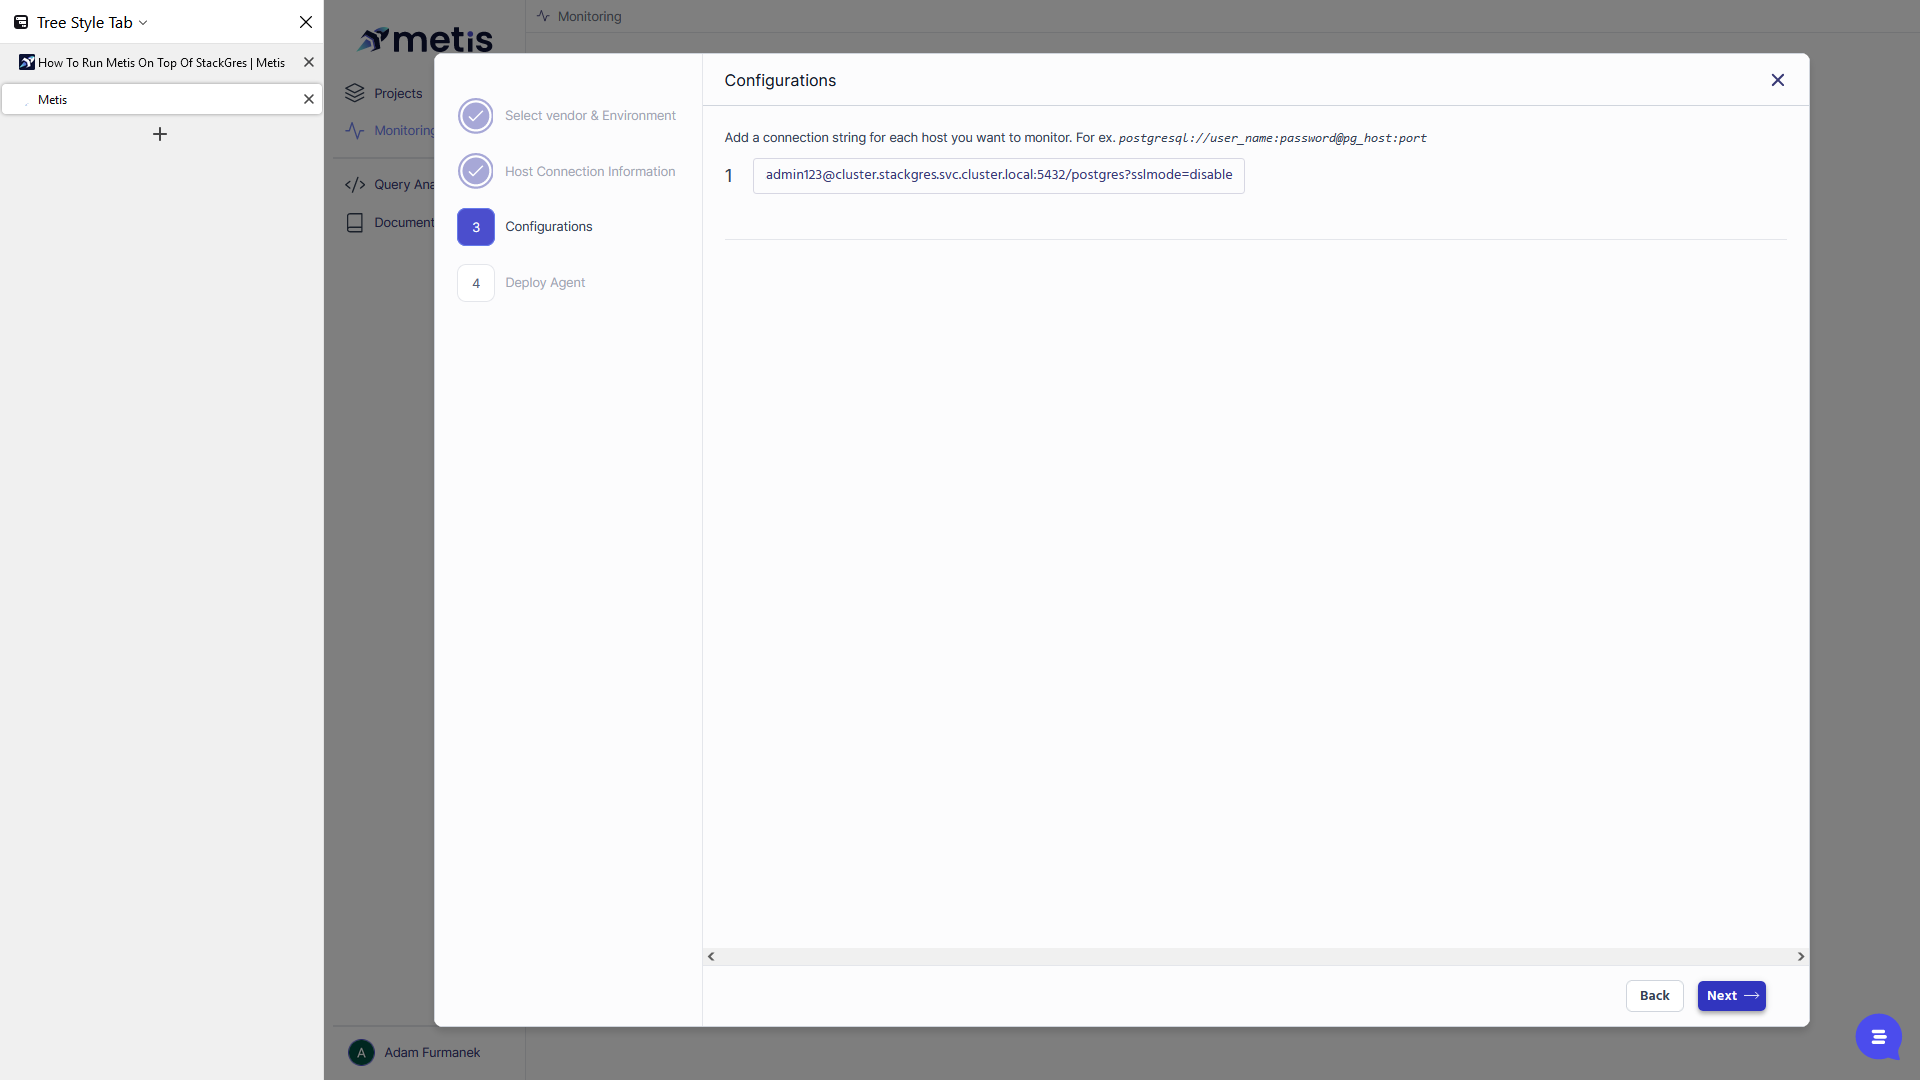
This is what we need to do.

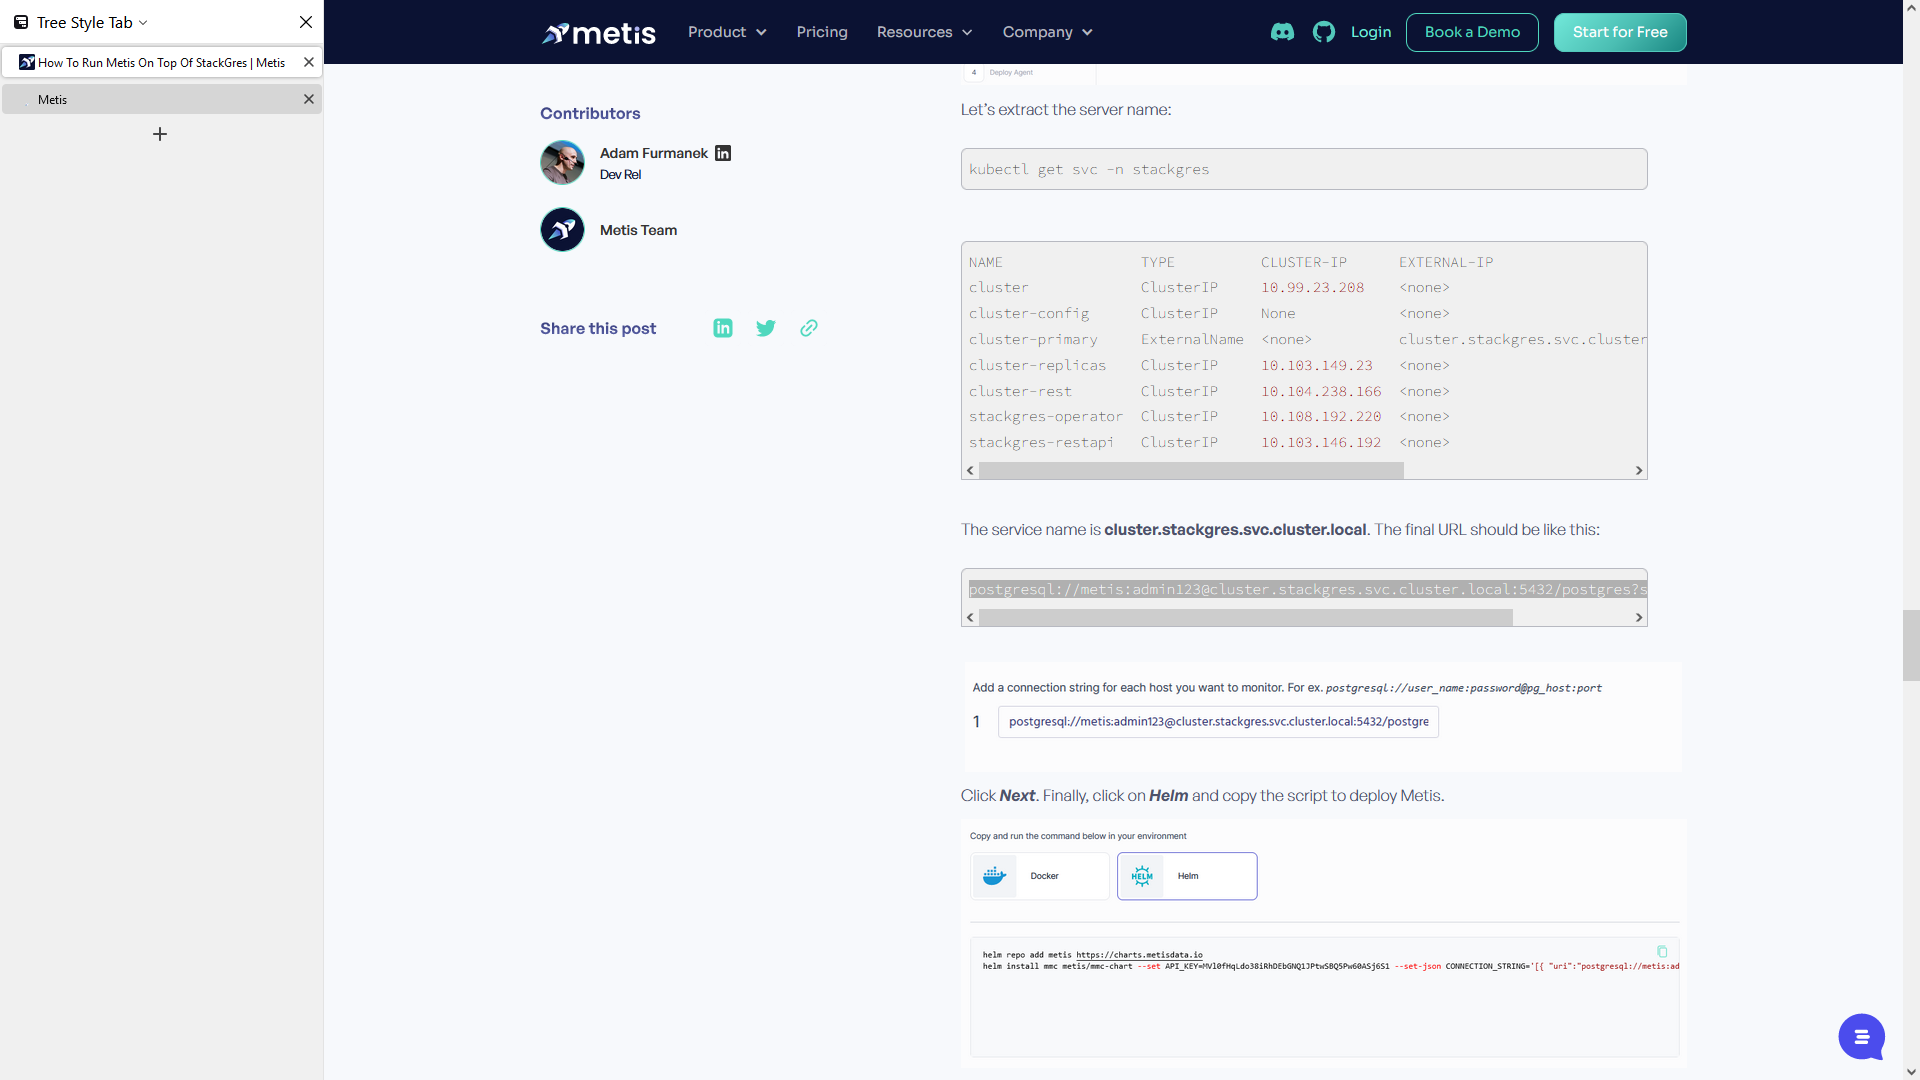
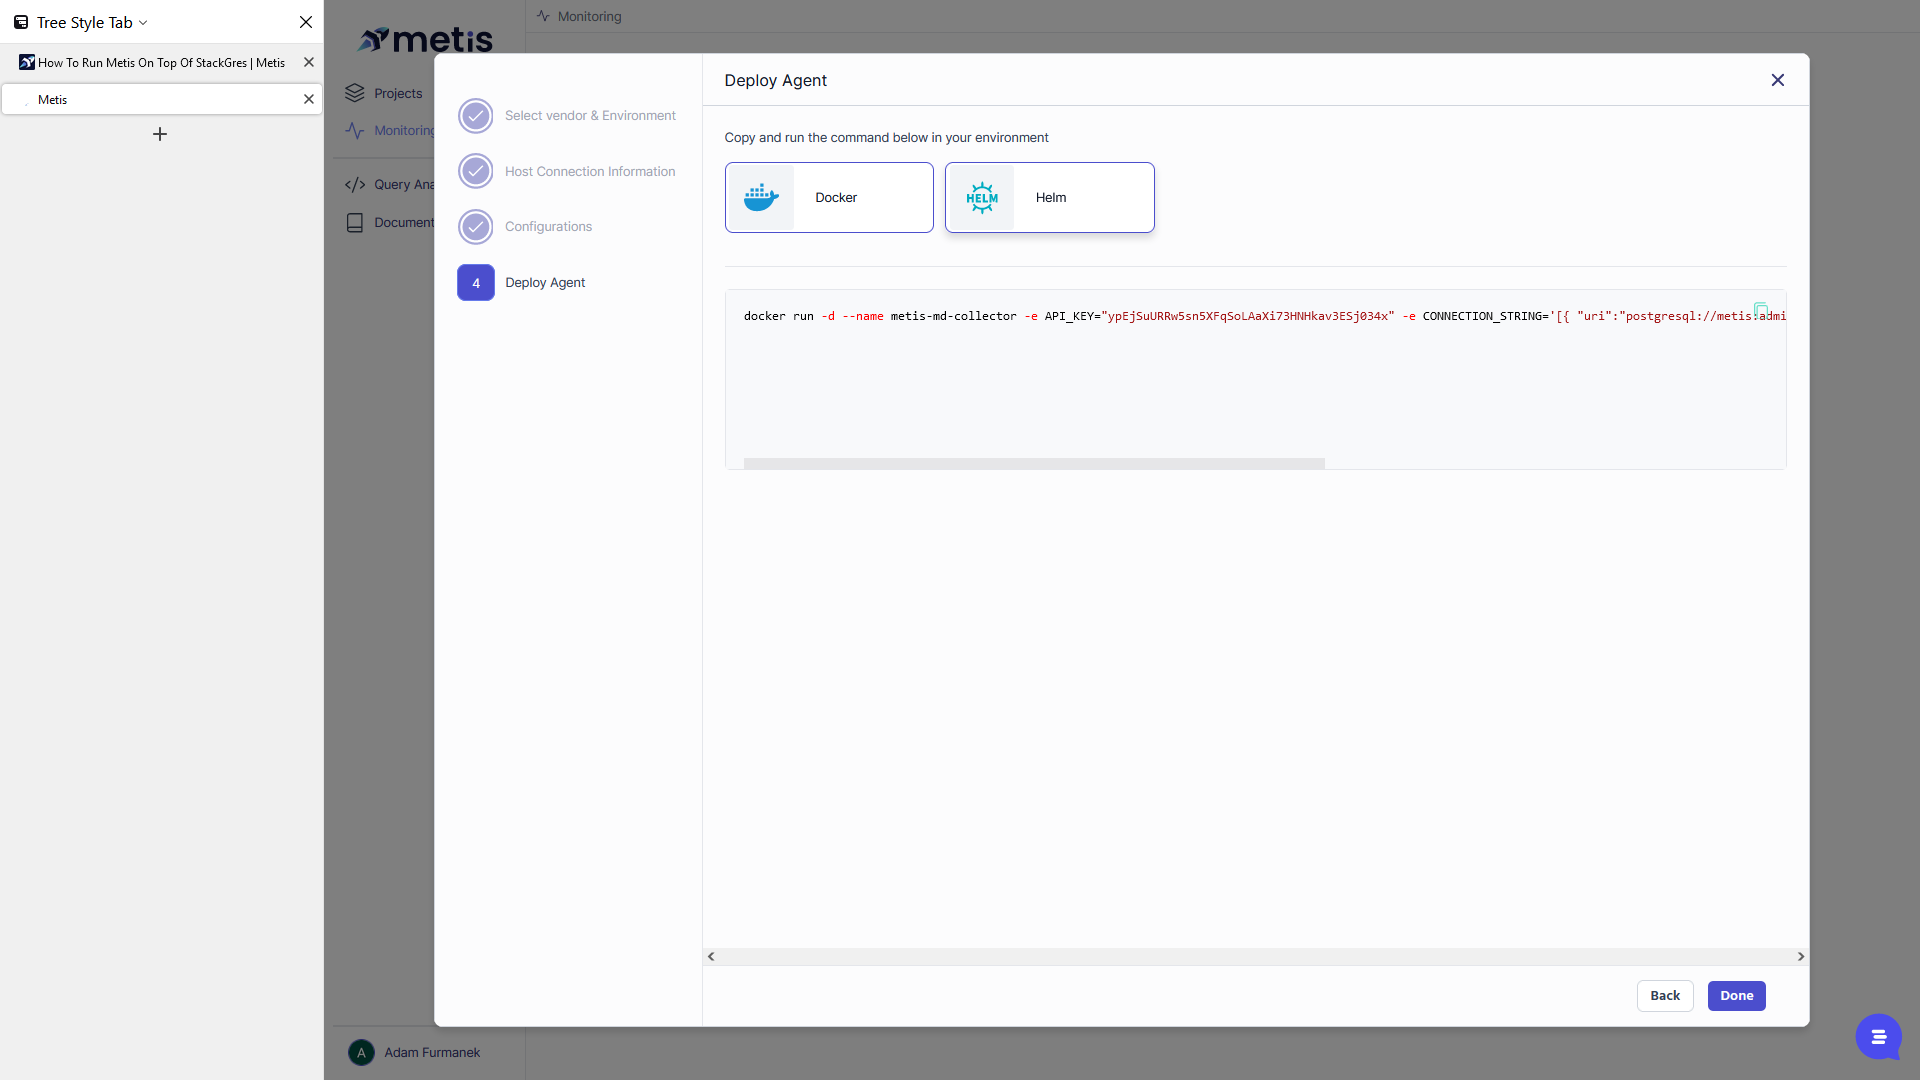
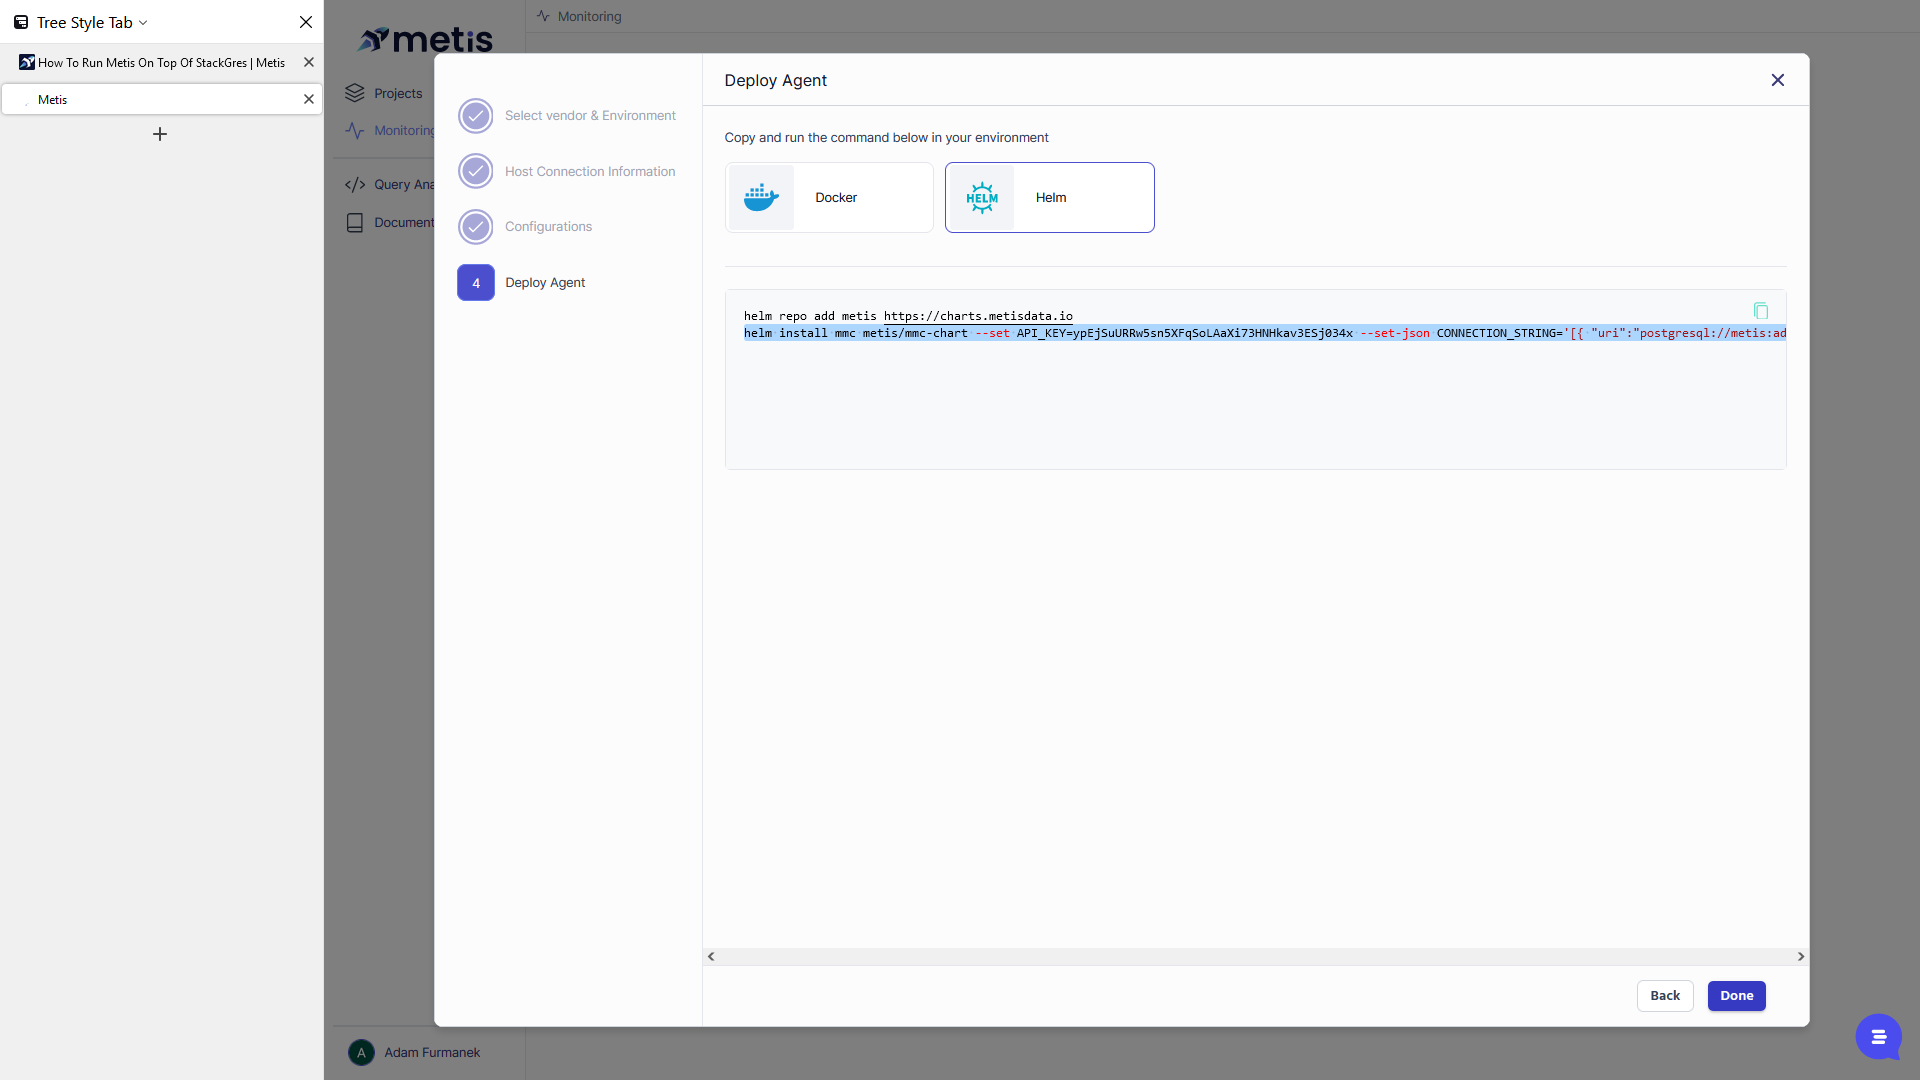
Now, click "Next." You can choose to run this command using Docker or Helm.
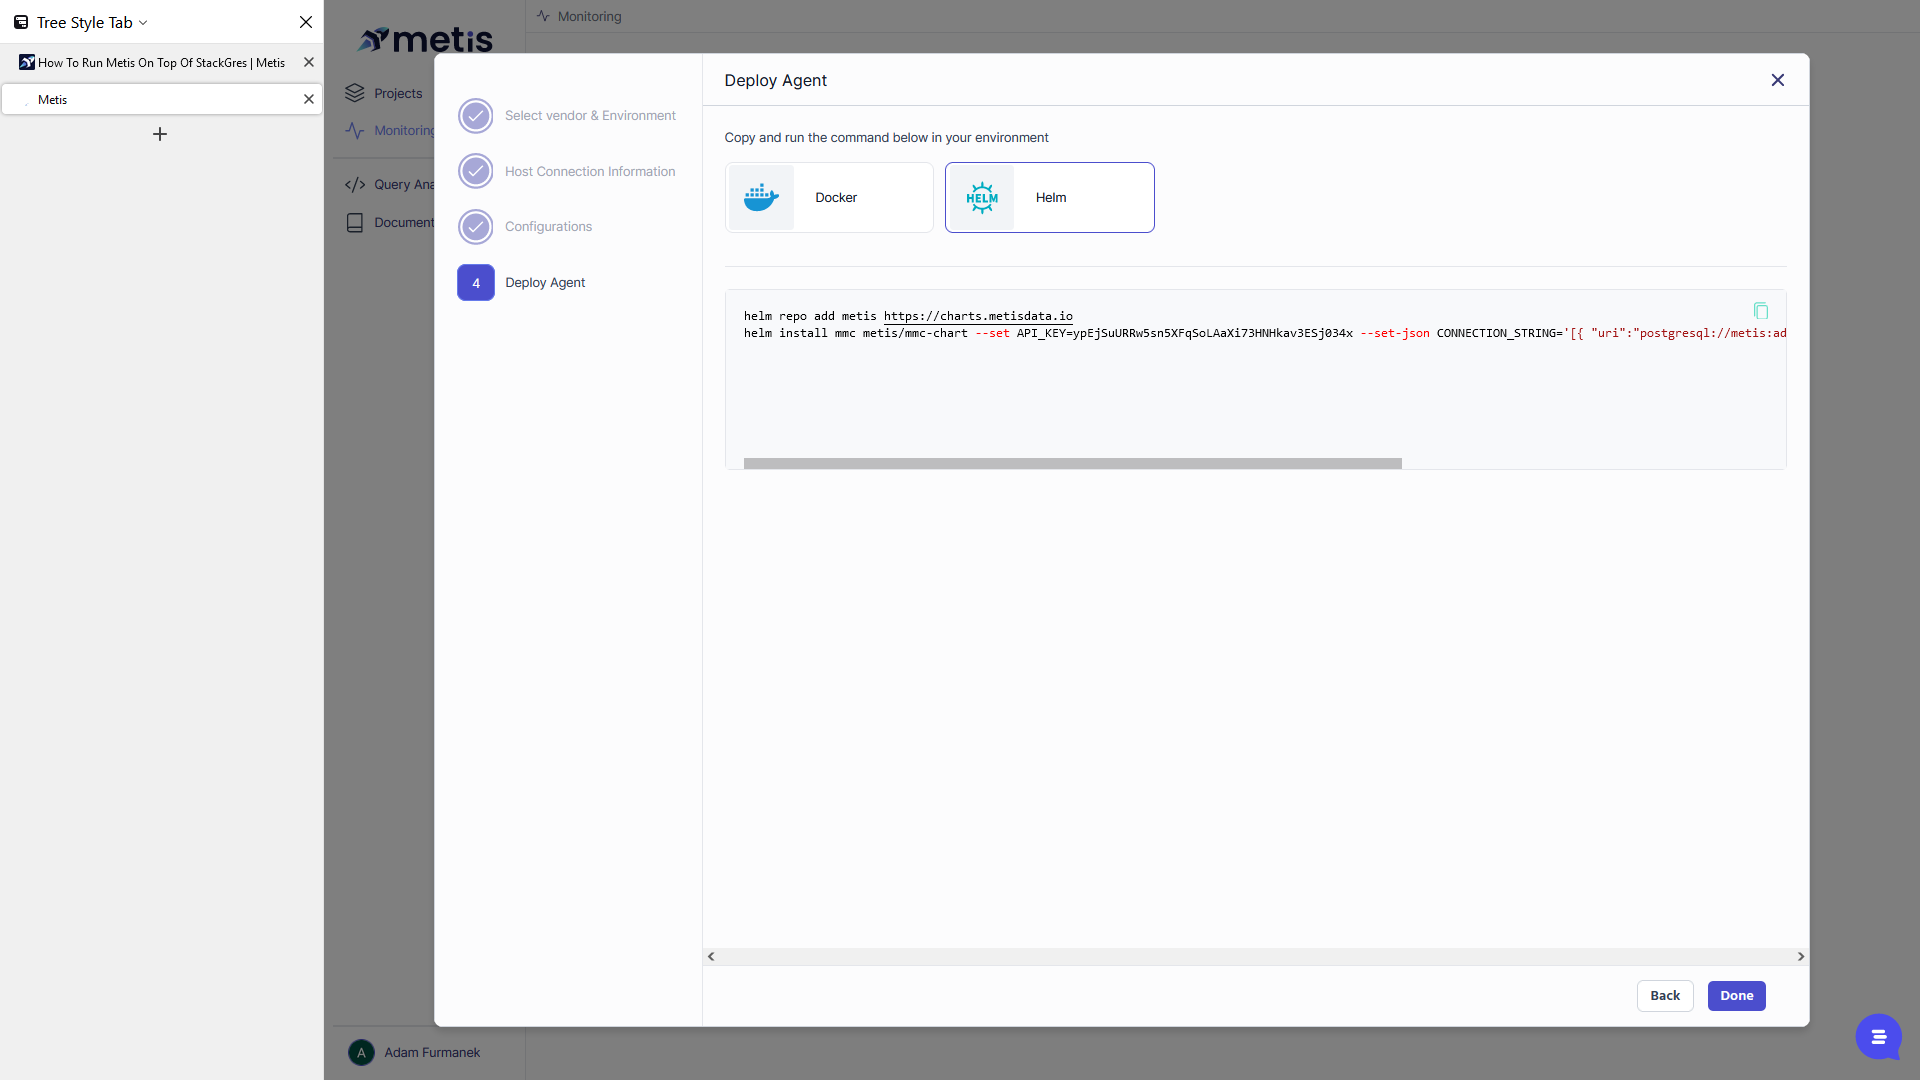
Since we use Helm to deploy items in our cluster, we will also utilize Helm here.
We need to copy this repository command to add the Metis repository for MMC.
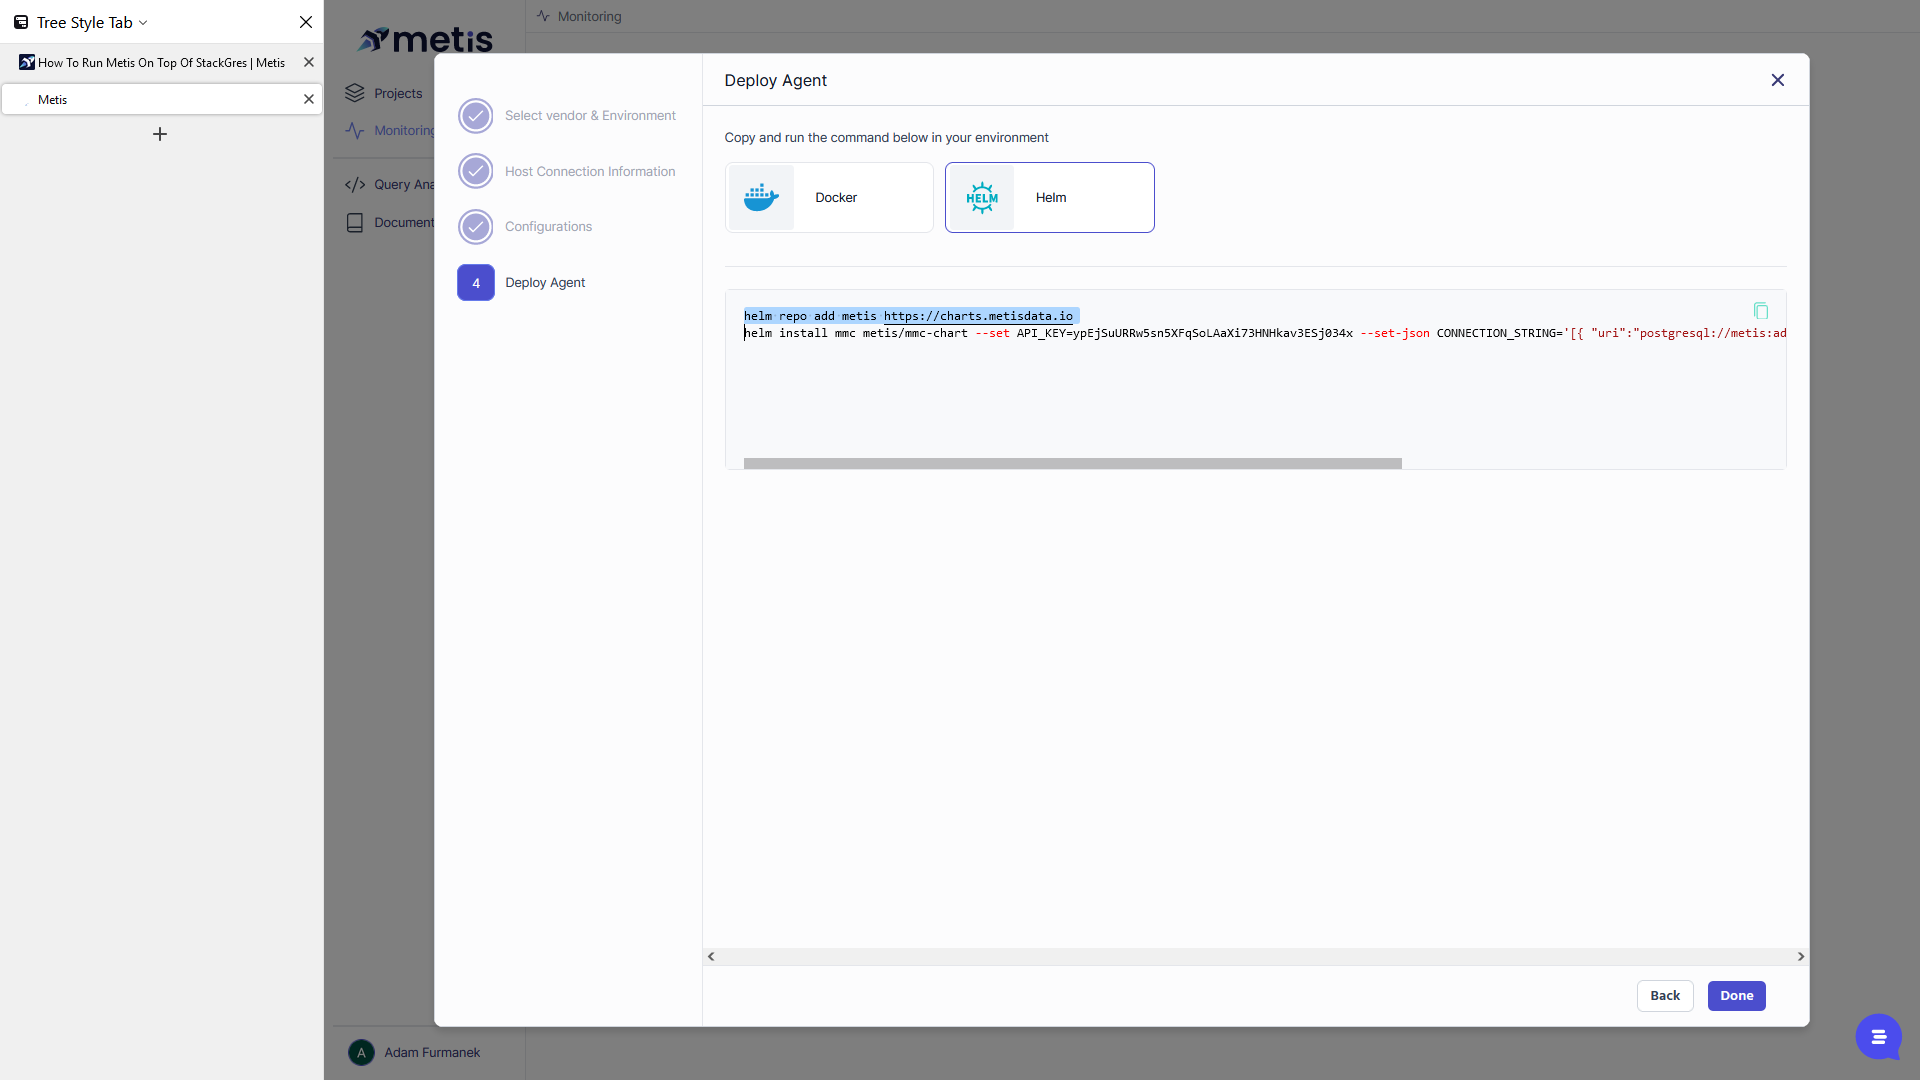


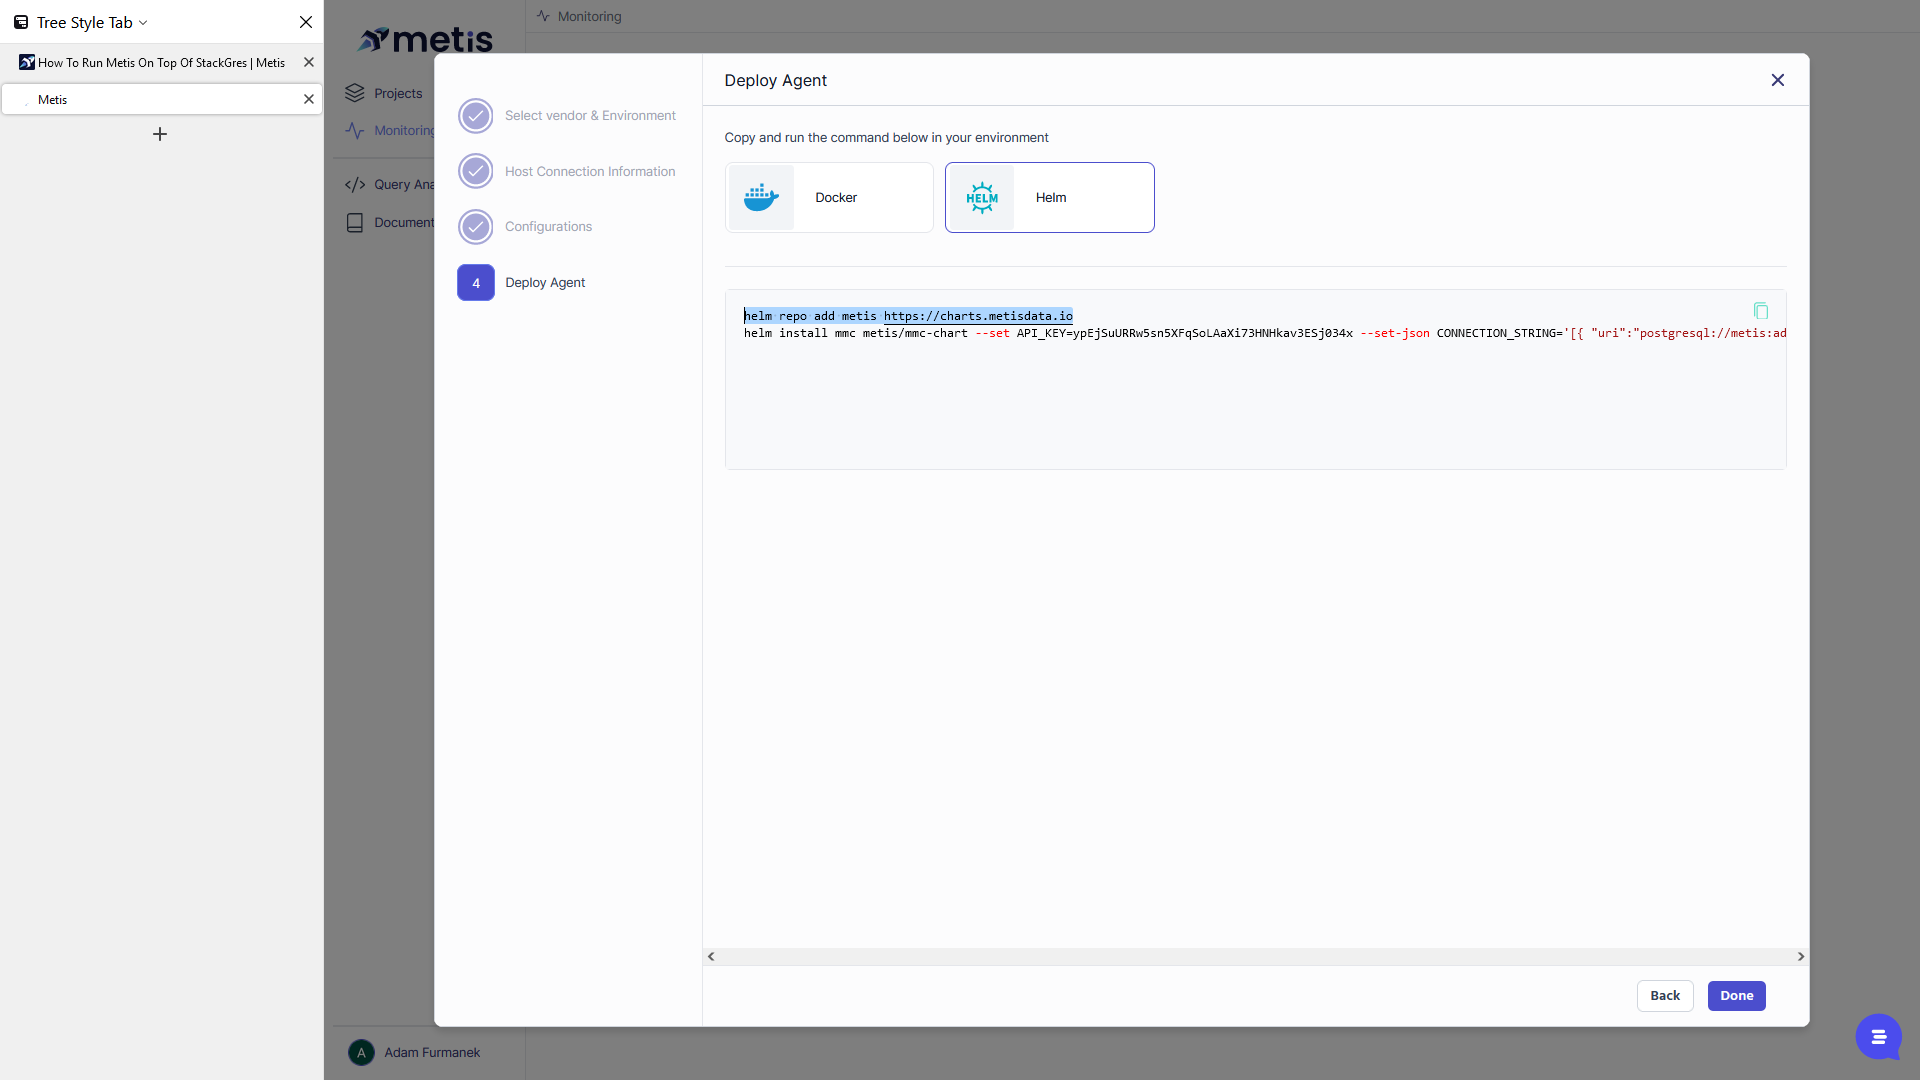
We can add this repository. The repository has been successfully added.
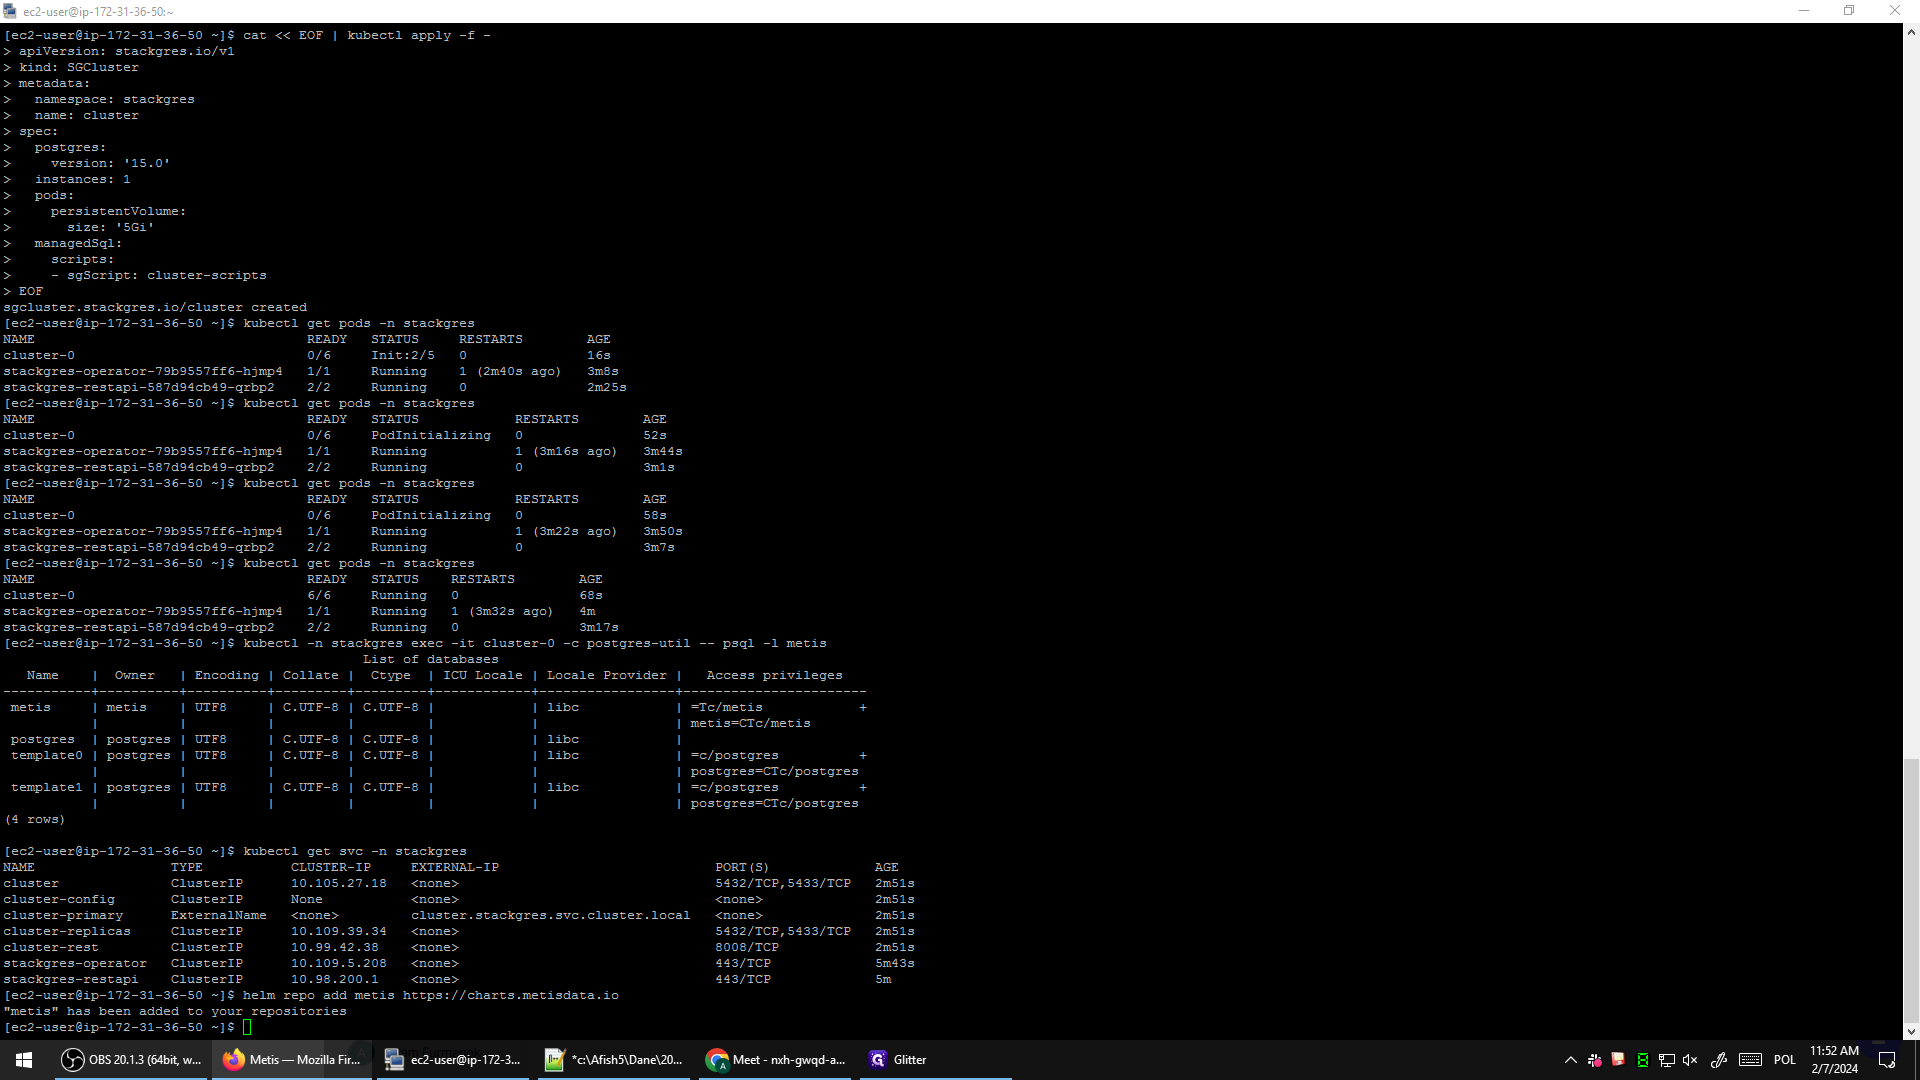
The next step is to copy the command that will install MMC.


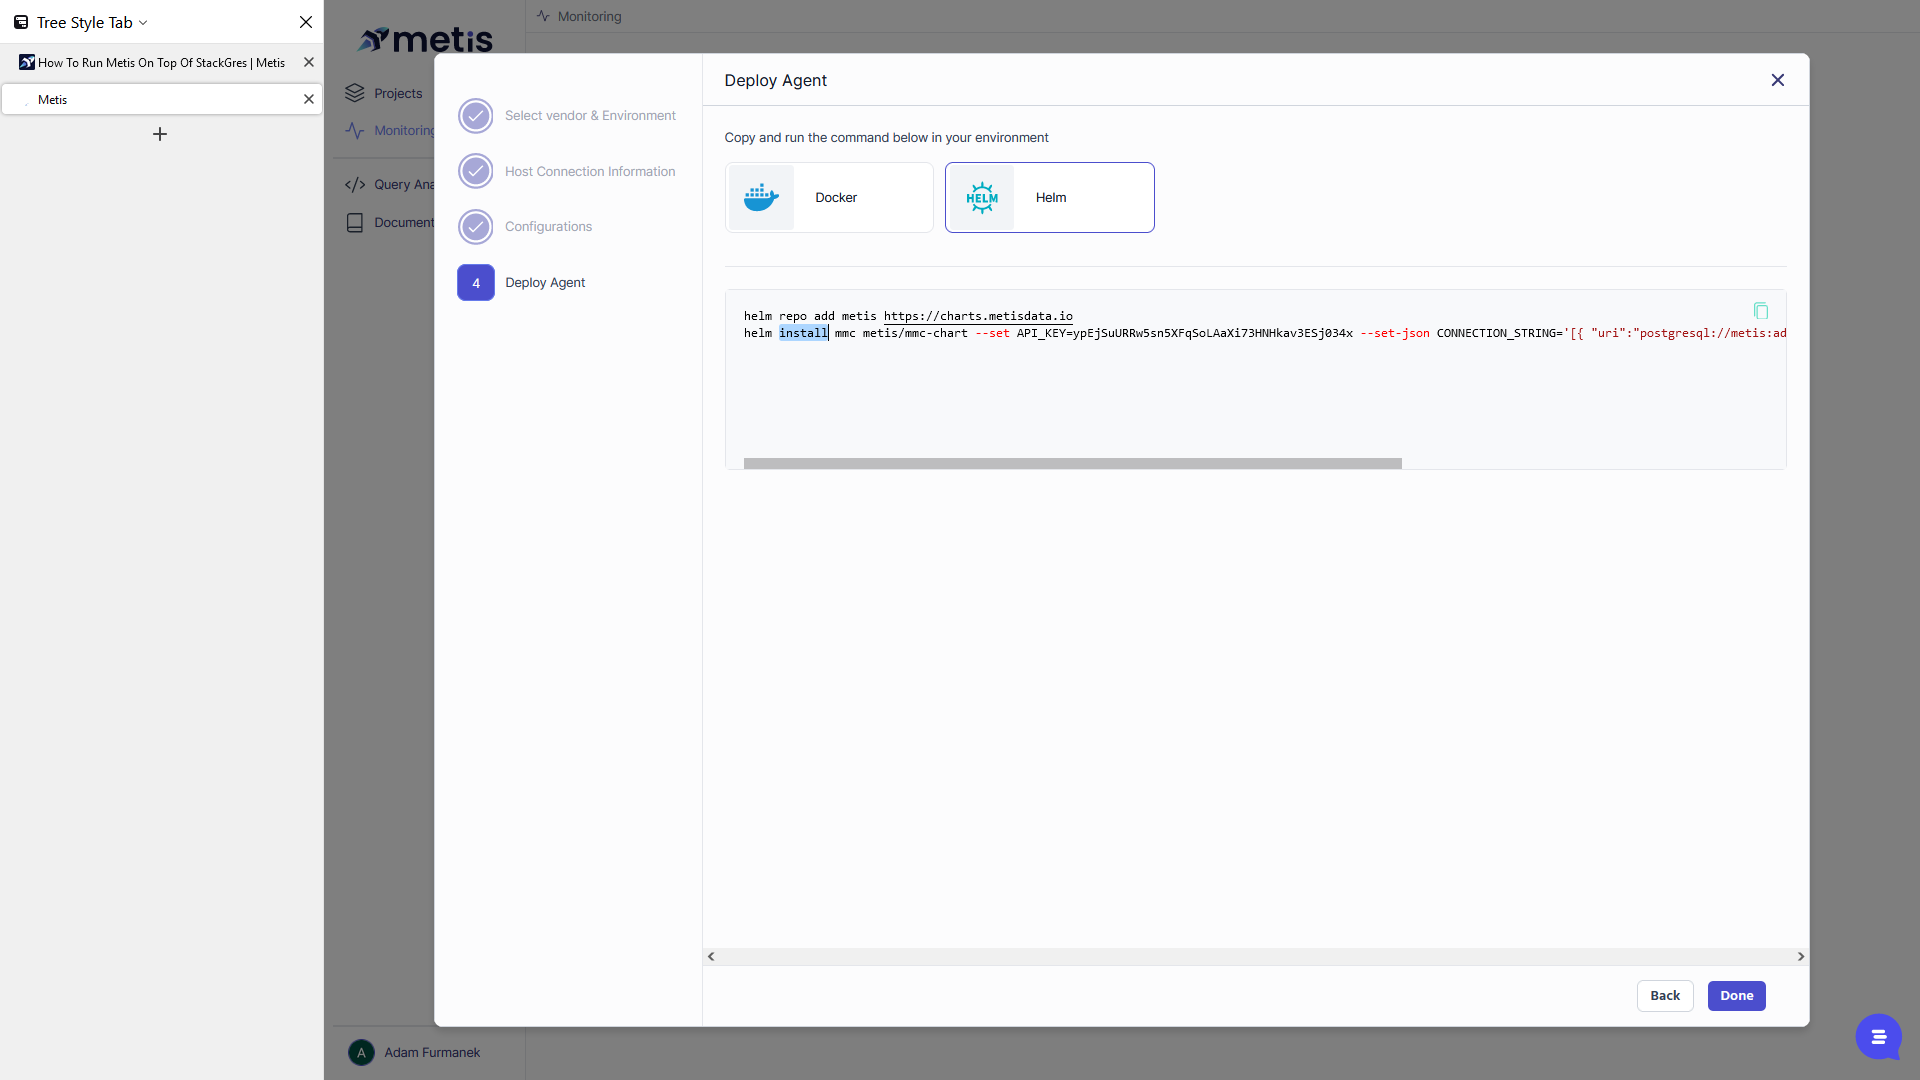
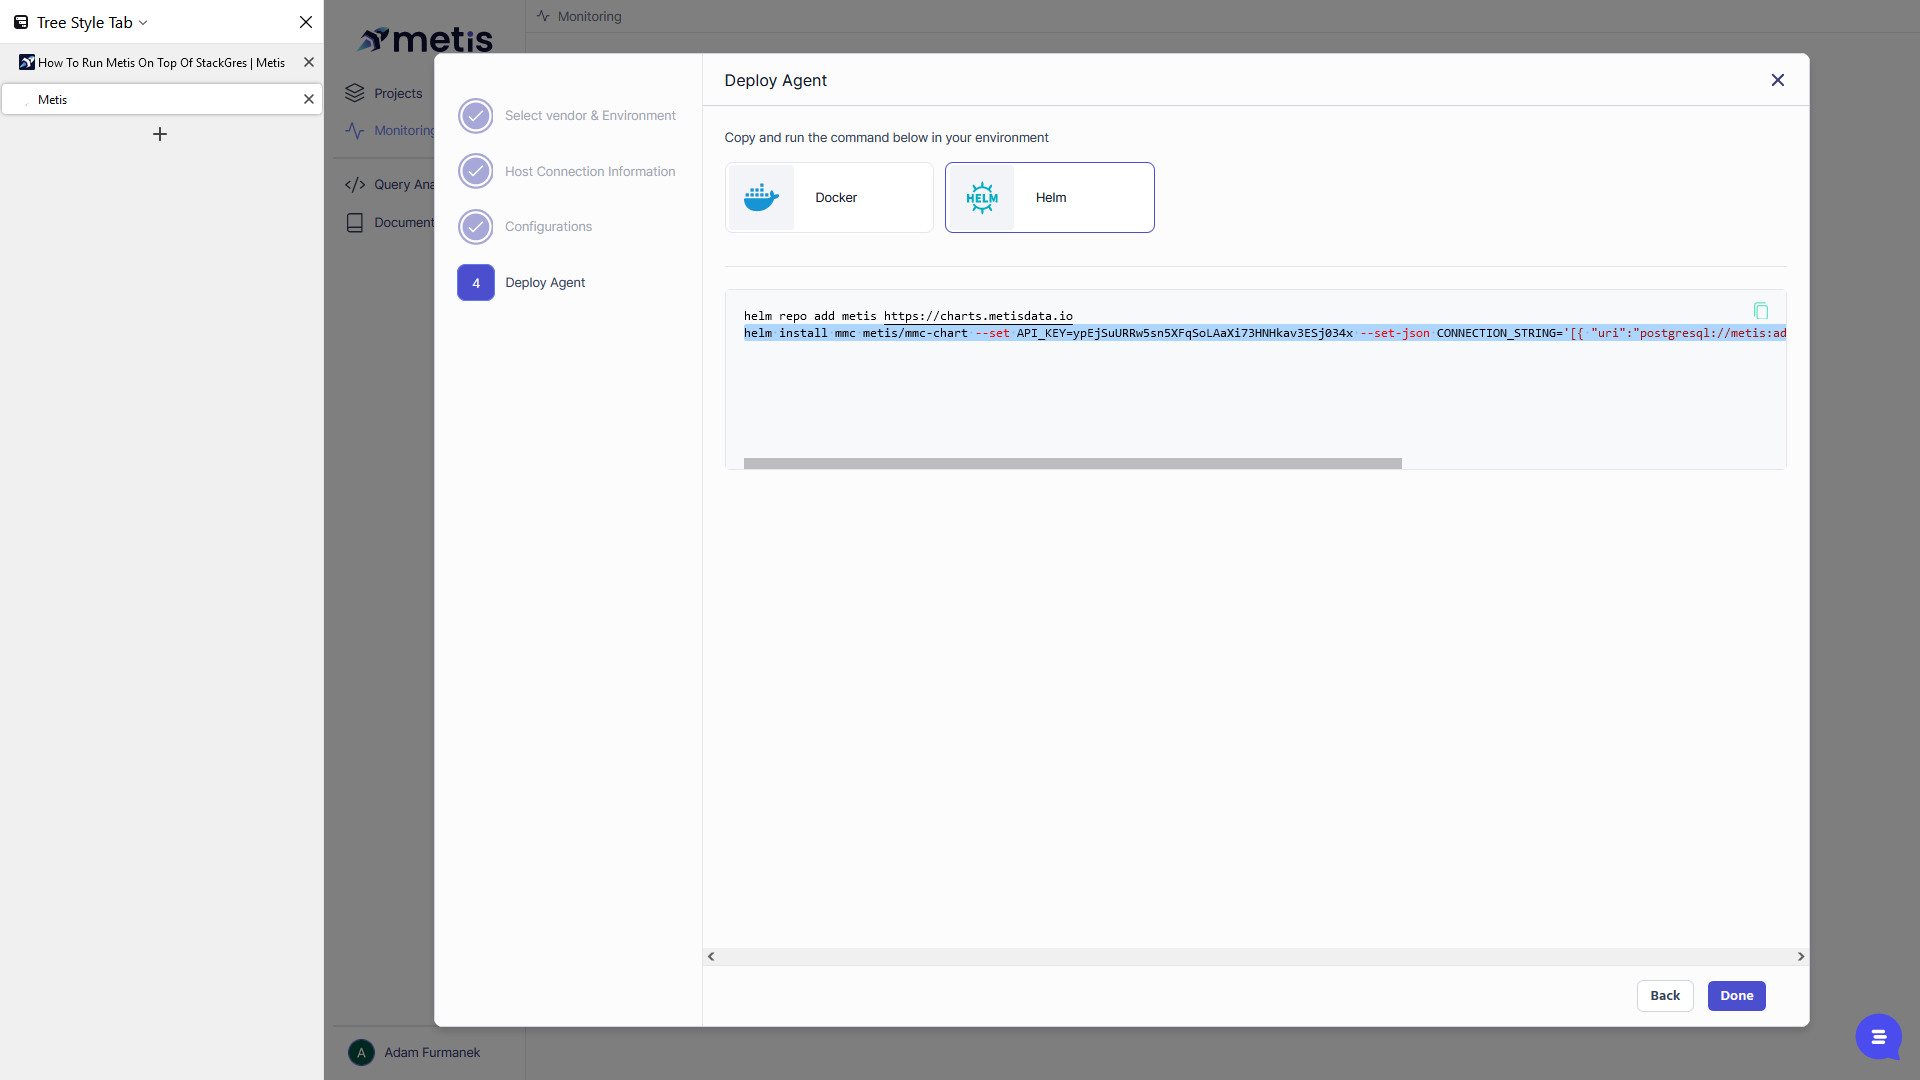
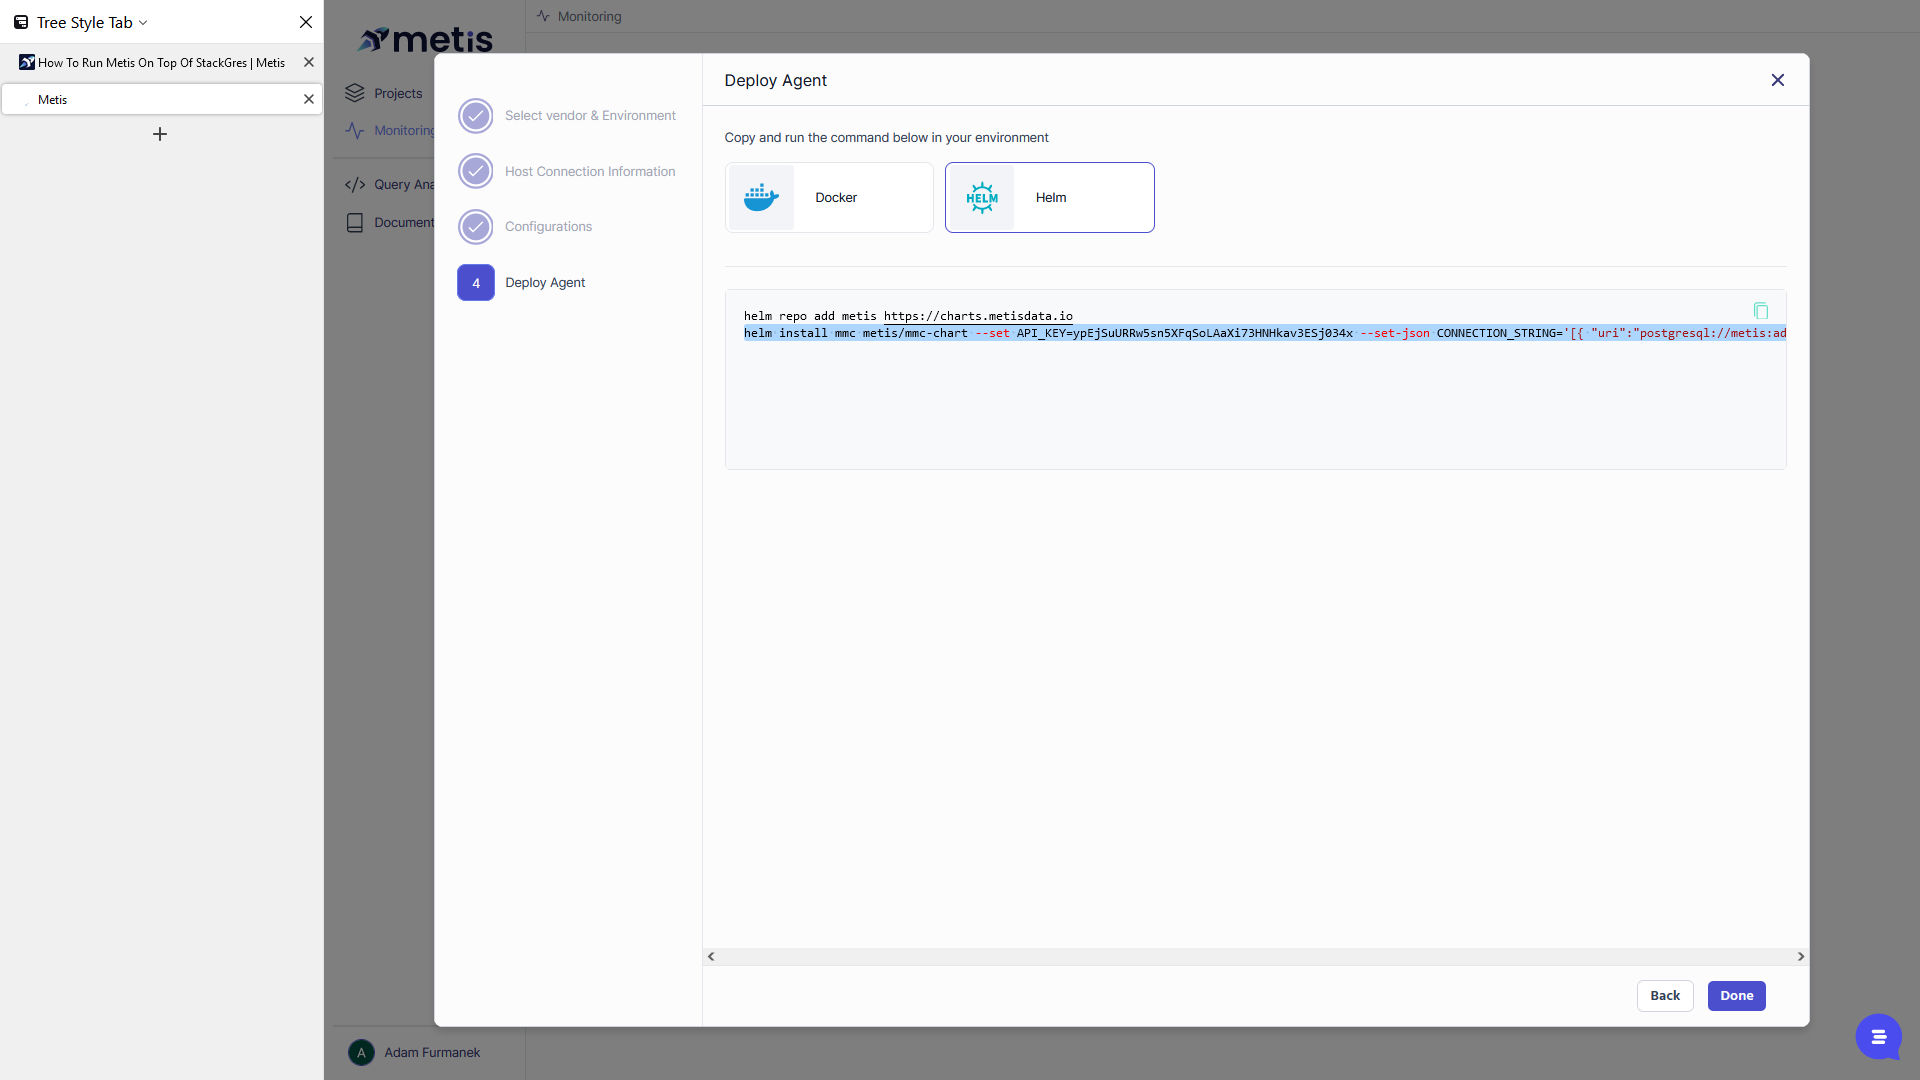
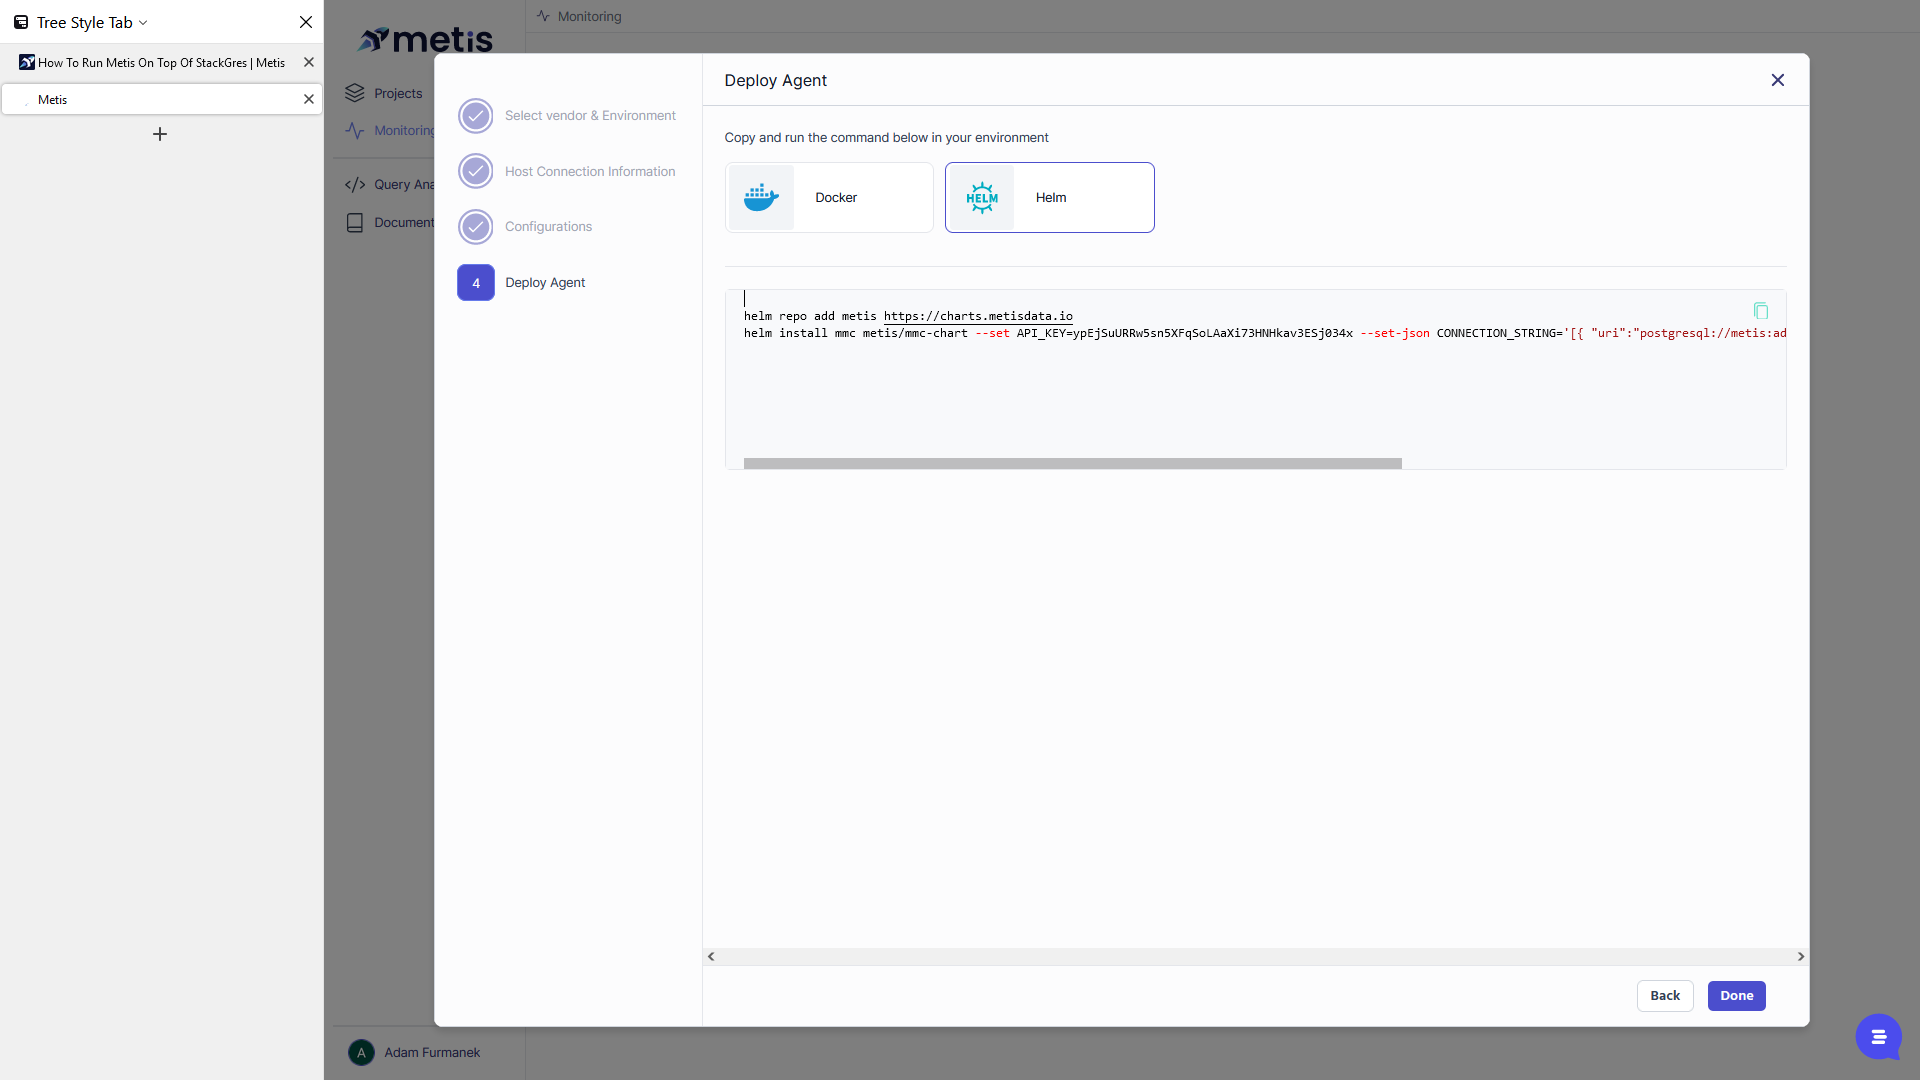
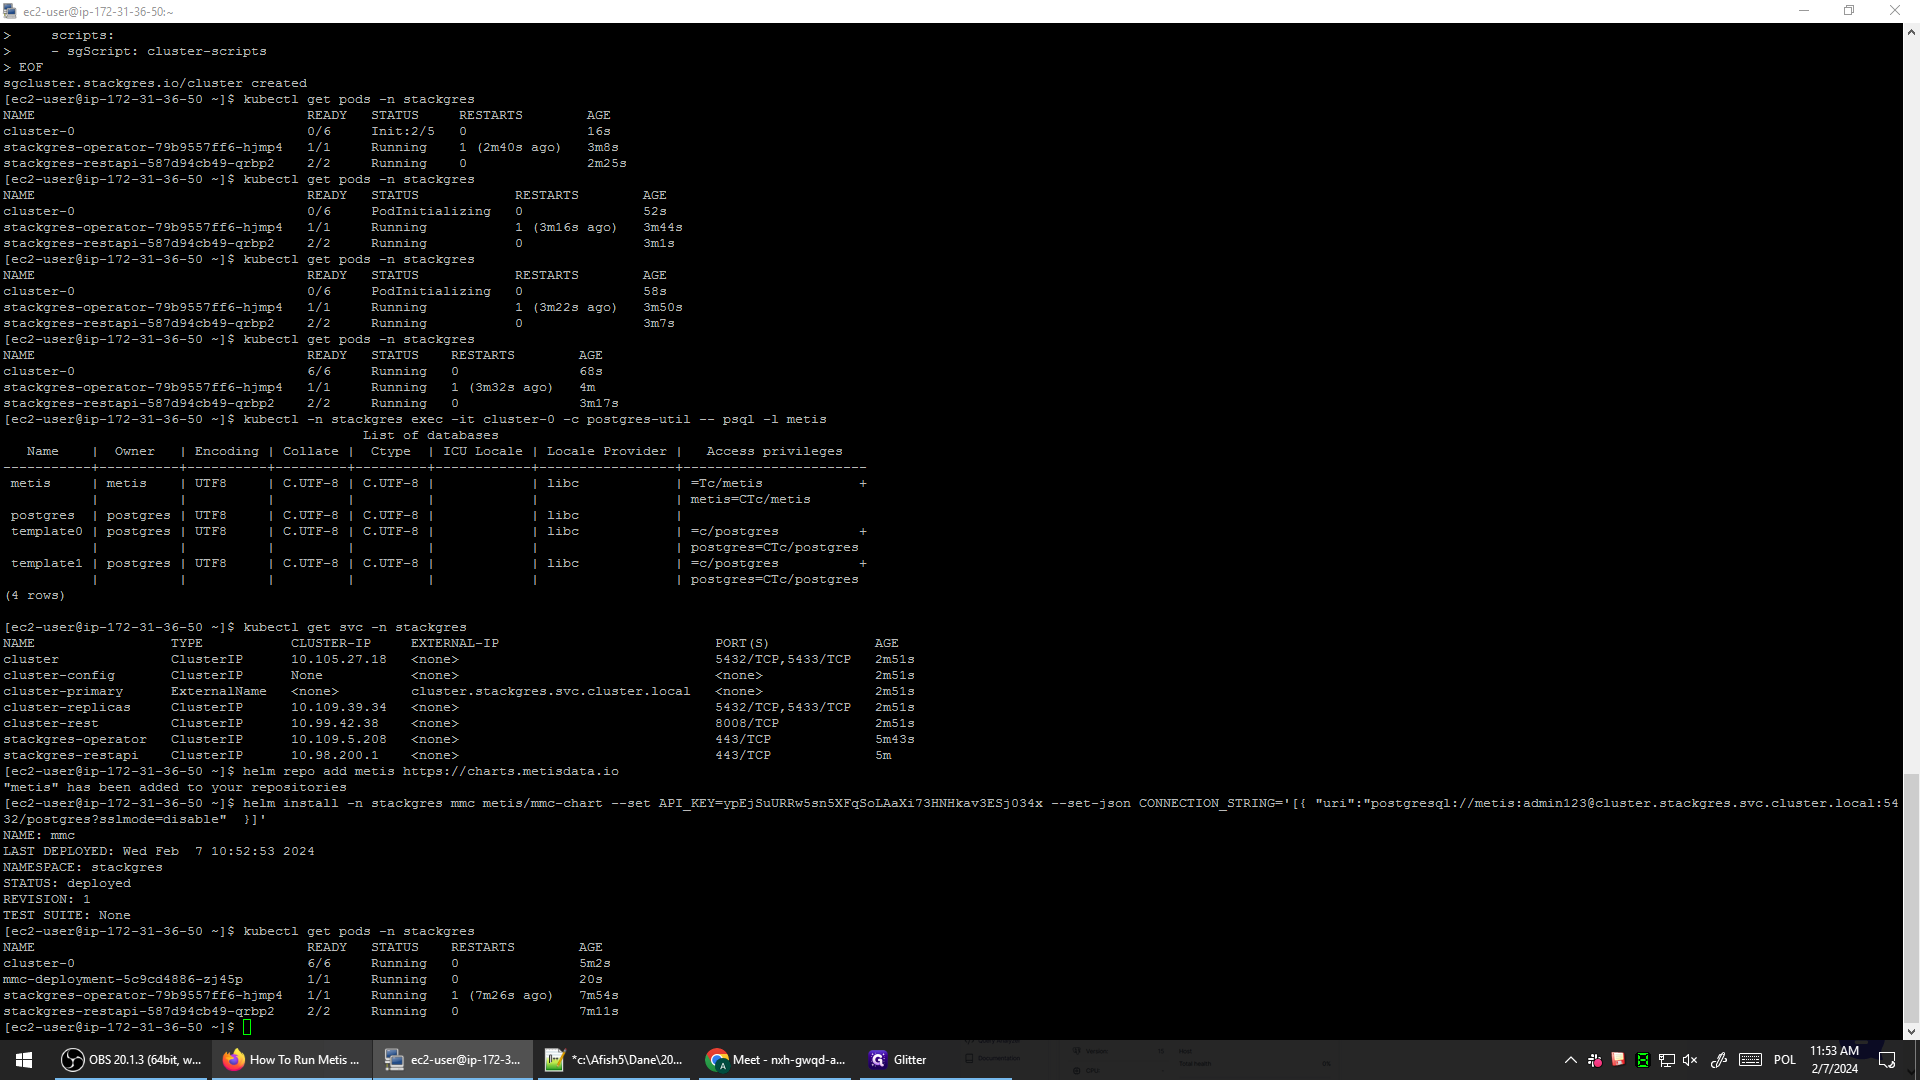
This command will install MMC using the API key. The API key will be unique to your Metis project and will utilize the connection string provided. Additionally, a tweak is required since everything was deployed in the namespace stackres.
We also need to extend this command to use the namespace stackres. Now, you can run this command to deploy MMC to the namespace stackres, where it will initialize.
Once again, we can click "Done" here and return to the instructions.
And once again, we can try checking all the pods to see if everything is up and running.
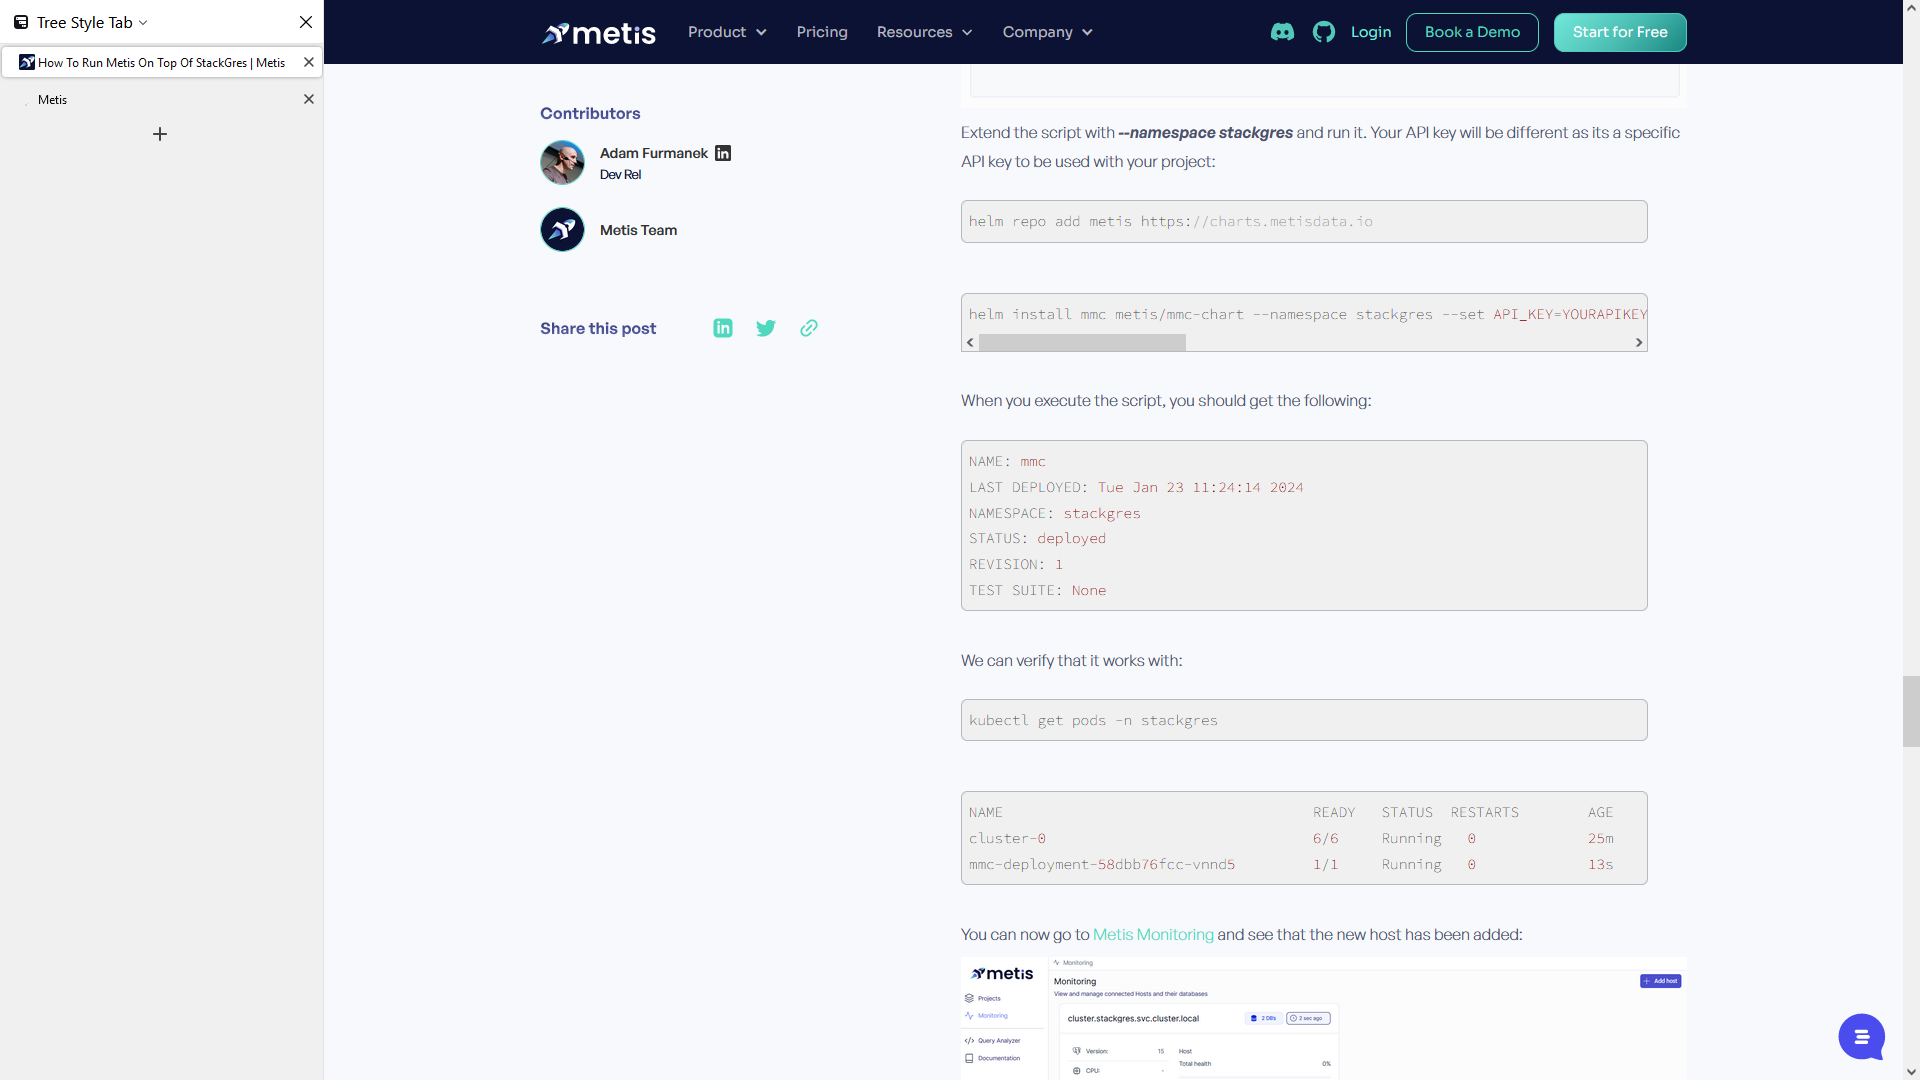

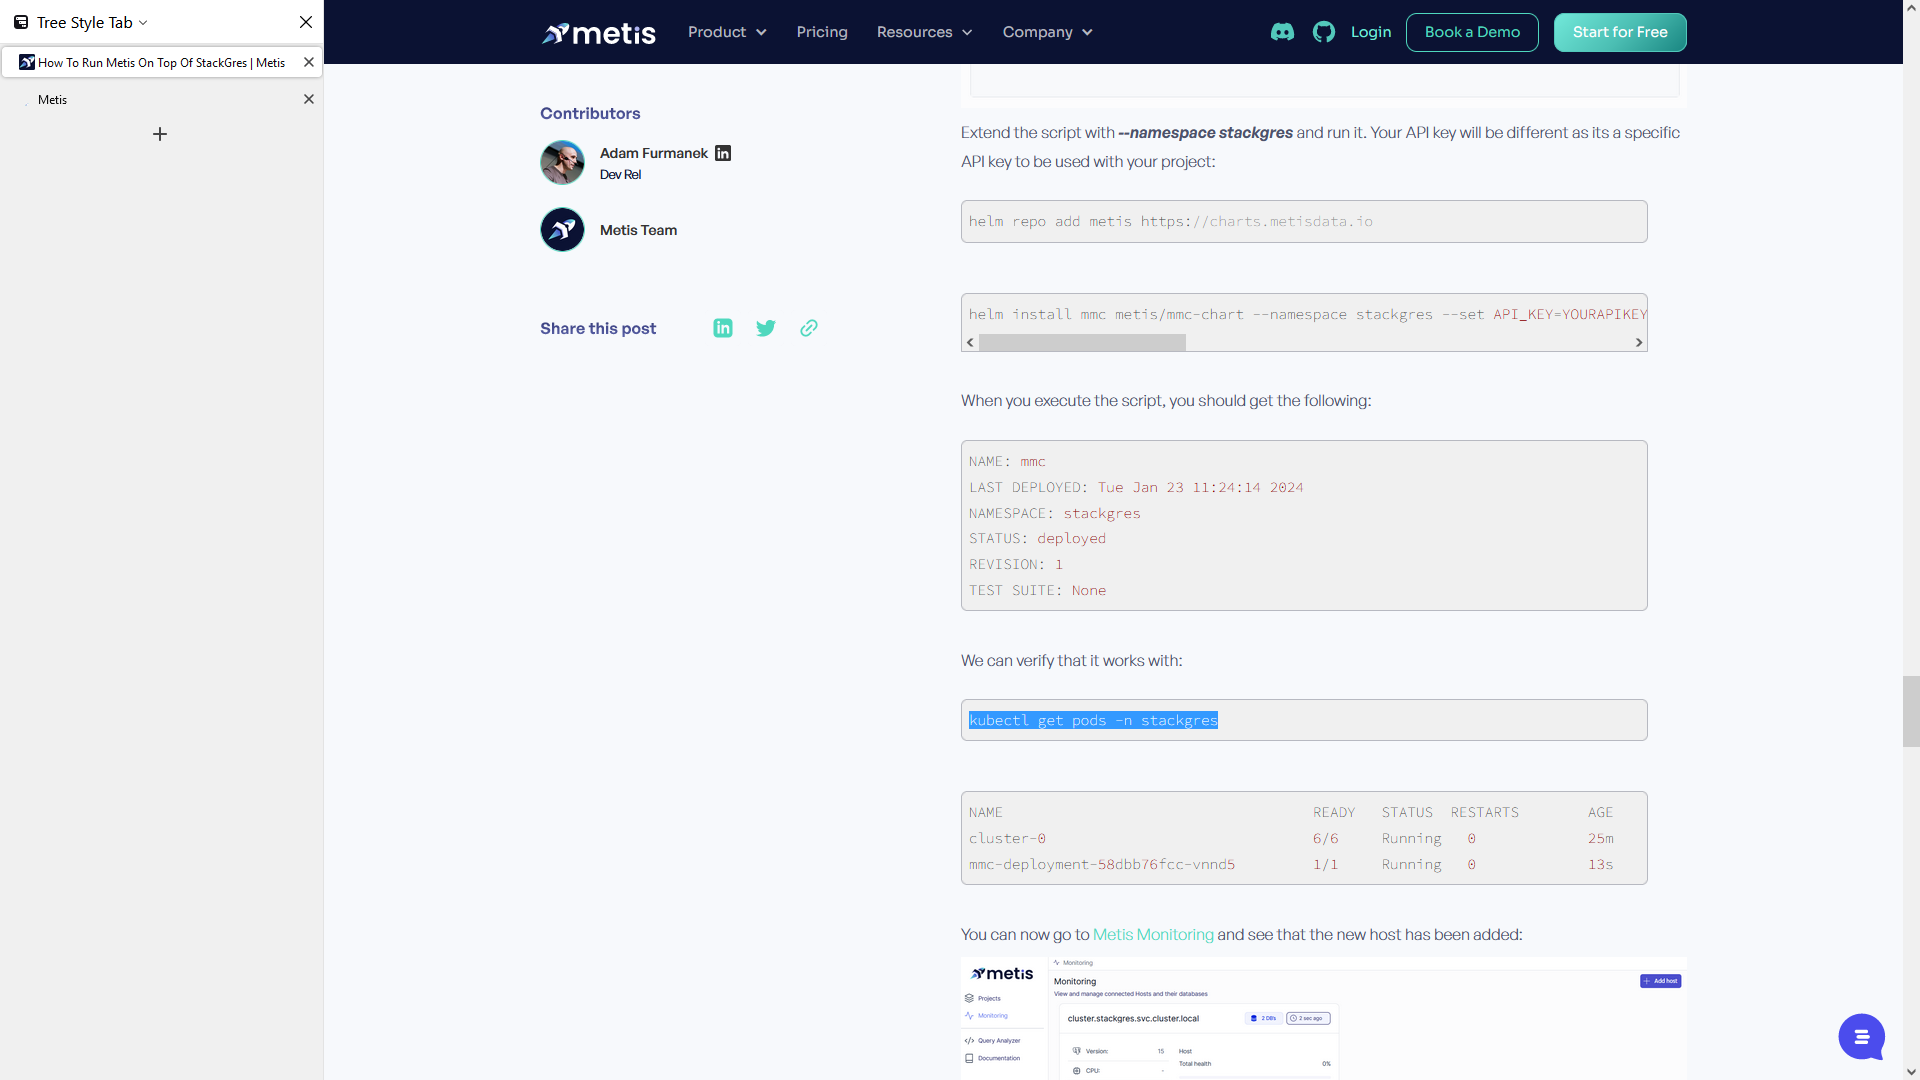

After running the command "get pods," you will observe that the MMC is deployed and running correctly.
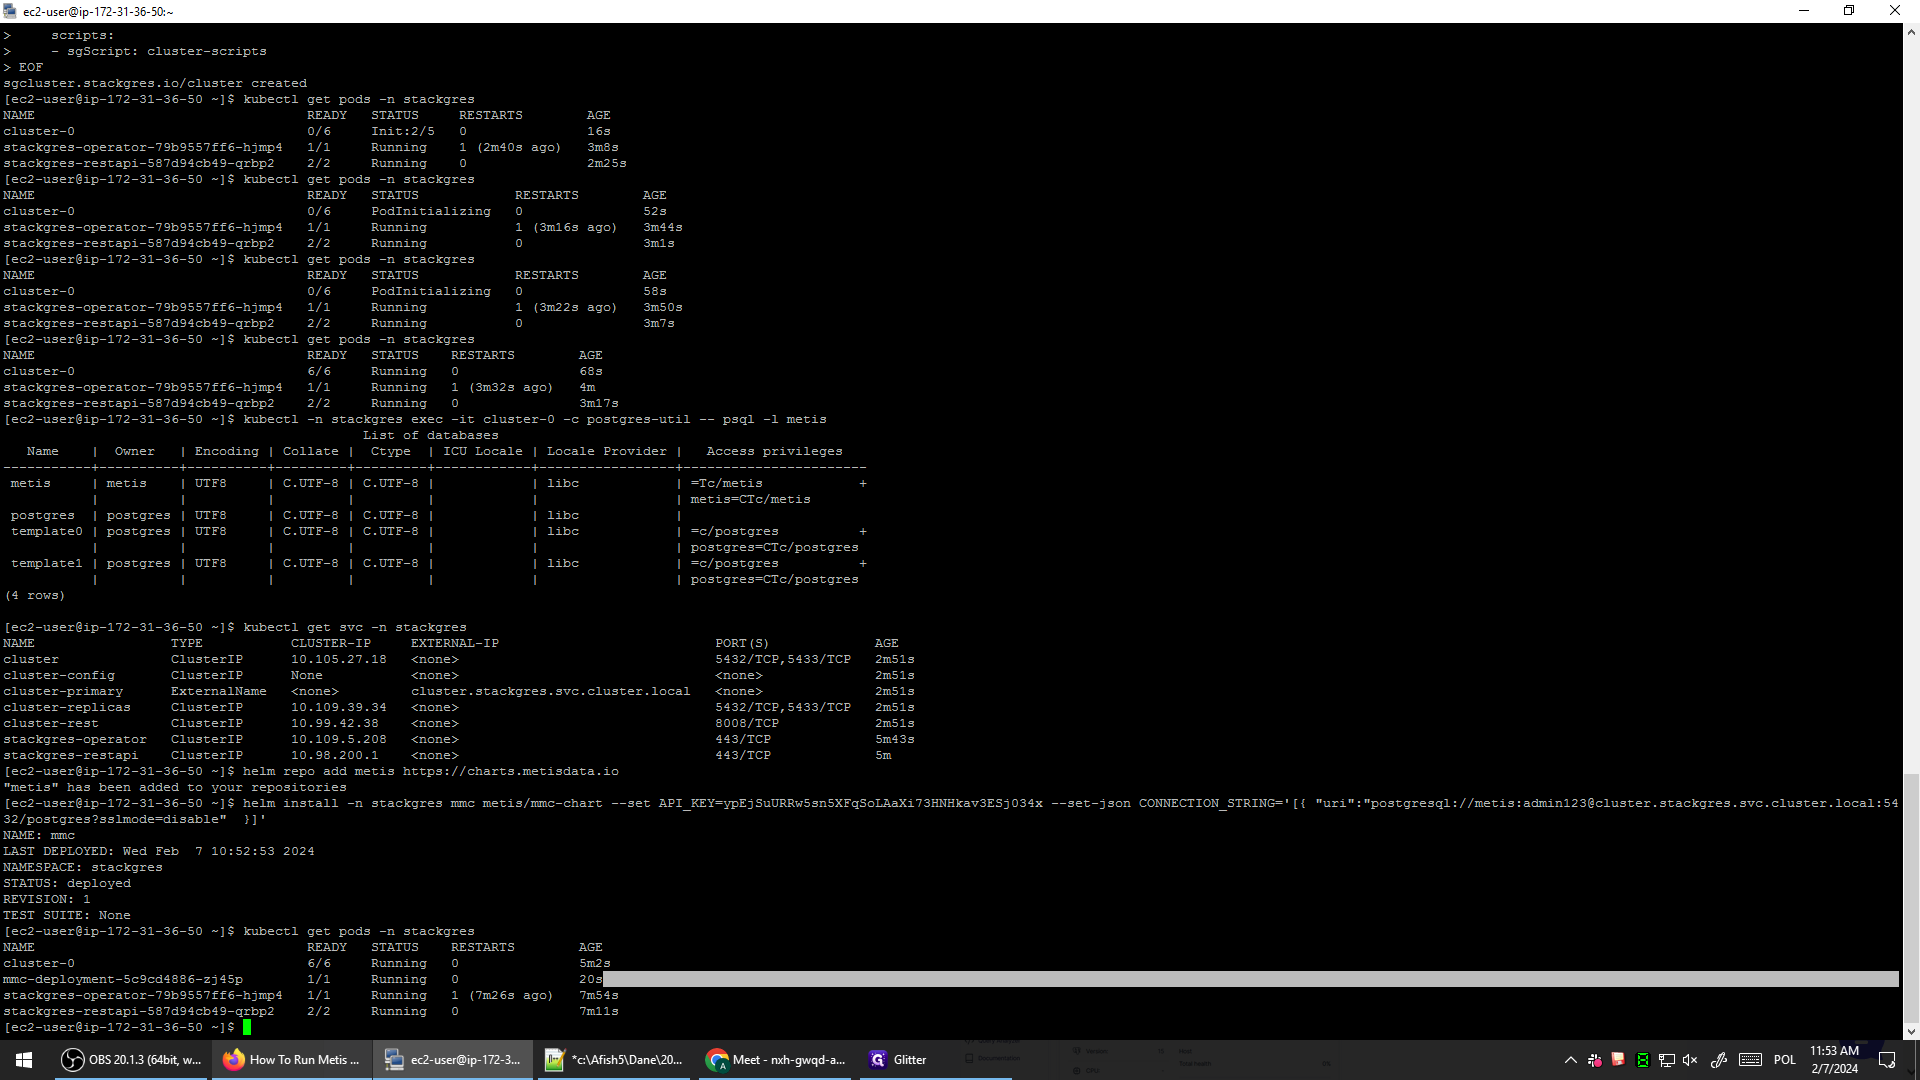
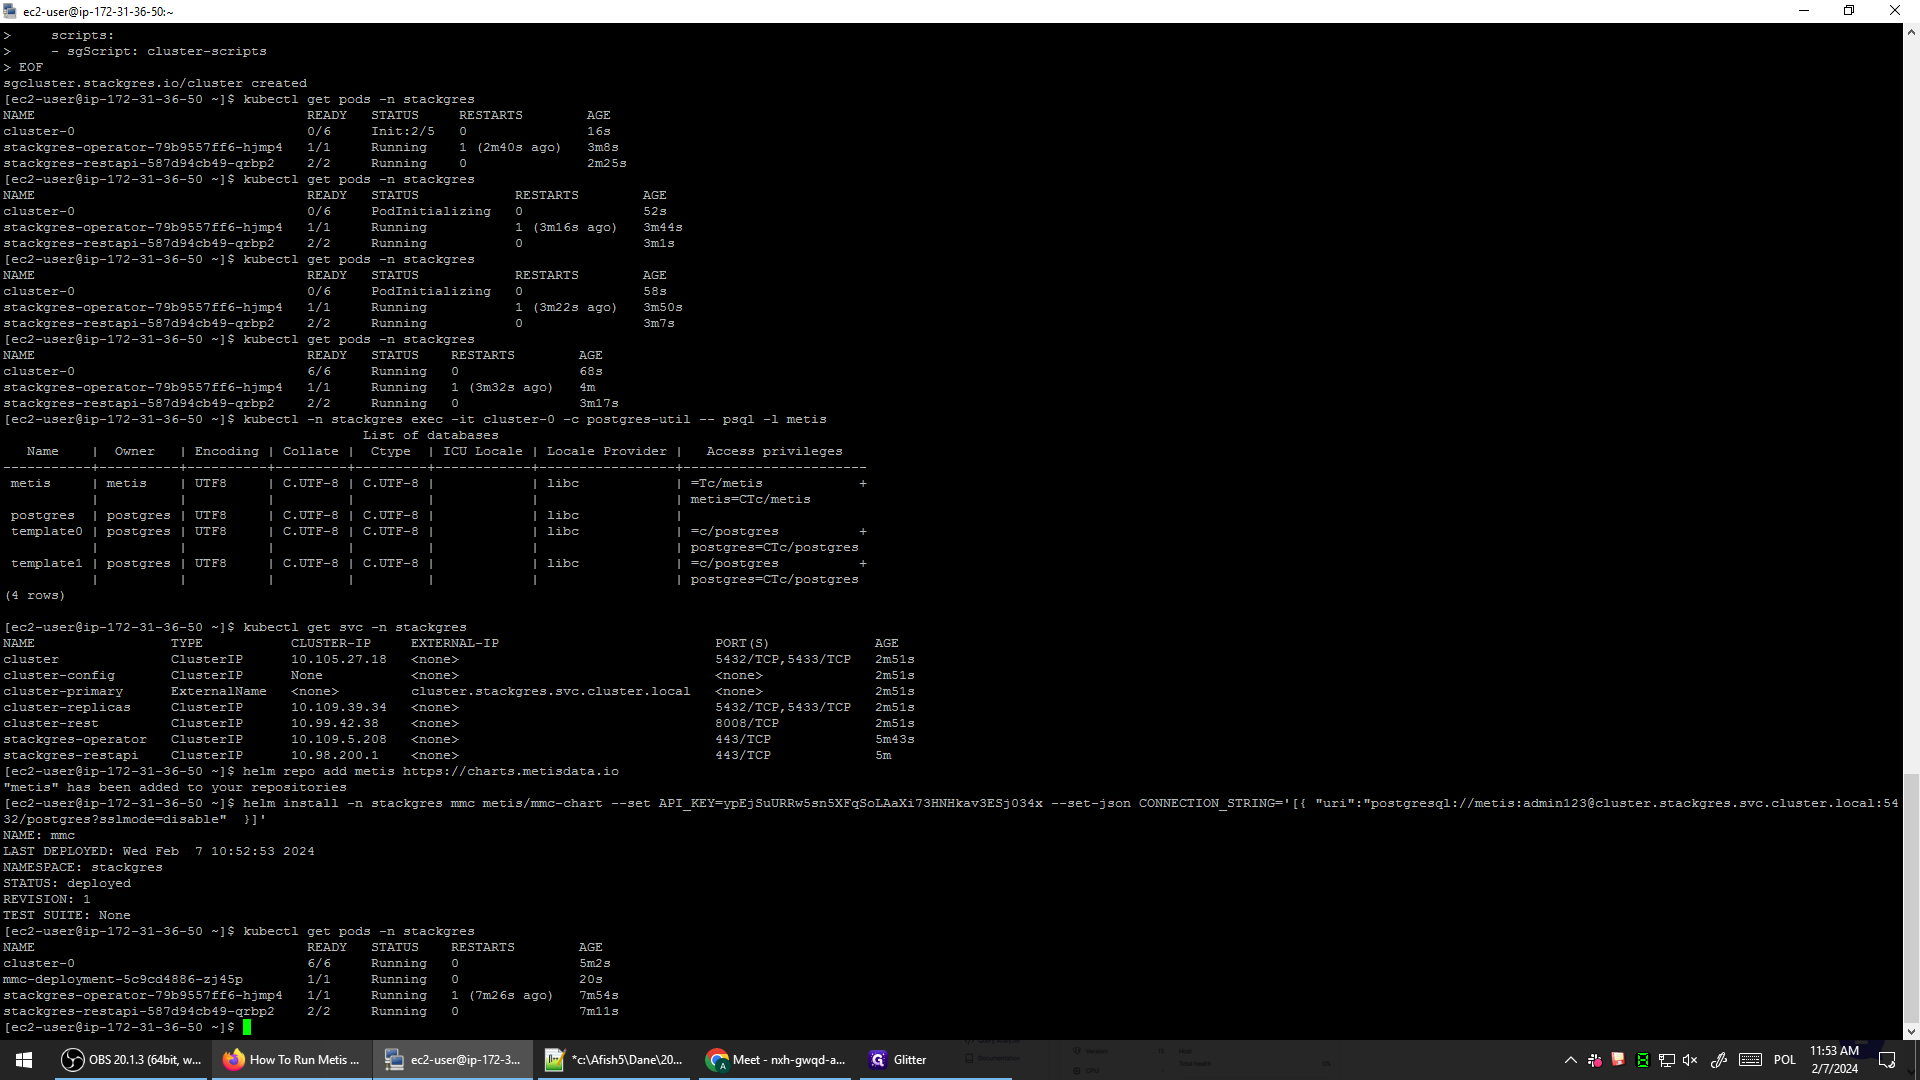
So, at this point, the MMC is up and running in our cluster. MMC can now connect to the database. The MMC Metis Metadata Collector can connect to your server and offer live monitoring.
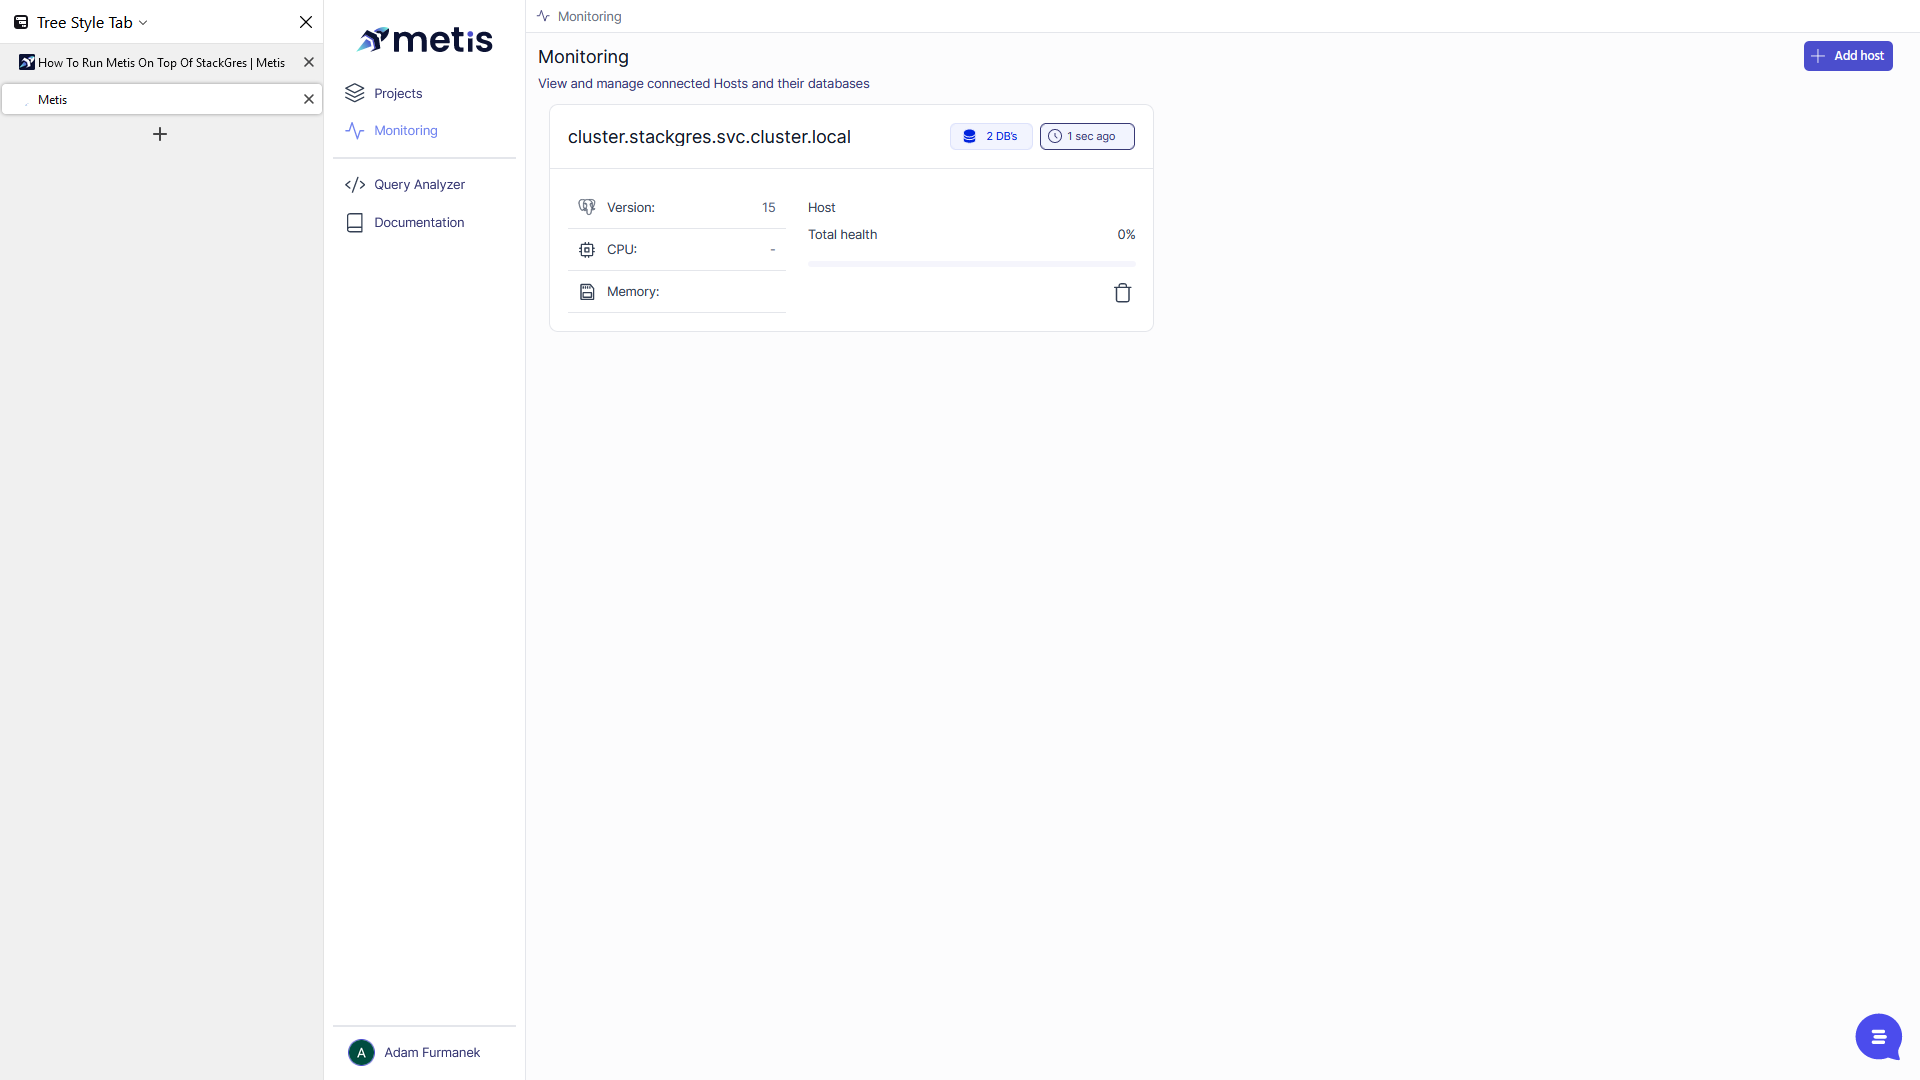
We can return to the monitoring page.

We can refresh this page.
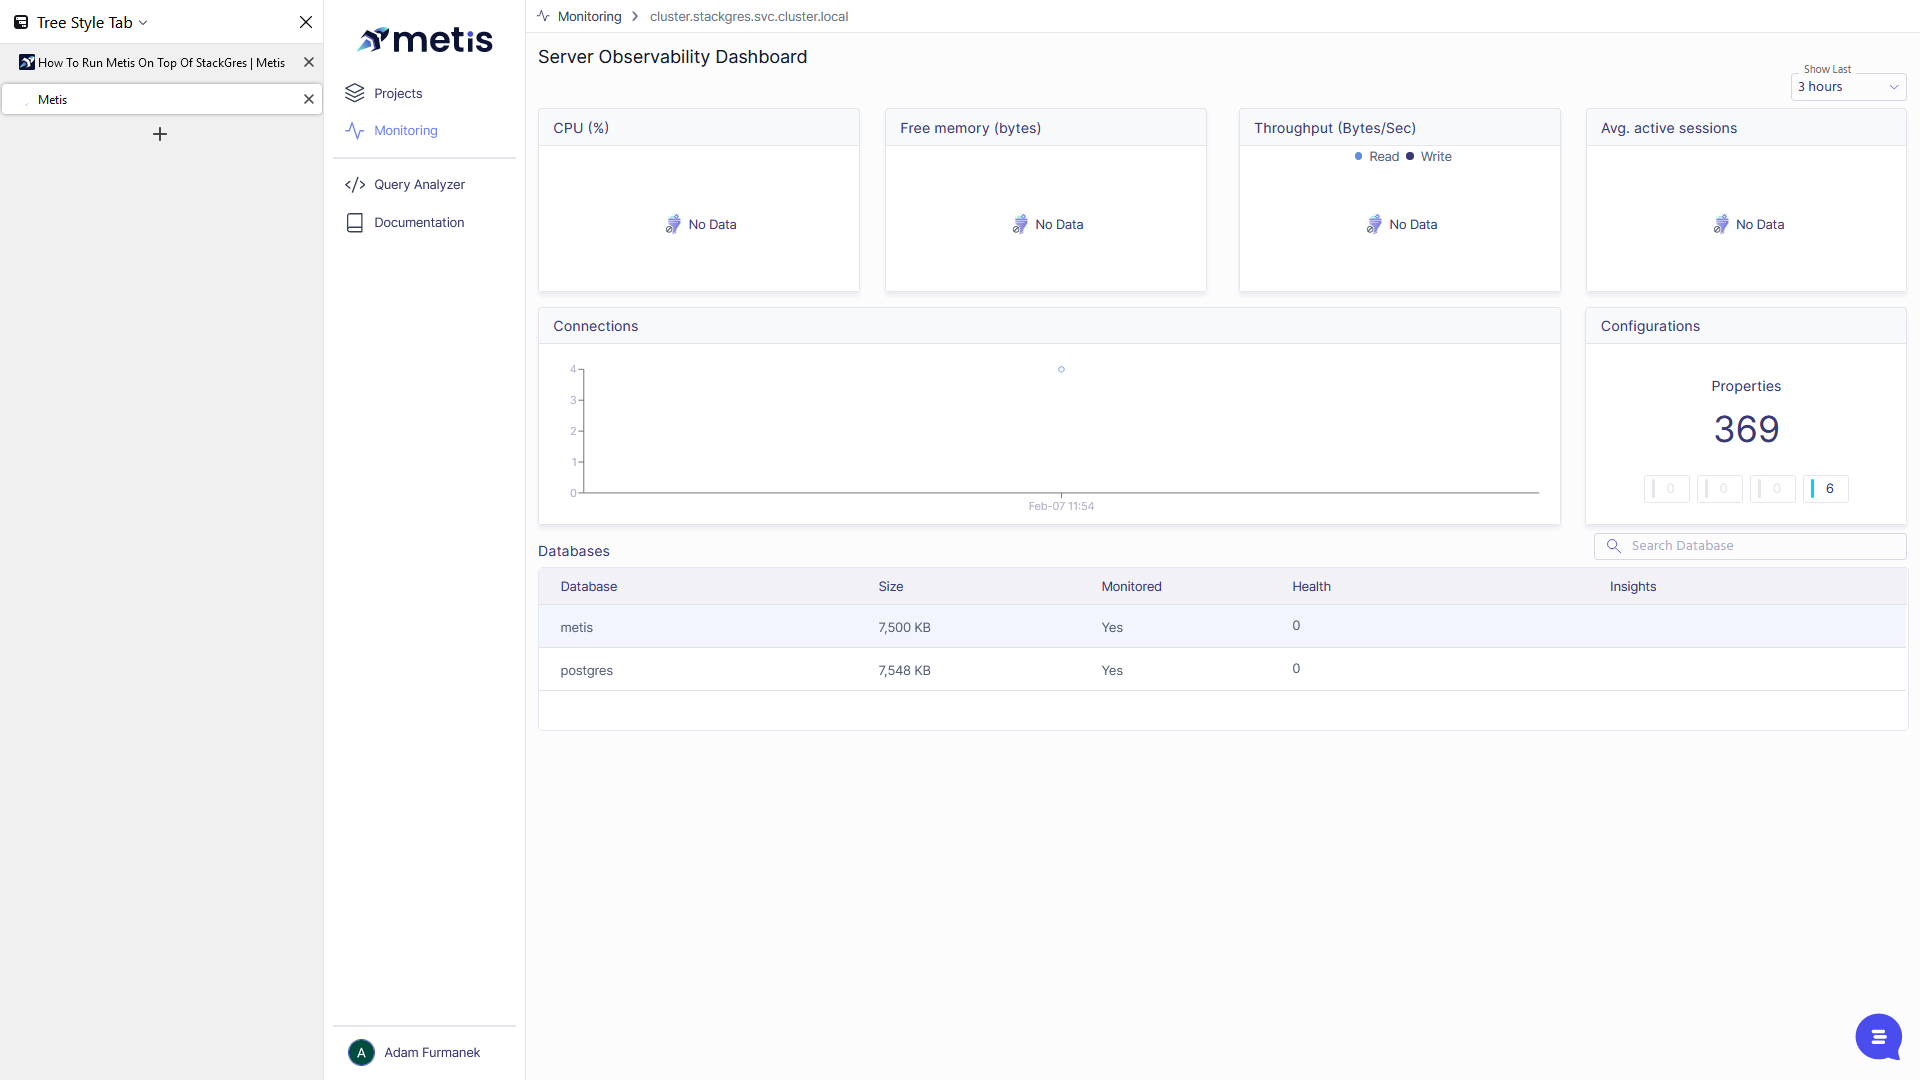
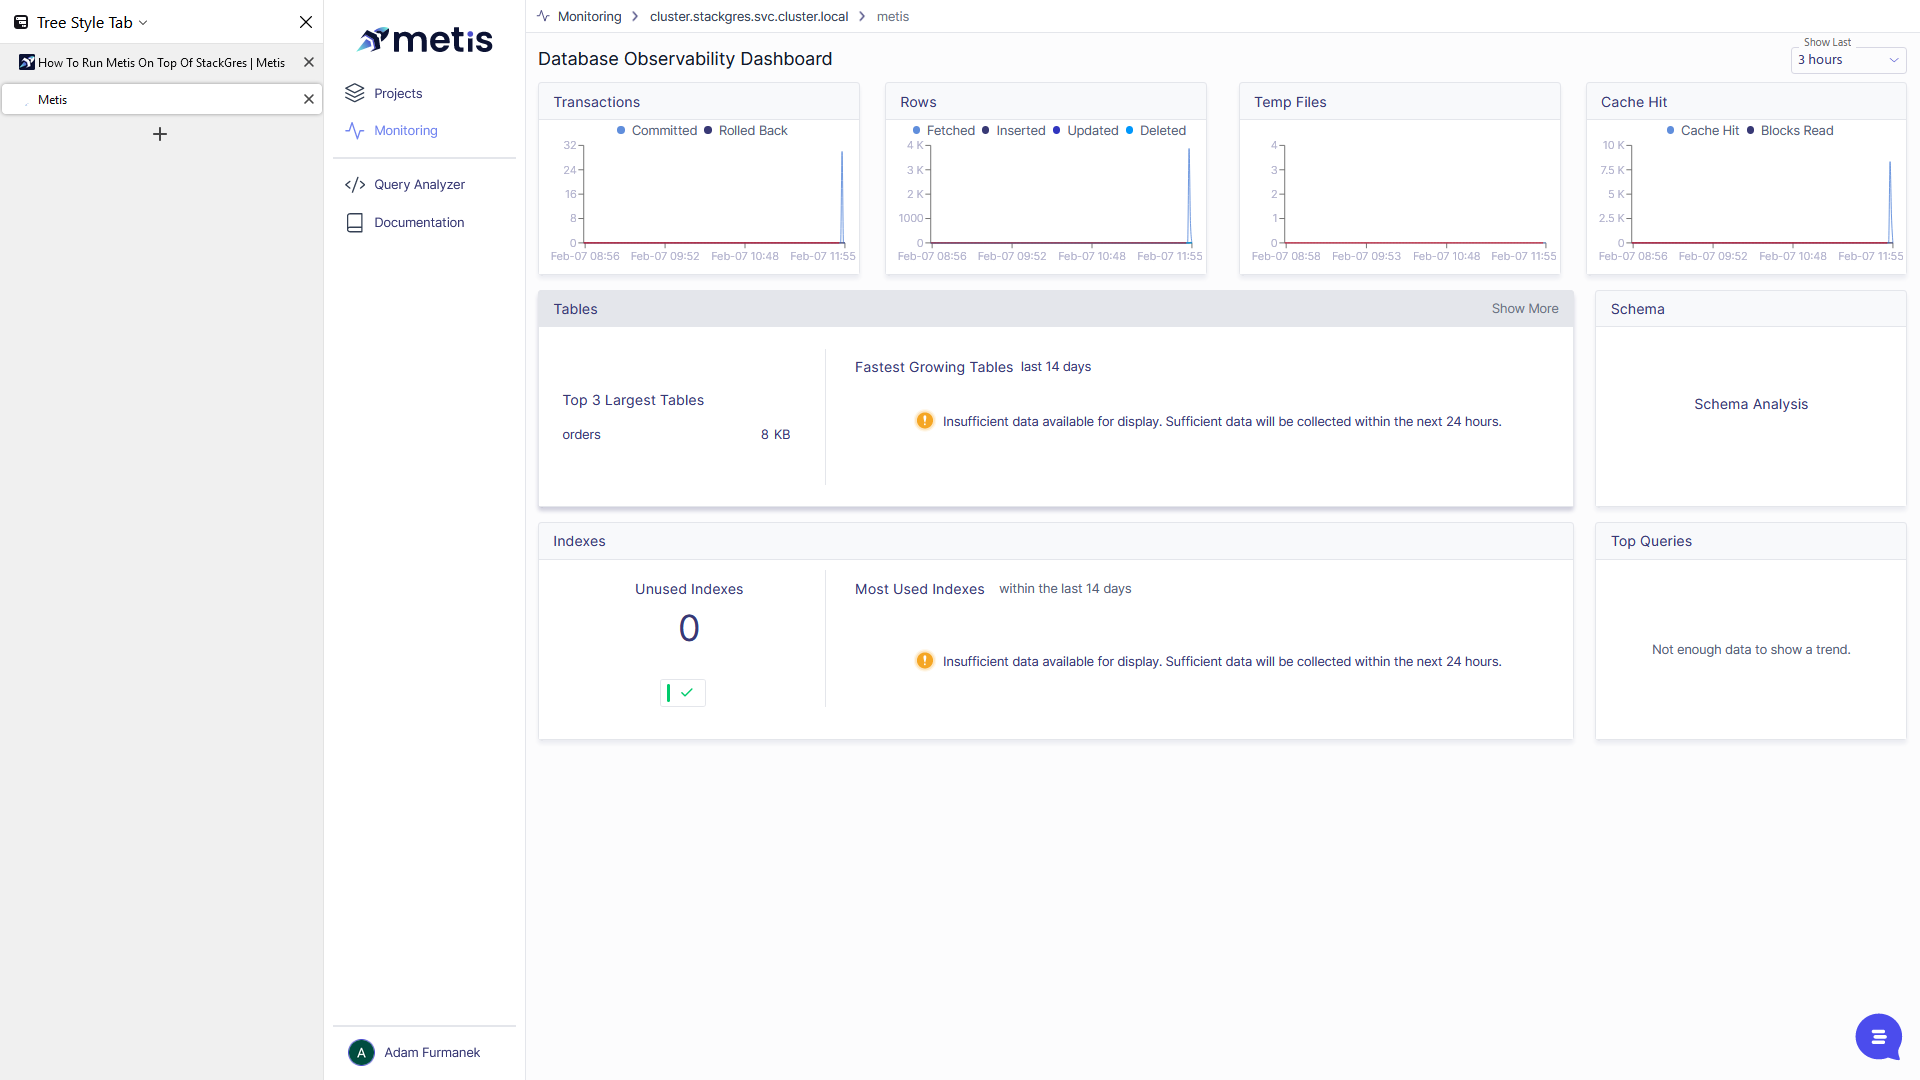
We should now see a new server named cluster stackres-svc-cluster-local with two databases.

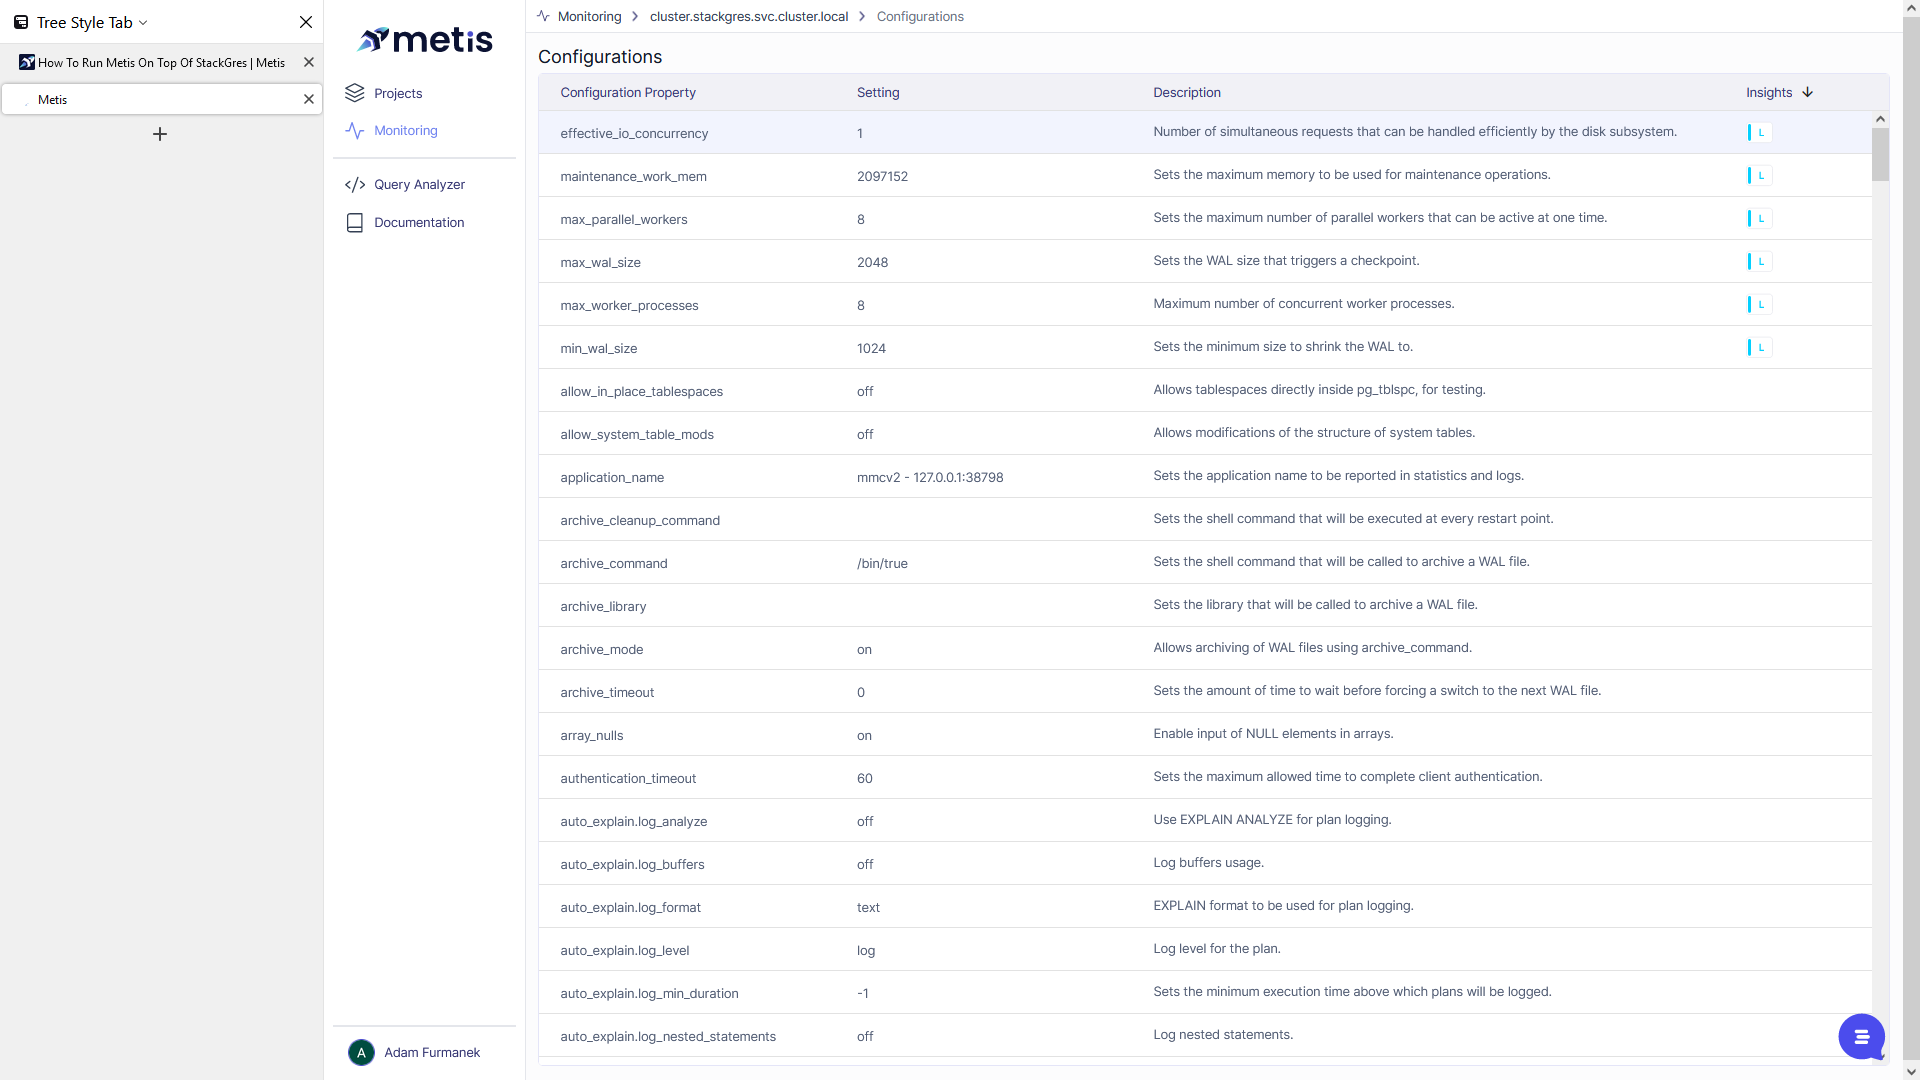
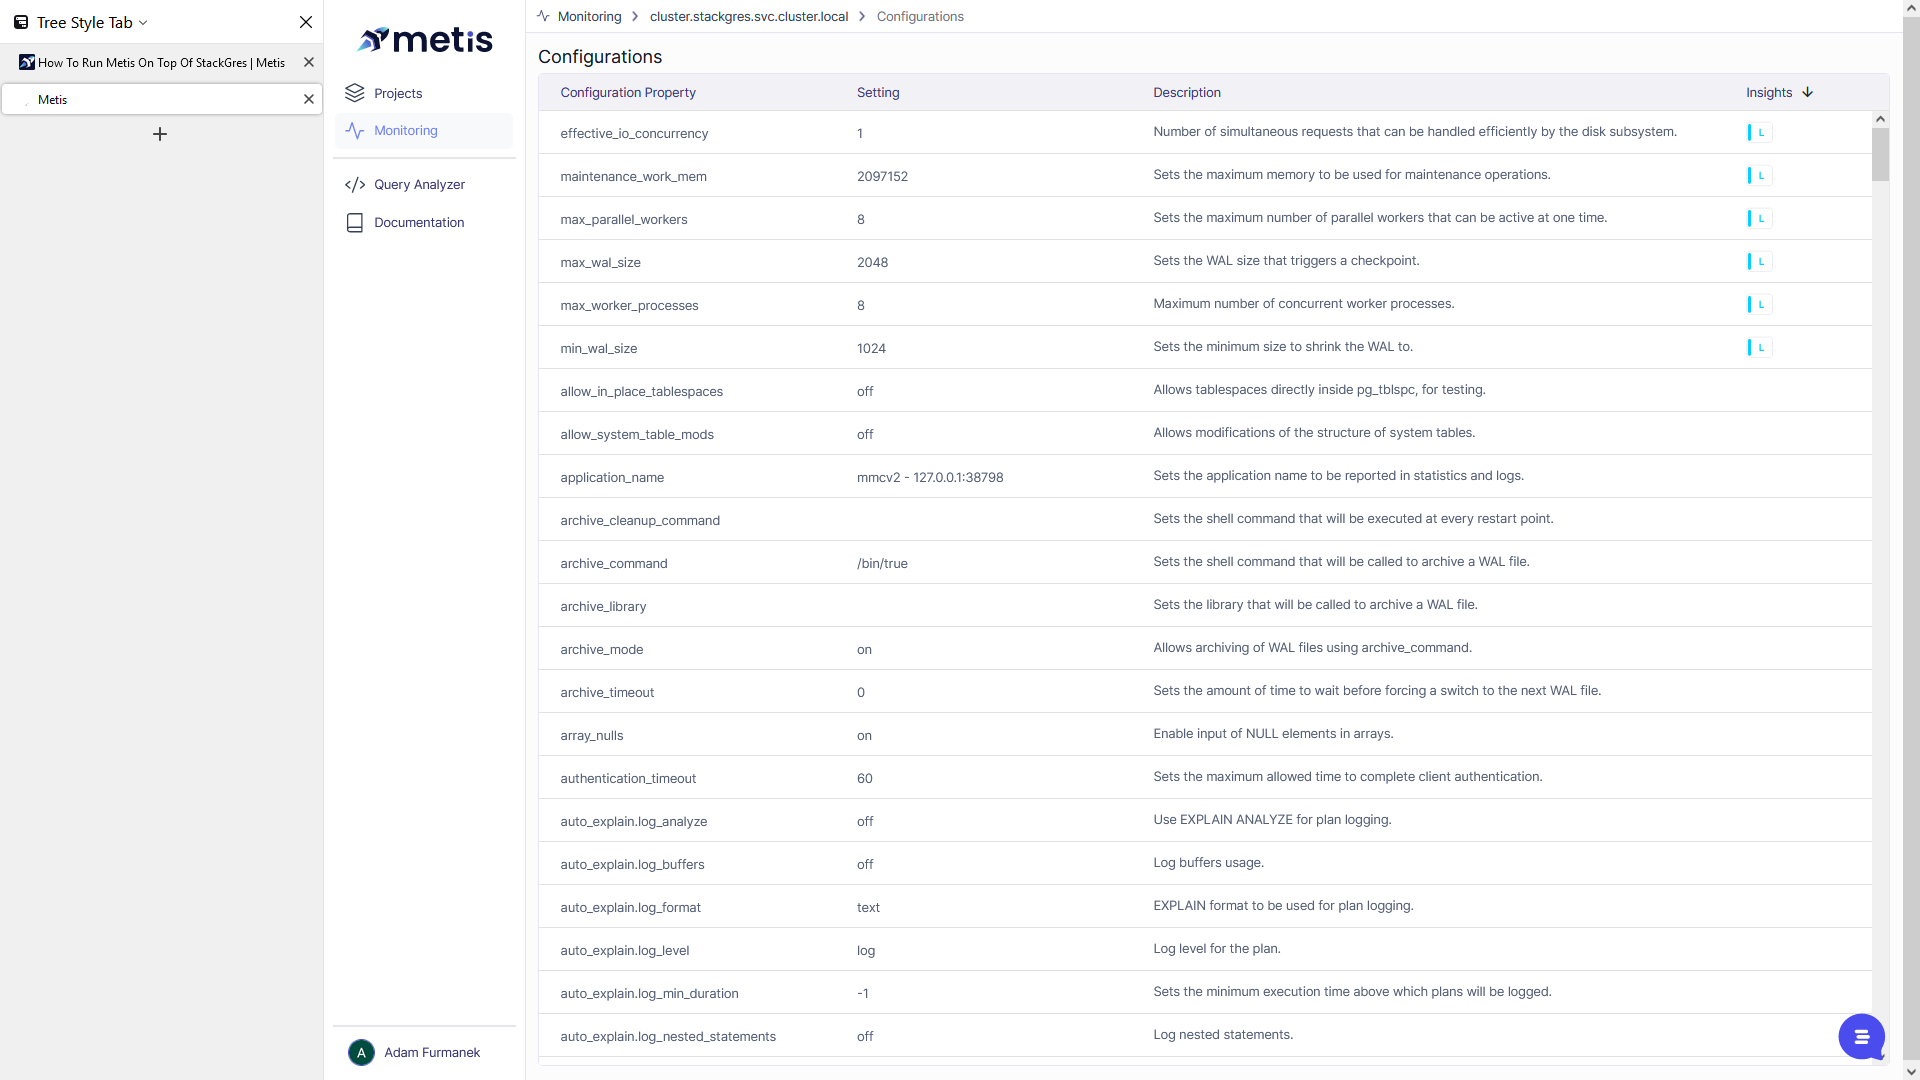
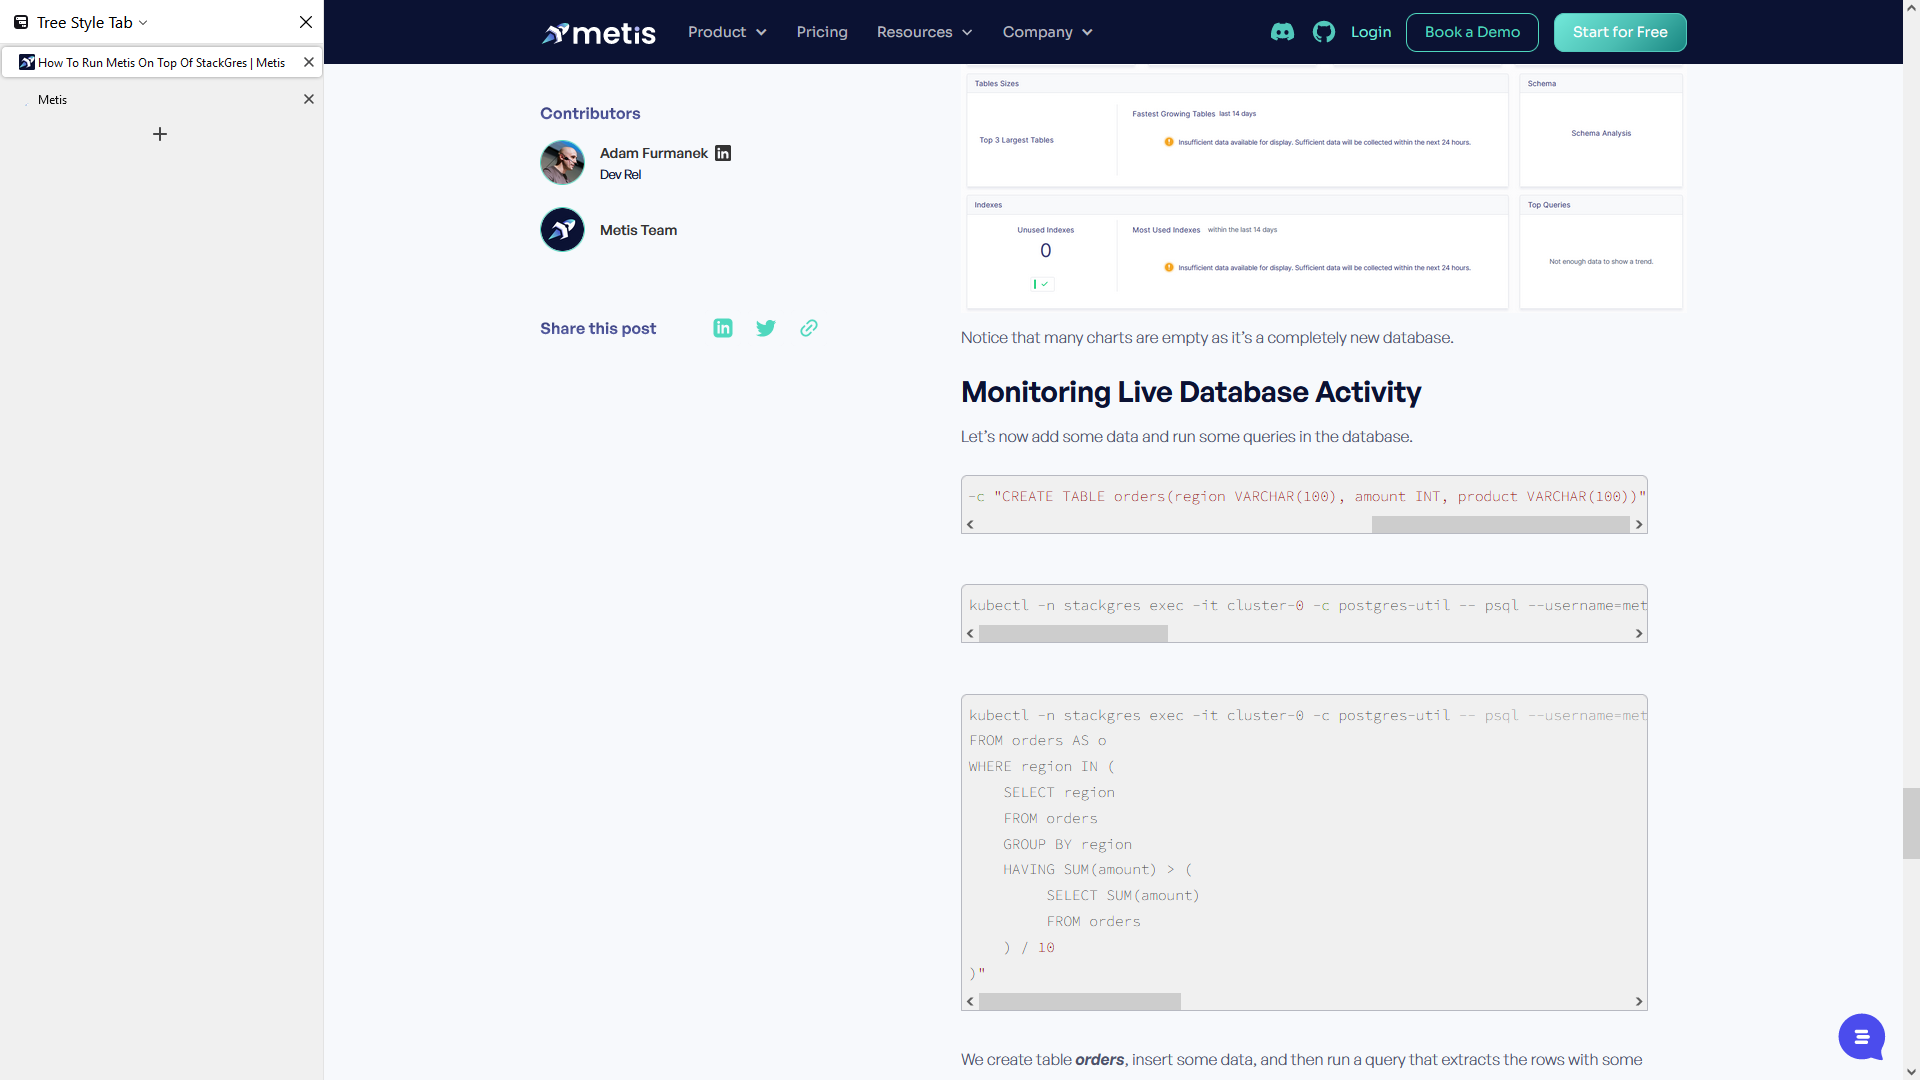
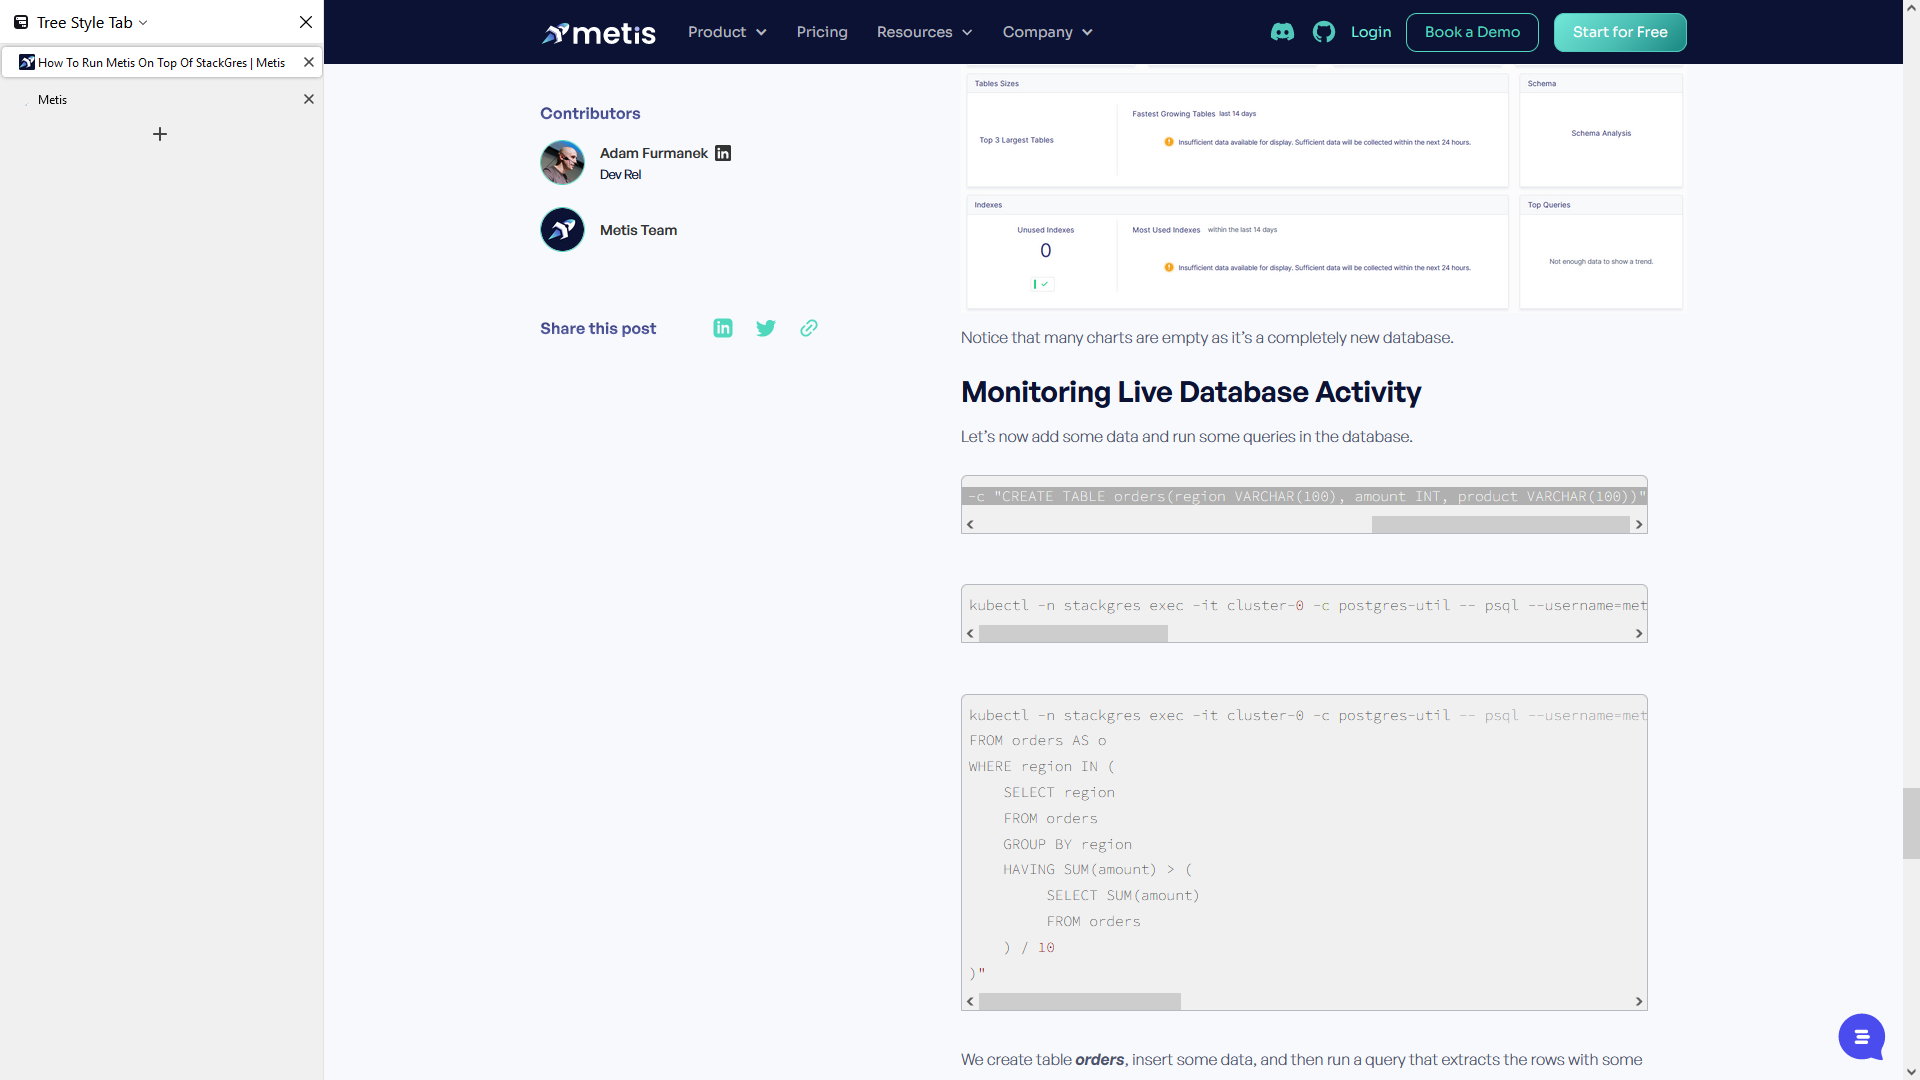
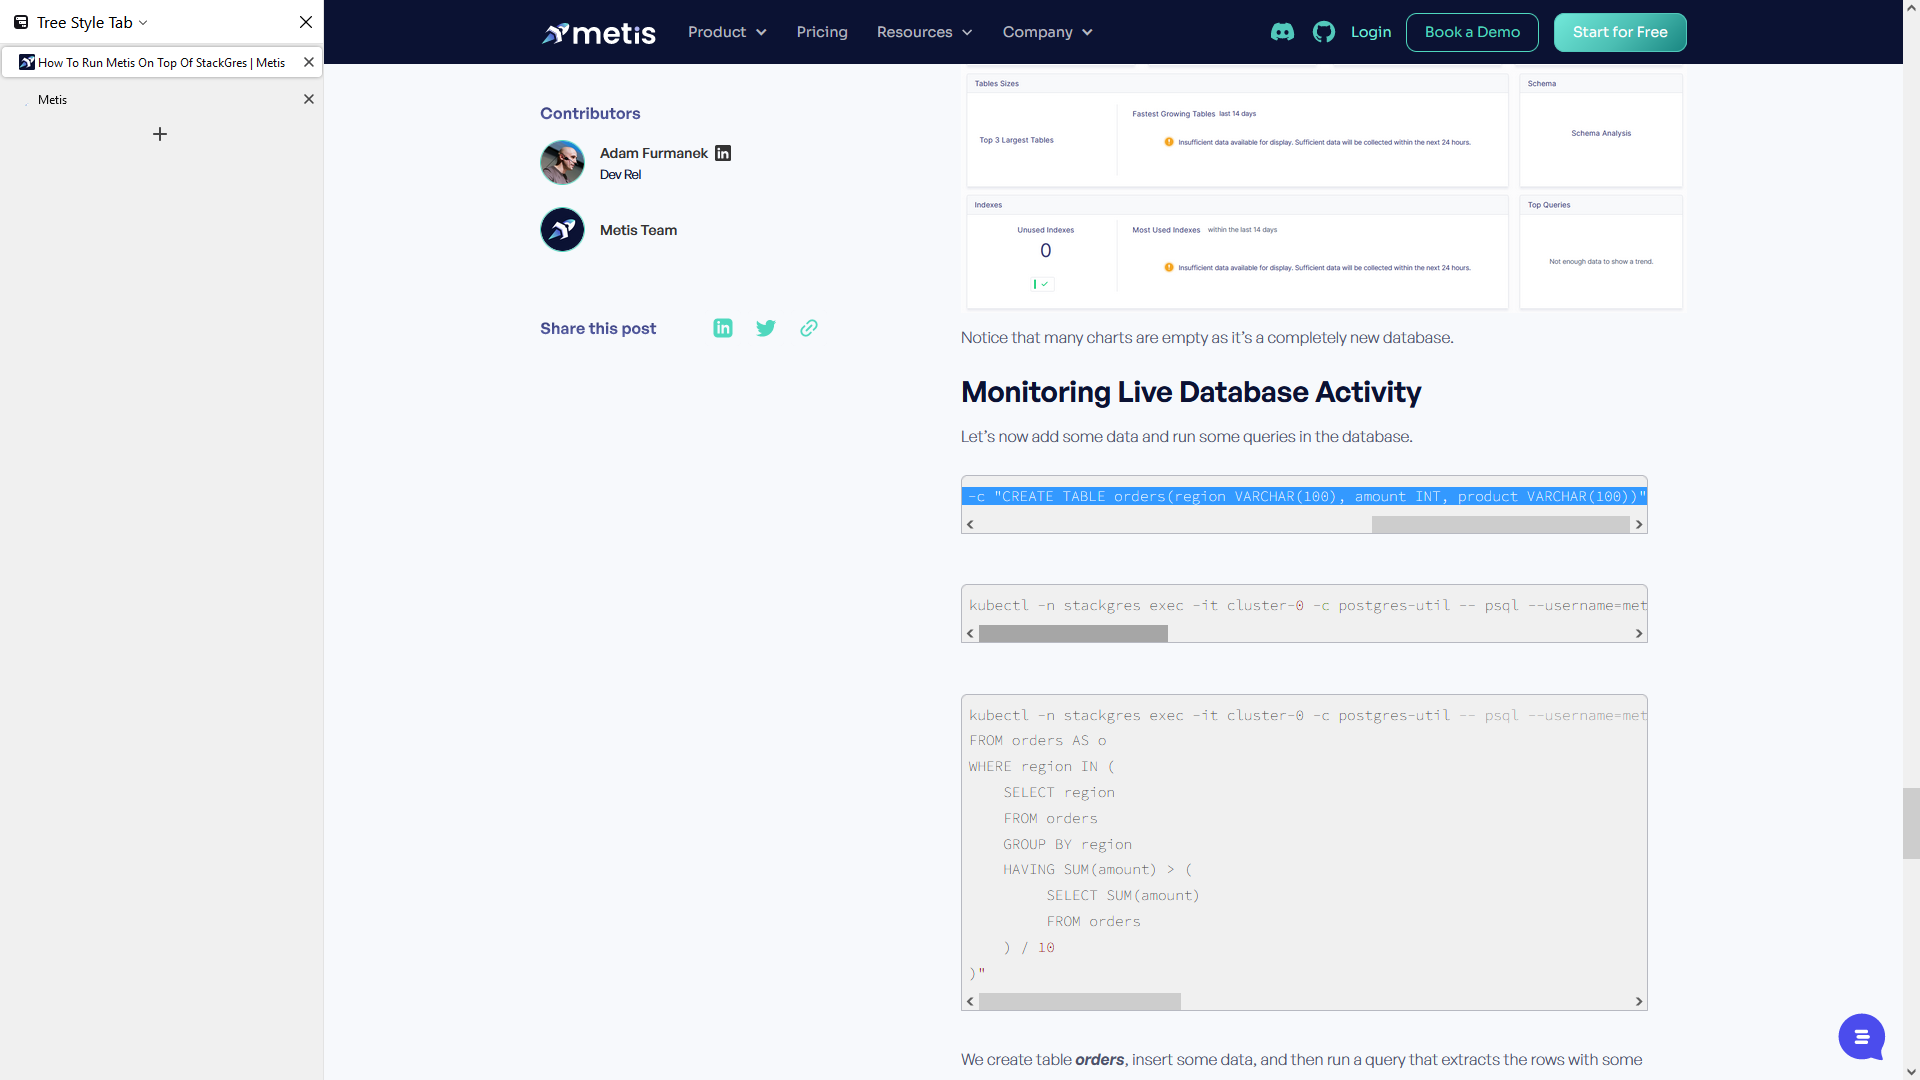
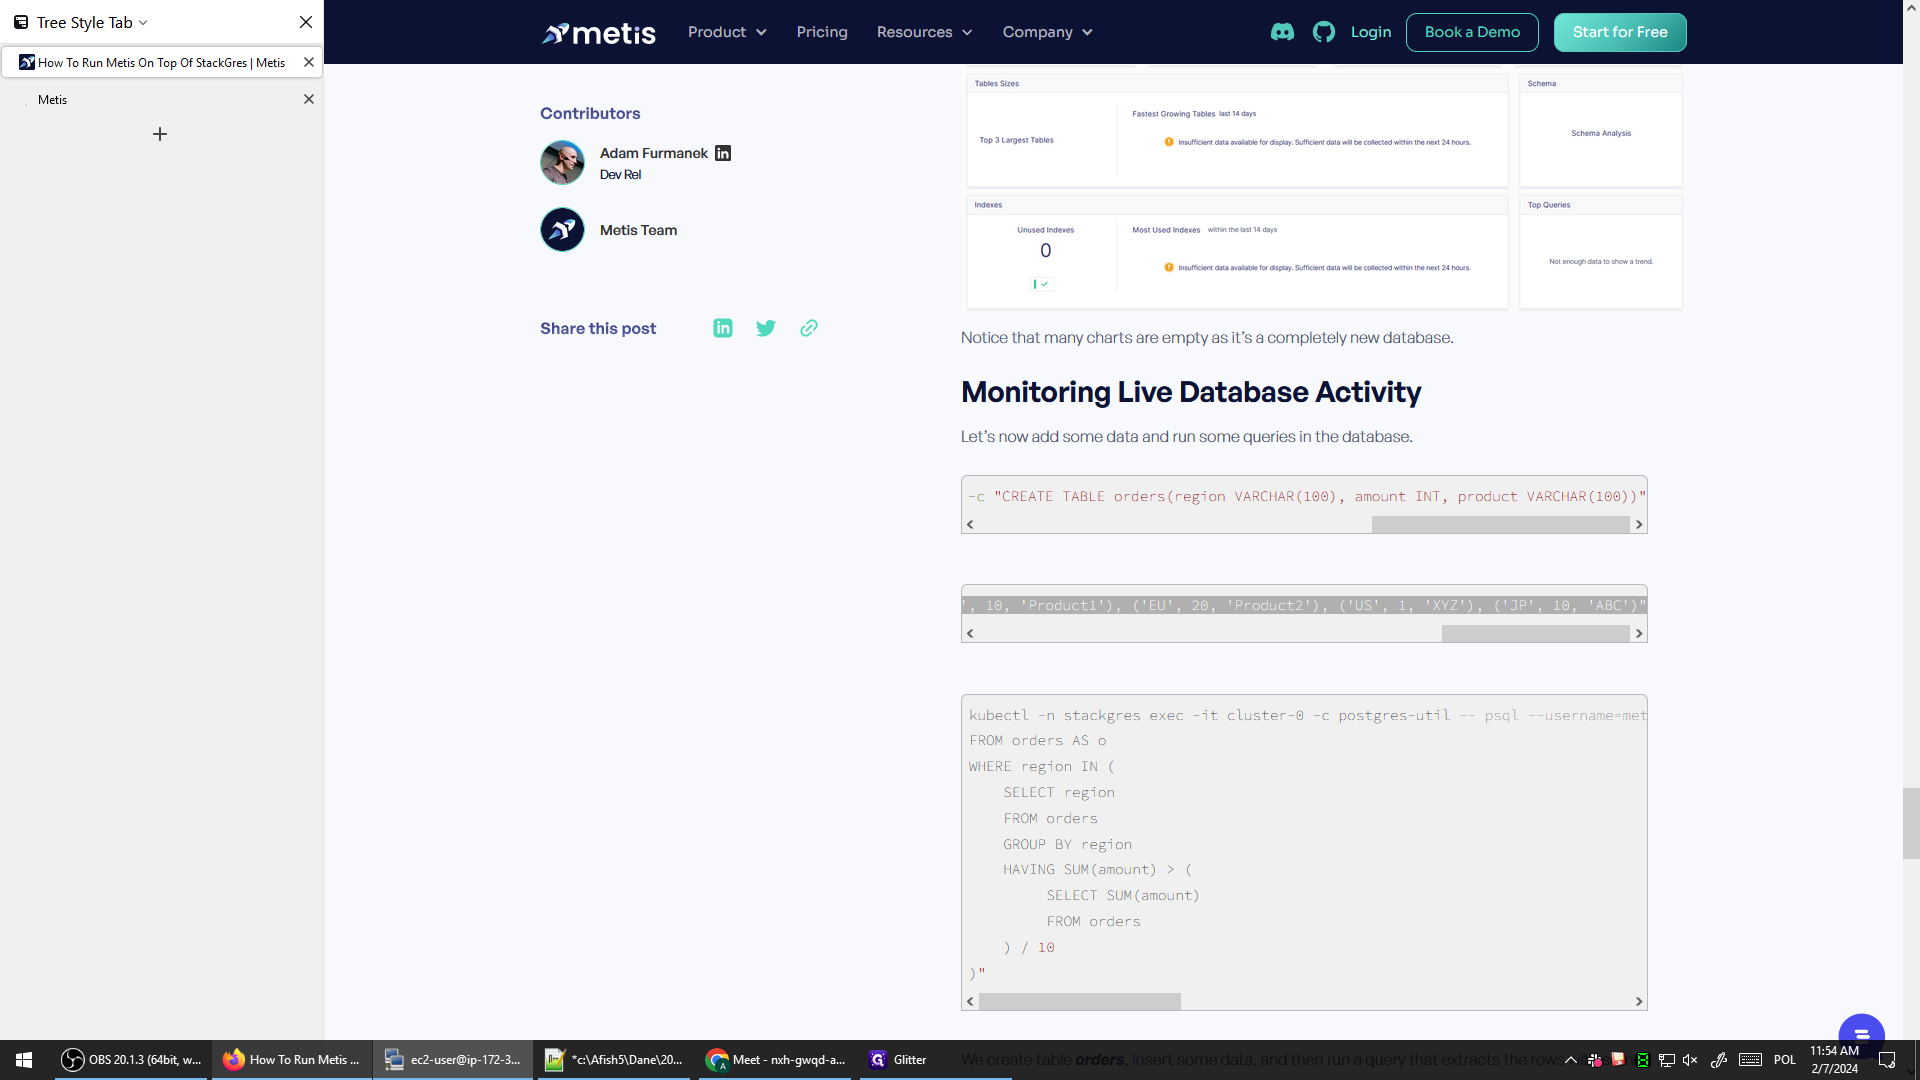
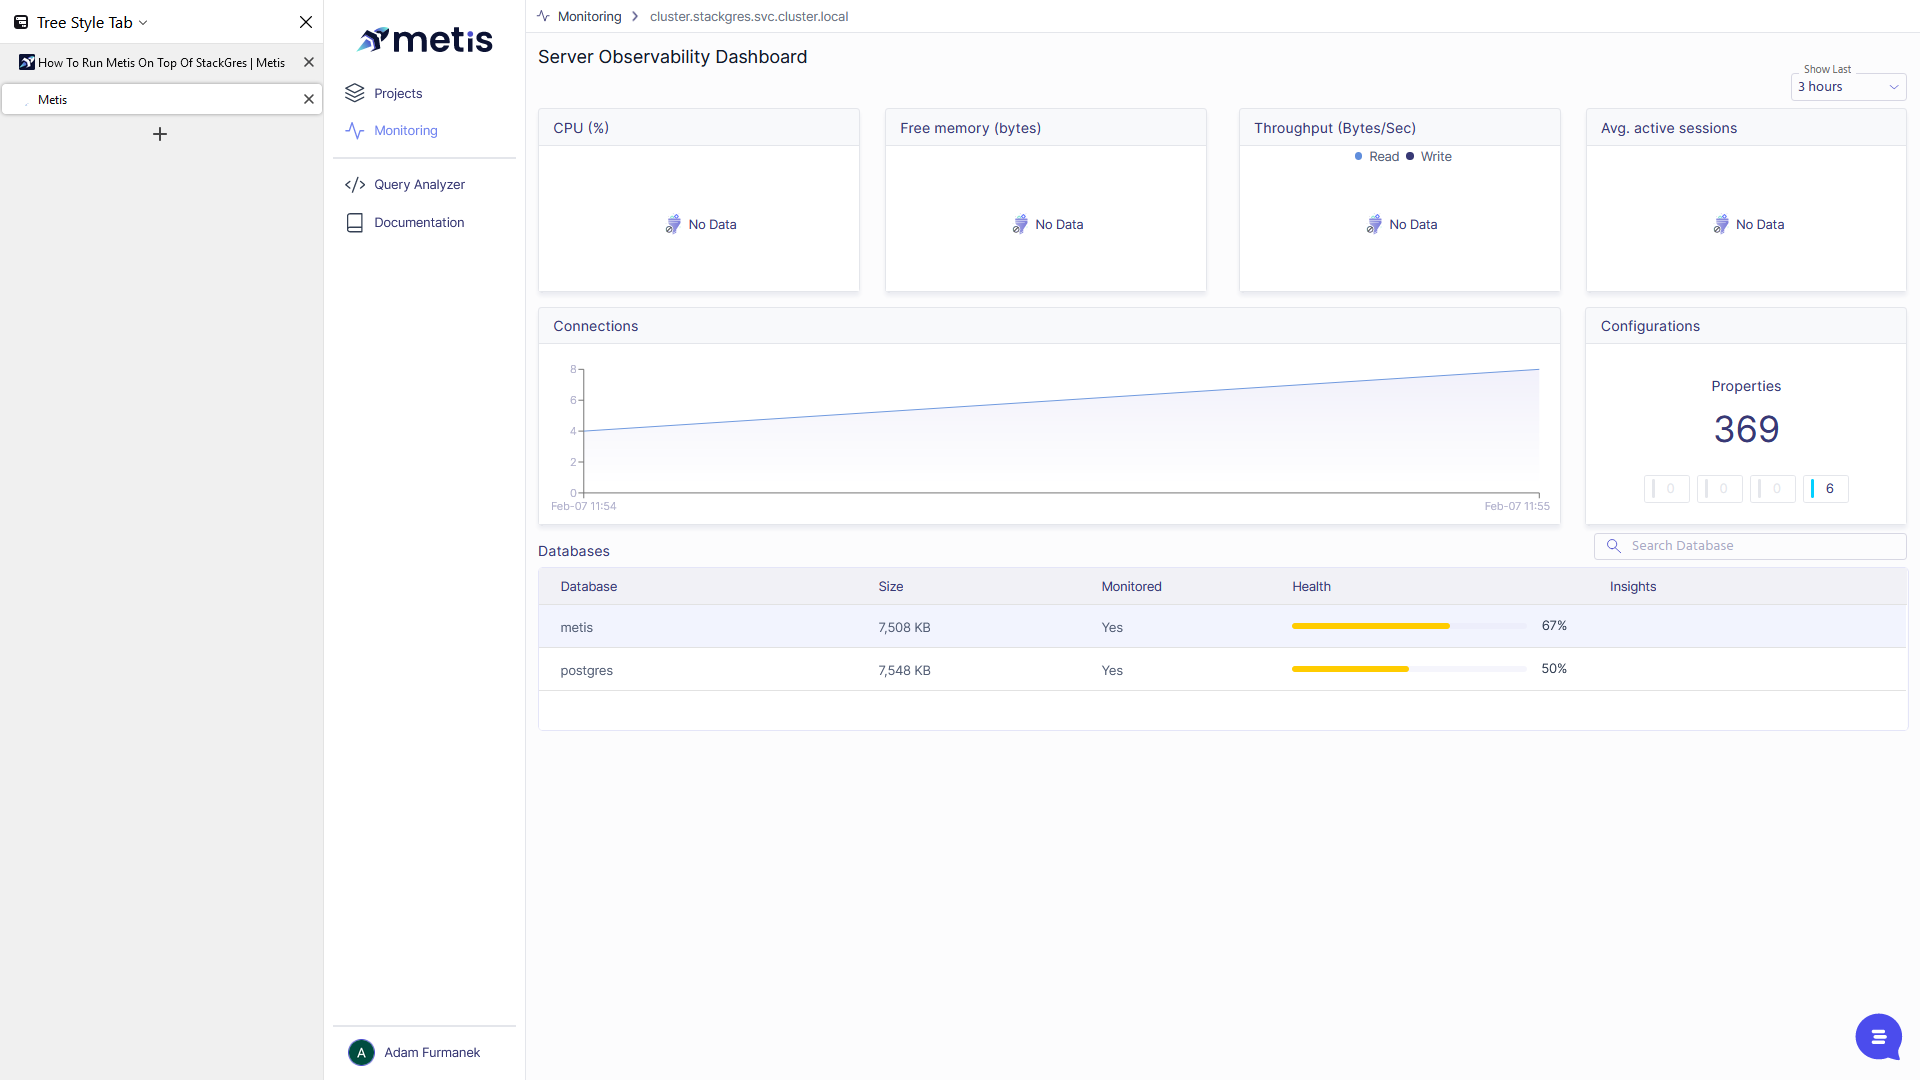
One of them is the default Postgres, and the other is the database Metis. Metis has started collecting various metrics and configurations. You can see that we do not have data yet because we have just created the observability agent. However, we already have configurations.
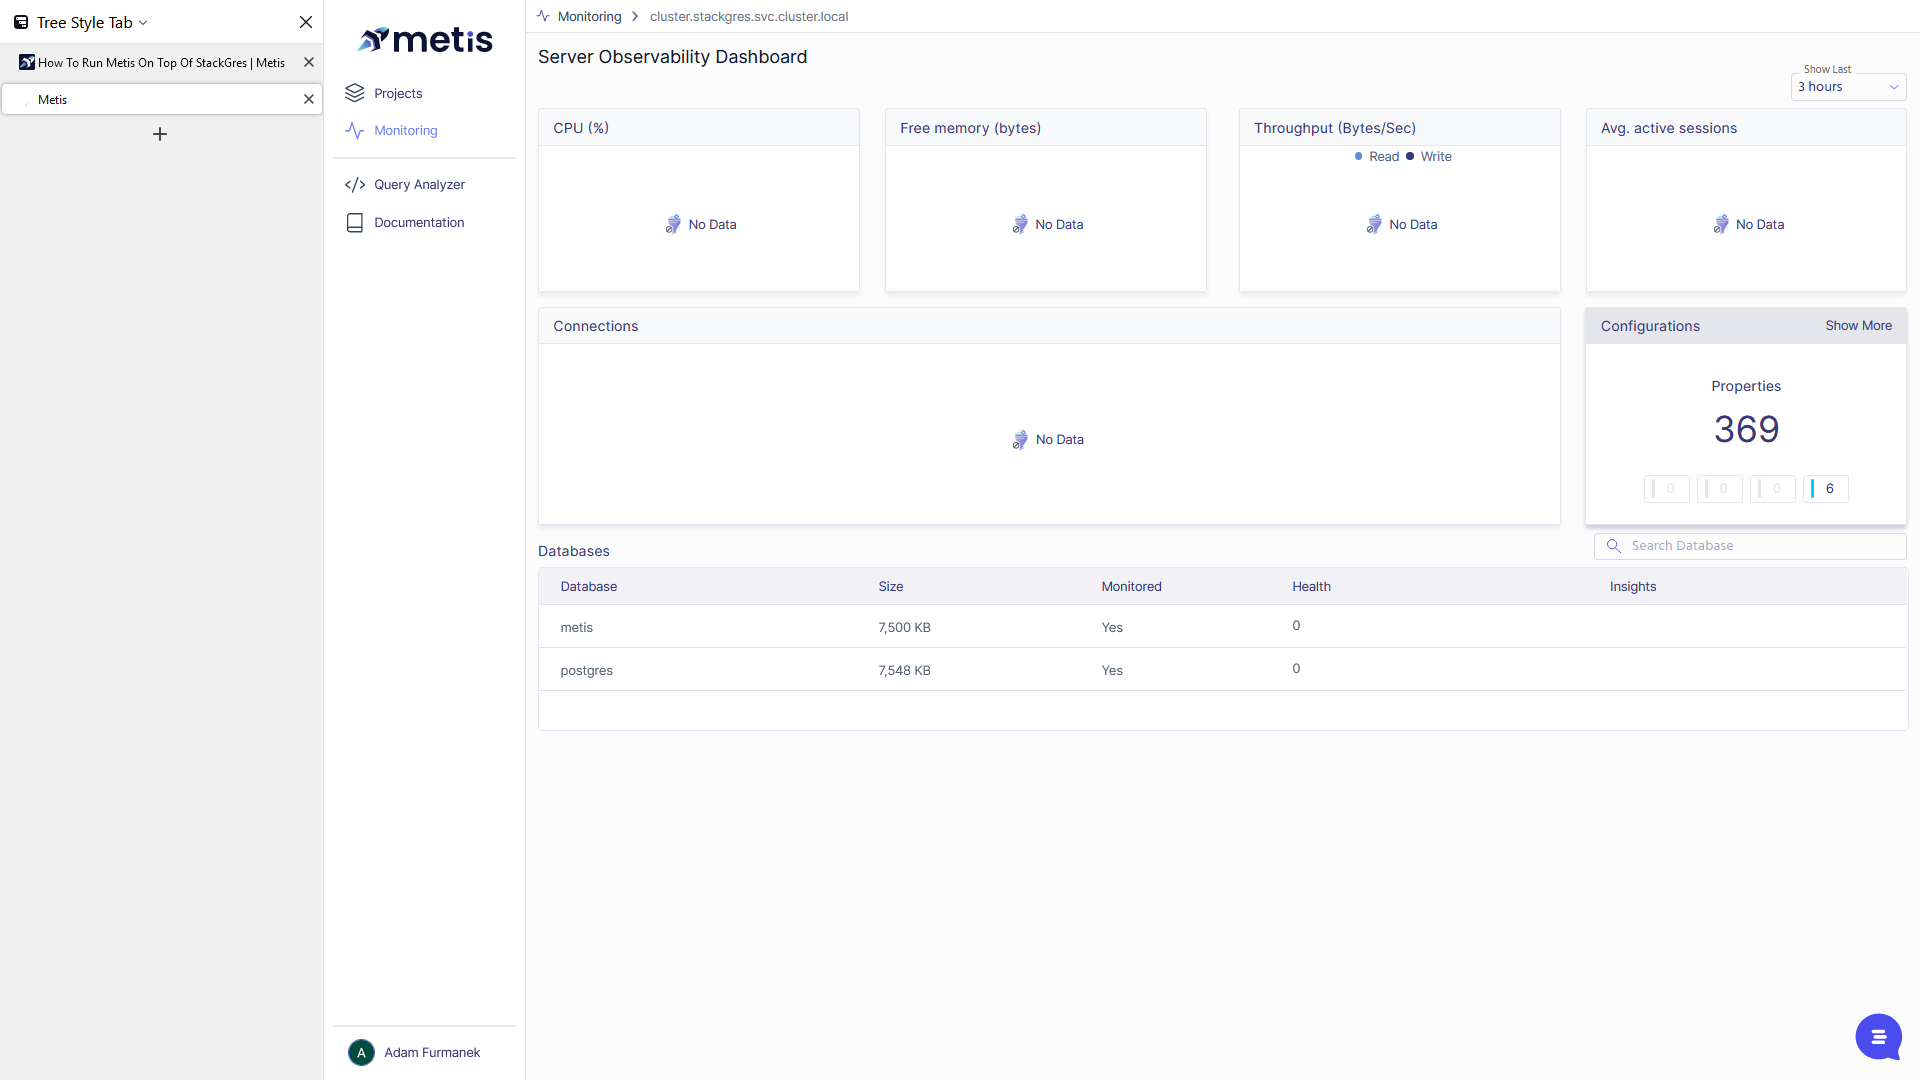
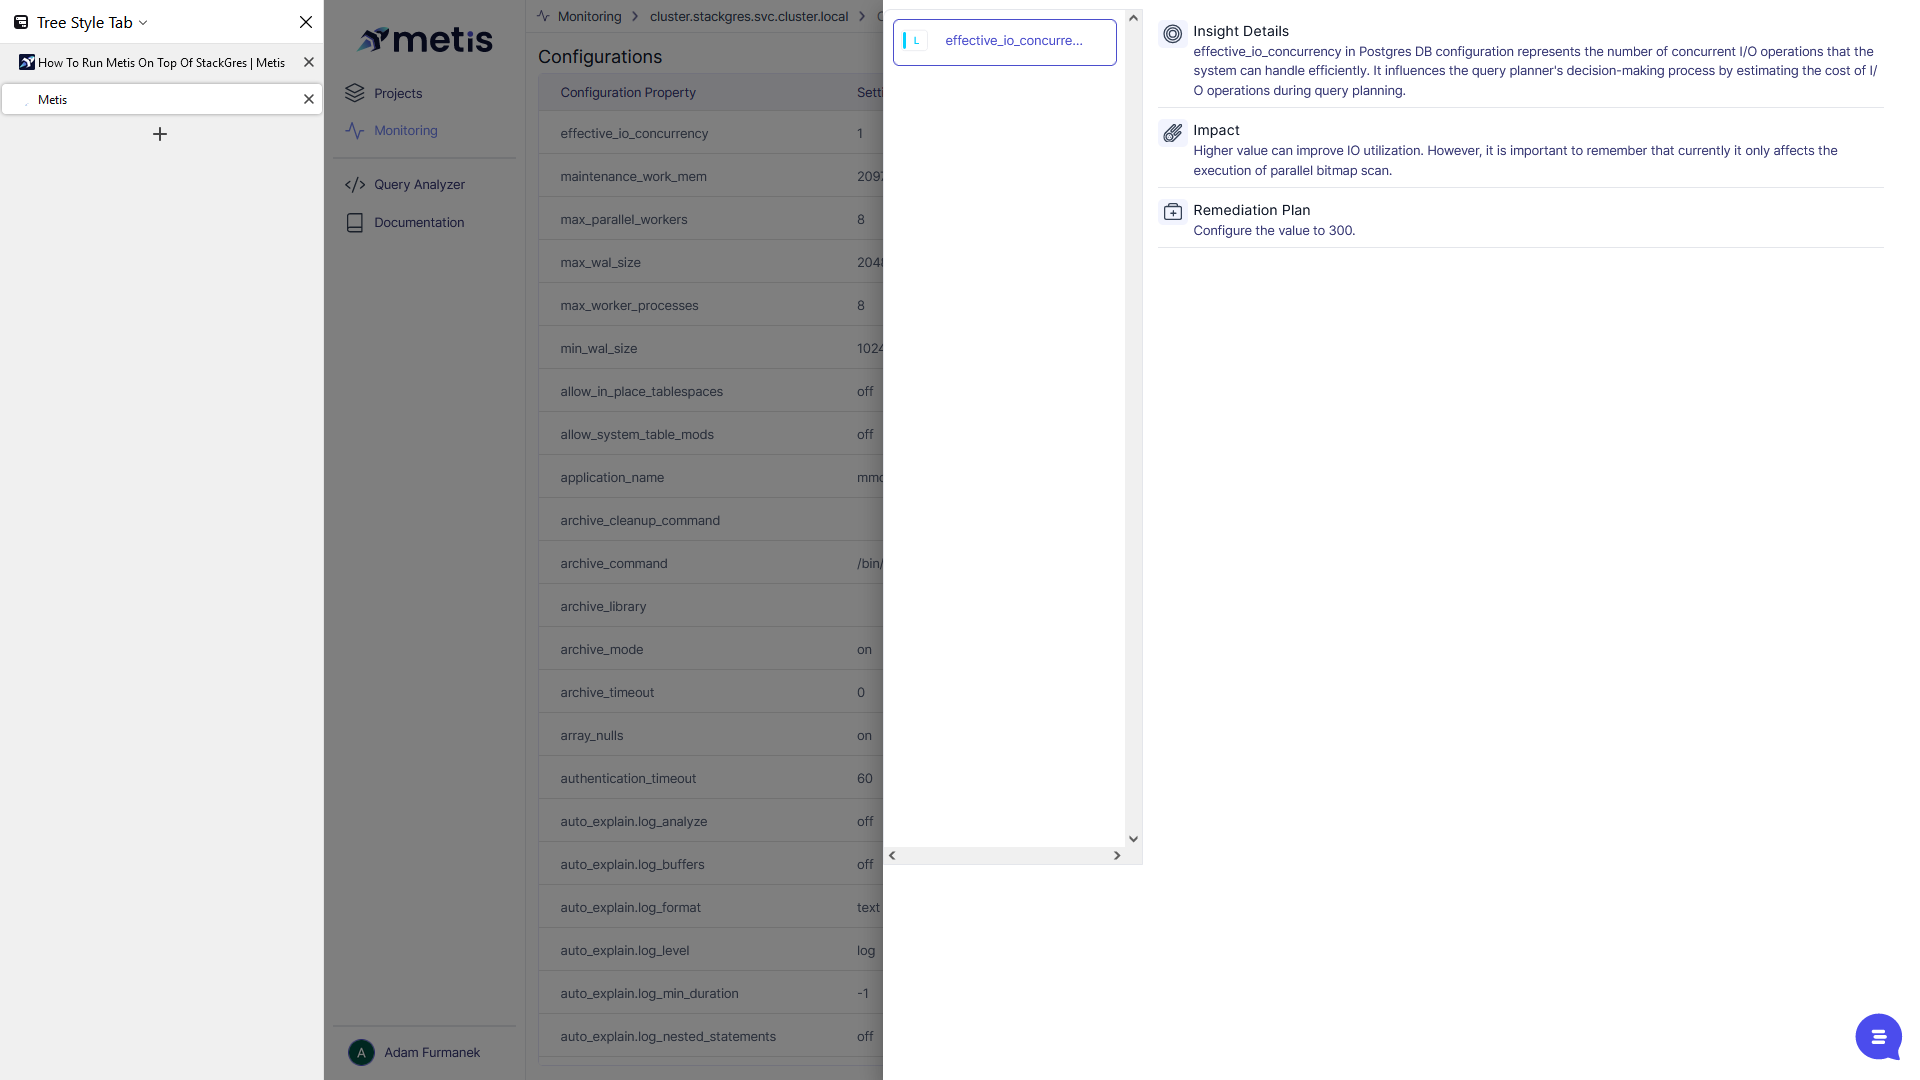
We can check your Postgres configuration and provide insights on how to reconfigure the server for optimal performance.

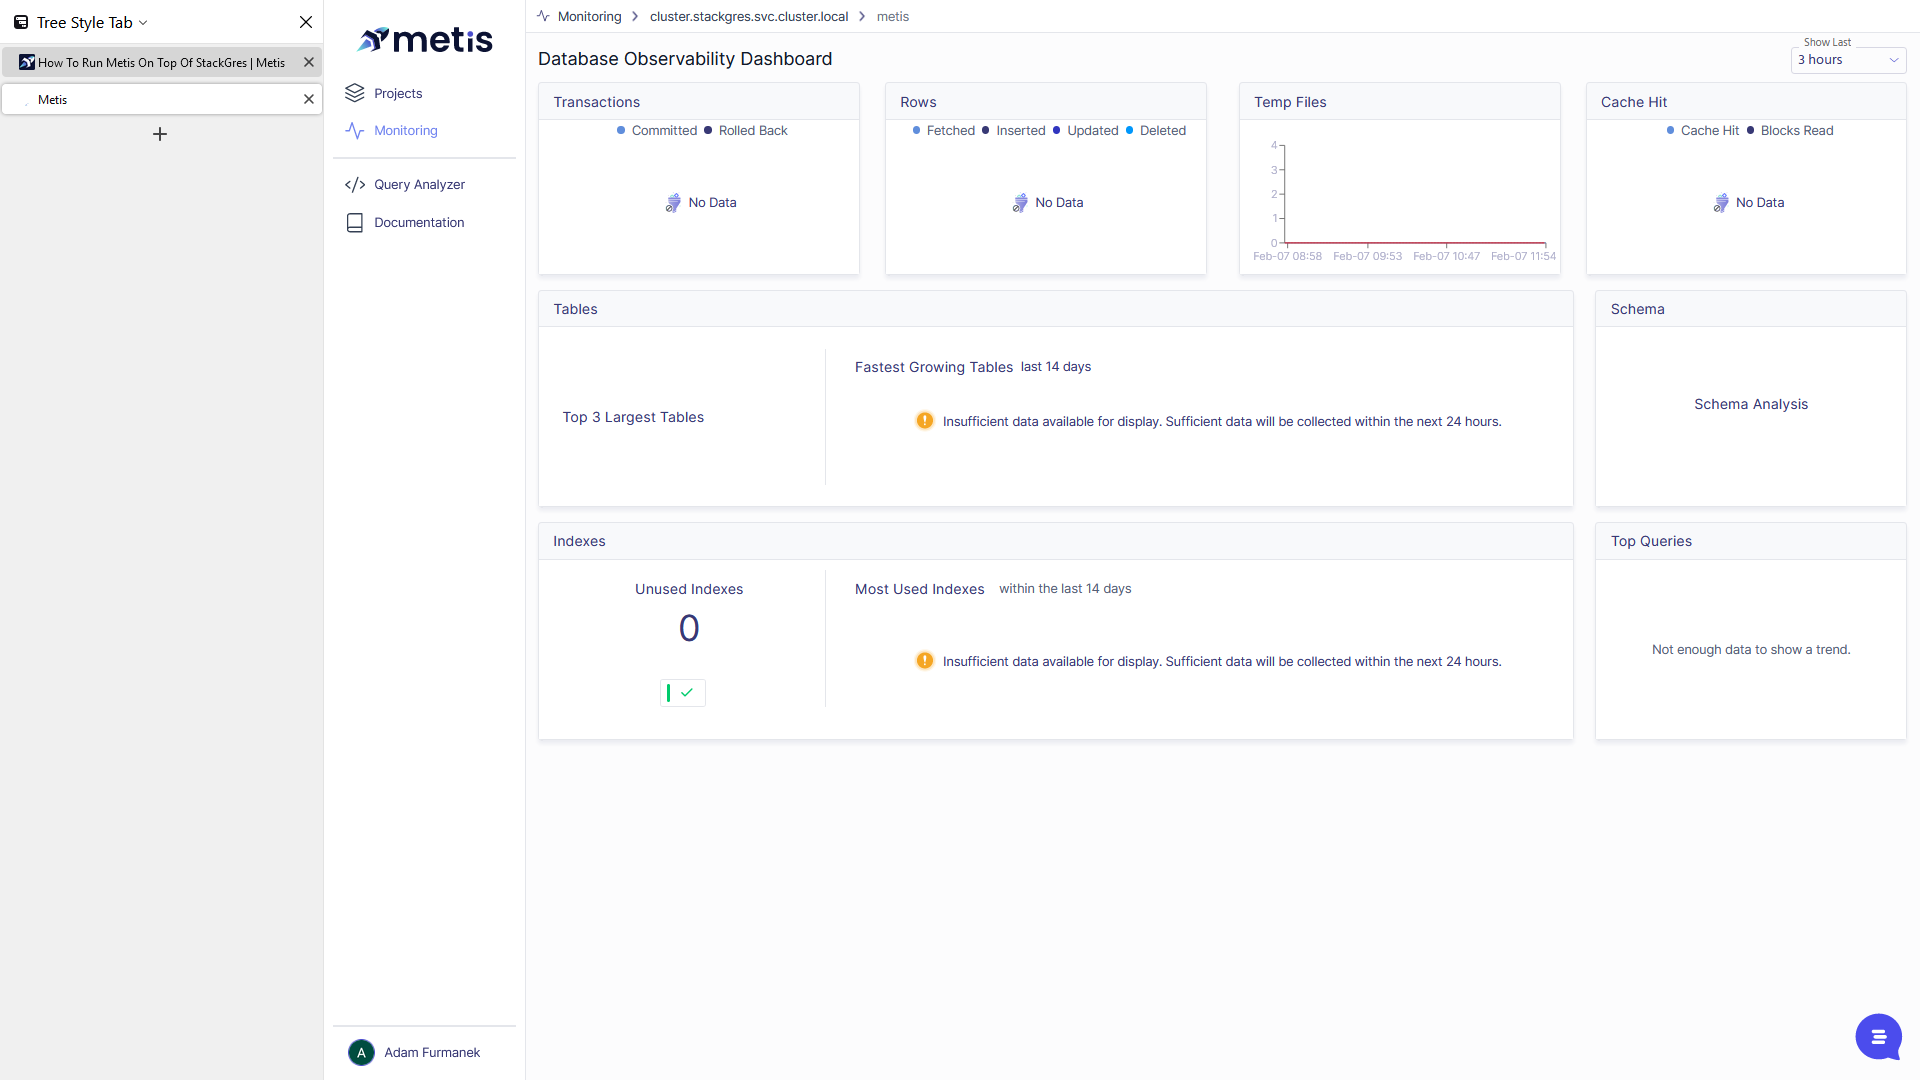
What we can also do is go to the database. We can see that we have started capturing metrics, and they will start flowing in every minute. We have also begun capturing other data.

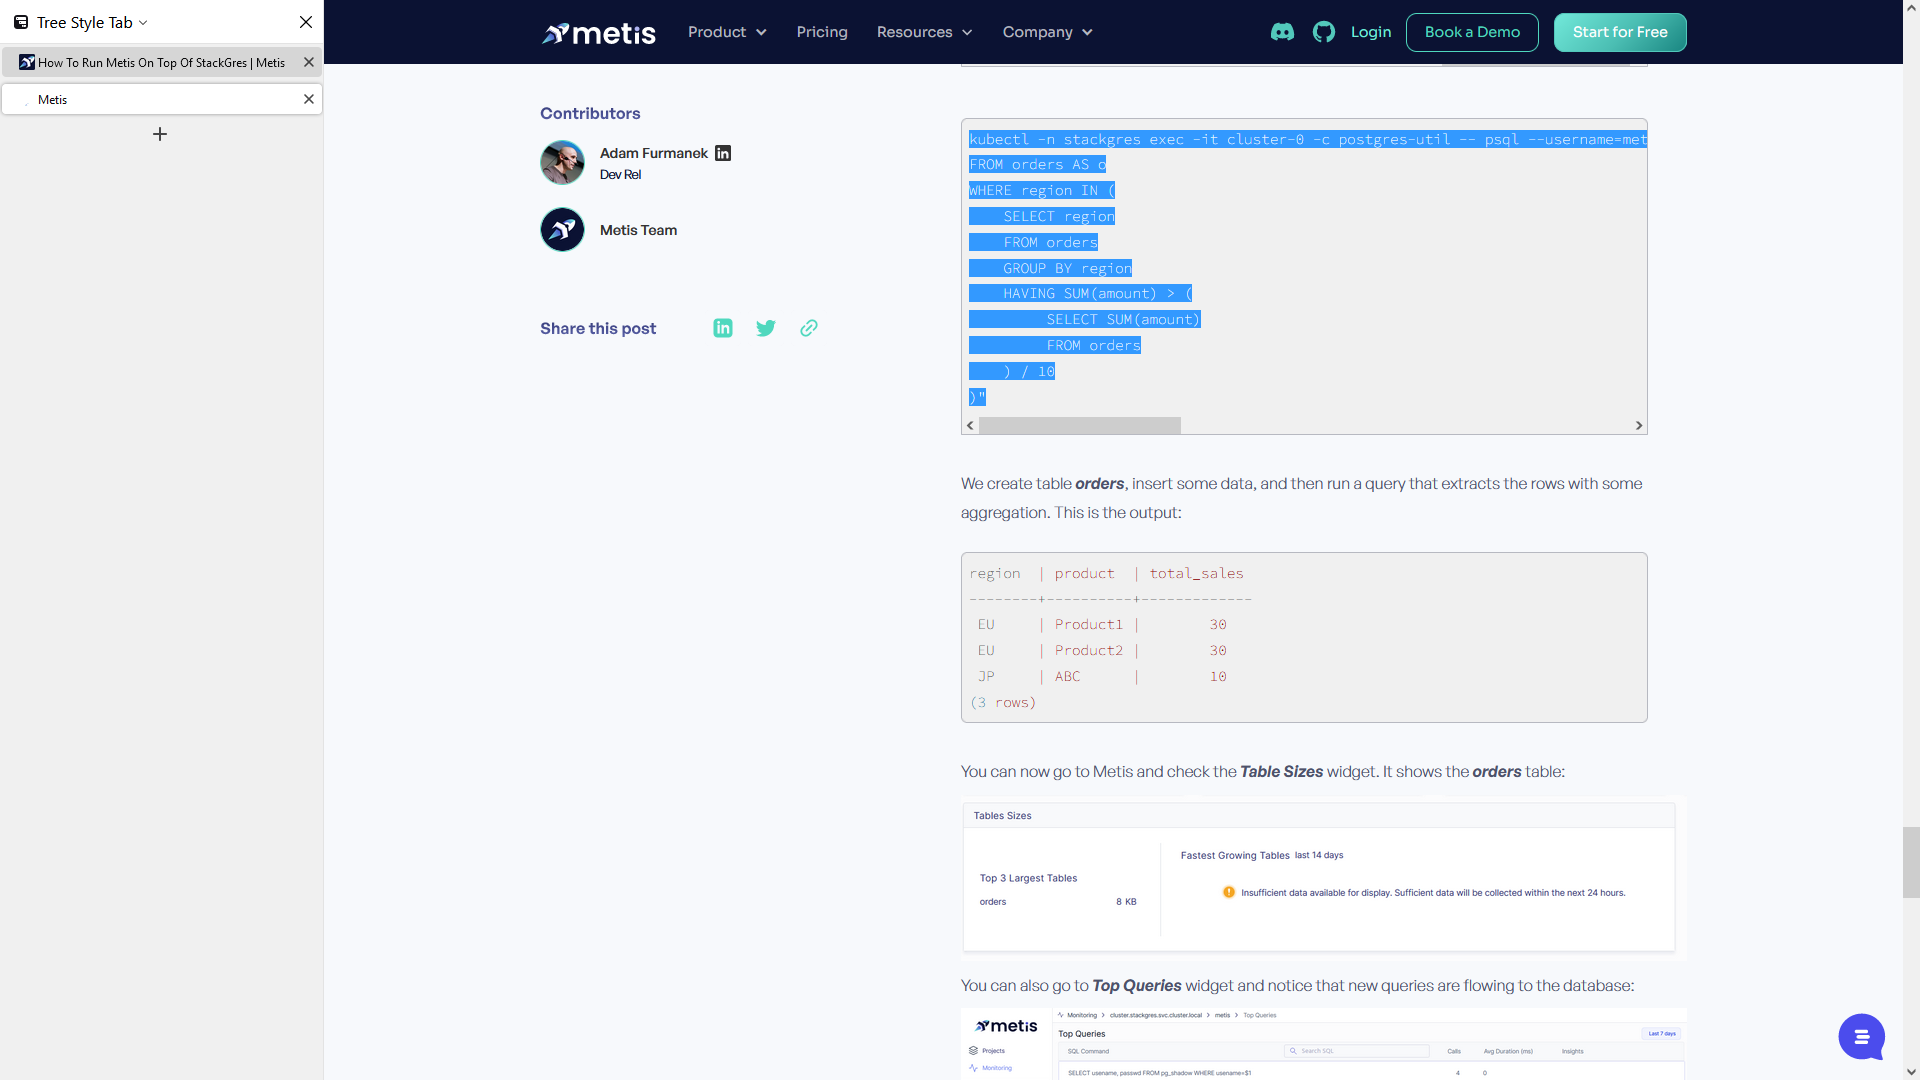
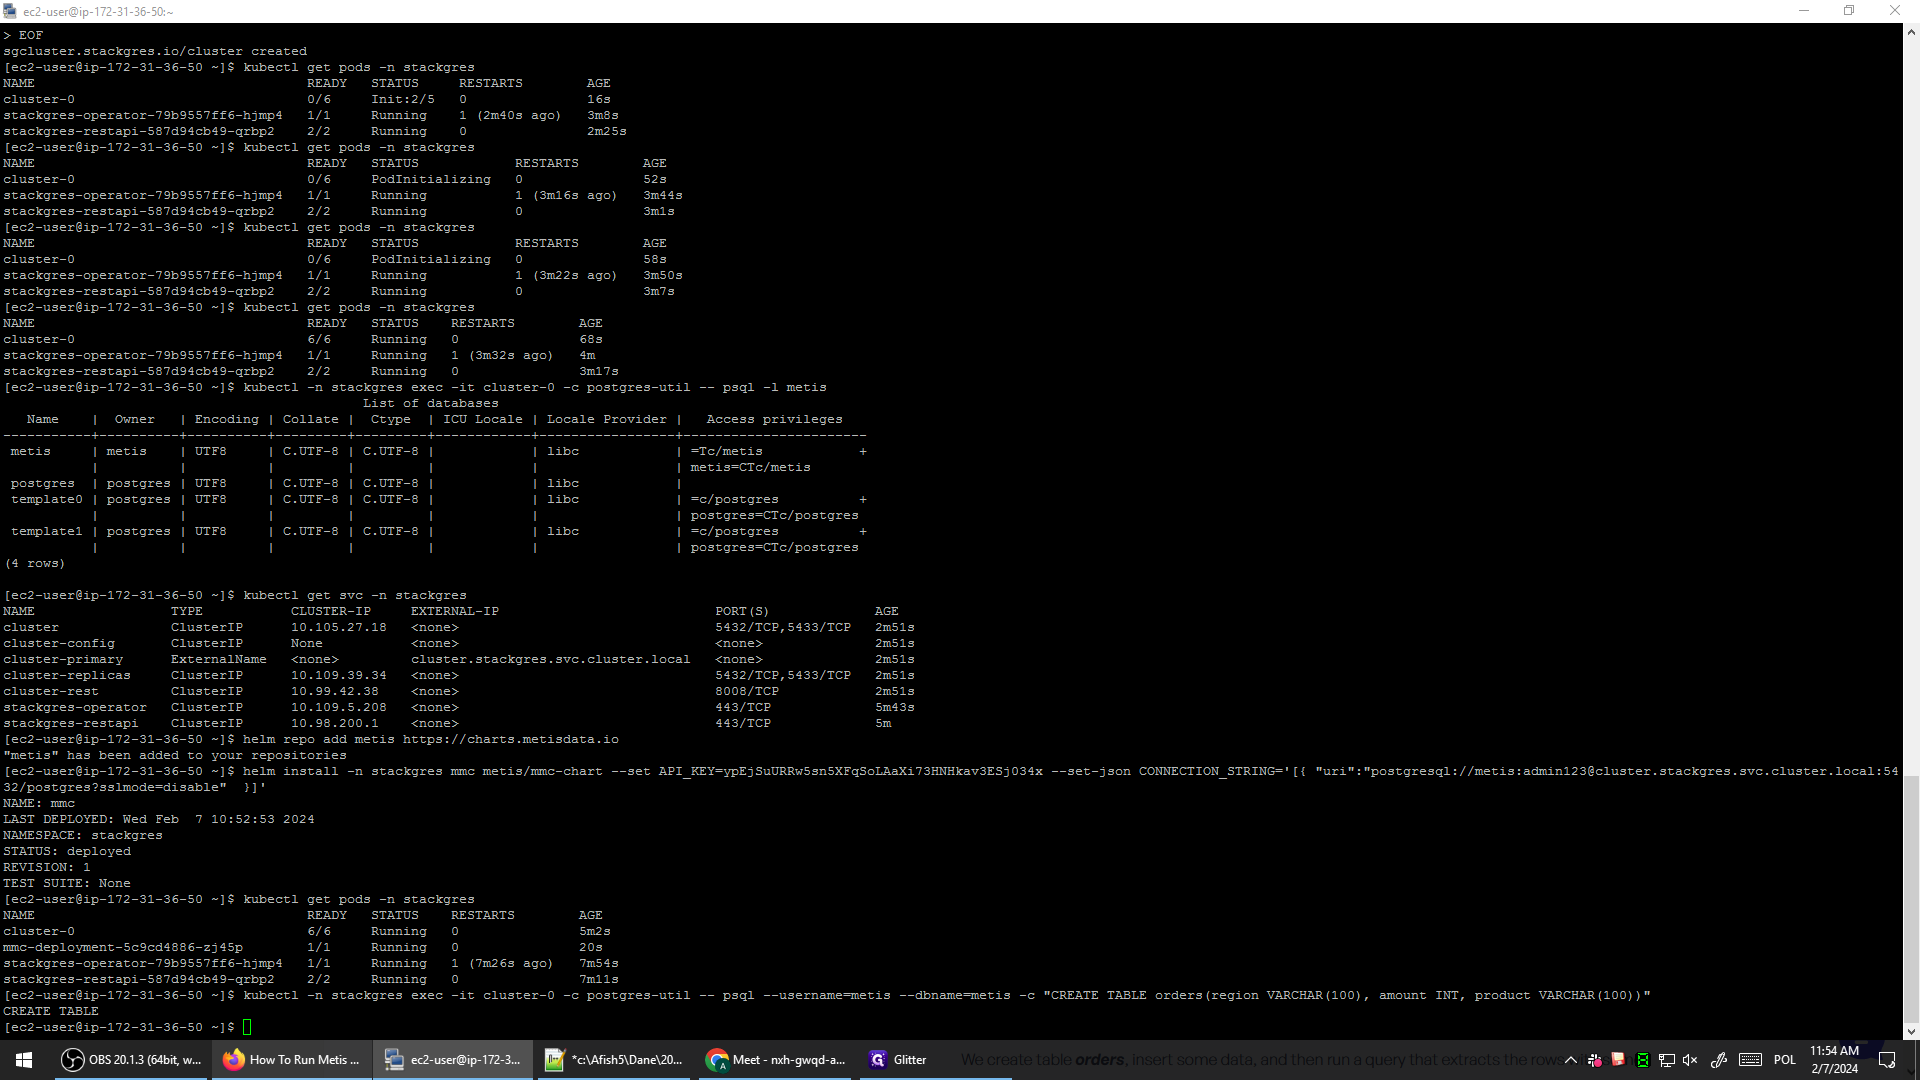
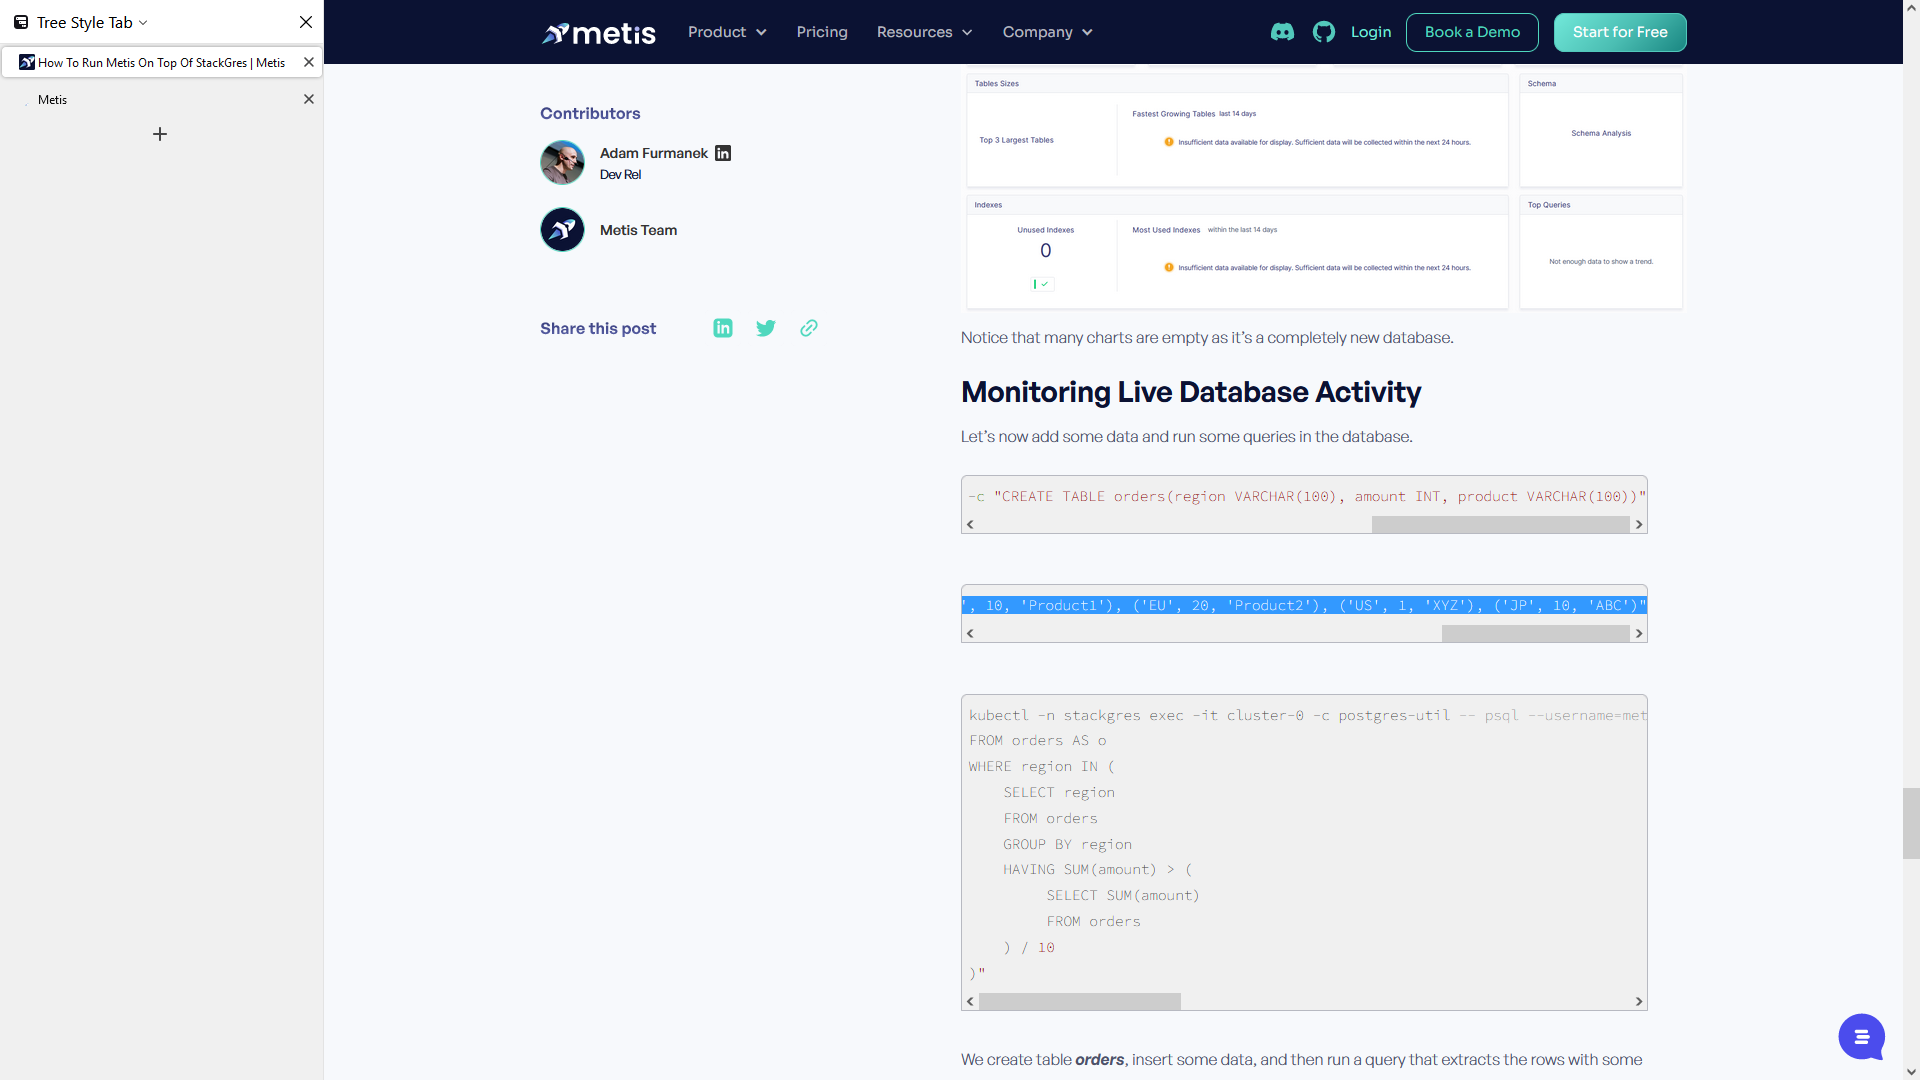
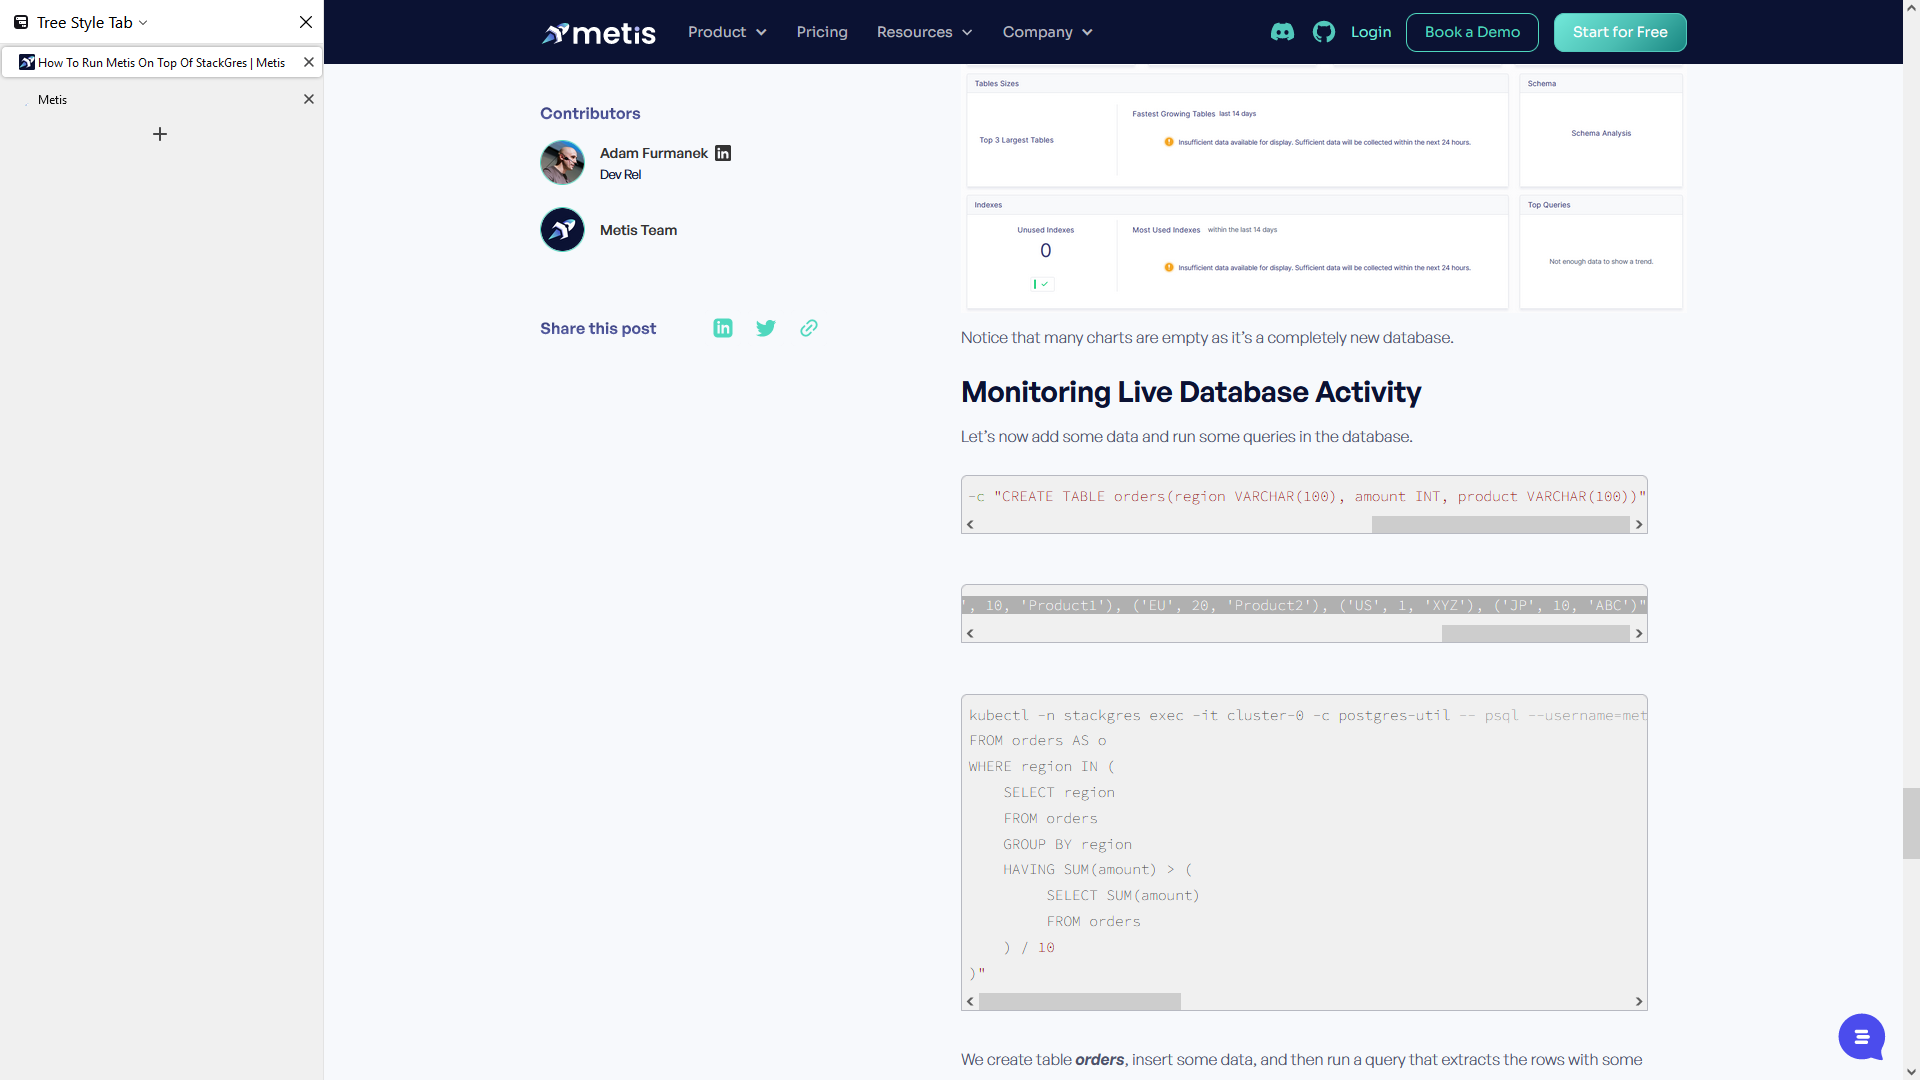
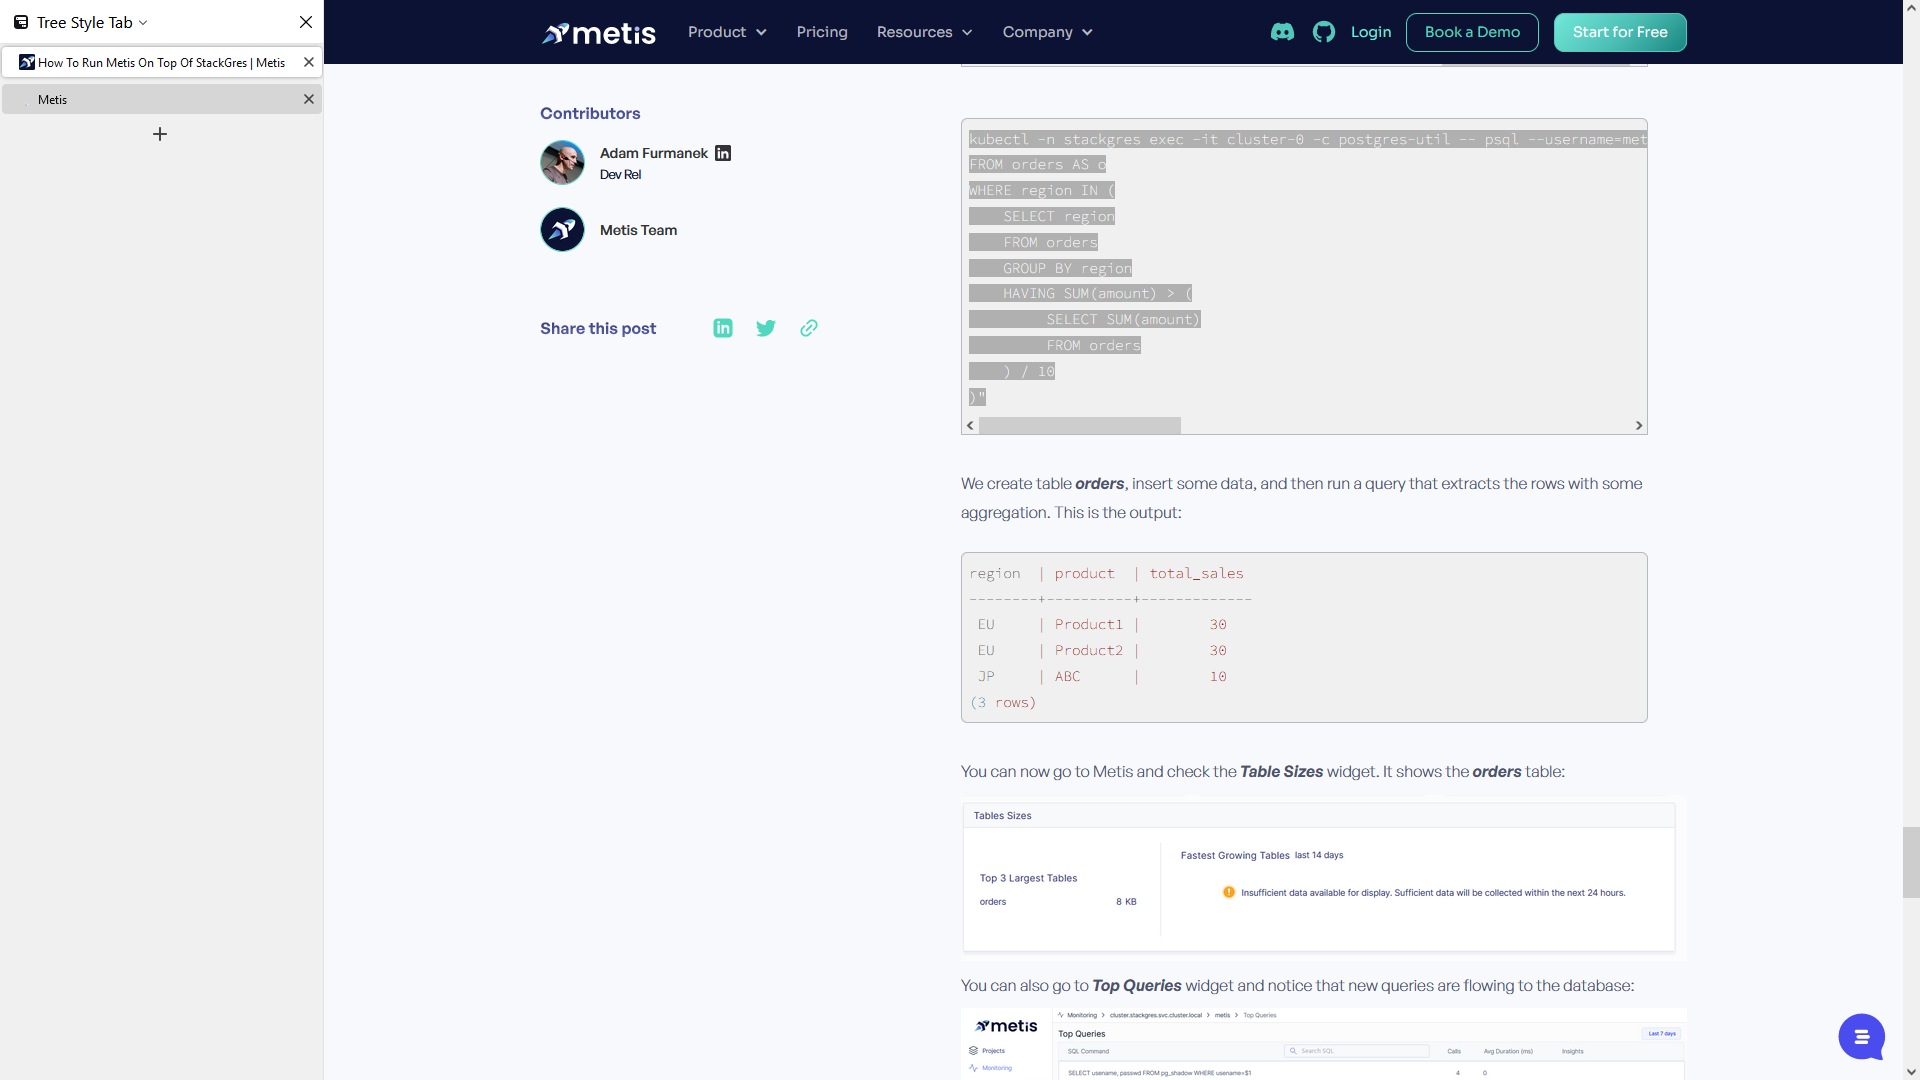
So, what we can do now is create a table. Let's input some data and see if Metis can capture it.
We can now run a command to create a table.
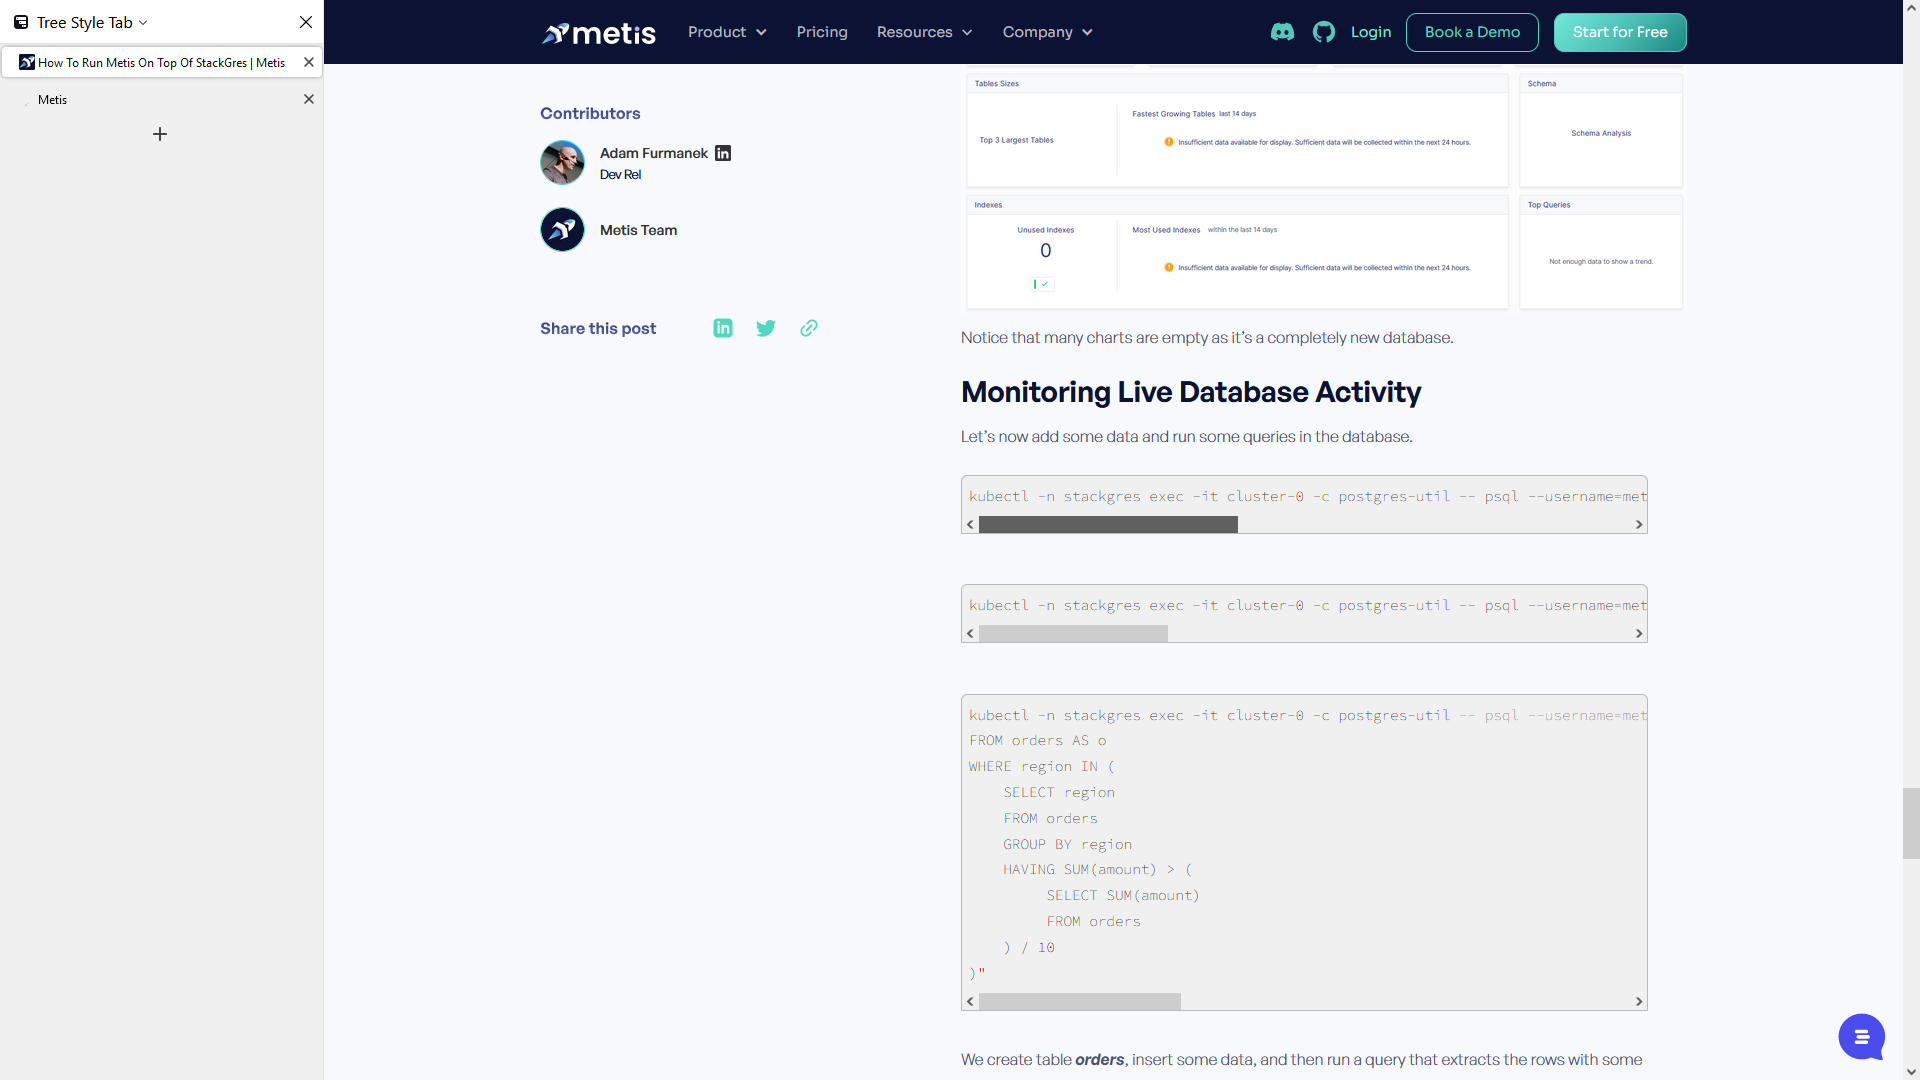


Let's get started.
We made a table.
We can run a command to insert the products we have created into the table.


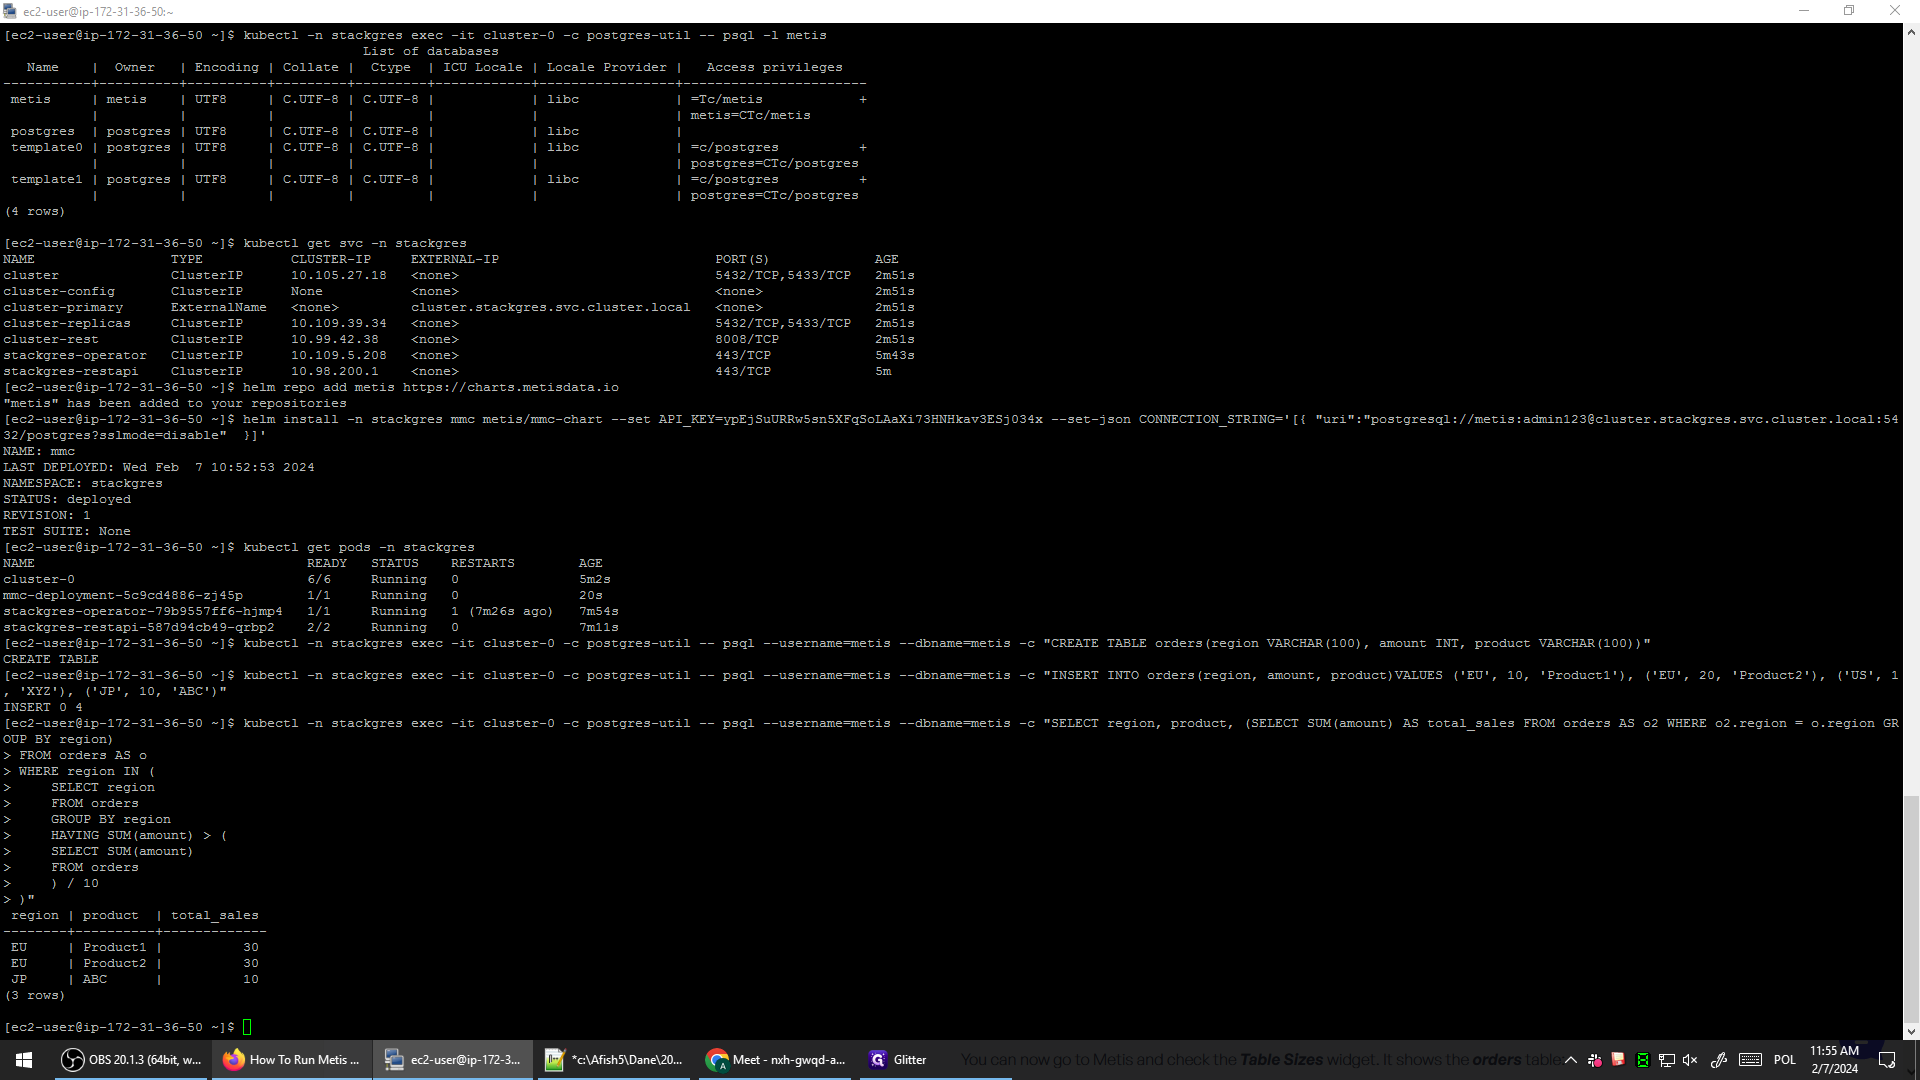
And then we can also run another command that will execute a select statement to check if the data is present.

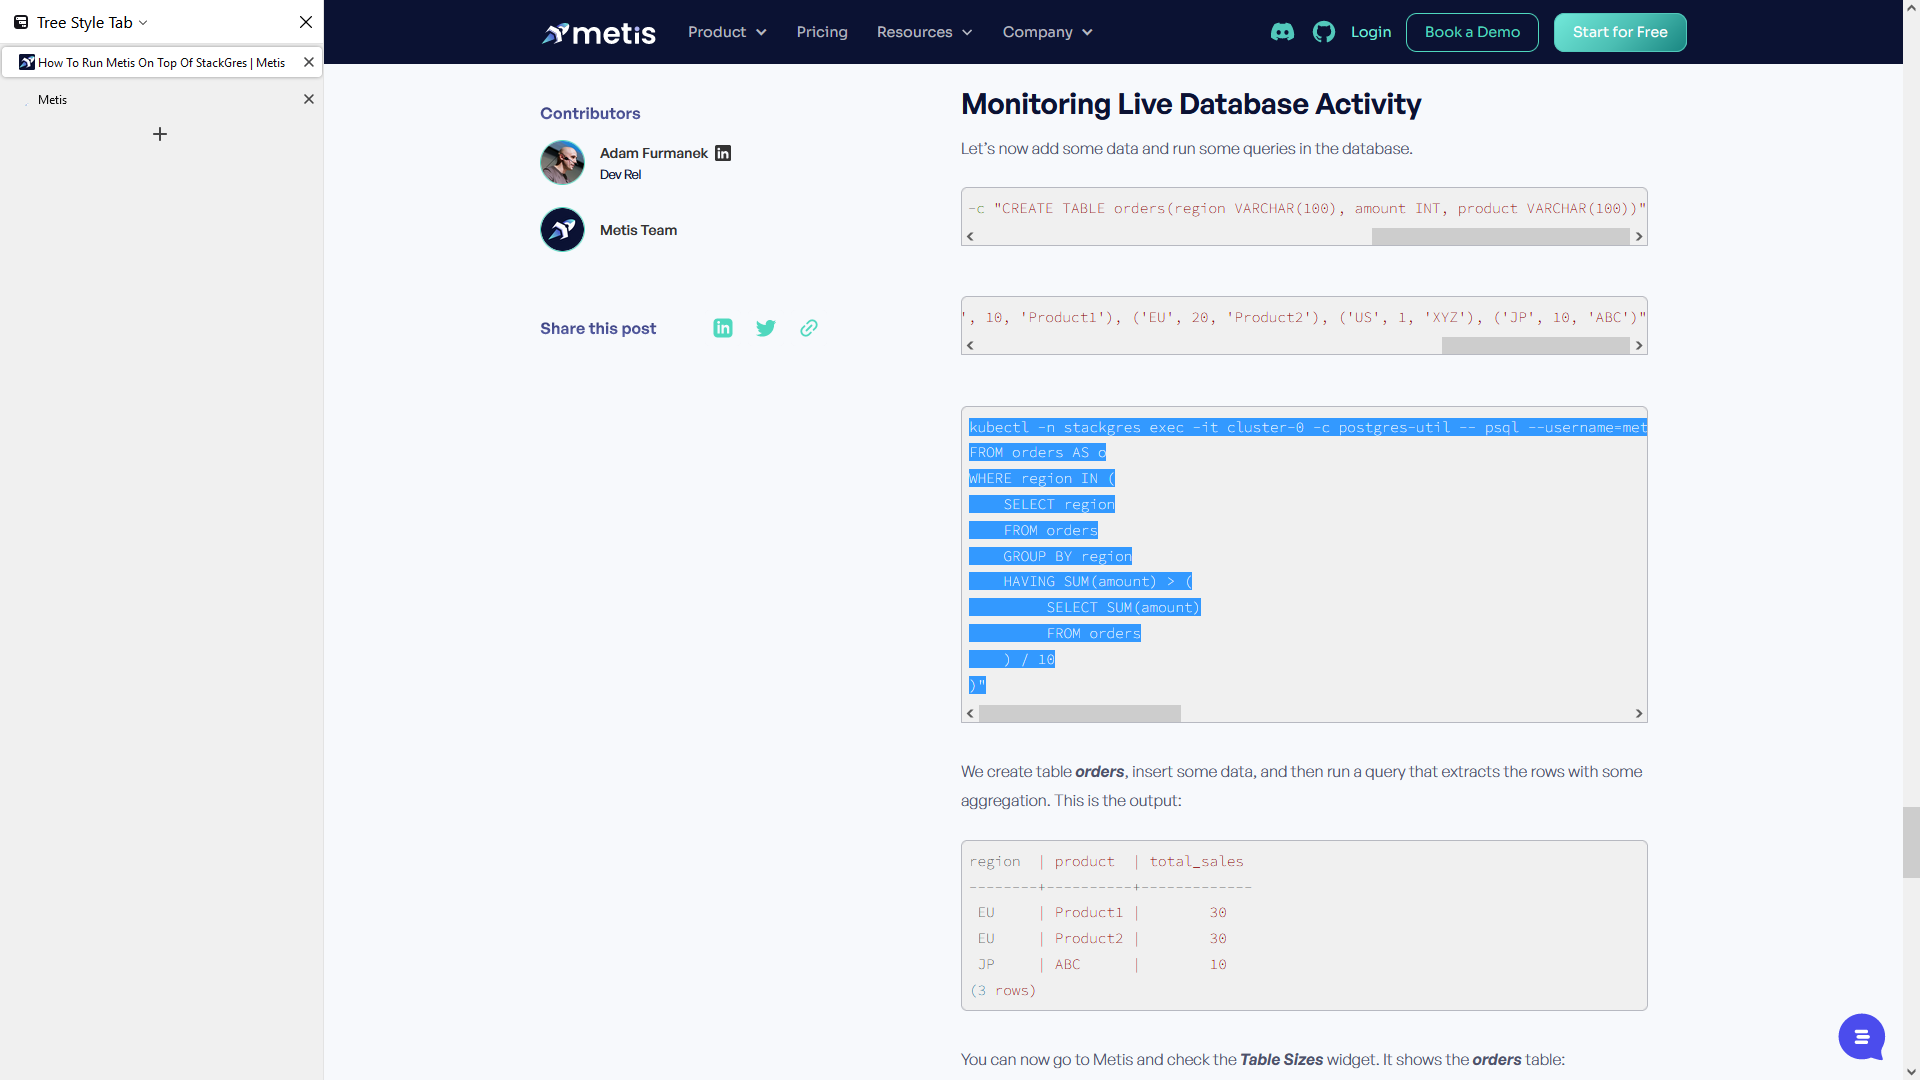
And you can see that, yes, we do have some data.
We have products and sample entries.
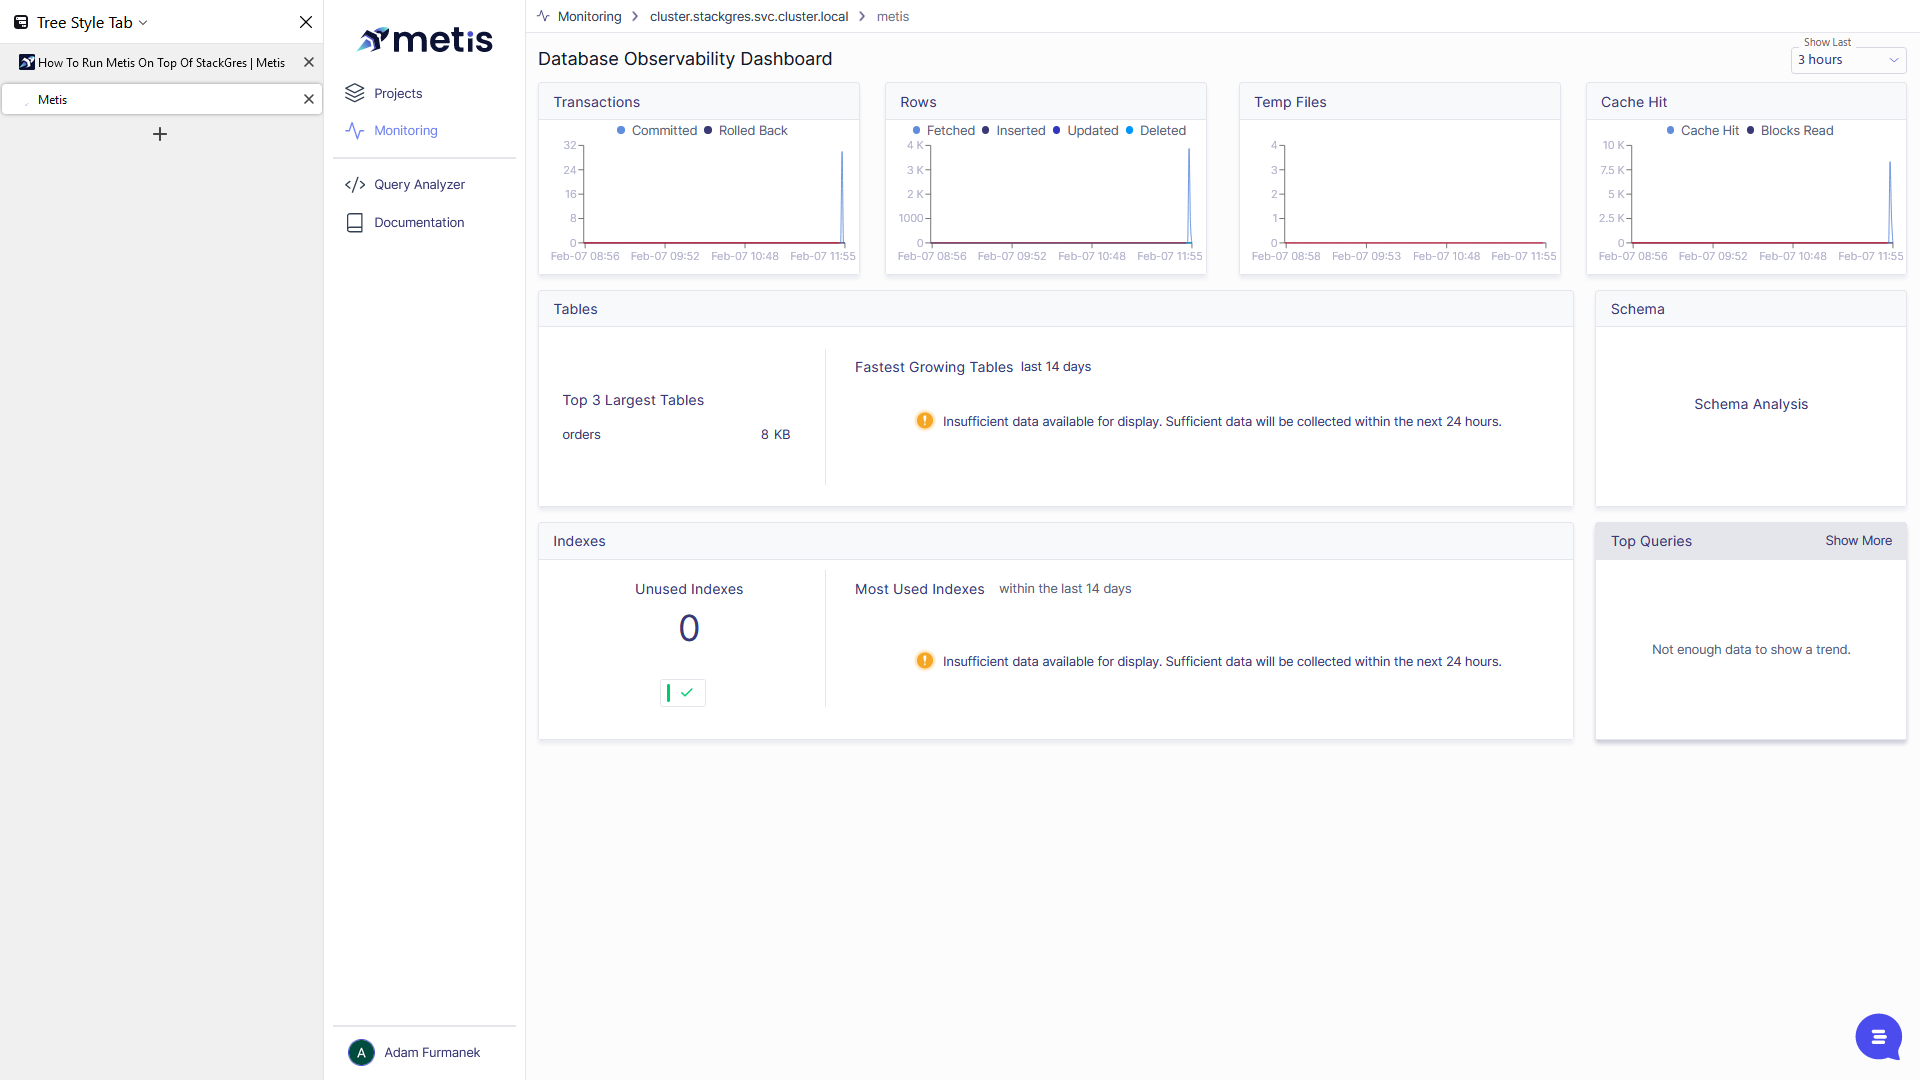
We can now return to our monitoring. Refresh the page to see that Metis is running tasks every minute.
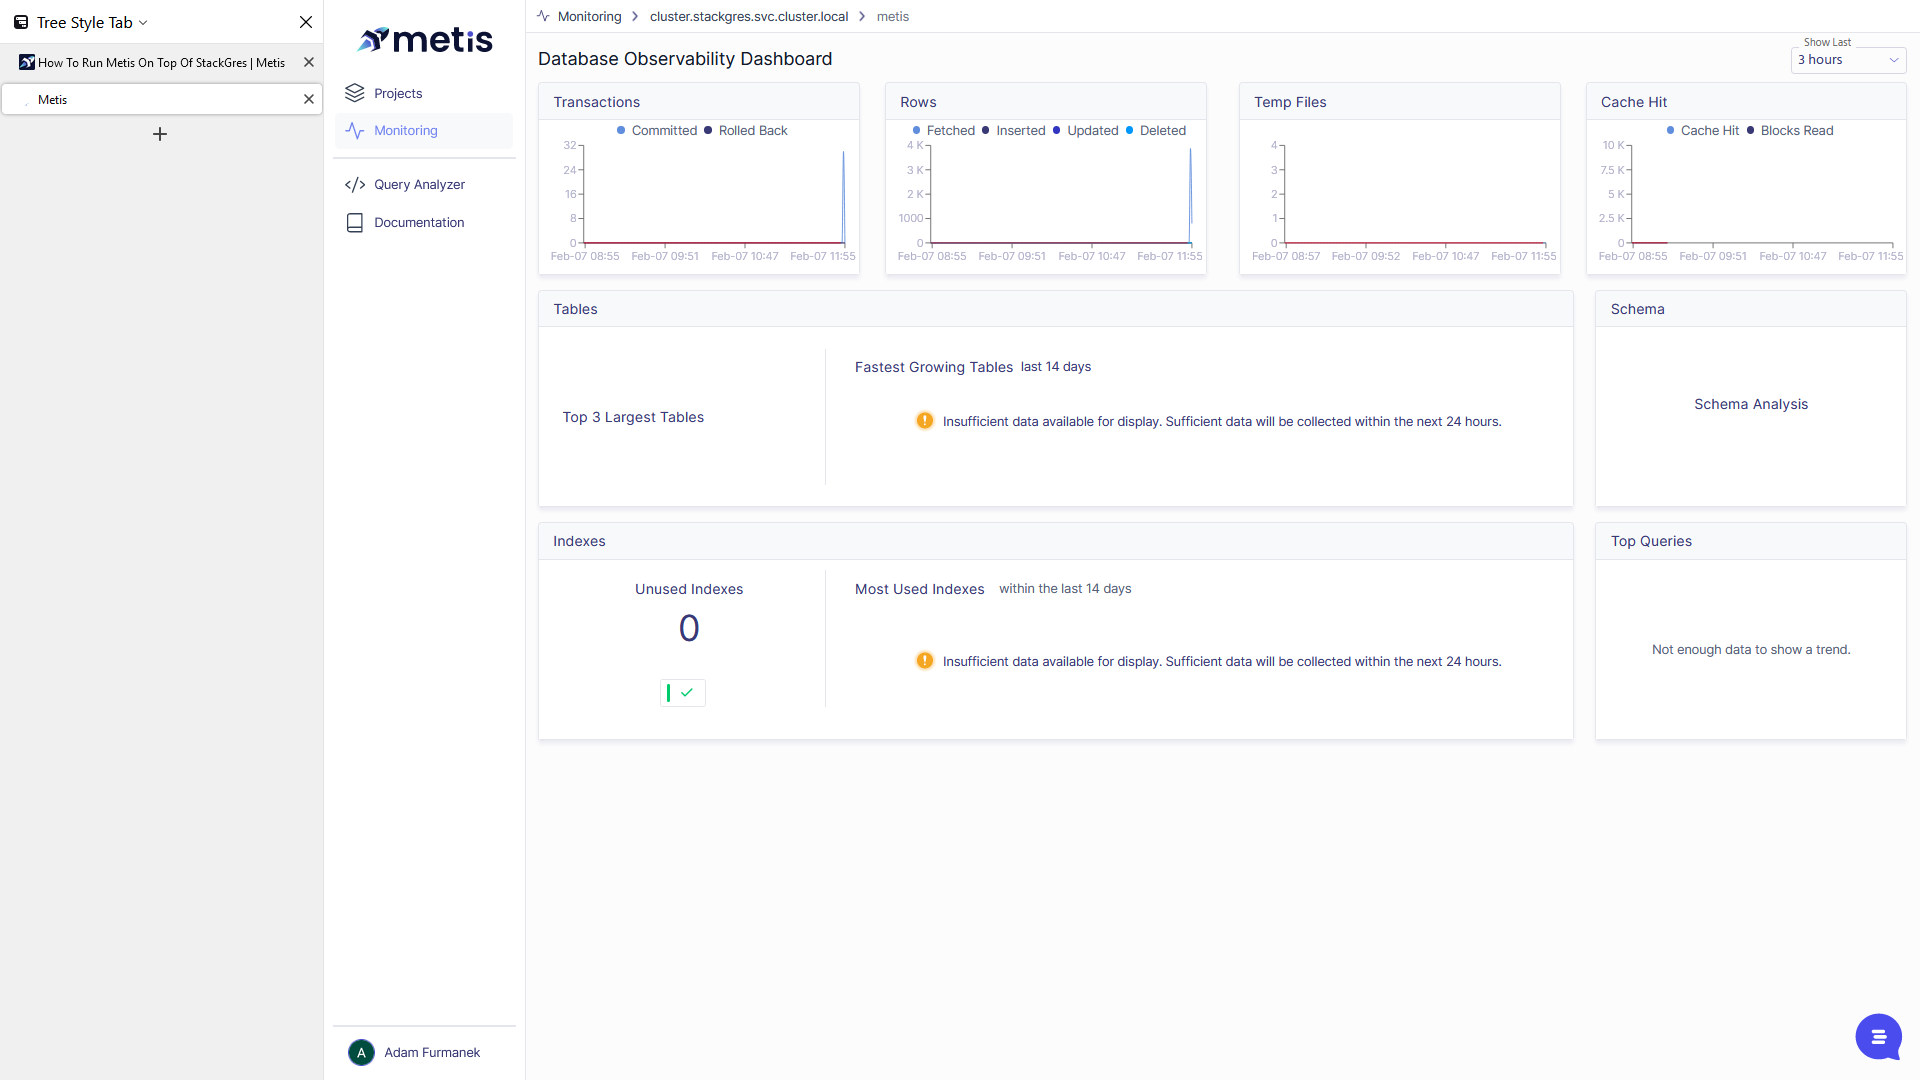
Last time, it updated data about seven seconds ago.

So let's check if it captured the table we just made. We can see connections coming in. Click on "metis" to view the new table we created.

And also, we began receiving data points for transactions, rows, and other items. This is how you can integrate Metis. Metis will now analyze the activities in your cluster. For example, it will analyze schemas as more data becomes available.
It can even analyze live queries that go to your database. All of that is available out of the box once you connect the Metis observability agent to your server.