Icon

How to Process a Customer Return

Learn how to process a customer return, from initial setup and warehouse inspection to issuing the final refund, using this step-by-step guide.

By Ben Fotheringham

This guide walks through the end-to-end procedure for managing a customer return, including setting up the initial request, logging the warehouse inspection, and issuing the final refund. Following these steps ensures inventory and customer accounts remain accurate when items are sent back.

This workflow applies to customer service representatives who initiate returns and process refunds, as well as warehouse staff responsible for receiving and inspecting returned merchandise.

1. Setting up a Return (Customer Service)

First, you need to initiate the return in the system when the customer requests it.
1
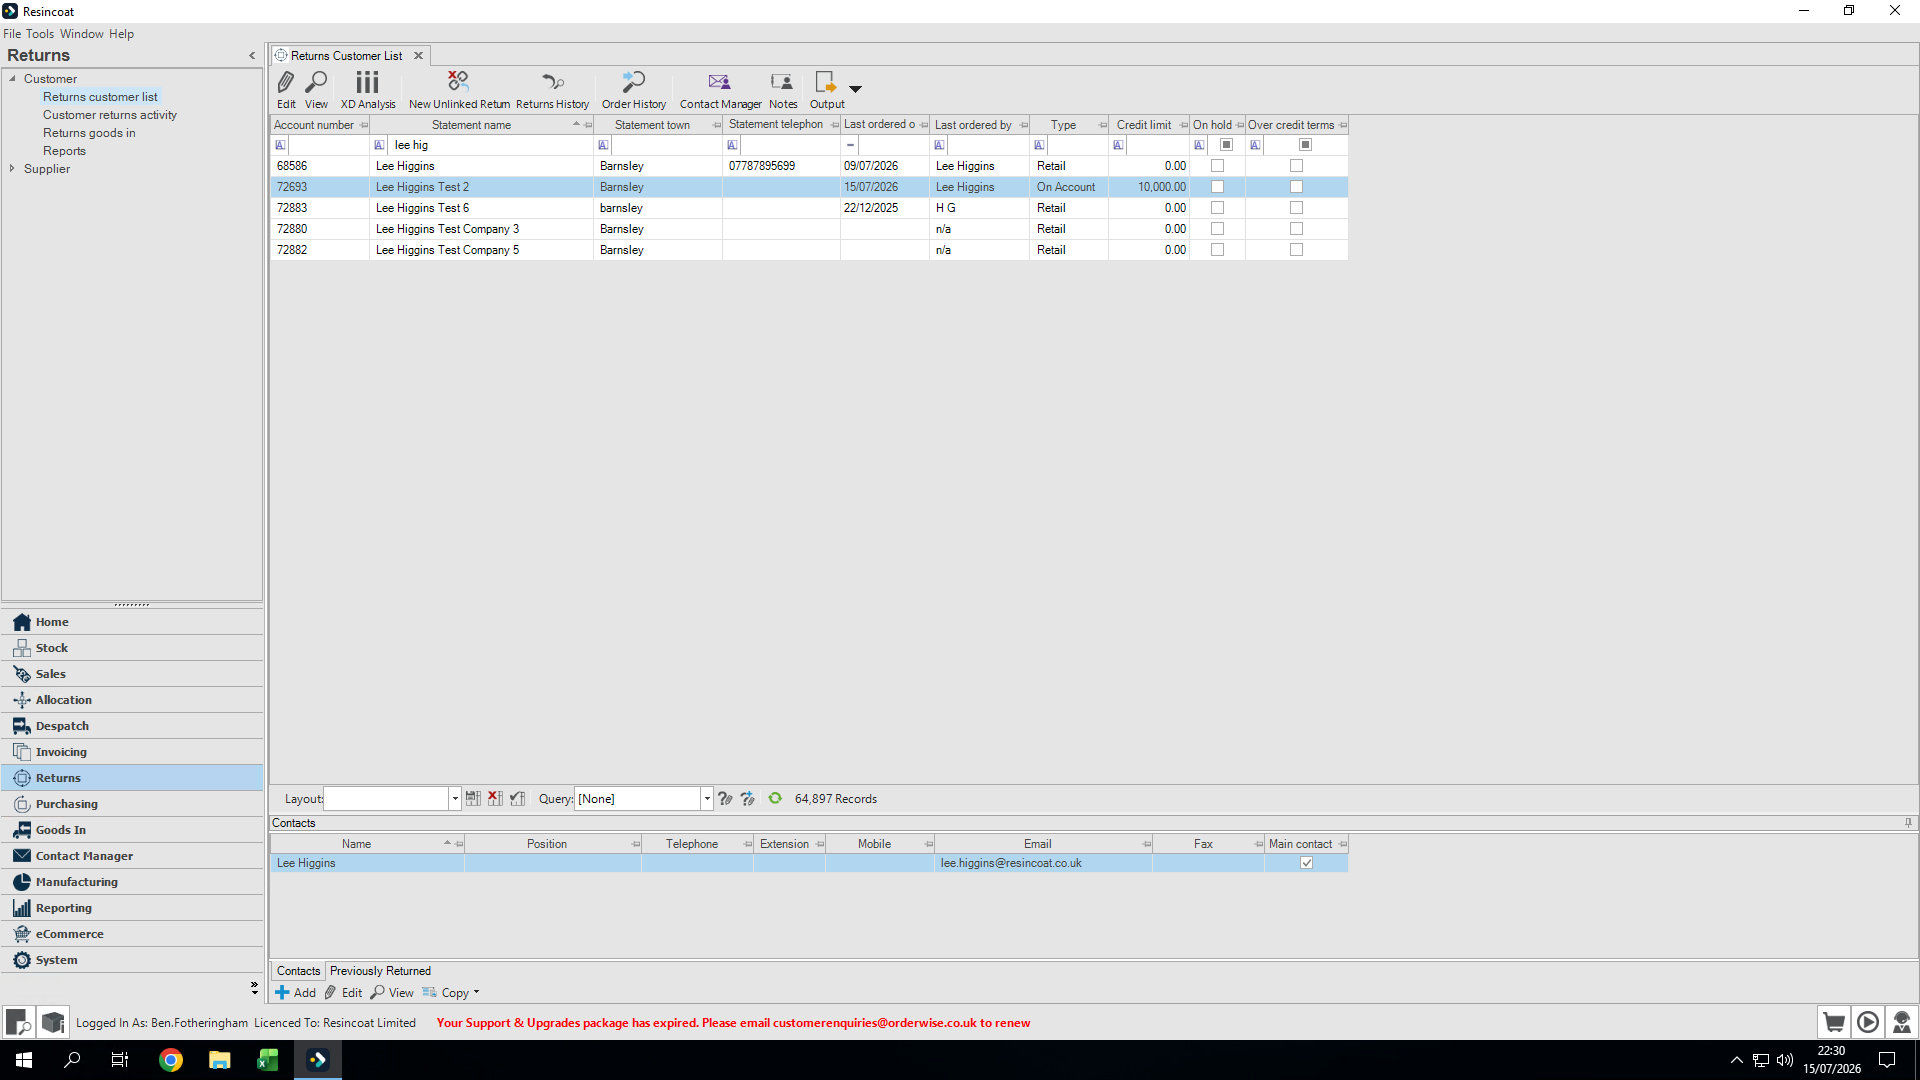
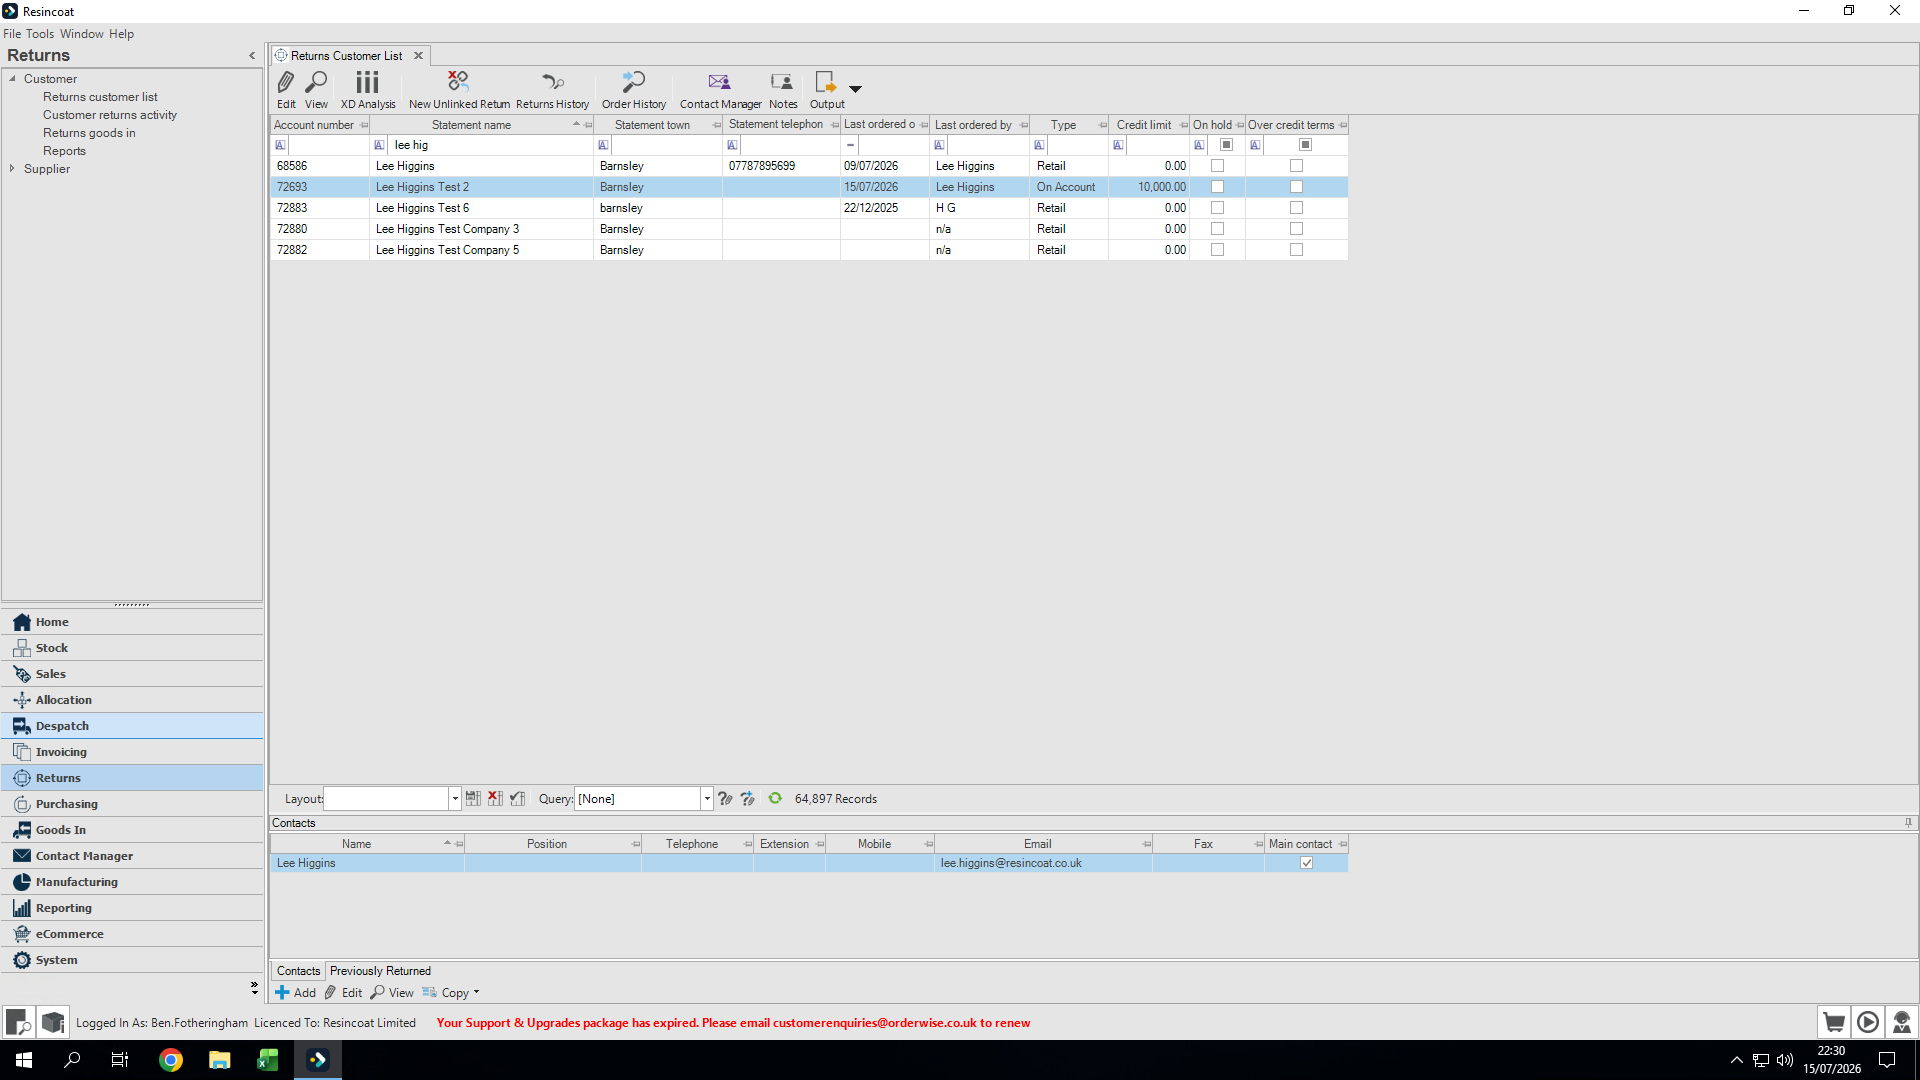
Navigate to the Returns tab in the main navigation.
Step #1: Navigate to the Returns tab in the main navigation.
2
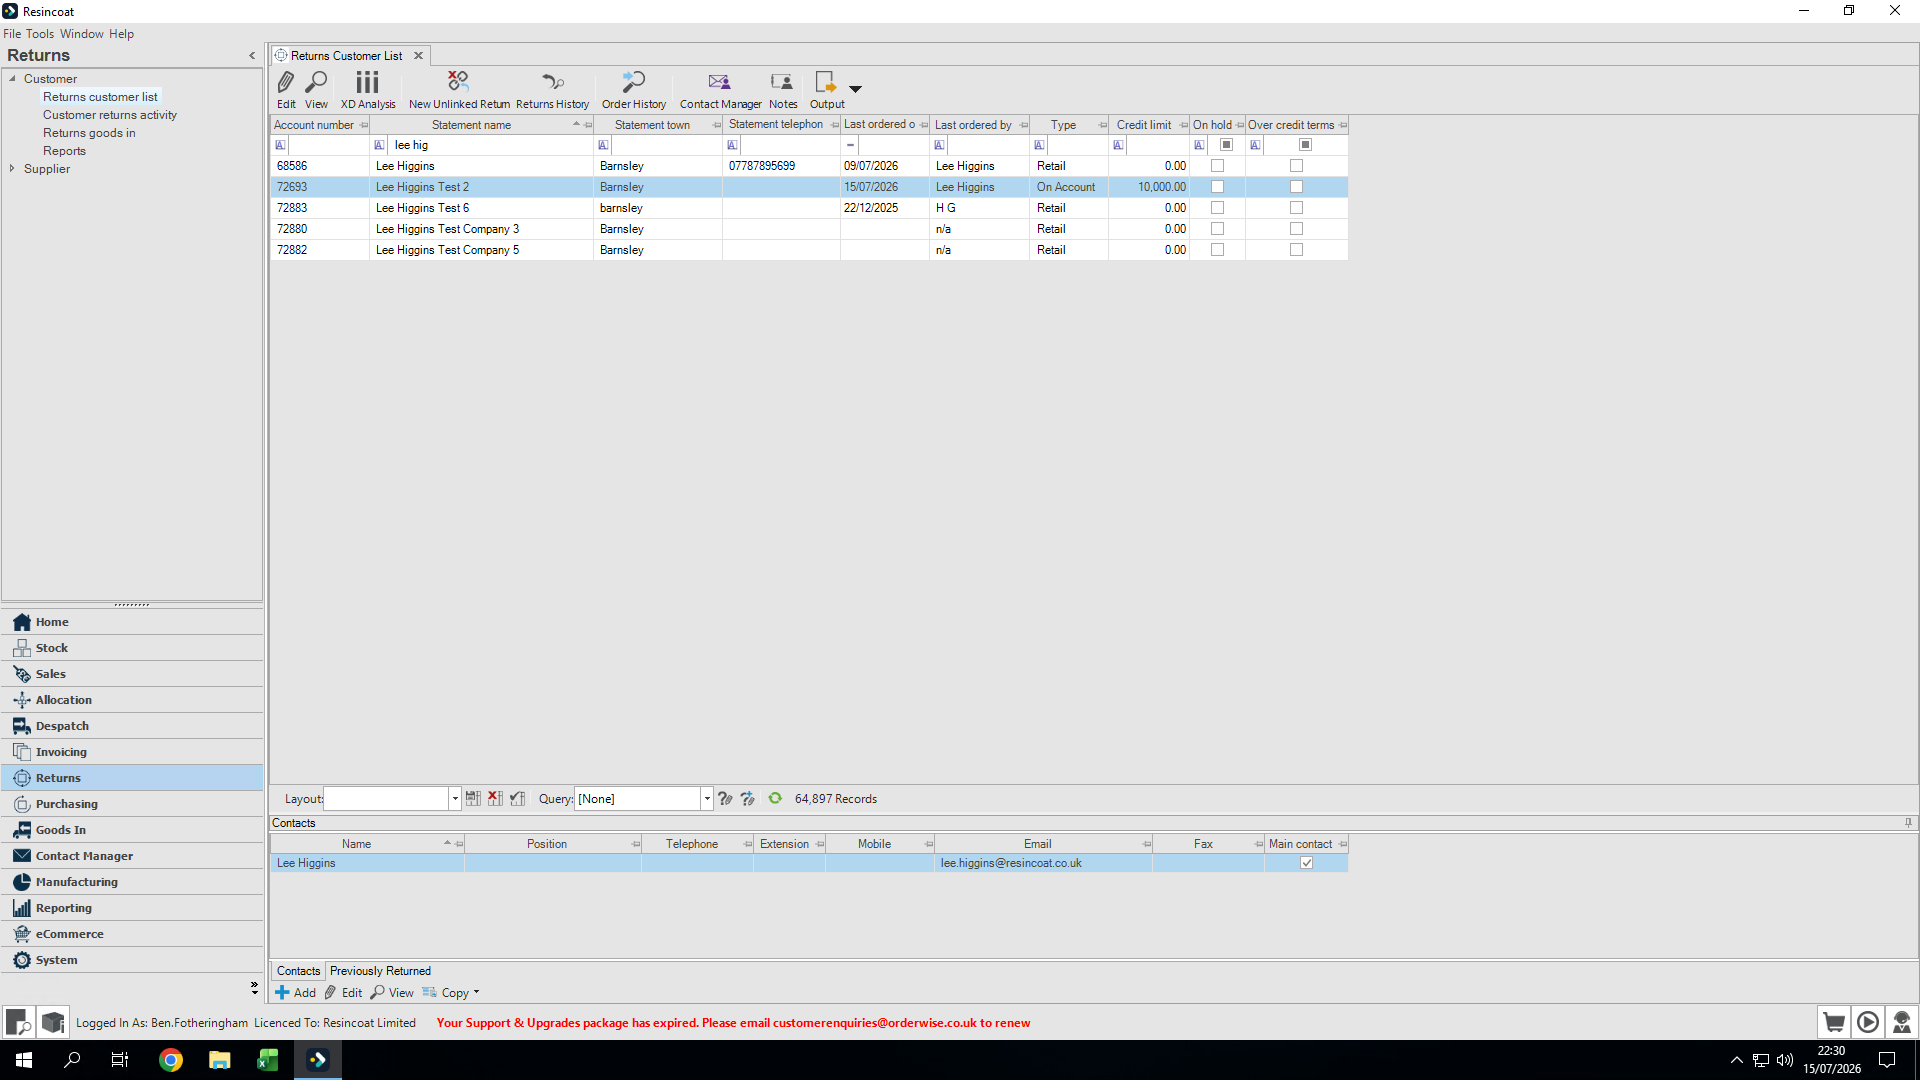
Click on Customer returns activity.
Step #2: Click on Customer returns activity.
3
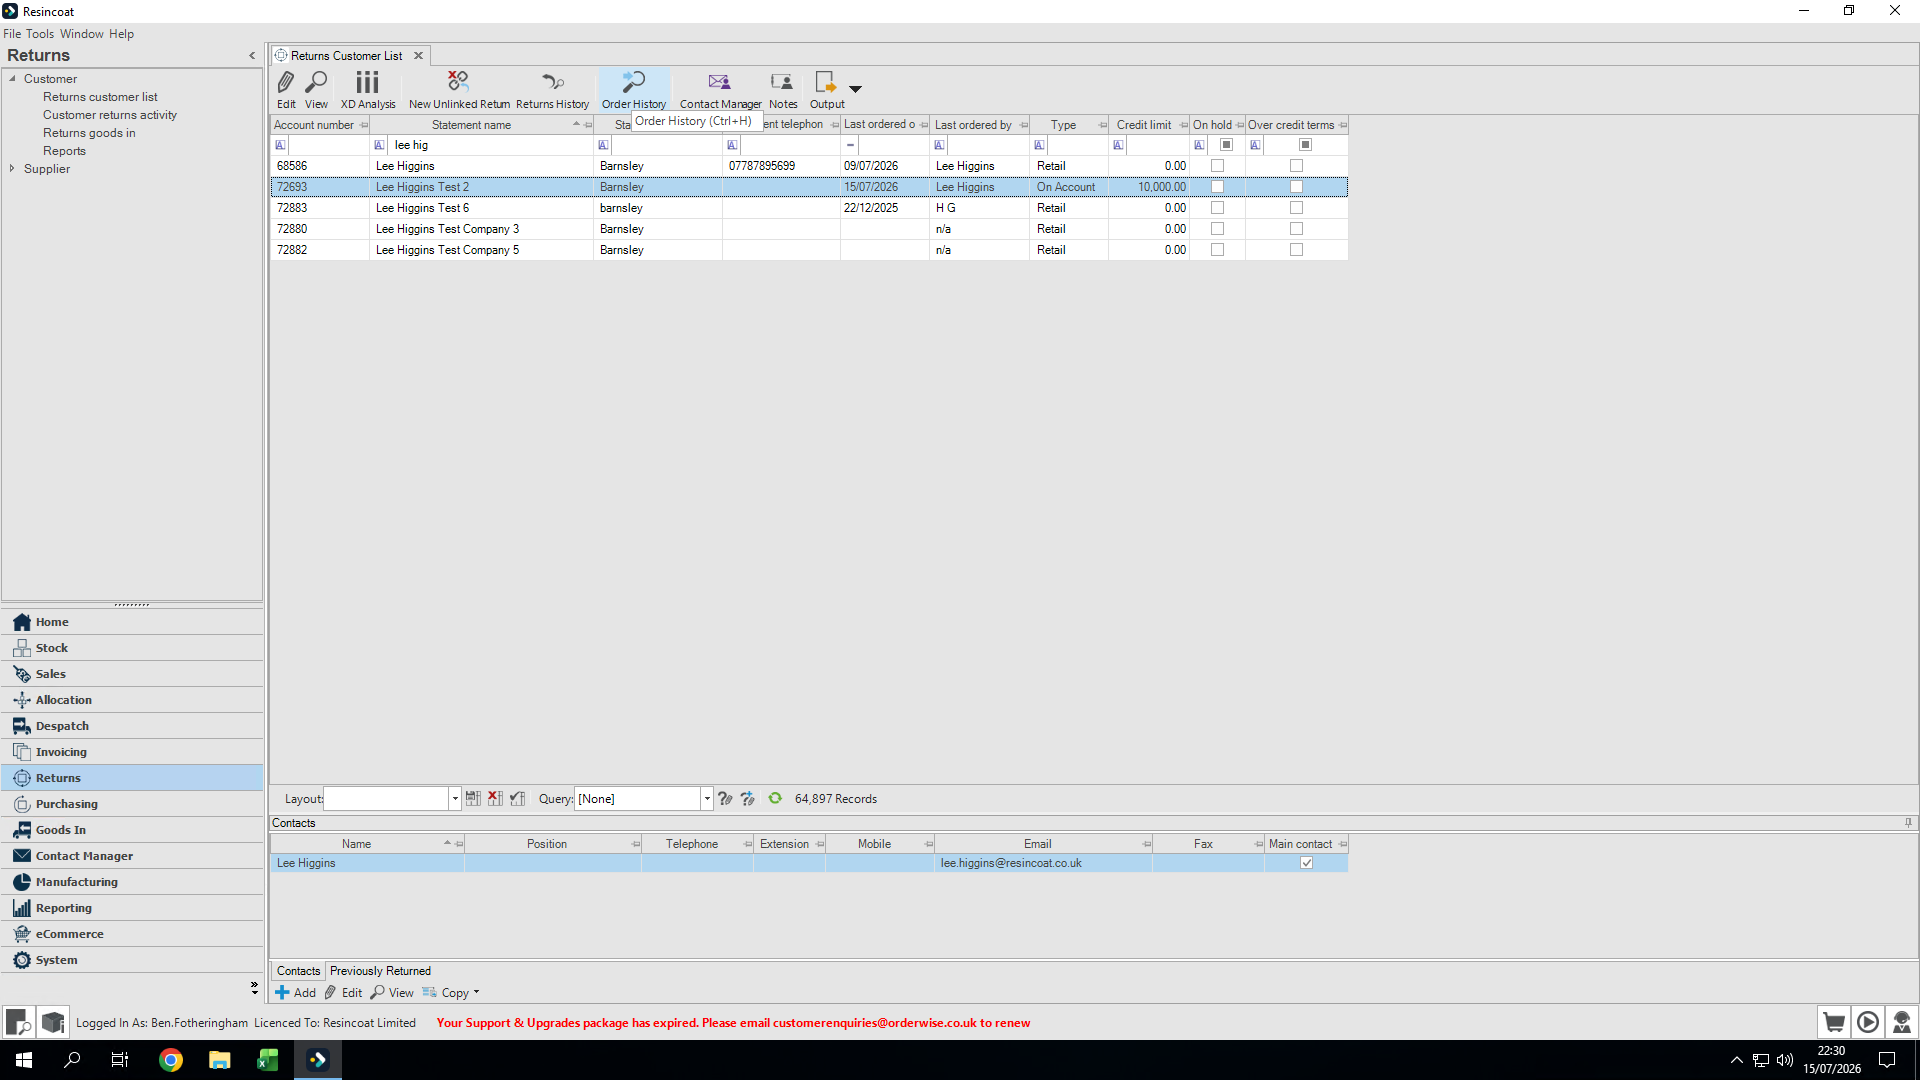
Use the search function to locate the customer, then click on their name to highlight the record.
Step #3: Use the search function to locate the customer, then click on their name to highlight the record.
4
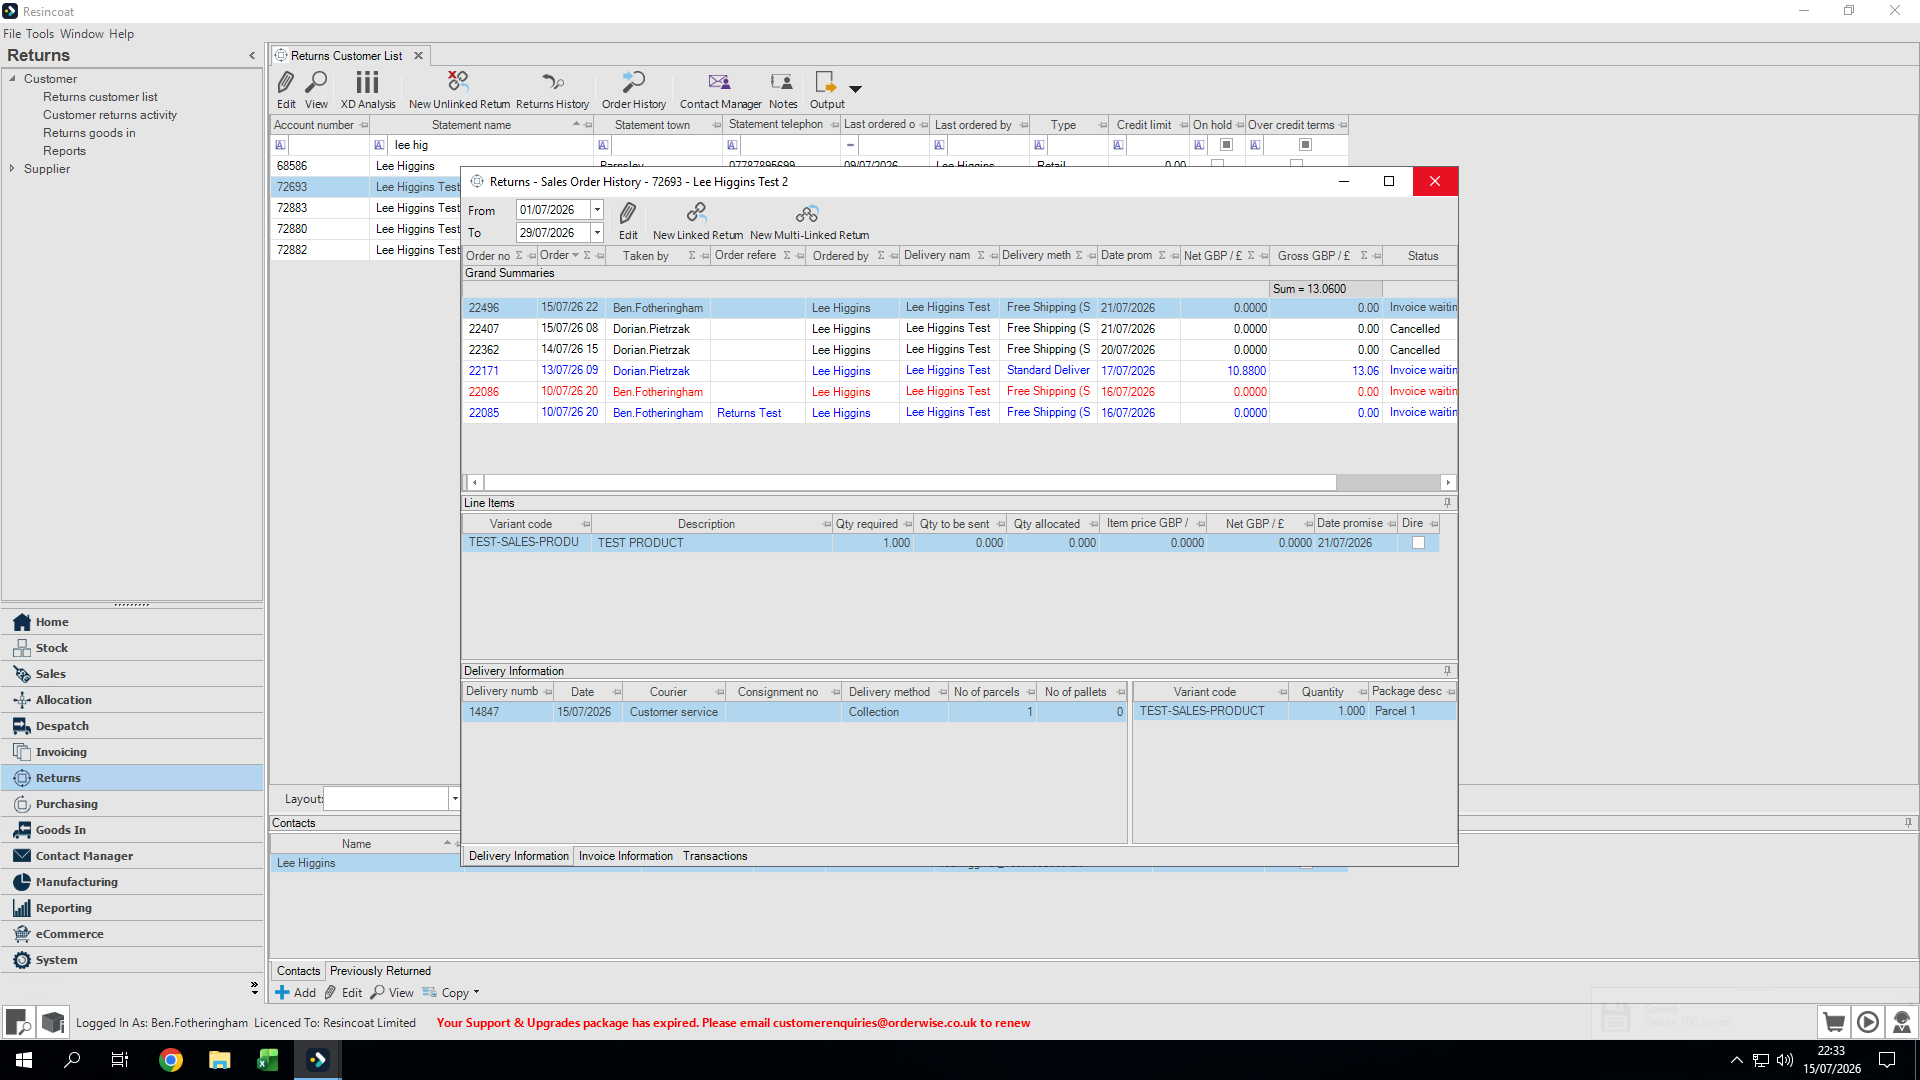
Click Order History in the top toolbar to view their past purchases.
Step #4: Click Order History in the top toolbar to view their past purchases.
5
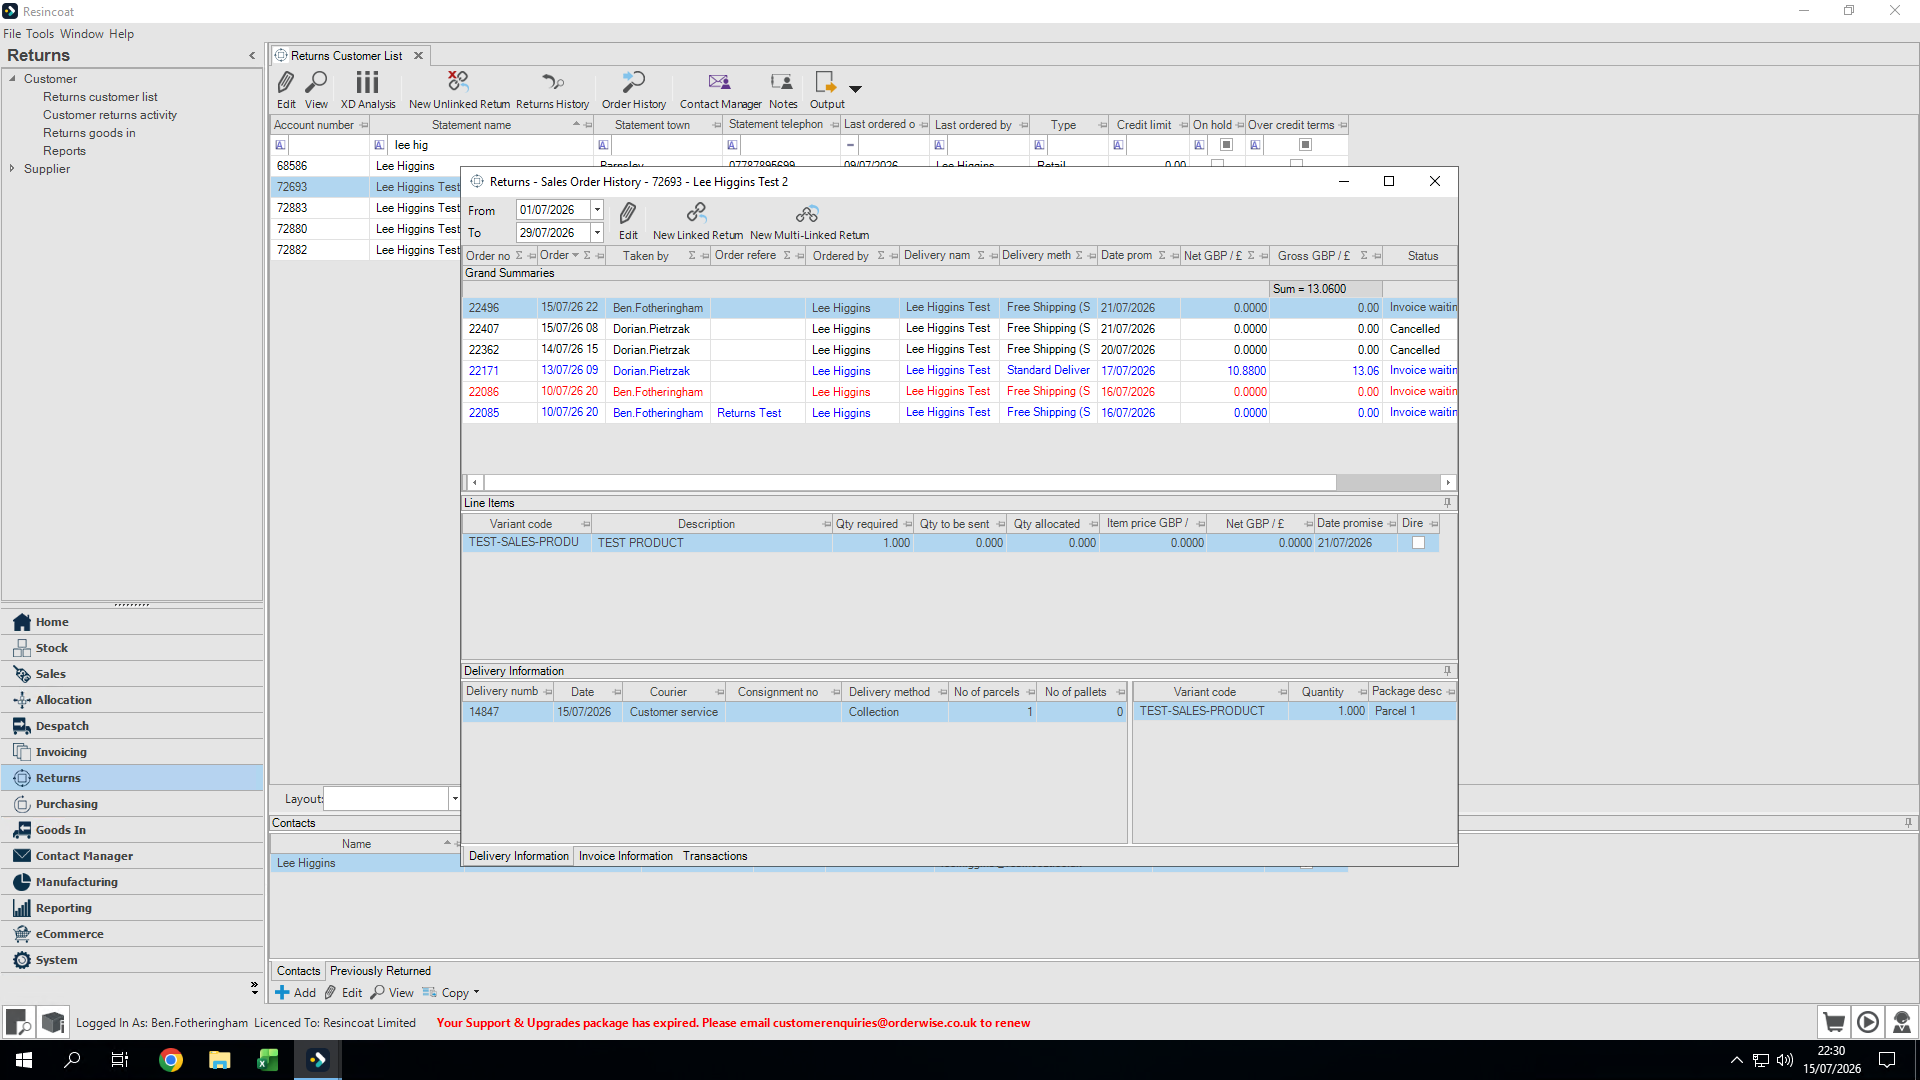
Double-click the specific order you wish to process a return for.
Step #5: Double-click the specific order you wish to process a return for.

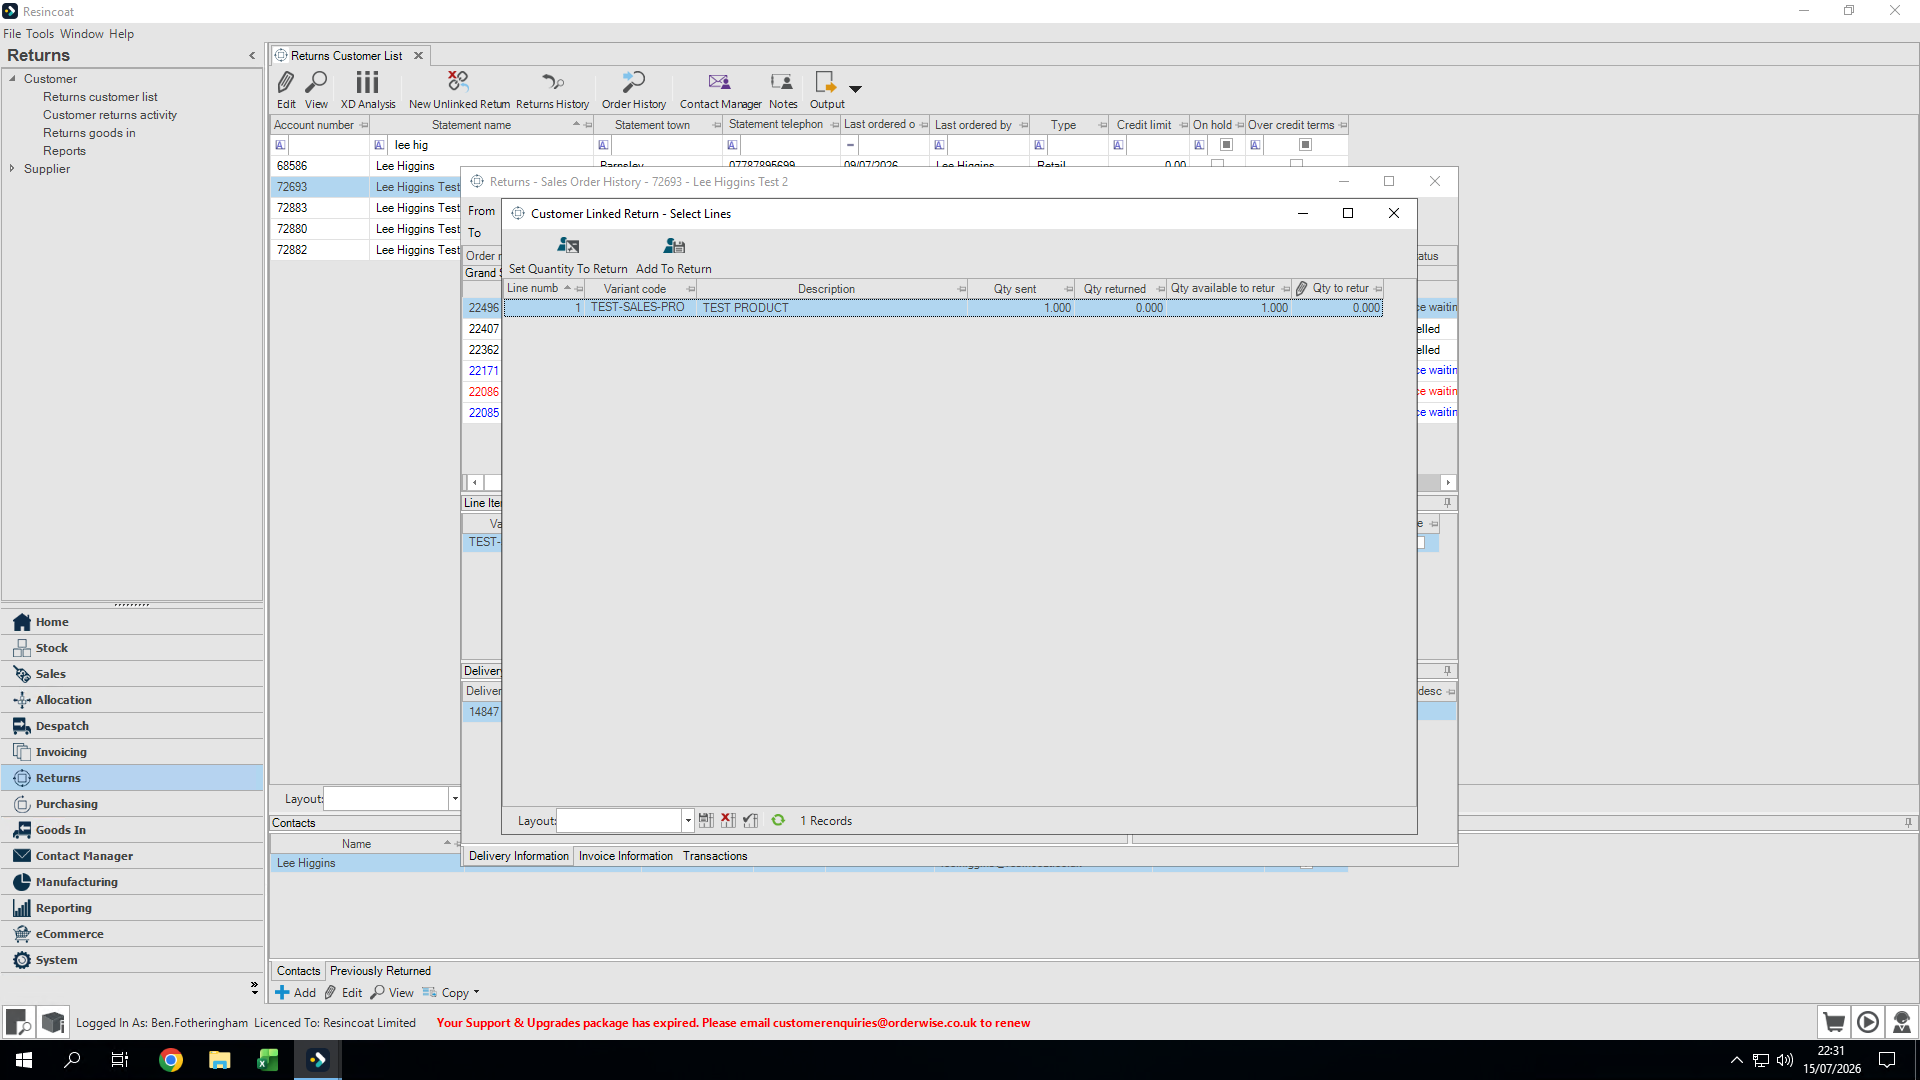
The order lines will appear, displaying the products the customer purchased.
6
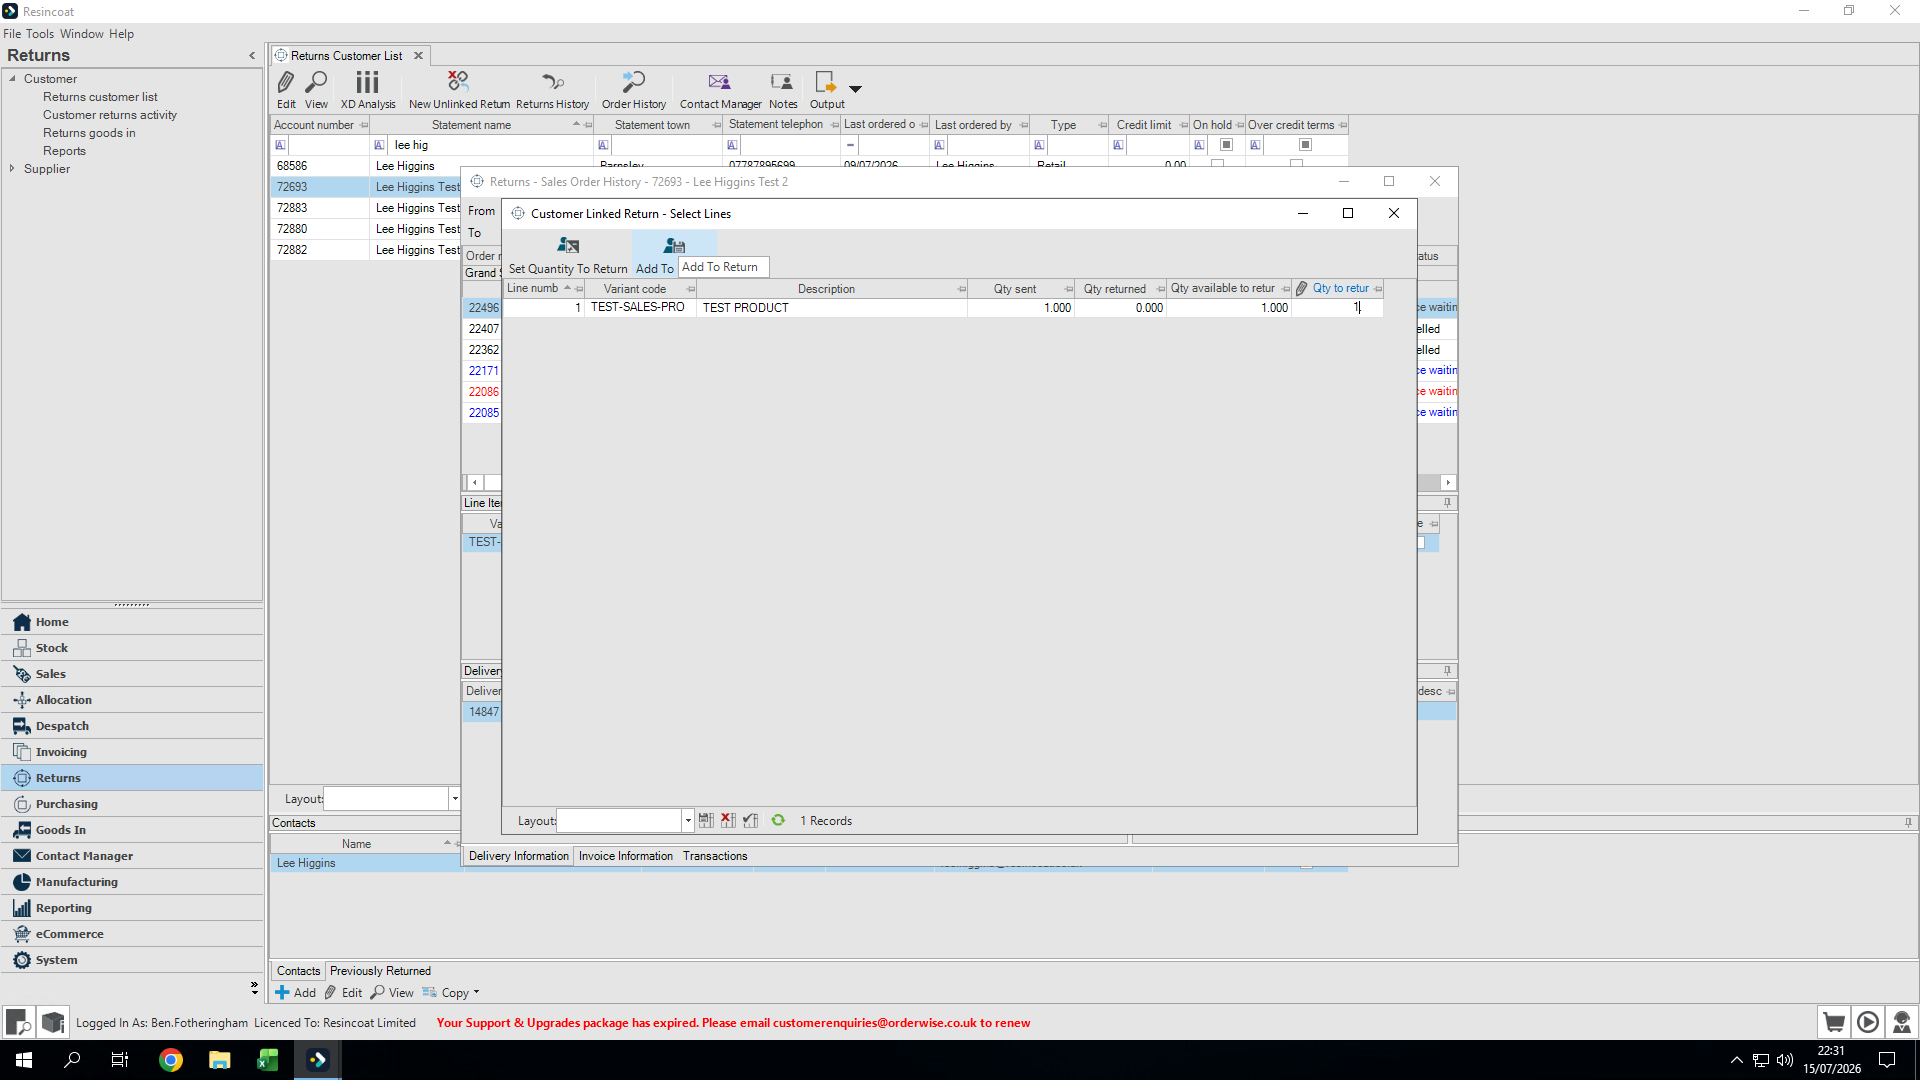
Click the quantity box next to the product the customer wishes to return.
Step #6: Click the quantity box next to the product the customer wishes to return.
7
Type the quantity being returned.
8
Click Add to Return.
Step #8: Click Add to Return.

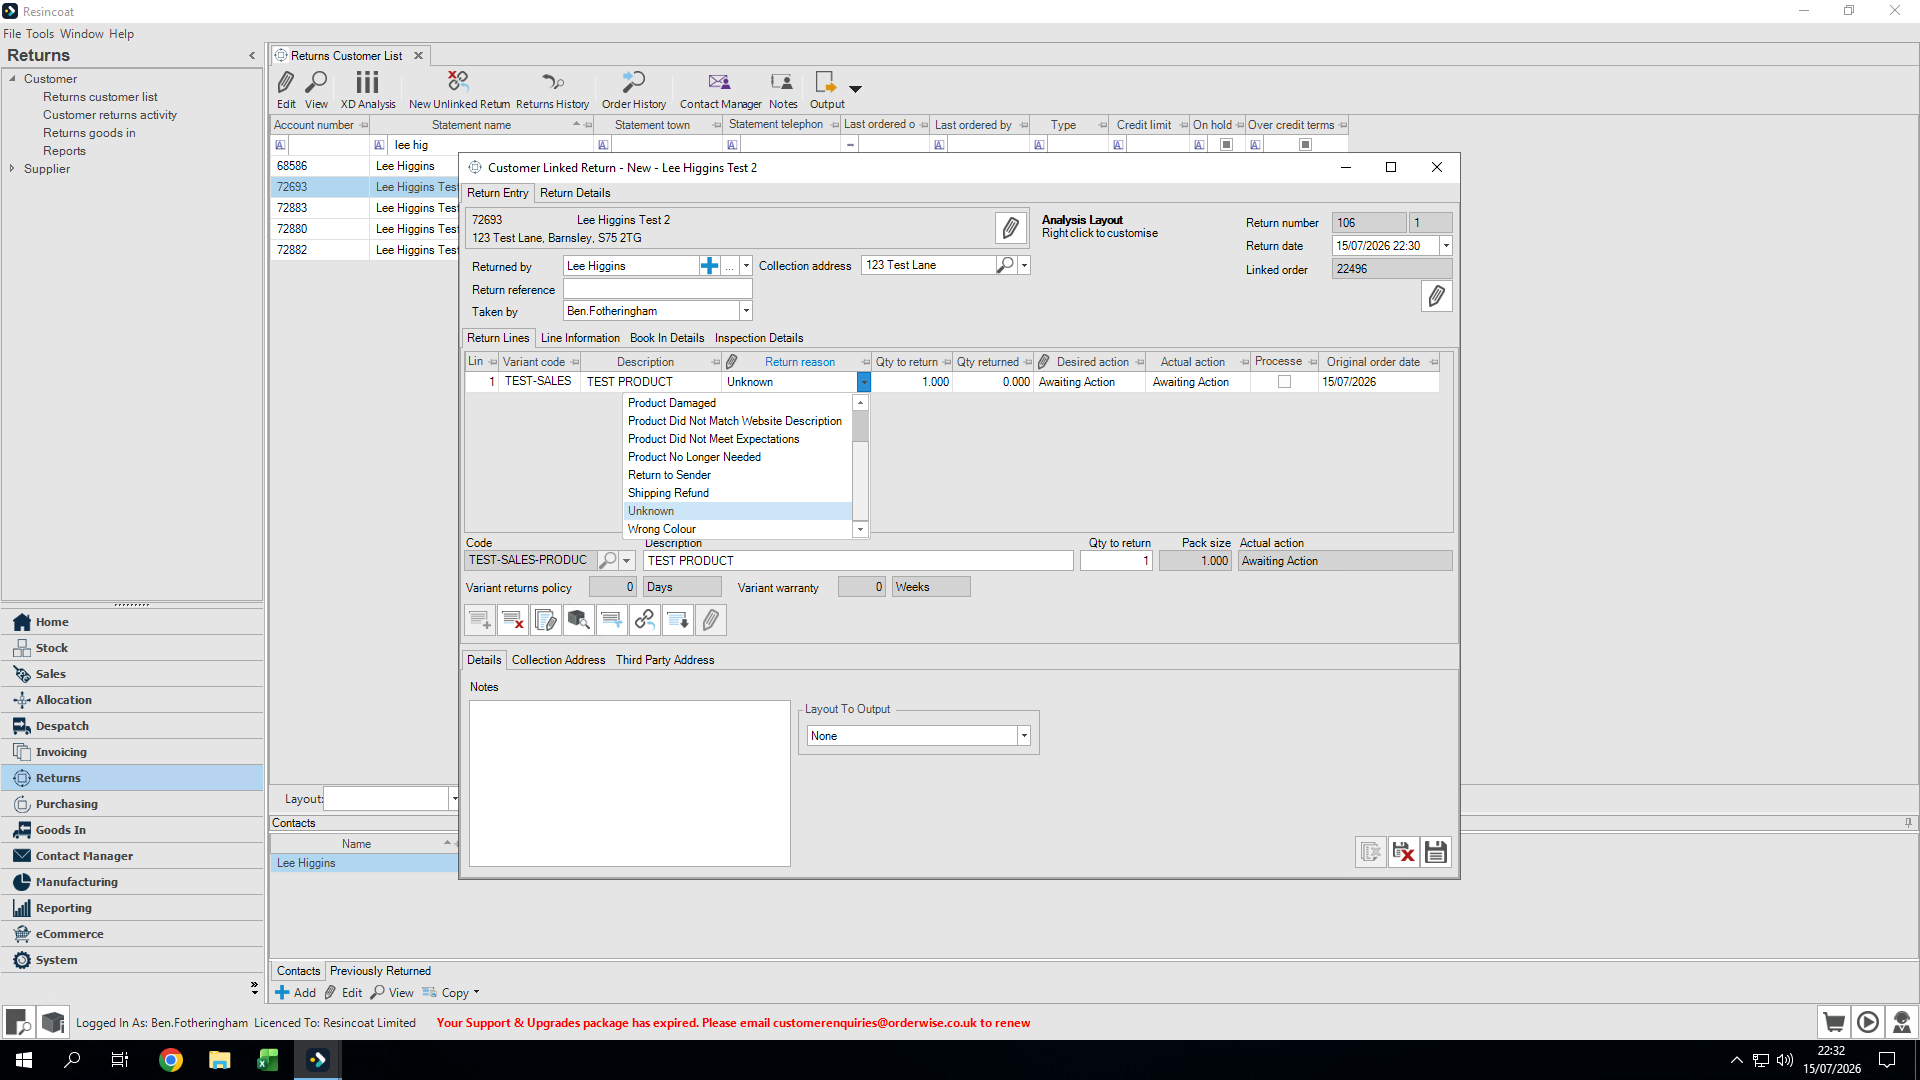
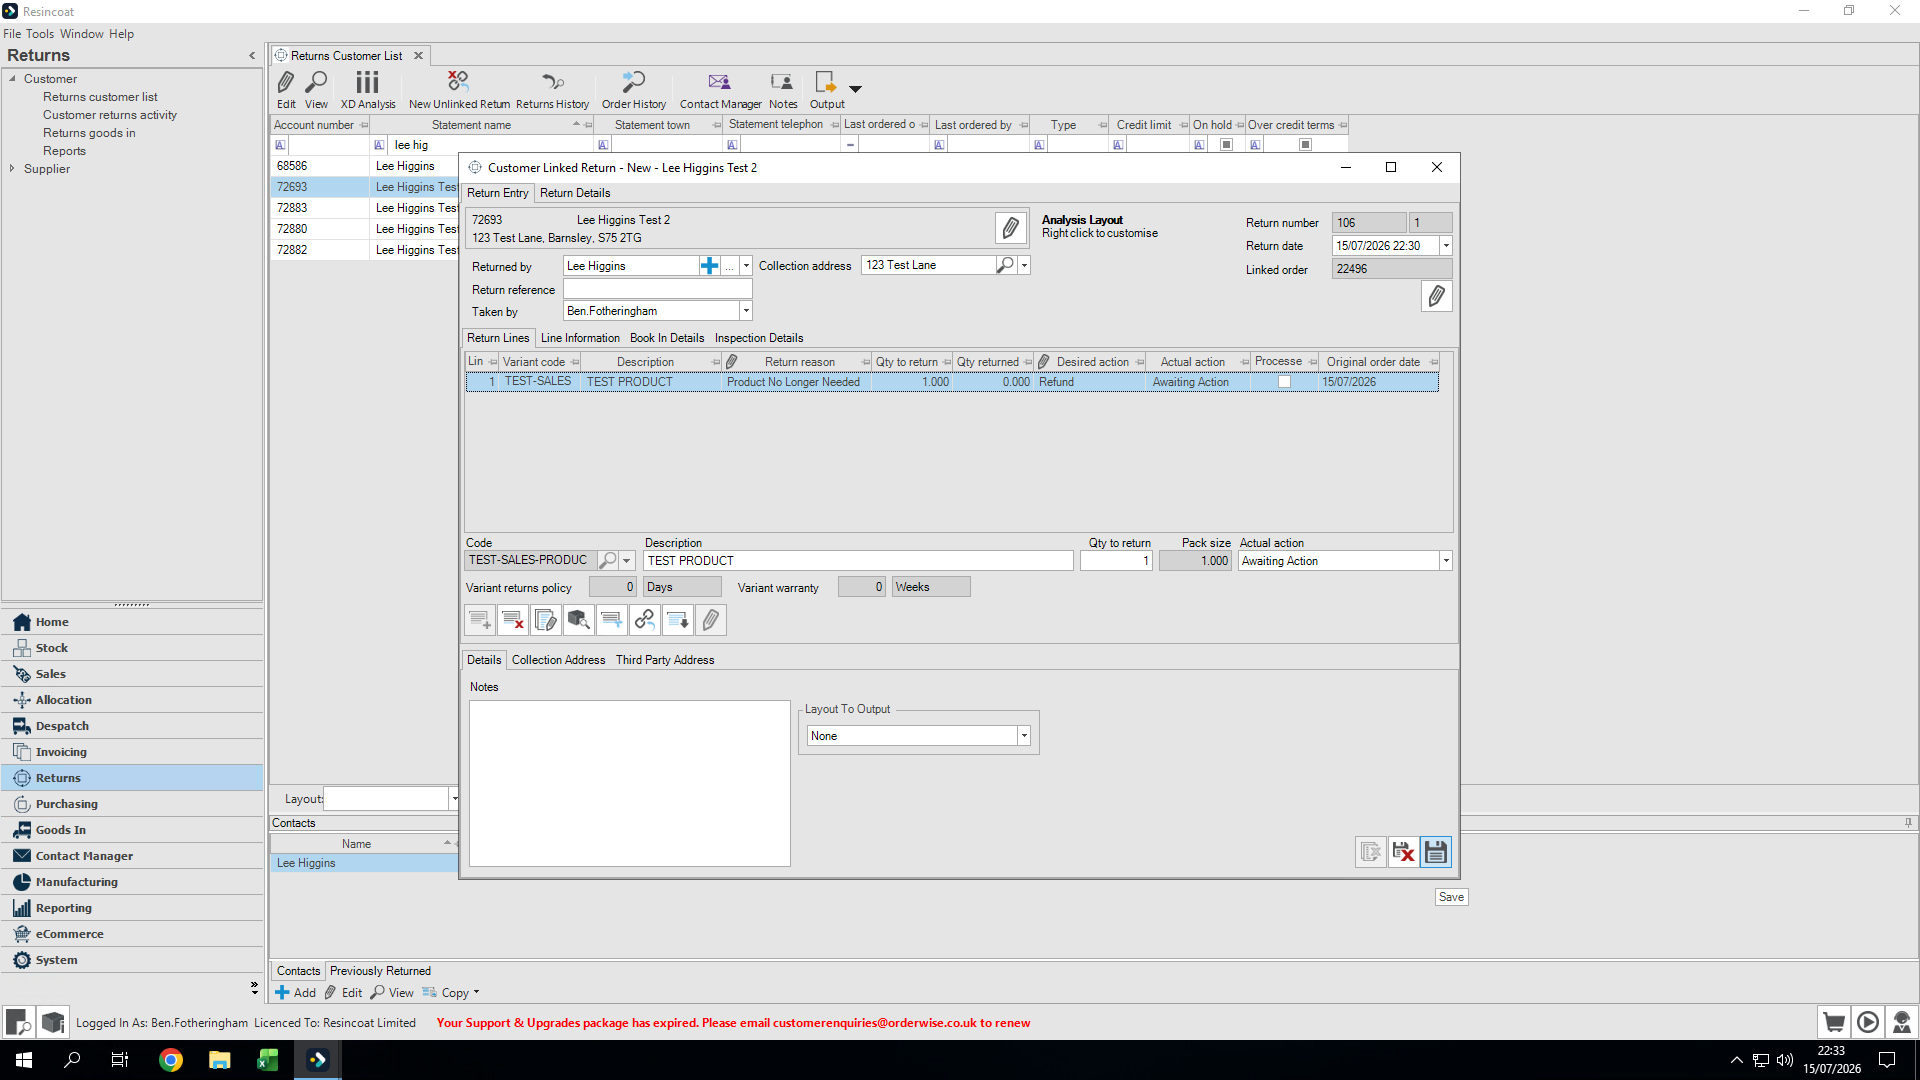
A new return form will open.

9
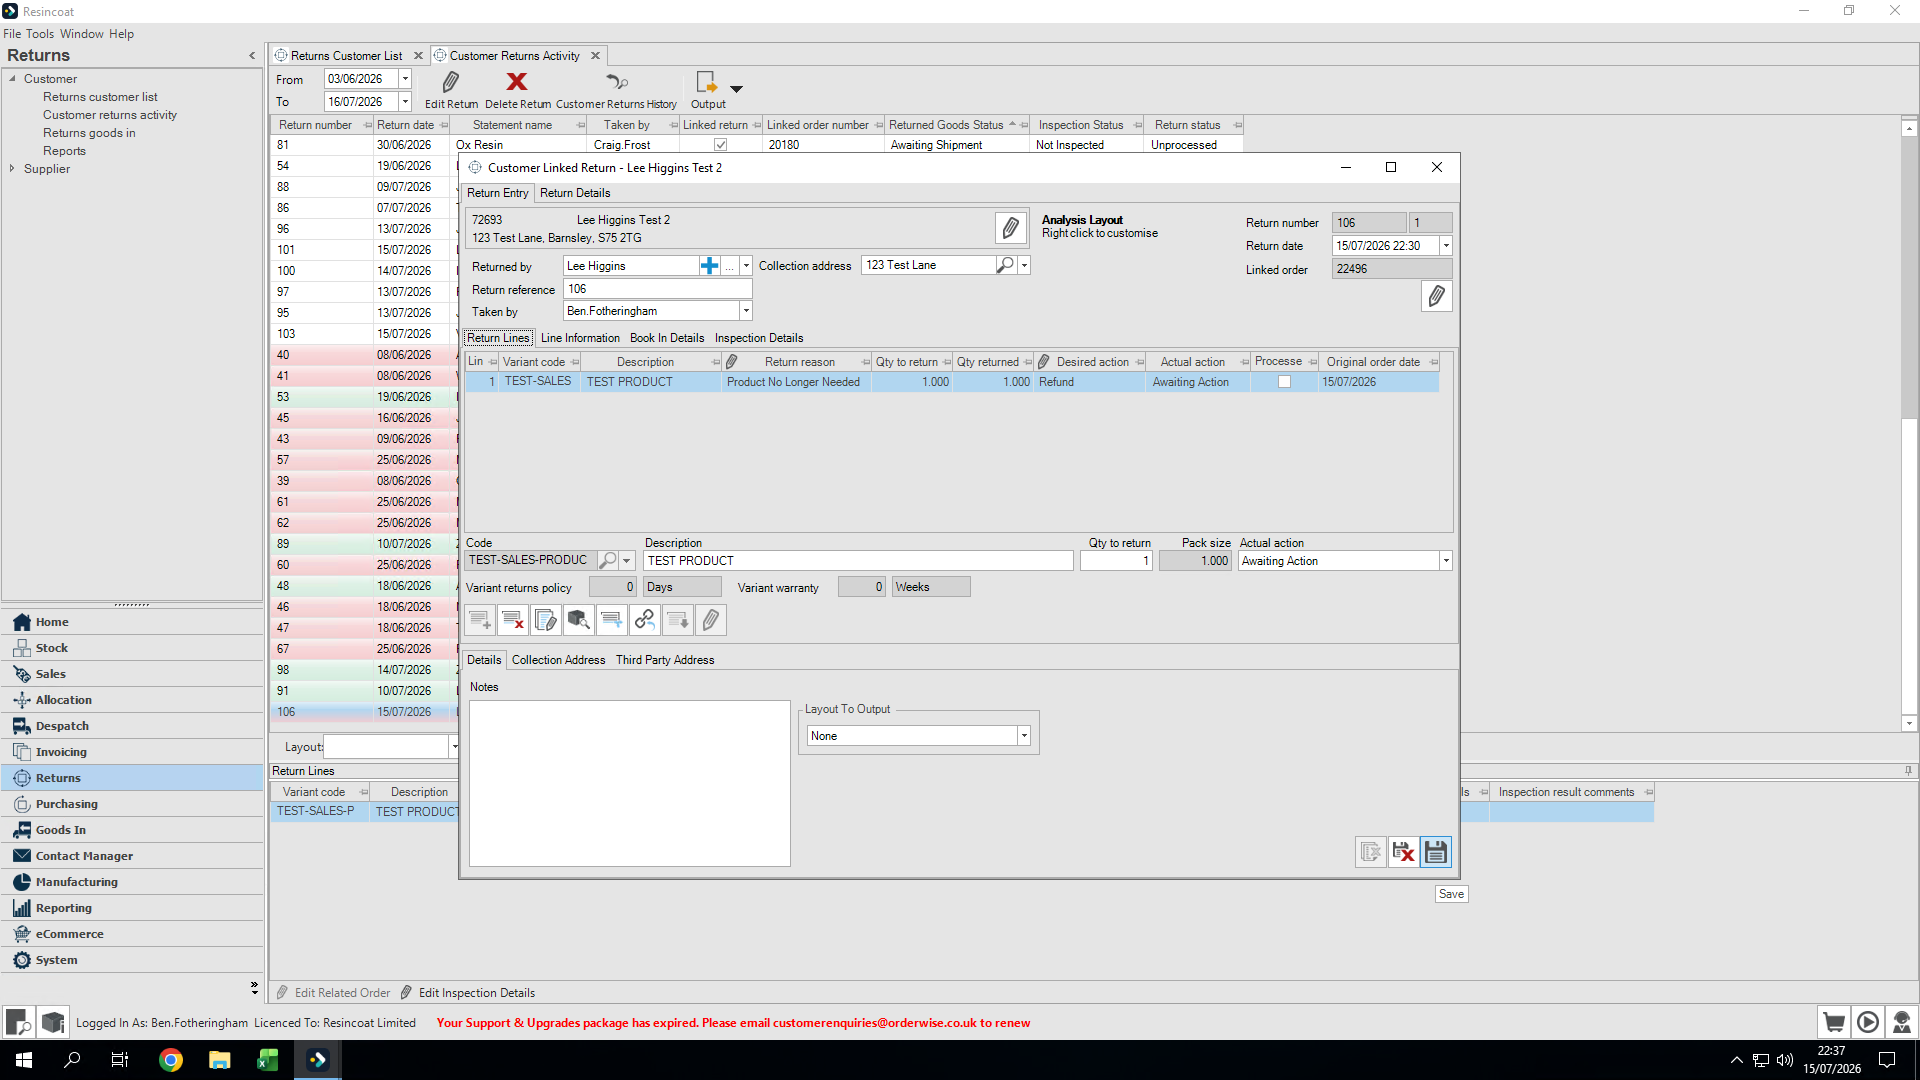
Click the Return reason dropdown for the item.
Step #9: Click the Return reason dropdown for the item.
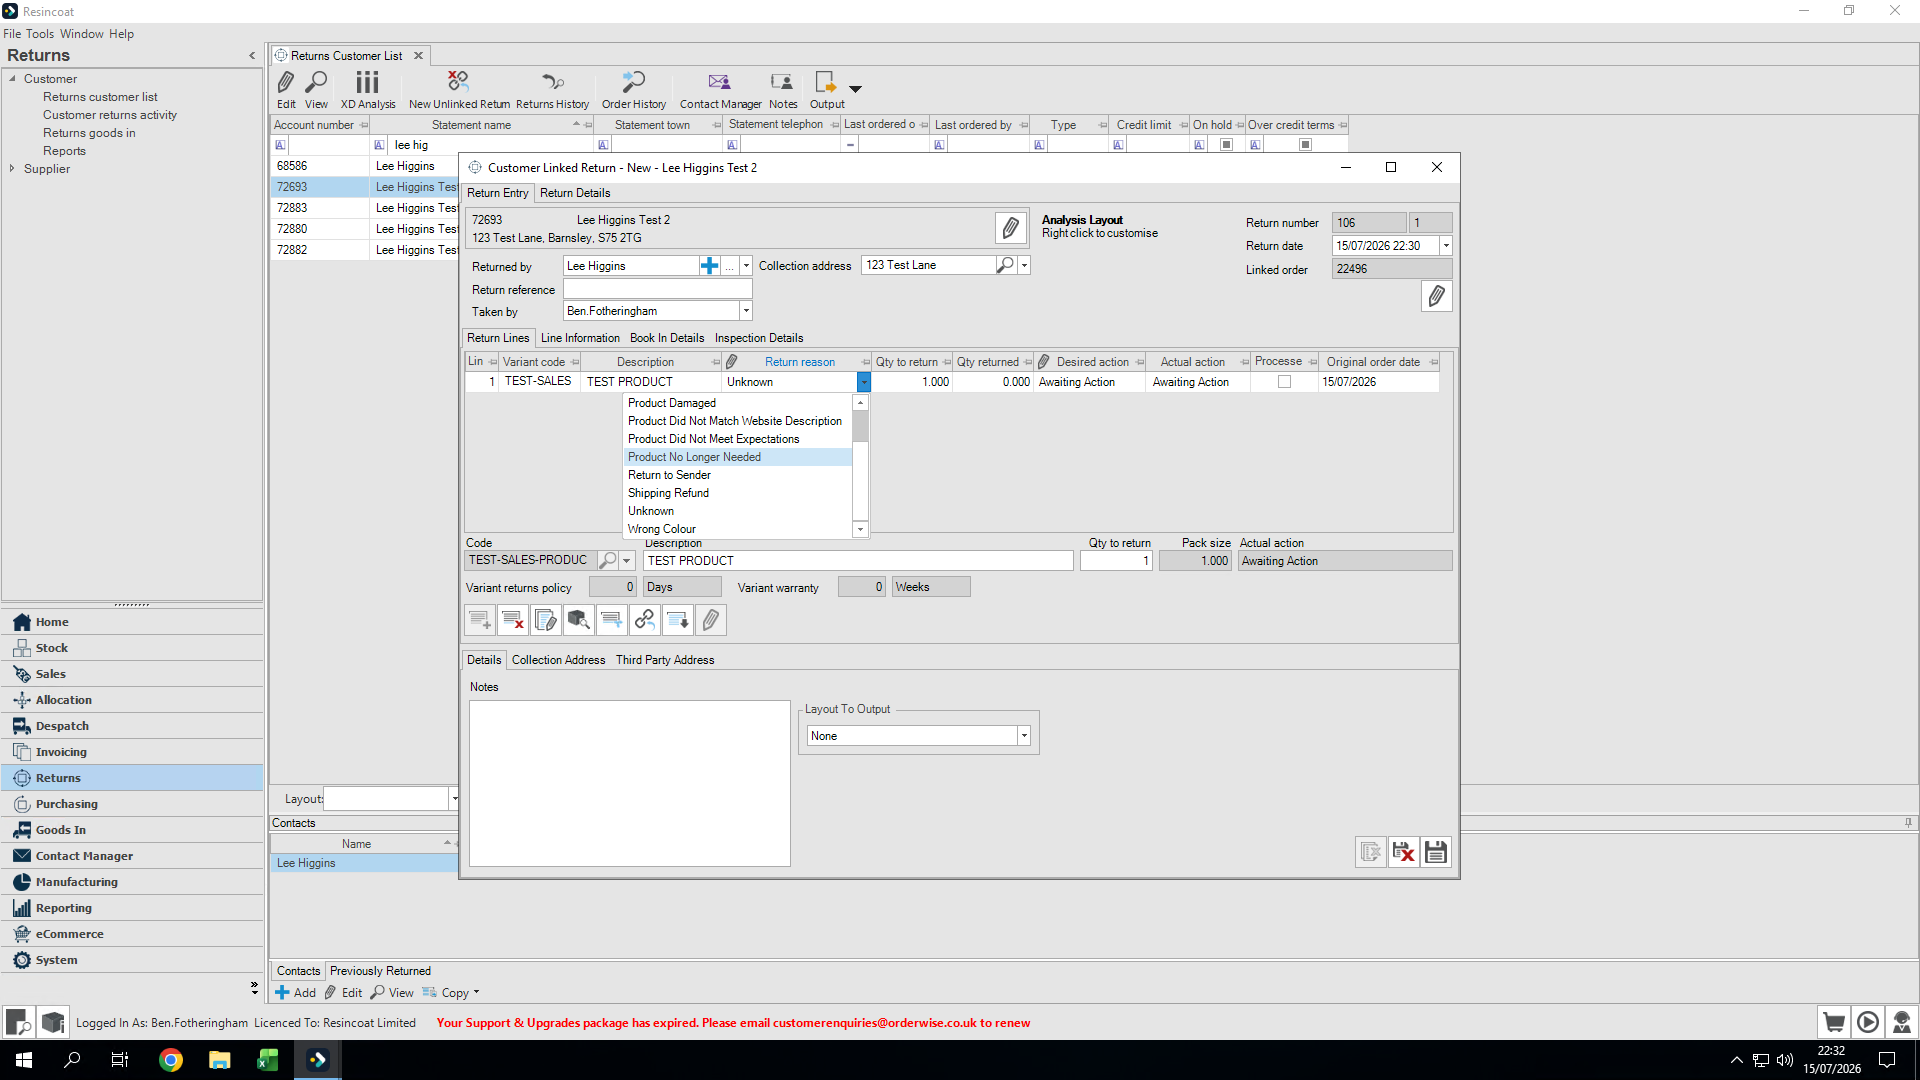
10
Select the appropriate reason, such as Product No Longer Needed.
Step #10: Select the appropriate reason, such as Product No Longer Needed.
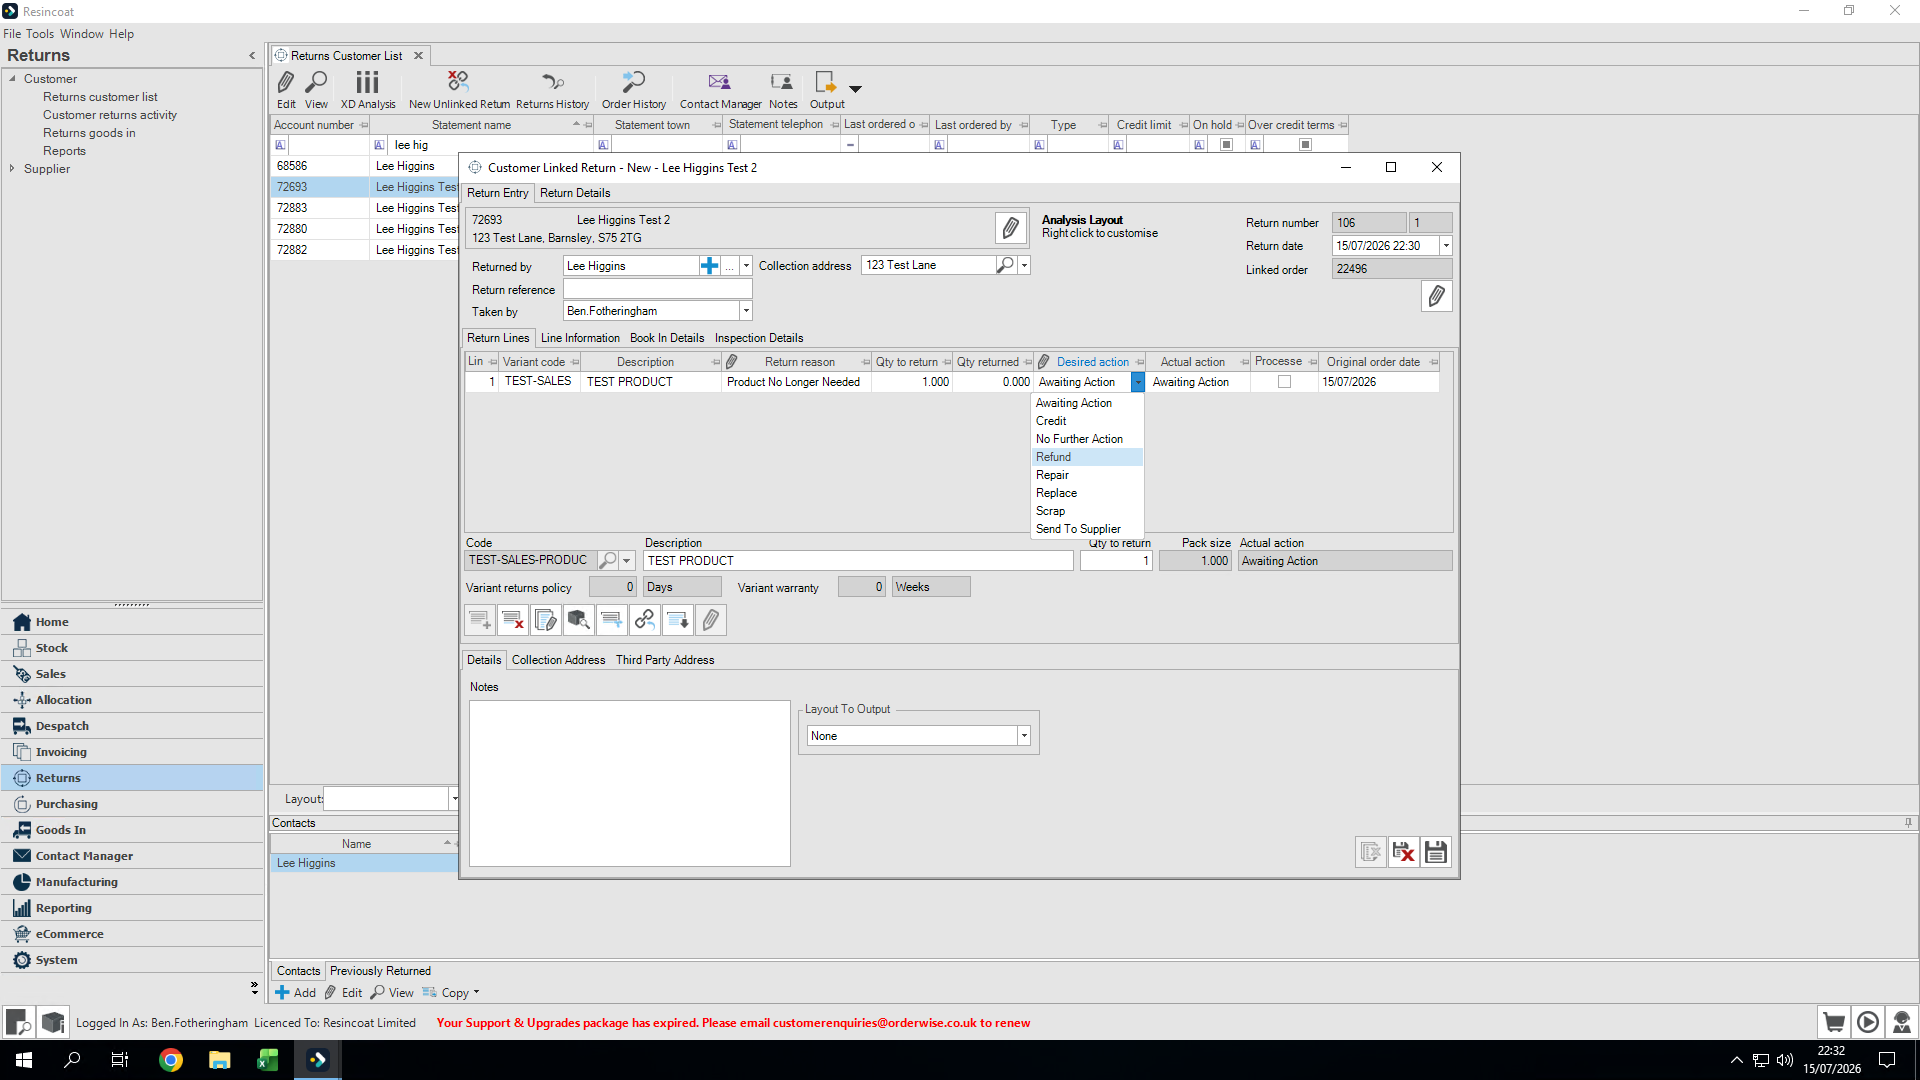
11
Set the Desired action to what the customer has requested (e.g., Refund).
Step #11: Set the Desired action to what the customer has requested (e.g., Refund).
12
Review the product description and quantity to ensure they are correct, then click Save.
Step #12: Review the product description and quantity to ensure they are correct, then click Save.
13
Close the return screen.
Step #13: Close the return screen.

2. Receiving and Inspecting the Return (Warehouse)

Once the courier delivers the returned items to the warehouse, the warehouse team takes over. The item is typically booked in via a scanner gun, which automatically registers it as received.
14
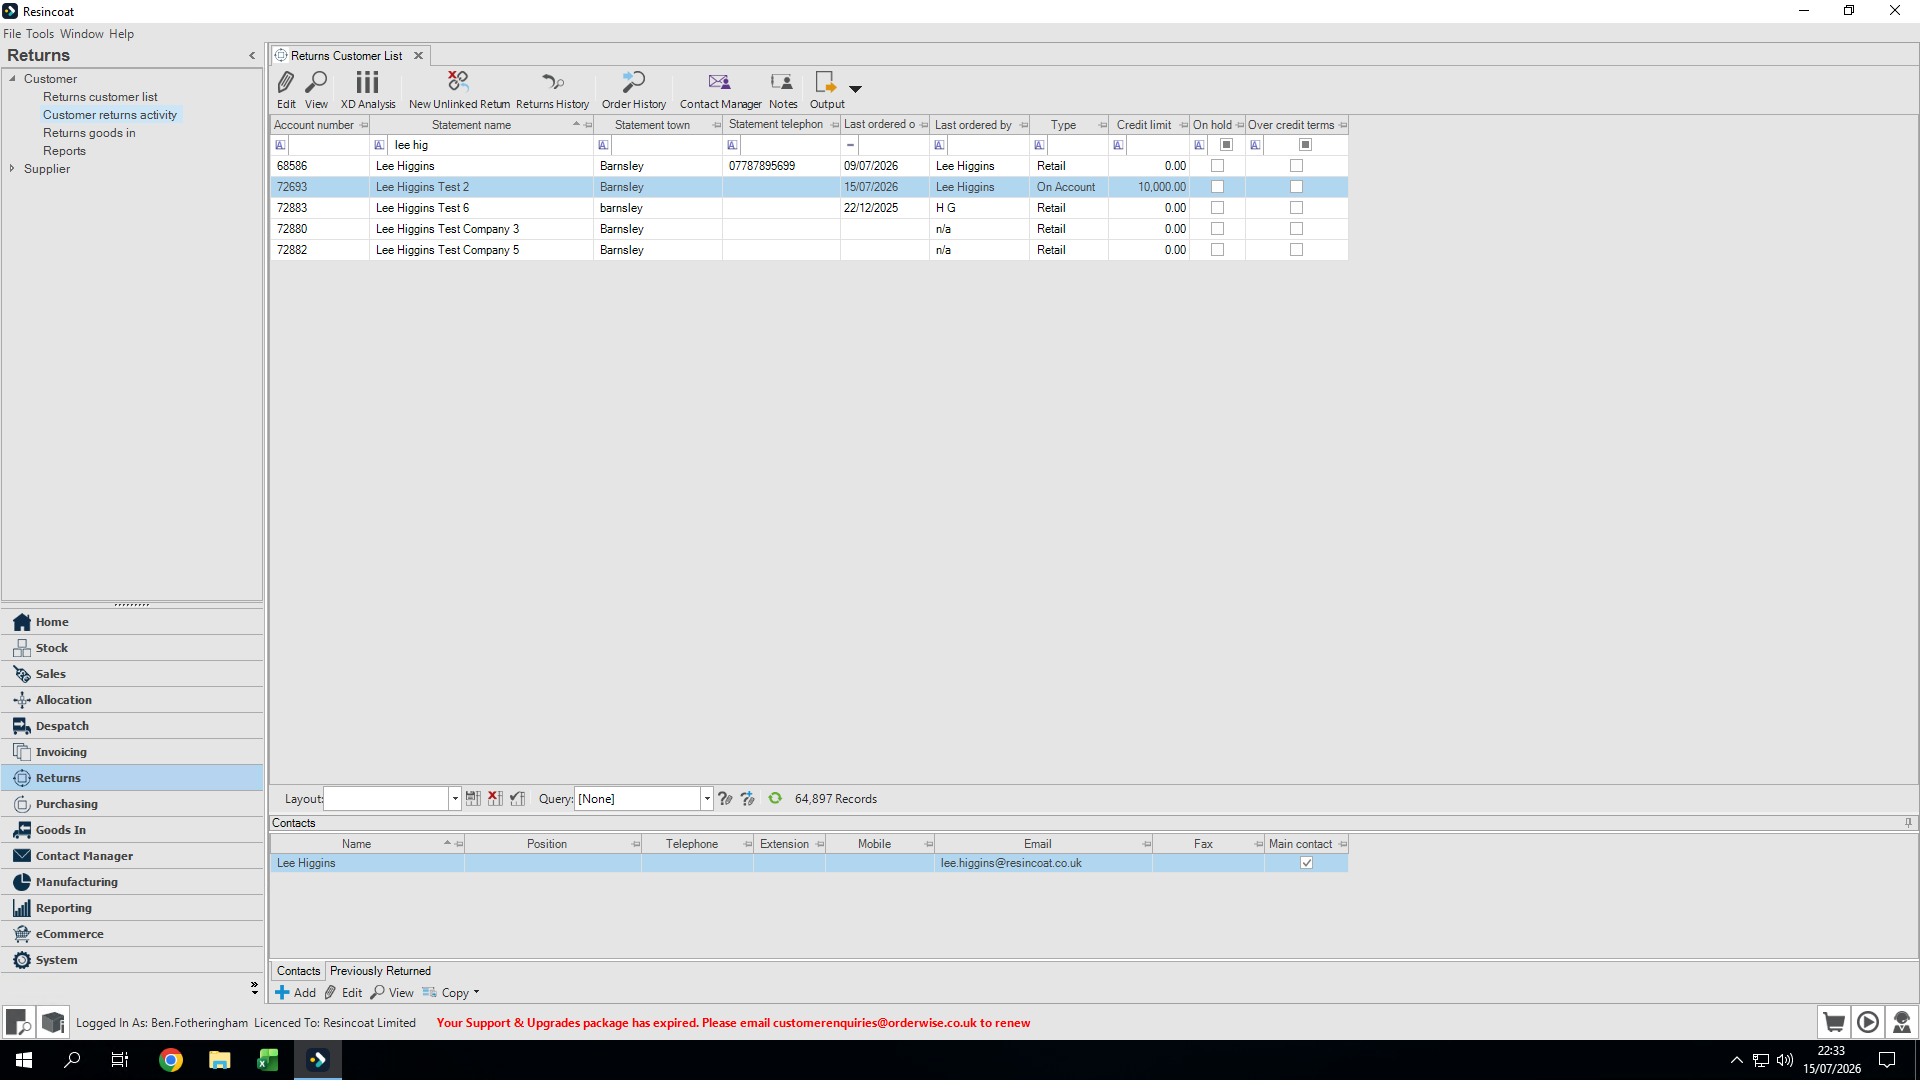
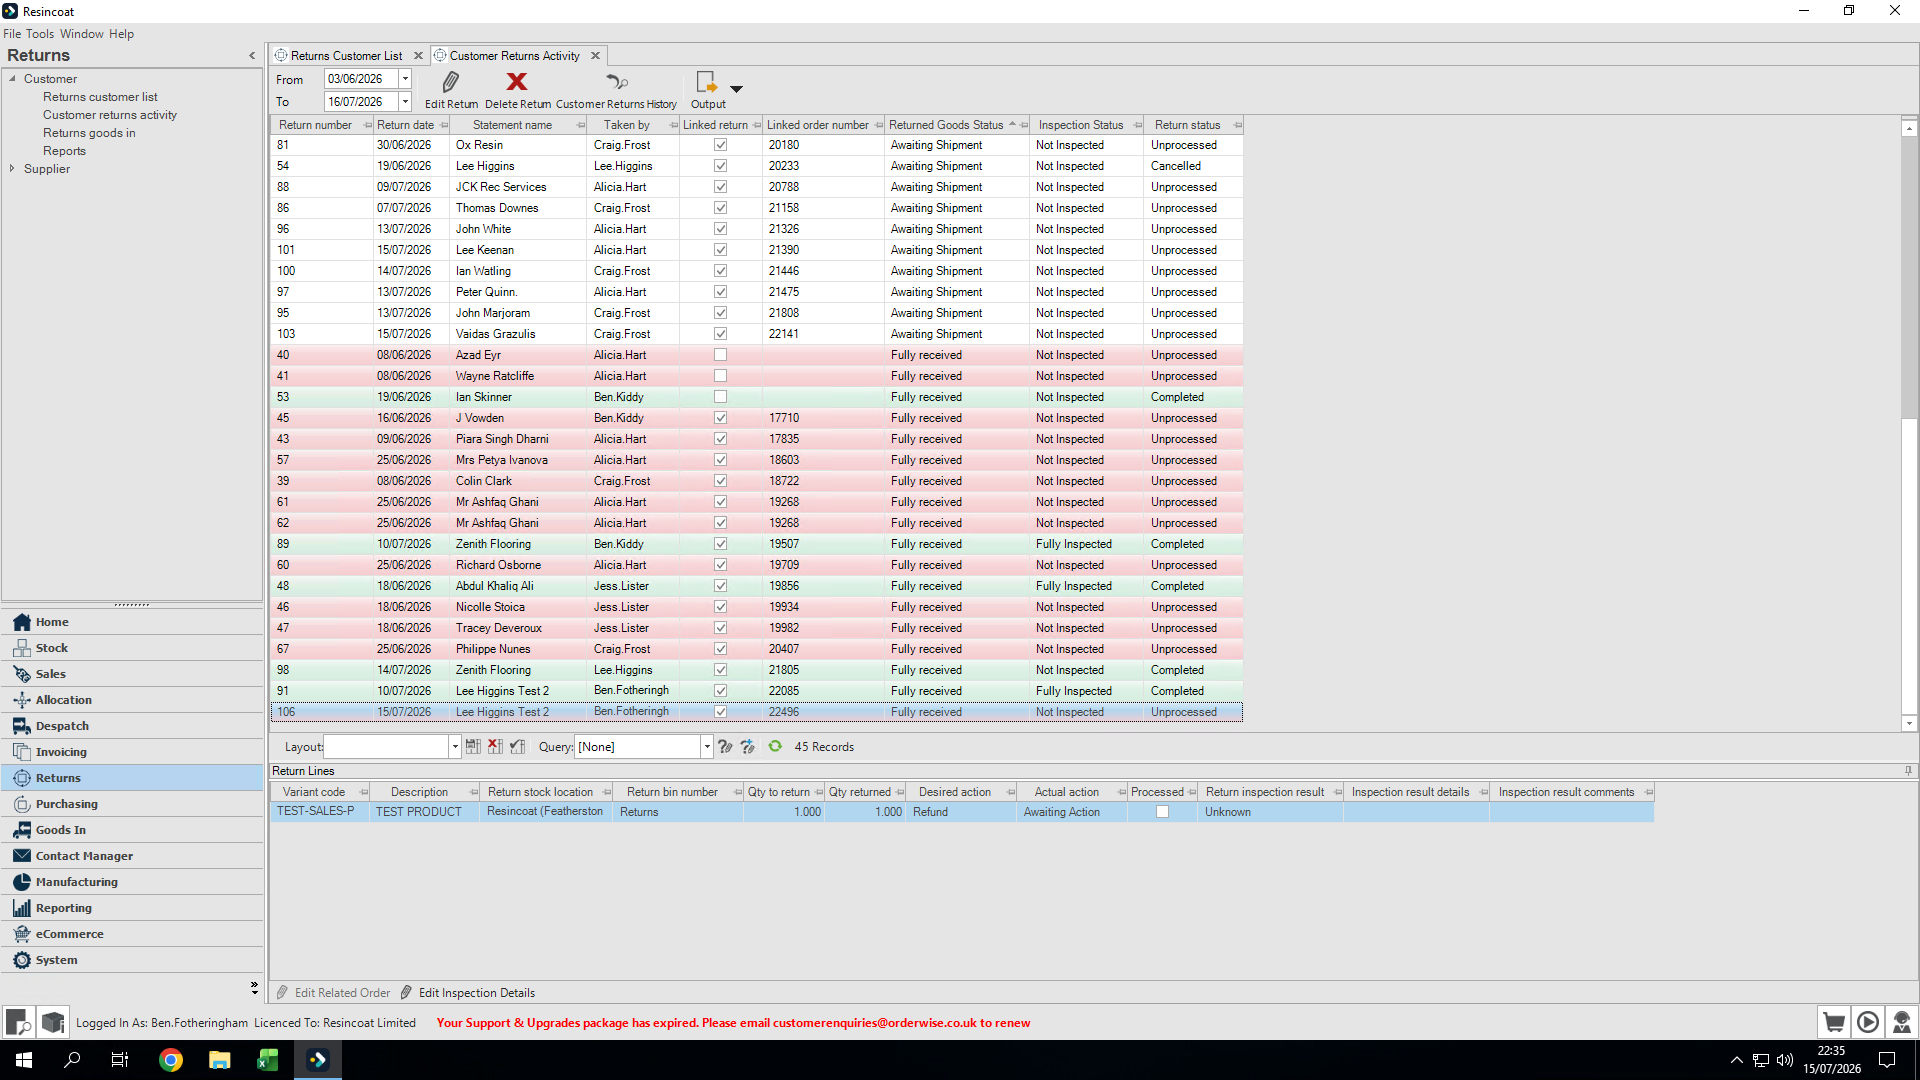
From the Returns tab, click Customer returns activity.
Step #14: From the Returns tab, click Customer returns activity.
15
Locate the return in the red section (indicating it has arrived) and double-click to open it.
Step #15: Locate the return in the red section (indicating it has arrived) and double-click to open it.
16
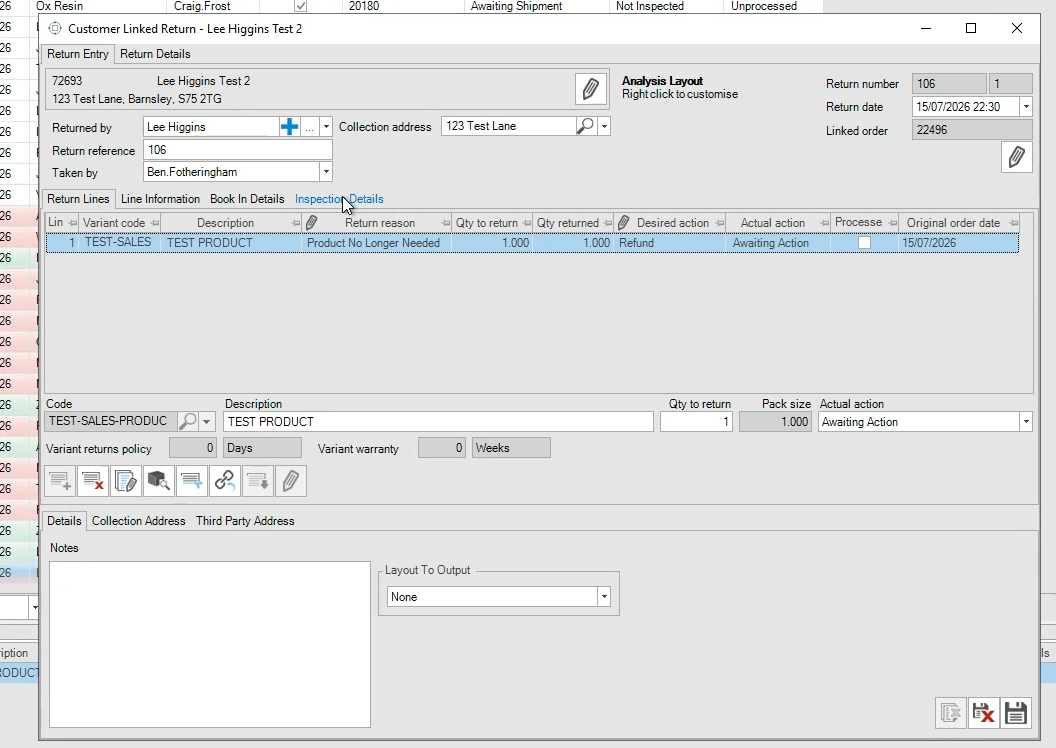
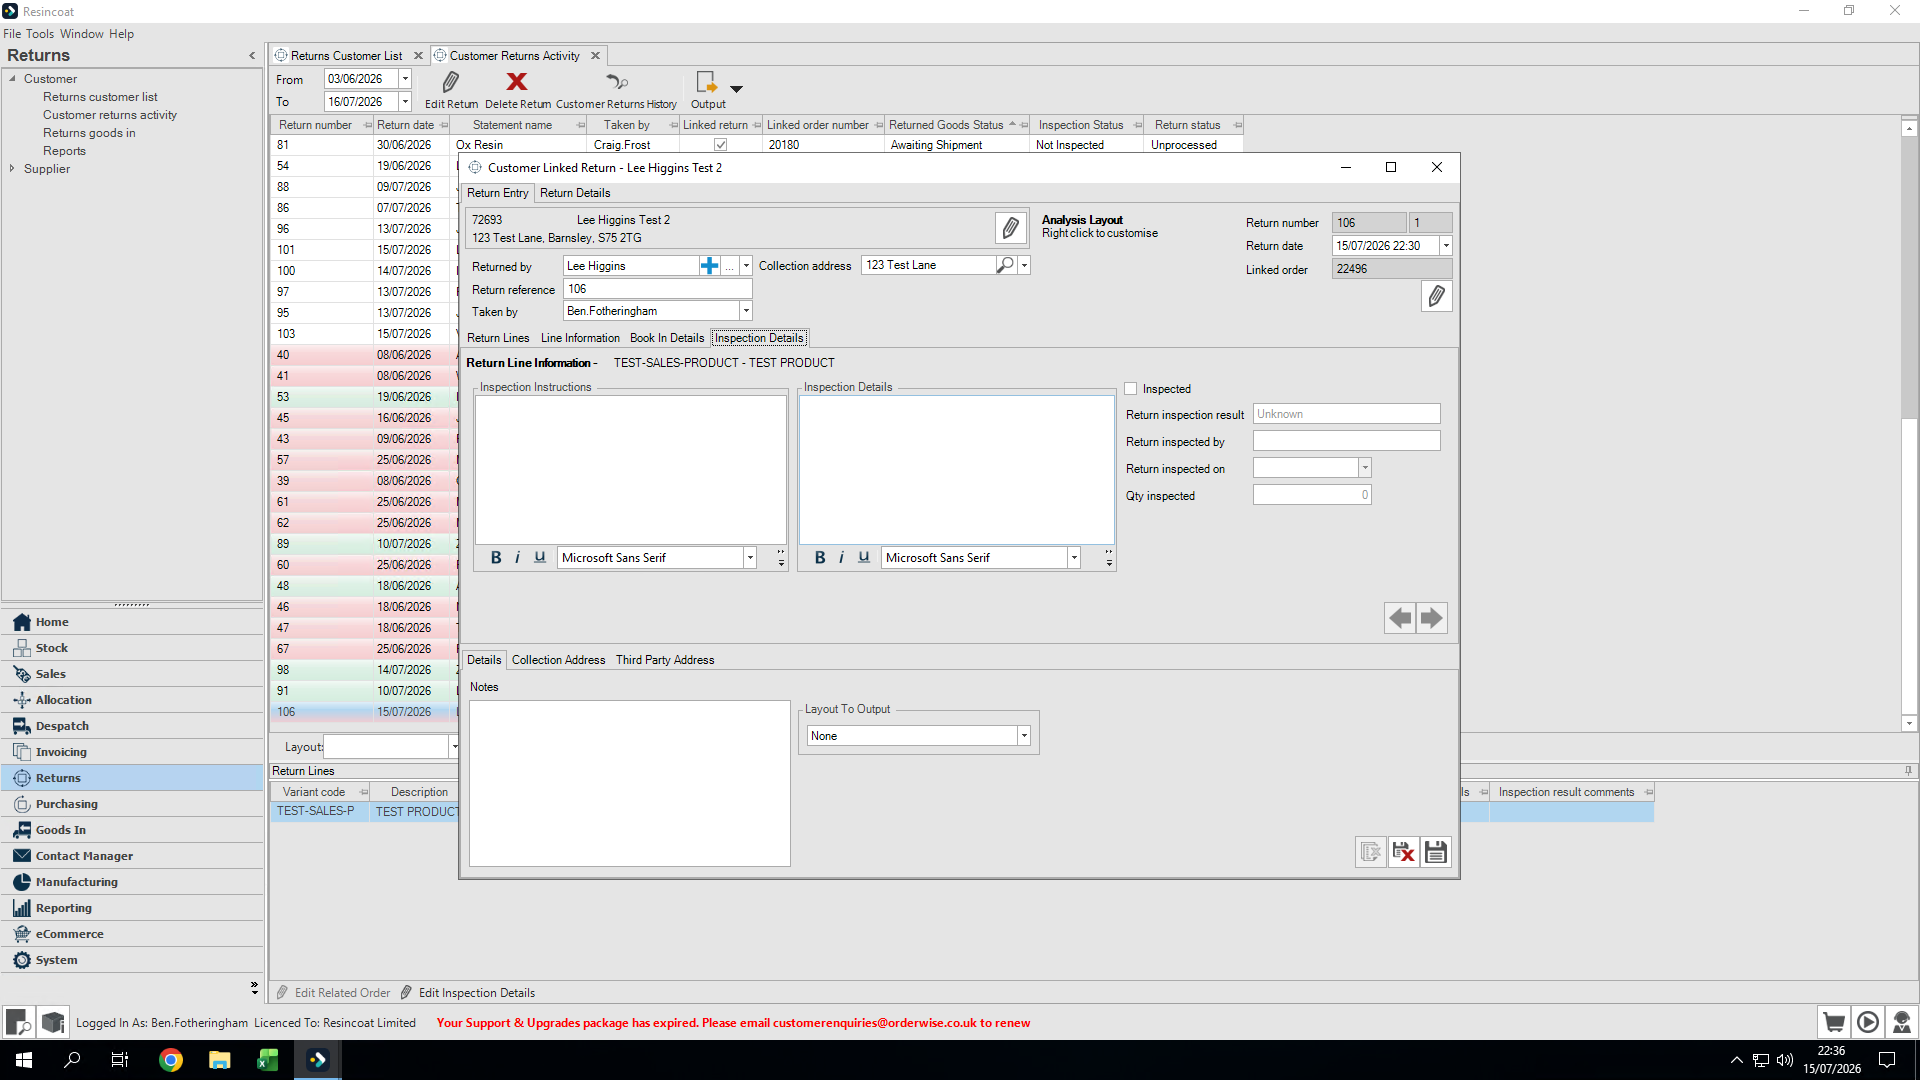
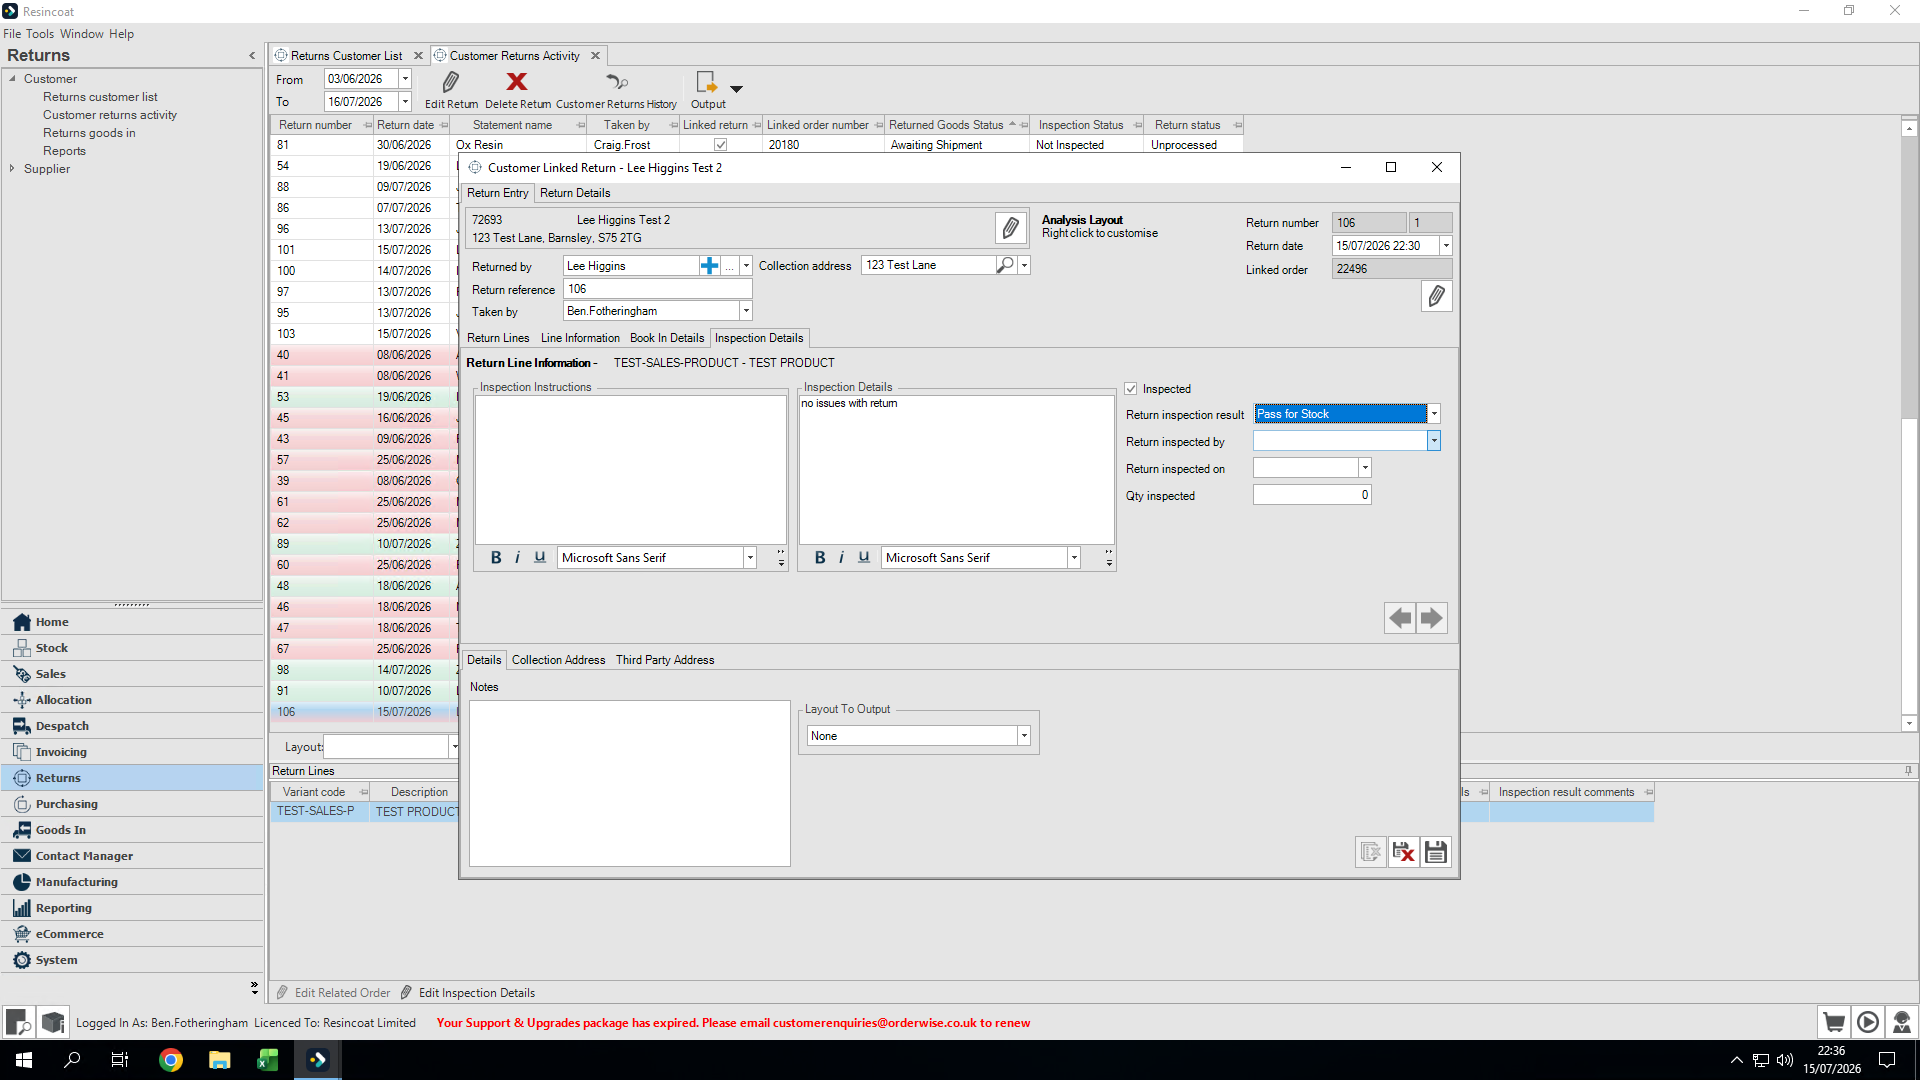
Select the item being inspected and click Inspection Details.
Step #16: Select the item being inspected and click Inspection Details.
17
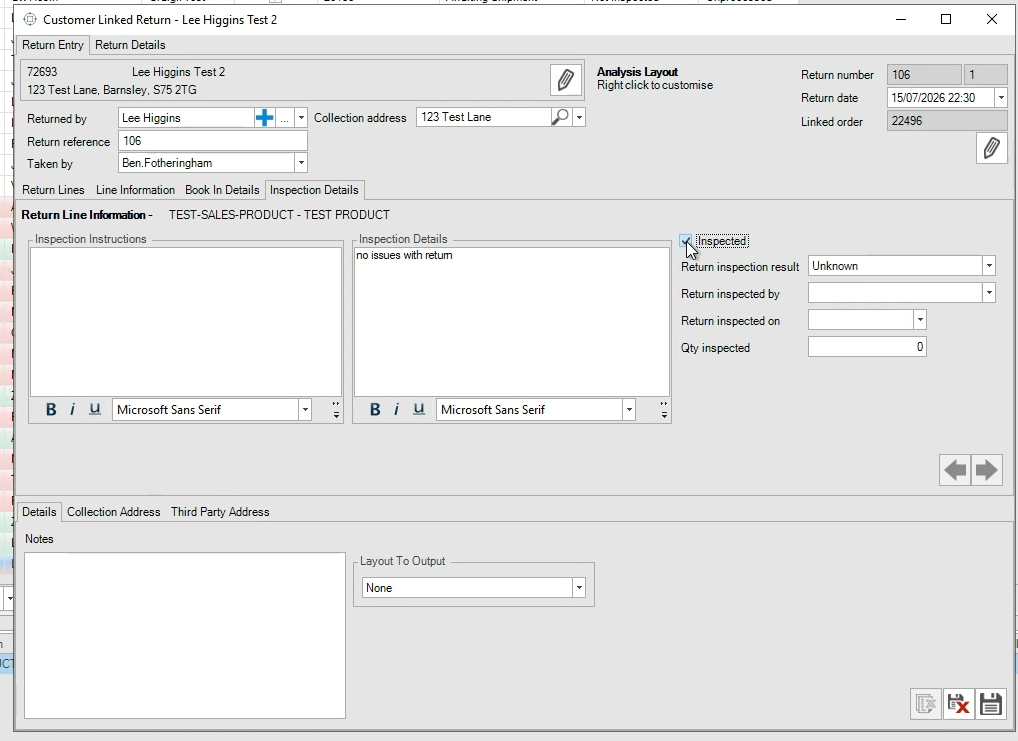
Type any relevant inspection notes into the details field.
Step #17: Type any relevant inspection notes into the details field.
18
Click to say you have inspected the item.
Step #18: Click to say you have inspected the item.
19
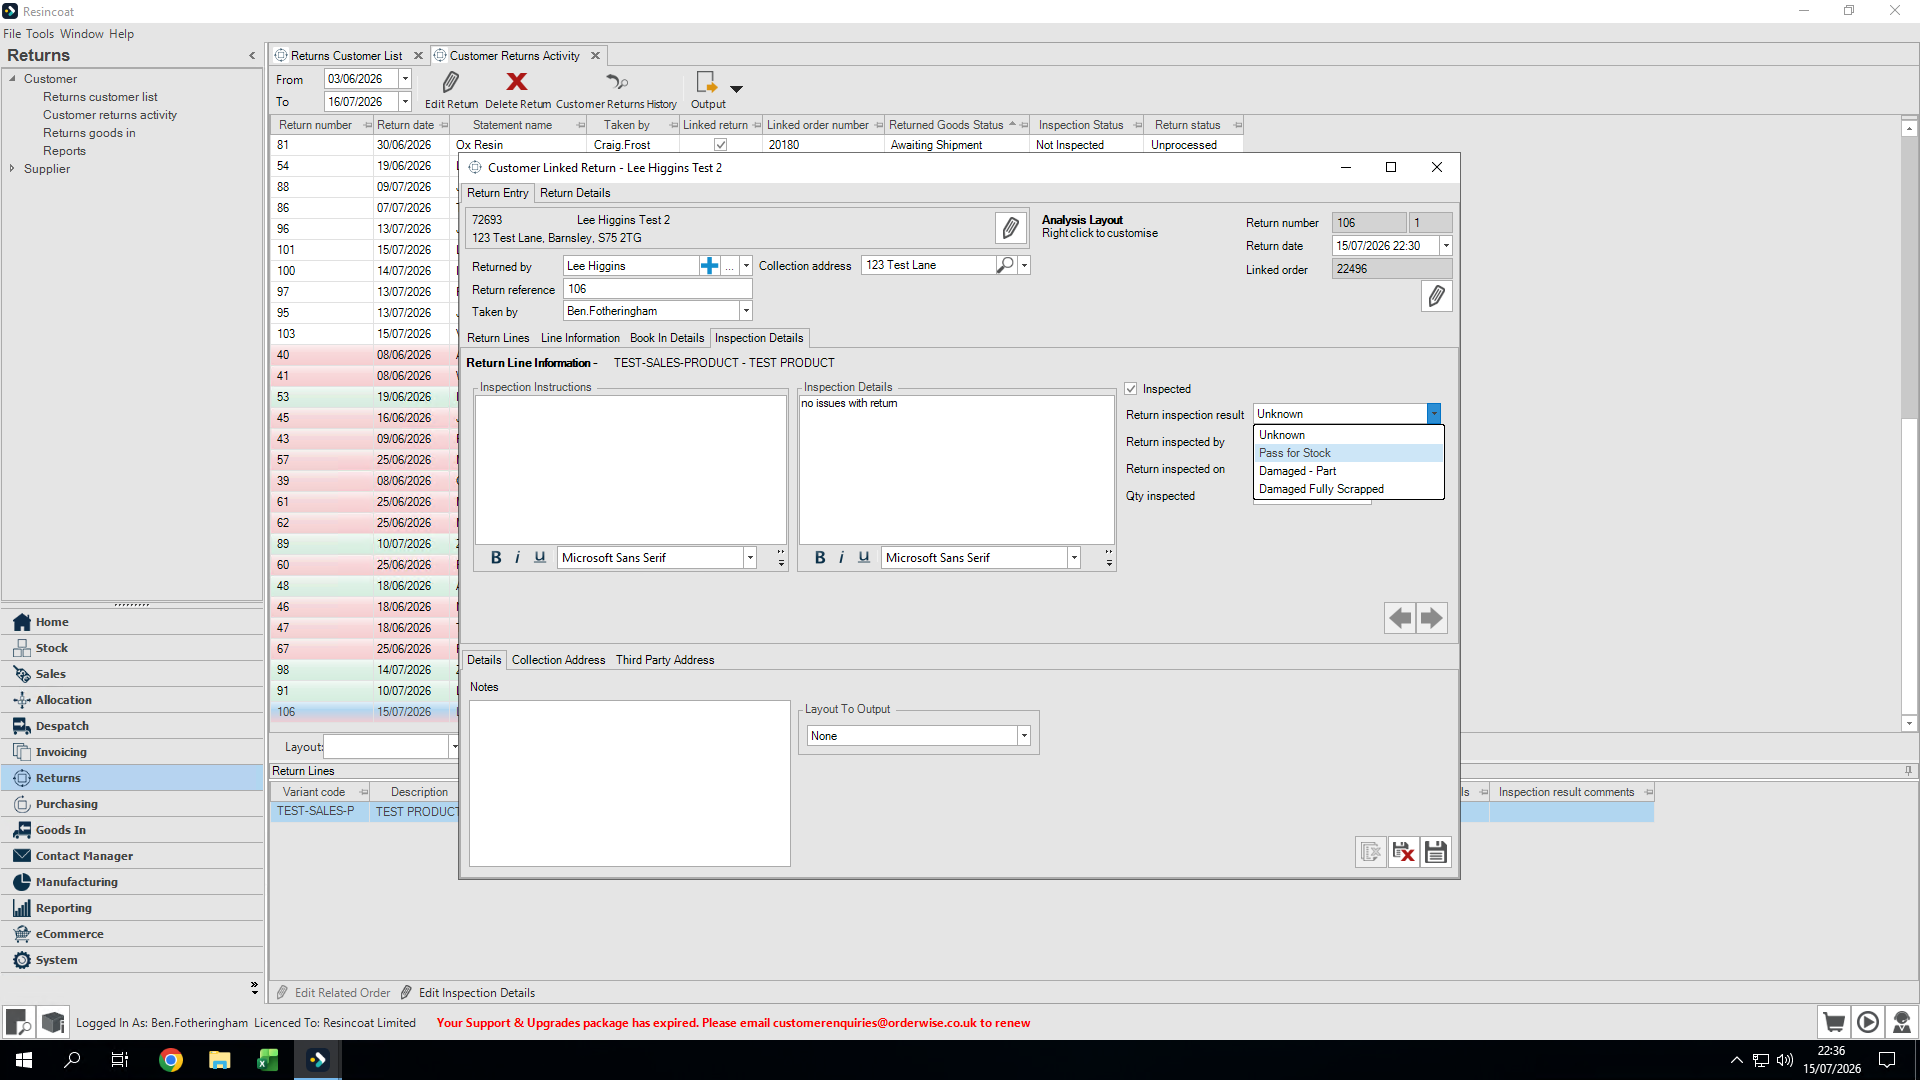
Select the Return inspection result from the dropdown menu.
Step #19: Select the Return inspection result from the dropdown menu.

When choosing an inspection result, use the following guidelines:

Inspection Result

Description

Pass for stock

Item is in perfect condition and can go straight back onto the shelf to be resold.

Damage part

Minor damage (e.g., might need decanting into another tin), but the product is salvageable.

Damage fully scrapped

Item has returned in an unusable state and must be entirely scrapped.

20
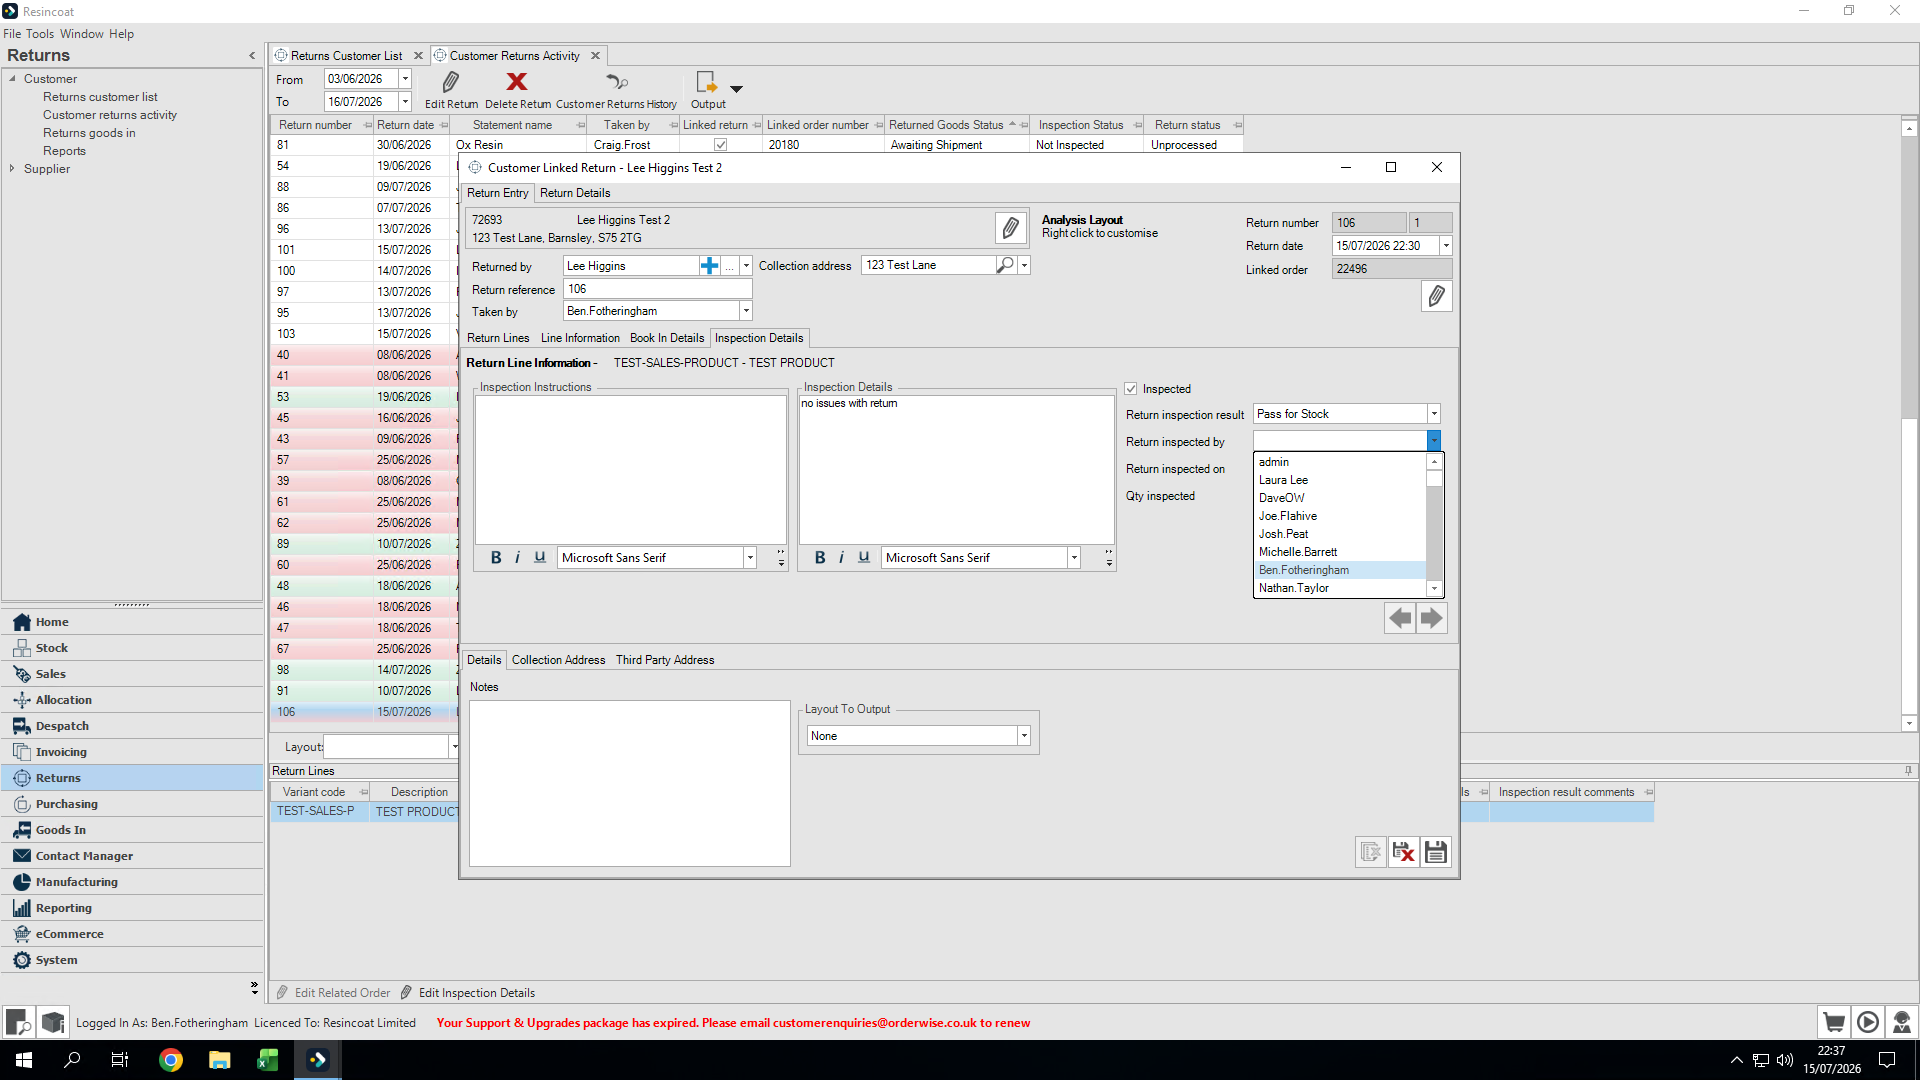
Select your username in the Inspected by field.
Step #20: Select your username in the Inspected by field.
21
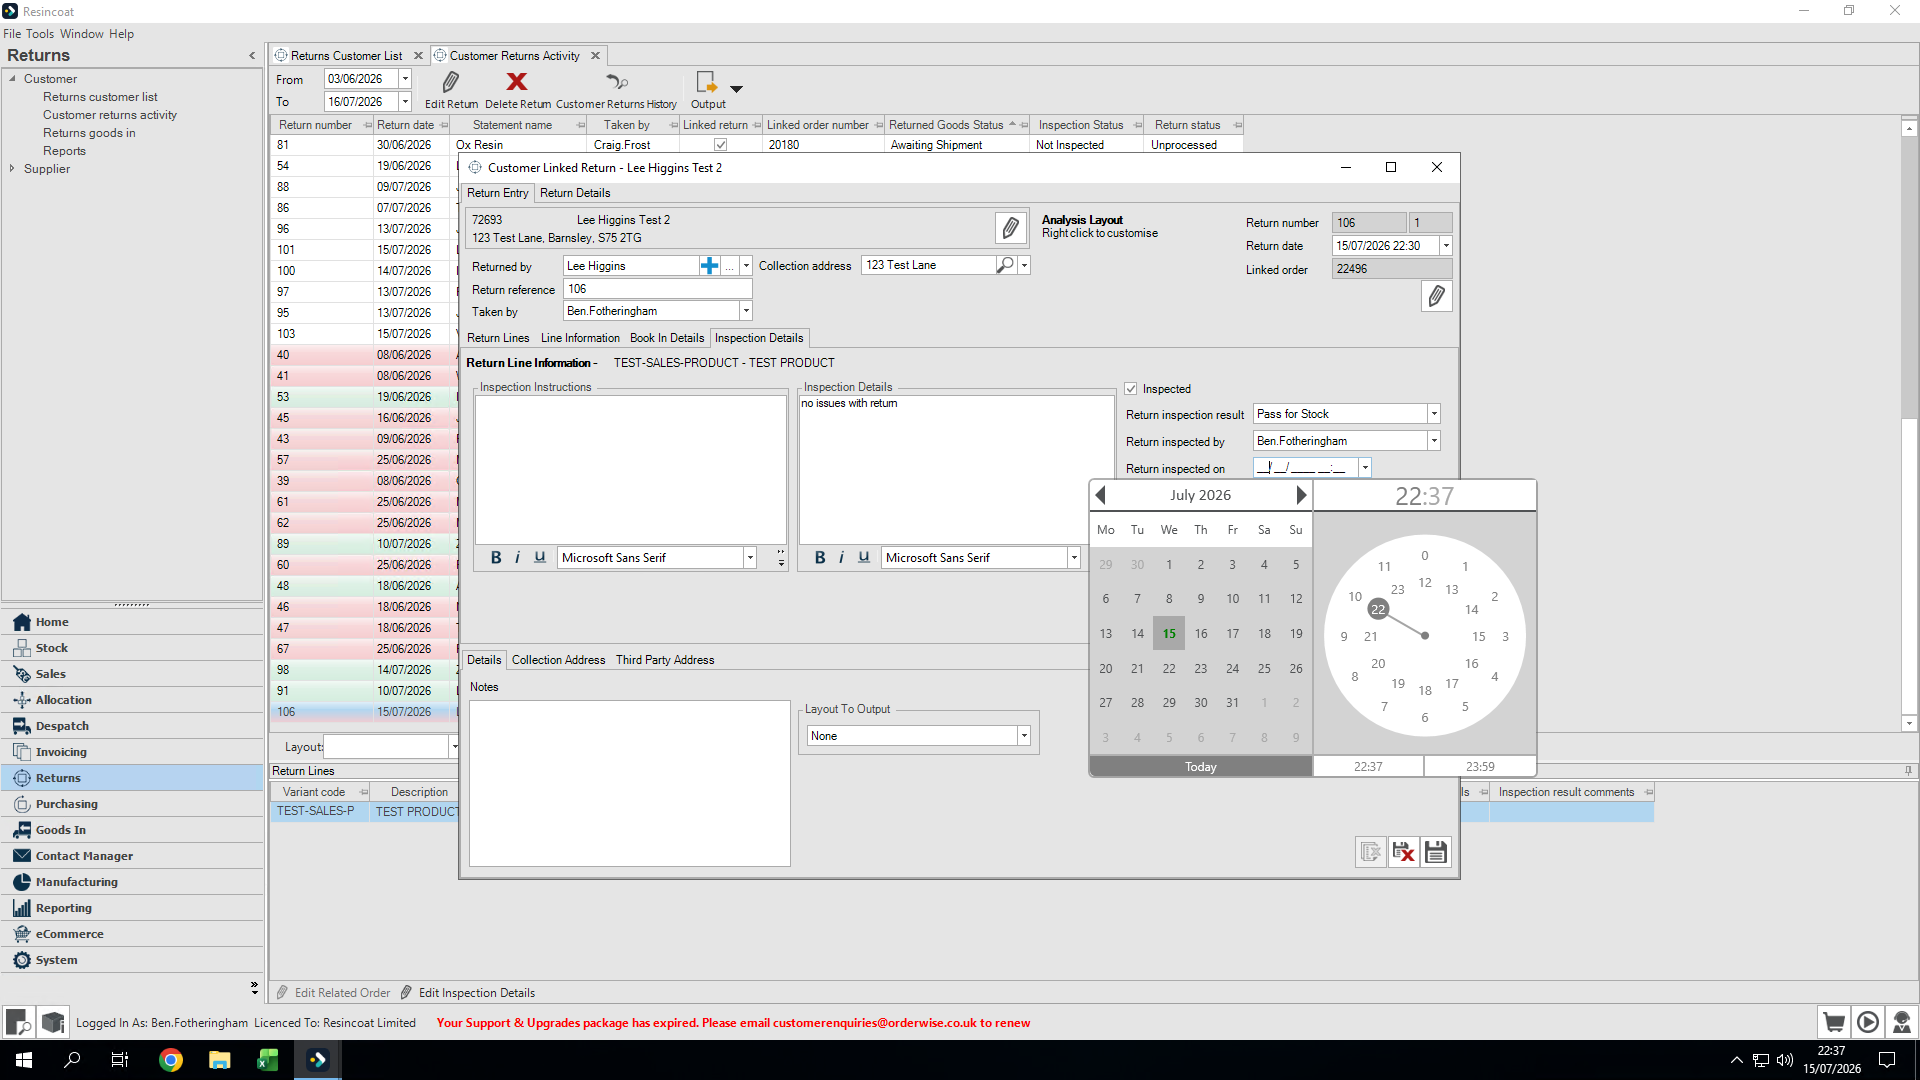
Set the current date and time in the Return inspected on fields.
Step #21: Set the current date and time in the Return inspected on fields.
22
Confirm the inspected quantity, repeat the inspection process for any other items on the return, and click Save.
Step #22: Confirm the inspected quantity, repeat the inspection process for any other items on the return, and click Save.

The return order will now turn yellow on the dashboard, signaling Customer Service to finalize the refund.

3. Issuing the Refund (Customer Service)

After the warehouse inspects the items, Customer Service completes the financial side.
23
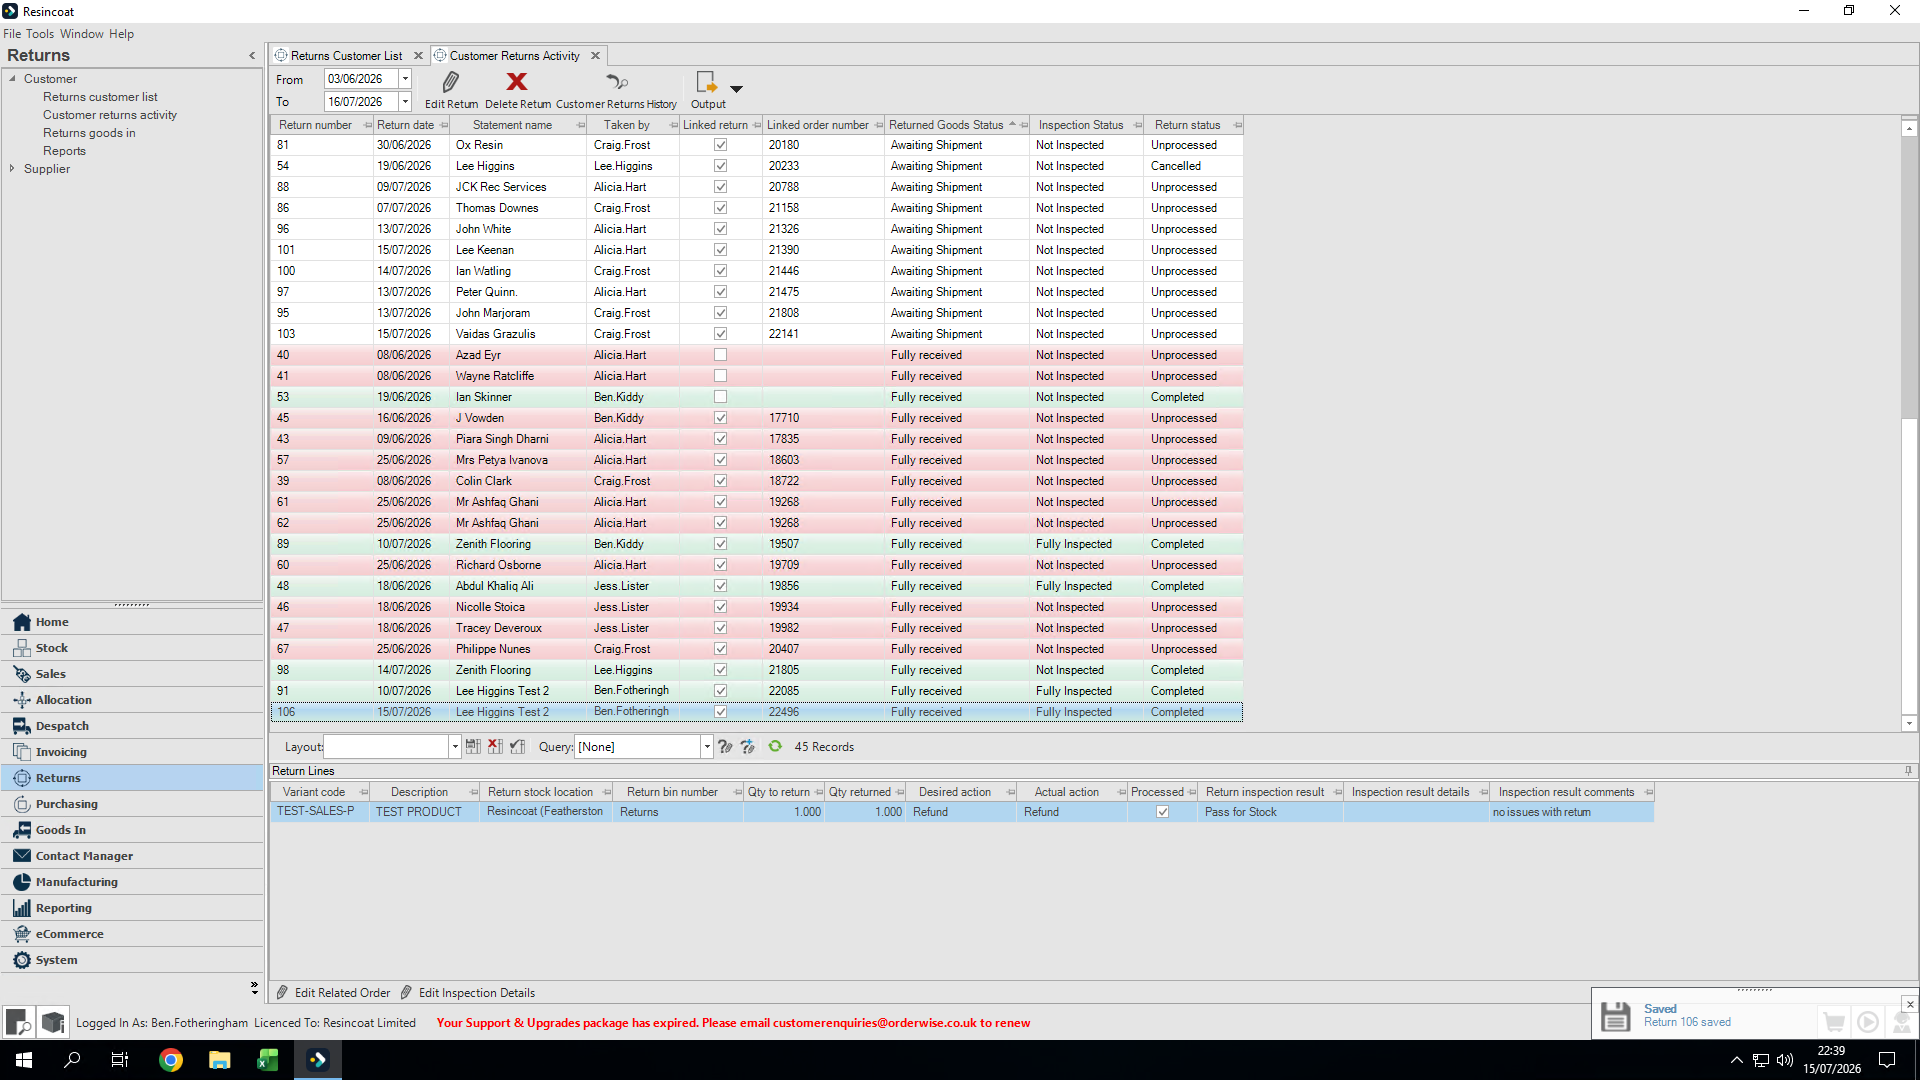
Check the Customer returns activity list for yellow orders, and double-click the inspected return.
Step #23: Check the Customer returns activity list for yellow orders, and double-click the inspected return.
24
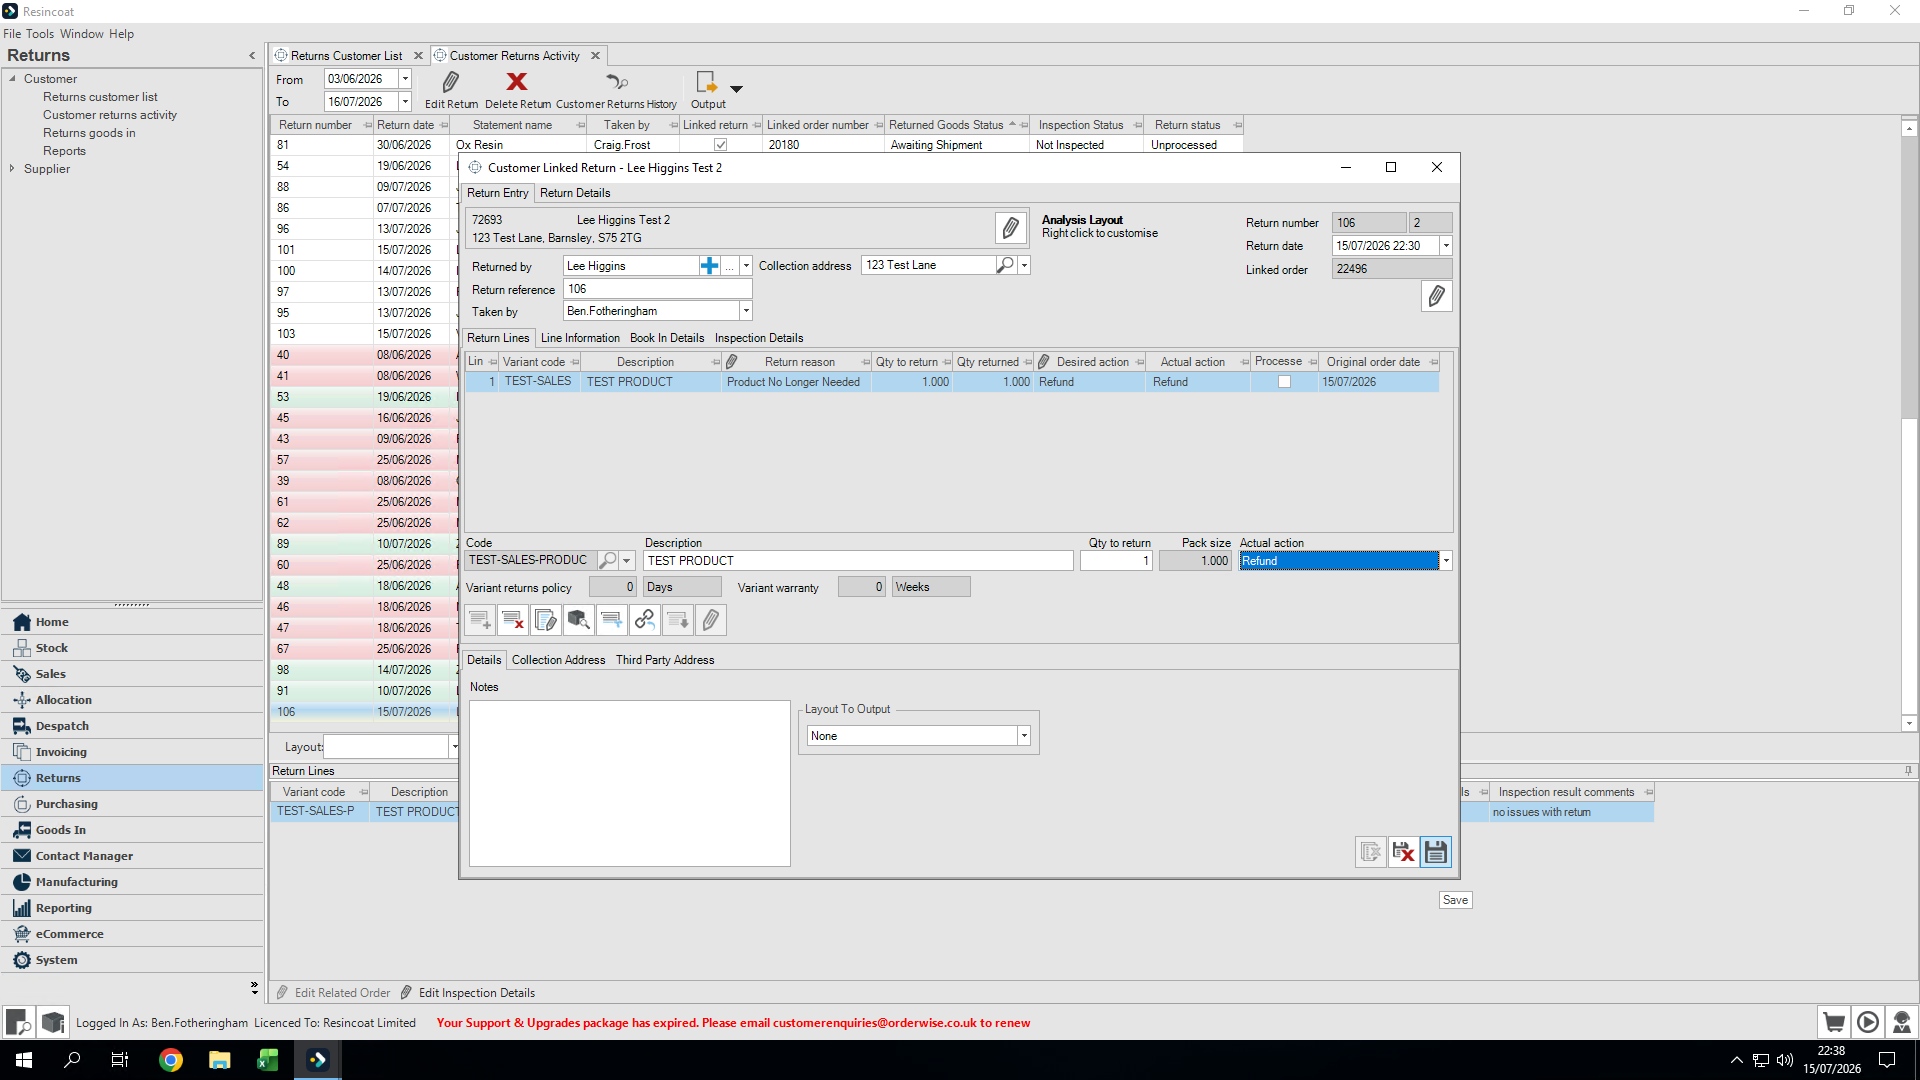
Review the inspection details to ensure everything is correct, then set the Actual action to Refund.
Step #24: Review the inspection details to ensure everything is correct, then set the Actual action to Refund.
25
Click Save.
Step #25: Click Save.
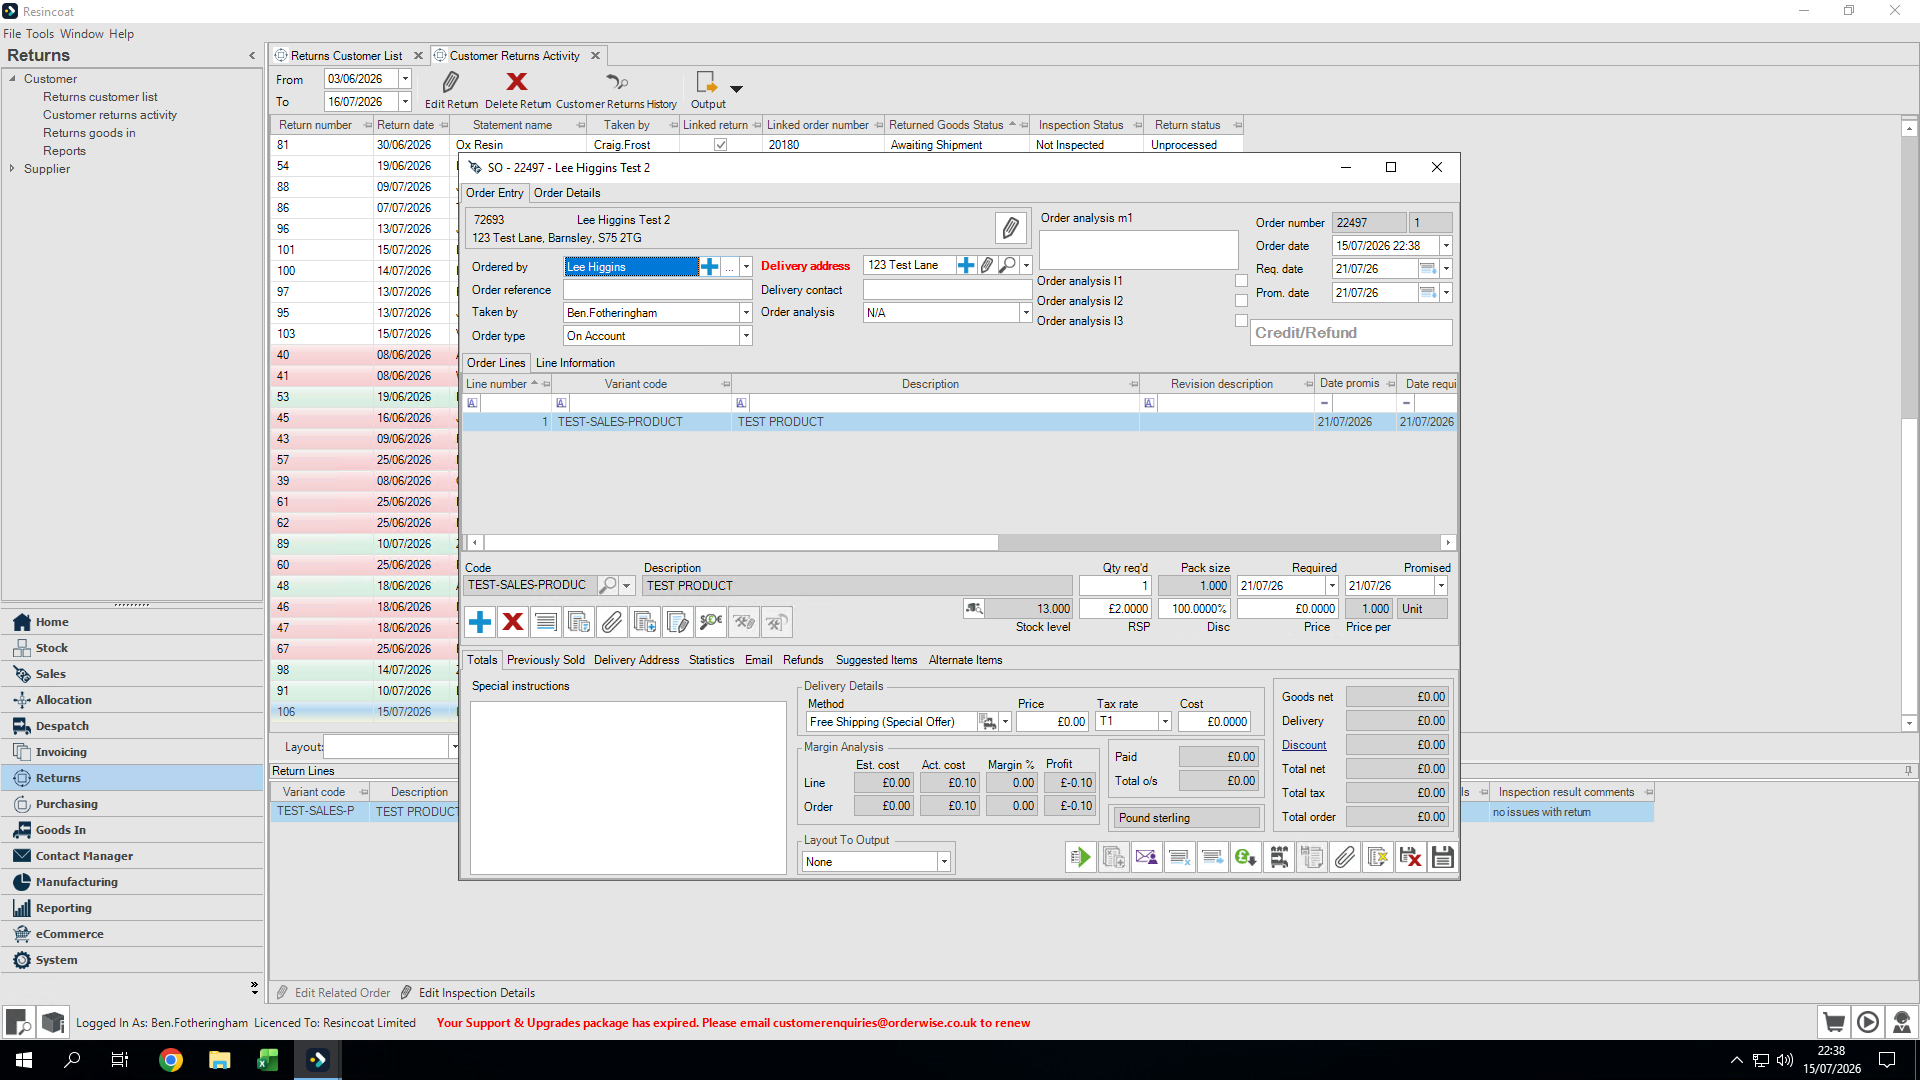
26
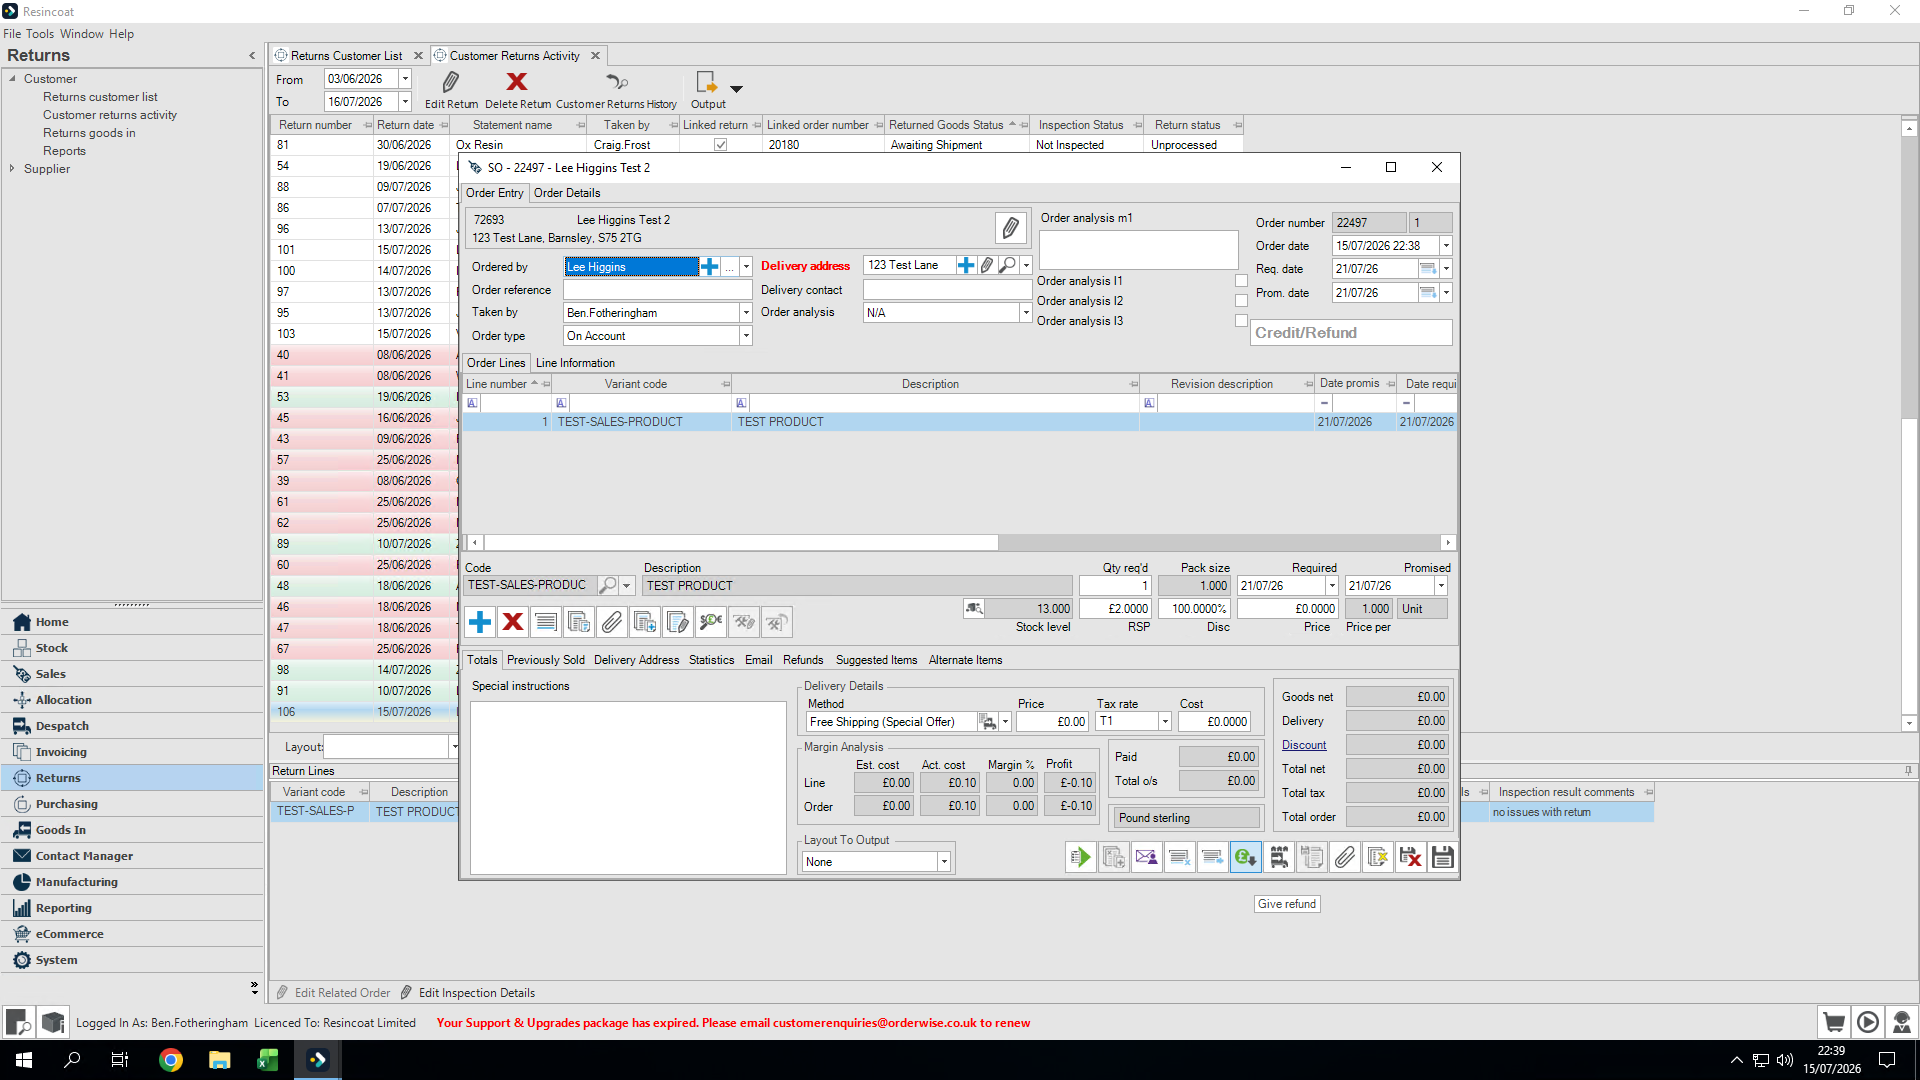
Click Credit / Refund in the top toolbar.
Step #26: Click Credit / Refund in the top toolbar.
27
Review the calculated refund amount and click Give Refund to process the transaction via your payment gateway.
Step #27: Review the calculated refund amount and click Give Refund to process the transaction via your payment gateway.
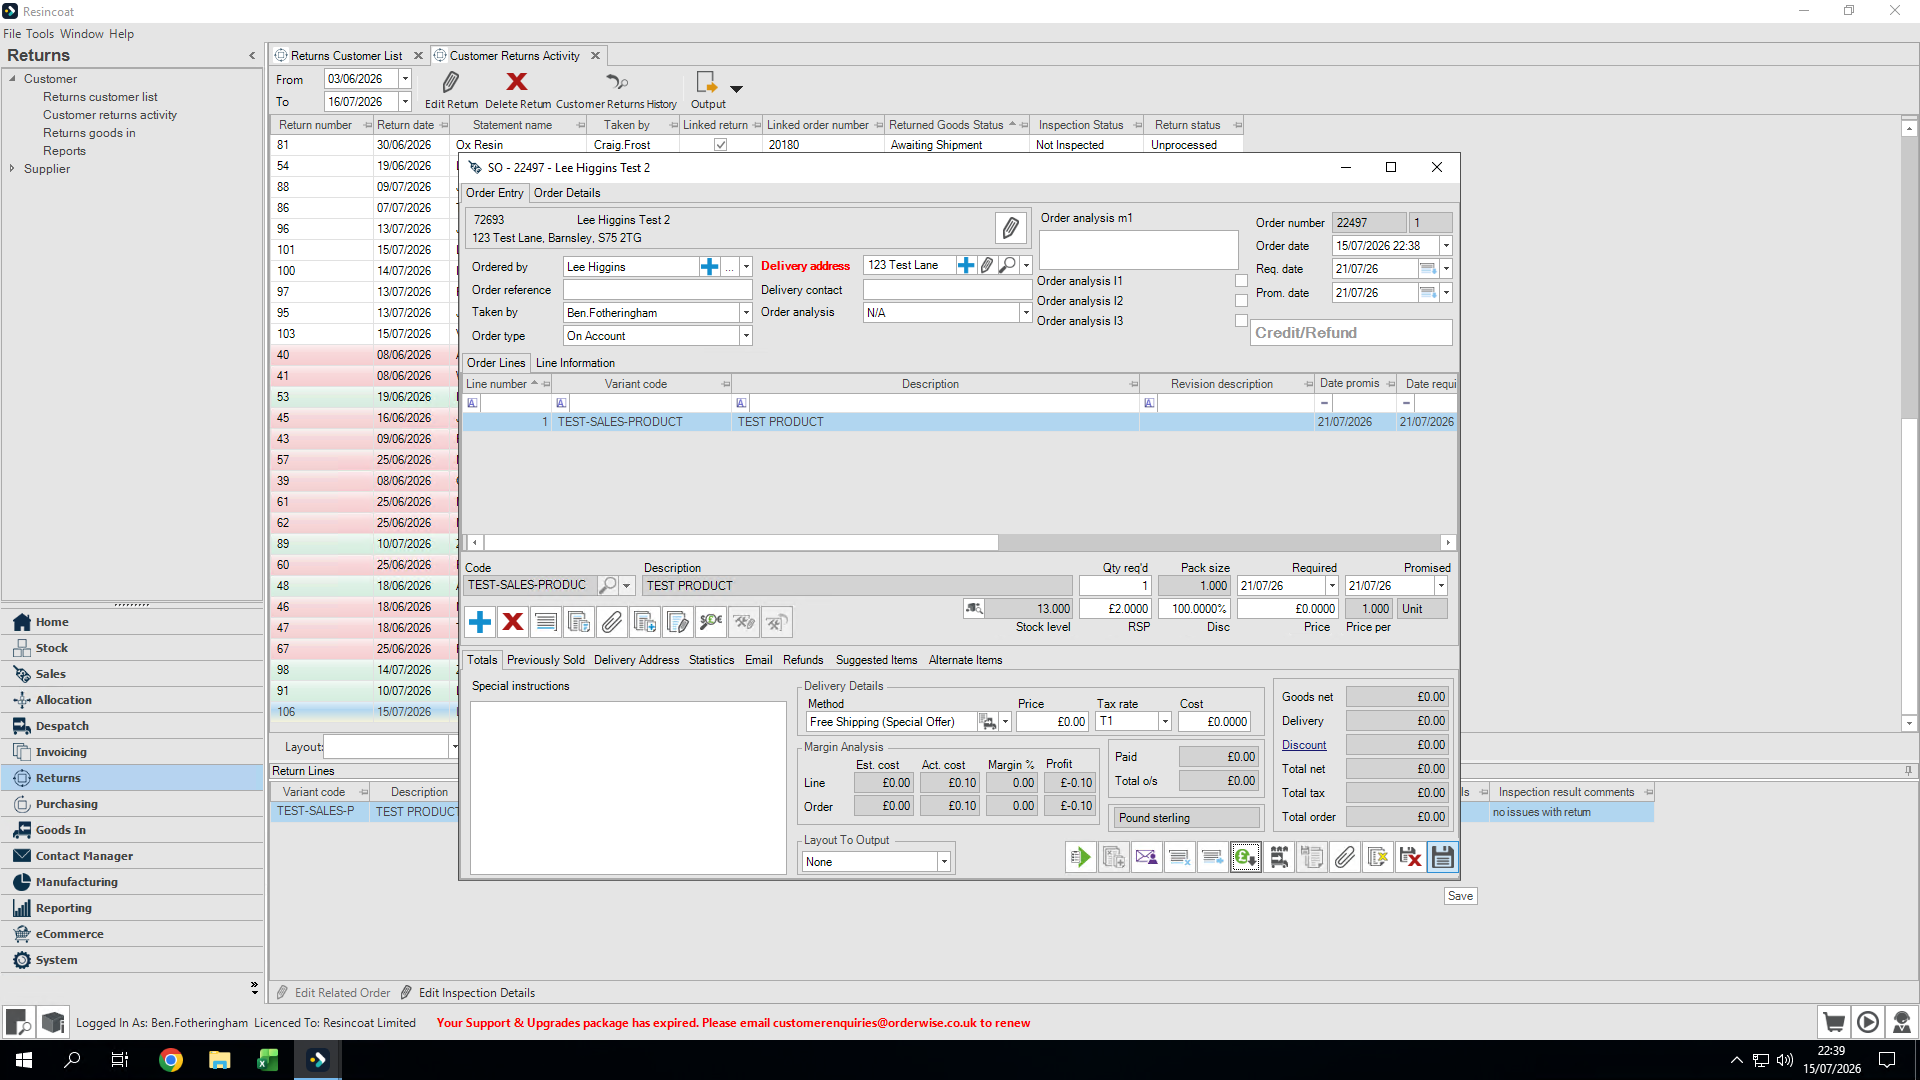
28
Once the transaction is completed, click Save to finish the return.
Step #28: Once the transaction is completed, click Save to finish the return.
29
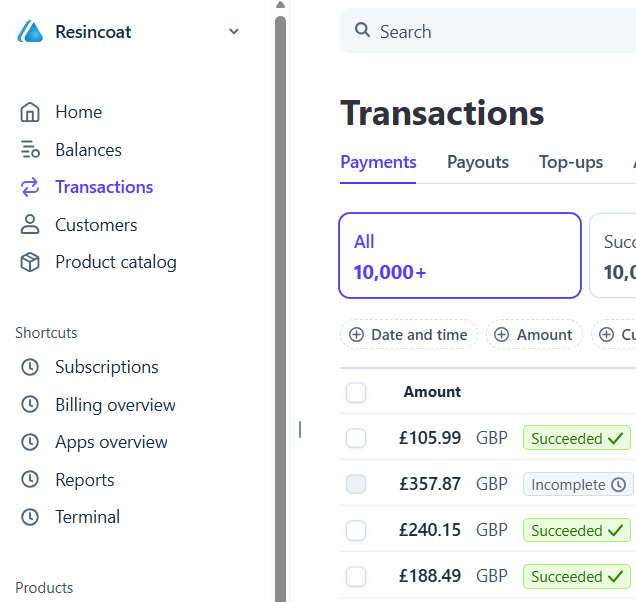
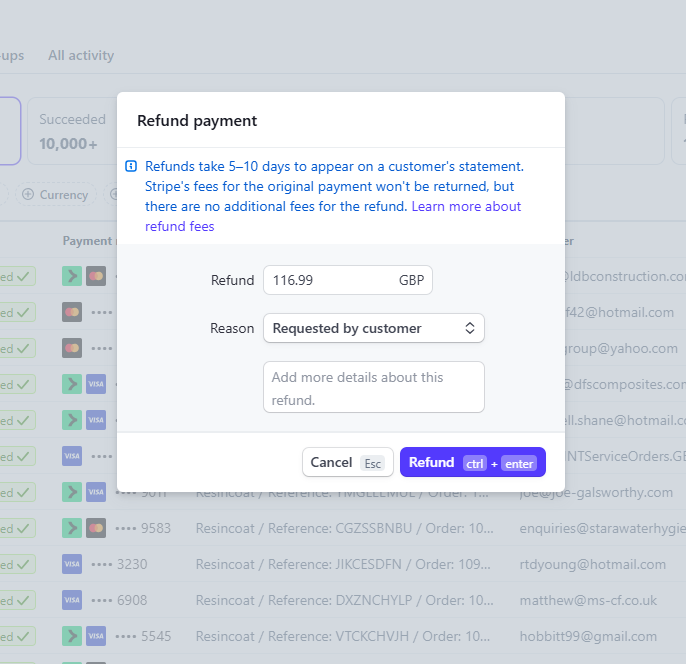
Open stripe and proceed to the transactions tab.
Step #29: Open stripe and proceed to the transactions tab.
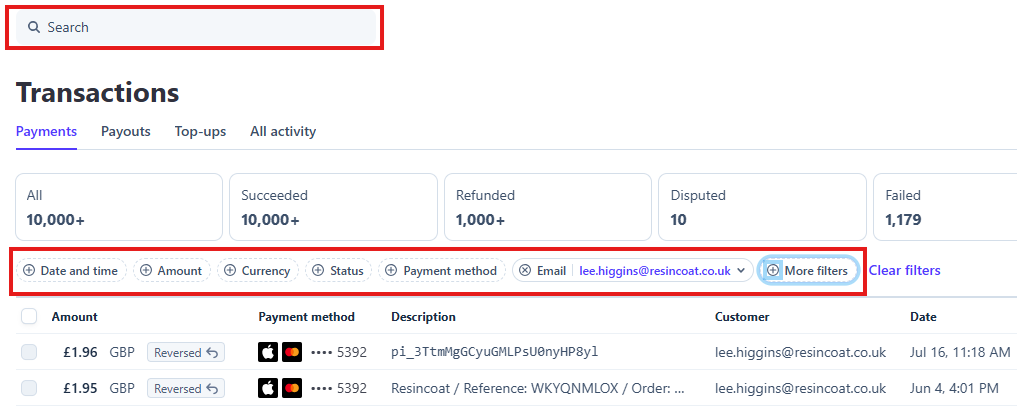
30
Search for the customer you wish to refund, this can either be done in the search bar at the top of the screen, or via the filters above the transactions (E.G by amount, date, customer email)
Step #30: Search for the customer you wish to refund, this can either be done in the search bar at the top of the screen, or via the filters above the transactions (E.G by amount, date, customer email)
31
Select the arrow icon to the right of the transaction labelled "Refund Payment" this will now open up a dialogue box.
Step #31: Select the arrow icon to the right of the transaction labelled "Refund Payment"  this will now open up a dialogue box.
32
Select the refund reason and ensure the amount is correct that you have authorised to refund, then select the refund button in the bottom right to process the refund to the customer.
Step #32: Select the refund reason and ensure the amount is correct that you have authorised to refund, then select the refund button in the bottom right to process the refund to the customer.

The return status will eventually change to green, signifying the entire process is completed.

Q: How do I know the status of a return in the Customer Returns Activity list?

A: The list uses color coding: White means awaiting arrival, Red means arrived but not inspected, Yellow means inspected but awaiting action, and Green means completed.

Q: Do I need to manually enter a return reference number?

A: No, you can leave it blank and the system will automatically generate a return reference number for you.

Q: How long does it take for a return status to show as "Completed" after issuing a refund?

A: Sometimes the process for the status to officially update to Completed can take up to 15 minutes.

Term

Definition

Return reference

A unique identifier generated by the system (or manually entered) for tracking a specific customer return.

Variant code

A specific code used to identify the exact variation of a product in the warehouse inventory.